


Hella 90mm H9 projectors Installed in a 2001 Firebird (plenty of pics)

TECH Enthusiast
iTrader: (27)
Joined: Aug 2005
Posts: 741
Likes: 0
From: Anheuser Busch, Houston Texas
Very nice. I have two questions, as I have been following this. No doubt you made refinements along the way.
HIDs are getting cheaper - you can ebay up a set that will allegedly fit an h9 housing for $100 now I guess. Have you looked at what's out there lately to see if there are more cost effective HID kits now that work with these projectors?
The shrouds - they are pretty nice. How did you do them, and if you had to do them again, would you go the same route? I was thinking fiberglassing on an old set as a mold and making some new ones...but that seems overcomplicated. Any thoughts on that?
Thread Starter
Copy & Paste Moderator


Joined: Apr 2002
Posts: 9,764
Likes: 208
From: Eastern MA
Originally Posted by lo_jack
HIDs are getting cheaper - you can ebay up a set that will allegedly fit an h9 housing for $100 now I guess. Have you looked at what's out there lately to see if there are more cost effective HID kits now that work with these projectors?
Originally Posted by lo_jack
The shrouds - they are pretty nice. How did you do them, and if you had to do them again, would you go the same route? I was thinking fiberglassing on an old set as a mold and making some new ones...but that seems overcomplicated. Any thoughts on that?
Last edited by VIP1; Feb 27, 2009 at 06:35 PM.
TECH Enthusiast
iTrader: (27)
Joined: Aug 2005
Posts: 741
Likes: 0
From: Anheuser Busch, Houston Texas
Very interesting. Thanks for the update. I'm riding dirty with my shrouds half off currently. I was thinking about making some new shrouds out of fiberglass, casting off a paper mache type mold, but I don't know if that is doable or not.
LS1 Tech Stories
The Best V8 Stories One Small Block at Time

Topdon ONE vs. Artidiag 800 BT2: Which is the Diagnostic Tablet For You?
Pouria Savadkouei
Gas Monkey Built a 6-Wheel Ferrari Testarossa With a Corvette LT4 Engine
Verdad Gallardo
7 Most Reliable High-Performance Engines GM Has Ever Built
Verdad Gallardo
Amazing '71 Camaro Restomod Is Modern Muscle Car Under the Skin
Verdad Gallardo
6 Common C5 Corvette Failures and What's Involved In Repairing Them
Pouria Savadkouei
Retro Modern Bandit Pontiac Trans AM Comes With Burt Reynolds' Autograph
Verdad Gallardo
Top 10 Greatest Cadillac V Series Performance Models Ever, Ranked
Pouria Savadkouei
Top 10 Most Powerful Chevy Trucks Ever Made!

Hennessey's New Supercharged Silverado ZR2 Has 700 HP
Verdad Gallardo TECH Enthusiast
iTrader: (27)
Joined: Aug 2005
Posts: 741
Likes: 0
From: Anheuser Busch, Houston Texas
This is cool. You asked me about this a long time ago, now I asked you for an update. It comes full circle, and the whole thing has improved drastically. I'm going to be getting a set of 35w from Retrofit. I was concerned about the heat from a 55w on these 90mms myself. I replaced all my wiring with heavier gauge from the gray factory connector up, and the housings make me all the more nervous. Are you going to put the 55w into the Hellas when you do that upgrade?
Thread Starter
Copy & Paste Moderator
Joined: Apr 2002
Posts: 9,764
Likes: 208
From: Eastern MA
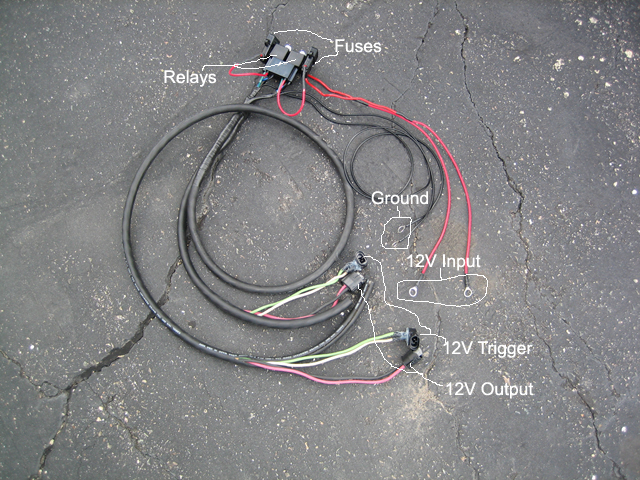
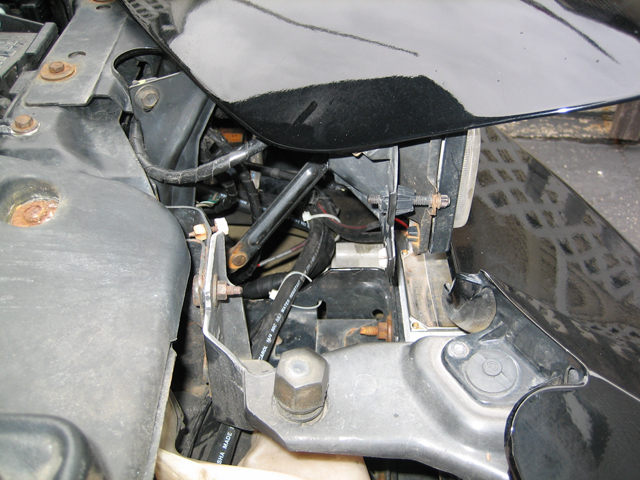
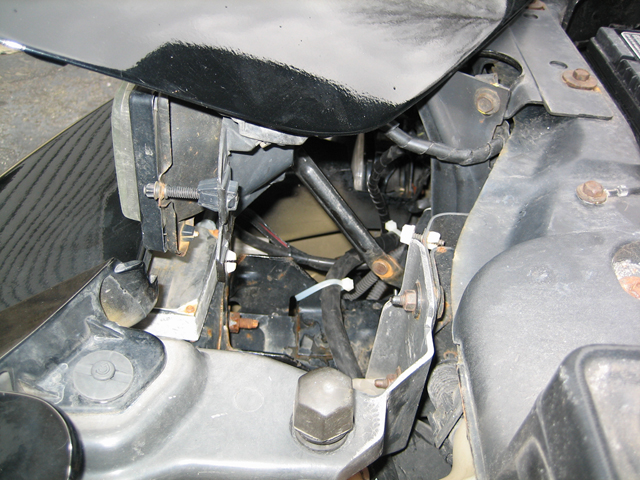
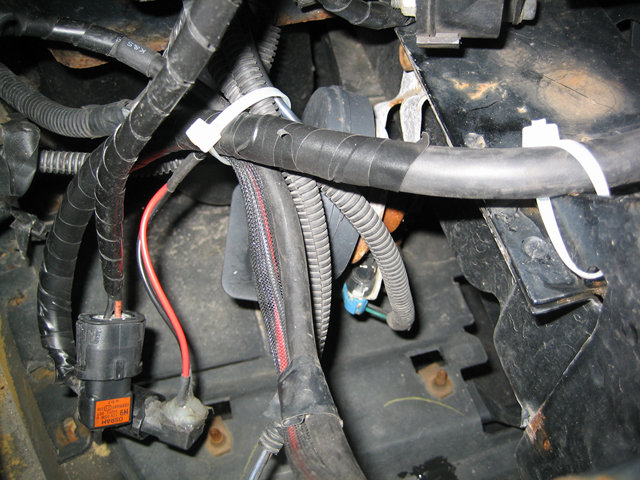
Today I installed an upgraded wire harness for the low beams.
Here are the highlights:
* 14 AWG wire throughout
* All connections are soldered
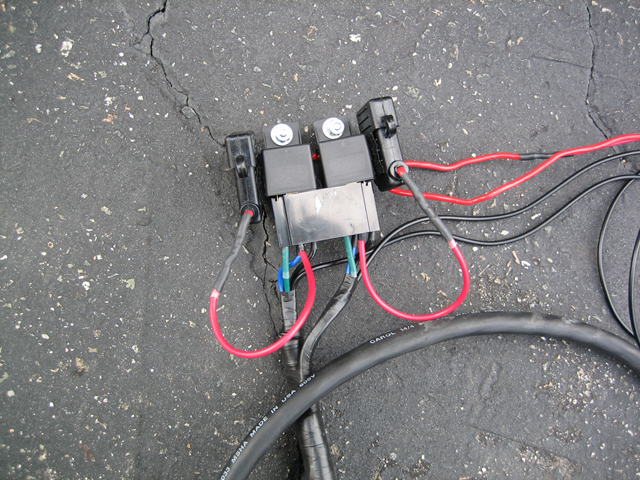
* Indiviual Relay and Fuse (15AMP) for each bulb
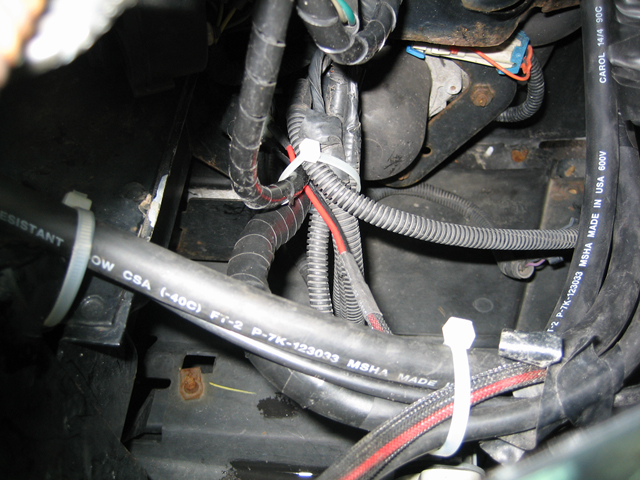
The bulk of the wire is a 14/4 cable that I found at Home Depot. It has a thick rubber casing and (4) 14 AWG wires that also have thick insulation.
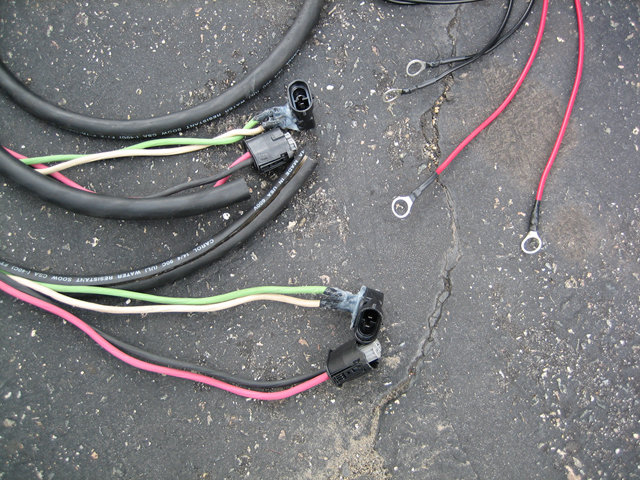
Since Male H9 connectors don't exist, I had to make my own by breaking a pair of new H9 bulbs to use their bases.
In the first few pictures the insulation at ends with the bulb connectors is cut/split. I waited until the harness was installed in the car to trim the extra insulation and wrap the ends with electrical tape. The result is that the outer insulation goes up to the connectors. The reason I did it this way is that I can easily go back to halogen. In which case, I'd remove the electrical tape and peel back the split insulation. Then the exposed wires would reach the bulbs.
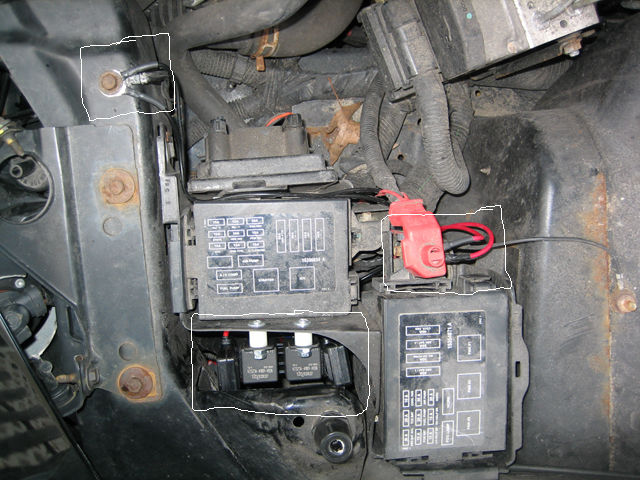
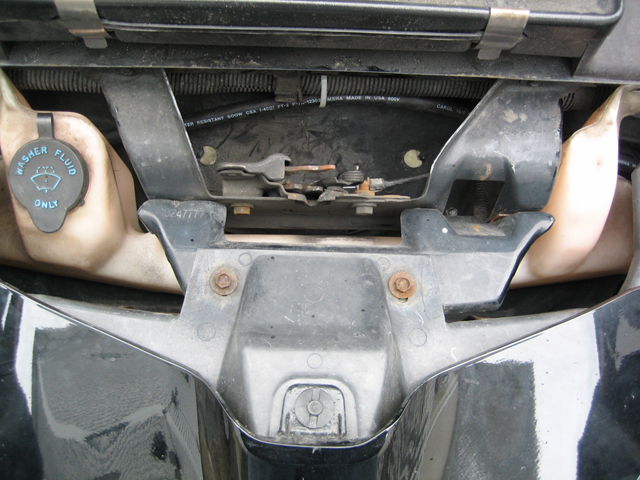
I tapped into power at the AUX power terminal and used a nut I already had to secure the connector to the terminal on top the exiting bundle. I tapped into ground at an existing ground point. It both locations I used a file and wire brush to make sure I had a good clean connection.
640x480
1024x768
2592x1944
640x480
1024x768
2592x1944
640x480
1024x768
2592x1944

640x480
1024x768
2592x1944
640x480
1024x768
2592x1944
640x480
1024x768
2592x1944
640x480
1024x768
2592x1944
640x480
1024x768
2592x1944
640x480
1024x768
2592x1944
640x480
1024x768
2592x1944
Here are the highlights:
* 14 AWG wire throughout
* All connections are soldered
* Indiviual Relay and Fuse (15AMP) for each bulb
The bulk of the wire is a 14/4 cable that I found at Home Depot. It has a thick rubber casing and (4) 14 AWG wires that also have thick insulation.
Since Male H9 connectors don't exist, I had to make my own by breaking a pair of new H9 bulbs to use their bases.
In the first few pictures the insulation at ends with the bulb connectors is cut/split. I waited until the harness was installed in the car to trim the extra insulation and wrap the ends with electrical tape. The result is that the outer insulation goes up to the connectors. The reason I did it this way is that I can easily go back to halogen. In which case, I'd remove the electrical tape and peel back the split insulation. Then the exposed wires would reach the bulbs.
I tapped into power at the AUX power terminal and used a nut I already had to secure the connector to the terminal on top the exiting bundle. I tapped into ground at an existing ground point. It both locations I used a file and wire brush to make sure I had a good clean connection.
640x480
1024x768
2592x1944
640x480
1024x768
2592x1944
640x480
1024x768
2592x1944
640x480
1024x768
2592x1944
640x480
1024x768
2592x1944
640x480
1024x768
2592x1944
640x480
1024x768
2592x1944
640x480
1024x768
2592x1944
640x480
1024x768
2592x1944
640x480
1024x768
2592x1944
Last edited by VIP1; Dec 26, 2020 at 10:00 PM.
Thread Starter
Copy & Paste Moderator
Joined: Apr 2002
Posts: 9,764
Likes: 208
From: Eastern MA
Today I installed an upgraded wire harness for the low beams.
Here are the highlights:
* 14 AWG wire throughout
* All connections are soldered
* Indiviual Relay and Fuse (15AMP) for each bulb
The bulk of the wire is a 14/4 cable that I found at Home Depot. It has a thick rubber casing and (4) 14 AWG wires that also have thick insulation.
Since Male H9 connectors don't exist, I had to make my own by breaking a pair of new H9 bulbs to use their bases.
In the first few pictures the insulation at ends with the bulb connectors is cut/split. I waited until the harness was installed in the car to trim the extra insulation and wrap the ends with electrical tape. The result is that the outer insulation goes up to the connectors. The reason I did it this way is that I can easily go back to halogen. In which case, I'd remove the electrical tape and peel back the split insulation. Then the exposed wires would reach the bulbs.
640x480
1024x768
2592x1944
640x480
1024x768
2592x1944
640x480
1024x768
2592x1944
640x480
1024x768
2592x1944
640x480
1024x768
2592x1944
640x480
1024x768
2592x1944
640x480
1024x768
2592x1944
640x480
1024x768
2592x1944
640x480
1024x768
2592x1944
640x480
1024x768
2592x1944
Last edited by VIP1; Dec 26, 2020 at 10:00 PM.