
 05-02-2016, 01:17 PM
Last edit by: IB Advertising
See related guides and technical advice from our community experts:
- Camaro 2010 � 2015: How to Install HID Headlights <br>Step by step instructions for do-it-yourself repairs.

My BLS HID kit install! (56K go away)
04-17-2010, 04:22 PM
#1
TECH Enthusiast
Thread Starter
iTrader: (8)

Join Date: Feb 2005
Posts: 532
Likes: 0
Received 0 Likes
on
0 Posts
I received my BLS HID projector kit yesterday, and got to install it today. The install was nice and easy. The parts are all high quality, and the plug-and-play wiring harness is great. Here's the pics from the install:
The contents of the kit:
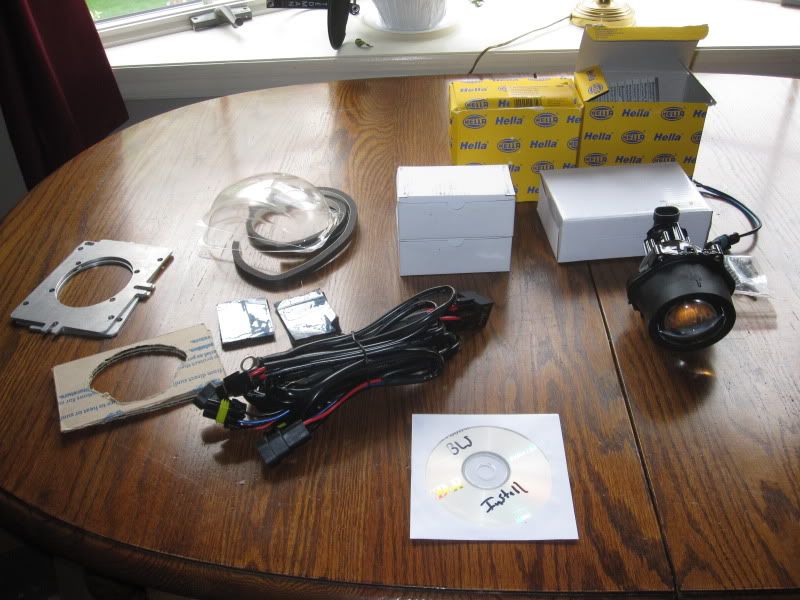
The white boxes contain the HID ballasts and bulbs. The yellow boxes contain the Hella projector housings. The mounting plates are on the left hand side - Brian did a great job on these!
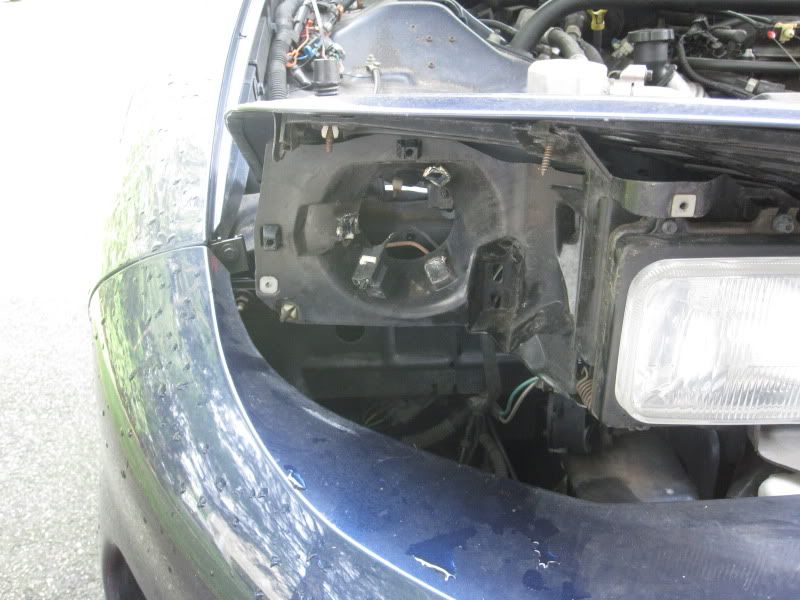
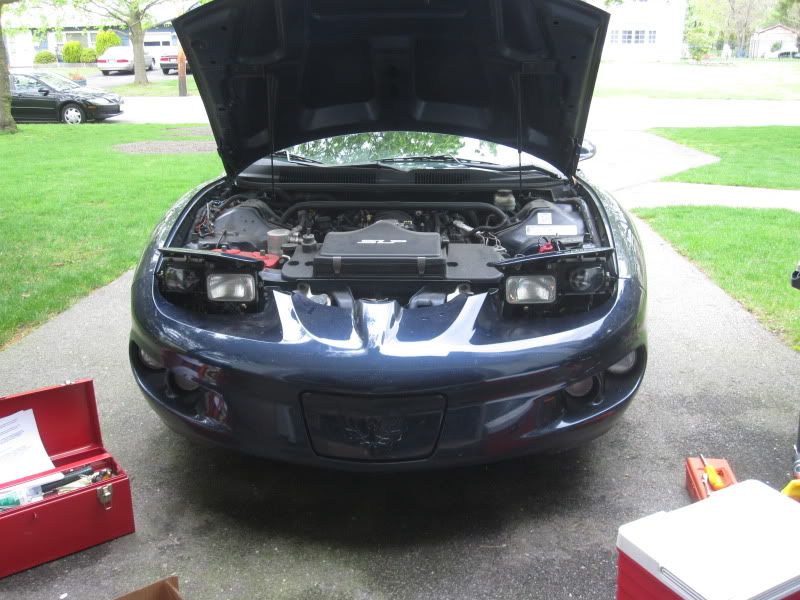
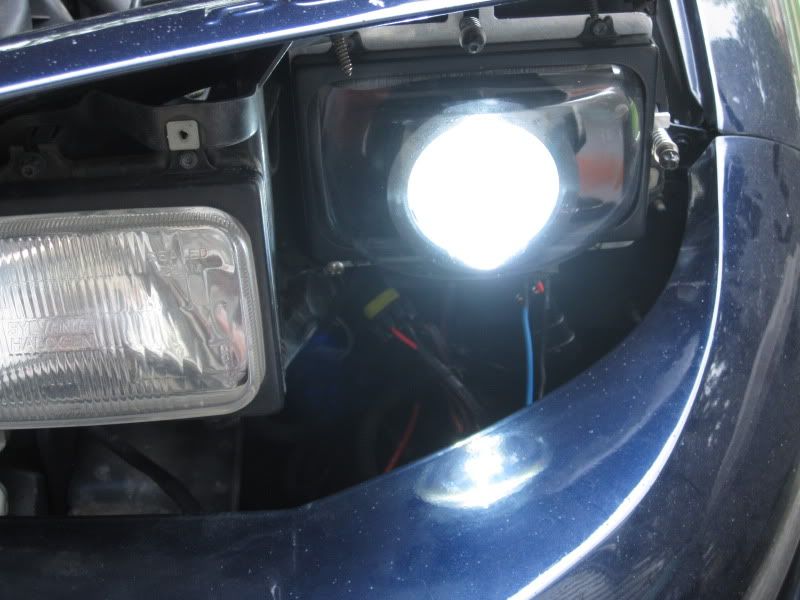
Here is the passenger side, with the low beam removed.
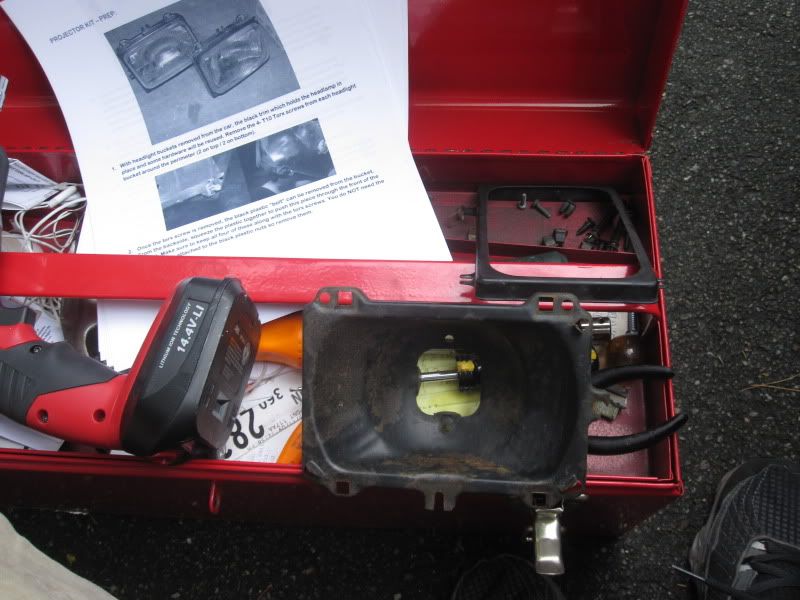
This is the stock headlight, after disasembly.
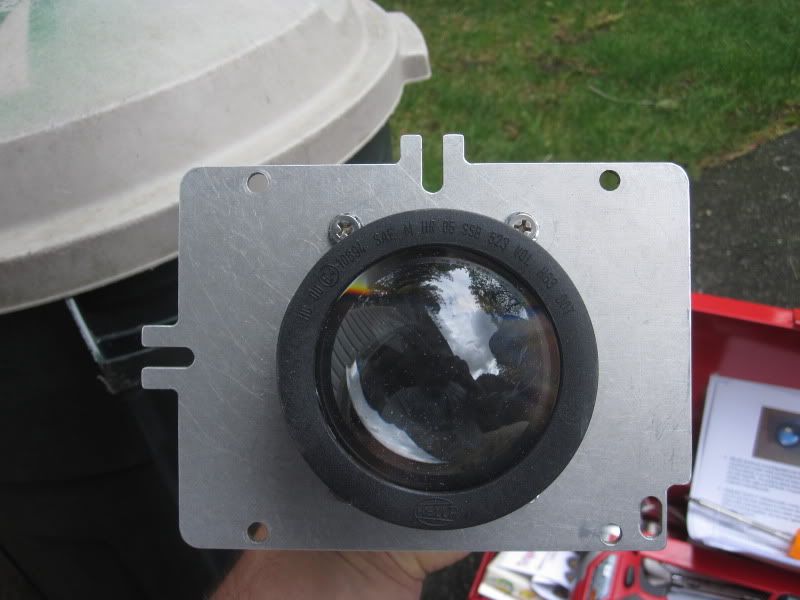
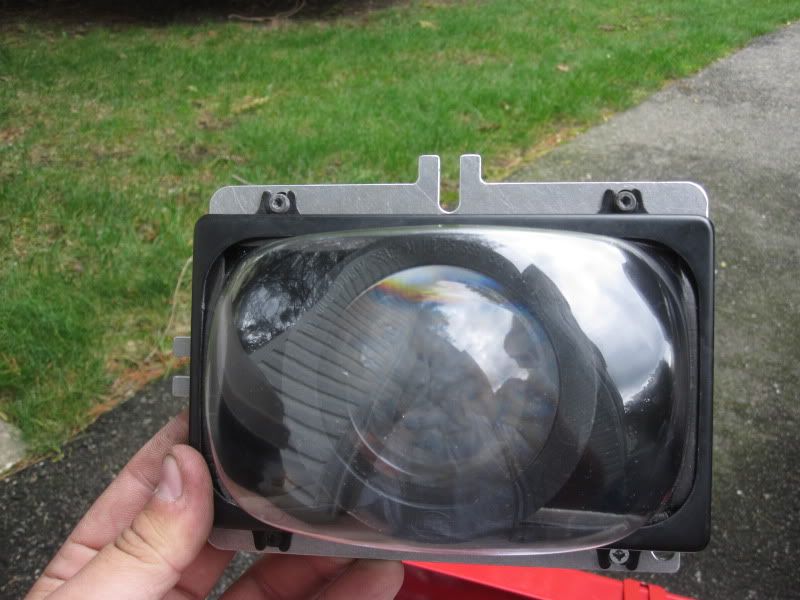
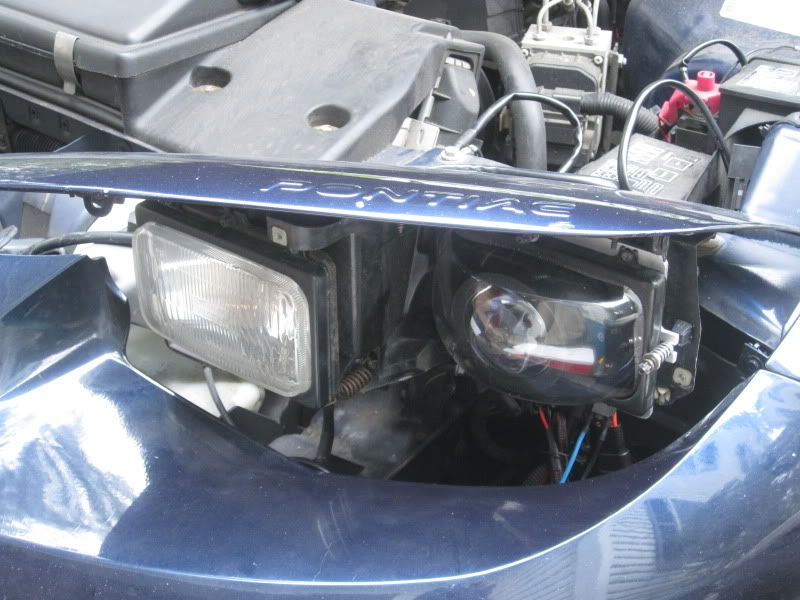
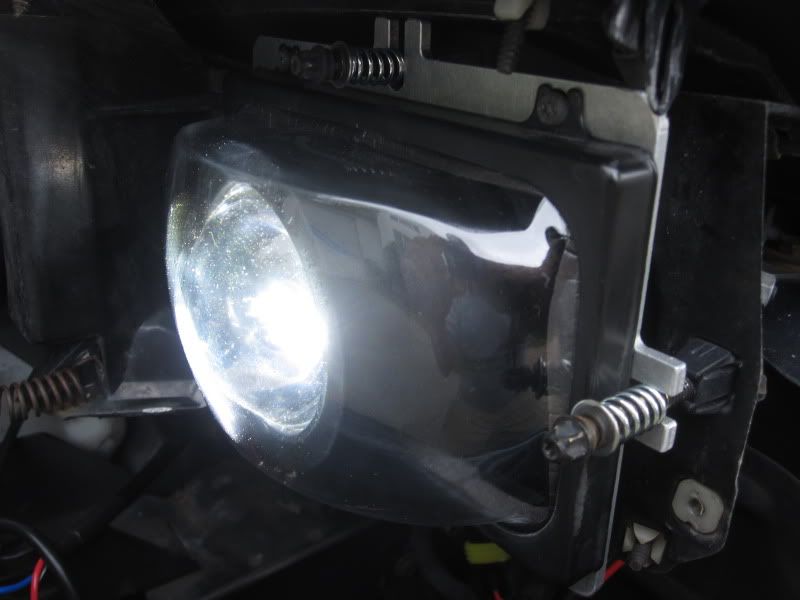
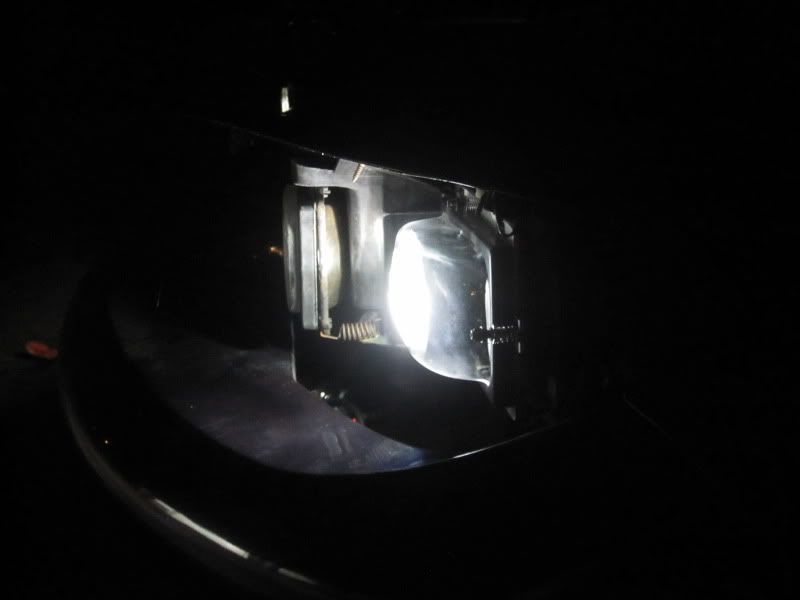
The passenger side projector, bolted into the mounting plate.
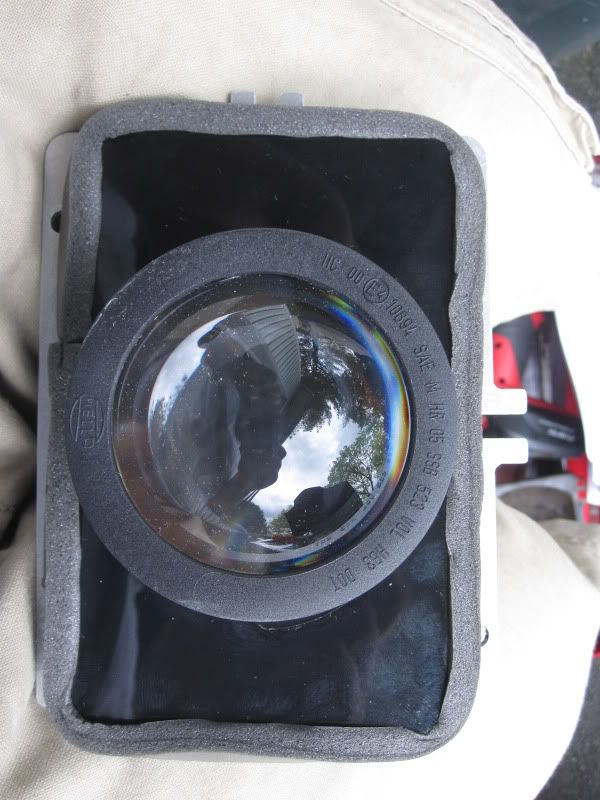
The projector, now with the black plexiglass panel covering the mounting plate, and the foam sealing strip attached.
The passenger side headlight, fully assembled. It reuses the stock trim ring to hold everything in place.
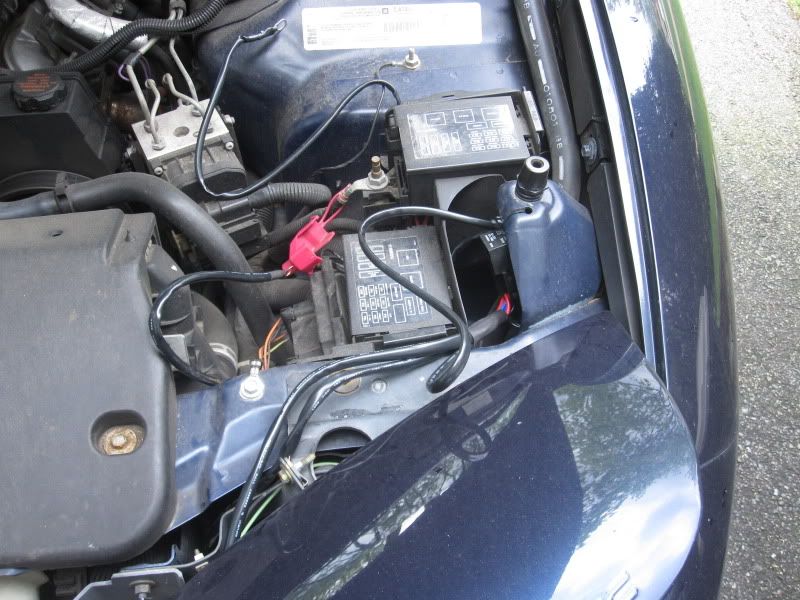
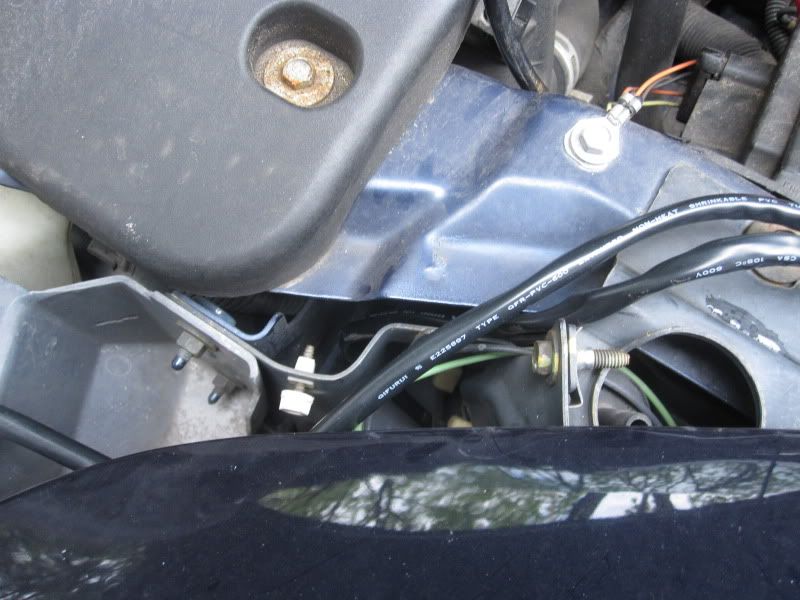
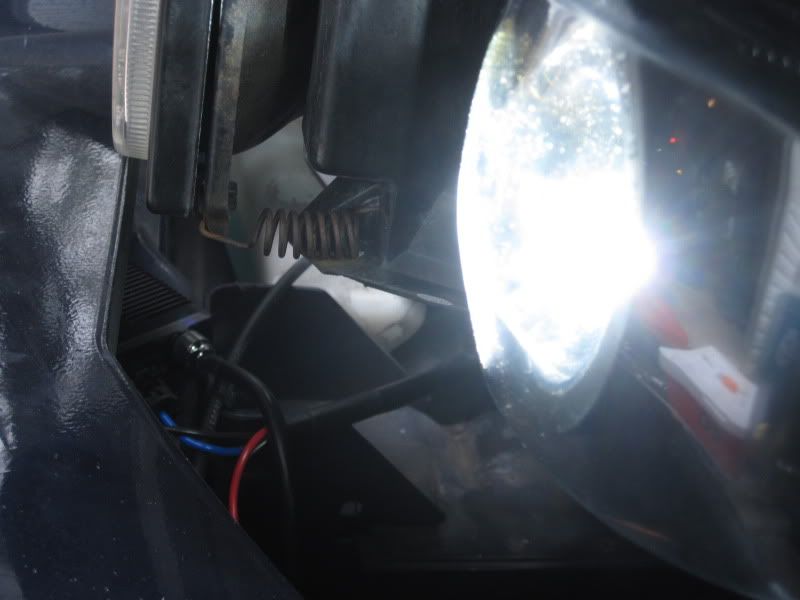
Here's how I mounted the wiring harness. The relay goes in the empty space by the fuse panels, where it is zip-tied to the piece of metal with the rubber hood cushion in it. The power cable is routed underneath the fuse panels, and connected to the positive terminal to the left of the top fuse panel (the one with the red cover). The ground cable is also routed underneath the fuse panels, and connected to the negative terminal on the support to the left of the bottom fuse panel.
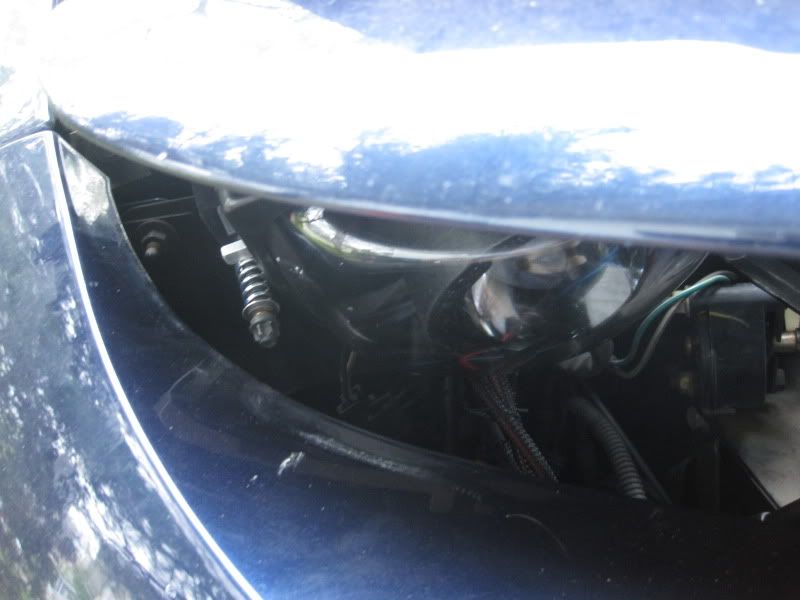
Here's the passenger side headlight wire, which I routed along the wiper fluid tank.
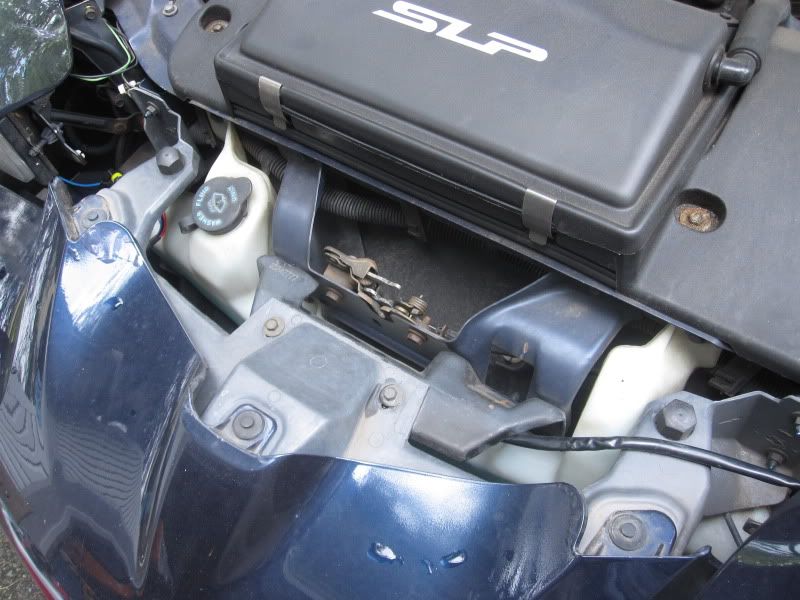
Here's where I routed the driver's side headlight wire. It goes through the space between the support and the small frame with the bolt in the middle of it, then comes out underneath the frame.
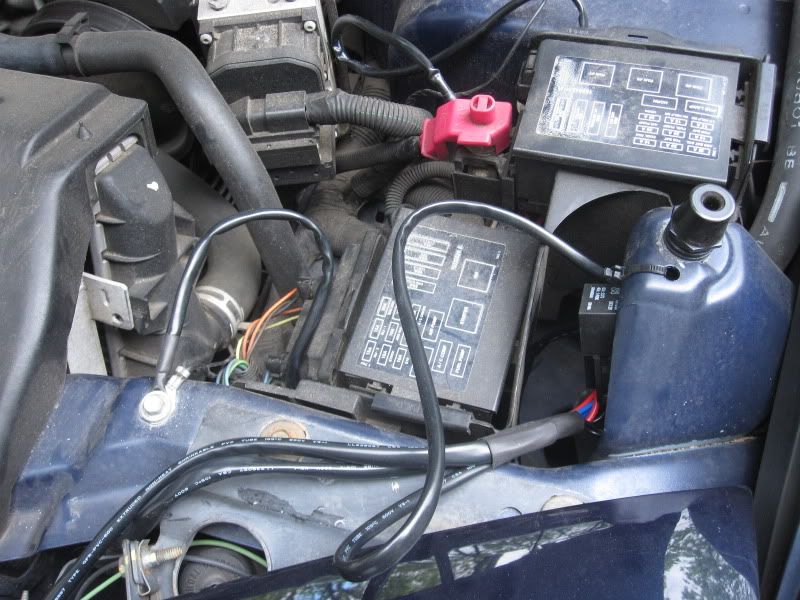
Here's the wiring harness, with the power and ground cables connected.
I mounted the ballasts inside the front bumper. There's a part of the bumper support that is kind of like a little shelf. I cleaned it off well and installed the ballasts using the industrial-strength Velcro mounts provided.
The contents of the kit:
The white boxes contain the HID ballasts and bulbs. The yellow boxes contain the Hella projector housings. The mounting plates are on the left hand side - Brian did a great job on these!
Here is the passenger side, with the low beam removed.
This is the stock headlight, after disasembly.
The passenger side projector, bolted into the mounting plate.
The projector, now with the black plexiglass panel covering the mounting plate, and the foam sealing strip attached.
The passenger side headlight, fully assembled. It reuses the stock trim ring to hold everything in place.
Here's how I mounted the wiring harness. The relay goes in the empty space by the fuse panels, where it is zip-tied to the piece of metal with the rubber hood cushion in it. The power cable is routed underneath the fuse panels, and connected to the positive terminal to the left of the top fuse panel (the one with the red cover). The ground cable is also routed underneath the fuse panels, and connected to the negative terminal on the support to the left of the bottom fuse panel.
Here's the passenger side headlight wire, which I routed along the wiper fluid tank.
Here's where I routed the driver's side headlight wire. It goes through the space between the support and the small frame with the bolt in the middle of it, then comes out underneath the frame.
Here's the wiring harness, with the power and ground cables connected.
I mounted the ballasts inside the front bumper. There's a part of the bumper support that is kind of like a little shelf. I cleaned it off well and installed the ballasts using the industrial-strength Velcro mounts provided.

 04-17-2010, 04:26 PM
#3
TECH Enthusiast
Thread Starter
iTrader: (8)
Join Date: Feb 2005
Posts: 532
Likes: 0
Received 0 Likes
on
0 Posts
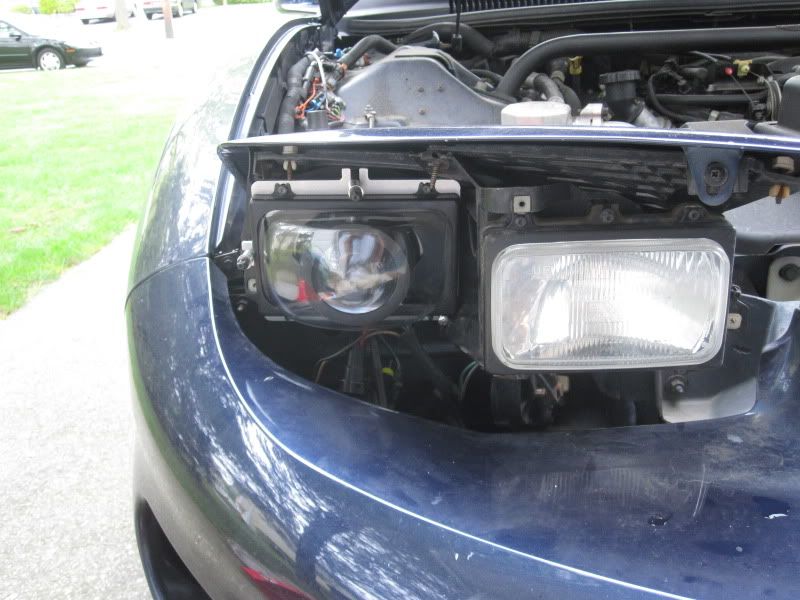
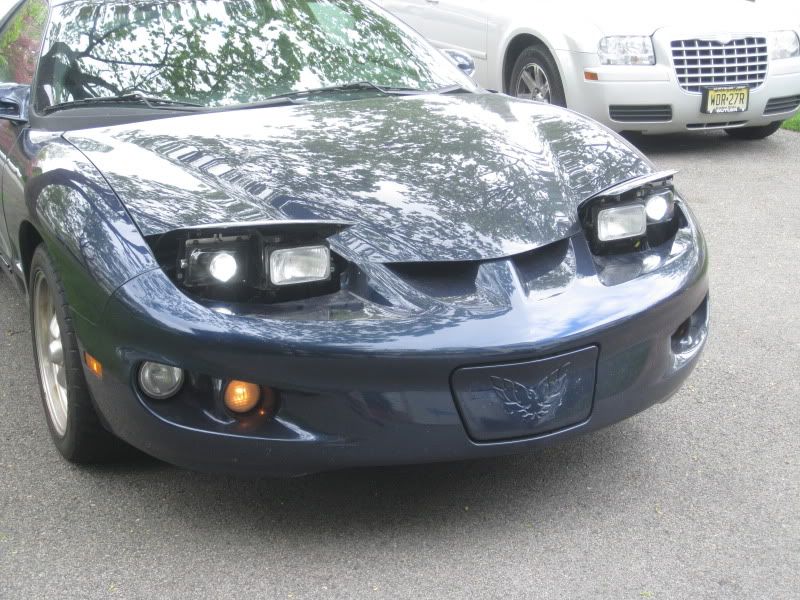
This is the passenger side headlight assembly getting mounted back up.
Clearance is good!
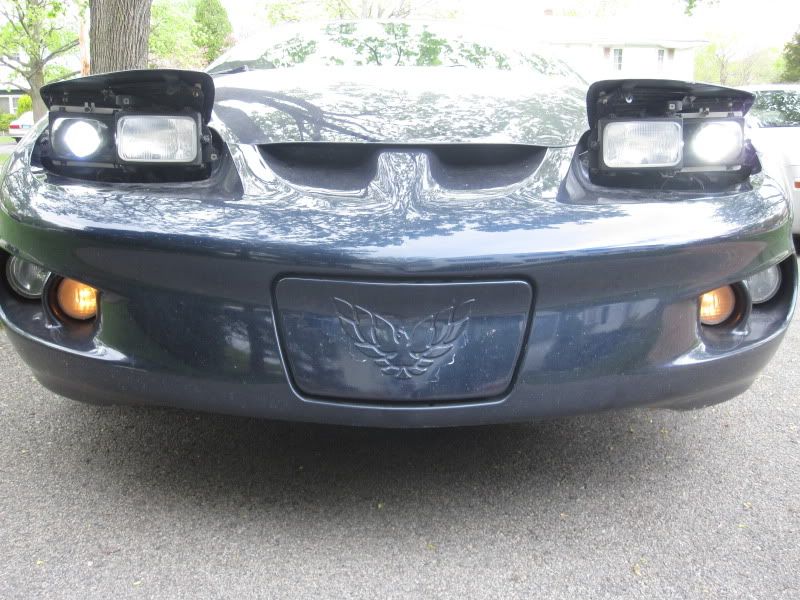
Here's both headlights installed.
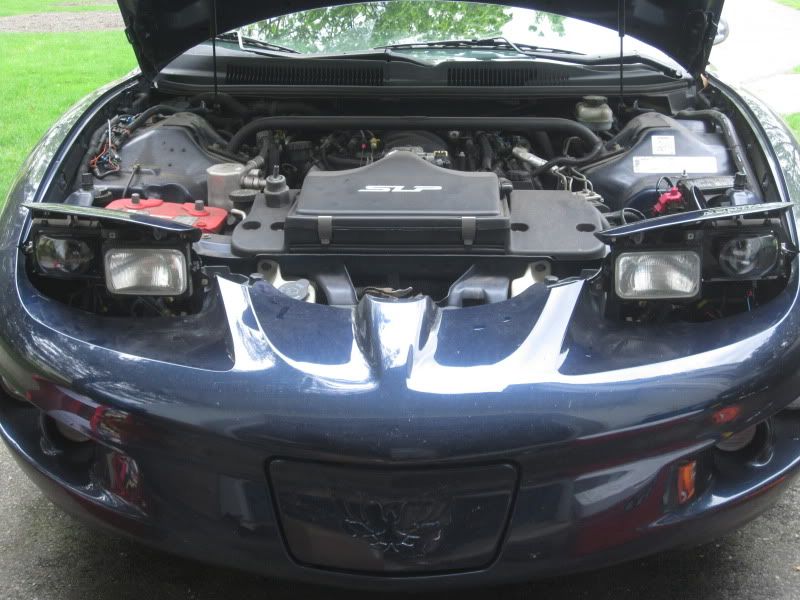
A closer front shot.
From the side.
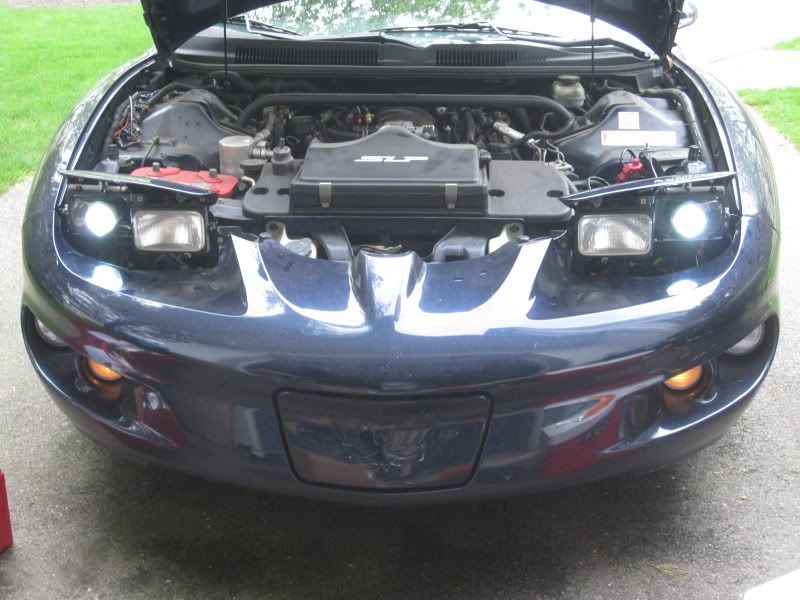
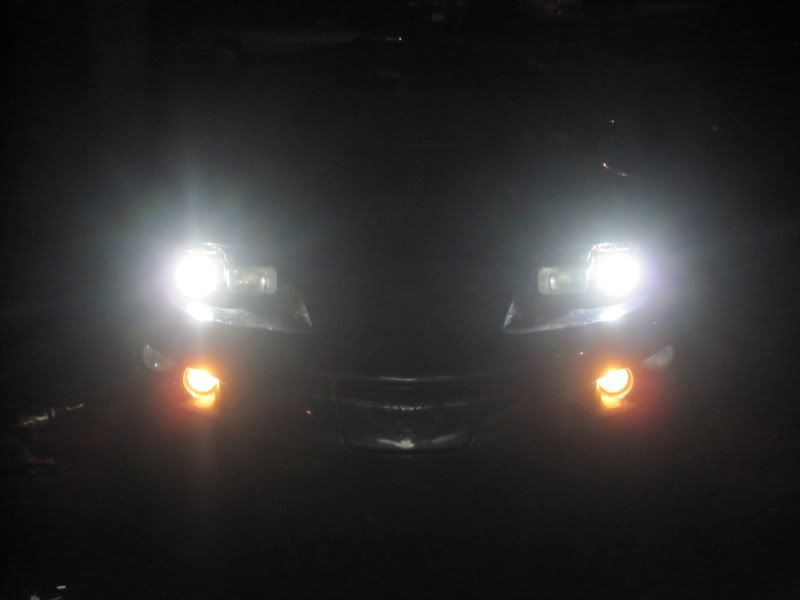
Moment of truth! They work great!
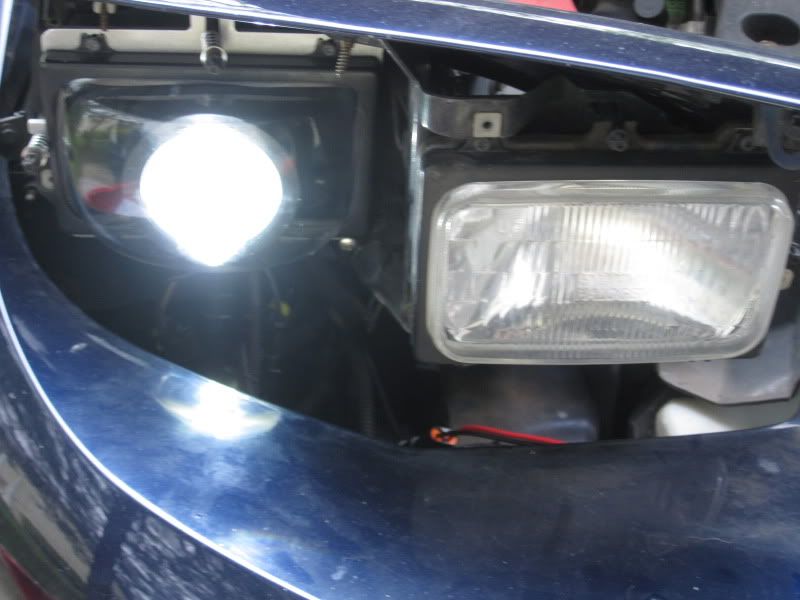
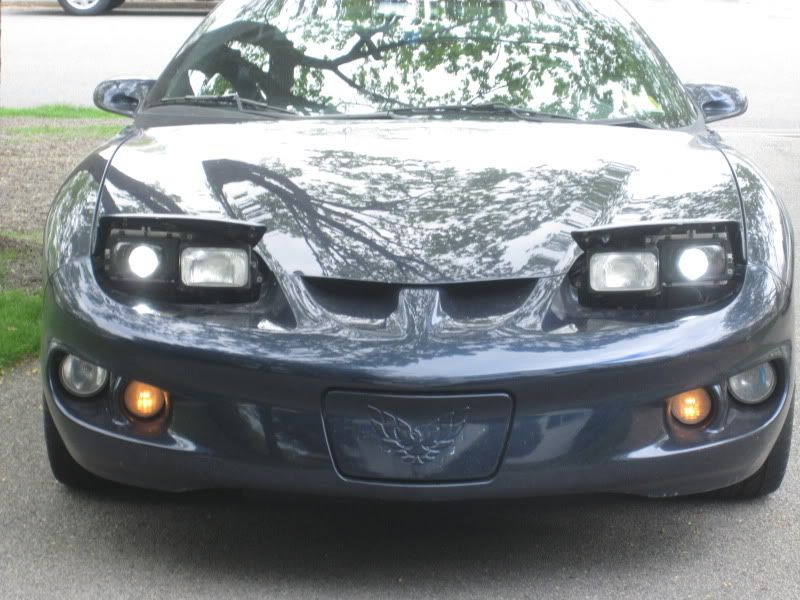
It looks pretty mean!
04-17-2010, 04:30 PM
#4
TECH Enthusiast
Thread Starter
iTrader: (8)
Join Date: Feb 2005
Posts: 532
Likes: 0
Received 0 Likes
on
0 Posts
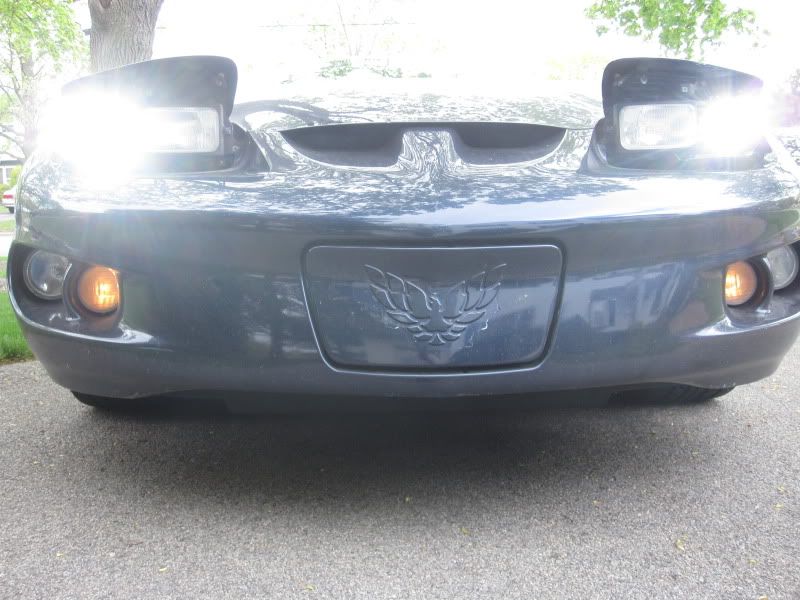
This pic is with the camera more in the path of the lights.
I'm really happy with these, and I haven't even tried them at night yet! Brian did a great job on this kit. I'm very impressed. I highly recommend this kit to anyone who wants HIDs for their 98-02 Firebird. I still have to adjust the lights, but I have to wait until nighttime to do so. I'll put up more pics after I get them adjusted.

Trending Topics
04-17-2010, 11:31 PM
#9
TECH Enthusiast
Thread Starter
iTrader: (8)
Join Date: Feb 2005
Posts: 532
Likes: 0
Received 0 Likes
on
0 Posts
I went with the 5000K kit. I wanted an OEM-style look. I think it looks really clean.
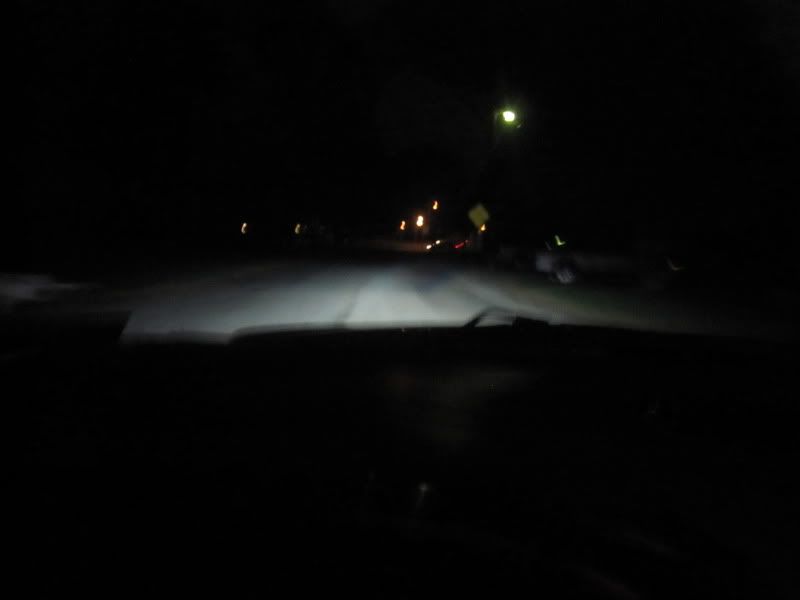
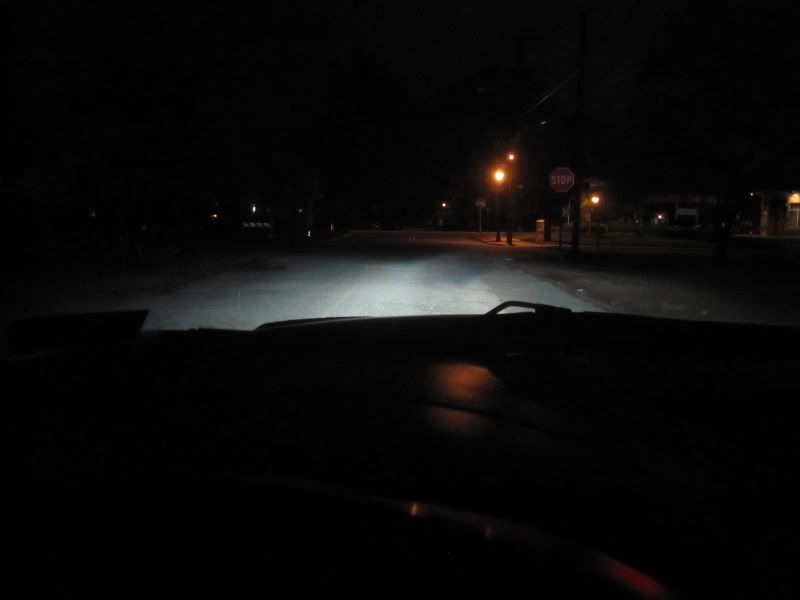
Without further ado, here's the night pictures:
I think I got them lined up correctly...
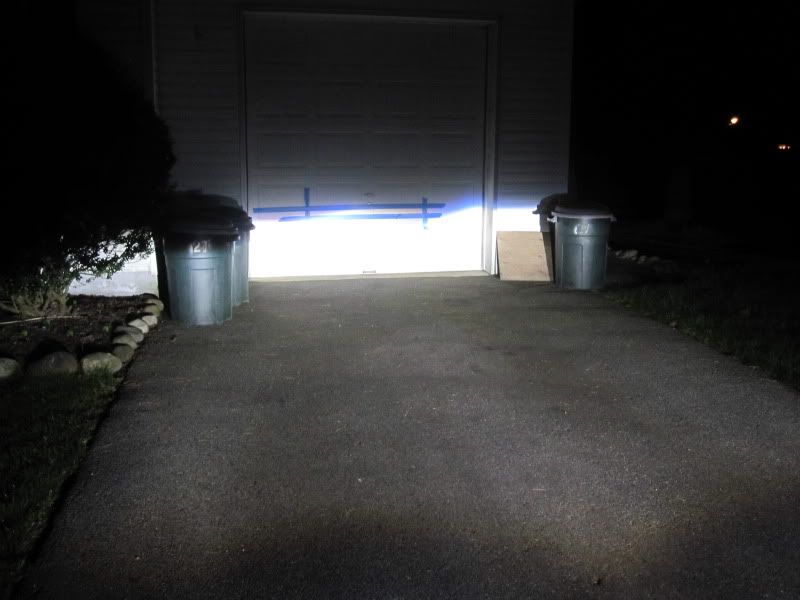
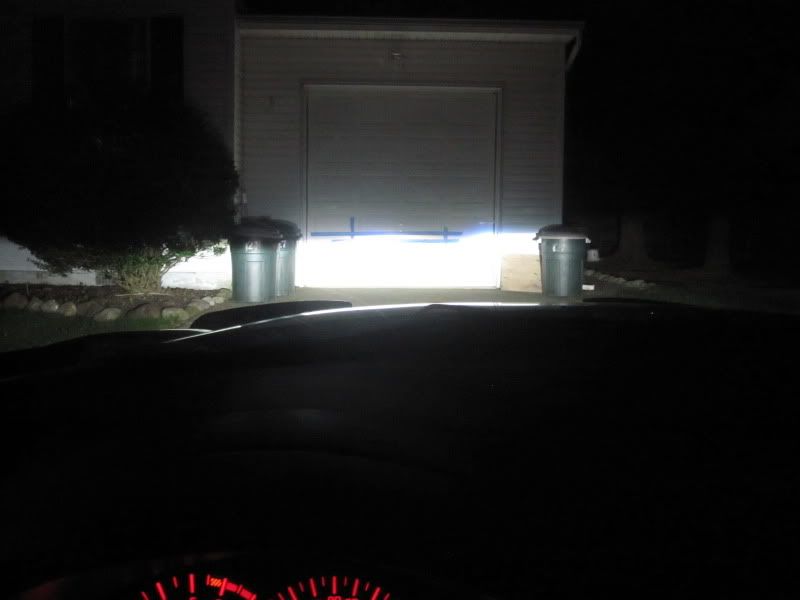
These pics are on the street:
And last but not least, some video:
http://s17.photobucket.com/albums/b1...ent=hid034.flv
.
The HIDs are awesome. They light up the whole road. Driving in the middle lane on a 3-lane highway, all 3 lanes were lit up. It's nice to be able to see clearly for once.
I installed the springs on the adjustment screws wrong, which made it hard to adjust the lights. I'm going to fix that tomorrow, and get more pics.
Without further ado, here's the night pictures:
I think I got them lined up correctly...
These pics are on the street:
And last but not least, some video:
http://s17.photobucket.com/albums/b1...ent=hid034.flv
.
The HIDs are awesome. They light up the whole road. Driving in the middle lane on a 3-lane highway, all 3 lanes were lit up. It's nice to be able to see clearly for once.
I installed the springs on the adjustment screws wrong, which made it hard to adjust the lights. I'm going to fix that tomorrow, and get more pics.
Last edited by skorpion317; 04-17-2010 at 11:38 PM.
04-18-2010, 12:02 AM
#11
TECH Enthusiast
Thread Starter
iTrader: (8)
Join Date: Feb 2005
Posts: 532
Likes: 0
Received 0 Likes
on
0 Posts
It's getting washed in the morning. I have to fix the bezels too - they're a little off for some reason. They're closer to the bumper than they were before, which is kind of weird.
04-18-2010, 12:06 AM
#12
TECH Enthusiast
Thread Starter
iTrader: (8)
Join Date: Feb 2005
Posts: 532
Likes: 0
Received 0 Likes
on
0 Posts
I'm also going to switch to LED turn signals and fog lights. I have clear incandescent bulbs in the turn signals, and they're still kind of yellow. I can't stand yellow lights.
04-18-2010, 04:31 PM
#17
TECH Enthusiast
Thread Starter
iTrader: (8)
Join Date: Feb 2005
Posts: 532
Likes: 0
Received 0 Likes
on
0 Posts
I got them from Blackbird Lighting Solutions, one of the great sponsors of this forum. The 98-02 Firebird's lights are not the same size as the 93-97 Camaro's lights, so these won't work for your application.
04-18-2010, 04:31 PM
#18
Teching In

Join Date: Sep 2009
Posts: 5
Likes: 0
Received 0 Likes
on
0 Posts
No, the '98-'02 Firebird lights (150 x 92 mm) are bigger than the '93-'97 Camaro lights. (140 x 64 mm)
Chris
04-18-2010, 08:10 PM
#20
EDIT: I really am starting to lean towards the 500k selection. I was between that and the 600k, but I'm still not 100% sure.