
Blue TA odometer and white LED warning lights FTW!
 12-24-2011, 12:53 AM
#1
I've never seen anybody change all the stupid yellow and red warning light on the gauge cluster, so I decided to do so. I wouldn't recommend doing this if you don't know what you're doing. I knew what I was doing and it was still troublesome, but I got it! I'm not going to do a full write-up on the White LEDs. It's not really complicated, but you can easily screw it up. If you think you are pretty good and know what you are doing go ahead. If you have a problem along the way, SEE POST #16. That should get you through the hard part.
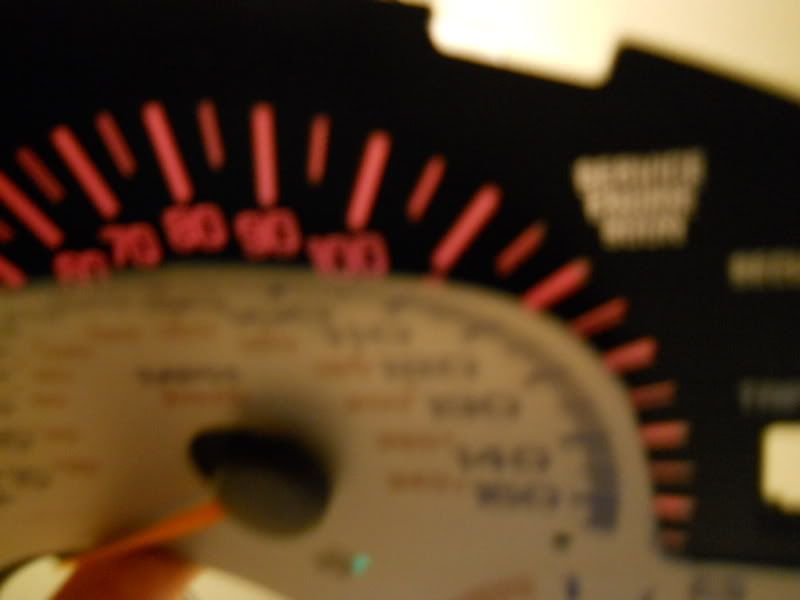
I turned the key and snapped the pic super quick so it didn't read my odometer, the airbag light flashes so I'd didn't capture that either.
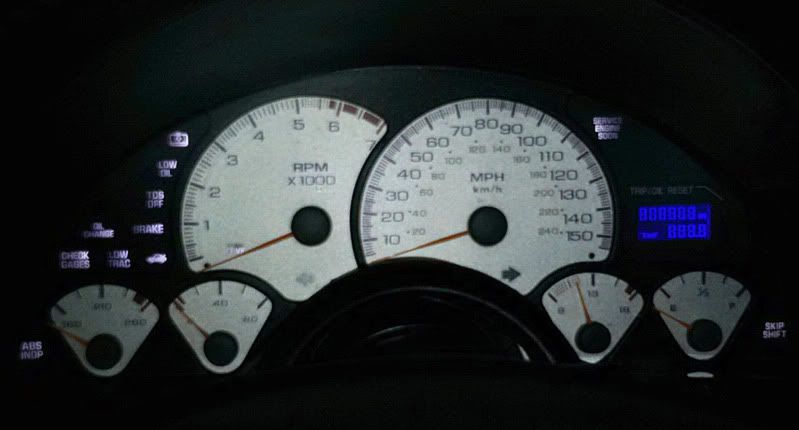
*These are some cheap eBay sliver overlays that light up blue. I bought these several years ago. I'm sure you won't find them.
*The color is cool white for the LEDs. These LED's are are 3000mcd, 30 degree. I wouldn't go any brighter, mine are just fine like they are.
*The blue 3mm LEDs are 2000mcd, 30 degree
*All from SuperBrightLEDS
Just some general good info to know:
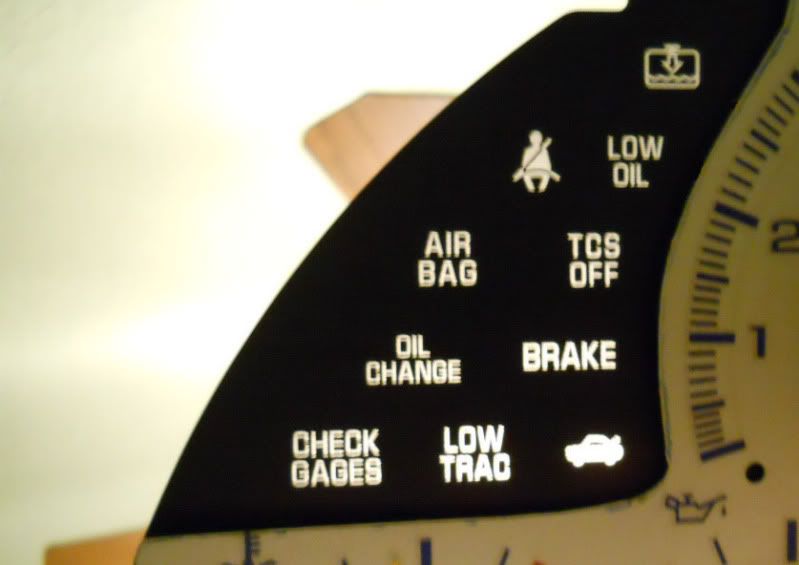
*The warning lights get their color from the LED behind them.
*The turn signals have a green film as you can see...and it uses regular 194 bulbs to light up.
*The high beam indicator has a blue film and uses a regular 194 bulb to light up.
I held it up against the light and here's what you get.

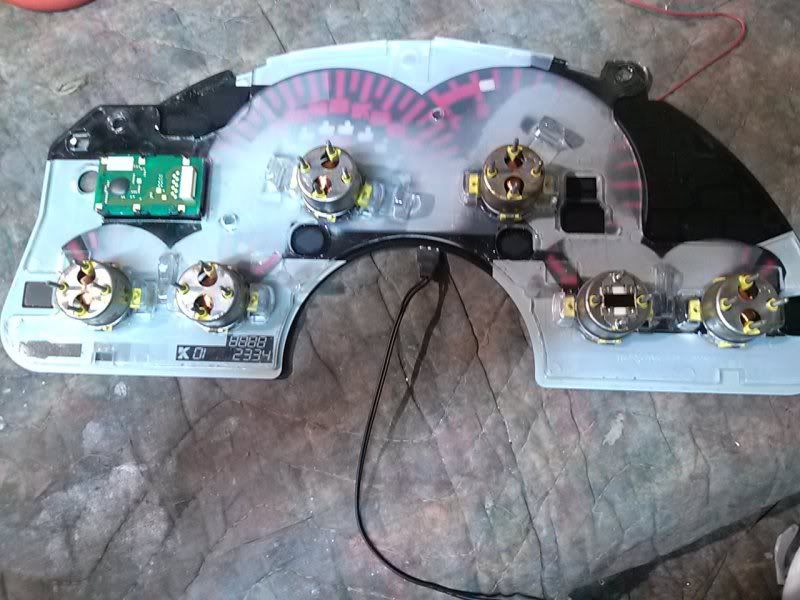
*That infamous red film on Pontiacs? It's hidden behind this particular overlay (which light up blue) The red film only lays behind where the gauge needles sweep over. The red film is suppose to be permanent, but you can scrape off the red tint as well as the blue-ish tint on the Camaro. I've seen a few pics floating around during some searches though. It's relatively straight forward as scary as it seems. Everything is printed on the front except for the colored tint. As for the HVAC and headlight overlay, you're screwed. Everything is printed on the back and impossible to remove just the color.
Red film from the back
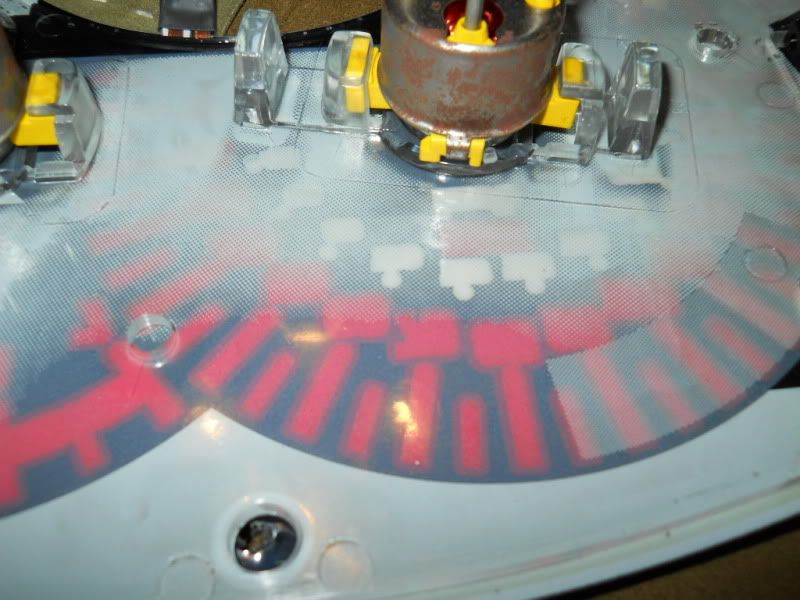
The red film shining through....I was holding it in the air at my ceiling fan light
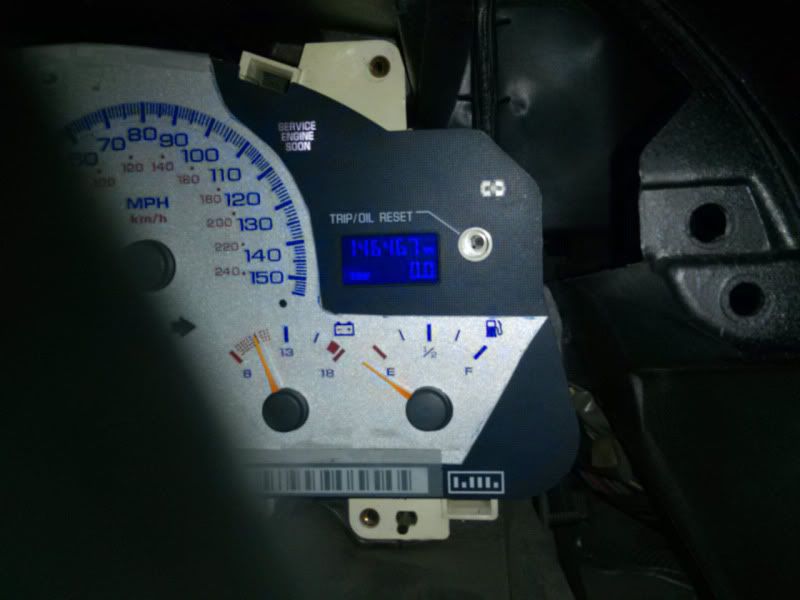
*I had an issue with all of my gauge needles once I re-installed the cluster. I never took the needles off! The problem? When I had the cluster upside down working on it, they got pushed in causing them to bind. All I had to do was pull them back out a little bit and they were just fine. I thought I bent the pins or something on plug on the dash and was searching here on Tech for that. I can say I've had this gauge cluster in and out of my car at least 100 times. I'd be really hard to mess up the connection from the dash to the cluster IMO.
I turned the key and snapped the pic super quick so it didn't read my odometer, the airbag light flashes so I'd didn't capture that either.
*These are some cheap eBay sliver overlays that light up blue. I bought these several years ago. I'm sure you won't find them.
*The color is cool white for the LEDs. These LED's are are 3000mcd, 30 degree. I wouldn't go any brighter, mine are just fine like they are.
*The blue 3mm LEDs are 2000mcd, 30 degree
*All from SuperBrightLEDS
Just some general good info to know:
*The warning lights get their color from the LED behind them.
*The turn signals have a green film as you can see...and it uses regular 194 bulbs to light up.
*The high beam indicator has a blue film and uses a regular 194 bulb to light up.
I held it up against the light and here's what you get.
*That infamous red film on Pontiacs? It's hidden behind this particular overlay (which light up blue) The red film only lays behind where the gauge needles sweep over. The red film is suppose to be permanent, but you can scrape off the red tint as well as the blue-ish tint on the Camaro. I've seen a few pics floating around during some searches though. It's relatively straight forward as scary as it seems. Everything is printed on the front except for the colored tint. As for the HVAC and headlight overlay, you're screwed. Everything is printed on the back and impossible to remove just the color.
Red film from the back
The red film shining through....I was holding it in the air at my ceiling fan light
*I had an issue with all of my gauge needles once I re-installed the cluster. I never took the needles off! The problem? When I had the cluster upside down working on it, they got pushed in causing them to bind. All I had to do was pull them back out a little bit and they were just fine. I thought I bent the pins or something on plug on the dash and was searching here on Tech for that. I can say I've had this gauge cluster in and out of my car at least 100 times. I'd be really hard to mess up the connection from the dash to the cluster IMO.
Last edited by HotWhipT/A; 03-02-2016 at 09:32 PM.
 12-24-2011, 12:54 AM
#2
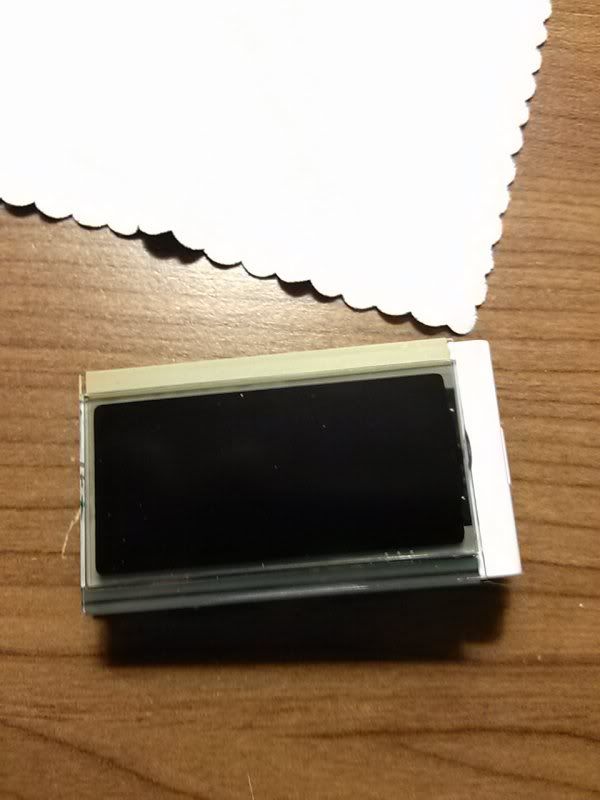
Want to know how to do the blue odometer? Their used to be a link, but the pictures sucked and the info was brief.
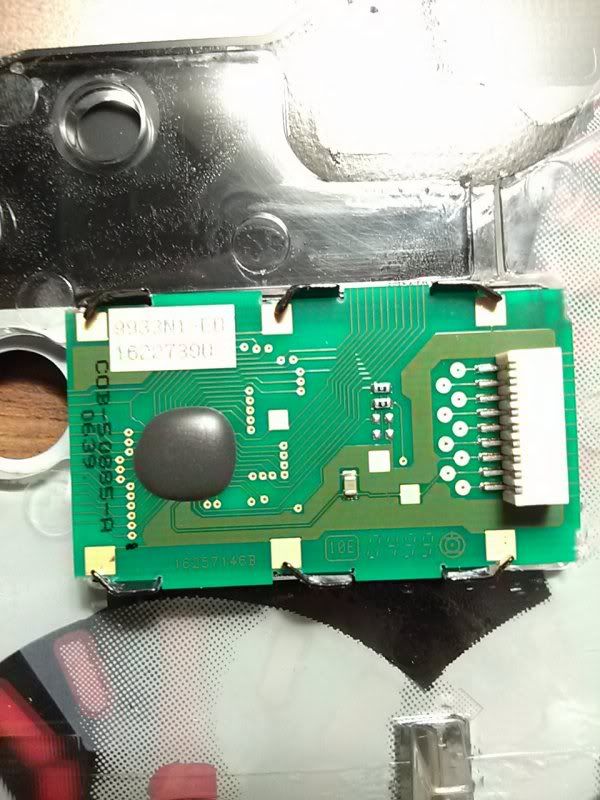
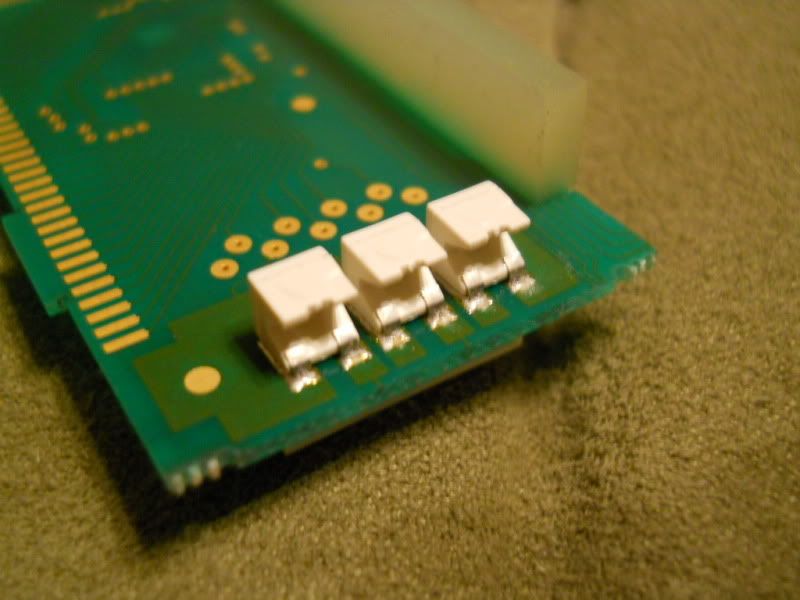
99-02 Camaros and Pontiacs have the 3 red SMD LEDs. Their is NO film on the odometers!
98 Camaros and Pontiacs have a 194 bulb and a red piece of film that you can remove. Replace the bulb with the color of your choice LED 194 bulb.
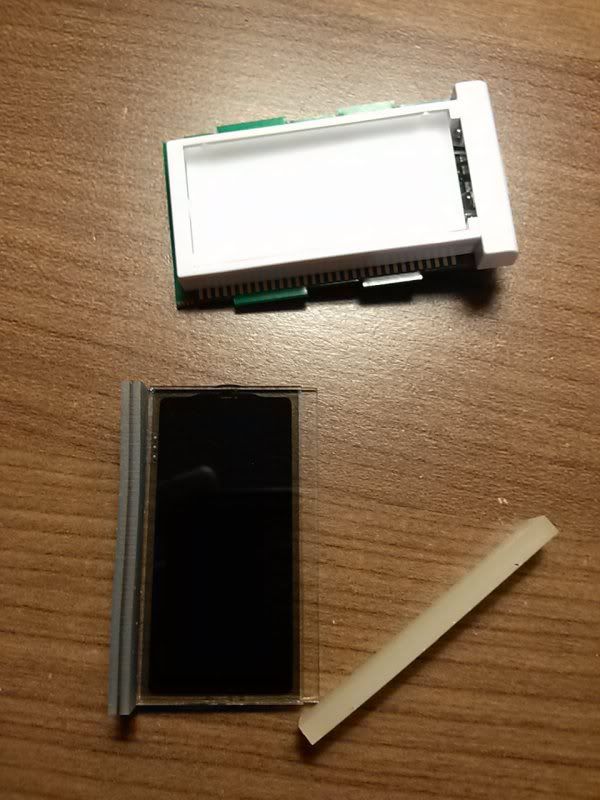
Better pics for your reference:
Tabs bent
Tabs un-bent
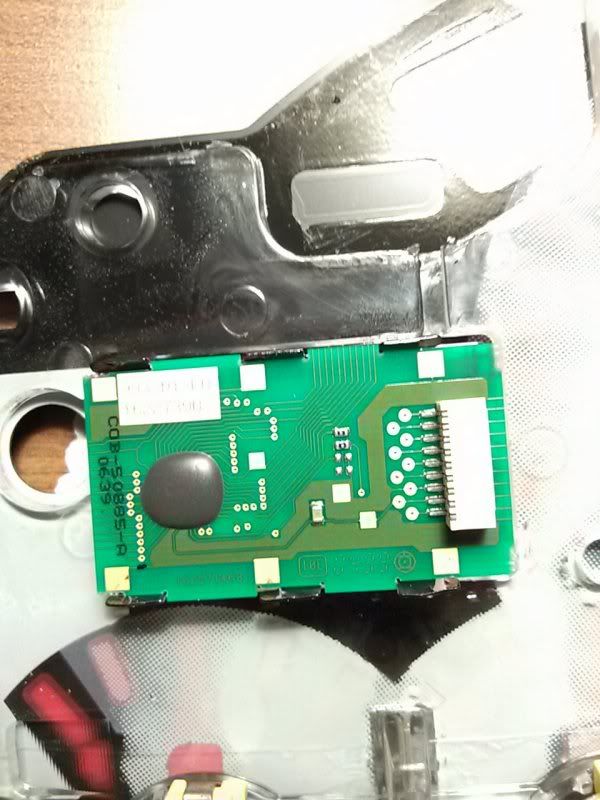
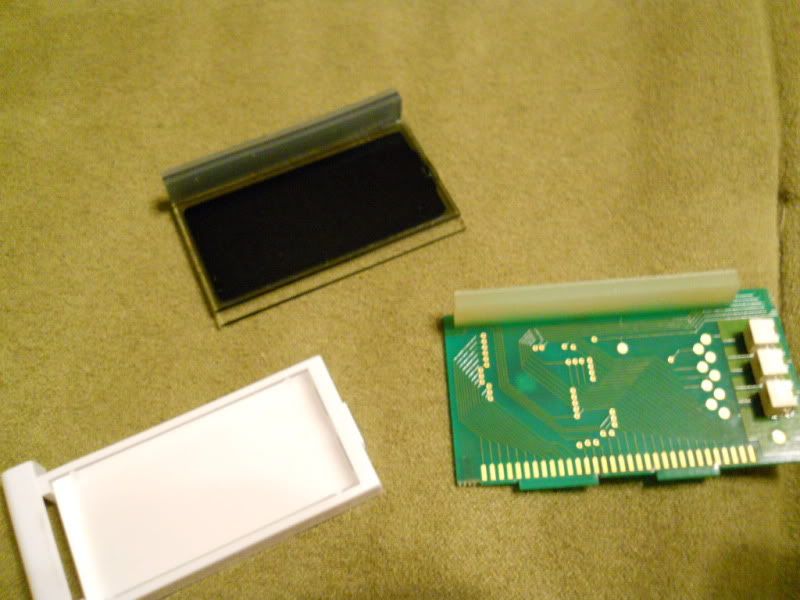
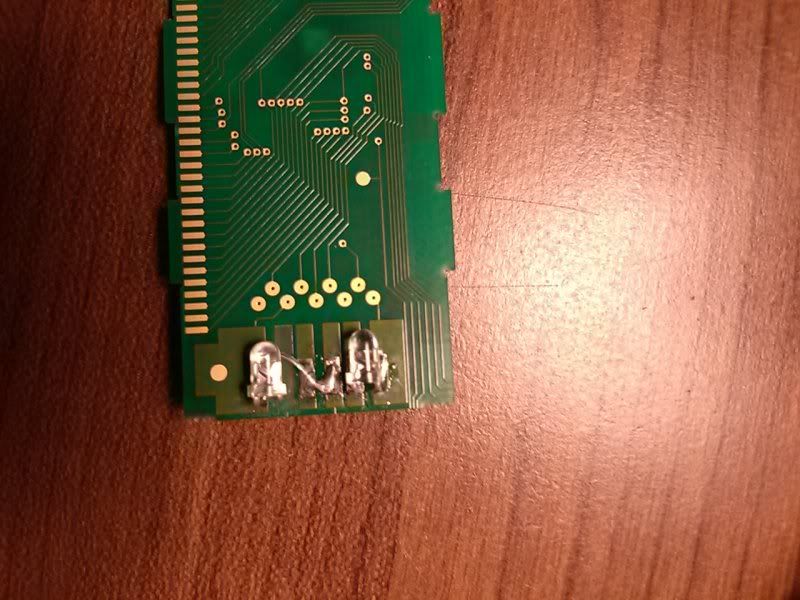
Notice the clearish rubbery thing? Its okay if if comes off. The darker one with the black line has to go back on to the circuit board on the side with all the little gold things.
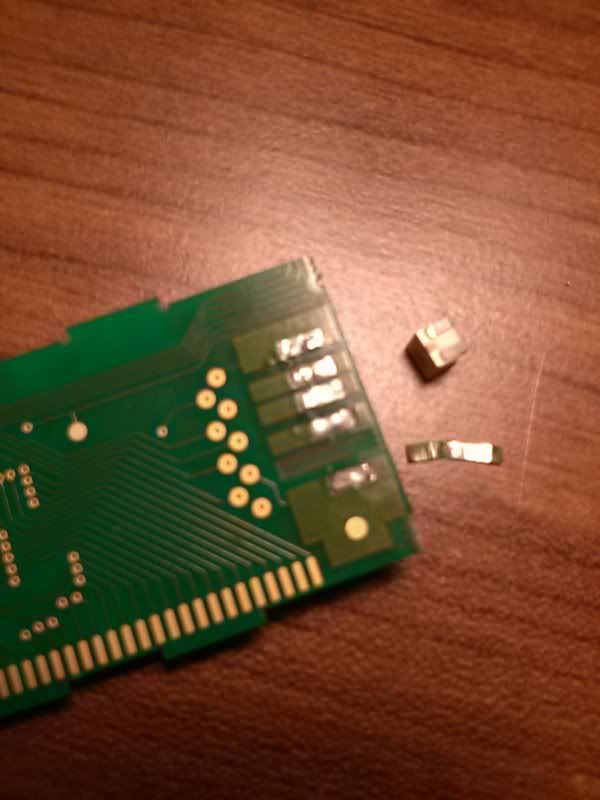
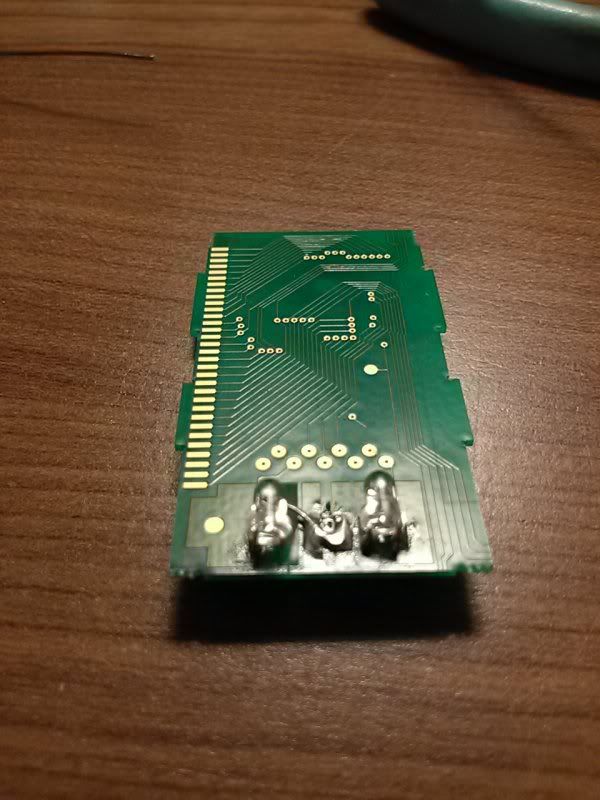
The whole bottom side of the SMD LED is sodered on. I figured this out afterwards the hard way. Heat up one lead and pull/push the opposite way once the soder melts it to break loose. Continue the process.....
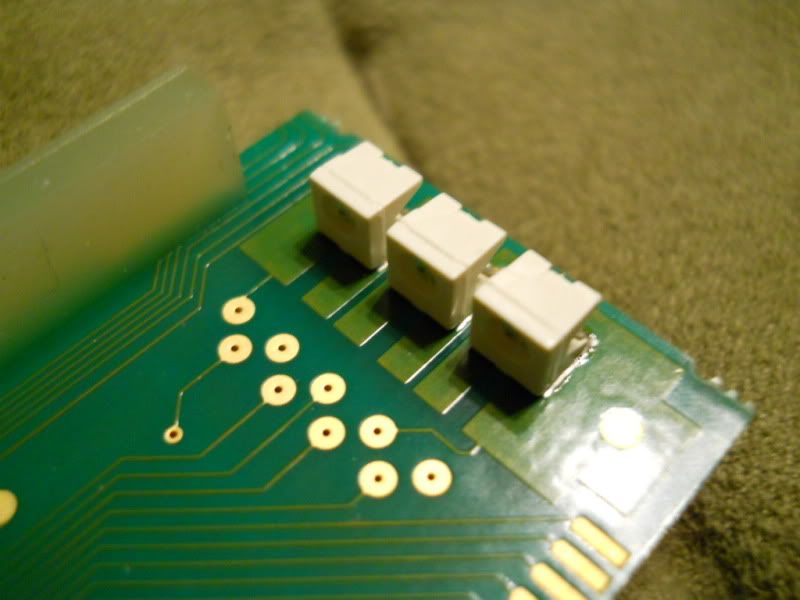
Thought I was screwed here...I pulled the trace up. Theirs suppose to be 6 solder points, LOL.
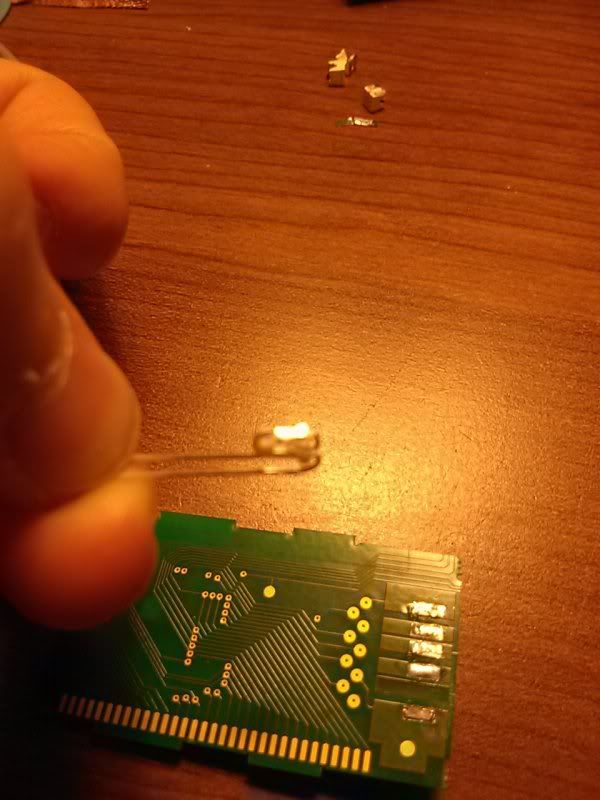
Here's the important part: The Positive is the bottom and the Negative is the top. They are wired in series.
Bend the leads like this...the negative is always the shorter lead and looking at the LED itself, the negative should always be the flag looking part.
Soldered
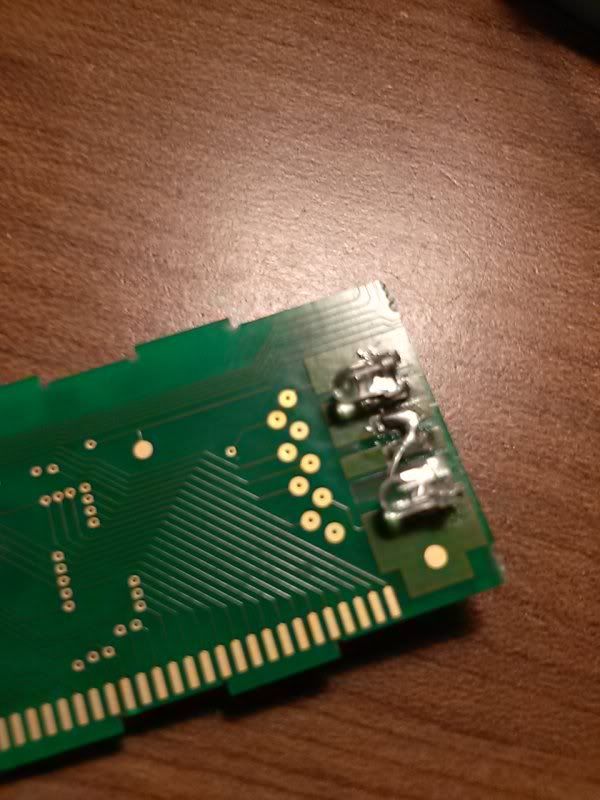
Now you have fun putting it all back together!
ENJOY
99-02 Camaros and Pontiacs have the 3 red SMD LEDs. Their is NO film on the odometers!
98 Camaros and Pontiacs have a 194 bulb and a red piece of film that you can remove. Replace the bulb with the color of your choice LED 194 bulb.
Better pics for your reference:
Tabs bent
Tabs un-bent
Notice the clearish rubbery thing? Its okay if if comes off. The darker one with the black line has to go back on to the circuit board on the side with all the little gold things.
The whole bottom side of the SMD LED is sodered on. I figured this out afterwards the hard way. Heat up one lead and pull/push the opposite way once the soder melts it to break loose. Continue the process.....
Thought I was screwed here...I pulled the trace up. Theirs suppose to be 6 solder points, LOL.
Here's the important part: The Positive is the bottom and the Negative is the top. They are wired in series.
Bend the leads like this...the negative is always the shorter lead and looking at the LED itself, the negative should always be the flag looking part.
Soldered
Now you have fun putting it all back together!
ENJOY
Last edited by HotWhipT/A; 03-02-2016 at 09:31 PM.
12-24-2011, 02:50 AM
#4
I'll only do this for local folks! I'd love to have people send me their clusters, but so many things can go wrong and I only have one shot. I absolutely need the car for this. It's hard to explain, but you can't just test the bulb when its in the circuit board...AND some are sort of connected too, not to mention LEDs have a polarity so they have to go in the right way. If you screw up a connection/trace, you have to hard wire that bulb. You won't know until you test it in the car. Also, I won't keep taking mine out and not every cluster from camaros/pontiacs through the various years are the same.
12-24-2011, 12:20 PM
#5
If you're ever in Austin and want to do this, let me know. It'll cost ya some change though.
I'll only do this for local folks! I'd love to have people send me their clusters, but so many things can go wrong and I only have one shot. I absolutely need the car for this. It's hard to explain, but you can't just test the bulb when its in the circuit board...AND some are sort of connected too, not to mention LEDs have a polarity so they have to go in the right way. If you screw up a connection/trace, you have to hard wire that bulb. You won't know until you test it in the car. Also, I won't keep taking mine out and not every cluster from camaros/pontiacs through the various years are the same.
I'll only do this for local folks! I'd love to have people send me their clusters, but so many things can go wrong and I only have one shot. I absolutely need the car for this. It's hard to explain, but you can't just test the bulb when its in the circuit board...AND some are sort of connected too, not to mention LEDs have a polarity so they have to go in the right way. If you screw up a connection/trace, you have to hard wire that bulb. You won't know until you test it in the car. Also, I won't keep taking mine out and not every cluster from camaros/pontiacs through the various years are the same.
 12-25-2011, 03:19 PM
#7
12 Second Club
iTrader: (6)
Join Date: Jun 2004
Location: Ft. Irwin, California (But Virginia is home)
Posts: 1,501
Likes: 0
Received 7 Likes
on
1 Post

Looks awesome.... and like a lot of work!
I have the same gauge overlay you do. Got mine back in 2002....and still works. Too bad they don't make it anymore.
I have the same gauge overlay you do. Got mine back in 2002....and still works.
Too bad they don't make it anymore. Trending Topics
12-25-2011, 03:50 PM
#10
TECH Fanatic
iTrader: (14)
Join Date: Mar 2007
Location: Phoenix/Tempe, AZ
Posts: 1,969
Likes: 0
Received 0 Likes
on
0 Posts
i did mine in white for the backlights and odo, then green/blue for the signals/brights. odo matches my aeroforce gauge/6le overlay.
i think the first time i did it i replaced the rubber part where the black piece goes in the odo and i got lights but no actual reading (looked like one of those solar calculators when you push the screen)
EDIT: ditto about the 6le overlay making it darker, probably has more layers than stock (feels like different material too). I just planned on replacing my turn signals (only the signals cause me issues) with a 5wled that has a light pointing straight up, vs the w6led that has a 360* output but nothing facing straight up (may be better for stopping 'hot spots' but w the exhaust and music i cant tell when my signals are on some times )
i think the first time i did it i replaced the rubber part where the black piece goes in the odo and i got lights but no actual reading (looked like one of those solar calculators when you push the screen)
EDIT: ditto about the 6le overlay making it darker, probably has more layers than stock (feels like different material too). I just planned on replacing my turn signals (only the signals cause me issues) with a 5wled that has a light pointing straight up, vs the w6led that has a 360* output but nothing facing straight up (may be better for stopping 'hot spots' but w the exhaust and music i cant tell when my signals are on some times
)
12-25-2011, 07:28 PM
#12
EDIT: ditto about the 6le overlay making it darker, probably has more layers than stock (feels like different material too). I just planned on replacing my turn signals (only the signals cause me issues) with a 5wled that has a light pointing straight up, vs the w6led that has a 360* output but nothing facing straight up (may be better for stopping 'hot spots' but w the exhaust and music i cant tell when my signals are on some times )
)http://www.superbrightleds.com/cgi-b...-x6.htm#photos
 Looks really good man, nice work. Good thread too, nice to see you thought everything out before hand.
12-27-2011, 01:22 AM
Looks really good man, nice work. Good thread too, nice to see you thought everything out before hand.
12-27-2011, 01:22 AM
#16
This is my little story of my problems:
I tested each stock LED when I took them out for polarity just to be sure. Common knowledge says if you look at the leadframe (post and anvil) the anvil which looks like a flag is the negative.
All the stock yellow lights are normal. What tripped me up is all the stock red LEDs are backwards! The anvil was the positive. So needless to say, I put those few white LED's in backwards.
I still can't figure out why the reds are like that but anyways, so what I thought was doing it right didn't work. None of the white LEDs that were originally red lit up, also causing some of the other once yellow LEDs not to light too. Once I swapped over the white LED's that were in the red spot, everything worked. I did have to hard wire a few after I damaged some of the embedded trace in the green board after pulling them out in my haste of being mad and rushing.

So I figured this out the hard way....
All the new LED's go in just like the board shows...like the backwards D. So the flat part should be on the right side.
Last edited by HotWhipT/A; 03-02-2016 at 09:23 PM.
12-27-2011, 08:16 AM
#17
Thanks for the info - I have a junk cluster sitting around that I'm going to screw with first before tearing apart my own. You definitely gave me the motivation to try this, and all I'm after is trying to get the LEDs behind a McNord overlay to be brighter since the McNord overlay dims them so much. I want those warning lights to be seen from space.
Did you test it by just taking the circuit board only out to your car and just plugging it in (with the rest of the cluster disassembled)?
Did you test it by just taking the circuit board only out to your car and just plugging it in (with the rest of the cluster disassembled)?
12-27-2011, 11:54 AM
#18
Yea, I just had the green circuit board, turn on the key and check. So I just kept taking it in and out. You know what probably wouldn't be a bad idea is to do one LED...check to make sure it works and then proceed to the next until you are finished. That would be the safe way to do it.
12-27-2011, 12:38 PM
#19
Yea, I just had the green circuit board, turn on the key and check. So I just kept taking it in and out. You know what probably wouldn't be a bad idea is to do one LED...check to make sure it works and then proceed to the next until you are finished. That would be the safe way to do it.
