Ferrari 250 Europa vs. Rupes - BlackICE
 01-23-2014, 08:04 AM
#1
Closed ex-Sponsor Account
Thread Starter
Join Date: Aug 2013
Location: Orlando & Palm Beach, FL
Posts: 161
Likes: 0
Received 0 Likes
on
0 Posts
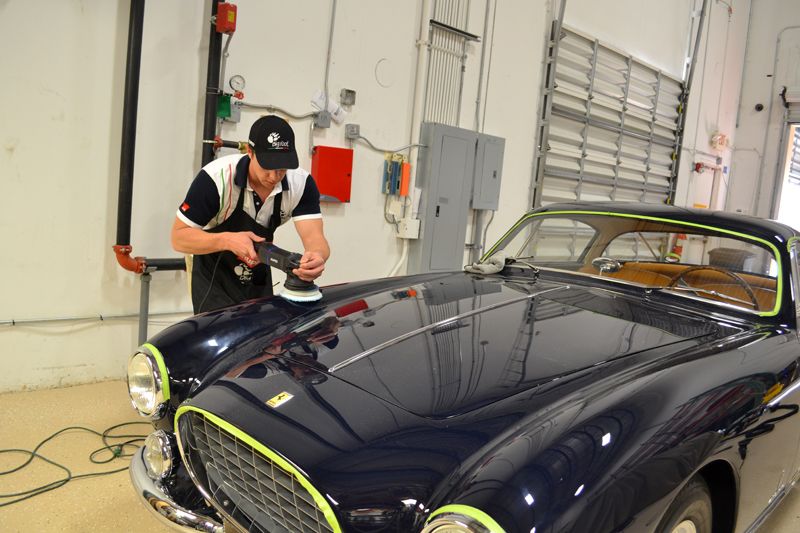
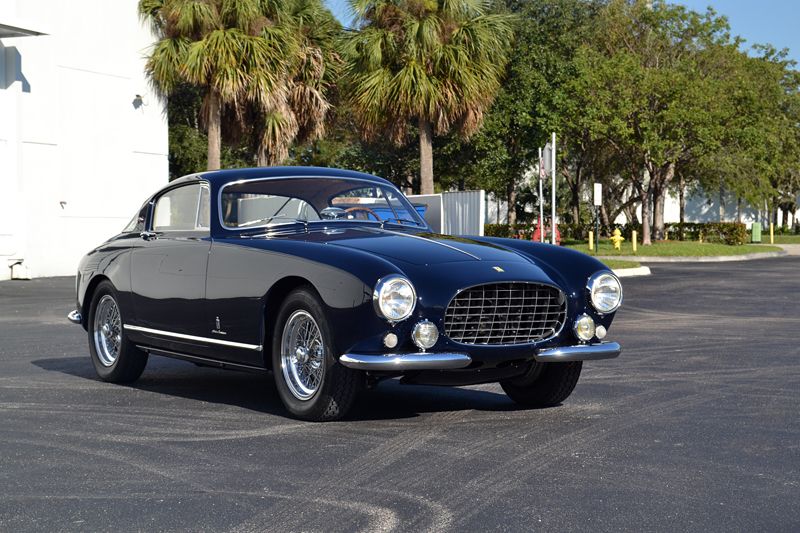
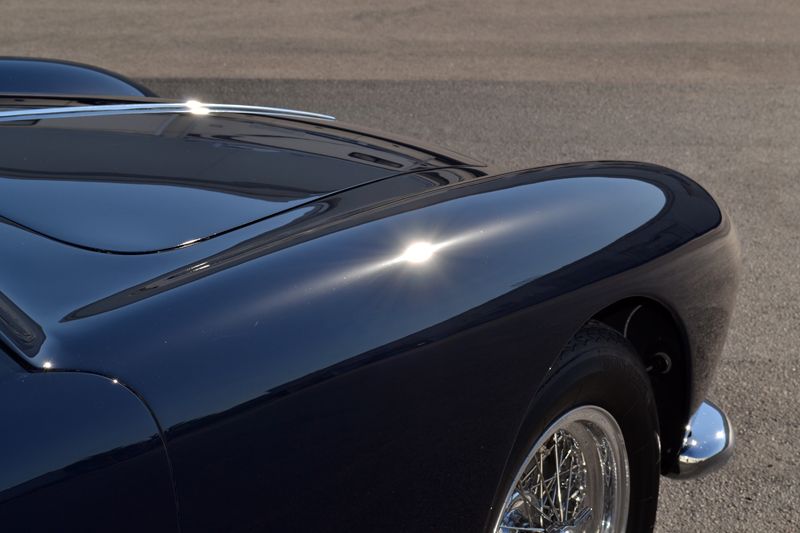
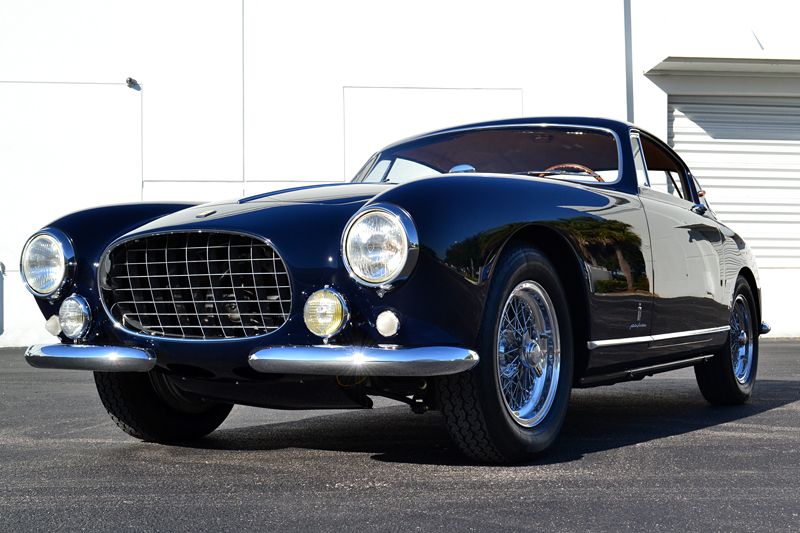
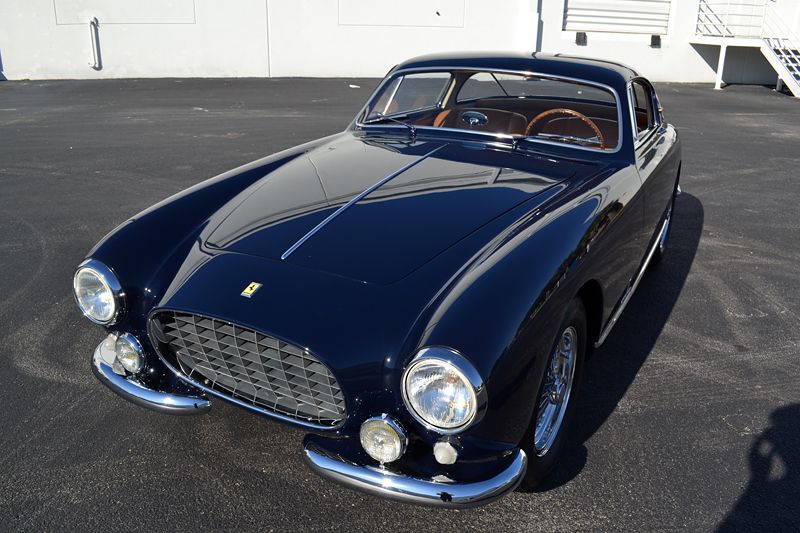
I recently had the chance to dust off some old polishing skills and play with some cool products on a very cool car: 1955 Ferrari 250 Europa in dark blue!
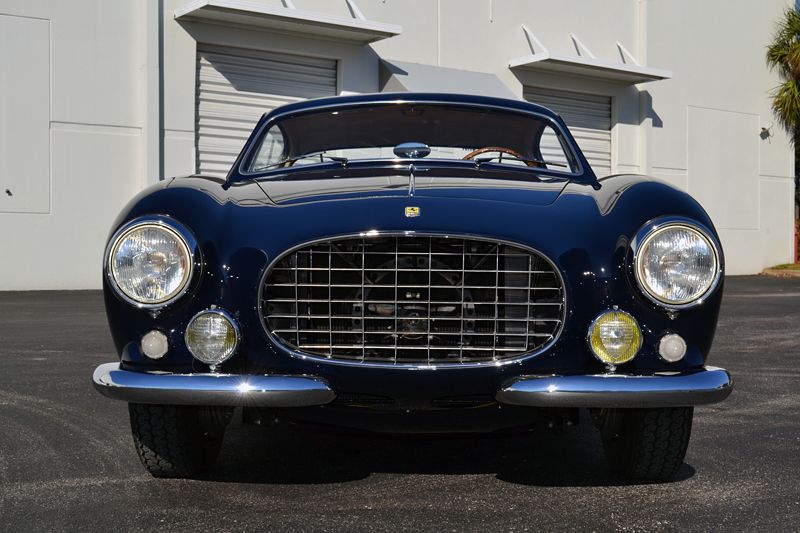
With coachwork handled by both Pininfarina and Vignale, and with only 21 produced in total, this prancing horse is rare and beautiful.
This particular Ferrari was in extremely good condition with exceptionally flat paint, amazing gaps (how consistent the gaps of the body lines are), and exceptional build quality. The paint, which proved to be extremely soft, had a fair amount of surface scratching. My job wasn't to restore a well-worn Ferrari, but rather carefully enhance an already great car - taking good to excellent can be just as challenging as taking poor to good.
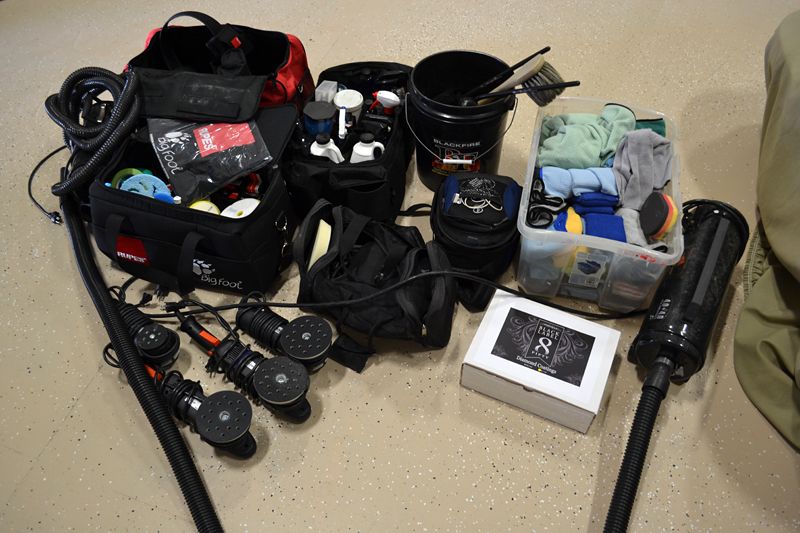
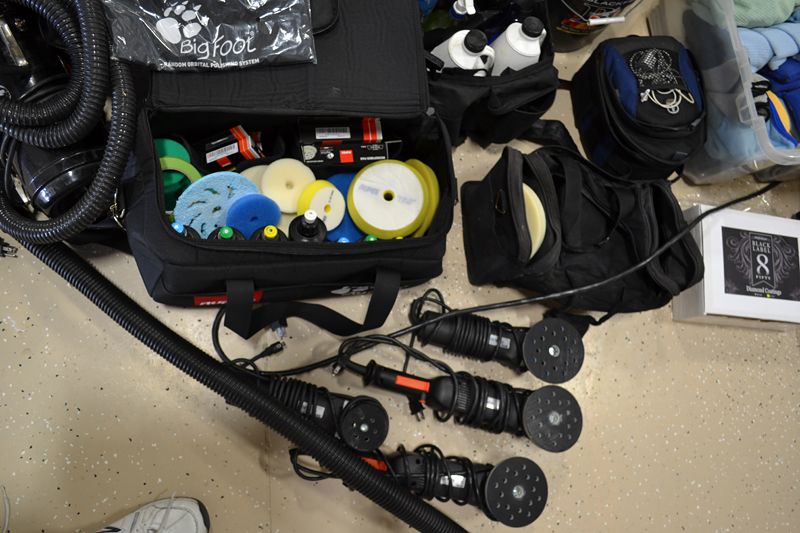
I started by unpacking my bags, which just-so-happened to contain at least every Rupes BigFoot Polisher made, every polish and several bags of pads. Also along was my usual blend of Blackfire, 1Z, Ultima and more. I even snagged a Pinnacle Black Label Hide Soft Leather Care kit to treat this Ferrari with. And finally, two coats of BLACKFIRE BlackICE to ice the cake.
I started by giving the Ferrari a very thorough rinseless bath. I used BLACKFIRE Wet Diamond Rinseless Wash and a .Gold Plush Microfiber Towel. Drying duties were easily handled by an Ultimate Guzzler.

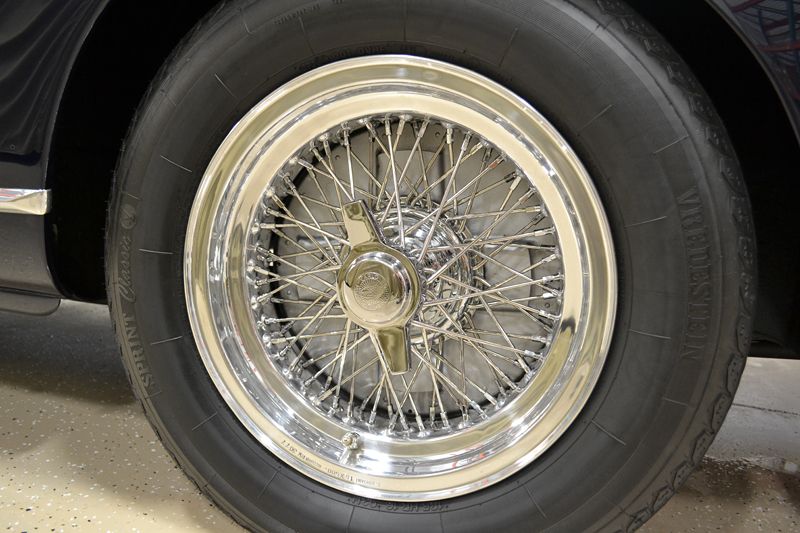
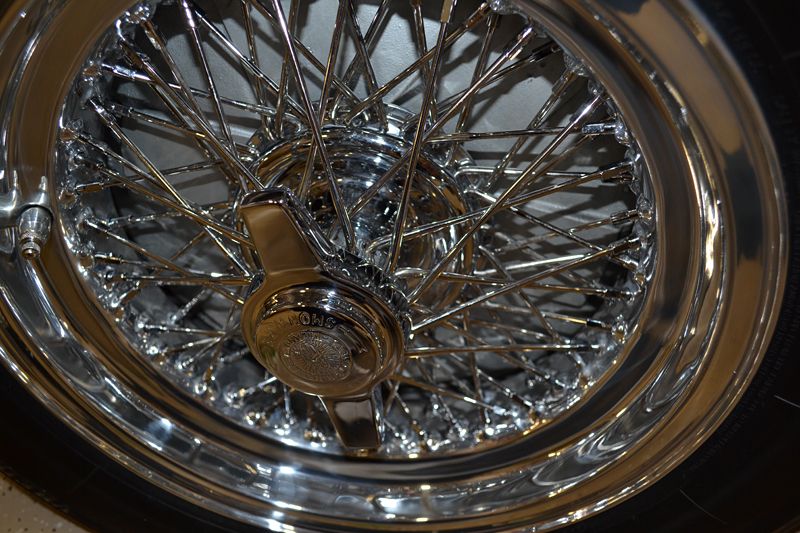
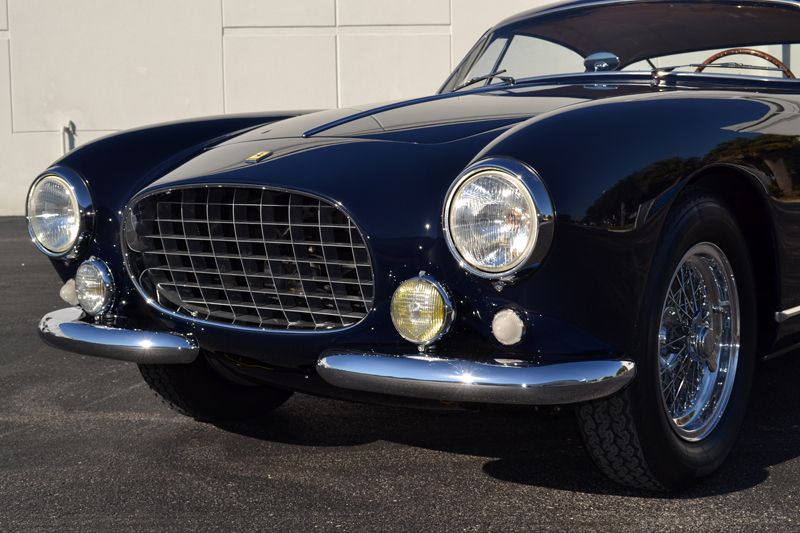
To clean the beautiful and valuable (read:don't screw this up) Borani Spoke Wheels, I relied on the safe cleaning power of 1Z Colour Tec Wheel Cleaner.
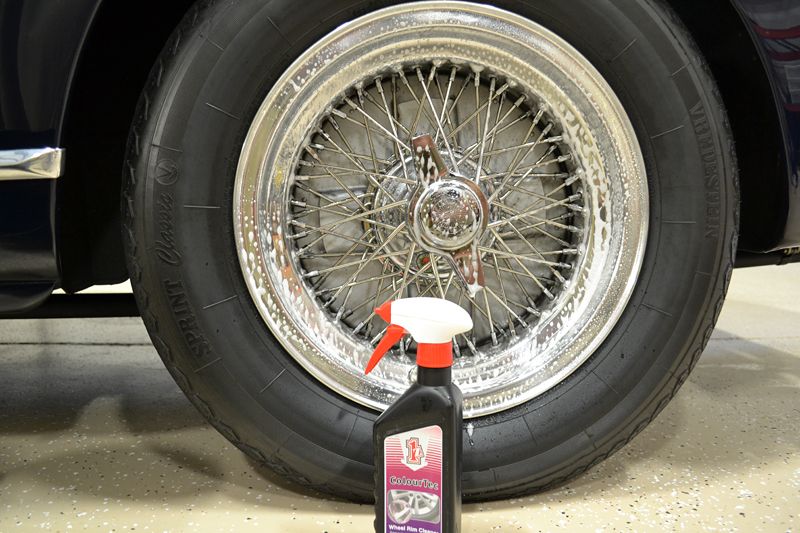
Since I was using a rinseless wash, I used a Montana Boar's Hair Wheel Brush to agitate and rinse away the cleaning solution. Finally I blew the wheel dry with a MetroVac Master Blaster and toweled any remaining spots.

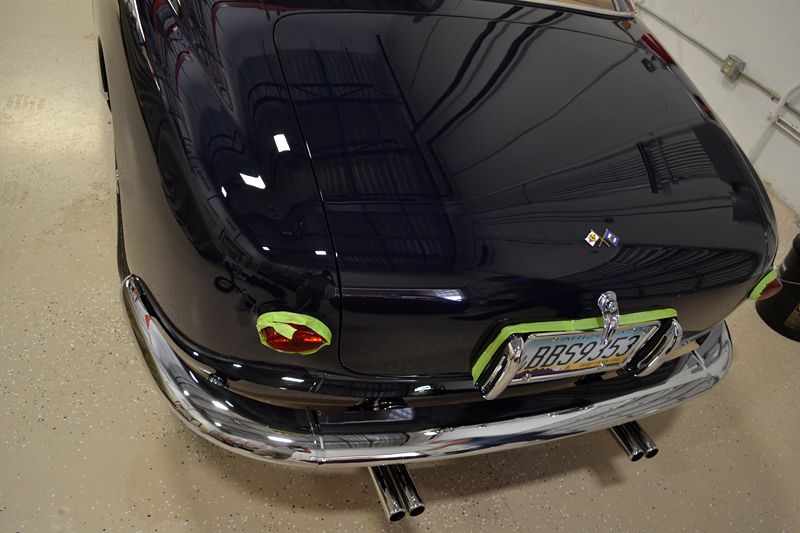
The exceptionally clean exterior was ready to prep for polishing. Any areas that had exposed weather stripping or rubber seals was carefully masked with 3M Painter's Tape. The paint was not clayed as their was no palpable contamination when using the baggy test.
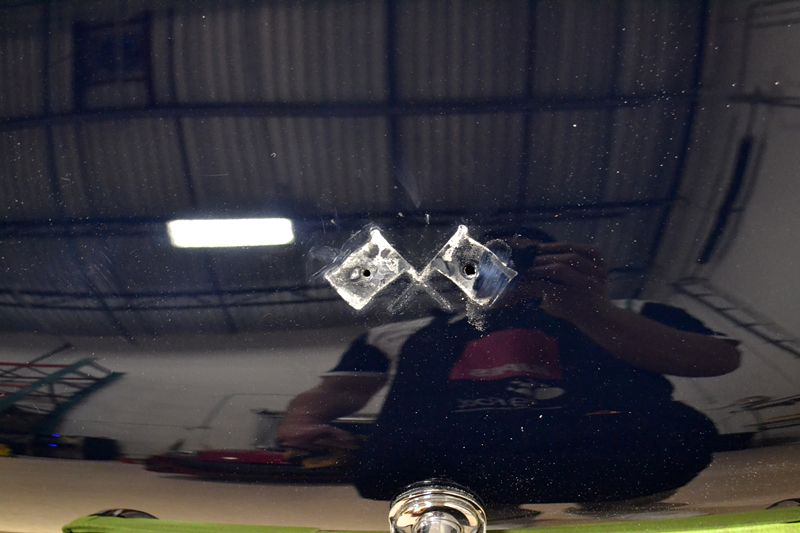
Is to remove emblems came off for detailing.
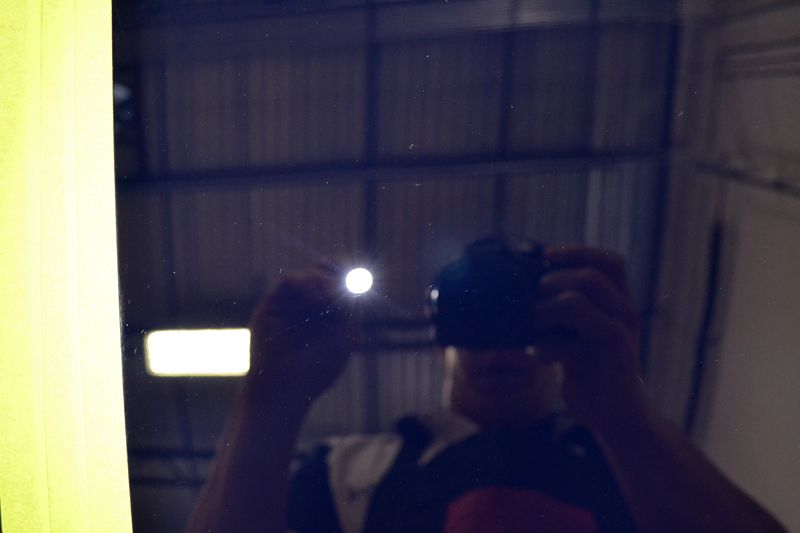
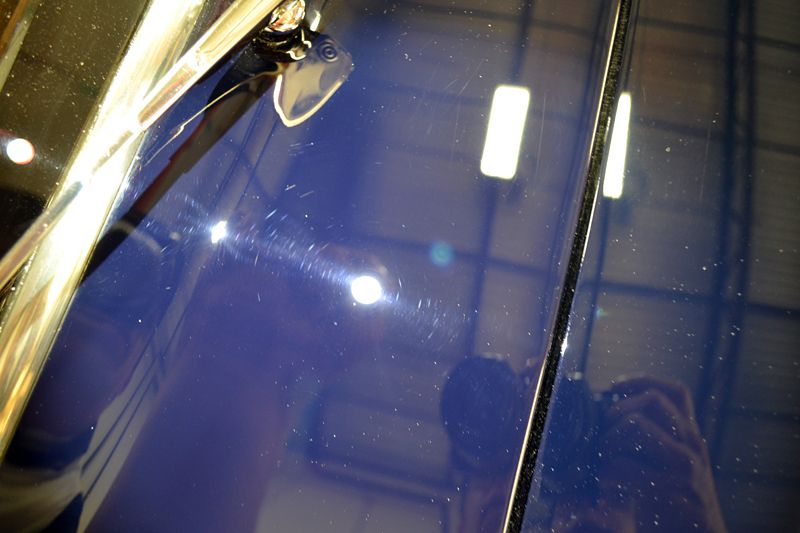
Rupes' soon-to-be released Inspection Pen. I won't bore with the details yet, but it uses an optically color light color to show swirl marks clearly on red and other bright colors. I wanted to see how it did on blue.
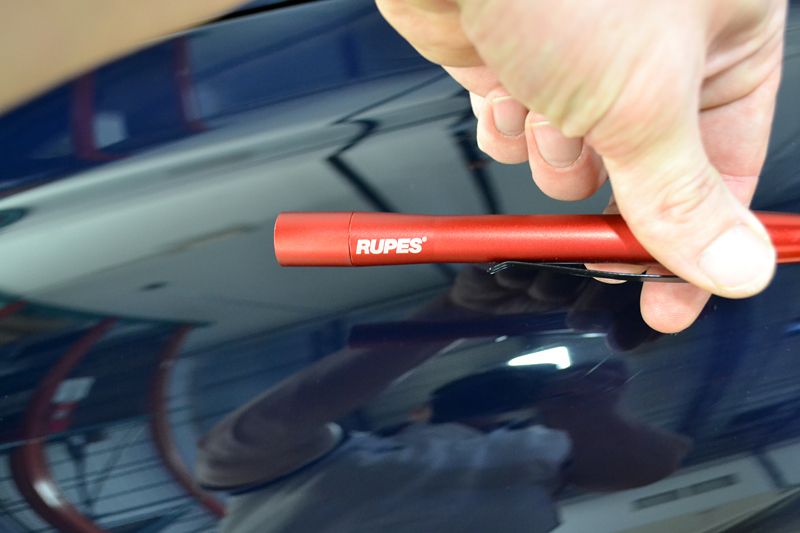
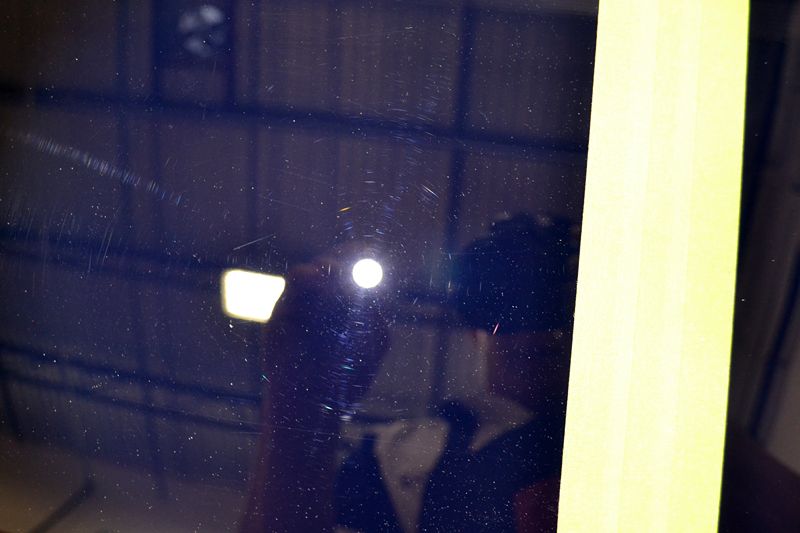
The pen lit up many more defects than the camera captured. The paint had a fair amount of light scratching, with some considerable (and frequent RIDS- Random Isolated Deeper Scratches). As I would learn later (through doing a test spot), the paint was incredibly soft which meant that some of the RIDS were super deep into the clear coat.
Every paint presents a unique riddle to solve. This paint combined extremely deep rids with an almost unbearably-soft clear coat. This finish would scratch if you used too much pressure and a soft microfiber towel!
In order to dial in your process (and technique), it is important to do a test spot. Start with the least aggressive approach and dial up the aggressiveness until you find the product that delivers the results you want in terms of correction.
Rupes makes its very easy with their color-coded system.
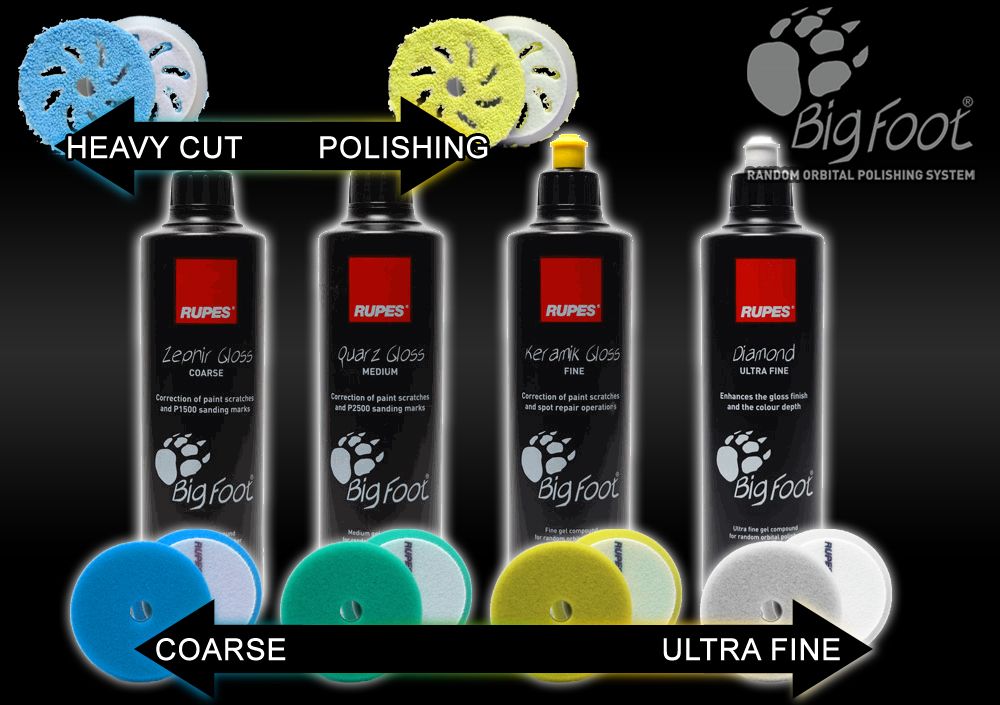
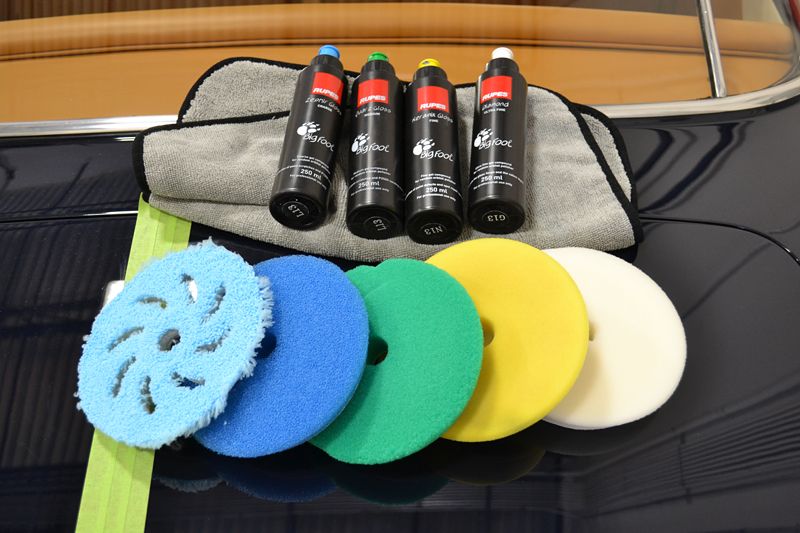
Eventually I went with the coarse Rupes "Blue" Zephir Gel Compound and either the "Blue" Microfiber or Foam Pads to knock out the deeper rids. Even at this point, some were too deep.
The coarse combination left very little haze in the paint, but given how soft it was, I felt safer going to a three step system to make sure any haze was removed before the finishing step. I used the Rupes "Yellow" Keramic Gel Polish to wipe out any haze marks.
Finally, I jeweled the paint with the Rupes "White" Diamond Ultra Fine Gel Polish.
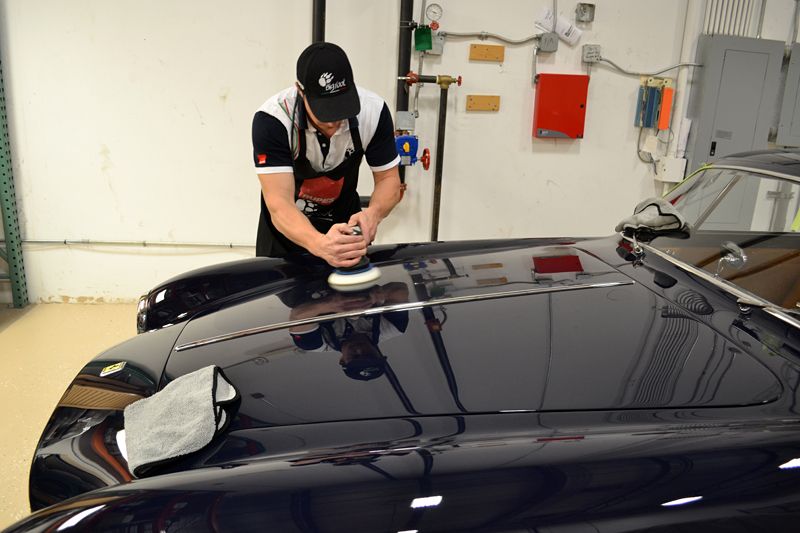
I had secured some Rupes "Swag" at SEMA this year, including an apron and a hat (not to mention the polo shirt), I figured I would dress the part.
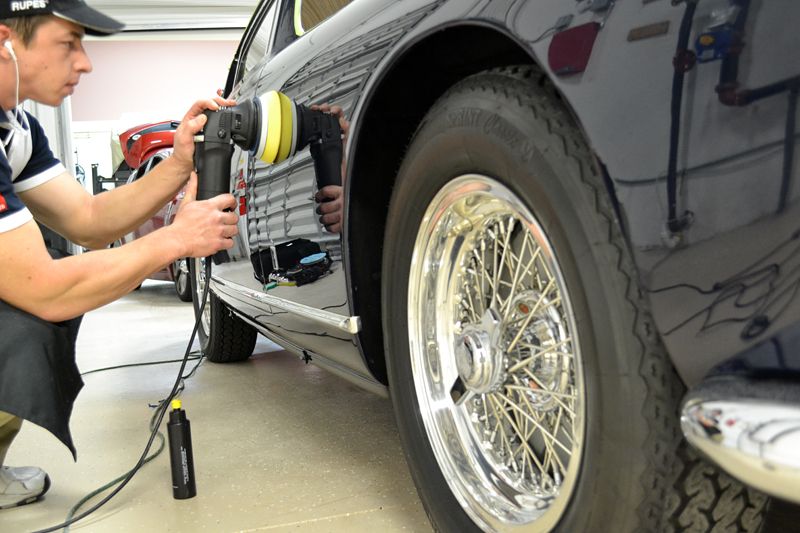
I polished all of the large sections with the Rupes "21" BigFoot. I used the 180mm coarse blue pads. I even switched to a 5 inch (125 mm) backing plate and tried the blue coarse microfiber pads out (as in the picture below) with the 21.
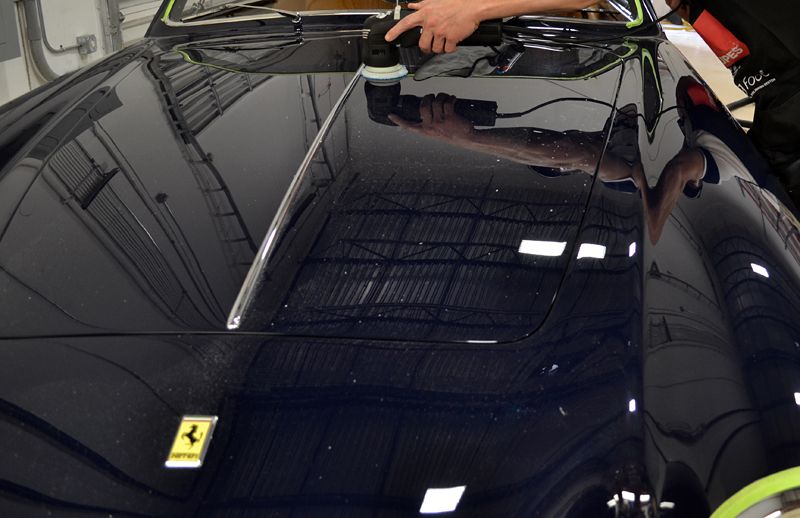
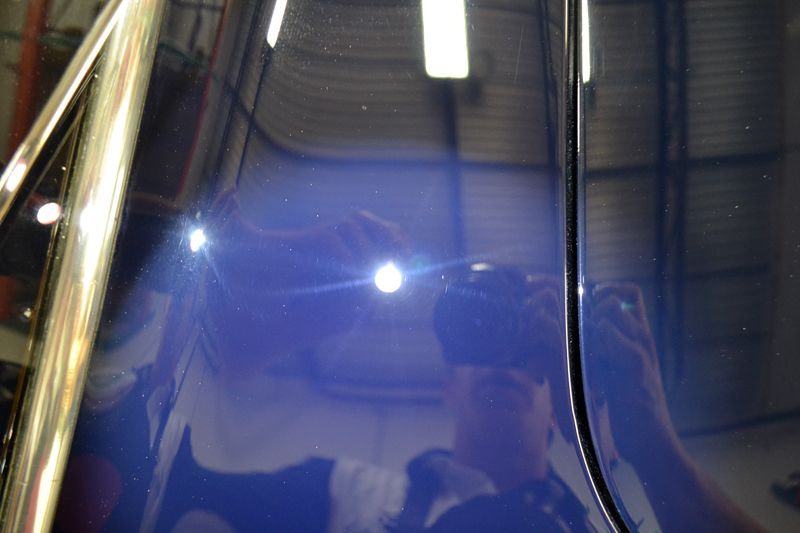
The paint looks amazingly glossy after compounding, even with a slight haze.
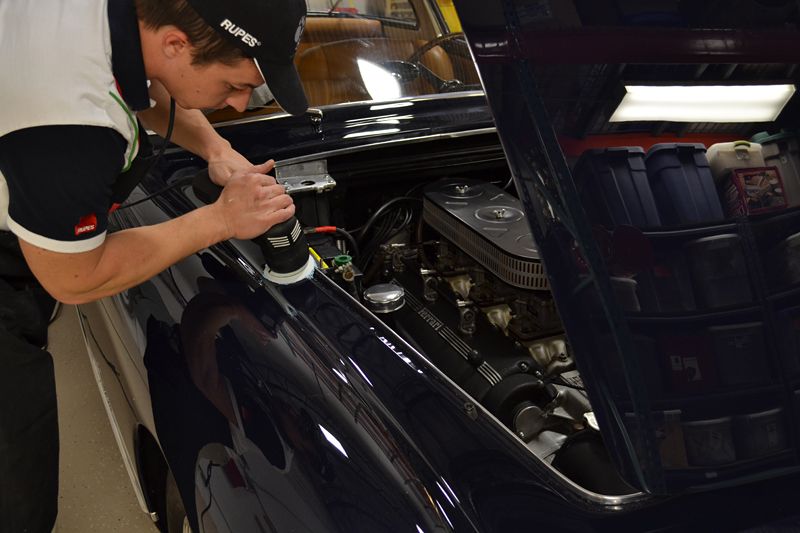
For "surgical" compounding and polishing tight, hard-to-reach areas I have to give some love to the Mini BigFoot. I love this tool!
Armed with 100 mm (4 inch) microfiber pad, this little machine tore through defects with same ferocity as it's legendary big brother.
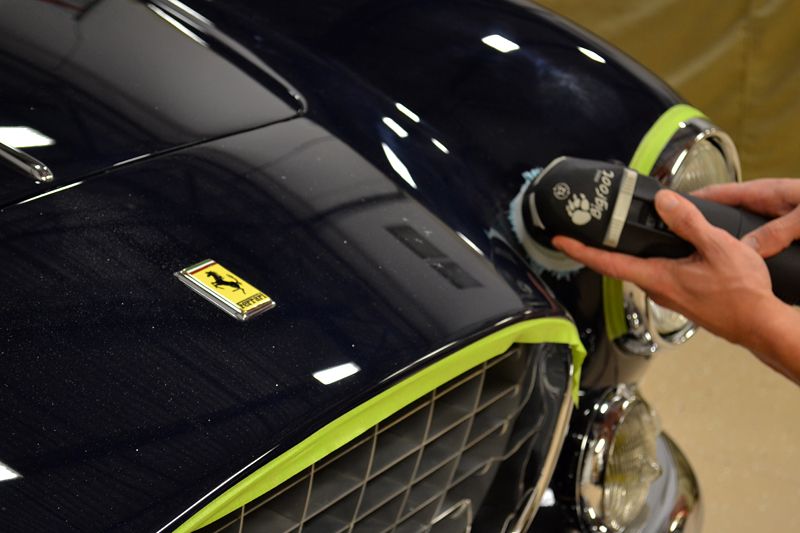
Even the thin strip in between the windshield and hood gap, proved no match for the Mini Bigfoot.
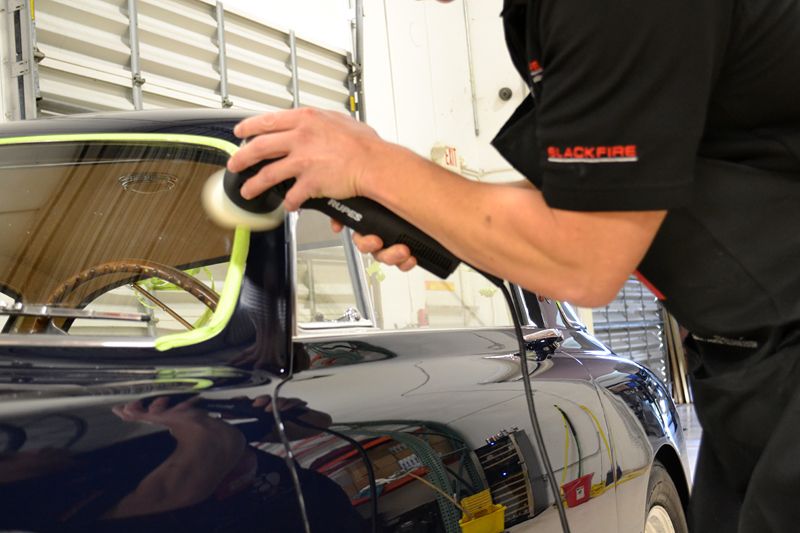
After compounding every possible section of paint, I switched gears and when with a BigFoot Duetto with the 150 mm Yellow Pad and Keramik Gloss Polish.
It was getting late in the day when I started final polishing. I stuck with the Duetto and switched to the Diamond Fine Gel and white 150mm polishing pad. I was able to finish all the larger panels by nearly midnight, so it was time to call it a night.
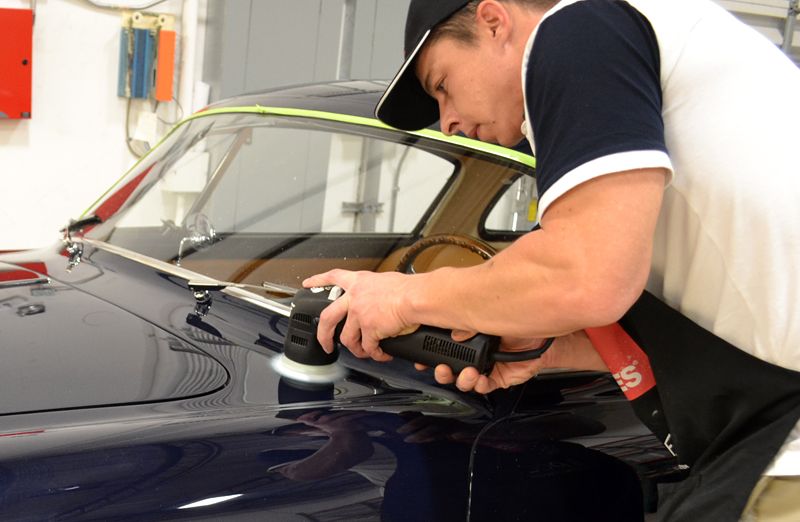
Early the next day, I started by finishing up polishing, using the BigFoot Mini and the same finishing combination above. (Note the stylish change in wardrobe).
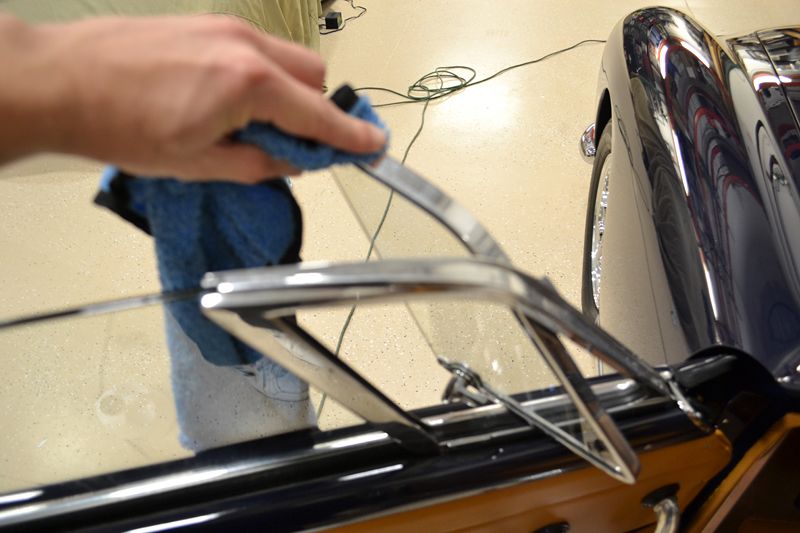
With polishing chores complete, it was time to give the Ferrari another careful wash. Again I was limited to a rinseless wash. I started with BLACKFIRE Wet Diamond Rinseless Wash, this time going with a softer Miracle Towel to help buffer the soft paint from scratching.
By soaking the paint with water, then using the power of the Master Blaster, I was able to quickly and effectively evacuate all of the polishing dust from the tightest areas.
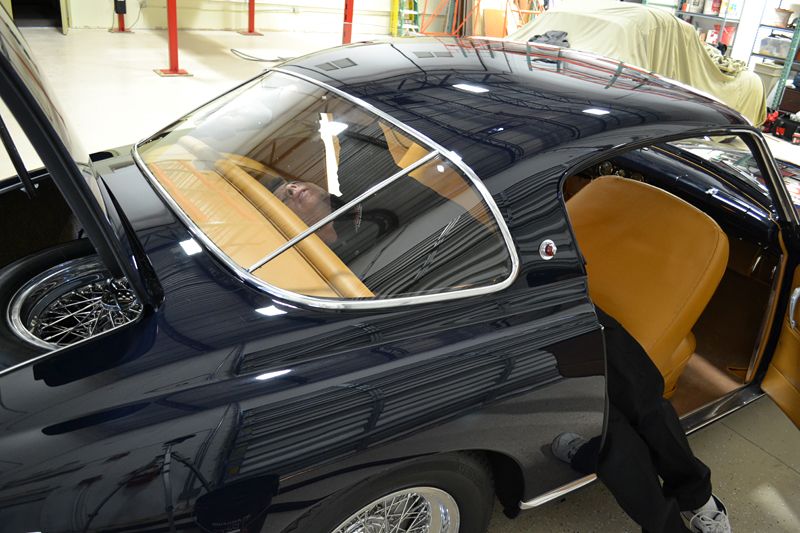
I used the same washing solution of Wet Diamond Rinseless Wash to clean the interior and exterior glass. Here I am playing contortionist.
Detailing, means well, detailing. Every area of the car, from the jambs, shuts and nooks & crannies received my full attention.
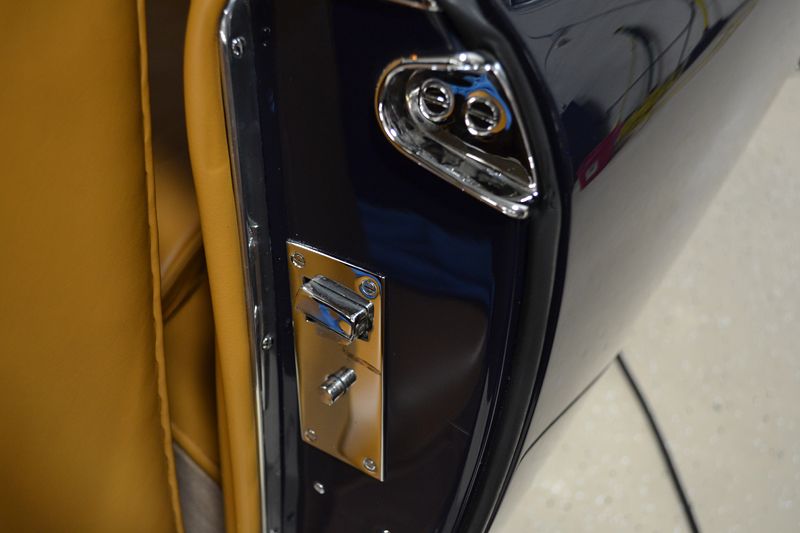
The interior was "blown out" with the Master Blaster and carefully vacuumed with a Metro Vac N' Blow. The dash (and door shuts) were wiped with Wet Diamond Rinseless Wash, and treated to a coat of BLACKFIRE Total Polish & Seal.
With coachwork handled by both Pininfarina and Vignale, and with only 21 produced in total, this prancing horse is rare and beautiful.
This particular Ferrari was in extremely good condition with exceptionally flat paint, amazing gaps (how consistent the gaps of the body lines are), and exceptional build quality. The paint, which proved to be extremely soft, had a fair amount of surface scratching. My job wasn't to restore a well-worn Ferrari, but rather carefully enhance an already great car - taking good to excellent can be just as challenging as taking poor to good.
I started by unpacking my bags, which just-so-happened to contain at least every Rupes BigFoot Polisher made, every polish and several bags of pads. Also along was my usual blend of Blackfire, 1Z, Ultima and more. I even snagged a Pinnacle Black Label Hide Soft Leather Care kit to treat this Ferrari with. And finally, two coats of BLACKFIRE BlackICE to ice the cake.
I started by giving the Ferrari a very thorough rinseless bath. I used BLACKFIRE Wet Diamond Rinseless Wash and a .Gold Plush Microfiber Towel. Drying duties were easily handled by an Ultimate Guzzler.
To clean the beautiful and valuable (read:don't screw this up) Borani Spoke Wheels, I relied on the safe cleaning power of 1Z Colour Tec Wheel Cleaner.
Since I was using a rinseless wash, I used a Montana Boar's Hair Wheel Brush to agitate and rinse away the cleaning solution. Finally I blew the wheel dry with a MetroVac Master Blaster and toweled any remaining spots.
The exceptionally clean exterior was ready to prep for polishing. Any areas that had exposed weather stripping or rubber seals was carefully masked with 3M Painter's Tape. The paint was not clayed as their was no palpable contamination when using the baggy test.
Is to remove emblems came off for detailing.
Rupes' soon-to-be released Inspection Pen. I won't bore with the details yet, but it uses an optically color light color to show swirl marks clearly on red and other bright colors. I wanted to see how it did on blue.
The pen lit up many more defects than the camera captured. The paint had a fair amount of light scratching, with some considerable (and frequent RIDS- Random Isolated Deeper Scratches). As I would learn later (through doing a test spot), the paint was incredibly soft which meant that some of the RIDS were super deep into the clear coat.
Every paint presents a unique riddle to solve. This paint combined extremely deep rids with an almost unbearably-soft clear coat. This finish would scratch if you used too much pressure and a soft microfiber towel!
In order to dial in your process (and technique), it is important to do a test spot. Start with the least aggressive approach and dial up the aggressiveness until you find the product that delivers the results you want in terms of correction.
Rupes makes its very easy with their color-coded system.
Eventually I went with the coarse Rupes "Blue" Zephir Gel Compound and either the "Blue" Microfiber or Foam Pads to knock out the deeper rids. Even at this point, some were too deep.
The coarse combination left very little haze in the paint, but given how soft it was, I felt safer going to a three step system to make sure any haze was removed before the finishing step. I used the Rupes "Yellow" Keramic Gel Polish to wipe out any haze marks.
Finally, I jeweled the paint with the Rupes "White" Diamond Ultra Fine Gel Polish.
I had secured some Rupes "Swag" at SEMA this year, including an apron and a hat (not to mention the polo shirt), I figured I would dress the part.
I polished all of the large sections with the Rupes "21" BigFoot. I used the 180mm coarse blue pads. I even switched to a 5 inch (125 mm) backing plate and tried the blue coarse microfiber pads out (as in the picture below) with the 21.
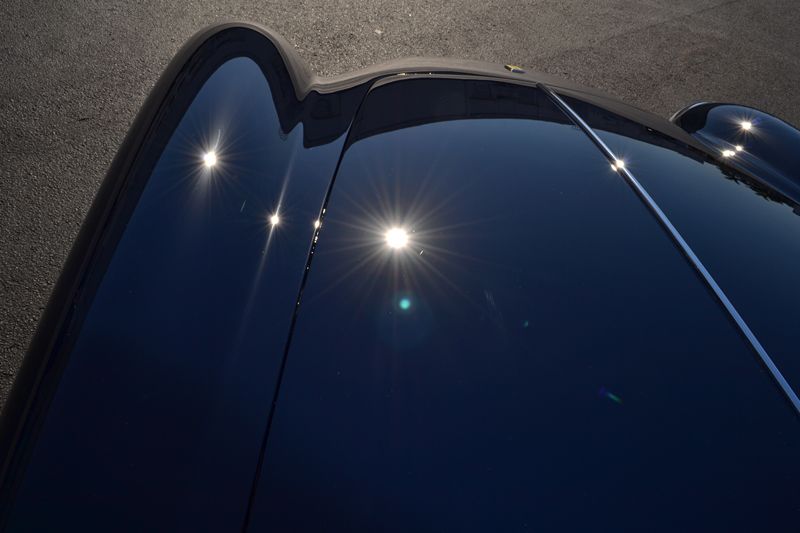
The paint looks amazingly glossy after compounding, even with a slight haze.
For "surgical" compounding and polishing tight, hard-to-reach areas I have to give some love to the Mini BigFoot. I love this tool!
Armed with 100 mm (4 inch) microfiber pad, this little machine tore through defects with same ferocity as it's legendary big brother.
Even the thin strip in between the windshield and hood gap, proved no match for the Mini Bigfoot.
After compounding every possible section of paint, I switched gears and when with a BigFoot Duetto with the 150 mm Yellow Pad and Keramik Gloss Polish.
It was getting late in the day when I started final polishing. I stuck with the Duetto and switched to the Diamond Fine Gel and white 150mm polishing pad. I was able to finish all the larger panels by nearly midnight, so it was time to call it a night.
Early the next day, I started by finishing up polishing, using the BigFoot Mini and the same finishing combination above. (Note the stylish change in wardrobe).
With polishing chores complete, it was time to give the Ferrari another careful wash. Again I was limited to a rinseless wash. I started with BLACKFIRE Wet Diamond Rinseless Wash, this time going with a softer Miracle Towel to help buffer the soft paint from scratching.
By soaking the paint with water, then using the power of the Master Blaster, I was able to quickly and effectively evacuate all of the polishing dust from the tightest areas.
I used the same washing solution of Wet Diamond Rinseless Wash to clean the interior and exterior glass. Here I am playing contortionist.
Detailing, means well, detailing. Every area of the car, from the jambs, shuts and nooks & crannies received my full attention.
The interior was "blown out" with the Master Blaster and carefully vacuumed with a Metro Vac N' Blow. The dash (and door shuts) were wiped with Wet Diamond Rinseless Wash, and treated to a coat of BLACKFIRE Total Polish & Seal.
 01-23-2014, 08:06 AM
#2
Closed ex-Sponsor Account
Thread Starter
Join Date: Aug 2013
Location: Orlando & Palm Beach, FL
Posts: 161
Likes: 0
Received 0 Likes
on
0 Posts
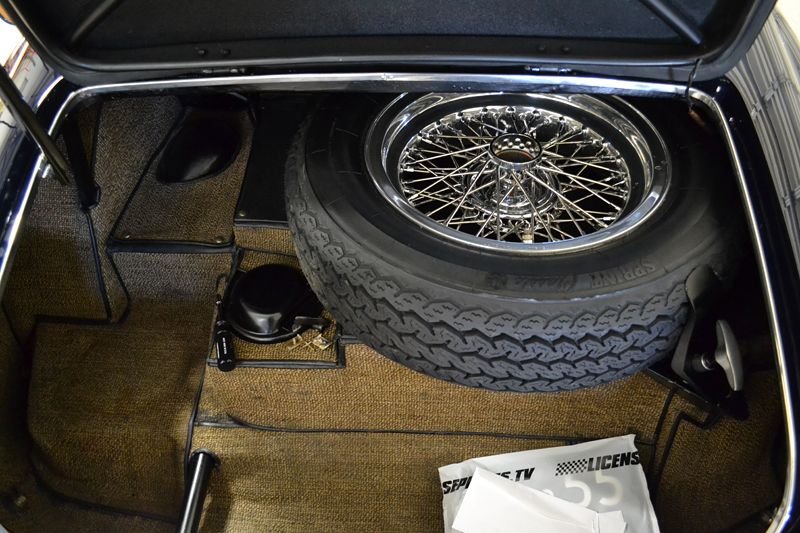
The required very little attention. The spare wheel was lightly polished, but that is it. Interestingly enough, the trunk is 100% original and in AMAZING shape!
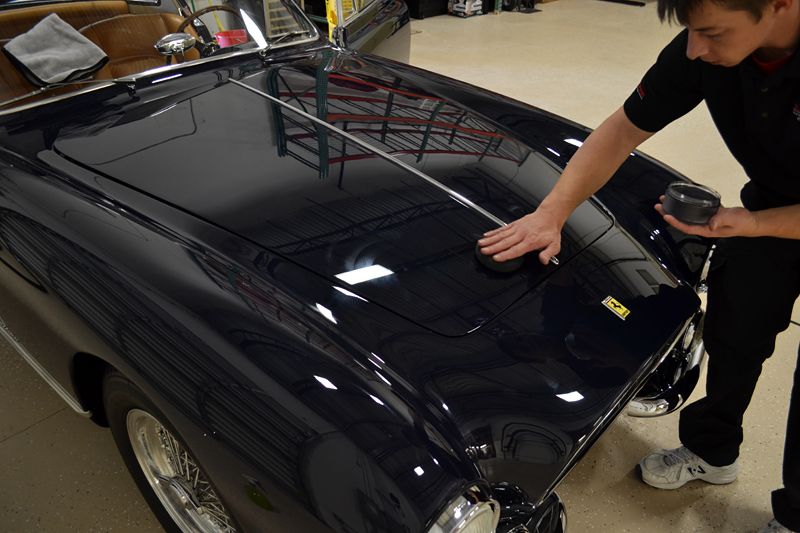
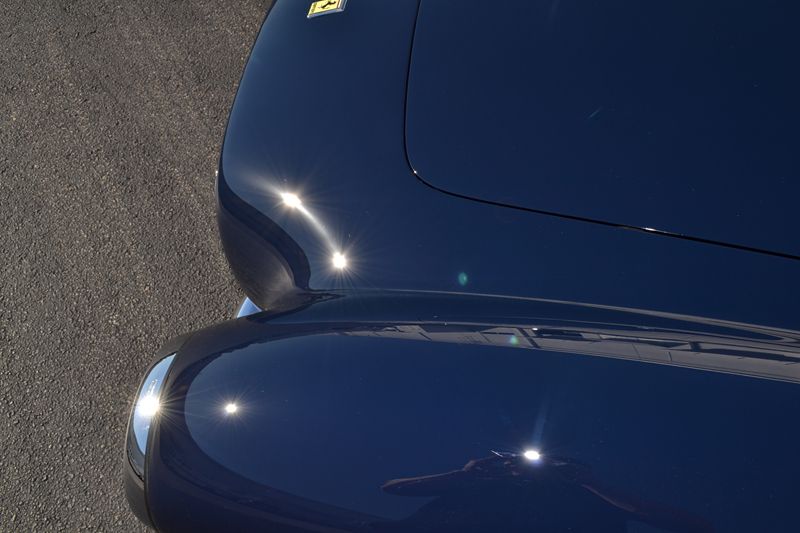
Finally two coats of BLACKFIRE BlackICE were applied. The trick is to use an extremely thin amount and allow to dry for 30 minutes (it will almost disappear into the paint). The "black ink" look and wax-like gloss of BlackICE was going to make this paint shimmer, and I couldn't wait!
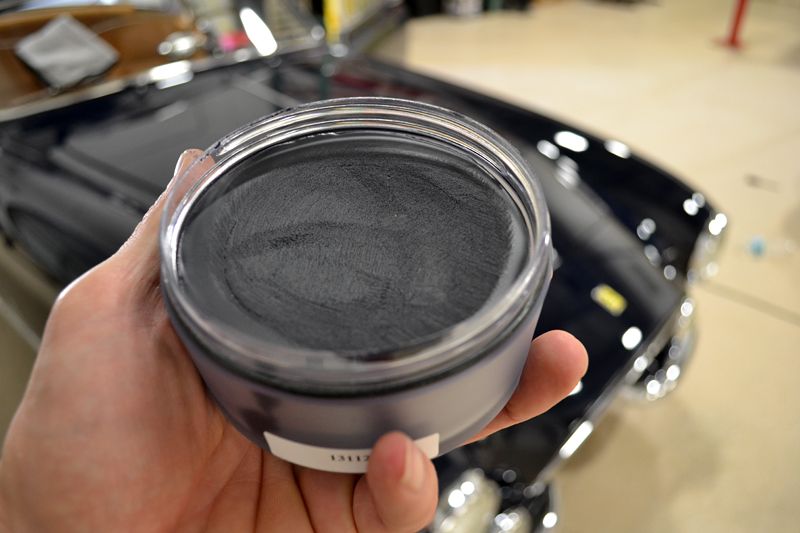
To give you an idea of how little goes how long... Here is how much I used after the first coat.
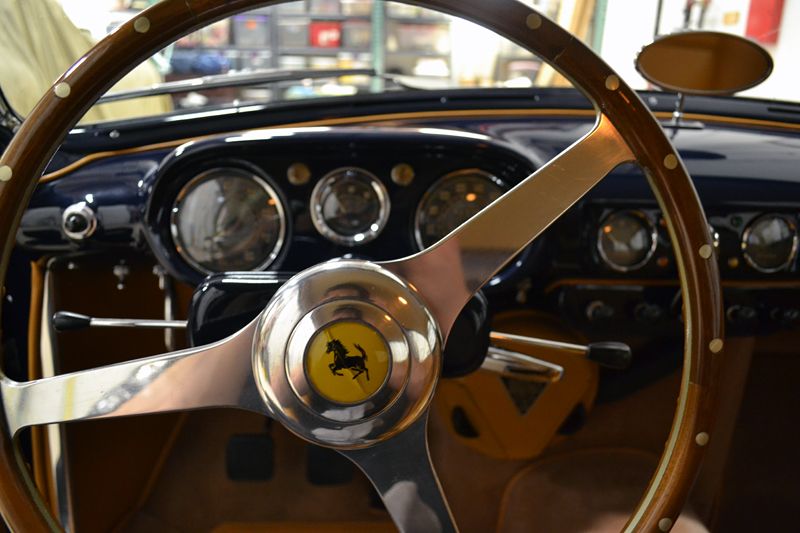
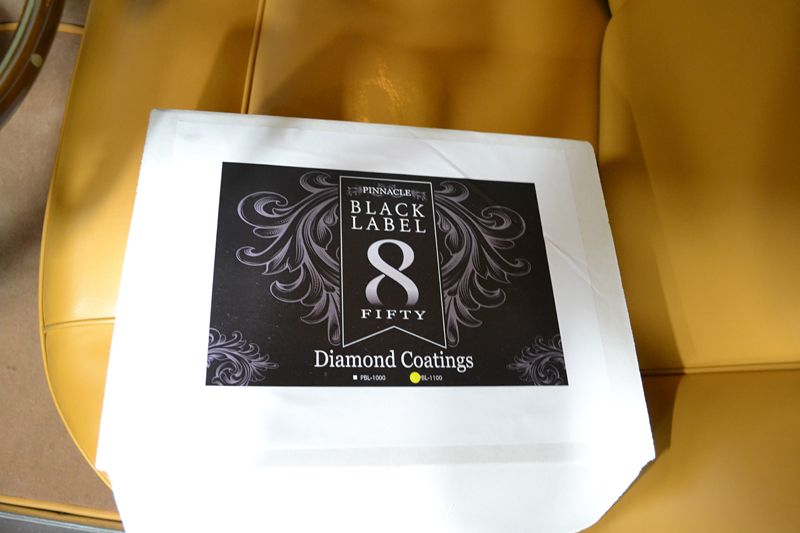
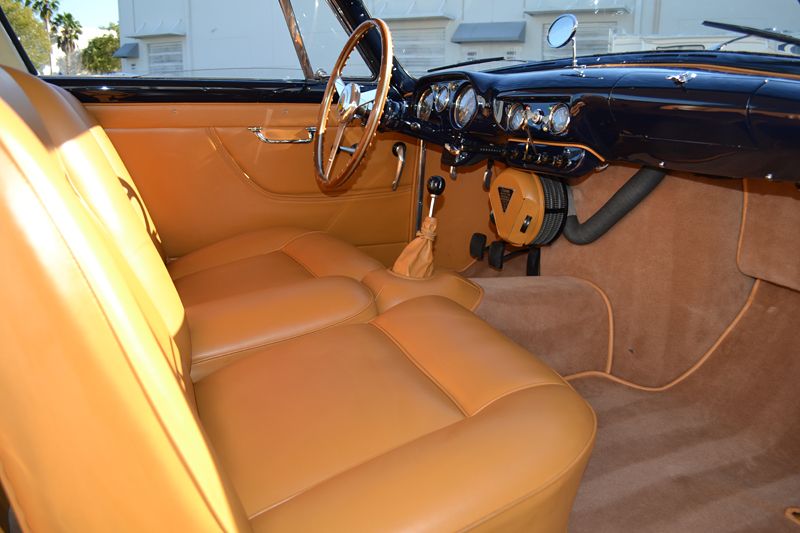
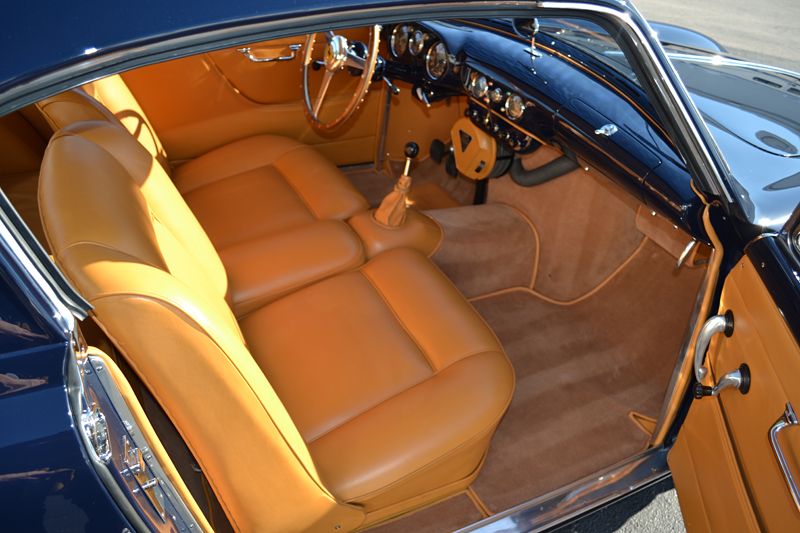
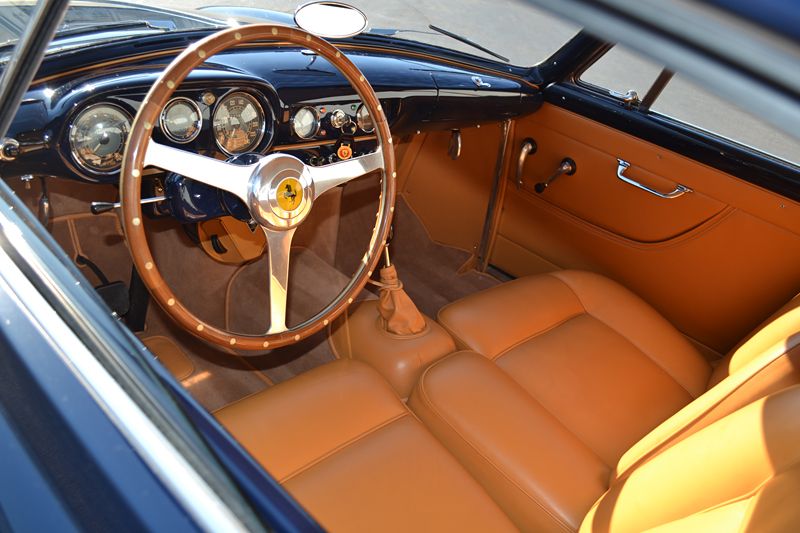
While the first coat was curing, I turned my attention to this Ferrari's luxurious (and delicate) leather interior. Because the leather was delicate, I went with Pinnacle Black Label's Hide Soft Kit. The cleaner and conditioner are both safe for full grain aniline leather, so I knew it would be perfect for this.

The Black Label Hide Soft Leather Cleaner comes in a pump dispensor. It is easiest to apply directly to the Natural Horse Hair Brush (included) and work into a light lather.

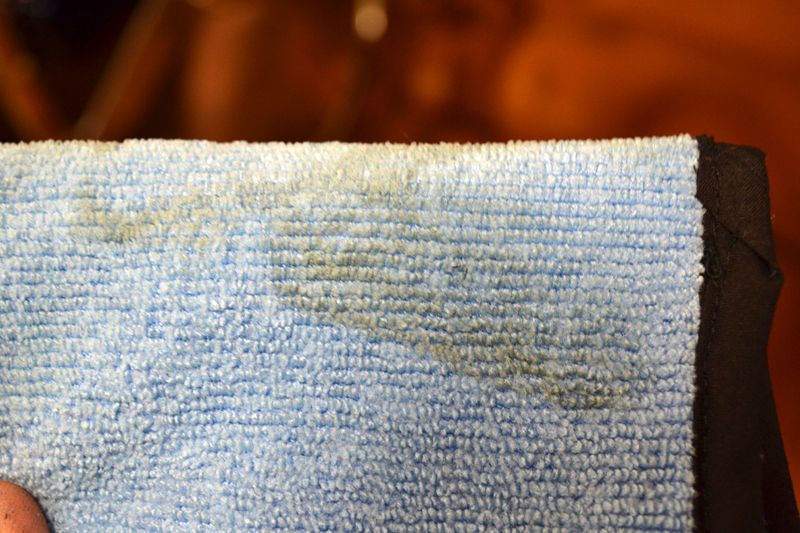
You can see some of the dirt that came off of the leather.
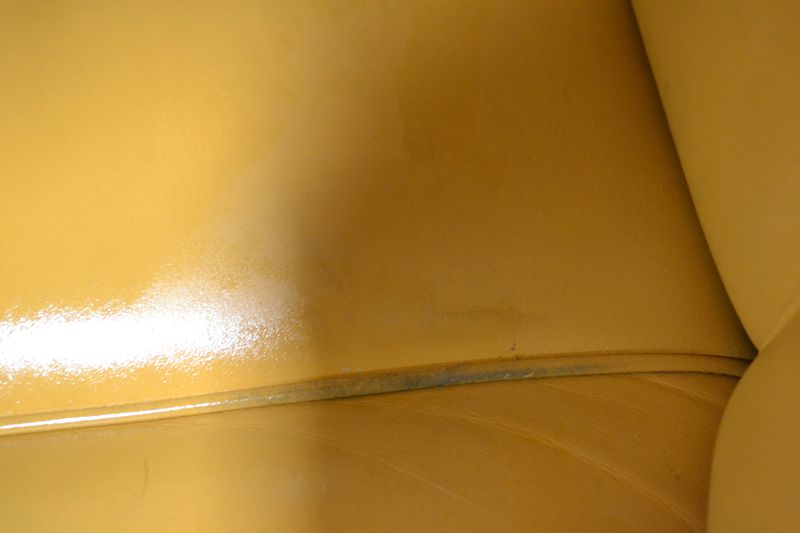
Than simply wipe dry, carefully, with the included Magic Towel.
For the Black Label Hide Soft Leather Conditioner, I decided to apply it by hand. It works just fine by foam applicator, but I wanted to add a little novelty (plus I feel like I can really work into all of the folds of the seats). Whenever using chemicals, it is a good idea to protect your skin with Nitrile (or latex) gloves.
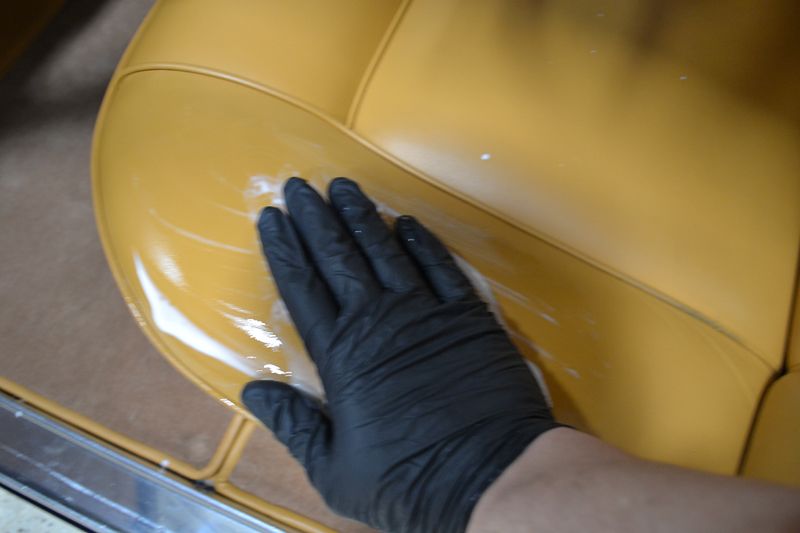
After allowing the conditioner to soak & penetrate for a few minutes, I wiped off the excess with the second Miracle Towel.

Finally, I turned my attention to the details (while the second coat of BlackICE was curing).
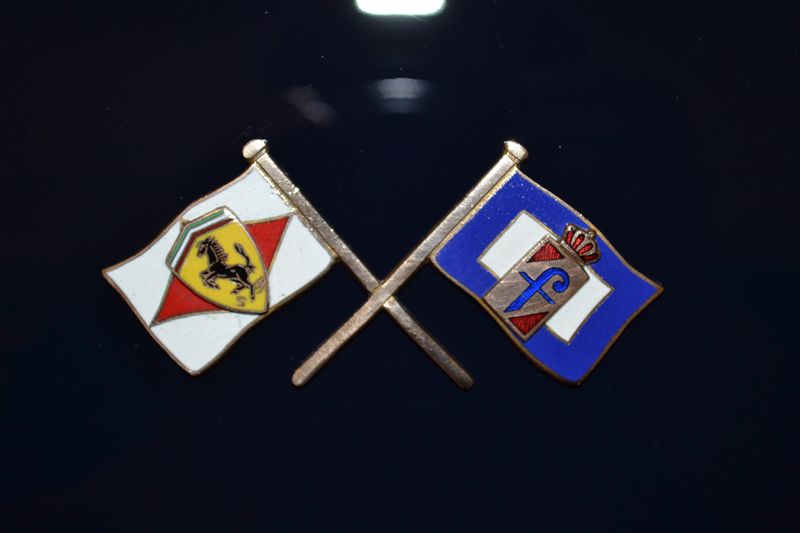
Here is the original tank emblem, proudly displaying the Ferrari "Scuderia" Shield and the Pinnifarina "Crown" Logo on a pair of crossed flags. The copper/bronze finish of the emblem looked lifeless.
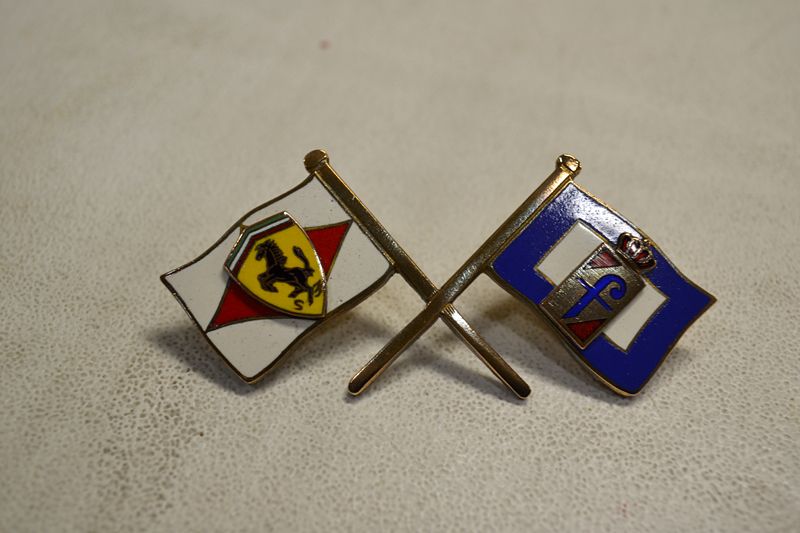
A cotton swab and a little Marine 31 Staineless Steel Polish made quick work of it.
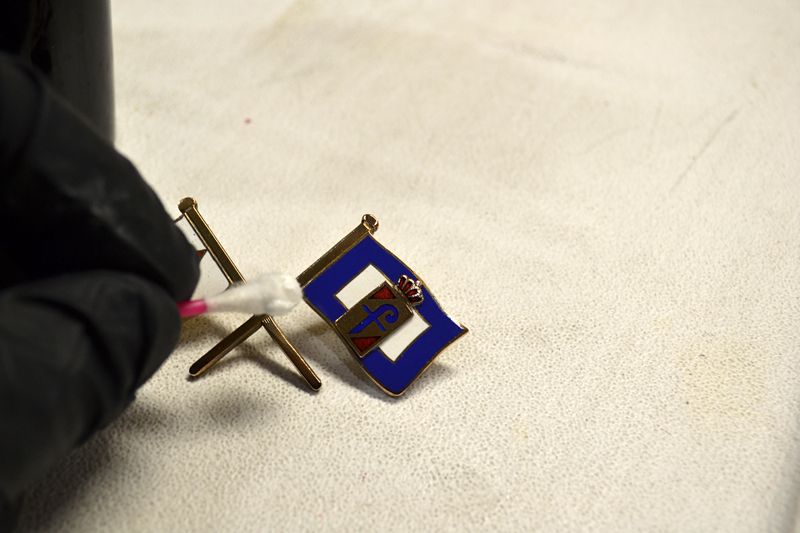
Here the lower right section of the flag pole has been polished. The rest of the emblem was carefully polished and placed back onto the Ferrari, like placing a cherry on top of the (black) iced cake


The aluminum Borani wheels were carefully hand polished using the same Marine 31 Staineless Steel Polish. While the tires were treated to the Tuf Shine Treatment.
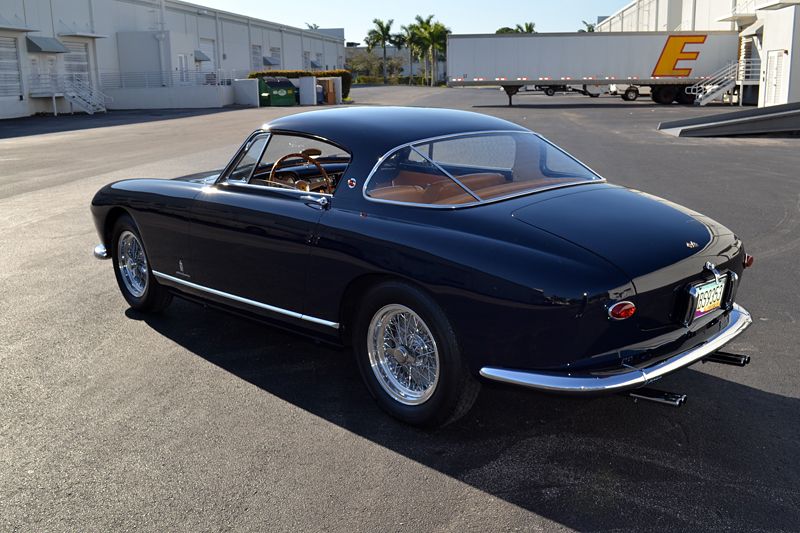
After two long days, the Ferrari was ready to see the day of light and I was excited to see the results. I will let the pictures do the talking.

 01-23-2014, 08:07 AM
#3
Closed ex-Sponsor Account
Thread Starter
Join Date: Aug 2013
Location: Orlando & Palm Beach, FL
Posts: 161
Likes: 0
Received 0 Likes
on
0 Posts
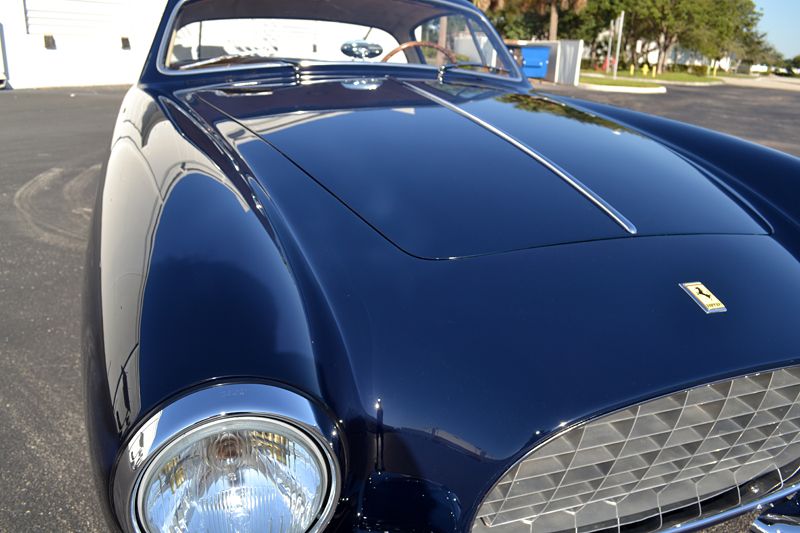
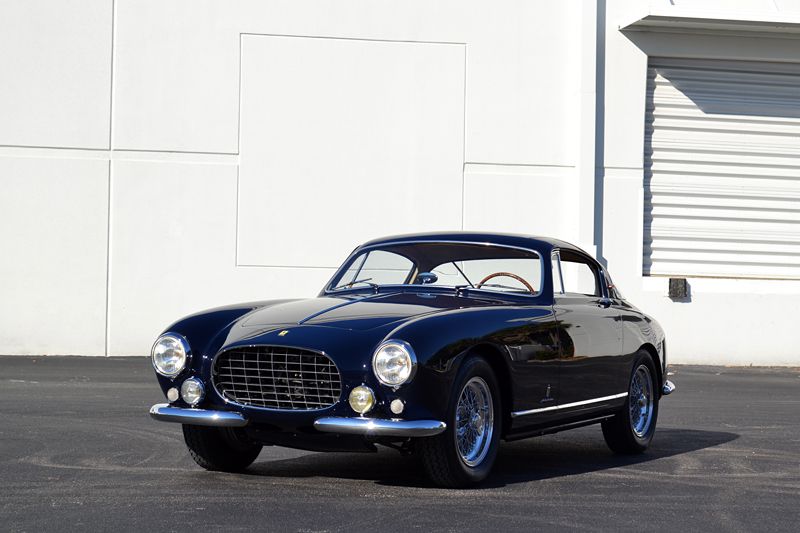


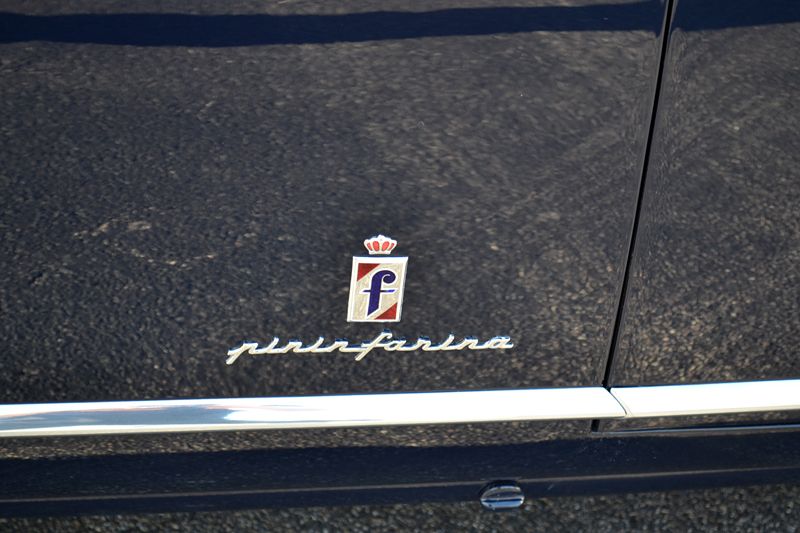
The reflections of the paint make the Pininfarina logo appear to be floating... That is the depth of shine of BlackICE!
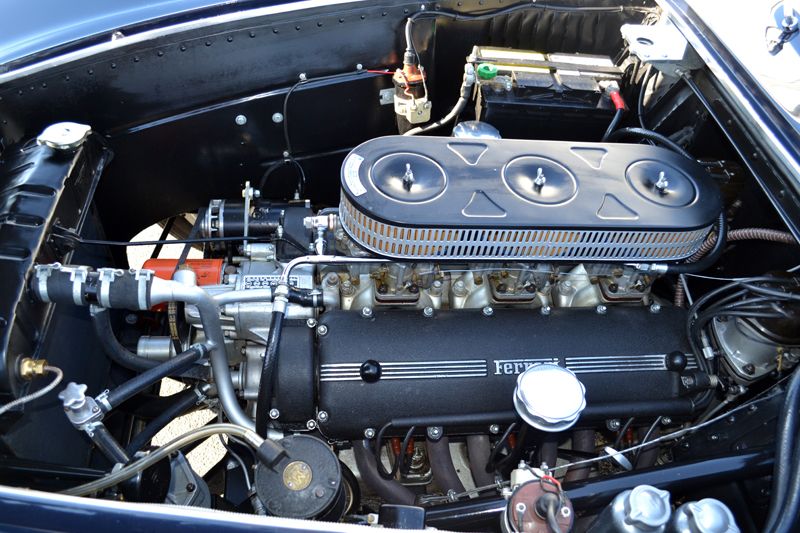
Finally the glorious V12 engine, which was wiped down with a combination of BLACKFIRE Wet Diamond All In One APC and Wet Diamond Waterless Wash.