

 05-20-2016, 01:46 PM
Last edit by: IB Advertising
See related guides and technical advice from our community experts:
- Camaro 1990 - 2002: How to Install Halo Headlights<br>Step by step instructions for do-it-yourself repairs.

Halo Headlight/Smoked Corner Install(w/pics)
11-25-2005, 02:53 AM
#1
TECH Enthusiast
Thread Starter
iTrader: (2)
Join Date: May 2004
Location: East Bay, Ca
Posts: 679
Likes: 0
Received 0 Likes
on
0 Posts

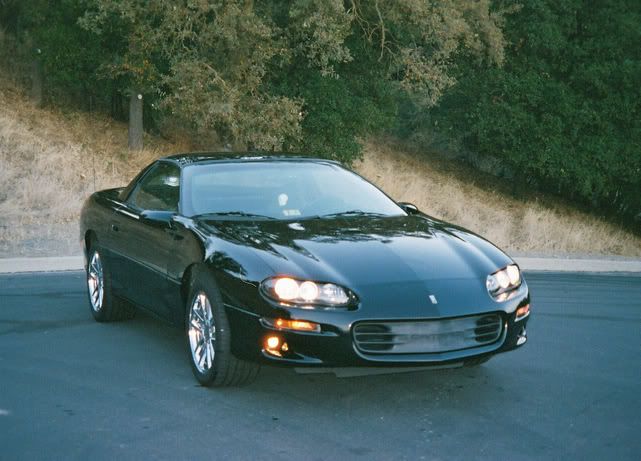
OK, I did this a few weeks ago but just got the film developed. No real glamour shots, not much in the way of showing off the halo lighting itself, but enough for anyone looking to do this to see whats involved.
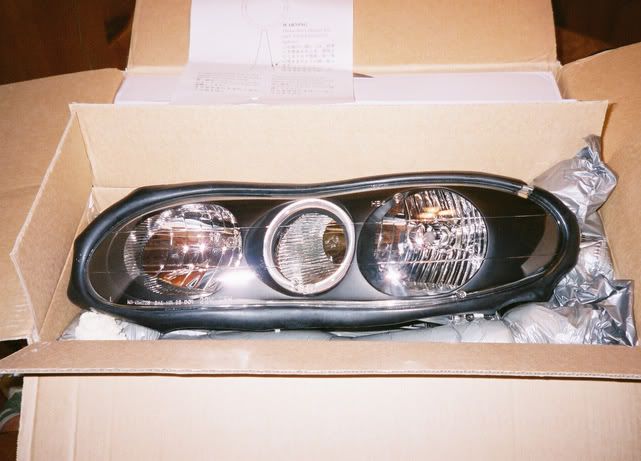
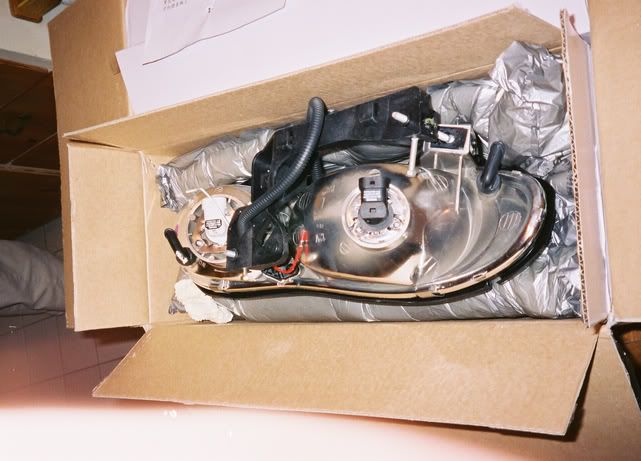
Here's the lights, nicely packaged:
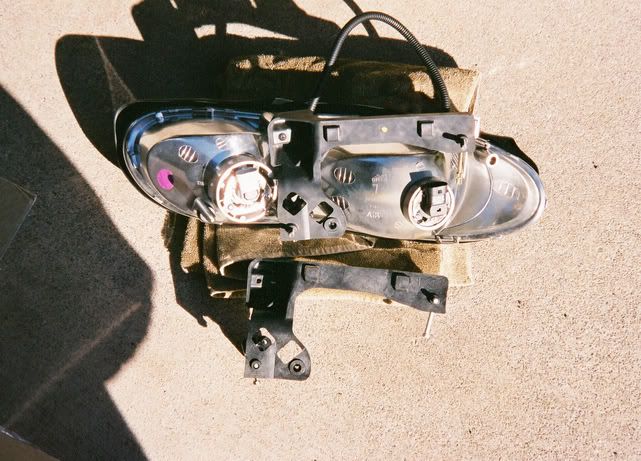
Stock light:
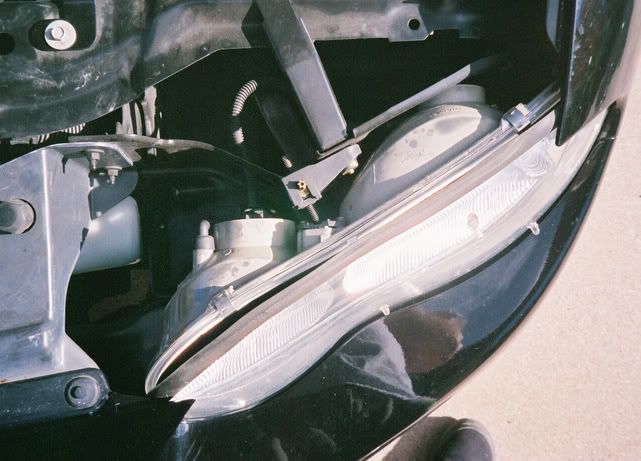
Light Removed, I unbolted and removed the bar connecting the light to the frame and moved it out of the way, but once it is unbolted from the light you can -slide- the lights out of their housing:
As many others on this board have mentioned/recommended I unbolted and reused the factory light mounts. They seem a bit sturdier and as you'll see below I do not have the bad gaps that can be a problem with these lights.
CORNER LIGHTS
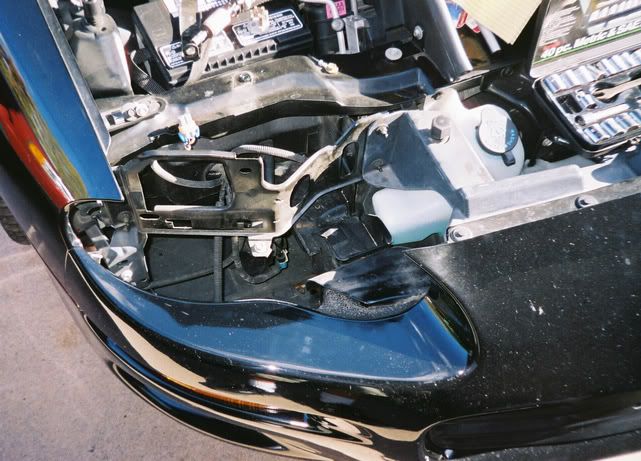
Easy, just remove the 2 bulbs with a twist, and then unscrew the two bolts on each side, and the one tricky to get at middle bolt coming up from the cars underside.
Here's what it looks like with everything removed:
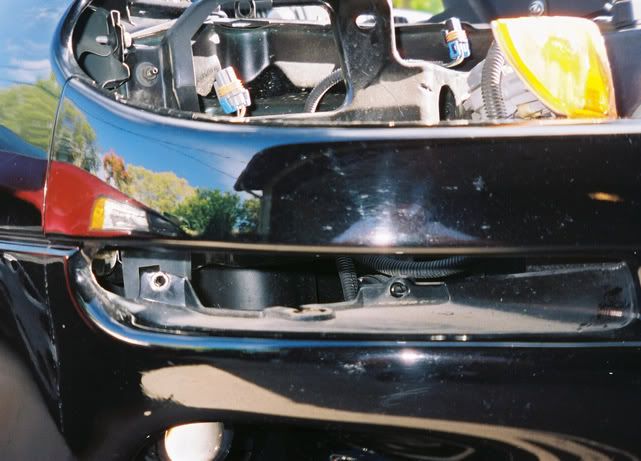
You can see all three corner light bolt holes in the above picture.
Continued Next Post.
Here's the lights, nicely packaged:
Stock light:
Light Removed, I unbolted and removed the bar connecting the light to the frame and moved it out of the way, but once it is unbolted from the light you can -slide- the lights out of their housing:
As many others on this board have mentioned/recommended I unbolted and reused the factory light mounts. They seem a bit sturdier and as you'll see below I do not have the bad gaps that can be a problem with these lights.
CORNER LIGHTS
Easy, just remove the 2 bulbs with a twist, and then unscrew the two bolts on each side, and the one tricky to get at middle bolt coming up from the cars underside.
Here's what it looks like with everything removed:
You can see all three corner light bolt holes in the above picture.
Continued Next Post.
 11-25-2005, 03:10 AM
#2
TECH Enthusiast
Thread Starter
iTrader: (2)
Join Date: May 2004
Location: East Bay, Ca
Posts: 679
Likes: 0
Received 0 Likes
on
0 Posts
The new stuff now goes in, just reverse your work, lol...
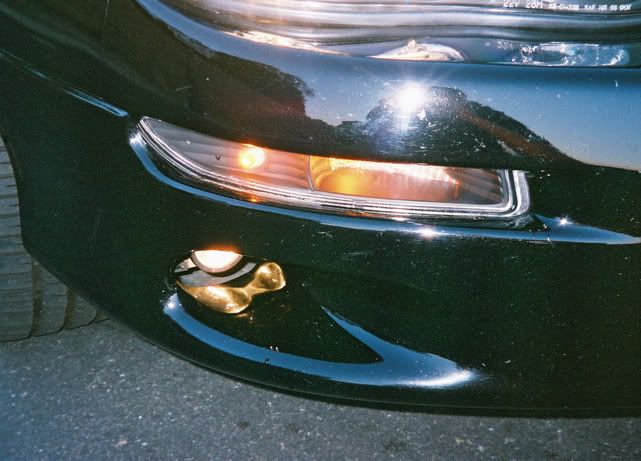
The corner install is easy and straightforward, the kit I bought off Ebay included the new brighter orange colored bulbs. Be careful not to overtighten as I did snap off one bolt while trying to get rid of the "play" the lenses had.
Corners done.
At this point you'll want to know how you are going to wire up your halo lights. There are several methods, just do a search and you'll find some good suggestions/writeups. If you decide to wire them into the foglights you may want to wire them in BEFORE installing the corners as you will have more room to work with.
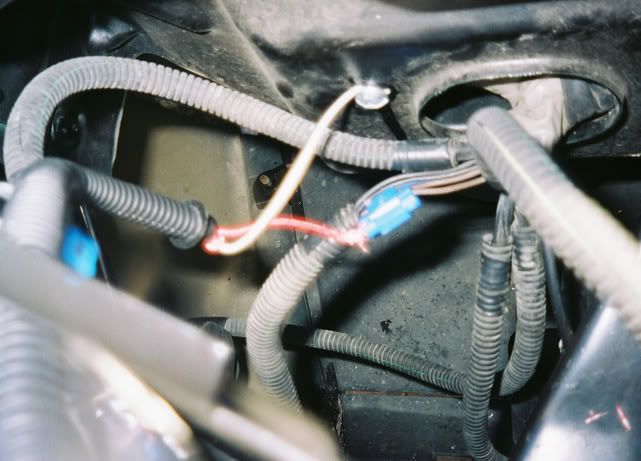
I installed the halo's into the DRL/Parking lights. I used these: http://www.delcity.net/delcity/servl...id=9329&page=1
to tap into the wires. You can pick them up at any Radio Shack.
The wires are insulated inside of plastic tubing, pull the tubing back and cut into the tape wrapped around the wires. Black is the ground. Brown is the juice. Red and White off of the halo. White is ground, Red is the juice.
You have to be a bit nimble with the fingers, but once you get the wires clamped into the T-Taps(I used super glue and pliers to squeeze them nice and tight/closed) you're good to go. I then tightly wrapped the T-Taps with electrical tape.
Right then, so now comes the fun part. Getting the light back in to the housing. This IS a pain in the ***. You just have to be patient and play with the two adjustment screws. I also recommend removing the little snap-bolts holding the front bumper cover on, then lifting up on it to give you a little more play when trying to fit the light in(also helps with removal).
The corner install is easy and straightforward, the kit I bought off Ebay included the new brighter orange colored bulbs. Be careful not to overtighten as I did snap off one bolt while trying to get rid of the "play" the lenses had.
Corners done.
At this point you'll want to know how you are going to wire up your halo lights. There are several methods, just do a search and you'll find some good suggestions/writeups. If you decide to wire them into the foglights you may want to wire them in BEFORE installing the corners as you will have more room to work with.
I installed the halo's into the DRL/Parking lights. I used these: http://www.delcity.net/delcity/servl...id=9329&page=1
to tap into the wires. You can pick them up at any Radio Shack.
The wires are insulated inside of plastic tubing, pull the tubing back and cut into the tape wrapped around the wires. Black is the ground. Brown is the juice. Red and White off of the halo. White is ground, Red is the juice.
You have to be a bit nimble with the fingers, but once you get the wires clamped into the T-Taps(I used super glue and pliers to squeeze them nice and tight/closed) you're good to go. I then tightly wrapped the T-Taps with electrical tape.
Right then, so now comes the fun part. Getting the light back in to the housing. This IS a pain in the ***. You just have to be patient and play with the two adjustment screws. I also recommend removing the little snap-bolts holding the front bumper cover on, then lifting up on it to give you a little more play when trying to fit the light in(also helps with removal).
11-25-2005, 03:15 AM
#3
TECH Enthusiast
Thread Starter
iTrader: (2)
Join Date: May 2004
Location: East Bay, Ca
Posts: 679
Likes: 0
Received 0 Likes
on
0 Posts
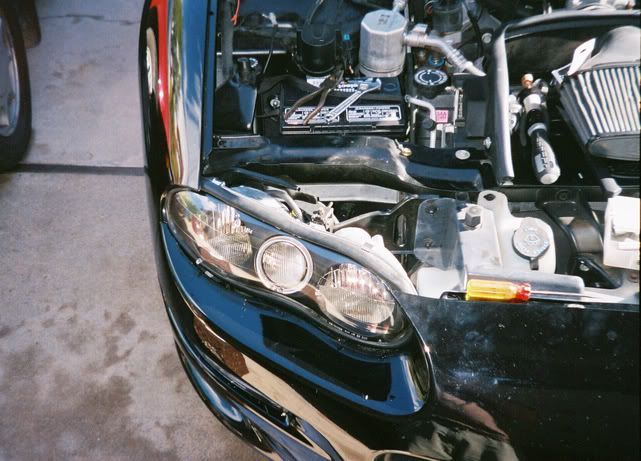
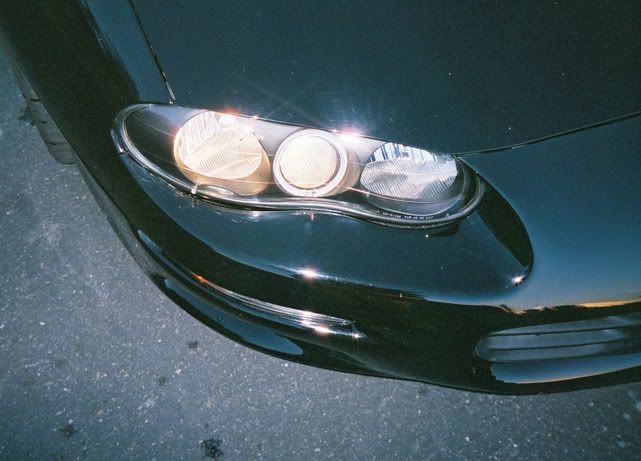
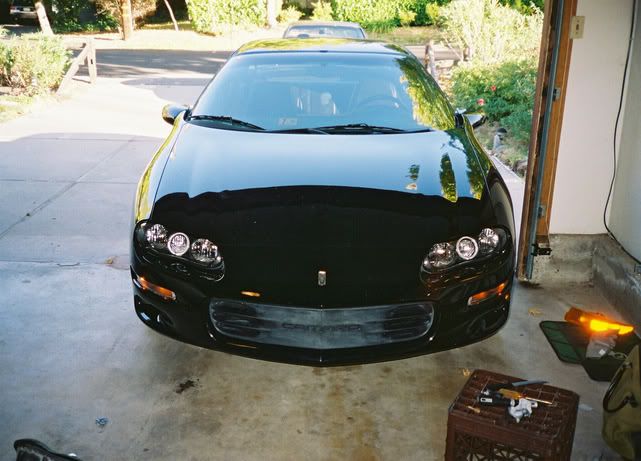
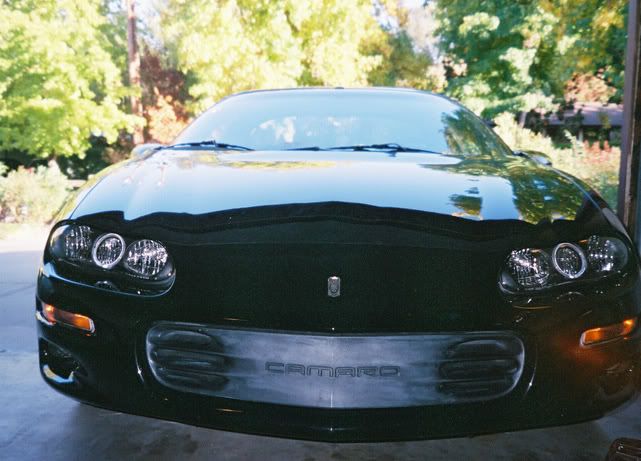
After you get the lights in adjust their fit to the bumper with the adjusting screws, which also aims the headlight. I was fairly lucky here in that mine fit nicely and after adjusting them for fit and finish I found the lights were still quite well aimed.
Here's a few pics of the finished work:
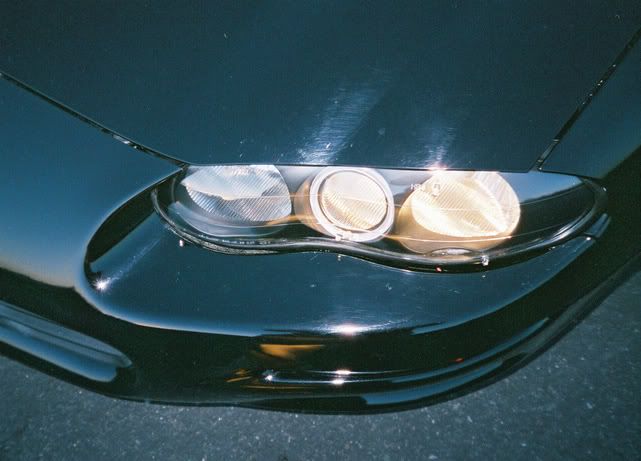
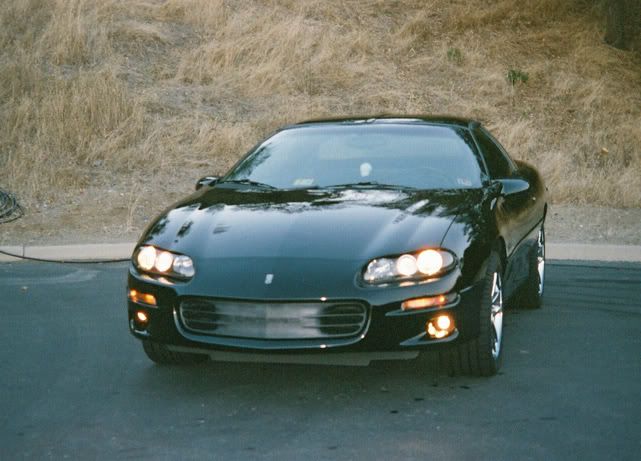
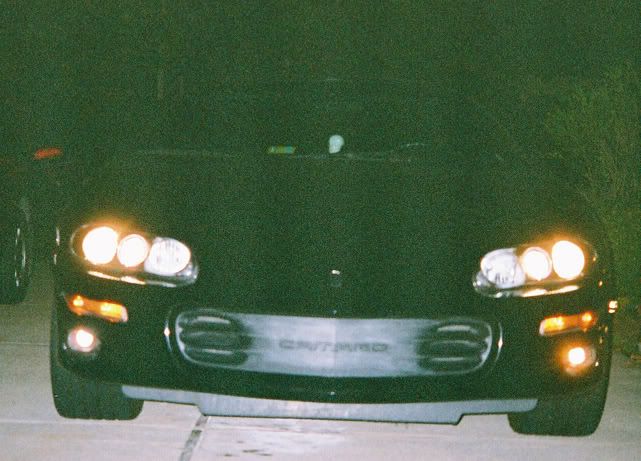
Here's a few pics of the finished work:


Trending Topics
 11-25-2005, 01:44 PM
#11

its a good thing that you mentioned using the stock brackets..at first i used the ones that came with the lights but with those the fitment was way off and the lights were aiming at the ground and it seemed like no matter how much i tried to adjust them they just weren't right..so finally a few months ago i used the stock brackets and now they fit just fine and are aimed correctly..however they still dont fit perfectly but they still look 100 times better then the stock ones
 11-25-2005, 03:20 PM
#13
TECH Resident
iTrader: (6)
Join Date: Nov 2004
Location: northeast Miss.
Posts: 821
Likes: 0
Received 0 Likes
on
0 Posts
Originally Posted by Roarin_8
Take that grill of and you'll be set, it doesn't even look black anymore. I also did the black halos with the black smoked corners.
Looks great!
11-25-2005, 06:08 PM
#14
TECH Enthusiast
Thread Starter
iTrader: (2)
Join Date: May 2004
Location: East Bay, Ca
Posts: 679
Likes: 0
Received 0 Likes
on
0 Posts
Thanks everyone.
The grille is the next job. I'm planning on a black powdercoated billet grille with a classic Z/28 emblem. Hopefully will have that in my hands and on the car by early-mid Jan.
The grille is the next job. I'm planning on a black powdercoated billet grille with a classic Z/28 emblem. Hopefully will have that in my hands and on the car by early-mid Jan.
11-25-2005, 06:58 PM
#15
On The Tree
iTrader: (12)

Join Date: Jun 2004
Location: Fletcher, NC
Posts: 104
Likes: 0
Received 0 Likes
on
0 Posts
probably a stupid question...but when does that center lens light up? i'm about to get a set and can't figure out whether it comes on with hi beams or low beams or all the time.
11-25-2005, 07:30 PM
#16
TECH Enthusiast
Thread Starter
iTrader: (2)
Join Date: May 2004
Location: East Bay, Ca
Posts: 679
Likes: 0
Received 0 Likes
on
0 Posts
You can wire it in multiple ways.
As you can see in my above description I chose to wire the halo into the DRL/Parking lights. By doing this the center(halo) light is on all the time.
Others have wired independent switches, or wired them into their fog lights so they come on with them.
As you can see in my above description I chose to wire the halo into the DRL/Parking lights. By doing this the center(halo) light is on all the time.
Others have wired independent switches, or wired them into their fog lights so they come on with them.

