
How to install aftermarket (Mad Racing/Arizen/Recaro) seats on factory rails...
 01-14-2007, 06:26 AM
#1


UPDATE: Go here for updates/questions/how to buy these seats... http://6litereaterdesigns.com/forum/...php?topic=34.0
I've condensed my other post into this one to give everyone an easier reference of one way to install aftermarket seats onto factory rails (power rails included)...
It's also a complete walk through of my first hand experiences with Mad Racing Concepts seats...
LET ME PREFACE IT WITH THIS THOUGH... Unless you just HAVE TO HAVE power adjustablity I would recommend just buying the brackets to adapt the universal sliders to our cars... They are lighter and not too much more money (I spent about $80 making these and I could have bought brackets for $130)...
If you are set on making your own factory rails work and want to read a write-up to guide you , here it is:
Well the day FINALLY arrived ! After obsessing over these seats (and apparently getting a few other board members obsessed with them as well
  ) they arrived today
I'll keep updating this post/thread with very detailed installation pictures to help any who are considering these seats...
For those who haven't seen the million other posts here's the basic history:
Recaro makes a GREAT looking seat, therefore a manufacturer copied it and sells it to a bunch of other distributors...
The first we found was Arizen Racing Seats... They make a copy and offer MANY ways to customize it (suede inserts, different color leather, lumbar, heaters, etc...Check out KANDY SS's posts, he's got a lot of cool custom stuff done including a matching rear seat...) and offer the seats for a good price (at about $800 for a pair of leather seats they are about half the price of real leather Recaros...).
THEN I found a company called Mad Racing Concepts that sold the same seats (less customizing options but you can still get them in different color leather with different inserts, etc...) for even half of Arizen Racing Seat's price ($458 for the PAIR of leather seats shipped to my door).
A local friend (toofazt) got a GREAT DEAL on some Arizen Racing Seats and I drove out to his place and checked them out. They were AMAZING! Very comfortable and the leather was VERY soft (his car smelled like a wallet store! That's right REAL leather, not the hard plastic like crap GM passes off as leather).
Then a board memeber ('Trust') bought a set from Mad Racing Concepts and was very pleased with them... SO, my set came from Mad Racing Concepts as well...
They got here today and having now seen both Arizen Racing Seats and Mad Racing Concepts black REAL LEATHER seats I can honestly tell you they are IDENTICAL!!! Of course the Arizen Racing Seats' seats have lumbar and the NEWER seats have a slightly different **** and seat belt harness area BUT the seat, it's feel and leather quality ARE IDENTICAL
I will chronicle the install of my seats in this post for any who are interested. I'll be as detailed as possible and update it as I go (could get finished today, it might not happen untill Saturday, we'll see...).
DO NOT ASK ME TO POST LINKS TO WHERE THEY WERE BOUGHT... Neither here OR IN PM'S. I have deliberately typed out the FULL name of the companies EVERYTIME in this post so if you're too dumb to do a google search for the company name and "seats" than you're probably to dumb to put these in your car...
There are also PLENTY of other posts on this board where we did post links so...
On the other hand, feel free to post or PM (preferrably post so others can benefit) any questions you have at all about them, again, other than "Where did you get them?"...
Ok, on with the write-up...
Here's how they showed up today...
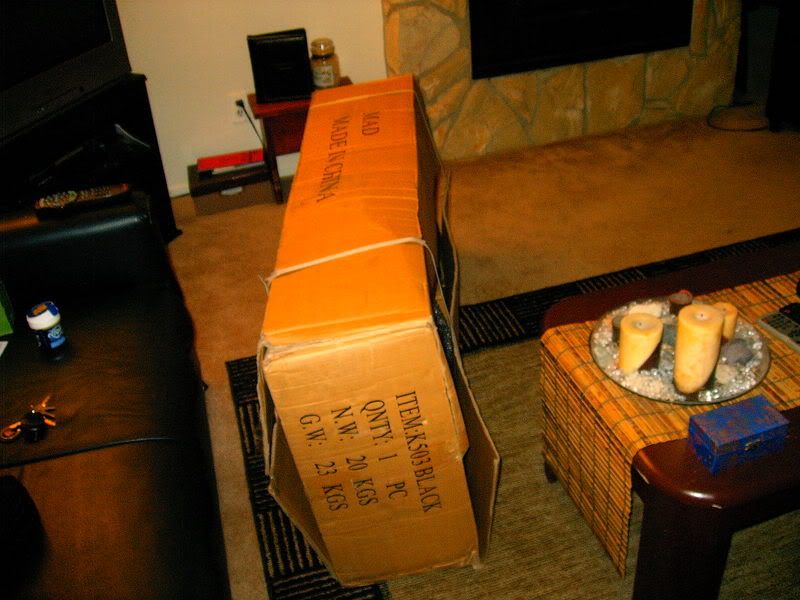

I was a little concerned since the packages were falling apart but at least they were bubble wrapped and had SOME support...
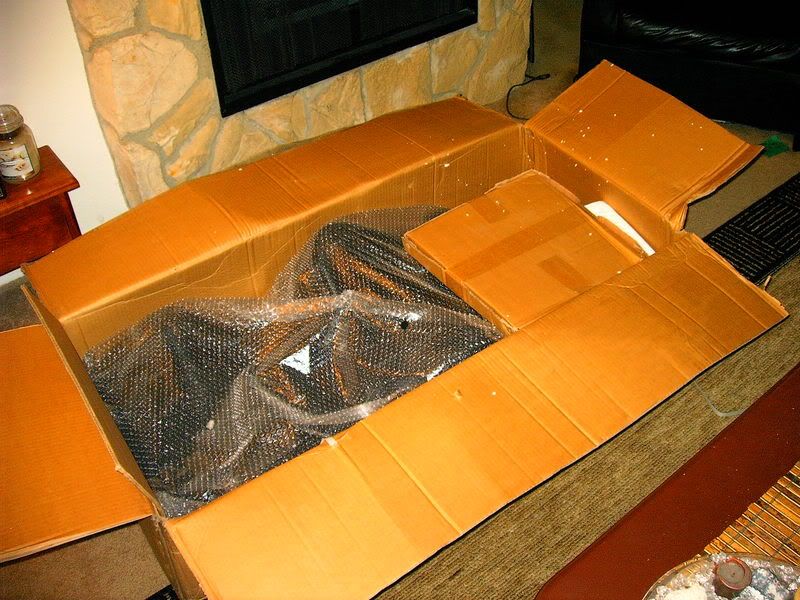
and after THOROUGHLY inspecting the seats there was NO damage to them
Here's how she comes all laid out like a $2 hooker ...
...
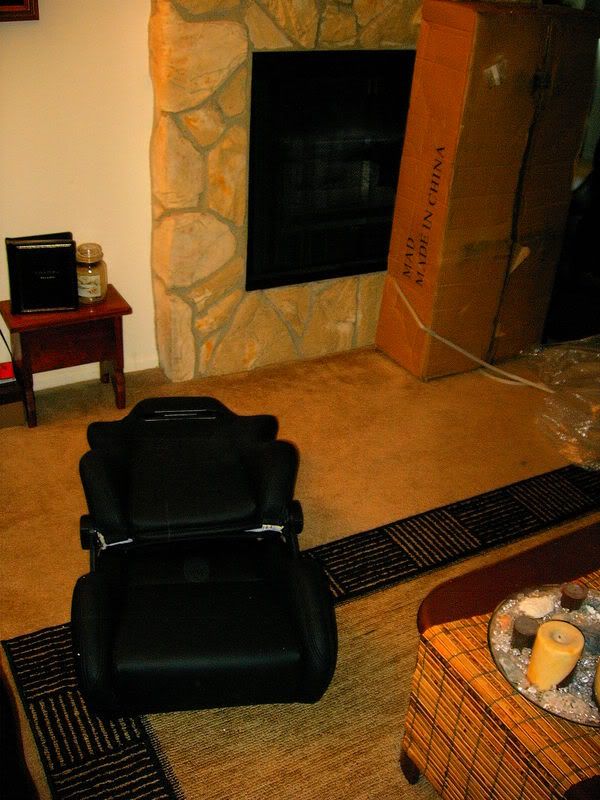
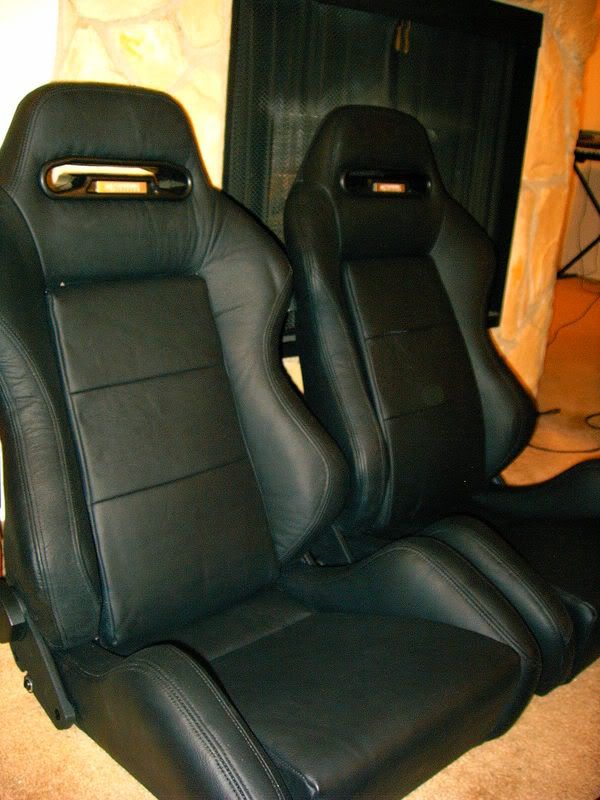
I got her sitting up like a proper lady...
and installed my GM PERFORMANCE DIVISION emblems...

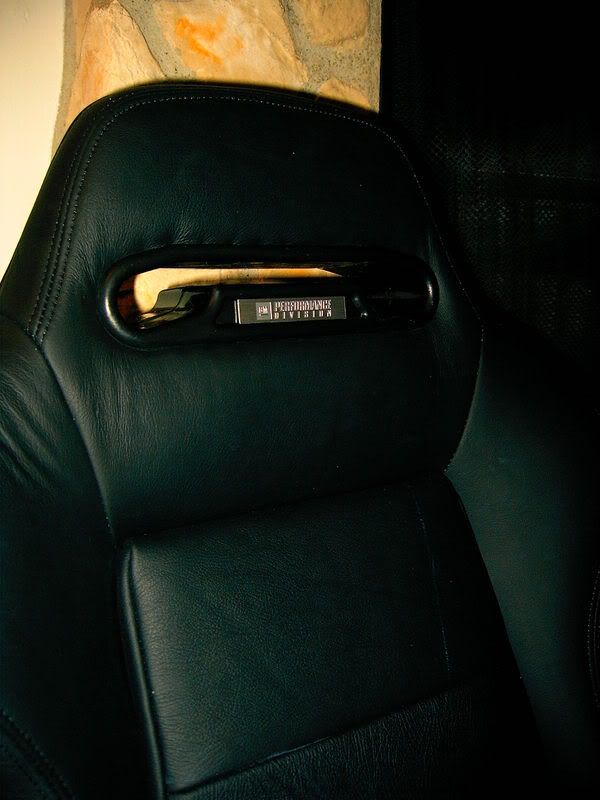
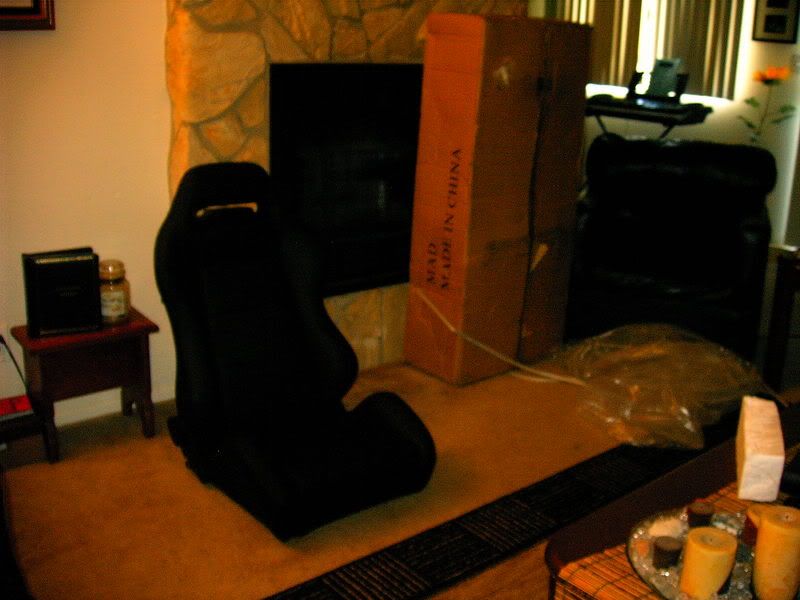
and for a little side by side emblem vs. no emblem comparison...
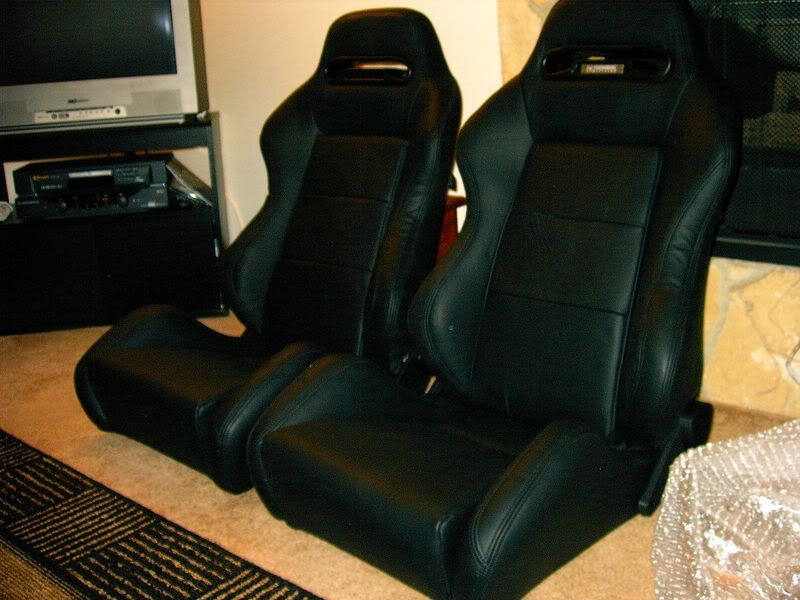
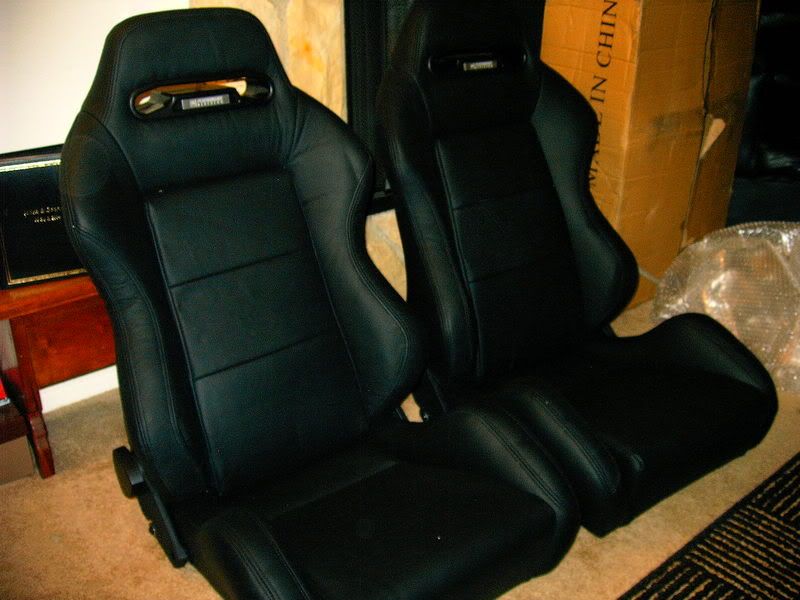
and finally both seats out of the box with their emblems on...
A little dark in our apartment but I'll move to a brighter area to get better pics and start fabbing up the adapters to make the stock rails mount to the seats... Now it's time to pick up the trash, get my passenger seat out of the car and upstairs, figure out what I need to buy and go buy it (and some lunch ) 
NOTE: I TRIED TO KEEP THE WRITE-UP IN THIS POST BUT IT WAS TOO MANY IMAGES TO SCROLL DOWN SO SEE ALL THE UPDATES...
NOTE: PAGE TWO HAS A WRITE-UP ON HOW TO MAKE AND INSTALL A LUMBAR SUPPORT...
I've condensed my other post into this one to give everyone an easier reference of one way to install aftermarket seats onto factory rails (power rails included)...
It's also a complete walk through of my first hand experiences with Mad Racing Concepts seats...
LET ME PREFACE IT WITH THIS THOUGH... Unless you just HAVE TO HAVE power adjustablity I would recommend just buying the brackets to adapt the universal sliders to our cars... They are lighter and not too much more money (I spent about $80 making these and I could have bought brackets for $130)...
If you are set on making your own factory rails work and want to read a write-up to guide you , here it is:
Well the day FINALLY arrived
! After obsessing over these seats (and apparently getting a few other board members obsessed with them as well ) they arrived today I'll keep updating this post/thread with very detailed installation pictures to help any who are considering these seats...
For those who haven't seen the million other posts here's the basic history:
Recaro makes a GREAT looking seat, therefore a manufacturer copied it and sells it to a bunch of other distributors...
The first we found was Arizen Racing Seats... They make a copy and offer MANY ways to customize it (suede inserts, different color leather, lumbar, heaters, etc...Check out KANDY SS's posts, he's got a lot of cool custom stuff done including a matching rear seat...) and offer the seats for a good price (at about $800 for a pair of leather seats they are about half the price of real leather Recaros...).
THEN I found a company called Mad Racing Concepts that sold the same seats (less customizing options but you can still get them in different color leather with different inserts, etc...) for even half of Arizen Racing Seat's price ($458 for the PAIR of leather seats shipped to my door).
A local friend (toofazt) got a GREAT DEAL on some Arizen Racing Seats and I drove out to his place and checked them out. They were AMAZING! Very comfortable and the leather was VERY soft (his car smelled like a wallet store! That's right REAL leather, not the hard plastic like crap GM passes off as leather).
Then a board memeber ('Trust') bought a set from Mad Racing Concepts and was very pleased with them... SO, my set came from Mad Racing Concepts as well...
They got here today and having now seen both Arizen Racing Seats and Mad Racing Concepts black REAL LEATHER seats I can honestly tell you they are IDENTICAL!!! Of course the Arizen Racing Seats' seats have lumbar and the NEWER seats have a slightly different **** and seat belt harness area BUT the seat, it's feel and leather quality ARE IDENTICAL
I will chronicle the install of my seats in this post for any who are interested. I'll be as detailed as possible and update it as I go (could get finished today, it might not happen untill Saturday, we'll see...).
DO NOT ASK ME TO POST LINKS TO WHERE THEY WERE BOUGHT... Neither here OR IN PM'S. I have deliberately typed out the FULL name of the companies EVERYTIME in this post so if you're too dumb to do a google search for the company name and "seats" than you're probably to dumb to put these in your car...
There are also PLENTY of other posts on this board where we did post links so...
On the other hand, feel free to post or PM (preferrably post so others can benefit) any questions you have at all about them, again, other than "Where did you get them?"...
Ok, on with the write-up...
Here's how they showed up today...
I was a little concerned since the packages were falling apart but at least they were bubble wrapped and had SOME support...
and after THOROUGHLY inspecting the seats there was NO damage to them
Here's how she comes all laid out like a $2 hooker
I got her sitting up like a proper lady...
and installed my GM PERFORMANCE DIVISION emblems...
and for a little side by side emblem vs. no emblem comparison...
and finally both seats out of the box with their emblems on...
A little dark in our apartment but I'll move to a brighter area to get better pics and start fabbing up the adapters to make the stock rails mount to the seats... Now it's time to pick up the trash, get my passenger seat out of the car and upstairs, figure out what I need to buy and go buy it (and some lunch
) NOTE: I TRIED TO KEEP THE WRITE-UP IN THIS POST BUT IT WAS TOO MANY IMAGES TO SCROLL DOWN SO SEE ALL THE UPDATES...
NOTE: PAGE TWO HAS A WRITE-UP ON HOW TO MAKE AND INSTALL A LUMBAR SUPPORT...
Last edited by 6LITEREATER; 10-11-2008 at 01:34 PM.
 01-14-2007, 06:27 AM
#2
FIRST UPDATE:
Ok, a friend came over, the wife came home from work, yada yada yada... I just got to the hardware store and got back before they closed
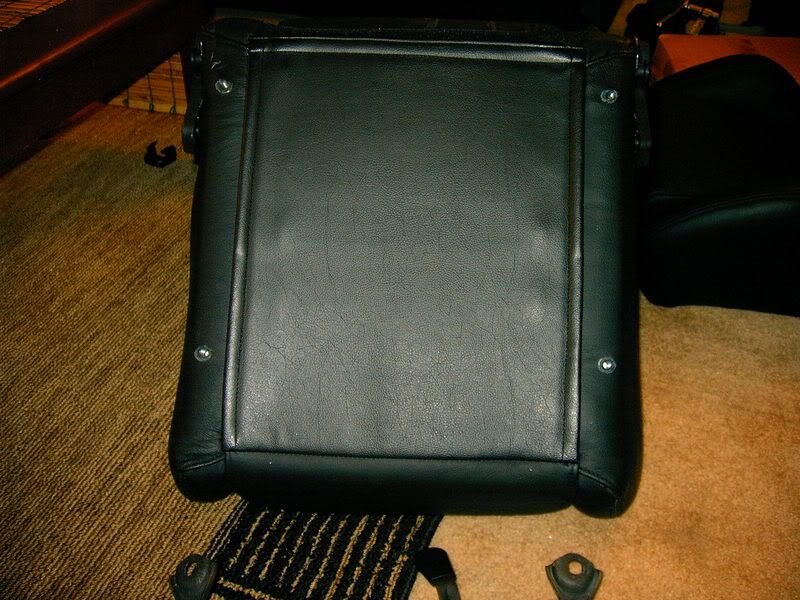
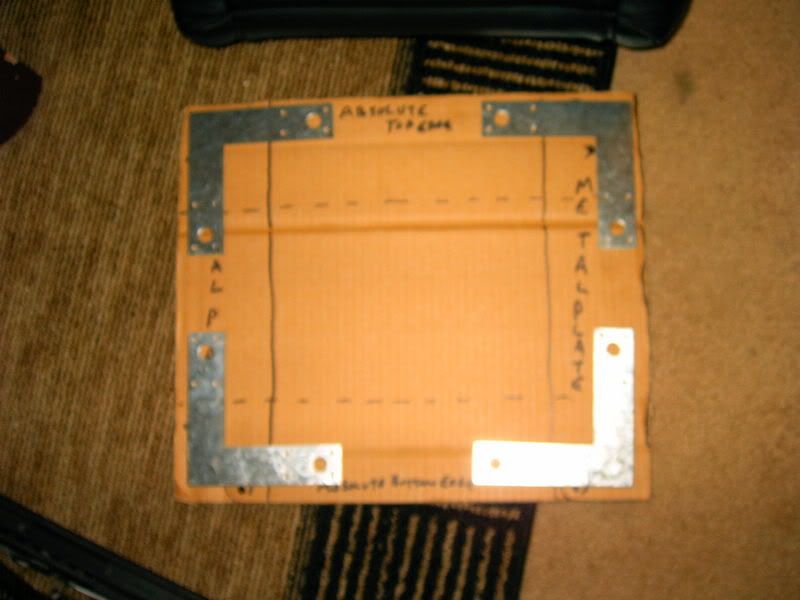
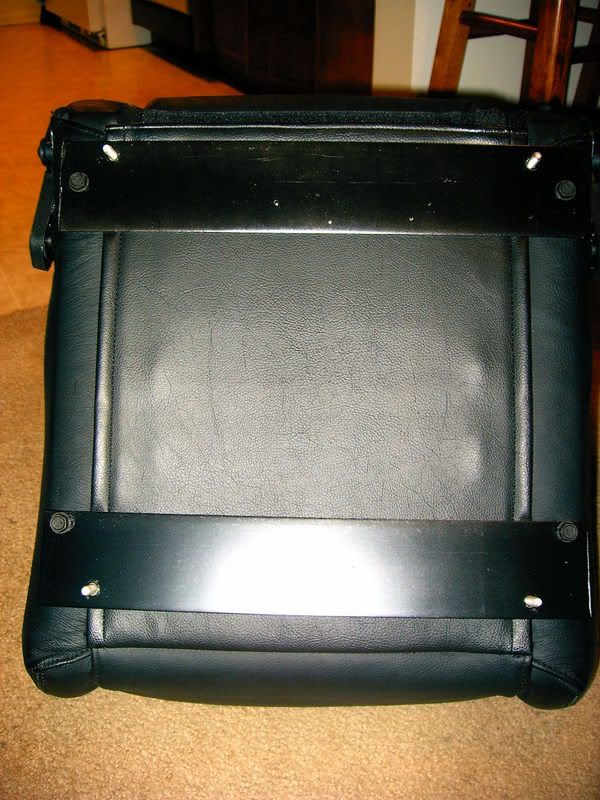
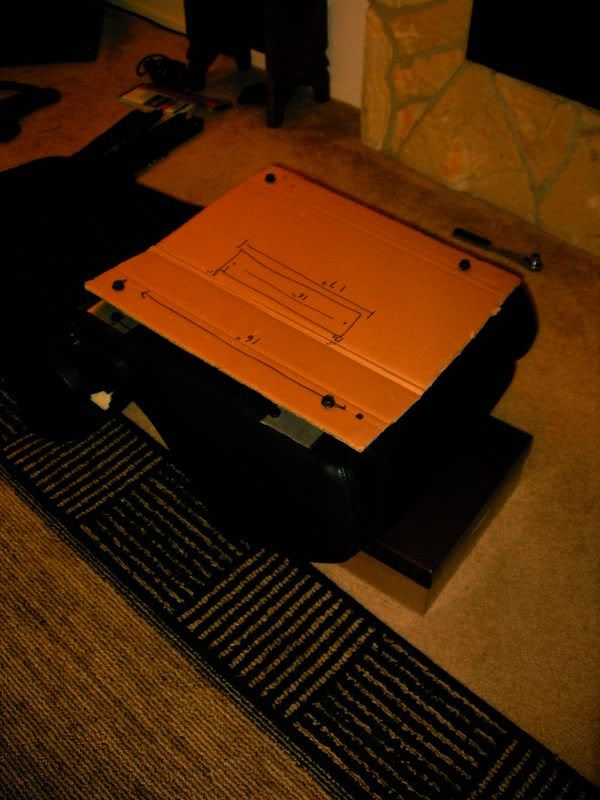
The first thing I did though was to make a template to take with me of the seat bottom (how big it was, where the edges were, where it need to bolt to the seat and where the frames needed to bolt to the bracket)... Nothing EXACT just something to give me a rough idea of how wide/big a piece of metal I needed...
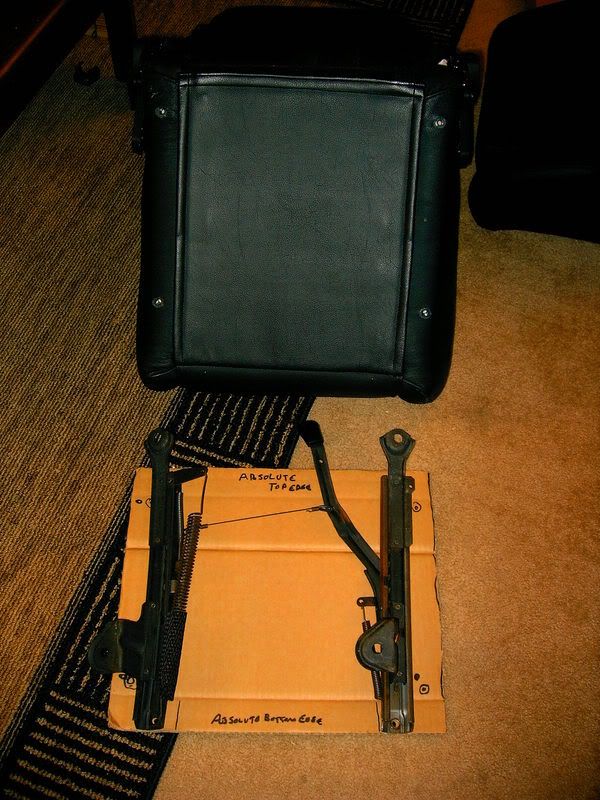
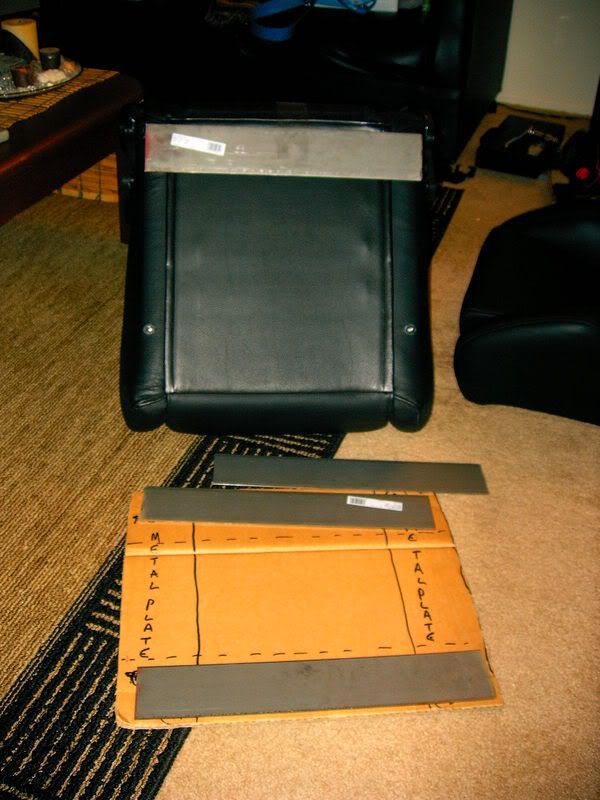
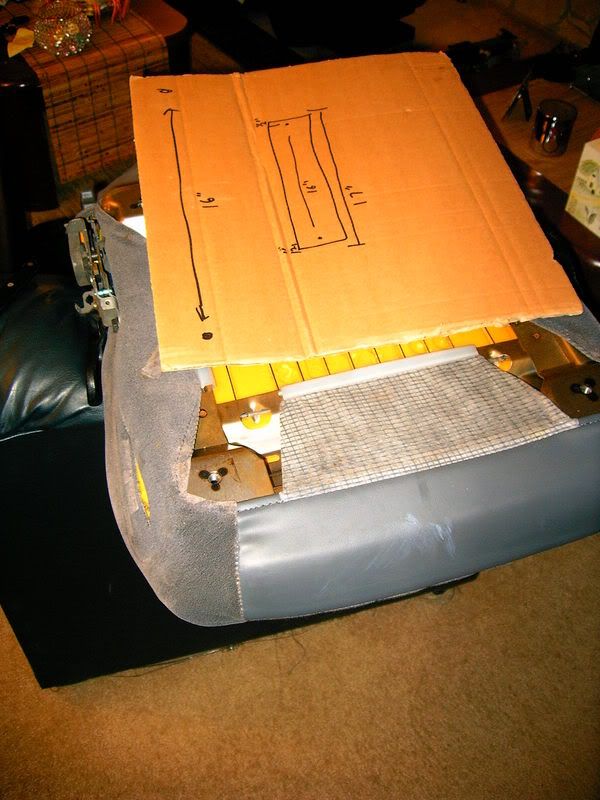
Here's the seat bottom:
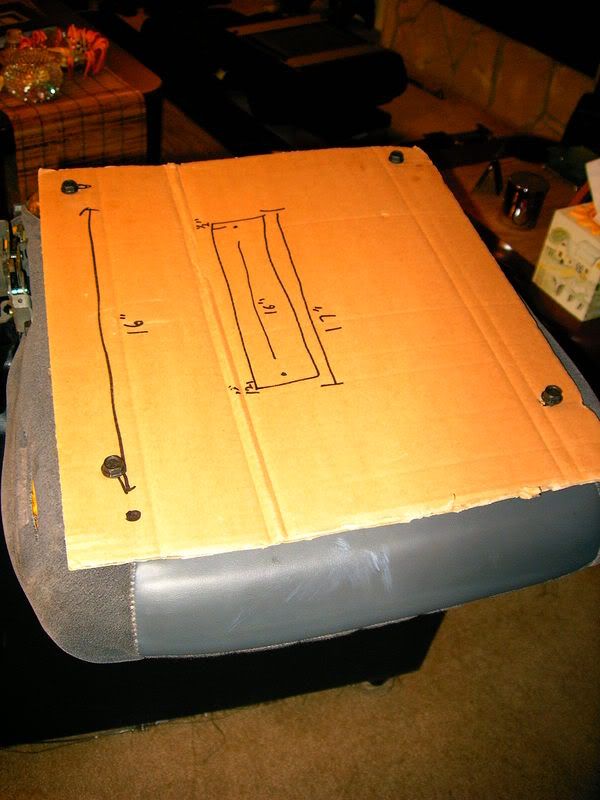
Here's the template I made. The original plans were to get a big plate of steel to mount either "side to side" or "top to bottom", wide enough to then mount the brackets to... This is represented by the areas marked "metal plate" on either side and then the dashed lines represent the alternative way to mount it:
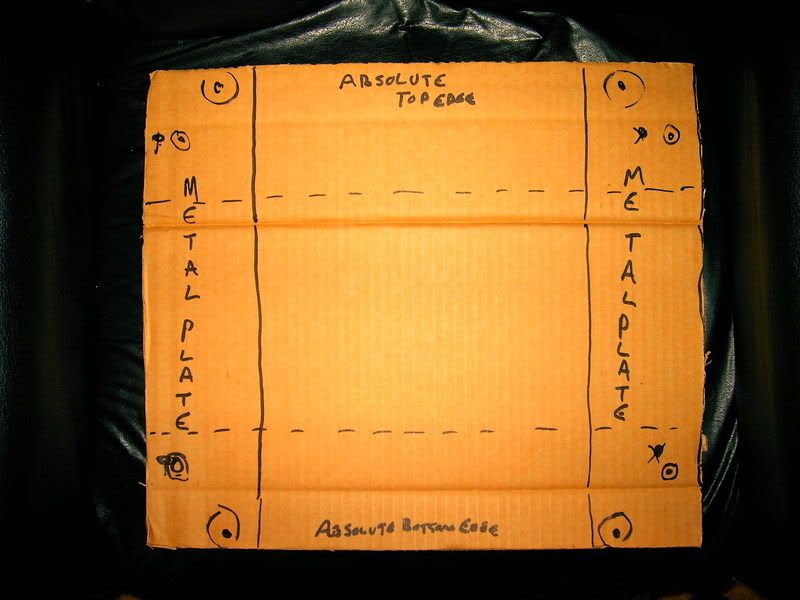
and here's where the stock brackets would need to be:
So off to the hardware store I went...
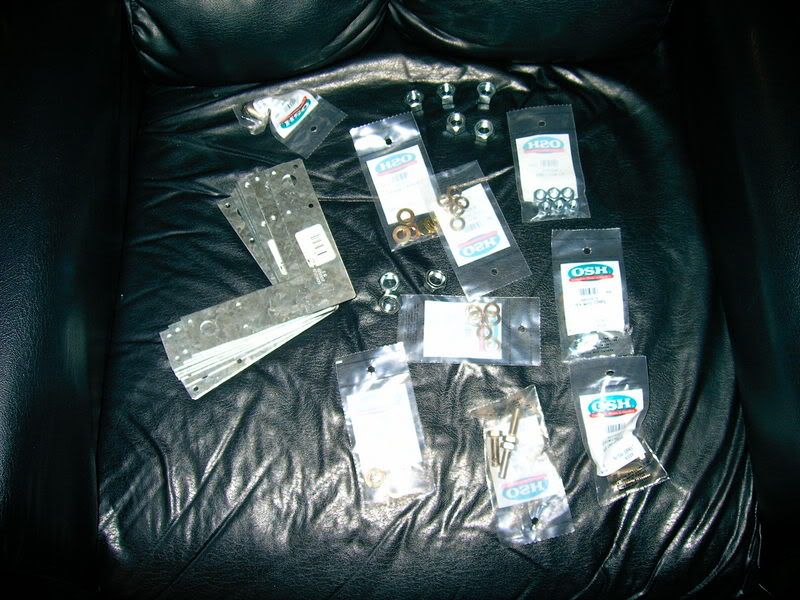
I found the metal but it seemed like over kill. I also found some nice "L" shaped brackets that I couldn't bend no matter how hard I tried (and I'm a pretty strong guy) and since the mounting points would be very close to their stronger center I went with them instead (cuts down on weight and fabrication as well)... Bought a bunch of bolts and nuts and washers to mount the stock rails to the brackets with as well.
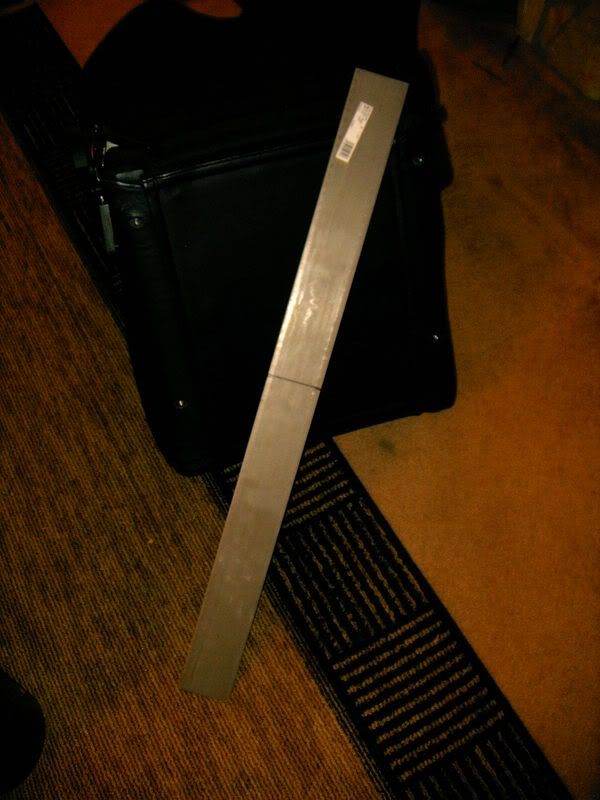
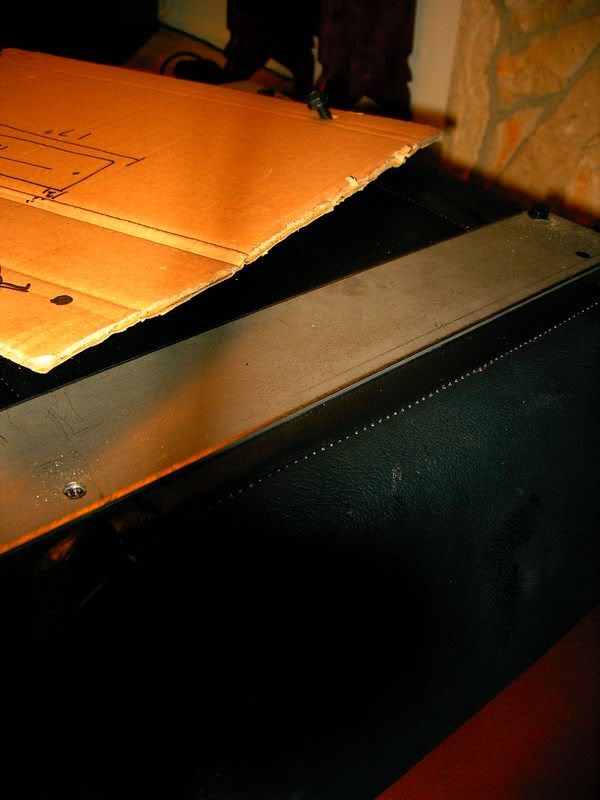
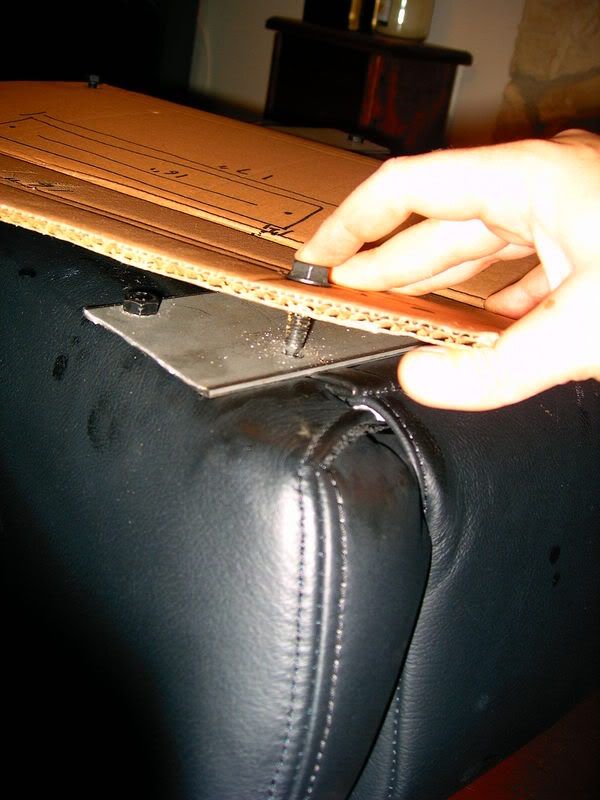
Here's what I came back with:
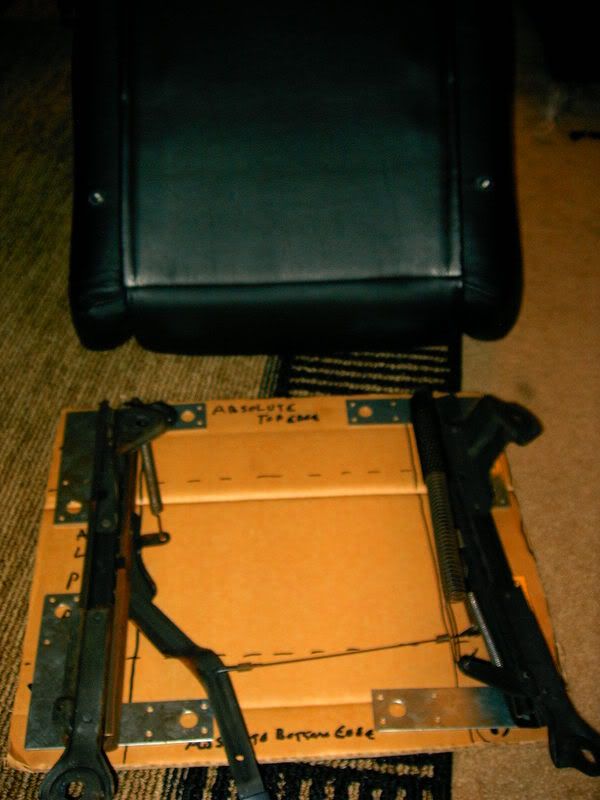
I plan to mount the "L" brackets here:
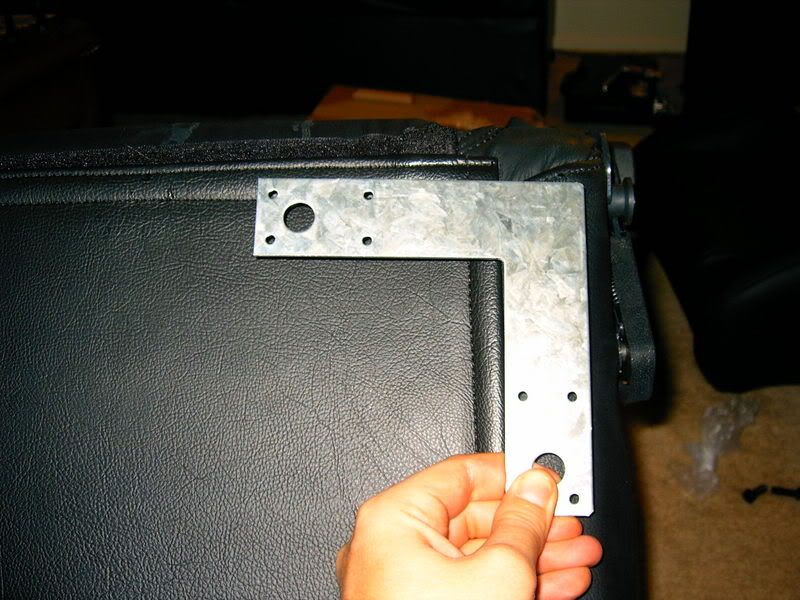
With a finished product similar to this (imagine the cardboard is the seat bottom):
and the rails could be mounted like this:

and for comparison:
That's as far as I am right now. I need to figure out where on the brackets to drill the holes to mount everything. Once I do that I'll mock it all up and make sure it sits in the car just where I want it (don't want it hitting the door or anything)...
After that I will trim the brackets down (take off any unnecessary length to prevent any rattles), spray them satin black to prevent rust and then put it back together for a final time...
NOTE: CHECK YOUR BOXES FOR ALL THE HARDWARE BEFORE YOU LEAVE YOUR HOUSE!!! My sliders were missing 4 bolts (I was just using their hardware to mount my brackets to the seats and buying bolts to mount my brackets to the stock seat rails)...
LUCKILY, the bolts that hold our factory rails to our factory seats are the identical size needed!!! I also had bought spacers that I don't need because the seats came with some
Ok, off to get back to work, I'll be going to the gym at 11:00pm untill God knows when so the next update will be in the wee hours of the morning...
Ok, a friend came over, the wife came home from work, yada yada yada... I just got to the hardware store and got back before they closed
The first thing I did though was to make a template to take with me of the seat bottom (how big it was, where the edges were, where it need to bolt to the seat and where the frames needed to bolt to the bracket)... Nothing EXACT just something to give me a rough idea of how wide/big a piece of metal I needed...
Here's the seat bottom:
Here's the template I made. The original plans were to get a big plate of steel to mount either "side to side" or "top to bottom", wide enough to then mount the brackets to... This is represented by the areas marked "metal plate" on either side and then the dashed lines represent the alternative way to mount it:
and here's where the stock brackets would need to be:
So off to the hardware store I went...
I found the metal but it seemed like over kill. I also found some nice "L" shaped brackets that I couldn't bend no matter how hard I tried (and I'm a pretty strong guy) and since the mounting points would be very close to their stronger center I went with them instead (cuts down on weight and fabrication as well)... Bought a bunch of bolts and nuts and washers to mount the stock rails to the brackets with as well.
Here's what I came back with:
I plan to mount the "L" brackets here:
With a finished product similar to this (imagine the cardboard is the seat bottom):
and the rails could be mounted like this:
and for comparison:
That's as far as I am right now. I need to figure out where on the brackets to drill the holes to mount everything. Once I do that I'll mock it all up and make sure it sits in the car just where I want it (don't want it hitting the door or anything)...
After that I will trim the brackets down (take off any unnecessary length to prevent any rattles), spray them satin black to prevent rust and then put it back together for a final time...
NOTE: CHECK YOUR BOXES FOR ALL THE HARDWARE BEFORE YOU LEAVE YOUR HOUSE!!! My sliders were missing 4 bolts (I was just using their hardware to mount my brackets to the seats and buying bolts to mount my brackets to the stock seat rails)...
LUCKILY, the bolts that hold our factory rails to our factory seats are the identical size needed
!!! I also had bought spacers that I don't need because the seats came with some Ok, off to get back to work, I'll be going to the gym at 11:00pm untill God knows when so the next update will be in the wee hours of the morning...
01-14-2007, 06:27 AM
#3
REVISION: Should have thought it through...
Ok, I'm an idiot. I just thought that original plan through and realized with four independent brackets I will probably end up with the rails pivoting on the bolts holding the brackets to the seat when I try to slide the seat forward
I do have lock washers so they SHOULD stay in place but who knows... I could just tack weld the brackets to the stock rails BUT I want to install these in such a way that anyone can do them...
So, tommorrow morning it's back to the hardware store to return the "L" brackets and just buy flat steel like I had originally planned
At least it will be a little cheaper this way
Then again I might just get restless tonight and make two mounting points for the bracket on the seat bottom and solve this problem
EDIT: I'm DEFINETLY going with my original plan... I'm taking back the $20 in brackets tommorrow and just buying the flat steel
Last edited by 6LITEREATER; 01-14-2007 at 06:35 AM.
01-14-2007, 06:27 AM
#4
SECOND UPDATE: LUMBAR ADDED
Well, I am a moron. Went to the hardware store and forgot to bring the old brackets back, I still bought the new ones but I got home and realized I have no cutting discs for my Dremel so I still can't cut the f@ckin brackets!!!!!!!
Anyways, I picked up stuff to make my lumbar while I was out and I installed it... Here goes the write up:
First of all, Arizen seats come with an adjustable lumbar and Mad Racing seats do not. For me personally, it wasn't worth paying another $400 to get the same seats but with an adjustable lumbar so I, obviously, went with the Mad Racing seats.
I did still want some lumbar support so I decided to make my own... I've watched "American Hotrod" and "Overhaulin" enough to know a little about interior stuff
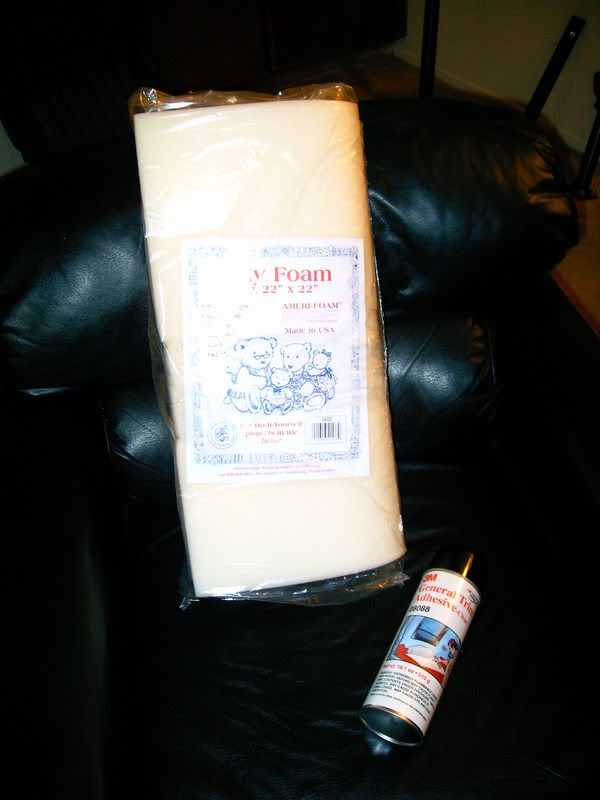
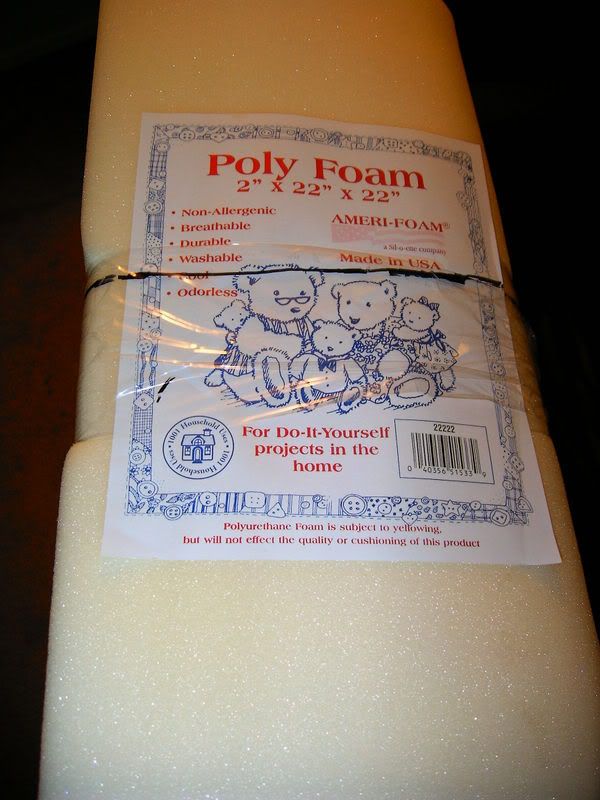
SO, I went to the craft store (Michaels) to buy some foam and to the autoparts store (Kragen) to get some spray adhesive:
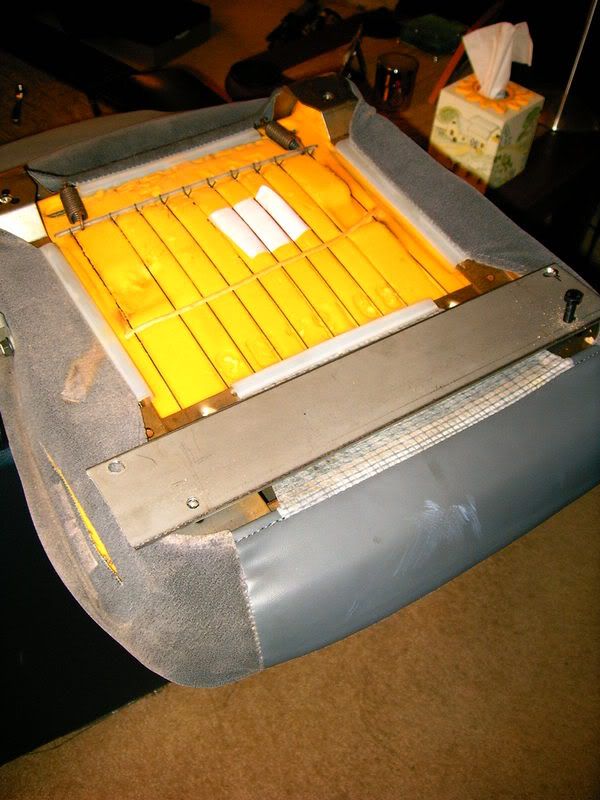
The point is to make a lumbar and then stick it in here (notice how easy it is to access this area):
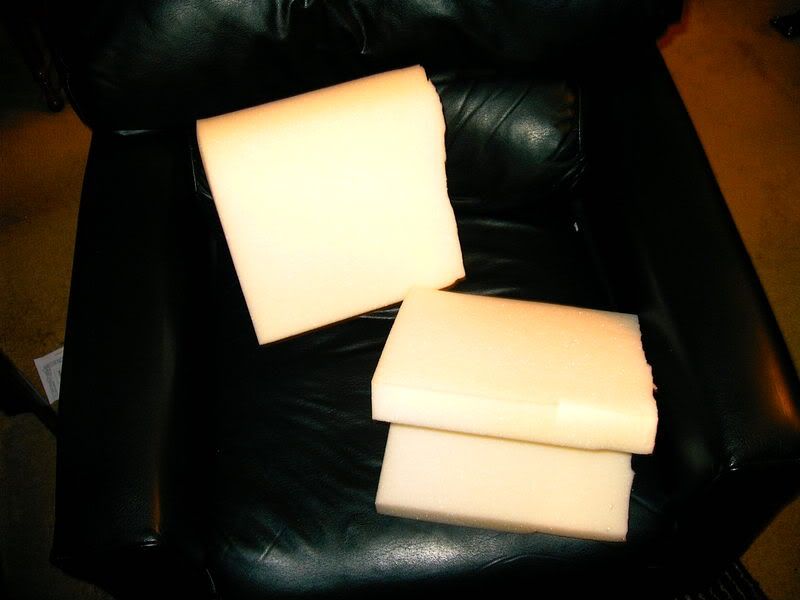
First thing I did was measure, draw a line and cut the foam in half with some scissors while it was still folded over:
Which left me with this:
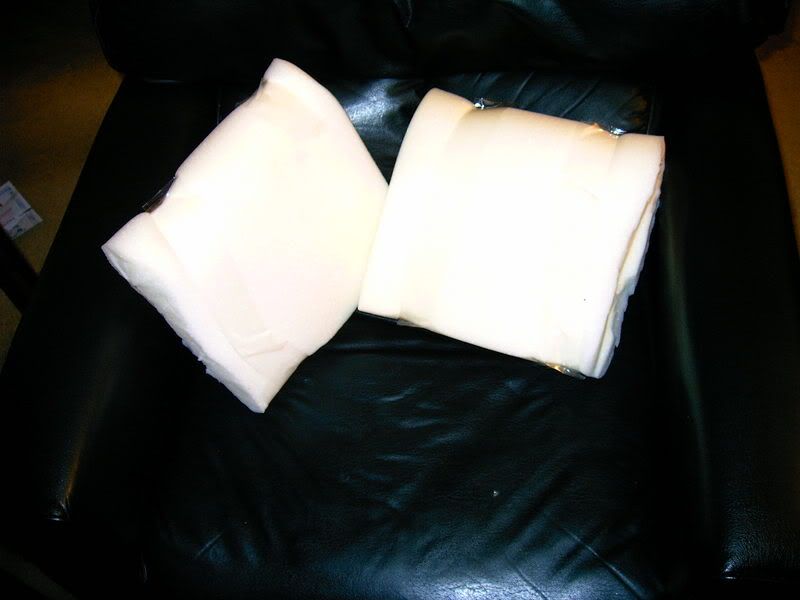
I then sprayed the inside parts liberally with the adhesive, folded it together, taped it together to hold it and then put pressure evenly on it a few minutes so it would hold, looked like this:
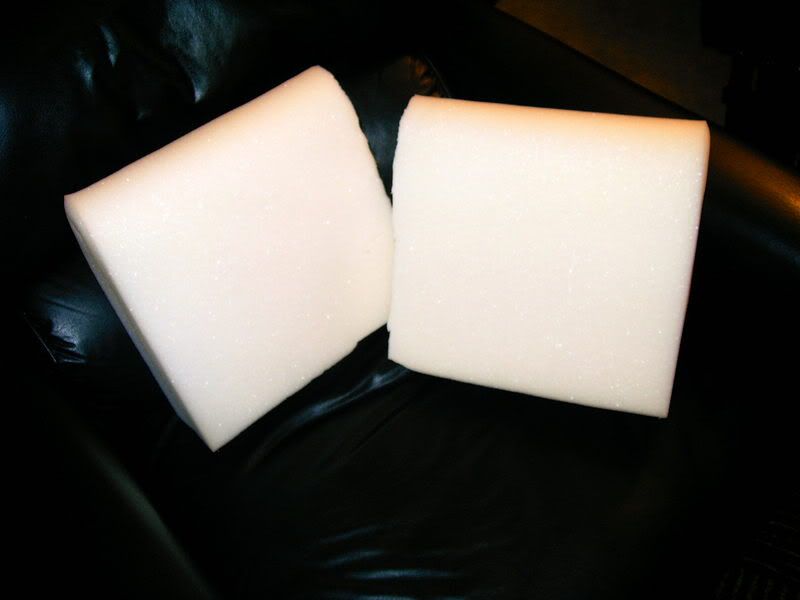
After leaving it pressed for a few minutes I removed the tape and used a filet knife to clean up the cut edges... Giving me my final "lumbar insert":
The rest is easy, just stuff it in there...
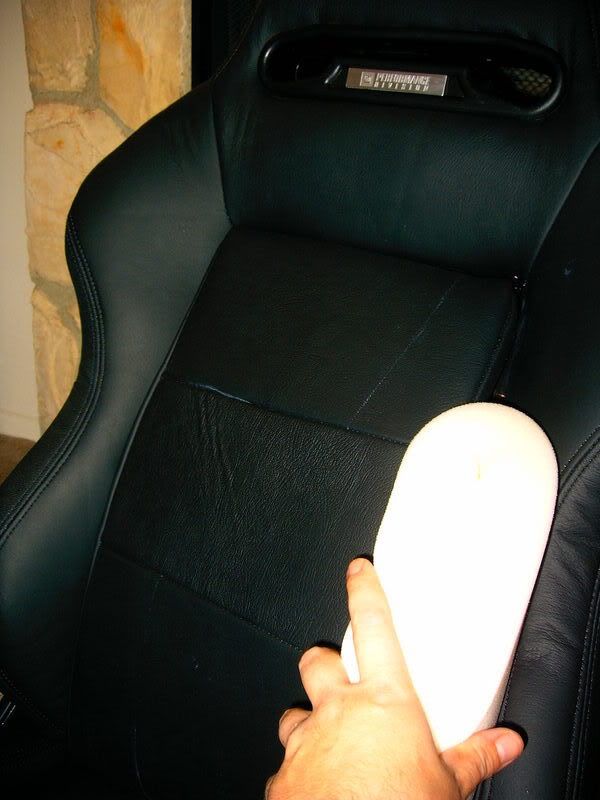
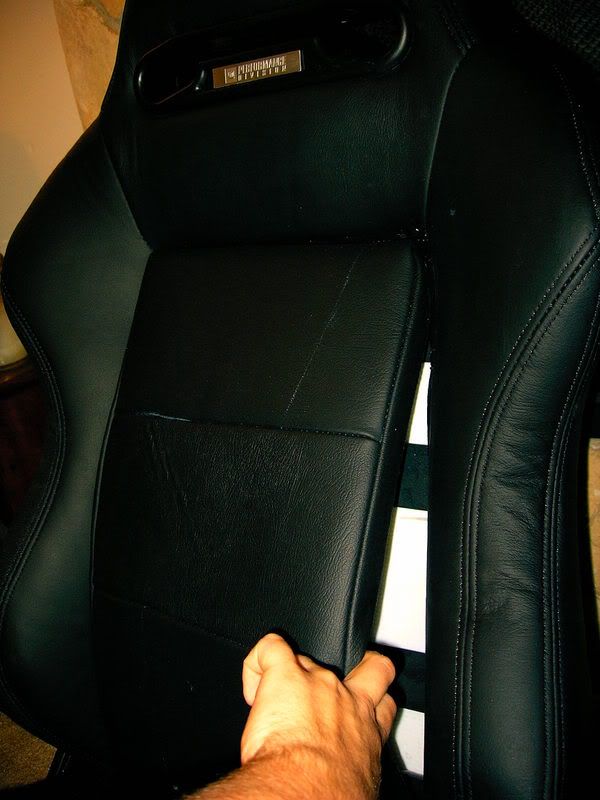
...and then with a hand reached into each side adjust it all the way down (the rounded side is up and the square bottom is down). Here's a comparison of the finished seat on the right and the still lumbar-less seat on the left:
and another picture from the other side:

Hard to see the difference in the pics but it is a WORLD of difference sitting in it
For a grand total of $20 ($5 for the foam $15 for the adhesive which I will also use recovering my door panels in black leather) I have GREAT lumbar support
Well, I am a moron. Went to the hardware store and forgot to bring the old brackets back, I still bought the new ones but I got home and realized I have no cutting discs for my Dremel so I still can't cut the f@ckin brackets!!!!!!!
Anyways, I picked up stuff to make my lumbar while I was out and I installed it... Here goes the write up:
First of all, Arizen seats come with an adjustable lumbar and Mad Racing seats do not. For me personally, it wasn't worth paying another $400 to get the same seats but with an adjustable lumbar so I, obviously, went with the Mad Racing seats.
I did still want some lumbar support so I decided to make my own... I've watched "American Hotrod" and "Overhaulin" enough to know a little about interior stuff
SO, I went to the craft store (Michaels) to buy some foam and to the autoparts store (Kragen) to get some spray adhesive:
The point is to make a lumbar and then stick it in here (notice how easy it is to access this area):
First thing I did was measure, draw a line and cut the foam in half with some scissors while it was still folded over:
Which left me with this:
I then sprayed the inside parts liberally with the adhesive, folded it together, taped it together to hold it and then put pressure evenly on it a few minutes so it would hold, looked like this:
After leaving it pressed for a few minutes I removed the tape and used a filet knife to clean up the cut edges... Giving me my final "lumbar insert":
The rest is easy, just stuff it in there...
...and then with a hand reached into each side adjust it all the way down (the rounded side is up and the square bottom is down). Here's a comparison of the finished seat on the right and the still lumbar-less seat on the left:
and another picture from the other side:
Hard to see the difference in the pics but it is a WORLD of difference sitting in it
For a grand total of $20 ($5 for the foam $15 for the adhesive which I will also use recovering my door panels in black leather) I have GREAT lumbar support
 01-14-2007, 06:28 AM
#6
THIRD UPDATE CONTINUED: THE FABRICATION IS DONE!!!!!
Well, to be honest, if I had a garage this would have taken me all of 30 minutes per seat... Since I had to sneak around doing it in my apartment (spacing out the Dremel noises so I don't get caught) it took me two hours total...
Ok, on with the write-up...
SO, here's the last picture I showed you of the metal I bought to make the brackets out of:
Using my Dremel (if you don't have one GET ONE they are GREAT!!!) I cut the metal (actually just notched the edges, scarred the top and then bent it and broke it) into 4 17" pieces:
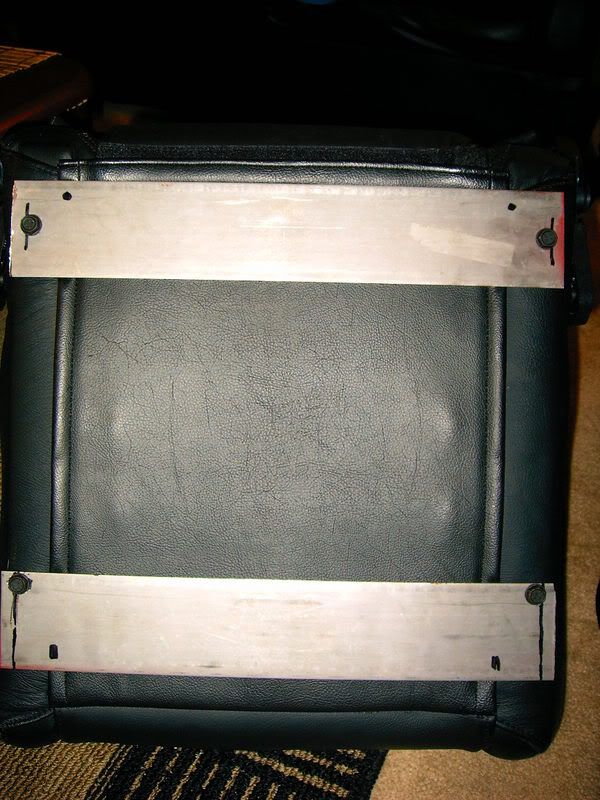
Since the holes are 16" apart on the seat bottoms my holes needed to be drilled 1/2" in on each side:
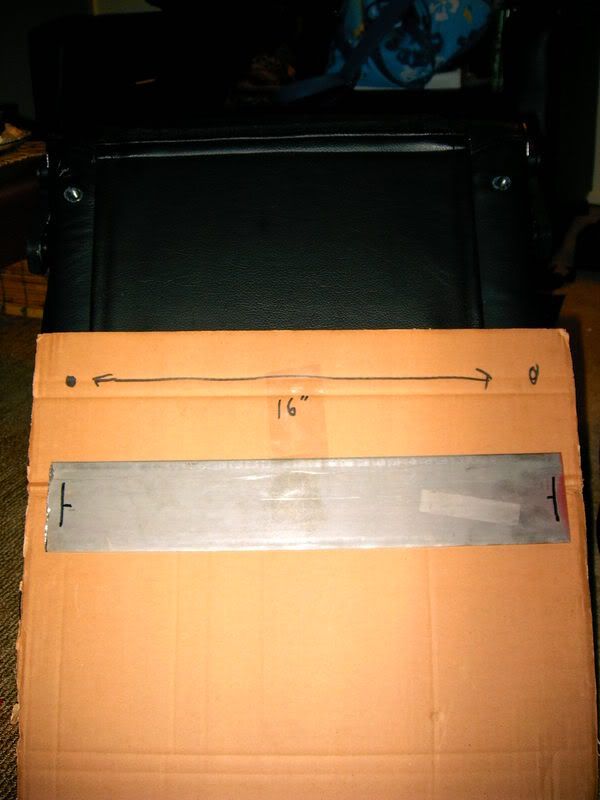
On the top bracket I pretty much centered the holes...
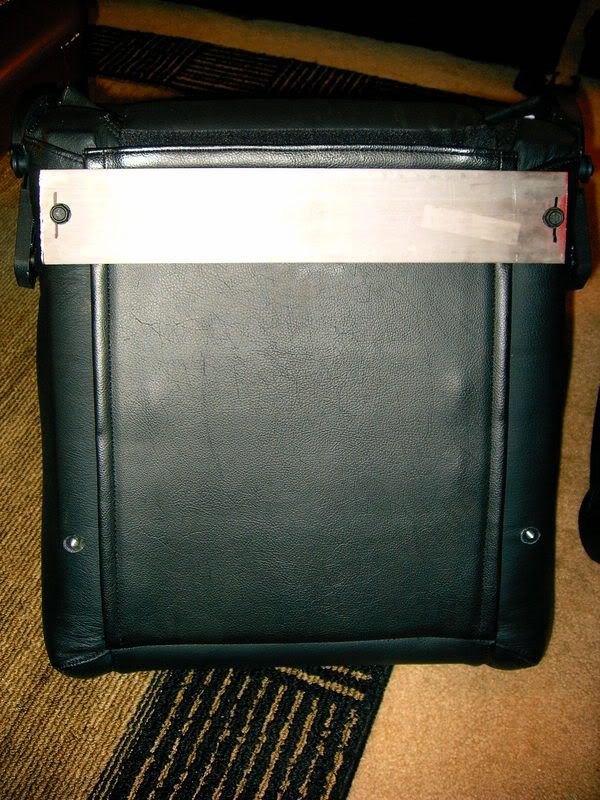
but on the bottom bracket they needed to be at the very top of the bracket so that when I mounted the rails, the rails would be centered with the seats (NOTE: I mounted the brackets using the bolts from my factory seats):
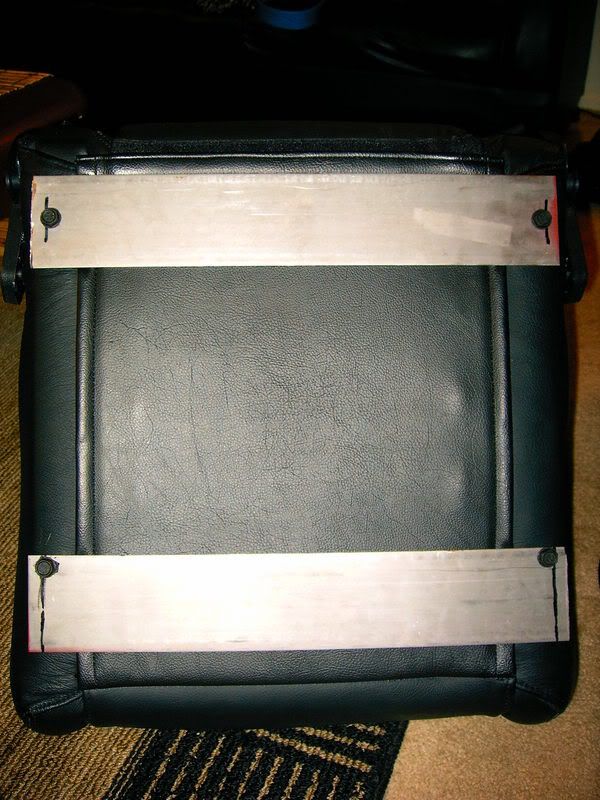
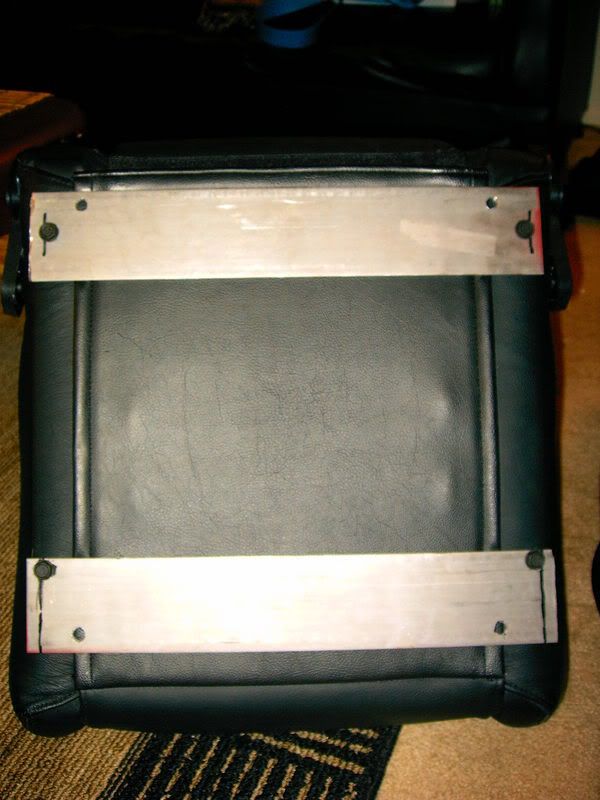
I then put the rails up to the bracket... I put them right up against the bolts and then leveled them with the edges of the brackets top and bottom (that wasn't just dumb luck as I had held the brackets up there while figuring out the position for the bottom bracket to be mounted) and marked the holes:
I then measured the distance between the holes on the stock seat bottom and made sure the distance between my marking were identical (in all directions) and they were .
So I drilled out the marks I made...
...installed my bolt with washer through the back...
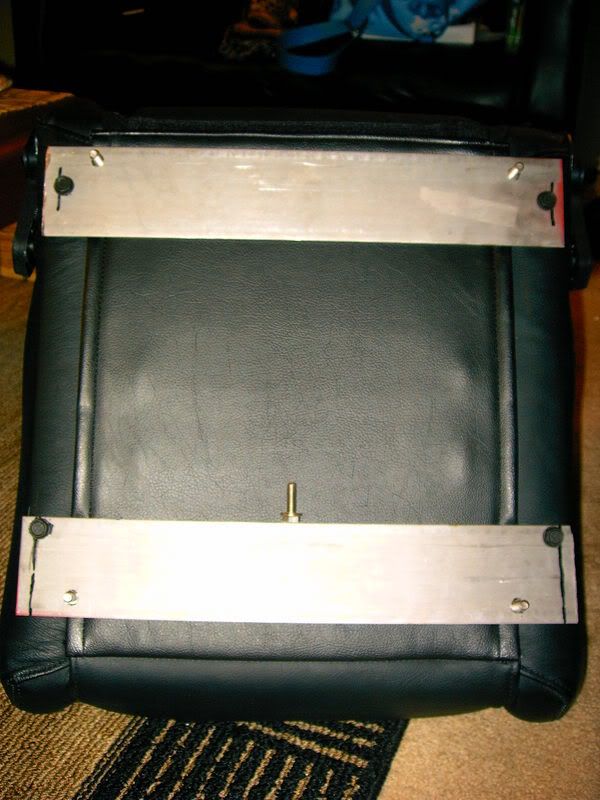
...and mounted my factory rails using a lock washer and nut...
All is good
I thought I would have to use spacers but didn't so the seats should seat the same as factory height...
I pulled it all back apart, filed down the edges (from the cuts I made) and sprayed them satin black (to prevent rust).
As soon as they dry I'll do the final re-assembly and go mount her in the car
I used these brackets to mark the other ones so I would know where to drill... I'll finish and install the driver side tommorrow.
IF YOU WANT A PICTURE OF ANY PART OF THE ASSEMBLY YOU DON'T SEE HERE ASK FOR IT NOW BEFORE I FINISH THE DRIVER SIDE SO THAT I HAVE A CHANCE TO TAKE THE PICTURE FOR YOU...
Alrighty, I'm off to finish her up...
Well, to be honest, if I had a garage this would have taken me all of 30 minutes per seat... Since I had to sneak around doing it in my apartment (spacing out the Dremel noises so I don't get caught) it took me two hours total...
Ok, on with the write-up...
SO, here's the last picture I showed you of the metal I bought to make the brackets out of:
Using my Dremel (if you don't have one GET ONE they are GREAT!!!) I cut the metal (actually just notched the edges, scarred the top and then bent it and broke it) into 4 17" pieces:
Since the holes are 16" apart on the seat bottoms my holes needed to be drilled 1/2" in on each side:
On the top bracket I pretty much centered the holes...
but on the bottom bracket they needed to be at the very top of the bracket so that when I mounted the rails, the rails would be centered with the seats (NOTE: I mounted the brackets using the bolts from my factory seats):
I then put the rails up to the bracket... I put them right up against the bolts and then leveled them with the edges of the brackets top and bottom (that wasn't just dumb luck as I had held the brackets up there while figuring out the position for the bottom bracket to be mounted) and marked the holes:
I then measured the distance between the holes on the stock seat bottom and made sure the distance between my marking were identical (in all directions) and they were
.So I drilled out the marks I made...
...installed my bolt with washer through the back...
...and mounted my factory rails using a lock washer and nut...
All is good
I thought I would have to use spacers but didn't so the seats should seat the same as factory height...
I pulled it all back apart, filed down the edges (from the cuts I made) and sprayed them satin black (to prevent rust).
As soon as they dry I'll do the final re-assembly and go mount her in the car
I used these brackets to mark the other ones so I would know where to drill... I'll finish and install the driver side tommorrow.
IF YOU WANT A PICTURE OF ANY PART OF THE ASSEMBLY YOU DON'T SEE HERE ASK FOR IT NOW BEFORE I FINISH THE DRIVER SIDE SO THAT I HAVE A CHANCE TO TAKE THE PICTURE FOR YOU...
Alrighty, I'm off to finish her up...
Last edited by 6LITEREATER; 01-14-2007 at 06:36 AM.
01-14-2007, 06:29 AM
#7
FOURTH UPDATE: PASSENGER SEAT IS FINISHED!!!
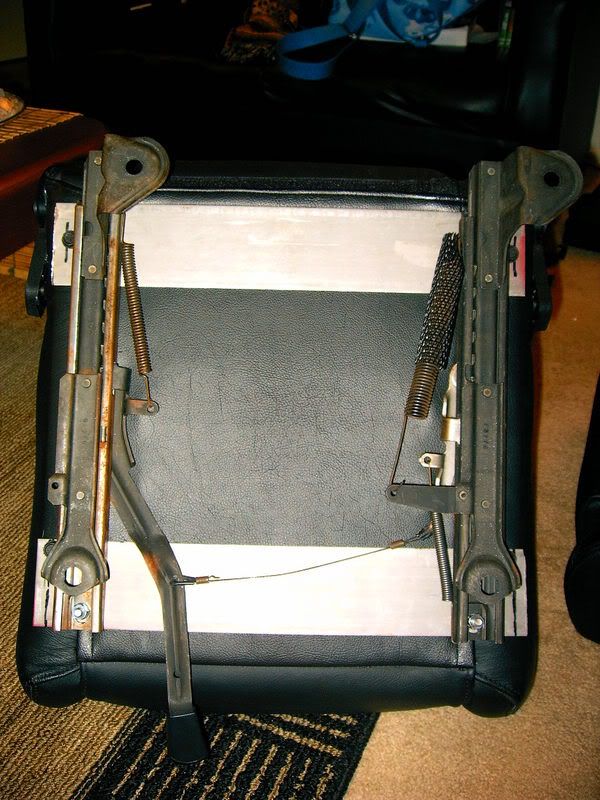
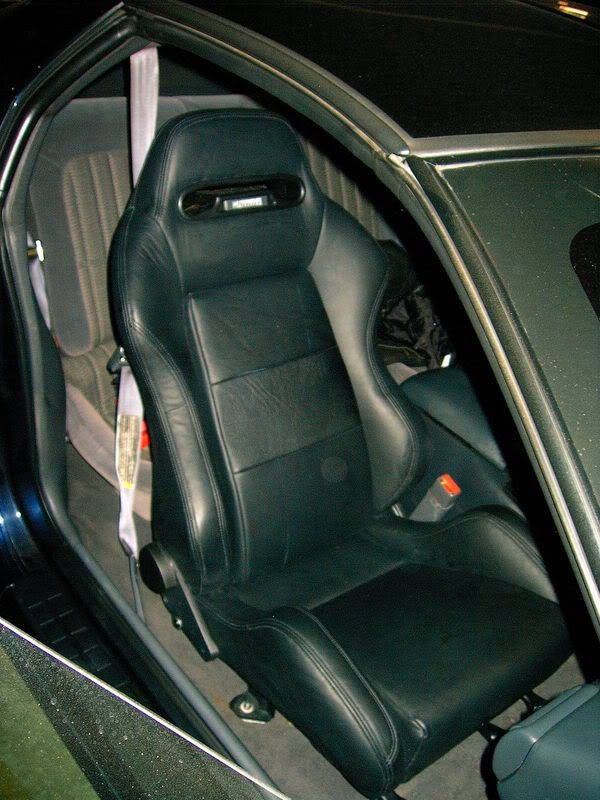
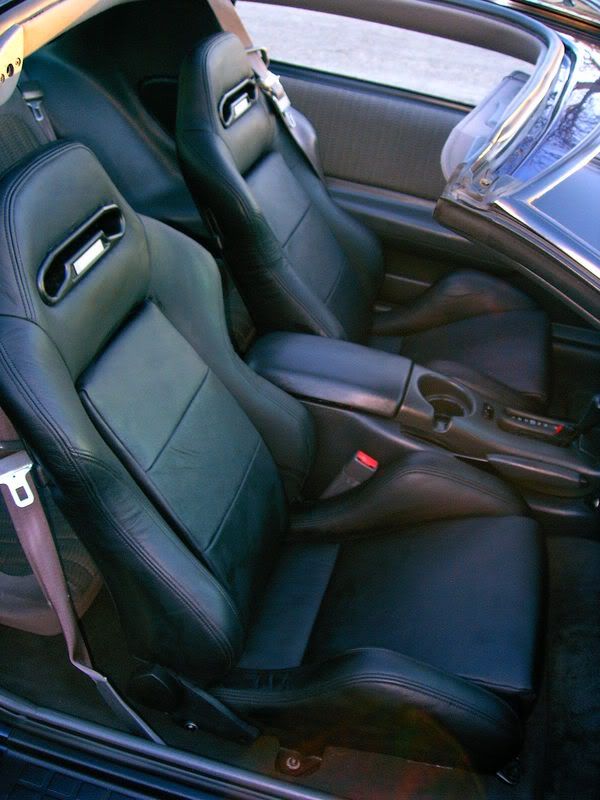
Alrighty, the passenger side is in! Here it is being reassembled after paint:
Here's a shot of the rails mounted:

A side shot:

Another side shot:
I actually was worried the seat rail release was rubbing on the bottom of the seat so I added spacers (that came with the seats) which I removed later (while it was in the car which SUCKED!!!) to help with the height...
Yup, you heard me, to help with the height At first it was like sitting on a phone book but it wasn't all the way down. After getting the seat all the way in and removing my spacers (so the final product is what you see in the above pictures) it's a lot better...
I'm going to have to get with toofazt and compare our setups (since he is using the sliders the seat came with)... I mean my seat is sitting flat against the rail so the height isn't from the mounting setup it's just from the fact that this seat bottom is thicker than our factory seats...
It's fine for me, I'm about 5' 9" barefoot... but someone who is 6' would probably have a problem with these seats mounted as mine are (sliders might make it mount lower).
Also, anyone larger than a 36" waste would be too large for these seats as well... but let's face it, if you're larger than a 36" waste you're probably too large for any tight "race" seat.
ALL SAID AND DONE I WOULD RECOMMEND ANYONE BUYING MRC SEATS TO JUST BUY THE BRACKETS THAT MAKE THE SLIDERS MOUNT TO THE F-BODY'S FLOOR... I spent $60 on materials and I THINK I could have bought brackets from MRC for $50 Worst case scenario I could have bought them for $130 from Arizen and I think it would have been worth the extra $70 to sit lower (IF they make you sit lower) and not have to hassle with making anything...
To me the power adjustability is not worth sitting higher... but I am not sure if the sliders will make me sit lower or no.
Alrighty, the passenger side is in
! Here it is being reassembled after paint:Here's a shot of the rails mounted:
A side shot:
Another side shot:
I actually was worried the seat rail release was rubbing on the bottom of the seat so I added spacers (that came with the seats) which I removed later (while it was in the car which SUCKED!!!) to help with the height...
Yup, you heard me, to help with the height
At first it was like sitting on a phone book but it wasn't all the way down. After getting the seat all the way in and removing my spacers (so the final product is what you see in the above pictures) it's a lot better...I'm going to have to get with toofazt and compare our setups (since he is using the sliders the seat came with)... I mean my seat is sitting flat against the rail so the height isn't from the mounting setup it's just from the fact that this seat bottom is thicker than our factory seats...
It's fine for me, I'm about 5' 9" barefoot... but someone who is 6' would probably have a problem with these seats mounted as mine are (sliders might make it mount lower).
Also, anyone larger than a 36" waste would be too large for these seats as well... but let's face it, if you're larger than a 36" waste you're probably too large for any tight "race" seat.
ALL SAID AND DONE I WOULD RECOMMEND ANYONE BUYING MRC SEATS TO JUST BUY THE BRACKETS THAT MAKE THE SLIDERS MOUNT TO THE F-BODY'S FLOOR... I spent $60 on materials and I THINK I could have bought brackets from MRC for $50
Worst case scenario I could have bought them for $130 from Arizen and I think it would have been worth the extra $70 to sit lower (IF they make you sit lower) and not have to hassle with making anything...To me the power adjustability is not worth sitting higher... but I am not sure if the sliders will make me sit lower or no.
Trending Topics
01-14-2007, 06:30 AM
#8
FIFTH UPDATE: PASSENGER SEAT IS IN!!!!
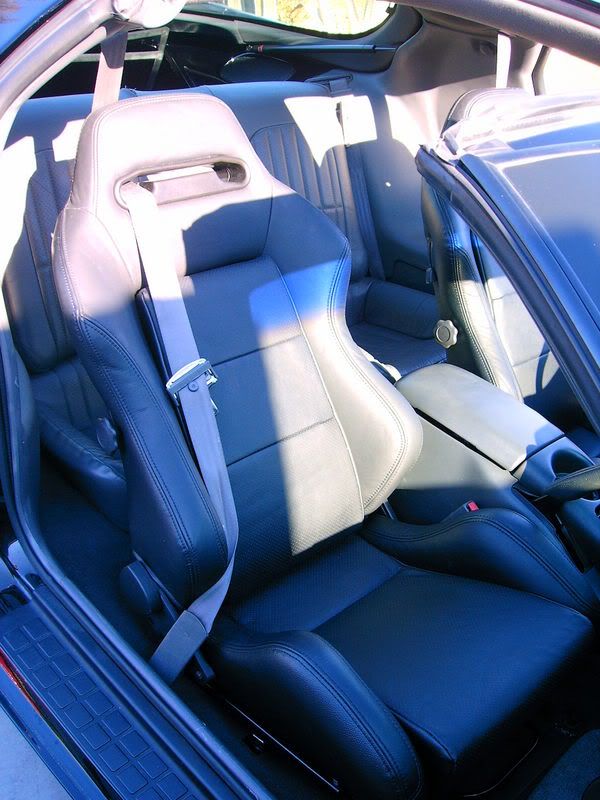
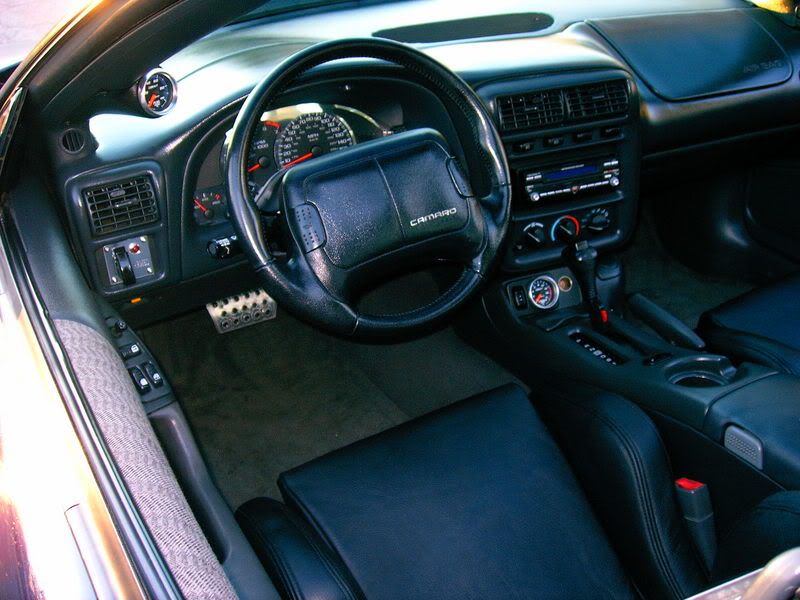
Well, the passenger seat is in officially! After leaving and coming back to it the height isn't really all that bad... Anyways, here's some pics:
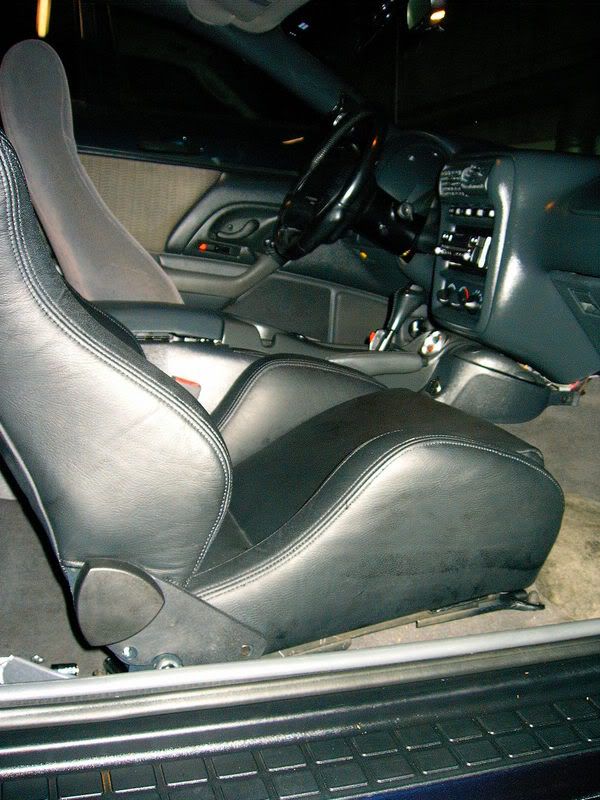
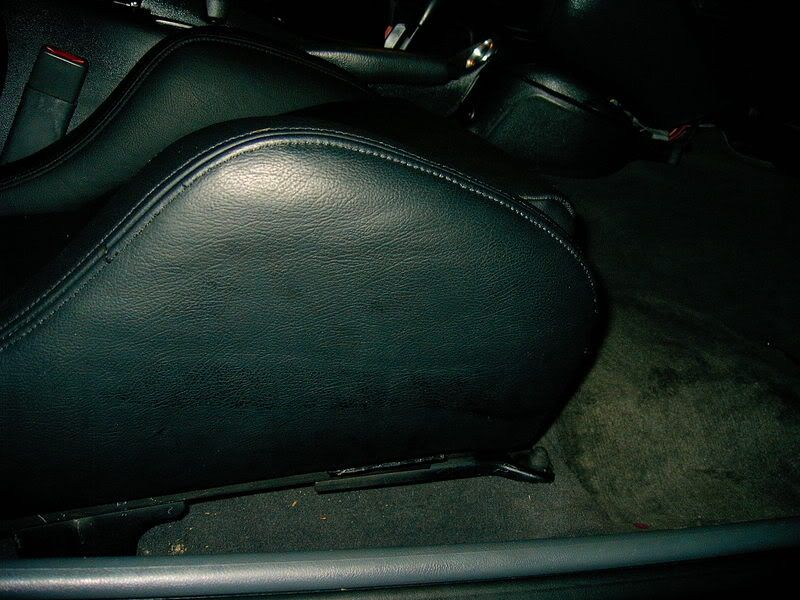
Here's one from the top... It's pretty close to the center console, I'll eventually (when I pull it back out for the carpet) shift it over 1/4"-1/2" :

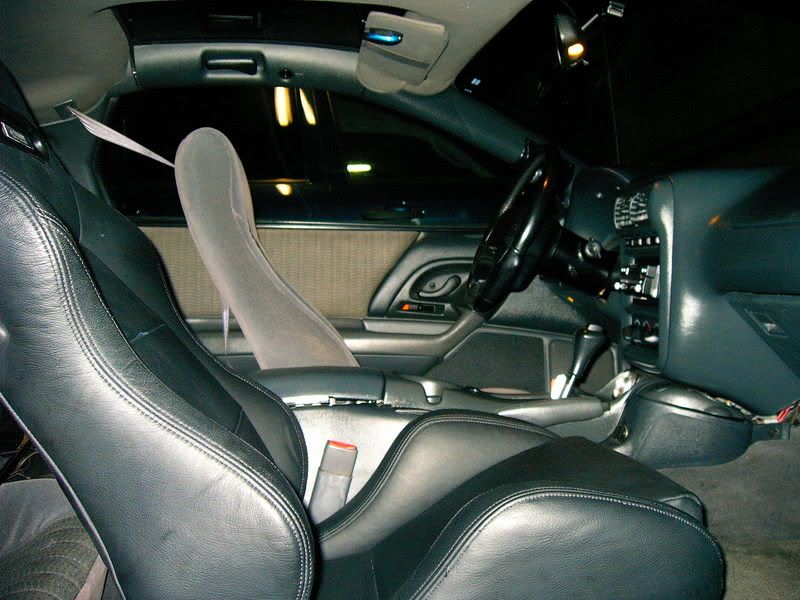
Here's the final full shot:
Once the seat installation and rollbar installation (this weekend) is all said and done the interior is getting Ebony: Carpet w/mats, Center Console, Trim and Seatbelts... so the seats will be tied into the interiors color betters.
Well, the passenger seat is in officially! After leaving and coming back to it the height isn't really all that bad... Anyways, here's some pics:
Here's one from the top... It's pretty close to the center console, I'll eventually (when I pull it back out for the carpet) shift it over 1/4"-1/2" :
Here's the final full shot:
Once the seat installation and rollbar installation (this weekend) is all said and done the interior is getting Ebony: Carpet w/mats, Center Console, Trim and Seatbelts... so the seats will be tied into the interiors color betters.
01-14-2007, 06:30 AM
#9
BRACKET COMPARISON: Mine, fabricated to fit stock rails... toofazt's, home made brackets to attach universal sliders to our cars... KANDY SS's, brackets bought pre-made to attach universal sliders to our cars...
Since I took an assload of pics of Steve's (toofazt) seats I have a couple of good shots to compare his height (using the sliders that came with the seats) to my height (using the factory rails) and they actually look identical...
Compare how high each of our bolsters comes up on the center console, looks identical to me...
Steve's seat:
My seat:
Steve's seat again:
My seat again:
I also went back and checked out KANDY SS's thread. He BOUGHT the brackets from Arizen that attached to the sliders that came with the seat where as toofazt MADE HIS OWN brackets to attach to the sliders that came with the seat...
It would appear KANDY SS's seats sit a good inch lower...
KANDY SS's seats:

My seats:
Maybe they will sit lower with Arizen's brackets...
EDIT: Never mind, I am looking at it wrong... KANDY SS's seat is a LOT further back than mine... I think they are the same height
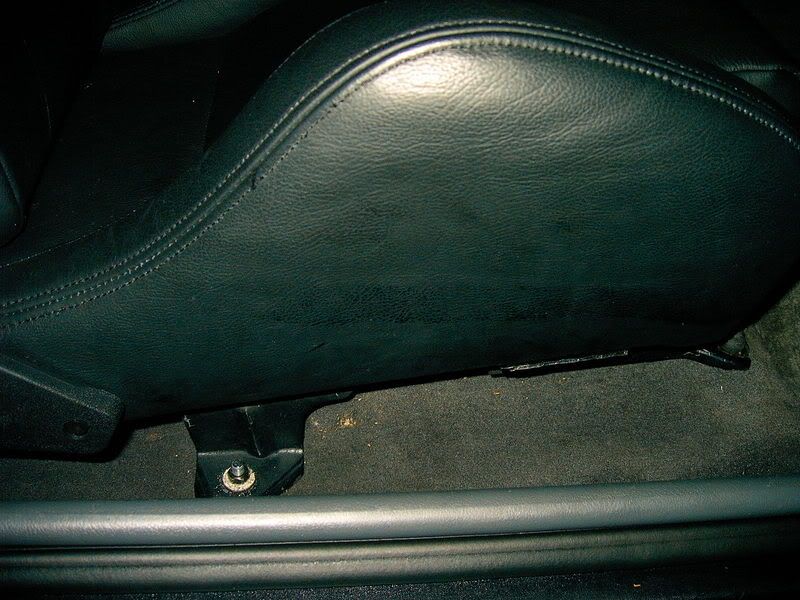
Here's a new pic for comparison but this is as far back as my seat goes:
Since I took an assload of pics of Steve's (toofazt) seats I have a couple of good shots to compare his height (using the sliders that came with the seats) to my height (using the factory rails) and they actually look identical...
Compare how high each of our bolsters comes up on the center console, looks identical to me...
Steve's seat:
My seat:
Steve's seat again:
My seat again:
I also went back and checked out KANDY SS's thread. He BOUGHT the brackets from Arizen that attached to the sliders that came with the seat where as toofazt MADE HIS OWN brackets to attach to the sliders that came with the seat...
It would appear KANDY SS's seats sit a good inch lower...
KANDY SS's seats:
My seats:
Maybe they will sit lower with Arizen's brackets...
EDIT: Never mind, I am looking at it wrong... KANDY SS's seat is a LOT further back than mine... I think they are the same height
Here's a new pic for comparison but this is as far back as my seat goes:
Last edited by 6LITEREATER; 01-14-2007 at 06:41 AM.
01-14-2007, 06:31 AM
#10
SIXTH UPDATE: DRIVER SIDE FABRICATION IS DONE!!!
Well, after a good night's rest (as you can see from the posts I stayed up untill 5:00am messing with this) I came back and just jumped into it and it came out well...
Ok, on with the write-up:
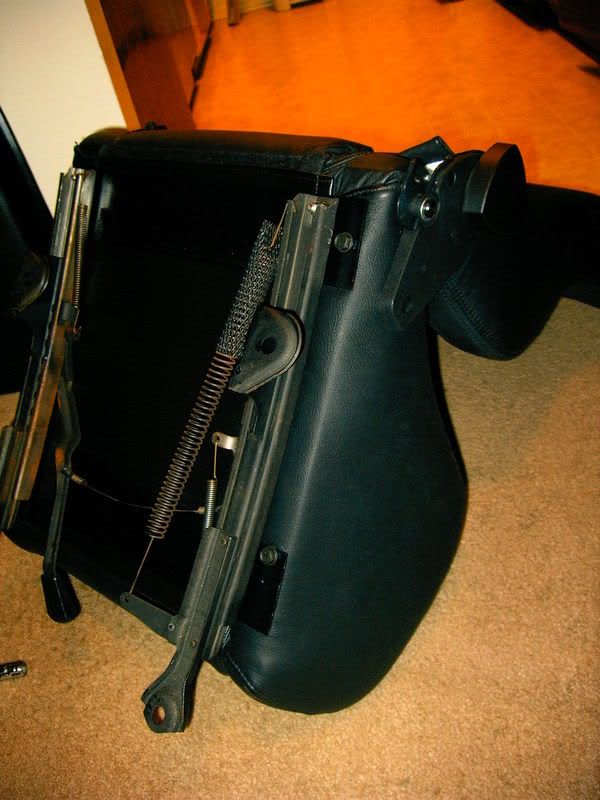
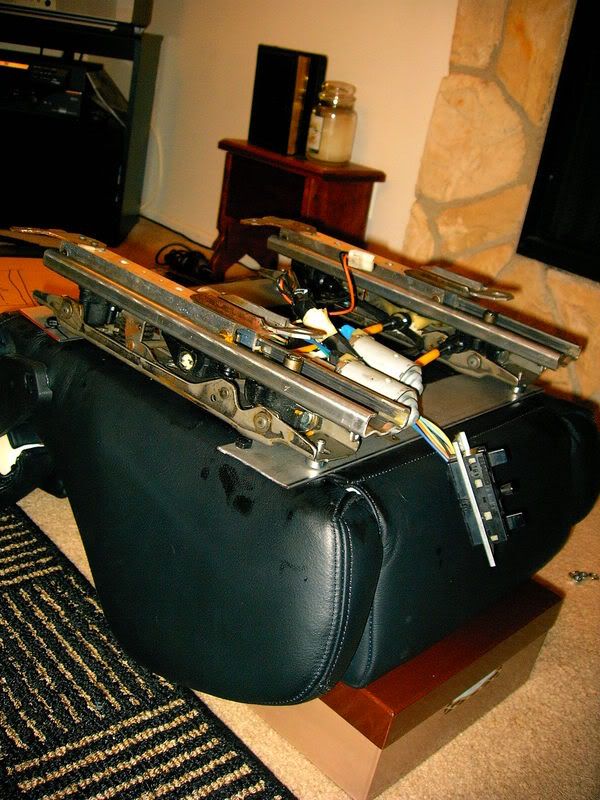
Once again here's the beast known as the driver side rails:
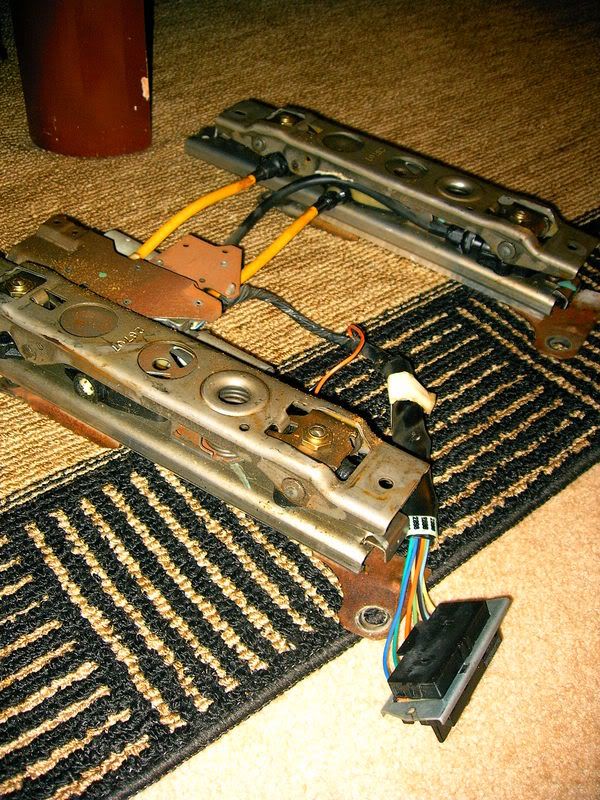
I just got started by getting the brackets mounted on the seat like before:

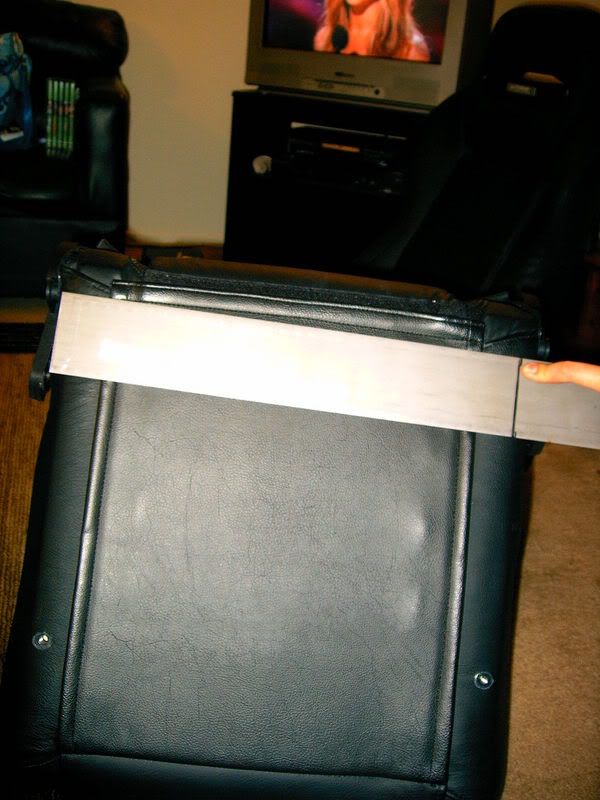
Then, since this rails are pretty tricky to manuever, I got smart and made a template using the factory seat bottom:
I punched holes in it and put the factory bolts through it:
With the bolts still in I carried it over to the aftermarket seat (which I had the brackets bolted down tight to):
Then just started with one bolt as a starting position and marked the bracket:

Then I drilled the hole... it's tedious but do ONE AT A TIME (mark, un-bolt, drill, re-bolt, mark, etc...) TO INSURE ACCURACY...
I then put the bolt in the hole so it would stay in place and I could accurately mark the other holes...
To insure accuracy I kept checking it against the stock seat bottom as well (make sure you keep the correct orientation):
Lather, rinse and repeat and before you know it all four are done... I put the bolts in for the rails and bolted her on... I used the spacers that came with the aftermarket seats as well because you will need them with the power rails:
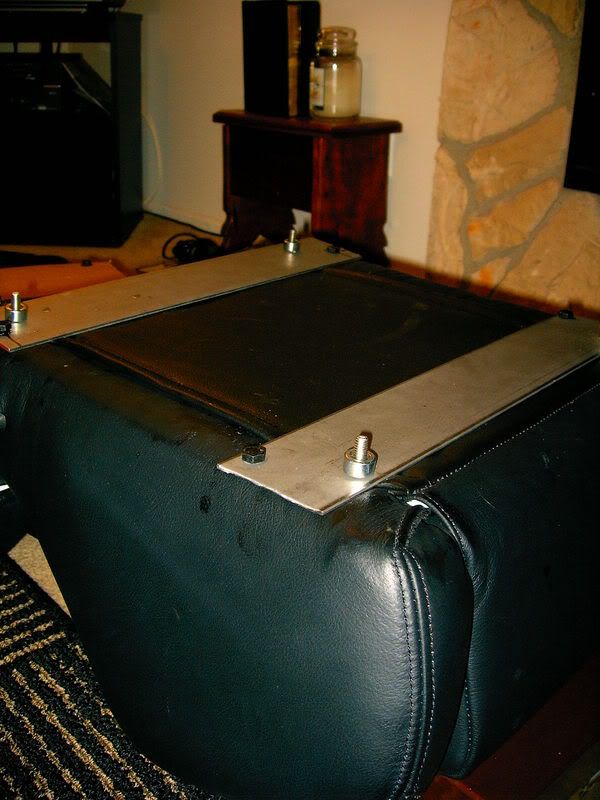
Here you see why:
Here it is all lined up and where it needs to be:
Now it's time to clean up the edges, paint the brackets and clean up our poor apartment...
Probably get a shower, grab something to eat and then do the final assembly and stick her in the car
NOTE: Special thanks to 'Trust' for his quick PM's back and forth of advice and encouragement on this side!
Well, after a good night's rest (as you can see from the posts I stayed up untill 5:00am messing with this) I came back and just jumped into it and it came out well...
Ok, on with the write-up:
Once again here's the beast known as the driver side rails:
I just got started by getting the brackets mounted on the seat like before:
Then, since this rails are pretty tricky to manuever, I got smart and made a template using the factory seat bottom:
I punched holes in it and put the factory bolts through it:
With the bolts still in I carried it over to the aftermarket seat (which I had the brackets bolted down tight to):
Then just started with one bolt as a starting position and marked the bracket:
Then I drilled the hole... it's tedious but do ONE AT A TIME (mark, un-bolt, drill, re-bolt, mark, etc...) TO INSURE ACCURACY...
I then put the bolt in the hole so it would stay in place and I could accurately mark the other holes...
To insure accuracy I kept checking it against the stock seat bottom as well (make sure you keep the correct orientation):
Lather, rinse and repeat and before you know it all four are done... I put the bolts in for the rails and bolted her on... I used the spacers that came with the aftermarket seats as well because you will need them with the power rails:
Here you see why:
Here it is all lined up and where it needs to be:
Now it's time to clean up the edges, paint the brackets and clean up our poor apartment
...Probably get a shower, grab something to eat and then do the final assembly and stick her in the car
NOTE: Special thanks to 'Trust' for his quick PM's back and forth of advice and encouragement on this side
!
01-14-2007, 06:32 AM
#11
SEVENTH UPDATE: DRIVER SIDE IS FINISHED!!!
Well, it's all done! I finished it and installed it... 'Trust' is right, it sits at the EXACT same height as the passenger side
To finish the write-up...
Here's where I started final assembly after paint:

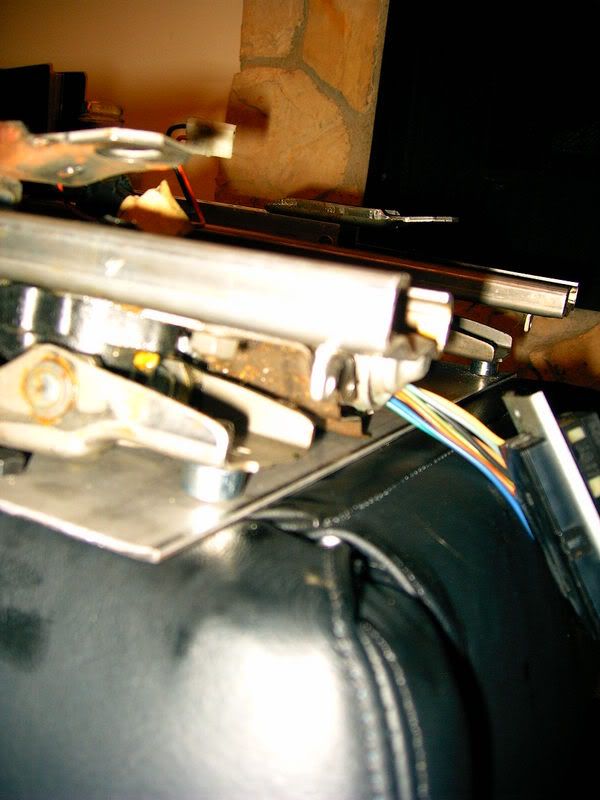
I put the rails back on:

Don't forget to install your rail covers and this little bracket for the switches:

I cut down the original long piece that the switches fit in into this:

Here's a pic from the back so you can see I cut it right where there was a plastic "wall" to cap the piece off and make it look factory:

A few coats of Dupli-Color Low Gloss Black paint later:

Here she is installed:

One final shot in all her glory:

Sorry, I didn't realize how dark that pic came out when I took it... I can't retake it now since the seat is in the car
I'll get some installed pics up here later tonight, I have to meet a friend at the gym in 20 minutes...
I can tell you, like I mentioned in the beginning, the height is IDENTICAL to the passenger seat... Both seats are starting as low as the factory seats did but since they are thicker than the factory seats you sit higher in them...
Not too high though (the t-tops help with head room, a hardtop might be more snug)...
It's AMAZING how great they look in there and how much more classy the black leather is
My car's so cool !!!
Well, it's all done
! I finished it and installed it... 'Trust' is right, it sits at the EXACT same height as the passenger side To finish the write-up...
Here's where I started final assembly after paint:
I put the rails back on:
Don't forget to install your rail covers and this little bracket for the switches:
I cut down the original long piece that the switches fit in into this:
Here's a pic from the back so you can see I cut it right where there was a plastic "wall" to cap the piece off and make it look factory:
A few coats of Dupli-Color Low Gloss Black paint later:
Here she is installed:
One final shot in all her glory:
Sorry, I didn't realize how dark that pic came out when I took it... I can't retake it now since the seat is in the car
I'll get some installed pics up here later tonight, I have to meet a friend at the gym in 20 minutes...
I can tell you, like I mentioned in the beginning, the height is IDENTICAL to the passenger seat... Both seats are starting as low as the factory seats did but since they are thicker than the factory seats you sit higher in them...
Not too high though (the t-tops help with head room, a hardtop might be more snug)...
It's AMAZING how great they look in there and how much more classy the black leather is
My car's so cool
!!!
01-14-2007, 06:32 AM
#12
EIGTH UPDATE: DRIVER SIDE IS IN!!!!
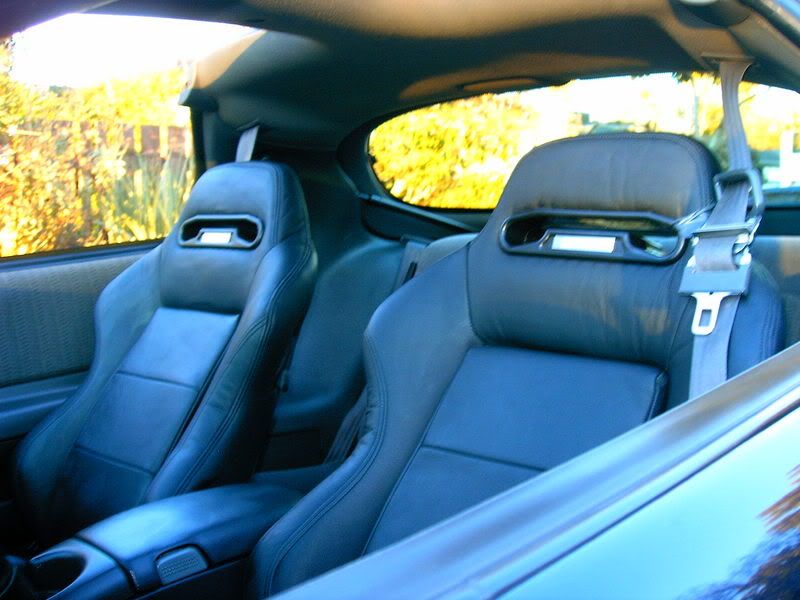
Here's the money shots (sorry it's dark, just got the chance to snap the pics):
The beast:
Look at them, just peaking at you all sinister like...

Side shot to compare height:

Here's a bunch of different angles...


I LOVE the emblems...

Now I need to clean them up (they're greasy from the install) with the Lexol that you can see in the back seat !!!
!!!
Here's the money shots (sorry it's dark, just got the chance to snap the pics):
The beast:
Look at them, just peaking at you all sinister like...
Side shot to compare height:
Here's a bunch of different angles...
I LOVE the emblems...
Now I need to clean them up (they're greasy from the install) with the Lexol that you can see in the back seat
01-14-2007, 06:33 AM
#13
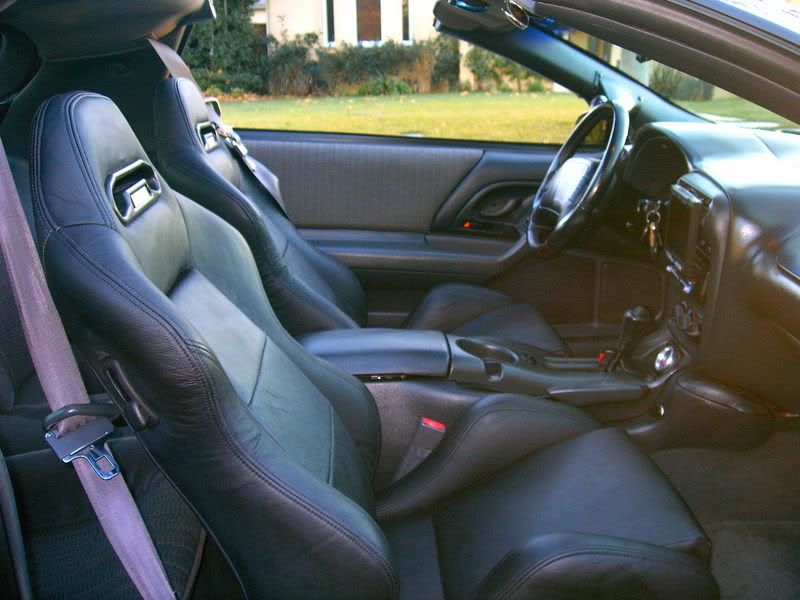
NINTH (and final) UPDATE: All is in, all is good, better pics are up!!!
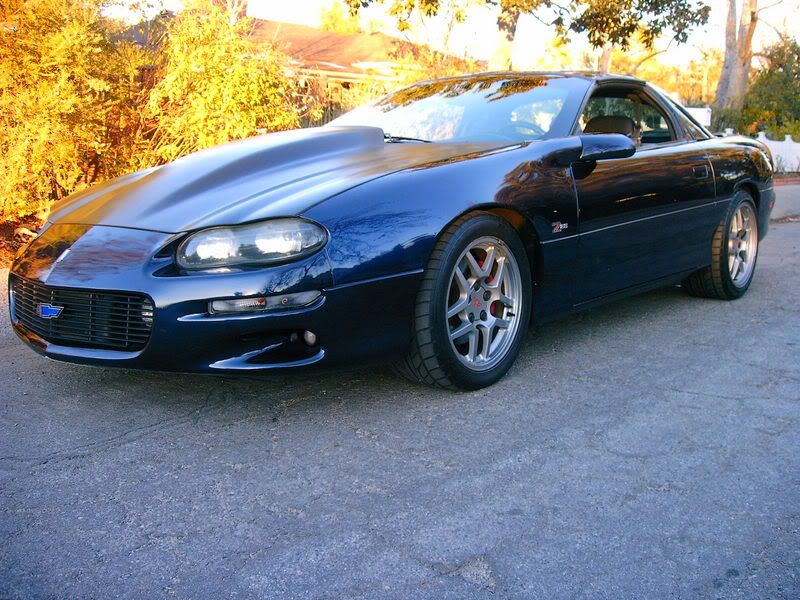
Went and took some more pics for you guys today since the last ones were a little crappy (the light was low and my crappy camera turns things brown with it's flash)...
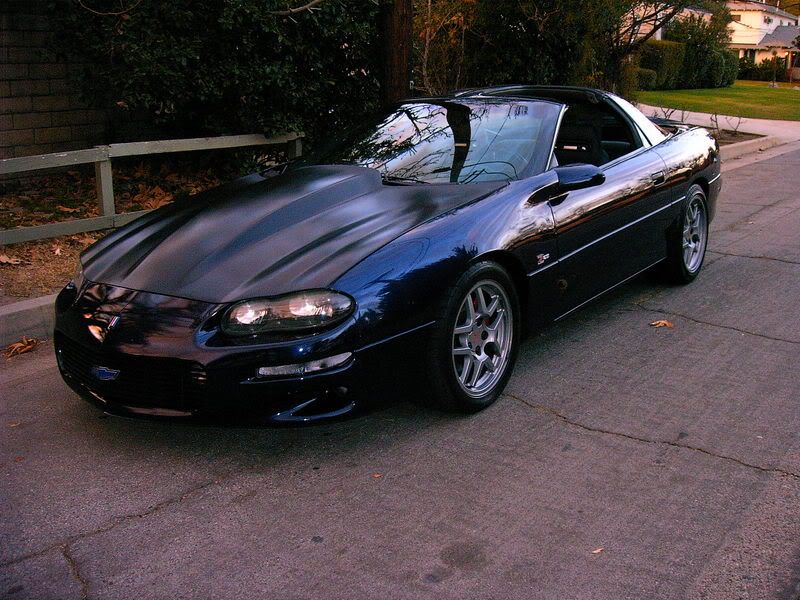
Here we go "The Beast" (I like that name, blue like Beast from the X-Men):

Tommorrow I'm polishing the headlights to get rid of the haze and drilling holes in the turn signal to get rid of the condensation:
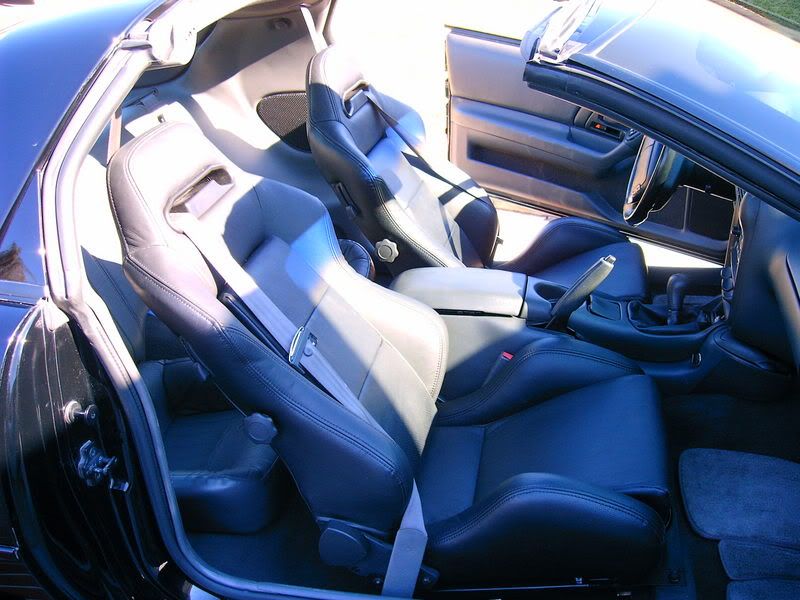
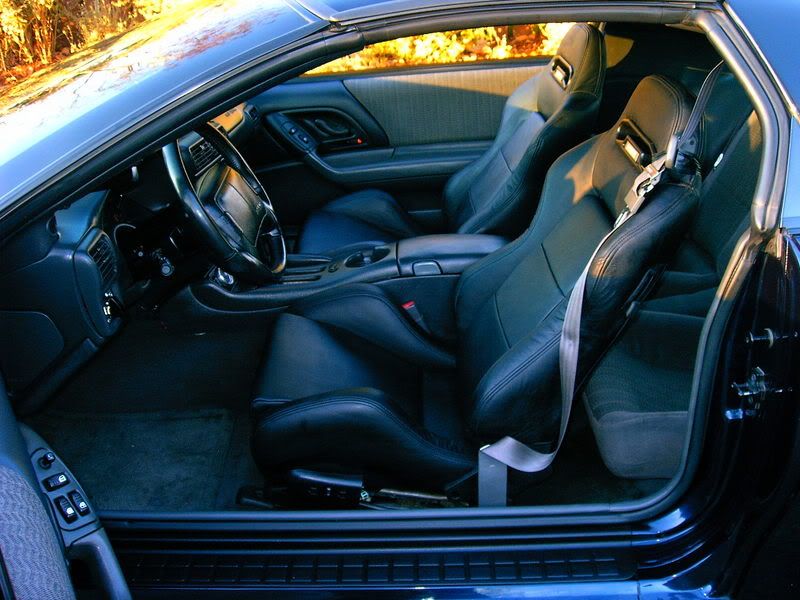
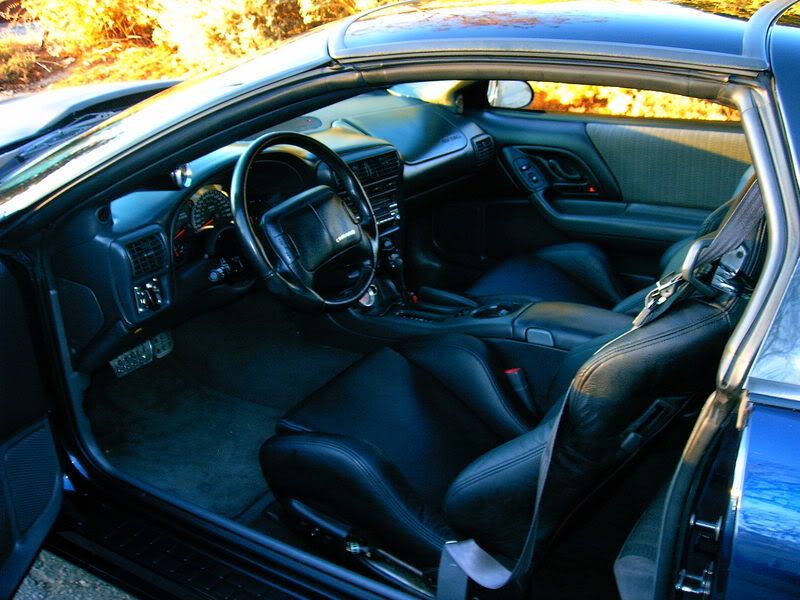
And the seats in all their glory:
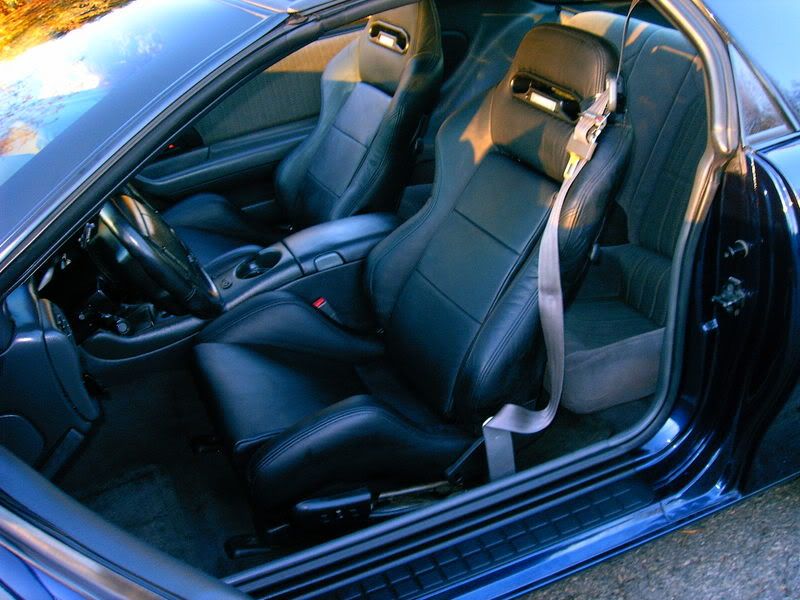
I think the black leather w/shiny emblems...
...match my interior "theme" of black and chrome well:
From the passenger side (you can sort of see my in-dash DVD/TV Tuner/Radio in this pic):

And a couple of more side pics:
Next will be the rollbar and a lot of Ebony interior pieces (Carpet/Mats, Seatbelts, Console, Trim Pieces) and black leather inserts for the doors...
After that some LED's for the ligting and the interior will be done
Tonight I am going to condense all of my "updates" into one mega thread for anyone trying to learn how to attach aftermarket seats to stock rails and a guide to the pro's and con's of these seats for anyone who is considering them.
Once I do that I will delete this thread (because it will be a duplicate basically) but this way all of the information will be on the first page and people won't have to thumb through 6 pages for the info they need...
Oh yeah, say goodbye to the back seat as well... I'm pulling it AND the brackets welded to the floor for it so when I'm done there will be no humps to "delete" and the carpet will just lay flat
Went and took some more pics for you guys today since the last ones were a little crappy (the light was low and my crappy camera turns things brown with it's flash)...
Here we go "The Beast" (I like that name, blue like Beast from the X-Men):
Tommorrow I'm polishing the headlights to get rid of the haze and drilling holes in the turn signal to get rid of the condensation:
And the seats in all their glory:
I think the black leather w/shiny emblems...
...match my interior "theme" of black and chrome well:
From the passenger side (you can sort of see my in-dash DVD/TV Tuner/Radio in this pic):
And a couple of more side pics:
Next will be the rollbar and a lot of Ebony interior pieces (Carpet/Mats, Seatbelts, Console, Trim Pieces) and black leather inserts for the doors...
After that some LED's for the ligting and the interior will be done
Tonight I am going to condense all of my "updates" into one mega thread for anyone trying to learn how to attach aftermarket seats to stock rails and a guide to the pro's and con's of these seats for anyone who is considering them
. Once I do that I will delete this thread (because it will be a duplicate basically) but this way all of the information will be on the first page and people won't have to thumb through 6 pages for the info they need...
Oh yeah, say goodbye to the back seat as well... I'm pulling it AND the brackets welded to the floor for it so when I'm done there will be no humps to "delete" and the carpet will just lay flat
01-14-2007, 10:16 AM
#14
Copy & Paste Moderator

Nice write-up.
This needs to be a sticky.
Btw, you could have saved yourself some time and used the passenger adpaters you made as a template for the driver's side since the bottom of the stock passenger and driver's seat are identical. In fact, the bottom of my driver's seat is actually the bottom of my passengers seat. The bottom drivers seat frame was cracked so I attached the bottom of the passenger seat to the back of the drivers seat so I could still drive the car while my father took the seat bottom frame to his friend to get it welded. The only thing I had to do to get it to bolt up was move a threaded clip from the right side of the bottom seat frame to the left. Its the threaded clip where the seat back attaches to the seat bottom.
I have the stock cloth seats, but I don't see why the stock leather seats would mount any differently.
This is also working with the assumption that the bolt holes in those aftermarket seats are in the same location on both seats.
Sorry for the long post. I don't want to detract/distract from your work. I just wanted to explain so it wouldn't sound like I was making stuff up.
Again...
Great Work.
This really needs to be a sticky.
01-14-2007, 10:23 AM
#15
Copy & Paste Moderator
I forgot to ask...
How is ingress/egress?
I'm guessing those high bottom bolsters can catch you somewhere you dont want to get hit when getting out. I had that happen to me getting out of a BMW M6 once. I learned quickly to lift my self a bit higher on egress.
How is ingress/egress?
I'm guessing those high bottom bolsters can catch you somewhere you dont want to get hit when getting out. I had that happen to me getting out of a BMW M6 once. I learned quickly to lift my self a bit higher on egress.
01-14-2007, 06:28 PM
#18
Originally Posted by VIP1
Nice write-up.
This needs to be a sticky.
Btw, you could have saved yourself some time and used the passenger adpaters you made as a template for the driver's side since the bottom of the stock passenger and driver's seat are identical.
This needs to be a sticky.
Btw, you could have saved yourself some time and used the passenger adpaters you made as a template for the driver's side since the bottom of the stock passenger and driver's seat are identical.
Luckily, before I just started drilling I checked it... It wouldn't have worked at all. I WAS able to use the bottom bracket's markings as a reference but the top ones were completely different
My assumption was that it was due to the fact the passenger side was manual and the driver side was power...
Then I finally got the idea to just make a carboard template from the seat bottom
01-14-2007, 06:31 PM
#19
Originally Posted by VIP1
I forgot to ask...
How is ingress/egress?
I'm guessing those high bottom bolsters can catch you somewhere you dont want to get hit when getting out. I had that happen to me getting out of a BMW M6 once. I learned quickly to lift my self a bit higher on egress.
How is ingress/egress?
I'm guessing those high bottom bolsters can catch you somewhere you dont want to get hit when getting out. I had that happen to me getting out of a BMW M6 once. I learned quickly to lift my self a bit higher on egress.