
Another DIY 4L80E rebuild, Dual feed, HD2, 3-4 accumulator block off, etc
 06-18-2018, 09:42 PM
#1
Launching!
Thread Starter
iTrader: (6)

Join Date: Jul 2010
Posts: 220
Likes: 0
Received 0 Likes
on
0 Posts
I'm switching from a built FMVB powerglide to a 4L80E. The glide was a temporary deal and performed flawless as expected. But I wanted the car more street friendly and the highway RPM was annoying
Car is a 65 Nova, turbo 6.0 around 650-700hp. weighs 3,400lbs so the 4L80E with a few upgrades should be perfect. FTI spec'd me a triple disc 3800rpm stall as well
Picked up a used trans. Was going to slap a HD2 kit in it and install but found that some water had gotten in the trans and caused some rust. So I tore it all the way down for peace of mind.
-ATSG book in hand
-Borg warner high friction clutches (new steels)
-I already had the HD2 kit so will use some of the bits but not the pressure relief parts
-Dual feed mod
-CK performance 3-4 accumulator block off plate
-FTI spec'd me a triple disc 3800rpm stall as well
I'm waiting for the rebuild kit to arrive from Transmission Parts Distributors. It's been a week so hopefully it shows up soon. The trans has been torn down, cleaned up and painted the case.
Had to use the old battery charger electrolysis method for a few parts with surface rust.
I've been reading a lot but will likely have questions later on this week. Appreciate any input along the way.
Mike
[url=https://flic.kr/p/26Ys1ea]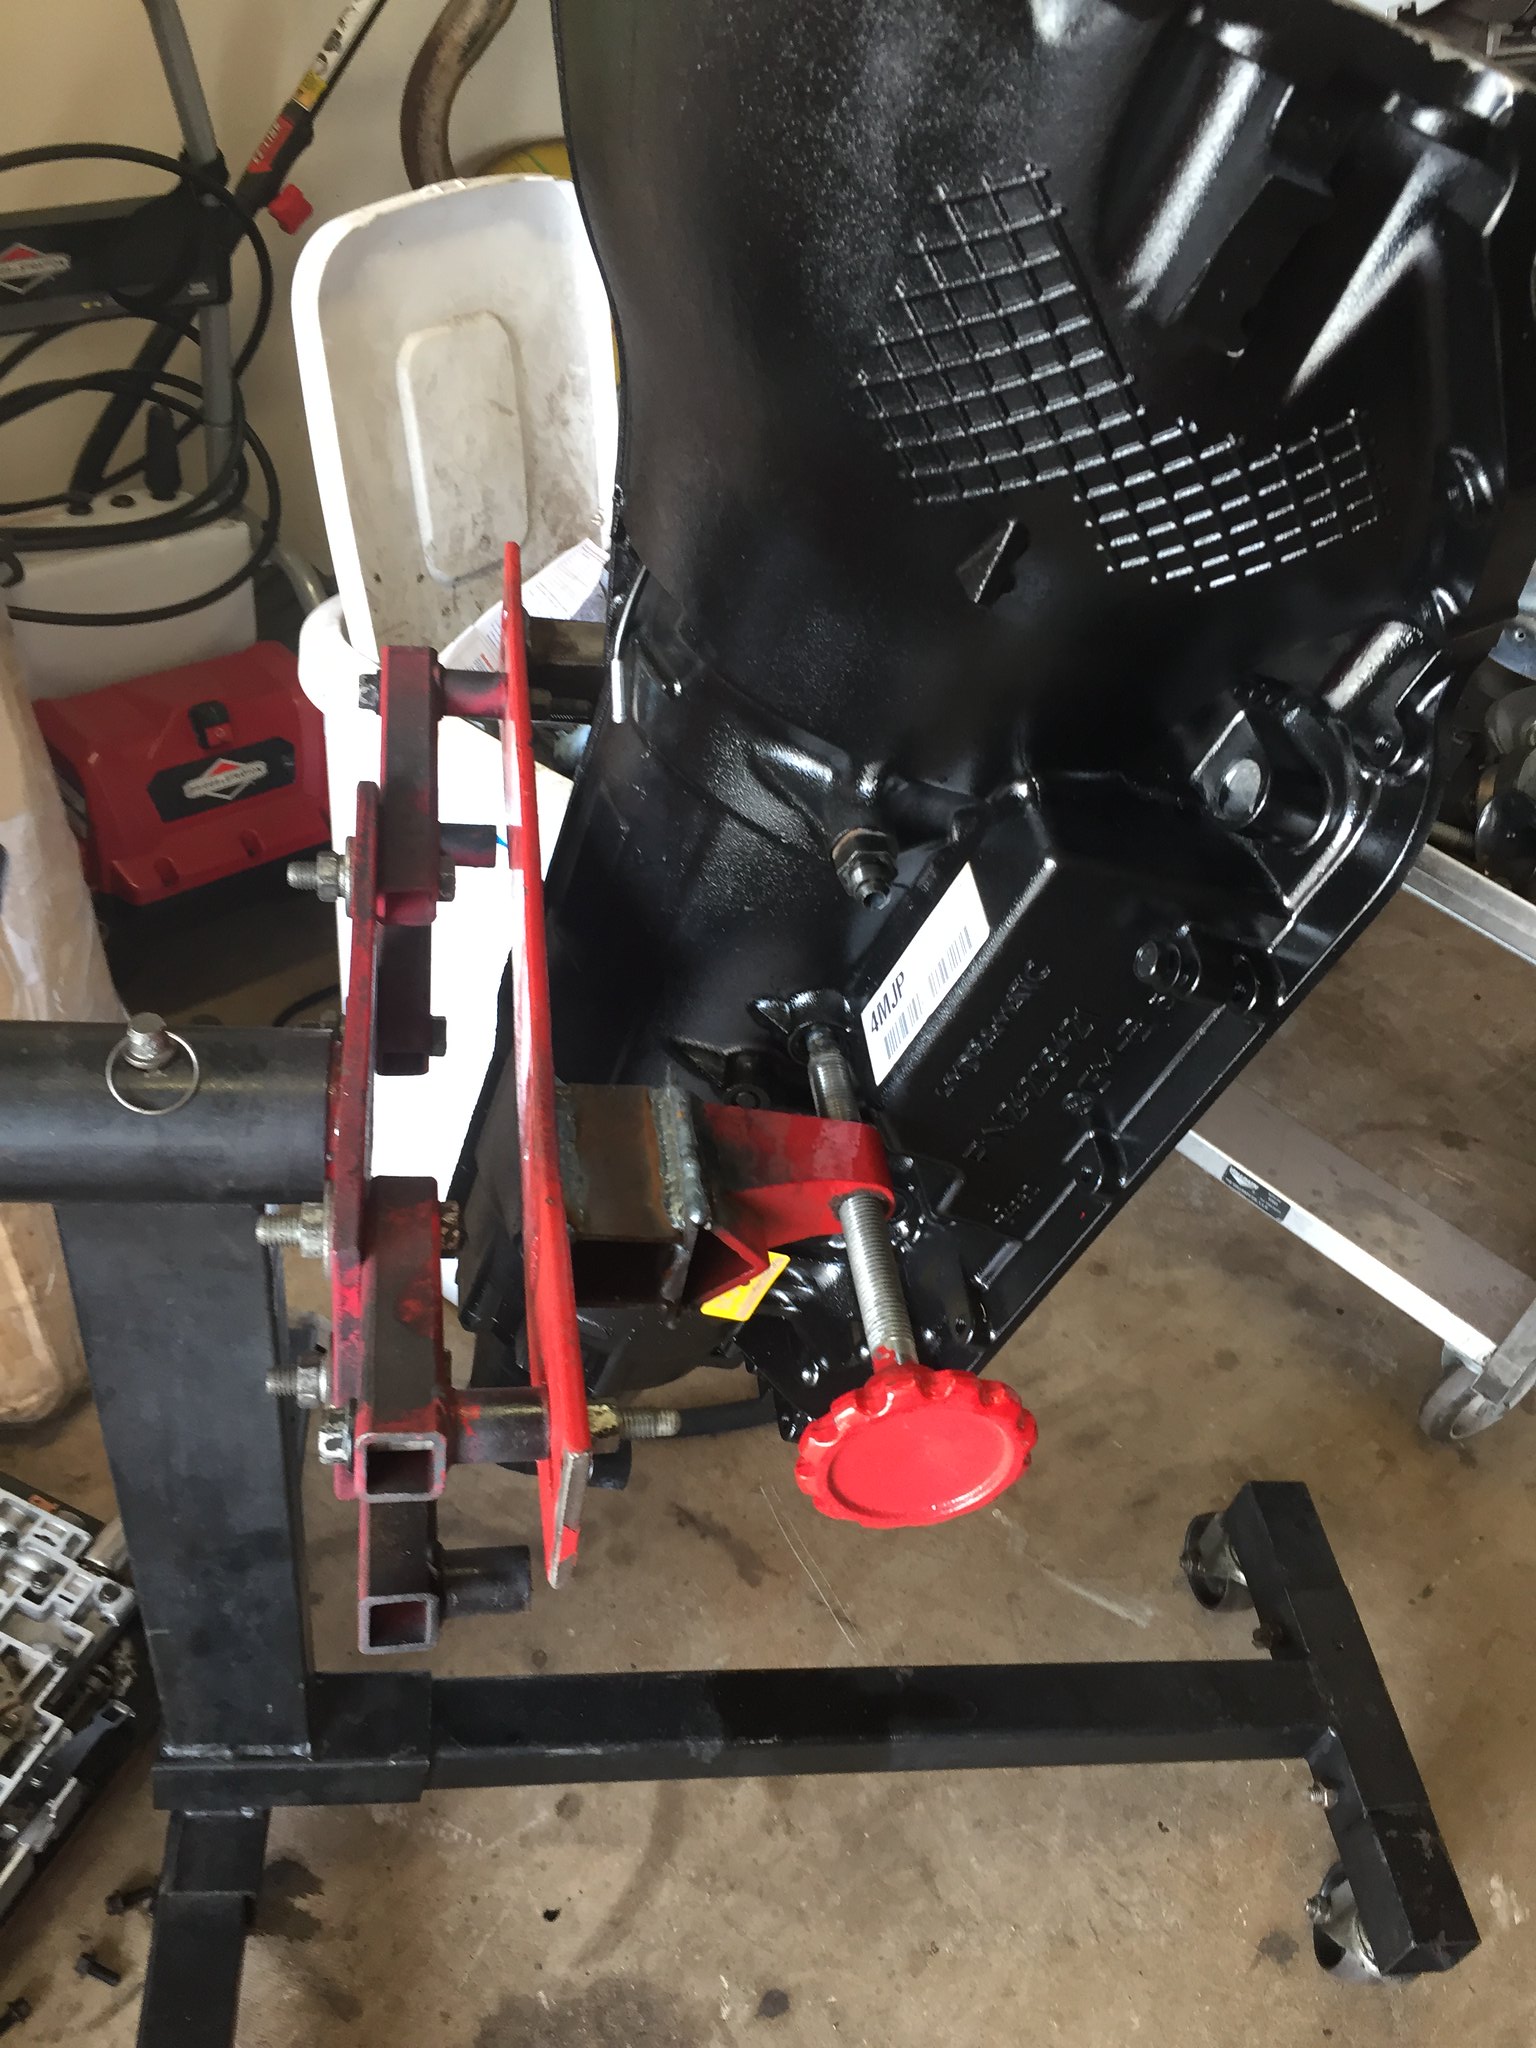
[url=https://flic.kr/p/26Ys1n6]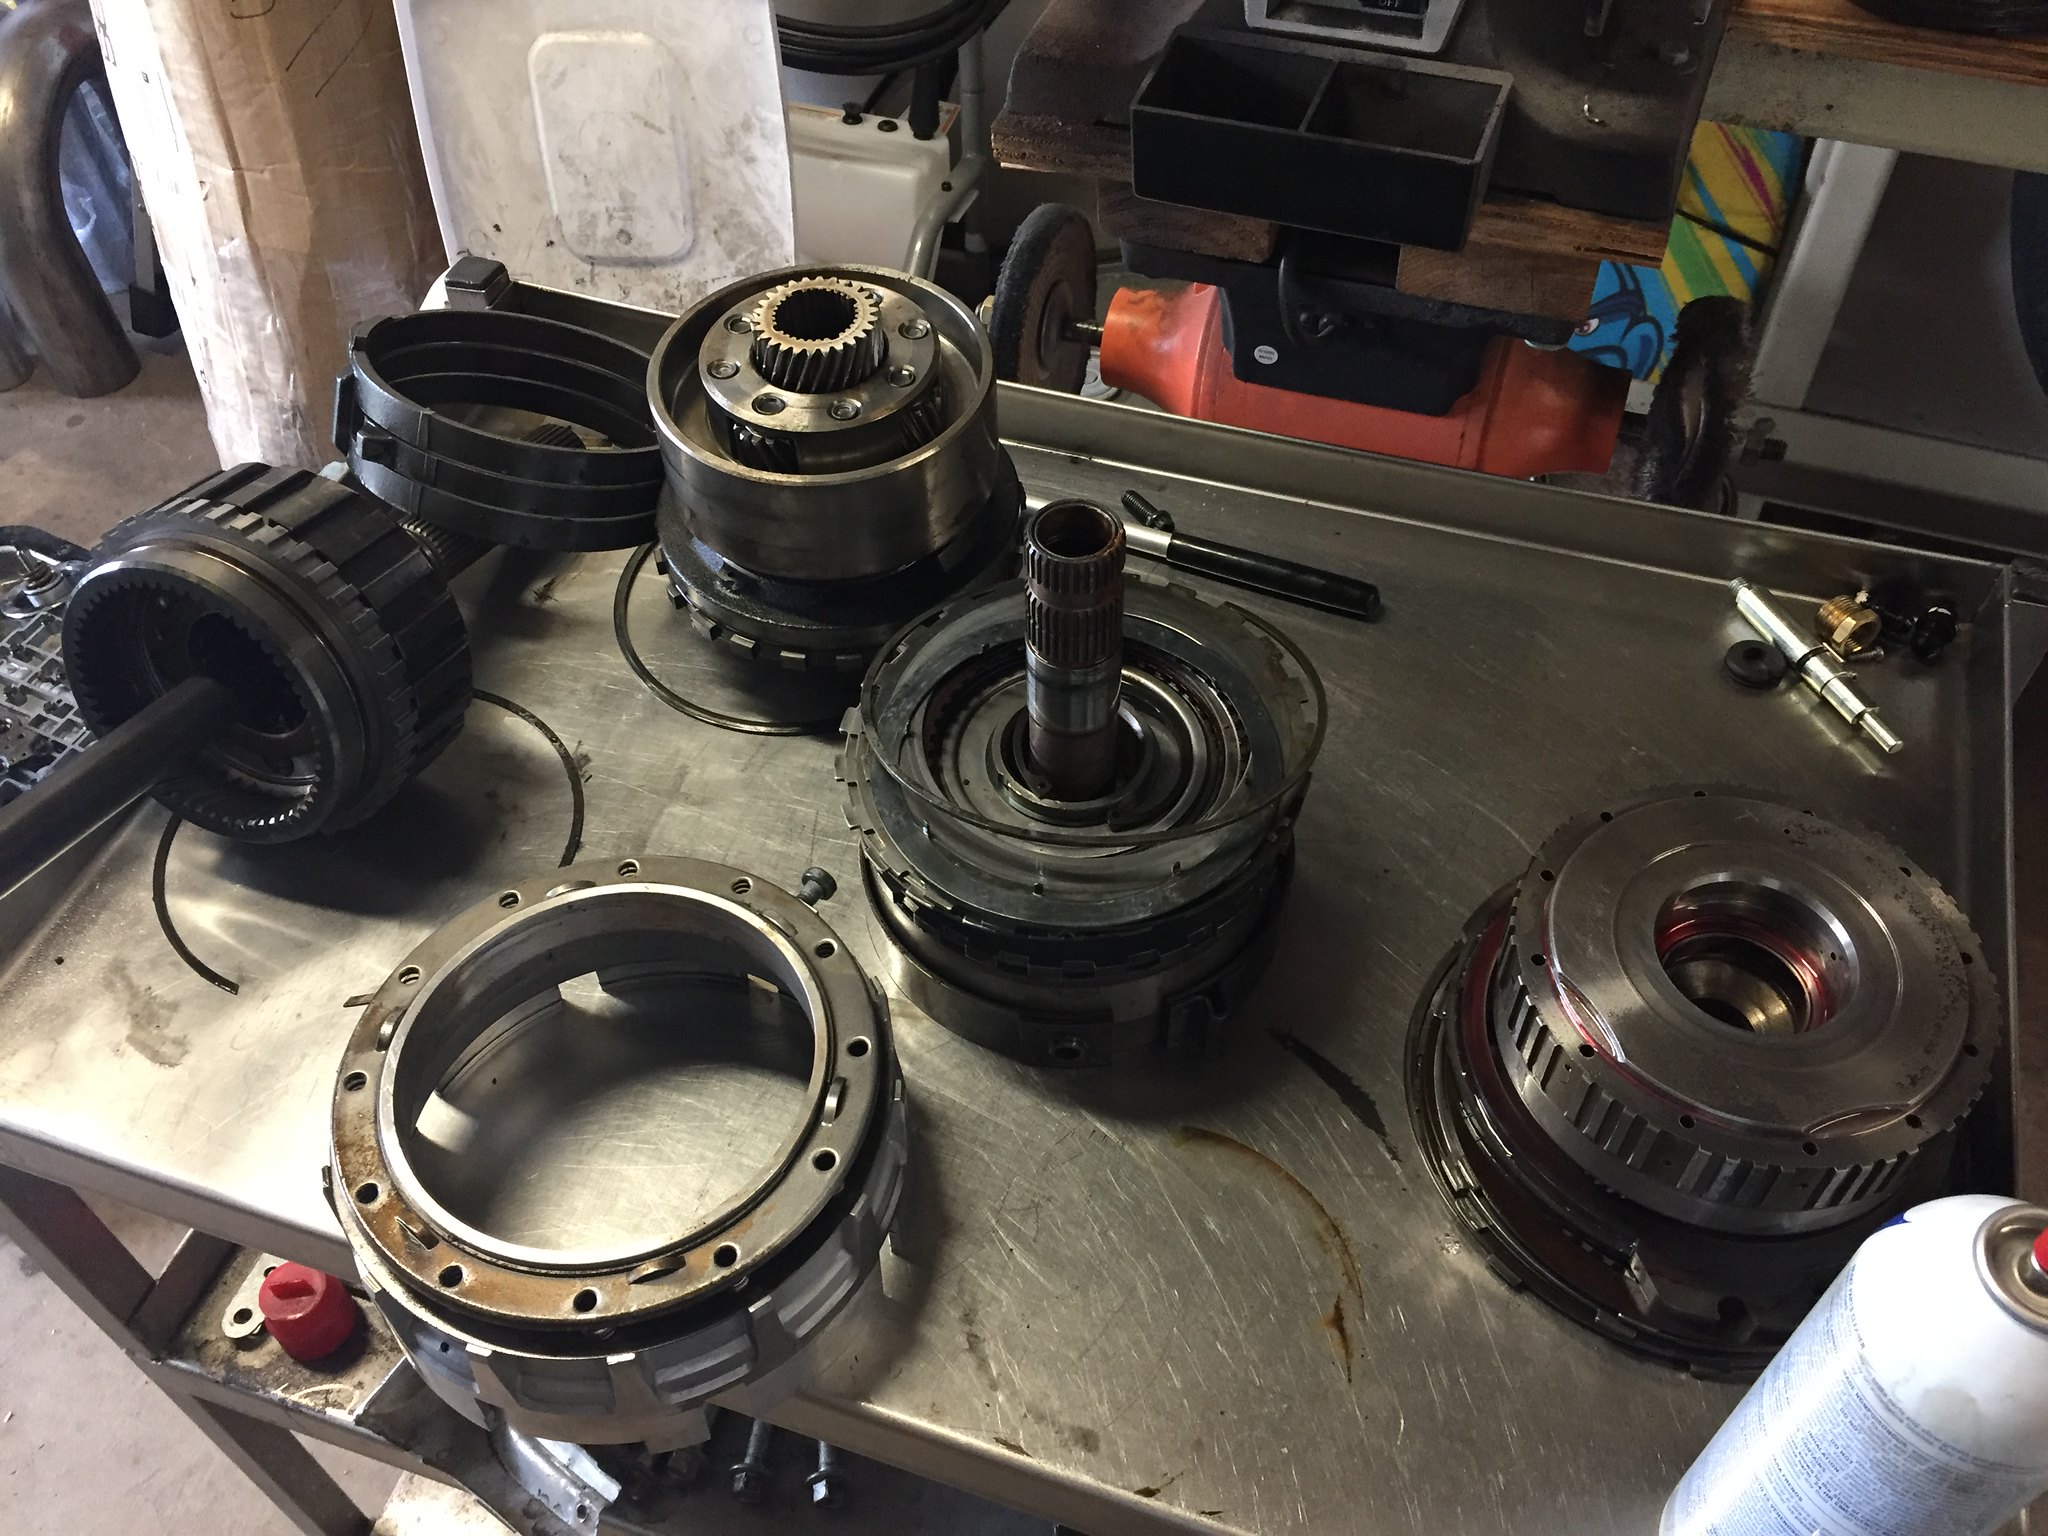
[url=https://flic.kr/p/25A4oT9]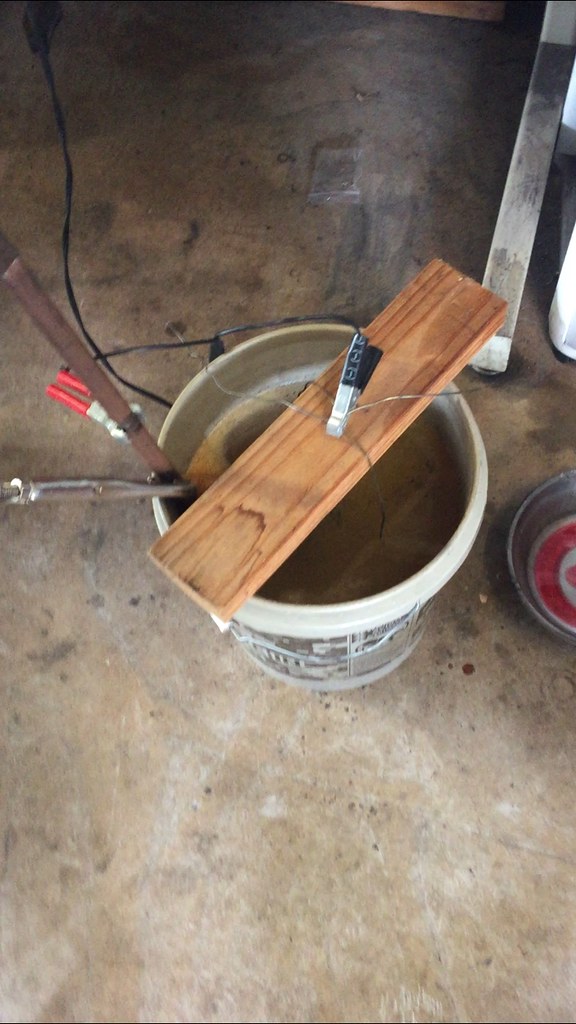
[url=https://flic.kr/p/Ldc8ko]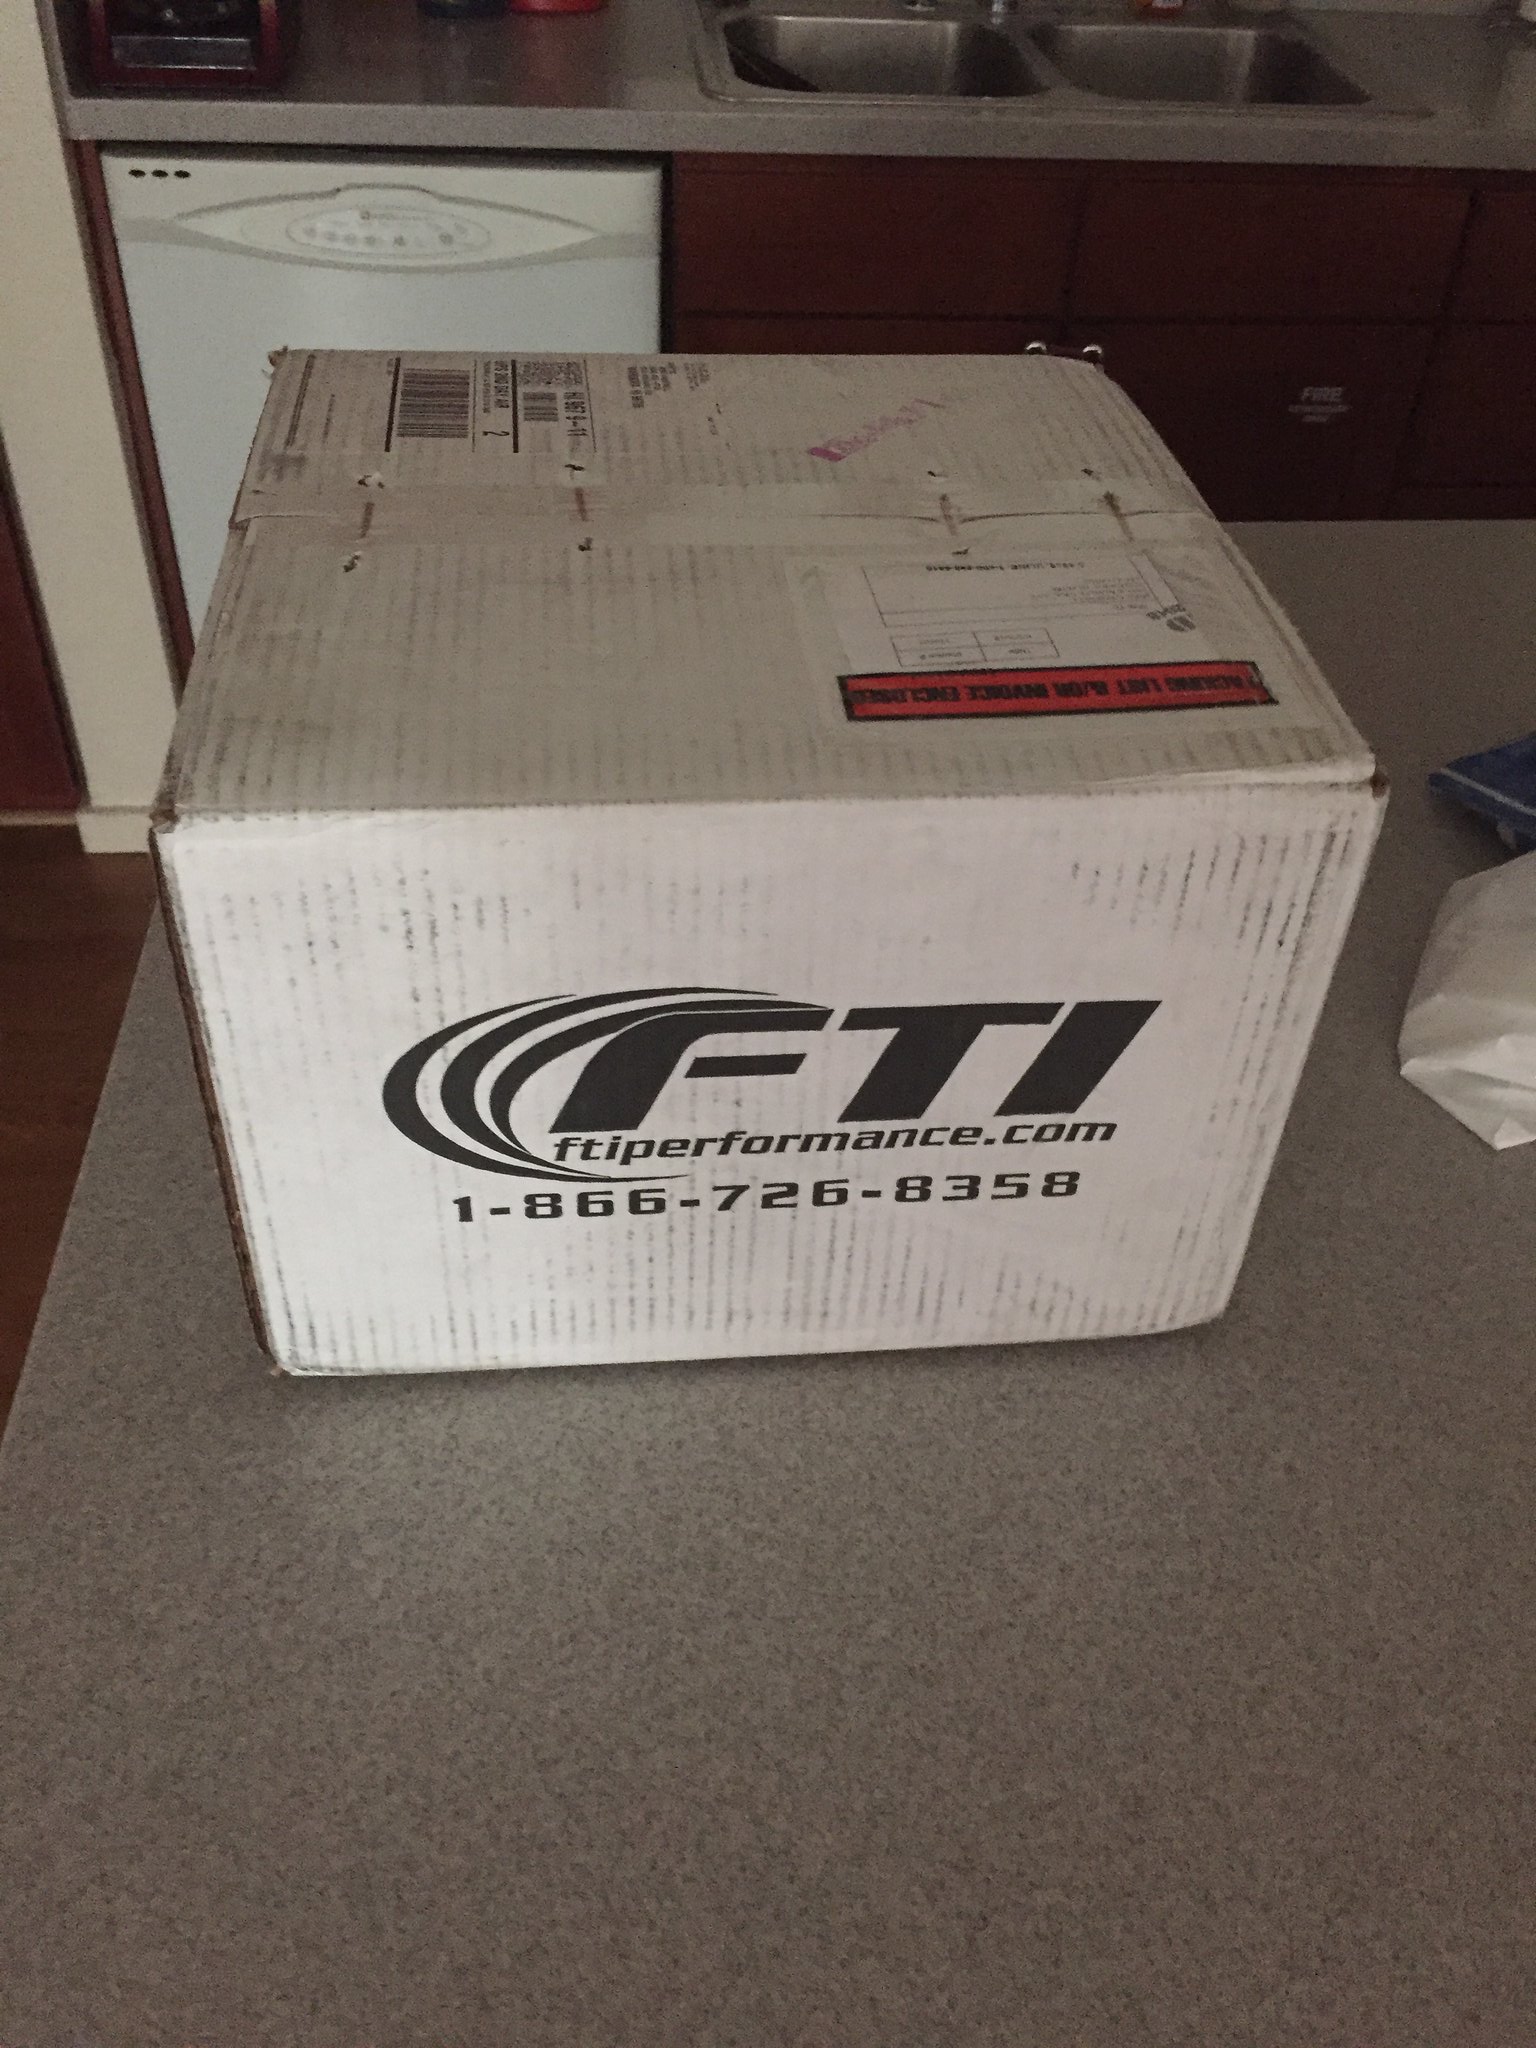
Last edited by MIKE93SVT; 06-18-2018 at 09:49 PM.
 06-19-2018, 09:26 AM
#2
TECH Regular

I did mine over a year ago, take your time and check/re-check clearances. Install the Sonnax 34200-14K line to lube regulator valve or drill the relief hole in the pump, mine had an issue with TCC dragging in reverse until I installed the valve.
If you plan to install a brake you should go ahead and drill the relief hole in the direct drum. I've got mine out right now installing a Jake's D3 brake, I had to tear it down to drill the direct because I didn't do it when I built the trans. Had I drilled it then I could've installed the brake with the trans in the car.
If you plan to install a brake you should go ahead and drill the relief hole in the direct drum. I've got mine out right now installing a Jake's D3 brake, I had to tear it down to drill the direct because I didn't do it when I built the trans. Had I drilled it then I could've installed the brake with the trans in the car.
Last edited by squarles67; 06-19-2018 at 12:45 PM.
06-19-2018, 09:49 AM
#3
TECH Junkie

Drilling the hole in the direct drum is a good idea even if not going with a brake. a .050" ish hole on the outer edge of the piston bore is a good size.
Helps avoid centrifugal apply. Helps them release faster on a 3-2 downshift as well.
It's just a good idea for these trans...and the pump has plenty of volume to keep up so don't worry about losing holding power because of it
Helps avoid centrifugal apply. Helps them release faster on a 3-2 downshift as well.
It's just a good idea for these trans...and the pump has plenty of volume to keep up so don't worry about losing holding power because of it
06-19-2018, 09:53 PM
#5
Launching!
Thread Starter
iTrader: (6)
Join Date: Jul 2010
Posts: 220
Likes: 0
Received 0 Likes
on
0 Posts
ordered the sonnax lube regulator valve. thanks for that
going off this little list of things I'm curious about what size to drill the plate for shifts
My fear is to end up like this thread where he says the 1-2 is too hard. My stall should soak up a fair amount but don't want to set myself up for failure as this is primarily a street car.
https://ls1tech.com/forums/automatic...ust-haves.html post number 60
suggestions on hole sizes to drill while doing all these other changes?
Thanks
Mike
Rollerize the the Forward Hub to Direct Drum thrust face & reduce the Direct Drum to Forward Hub end-play to .003" to .008".
I use a Ford AXOD final drive sun gear bearing....Part# E6DZ-7F404-A
Ford has discontinued this part, But Green Sales has them in stock Phone# 1-800-543-4959.
This requires machining the forward hub thrust face & careful measurement to set the end-play!
Ditch the flimsy 4L80E Intermediate return spring retainer in favor of a much stouter TH400 piece, Carefully pry the springs off the 4L80E retainer & reuse the springs.
Dual Feeding the Directs requires the use of "High Rate" direct piston return springs in my opinion to keep downshifts clean & prevent direct piston creep at high rpm in 1st.
I don't like using high rate springs in the 4L80E spring cage assembly as I've seen the aftermath of the springs laying over & distorting the **** out of the bottom spring retainer.
I recommend running a Aluminum TH400 piston with cast-in spring pockets along with a TH400 top spring retainer.
Using this piston allows you to machine the piston to run a extra friction/Get the clutch clearance just right.
Every 4L80E direct drum I've ever seen has a Bleed Checkball in it, Locate a TH400 piston that DOES NOT have a bleed as some TH400's used a drum bleed....And some used a piston bleed.
I also drill a .055" bleed hole at the edge of the direct drum on units that will see high RPM.
Install a HD Intermediate Clutch Snap Ring.
Drill a .055" "Lube to Line" Bypass in the Pump Cover
Delete the 3rd & 4th Accumulator Housing with a block-off plate, Control your 3rd & 4th shift firmness with the feed orifices in the plate.
Use the Brass Thrust Washer that came from the Case Thrust between the Reaction & Output Carriers....Replacing the Plastic Thrust Washer.
Sonnax drop-in TCC Regulator Valve part#34994-01K.....Avoid the disgusted feeling of your fresh unit falling out of lock-up hot/No lock-up!
I Ream the AFL Valve Bore & install a oversized AFL Valve on EVERY 4L80E, The cheaper Trans Go kit is fine & very effective. Trans Go part# 48-ACT-TL, After your done you can sell it & get most of your money back!
A hard worked 4L80E will need ALL the Bushings replaced, Keeps the unit running on center!
Replace the AFL Filter at the end of manual valve bore, Be VERY careful not to crack the end cap during installation! Remove the shift solenoid closest to the bore plug as it gets in the way of removing the bore plug.
Set all FOUR end-play locations!
Total Rear Unit.....003"-.008" (Rollerized)
Reaction Carrier to Center Support......008"-.015"
Direct Drum to Forward Hub......003"-.008" (Rollerized)
Front unit.....005-.008" more/greater than the Rear Unit
Checking Front Unit end-play is a little tricky because the input shaft floats in the O/D Carrier.....I use shims between the Carrier & Snap Ring to remove the play, Check & adjust end-play....Then remove the shims for final assembly.
06-22-2018, 03:33 PM
#7
Launching!
Thread Starter
iTrader: (6)
Join Date: Jul 2010
Posts: 220
Likes: 0
Received 0 Likes
on
0 Posts
thanks. I have that printed out and will be doing all the work this weekend.
I do have a question regarding the hole being drilled in the pump though:
Drill a .055" to .067" hole between the line pressure and converter charge passages in the pump cover as shown in Figure 4.
is this done even with the Sonnax lube regulator valve?
I do have a question regarding the hole being drilled in the pump though:
Drill a .055" to .067" hole between the line pressure and converter charge passages in the pump cover as shown in Figure 4.
is this done even with the Sonnax lube regulator valve?
Trending Topics
06-22-2018, 06:28 PM
#10
Launching!
Thread Starter
iTrader: (6)
Join Date: Jul 2010
Posts: 220
Likes: 0
Received 0 Likes
on
0 Posts
got it. Thanks!
This showed up while I was home for lunch. Still waiting for the 3-4 accumulator block off plate but I can get most of the trans done this weekend!
[url=https://flic.kr/p/LjgVs9]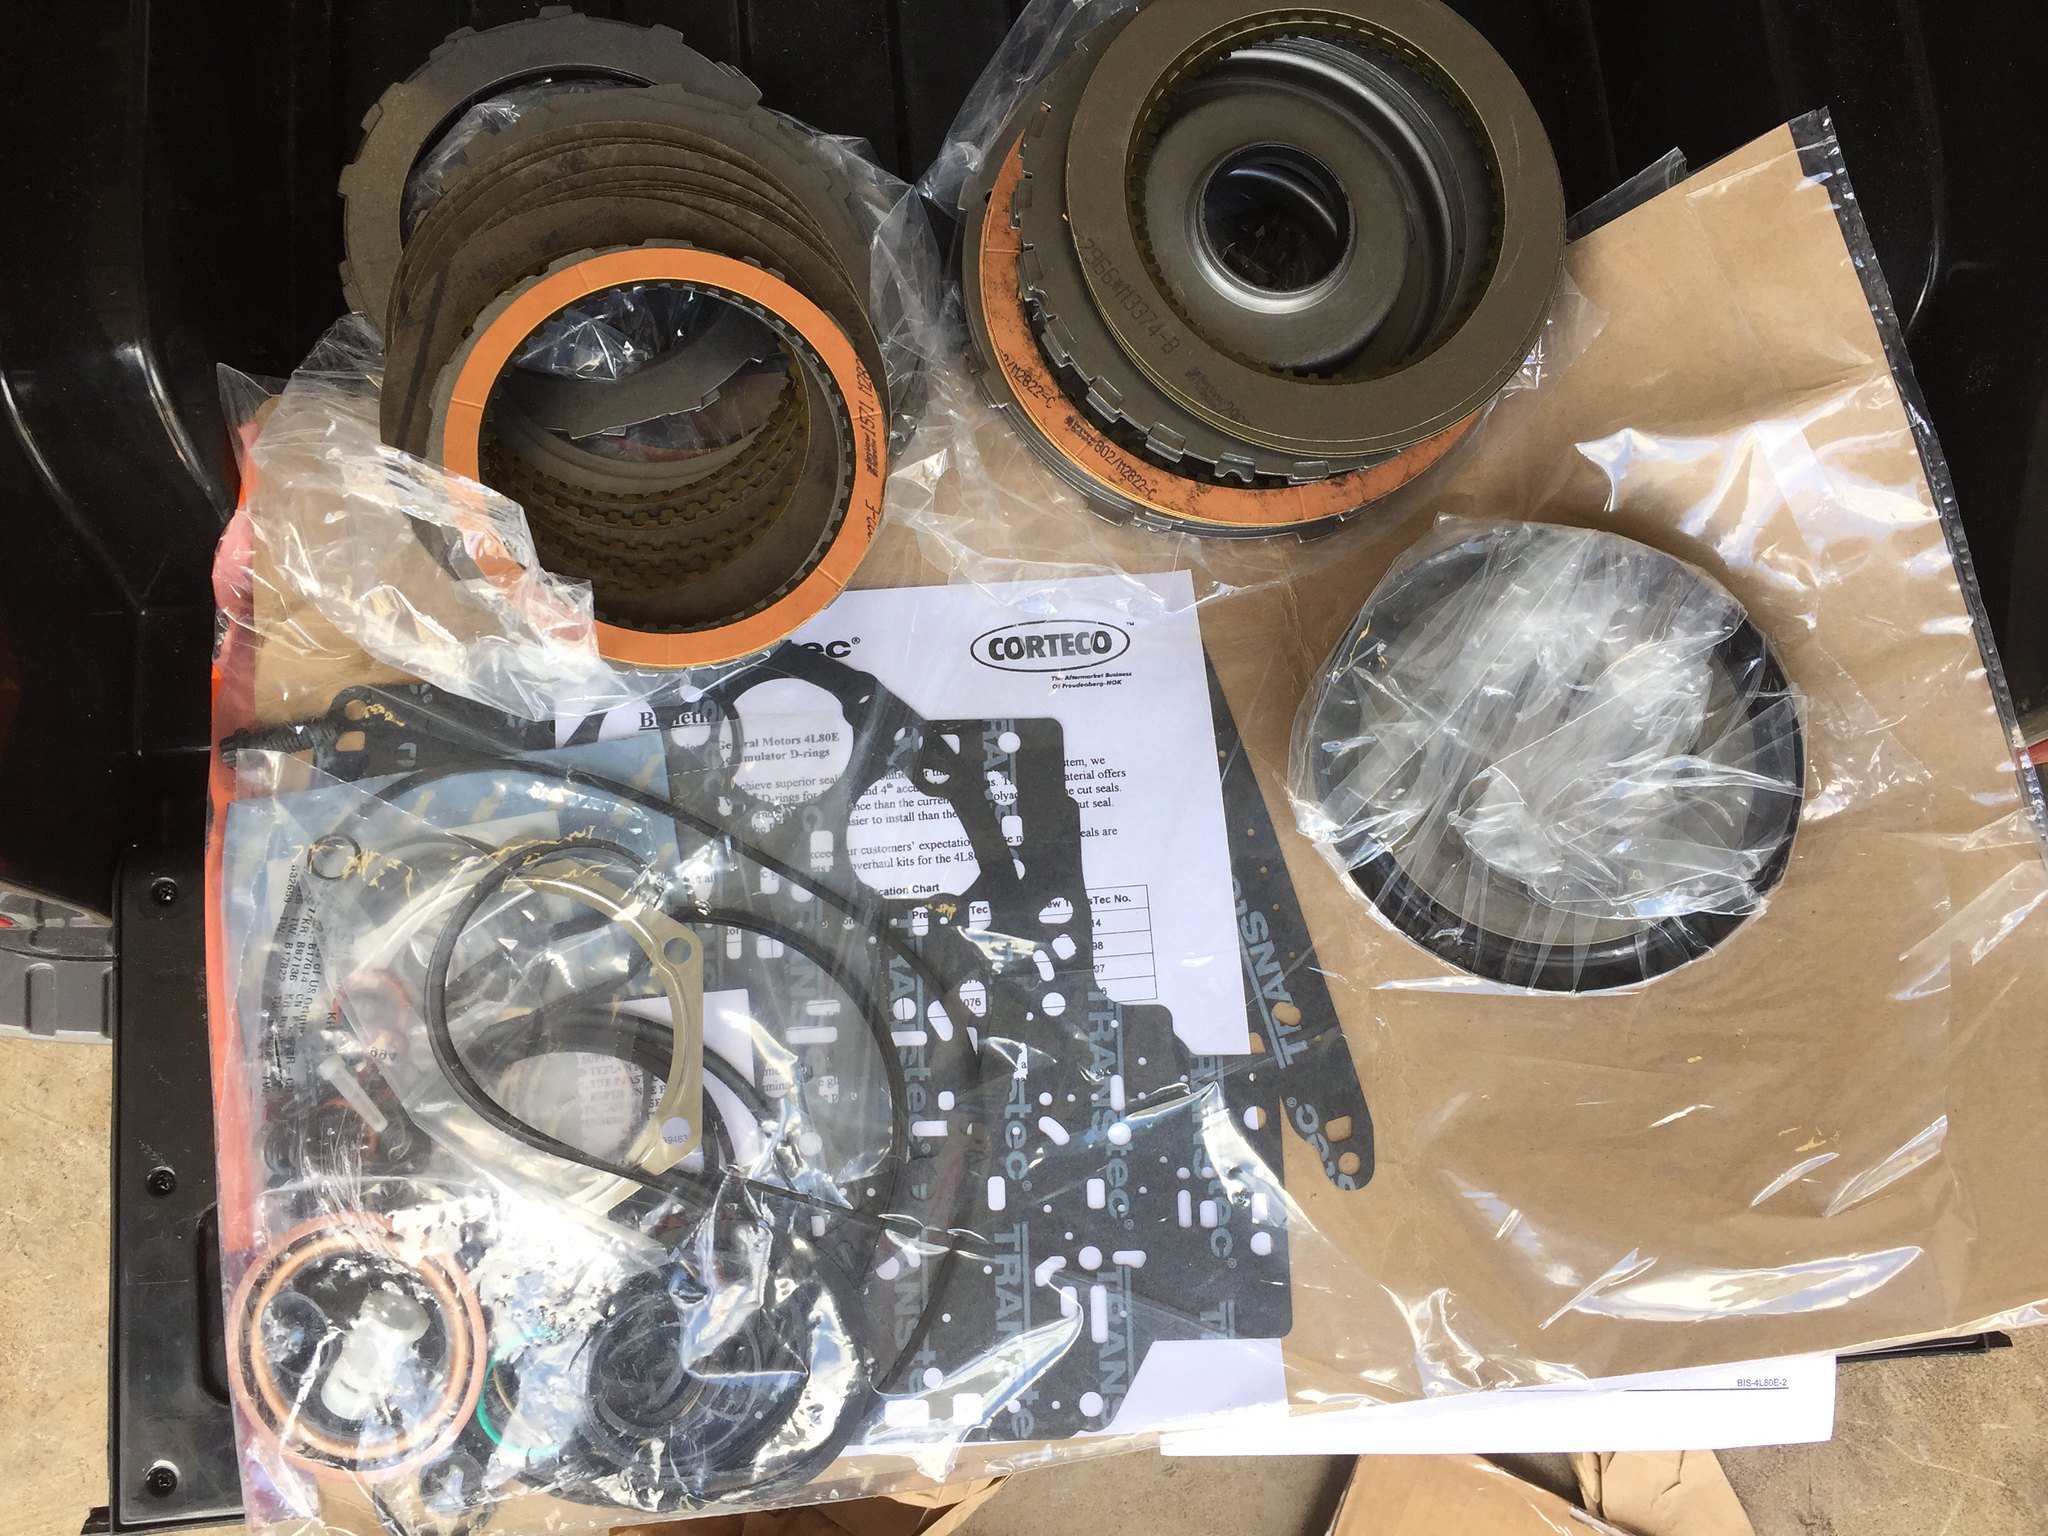
This showed up while I was home for lunch. Still waiting for the 3-4 accumulator block off plate but I can get most of the trans done this weekend!
[url=https://flic.kr/p/LjgVs9]
06-25-2018, 06:24 PM
#11
Launching!
Thread Starter
iTrader: (6)
Join Date: Jul 2010
Posts: 220
Likes: 0
Received 0 Likes
on
0 Posts
worked on other people's junk most of the weekend. but got all the internals redone and back in the trans. CK performance accumulator block off plate is supposed to be here today. Just need to drill the drain larger in the pump, toss in the sonnax valve and install it along with the valve body.
Hopefully it'll be shifting gears this weekend.
Mike
Hopefully it'll be shifting gears this weekend.
Mike
07-02-2018, 01:38 AM
#12
Launching!
Thread Starter
iTrader: (6)
Join Date: Jul 2010
Posts: 220
Likes: 0
Received 0 Likes
on
0 Posts
Got the trans together and installed
Everything is perfect except 3rd gear slips even at half throttle. Slips, grabs, slips, grabs, etc
I messed up and put the reverse check ball back in but you’re not supposed to with the dual feed mod. Going to remove it and hope that solves it. Does that sound likely to be the problem?
the only check ***** i left out were for the 3-4 accumulators. So there’s 7 installed
looks like I should remove #8 and #9
thoughts?
07-02-2018, 04:15 PM
#13
Launching!
Thread Starter
iTrader: (6)
Join Date: Jul 2010
Posts: 220
Likes: 0
Received 0 Likes
on
0 Posts
Update. Trans wasn’t actually slipping
The rpm jump had freaked me out so took it back home.
After adjusting the shift linkage and another test I saw the shift indicator go from 2-3-2-3. The trans was downshifting after going into 3rd. Hooked up the computer and somehow one of the downshift points got bumped up
So that problem is solved
What about those checkballs. I still need to remove at least one right? For the dual feed setup
#8 and #9 or just the reverse #8?
Or is it ok the way it is with all of them installed minus the accumulator ones (delete plate) thanks guys!!!
07-02-2018, 06:23 PM
#14
Launching!
Thread Starter
iTrader: (6)
Join Date: Jul 2010
Posts: 220
Likes: 0
Received 0 Likes
on
0 Posts
to clarify my question:
I don't fully understand what removing the reverse check ***** accomplishes while doing the dual feed.
I've removed the inner lip seal off the direct clutch housing and the second oil seal from the top of the center support. Also plugged the hole in the case as directed.
This was following instruction found online and through CK performance. but the CK Performance steps don't mention the check ball being left out
By leaving check ball #8 and #9 in, am I losing any fluid pressure on the directs? or is that check ball only omitted to help with quicker engagement of reverse?
Currently the car takes a second or two to engage reverse but it's not bad at all. I'll leave it alone if possible since the trans will get a trans brake next year anyways.
Thanks
Mike
Last edited by MIKE93SVT; 07-02-2018 at 06:29 PM.
07-03-2018, 07:42 AM
#15
TECH Junkie

Removing reverse checkball is only for quicker apply of reverse. Remove #9 to bypass the metering orifice for reverse apply of the direct clutches. Wont hurt anything. If your apply is a little sluggish, then pulling it will make it quicker. If it becomes harsh, put it back in and just open up the R hole in the separator plate a little bit...see the attached pic with TERRIBLE paint that I did haha
Leave #8
If you remove #8, your drill size for 3rd apply will be irrelevant as all of the apply will go through the check ball hole.
07-03-2018, 07:07 PM
#17
Launching!
Thread Starter
iTrader: (6)
Join Date: Jul 2010
Posts: 220
Likes: 0
Received 0 Likes
on
0 Posts
took it out beyond the neighborhood today. trans works flawless so far. shifts are slower than my old powerglide but that's expected, lol. holds strong and shifts smoothly
thanks for all the advice along the way!
Mike
thanks for all the advice along the way!
Mike
07-12-2018, 02:43 PM
#18
Launching!
Thread Starter
iTrader: (6)
Join Date: Jul 2010
Posts: 220
Likes: 0
Received 0 Likes
on
0 Posts
been putting some miles on the car and the trans mechanically functions perfect. no issues there.
but I am chasing a temperature problem. It takes a while to warm up which is normal. if I make a few pulls in the car temps hit 190ish and stay there. It takes a long time to cool and doesn't drop below 185 for at least 20 minutes.
There's -6 AN fittings off the trans to a Tru Cool Max 40k cooler mounted under the drivers floor board. I also have a Derale fan on the cooler which turns on at 140 degrees.
I'm going to unbolt the cooler (which is horizontal to the ground) and run the car with it being vertical to purge any potential air out of it. I'll also check the temps with an IR gauge to confirm the accuracy of the stock sensor in the pan.
Another test I need to do is get on the highway and lock the converter to see if the temps drop. That will help pinpoint the issue hopefully.
Mike
