When you click on links to various merchants on this site and make a purchase, this can result in this site earning a commission. Affiliate programs and affiliations include, but are not limited to, the eBay Partner Network.
Still no car back. I am being fed a litany of excuses and they all make sense, logistically. While I am unhappy, i am not going to cause a ruckus until the car is done and in my possession. I will never return to that dealer because they, simply, lack the ideal of communication. A simple phone call was all that was needed and I got none. I get more straight answers from the parts guy and techs, past 5 o'clock, than I do from the Service Advisors.
The car sat in the algignment rack safe from others on Monday because the fuel level sensor gauge was not ordered. The mechanic did not want to start the job without all the parts so he was moved onto the next job while my car sat inside.
Yesterday, Tuesday, as far as I know, all of the work was done, but there was not a road test performed. I had such little fuel in the tank, they did not even want to try and road test the car yesterday. The tech had problem connecting the harness because GM does not extend the wiring harness to take into account the fuel tank is being dropped etc.... I can imagine.
The brake lines are done, no one has any clue about the key being done or not. The tech did not finalize the Repair order last night and today, that technician is off at a Doctor's appointment. All the wrong things or bad things have happened, but so far, I see no actual issues and no one has brought any problems to my attention. But then again, they did not even call me to tell me any problems had began so who knows.
I just want my car back so I can never go back to that dealer, again. Hopefully today, if not, tomorrow AM.
Sent in the drawings to fab my adjustable tie rods, toe rods, and rear spring perches using 17-4 PH H1150 stainless. They cost an average of $700 per set, or $2100 total. Although I've done the math and the modeling and gotten significant peer review, they need to be torture tested. Should be fun. Also, I can't wait to see the tears of joy on my alignment tech's face. No more jam nuts messing up the settings. Also, the rear spring perches have swivel perches to reduce spring side load. I primarily created them because I didn't want to chop up and weld on the OEM perches and I wanted more camber adjustment without butchering the rear subframe. The nice thing about all of these designs is that they can be adapted to pretty much any car with a small change. Next up: Corvette spindle UCA adapters. The design is in the drawing stage and allows SAI, camber, and caster to be adjusted independently. The main challenge is to keep the weight down. The adjustment plates are so damn heavy.
Any reason you're modding the car one piece a time?
You like to brag about the money you're spending so let's take a look...you're at roughly 10k invested in a basically stock rear cradle so I'm curious if you ever looked at other alternatives....for example, buy the 9 inch without all the costly cts specific adapters, buy the lightweight c6 corvette suspension assembly and just build your own cradle to accommodate all this...the cost would be the roughly the same or less if you're as sharp as you think you are and the results would arguably be more in line with what you're trying to do...
Any reason why you're such an idiot? First of all, it's my daily driver, and I have a real job--a really cool one, which I greatly enjoy and spend a lot of time doing. Secondly, do you have any idea how much time and effort it takes to do the stress calculations and Solidworks models for ONE part, then repeat the process several times to optimize strength and weight? I had to spend $900 last year on books and research papers alone, which I later had to read and master to ensure that the parts wouldn't fail and kill me.
Just to give you some examples, there's buckling, bending, and shear stress on the rods, misalignments, and tapered pins. Also, you have to consider material endurance limits (10^8 cycles baby!), stress concentration factors (accounting for intentionally-placed notches and other design features), stress corrosion cracking (driving in the winter with all that **** on the roads), and all the other ways that the parts can fail. If you don't handle all that, you could die. Seriously. I'm not just welding some cheap DOM tubing together and charging $450 for it. In fact, I'm not selling this stuff at all. I already have a great engineering job--this is my way to kill time and continue learning + engineering when I'm off work.
Identifying price =! bragging about money. I've put $30k into this car. A huge chunk of that was for tools, since I didn't have any when I started right out of college. Compared to LS series project cars, $30k puts me between the first and second quartile. Overall, people spend between $50-120k by the time they're done modifying their cars. I've invested $6200 into the stock cradle, including the Geforce 9" and six Revshift bushings. There's nothing costly about it, and very little is special for the CTS-V. Just a nice welded case with cooler ports. Look up the price of a Strange Engineering 9", 300M axles, and 3.75" PST CF driveshaft rated for 200+ MPH and you'll find that it's a very good deal. Geforce sales FTW.
The stock rear subframe is very good--much better than any BMW subframe. However, like all GM products, it needs to be seam welded to increase stiffness. There's nothing magical about the V2 subframe (since I know you're thinking about it) beyond the improved differential mounting scheme. All that's required to adapt the Geforce 9" to the V2 subframe is the V2 case and a different driveshaft coupler. Finally, I have all the C5 and C6 suspension parts. Most of them are heavier than the CTS-V parts. They're also entirely incompatible with the CTS-V. The only one that I think is worth investing time into is the C6 front spindle. It's several pounds lighter than the aluminum STS spindle and provides even more room for wider front wheels. Plus it allows me to correct some of the bump steer and SAI issues that were either in the OEM design or get introduced when you lower the car.
I LMFAO at this. This is precisely why many stop counting the money they pour into their hobby. Seriously, this is funny **** because it's so true.
i keep a firm grip on what ive spent and the 130k miles I've put on 3 v1s at this point have cost me between 9 and 10 cents a mile (strictly vehicular cost including depreciation ) which I think is reasonable given how much car it is.
- Decided to finally tackle the modified Hurst shifter install. Got the old UUC shifter out - the stock plastic socket has definitely seen better days, so I'm sure the Hurst will be nice and solid in comparison.
Unfortunately, I couldn't get the damn clevis on the shifter linkage to fit onto the bottom of the Hurst shifter. Tried wiggling things every which way, prying here and there, tried with the shifter base plate bolted in place and with it not bolted in place, just wouldn't go. So I'm going to have take it back out again so I can either shave a bit off the bushing sleeve in the base of the Hurst, or try to pry the clevis open a wee bit. I tried doing the latter from under the car, but there was just wasn't enough room to get a grip and get any leverage on it.
Yet another frustrating defeat.
I have 3 shifter linkages and they're all curved inward to a certain extent. Since you're doing this on your car, getting a tool on the clevis to expand it so the arms are perpendicular is going to be hard. Before you mess with the clevis, though, I'd check to make sure that the shifter bushings are totally pressed in using a bench vise or arbor press.
Then, if you're still out of luck, get a 2" or 2.25" long 1/4" bolt and a couple of nuts and washers (to avoid marring the clevis). Thread the bolt through the clevis and put the nuts and washers on the inside. Crank the nuts outward to expand the clevis arms. The inside-to-inside dimensions of your clevis is going to be somewhere around 1.25", and a perfectly perpendicular clevis should measure 1.288" to 1.290" from inside face to face.
Last edited by FuzzyLog1c; 06-21-2017 at 11:29 PM.
Ok after a grueling wait period with the excuses out the wazoo, I was returned my 2006 CTS-V this morning. About three minutes less than a full 72-hour cycle after I dropped the car off at 9:18AM on June 19th, I picked the car up today, Thursday, June 22 at 9:15AM
Two days the car sat. Monday, sat with no work done because no parts were there. Tuesday, the tech had a hell of a difficult time connecting the clip or something so only the tank was done Tuesday. Wednesday, the tech had a doctors appointment and I guess zero communication was done so the car sat all day Wednesday. The brake line and keys were done today and I was called around 8:53AM to pick-up.
Anyway, onto the work.
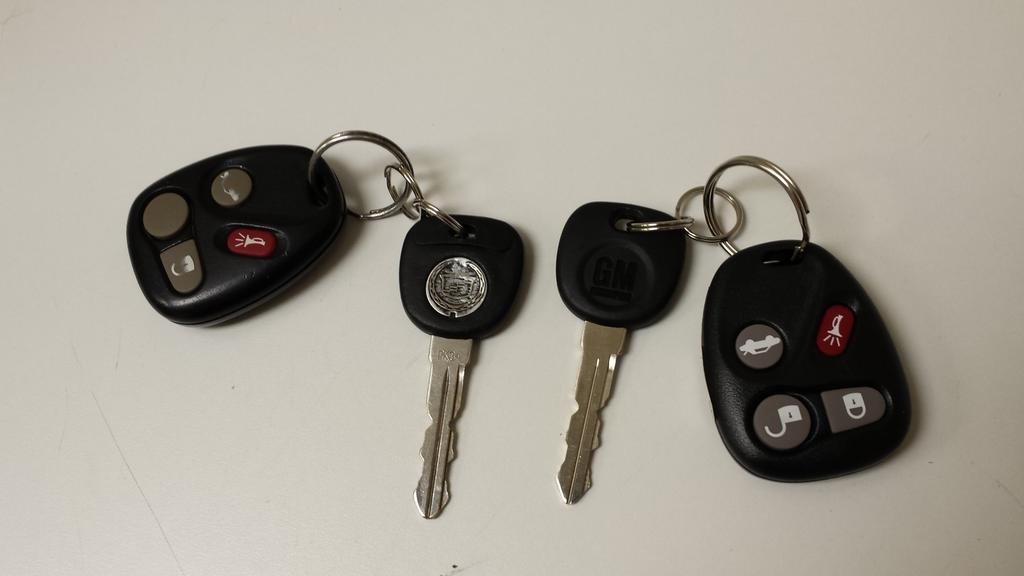
Here are the keys, side-by-side.
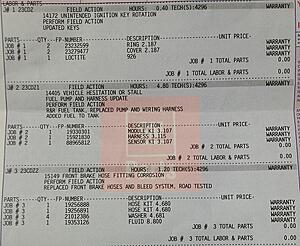
Here is the repair order with the GM-provided labor hour units and part numbers. Are you can see, the fuel pump module, the wiring harness, and the fuel level sensor gauge were replaced.
The car starts quite differently. Much smoother, similar to the XTS that they just gave me, minus all that V8 rumble that we all know and love. The idle was more consistent and the car seems to run smoother overall. That was only a 1.5 mile trip to work. I will know more when I get more seat time. I hope this helps someone. I am glad to have my car back.
It's a Hydraulic lift table. It will also make it easy to put the motor in the back of my truck.
I got it from... Pause...Pause... Harbor Freight. It only has to make it through the re-install and dropping the rear. The jack I bought from them has lasted longer the the one I bought from sears.
I have 3 shifter linkages and they're all curved inward to a certain extent. Since you're doing this on your car, getting a tool on the clevis to expand it so the arms are perpendicular is going to be hard. Before you mess with the clevis, though, I'd check to make sure that the shifter bushings are totally pressed in using a bench vise or arbor press.
Then, if you're still out of luck, get a 2" or 2.25" long 1/4" bolt and a couple of nuts and washers (to avoid marring the clevis). Thread the bolt through the clevis and put the nuts and washers on the inside. Crank the nuts outward to expand the clevis arms. The inside-to-inside dimensions of your clevis is going to be somewhere around 1.25", and a perfectly perpendicular clevis should measure 1.288" to 1.290" from inside face to face.
The bolt trick is what I should've done, but I was too busy trying to find a way to pry the clevis apart just a liiiittle bit so the thing would slide into position, and ran out of time before I had to wrap things up and put the car back on the ground. It's going to have to wait a few days for me to get back to it.
I thought i'd finally add something to this thread.
1) debadged trunk
2) washed
3) got the SW exhaust re-fabbed around the diff today by a pro because I was sick of messing around with it. Not perfect tip exit, but it was about as good as it was going to get without serious modification to the hanger placement on the mufflers. Maybe I'll do that at some later date once some other bigger stuff is out of the way.
Last edited by TorchRedRob; 06-23-2017 at 11:30 PM.

 06-21-2017, 10:00 AM
 I am being fed a litany of excuses and they all make sense, logistically. While I am unhappy, i am not going to cause a ruckus until the car is done and in my possession. I will never return to that dealer because they, simply, lack the ideal of communication. A simple phone call was all that was needed and I got none. I get more straight answers from the parts guy and techs, past 5 o'clock, than I do from the Service Advisors.


 Seriously, this is funny **** because it's so true.
 Tried wiggling things every which way, prying here and there, tried with the shifter base plate bolted in place and with it not bolted in place, just wouldn't go. So I'm going to have take it back out again so I can either shave a bit off the bushing sleeve in the base of the Hurst, or try to pry the clevis open a wee bit. I tried doing the latter from under the car, but there was just wasn't enough room to get a grip and get any leverage on it.