
1964 Chevelle - 5.3 LQ4/4L60E
 05-10-2009, 11:42 AM
#21
TECH Fanatic
iTrader: (9)
Join Date: Aug 2007
Location: Rocky Mtn thin air & snow...
Posts: 1,237
Likes: 0
Received 1 Like
on
1 Post

Originally Posted by twotone64
I plan to make a steel skid plate from 1/4" plate to divert debris in the road way.

 05-20-2009, 09:19 AM
#22
Staging Lane
Thread Starter

Join Date: Feb 2009
Posts: 69
Likes: 0
Received 0 Likes
on
0 Posts
for the belt I used an 87.2" belt. I think I probably could have gone to the next size up, but for now thats what I am using. The next size down was too small (86.7").
To get the correct back spacing I used @1" spacer behind the pulley and used a 12x1.75 metric tap to tap the lower alternator bracket bolt. This put the pulley in a position to keep the belt in contact with all the other pulleys about as much as the OE power steering pump did.
I got the wiring harness and computer back last night and it is nice and PURDY.
This weekend and the next two weeks I have off, so I plan to cut my trunk floor and install my fuel tank so I can get the fuel line and filter installed.
I moved my proportioning valve back 3 inches and down 2 inches to clear the exhaust manifold. I now have one of the flange studs hitting the frame. So that is my next big hurdle to over come. I plan to either shorten the stud, notch the frame. Another option would be to try to find headers but Im trying to stay stock and as cheap a build as possible.
 05-27-2009, 10:42 AM
#24
Staging Lane
Thread Starter
Join Date: Feb 2009
Posts: 69
Likes: 0
Received 0 Likes
on
0 Posts
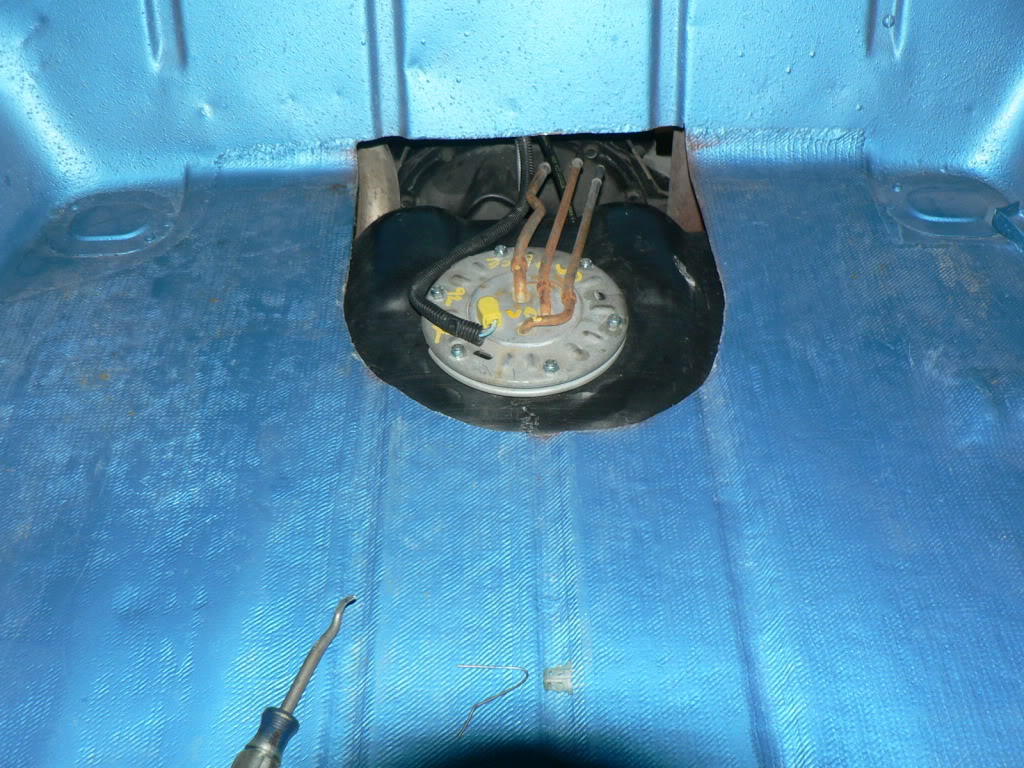
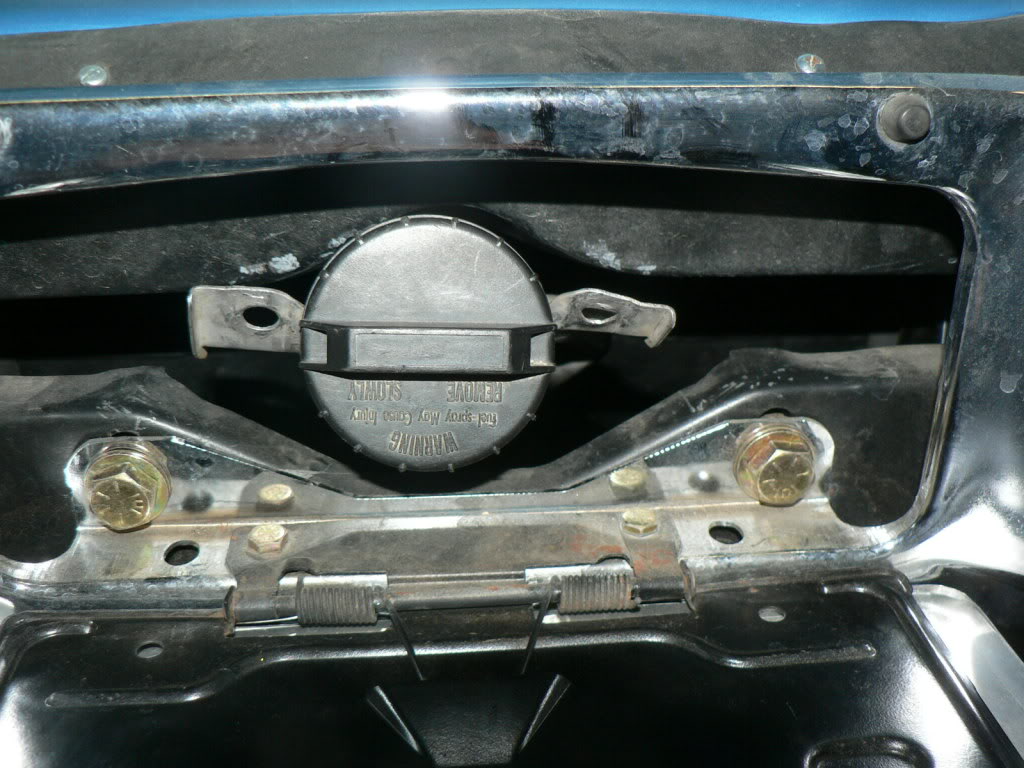
You can see in this picture where the gas tank sits up into the trunk, and the fuel line connections are positioned. I will be making a square box about an inch in height to cover the hole. I will be using some sheet metal screws to position the cover so that it can be removable. I was able to get the nylon fuel line ran that I picked up from the caprice. I used some vinyl fuel line repair fittings from O'Rielys that are similiar to brass tubing compression fittings, but they had nylon ferrouls.
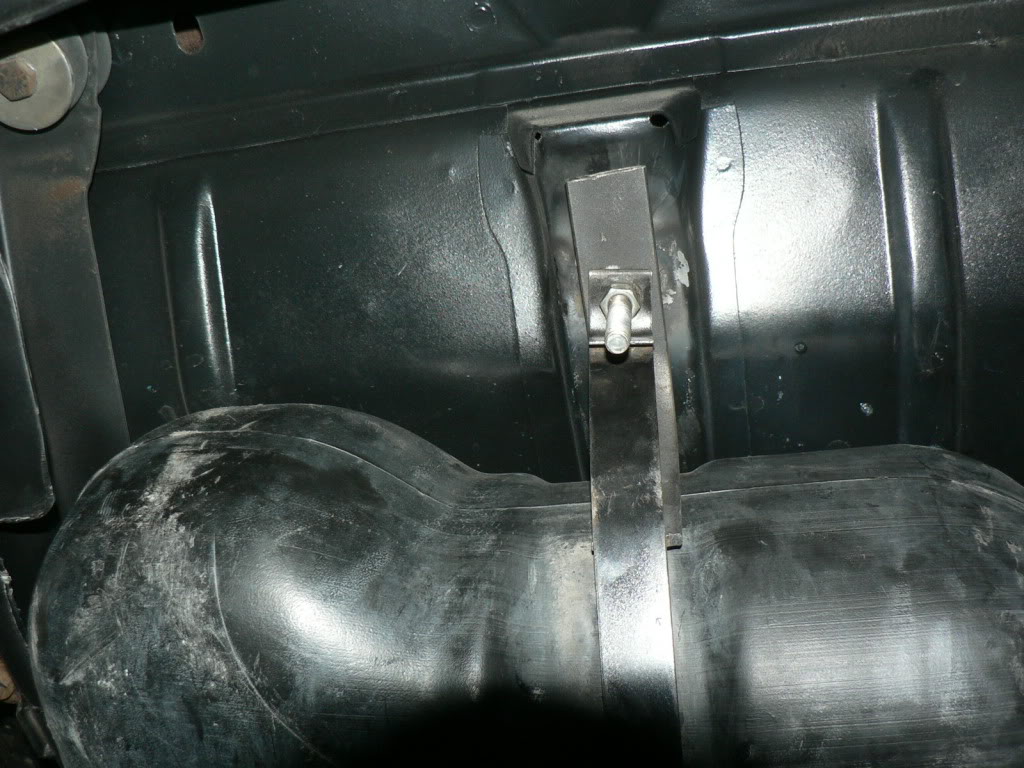
I got the gas tank in and strapped up. I was able to use the original Chevelle straps. I had to take some bolts and weld them to the tank/trunk supports. The welded bolts were about 6-8" toward the front of the car from the original positions where they just slid in. After placing the tank up I noticed I needed to create some sort of brace to keep the tank from sliding back, so I took some 1"x1/8" strap and created L brackets.
Once it was in I then started to do the modifications to the fill neck to get it on and positioned behind the license plate. I had to cut a wedge in the last bend going into the gas tank. The wedge started at 3/8" on the outter part of the curve, all the way to nothing. I then bent it so that I closed in the wedge and then welded it in position. I tested it with gas upside down, no fuel leaked out of the gas cap or the weld.
05-27-2009, 10:44 AM
#25
Staging Lane
Thread Starter
Join Date: Feb 2009
Posts: 69
Likes: 0
Received 0 Likes
on
0 Posts
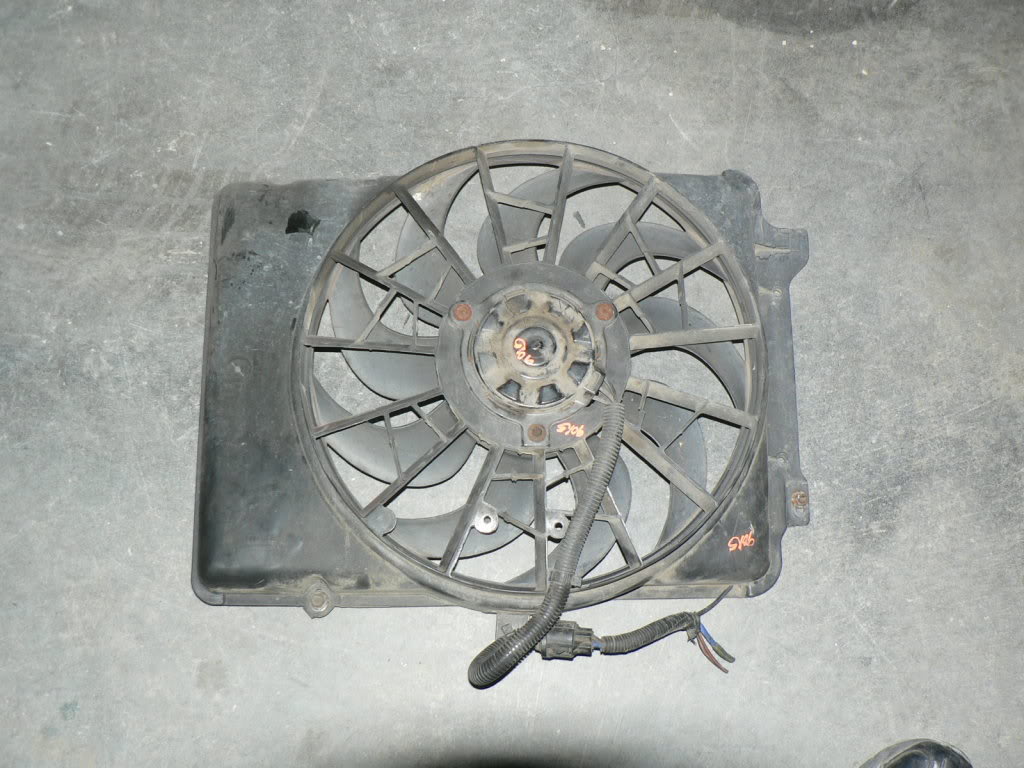
I also decided to pick up a different fan for the radiator. I pulled it out of a 1993 ford taurus with a V-6. It will fit between the accessories and the radiator with about 3/4" clearance. I like it because it is dual speed.
After the gas tank and fuel line installation I moved on to the drive by wire throttle assembly. I cut the pedal off and left about 3" of the pedal bar on the assembly. I will be getting a heim joint and welding it at a slight downward angle on the passenger side of the existing assembly. I used some sheetmetal screws for now to hold it in place while I mock it up. once it is done, Ill remove it and put some perminant 1/4" bolts in place. The reason for the heim joint is to give me a curved surface that will allow me to use my OE pedal and allow it to slide up and down on the bottom of the pedal so that I have the OE look instead of a pedal 3/4 the size of the brake pedal.
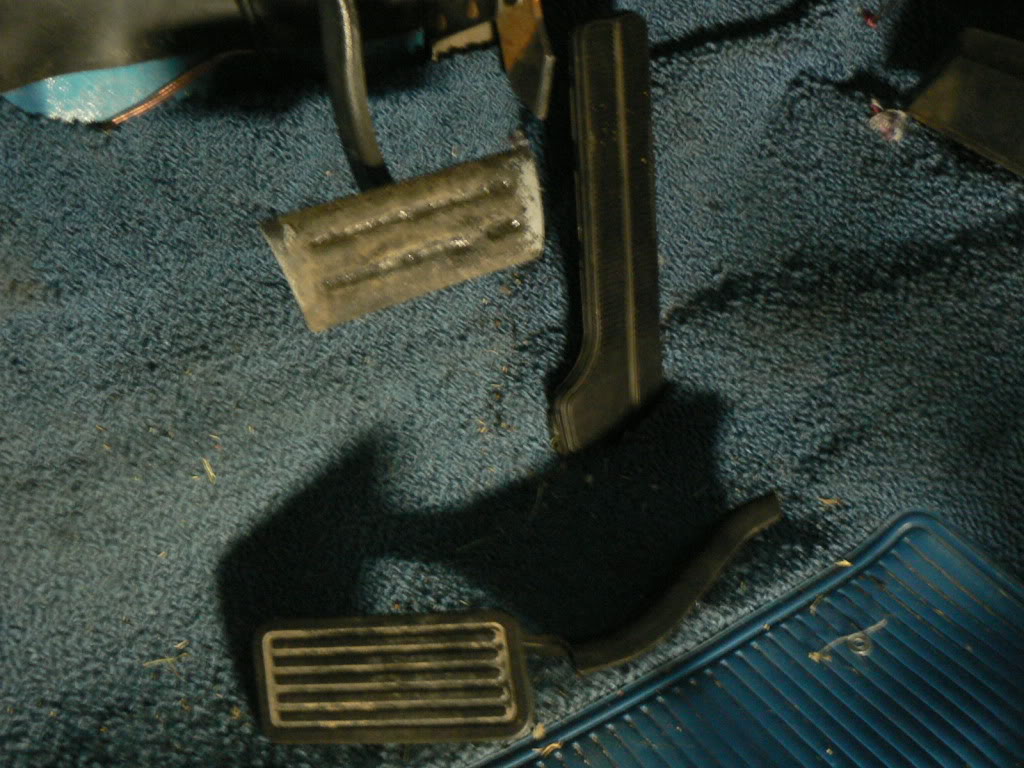
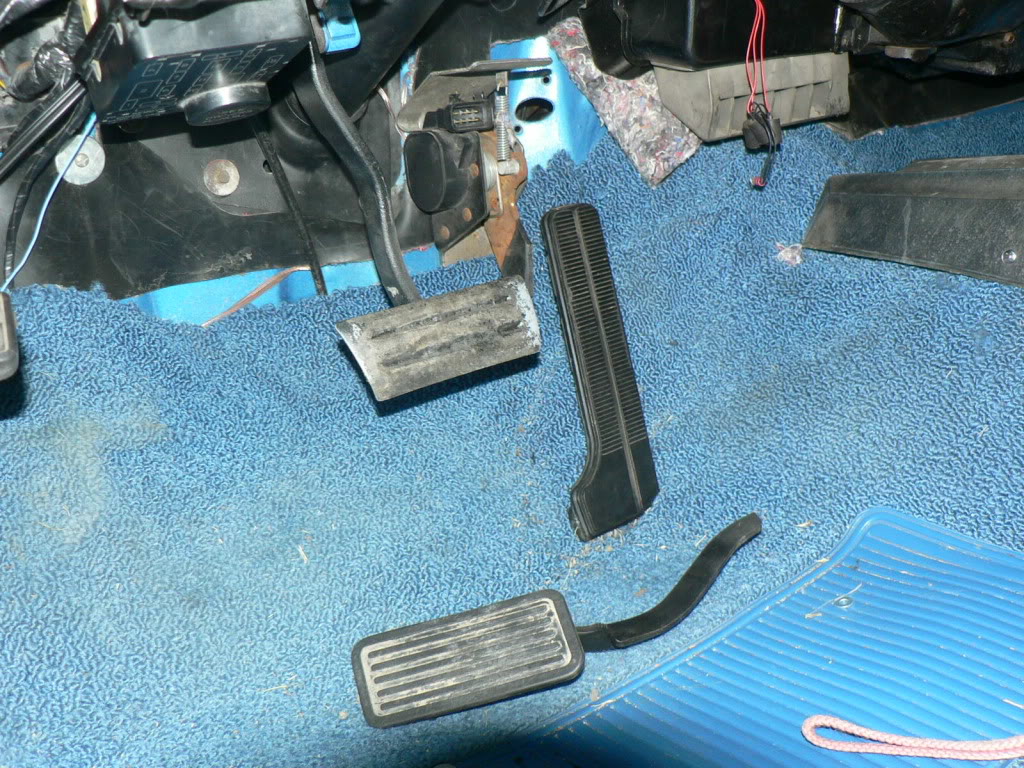
After the gas tank and fuel line installation I moved on to the drive by wire throttle assembly. I cut the pedal off and left about 3" of the pedal bar on the assembly. I will be getting a heim joint and welding it at a slight downward angle on the passenger side of the existing assembly. I used some sheetmetal screws for now to hold it in place while I mock it up. once it is done, Ill remove it and put some perminant 1/4" bolts in place. The reason for the heim joint is to give me a curved surface that will allow me to use my OE pedal and allow it to slide up and down on the bottom of the pedal so that I have the OE look instead of a pedal 3/4 the size of the brake pedal.
05-27-2009, 10:45 AM
#26
Staging Lane
Thread Starter
Join Date: Feb 2009
Posts: 69
Likes: 0
Received 0 Likes
on
0 Posts
Today I plan to attack the frame I have to notch the frame for the exhaust manifold to fit into the engine bay and bolt of to the engine. After that I need to relocate my proportioning valve above and outside of the framerail to clear the exhaust. Once those two are done, it will be time for the 4th time the motor will enter the bay, bolt it up and the manifolds and get going on the radiator lines.
I bought a couple options, and when I get the combinations right and what exactly I do, I will post what part numbers and how I made them work. I plan to use the Tahoe's overflow/return tank in my car to retain all the rest of the stock lines.
Thursday if I complete everything wednesday, I am going to tackle the air filter situation. I need to find a compact 90* elbow to attach to my throttle body and then attach the other side to my MAF sensor, and then off to the filter, not exactly where Im going to go to get the elbow. The hardware store has some rubber ABS repair pieces that may work, or go down to the local truck repair shop and see what they have to offer.
05-28-2009, 01:14 AM
#27
twotone...
On the filler neck, I used two pieces of 1" metal and used the two hole and bolted it to the frame to keep the neck secure. Just a suggestion.
Keep up the good work, We'll have to catch up again one of these days. hopefully yours will be running !
On the filler neck, I used two pieces of 1" metal and used the two hole and bolted it to the frame to keep the neck secure. Just a suggestion.
Keep up the good work, We'll have to catch up again one of these days. hopefully yours will be running !
06-03-2009, 05:19 PM
#28
Staging Lane
Thread Starter
Join Date: Feb 2009
Posts: 69
Likes: 0
Received 0 Likes
on
0 Posts
Brian,
Thanks for the use of your manifolds they worked perfect. I tried the truck headers but the bends were too far out and hit the a-arms and the steering shaft so I got on the craigs list search "crazedlist.com" and couldnt find anything listed for those manifolds on the west coast. Some of the junk yards wanted 150-200 EACH and could not supply me with the collectors so .... I orderd some off of ebay (the only set listed at the time) along with the collectors from Arkansas $370 delivered next week. I haven't turned it over yet (hopeing for tomorrow). I still have to install the trans., drive line, shifter, engine light, and connect the electrical to my fuel pump and put one more fitting to get my purge setup done.
Rod
06-03-2009, 05:19 PM
#29
Staging Lane
Thread Starter
Join Date: Feb 2009
Posts: 69
Likes: 0
Received 0 Likes
on
0 Posts
Here are some recent photos:
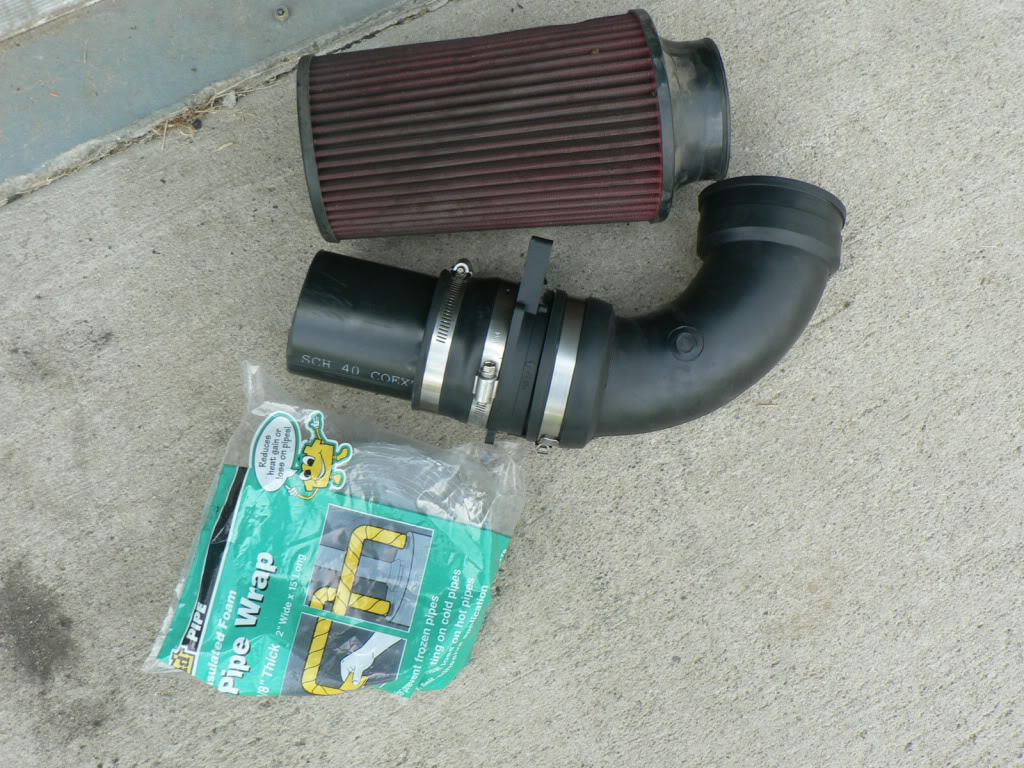
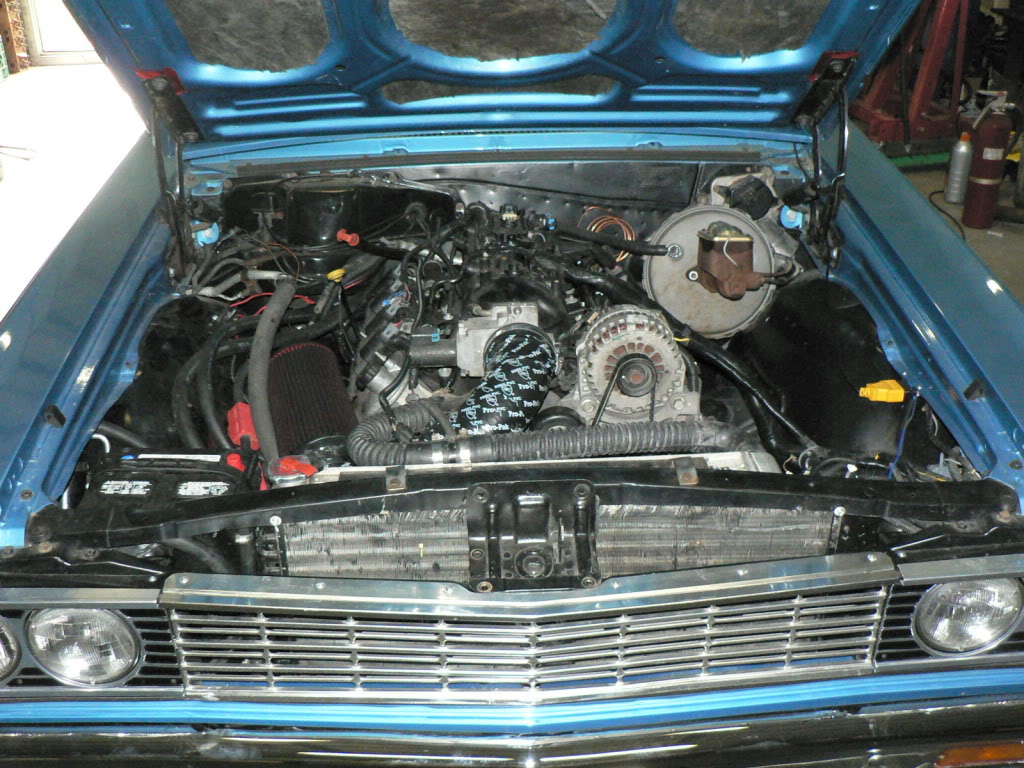
My home made air cleaner"
The computer and wiring harness (computer still needs to be permanantly mounted)

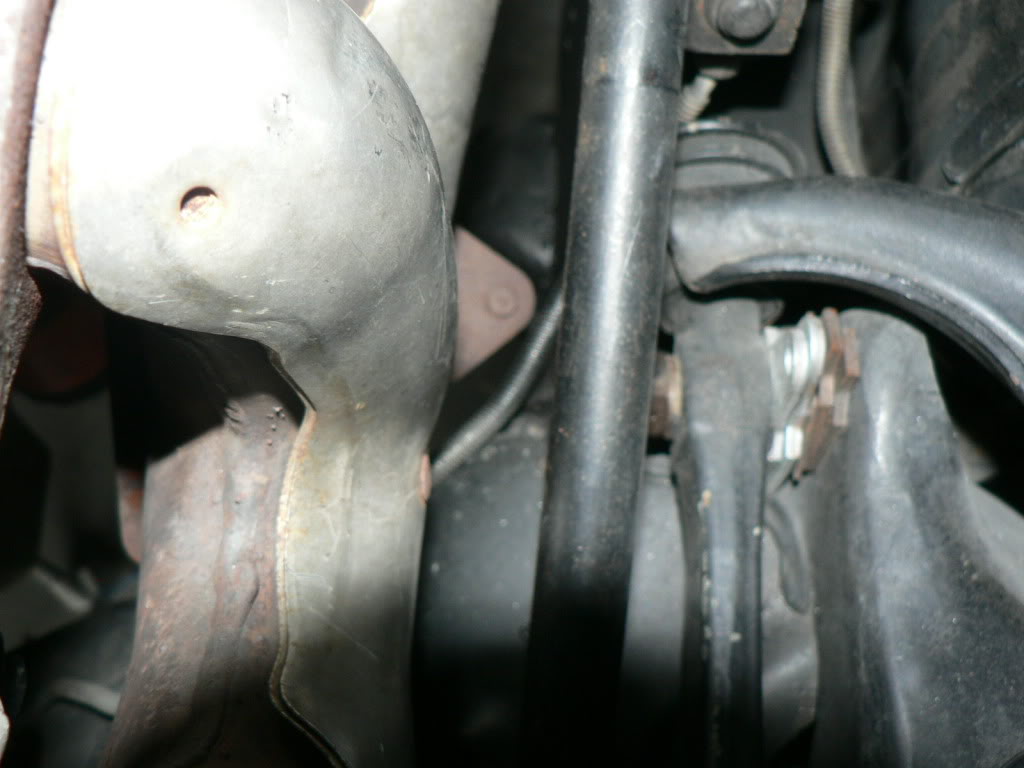
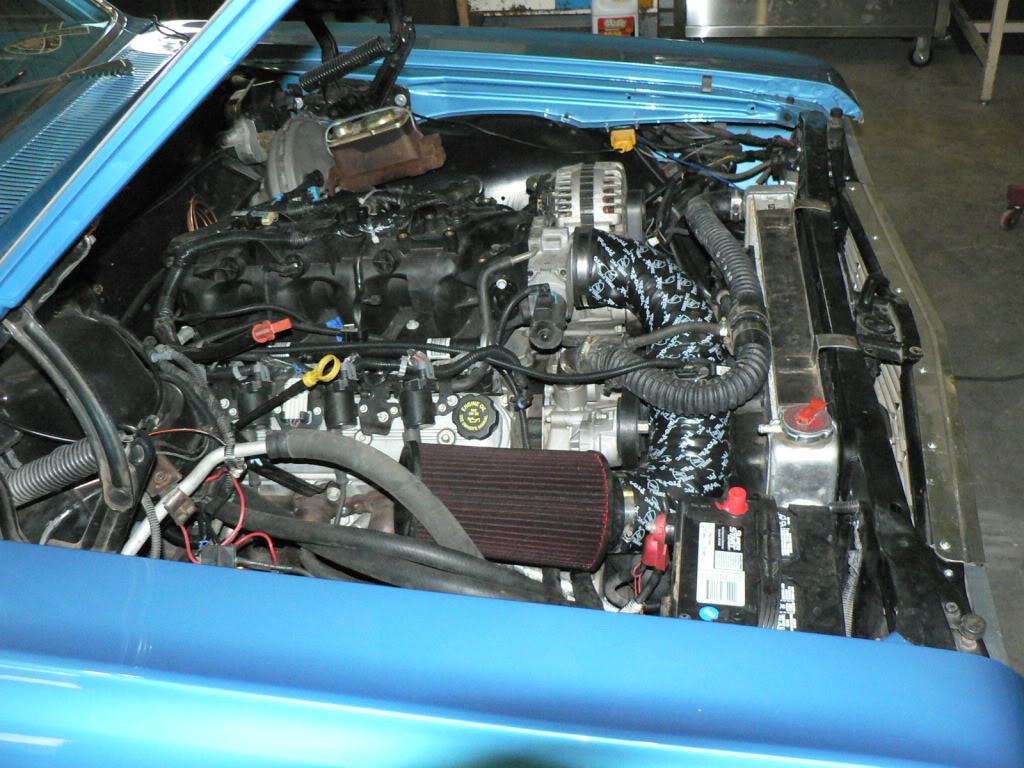
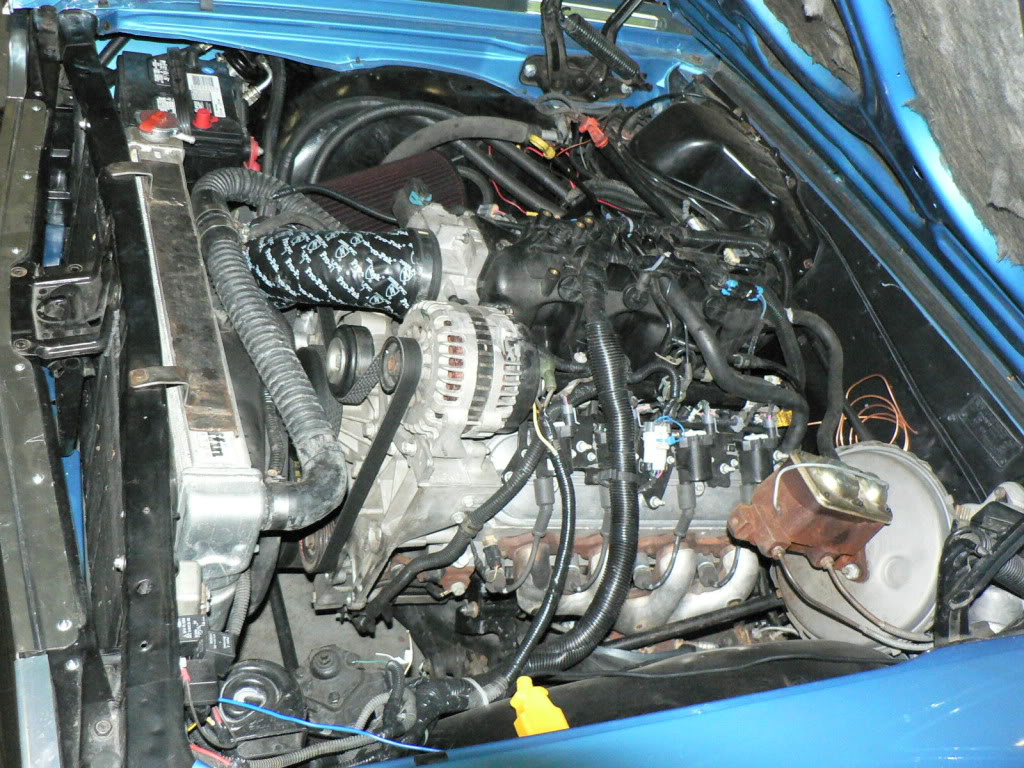
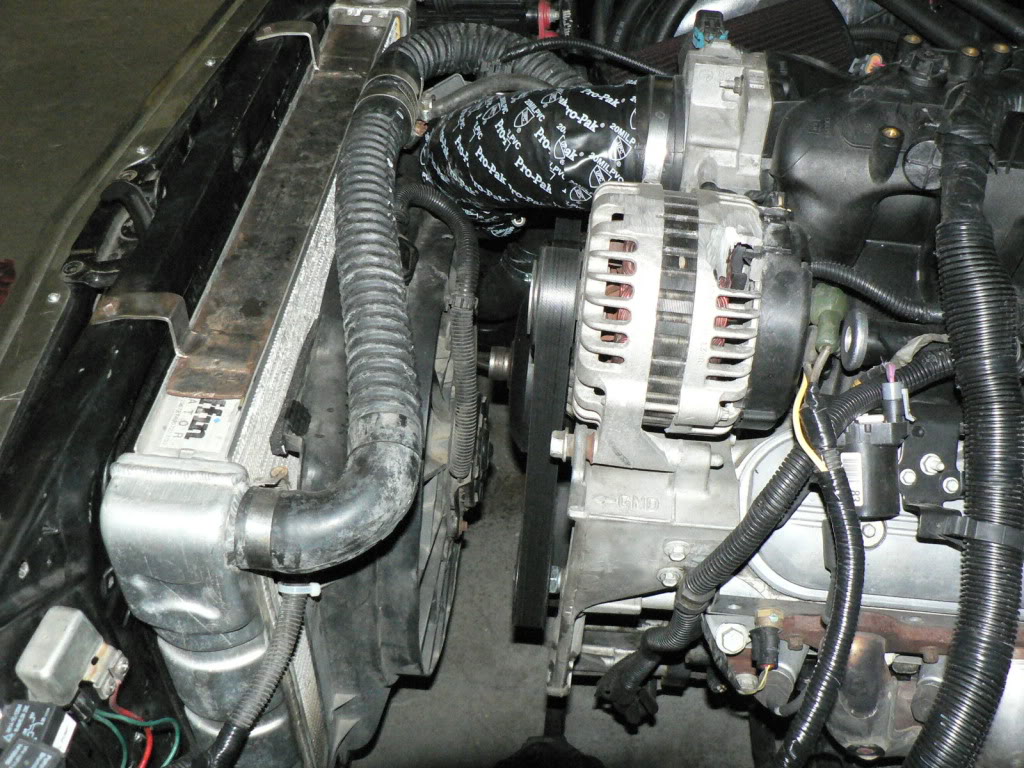
The clearance (perfect) using the 98-99 f-body tubular style manifolds
Some of the help
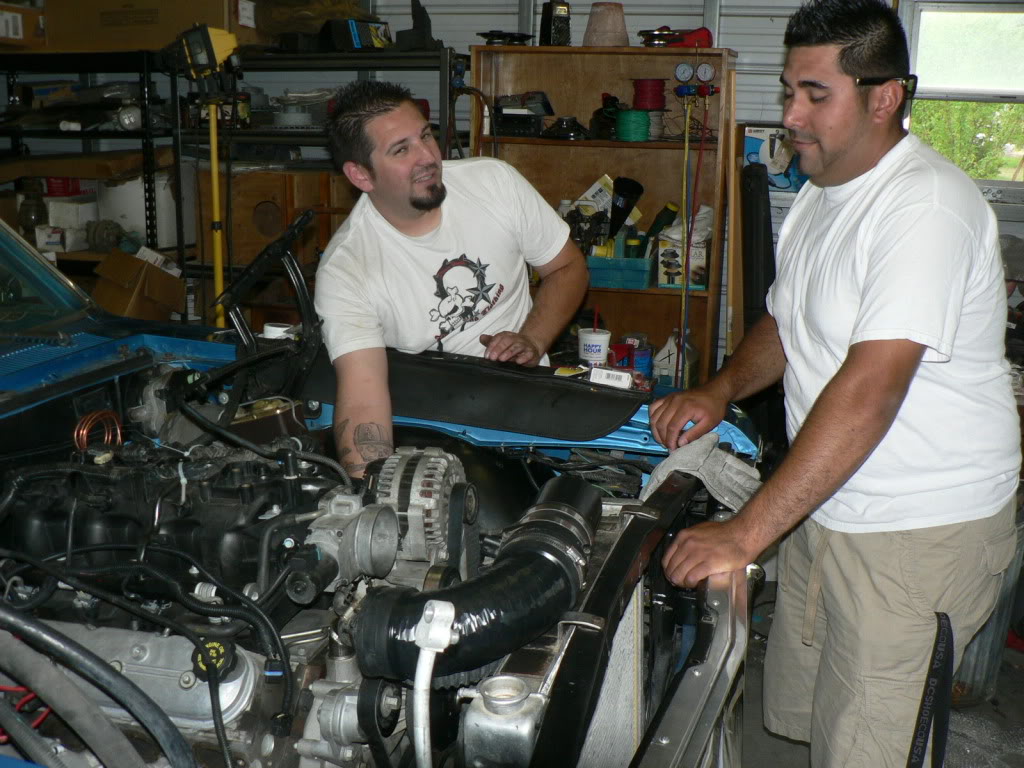
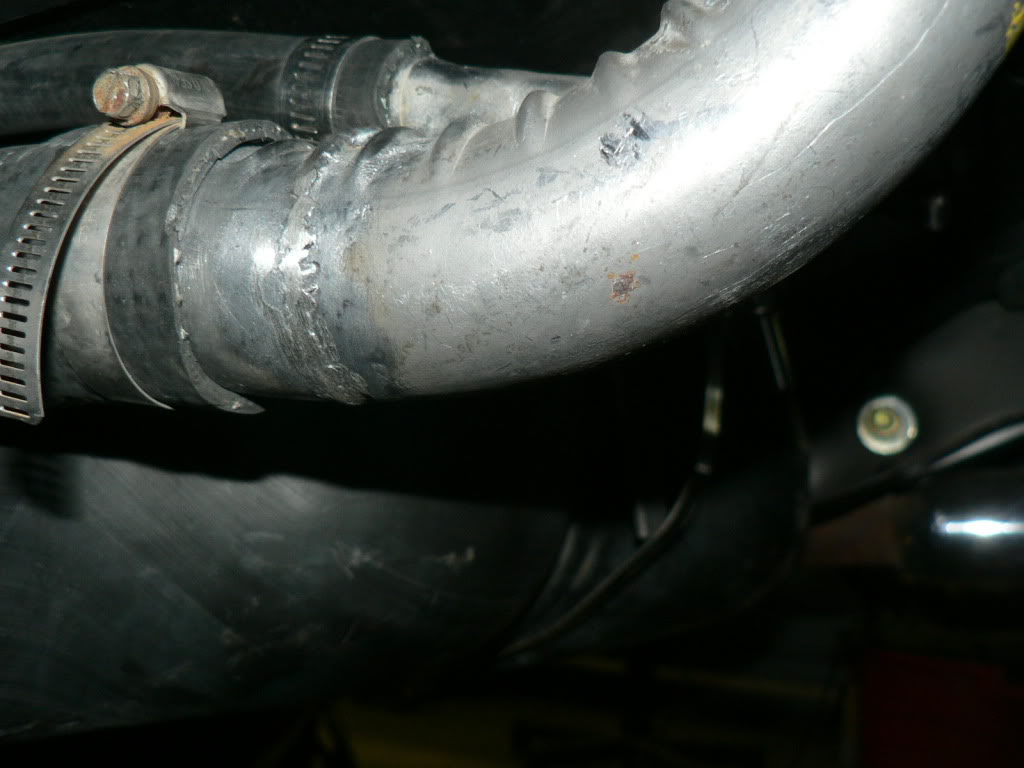
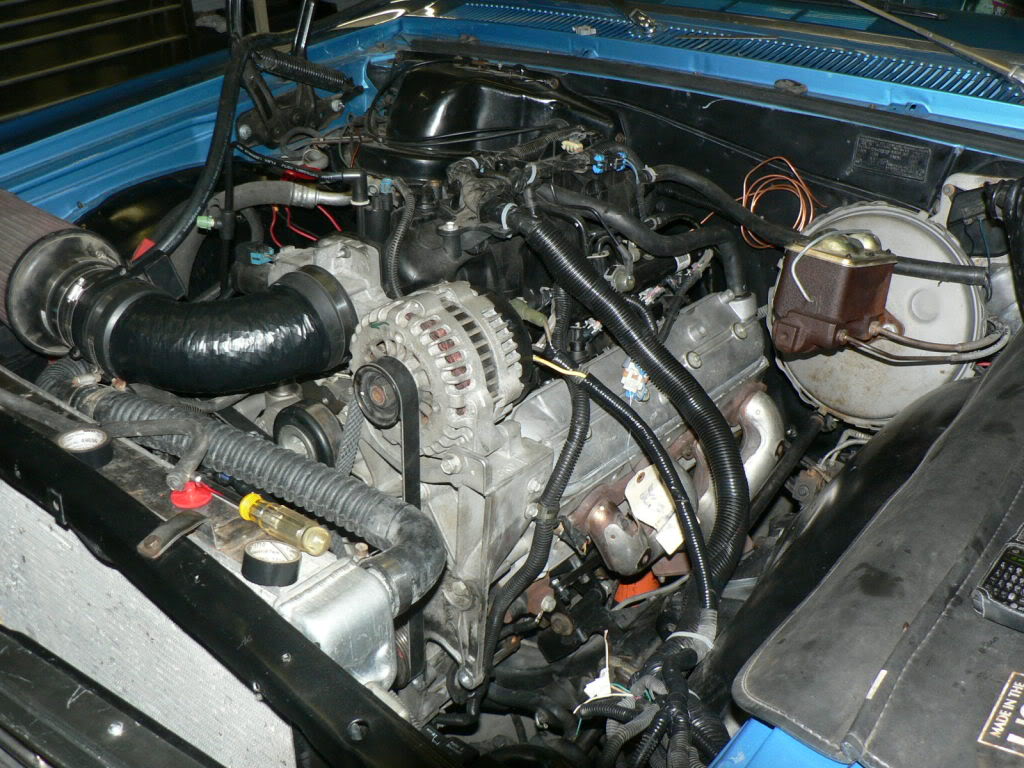
The complete motor minus exhaust, purge and A/C. in this one you can see the air cleaner installed and the top radiator hose setup.
My home made air cleaner"
The computer and wiring harness (computer still needs to be permanantly mounted)
The clearance (perfect) using the 98-99 f-body tubular style manifolds
Some of the help
The complete motor minus exhaust, purge and A/C. in this one you can see the air cleaner installed and the top radiator hose setup.
06-03-2009, 05:24 PM
#30
Staging Lane
Thread Starter
Join Date: Feb 2009
Posts: 69
Likes: 0
Received 0 Likes
on
0 Posts
I will update my cost list next week or sometime in the next couple of weeks it has grown by a few hundred.
Battery, exhaust manifolds, electrical connectors, radiator hoses, filters, oil, collant, wire, and others.
Battery, exhaust manifolds, electrical connectors, radiator hoses, filters, oil, collant, wire, and others.
06-24-2009, 09:57 AM
#32
Staging Lane
Thread Starter
Join Date: Feb 2009
Posts: 69
Likes: 0
Received 0 Likes
on
0 Posts
So it's been nearly a month since I updated the progress. Ive been busy with a family trip to yellowstone, a week coaching a high school all-star football game (we won first time in 6 years 19-3), and this week we are coaching another all star game playing friday night.
In the mean time: I have been piddling with the exhaust which I finally got. I used the 98-99 F-body manifolds and they worked perfect. I have the bank 1 o2 sensors (pre cat on the tahoe and no cats on my Chevelle).
I got all the wiring completed, minus an engine light (going to use an LED in the dash), and minus the cruise control saved for a later date.
I beat the crap out of the trans tunnel to fit the bell housing bolts because the 4l60 has a removable bell housing. I had to fabricate my own cooling lines for the transmission as well. I ran the shifter cable using a B&M Mega Shifter which I had already. I was also able to reuse my original shifter column and cover plate (bezel) for a somewhat factory look.
For the trans line, I used my existing external cooler, and ran some short pieces of rubber hose from that to a 3/8" steel line which I bent/broke to run along the frame above the lower control arm, around the starter and then connected using a flare connection to the original quick connect fittings.
My driveline was good to go as the tranmission was only 1/4" further back than the 700R4 with the old SBC.
I ran the wire from the fuel relay to the fuel pump and tested it with just my batt. charger. I also wired up two more relays one for high speed when the a/c is on, and low speed when it is not on, and need to put a thermostat on the fan.
At 4pm PST on Monday evening I connected the battery and attempted to fire it up. I turned the key and heard "click buzzz." I hooked the battery charger up and did it again... "click buzzz". Could it be.... I got a bad starter with my pull out engine... sure enough my fears were realized when I took it into O'rielies on tuesday afternoon. I bought a remanufactured one because a new one was $199+8.25% tax (with a discount). The reman was $139 + tax. Got it home yesterday evening and at 4:15pm PST she fired up on the turn of the key and idled immediately..... woooo hooooo no leaks.... buuuut
the thermostat didnt open up and after 15 min of idling it reached 230 and I shut it down.
I put the hood on and it didn't shut. The Air Intake was too tall, the wiring harness was touching, the purge solenoid was touching, and now the alternator is touching. So I have to shave the alternator housing, remove the purge solenoid, and do something about the air intake.... (not sure about that yet).
But its well on its way...
06-24-2009, 10:22 PM
#34
Great news and progress.. I guess your going to have put a Cowl Induction hood on to clear the Intake. Were the E-Fans working ?..
Where on the wiring harness was it hitting ?.. going to be able to re-route the harness any ?.. Purge valve.. dump it.. LOL. I just used the vacuum source to pull it tanks vapors though the Charcoal Canister.
I guess I can get my F-Body exhaust stuff back now.. no rush.. we can arrange something one way or another.
06-25-2009, 02:20 PM
#35
Staging Lane
Thread Starter
Join Date: Feb 2009
Posts: 69
Likes: 0
Received 0 Likes
on
0 Posts
Had to grind quite a bit on the alt. and the wiring harness where it splits to the two sides on top of the intake is where it was pushing. I raised the back of the trans about a half inch and that allowed me to close my hood. Not sure about a cowl hood but may look into it. going to drive it to get the exhaust done today.
06-26-2009, 12:00 AM
#36
Staging Lane
Thread Starter
Join Date: Feb 2009
Posts: 69
Likes: 0
Received 0 Likes
on
0 Posts
I will post pictures tomorrow but in the mean time.... I drove it to the exhaust shop and it over heated, got to 235 it took 5 miles and 15 min of driving to get it to the shop. So I stopped in at a buddy's friend's shop to confirm a few things... that the water pump does rotate counter clockwise. I bought a new thermostat (which is part of the freaking housing on these motors @$20 and verified it worked in pot of boiling water).
While there the guy asked "how much antifreeze did you put in it?"
I said "a gallon and a half..."
he shook his head and told me you have to fill the block, from the top because the thermostat is on the bottom and will not allow the water to fill from there like the small blocks"
So I pulled the top radiator hose, and poured 2 more gallons of antifreeze...
On the drive home, I watched the temp through my OBDII scanner, it hit 225 and then all at once it dropped to 201 and quickly to 194 where it sat even at the light, in 100* wether....
When I picked up the car, it had a nice mellow sound, and does not resonate in the drivers compartment, but nice and throaty on WOT.
Now its on to the A/C and then adjusting the cams on the rear suspension to match the transmission angle.
06-26-2009, 02:17 AM
#37
good update.. yeah.. air pocket or trapped in the block. Many have done the same thing as you (Not fill if from the top radiator hose). What is do you have the fans set to come on at ?.. High/Low ?
What mufflers did you use? Mine are Flowmaster 40's...
What mufflers did you use? Mine are Flowmaster 40's...
06-26-2009, 09:11 AM
#38
Staging Lane
Thread Starter
Join Date: Feb 2009
Posts: 69
Likes: 0
Received 0 Likes
on
0 Posts
low speed on the fan, not set on a thermostat yet, and I have 40 serries flowmasters as well. Today when it warms up, Im going to let the car idle without the fan on and see what kind of temps I get. I dont have the condensor in front of the radiator yet either so that may add a little restriction, but not sure yet.
 06-30-2009, 10:34 AM
#40
Staging Lane
Thread Starter
Join Date: Feb 2009
Posts: 69
Likes: 0
Received 0 Likes
on
0 Posts
Here are the pictures of the completed project:
Ive taken it for a couple of 2-5 mile runs and nothing eventful has happened since the second run when the feed line directly on the fuel pump came off. I fixed that by replacing the plastic clip with a stainless hose clamp.
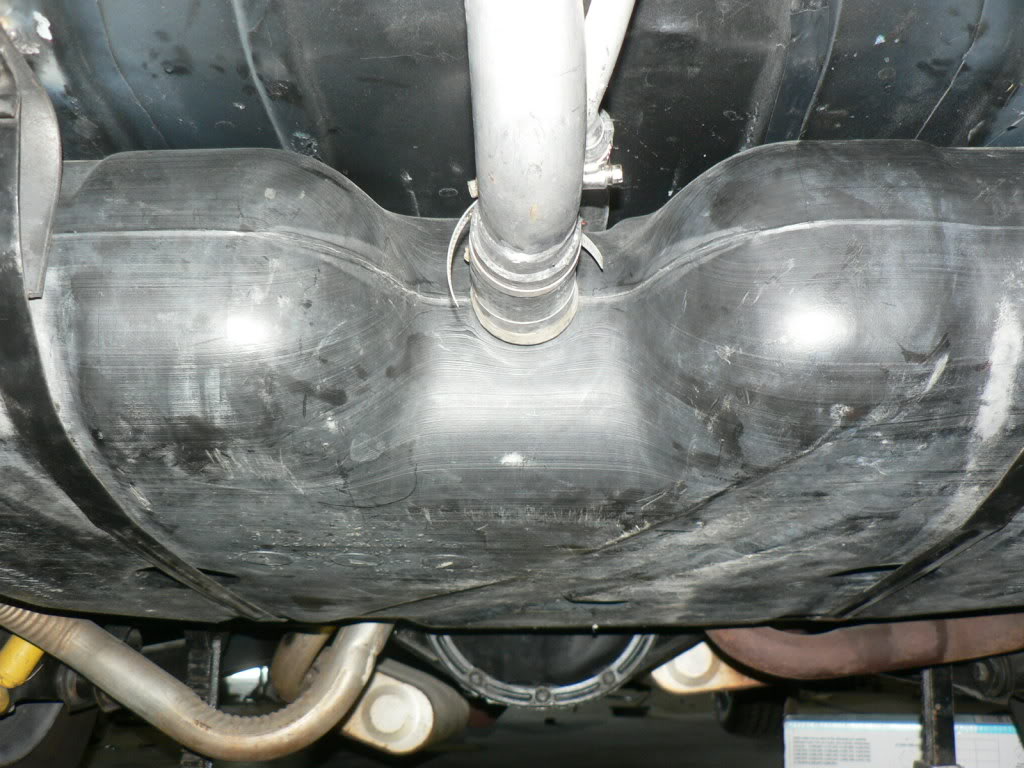
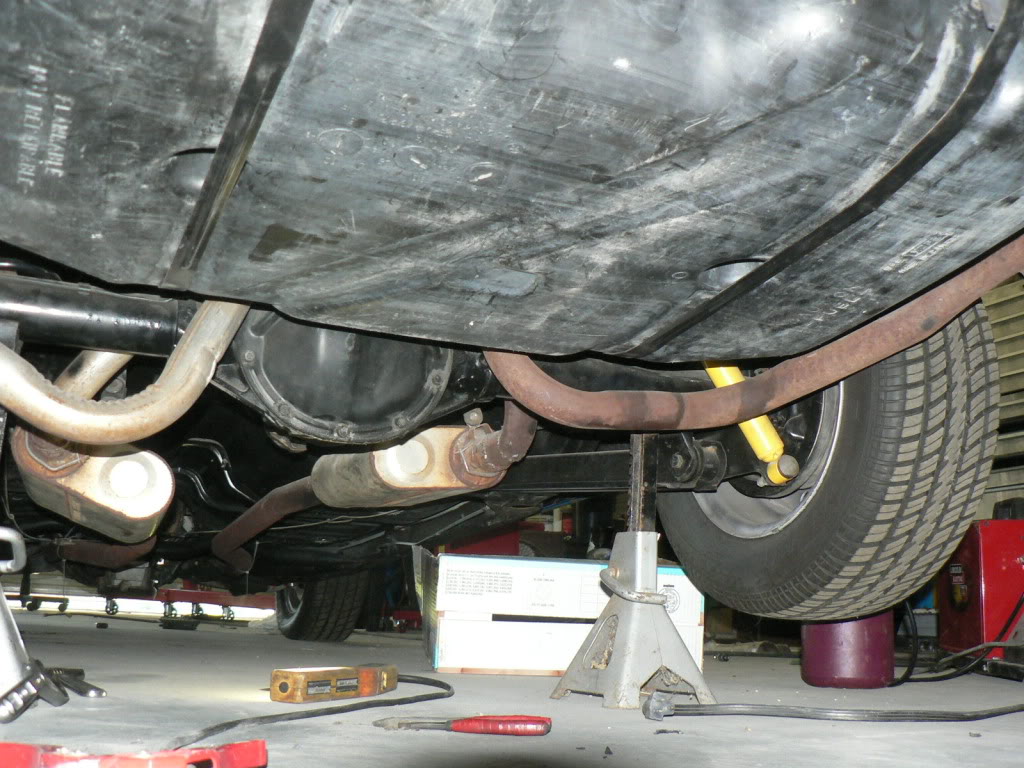
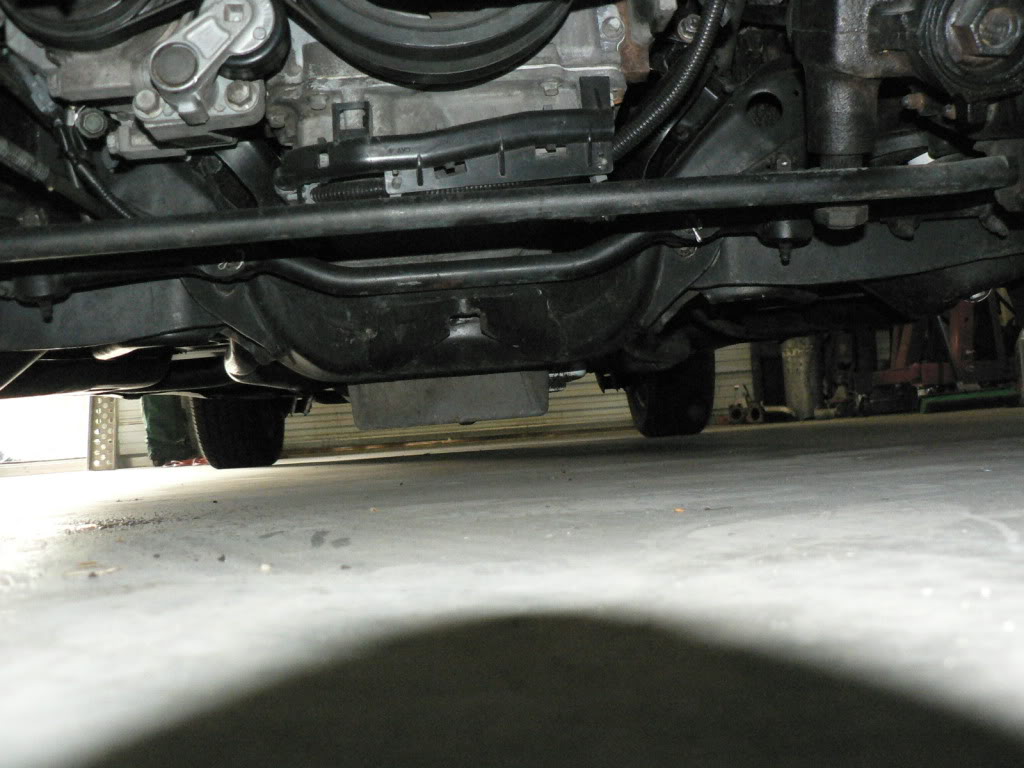
And here is the final ground clearance, kinda scarry, but I only hit going over rail road tracks, Ill be lookinginto a different oilpan as well as taller springs, I have the wrong spings in the front currently.
Still to come is the list of parts and a near total on the entire swap.
Ive taken it for a couple of 2-5 mile runs and nothing eventful has happened since the second run when the feed line directly on the fuel pump came off. I fixed that by replacing the plastic clip with a stainless hose clamp.
And here is the final ground clearance, kinda scarry, but I only hit going over rail road tracks, Ill be lookinginto a different oilpan as well as taller springs, I have the wrong spings in the front currently.
Still to come is the list of parts and a near total on the entire swap.