
s10 + T56+ TURBO + LS1 Schwab Shop Customs
 06-19-2009, 11:56 AM
#21
On The Tree
Thread Starter

Join Date: Feb 2009
Location: Rhode Island. (new hampshire)
Posts: 153
Likes: 0
Received 0 Likes
on
0 Posts
I gotta say... I like your style. Nice blend of using cheap/free/old parts from your vette and using new stuff. Ive never given thought to building an S10...but after seeing your thread Im starting to think that would make an awesome DD/putz around truck. I like the use of the rear GTO seats!! I guess you cant adjust them at all though right? Did you have to build a frame to hold the backs firmly?
Great work!!! Cant wait to see the finished truck...and to see it running/driving! Its gonna be a handful for sure!
J.
Great work!!! Cant wait to see the finished truck...and to see it running/driving! Its gonna be a handful for sure!
J.
Thought about a Del Sol, CRX, and was REALLY set on getting a 240... then i saw an S10 for sale for $1000... That sold me! Searched a little bit and found everything i needed for the swap i could buy.
So in doing this, i thought i'd do something that no one else has done yet... 6-speed, LS1, Turbo, and an 8.8 rear end. This is basically just for the fun factor. Not meant for Drag strip, not meant for the track... Maybe some drifting though!!!!!!!!!!!!
Fabrication that's still left to do is:
Rear sway bar. I have to mount the Corvette's front sway bar in my rear end somehow. Gotta weld on some brackets on the bottom of the axle, and links on the frame.
Also, Seat back mounts.
The stock seats were not adjustable anyway, so these aren't either. The seat bottom is fixed and brackets made. The seat back bracket still has to be made.
 06-20-2009, 09:50 AM
#22

There are a lot of these type swaps over on S10forum.com. A guy had a LS6 with front mount turbo and a 8.8 swap...Some guys are spraying too...I was going to recommend a Blazer floor shifter console to go with the T56 but you used those other seats so it won't work...If you weren't planning on using it on the strip or using drag radials then the stock 7.625 rear would have held up pretty well....
06-20-2009, 10:16 AM
#23
On The Tree
iTrader: (18)
Join Date: Jan 2006
Location: Wetumpka, AL
Posts: 175
Likes: 0
Received 0 Likes
on
0 Posts
I gotta say... I like your style. Nice blend of using cheap/free/old parts from your vette and using new stuff. Ive never given thought to building an S10...but after seeing your thread Im starting to think that would make an awesome DD/putz around truck. I like the use of the rear GTO seats!! I guess you cant adjust them at all though right? Did you have to build a frame to hold the backs firmly?
Great work!!! Cant wait to see the finished truck...and to see it running/driving! Its gonna be a handful for sure!
J.
Great work!!! Cant wait to see the finished truck...and to see it running/driving! Its gonna be a handful for sure!
J.
 06-20-2009, 01:08 PM
#25
On The Tree
Thread Starter
Join Date: Feb 2009
Location: Rhode Island. (new hampshire)
Posts: 153
Likes: 0
Received 0 Likes
on
0 Posts
Finished painting most of the rear, drained the oil out of the 8.8 and put my new Chrome diff cover on. Looks Awesome!
I know its worthless without pics, but i'll get some up soon.
Also, i'll get more pics and info on the fitment of the seats as well... I still have to make the bracket for the back part of the seat. I'm thinking of making a hinge type of deal so that i can tilt the seat forward and put stuff behind it.... Time to get creative!
Hooked up the hoses for my oil catch can from the valve covers. Here's how the whole oil system is going to work:
06-21-2009, 10:26 AM
#27
On The Tree
Thread Starter
Join Date: Feb 2009
Location: Rhode Island. (new hampshire)
Posts: 153
Likes: 0
Received 0 Likes
on
0 Posts
06-28-2009, 10:04 AM
#28
On The Tree
Thread Starter
Join Date: Feb 2009
Location: Rhode Island. (new hampshire)
Posts: 153
Likes: 0
Received 0 Likes
on
0 Posts
Hey all again, New update...
TRUCK DID A BURNOUT IN THE STREET!!!!!
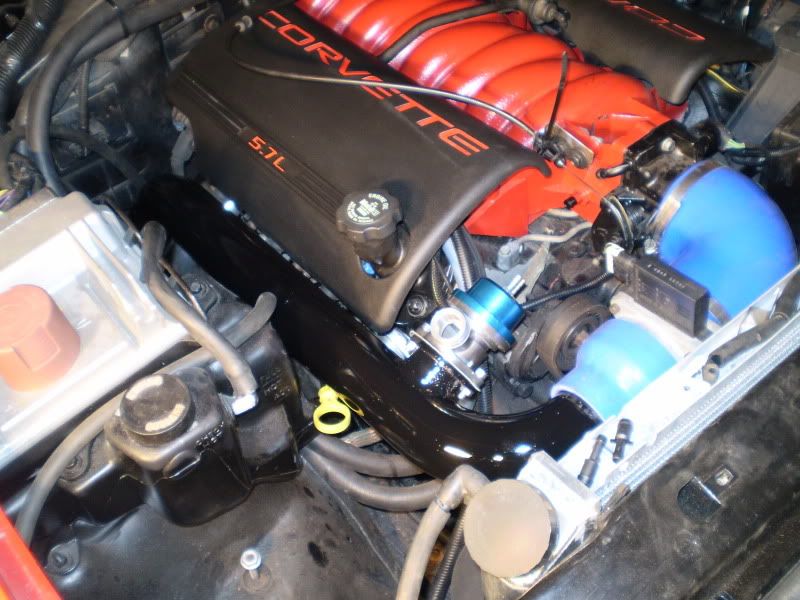
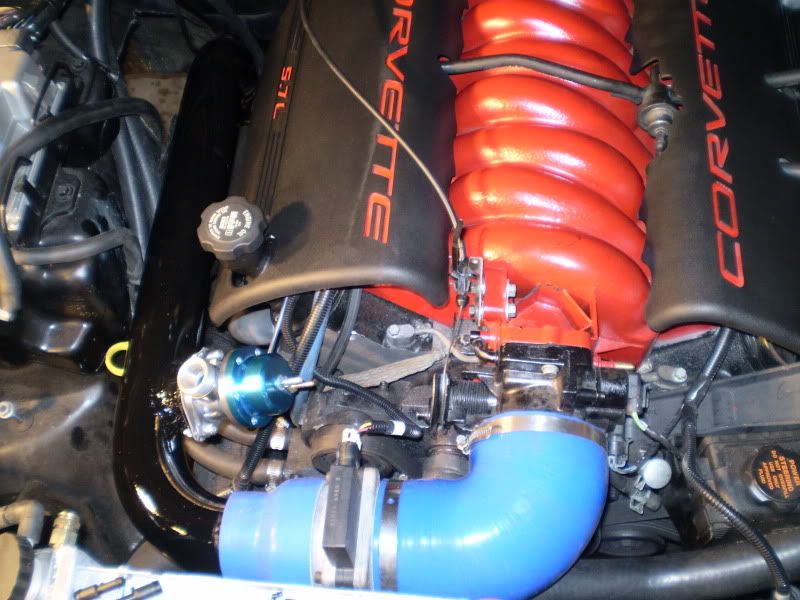
Intercooler piping is all done. Blow off valve is in, All vaccuum lines are plumbed.
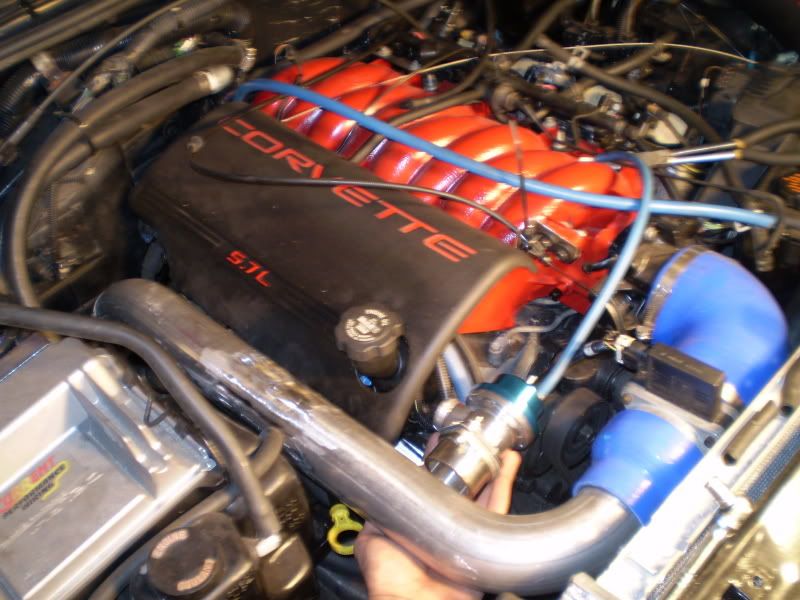
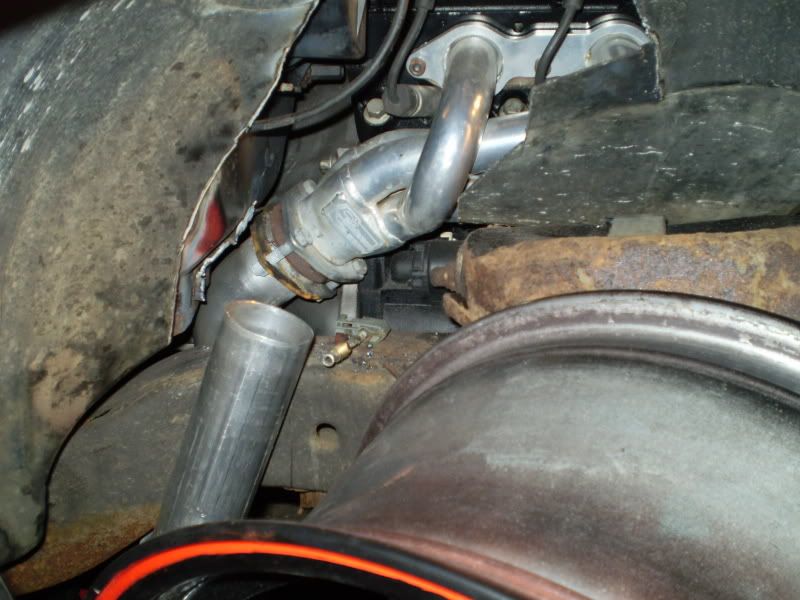
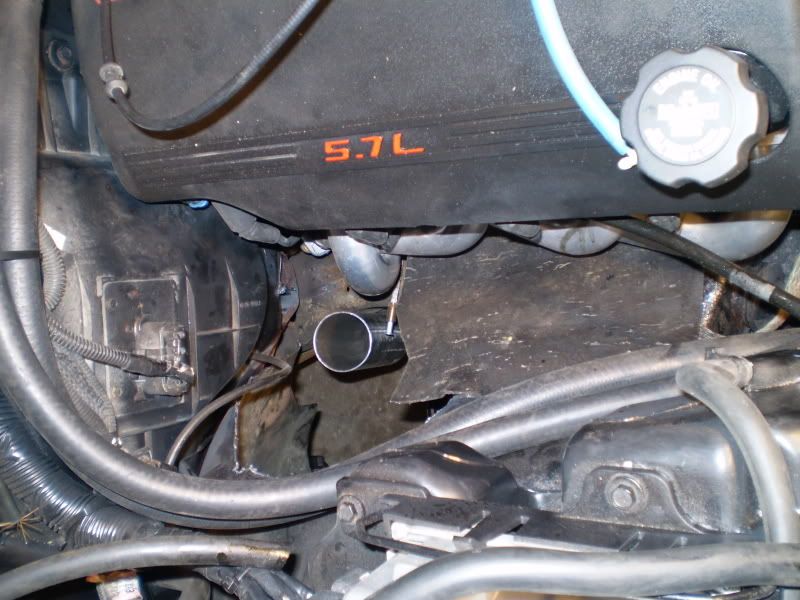
^ I think i cut the hole just a LITTLE too big!!!! hahaha, that will be fixed later.
I had to slip under the frame rail right before the lower control arm and come up into the engine bay this way in the fenderwell. I had no other way in. THe truck is too low to go under the cross member.
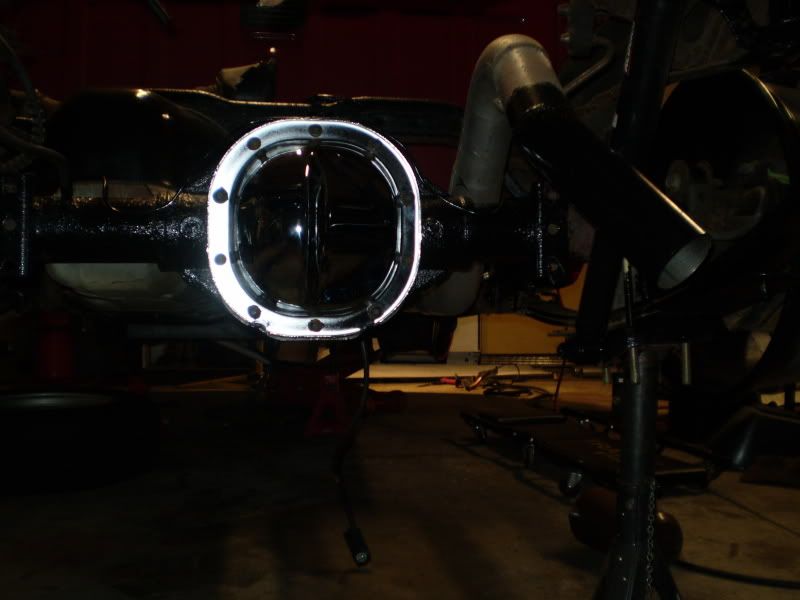
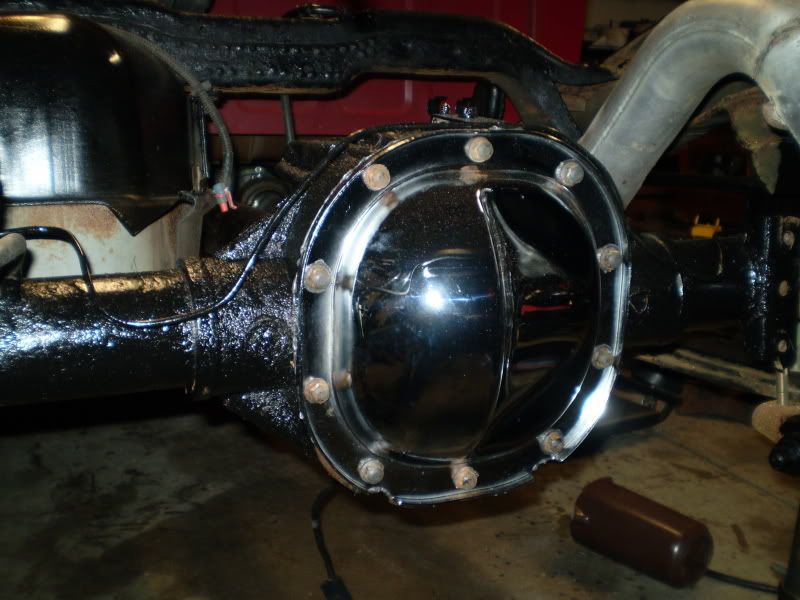
New diff cover on the 8.8" rear end! Rear is all painted and finished.
So... things left to do:
1. Fab up oil catch tank
2. get a new oil return pump
3. plumb all oil lines. (half done)
4. Bolt bed back on
5. charge pipe support and clamps.
6. throttle cable bracket
7. get tires
8. ARP head bolts
9. Strong clutch (has stock)
10. power steering lines
11. seat back brackets (fabrication)
12. battery tie down
13. Bleed all brake lines, and finish front pass. side line.
14. Steering shaft needs more clearance from header.
SO what's been the delay so far?!
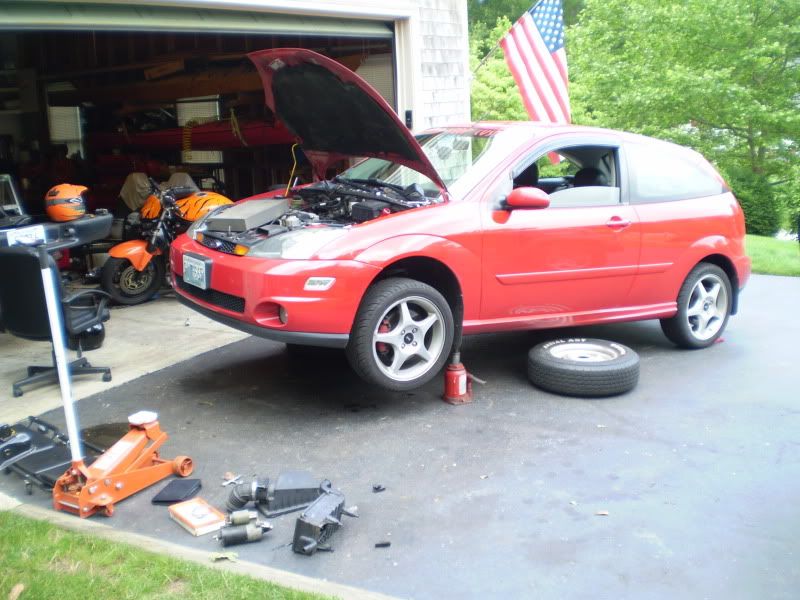
STUPID FRIGGEN DAILY DRIVER problems!!!!!!!!
I H A T E F O R D !!!!!!!
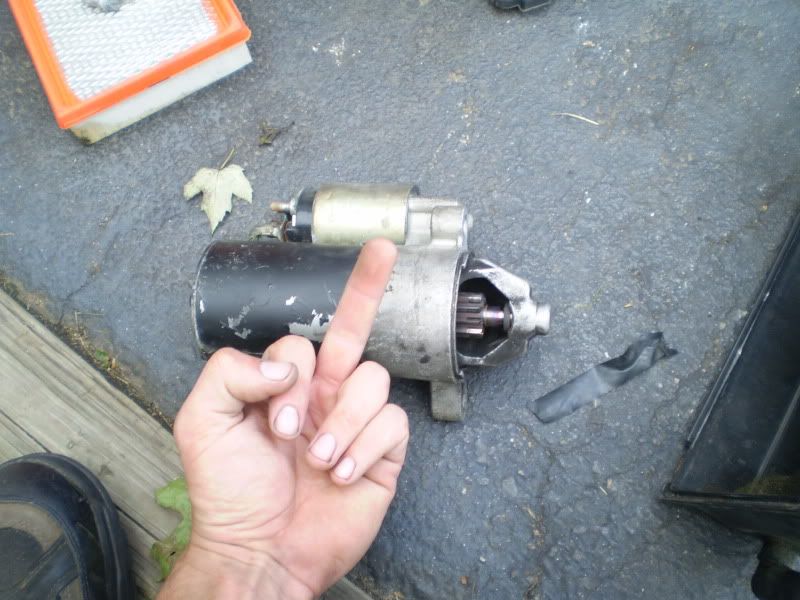
The starter seized up and fried. Starter woudl not turn off, continued to crank and not disengage, even with the key out of the ignition. Checked relays/fuses, all were good. Just a crappy ford product. So, 140$ down the tubes to get that fixed when i could have bought an oil pump, or Head bolts, or front tires~
TRUCK DID A BURNOUT IN THE STREET!!!!!
Intercooler piping is all done. Blow off valve is in, All vaccuum lines are plumbed.
^ I think i cut the hole just a LITTLE too big!!!! hahaha, that will be fixed later.
I had to slip under the frame rail right before the lower control arm and come up into the engine bay this way in the fenderwell. I had no other way in. THe truck is too low to go under the cross member.
New diff cover on the 8.8" rear end! Rear is all painted and finished.
So... things left to do:
1. Fab up oil catch tank
2. get a new oil return pump
3. plumb all oil lines. (half done)
4. Bolt bed back on
5. charge pipe support and clamps.
6. throttle cable bracket
7. get tires
8. ARP head bolts
9. Strong clutch (has stock)
10. power steering lines
11. seat back brackets (fabrication)
12. battery tie down
13. Bleed all brake lines, and finish front pass. side line.
14. Steering shaft needs more clearance from header.
SO what's been the delay so far?!
STUPID FRIGGEN DAILY DRIVER problems!!!!!!!!
I H A T E F O R D !!!!!!!
The starter seized up and fried. Starter woudl not turn off, continued to crank and not disengage, even with the key out of the ignition. Checked relays/fuses, all were good. Just a crappy ford product. So, 140$ down the tubes to get that fixed when i could have bought an oil pump, or Head bolts, or front tires~
 06-28-2009, 09:19 PM
#32
On The Tree
Thread Starter
Join Date: Feb 2009
Location: Rhode Island. (new hampshire)
Posts: 153
Likes: 0
Received 0 Likes
on
0 Posts
Ran out of money for right now.
Those ebay intercoolers that are like 150$ will not fit. I need special end tanks to get the pipes where i need them. Or, better to say, to get the pipes in the only places that they will fit.
To afford an intercooler that i need, i'll be spending $700+
I think in the fall, or this coming winter, i'll rebuild the engine, and do a 1000hp setup. 550-600hp is all i need for now.
07-07-2009, 01:20 PM
#33
[QUOTE=TurboBandit;11829883]Those ebay intercoolers that are like 150$ will not fit. I need special end tanks to get the pipes where i need them. Or, better to say, to get the pipes in the only places that they will fit.
To afford an intercooler that i need, i'll be spending $700+
QUOTE]
You could mount the intercooler just infront of the passenger side rear wheel in the bed laterally. Then slap a subaru (or old VW bus) style scoop to the side of the bed just behind the passenger door, and still use your cheap intercooler with just a little ducting!
Any new pics, with the corvette wheels, mounted with tires?
 07-10-2009, 03:21 PM
#35
Teching In

Join Date: Jul 2009
Posts: 5
Likes: 0
Received 0 Likes
on
0 Posts
Nice project, I can't wait for the next update.
We've been considering placing the turbo under the bed on our own project truck (LS2S10). We had laid it all out and all of it seems to fit ok except for the hot pipe. We were thinking we wanted to do what you did, come forward next to the frame rail and come up the fender into the engine bay, but there doesn't seem to be enough clearance for the tires to turn. We are running skinnys in the front and the pipe was a 3 inch. What size hot pipe are you running? Have you measured your clearance with the tires mounted and the wheel turned all the way? We were also considering running an air to water under the bed in the back to keep the charge pipe shorter. The project is currently on hold considering we cracked a sleeve.
We've been considering placing the turbo under the bed on our own project truck (LS2S10). We had laid it all out and all of it seems to fit ok except for the hot pipe. We were thinking we wanted to do what you did, come forward next to the frame rail and come up the fender into the engine bay, but there doesn't seem to be enough clearance for the tires to turn. We are running skinnys in the front and the pipe was a 3 inch. What size hot pipe are you running? Have you measured your clearance with the tires mounted and the wheel turned all the way? We were also considering running an air to water under the bed in the back to keep the charge pipe shorter. The project is currently on hold considering we cracked a sleeve.
 07-26-2009, 11:44 PM
#37
TECH Resident
iTrader: (23)

Join Date: Oct 2008
Location: Rhode Island
Posts: 990
Likes: 0
Received 0 Likes
on
0 Posts

damn i wish i would of met ya before i joined a few yrs ago. i would of loved being involved with some o your projects and gain some knowledge. ill hit ya up whenever i take leave.
btw, pm me if you know anyone interested in my camaro. im looking for a high mileaged one or a roller.
im gonna put mine up on base for 15k firm. 60k on the odo
btw, pm me if you know anyone interested in my camaro. im looking for a high mileaged one or a roller.
im gonna put mine up on base for 15k firm. 60k on the odo
07-29-2009, 05:58 PM
#38
dude i love your build its DIY no damn million dollar budjet all done in a garage with some friends... looking awsome cant wait to see finish product on your car you made those wheels look remarkable...keep us updated with pix man
08-13-2009, 08:28 AM
#39
On The Tree
Thread Starter
Join Date: Feb 2009
Location: Rhode Island. (new hampshire)
Posts: 153
Likes: 0
Received 0 Likes
on
0 Posts
update: TRUCK CAN DO DONUTS REEEEEAL EASY! 
From my last list~
So... things left to do:
1. Fab up oil catch tank Done
2. get a new oil return pump 8000-643-210 Shurflo with Relay hooked up to power signal from the fuel pump
3. plumb all oil lines. (half done) Done, oil cooler is mounted in the front
4. Bolt bed back on Done
5. charge pipe support and clamps. Done
6. throttle cable bracket Kinda done... Zip ties?!
7. get tires Done, and mounted/balanced
8. ARP head bolts Done. PAIN IN THE **** TO do w/ the heads on the truck
9. Strong clutch (has stock) Done, ACT with 6puck sprung. 925 ft/lbs
10. power steering lines Done, but one is leaky. I omitted the p/s cooler, and just ran it back to the resevoir.
11. seat back brackets (fabrication) NOT done. To be finished
12. battery tie down 1 motorcycle tie down strap, DONE
13. Bleed all brake lines, and finish front pass. side line. I love speed bleeders. Done! rear line had a leak... fixed after an hour of re-flaring.
14. Steering shaft needs more clearance from header. Done! Was rubbing, but now it has plenty of clearance. Cut the shaft in half, welded in a skinnier section of pipe past the header. Now it has about an 1/8" to 1/4" of clearance. No issues now
My clutch will ship out on the 17th. ACT has to make the disc.
Smoke Problem:
I had some smoke issues with the turbo because i was only running the lines with no catch tank below the turbo. When the truck was off, the oil in the lines would flow down, and fill the turbo up w/ oil, thus slowly dribbling out into the exhaust. On the next startup, i'd have smoke for the first 20 mins of driving. Putting a small catch tank resevoir under the turbo solved all of it. My oil pump now has it's feed coming from the bottom of that tank. Oil flows back into the tank on shutoff, rather than back into the turbo now. FIXED!
ELECTRIC TURBO OIL RETURN PUMP
My oil routing is long, but it works!!!!!!! I ended up going with the Shurflo pump 8000-643-210. Rated for working temp of 180 degrees. Used for transmission fluid flow/cooling in big rig diesel trucks. Also has a self priming capability of 6 vertical meters or 30 horizontal meters. CAN RUN DRY!!!! with no damage! I ran a simple 6$ relay from the Pepboys Offroad Lights shelf. Took the signal from the CPU for the fuel pump relay. Oil pump primes just like the fuel pump, and also ONLY RUNS whent he fuel pump is on.
Here's how it goes....
1-oil drains from turbo, gravity drain, into catch tank
2-hose from bottom of catch tank, routed up to oil cooler in grill of truck.
3-other side of cooler goes to the electric oil pump mounted on passenger fenderwell
4-oil pump pushes oil back into valve cover nipple (old pcv outlet)
My pump is working more like a sucker pump rather than a pusher pump, but it works great, and i have an extra pump lyin around in case of failure.
I REALLY wanted to route the hot oil through a cooler before i put it through the pump, and it has about 10 feet of travel horizontally before it hits the pump. So i believe it definately brings the oil temps down significantly before the pump sees it.
Air filter goes right on the mouth of the turbo. More like an air screen than a filter. Truck cannot be driven in the rain, might hydro lock. I suppose i could rig up a splash shield, which i most likely will, and then it would be ok in the rain.
My hot pipe headers to turbo is 2.5", my charge pipes are also all 2.5".
I have clearance issues with the wheel turning all the way right with the new wheels/tires, But i need to raise the truck up another few inches. I was bored one afternoon and just chopped my springs. Chopped them WAY too much! So i just need some 2" drop springs to finish up the front end, then i'll check clearance again, and go from there. I believe the clearance issues i have are because of the wheel spacers i'm using. They are 2.5" spacers, and instead of the tire turning on an axis, it now swings out farther because of the spacer. An air to water intercooler is my next project.
DIY!!!!!! Home Made!!!!!! Hell Yea!!!!!!! Thanks!
From my last list~
So... things left to do:
1. Fab up oil catch tank Done
2. get a new oil return pump 8000-643-210 Shurflo with Relay hooked up to power signal from the fuel pump
3. plumb all oil lines. (half done) Done, oil cooler is mounted in the front
4. Bolt bed back on Done
5. charge pipe support and clamps. Done
6. throttle cable bracket Kinda done... Zip ties?!
7. get tires Done, and mounted/balanced
8. ARP head bolts Done. PAIN IN THE **** TO do w/ the heads on the truck
9. Strong clutch (has stock) Done, ACT with 6puck sprung. 925 ft/lbs
10. power steering lines Done, but one is leaky. I omitted the p/s cooler, and just ran it back to the resevoir.
11. seat back brackets (fabrication) NOT done. To be finished
12. battery tie down 1 motorcycle tie down strap, DONE
13. Bleed all brake lines, and finish front pass. side line. I love speed bleeders. Done! rear line had a leak... fixed after an hour of re-flaring.
14. Steering shaft needs more clearance from header. Done! Was rubbing, but now it has plenty of clearance. Cut the shaft in half, welded in a skinnier section of pipe past the header. Now it has about an 1/8" to 1/4" of clearance. No issues now
My clutch will ship out on the 17th. ACT has to make the disc.
Smoke Problem:
I had some smoke issues with the turbo because i was only running the lines with no catch tank below the turbo. When the truck was off, the oil in the lines would flow down, and fill the turbo up w/ oil, thus slowly dribbling out into the exhaust. On the next startup, i'd have smoke for the first 20 mins of driving. Putting a small catch tank resevoir under the turbo solved all of it. My oil pump now has it's feed coming from the bottom of that tank. Oil flows back into the tank on shutoff, rather than back into the turbo now. FIXED!
ELECTRIC TURBO OIL RETURN PUMP
My oil routing is long, but it works!!!!!!! I ended up going with the Shurflo pump 8000-643-210. Rated for working temp of 180 degrees. Used for transmission fluid flow/cooling in big rig diesel trucks. Also has a self priming capability of 6 vertical meters or 30 horizontal meters. CAN RUN DRY!!!! with no damage! I ran a simple 6$ relay from the Pepboys Offroad Lights shelf. Took the signal from the CPU for the fuel pump relay. Oil pump primes just like the fuel pump, and also ONLY RUNS whent he fuel pump is on.
Here's how it goes....
1-oil drains from turbo, gravity drain, into catch tank
2-hose from bottom of catch tank, routed up to oil cooler in grill of truck.
3-other side of cooler goes to the electric oil pump mounted on passenger fenderwell
4-oil pump pushes oil back into valve cover nipple (old pcv outlet)
My pump is working more like a sucker pump rather than a pusher pump, but it works great, and i have an extra pump lyin around in case of failure.
I REALLY wanted to route the hot oil through a cooler before i put it through the pump, and it has about 10 feet of travel horizontally before it hits the pump. So i believe it definately brings the oil temps down significantly before the pump sees it.
Air filter goes right on the mouth of the turbo. More like an air screen than a filter. Truck cannot be driven in the rain, might hydro lock. I suppose i could rig up a splash shield, which i most likely will, and then it would be ok in the rain.
Nice project, I can't wait for the next update.
We've been considering placing the turbo under the bed on our own project truck (LS2S10). We had laid it all out and all of it seems to fit ok except for the hot pipe. We were thinking we wanted to do what you did, come forward next to the frame rail and come up the fender into the engine bay, but there doesn't seem to be enough clearance for the tires to turn. We are running skinnys in the front and the pipe was a 3 inch. What size hot pipe are you running? Have you measured your clearance with the tires mounted and the wheel turned all the way? We were also considering running an air to water under the bed in the back to keep the charge pipe shorter. The project is currently on hold considering we cracked a sleeve.
We've been considering placing the turbo under the bed on our own project truck (LS2S10). We had laid it all out and all of it seems to fit ok except for the hot pipe. We were thinking we wanted to do what you did, come forward next to the frame rail and come up the fender into the engine bay, but there doesn't seem to be enough clearance for the tires to turn. We are running skinnys in the front and the pipe was a 3 inch. What size hot pipe are you running? Have you measured your clearance with the tires mounted and the wheel turned all the way? We were also considering running an air to water under the bed in the back to keep the charge pipe shorter. The project is currently on hold considering we cracked a sleeve.
I have clearance issues with the wheel turning all the way right with the new wheels/tires, But i need to raise the truck up another few inches. I was bored one afternoon and just chopped my springs. Chopped them WAY too much! So i just need some 2" drop springs to finish up the front end, then i'll check clearance again, and go from there. I believe the clearance issues i have are because of the wheel spacers i'm using. They are 2.5" spacers, and instead of the tire turning on an axis, it now swings out farther because of the spacer. An air to water intercooler is my next project.
DIY!!!!!! Home Made!!!!!! Hell Yea!!!!!!! Thanks!
08-18-2009, 08:50 AM
#40
Teching In

Join Date: Dec 2008
Location: Newark, DE
Posts: 1
Likes: 0
Received 0 Likes
on
0 Posts
Cool project. Can't wait to see some videos of this thing in action.
Question about the rear wheels. With the adapter in there how close are you to the fender lip? Could you get some pics please? I've been looking at the 8.8 swap and running C5 or C6 wheels but I suck at figuring out back space and offset.
Question about the rear wheels. With the adapter in there how close are you to the fender lip? Could you get some pics please? I've been looking at the 8.8 swap and running C5 or C6 wheels but I suck at figuring out back space and offset.