
*vids on pg 5* 6.0L LSX/T56 in a 1991 Z28 convertible
 10-21-2009, 09:46 PM
#1

I figured my swap has had enough progress that it's worth showing to you all now.
Just some specs on the block first off:
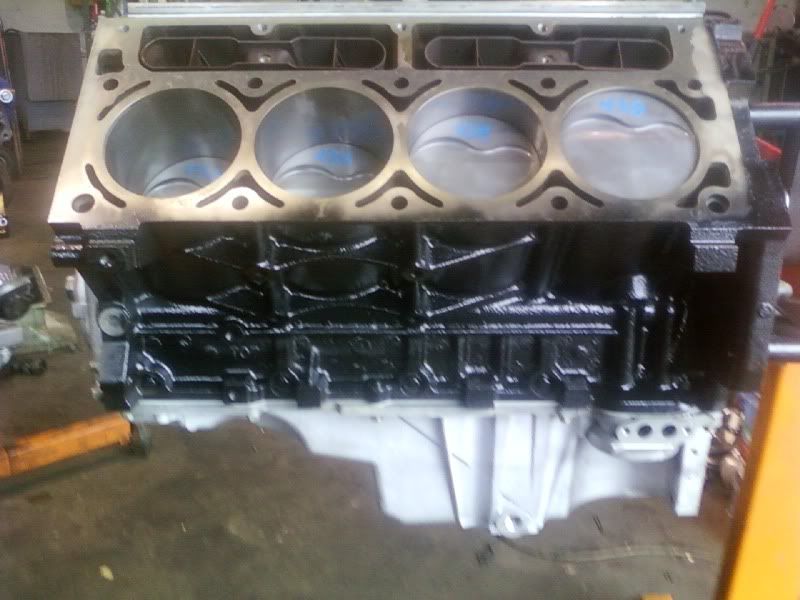
It started out as a 2000 LQ4 with the longer crankshaft, which I tore the block down to replace it with an LS1 crankshaft so I can use a T56. Well when I tore it down I found that the inside of the block was really nasty, the pistons and rings were about shot, looked like it hadn't had an oil change in 8,000 miles. So I decided to rebuild it.
The longblock parts list (I have the build sheet on the shortblock if anyone is interested in seeing that as well):
Mahle forged pistons with teflon coated skirts
Eagle forged I-beams
Texas Speed MS4
all new bearings and bolts
Melling race oil pump
25% underdrive crank pulley
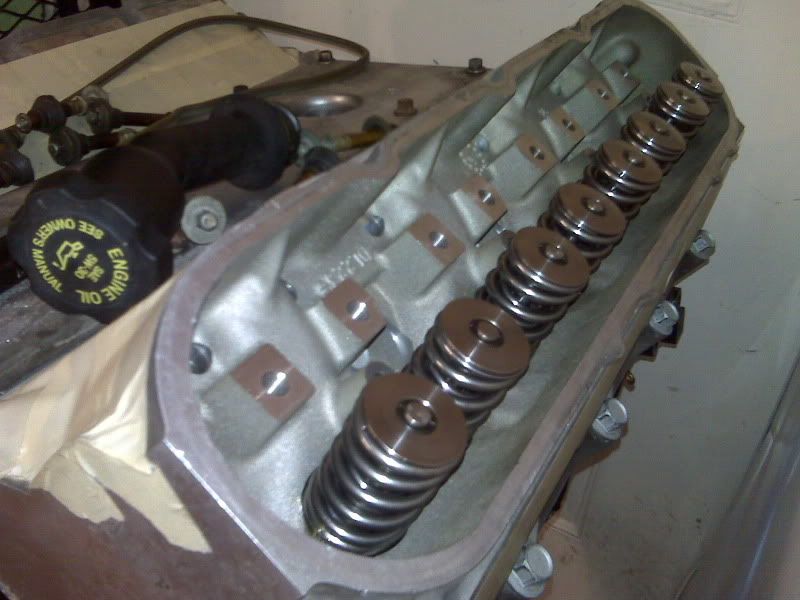
milled 317 casting heads
Cometic head gaskets
PRC dual valve springs from Texas Speed
PBM chrome-moly pushrods
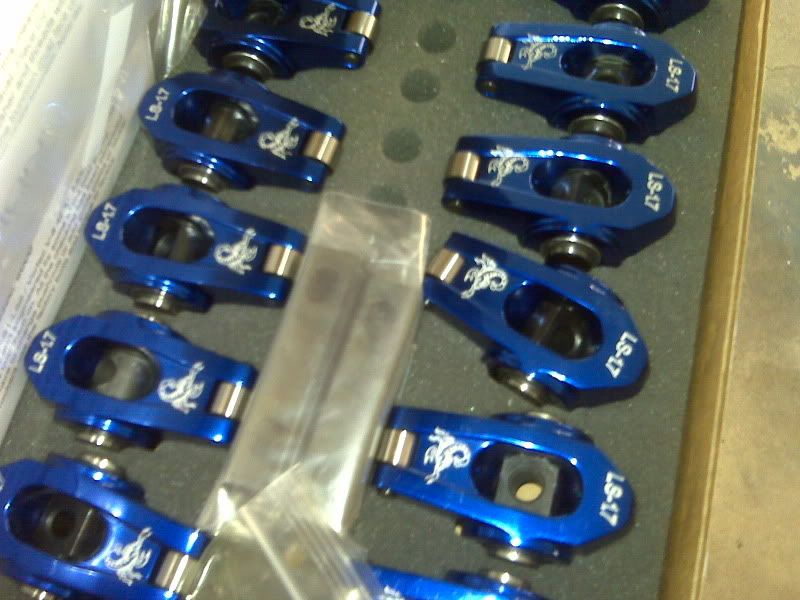
Scorpion 1.7 rockers
LS6 intake
of course the heads got a thorough valve job and cleaning as well
the compression ratio is 10.6x:1 with the milled heads
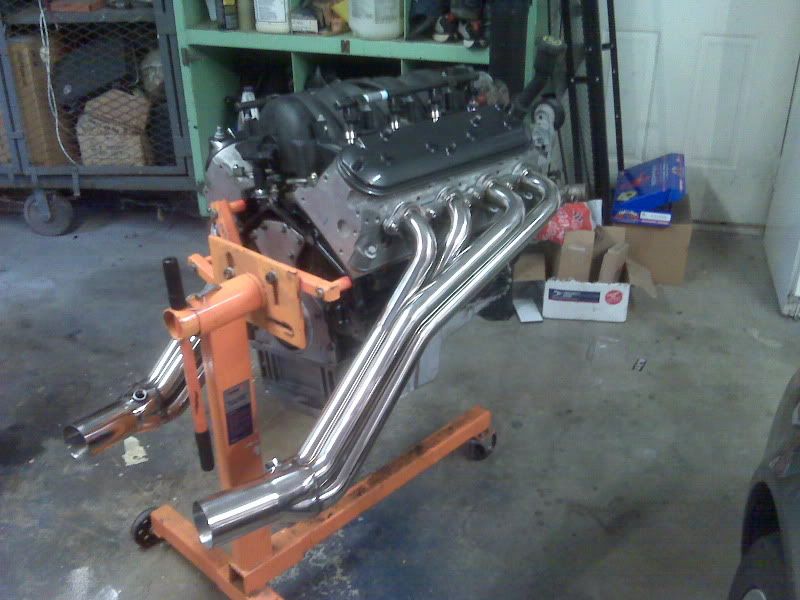
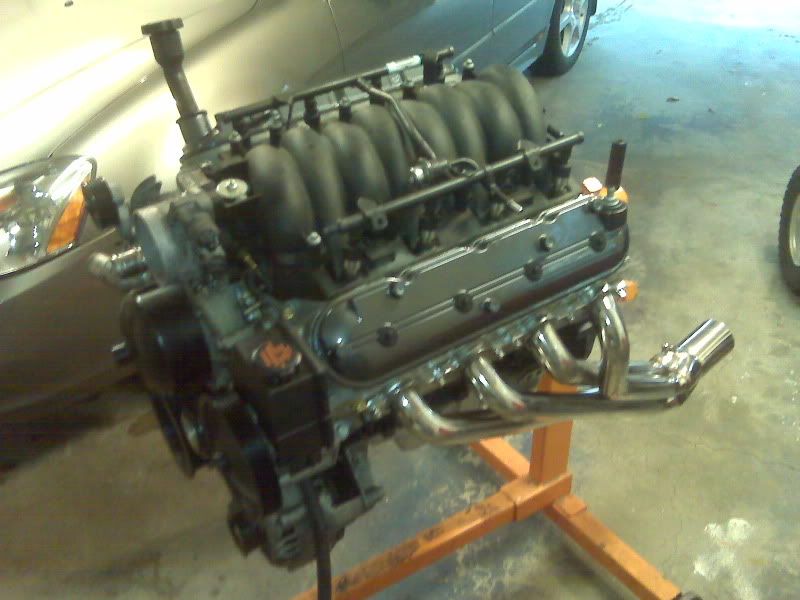
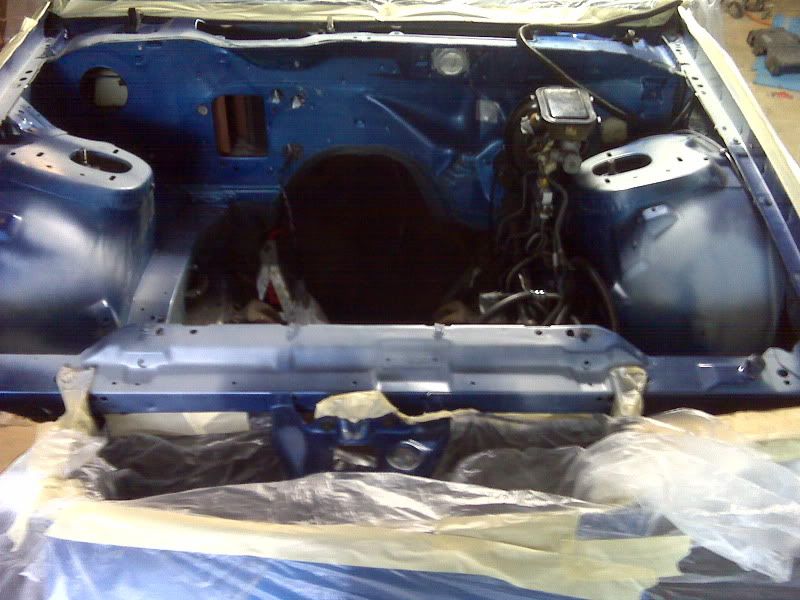
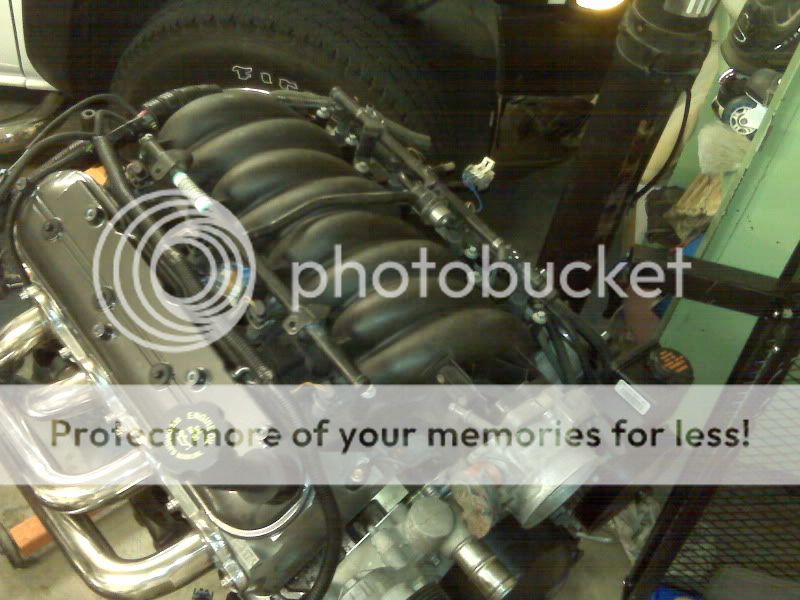
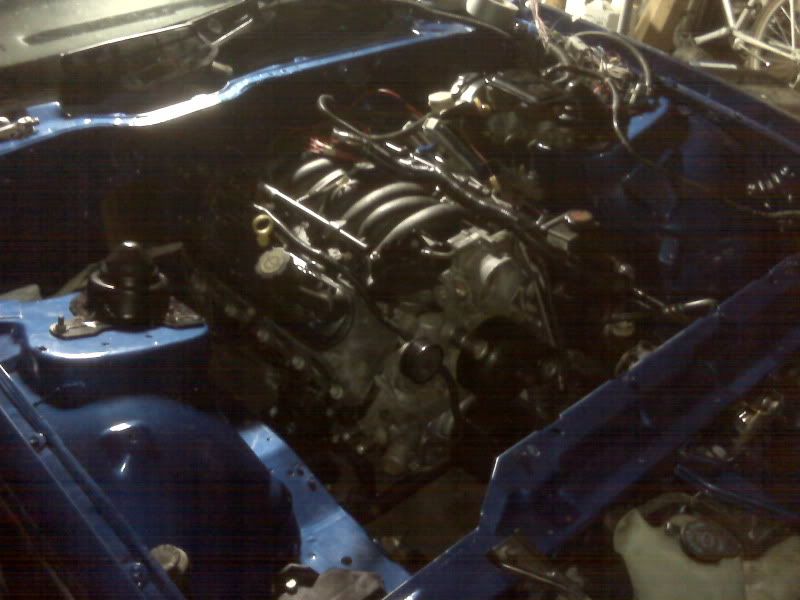
These were taken this evening, I bought a set of longtubes made for 3rd gen Fbodies with the LSX swap, they're made by Stainless Steel Works. I also had the valve covers powder coated in black chrome, got the intake put on and the fuel rails. Obviously I had to swap out the accessories and oil pan for that of an Fbody:
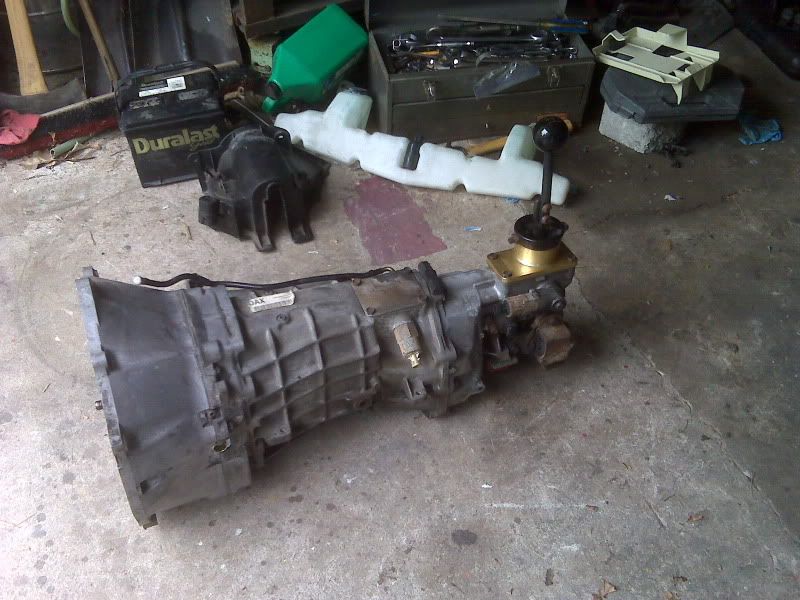
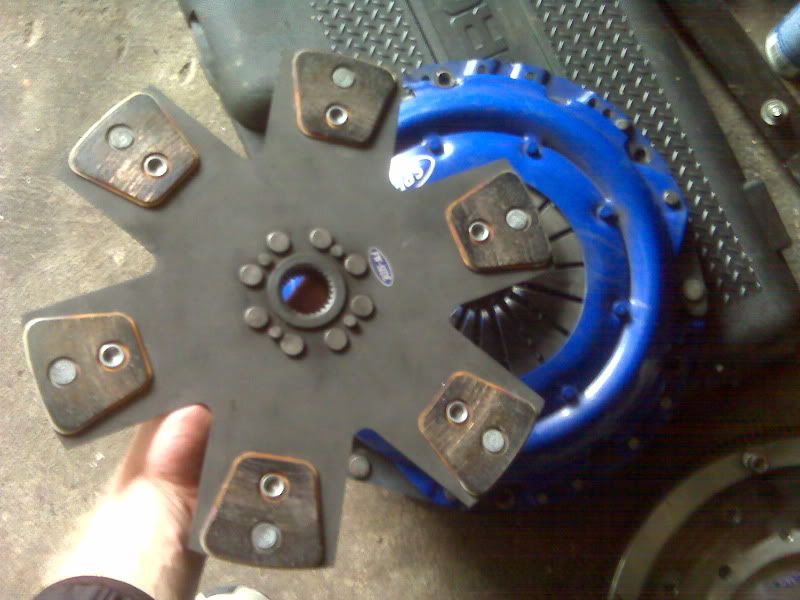
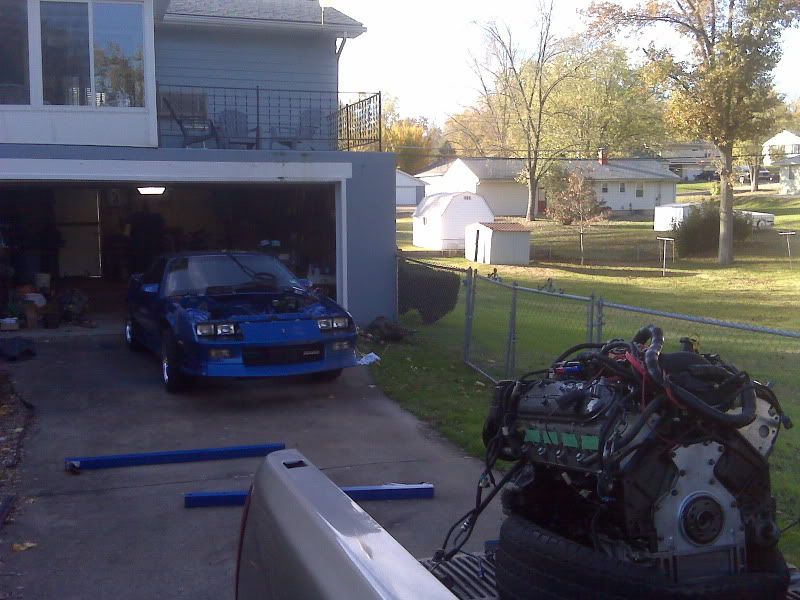
Here is what will be behind the motor, it has a Spec 4 with only 100 miles on it and an alum./steel Spec flywheel as well.
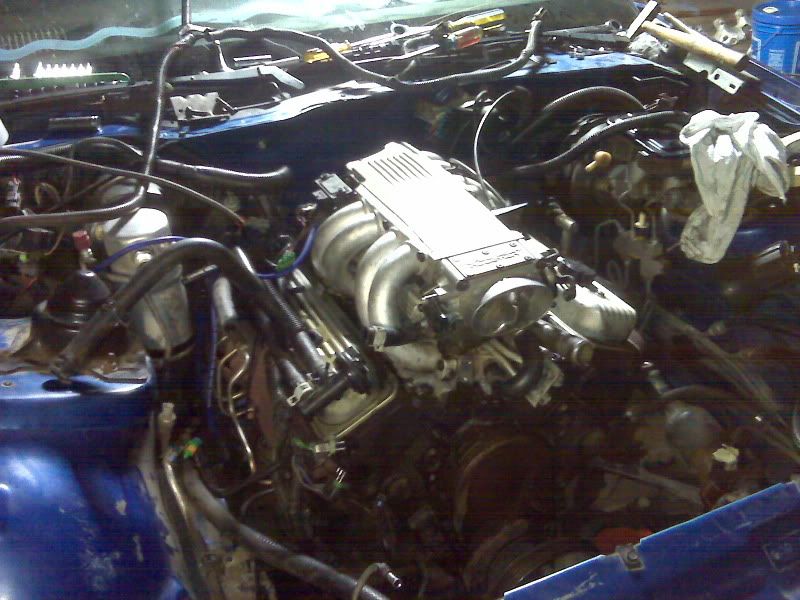
Here is a picture of the old 305TPI beast in there:
Primered:
Painted:

Tubular k-member:
I'm going with the 4th gen coolant and windshield wiper reservoirs:
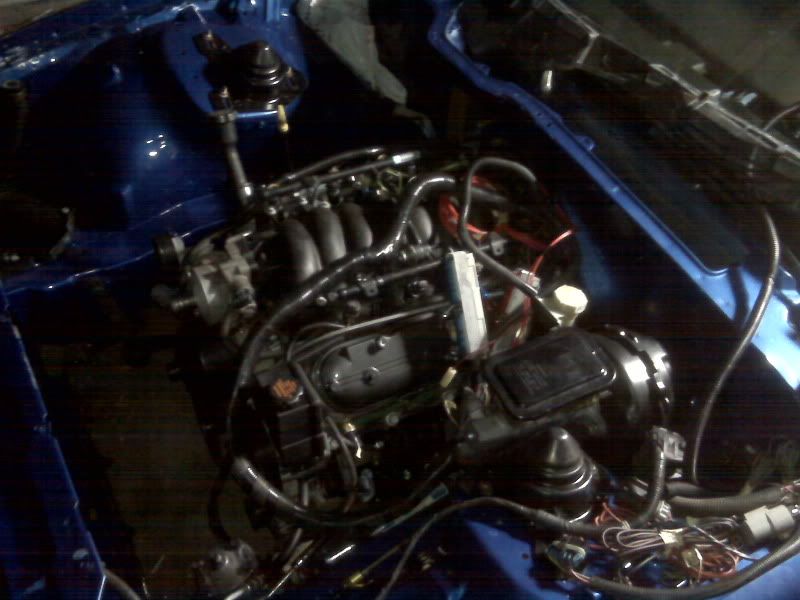
And this is how the engine looks as of yesterday. I got my wiring harness out of the box, and started plugging things in. I'm taking the LS6 intake off tomorrow and having it powdercoated the same black-chrome color as the valve covers.
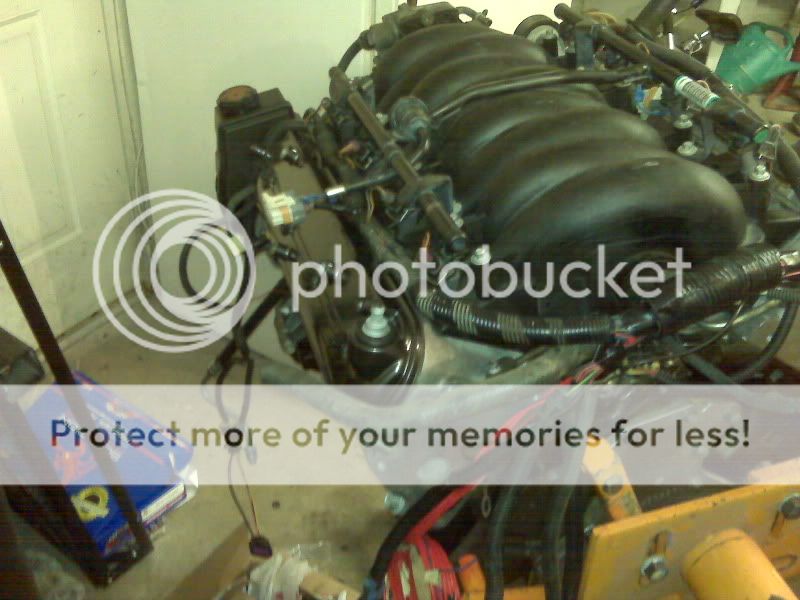
I'll keep adding more updates and pictures as I progress. I'm going to get the hole cut for the shifter this weekend and undercoat the trans tunnel so next week I can drop the motor and trans in.
Just some specs on the block first off:
It started out as a 2000 LQ4 with the longer crankshaft, which I tore the block down to replace it with an LS1 crankshaft so I can use a T56. Well when I tore it down I found that the inside of the block was really nasty, the pistons and rings were about shot, looked like it hadn't had an oil change in 8,000 miles. So I decided to rebuild it.
The longblock parts list (I have the build sheet on the shortblock if anyone is interested in seeing that as well):
Mahle forged pistons with teflon coated skirts
Eagle forged I-beams
Texas Speed MS4
all new bearings and bolts
Melling race oil pump
25% underdrive crank pulley
milled 317 casting heads
Cometic head gaskets
PRC dual valve springs from Texas Speed
PBM chrome-moly pushrods
Scorpion 1.7 rockers
LS6 intake
of course the heads got a thorough valve job and cleaning as well
the compression ratio is 10.6x:1 with the milled heads
These were taken this evening, I bought a set of longtubes made for 3rd gen Fbodies with the LSX swap, they're made by Stainless Steel Works. I also had the valve covers powder coated in black chrome, got the intake put on and the fuel rails. Obviously I had to swap out the accessories and oil pan for that of an Fbody:
Here is what will be behind the motor, it has a Spec 4 with only 100 miles on it and an alum./steel Spec flywheel as well.
Here is a picture of the old 305TPI beast in there:
Primered:
Painted:
Tubular k-member:
I'm going with the 4th gen coolant and windshield wiper reservoirs:
And this is how the engine looks as of yesterday. I got my wiring harness out of the box, and started plugging things in. I'm taking the LS6 intake off tomorrow and having it powdercoated the same black-chrome color as the valve covers.
I'll keep adding more updates and pictures as I progress. I'm going to get the hole cut for the shifter this weekend and undercoat the trans tunnel so next week I can drop the motor and trans in.

 10-22-2009, 10:31 PM
#5
So after doing a quick search for "SpareECM" on this site, I ordered a computer for the swap from that seller on ebay. I ganked a VIN from a car on ebay so that I can get the programming for an '02 6spd car, should have it in a few days. Not bad for $101 with shipping. 
10-25-2009, 07:29 PM
#6
More progress.
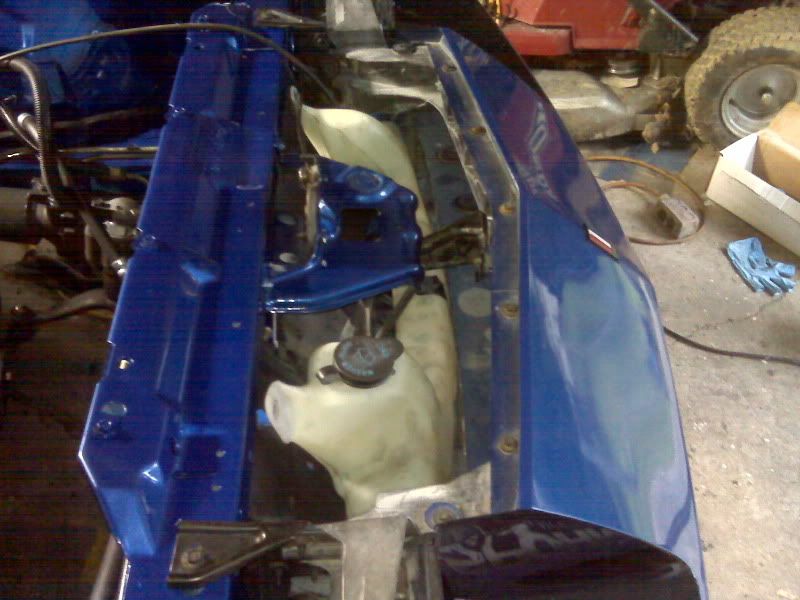
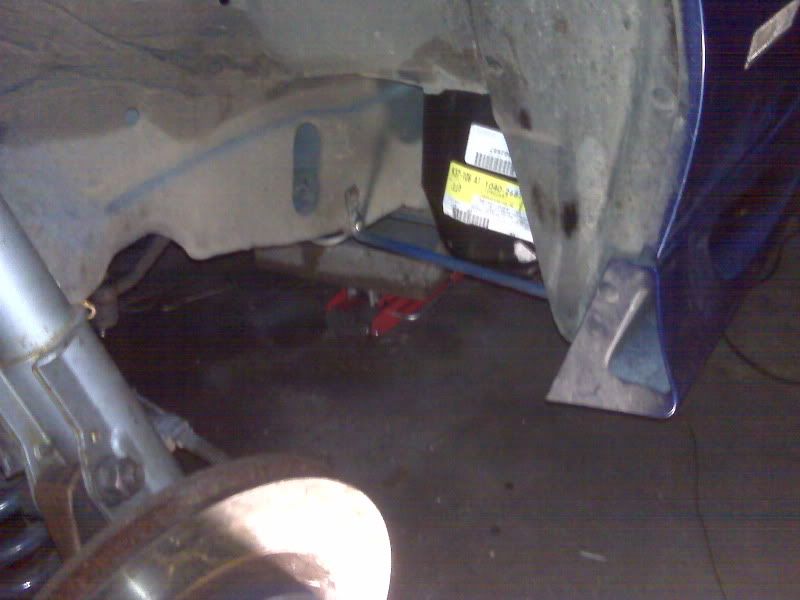
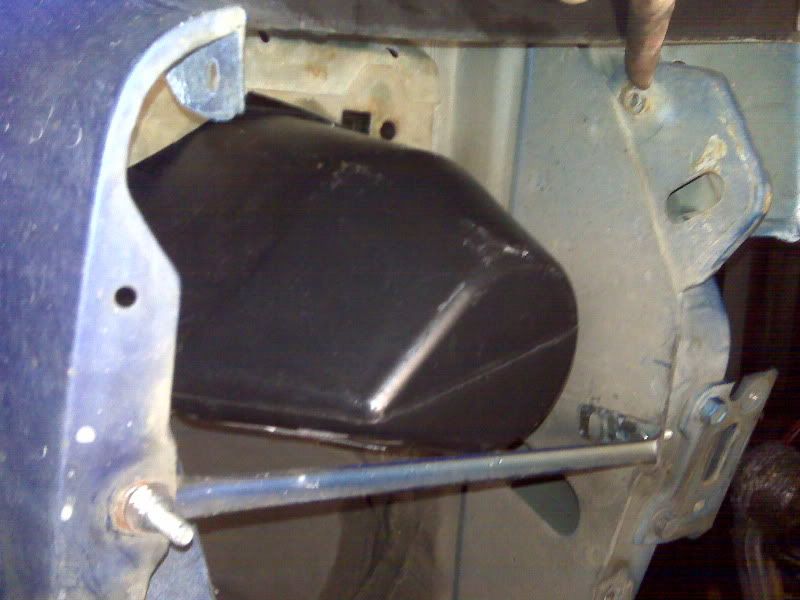
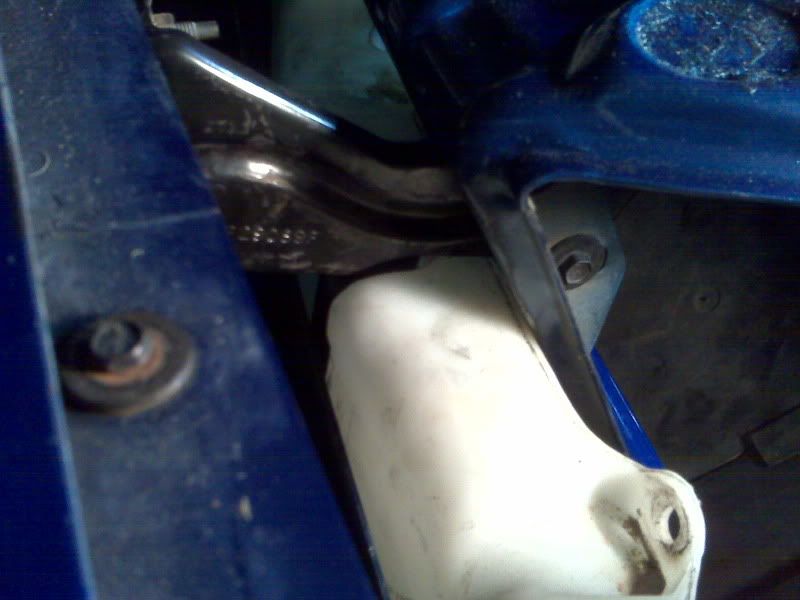
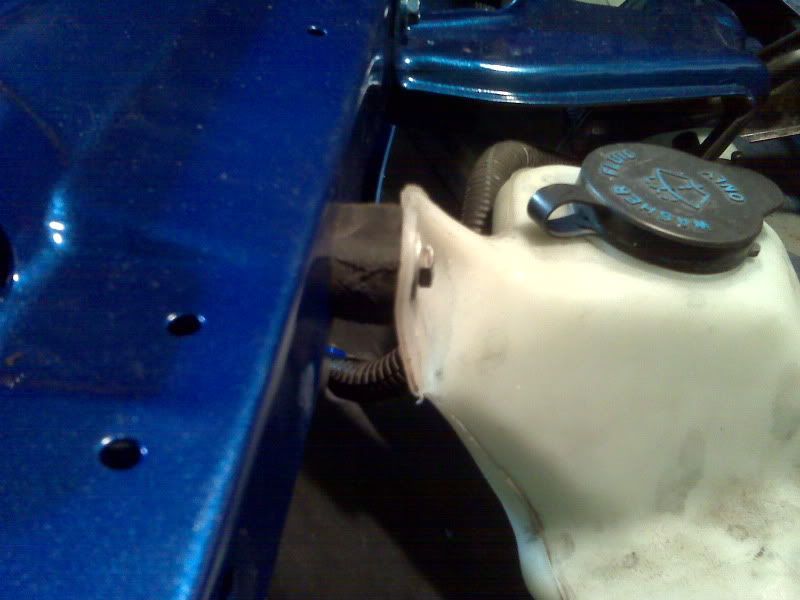
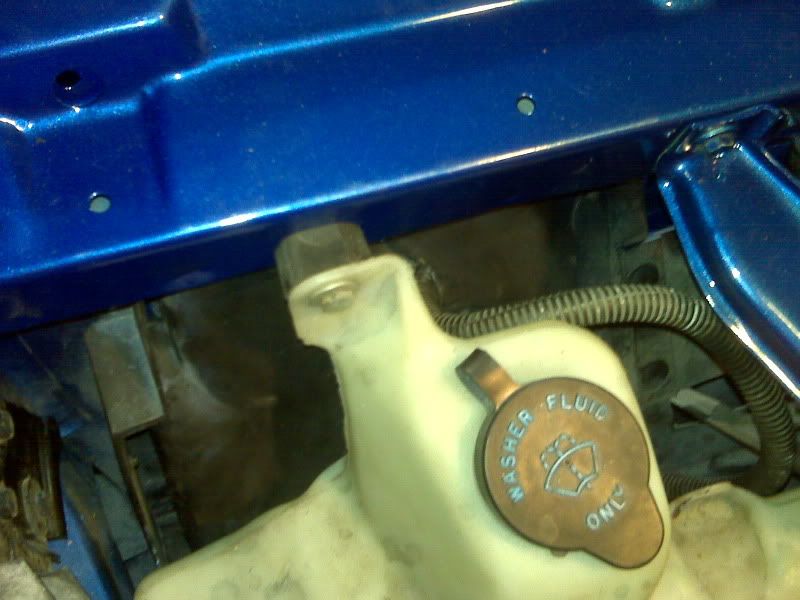
First off, I have somewhat of a unique item to share with those of you who are using the 4th gen coolant reservoir on a 3rd gen Fbody. When you cut the hole in the battery tray to make room for the bottom end of the 4th gen bottle, you will notice that there is a brace for the passenger side fender that is in the way, and it will not let the coolant bottle rest correctly against the battery tray. Removing the brace will allow the fender to flab in the wind when you're going down the highway. So, it is important that you somehow utilize this brace, and my dad and I came up with an easy solution to do just that. There is a small hole in the passenger frame rail, just a little ways backwards from where this brace would normally mount. I decided to use that hole to mount the brace because it allowed just enough room for the coolant bottle to sit properly. To do this, I took a sharpie and marked how short I needed to make the brace, then put it in a vice and bent it at a 90* angle, drilled another hole in it and got a bolt and locking nut to fasten it in place in the new hole. You can see from these pictures exactly where I decided to mount it, and I took a picture from below the fender to show how much clearance it gave me with the coolant bottle. In the 3rd picture, my index finger points to where the brace mounted from the factory, so you can see how it poses a problem when using this coolant bottle.

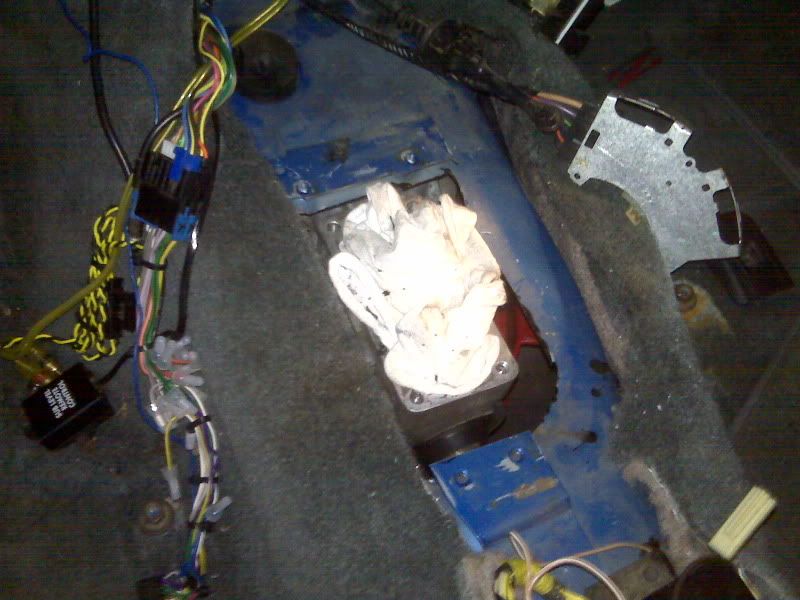
The other big part of my progress from today was cutting the hole for the manual shifter. I cut it just within the stock holes for mounting the auto shifter (there are four holes). The carpet on the driver side hangs over a little bit so you can't see all four edges of the hole, but you get the idea.
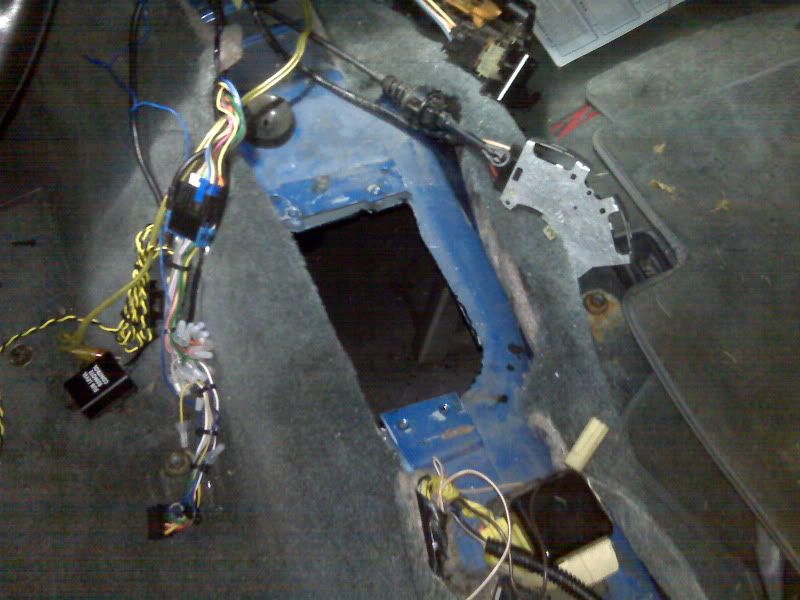
Then here is something I was really excited to get out of the way. I went ahead and undercoated just the transmission tunnel, all the way back to about 6" behind where the shifter will be. I also undercoated up into the engine bay just a little bit. I wanted to get the tunnel done so I can get the motor and trans in next weekend. I'll undercoat the rest of the car once it is running and I can take it up to my friend's work and use their lift, because doing it all on your back with the car 2' off the ground kind of sucks.
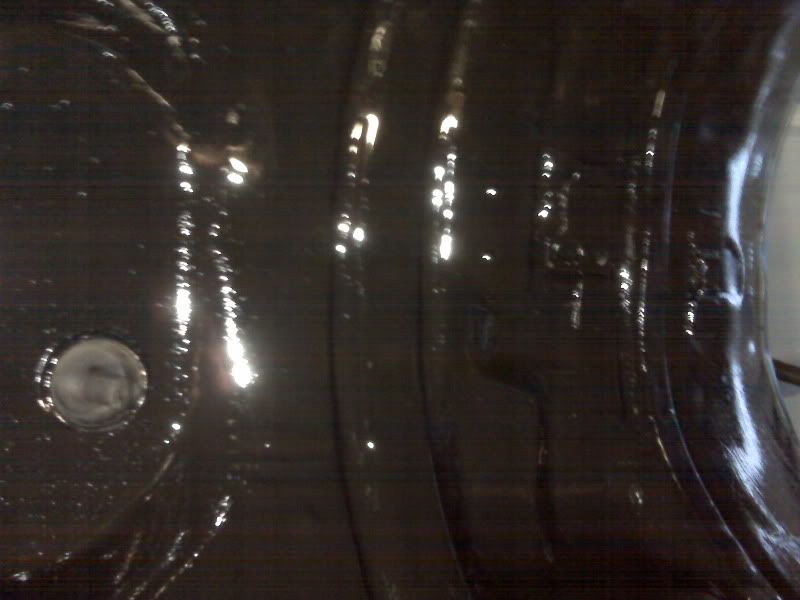
More of the undercoating. I made a fine line between blue and black on the trans tunnel, I think I like it this way with it coming into the frame rail in the engine bay. What do you guys think?
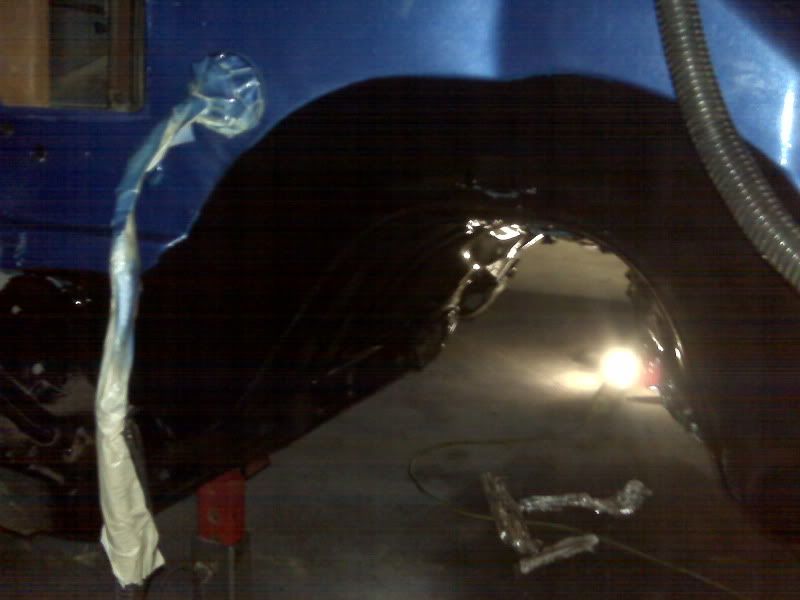
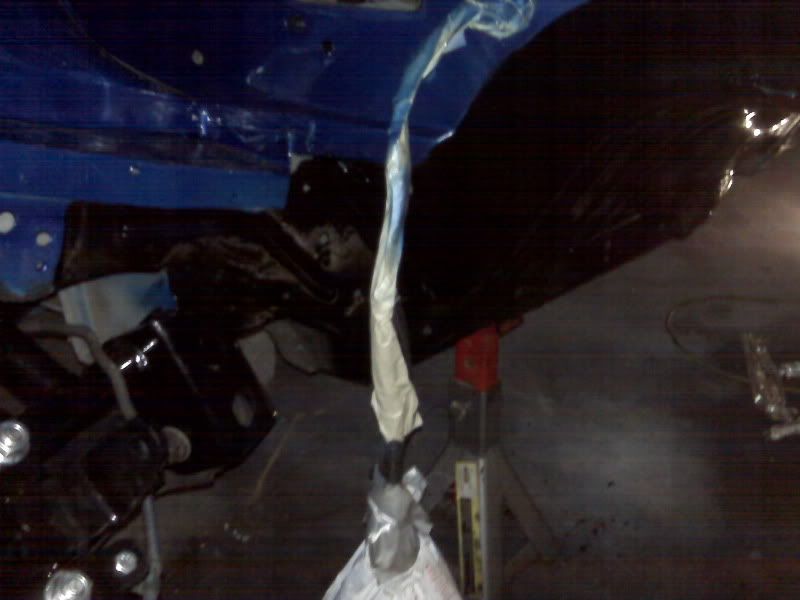
First off, I have somewhat of a unique item to share with those of you who are using the 4th gen coolant reservoir on a 3rd gen Fbody. When you cut the hole in the battery tray to make room for the bottom end of the 4th gen bottle, you will notice that there is a brace for the passenger side fender that is in the way, and it will not let the coolant bottle rest correctly against the battery tray. Removing the brace will allow the fender to flab in the wind when you're going down the highway. So, it is important that you somehow utilize this brace, and my dad and I came up with an easy solution to do just that. There is a small hole in the passenger frame rail, just a little ways backwards from where this brace would normally mount. I decided to use that hole to mount the brace because it allowed just enough room for the coolant bottle to sit properly. To do this, I took a sharpie and marked how short I needed to make the brace, then put it in a vice and bent it at a 90* angle, drilled another hole in it and got a bolt and locking nut to fasten it in place in the new hole. You can see from these pictures exactly where I decided to mount it, and I took a picture from below the fender to show how much clearance it gave me with the coolant bottle. In the 3rd picture, my index finger points to where the brace mounted from the factory, so you can see how it poses a problem when using this coolant bottle.
The other big part of my progress from today was cutting the hole for the manual shifter. I cut it just within the stock holes for mounting the auto shifter (there are four holes). The carpet on the driver side hangs over a little bit so you can't see all four edges of the hole, but you get the idea.
Then here is something I was really excited to get out of the way. I went ahead and undercoated just the transmission tunnel, all the way back to about 6" behind where the shifter will be. I also undercoated up into the engine bay just a little bit. I wanted to get the tunnel done so I can get the motor and trans in next weekend. I'll undercoat the rest of the car once it is running and I can take it up to my friend's work and use their lift, because doing it all on your back with the car 2' off the ground kind of sucks.
More of the undercoating. I made a fine line between blue and black on the trans tunnel, I think I like it this way with it coming into the frame rail in the engine bay. What do you guys think?

Trending Topics

 10-29-2009, 09:34 PM
#14
Ok so I got a CRAP ton of stuff done tonight thanks to my bad case of senior-itis ( skipped my last class tonight haha ).
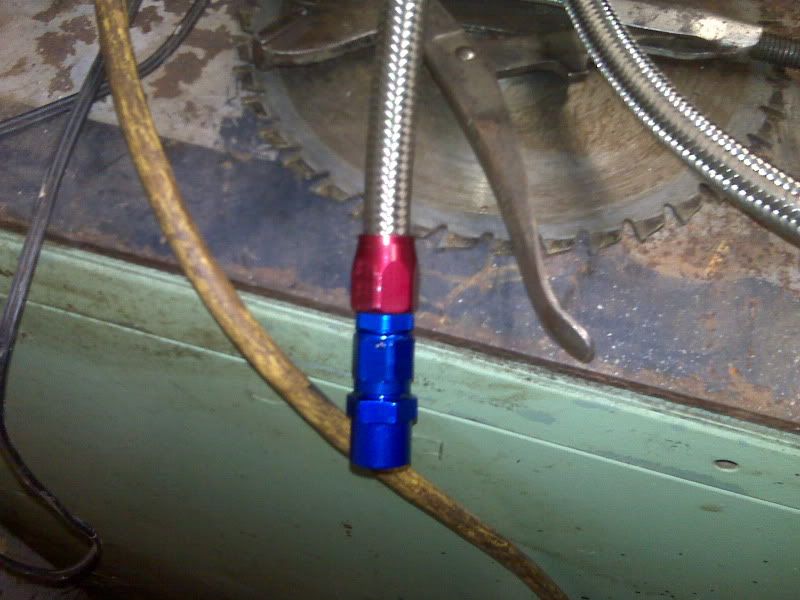
I got to work on the fuel lines tonight since my last fitting came in from Summit the other day. This is the saginaw fitting that goes on the hard feed line coming from the stock sending unit.
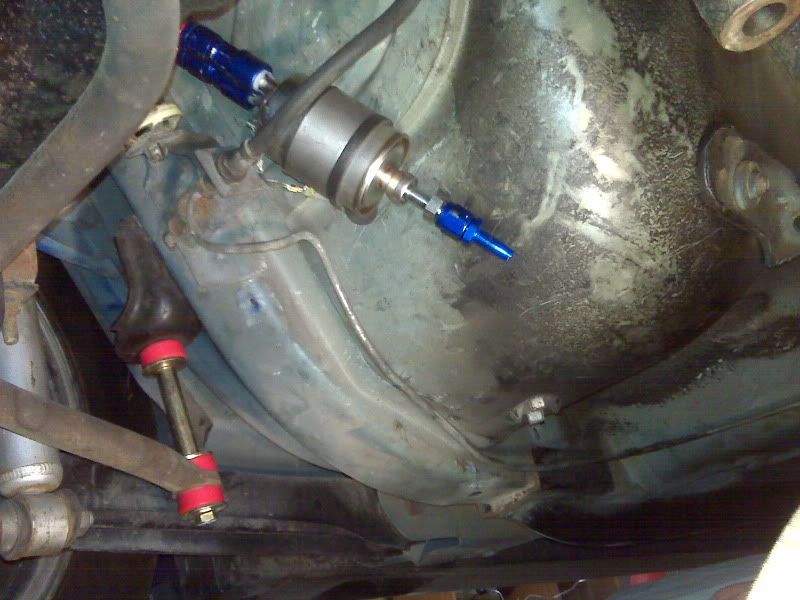
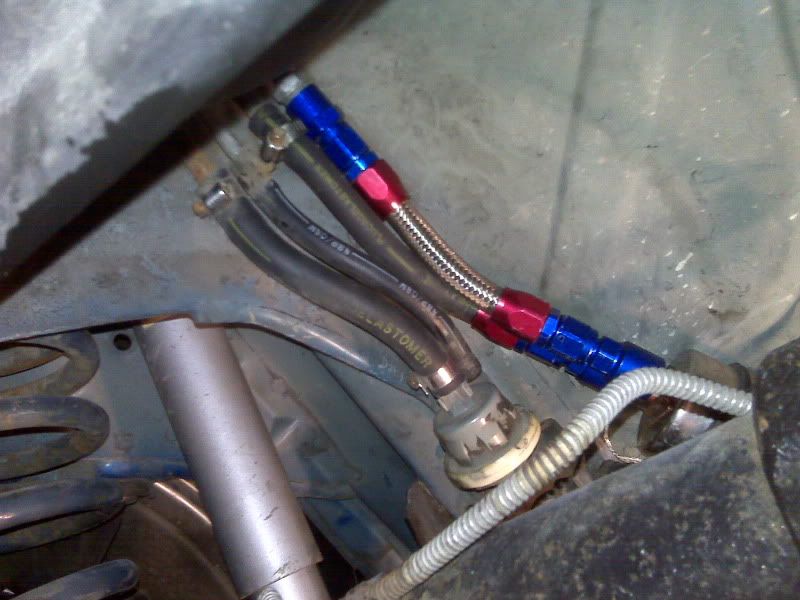
I had to use some imagination to get the fuel filter mounted. With the extra fittings coming off both ends, it made the unit way too long to mount in the stock position (which you can see where the stock one mounted in this picture, in the bottom right corner of the photo). I drilled a hole and put a self-tapping screw in to hold the filter here. I had to mount it vertically instead of horizontally like the stock one. This allowed me to also use the stock rubber line that is used for the return that would have gone into a hard return line. Instead, the rubber line goes into a Russel fitting then straight to the Corvette filter. I'll have more pictures of the fuel lines once I get the motor and transmission in the car this weekend. I didn't want to mess with the feed line coming from the filter because I don't know exactly how long it will be just yet.
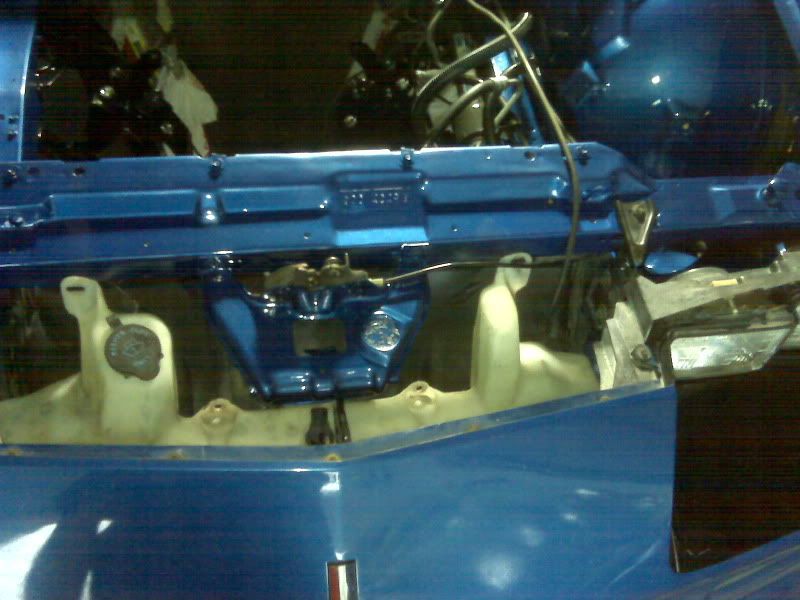
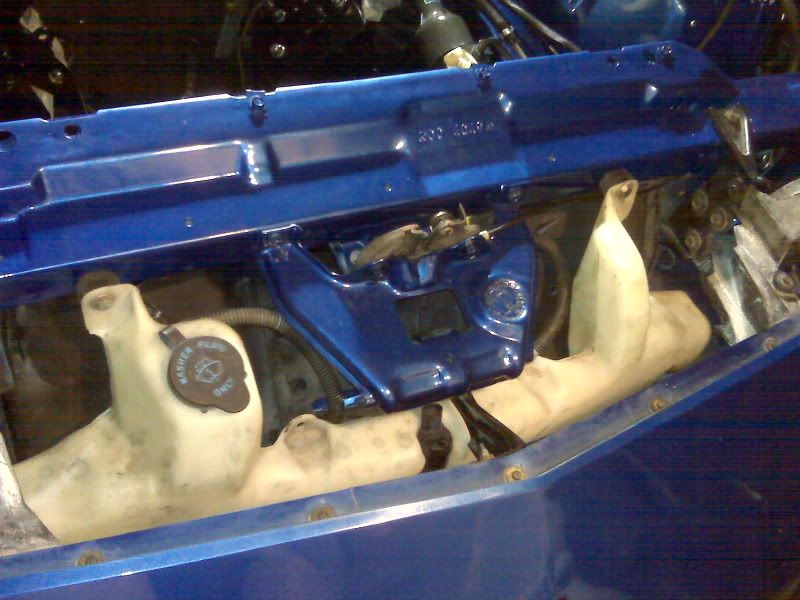
This next piece also took some creativity. As you know from some previous posts, I am using 4th gen coolant and washer tanks, which the washer tank mounts in the front bumper. Well on a 3rd gen there is a black brace that mounts from the front bumper to the brace for the hood latch. I didn't want to toss the piece away because I want to try and use every piece from the stock front end as possible to make it as sturdy as possible. But in order to use this brace it needed to be trimmed down some to clear the top of the washer tank. Here you can see where I made the cut.
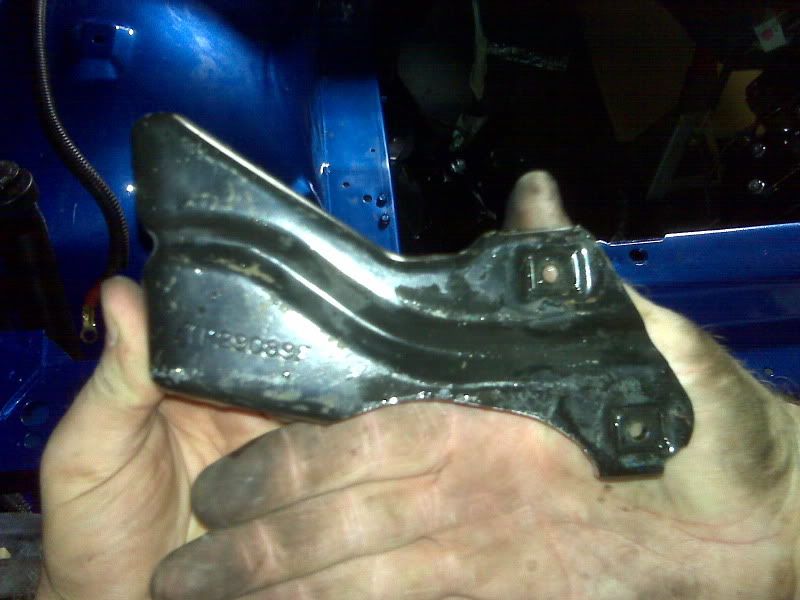
And you can see how well it clears the washer tank now.
And for mounting the washer tank, yet again, I used my imagination. If you mount it flush against the frame, it hits the hood latch support brace. Ideally, you want to mount an inch or so off the frame so that it's not in a bind, or hitting the brace support. Some people have used a longer bolt and a piece of fuel line as a spacer to keep the tank off the frame a little bit. I took the black plastic trapezoid shaped piece that was used with the stock battery tray to mount the battery in place, and cut it in half, and ground it down smooth into two oval shaped piece. It was just thick enough to meet my satisfaction, so I drilled holes in the two pieces and mounted it just the way it is.
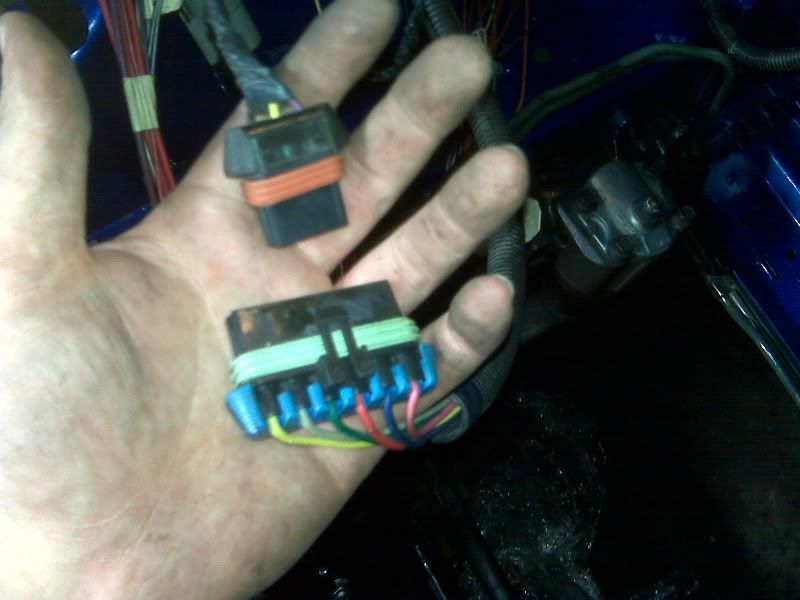
And lastly, I'll end this post with a question. I found these two connectors on the headlight/washer side of the bulk connector, yet I don't remember where they go to. If anyone can refresh my memory that would be awesome. I know they're not the cruise control, I just yanked all those wires and connectors out tonight as well to clean up the bay a little.
I got to work on the fuel lines tonight since my last fitting came in from Summit the other day. This is the saginaw fitting that goes on the hard feed line coming from the stock sending unit.
I had to use some imagination to get the fuel filter mounted. With the extra fittings coming off both ends, it made the unit way too long to mount in the stock position (which you can see where the stock one mounted in this picture, in the bottom right corner of the photo). I drilled a hole and put a self-tapping screw in to hold the filter here. I had to mount it vertically instead of horizontally like the stock one. This allowed me to also use the stock rubber line that is used for the return that would have gone into a hard return line. Instead, the rubber line goes into a Russel fitting then straight to the Corvette filter. I'll have more pictures of the fuel lines once I get the motor and transmission in the car this weekend. I didn't want to mess with the feed line coming from the filter because I don't know exactly how long it will be just yet.
This next piece also took some creativity. As you know from some previous posts, I am using 4th gen coolant and washer tanks, which the washer tank mounts in the front bumper. Well on a 3rd gen there is a black brace that mounts from the front bumper to the brace for the hood latch. I didn't want to toss the piece away because I want to try and use every piece from the stock front end as possible to make it as sturdy as possible. But in order to use this brace it needed to be trimmed down some to clear the top of the washer tank. Here you can see where I made the cut.
And you can see how well it clears the washer tank now.
And for mounting the washer tank, yet again, I used my imagination. If you mount it flush against the frame, it hits the hood latch support brace. Ideally, you want to mount an inch or so off the frame so that it's not in a bind, or hitting the brace support. Some people have used a longer bolt and a piece of fuel line as a spacer to keep the tank off the frame a little bit. I took the black plastic trapezoid shaped piece that was used with the stock battery tray to mount the battery in place, and cut it in half, and ground it down smooth into two oval shaped piece. It was just thick enough to meet my satisfaction, so I drilled holes in the two pieces and mounted it just the way it is.
And lastly, I'll end this post with a question. I found these two connectors on the headlight/washer side of the bulk connector, yet I don't remember where they go to. If anyone can refresh my memory that would be awesome. I know they're not the cruise control, I just yanked all those wires and connectors out tonight as well to clean up the bay a little.
11-01-2009, 01:34 AM
#15
Does this count as a "little" progress?
This is love at first site, if I have never seen it before:
Ok, I think some of you guys are going to be really jealous with this next part. The reason I say that, is because not only did I not have to loosen the motor mount pedestals, or the motor mounts themselves, I also didn't even have to jack the car up off the ground, well partially anyways. All I did was jack the rear axle up off the ground about 8", left the front tires on the ground, and did a lot of lowering and then man-handling the motor and transmission on the hoist and lowered them down together from the top. Both bolts for the motor mounts went in without much problem. In fact, the driver side one went in right away, and I just had to have my friend push down on the block a little while I knocked the passenger side bolt in with a rubber hammer. Easy as pie.
Sorry for the crappy BlackBerry pictures, I am definitely going to clean her up this week and take some really good ones with my Canon DSLR. I've been using my phone to take pictures of most of the progress because it's so handy to use instead of swinging around an actual camera.

Ok, and one more positive note before I begin with the negative that I found tonight.
The hole I cut for the shifter seems to be just right. I cut it in the correct spot, it could be a little smaller but I think the lower shift boot will cover most of it.
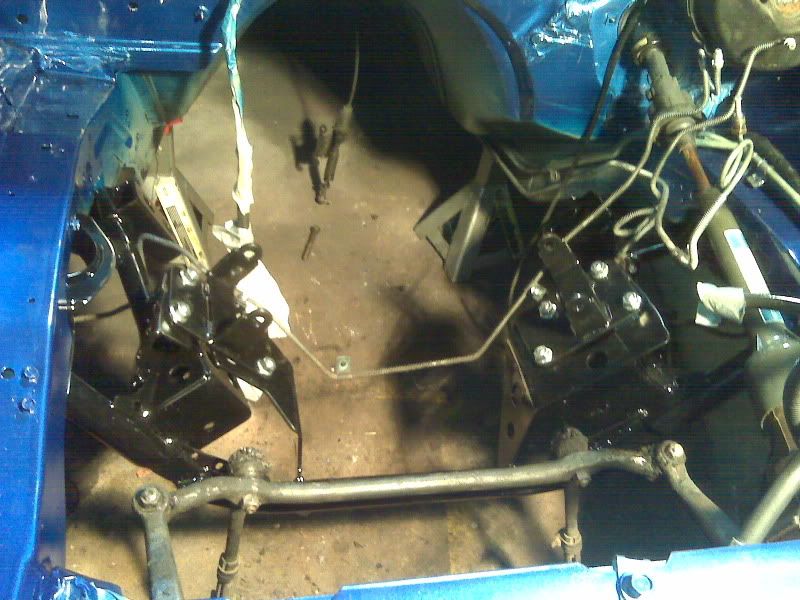
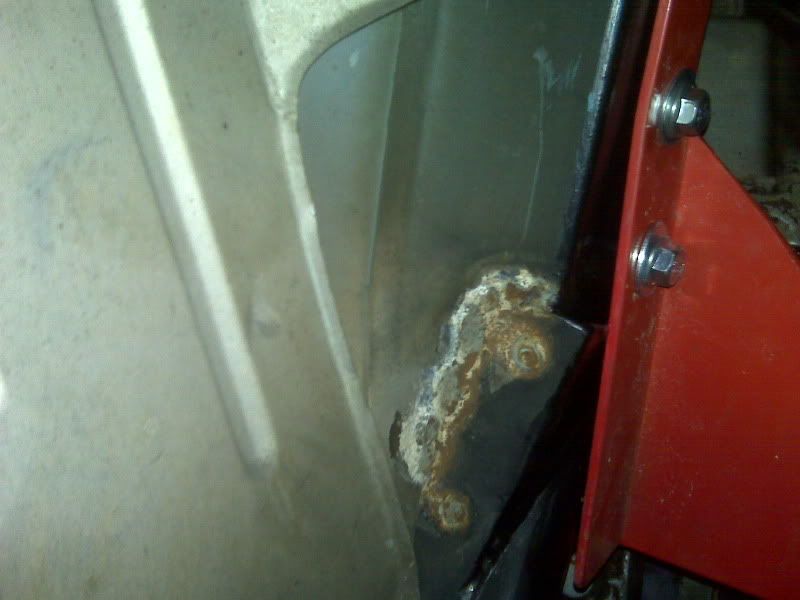
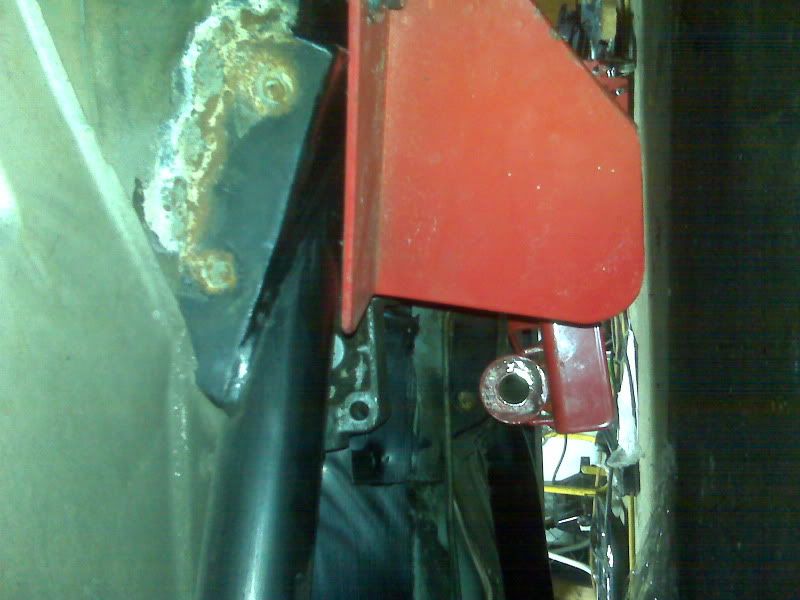
Ok here's the negative. Am I the first person to try using the Alston Racing sfc's and the Spohn T56 crossmember? The reason I ask, is because I haven't come across anyone else with this problem before. I'm thinking I will need to notch out a chunk of the mounting face of the cross member to clear the front of the sfc. You can see how bad it really is, there is like a 1/2" gap between the frame rail and the cross member, creating horrible ground clearance, as well as me not being able to bolt down the cross member all the way without breaking it. I'll wait to get some input from you guys before I start hacking away on it.
This should be sitting flush with the frame rail:

This is love at first site, if I have never seen it before:
Ok, I think some of you guys are going to be really jealous with this next part. The reason I say that, is because not only did I not have to loosen the motor mount pedestals, or the motor mounts themselves, I also didn't even have to jack the car up off the ground, well partially anyways. All I did was jack the rear axle up off the ground about 8", left the front tires on the ground, and did a lot of lowering and then man-handling the motor and transmission on the hoist and lowered them down together from the top. Both bolts for the motor mounts went in without much problem. In fact, the driver side one went in right away, and I just had to have my friend push down on the block a little while I knocked the passenger side bolt in with a rubber hammer. Easy as pie.
Sorry for the crappy BlackBerry pictures, I am definitely going to clean her up this week and take some really good ones with my Canon DSLR. I've been using my phone to take pictures of most of the progress because it's so handy to use instead of swinging around an actual camera.
Ok, and one more positive note before I begin with the negative that I found tonight.
The hole I cut for the shifter seems to be just right. I cut it in the correct spot, it could be a little smaller but I think the lower shift boot will cover most of it.
Ok here's the negative. Am I the first person to try using the Alston Racing sfc's and the Spohn T56 crossmember? The reason I ask, is because I haven't come across anyone else with this problem before. I'm thinking I will need to notch out a chunk of the mounting face of the cross member to clear the front of the sfc. You can see how bad it really is, there is like a 1/2" gap between the frame rail and the cross member, creating horrible ground clearance, as well as me not being able to bolt down the cross member all the way without breaking it. I'll wait to get some input from you guys before I start hacking away on it.
This should be sitting flush with the frame rail:
11-01-2009, 11:56 AM
#19
TECH Resident
iTrader: (10)
Join Date: Oct 2005
Location: Cincinnati, Ohio
Posts: 948
Likes: 0
Received 0 Likes
on
0 Posts

I always loved this body style of Camaro. I bet it really makes the car a lot more fun to have some fire power under the hood. Very nice swap great job.
