Pro-Touring 68 Acadian (Nova) with L92
 07-27-2011, 10:38 AM
#121
Great writeup on the cam swap with plenty of pictures to go with it. The tools you're using certainly make the job easier.
Why do you need a piston stop to degree the cam? You have a dial indicator and the heads are off. Just rotate the piston one way until it's near the top of the board making contact with the indicator, zero the indicator, check the reading on the degree wheel, then rotate the engine the other way until you reach zero on the indicator again, then check the degree wheel. Halfway between the two degree readings is TDC.
Why do you need a piston stop to degree the cam? You have a dial indicator and the heads are off. Just rotate the piston one way until it's near the top of the board making contact with the indicator, zero the indicator, check the reading on the degree wheel, then rotate the engine the other way until you reach zero on the indicator again, then check the degree wheel. Halfway between the two degree readings is TDC.
 07-27-2011, 12:07 PM
#122
On The Tree
Thread Starter
iTrader: (4)

Join Date: Mar 2009
Location: British Columbia, Canada
Posts: 132
Likes: 0
Received 0 Likes
on
0 Posts
Great writeup on the cam swap with plenty of pictures to go with it. The tools you're using certainly make the job easier.
Why do you need a piston stop to degree the cam? You have a dial indicator and the heads are off. Just rotate the piston one way until it's near the top of the board making contact with the indicator, zero the indicator, check the reading on the degree wheel, then rotate the engine the other way until you reach zero on the indicator again, then check the degree wheel. Halfway between the two degree readings is TDC.
Why do you need a piston stop to degree the cam? You have a dial indicator and the heads are off. Just rotate the piston one way until it's near the top of the board making contact with the indicator, zero the indicator, check the reading on the degree wheel, then rotate the engine the other way until you reach zero on the indicator again, then check the degree wheel. Halfway between the two degree readings is TDC.
 07-27-2011, 05:53 PM
#124
Launching!

Join Date: Jan 2011
Location: Arizona
Posts: 200
Likes: 0
Received 0 Likes
on
0 Posts

the piston stop is used so that you can put a little (read real little) pressure on the piston so that it takes up what little room there is in the bearings. if you put light pressure on the piston with your fingers while your using the dial indicator it does the same thing. and the piston stop allows you to hold pressure while reading the wheel and make it repeatable every time until you remove it. sometimes i have pushed .002 past while trying to read the guage. just my experience. they all work.
07-27-2011, 08:01 PM
#125

the piston stop is used so that you can put a little (read real little) pressure on the piston so that it takes up what little room there is in the bearings. if you put light pressure on the piston with your fingers while your using the dial indicator it does the same thing. and the piston stop allows you to hold pressure while reading the wheel and make it repeatable every time until you remove it. sometimes i have pushed .002 past while trying to read the guage. just my experience. they all work.
07-27-2011, 09:19 PM
#126
On The Tree
Thread Starter
iTrader: (4)
Join Date: Mar 2009
Location: British Columbia, Canada
Posts: 132
Likes: 0
Received 0 Likes
on
0 Posts
Thanks.
Thanks guys. It's slowly all making sense  I've already ordered and paid for the kit, and it was a special order, so I'll get the kit and see how it goes. I will definitely keep that in mind about the chain. I will also check it a couple times to see if it gives me the same readings. I'll update when I get it done.
Got the trunion upgrade done today. For anyone that doesn't want to spend the money on roller rockers, but wants something a little better than the stock rockers...highly recommend this kit. I noticed the difference right away. The stock ones feel so flimsy compared to trunion kit. The stock ones don't feel very tight at all and rattle quite a bit. With the upgrade kit, they are way smoother moving and there is no play at all. On to the pics.
They were actually very easy to install. Took about an hour or so to do the full set of 16. All you need is a vice or a press. I'm sure most guys will be doing with a vice, that's how I did mine.
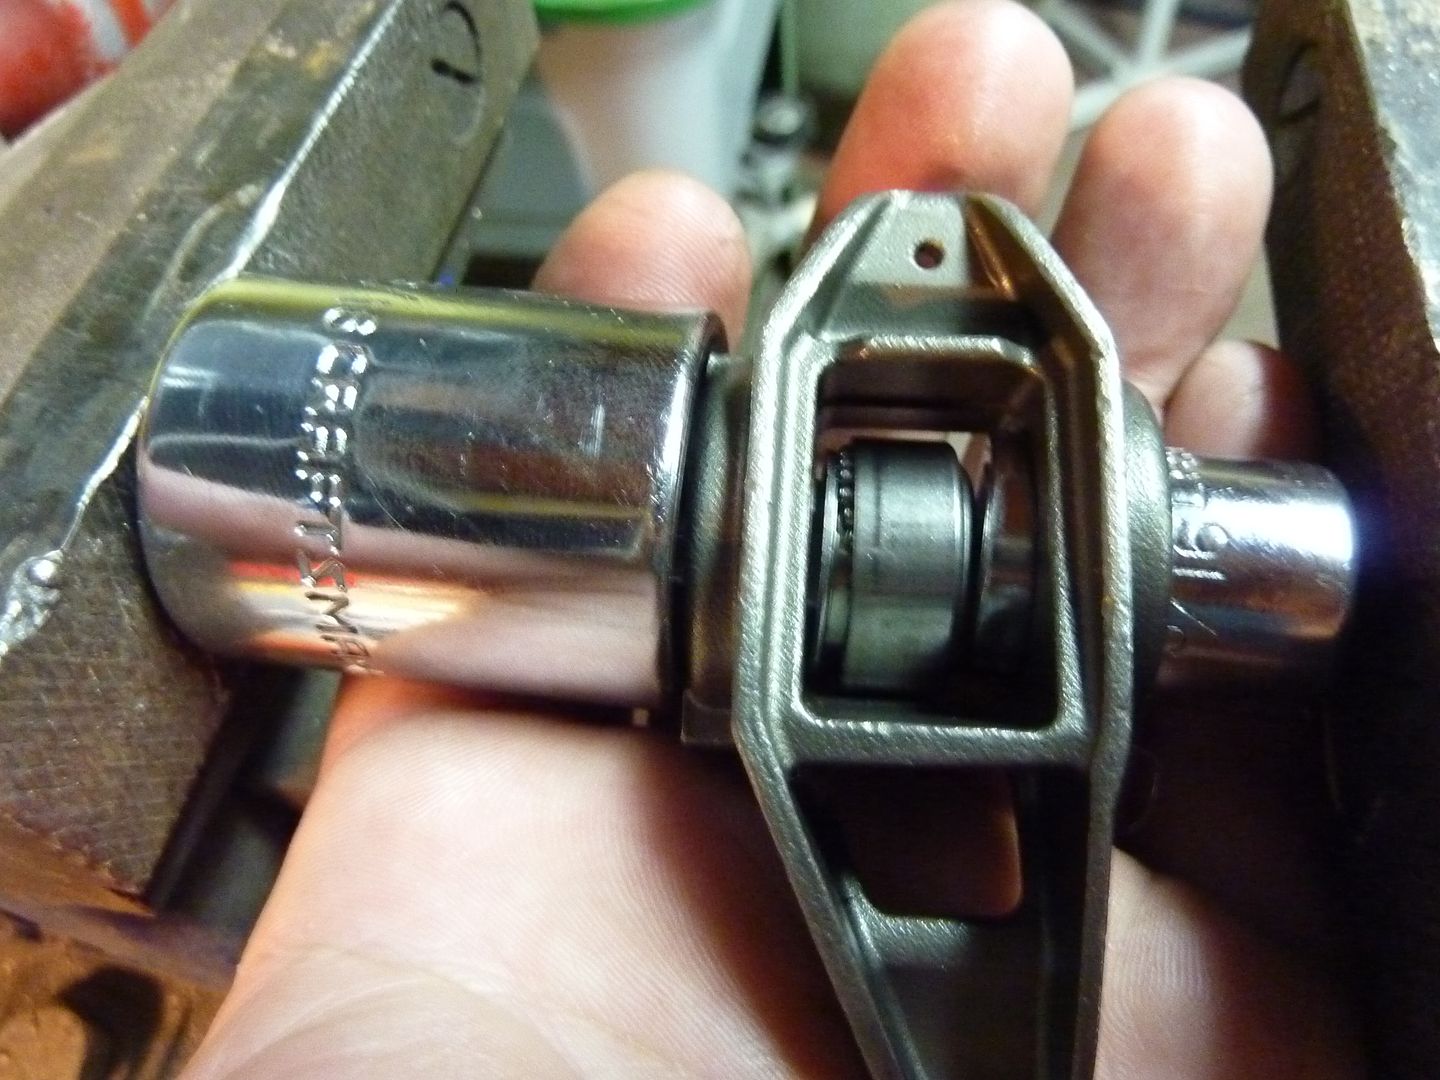
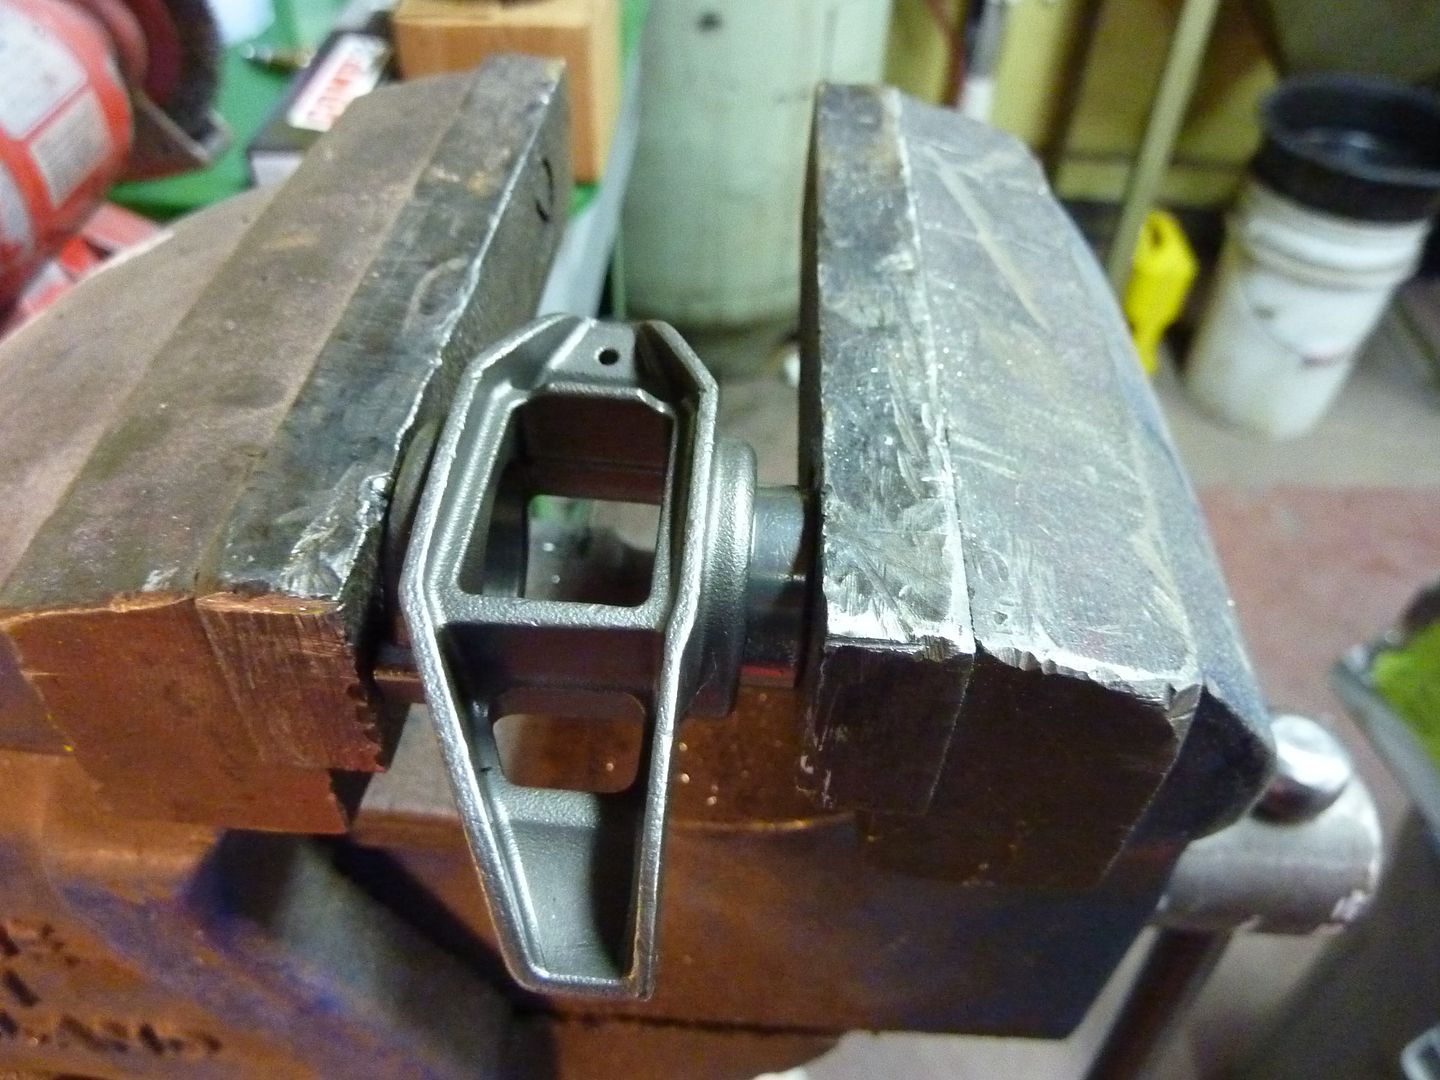
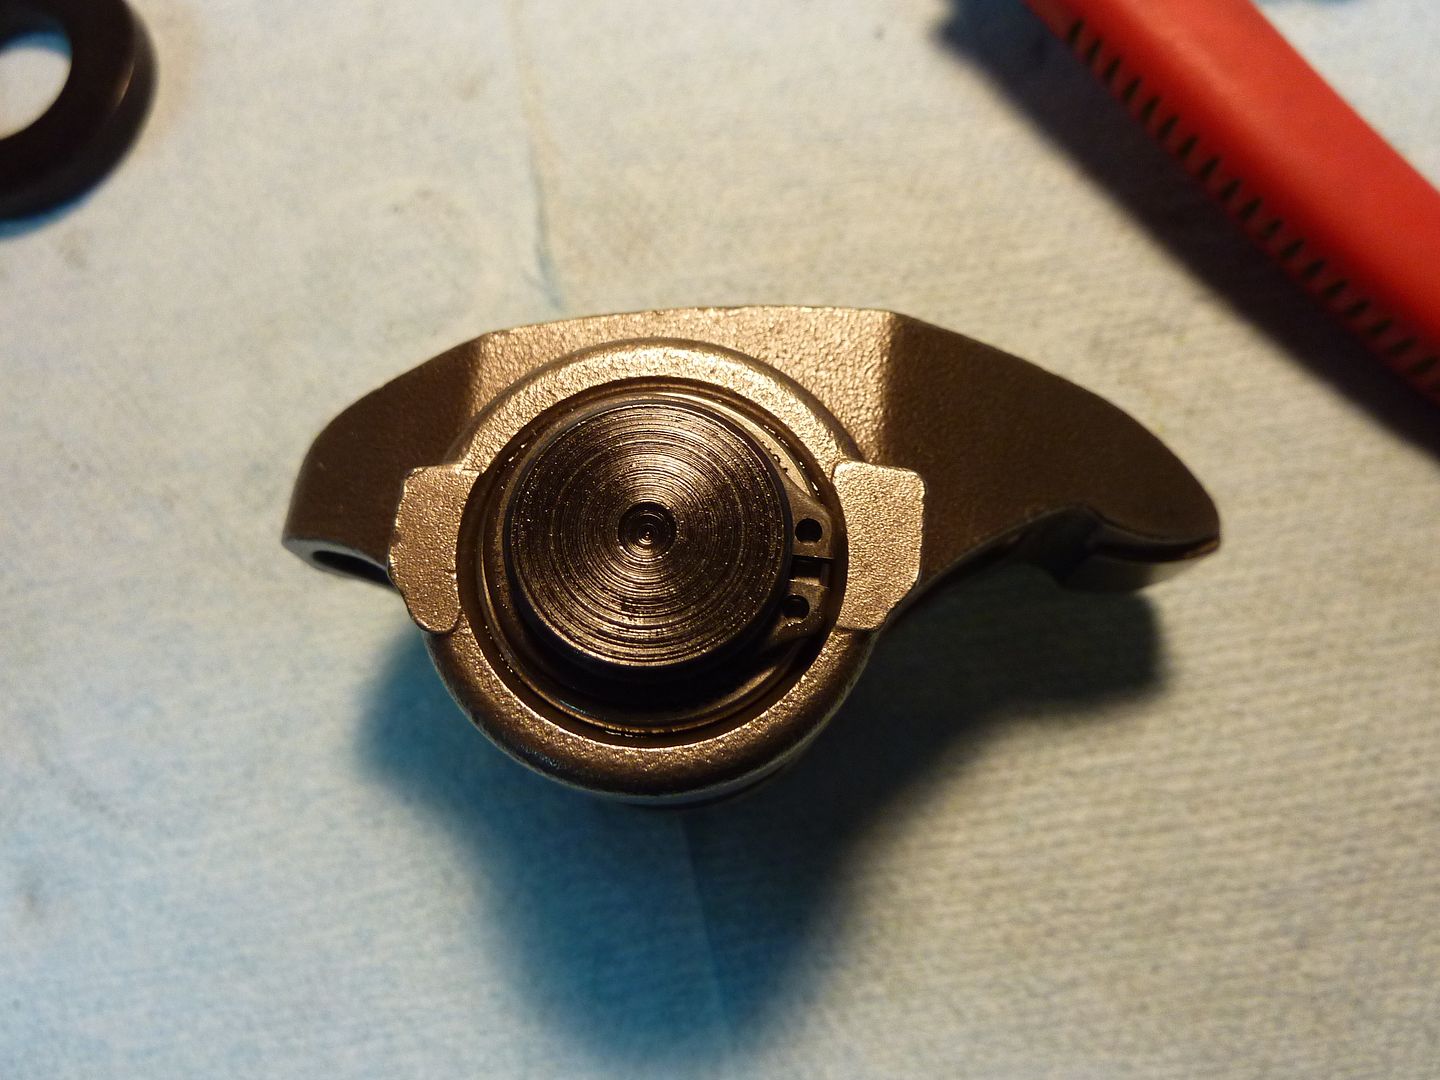
First thing is to pop out the stock trunion. The instructions say to use a socket underneath and use a hammer and bar to the knock them out. I found it easier to use my vice. I used a 15/16 socket on one side an a 9/16 socket on the other

You'll notice that on one side of the rocker there are some tabs that are not on the other side. I put the 15/16 socket on the side with the extra tabs to help secure it in place
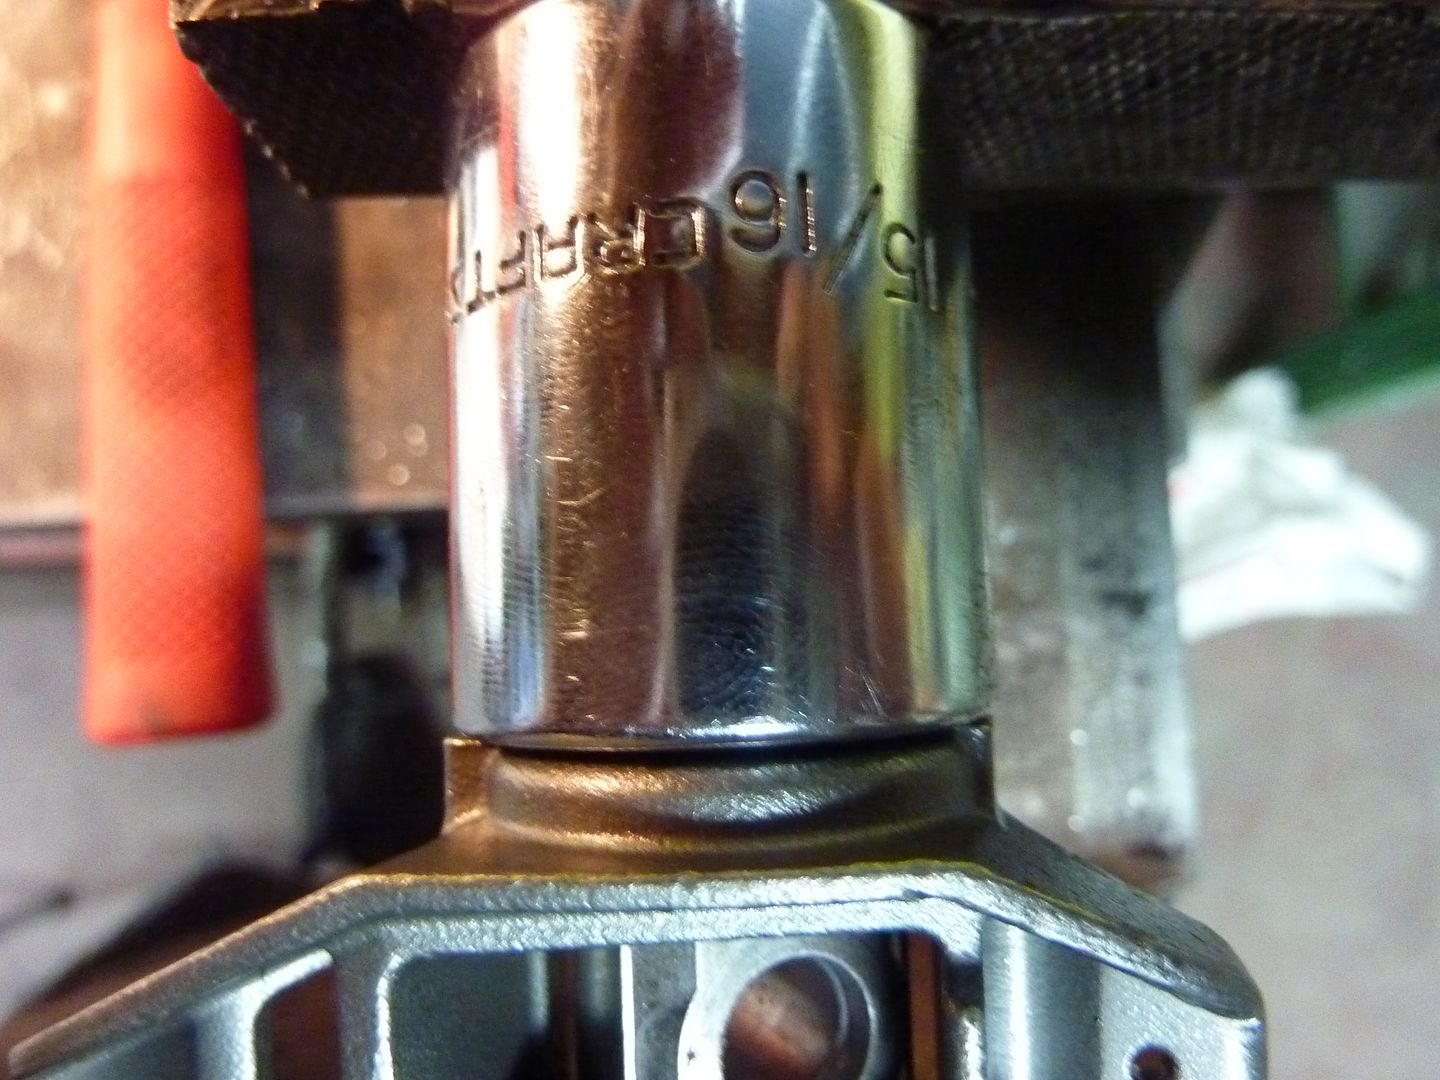
The 9/16 socket fit nicely to push the old trunion out
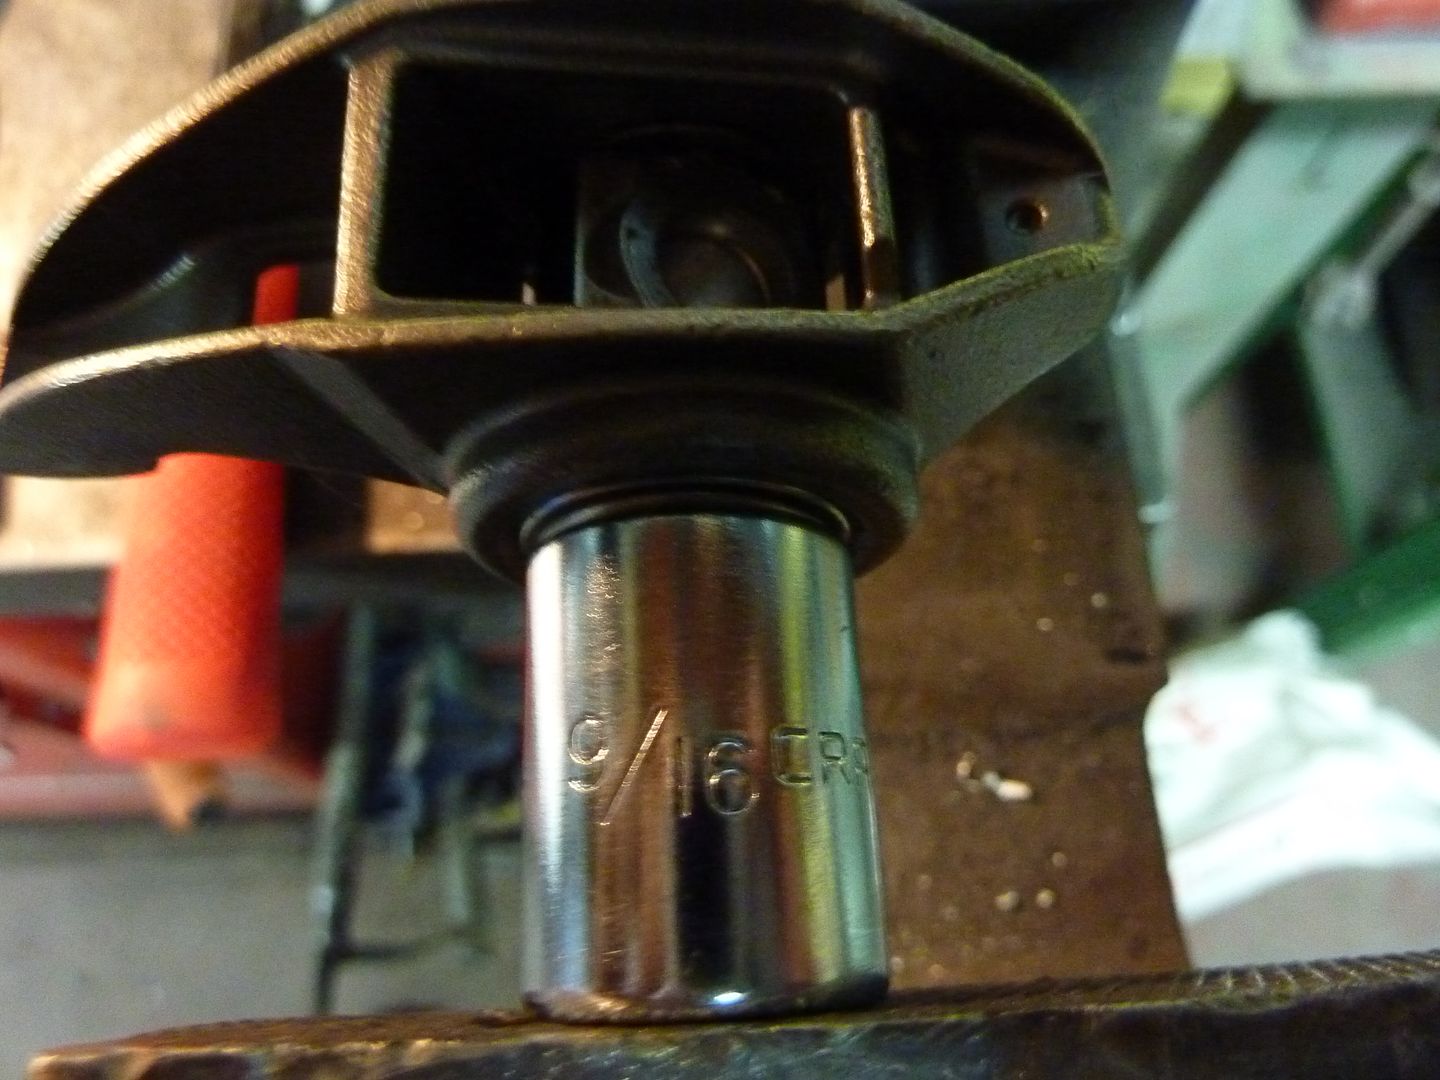
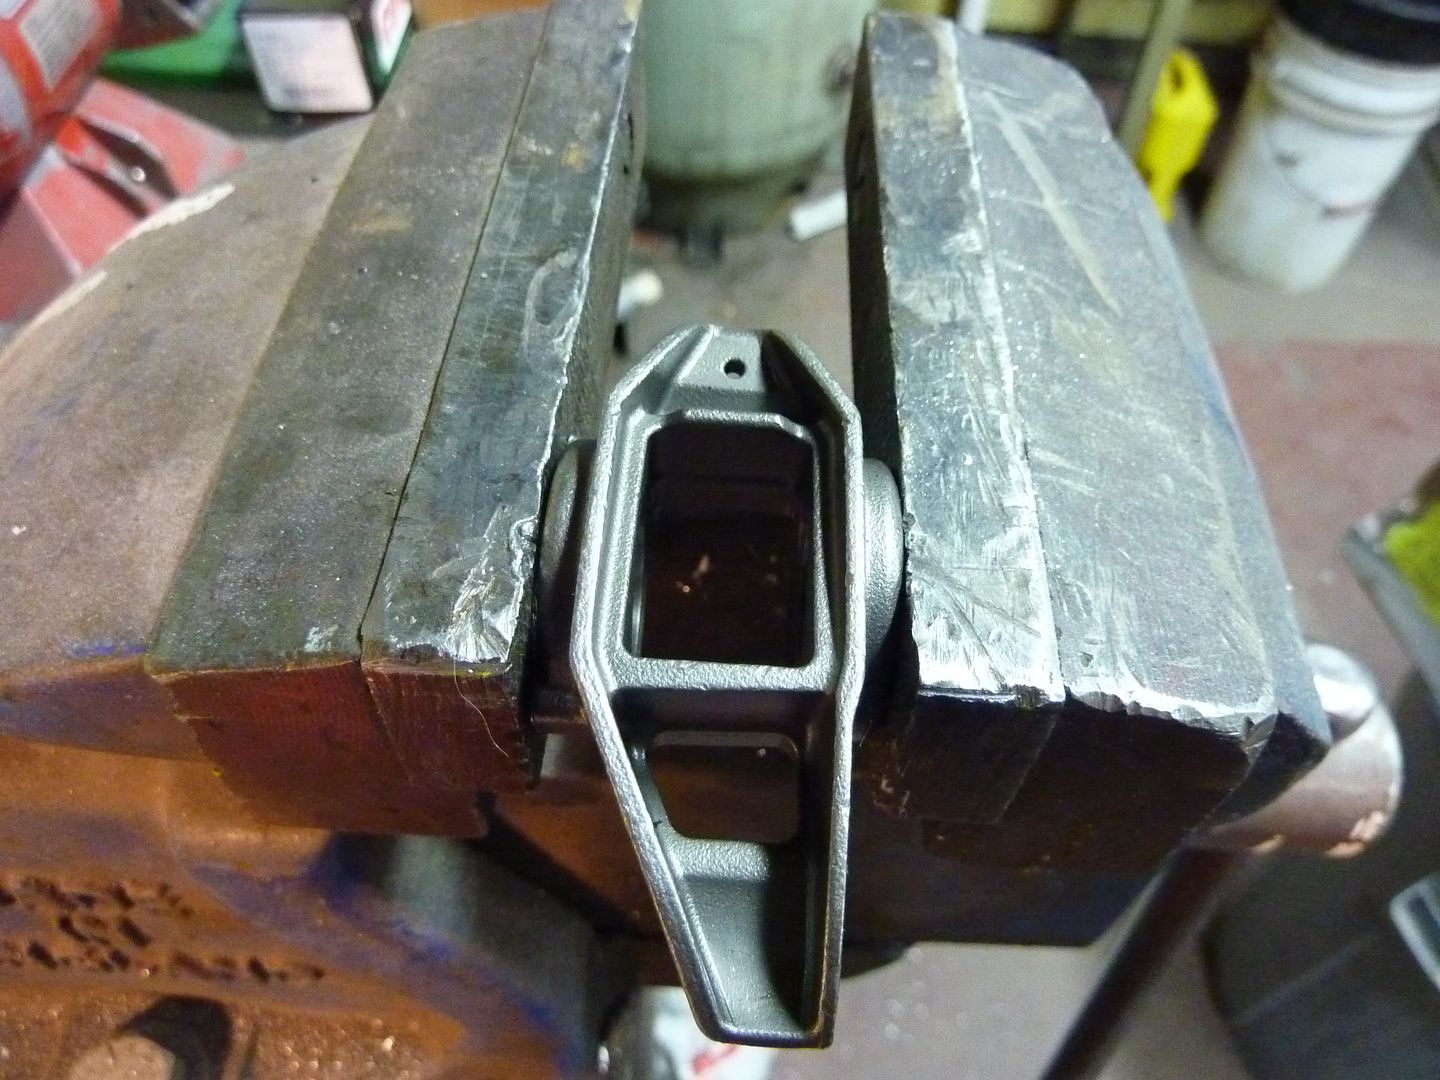
Then just tighten the vice until the bearings pop out. You'll want to keep your hands underneath to catch everything
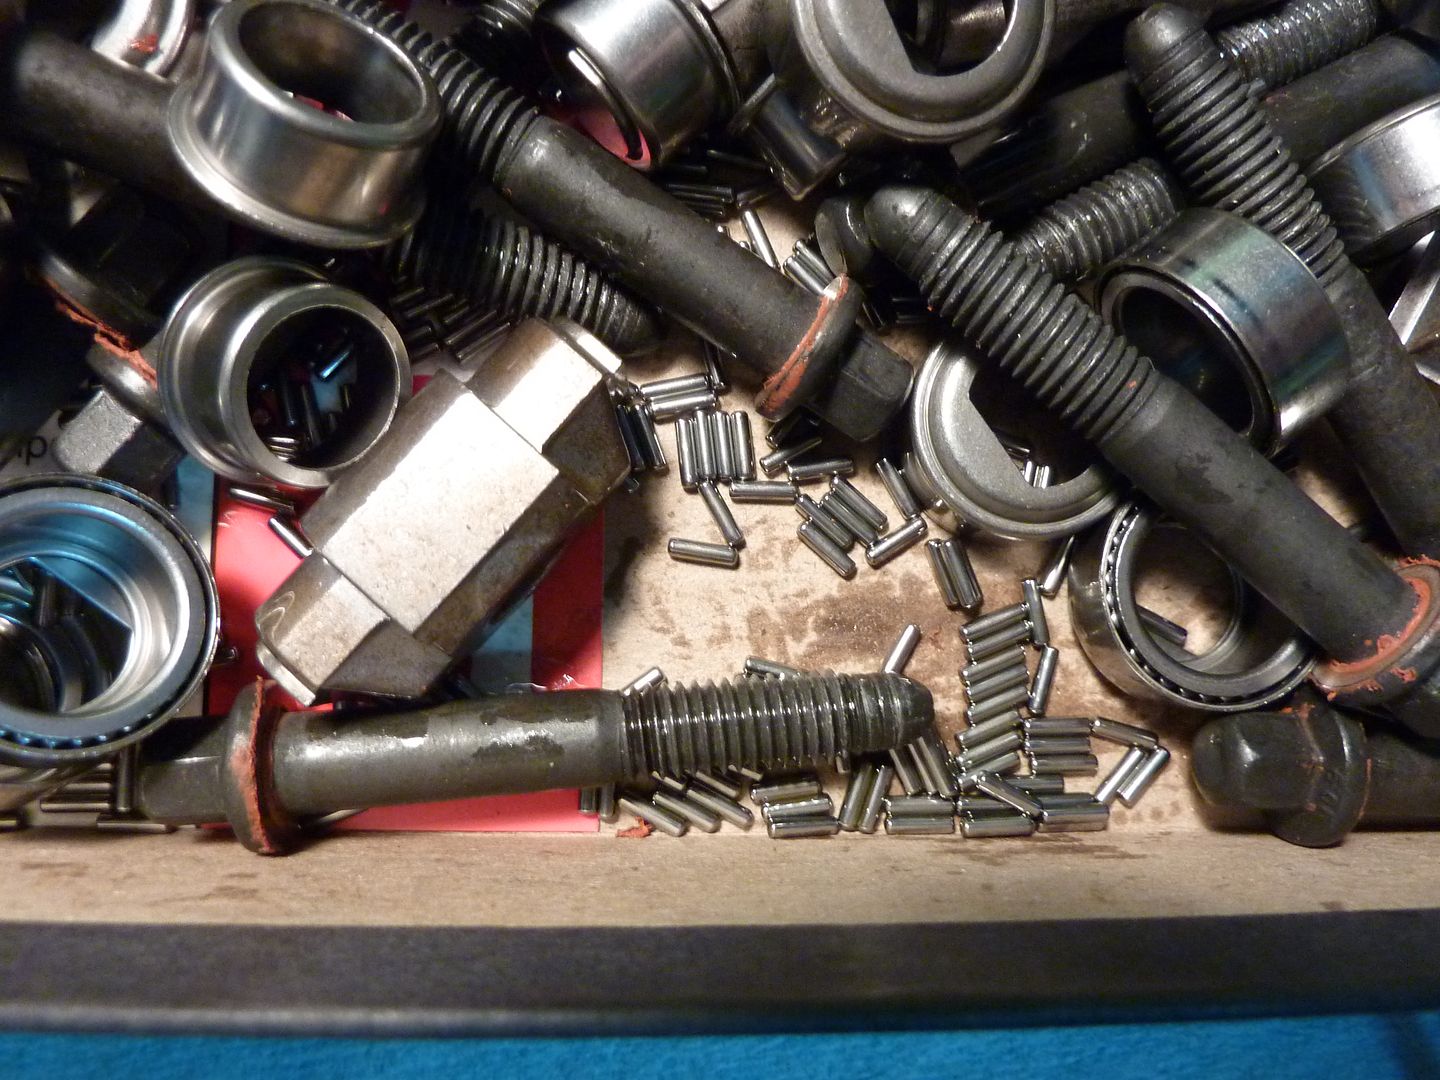
The one thing that I found that was about half of the bearings in the stock trunion were so dry that the needles fell out right away. You can also see the parts that I took out.

Now you need to put the new bearings in. The only thing with this part is you have to make sure the letters on the bearings stay on the outside. Using the vice I put one side in
You only have to tighten the vice until the bearing is flush
One side done
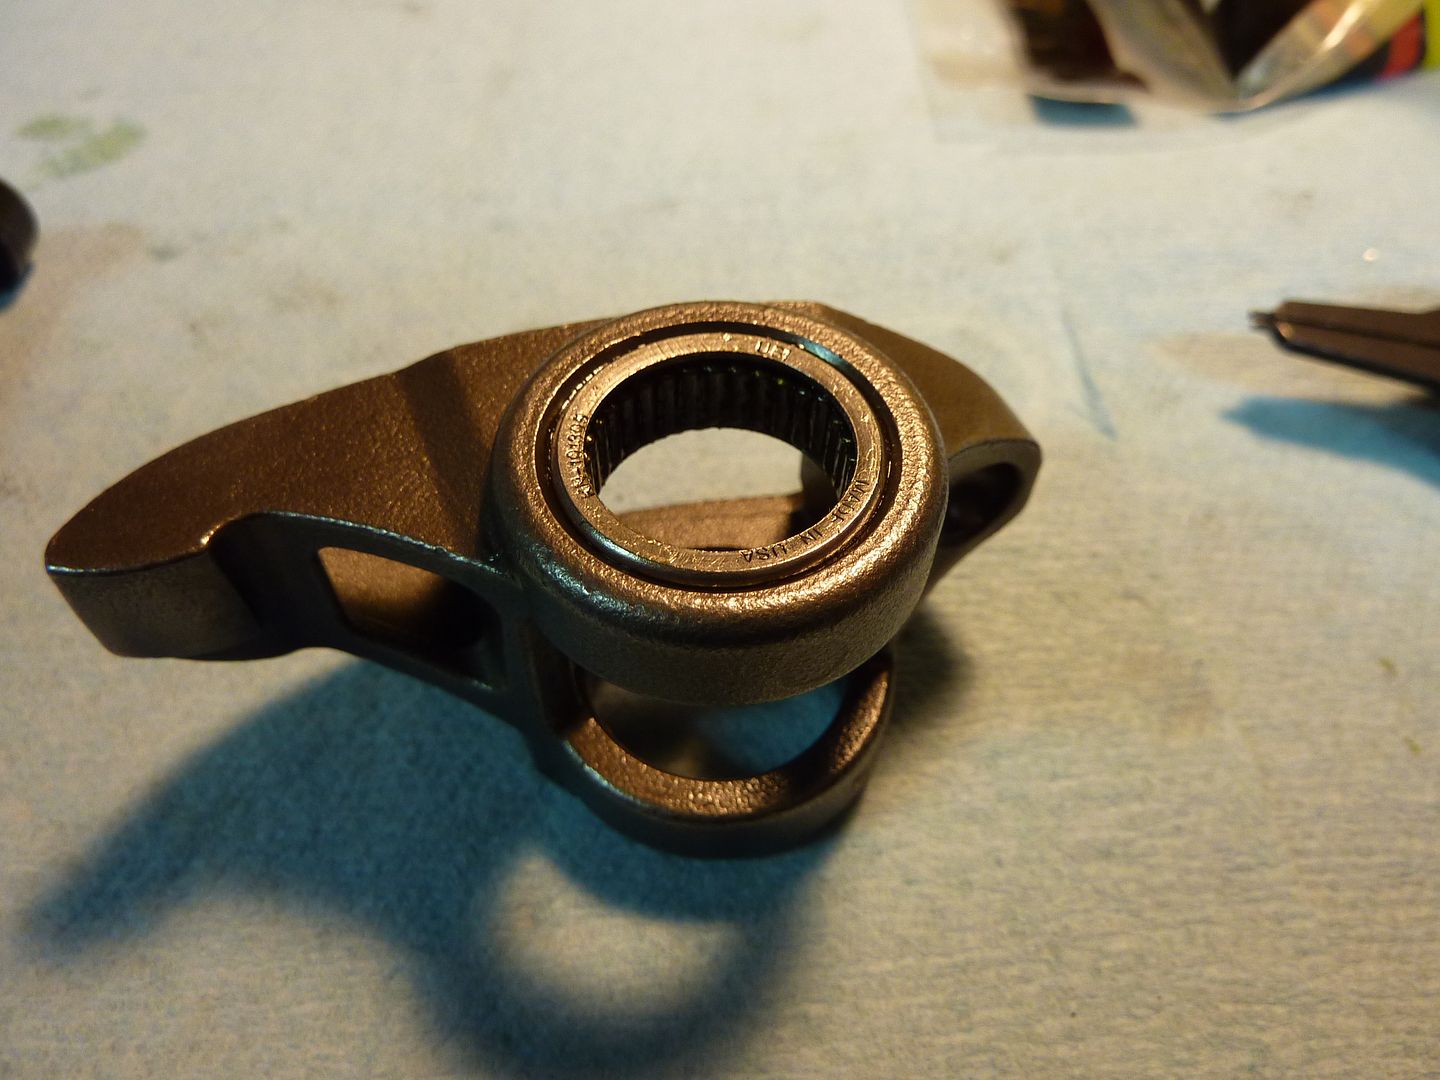
The kit also includes two thick washers that help with the install. Once you have one of the bearings in, you put in the main piece (I'm assuming that's the actually part called the trunion). You put the other bearing into place. I found it easier to press the second bearing in a bit before using the washer. That way I didn't have to worry about lining up the washer and holding the bearing in place. You can see how you use the washers when installing

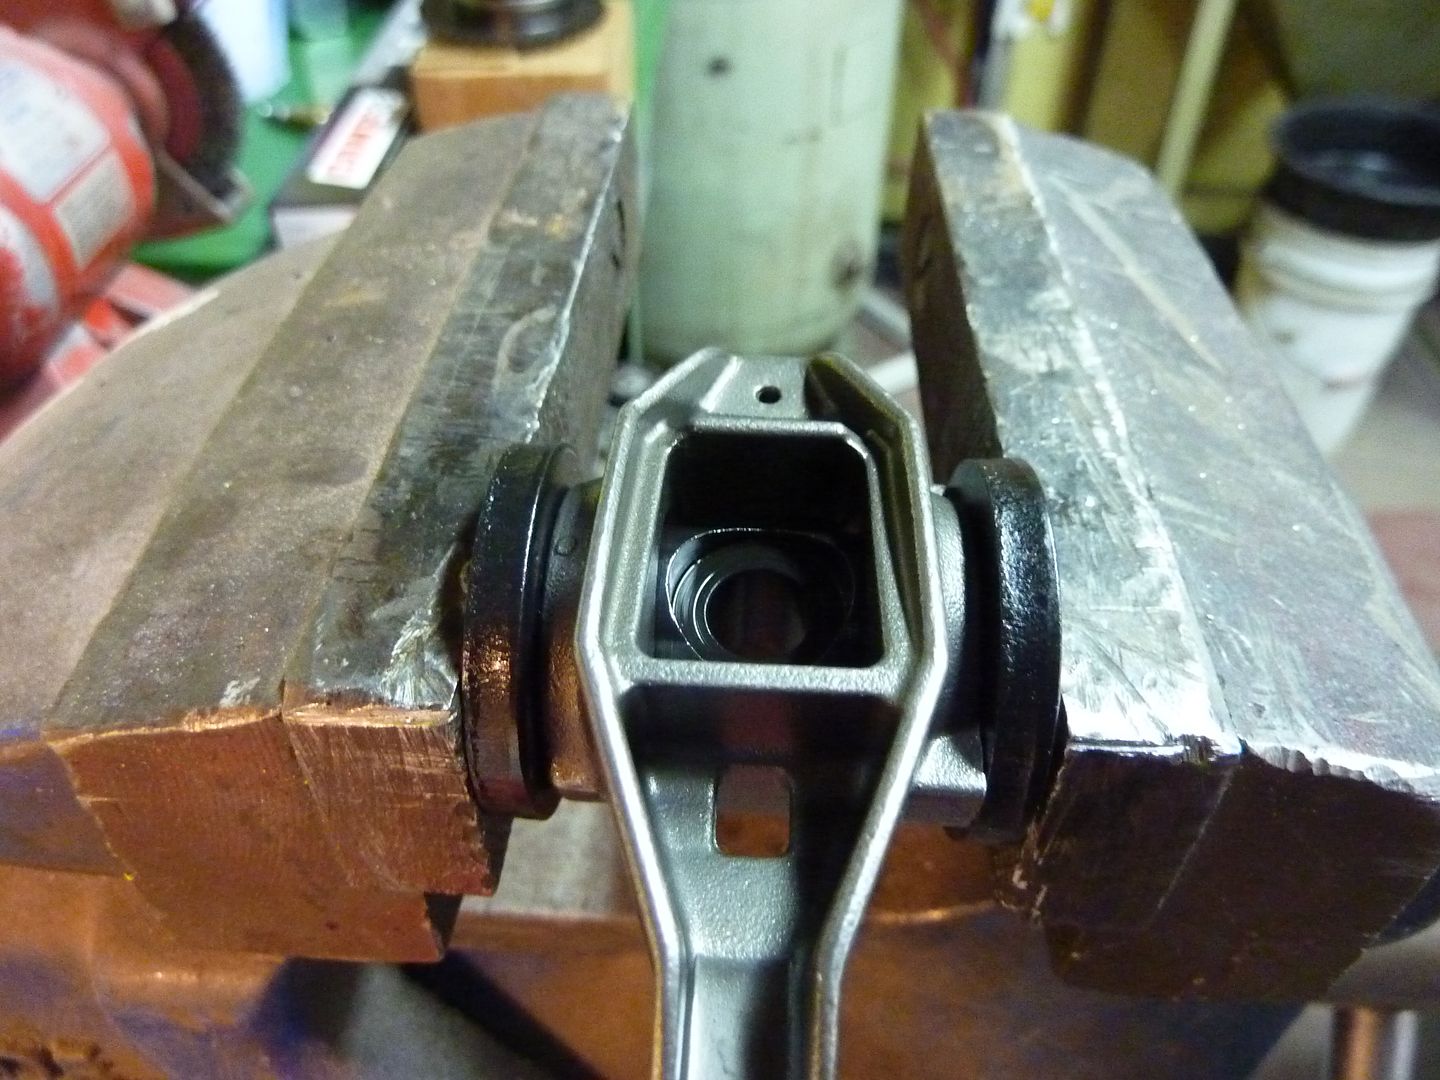
Then put a c clip onto both sides are you're done
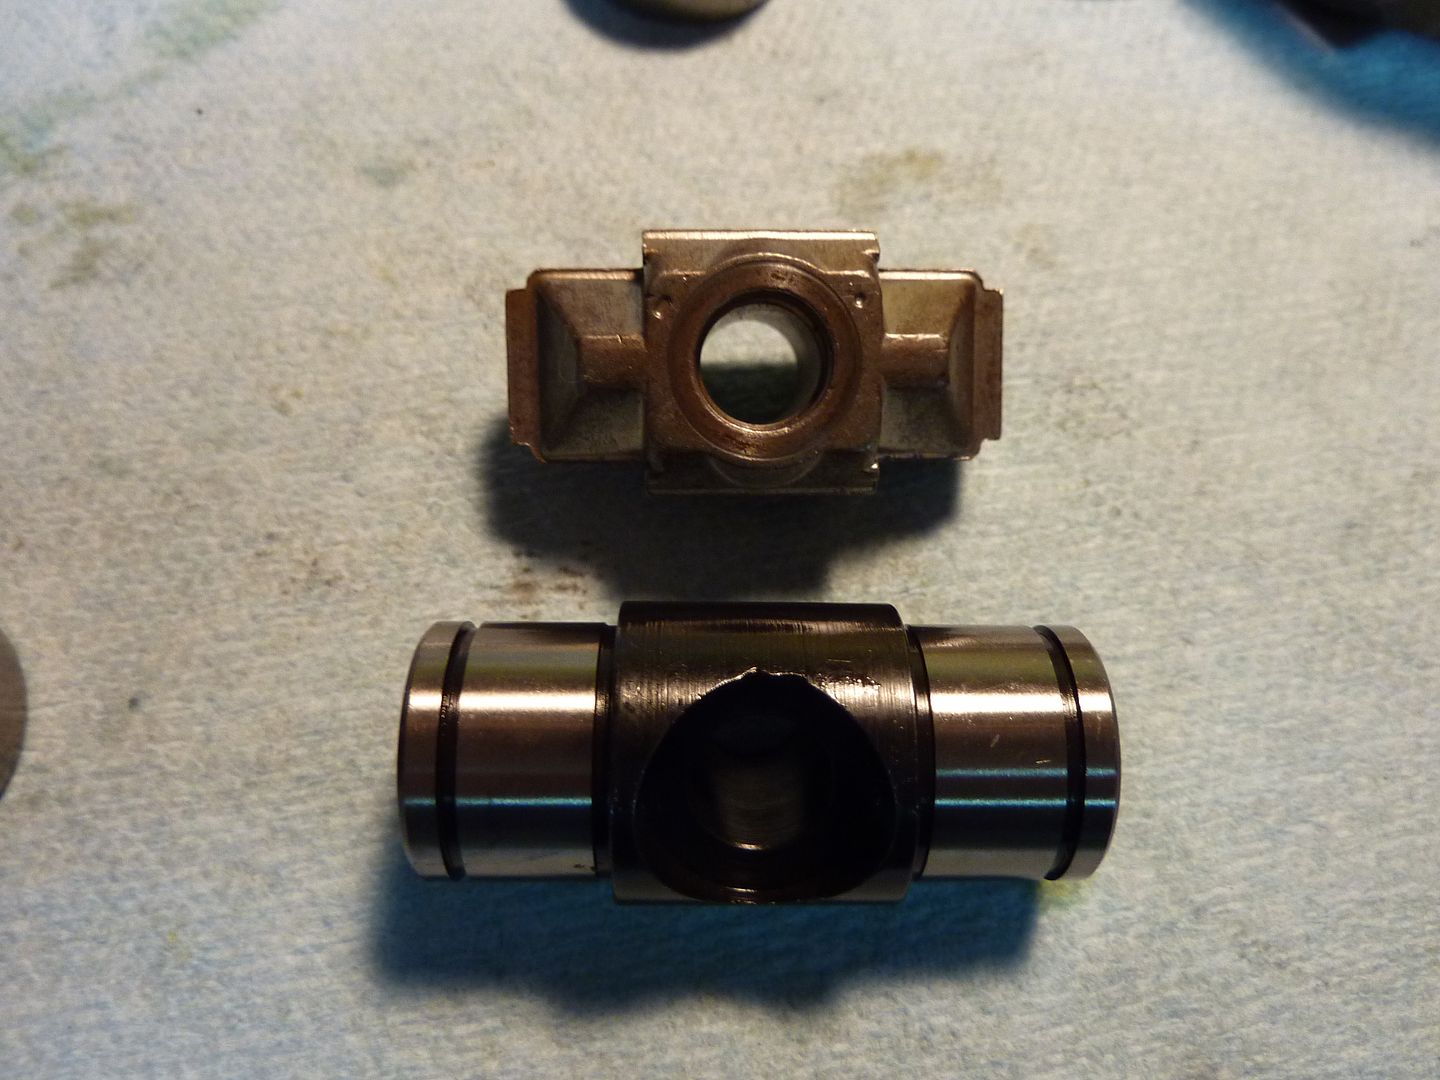
Here's some pics of the differences
First, this is what comes with the kit for each rocker arm
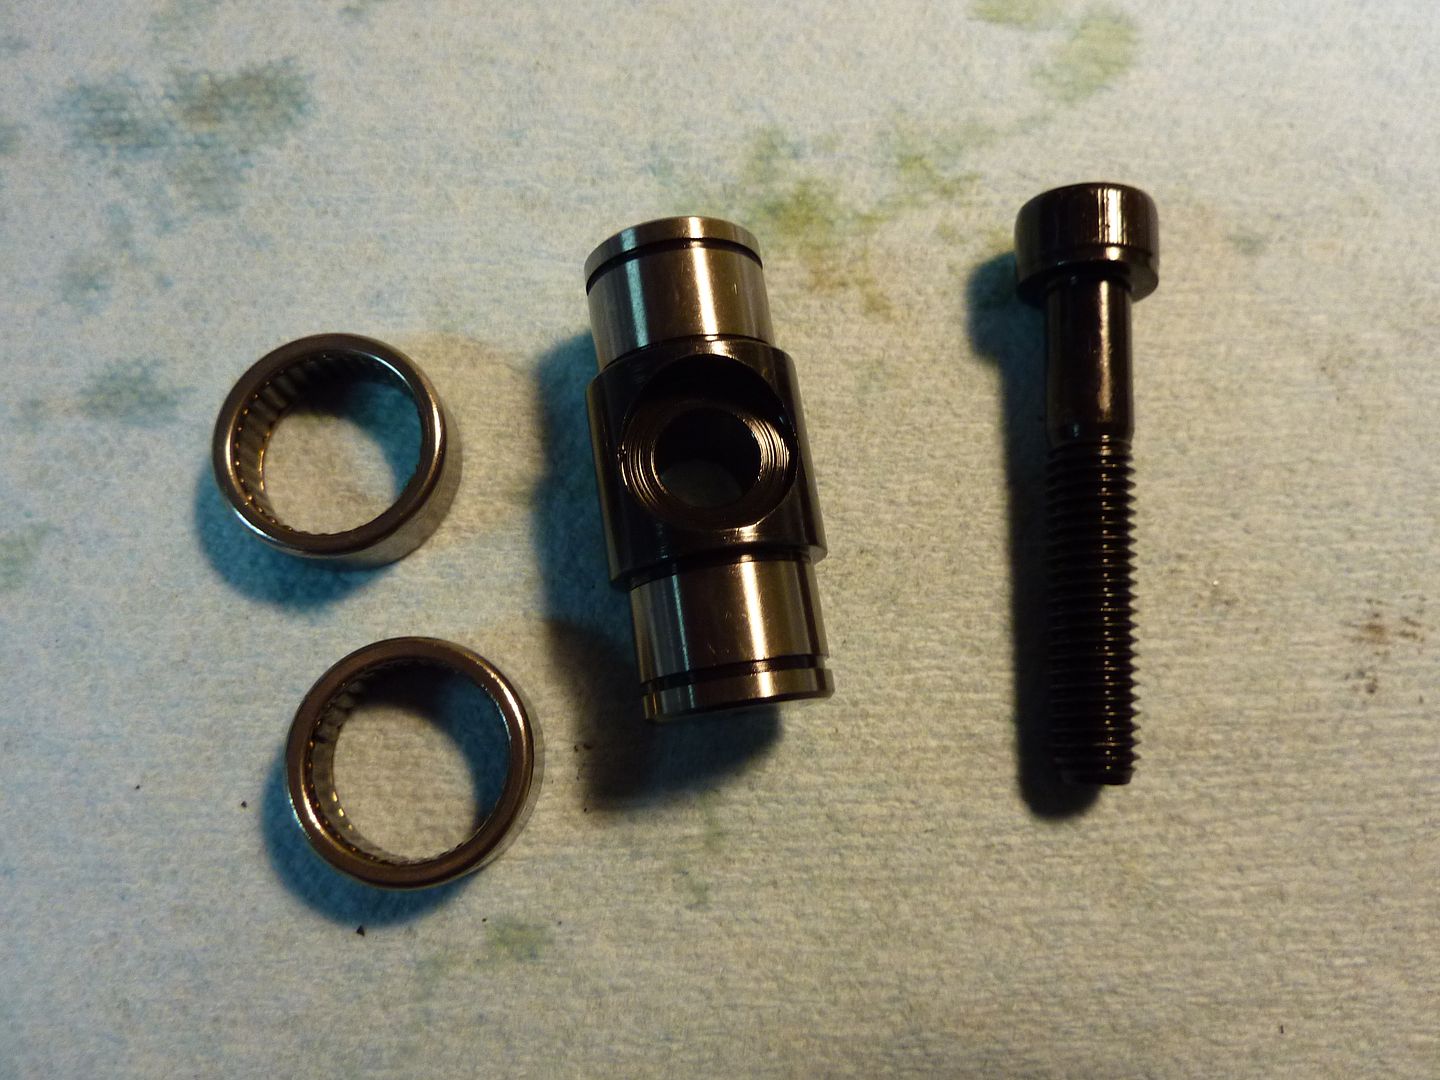
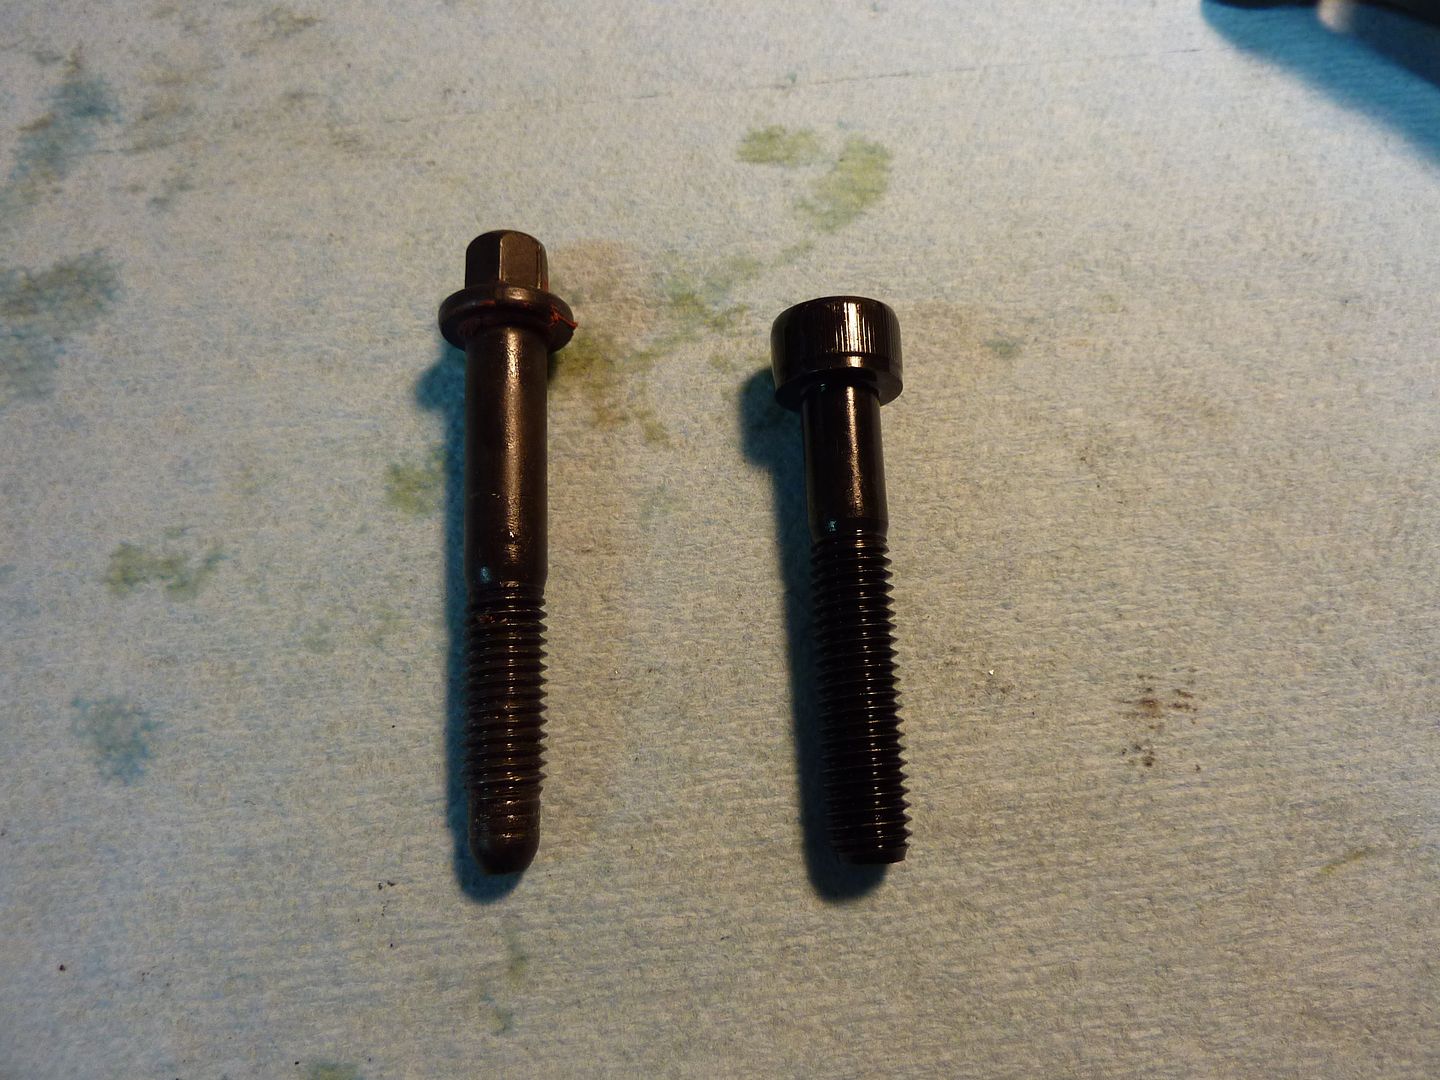
Stock bolt on the left, bolt with the upgrade kit on the right
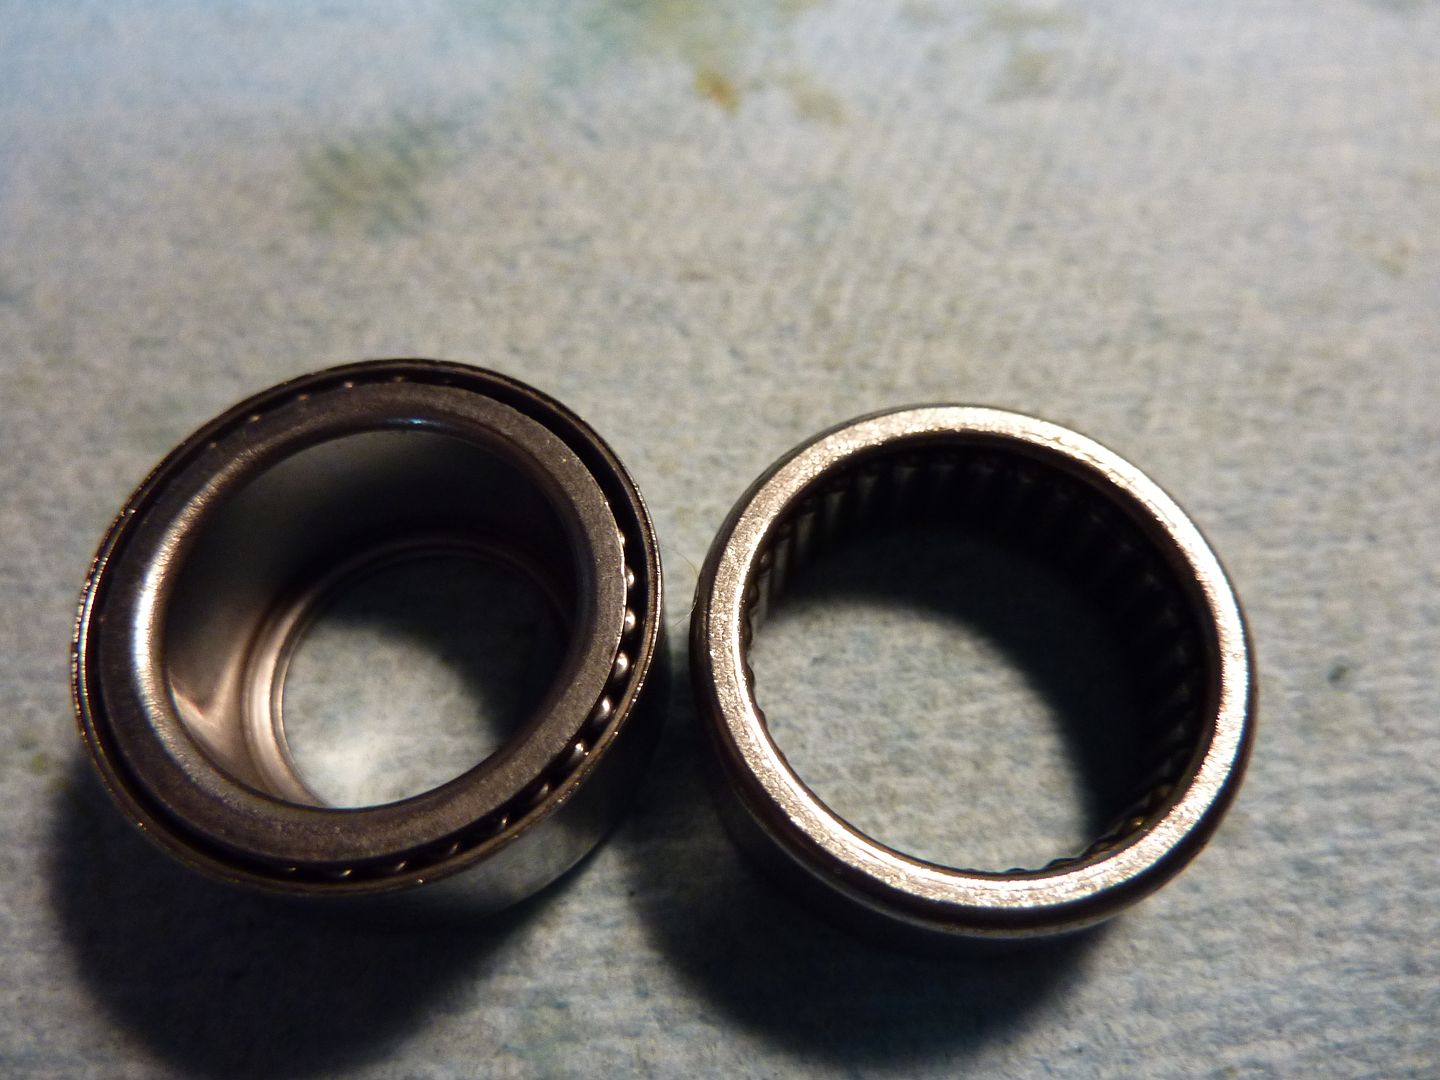
Stock bearing on left, upgrade on right
Stock on top, upgrade on bottom. You can see from this picture why you need the washers when pressing in the bearings. The upgraded one is quite a bit longer than stock.
the piston stop is used so that you can put a little (read real little) pressure on the piston so that it takes up what little room there is in the bearings. if you put light pressure on the piston with your fingers while your using the dial indicator it does the same thing. and the piston stop allows you to hold pressure while reading the wheel and make it repeatable every time until you remove it. sometimes i have pushed .002 past while trying to read the guage. just my experience. they all work.
I couldnt agree more! I always use a piston stop! Heads on or off! Of course the larger your degree wheel the more accurate your readings will be. We have a local guy that has a 4 foot degree wheel. He gets paid quite a bit to degree in the local Nascar Modifieds with their $35,000-$45,000 engines. On a LS engine I didnt even bother degreeing my cam in. **** theres 1/4 play in the timing chain so no matter how accurate you think it is, it really isnt! The only thing the timing chain drives is the cam. SBC timing chain drove the cam which drove the distributor which in turn drove the oil pump. Those chains were tight of course they had to be. Good luck with degreeing the cam! I dont know how tight your timing chain is but if it is loose like mine, could you do something for me? After you get it dial in, rotate the reciprocating assembly around a couple of times and recheck the degrees again. I am just curious if it will give different readings since there is some slack in the chain. If your chain is tight and no visible slack disregard the last 3-4 sentences.
I've already ordered and paid for the kit, and it was a special order, so I'll get the kit and see how it goes. I will definitely keep that in mind about the chain. I will also check it a couple times to see if it gives me the same readings. I'll update when I get it done.Got the trunion upgrade done today. For anyone that doesn't want to spend the money on roller rockers, but wants something a little better than the stock rockers...highly recommend this kit. I noticed the difference right away. The stock ones feel so flimsy compared to trunion kit. The stock ones don't feel very tight at all and rattle quite a bit. With the upgrade kit, they are way smoother moving and there is no play at all. On to the pics.
They were actually very easy to install. Took about an hour or so to do the full set of 16. All you need is a vice or a press. I'm sure most guys will be doing with a vice, that's how I did mine.
First thing is to pop out the stock trunion. The instructions say to use a socket underneath and use a hammer and bar to the knock them out. I found it easier to use my vice. I used a 15/16 socket on one side an a 9/16 socket on the other
You'll notice that on one side of the rocker there are some tabs that are not on the other side. I put the 15/16 socket on the side with the extra tabs to help secure it in place
The 9/16 socket fit nicely to push the old trunion out
Then just tighten the vice until the bearings pop out. You'll want to keep your hands underneath to catch everything
The one thing that I found that was about half of the bearings in the stock trunion were so dry that the needles fell out right away. You can also see the parts that I took out.
Now you need to put the new bearings in. The only thing with this part is you have to make sure the letters on the bearings stay on the outside. Using the vice I put one side in
You only have to tighten the vice until the bearing is flush
One side done
The kit also includes two thick washers that help with the install. Once you have one of the bearings in, you put in the main piece (I'm assuming that's the actually part called the trunion). You put the other bearing into place. I found it easier to press the second bearing in a bit before using the washer. That way I didn't have to worry about lining up the washer and holding the bearing in place. You can see how you use the washers when installing
Then put a c clip onto both sides are you're done
Here's some pics of the differences
First, this is what comes with the kit for each rocker arm
Stock bolt on the left, bolt with the upgrade kit on the right
Stock bearing on left, upgrade on right
Stock on top, upgrade on bottom. You can see from this picture why you need the washers when pressing in the bearings. The upgraded one is quite a bit longer than stock.
07-27-2011, 09:19 PM
#127
On The Tree
Thread Starter
iTrader: (4)
Join Date: Mar 2009
Location: British Columbia, Canada
Posts: 132
Likes: 0
Received 0 Likes
on
0 Posts
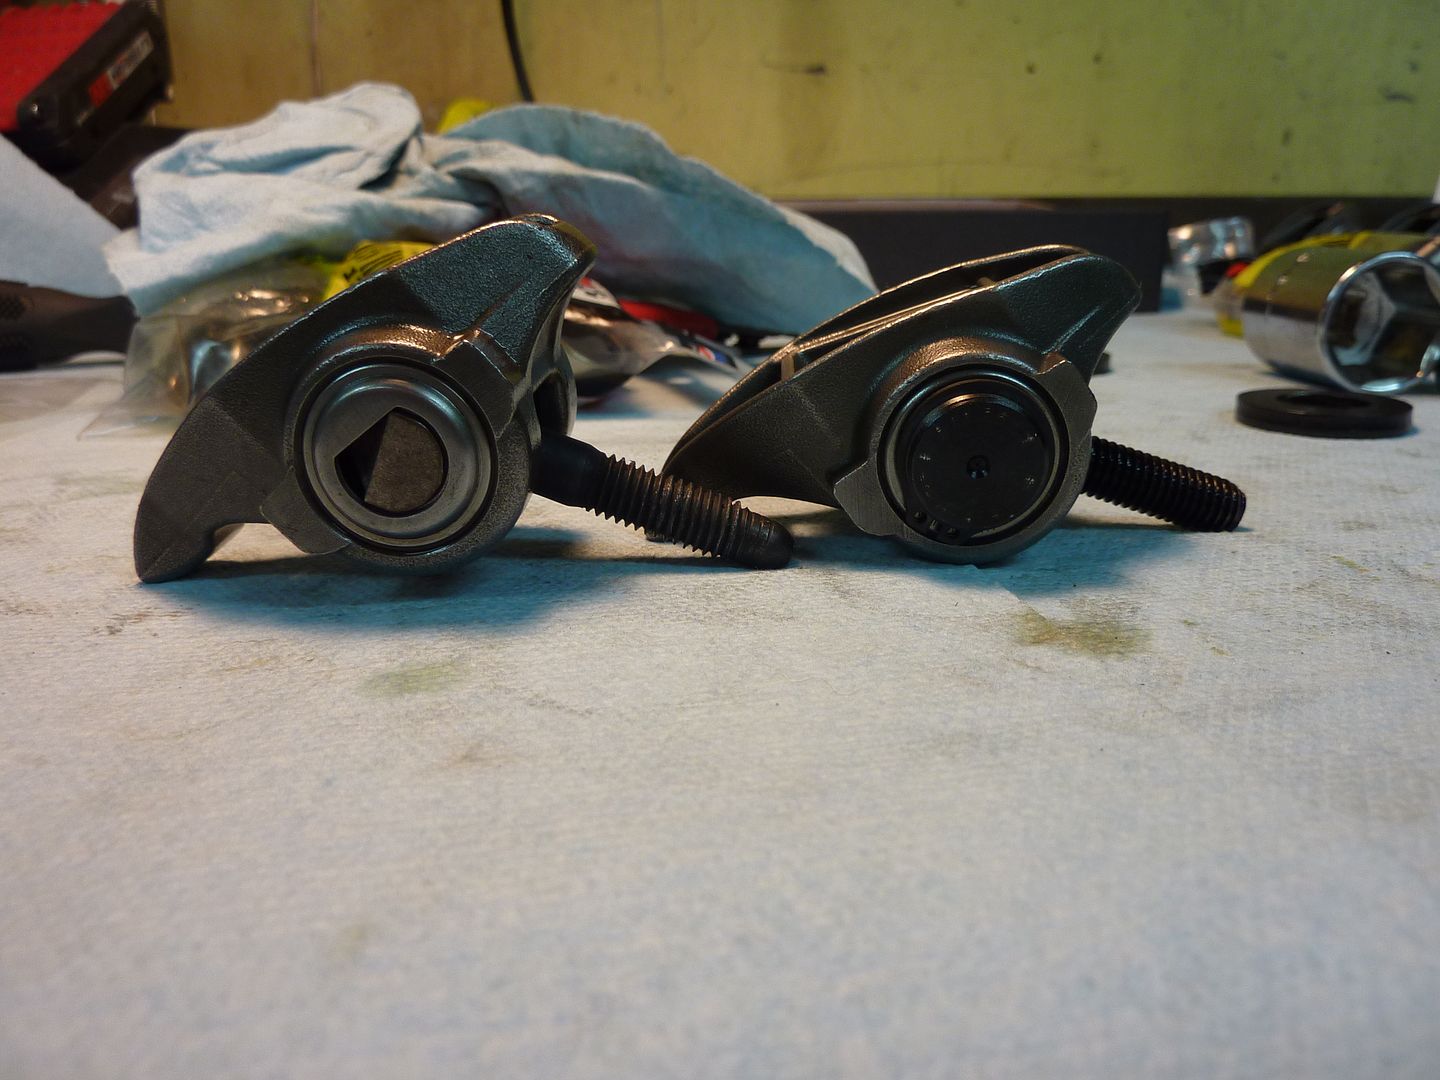
Here's the two complete units side by side. I'm sure you can figure out which one is which
And the parts left over
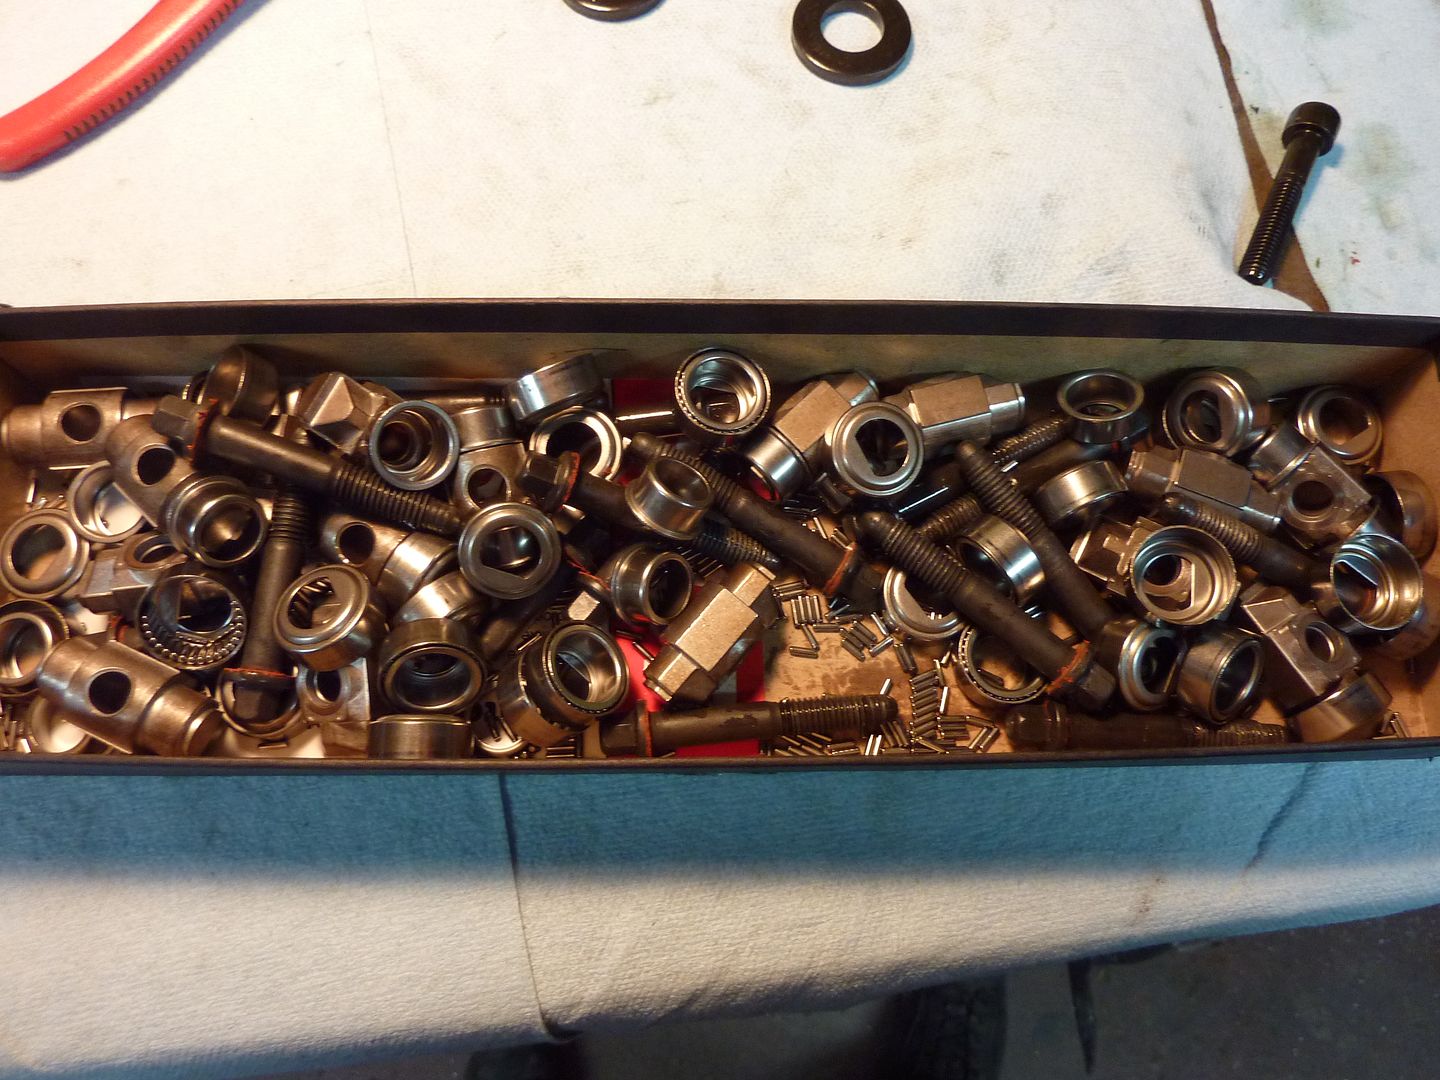
You can see all the needles from the bearings that fell apart
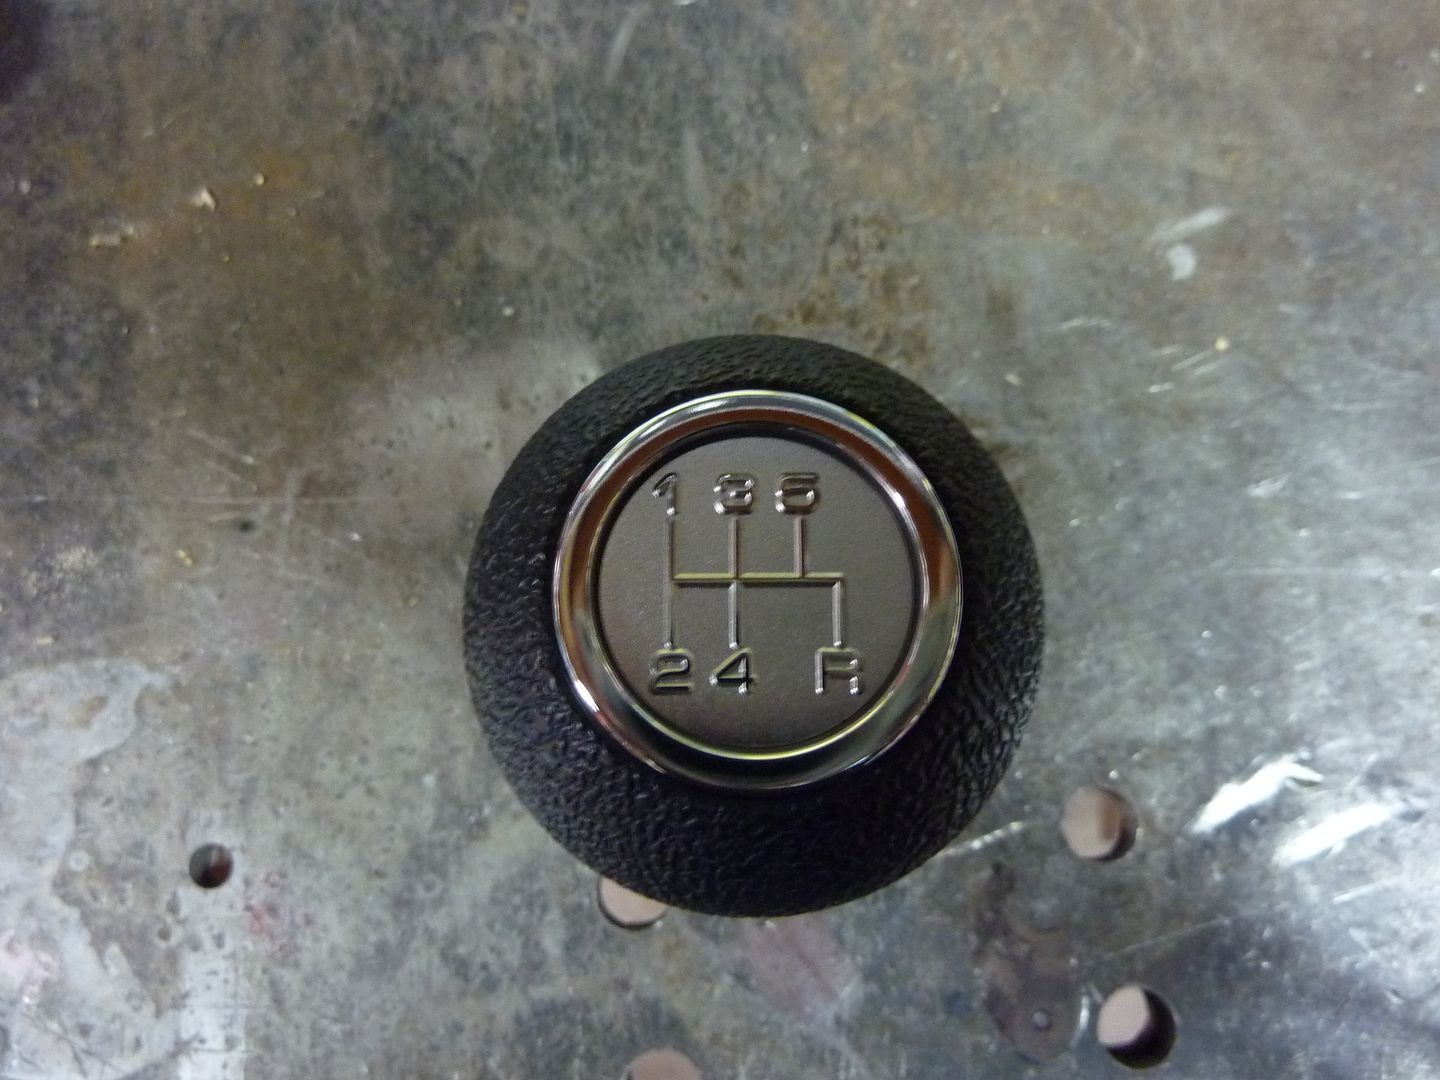
I forgot to add on the last update...I got my new and proper shifter **** from MGW shifters. Looks much better
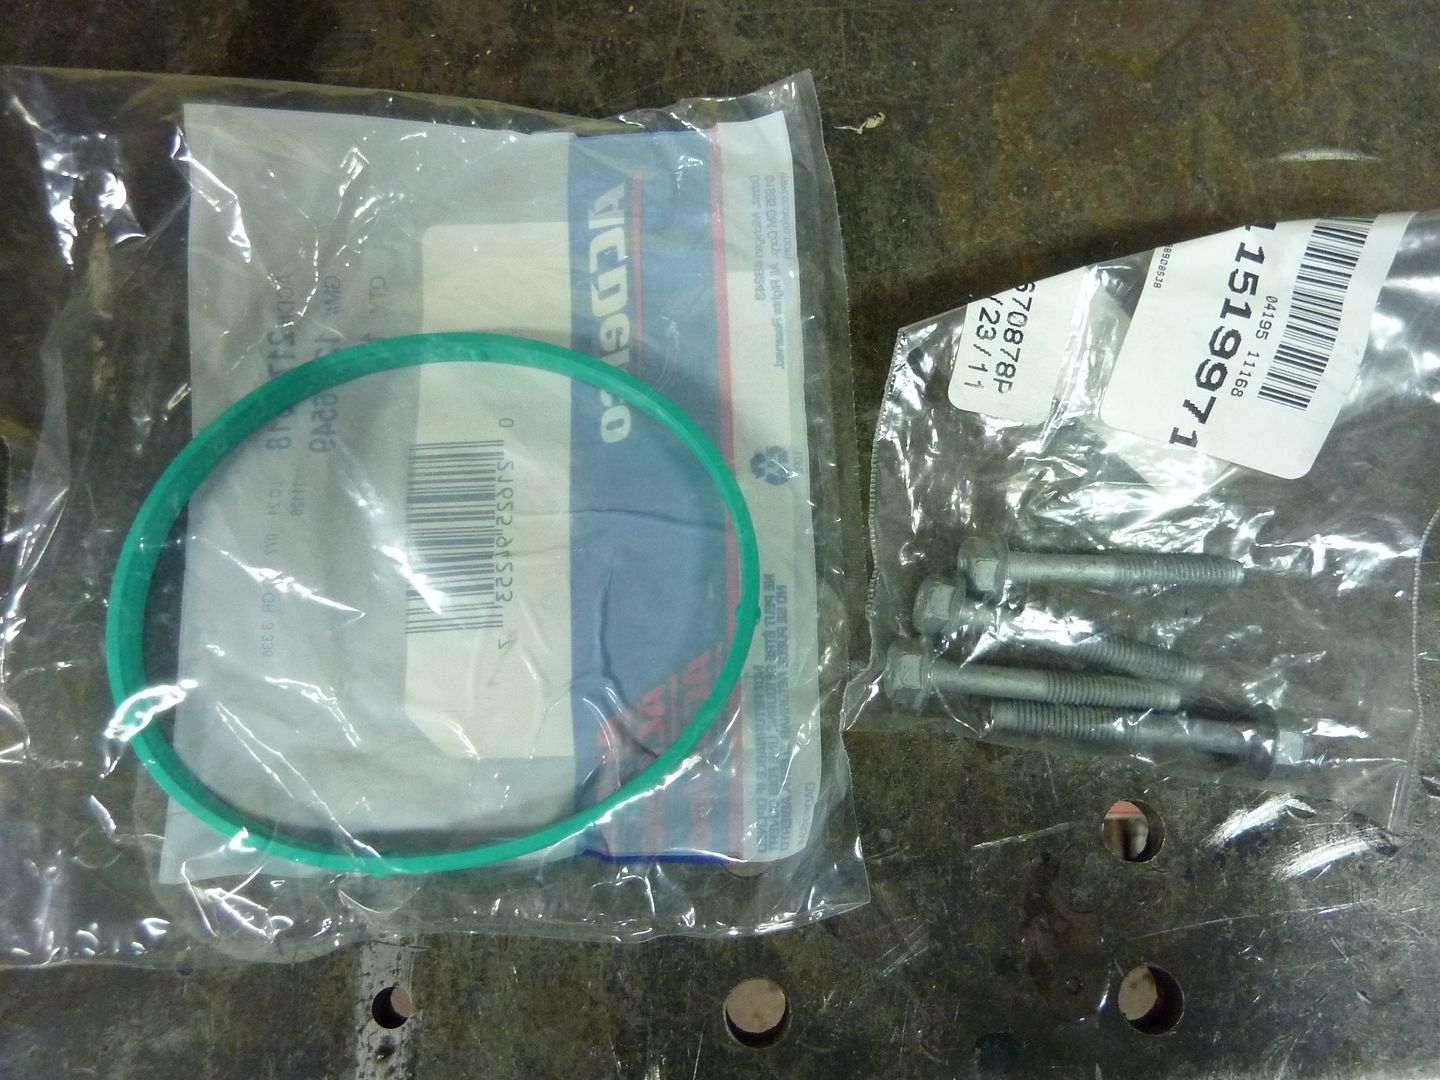
The one thing I find really annoying with buying parts separate from different companies, you have to buy some things separately from GM. 40 bucks for the intake seal and 40 bucks for the throttle body bolts. GM is such a rip off sometimes.
Not sure when I'll get a chance to update again. I'm waiting for a few little things that are halting progress (hinges, degree kit, and a few others). Plus we plan on painting the house next week so likely won't get into the shop for a bit.
And the parts left over
You can see all the needles from the bearings that fell apart
I forgot to add on the last update...I got my new and proper shifter **** from MGW shifters. Looks much better
The one thing I find really annoying with buying parts separate from different companies, you have to buy some things separately from GM. 40 bucks for the intake seal and 40 bucks for the throttle body bolts. GM is such a rip off sometimes.
Not sure when I'll get a chance to update again. I'm waiting for a few little things that are halting progress (hinges, degree kit, and a few others). Plus we plan on painting the house next week so likely won't get into the shop for a bit.
07-28-2011, 10:03 AM
#129
I'm assuming it's Comp's trunion kit, PN 13702-KIT ($135 thru summit). Seems like a good upgrade, esp w/ higher pressure springs.
ps - here's what can happen if you keep the stockers.
ps - here's what can happen if you keep the stockers.
07-28-2011, 11:13 AM
#130
On The Tree
Thread Starter
iTrader: (4)
Join Date: Mar 2009
Location: British Columbia, Canada
Posts: 132
Likes: 0
Received 0 Likes
on
0 Posts
I'm assuming it's Comp's trunion kit, PN 13702-KIT ($135 thru summit). Seems like a good upgrade, esp w/ higher pressure springs.
ps - here's what can happen if you keep the stockers.
ps - here's what can happen if you keep the stockers.
07-28-2011, 08:09 PM
#131
Great posts on the trunion kit!! Thanks. Makes me wish I had done this prior to installation. I can definately see the difference in strengths. I agree with you on the value of this upgrade. Let me put that on the mile long list I already have! $40 bucks for an o-ring??? Man thats crazy. I may just measure the diameter and head on over to the local hose and hydrualics store and see if I can get one from them.
07-29-2011, 05:31 PM
#132
I had Oreillys Auto cross the GM part #12576549 and they had me a seal within 3 hours for $11.99. Just thought I would throw that out there incase you want to return the GM one. This one is from Fel-Pro and is the same color and everything. They prolly make it for GM if the truth be known. The Fel-Pro number is 61436.
07-29-2011, 10:35 PM
#133
On The Tree
Thread Starter
iTrader: (4)
Join Date: Mar 2009
Location: British Columbia, Canada
Posts: 132
Likes: 0
Received 0 Likes
on
0 Posts
I had Oreillys Auto cross the GM part #12576549 and they had me a seal within 3 hours for $11.99. Just thought I would throw that out there incase you want to return the GM one. This one is from Fel-Pro and is the same color and everything. They prolly make it for GM if the truth be known. The Fel-Pro number is 61436.
07-30-2011, 09:37 AM
#134
I called the local GM stealership and you were right on the price. They said it was $35 plus tax and it would be Monday before it would come in. I figure it like this, if you are going to have another company make an item that the average guy can buy for $12 and you are going to jack up the price 300%, you should have it on the shelf! I would have bought it from them if it were available just like you but I am glad it wasnt. GM's head gaskets are for sure made by FelPro but are cheaper to buy from the dealership than from any of the boxstores. Sometimes it makes you wonder who is controlling the prices.
09-14-2011, 12:51 PM
#135
On The Tree
Thread Starter
iTrader: (4)
Join Date: Mar 2009
Location: British Columbia, Canada
Posts: 132
Likes: 0
Received 0 Likes
on
0 Posts
Unfortunately I haven't had much time to work on the car. It sucks when life gets in the way. Over the past month or so, we've painted the house and the shop. It really needed to be done. I don't think it's been painted for 20-25 years. I'll post some pics of the difference when I take some new ones. I'm also still waiting on the cam degree kit and the head gaskets. The cam degree kit is shipping out today so I should have it tomorrow morning. The head gaskets should be here any day. I've also received a few other small parts, but haven't had a chance to put them on. I'll post pics of everything when I have a better update for work done.
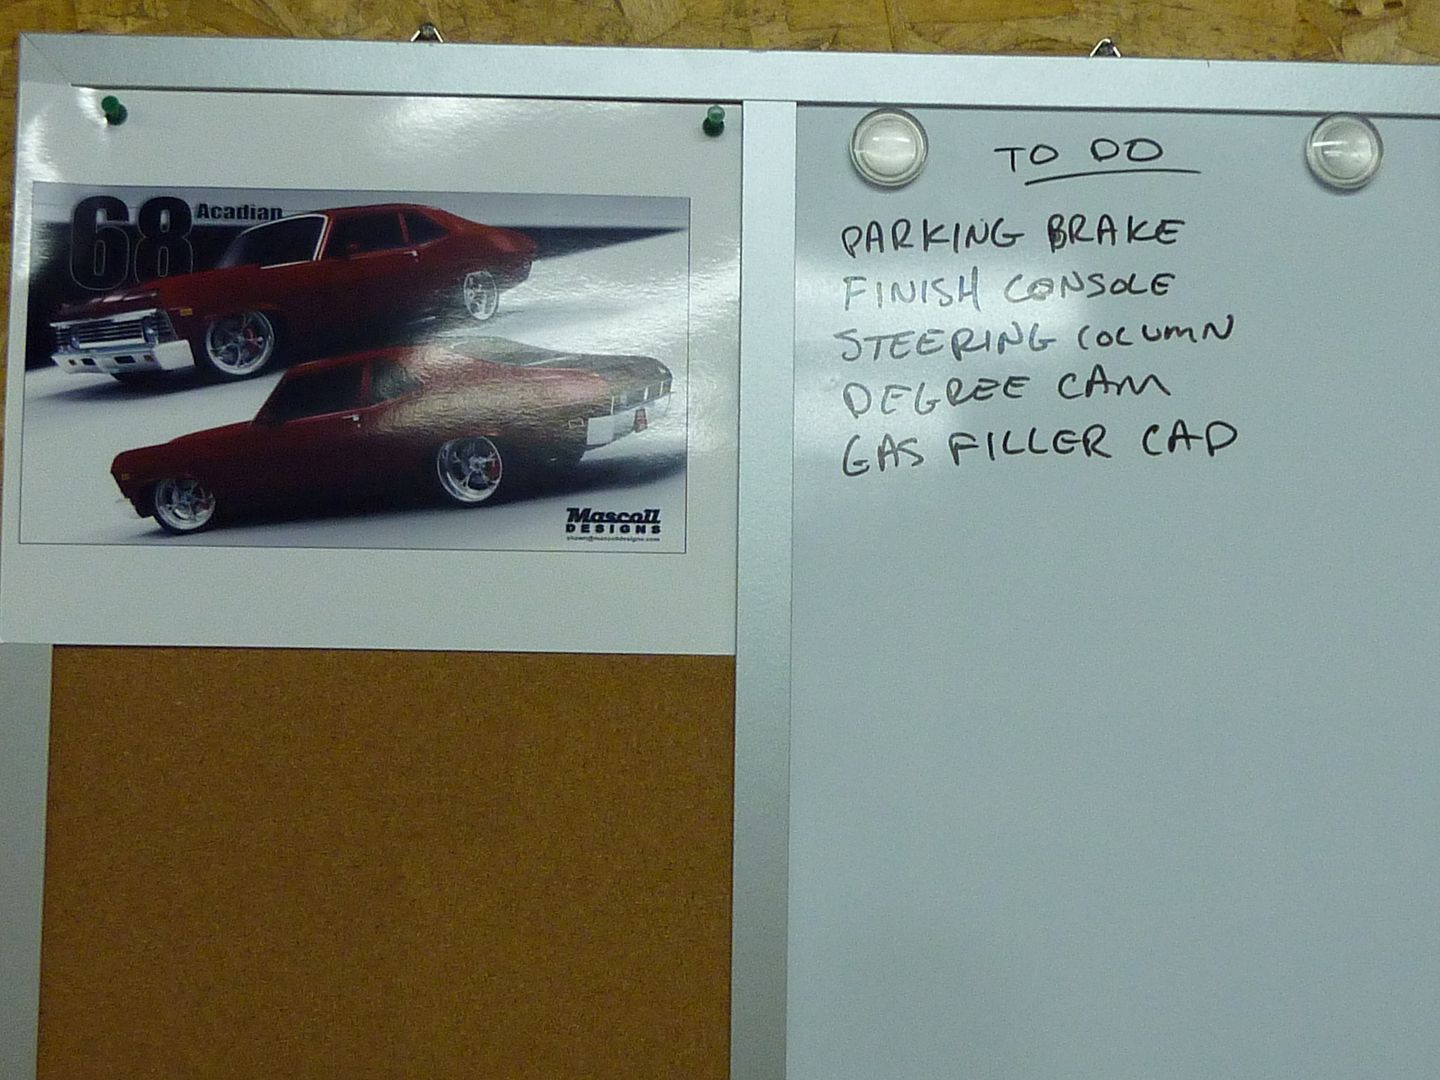
I do though have a good update for today though. I had Shawn Mascoll do a rendering for me. Turned out great. Now I just have to get the damn car done!!!! Here's his website if anyone is interested in getting him to do one: http://mascolldesigns.com/
Here it is:

I do though have a good update for today though. I had Shawn Mascoll do a rendering for me. Turned out great. Now I just have to get the damn car done!!!! Here's his website if anyone is interested in getting him to do one: http://mascolldesigns.com/
Here it is:
09-15-2011, 07:37 PM
#137
On The Tree
Thread Starter
iTrader: (4)
Join Date: Mar 2009
Location: British Columbia, Canada
Posts: 132
Likes: 0
Received 0 Likes
on
0 Posts
Thanks. I'm slowly getting there.
Well the cam degree kit and the head gaskets both arrived today. I decided to head out to the shop and take another shot at degreeing the cam. It's actually not so bad when you have the proper equipment.
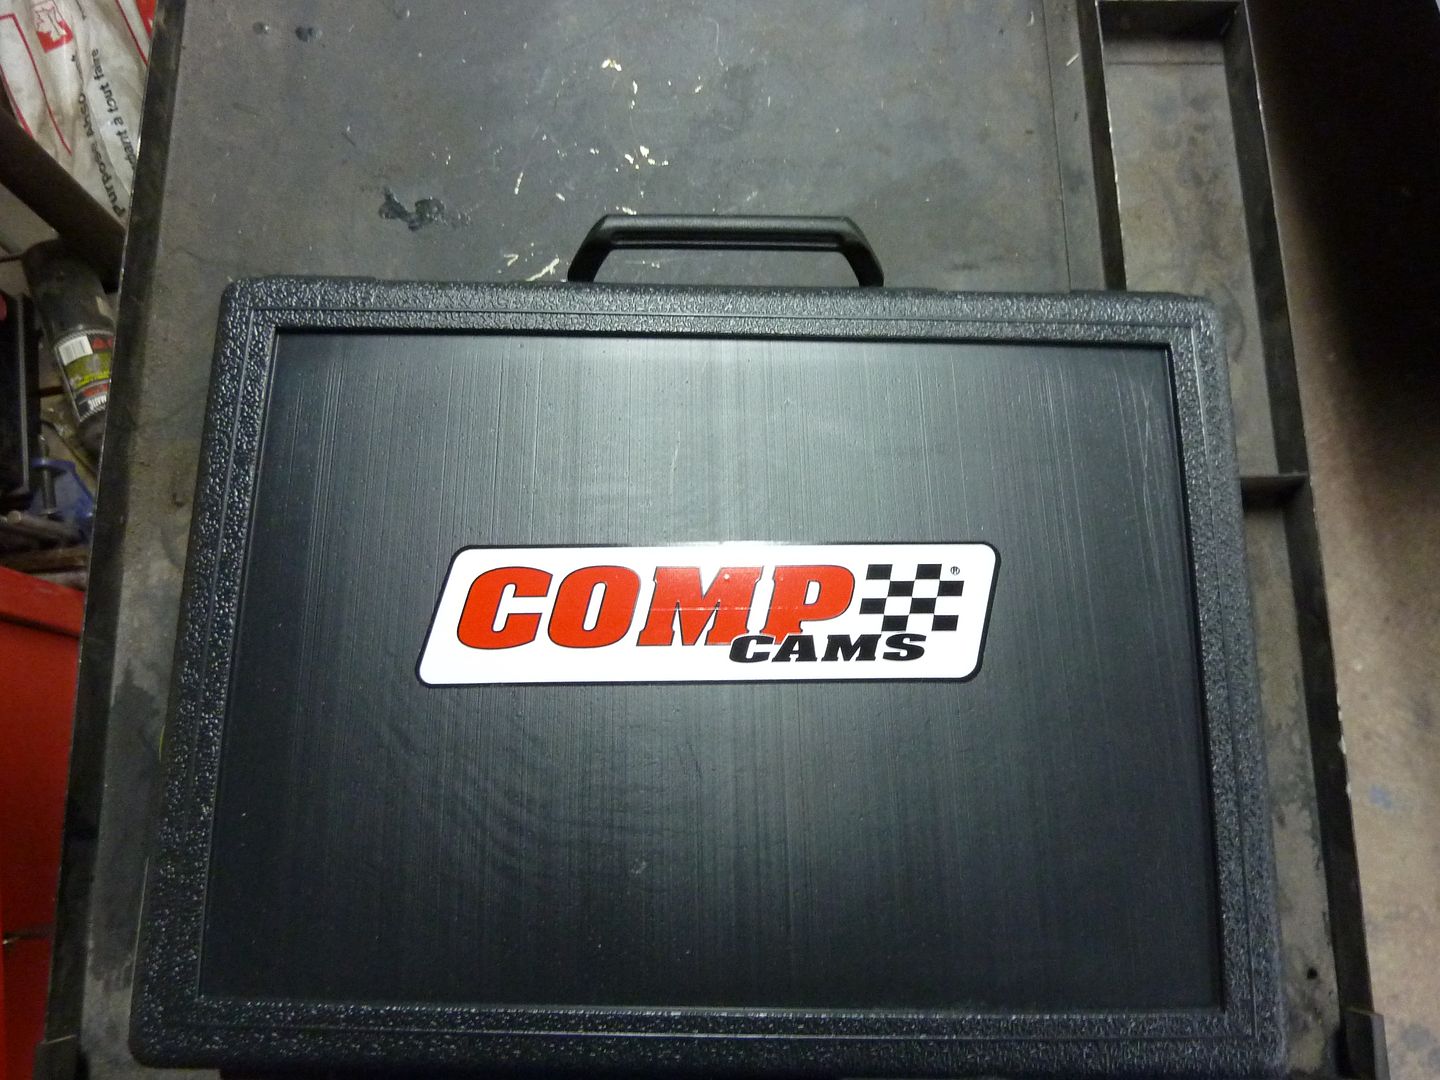
So here's the degree kit I got. It's a LS specific kit and is Comp Cams part number 4942. Here's how it comes:
And here's what's included:

First thing I did when I got out to the shop was to hang up some inspiration. I plan on getting a blown up print done and framing it. It will also hang in the shop.
A couple guys on the forums brought it to my attention that I didn't put any assembly lube on the bearing portion of the cam. So while it was still easy to get at, I pulled the cam out and put some more lube on.
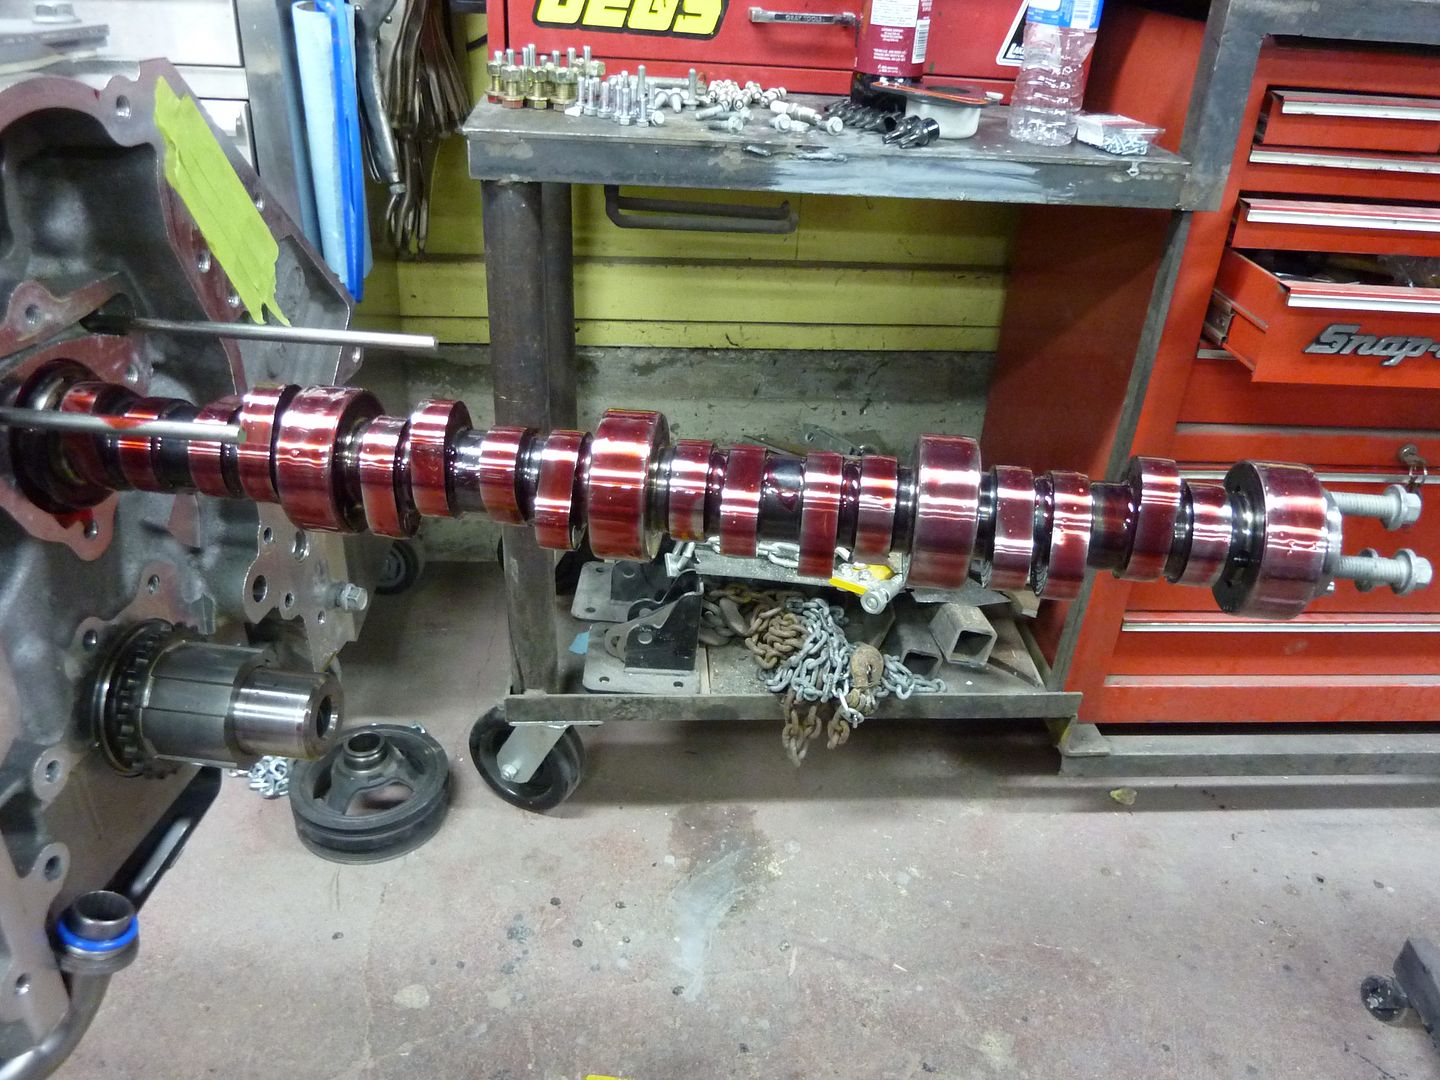
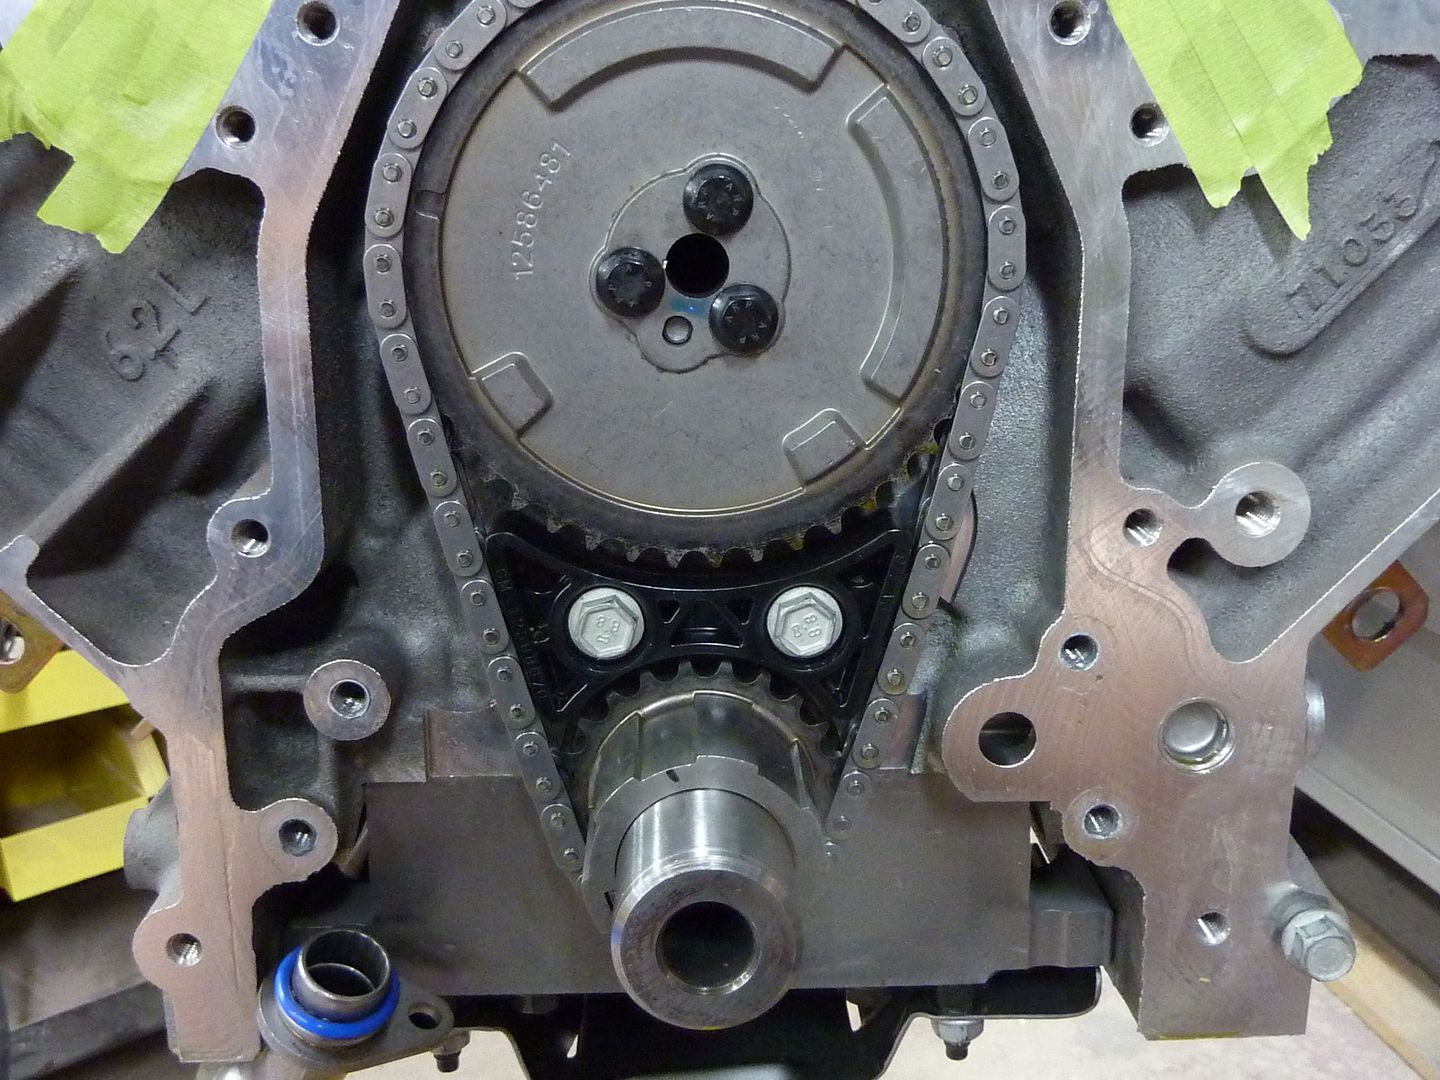
Put it back together with the new LS2 timing chain dampner.
Then it was time to degree the cam. I found a really good website that shows step by step how to degree a cam using the same kit I have. It looks like it was done by Car Craft Magazine. Was very useful: http://xtremecarzone.com.au/lofivers....php?t805.html
Here's another website that I found very helpful for replacing the cam shaft: http://www.camaro5.com/forums/showthread.php?t=125123
One more site I found very useful was: http://ls1howto.com/ It has all the bolt torque ratings for the entire engine as well as several other good articles.
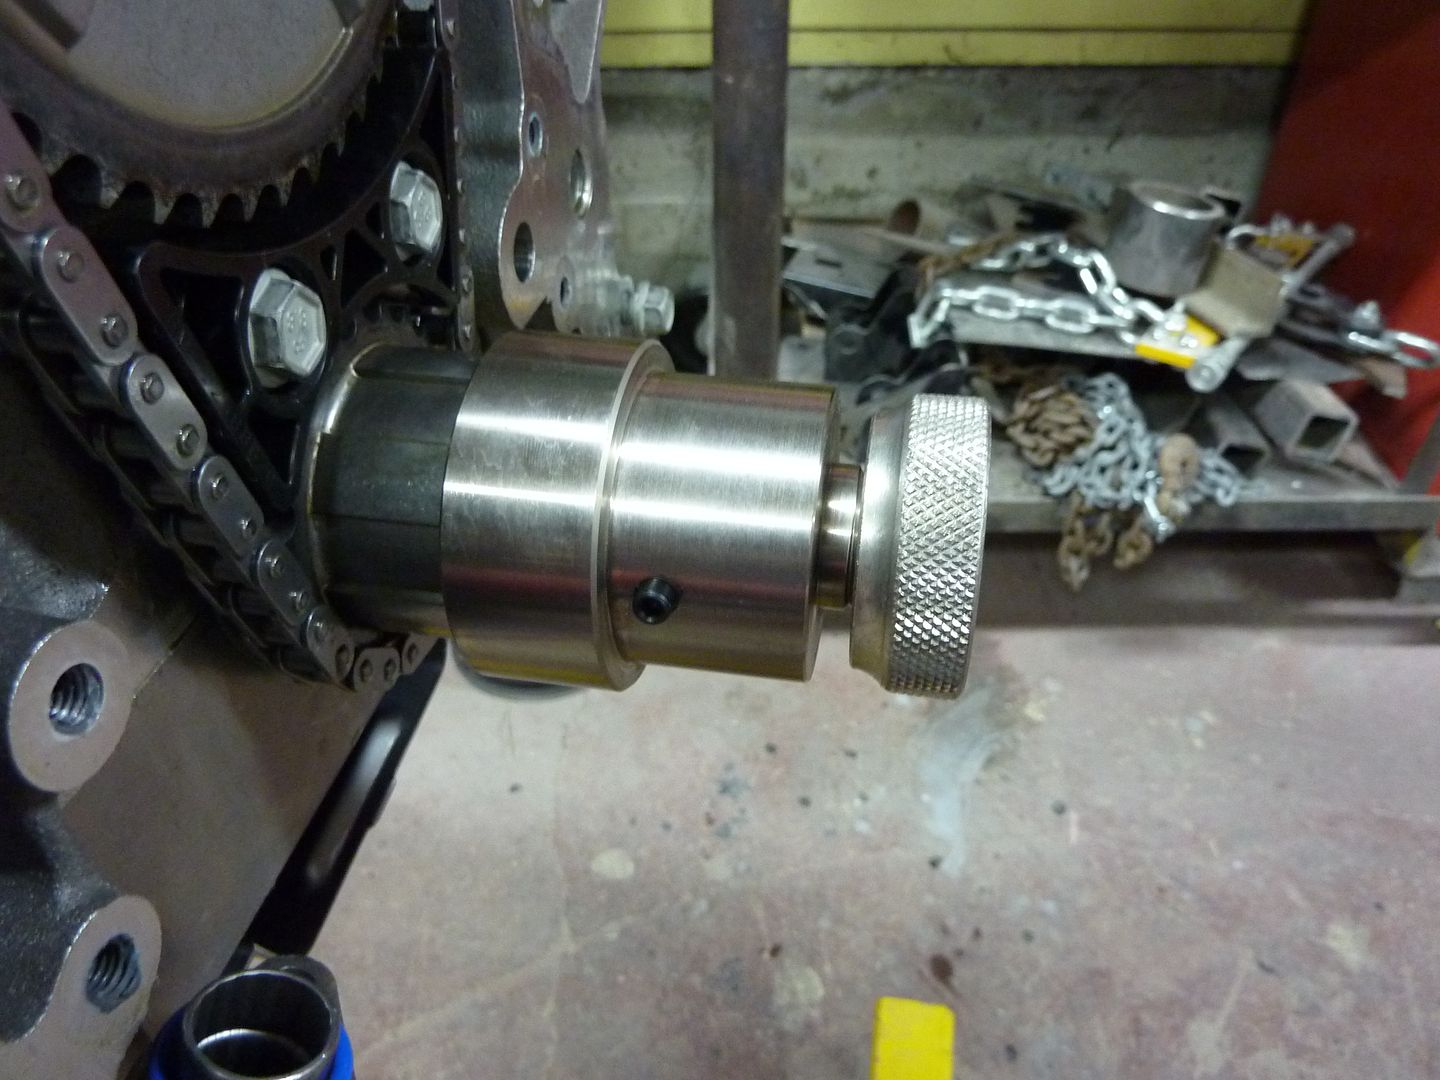
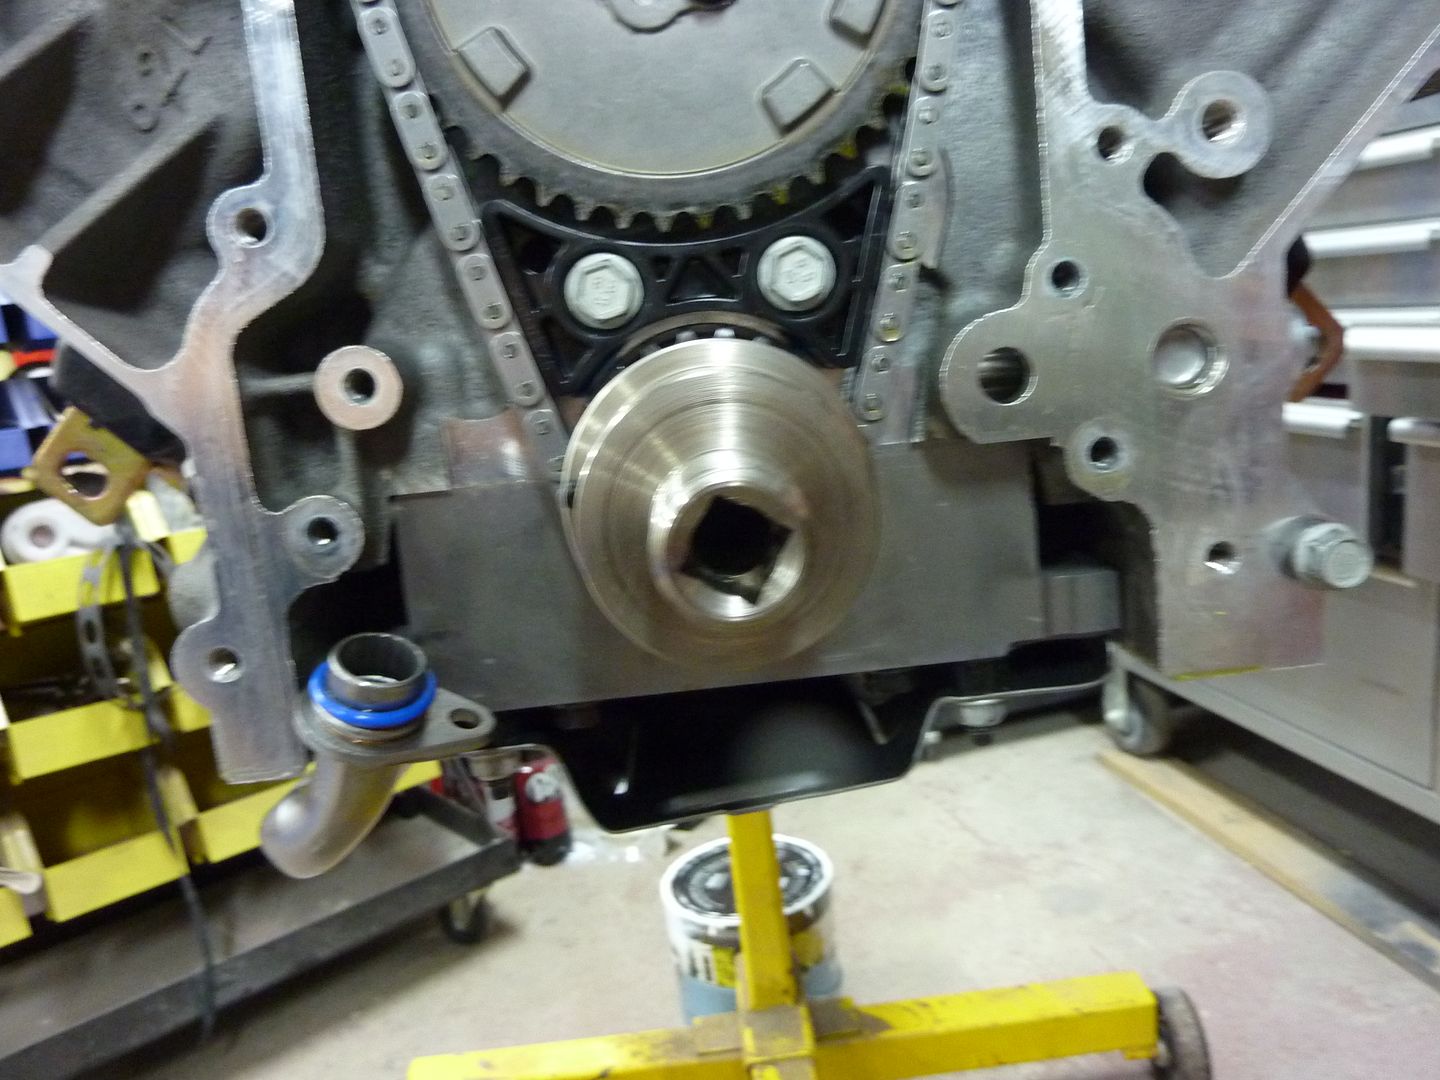
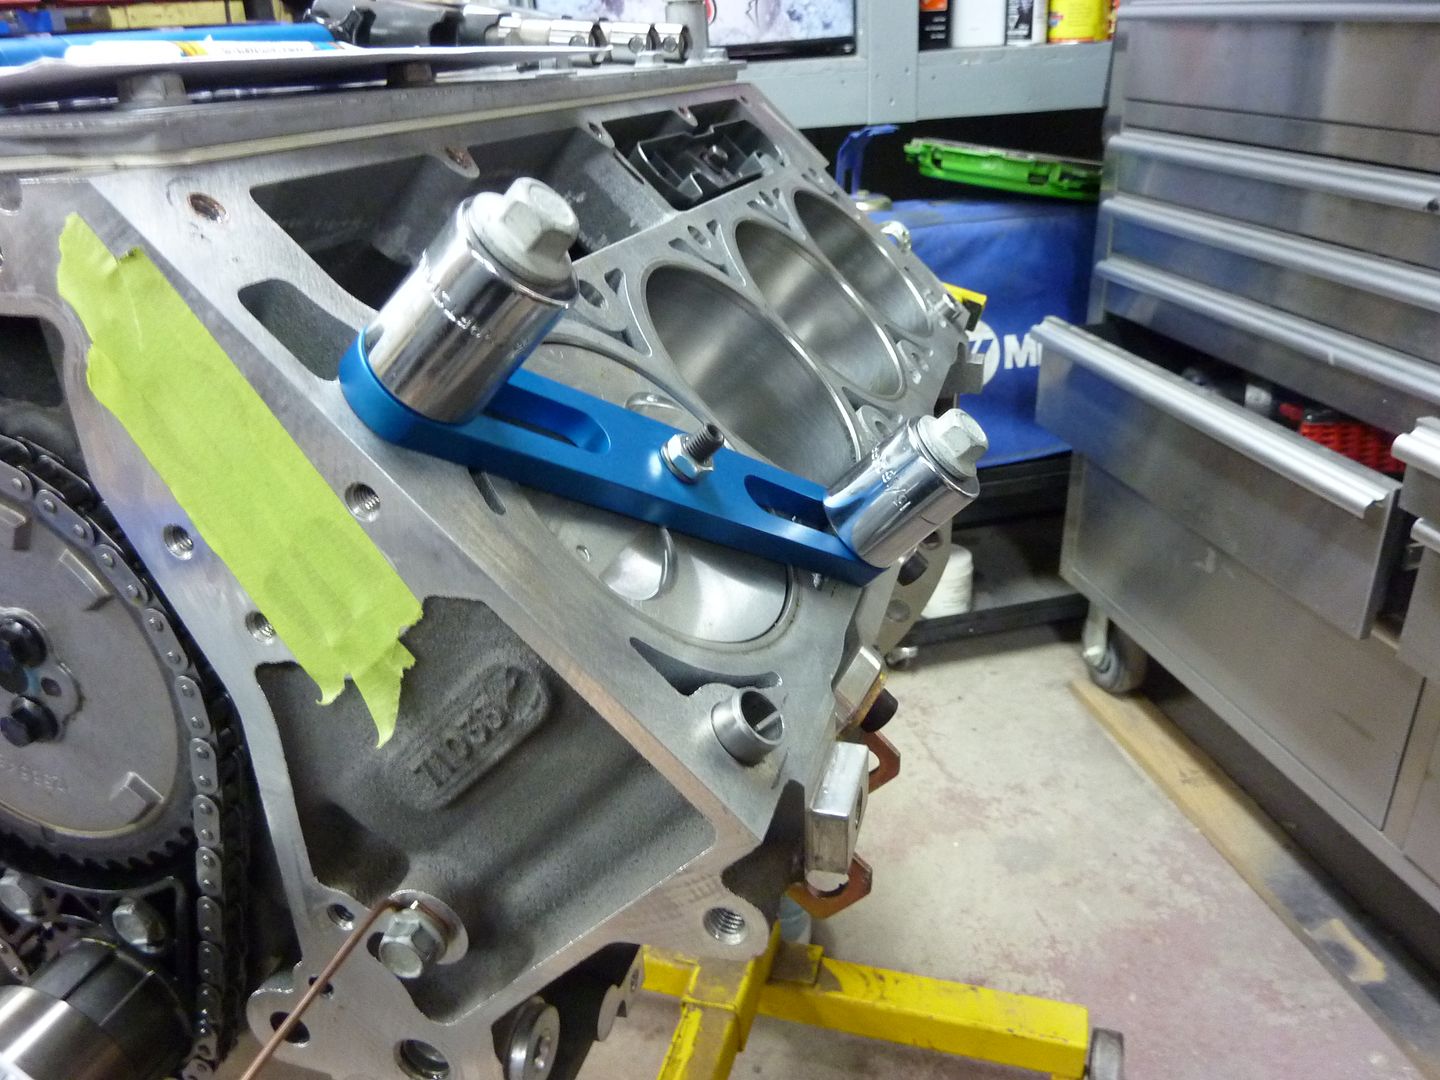
First thing I put on was the crank socket. This thing works really well and sure makes turning the crank over a breeze.

At the end of the socket, there is a threaded part where the degree wheel goes. Very easy to adjust. Loosen the nut, move the wheel and tighten it back up.
Uses a half inch wratchet
Degree wheel on. I didn't take a picture with the pointer in place, but I mounted it with a bolt to the hole just to the upper right of the wheel. You bend the piece of copper that's included with the kit to 90 degrees to make a pointer.
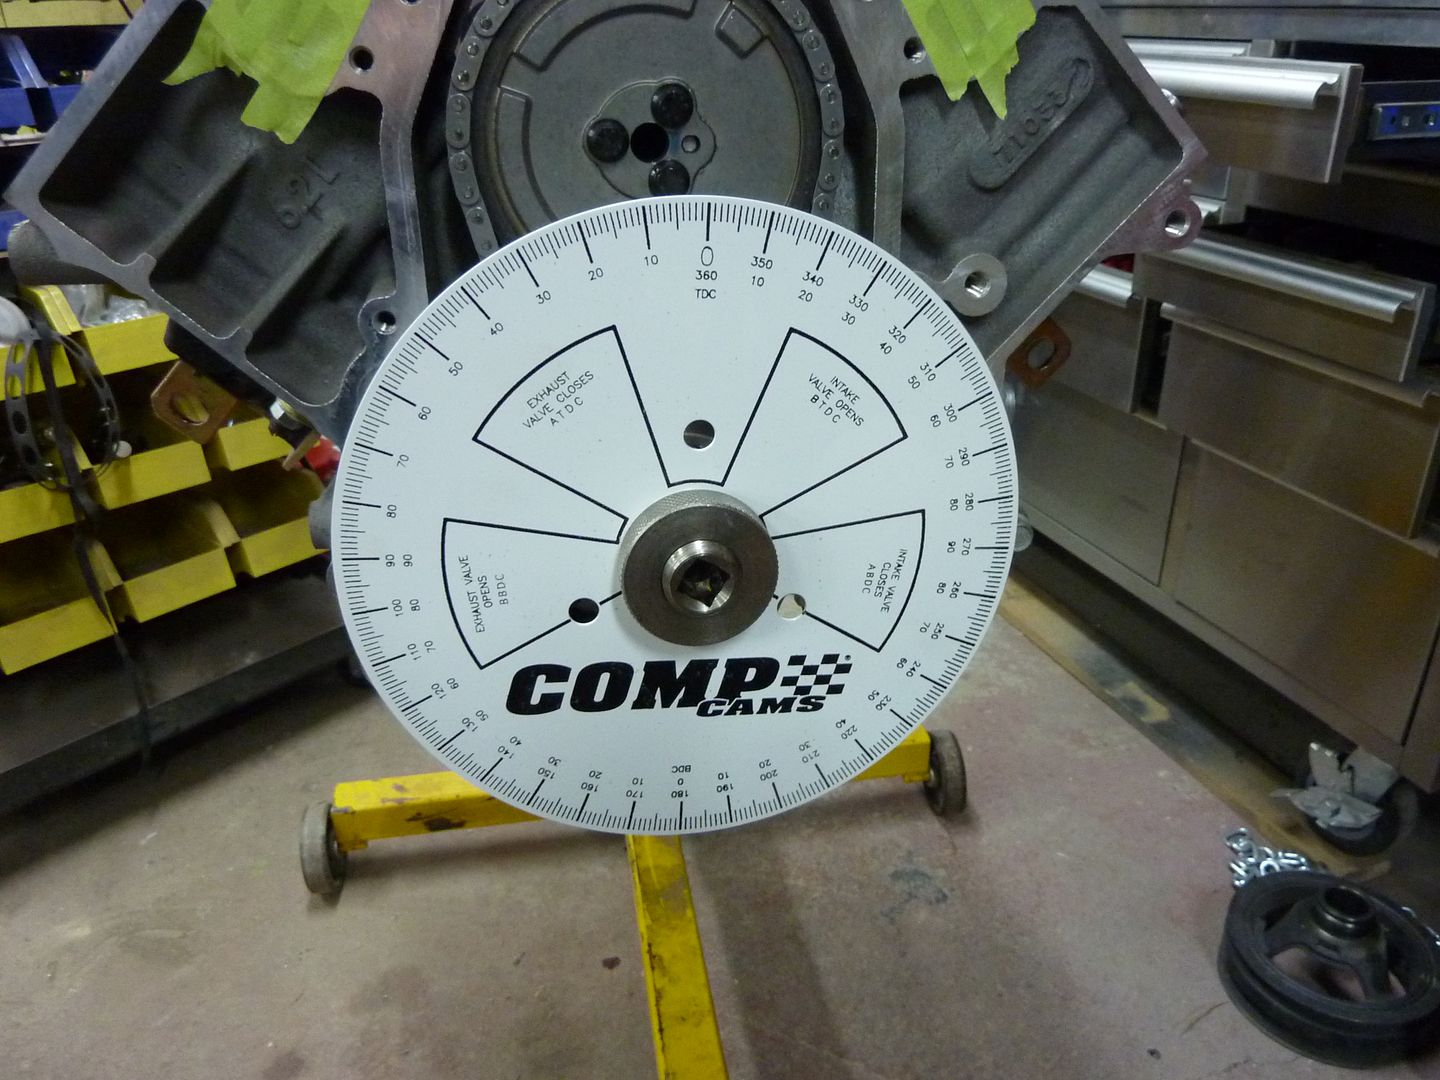
I'm not going to repeat what the step by step article says (if you're going to degree your cam, well worth reading it. I even took my laptop out to the shop and followed it) but here's a pic of the piston stop in place.
The dial indicator with in place. They include a couple different size ends for where it screws into the block.

So after following the step by step instructions on the website I posted, I came up with 71 degrees before max lift and 154 degrees after max lift. That gave me a lobe centre angle of 112.5. I compared that to the lobe centre angle on my cam specs. It should be 112. I'm happy with that. Unless someone tells me that I shouldn't be. I checked the numbers about 5 times and came up with the same results each time.
I go back to work tomorrow so won't get chance to get back into the shop until Tuesday or Wednesday. I also ordered a new oil pan gasket, timing cover gasket and front seal today. Next week I should have the engine back together and will hopefully get it back into the car (hopefully for good....again).
Here's a couple other parts that I got over the last couple weeks:
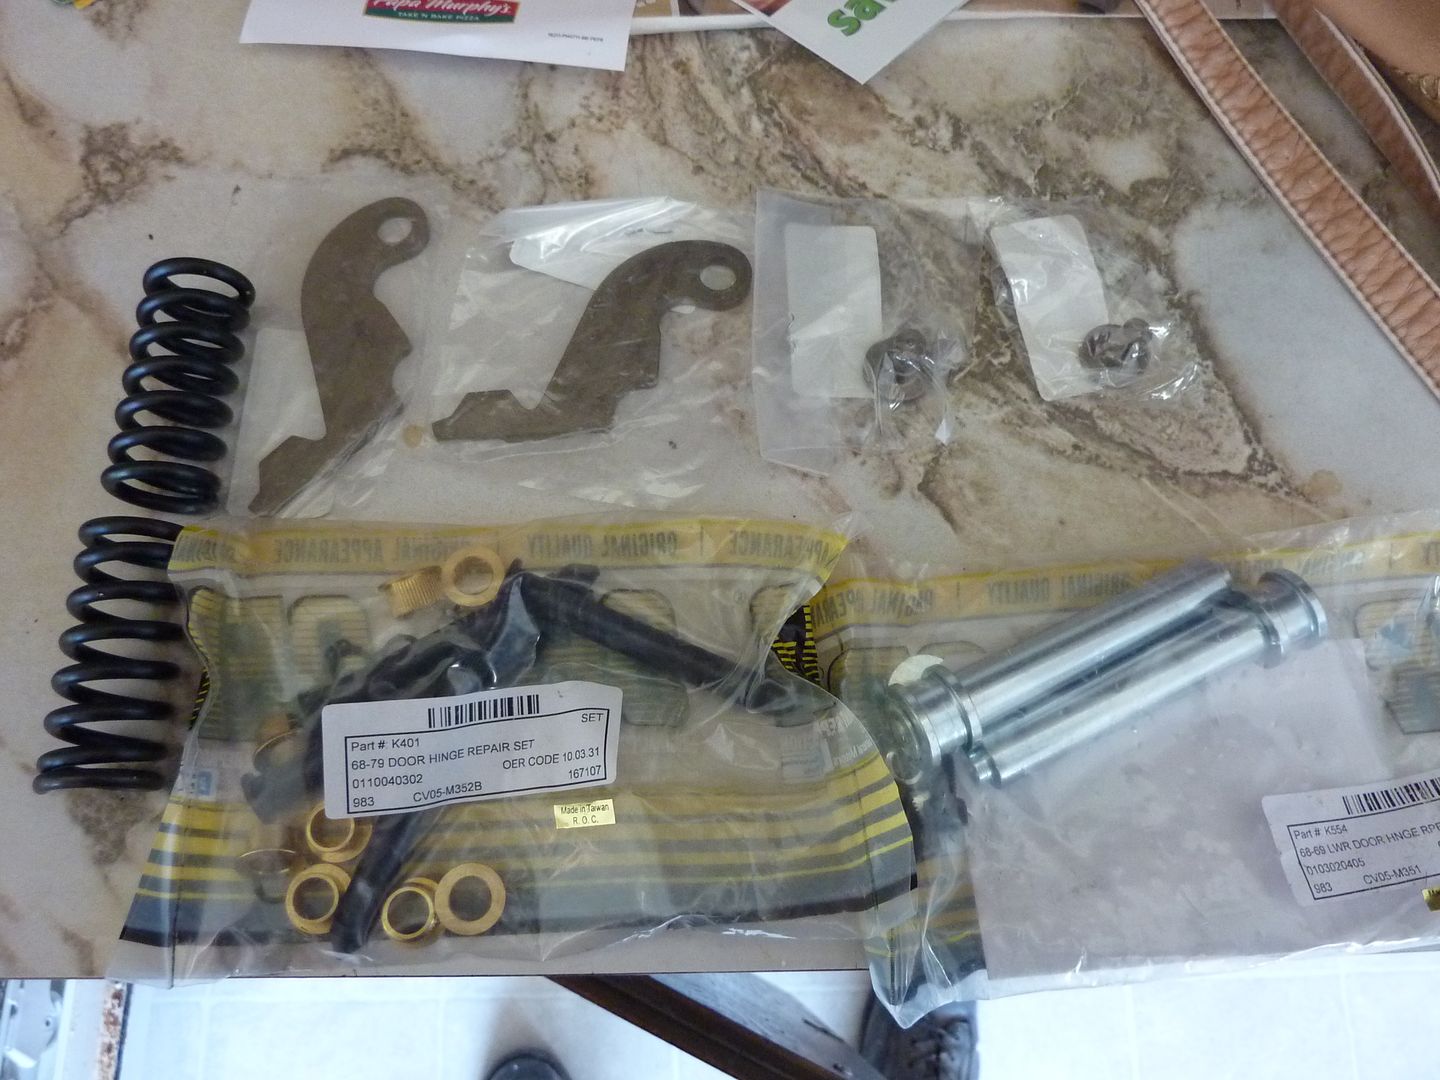
Complete hinge rebuild from Classic Industries:
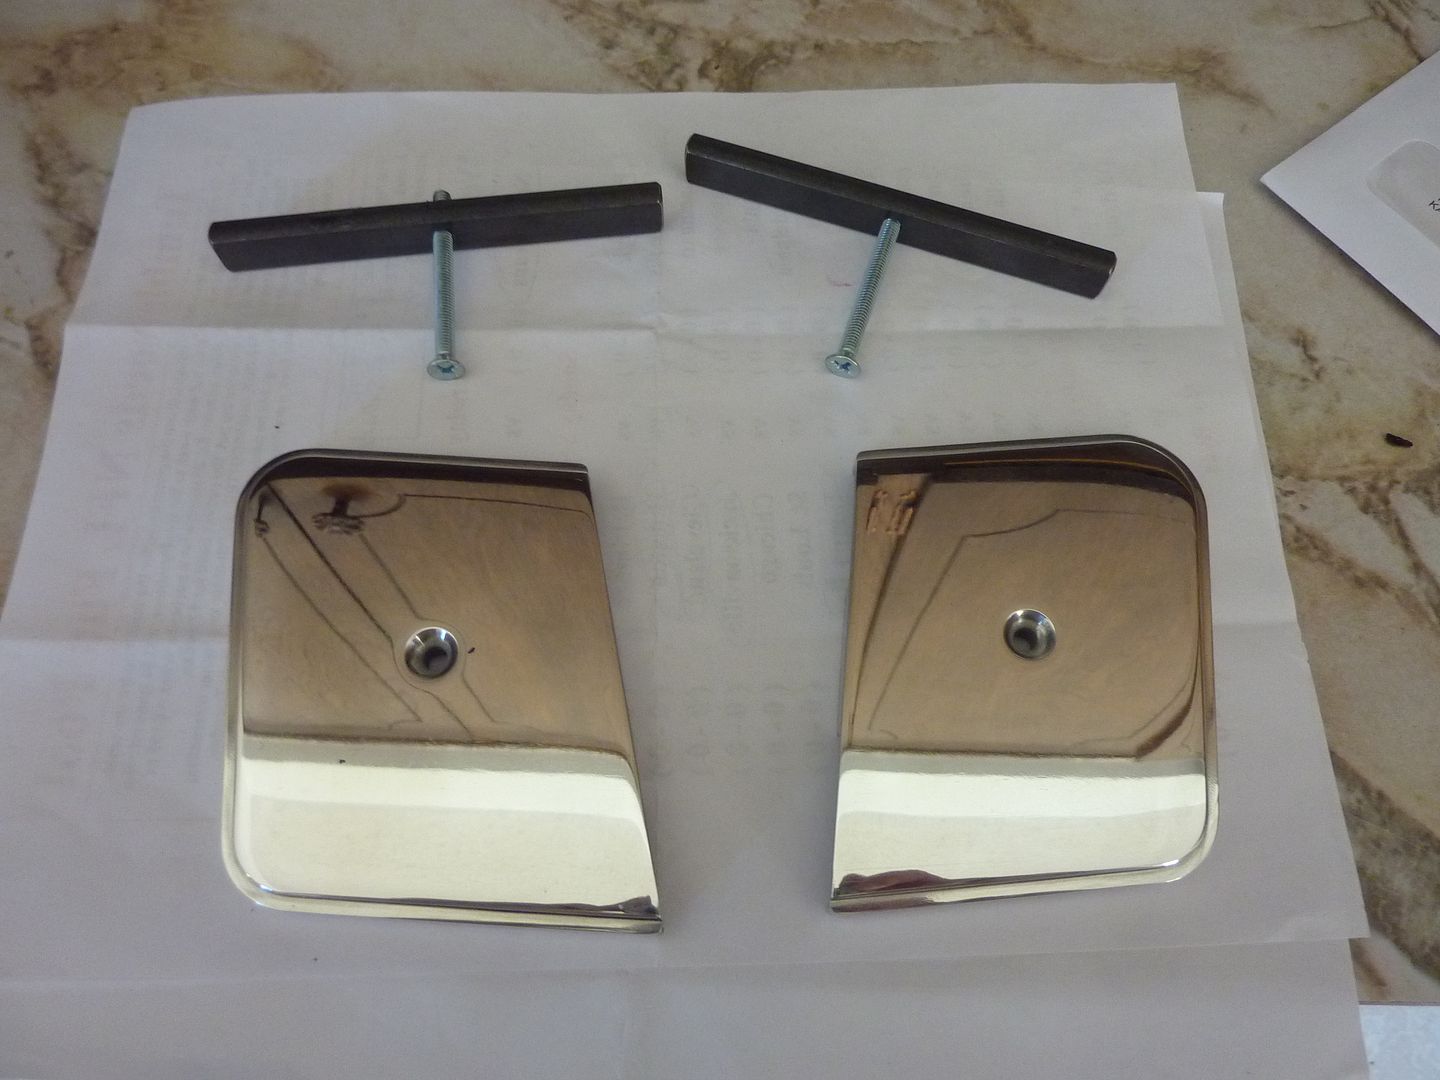
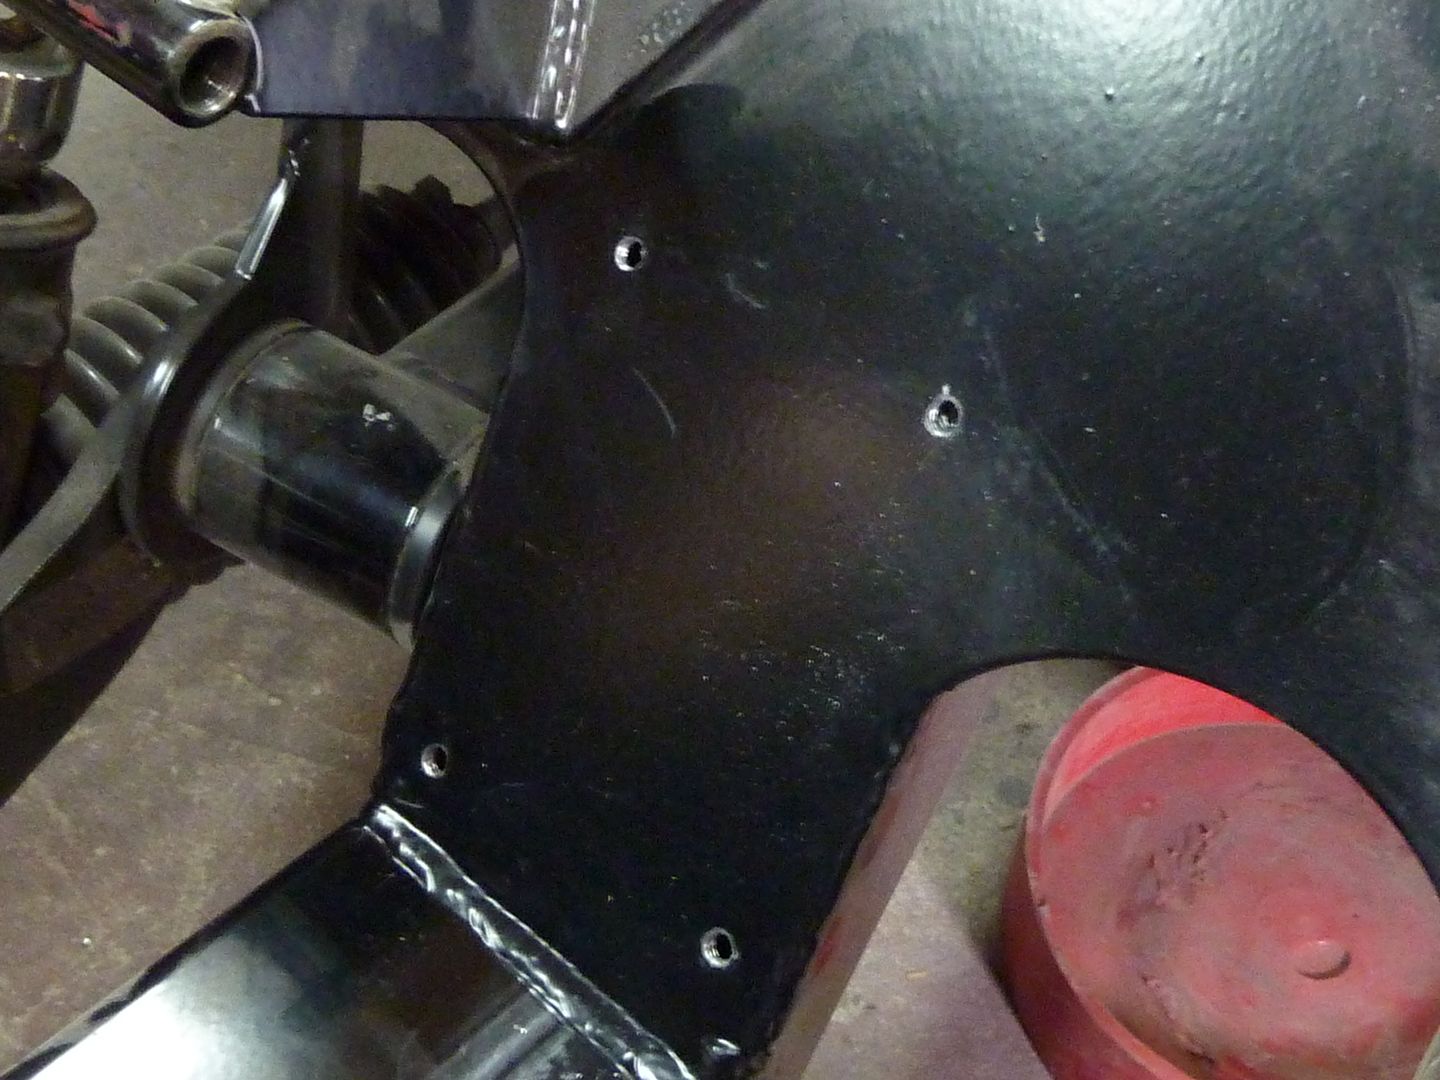
Close out covers for the firewall. They will cover up the ugly subframe bolt openings. I have them on, but forgot to take a pic. They really clean up the firewall. Got these from Mike at http://musclerodz.com/
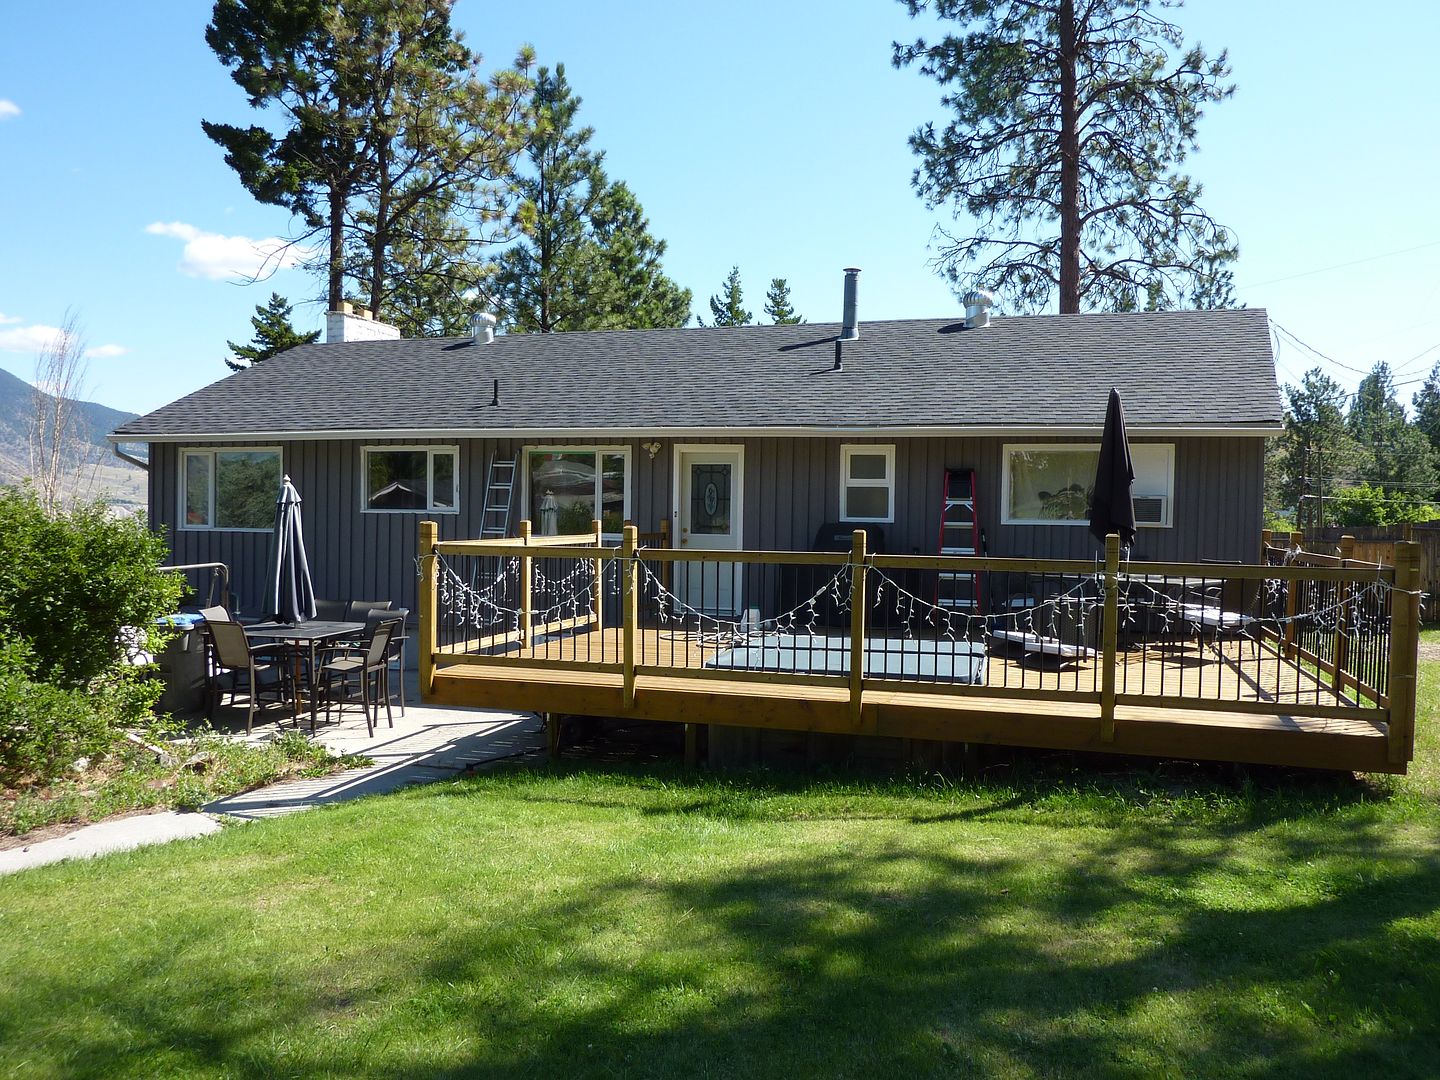
I mentioned that we painted the house and shop last month. Thought I'd post some before and after pics:
House before:
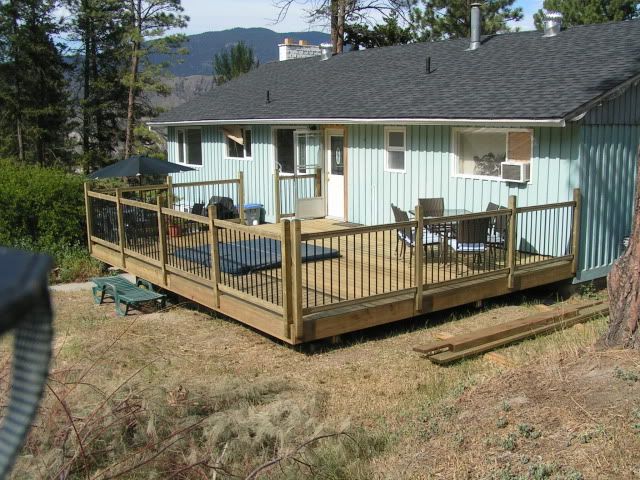
After:
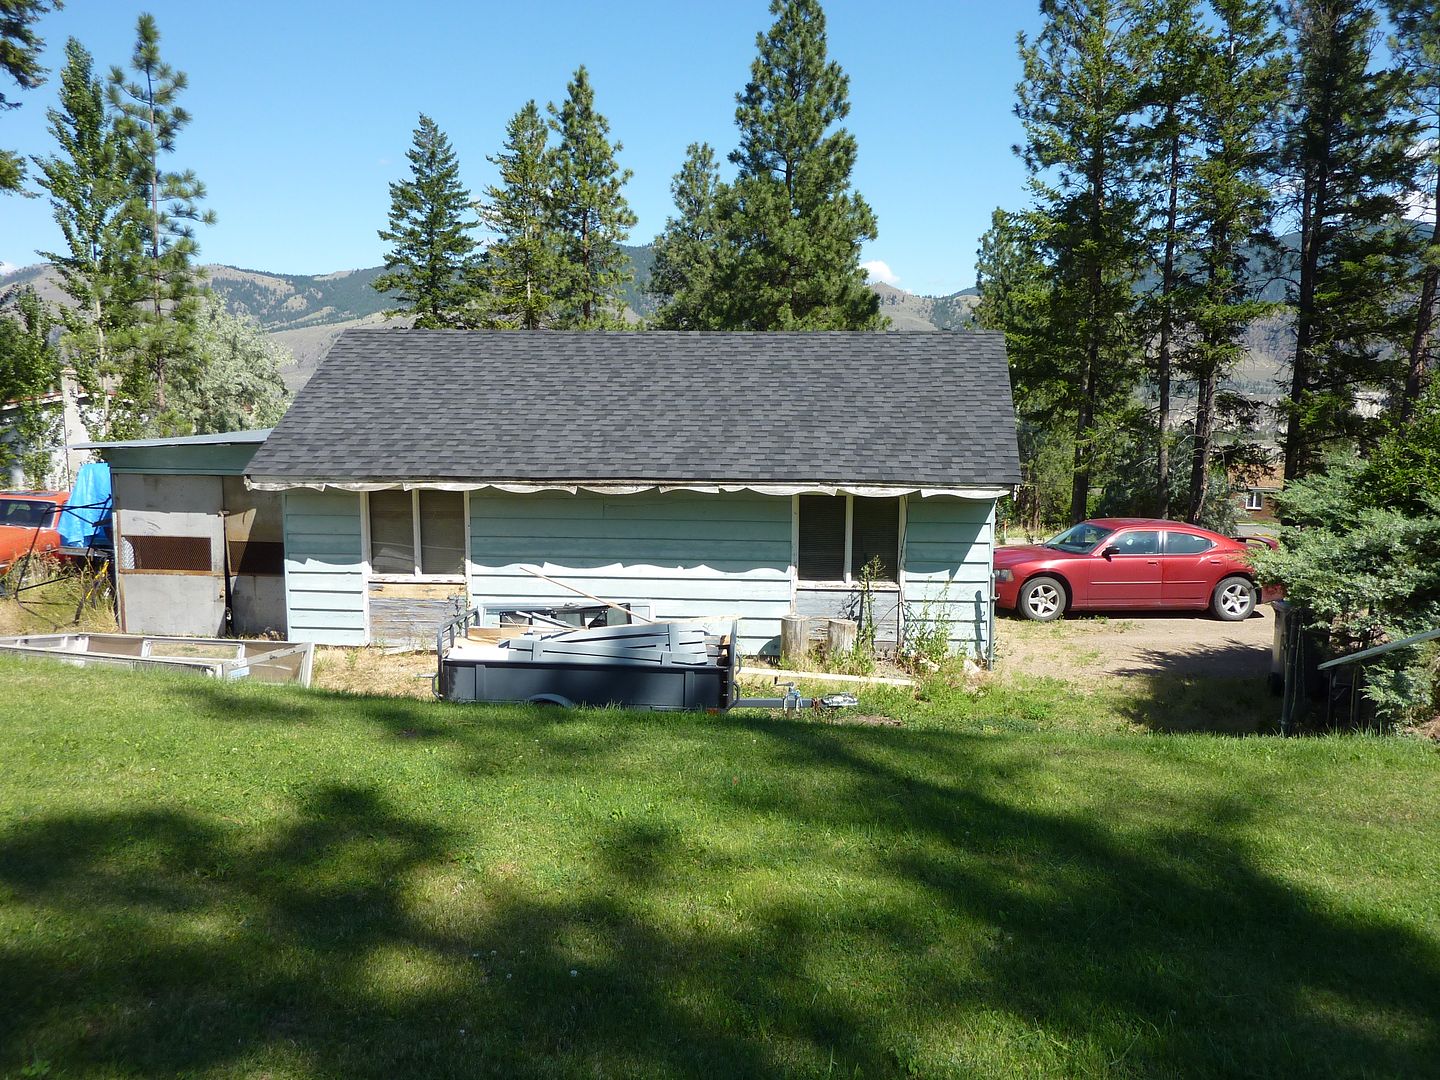
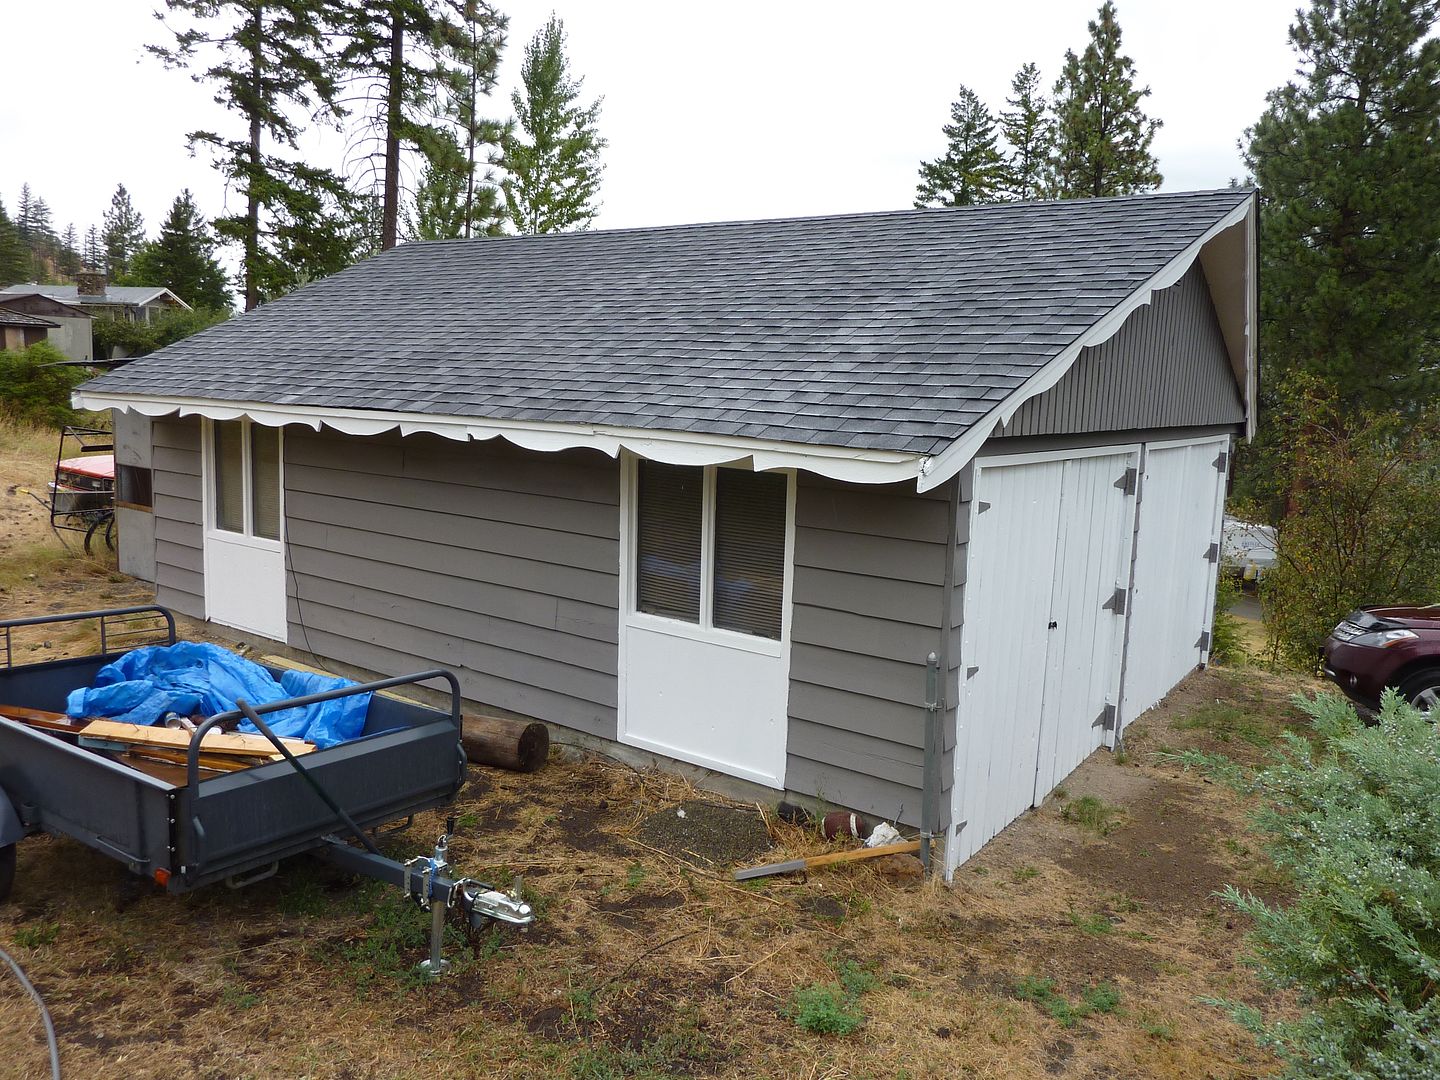
Shop before:
After:
Well the cam degree kit and the head gaskets both arrived today. I decided to head out to the shop and take another shot at degreeing the cam. It's actually not so bad when you have the proper equipment.
So here's the degree kit I got. It's a LS specific kit and is Comp Cams part number 4942. Here's how it comes:
And here's what's included:
First thing I did when I got out to the shop was to hang up some inspiration. I plan on getting a blown up print done and framing it. It will also hang in the shop.
A couple guys on the forums brought it to my attention that I didn't put any assembly lube on the bearing portion of the cam. So while it was still easy to get at, I pulled the cam out and put some more lube on.
Put it back together with the new LS2 timing chain dampner.
Then it was time to degree the cam. I found a really good website that shows step by step how to degree a cam using the same kit I have. It looks like it was done by Car Craft Magazine. Was very useful: http://xtremecarzone.com.au/lofivers....php?t805.html
Here's another website that I found very helpful for replacing the cam shaft: http://www.camaro5.com/forums/showthread.php?t=125123
One more site I found very useful was: http://ls1howto.com/ It has all the bolt torque ratings for the entire engine as well as several other good articles.
First thing I put on was the crank socket. This thing works really well and sure makes turning the crank over a breeze.
At the end of the socket, there is a threaded part where the degree wheel goes. Very easy to adjust. Loosen the nut, move the wheel and tighten it back up.
Uses a half inch wratchet
Degree wheel on. I didn't take a picture with the pointer in place, but I mounted it with a bolt to the hole just to the upper right of the wheel. You bend the piece of copper that's included with the kit to 90 degrees to make a pointer.
I'm not going to repeat what the step by step article says (if you're going to degree your cam, well worth reading it. I even took my laptop out to the shop and followed it) but here's a pic of the piston stop in place.
The dial indicator with in place. They include a couple different size ends for where it screws into the block.
So after following the step by step instructions on the website I posted, I came up with 71 degrees before max lift and 154 degrees after max lift. That gave me a lobe centre angle of 112.5. I compared that to the lobe centre angle on my cam specs. It should be 112. I'm happy with that. Unless someone tells me that I shouldn't be. I checked the numbers about 5 times and came up with the same results each time.
I go back to work tomorrow so won't get chance to get back into the shop until Tuesday or Wednesday. I also ordered a new oil pan gasket, timing cover gasket and front seal today. Next week I should have the engine back together and will hopefully get it back into the car (hopefully for good....again).
Here's a couple other parts that I got over the last couple weeks:
Complete hinge rebuild from Classic Industries:
Close out covers for the firewall. They will cover up the ugly subframe bolt openings. I have them on, but forgot to take a pic. They really clean up the firewall. Got these from Mike at http://musclerodz.com/
I mentioned that we painted the house and shop last month. Thought I'd post some before and after pics:
House before:
After:
Shop before:
After:
09-23-2011, 05:08 PM
#139
On The Tree
Thread Starter
iTrader: (4)
Join Date: Mar 2009
Location: British Columbia, Canada
Posts: 132
Likes: 0
Received 0 Likes
on
0 Posts
Got to spend some time in the shop the past few days. Unfortunately not as much as I wanted to. I ended up getting a new wireless router that allows us to print from our laptops wirelessly using an older USB printer. Took a little longer to get set up than I thought as I was having an idiot day and couldn't follow instructions. Enough whining and on to the updates.
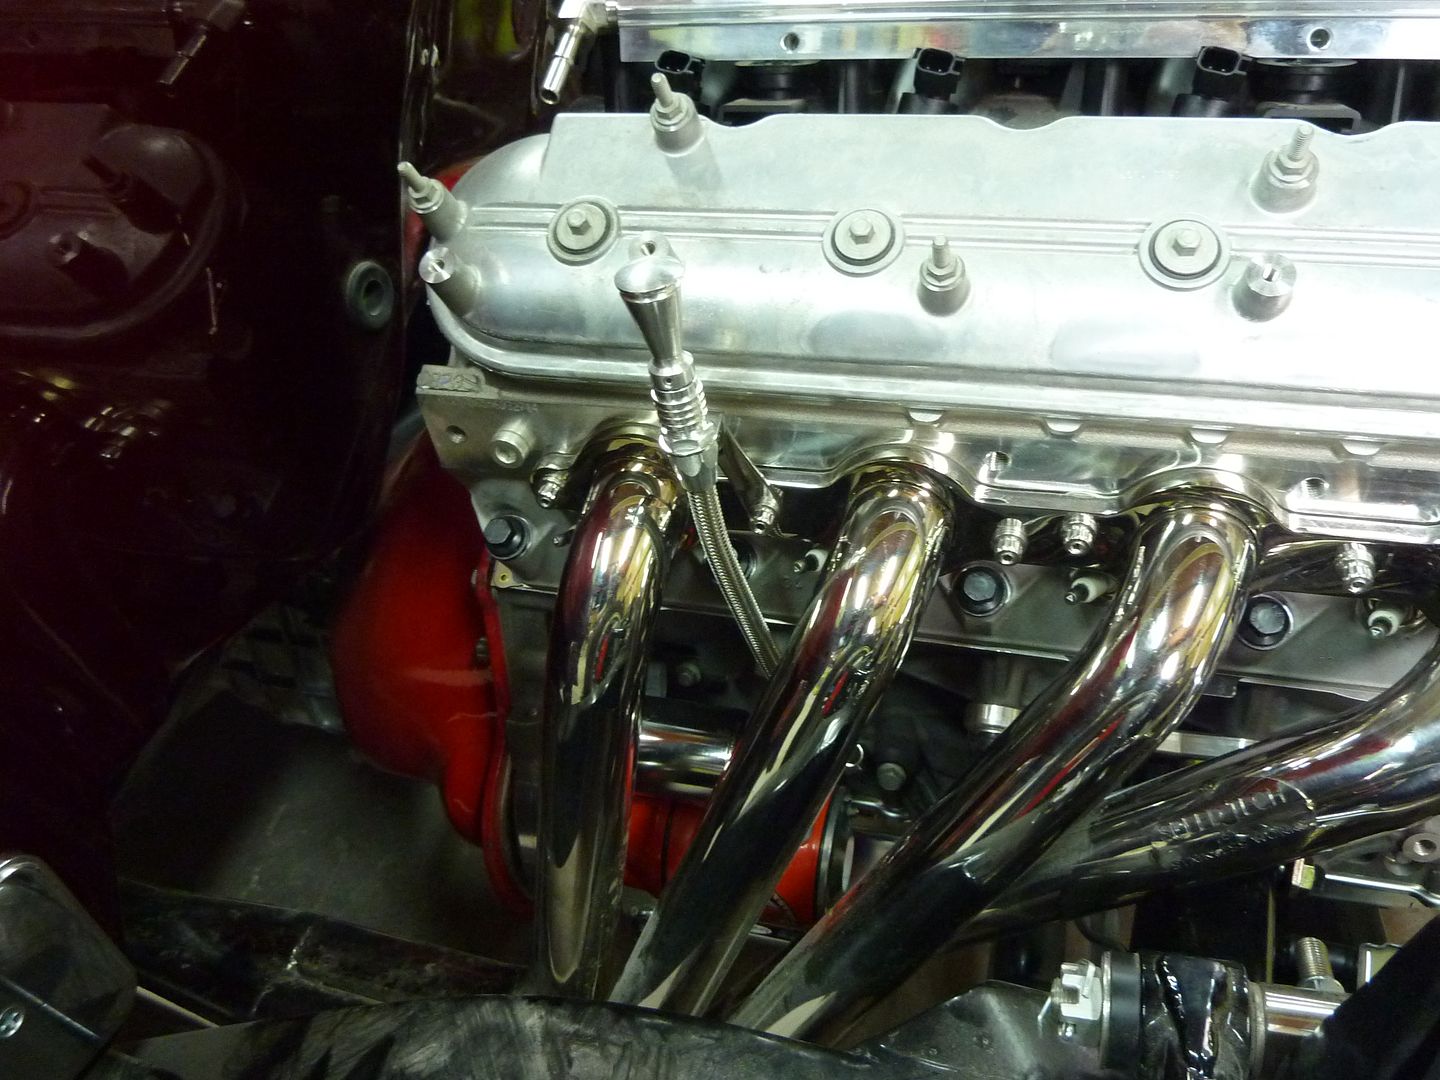
Got the motor back together with all new gaskets. Decided to install the intake, throttle body, fuel rails and starter also
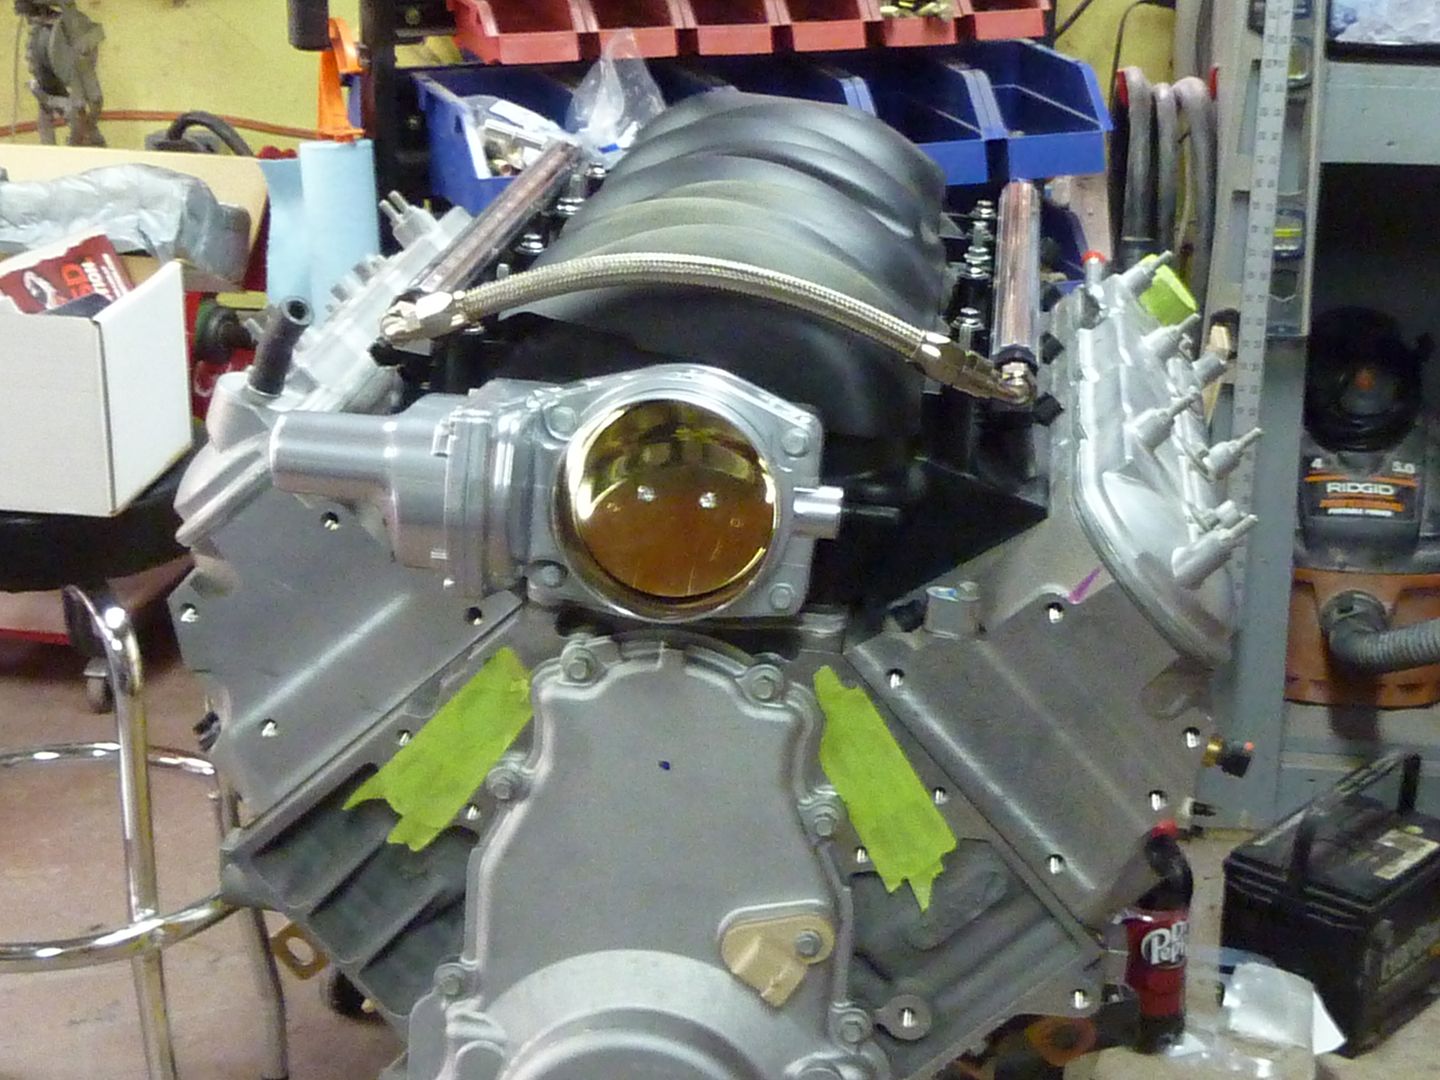

Unfortunately the mounting holes are off on the fuel rails. Not sure if I'm going to drill new holes or get different rails. You can see the hole to the left of the bolt.
The starter fit good. Lots of room
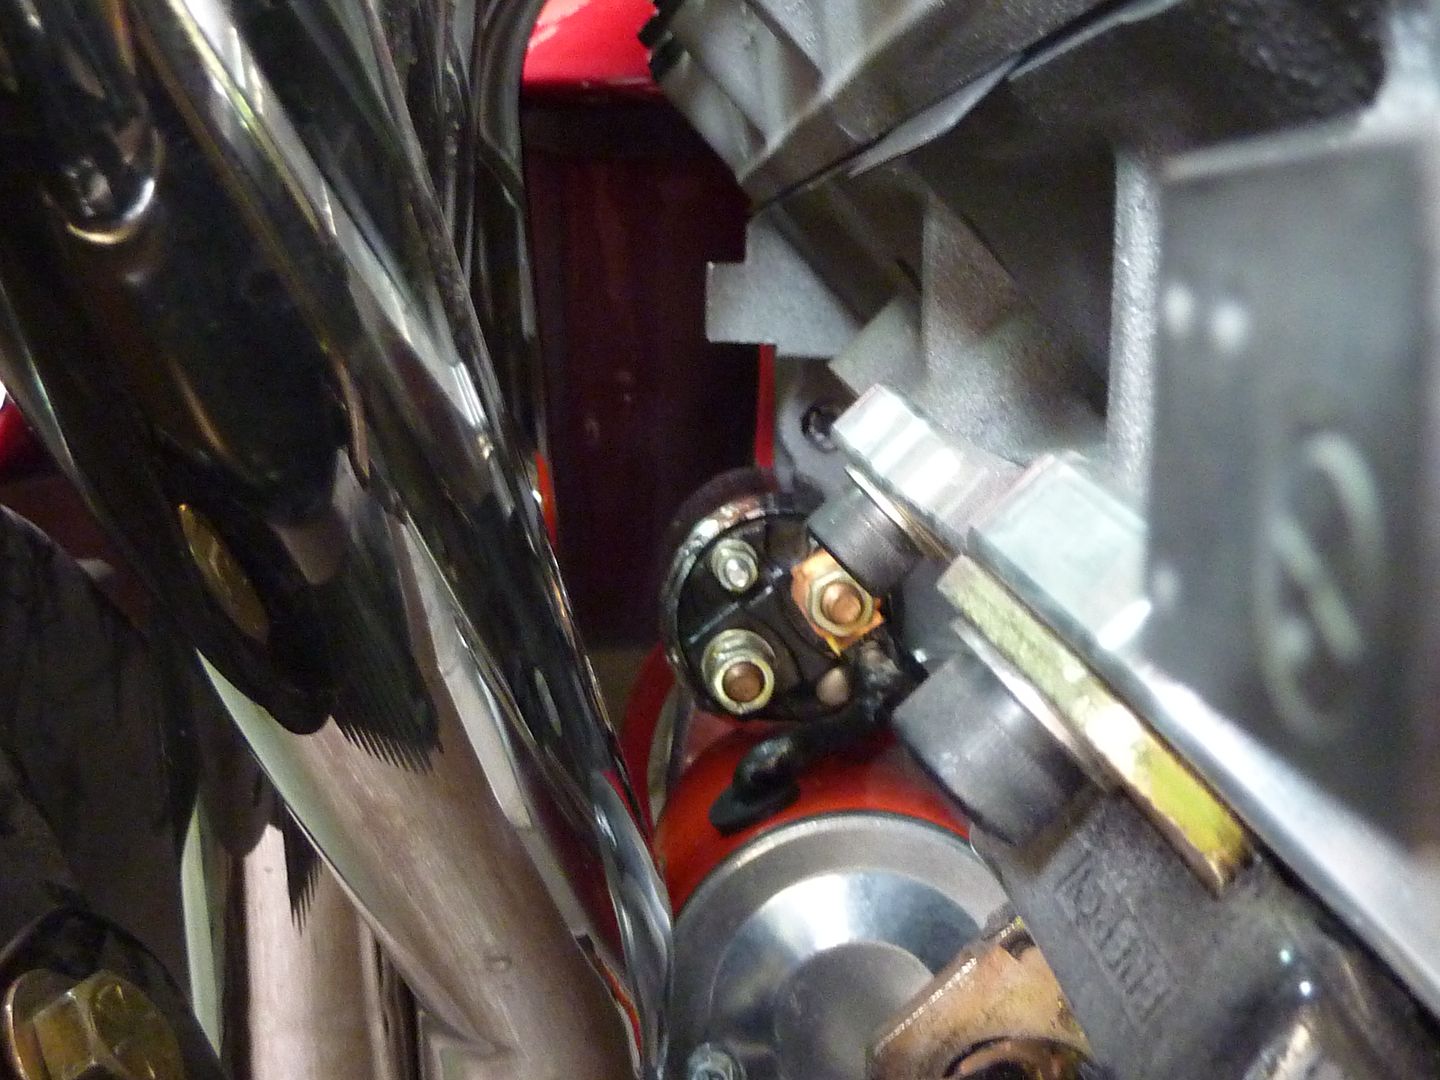

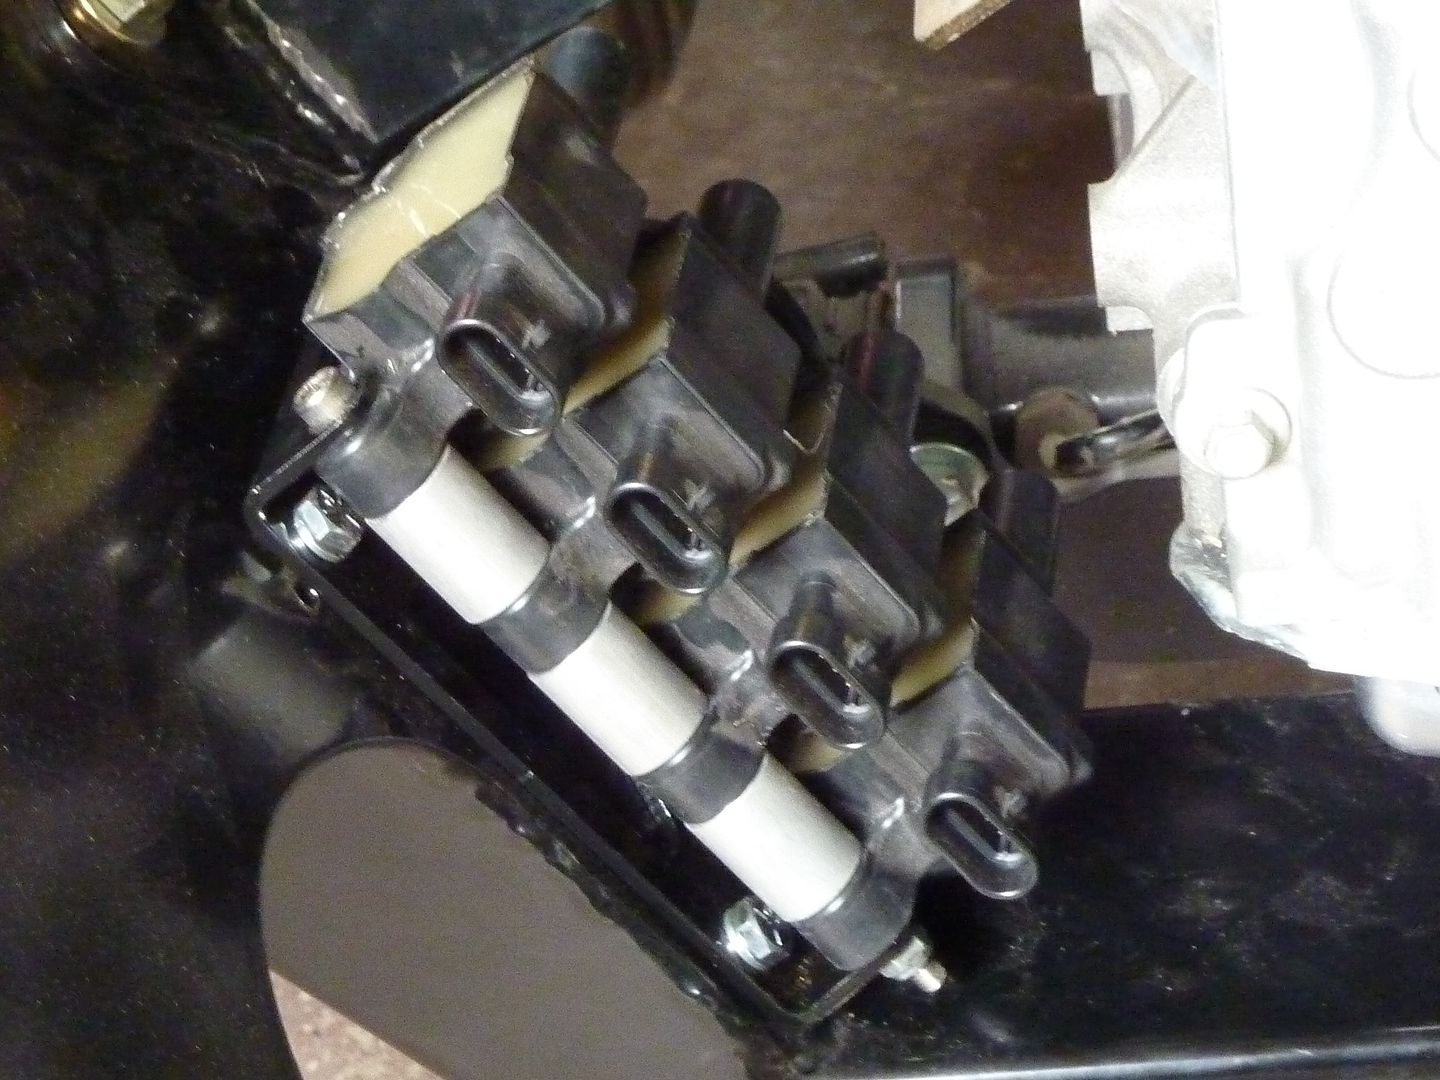
Decided to mount the coil relocation brackets. First had to drill and tap some holes
Painted the brackets with Duplicolor rattle can

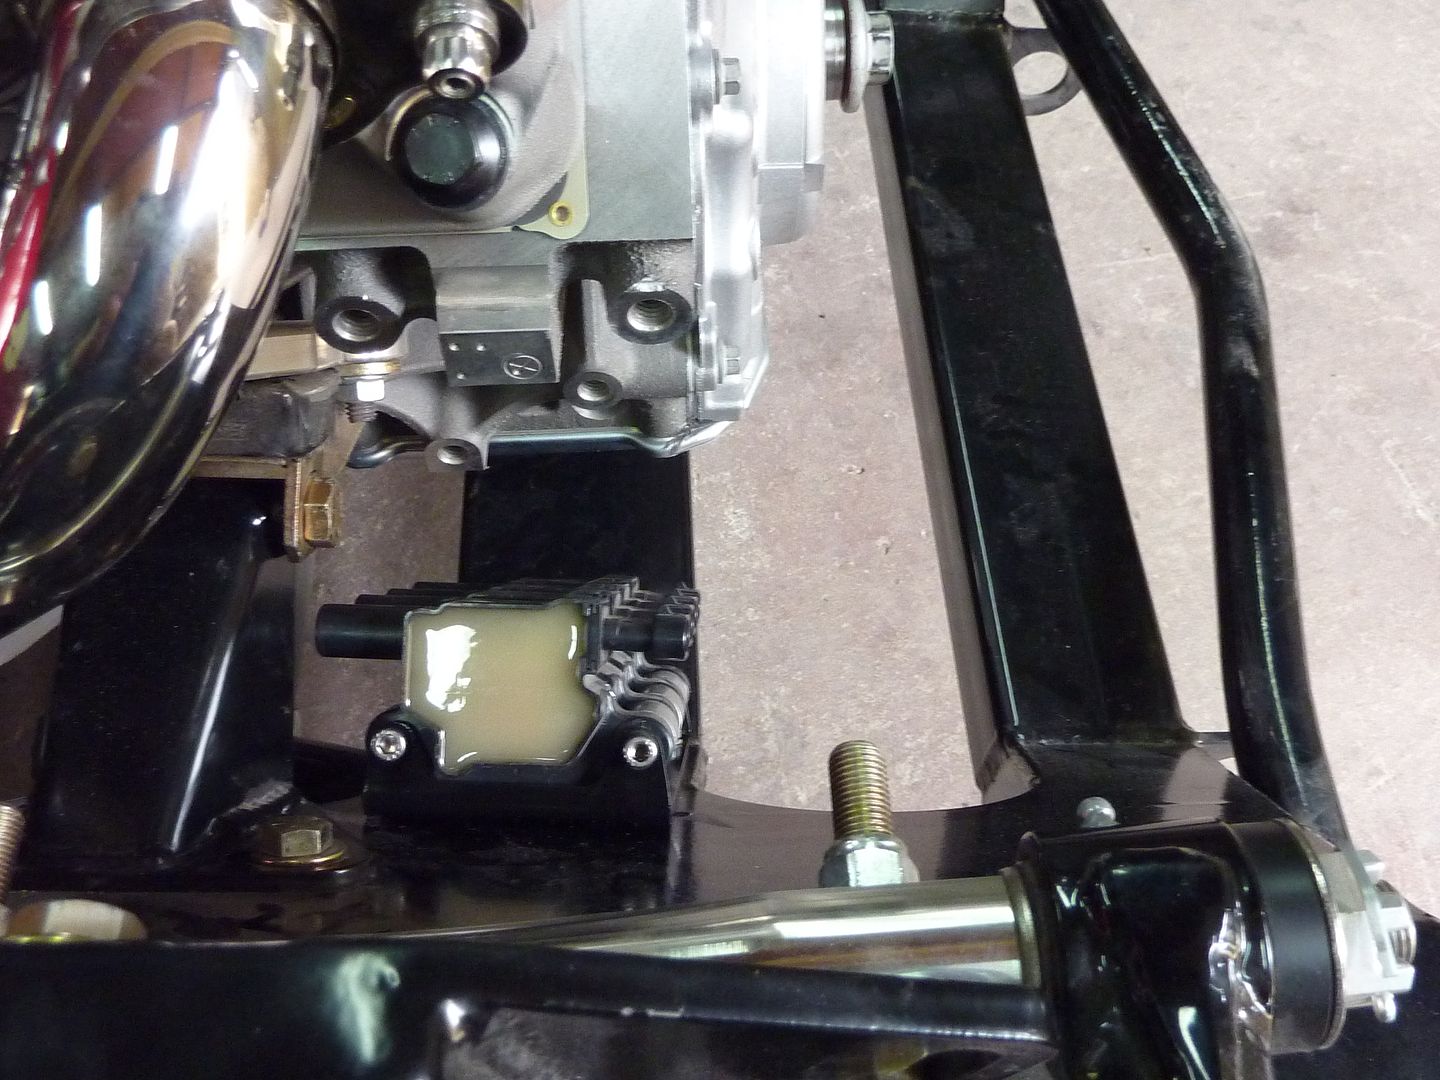
Mounted them in place. I haven't decided which direction I'm going to mount the coils. I'll likely keep them the way they are. If I do, I'll paint the passenger side ones black as I don't like the yellow color that's facing up.

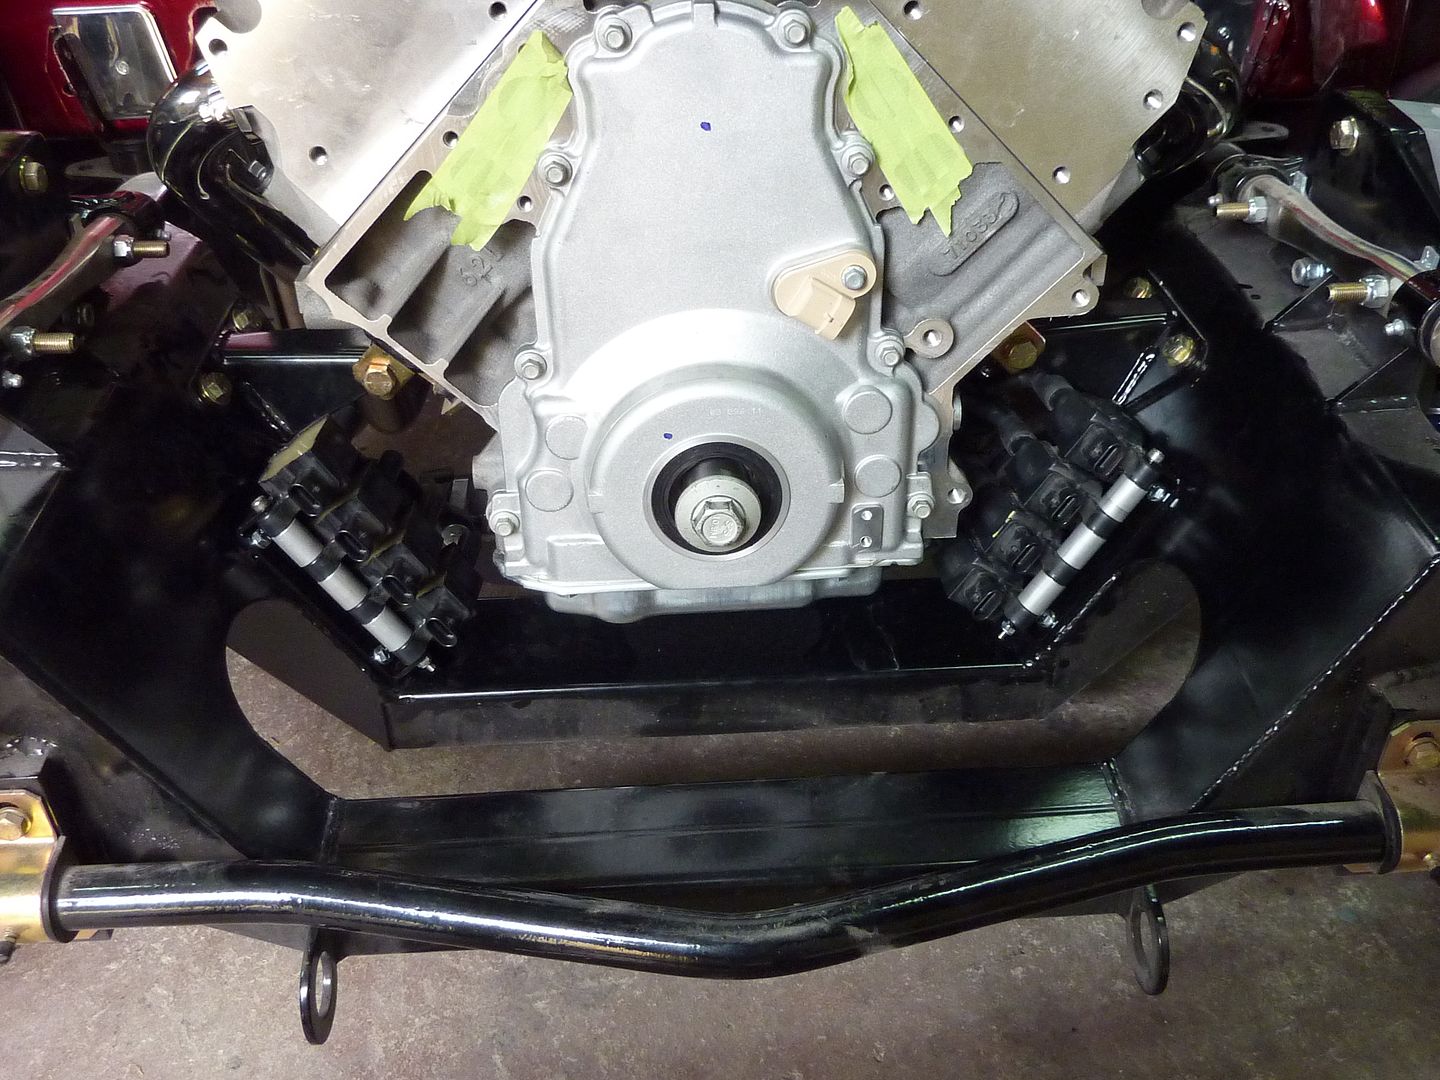
From the side, lots of room for the pulleys to clear
As you could tell from some of the other pics, the motor and trans are back into the car.

Installed the Lokar oil dipstick. Thought I'd put it in now so no debris can get in the open hole
The dipstick I'm using is one of their tight seal ones. It actually locks into place and you have to push the release down to get it out

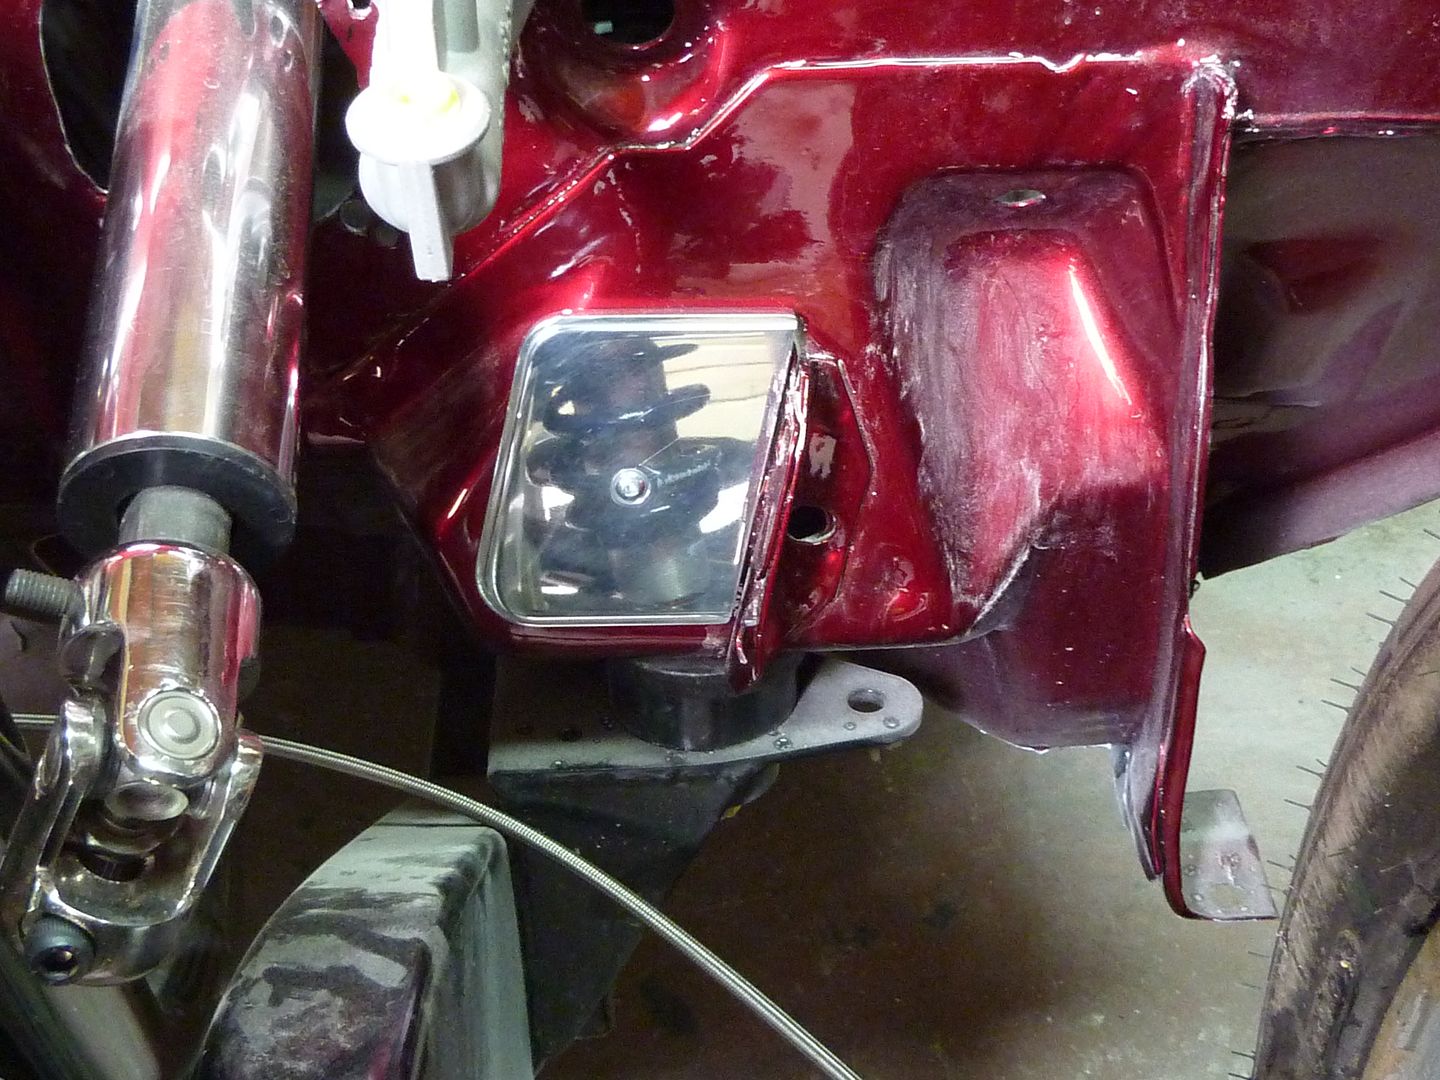
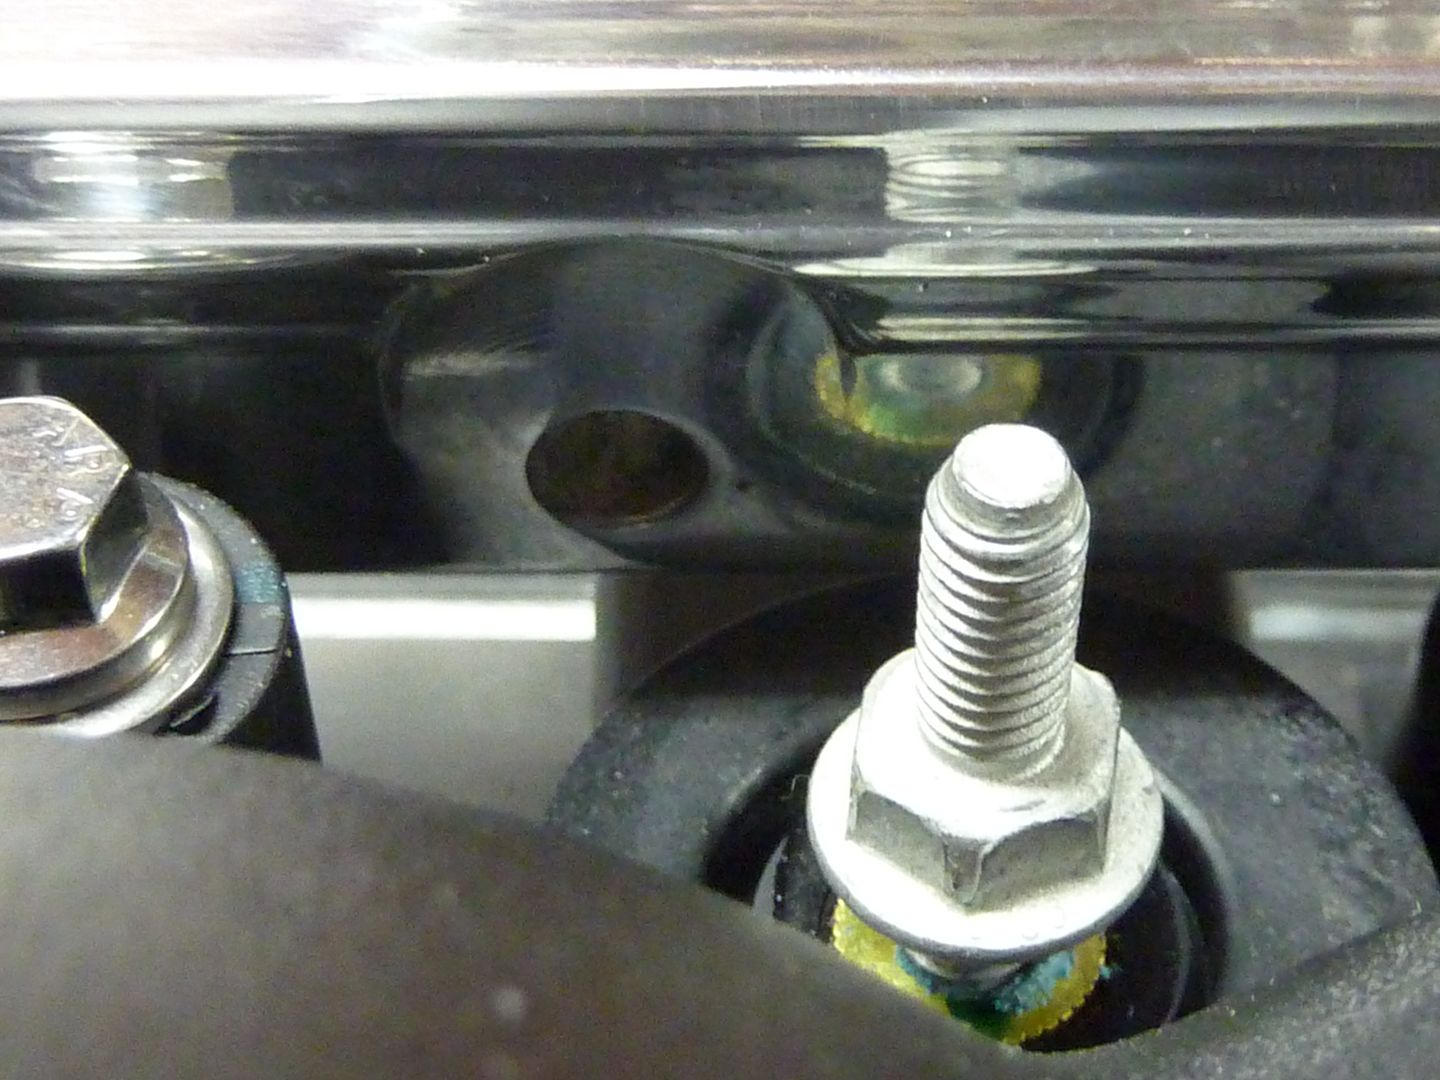
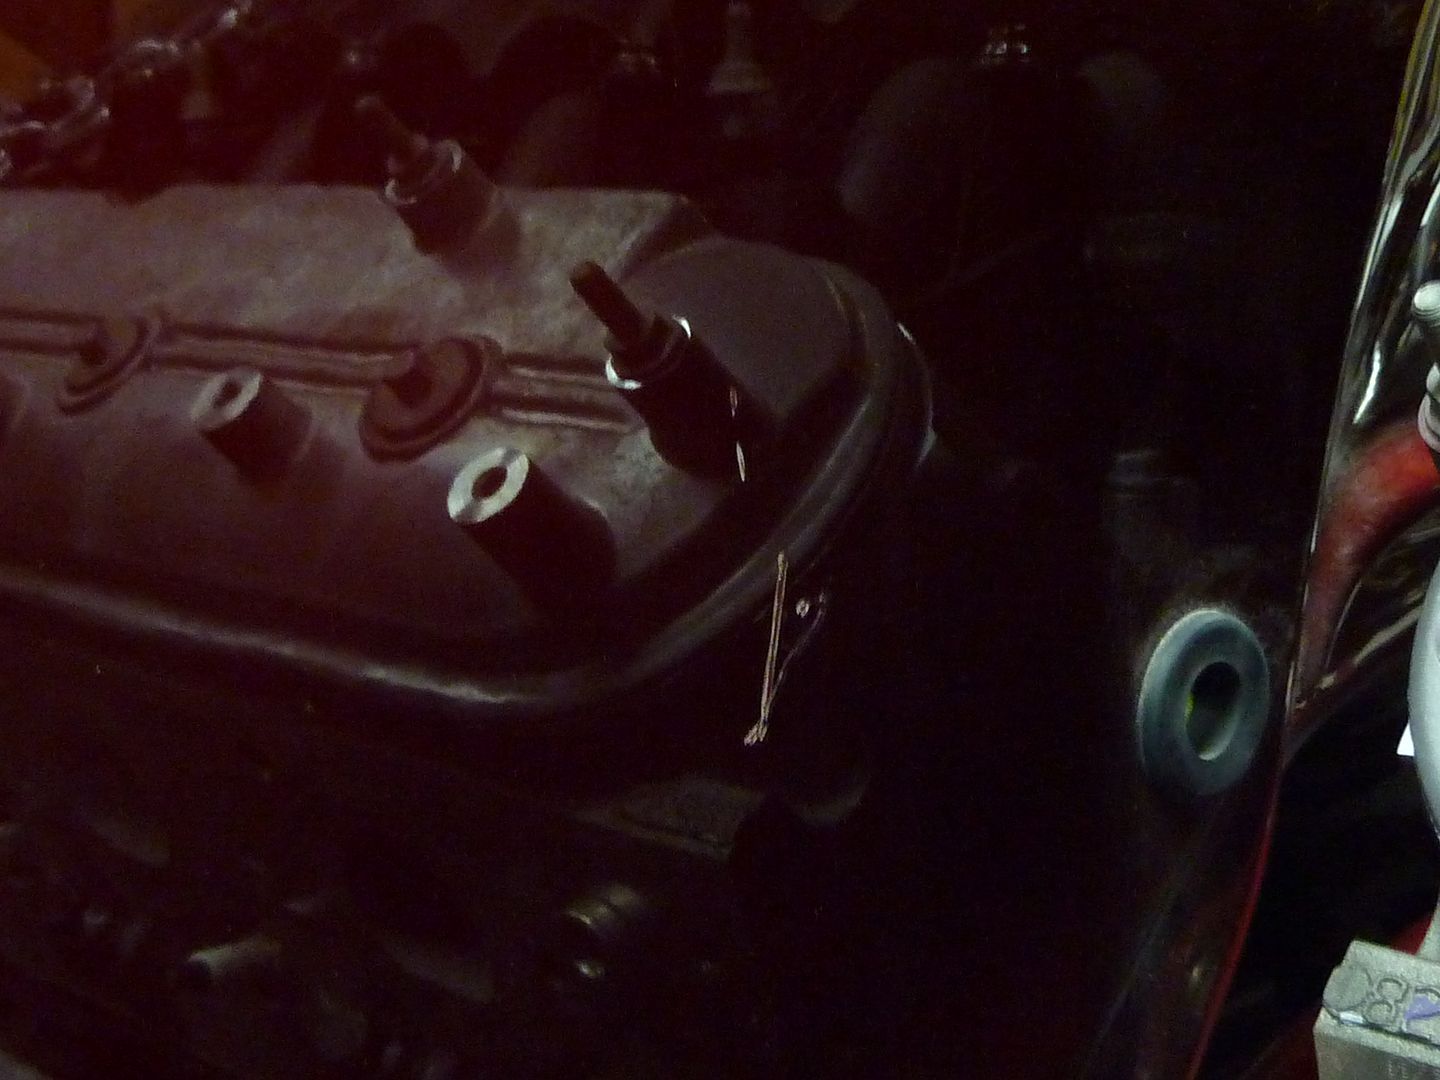
Now onto some bad news. When I put the motor in, I was doing it by myself. Should have grabbed someone, but I wanted it in now and I've done it by myself several times. Unfortunately though one of the coil mounting bolts did this
And it got worse from there. As I was looking at the new gouge I put into the paint, I saw this

Unfortunately there are two bubbles a few inches apart. As first I was mad, but the more I thought about it, there was really no point in getting mad. That's part of doing these builds. So I think what I'm going to do is concentrate on getting a bunch of things done over the winter. In the spring, I'm going to strip the firewall and when it's time for paint, I will paint the entire shell at once. Hopefully over the winter I can get all the gaps done. I still haven't decided if I'm going to try and paint it myself or pay someone to do it. The one positive note is that there were a few things that I wish I could have done, but couldn't since the firewall was already painted. This way, I can fix up a few things and don't have to worry about the paint since it's coming off anyways. The worst part of it though...the cost. The firewall cost me about $400-$500 to do. Ouch!!!!
Oh also as promised, here's some pics of the Muscle Rodz firewall closeouts.