
'70 Nova LY6/TH400 6.0VVT
 09-10-2015, 11:24 AM
#1001

Update
Bolstered by a wave of enthusiasm and false sense of confidence, I got to work on my first new task since getting the car inside: mounting the MAF sensor. I felt like this would be a nice little project to knock out because it should be fairly quick and it gives me the opportunity to try out something new, which is my favorite part of any project.
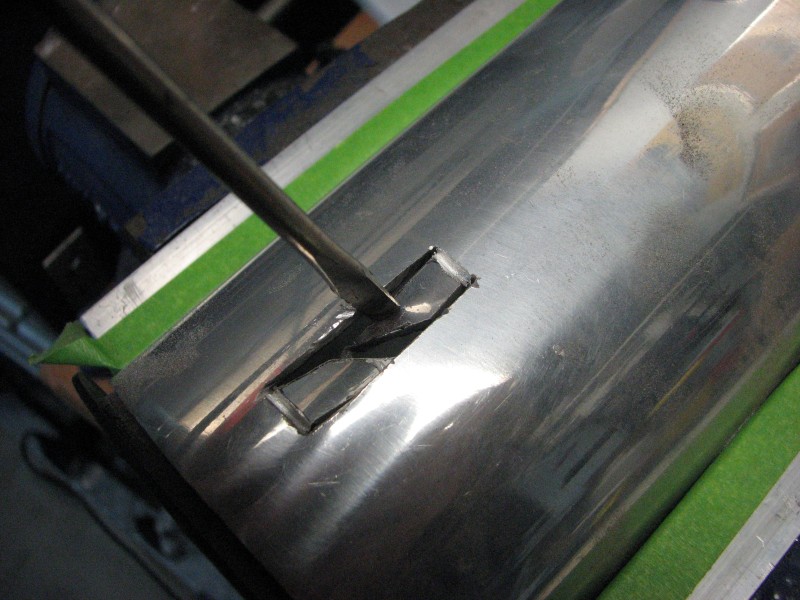
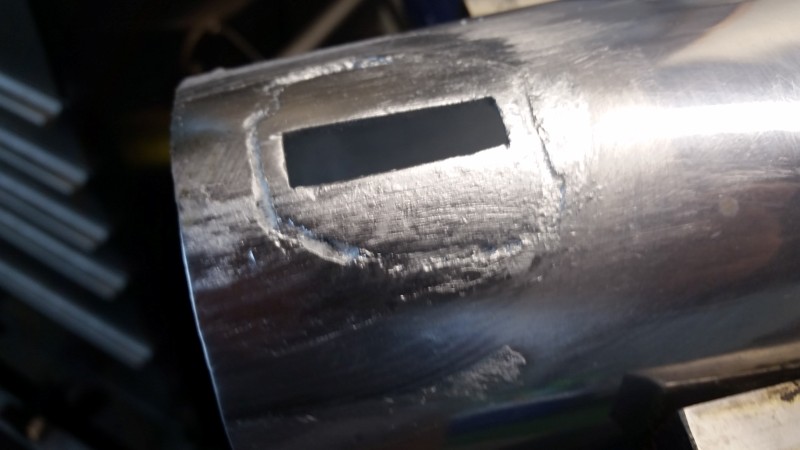
I planned to mount my MAF to the intake tube using a cast aluminum mounting pad available from GM Performance Parts. I had already decided a while back on where it would be mounted, but I needed to cut a slot for the MAF sensor to slot into. Here it is marked.

I used a small ~1.5" diameter cutting wheel on my Dremel to cut the rectangle. Because the ends of the rectangle were so short, I did not cut full depth and instead made a cross slice in the center so I could bend the material back and forth to break off those ends.
Here is the finished slot and the MAF mounting pad sitting nearby.

What follows next is my first attempt at brazing aluminum. I decided to try out brazing because I do not have a TIG, but I do have a MAP torch and it seemed like a promising approach. I bought some Bernzomatic AL3 aluminum brazing rods and a stainless steel wire brush from the local Home Depot, and borrowed some isopropyl alcohol from in the house for cleaning duties. I vigorously brushed and cleaned both parts a few times. Lots of nasty came off the mounting pad; probably oils from manufacturing.

I found a suitable fastener and washers to hold things together then fired up the torch and went to work. I thought I'd focus heat on the mounting pad because it was thicker, but in hindsight this was the wrong approach. Things didn't start out too well when the mounting pad turned into a gooey marshmallow before the rod would melt against the joint. It's probably cast from something with a low melting temperature.
When I realized the aluminum had suddenly changed colors and seemed to be on the verge of melting, I quickly adjusted by re-concentrating heat onto the tube rather than the pad. That seemed to be working much better. The rod began to melt just by grazing the joint and I started to get some capillary action and fillet. I continued on merrily with brazing around the entire pad, with the joint quality continuing to improve as I adjusted the torch a little further back and pointed mostly at the tubing rather than the pad.
What is now obvious, but I did not notice in that momentary change of color with the mounting pad, is that the damn thing had become molten and was collapsing like a dry sandcastle at the beach. I was so focused on the joint that I did not even realize until I was done. Here are photos from my amateur hour:


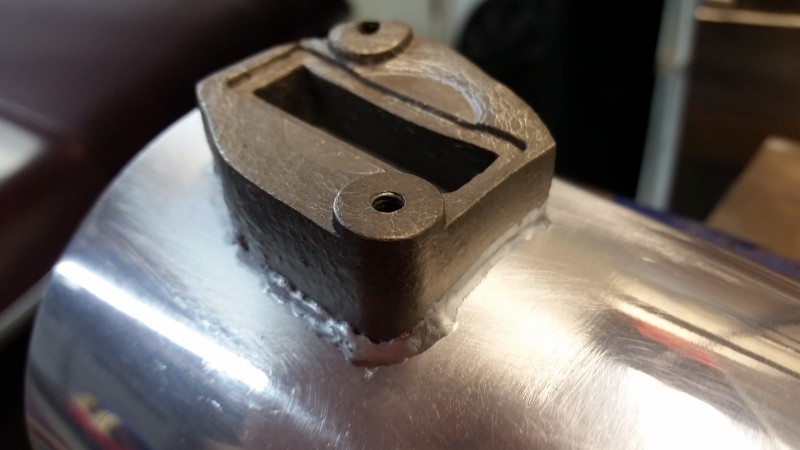
So I think it's obvious from the photos I have screwed the pad up pretty bad. The washer made an indentation in the gasket gland area of the pad, the slot is distorted inward, and the one screw hole and boss are in bad shape. Now I'll have to decide if I want to attempt removing the pad altogether or somehow repair it.
On a positive note, I think brazing this with good results is entirely possible. There are sections of the brazed joint that look good. If I had just directed less heat at the pad, I think I could have made a very nice joint without screwing it up. What I have now seems to be very well connected, just FUBAR due to melting the pad.

Last edited by -TheBandit-; 09-10-2015 at 11:59 AM.

 09-10-2015, 12:20 PM
#1003
I am trying to gauge if it would be easier/possible to remove the whole thing by heating it up and start over with a new pad. I have a second pad that was sent to me by mistake when I bought it, so replacement part is not an issue. I'm just not sure if I'll be able to get the whole thing off without making a mess of the tube. Judging by how easily it melted, I could probably just turn the thing upside down and hold the torch on it for a while just to make it fall/drip off.
I could use the mill, but I haven't wired it up yet. There is a 30amp 220 circuit that terminates about 30 ft away from where I have the mill sitting currently. It's on my eventual to-do list, not just for the mill but also the MIG. If I decide to repair the part, that would certainly work.
I could use the mill, but I haven't wired it up yet. There is a 30amp 220 circuit that terminates about 30 ft away from where I have the mill sitting currently. It's on my eventual to-do list, not just for the mill but also the MIG. If I decide to repair the part, that would certainly work.
09-11-2015, 03:35 PM
#1005
Removing the damaged mounting pad ended up being easy enough. I applied heat for a while was able to pluck it off with pliers. I was left with a lot of filler material on the surface of the tube and a couple of pitted areas.
With a little heat, I was able to get most of the old filler material off the tube, then I scuffed the surface, cleaned, wire brushed, cleaned again and threw a new mounting pad on there. This time I leveraged my experience by keeping the heat a bit further away and more focused on the tube. Things went well for the most part.

The only issue I'm left with is that the filler was wicking away in a couple areas (perhaps along remnants of the old filler) and made mounds nearby that I need to heat up and clean off somehow. I'm thinking maybe melting it and quickly taking stainless steel wool over it may help me pull the stuff off. I think this aluminum brazing thing is going to come in quite handy down the road.
With a little heat, I was able to get most of the old filler material off the tube, then I scuffed the surface, cleaned, wire brushed, cleaned again and threw a new mounting pad on there. This time I leveraged my experience by keeping the heat a bit further away and more focused on the tube. Things went well for the most part.
The only issue I'm left with is that the filler was wicking away in a couple areas (perhaps along remnants of the old filler) and made mounds nearby that I need to heat up and clean off somehow. I'm thinking maybe melting it and quickly taking stainless steel wool over it may help me pull the stuff off. I think this aluminum brazing thing is going to come in quite handy down the road.
09-11-2015, 11:55 PM
#1007
I had good results on a few things using the HTS-2000 rods..
http://www.aluminumrepair.com/
They have a few videos that might help give you some insite on how to use it in different ways.
BC
http://www.aluminumrepair.com/
They have a few videos that might help give you some insite on how to use it in different ways.
BC
09-15-2015, 10:06 AM
#1008
Okay I take it back. After careful inspection there appear to be several areas where the brazing filler has cracked/separated from the mounting pad. This isn't going to work. I think it's happening as the parts cool. I tried redoing it again last night; it looks great as the filler goes in and immediately afterwards, but after a minute or two it starts cracking at the mounting pad side of the joint. Perhaps the issue is dissimilar materials or cooling rates. I still have hope for the process, just not for this particular application. I'll have to cook this one of again and take it to be TIG welded. Dang.
09-18-2015, 12:41 PM
#1009
I dropped the part off yesterday with a local fab shop, Bones Fab. I also dropped off a new gas tank and a little prefabricated recess tray from Tanks Inc for hanging the fuel pump (link). They quoted 3 hours to do both the MAF pad and the recess tray for the fuel tank. It's all stuff I could probably eventually learn to do (given the right equipment) but I have other things I need to do with my time righ tnow. Financially I'm way further into this tank than I should be. Since I started Tanks Inc has come out with a ready-made tank for this application, but the cost of that tank and the required hanger and sending unit are more than it will cost to finish this one out, so I'm just going to take my beatings.
09-18-2015, 08:41 PM
#1011
I dropped the part off yesterday with a local fab shop, Bones Fab. I also dropped off a new gas tank and a little prefabricated recess tray from Tanks Inc for hanging the fuel pump (link). They quoted 3 hours to do both the MAF pad and the recess tray for the fuel tank. It's all stuff I could probably eventually learn to do (given the right equipment) but I have other things I need to do with my time righ tnow. Financially I'm way further into this tank than I should be. Since I started Tanks Inc has come out with a ready-made tank for this application, but the cost of that tank and the required hanger and sending unit are more than it will cost to finish this one out, so I'm just going to take my beatings.
09-22-2015, 03:33 PM
#1013
I used Alumiweld rods to braze my BOV flange on for all the same reasons you did. It seemed to work well although not the prettiest thing to look at. Have been running it like that for a while now. The only issue I have is that after doing a boost leak test I do have a small amount of leak from it. I will probably pull it back out this winter and fix it. Like was said before it takes time to learn. I attempted to braze a lot of cans together before starting on the BOV flange.
09-25-2015, 10:40 AM
#1014
I used Alumiweld rods to braze my BOV flange on for all the same reasons you did. It seemed to work well although not the prettiest thing to look at. Have been running it like that for a while now. The only issue I have is that after doing a boost leak test I do have a small amount of leak from it. I will probably pull it back out this winter and fix it. Like was said before it takes time to learn. I attempted to braze a lot of cans together before starting on the BOV flange.
Update
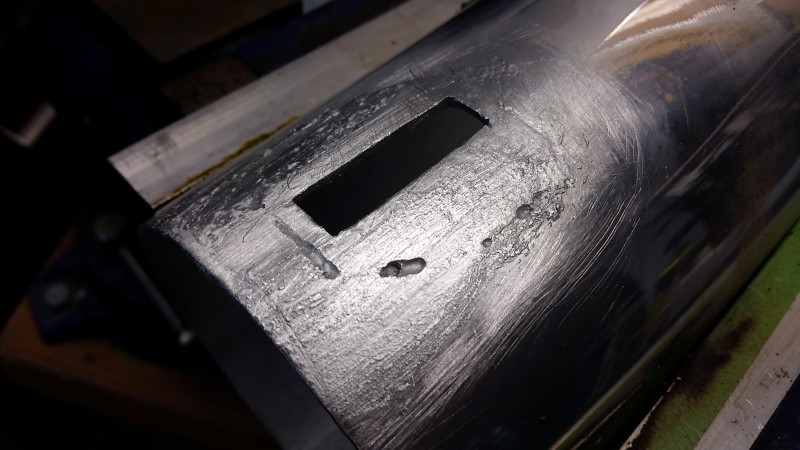
Here is the MAF PAD removed (again). I just heated it up and it slid off easily. It left a bit of pitting around the perimeter that I didn't see the first time I took it off - I'm not sure why.
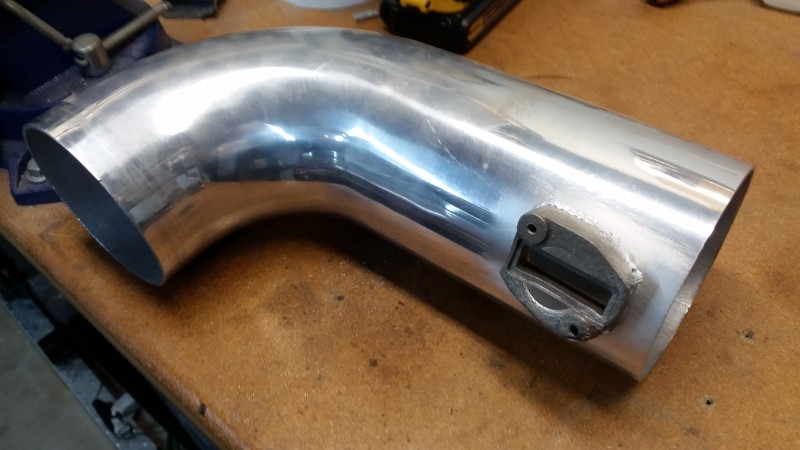
I took the parts to the local hotrod/fab shop, Bones Fab where the owner Jim TIG welded it back on. I'll have to clean up around the area a bit for cosmetic reasons, but I think the welding looks good.


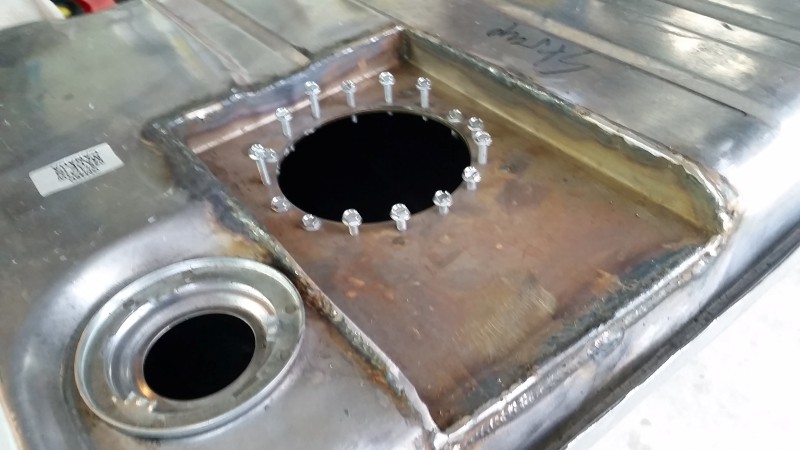
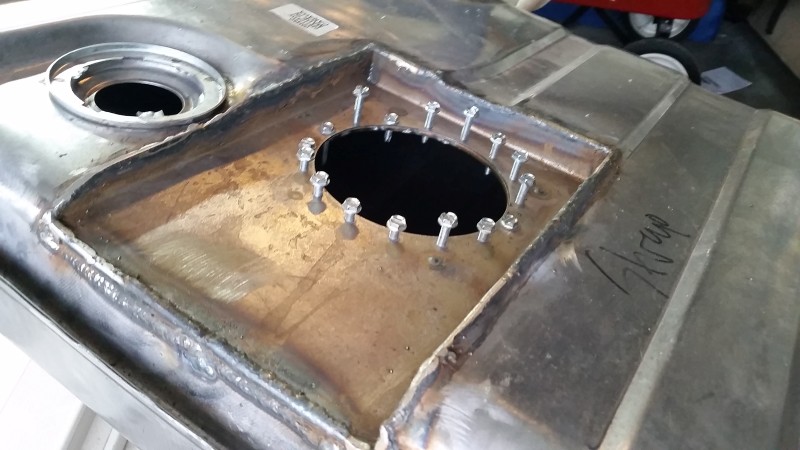
I also dropped off my fuel tank and a Tanks Inc prefabricated recess tray for the fuel pump hanger. Bones did a decent job getting it in and TIG welding it. I will need to clean out the tank and leak check before I put it in the car. I've also got to shorten the fuel pump hanger so things will fit.
I gotta say, it is very odd dropping off parts for fab work and picking them up finished. I felt like I was paying another man to take my wife on a date. And for the cost of this, I could have put a decent down payment on a TIG welder. But then again, I didn't have to worry about the learning curve and I'm a step closer to getting the car running.
Fuel lines and fittings are on their way so I can plumb this to the filter-regulator. I also have some 10awg GXL wire en route. I plan to put the relay in the trunk (where the battery will be located). I think after the tank is in, I'll start looking at mounting and wiring the battery and cutout switch.
09-25-2015, 11:25 AM
#1015
I'm the same way. I hate having other people do work for me KNOWING that I can do it myself. The thing I have realized as I've grown older, my time is worth more than doing some projects for the sake of saying 'I did it myself'. Now that you have a little one around, wait until you see how true this rings home in the coming years. I don't know how things were for you when you were younger, but I could never understand why my dad didn't change his own oil or do the brakes on his cars? He always told me stories that he did his clutches, brakes, and oil before I was around? Me - "Why don't you change your oil... it'll only take you 30 mins tops?" Dad - "I'm too busy son!" It's the typical time/value proposition.
Looks good man.
Looks good man.
09-25-2015, 04:42 PM
#1016

Clint,
Too bad you weren't local to me, I would of let you barrow my Dynasty to practice and weld it.
Too bad you weren't local to me, I would of let you barrow my Dynasty to practice and weld it.
09-28-2015, 03:43 PM
#1018
The estimate was 3hrs labor for both the MAF pad and the fuel tank. I asked for a breakdown and was told about 1hr for the MAF and 2hr for the tank. I was charged for 3hr labor in the end, but I don't know how closely they actually tracked the labor. I'd be willing to bet the MAF was less than half an hour of actual work and the tank may have been more or less than the estimated 2 hour - I really don't know. The shop rate was $96/hr.
