
1971 Nova Swap - 02 LS1/A4
 11-08-2010, 11:42 AM
#21
Why would somone waste their time putting an LS1 in a '71 Nova????? Oh, wait, nevermind! 
Looking good man! What are your plans for the exterior? Looks like you could polish the paint and be done with it, you California guys have it good in the rust department, but I don't envy you with all the smog/emmissions crap you have to put up with.
Keep up the good work, and keep the pics coming, I'll be watching this one.
 11-08-2010, 06:45 PM
#23
LS1Nova71.. don't have to worry about the smog crap.. 75 and older is exempt from testing.. The paint isn't to bad, but there is a lot of parking lot damage (ding and scrapes). The car will most likely be paint somewhere down the road after it is running the way I want. It will be a sleeper car.. Column shift and maybe dog disk hub caps !?!?
Like I said, It will be slowing down a bit until I can get some time to finish the firewall and under body.. I hate being on my back and cleaning..
Like I said, It will be slowing down a bit until I can get some time to finish the firewall and under body.. I hate being on my back and cleaning..
Last edited by bczee; 11-21-2010 at 01:19 AM.
11-08-2010, 08:50 PM
#24

Great looking build, very similar to the one I just finished. I did a '71 with LQ4, L92 heads, TKO 600, 9", Heidts narrowed Control Arms & Coilovers, 2" drop spindles, Hooker conversion headers. The cars a blast to drive, keep up the good work.
11-21-2010, 01:18 AM
#25
Got a little bit of work done. It's been raining here.. I finished cleaning up the firewall and 1/3 of the under body.. sparyed it with self-eching primer. Once I clean up some more.. (to the start of the rear spring) I will prime that and spray the final black finish on the sections that are ready. Then I can re-attached the sub frame and check the firewall and trans clearances and start the final mounts and attaching the accessories and stuff. Going to have to order the new tubing (brakes and fuel) soon.

 11-21-2010, 03:30 PM
#27

^^^^ what he said^^^^
11-21-2010, 04:10 PM
#28
TECH Enthusiast
iTrader: (9)
Join Date: Mar 2008
Location: IL
Posts: 698
Likes: 0
Received 0 Likes
on
0 Posts

Great build can't wait to see the finishing touches. I'm in the same boat as you, doing it step by step on my 79' Malibu. How do you plan on starting the engine up for the first time with a new cam, and fresh heads? I'm putting a TR224, TSP LS6 ported and shimmed oil pump and 243 Z06 heads on my LQ4 and I'm a little hesitant to do it out of the car because I don't want it to sit there through the winter without starting. Also, did you have to do any work to the rods after you put the ARP bolts in such as re-sizing them? I'm looking at the Katech's and they say that there is nothing needed to be done. The ARP ones don't say that, and well for half the price and a great rep, ARP is looking pretty good right about now.
11-22-2010, 01:30 PM
#29
If your just swapping out the Bolts out for ARP, there shouldn't be any need to resize them, just torque to spec's per the instructions.
As far as startup. I plan on just doing as everyone has.. pulling the fuse to the coils and fuel pump.. crank it over until there is some pressure (Hopefully it will come quick).
I did fill my pump with some light assembly grease and oil.. Hopefully that will help the startup of building pressure by causing a bit more vacuum between the pump and the pickup.
 11-30-2010, 01:28 PM
#32
Progress has stopped for now. to Freaking Cold and Wet out side!.. Once I get a bit of dry weather, I'll finish up the paint on the firewall and underside (at lease up the to front of the leaf springs, that will be done when I get to the back half).
 11-30-2010, 03:37 PM
#35
Bandit. - Good eye.. but as you can see.. the nuts are not secured yet.. I wasn't sure which way I was going to have to install them at this time. POL didn't spec out what would be recommened.. so i was going to try and see if anyone in the area that might have some of those alignement tool to see what it comes out to before I finially lock down the engine and suspension.
Rockytopper - I am hoping to get it running before then.. and maybe have both the Chevelle and Nova up there..!
Rockytopper - I am hoping to get it running before then.. and maybe have both the Chevelle and Nova up there..!
 Oh yeah, and I don't even want to hear about how cold it is in California!
  03-07-2011, 11:58 PM
#38
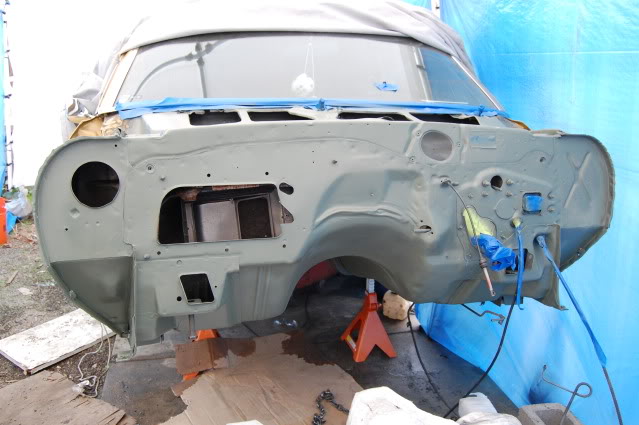
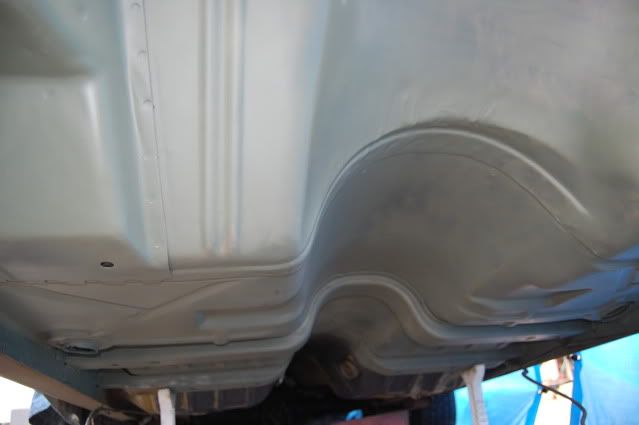
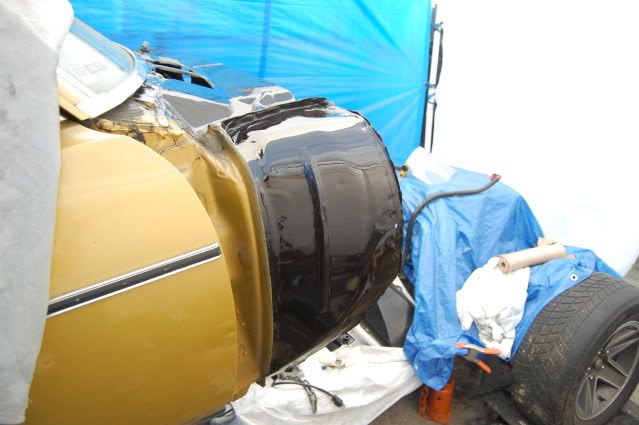
Got the firewall and under body cleaned, primed and painted. (don't look too close, got some Drips.. it was hard doing the under side wtih limited space on my back and with the spray gun/hose).
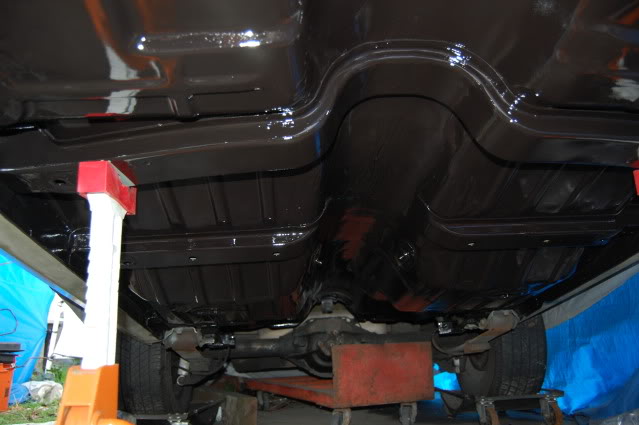
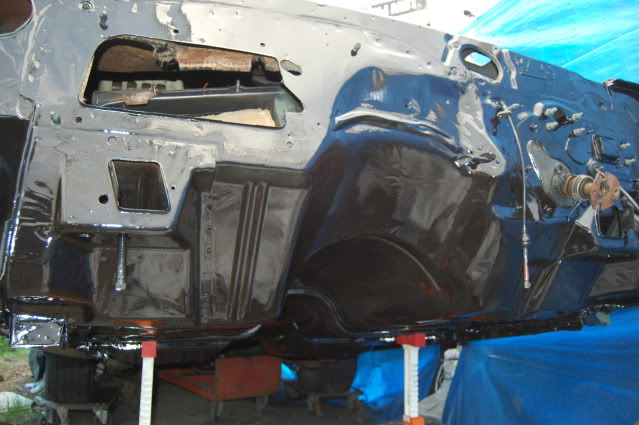
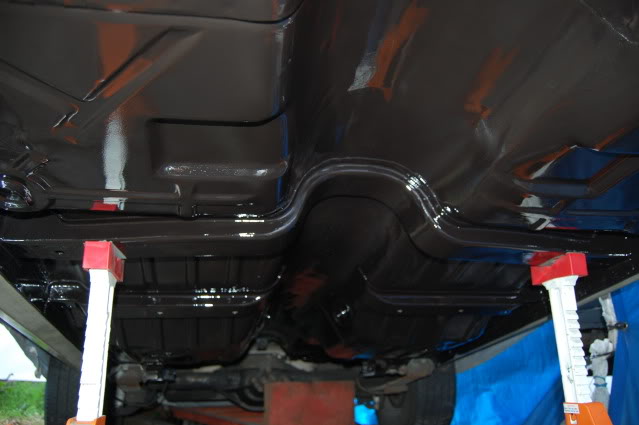
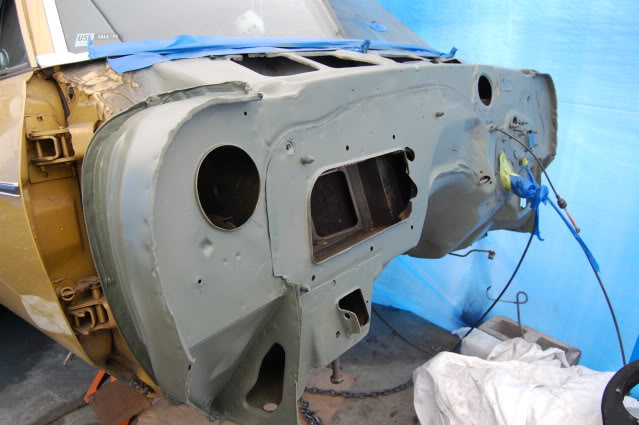
Remounted the Sub Frame / Engine to the body.. found out that the Right side head was very close to the firewall.. didn't really like that. So I remounted the Engine by moving the Frame mount 1/2" forward.. I did this by redrilling the holes in the Frame stands 1/2" so that the frame stands would be moved forward, since the Adapter plates were already finished, this was the easy route.
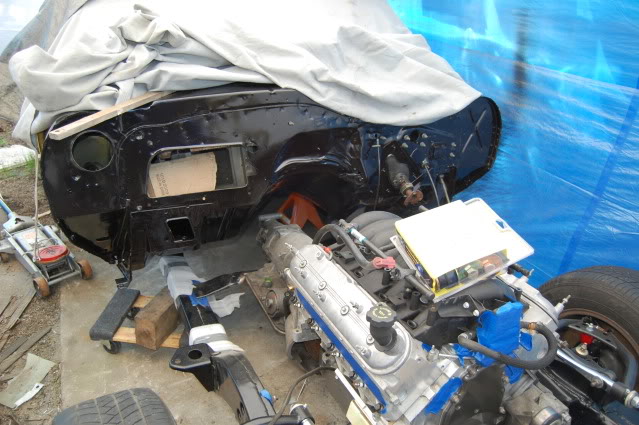
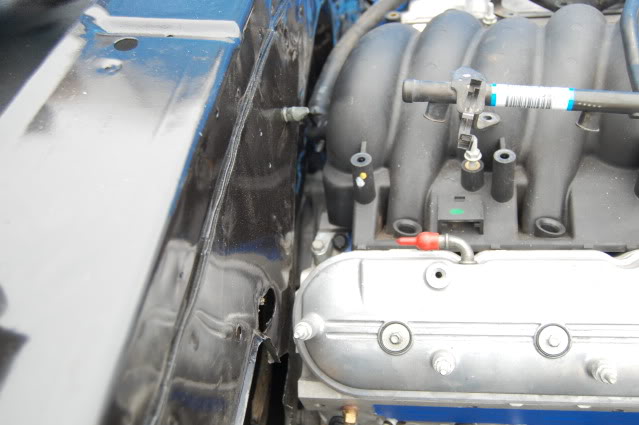
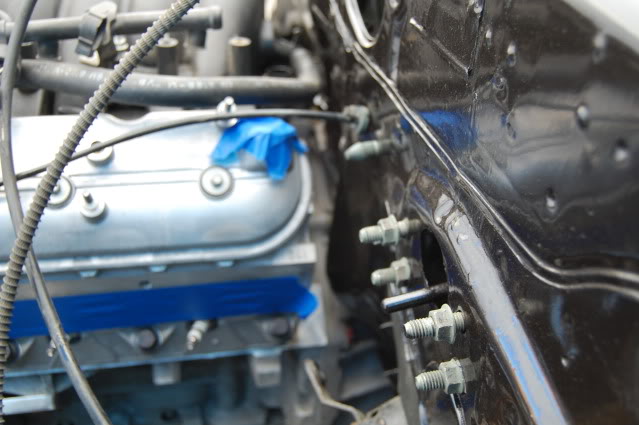
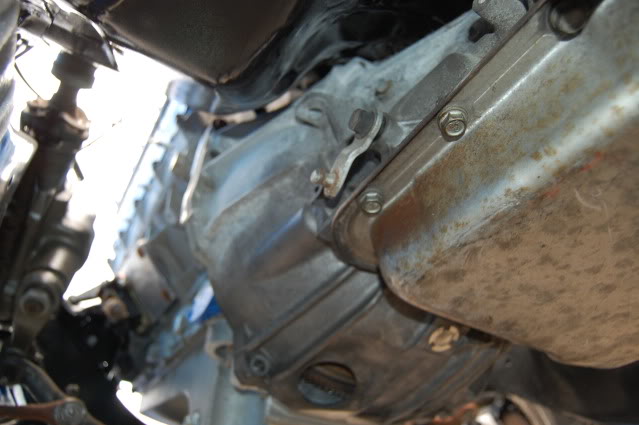
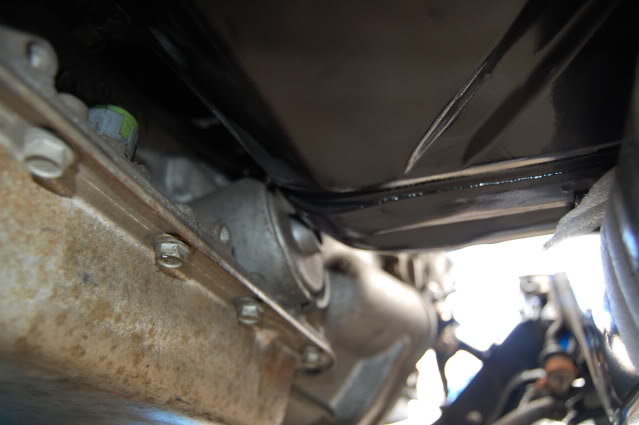
As you can see from the above pictures, the Standard 1" setback gave me some issue with clearance in the Trans Tunnel area and after using a BFH some and looking it over some more. I then decided to move the engine forward 1/2" (more pictures of the later), clearance problem soloved. By doing this, I was able to remove some of the shim and spacer that was lifting the frame same up 1/8".
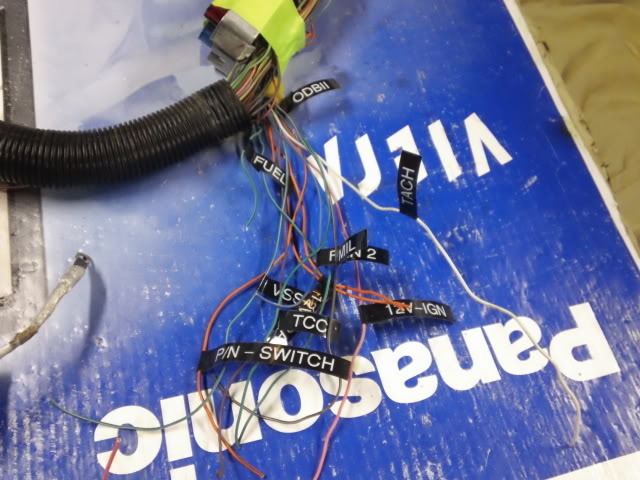
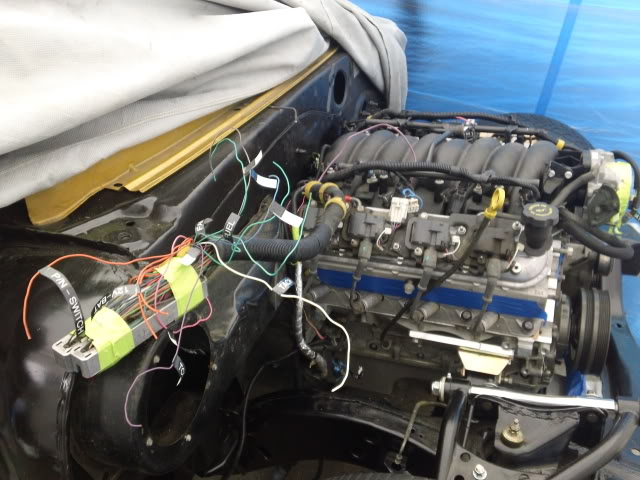
I Started the Engine Wiring harness. Almost done. got a few more wires to add/join, well do the fuse and relays once I know where everything will sit.
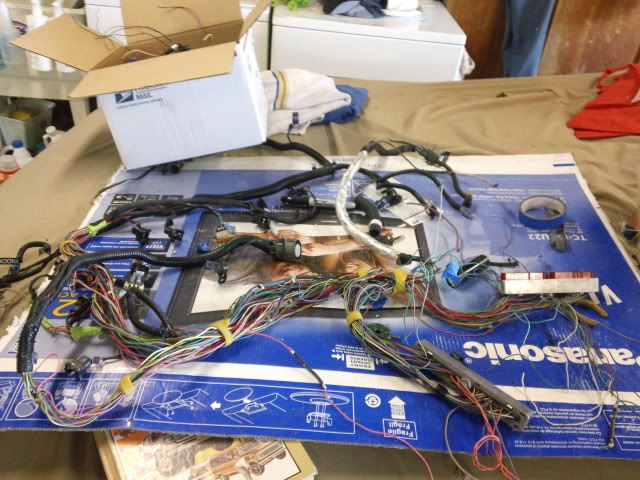

Box of discarded Wires and Connectors:

I layed out to check if all fit and where I want to run the wires.. After all of the un-wrapping and moving and then re-wrapping. I have a lot of harness leading from the harness to the PCM. I am thinking of mounting the PCM above the Glove Box (Inside the Cab).
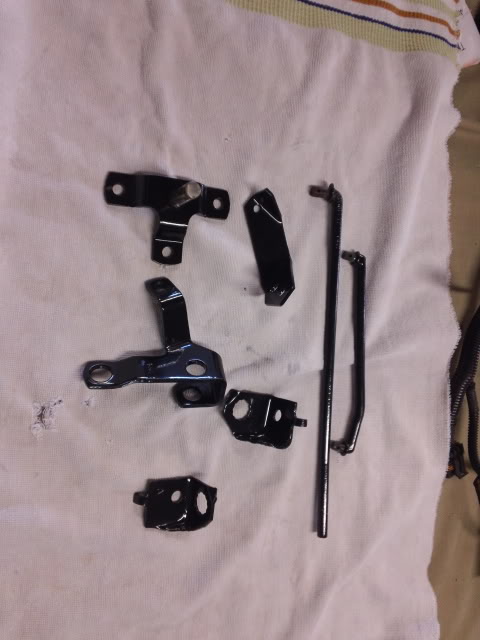
Also Powder Coated a few more parts for (brackets and Column Shifter)
That's it for now.. will see about getting more done next week.
BC
Remounted the Sub Frame / Engine to the body.. found out that the Right side head was very close to the firewall.. didn't really like that. So I remounted the Engine by moving the Frame mount 1/2" forward.. I did this by redrilling the holes in the Frame stands 1/2" so that the frame stands would be moved forward, since the Adapter plates were already finished, this was the easy route.
As you can see from the above pictures, the Standard 1" setback gave me some issue with clearance in the Trans Tunnel area and after using a BFH some and looking it over some more. I then decided to move the engine forward 1/2" (more pictures of the later), clearance problem soloved. By doing this, I was able to remove some of the shim and spacer that was lifting the frame same up 1/8".
I Started the Engine Wiring harness. Almost done. got a few more wires to add/join, well do the fuse and relays once I know where everything will sit.
Box of discarded Wires and Connectors:
I layed out to check if all fit and where I want to run the wires.. After all of the un-wrapping and moving and then re-wrapping. I have a lot of harness leading from the harness to the PCM. I am thinking of mounting the PCM above the Glove Box (Inside the Cab).
Also Powder Coated a few more parts for (brackets and Column Shifter)
That's it for now.. will see about getting more done next week.
BC
Last edited by bczee; 03-08-2011 at 12:10 AM.
 03-08-2011, 08:38 AM
#40
Teching In
Join Date: Mar 2011
Location: McAllen, TX
Posts: 21
Likes: 0
Received 0 Likes
on
0 Posts
Your work really has inspired me! I've owned a couple of F-Bodys and do enjoy them although the Nova has always been my true love. Awesome thread, keep up the great work.