LS1 S14 240sx build
#1
Staging Lane
Thread Starter
iTrader: (2)
Join Date: Dec 2005
Posts: 64
Likes: 0
Received 0 Likes
on
0 Posts
The car and motor:
Car: 97 Nissan 240sx SE


Motor:
40K mile 2000 Corvett LS1 with AFR 205 heads, FAST 92 600 lift Comp cam

Slightly used Spec stage 3+ clutch and Spec flywheel.

S15 HLSD

Car: 97 Nissan 240sx SE


Motor:
40K mile 2000 Corvett LS1 with AFR 205 heads, FAST 92 600 lift Comp cam
Slightly used Spec stage 3+ clutch and Spec flywheel.
S15 HLSD

Last edited by SupraNatural; 03-13-2011 at 01:01 PM.
#2
Staging Lane
Thread Starter
iTrader: (2)
Join Date: Dec 2005
Posts: 64
Likes: 0
Received 0 Likes
on
0 Posts
New Fortune Auto 500 series coilovers!
These things are real nice quality!


Wheels: 9.5" x 17" Battles

Tires: 255/40/17's and 275/40/17's NT05's

PBM Suspension

Here is the new home for my LS1:

T56 that I had built to handle 700+ HP.

94 Q45 3.54 ring and pinion set.

Walbro 255 fuel pump

These things are real nice quality!
Wheels: 9.5" x 17" Battles
Tires: 255/40/17's and 275/40/17's NT05's
PBM Suspension
Here is the new home for my LS1:
T56 that I had built to handle 700+ HP.
94 Q45 3.54 ring and pinion set.
Walbro 255 fuel pump
Last edited by SupraNatural; 11-12-2011 at 01:59 AM.
#3
Staging Lane
Thread Starter
iTrader: (2)
Join Date: Dec 2005
Posts: 64
Likes: 0
Received 0 Likes
on
0 Posts
My new Rad (Koyo for KA). Fits like it should.

-------------------------------------
since I am lowering the car, I needed to move the wire harness that runs inside the driver side fender.
I removed the fender got rid of the white and black harness holder thingies, hammered as seen in the third pic. I used one hole already there and drilled a hole to attach with zip ties above the ridge. I ran the hood latch cable inside the engine bay through the triangle hole near firewall and along the frame rail.

-----------------------------------------------
I also ran my fuel system using the corvette filter regulator (Wix from Rock Auto). I had to change the configuration of the mounting bracket and used a self tapper to attach under the frame rail.


I used Russell adapter fitting: RUS-640940

I cut down the ends on the filter/regulator and used the factory return line and a new feed that was the perfect size. I removed the hardlines and ran -6AN line up to engine bay. I used heater line with a slit to cover the braided line where it comes in contact with the fuel tank, as not to rupture it.


I will use some heat sleeve where it comes by the header and this fitting to attach to fuel rail: RUS-640853

New Fueled Performance motor and trans mount kit came in. Looks great!!
http://www.fueledracing.com/


-------------------------------------
since I am lowering the car, I needed to move the wire harness that runs inside the driver side fender.
I removed the fender got rid of the white and black harness holder thingies, hammered as seen in the third pic. I used one hole already there and drilled a hole to attach with zip ties above the ridge. I ran the hood latch cable inside the engine bay through the triangle hole near firewall and along the frame rail.

-----------------------------------------------
I also ran my fuel system using the corvette filter regulator (Wix from Rock Auto). I had to change the configuration of the mounting bracket and used a self tapper to attach under the frame rail.


I used Russell adapter fitting: RUS-640940

I cut down the ends on the filter/regulator and used the factory return line and a new feed that was the perfect size. I removed the hardlines and ran -6AN line up to engine bay. I used heater line with a slit to cover the braided line where it comes in contact with the fuel tank, as not to rupture it.
I will use some heat sleeve where it comes by the header and this fitting to attach to fuel rail: RUS-640853

New Fueled Performance motor and trans mount kit came in. Looks great!!
http://www.fueledracing.com/

#4
Staging Lane
Thread Starter
iTrader: (2)
Join Date: Dec 2005
Posts: 64
Likes: 0
Received 0 Likes
on
0 Posts
I cut off the brake dust covers but was sure to leave tabs that I will later use to attach brake ducts to.

Installed some front suspension pieces.


I finished the conversion from auto to 6 speed. I took the dash out to get the pedals in and cut the hole for the clutch master cylinder.


Parts used for clutch master to slave:
Wilwood CMC. Part # 260-1304

Fitting into Slave, Russell Part # 640281

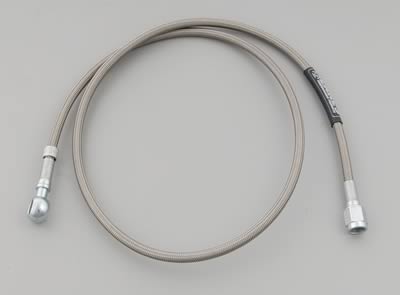
Clutch line, Earls Part # 63010236ERL

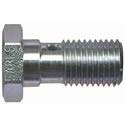
Banjo bolt, Earls Part # 997503ERL

I installed the Max rear sub frame aluminum collar/shims. After looking into this further I wish I had bought Stance because I machined out the Max to look like the Stance because the stock bushimgs interfeared with the Max items.


Put the Fueled Racing oil pan on. It came with a custom pickup and stud kit. Notice the trap doors to keep the oil where it belongs.


Installed new FAST 92mm big mouth TB:

Motor and trans ready to go into car.

Dropped the motor in.


Took the motor back out after test fitting the headers and making a list of things to do before the motor goes back in for the final time.
I started by taking out the AC evap and making these plates to cover the holes.
I also put some fire sleeve over the fuel line after seeing how close the header on that side will be.

I am also in the process of trading all my Vette accessories for 98-02 Camaro accessories because my intake has no room with where the Vette PS res mount.

Installed some front suspension pieces.
I finished the conversion from auto to 6 speed. I took the dash out to get the pedals in and cut the hole for the clutch master cylinder.
Parts used for clutch master to slave:
Wilwood CMC. Part # 260-1304

Fitting into Slave, Russell Part # 640281

Clutch line, Earls Part # 63010236ERL

Banjo bolt, Earls Part # 997503ERL

I installed the Max rear sub frame aluminum collar/shims. After looking into this further I wish I had bought Stance because I machined out the Max to look like the Stance because the stock bushimgs interfeared with the Max items.


Put the Fueled Racing oil pan on. It came with a custom pickup and stud kit. Notice the trap doors to keep the oil where it belongs.
Installed new FAST 92mm big mouth TB:
Motor and trans ready to go into car.
Dropped the motor in.
Took the motor back out after test fitting the headers and making a list of things to do before the motor goes back in for the final time.
I started by taking out the AC evap and making these plates to cover the holes.
I also put some fire sleeve over the fuel line after seeing how close the header on that side will be.
I am also in the process of trading all my Vette accessories for 98-02 Camaro accessories because my intake has no room with where the Vette PS res mount.
Last edited by SupraNatural; 03-13-2011 at 01:29 PM.
#5
Staging Lane
Thread Starter
iTrader: (2)
Join Date: Dec 2005
Posts: 64
Likes: 0
Received 0 Likes
on
0 Posts
Motor and trans back in with Camaro accessories so my intake will clear.
I Installed the drive shaft, fits perfectly.
I installed the driver side header and it does not interfear with the steering knuckle at all.
I also hooked up the fuel line, radiator including hoses, fans, clutch master cylinder, wire harness,
300ZX brake master cylinder, vacuum line for brakes, pro 5 0 shifter and Ford SVO 30lb injectoers (36lb on GM fuel pressure).


OK so I got around to installing and plumbing my oil and PS coolers. I ran some thick foam tape on the bottom or the rad support and used the tops of the Earls cooler brackets along with some threaded rod.


For the steering rack I used the Fueled Racing fittings and XRP AN -6 straight and AN -6 30 deg fittings. It's a tight fit how I ran it but it worked.

I also mocked up my intake, hope the hood shuts.

I Installed the drive shaft, fits perfectly.
I installed the driver side header and it does not interfear with the steering knuckle at all.
I also hooked up the fuel line, radiator including hoses, fans, clutch master cylinder, wire harness,
300ZX brake master cylinder, vacuum line for brakes, pro 5 0 shifter and Ford SVO 30lb injectoers (36lb on GM fuel pressure).
OK so I got around to installing and plumbing my oil and PS coolers. I ran some thick foam tape on the bottom or the rad support and used the tops of the Earls cooler brackets along with some threaded rod.
For the steering rack I used the Fueled Racing fittings and XRP AN -6 straight and AN -6 30 deg fittings. It's a tight fit how I ran it but it worked.
I also mocked up my intake, hope the hood shuts.
Last edited by SupraNatural; 09-05-2011 at 01:23 AM.
#6
Staging Lane
Thread Starter
iTrader: (2)
Join Date: Dec 2005
Posts: 64
Likes: 0
Received 0 Likes
on
0 Posts
I used the 2Fass240us brackets for Wilwood Superlights and (350Z Track) rotors:
Here are some pics:


I also had time and a little help to install the rear suspension and 300ZX rear brakes. Yes I know I need to paint the rear calipers.


I took off all the Vette accessories and traded for Camaro accessories so I would have room for my intake and not have the alernator on the top of the motor.
This side is done:

This side is not so done, I'm still wiring everything and it's not easy.

My seats and steering wheel came in (seat not mounted).

I made a flywheel cover because that's one thing the Fueled kit was lacking. Notice anywhere the braided line is near heat or another surface I used the firesleeve. The braided line will cut through **** over time.

See in pic where I mounted the oil filter relo:

Here are some pics:
I also had time and a little help to install the rear suspension and 300ZX rear brakes. Yes I know I need to paint the rear calipers.
I took off all the Vette accessories and traded for Camaro accessories so I would have room for my intake and not have the alernator on the top of the motor.
This side is done:
This side is not so done, I'm still wiring everything and it's not easy.
My seats and steering wheel came in (seat not mounted).
I made a flywheel cover because that's one thing the Fueled kit was lacking. Notice anywhere the braided line is near heat or another surface I used the firesleeve. The braided line will cut through **** over time.
See in pic where I mounted the oil filter relo:
Last edited by SupraNatural; 03-13-2011 at 06:10 PM.
Trending Topics
#8
The Machinist
iTrader: (1)
Join Date: Dec 2007
Location: NH
Posts: 119
Likes: 0
Received 0 Likes
on
0 Posts

Good lookin build man.
Im glad to hear your happy with the fueled kit as that is what im going with after i get this sr20 out of my engine bay. LS1 waiting to go in.
Is this being built as a dd street car?
Im glad to hear your happy with the fueled kit as that is what im going with after i get this sr20 out of my engine bay. LS1 waiting to go in.
Is this being built as a dd street car?
#16
Staging Lane
Thread Starter
iTrader: (2)
Join Date: Dec 2005
Posts: 64
Likes: 0
Received 0 Likes
on
0 Posts
Good lookin build man.
Im glad to hear your happy with the fueled kit as that is what im going with after i get this sr20 out of my engine bay. LS1 waiting to go in.
Very happy with the Fueled kit. It was almost like the motor and trans were made for this car.
Is this being built as a dd street car?
Im glad to hear your happy with the fueled kit as that is what im going with after i get this sr20 out of my engine bay. LS1 waiting to go in.
Very happy with the Fueled kit. It was almost like the motor and trans were made for this car.
Is this being built as a dd street car?
The oil pan is made so it can hold the most oil possible (6 qt) and hugs the angle of the cross member very closely. I'll get more pics of what I'm talking about the next time I get it up on jackstands. It is even with the sway bar.


 Always loved this swap
