
Project M - AKA Emmy - 1968 Bel Air Wagon


 04-18-2011, 07:08 PM
#23

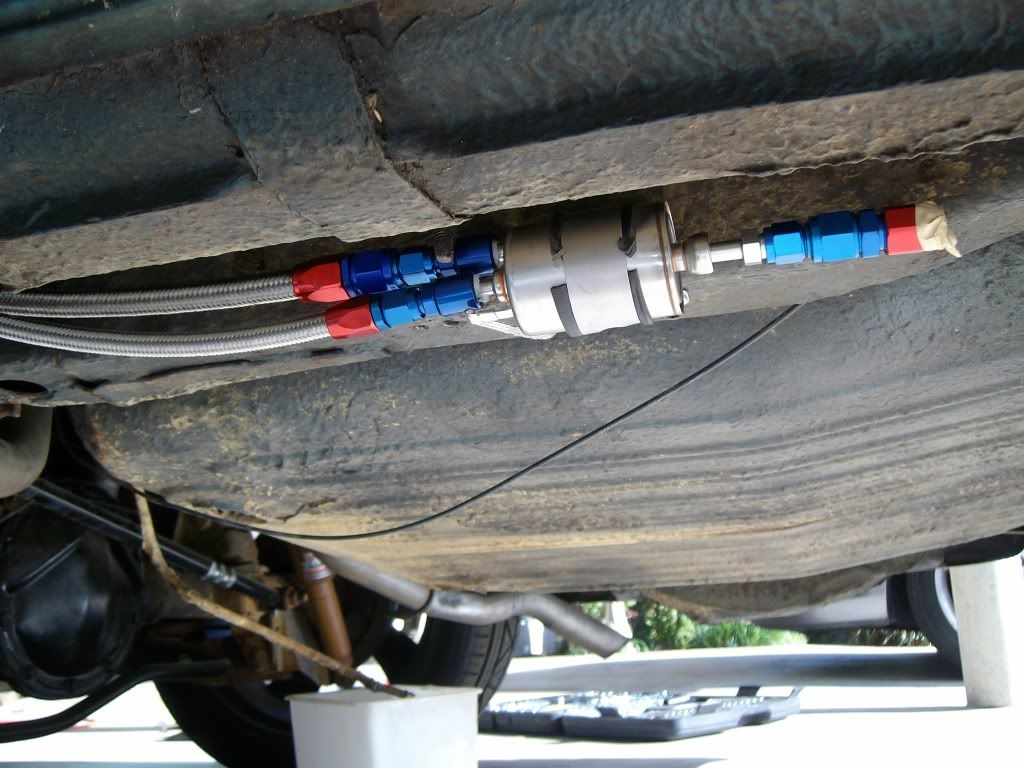
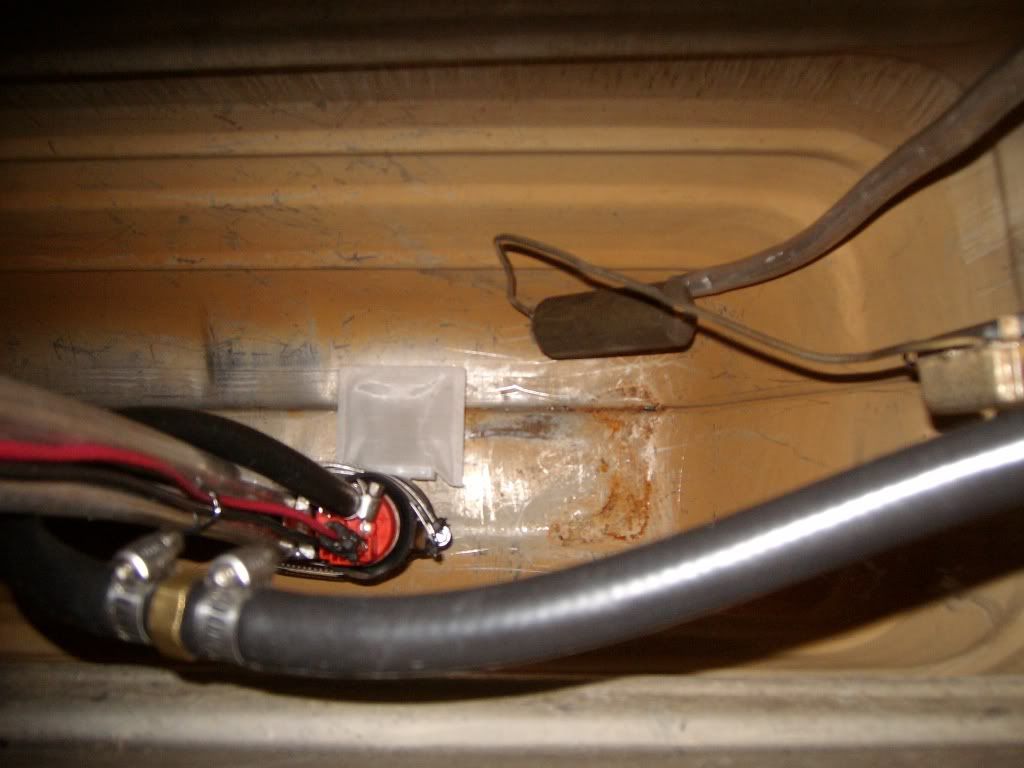
Okay, got a little more of my fuel system laid out and some lines made, Corvette filter/regulator mounted.
Here's a few pics....
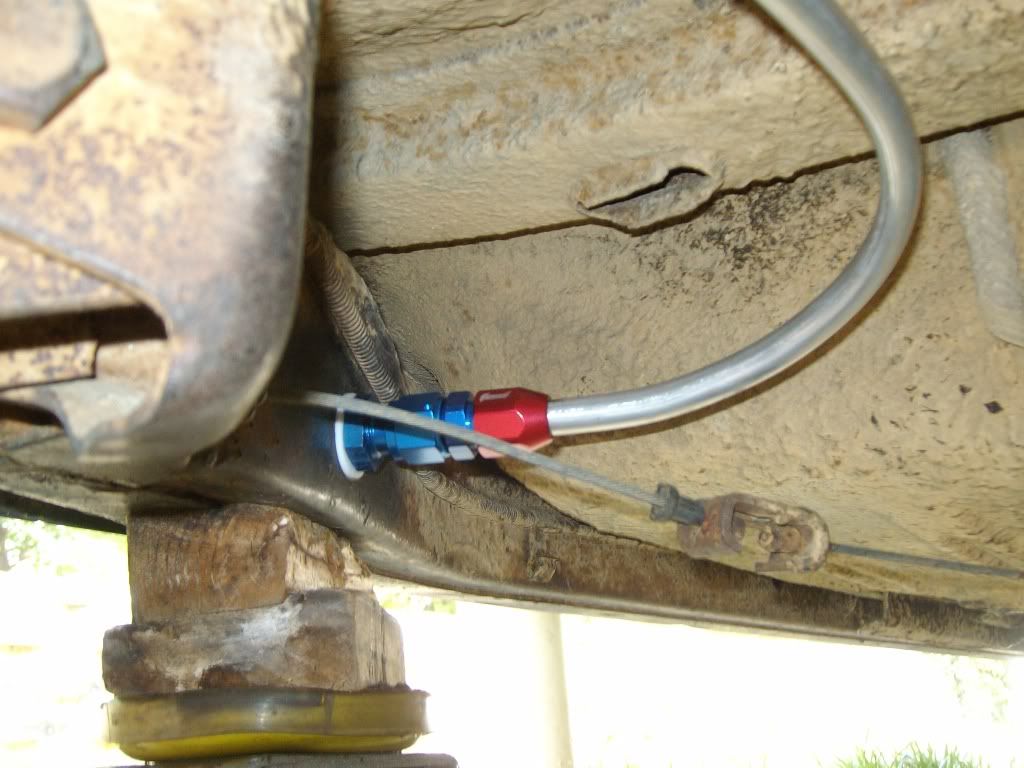
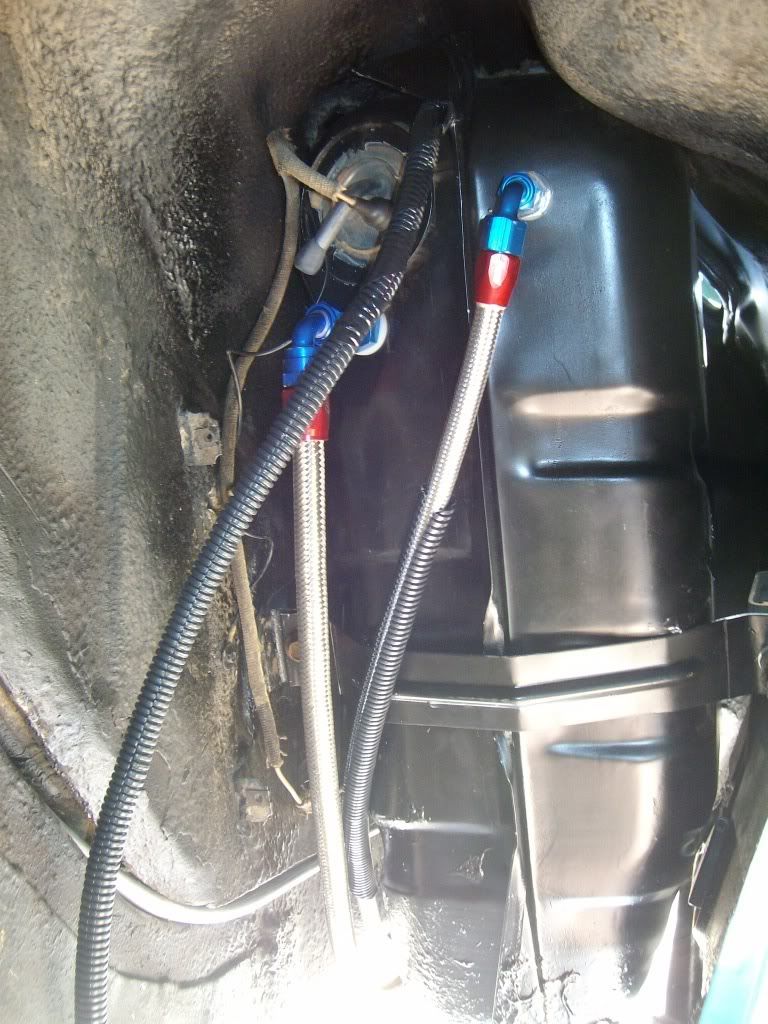
Regulator and feed and return lines made up and mounted....
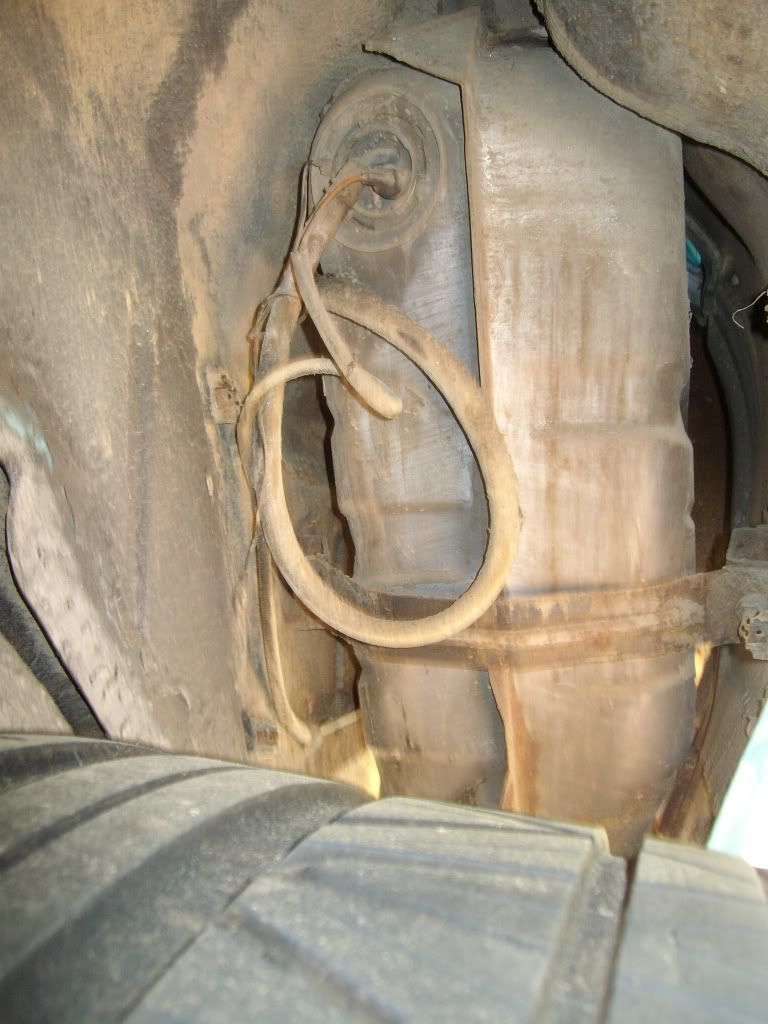
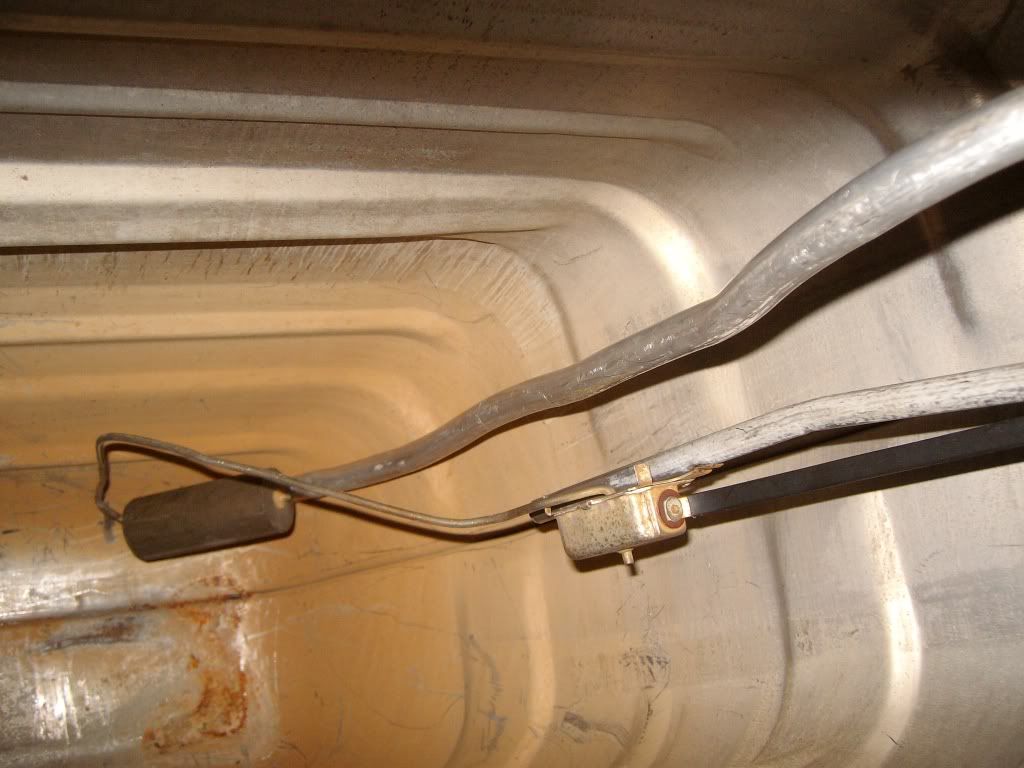
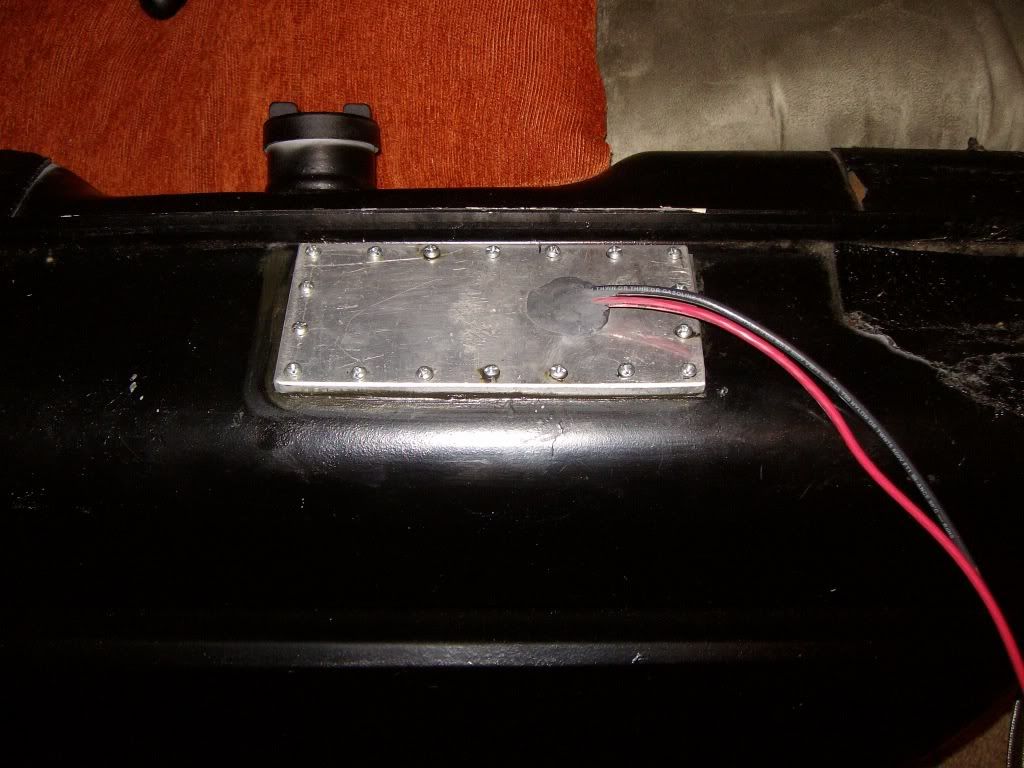
Tank...
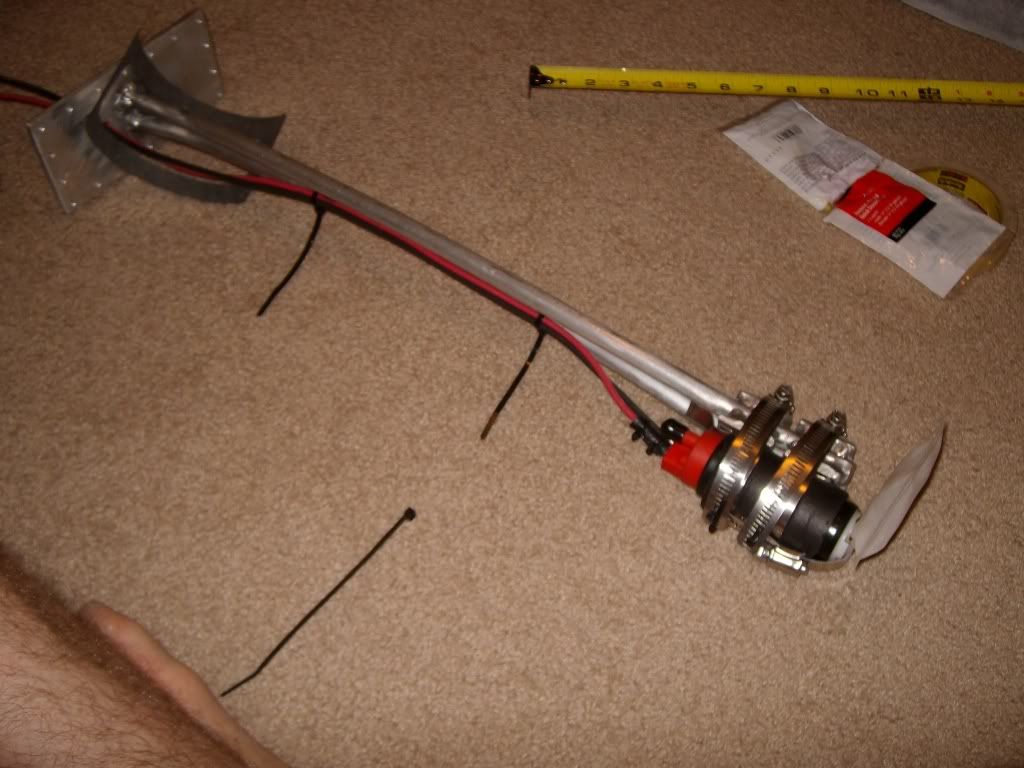
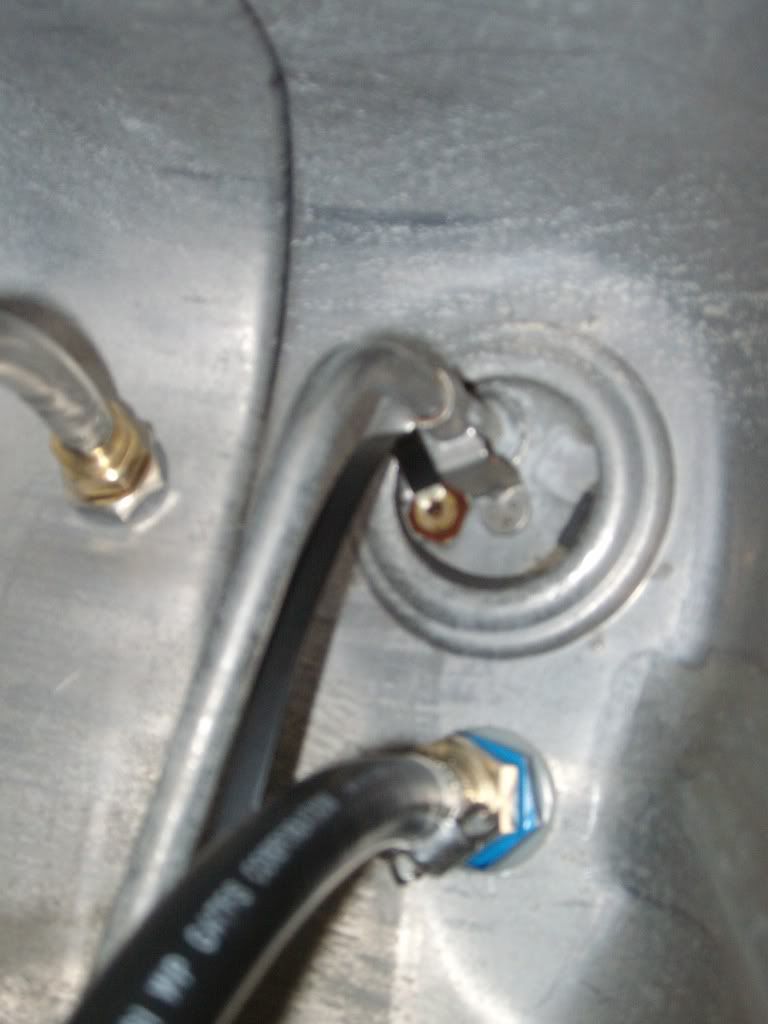
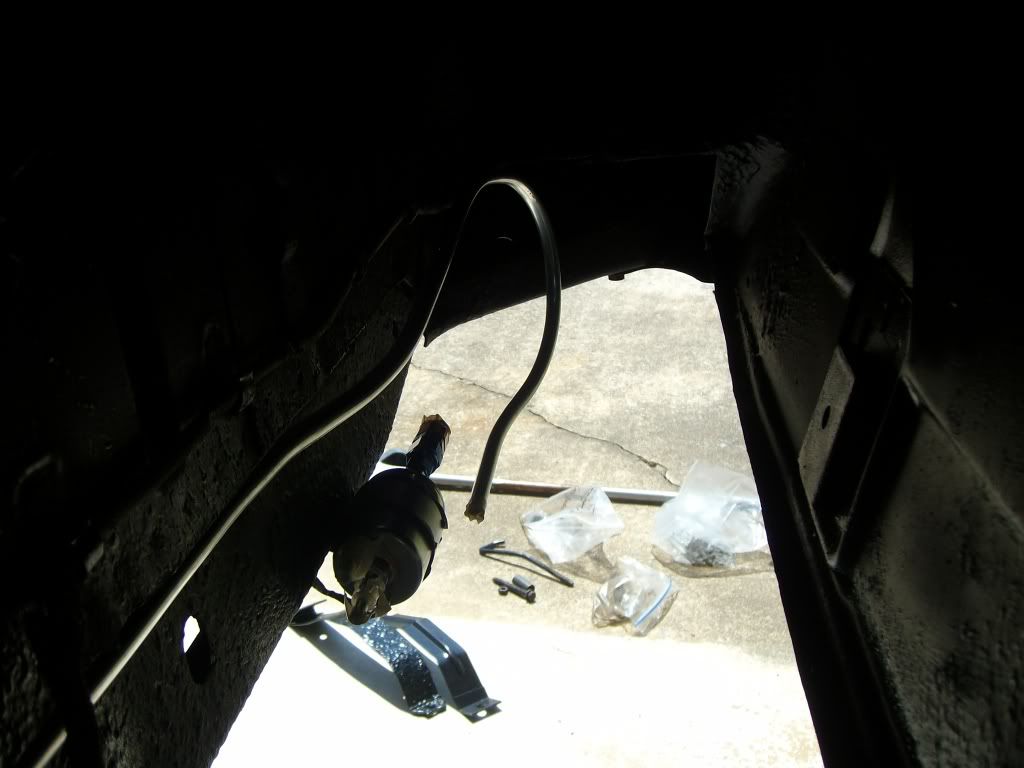
Sending Unit....
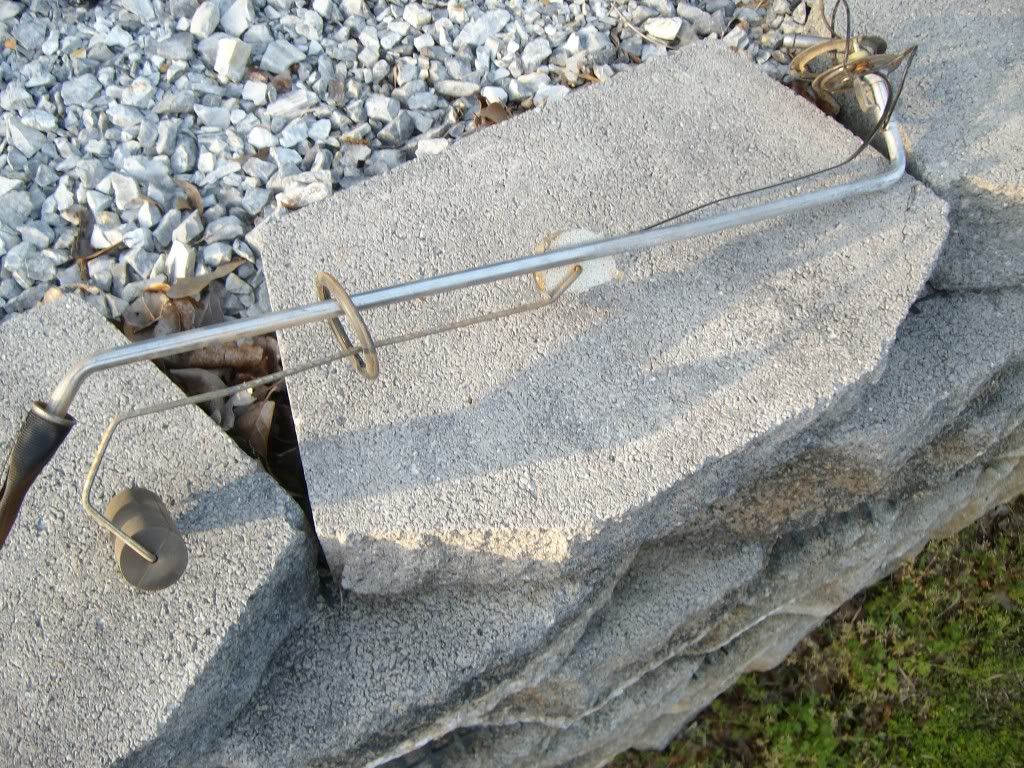
The layout....
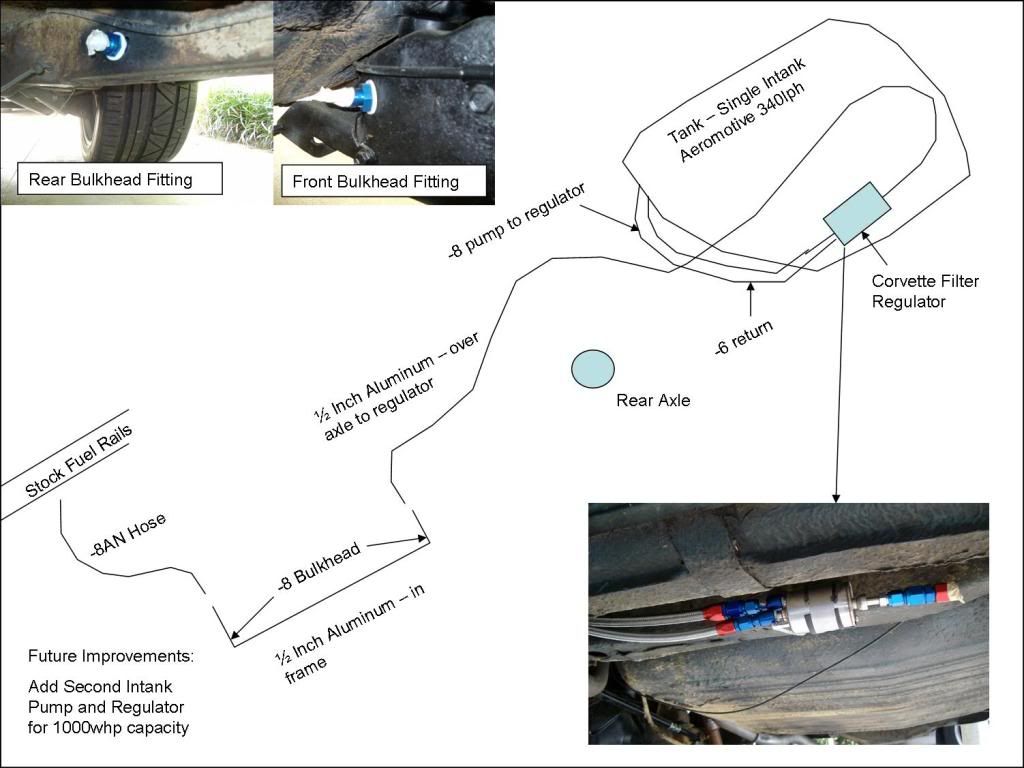
And changes to the tank to allow for intake pump...a second pump will be added later....
I'll post some more pics when I get the rest finished...
Also got my Aeromotive pump today. Can't wait to make my fuel pump setup.
Here's a few pics....
Regulator and feed and return lines made up and mounted....
Tank...
Sending Unit....
The layout....
And changes to the tank to allow for intake pump...a second pump will be added later....
I'll post some more pics when I get the rest finished...
Also got my Aeromotive pump today. Can't wait to make my fuel pump setup.
04-23-2011, 10:53 AM
#24
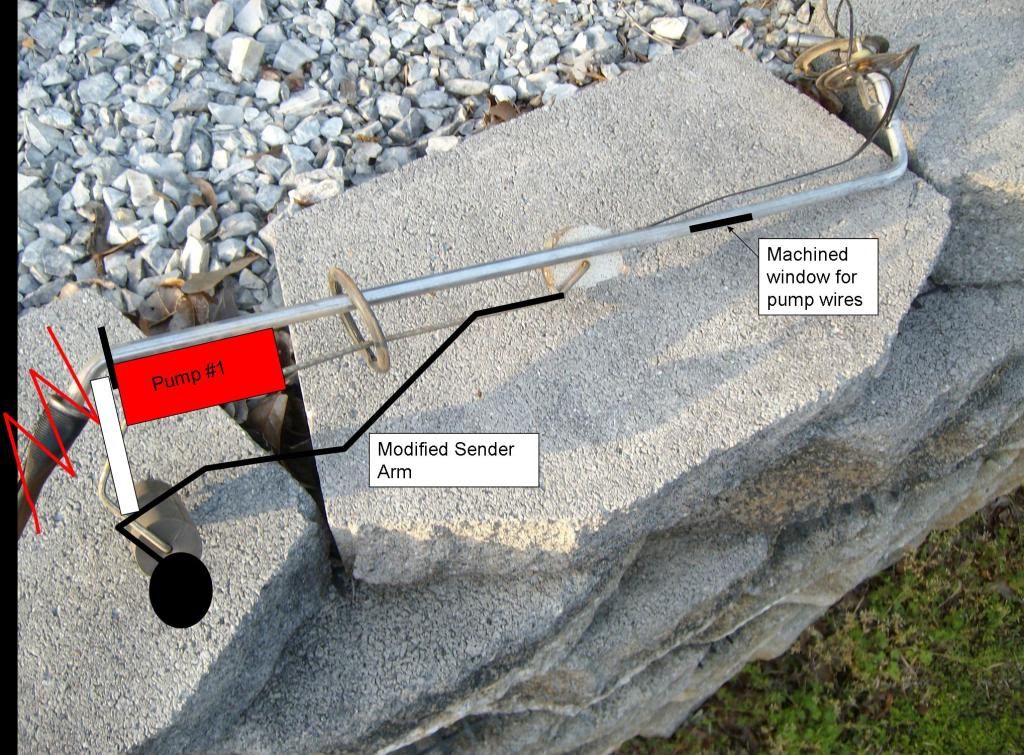
Okay, well, the above pic/layout wont work.
The Aeromotive pump's strainer will not fit through my sending unit hole.
So I on to my second option.
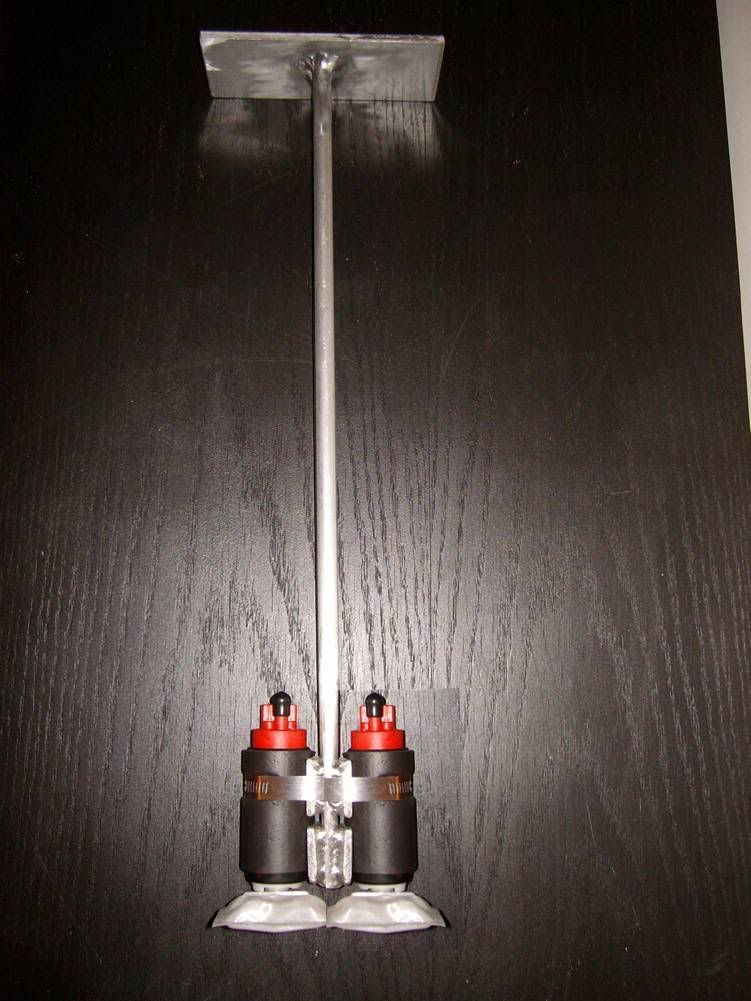
I will have to have a drop in dual pump setup.
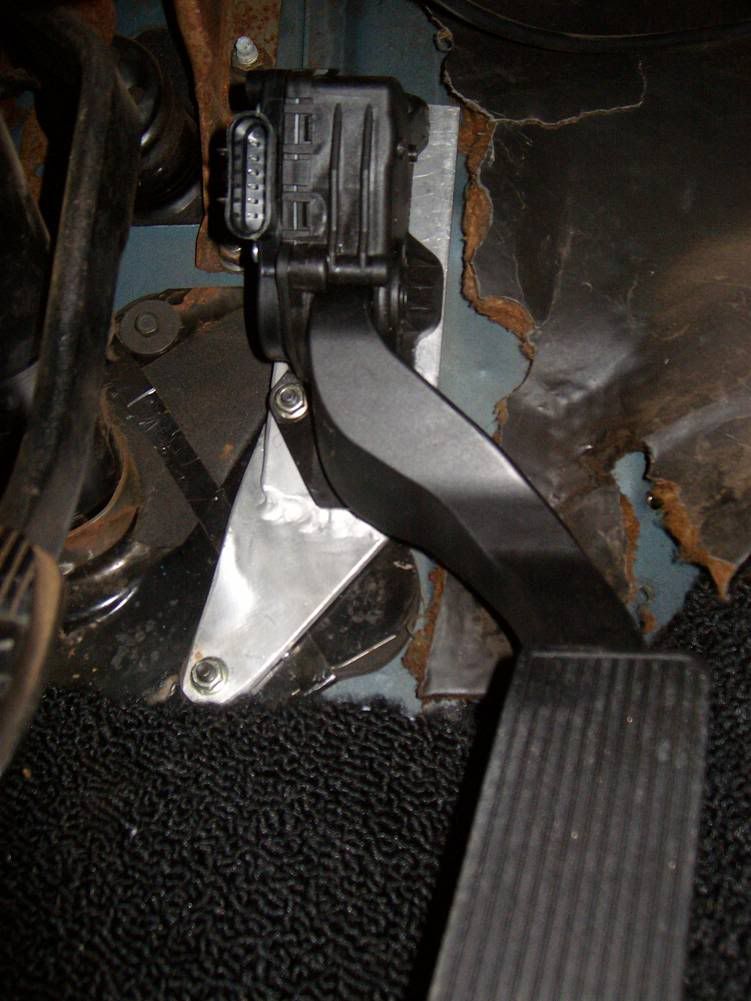
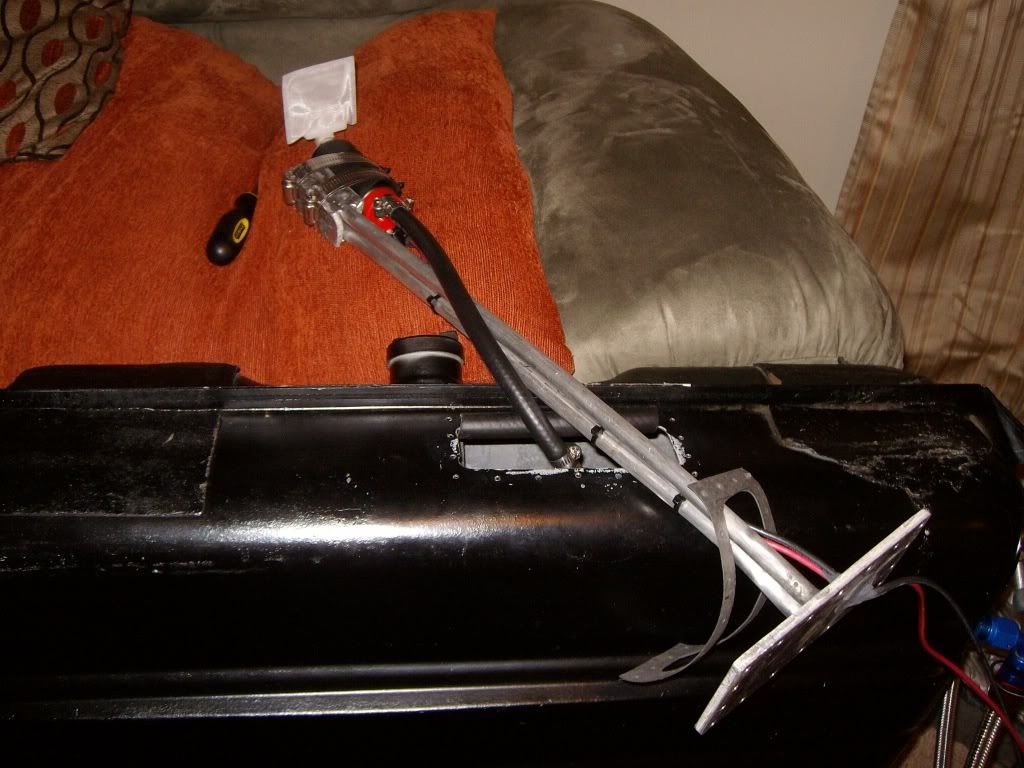
I have attached pics of what I welded up out of aluminum.
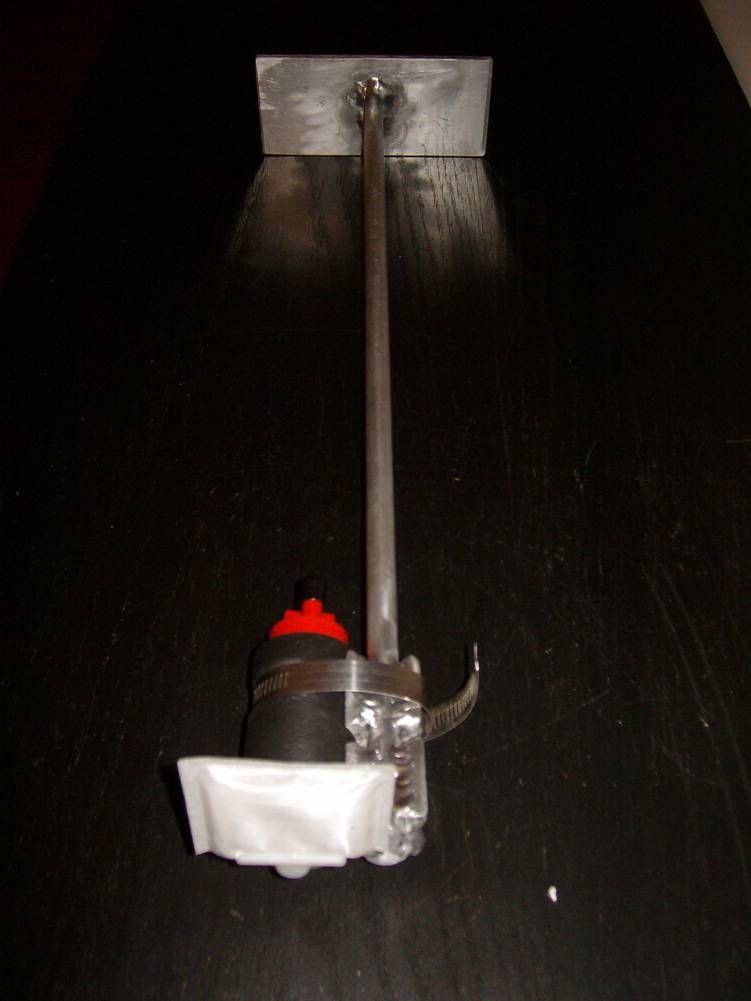
Here's what it will look like with dual pumps....
The tank....
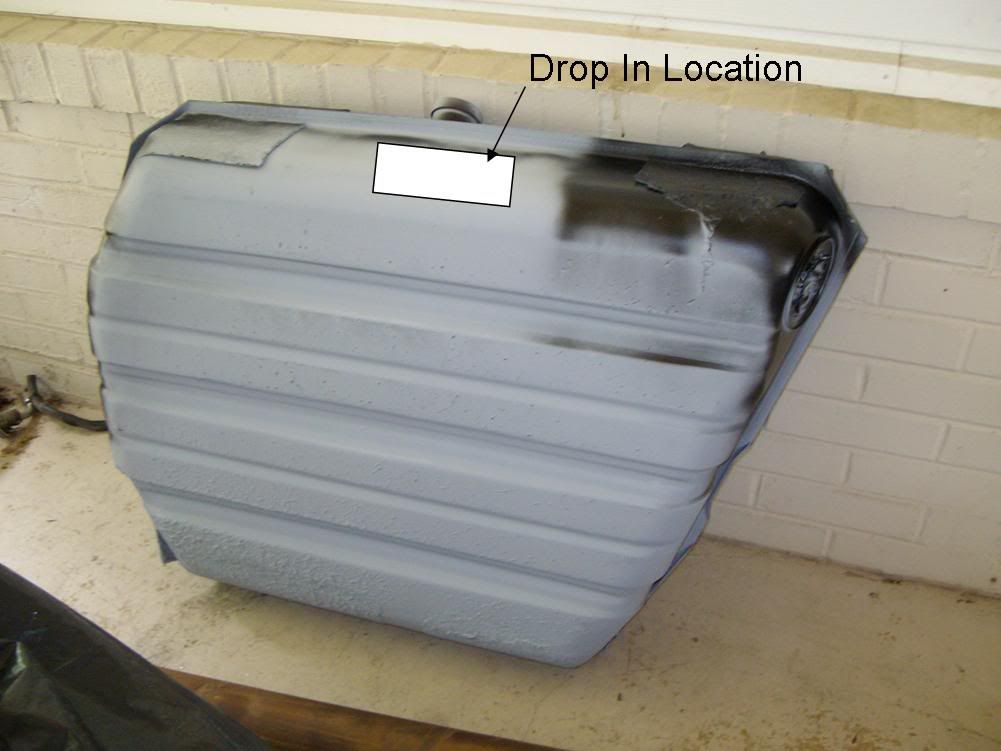
And my accel brkt that I welded out of aluminum...
The Aeromotive pump's strainer will not fit through my sending unit hole.
So I on to my second option.
I will have to have a drop in dual pump setup.
I have attached pics of what I welded up out of aluminum.
Here's what it will look like with dual pumps....
The tank....
And my accel brkt that I welded out of aluminum...
04-23-2011, 09:56 PM
#25
Hey Guys,
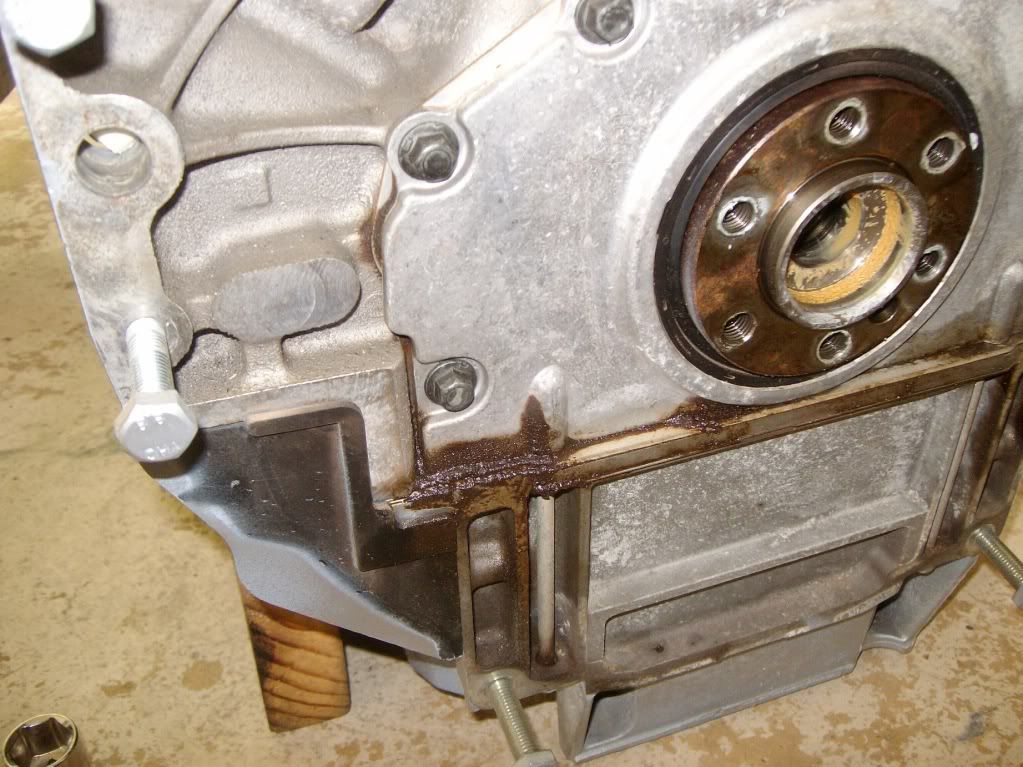
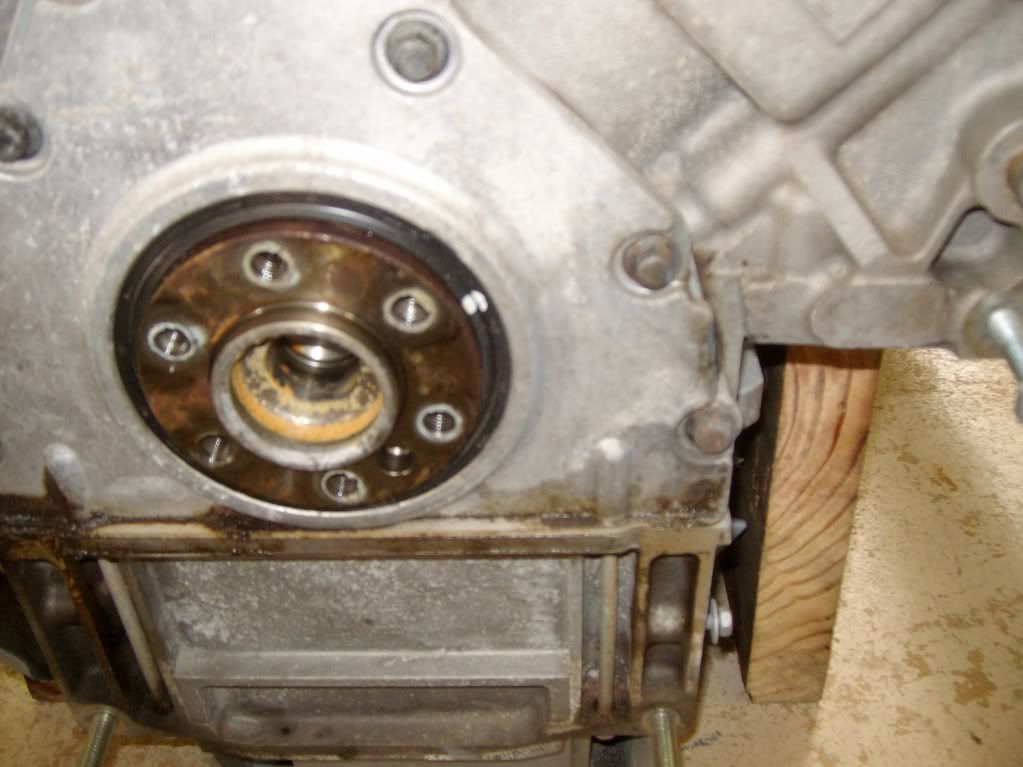
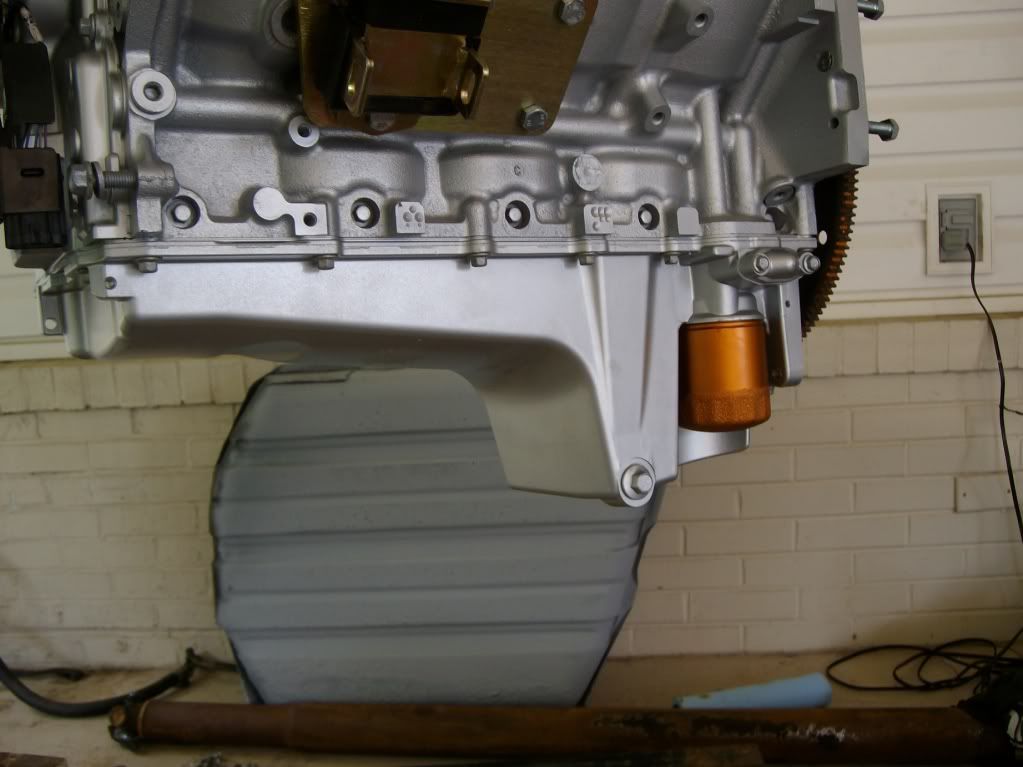
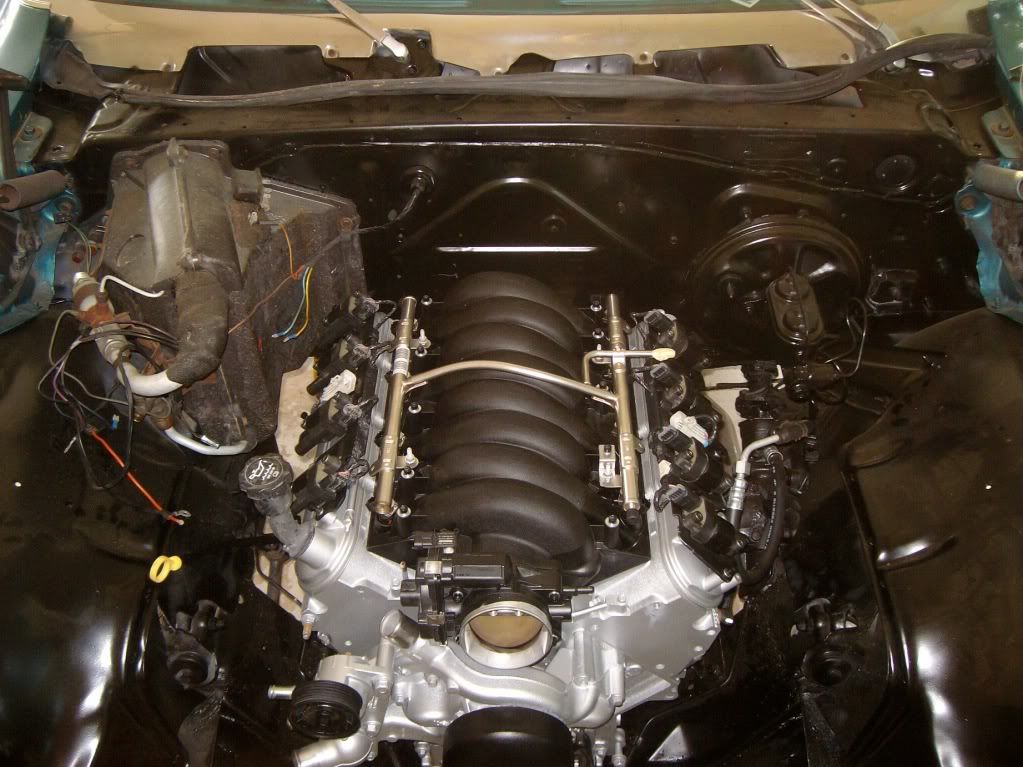
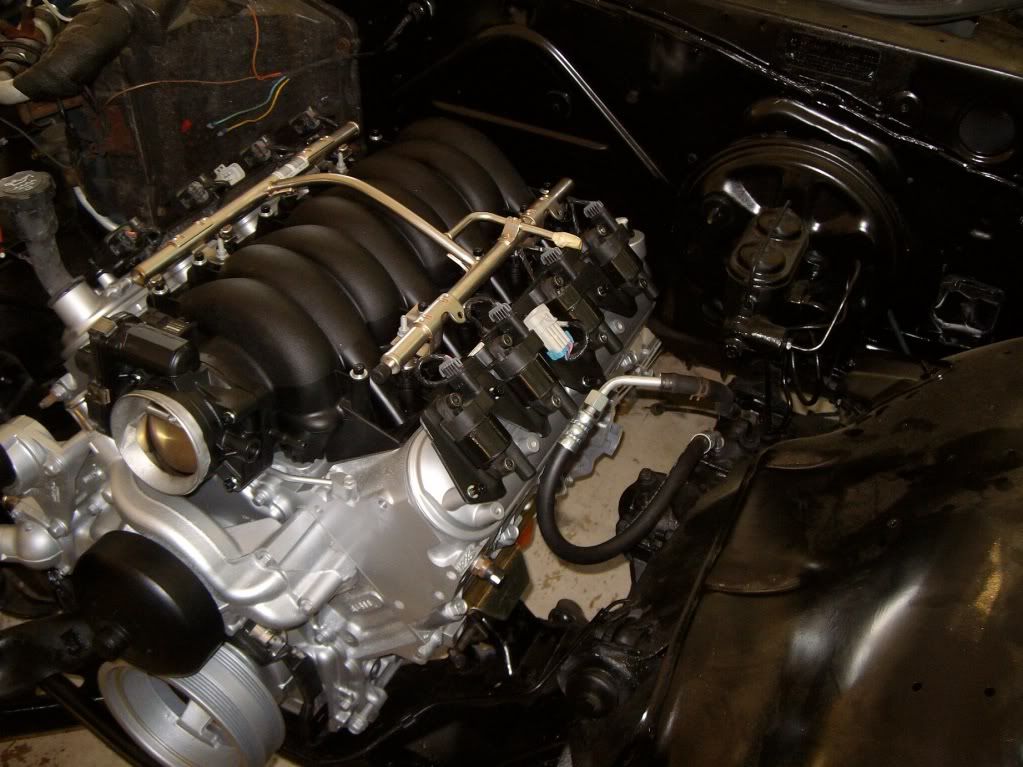
Today a buddy of mine showed up...His timing couldn't have been better. I put him to work and we changed the rear main seal, rear cover gasket, installed the Musclecar oil pan, and installed converter and tranny.
I couldn't tell exactly how my rear cover was leaking but the gasket plate seemed to be stained between the oring and the bolt.
When I installed the new seal, I tapped it in dry. I remembered after the fact that I should have use a little oil. Doh. But it went in easy enough. I left the inner of the rear seal dry(or only lubed as it came). The rear cover seems to center itself on the rear seal and the cover lined up with the bottom of the block on both sides.
I just hoped she's sealed up. I don't want to deal with leaks.
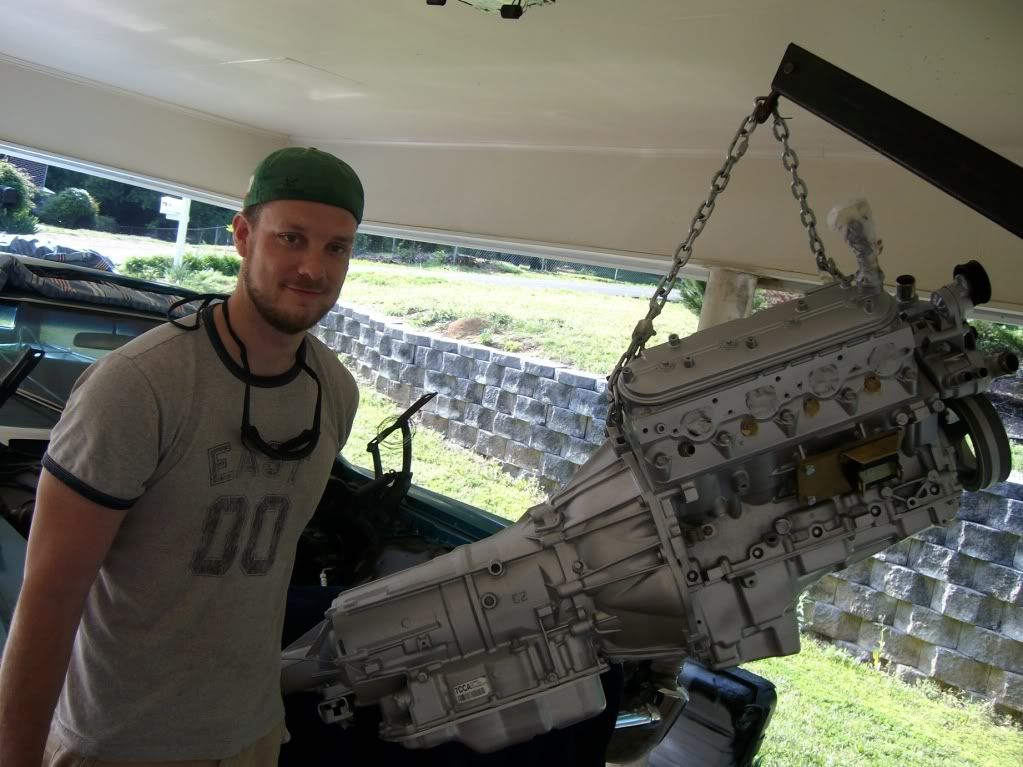
Last edited by BelAir1000; 04-23-2011 at 10:04 PM. Reason: moved pics
05-04-2011, 06:57 PM
#26
So I've been on and off working on my wiring as I found the parts I needed and had the patience. I ended up finding a Honda Pilot underhood fuse box that works perfectly and should mount cleanly under the hood.
Today I taped together a 9V and two AA's and did a test fire. The fuel pumpe relay will mount at the rear close to the pump and battery so I wired it up temporarily.
I connected the batterys, the relays all fire in sequence as intended and then the fuel pump relay shuts off after the 3 second prime period.
Its not that I ever expected it(my wiring) not to work...but its nice to see signs of life after 2.5 months of the car not running.
 good looks Station Wagon

 05-29-2011, 10:06 AM
#36

Are you running EFI push-lock hose and matching barbs inside the tank and using the hose clamps for a piece of mind? Any more details?
05-30-2011, 11:50 AM
#38
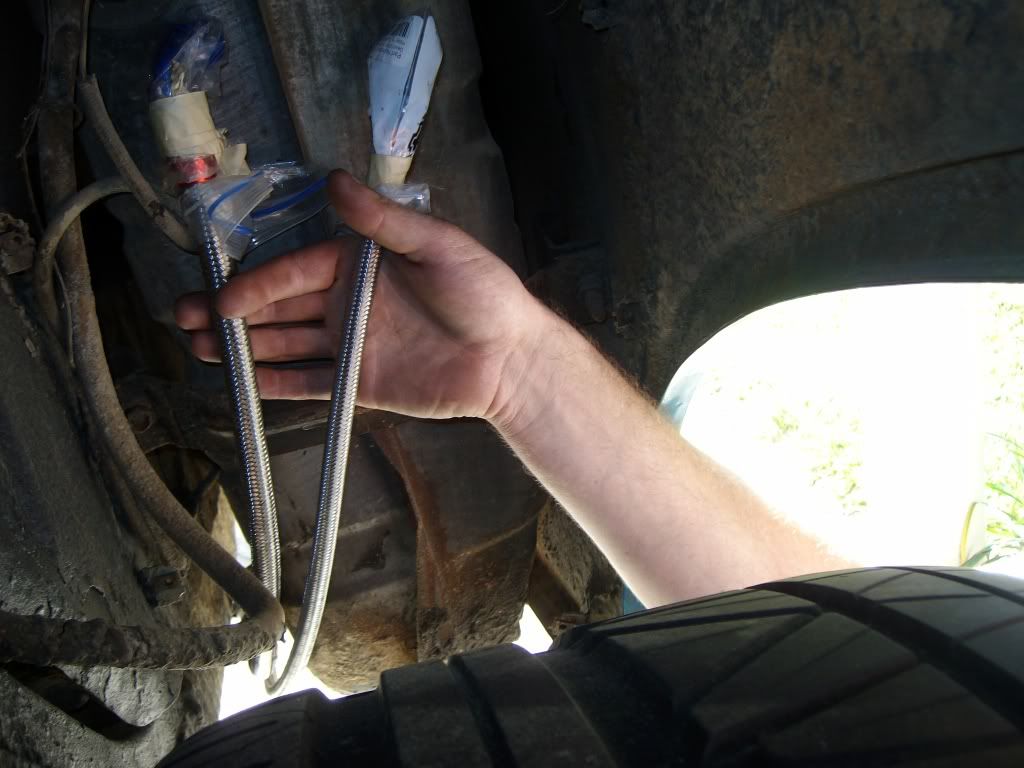
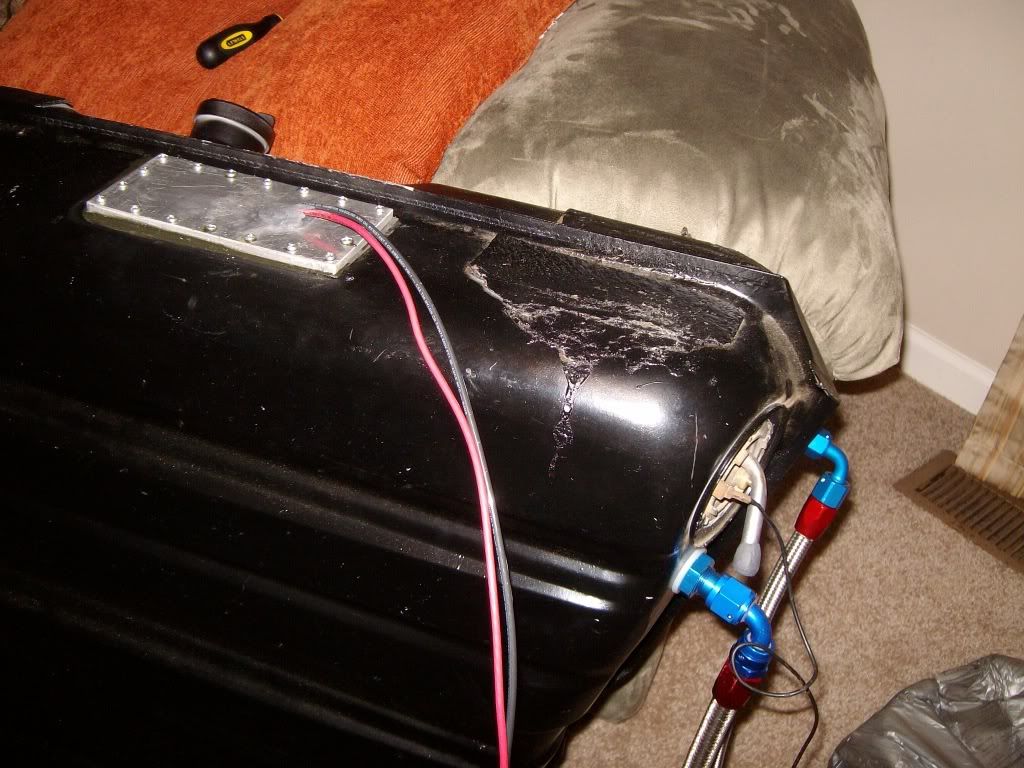
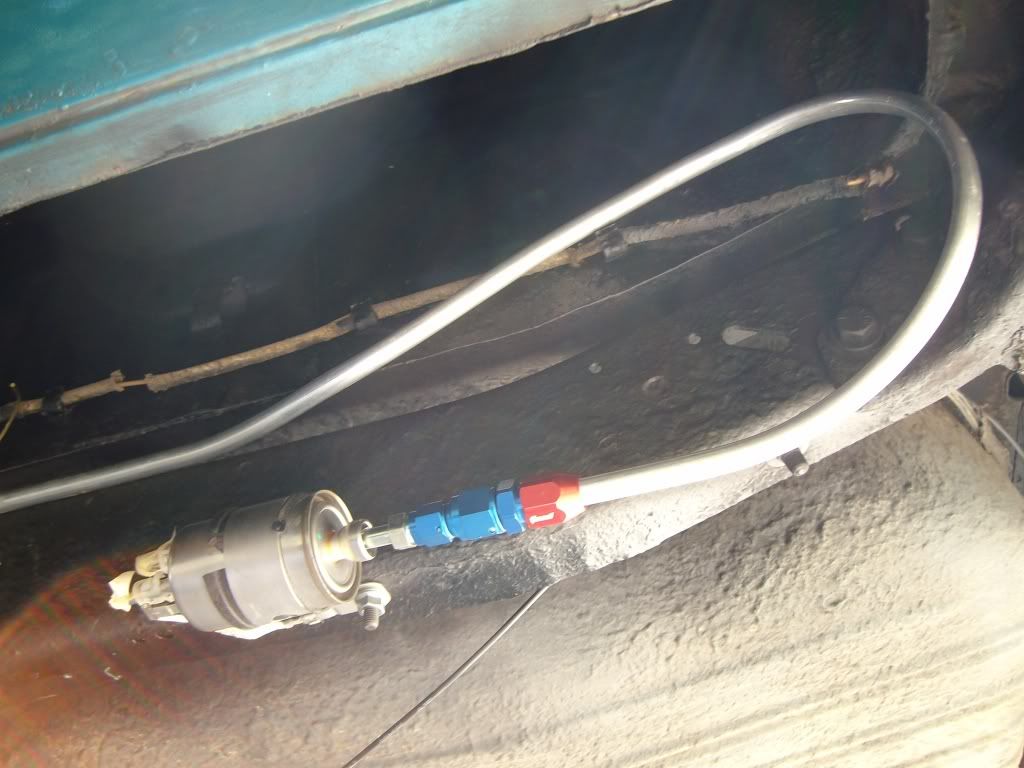
Got the tank in the car.
Only problem I ran into was I locate the return line a little higher on the tank than I originally planned. So the line was a little tight.
I tweaked the filter outlet just a touch to relieve the tension. Also, the return line quick conenct fitting clip wasn't holding so I need to replace it.
I'm been careful to keep the ends of pipes and fitting cover when not working on it. But when I get ready to start it, I'll pump fuel out the open fitting at the rail to clean out any dirt and prime the line.
I'm a little anxious to power it up and pressure test it too...
I'm kinda fearful of finding leaks. There are a lot of fittings in this system.Its also the first time I've used the compression tubing ends.
As long as its not a leak inside the frame, it will be an easy fix.
But it would have been a lot easier to run one single braided line outside of the frame.
Anyway, here's the final installed pics.

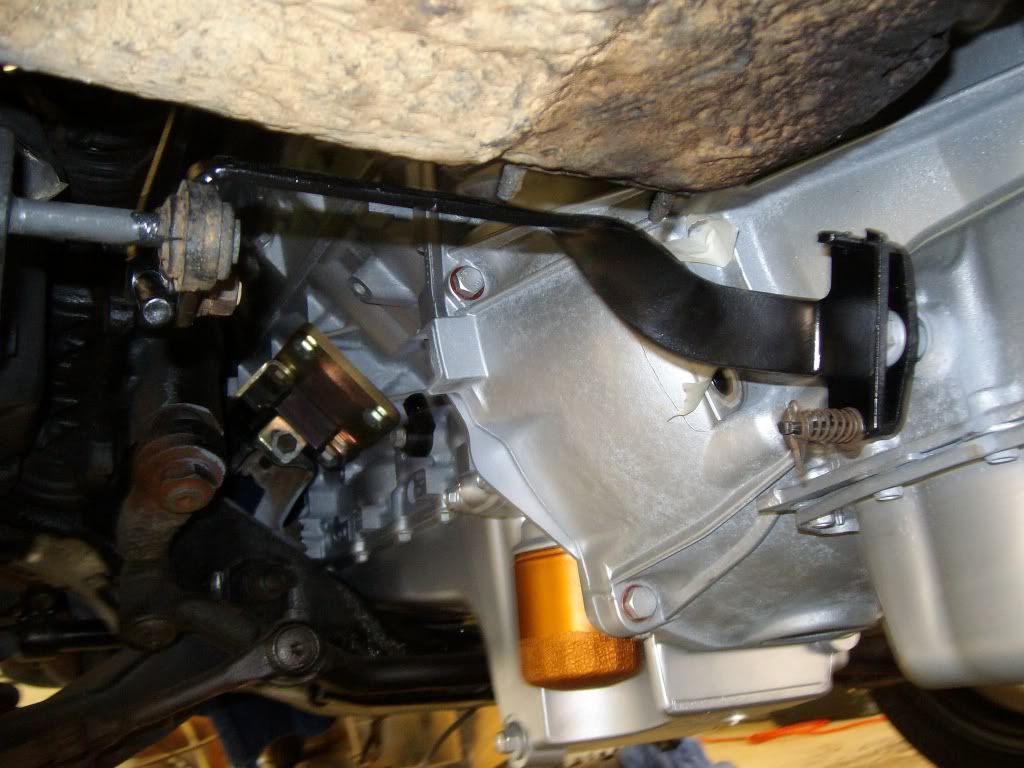
And the stock shift linkage(P-R-N-D-L2-L1) works well with the 6L80E from P through 2. The detents are the right size.
The 6L80E has P-R-N-D-3-2-1....the stock shifter will only allow P-R-N-D-3-2.
Should not be an issue.
Only problem I ran into was I locate the return line a little higher on the tank than I originally planned. So the line was a little tight.
I tweaked the filter outlet just a touch to relieve the tension. Also, the return line quick conenct fitting clip wasn't holding so I need to replace it.
I'm been careful to keep the ends of pipes and fitting cover when not working on it. But when I get ready to start it, I'll pump fuel out the open fitting at the rail to clean out any dirt and prime the line.
I'm a little anxious to power it up and pressure test it too...
I'm kinda fearful of finding leaks. There are a lot of fittings in this system.Its also the first time I've used the compression tubing ends.
As long as its not a leak inside the frame, it will be an easy fix.
But it would have been a lot easier to run one single braided line outside of the frame.
Anyway, here's the final installed pics.
And the stock shift linkage(P-R-N-D-L2-L1) works well with the 6L80E from P through 2. The detents are the right size.
The 6L80E has P-R-N-D-3-2-1....the stock shifter will only allow P-R-N-D-3-2.
Should not be an issue.
05-31-2011, 09:29 AM
#39

Do/have you the the P/N of the Russell fittings that go on the GM filter and the a AN fitting go from there, I need to get a couple of them and you were showing them in the pics thanks Steve
Great build I used to have a 68 vert' but it got wrecked, drunks!
Great build I used to have a 68 vert' but it got wrecked, drunks!
05-31-2011, 09:04 PM
#40
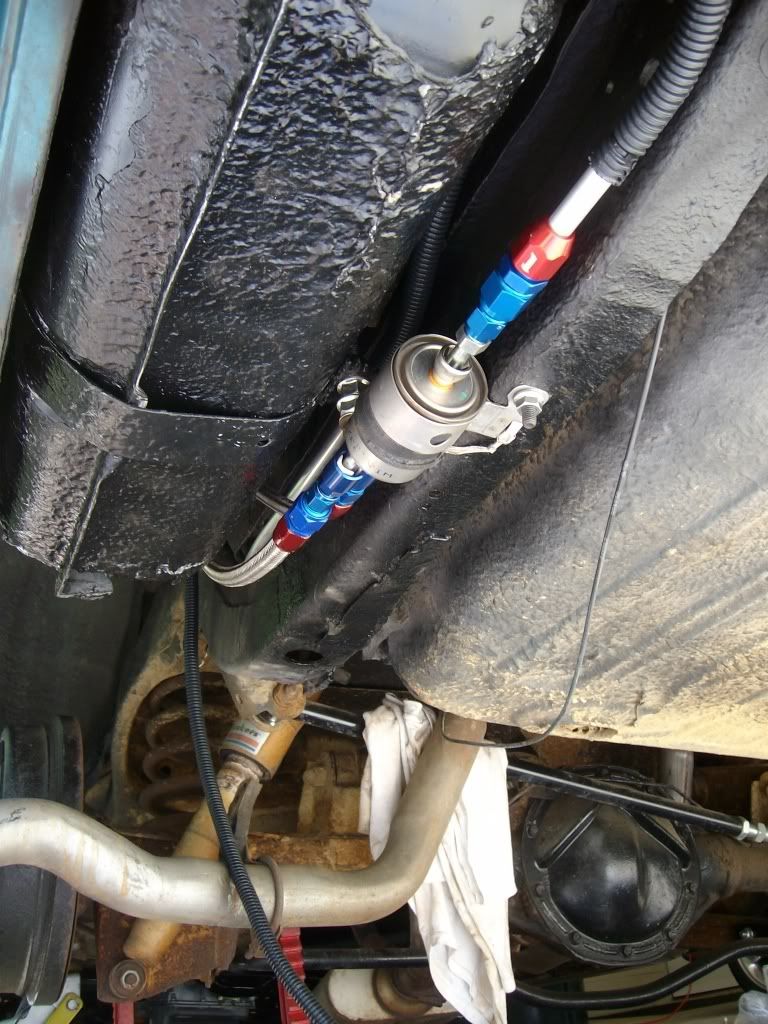
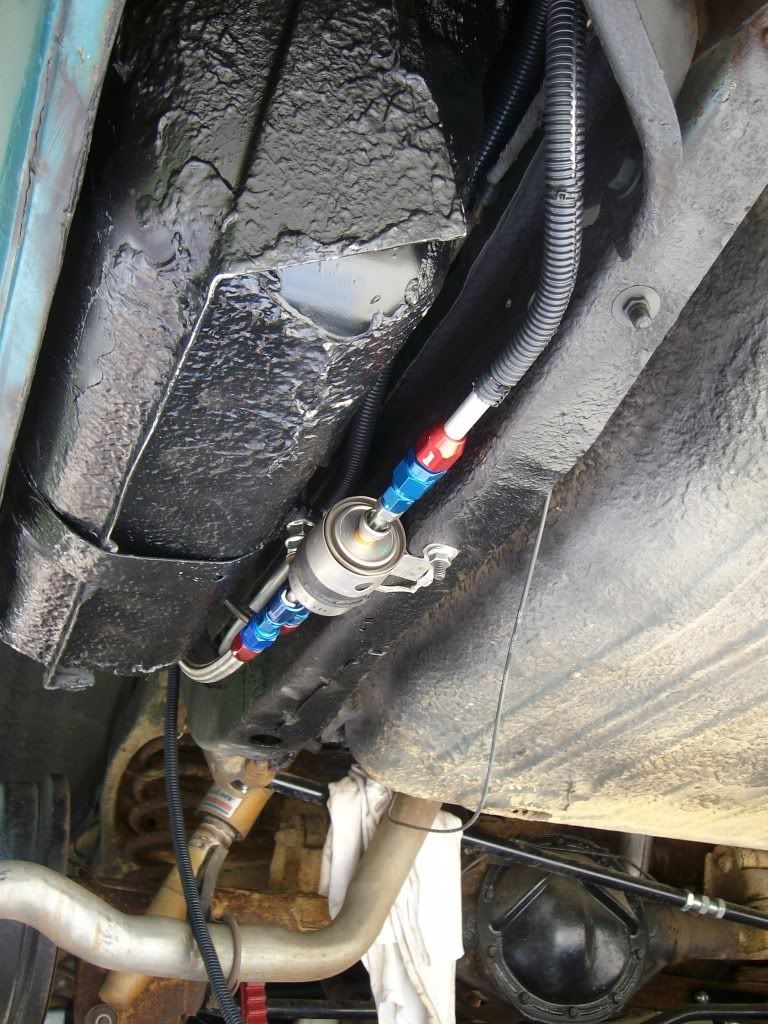
The outlet end....
-6AN to 3/8 EFI Male.
http://www.jegs.com/i/Russell/799/640940/10002/-1
Then I used an adapter to get to -8AN.
Incoming from pump....
-6AN to 3/8 EFI Female
http://www.jegs.com/i/Russell/799/64...ductId=1329877
I actually used a -6 to 3/8 efi and an -6/-8 adapter. The one I listed above is a the -8 to 3/8...saves a fitting.
Return line....
-6AN to 5/16 EFI Female
http://www.summitracing.com/parts/RUS-640860/