
1973 Nova LS BUDGET swap
 06-05-2012, 10:48 AM
#61

Good update and keep it up.. how is the work on the oil pan going ?
suggestion... on you're fuel line at the engine, I would give it more space between the line and the block, or cover it with some heat reflective covering.. I wouldn't take a chance of it Vapor Locking.. even with the Electric pump and all.. and cooler fuel mean better HP anyway. Just a suggestion...
Have you thought about hitting them header with some extra fine wet sandpaper and then with some polishing compound and a polishing wheel.. that might bring back that BING !...
I just ran 3/8" SS tubing from front to rear, looks like you did a good job on yours.. might had a few area I was not completely happy, but it all fits in and around everything. Just got my SS Brake Lines in... will be working on finishing up with my rear area floor pan, need to clean and paint before all of the lines go in. (Yuck.. I hate that cleaning part .. LOL).
Looking forward to your updates !
BC
 06-05-2012, 12:27 PM
#62
Bczee, thanks for the vote of confidence! One of the guys from Steve's recommended doing something to avoid vapor lock issue on the engine fuel line as well. I am leaning towards a reflective wrap or heat shield of some sort. I have to come up with another option to secure that line anyway as the M10-1.5 bolt is to large to fit the clamp. Maybe a spacer, allen head bolt and heat wrap.
Interesting side note: My father was telling me that back in his hot rod days they would bend up fuel line into a coil and run the coil into and out of a folgers coffee can. Then before a night of racing they would fill the can with ice or even dry ice to chill the fuel charge! A poor mans fuel cooler. I thought it was pretty innovative and funny.
Ya thanks for the advice on the headers, I think I'll stick with the brushed look. Just like you and every man on here I hate cleaning and I hate polishing!! But if you are bored, I would pay shipping to send them to ya
I was amazed how similar our fuel routing ended up. I am pretty happy with the end result, but man did it take a butt load of time to get them to look good. How did you straighten out coils of SS line?! I though the steel was bad enough!
I have not done anything with the oil pan yet. I am still planning to cut down the truck pan if I think I would be left with enough capacity. I would LIKE to have 5qts, but about 4.5qts is about as low as I would consider going.
My next project has to be fixing my damn air compressor. It would not build past 25 PSI so I tore it apart to find that the exhaust reed valve had crakced right down the center. Since it is some knock off brand I am having trouble finding replacement parts and may have to make my own. I'm thinking about posting in the tools section to see if anyone has any bright ideas!
06-05-2012, 01:24 PM
#64
I was able to go to a local Hydralic shop and by a 20' stick of SS 3/8" tubing, $1.28 a foot. May not be the same as some other high Quality stuff (did come from Canada).. but the guy said he is using it on his car. So, I didn't have to un Coil it, and bending it was a PITA.. I had to use cheater handles on the Bender, bu once it got started, it was ok.
Yeah. I didn't the old Budget Cool Can back in the day with my 57 Chevy and my Brothers 62 Vette. Couldn't see spending a lot of cash back then when some I could take (find) some steel or copper tubing, some hose and clamps, a can and ice would do the same as a brand name cool can ! And don't forget the Beer Can overflow for the Radiator (I still seen some of that around, !!)
!!)
Now a days, you get arrested for finding Copper !.. LOL
4.5qt, hmmm.. as long as you change oil more offen and don't stave the engine on any hard and long pedal to the metal run. it should be ok. I think you did considered a oil Cooler, didn't you?. If not, you should with that low of a capacity...
BC
Yeah. I didn't the old Budget Cool Can back in the day with my 57 Chevy and my Brothers 62 Vette. Couldn't see spending a lot of cash back then when some I could take (find) some steel or copper tubing, some hose and clamps, a can and ice would do the same as a brand name cool can ! And don't forget the Beer Can overflow for the Radiator (I still seen some of that around,
!!)Now a days, you get arrested for finding Copper !.. LOL
4.5qt, hmmm.. as long as you change oil more offen and don't stave the engine on any hard and long pedal to the metal run. it should be ok. I think you did considered a oil Cooler, didn't you?. If not, you should with that low of a capacity...
BC
06-05-2012, 01:53 PM
#65
Darren, thanks for the compliment, the fuel lines were a pain, but in a sadistic way I really did enjoy it. I am actually looking forward to my tranny cooler lines.
The Nova was my first car. As a birthday present my parents paid $500 and I paid $250! And she'll be my last car!
Bczee. Oil starvation at prolonged high RPM is a valid concern. I was considering an oil cooler, but in my research I found that in a street car a cooler can keep the oil from reaching optimal temp and reduce its life and lubrication ability. But maybe a cooler somewhere out of the airflow would give me the capacity I want and not drop the temp to much...HHHMMM. In college I was involved in the Formula-SAE design series and we were considering an oil accumulator to aid the dry sump system during sustained cornering AND allow us to precharge the engine at cold start. In the future I may consider adding this to the Nova. A few weeks ago I scored a sweet tranny cooler from a Ford E-van, maybe another one would make a good oil cooler. Bczee you are becoming that little devil on my shoulder! I guess that is what friends are for right?
06-05-2012, 02:51 PM
#66
Heheh... i guess so.. its funny.. when I was building my project Chevelle.. Stealth71 was doing his and we started around the same time.. it was fun with the comparing of build notes and comments.. let alone all of the ribbing and jokes.. I did get my Chevelle back on the road 1st. and continued to rib him along to hurry up with his..LOL (all in good fun). But he did do a great job !!
BC
BC
 08-22-2012, 07:46 AM
#70
Thank you Rocket! It had been a while since I updated. I have made some progress. The last couple months have been extremely eventful! My fiance graduated her master's program, started job searching and prepping for her board exam! The inlaws came to visit for a week. We are planning our wedding. So needless to say time and money have both been limited!
I'll up date this weekend with pics and progress.
I'll up date this weekend with pics and progress.
 08-23-2012, 09:57 AM
#73
Slim man, I would lov eto see the Camaro, and take it for a ride. It would def get me pumped to get back in the garage! Shoot me a text so we can figure out a time!
LS1MCSS, Thanks man! I just can't stomache $100+ for laser jet plates! Making my own did take more time, but I learned a lot, I was able to position my motor right where I wanted it, and it was like a small F'you to all the companies out there trying to take an unfairly large bite out of my wallet! I will be taking them out soon for finish welding, clean up and paint. Maybe powder coat.
LS1MCSS, Thanks man! I just can't stomache $100+ for laser jet plates! Making my own did take more time, but I learned a lot, I was able to position my motor right where I wanted it, and it was like a small F'you to all the companies out there trying to take an unfairly large bite out of my wallet! I will be taking them out soon for finish welding, clean up and paint. Maybe powder coat.
08-28-2012, 07:06 AM
#74
Progress update:
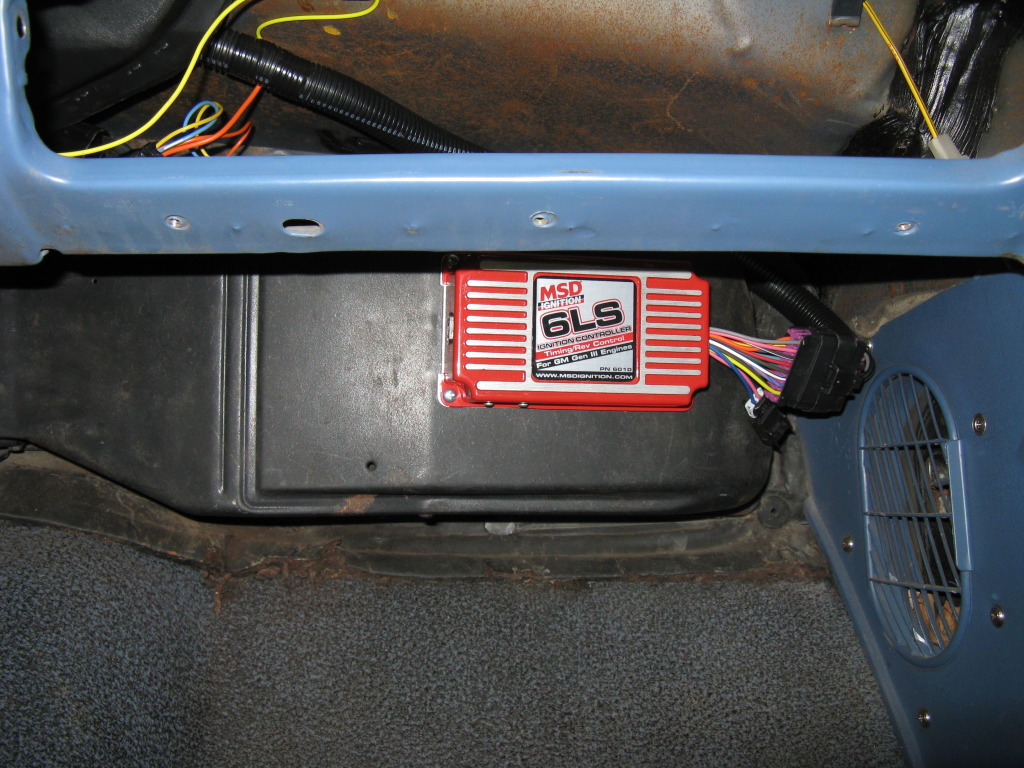
Mounted the MSD box to the heater box. It makes for nice routing, easy access and it tucks in perfectly behind the glove box. It is also high enough to avoid getting kicked.
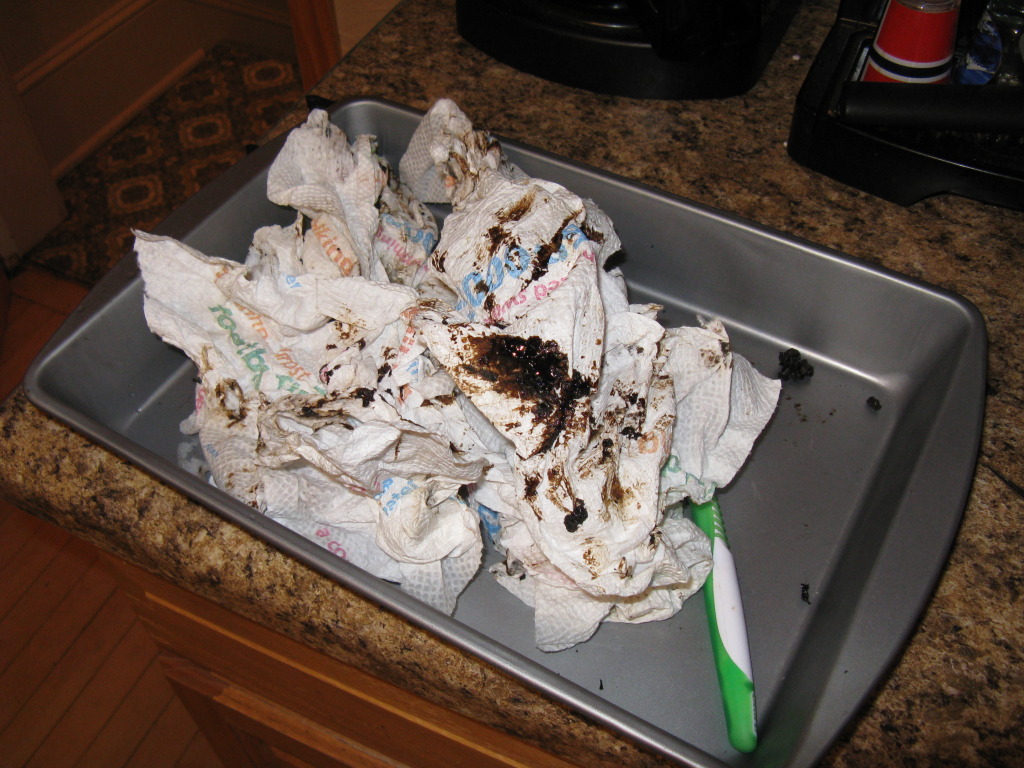
Here is the firewall bulkhead connector. I am not sure how GM got ahold of tar from the Labria Tar Pits, but they packed the connector full of it! Guess if it was good enough to trap dinos its good enough to keep water out!
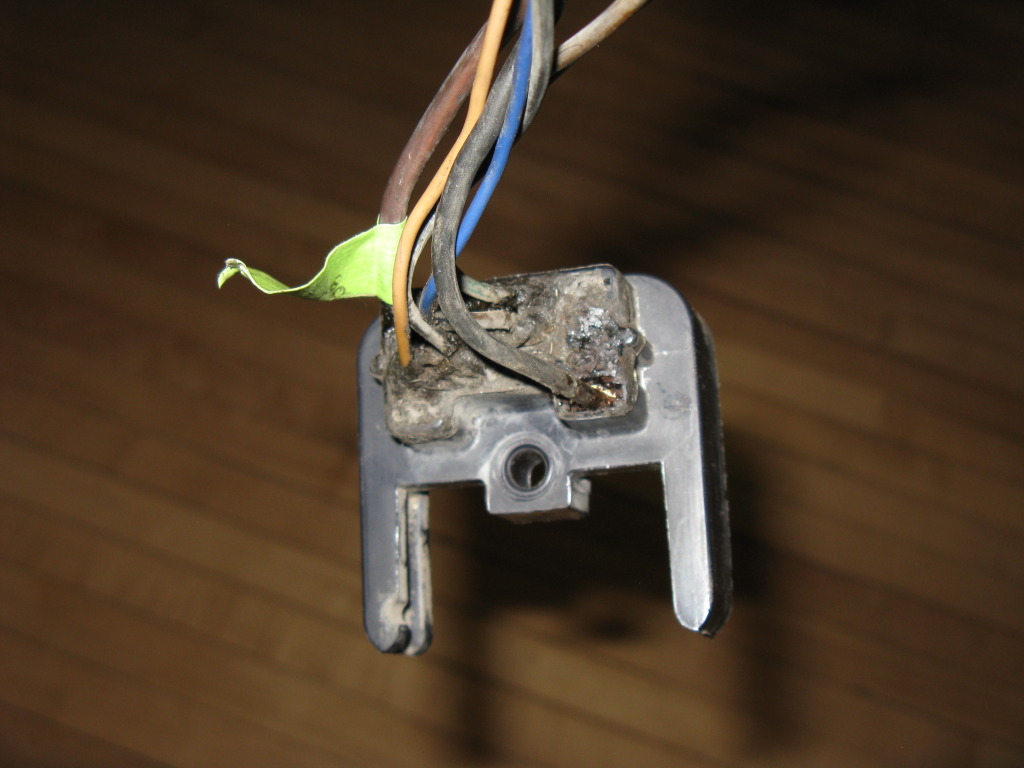
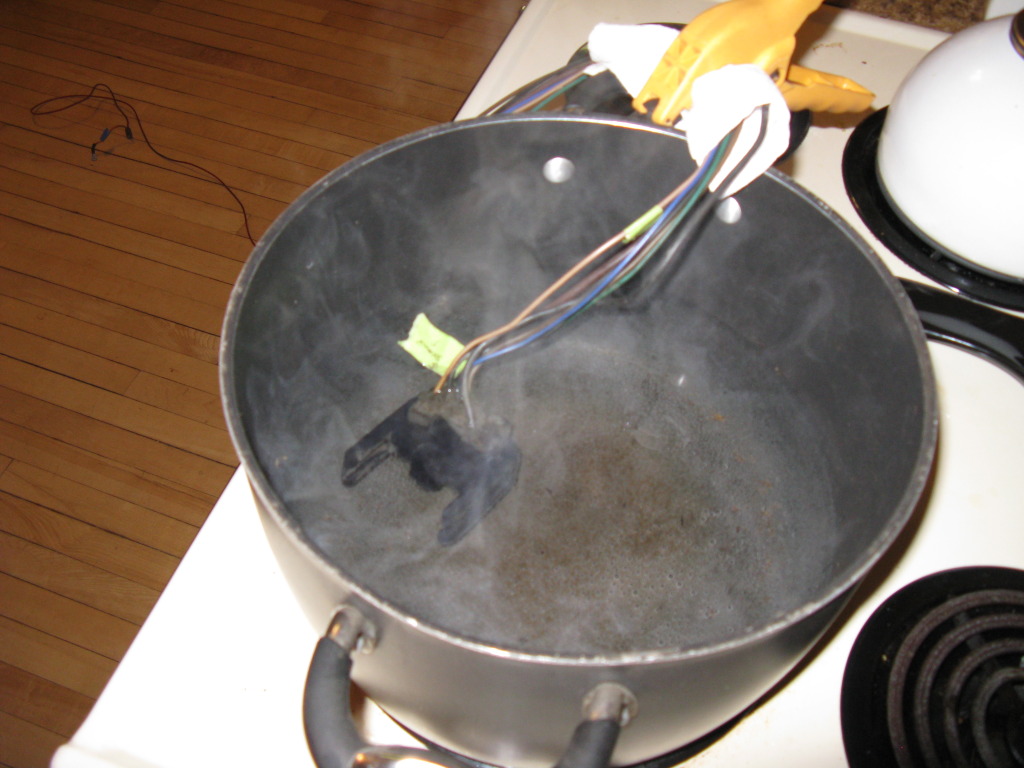
I found that heating the connector to near boiling really helped loosen the sealent. I could then remove chucks of it with needle nose, a pick set, wire brush and small screw driver.
After the tar was removed I was able to pull out the terminals. You have to use a fine needle nose plier to pinch the cab side and close the open "mouth" of the connector. Then they pull right out!
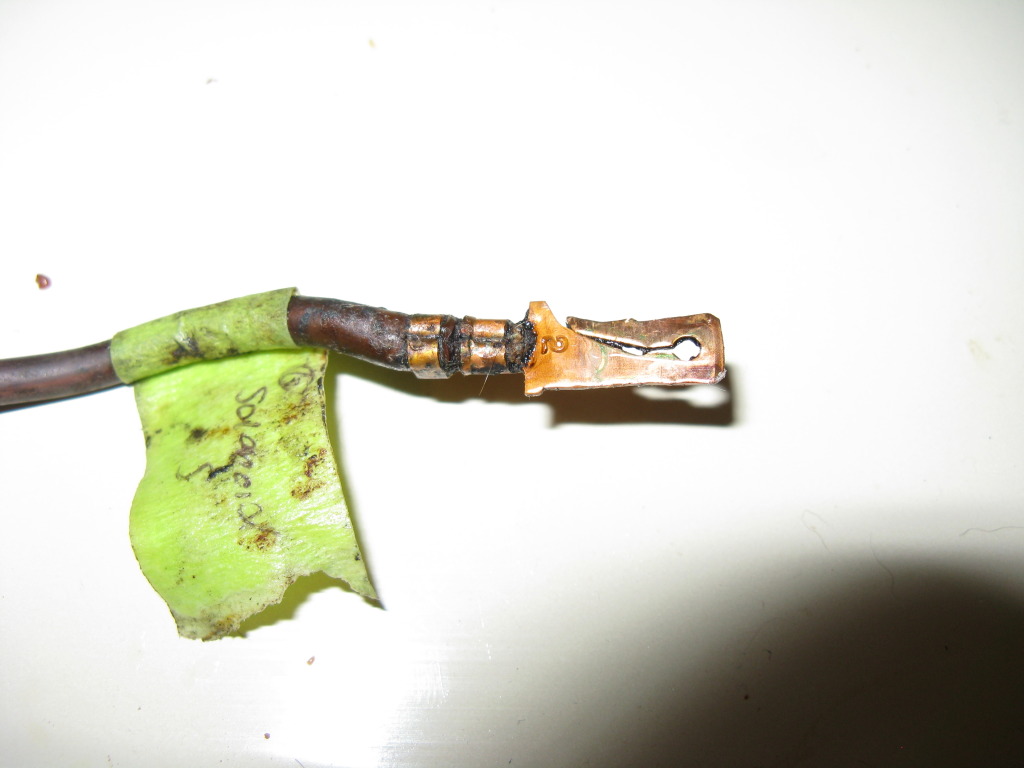
Here are the left overs.
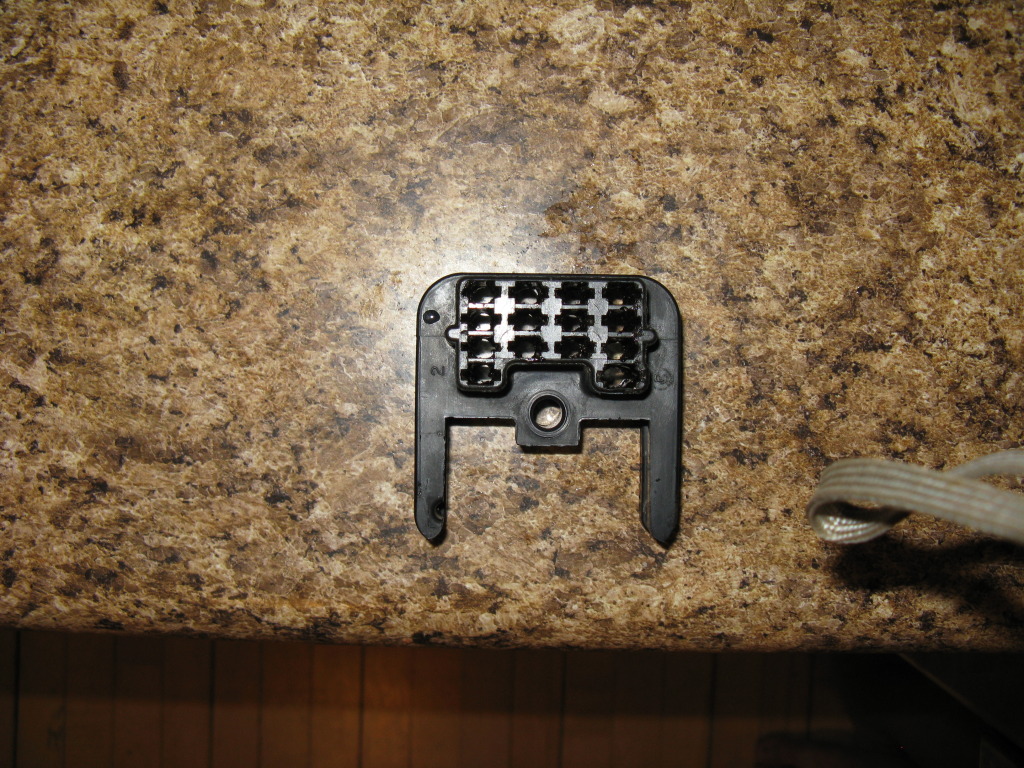
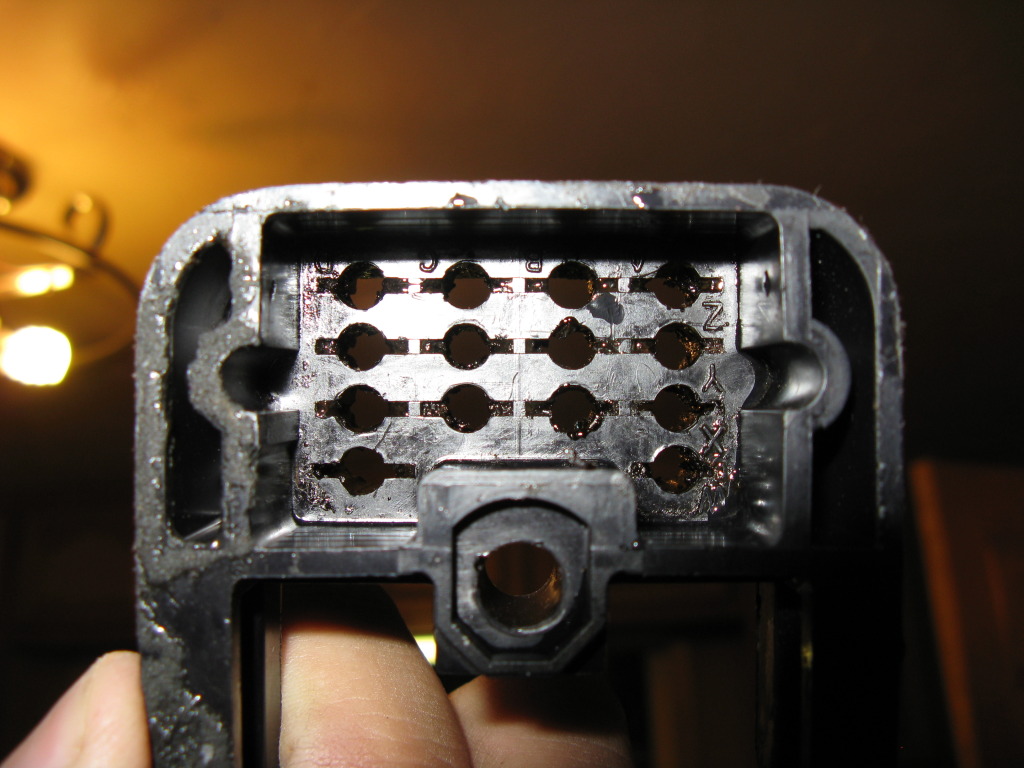
Here is the clean connector.
BTW, don't tell the wife I did that in her kitchen! ;O
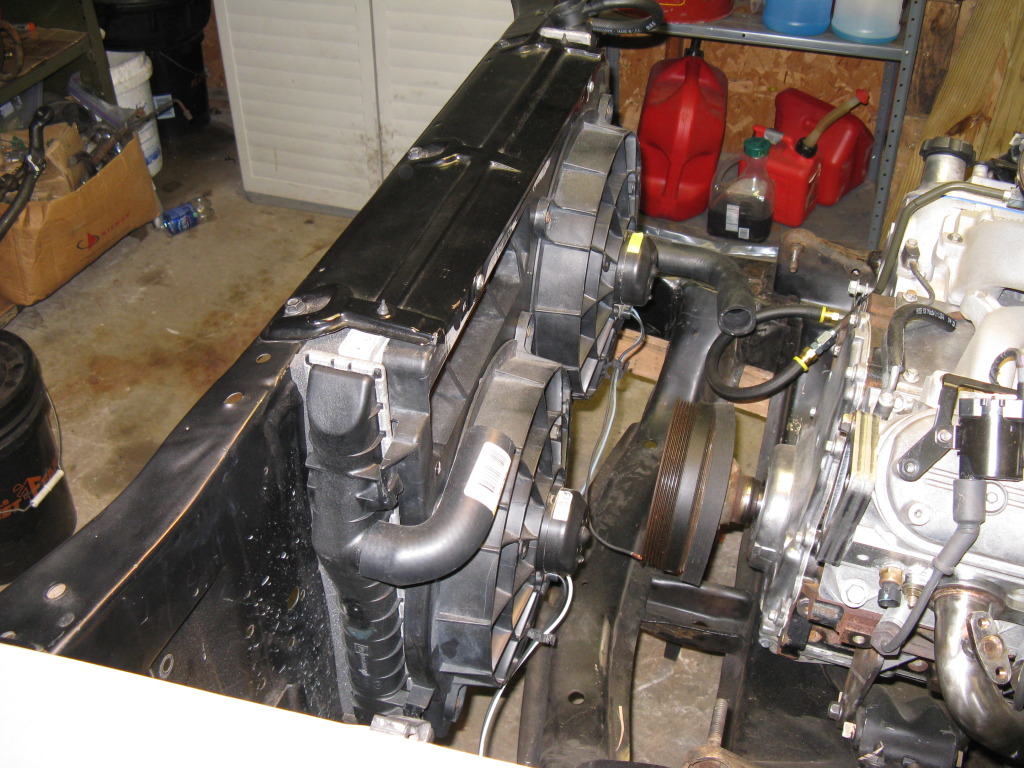
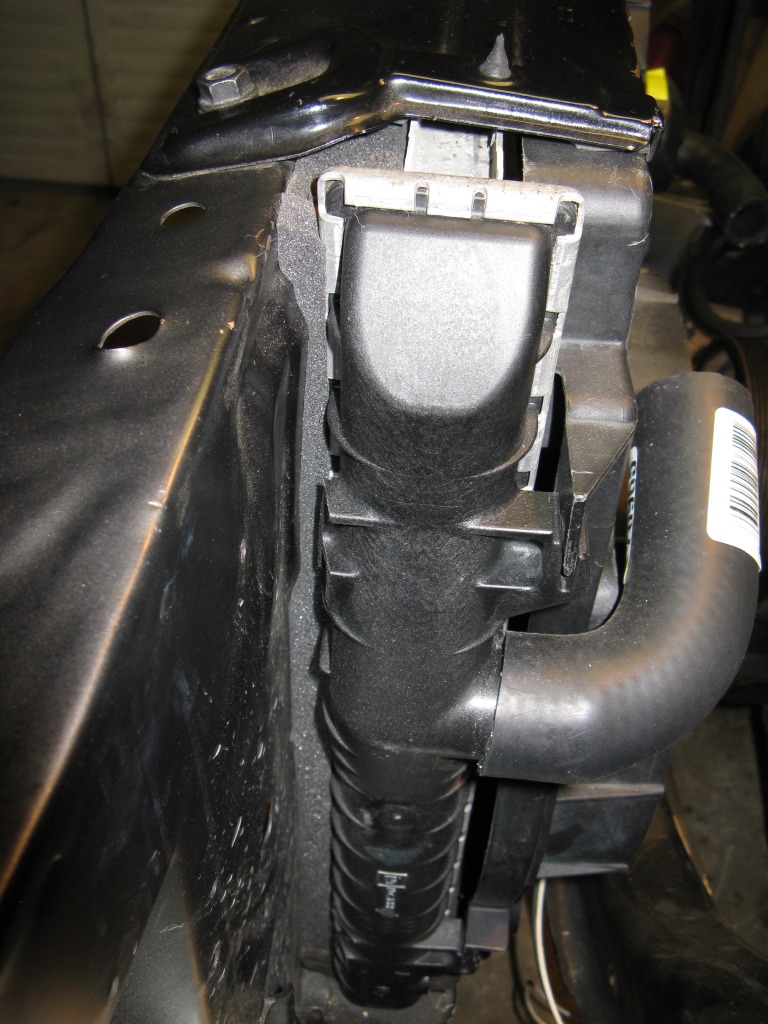
OK, radiator mounting time. I had to remove the mounting stud from the bottom of the tank to get the rad to sit flush on the rad shelf
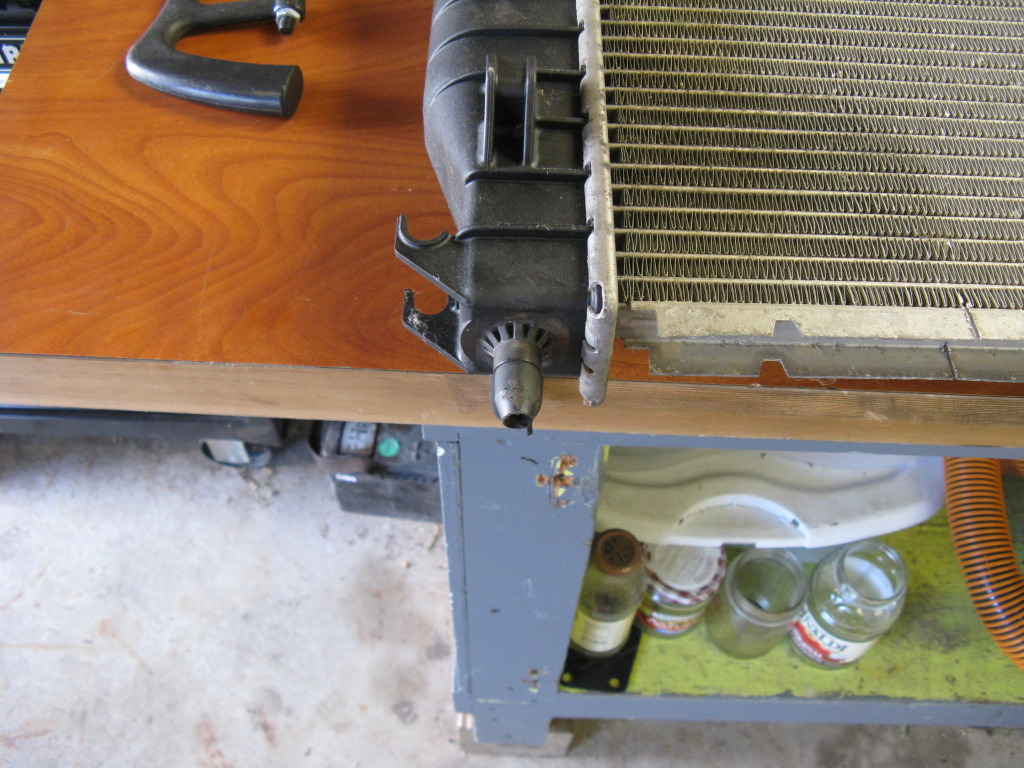
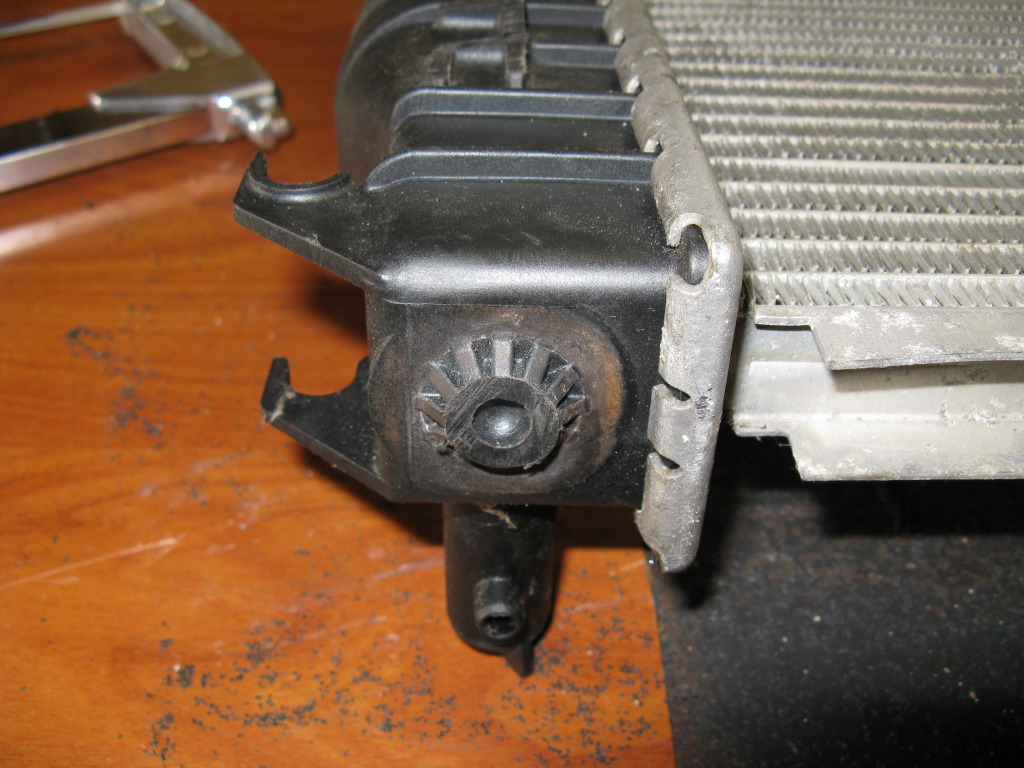
I also had to cut off the retaining clips on the front of the rad to get the rad to tuck in nice and tight to the core support. I then used single side adhesive foam to fill the gap and seal the rad flowpath. I used some 1" thick foam to seal the gap up top. The stock rad plate fits over the top like it was designed for it. I also reused the stock rad isolators top and bottom.
Check out this sweet little score I recently made. Autometer volt/oil/water gauges that a guy determined were not right for his build. They are practically new! To the left of the dash was the best place I could find to mount the gauges. I first mounted the gauges straight in to the dash, but due to the 15� downward angle of the dash you could not see the gauge without cranking your head down next to the window roller! So I designed a mounting plate and offset angle rings that face the gaugews upward and towards the driver. I know Autometer makes similar rings but the angle was to narrow. After several tests I found 27� pointed the gauges directly at the driver.
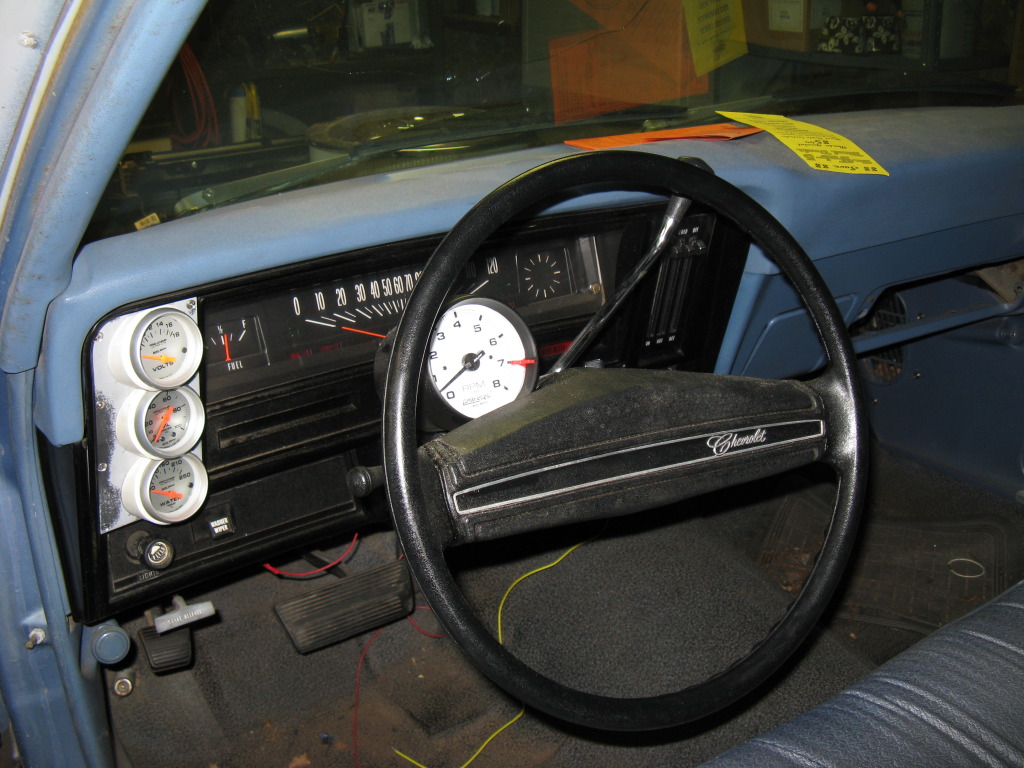
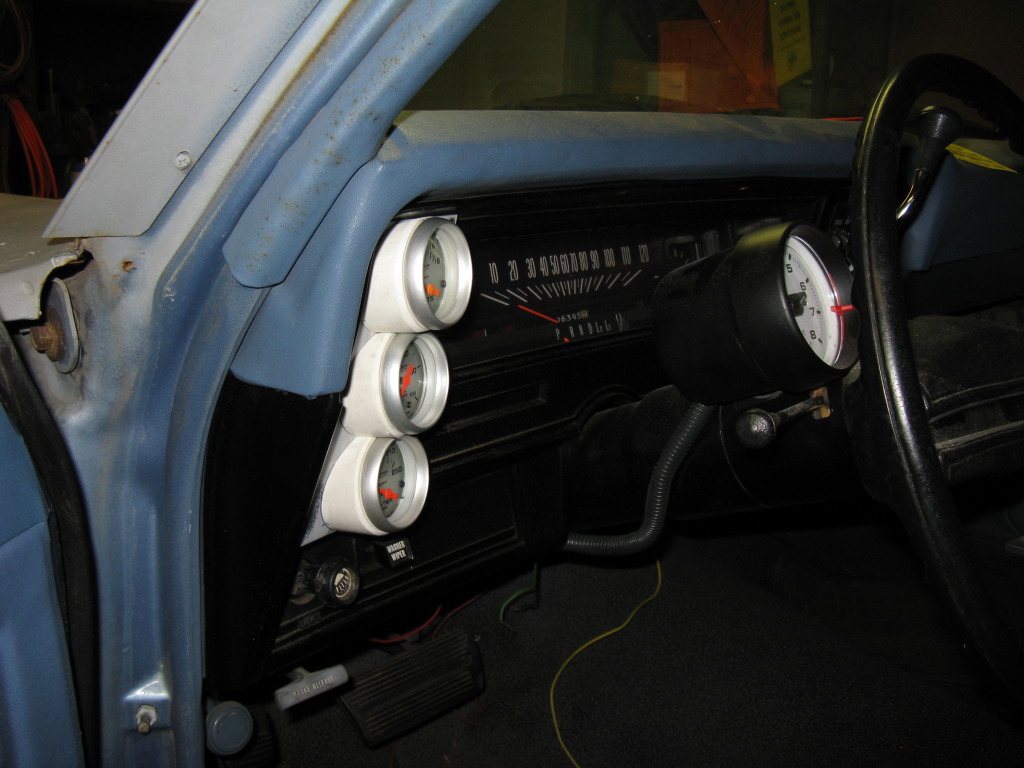

I was thinking about painting the plate and rings black, but I am starting to think a dull aluminum would contrast with the dash nicely. Thoughts?
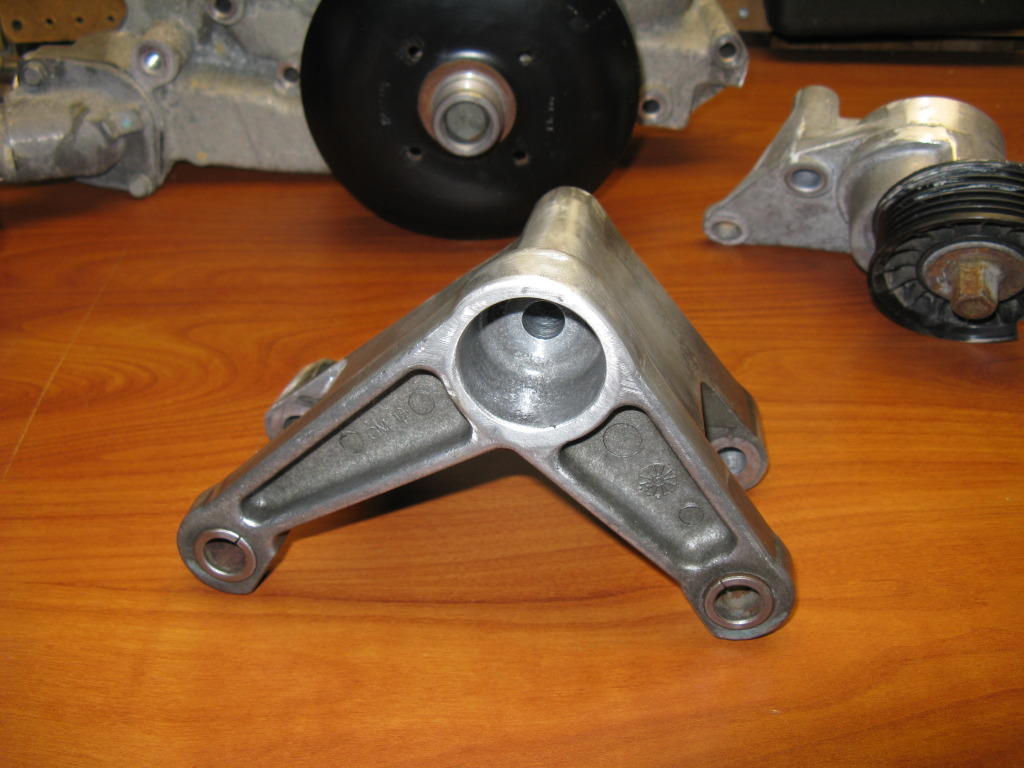
Moving to the FEAD stuff. I know I wanted a clean, smooth, incognito look. After a lot of searching I came across Rocket Rod's solution and knew I had a winner. Thanks Rocket Rod! Check out his single post:
https://ls1tech.com/forums/15925038-post68.html
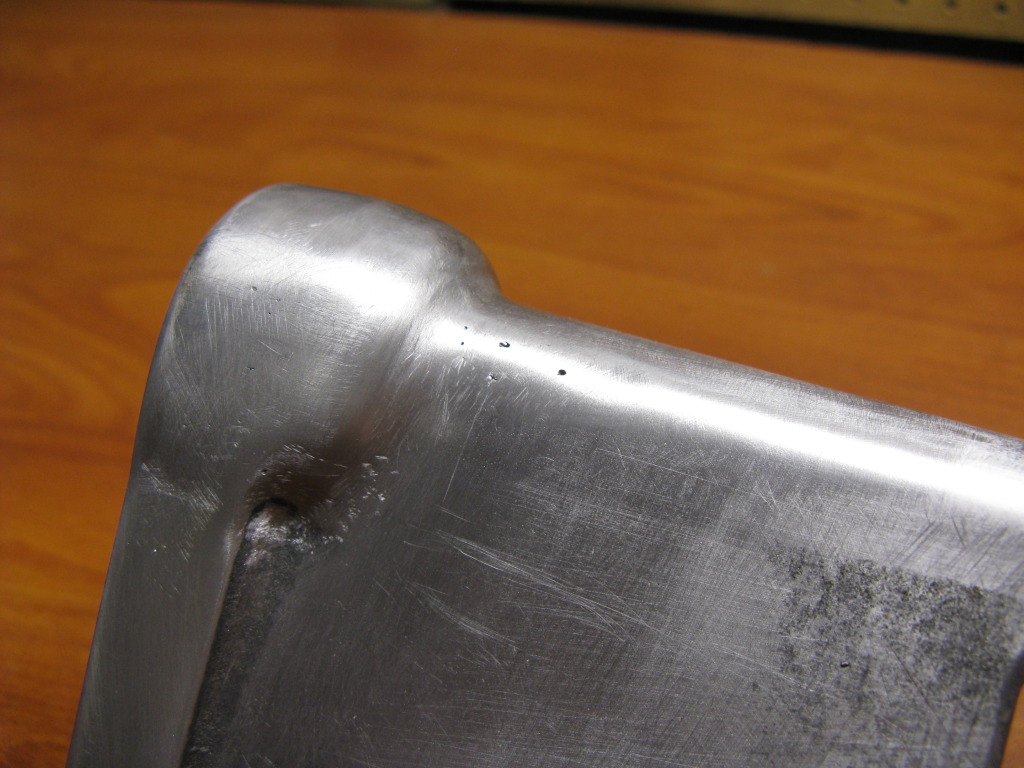
In an effort to reproduce the appearance I took some time to smooth out all the real nasty casting flash and inconsistancies.

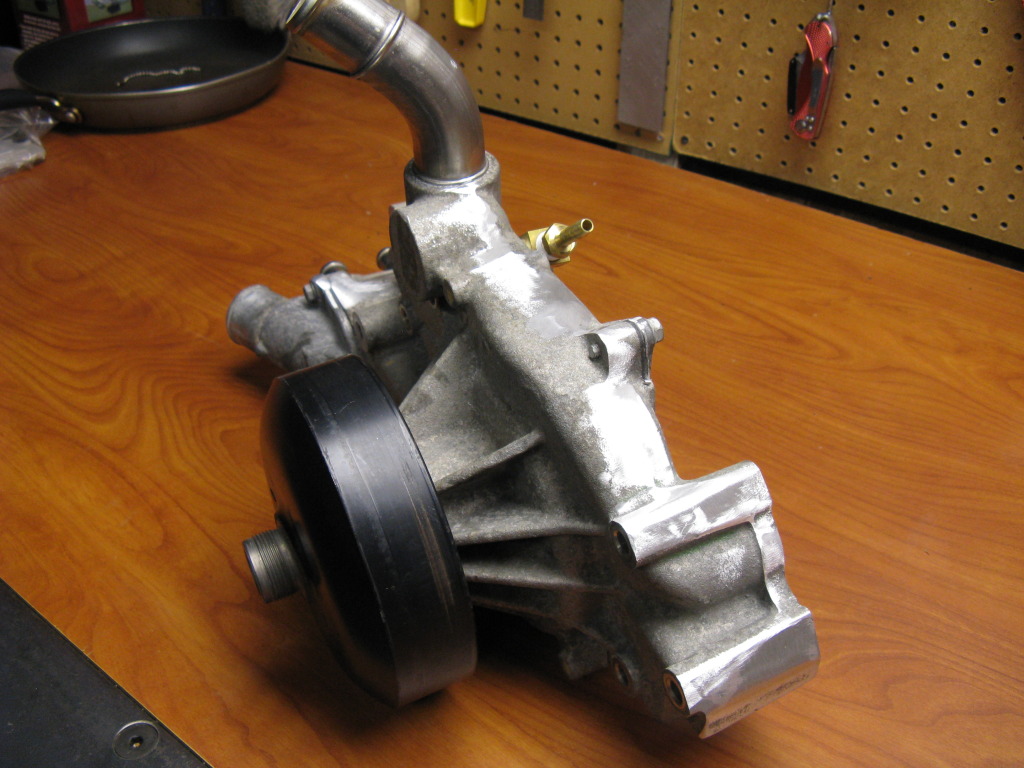
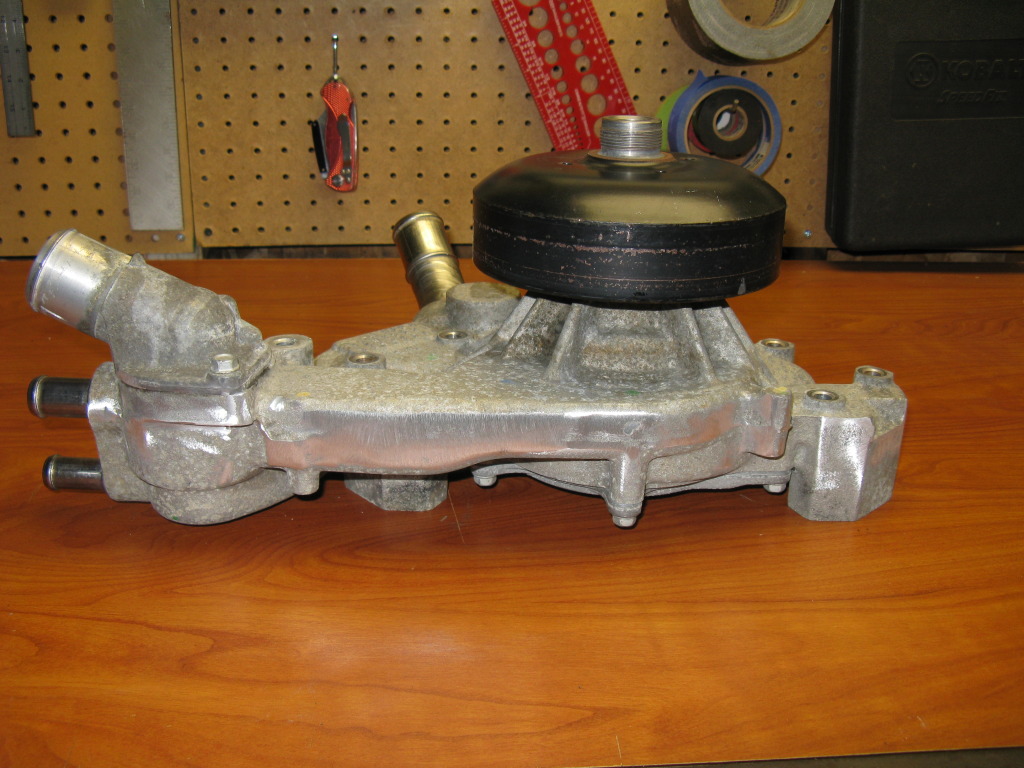
This shot also shows where I drill,tapped and mounted a fitting for he steam line return.

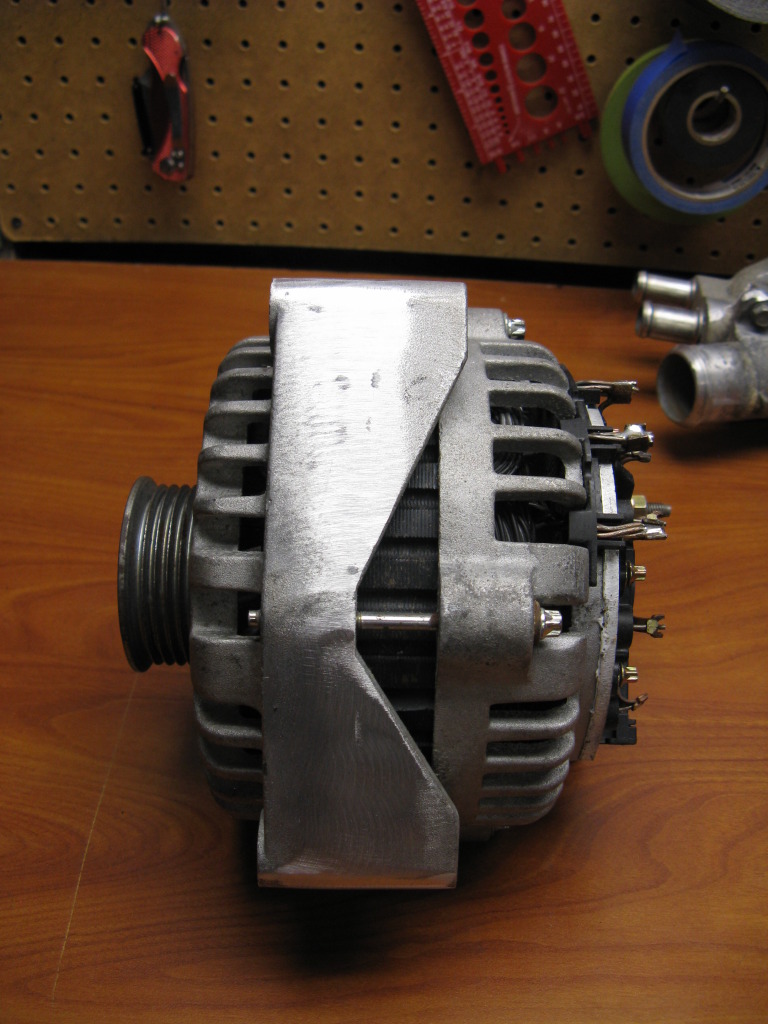
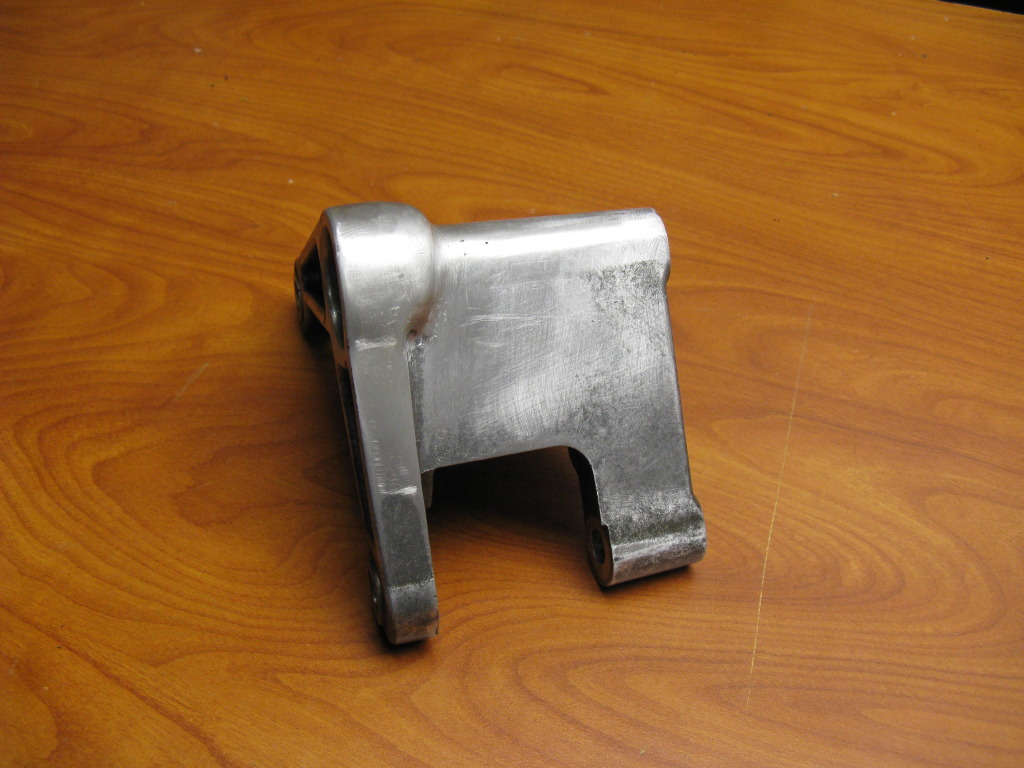
Since I will not be using the idler pulley off the F-body alternator bracket I used a hacksaw to remove the arm. A grinder to rough in the shape. And finished with an assortment of files and sandpaper. Not to bad if I do say so!
That is most my progress for the last few weeks. I have been working on a new wiring schematic for the car. I think I will post it up here soon for a little feedback. See what kind of useful (and I am sure non-usefull as well) input I can get.
Mounted the MSD box to the heater box. It makes for nice routing, easy access and it tucks in perfectly behind the glove box. It is also high enough to avoid getting kicked.
Here is the firewall bulkhead connector. I am not sure how GM got ahold of tar from the Labria Tar Pits, but they packed the connector full of it! Guess if it was good enough to trap dinos its good enough to keep water out!
I found that heating the connector to near boiling really helped loosen the sealent. I could then remove chucks of it with needle nose, a pick set, wire brush and small screw driver.
After the tar was removed I was able to pull out the terminals. You have to use a fine needle nose plier to pinch the cab side and close the open "mouth" of the connector. Then they pull right out!
Here are the left overs.
Here is the clean connector.
BTW, don't tell the wife I did that in her kitchen! ;O
OK, radiator mounting time. I had to remove the mounting stud from the bottom of the tank to get the rad to sit flush on the rad shelf
I also had to cut off the retaining clips on the front of the rad to get the rad to tuck in nice and tight to the core support. I then used single side adhesive foam to fill the gap and seal the rad flowpath. I used some 1" thick foam to seal the gap up top. The stock rad plate fits over the top like it was designed for it. I also reused the stock rad isolators top and bottom.
Check out this sweet little score I recently made. Autometer volt/oil/water gauges that a guy determined were not right for his build. They are practically new! To the left of the dash was the best place I could find to mount the gauges. I first mounted the gauges straight in to the dash, but due to the 15� downward angle of the dash you could not see the gauge without cranking your head down next to the window roller! So I designed a mounting plate and offset angle rings that face the gaugews upward and towards the driver. I know Autometer makes similar rings but the angle was to narrow. After several tests I found 27� pointed the gauges directly at the driver.
I was thinking about painting the plate and rings black, but I am starting to think a dull aluminum would contrast with the dash nicely. Thoughts?
Moving to the FEAD stuff. I know I wanted a clean, smooth, incognito look. After a lot of searching I came across Rocket Rod's solution and knew I had a winner. Thanks Rocket Rod! Check out his single post:
https://ls1tech.com/forums/15925038-post68.html
In an effort to reproduce the appearance I took some time to smooth out all the real nasty casting flash and inconsistancies.
This shot also shows where I drill,tapped and mounted a fitting for he steam line return.
Since I will not be using the idler pulley off the F-body alternator bracket I used a hacksaw to remove the arm. A grinder to rough in the shape. And finished with an assortment of files and sandpaper. Not to bad if I do say so!
That is most my progress for the last few weeks. I have been working on a new wiring schematic for the car. I think I will post it up here soon for a little feedback. See what kind of useful (and I am sure non-usefull as well) input I can get.
Last edited by cruisin'73; 08-28-2012 at 07:49 AM.
 08-31-2012, 10:04 PM
#76
On The Tree

Join Date: Apr 2012
Location: Neenah, WI
Posts: 103
Likes: 0
Received 0 Likes
on
0 Posts
Gauges look like they are in a nice location. Now stop with all that fancy stuff and get that thing running, you will have all winter to shine it up  Just busting your chops a bit.
Just busting your chops a bit.
09-01-2012, 11:03 PM
#77
TECH Regular
iTrader: (12)
Join Date: May 2010
Location: Waxahachie, Tx
Posts: 445
Likes: 0
Received 0 Likes
on
0 Posts
Just read the whole build. Great job so far.
On the rear axle - you don't want to swap in a gen 4. You have an 8.5 rear.
When you decide to buy a limited slip - just buy one for 30 spline instead of 28.
And get 30 spline axles and bearings at the same time. I prefer Tom's Differentials.
He will tell you anything you need to know over the phone if you want to rebuild your own rear axle.
For rear discs - a complete gen 4 setup will work. Just need to watch CL for a complete rear.
Fuel line on the front frame - just slip some DEI heat shield tubing over it.
You'll be fine w/o it most likely though. Mine was closer than yours on my 69 f body with coated headers.
American Auto Wire sells the fire wall plug parts and tools.
-paint the gauge pod-
09-04-2012, 10:54 AM
#79
Thanks for all the compliments! It is coming together, slowly but surely!
Thanks fo the input on the gauge panel, I will be going black to match the interior plastic parts. That will make the silver gauge faces pop and easier to focus on in a quick glance.
Slim, it was awesome to see your Camaro and go for a little joy ride. Still a few bugs to work out of the swap but truly impressive for how fast you pulled it together!
S10. Thanks for all the input on the rear axle. I am concerned the stocker will not hold up for many rompings considering its humble origins! Unfortunately the rear axle build will have to come after a front disc swap, and head/cam upgrade. But I will keep your advice in mind!
Thanks 1970, welcome to Ls1Tech. I've seen you post on a bunch of other build threads like Bczee and Frojoe's (take noted from those guys!) Its good to see you putting in the time and mouse work to find this information for yourself. Seems like a lot of new guys are posting 100 new threads asking for answers to questions that a few minutes of searching would have easily found!