
1973 Nova LS BUDGET swap


 10-25-2012, 08:22 AM
#82
awesome work!!!
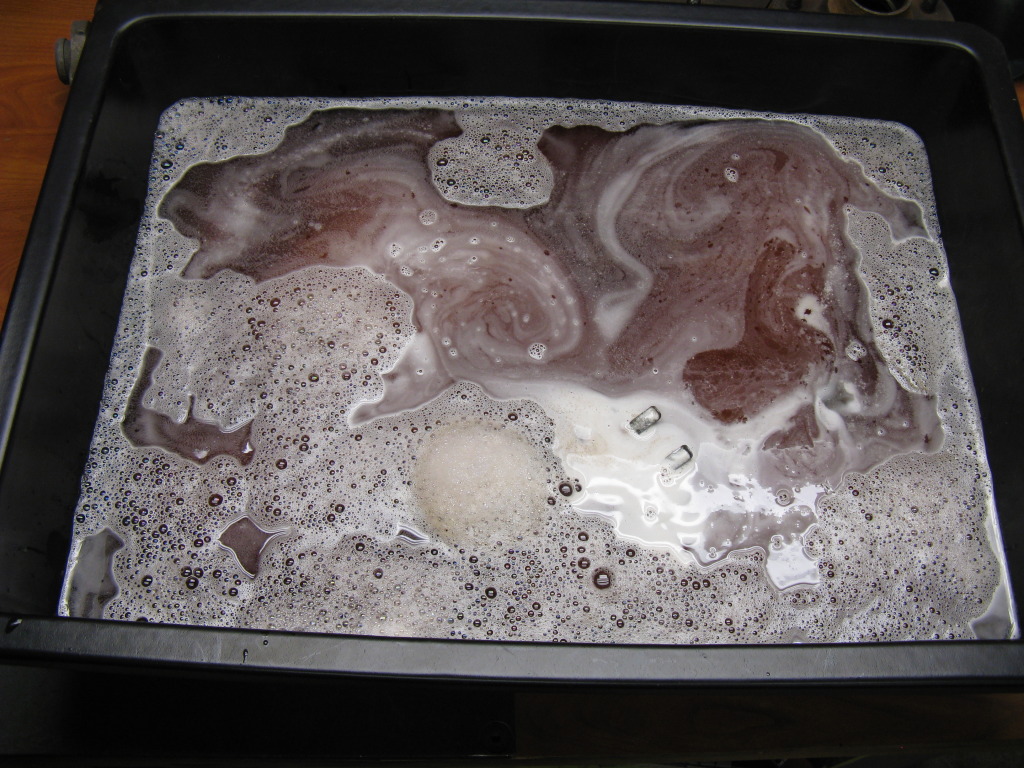
Been a while since my last update, but again I have been hauling some butt! After much research into rust removal procedures I chose to use my old favorite, white vinegar. In the past I have had excellent experience. AND it's cheap, like $2.00 a gallon. I used vinegar on all my nuts, bolts and small brackets.

Check out the oxidation bubbles as the vinegar reacts to breakdown the iron oxide (rust)
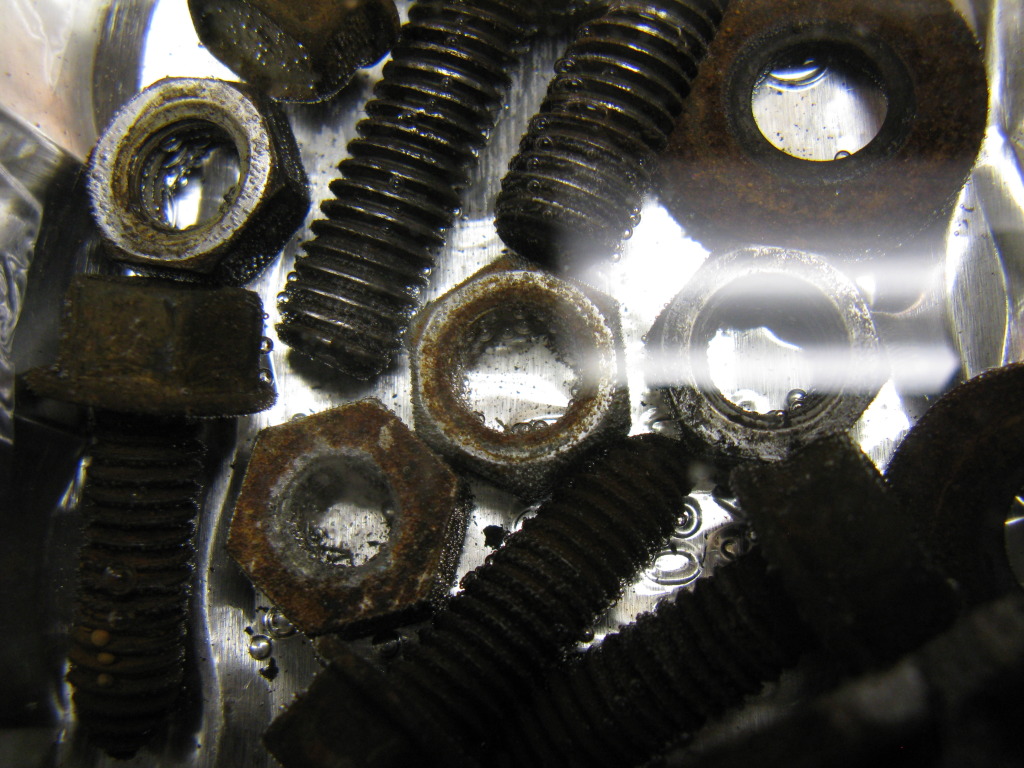
After a few days:
YUM!
Unfortunately I was in such a hurry I did not get many AFTER photos. But you will see the hardware installed throughout the rest of the build.
In addition to vinegar I also decided to try the more agressive Phosphoric acid. Phosphoric acid is the common ingredient in rust treatments like Evaporust, the POR-15 prep product and a component of the system used to "blue" firearms. As I am on a budget and forever on the hunt to be resourceful I went to Menard's and bought 3 gallons of Krud Kutter's concrete cleaner and etcher for $13/gal and is 70% phosphoric acid.
Here is a batch of parts and a few test samples ready for thier soak
In a matter of minutes the acid was working a fury of bubbles!
I was impressed with how quickly the phosphoric acid worked. in 24 hours the parts were stripped of paint, grime and rust! However, though impressed, I would not recommend phosphoric acid. I found the after rinse process and clean up to be very time intensive. AND once rinsed in hot soapy water the parts would begin to rust immediately! like, spotted surface rust in 5 minutes! So I had to coat the bare metal in WD-40. Now I have to re-wash the parts for paint! Though vinegar takes much longer I think I will stick with it in the future. It may take a week for the same results, but the post rinse is easier, it is much cheaper and once I am finished with the vinegar I can dispose of it on the weeds behind the garage. Oh well, live and learn.
BTW, the stripped parts can be spied in with my painted part pics!
Now on the painting! The original plan was to construct a mid size paint booth big enough for painting the subframe, suspension and enigne compartment parts. Well true to my form it quickly grow far beyond my plan! (insert evil laugh)
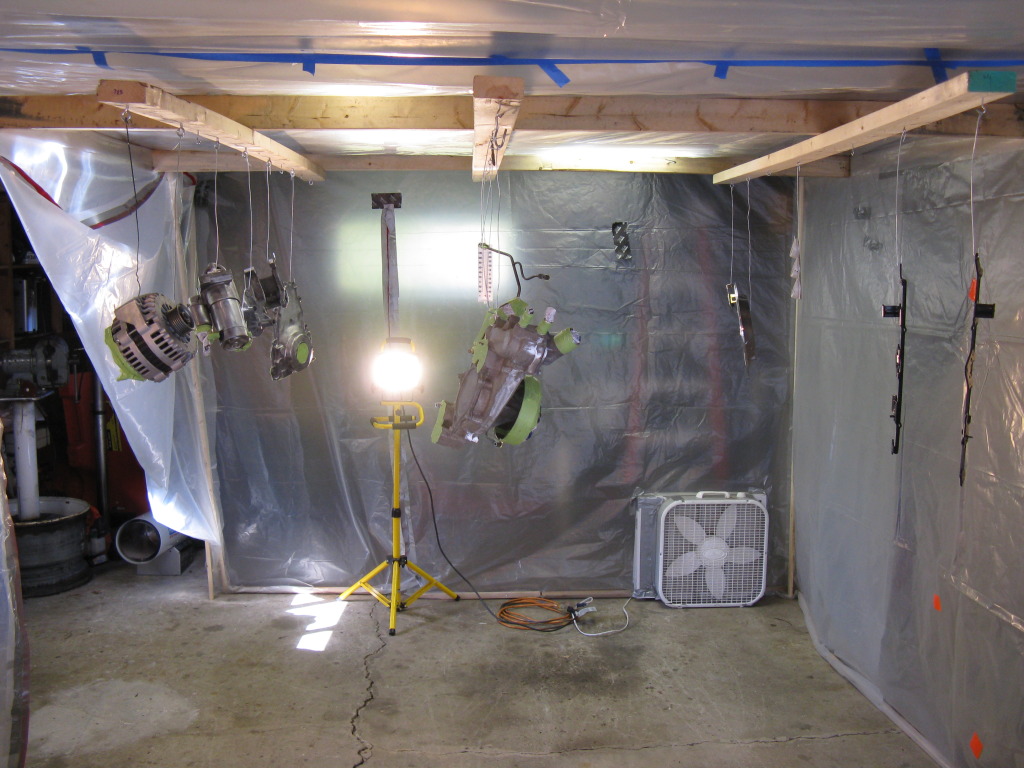
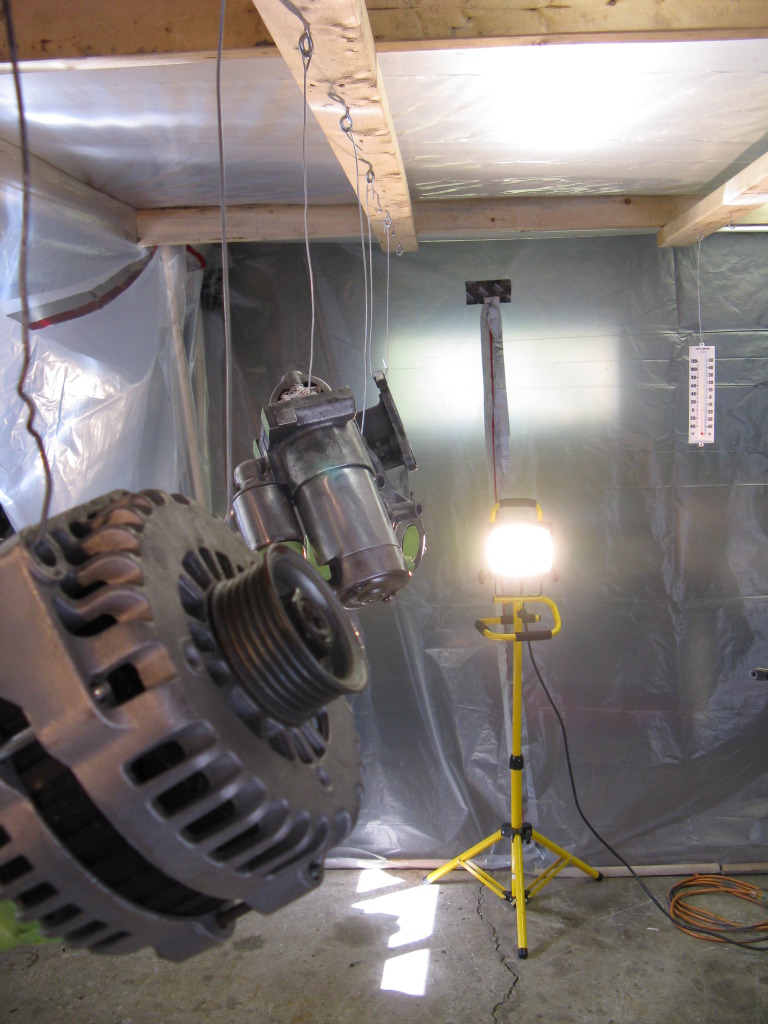
Here is the start of the booth. Suspended from the ceiling to limit the amount of 2X4s I needed.
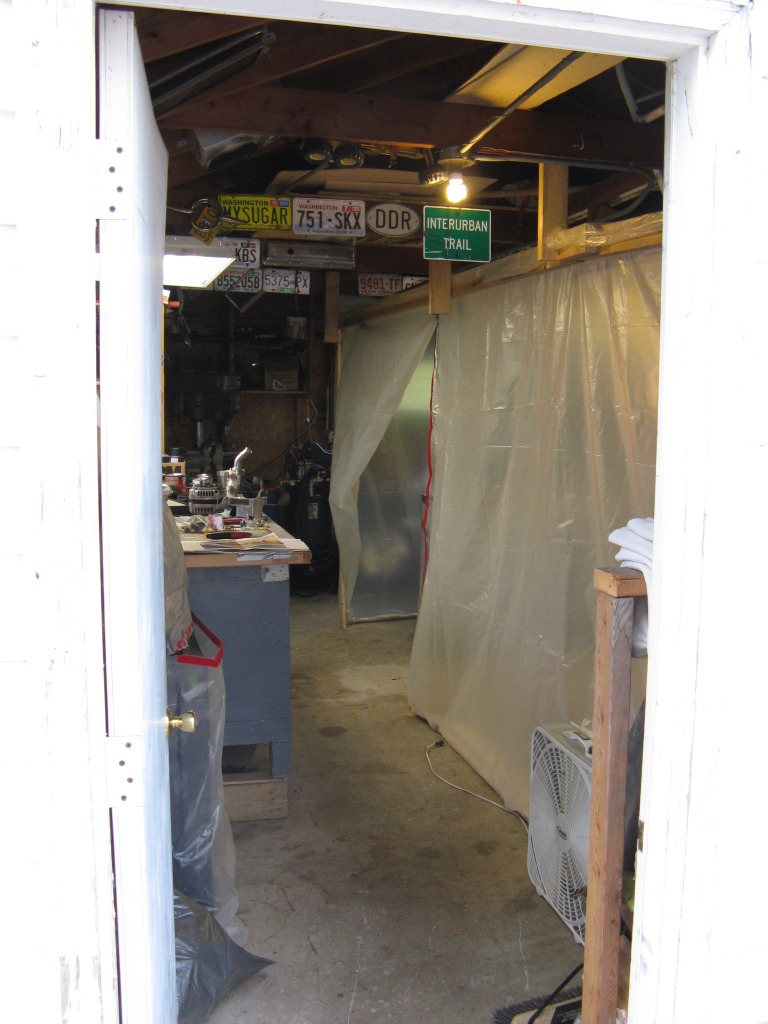
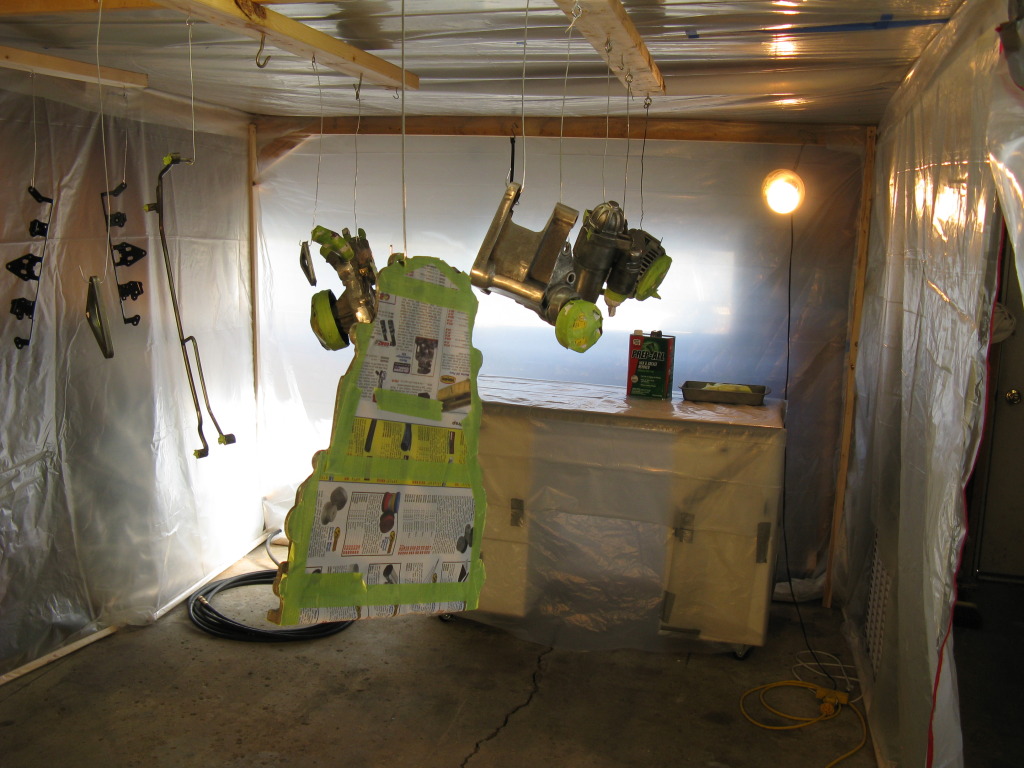
I covered my mobile bench in visqueen and it was rolled int othe booth. Booth dimensions were roughly 9W X 7T X 16L.

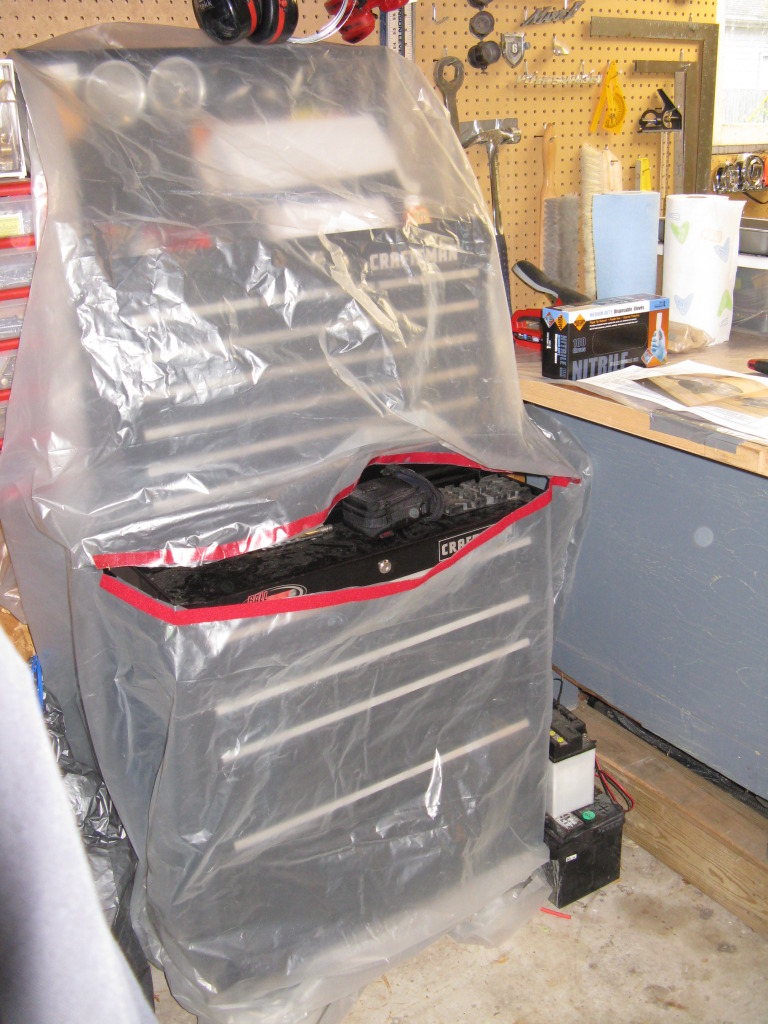
I covered my tool box to limit any escaped overspray. For the toolbox cover and booth doors I used adhesive backed velcro. So far it is working well.
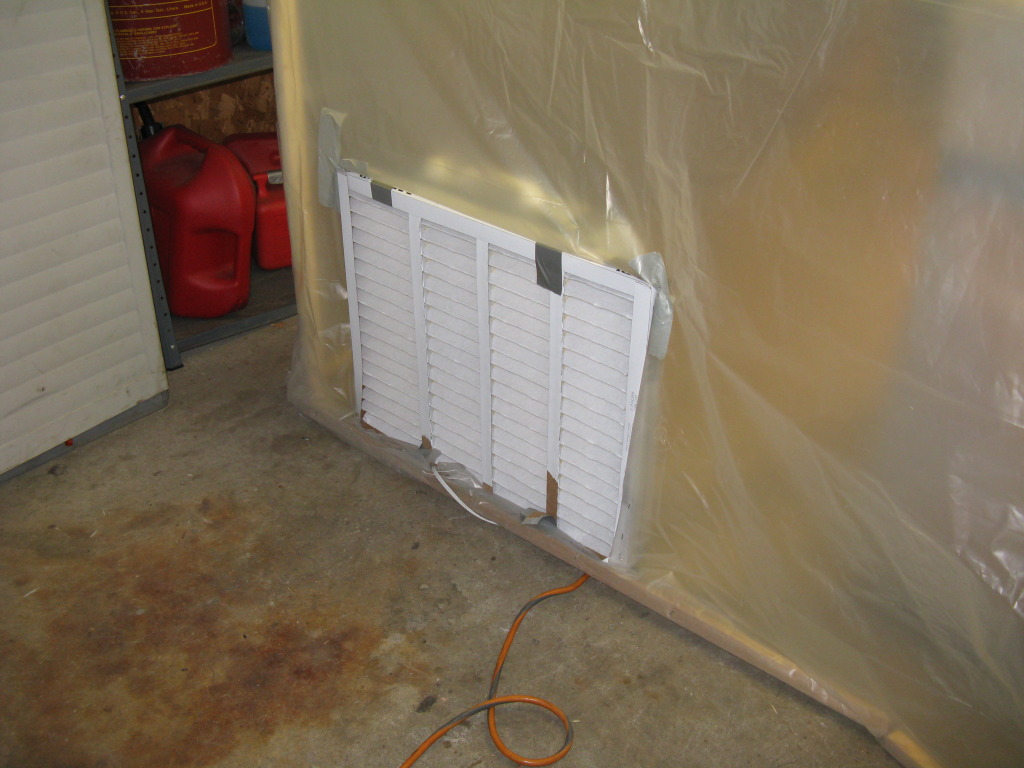
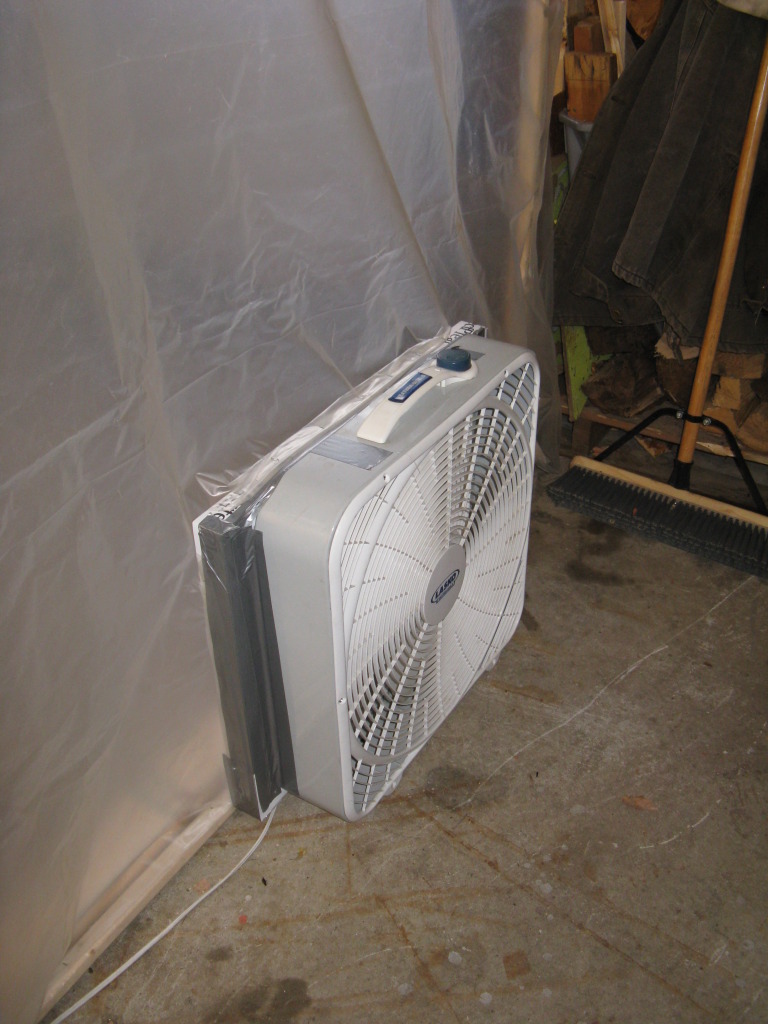
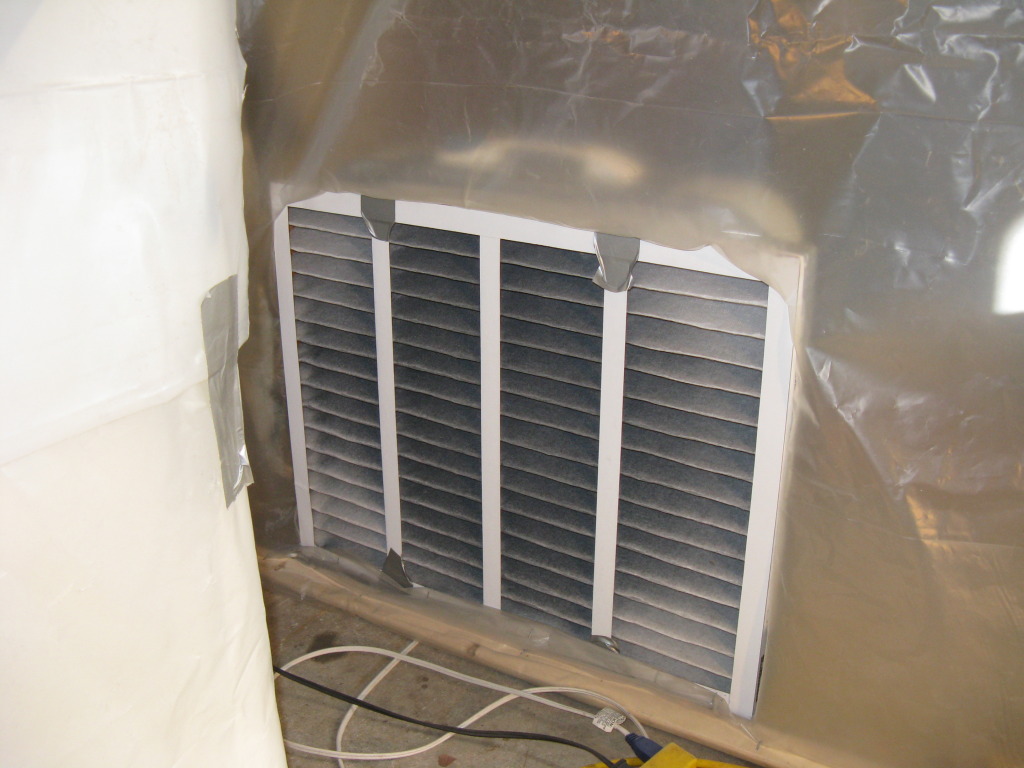
I set up both an inlet and oulet filter/fan combo. It moves enough air to suck in the visqueen sides a bit.
From the ceiling I strung 3 2X4s full of hooks for hanging small parts. Its a tight fit for a big boy like me, but it allows me to paint many parts at once.
Wow, lots of pics! I'm going to break this into several posts. Next up, painting!
Last edited by cruisin'73; 10-25-2012 at 10:56 AM.
10-25-2012, 08:52 AM
#83
I started with my small parts. As this is my first adventure into painting, I figured small scale OPPS! would be easier to correct.
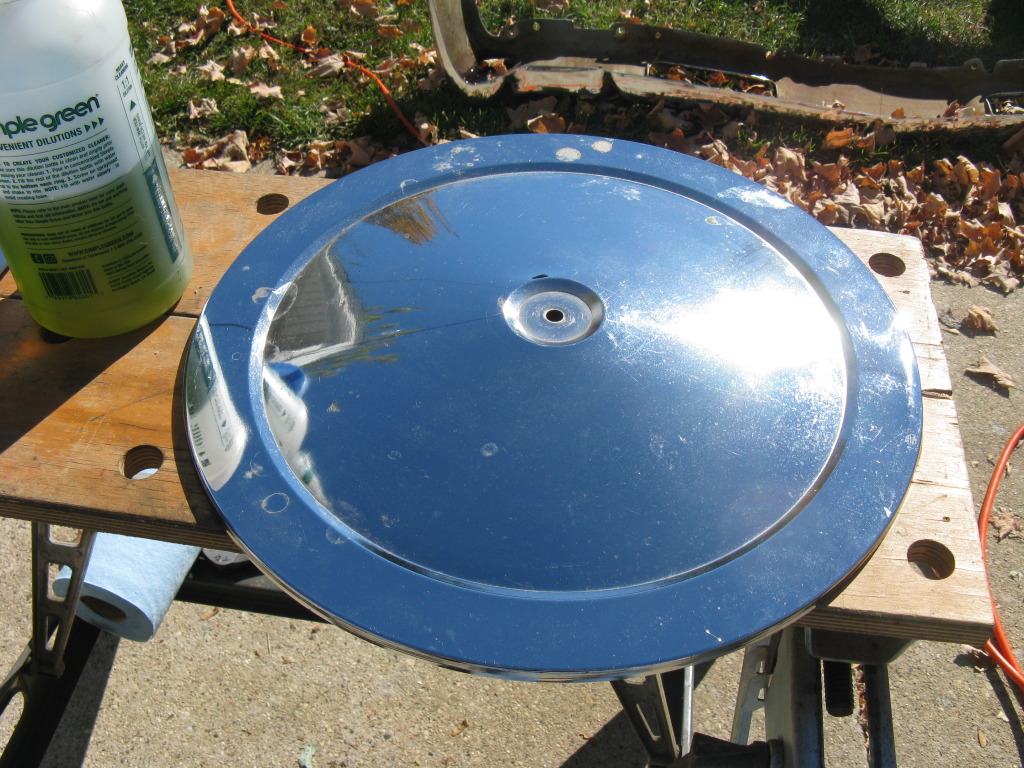
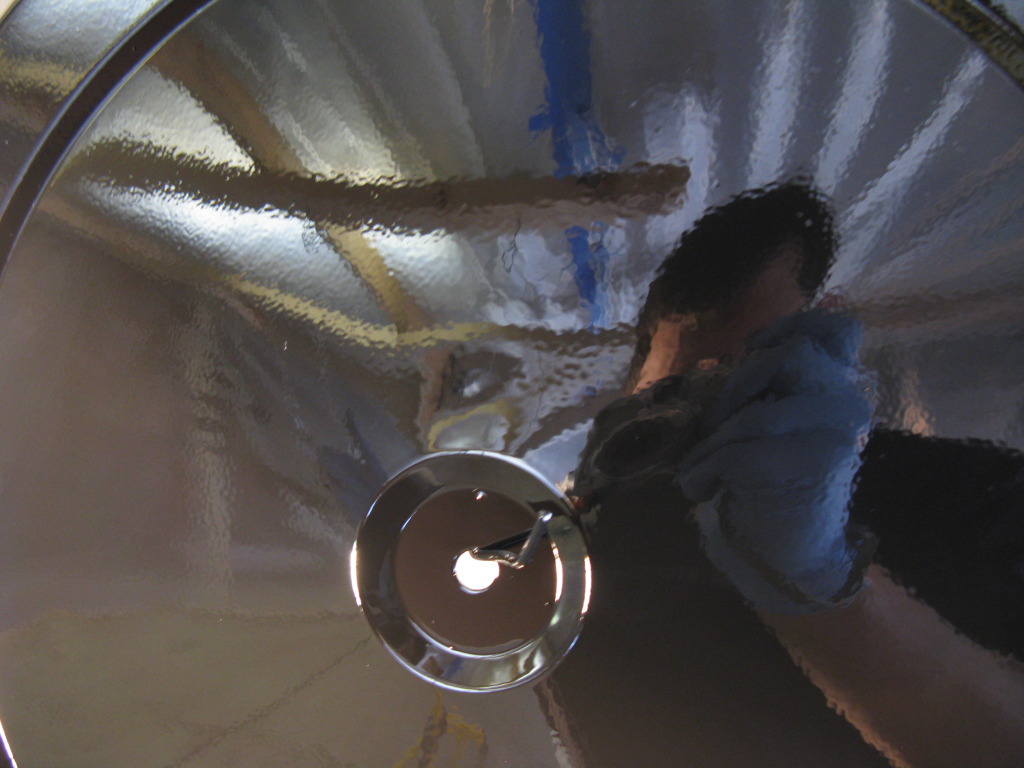
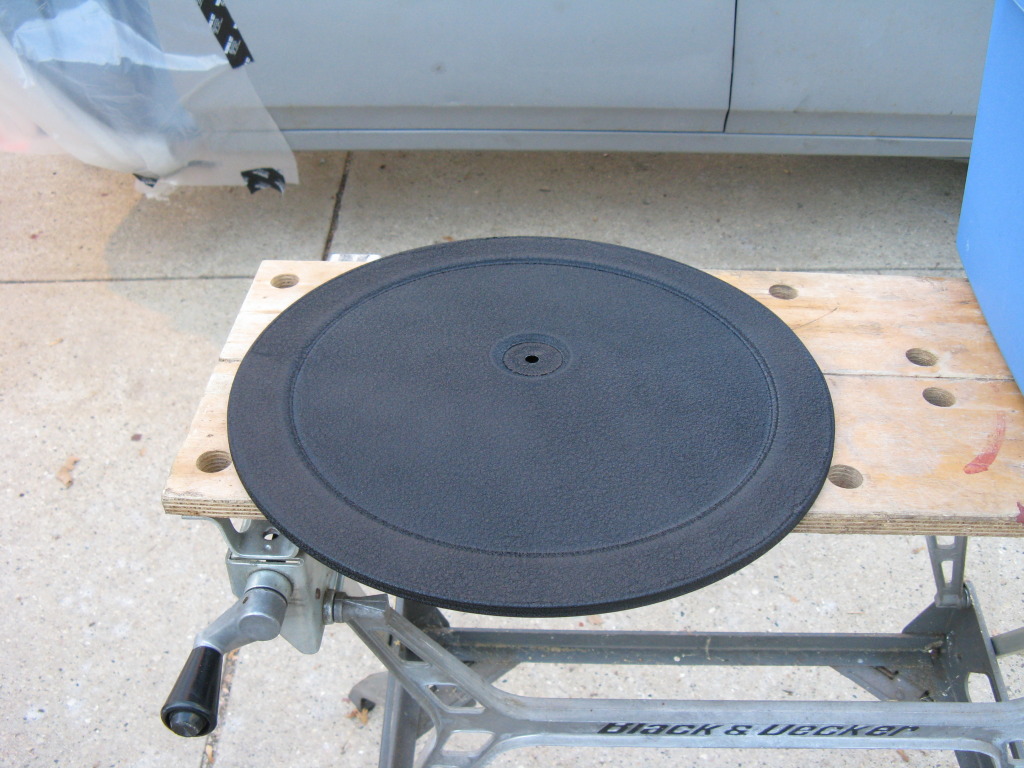
My first goal was to test the wrinkle black I will be using on an old air filter lid.
Here it is washed ans shiny
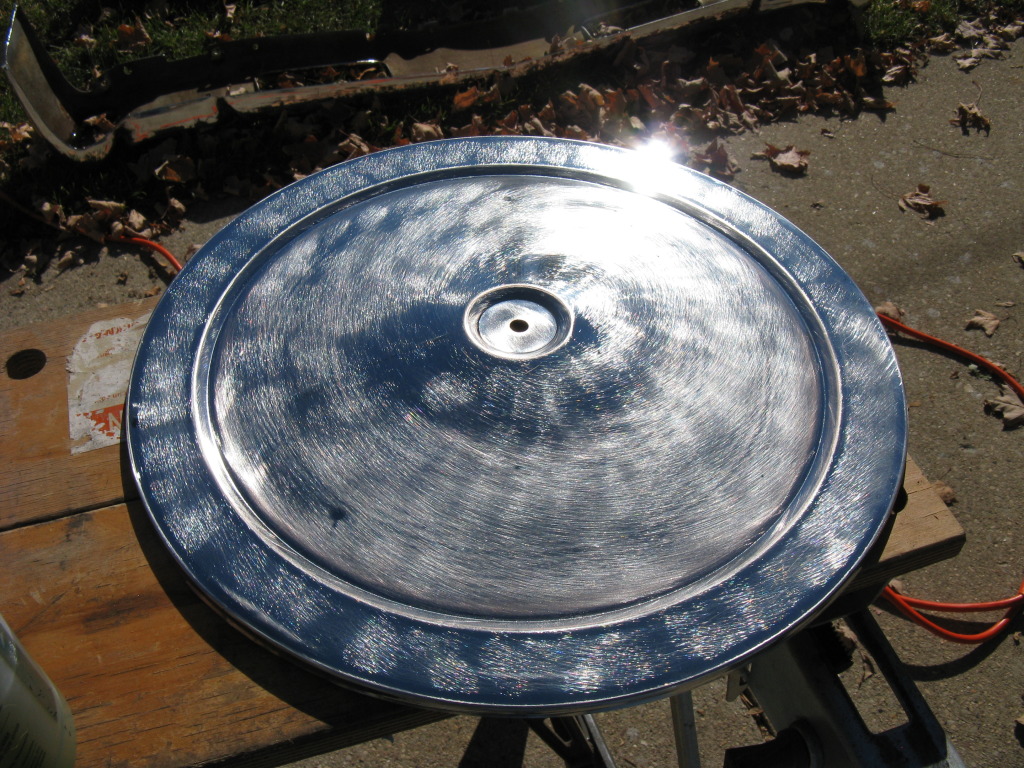
Then with a 400 grit sanding
First coat of VHT wrinkle
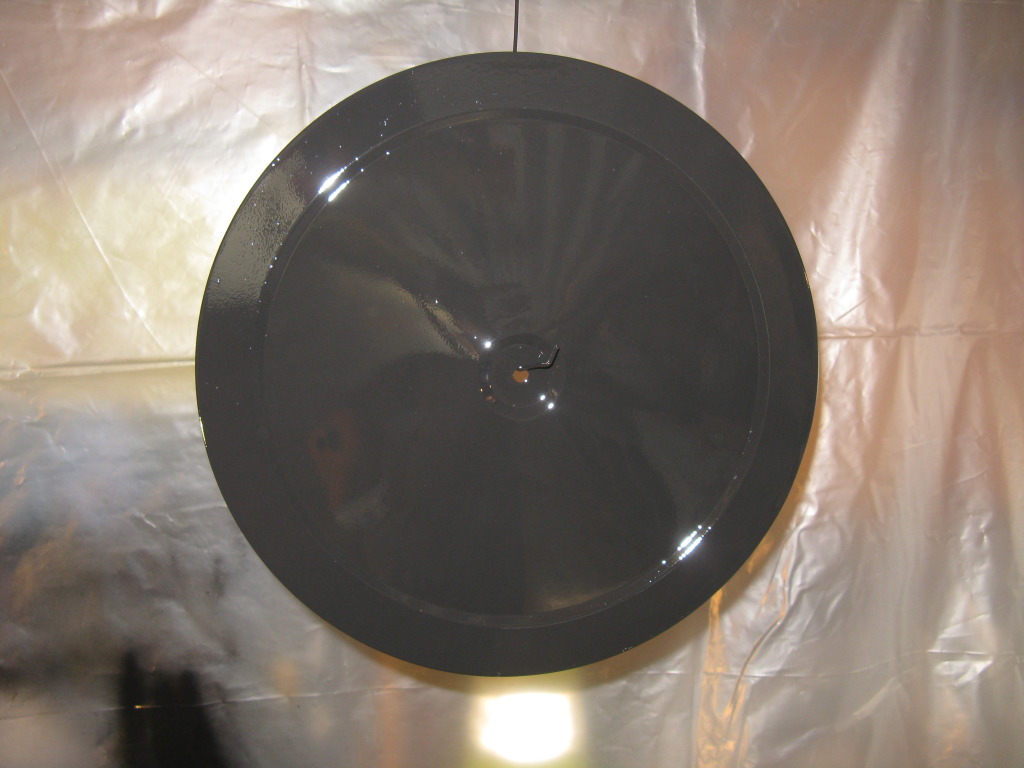
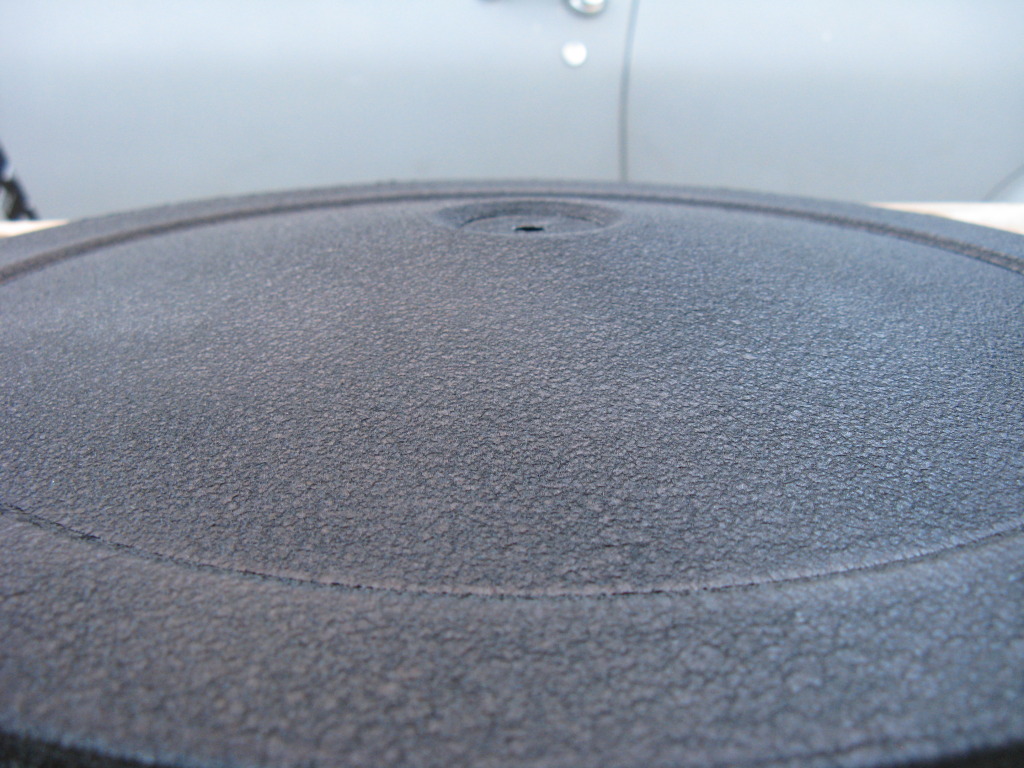
By the 3rd and final coat you can start to see the wrinkles rising
Guess my filter is working!
Per the instructions, into the wife's oven for a 200� 1hr bake. She was NOT happy about the smell. To win some brownie points I did take the dog for a walk and do all the dishes, it helped my case a bit!
Here is the finished product
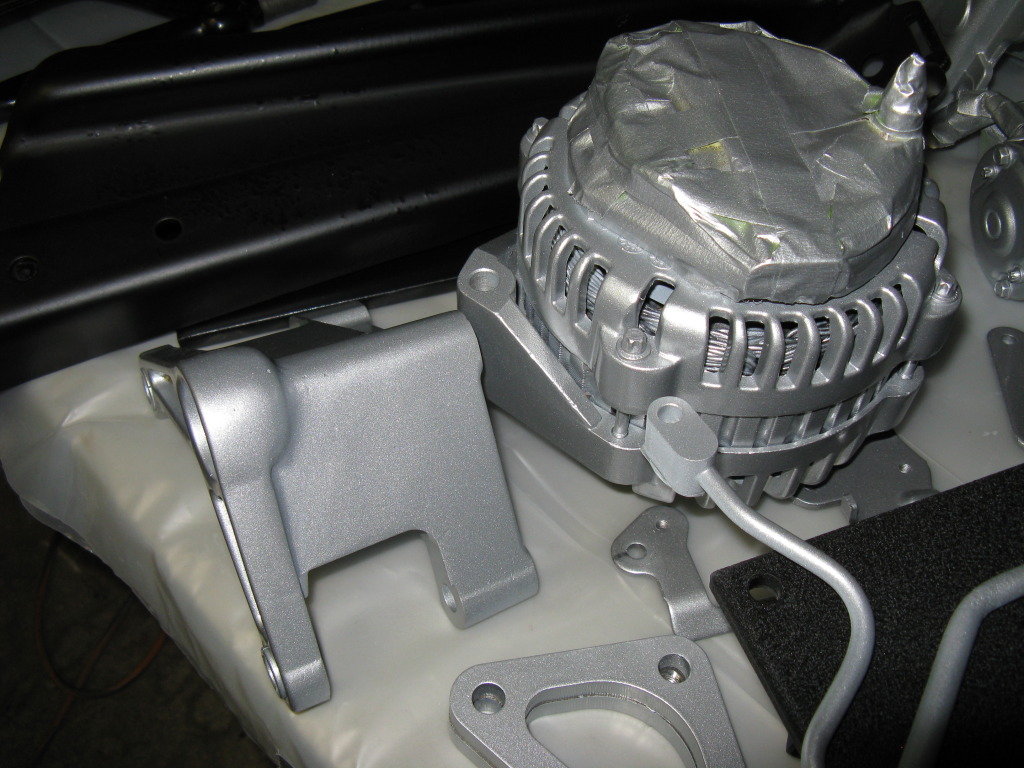
Next up for paint was the FEAD components. For which I chose a PPG single stage poly silver paint. Thanks to Rocketrod for the color!
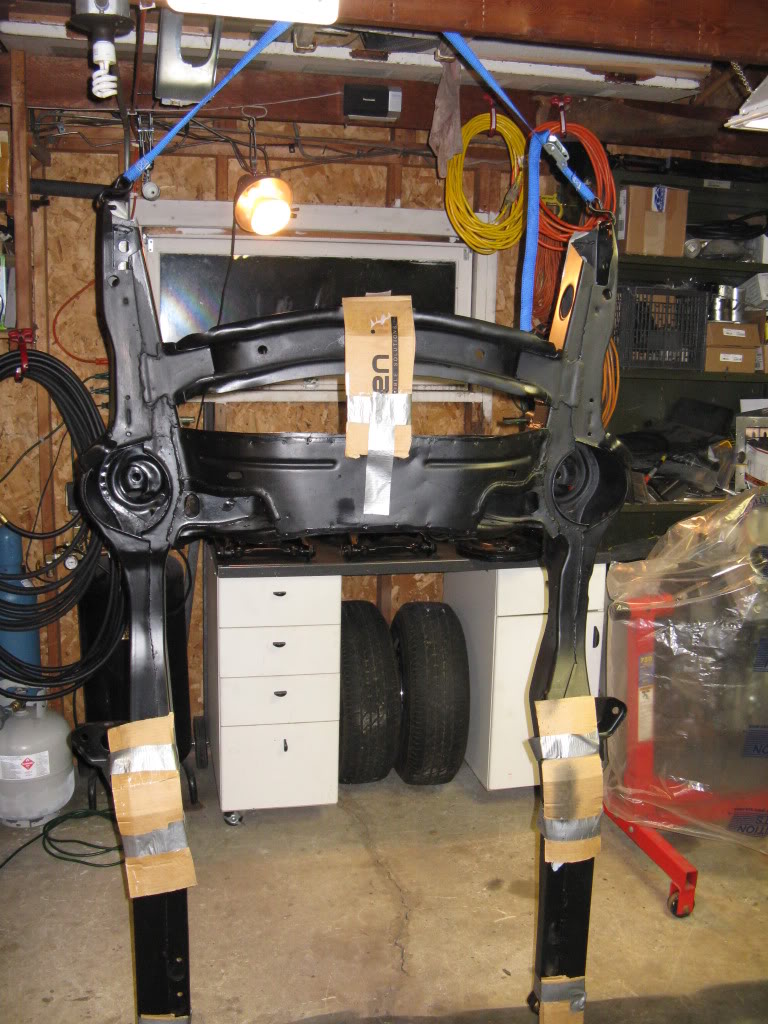
While that dried for a couple cool (50�) days I decided to try spraying a little POR15 on the subframe, trans Xmember and bumper brackets.
Wire brushed, washed, rinsed, and wax and grease remover prepped ready for POR15.
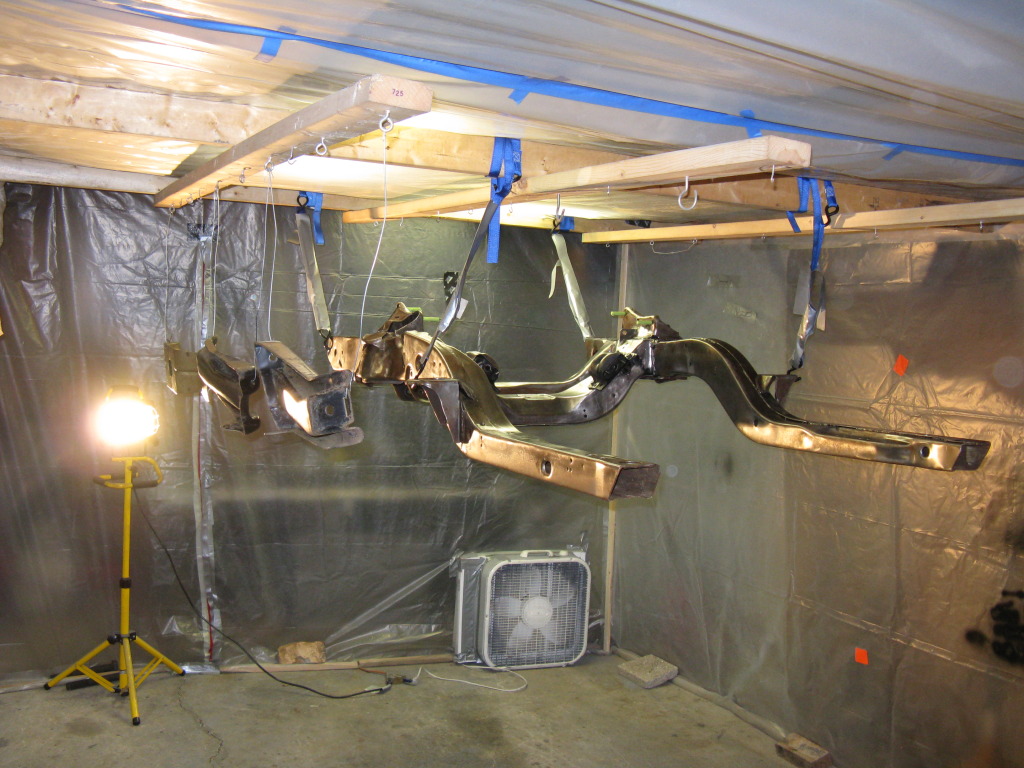
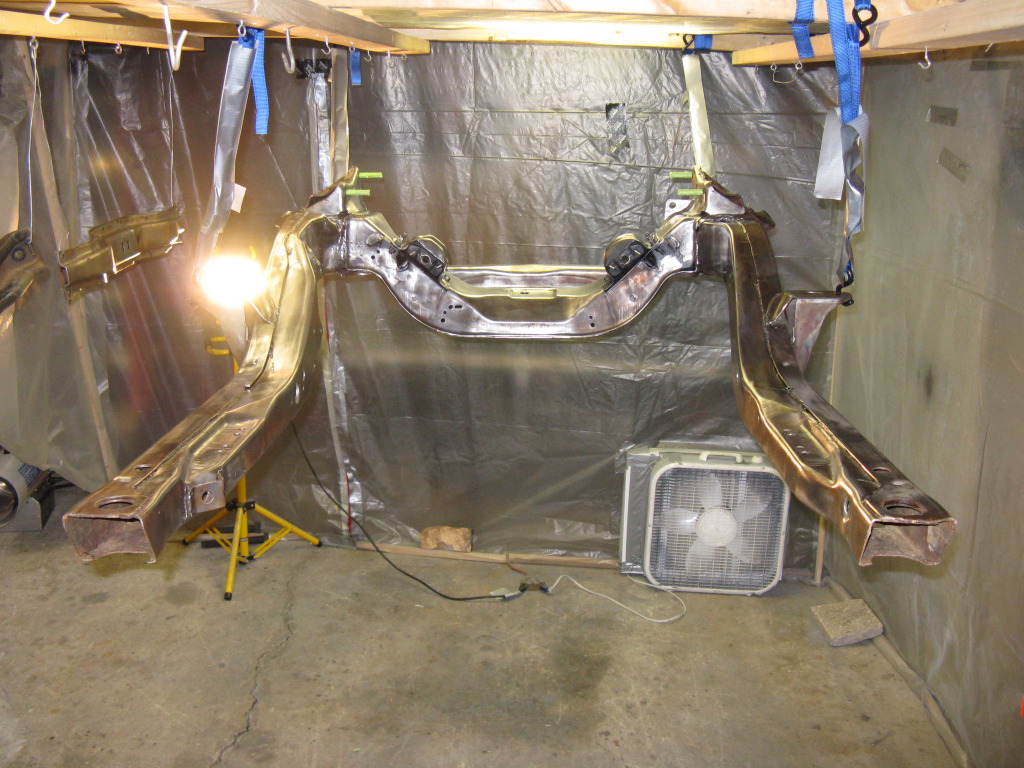
For testing I left a bit of surface rust on the trans-X to see how it would come out in comparison to the near-rust free subframe
I cleaned and scrubbed the bumper brackets but left them in orignal paint and rust to see how they would come out

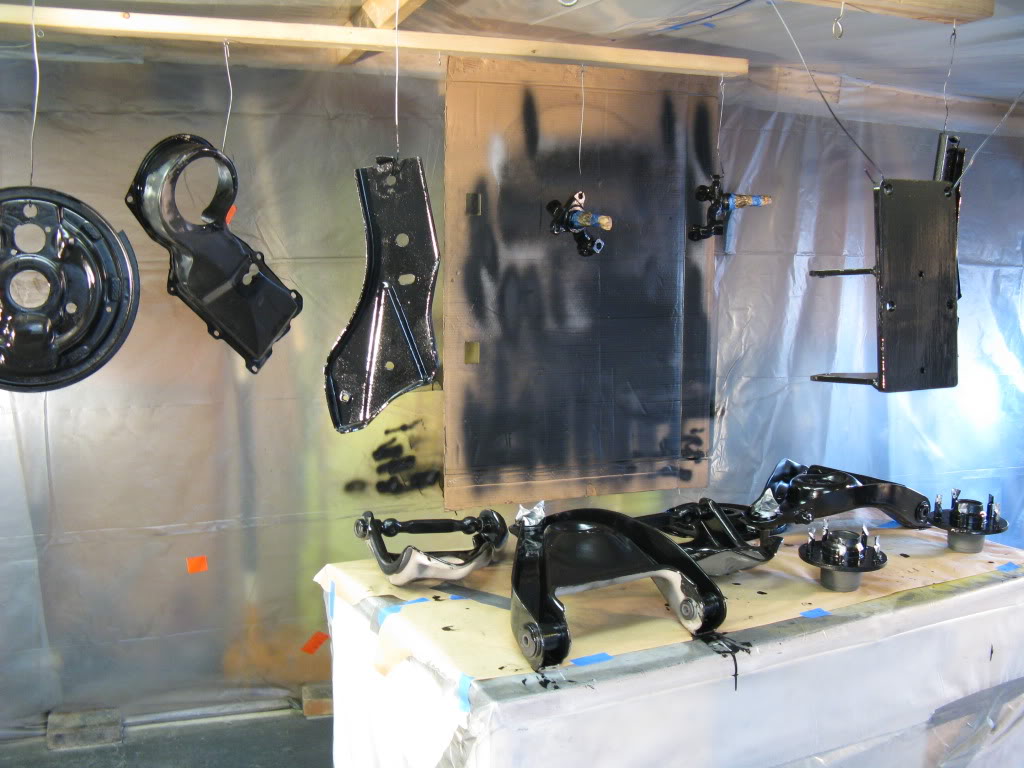
Now for all the results of my hard work:
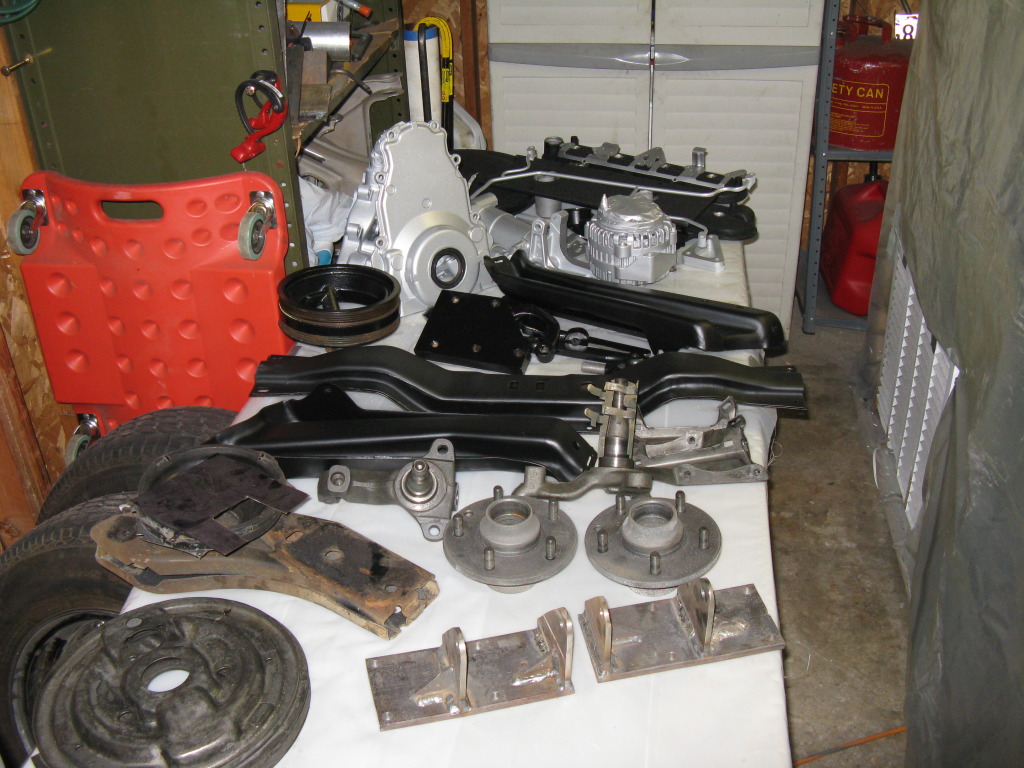
Here is my parts table. Including the acid soaked parts, stripped right down to bare metal! Next are the bumper brackets and trans-X in the spray POR15 coating. Looking smooth and protected.
Then the Poly Silver FEAD parts. They came out pretty nice as well.

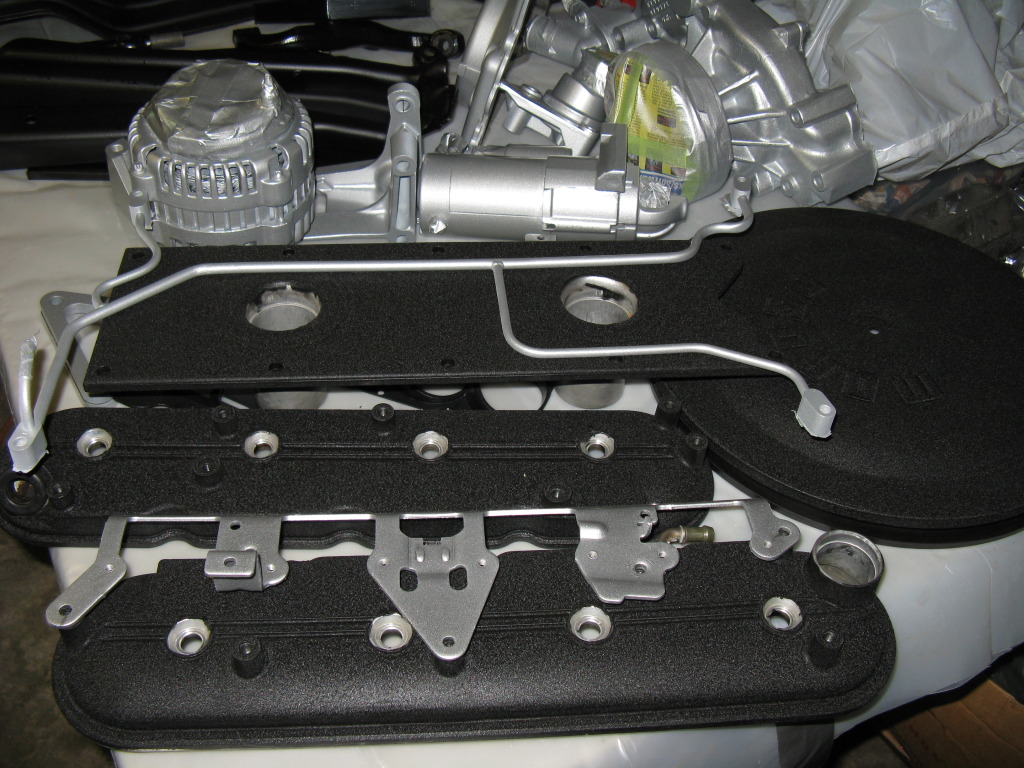
Finally the wrinkle black valley and valve cover and MOROSO air cleaner lid. I think the silver on black looks SHARP!
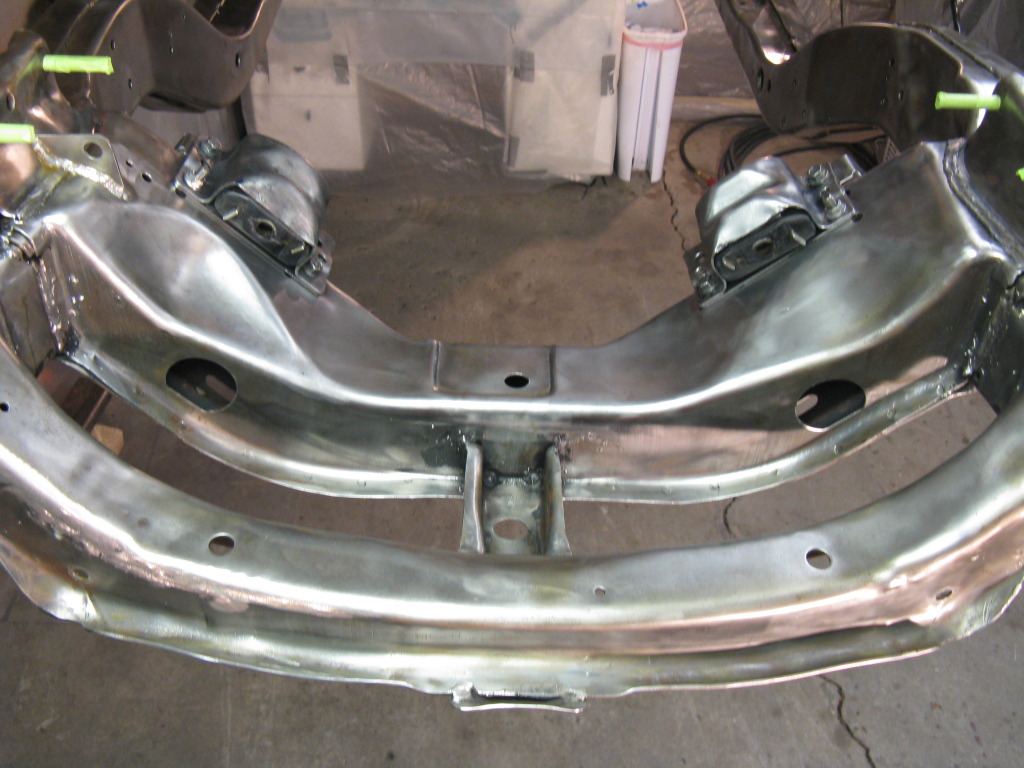
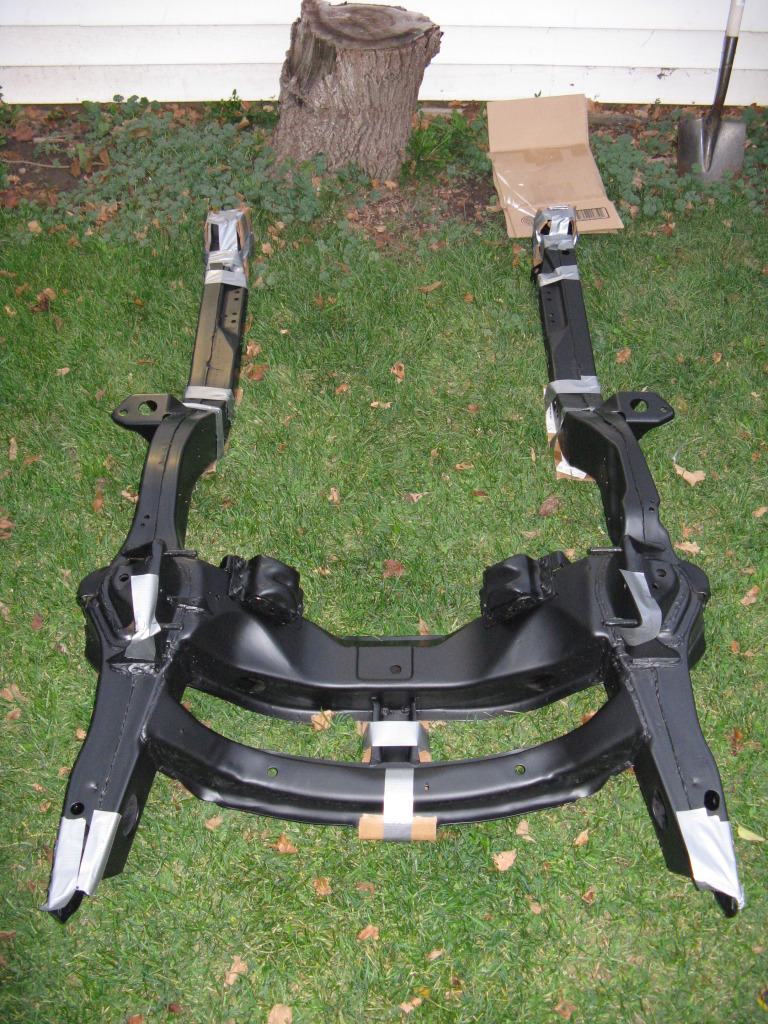
Here is the subframe in POR15, it came out very nice!
Painting is fun! and while it is a lot of work, it is very gradifying! One more post of painted parts to come yet!
My first goal was to test the wrinkle black I will be using on an old air filter lid.
Here it is washed ans shiny
Then with a 400 grit sanding
First coat of VHT wrinkle
By the 3rd and final coat you can start to see the wrinkles rising
Guess my filter is working!
Per the instructions, into the wife's oven for a 200� 1hr bake. She was NOT happy about the smell. To win some brownie points I did take the dog for a walk and do all the dishes, it helped my case a bit!
Here is the finished product
Next up for paint was the FEAD components. For which I chose a PPG single stage poly silver paint. Thanks to Rocketrod for the color!
While that dried for a couple cool (50�) days I decided to try spraying a little POR15 on the subframe, trans Xmember and bumper brackets.
Wire brushed, washed, rinsed, and wax and grease remover prepped ready for POR15.
For testing I left a bit of surface rust on the trans-X to see how it would come out in comparison to the near-rust free subframe
I cleaned and scrubbed the bumper brackets but left them in orignal paint and rust to see how they would come out
Now for all the results of my hard work:
Here is my parts table. Including the acid soaked parts, stripped right down to bare metal! Next are the bumper brackets and trans-X in the spray POR15 coating. Looking smooth and protected.
Then the Poly Silver FEAD parts. They came out pretty nice as well.
Finally the wrinkle black valley and valve cover and MOROSO air cleaner lid. I think the silver on black looks SHARP!
Here is the subframe in POR15, it came out very nice!
Painting is fun! and while it is a lot of work, it is very gradifying! One more post of painted parts to come yet!
Last edited by cruisin'73; 10-25-2012 at 11:00 AM.
10-25-2012, 09:22 AM
#84
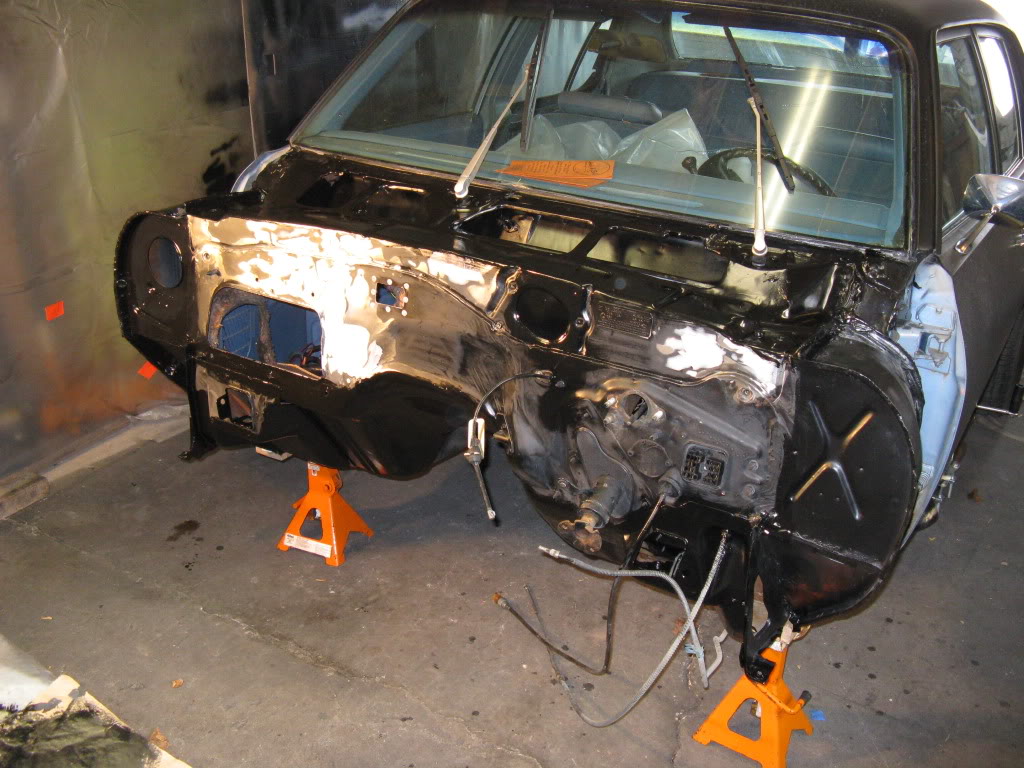
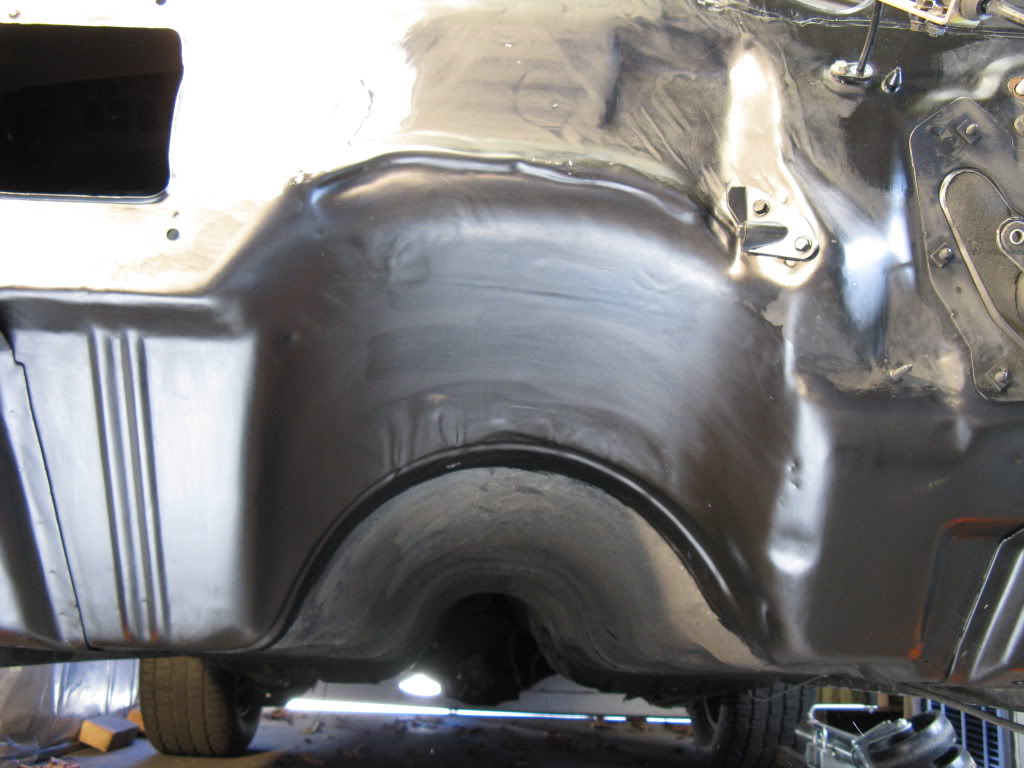
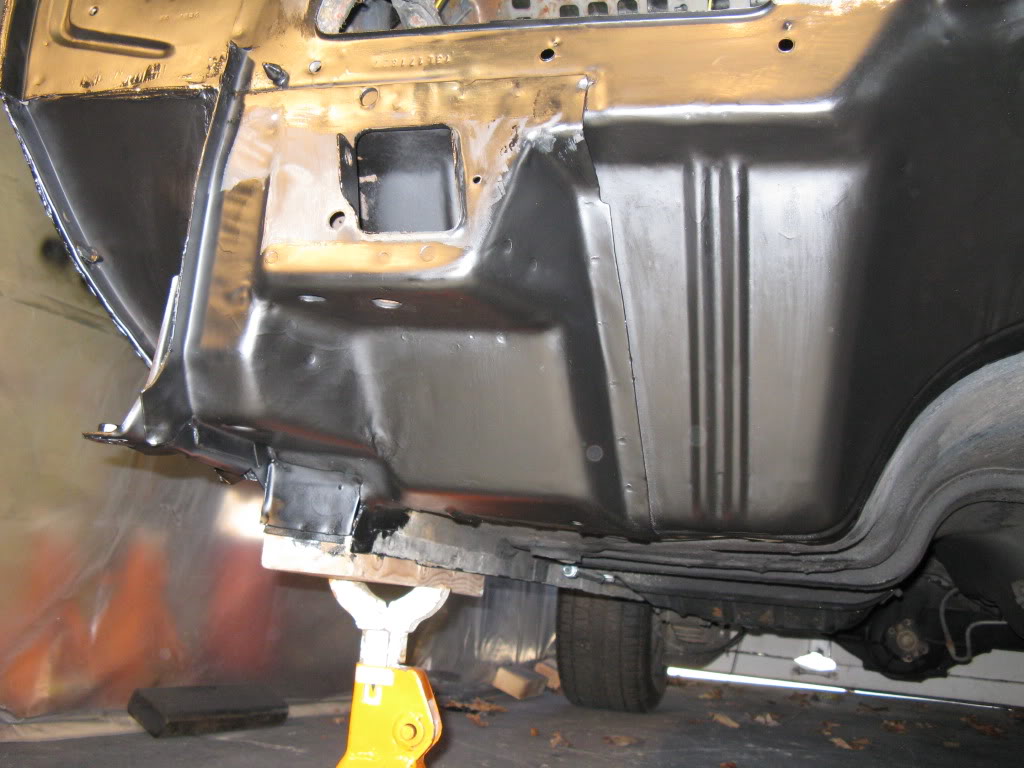
So this is where my painting project started getting out of hand...I figured well since I have the booth setup, garage all torn apart and its the last warm days of fall...Perhaps I should show the rest of the Nova some love! I knew these would only be a temp paint job and as I always wanted a matte black car I figured now was my chance! So after mush research into time/effort/cost and final product I decided to to with SEM Semi-gloss Trim Black! The guy at the paint shop gave me a very funny look when I asked for a whole GALLON of the stuff! HAHA!
First step was to sand the current surface of the Nova to prep for the SEM.
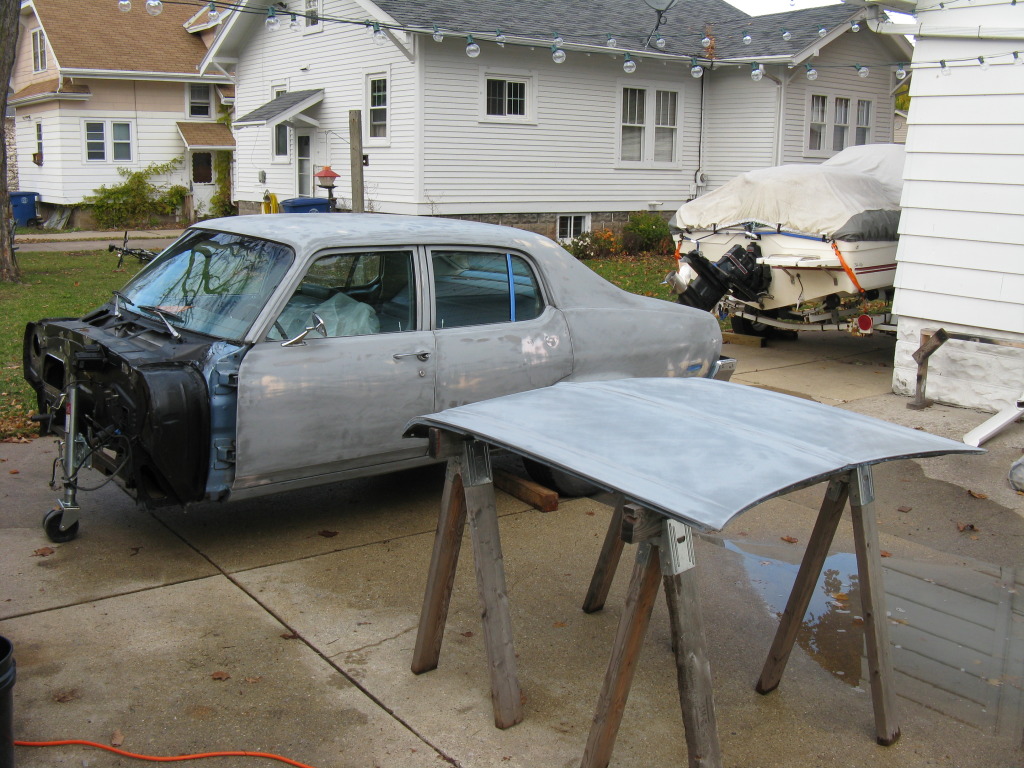
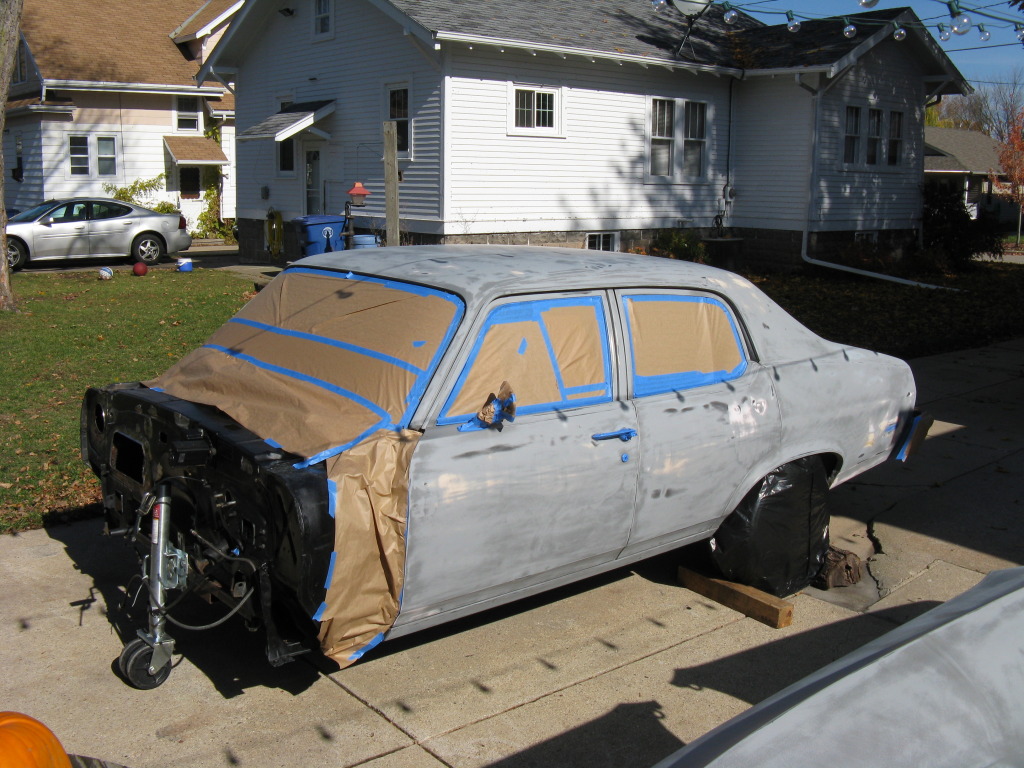
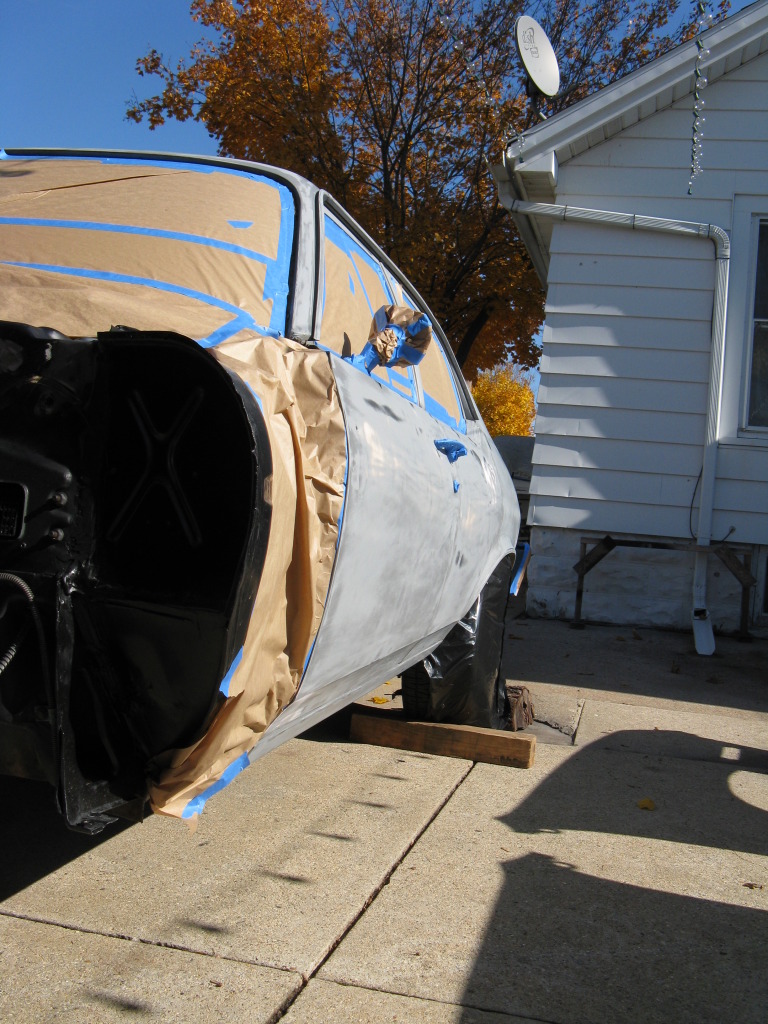
The lack of required prep was one of the reasons I chose the SEM product. It only specifies a 400 grit sanding and wax/grease remover. No prime or sealer required.
Well after a lot of prep and about 3 quarts of SEM...Drum roll please!
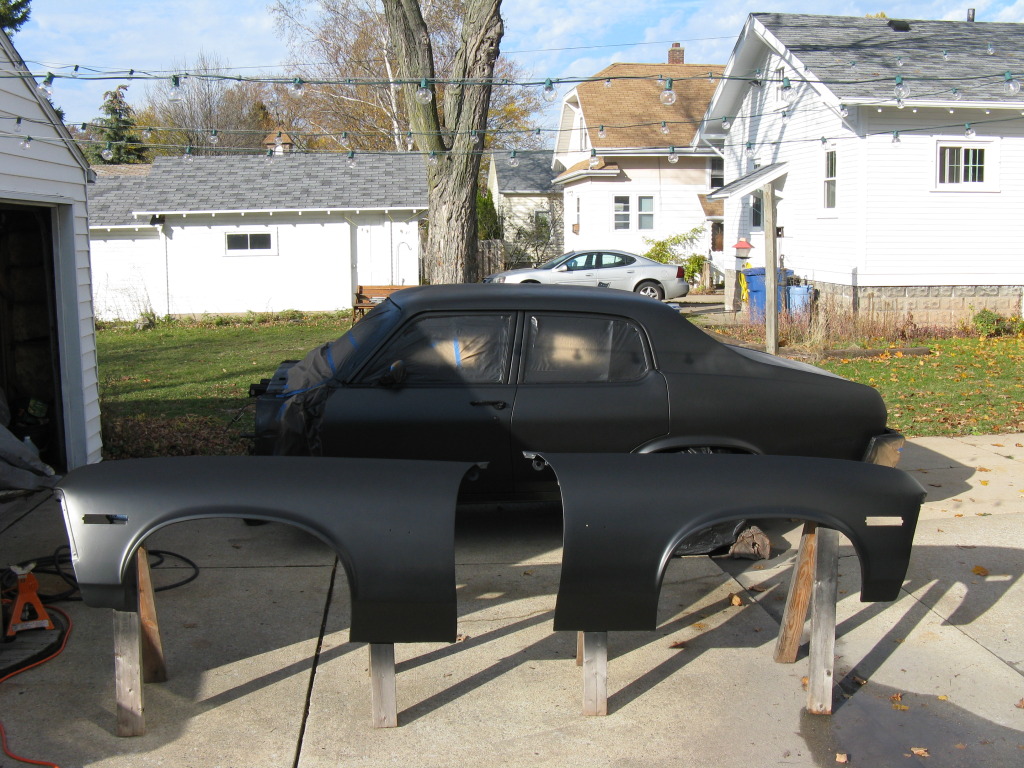
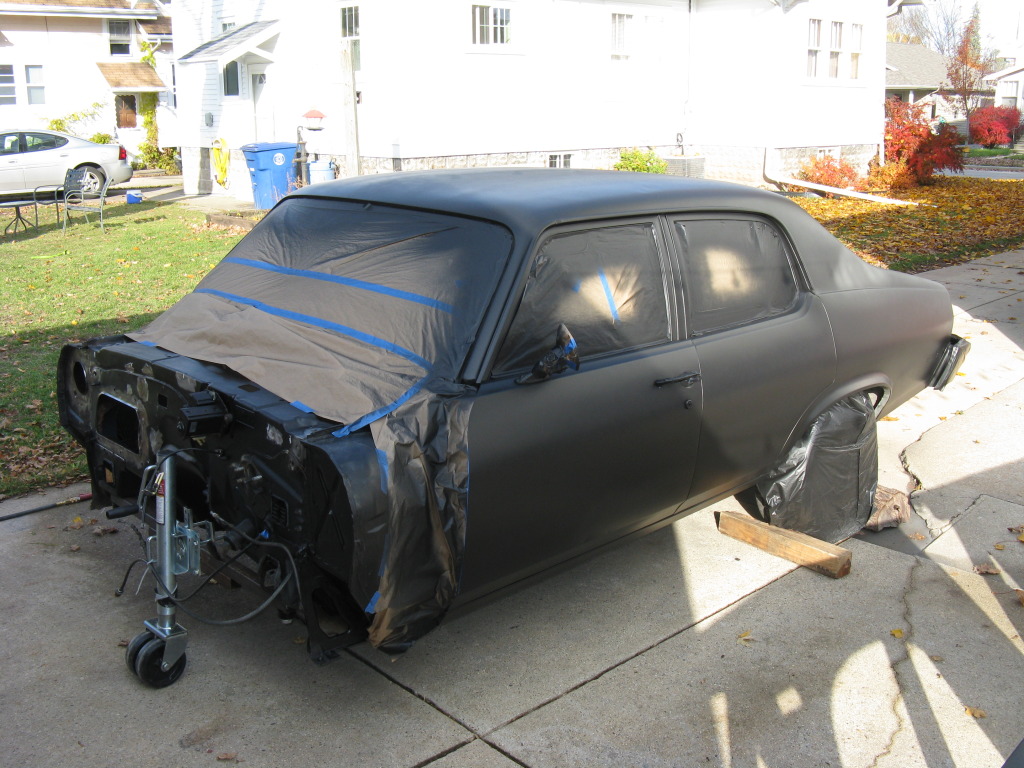
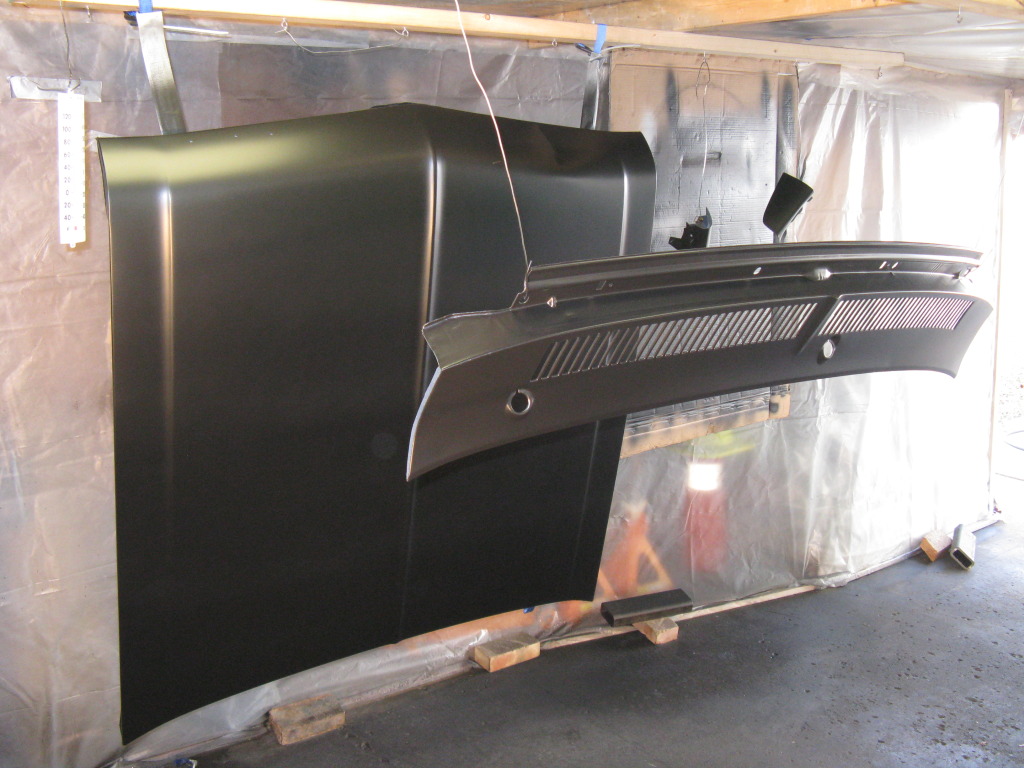
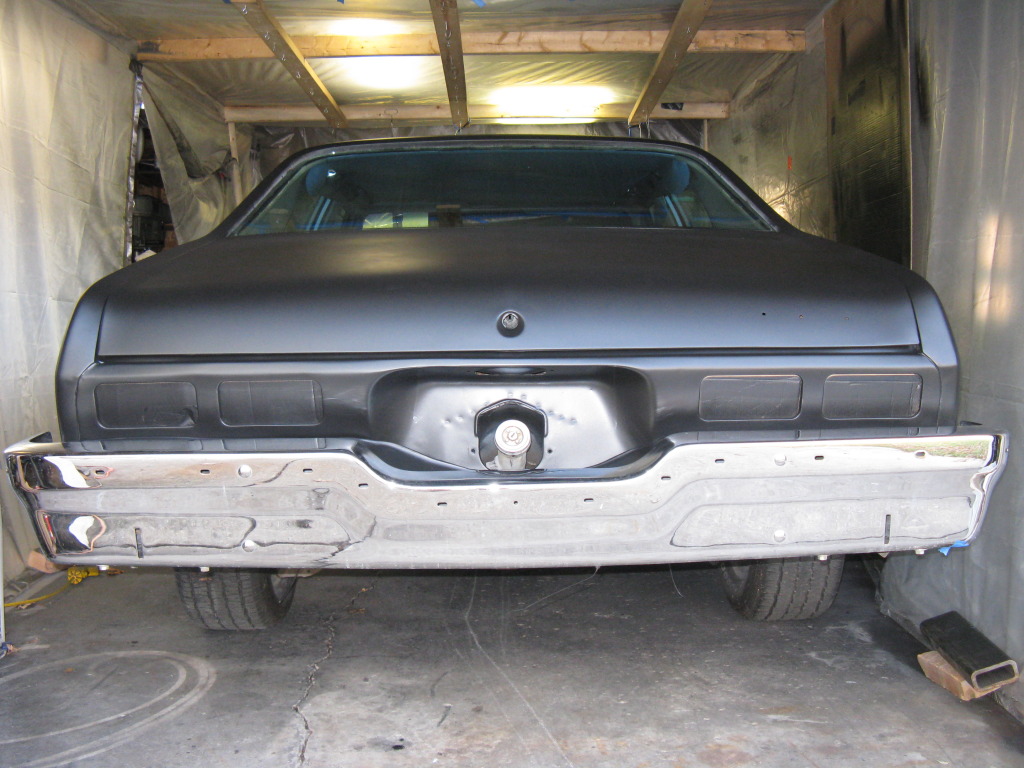
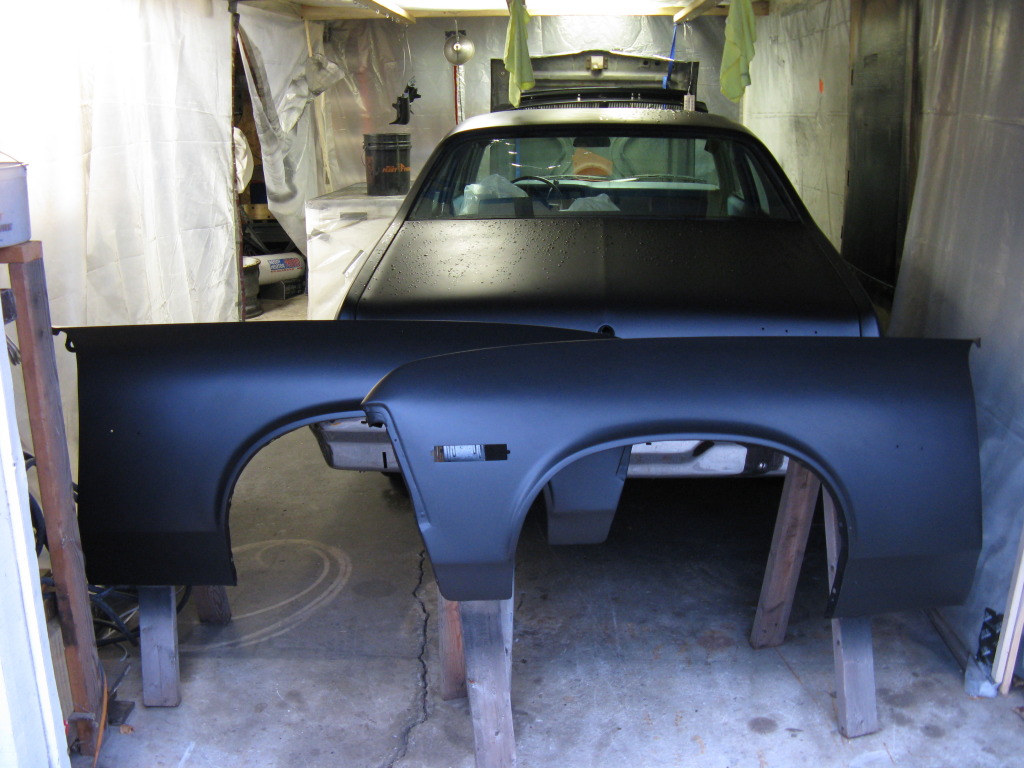
I LOVE the semi-gloss black! Wish I would have done this years ago. Every time I go into the garage it makes me salivate in anticipation of getting the car finished!! Unfortunately I had to roll the car into the garage do to an impending rain storm. So more pictures to come later! Plan for this upcoming weekend it to finish painting the firwall, inner nad outer fenders and other small parts. Well, if Halloween partying doesn't get the better of me!
First step was to sand the current surface of the Nova to prep for the SEM.
The lack of required prep was one of the reasons I chose the SEM product. It only specifies a 400 grit sanding and wax/grease remover. No prime or sealer required.
Well after a lot of prep and about 3 quarts of SEM...Drum roll please!
I LOVE the semi-gloss black! Wish I would have done this years ago. Every time I go into the garage it makes me salivate in anticipation of getting the car finished!! Unfortunately I had to roll the car into the garage do to an impending rain storm. So more pictures to come later! Plan for this upcoming weekend it to finish painting the firwall, inner nad outer fenders and other small parts. Well, if Halloween partying doesn't get the better of me!
Last edited by cruisin'73; 10-25-2012 at 11:01 AM.
10-25-2012, 10:37 AM
#85

Looking really good. That por 15 is some good ****. I did my floor with it after my floor pans and subframe conecters. Be careful spaying it though. It's meant to be brushed or sponged on. After it's atomized coming out of the gun and you breath it in a few times it can cause respiratory failure. They where talking about it killing people in one of the icar classes I had to go to a couple months ago. Just a heads up man. Keep up the good work though!
10-25-2012, 02:59 PM
#86
Thanks Beans and WOW, I know it is not good for you but I did not know it was that bad for you. After spraying POR15 once and realizing how much material is lost, and ends up onmy floor I plan to brush all expect the most visible of parts. So the only parts I have left to spray are the inner fenders and firewall. Whenever I have been painting I do use a 2 filter respirator and goggles. I'll be sure to limit my exposure, thanks for the heads up!
10-26-2012, 07:40 AM
#88
After my first experience with spraying POR I did start to brush it unto parts that would not be right in hte line of site, or had cast surfaces like suspension components or the inside of the fender wells. It really does level out very nicely. With a little practice I may be able to get a finish nearly as nice as spraying it. I have revised my original plan to spray all my parts the were getting the POR treatment to only spray parts that are obviously visible like the inner fenders, upper firewall and heaterbox. Everything else will be brush on! I hope to finish all my painting this weekend and I will try to post again next week with the finished parts.
10-28-2012, 11:13 PM
#89
On The Tree

Join Date: Apr 2012
Location: Neenah, WI
Posts: 103
Likes: 0
Received 0 Likes
on
0 Posts
Awesome update. I was wondering if you were taking a break to regroup or if you were still plugging away. Thanks for the tip on the white vinegar, I will for sure give that a on some of my parts.
10-29-2012, 08:04 AM
#90
Don't worry Slim, I have been making pretty steady forward progress. Slathered a few more parts in POR15 yesterday and I am hoping to lay some paint this week if my propane heater can blast the garage warm enough!!
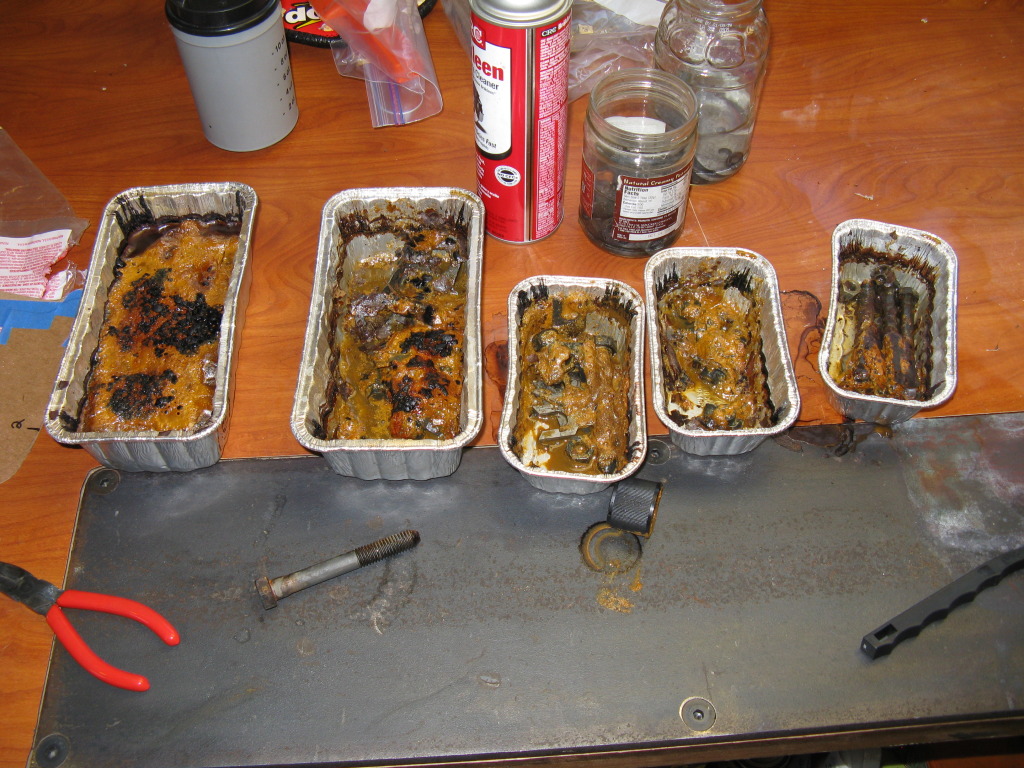
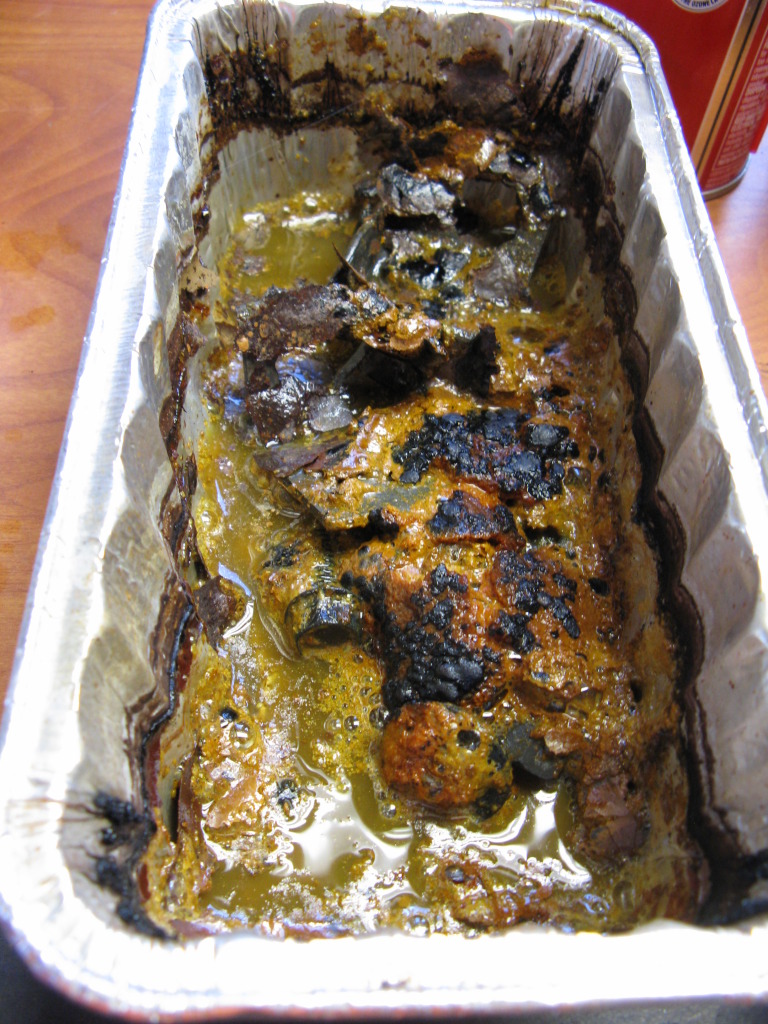
FYI, DO NOT use those disposible meatloaf trays in the picture! The vinegar and especially the phosphoric acid ate through the metal in a couple days... I came home from a weekend trip to find a nasty vinegar mess all over my workbench. Stick to ceramic or plastic containers!
FYI, DO NOT use those disposible meatloaf trays in the picture! The vinegar and especially the phosphoric acid ate through the metal in a couple days...
I came home from a weekend trip to find a nasty vinegar mess all over my workbench. Stick to ceramic or plastic containers!
12-08-2012, 03:02 PM
#91
Update time! OK no introduction needed, right to pictures
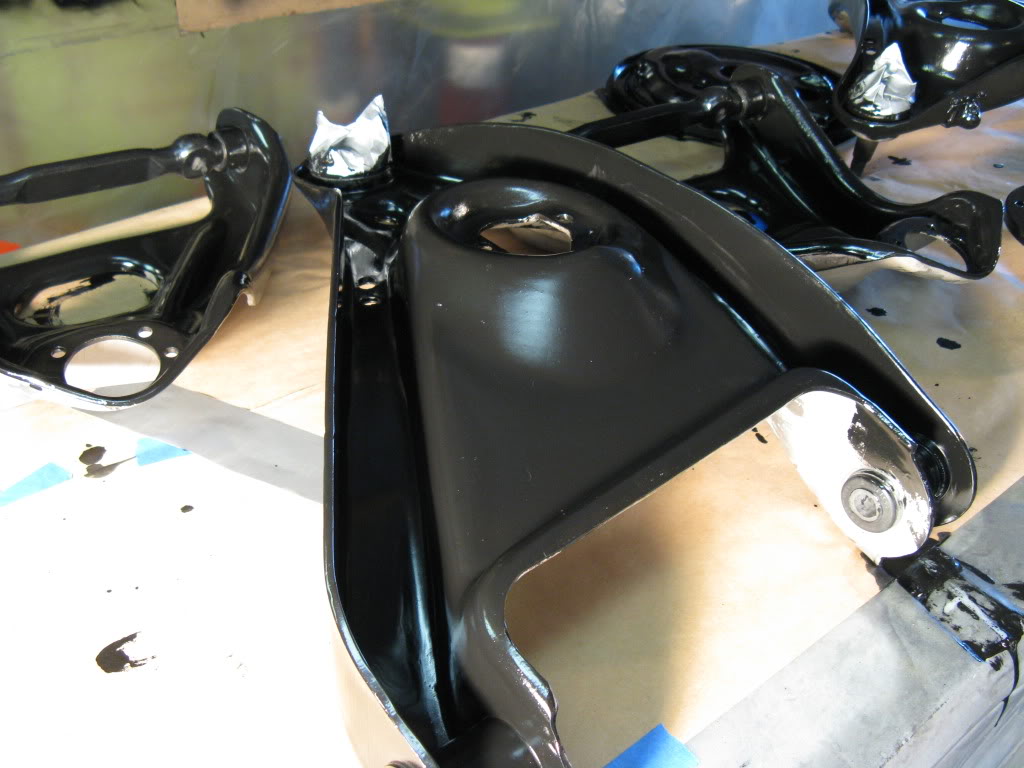
A batch of small hand painted POR15 pieces
Underside of the lower control arms. Brushed POR15 comes out pretty nice. There are some brush strokes, but not many.
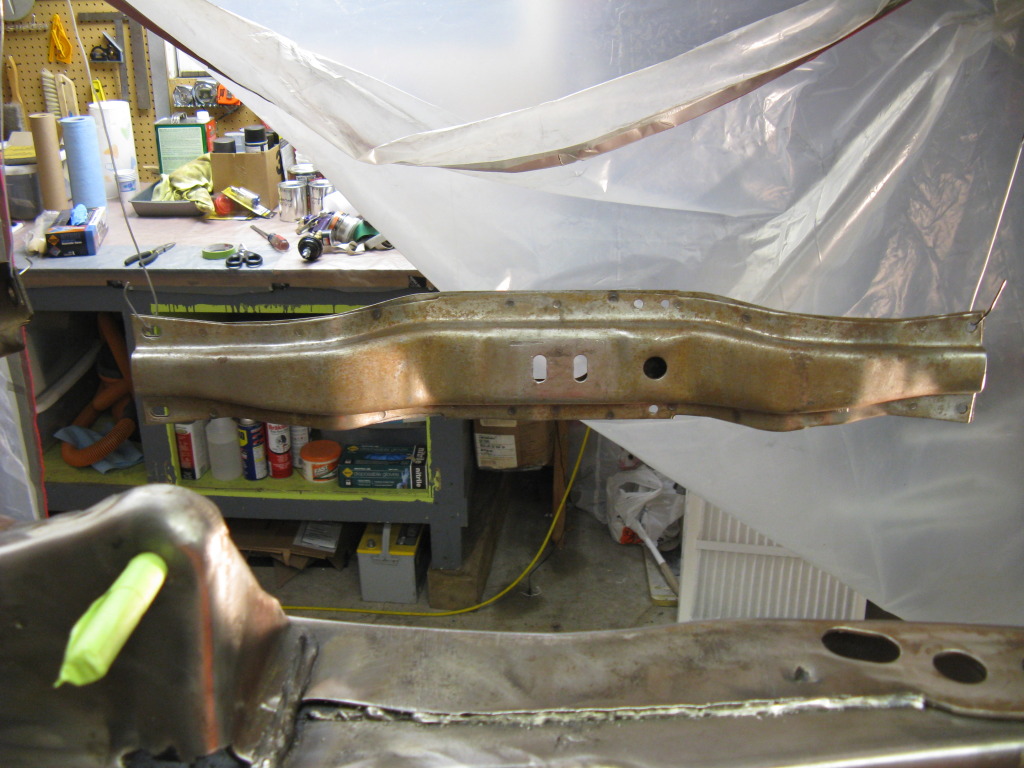
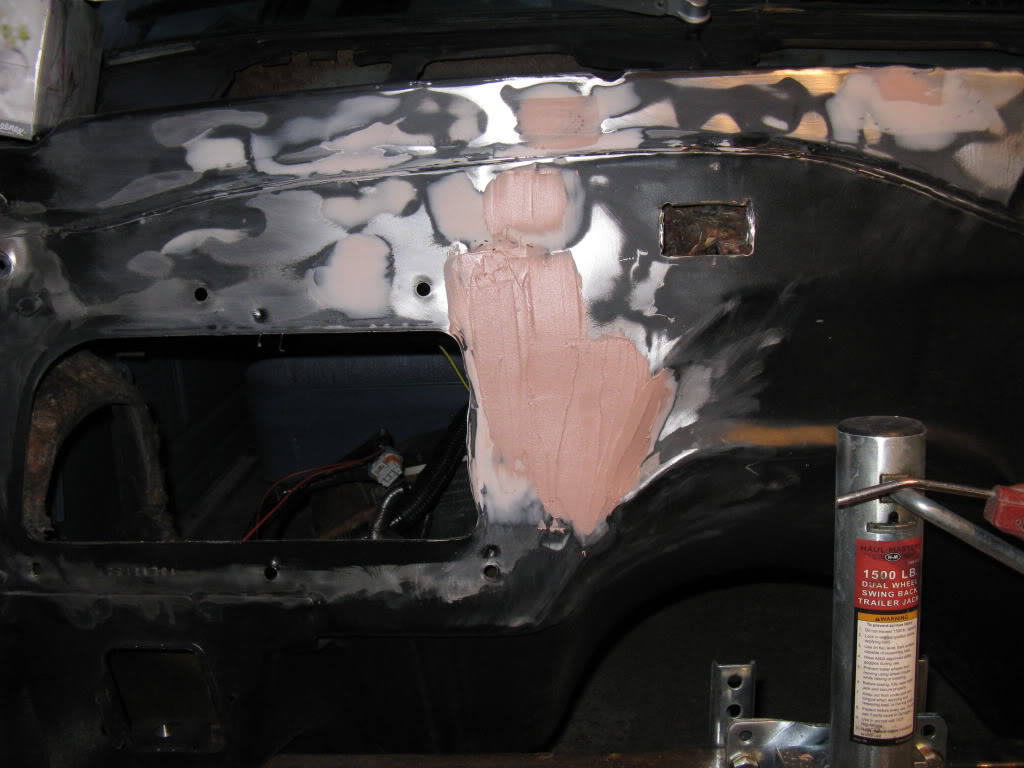
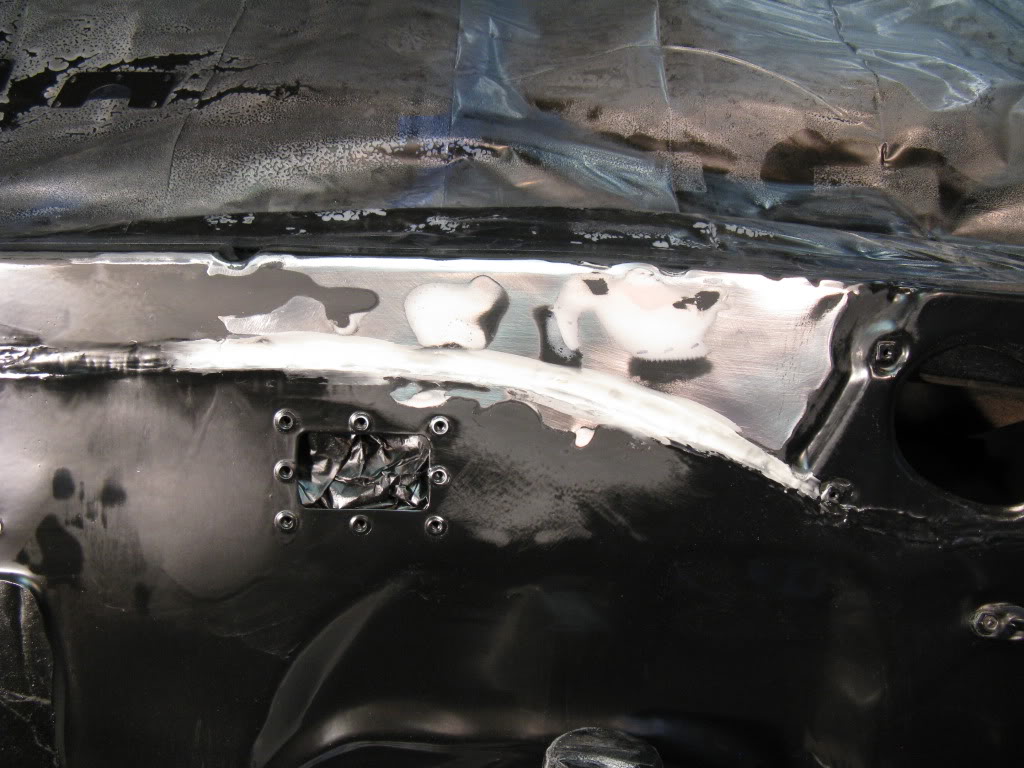
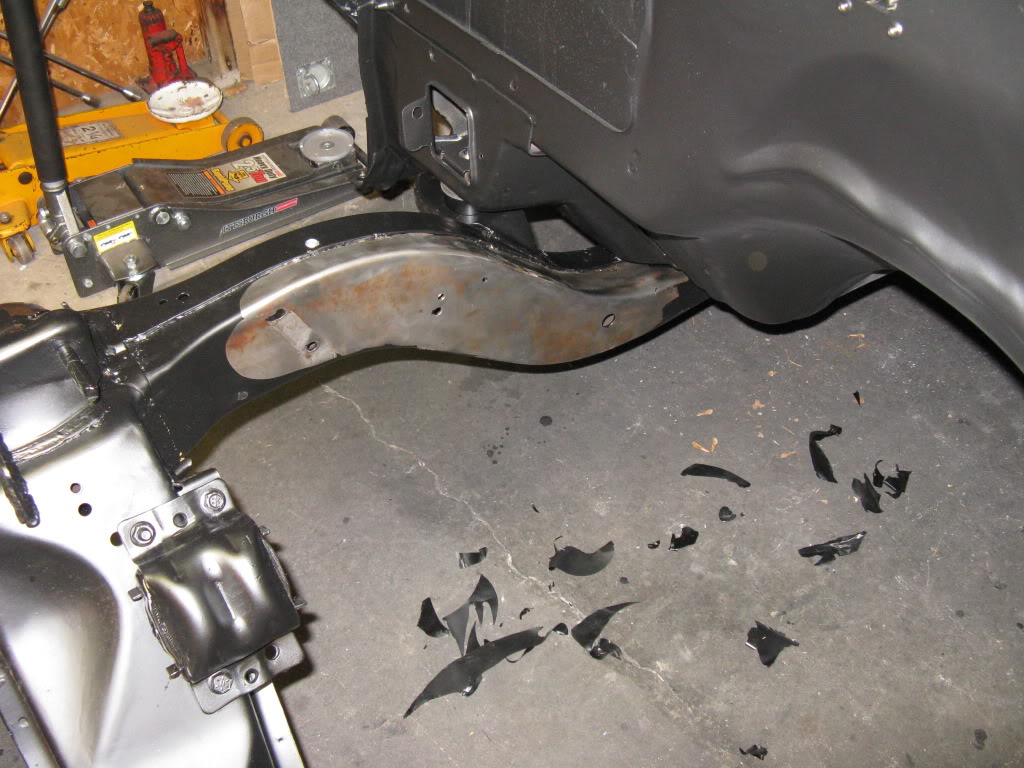
Since I am using a big block heater core my buddy and I patched the original firewall cutouts and I smoothed them over with a little bondo. You can also see the begining of the pass thru for the MSD harness.
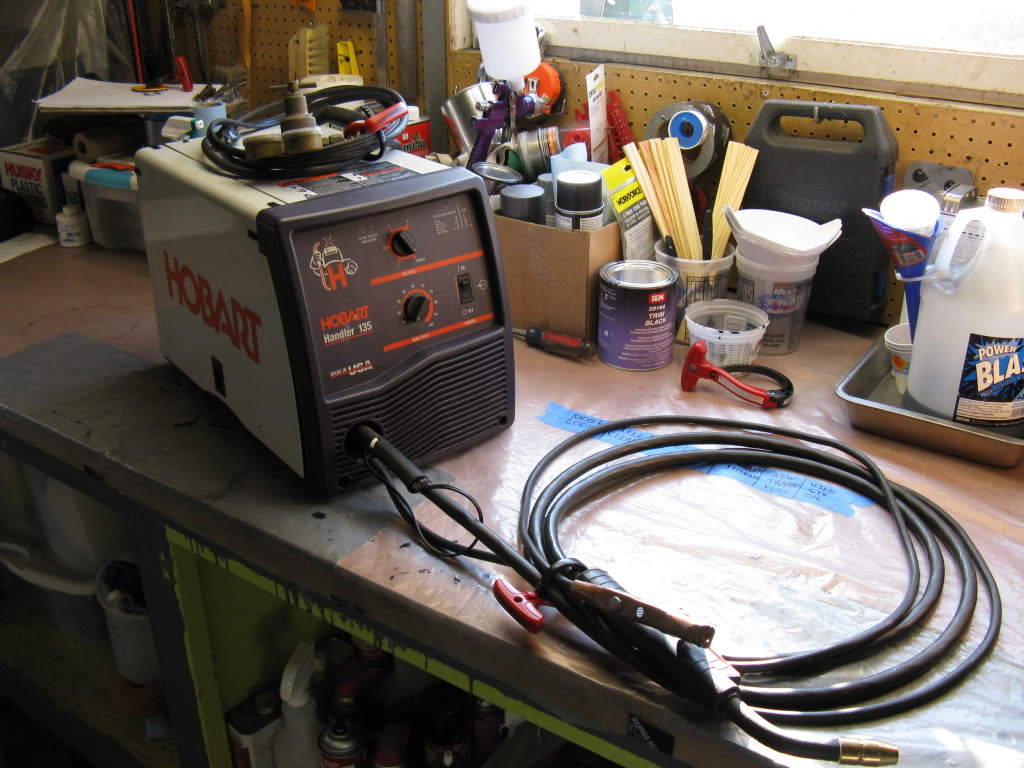
check out my latest Craigslist score! A Hobart Handler 135. the guy said its about 4 years old nad had a single spool of wire run thru it! So I picked up a tank all the gear and have been buzzing together all the small scraps I had in my steel pile. Its been a learning experience.
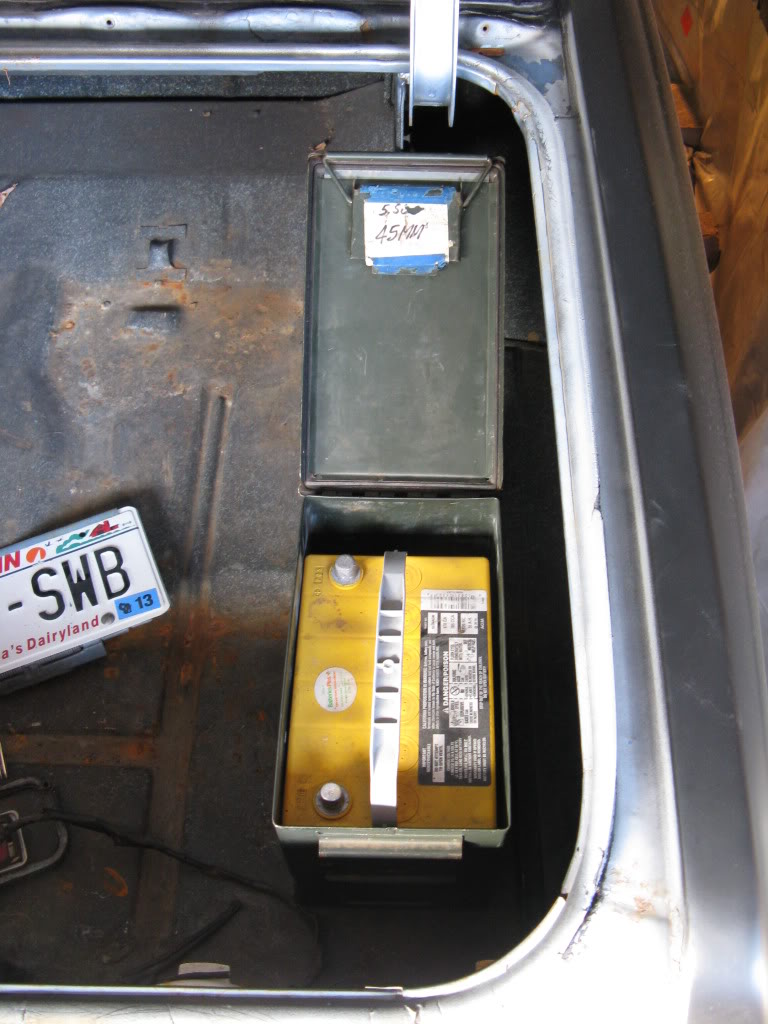
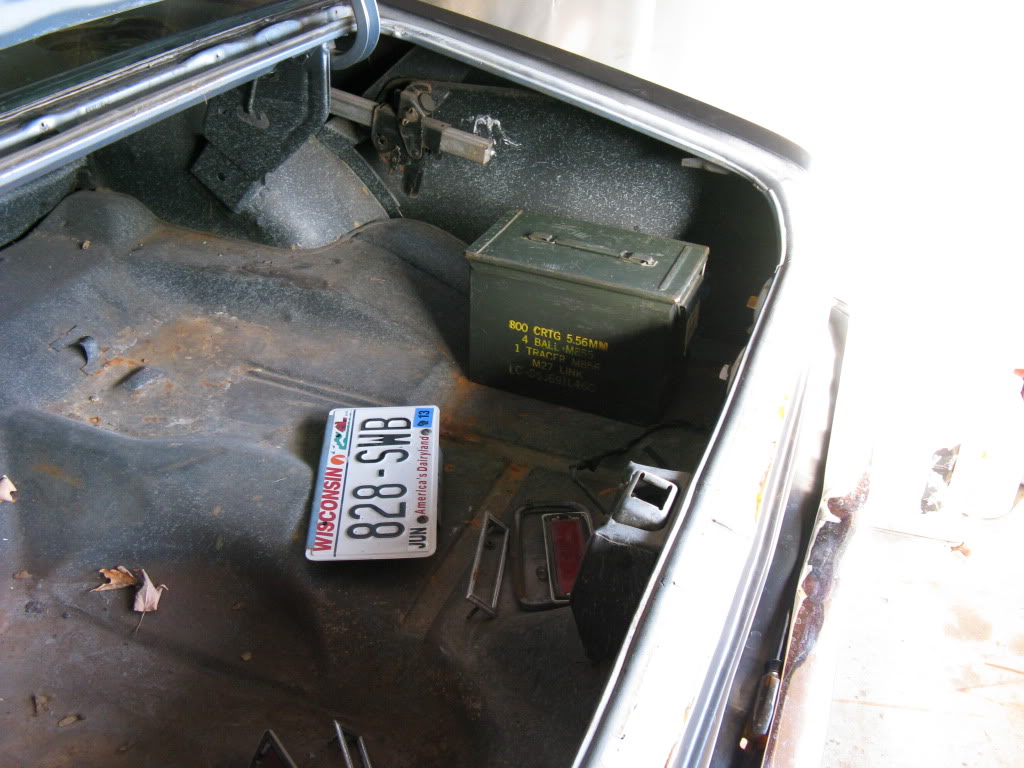
Sticking to the budget theme, here is my new trunk mount battery box! I had to scour an entire gun show to find the right size can. The guy I got it from was selling cans full of old ammo and almost jumped thru the roof when I told him I wanted the whole can. He thought I wanted to buy 1500 rds. of rare Russian ammo for $500! Haggled him down to $15 for the odd sized old can.
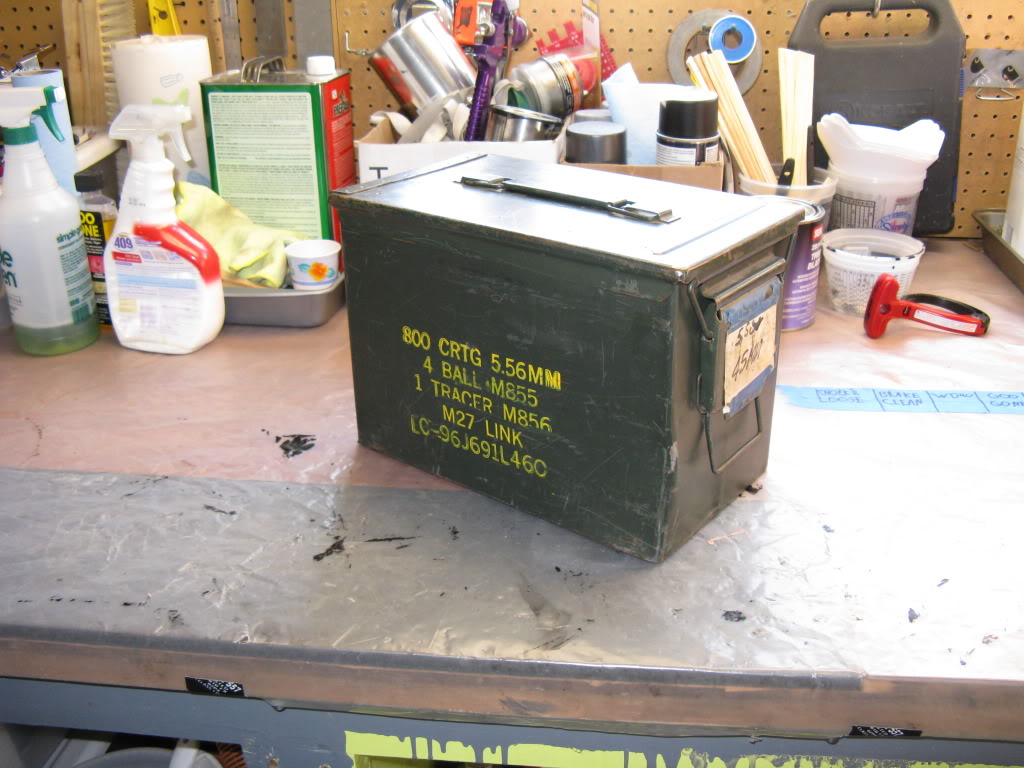
the fit is almost perfect. I'll be building a battery retention system and cables soon. More pictures of that later.
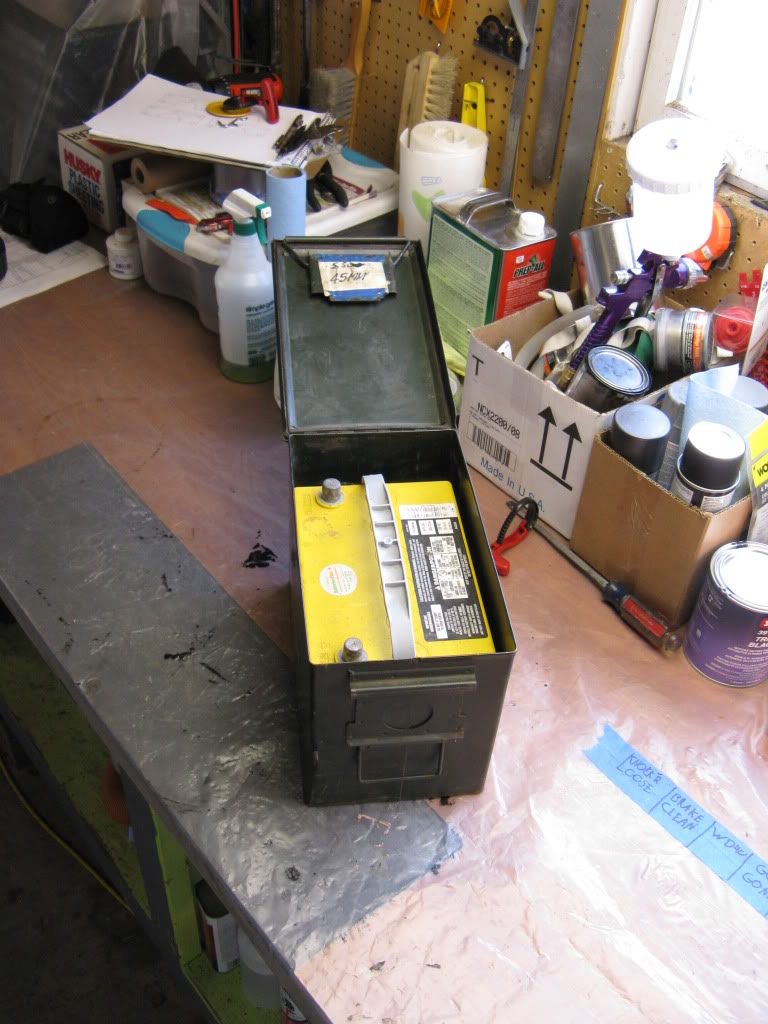
I was thinking about leaving the original paint and script on the can for a bit of a Rat Rod look but decided I am going to spackle paint it to match the trunk.
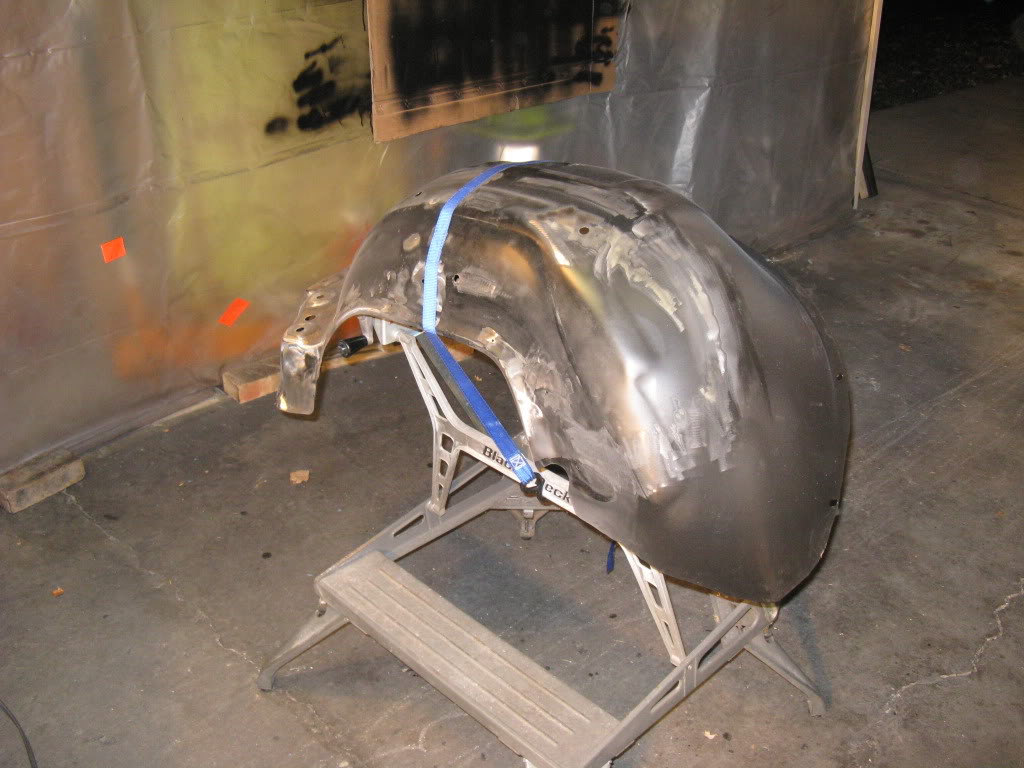
Time for my first welding project! Welding up the unused mounting holes in the inner fenders.
found some peeling POR15 on the fender tops! GGGRRRR. At least I'm going to be repainting them anyway.
As I progressed I got better and better. Welding body panels is frustrating! I burned through several times. had to talk to my welding buddy for some advice on that front
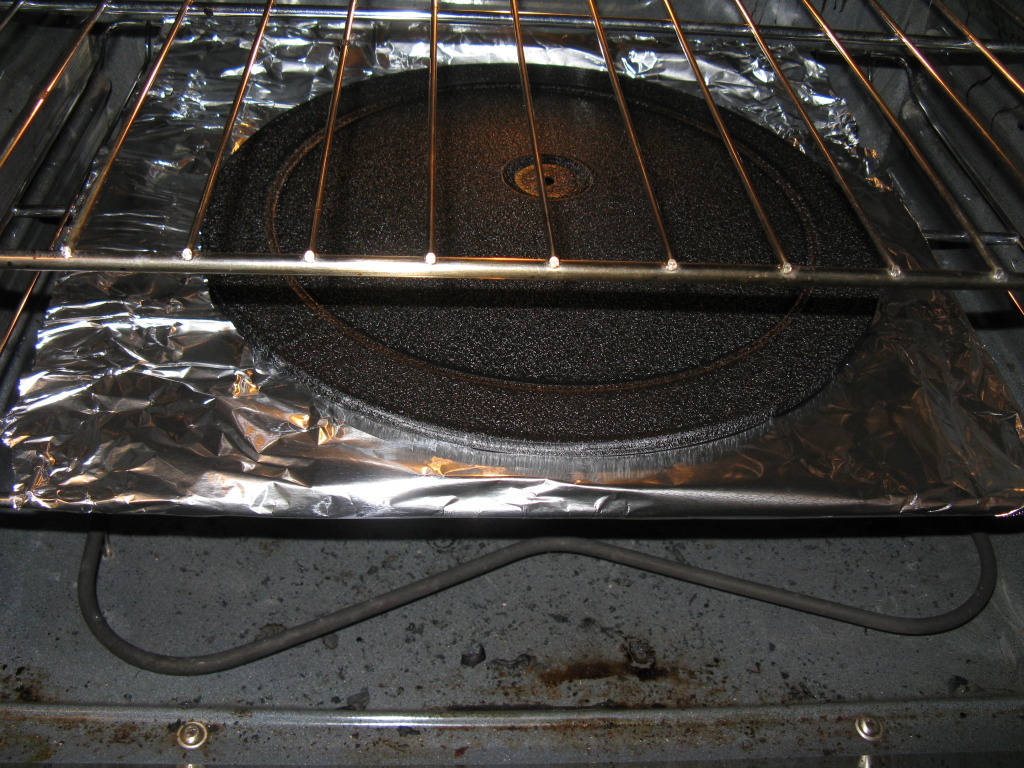
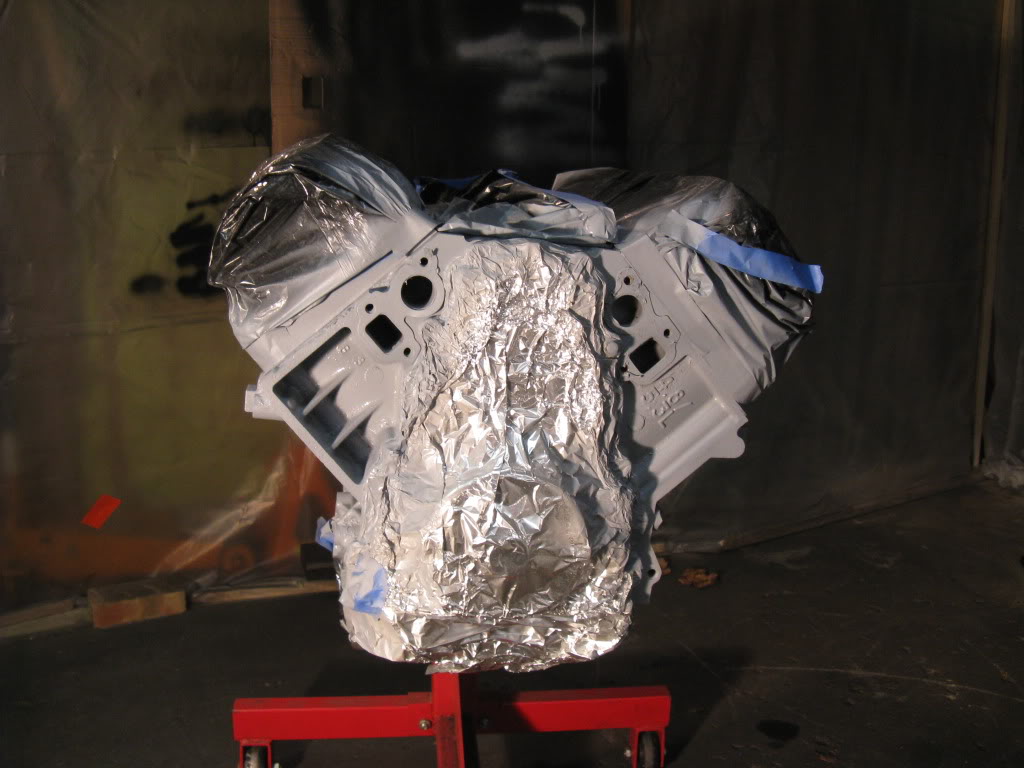
Next project, painting the engine finally! I used tin foil to cover the pan and front cover. I was almost expecting to find a chocolate timing cover when I took the foil off!

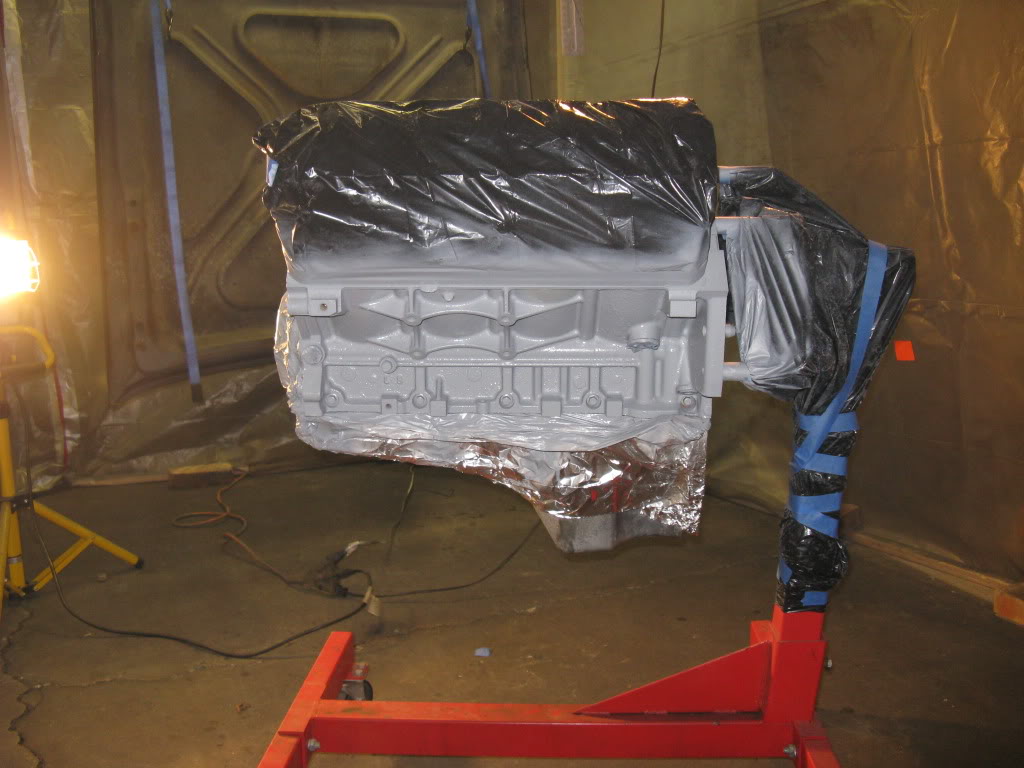
In primer:
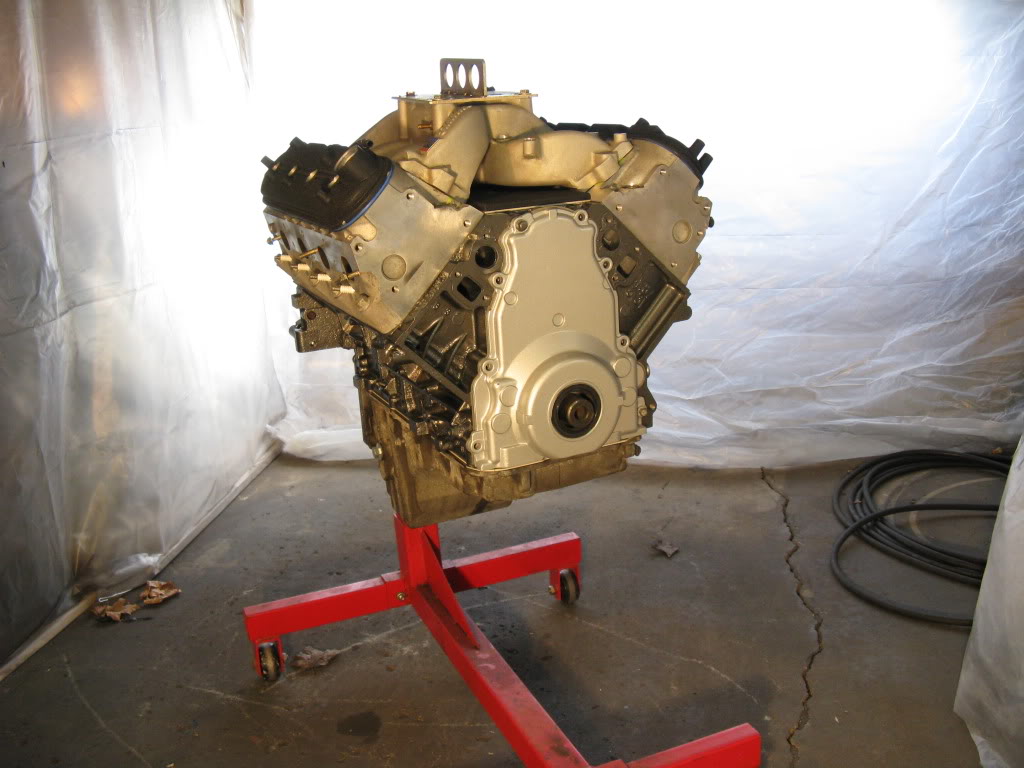
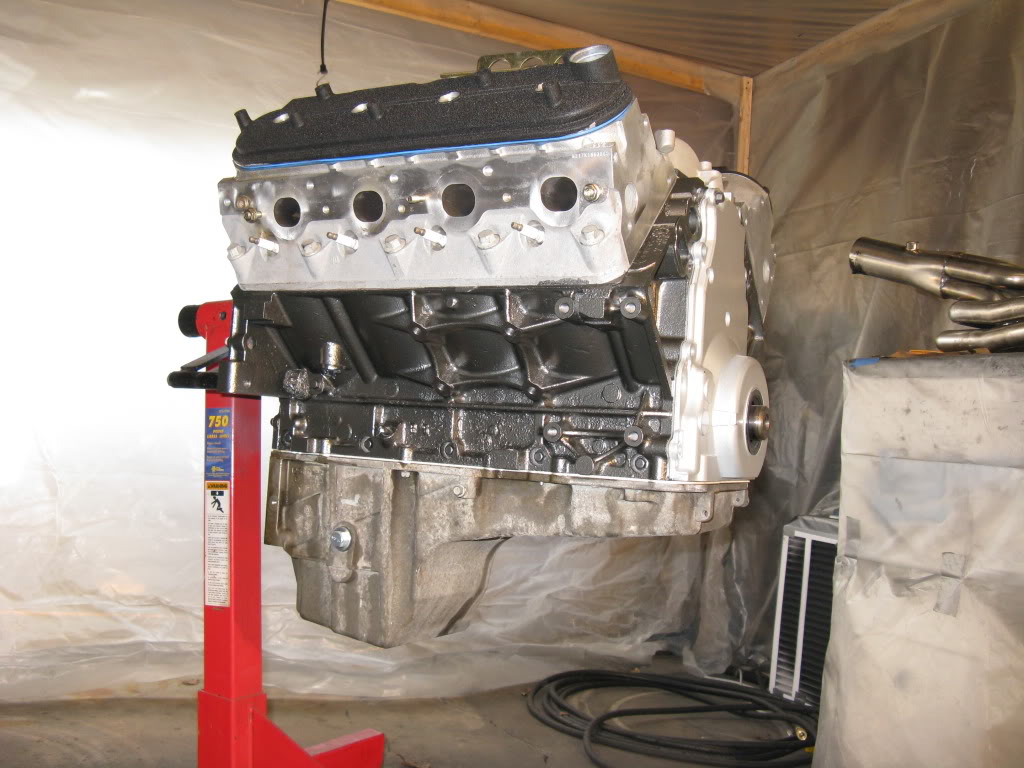
And the final product. I was to excited to wait and ran to the basement and got the valley cover, intake and valve covers to get a little peek at what the complete engine will look like.
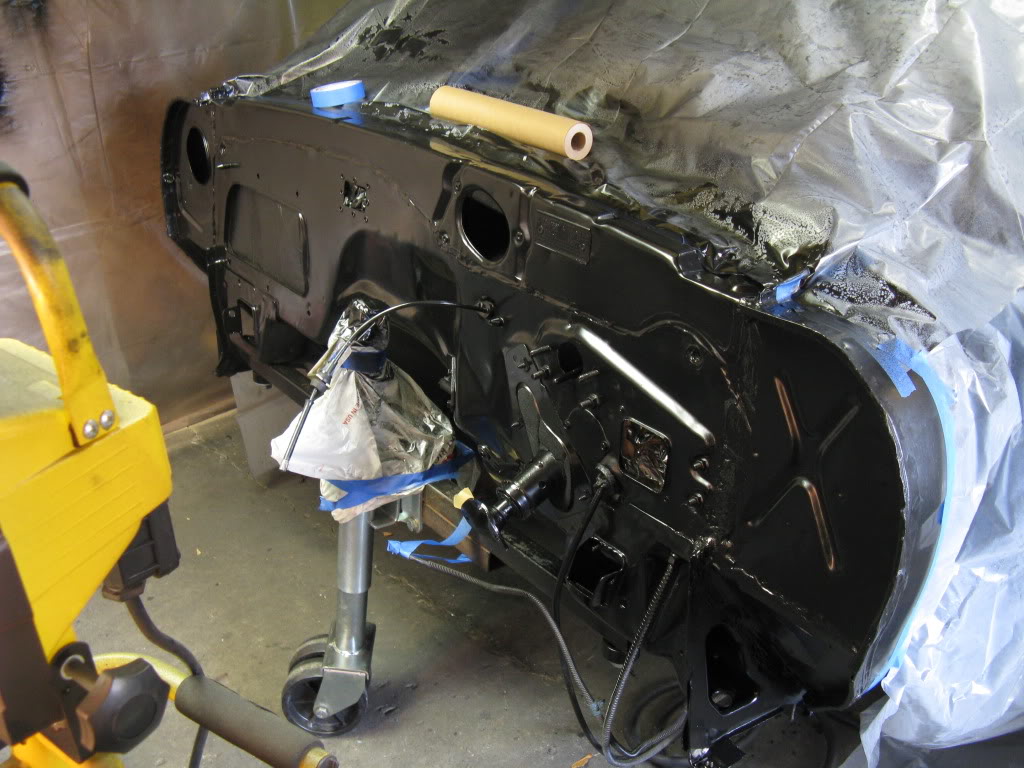
Next, brush POR15'ing the unseen parts of the firewall. The center section will be sprayed to achieve the best finish I can.
I even painted as much of the cowl vent area as possible.
Cowl shoulder
Underside and tunnel. I was fighting the urge to just keep painting the undercarriage.
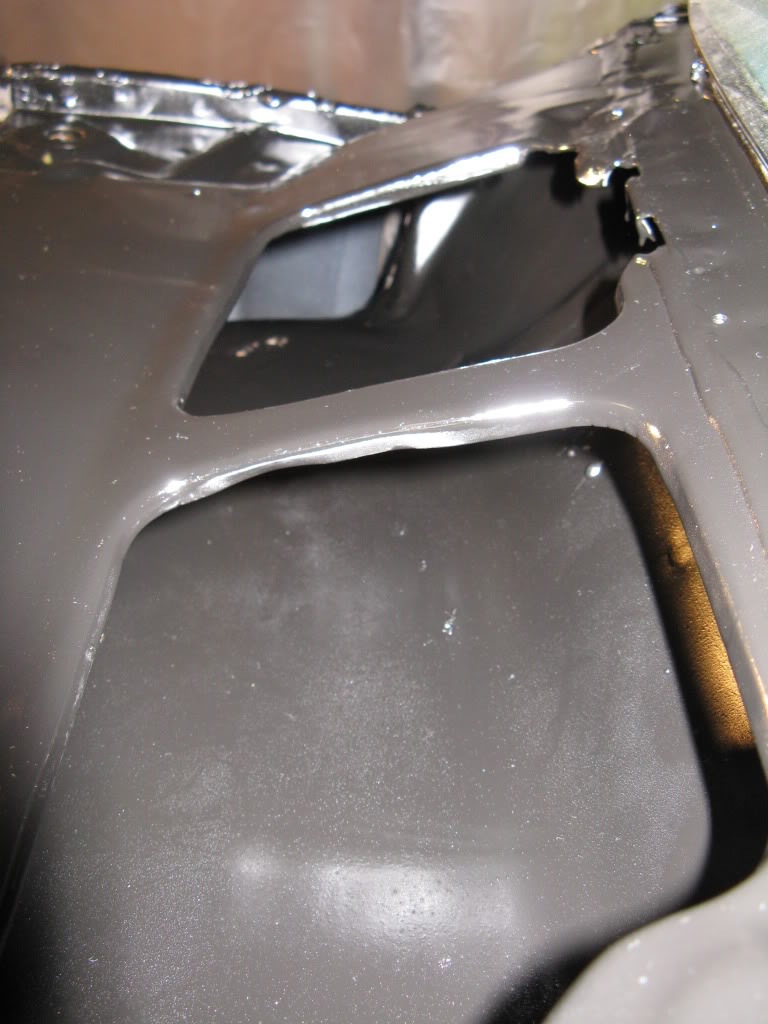
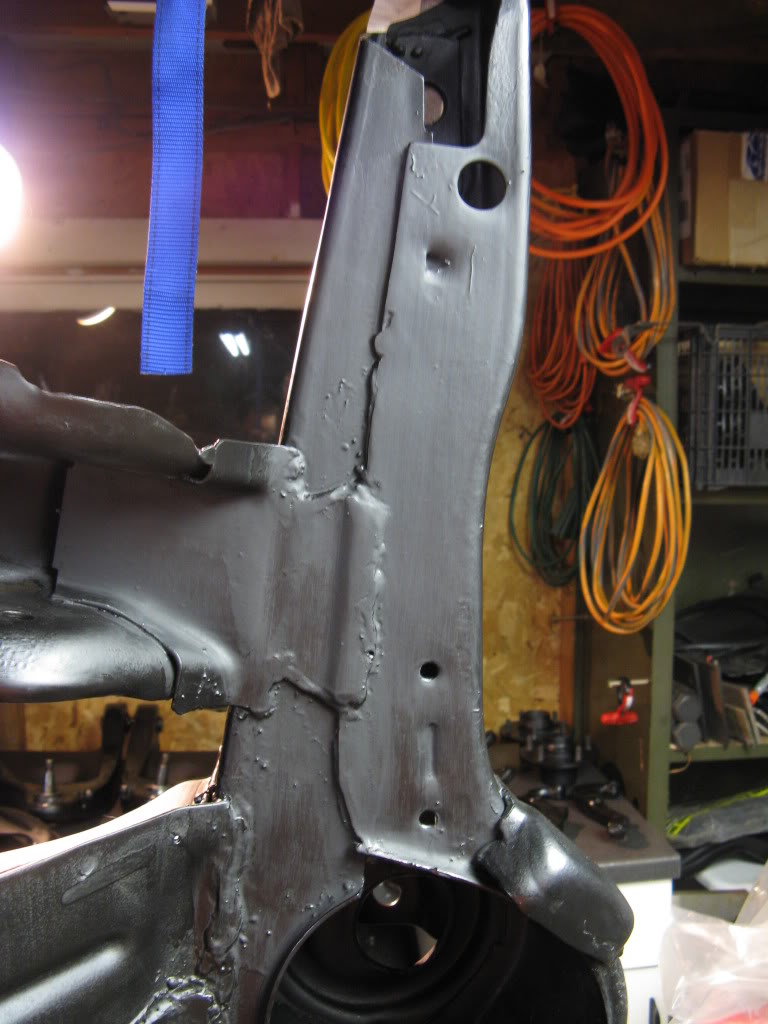
Here is the finished spray POR15 firewall. It looks great!
Except for this crap! Right up high in the center. So I started sanding to smooth for a small repaint

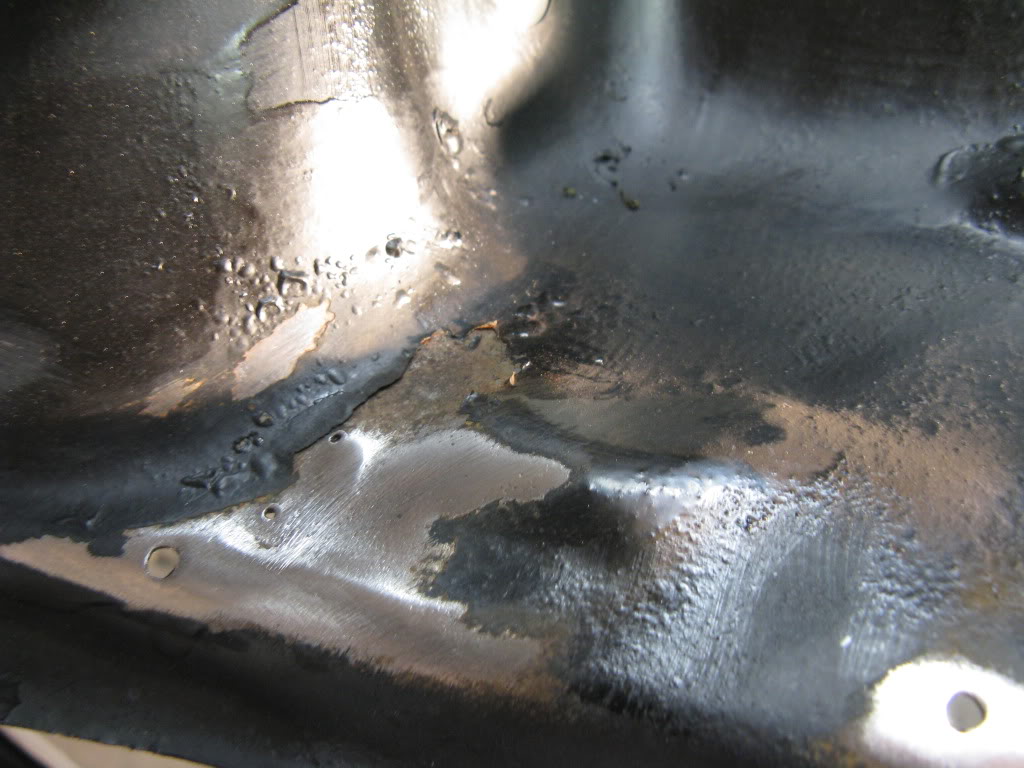
And this happened. The POR15 just started peeling off! And it took the seam sealer with it...
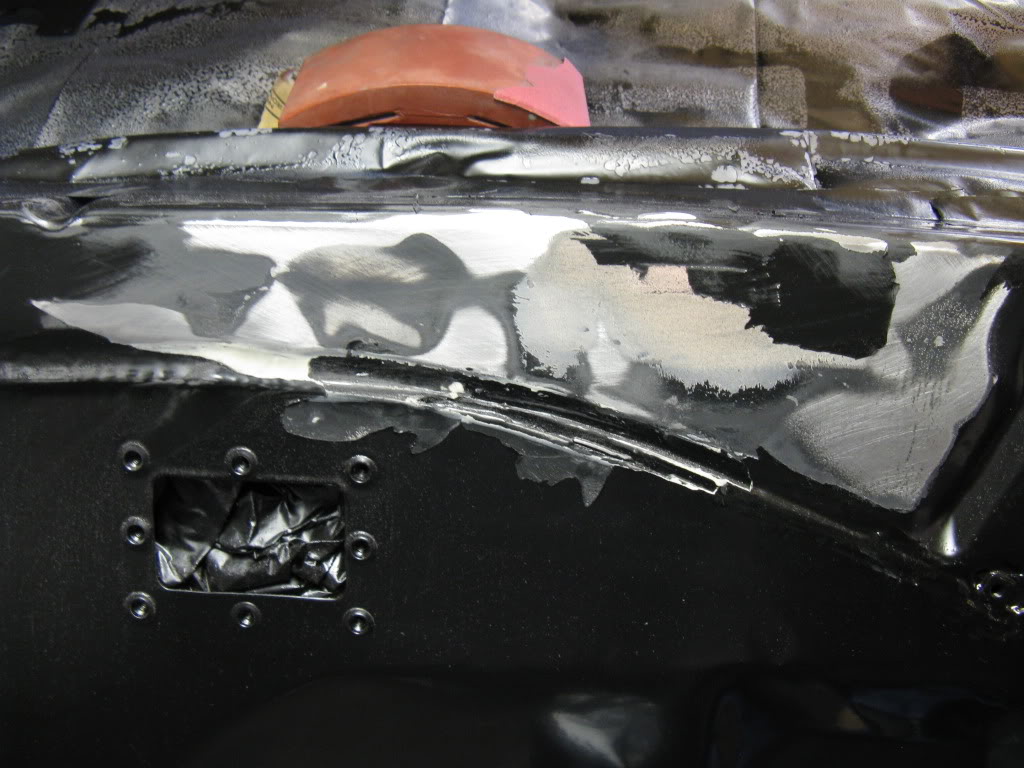
So I had to resand the metal and bondo, feather the edge of the POR15 as much as possible. BTW, check out the finished pass thru for the MSD harness. I have a 2 peice small cover that bolts to the firewall using the thread inserts I installed.
After that frustrating PITA, I made an executive decision to change to my paint plan and repainted the core, inners and firewall in the same SEM trim black I used on the car. Glad I bought a whole gallon! I'll post a few more pictures of these parts later. BTW, that was all the room I had to stand and spray in my little booth with all those parts. Fortunately I am a small guy, only 6ft and 260lb!

Now the happiest moment of my recent life, tearing down the paint booth and reclaiming my garage!

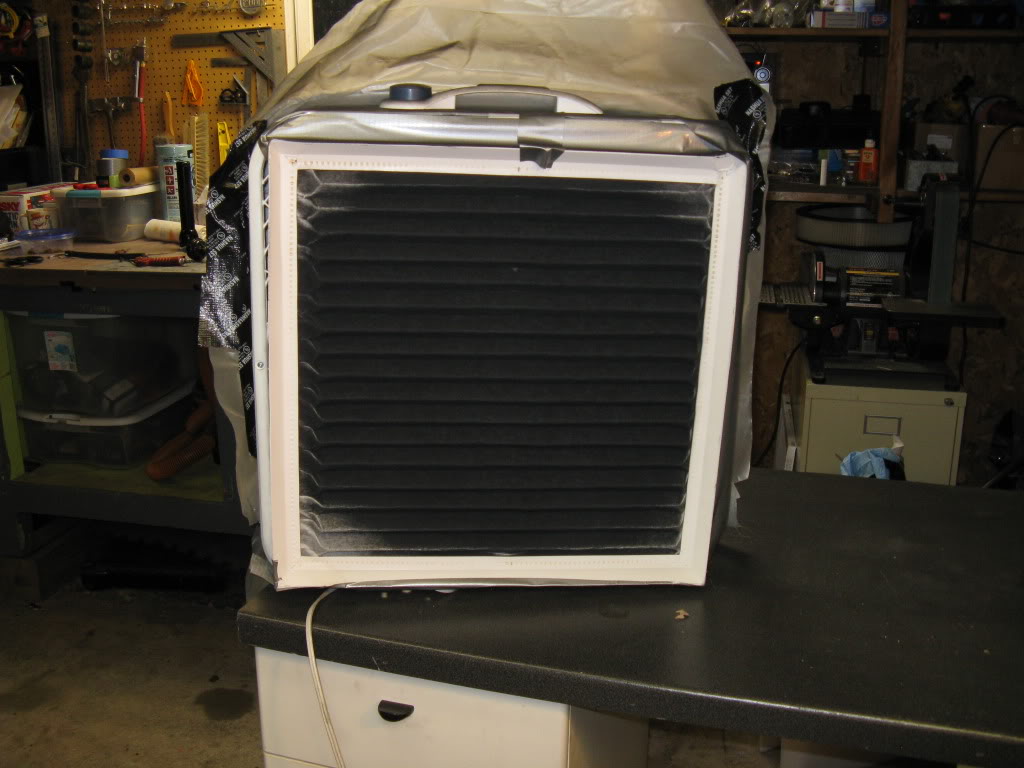
Check out the outlet air filter after only 1 batch of POR and 1 of SEM! Glad I had a good respirator!
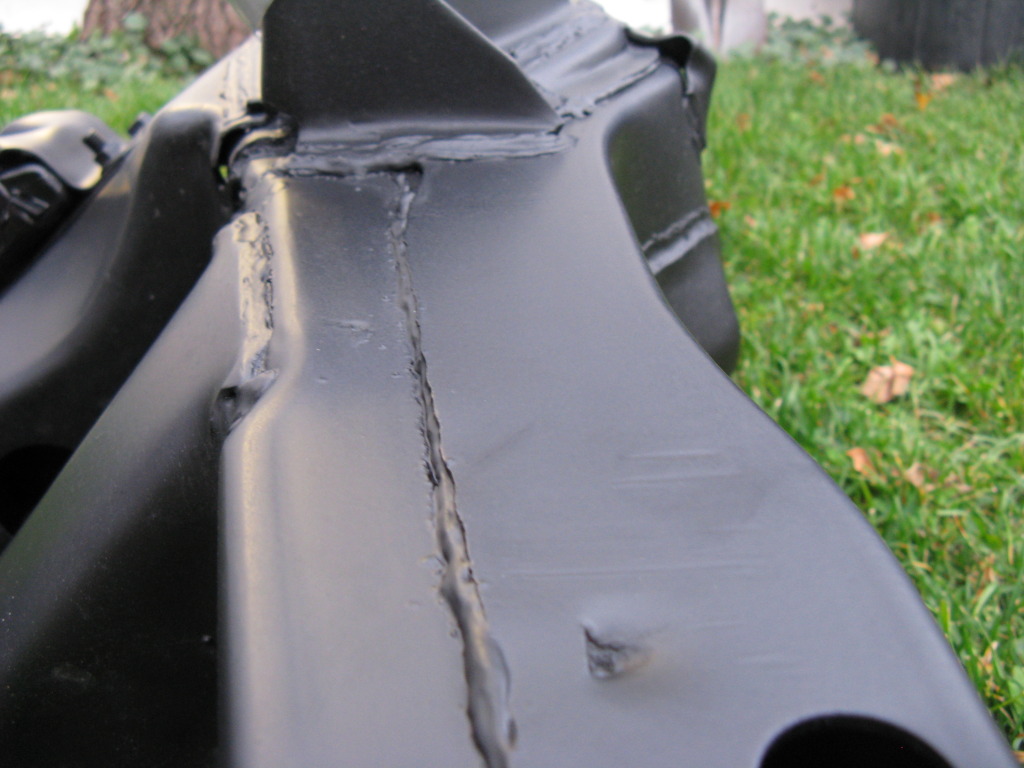
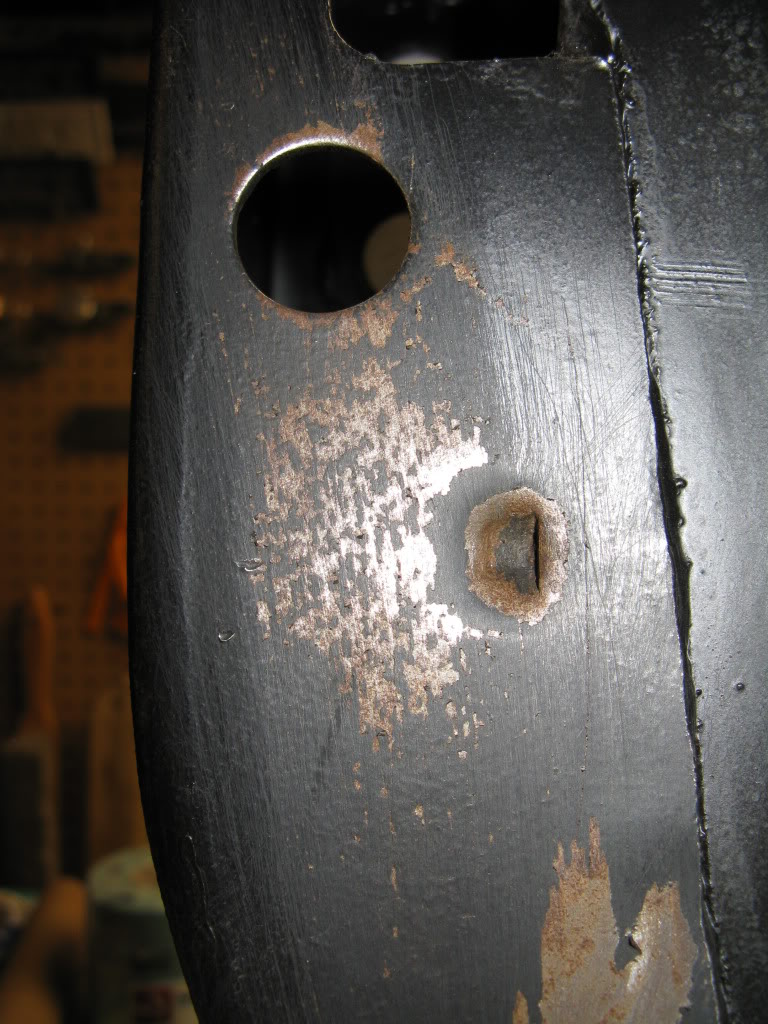
So, more bad news on the POR15 paint. Big areas of the subframe are peeling just like the firewall!

But some parts are holding tight! Here I had to use the angle grinder and wire brush and barely took it off!
I touched up all the peeling areas with brush POR15 treatment
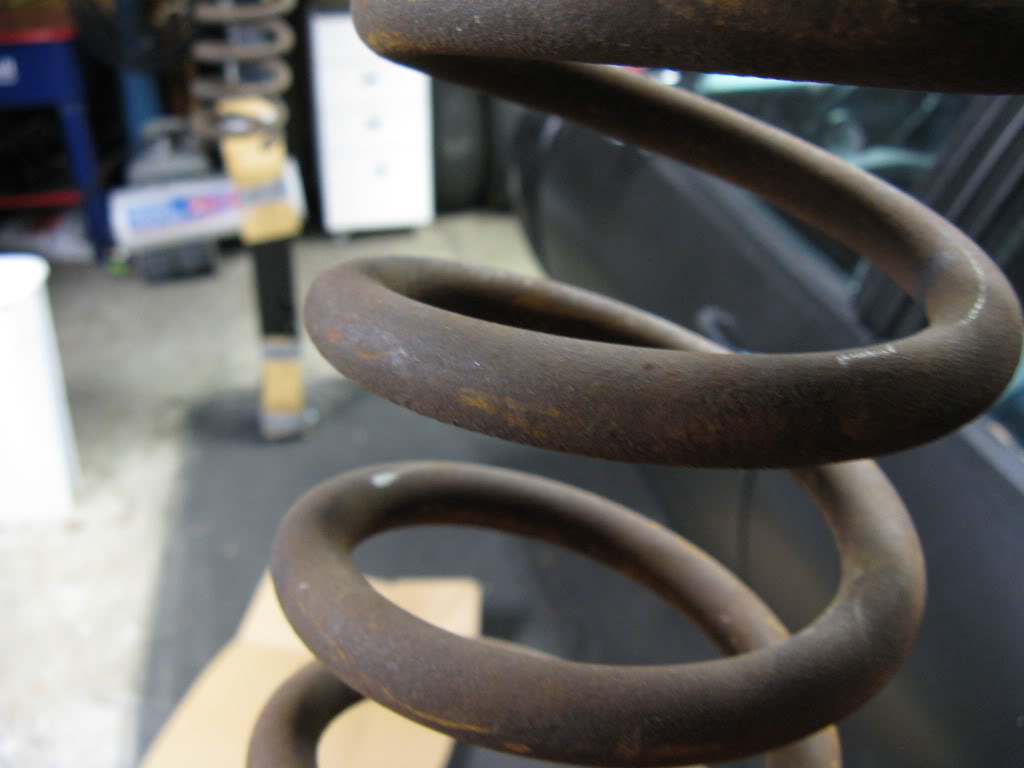
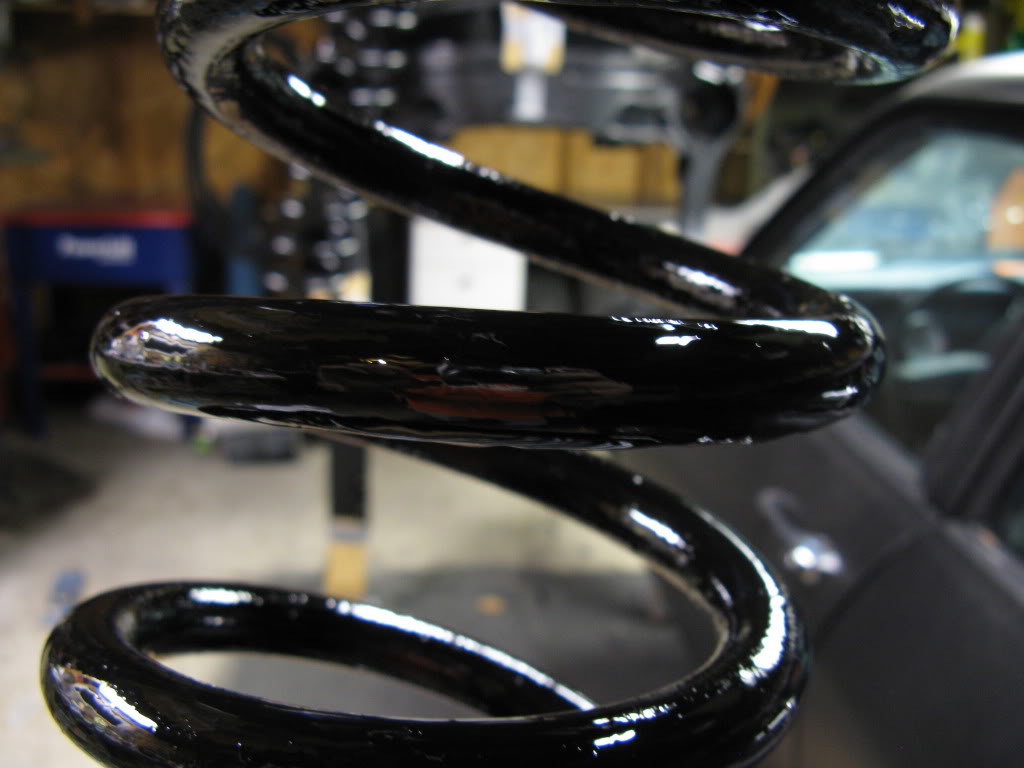
While I was painting the subframe I also hit the springs

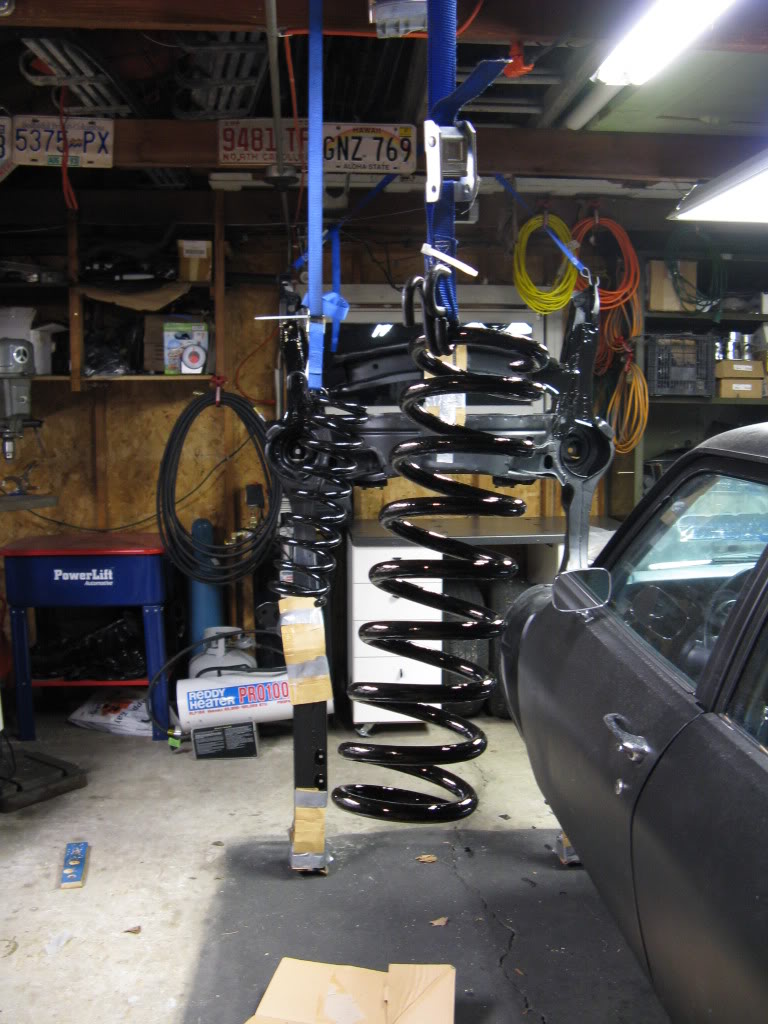
That about brings the project up to date. This week I am working to reassemble the suspension and install the subframe. I'm excited to have a rolling chassis for the first time in a year! Expect and update by the end of next week. Thanks for looking!
A batch of small hand painted POR15 pieces
Underside of the lower control arms. Brushed POR15 comes out pretty nice. There are some brush strokes, but not many.
Since I am using a big block heater core my buddy and I patched the original firewall cutouts and I smoothed them over with a little bondo. You can also see the begining of the pass thru for the MSD harness.
check out my latest Craigslist score! A Hobart Handler 135. the guy said its about 4 years old nad had a single spool of wire run thru it! So I picked up a tank all the gear and have been buzzing together all the small scraps I had in my steel pile. Its been a learning experience.
Sticking to the budget theme, here is my new trunk mount battery box! I had to scour an entire gun show to find the right size can. The guy I got it from was selling cans full of old ammo and almost jumped thru the roof when I told him I wanted the whole can. He thought I wanted to buy 1500 rds. of rare Russian ammo for $500! Haggled him down to $15 for the odd sized old can.
the fit is almost perfect. I'll be building a battery retention system and cables soon. More pictures of that later.
I was thinking about leaving the original paint and script on the can for a bit of a Rat Rod look but decided I am going to spackle paint it to match the trunk.
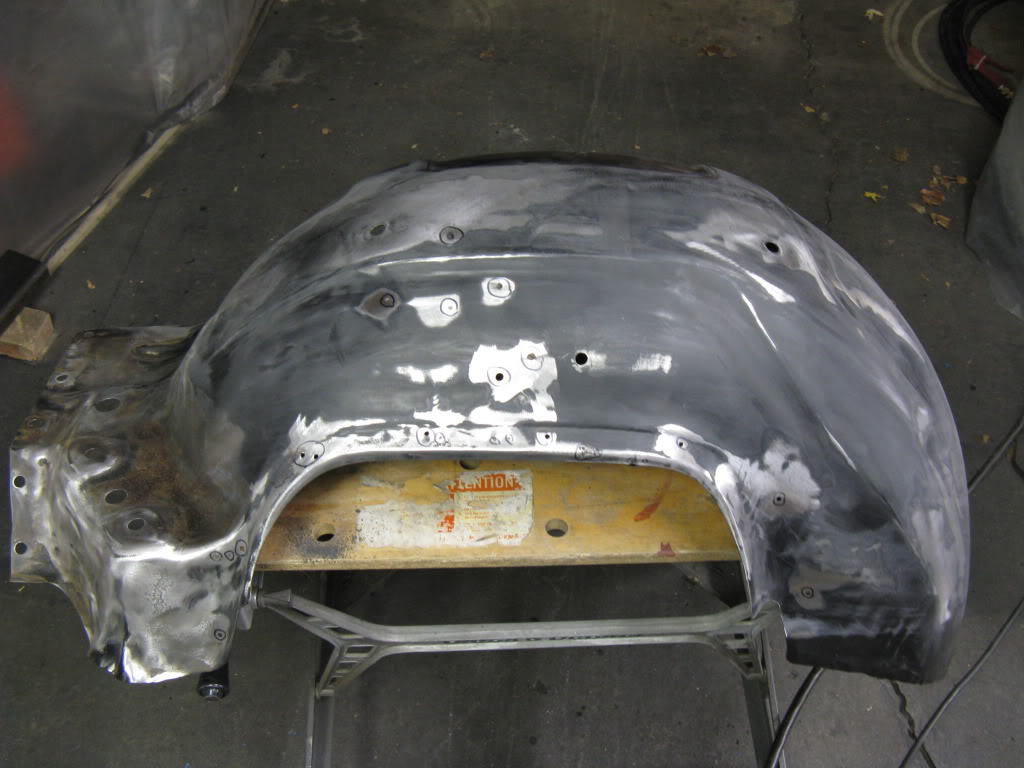
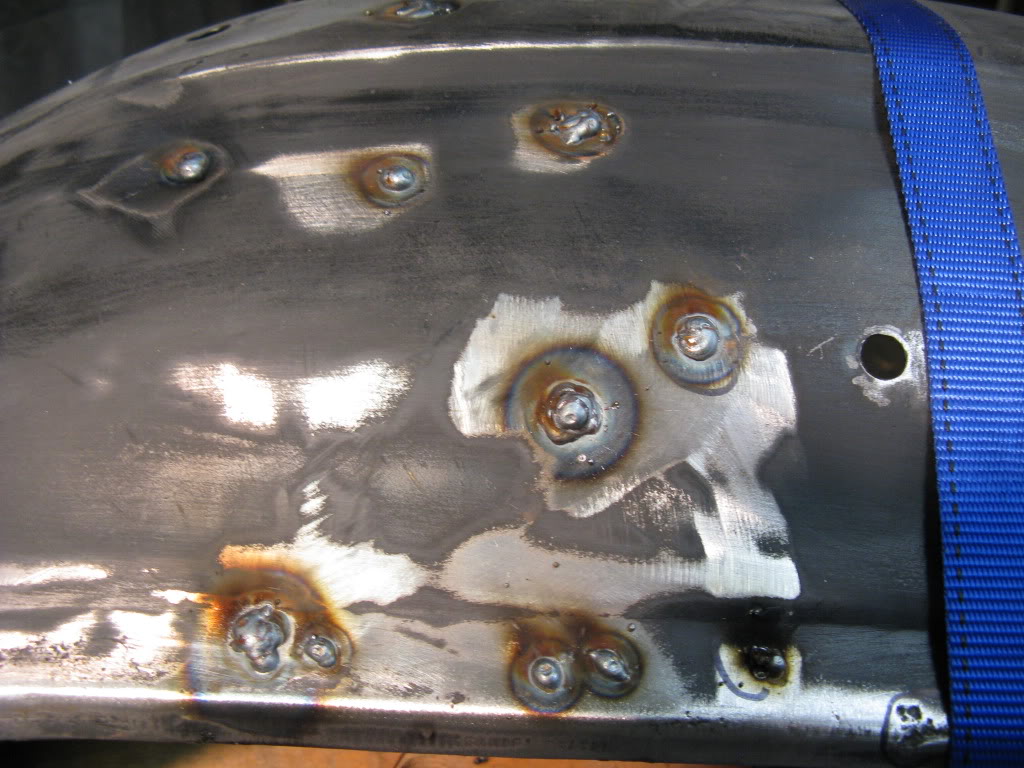
Time for my first welding project! Welding up the unused mounting holes in the inner fenders.
found some peeling POR15 on the fender tops! GGGRRRR. At least I'm going to be repainting them anyway.
As I progressed I got better and better. Welding body panels is frustrating! I burned through several times. had to talk to my welding buddy for some advice on that front
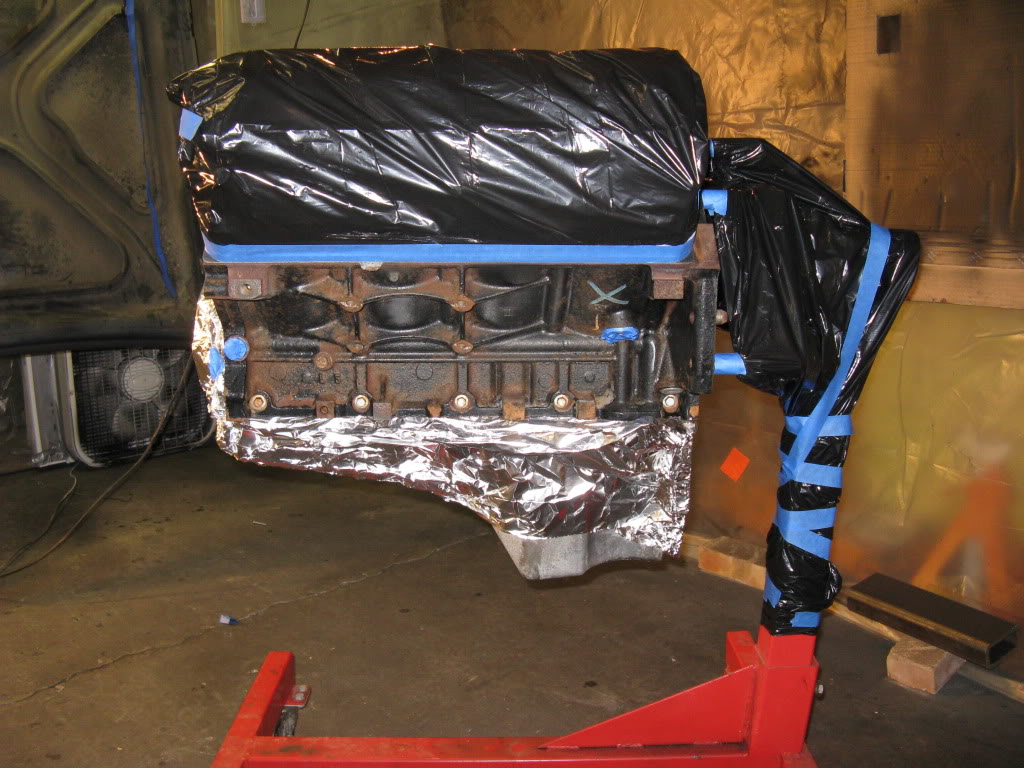
Next project, painting the engine finally! I used tin foil to cover the pan and front cover. I was almost expecting to find a chocolate timing cover when I took the foil off!
In primer:
And the final product. I was to excited to wait and ran to the basement and got the valley cover, intake and valve covers to get a little peek at what the complete engine will look like.
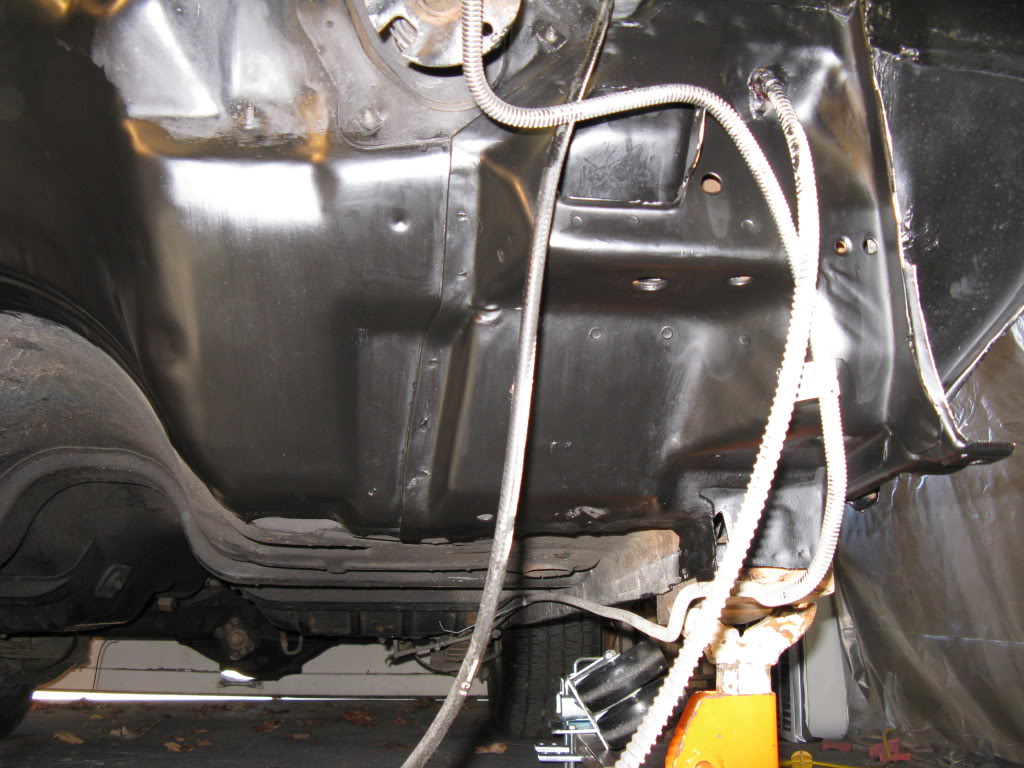
Next, brush POR15'ing the unseen parts of the firewall. The center section will be sprayed to achieve the best finish I can.
I even painted as much of the cowl vent area as possible.
Cowl shoulder
Underside and tunnel. I was fighting the urge to just keep painting the undercarriage.
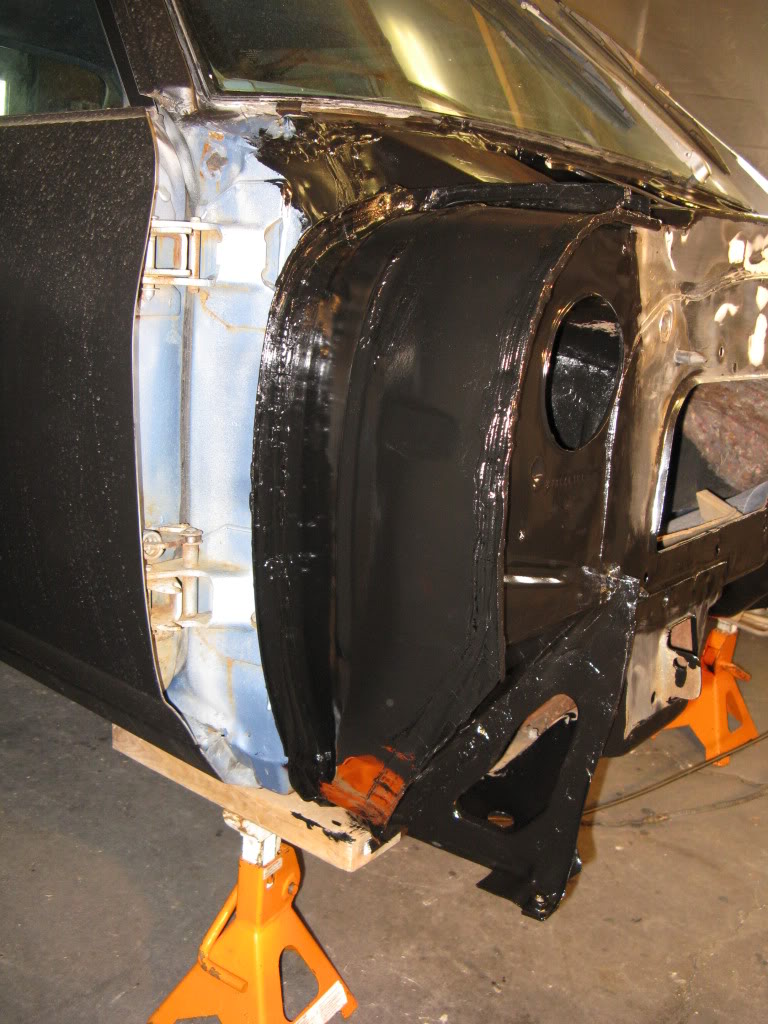
Here is the finished spray POR15 firewall. It looks great!
Except for this crap! Right up high in the center. So I started sanding to smooth for a small repaint
And this happened. The POR15 just started peeling off! And it took the seam sealer with it...
So I had to resand the metal and bondo, feather the edge of the POR15 as much as possible. BTW, check out the finished pass thru for the MSD harness. I have a 2 peice small cover that bolts to the firewall using the thread inserts I installed.
After that frustrating PITA, I made an executive decision to change to my paint plan and repainted the core, inners and firewall in the same SEM trim black I used on the car. Glad I bought a whole gallon! I'll post a few more pictures of these parts later. BTW, that was all the room I had to stand and spray in my little booth with all those parts. Fortunately I am a small guy, only 6ft and 260lb!
Now the happiest moment of my recent life, tearing down the paint booth and reclaiming my garage!
Check out the outlet air filter after only 1 batch of POR and 1 of SEM! Glad I had a good respirator!
So, more bad news on the POR15 paint. Big areas of the subframe are peeling just like the firewall!
But some parts are holding tight! Here I had to use the angle grinder and wire brush and barely took it off!
I touched up all the peeling areas with brush POR15 treatment
While I was painting the subframe I also hit the springs
That about brings the project up to date. This week I am working to reassemble the suspension and install the subframe. I'm excited to have a rolling chassis for the first time in a year! Expect and update by the end of next week. Thanks for looking!
Last edited by cruisin'73; 12-08-2012 at 03:14 PM.
12-09-2012, 04:36 PM
#94

I noticed that were you say that some of the areas that bubbled had previous paint or bondo which the POR15 may have had a reaction. POR15 is really only meant to go on bare/rusty metal also you need to use the metal ready blue stuff and marine clean along with the POR-15. Ive used that stuff quite a bit on my Nova using that system and never had it bubble like that.
12-09-2012, 07:23 PM
#95
Slim, Darren
Thanks guys. I know I'm taking my time to complete this, I just can't stand the thought of half assing this stuff to rush and get the car done. And don't worry, this will be no trailer queen!
Tattoed. I am pretty sure that my frustration with the POR15 has been do to my prep and application method. Though I did brush, chem wash, water and soap wash, degrease and wax and grease remover before painting I did not use the POR15 recommended products or procedures. All and all, I have determined that POR15 is designed to cover and protect heavily rusted sturctures. And that trying to get a high grade finish, as I did, is not the proper application. That said, in the next few years I plan to replace the floorpans and POR15 will be used extensively to protect both inside and under the car in a brush application. But for firewalls and highly visible areas I'll stick to SEM trim or perhaps Eatwood Rust Encapsulator which my local Nova buddy highly recommends.
As far as the car goes, I have been working on the suspension and will have the next post soon.
12-14-2012, 12:41 PM
#97
TECH Enthusiast
iTrader: (1)

Join Date: Jan 2006
Location: Charlotte, NC
Posts: 581
Likes: 0
Received 0 Likes
on
0 Posts

I used por15 on the chassis of my Cavalier that I had during college - the parts that weren't rusty - just stripped and peeled right off like you are seeing.
The parts that where rusted - it stuck to it like no ones business.
So I've been there.
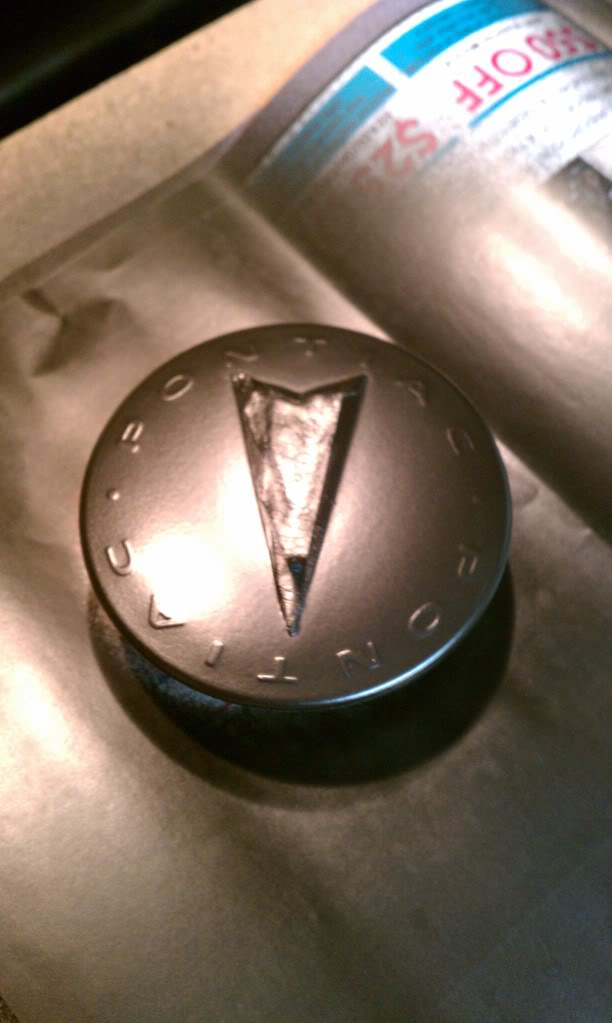
As far as the SEM flat black trim paint - I painted a set of center caps for my G8 - and after a year - no peeling fading or anything - so no complaints!

The parts that where rusted - it stuck to it like no ones business.
So I've been there.
As far as the SEM flat black trim paint - I painted a set of center caps for my G8 - and after a year - no peeling fading or anything - so no complaints!
01-22-2013, 06:55 PM
#99
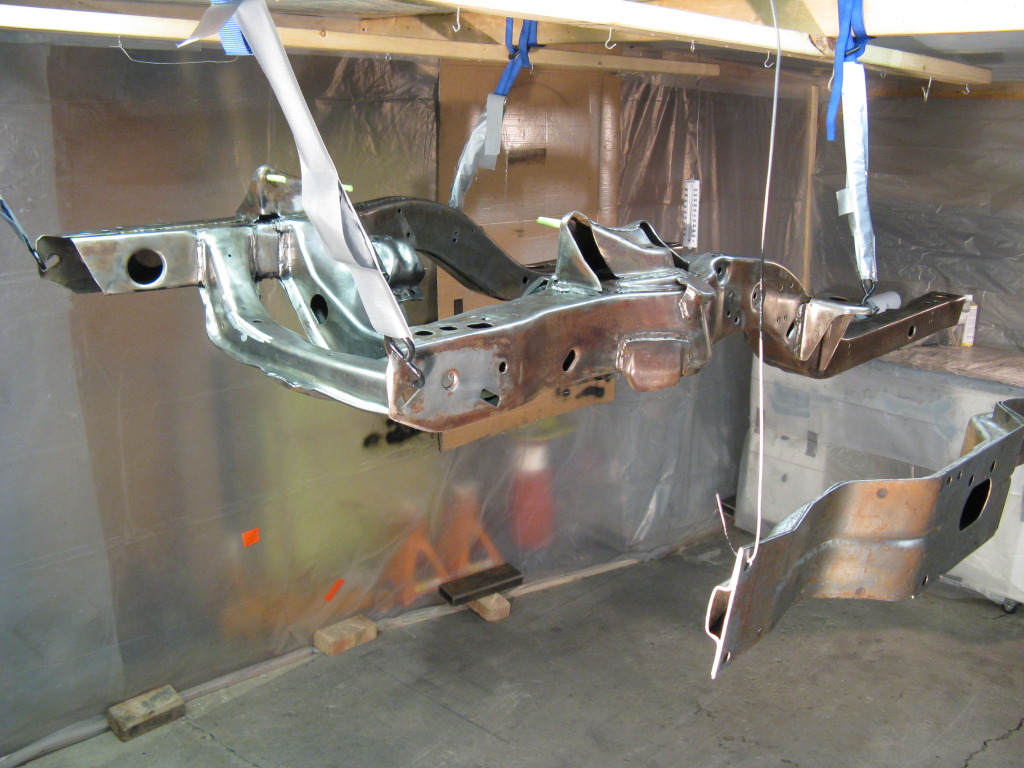
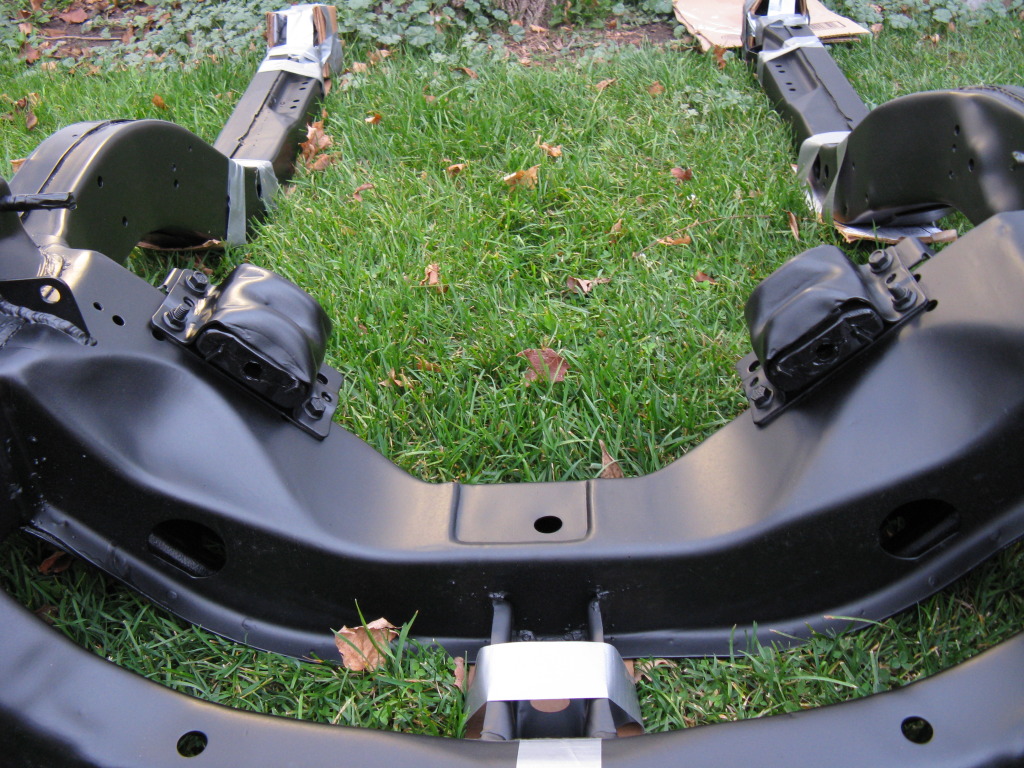
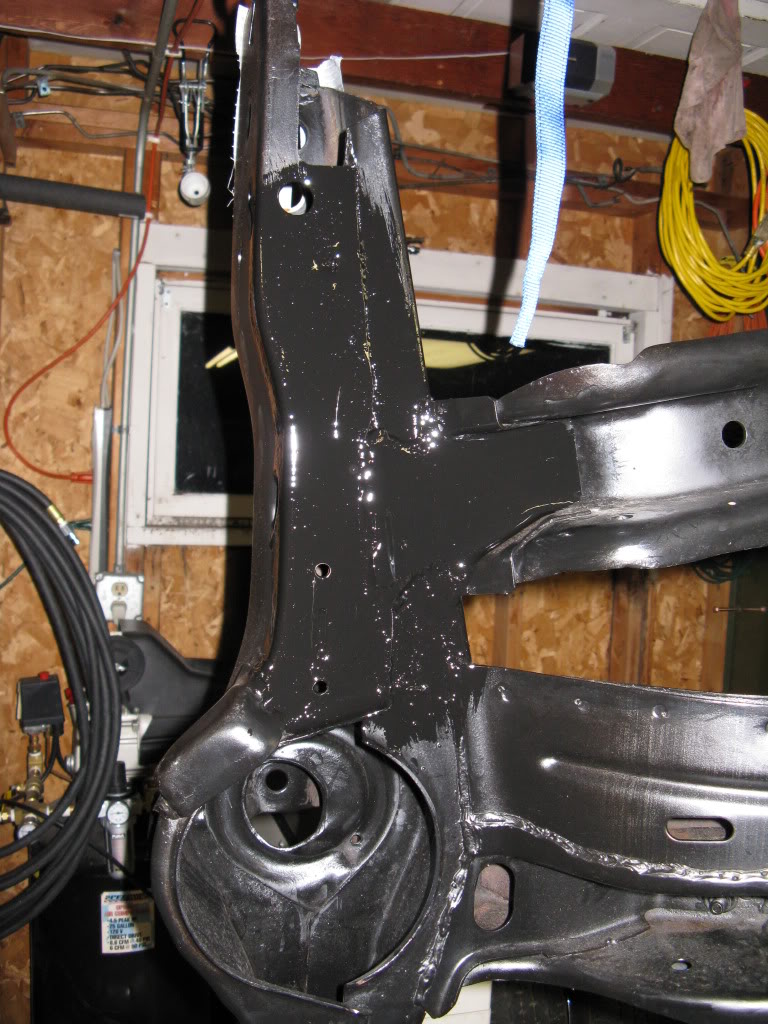
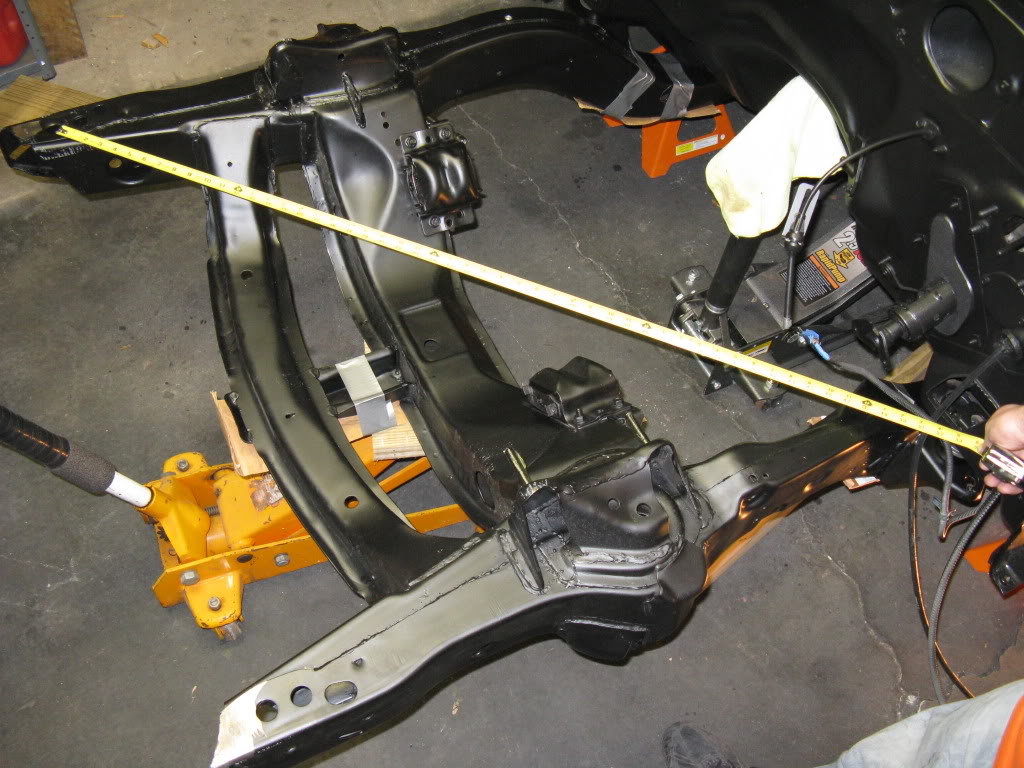
OK, right to it. First few are the painted subframe.
Came out looking close to the sprayed POR15... still frustrated overall withthe results.
Ready for hookup!

Checking for square. Came within 1/4". Thats good enough for now.
And wouldn't you know it! Anywhere I had taped to the sprayed POR it peeled right off. Pissing me off in the process. I'll have to touch these spots up with a brush at the same time I touch up the suspension after installation.
TADA!
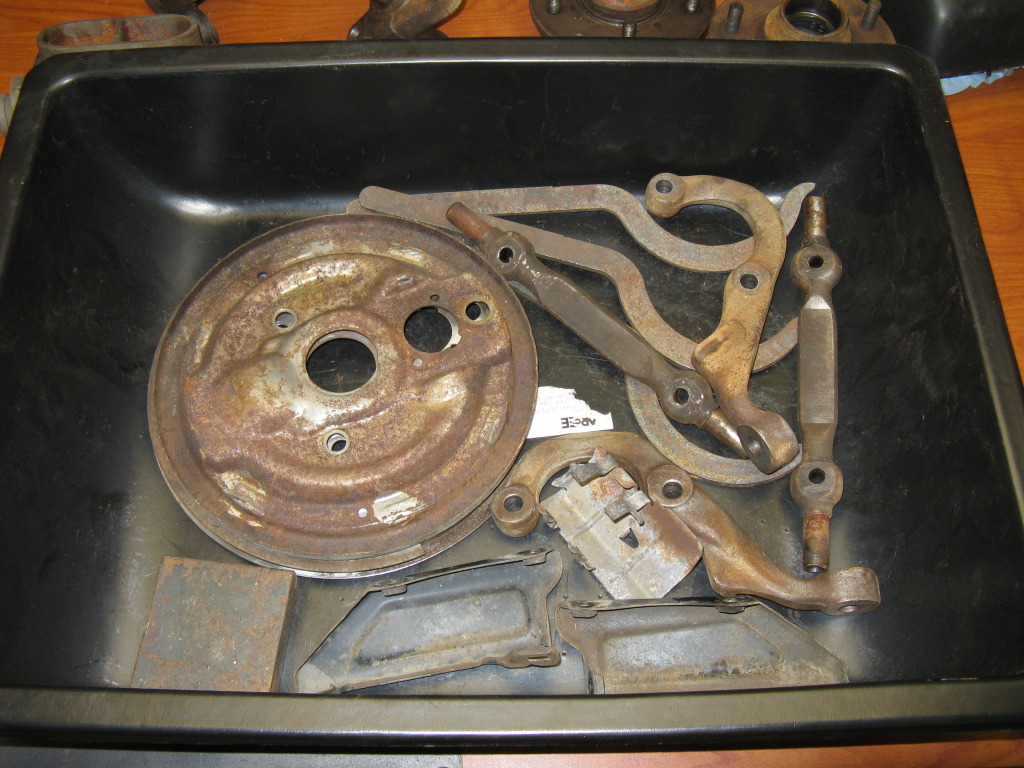
Painted suspension hard parts ready for installation.
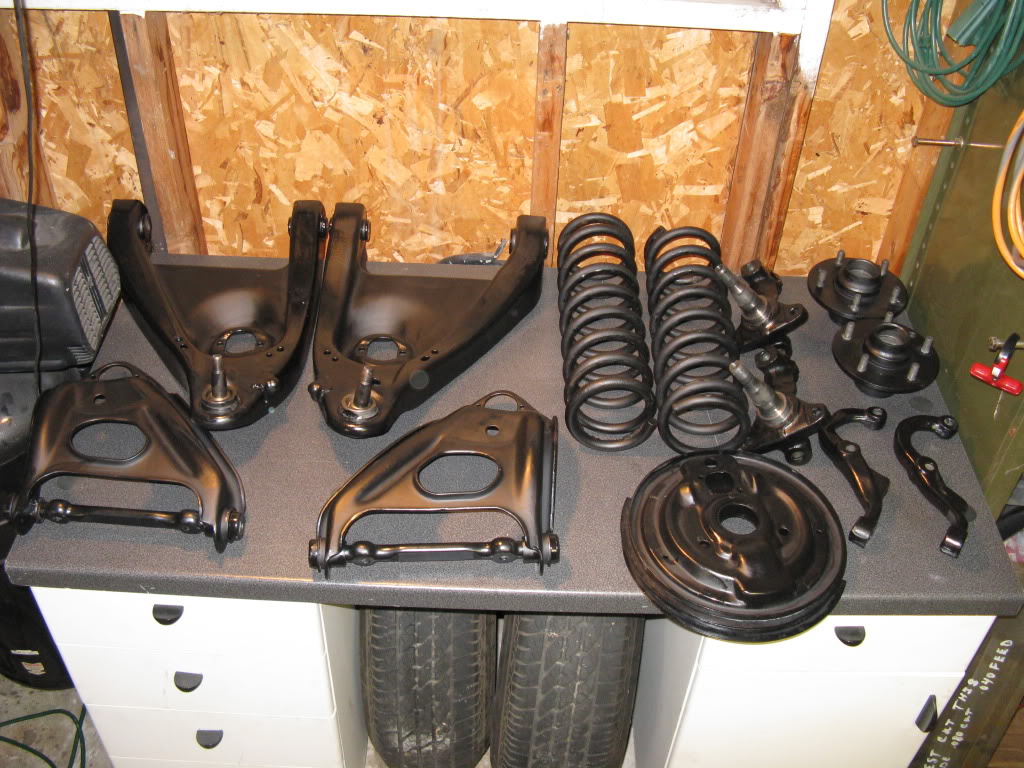
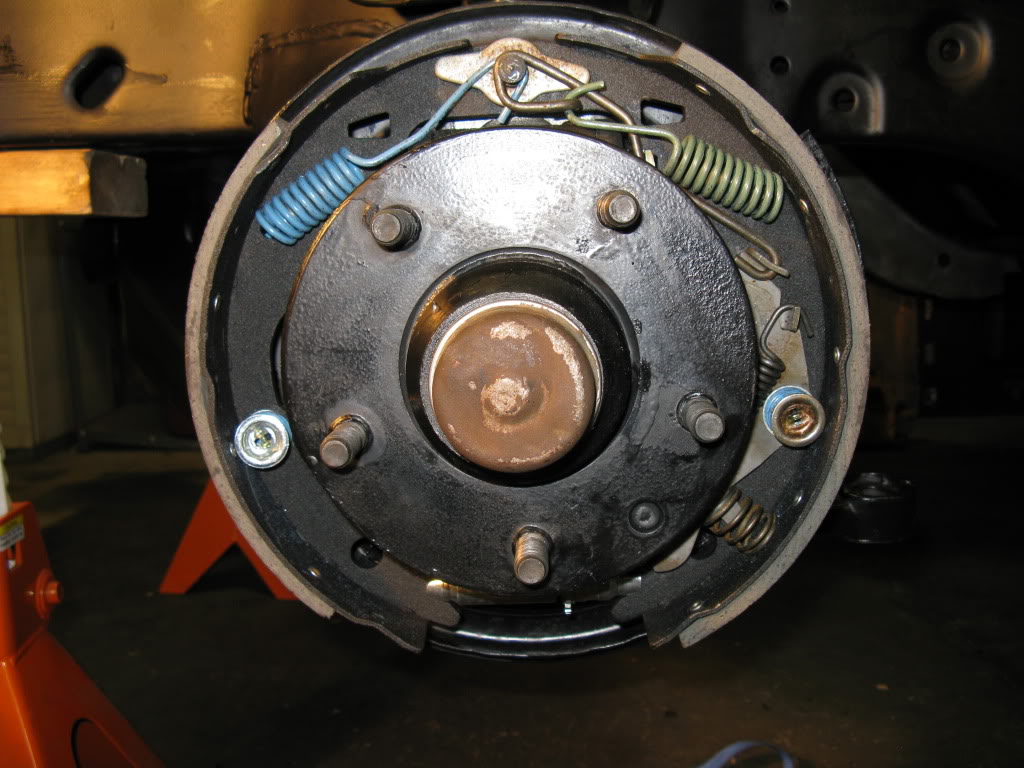
See how easy it is to rebuild drum brakes! YYYAAAA
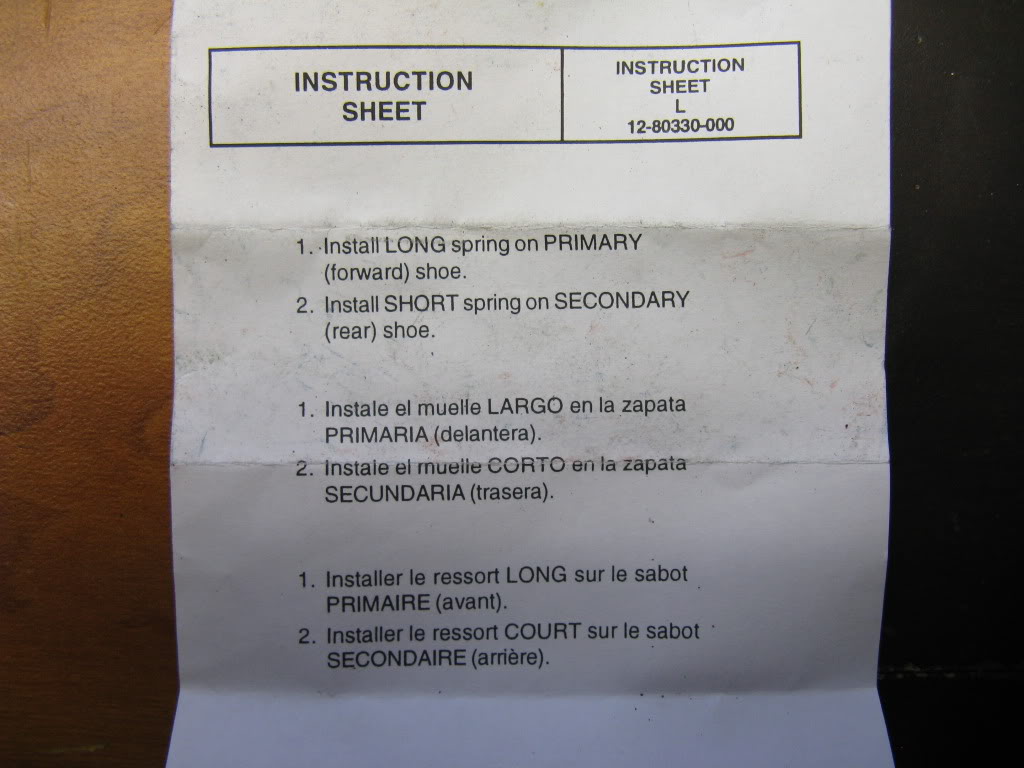
Here is the finished product. It was a PITA! If only for the easy of rebuild and service I WANT DISCS! I searched all over the internet for pictures of how the plates and springs go. So if you are in the same boat check out my photobucket for a few more pics.
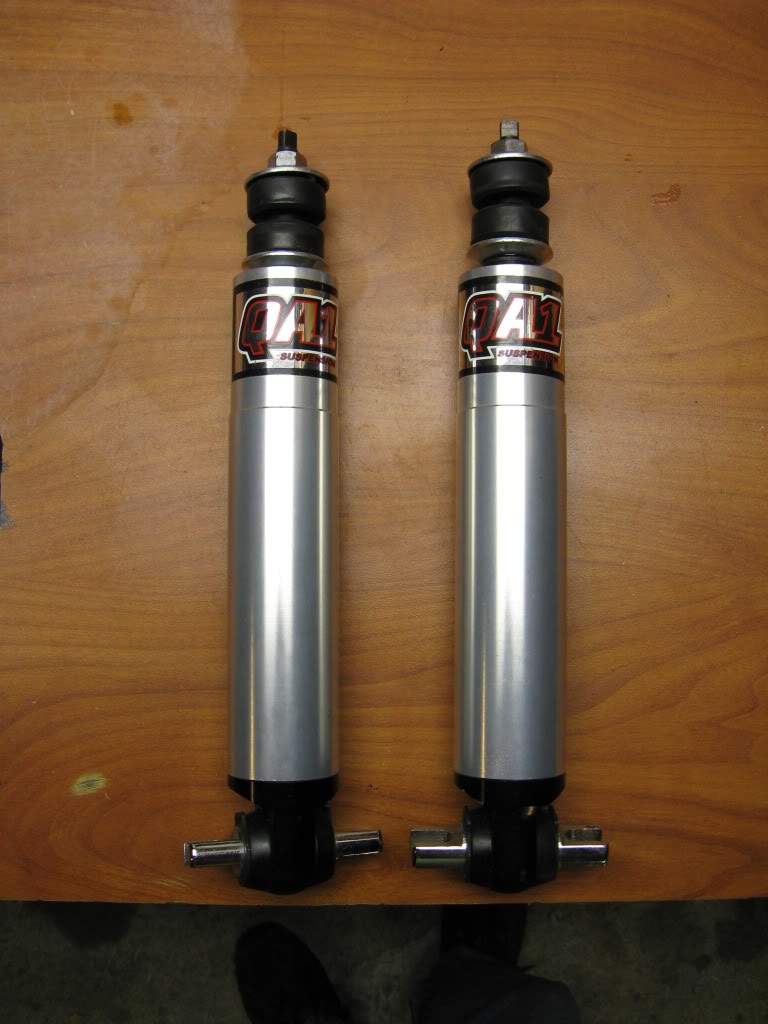
A nice little score I made. QA1 front shocks. Used for rolling into and out of the garage. The guy changed to tubular arms and wanted coil overs so I scored them for a song!
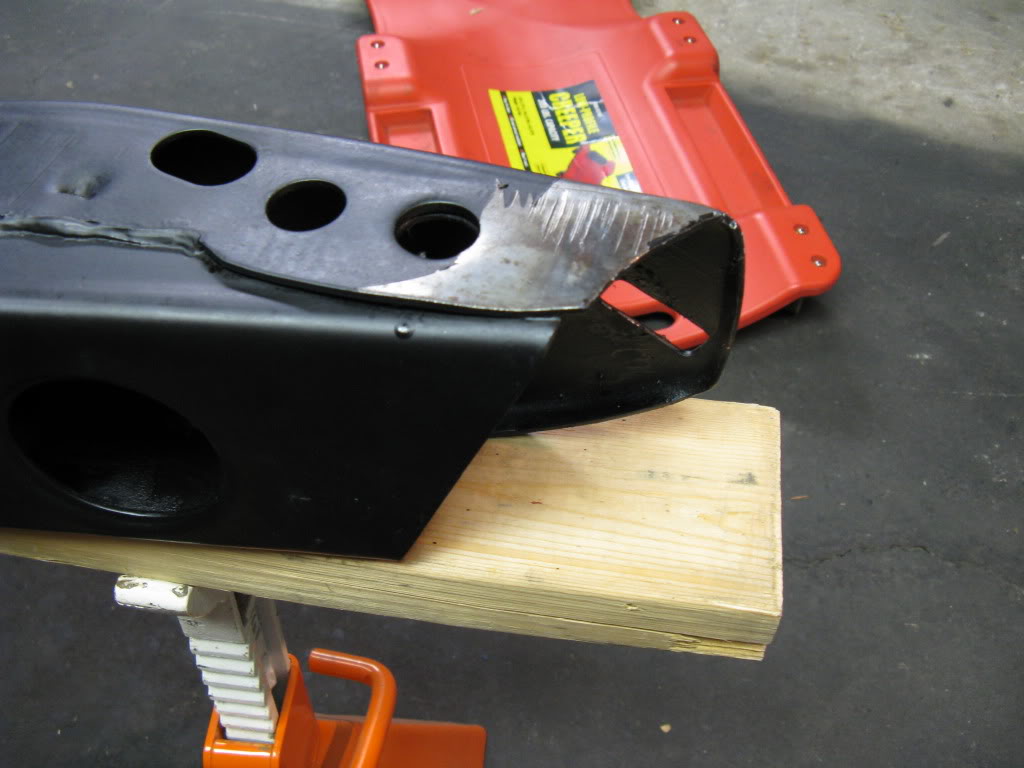
I knew it was time to call it a night when I installed the ARB upside down! At first I was very concerned about oil pan clearance. then I realized my mistake.
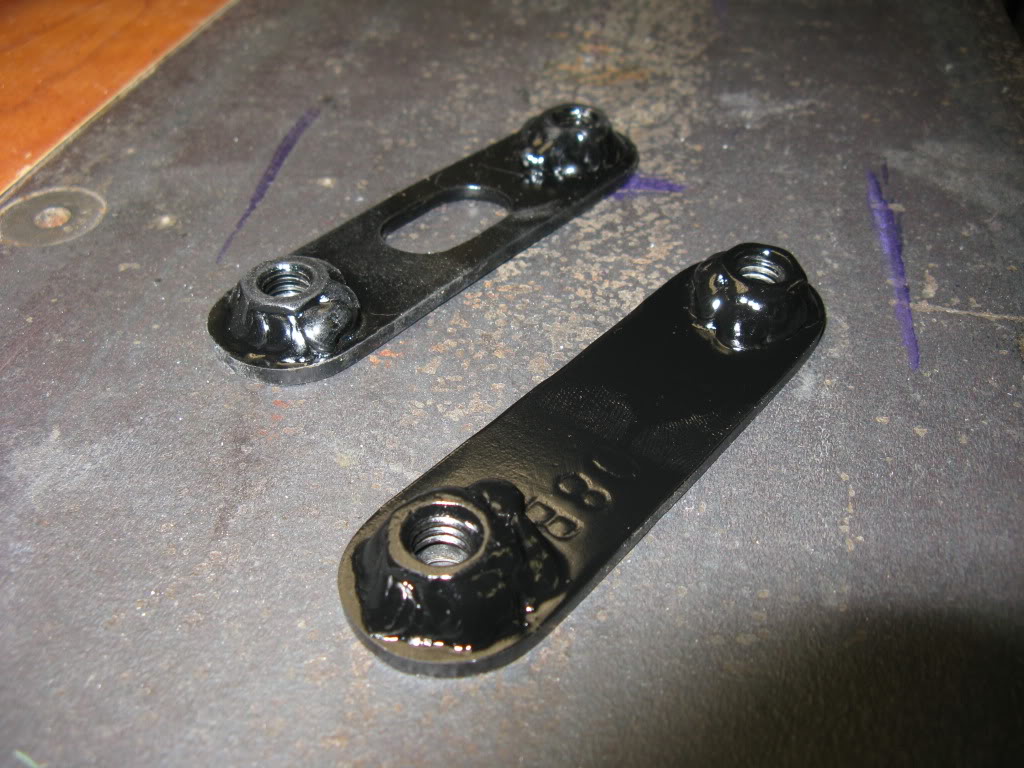
While reinstalling the ARB I realized the original frame tapped mounting holes were stripped. So I made these handy plates. Yes, it was so cold I had to use a torch to get the chem-dye to dry!
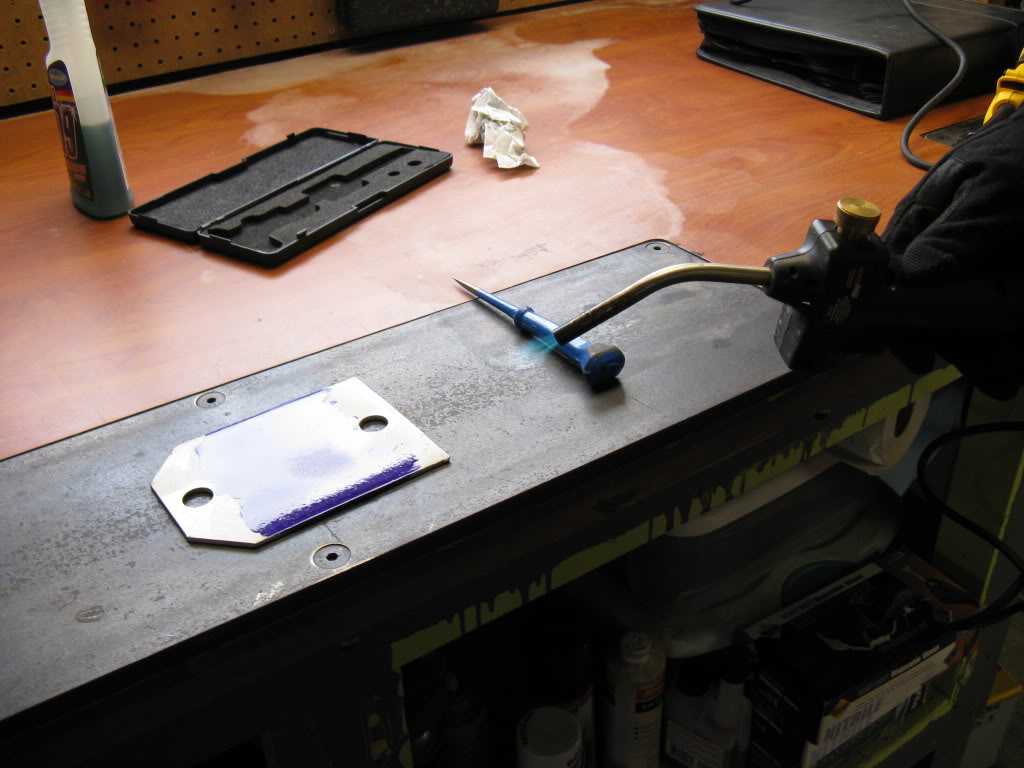
Ready for welding.

Painted...Ya I may have been over zealous on the welding!
Here they are installed. Kind of a bugger to get in, but worked perfectly.
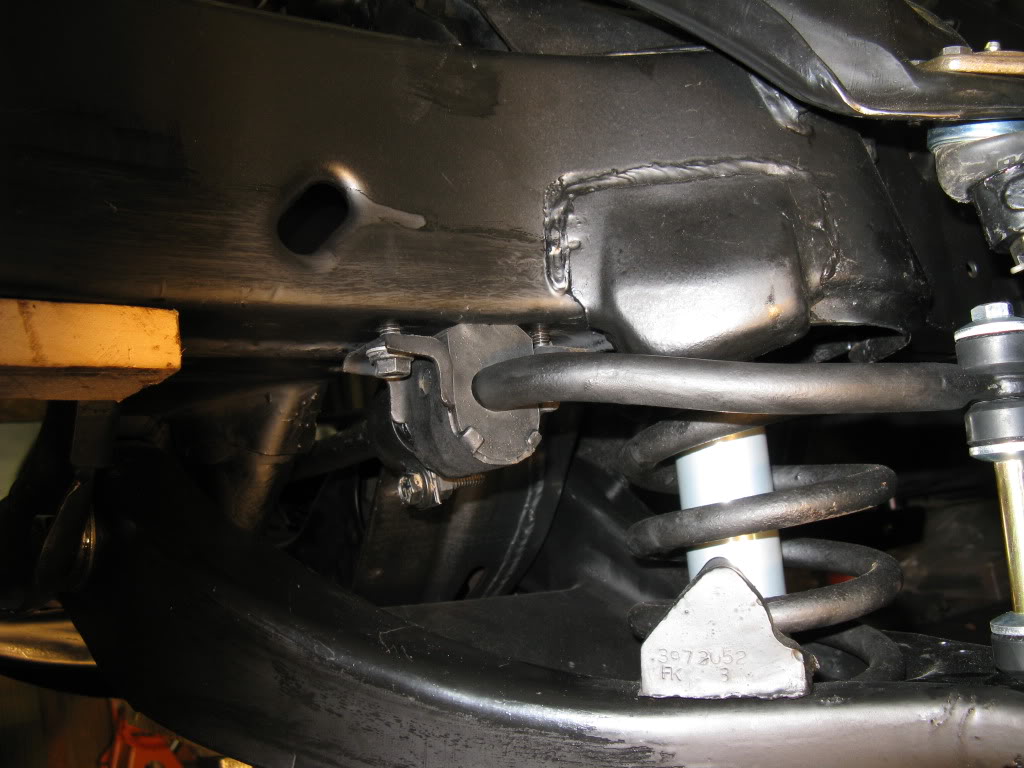

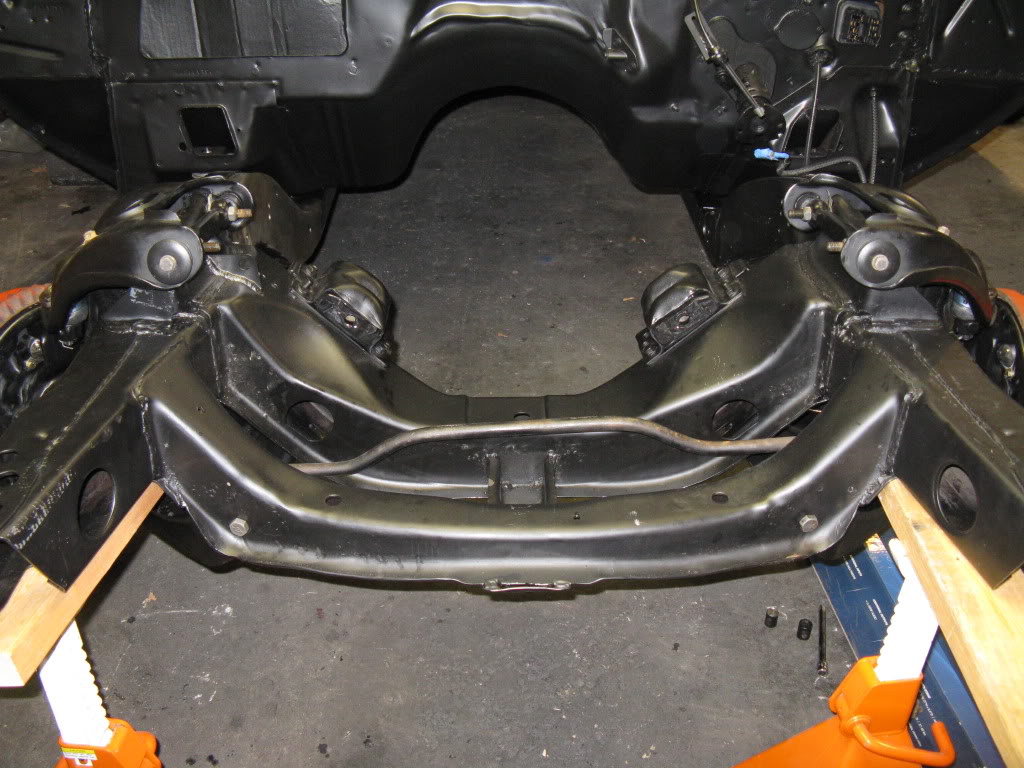
And here is the suspension all together. A little pissed about the paint runs from touch up after install. This summer I may sand and repaint. To cold for now.
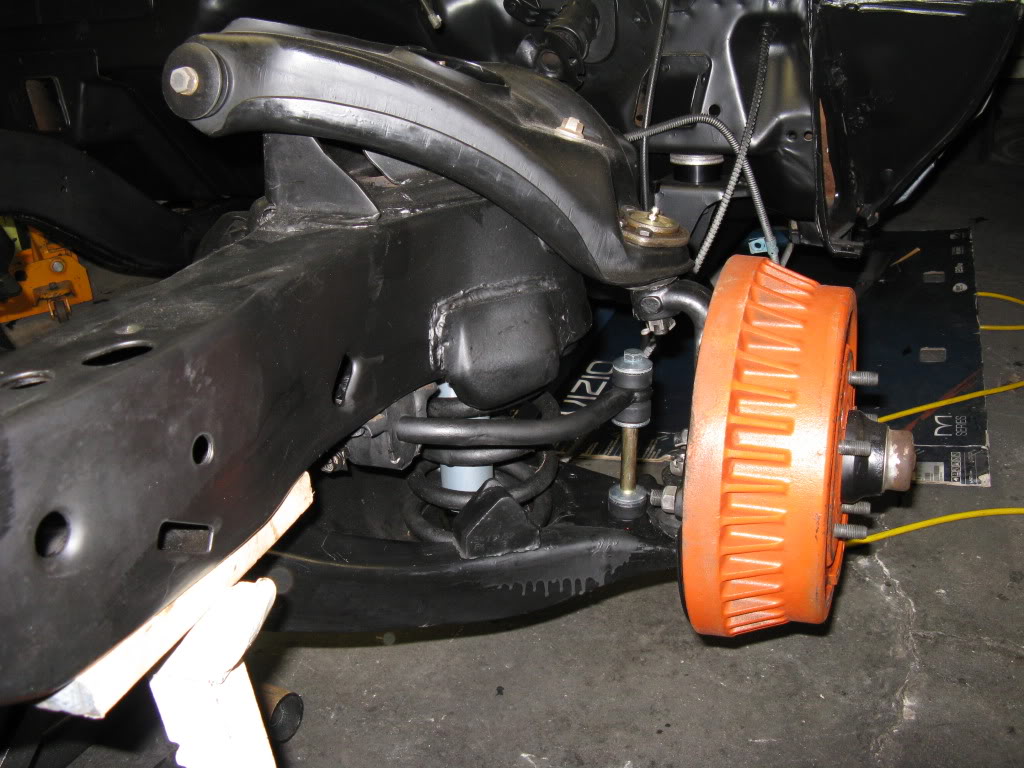
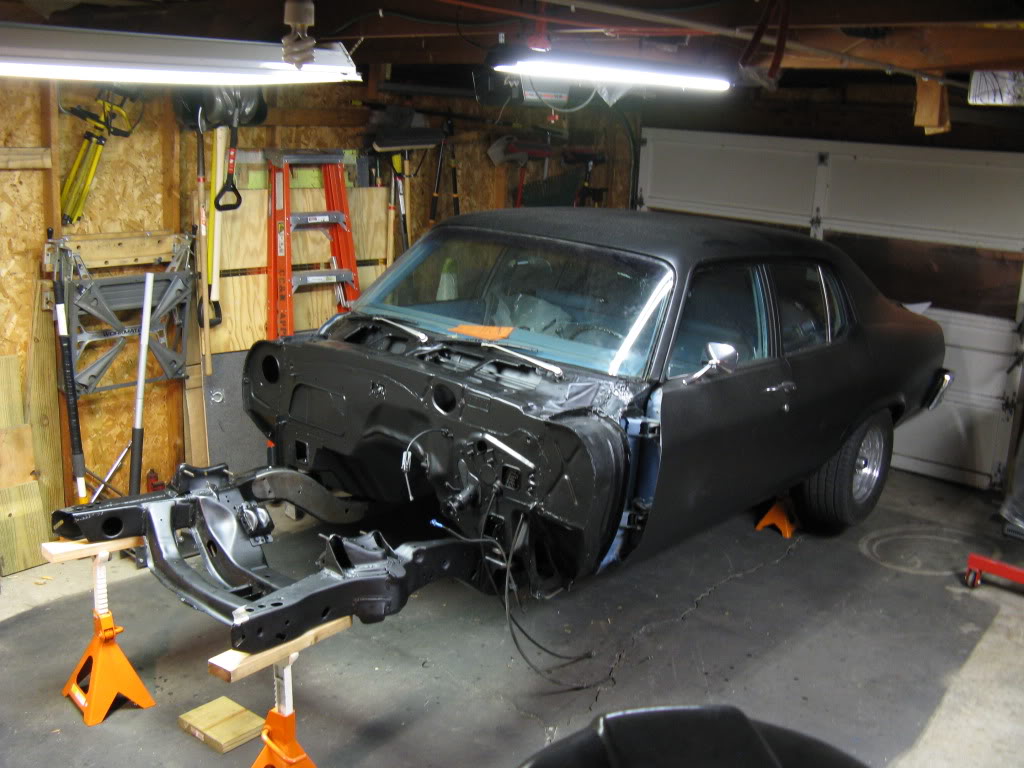
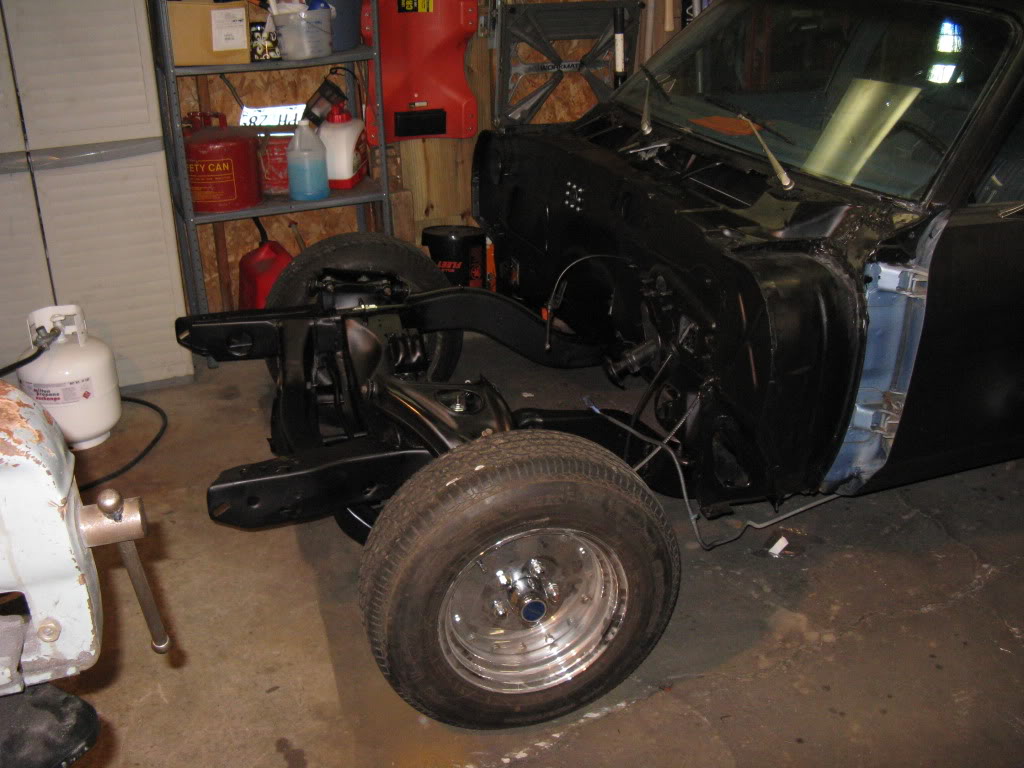
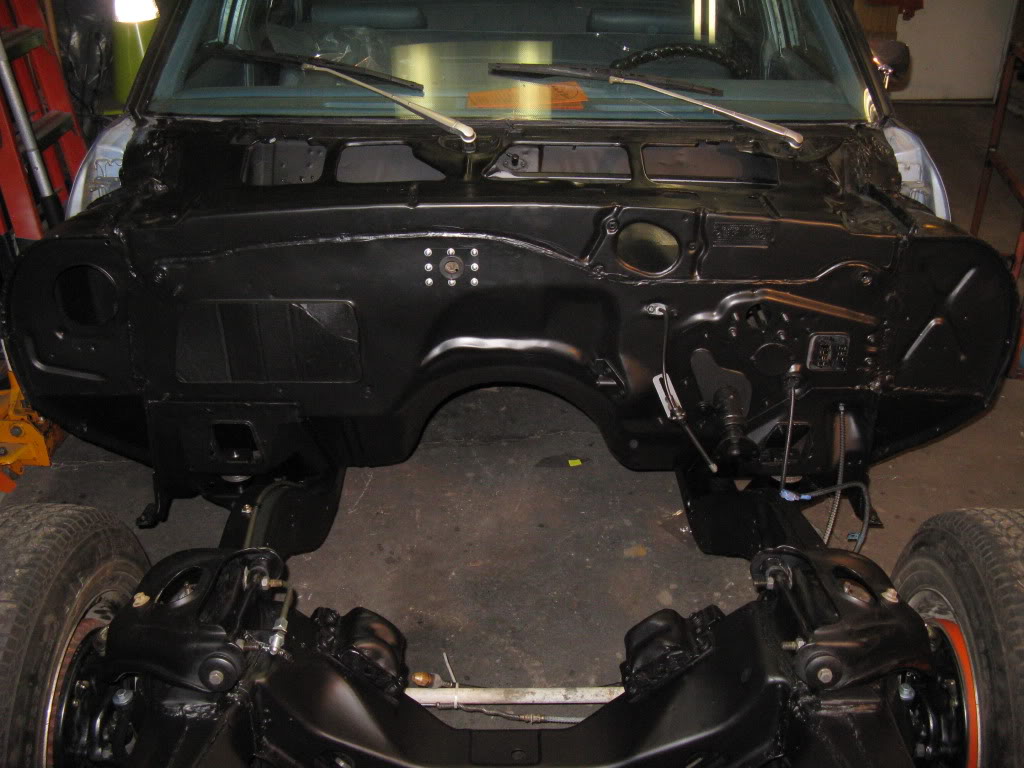
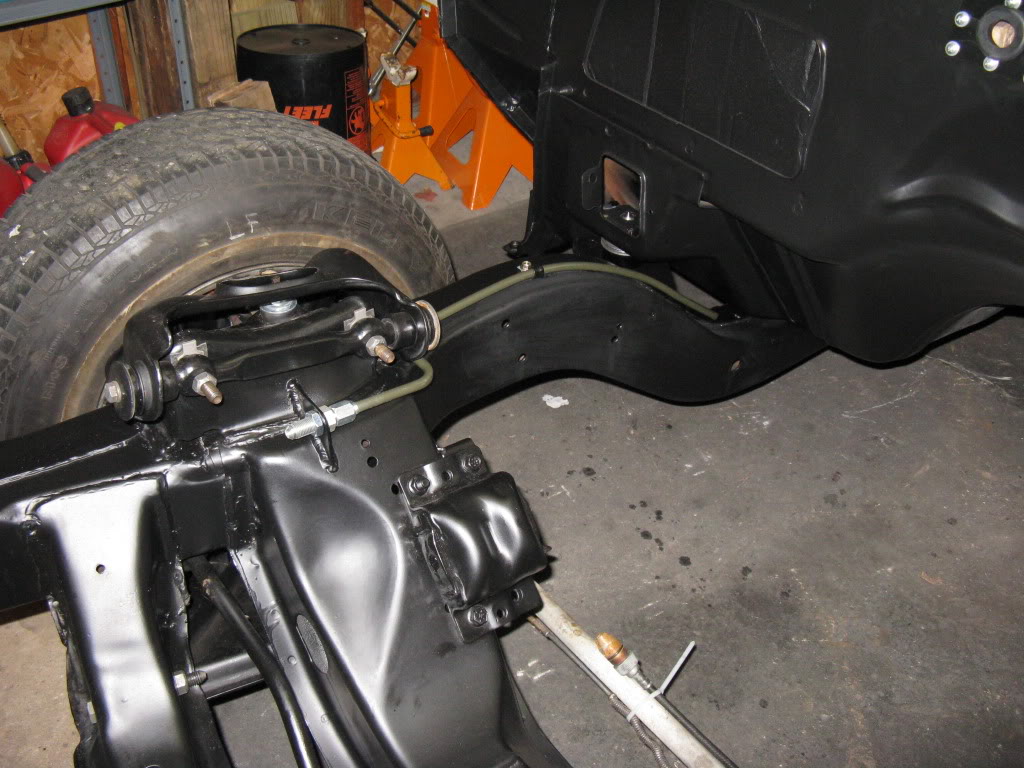
And here for the first time in a year, the rolling chassis!

Note the fuel line and the touched up section. Brushing yeilds a flatter finish then spray, but its close enough for government work!
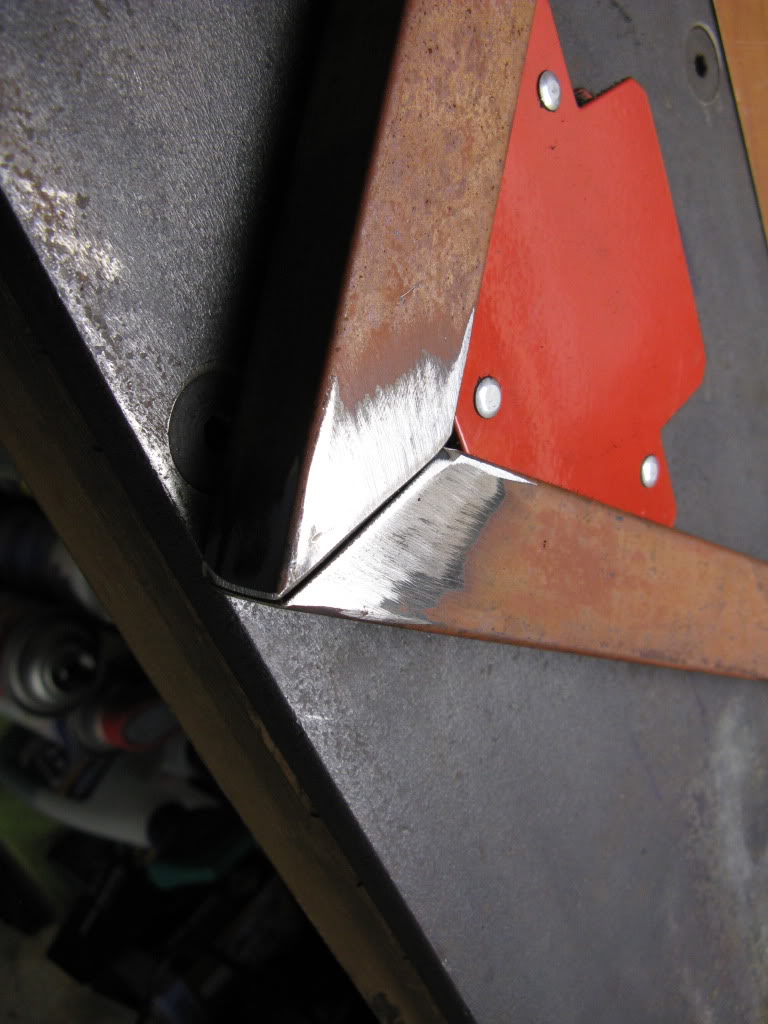
And here is the current state of my first welding project, my welding cart. The steel is from left over packaging of my buddies table saw. .020" wall make for hard difficult welds. But its coming out well so far.
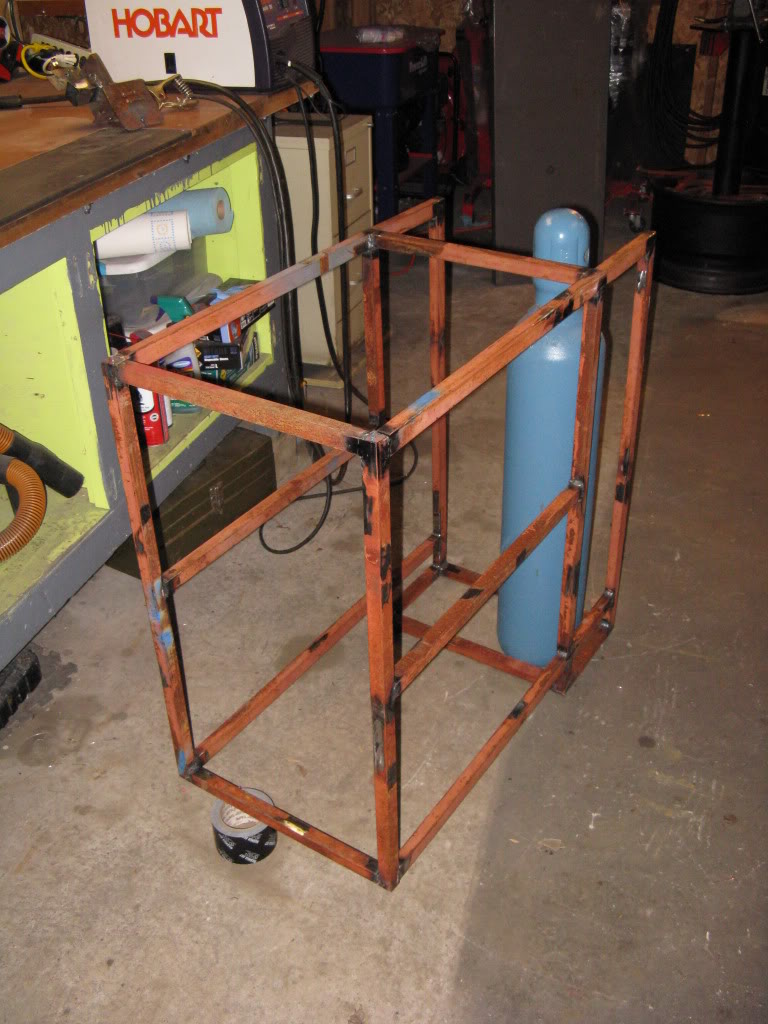
Fittment is 80% of the job and I think I am doing pretty well. Next tool purchase will be an abrasive chopsaw. Its tough to get 45s and straight cuts with an angle grinder!
In engine news I just got the trans back from the rebuilder. Next step is to get the oil pan chopped and installed the powertrain! Unfortunately it is currently -10 in the garage so maybe next week!
Came out looking close to the sprayed POR15... still frustrated overall withthe results.
Ready for hookup!
Checking for square. Came within 1/4". Thats good enough for now.
And wouldn't you know it! Anywhere I had taped to the sprayed POR it peeled right off. Pissing me off in the process. I'll have to touch these spots up with a brush at the same time I touch up the suspension after installation.
TADA!
Painted suspension hard parts ready for installation.
See how easy it is to rebuild drum brakes! YYYAAAA
Here is the finished product. It was a PITA! If only for the easy of rebuild and service I WANT DISCS! I searched all over the internet for pictures of how the plates and springs go. So if you are in the same boat check out my photobucket for a few more pics.
A nice little score I made. QA1 front shocks. Used for rolling into and out of the garage. The guy changed to tubular arms and wanted coil overs so I scored them for a song!
I knew it was time to call it a night when I installed the ARB upside down! At first I was very concerned about oil pan clearance. then I realized my mistake.
While reinstalling the ARB I realized the original frame tapped mounting holes were stripped. So I made these handy plates. Yes, it was so cold I had to use a torch to get the chem-dye to dry!
Ready for welding.
Painted...Ya I may have been over zealous on the welding!
Here they are installed. Kind of a bugger to get in, but worked perfectly.
And here is the suspension all together. A little pissed about the paint runs from touch up after install. This summer I may sand and repaint. To cold for now.
And here for the first time in a year, the rolling chassis!
Note the fuel line and the touched up section. Brushing yeilds a flatter finish then spray, but its close enough for government work!
And here is the current state of my first welding project, my welding cart. The steel is from left over packaging of my buddies table saw. .020" wall make for hard difficult welds. But its coming out well so far.
Fittment is 80% of the job and I think I am doing pretty well. Next tool purchase will be an abrasive chopsaw. Its tough to get 45s and straight cuts with an angle grinder!
In engine news I just got the trans back from the rebuilder. Next step is to get the oil pan chopped and installed the powertrain! Unfortunately it is currently -10 in the garage so maybe next week!
Last edited by cruisin'73; 01-22-2013 at 07:13 PM.
01-22-2013, 07:51 PM
#100
Staging Lane

Join Date: Oct 2007
Posts: 81
Likes: 0
Received 0 Likes
on
0 Posts
And now you've learned why professional shops don't use POR15.....
The best solution for bare metal is epoxy primer, which can be left as is or covered with SEM Trim Black if you want a flatter finish. The project is coming along nicely, though.
The best solution for bare metal is epoxy primer, which can be left as is or covered with SEM Trim Black if you want a flatter finish. The project is coming along nicely, though.