
1972 240z Blown Hybrid
 12-23-2011, 02:49 AM
#1
On The Tree
Thread Starter
iTrader: (9)

Join Date: Sep 2008
Posts: 176
Likes: 0
Received 0 Likes
on
0 Posts
Not many guys out there with a supercharged LSx swap in a 240z so I figured I would share my build on here.
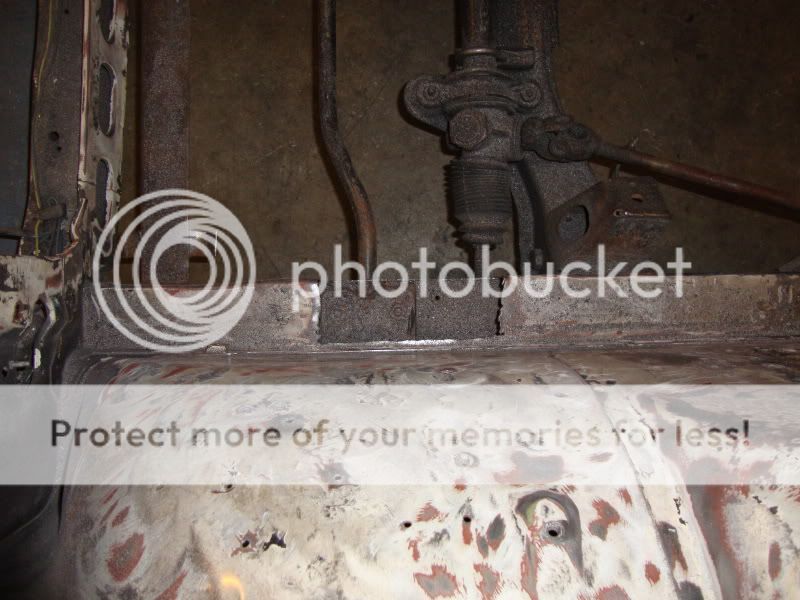
I've owned this car since I was 18 or so, and it has gone through MANY different motor combos. (Turbo i6, and about 6 different SBC setups) This final (Crossing my fingers on that) build is me doing what I ultimately wanted for it all the time, but could never afford to do. As I started, I found a TON of rot on my frame rails up by the engine, so I had to fix that before anything.


Continued....
I've owned this car since I was 18 or so, and it has gone through MANY different motor combos. (Turbo i6, and about 6 different SBC setups) This final (Crossing my fingers on that) build is me doing what I ultimately wanted for it all the time, but could never afford to do. As I started, I found a TON of rot on my frame rails up by the engine, so I had to fix that before anything.
Continued....
 12-23-2011, 02:50 AM
#2
On The Tree
Thread Starter
iTrader: (9)
Join Date: Sep 2008
Posts: 176
Likes: 0
Received 0 Likes
on
0 Posts
Had to cut out rotten sections
My close friend, Liz, is an amazing welder. She welded up framerail re-enforcement and filled all the holes under my hood from years of small screws being used to mount stuff.
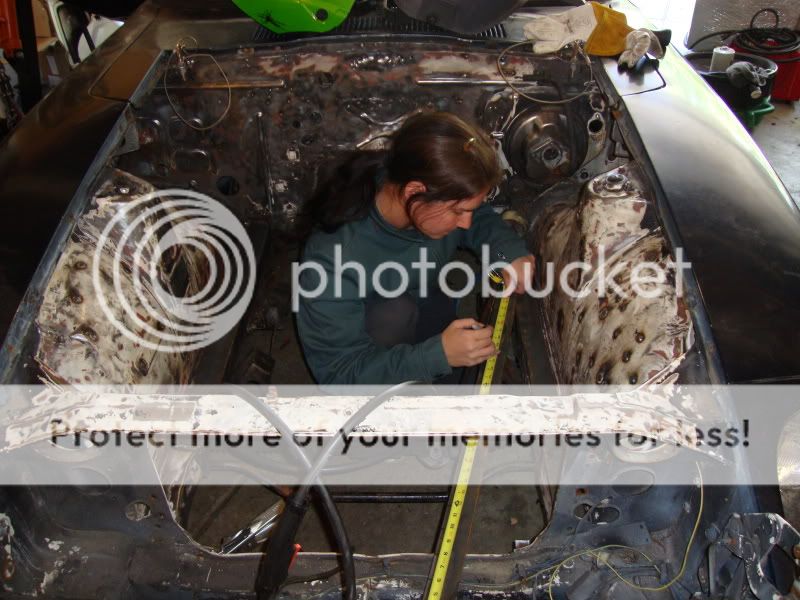
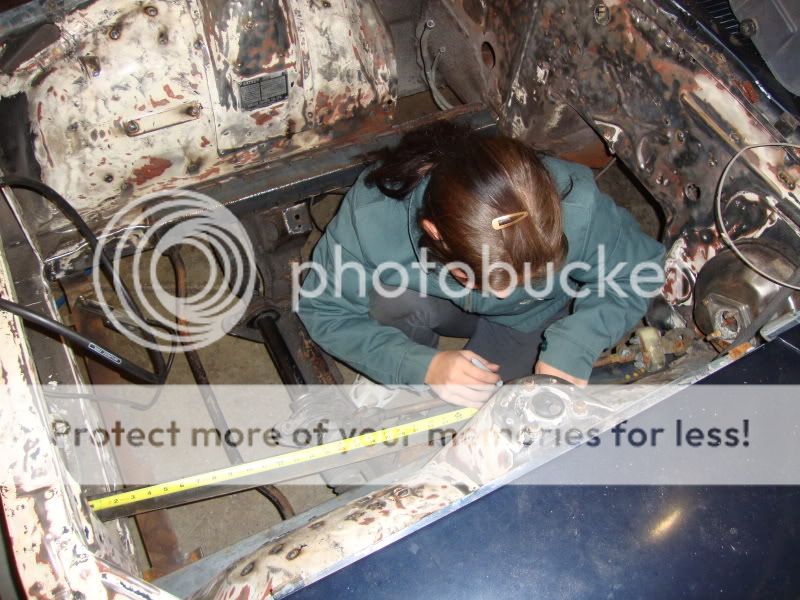
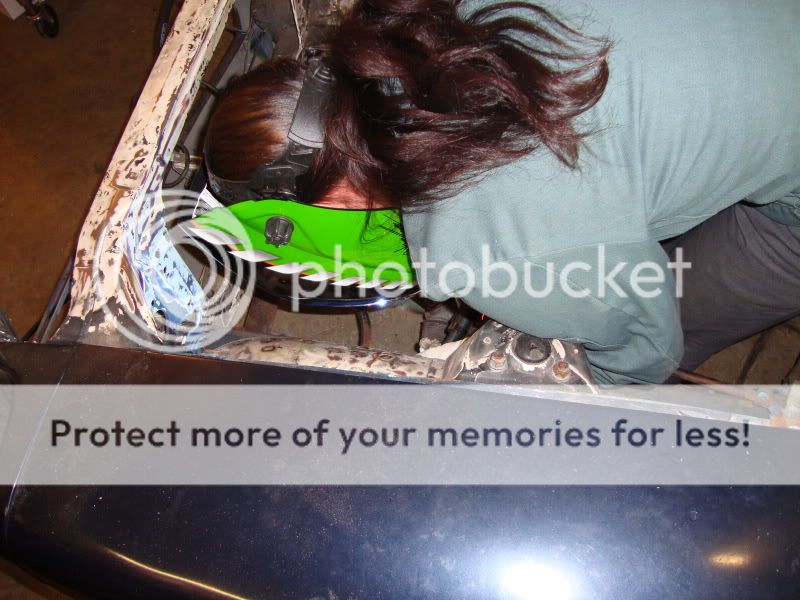
After the welding was done, I POR15ed the whole underhood as best I could. I actually conned my girlfriend into doing most of it, hahahahahaha.


Before:
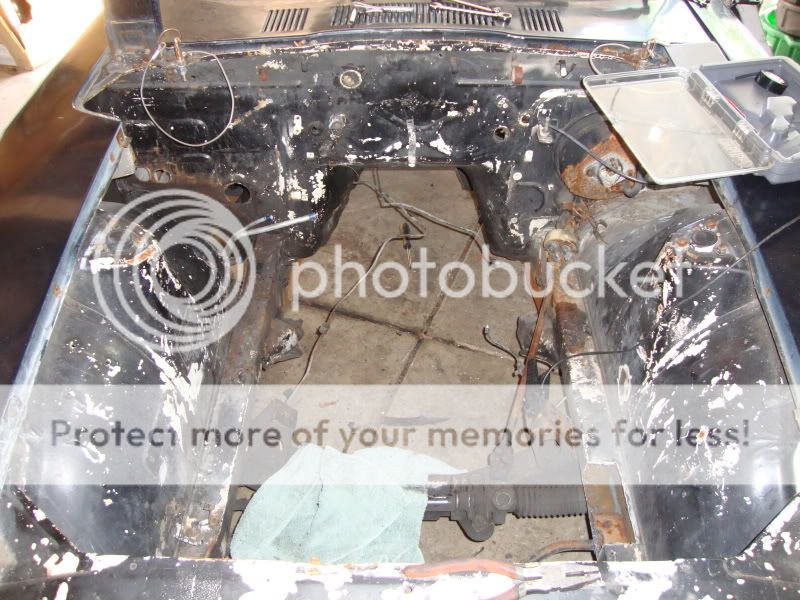
After:

My original plan was to use a buick v6 GN motor that I bought from a car that ran 10.70s at low boost and 3900lb curb weight. Unfortunately when I opened that motor up, I found someone had essentially thrown a grenade in it. Almost every internal hard part was destroyed, crank, pistons, heads, ect ect. When I found out how much it would cost me to build a buick motor with the power I wanted, I realized I needed to scrap the whole idea and pick another powerplant.
 The "donor" motor
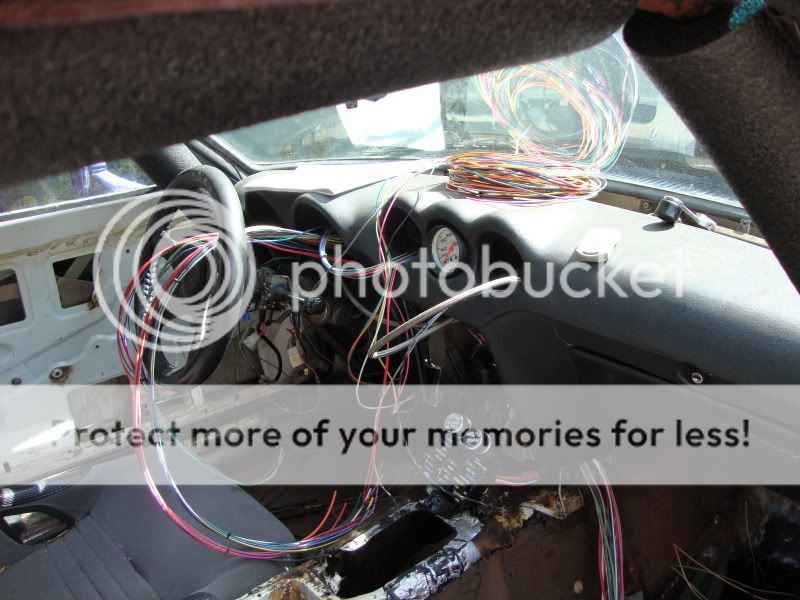
At this point I was picking up all the fuel system items, and re-wiring the car with a painless harness. Luckily I had my 10 second corvette to still mess around with so I wasn't too bothered by the set backs I was having. I took my time and made sure the wiring in the dash and for the lighting was absolutely perfect.
My close friend, Liz, is an amazing welder. She welded up framerail re-enforcement and filled all the holes under my hood from years of small screws being used to mount stuff.
After the welding was done, I POR15ed the whole underhood as best I could. I actually conned my girlfriend into doing most of it, hahahahahaha.
Before:
After:
My original plan was to use a buick v6 GN motor that I bought from a car that ran 10.70s at low boost and 3900lb curb weight. Unfortunately when I opened that motor up, I found someone had essentially thrown a grenade in it. Almost every internal hard part was destroyed, crank, pistons, heads, ect ect. When I found out how much it would cost me to build a buick motor with the power I wanted, I realized I needed to scrap the whole idea and pick another powerplant.
The "donor" motorAt this point I was picking up all the fuel system items, and re-wiring the car with a painless harness. Luckily I had my 10 second corvette to still mess around with so I wasn't too bothered by the set backs I was having. I took my time and made sure the wiring in the dash and for the lighting was absolutely perfect.
12-23-2011, 02:51 AM
#3
On The Tree
Thread Starter
iTrader: (9)
Join Date: Sep 2008
Posts: 176
Likes: 0
Received 0 Likes
on
0 Posts
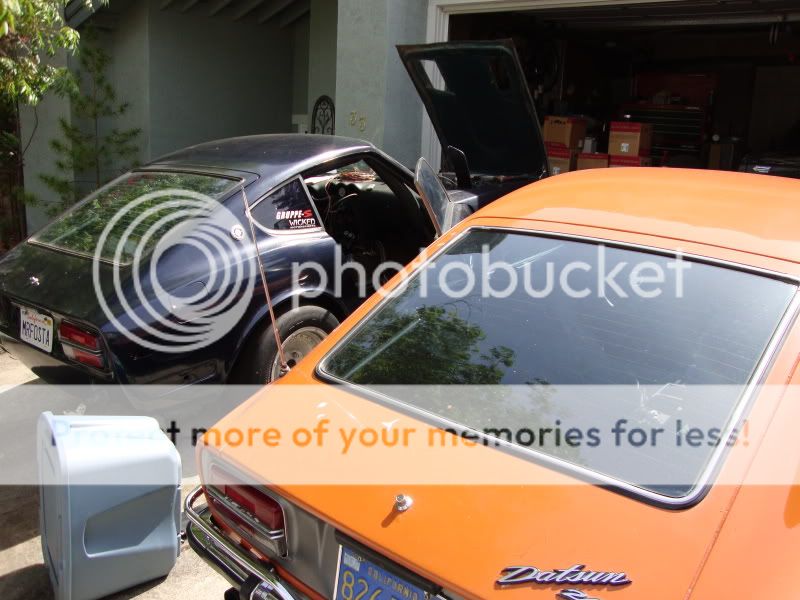
So I was pretty much at a standstill until I could figure out a motor for this car after getting the wiring done for the most part. At this point, my friend came up with the shitty idea of taking the engine out of my corvette and putting it into the datsun, that way I can save myself from spending the next two years building an engine.
His car is the orange car
http://youtu.be/PDfcuDgB9mo
I pulled the vette motor, after putting together a stock ls6 to replace it with. Sold my fancy clutch, headers, ect, and returned the car to stock minus my trans/rear and a 160 tstat.
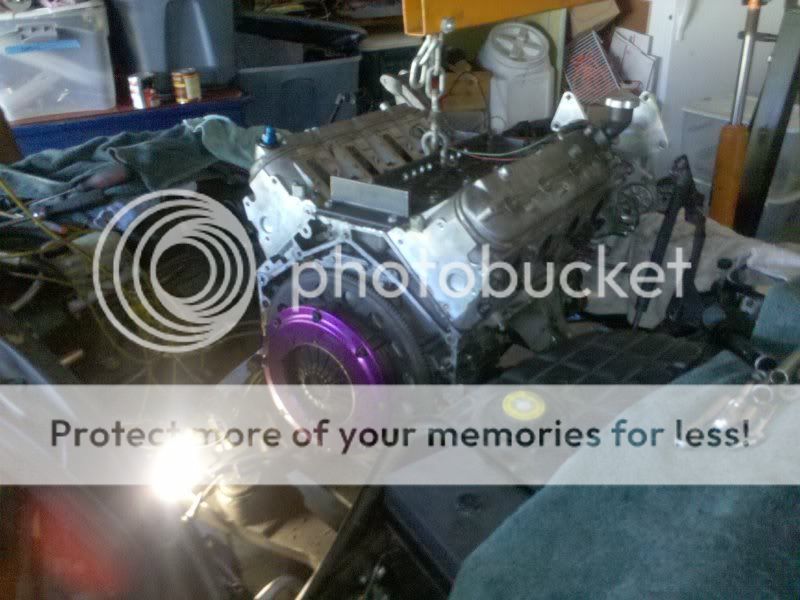
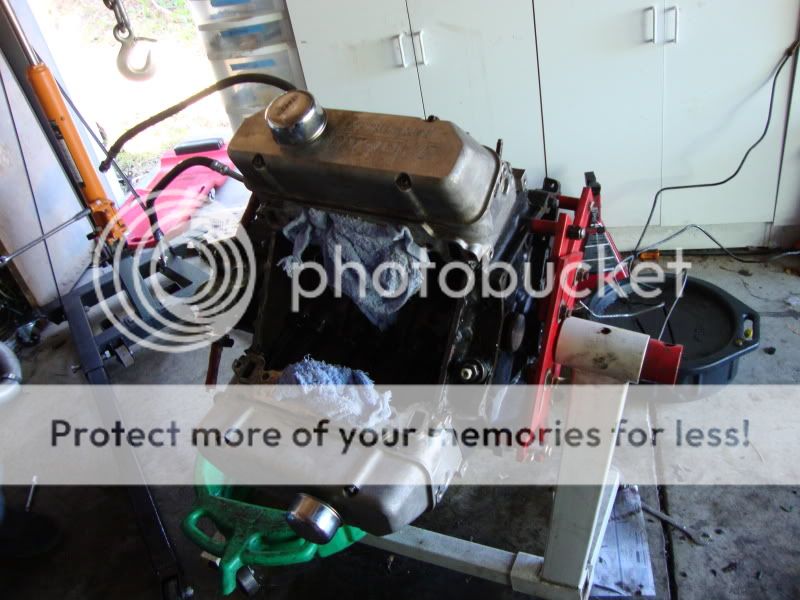
Old and new
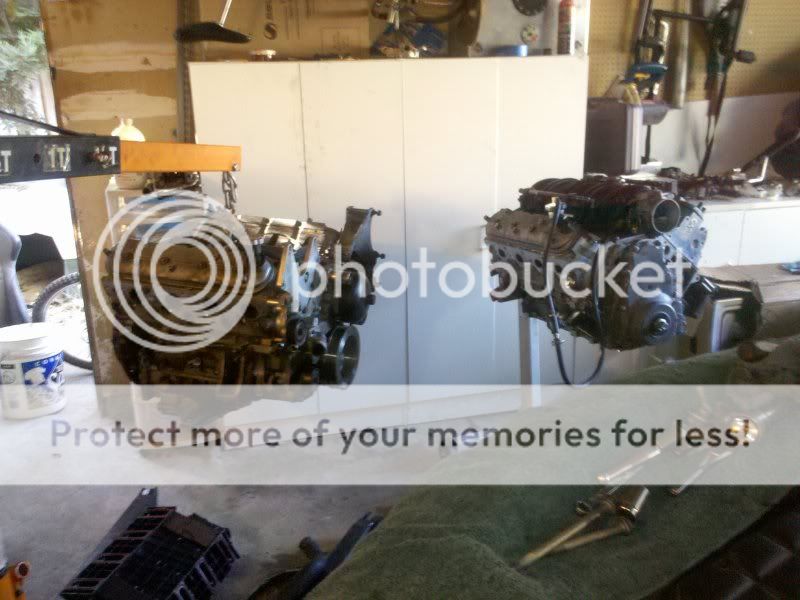
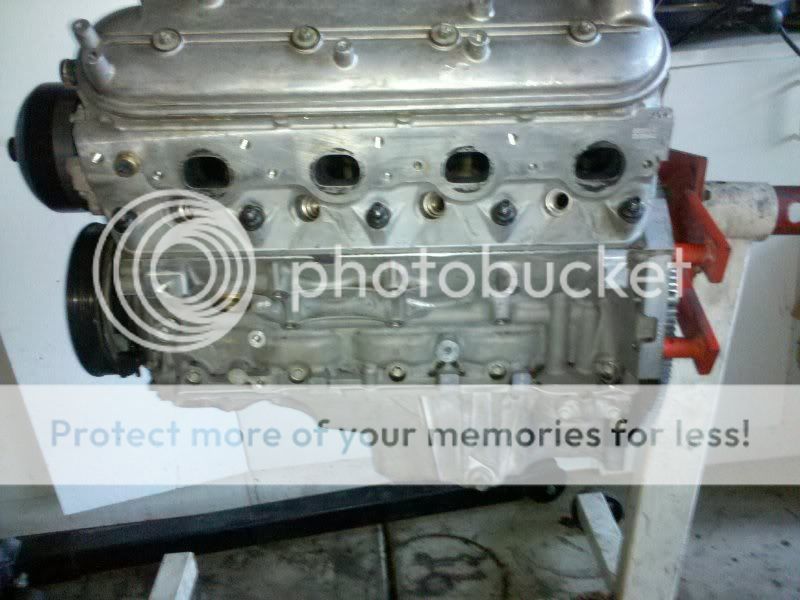
This is after hours of cleaning the motor. It was a dirty pig.
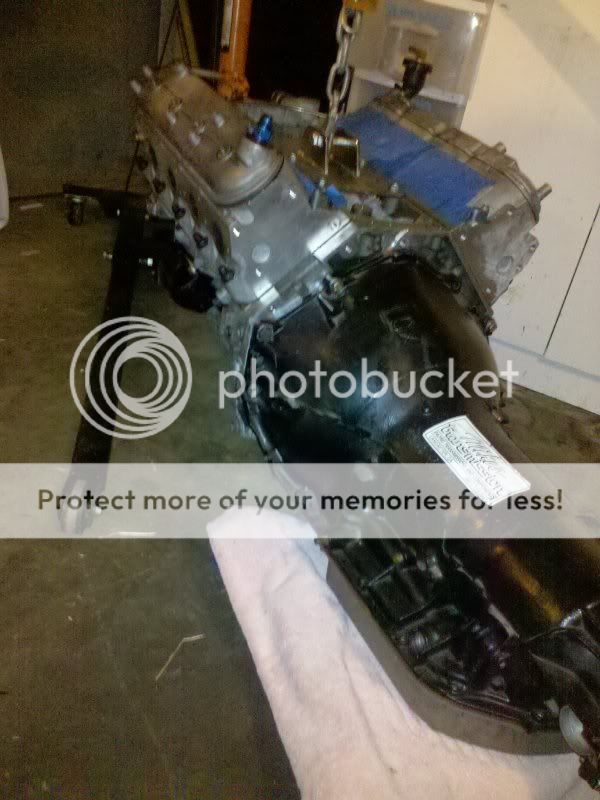
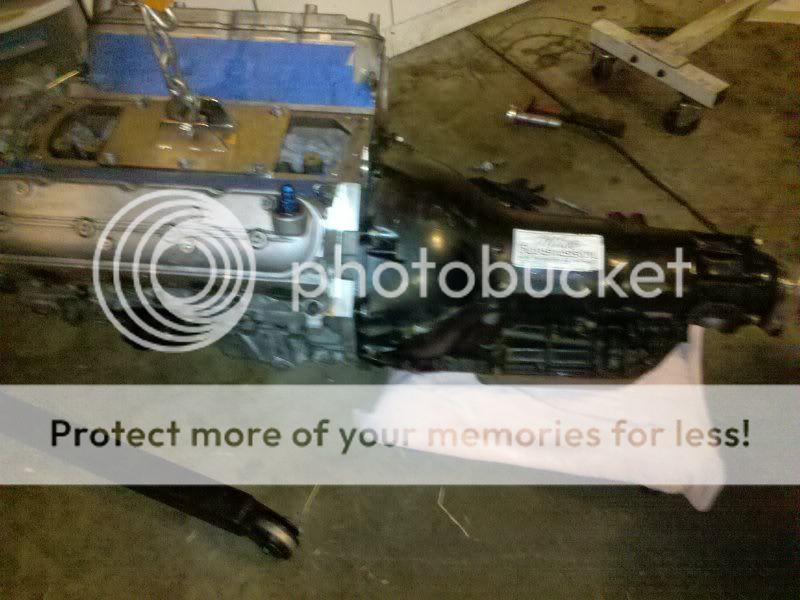
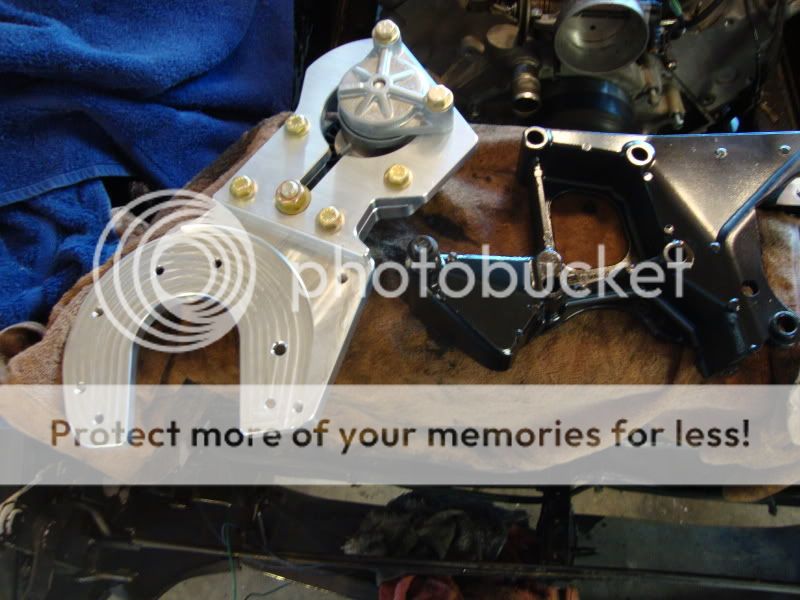
Bought a Mike's Ultimate TH400, and some other goodies for the drivetrain
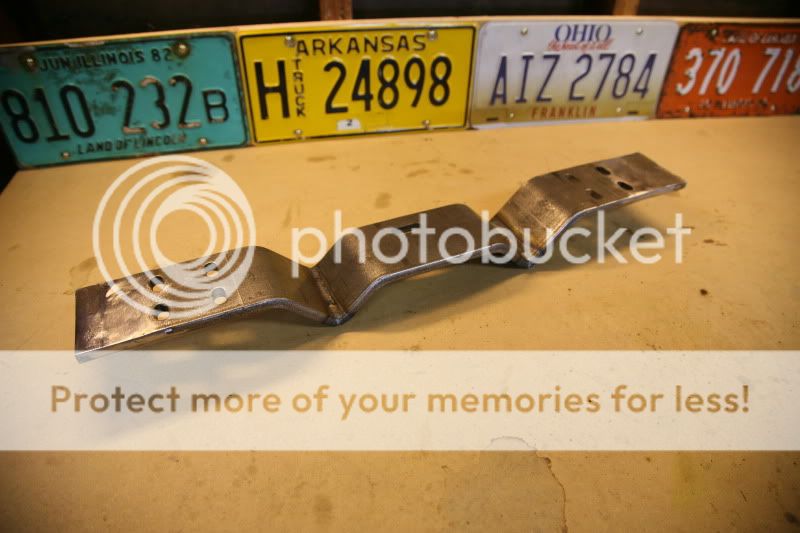
Liz made me a nice lil crossmember out of my old one for the car too
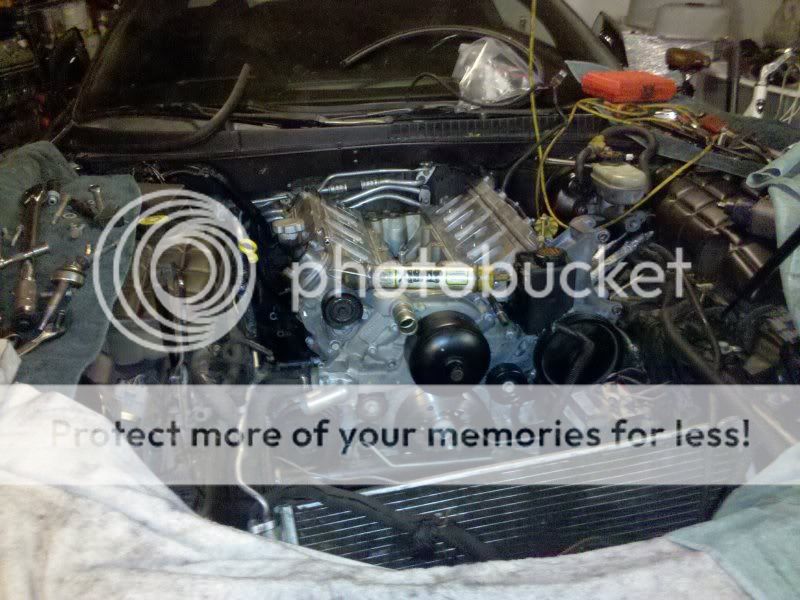
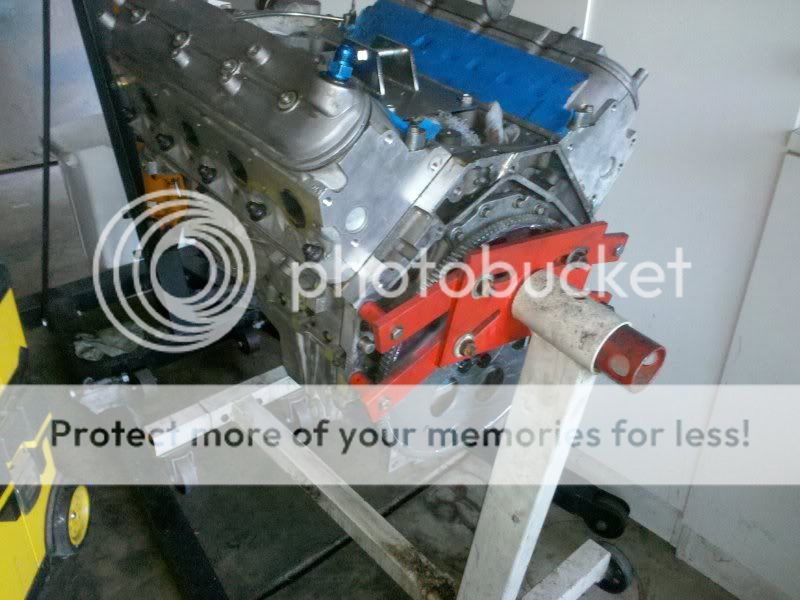
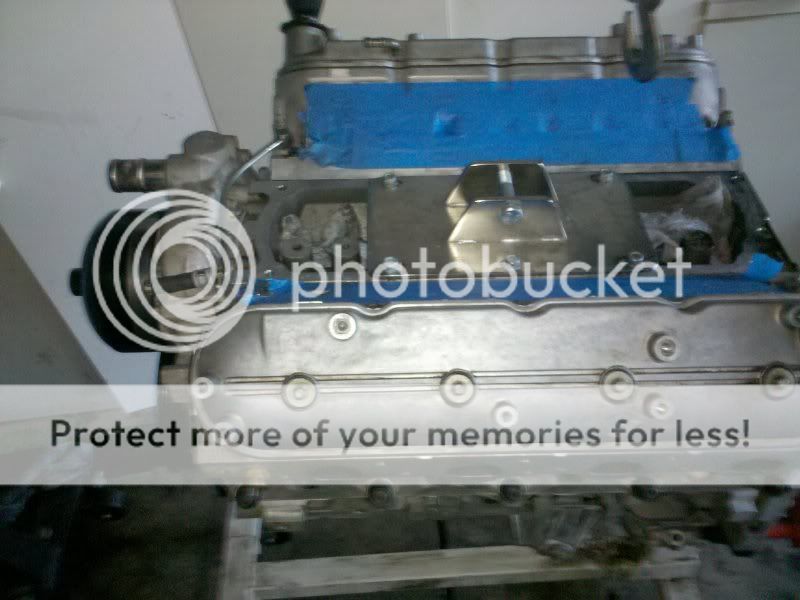
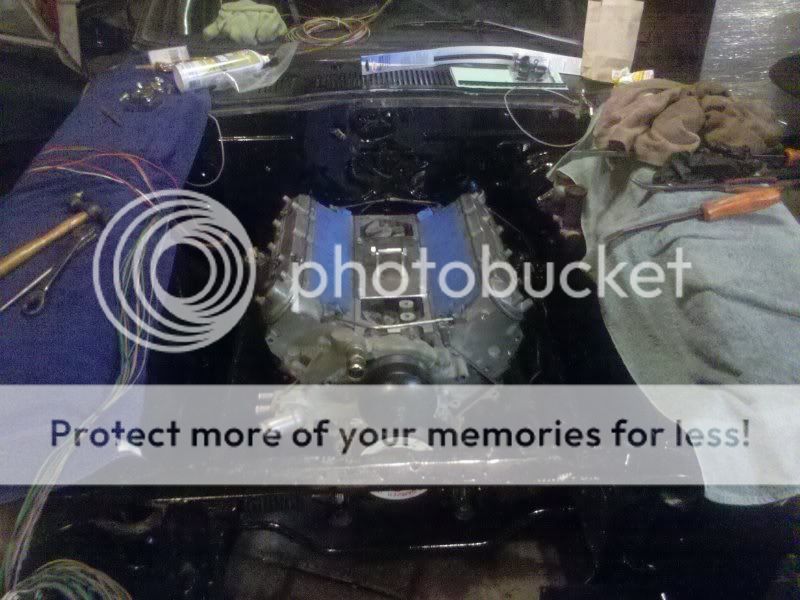
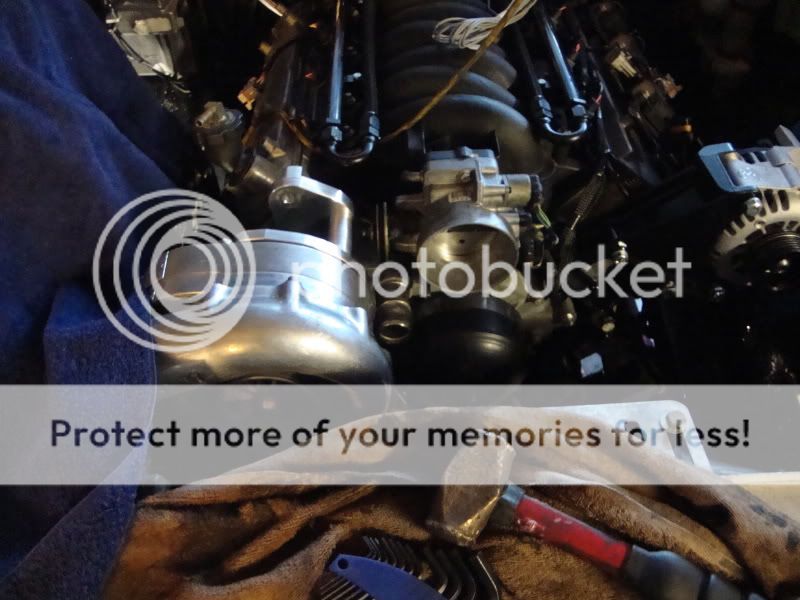
And in it went! Fit quite nicely as just a long block. Unfortunately there were other fitment issues down the road.
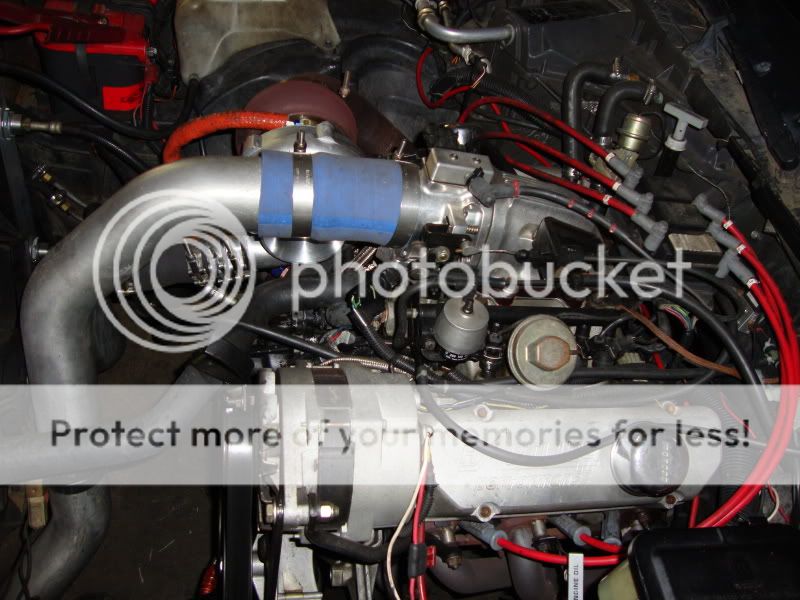
I started to do the basics, put the manifold on, wire under the hood (Used a summit harness) and plumb fuel system too
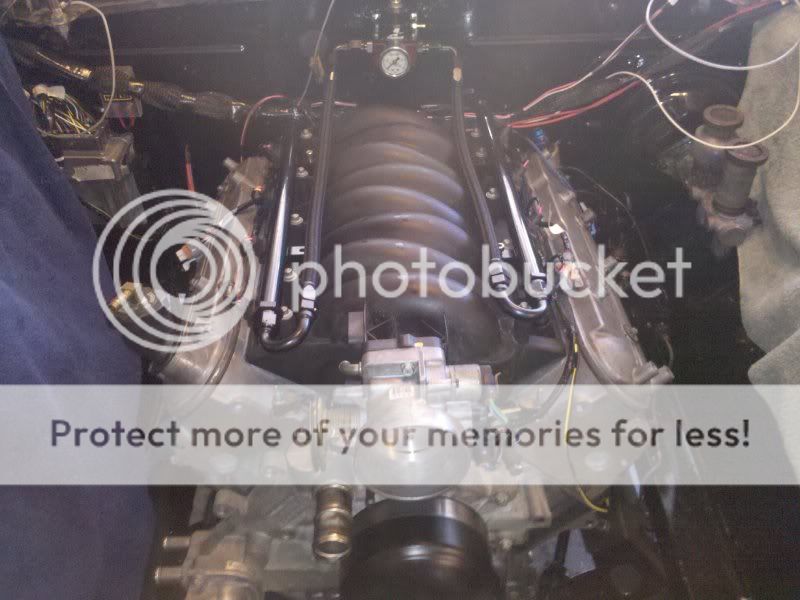

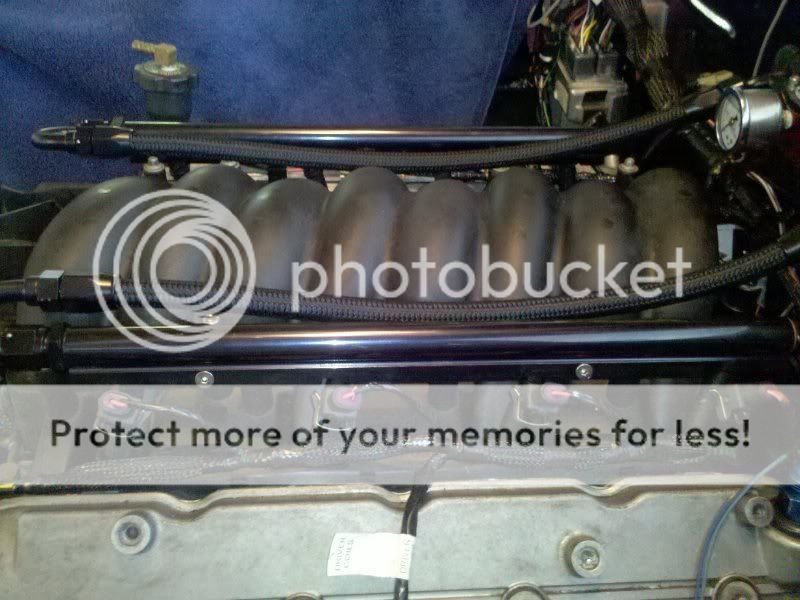
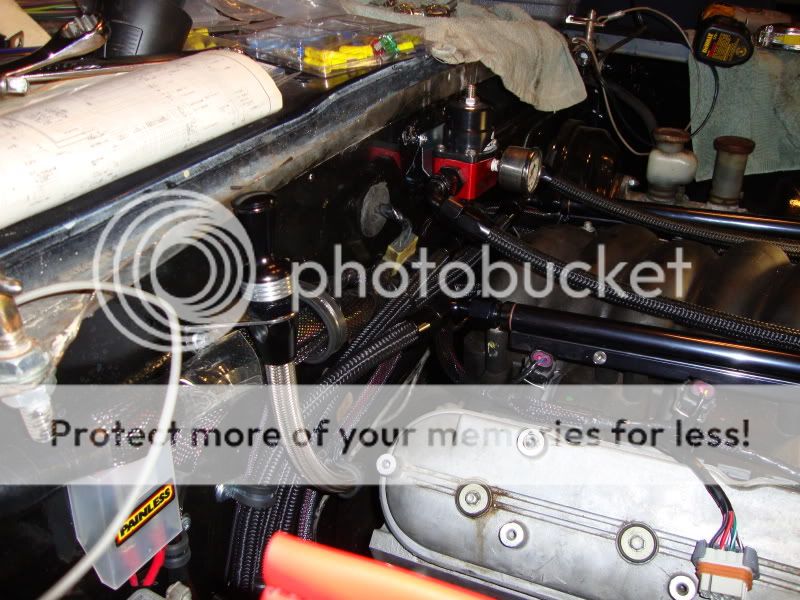
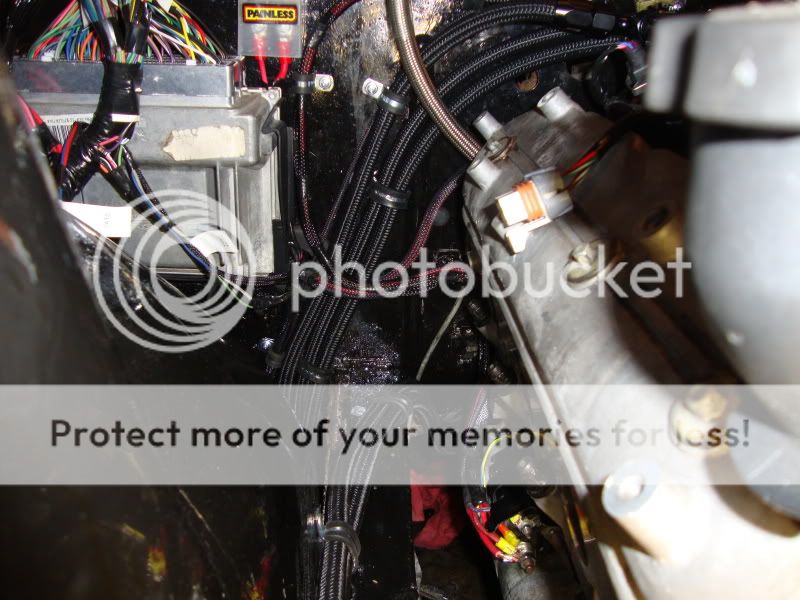
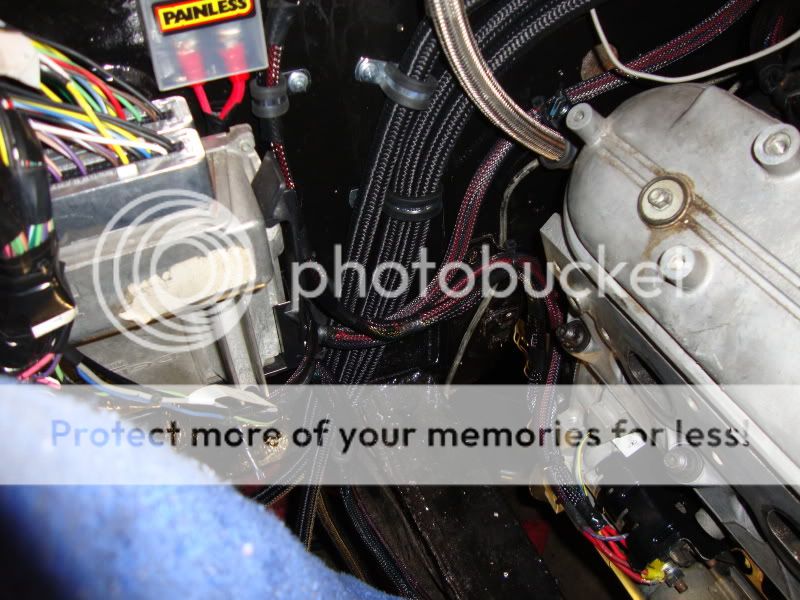
I tried to make the wiring as clean as possible, I feel like the pictures don't really do it justice. Next up was the accessories fitting. I got a beautiful bracket from AandA Corvette, and heavily modified a stock alternator bracket from a c5 to fit my car with a mini alternator (hi output from a chevy truck. 105amp I believe)
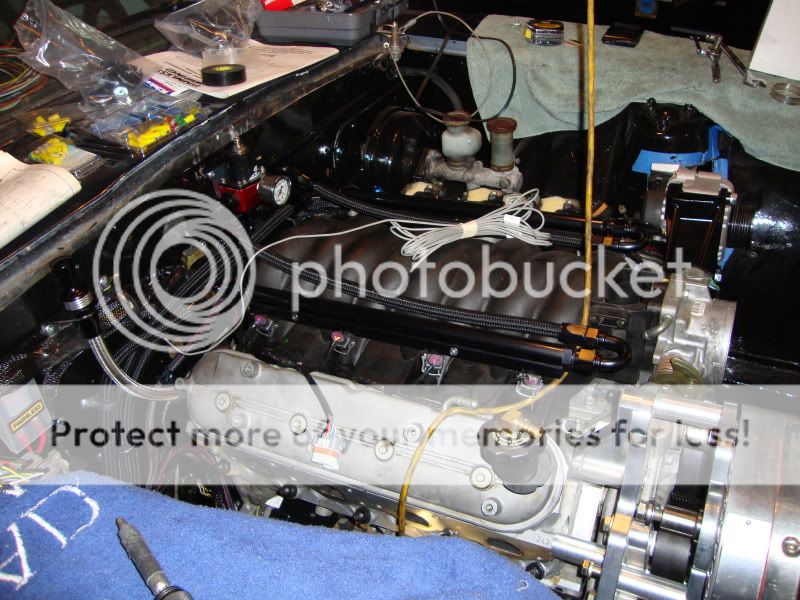
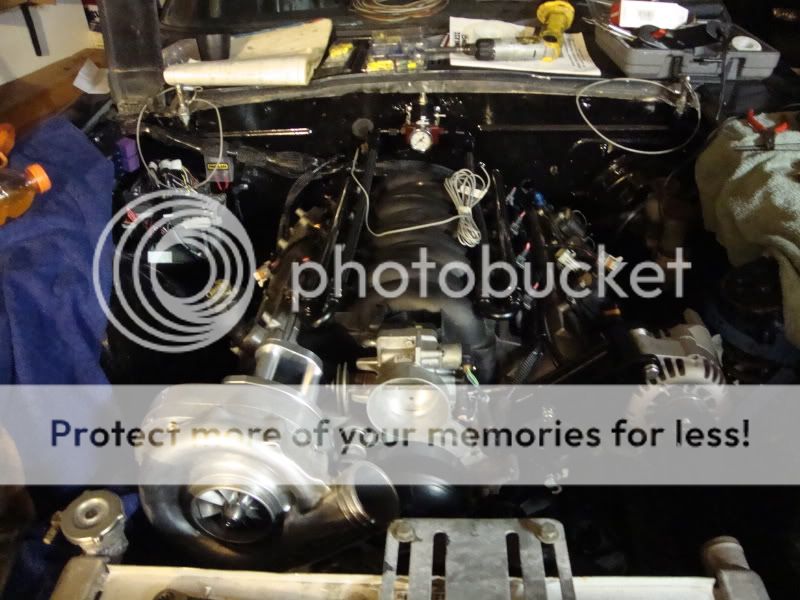
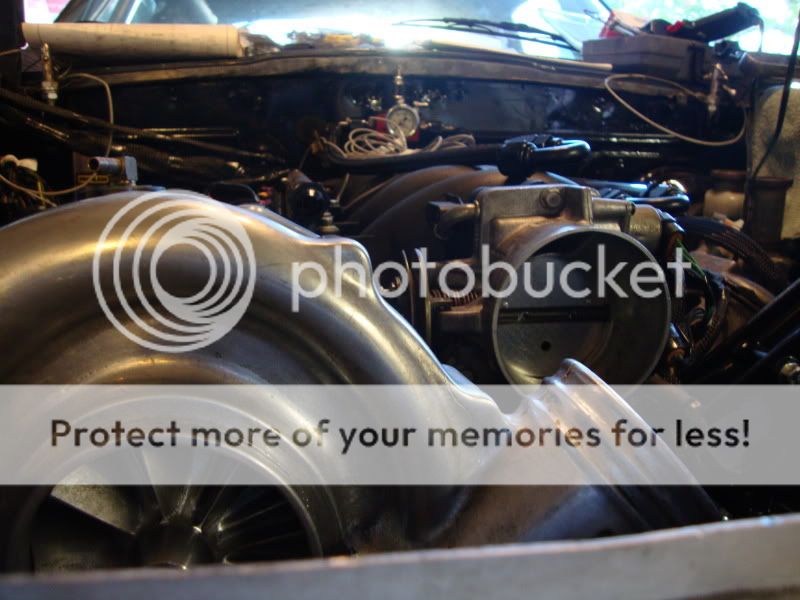
(Blower is reclocked now, obviously)
I might lay the radiator down for more clearance to fit an intake to a filter, since this really is a street car despite what people seem to think.
After the motor was pretty much done, besides fluids and intake/exhaust design I towed it to Scott's Speed and Custom to build be a custom trunk and get my cage up to certification. That is where it is right now, hopefully I will have some updates soon on it.
His car is the orange car
http://youtu.be/PDfcuDgB9mo
I pulled the vette motor, after putting together a stock ls6 to replace it with. Sold my fancy clutch, headers, ect, and returned the car to stock minus my trans/rear and a 160 tstat.
Old and new
This is after hours of cleaning the motor. It was a dirty pig.
Bought a Mike's Ultimate TH400, and some other goodies for the drivetrain
Liz made me a nice lil crossmember out of my old one for the car too
And in it went! Fit quite nicely as just a long block. Unfortunately there were other fitment issues down the road.
I started to do the basics, put the manifold on, wire under the hood (Used a summit harness) and plumb fuel system too
I tried to make the wiring as clean as possible, I feel like the pictures don't really do it justice. Next up was the accessories fitting. I got a beautiful bracket from AandA Corvette, and heavily modified a stock alternator bracket from a c5 to fit my car with a mini alternator (hi output from a chevy truck. 105amp I believe)
(Blower is reclocked now, obviously)
I might lay the radiator down for more clearance to fit an intake to a filter, since this really is a street car despite what people seem to think.
After the motor was pretty much done, besides fluids and intake/exhaust design I towed it to Scott's Speed and Custom to build be a custom trunk and get my cage up to certification. That is where it is right now, hopefully I will have some updates soon on it.
12-23-2011, 02:56 AM
#4
On The Tree
Thread Starter
iTrader: (9)
Join Date: Sep 2008
Posts: 176
Likes: 0
Received 0 Likes
on
0 Posts
First, I felt that I didn't quite have the rear end that I wanted in the car. So I started by taking out the old suspension and rear end:


Then I cut everything out, so we can start "fresh"


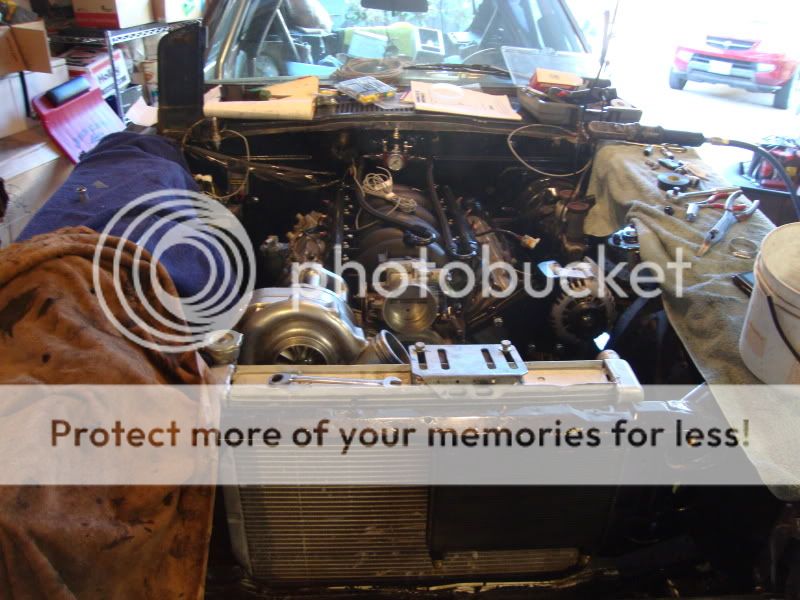
While I was working on that, SS&C got to work on the intercooler piping and mounting. We ended up having to lean the radiator forward to clear the intake tube, so they made a nice new upper radiator support beam for me as well. Also they filled in any extra holes.


Then I cut everything out, so we can start "fresh"
While I was working on that, SS&C got to work on the intercooler piping and mounting. We ended up having to lean the radiator forward to clear the intake tube, so they made a nice new upper radiator support beam for me as well. Also they filled in any extra holes.
12-23-2011, 02:57 AM
#5
On The Tree
Thread Starter
iTrader: (9)
Join Date: Sep 2008
Posts: 176
Likes: 0
Received 0 Likes
on
0 Posts
While Scott was working on the cage/rear end I redid some stuff.
My suspension up front looked like this:


So I figured, I might as well do it right since the rear half of the car is going to be so nice. I bought a 5 lug setup, all new bushings, new trailing arms, and a nicer coil setup. Also some brakes, and a matching front set of Tel-Star rims.
This is the result:


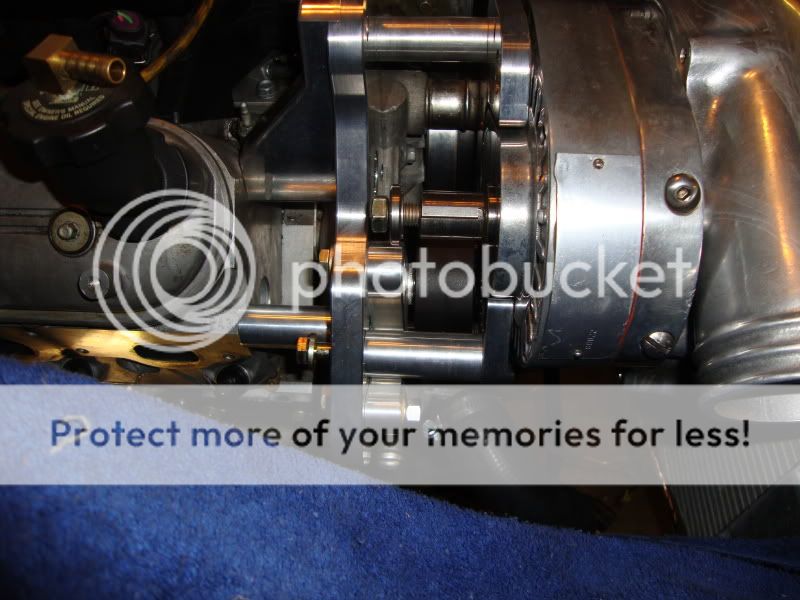
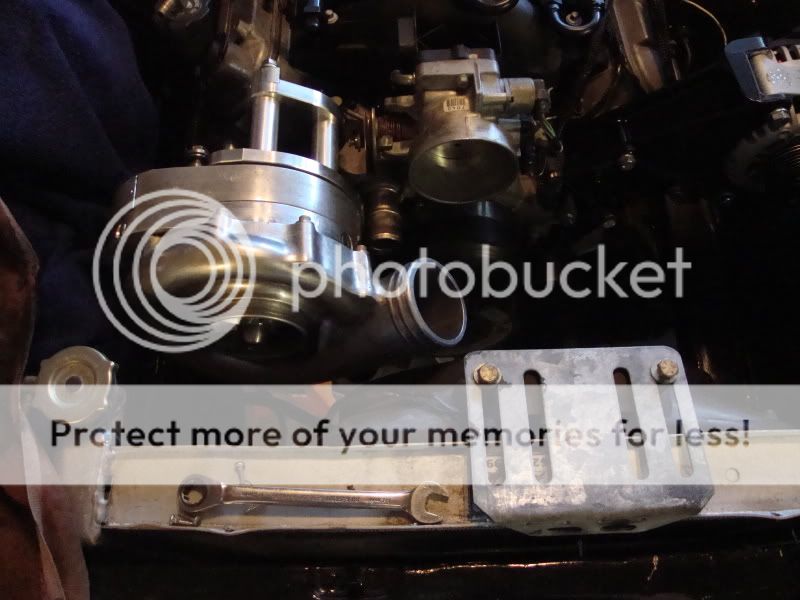
Next up I wanted to tidy a few things on the blower up. I mocked up the new 8 rib blower pulley, so I could measure belt length, and I figured out where I wanted to put the blow of valve. (Its now welded in, just don't have pictures yet. I think I am going to powdercoat the piping black)


I chose that location so that I wouldn't have fitment issues with whichever fan I decided to run.
While I was working, Scott and Alex were plugging away on the main hoop. (We had to cut out all the old stuff, and now they are redoing it CORRECTLY.


with how opened up the car is, Scott was able to remove the main hoop after tacking it together and getting all the angles perfect. Then he TIG welded it on a welding table to make sure it remained perfect.
My suspension up front looked like this:
So I figured, I might as well do it right since the rear half of the car is going to be so nice. I bought a 5 lug setup, all new bushings, new trailing arms, and a nicer coil setup. Also some brakes, and a matching front set of Tel-Star rims.
This is the result:
Next up I wanted to tidy a few things on the blower up. I mocked up the new 8 rib blower pulley, so I could measure belt length, and I figured out where I wanted to put the blow of valve. (Its now welded in, just don't have pictures yet. I think I am going to powdercoat the piping black)
I chose that location so that I wouldn't have fitment issues with whichever fan I decided to run.
While I was working, Scott and Alex were plugging away on the main hoop. (We had to cut out all the old stuff, and now they are redoing it CORRECTLY.
with how opened up the car is, Scott was able to remove the main hoop after tacking it together and getting all the angles perfect. Then he TIG welded it on a welding table to make sure it remained perfect.
12-23-2011, 02:58 AM
#6
On The Tree
Thread Starter
iTrader: (9)
Join Date: Sep 2008
Posts: 176
Likes: 0
Received 0 Likes
on
0 Posts
Car is rolling now, cage is pretty much done except for door bars, and the frame is in the car. 4 Link is welded in as well. Once we get shocks/springs we will set the suspension up and start the tin work.


I ordered a belt for the blower, and finished the front brake lines. Still have to do a bunch of little stuff under the hood though.


I ordered a belt for the blower, and finished the front brake lines. Still have to do a bunch of little stuff under the hood though.
12-23-2011, 02:59 AM
#7
On The Tree
Thread Starter
iTrader: (9)
Join Date: Sep 2008
Posts: 176
Likes: 0
Received 0 Likes
on
0 Posts
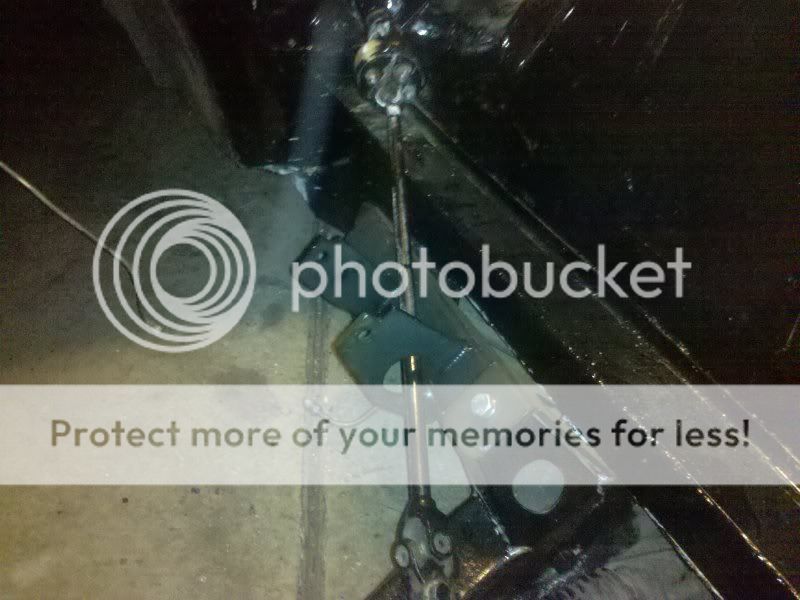
Got a belt measured up and it fits perfect. This tensioner setup has a manual and spring tensioner built into it. Pretty snazzy


I powdercoated the piping black, I think it cleans up the underhood a bit. Also changed my coil mounting design. The driver side coils were hitting the alternator and there just wasnt a clean way for me to relocate the one coil. I may relocate them somewhere hidden, but for now this is how they will sit.


Scott made progress on the cage and tin work as well. The cage will be getting certed next week and the tin should be done as well. Getting close, finally.


I powdercoated the piping black, I think it cleans up the underhood a bit. Also changed my coil mounting design. The driver side coils were hitting the alternator and there just wasnt a clean way for me to relocate the one coil. I may relocate them somewhere hidden, but for now this is how they will sit.
Scott made progress on the cage and tin work as well. The cage will be getting certed next week and the tin should be done as well. Getting close, finally.
Trending Topics
12-23-2011, 03:01 AM
#8
On The Tree
Thread Starter
iTrader: (9)
Join Date: Sep 2008
Posts: 176
Likes: 0
Received 0 Likes
on
0 Posts
Got the car back home from Scotts. They did AMAZING work on the cage, tinwork, and painting the interior. I couldn't be happier. We still have to set up the rear end and do a final weighing of the car before I can go racing. (Though, I may have gotten to do an initial weighing just to see how much the car weighs. Its pretty light  ) Also there is a TON of work left to do at home, which I have been doing almost non stop since friday.

Back in the garage, getting started.

Seats fitted, door bars done. (Done at Scotts)

Still have so much to do under the hood. Chased some wiring gremlins, including not one but TWO bad relays on my summit racing LS1 wiring harness. Was not happy about that, but Picnic George hooked me up as always.

Fuel tank installed for the last time. (I hope)

All this rear end, no more fragged rings and snapped axles for me!

Running fuel system, since its a street car I ran check valves so that I don't have to cycle the pump to start the car.


To keep my weldon in line I got a fuel pump controller. (Was using a Weldon 2025 up until about a month ago) I was EXTREMELY disappointed in the noise level of this weldon pump, and using the Aeromotive fuel controller was a big hassle and never quite worked correctly. I upgraded to the new Holley Dominator pump, and couldn't be happier. It is significantly quieter, runs as much or more fuel, and is perfectly safe for street driving WITHOUT a controller.

When swapping the pump out, I also got a new Holley Dominator FPR. It holds much more consistent pressures for me than the weldon regulator did as well.

Carpets are for wussies. I think the bedliner interior really turned out well.

Fuel lines, CHECK! Battery cables and extra grounds, CHECK CHECK.

Snazzy battery box that Scott built for me. And the obligatory shutoff switch for when I visit the track.

I like the HIDs, will help a lot for night driving. The old headlights were tragically bad...

Getting closer....
Again, a HUGE thank you to Scott Speed and Custom in Pittsburg CA. They did absolutely amazing work and kept the build to exactly what I wanted. Scott, John, Alex, and the rest of the crew are extremely helpful and knowledgeable on building a badass setup.
) Also there is a TON of work left to do at home, which I have been doing almost non stop since friday.Back in the garage, getting started.
Seats fitted, door bars done. (Done at Scotts)
Still have so much to do under the hood. Chased some wiring gremlins, including not one but TWO bad relays on my summit racing LS1 wiring harness. Was not happy about that, but Picnic George hooked me up as always.
Fuel tank installed for the last time. (I hope)
All this rear end, no more fragged rings and snapped axles for me!
Running fuel system, since its a street car I ran check valves so that I don't have to cycle the pump to start the car.
To keep my weldon in line I got a fuel pump controller. (Was using a Weldon 2025 up until about a month ago) I was EXTREMELY disappointed in the noise level of this weldon pump, and using the Aeromotive fuel controller was a big hassle and never quite worked correctly. I upgraded to the new Holley Dominator pump, and couldn't be happier. It is significantly quieter, runs as much or more fuel, and is perfectly safe for street driving WITHOUT a controller.
When swapping the pump out, I also got a new Holley Dominator FPR. It holds much more consistent pressures for me than the weldon regulator did as well.
Carpets are for wussies. I think the bedliner interior really turned out well.
Fuel lines, CHECK! Battery cables and extra grounds, CHECK CHECK.
Snazzy battery box that Scott built for me. And the obligatory shutoff switch for when I visit the track.
I like the HIDs, will help a lot for night driving. The old headlights were tragically bad...
Getting closer....
Again, a HUGE thank you to Scott Speed and Custom in Pittsburg CA. They did absolutely amazing work and kept the build to exactly what I wanted. Scott, John, Alex, and the rest of the crew are extremely helpful and knowledgeable on building a badass setup.
Last edited by mistafosta; 01-09-2012 at 05:46 PM.
12-23-2011, 03:06 AM
#9
On The Tree
Thread Starter
iTrader: (9)
Join Date: Sep 2008
Posts: 176
Likes: 0
Received 0 Likes
on
0 Posts
Got it running, and buttoned up almost everything. I still have some track only stuff left to setup but I will do that when I have time/money. All the little bits and pieces I had to use at the end here cost me an arm and a leg. Don't know when I will be able to afford the exhaust system...


Yes, I know I have the most wrecked hood ever. I'm gonna try to wetsand it so its presentable until I find a good cowl hood setup for the car.

Yes, I know I have the most wrecked hood ever. I'm gonna try to wetsand it so its presentable until I find a good cowl hood setup for the car.
12-23-2011, 03:13 AM
#10
On The Tree
Thread Starter
iTrader: (9)
Join Date: Sep 2008
Posts: 176
Likes: 0
Received 0 Likes
on
0 Posts
http://www.youtube.com/watch?v=nAWWPloNNmk
This was the first time testing the car, and for some reason it would not rev past 5200 rpms at all (New problem, wasn't doing that before, as far as I noticed. Read next paragraph for reason). Drove it about 150 miles round trip in 105 degree heat. This was after 3 hot laps, destroyed roller tires, and no adjustments allowed since the track was about to close.
I also found out a few days after that my motor had 2 broken ring lands, a badly beat up set of rod bearings (Spun the bearing, thus finding out about the internals issues) and a damaged camshaft. Needless to say I had to rebuild the motor, which just got out of the machine shop.


 12-24-2011, 02:43 PM
#14
On The Tree
Thread Starter
iTrader: (9)
Join Date: Sep 2008
Posts: 176
Likes: 0
Received 0 Likes
on
0 Posts
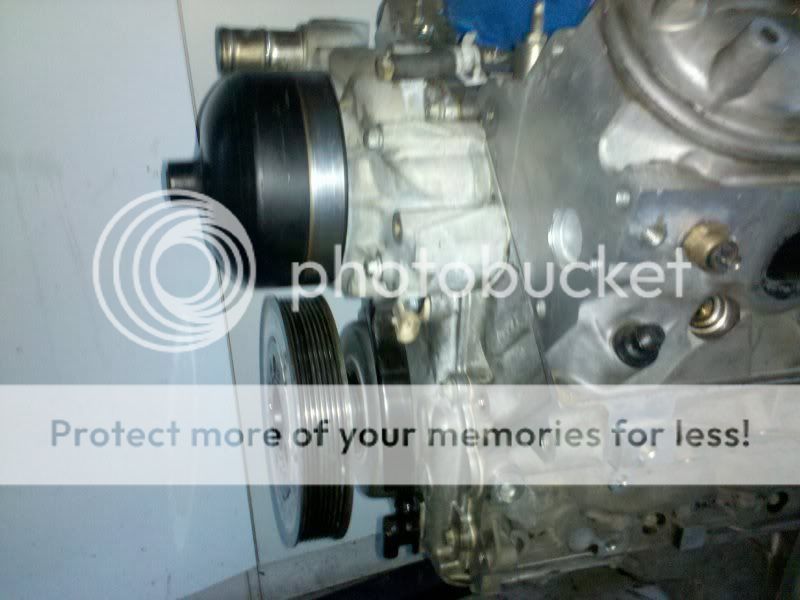
Blower is a D1SC procharger, using the A&A corvette bracket kit. I run a 01 corvette pulley setup but its modified. There isn't enough clearance to use a stock alternator mount from a corvette so I took one and cut it down to bring the alternator in. Its tucked against the valve cover so tightly I had to run the other style coil mounting otherwise it would have hit. I am actually having an issue with alignment, but I got a laser aligning tool that I plan to use once I get the top end back on the motor. (Tues, I hope)
I am thinking about going to an F1r blower in the future, but at this point I have no issues with power and I am still on a relatively large blower pulley. (8lbs max)
12-24-2011, 08:09 PM
#15
I sold everything, pretty much. I think I have a couple of random stock parts sitting around from it but I walked away from GN motors and never looked back. Too expensive to build right.
Blower is a D1SC procharger, using the A&A corvette bracket kit. I run a 01 corvette pulley setup but its modified. There isn't enough clearance to use a stock alternator mount from a corvette so I took one and cut it down to bring the alternator in. Its tucked against the valve cover so tightly I had to run the other style coil mounting otherwise it would have hit. I am actually having an issue with alignment, but I got a laser aligning tool that I plan to use once I get the top end back on the motor. (Tues, I hope)
I am thinking about going to an F1r blower in the future, but at this point I have no issues with power and I am still on a relatively large blower pulley. (8lbs max)
12-24-2011, 08:24 PM
#16
On The Tree
Join Date: Feb 2011
Location: Katy, Texas
Posts: 116
Likes: 0
Received 0 Likes
on
0 Posts
I love it another z car. My 300 zx build link is in my signature. I think there is 5 or 6 of us now on LS1Tech. Lets stay in touch. Nice build. If you laid the radiator down like in the z31's you could probably turn the blower around and run a cog belt. What is the weight after the cage and all was done?
Doug Jonson
Doug Jonson
12-25-2011, 02:53 AM
#18
On The Tree
Thread Starter
iTrader: (9)
Join Date: Sep 2008
Posts: 176
Likes: 0
Received 0 Likes
on
0 Posts
As far as I know I am the only centrifugal SC lsx datsun around. (Would LOVE to see another, just haven't yet
12-25-2011, 02:54 AM
#19
On The Tree
Thread Starter
iTrader: (9)
Join Date: Sep 2008
Posts: 176
Likes: 0
Received 0 Likes
on
0 Posts
I love it another z car. My 300 zx build link is in my signature. I think there is 5 or 6 of us now on LS1Tech. Lets stay in touch. Nice build. If you laid the radiator down like in the z31's you could probably turn the blower around and run a cog belt. What is the weight after the cage and all was done?
Doug Jonson
Doug Jonson

I did lay the radiator down a bit, but I didn't have much room with the IC and trans cooler to get more than 3-5 degrees of layback.
12-25-2011, 06:03 AM
#20
Teching In

Join Date: Dec 2011
Posts: 9
Likes: 0
Received 0 Likes
on
0 Posts
nice, very nice..... i'm the first one to do a gn conversion, in a z that i can remember, there was a guy in florida and i around the same time, (scotty) but he went all out, and i retained much more of a stock car with the gn motor... thought about doing this, but i have 2000 passes on mine and two motors, so, no biggie. best of a 10.4. but i'm building a new project, an 82 vette with an ls motor, no big plans, just a driver. but i really enjoyed your z car.... i have been loving z cars for 30 years. and i have a garage full.... nice car, and i like your work...