
84 Monte 5.3 Build
 04-12-2012, 04:53 PM
#61
On The Tree
iTrader: (2)
Join Date: Mar 2012
Location: Mobile,Al
Posts: 116
Likes: 0
Received 0 Likes
on
0 Posts
I can get them close but not good. I found a new fabricated oil pan for 225$ shipped on ebay . Its made like the autokraft pan and comes with the pickup tube but no gasket or filter block . and you have to run a remote filter with it . Ill get some pics up when it arrives . Believe its Speedworks/procomp electronics that makes it . He had a nice set of stainless ls manifolds for around 200 too. I started ripping my dash apart so i can start laying stuff out . Trying to take my time but i love driving the camino.
 05-10-2012, 05:47 PM
#62
On The Tree

 05-12-2012, 06:13 PM
#64
Teching In

Join Date: May 2008
Location: Las Vegas, Nevada
Posts: 9
Likes: 0
Received 0 Likes
on
0 Posts
Any thoughts on using the KRB engine swap kit? I am gathering all the parts I need to swap out the HA turbo 3.8 in my 84 Buick Regal T-type for a 5.3 or bigger motor.
 06-08-2012, 11:16 AM
#66
Staging Lane
Thread Starter

Sorry guys, been busy racking up miles on the Z06 lately, haven't touched the Monte in a while. I do have updated pictures though, so I'll try to get them uploaded ASAP.
Thanks,
-matt
Thanks,
-matt
11-06-2012, 11:03 AM
#68
Staging Lane
Thread Starter
Sorry guys, I've been sucking at keeping up with this, but mainly because I haven't worked on the car in a while. I just ordered some parts, namely a 40-tooth reluctor for the 700R4 and a new VSS pigtail to fit the original 700R4 VSS. With the 40-tooth reluctor it will speak to the 5.3 PCM.
I'll try to get pictures organized and captioned tonight, I've got plenty on my camera still to post.
-matt
I'll try to get pictures organized and captioned tonight, I've got plenty on my camera still to post.
-matt
11-19-2012, 10:04 PM
#69
Staging Lane
Thread Starter
Let me preface this post by saying that I'm an idiot. I spent a bunch of time researching VSS options, and trying to figure out what I needed to get for my 700R4 to work. I ordered a 40-tooth reluctor for it, and then took off the tailshaft housing to install it. Turns out, since it's from a 93 S-10, it already has a 40-tooth reluctor and a VSS that will work with the 5.3's PCM. Again, I'm an idiot. Oh well, the original VSS was pretty brittle and stuck in place, so a new VSS isn't a bad idea anyway.
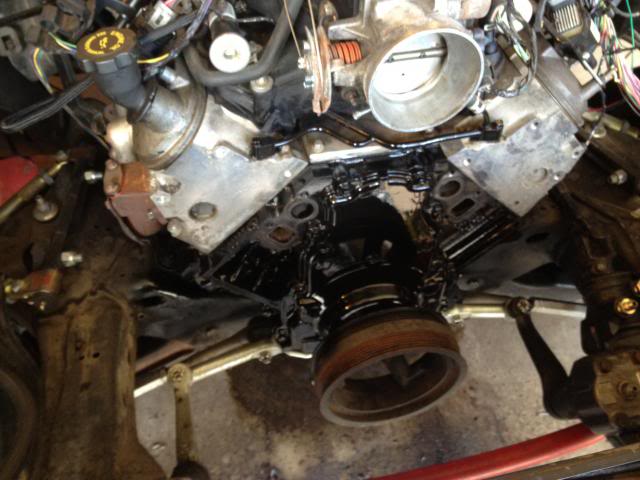
I know somebody wanted to see how the Autokraft pan fits in terms of clearance, so I snagged a couple pictures. the fit really couldn't be any more perfect. I'm really happy with this pan and wouldn't hesitate to drop the $400 on it again.
Fits nice huh?
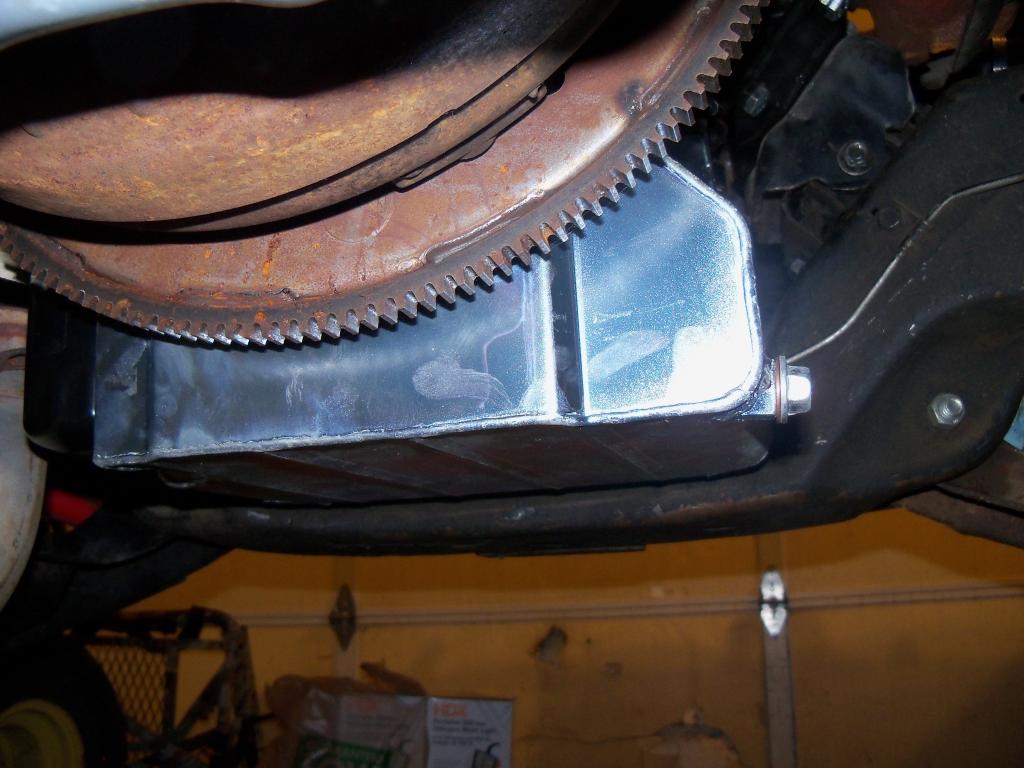
Really good here too. The motor could be further ahead if it needed too, but it's got a nice amount of clearance to allow for movement.

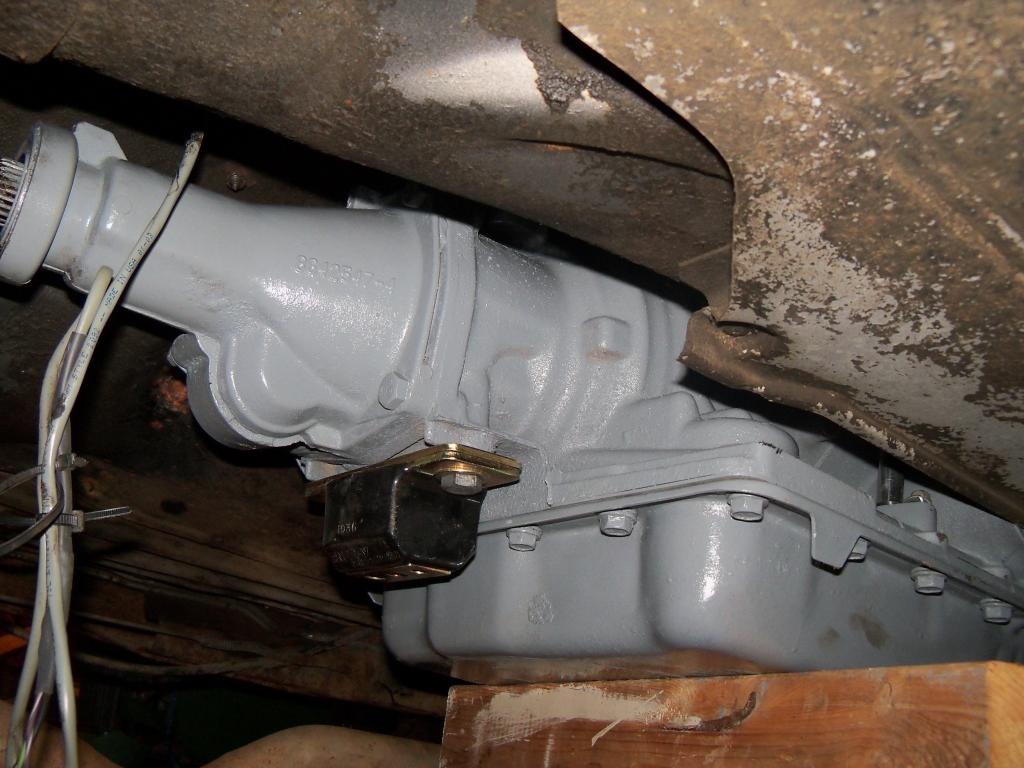
New trans mount, tranny is painted for cleanliness, but it was still a spray-can job, hence the thin spots. Getting ready to pull the tailshaft housing.
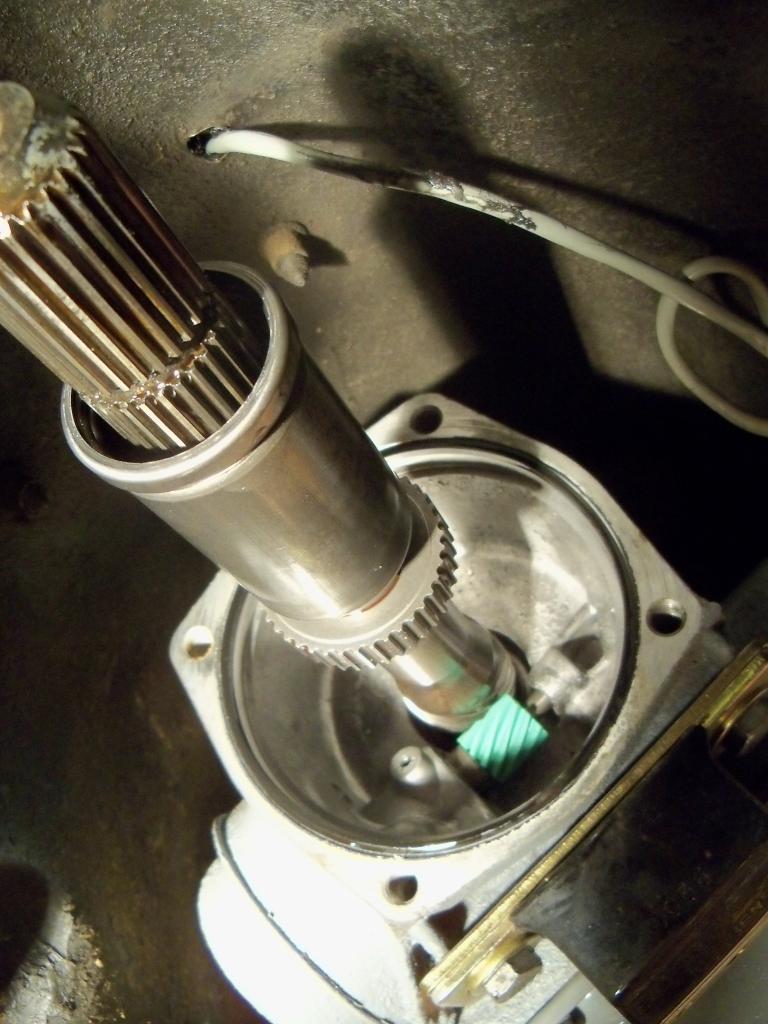
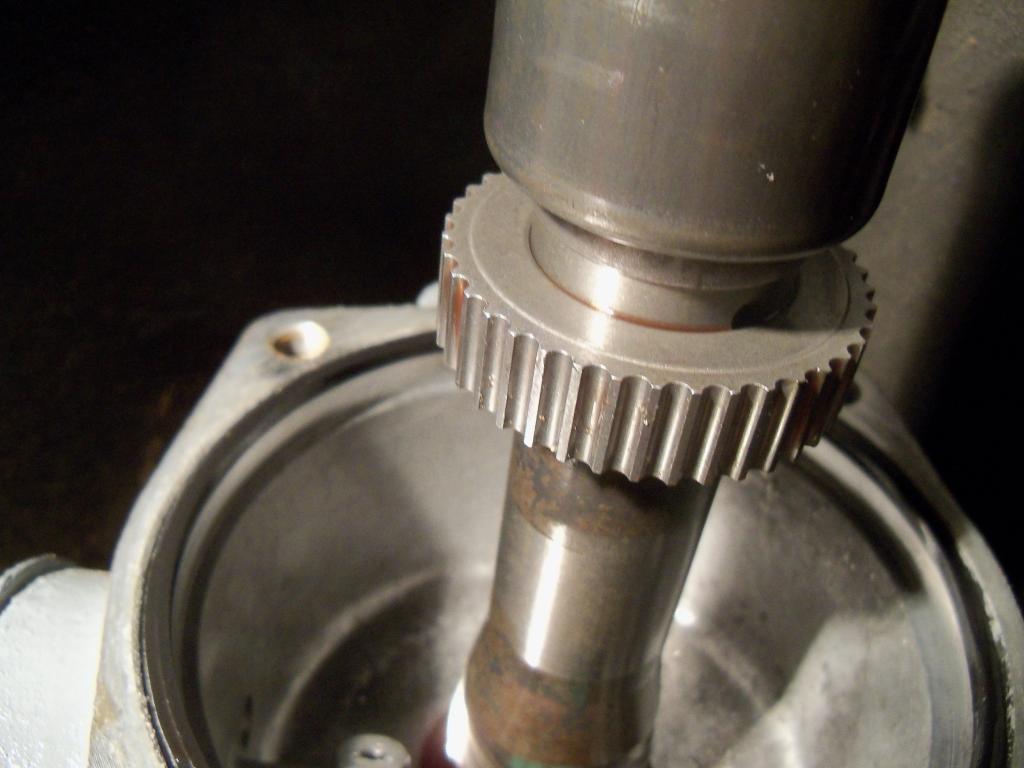
Oh look, a 40-tooth reluctor, that will work with a 5.3
TV Made EZ cable/kit. Nice stuff, easy install.
In any case, all this screwing around makes me think I should have just held out for a T56 swap, but the 700 has served me well and should work fine until I'm ready for a T56. I've made it more complicated than it needs to be, when all I needed to do was put a new plug on my VSS lead to make it all work. Live and learn, things will work out fine...
I'm really trying to be more attentive to this project now, it's been sitting for way too long already.
-matt
I know somebody wanted to see how the Autokraft pan fits in terms of clearance, so I snagged a couple pictures. the fit really couldn't be any more perfect. I'm really happy with this pan and wouldn't hesitate to drop the $400 on it again.
Fits nice huh?
Really good here too. The motor could be further ahead if it needed too, but it's got a nice amount of clearance to allow for movement.
New trans mount, tranny is painted for cleanliness, but it was still a spray-can job, hence the thin spots. Getting ready to pull the tailshaft housing.
Oh look, a 40-tooth reluctor, that will work with a 5.3
TV Made EZ cable/kit. Nice stuff, easy install.
In any case, all this screwing around makes me think I should have just held out for a T56 swap, but the 700 has served me well and should work fine until I'm ready for a T56. I've made it more complicated than it needs to be, when all I needed to do was put a new plug on my VSS lead to make it all work. Live and learn, things will work out fine...
I'm really trying to be more attentive to this project now, it's been sitting for way too long already.
-matt
 11-20-2012, 02:37 PM
#71
Staging Lane
Thread Starter
-matt
05-06-2013, 11:11 AM
#72
Staging Lane
Thread Starter
Been a while since I updated, I haven't really been working on this but I need room in the garage so I'm pushing to finish it up now in order to get it down off the jack stands.
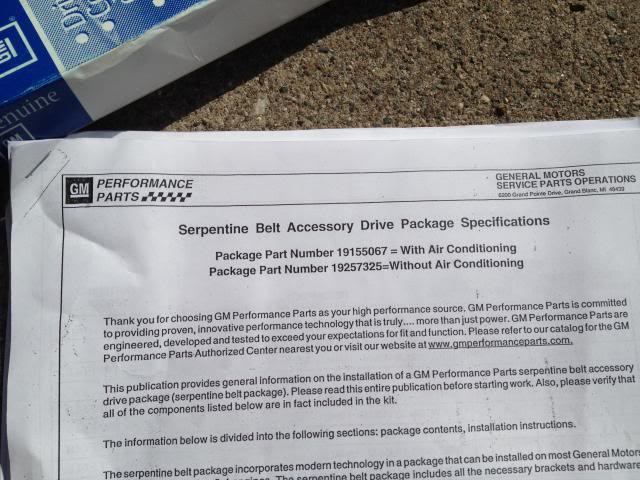
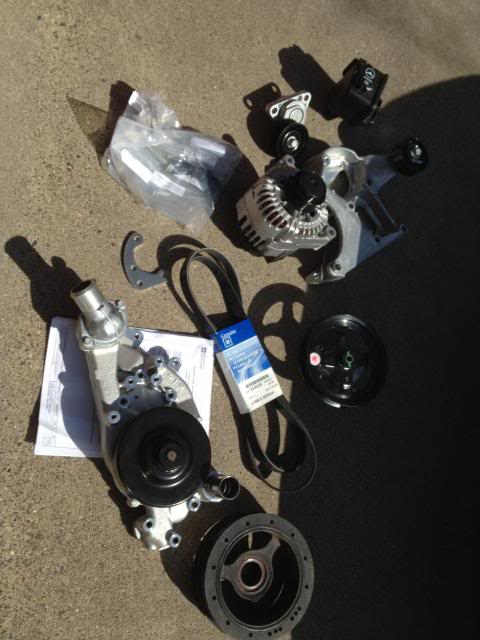
I had originally planned to run the truck accessories, but all of the parts I bought were used and came in looking like junk. To top it off, everything was a bit half-assed in terms of how things fit. I tried a number of solutions to the issue of clearance between the steering pump and box, hated all of them. Not to mention, even when the pulley cleared, the way I'd have to run the lines was pretty hokey. Long story short, I set aside the truck parts and bought a Corvette Accessory Drive kit from Pace, this is one hell of a good deal when you consider the price versus aftermarket or even used parts. To duplicate this with used parts would cost me more than new from Pace. I also bought an LS3 Corvette waterpump that was a never-run crate engine take-off on ebay, as well as a used harmonic balancer from a Corvette. It's worth noting, this Accy Drive will NOT work with a Camaro LS3 balancer, the offset is different. The LS3 water pump also has a different outlet location than the 5.3 or LS1, which makes radiator hose routing a bit easier. The pump is lighter than the stock truck piece, but I don't know how much, I've ehard varying numbers. If I weigh mine before installing, I'll document that here.

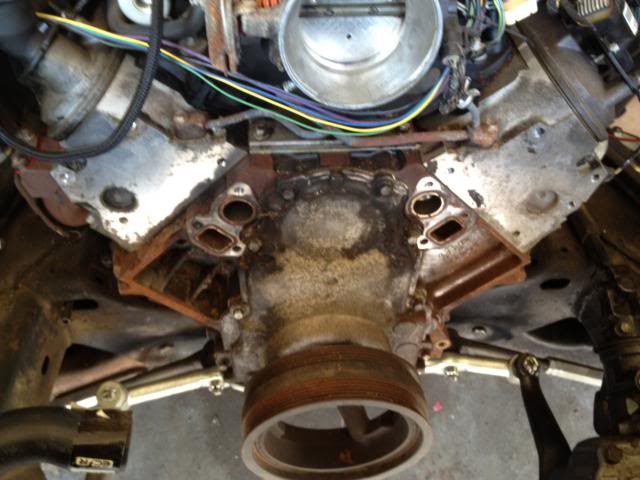
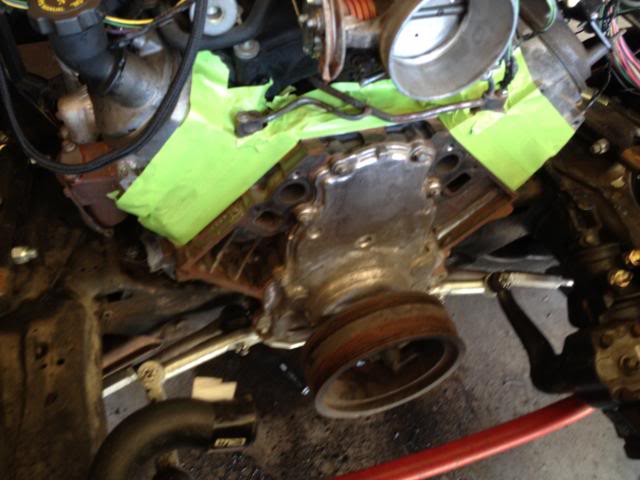
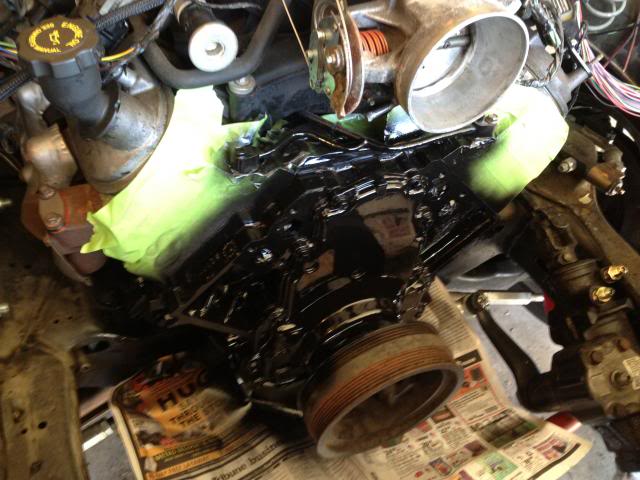
Swapping this gives me a good chance to clean up the front of the engine. I need to buy/borrow/rent a puller for the balancer, so I just left the truck one in place for prep and paint. All I used to clean up the rust and loose paint is my straight bristle steel wire brush on the Dewalt drill. It does a good job, and the Rustoleum Industrial paint will cover a certain amount of remaining rust. I usually don't like Gloss paint under the hood, but this stuff is really durable and they don't have a Satin, only Gloss or Flat.

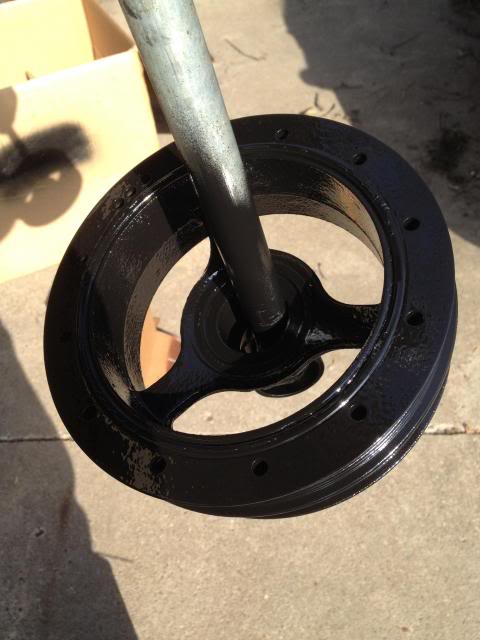
Also had to paint the LS3 Balancer...
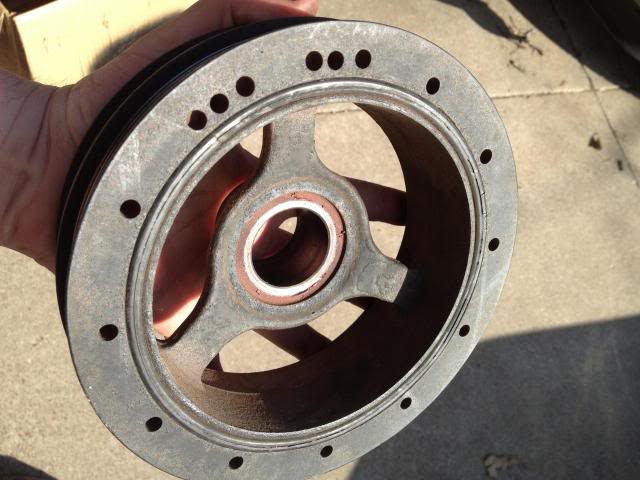
Much gooder.
I had gaskets for the water pump, but I can't find them now so I'll pick up some Fel Pro's on my way home tonight, more to come.
-matt
I had originally planned to run the truck accessories, but all of the parts I bought were used and came in looking like junk. To top it off, everything was a bit half-assed in terms of how things fit. I tried a number of solutions to the issue of clearance between the steering pump and box, hated all of them. Not to mention, even when the pulley cleared, the way I'd have to run the lines was pretty hokey. Long story short, I set aside the truck parts and bought a Corvette Accessory Drive kit from Pace, this is one hell of a good deal when you consider the price versus aftermarket or even used parts. To duplicate this with used parts would cost me more than new from Pace. I also bought an LS3 Corvette waterpump that was a never-run crate engine take-off on ebay, as well as a used harmonic balancer from a Corvette. It's worth noting, this Accy Drive will NOT work with a Camaro LS3 balancer, the offset is different. The LS3 water pump also has a different outlet location than the 5.3 or LS1, which makes radiator hose routing a bit easier. The pump is lighter than the stock truck piece, but I don't know how much, I've ehard varying numbers. If I weigh mine before installing, I'll document that here.


Swapping this gives me a good chance to clean up the front of the engine. I need to buy/borrow/rent a puller for the balancer, so I just left the truck one in place for prep and paint. All I used to clean up the rust and loose paint is my straight bristle steel wire brush on the Dewalt drill. It does a good job, and the Rustoleum Industrial paint will cover a certain amount of remaining rust. I usually don't like Gloss paint under the hood, but this stuff is really durable and they don't have a Satin, only Gloss or Flat.


Also had to paint the LS3 Balancer...

Much gooder.


I had gaskets for the water pump, but I can't find them now so I'll pick up some Fel Pro's on my way home tonight, more to come.
-matt
05-07-2013, 09:20 AM
#73
Staging Lane
Thread Starter
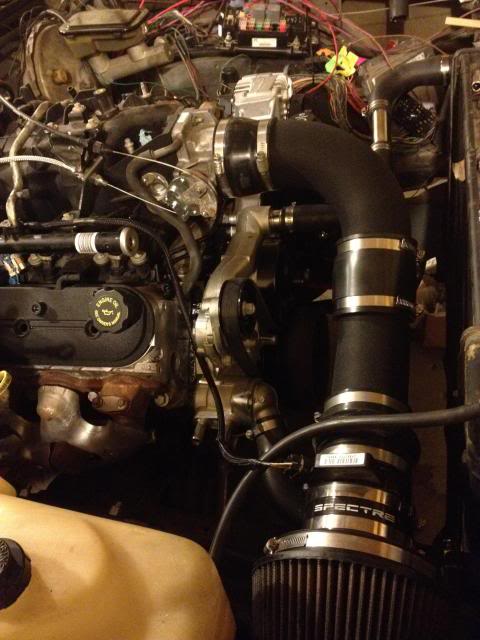
Worked on it some more last night, found some water pump gaskets and got the accessory drive installed. This really is a great kit, it fits like it was made for this car and having all new parts gives me some real peace of mind about traveling far from home in it.
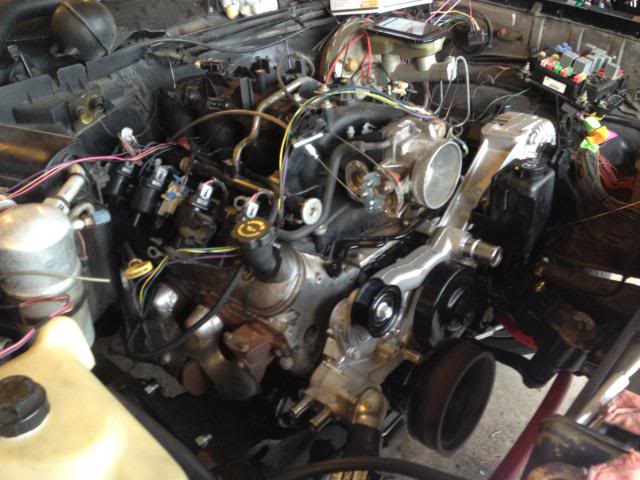
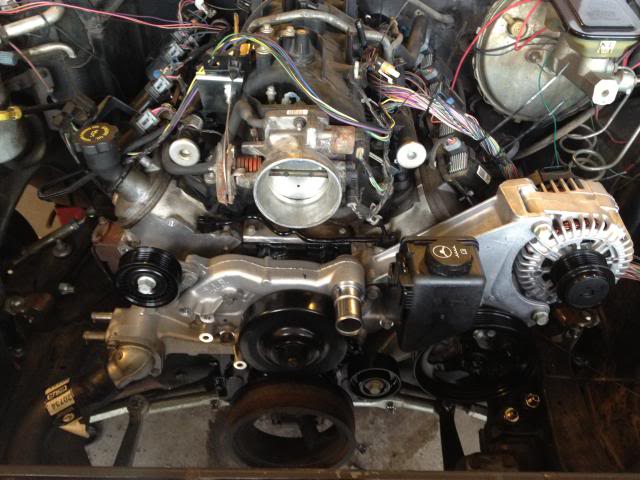
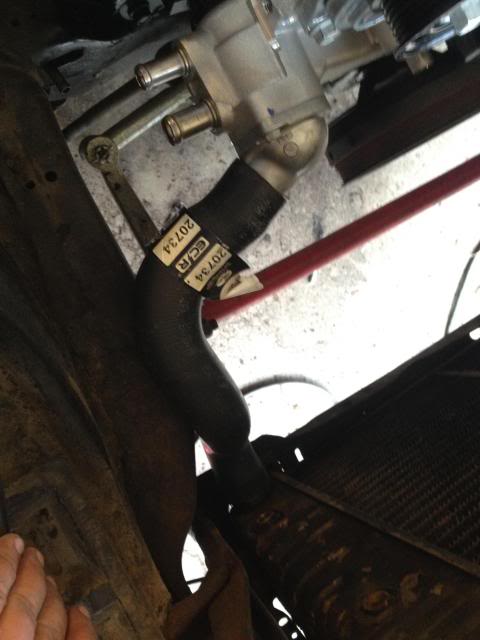
The Gates 20734 hose fits great without any cutting.
With the truck balancer still in place, you can see the difference in offset, it looks to be a little over 1 inch.
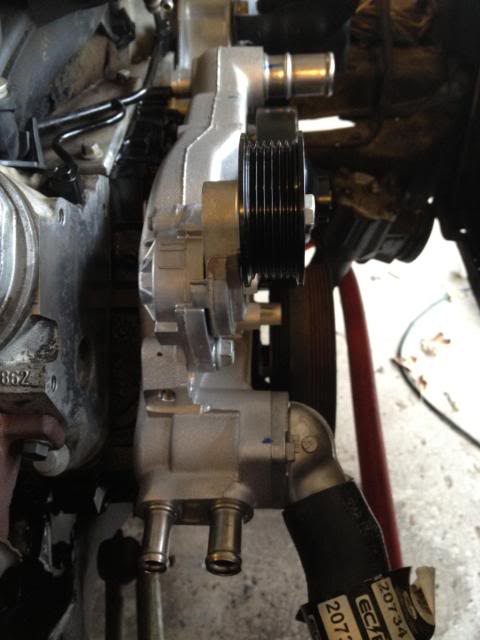
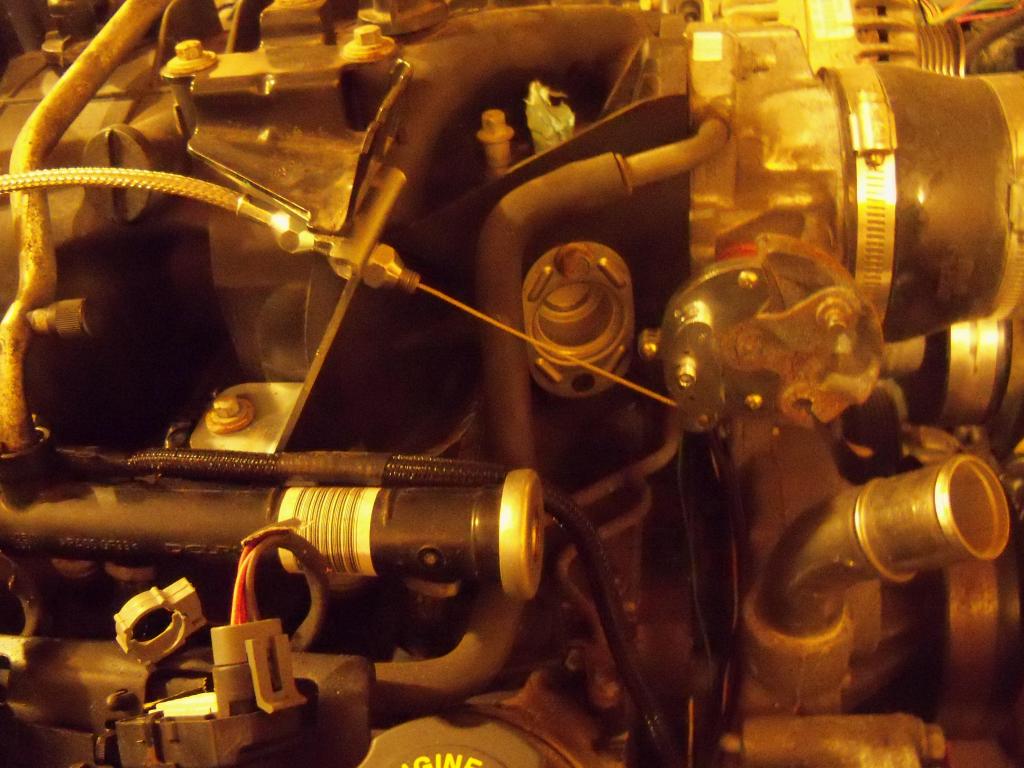
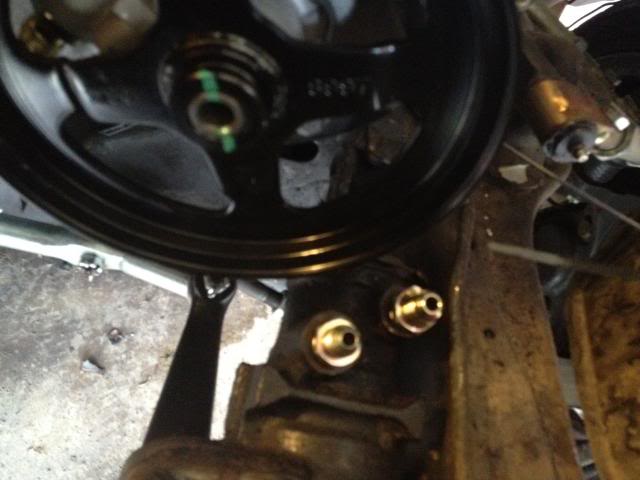
Steering box clearance is good, there's an inch or more between the PS pulley and the fittings. The return line will be a simple straight AN6 Push-lock fitting and hose, and the pressure line will be a short loop of high-pressure AN6 hose. I used DSE's AN6 fitting in the pump to provide clearance for the hose end when I install it.
-matt


The Gates 20734 hose fits great without any cutting.

With the truck balancer still in place, you can see the difference in offset, it looks to be a little over 1 inch.

Steering box clearance is good, there's an inch or more between the PS pulley and the fittings. The return line will be a simple straight AN6 Push-lock fitting and hose, and the pressure line will be a short loop of high-pressure AN6 hose. I used DSE's AN6 fitting in the pump to provide clearance for the hose end when I install it.

-matt
05-10-2013, 01:17 PM
#74
Staging Lane
Thread Starter
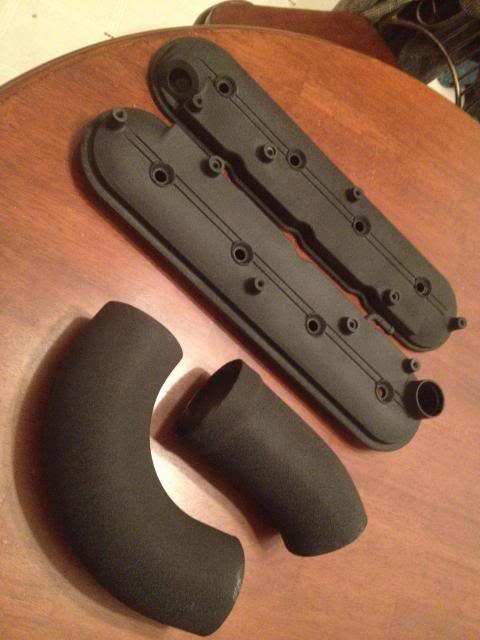
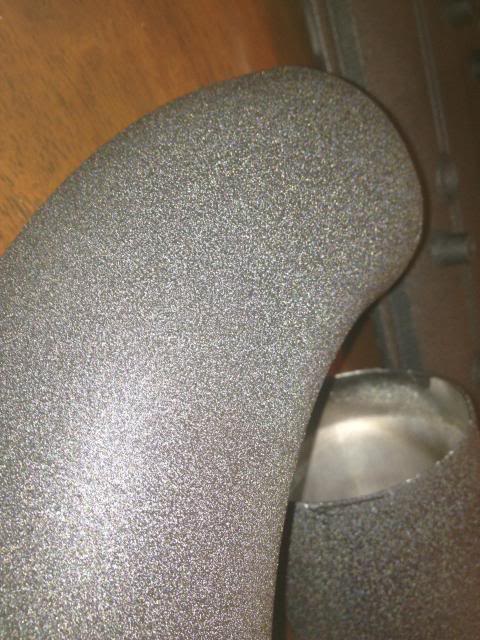
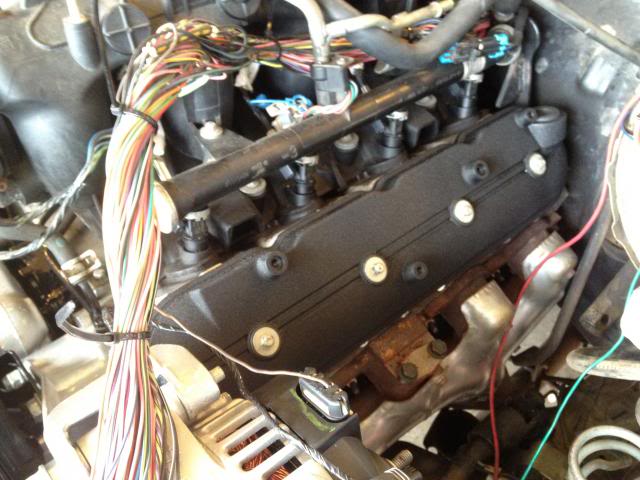
Some more slow, relatively meaningless progress. The air intake is a modified K&N Cold Air kit from a chevy truck, it's aluminum and was chromed, but when I cut it apart at a weld seam to turn part of it, the chrome started to flake. Since I'm not a big fan of chrome in general, I peeled the rest of it off in order to paint the tube. The valve covers were also ugly, so I decided to tackle them at the same time. VHT Black Wrinkle Paint to the rescue, this stuff did a great job and honestly for my first time with it, came out so near to the look of a powdercoated wrinkle finish that I see no reason to spend the additional money for that. I cleaned up all of the parts well with Zep Foaming Engine Degreaser, cleaned up casting flaws/parting lines on the valve covers with the belt sander, and went over everything with 400 grit before paint. The paint was heated in HOT water before spraying, and the parts were cured at 200 degrees for an hour after spraying. Not perfect, but I'm very happy with the results.
-matt


-matt
05-13-2013, 02:27 PM
#75
Staging Lane
Thread Starter
Valve covers are looking good.
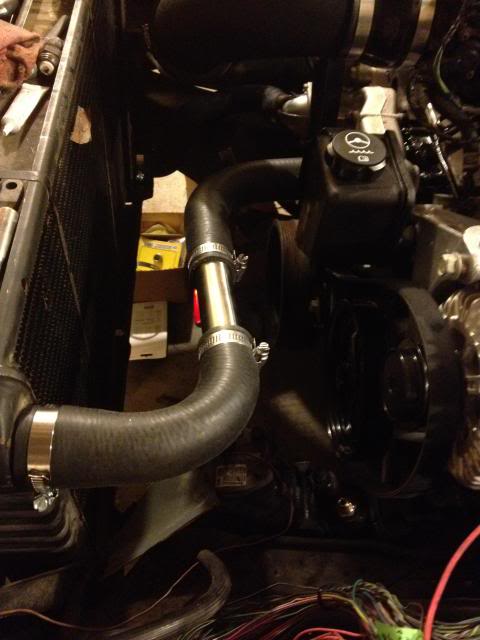
Upper radiator hose built. I was going to use silicone elbows and an aluminum tube, but that $#!7 is expensive, and nobody carries it. I took a Dayco 72044 and cut and lengthened it with a chromed brass 1.25 sink pipe from Home Depot, scuffed to dull the chrome. The 72044 hose fits a Chrysler minivan, so even if it blew out on a cross-country trip, I think I could find a replacement pretty easily.
Intake is all put together. I've got a K&N Bulge connector on one joint, and a Rubber PVC connector on another. Looks cheesy so I'll replace them later with clamps from spectre.
Random picture from mocking up rad hoses. I really need to work on my iphone photography skills :/

-matt

Upper radiator hose built. I was going to use silicone elbows and an aluminum tube, but that $#!7 is expensive, and nobody carries it. I took a Dayco 72044 and cut and lengthened it with a chromed brass 1.25 sink pipe from Home Depot, scuffed to dull the chrome. The 72044 hose fits a Chrysler minivan, so even if it blew out on a cross-country trip, I think I could find a replacement pretty easily.

Intake is all put together. I've got a K&N Bulge connector on one joint, and a Rubber PVC connector on another. Looks cheesy so I'll replace them later with clamps from spectre.

Random picture from mocking up rad hoses. I really need to work on my iphone photography skills :/

-matt
 05-16-2013, 10:53 PM
#77
Staging Lane
Thread Starter
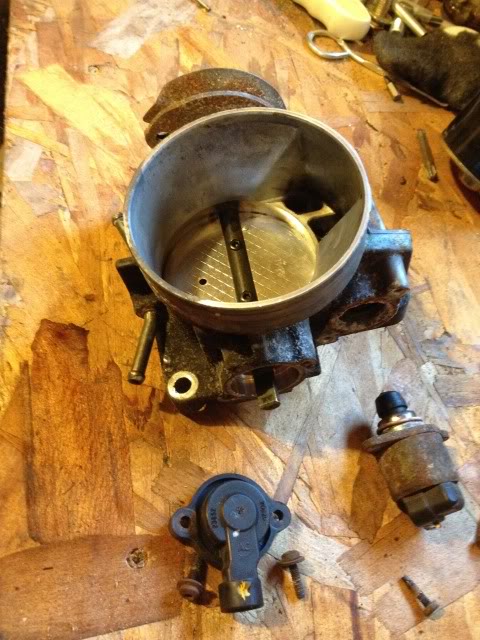
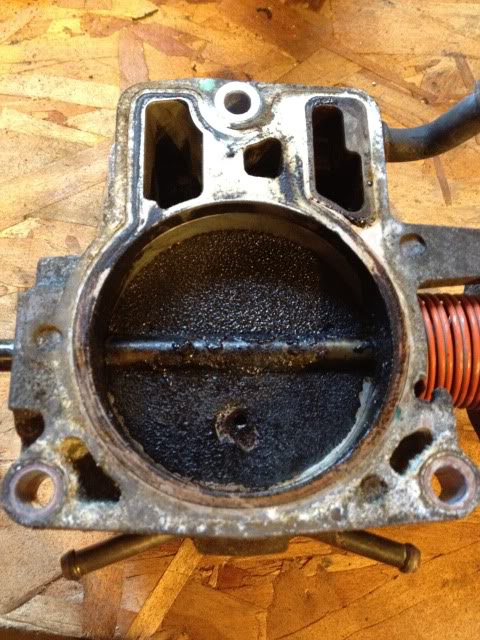
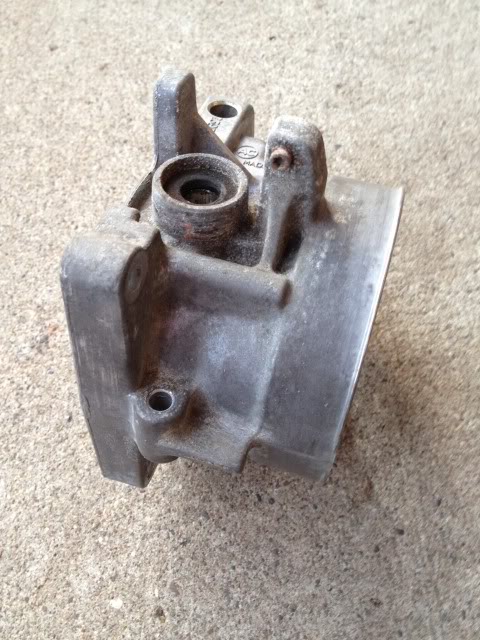
Filthy throttle body is filthy, time to clean it up...
MMM, yummy
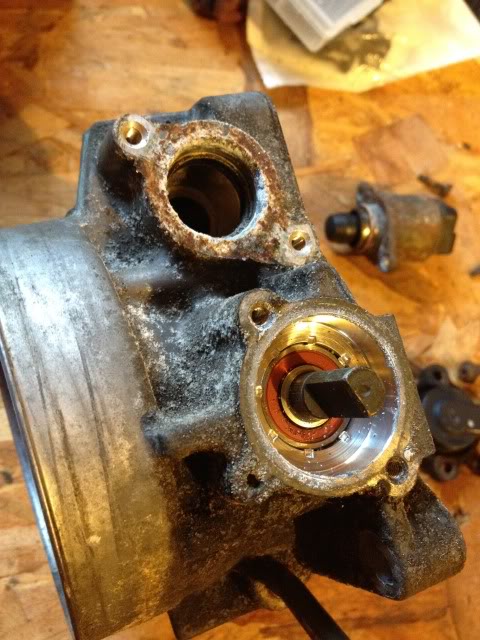
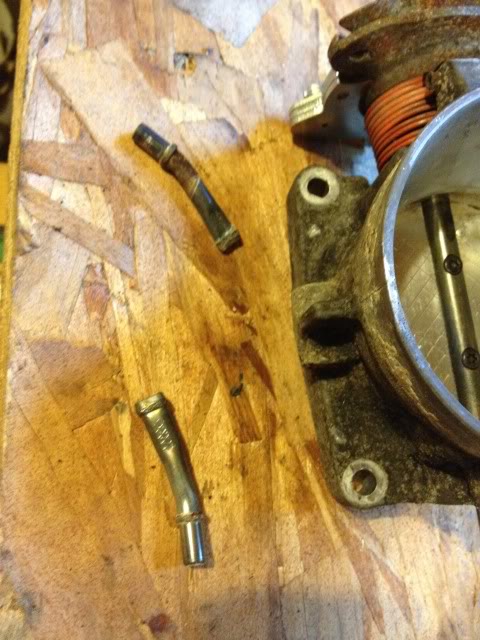
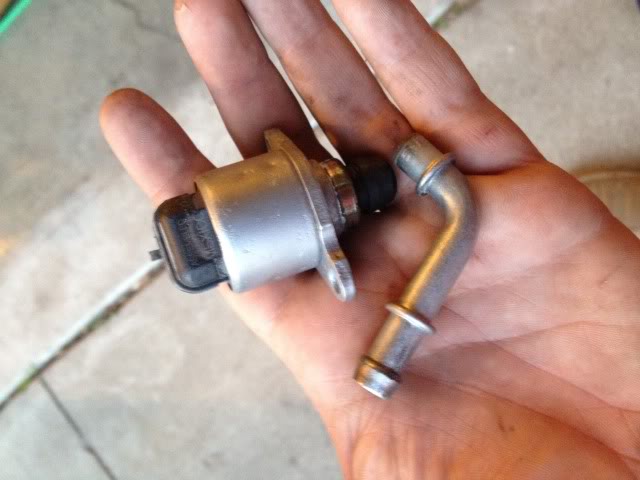
Removed the coolant tubes. I just clamped the tube in the vise, then heated the throttle body with the torch for a bit, and wiggled the TB back and forth until it pulled off the tube. Same thing for the other one. This literally is just a hole in the TB, with nothing connected to it, so it will stay wide open and not hurt a thing.
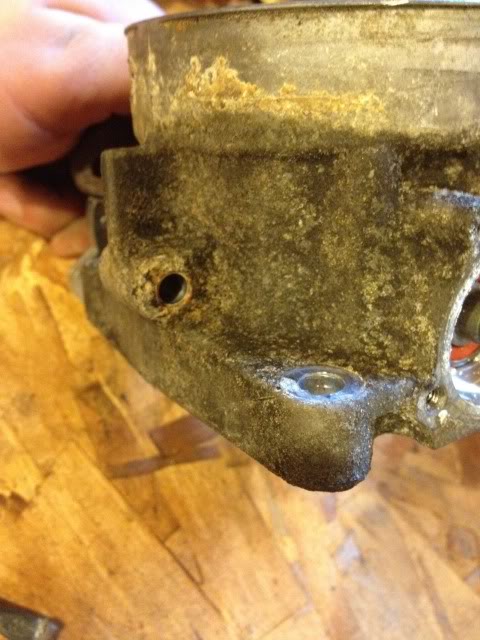
Getting better, I used Zep's foaming engine cleaner to get the filth off.

Then some bead blasting, and voila.
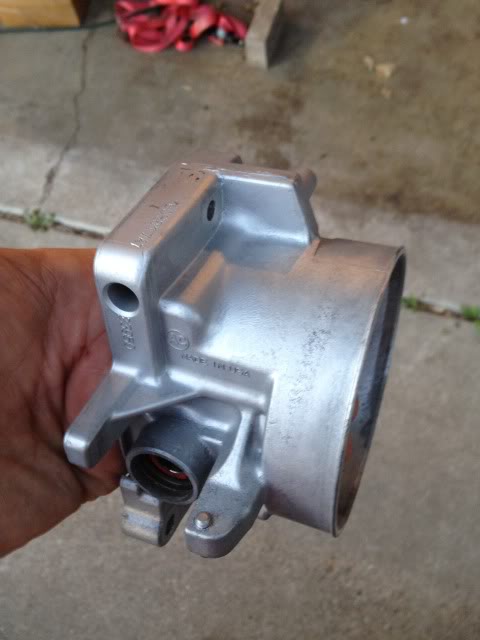

Cleaned these up too.
I could have just as well left it raw, but figured I'd coat it to seal it up. The TB was a bit pitted up, so I think it'd look ugly in a hurry without paint. Decided on Flat Black to make it match the intake.
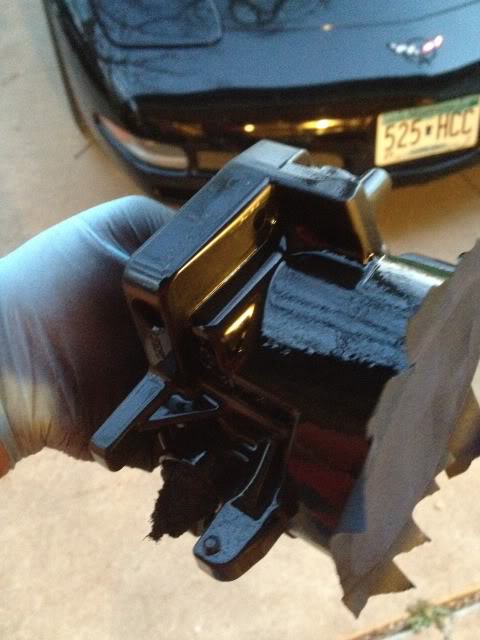
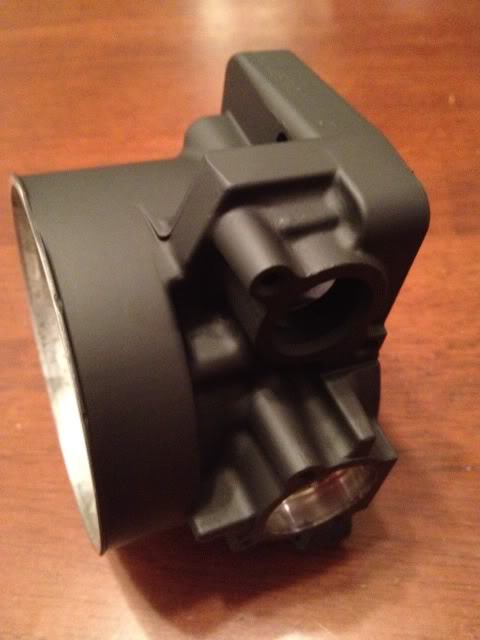
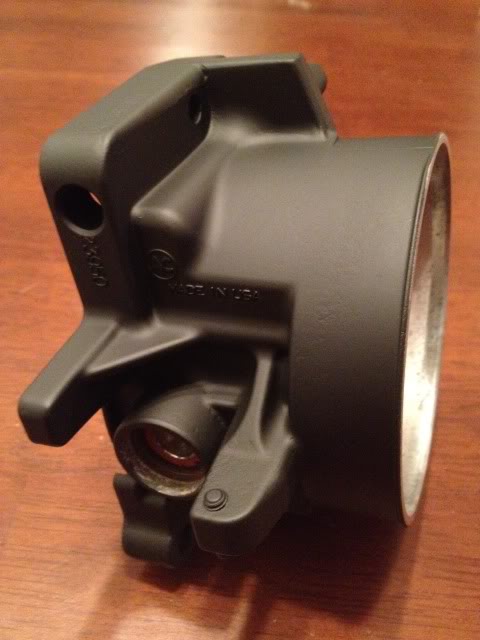
I'm happy with how it came out. In my naturally backward process, I'm thinking about porting it this weekend, I didn't realize how simple it was to do a basic P&P on them until looking at it and reading some write-ups on the subject.
-matt

MMM, yummy


Removed the coolant tubes. I just clamped the tube in the vise, then heated the throttle body with the torch for a bit, and wiggled the TB back and forth until it pulled off the tube. Same thing for the other one. This literally is just a hole in the TB, with nothing connected to it, so it will stay wide open and not hurt a thing.


Getting better, I used Zep's foaming engine cleaner to get the filth off.


Then some bead blasting, and voila.


Cleaned these up too.

I could have just as well left it raw, but figured I'd coat it to seal it up. The TB was a bit pitted up, so I think it'd look ugly in a hurry without paint. Decided on Flat Black to make it match the intake.


I'm happy with how it came out. In my naturally backward process, I'm thinking about porting it this weekend, I didn't realize how simple it was to do a basic P&P on them until looking at it and reading some write-ups on the subject.
-matt
05-29-2013, 12:49 PM
#78
Staging Lane
Thread Starter
I got a ton of work done on this last week and weekend, my wiring harness is about complete and I got the battery relocated to the trunk and wired. I have too many pictures to sort out at work but I'm going to try getting them posted tonight from at home. Shooting for June 15th as my ETA to have it running and driving.
-matt
-matt
 05-29-2013, 02:20 PM
#80
Staging Lane
Thread Starter

-matt
ETA: You can see the weld that I cut through in that picture, it's just to the right of the K&N decal.