
1979 ford fairmonster
 02-12-2012, 07:47 PM
#1
Staging Lane
Thread Starter
Join Date: Jul 2011
Location: MN
Posts: 52
Likes: 0
Received 0 Likes
on
0 Posts
I've been stalking around on here for a while and figured I had better get started on my project. Here are the details:
1979 Ford Fairmont
Orignial 5.0 302 V8
C4 Transmission
7.5 Rear, 2.73 gears
Thrush glasspack exhaust hackjob
Walmart Tint
Custom rattle-can primer paint
Picked the car up about 2 years ago and I've only driven it a handful of times. Added an Edelbrock Performer carb and intake to help it move along. It has sat in front of the house for a year and I'm tired of watching the little transmission fluid leak stain the street.
I want to make this thing into my DD that is also a 5.0 pony stomper. I think I'll be able to pull it off without spending a fortune, but we'll have to see about that. I want the car to be able to drive year round, on the interstate and around town. I'm looking for a very stable platform that I only have to build one time as well as one that I will be proud of until I can finish any body or interior work that I might want to do at a later date. I'm setting my goals at 350 rwhp, ~12 secs, under 3100 lbs with the driver. Here is what I have planned:
5.3 LSX swap
T56 swap
5 lug 8.8, 3.73 swap
Rear drum/disc conversion
I'd like to keep the car as stock as possible due to monetary constraints, (this wouldn't be any fun if I could spend as much money as possible!) but include the power adders and a few other creature comforts and maintenance add-ons to modernize the car a bit. I haven't made my mind up if I want to make this a Carb car or use EFI yet, but I am leaning towards Carb for $$$ and ease of maintenance.
Pictures are attached below. I'll follow up with more pics and updates/problems as I go on. Hopefully I'll be done by fall of this year!


 02-13-2012, 08:56 AM
#3
Somebody did a fairmount swap on here. From what I remember they did a phenomenal job too. You might try a search in this section.
Last edited by Pop N Wood; 04-19-2012 at 05:34 AM.
02-13-2012, 09:10 AM
#4
TECH Resident
Join Date: Nov 2011
Location: NJ
Posts: 812
Likes: 0
Received 0 Likes
on
0 Posts
if i'm not mistaken, the fairmonts never came with a 5 liter, but rather a 255.
swapping the chevy in there shouldn't be hard, but it's also stupidly easy to swap an OHV 5 liter from a fox body mustang, complete with the fuel system, and EEC4 control system. this would give you excellent driveability in all weather, along with(depending on how you build the engine) pony stomping ability.
regardless of which route you take......good move going to the 8.8 rear. make sure you use a 31 spline diff though.
also.......you will find that you can use the entire suspension from a fox body mustang in this car. right as it is, that car probably handles like poop.
install an 87 or newer front k-member complete, sway bars front and rear, you'll make that a whole different car going around corners. also use the mustang rack, for much quicker steering.
Last edited by 1ltcap; 02-13-2012 at 09:20 AM.
02-15-2012, 10:47 PM
#7
Staging Lane
Thread Starter
Join Date: Jul 2011
Location: MN
Posts: 52
Likes: 0
Received 0 Likes
on
0 Posts
Trending Topics
02-15-2012, 11:21 PM
#8
Staging Lane
Thread Starter
Join Date: Jul 2011
Location: MN
Posts: 52
Likes: 0
Received 0 Likes
on
0 Posts
Back to business...
Got my 5.3 engine this week and spent a ton of money on a NEW engine hoist and stand. Granted, these are essential pieces, but buying them new just to use them once is ridiculous. Got a decent deal on the engine from Weller Auto out of Grand Rapids, MI through eBay. Looks great and only 71k, I would steer anyone over to them. Showed up with truck intake and the nice heat sink coil packs installed
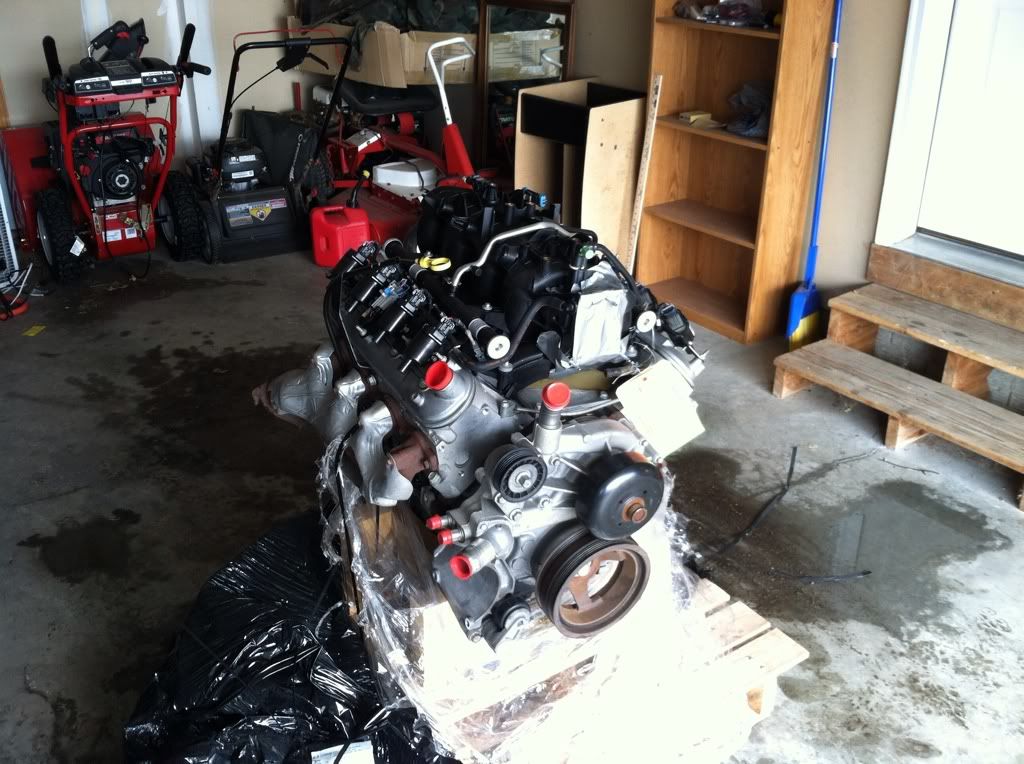
Came with 862 heads. Debating whether I should port and polish these or attempt to find some 243/799's and mill them down to keep comp ratio decent. Probably not going to do a valve replacement on these, so we'll see where the money goes...
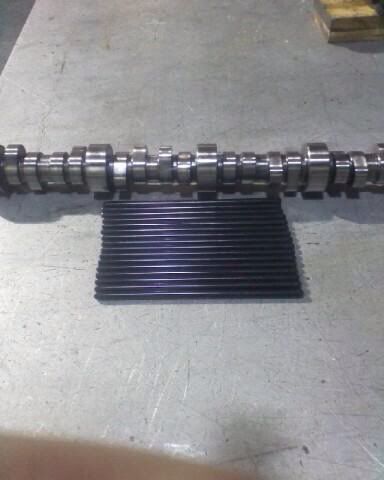
Also picked up a Thunder Racing Cam, TR224-112, and some 7.4 pushrods from billyflantos, should arrive this week. Thanks Billy.
Going to attempt to tear this thing down over the weekend and see where I stand with the engine. I'm not worried about too much due to the low miles.
Got my 5.3 engine this week and spent a ton of money on a NEW engine hoist and stand. Granted, these are essential pieces, but buying them new just to use them once is ridiculous. Got a decent deal on the engine from Weller Auto out of Grand Rapids, MI through eBay. Looks great and only 71k, I would steer anyone over to them. Showed up with truck intake and the nice heat sink coil packs installed

Came with 862 heads. Debating whether I should port and polish these or attempt to find some 243/799's and mill them down to keep comp ratio decent. Probably not going to do a valve replacement on these, so we'll see where the money goes...
Also picked up a Thunder Racing Cam, TR224-112, and some 7.4 pushrods from billyflantos, should arrive this week. Thanks Billy.

Going to attempt to tear this thing down over the weekend and see where I stand with the engine. I'm not worried about too much due to the low miles.
Last edited by R. Finkle; 05-21-2013 at 08:06 PM.
02-21-2012, 07:13 AM
#9
Staging Lane
Thread Starter
Join Date: Jul 2011
Location: MN
Posts: 52
Likes: 0
Received 0 Likes
on
0 Posts
Tore down the engine this weekend. There were no engine goblins to speak of, so I on my way. 
Everything looked good inside and came apart nicely. I've already been warned not to leave the heads sitting on the deck, thanks outlawdrifter, so everyone doesn't need to remind me. Still need to get the crank bolt out, but I have a plan for that.
I'm starting to think about how to get the engine in the car. I'm thinking about using the AJE K-member and going with a set of Kooks, BBK, or Dynatech headers to get around the stock steering shaft. Anybody have any suggestions on what works best? Dynatechs seem to be the most cost effective for a new purchase. Also need a T-56 mount option. I know there are several places to get one of those, but if i can modify my mount or steal one from somewhere that'd be great.
Everything looked good inside and came apart nicely. I've already been warned not to leave the heads sitting on the deck, thanks outlawdrifter, so everyone doesn't need to remind me. Still need to get the crank bolt out, but I have a plan for that.


I'm starting to think about how to get the engine in the car. I'm thinking about using the AJE K-member and going with a set of Kooks, BBK, or Dynatech headers to get around the stock steering shaft. Anybody have any suggestions on what works best? Dynatechs seem to be the most cost effective for a new purchase. Also need a T-56 mount option. I know there are several places to get one of those, but if i can modify my mount or steal one from somewhere that'd be great.
Last edited by R. Finkle; 05-21-2013 at 08:07 PM.
02-26-2012, 08:17 PM
#11
Staging Lane
Thread Starter
Join Date: Jul 2011
Location: MN
Posts: 52
Likes: 0
Received 0 Likes
on
0 Posts
no new pics, but I got the harmonic balancer off tonight. Totally sheared off my 1/2 to 3/8 adapter. I guess SEARS will be replacing that. Had a hard time with the gear puller because they are all cheap and designed like crap  (and it's been 5 years since I've even see one in person, lol). Pulled the front cover, all is well, oil pump, everything is good there, cam plate and old cam. Nothing out of the ordinary. Set in the new TR224-112 cam into place with a little Marvel Mystery to help it along.
Word of advice for these teardowns... (Outlawdrifter gave me this idea.) When removing the old cam and installing the new one, take 3 OEM water pump bolts and thread them into the front of the cam. They'll give you a great surface to hold onto while pulling/installing the cam.
Sending the 862 heads out this week to get p&p and (probably) new 2.00 intake valves installed. After that I'm just waiting for $$$ to roll in so I can grab all my rebuild parts and power adder bargains online. Maybe I'll win the lottery soon...
(and it's been 5 years since I've even see one in person, lol). Pulled the front cover, all is well, oil pump, everything is good there, cam plate and old cam. Nothing out of the ordinary. Set in the new TR224-112 cam into place with a little Marvel Mystery to help it along. Word of advice for these teardowns... (Outlawdrifter gave me this idea.) When removing the old cam and installing the new one, take 3 OEM water pump bolts and thread them into the front of the cam. They'll give you a great surface to hold onto while pulling/installing the cam.
Sending the 862 heads out this week to get p&p and (probably) new 2.00 intake valves installed. After that I'm just waiting for $$$ to roll in so I can grab all my rebuild parts and power adder bargains online. Maybe I'll win the lottery soon...
 07-12-2012, 06:16 PM
#15
Staging Lane
Thread Starter
Join Date: Jul 2011
Location: MN
Posts: 52
Likes: 0
Received 0 Likes
on
0 Posts
Some progress has been made in the past months, so I'll write what I remember.
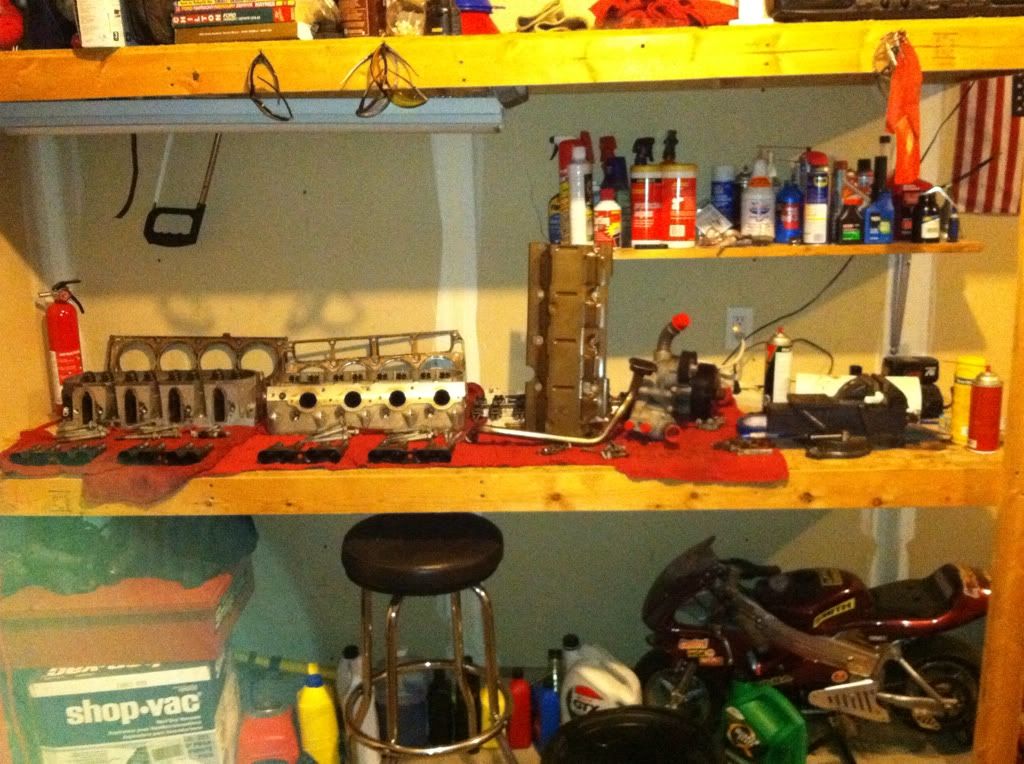
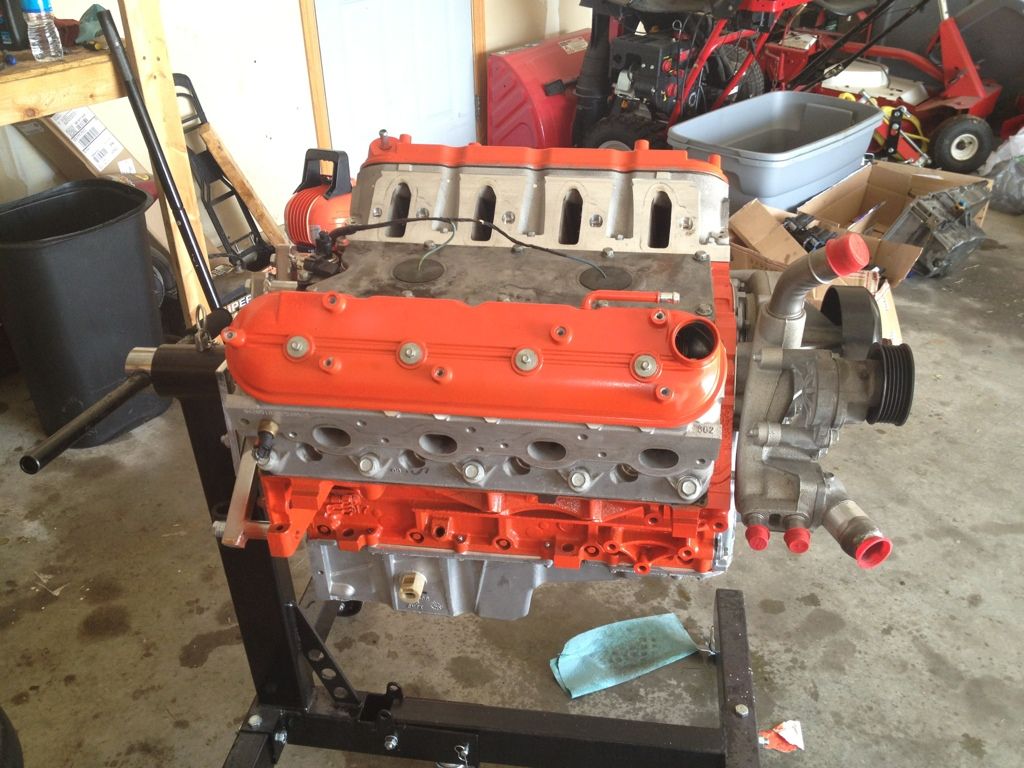
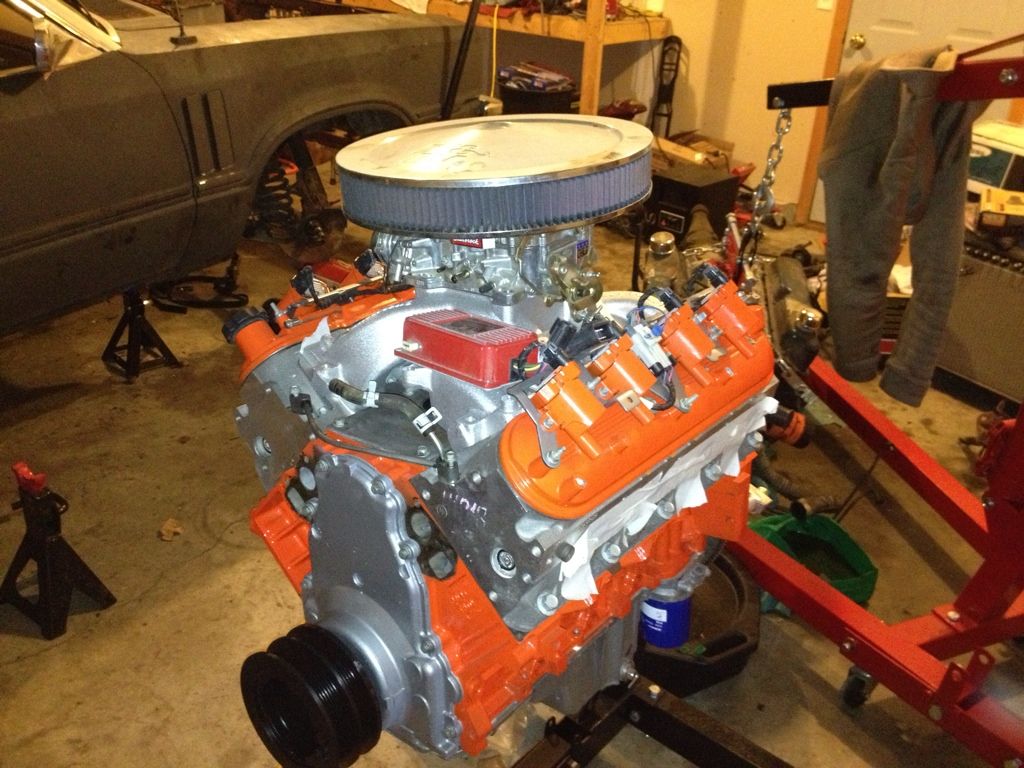
Got my heads back from Sehr Performance in Sioux Falls, SD. They look good. Only installed my COMP springs and had a 3 angle valve job done. Also had the deck milled 0.020 to increase my compression a little (every little bit helps).
I've decided to make this a carb car with a TH350 just for ease of install and maintenance. I don't think I'll save any money, but I won't have to wait for a tuner appointment either. Less computers = less wiring... blah blah blah. I also have an Edelbrock carb and K&N air filter from the old engine so that helps too.
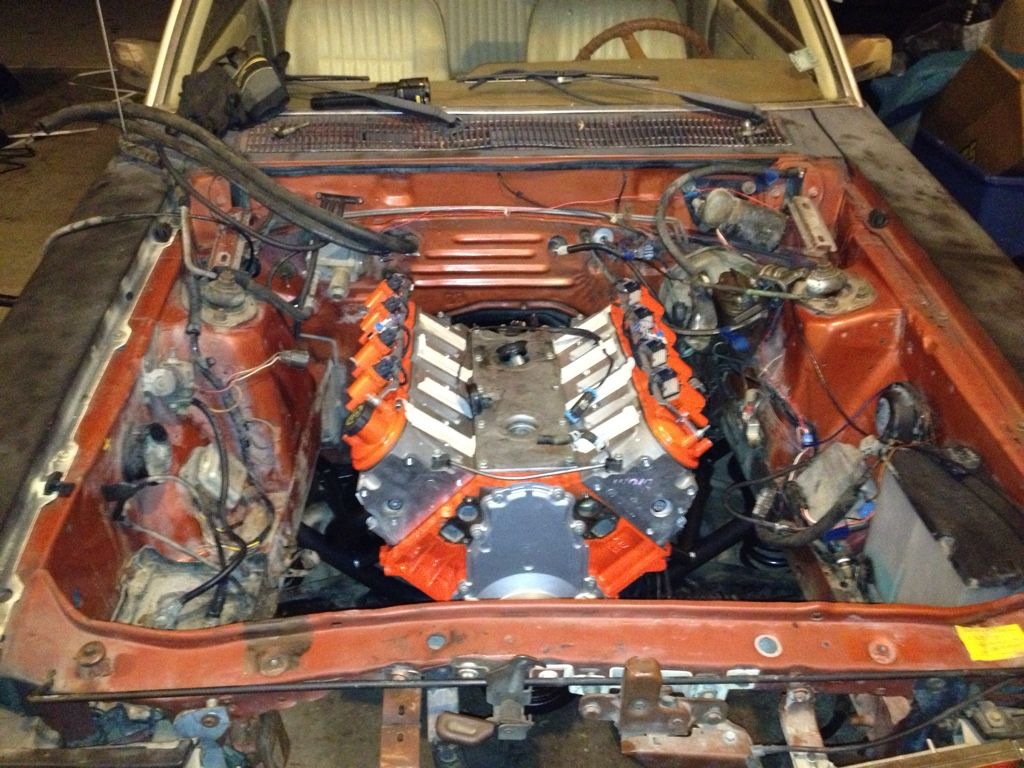
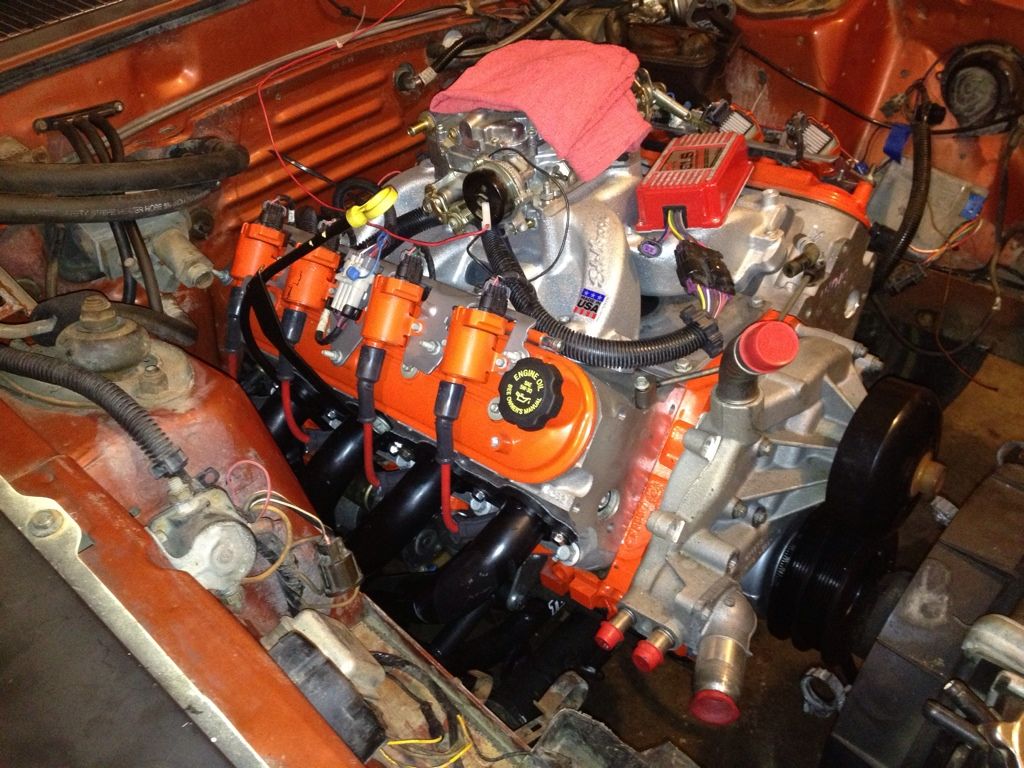
Tore everything down, painted the block Chevy orange. Reinstalled everything except an intake (which i am looking for in case anyone is selling ) Also painted the front cover Cast Aluminum. Duplicolor is good paint btw. I've used it several times and am pretty satisfied with their quick rattle can jobs.
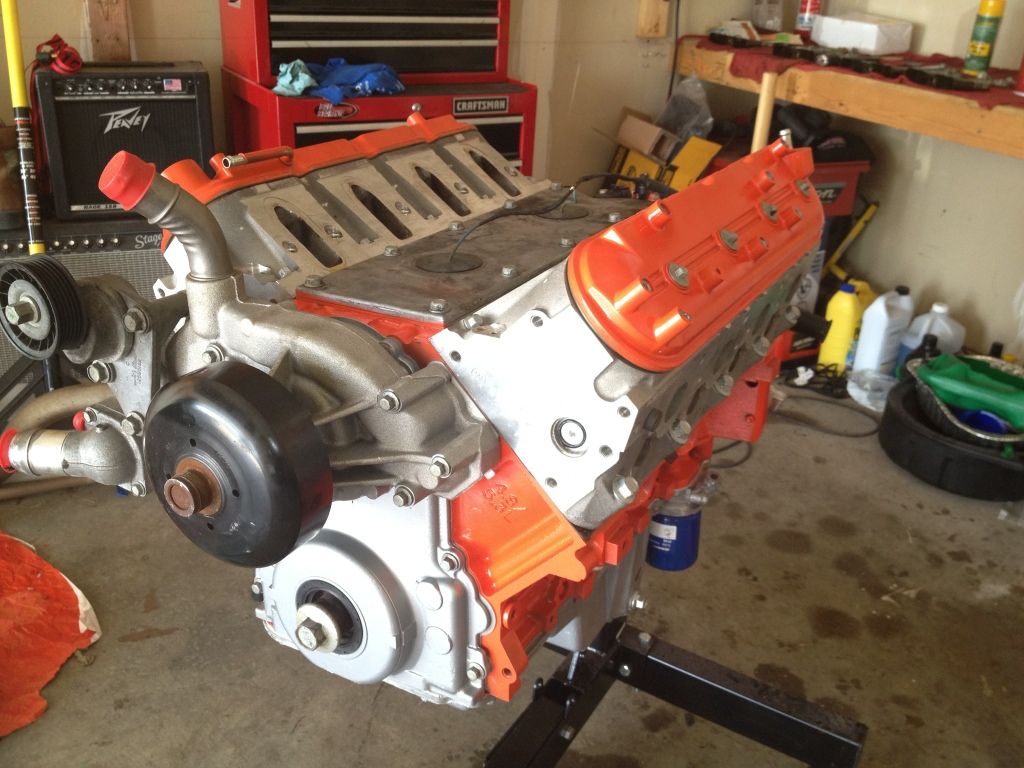
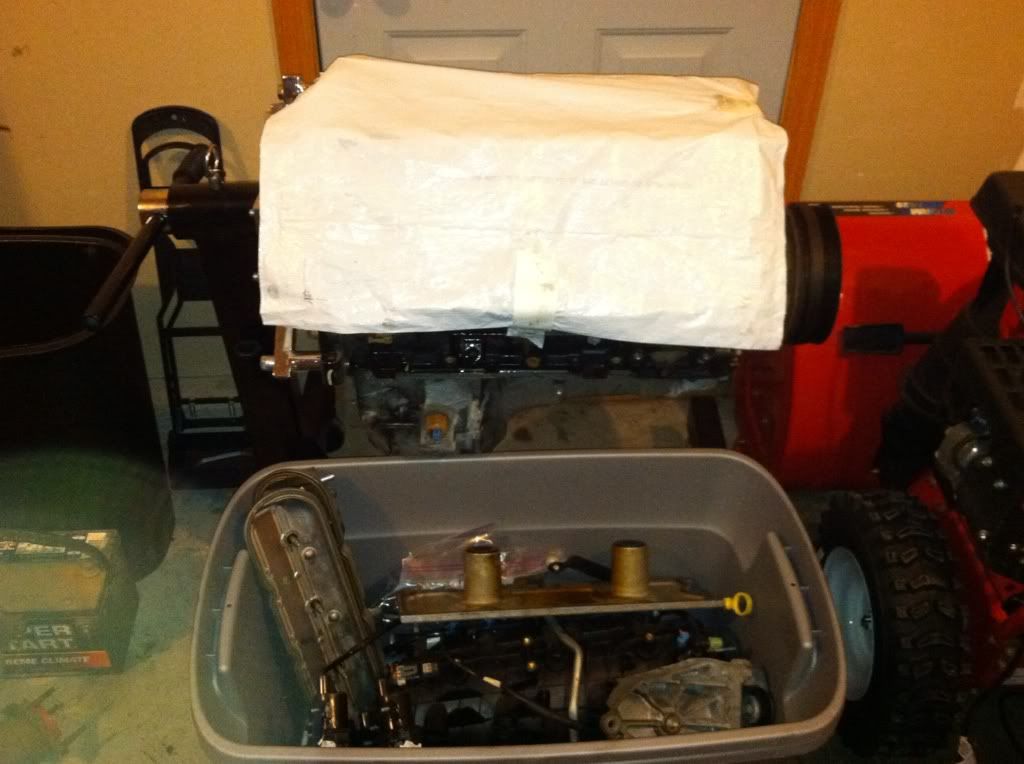
NOTE: For the guys who want to save a little coin, the stock 5.3 windage tray can be used with an f-body oil pan. I should have taken pics but I was in a hurry and it was 2300 hrs.
There are only two cuts needed. First, the front of the tray needs to be cut just forward of the second set of bolt holes from the front of the tray. Just cut a straight line across and it will be the same size as an f-body tray. Second, you'll have to notch out another square hole as a relief for the pickup tube bracket. The original hole is too far back. I'm kind of fuzzy on this, but I think it is one bolt hole forward of the original bracket placement where the relief needs to be cut. Test fit your f-body pickup tube to make sure you cut in the right place. Just use a Dremel with a metal cutting wheel and go slow. I marked a square outline first so I had some kind of reference. Sand off the rough edges and clean the tray really well so you don't get metal shavings in your oil pan. Saved me $30.
Picked up an MSD 6010 with everything and a FREE Holley Red fuel pump. Might have to rebuild the pump, but I'll deal with that later.
If anyone has timing curve advice for my setup please lend it out. I am more than willing to listen and learn. I only have the Curve 1 pill, so I'm also looking for the others as well.
Still need a driveshaft, headers, aje k member, accessories, radiator/fan setup, ud pulley
I still have a little ways to go, but there is movement here! Hopefully I'll have this thing installed and moving under its own power yet this year!
Got my heads back from Sehr Performance in Sioux Falls, SD. They look good. Only installed my COMP springs and had a 3 angle valve job done. Also had the deck milled 0.020 to increase my compression a little (every little bit helps).
I've decided to make this a carb car with a TH350 just for ease of install and maintenance. I don't think I'll save any money, but I won't have to wait for a tuner appointment either. Less computers = less wiring... blah blah blah. I also have an Edelbrock carb and K&N air filter from the old engine so that helps too.
Tore everything down, painted the block Chevy orange. Reinstalled everything except an intake (which i am looking for in case anyone is selling
) Also painted the front cover Cast Aluminum. Duplicolor is good paint btw. I've used it several times and am pretty satisfied with their quick rattle can jobs.

NOTE: For the guys who want to save a little coin, the stock 5.3 windage tray can be used with an f-body oil pan. I should have taken pics but I was in a hurry and it was 2300 hrs.
There are only two cuts needed. First, the front of the tray needs to be cut just forward of the second set of bolt holes from the front of the tray. Just cut a straight line across and it will be the same size as an f-body tray. Second, you'll have to notch out another square hole as a relief for the pickup tube bracket. The original hole is too far back. I'm kind of fuzzy on this, but I think it is one bolt hole forward of the original bracket placement where the relief needs to be cut. Test fit your f-body pickup tube to make sure you cut in the right place. Just use a Dremel with a metal cutting wheel and go slow. I marked a square outline first so I had some kind of reference. Sand off the rough edges and clean the tray really well so you don't get metal shavings in your oil pan. Saved me $30.
Picked up an MSD 6010 with everything and a FREE Holley Red fuel pump. Might have to rebuild the pump, but I'll deal with that later.
If anyone has timing curve advice for my setup please lend it out. I am more than willing to listen and learn. I only have the Curve 1 pill, so I'm also looking for the others as well.
Still need a driveshaft, headers, aje k member, accessories, radiator/fan setup, ud pulley
I still have a little ways to go, but there is movement here! Hopefully I'll have this thing installed and moving under its own power yet this year!
Last edited by R. Finkle; 05-21-2013 at 08:07 PM.
05-20-2013, 09:05 PM
#16
Staging Lane
Thread Starter
Join Date: Jul 2011
Location: MN
Posts: 52
Likes: 0
Received 0 Likes
on
0 Posts
looooong time since an update, but I'll put in here what I remember...
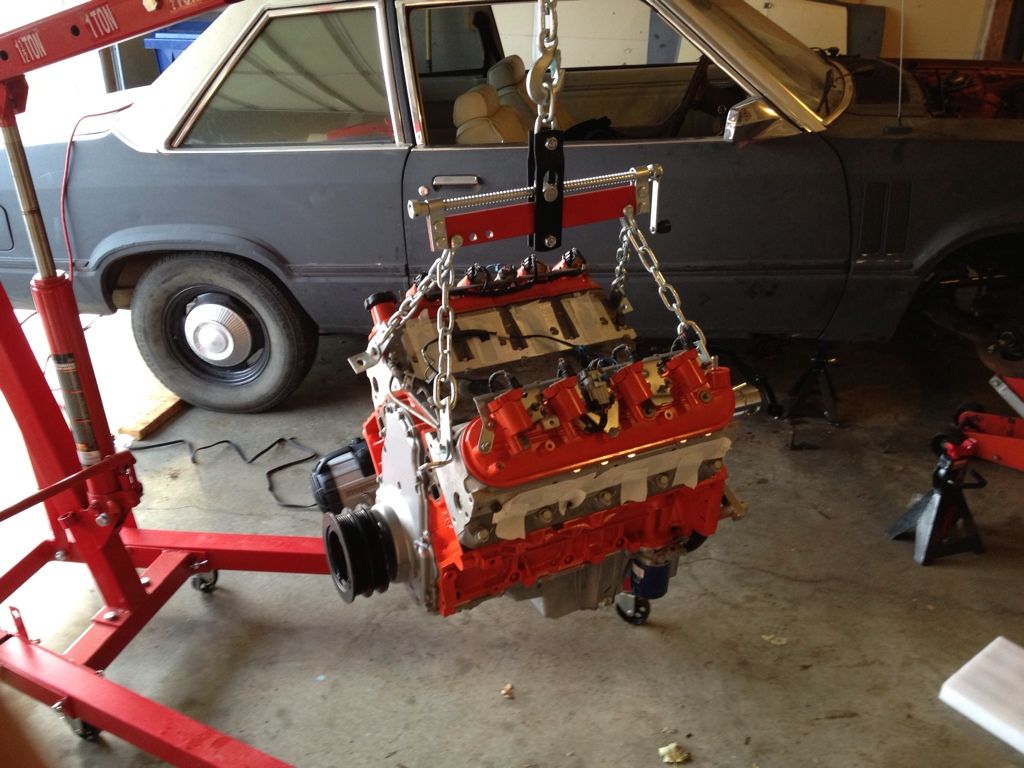
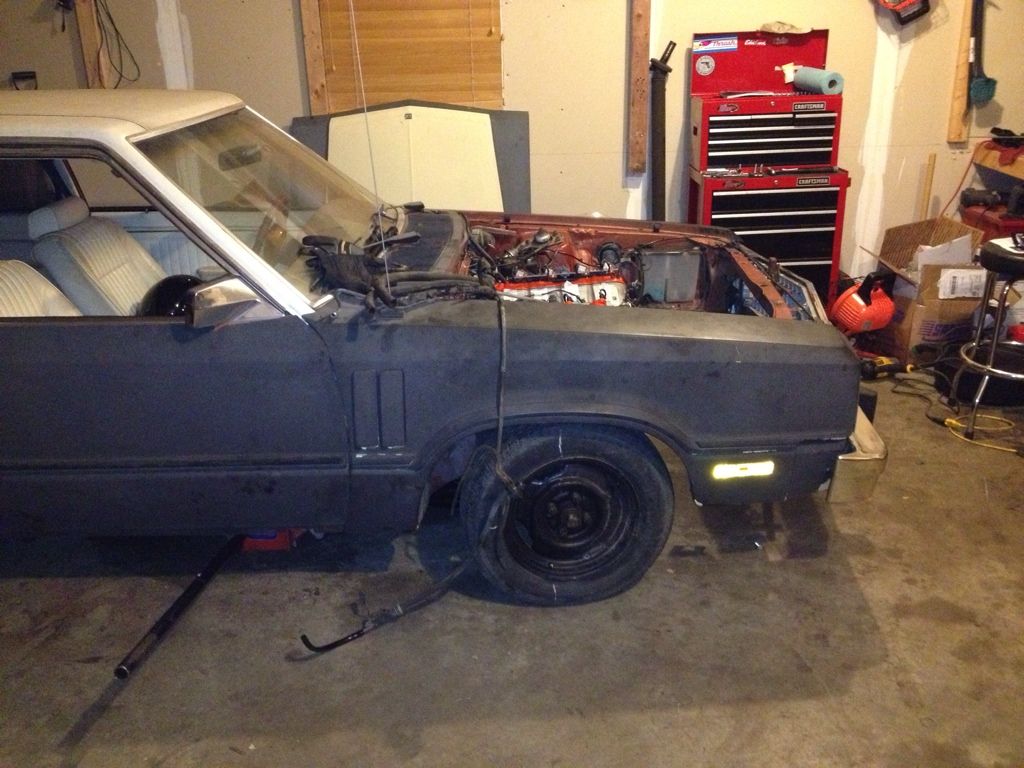
So, I ended up getting a Team Z K member, but it is an earlier version that was based around an aftermarket/CTS-V type oil pan. I am pretty sure the current versions will accept the standard F-body pan, but I'm not sure. Call Dave at Team Z and ask, he's always replied very quickly to my emails.
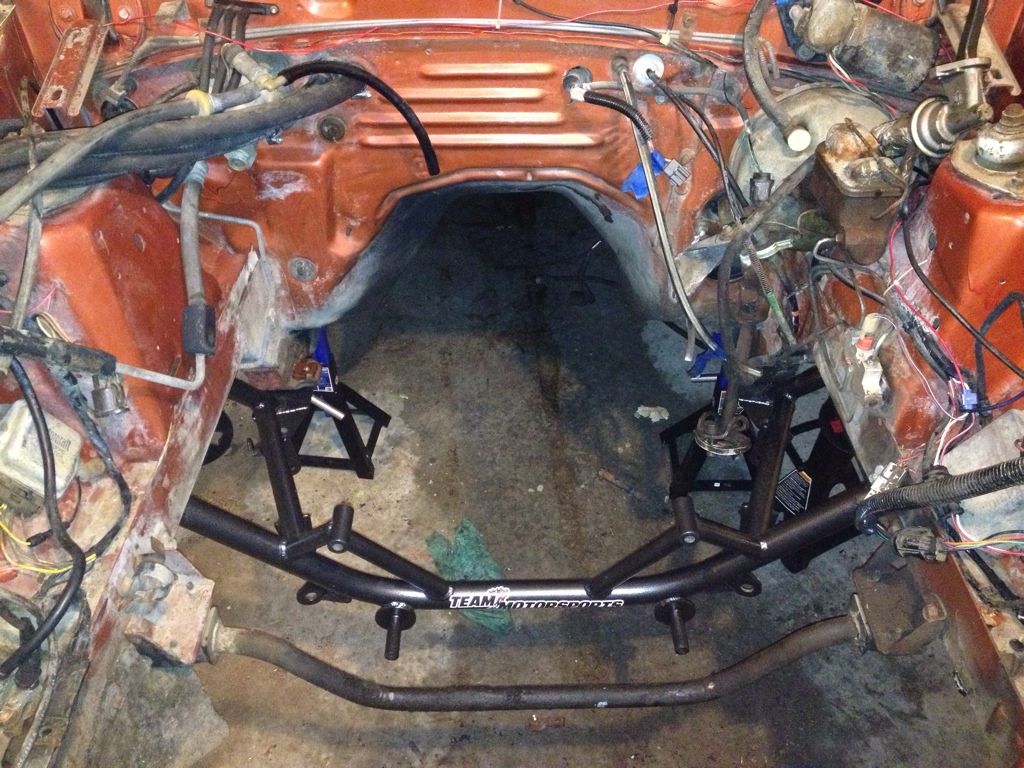
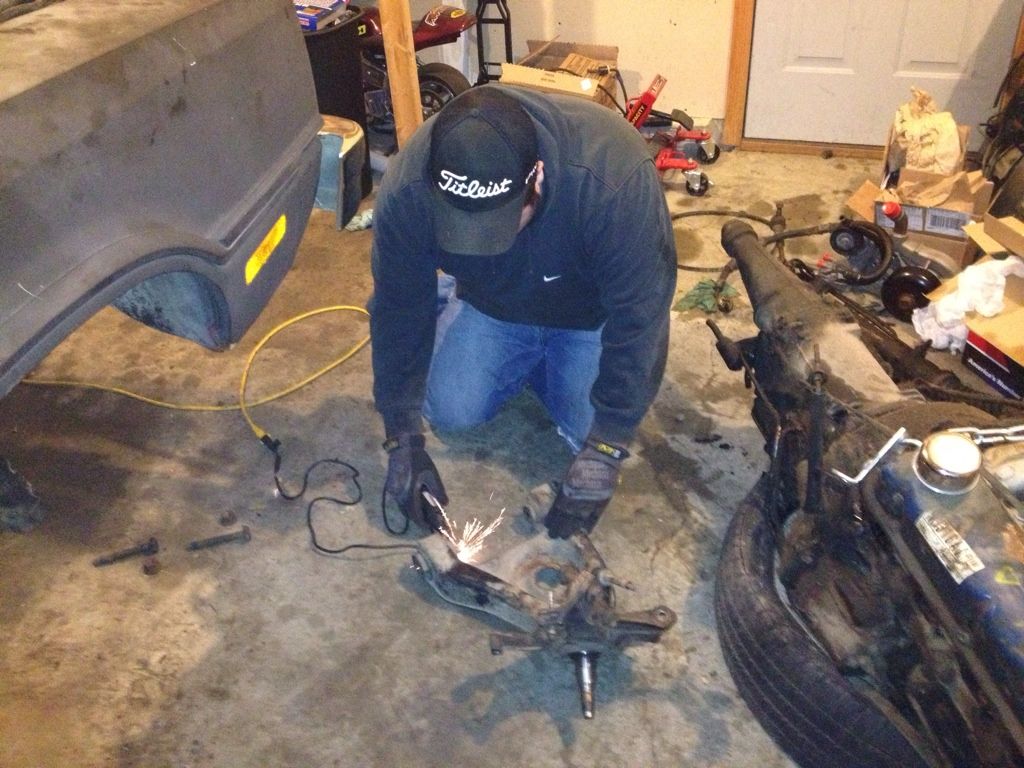
I did have to grind on both my A-Arms to get them to fit, but they went in with original equipment.
My buddy Cody w/the dremel... I upgraded to the grinder after losing patience
I added Eibach Pro springs to the front also. With the new K-member, it dropped the car quite a bit, but I'm planning a taller front tire, so hopefully it should be ok. I also ordered the spring install tool for lowered coil springs from Maximum Motorsports. This thing worked like a charm, I would definitely recommend it. I also ordered their steering shaft, which is expandable a bit and built like a brick shithouse, I would also recommend that as well, even though I had to "adjust" my headers to clear, more on that in a minute...
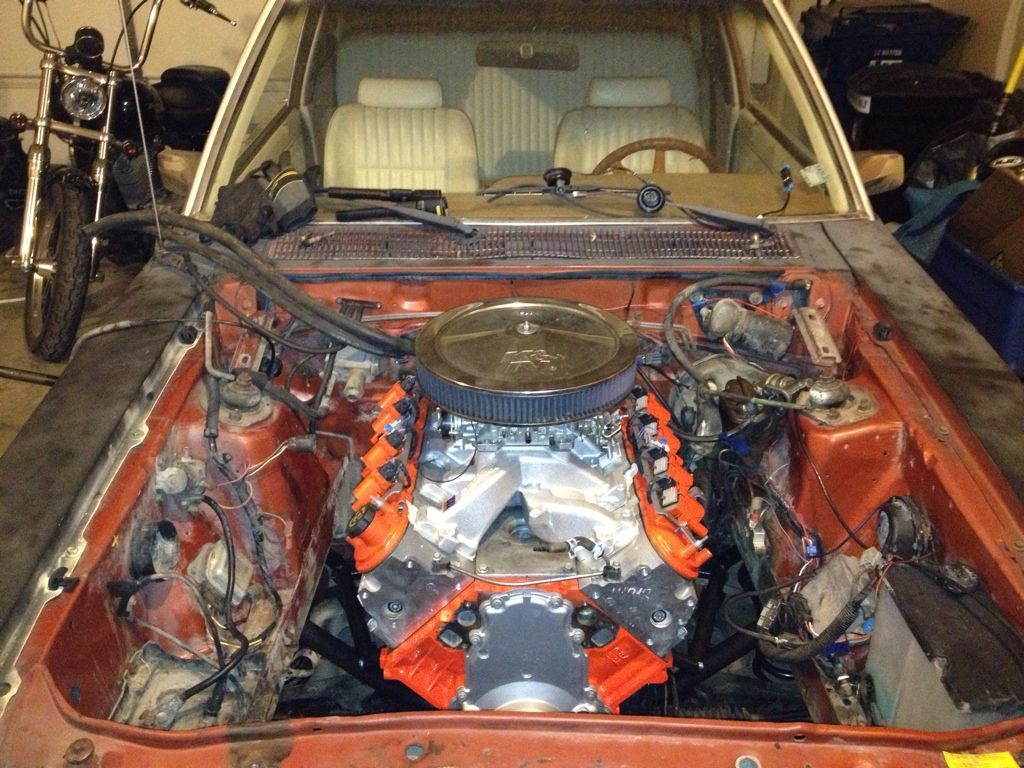
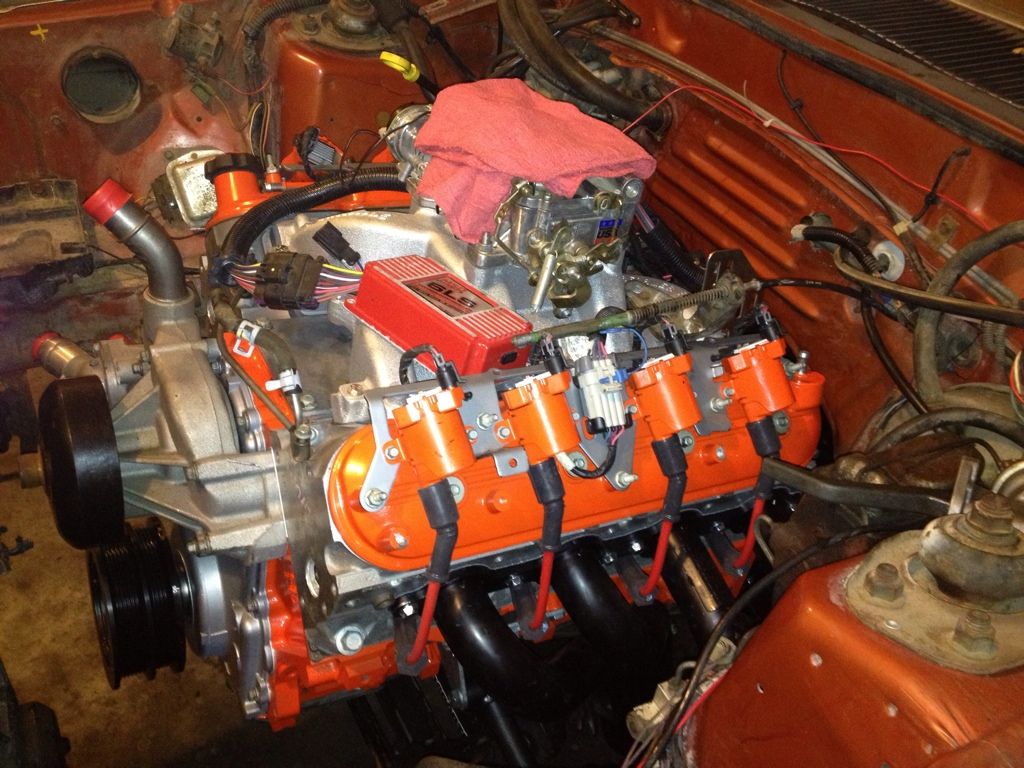
I got an MSD setup and a new Edelbrock intake to go with my current Eddy Carb and K&N filter setup.
After a bit of paint, here we are..
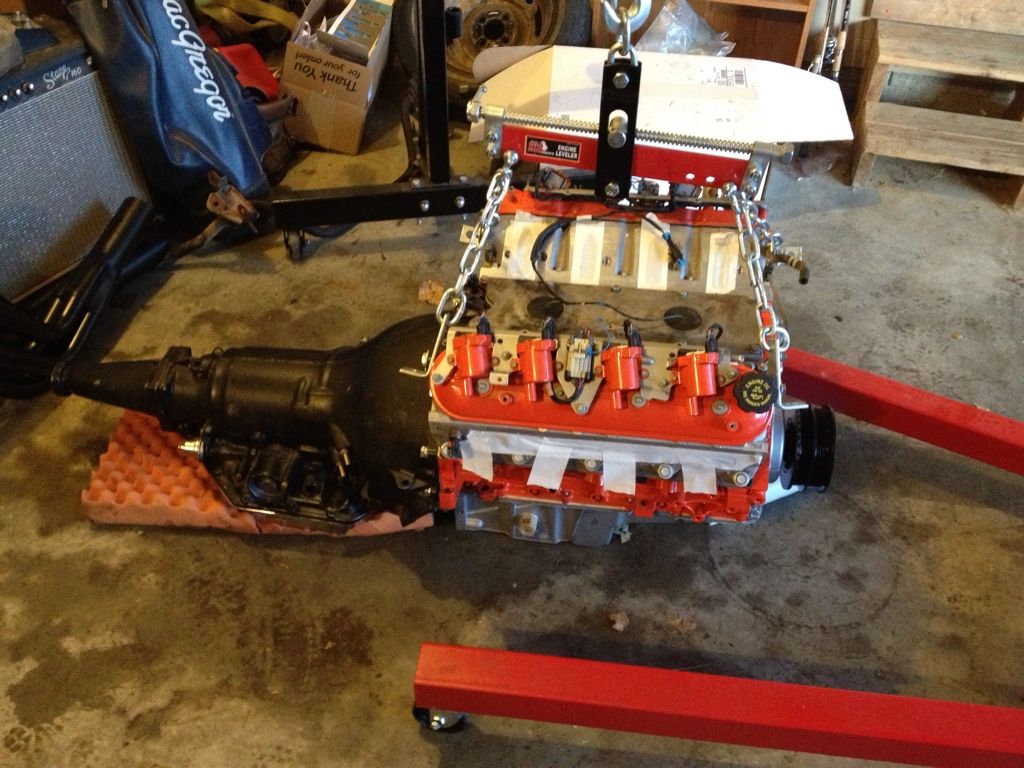
Got a trans and torque converter combo out of Texas with a couple after market parts, but it is basically a built TH350 with a 3600 stall. Should be close to 3k on the foot brake which is perfectly fine with me.
So, I ended up getting a Team Z K member, but it is an earlier version that was based around an aftermarket/CTS-V type oil pan. I am pretty sure the current versions will accept the standard F-body pan, but I'm not sure. Call Dave at Team Z and ask, he's always replied very quickly to my emails.

I did have to grind on both my A-Arms to get them to fit, but they went in with original equipment.
My buddy Cody w/the dremel... I upgraded to the grinder after losing patience

I added Eibach Pro springs to the front also. With the new K-member, it dropped the car quite a bit, but I'm planning a taller front tire, so hopefully it should be ok. I also ordered the spring install tool for lowered coil springs from Maximum Motorsports. This thing worked like a charm, I would definitely recommend it. I also ordered their steering shaft, which is expandable a bit and built like a brick shithouse, I would also recommend that as well, even though I had to "adjust" my headers to clear, more on that in a minute...
I got an MSD setup and a new Edelbrock intake to go with my current Eddy Carb and K&N filter setup.
After a bit of paint, here we are..

Got a trans and torque converter combo out of Texas with a couple after market parts, but it is basically a built TH350 with a 3600 stall. Should be close to 3k on the foot brake which is perfectly fine with me.

 05-20-2013, 09:09 PM
#17
Staging Lane
Thread Starter
Join Date: Jul 2011
Location: MN
Posts: 52
Likes: 0
Received 0 Likes
on
0 Posts
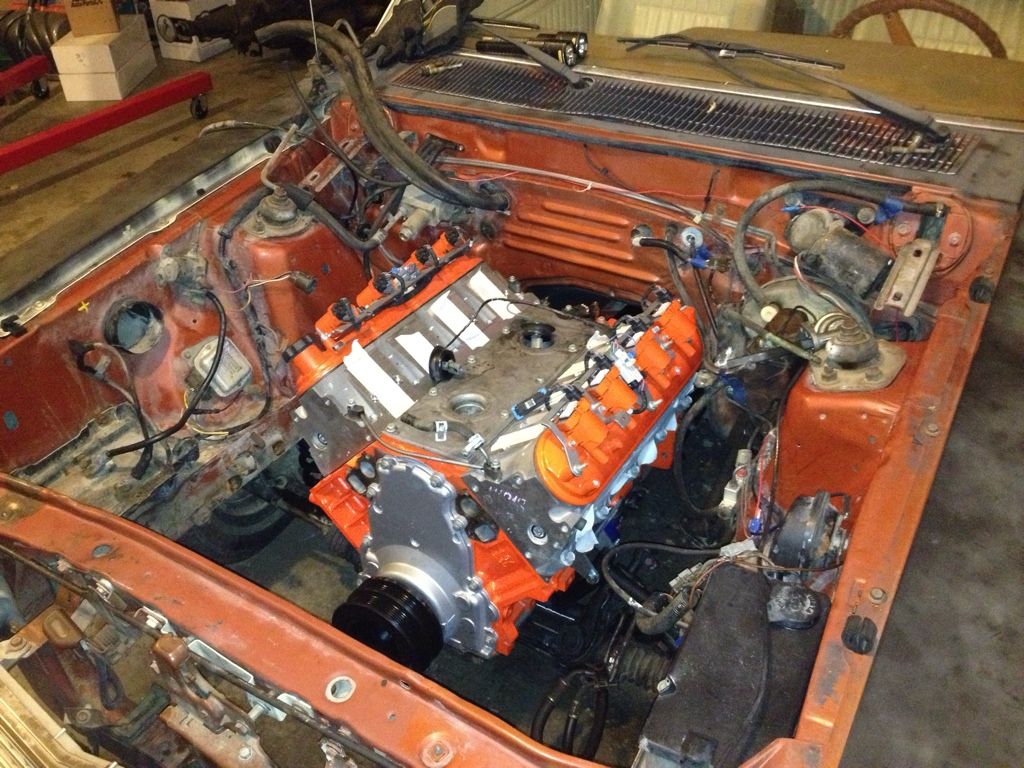
In the car.. took about 20 minutes.. then I realized the F-Body pan wouldn't work. To define how close it was, I contemplated grinding the front of the pan to fit the 1/8-1/4 of an inch, but retreated back to the truck pan until I get a CTSV pan and correctly do this thing.


 05-20-2013, 09:22 PM
#18
Staging Lane
Thread Starter
Join Date: Jul 2011
Location: MN
Posts: 52
Likes: 0
Received 0 Likes
on
0 Posts
After installing the engine, I started playing with all of my fitment issues. I used a pair of Dynatech 79-93 headers, which are supposed to work with the maximum motorsports/flaming river/aftermarket steering shafts.. I can vouch that with my power steering setup it wasn't close. I tried to adjust the clearance at the steering column, steering column shaft, and the rack... not gonna happen. I had to use the hammer on #3 and #5 to clear everything up. I doubt I'll seriously affect any performance with these 1-7/8 pipes. I'm sure other fox bodies didn't have any problems, but it took me quite a few test fits to make everything work together nice.
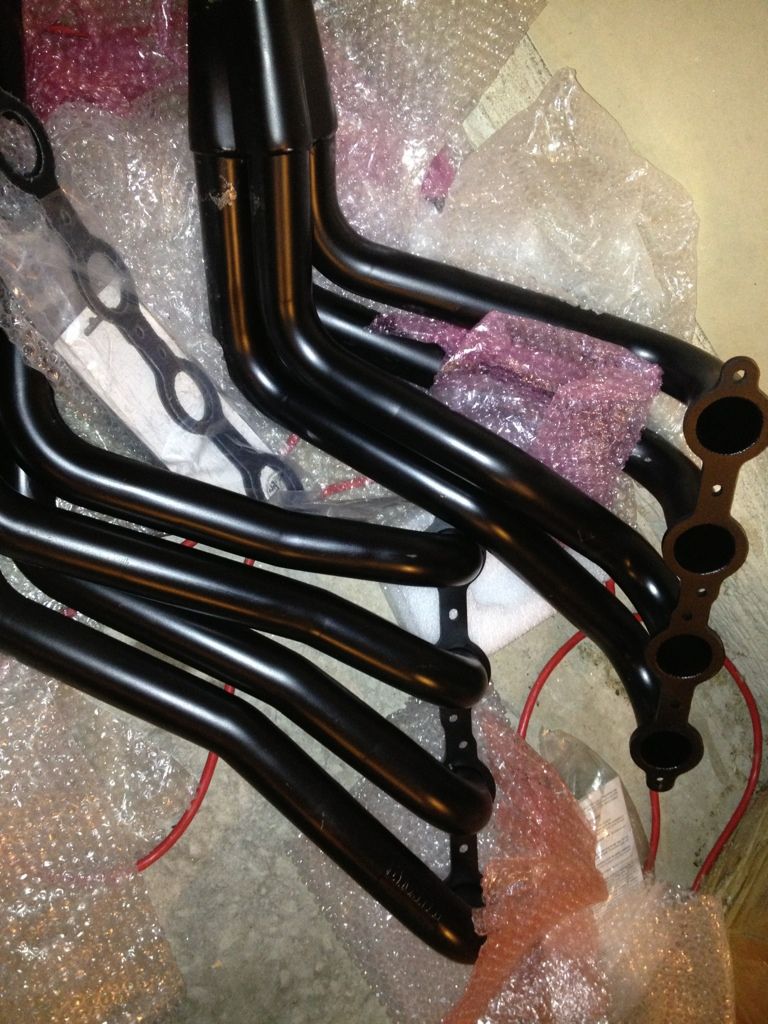

After the much needed persuasion, everything went together fine.


After the much needed persuasion, everything went together fine.
Last edited by R. Finkle; 05-21-2013 at 08:45 AM.
05-20-2013, 09:27 PM
#19
Staging Lane
Thread Starter
Join Date: Jul 2011
Location: MN
Posts: 52
Likes: 0
Received 0 Likes
on
0 Posts
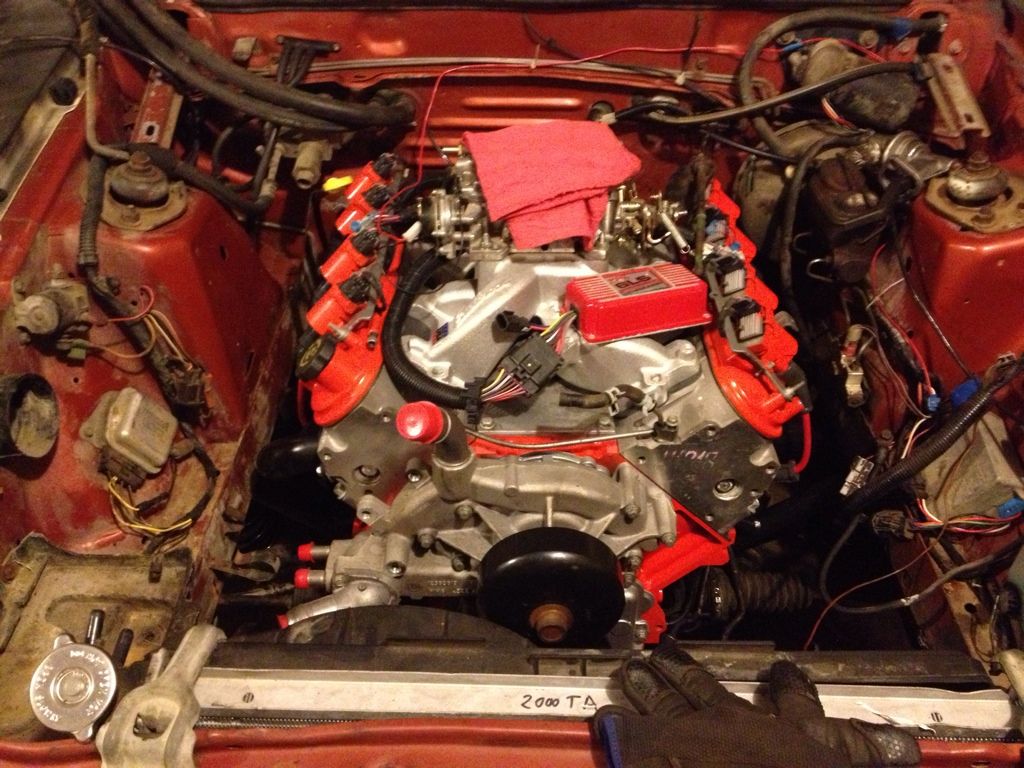
Next fitment issue, Radiator. This one wasn't nearly as complicated. an Fbody rad/fan setup out of an 02 T/A worked just fine. I bent my brackets down a bit and took the dremel to one of the rad cap tabs to make everything sit down in there. A little adjusting and it was good to go.

 05-20-2013, 09:38 PM
#20
Staging Lane
Thread Starter
Join Date: Jul 2011
Location: MN
Posts: 52
Likes: 0
Received 0 Likes
on
0 Posts
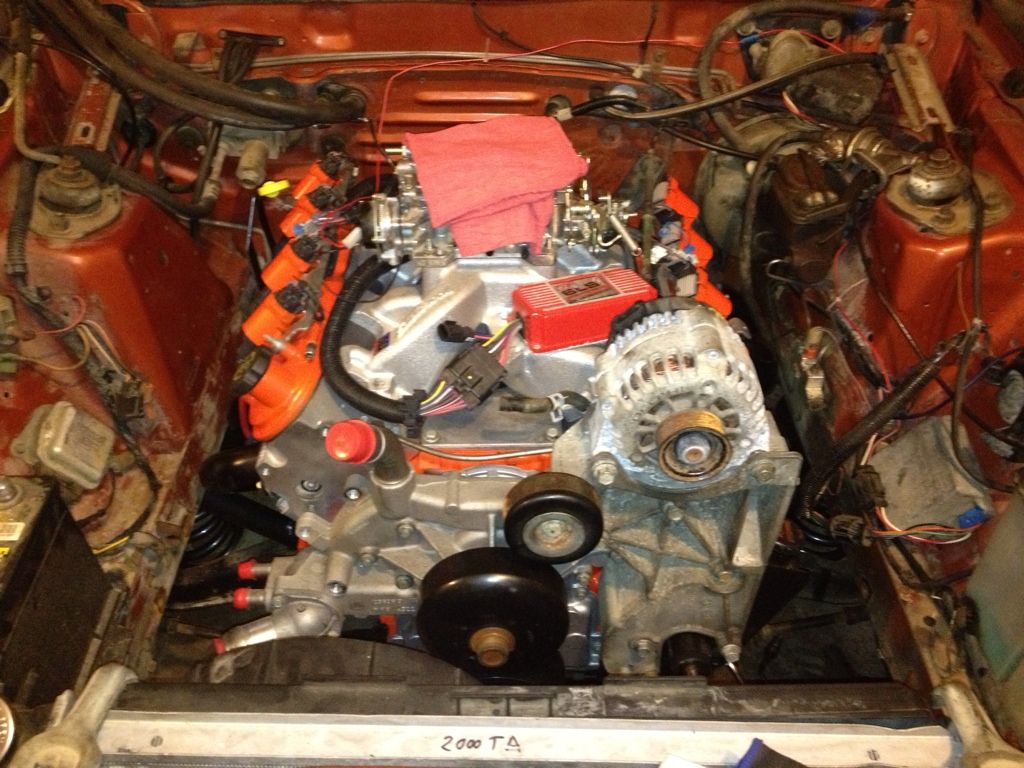
I started installing my accessories to get all of my fitment problems out of the way. My power steering pump shaft had me worried because of how close it was to the fans..
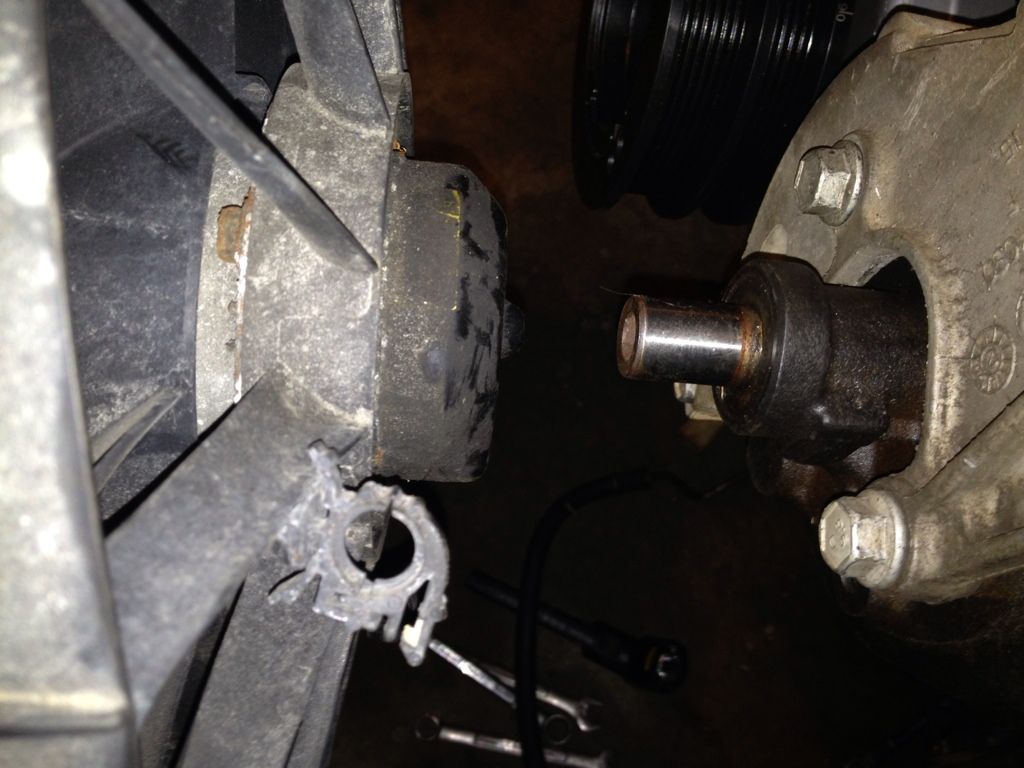
Also, I got my truck Alt installed along with the truck water pump and started playing around with the belt config... I then realized my underdrive wasn't really matching up. After some more reading into what I really had, I realized I got an Fbody underdrive, not the Truck series. So, I ended up reverting back to Fbody accessories and completely deleting my P/S pump and going over to manual steering. This was a costly mistake and took a lot of time. IMHO, do some real planning on what you want from the get go. If I would have just listened to my friend (Outlaw Drifter) and done this thing Pro Street style from the start, I wouldn't be in this position. Live and learn.
Now, I am back to the fbody waterpump and I've ordered my fbody alt. I'll show some more pics of that belt config and a part number of what worked when I get it done...
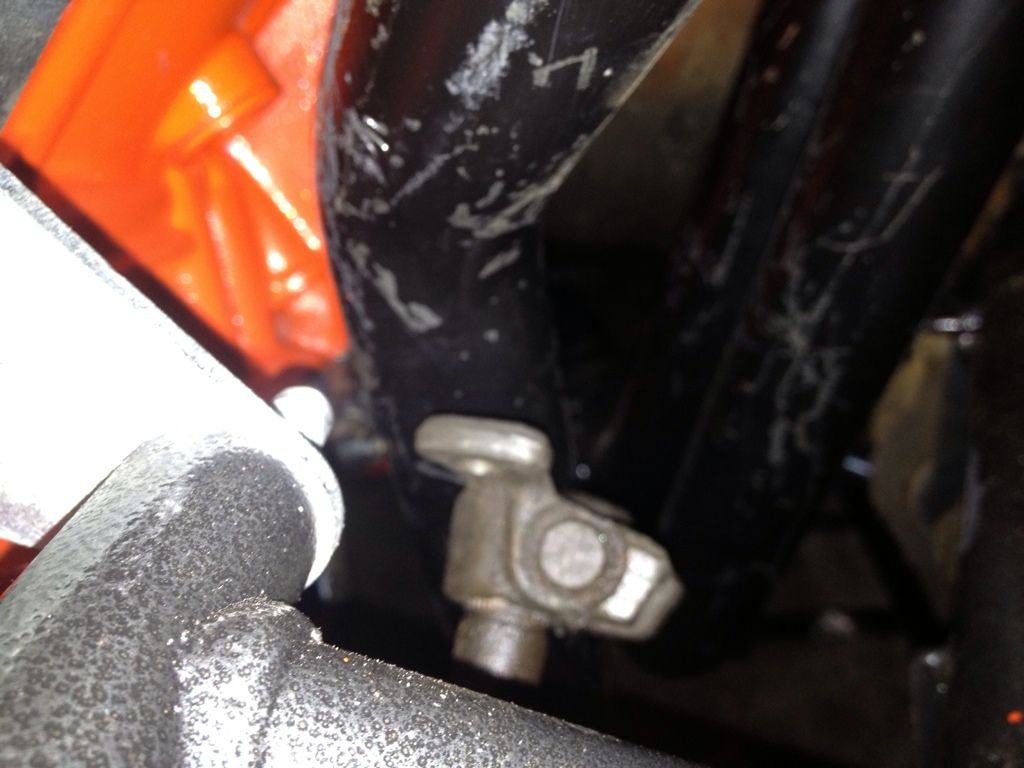
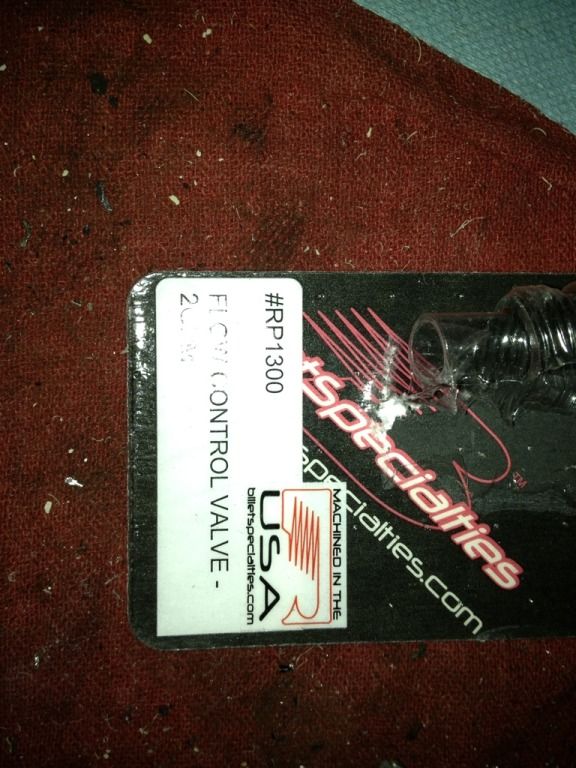
For those of you that want to use a 'Stang P/S rack with GM pump, you'll need this part. It is essentially a milled reducer that limits pressure going to the rack. This enables the rack and pump to function as normal while working together. It plugs into the back of the pump, replacing the stock fitting. You can get it on JEGS for like $30.
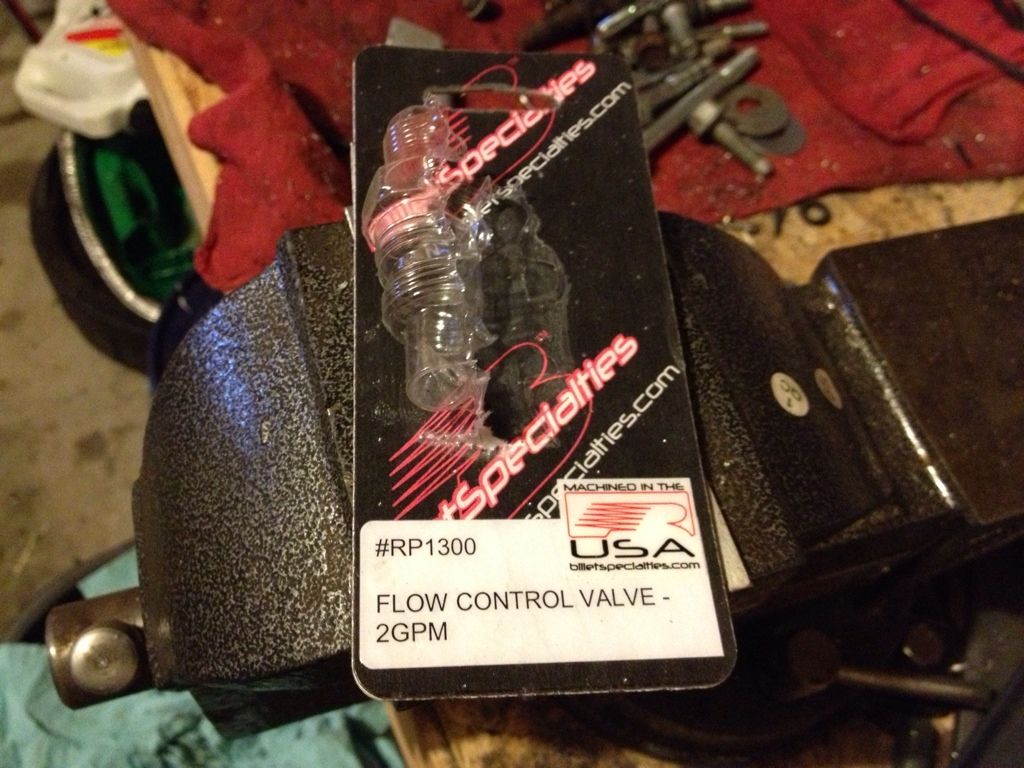

Also, I got my truck Alt installed along with the truck water pump and started playing around with the belt config... I then realized my underdrive wasn't really matching up. After some more reading into what I really had, I realized I got an Fbody underdrive, not the Truck series. So, I ended up reverting back to Fbody accessories and completely deleting my P/S pump and going over to manual steering. This was a costly mistake and took a lot of time. IMHO, do some real planning on what you want from the get go. If I would have just listened to my friend (Outlaw Drifter) and done this thing Pro Street style from the start, I wouldn't be in this position. Live and learn.


Now, I am back to the fbody waterpump and I've ordered my fbody alt. I'll show some more pics of that belt config and a part number of what worked when I get it done...

For those of you that want to use a 'Stang P/S rack with GM pump, you'll need this part. It is essentially a milled reducer that limits pressure going to the rack. This enables the rack and pump to function as normal while working together. It plugs into the back of the pump, replacing the stock fitting. You can get it on JEGS for like $30.

