
Project: Steezee - 1973 Datsun 240Z LQ9 V8 Build


 03-11-2013, 09:52 PM
#22
Teching In
Thread Starter

Join Date: Jan 2012
Posts: 30
Likes: 0
Received 0 Likes
on
0 Posts
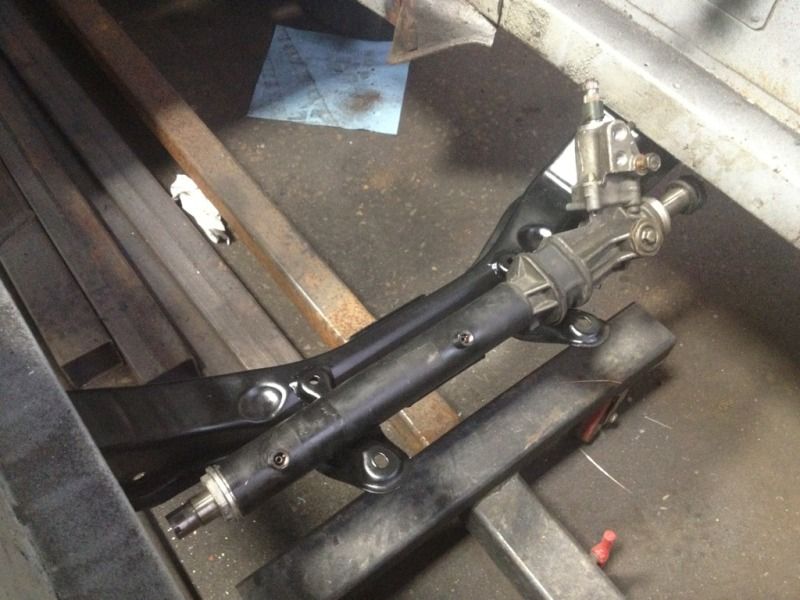
R33 GTR rack fits nicely on S30 subframe:
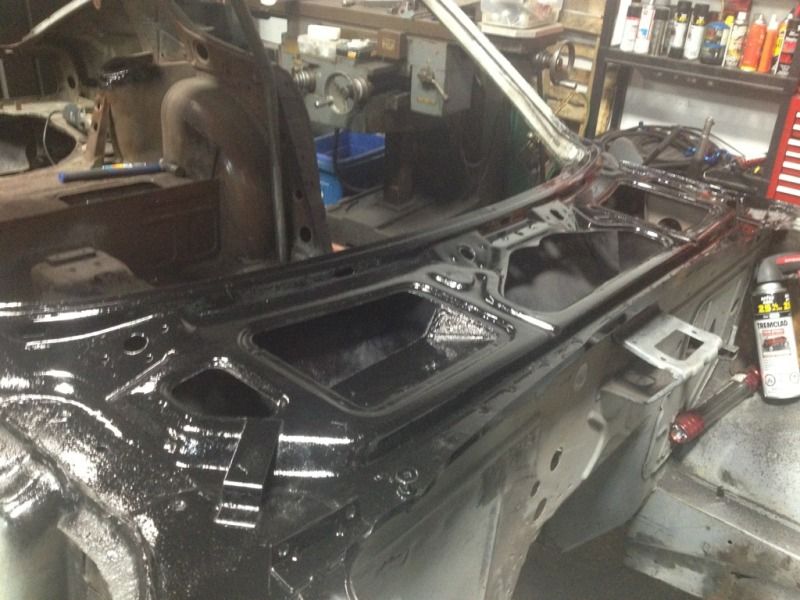
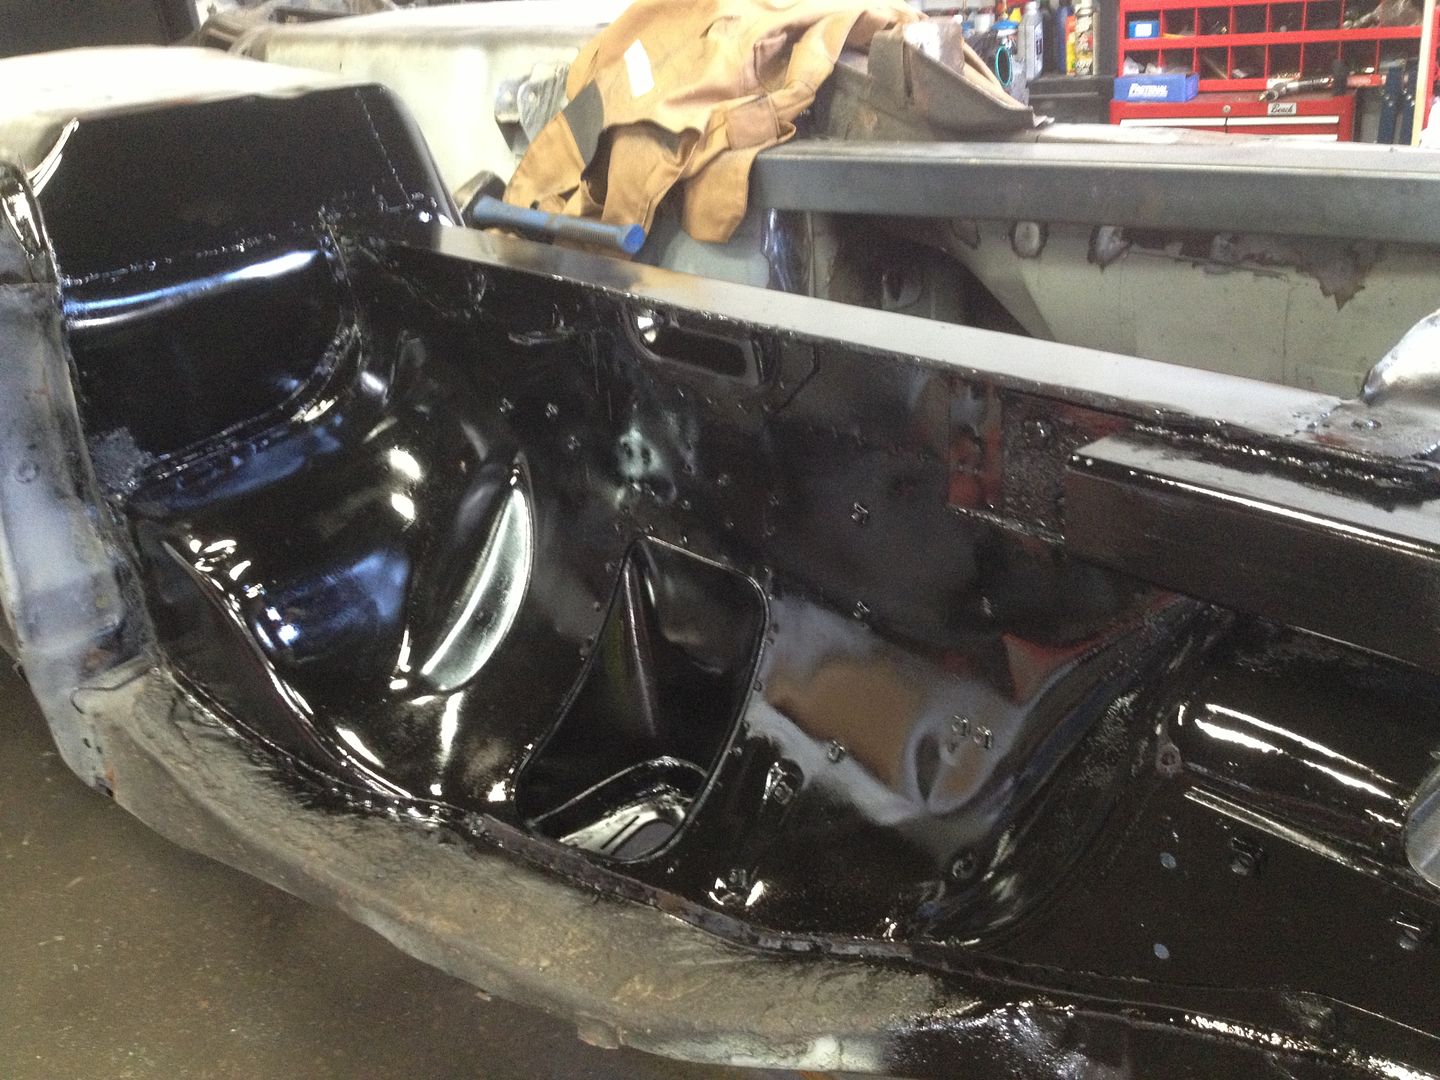
Cleaned up cowl area down to bare metal and sprayed it with temporary paint.
Got drivers side rear camber plate 90% done, it and the passenger will be done this week sometime
Cleaned up cowl area down to bare metal and sprayed it with temporary paint.
Got drivers side rear camber plate 90% done, it and the passenger will be done this week sometime
Last edited by AFischer; 09-03-2018 at 03:06 PM.
04-14-2013, 07:12 PM
#23
Teching In
Thread Starter
Join Date: Jan 2012
Posts: 30
Likes: 0
Received 0 Likes
on
0 Posts
Finally found some time to work on Z (truck needed yet another motor  ).
).
Got all 4 corners done for camber plates.
Started on the boxes for the main hoop:

Not nearly finished as the R34 subframe has to mount to these somehow.
Spent a bit of today time on this:
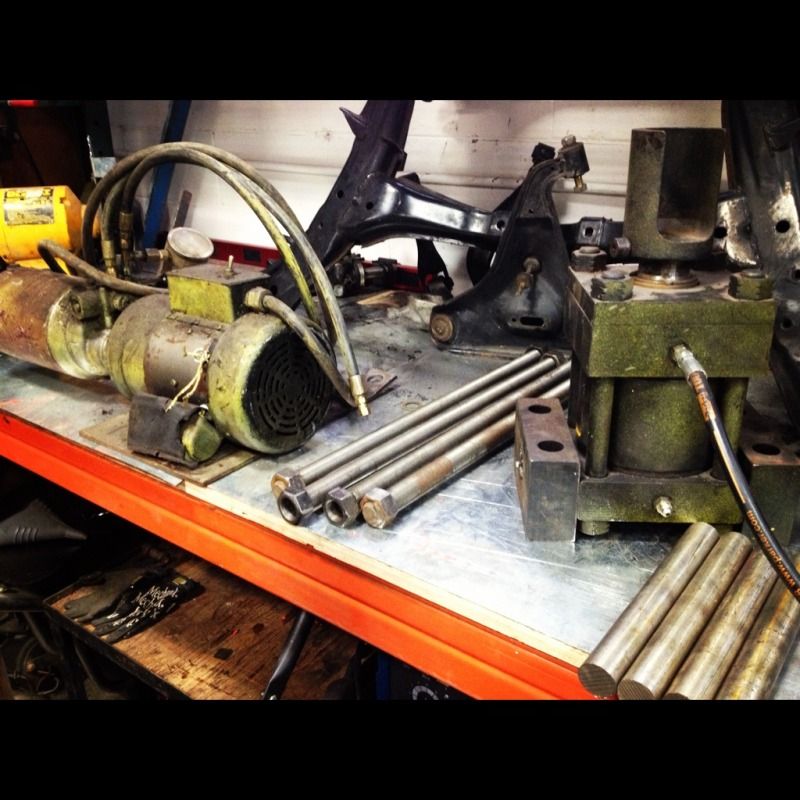
FWIW, little while ago I received a hydraulic power pack, a hydraulic ram (6" bore, 2" rod, 4" stroke), 8' of 1.25" stainless rod, 8' of 1" threaded rod, 1/4" wall 6x6x10, 40 feet of 1/4"x2x6, 8 feet of 6" c channel and some other bits.... FREE! so I am turning them all into a hydraulic shop press. I haven't done the math on it yet but I estimate the ram to be roughly 50 ton. I'm making attachments so I can use it as a brake, shear, mounting a JD Squared model 3 vertically on the back (baller tube bender), hydraulic hose crimper (ends came on the ram for this), as well as a general shop press (bearings, bushings, dimple die's etc..)..
Pretty stoked to get going on the car and press now that the truck is all wrapped up.
Got some work done on the press today. Would've been a lot farther if metal supply stores were fricken open on Sundays..
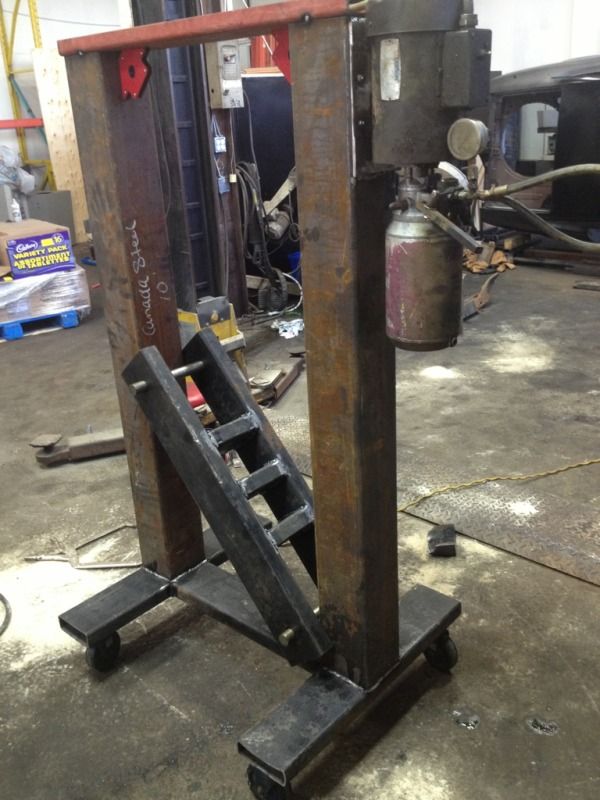
1.5HP motor to the hydraulic pump, should put out more than enough. Motor is held to the press via a plate with 4 holes with bolts welded and their heads cut off flush, then the plate welded to frame.
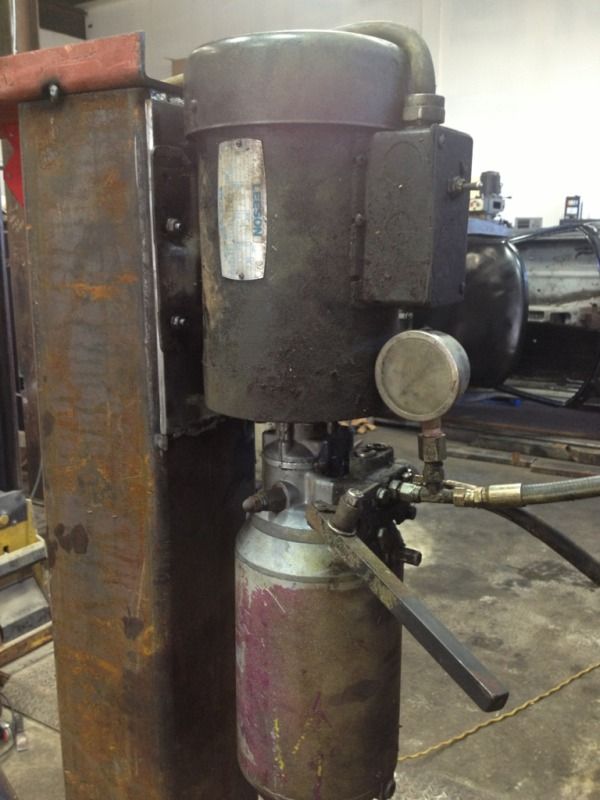
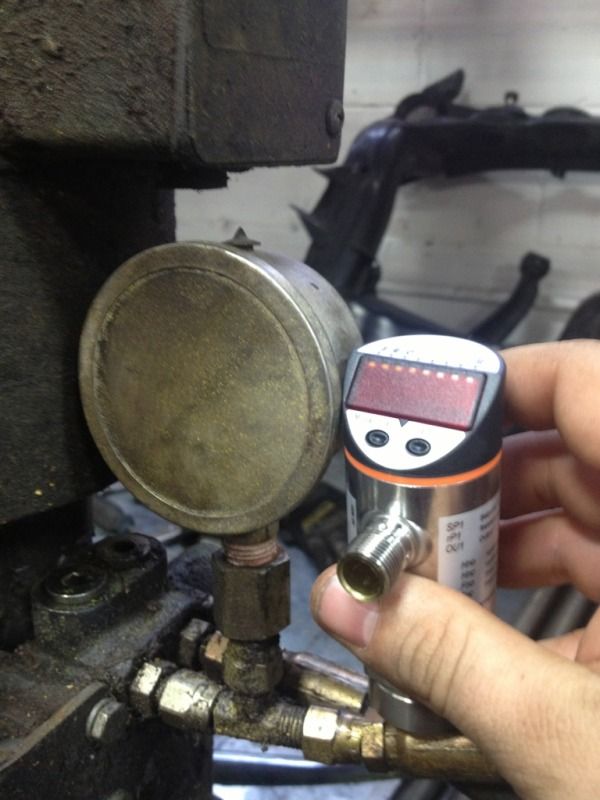
The gauge was fubar'd so I picked up a digital readout gauge that has a programmable pressure setpoint. This means I can hold the handle full tilt and it will automatically shut off the pump (or divert) back to tank if I set it up as a pressure relief.
).Got all 4 corners done for camber plates.
Started on the boxes for the main hoop:
Not nearly finished as the R34 subframe has to mount to these somehow.
Spent a bit of today time on this:
FWIW, little while ago I received a hydraulic power pack, a hydraulic ram (6" bore, 2" rod, 4" stroke), 8' of 1.25" stainless rod, 8' of 1" threaded rod, 1/4" wall 6x6x10, 40 feet of 1/4"x2x6, 8 feet of 6" c channel and some other bits.... FREE!
so I am turning them all into a hydraulic shop press. I haven't done the math on it yet but I estimate the ram to be roughly 50 ton. I'm making attachments so I can use it as a brake, shear, mounting a JD Squared model 3 vertically on the back (baller tube bender), hydraulic hose crimper (ends came on the ram for this), as well as a general shop press (bearings, bushings, dimple die's etc..)..Pretty stoked to get going on the car and press now that the truck is all wrapped up.
Got some work done on the press today. Would've been a lot farther if metal supply stores were fricken open on Sundays..
1.5HP motor to the hydraulic pump, should put out more than enough. Motor is held to the press via a plate with 4 holes with bolts welded and their heads cut off flush, then the plate welded to frame.
The gauge was fubar'd so I picked up a digital readout gauge that has a programmable pressure setpoint. This means I can hold the handle full tilt and it will automatically shut off the pump (or divert) back to tank if I set it up as a pressure relief.
Last edited by AFischer; 09-03-2018 at 03:06 PM.
05-20-2013, 06:24 PM
#24
Teching In
Thread Starter
Join Date: Jan 2012
Posts: 30
Likes: 0
Received 0 Likes
on
0 Posts
Picked up some S14 coil overs from Brendan - the fronts fit well even though my camber plate template is for a HSD/Stance rather than JIC.

And some more CAD for whoever is into that kind if thing, this is the basic layout of the underside of the Z. Motor is to size, and T56 is to size
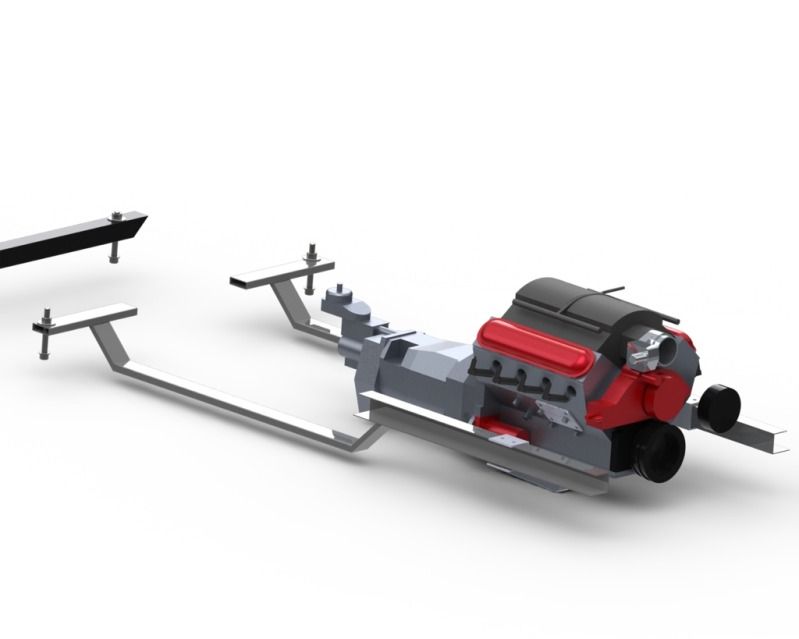

And some more CAD for whoever is into that kind if thing, this is the basic layout of the underside of the Z. Motor is to size, and T56 is to size

Last edited by AFischer; 09-03-2018 at 03:06 PM.
05-26-2013, 06:58 PM
#25
Teching In
Thread Starter
Join Date: Jan 2012
Posts: 30
Likes: 0
Received 0 Likes
on
0 Posts
Old crapiness:
Side by side (LQ9 pan vs LS1/LS6 Z06 "Batwing" pan):

New hotness:
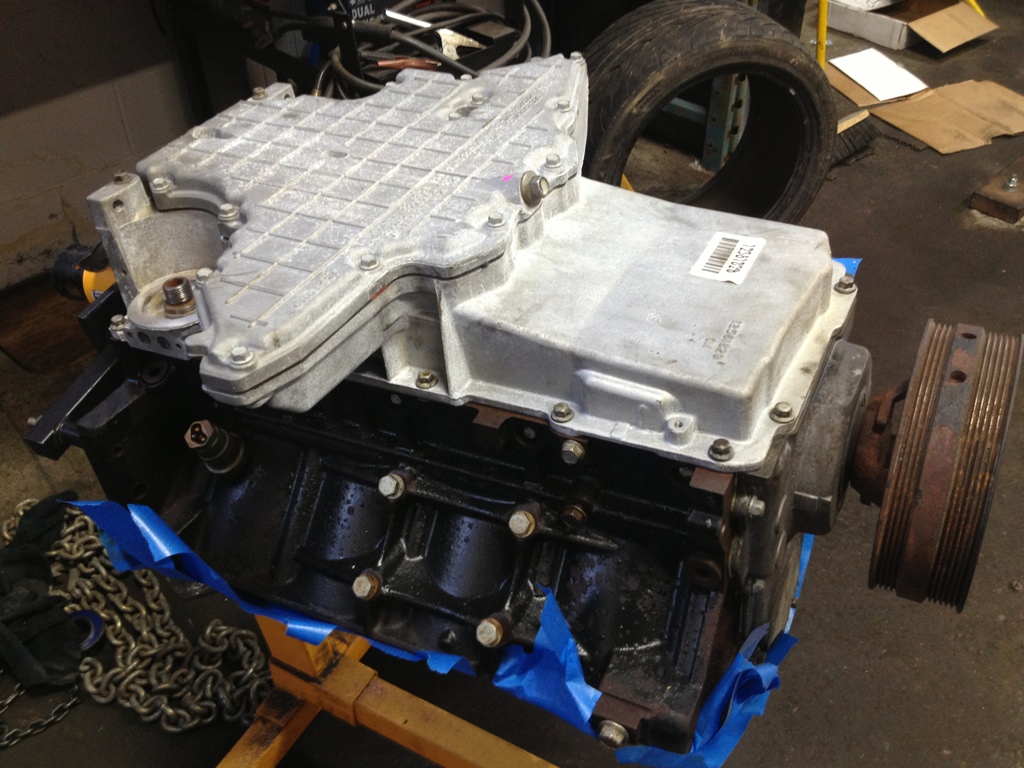
Holds 6.5 quarts but much better baffling design and the obvious extra clearance doesn't hurt either haha and this one was a "new take-off" and is mint shape

Side by side (LQ9 pan vs LS1/LS6 Z06 "Batwing" pan):

New hotness:

Holds 6.5 quarts but much better baffling design and the obvious extra clearance doesn't hurt either haha and this one was a "new take-off" and is mint shape
 05-27-2013, 11:06 AM
#27
You might be better served with the LS2/3 Vette pan. They both have the same depth but those bat wings will deal you fits getting exhaust to clear. Especially on a zed.
When the LS2 pans first came out everyone was ditching the bat wings for the LS2 stuff. Now I read threads where people are going back the other way for the same reason. I'm not sure which is better for oil control. I do know the LS2 pan was purposely redesigned to have better baffling than the LS1 and truck stuff.

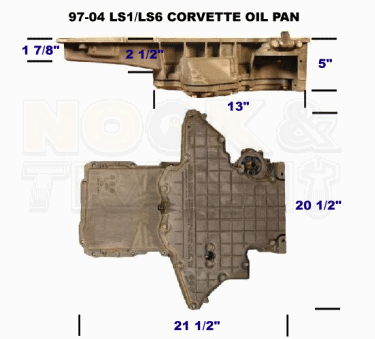
When the LS2 pans first came out everyone was ditching the bat wings for the LS2 stuff. Now I read threads where people are going back the other way for the same reason. I'm not sure which is better for oil control. I do know the LS2 pan was purposely redesigned to have better baffling than the LS1 and truck stuff.
07-14-2013, 07:21 PM
#28
Teching In
Thread Starter
Join Date: Jan 2012
Posts: 30
Likes: 0
Received 0 Likes
on
0 Posts
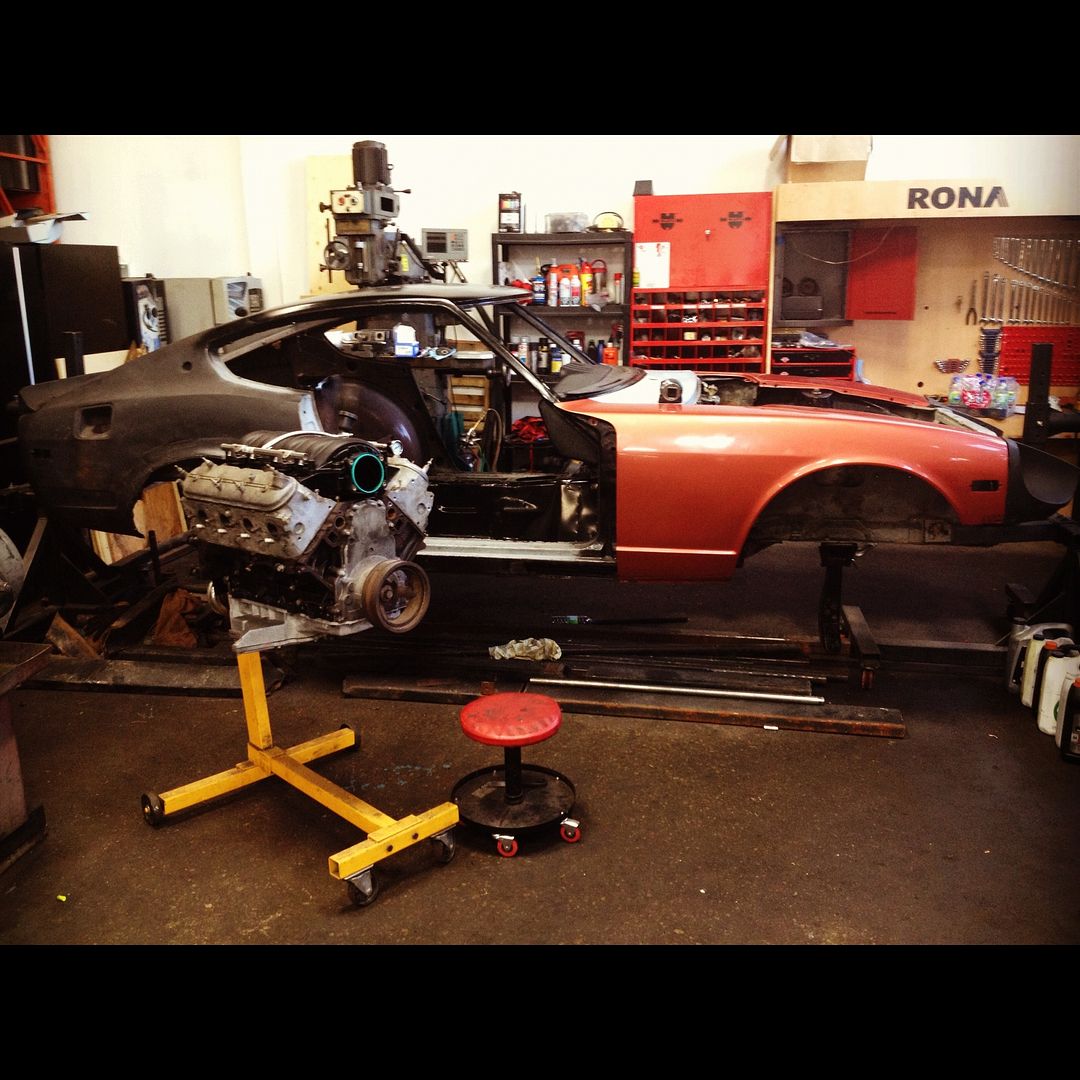
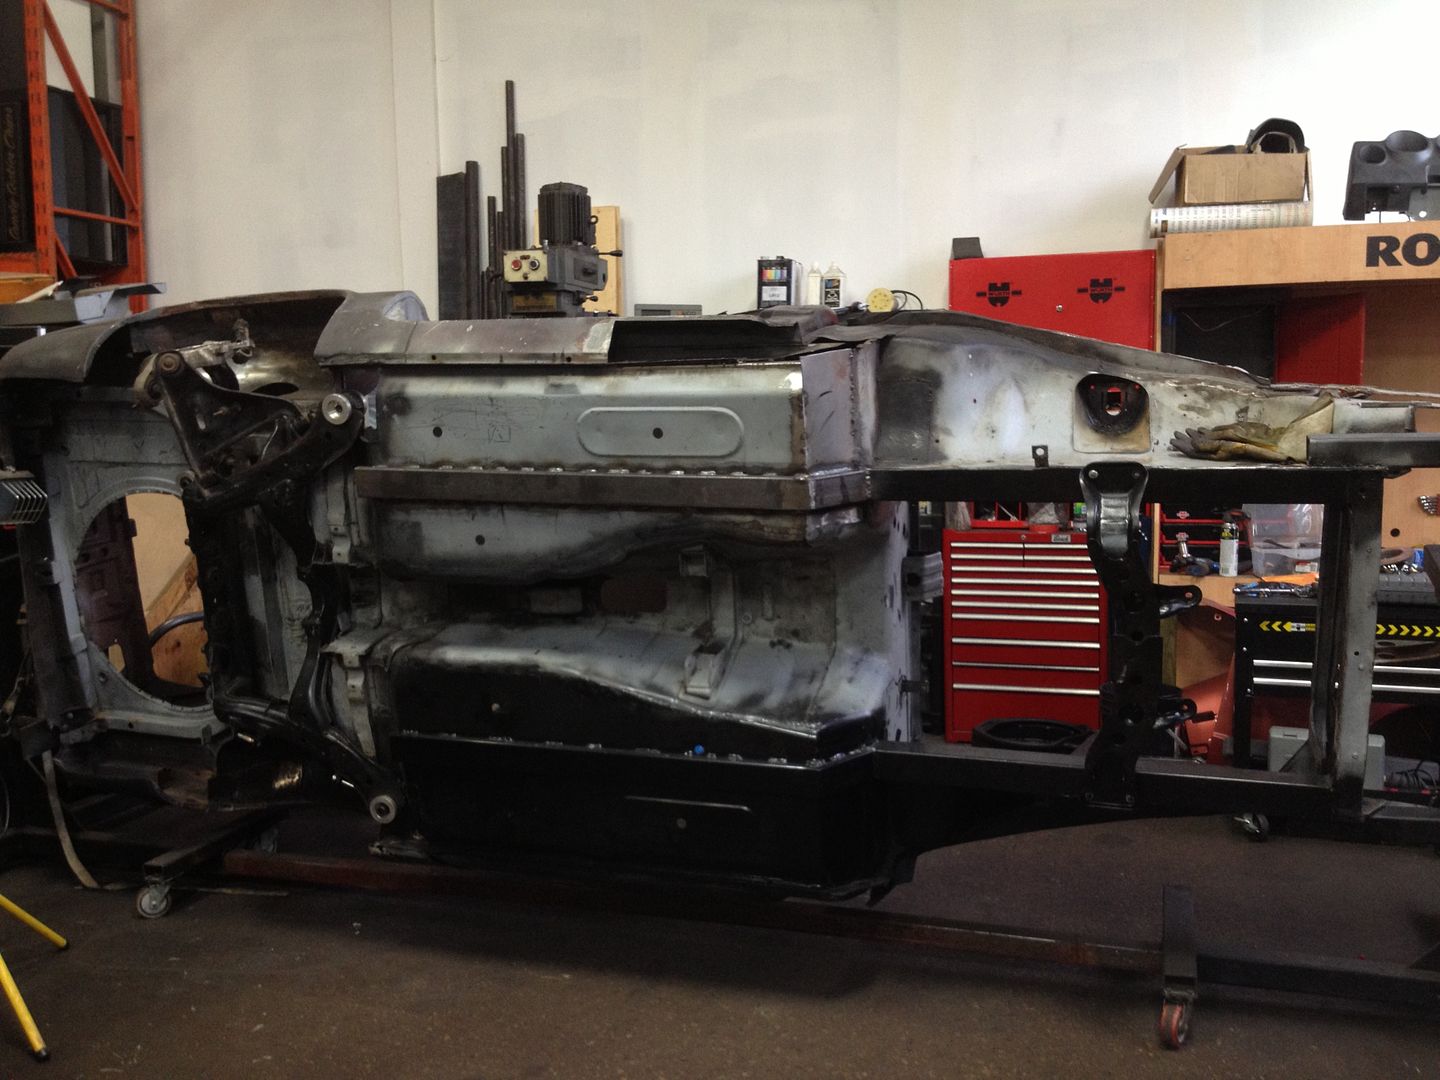
Soo, I took a month of weekends off to try and have a life outside of work.. But I'm back at it again - had full day on er today.
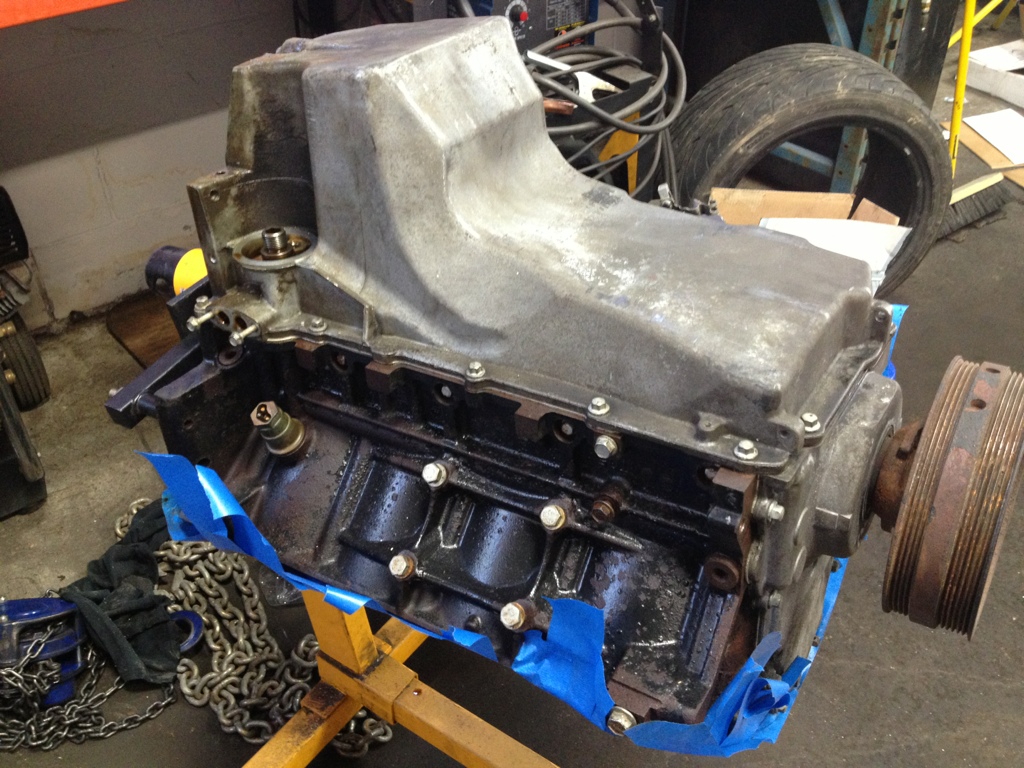
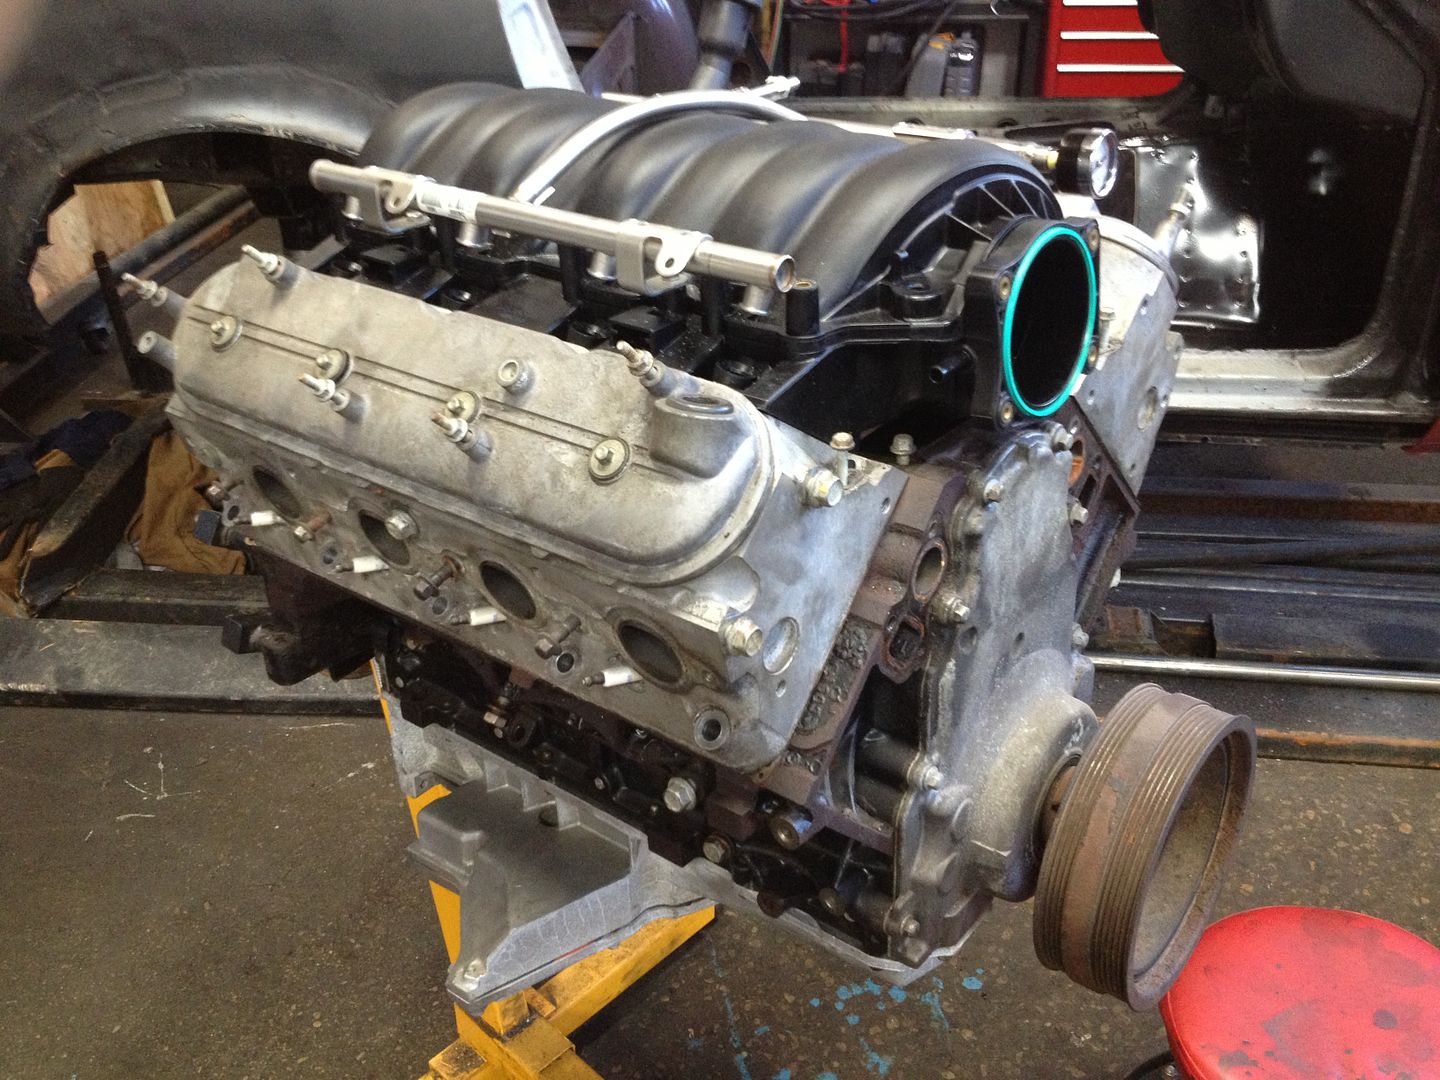
Took the LQ9 Truck manifold and tossed in storage:
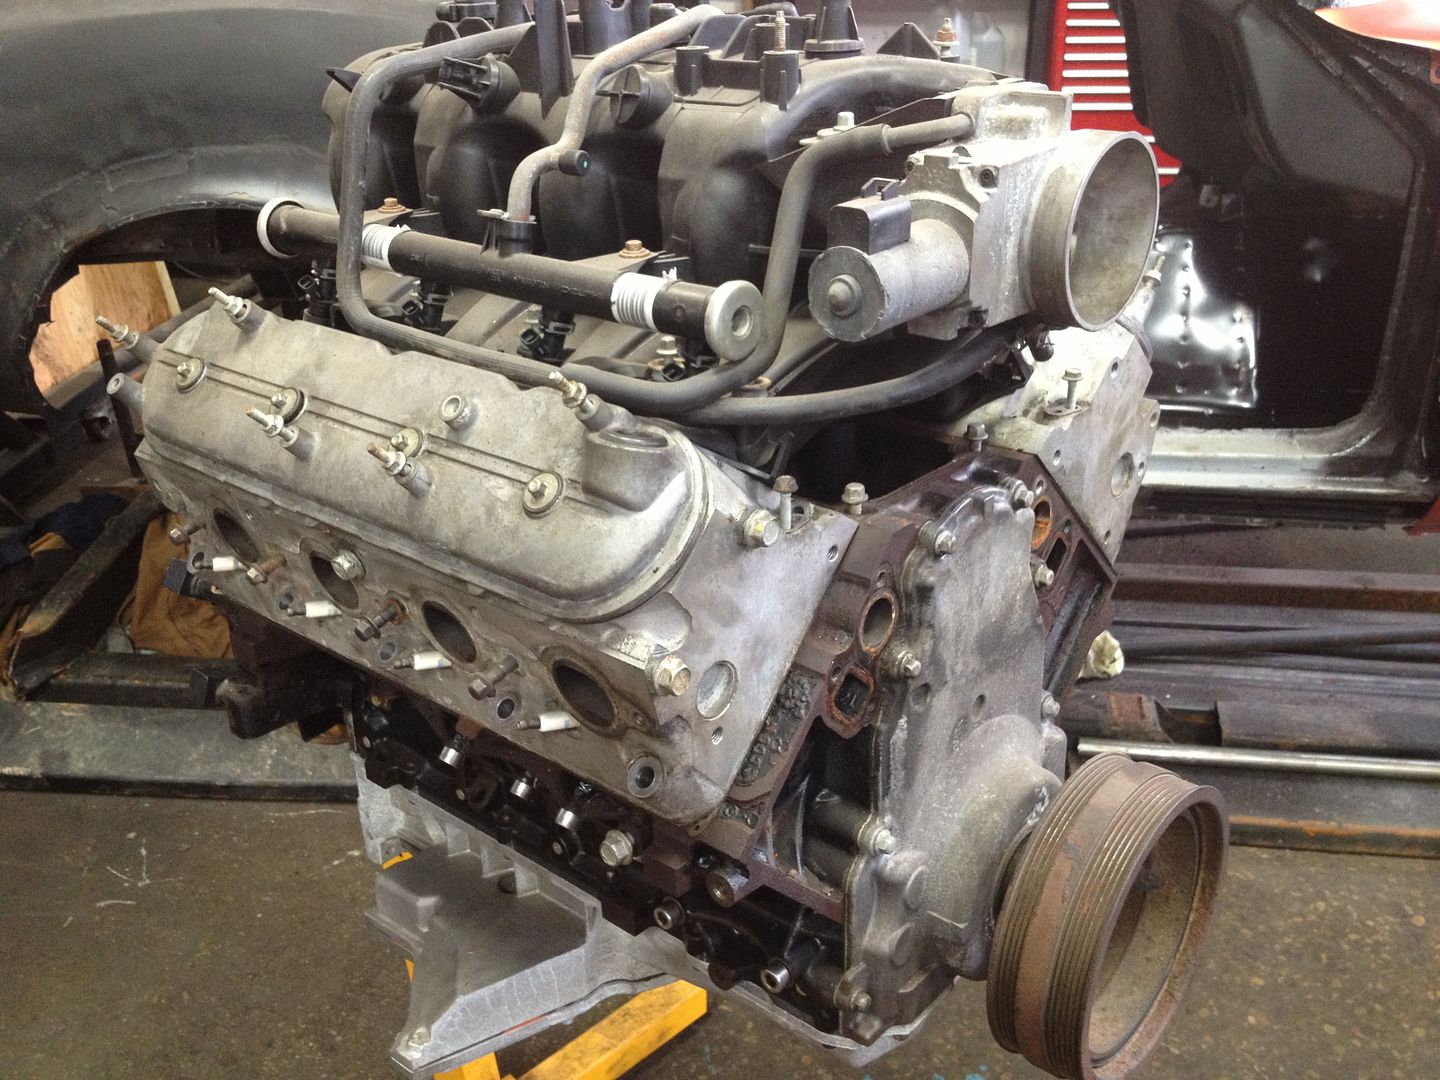
Took the NTO LS2 manifold and tossed in on the motor:
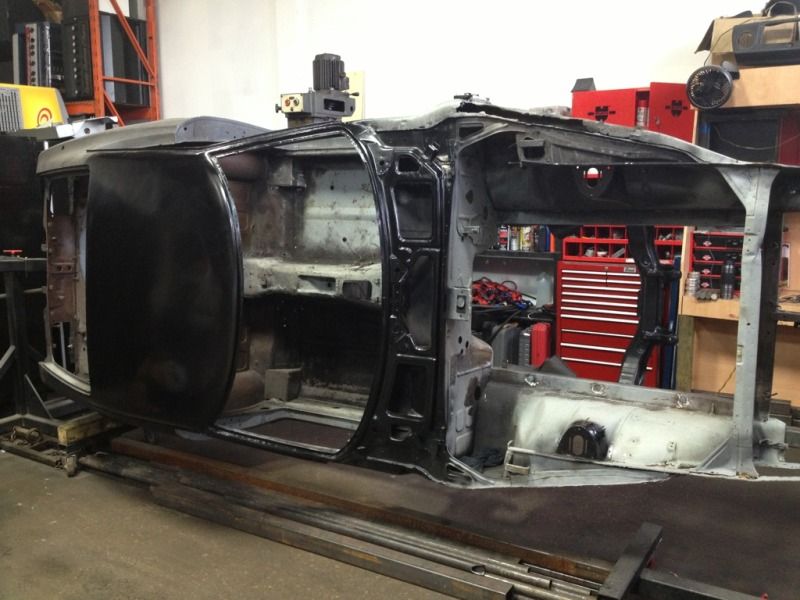
If you squint from 30 feet it resembles a car:
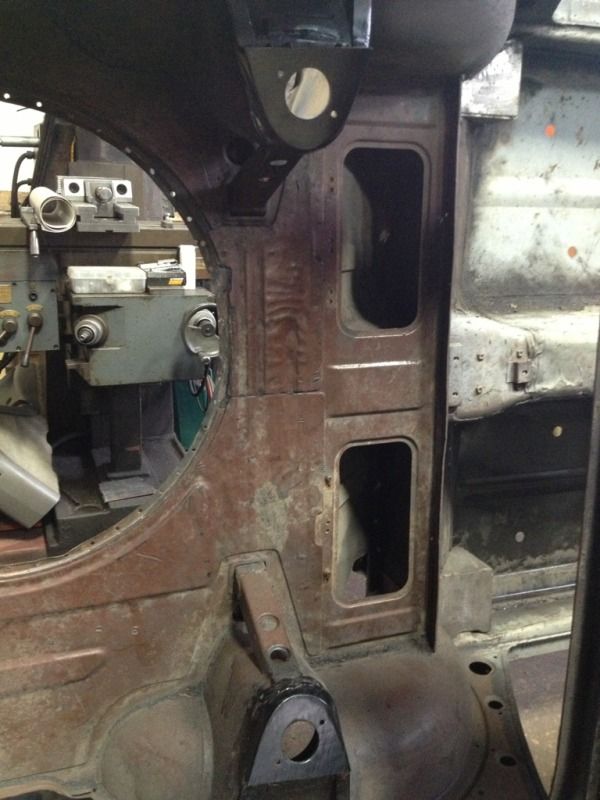
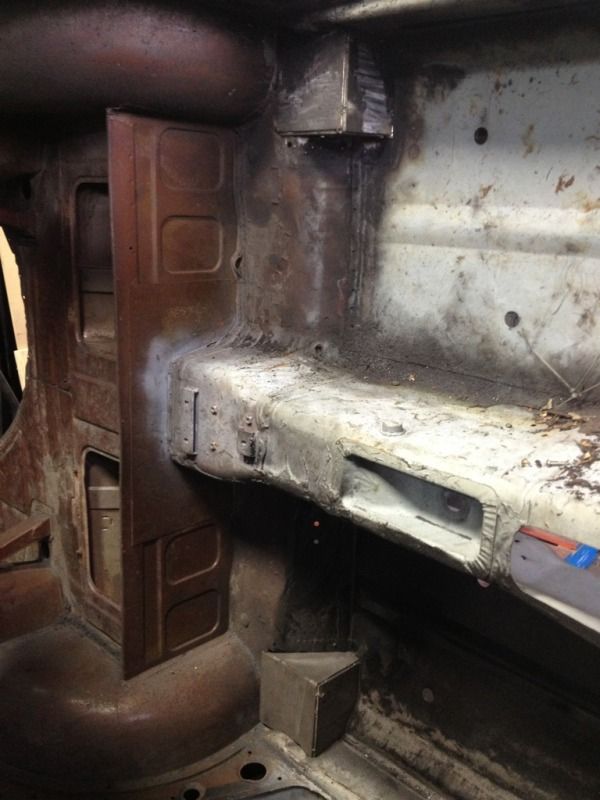
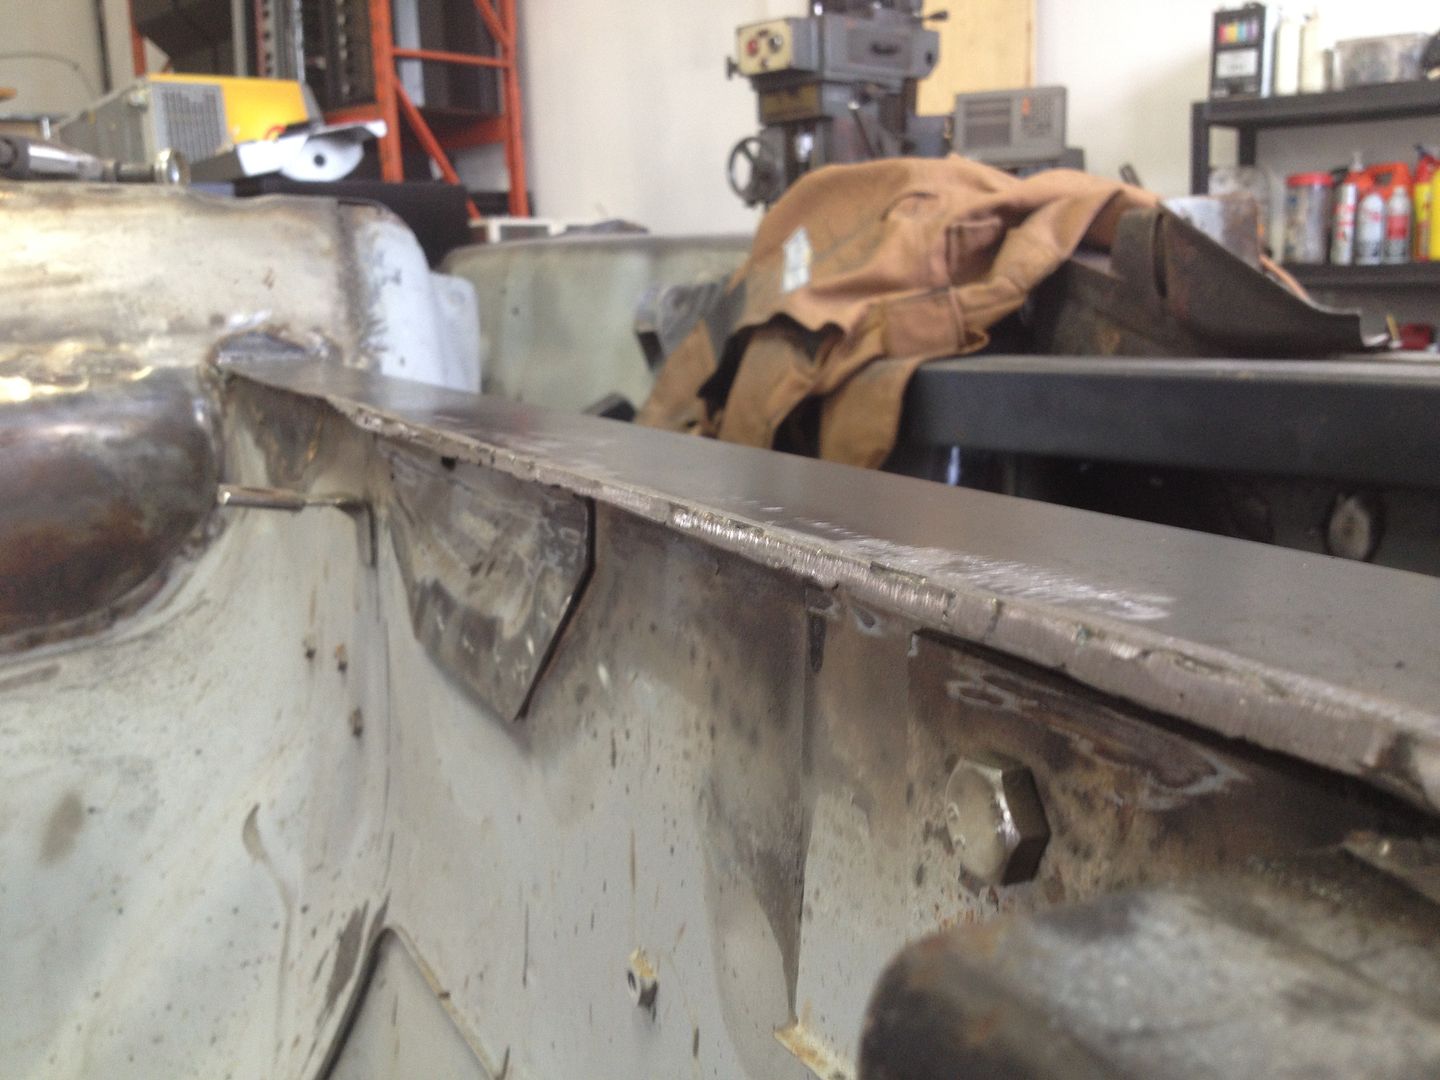
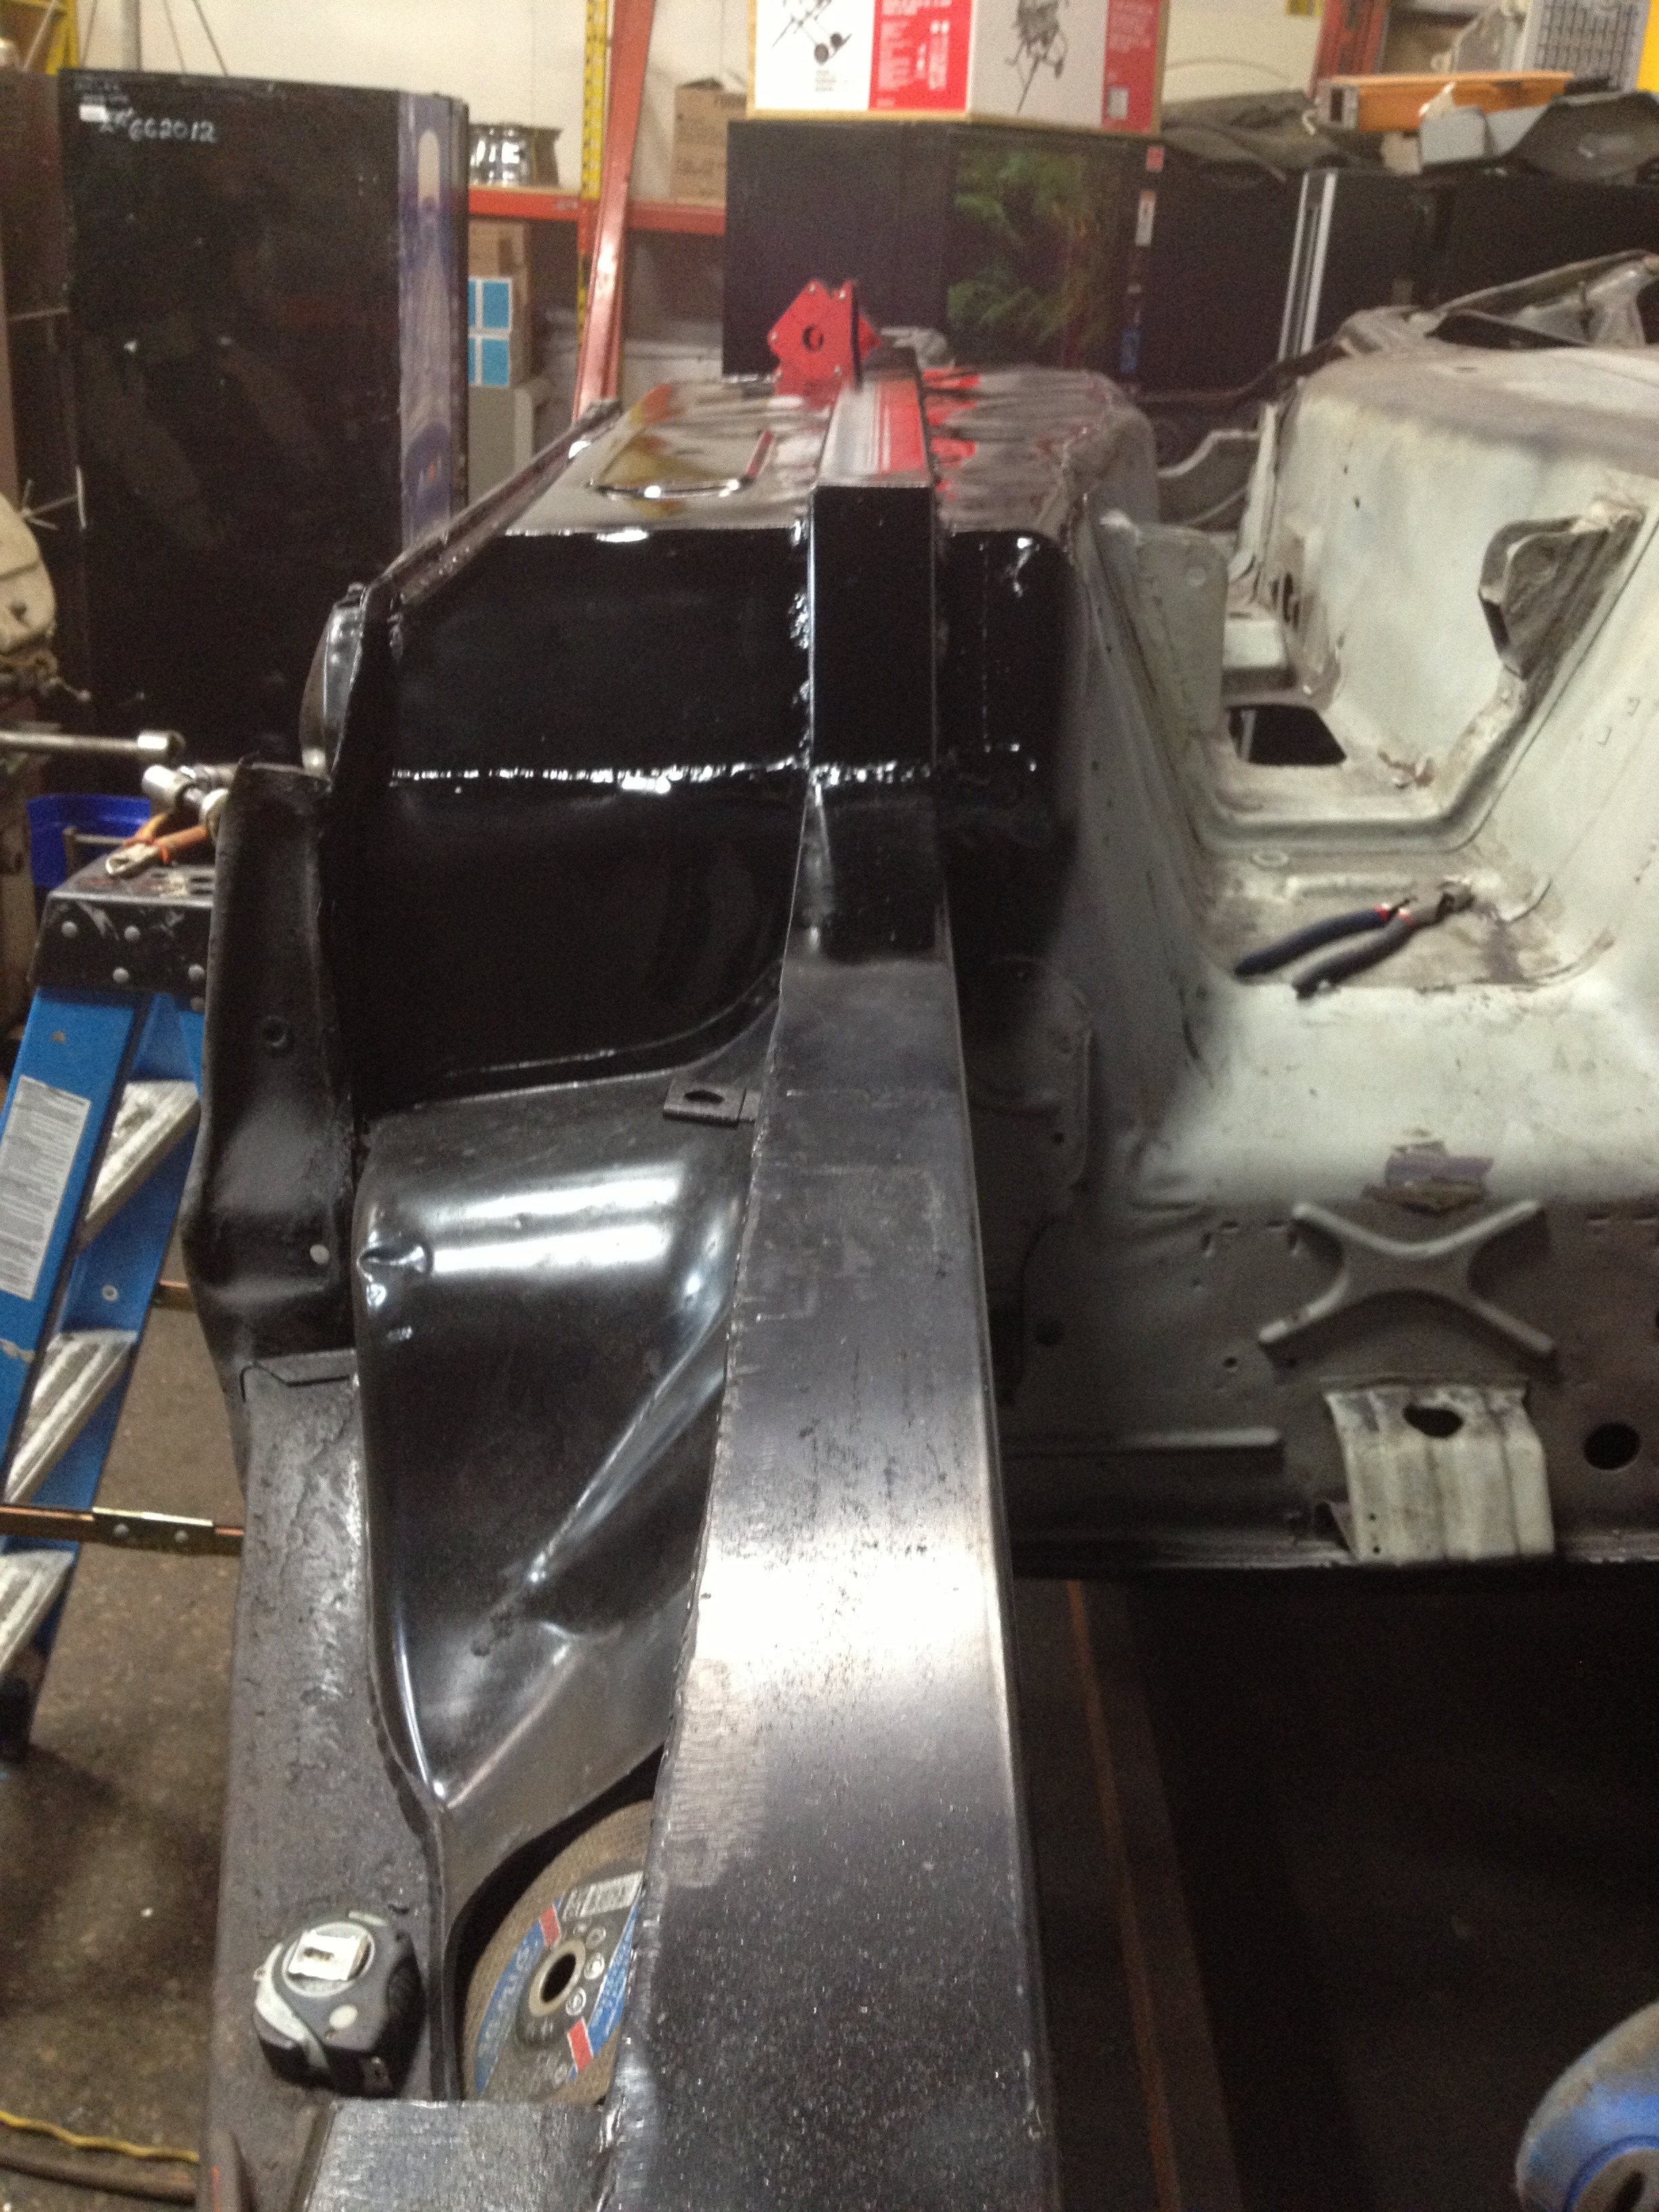
How both sides looked after all the cancer was cut out:
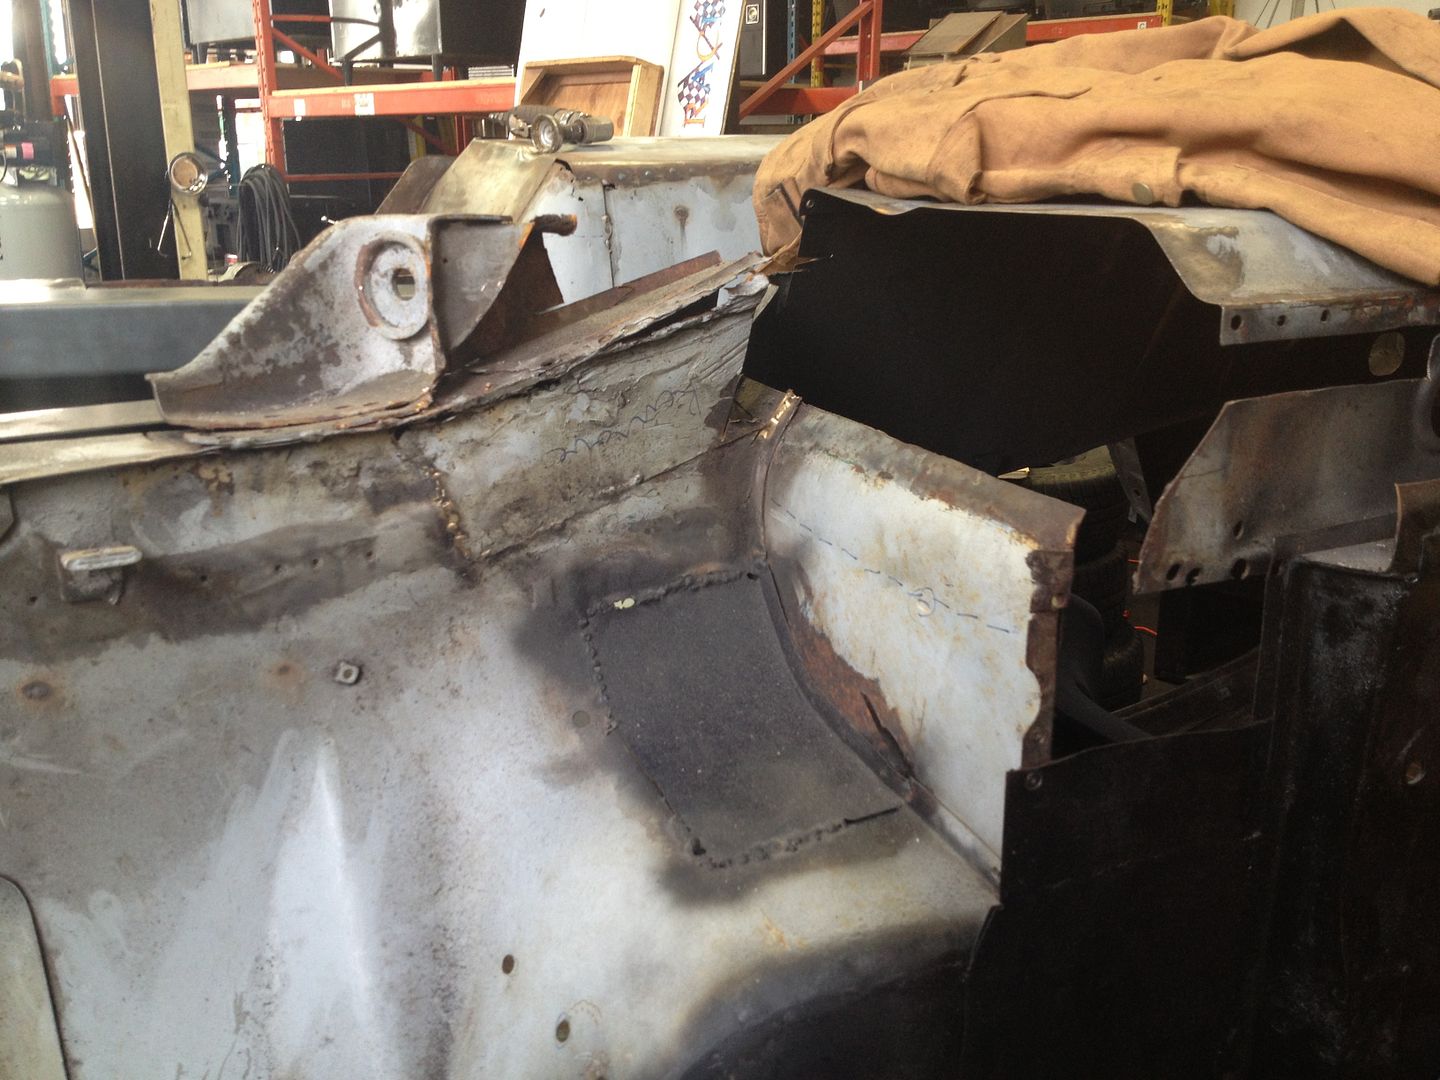
Cut off the traction arm mount, the gusseting to the footwell. This leaves a gap along the length of the from rail. Also note the new panels in footwell, formed to the curve in the new floors and all panel intersections fairly nice. (I now have newfound respect for tin-whackers haha)
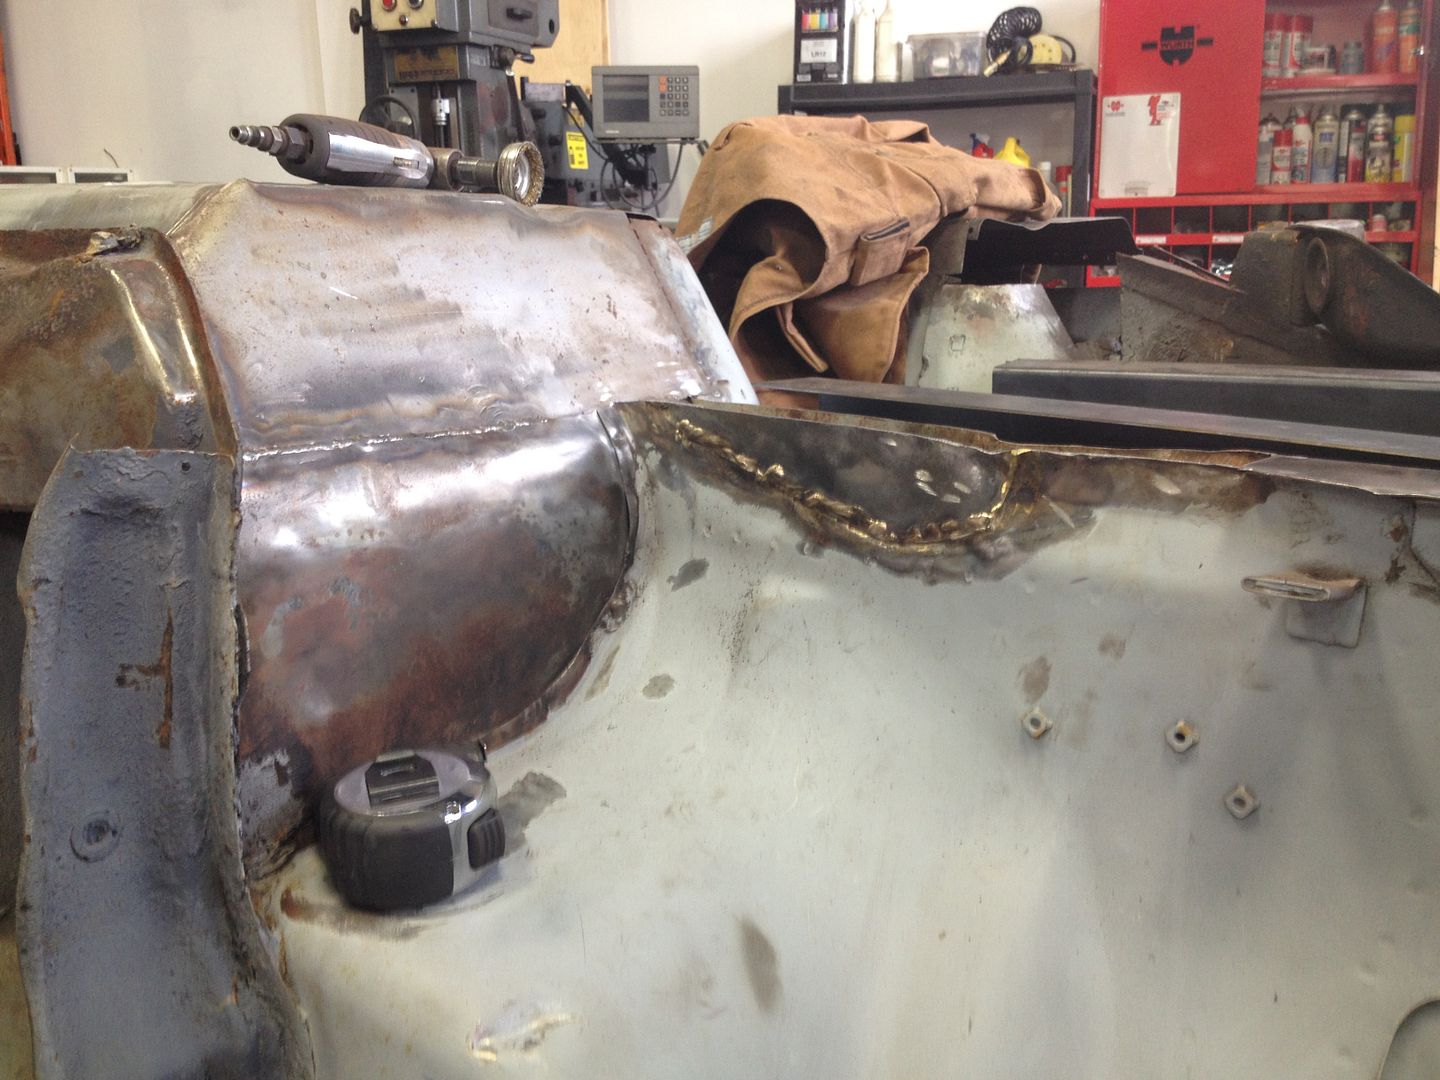
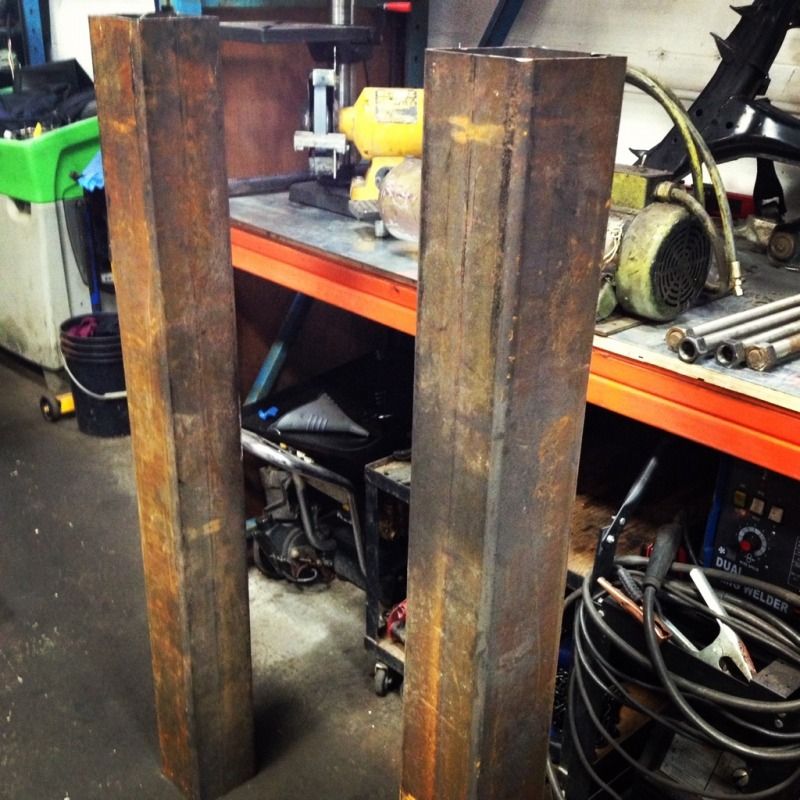
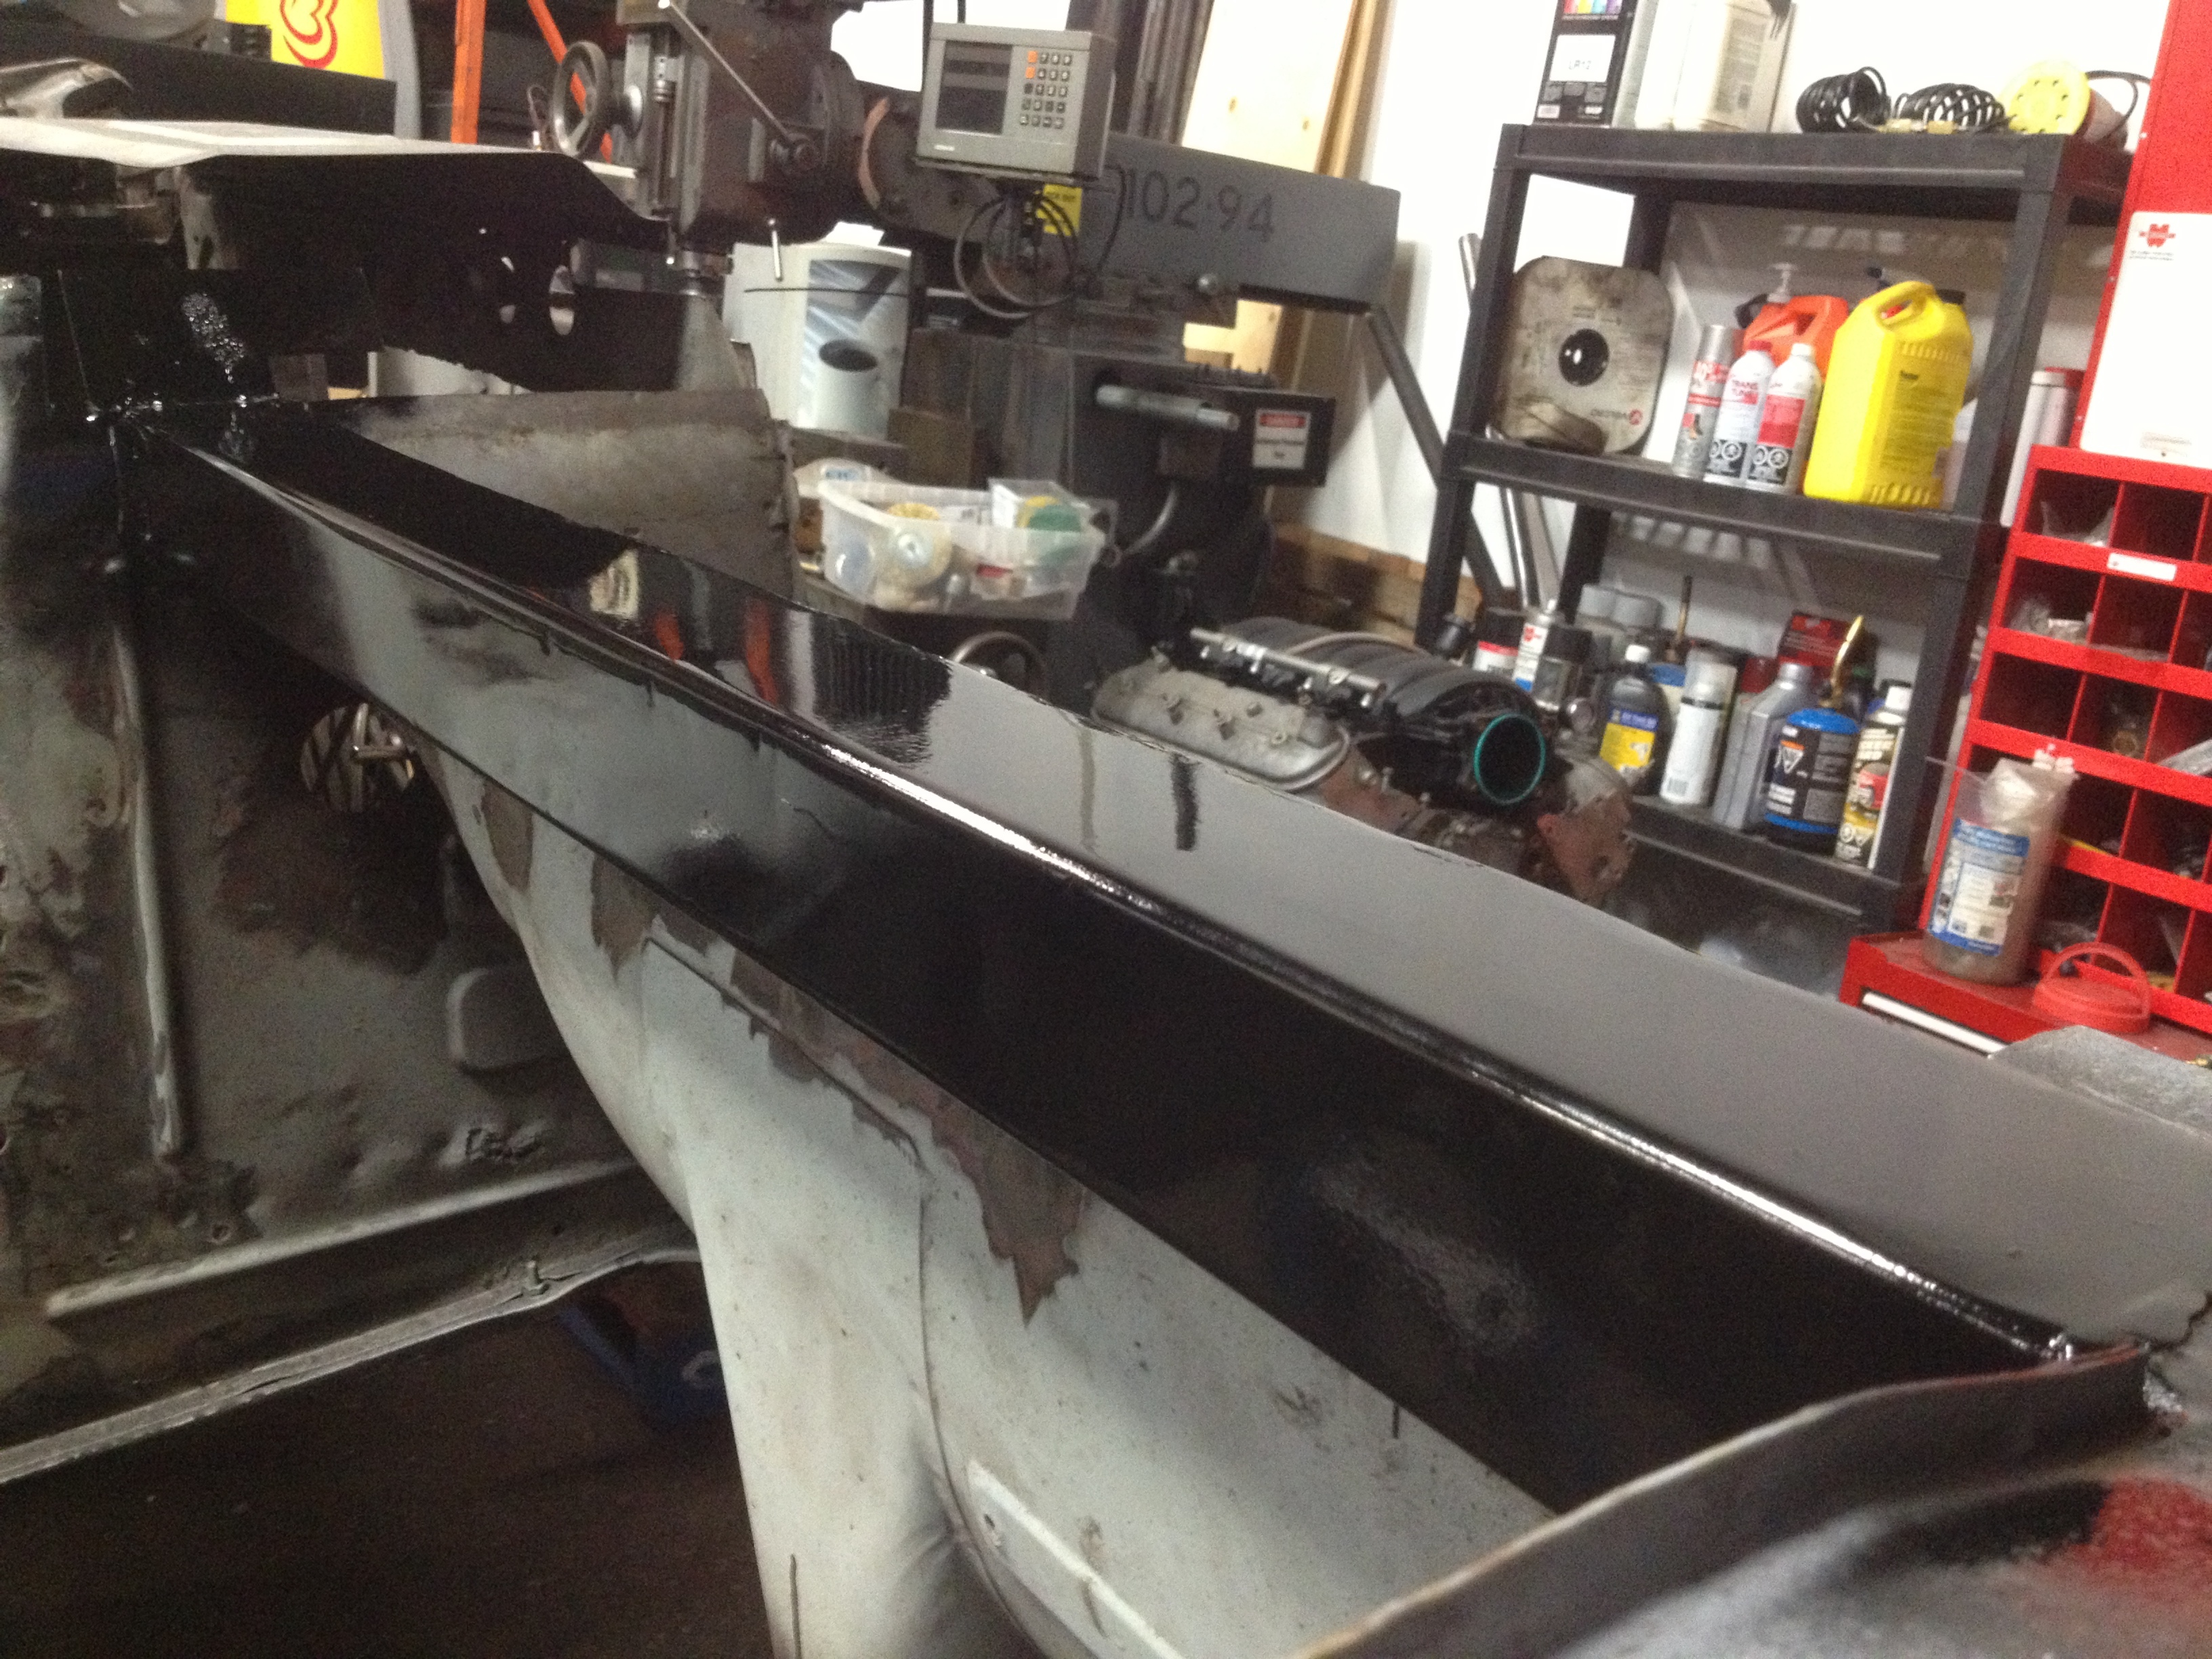
Test fit my new rails - bent up 14ga CRS into (Inside Dimensions) 2.25" along top, 2.5" along side and 3" along bottom, 42" long. These are oversized length ways so I can trim down to fit minty.
Welded in patch panel out of 18 ga CRS - 2.5" wide roughly 15" long with an extra 1" angled as flange support up the footwell.
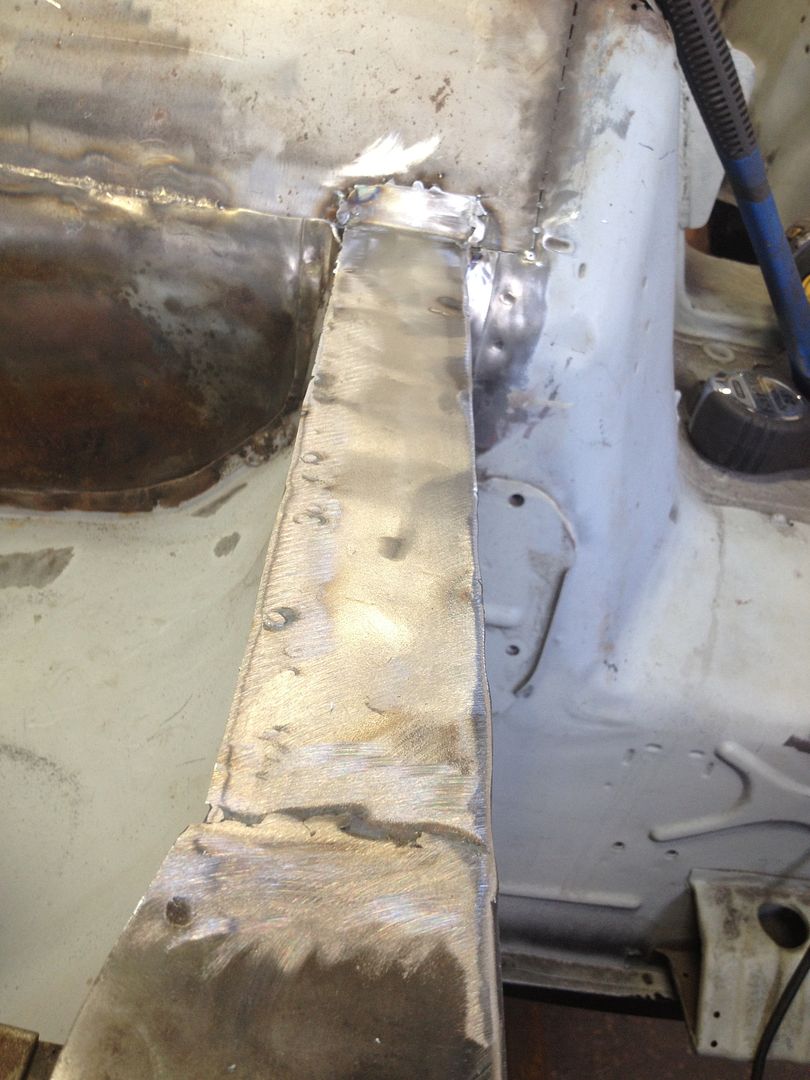
Boxing patch fits fairly flush.
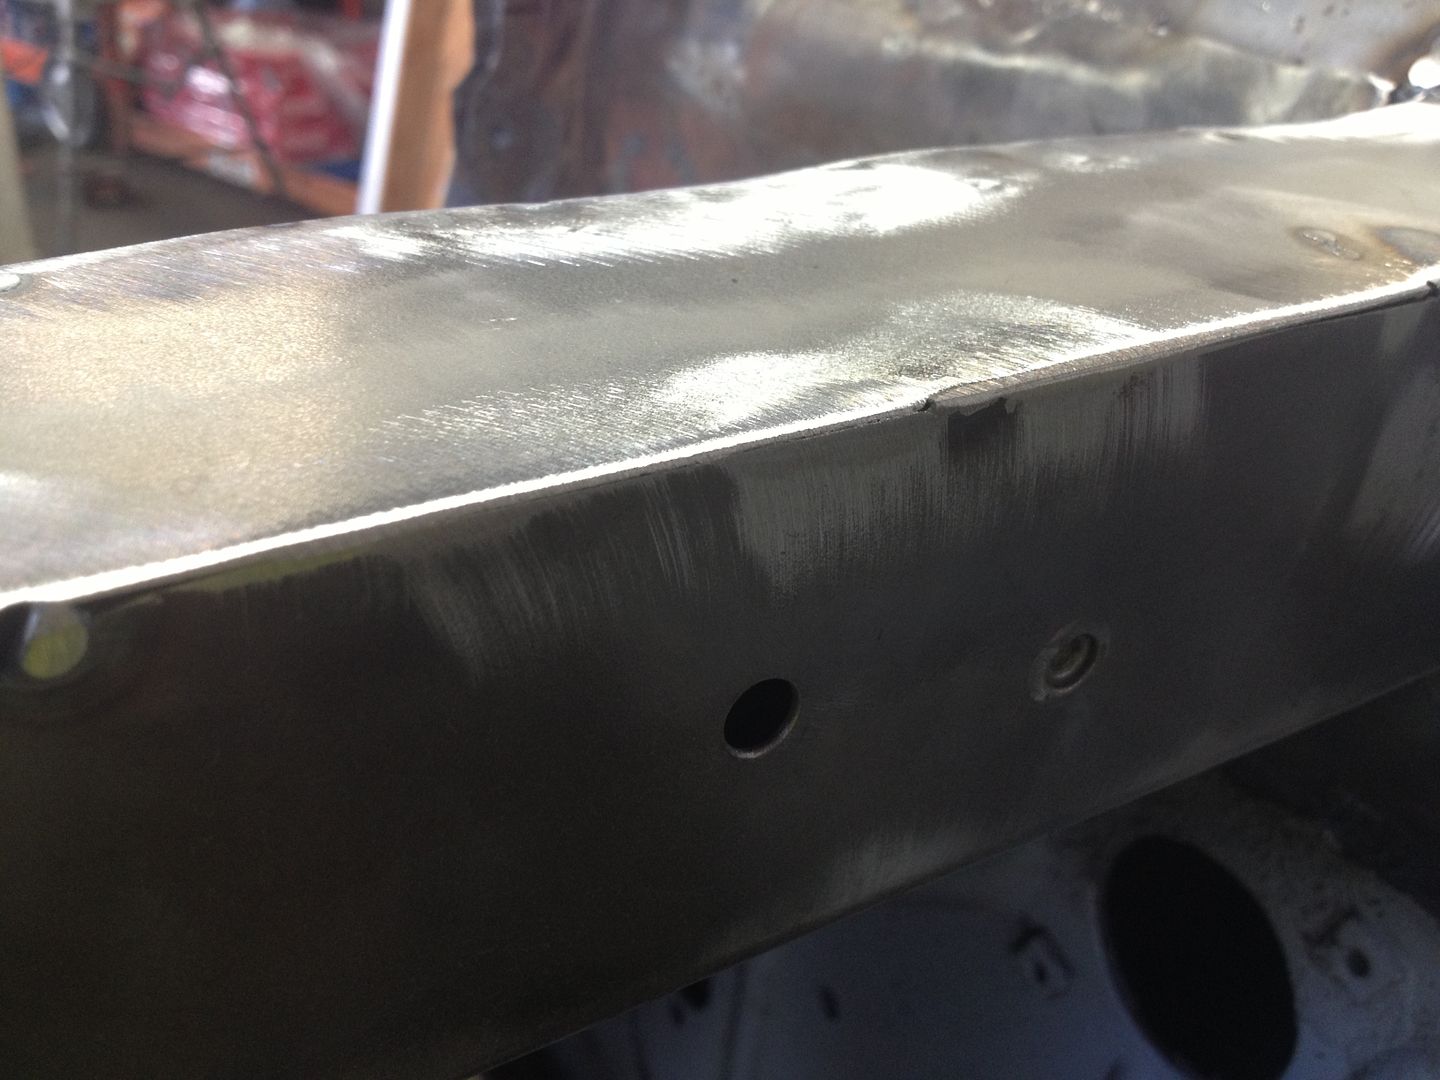
Frame rail fits even flusher.
First pass of welding it in.
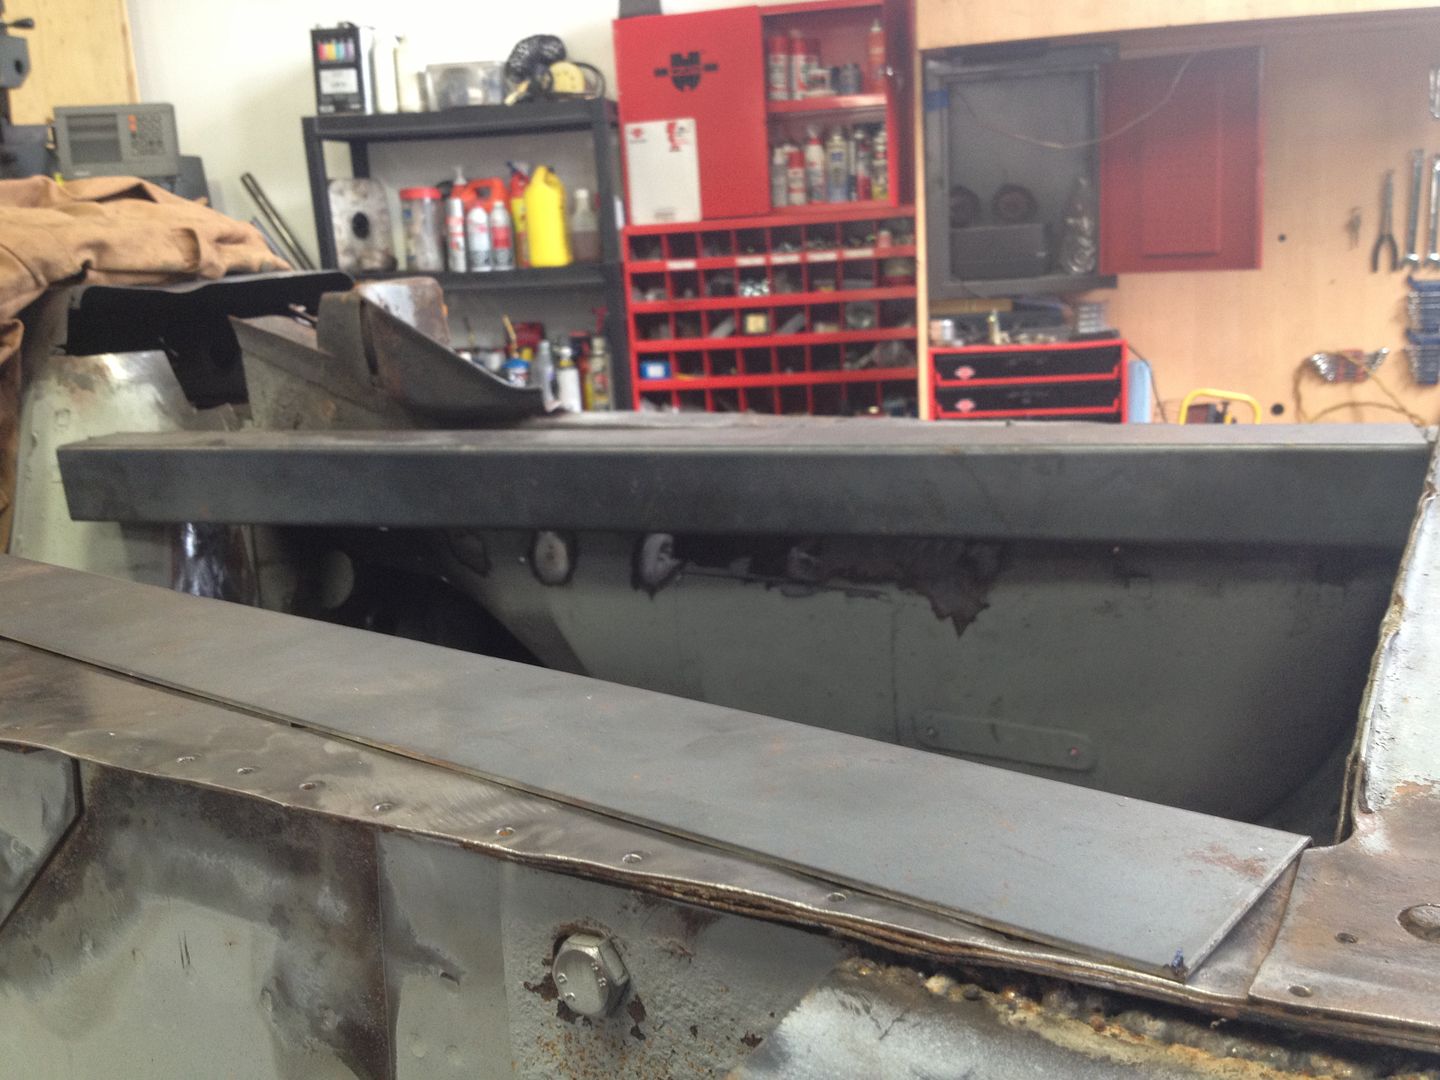
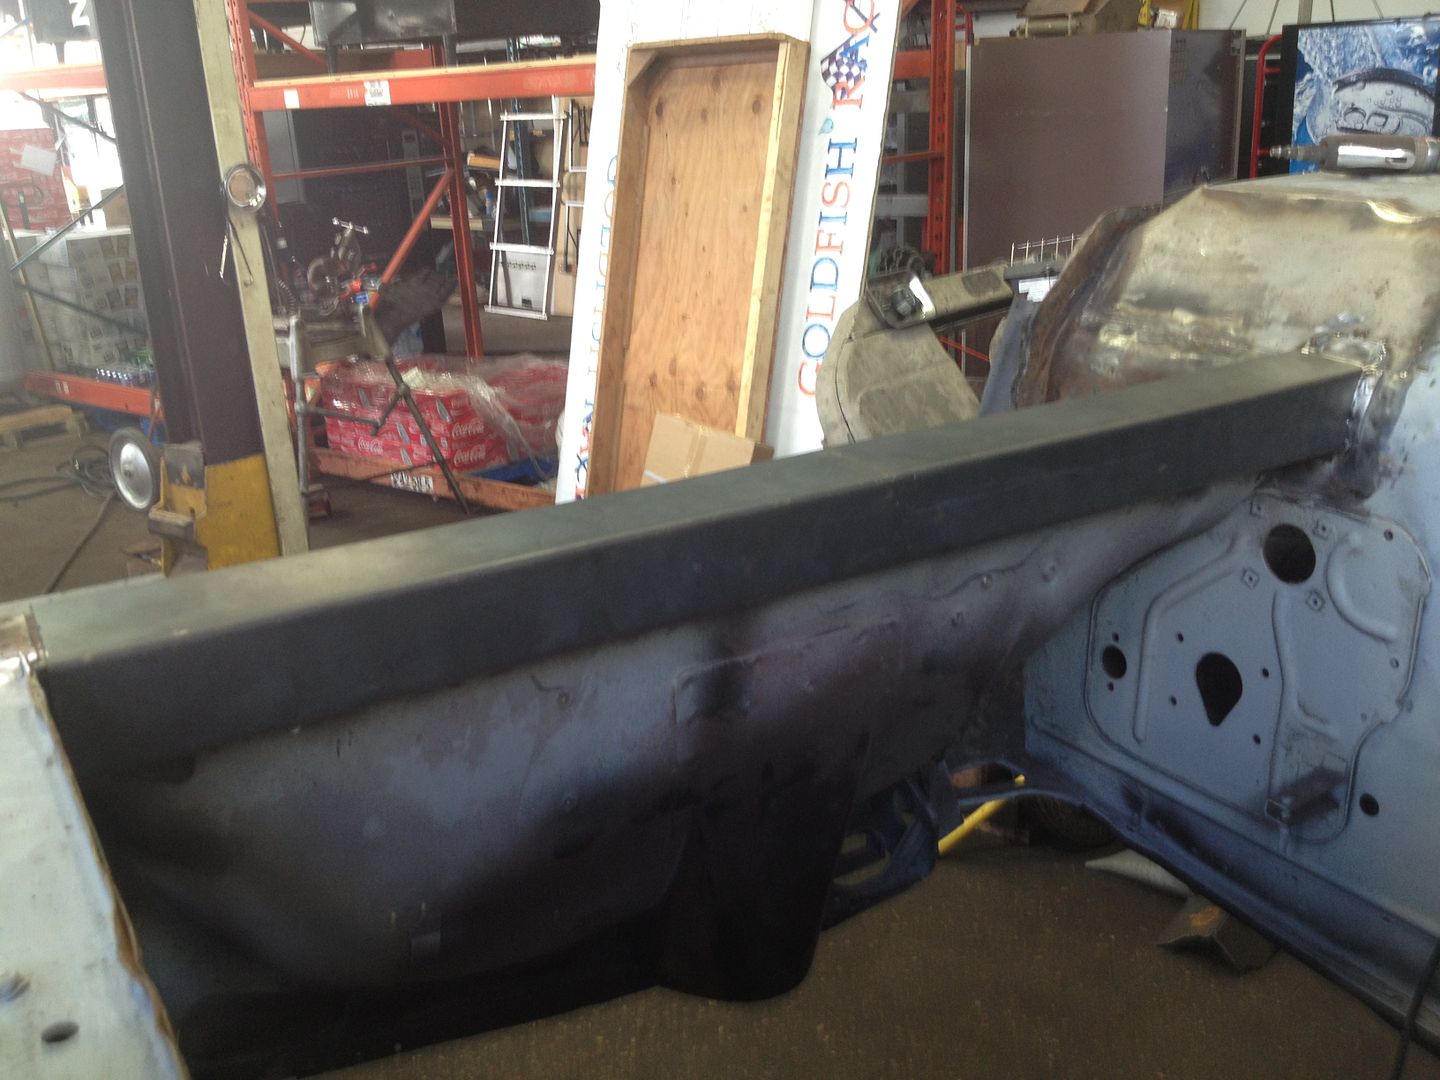
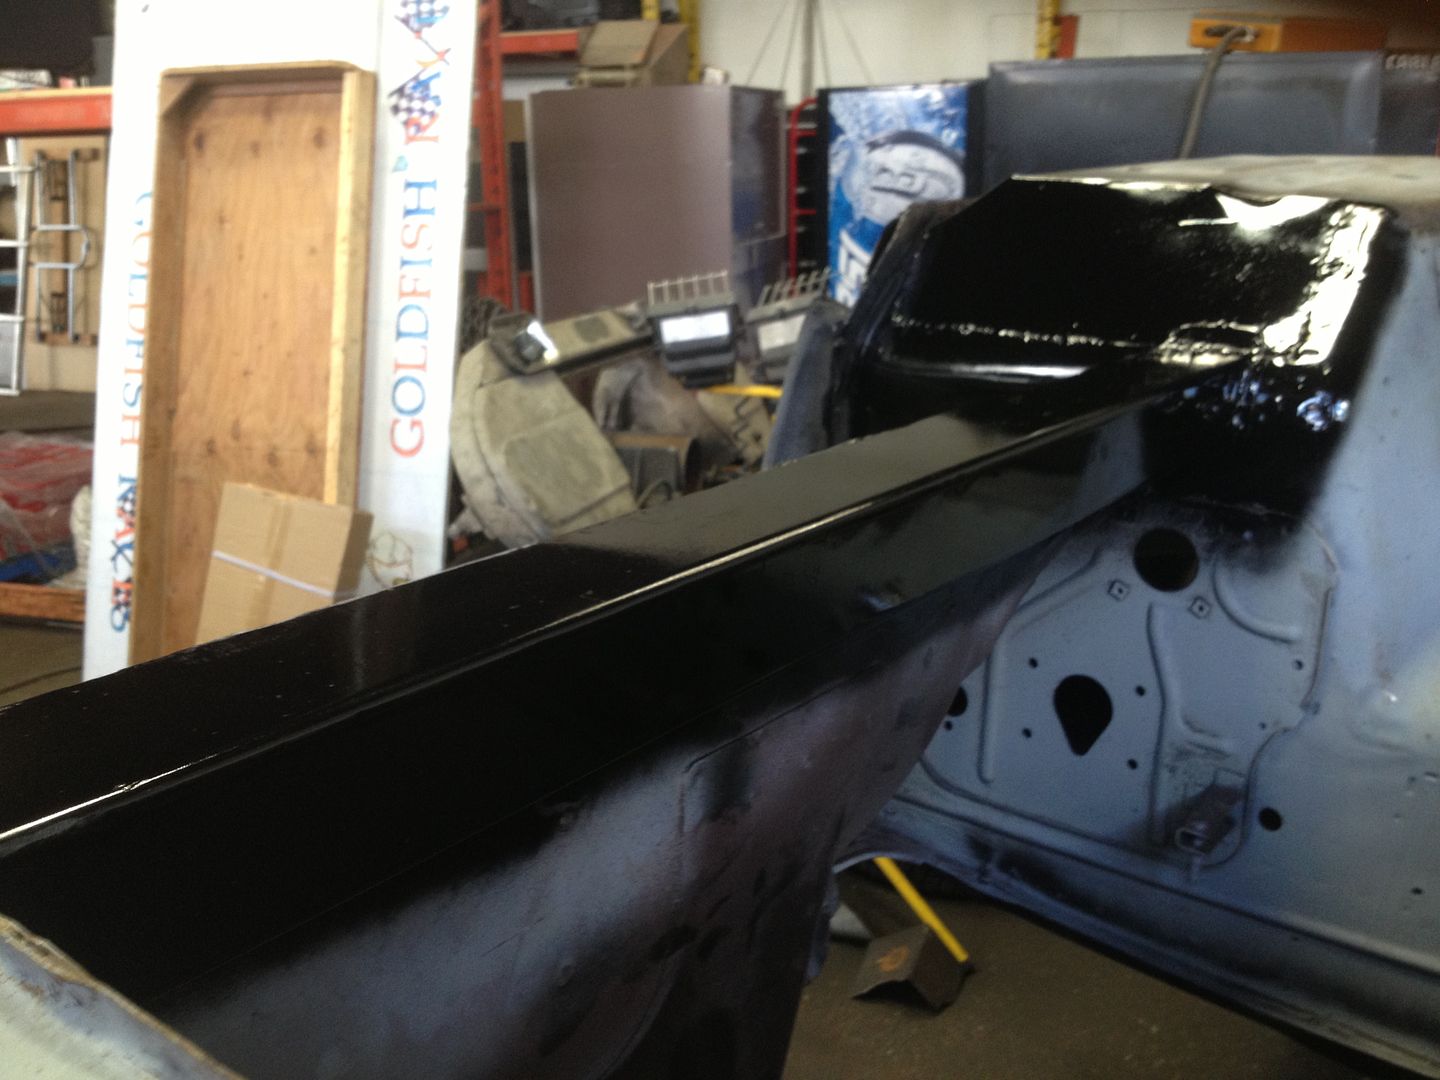
Cleaned up the wheel well and painted everything to keep the bare metal from rusting up.
Nice, flat and straight. And I feel 10,000,001 times better about bolting 450 horse to this frame rail as opposed to the stock.
That's all for today peeps, I'll hopefully have the passenger side matching this next weekend now that I've figured out how its done haha. This is actually a much bigger step in the build than it may seem. After this is done, I can tie in mid frame rails front to rear, cage mounts, motor mounts, tranny mounts etc etc.
Took the LQ9 Truck manifold and tossed in storage:

Took the NTO LS2 manifold and tossed in on the motor:

If you squint from 30 feet it resembles a car:

How both sides looked after all the cancer was cut out:

Cut off the traction arm mount, the gusseting to the footwell. This leaves a gap along the length of the from rail. Also note the new panels in footwell, formed to the curve in the new floors and all panel intersections fairly nice. (I now have newfound respect for tin-whackers haha)

Test fit my new rails - bent up 14ga CRS into (Inside Dimensions) 2.25" along top, 2.5" along side and 3" along bottom, 42" long. These are oversized length ways so I can trim down to fit minty.

Welded in patch panel out of 18 ga CRS - 2.5" wide roughly 15" long with an extra 1" angled as flange support up the footwell.

Boxing patch fits fairly flush.

Frame rail fits even flusher.

First pass of welding it in.

Cleaned up the wheel well and painted everything to keep the bare metal from rusting up.

Nice, flat and straight. And I feel 10,000,001 times better about bolting 450 horse to this frame rail as opposed to the stock.

That's all for today peeps, I'll hopefully have the passenger side matching this next weekend now that I've figured out how its done haha. This is actually a much bigger step in the build than it may seem. After this is done, I can tie in mid frame rails front to rear, cage mounts, motor mounts, tranny mounts etc etc.
Last edited by AFischer; 09-03-2018 at 03:07 PM.
 07-15-2013, 05:24 AM
#30
Man, that looks so weird having the rails come straight out of the firewall like that. I guess you will get your stiffness back from a cage, but seems like you are giving up lot of triangulation not tying them back into the cabin floor.
07-16-2013, 11:35 AM
#32
Teching In
Thread Starter
Join Date: Jan 2012
Posts: 30
Likes: 0
Received 0 Likes
on
0 Posts
Haha thanks ramair/redmonte - I'm aiming for it driving with or without body/paint done by next June.
Popnwood - if you read the bit under last pic - this isn't finished - I am running 1x3x.120 frame rails under floor and that will tie into the front frame rail one running tight to footwell and another extending out at roughly a 20 deg angle.
Popnwood - if you read the bit under last pic - this isn't finished - I am running 1x3x.120 frame rails under floor and that will tie into the front frame rail one running tight to footwell and another extending out at roughly a 20 deg angle.
07-16-2013, 04:28 PM
#33
Haha thanks ramair/redmonte - I'm aiming for it driving with or without body/paint done by next June.
Popnwood - if you read the bit under last pic - this isn't finished - I am running 1x3x.120 frame rails under floor and that will tie into the front frame rail one running tight to footwell and another extending out at roughly a 20 deg angle.
Popnwood - if you read the bit under last pic - this isn't finished - I am running 1x3x.120 frame rails under floor and that will tie into the front frame rail one running tight to footwell and another extending out at roughly a 20 deg angle.
07-18-2013, 10:40 AM
#34
Teching In
Thread Starter
Join Date: Jan 2012
Posts: 30
Likes: 0
Received 0 Likes
on
0 Posts
Haha yah - the painting of it is a little deceiving - I just spray all the bare metal with Tremclad to keep it from flash rusting as I only get to work on it once a week.
Thanks for double checking tho/following the build - I'm sure ill forget something someday and hopefully someone will catch it haha
Thanks for double checking tho/following the build - I'm sure ill forget something someday and hopefully someone will catch it haha
08-07-2013, 08:27 PM
#35
Teching In
Thread Starter
Join Date: Jan 2012
Posts: 30
Likes: 0
Received 0 Likes
on
0 Posts
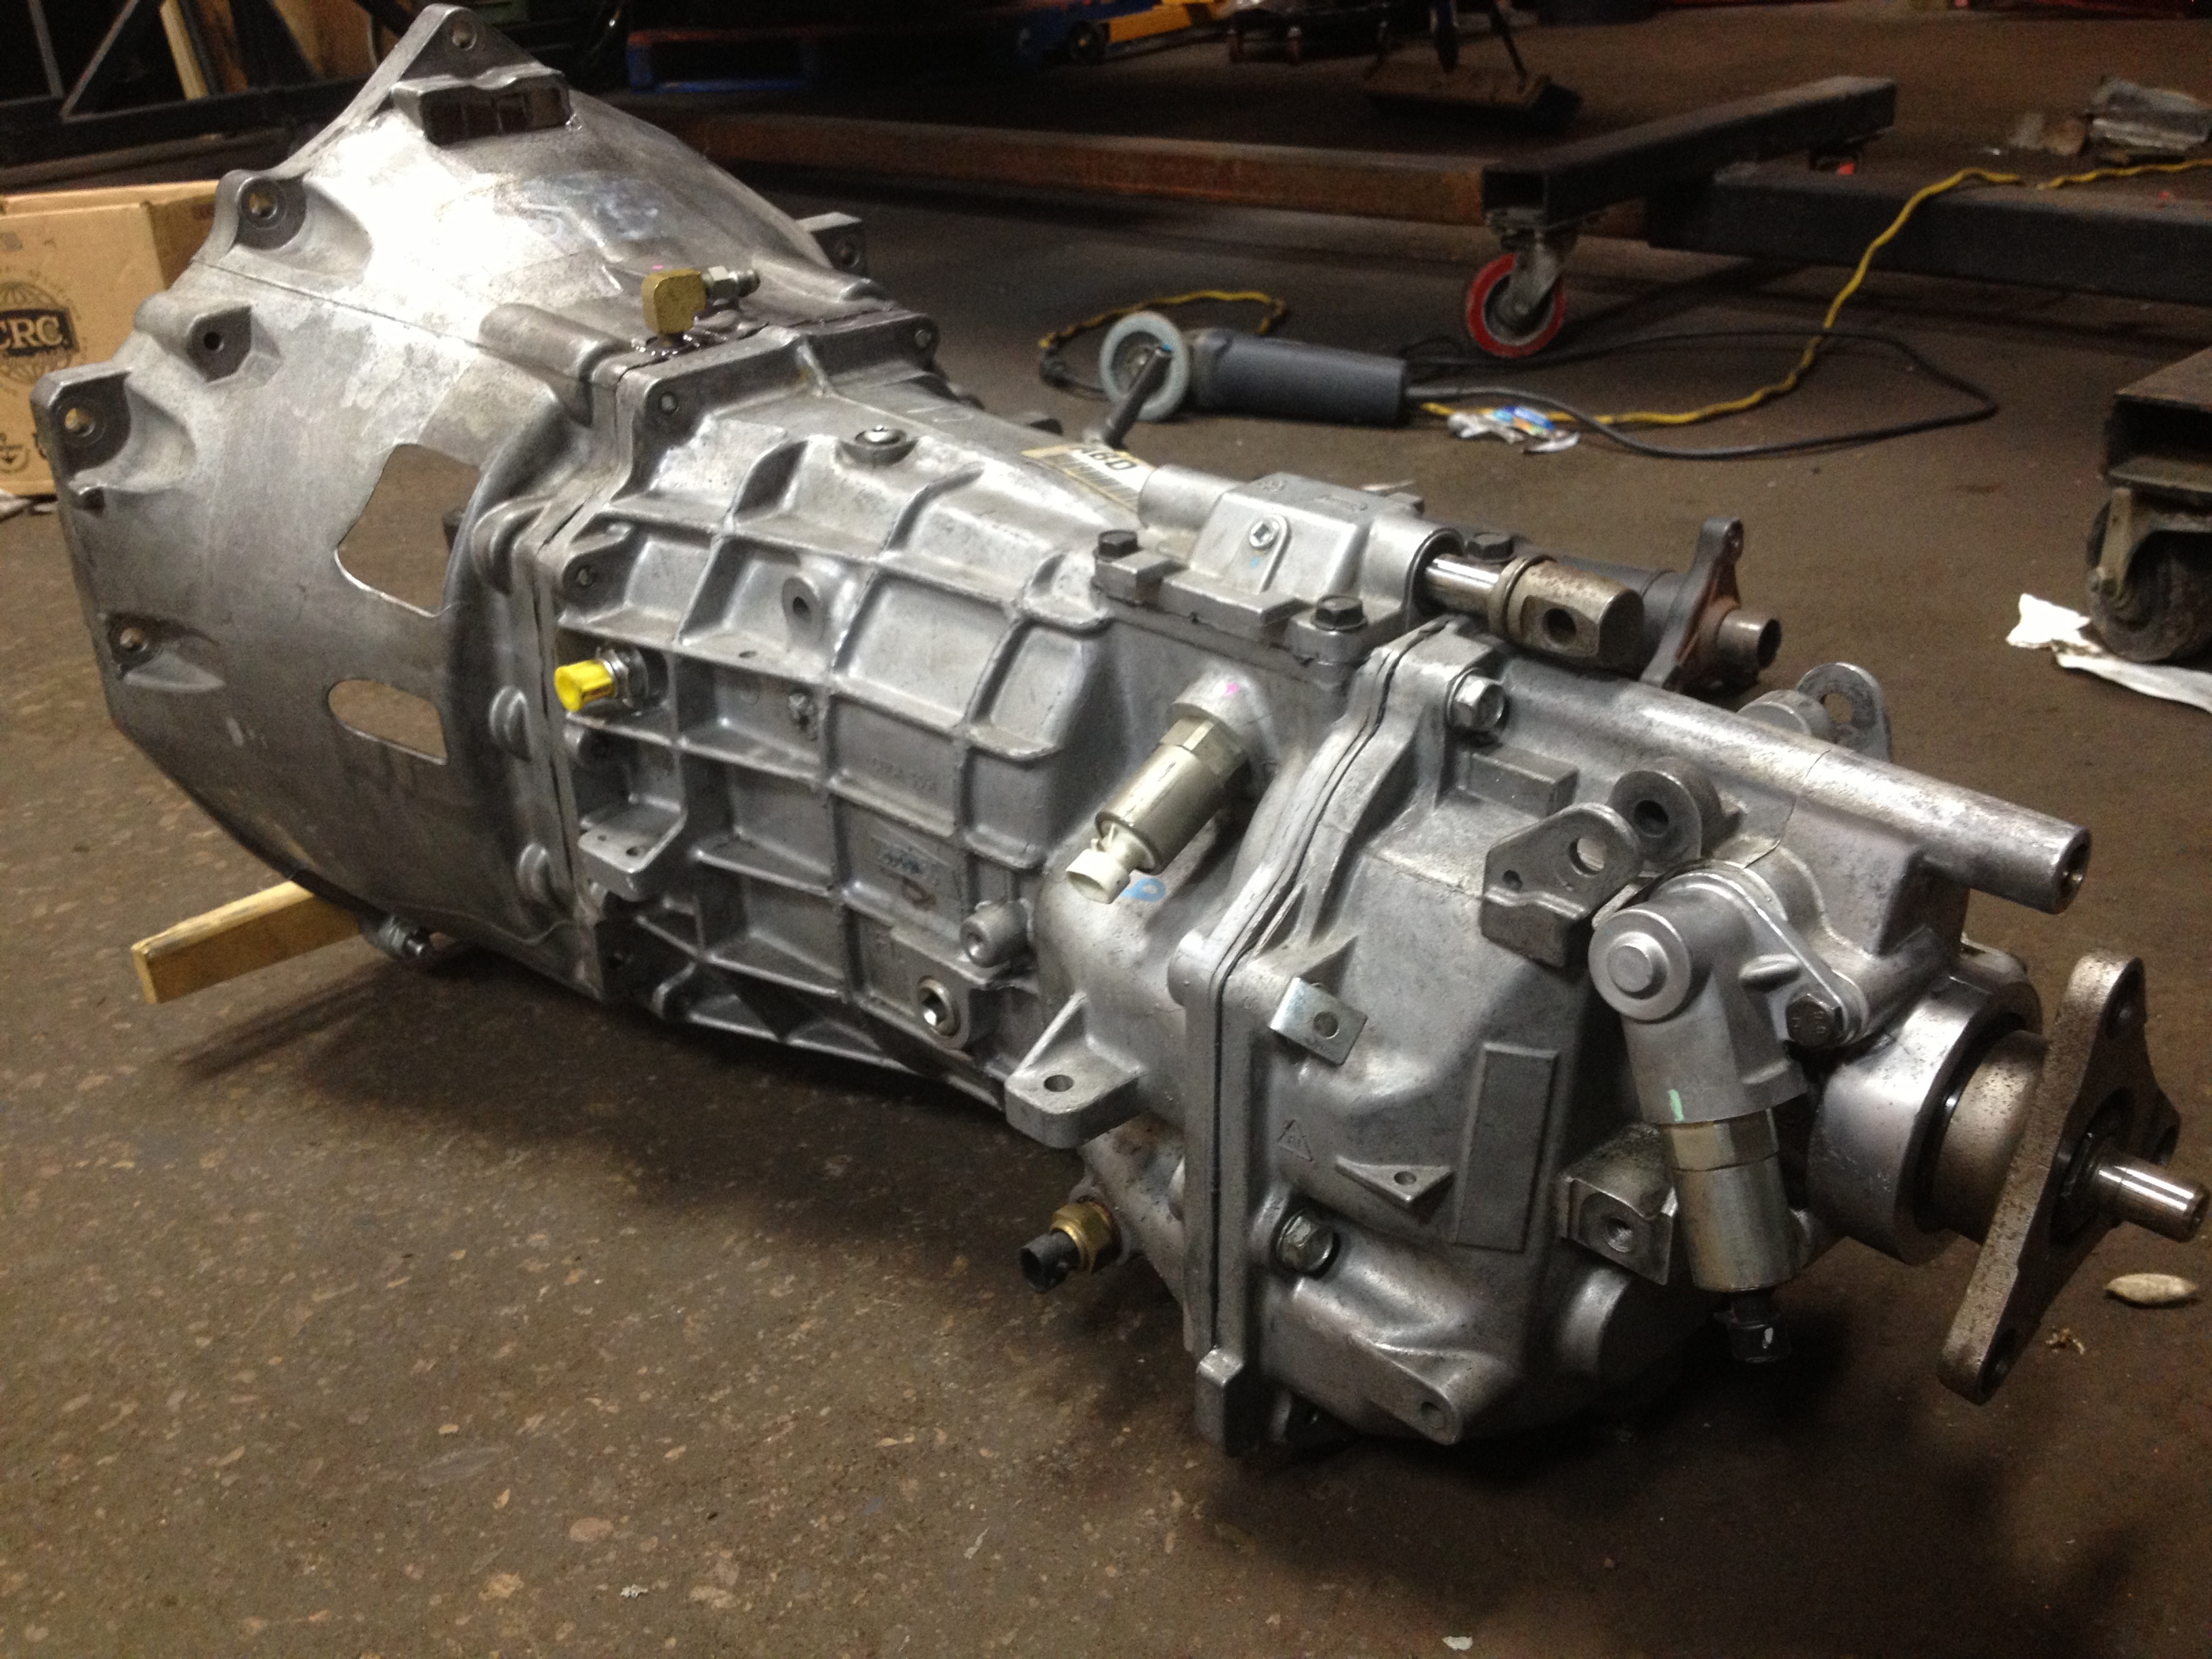
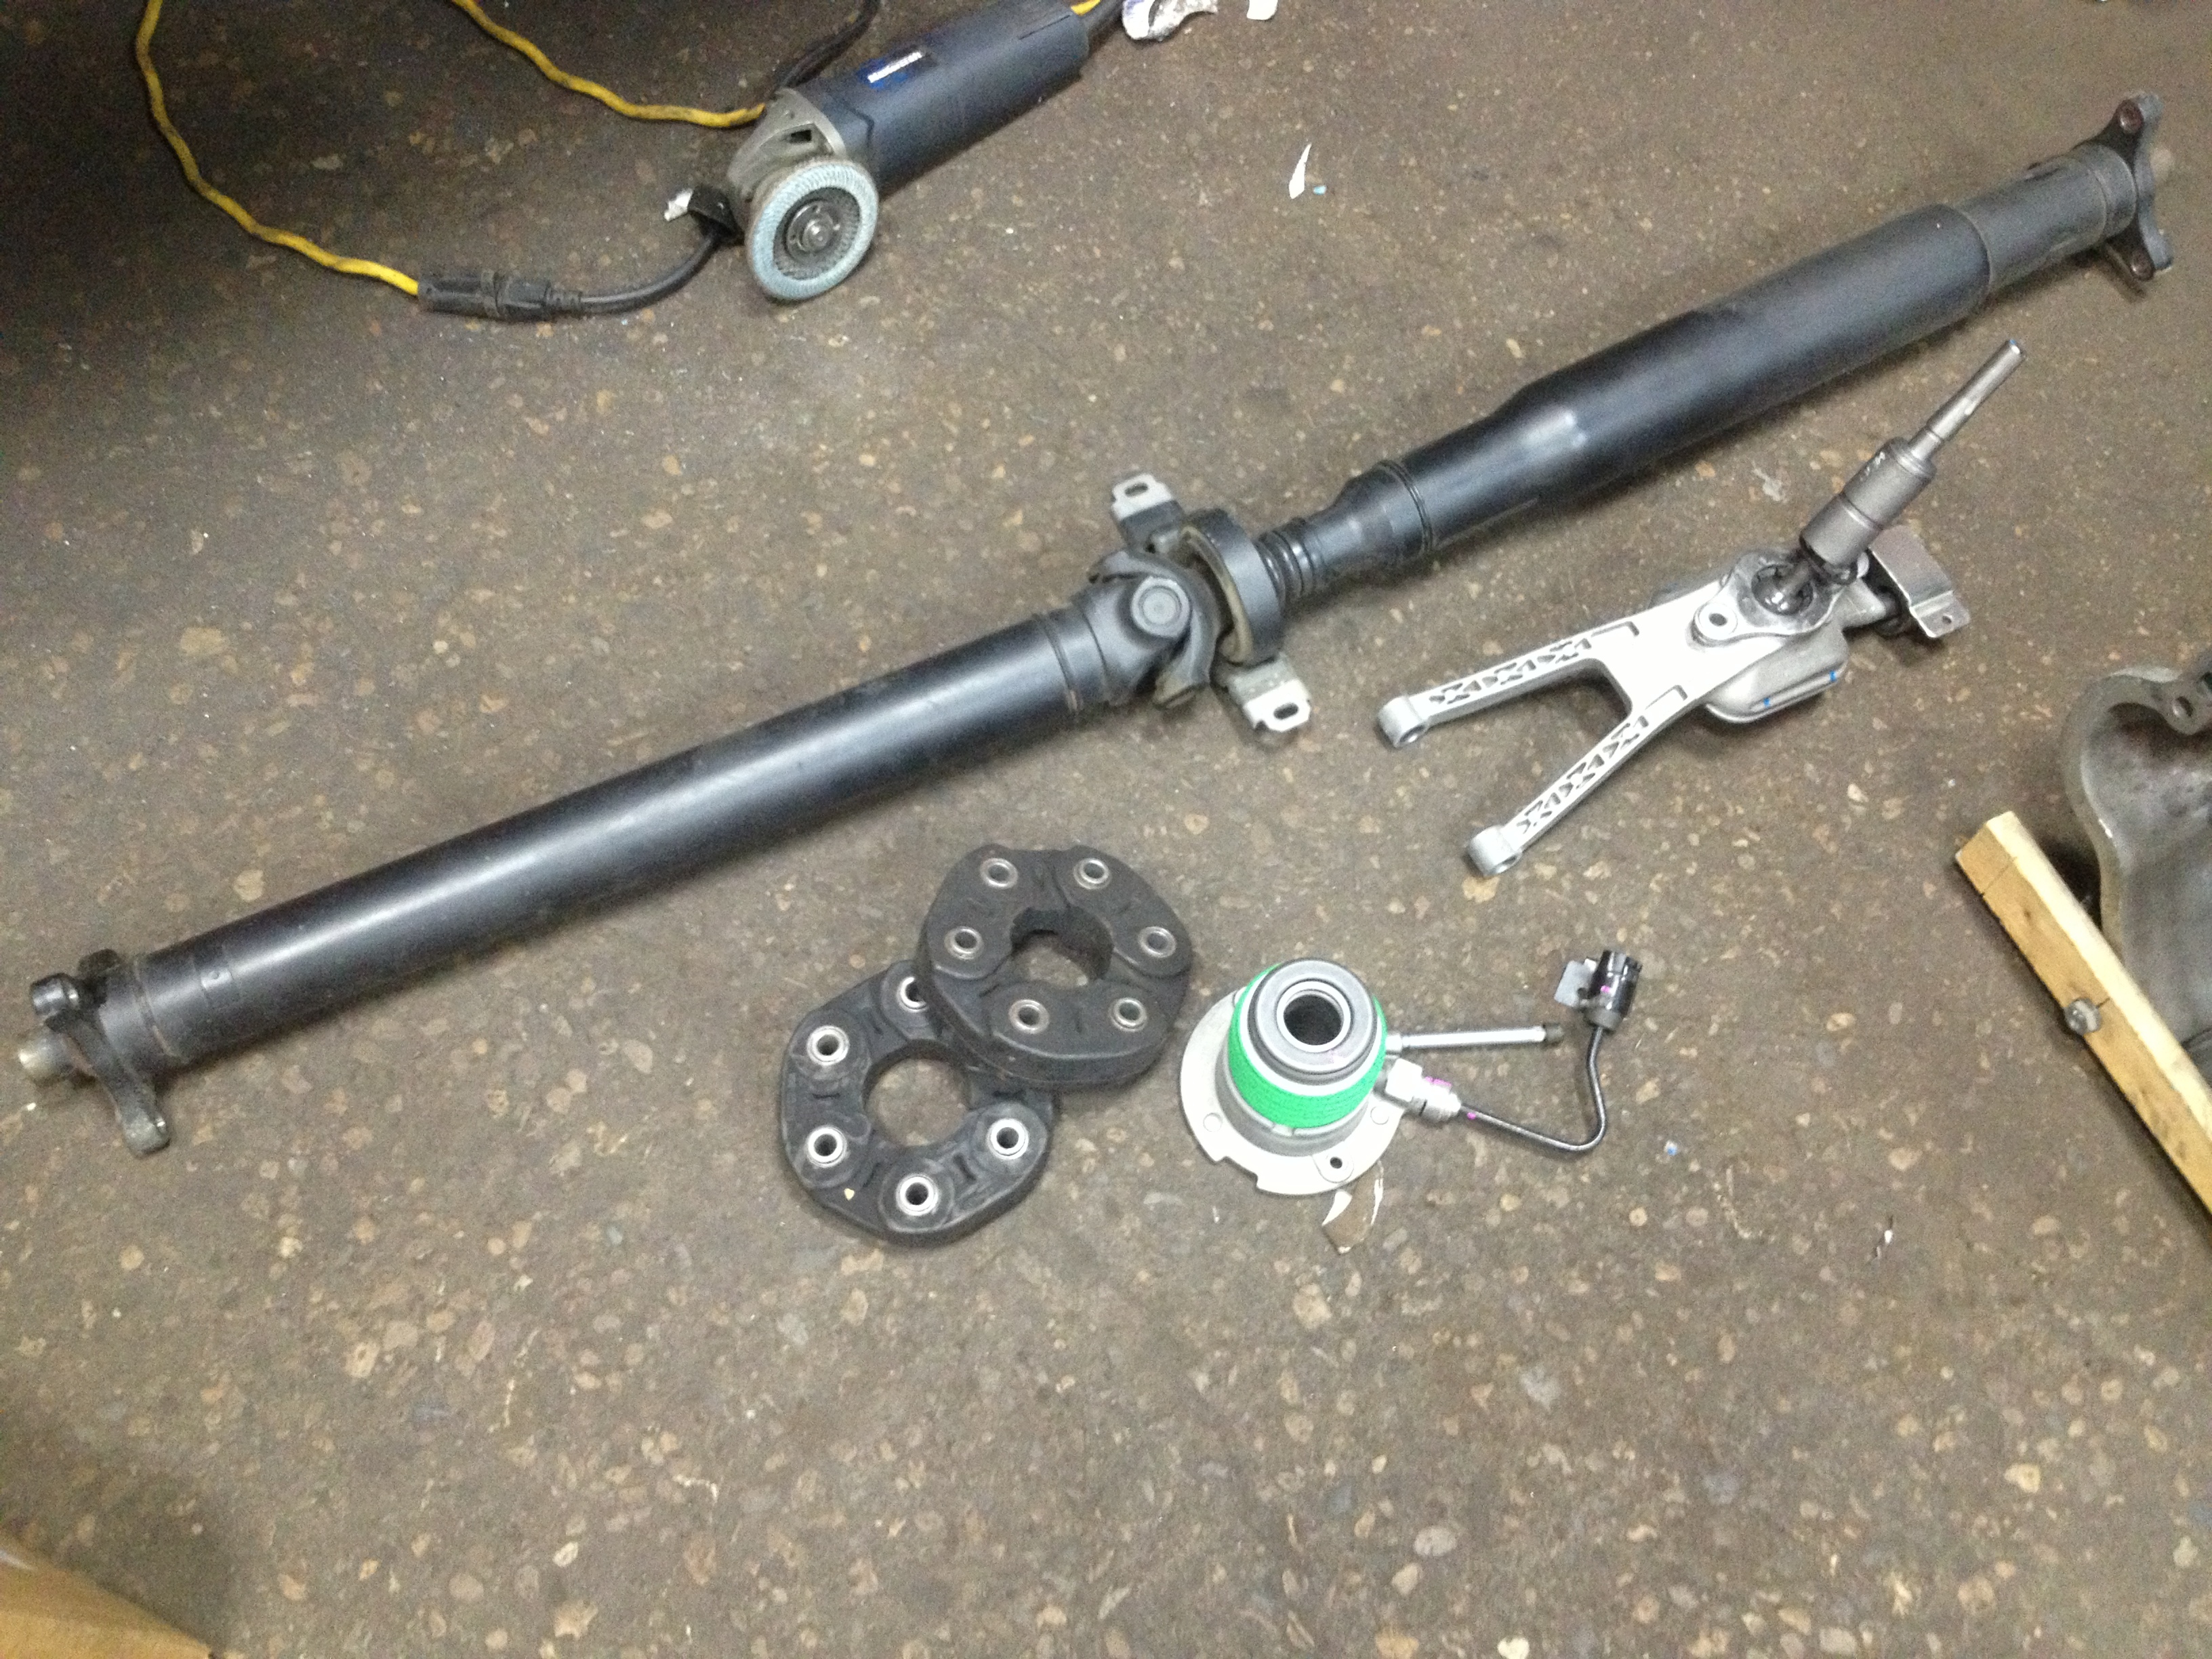
This ladies and gents is a TR6060 6 speed from a ~2012 Chevy Camaro. Thanks to a man named Joe, it now resides in my shop staring the LQ9 down. Also joining it is a bnib GM TR6060 concentric slave cylinder and a Camaro driveshaft, flex couplings and the shifter. TR6060 is fairly factory with exception of carbon synchro's.

08-11-2013, 09:14 PM
#36
Teching In
Thread Starter
Join Date: Jan 2012
Posts: 30
Likes: 0
Received 0 Likes
on
0 Posts
So probably one of my more productive days woohoo!
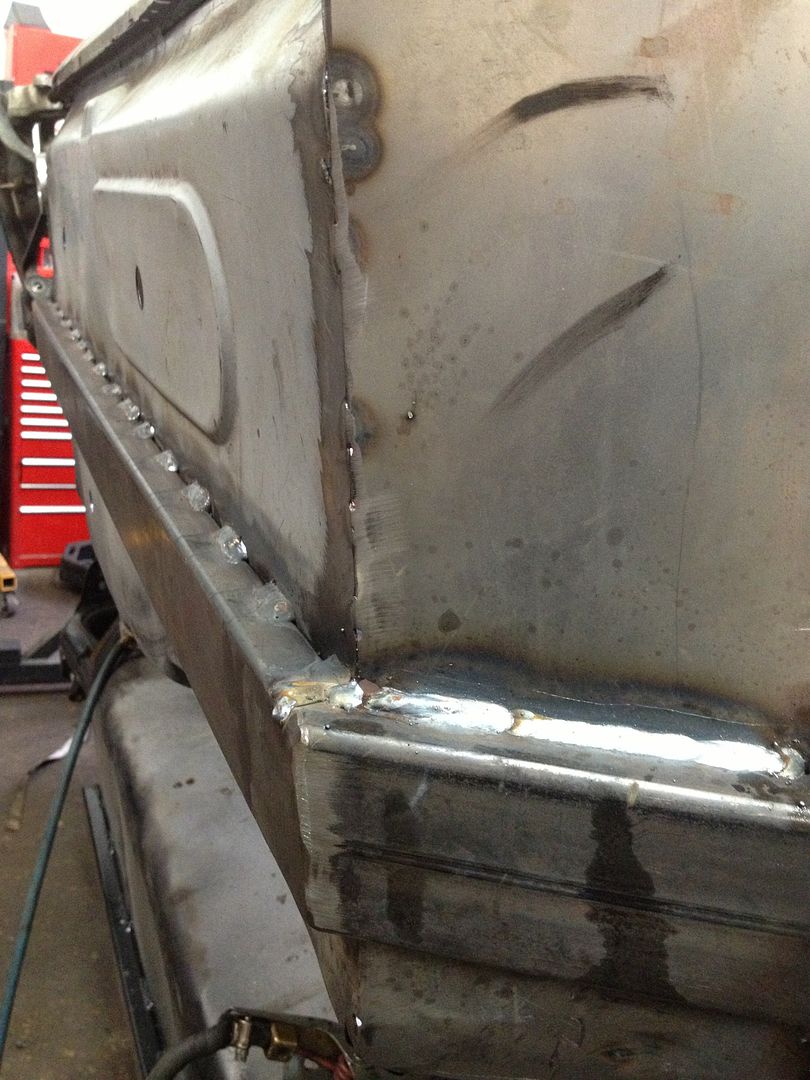
Did the passenger engine bay same as the drivers so no real process pics required:
Then I did a 1x3x.120 up the footwell at a 60* angle and all the way along the floor. The floor was bowed from welding the whole panel in but with a bit of planning and a bit of weight on it - it squared up to 0.1 degree side to side and 0.2 end to end relative to pinch weld and 0.6 degree relative to the engine bay rail - not too bad. I capped the top of the 60* piece so it's nice and flush but I might add a small drain hole for condensate inside the rails.

Nice and square
Ill match the other side up next weekend hopefully. Then tie both into rear subframe, add the 20* pieces connecting the engine frame rail with the floor rail and get some wheels bolted up and set on em!
Did the passenger engine bay same as the drivers so no real process pics required:
Then I did a 1x3x.120 up the footwell at a 60* angle and all the way along the floor. The floor was bowed from welding the whole panel in but with a bit of planning and a bit of weight on it - it squared up to 0.1 degree side to side and 0.2 end to end relative to pinch weld and 0.6 degree relative to the engine bay rail - not too bad. I capped the top of the 60* piece so it's nice and flush but I might add a small drain hole for condensate inside the rails.
Nice and square
Ill match the other side up next weekend hopefully. Then tie both into rear subframe, add the 20* pieces connecting the engine frame rail with the floor rail and get some wheels bolted up and set on em!
10-06-2013, 09:10 PM
#37
Teching In
Thread Starter
Join Date: Jan 2012
Posts: 30
Likes: 0
Received 0 Likes
on
0 Posts
Had some time today to get some done on the Z
Matched the passenger footwell, floor rail and footwell rail to the drivers.
I have to find out if the subframe fastener can stick through the mount plate for my cage main hoop. If it can't, I have to inset a nut inside of the 1x3. Anyone know if I can?
Matched the passenger footwell, floor rail and footwell rail to the drivers.
I have to find out if the subframe fastener can stick through the mount plate for my cage main hoop. If it can't, I have to inset a nut inside of the 1x3. Anyone know if I can?
Last edited by AFischer; 09-03-2018 at 03:08 PM.
10-07-2013, 06:19 AM
#39
Teching In
Thread Starter
Join Date: Jan 2012
Posts: 30
Likes: 0
Received 0 Likes
on
0 Posts
Hey Tainted thanks for the heads up, but only reason i went this way is that this LS2 intake was free. Someday I might spend the $$ on a FAST but if I port the inside of this LS2 myself, I'm pretty sure it will still perform well enough for the $.
