
Budget 1st gen camaro swap info 1969
 10-20-2012, 08:11 PM
#1

Ill post some pics up another day and more info. I couldnt find any camaro budget builds, so I figured id start my own as I am assuming most camaro owners may have money to burn on a swap like this. I know the subframe is like the 3rd gen nova but didnt see too much info there either. I am doing this swap as cheap as possible as i have several cars to do and in all honesty, i want to drive this one already and enjoy it now, not later. If the chevelle is sold ill have the nova next to do. I have a 5.3 & 6.0 to use.
Oil pan - CTSV/LSA It hangs a little below the xmember about an 1" but ill get an exact measurement when the engine mounts are made. Clears the steering easy. Lots of firewall clearance.
- i have an fbody pan but ive read it dont fit or barely does. If i feel frisky one day ill try it.
Engine mounts - i will just make my own n ill take a few pics. The frame mounts are tall n skinny welded to the frame. Im gonna cut the welds and bolt them in properly. I could buy aftermarket but this is budget i said, budget... This will be a solid mount setup.
Exhaust - pass has all the room in the world, any mani fits, fbody, truck & ill try some tbss when i
get them.
- driver has issues with the steering box. Fbody was tight or the heat shield hit. Edited this truck didn't fit
- tried some fbody shorty headers but the driver side hit the steering box.
- 4th gen long tubes ill try another day.
Last edited by LS1 pwrd NOVA; 11-15-2012 at 12:16 PM.
 10-20-2012, 08:23 PM
#2
UPDATED 11/10/12
This area will be for the cost of things I bought or had made. This will give others an idea what a true swap will/can cost. No bs here true prices. Good deals are there buts its right place right time and honestly, pure luck.
Engine prices vary as I bought a few but here it goes n these are true prices I got them for.
$400 02 6.0/4l80E 98K miles, bought truck complete running wrecked at local auction for $850 then parted it out.
$550 04 5.3 engine complete setup no tranny, 90k miles.
$800 06 5.3/4l65E truck was burned inside so harness n intake no good 60k miles, missing little stuff here n there.
$250 L33 5.3/t56 traded an lt1/t56 setup straight up. Parted out a wrecked ws6 paid $800. No harness etc or 243 heads.
$200 Ctsv pan complete
Free Ls swap plates free from a friend or made my own.
$21 Engine mounts local parts store
$6 bolts for frame mounts
??? Bolts for engine mounts
Last edited by LS1 pwrd NOVA; 11-10-2012 at 11:05 AM.
 10-20-2012, 09:49 PM
#6

Looks good. Keep the pics coming.
Trending Topics
 10-26-2012, 03:22 PM
#10
I only get to work on it during the weekends, mostly Saturdays. I am going to be taking off from work soon as I have time to use or loose so gotta use it. We made some engine plates at work but just the flat plate, not the sides to mount to the frame mounts. Will post some pics soon of the plates.
 10-26-2012, 07:05 PM
#12
The stock style motor mounts with std rubber isolators are dirt cheap & would really help reduce vibration over a solid mount. Mount them to the plates you fabbed up. That vibration will get old if you plan to drive & enjoy it a lot. 4th gen headers dont fit- the collectors are angled the wrong way. Lets see more pics along the way!!
10-26-2012, 09:43 PM
#13
On The Tree
iTrader: (1)

Join Date: Jun 2012
Location: TwinCities
Posts: 170
Likes: 0
Received 0 Likes
on
0 Posts
subscribed.. Keep the pics coming man. I'm doing the swap on mine over the winter too. Building the motor now and just about to start tearing down the car. Interested to see pics on EVERYTHING you're doing! thanks
Mine:

Mine:
10-26-2012, 10:12 PM
#14
The stock style motor mounts with std rubber isolators are dirt cheap & would really help reduce vibration over a solid mount. Mount them to the plates you fabbed up. That vibration will get old if you plan to drive & enjoy it a lot. 4th gen headers dont fit- the collectors are angled the wrong way. Lets see more pics along the way!!
Using the ctsv pan, ill need to check the distance from frame mounts to engine mounts and make sure the pan doesnt hang too low if i use something already made.
You are right that solid will get old, i remember those days of solid mounts n a big block.
Is that the only problem with 4th gen headers fitting? I have a set thats painted but if i cut them maybe they will fit? I borrowed them for fitment for now n if they fit i may get them cheap.
10-26-2012, 11:42 PM
#15
Just use a good brand of stock SBC motor mounts for 69 camaro. You'll need the narrow style to match your tall/narrow frame stands. I used some I bought off rock auto on my 68 firebird (i used short/wide style stands so I got the wider mounts. I think they were under $10 each. I test fit the 4th gen in my 69 camaro, but I also have a rack & pinion. They may not fit w/ steering box. Something along these lines: http://www.ebay.com/itm/ANCHOR-2267-...&forceRpt=true
 11-09-2012, 01:35 PM
#17
Ok it's been a few weeks, a good friend died on a motorcycle the last day I posted here. Had to help the family with support......
Ok so I did some work n here are some pics & info. Not too much done but did something at least.
Here are my mounts that were welded to the subframe. I don't know why they did it like this but I do recall him saying the BB didn't fit the mounts in the stock location. I grind the welds off then put them back in the factory holes. Had to buy new bolts but that wasn't much. Anyone know which mounts these are and are they correct as in left is left n right is right?
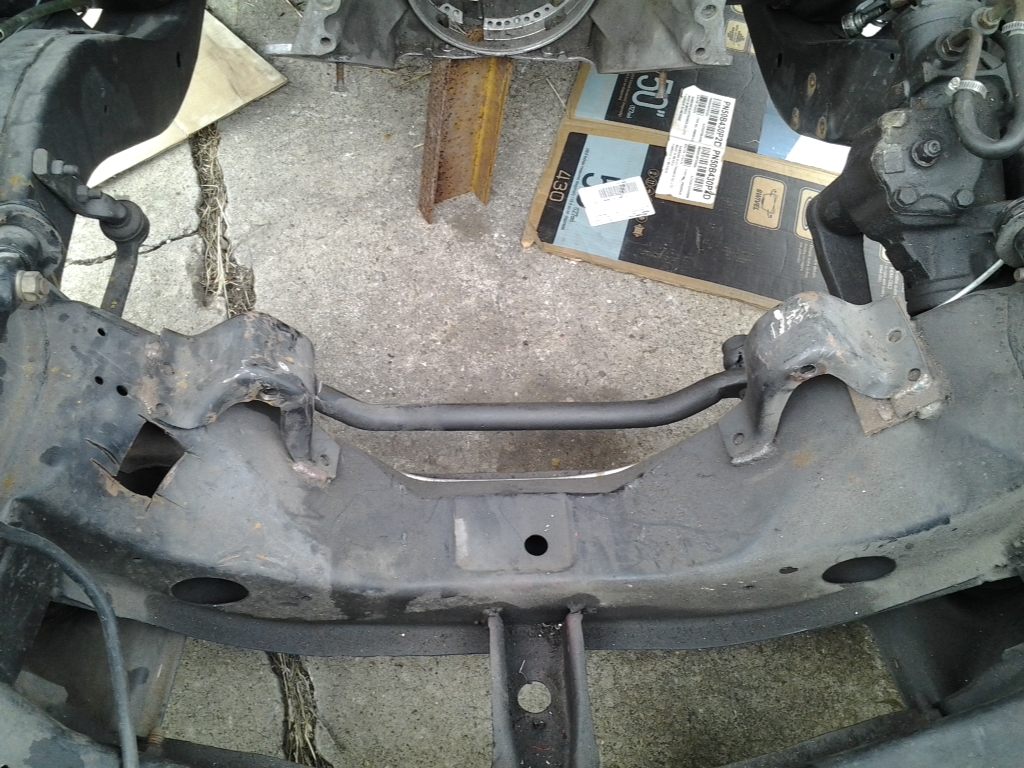
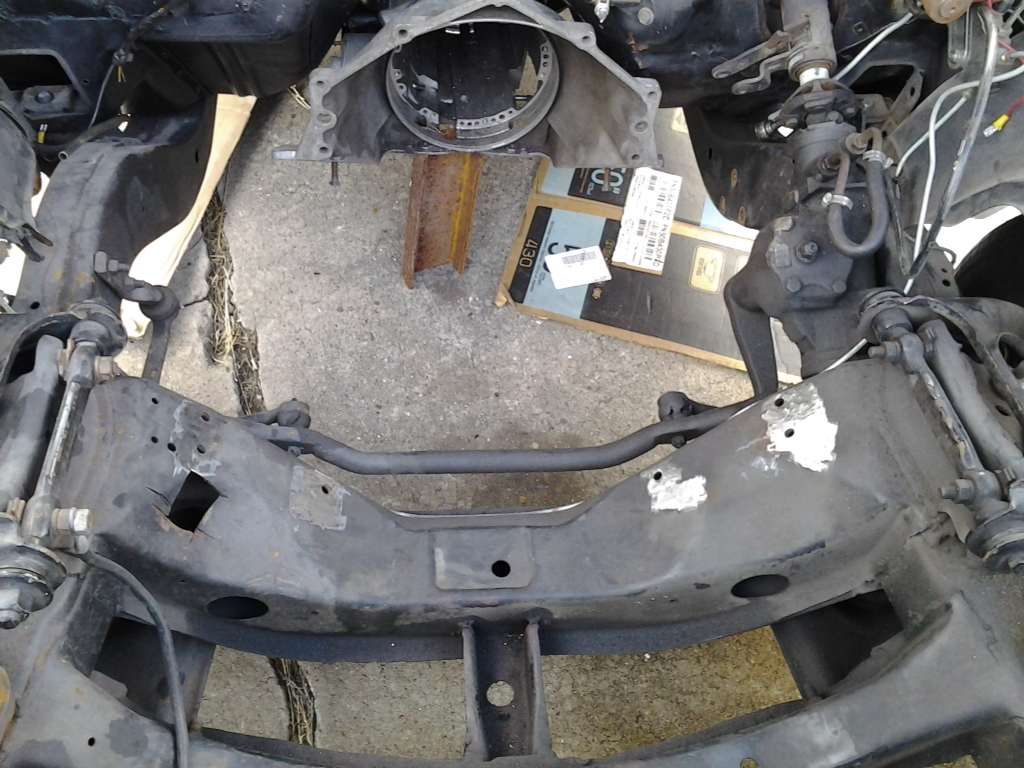
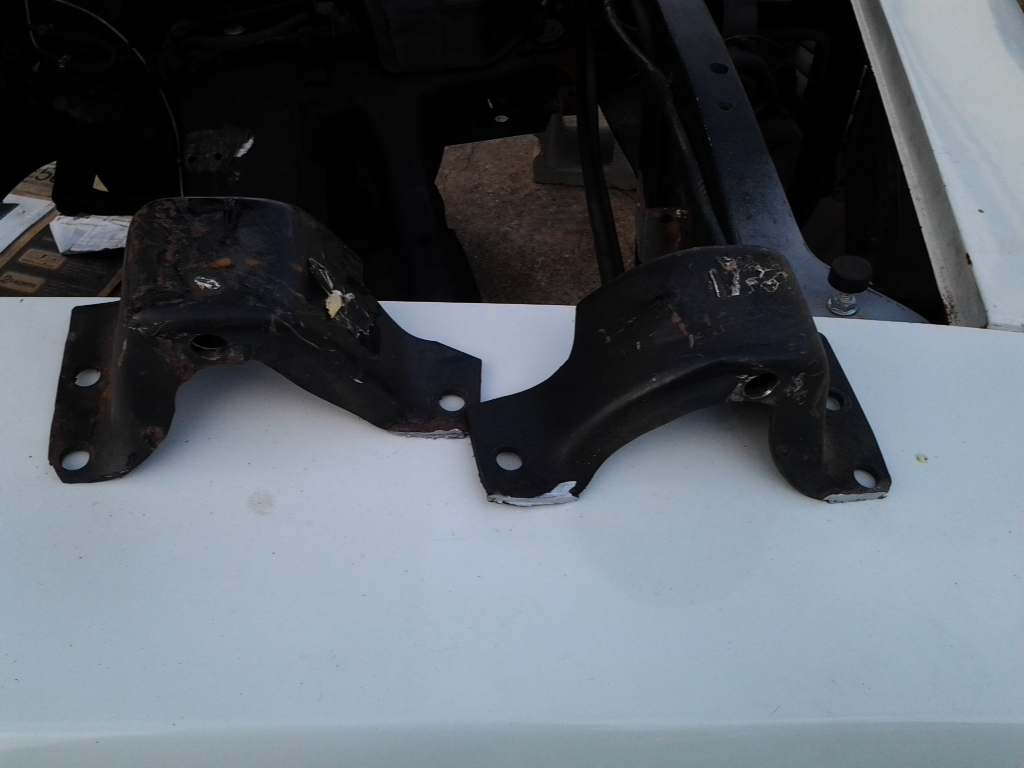
I also need to patch up the hole they put in the subframe. His brother cut it because of the mechanical fuel pump hitting right there, but it was the mounts were mounted wrong.
Ok so I did some work n here are some pics & info. Not too much done but did something at least.
Here are my mounts that were welded to the subframe. I don't know why they did it like this but I do recall him saying the BB didn't fit the mounts in the stock location. I grind the welds off then put them back in the factory holes. Had to buy new bolts but that wasn't much. Anyone know which mounts these are and are they correct as in left is left n right is right?
I also need to patch up the hole they put in the subframe. His brother cut it because of the mechanical fuel pump hitting right there, but it was the mounts were mounted wrong.
11-09-2012, 01:54 PM
#18
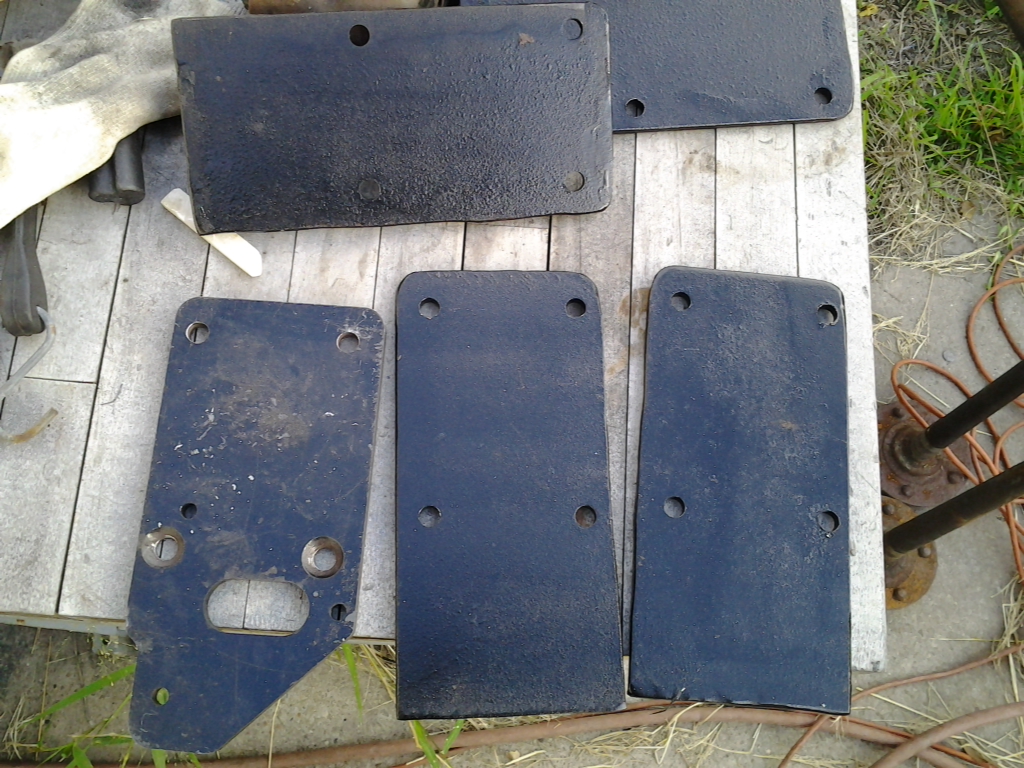
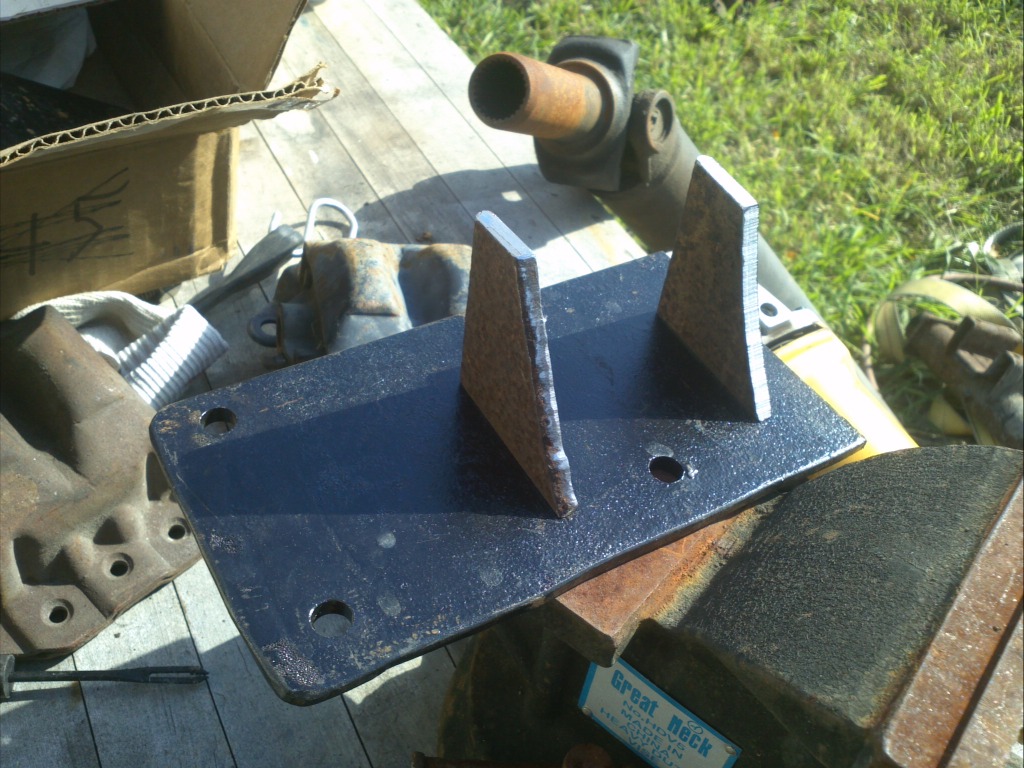
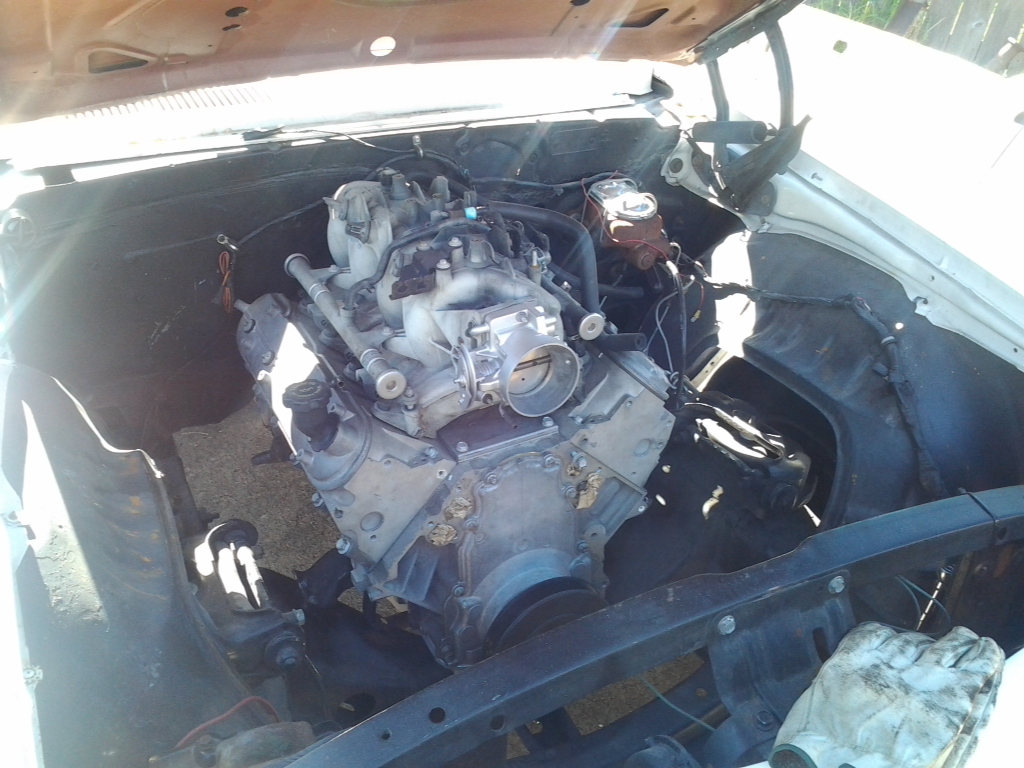
Here are a few pics of the engine plates we made at work. I had some engine plates a friend let me borrow. He said it was for a camaro but when I mocked them up, they wouldn't line up with the frame mounts. So we made our own. I will be going solid mounts for now. This may make the car not feel smooth while idling or driving, but its a stock engine so how bad can it be? I'll soon find out when it's running. I will change to rubber or poly mounts but not for now as this is low budget camaro swap for now. Or is it ever a low budget swap?
Also don't laugh at my side mounts, it was a quick mockup..... Haha...
Also don't laugh at my side mounts, it was a quick mockup..... Haha...
11-09-2012, 02:01 PM
#19
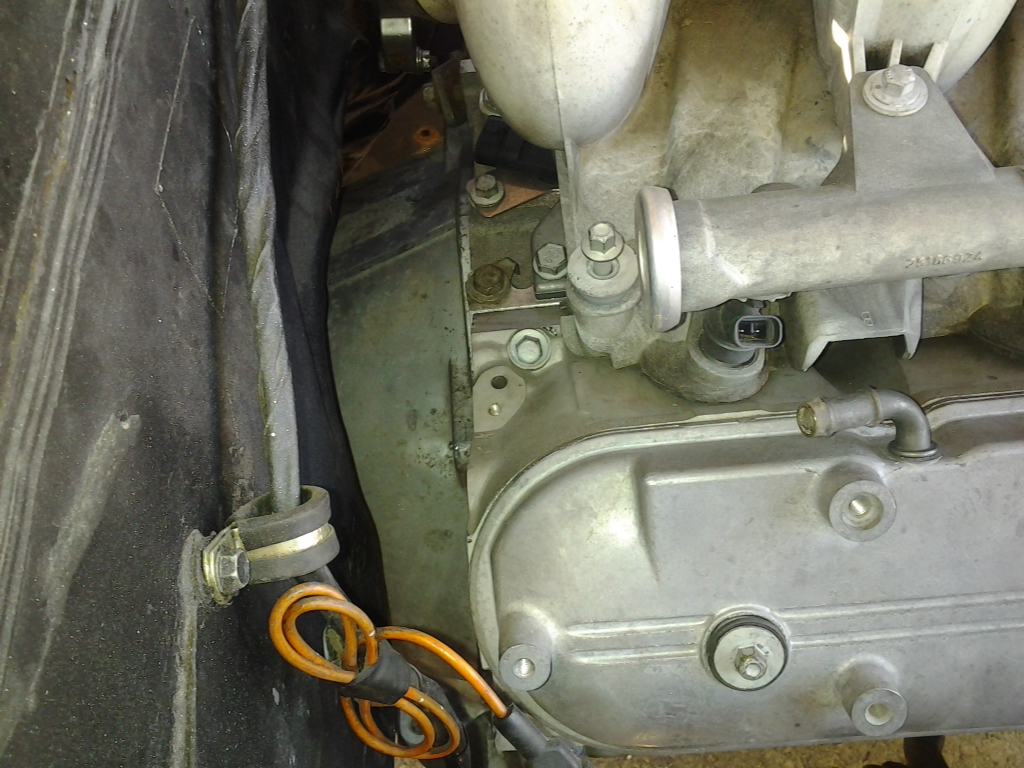
Here's how the ctsv pan hangs on the camaro. It's about an inch or a little more. Now if I lower the car, it will be a problem. I could lift the engine higher, but the truck intake will probably not fit as it is high enough already. I will have to smooth the truck intake for more clearance or use an ls1 intake I have then ill have all the room in the world. I just hear better things about the truck intake though so I wanna keep it. Once I smooth it out I may lift the engine a little higher. Then the pan may hang less than an inch.
I will weld angle iron, a good thick piece, to the bottom of the subframe to protect the oil pan. I don't know why people don't do this. I'd rather have a banged up angle iron or subframe first before I loose an oil pan or worse yet, an engine. It'll be easy to weld and easy to remove if need be. Just a little time and effort. I will take pics of this when or if I need to do it.
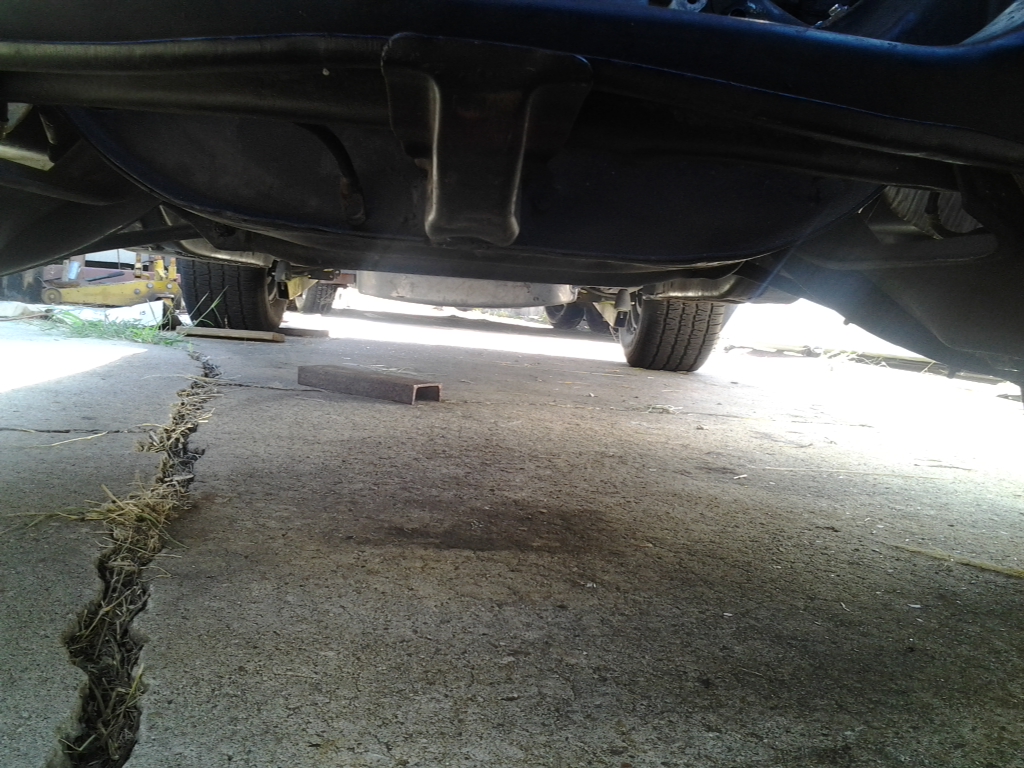
Here is how close I have the pan to the subframe. I used two pieces of steel so I could remove the engine hoist to place the intake on checking hood clearance. The hood does close as it sits. It isn't level but I made it pretty level after this pic was takin.
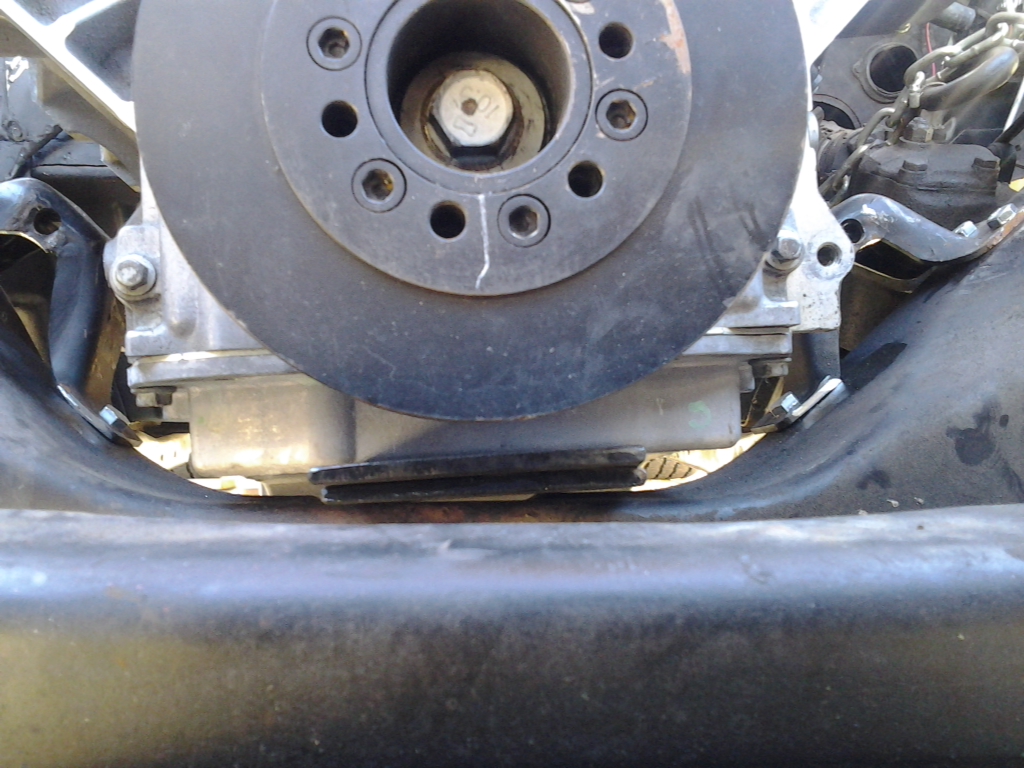
Here's how far it is from the steering.
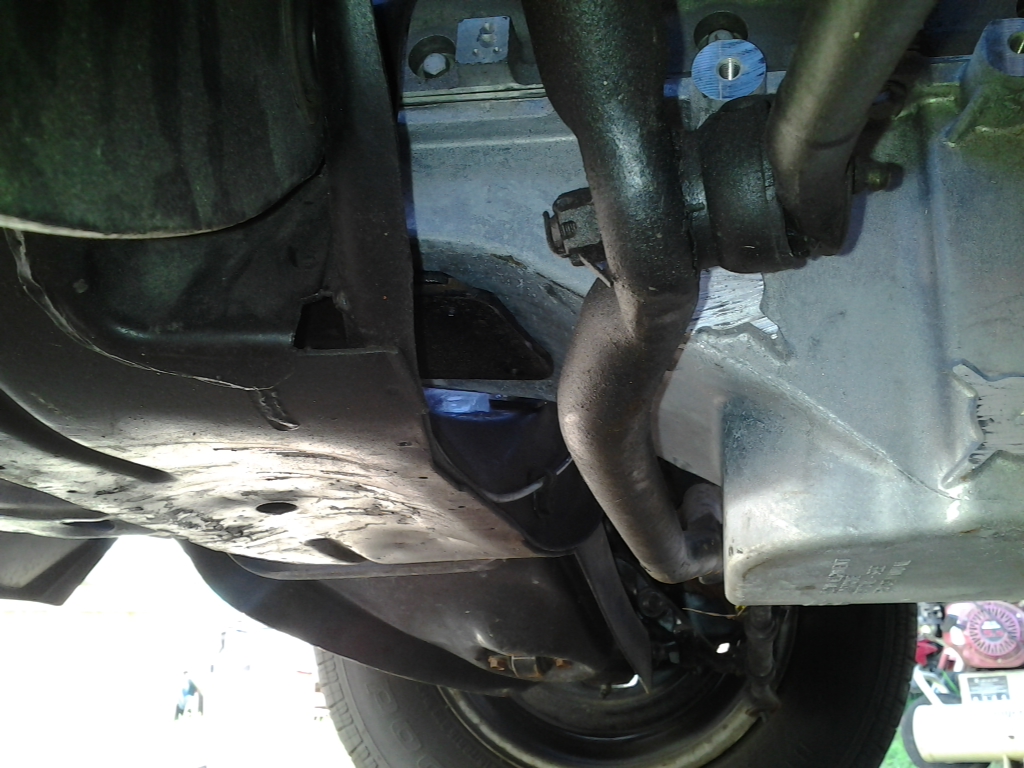
How close it looks like it is sticking out. The hood did close though and I couldn't tell if it hit the hood.
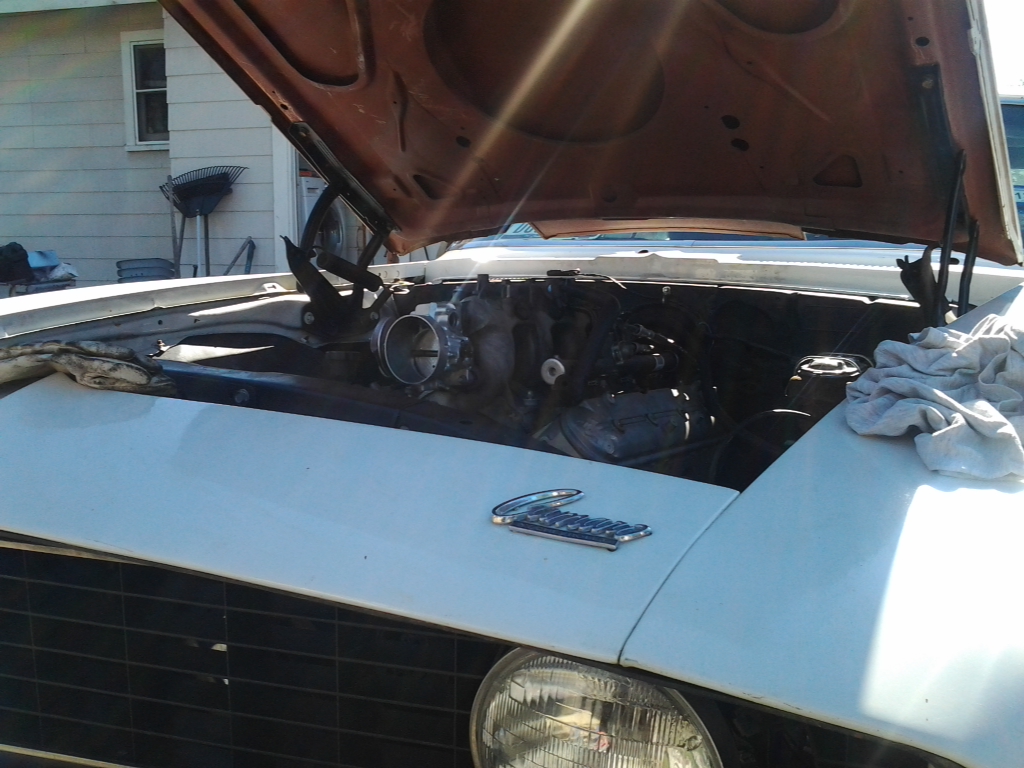
Lots of firewall clearance, the pan is about less than an inch from the steering. I don't know if that will be enough but I have lots of room to play with on moving the engine back.
I will weld angle iron, a good thick piece, to the bottom of the subframe to protect the oil pan. I don't know why people don't do this. I'd rather have a banged up angle iron or subframe first before I loose an oil pan or worse yet, an engine. It'll be easy to weld and easy to remove if need be. Just a little time and effort. I will take pics of this when or if I need to do it.
Here is how close I have the pan to the subframe. I used two pieces of steel so I could remove the engine hoist to place the intake on checking hood clearance. The hood does close as it sits. It isn't level but I made it pretty level after this pic was takin.
Here's how far it is from the steering.
How close it looks like it is sticking out. The hood did close though and I couldn't tell if it hit the hood.
Lots of firewall clearance, the pan is about less than an inch from the steering. I don't know if that will be enough but I have lots of room to play with on moving the engine back.
Last edited by LS1 pwrd NOVA; 11-09-2012 at 03:25 PM.
11-09-2012, 02:20 PM
#20
Youll have to measure the width of the mounts to see which ones they are. They look like short/wide but measure to be sure. If you are going to eventually use motor mounts, spend the $10-$15 now to put the stock ones I linked to above. Why go through all the trouble of making some & then fighting to removed the ears from the plates you made all while the motor is in the car. Plus it will be much more enjoyable to drive. Just my advise to ward off big headache later. Here's another link to a motor/plate setup that should work well with your swap. This puts bellhousing in stock location, making it easier to use either a T350 trans or 4L60 with either stock or bolt on aftermarket cross member. That directly leads to a driveline angle that is manageable. Nothing worse than driveline vibration, especially with solid motor mounts. Keep us posted, like pics so far! Scott
http://www.ebay.com/itm/330818959960...84.m1423.l2649
http://www.ebay.com/itm/330818959960...84.m1423.l2649