
Project "Blasphemy" - LSx Foxbody


 09-28-2013, 11:49 PM
#42
 10-04-2013, 02:34 PM
#44
some more pieces of the puzzle showed up today....
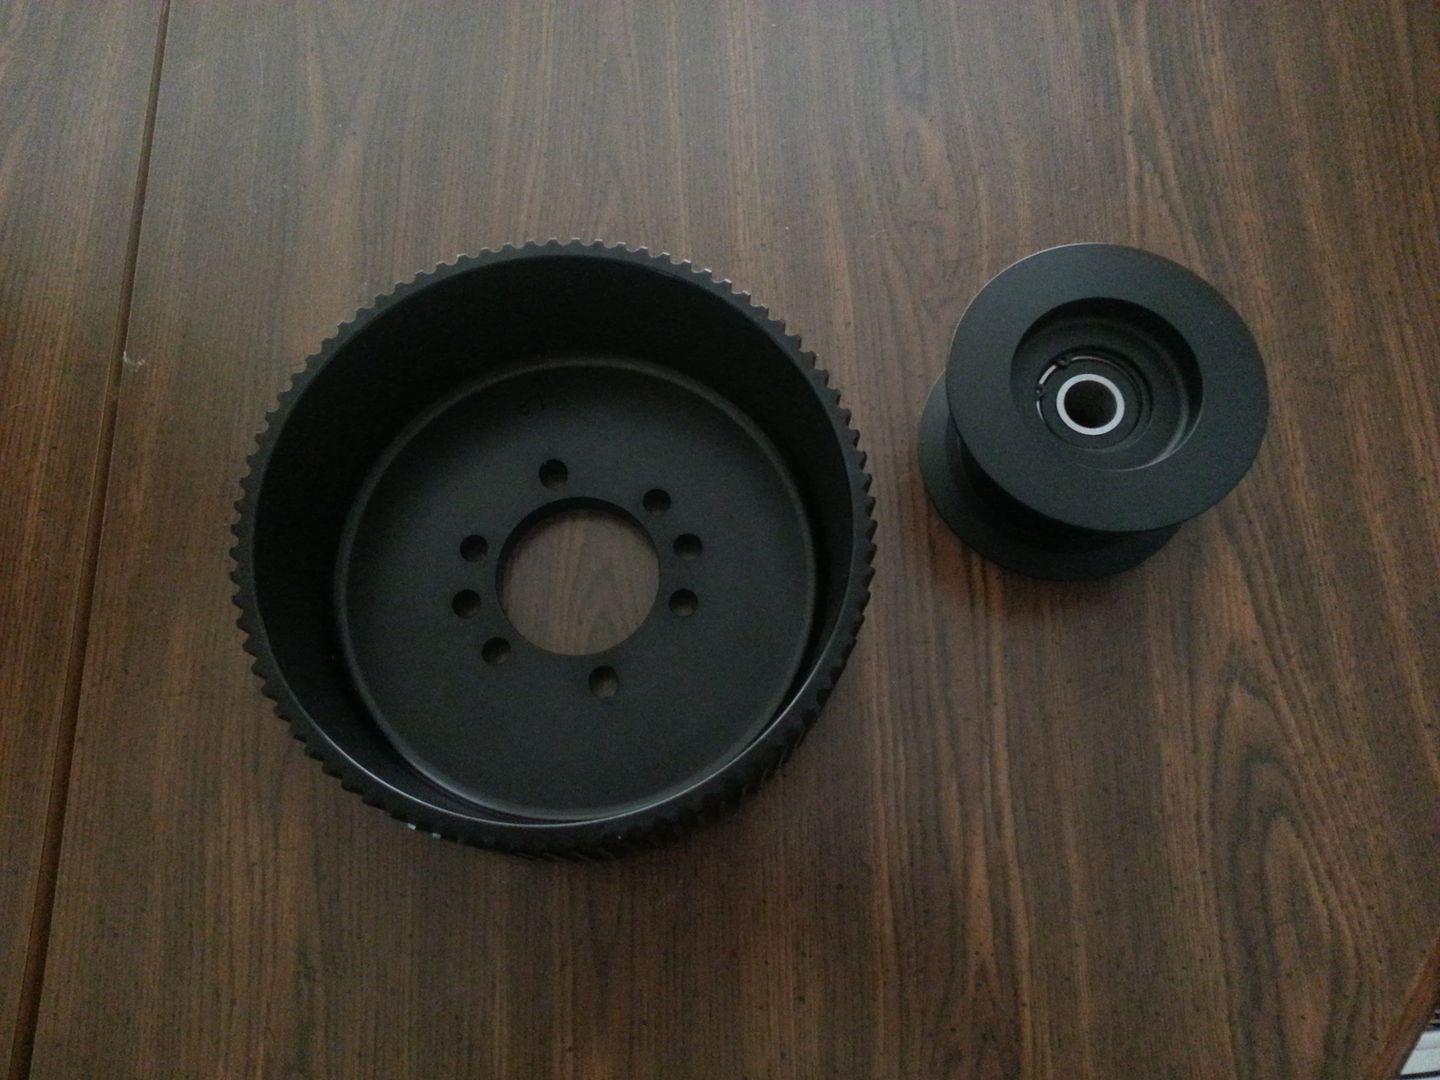
81 tooth Main Crank Cog Pulley, 3" Idler Cog Pulley
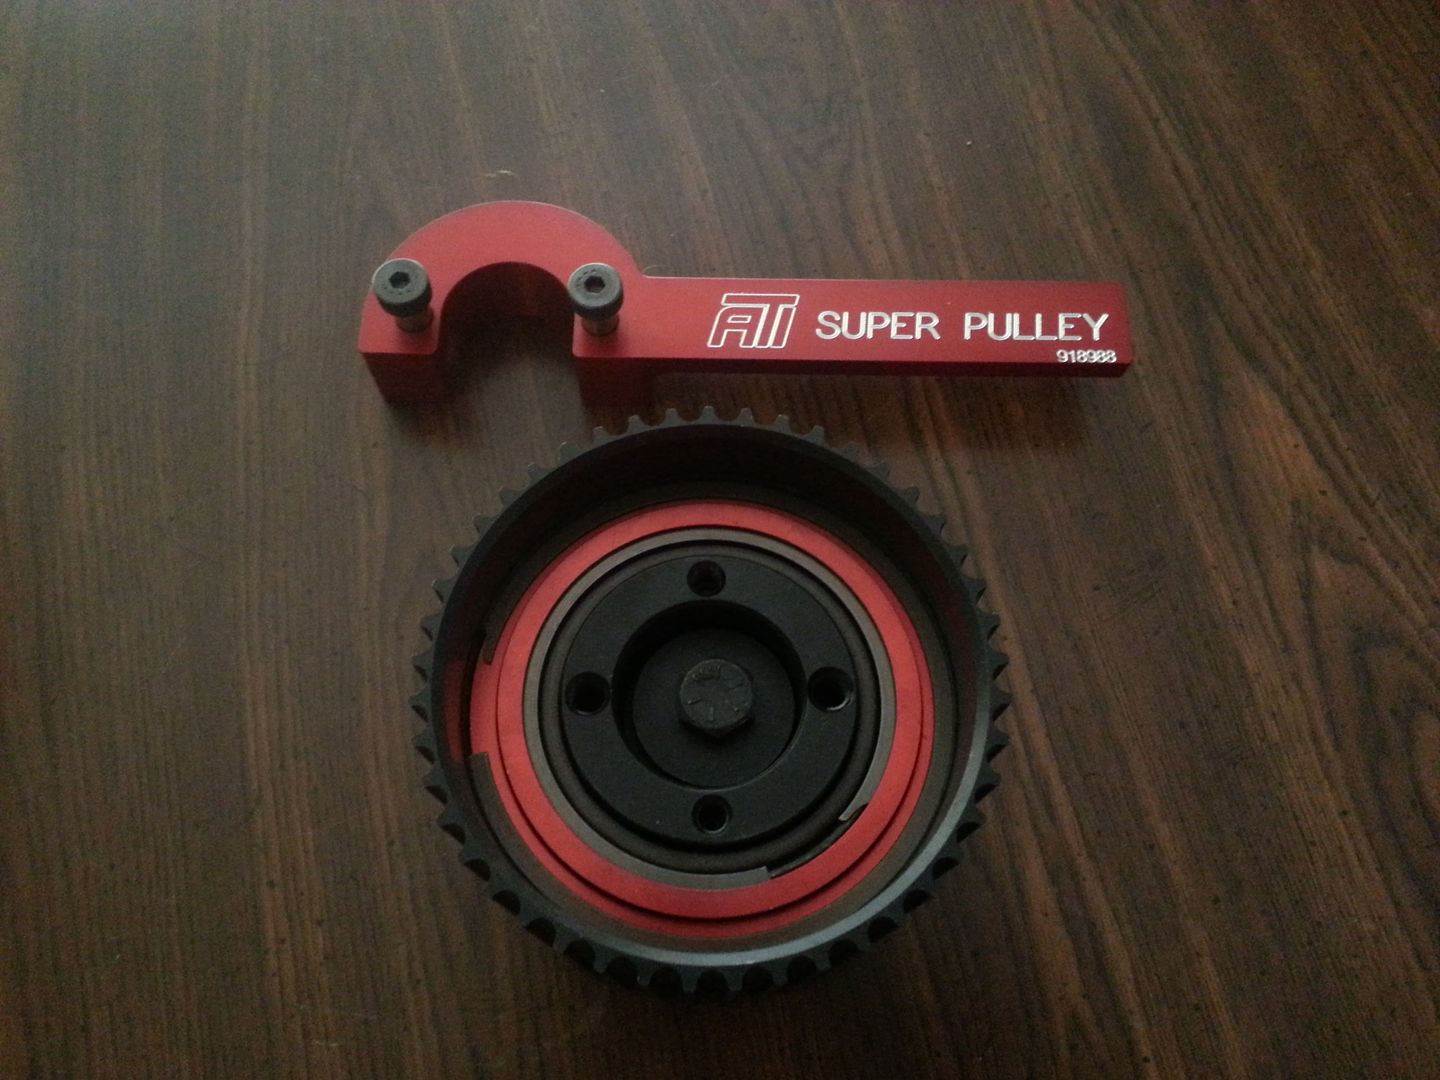
and the ATI 45 Tooth Sprag "Super Pulley"
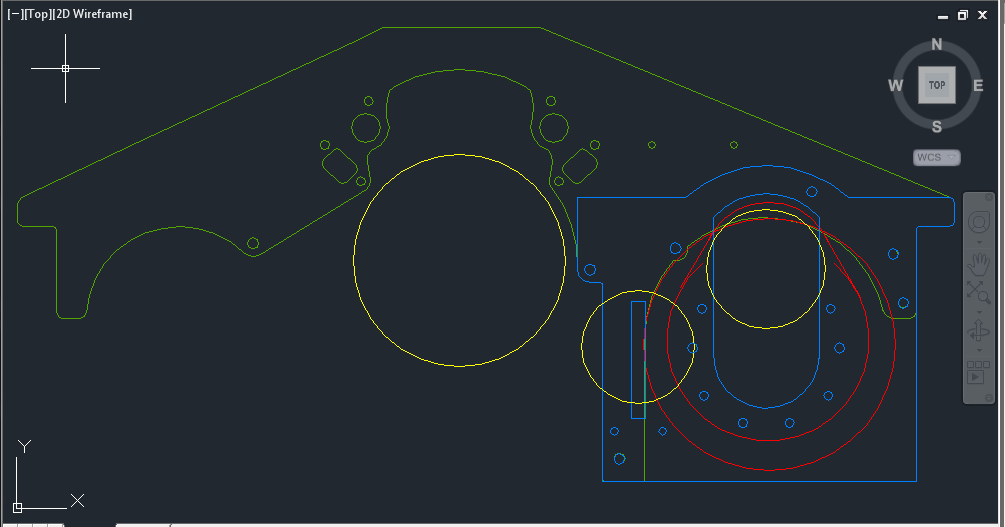
I also spent a bunch of time in AutoCAD designing a mount for the supercharger and modifying My Motor plate as well.
In this Drawing, Green is my Motor Plate, Blue is the Bracket I have designed for the F1c, and Yellow represents the COG Pulleys and the Red is the Supercharger.
I stared out with some Foam and making a mock up super charger, purposely made it just slightly oversized so I could make sure t would fit where I wanted to...
once I found a good home in my engine bay, I made sure of forwards backwards spacing...and proceeded to measure for space for the bracket, and started making things out of cardboard to figure out what would work and what wouldnt...
i ended up with that cad drawing above....
the Bracket and Motor Plate file was sent to the WaterJet earlier this week, so hopefully I will get something back sometime next week.
I bought some spacer stock, and I just have to order bolts...gonna mock t up with some threaded Rod for now till I figure out exactly what length I need for everything.
oh...and I still have to measure for a Cog belt once the thing is hanging on my car..LOL
81 tooth Main Crank Cog Pulley, 3" Idler Cog Pulley
and the ATI 45 Tooth Sprag "Super Pulley"


I also spent a bunch of time in AutoCAD designing a mount for the supercharger and modifying My Motor plate as well.
In this Drawing, Green is my Motor Plate, Blue is the Bracket I have designed for the F1c, and Yellow represents the COG Pulleys and the Red is the Supercharger.

I stared out with some Foam and making a mock up super charger, purposely made it just slightly oversized so I could make sure t would fit where I wanted to...
once I found a good home in my engine bay, I made sure of forwards backwards spacing...and proceeded to measure for space for the bracket, and started making things out of cardboard to figure out what would work and what wouldnt...
i ended up with that cad drawing above....
the Bracket and Motor Plate file was sent to the WaterJet earlier this week, so hopefully I will get something back sometime next week.
I bought some spacer stock, and I just have to order bolts...gonna mock t up with some threaded Rod for now till I figure out exactly what length I need for everything.
oh...and I still have to measure for a Cog belt once the thing is hanging on my car..LOL
10-06-2013, 05:06 PM
#45
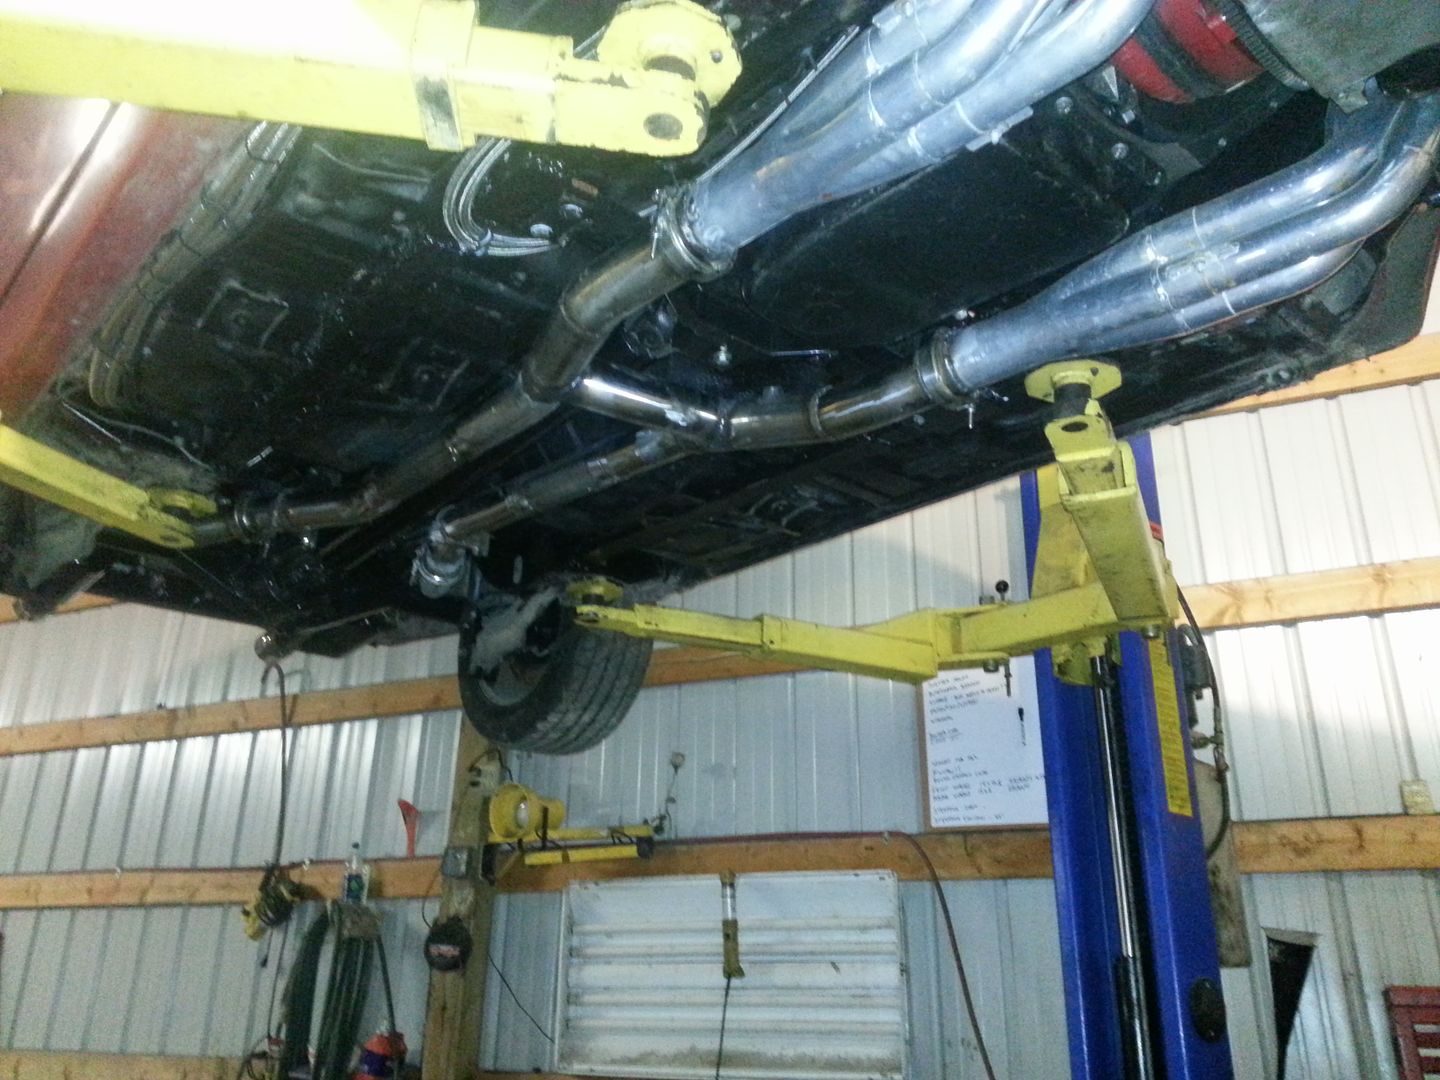
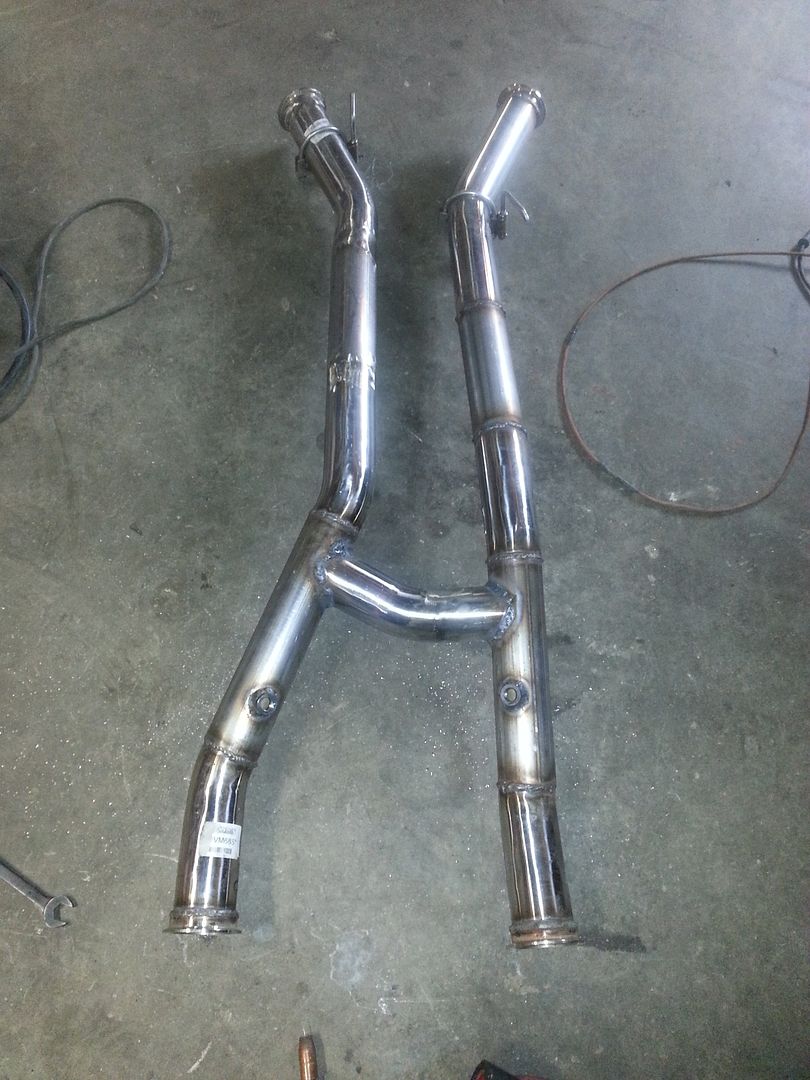
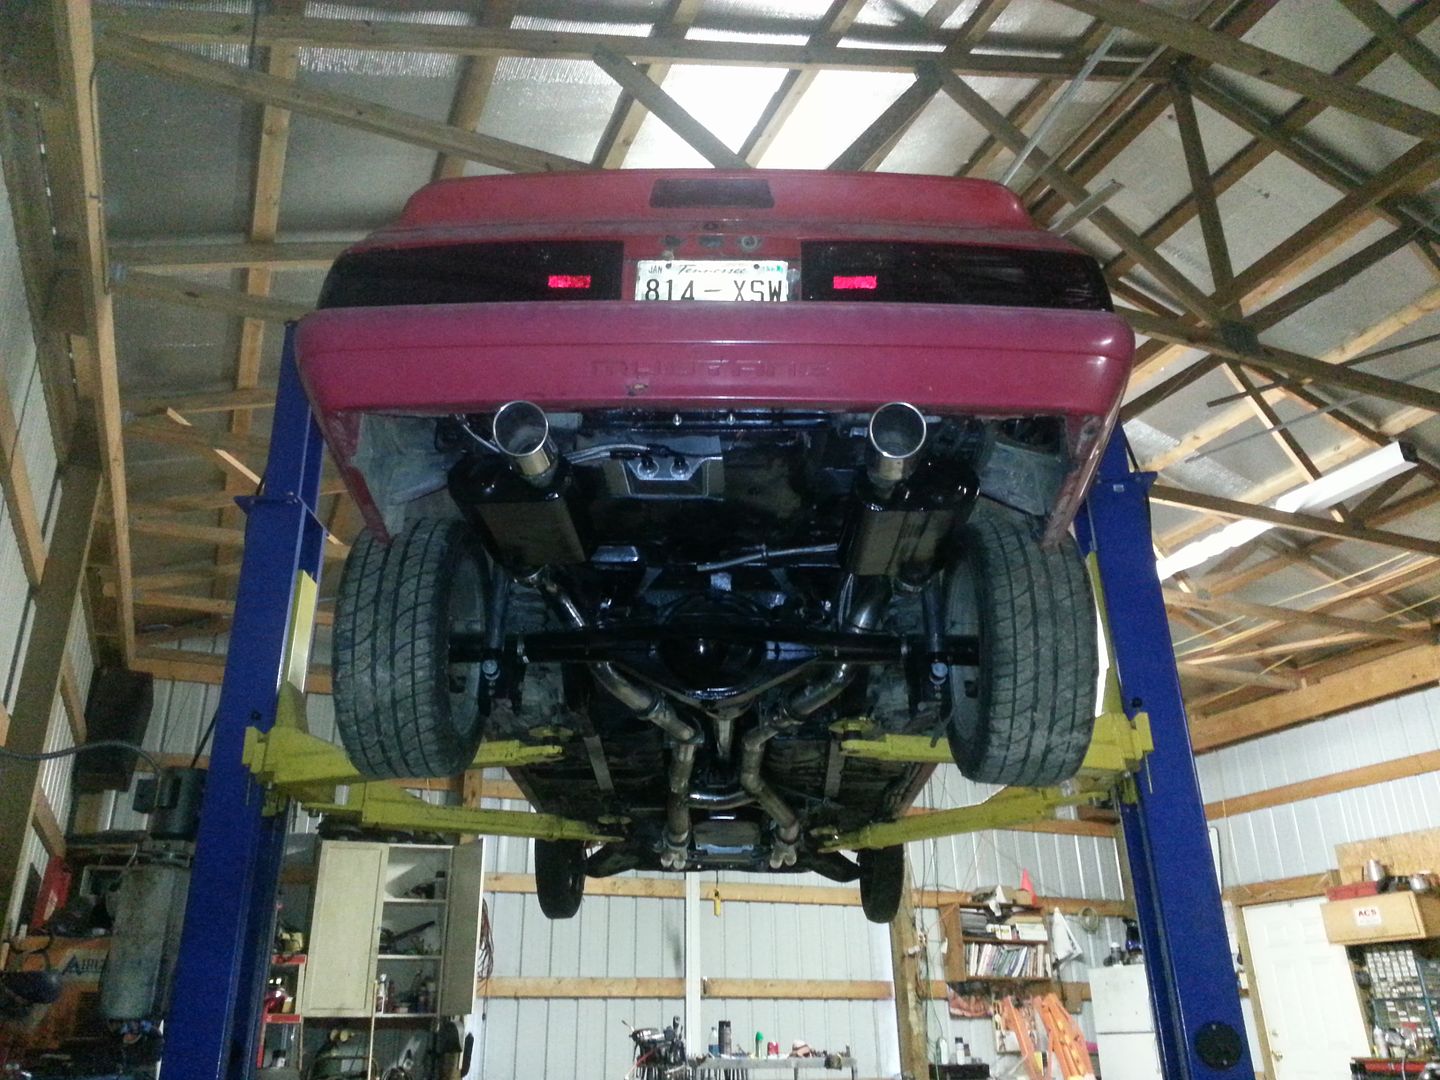
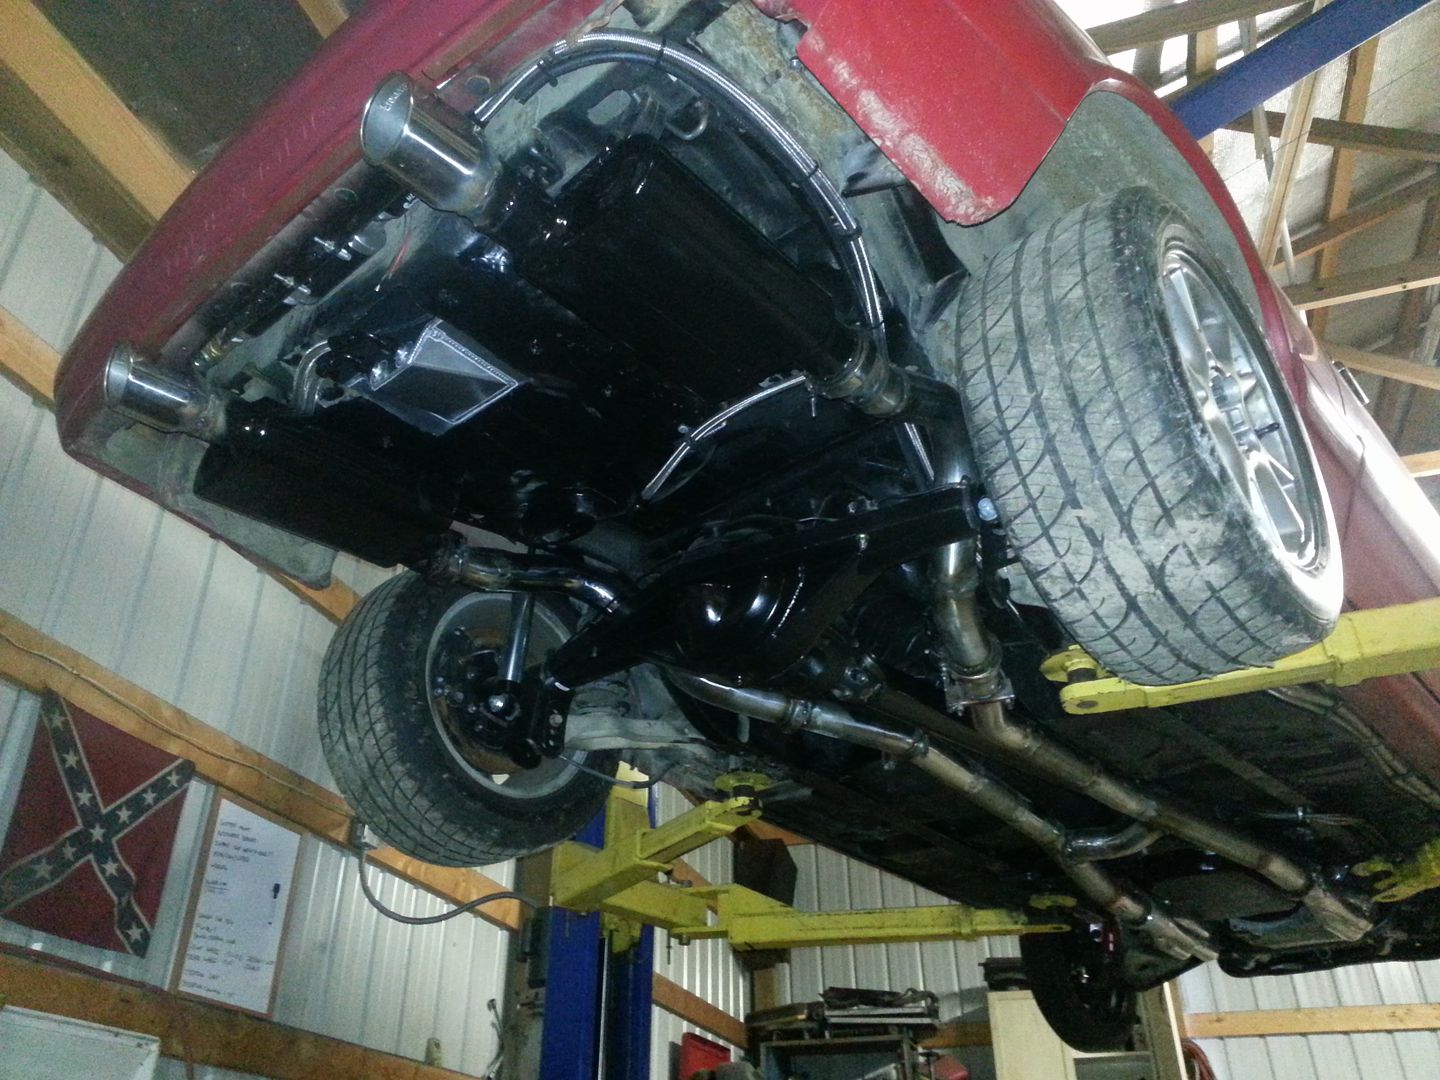
Got around to Finishing up the Exhaust....
I'm planning on making a set of shorty Dumps for the track at some point...so I made this so it was easy to remove and swap over...
goes in and comes out really easily with no extra help needed from a 2nd person... I dont even have to use a stand or a jack to help hold it when I remove it.
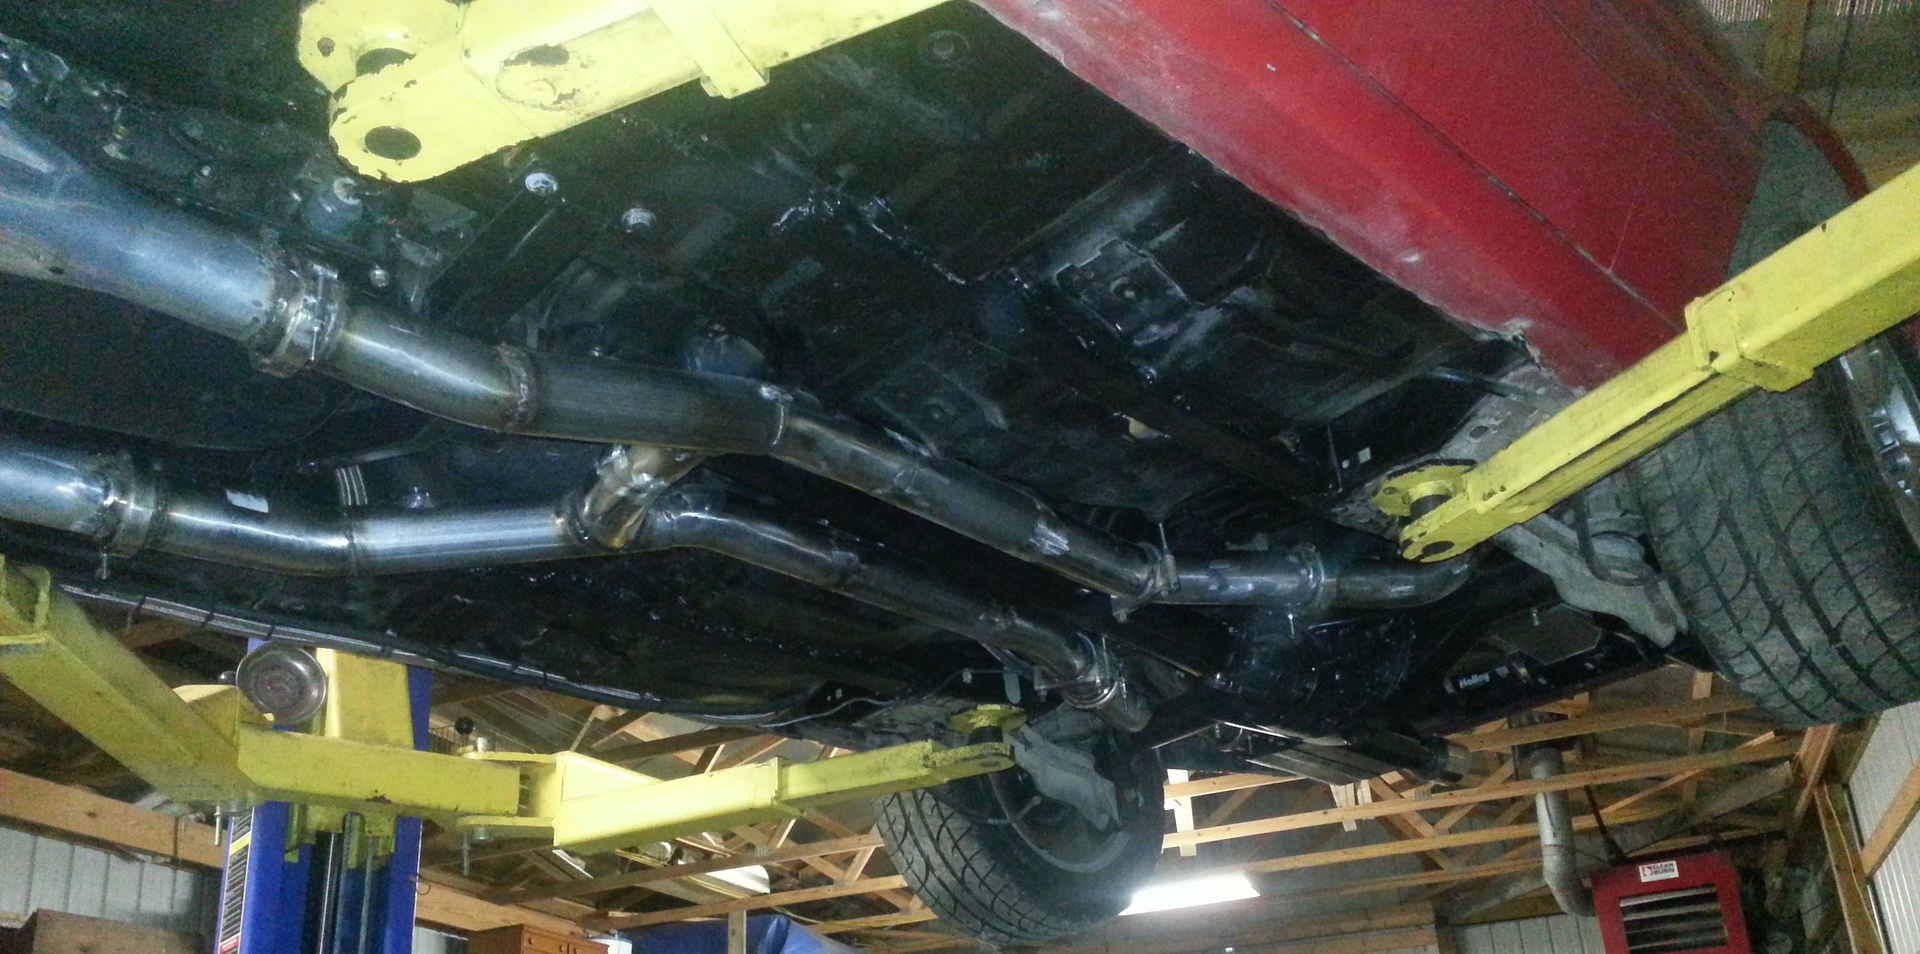
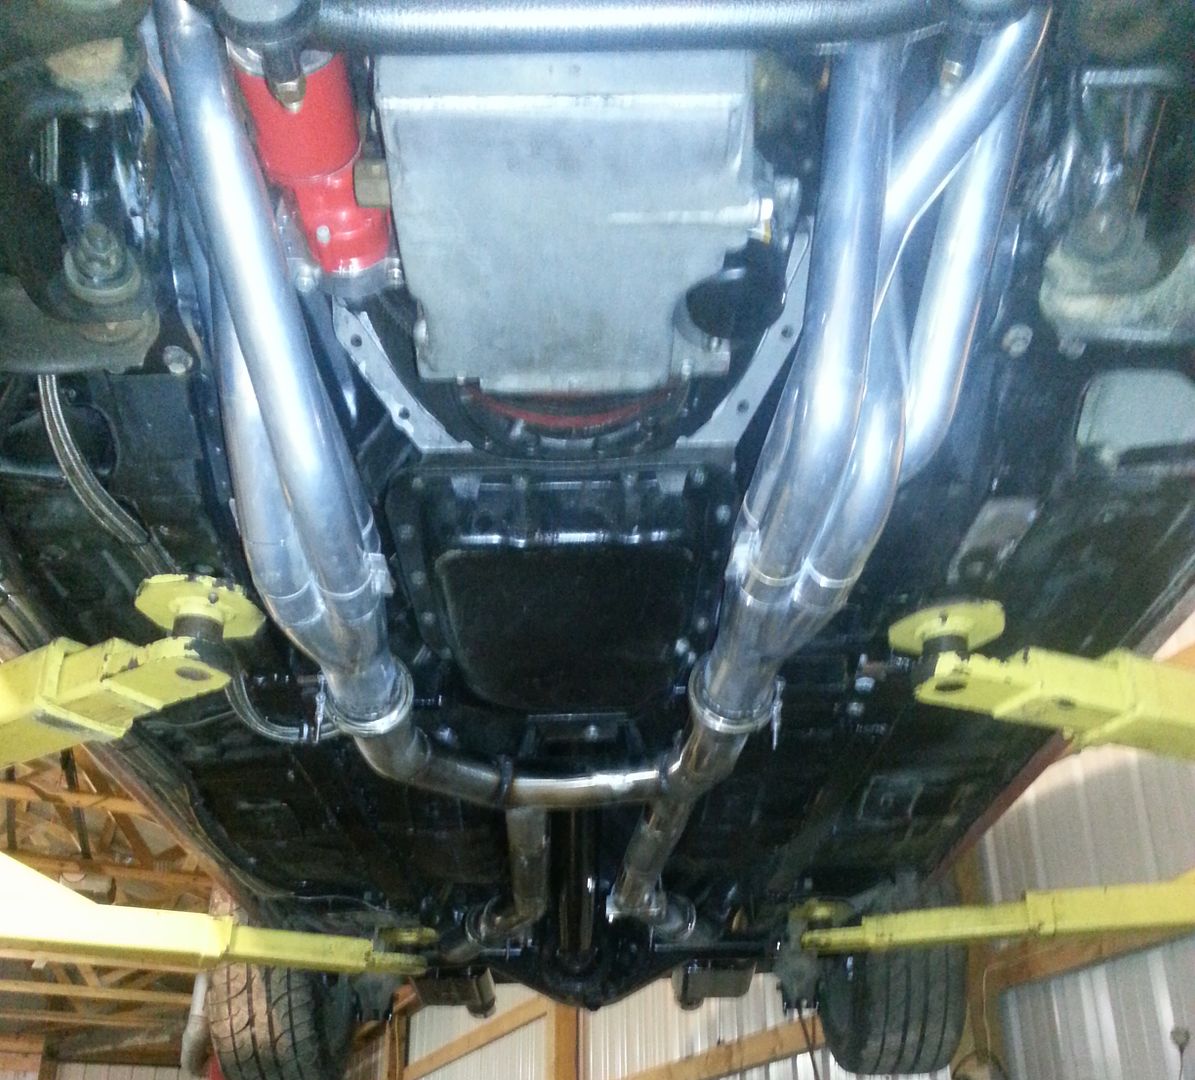
Just the H-Pipe Section.....
Rear View
I'm planning on making a set of shorty Dumps for the track at some point...so I made this so it was easy to remove and swap over...
goes in and comes out really easily with no extra help needed from a 2nd person... I dont even have to use a stand or a jack to help hold it when I remove it.


Just the H-Pipe Section.....

Rear View


 10-12-2013, 07:28 PM
#48
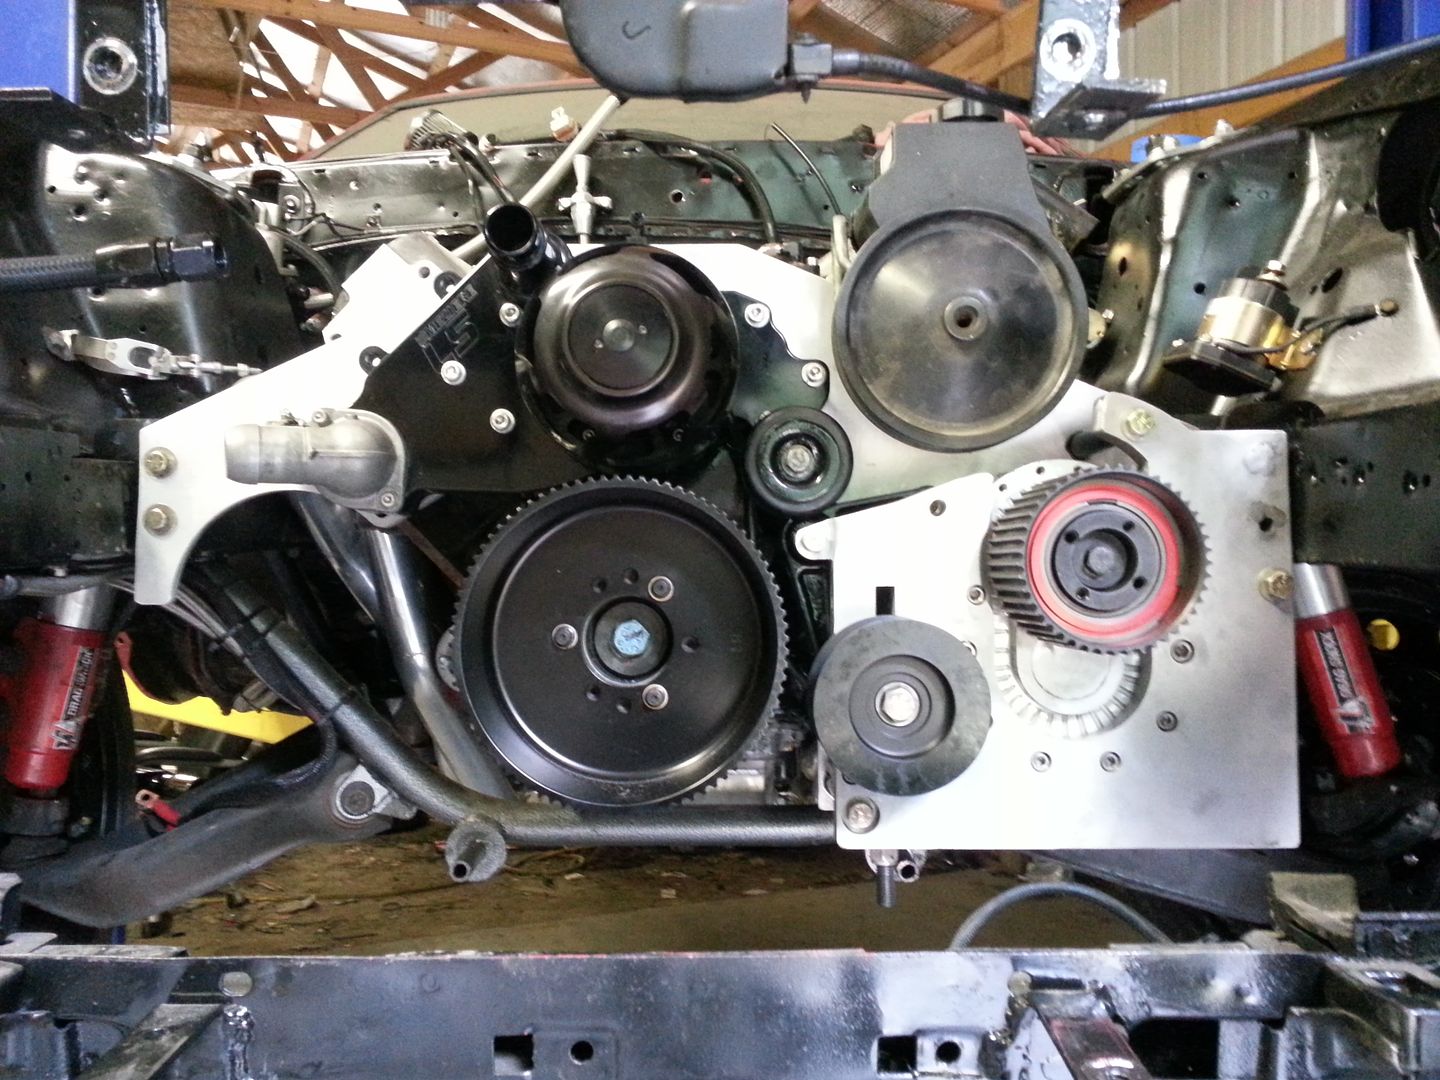
Today's Racecar Progress.....
Pulled the Heads,Rockers, Lifters, Cam.....
Did a little Cleanup....
Put in Morel 5274 Link Bar Lifters
Put in a 252/274 .646/.646 113+4 cam
Clearanced the heads for the Jesel Sportsman Adjustable Rockers
Mounted the Rocker pedestals.
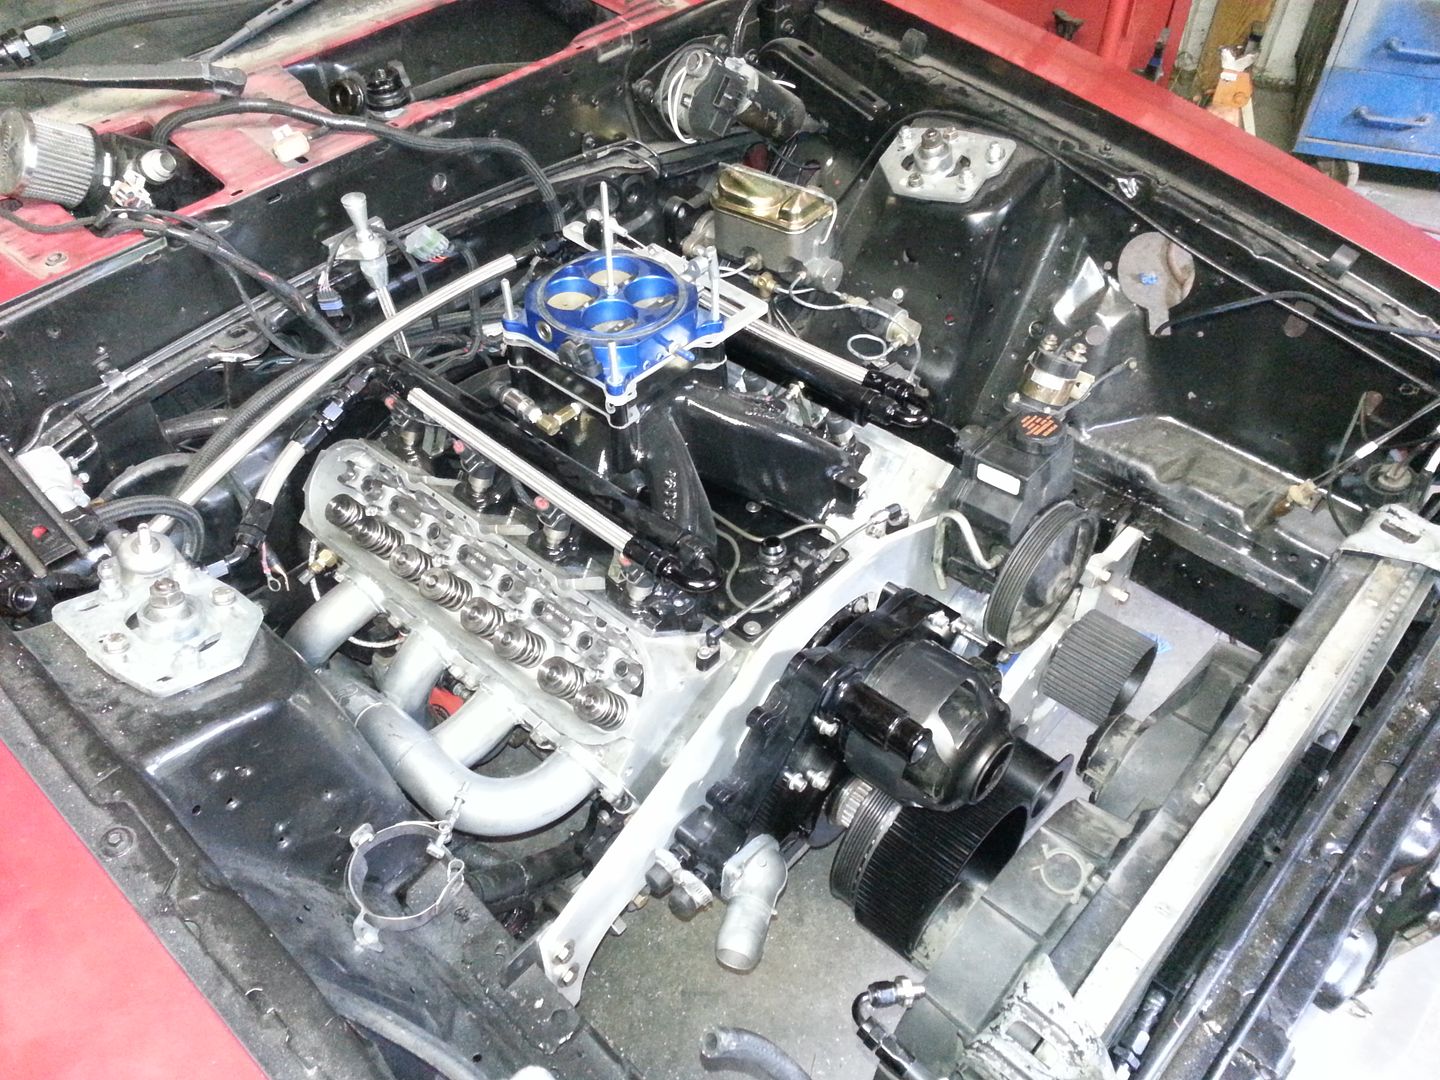
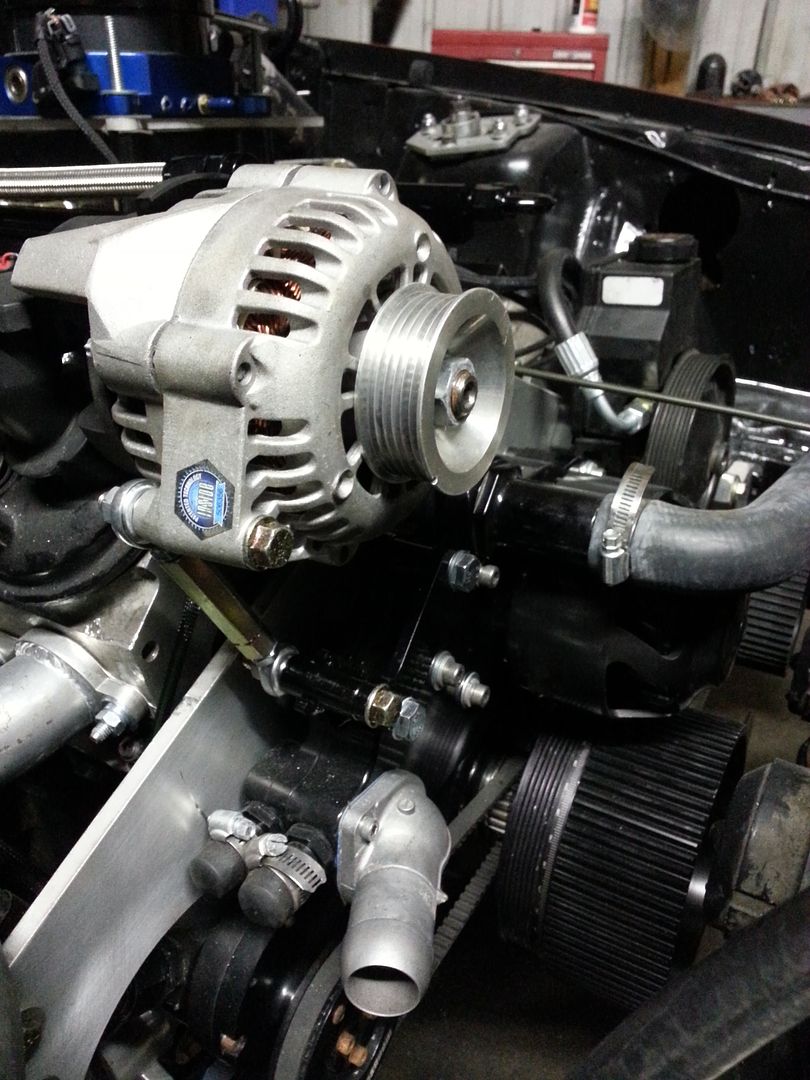
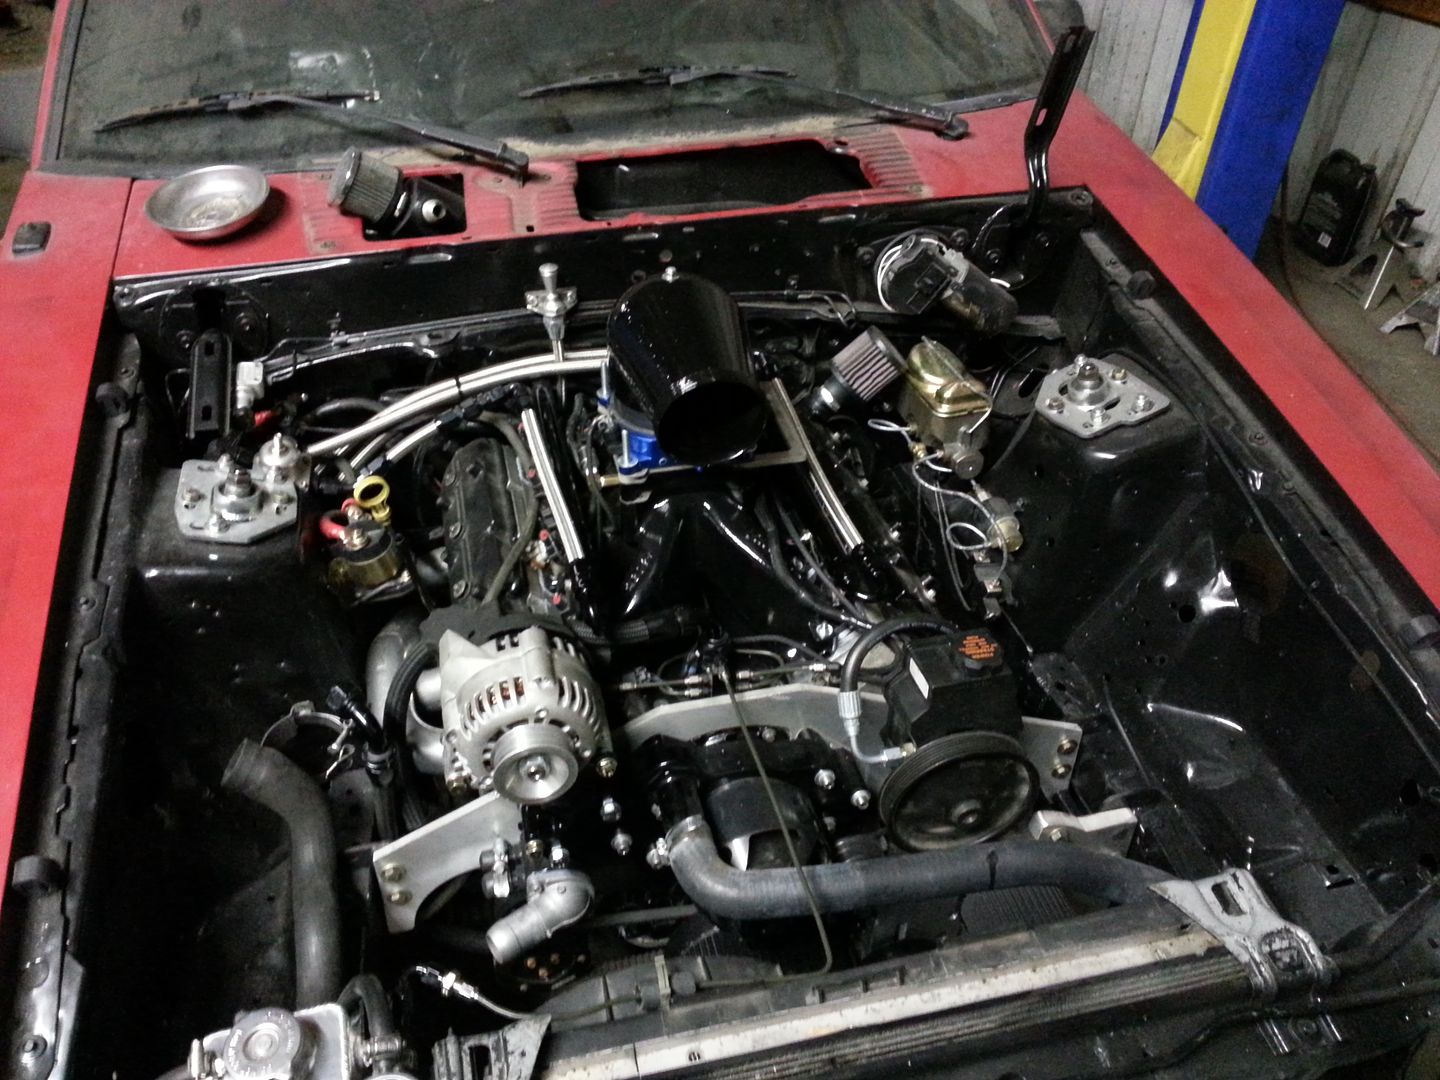
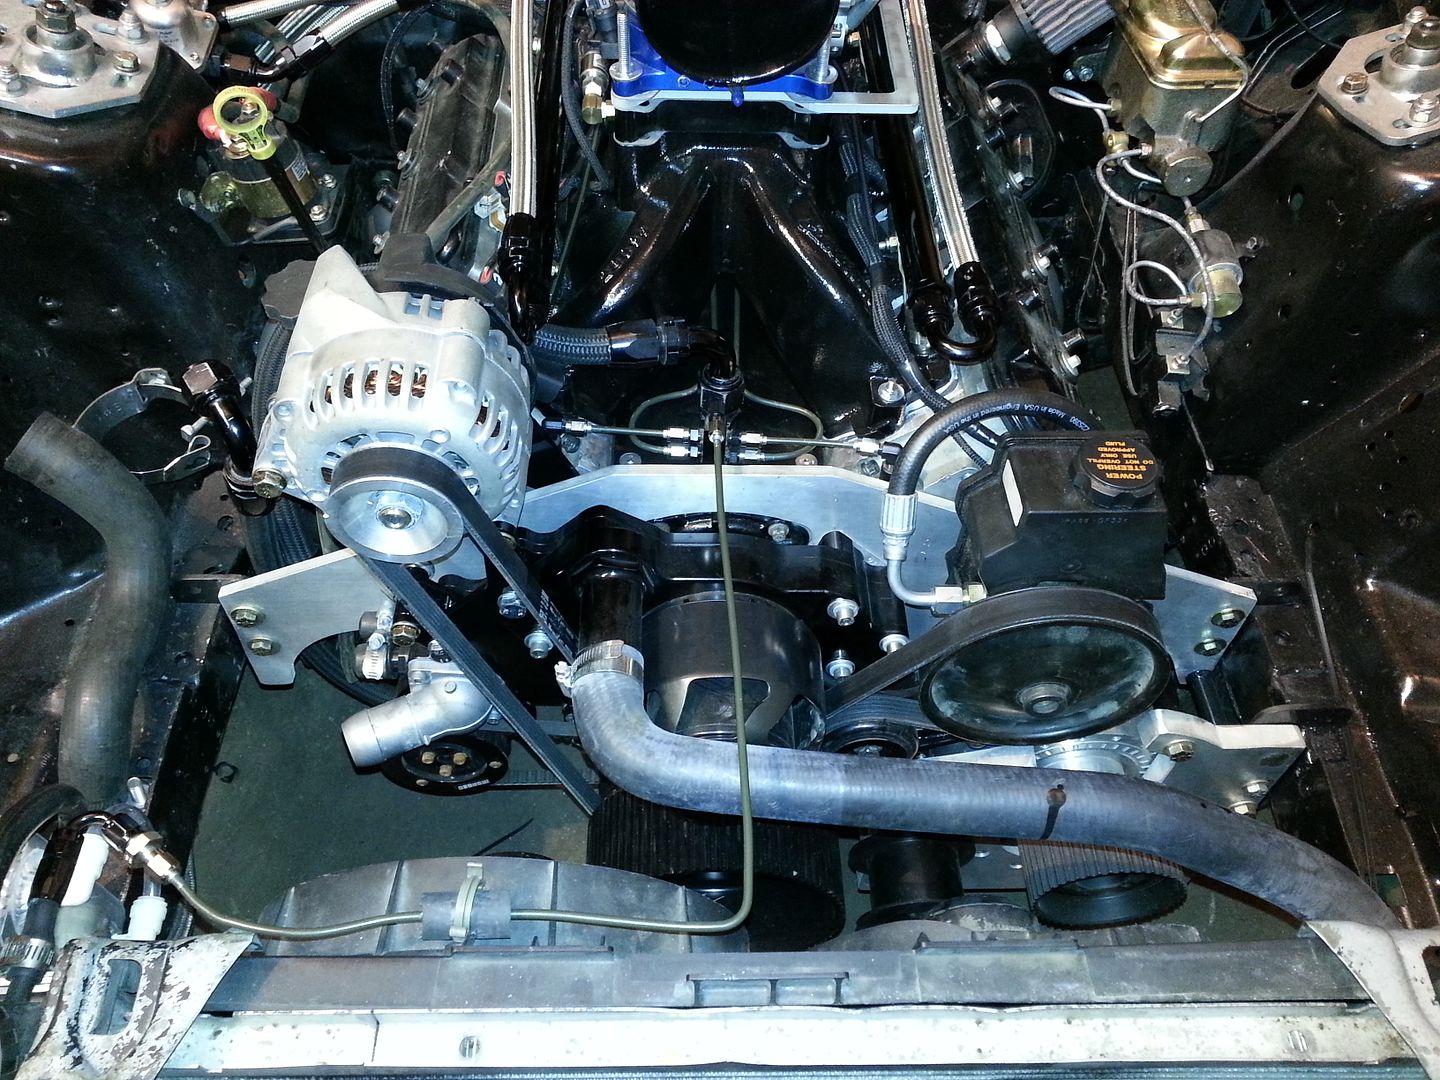
installed my Supercharger, and Pulleys
installed the power steering pump, and used the Alternator bracket for the Idler pulley to route the belt away from and around the supercharger...
Discovered I need to order 7.550 pushrods...
Discovered I need a 143 tooth 50mm Cog belt
still have to buy the Alternator relocation bracket with built in tensioner....
Had to do some modifications to my original design for the plate, because I forgot about the Power steering pump pulley...so a little cutting and some grinding....and were golden..

Pulled the Heads,Rockers, Lifters, Cam.....
Did a little Cleanup....
Put in Morel 5274 Link Bar Lifters
Put in a 252/274 .646/.646 113+4 cam
Clearanced the heads for the Jesel Sportsman Adjustable Rockers
Mounted the Rocker pedestals.
installed my Supercharger, and Pulleys
installed the power steering pump, and used the Alternator bracket for the Idler pulley to route the belt away from and around the supercharger...
Discovered I need to order 7.550 pushrods...
Discovered I need a 143 tooth 50mm Cog belt
still have to buy the Alternator relocation bracket with built in tensioner....
Had to do some modifications to my original design for the plate, because I forgot about the Power steering pump pulley...so a little cutting and some grinding....and were golden..


 10-21-2013, 02:50 PM
#52
TECH Enthusiast

Join Date: Feb 2007
Location: Raleigh, NC
Posts: 625
Likes: 0
Received 0 Likes
on
0 Posts


My long term plan is to pick up a 4.6L reverse rotation blower and swap on by building my own blower bracket. I need to finish everything else first though and get the car moving under it's own power.
11-04-2013, 10:15 PM
#53
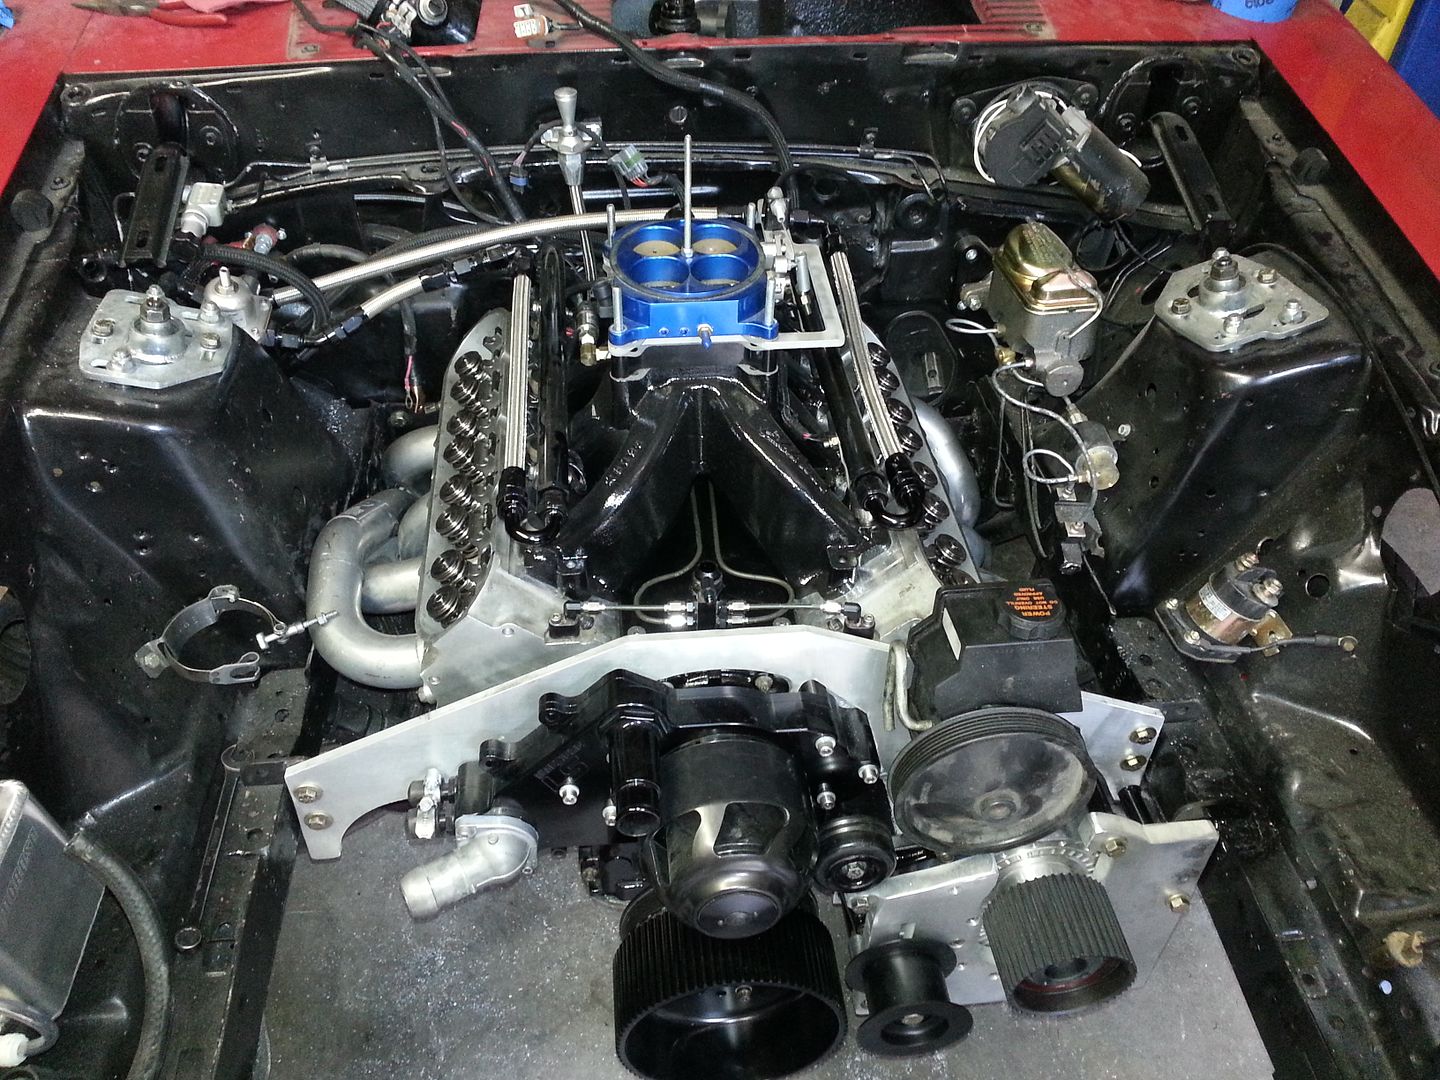
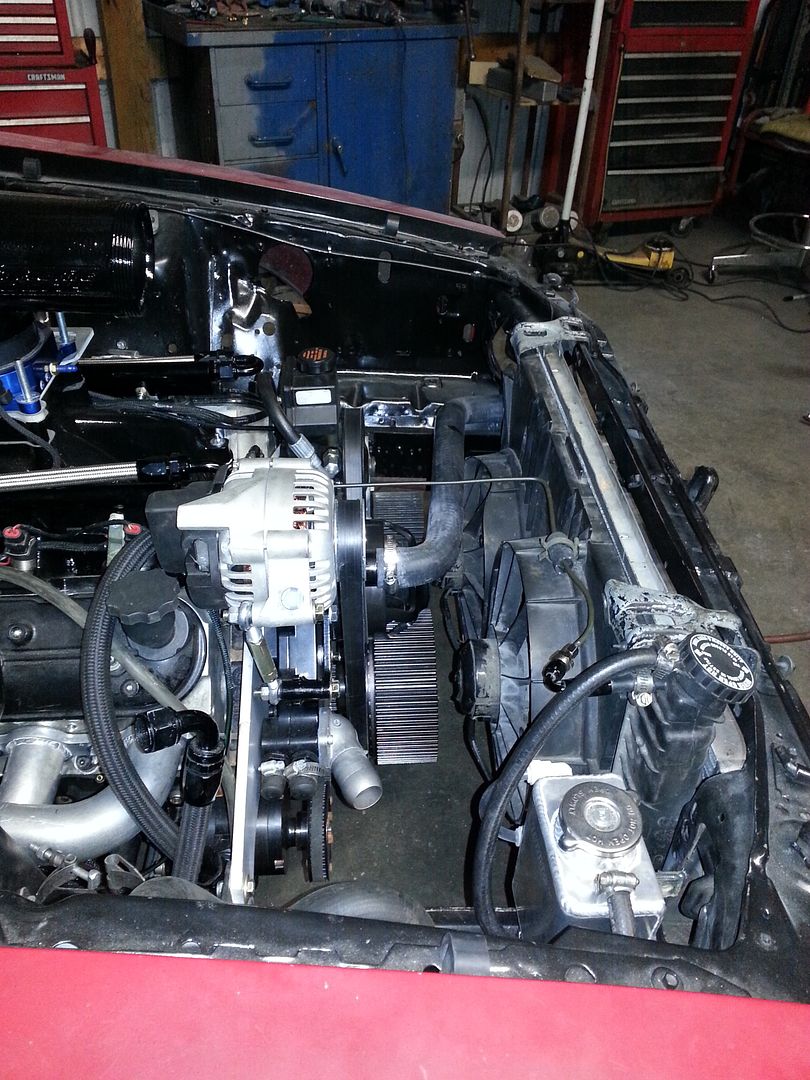
I ordered up a CBR Alternator Relocation Bracket.....
and installed my alternator....
Special Thanks to Chris at CBR Performance as he was willing to modify the design slightly to accommodate my Motor plate....
he removed the thickness of my motor plate from the spacers on the water pump so that it would all line up properly
and installed my alternator....
Special Thanks to Chris at CBR Performance as he was willing to modify the design slightly to accommodate my Motor plate....
he removed the thickness of my motor plate from the spacers on the water pump so that it would all line up properly


 11-12-2013, 06:39 PM
#54
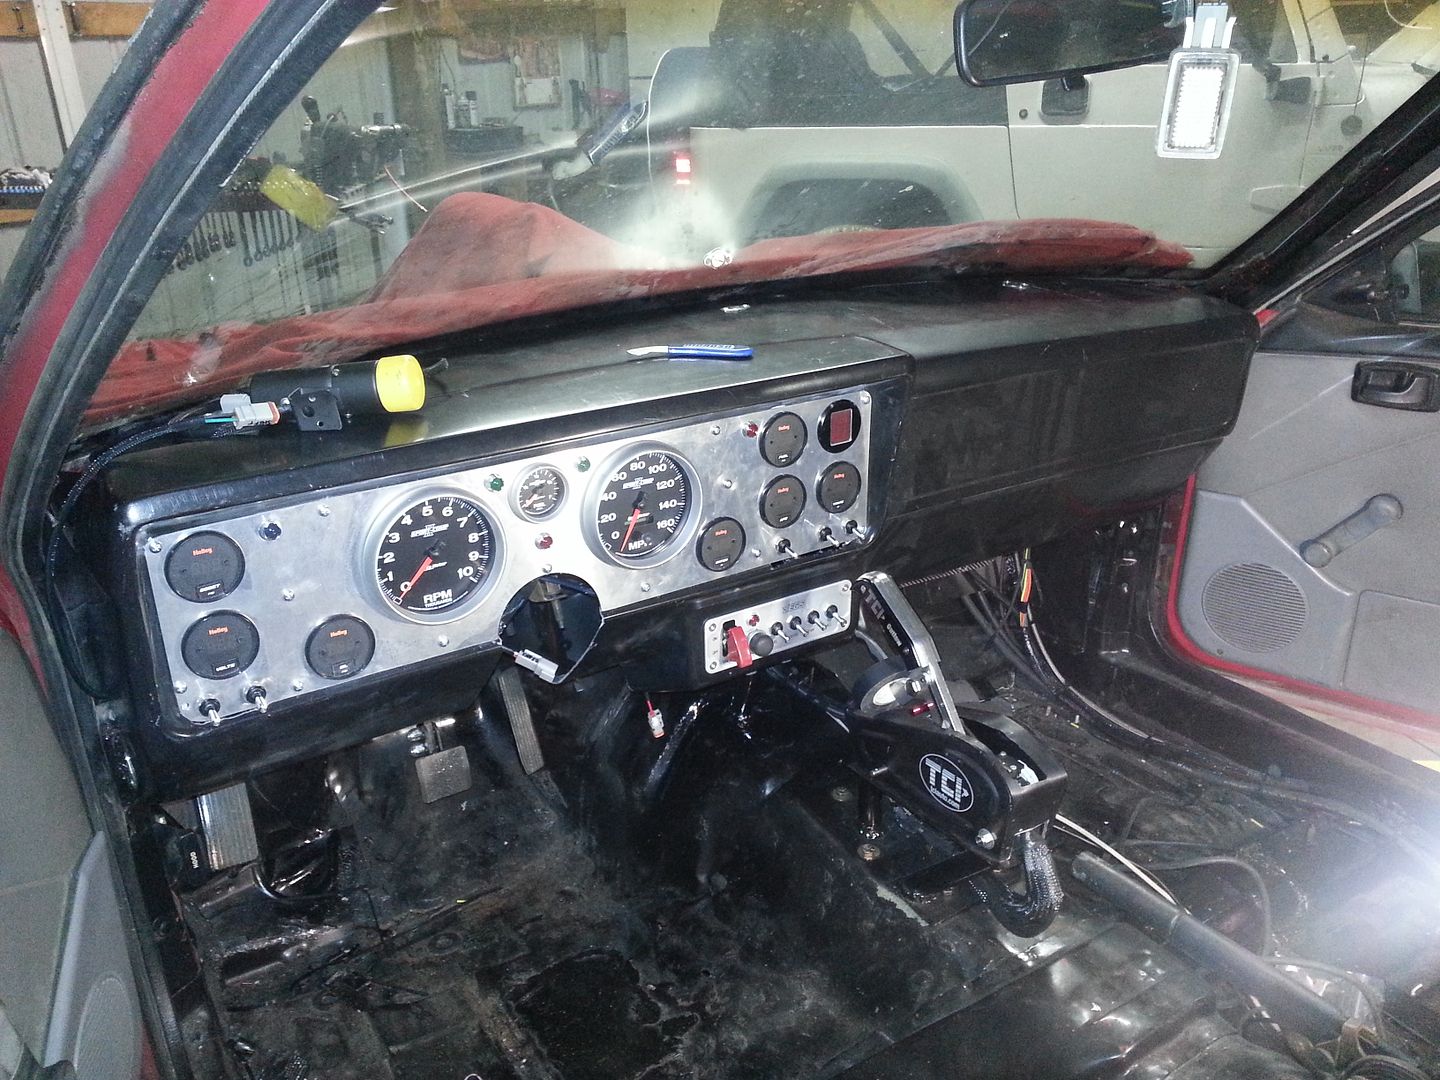
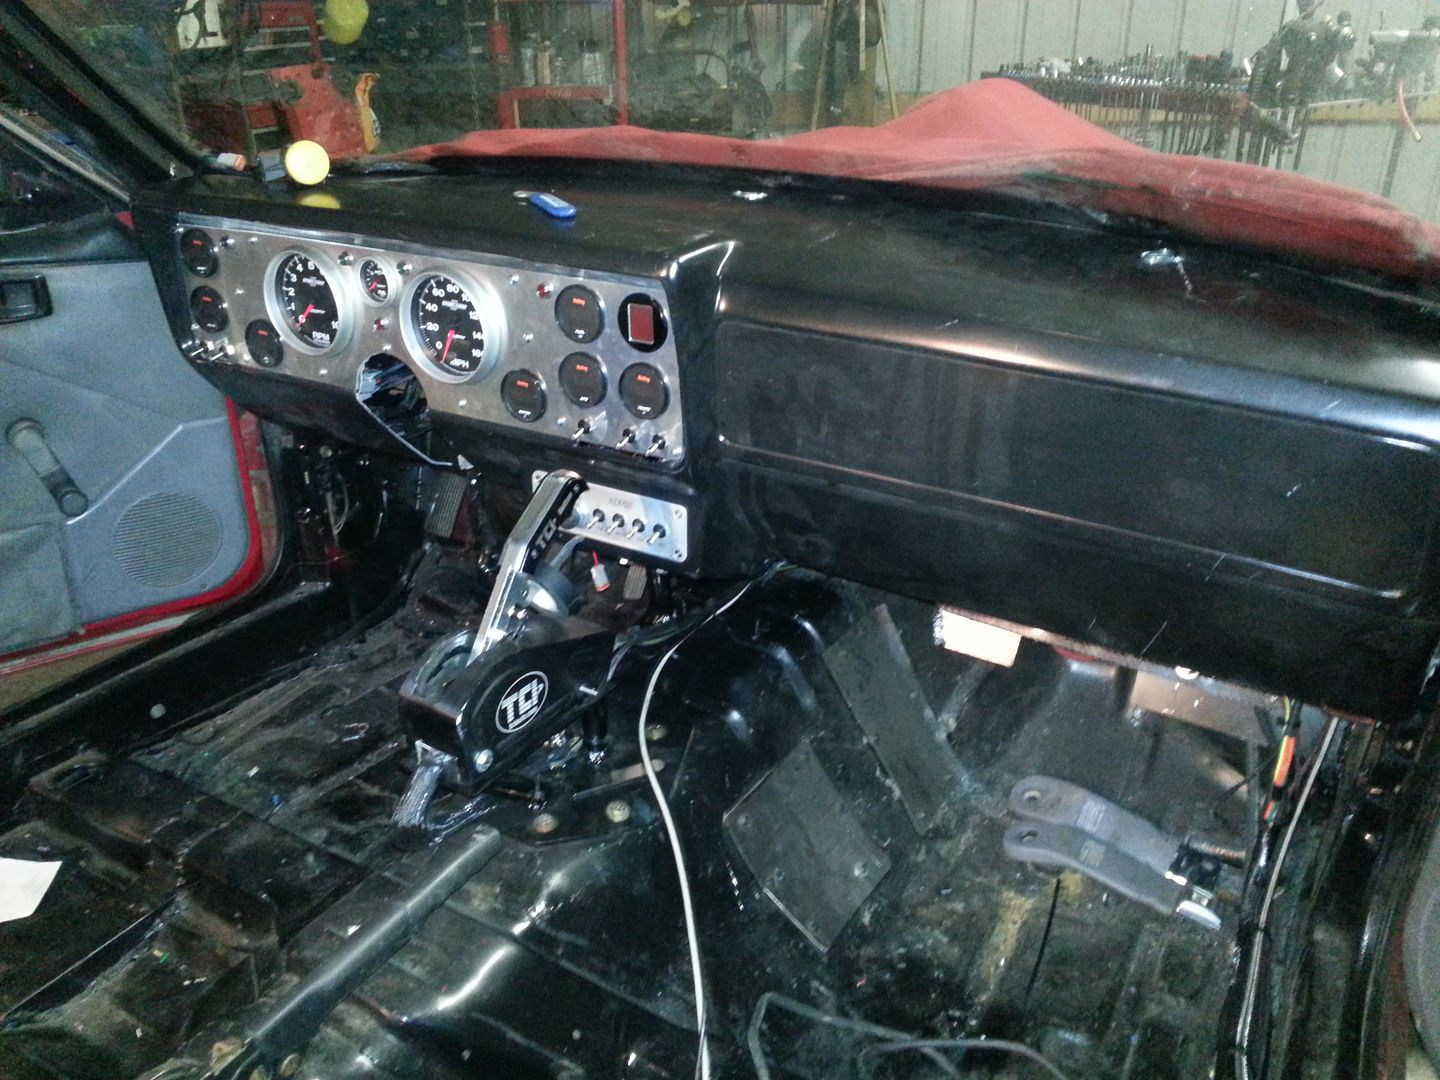
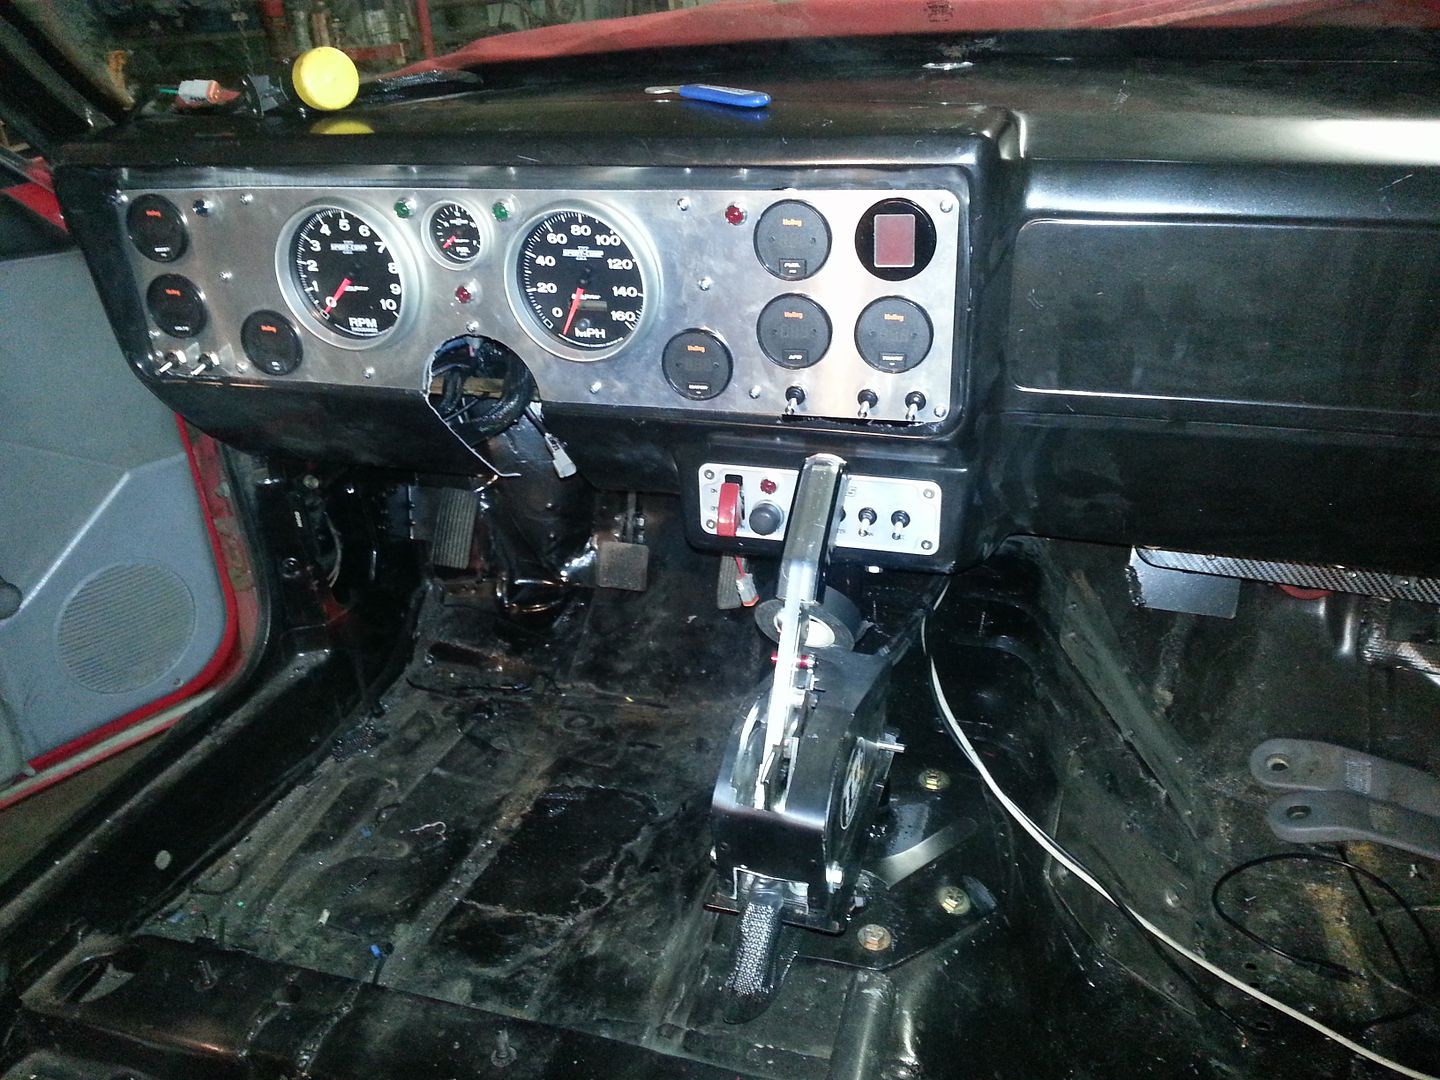
Dash Plate was Designed by me in AutoCAD....
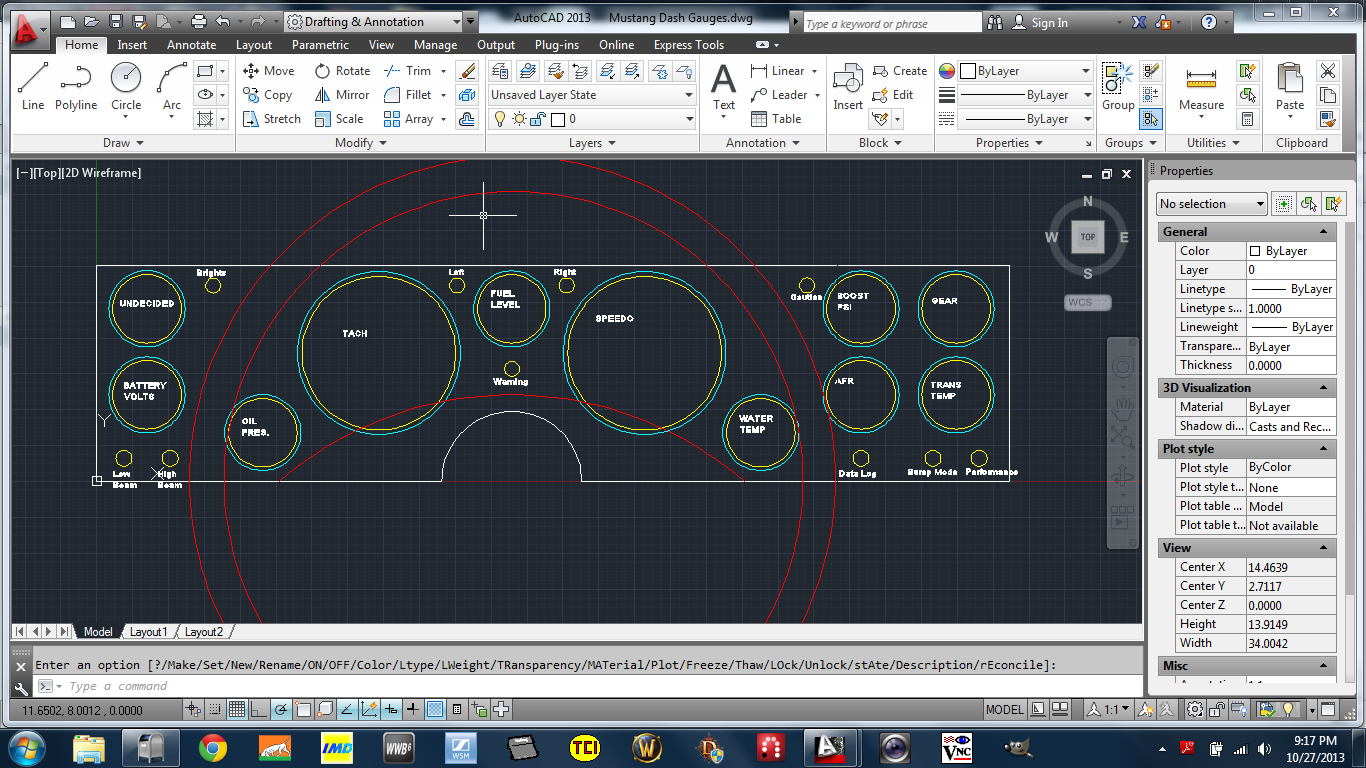
and I had it cut by a Local Shop that could Water Jet it for me..
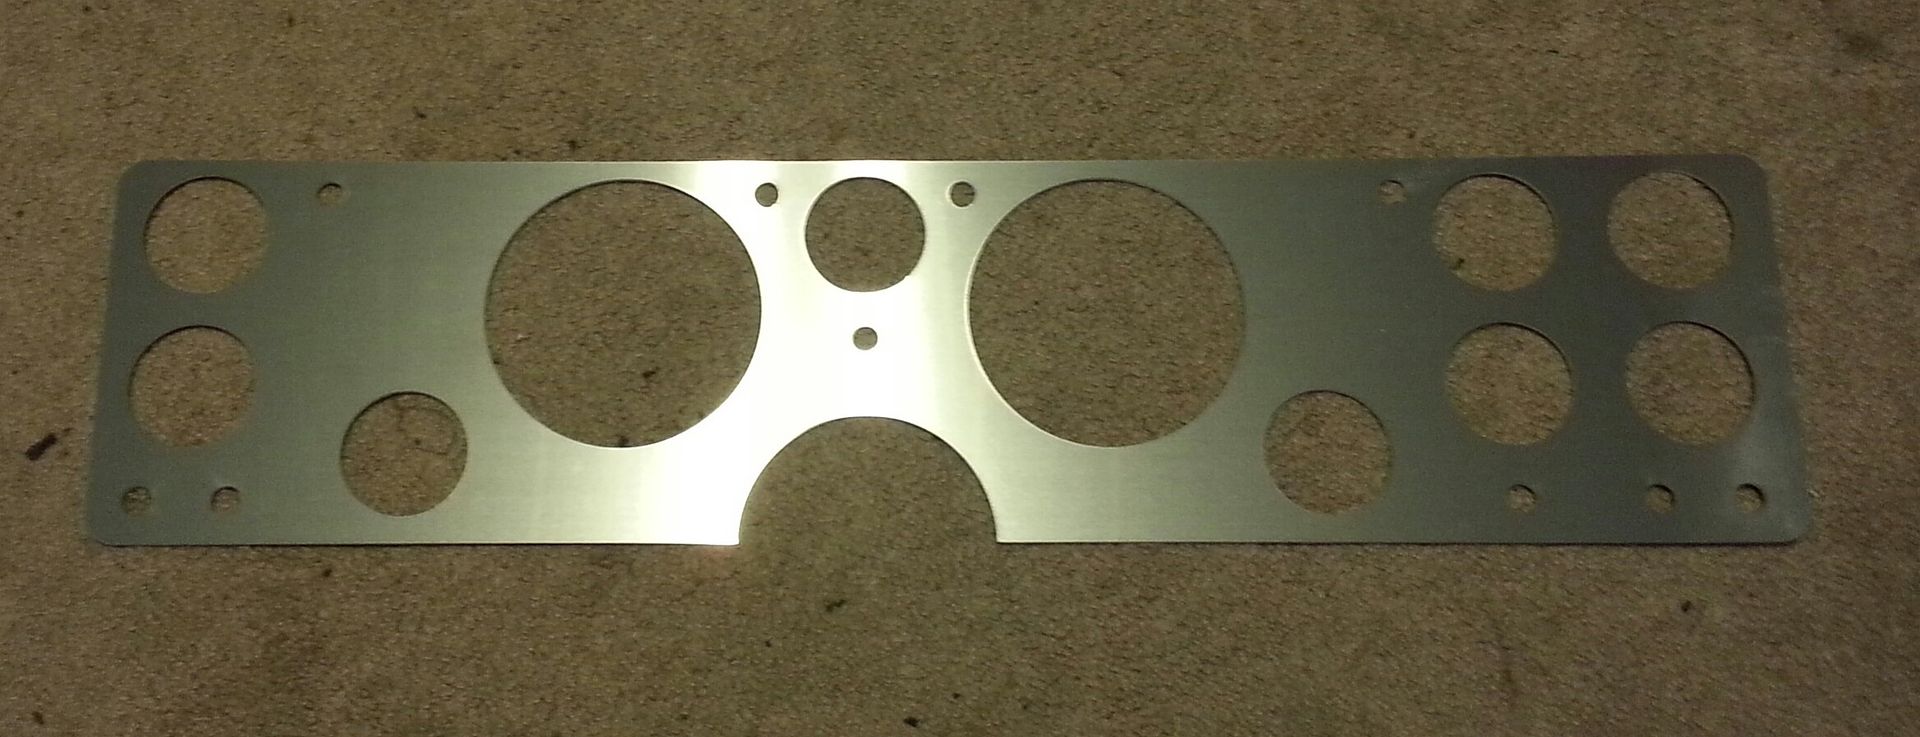
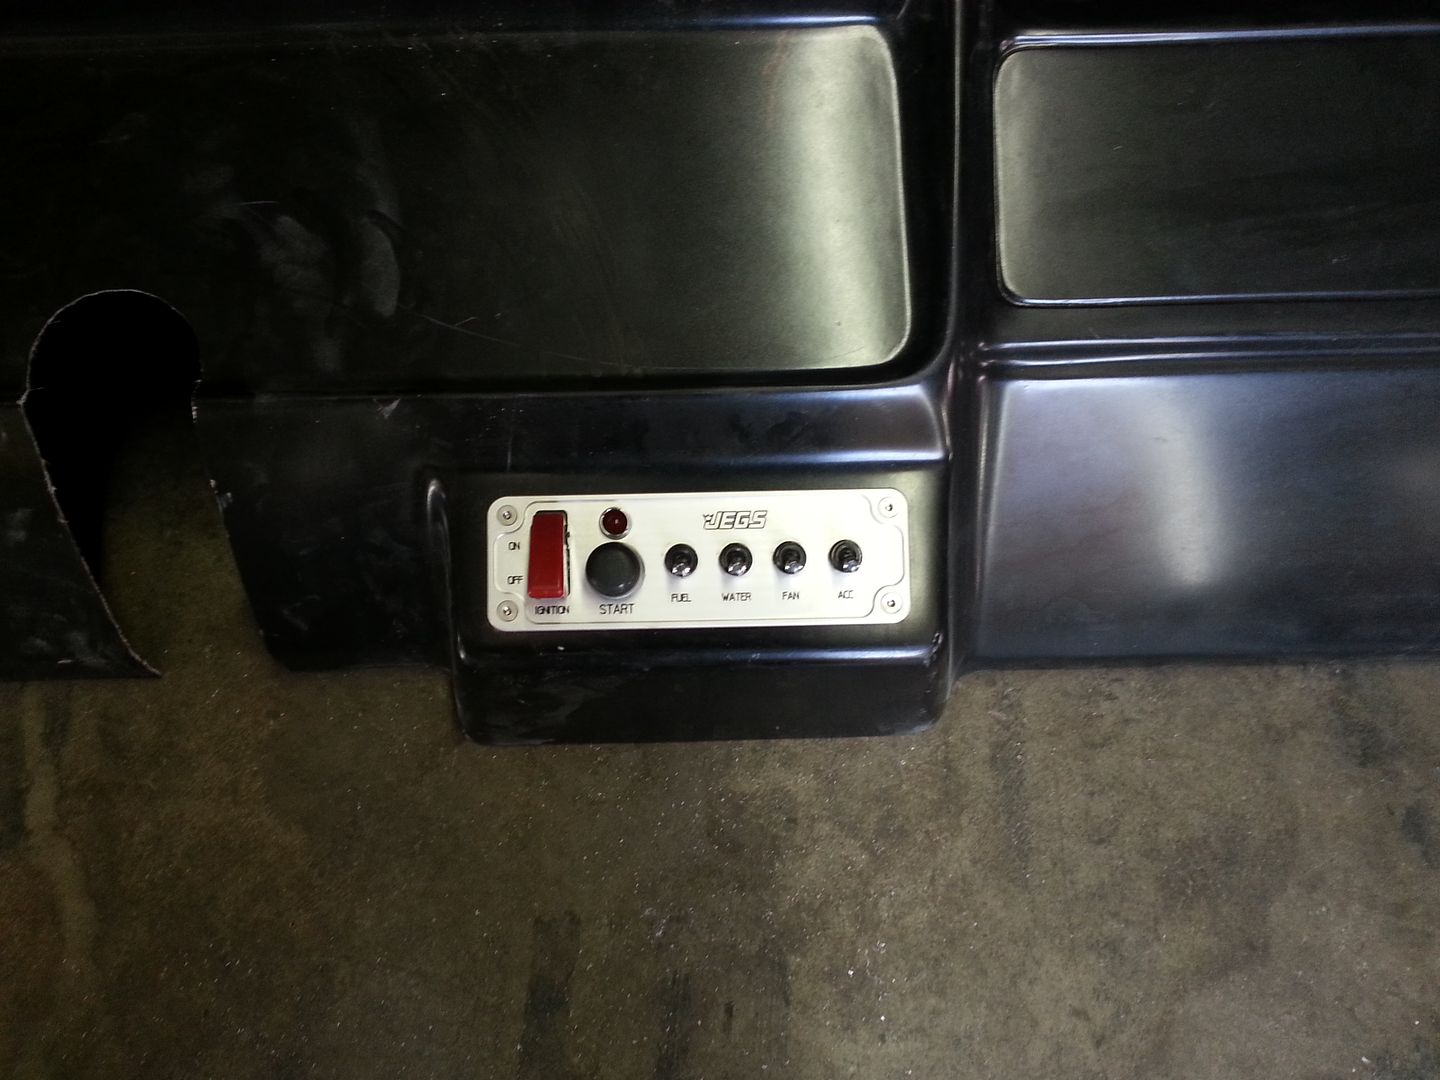
I installed an Ignition/Switch Panel in the Dash...
and I installed Gauges in the Panel I had Cut...
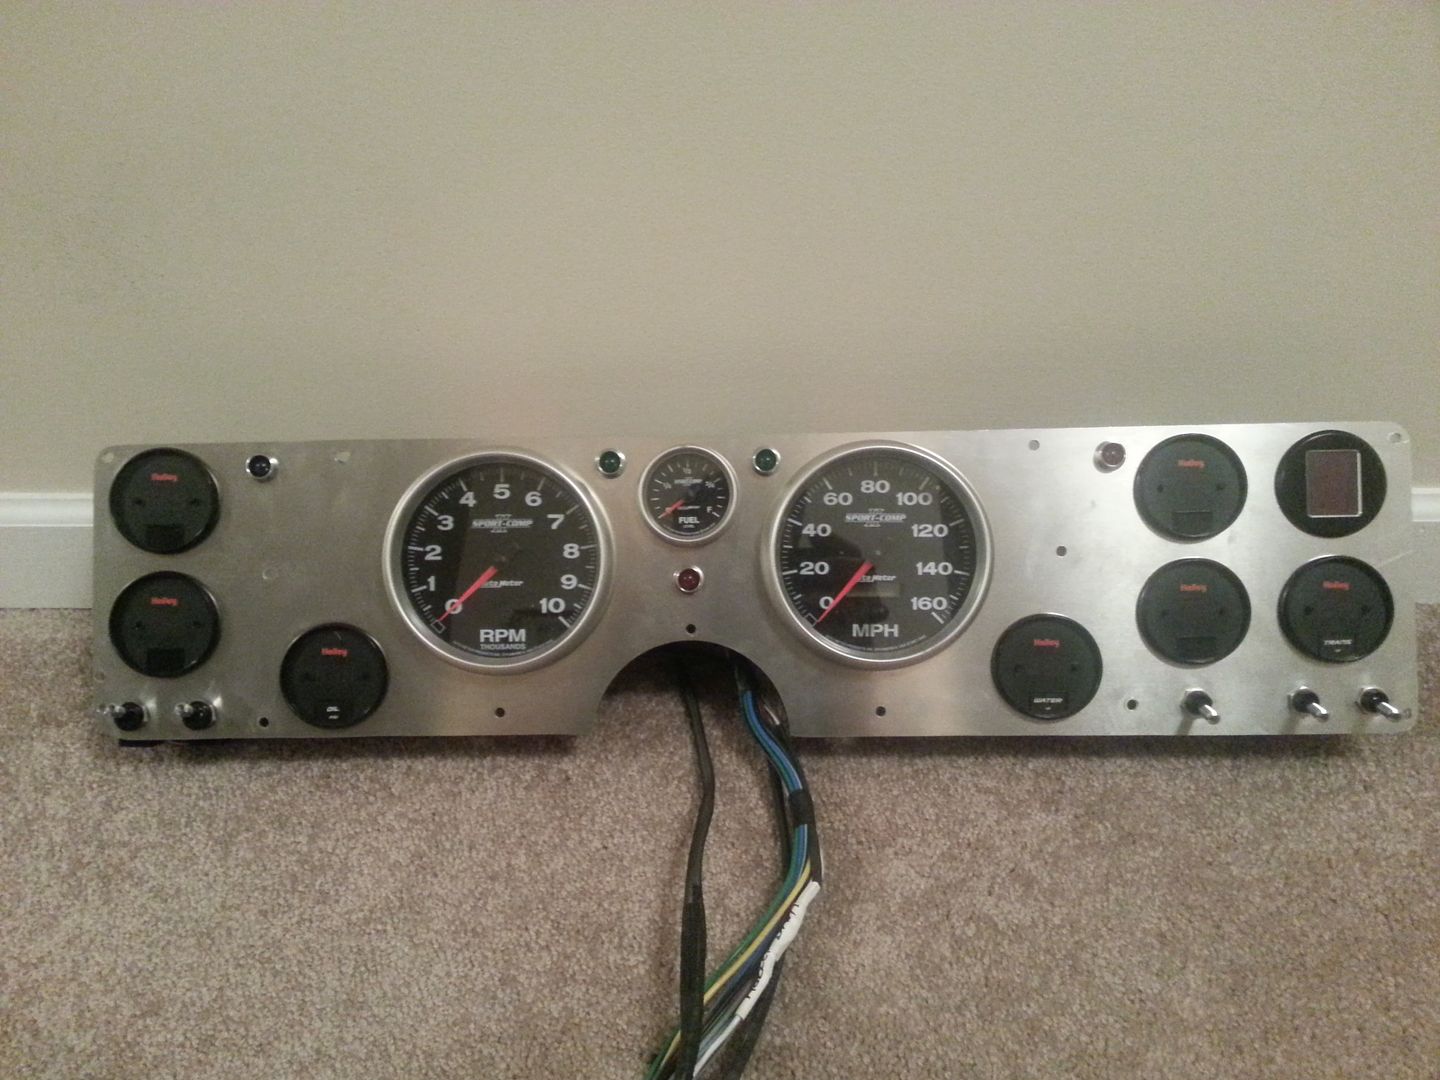
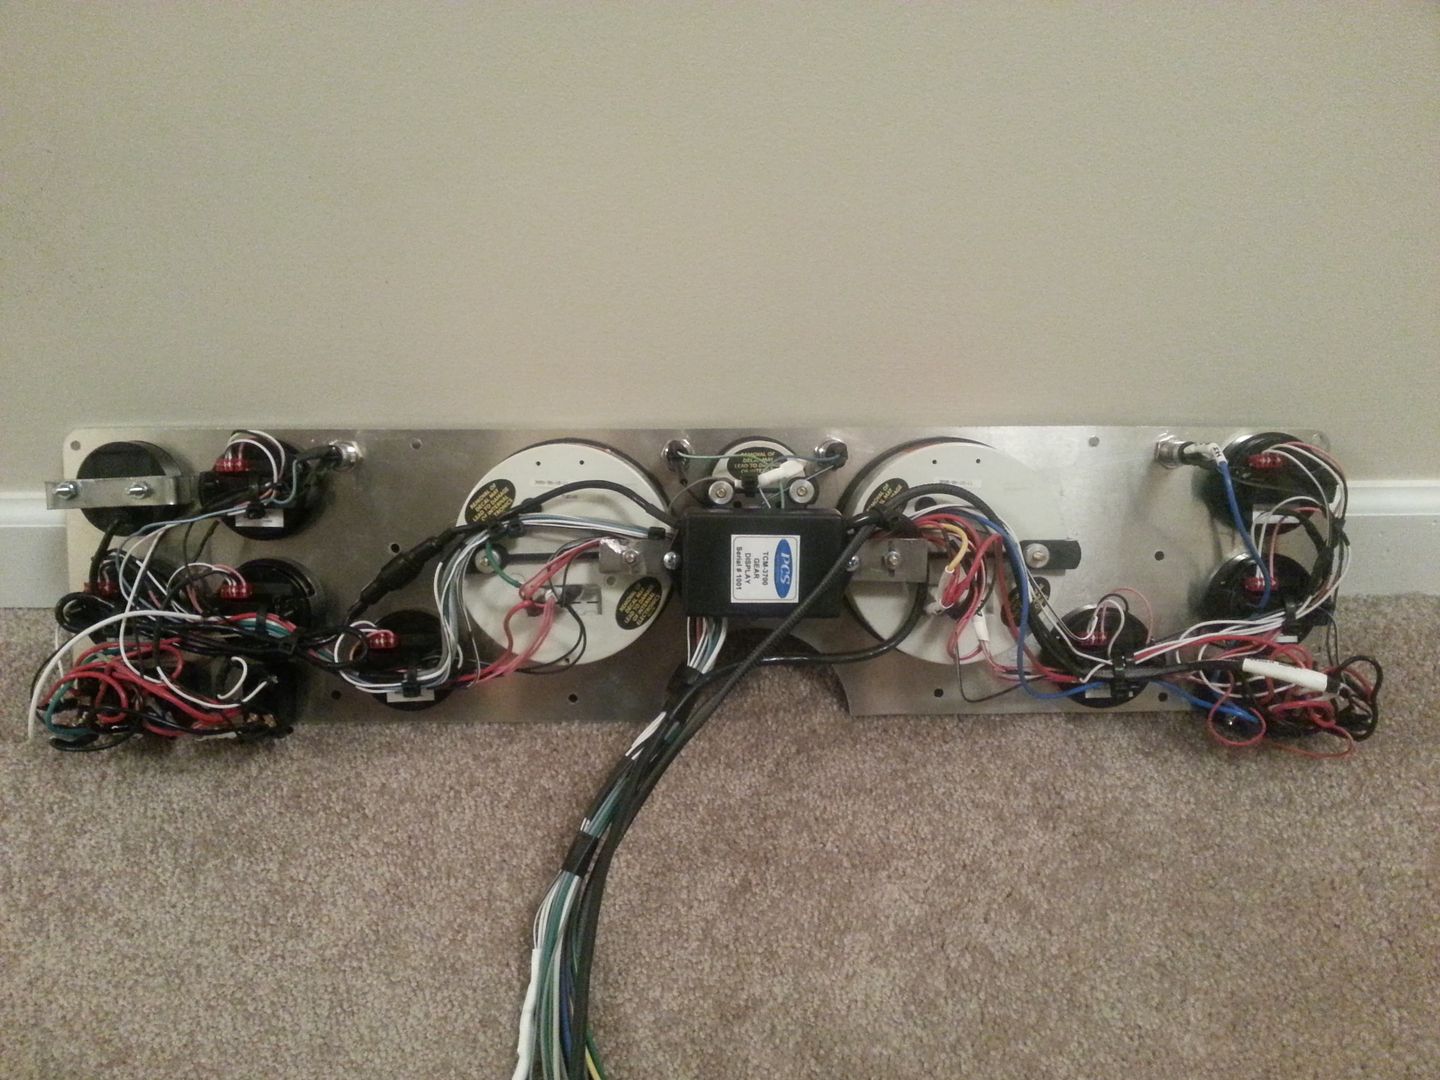
and then I installed the Gauge Plate in the Dash.

and I had it cut by a Local Shop that could Water Jet it for me..

I installed an Ignition/Switch Panel in the Dash...


and I installed Gauges in the Panel I had Cut...


and then I installed the Gauge Plate in the Dash.


 12-01-2013, 05:05 PM
#56
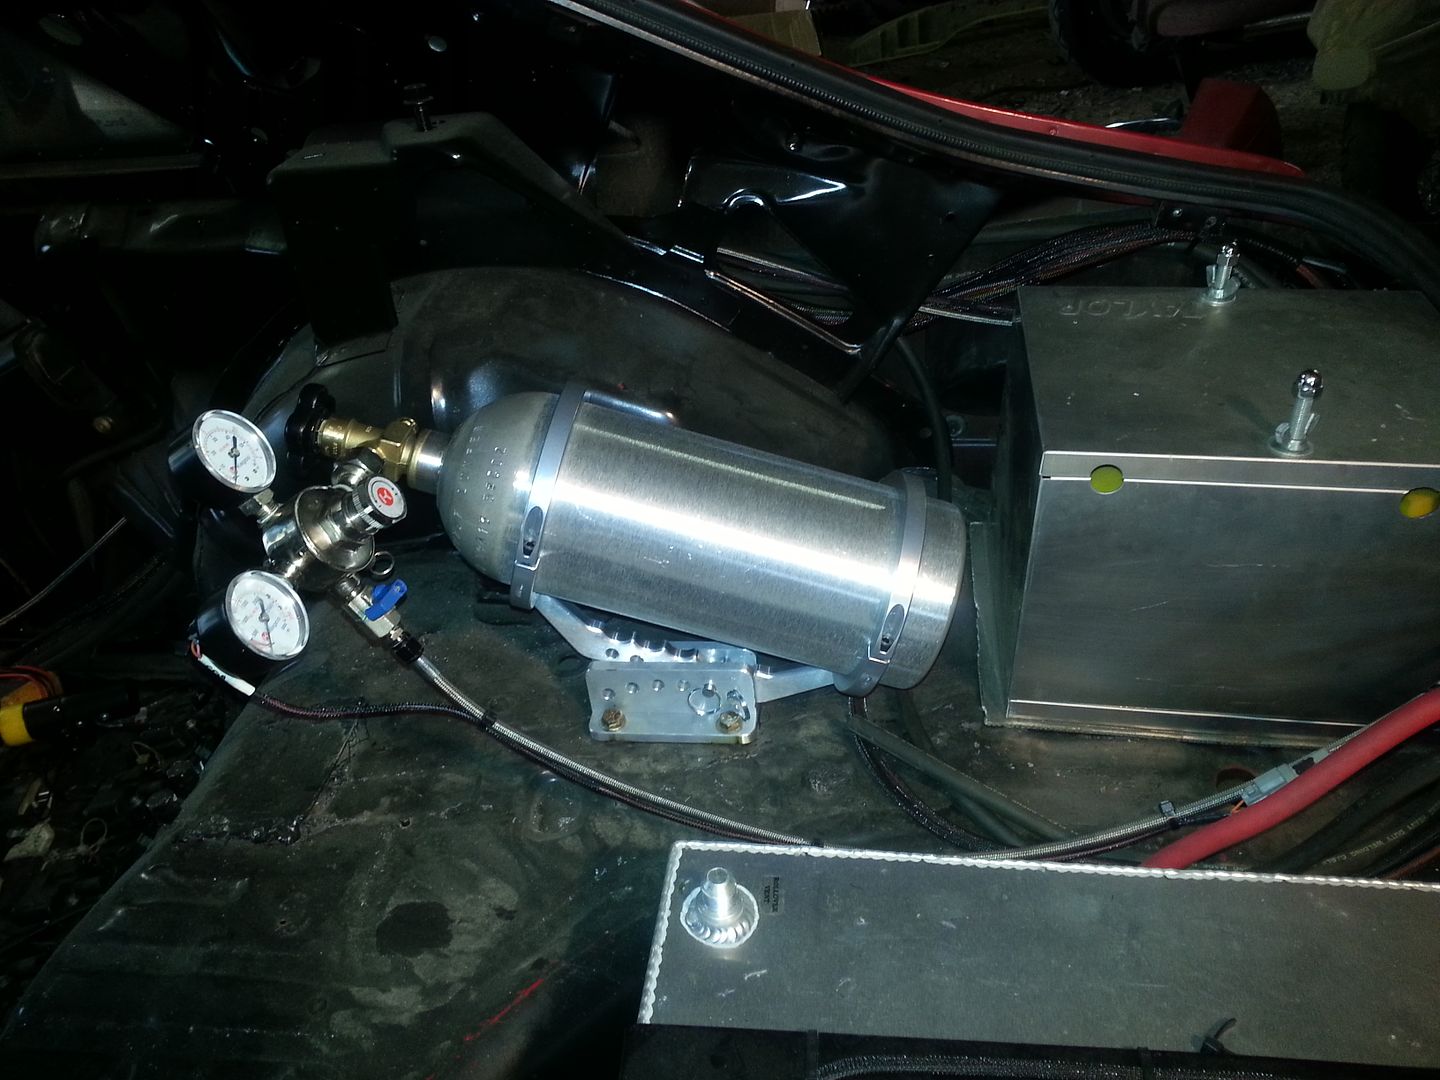
mounted the CO2 Bottle and installed pressure sensor and ran a 4an hose to the front of the car for the solenoids...
drilled holes in the car, bolted it in place, and then welded the nuts on the underside to the body so I could remove the bracket later to put in carpet
everything that bolts to the floor, has welded nuts on the underside to make it easier to remove and install on my own.
drilled holes in the car, bolted it in place, and then welded the nuts on the underside to the body so I could remove the bracket later to put in carpet
everything that bolts to the floor, has welded nuts on the underside to make it easier to remove and install on my own.

 12-11-2013, 07:54 PM
#58
the updates are that it is colder than **** here in Nashville Right now, and my waste oil heater for the shop has stopped working because the pump has failed....so I'm not working on the car while it is cold...LOL
I did manage to get a few minutes of warm the other day and I plumbed my coolant overflow, my trans puke tube, and my vacuum pump catch can overflow to all go out the back of the car behind the tires...
so if anything decides to puke some fluids... its going to end up behind my tires and not cause traction issues
12-13-2013, 04:21 PM
#59
Its been too cold to work out in the garage....Waste oil heater Pump is dead, and even if it was working, its been too cold for the oil sitting in a big container outside to flow anyways
it reached a whole whopping 46* today....
so I used the heat gun to warm up the inside of my car so I could work on it a little...LOL
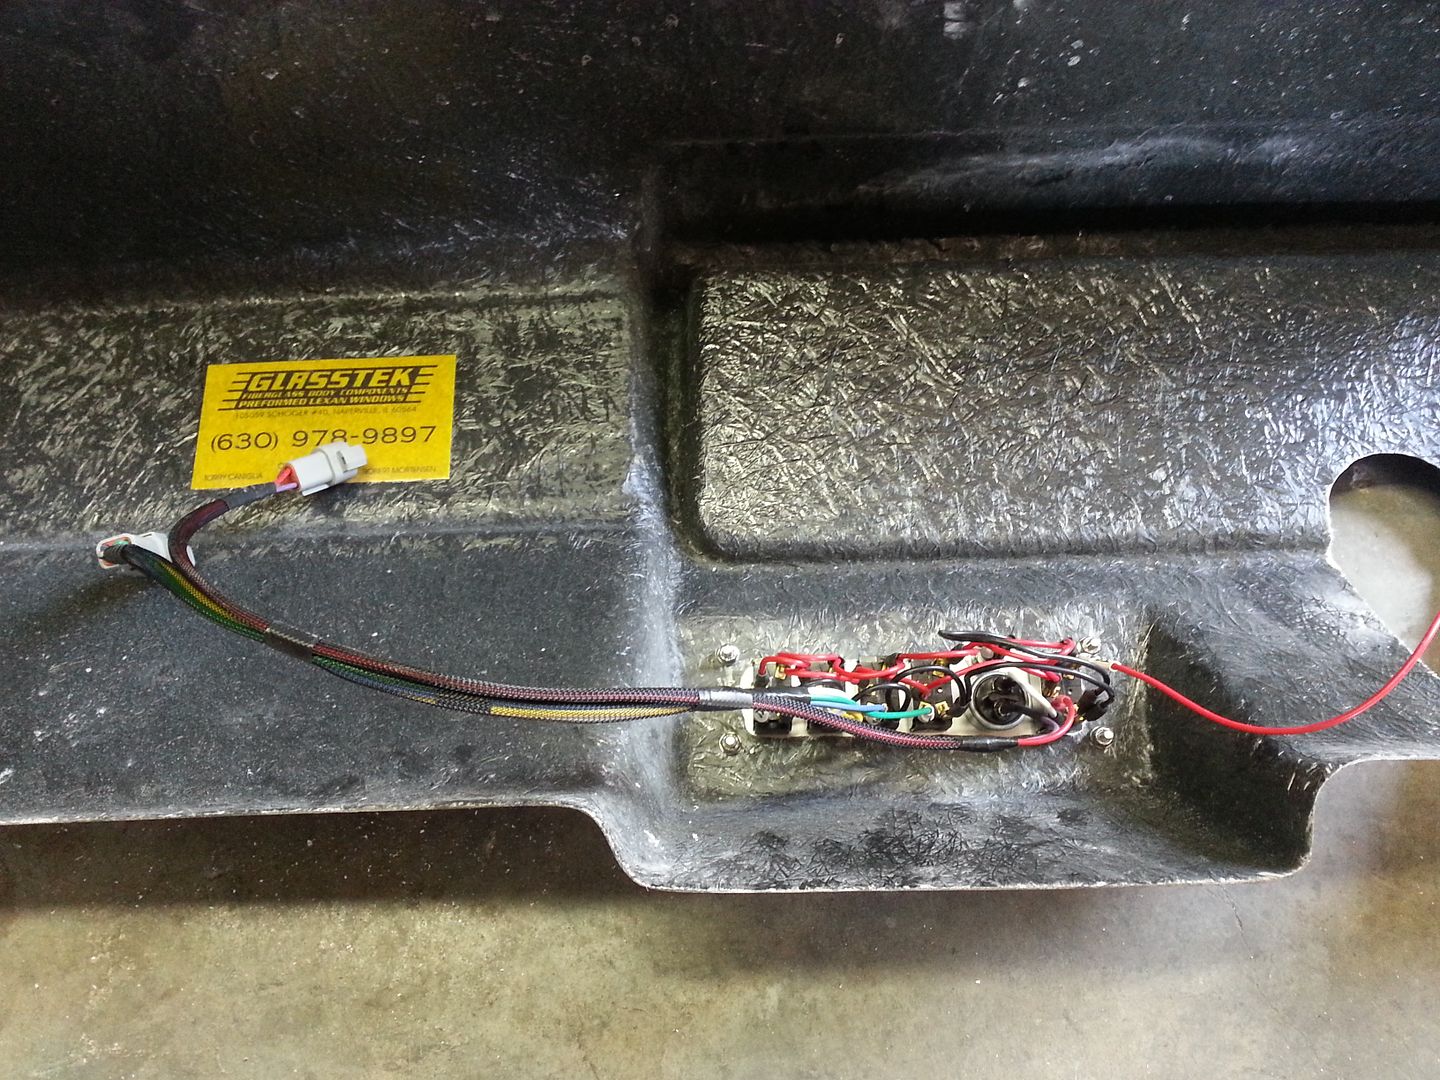
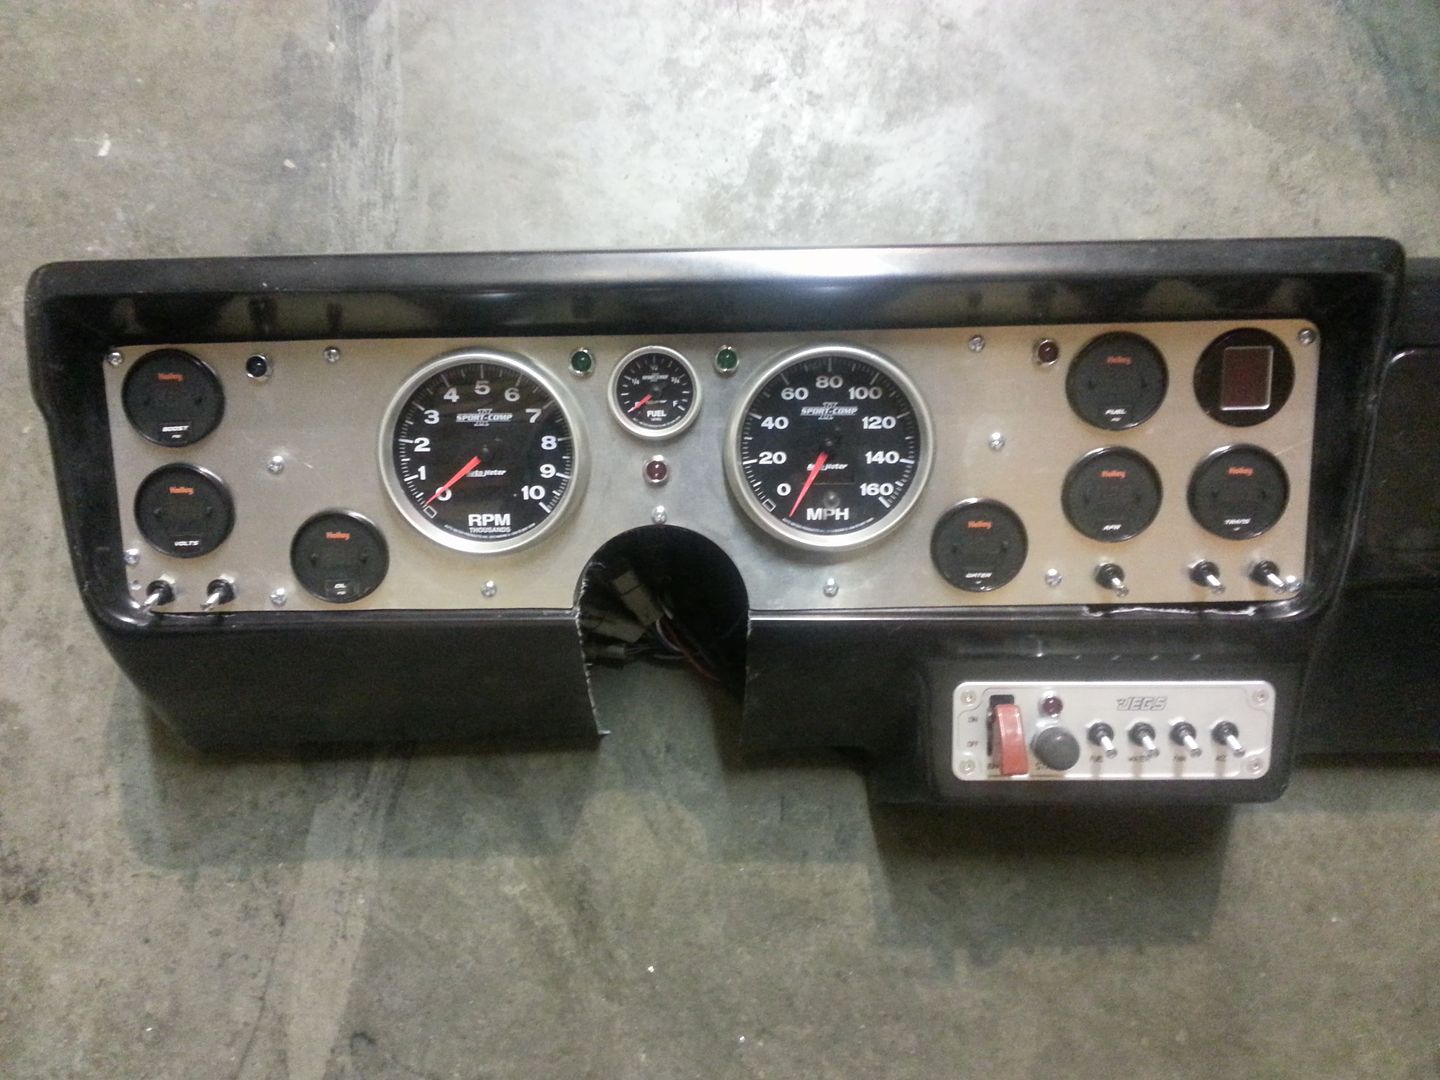
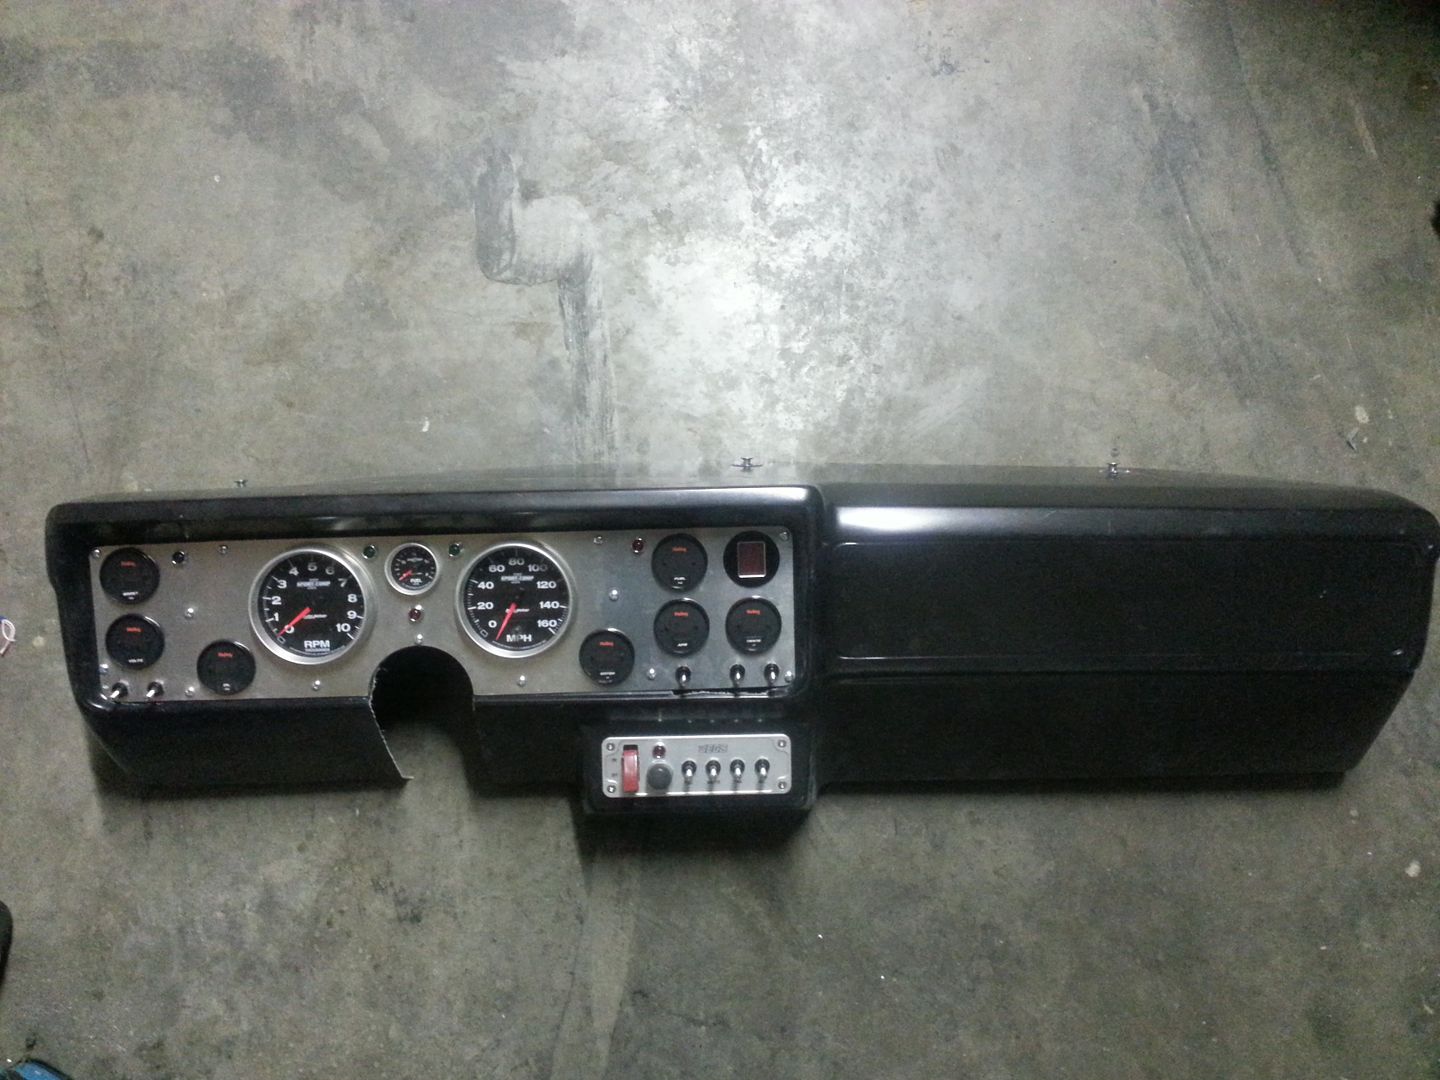
Finished up the Wiring inside the car, and installed my Dash
it reached a whole whopping 46* today....
so I used the heat gun to warm up the inside of my car so I could work on it a little...LOL
Finished up the Wiring inside the car, and installed my Dash


 12-13-2013, 11:33 PM
#60
TECH Enthusiast
Join Date: Feb 2007
Location: Raleigh, NC
Posts: 625
Likes: 0
Received 0 Likes
on
0 Posts
I've found lately when I head out to work, I do some welding right in the beginning to warm the place up a little. Nothing like 180amps of TIG plasma to bring the temp in the garage up a good 20 degrees.