
5.3/4L60 Iroc Build (Lots of Pics)
 04-09-2013, 02:41 AM
#1

Finally getting time and money to build my Iroc somewhat like I want to. It's been 2 years in planning this build, then replanning, buying, then selling, and buying some more lol. I'm finally to the point where I know what I want and I'm in the process of working on it.
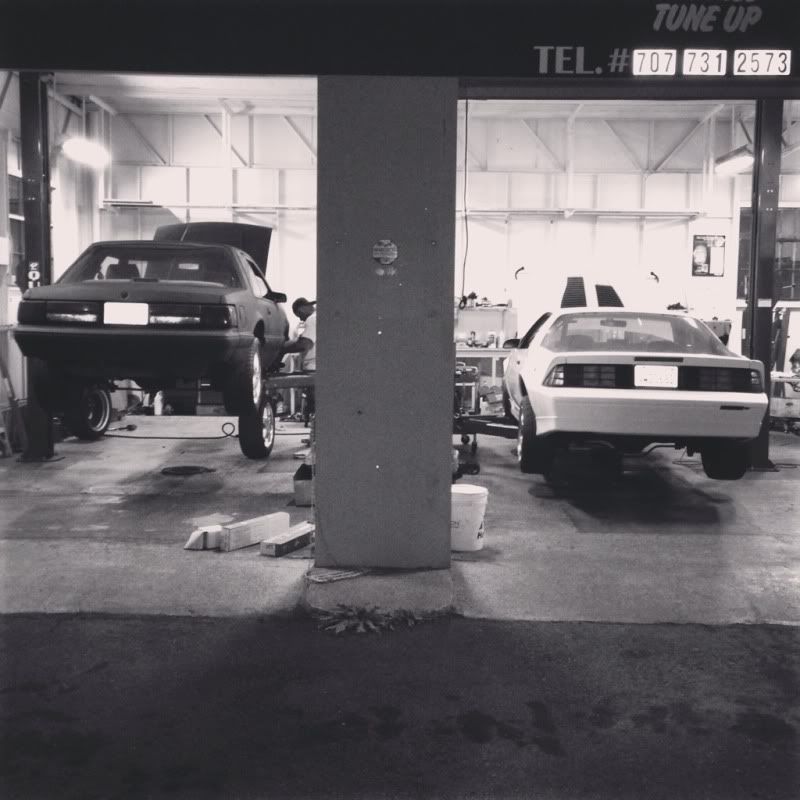
Unfortunately I can only work on this SOME weekends and at night. I just opened up a shop in the SF Bay Area so I've been busy working on everyone else's cars. It sucks but it pays the bills.
So this is what it comes down to... I got a good deal on an LS1/4L60e and a 5.3, separate deals but both in exchange for labor. It's how I got most of the parts that I'm using, except the ones I bought brand new.
I've had an 86 Iroc for a couple years awaiting my attention for the swap, but instead decided to use another 89 I picked up since it was a hardtop... The 86 Will be built by my girl.
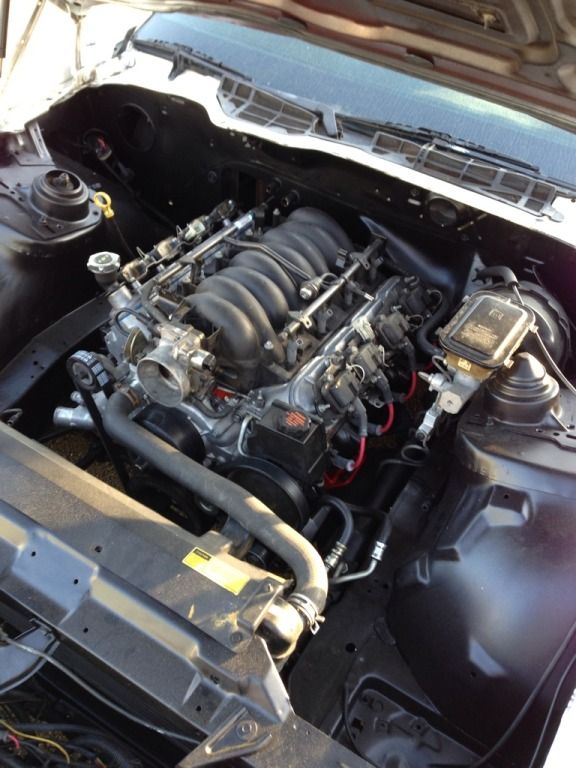
Engine:
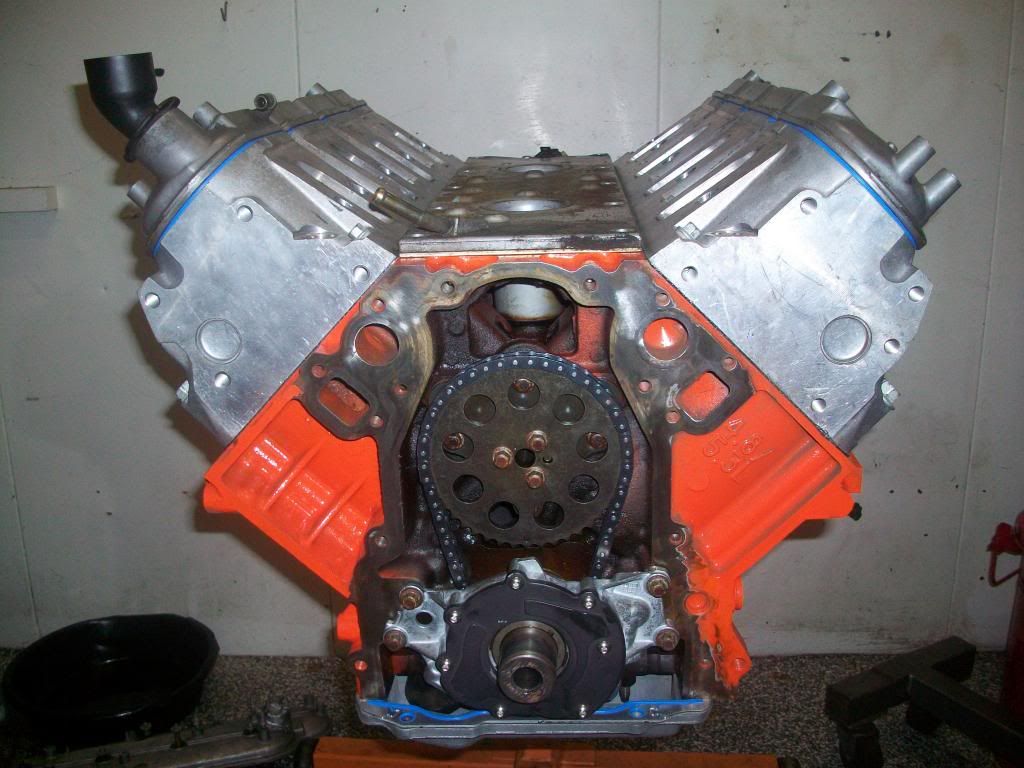
-5.3L LM7 from a 2001 Suburban
-TEA Stg 1.5 706 Heads
-PRC Dual .650 Lift Springs
-Thunder Racing 7.400" Pushrods
-Synergy Motorsports Oil Pump
-LS2 Timing Chain
-LS6 Cam from a 2001 Z06
-LS6 Valley Cover & PCV
-LS6 Intake Manifold
-2001 Camaro Exhaust Manifolds
-All New Gaskets
-New Knock Sensors
-New Engine Mounts
-NGK TR55 Plugs
Trans
-Built 4L60e (Let's See How Long It Lasts)
-PTC 3500 Stall Converter
Fuel
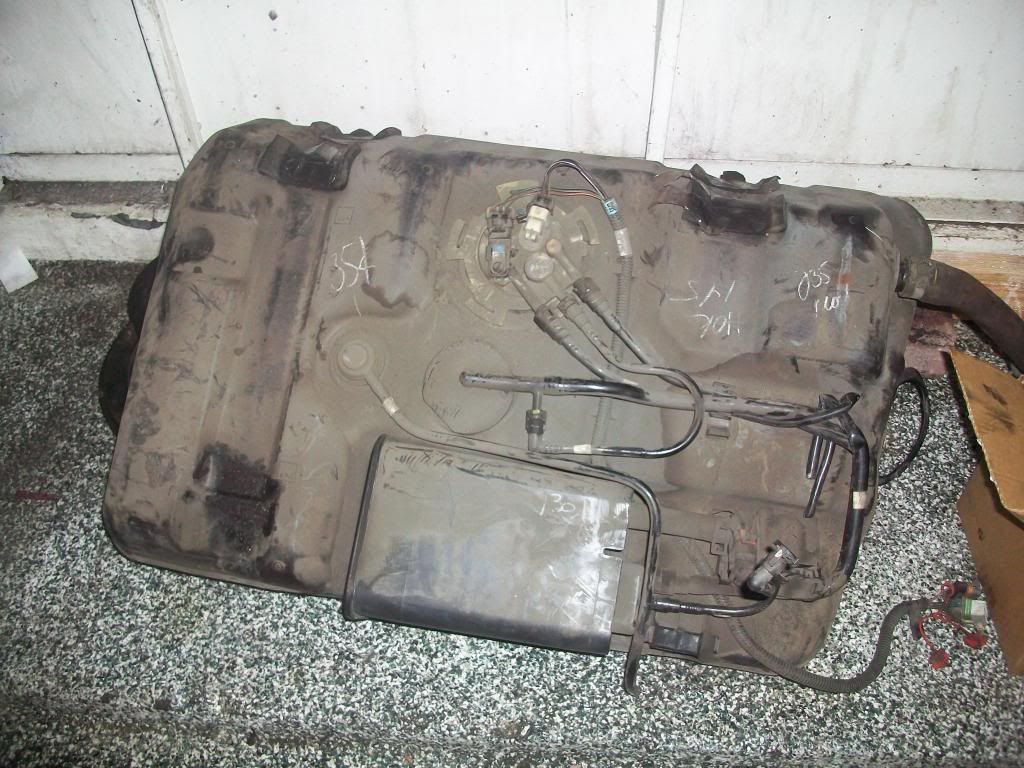
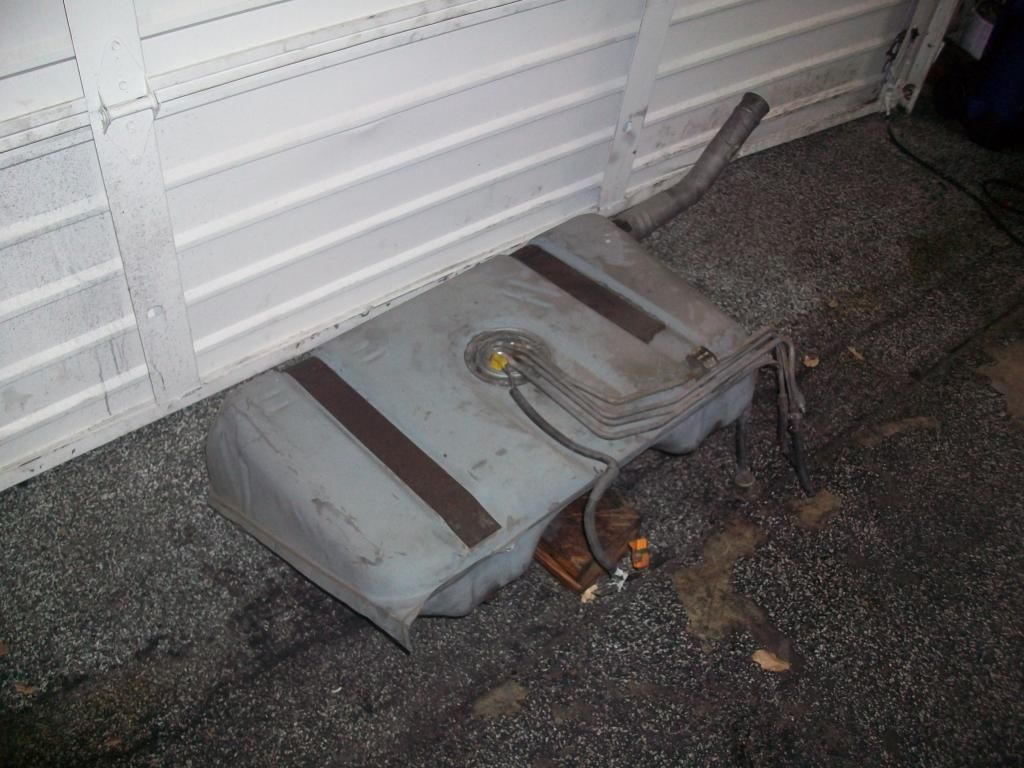
-4th Gen Fuel Tank w/ Stock Pump (for now)
-Stainless Steel Fuel Lines and Russell AN fittings
-Corvette Fuel Pressure Regulator
-97 Grand Prix Sending Unit
Rear
-4th Gen Rear
-3.42 Gears
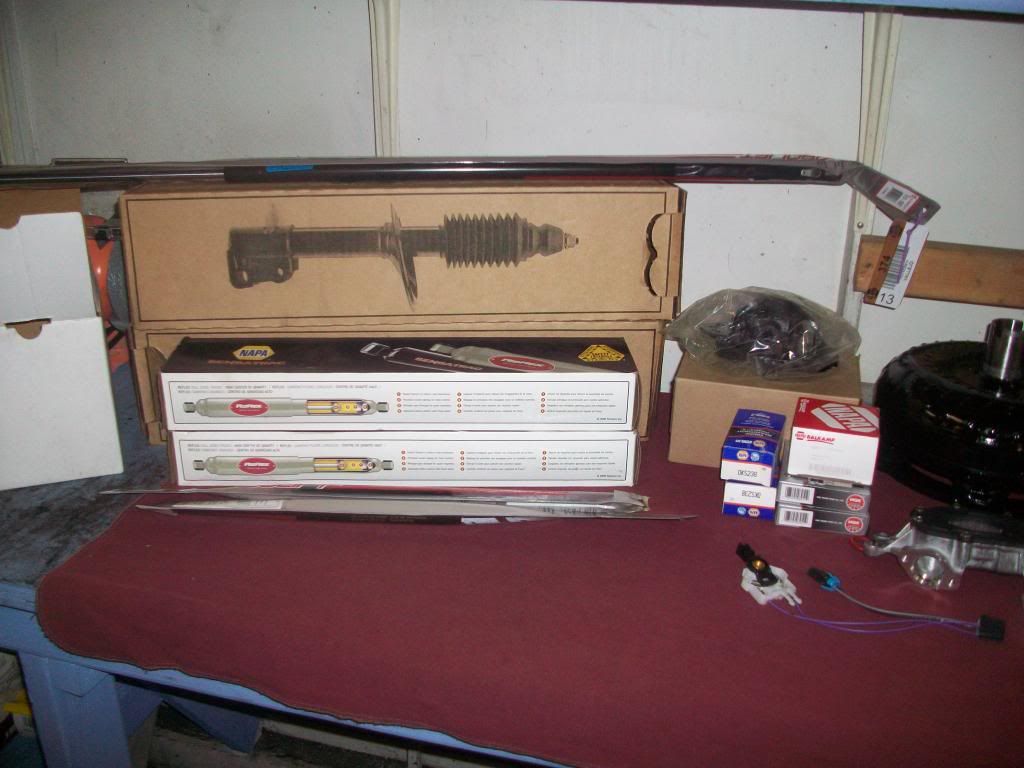
Suspension
-BMR Lower Control Arms
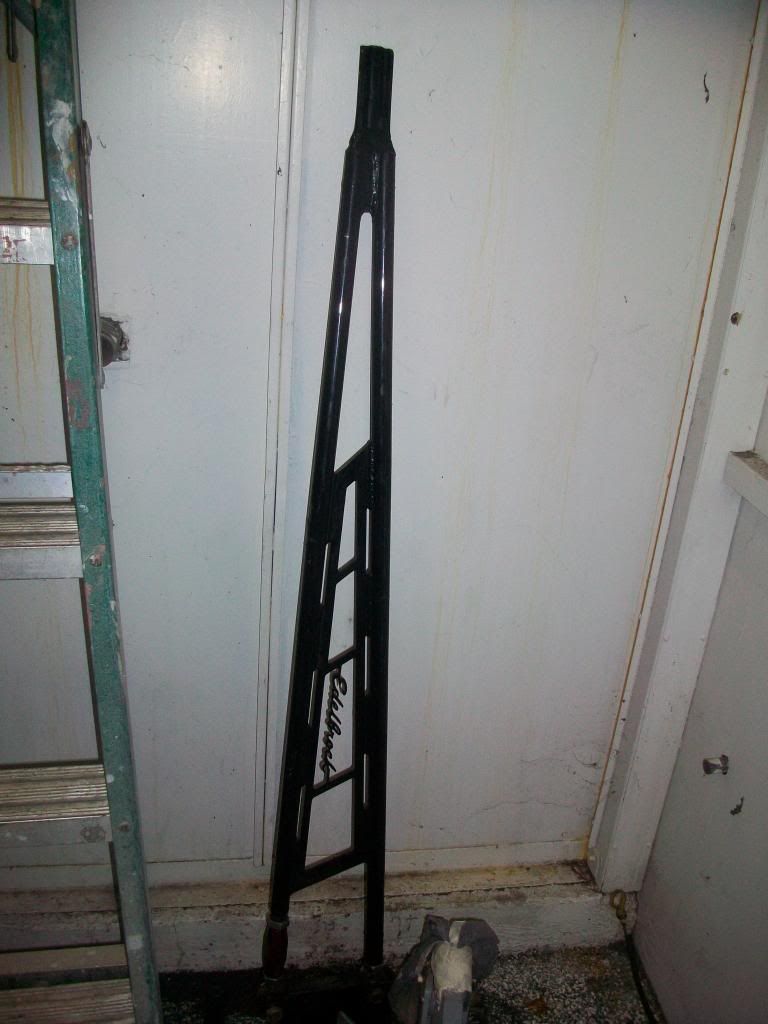
-Edelbrock Panhard Bar
-Edelbrock Torque Arm
-New Monroe Shocks and Struts
-New Tie Rod Ends (Inner & Outer)
-New Sway Bar End Links
I will be using Spohn Engine Mounts and Spohn Transmission Mount w/ Driveshaft Loop
I'm putting it together as a Stock-ish NA setup and after its running will go on to add Twin Turbos, hence why I'm using the 5.3 Block instead of the LS1 Block with the 317 Heads that I have.
Now, Onto the pics....
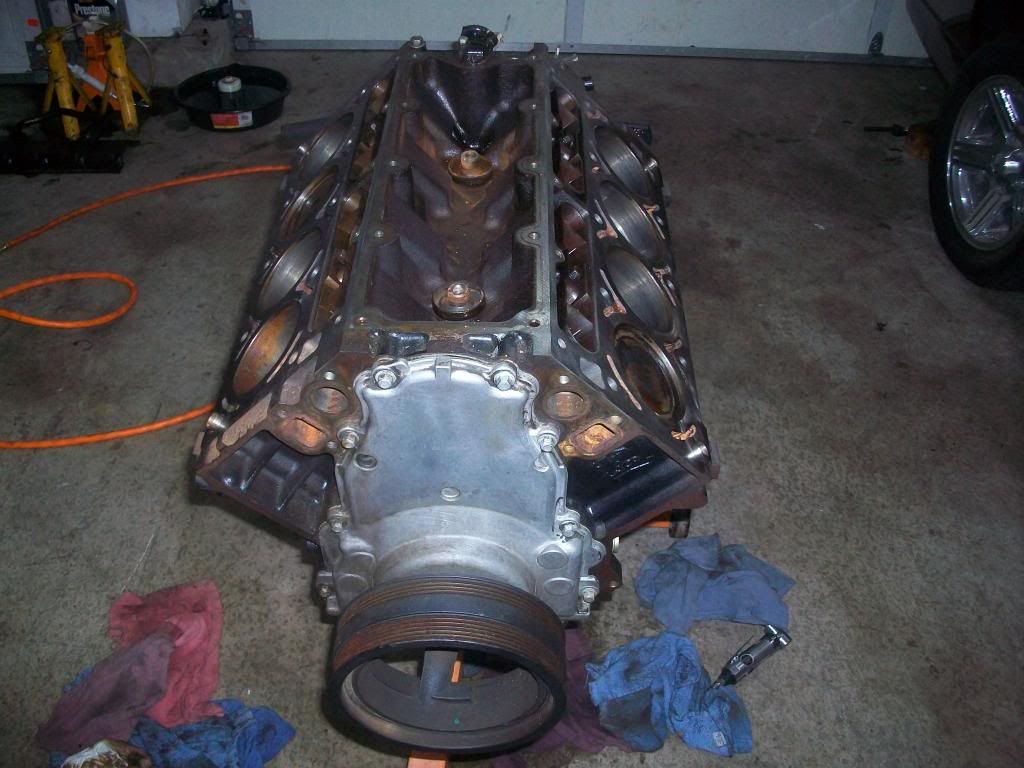
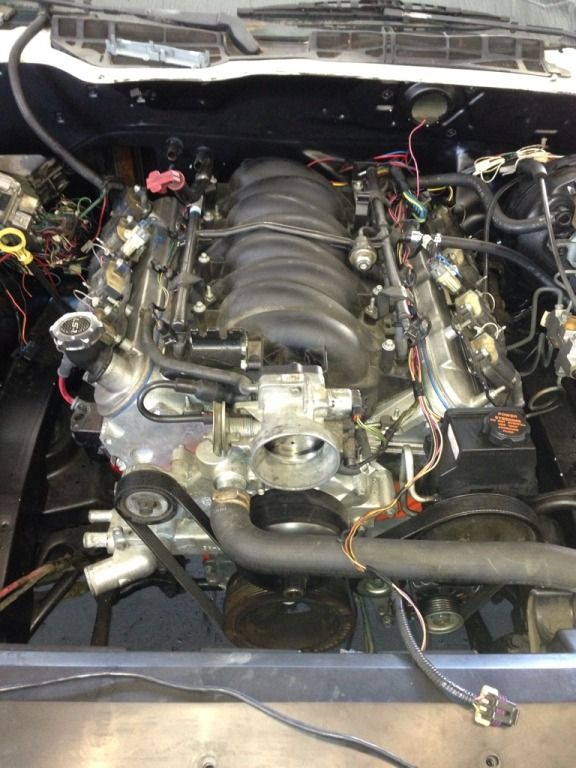
The 5.3 Block before I put the heads on and Painted it
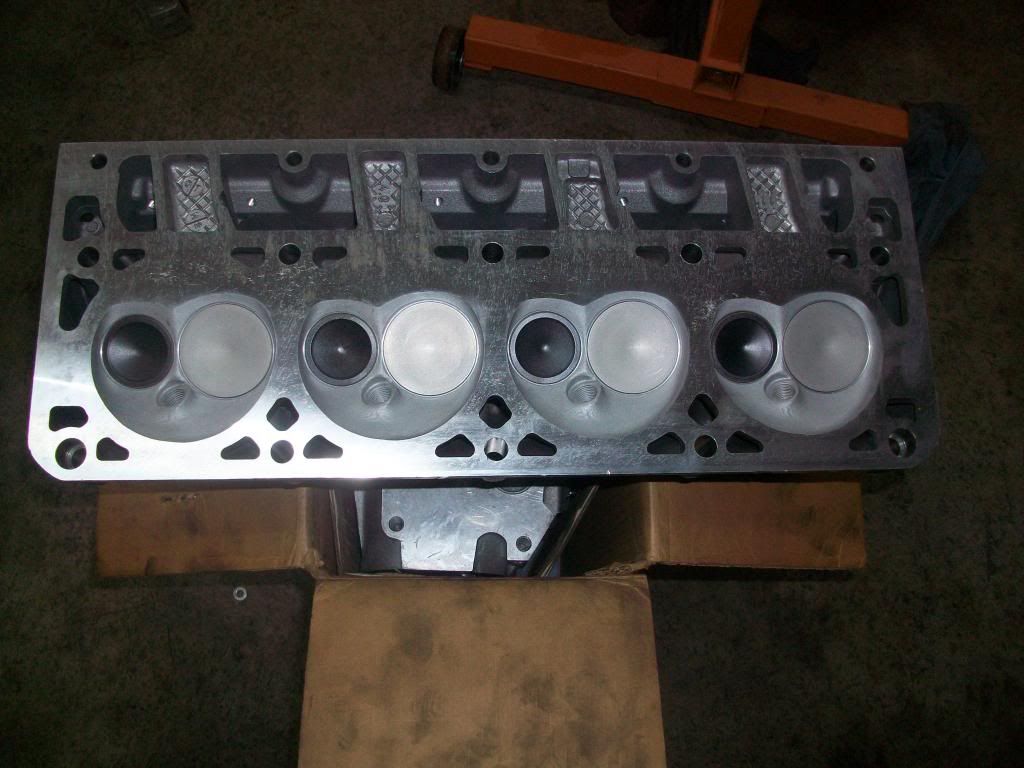
2.00" Valves in the 706 Heads
Heads on...

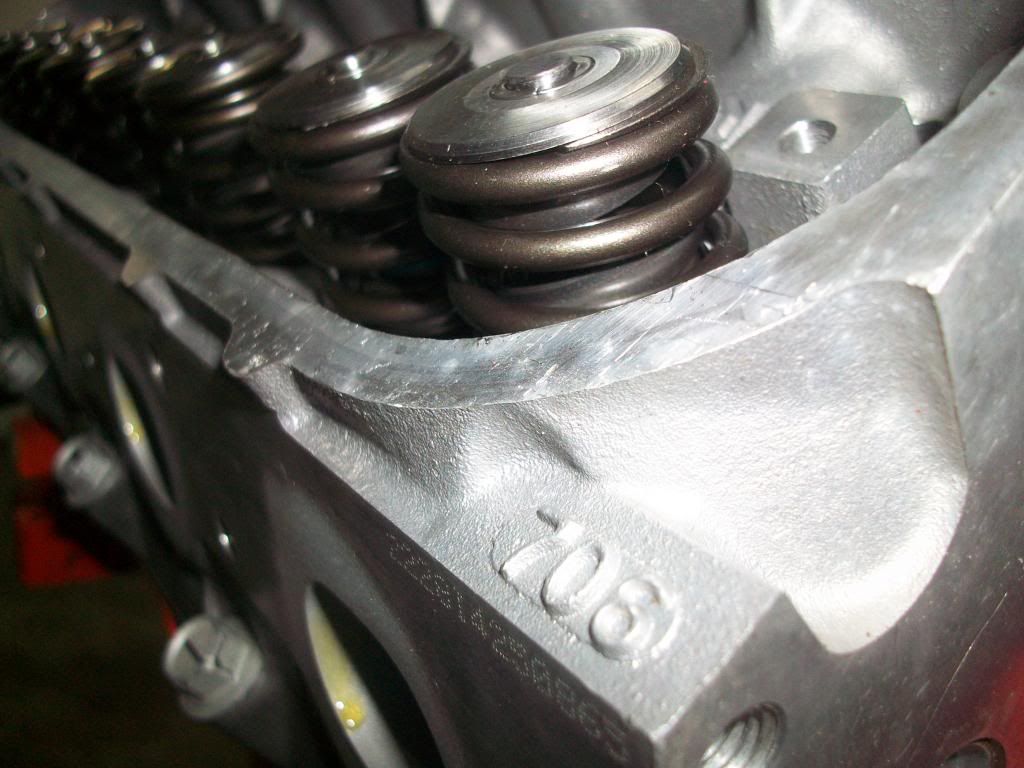
706 Heads and PRC Dual Gold .650's
Some of the parts
More Parts
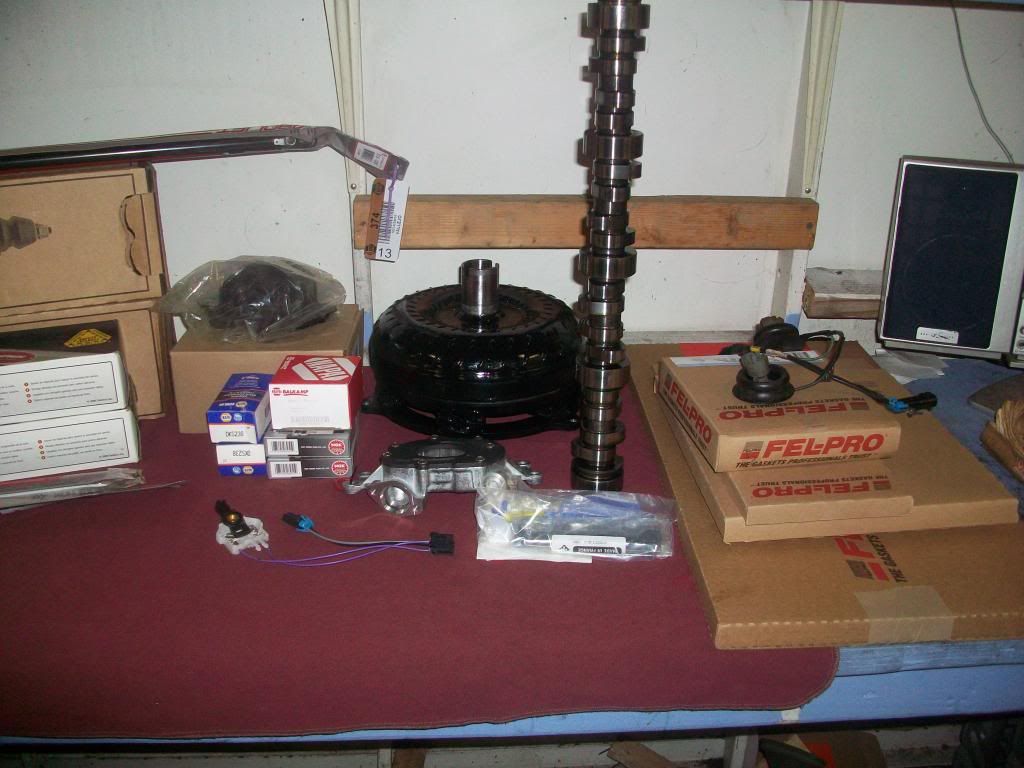
LS6 Cam, LS2 Timing Chain, Synergy Pump and Valve Covers on...
Unfortunately I can only work on this SOME weekends and at night. I just opened up a shop in the SF Bay Area so I've been busy working on everyone else's cars. It sucks but it pays the bills.
So this is what it comes down to... I got a good deal on an LS1/4L60e and a 5.3, separate deals but both in exchange for labor. It's how I got most of the parts that I'm using, except the ones I bought brand new.
I've had an 86 Iroc for a couple years awaiting my attention for the swap, but instead decided to use another 89 I picked up since it was a hardtop... The 86 Will be built by my girl.
Engine:
-5.3L LM7 from a 2001 Suburban
-TEA Stg 1.5 706 Heads
-PRC Dual .650 Lift Springs
-Thunder Racing 7.400" Pushrods
-Synergy Motorsports Oil Pump
-LS2 Timing Chain
-LS6 Cam from a 2001 Z06
-LS6 Valley Cover & PCV
-LS6 Intake Manifold
-2001 Camaro Exhaust Manifolds
-All New Gaskets
-New Knock Sensors
-New Engine Mounts
-NGK TR55 Plugs
Trans
-Built 4L60e (Let's See How Long It Lasts)
-PTC 3500 Stall Converter
Fuel
-4th Gen Fuel Tank w/ Stock Pump (for now)
-Stainless Steel Fuel Lines and Russell AN fittings
-Corvette Fuel Pressure Regulator
-97 Grand Prix Sending Unit
Rear
-4th Gen Rear
-3.42 Gears
Suspension
-BMR Lower Control Arms
-Edelbrock Panhard Bar
-Edelbrock Torque Arm
-New Monroe Shocks and Struts
-New Tie Rod Ends (Inner & Outer)
-New Sway Bar End Links
I will be using Spohn Engine Mounts and Spohn Transmission Mount w/ Driveshaft Loop
I'm putting it together as a Stock-ish NA setup and after its running will go on to add Twin Turbos, hence why I'm using the 5.3 Block instead of the LS1 Block with the 317 Heads that I have.
Now, Onto the pics....
The 5.3 Block before I put the heads on and Painted it
2.00" Valves in the 706 Heads
Heads on...
706 Heads and PRC Dual Gold .650's
Some of the parts
More Parts
LS6 Cam, LS2 Timing Chain, Synergy Pump and Valve Covers on...
 04-09-2013, 02:43 AM
#2
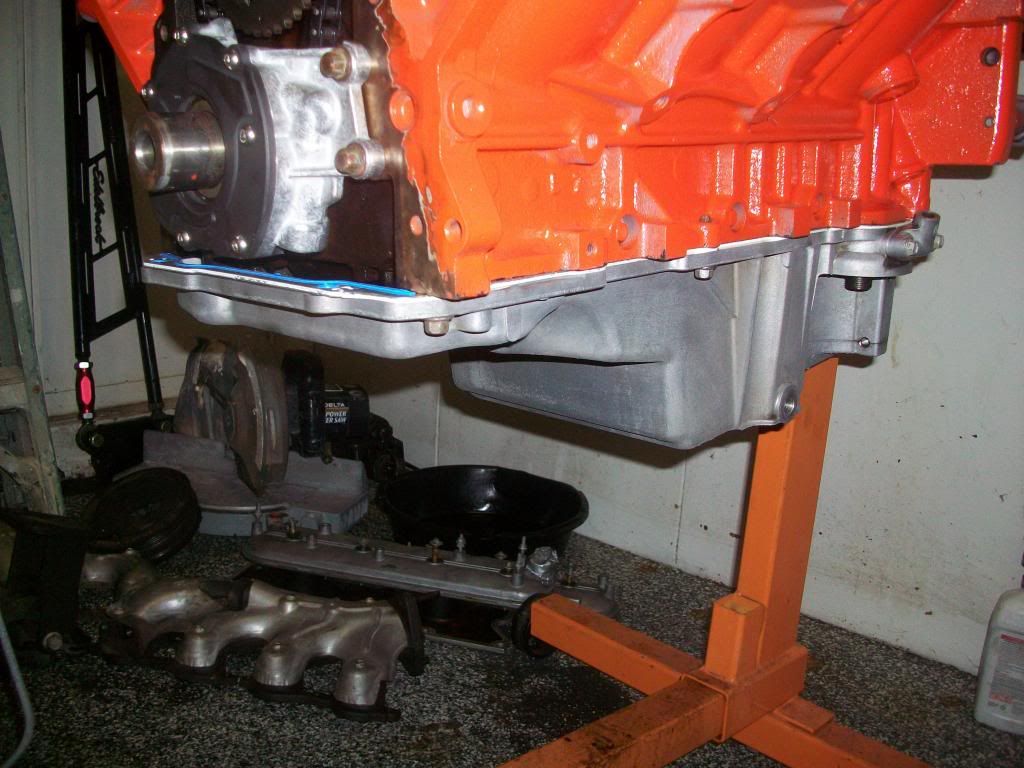
Having a Parts Washer DEFINITELY helps, Took me a few Hours to Clean the F-Body Oil Pan, But its clean, and installed...
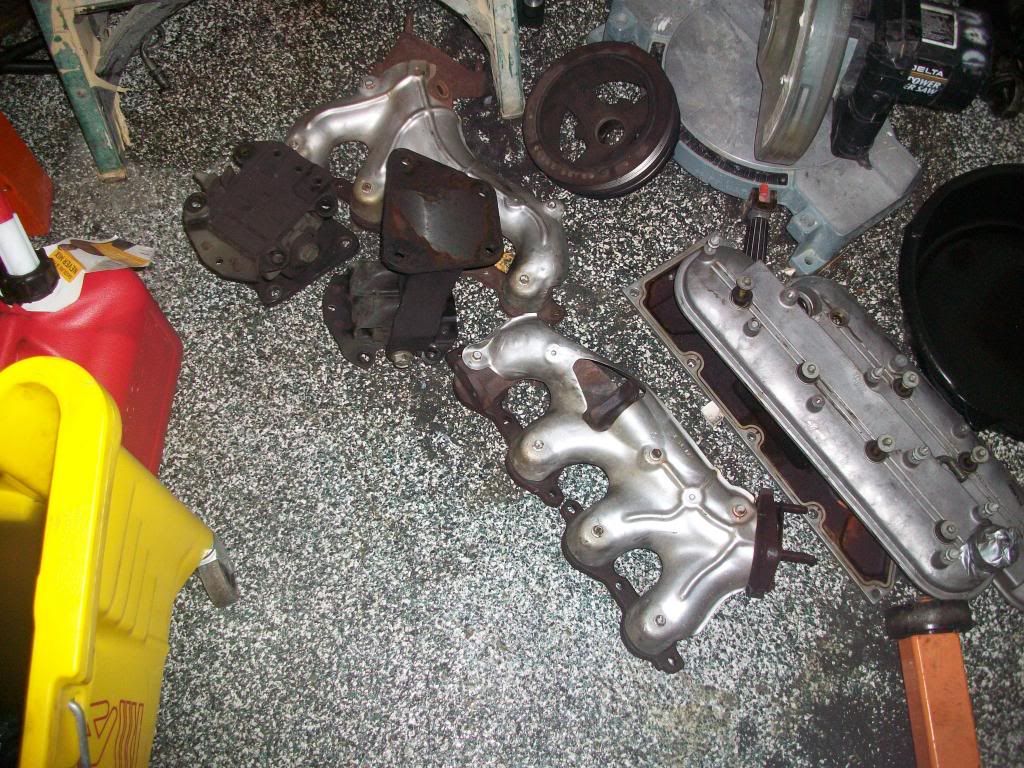
Manifolds, Balancer, and a few other parts...
Edelbrock Adjustable TQ Arm
4th Gen Tank
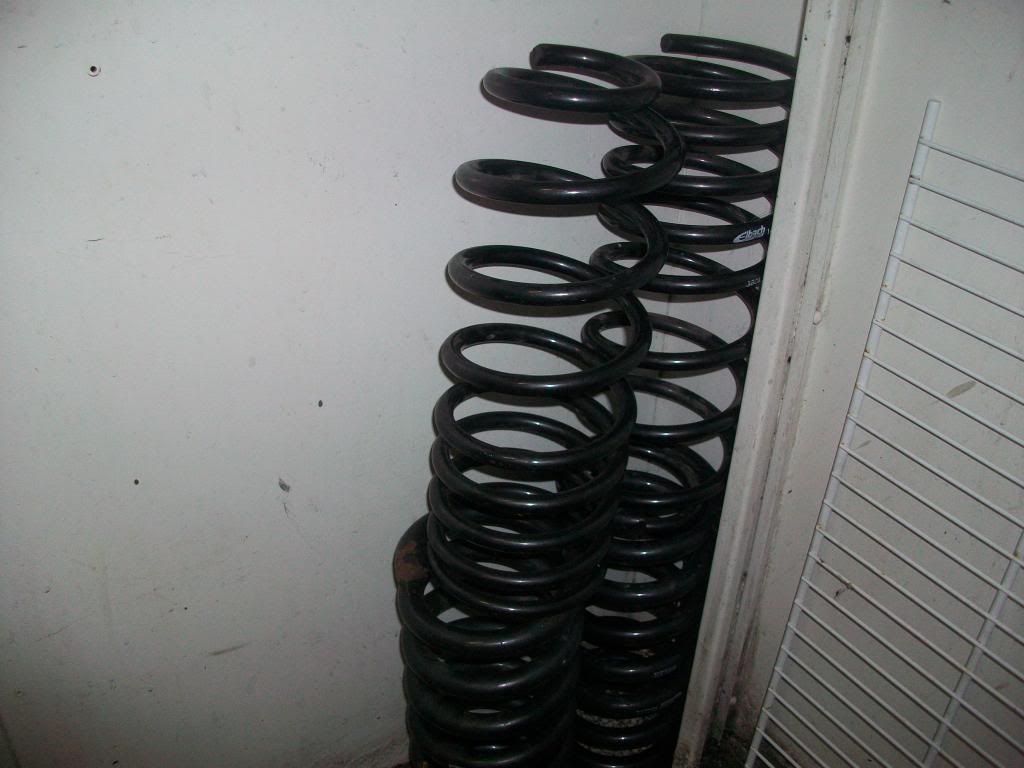
Eibach Pro-Kit Springs
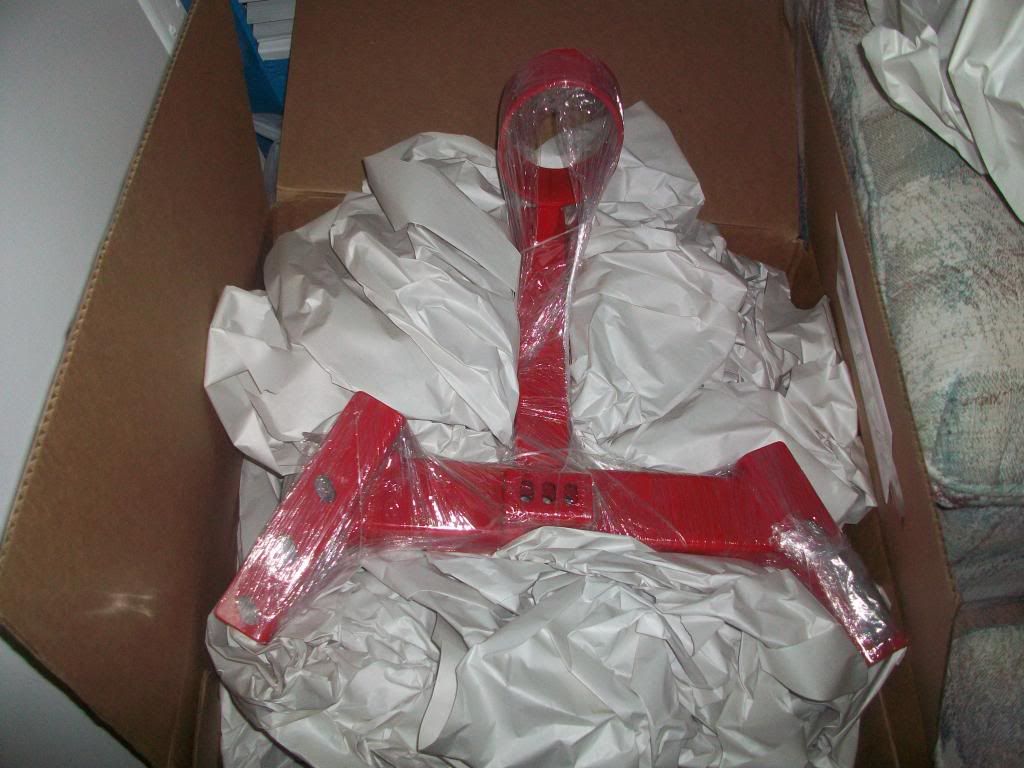
Spohn Trans Mount Powdercoated Red, It's a Shame it'll be hidden under the car!
Where I spend most of my days...
Manifolds, Balancer, and a few other parts...
Edelbrock Adjustable TQ Arm
4th Gen Tank
Eibach Pro-Kit Springs
Spohn Trans Mount Powdercoated Red, It's a Shame it'll be hidden under the car!
Where I spend most of my days...
04-09-2013, 02:45 AM
#3
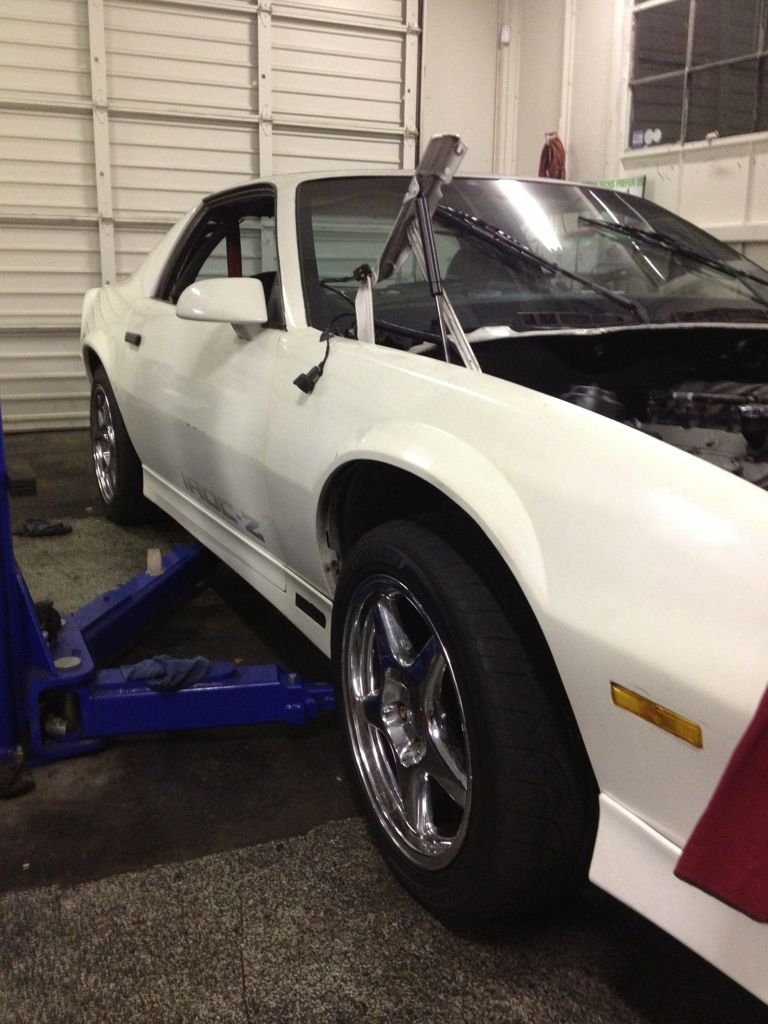
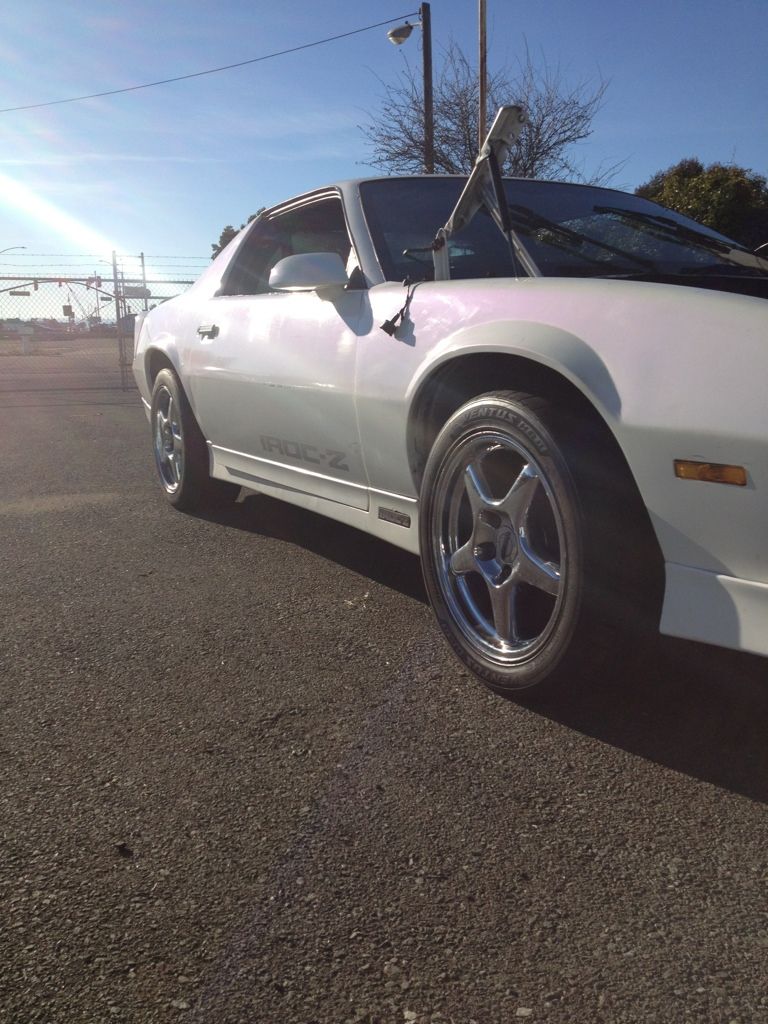
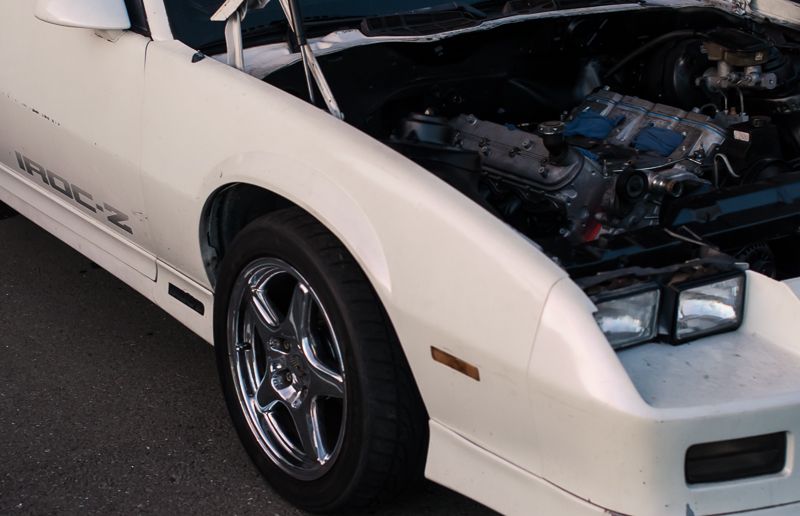
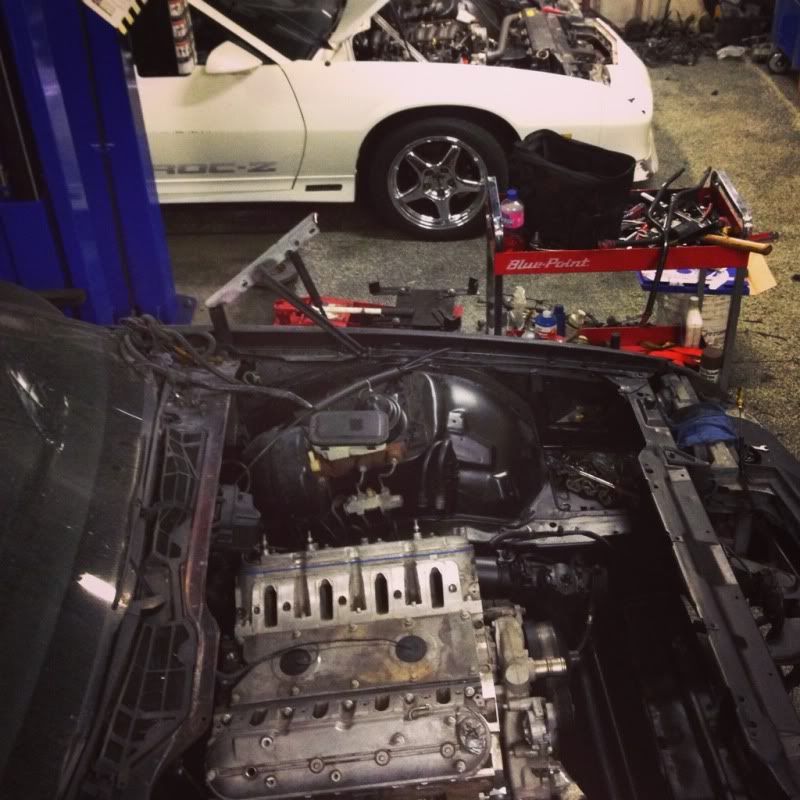
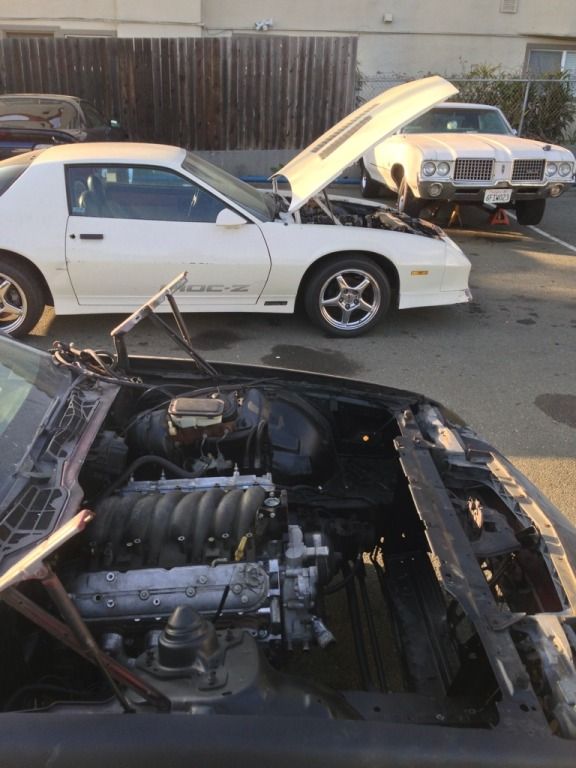
The Transplant Recipient... picked it up on 12/12/12. I'd been eyeing it for a year or two (Previous Owner let it sit for a while). I also have another 89 and an 86. The 86 was the previous swap candidate but it's in worse shape than this 89 though. In one of the pics you can see the primer black 86 in the background.
It's been repainted a Pearl White, has a little paint damage on the front end. Left Front fender needs to be replaced, but it runs and drives. Needs a few little things but I'll take care of those quickly. Going to put in the lowering springs and Shocks/Struts on Sunday. Possibly add the ZR1's I've had set aside.
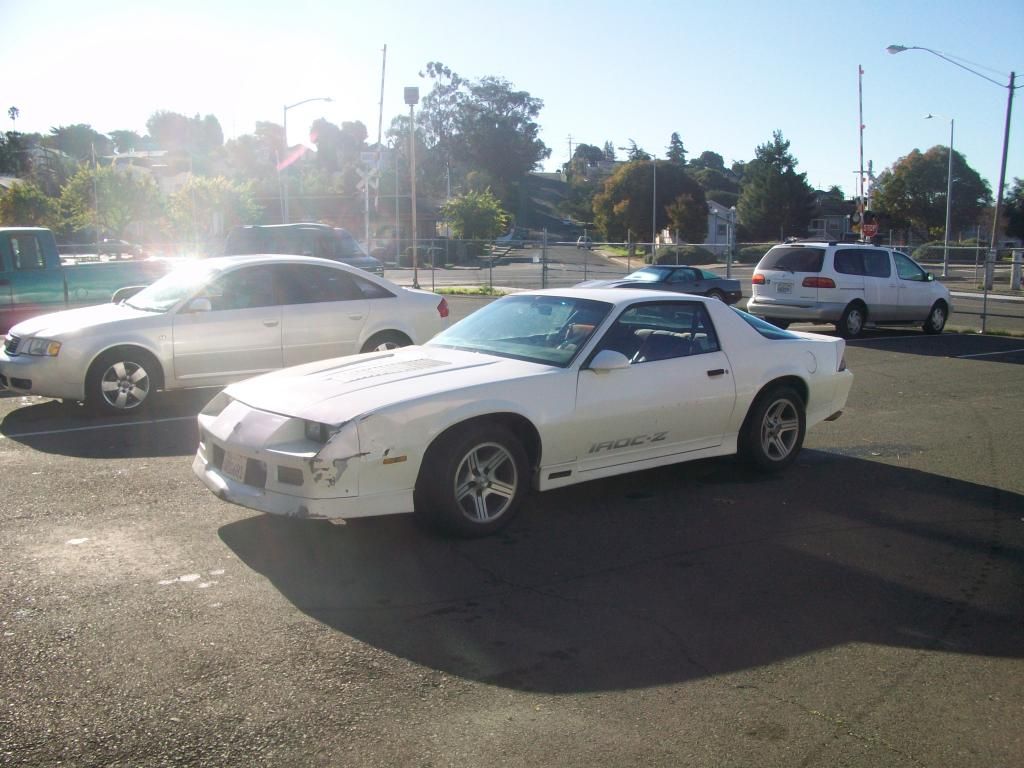
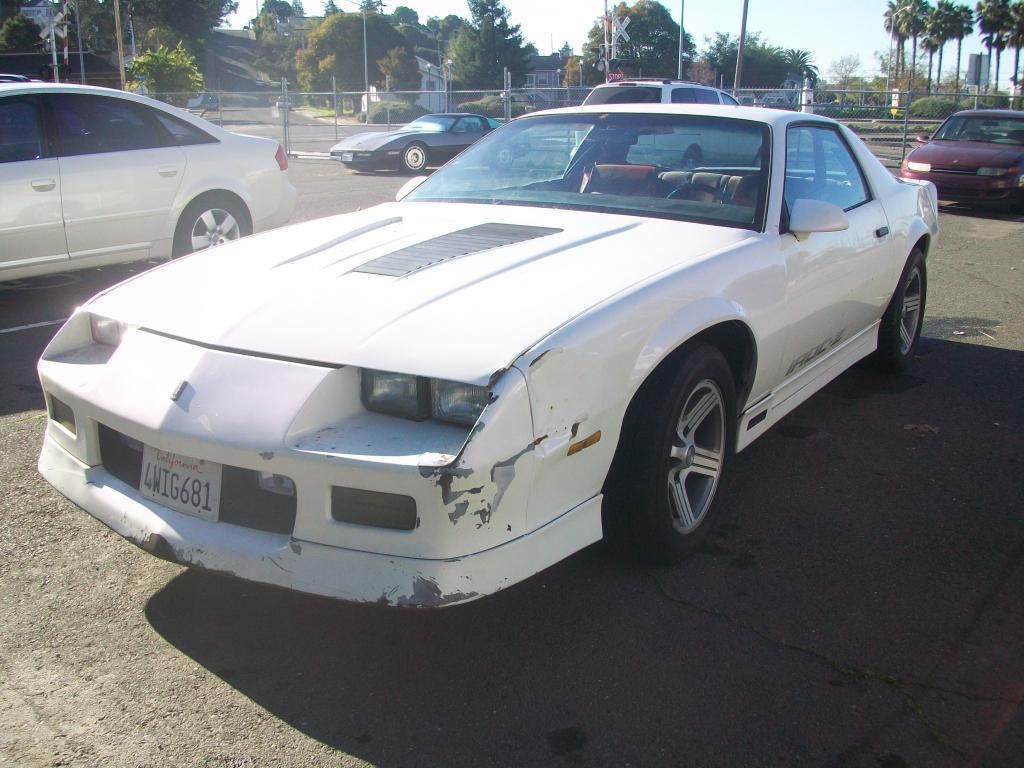
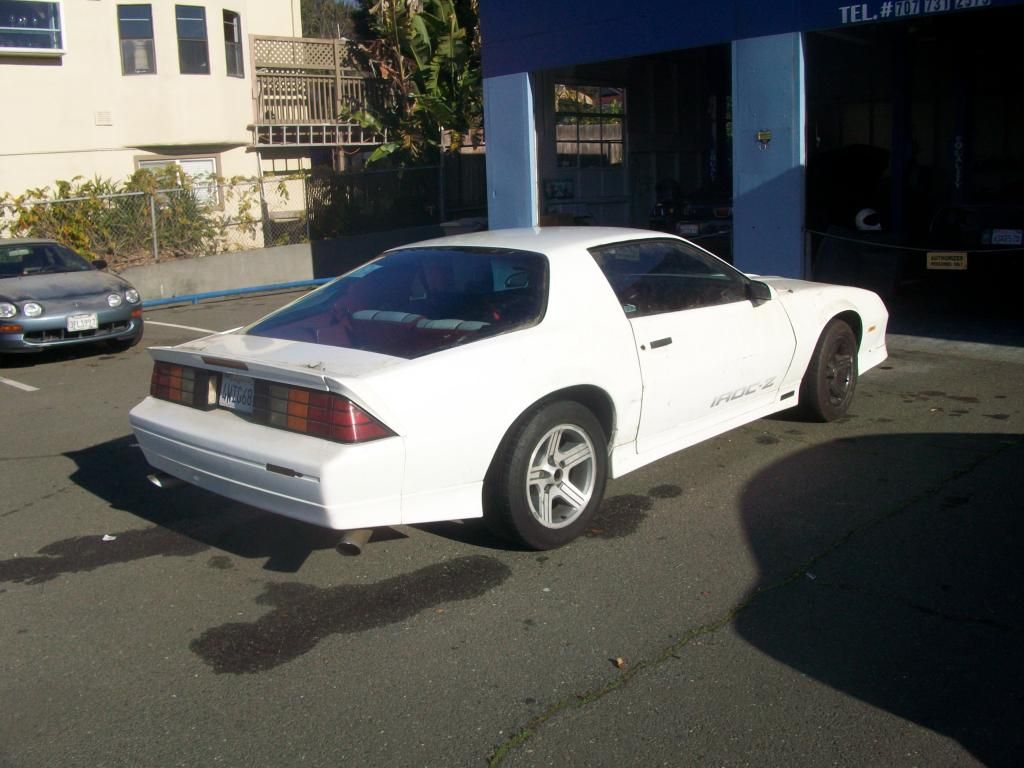
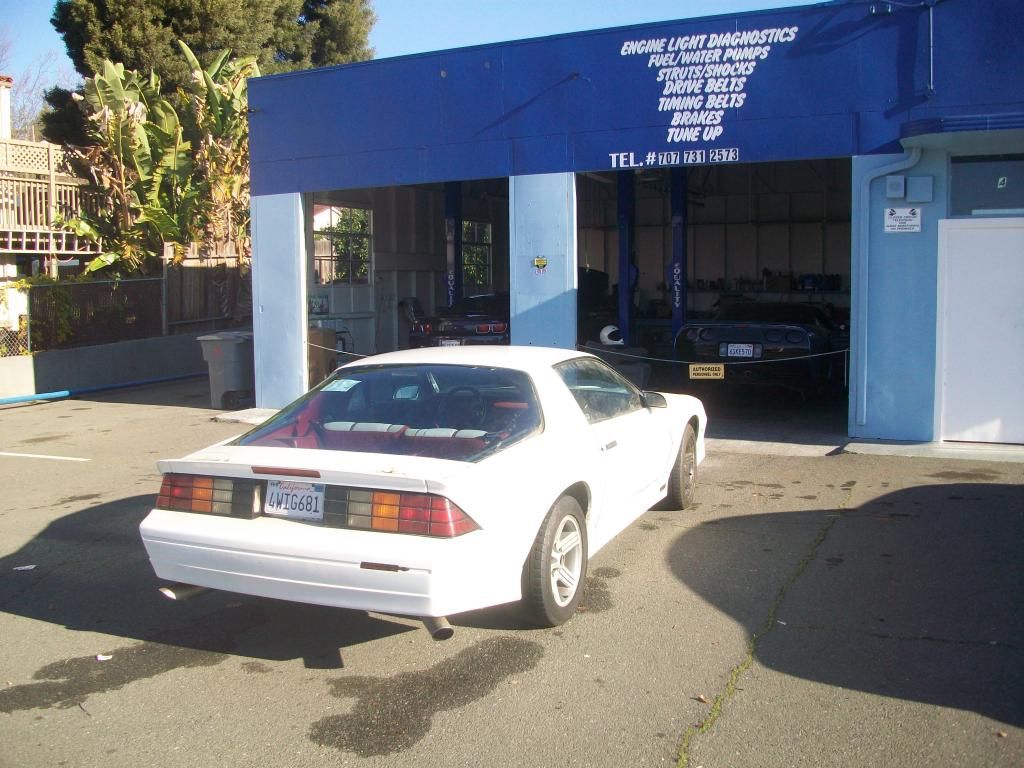
It's been repainted a Pearl White, has a little paint damage on the front end. Left Front fender needs to be replaced, but it runs and drives. Needs a few little things but I'll take care of those quickly. Going to put in the lowering springs and Shocks/Struts on Sunday. Possibly add the ZR1's I've had set aside.
04-09-2013, 02:46 AM
#4
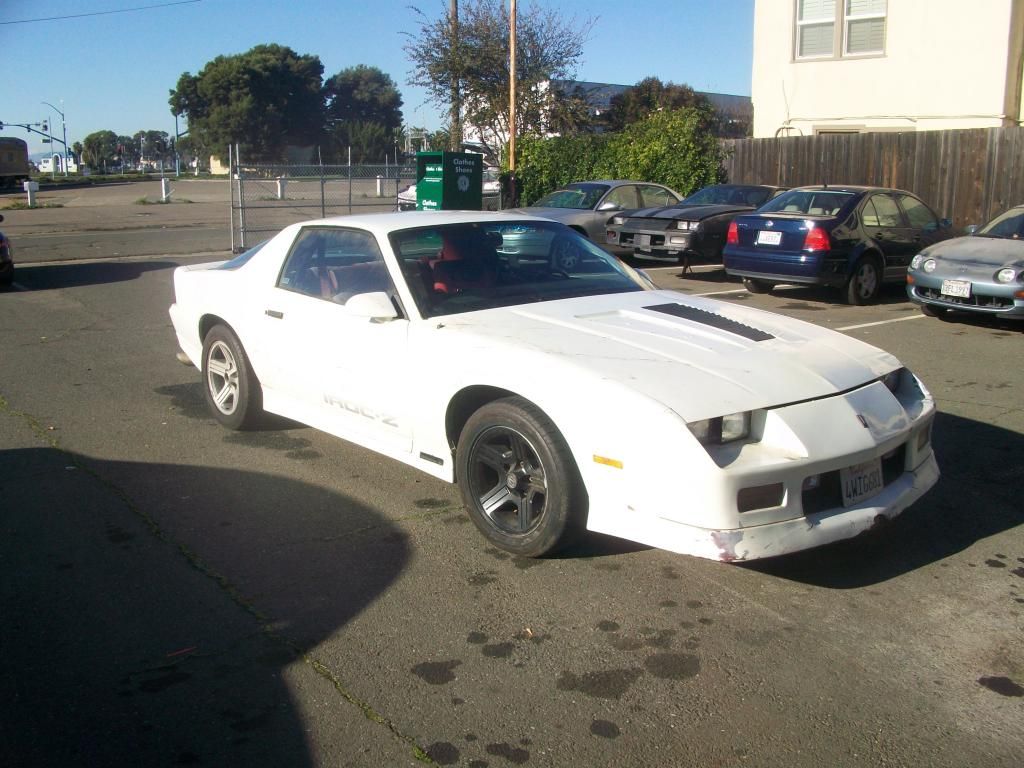
Here's a few pics of my 2000 SS... Been around Camaros for most of my life... Going to be painting this Iroc the same Blue.
Video from when I first installed the G5X4 cam a year and a half ago....
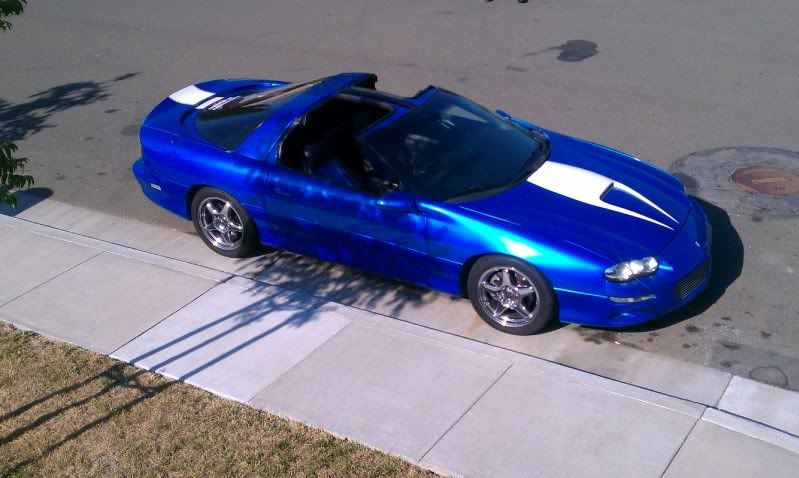
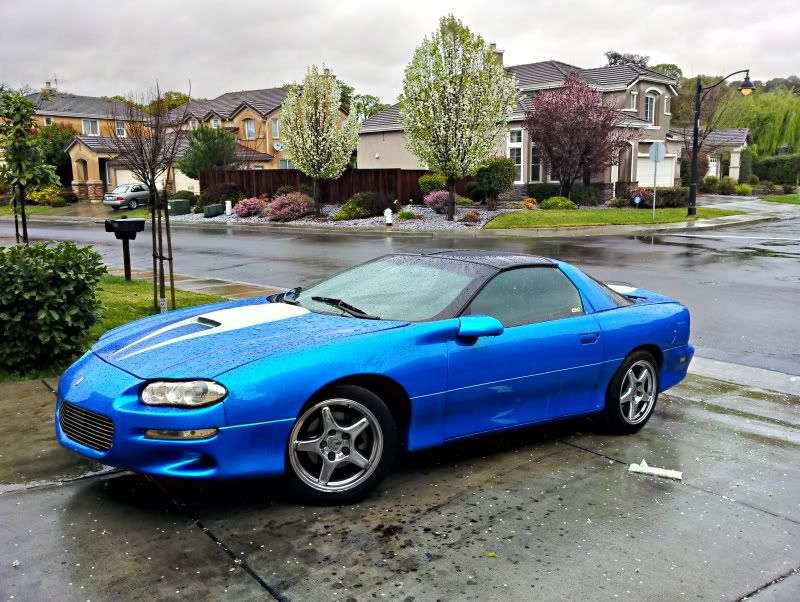


And a pic of my 00 next to the other 89
Video from when I first installed the G5X4 cam a year and a half ago....
And a pic of my 00 next to the other 89

 04-09-2013, 02:49 AM
#6
12/23/12
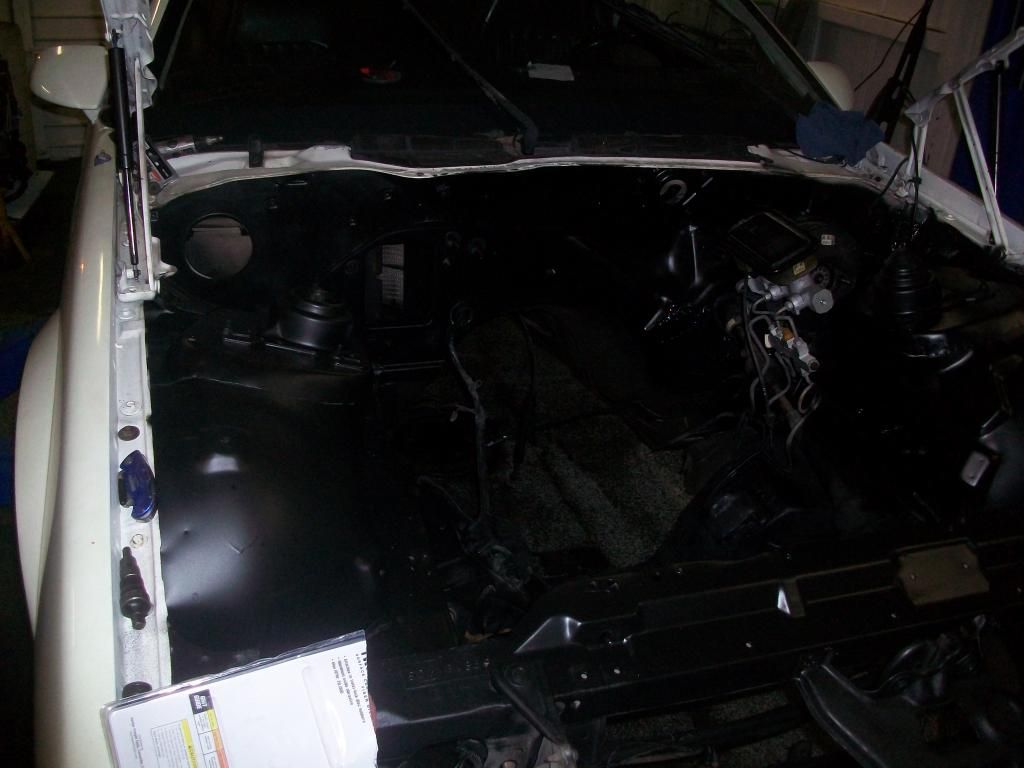
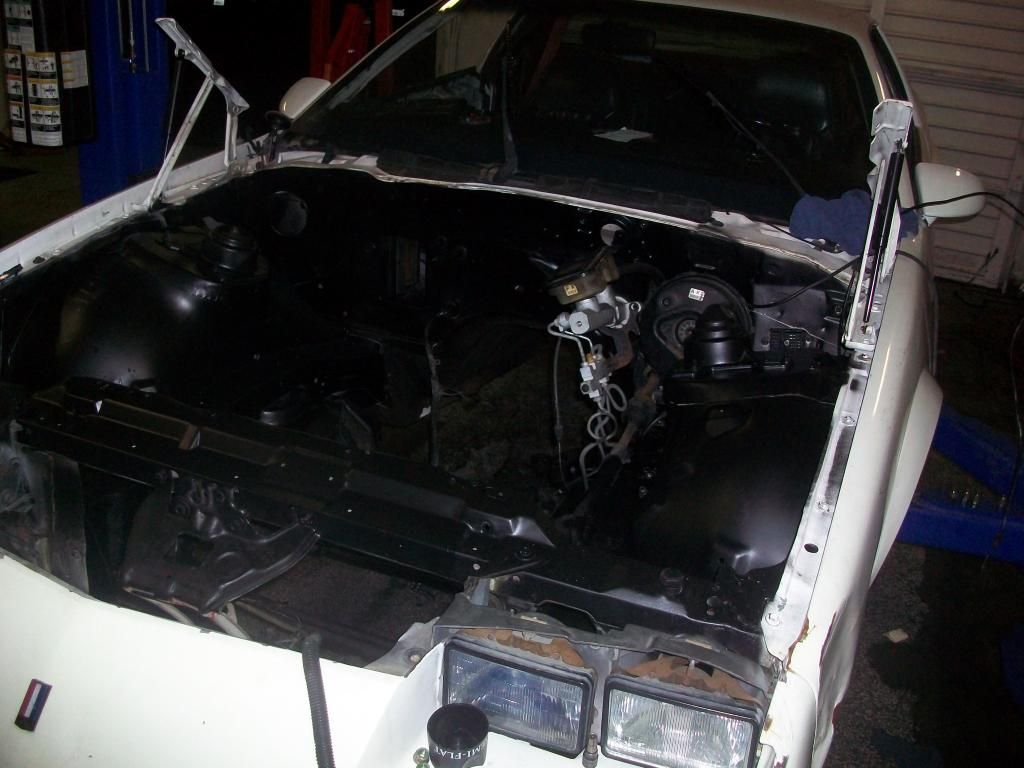
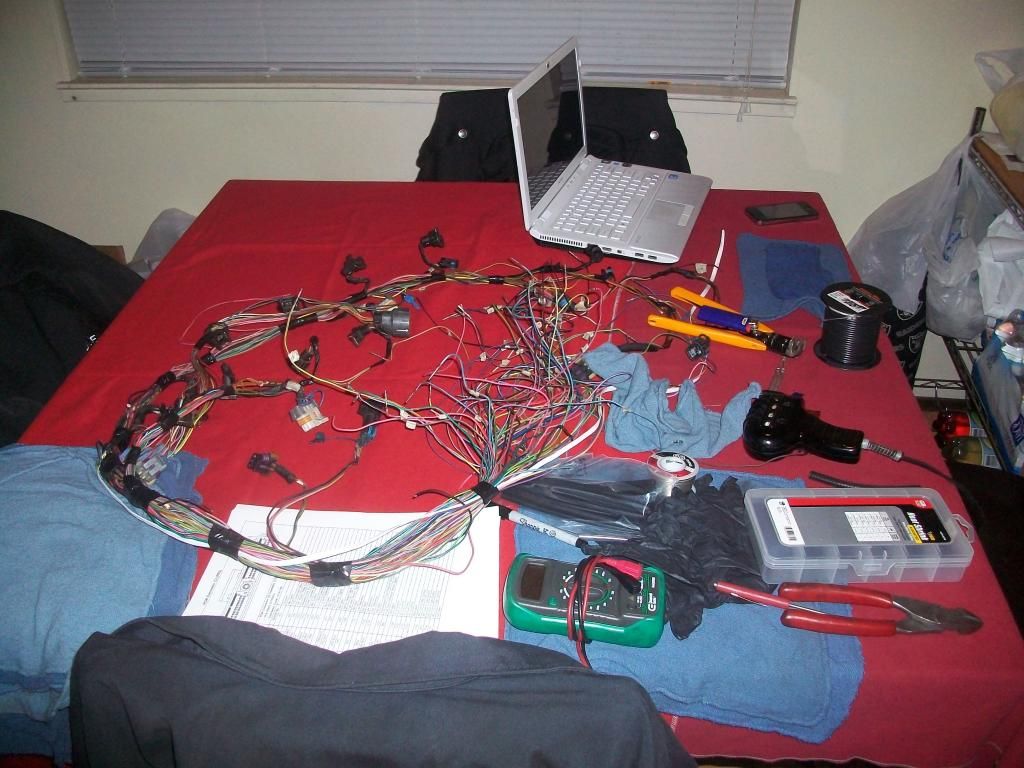
Pressure washed the engine bay and the undercarriage a little today between XMas shopping and all the other fun involved in the holidays... Also planning on undercoating it so it stays nice and clean... A few pics, Going to start working on the harness tomorrow as well...
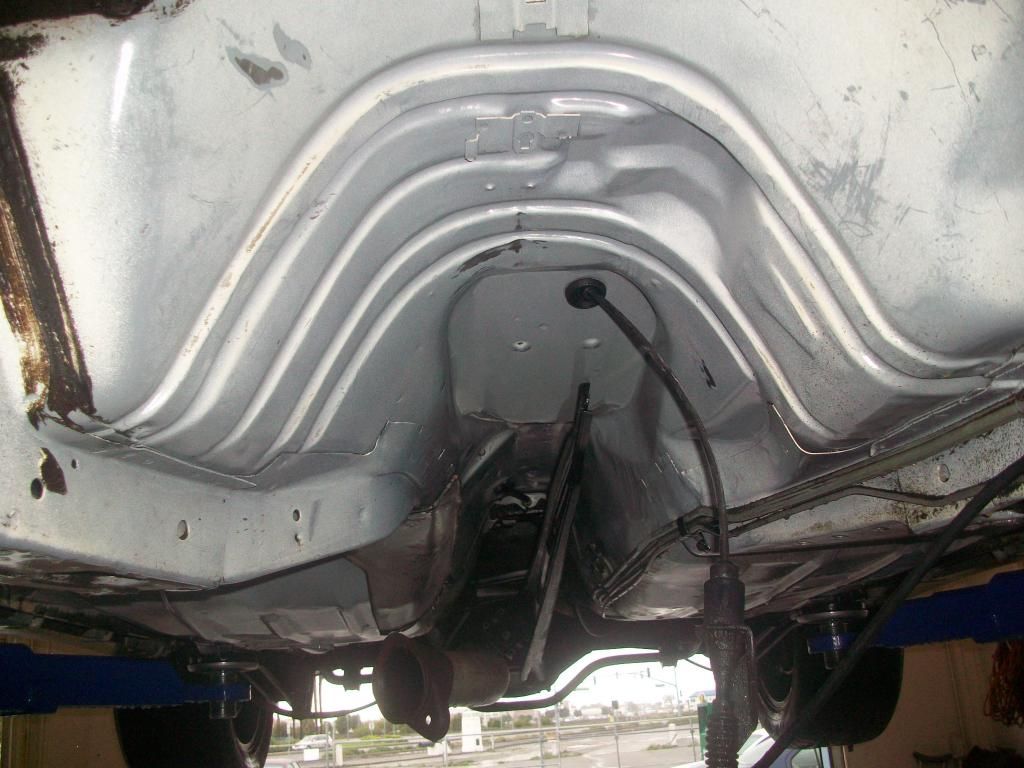
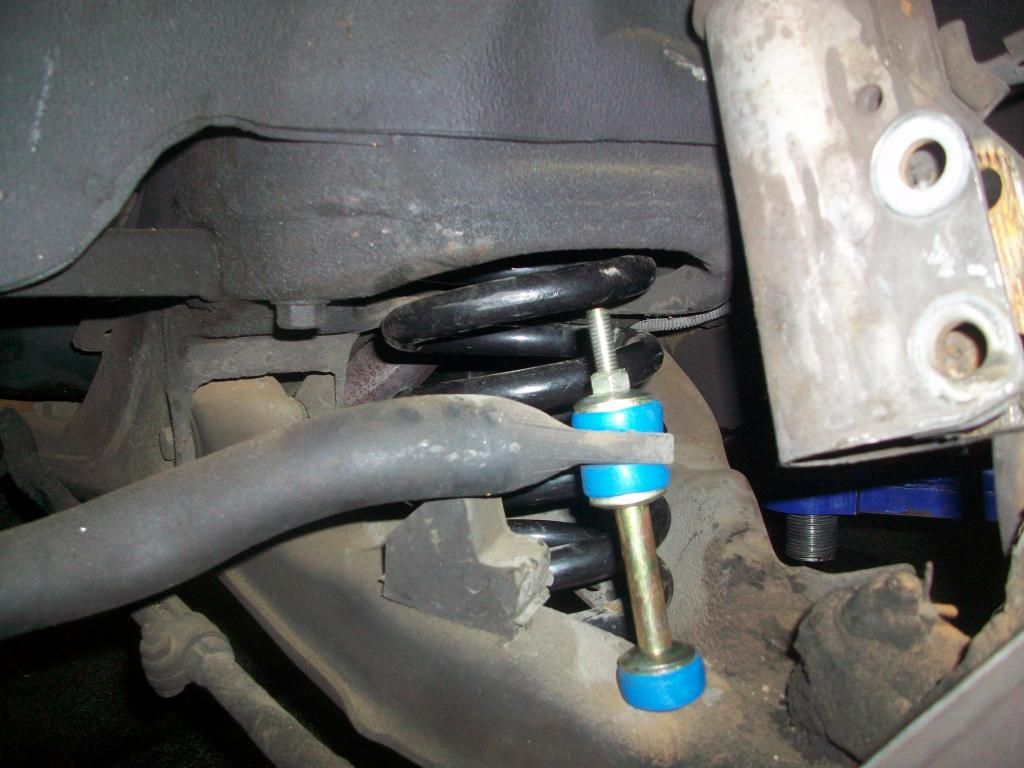
Also, put the Eibach Pro-Kit Springs in along with new sway bar end links last week before the engine came out... Doesn't seem like it's low enough for me, but We'll see after I put the ZR1's on...
Pressure washed the engine bay and the undercarriage a little today between XMas shopping and all the other fun involved in the holidays... Also planning on undercoating it so it stays nice and clean... A few pics, Going to start working on the harness tomorrow as well...
Also, put the Eibach Pro-Kit Springs in along with new sway bar end links last week before the engine came out... Doesn't seem like it's low enough for me, but We'll see after I put the ZR1's on...
04-09-2013, 02:50 AM
#7
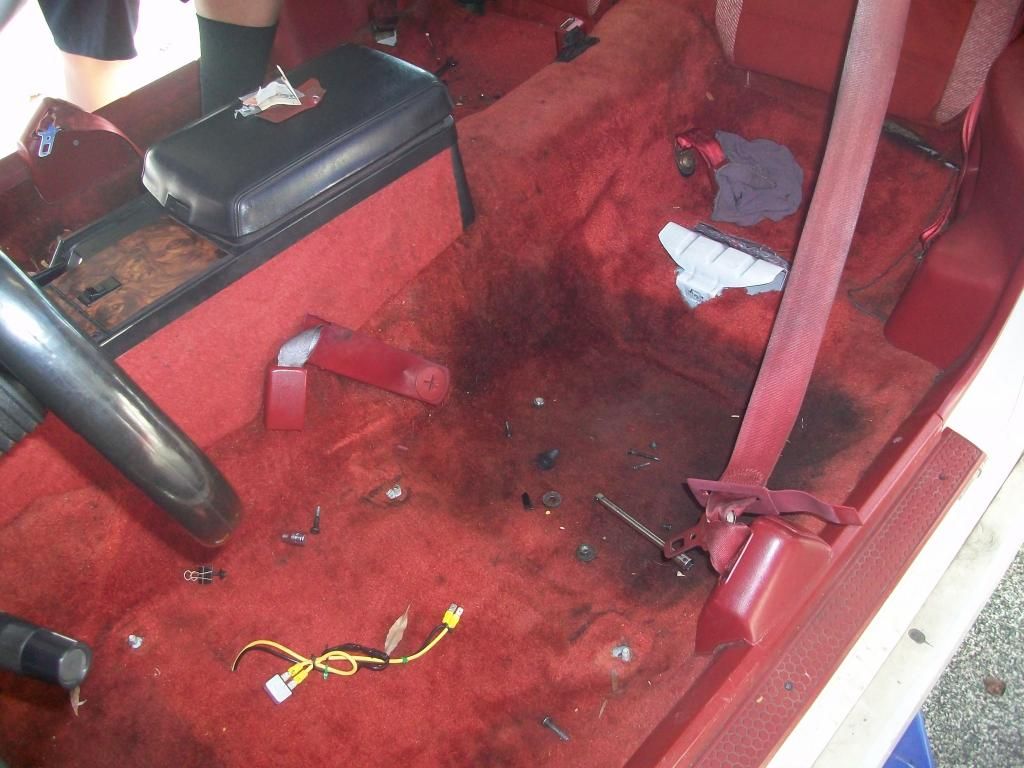
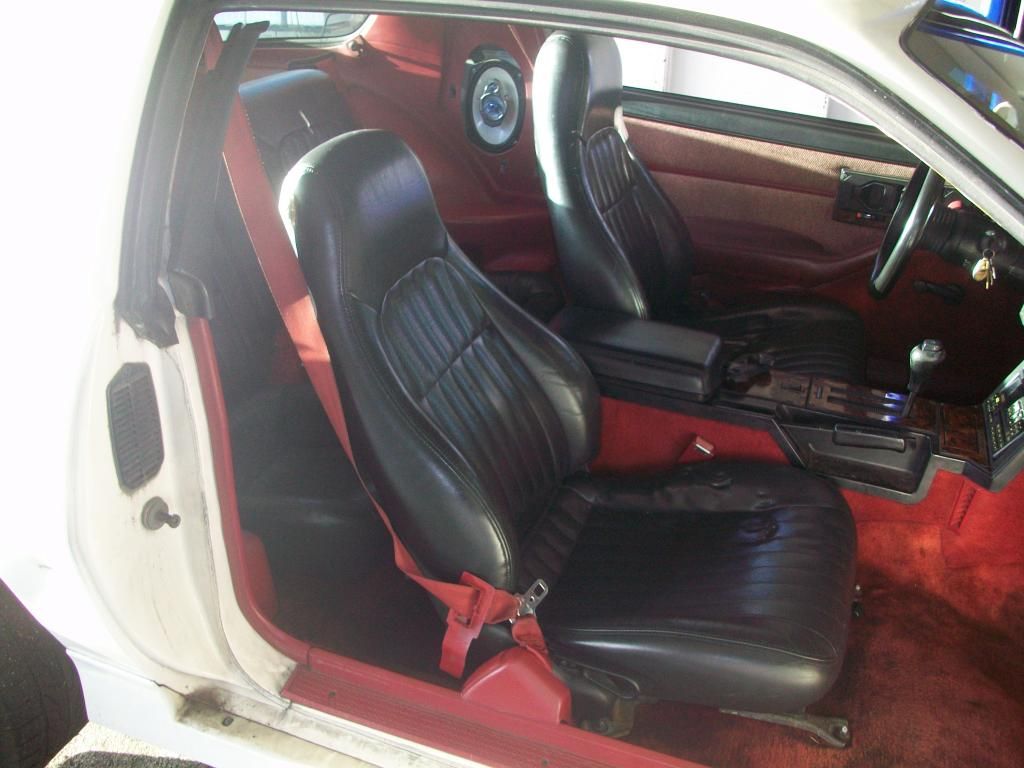
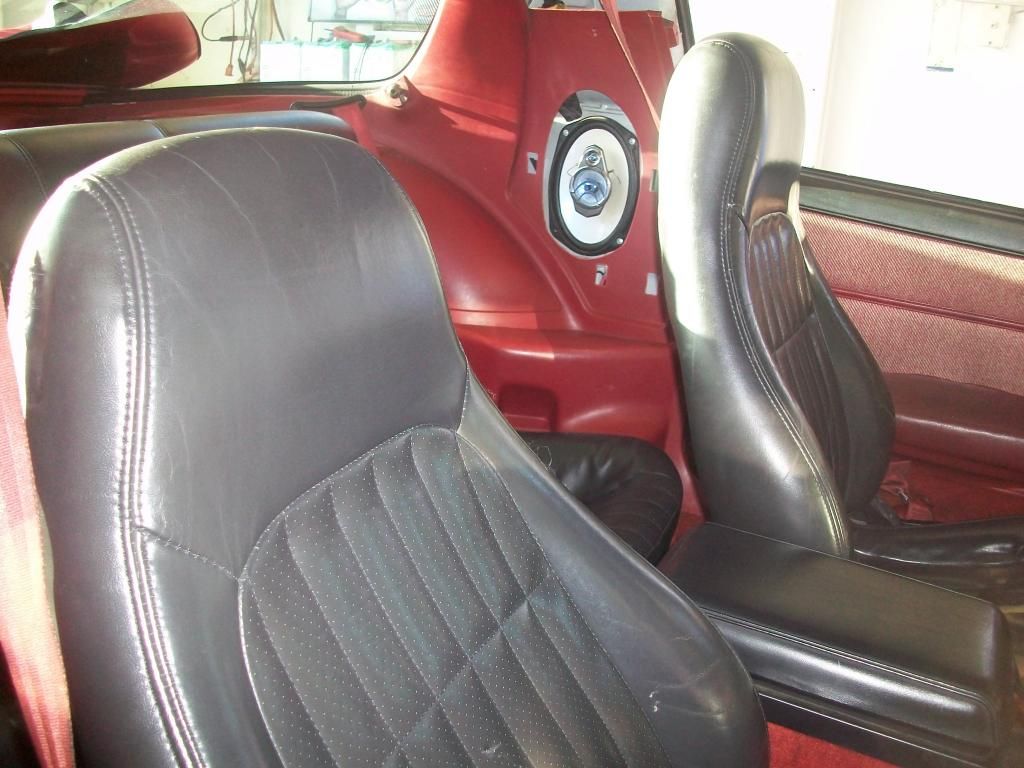
Removed the Original seats... the carpet needs some MAJOR cleaning... but I'm replacing all the red stuff with black for a cleaner look once the engine is running...
Installed the original seats from my SS... Going to probably get these recovered in Black Leather and White Suede or white leather eventually, but that'll come later
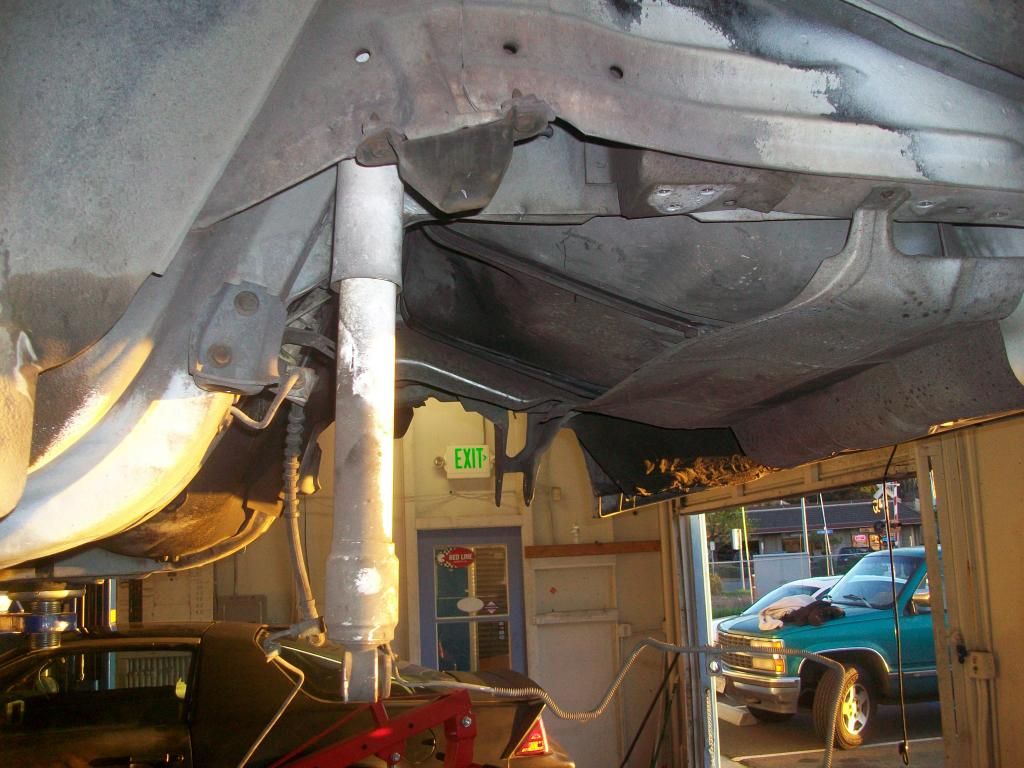
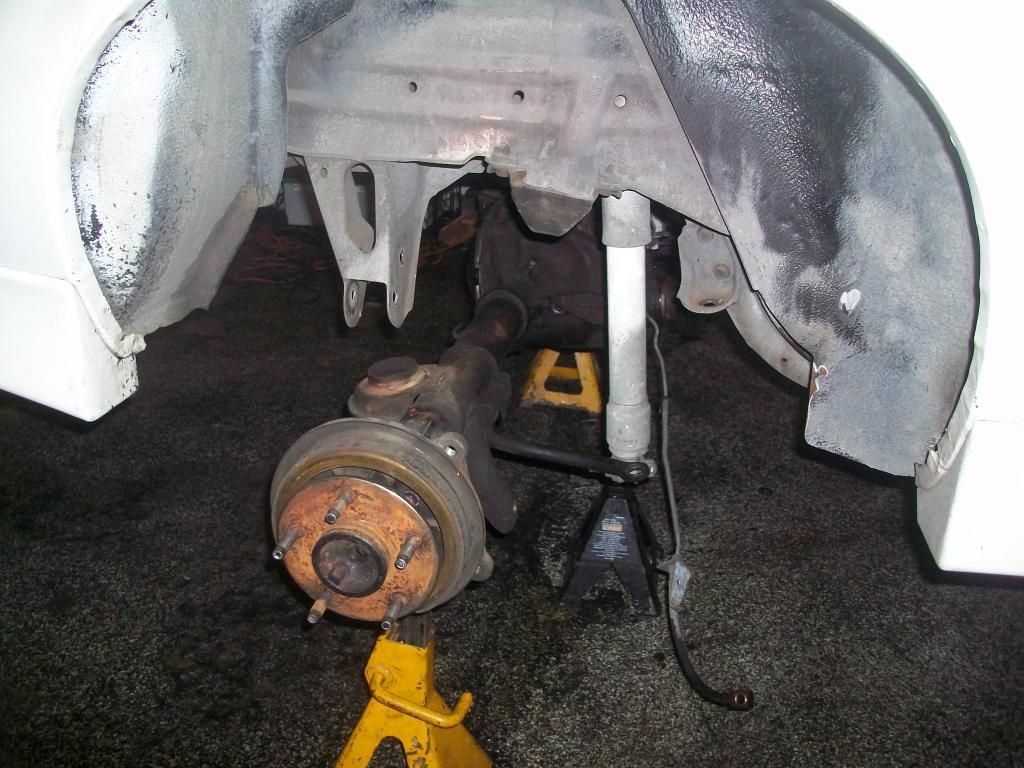
Removed the rear from the car to swap it with the 4th Gen rear with 3.42's... You can see the 86 Iroc in the background which is going to be built up next...
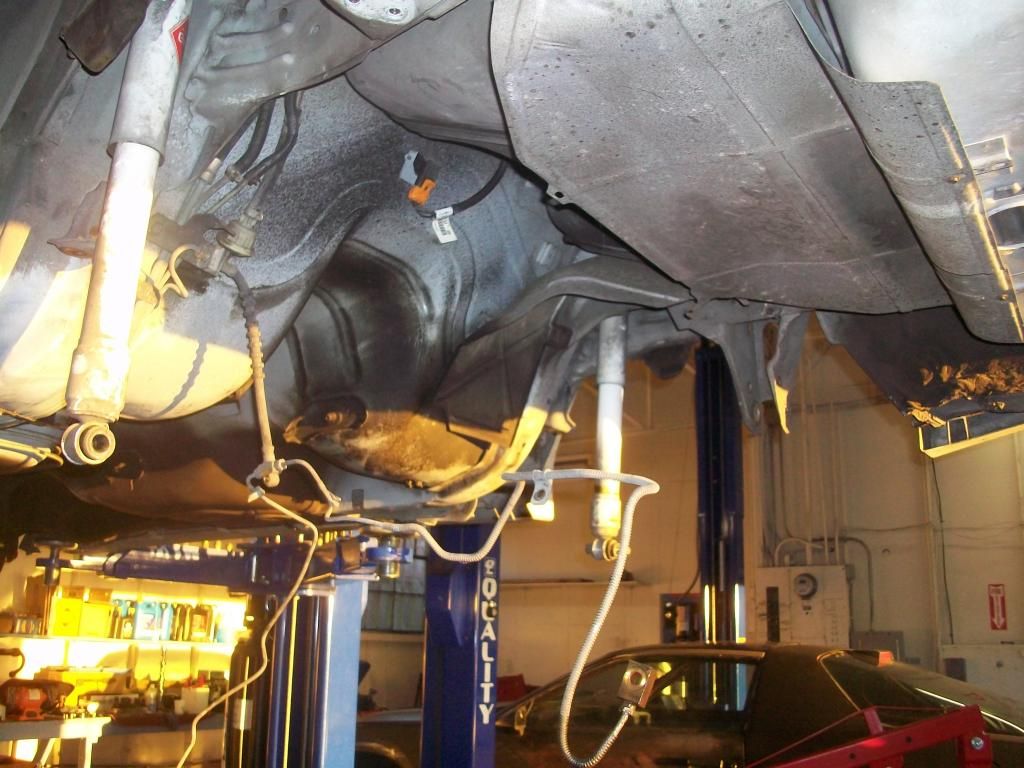
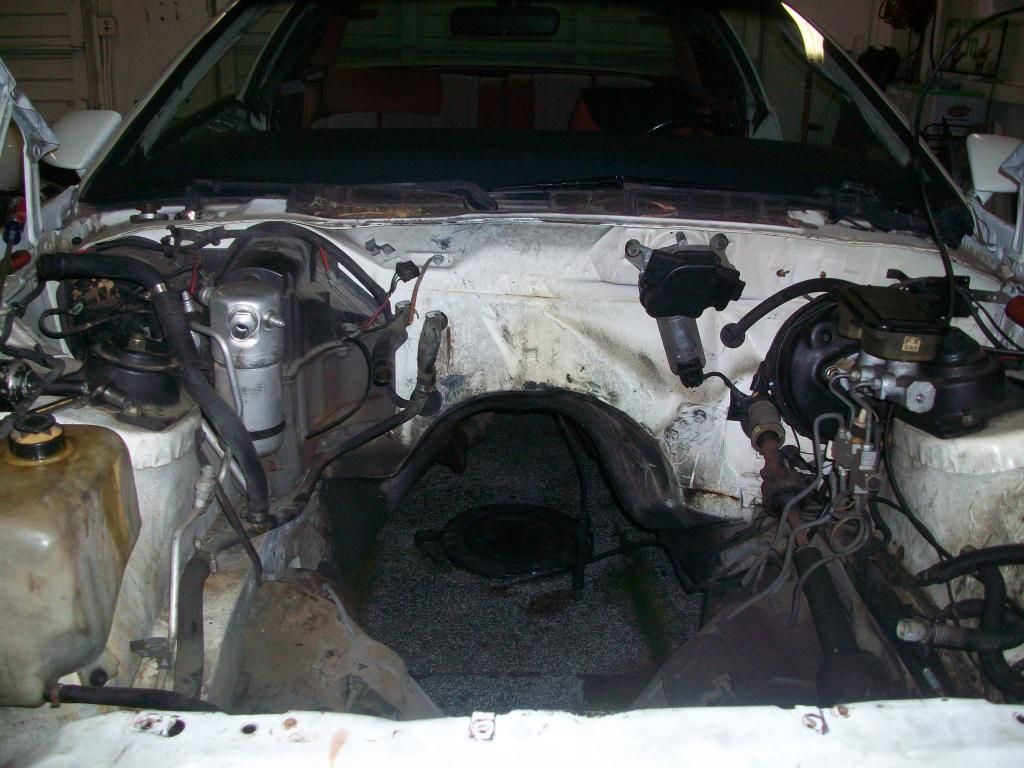
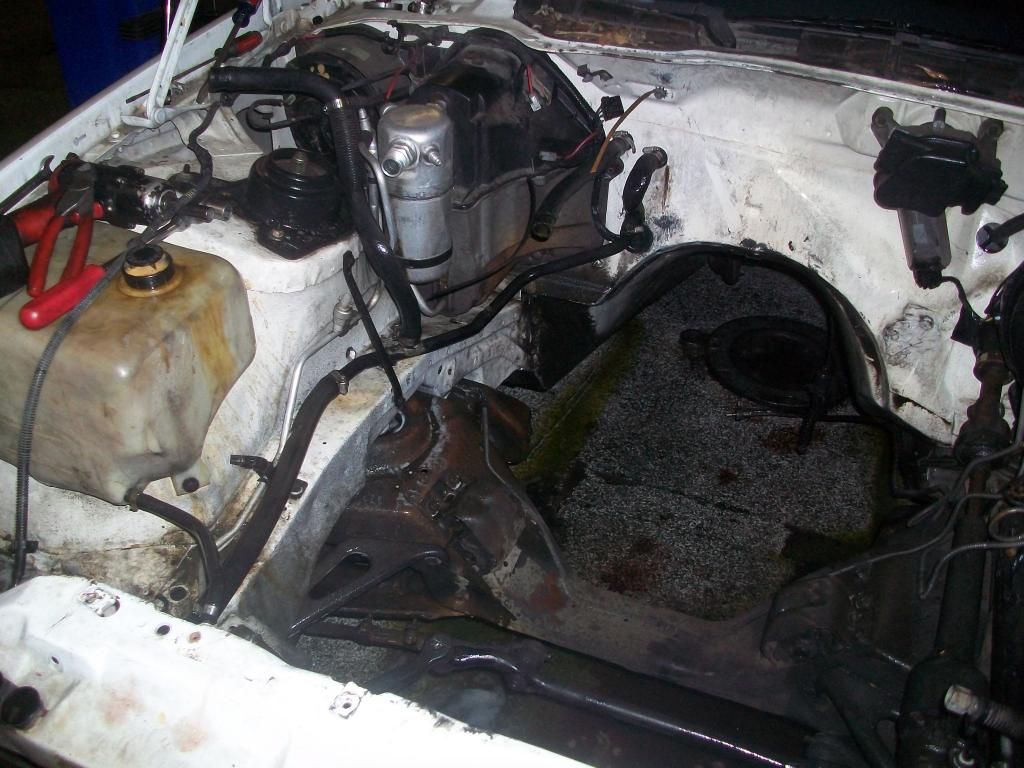
Sprayed the Engine Bay black, used Rattle can since I don't have a sprayer, came out pretty good, going to sand it a little and coat it a couple more times before the engine goes in it...
Also pressure washed the trans... yeah yeah yeah I know... I shouldn't have... oh well I'm going to build another one for it so that when this takes a dump on me I'll have another one ready...
4th Gen rear sitting under the car, not bolted up yet, since I've got to drop the tank first.
Installed the original seats from my SS... Going to probably get these recovered in Black Leather and White Suede or white leather eventually, but that'll come later
Removed the rear from the car to swap it with the 4th Gen rear with 3.42's... You can see the 86 Iroc in the background which is going to be built up next...
Sprayed the Engine Bay black, used Rattle can since I don't have a sprayer, came out pretty good, going to sand it a little and coat it a couple more times before the engine goes in it...
Also pressure washed the trans... yeah yeah yeah I know... I shouldn't have... oh well I'm going to build another one for it so that when this takes a dump on me I'll have another one ready...
4th Gen rear sitting under the car, not bolted up yet, since I've got to drop the tank first.
Trending Topics
04-09-2013, 02:51 AM
#8
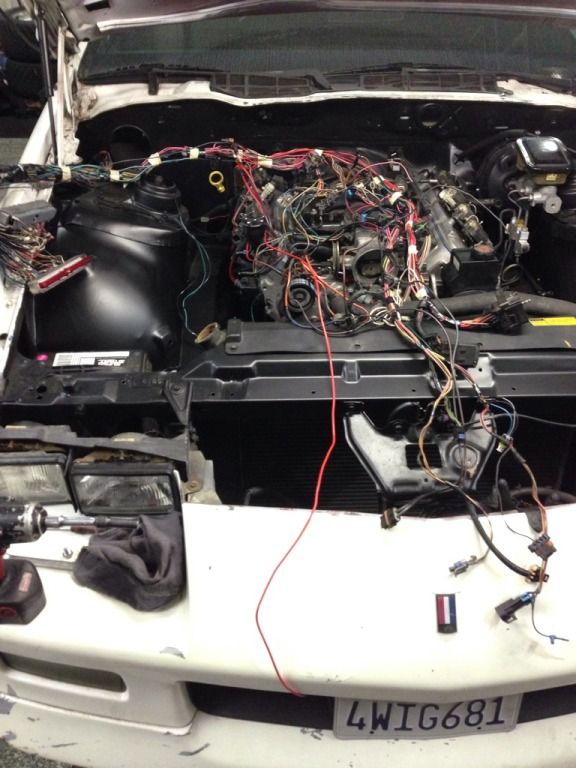
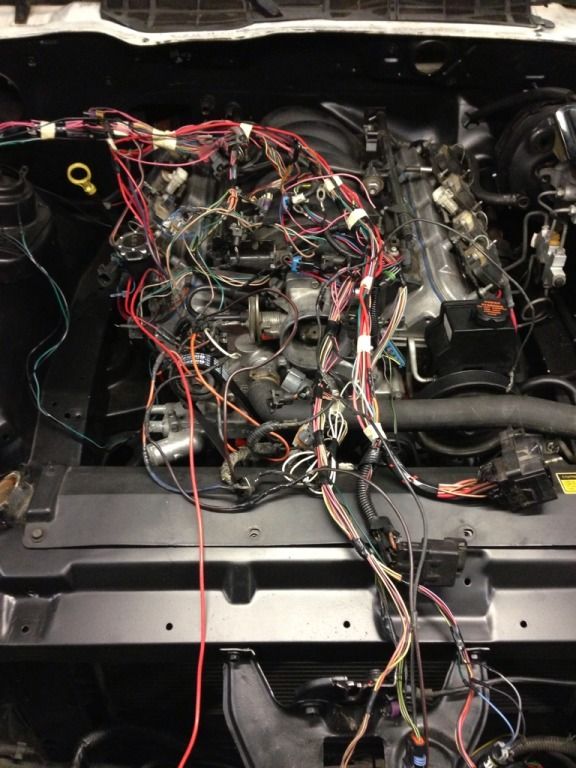
UPDATES: Finally getting around to posting them...
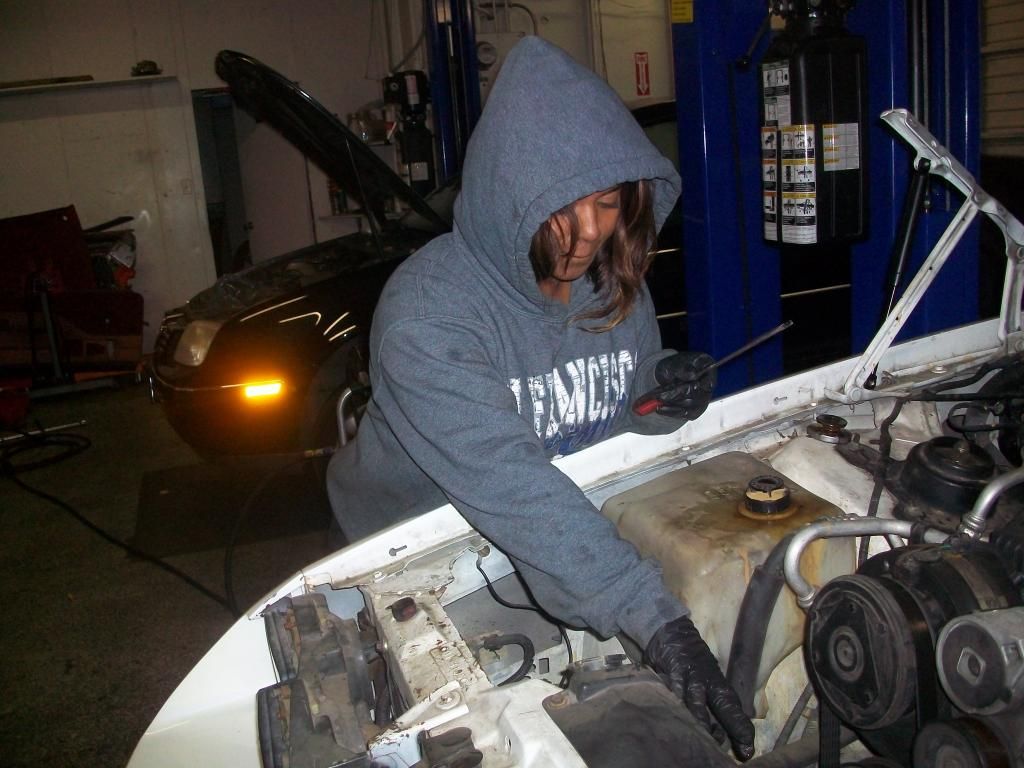
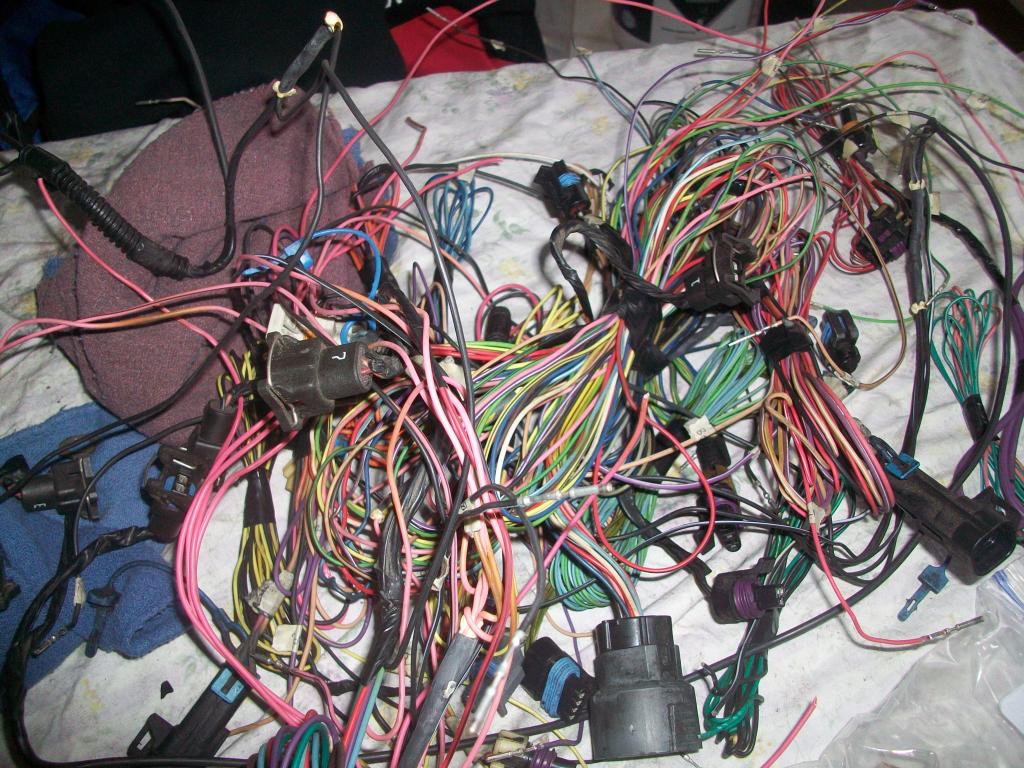
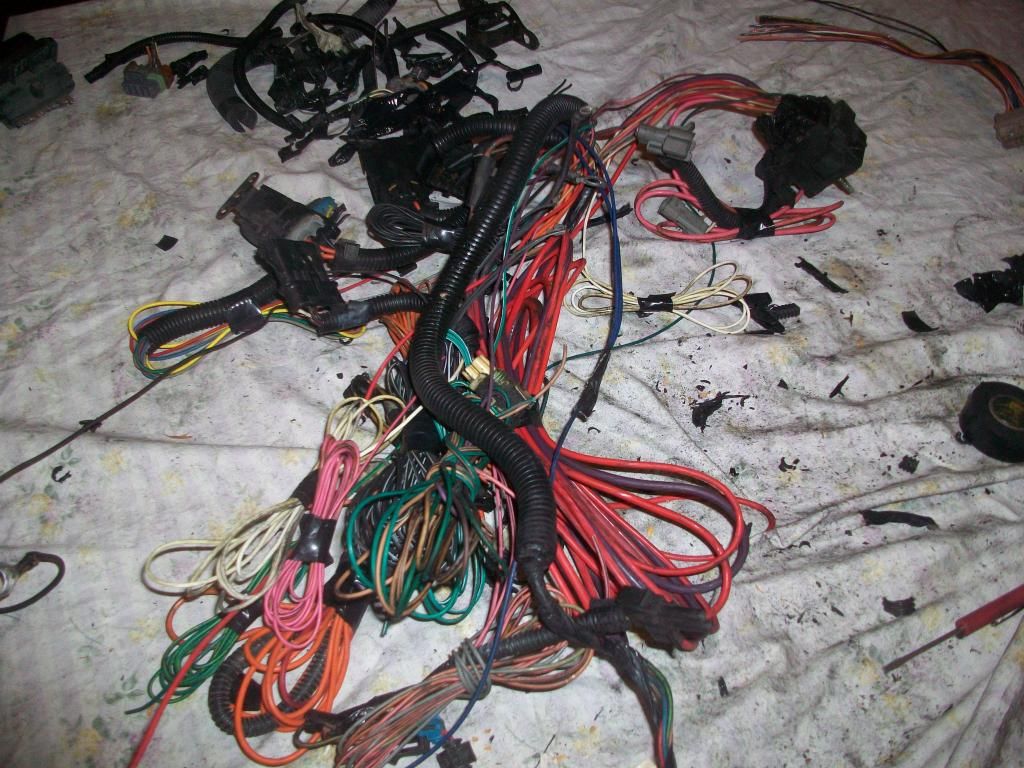
Wiring = Blah!!!! Got the 4th Gen harness stripped down, and working on laying it out on my engine. Still haven't figured out where the MAP and IAT will sit, but I'm going to give them enough room so that I can wire them up near the Driver's side fender.

Organized Mess...
2" Hole saw so that I can run the wiring thru to the Inside of the car...
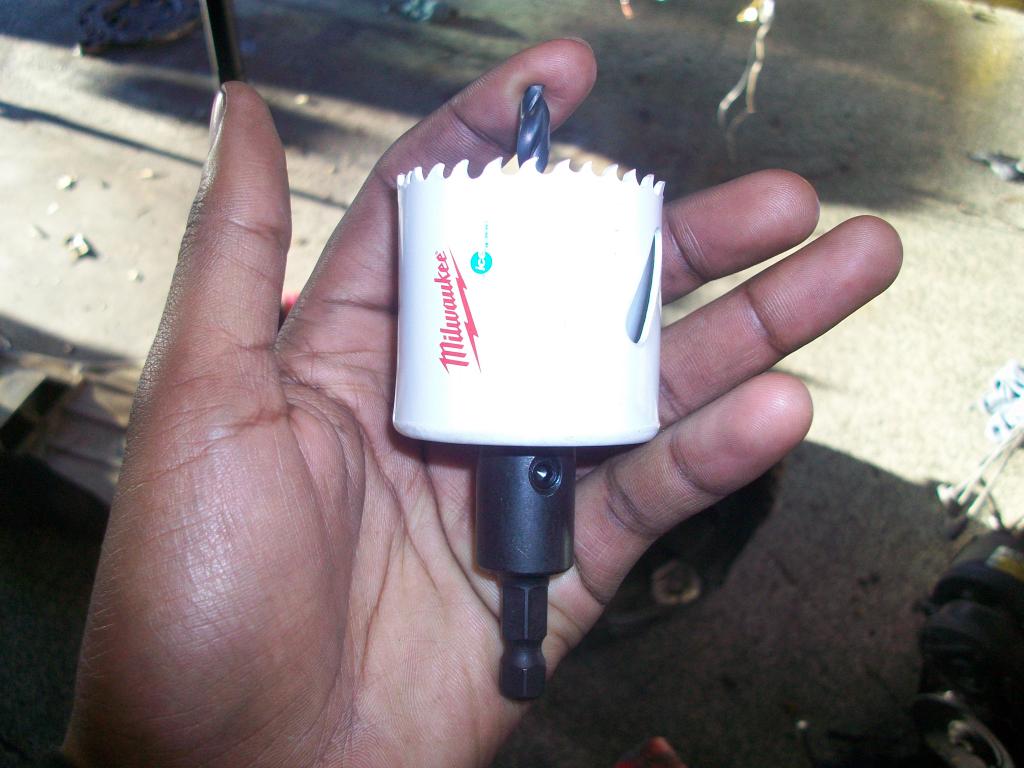
Drilled the hole for the wiring wasn't as bad as I thought it would be...

View from the inside of the car, I hit the bottom of the heater box slightly but oh well, it won't hurt it.

Also got the 1LE heater box and BIG THANKS to Geary (92z28outlaw) for hooking me up with it!!
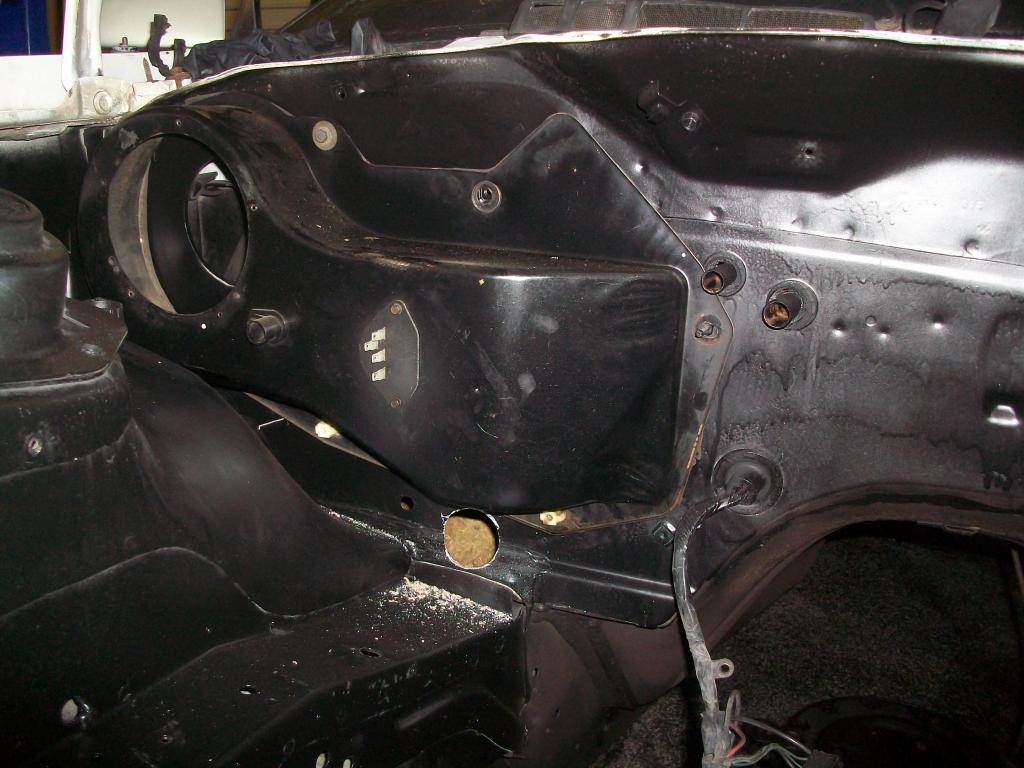
Here you can see how the hole clears the heaterbox and is still far enough above the frame rail to keep water out...

I've still got a bit more to do, I also need to sand the engine bay so that I can get the black paint to lay flatter. It would help if I had the proper spray equipment but for now I'm only using rattle can.
Wiring = Blah!!!! Got the 4th Gen harness stripped down, and working on laying it out on my engine. Still haven't figured out where the MAP and IAT will sit, but I'm going to give them enough room so that I can wire them up near the Driver's side fender.
Organized Mess...
2" Hole saw so that I can run the wiring thru to the Inside of the car...
Drilled the hole for the wiring wasn't as bad as I thought it would be...
View from the inside of the car, I hit the bottom of the heater box slightly but oh well, it won't hurt it.
Also got the 1LE heater box and BIG THANKS to Geary (92z28outlaw) for hooking me up with it!!
Here you can see how the hole clears the heaterbox and is still far enough above the frame rail to keep water out...
I've still got a bit more to do, I also need to sand the engine bay so that I can get the black paint to lay flatter. It would help if I had the proper spray equipment but for now I'm only using rattle can.
04-09-2013, 02:52 AM
#10
Drilled and Tapped for the Alternator Bracket...


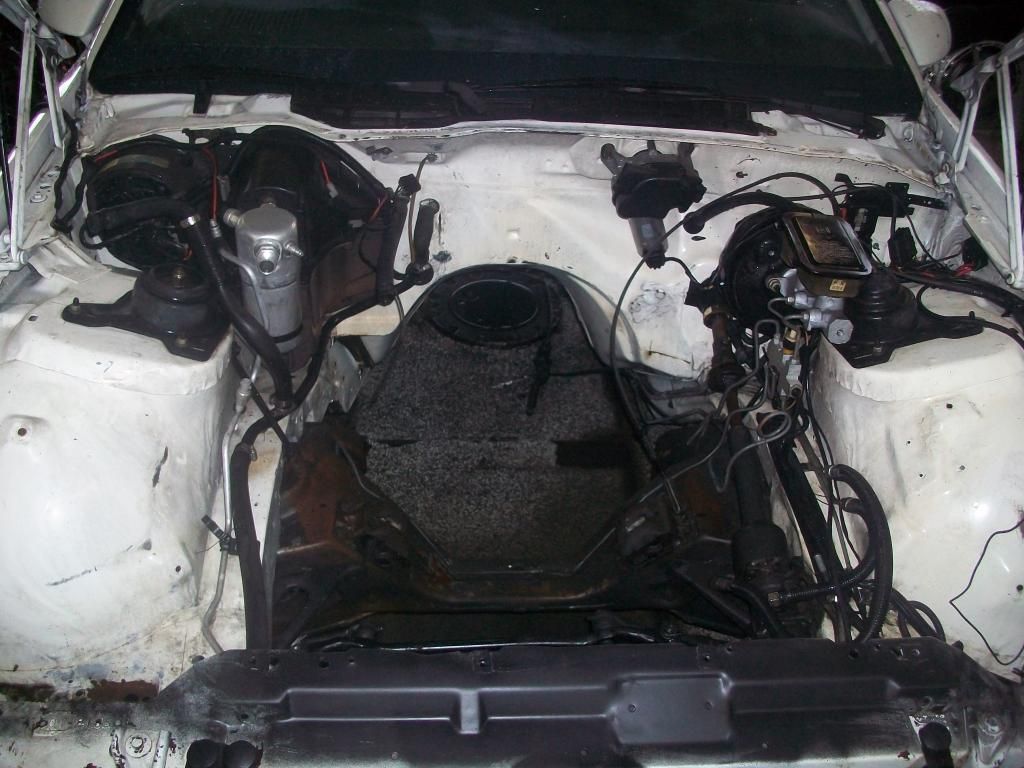
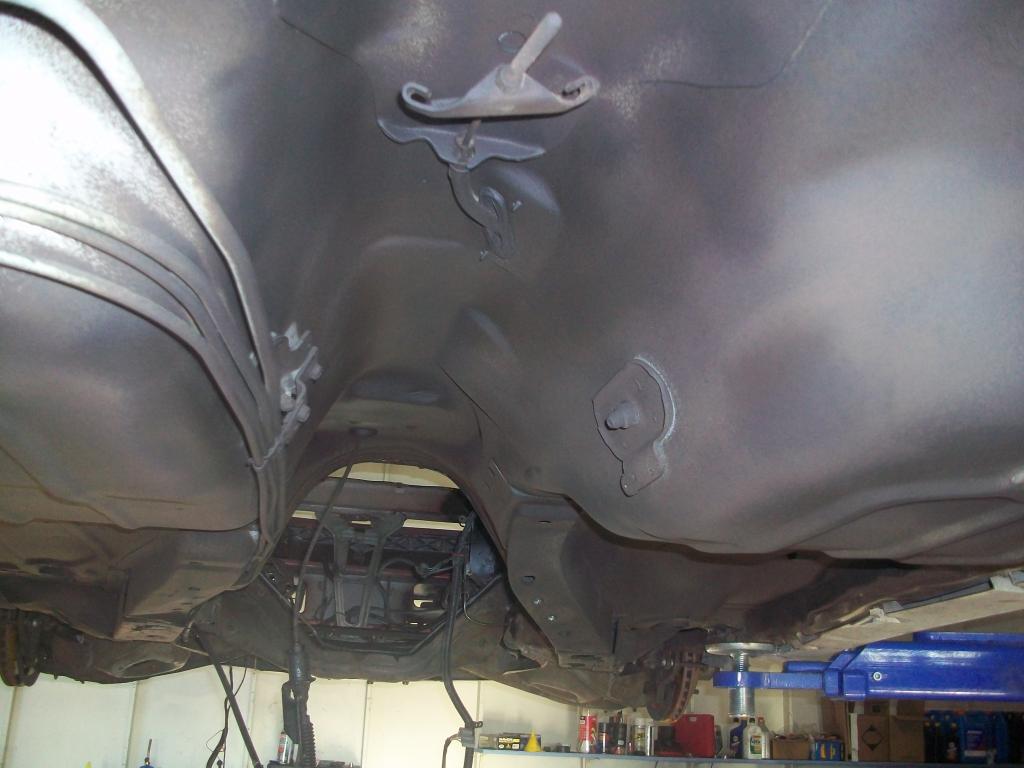
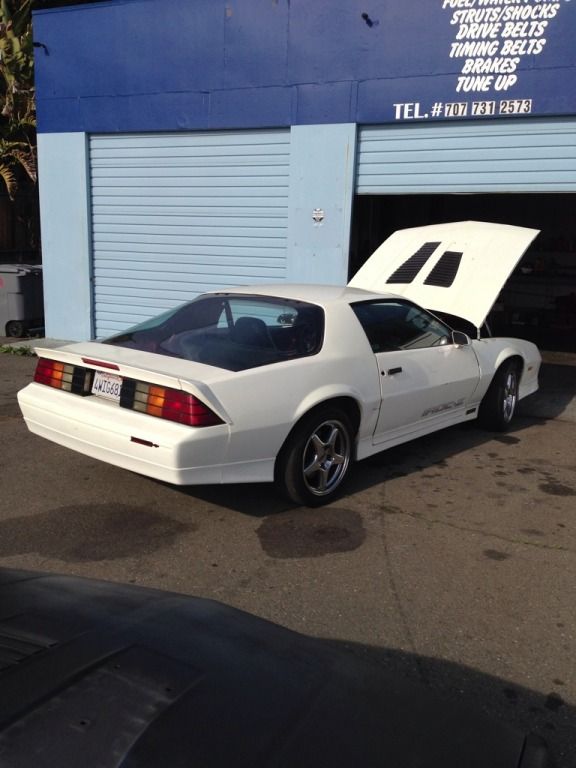
Also this is how the Iroc sits at the moment... Still have to drop the tank and do the fuel lines, also finish the undercoating....
Also my girl is now starting to work on my (her) 86, which We will be building for her... well, her building it with my advise and direction... Fun lol
Also this is how the Iroc sits at the moment... Still have to drop the tank and do the fuel lines, also finish the undercoating....
Also my girl is now starting to work on my (her) 86, which We will be building for her... well, her building it with my advise and direction... Fun lol
04-09-2013, 02:54 AM
#11
Mid January
Got a few updates, but I've left my Camera at home the last few days... Still working on the harness, that's the last issue holding up the build. Trying to figure out an easy way to run the 4th gen radiator as well, but may just end up flushing out the stock 3rd Gen radiator and running that... was hoping I didn't have to though since the 4th gen radiators I have are in better shape... anyone have any input on this??
Sorry these are iPhone pics, the only thing I had at the shop lol
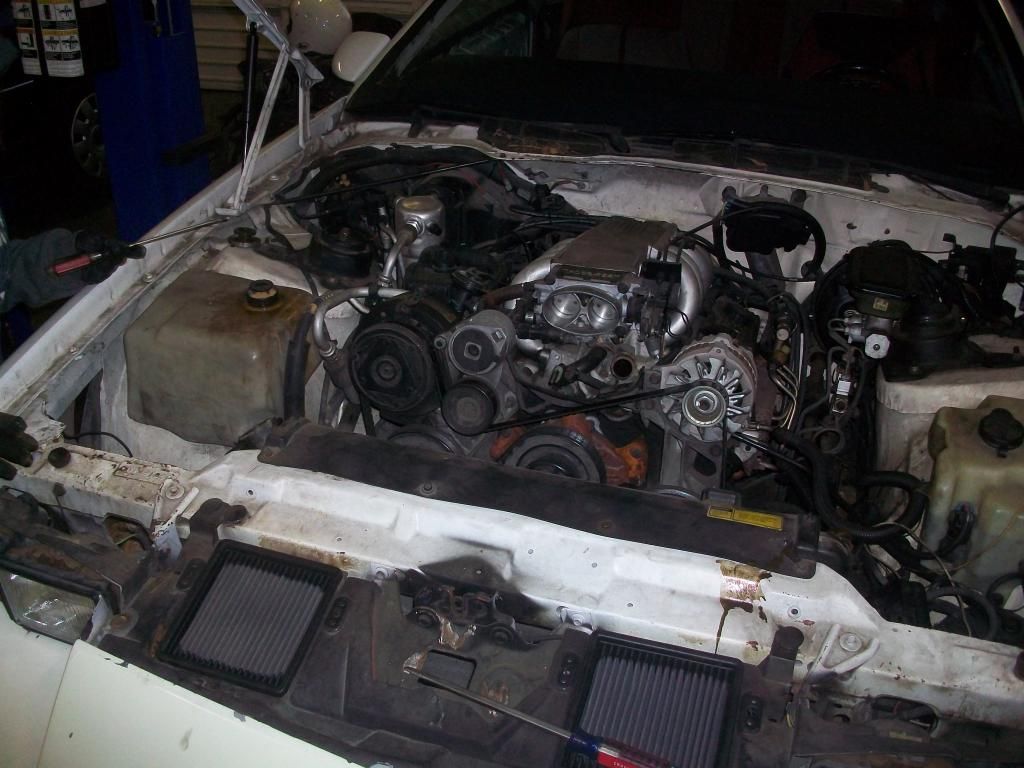
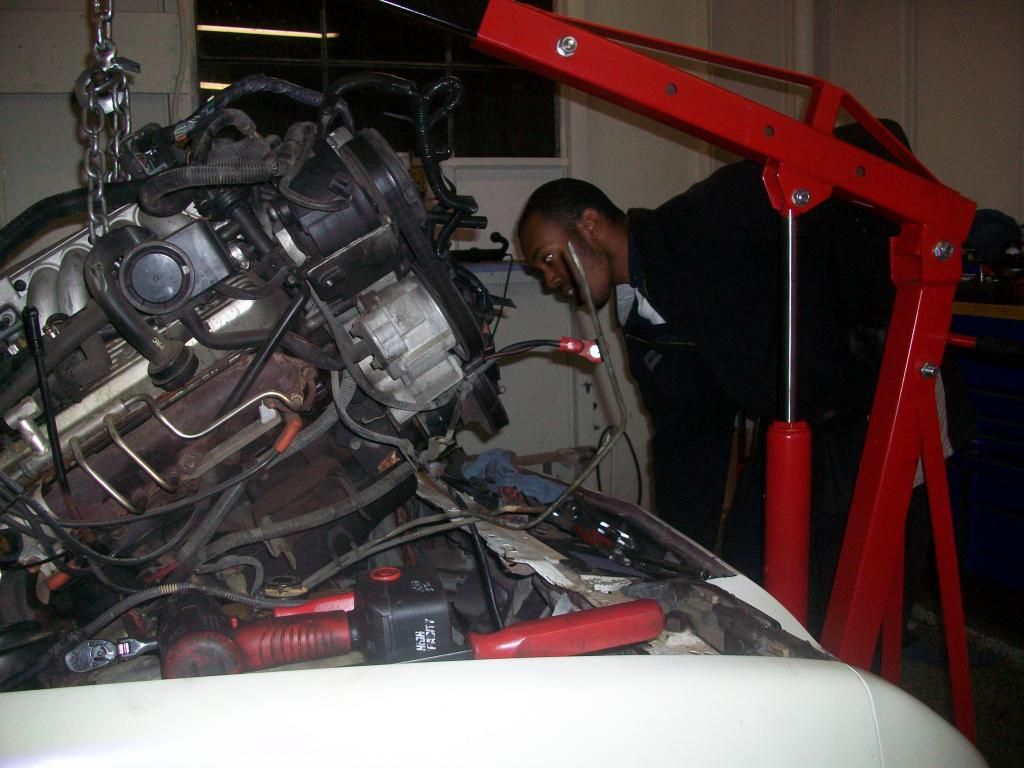
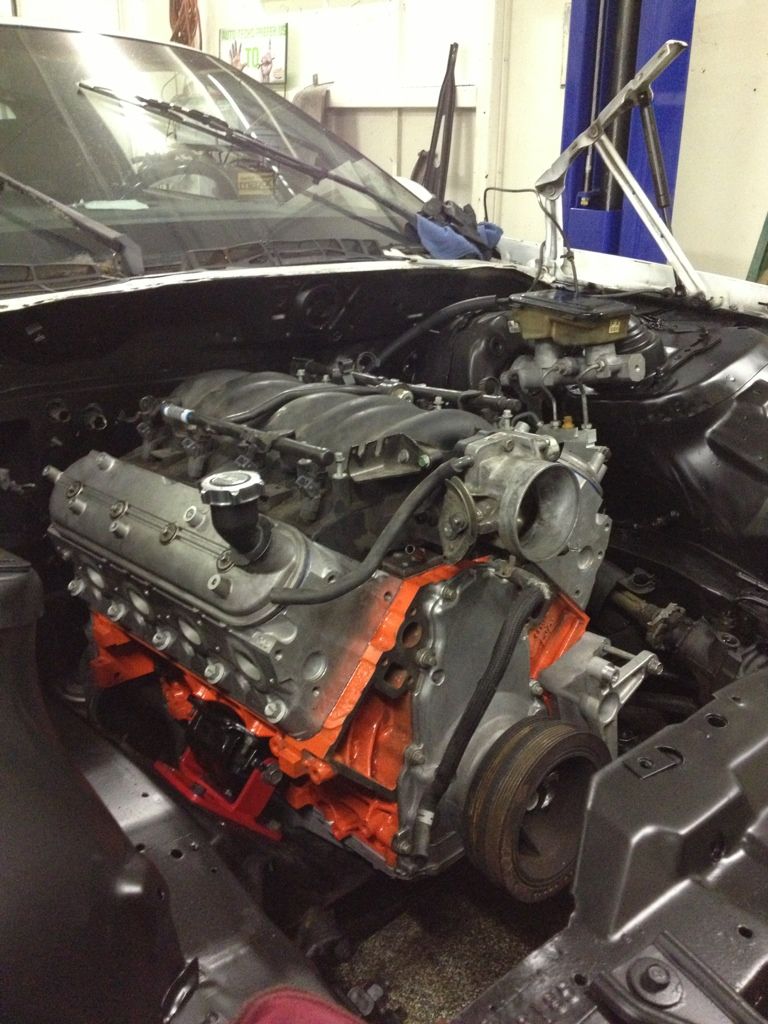
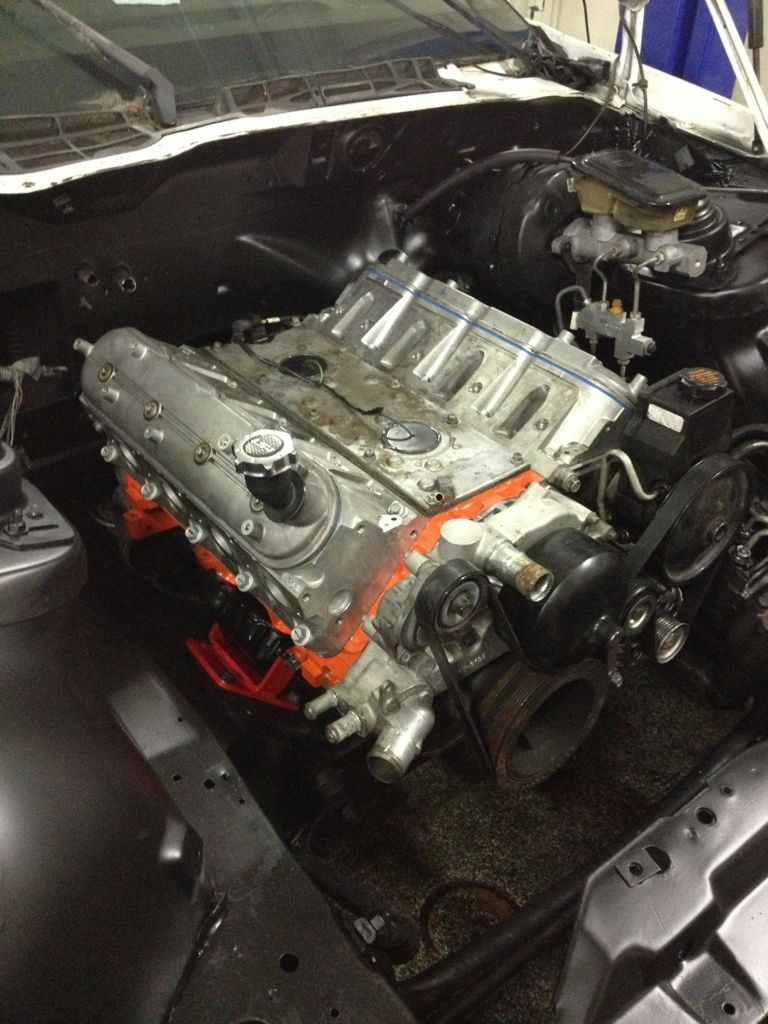
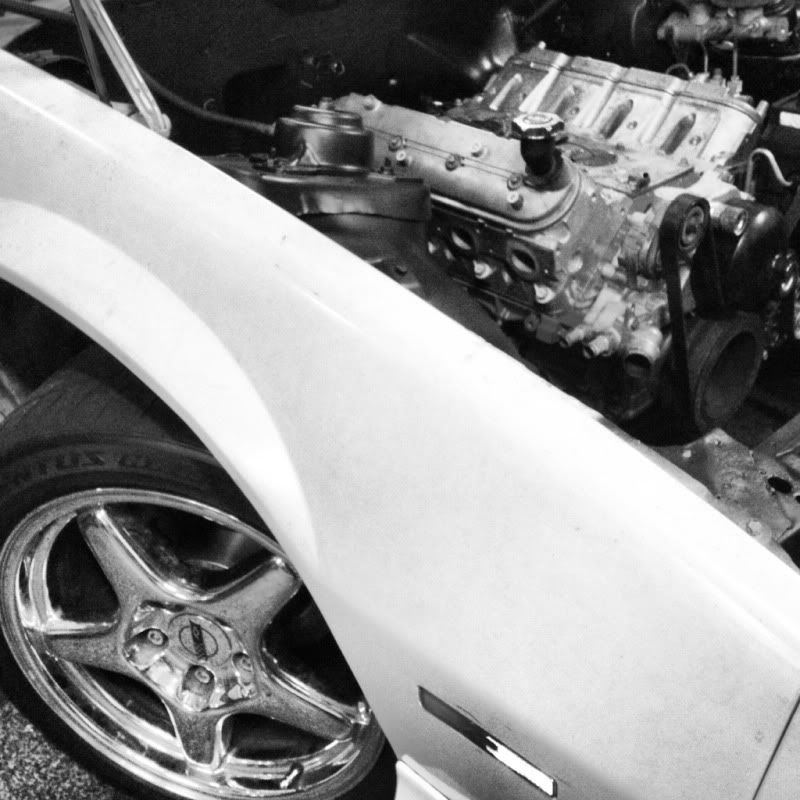
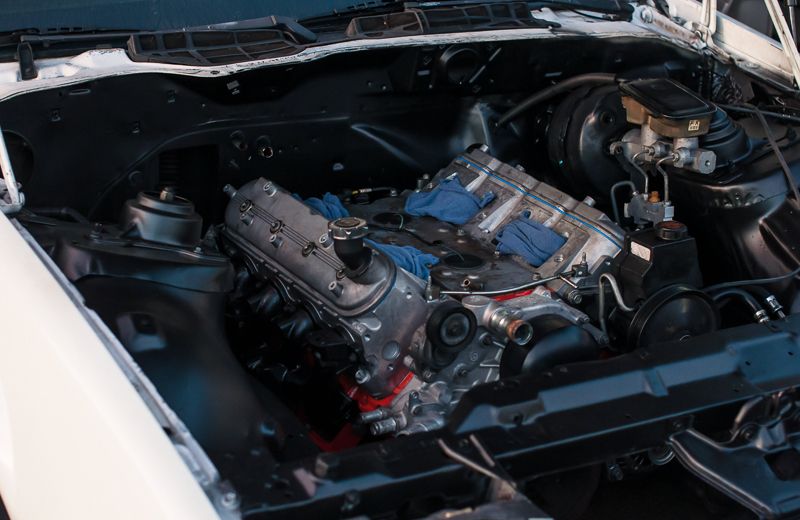
Engine in the car, bolted up...
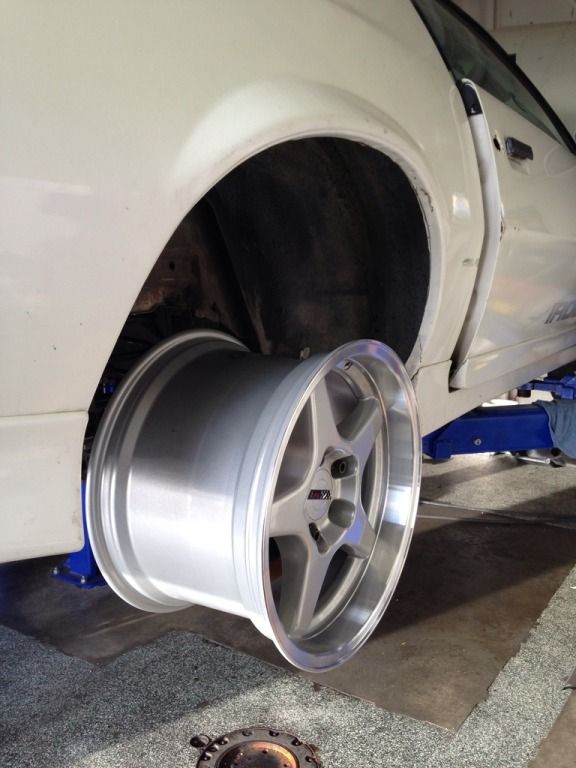
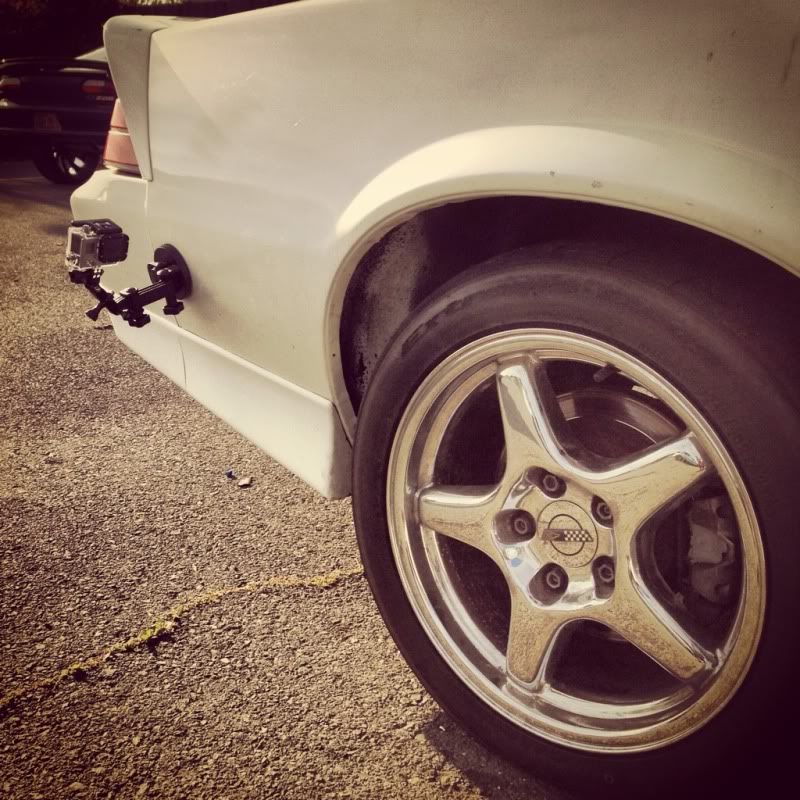
ZR1's on, got a set of 2.5" Spacers for free from a friend, hopefully it won't sit too far out but nonetheless all 4 wheels are on...
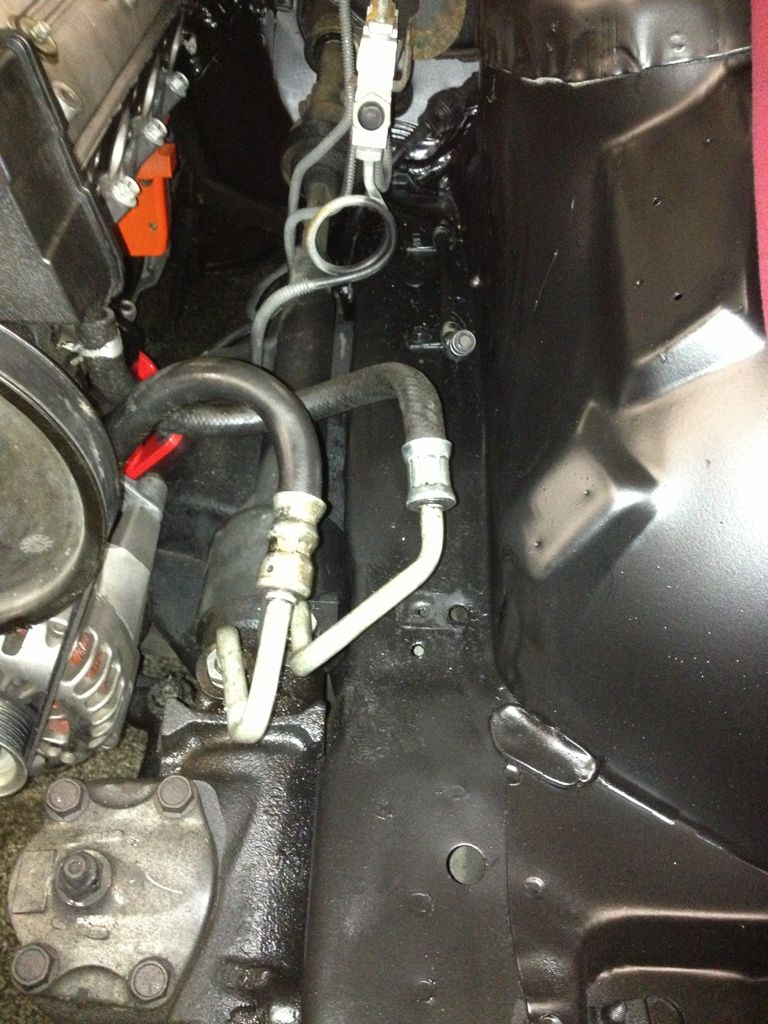
Used both stock 4th gen Power Steering Lines
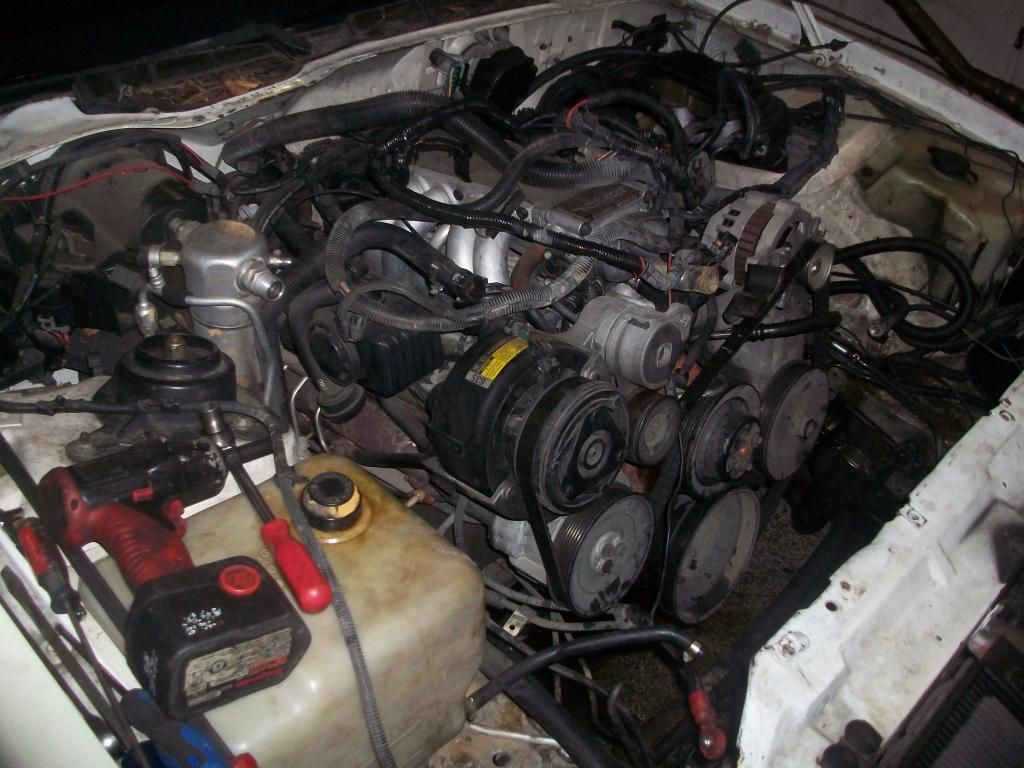
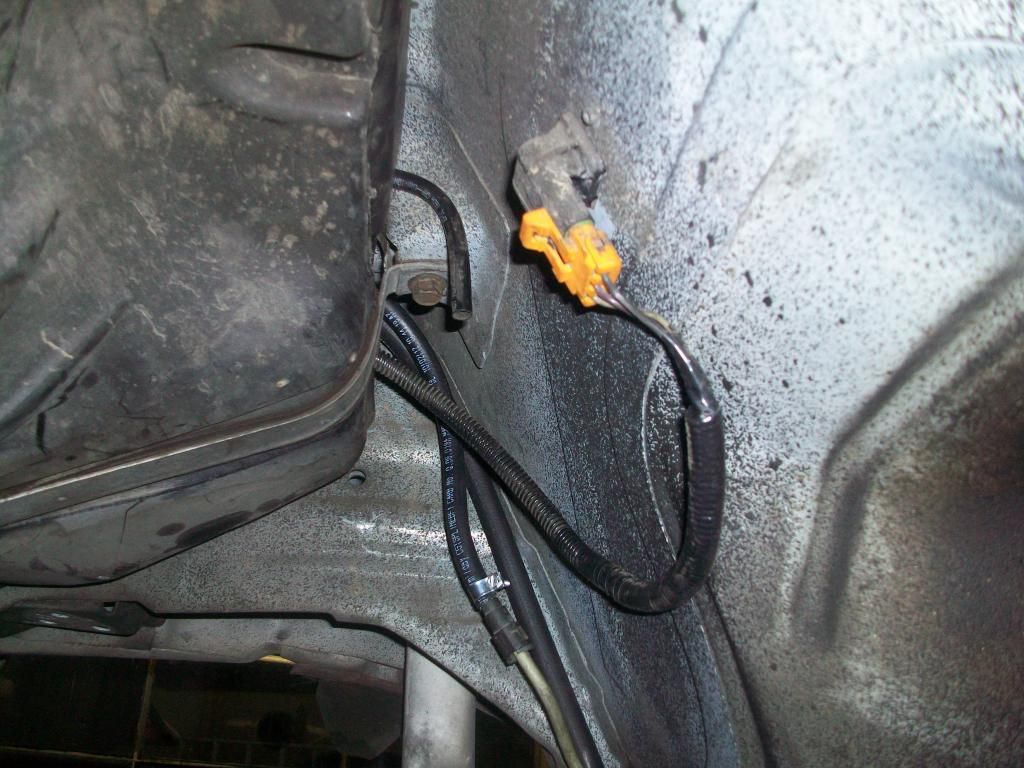
Knock Sensors and Harnesses in... All Accessories on...
Pushed it out of the shop today just for a little more motivation lol
Got a few updates, but I've left my Camera at home the last few days... Still working on the harness, that's the last issue holding up the build. Trying to figure out an easy way to run the 4th gen radiator as well, but may just end up flushing out the stock 3rd Gen radiator and running that... was hoping I didn't have to though since the 4th gen radiators I have are in better shape... anyone have any input on this??
Sorry these are iPhone pics, the only thing I had at the shop lol
Engine in the car, bolted up...
ZR1's on, got a set of 2.5" Spacers for free from a friend, hopefully it won't sit too far out but nonetheless all 4 wheels are on...
Used both stock 4th gen Power Steering Lines
Knock Sensors and Harnesses in... All Accessories on...
Pushed it out of the shop today just for a little more motivation lol
04-09-2013, 02:55 AM
#12
I just realized I haven't had any REAL updates with pics in a bit... so bear with me...
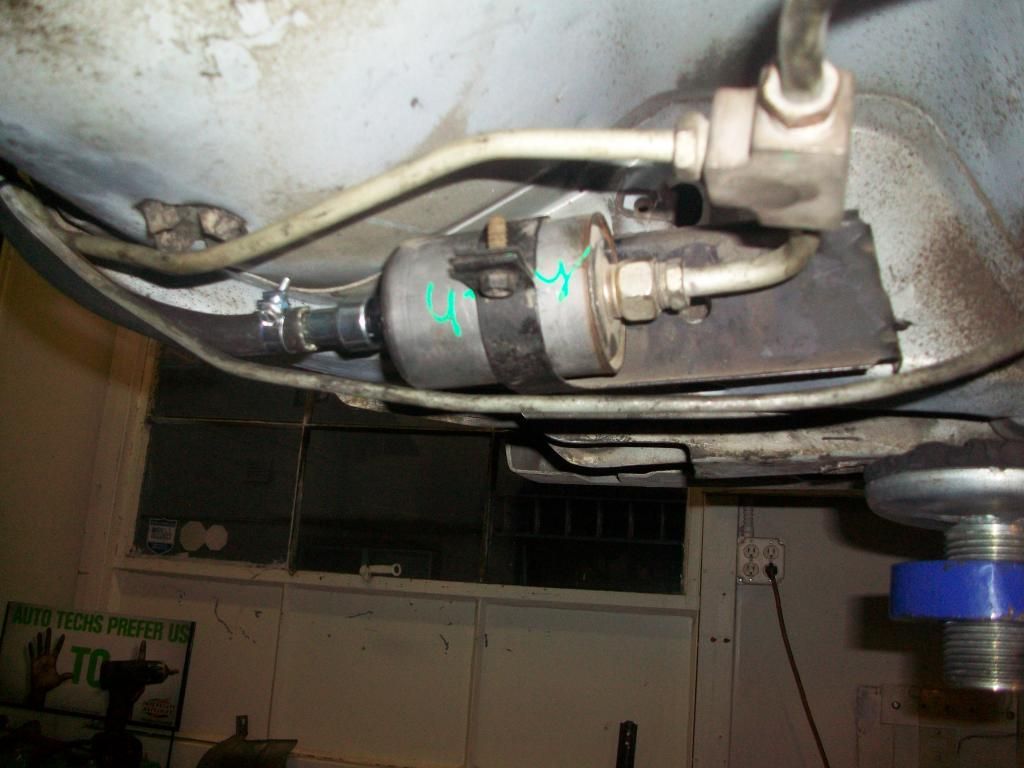
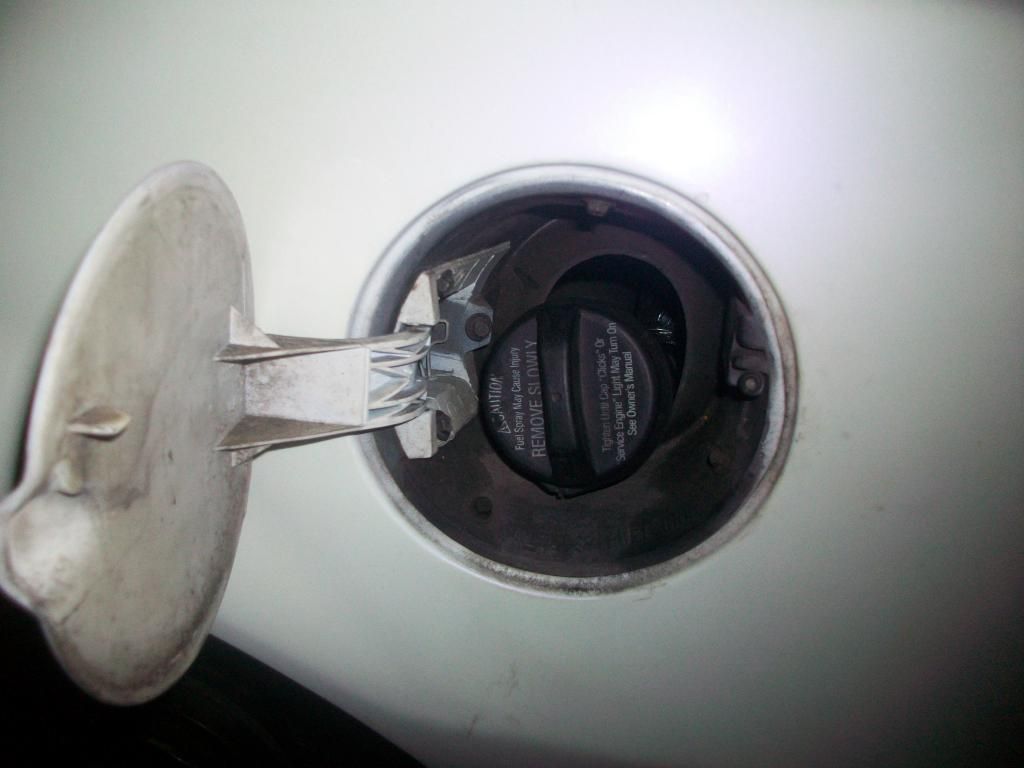
Stock 3rd Gen Fuel Tank out... with about 1/2 tank left in it... (Fuel Sender didn't work that well... :doh:
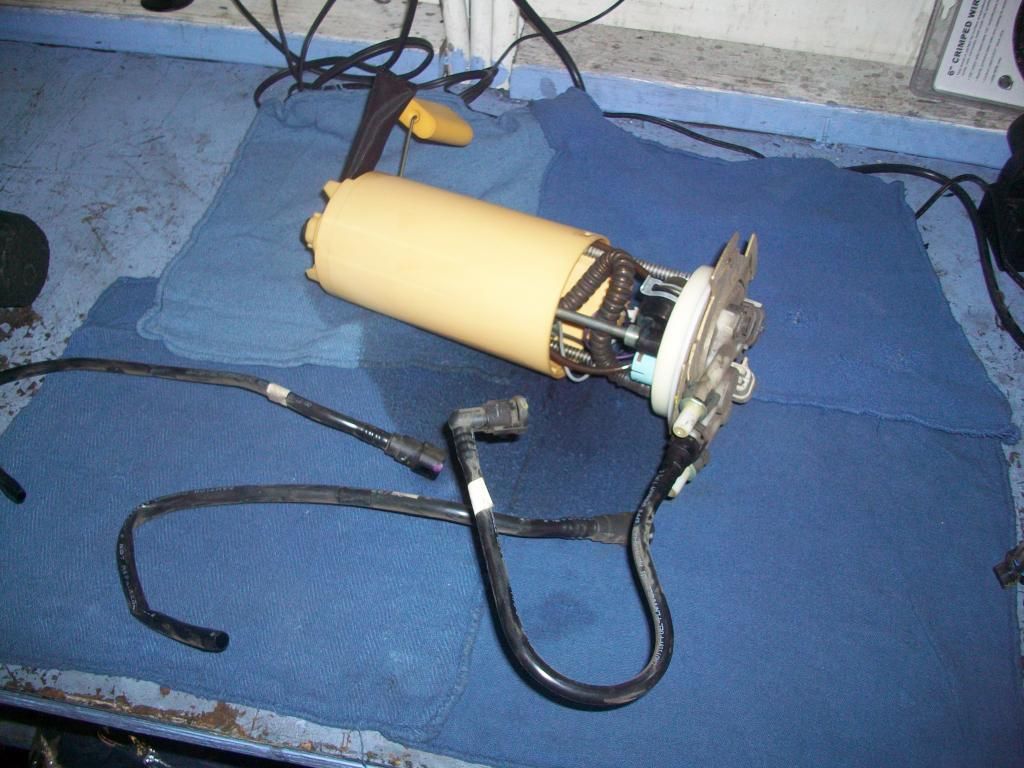
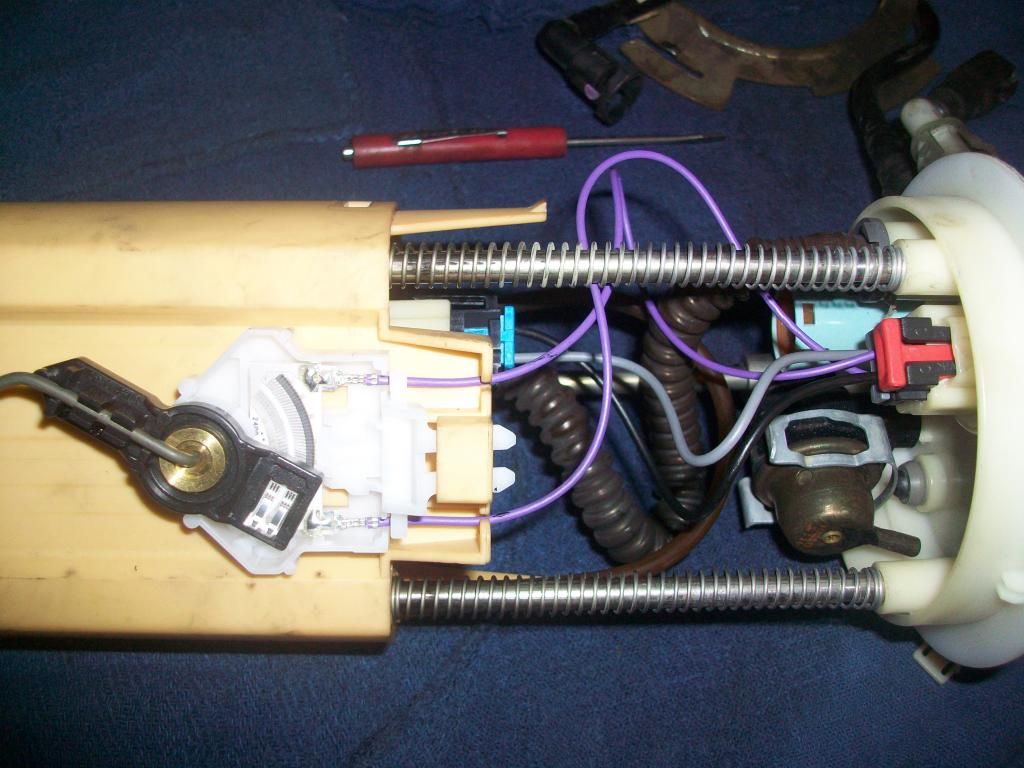
Stock 4th Gen Pump Assembly Out of the tank
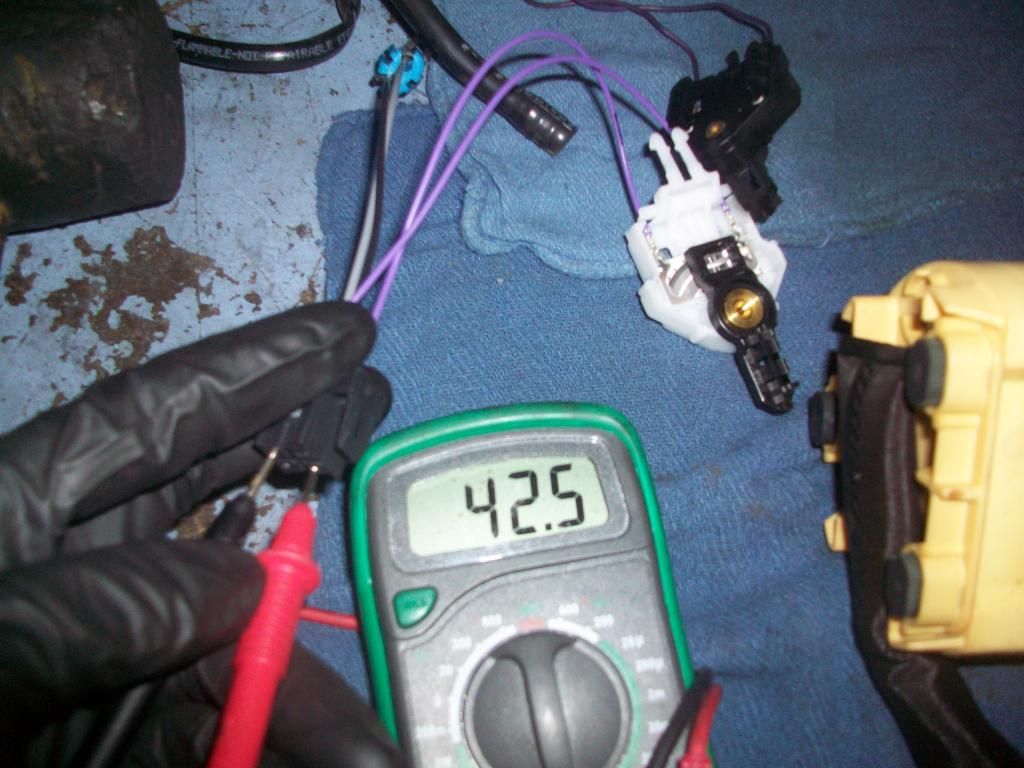
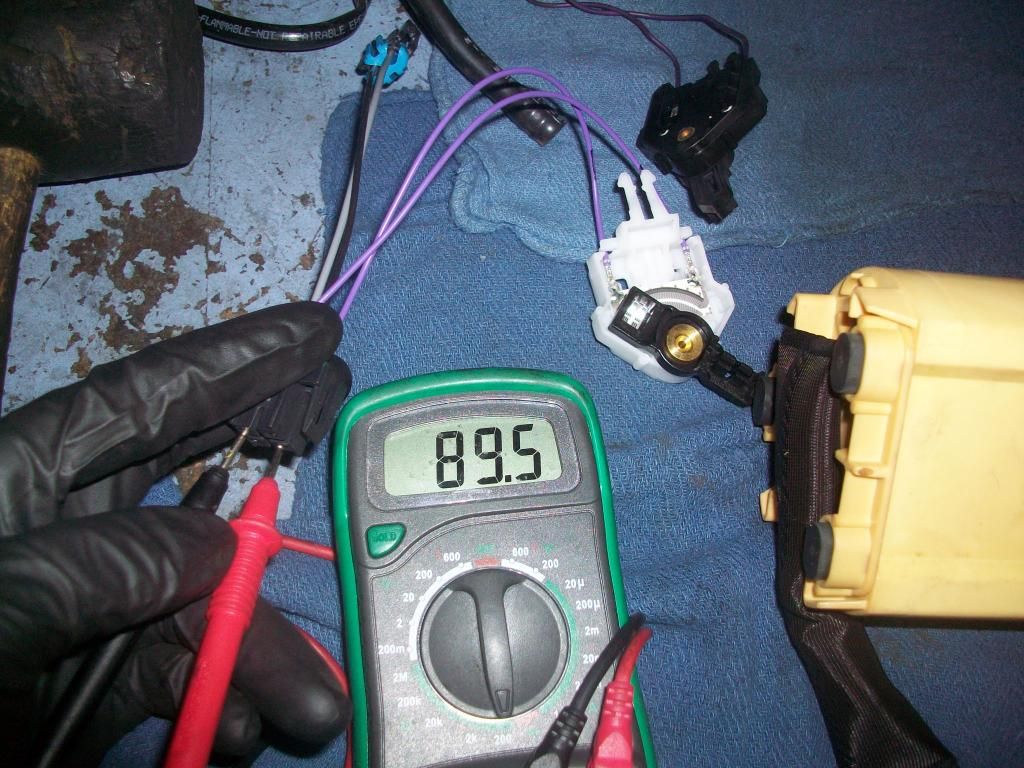
Modifying the Sender, checking the ohms...
In and Ready To Go...
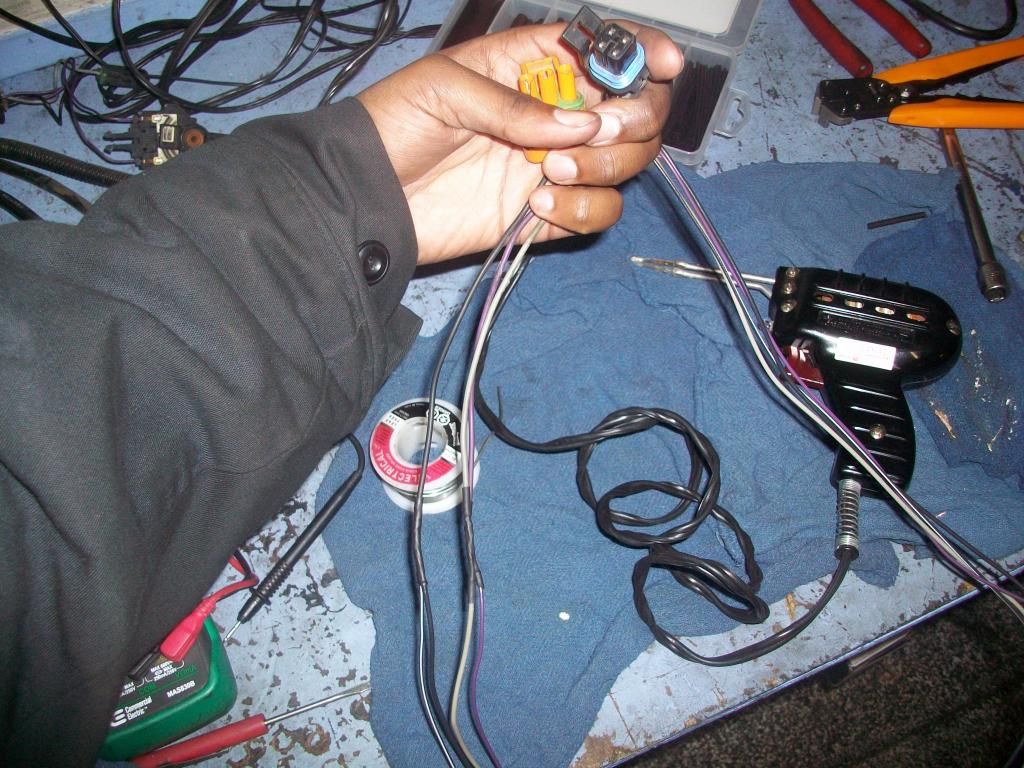
Modified the Plug so that it'll work for the 4th Gen Tank and the 3rd Gen Bulkhead Connector
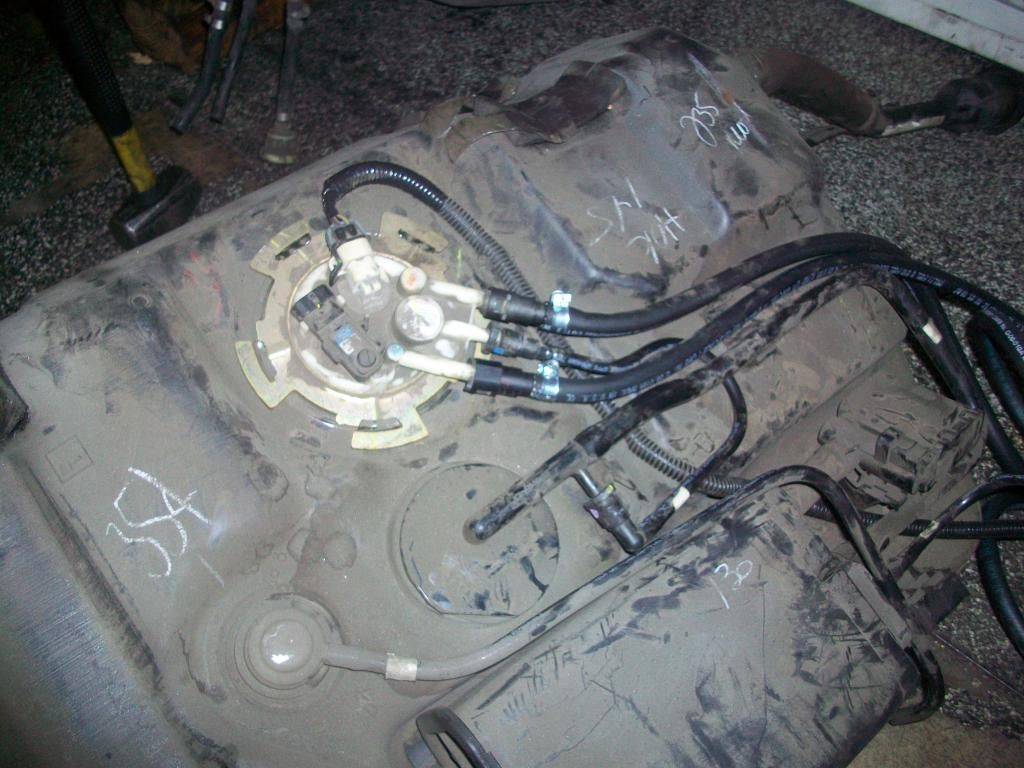
Tank ready to go in.... Hopefully the rubber fuel hoses don't leak... I clamped them on tightly though...
ABear with me... I'm trying to be as detailed as possible since sometimes its hard finding the info you need... That way if someone needs to know if it works or doesn't they can look back on this...
Tank in and plugged in... Factory look lol
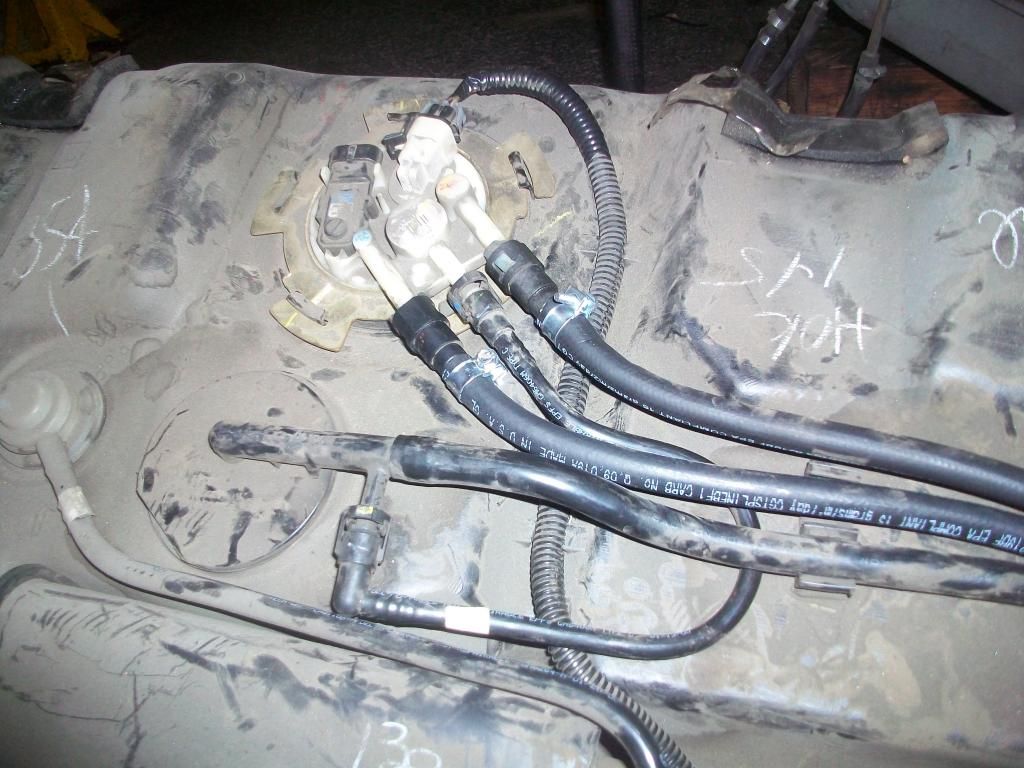
Lines in... I've got to find a way to tuck the Filter and everything up nicer... Any ideas?
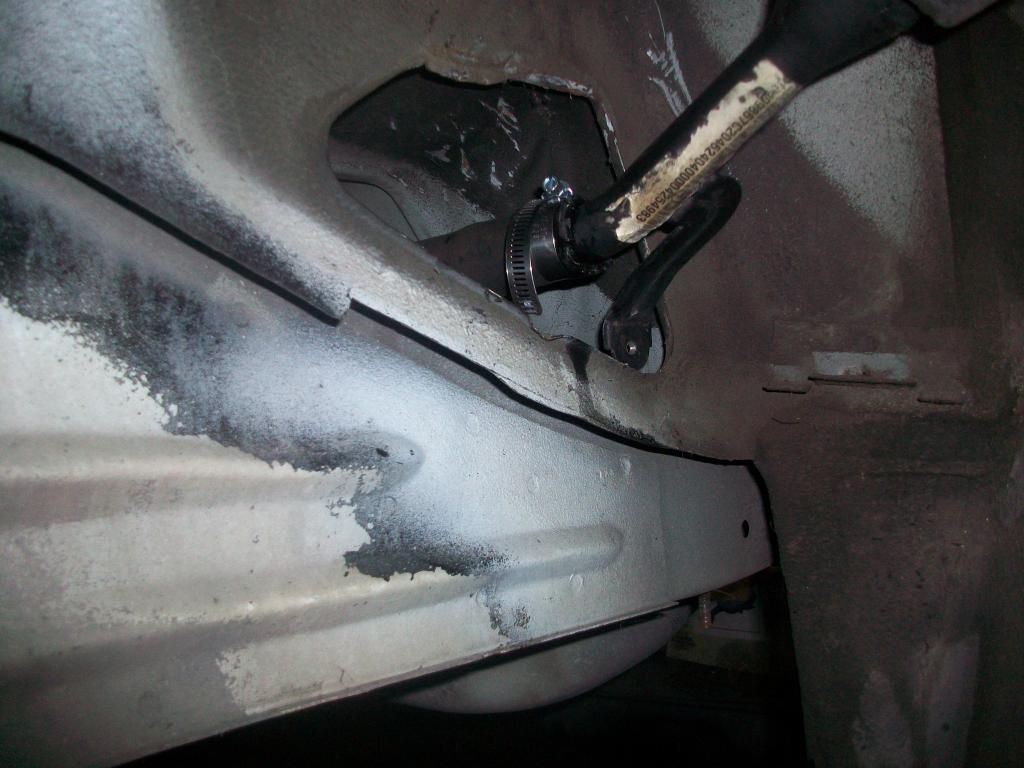
I originally took the tank end of the filler neck off, and once I got the tank in, I saw that it wouldn't work... so, had to drop the tank down a little and put a hose clamp on it...
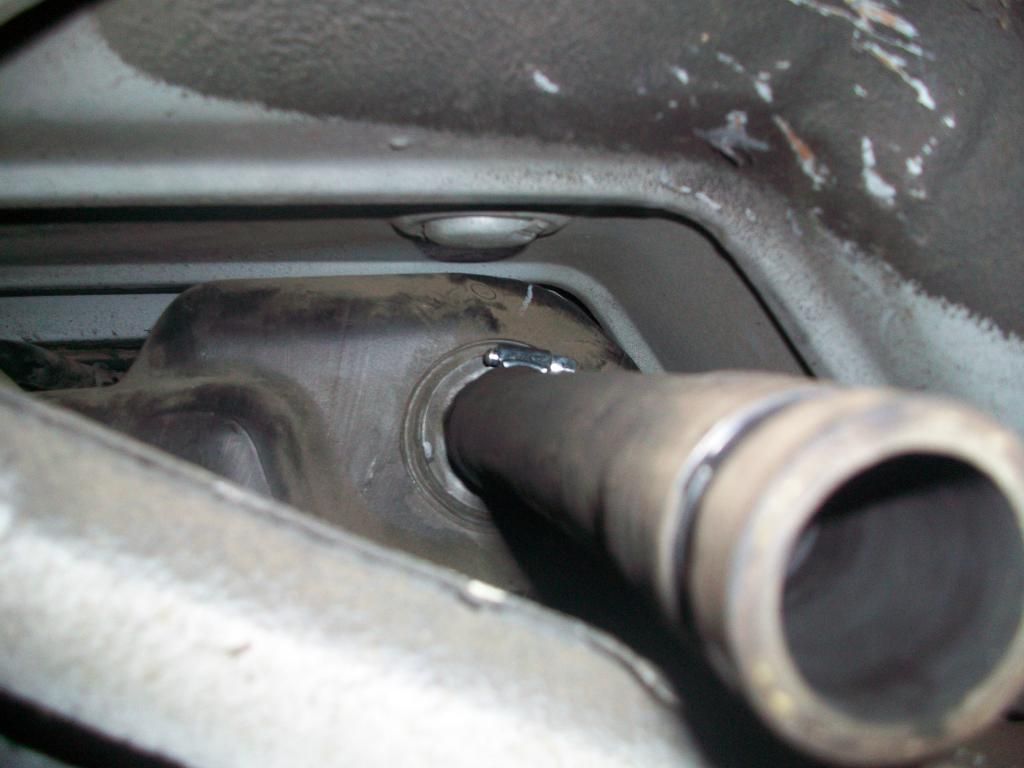
Got the filler neck in and bolted up, all in all had to trim about an inch... I may trim a little more to let it sit back in there better but I'll see later, I've still got to bolt it to the body so it won't move. No leaks when I went to put a couple gallons in the tank so that's a good sign so far.
I've probably got to bend the bracket a little more to get it to bolt down...
Stock 3rd Gen Fuel Tank out... with about 1/2 tank left in it... (Fuel Sender didn't work that well... :doh:
Stock 4th Gen Pump Assembly Out of the tank
Modifying the Sender, checking the ohms...
In and Ready To Go...
Modified the Plug so that it'll work for the 4th Gen Tank and the 3rd Gen Bulkhead Connector
Tank ready to go in.... Hopefully the rubber fuel hoses don't leak... I clamped them on tightly though...
ABear with me... I'm trying to be as detailed as possible since sometimes its hard finding the info you need... That way if someone needs to know if it works or doesn't they can look back on this...
Tank in and plugged in... Factory look lol
Lines in... I've got to find a way to tuck the Filter and everything up nicer... Any ideas?
I originally took the tank end of the filler neck off, and once I got the tank in, I saw that it wouldn't work... so, had to drop the tank down a little and put a hose clamp on it...
Got the filler neck in and bolted up, all in all had to trim about an inch... I may trim a little more to let it sit back in there better but I'll see later, I've still got to bolt it to the body so it won't move. No leaks when I went to put a couple gallons in the tank so that's a good sign so far.
I've probably got to bend the bracket a little more to get it to bolt down...
04-09-2013, 02:56 AM
#13
Wiring.... BLAH!!!! The holdup on the WHOLE project lol...

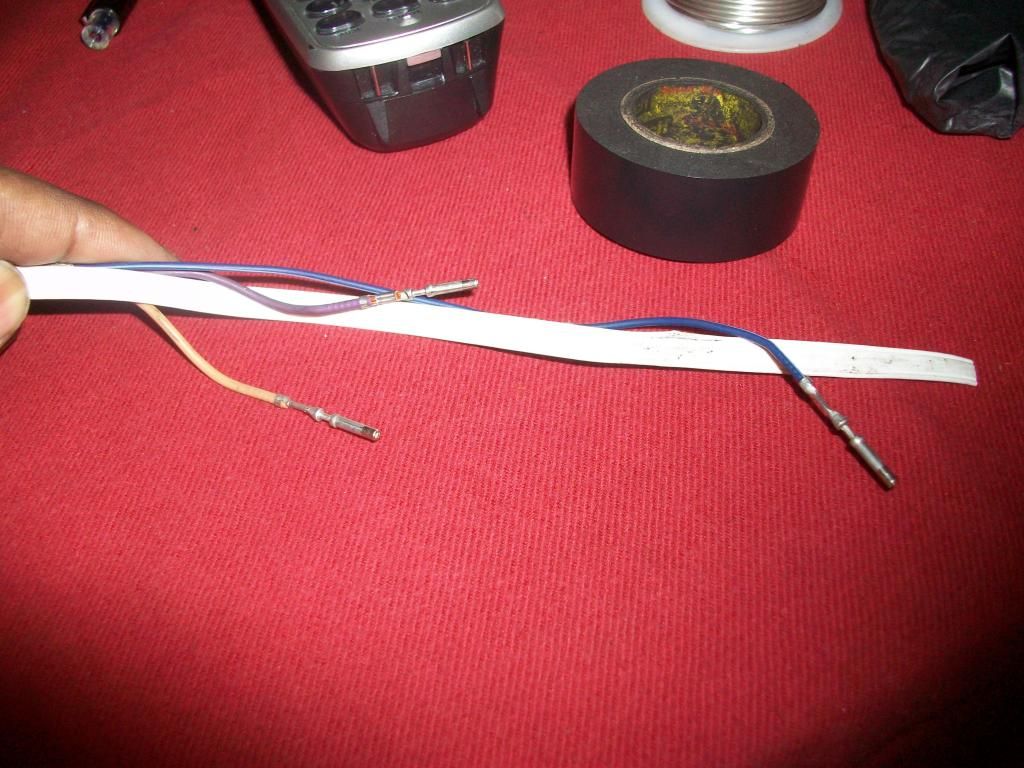
Extending some of the wires....
Pushed it out of the shop while I was doing Simultaneous cam swaps on 2 LS2 GTOs... so its been sitting for about two weeks so far... I'll get back on it this week I'm almost done with the wiring harness... Still haven't decided about the radiator but I guess I may just have to use the stock 3rd gen one...
04-09-2013, 02:57 AM
#14
Ok... so have a couple updates... and can't find my Camera charger so I've been using my Camera phone to take pics... I'll grab some better ones later...
17x11 Deep Dish ZR1's mounted up to see how much BFH'ing I'm going to have to do....
Couple more parts on finally...

So since I decided to build an LS Iroc... my girl decided to build my other Iroc (Was futher away from running so I set it to the side)... Complete drivetrain is in now... just need harness and tank, etc...
I'll be updating the build thread from that one as well... But ANYWAYS.... down to today....
Wiring MESS!!! I've got to take it back off once I get everything else dialed in and loom it/tape it...
My buddy came and tuned VATS out of the PCM so now I just need to bypass it on the car itself... BUT I'm impatient so I used my Power Probe and applied power to the starter and... IT'S ALIVE!!!!
Just wouldn't stay running without keeping the throttle plate open so I'll check into that...
17x11 Deep Dish ZR1's mounted up to see how much BFH'ing I'm going to have to do....
Couple more parts on finally...
So since I decided to build an LS Iroc... my girl decided to build my other Iroc (Was futher away from running so I set it to the side)... Complete drivetrain is in now... just need harness and tank, etc...
I'll be updating the build thread from that one as well... But ANYWAYS.... down to today....
Wiring MESS!!! I've got to take it back off once I get everything else dialed in and loom it/tape it...
My buddy came and tuned VATS out of the PCM so now I just need to bypass it on the car itself... BUT I'm impatient so I used my Power Probe and applied power to the starter and... IT'S ALIVE!!!!
Just wouldn't stay running without keeping the throttle plate open so I'll check into that...
04-09-2013, 02:57 AM
#15
Still have to fix the coolant hoses... the 01 Silverado Hose was a bad fit (as I expected) as was the gates 21505, which seems to be too big and kink when I try to put it on... anyone else have that problem and what are you using??? Also which hose will work for the top hose? I saw something that said to use an early 4th gen v6 upper... is that what people are using??
I'm also having an issue with the trans not wanting to **** into 1st when I put it into Drive or OD... seems like it's in 2nd or 3rd... but when I manually shift it into 1st its fine.
All in all... got a first drive video... and a pic or two...
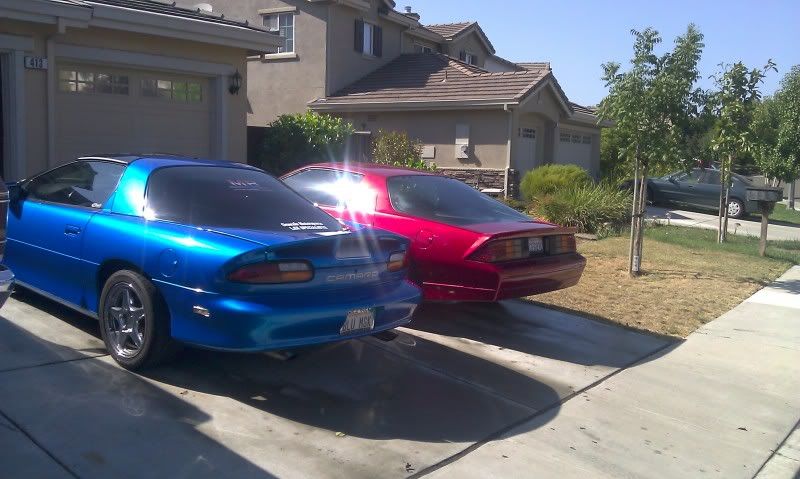
My buddy's 89 Notchback and my 89 Iroc one late night....
And finally a quick video with open manifolds....
I'm also having an issue with the trans not wanting to **** into 1st when I put it into Drive or OD... seems like it's in 2nd or 3rd... but when I manually shift it into 1st its fine.
All in all... got a first drive video... and a pic or two...
My buddy's 89 Notchback and my 89 Iroc one late night....
And finally a quick video with open manifolds....
 08-08-2014, 02:27 PM
#18
Teching In

Join Date: Jun 2012
Posts: 17
Likes: 0
Received 0 Likes
on
0 Posts
Sweet build I like how your girlfriend is helping out. What happened to the blue ss? I have a 87 IROC that I'm putting a nitrous 408 with a t56, 12 bolt. I'm not that patient to do the harness so I will buy a fast ez efi harness. I dont have a donor car but I do have my lq4.
