Nerd Rods, 55-59 Truck Frame Project 1956, C4 suspension, 5.3L Auto, Kit Frame Design
 07-28-2013, 08:55 AM
#21
Launching!
Thread Starter
Join Date: Jan 2007
Location: Luling TX In the Hot Rod Shop
Posts: 294
Likes: 0
Received 3 Likes
on
3 Posts

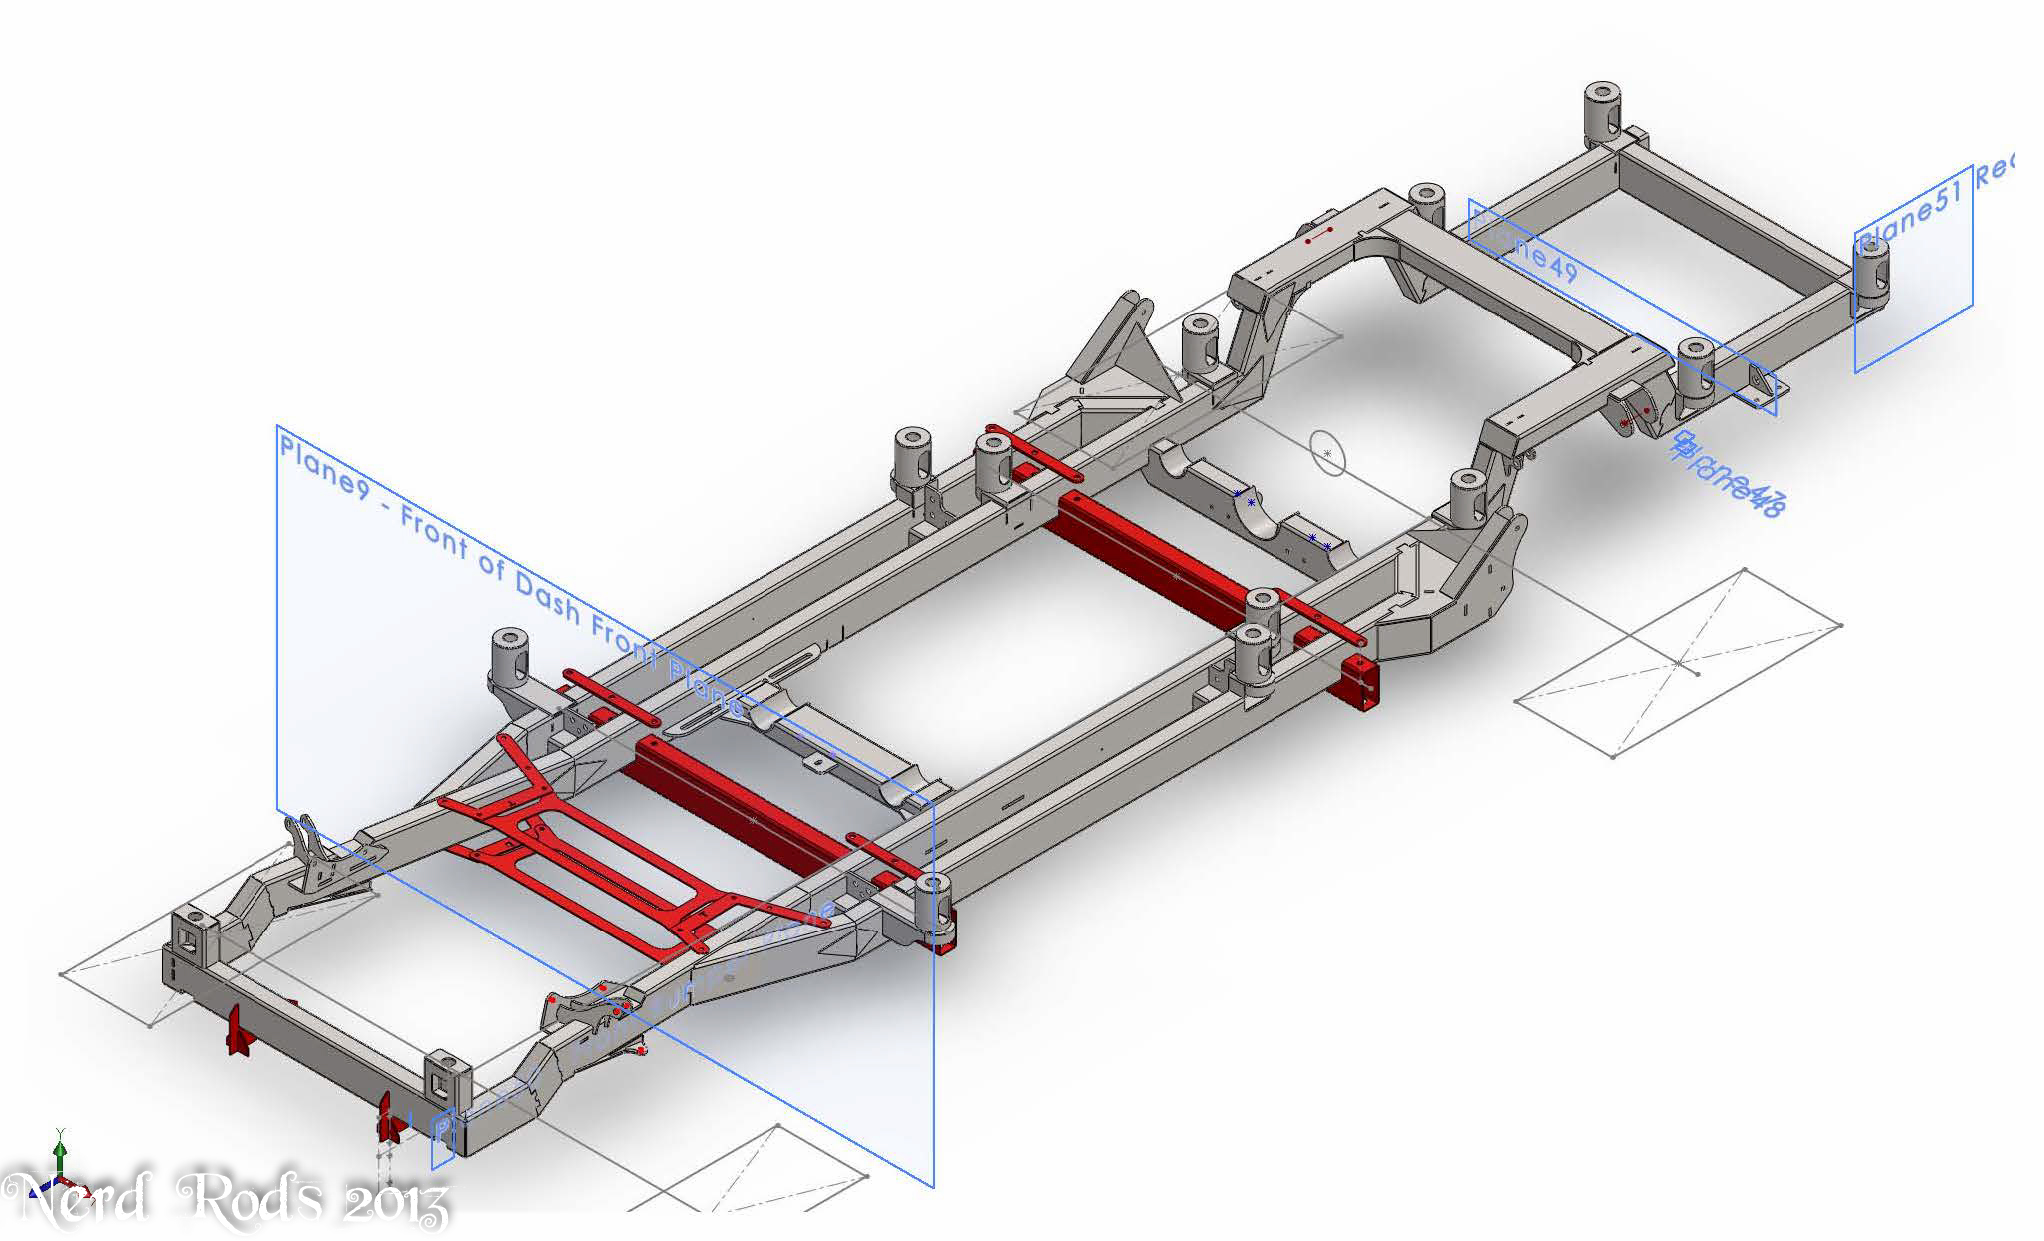
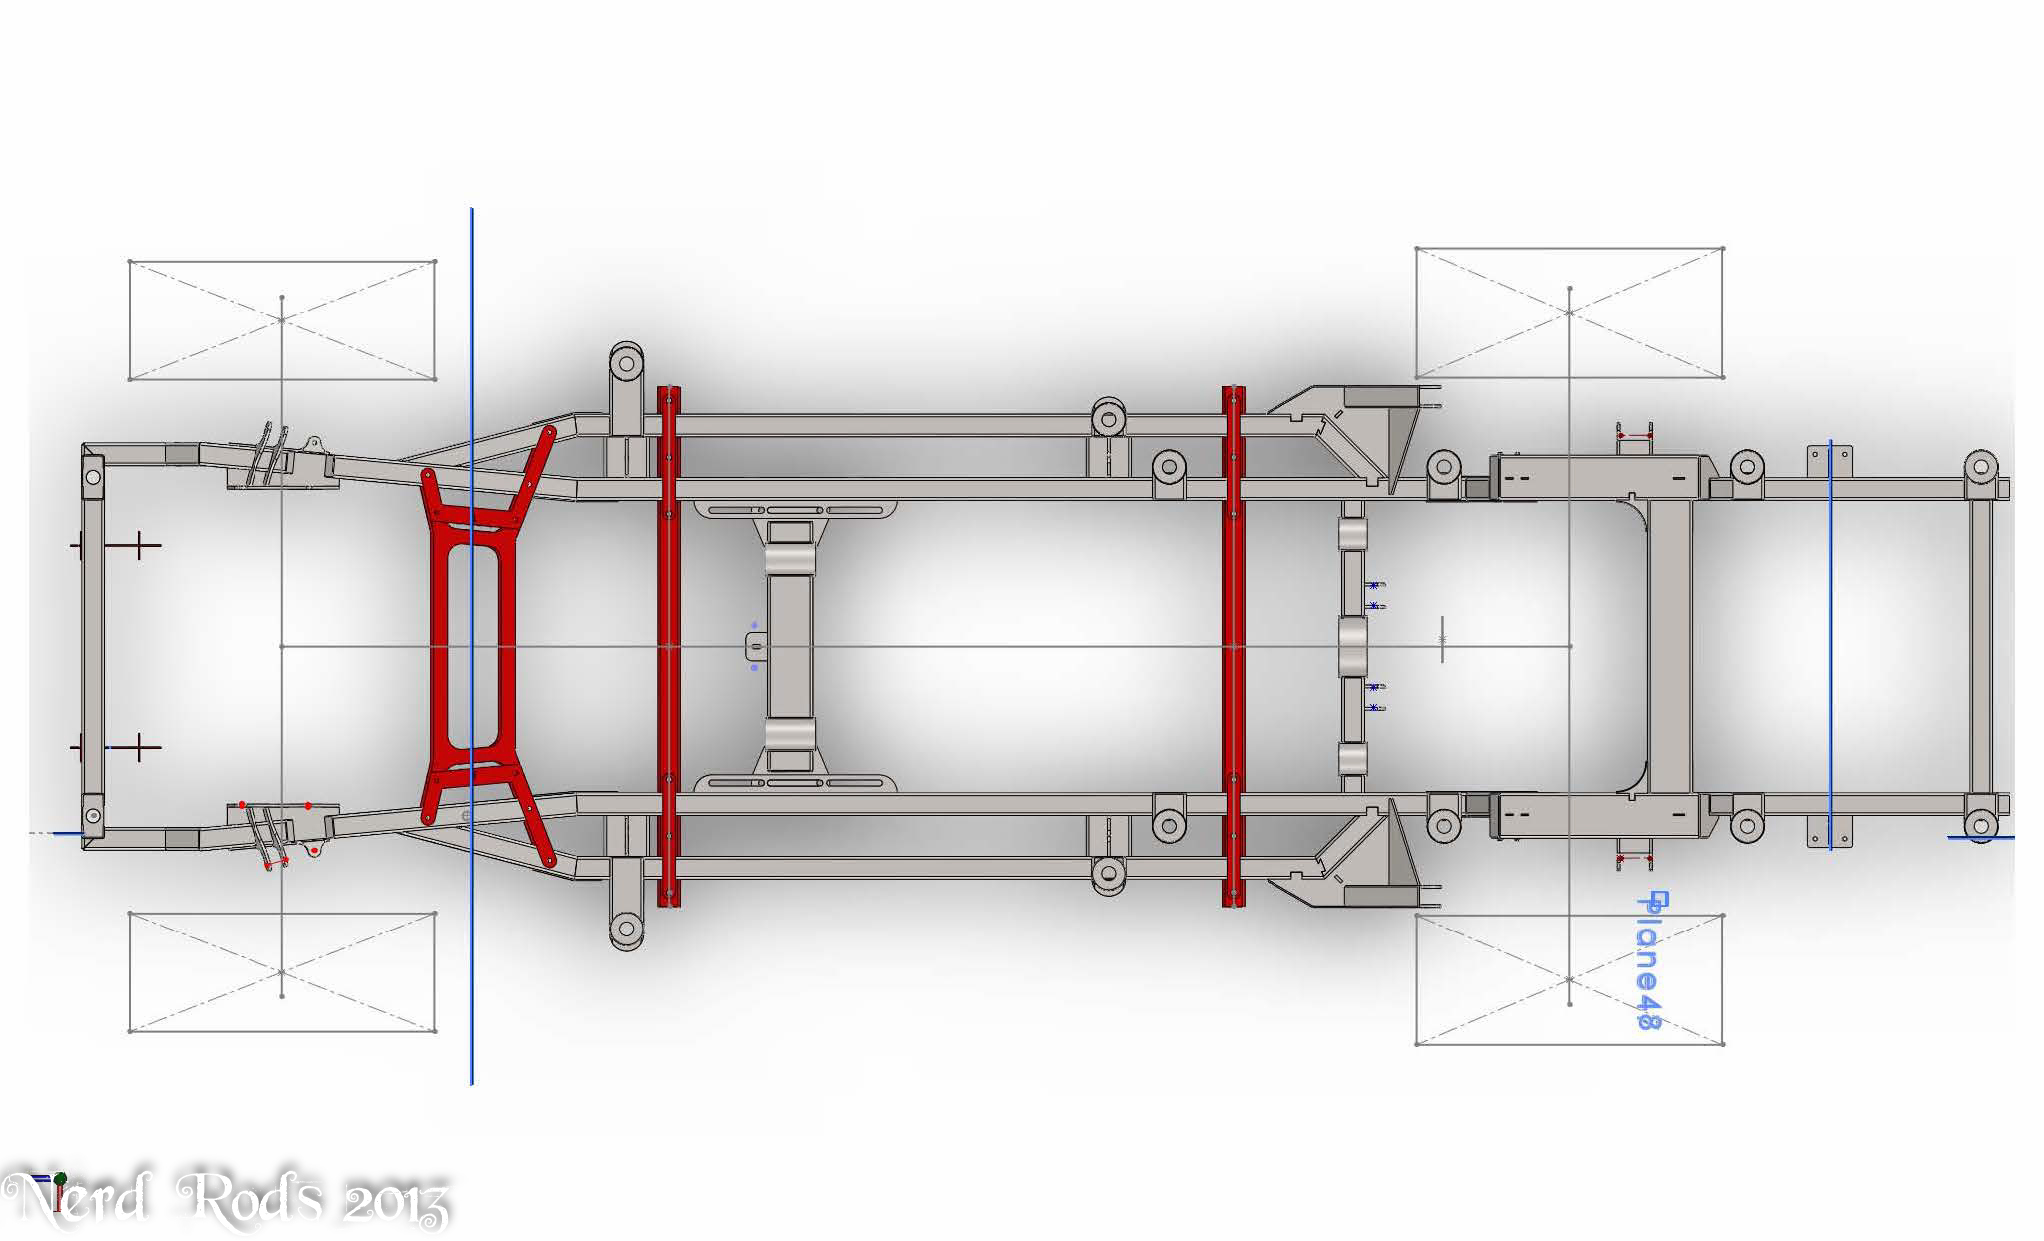
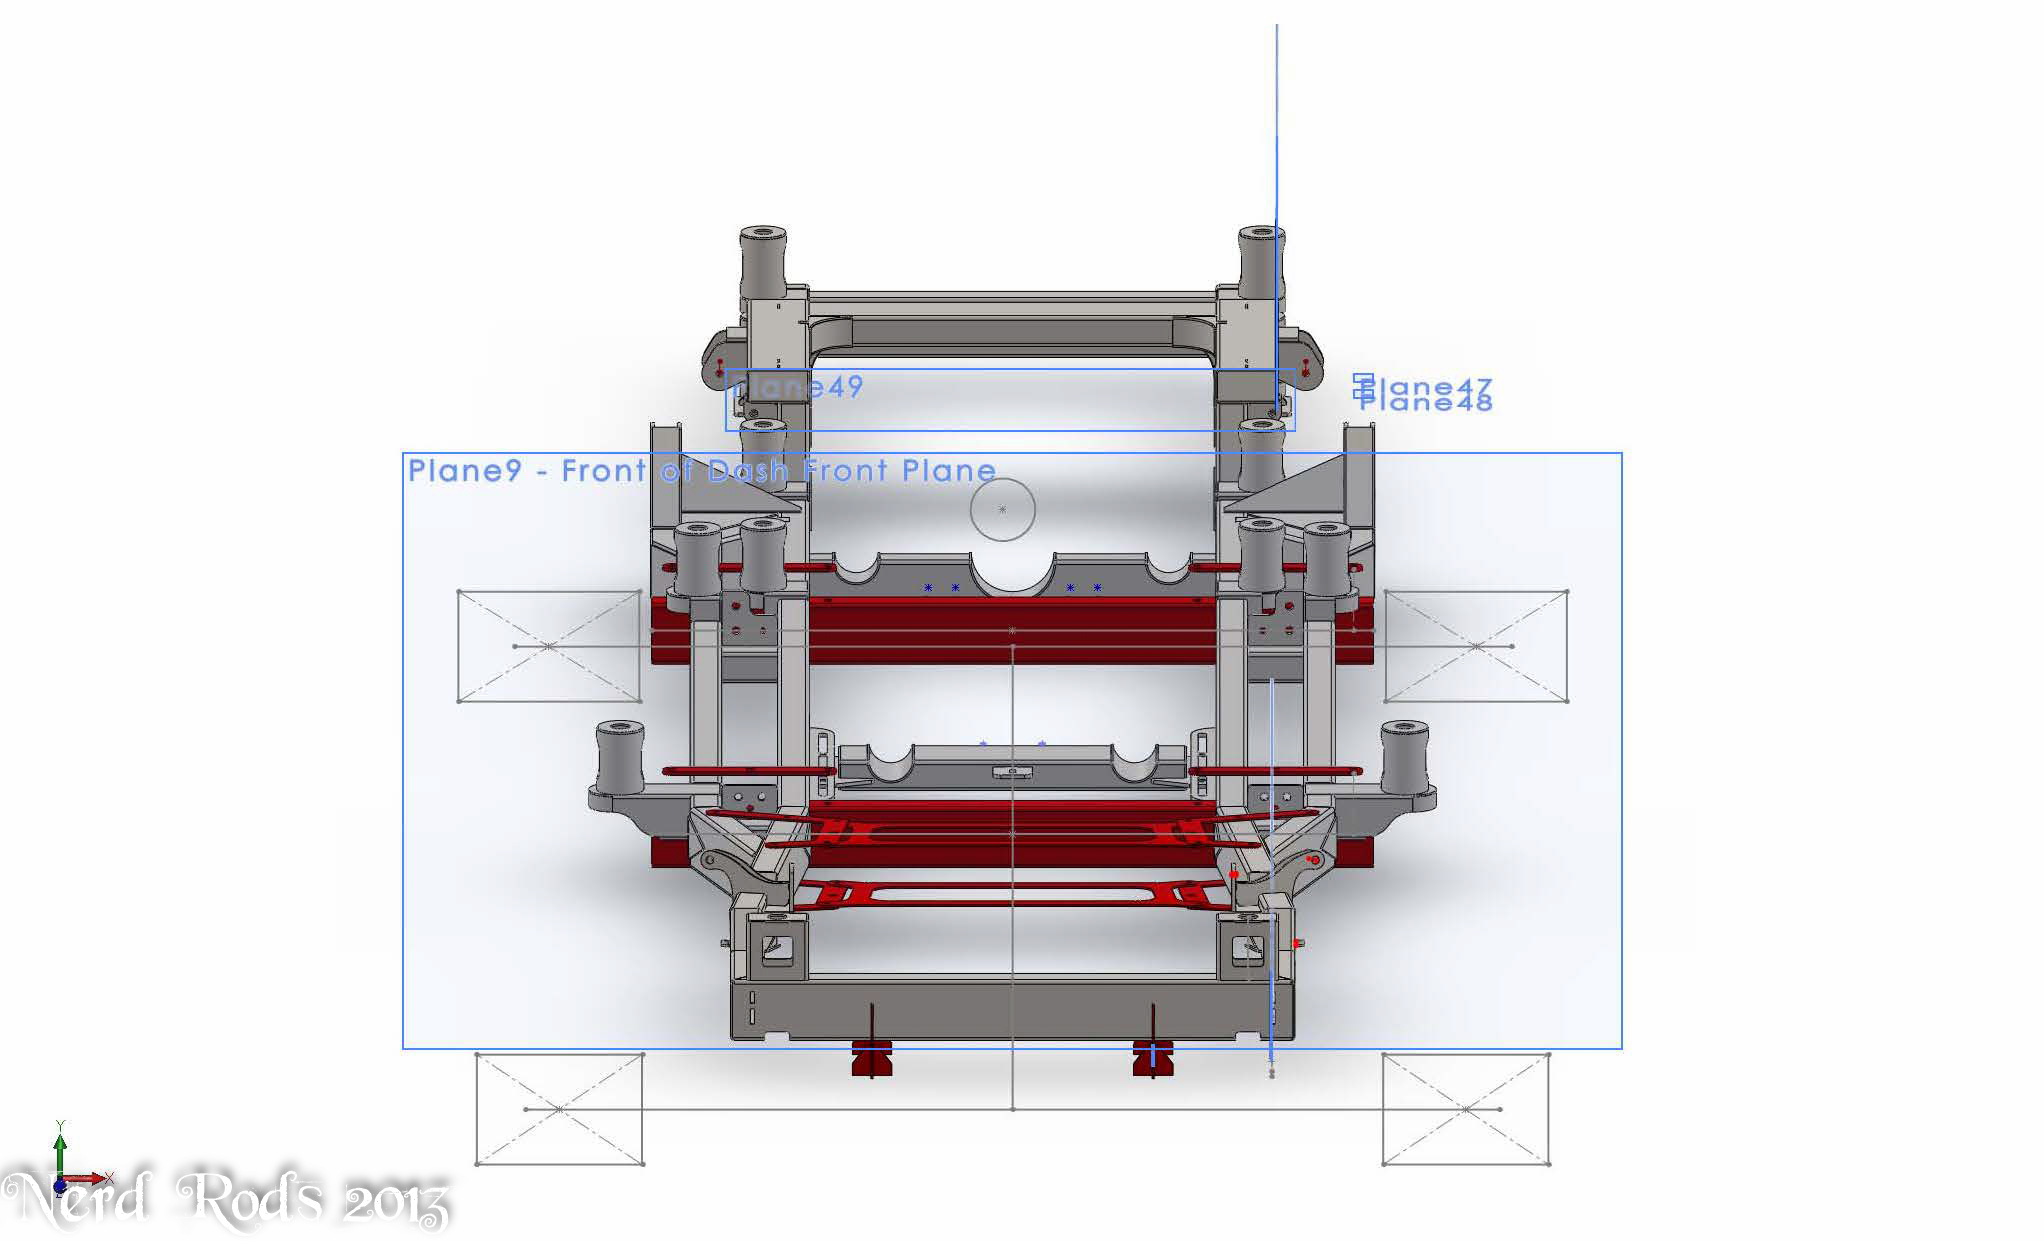
Torsional rigidity, more vertical surface to better support the center of the truck frame (nothing between the bed and the body to support it, its an even worse layout than a convertible) and it will make construction for the at home welder easier. If you look at the rail organization when I have this cut on the CNC Laser it will JIG itself and there will be nothing on the back side to obstruct it on the back side. So you'll lay one rail flat on the table, clamp it down and weld it up.
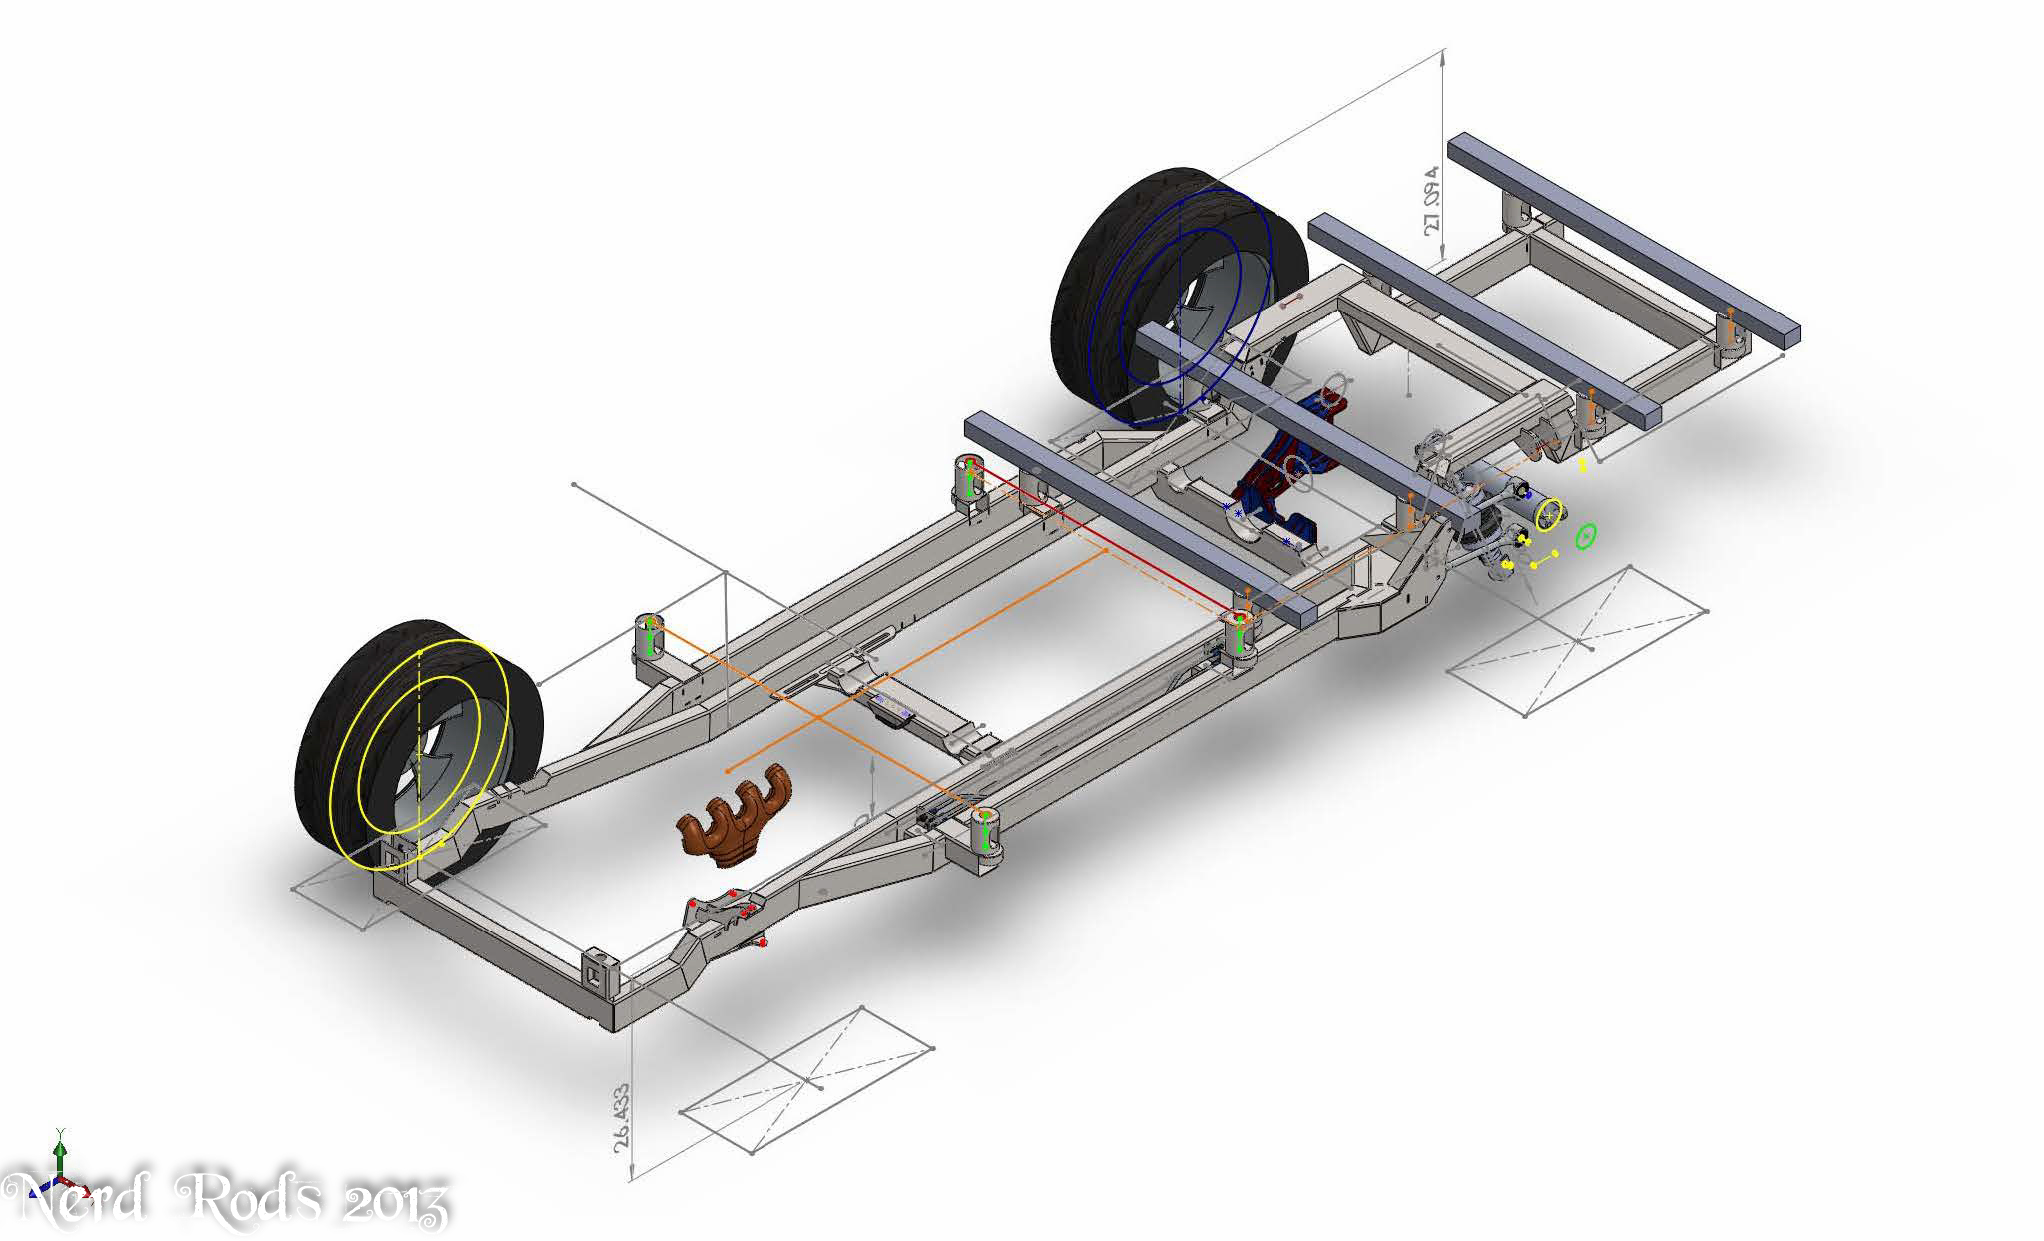
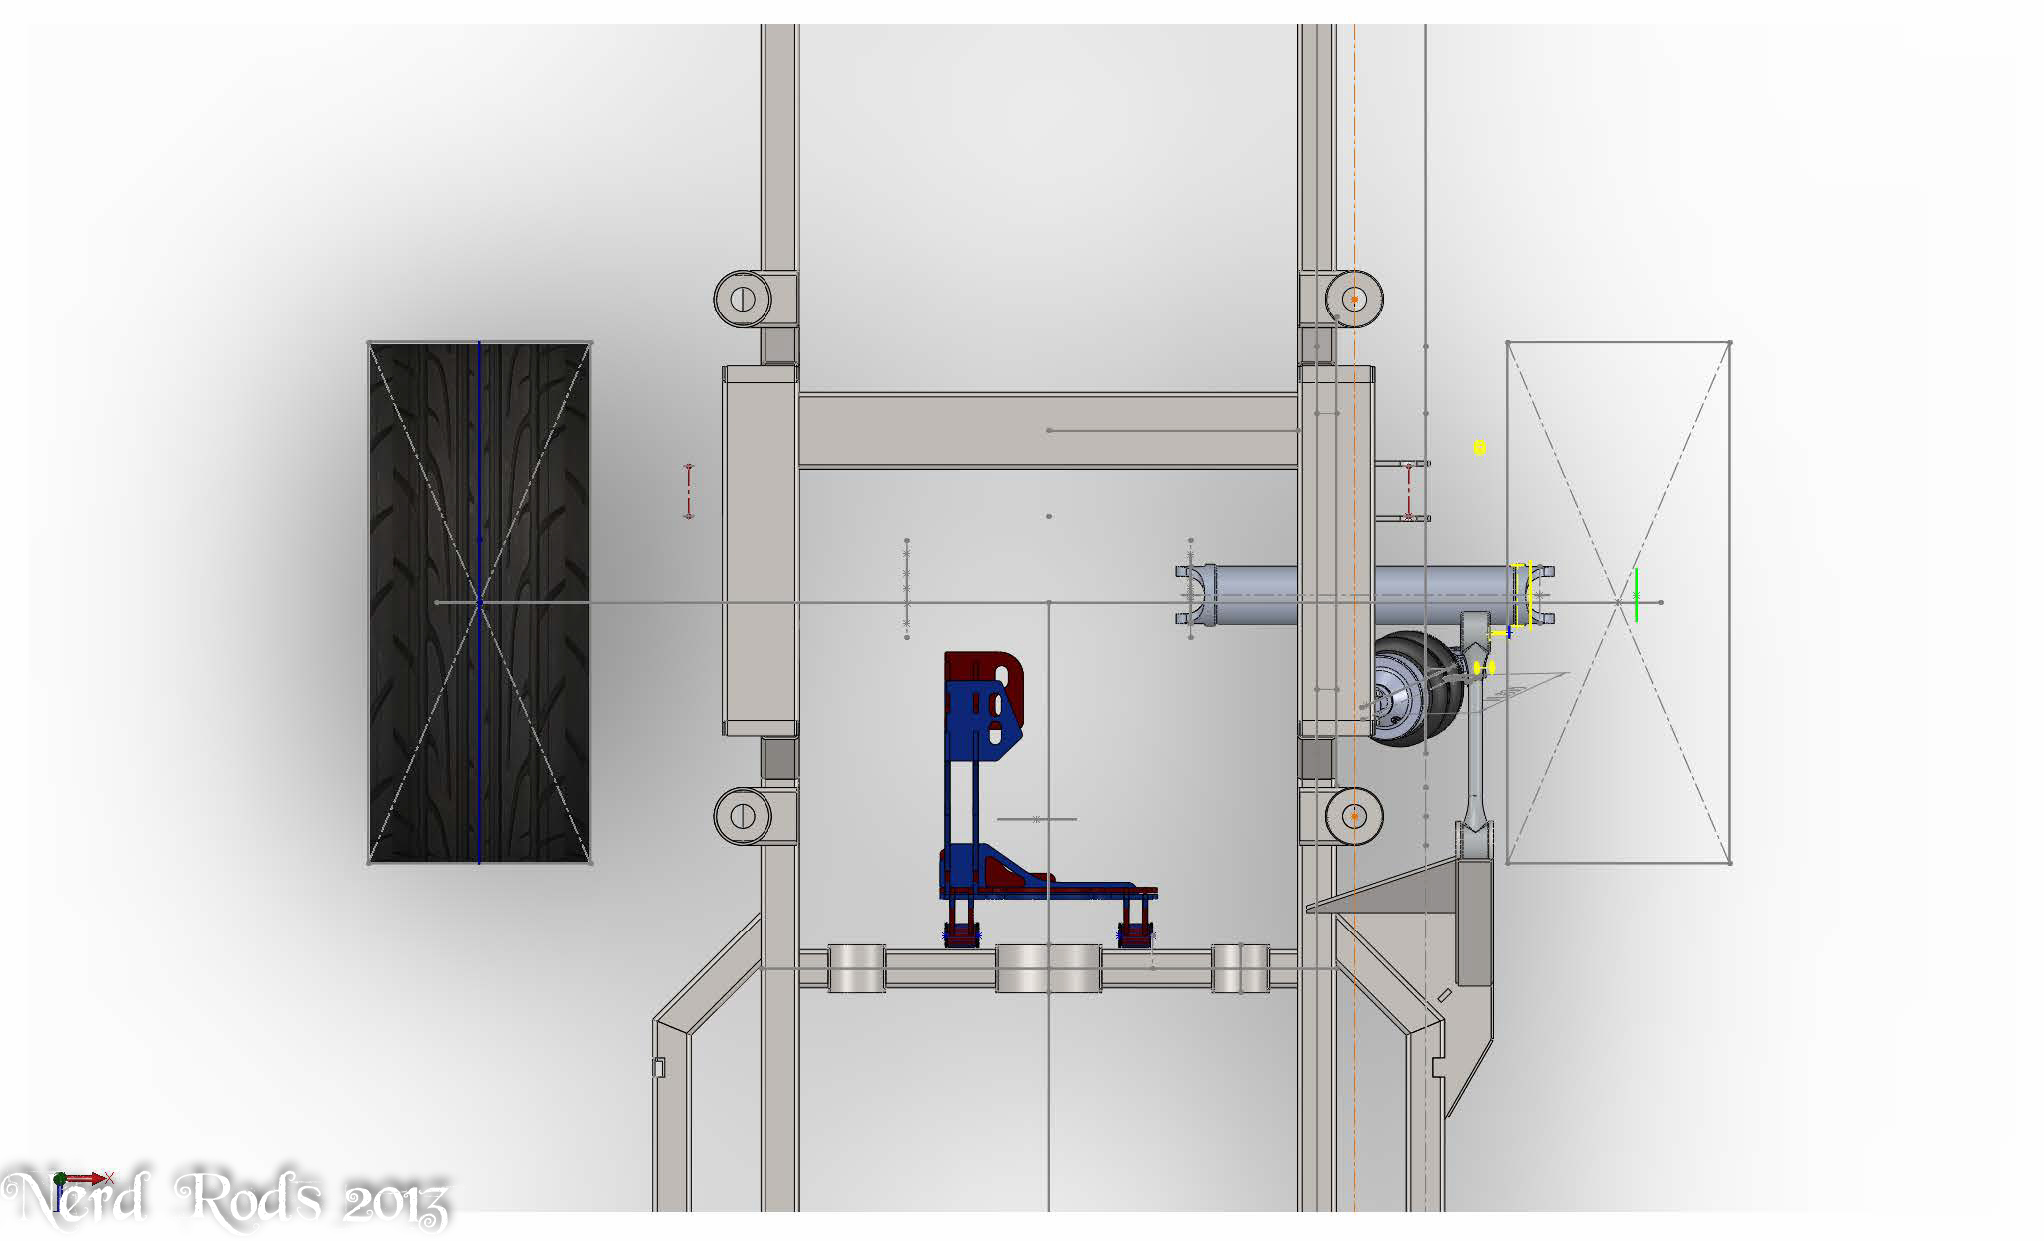
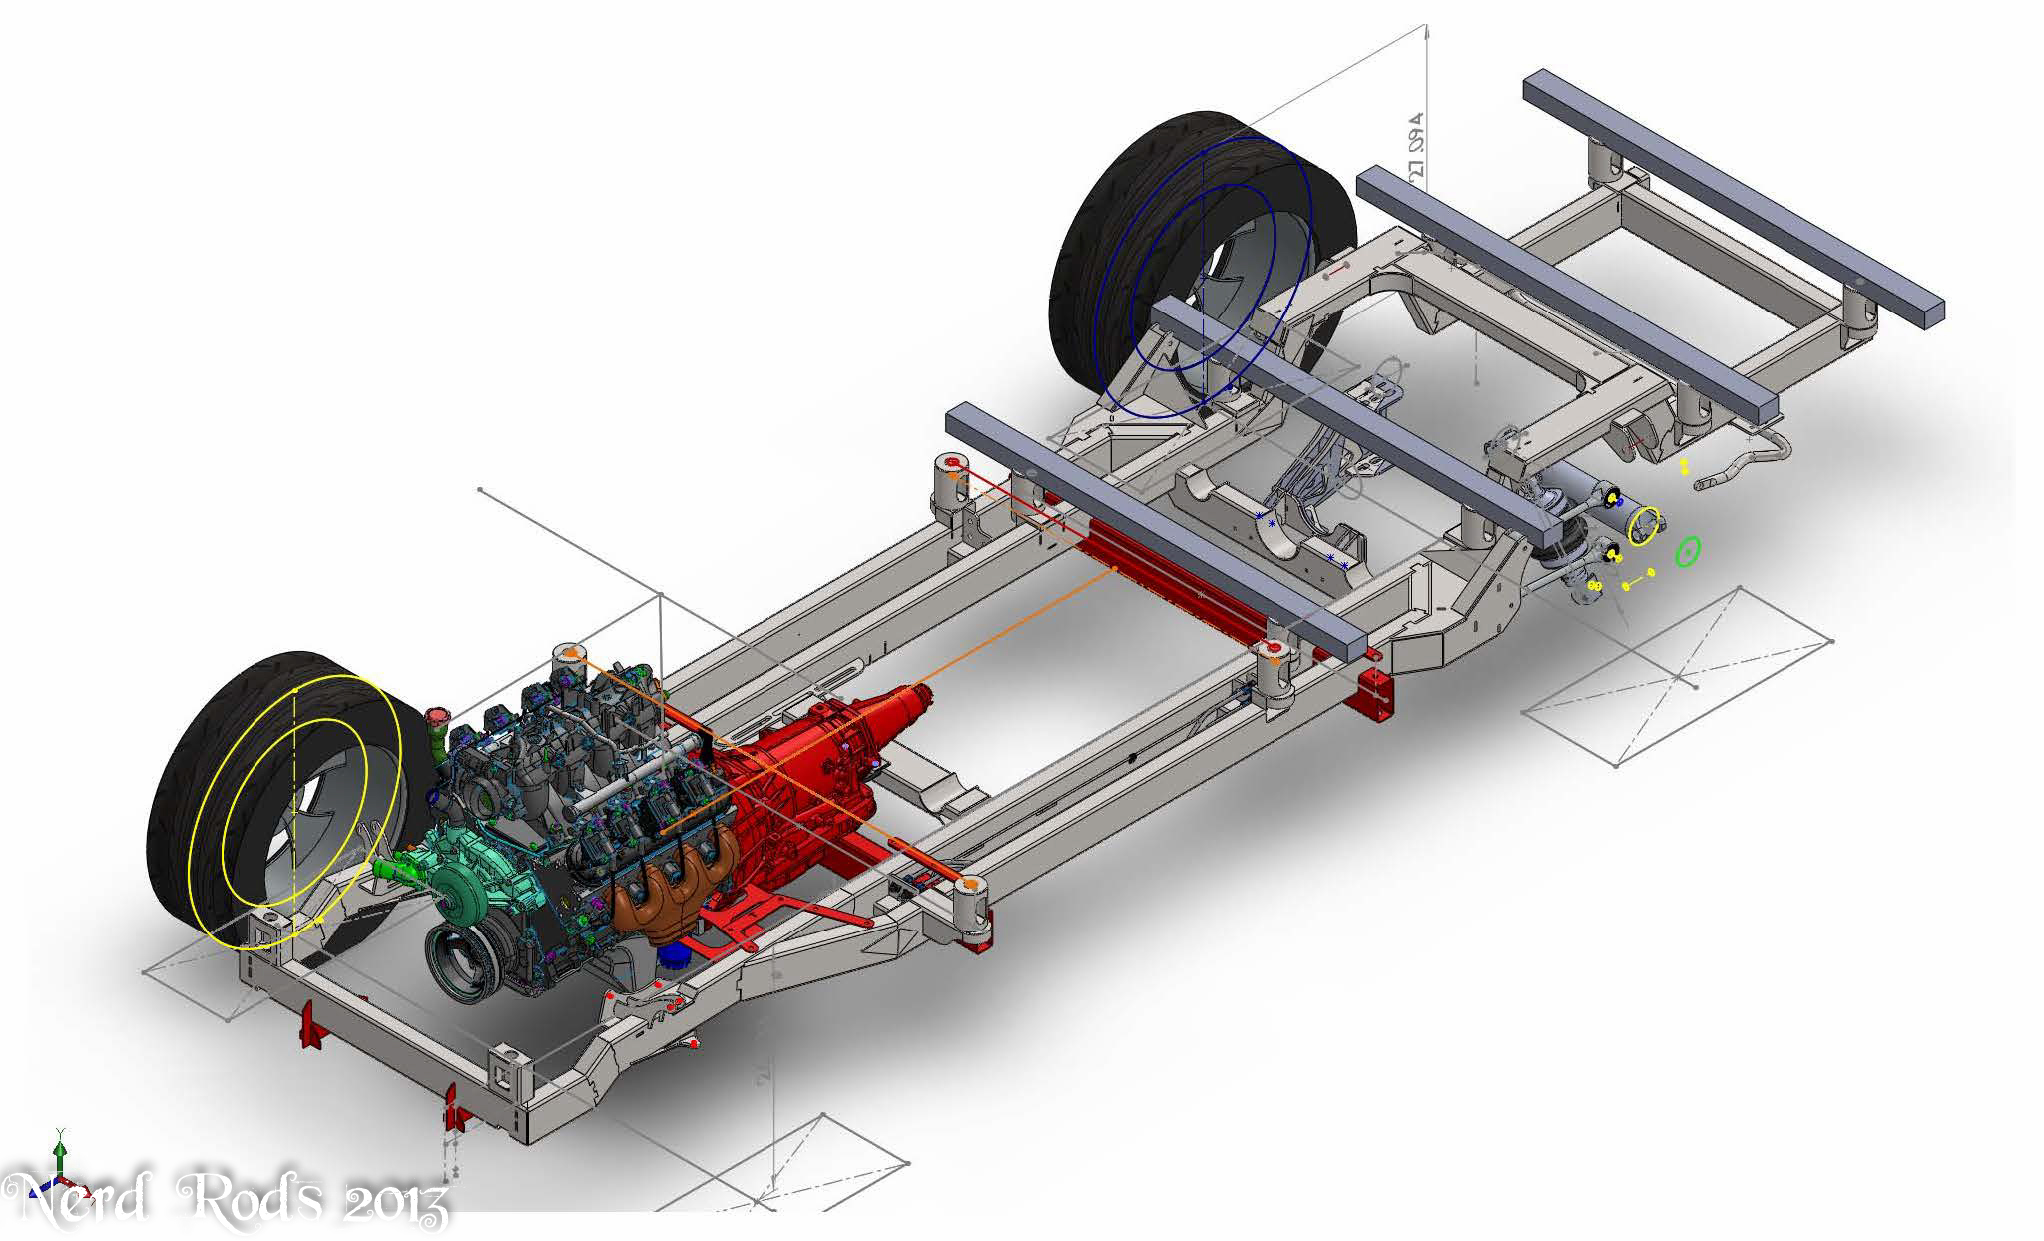
Why would you bother measuring the pickup points on the vette? Just make the instant center of your control arms intersect the center line of the front wheels where the CG intersects in on a line parallel to the ground. Your making the frame longer so you need to adjust and anti squat accordingly or the car is going to stand up in the center. I look my best guess off of it based on CG info I had off another truck I built but that's also why I made those parts easy to replace so I can get the entire truck together and calculate its CG and then tweak the frames design it if necessary.
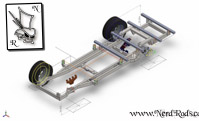
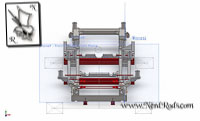
Like this, look at the 4 bars and follow the lines. The Optmial CG is aimed at the low 4" ride height and unfortunately this shows the 8" so its CG doesn't look right.
[IMG]nerdrods.com/Images/customer/CP5559C4/0001_George_Waddell/05/S-26.jpg[/IMG]
-Russell
Why would you bother measuring the pickup points on the vette? Just make the instant center of your control arms intersect the center line of the front wheels where the CG intersects in on a line parallel to the ground. Your making the frame longer so you need to adjust and anti squat accordingly or the car is going to stand up in the center. I look my best guess off of it based on CG info I had off another truck I built but that's also why I made those parts easy to replace so I can get the entire truck together and calculate its CG and then tweak the frames design it if necessary.
Like this, look at the 4 bars and follow the lines. The Optmial CG is aimed at the low 4" ride height and unfortunately this shows the 8" so its CG doesn't look right.
[IMG]nerdrods.com/Images/customer/CP5559C4/0001_George_Waddell/05/S-26.jpg[/IMG]
-Russell
 07-28-2013, 11:25 PM
#22
Staging Lane
Join Date: Jul 2012
Location: Bakersfield, CA
Posts: 84
Likes: 0
Received 0 Likes
on
0 Posts
I wanted to start with the OE pickup points to help me develop the axle sweep (how far rearward the axle centerline is from the diff centerline) and also how much the axles droop at ride height so I can have proper jounce/rebound travel. I noticed that most conversion kits do not use the trailing arm brackets and instead use a fixed mounting point that prevents you from altering the rear geometry with bolt on parts. I kept the OE trailing arm brackets for my build and can build new ones later on with altered pivot points similar to what Doug Rippie makes but I'll make them to suit my needs. I projected the oe instant center as it sits now and it is roughly 45" forward of the rear axle centerline. To get it where I want it I will need to drop the front of the upper arm just a bit and the rear about 1-1/4" .
08-06-2013, 09:44 PM
#23
Launching!
Thread Starter
Join Date: Jan 2007
Location: Luling TX In the Hot Rod Shop
Posts: 294
Likes: 0
Received 3 Likes
on
3 Posts
Sounds like a plan! Good luck with it.
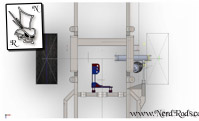
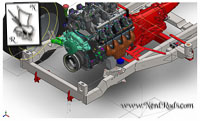
Detail work now. I'm happy with the shape and we've taken care of most every clearance issue I can think of with these tucks and got the number of parts down compared to the TriFive frame so there will be less welding and will make it easier to assemble but still similar in several ways to give the frame some parallel to the other frames to make guys who have welded one feel familiar with the other.
We've got the Corvette stuff dialed in now but we will have life axle support like the TriFive frame as well. I've sold a few of the truck frames besides this project already but they are all welded frames so I won't need to make instructions just yet. I'll do a time lapse of the second frame I weld for you guys to see how I do it.
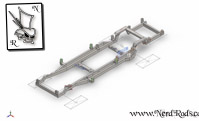
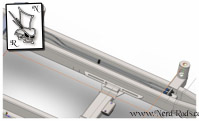
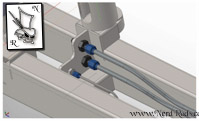
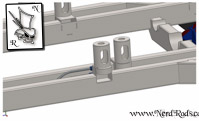
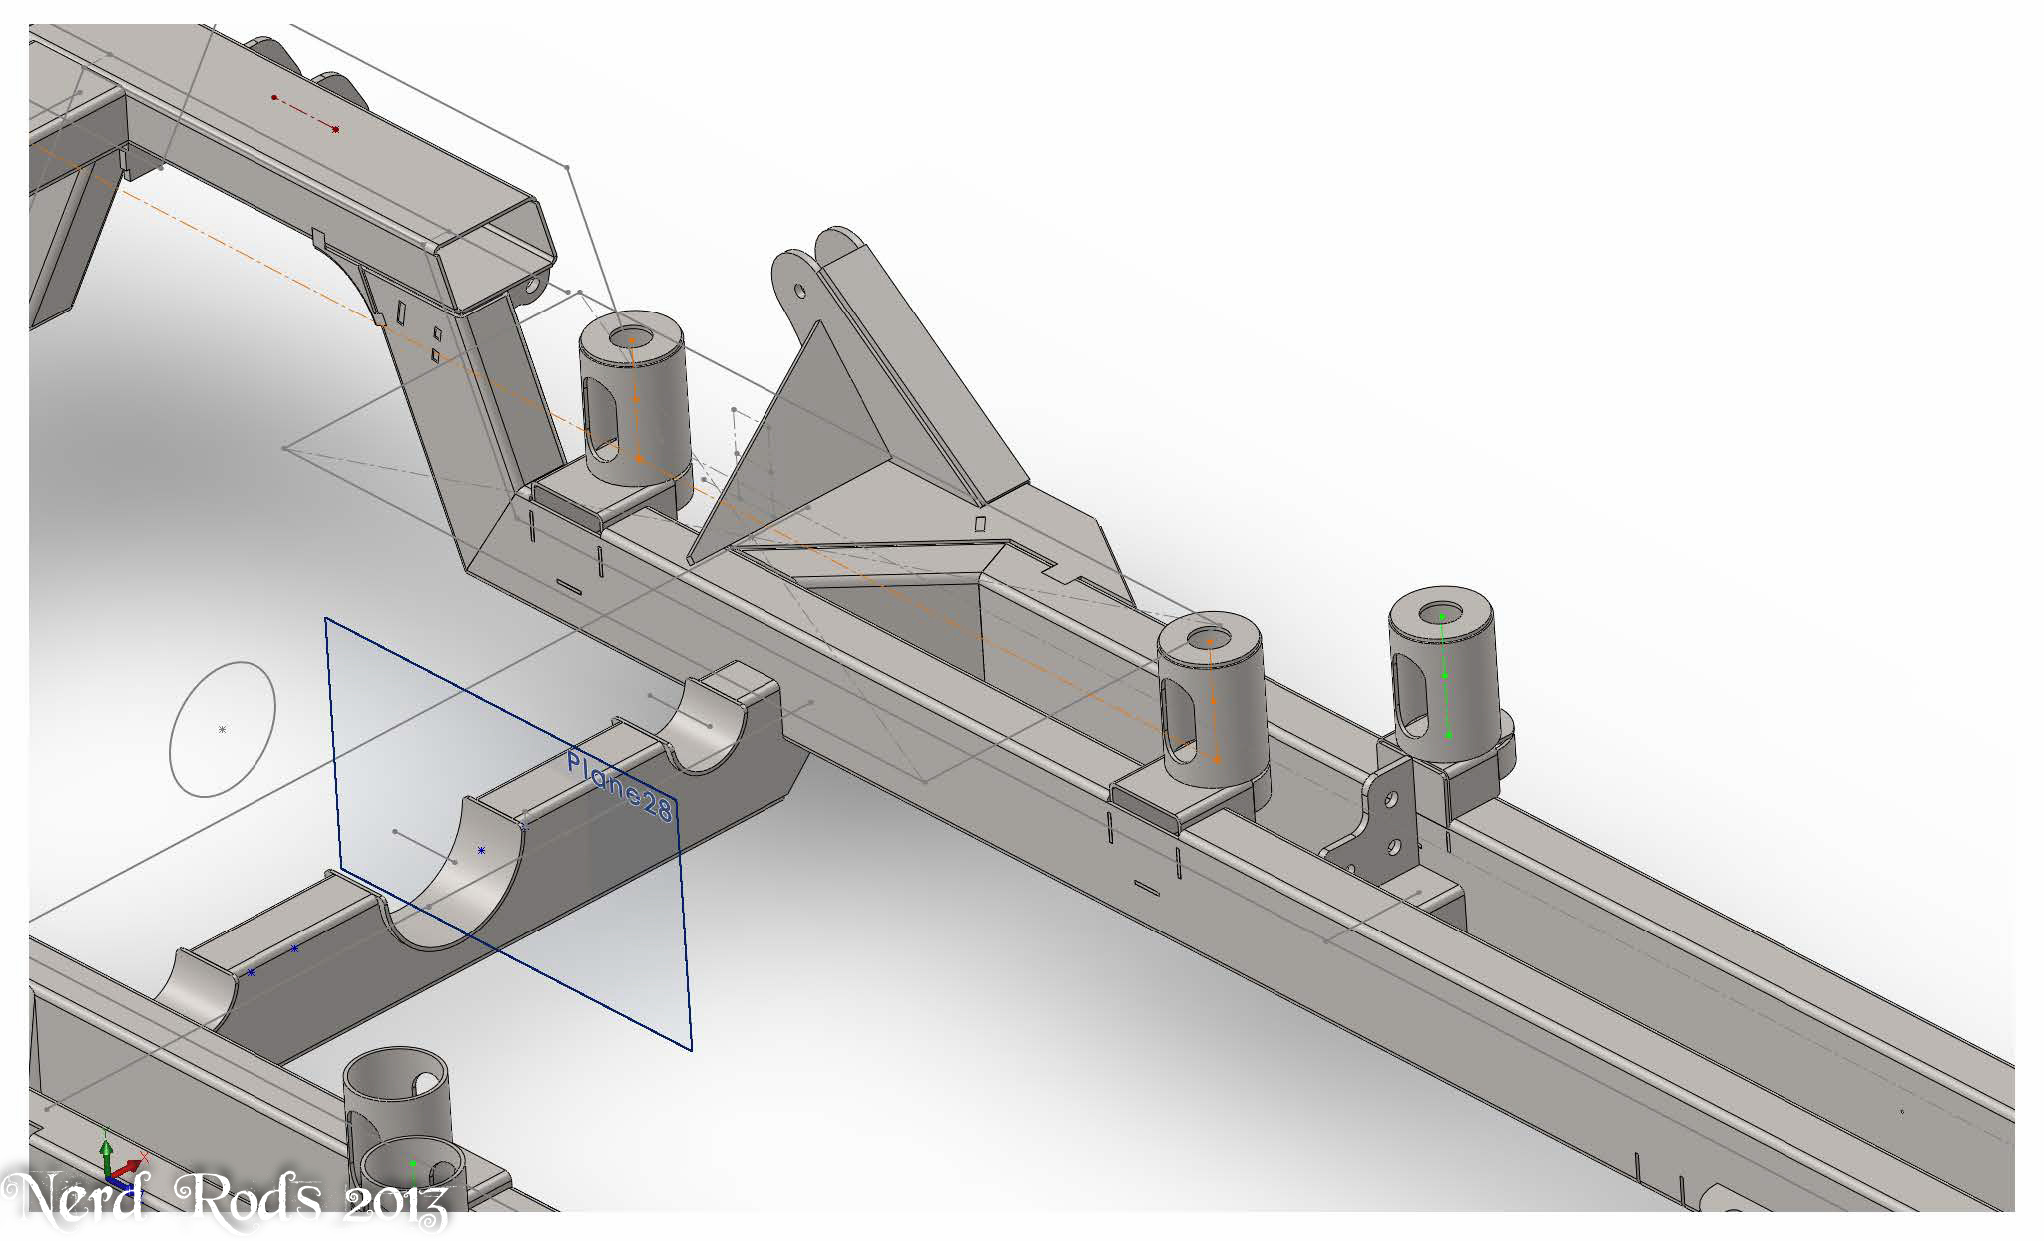
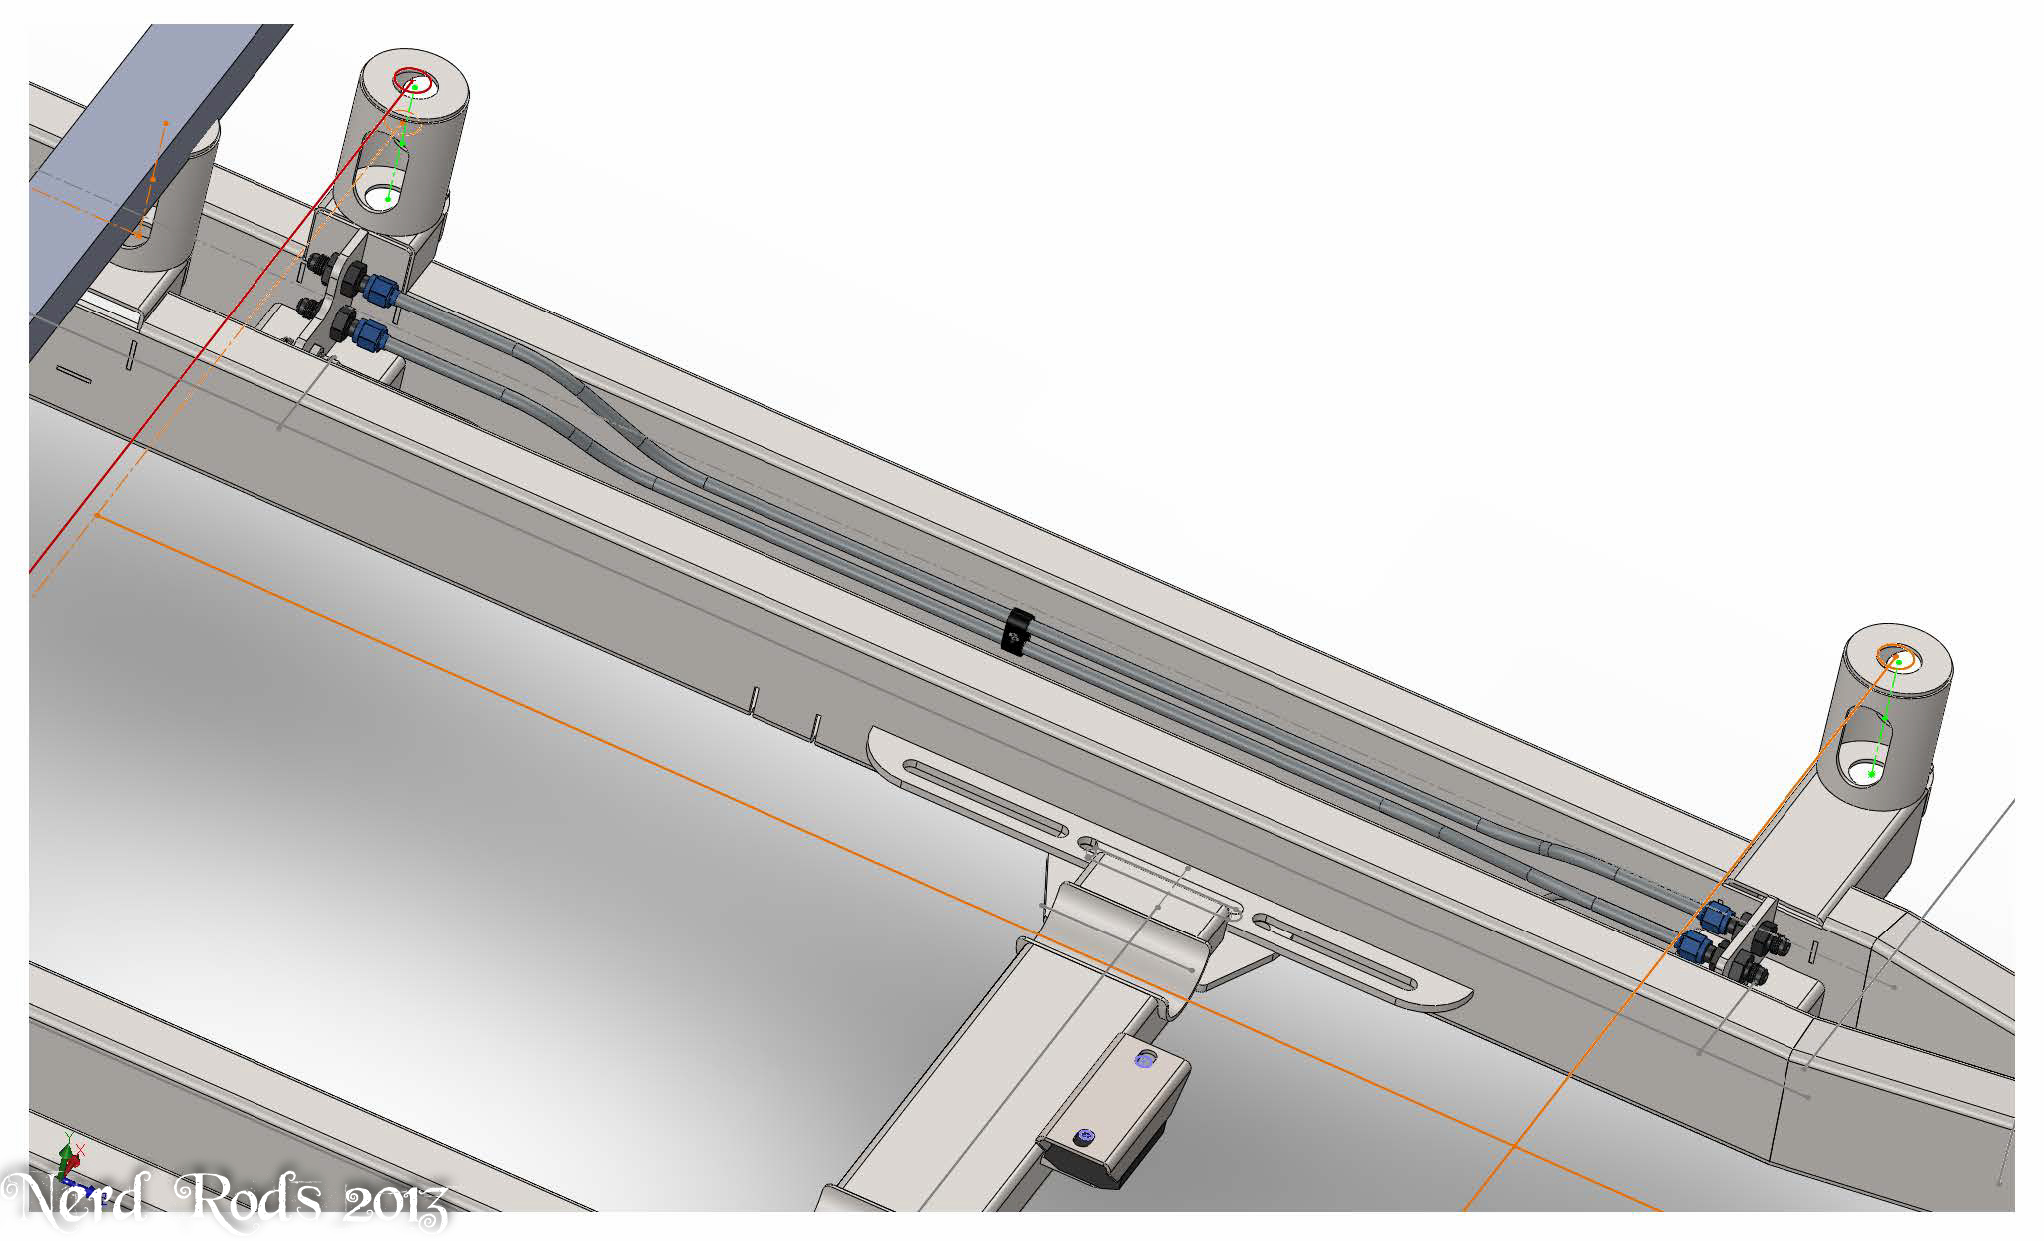
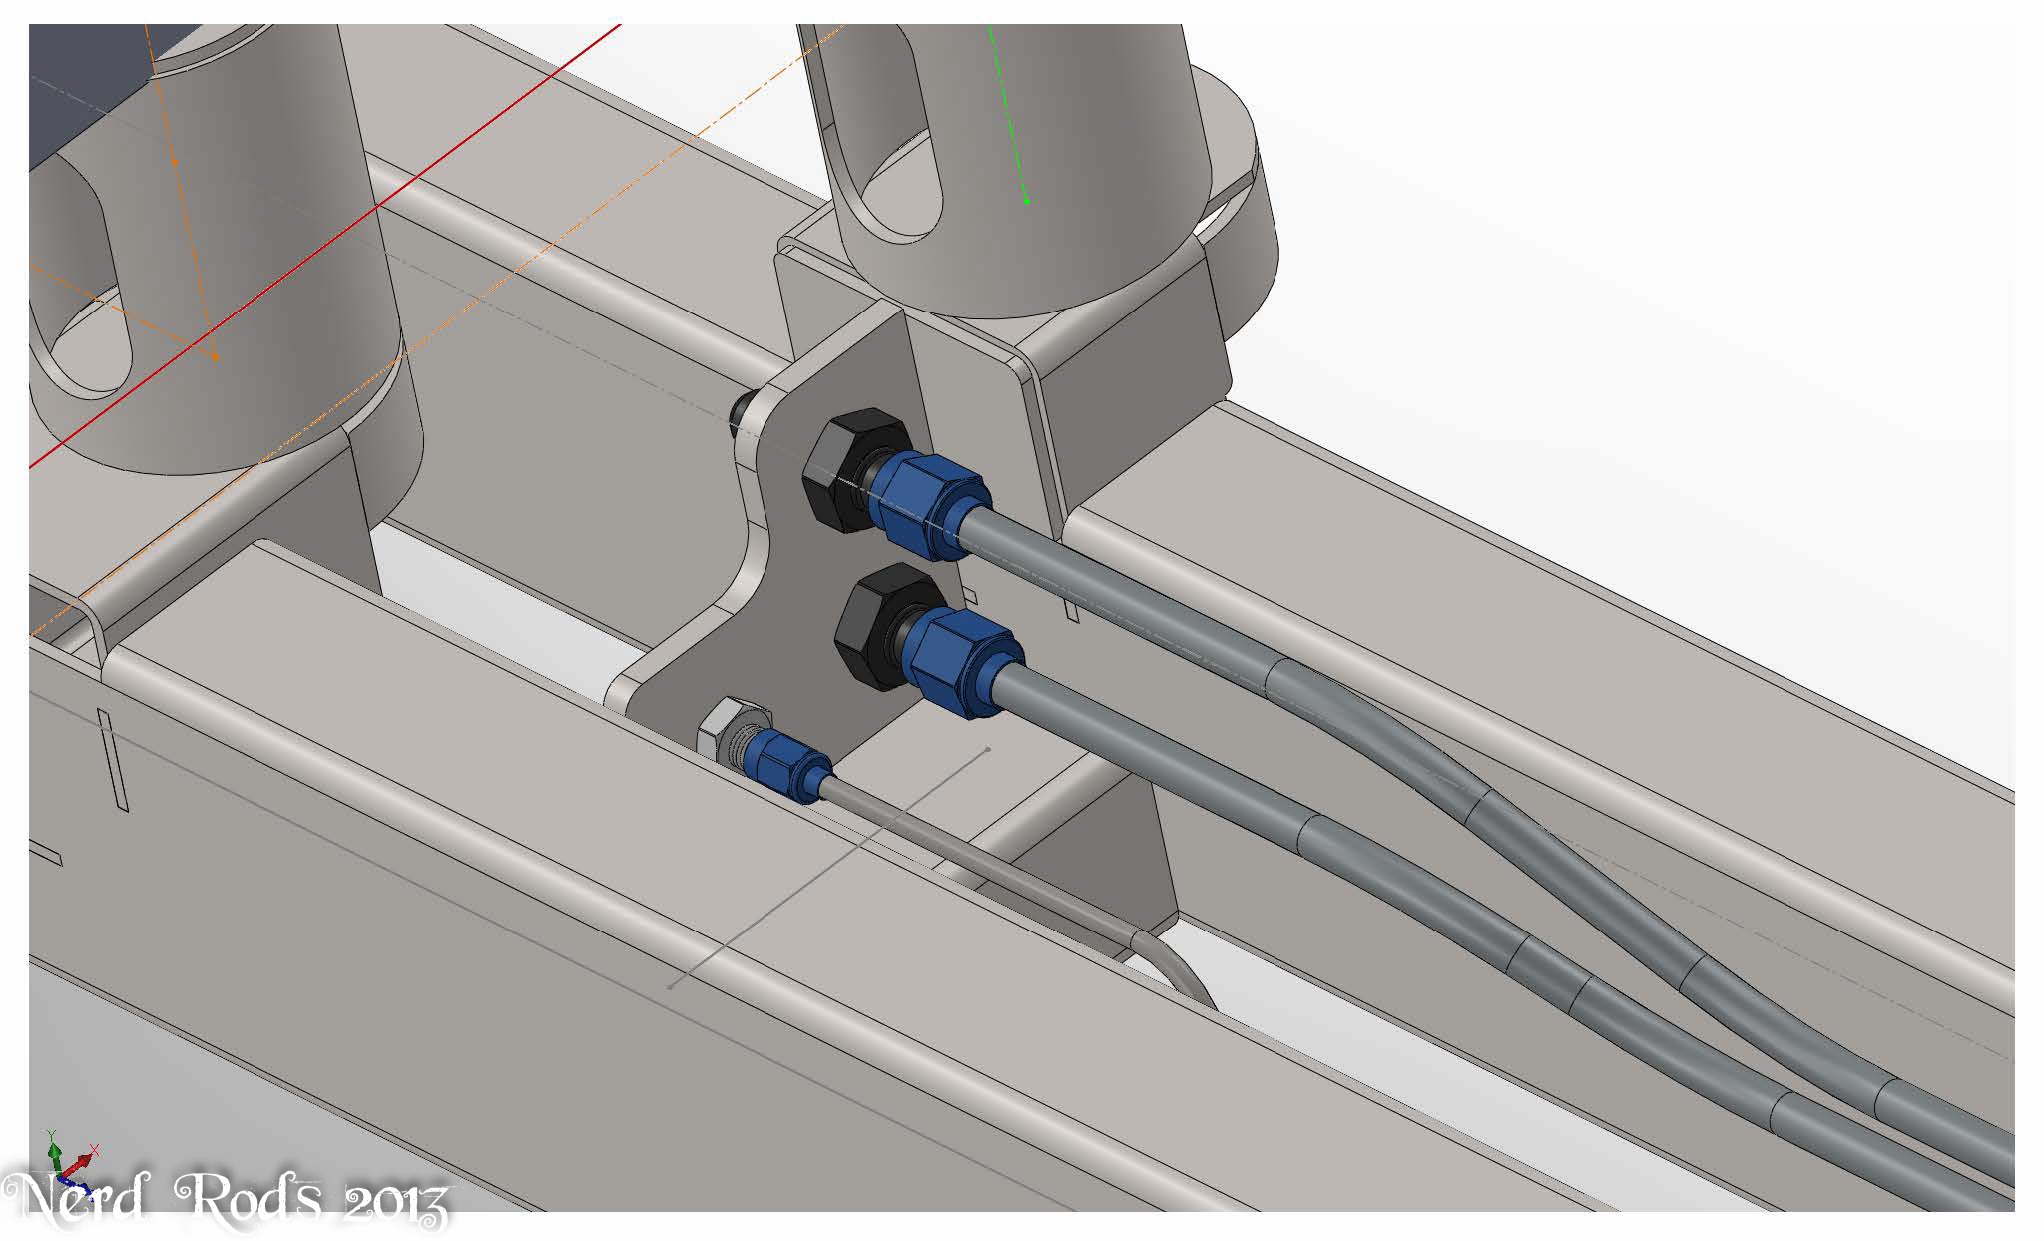
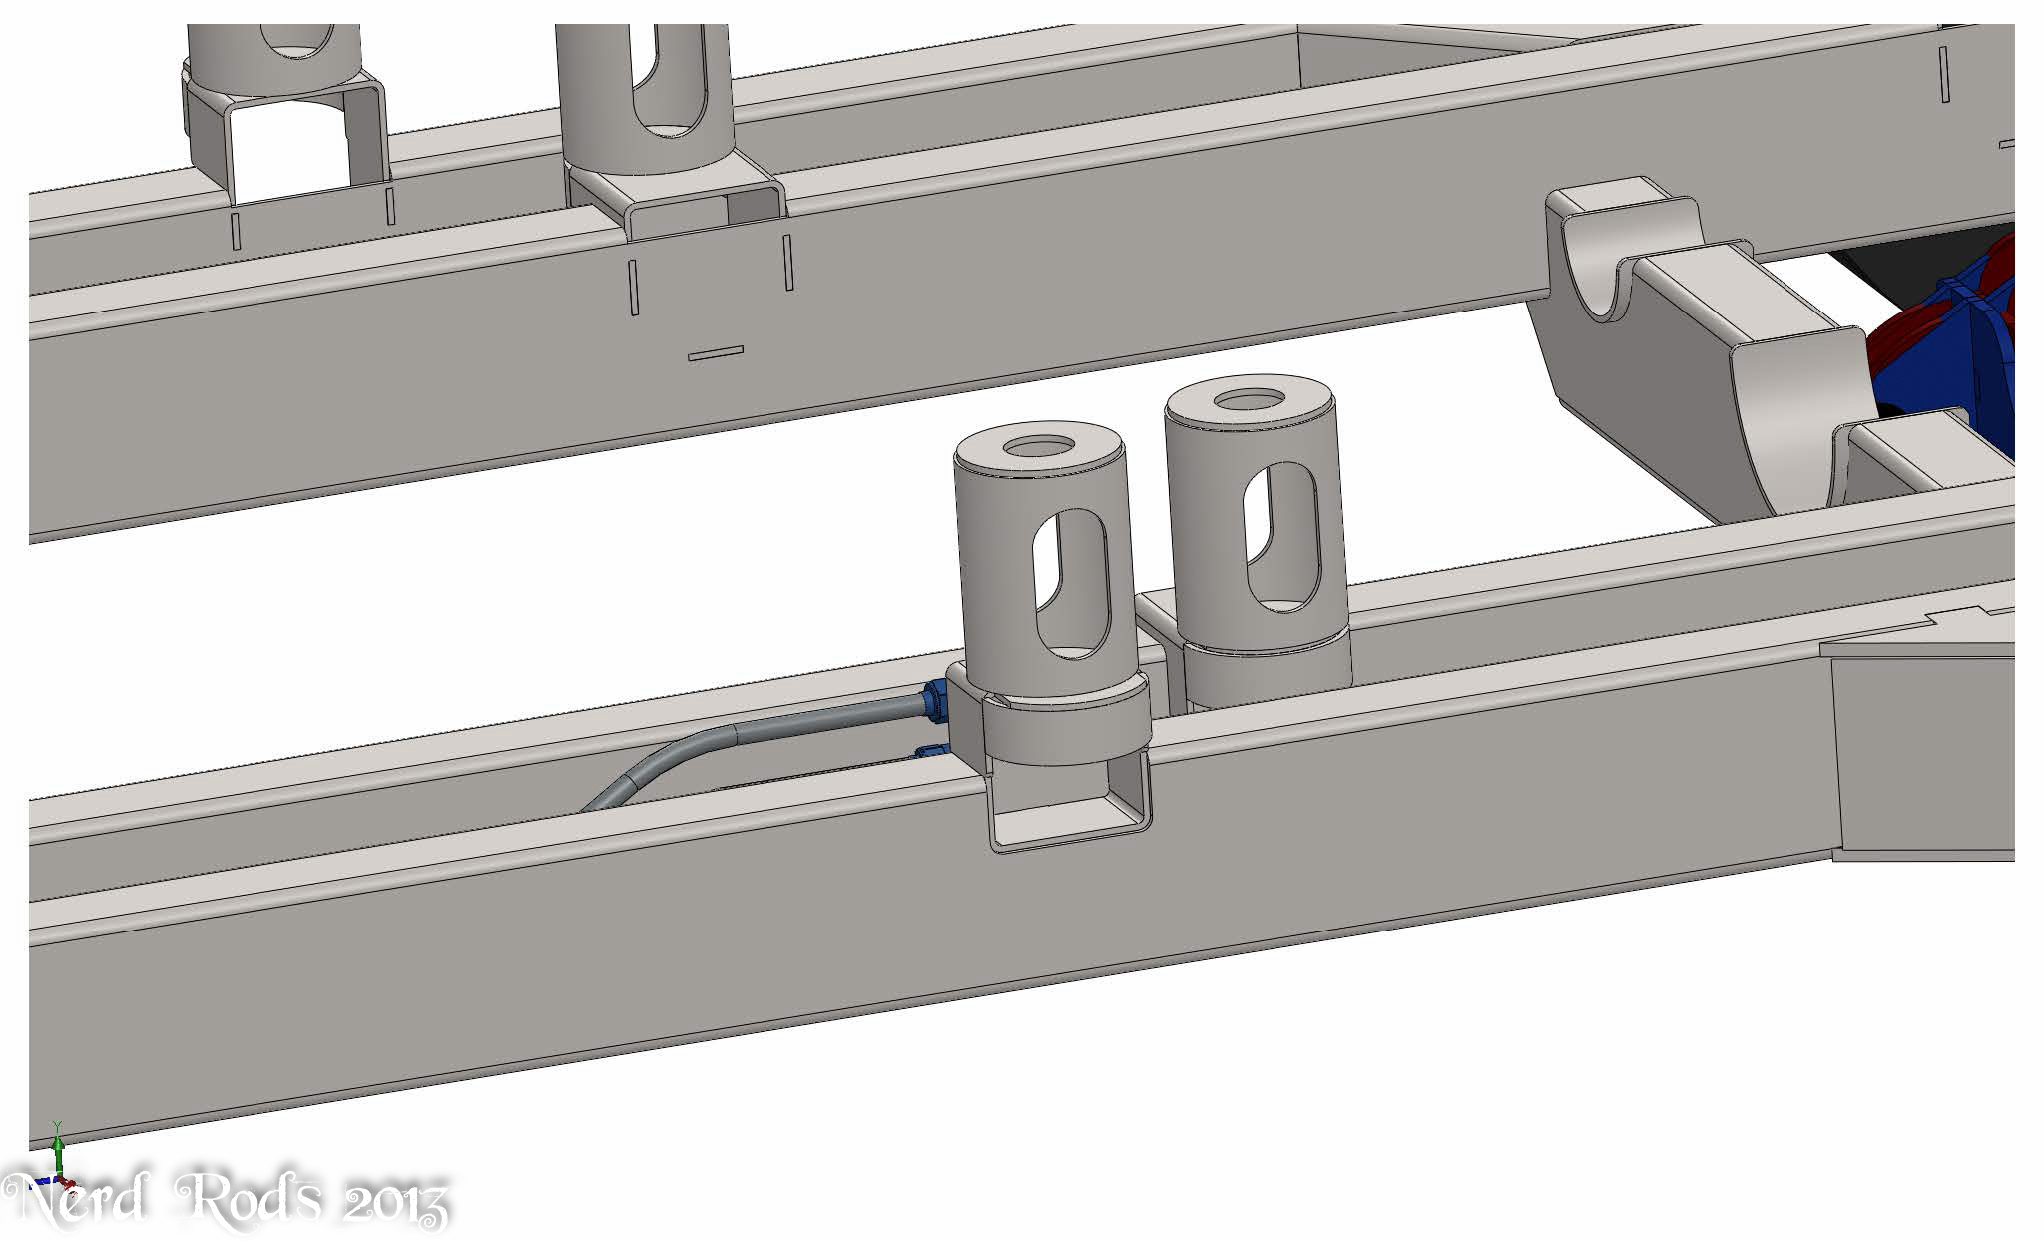
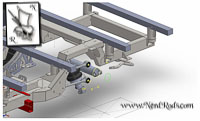
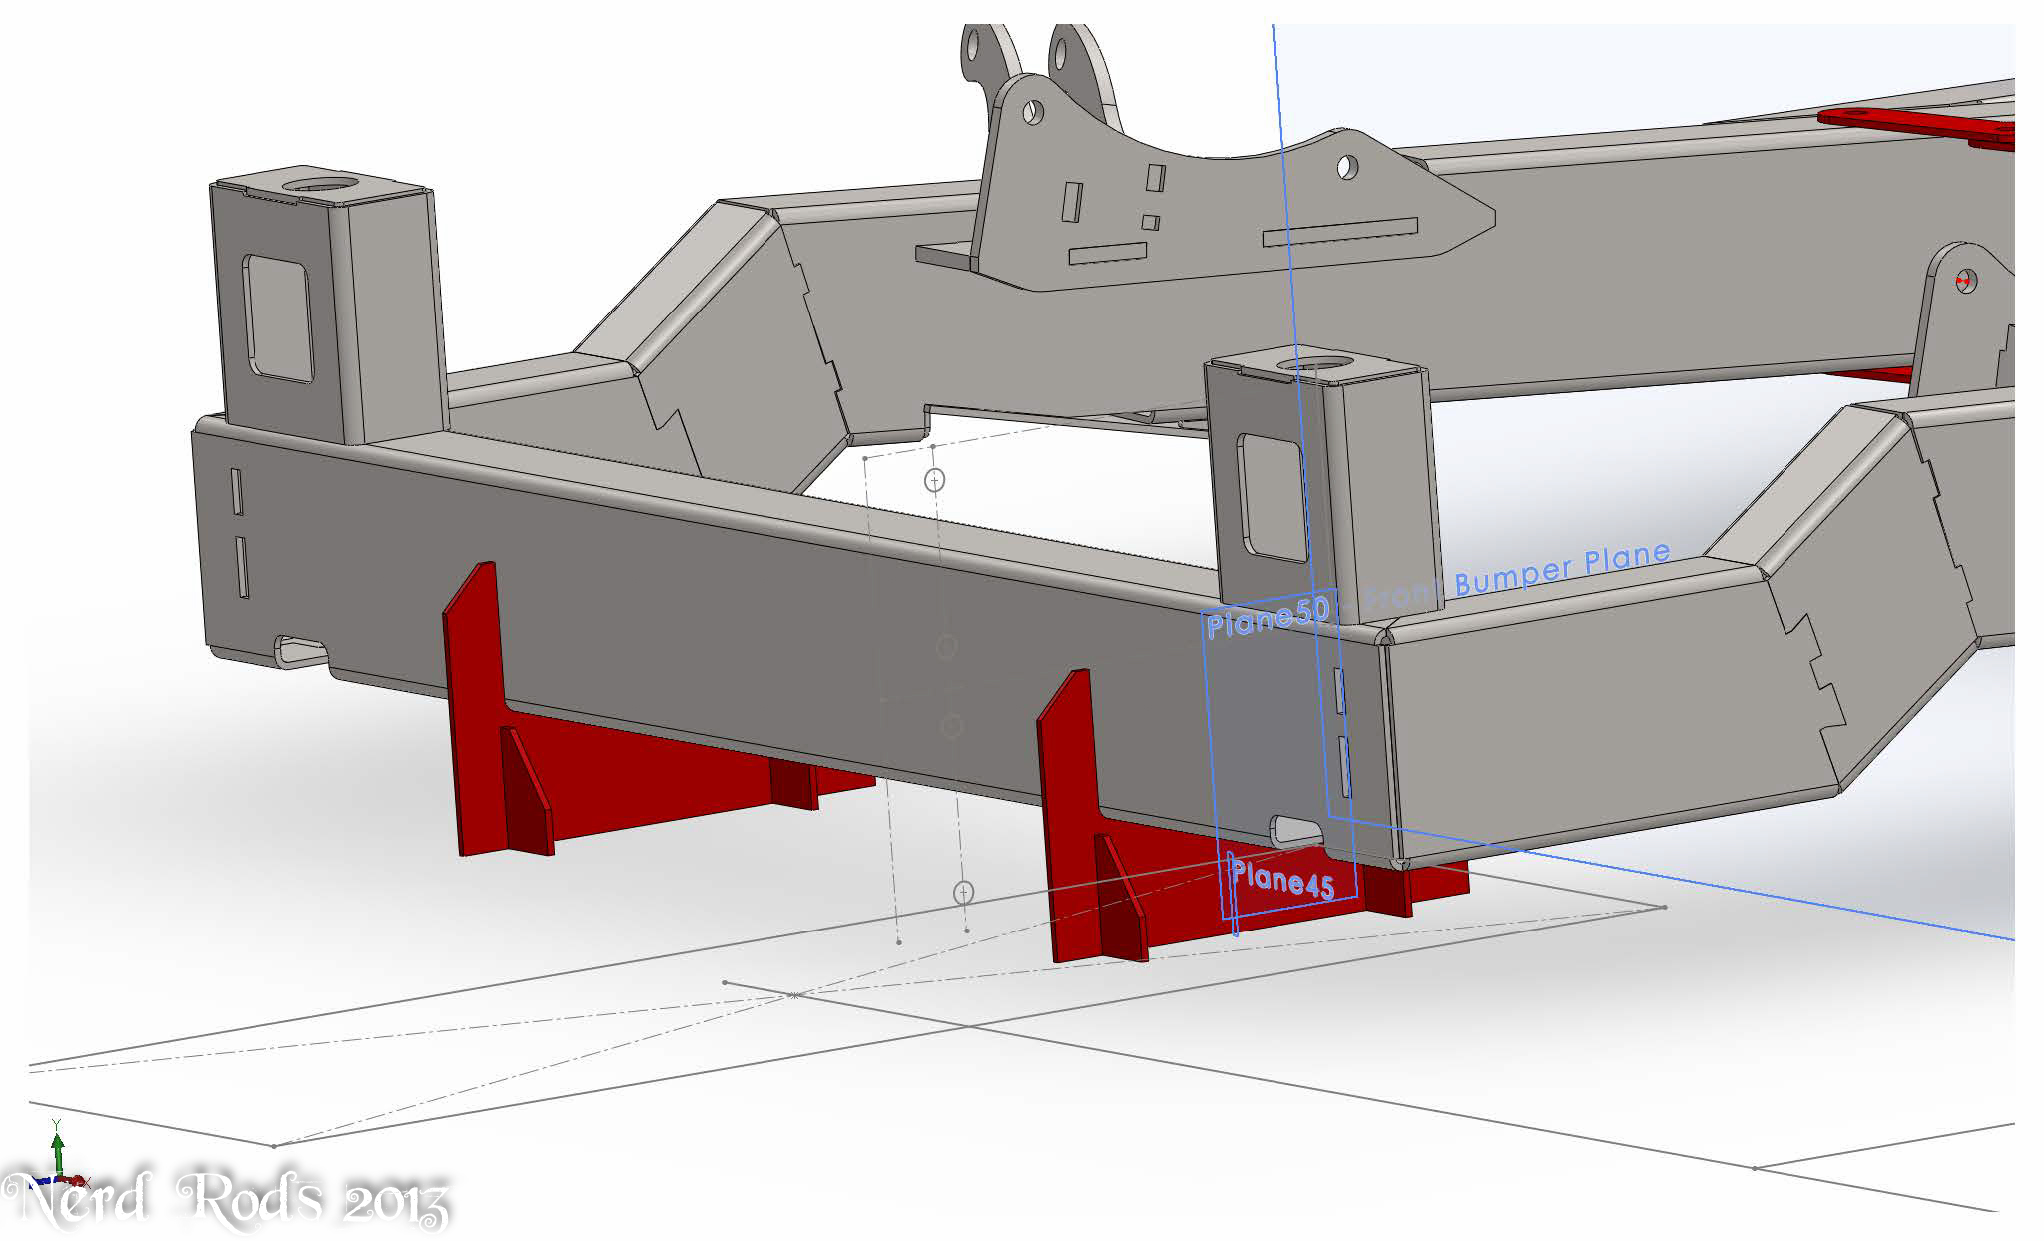
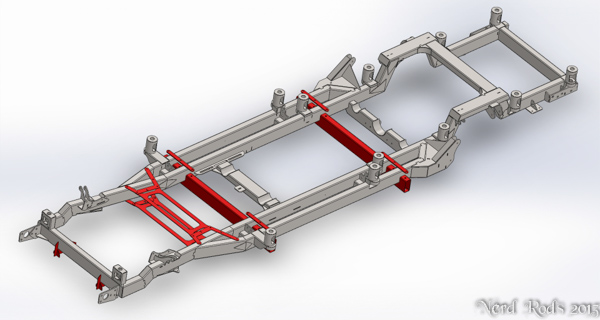
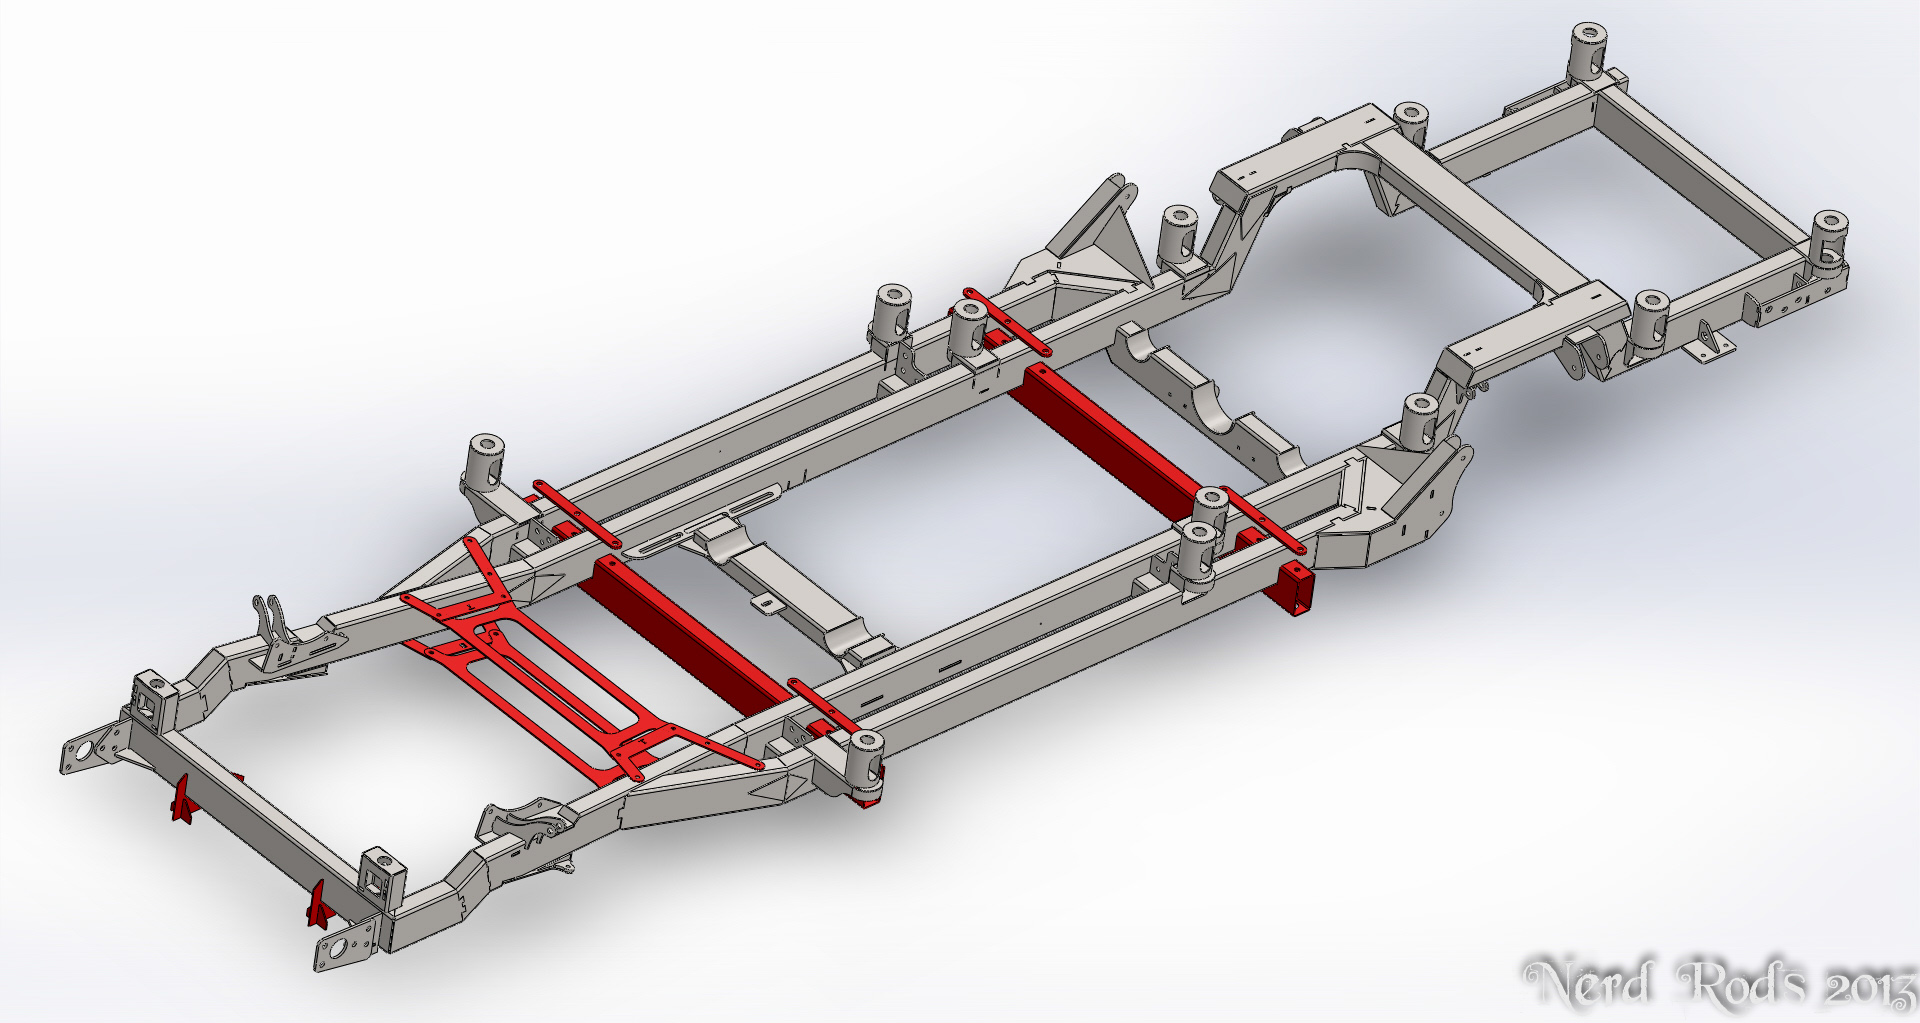
You can see two key thinks with this frame in the fuel and brake system support, still working on where and how to place the fuel tank and the 4" tall tubing risers to give the optional ride heights for different builders.
But I know what you all really want, pictures, lots and lots of pictures. So here's your fix.
Later
-Russell
Detail work now. I'm happy with the shape and we've taken care of most every clearance issue I can think of with these tucks and got the number of parts down compared to the TriFive frame so there will be less welding and will make it easier to assemble but still similar in several ways to give the frame some parallel to the other frames to make guys who have welded one feel familiar with the other.
We've got the Corvette stuff dialed in now but we will have life axle support like the TriFive frame as well. I've sold a few of the truck frames besides this project already but they are all welded frames so I won't need to make instructions just yet. I'll do a time lapse of the second frame I weld for you guys to see how I do it.
You can see two key thinks with this frame in the fuel and brake system support, still working on where and how to place the fuel tank and the 4" tall tubing risers to give the optional ride heights for different builders.
But I know what you all really want, pictures, lots and lots of pictures. So here's your fix.
Later
-Russell
08-27-2013, 03:26 AM
#24
Launching!
Thread Starter
Join Date: Jan 2007
Location: Luling TX In the Hot Rod Shop
Posts: 294
Likes: 0
Received 3 Likes
on
3 Posts
ALMOST!!!!!
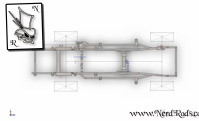
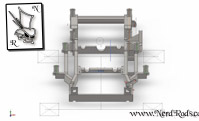
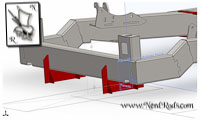
I'm looking for another frame to measure bumper mounting holes. I've measured one already but I like to check 2 and average the two or three to find my locations all dialed in. But until then, pictures of the 99% completed frame!!!!

Later
-Russell
I'm looking for another frame to measure bumper mounting holes. I've measured one already but I like to check 2 and average the two or three to find my locations all dialed in. But until then, pictures of the 99% completed frame!!!!


Later
-Russell
09-04-2013, 08:09 AM
#25
Launching!
Thread Starter
Join Date: Jan 2007
Location: Luling TX In the Hot Rod Shop
Posts: 294
Likes: 0
Received 3 Likes
on
3 Posts
DONE!!!!!! MAW HAHAHAHAHAHA!!!!!!!
Just got it all sent off to the laser yesterday. I've got some quality control books to make up so the guys cutting the parts won't miss anything but we should have a frame to weld up in 2-5 weeks. They need to poke around and see what time frames look like over there before I can get a solid time frame.
Thanks
-Russell
10-01-2013, 10:03 AM
#27
Launching!
Thread Starter
Join Date: Jan 2007
Location: Luling TX In the Hot Rod Shop
Posts: 294
Likes: 0
Received 3 Likes
on
3 Posts
On my way to Dallas right now, I'll try and post photos tonight. They took a little longer because they wanted to roll some parts instead of cutting them from round tubing to help save money.
Later
-Russell
Later
-Russell
10-13-2013, 03:52 AM
#28
Launching!
Thread Starter
Join Date: Jan 2007
Location: Luling TX In the Hot Rod Shop
Posts: 294
Likes: 0
Received 3 Likes
on
3 Posts
Sorry about the slow response. I got back and life happened. Had a bunch of powder coating work show up to take up space, got sick for a day, had to change out two ballasts in the shop lights, the shop was a mess from a CJ7 5.3L swap and I've got some new part time guys I'm getting trained. Nuts, just nuts.
But without further ado, the new frame!
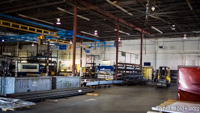
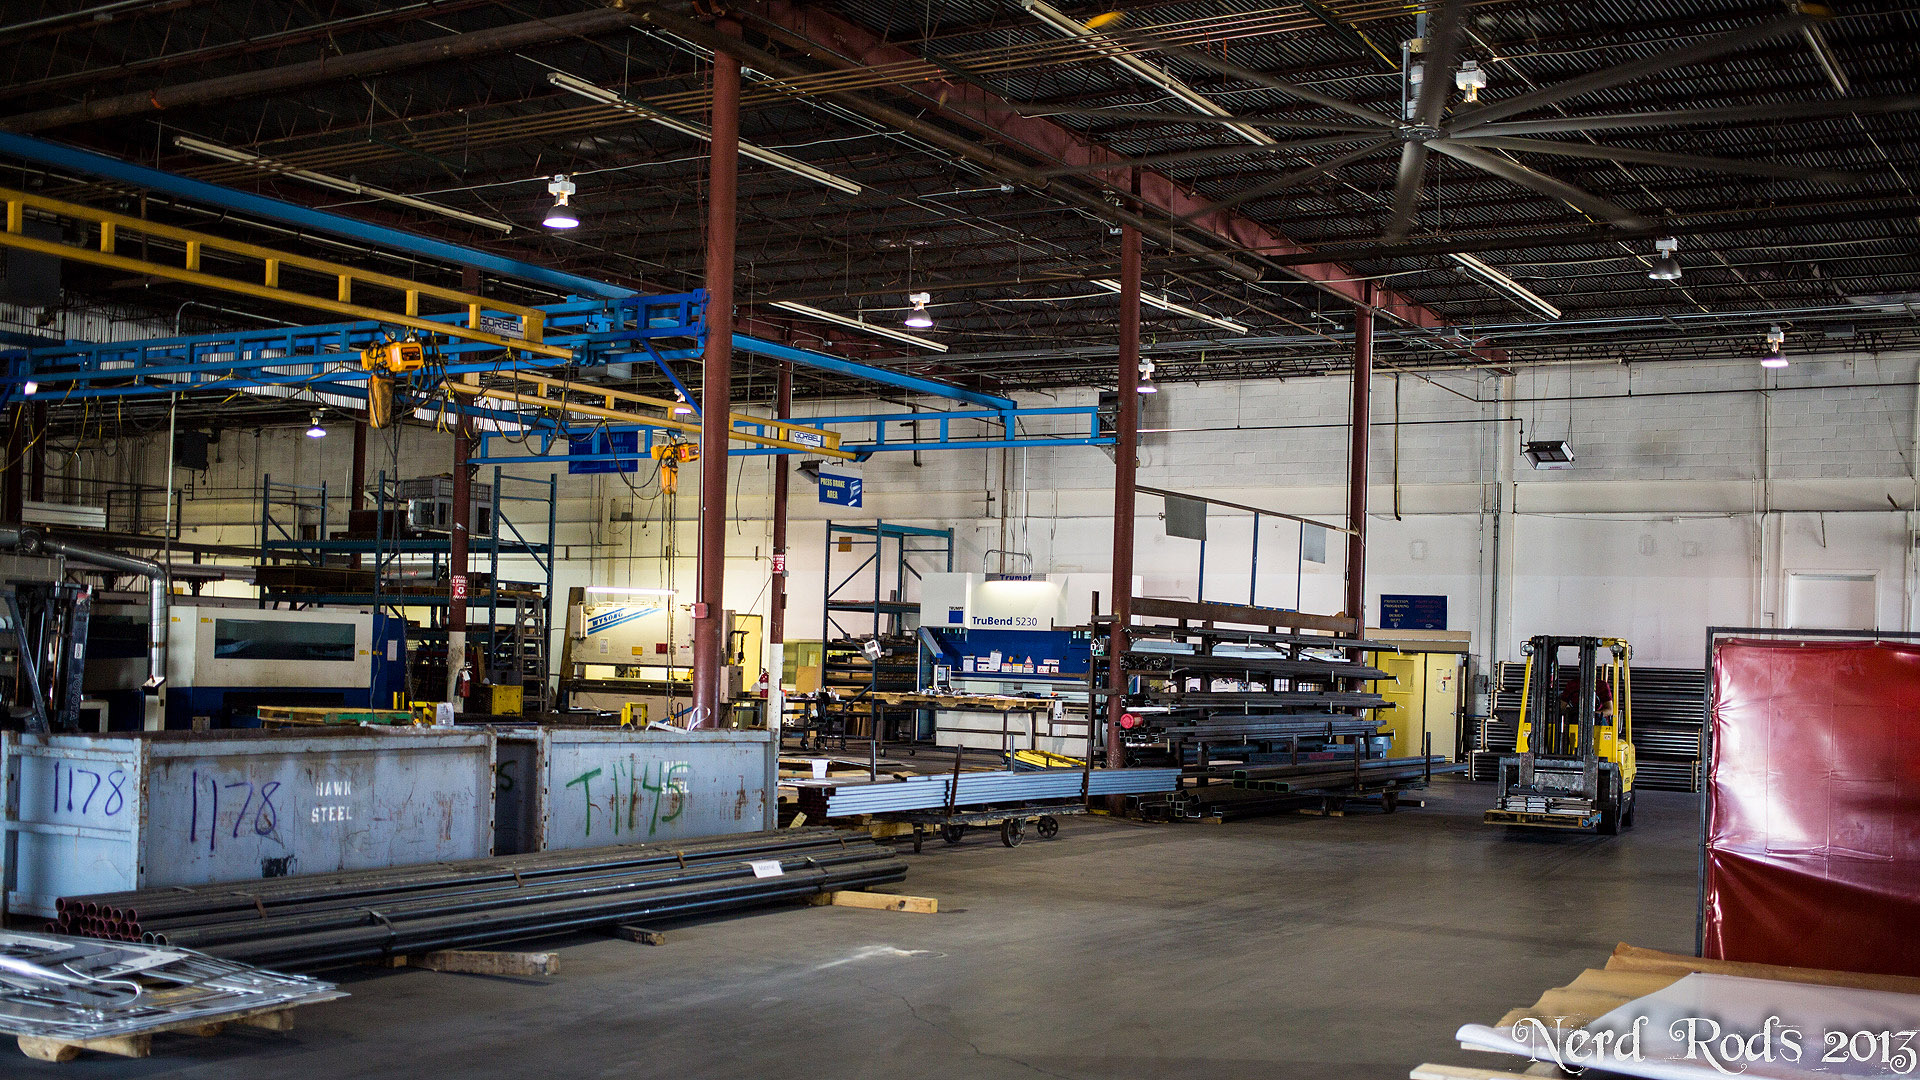
Man I love going to this place to get parts! They have all the cool tools and it turns out I'm getting better at my CAD package as well. They didn't charge me nearly as much as they did for the initial programing like they did last time for the TriFive car frame.
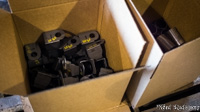

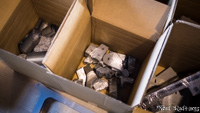
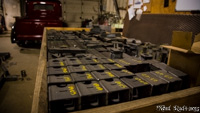
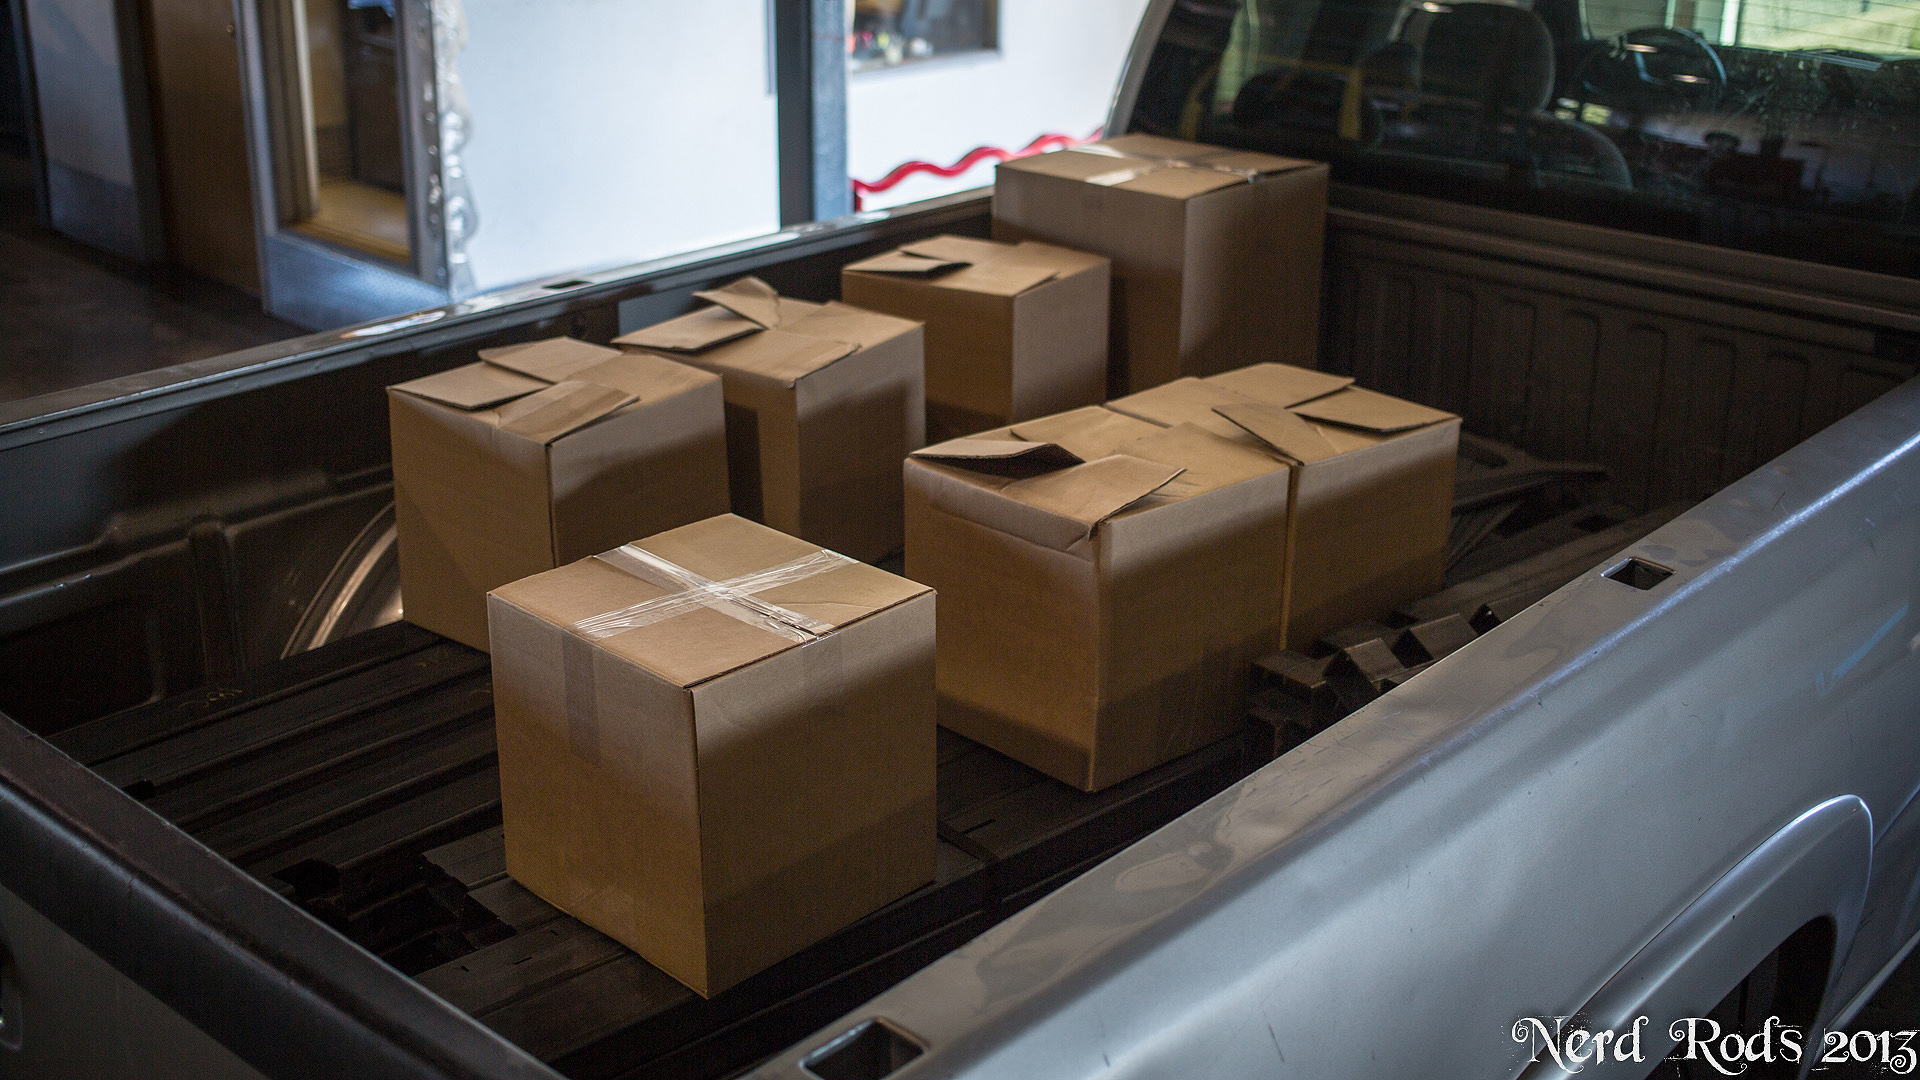
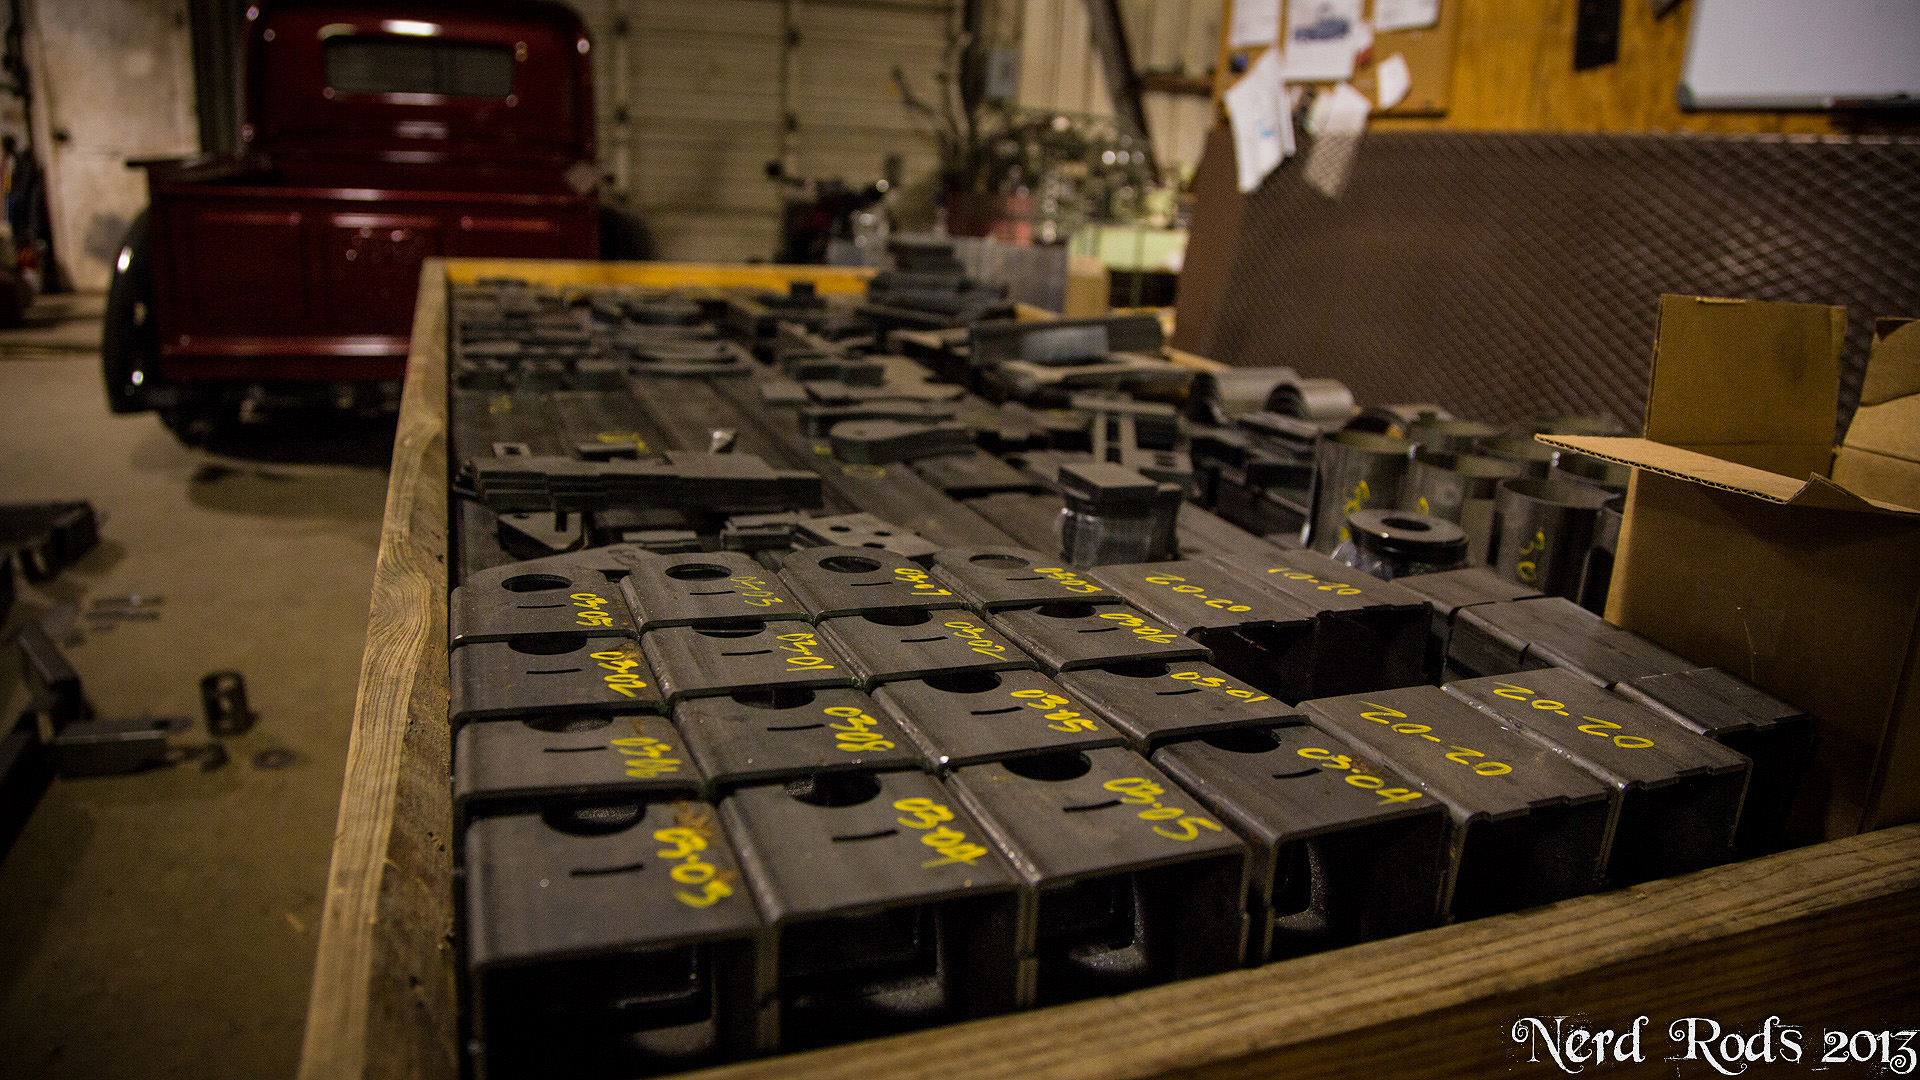
All packed up and ready to go. Just look at the forklift compared to the rest of the place. They just have all the fun toys!

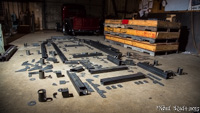
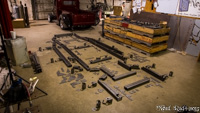
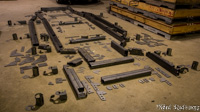
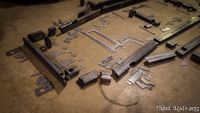
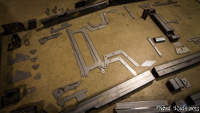
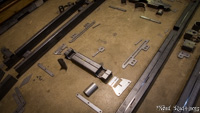
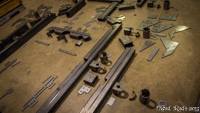
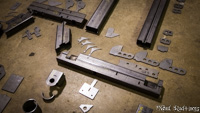
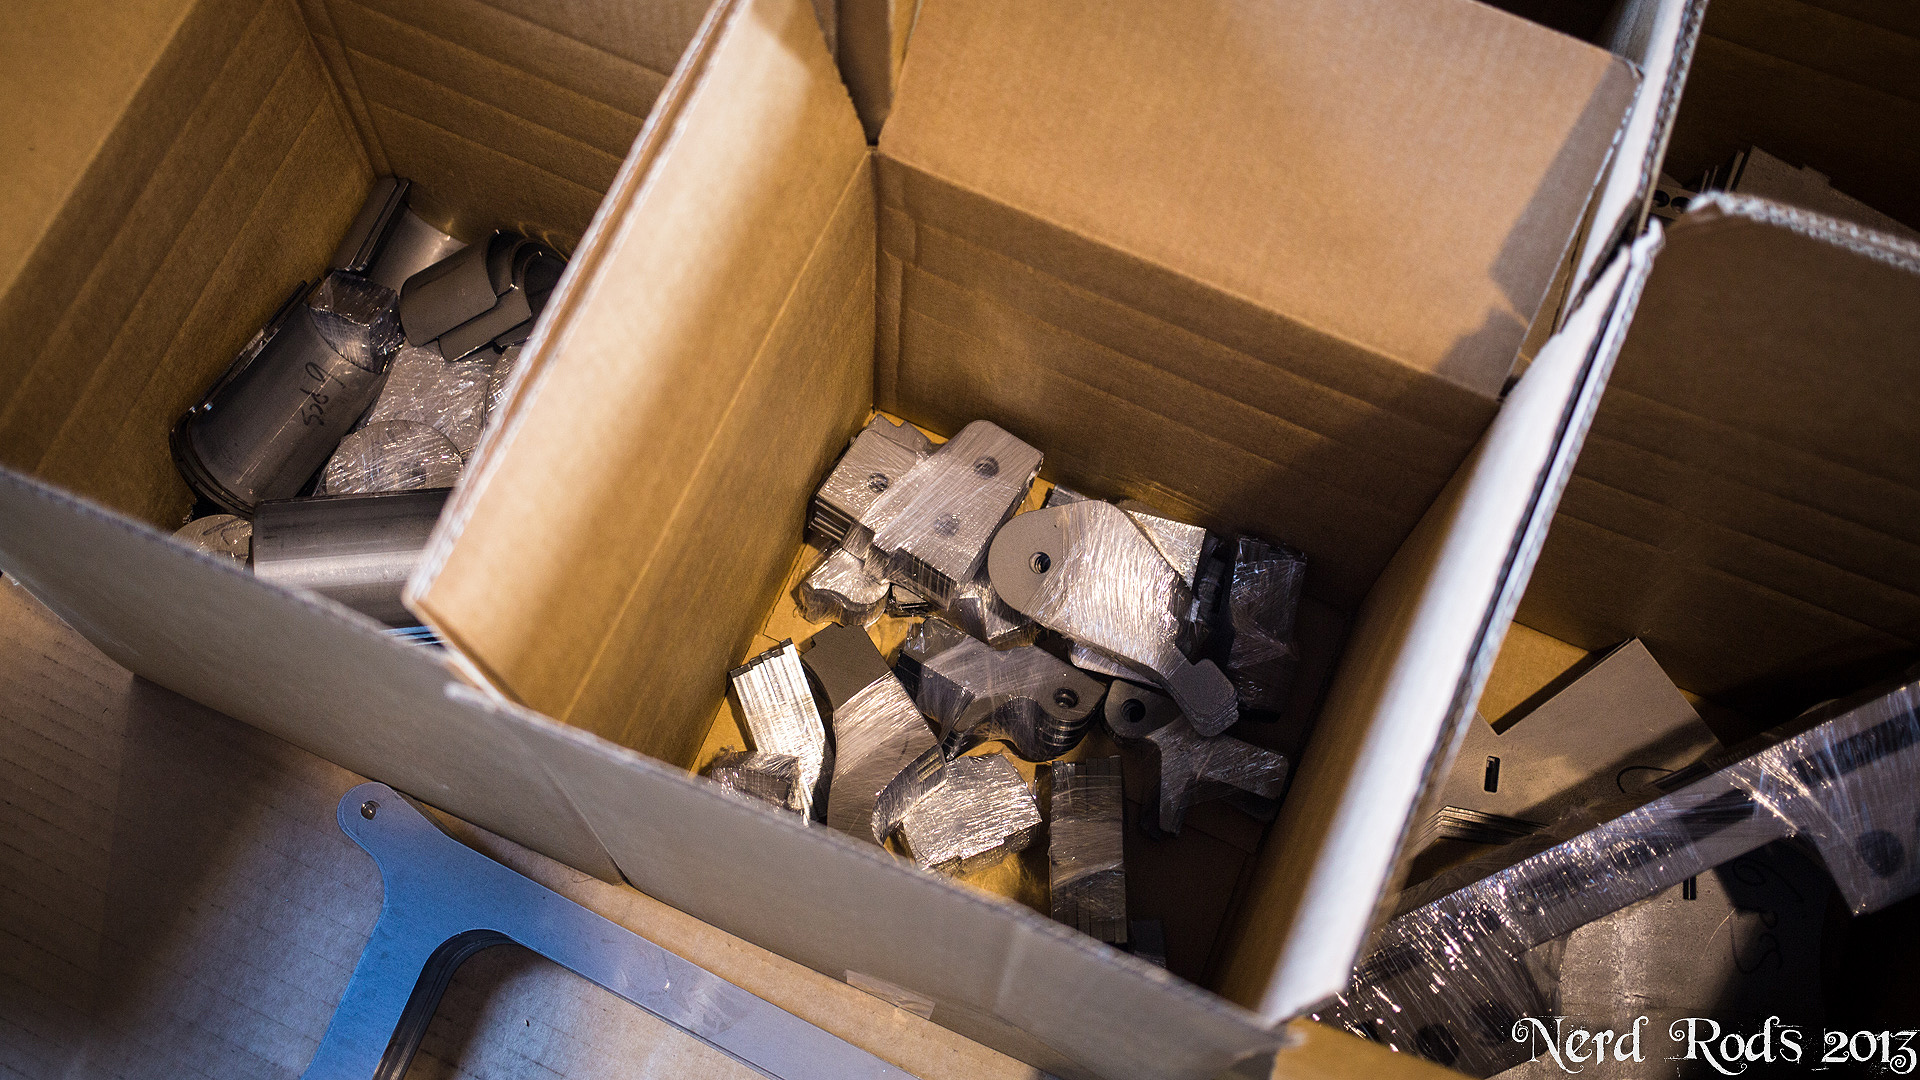
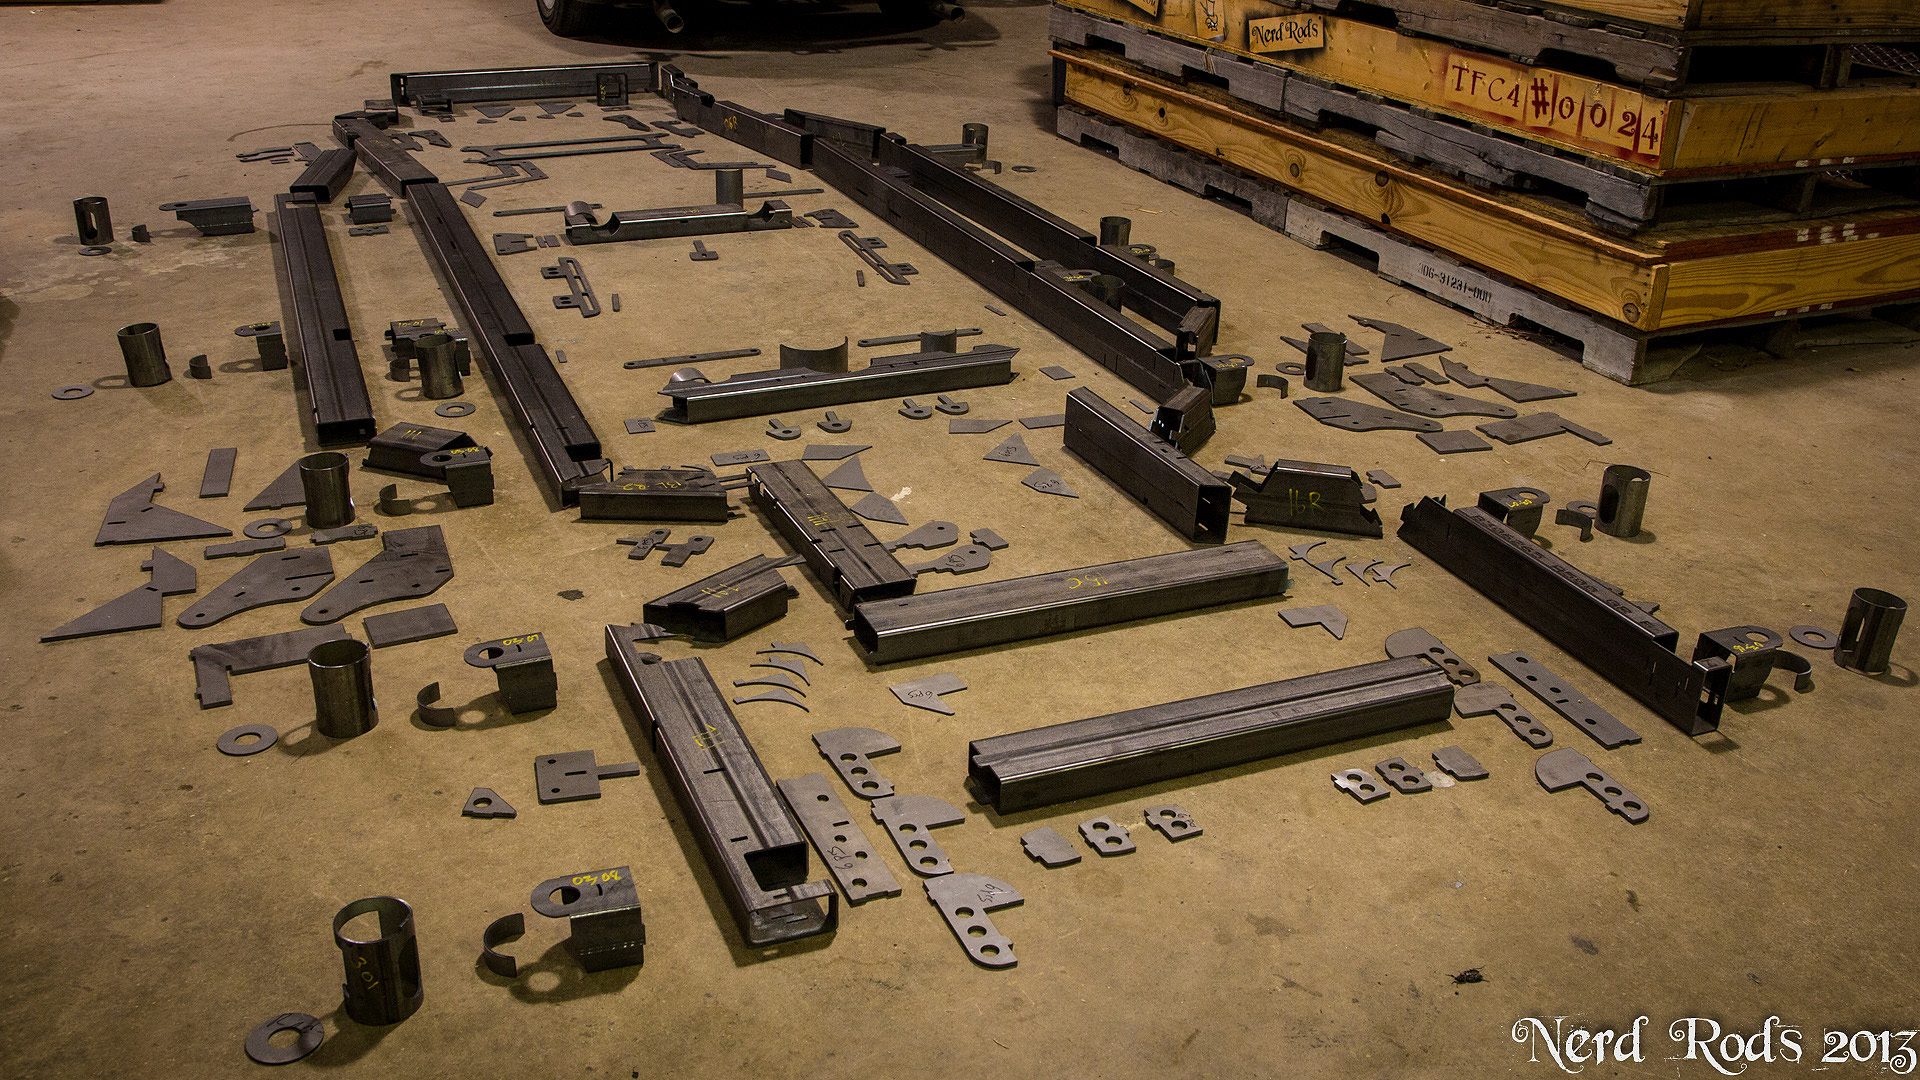
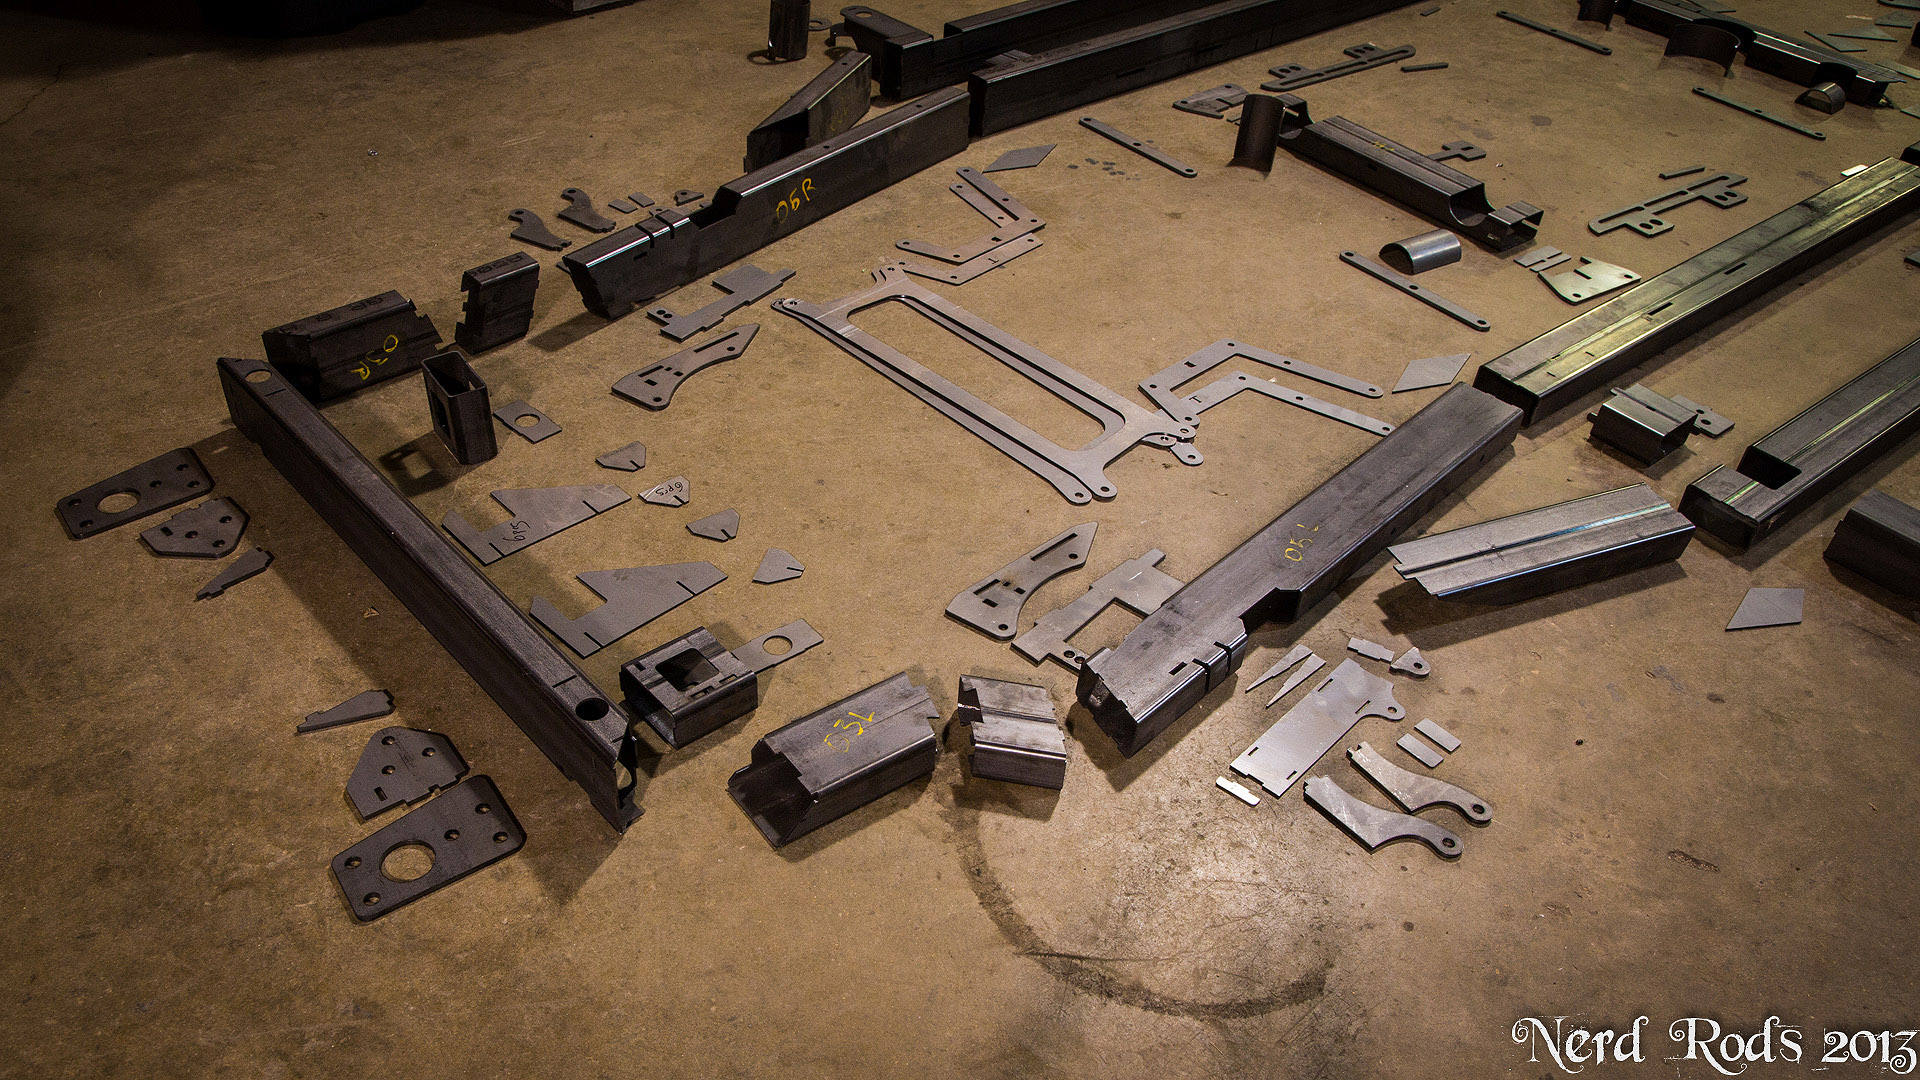
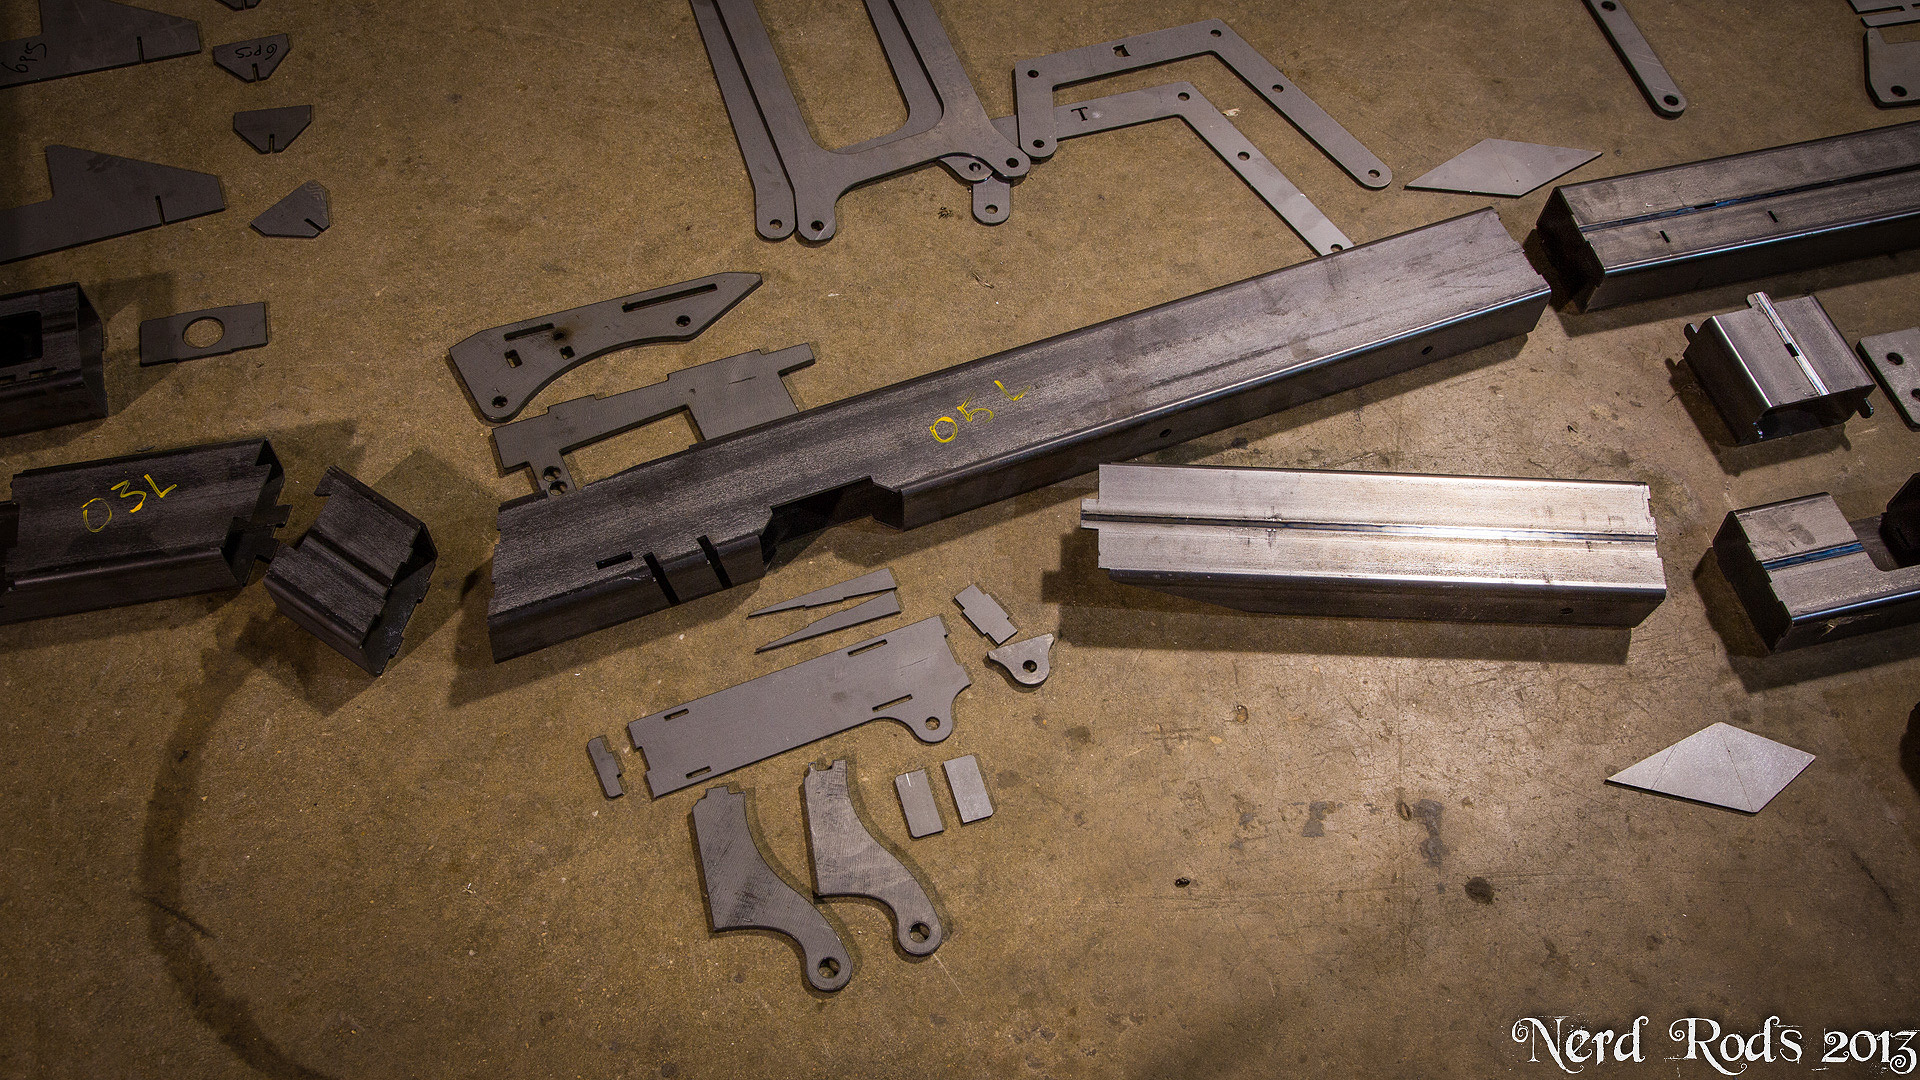
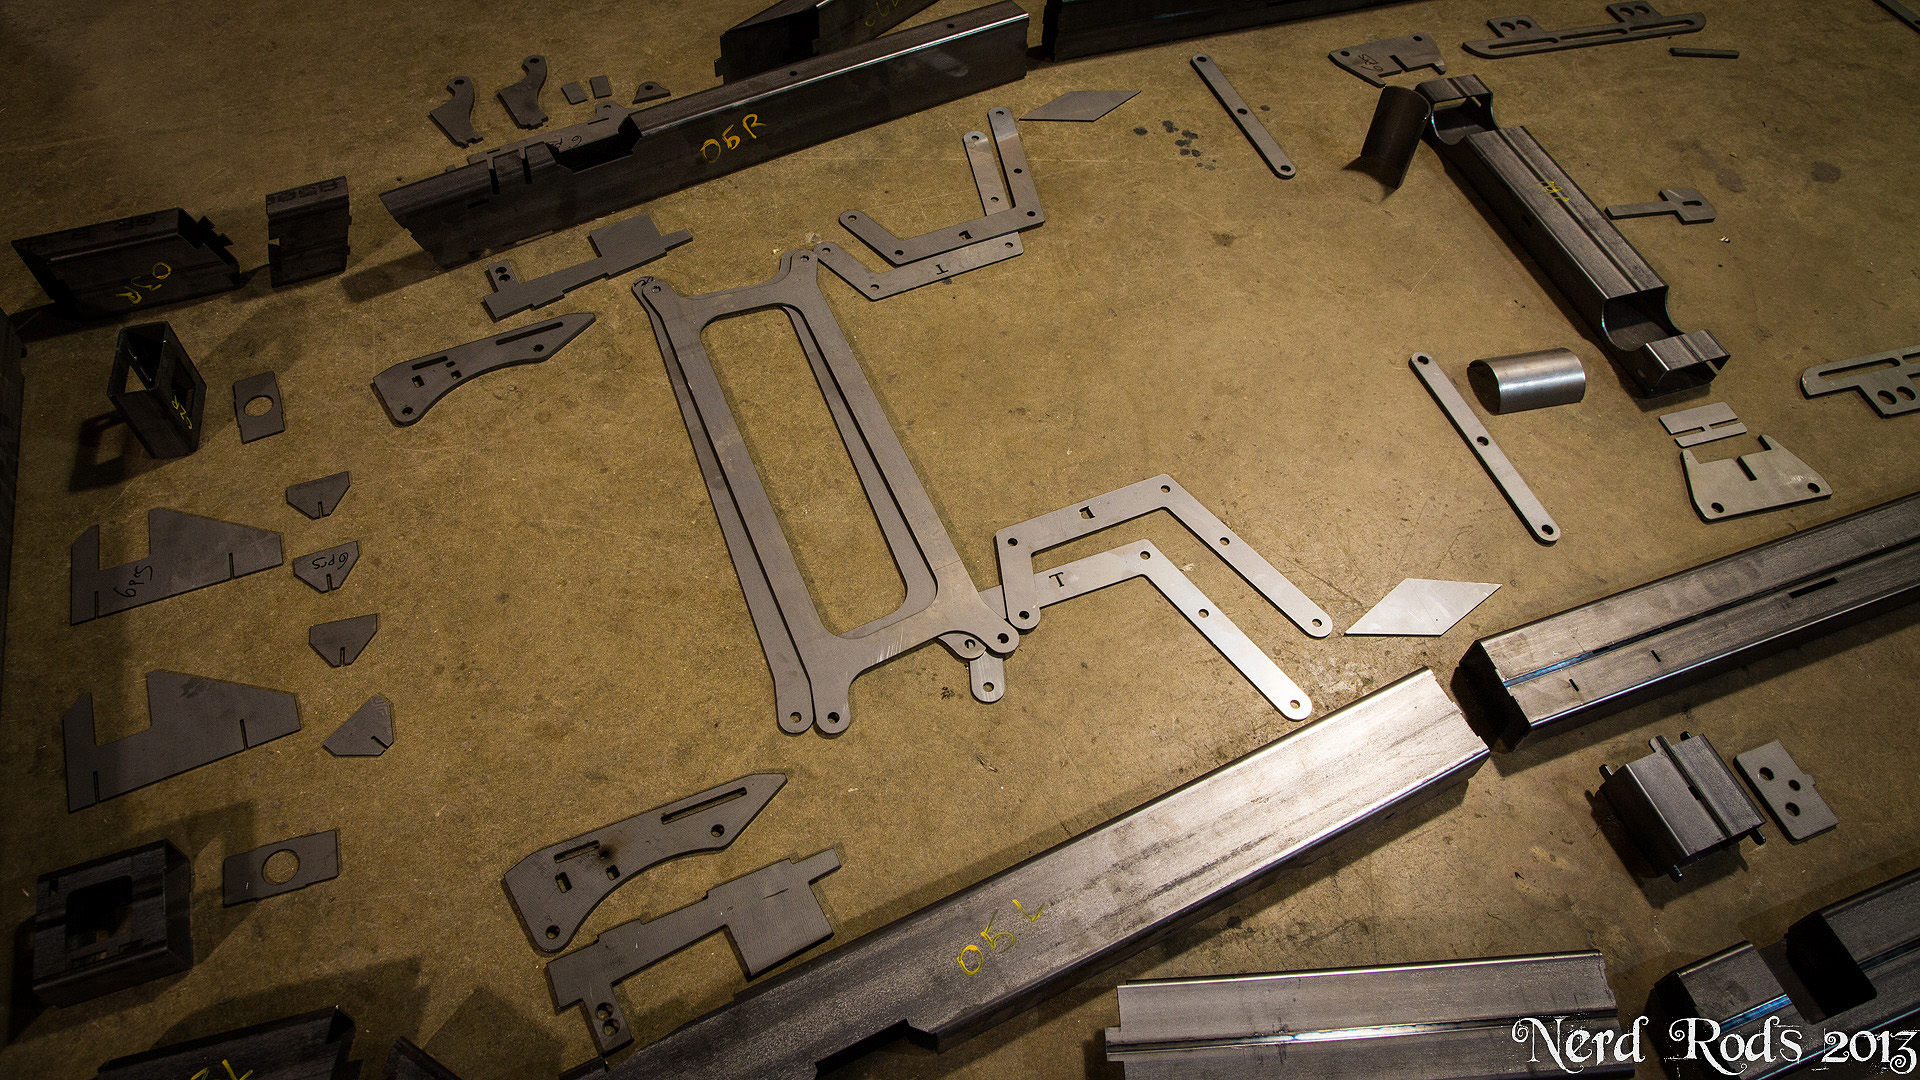
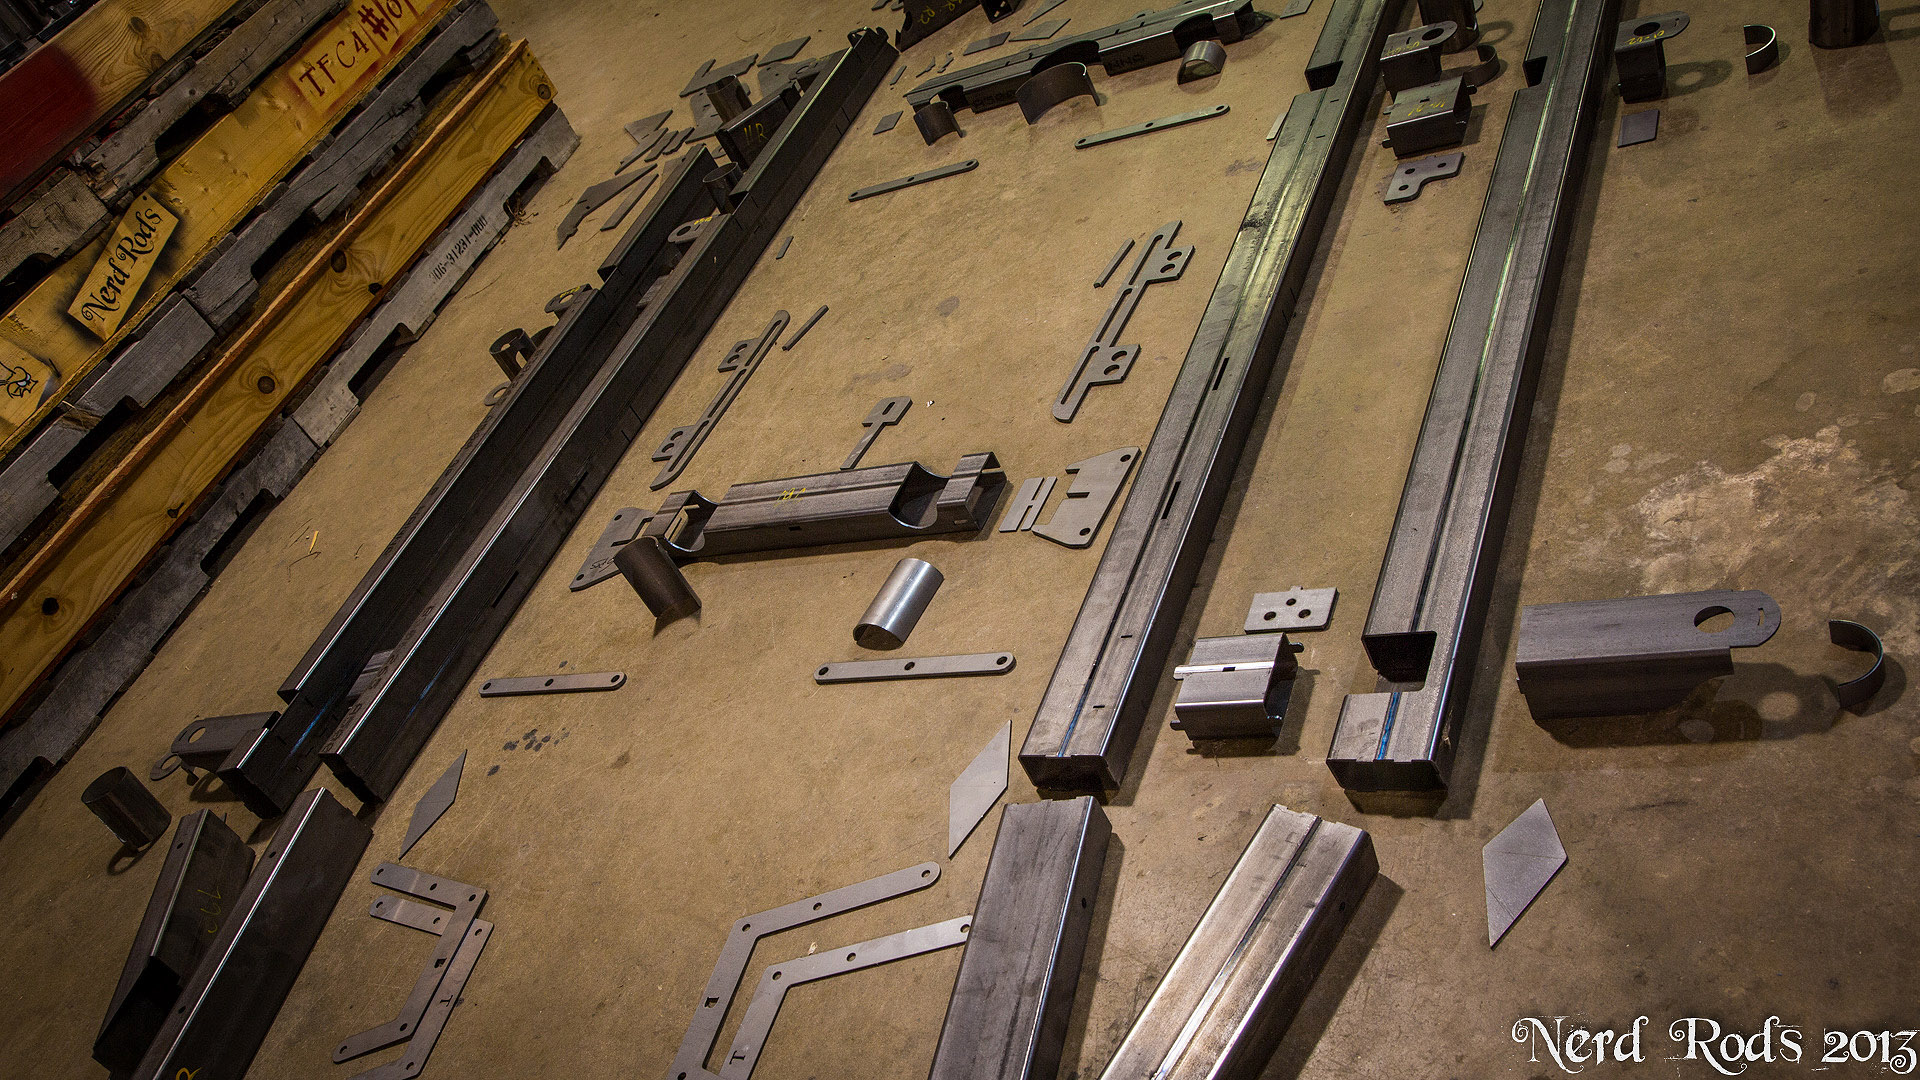
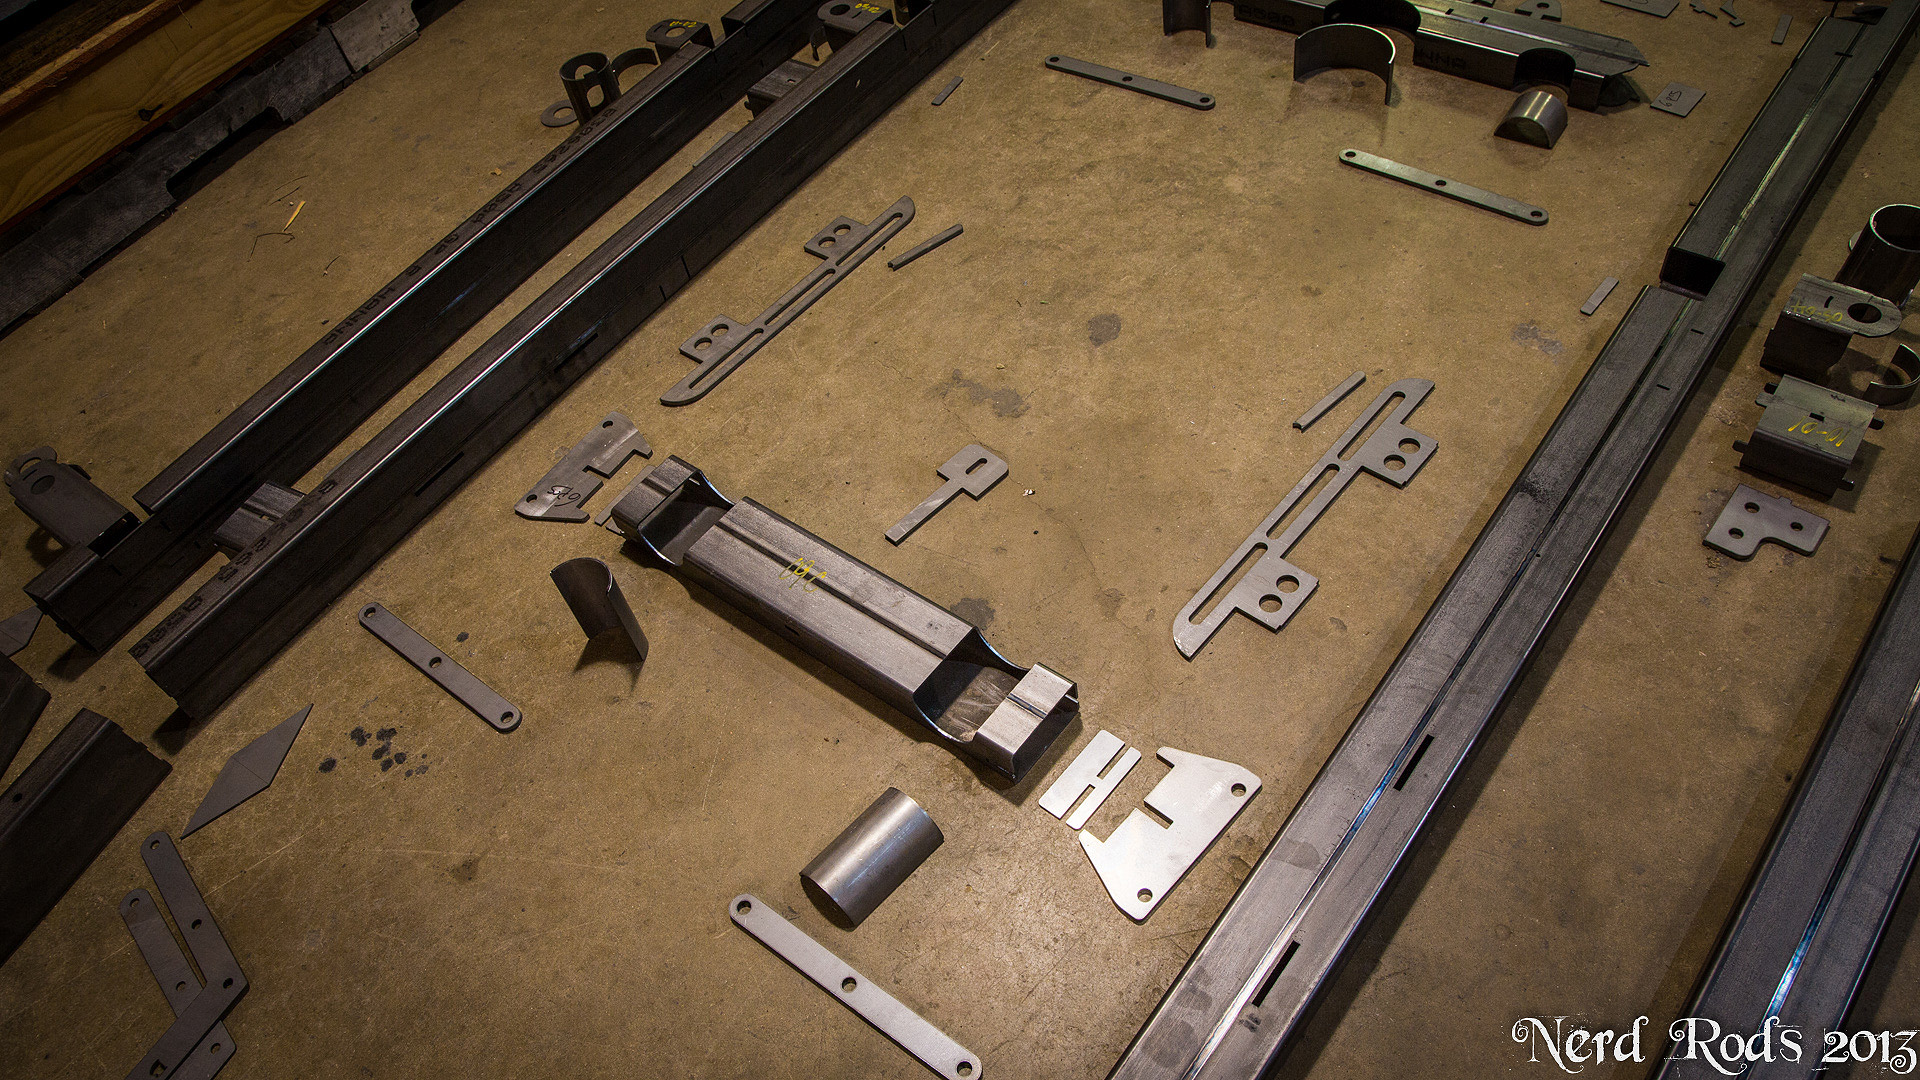
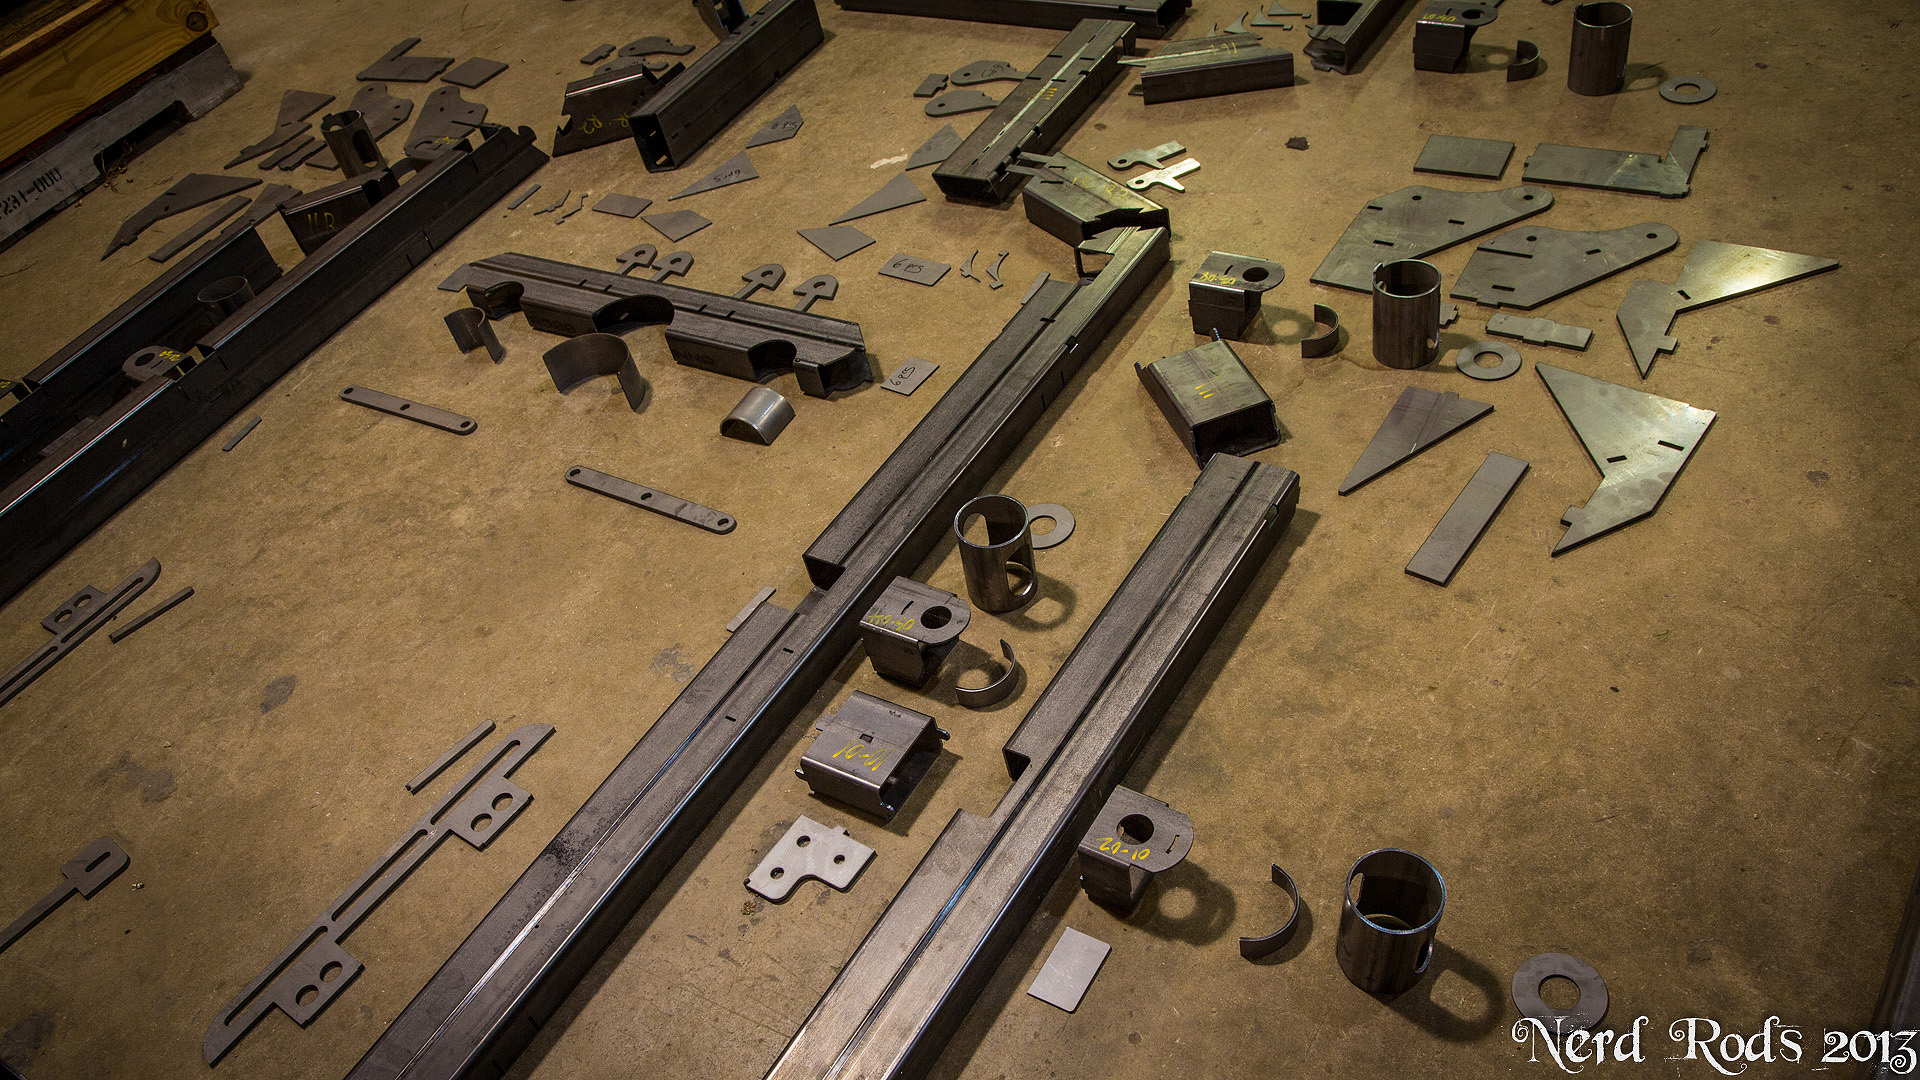
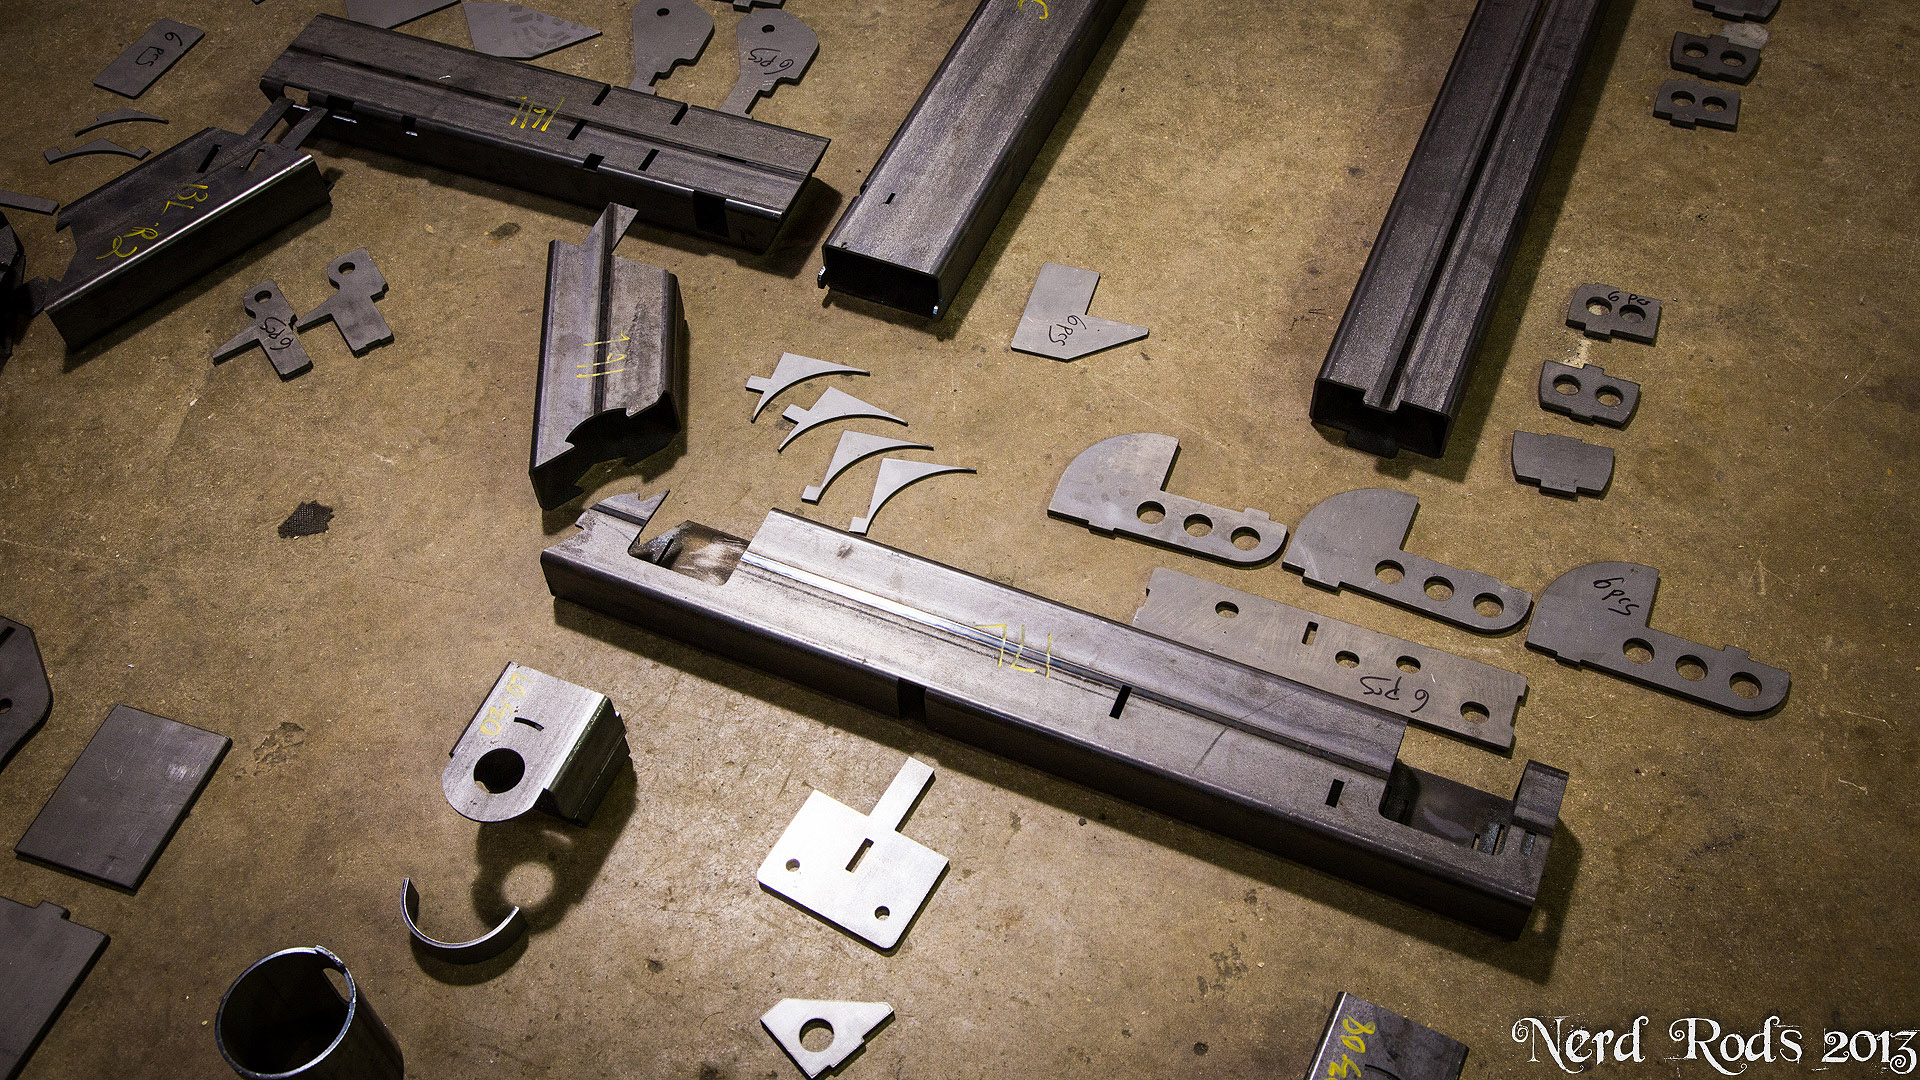
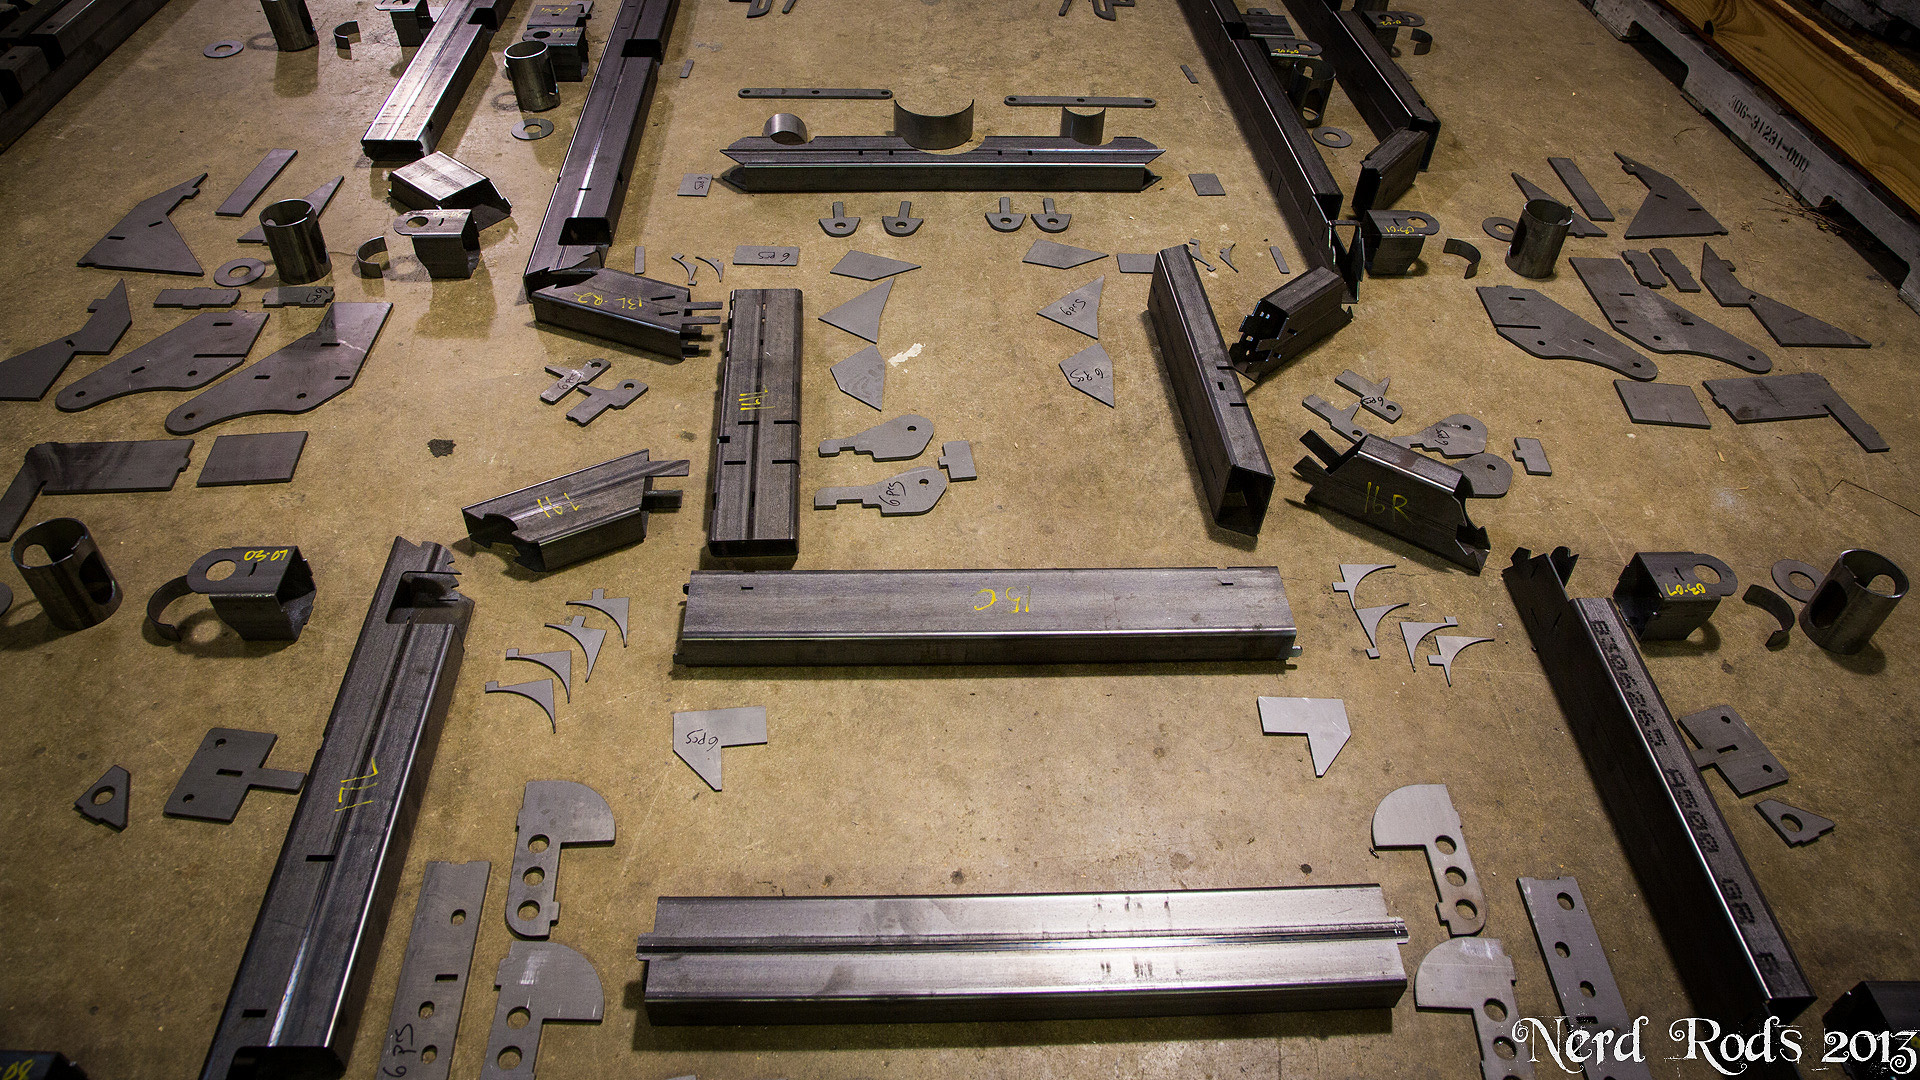
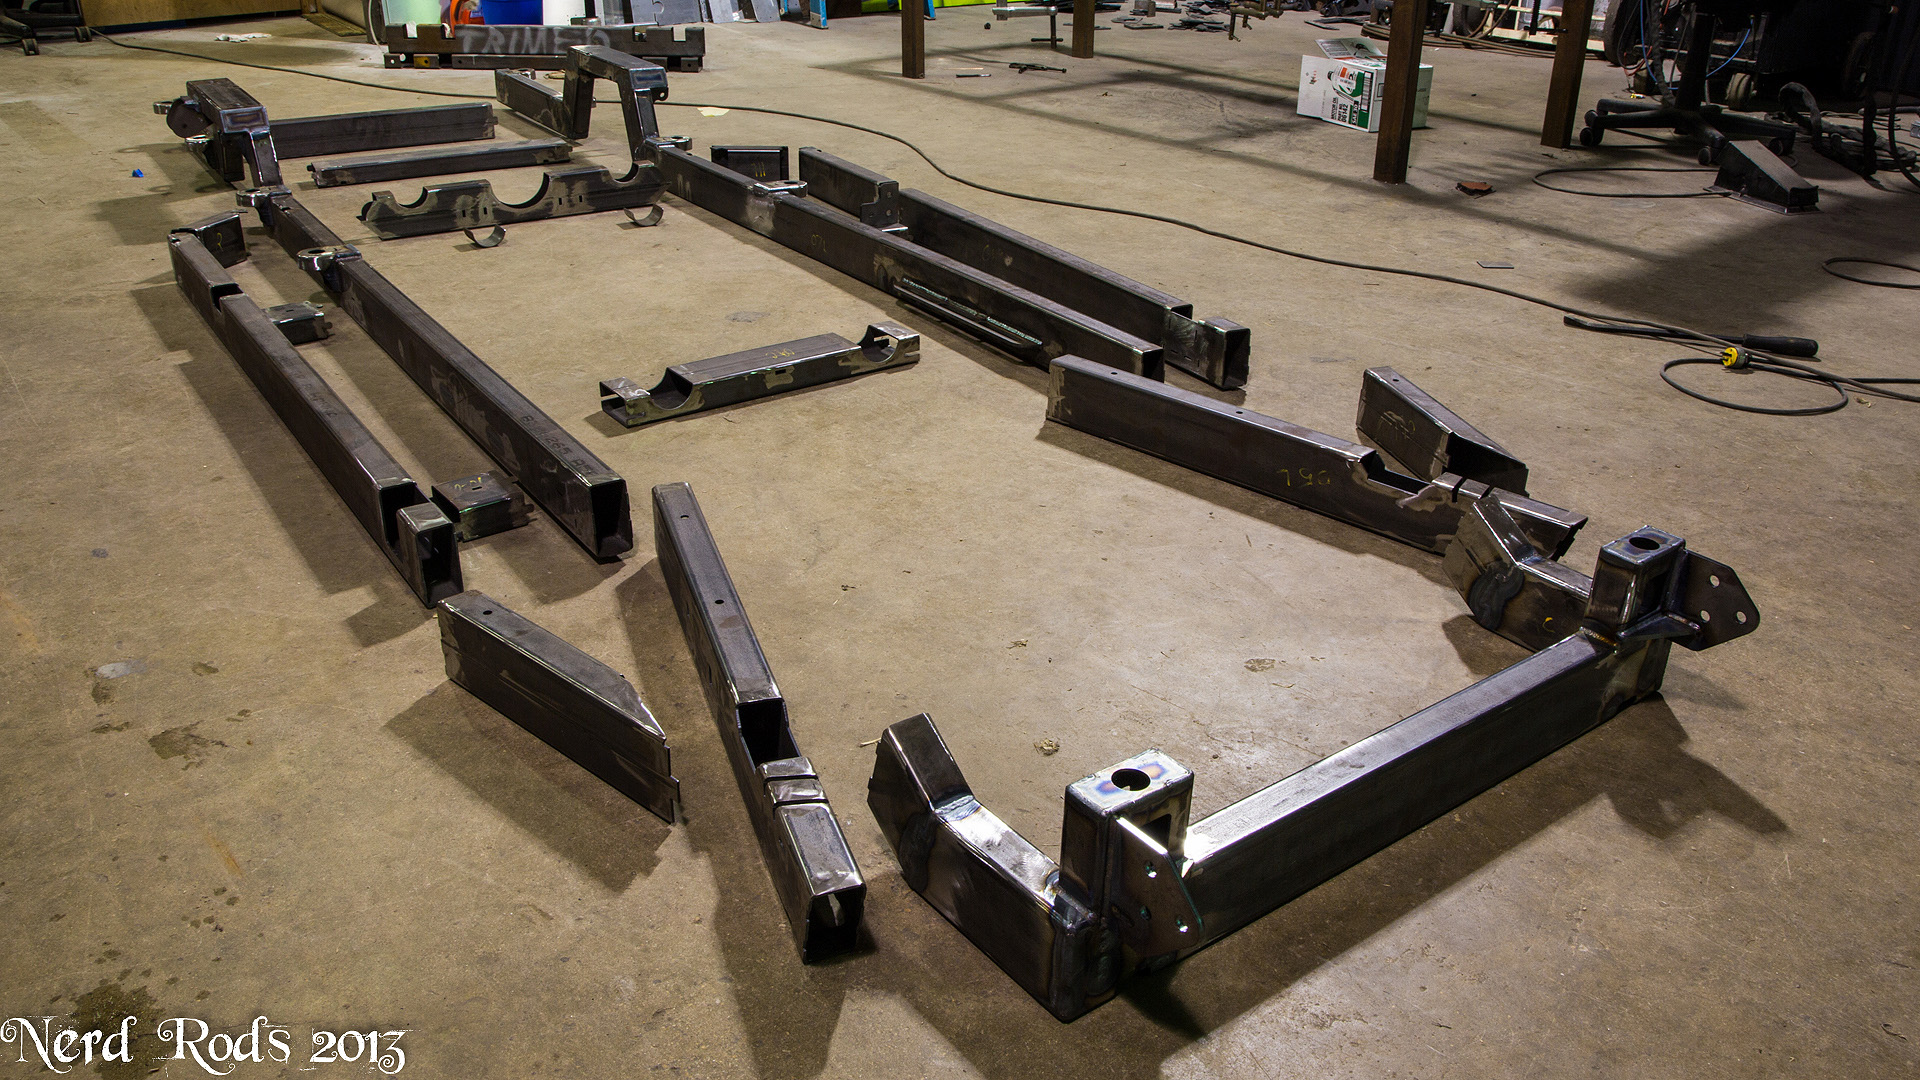
It took me a few days to get the shop all swept up so I could count parts but here we are, the complete CP5559C4 frame minus just a few parts that are missing but they are finishing parts so no worries there.


I've got 3 frames here at the shop. 2 are sold, one as a fully welded and the second it this turn key car project shown here. The fully welded frame is going to a local guy so I can keep close tabs on it while I get the other one finished up and running so I'll know if I need to make any changes to the final design. The third frame is going to sit for a while until I can find someone who wants it welded or get enough free time to make the 3D animation. Otherwise I'm going to just wait to be finished with this build and test drive the truck plenty before I do that video.
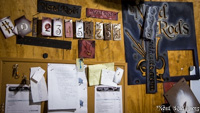
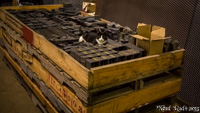
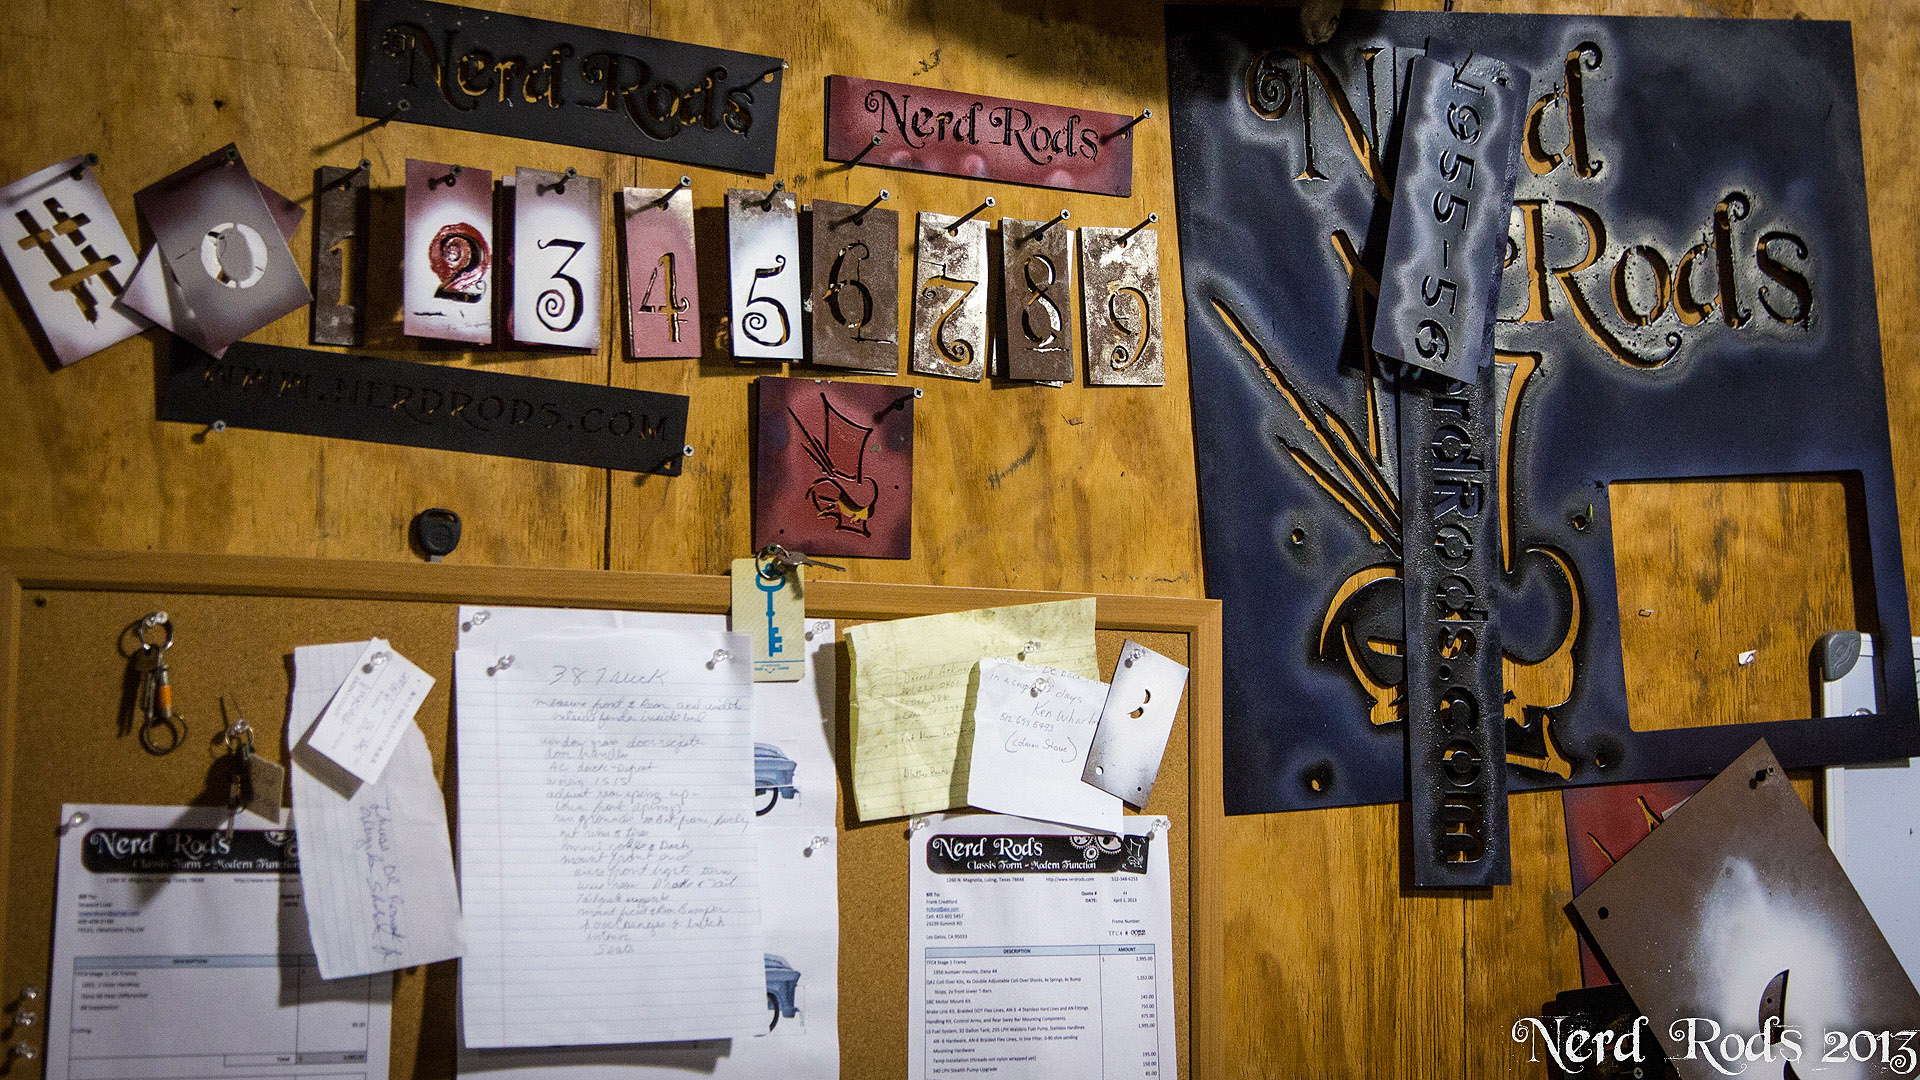
Got some cool new stencils for the shop crates and other shipping parts. I just ordered TriFive frames #28-32 so we're shipping nicely on the kit frames!
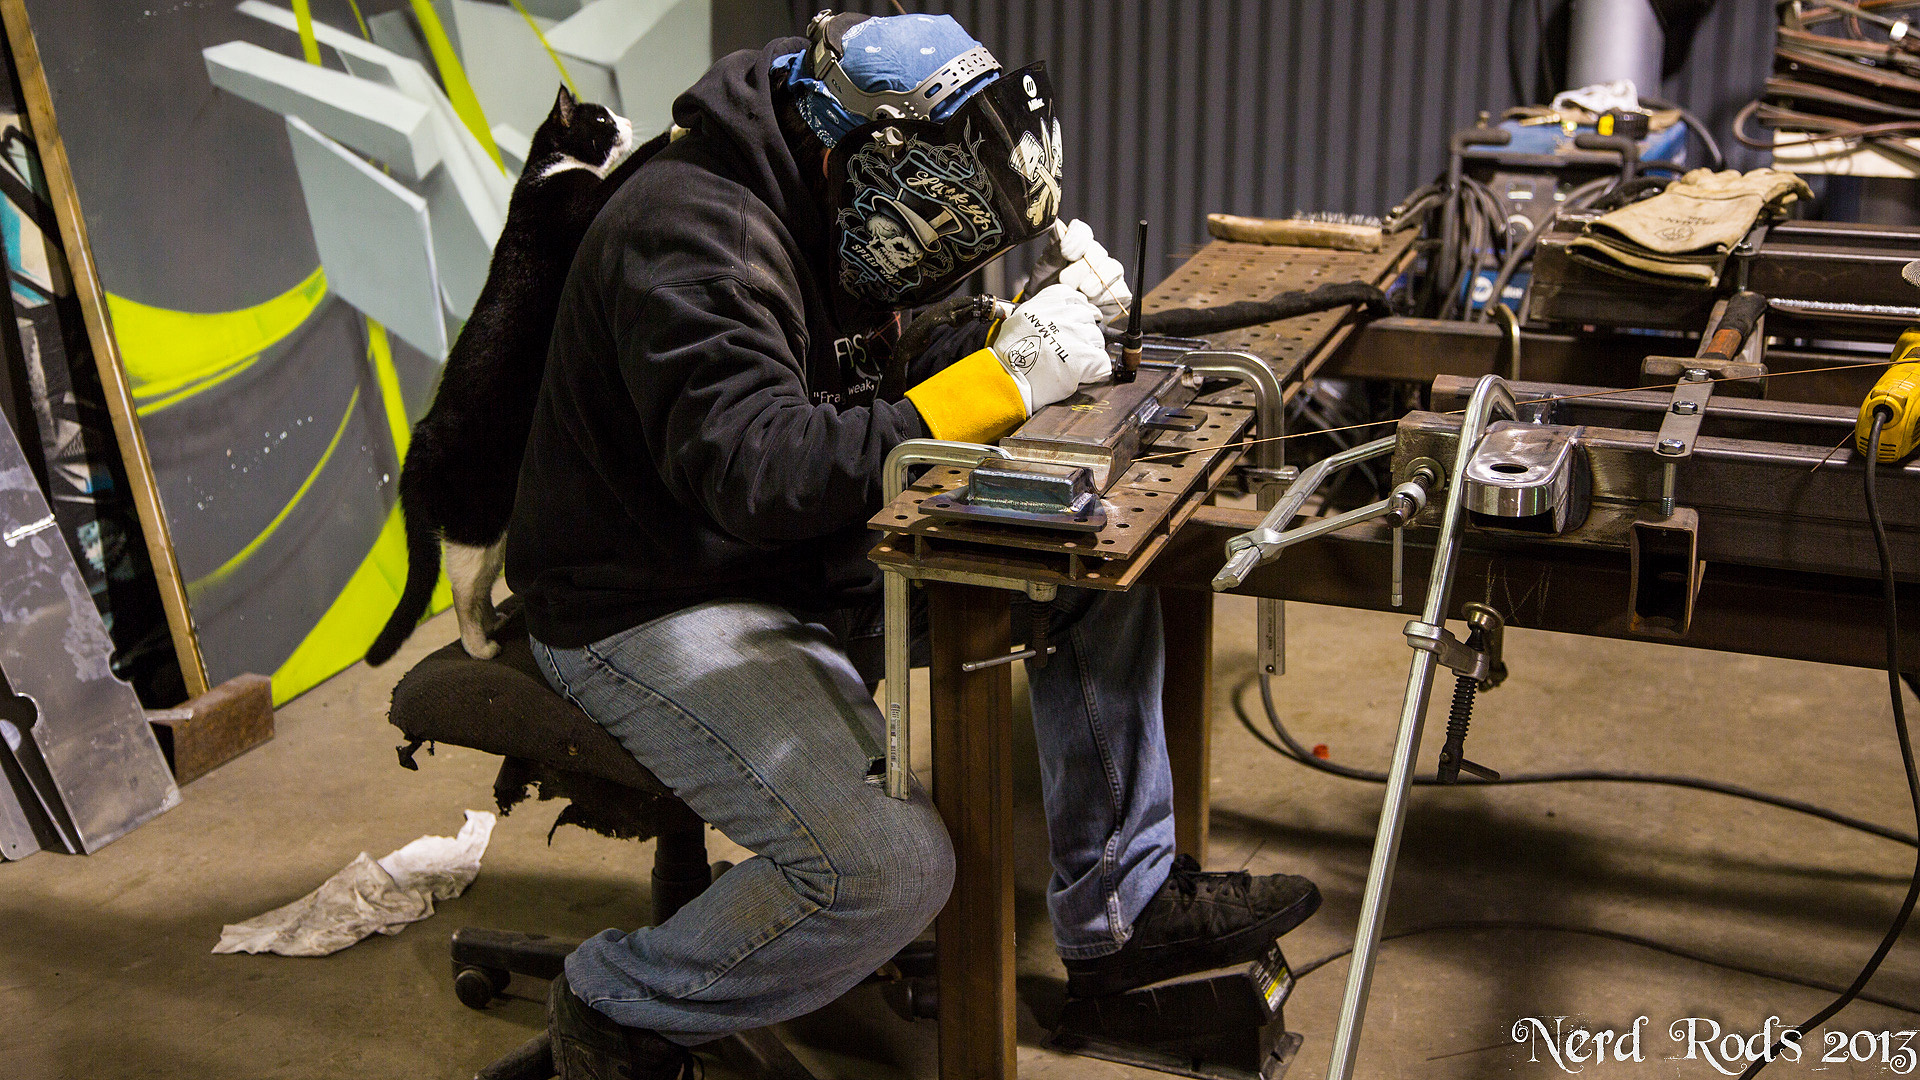
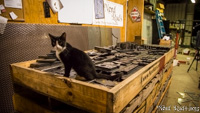
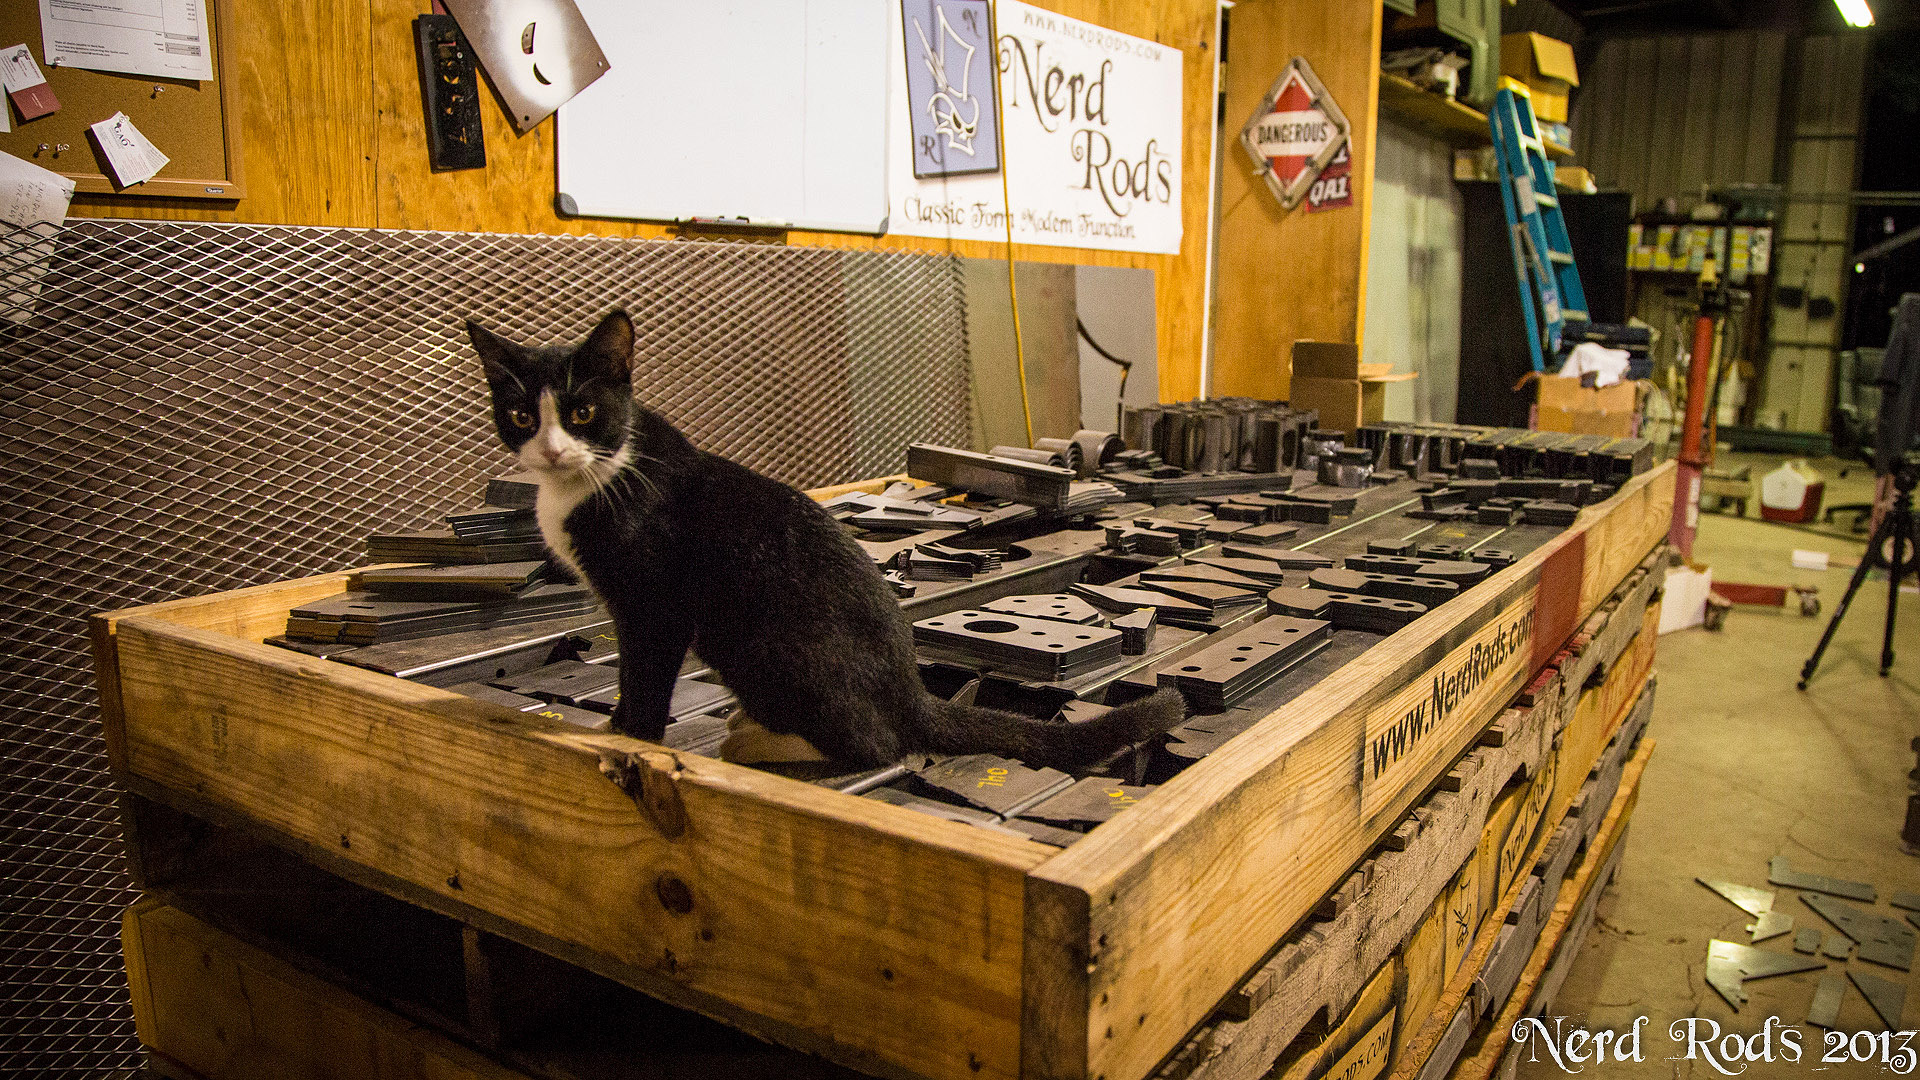
And we got a new quality control agent. You can see her hard at work.
I've got 2 TFC4 frames to weld up and get shipped out as rolling chassis with motor, transmission and the works so it will be a few weeks before I get to start on this one but I'll post of plenty of photos when I get started.
Thanks again!
Russell Alexander
Nerd Rods
But without further ado, the new frame!
Man I love going to this place to get parts! They have all the cool tools and it turns out I'm getting better at my CAD package as well. They didn't charge me nearly as much as they did for the initial programing like they did last time for the TriFive car frame.


All packed up and ready to go. Just look at the forklift compared to the rest of the place. They just have all the fun toys!
It took me a few days to get the shop all swept up so I could count parts but here we are, the complete CP5559C4 frame minus just a few parts that are missing but they are finishing parts so no worries there.


I've got 3 frames here at the shop. 2 are sold, one as a fully welded and the second it this turn key car project shown here. The fully welded frame is going to a local guy so I can keep close tabs on it while I get the other one finished up and running so I'll know if I need to make any changes to the final design. The third frame is going to sit for a while until I can find someone who wants it welded or get enough free time to make the 3D animation. Otherwise I'm going to just wait to be finished with this build and test drive the truck plenty before I do that video.
Got some cool new stencils for the shop crates and other shipping parts. I just ordered TriFive frames #28-32 so we're shipping nicely on the kit frames!
And we got a new quality control agent. You can see her hard at work.

I've got 2 TFC4 frames to weld up and get shipped out as rolling chassis with motor, transmission and the works so it will be a few weeks before I get to start on this one but I'll post of plenty of photos when I get started.
Thanks again!
Russell Alexander
Nerd Rods


 11-04-2013, 10:06 AM
#32
Launching!
Thread Starter
Join Date: Jan 2007
Location: Luling TX In the Hot Rod Shop
Posts: 294
Likes: 0
Received 3 Likes
on
3 Posts
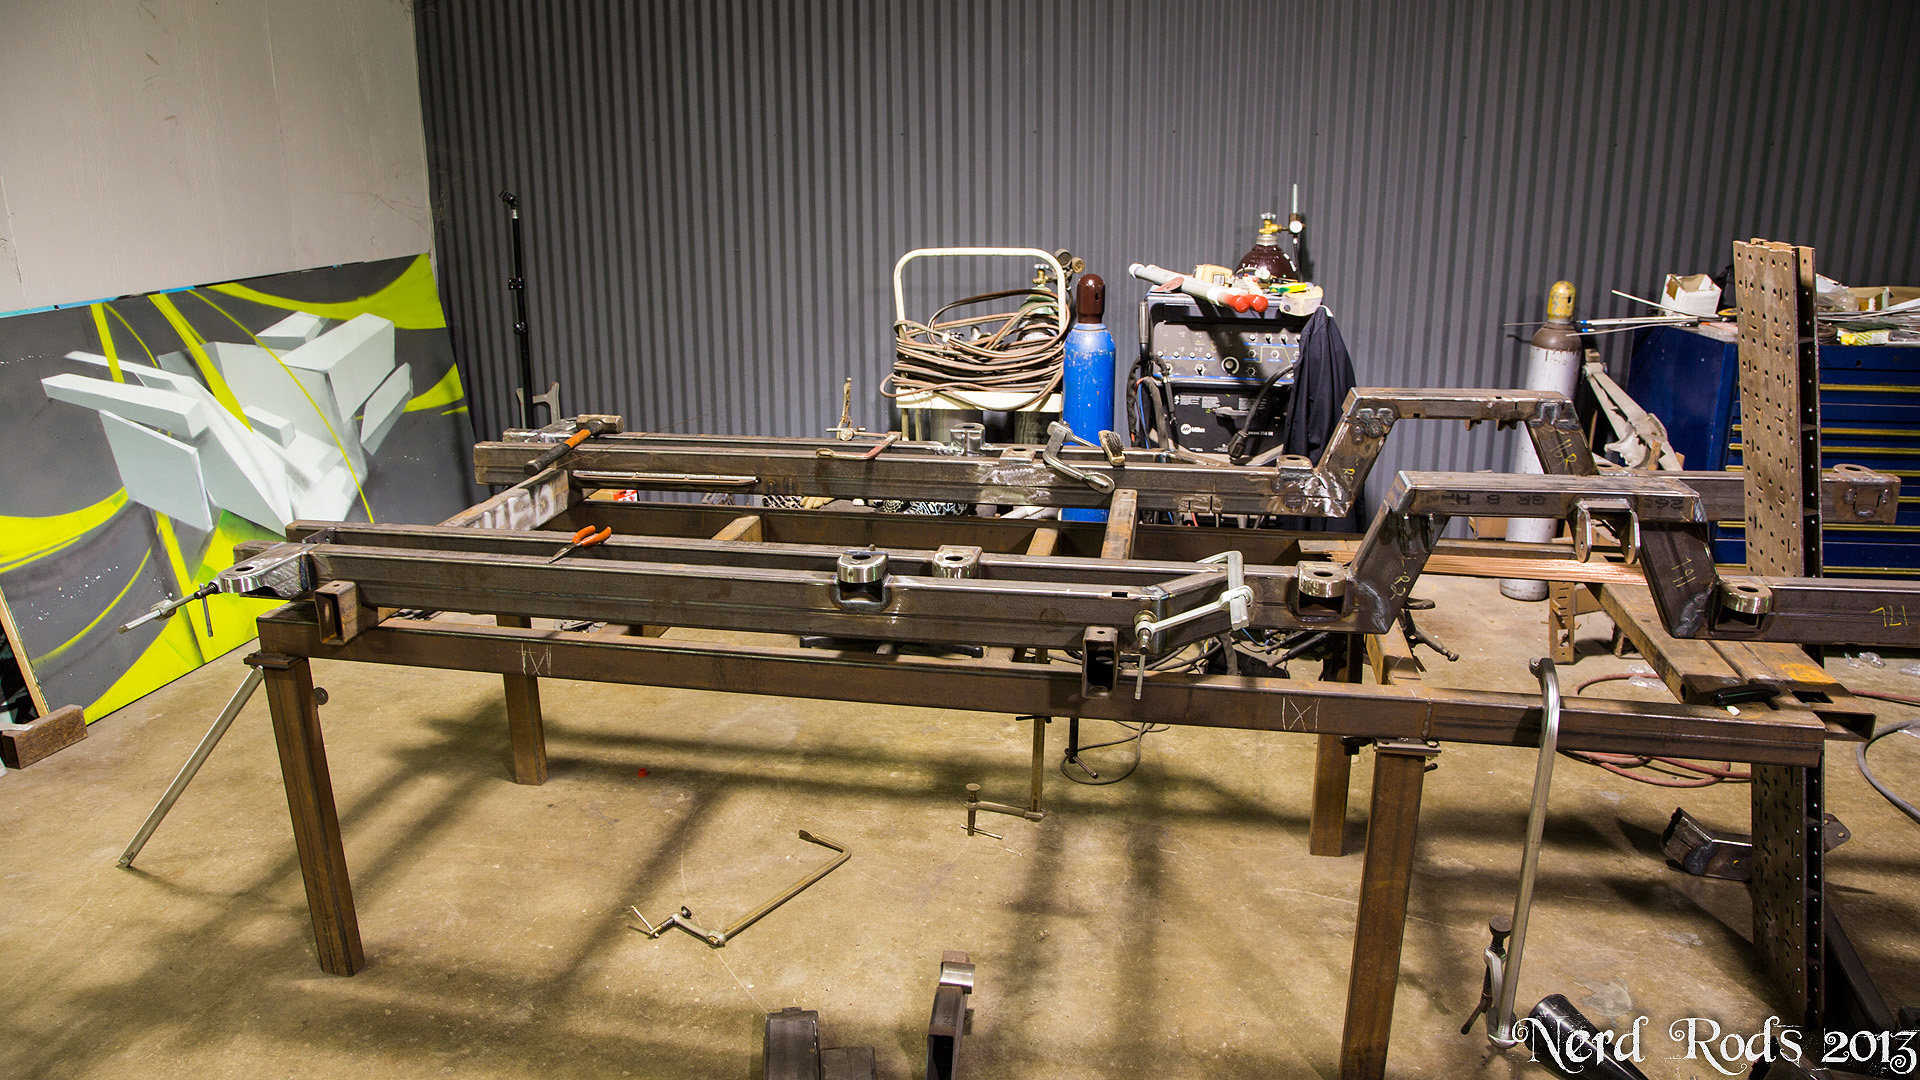
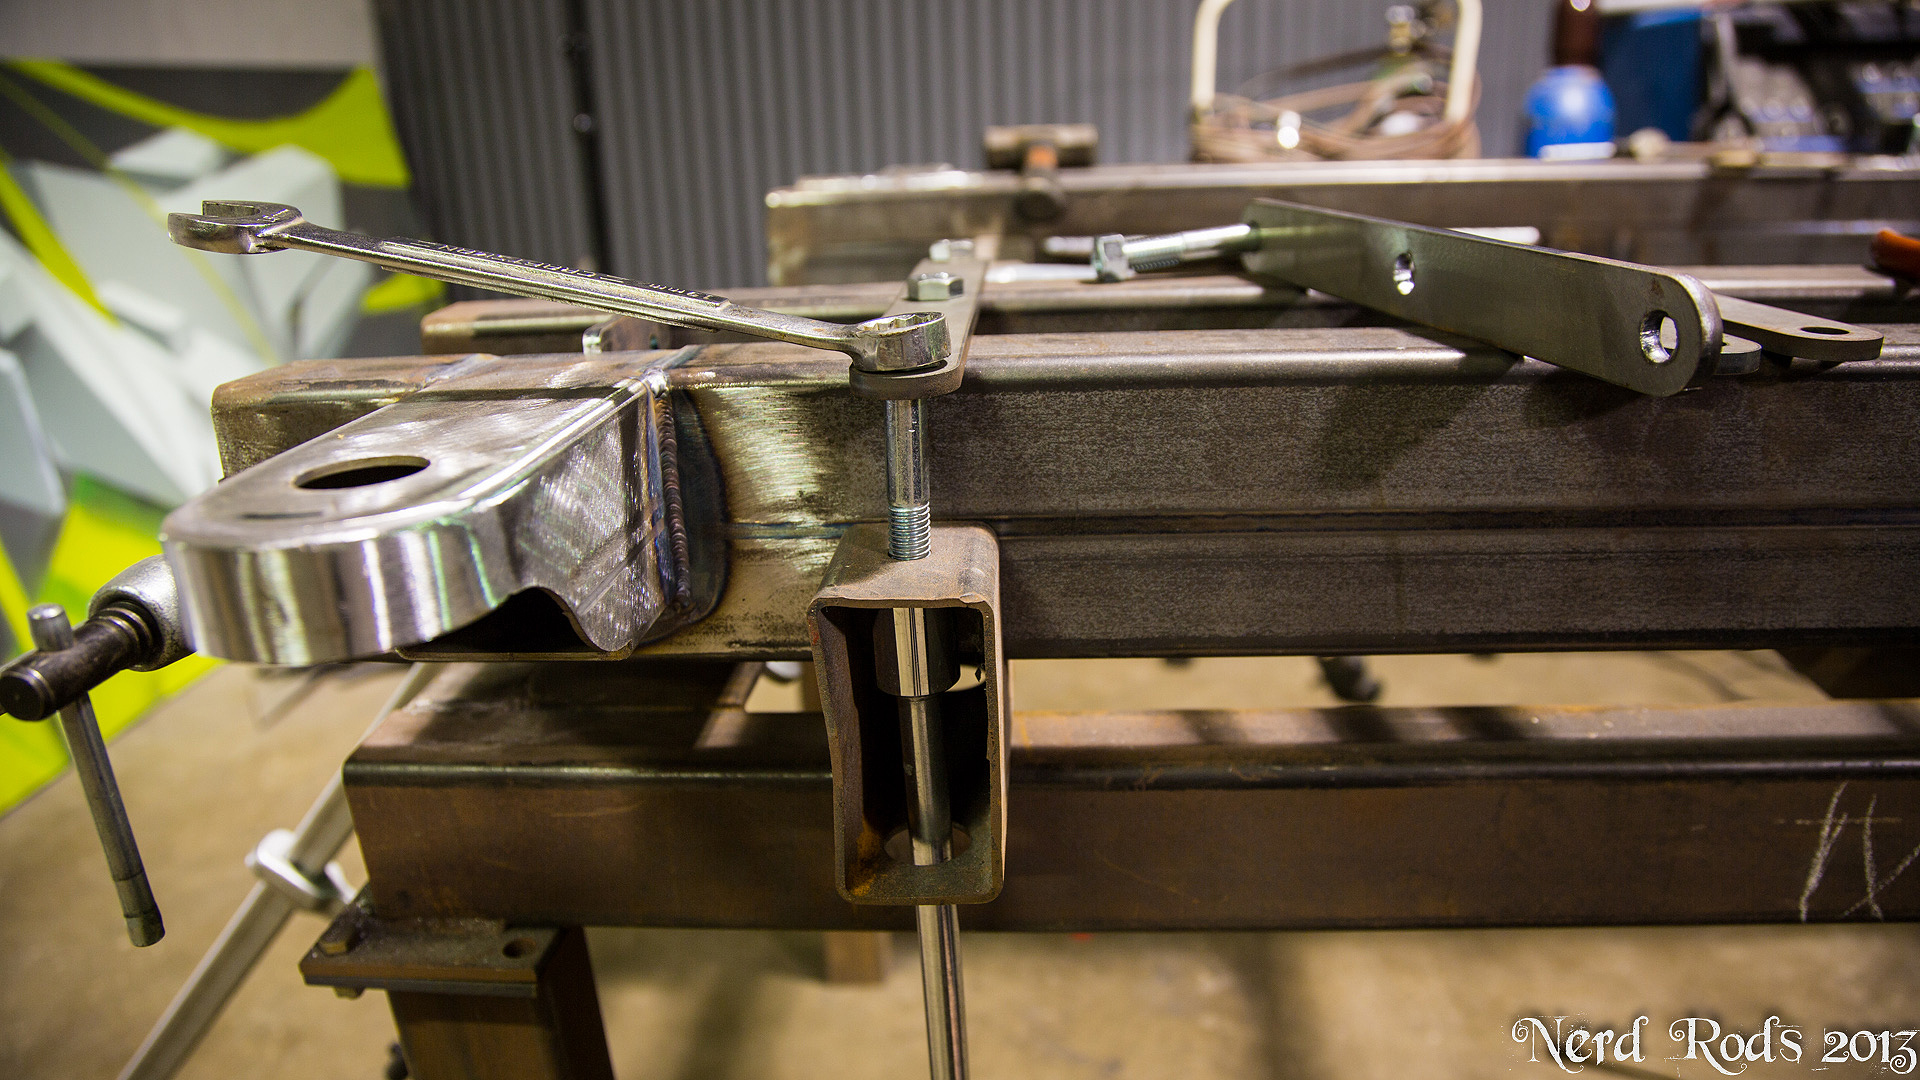
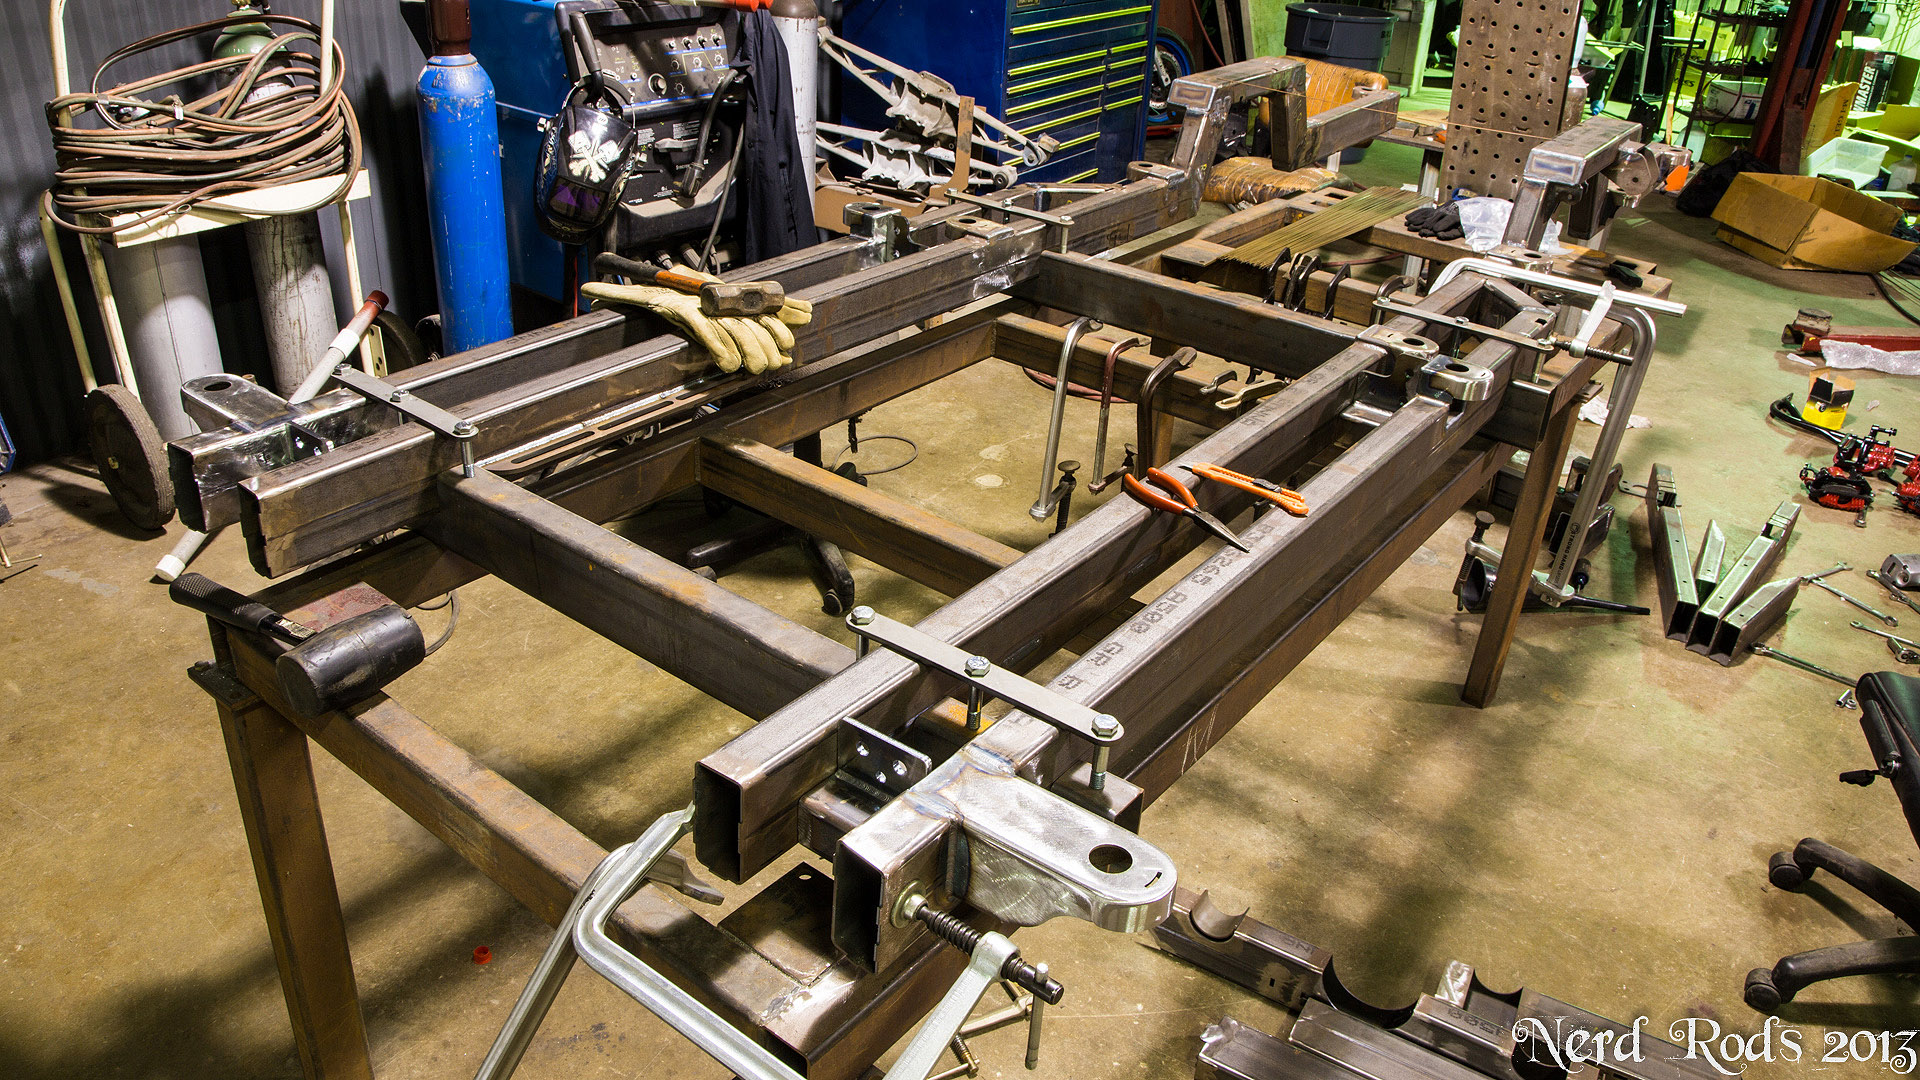
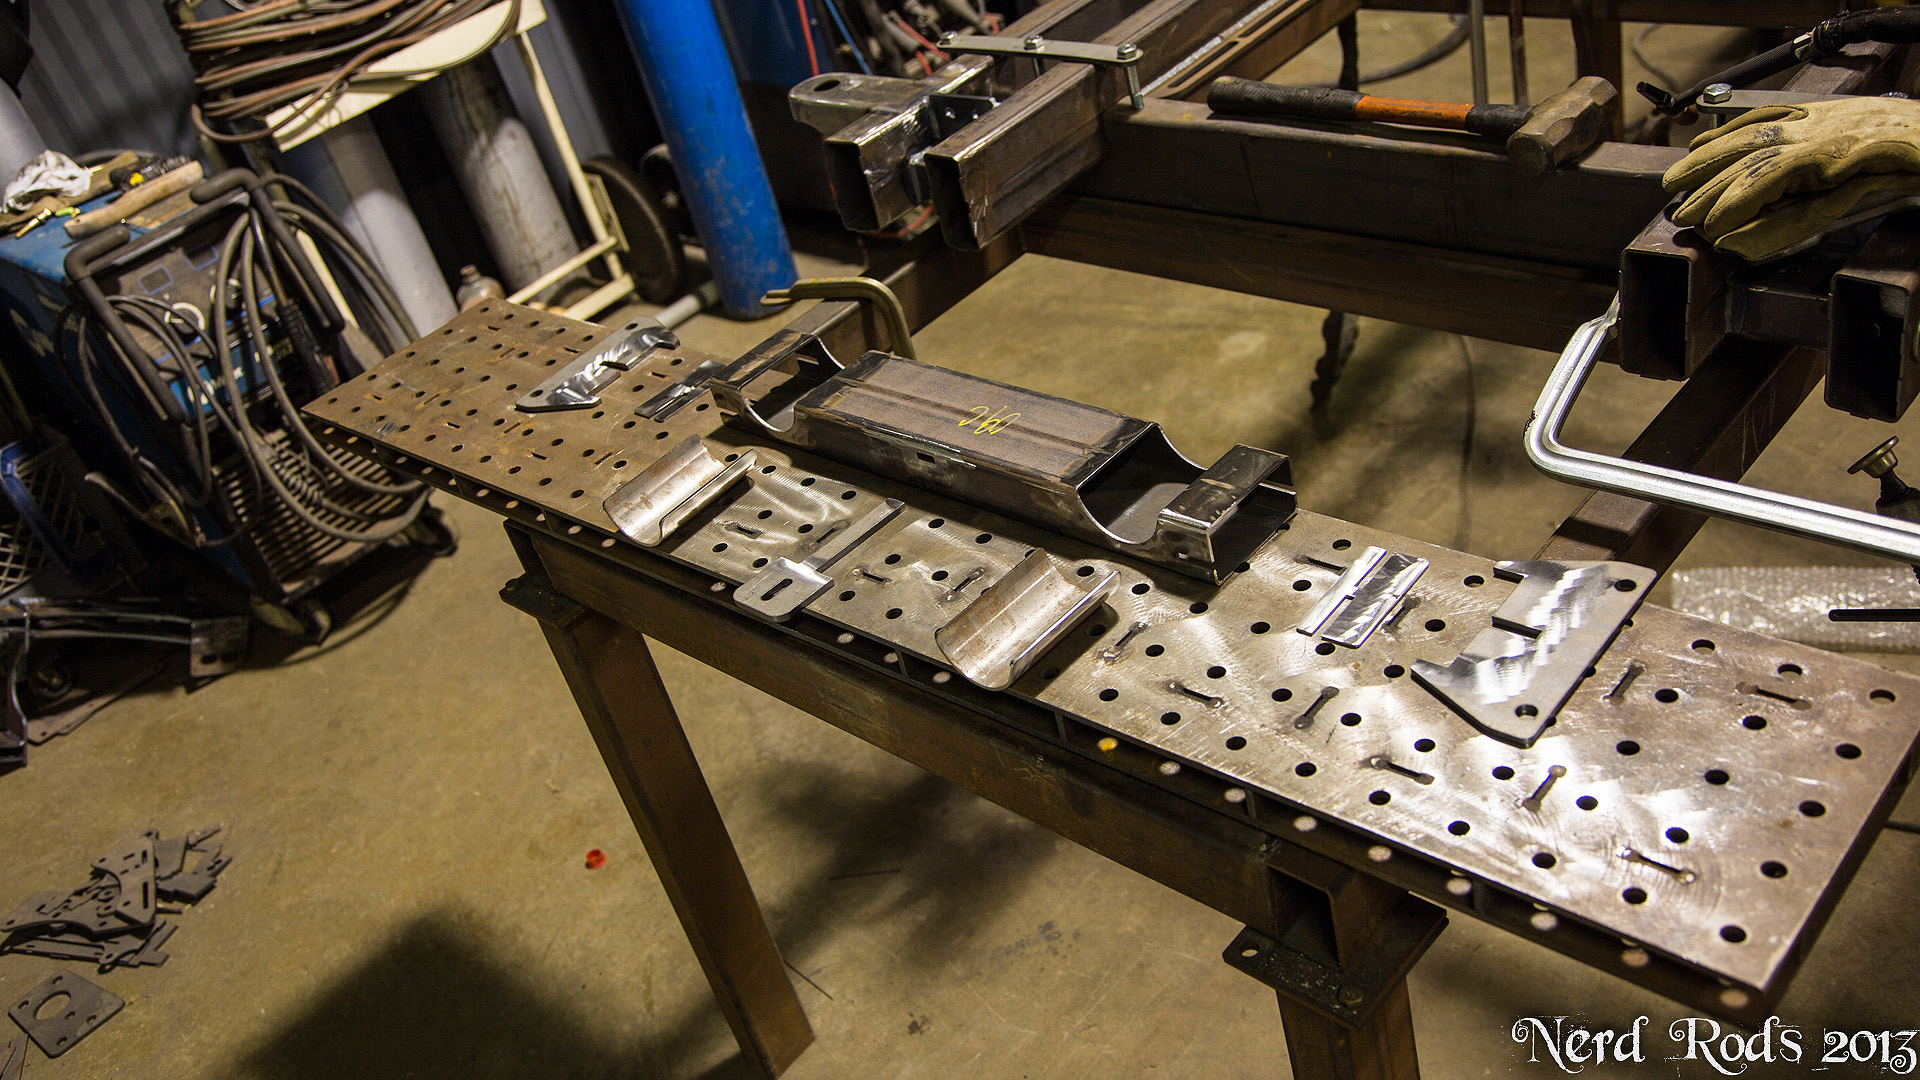
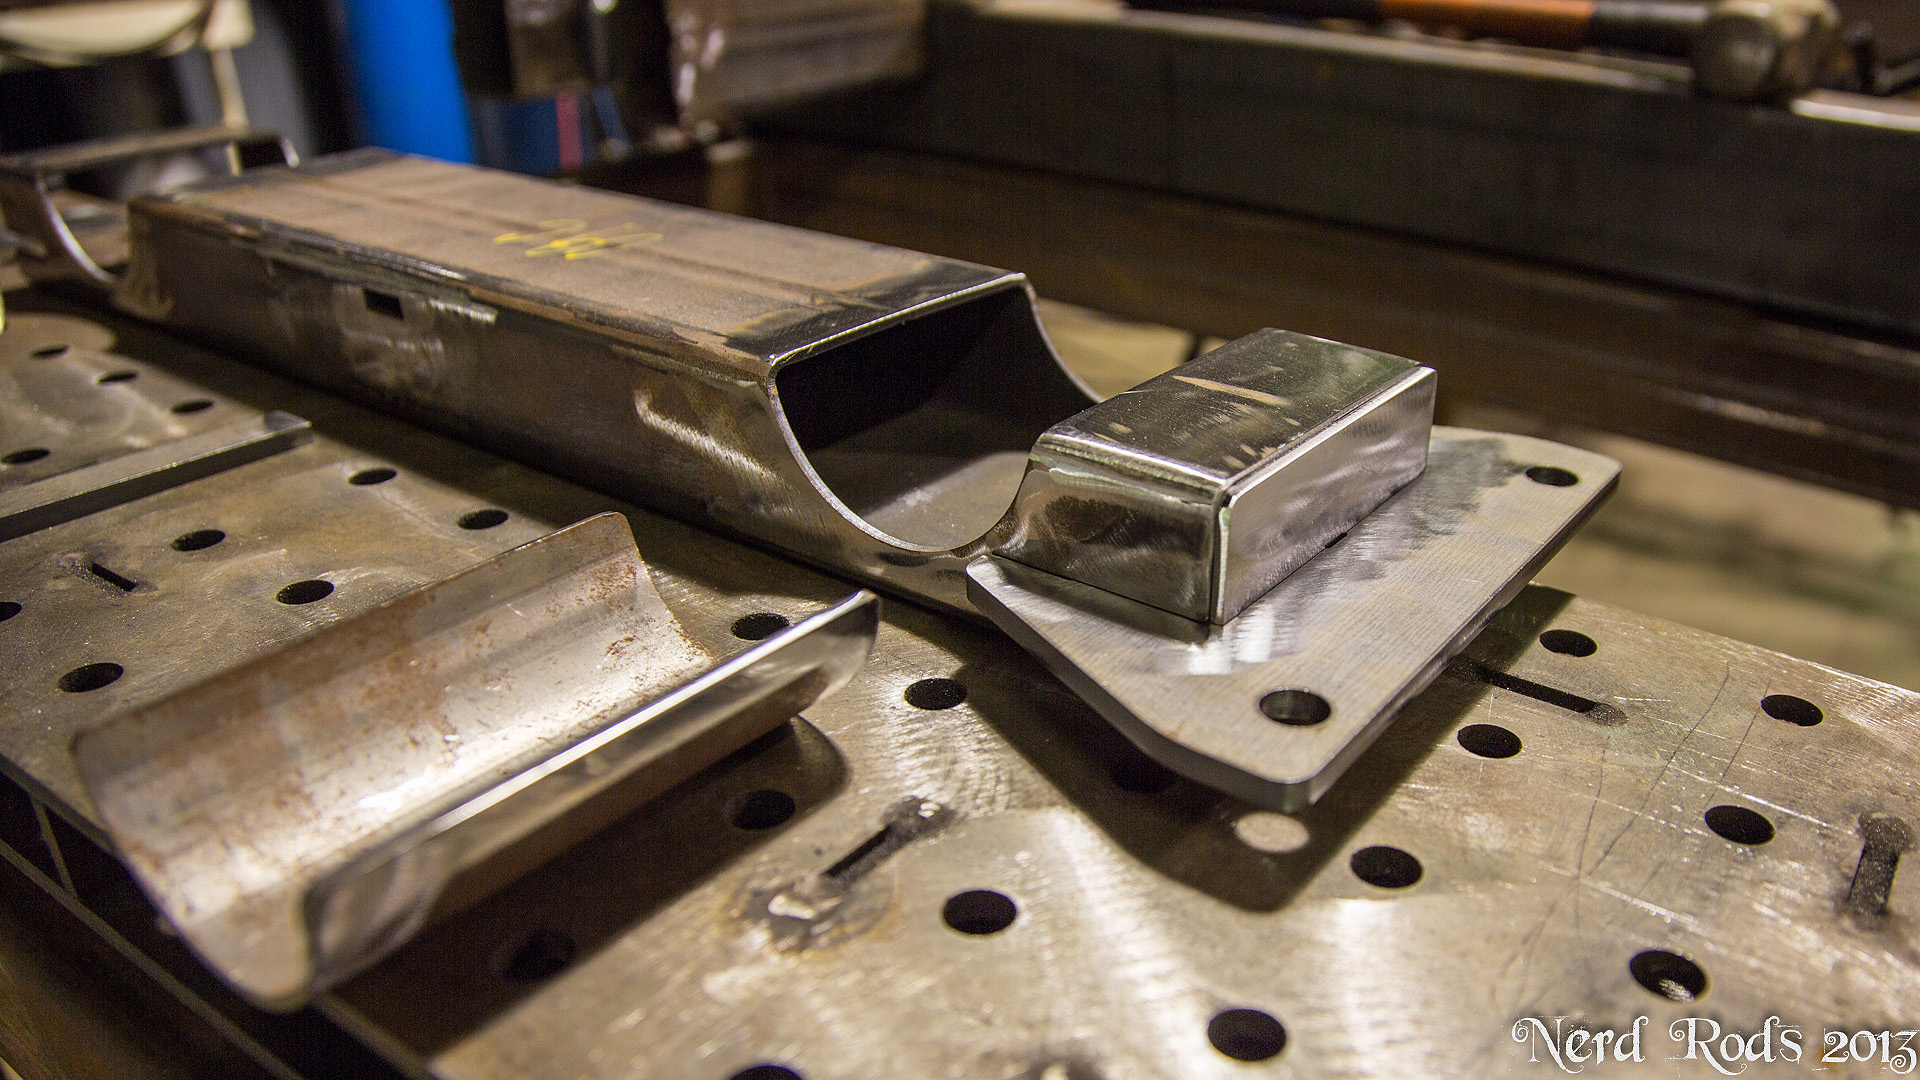
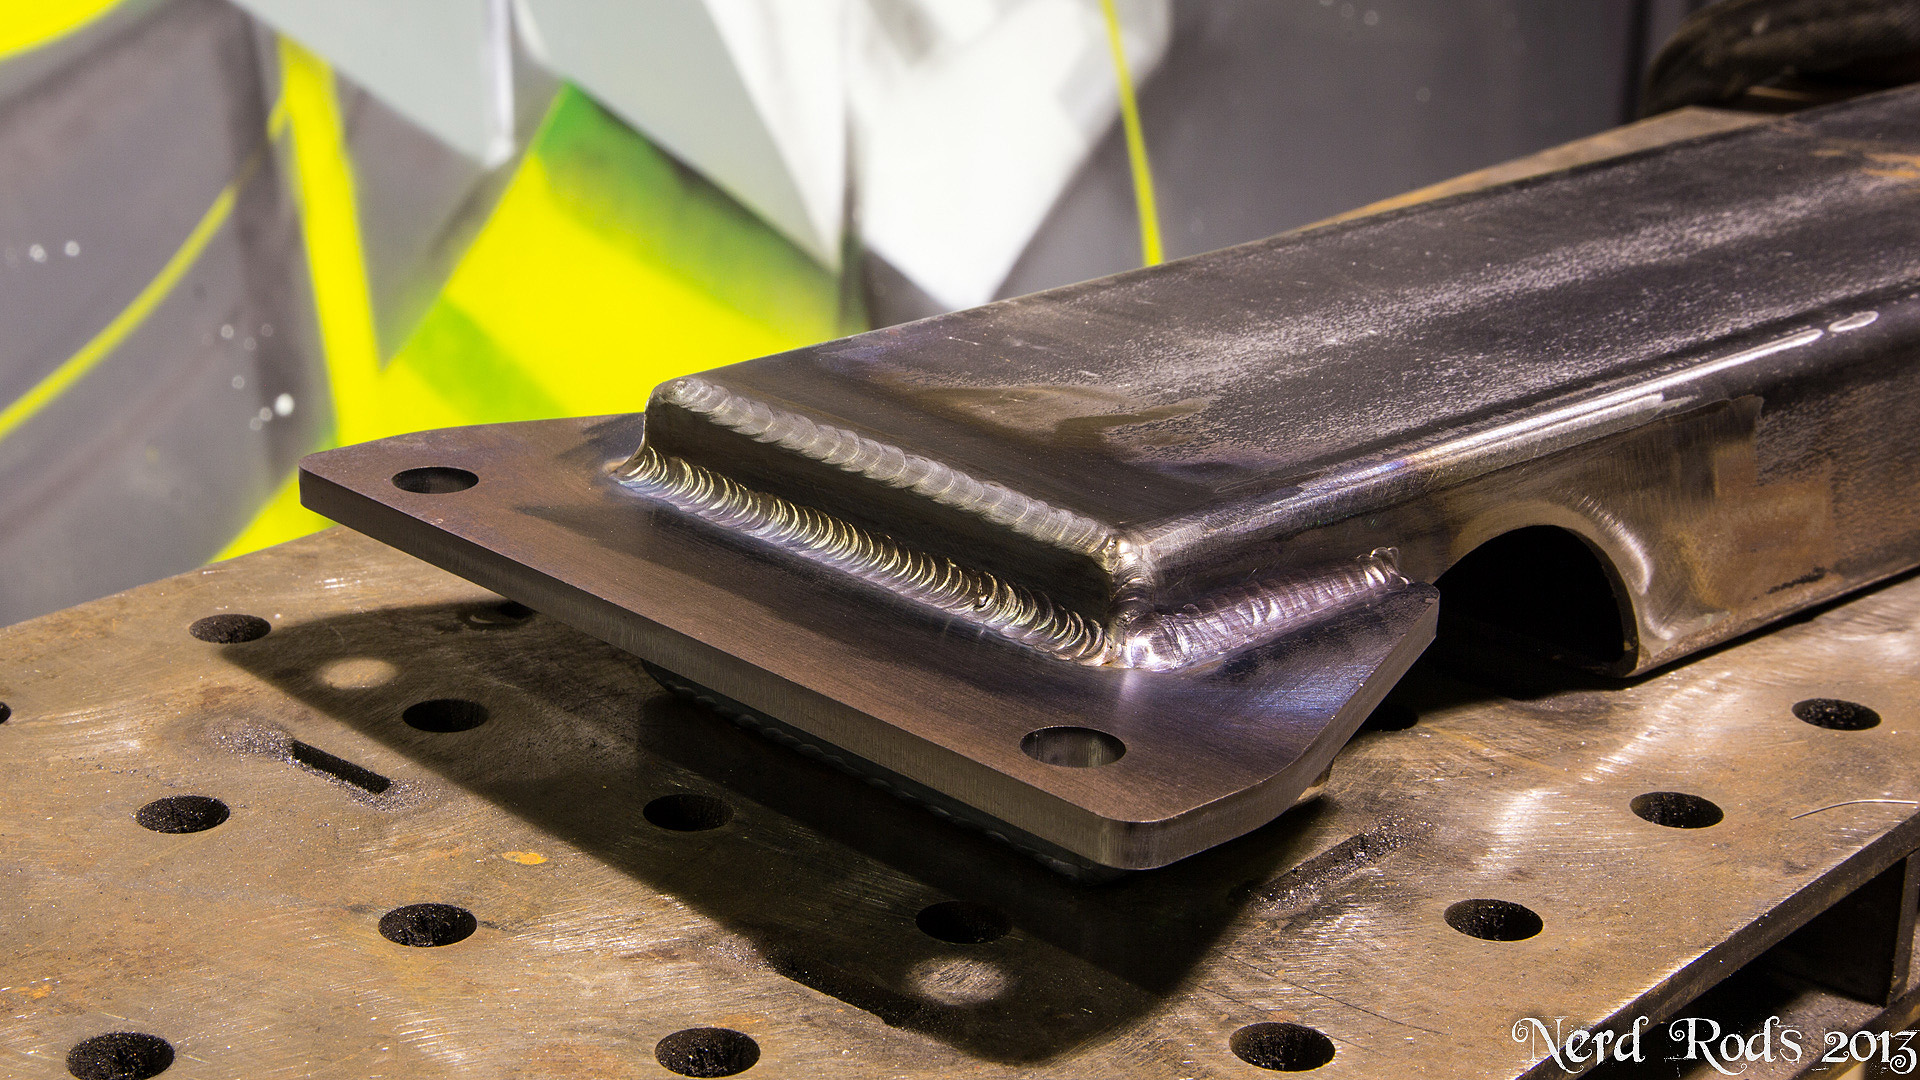
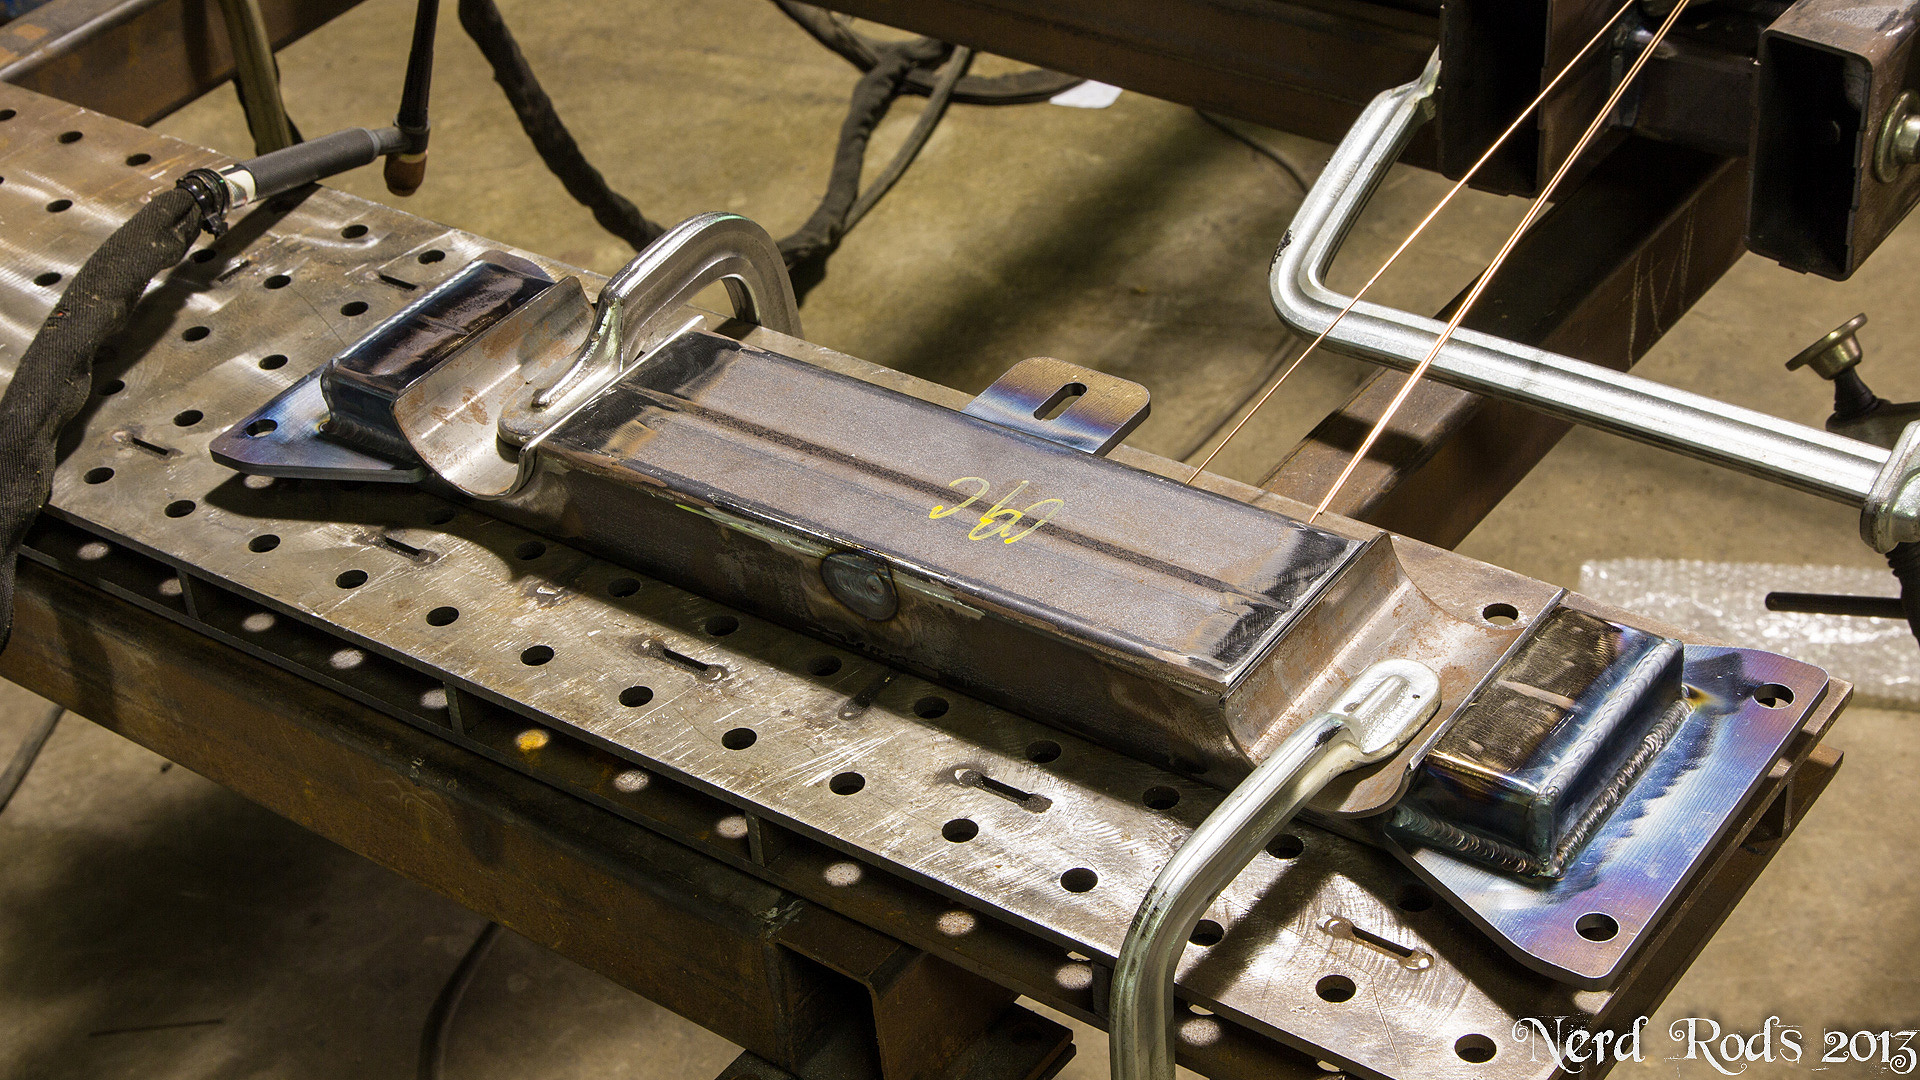
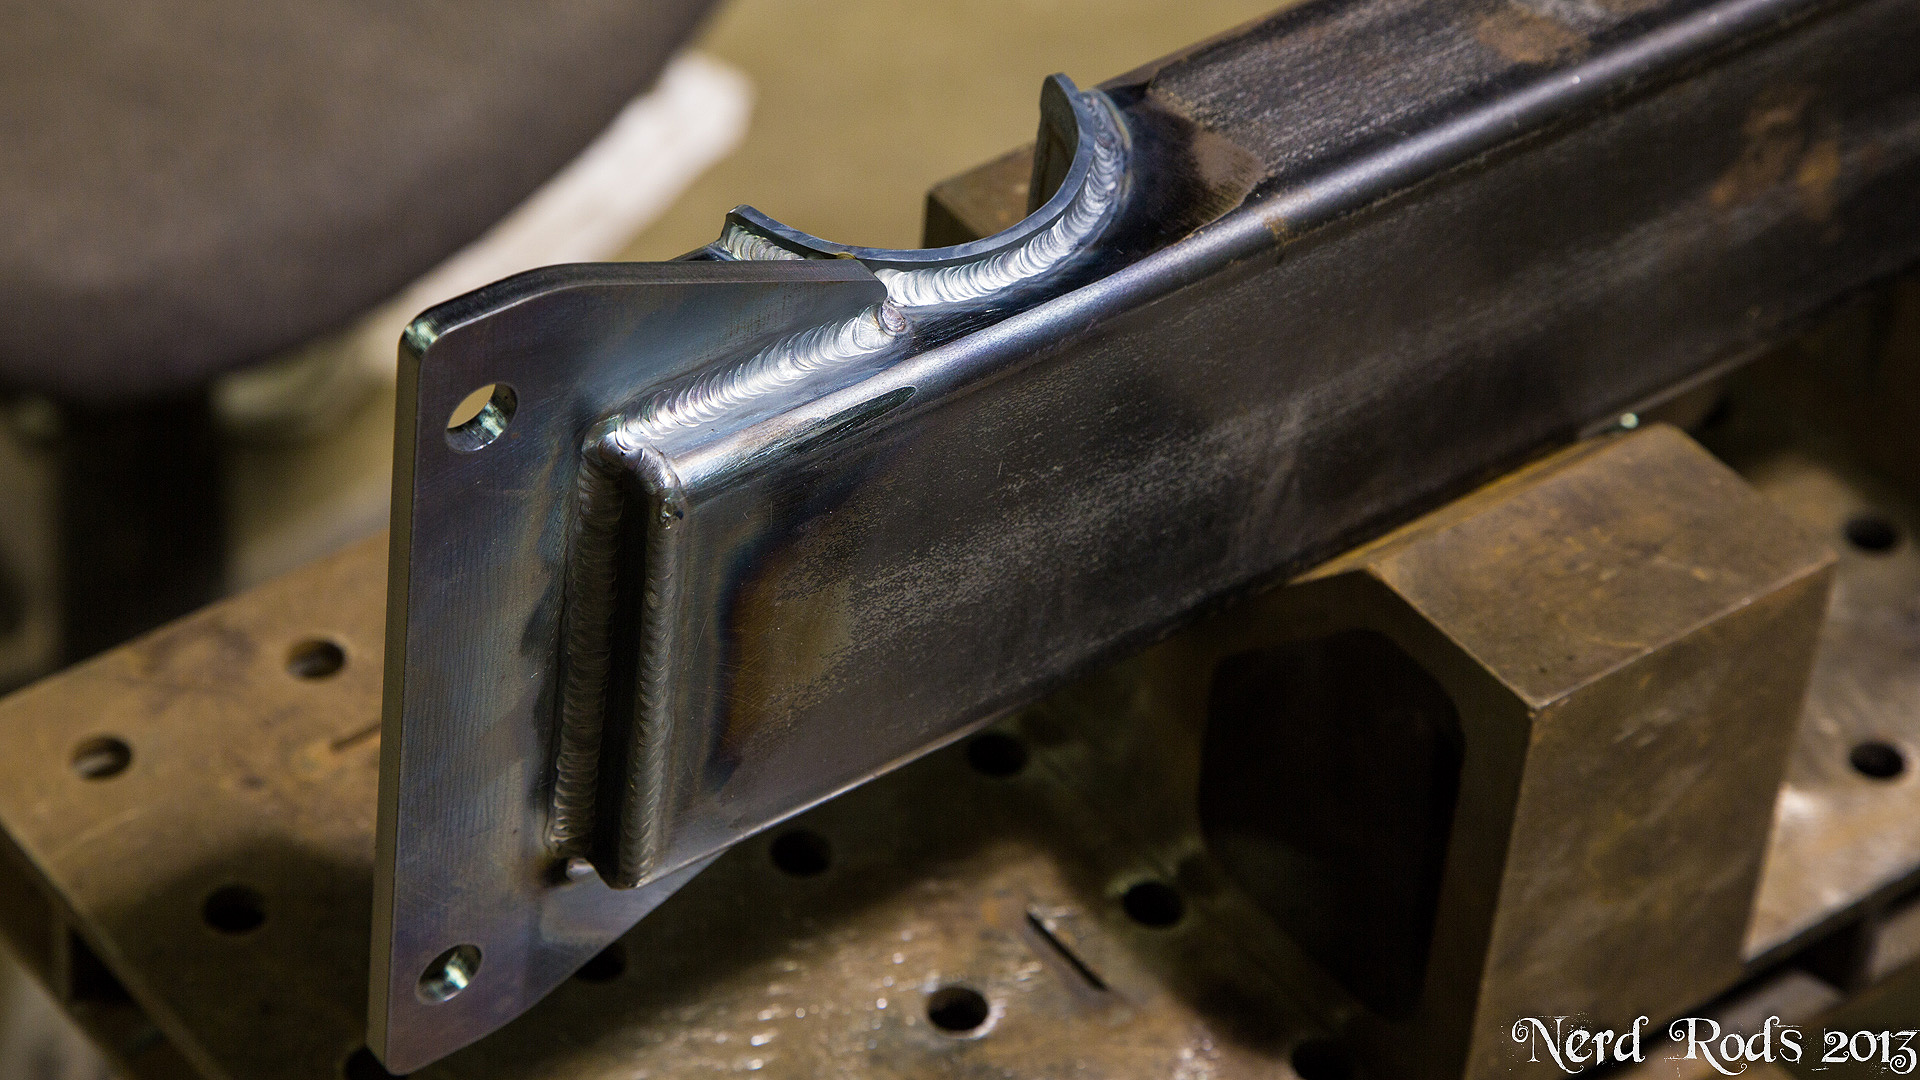
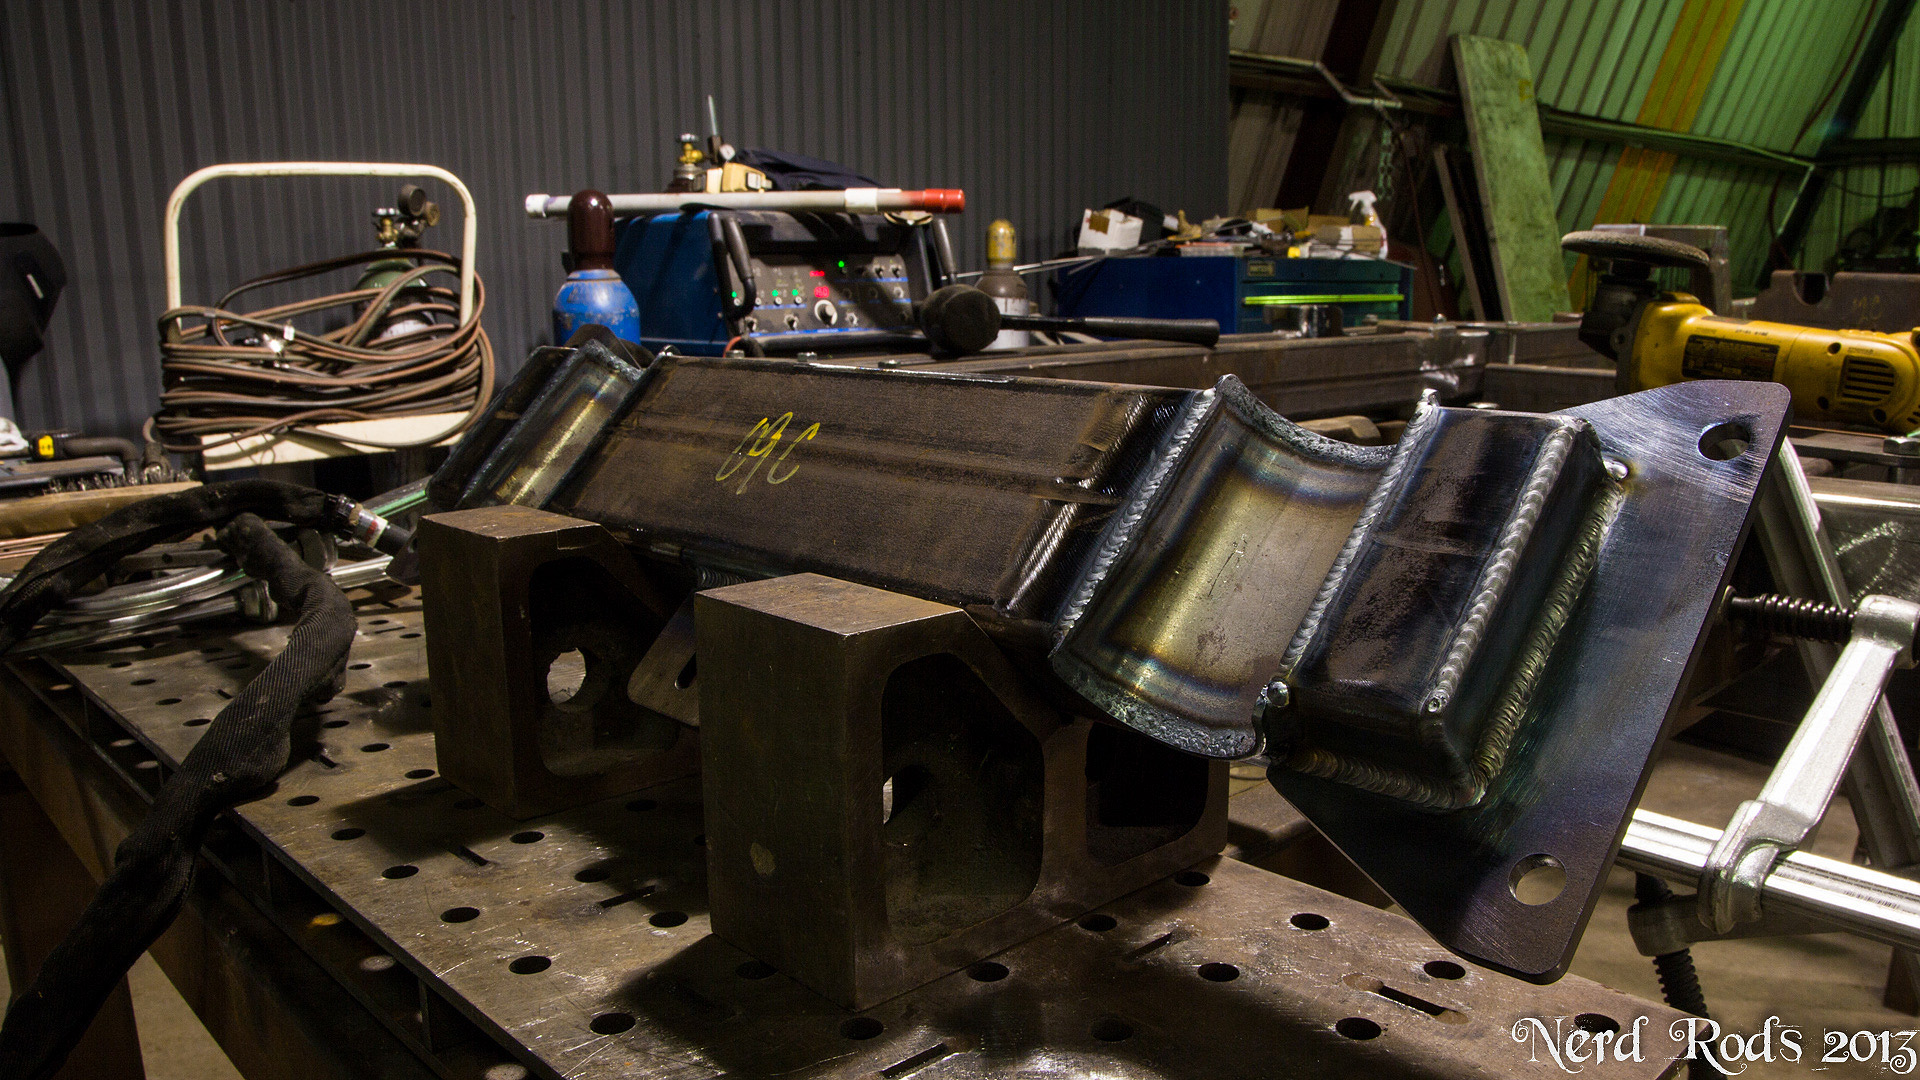
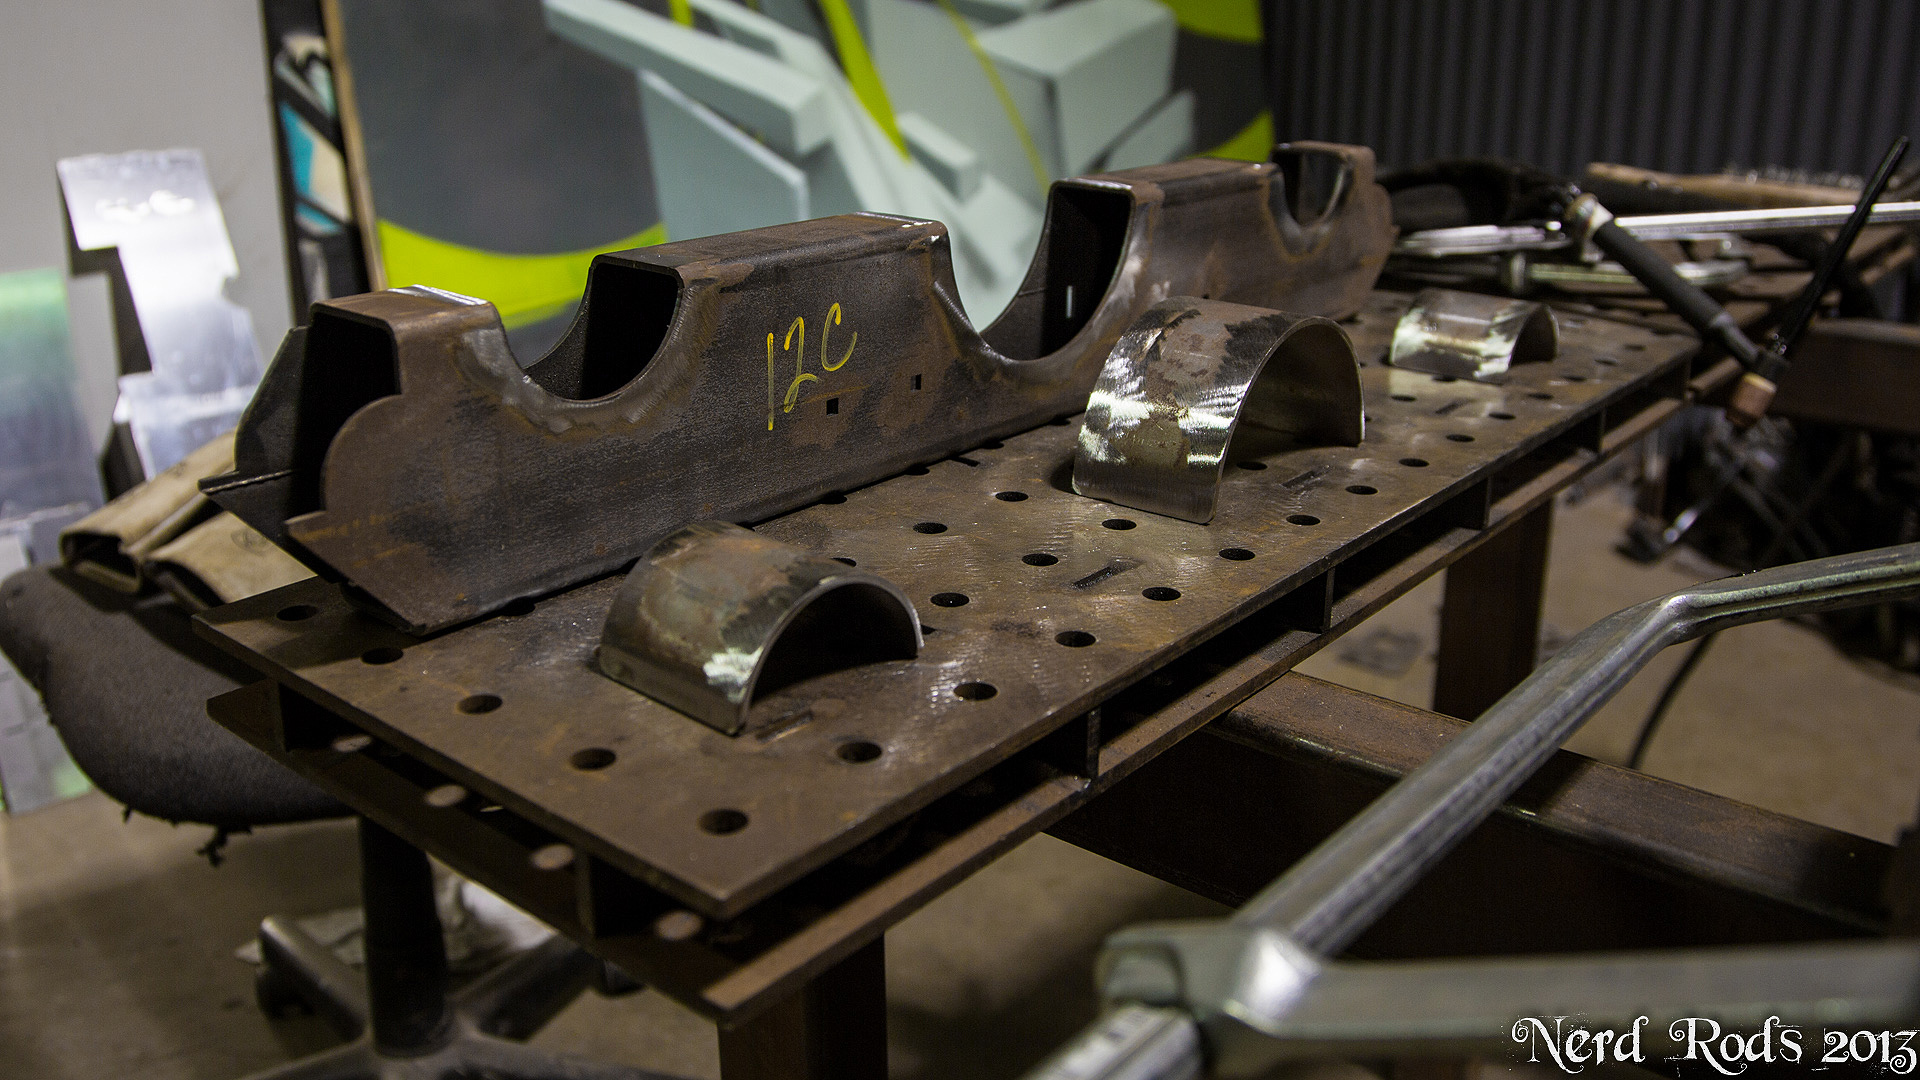
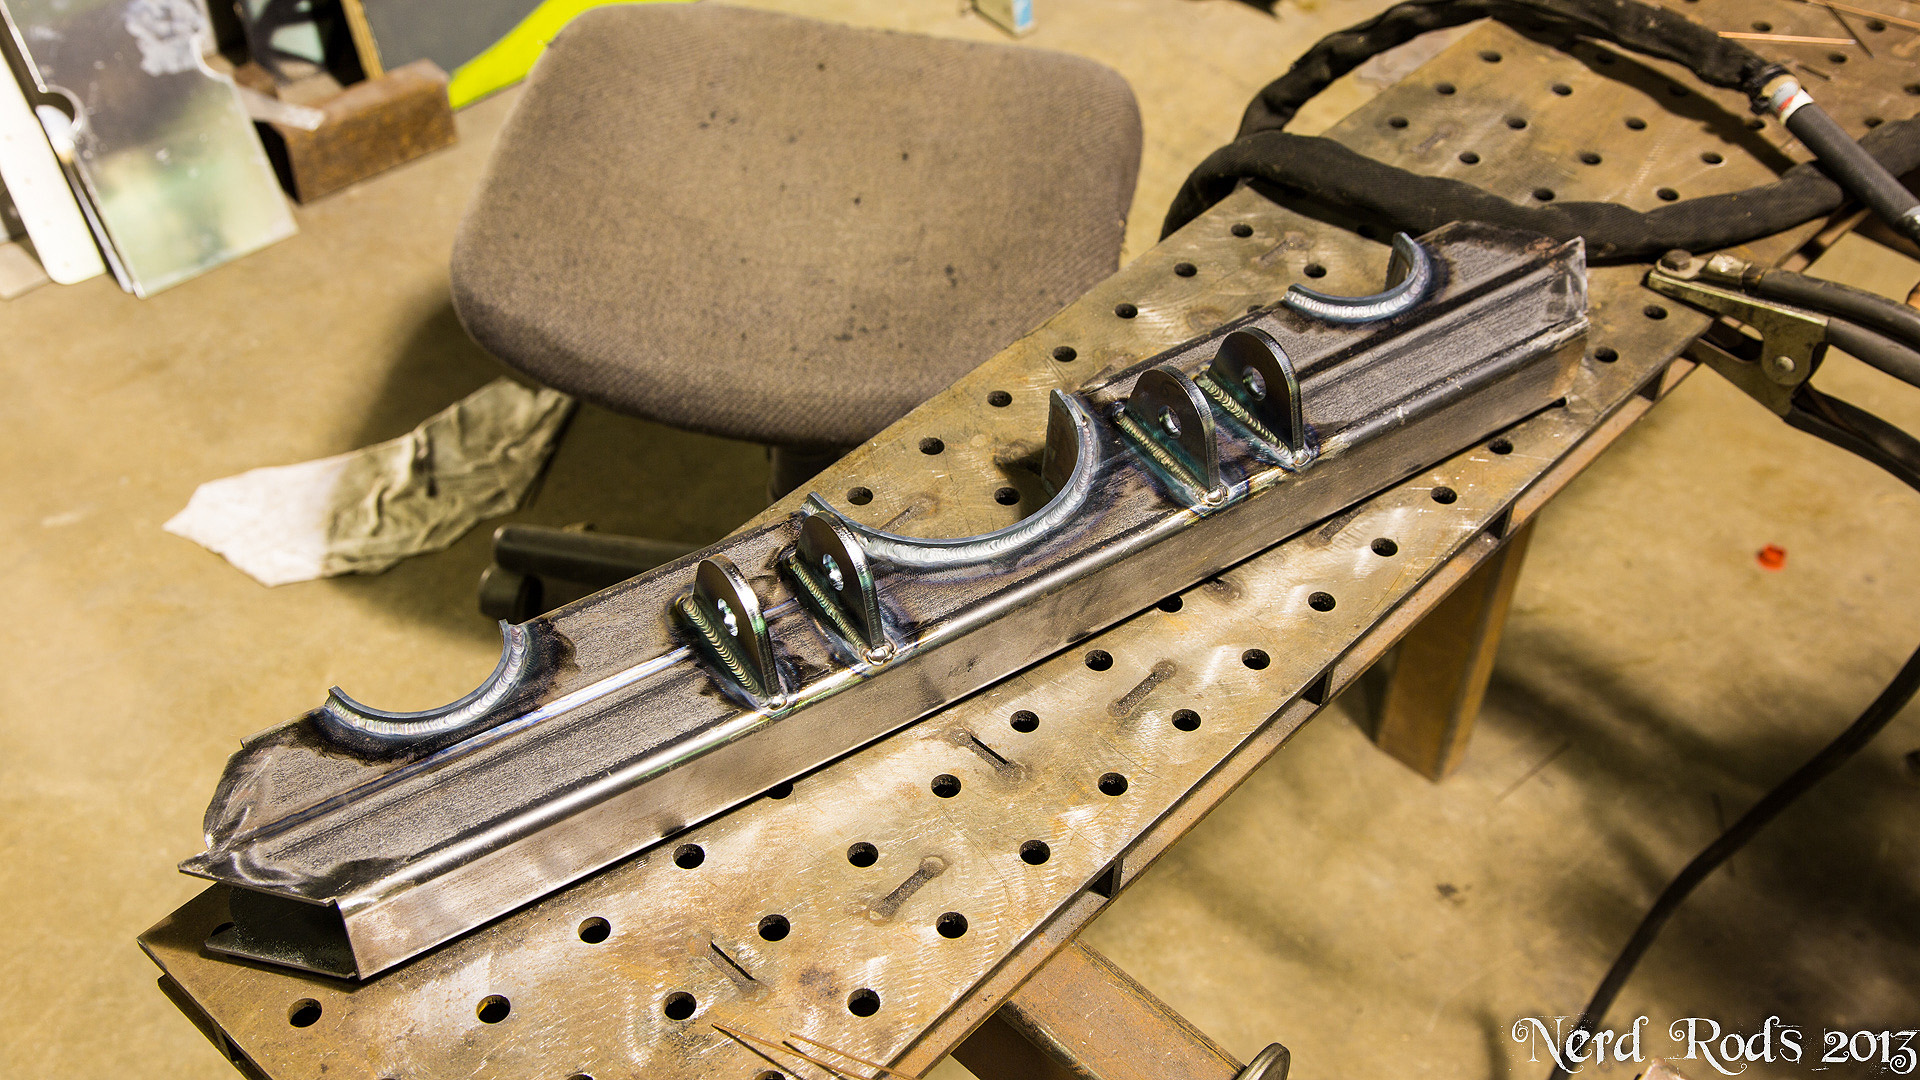
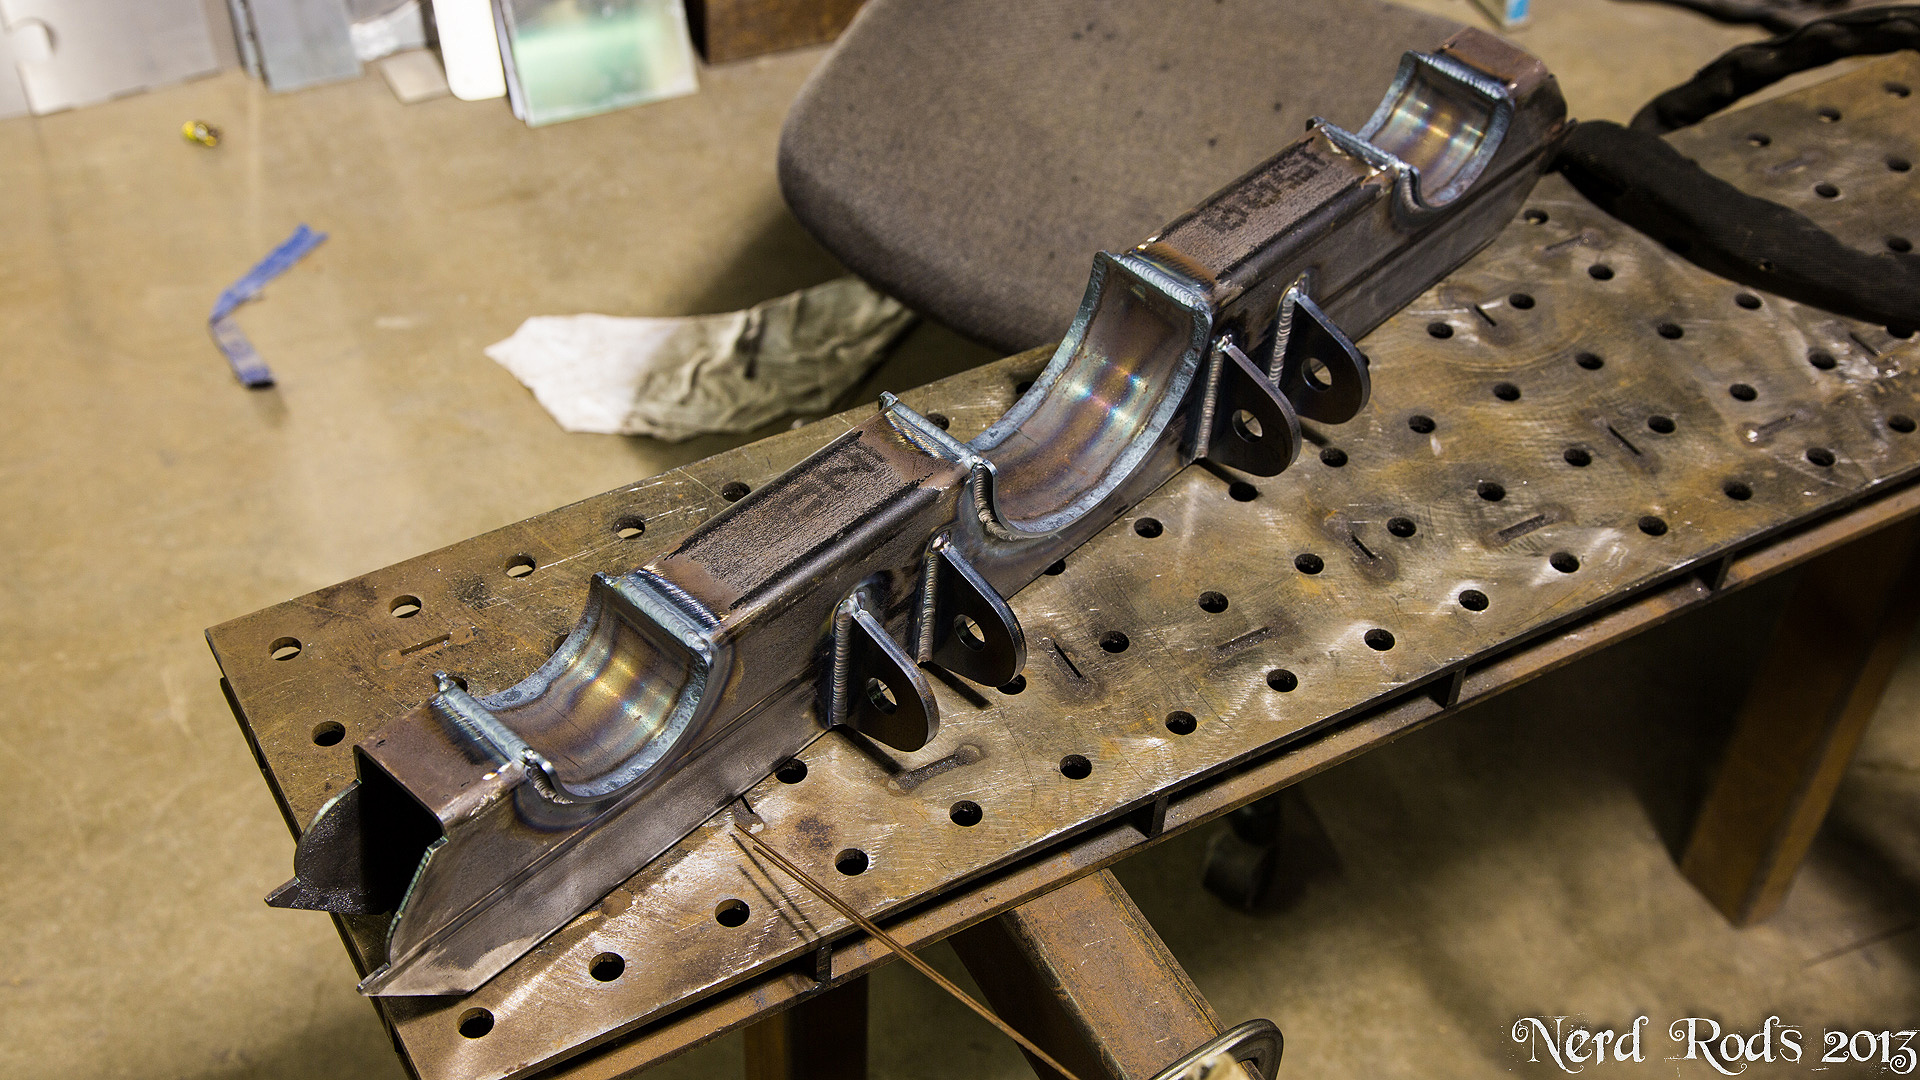
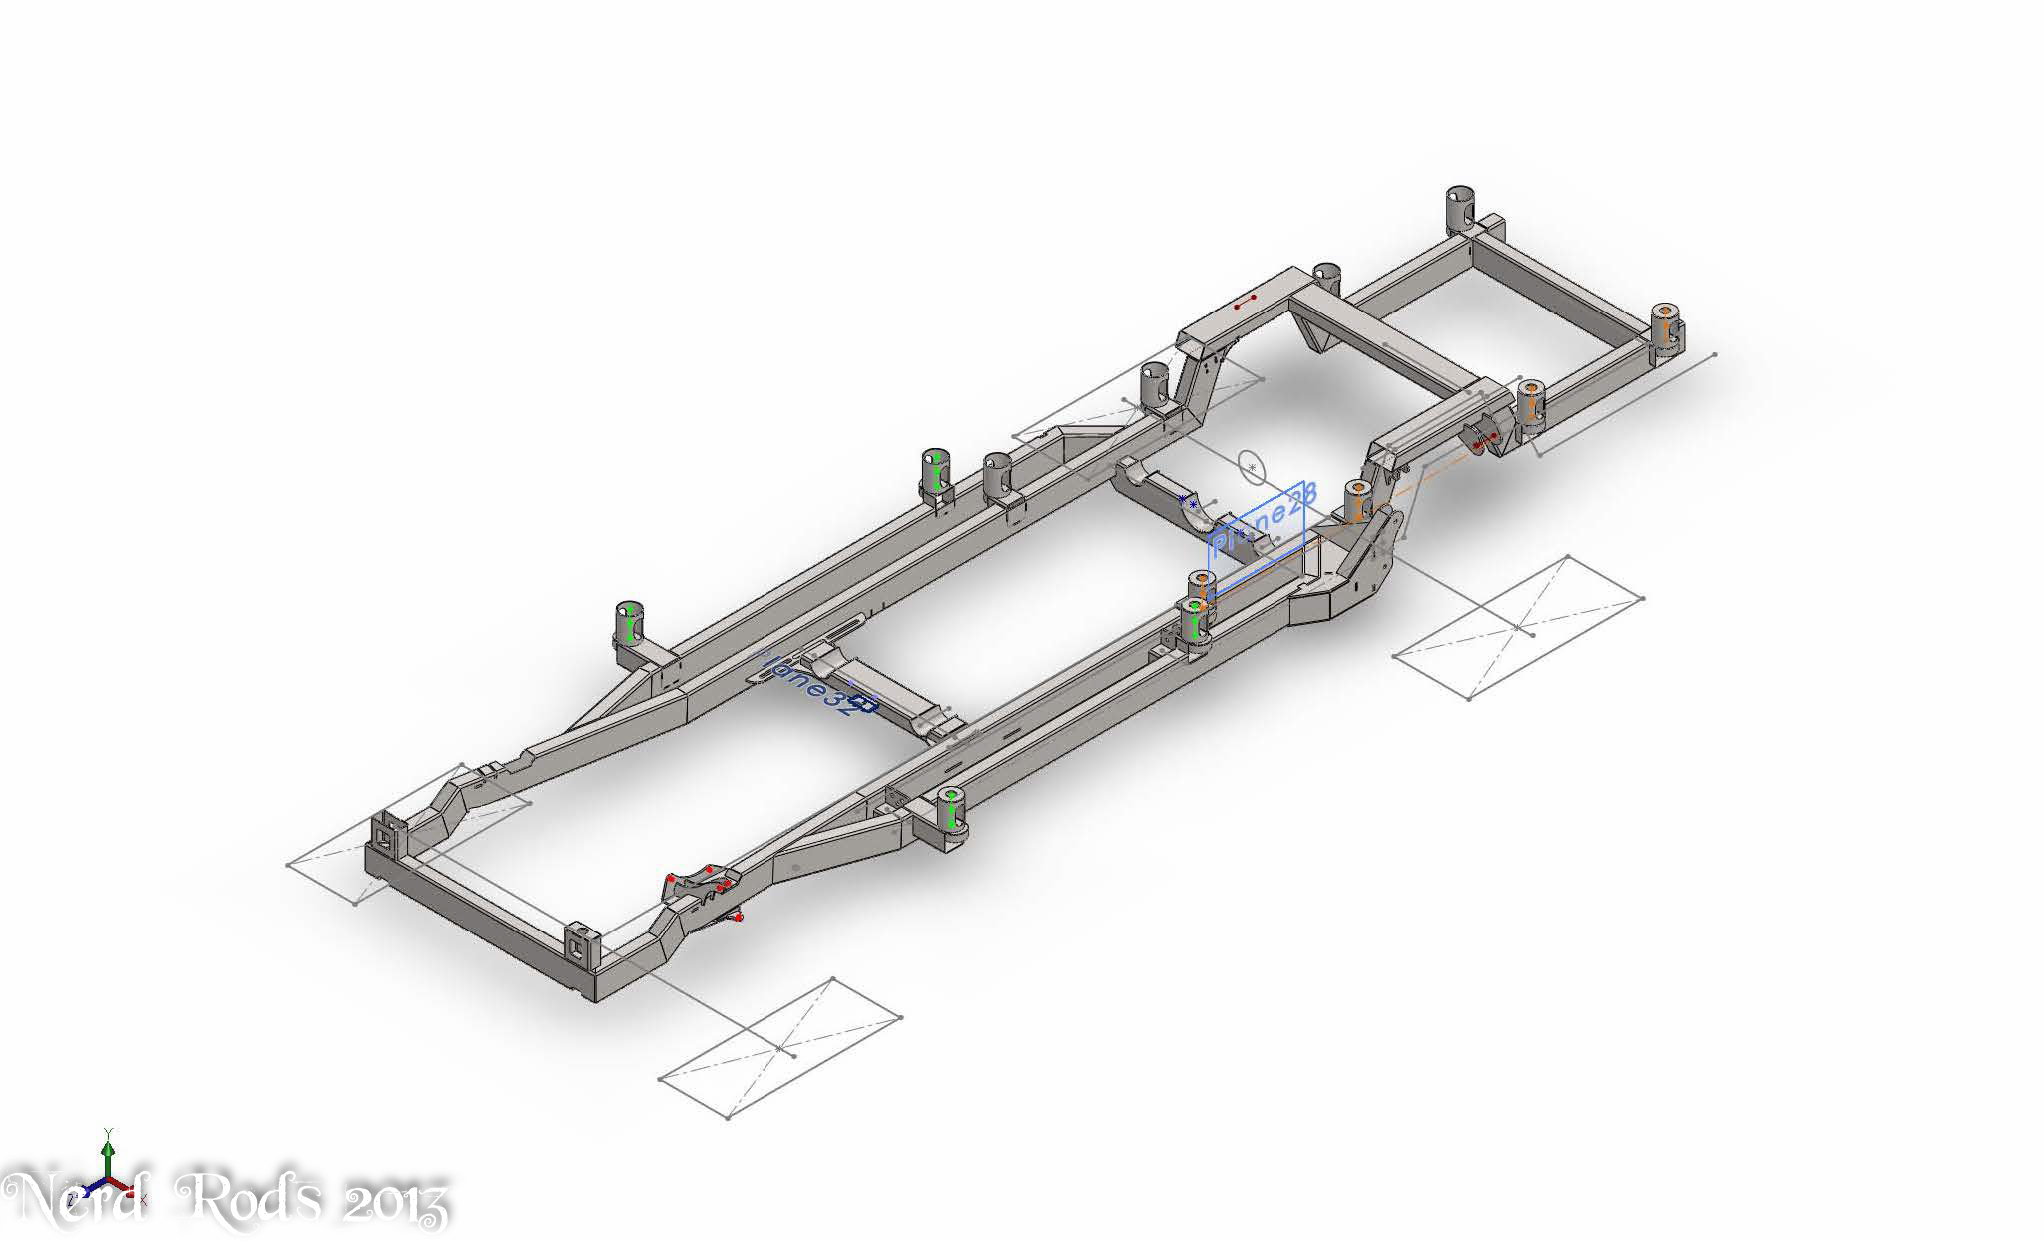
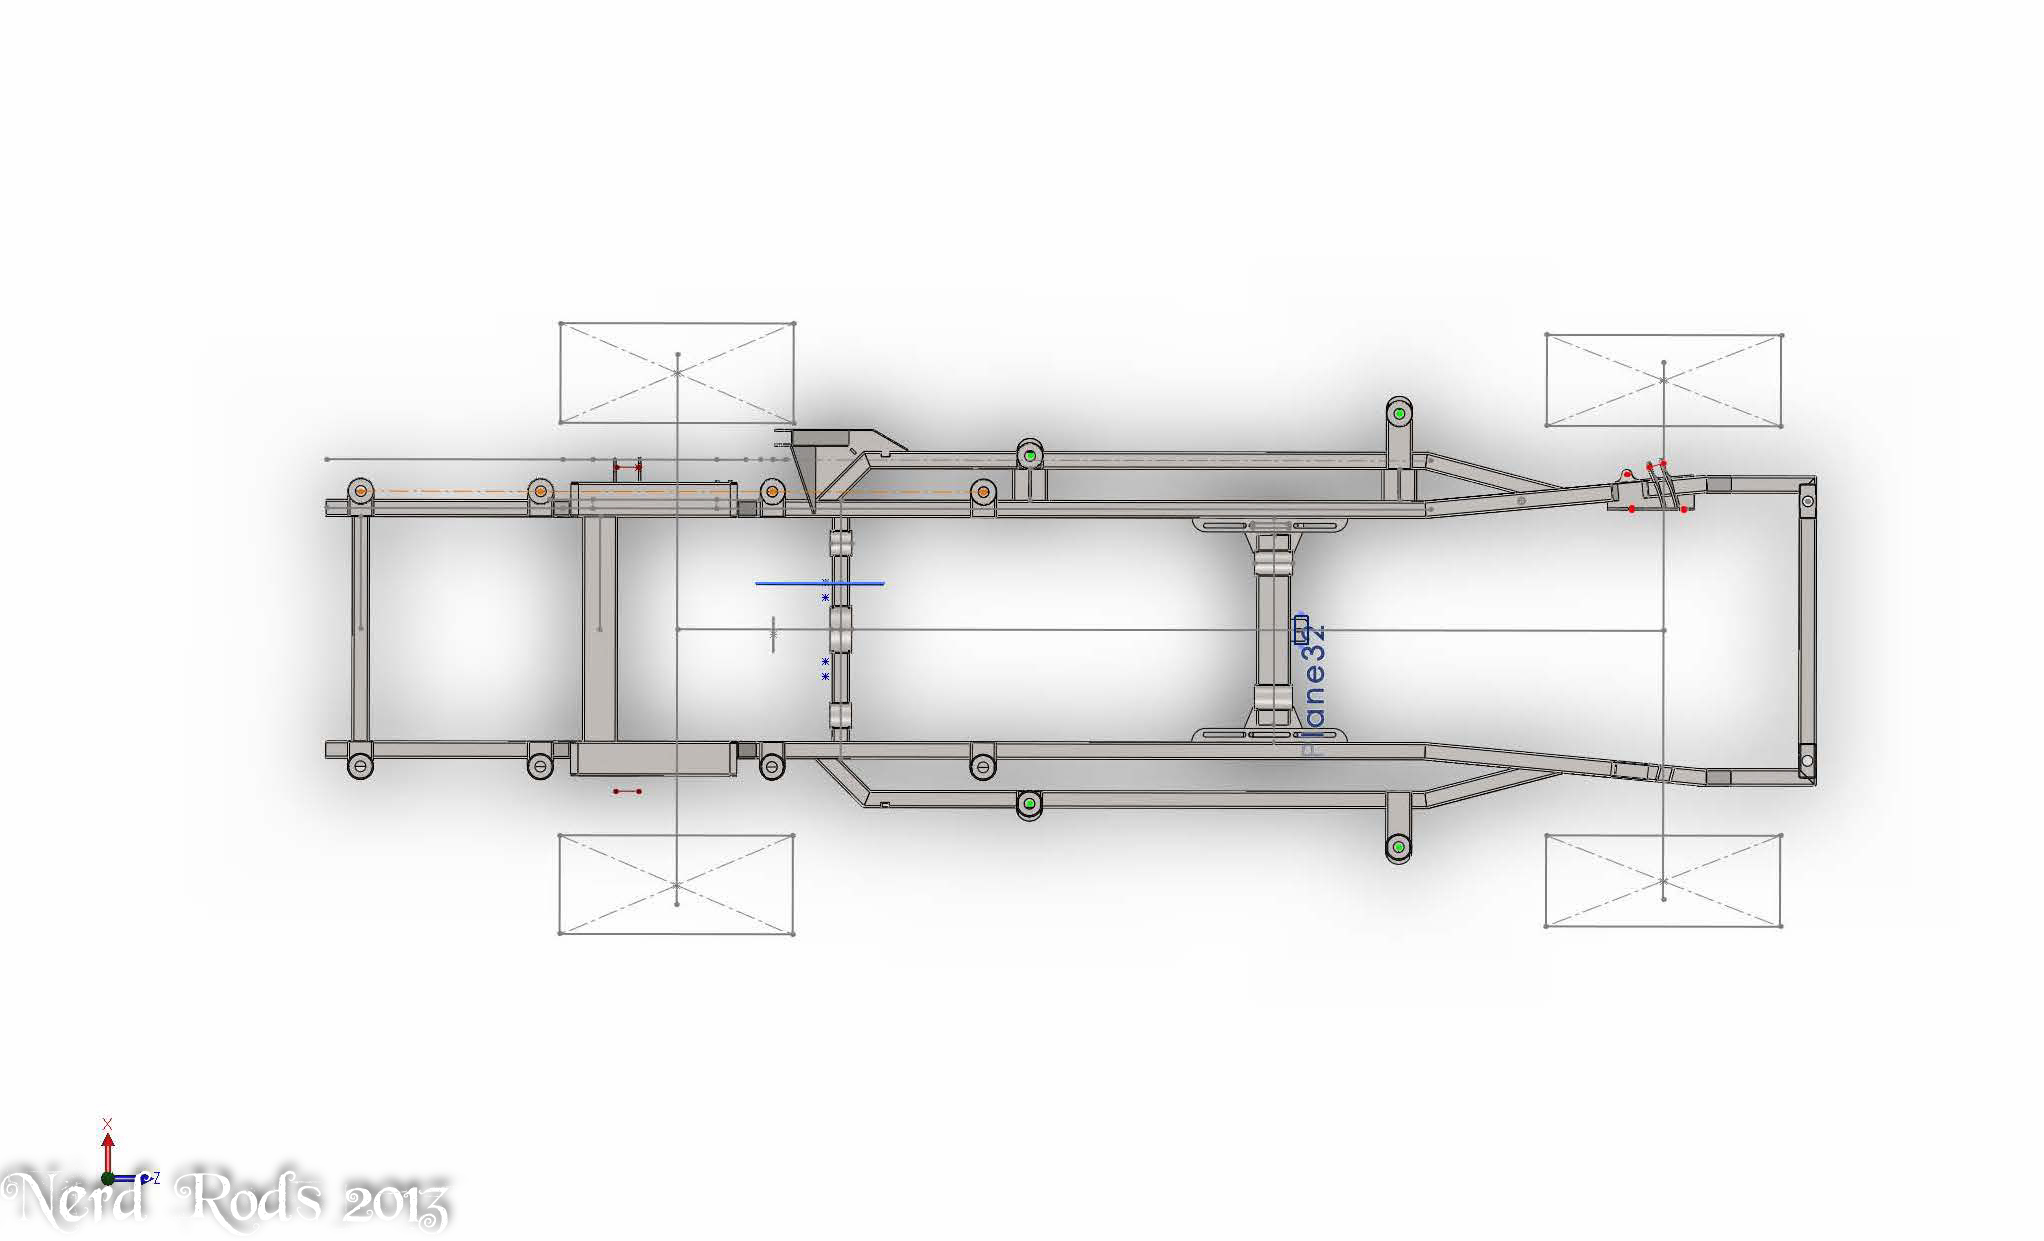
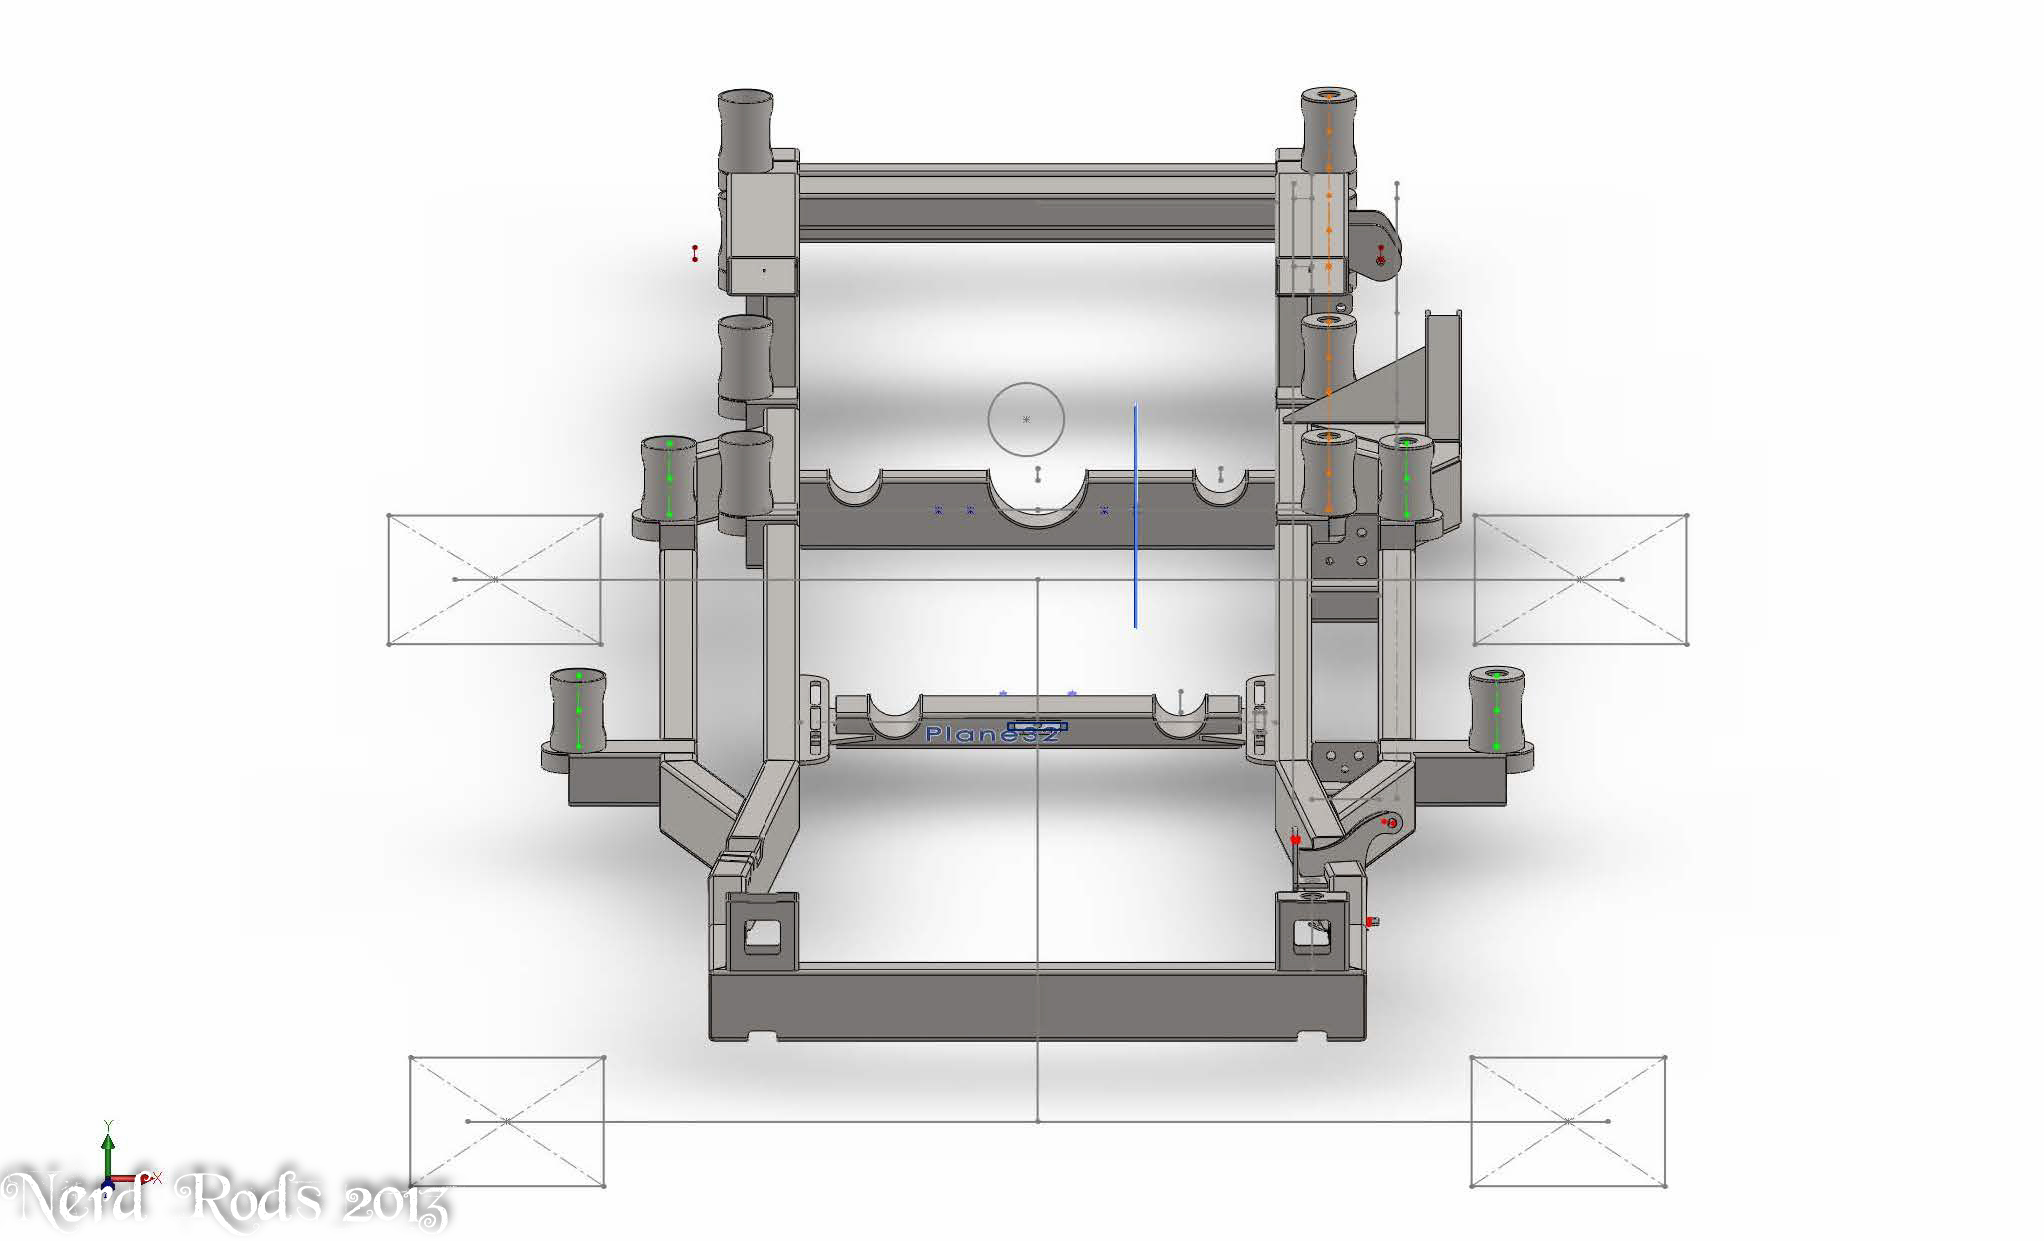
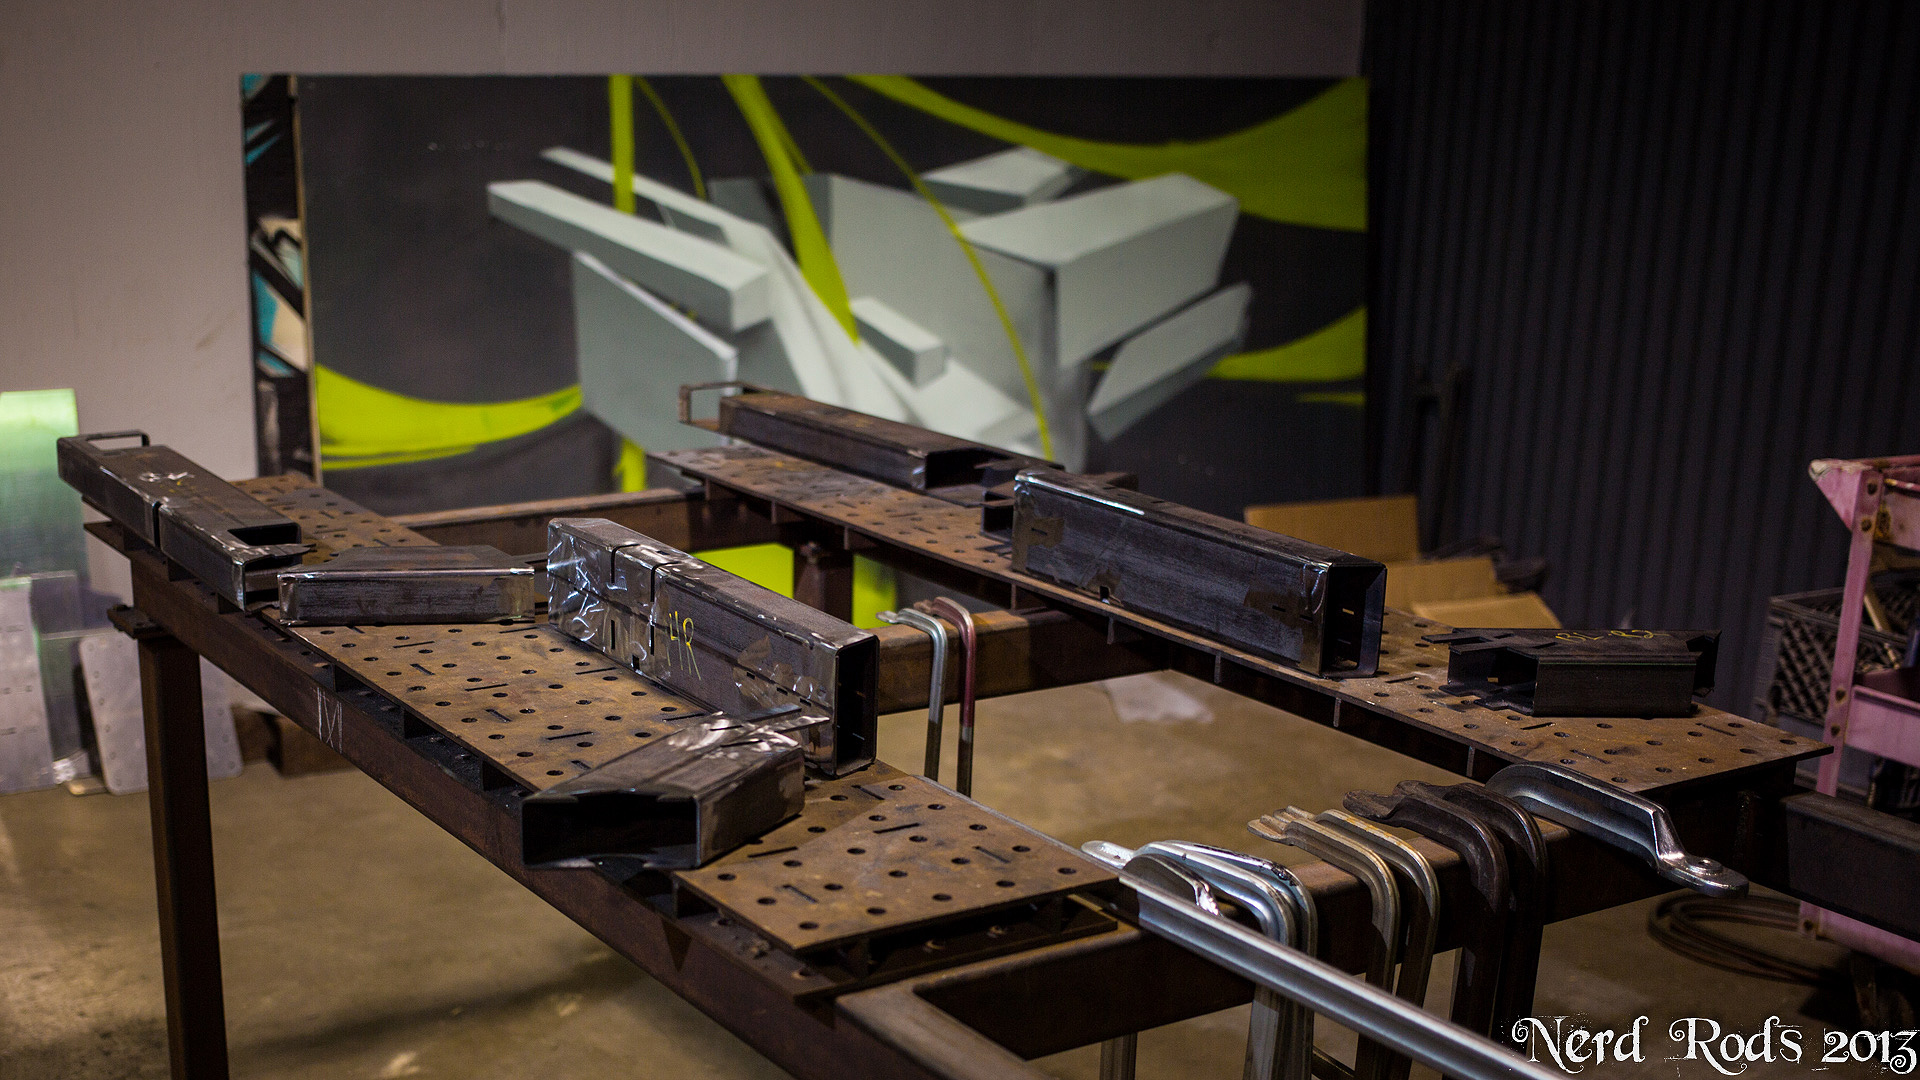
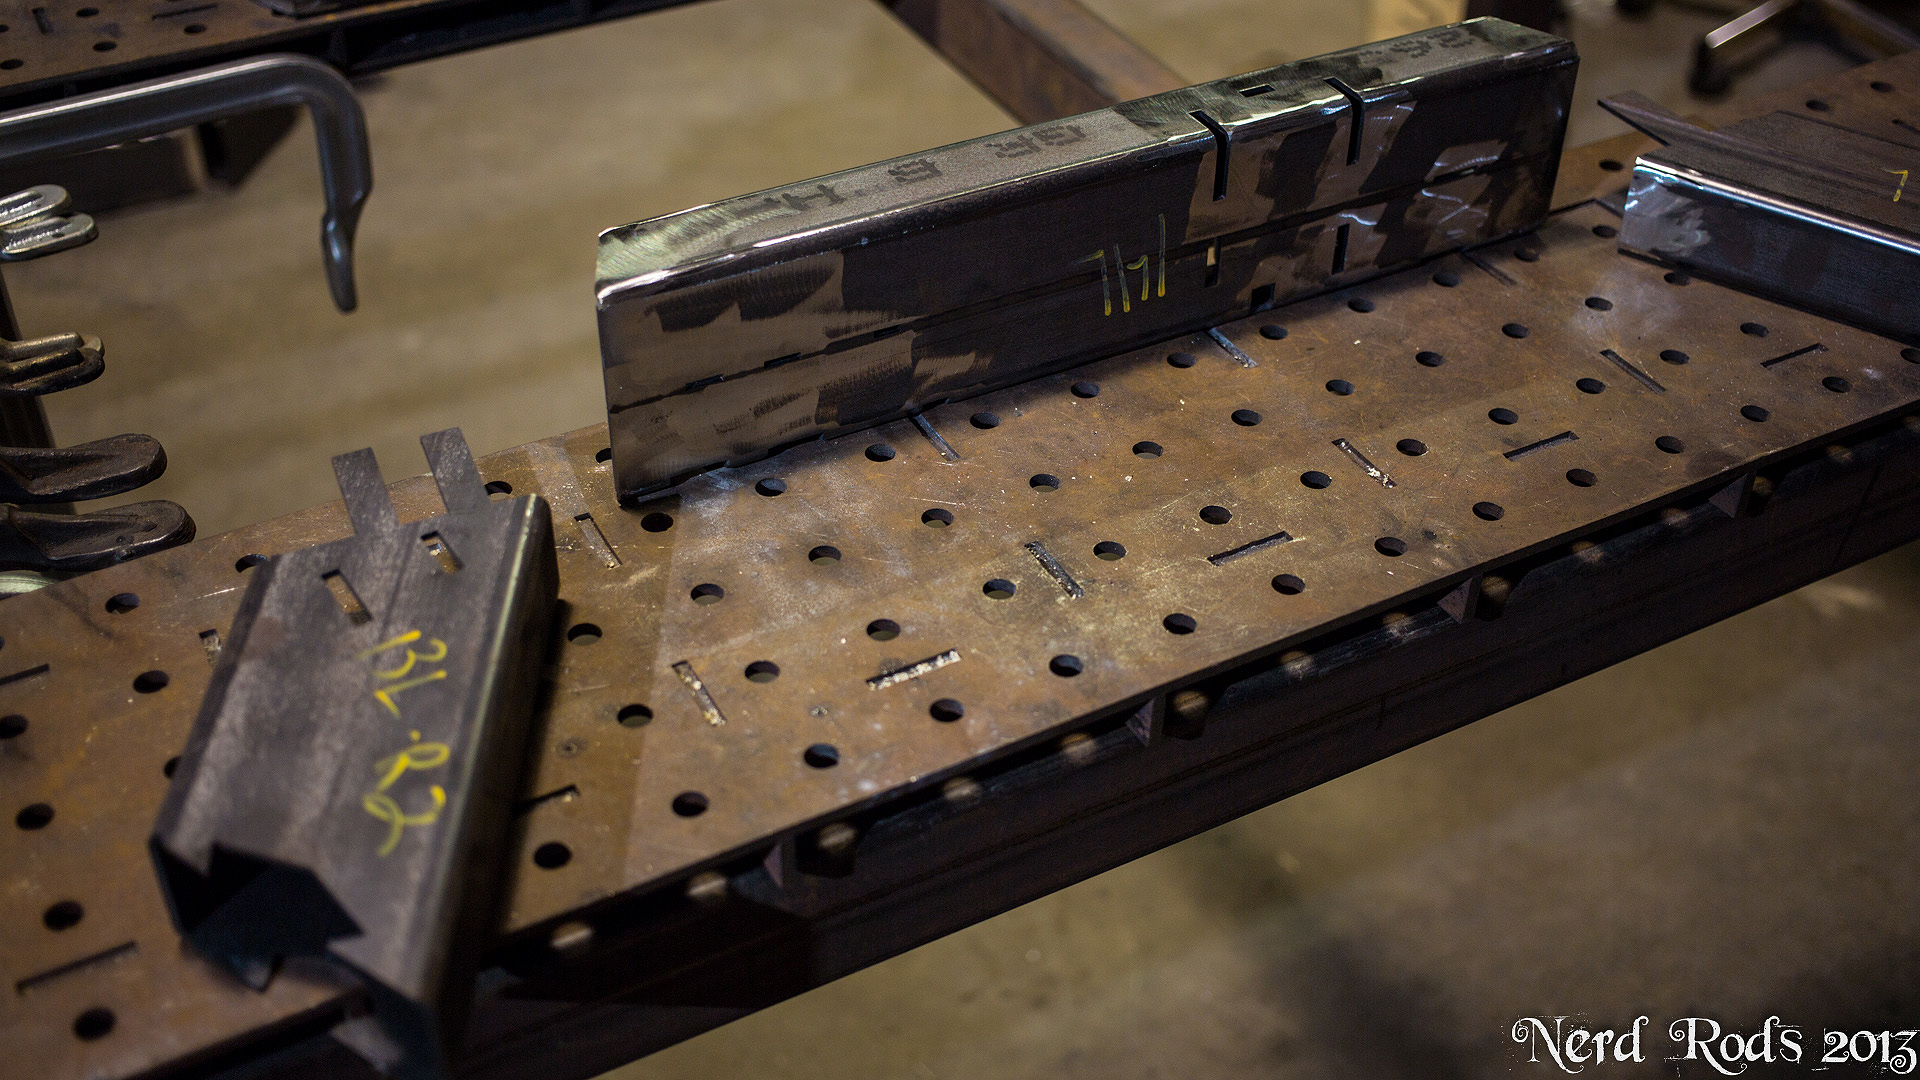
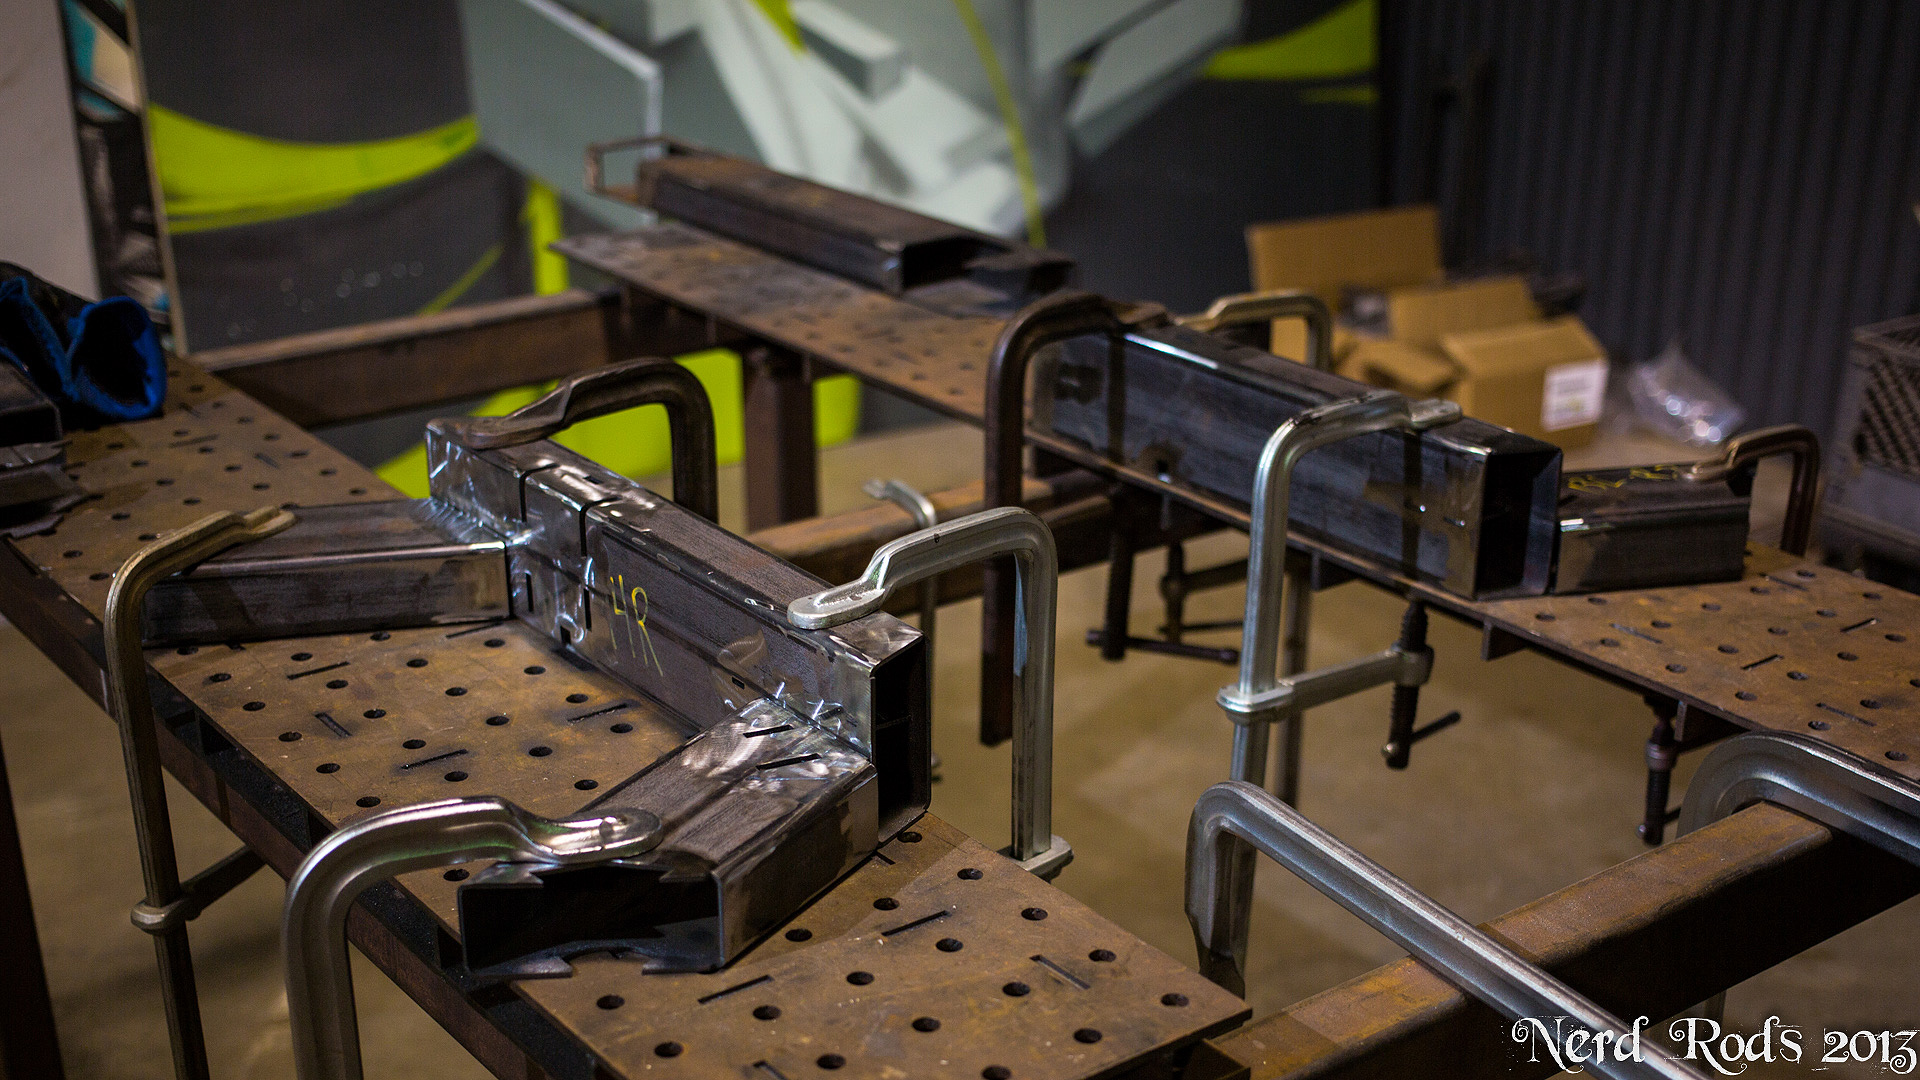
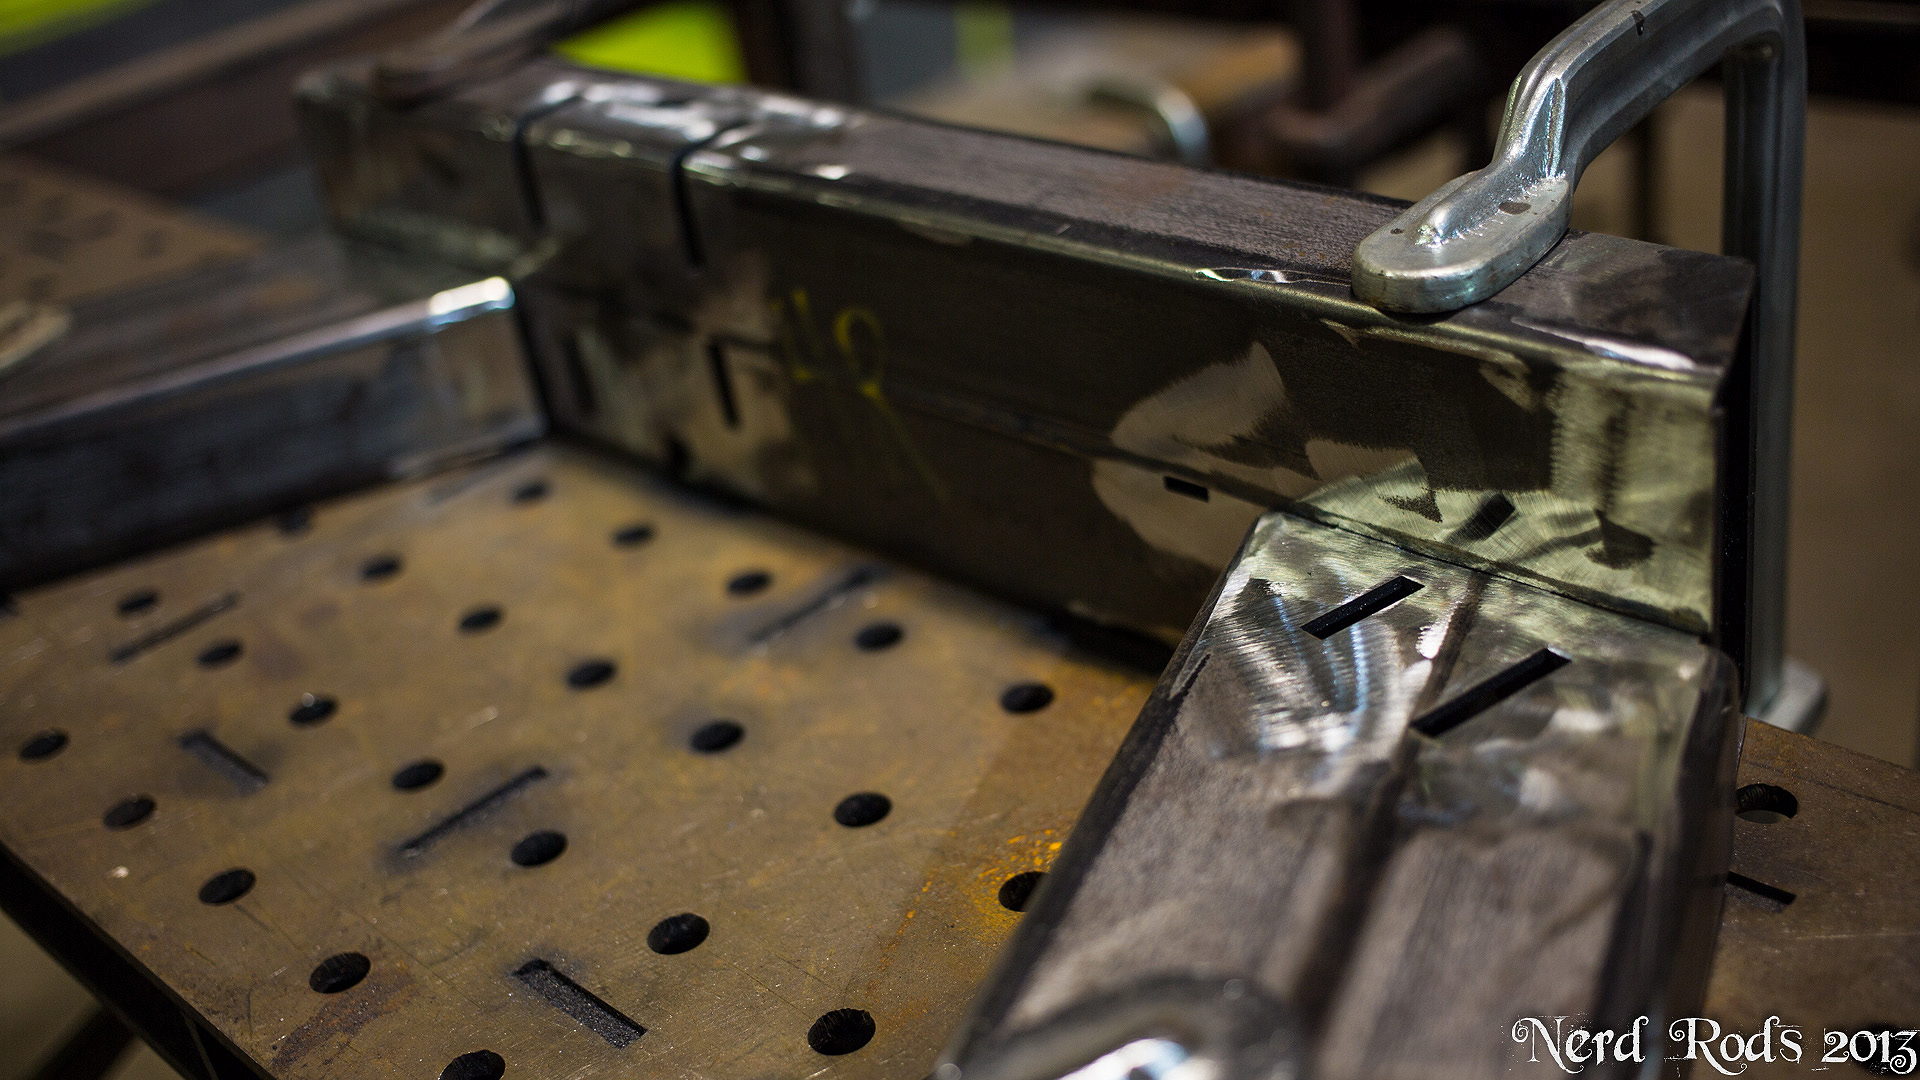
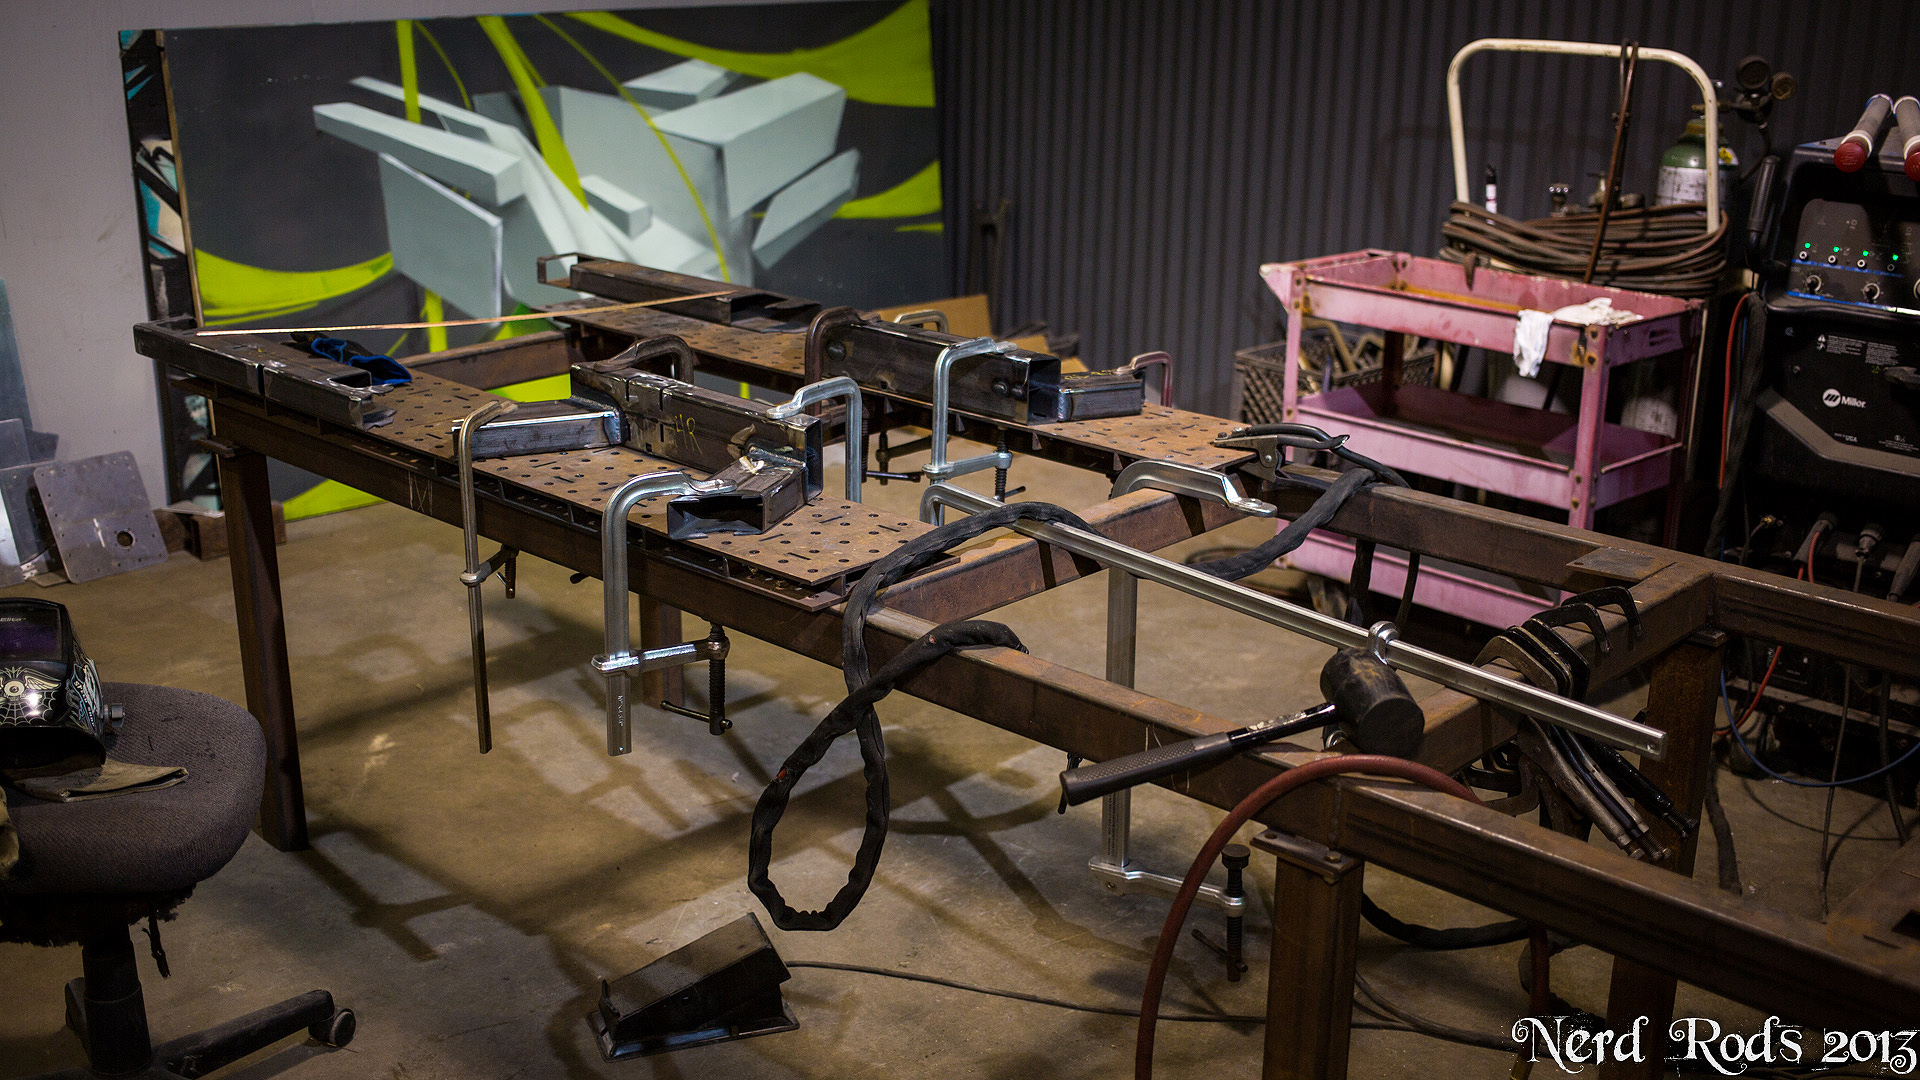
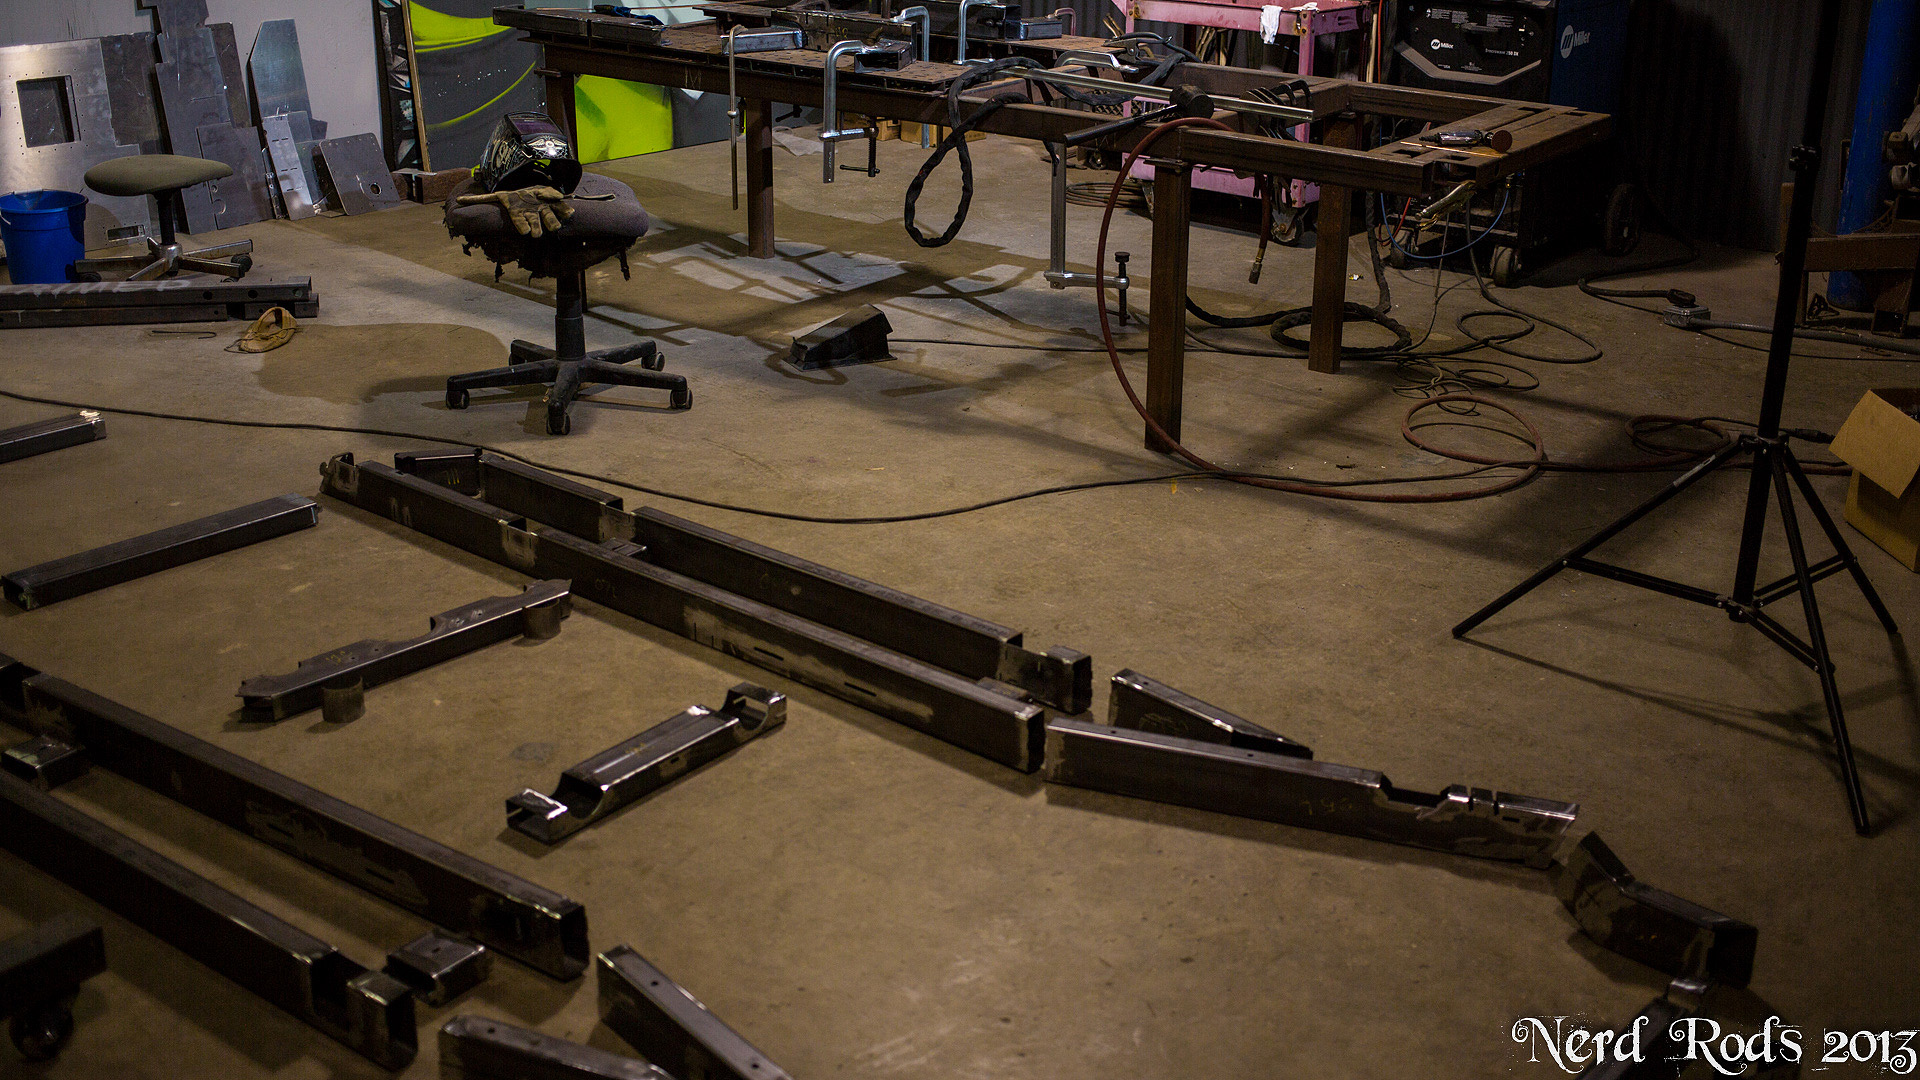
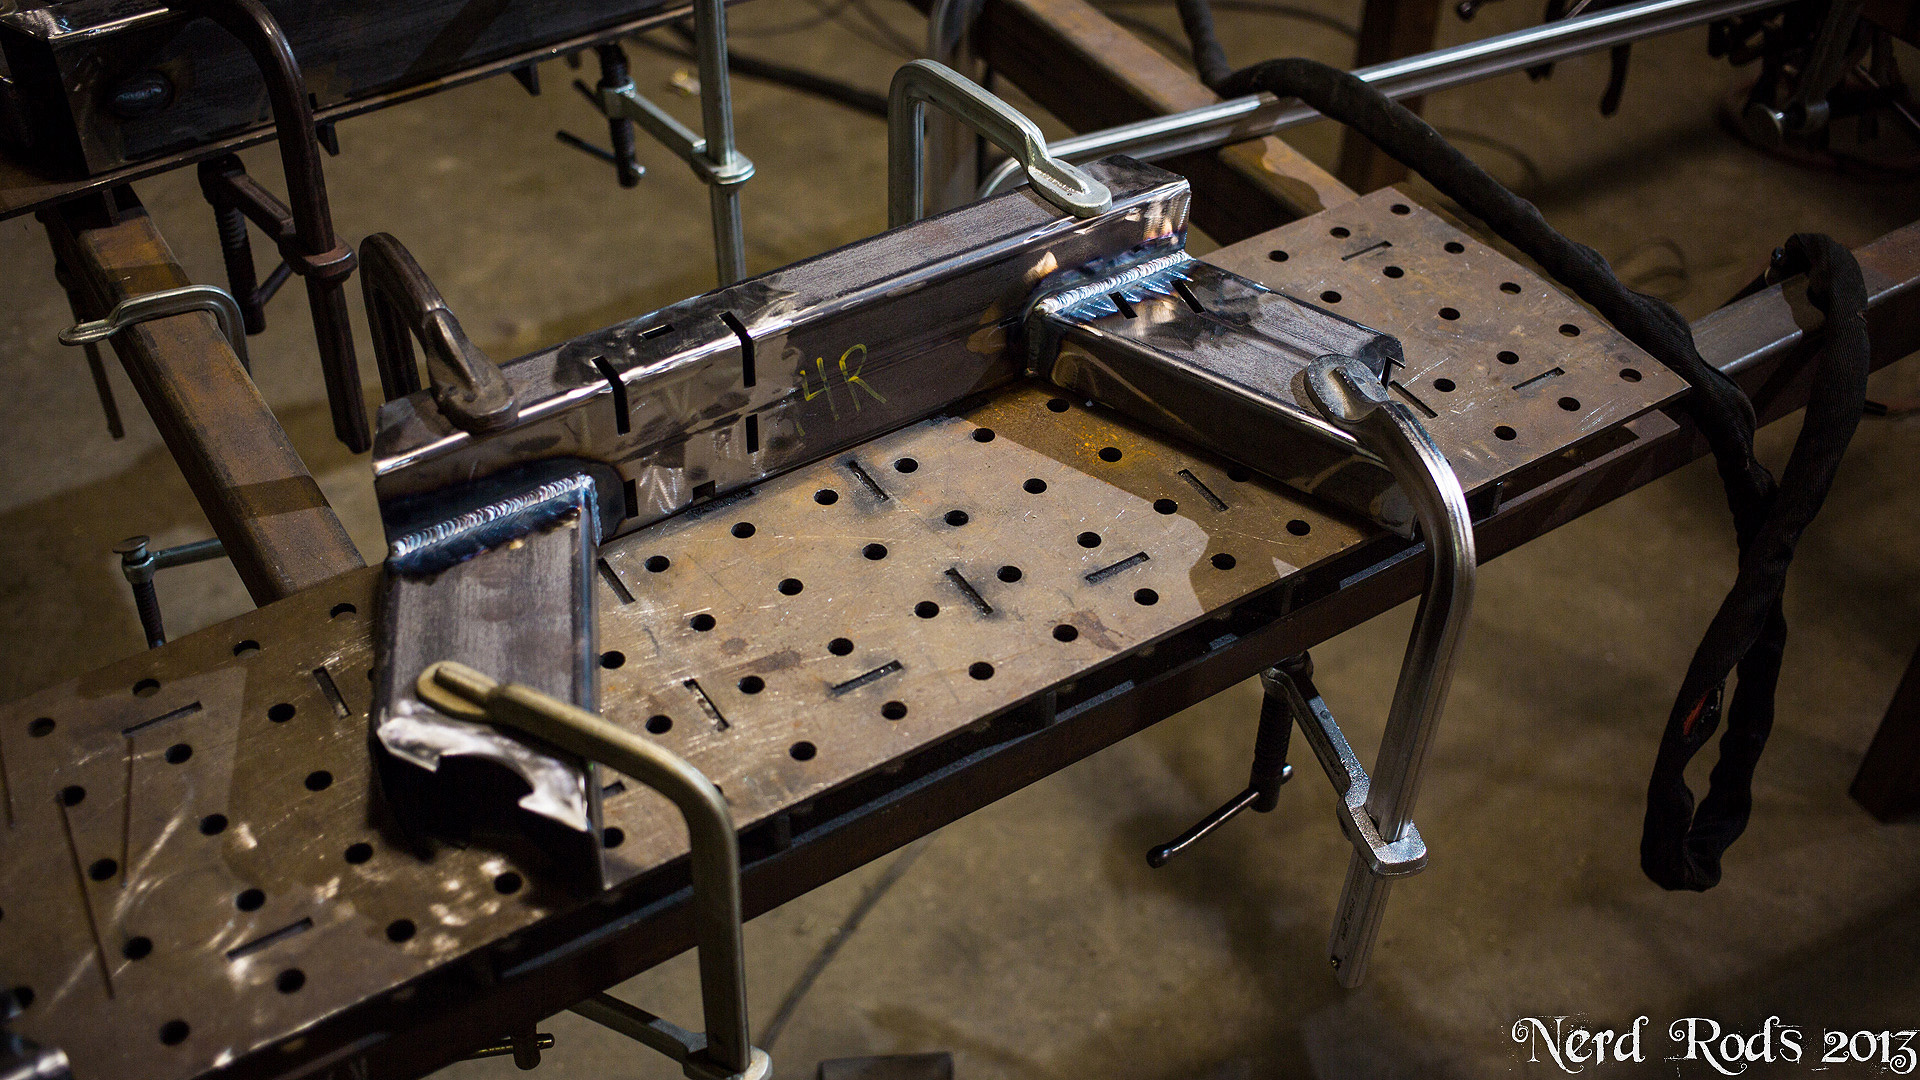
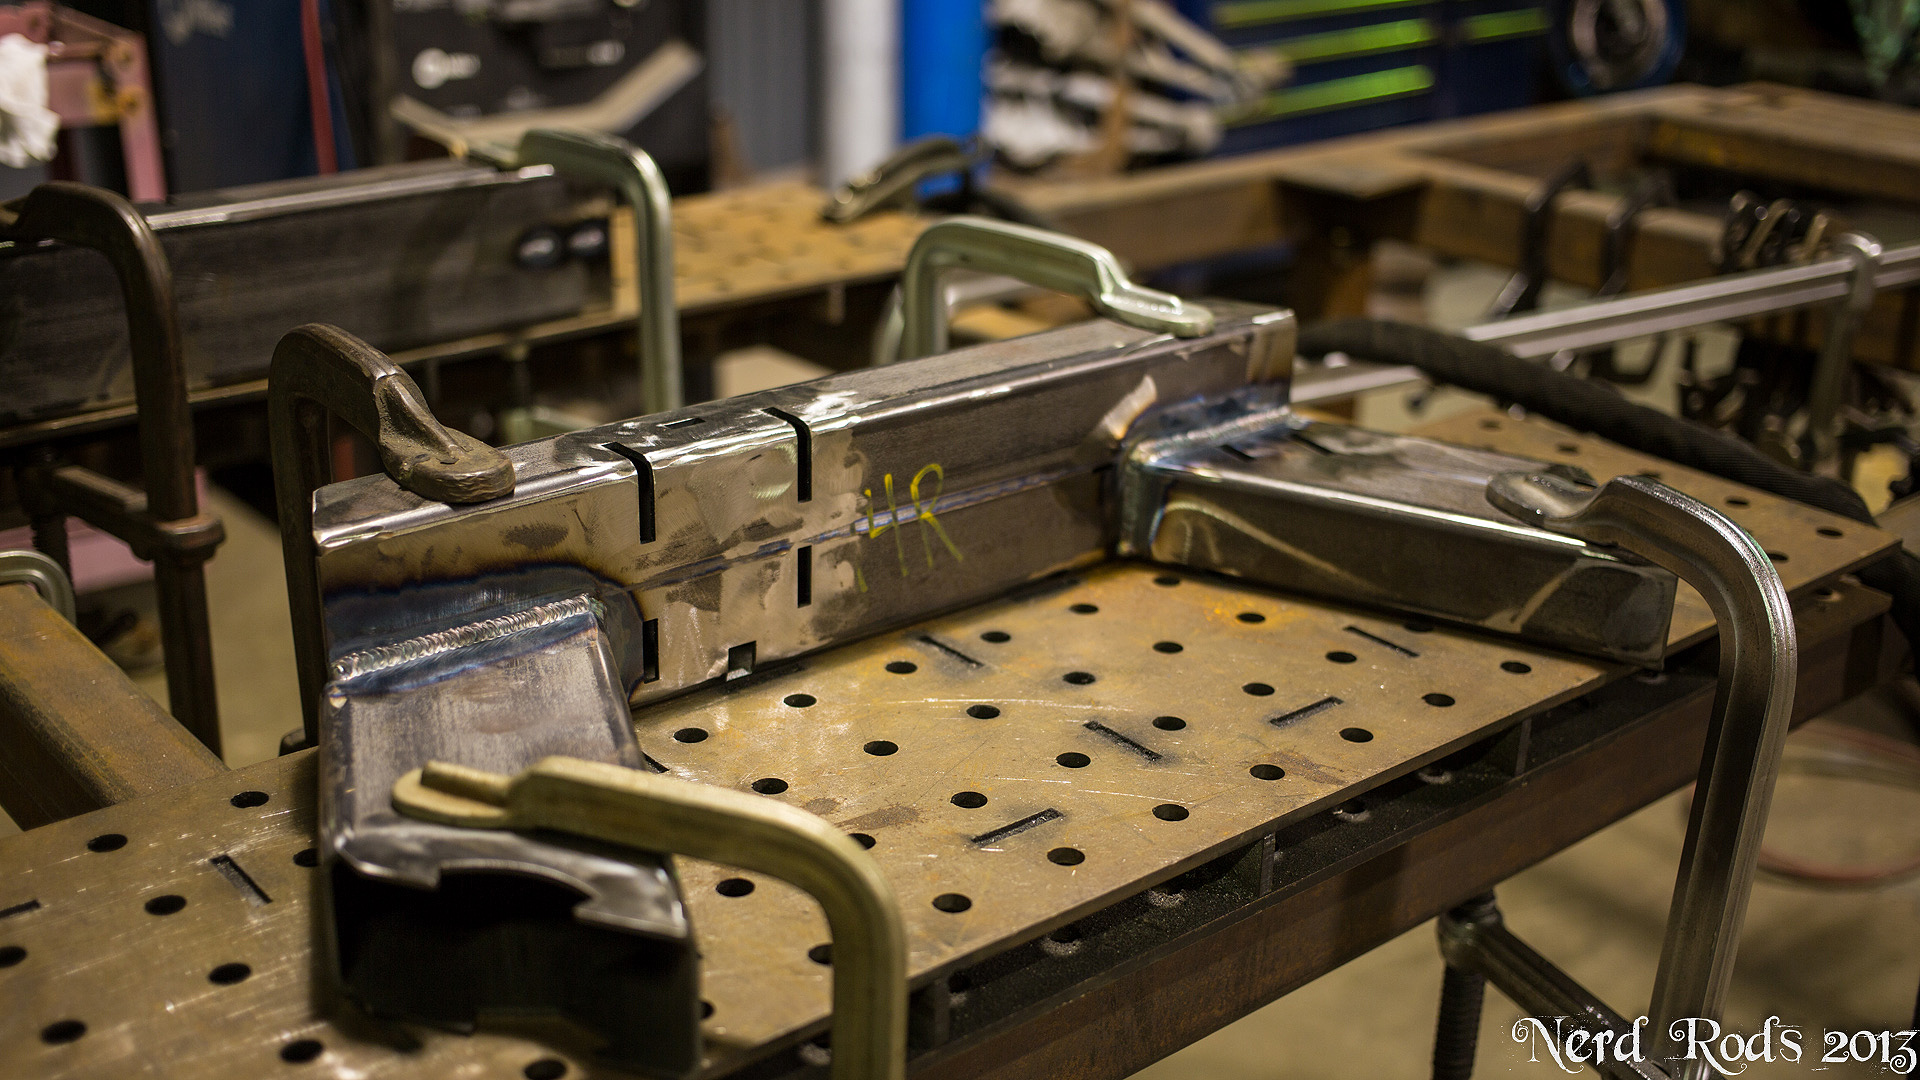
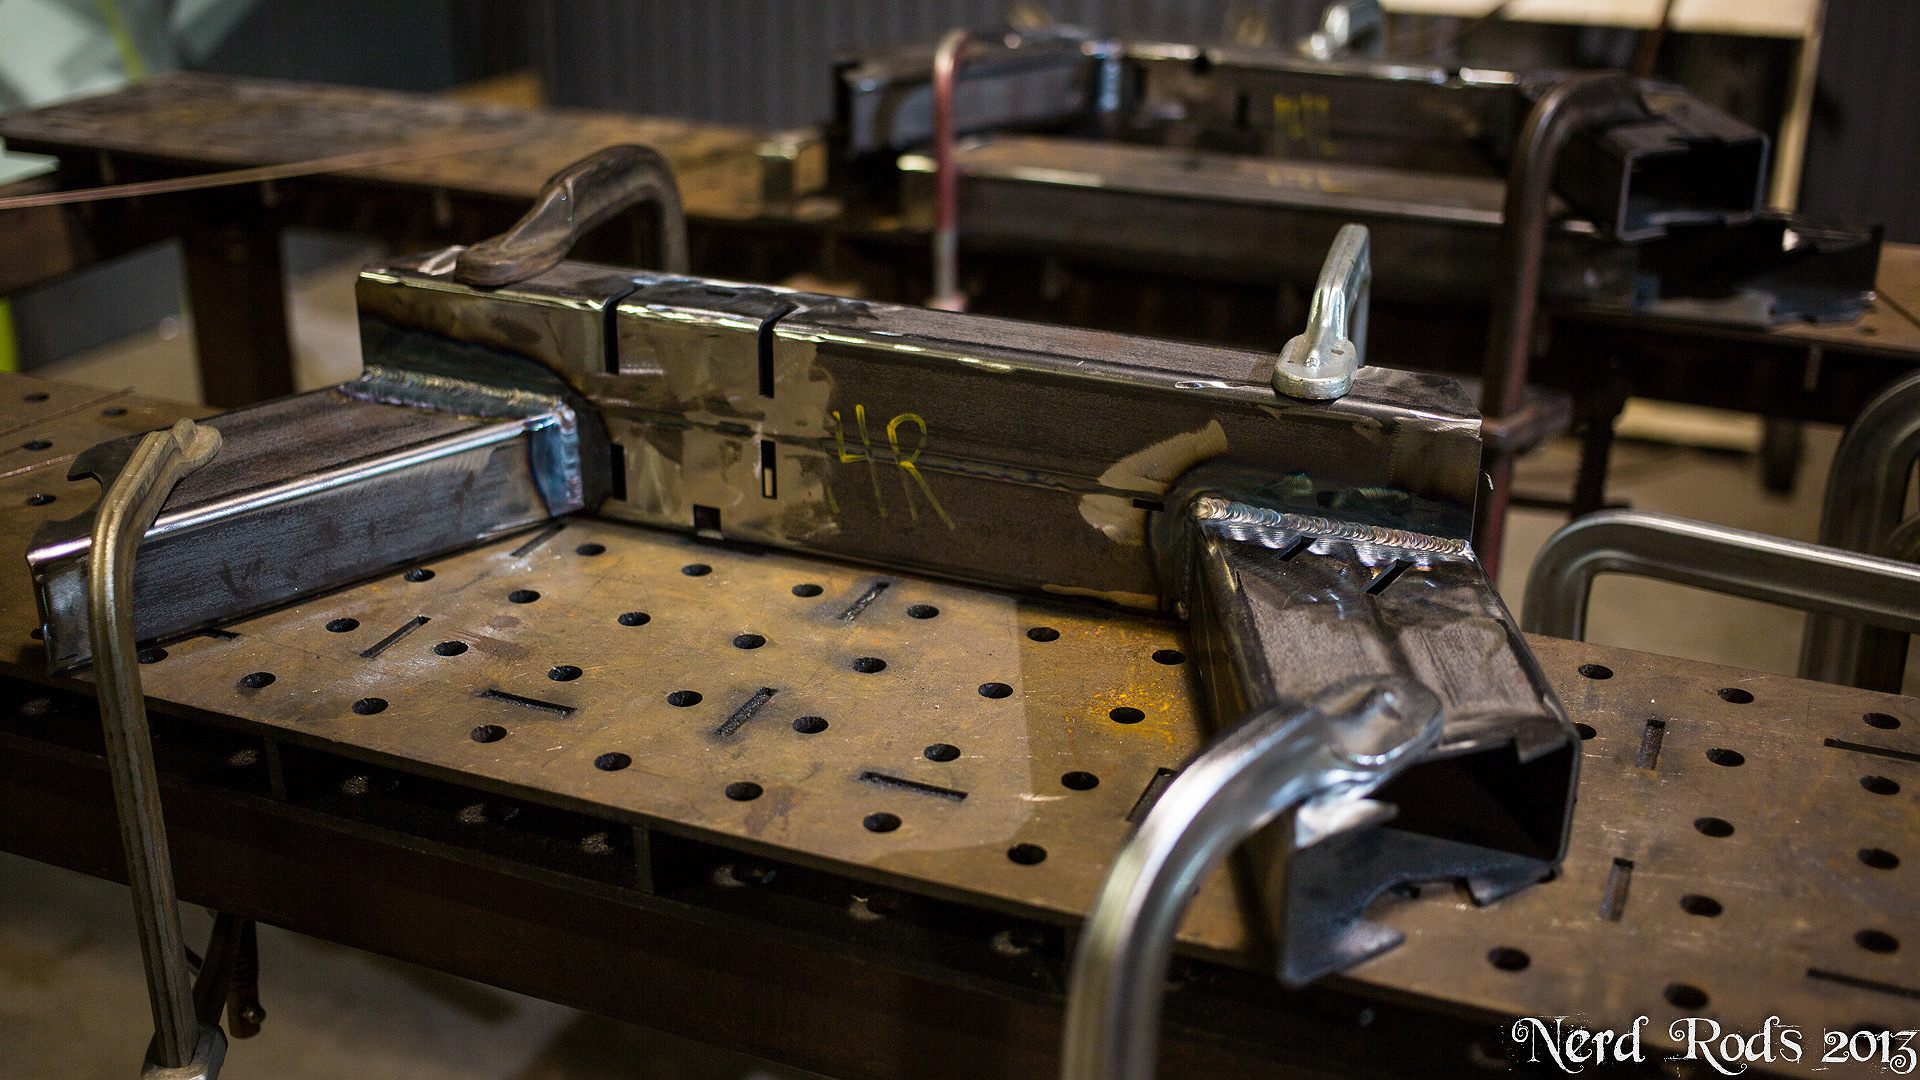
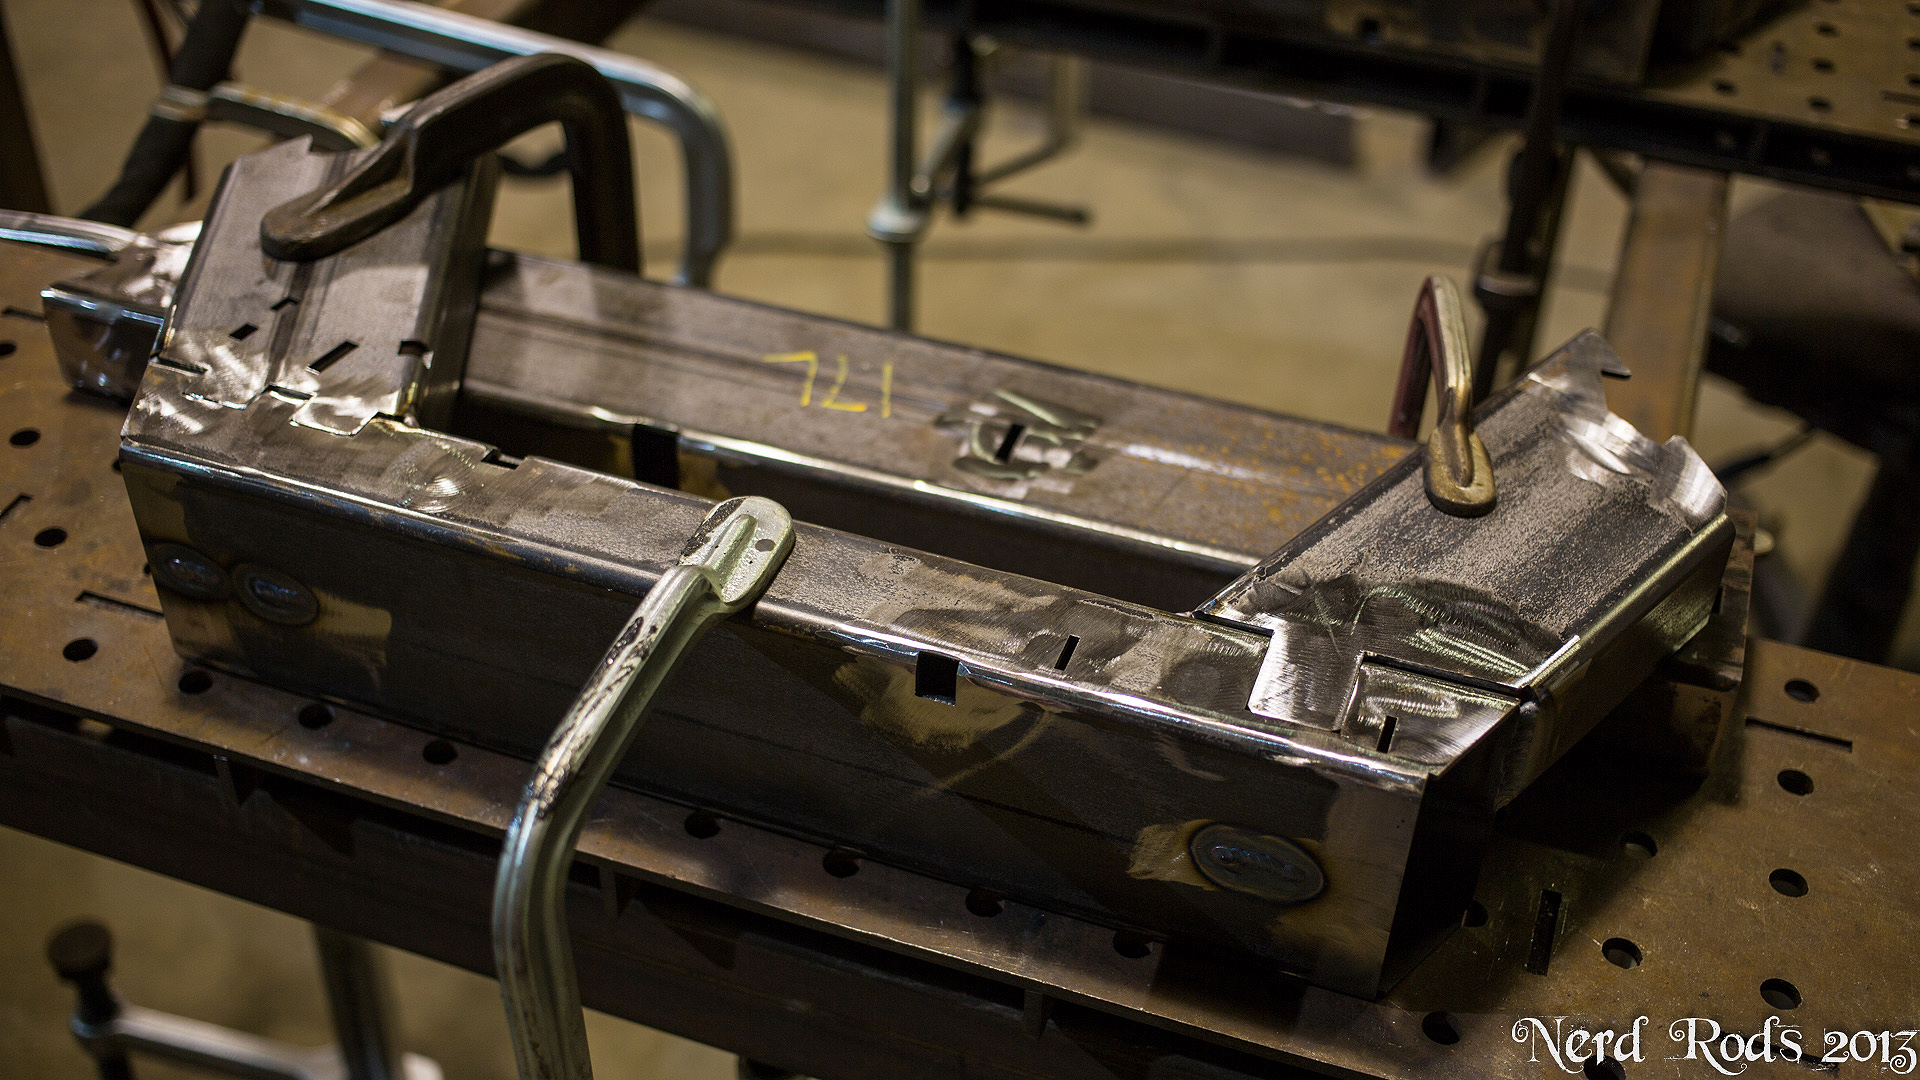
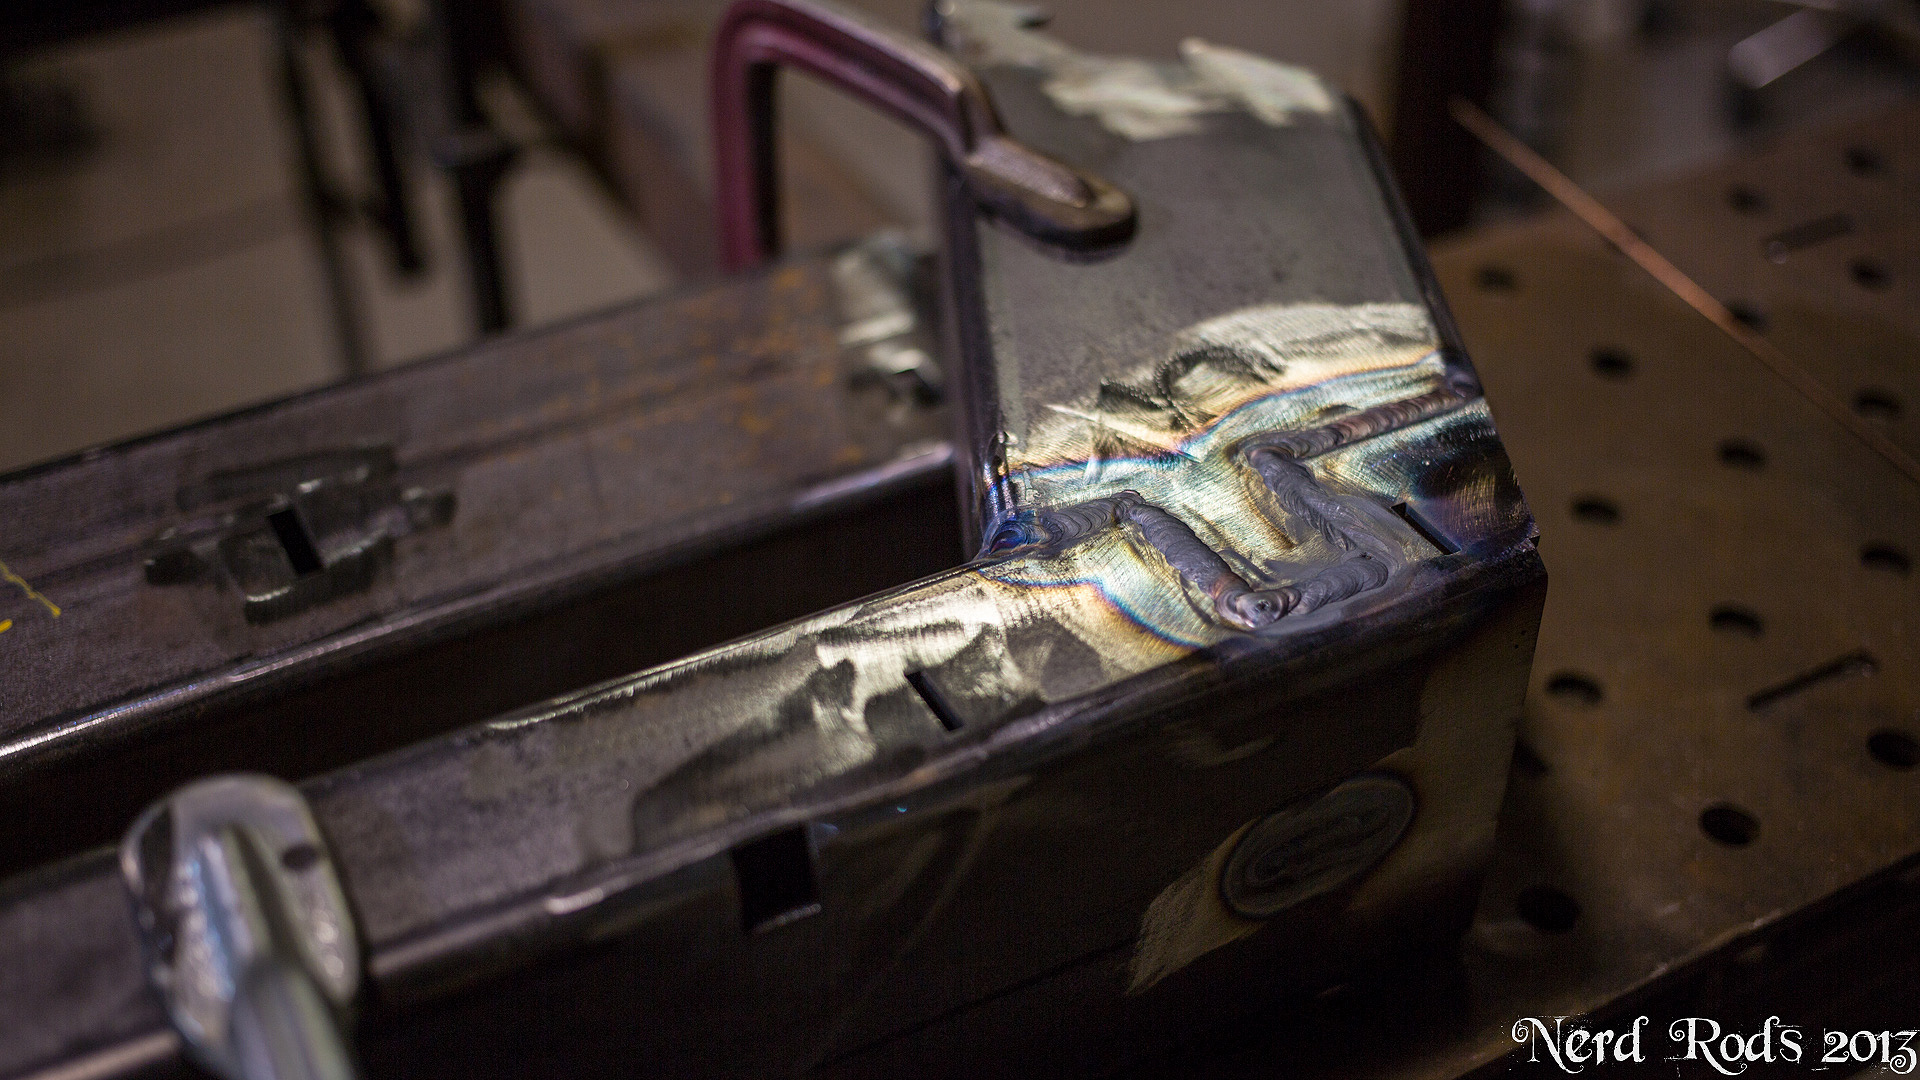
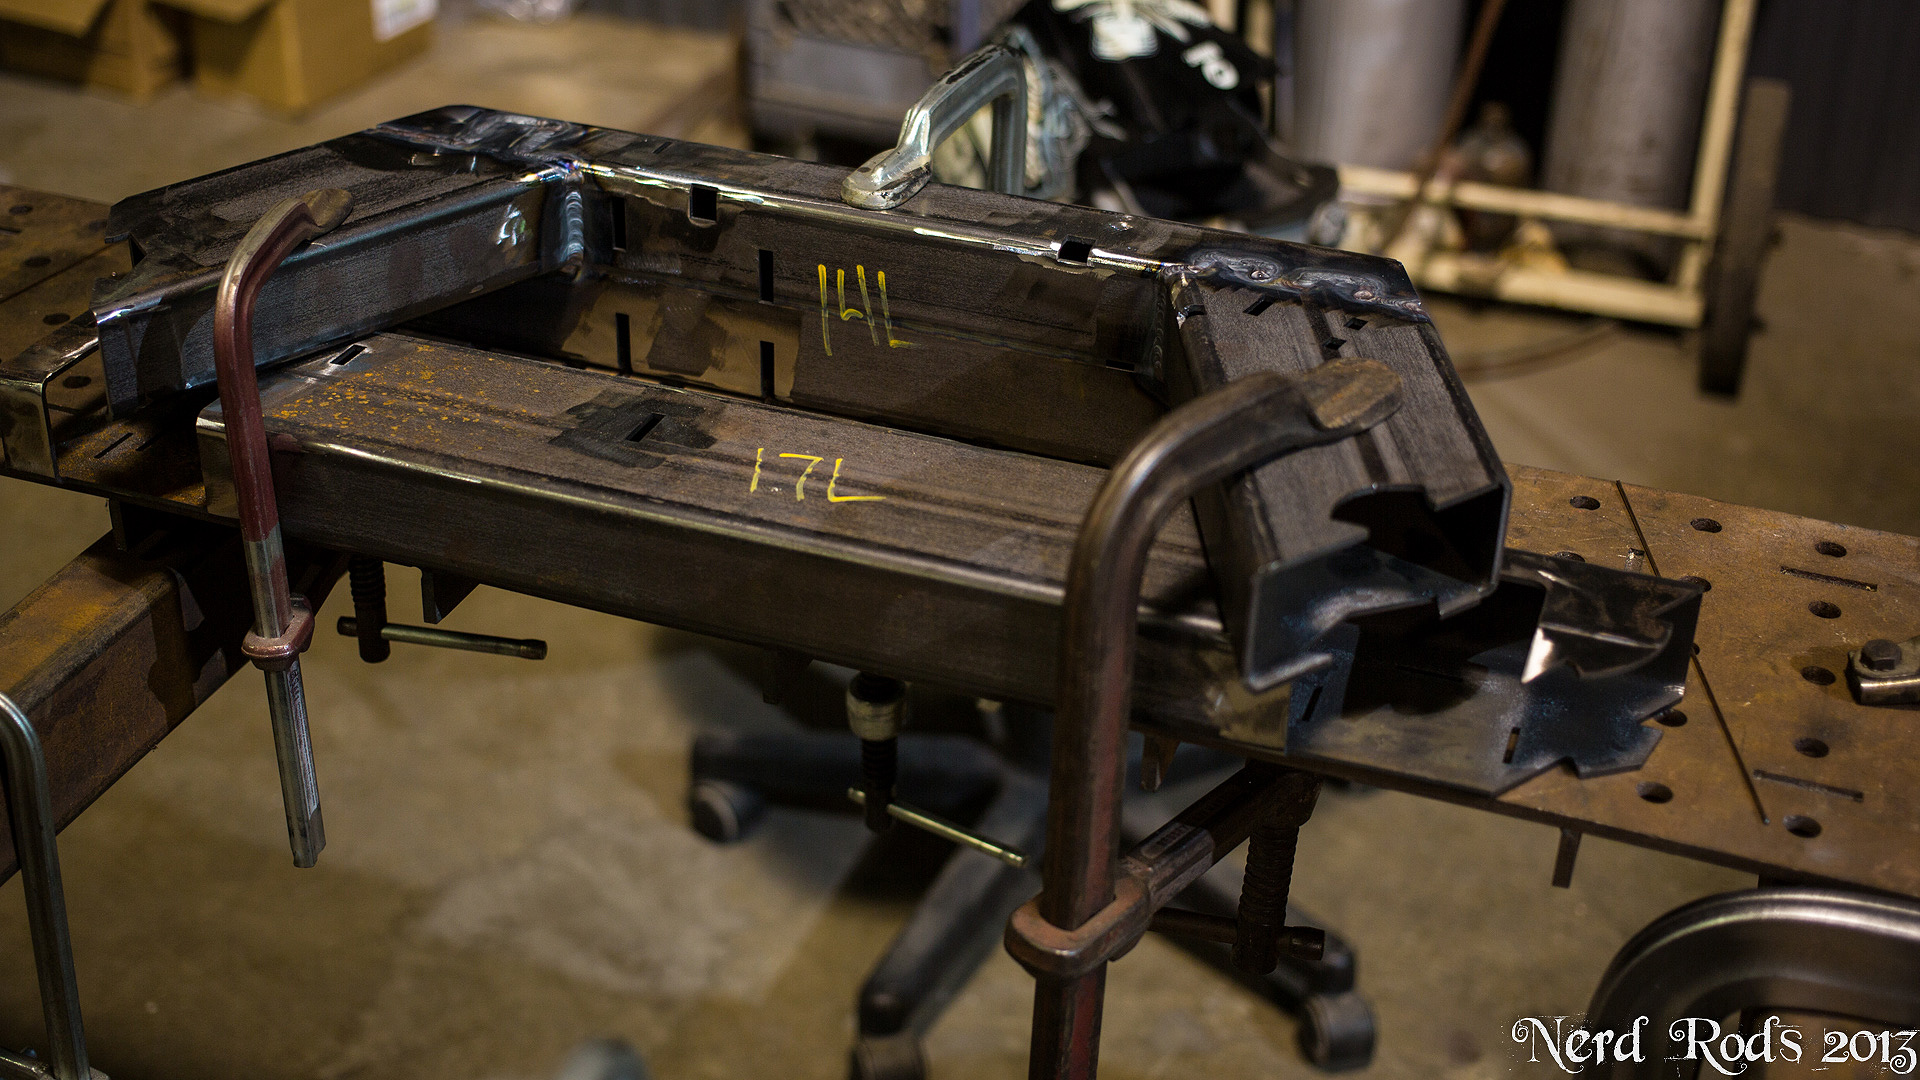
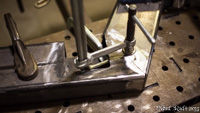
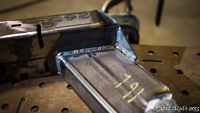
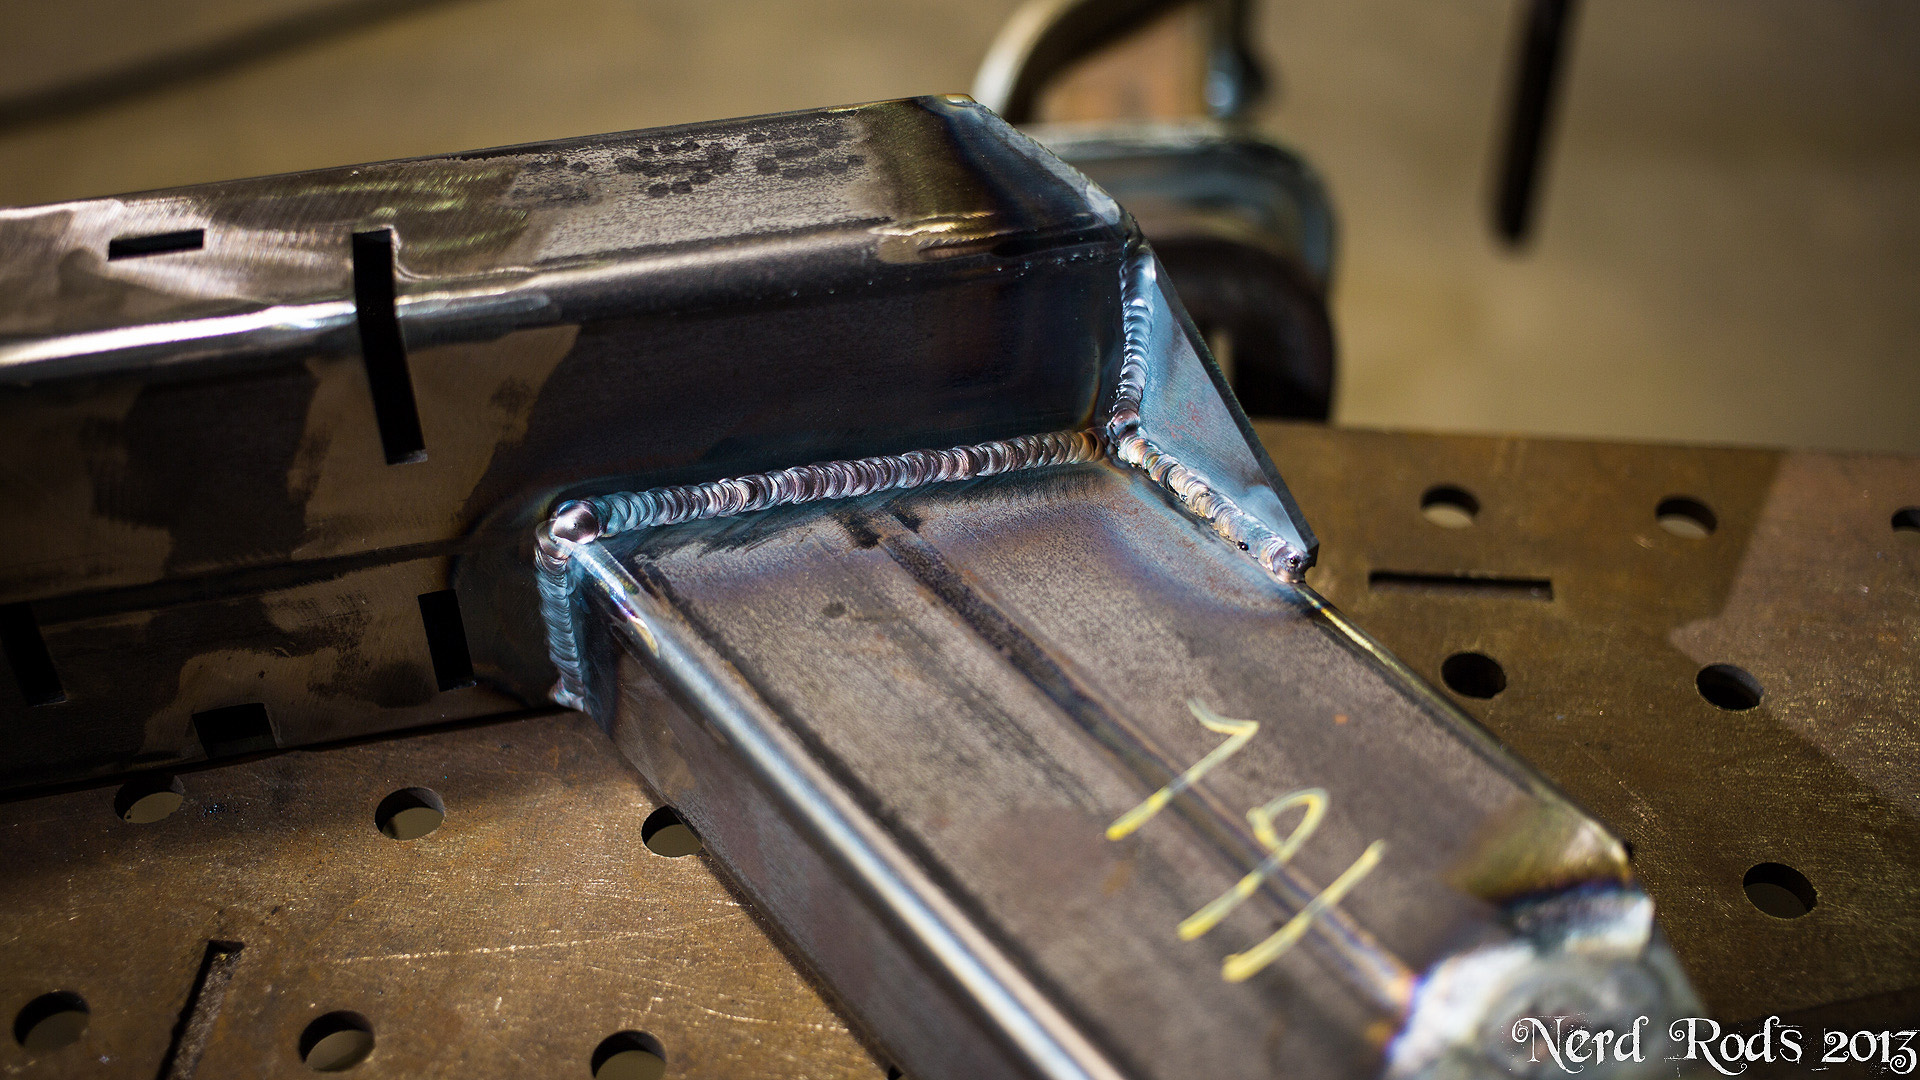
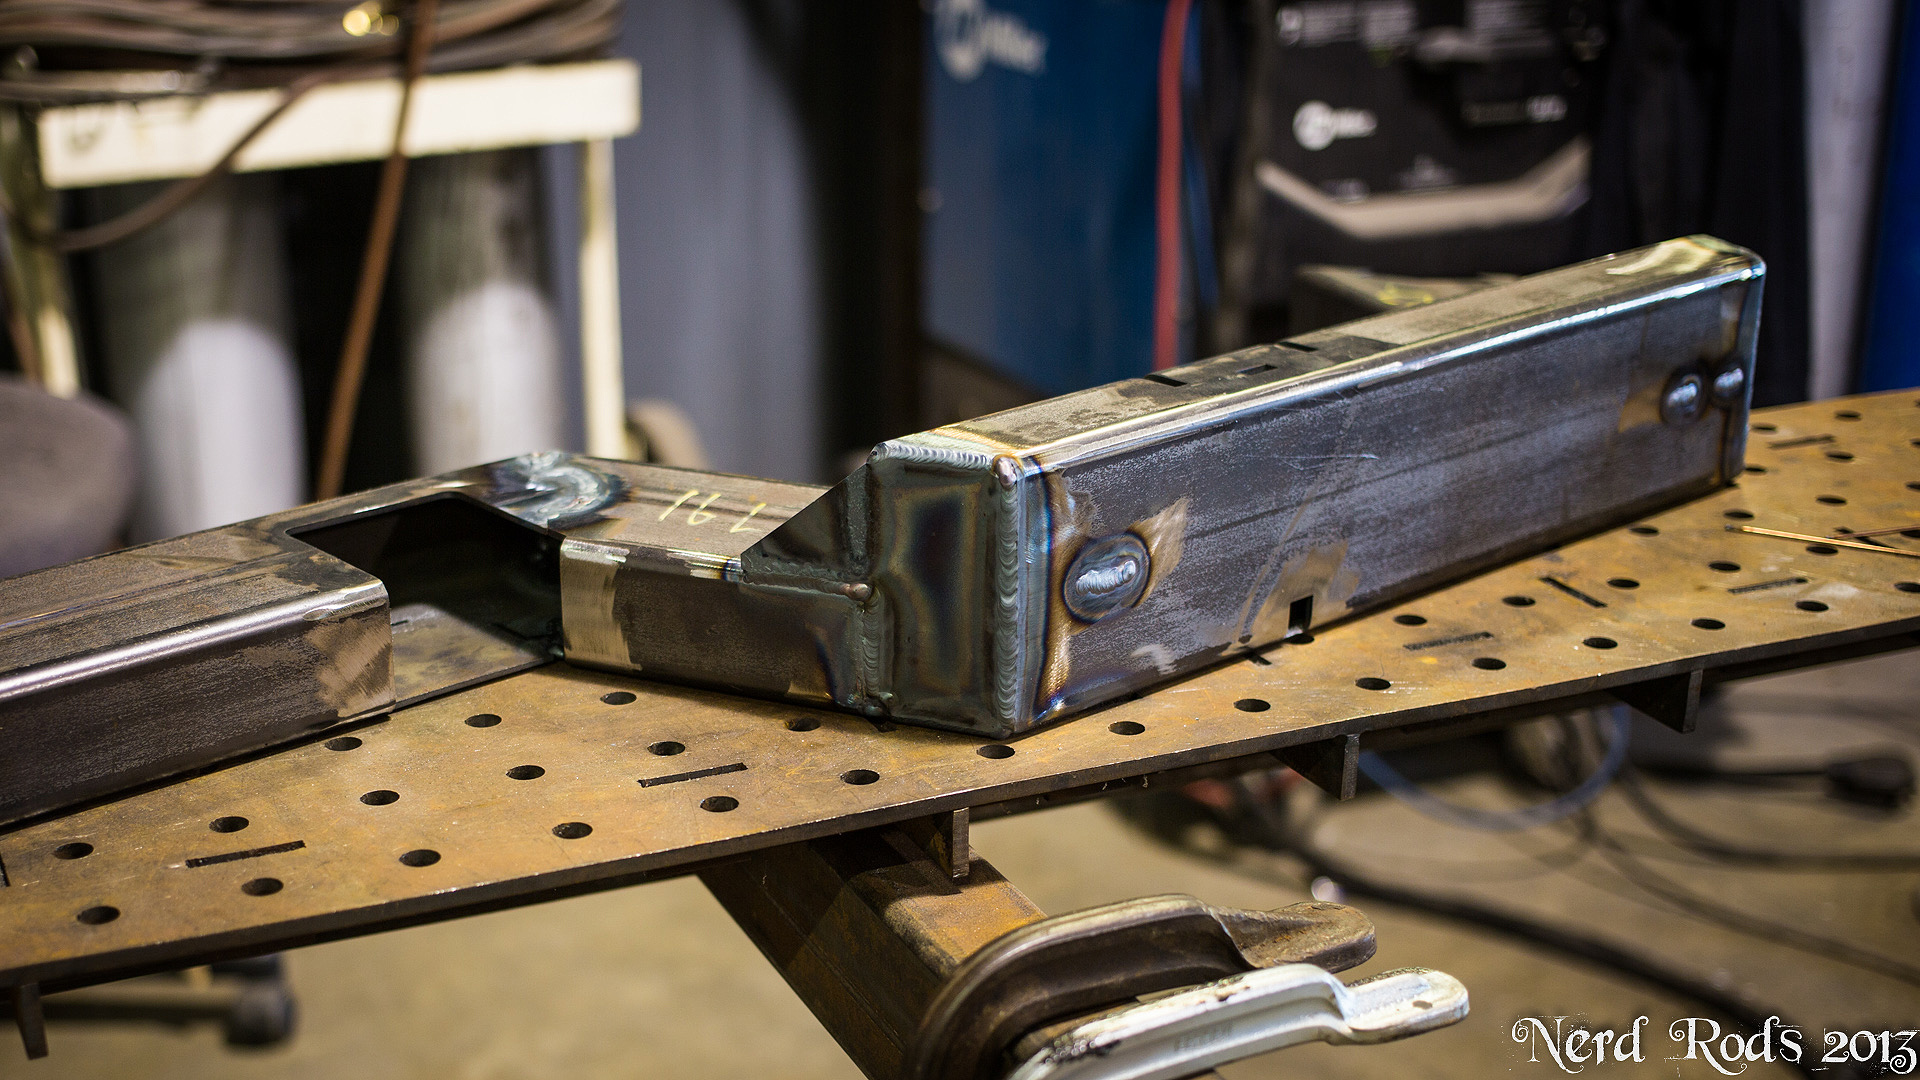
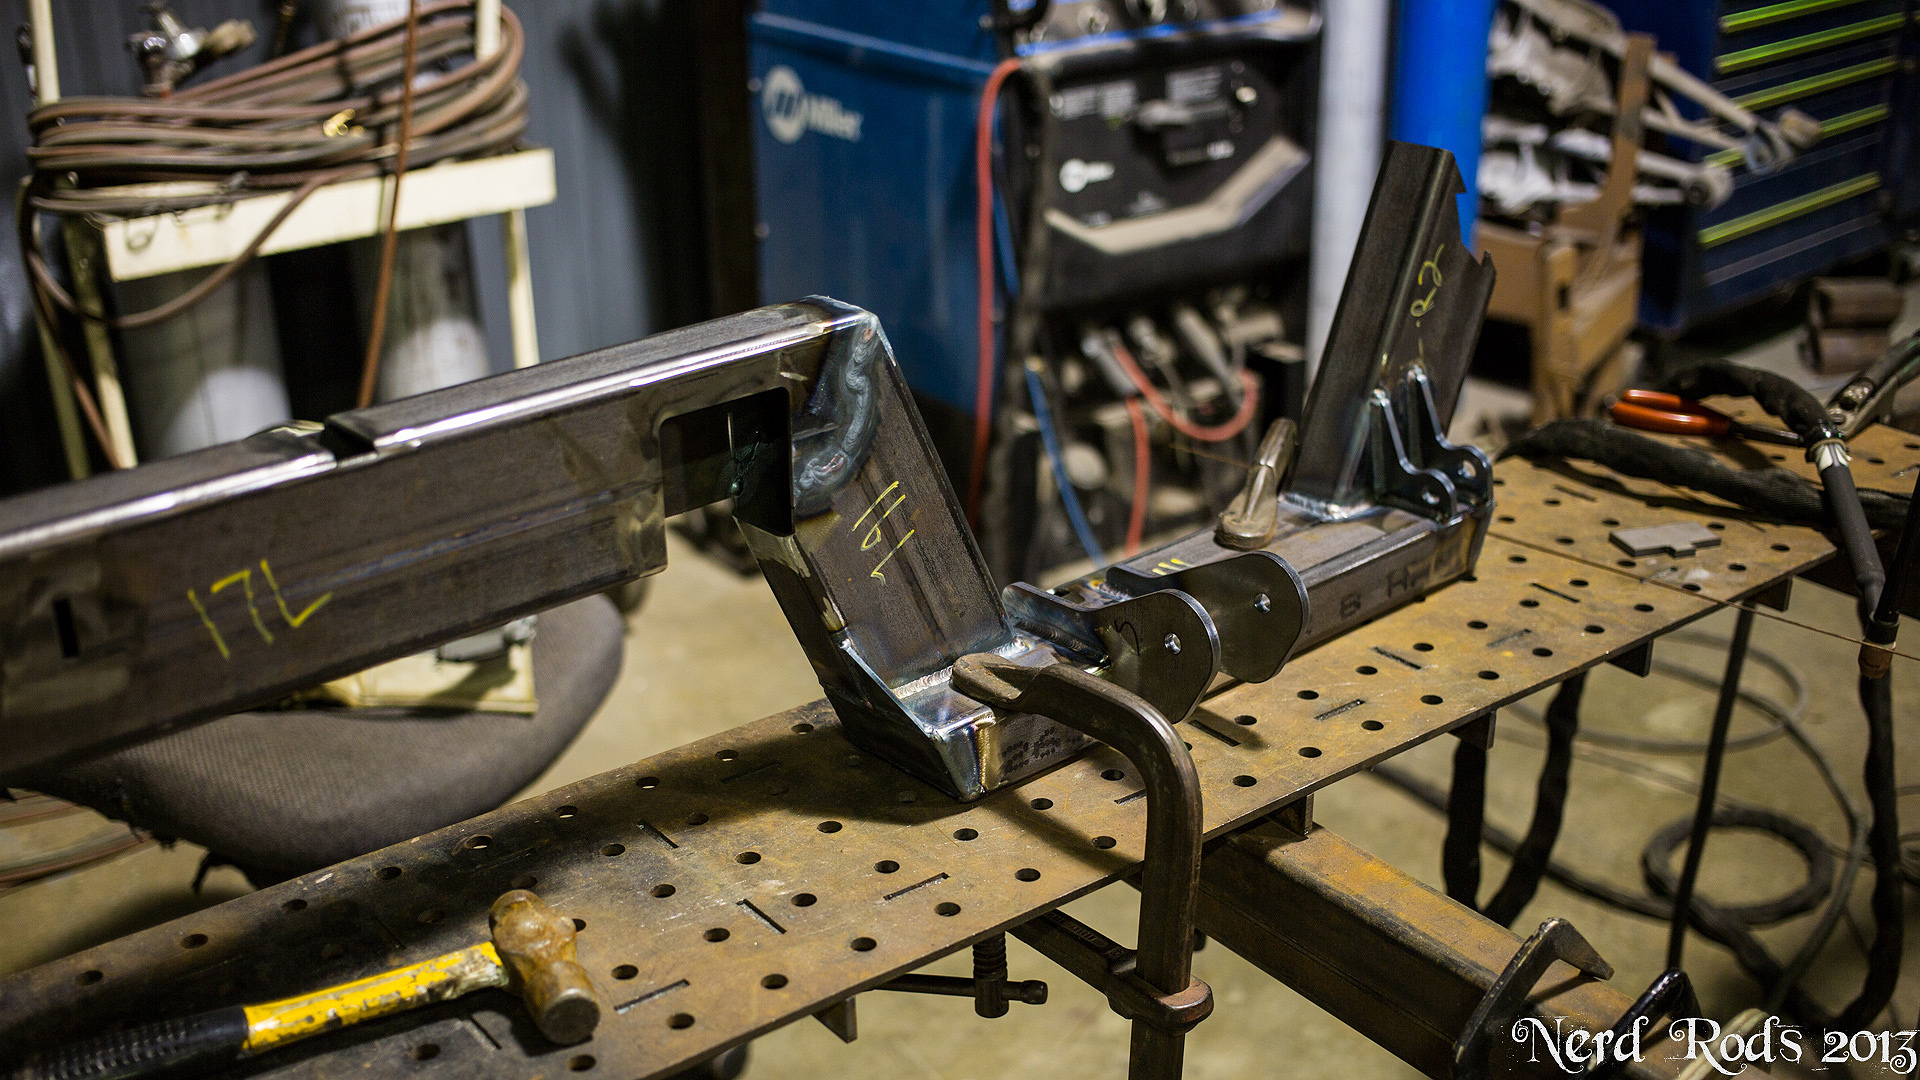
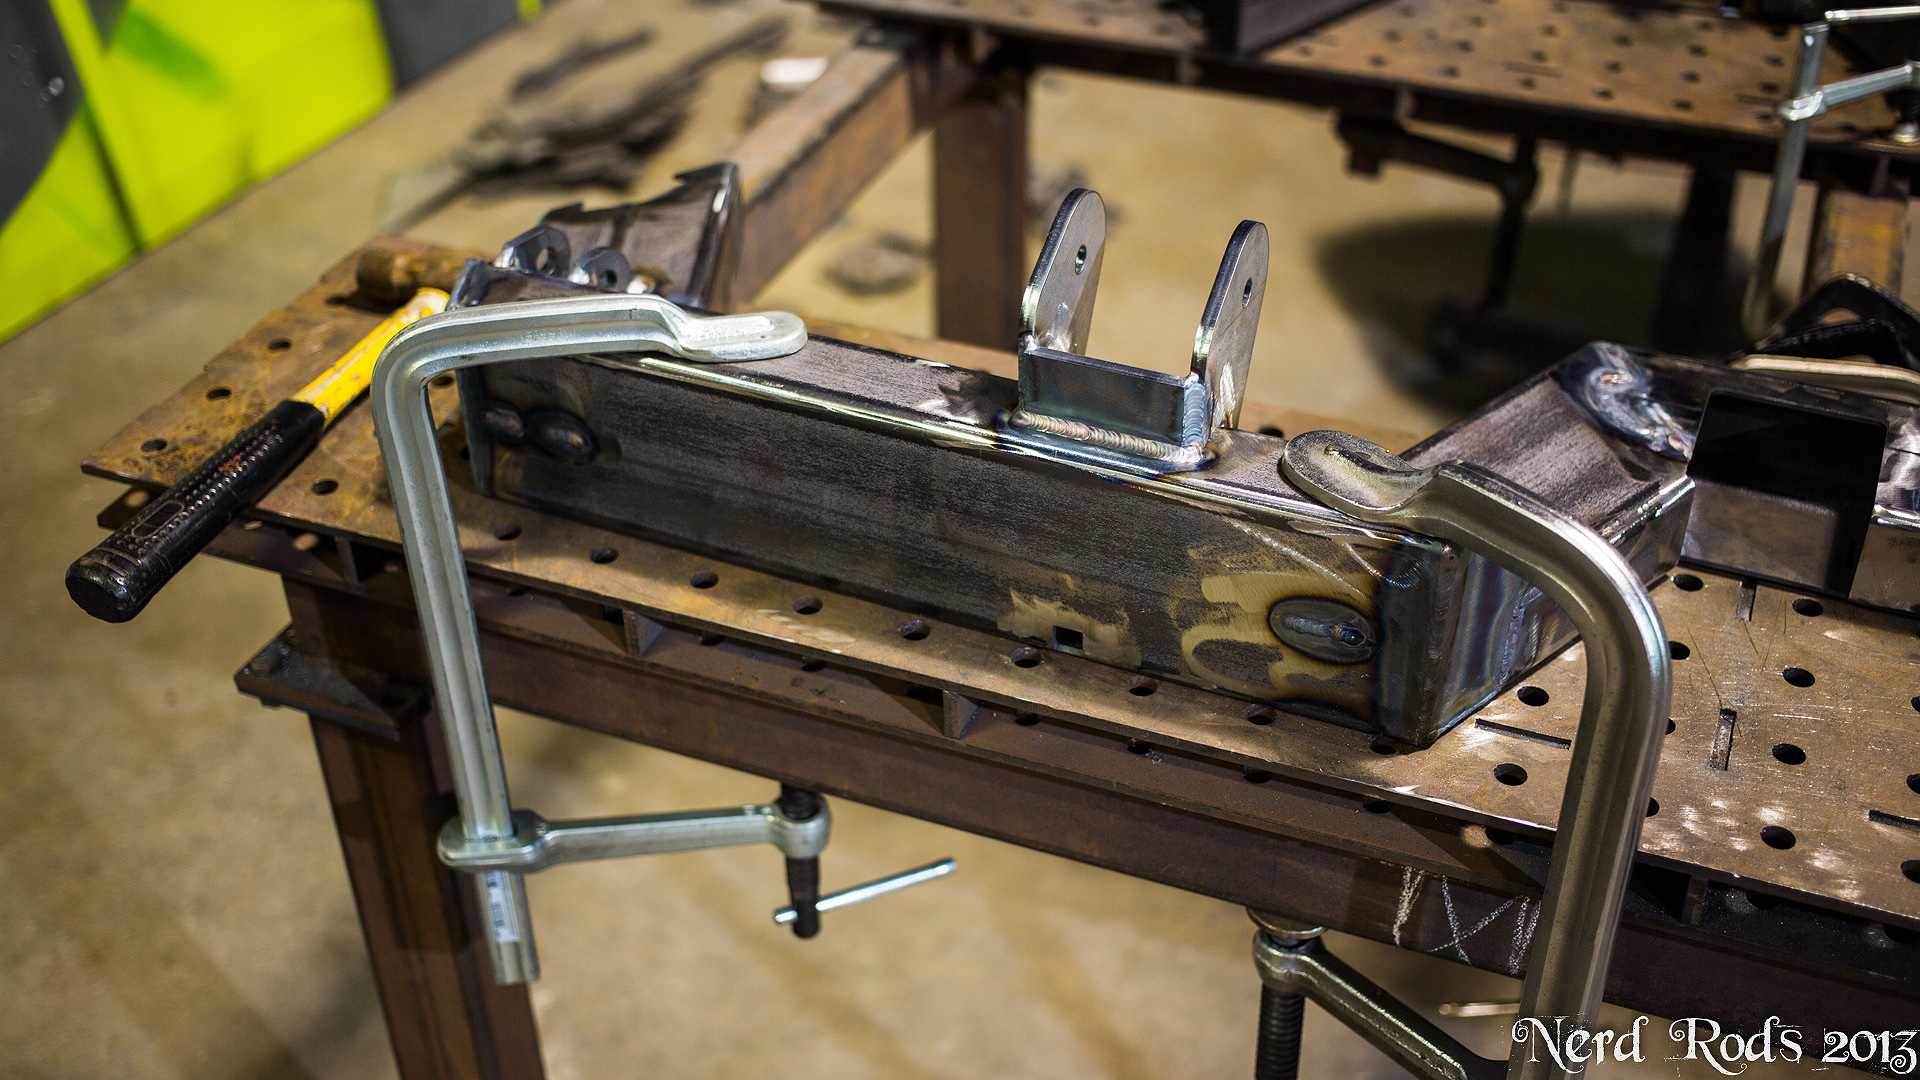
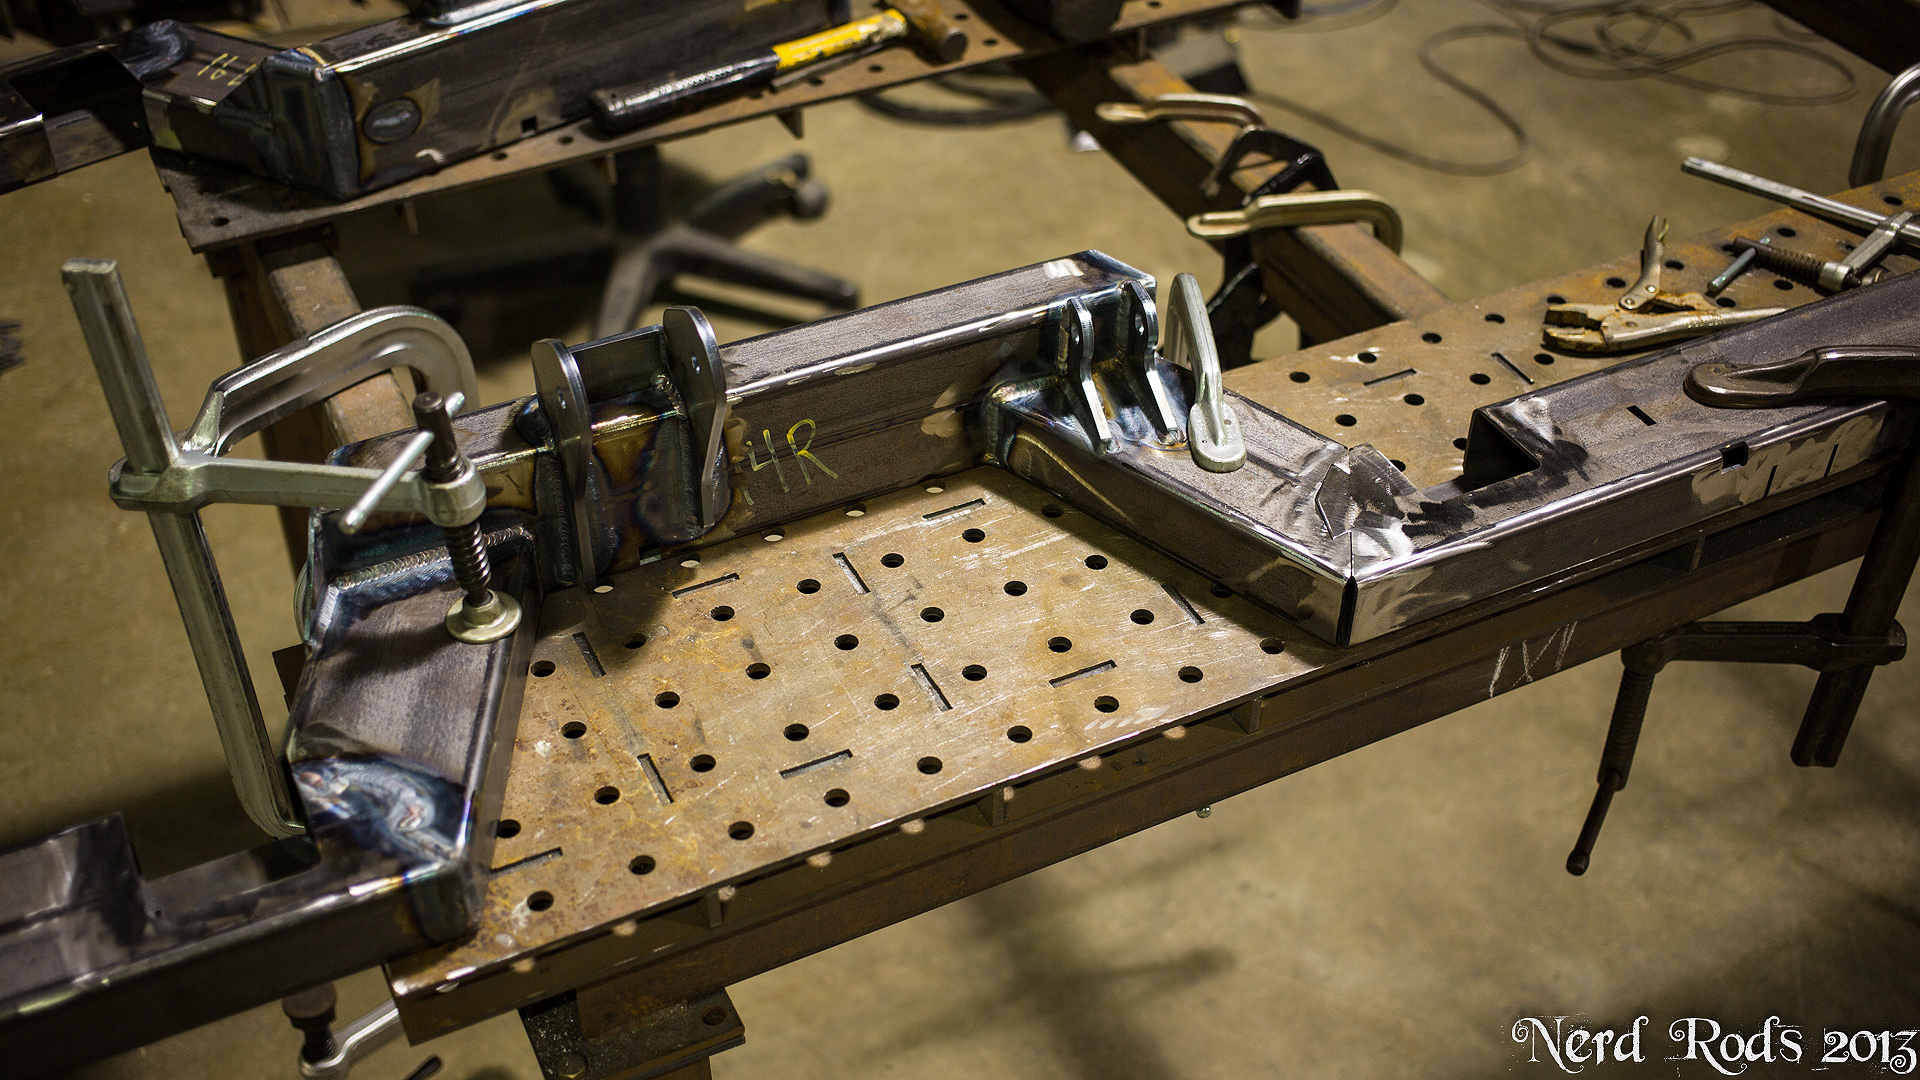
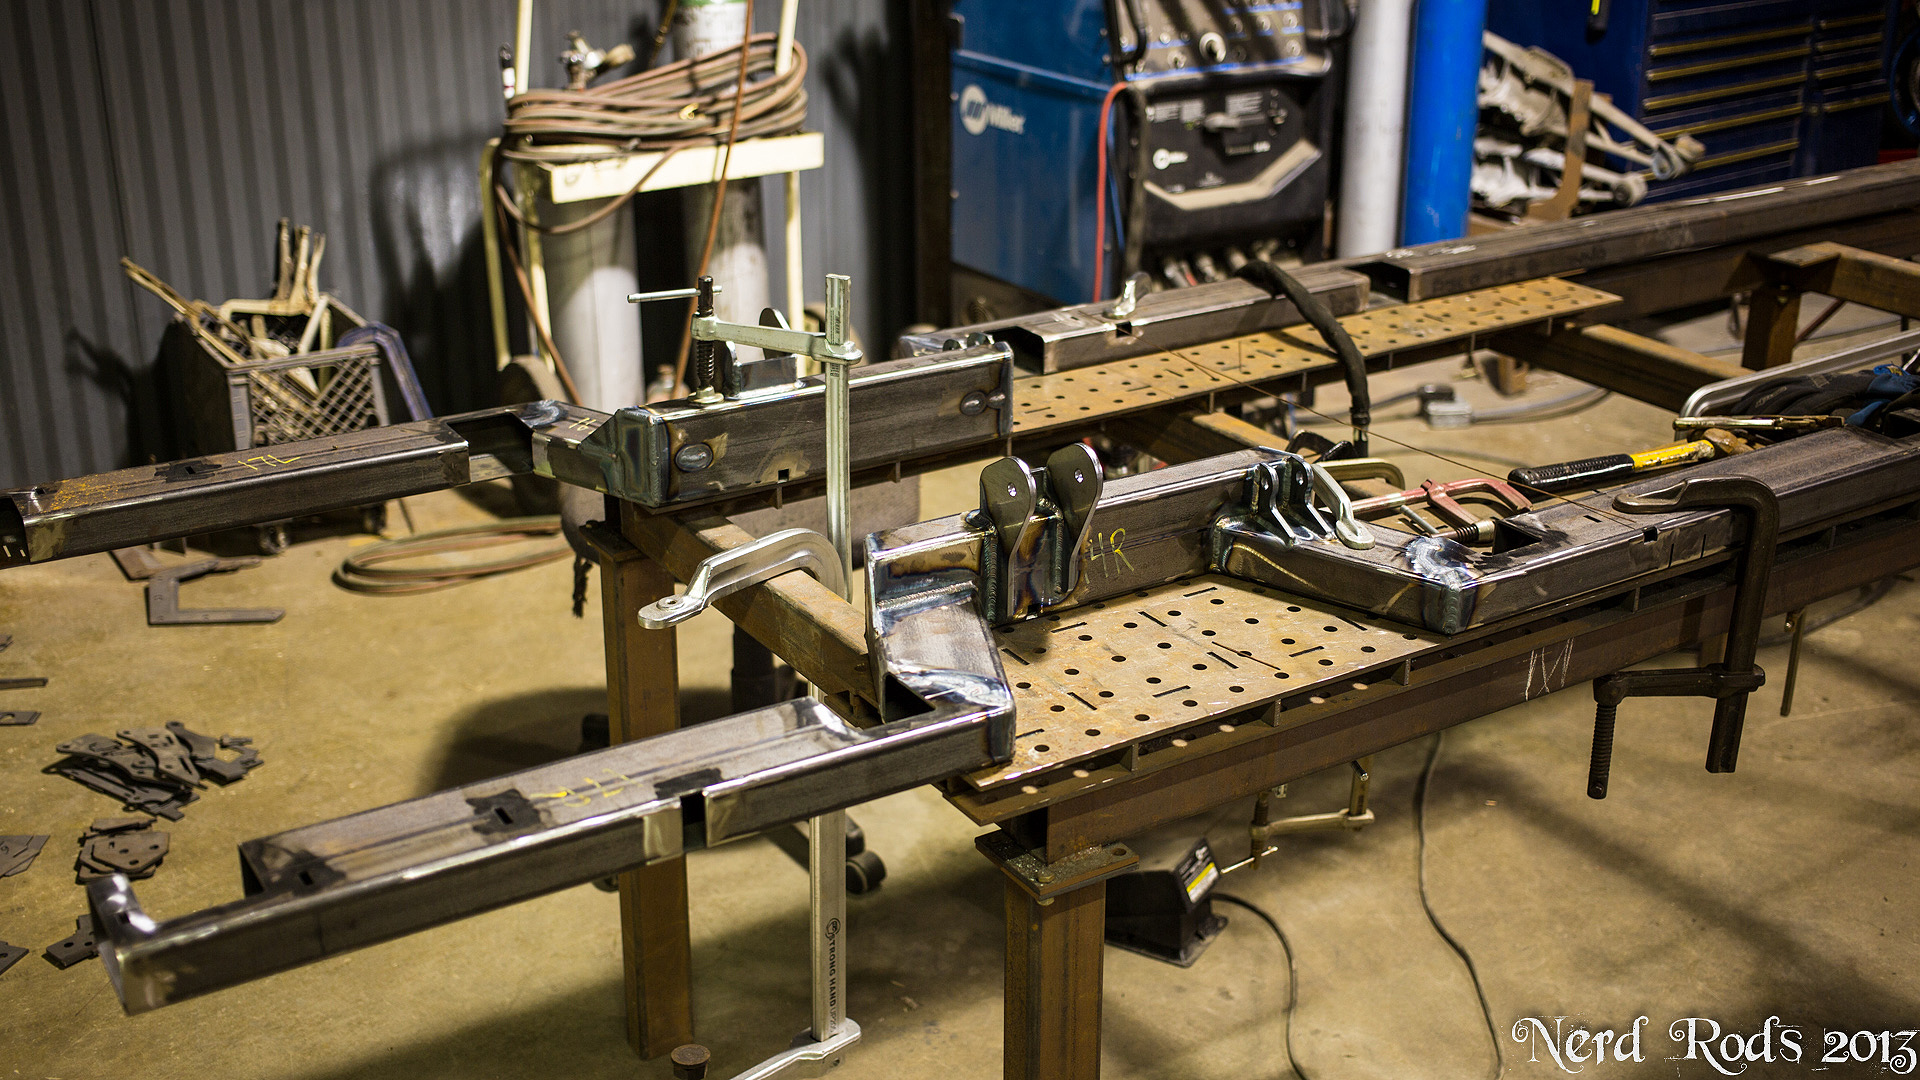
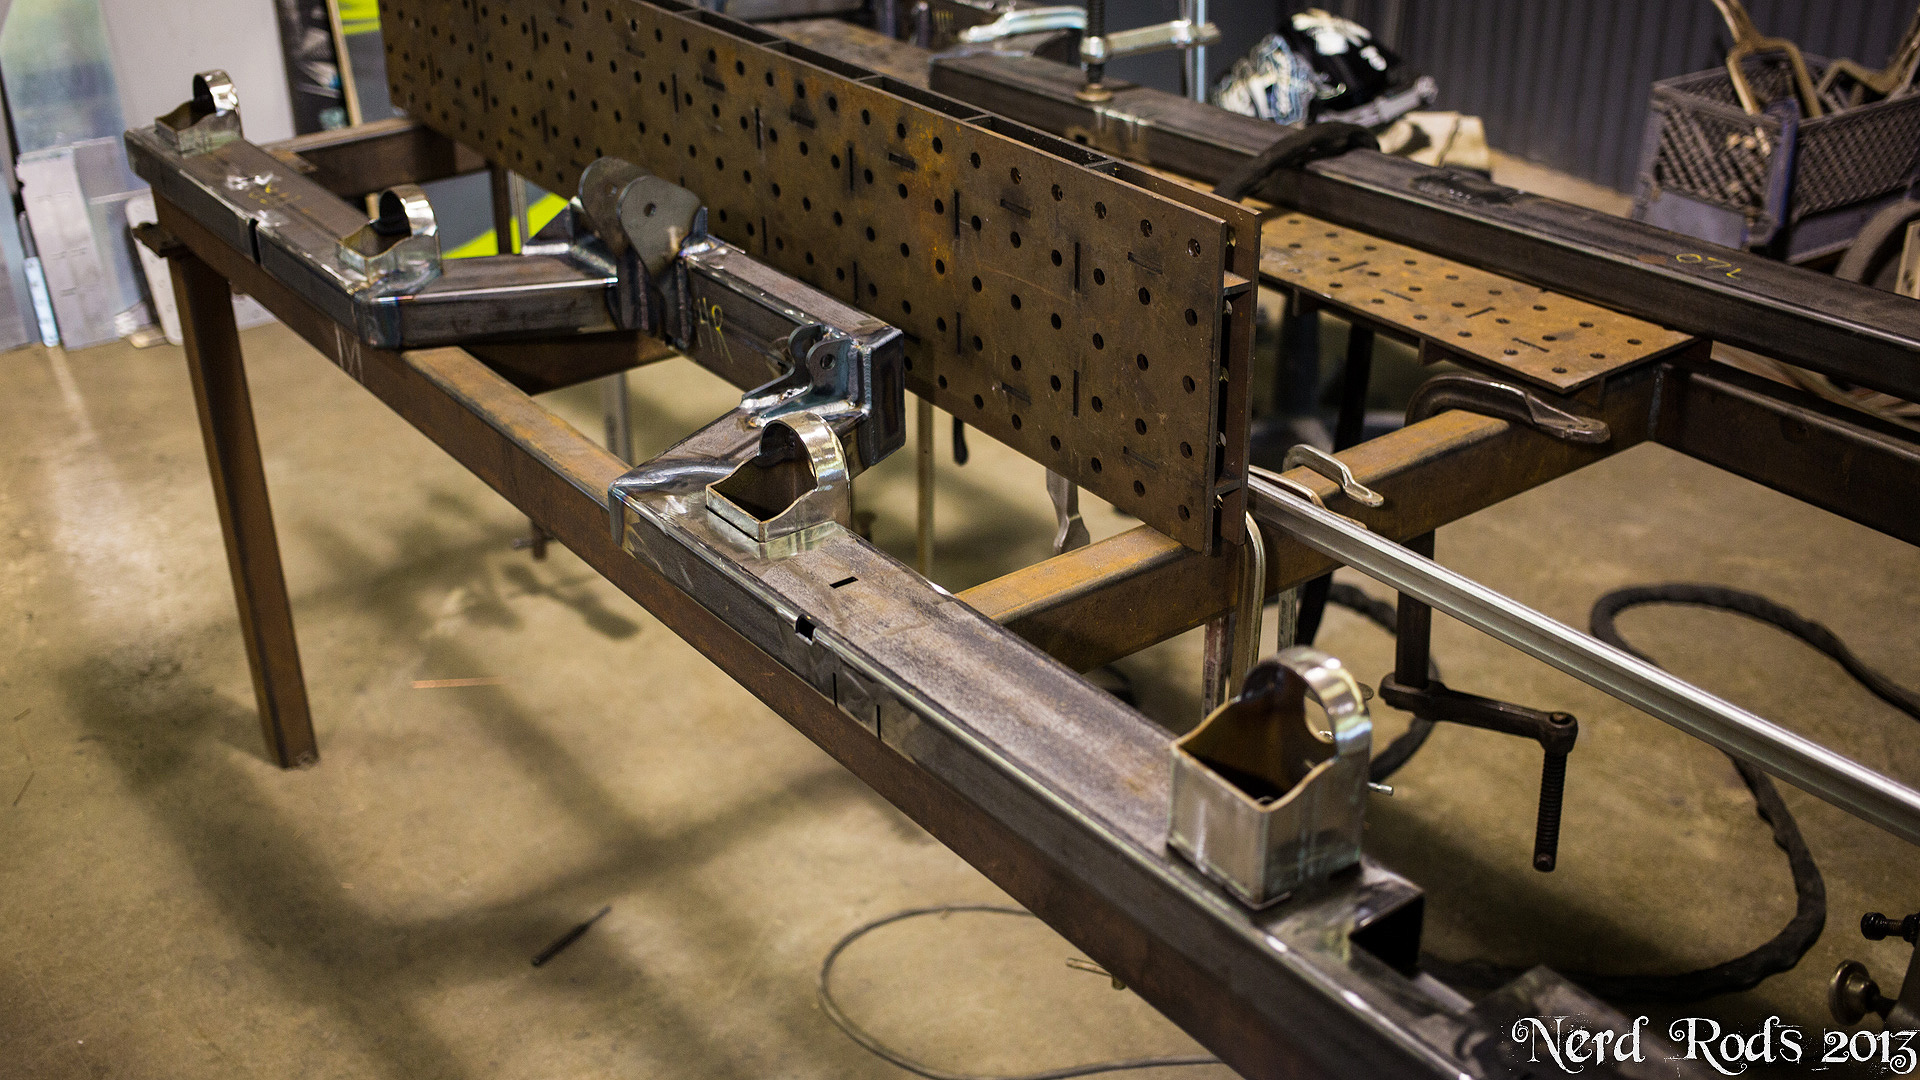
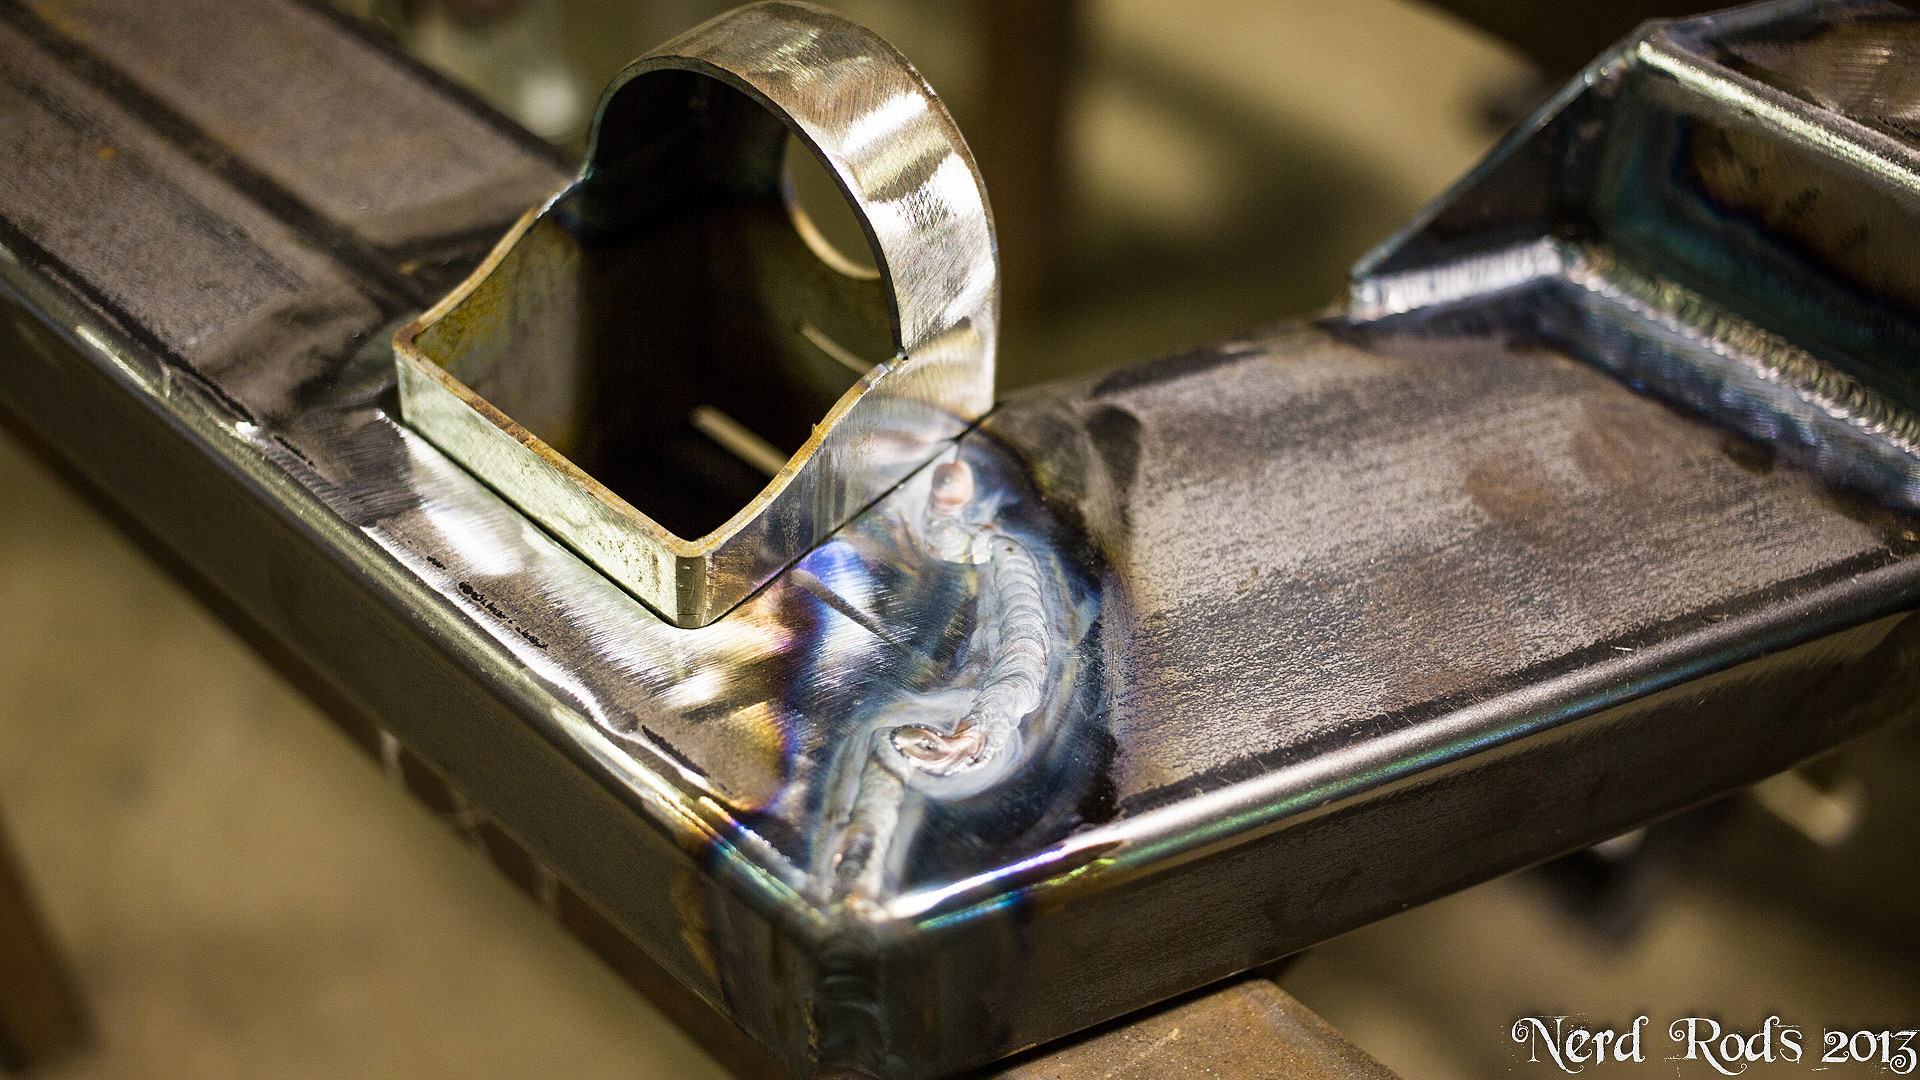
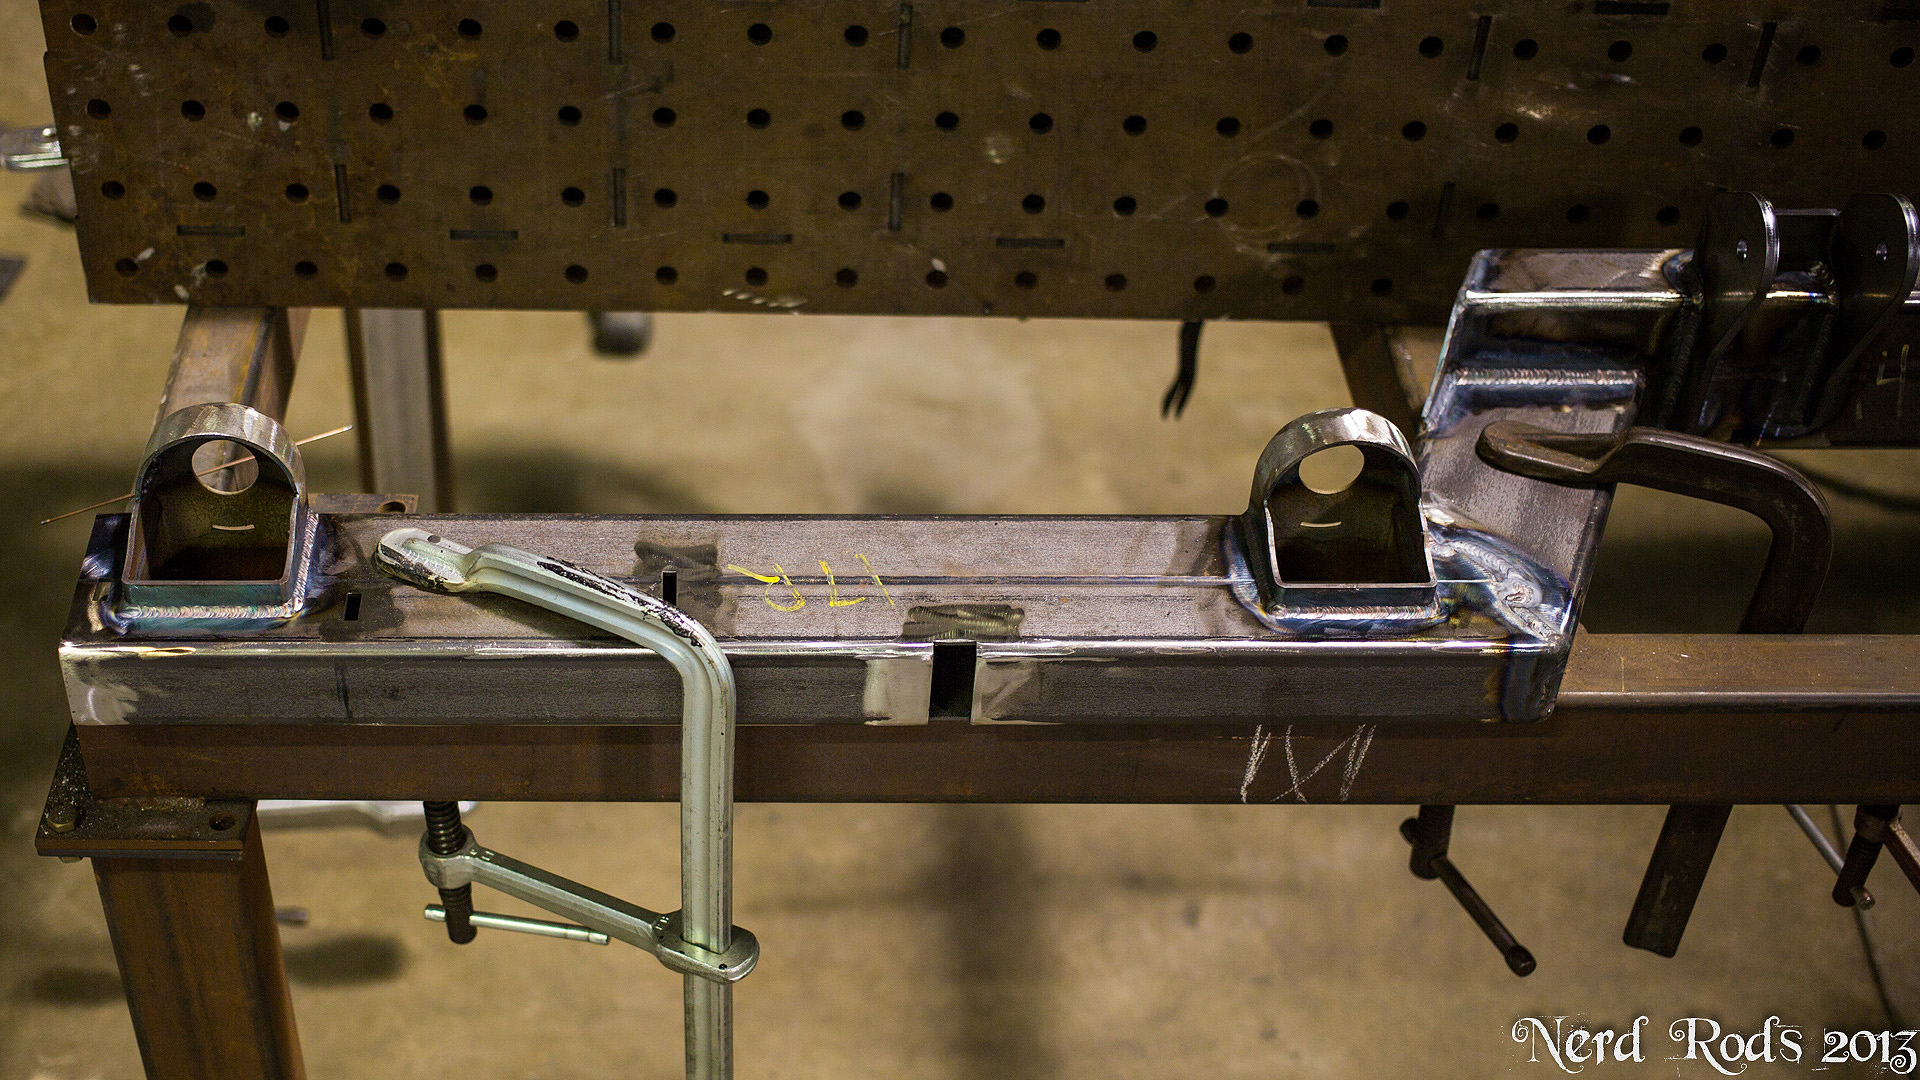
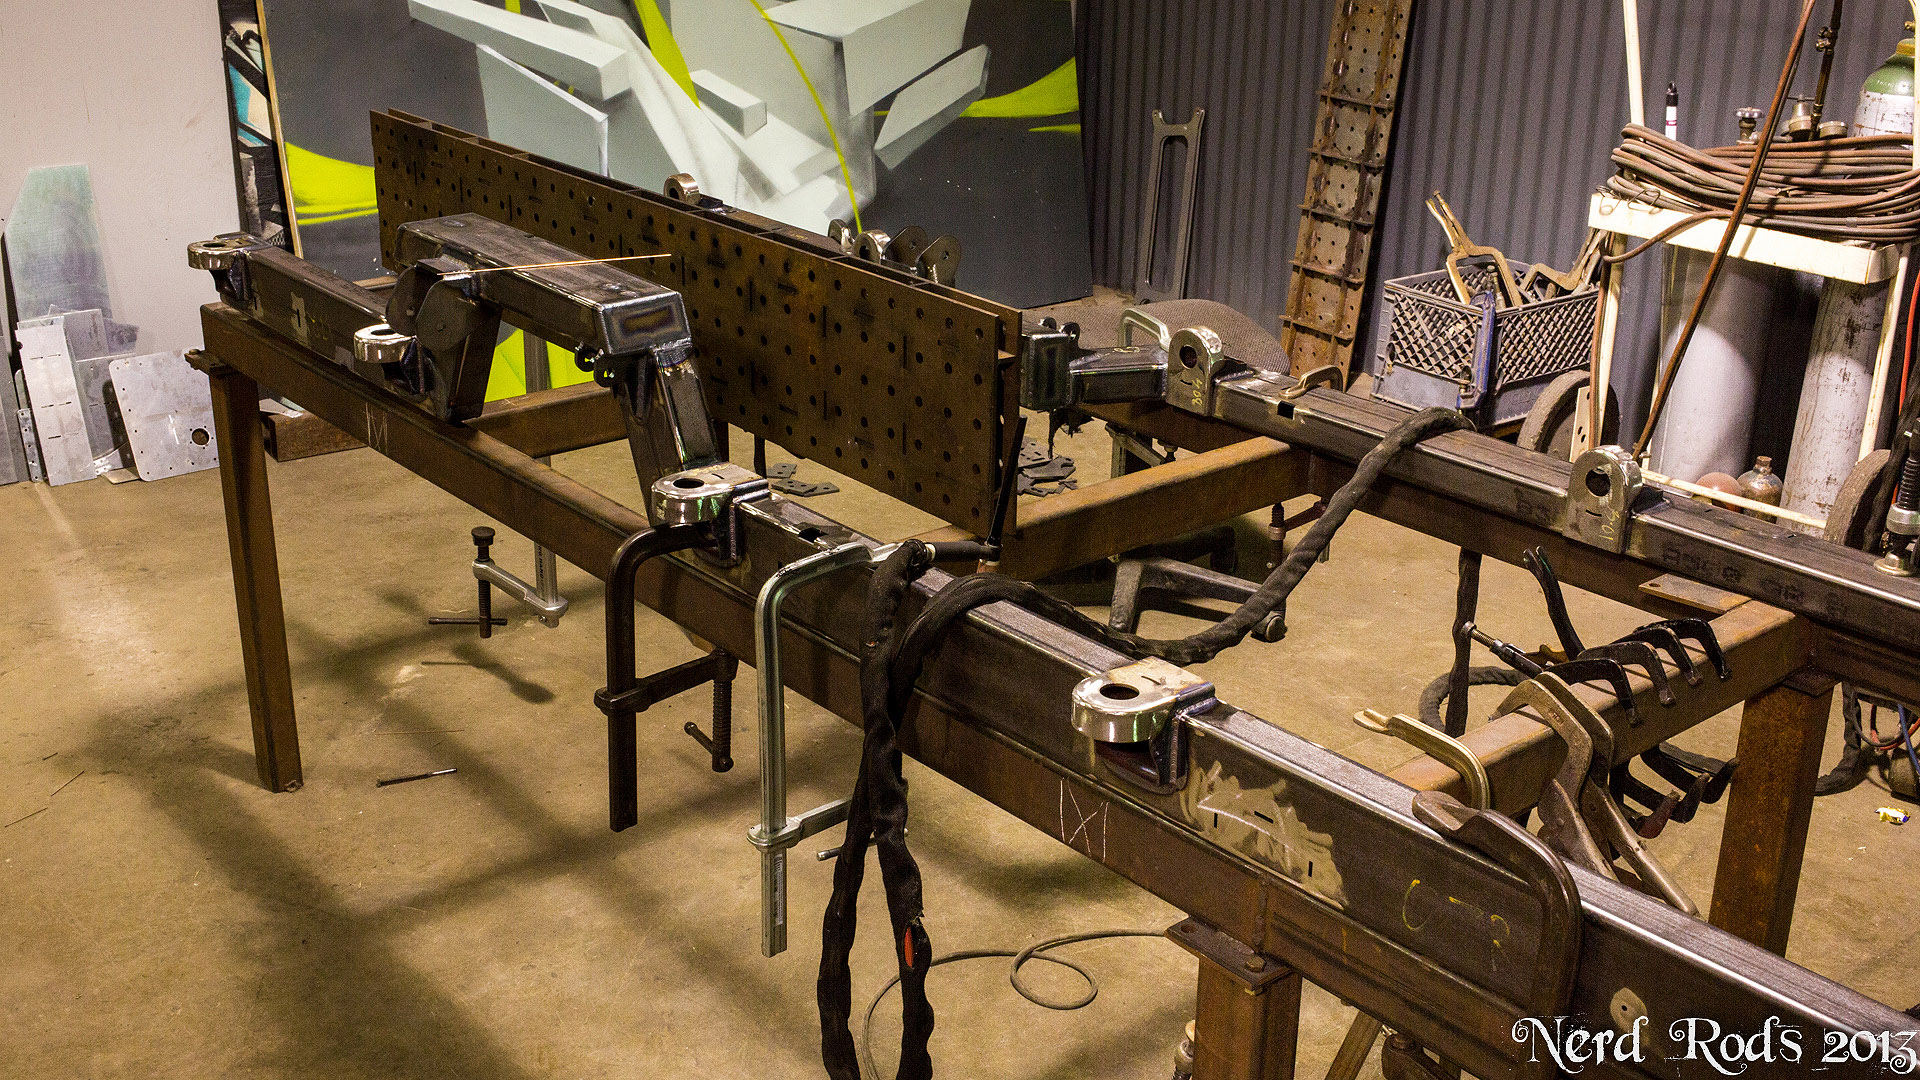
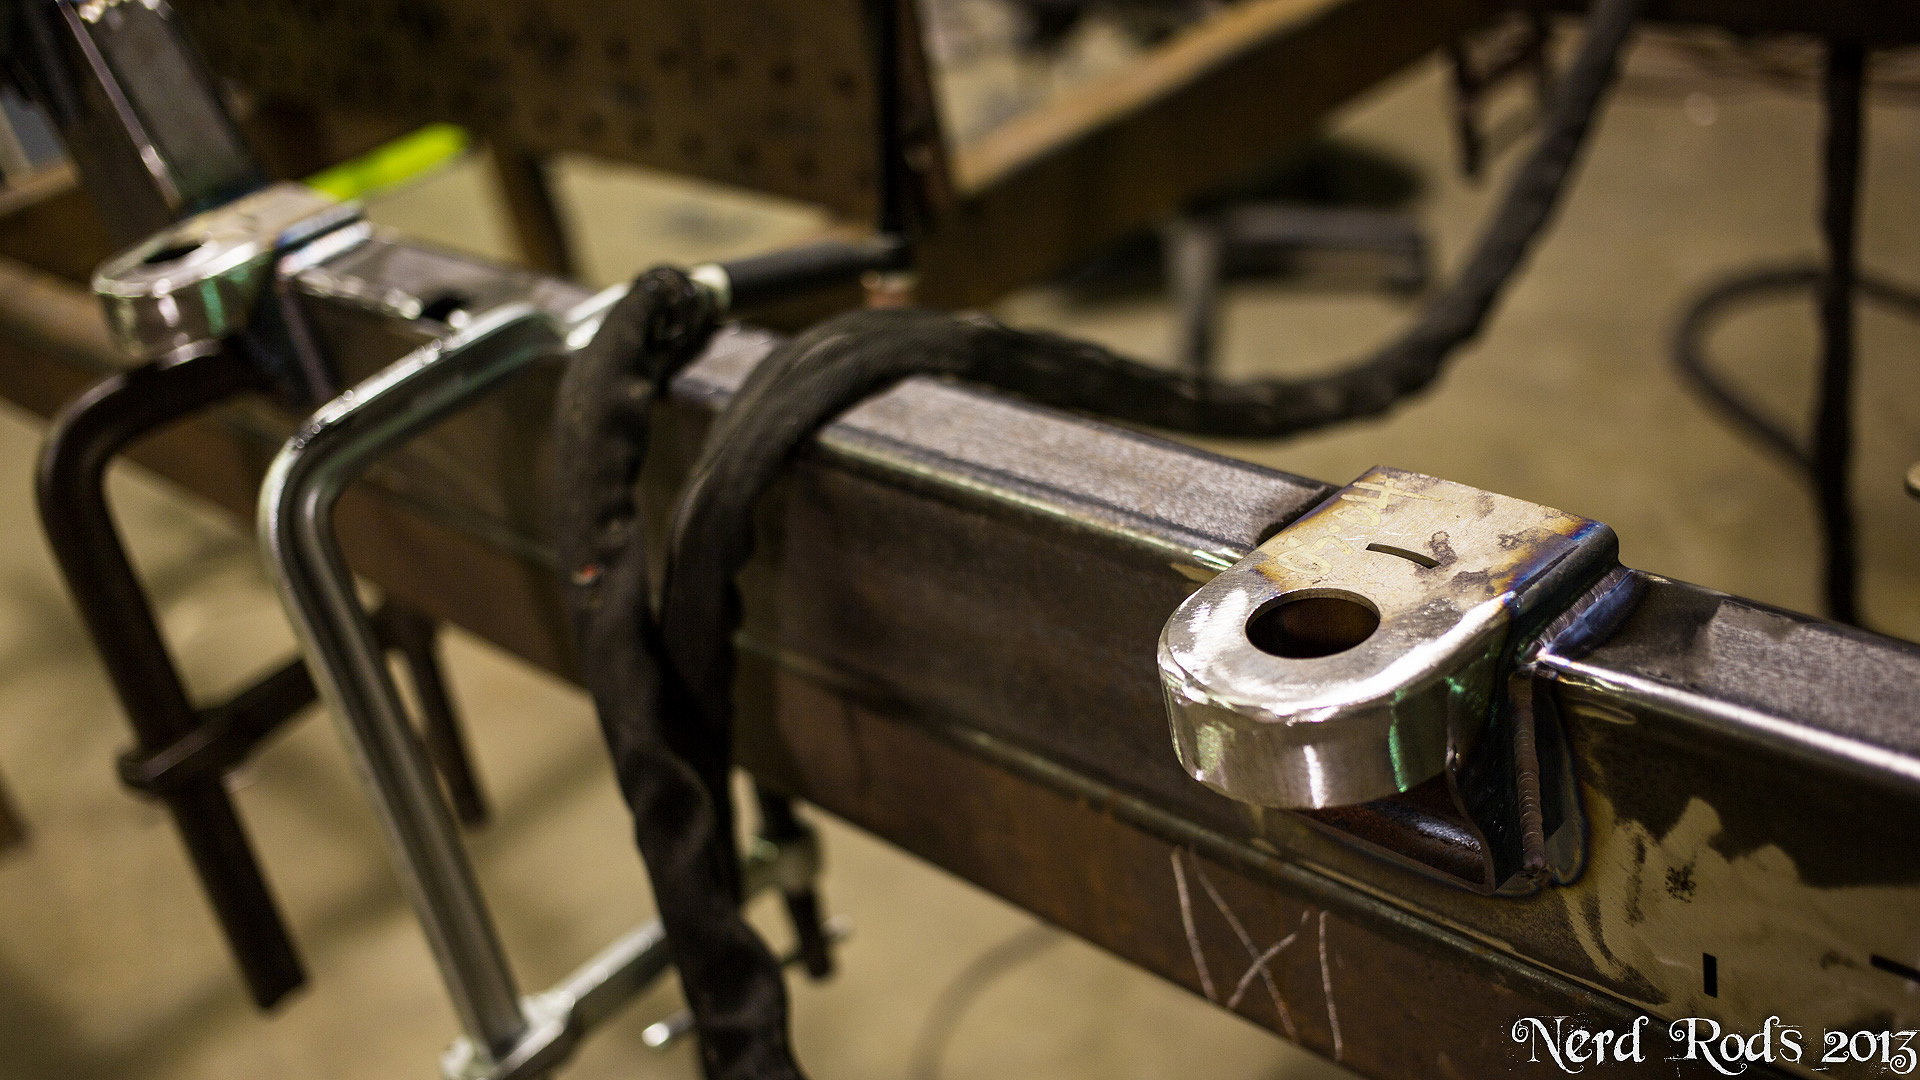
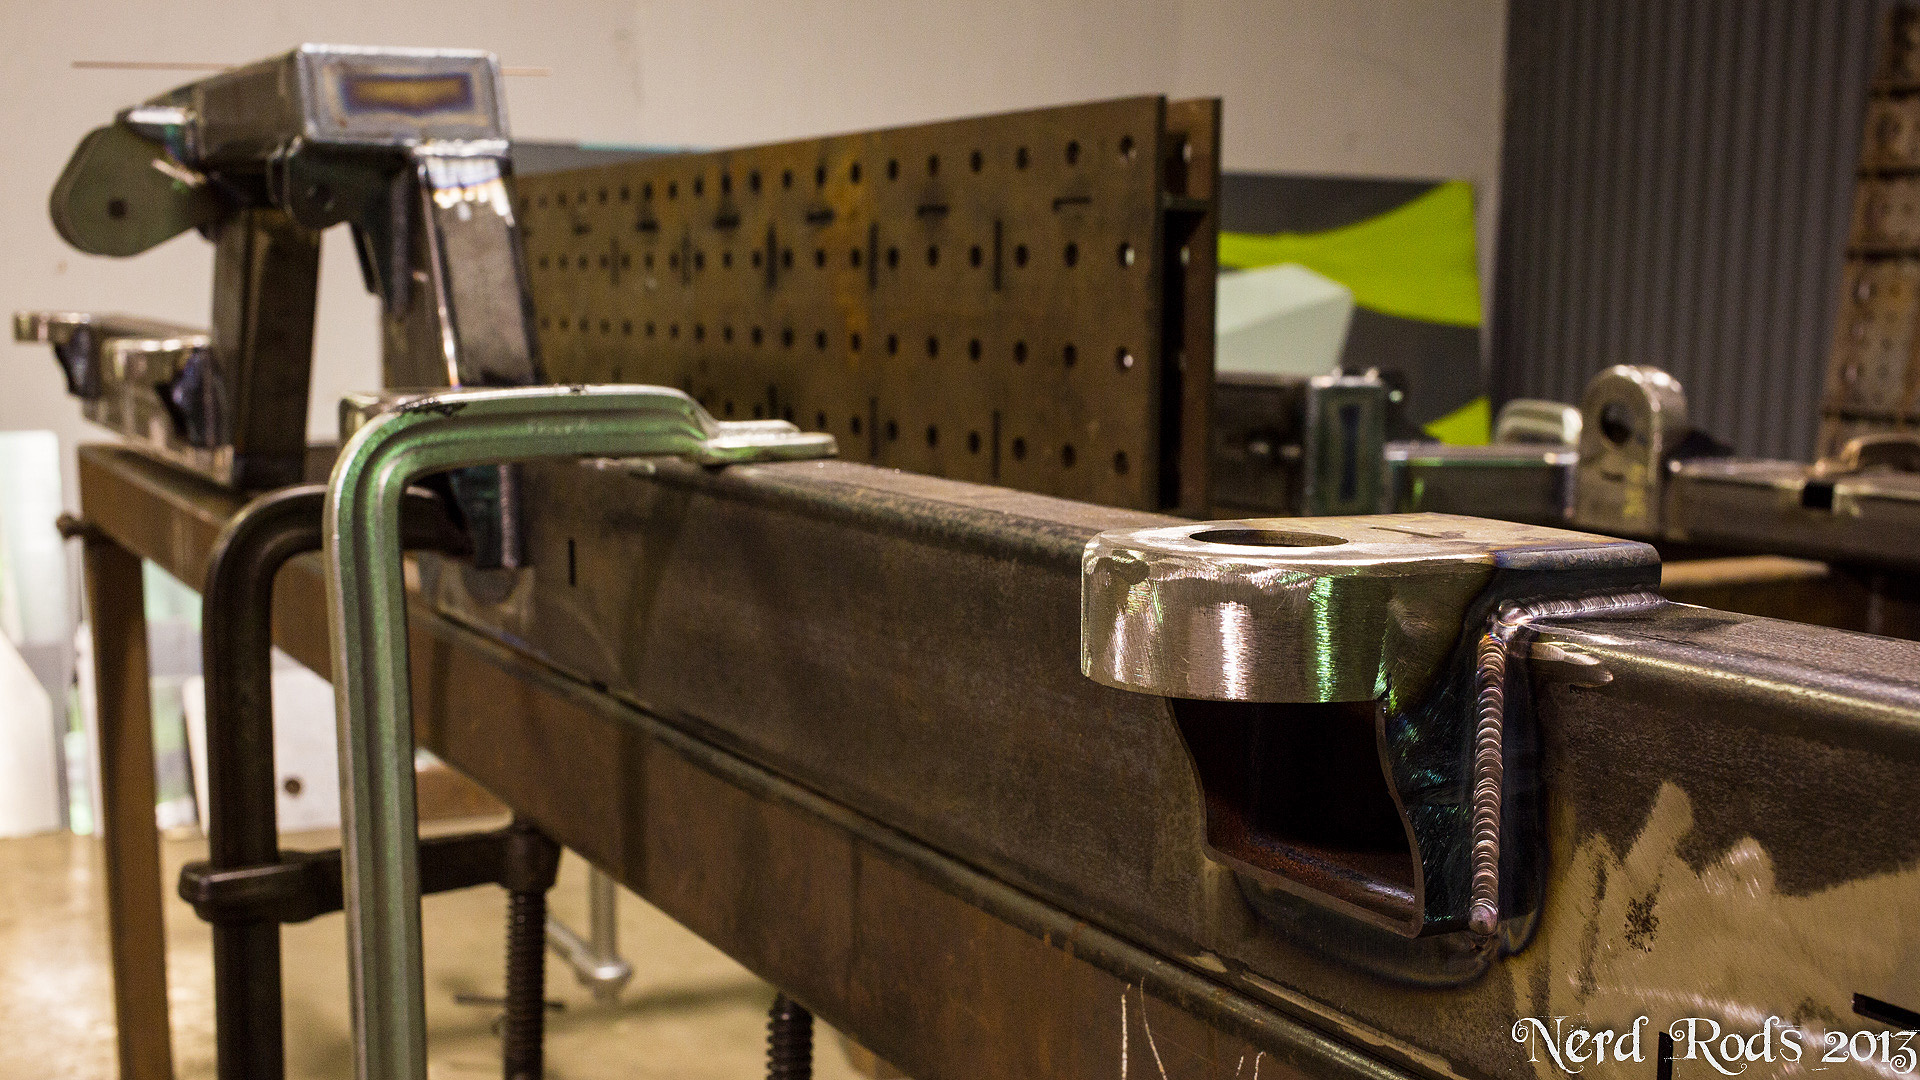
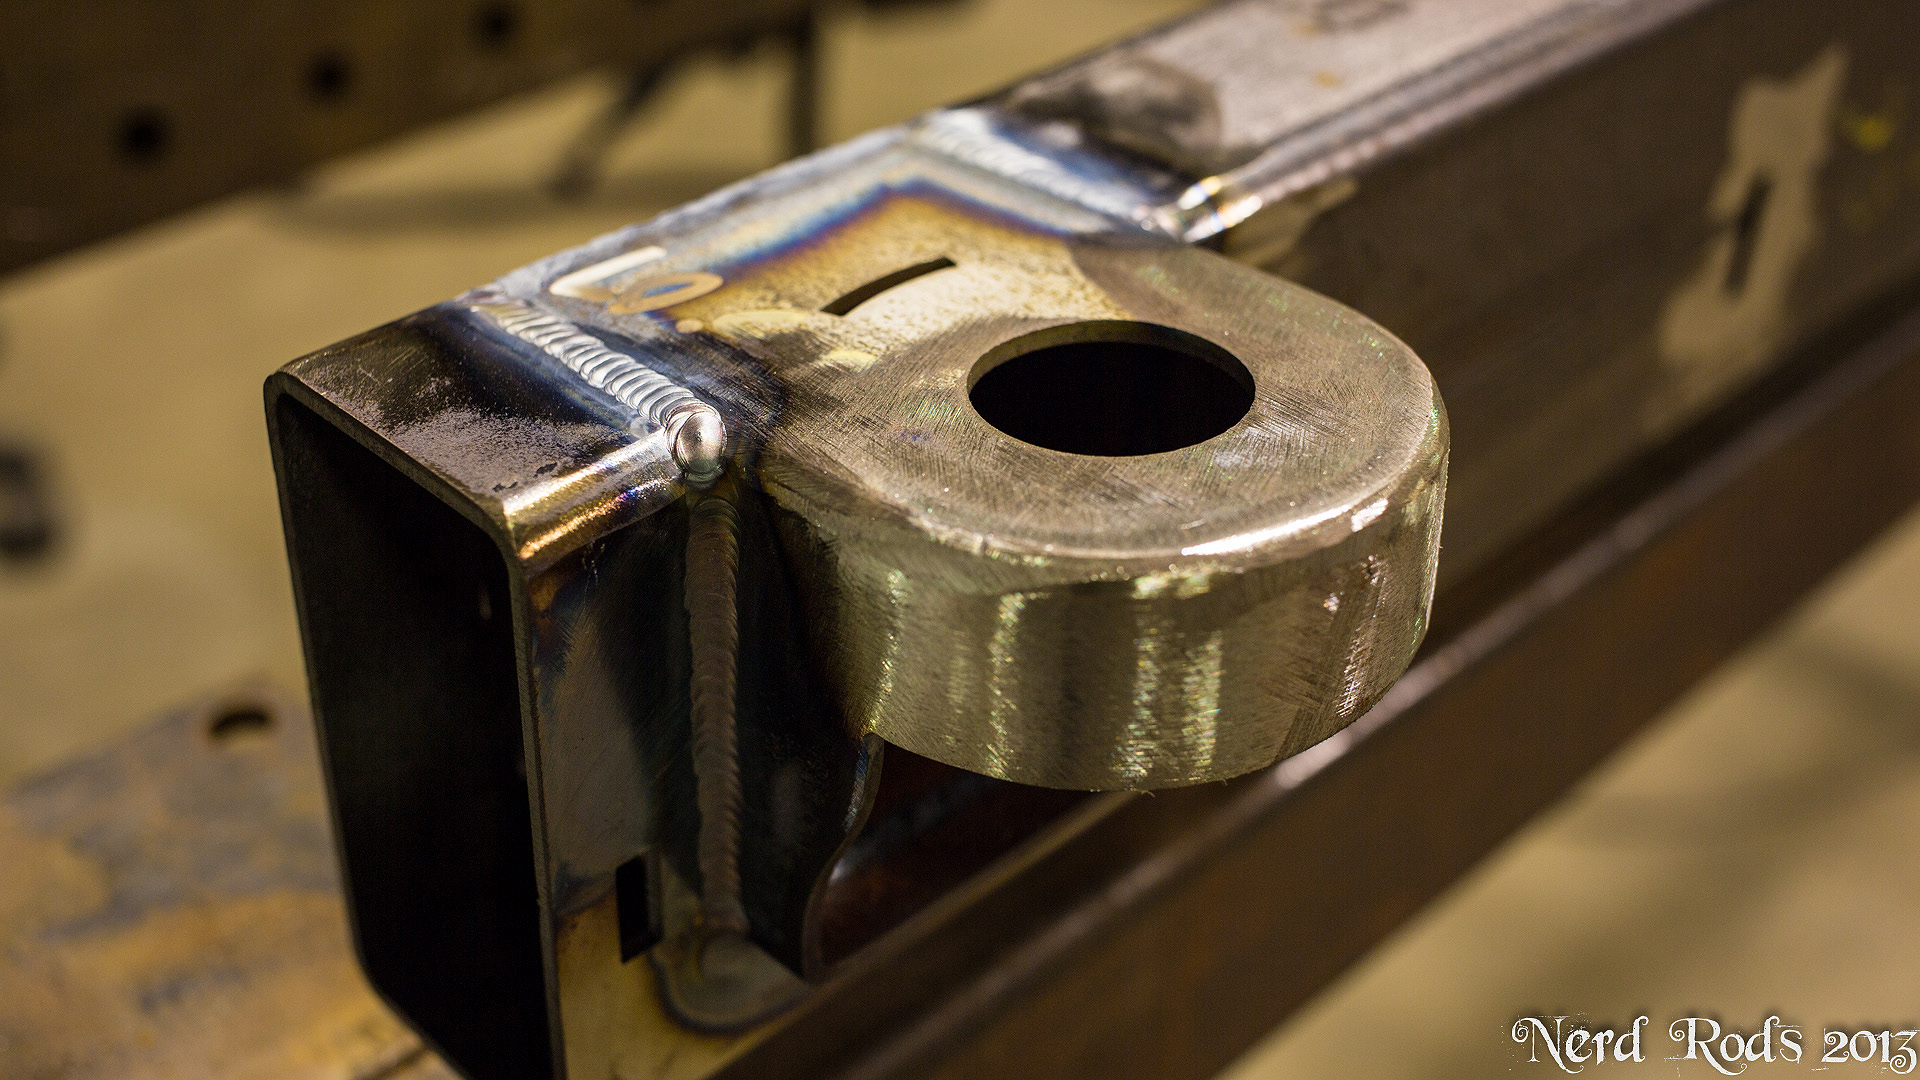
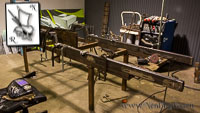
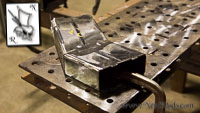
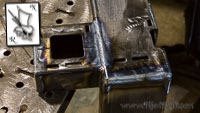
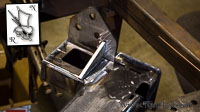
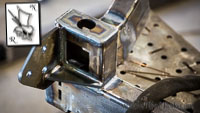
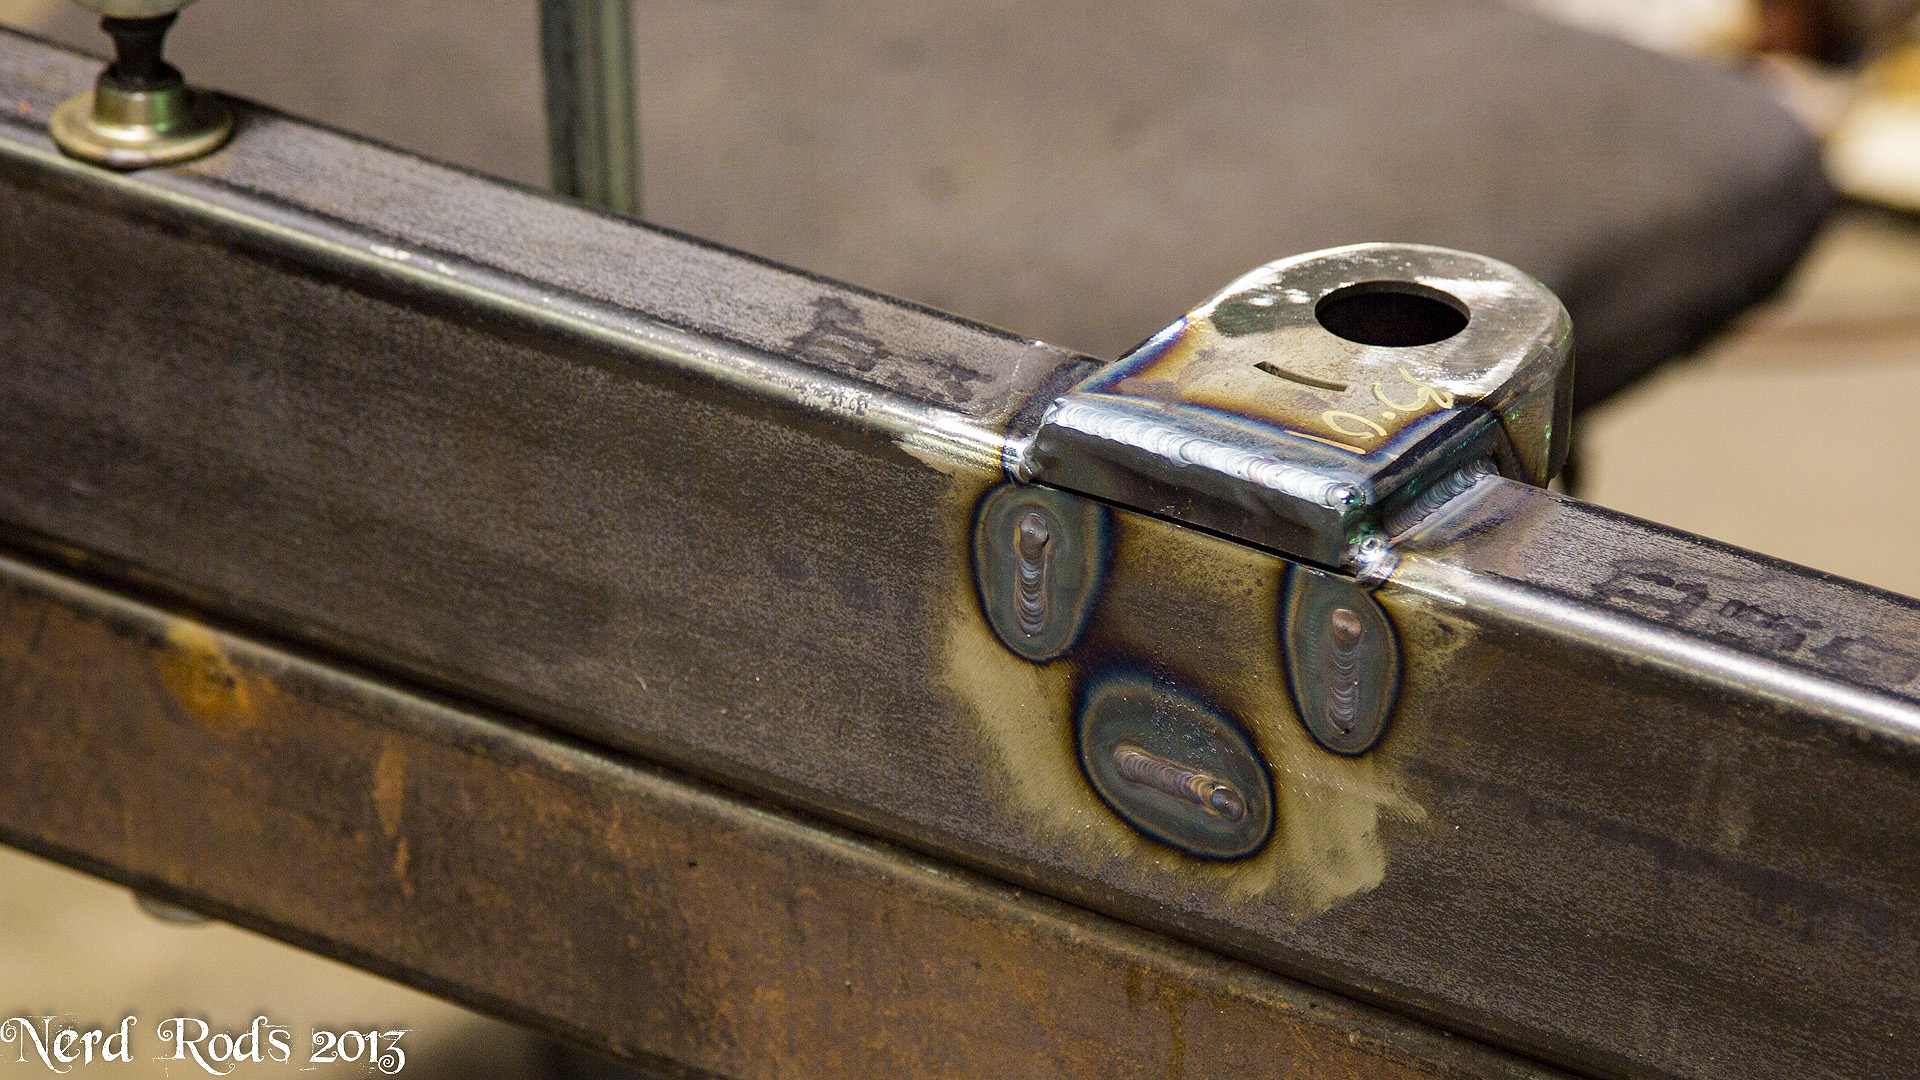
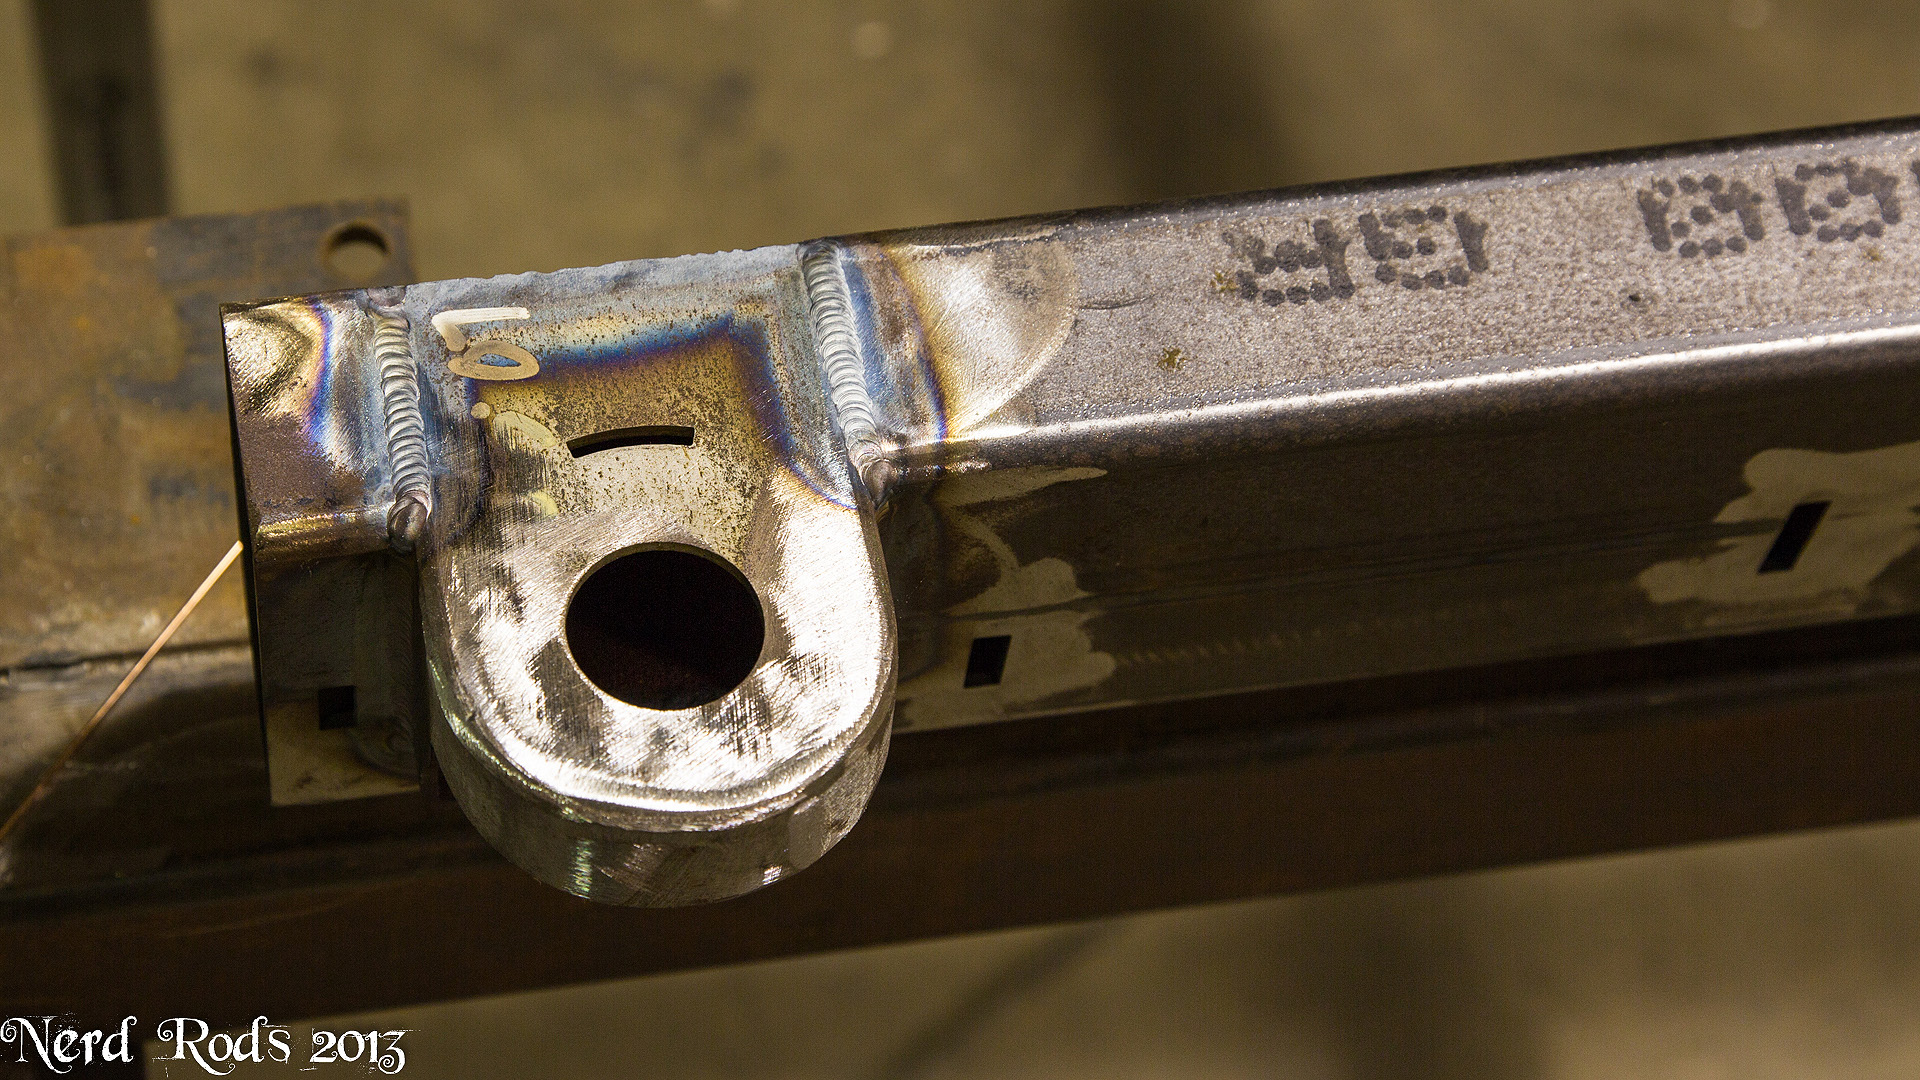
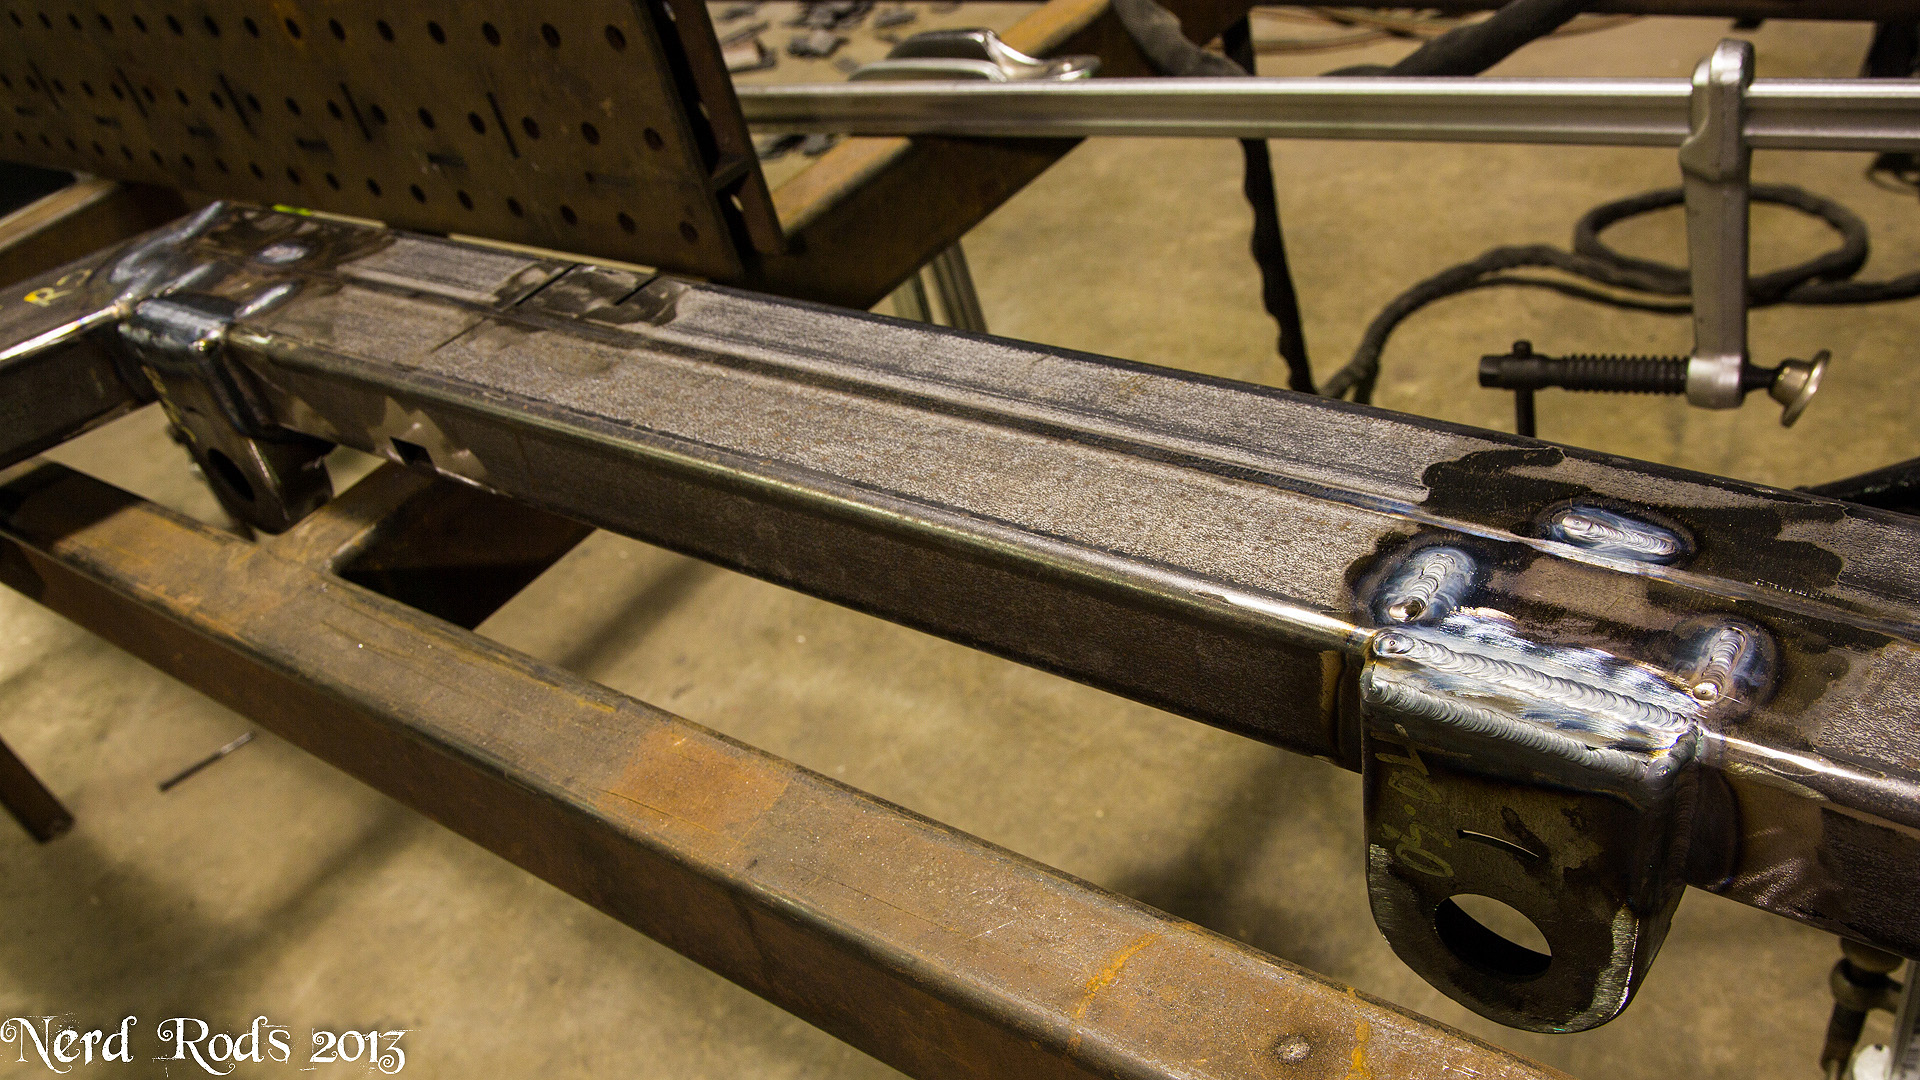
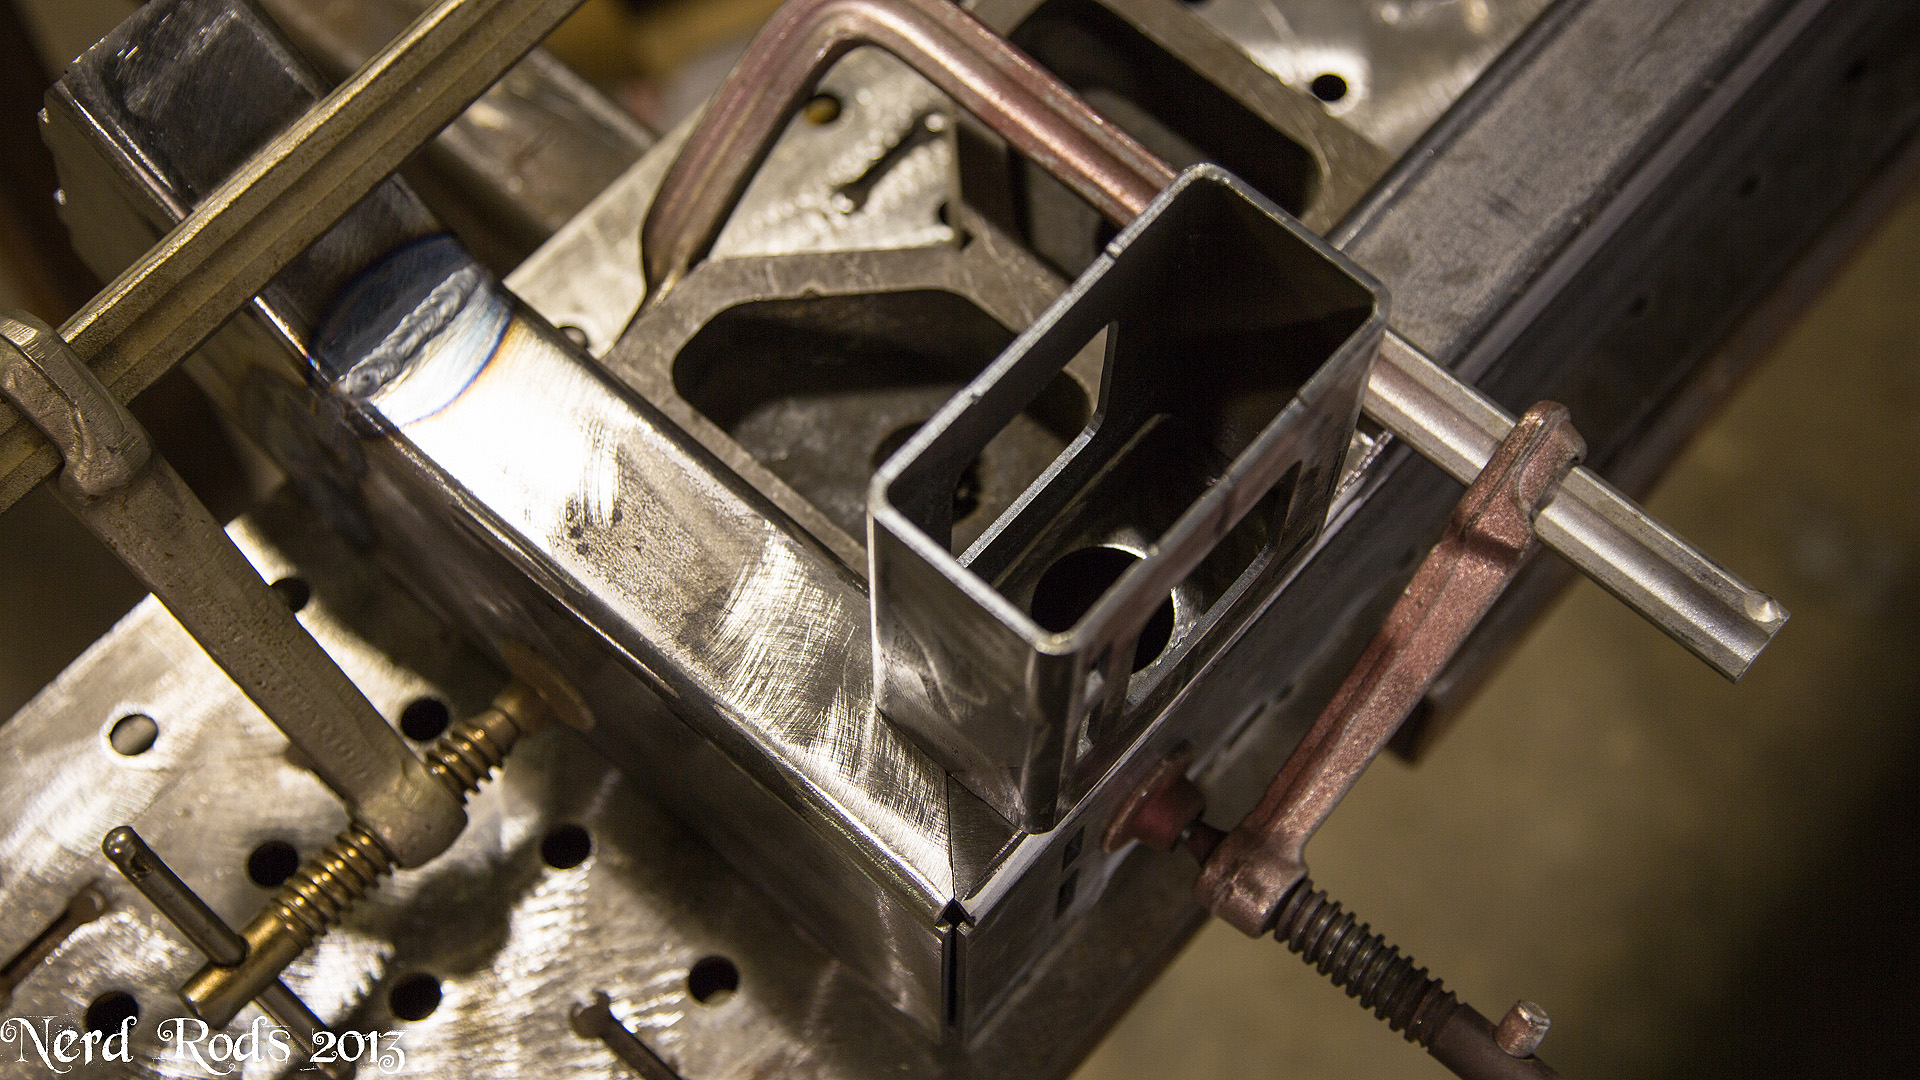
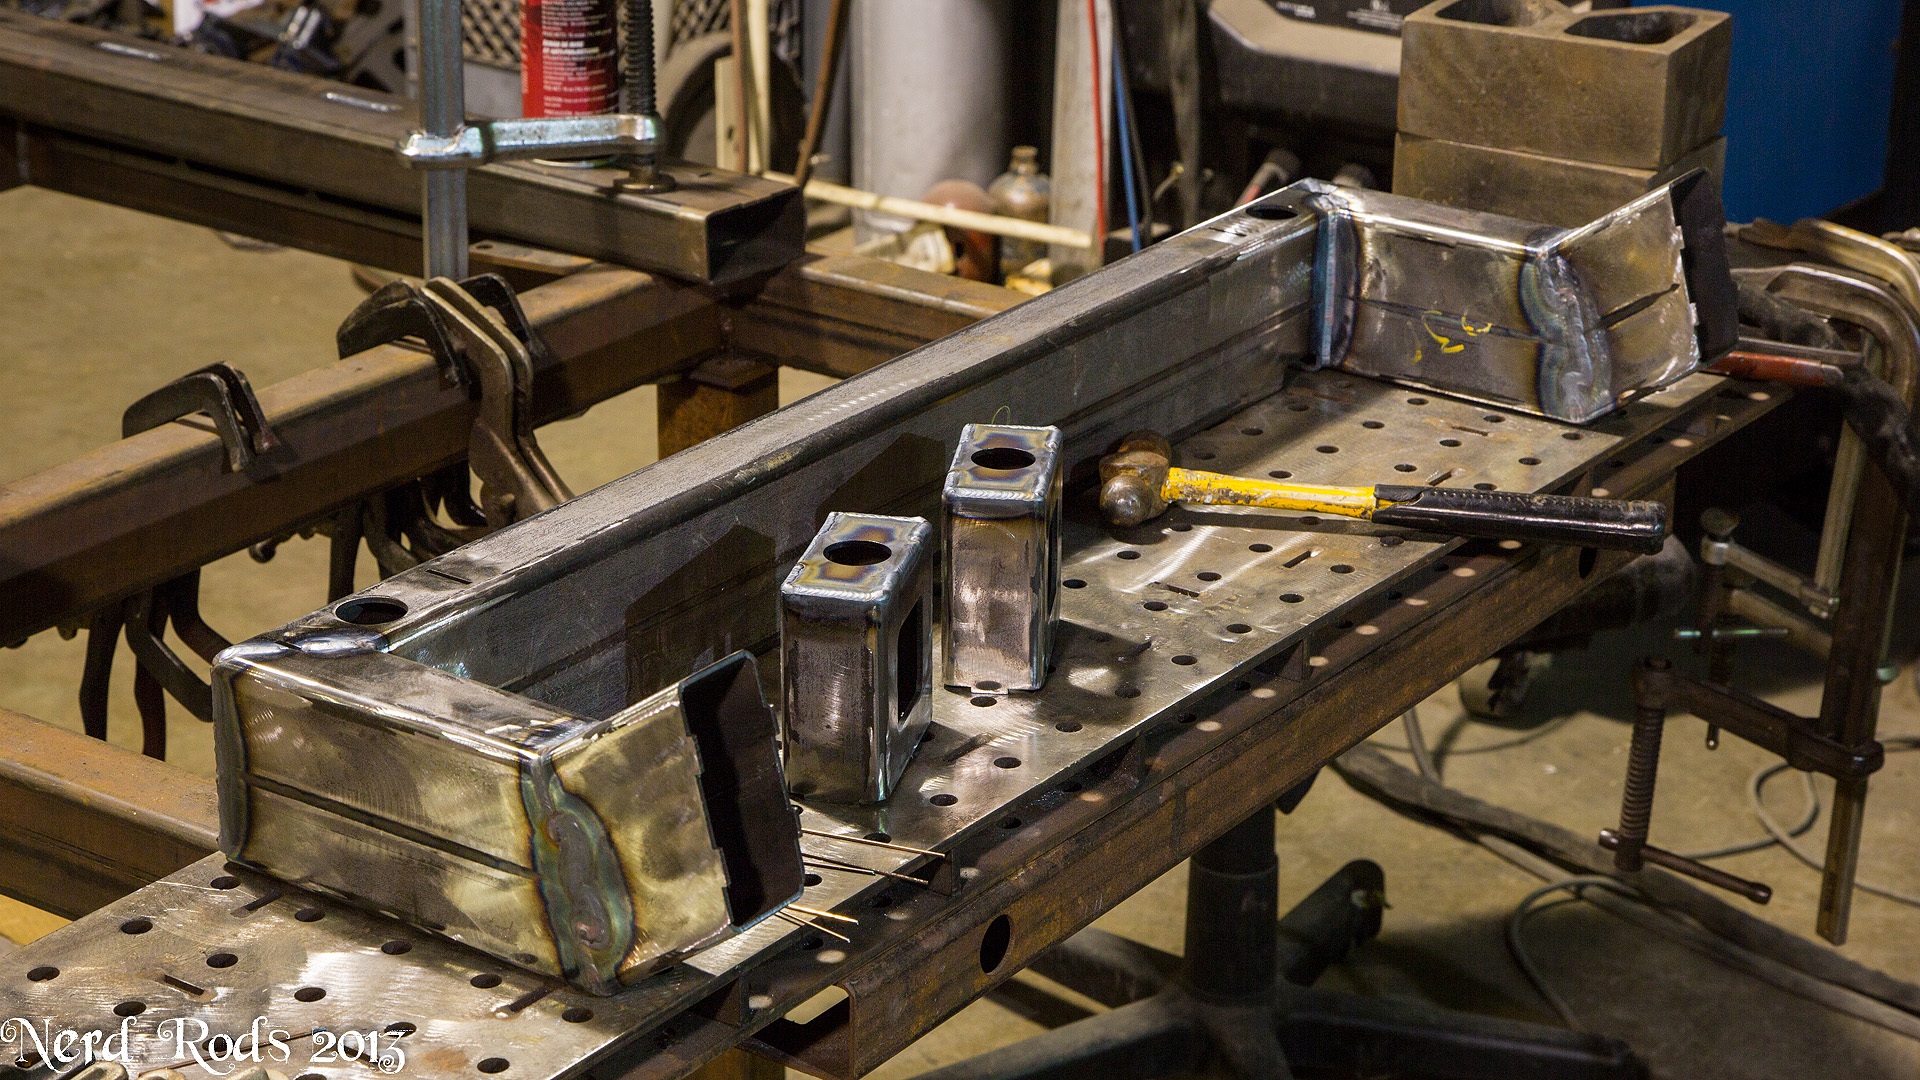
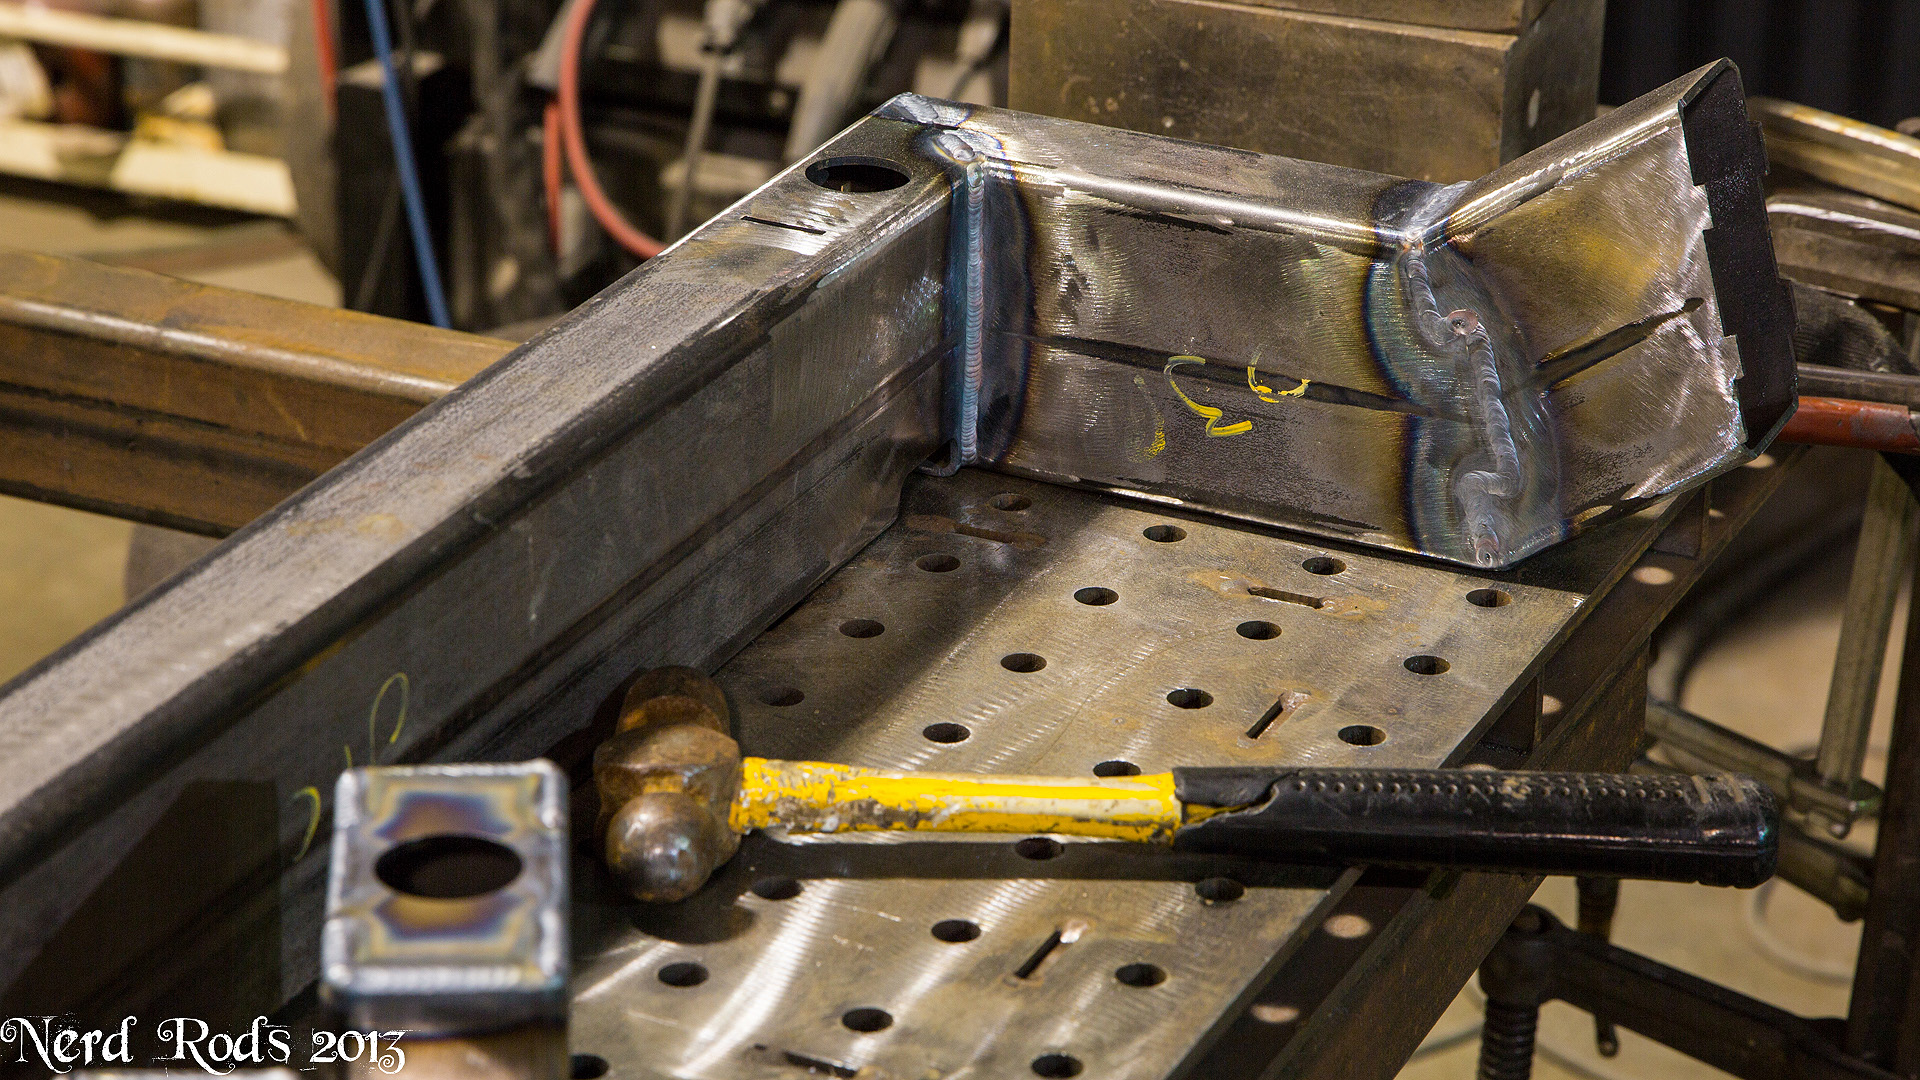
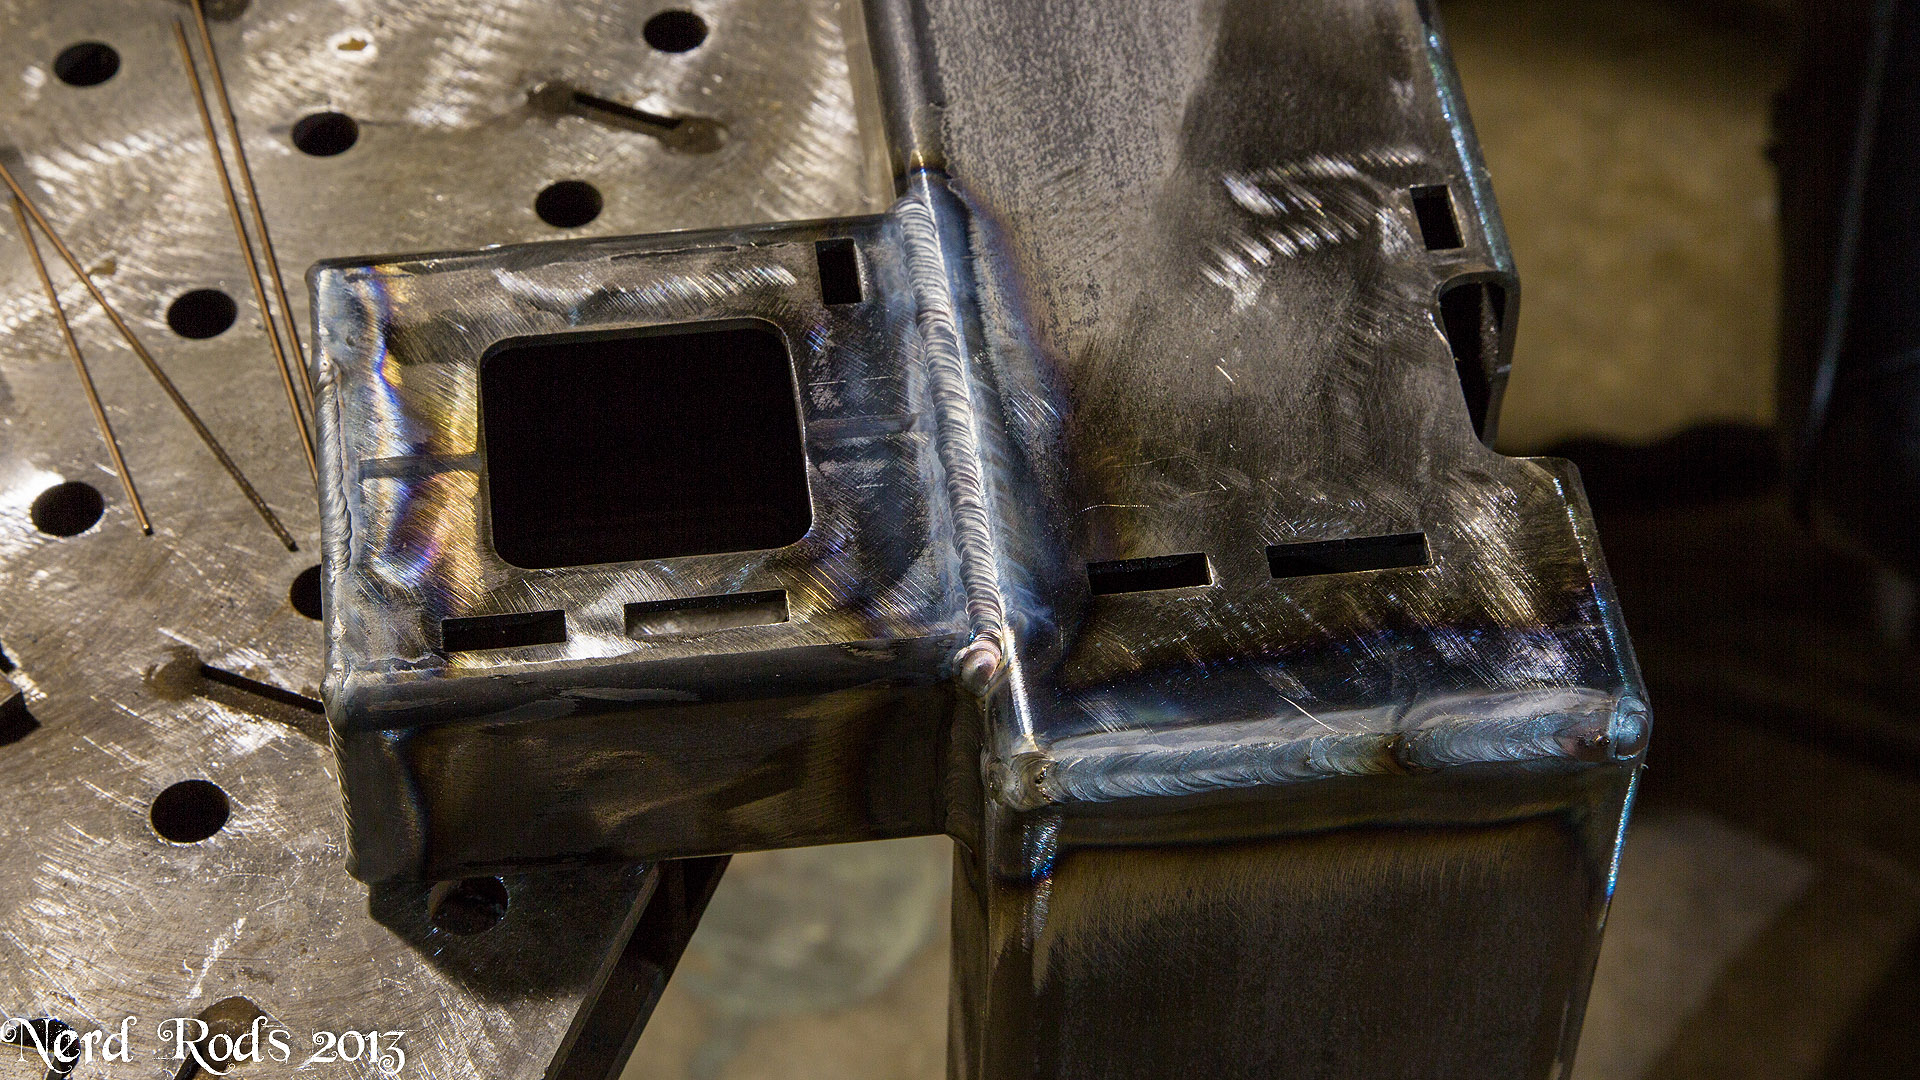
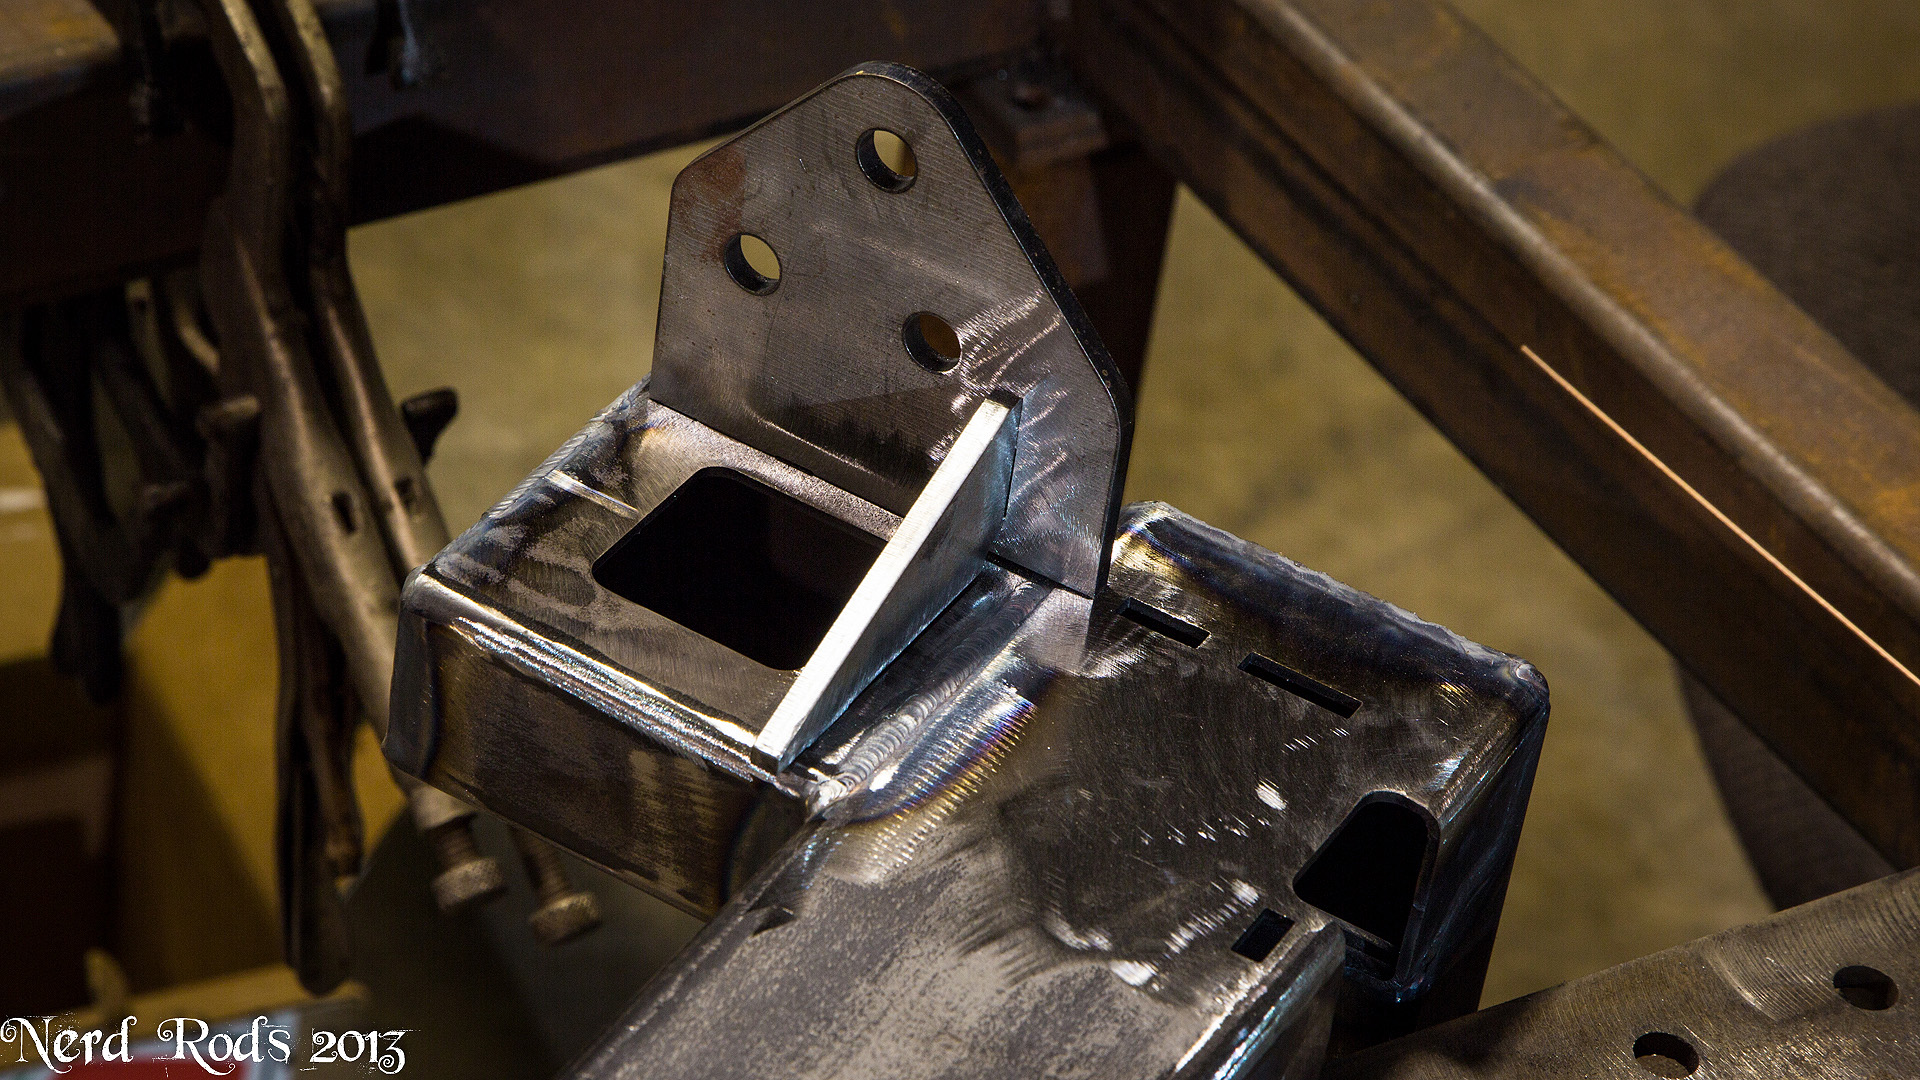
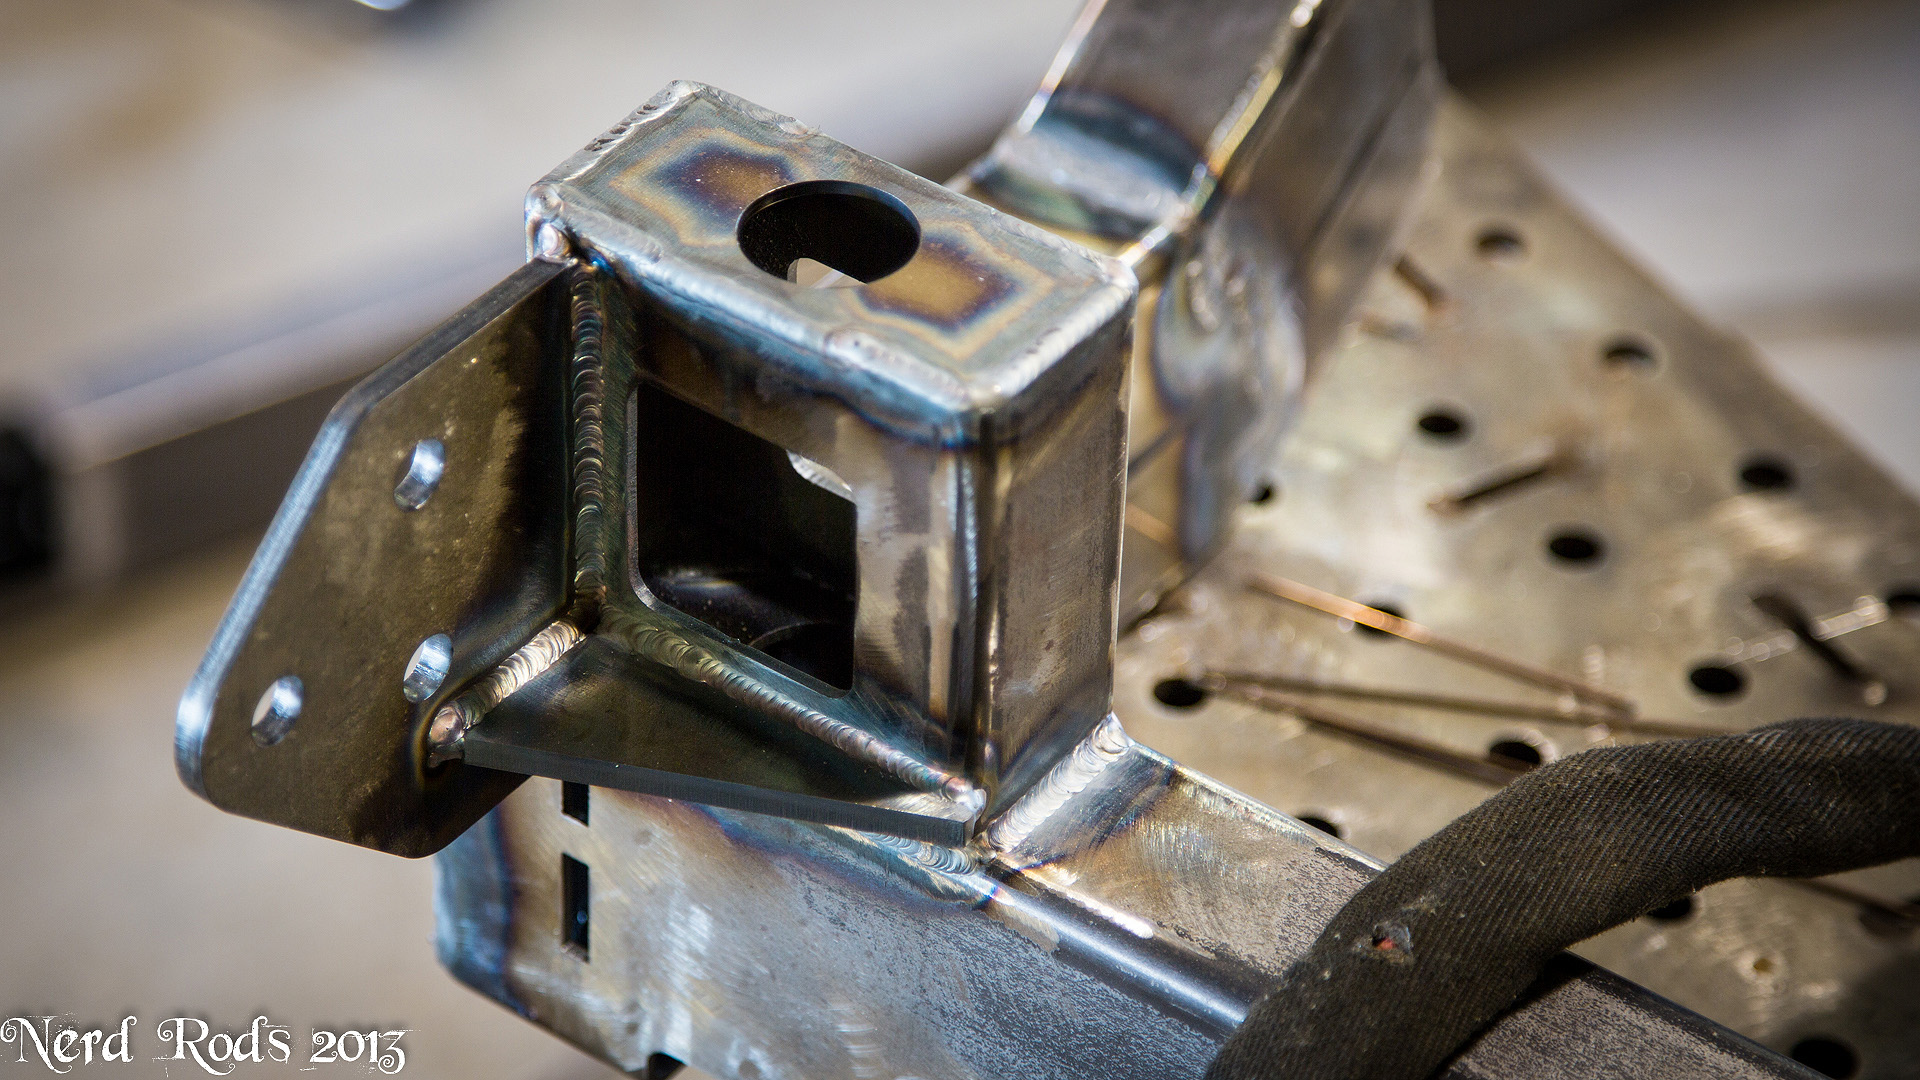
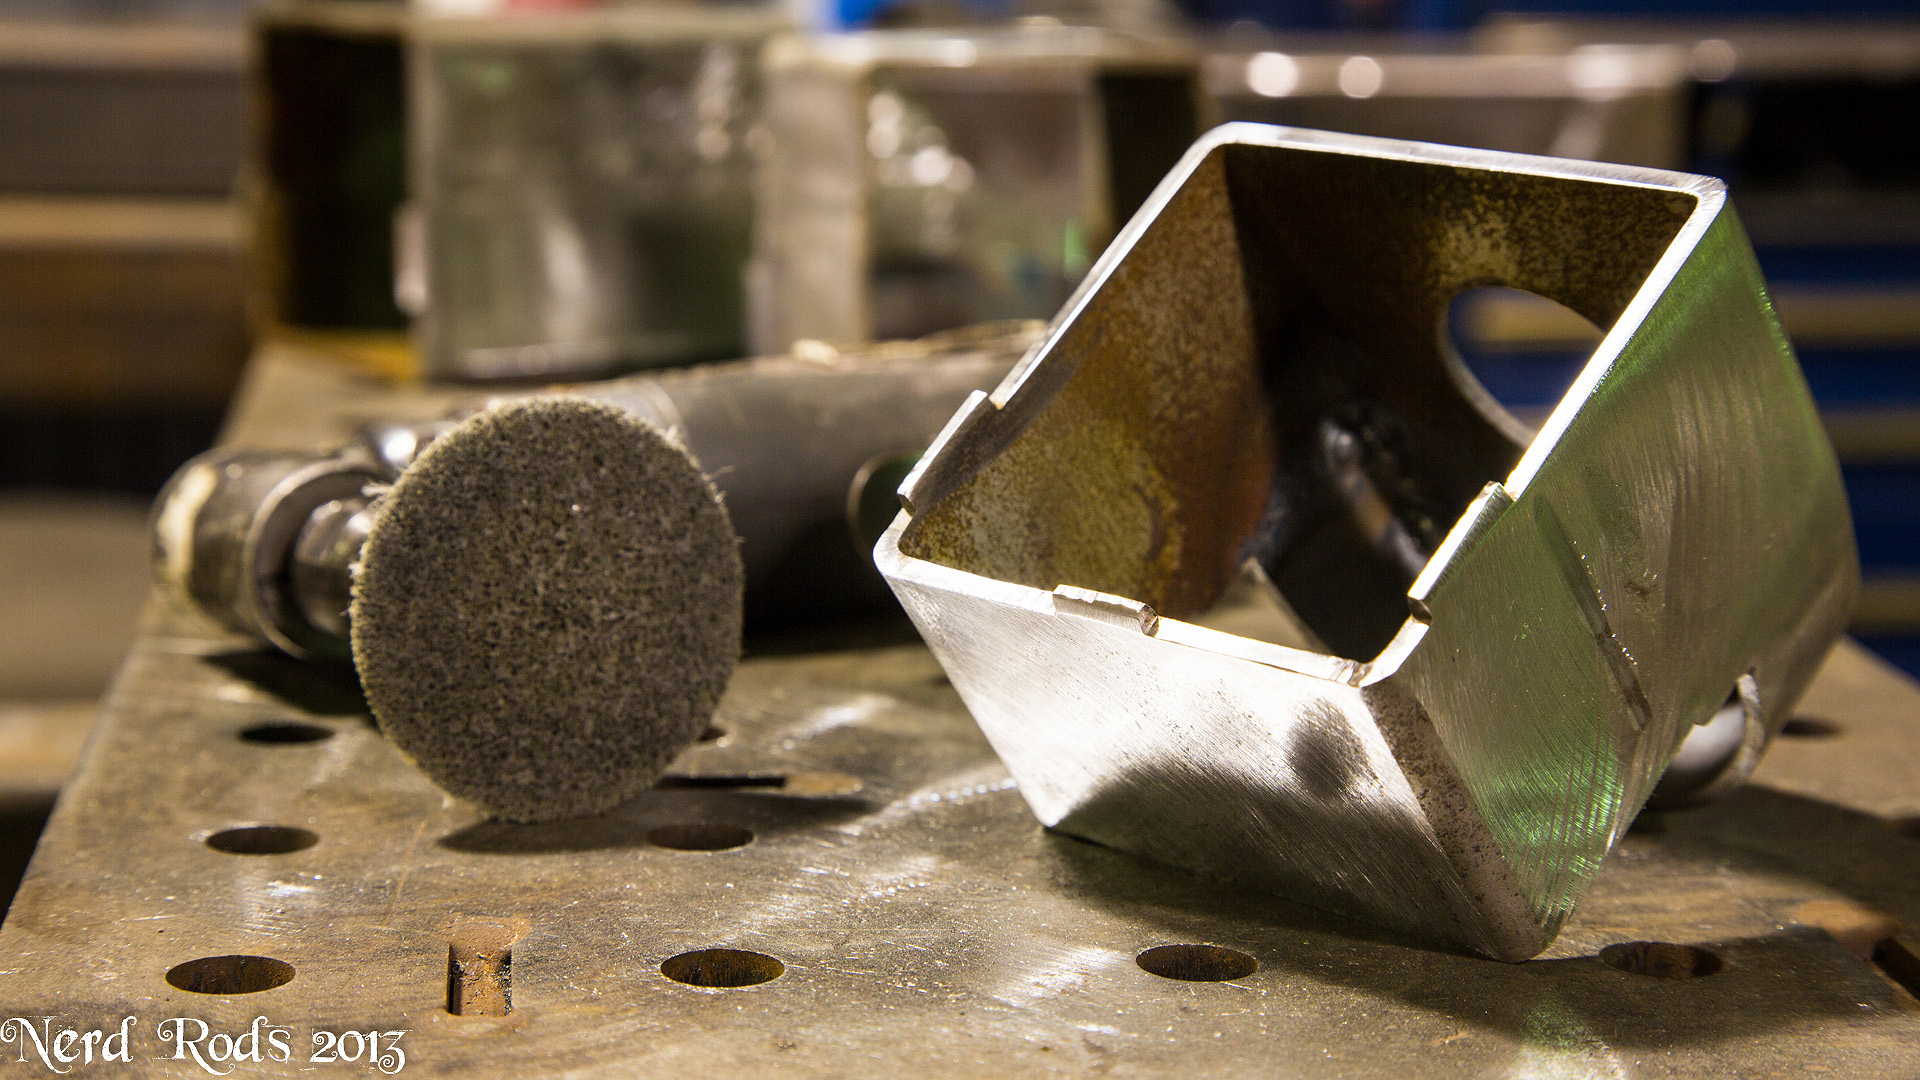
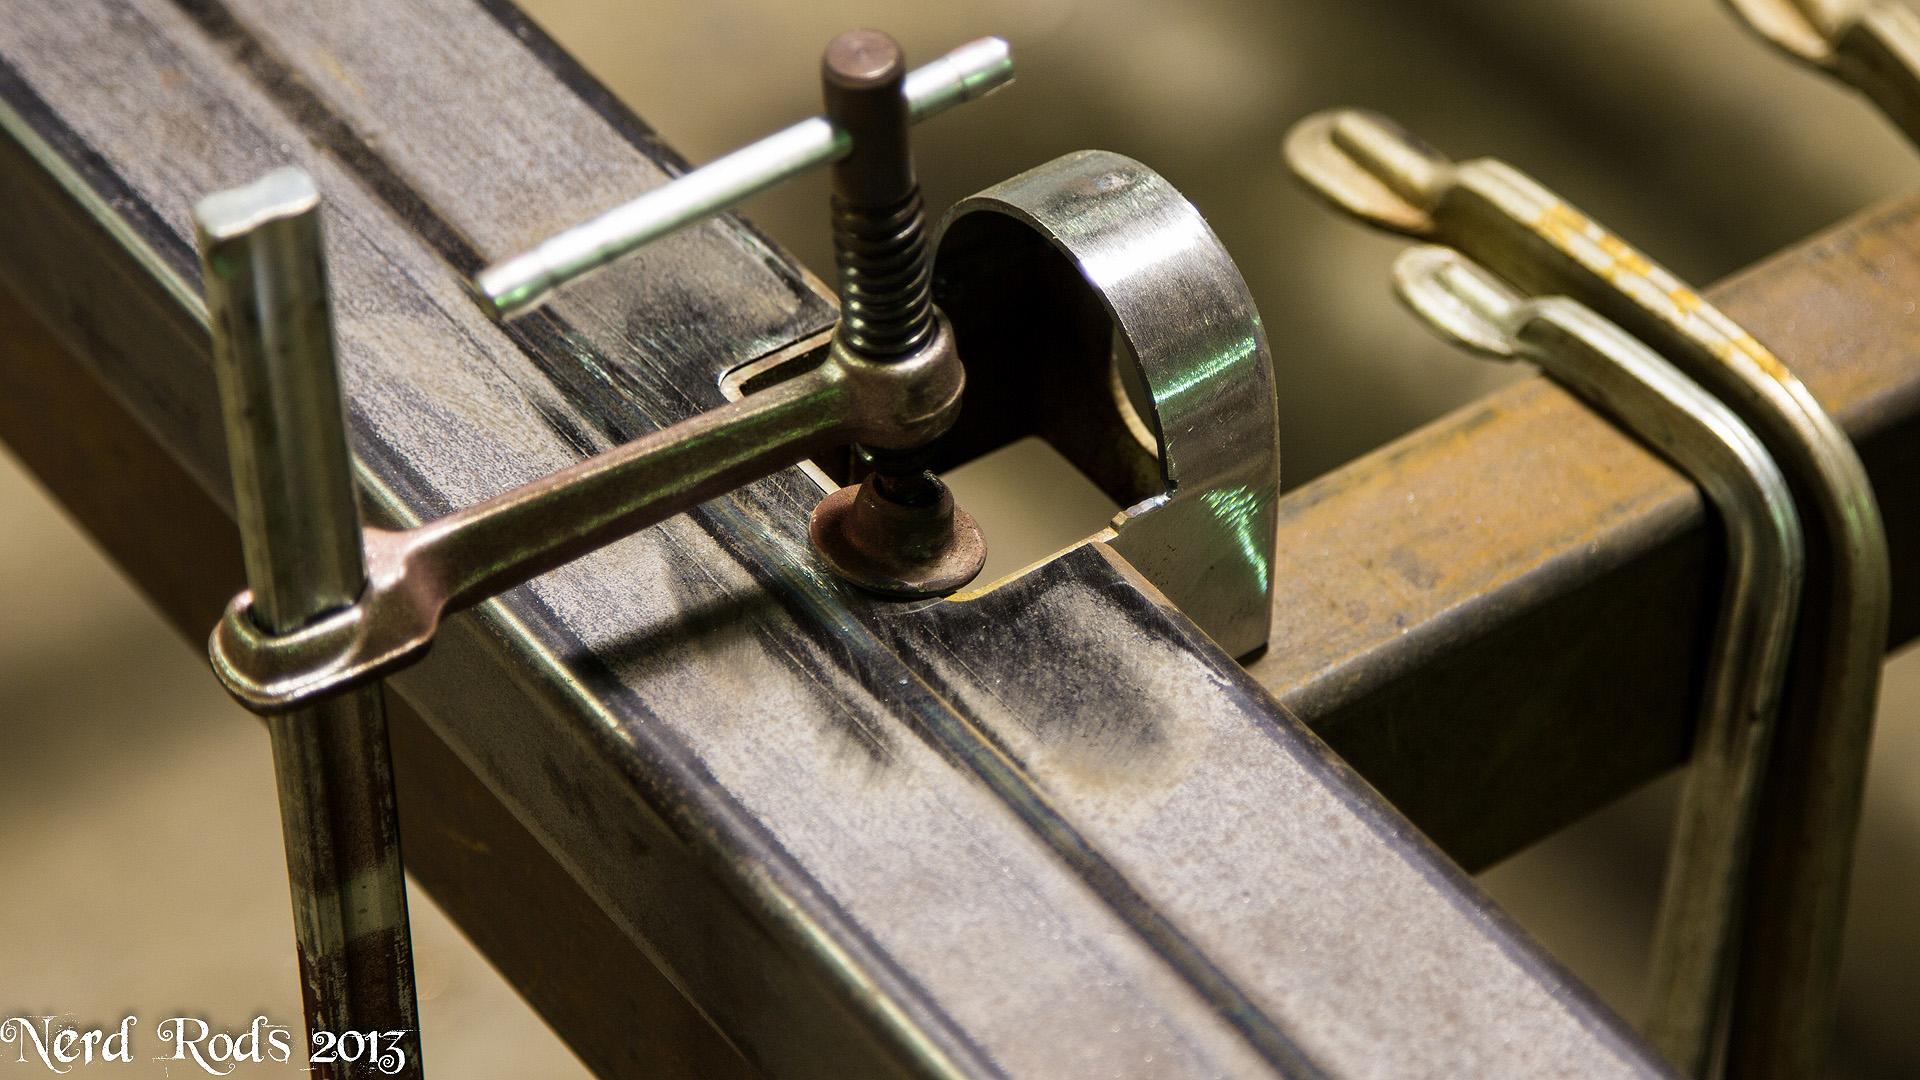
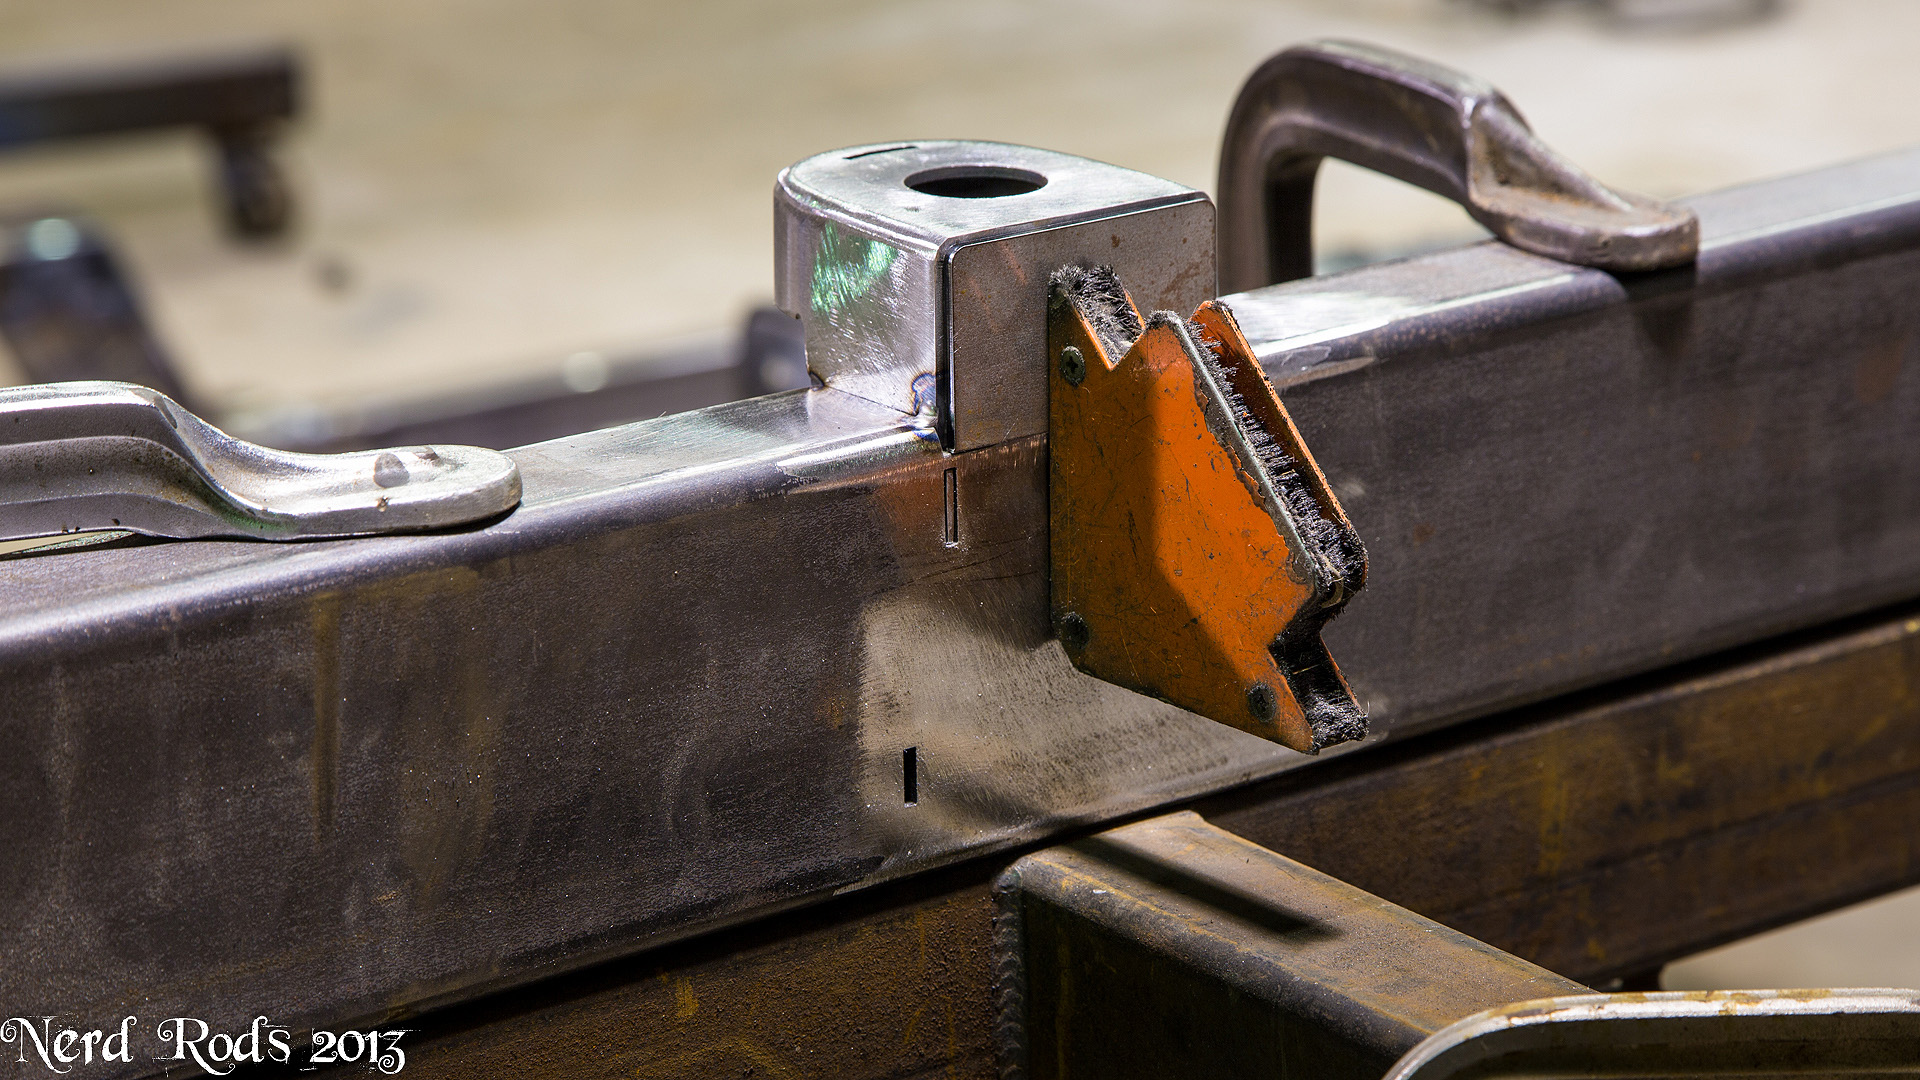
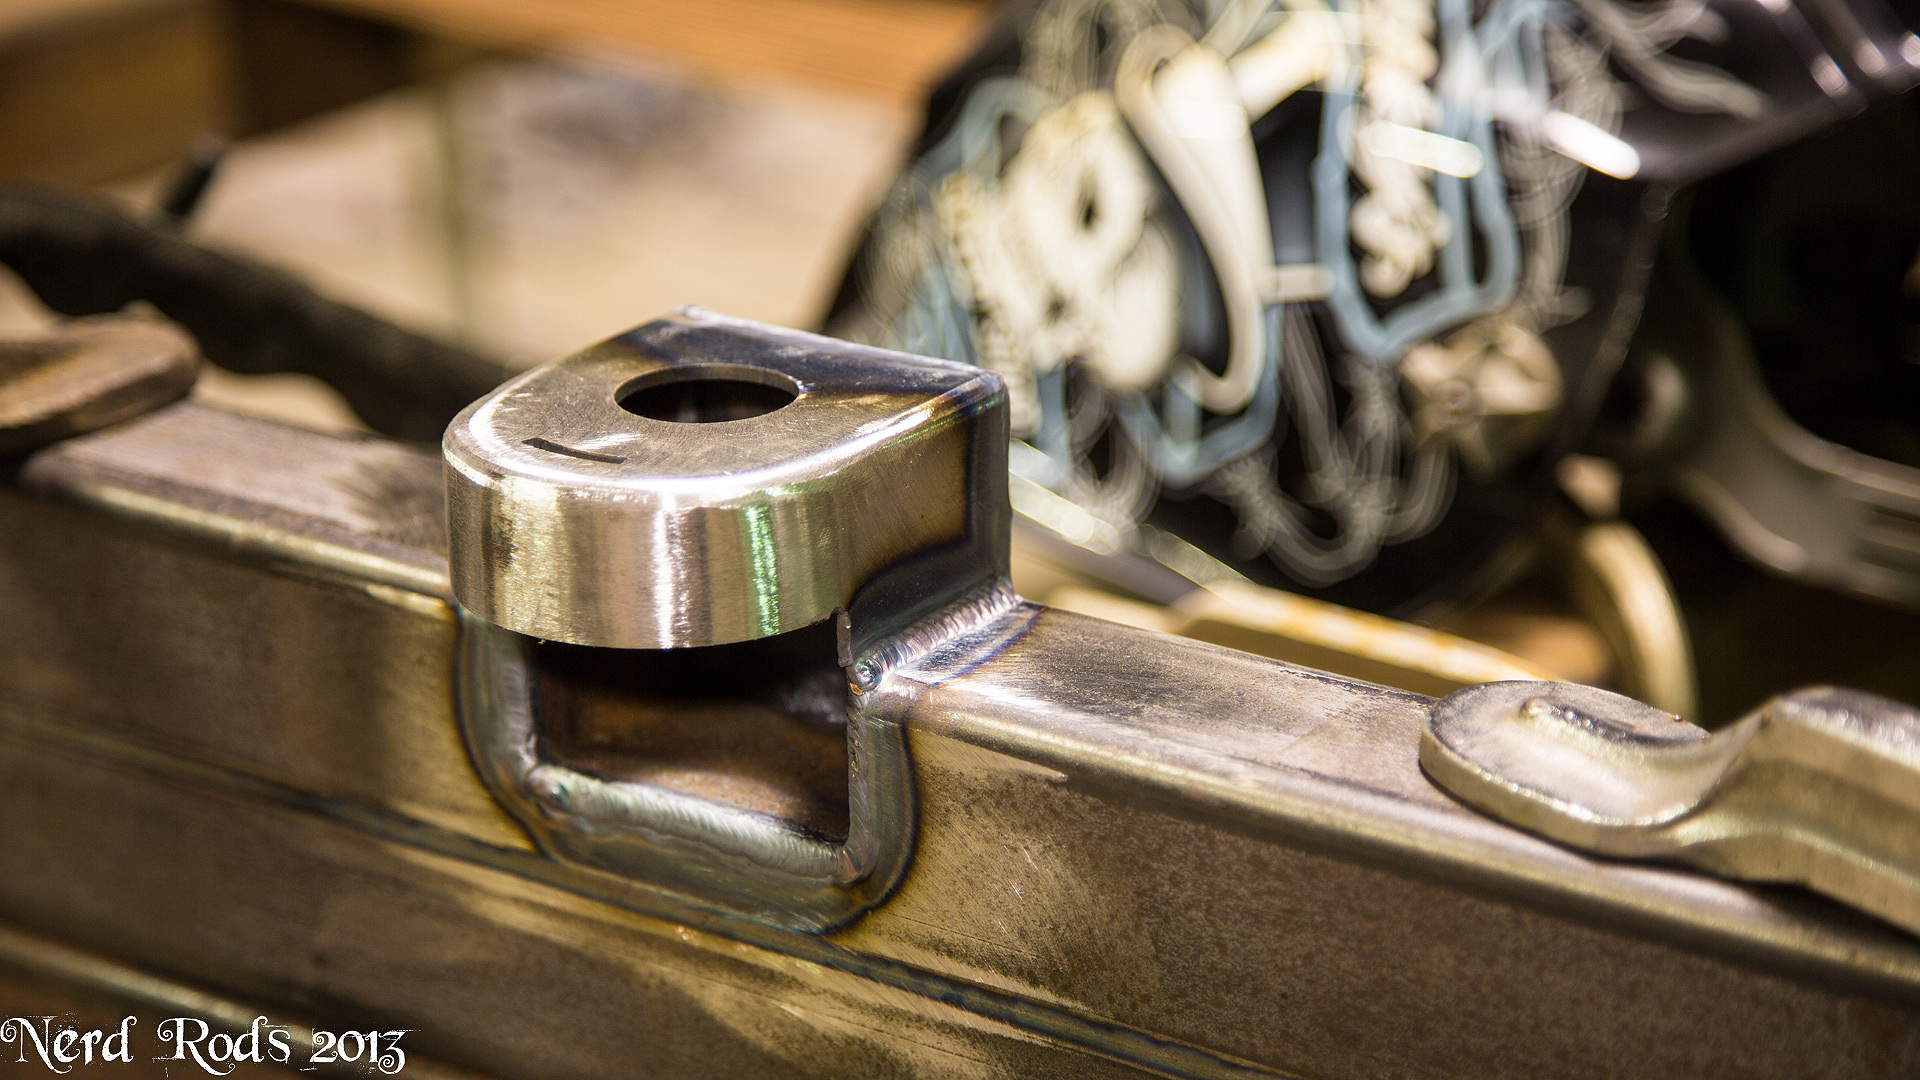
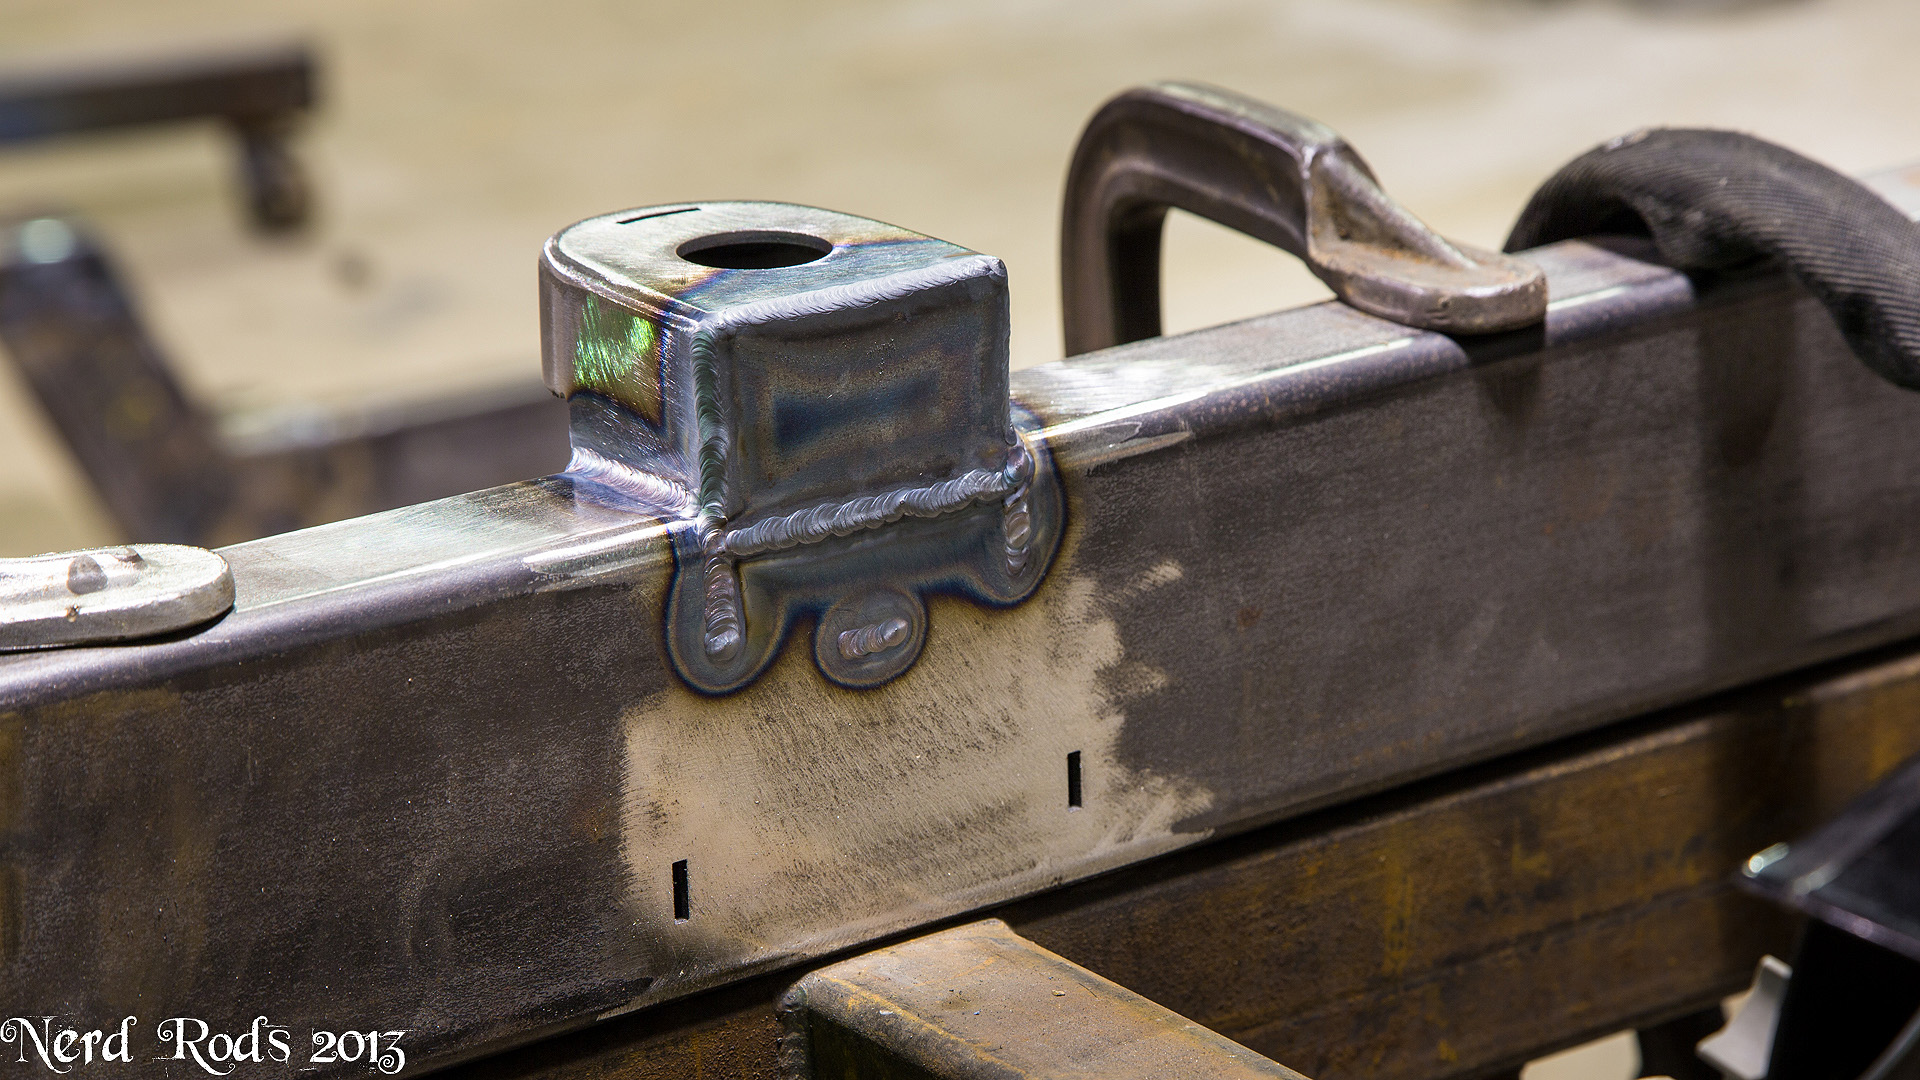
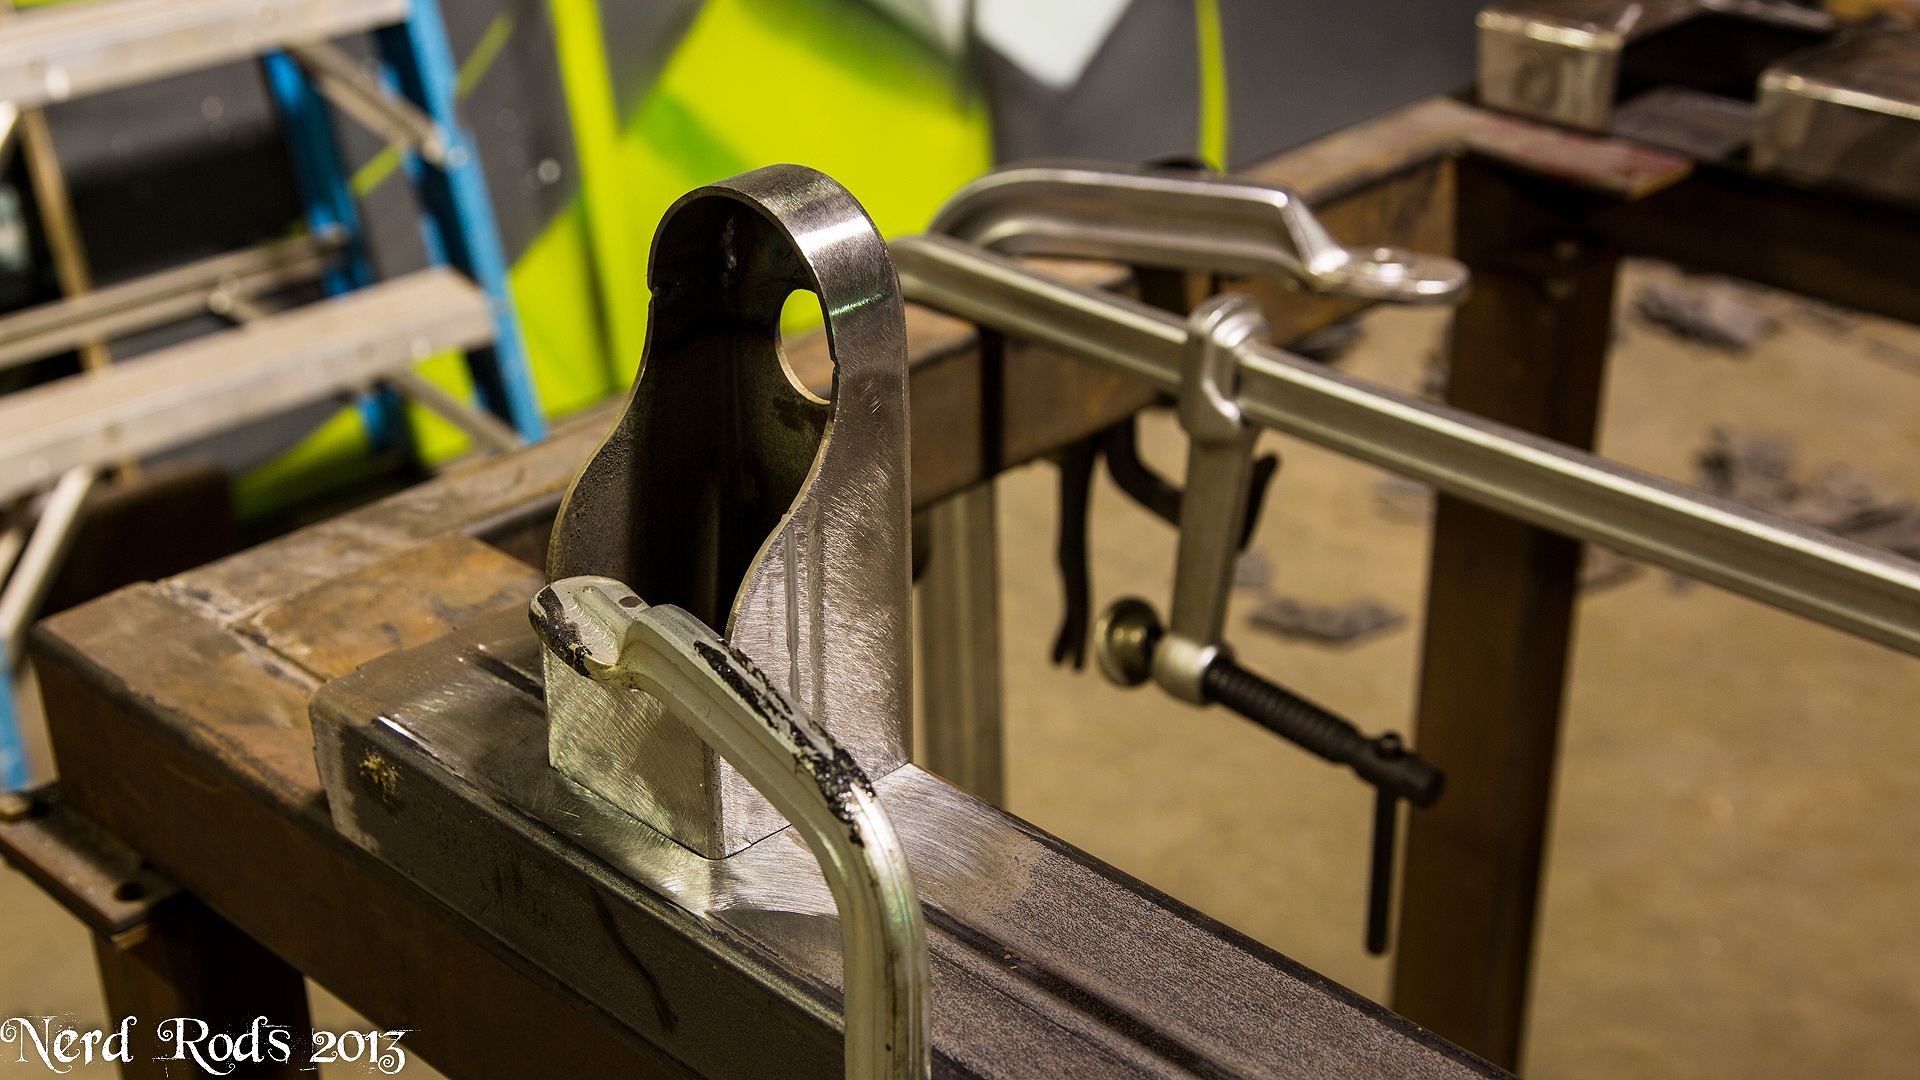
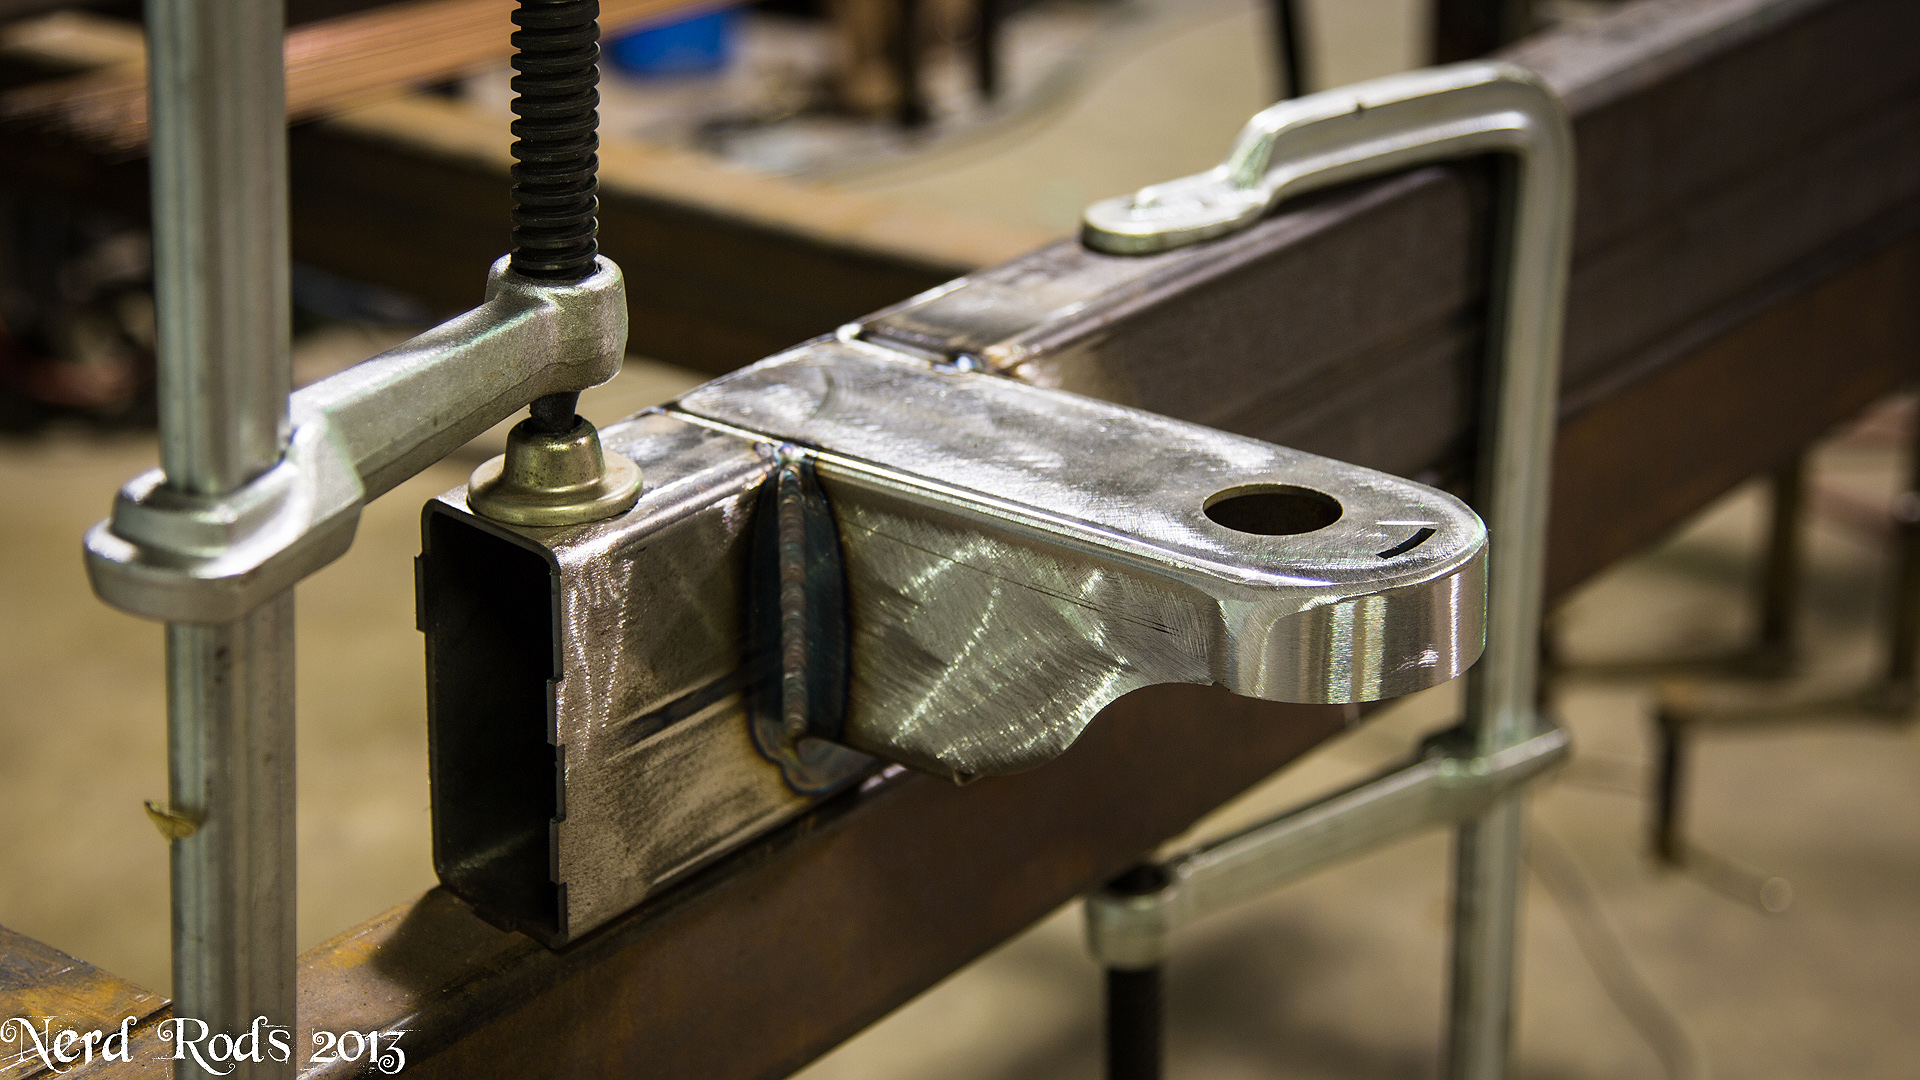
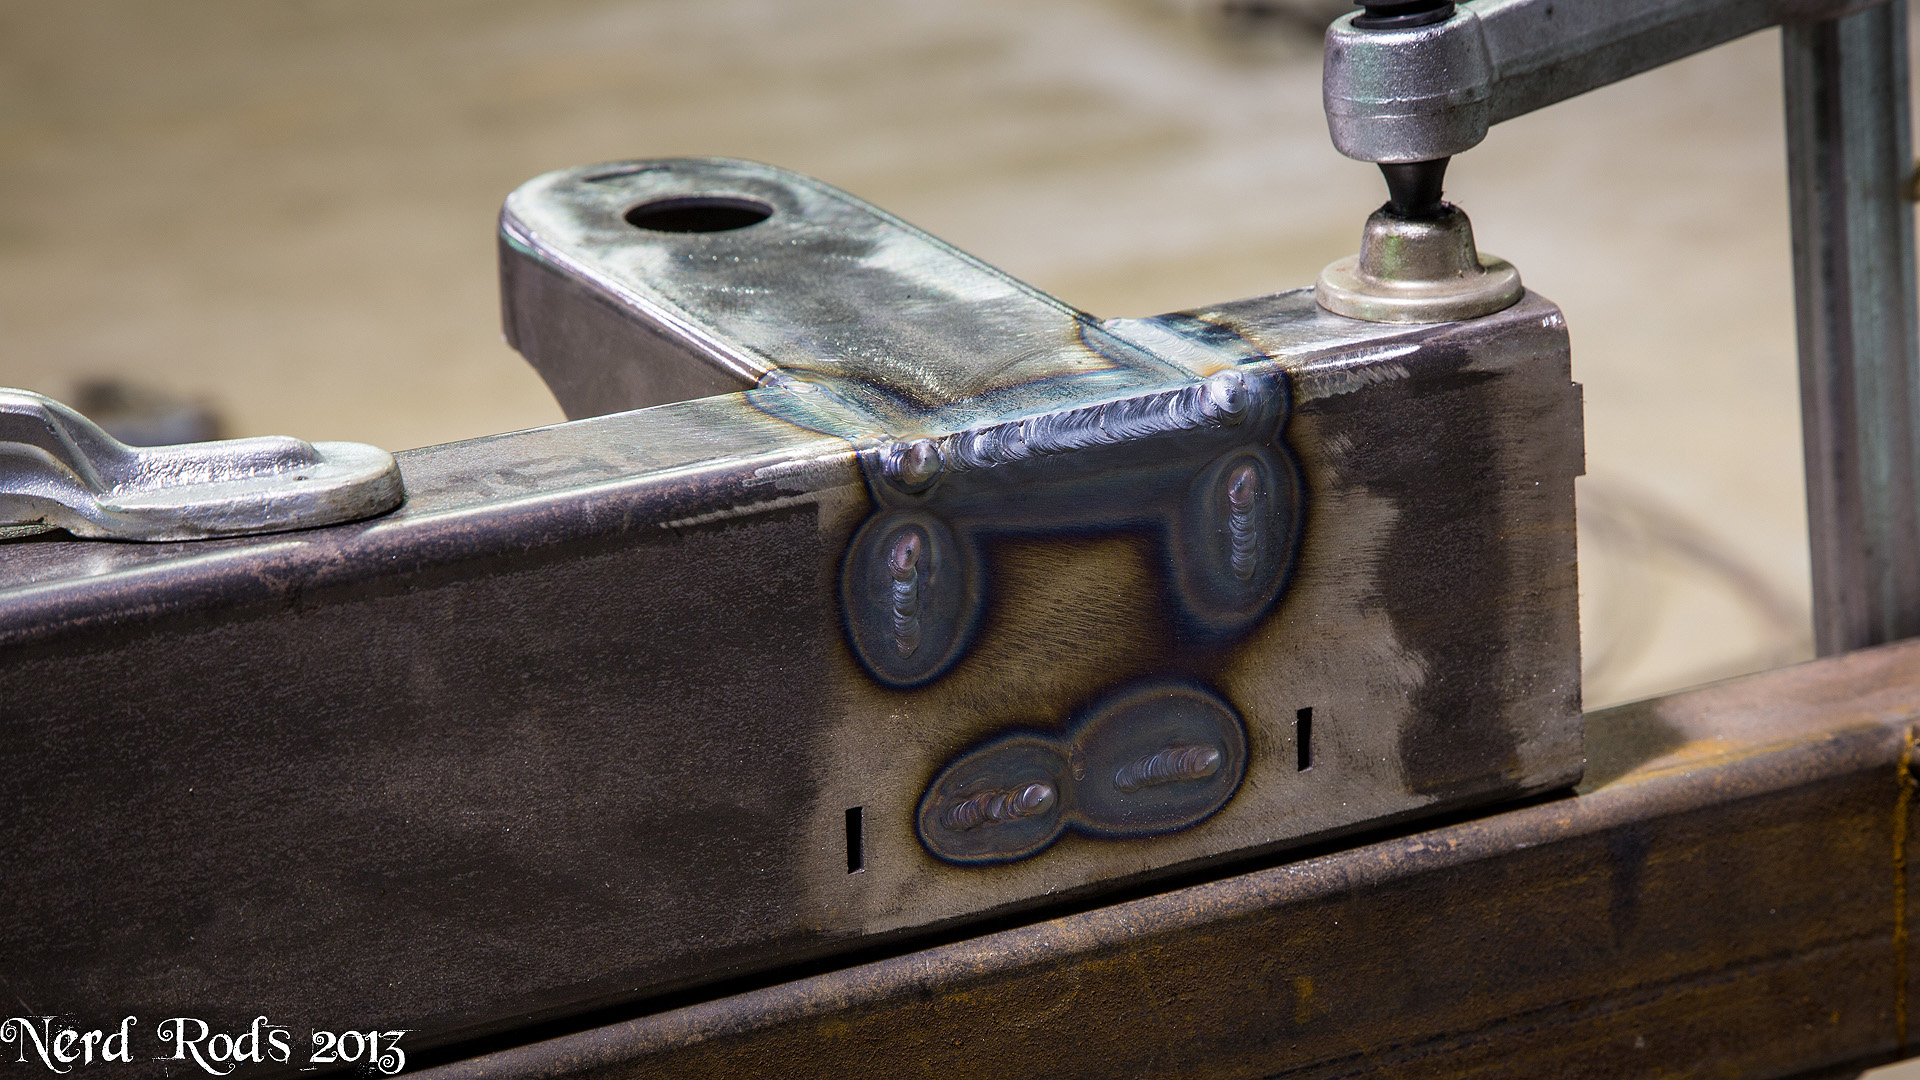
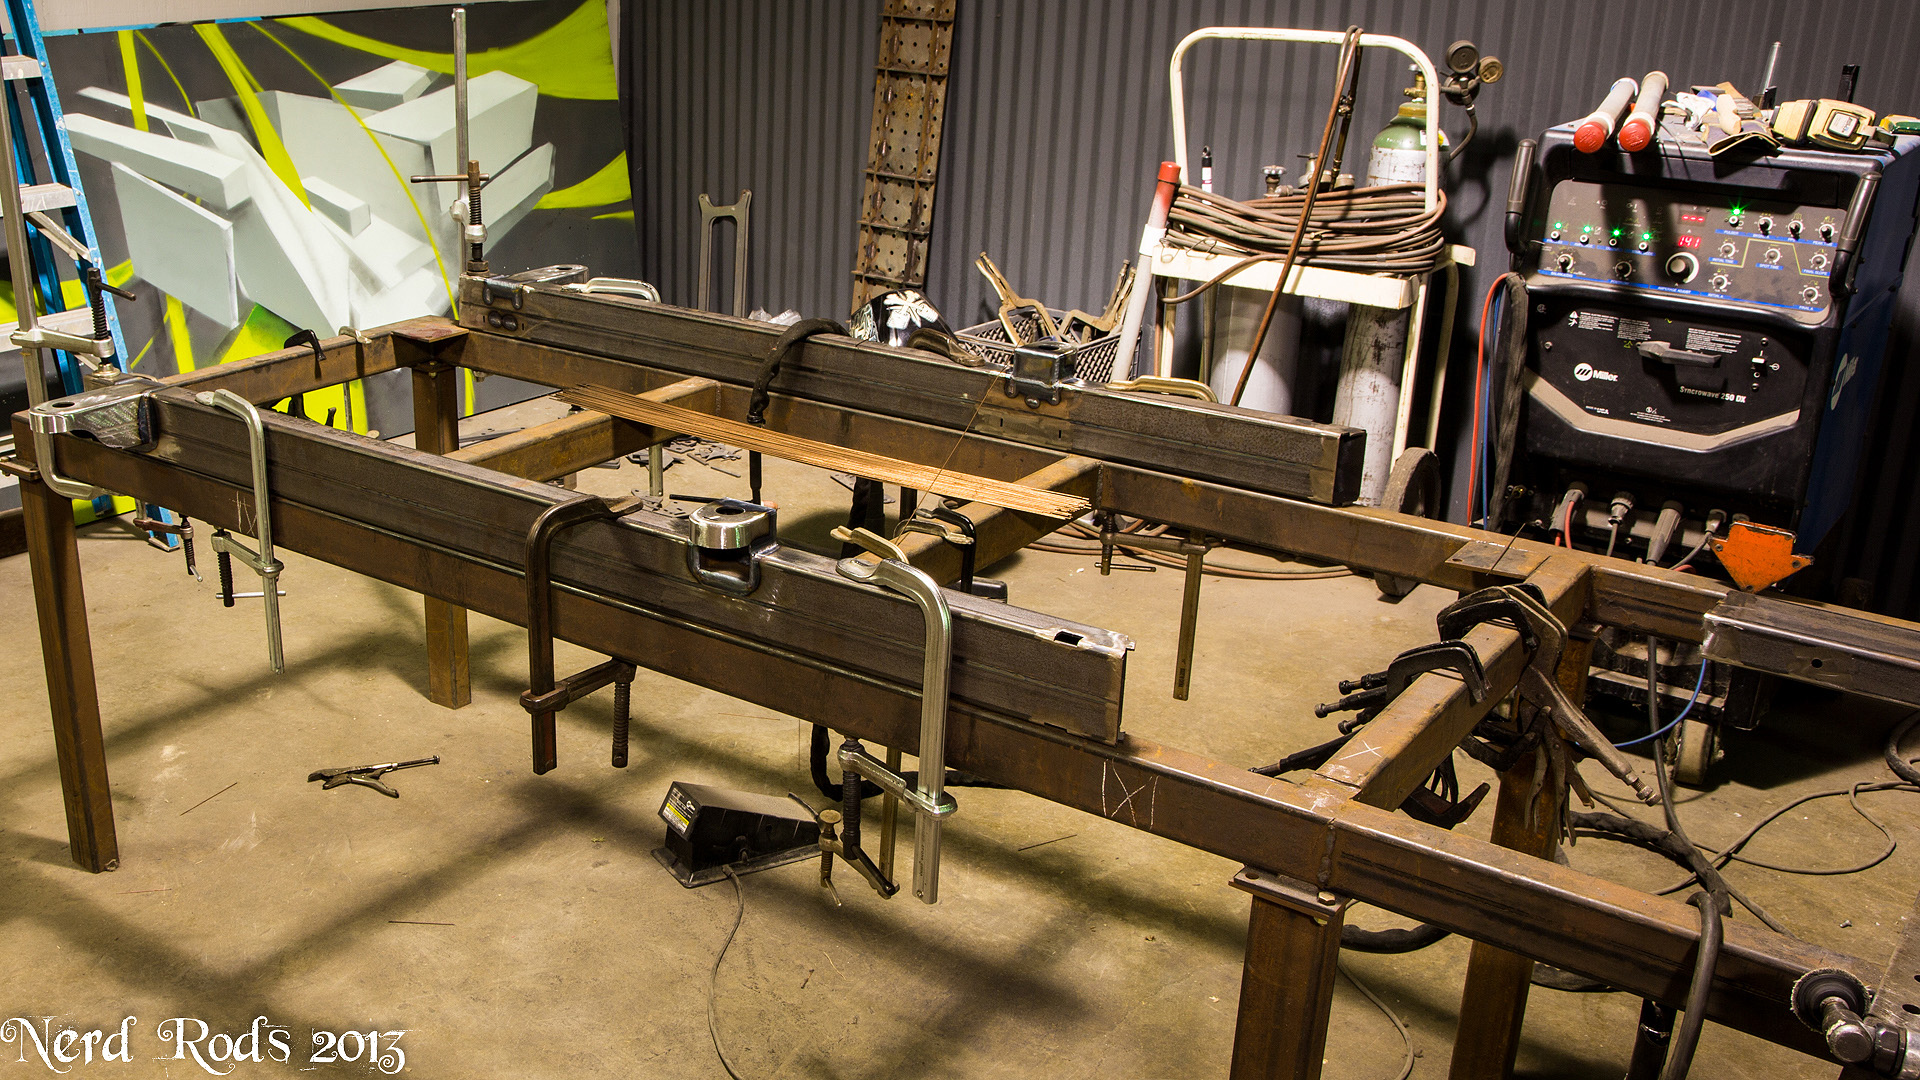
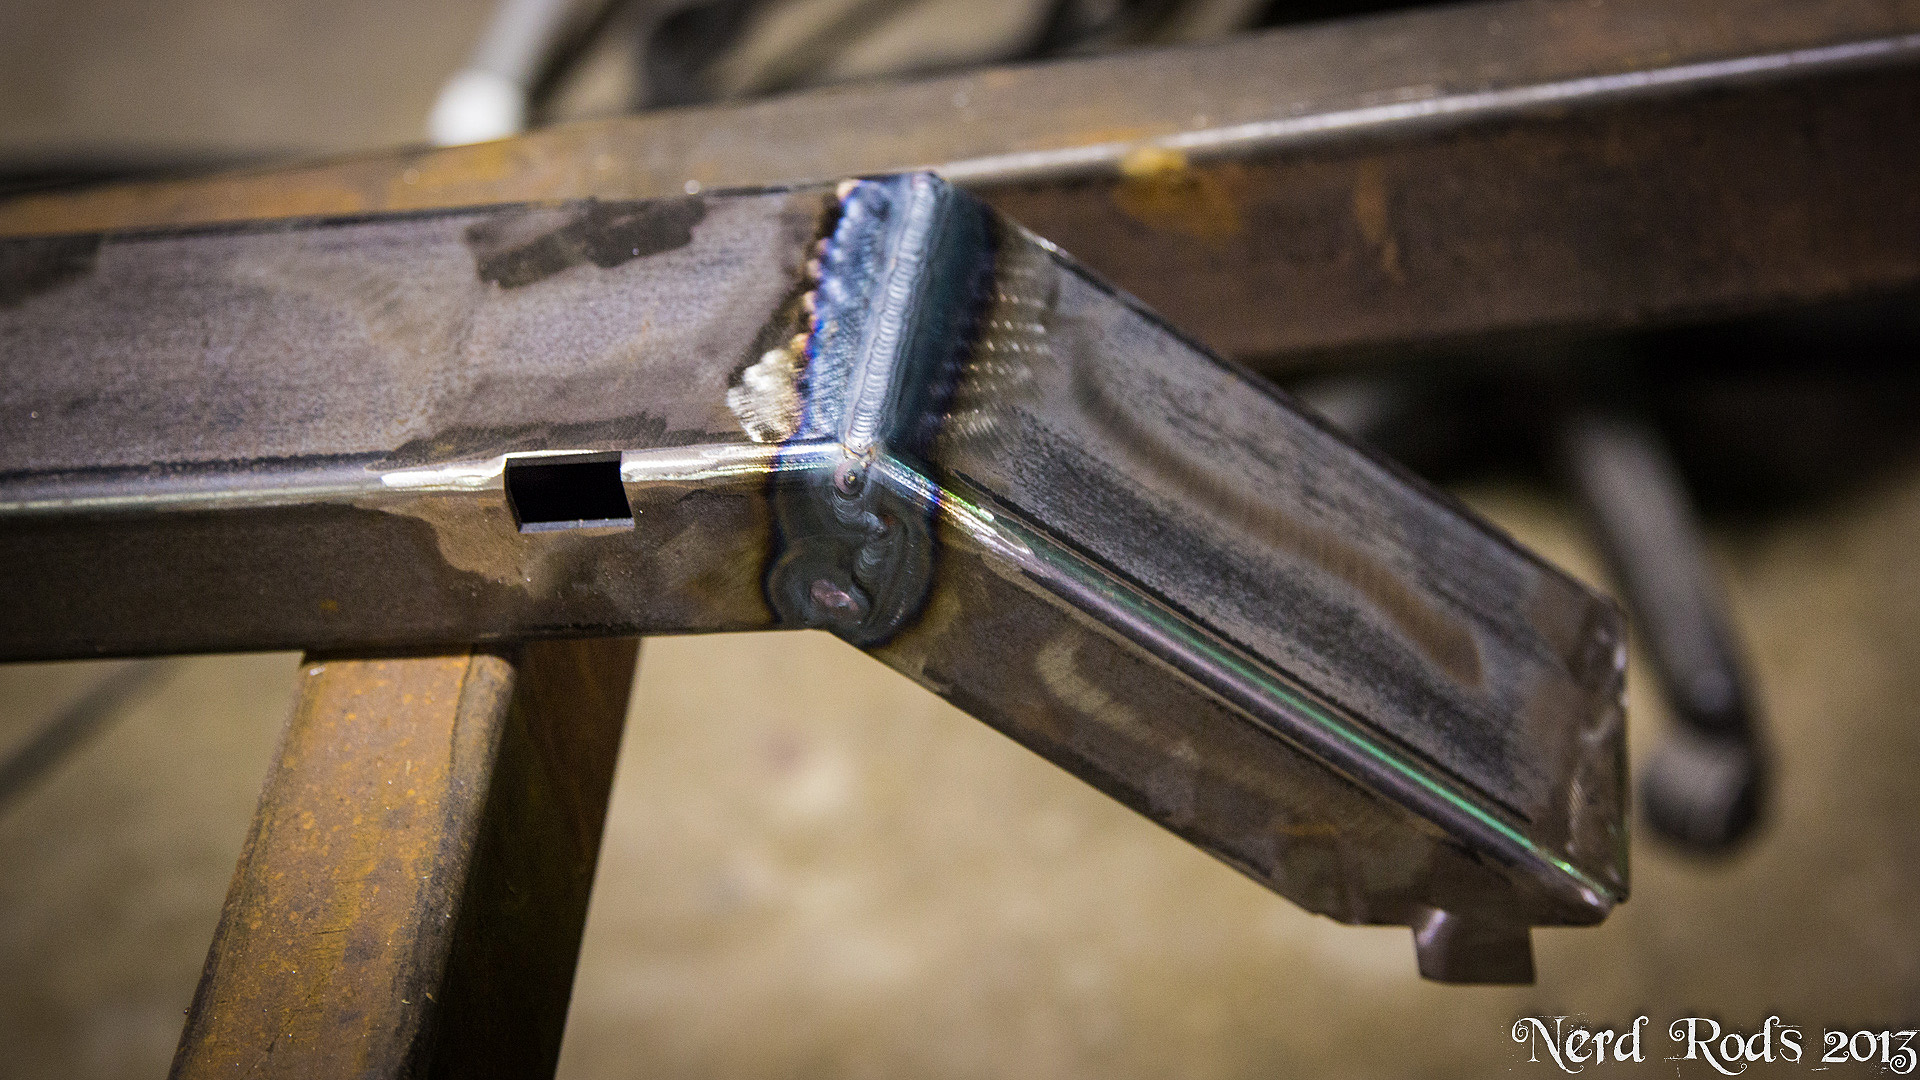
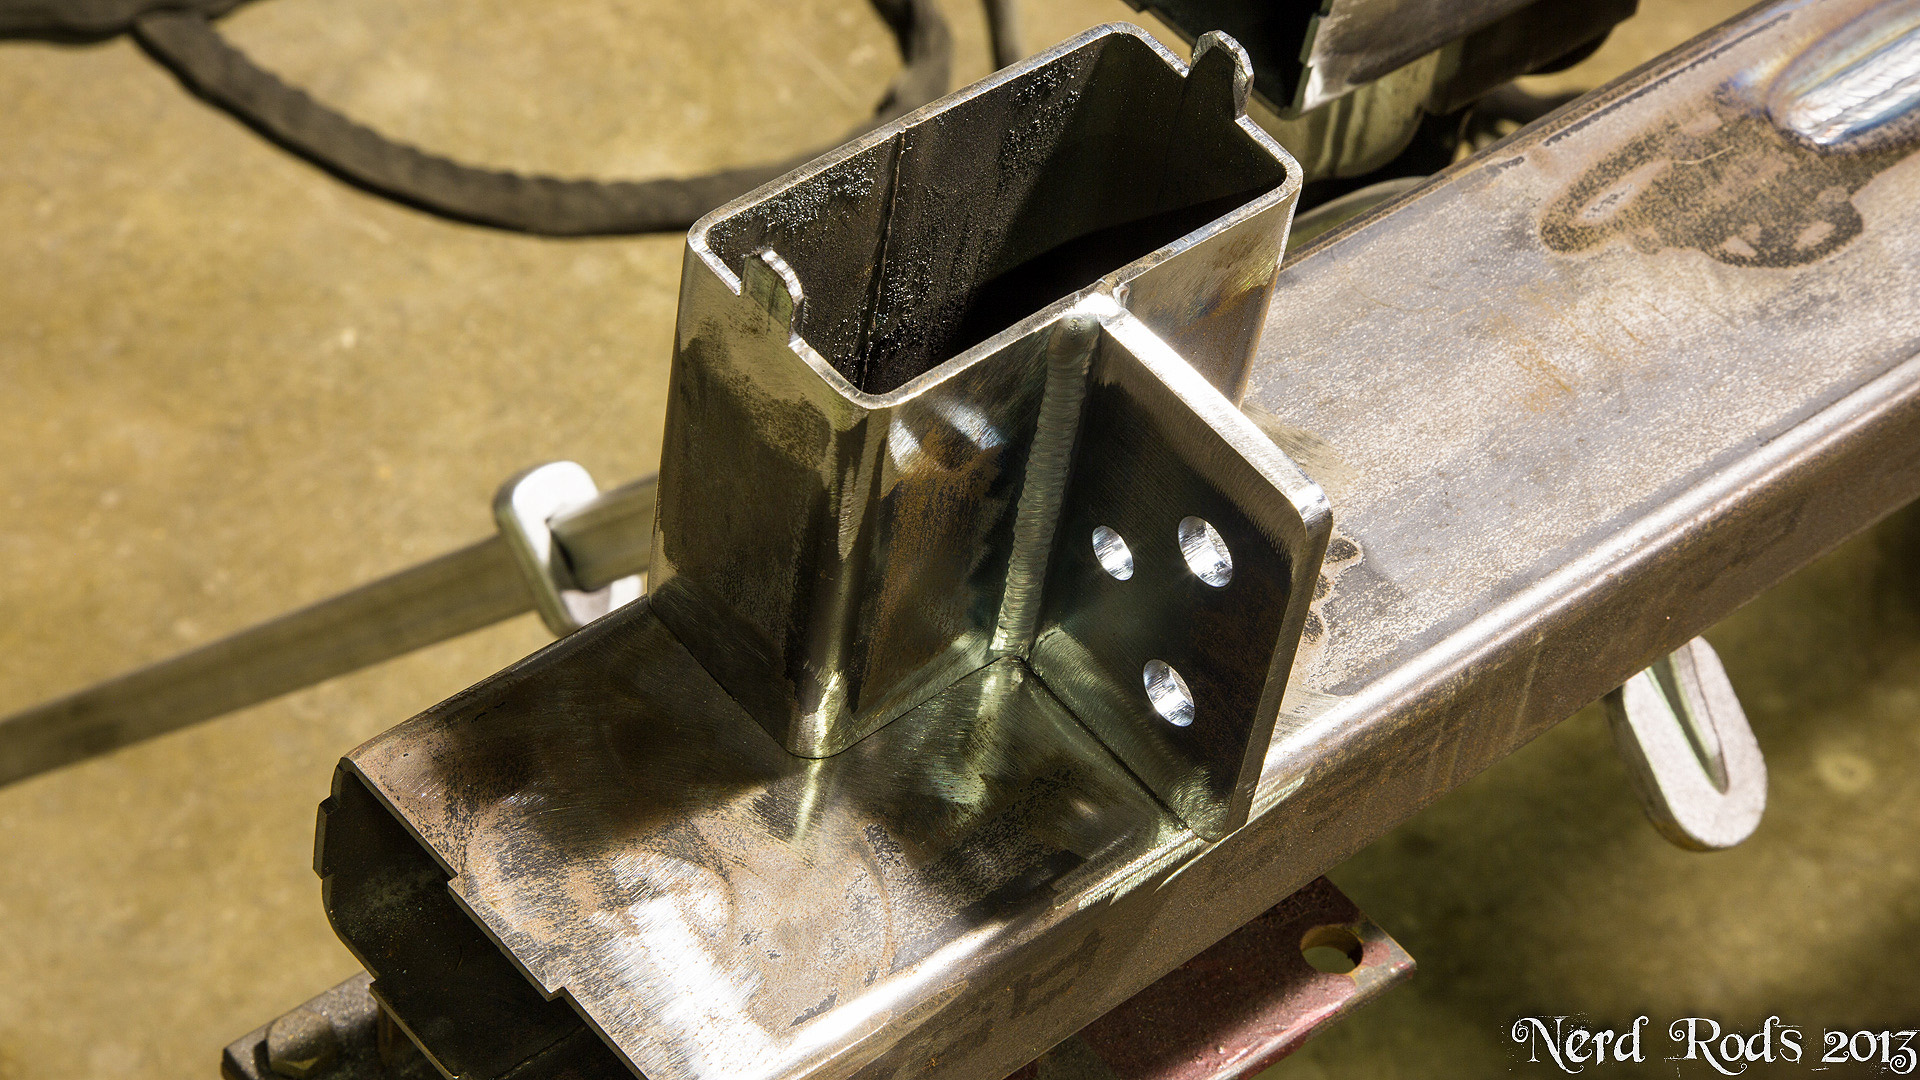
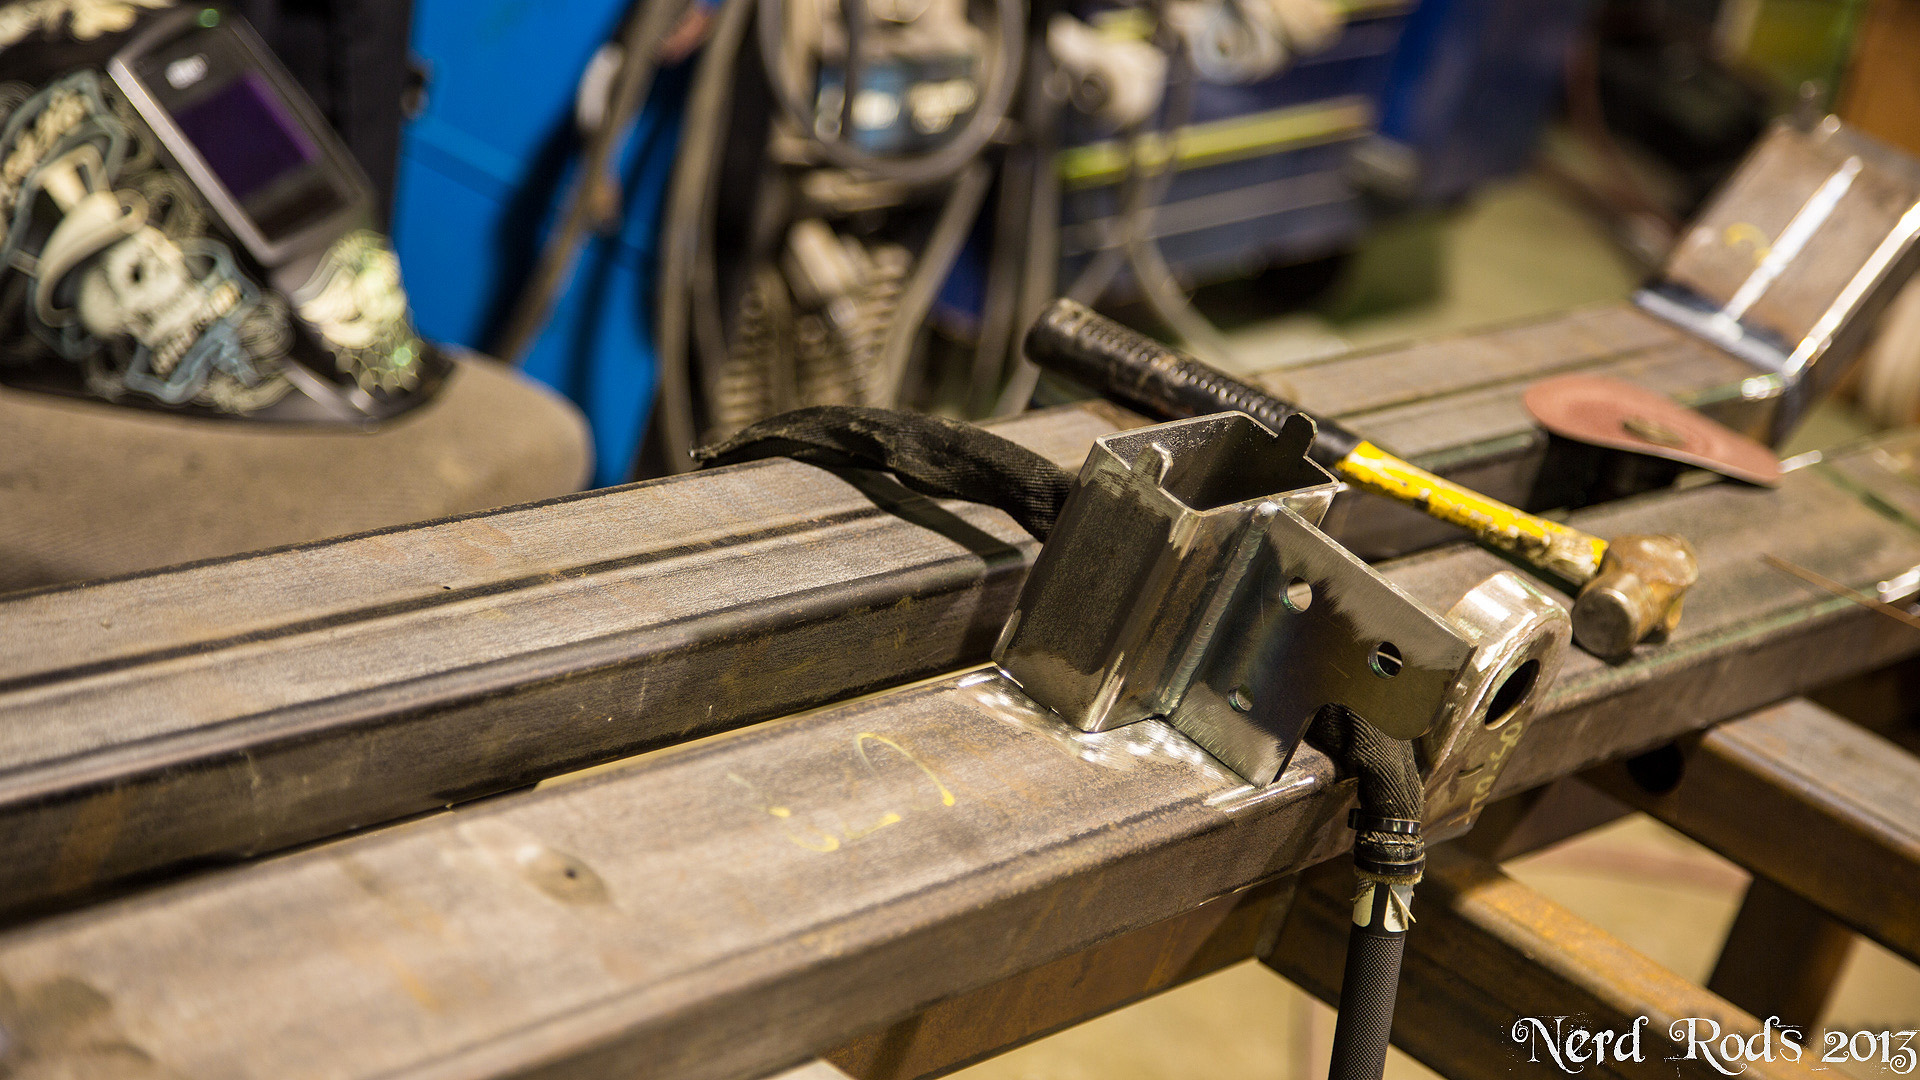
Update 2013.Nov.04
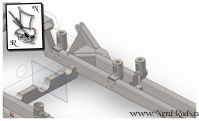
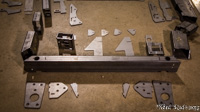
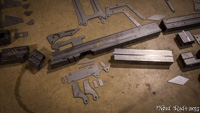
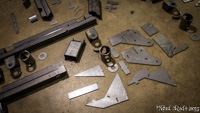
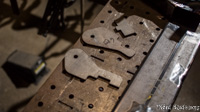
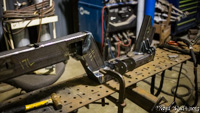
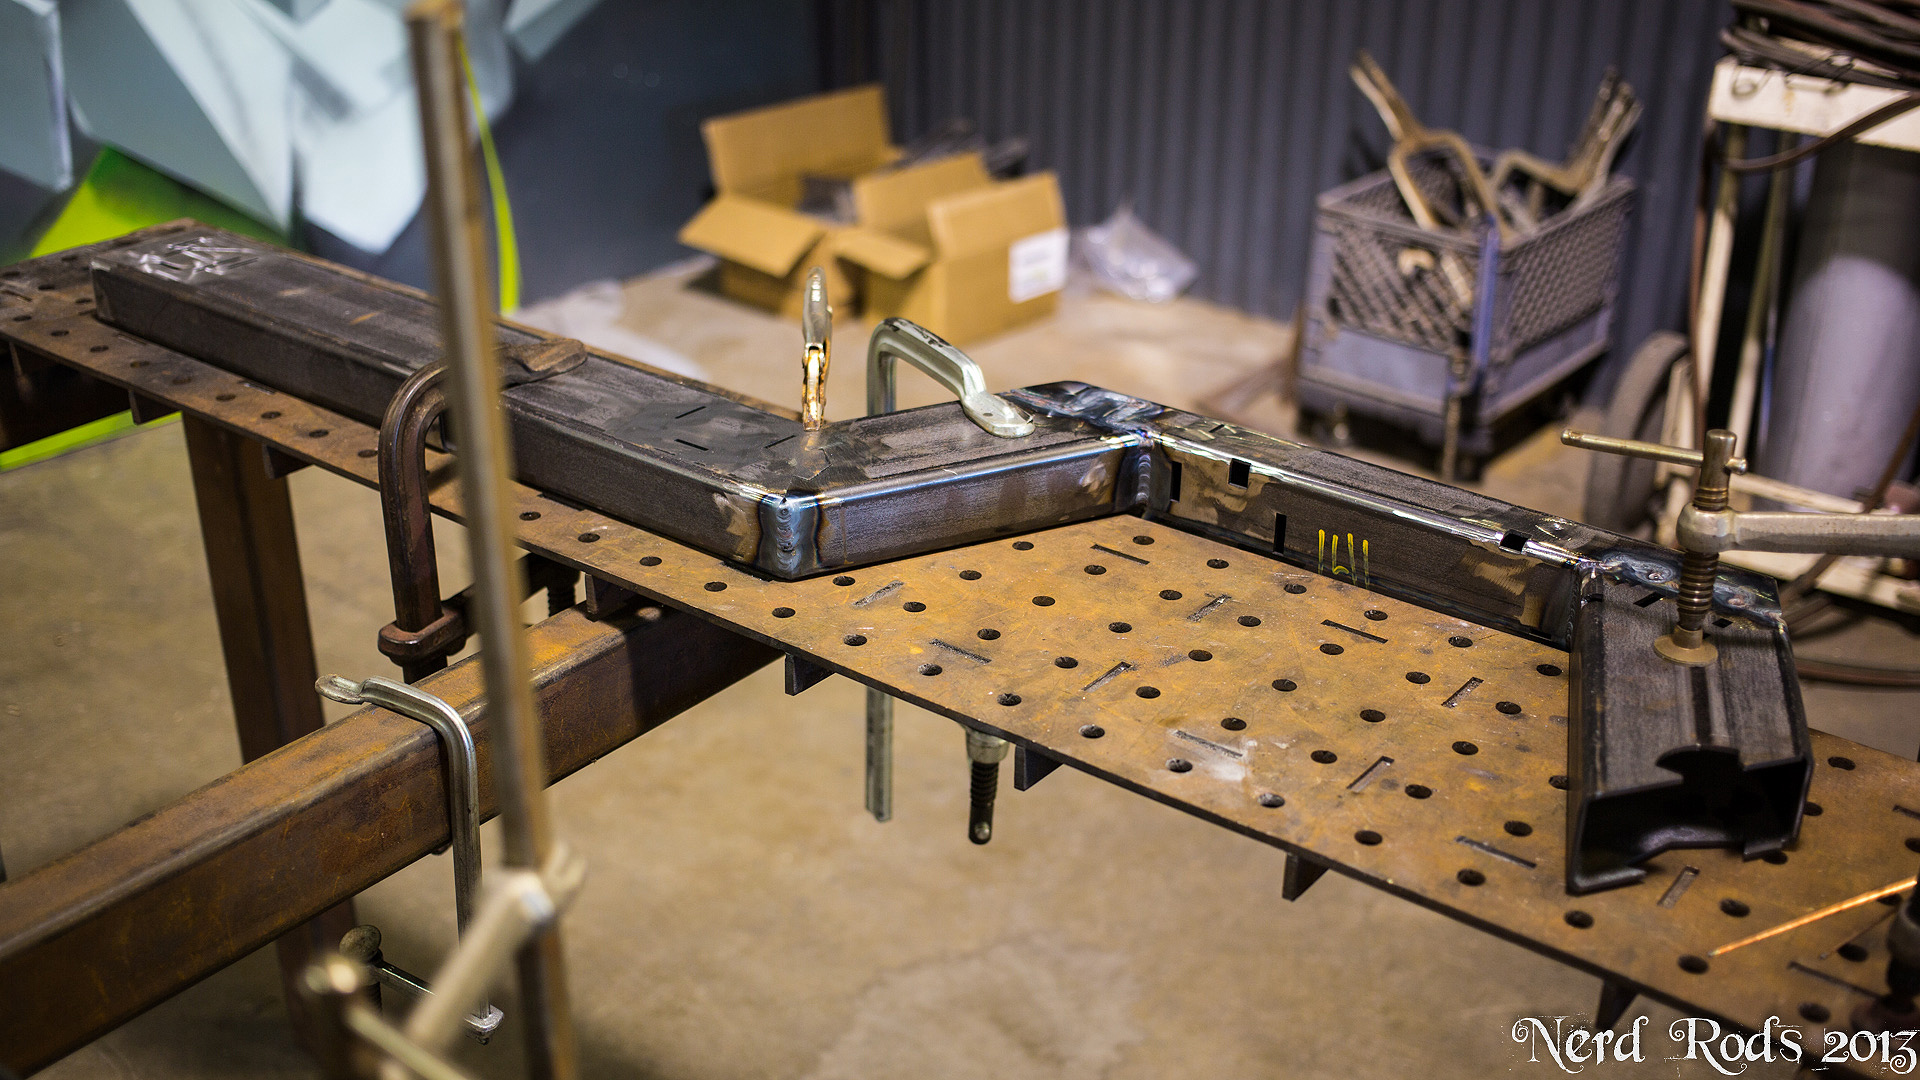
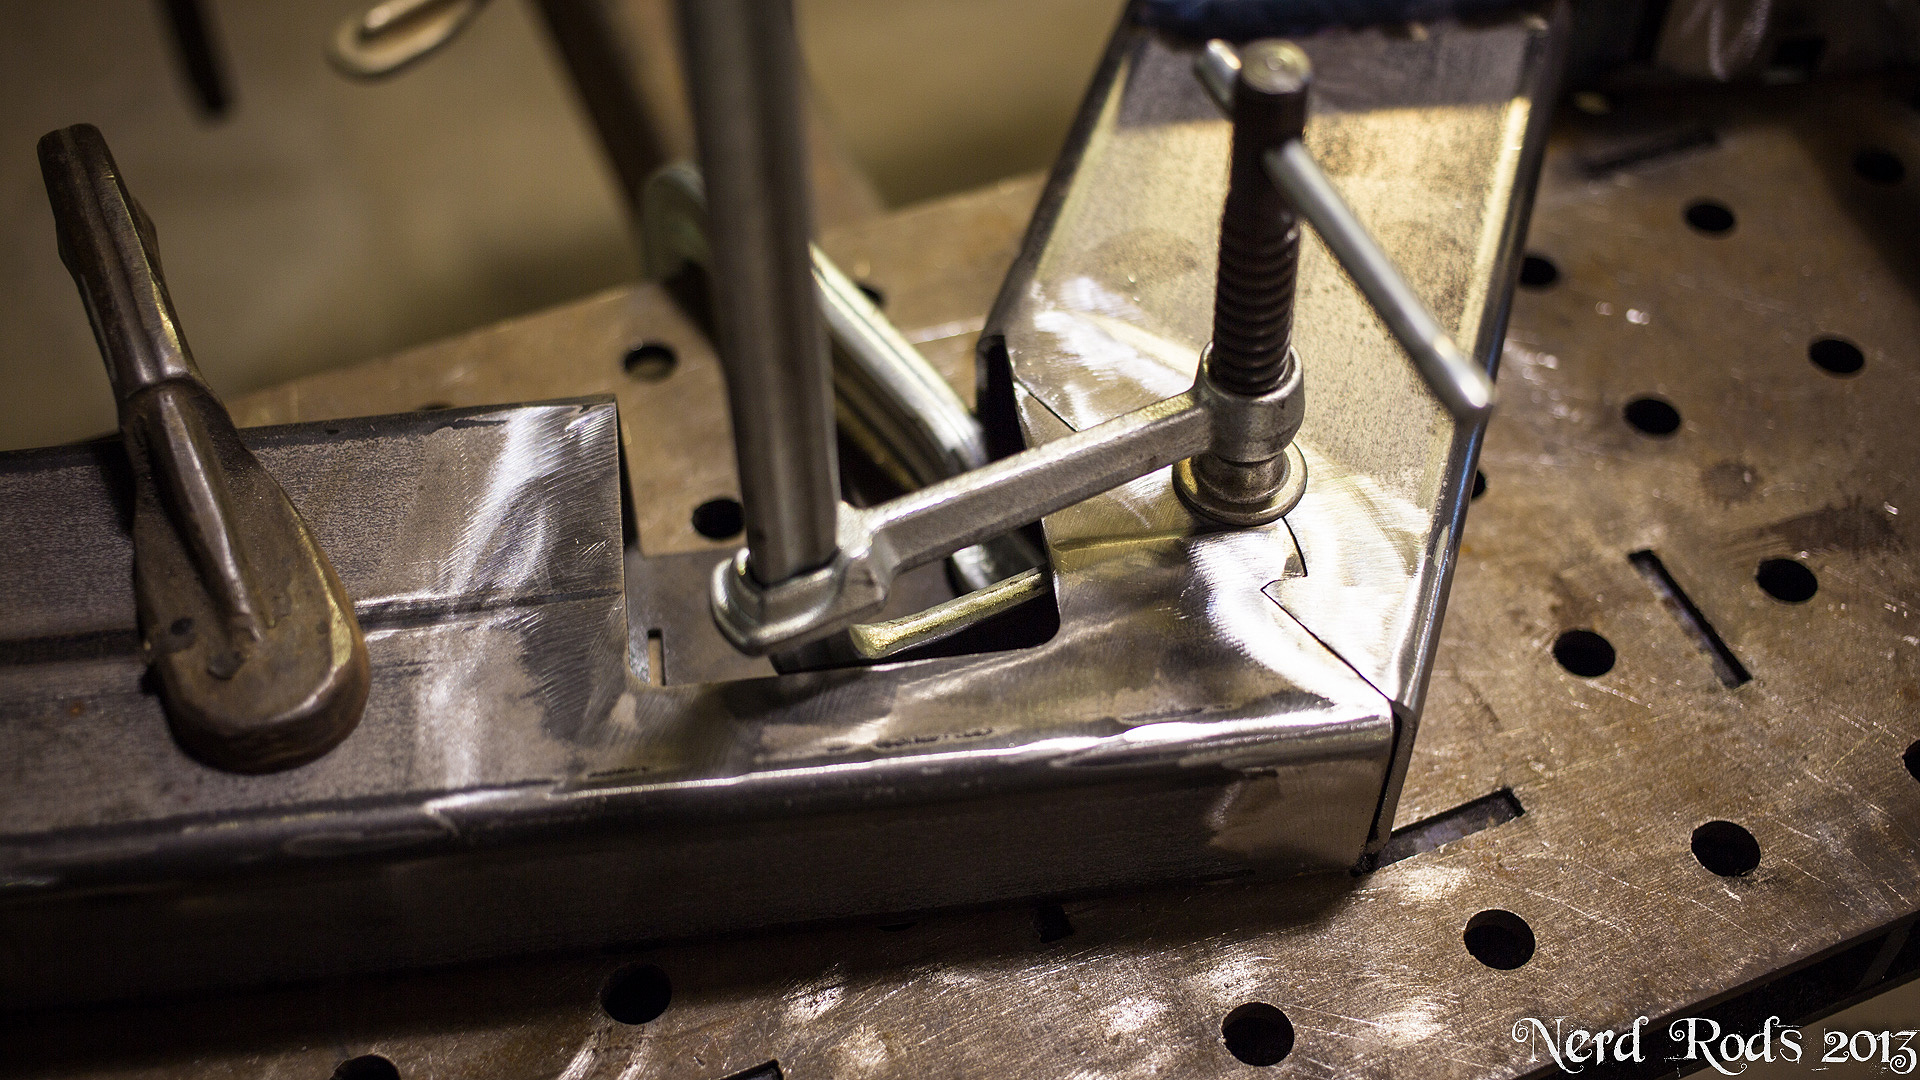
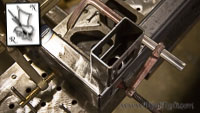
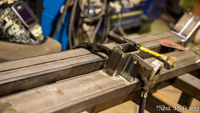
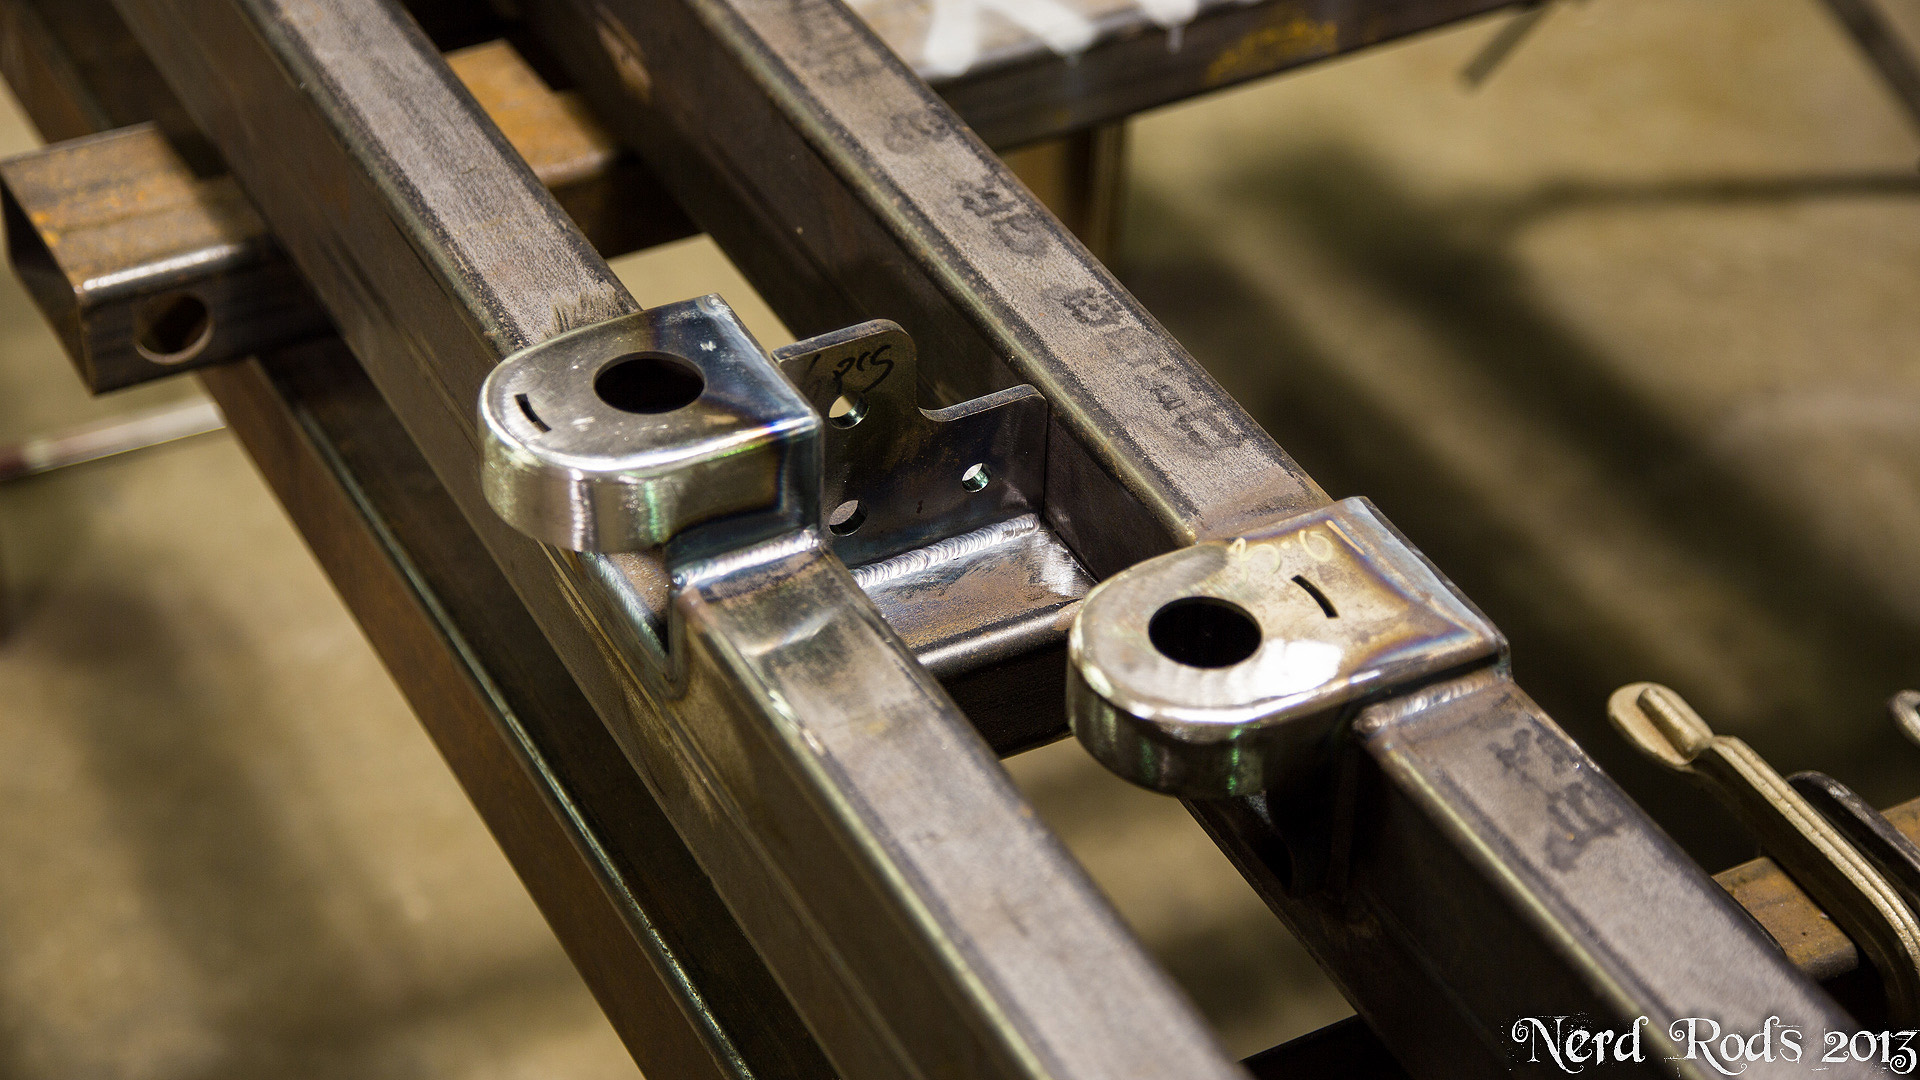
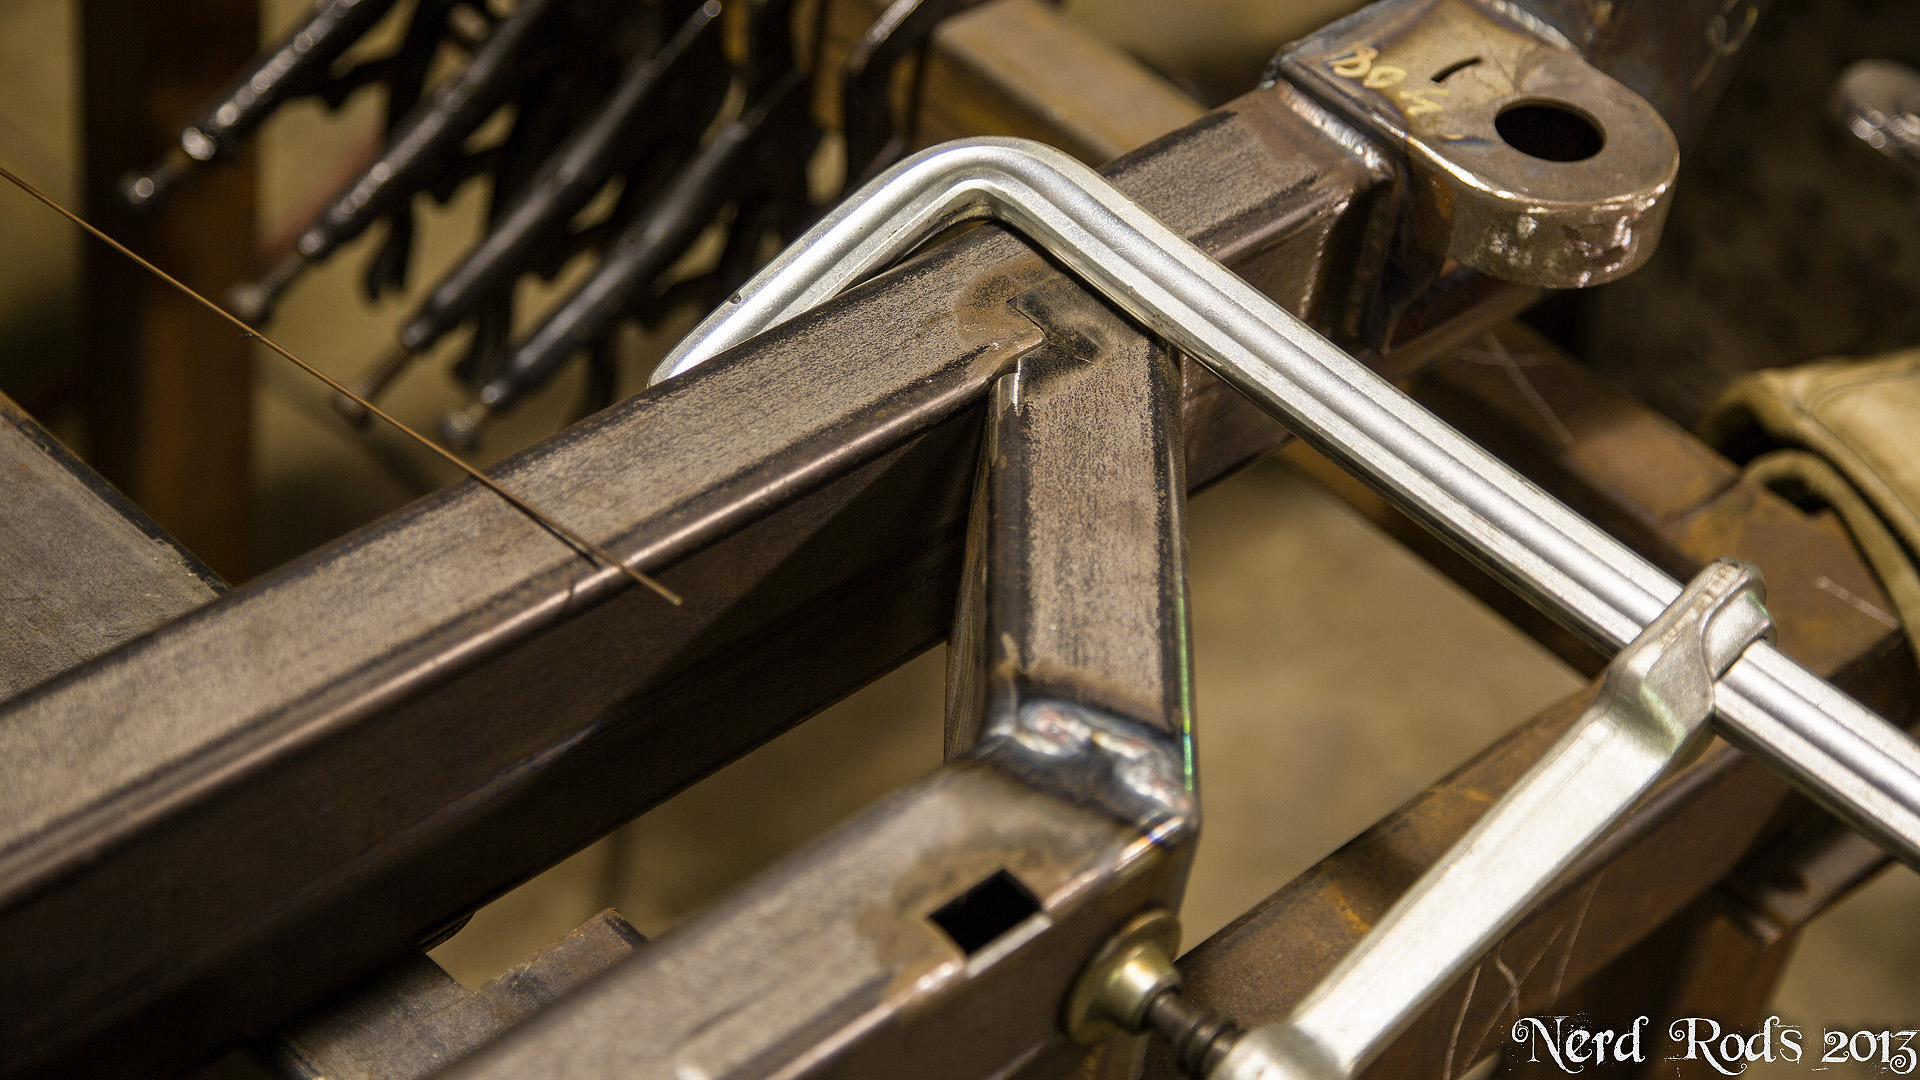
Inner rail is together, Rear upper shock mounts on, Corvette bat wing to frame brackets, Tubing boxing plate and gussets. These parts are much easier to weld on while the frame section is still light enough to flip by yourself.


Later
-Russell
Inner rail is together, Rear upper shock mounts on, Corvette bat wing to frame brackets, Tubing boxing plate and gussets. These parts are much easier to weld on while the frame section is still light enough to flip by yourself.


Later
-Russell
11-04-2013, 10:49 AM
#33

This is like a LEGO or Erector kit for big kids...I LOVE it!
I would LOVE to do this with one of the truck frames. What a fun project.
Great job with the SolidWorks! New versions are much more user friendly than they used to be. Its certainly shifted from very difficult to learn to pretty easy to figure out with some tinker time. But thats really impressive work!
J.
11-04-2013, 03:13 PM
#34
Launching!
Thread Starter
Join Date: Jan 2007
Location: Luling TX In the Hot Rod Shop
Posts: 294
Likes: 0
Received 3 Likes
on
3 Posts
This is like a LEGO or Erector kit for big kids...I LOVE it!
I would LOVE to do this with one of the truck frames. What a fun project.
Great job with the SolidWorks! New versions are much more user friendly than they used to be. Its certainly shifted from very difficult to learn to pretty easy to figure out with some tinker time. But thats really impressive work!
J.
I would LOVE to do this with one of the truck frames. What a fun project.
Great job with the SolidWorks! New versions are much more user friendly than they used to be. Its certainly shifted from very difficult to learn to pretty easy to figure out with some tinker time. But thats really impressive work!
J.
Thanks! There is some learning curve but I'm all self taught just using the built in tutorial system. The hard part is learning how to organize your construction of parts in the CAD software but PC's are also getting faster to make life easier. My current rig has an 8 core processor and a water cooling unit. A far cry from my old dual core machine.
-Russell
 11-10-2013, 07:13 AM
#36
Launching!
Thread Starter
Join Date: Jan 2007
Location: Luling TX In the Hot Rod Shop
Posts: 294
Likes: 0
Received 3 Likes
on
3 Posts
Thanks! Want to trade for one of those 911's!! 
I really want to build a 930 styled car with a nice light LS motor when I get some time for my own thing.
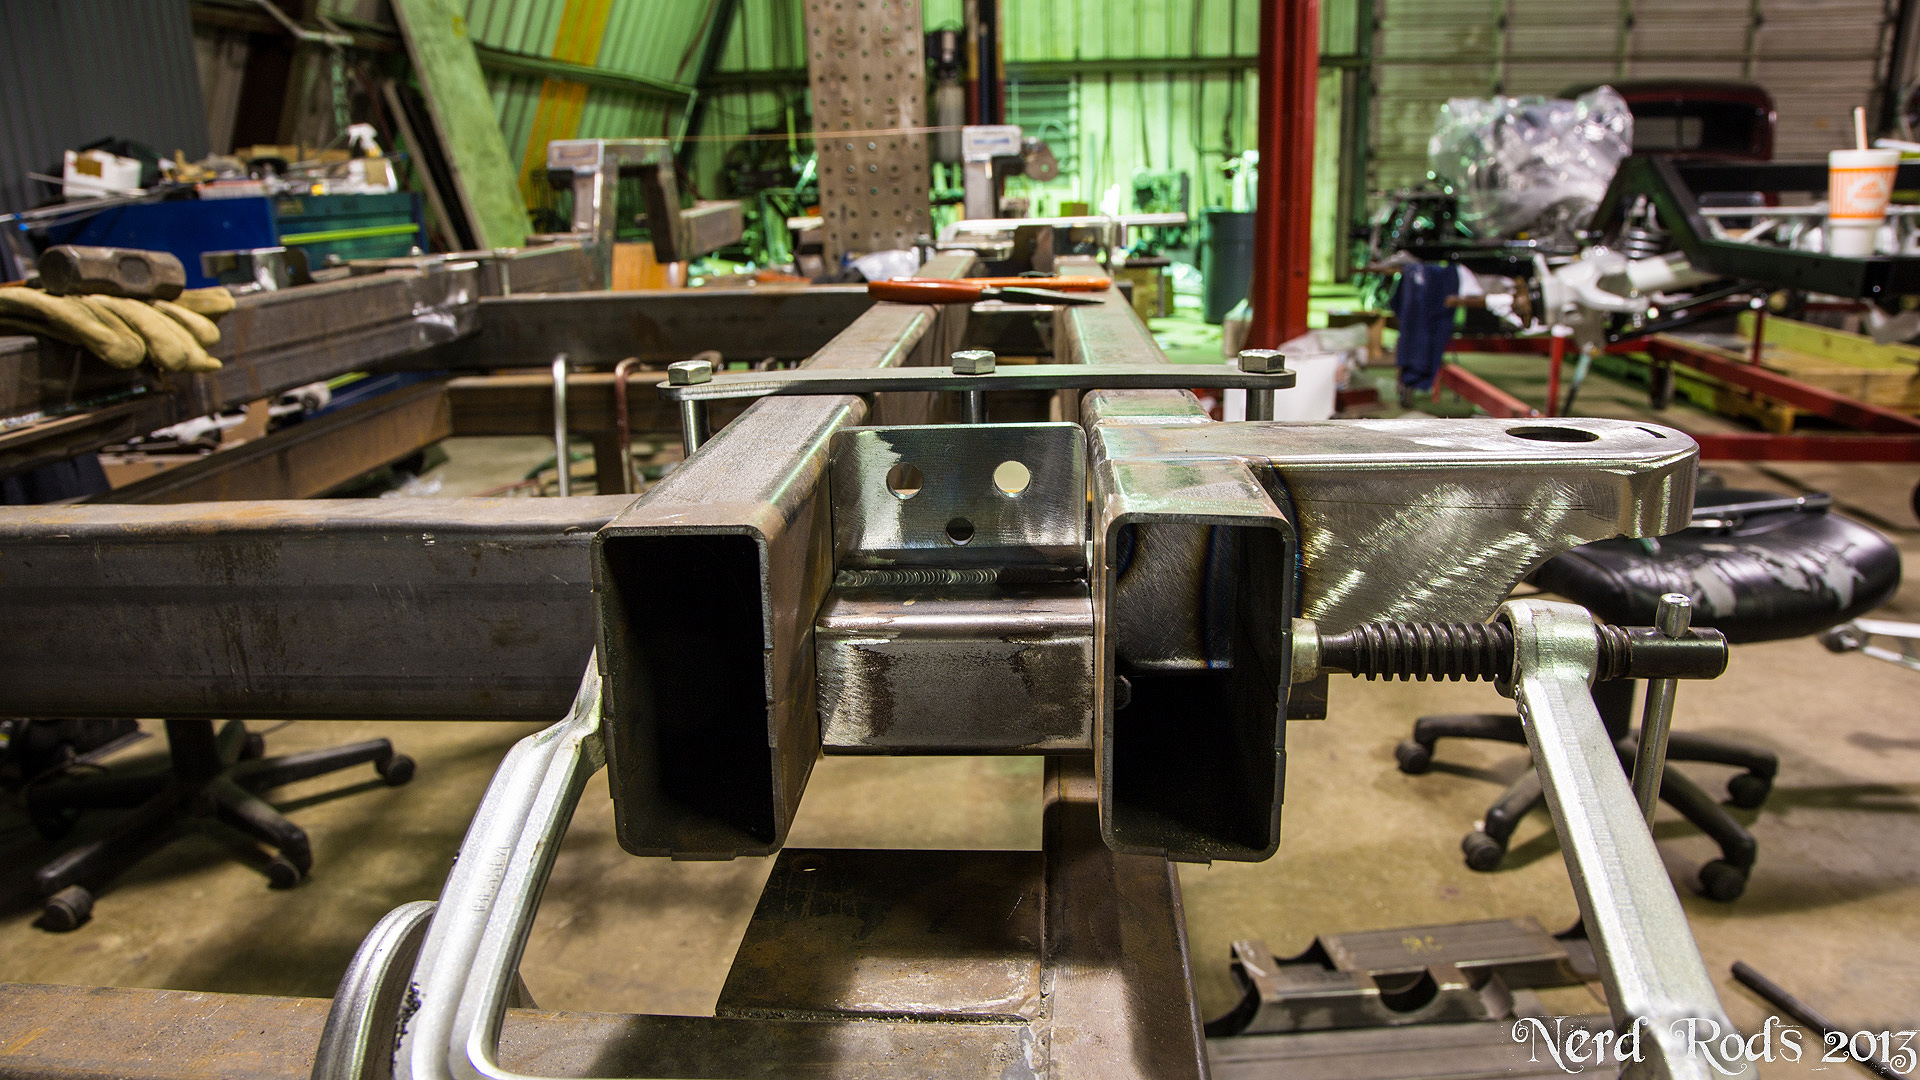
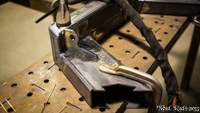
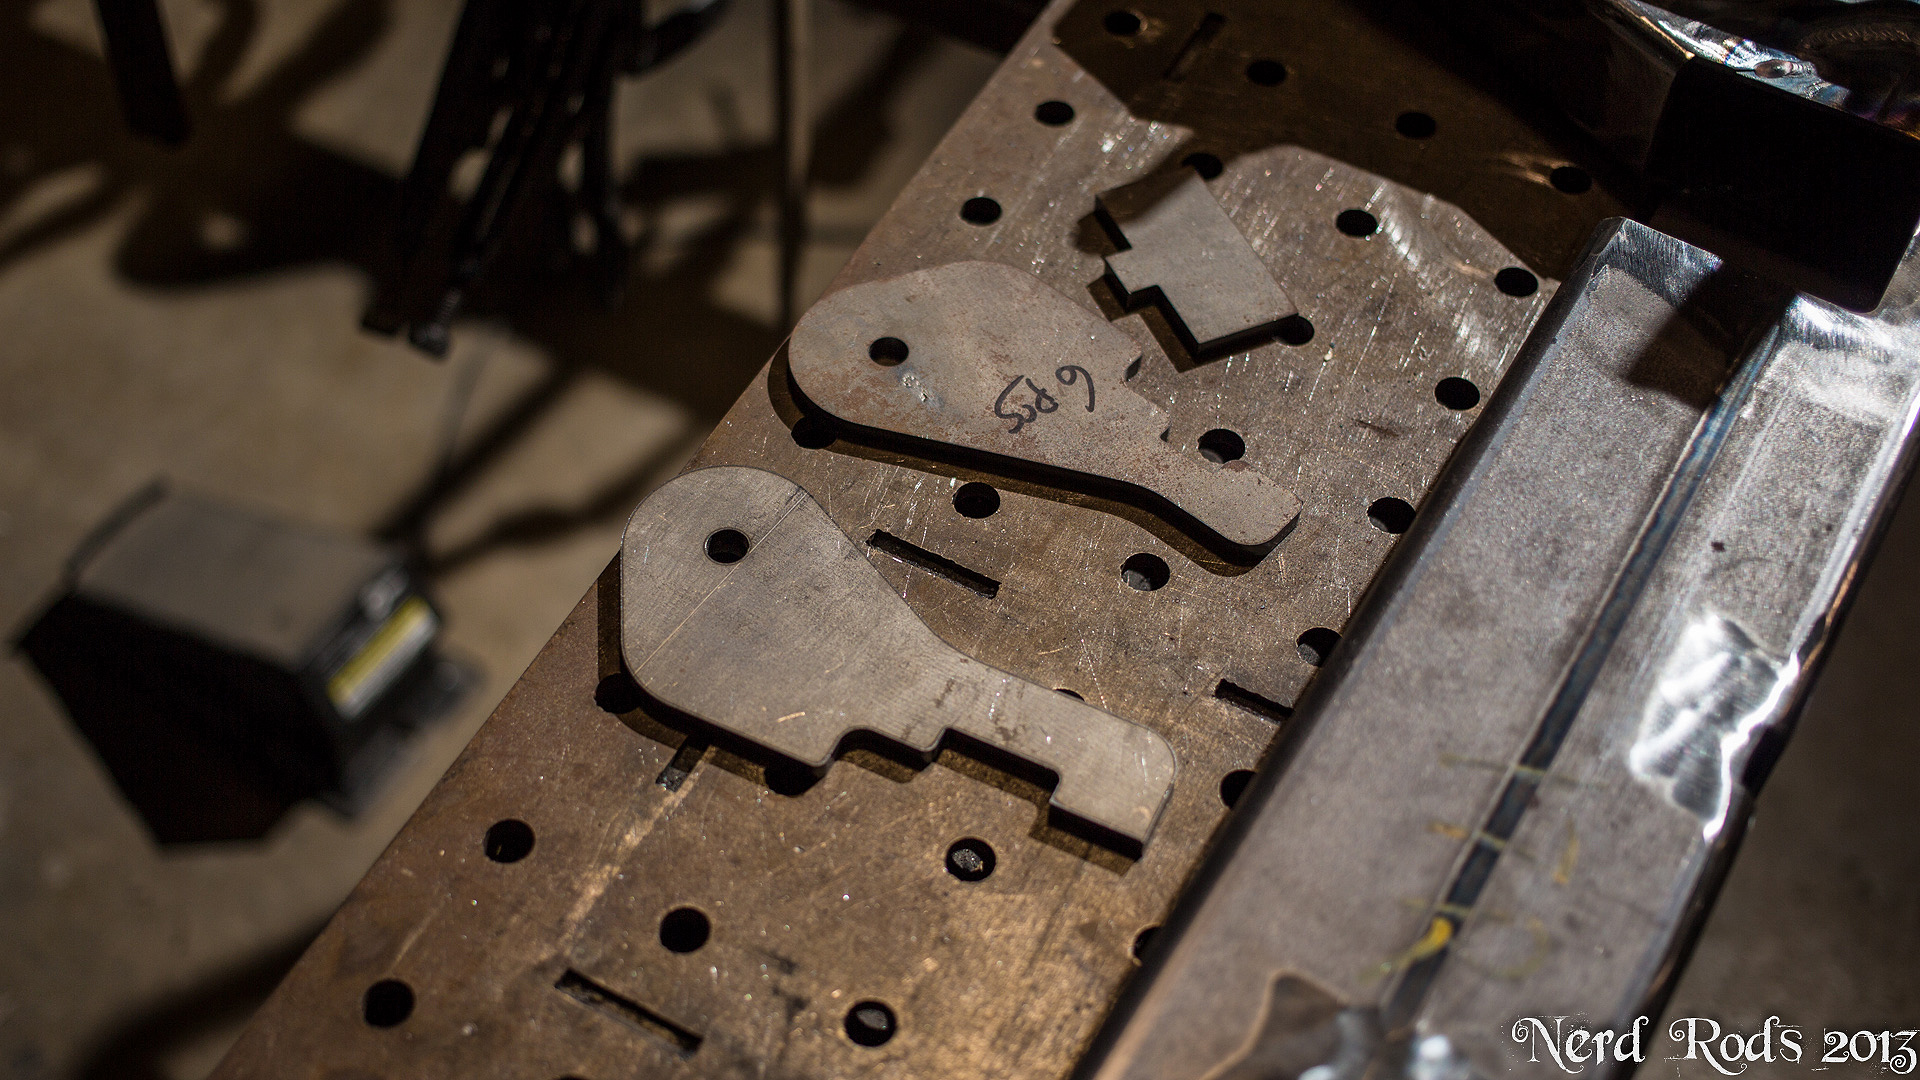
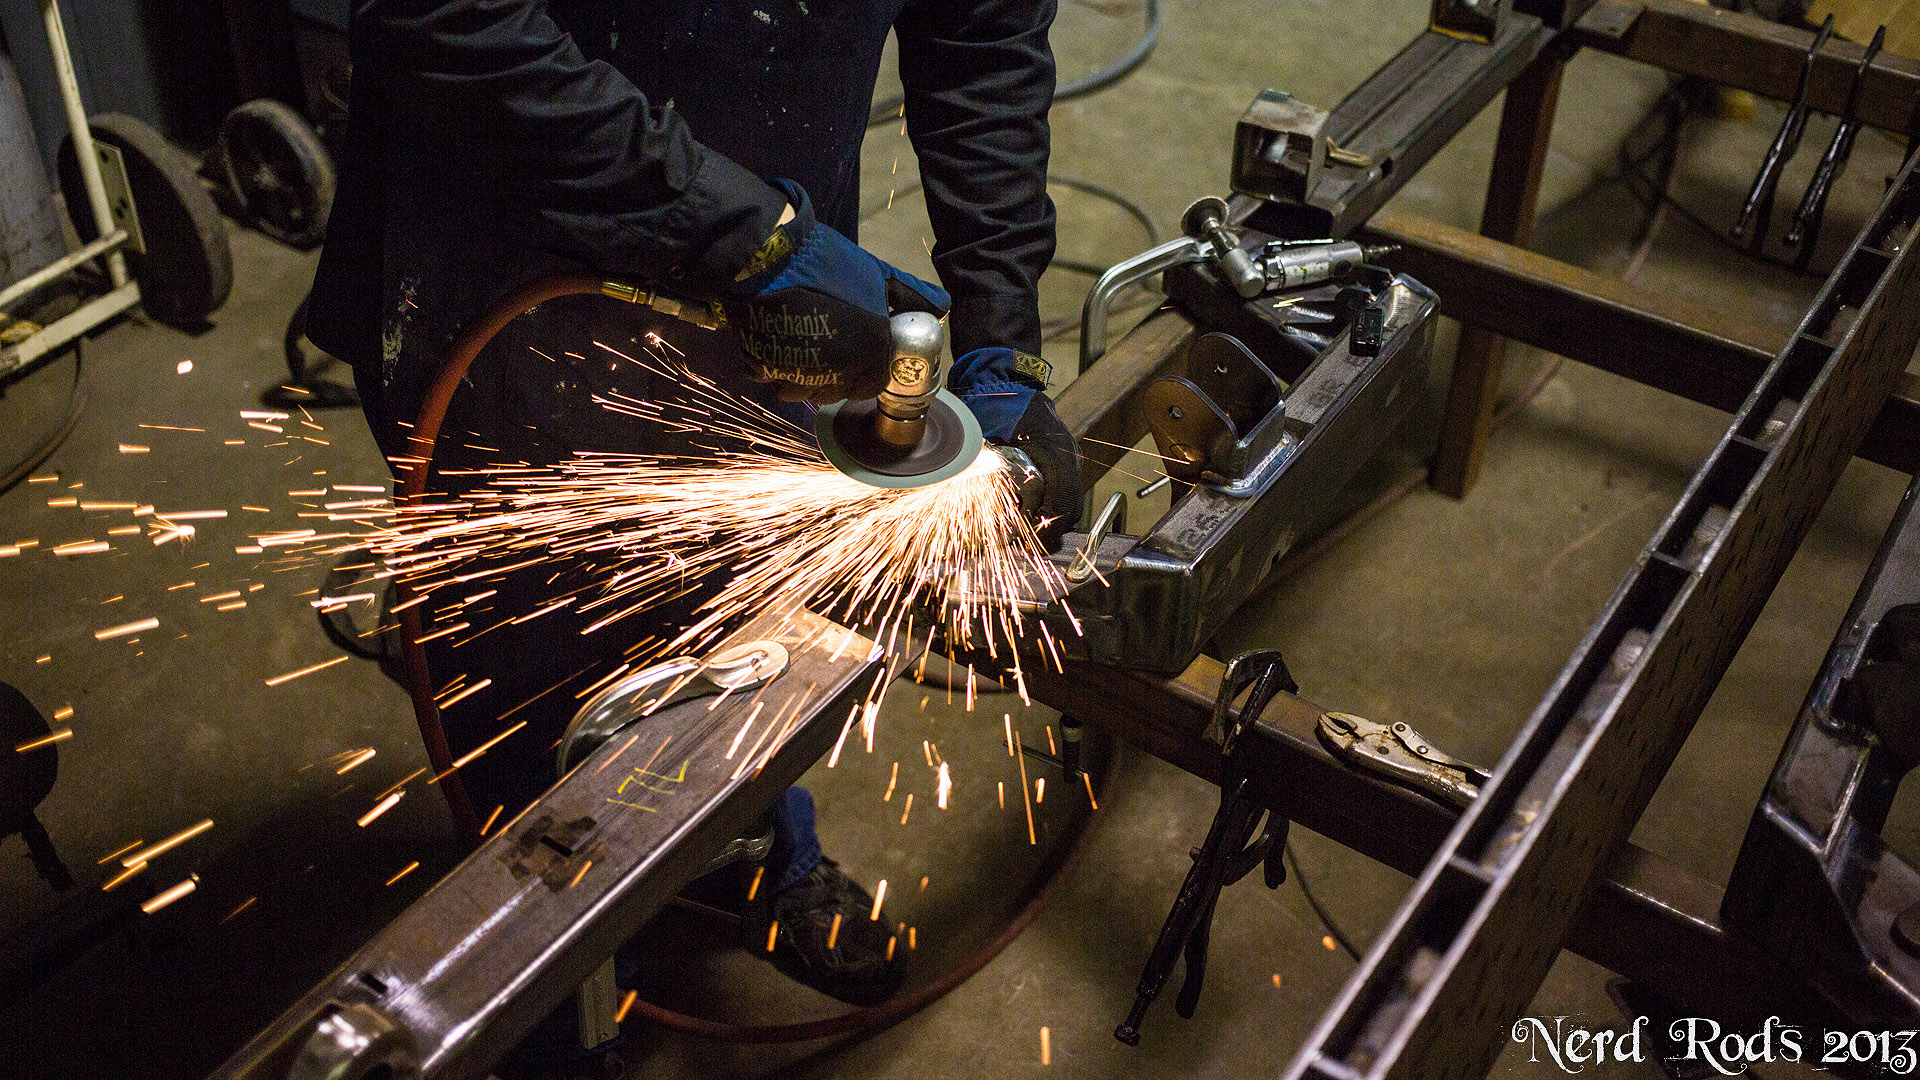
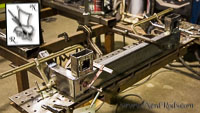
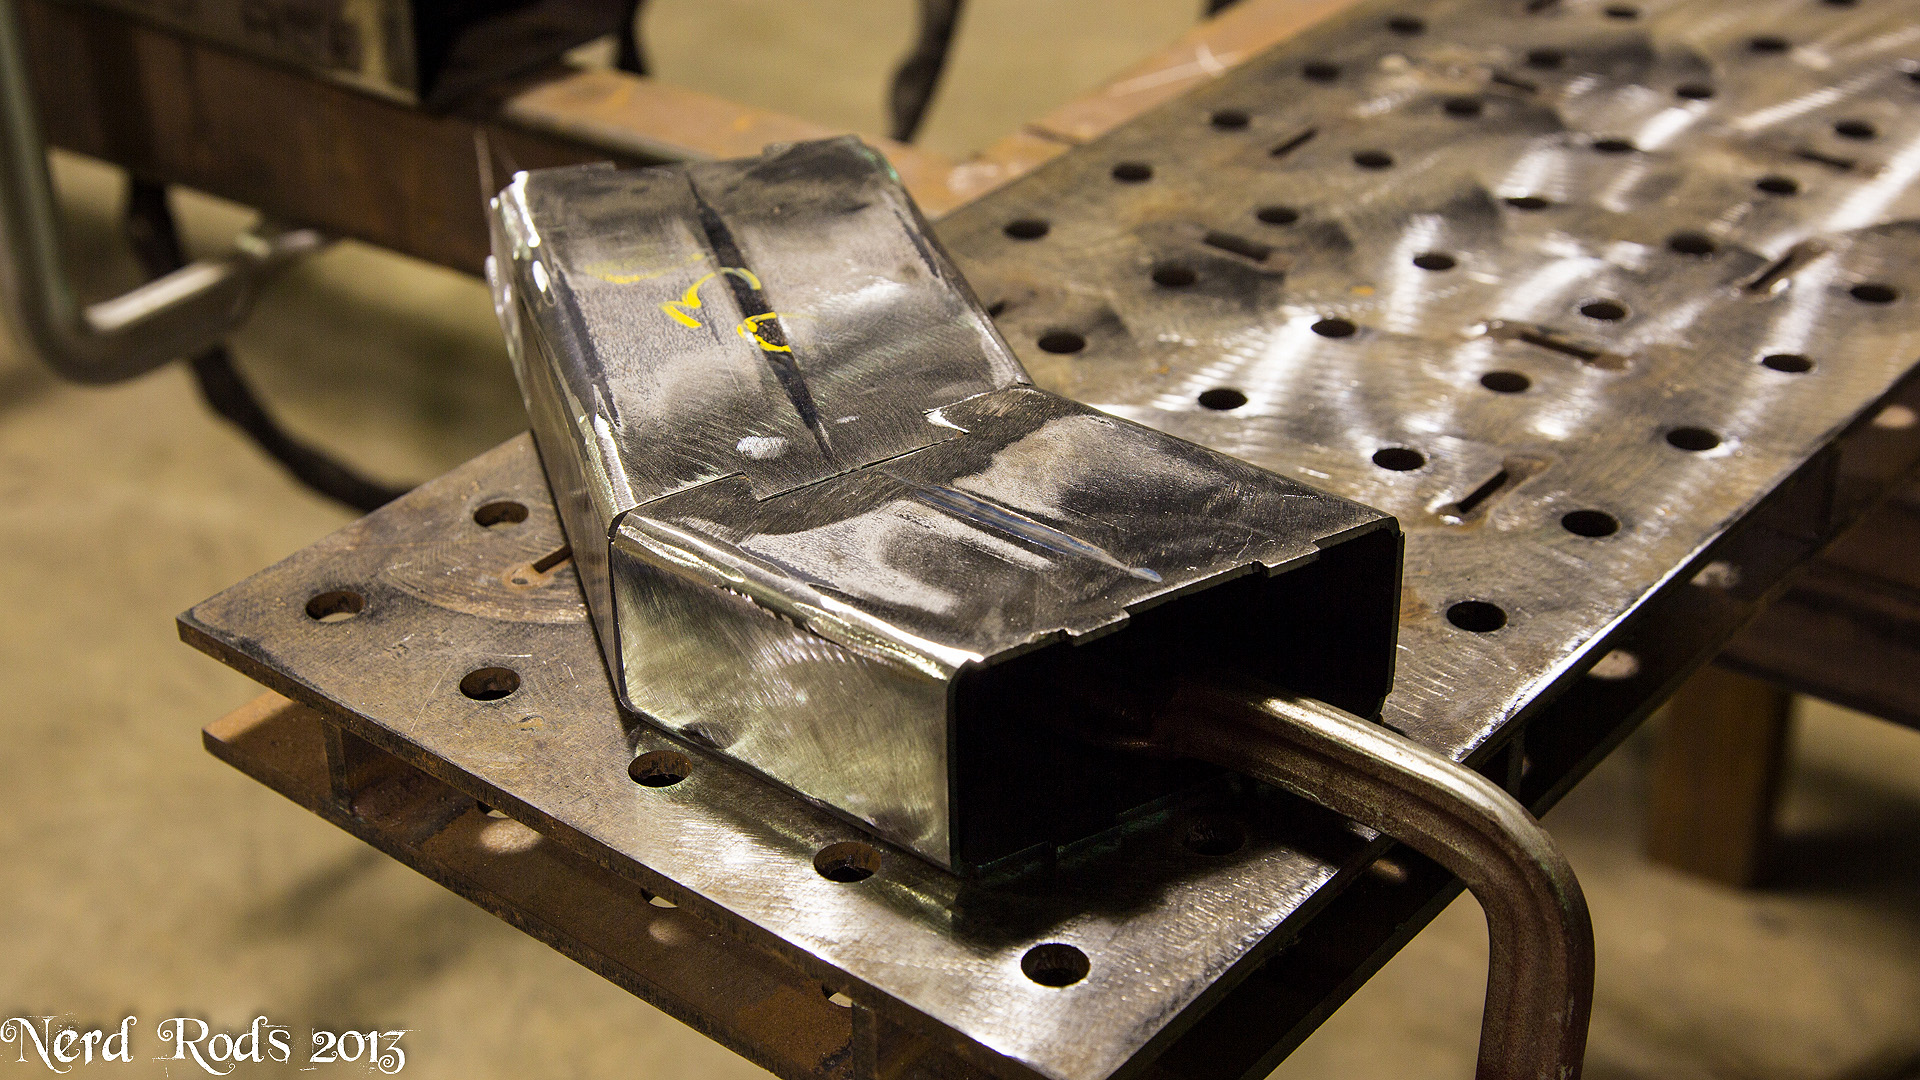
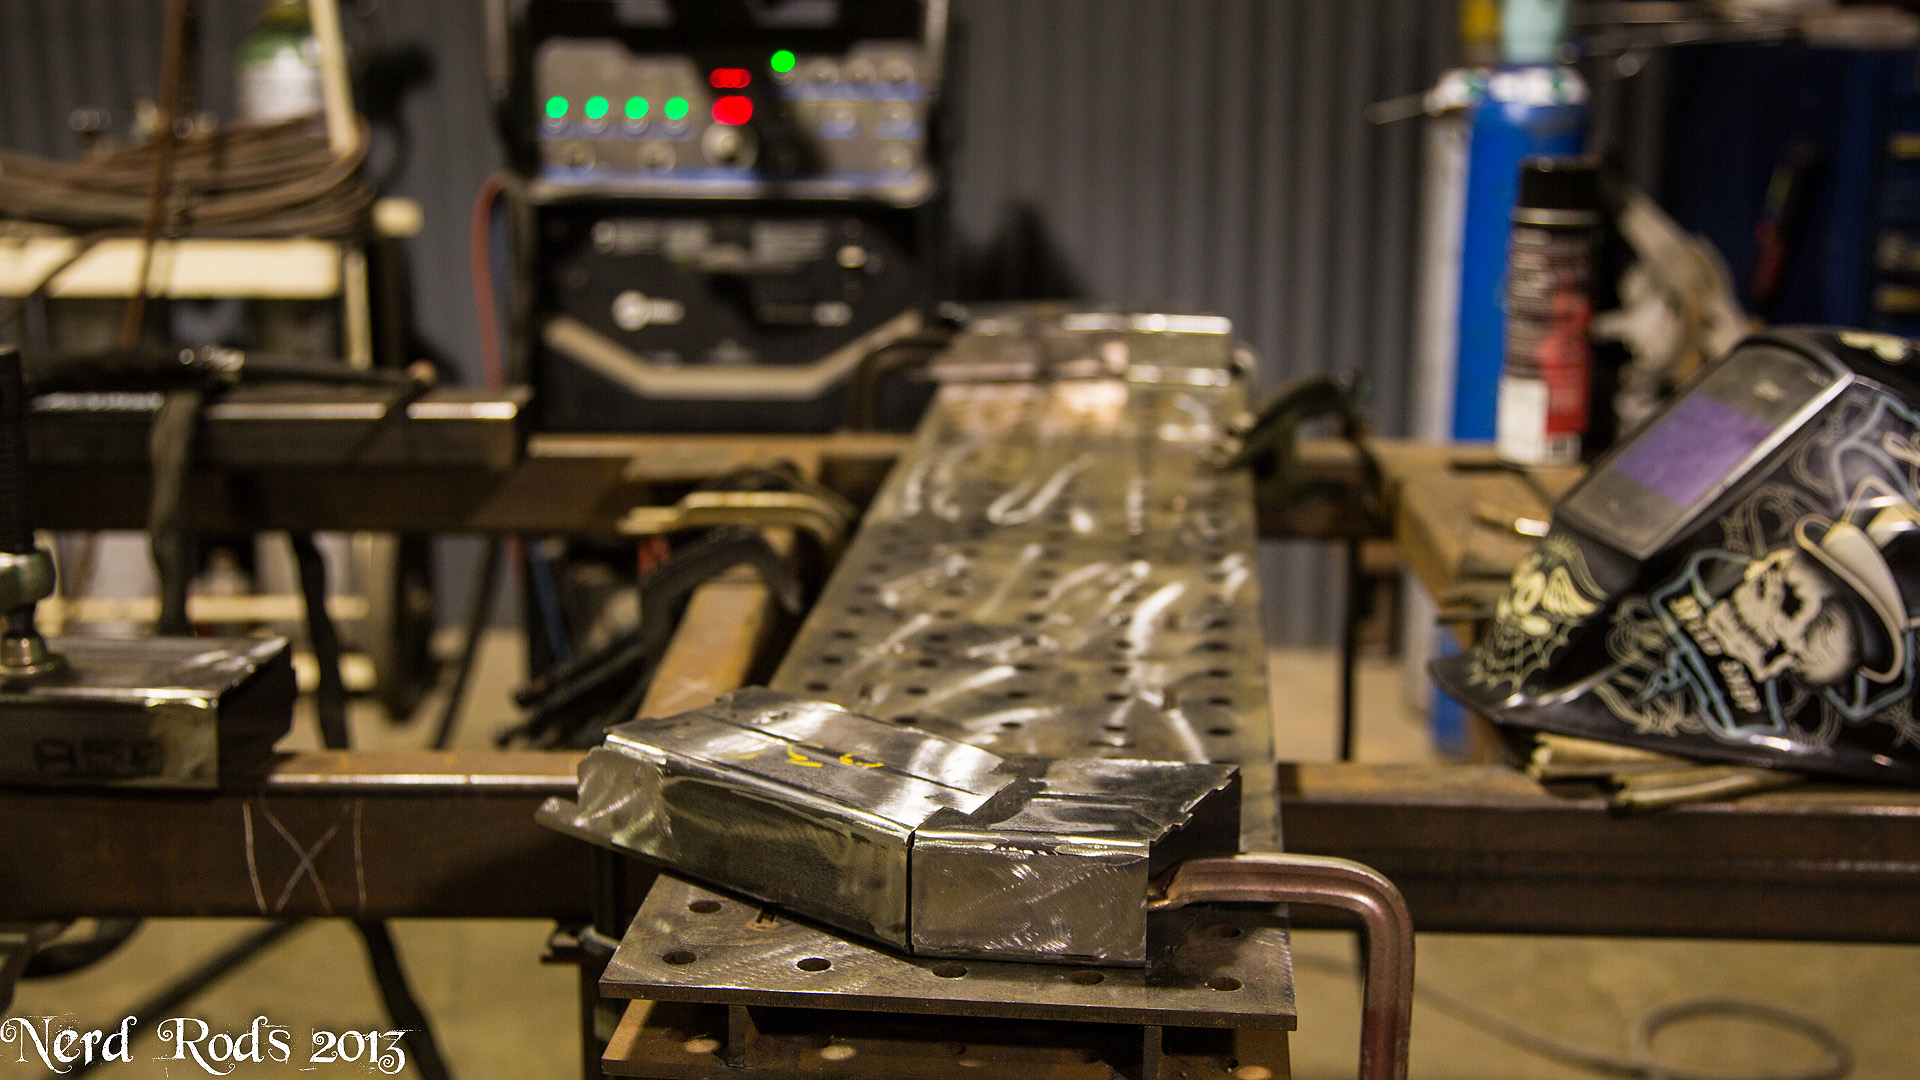
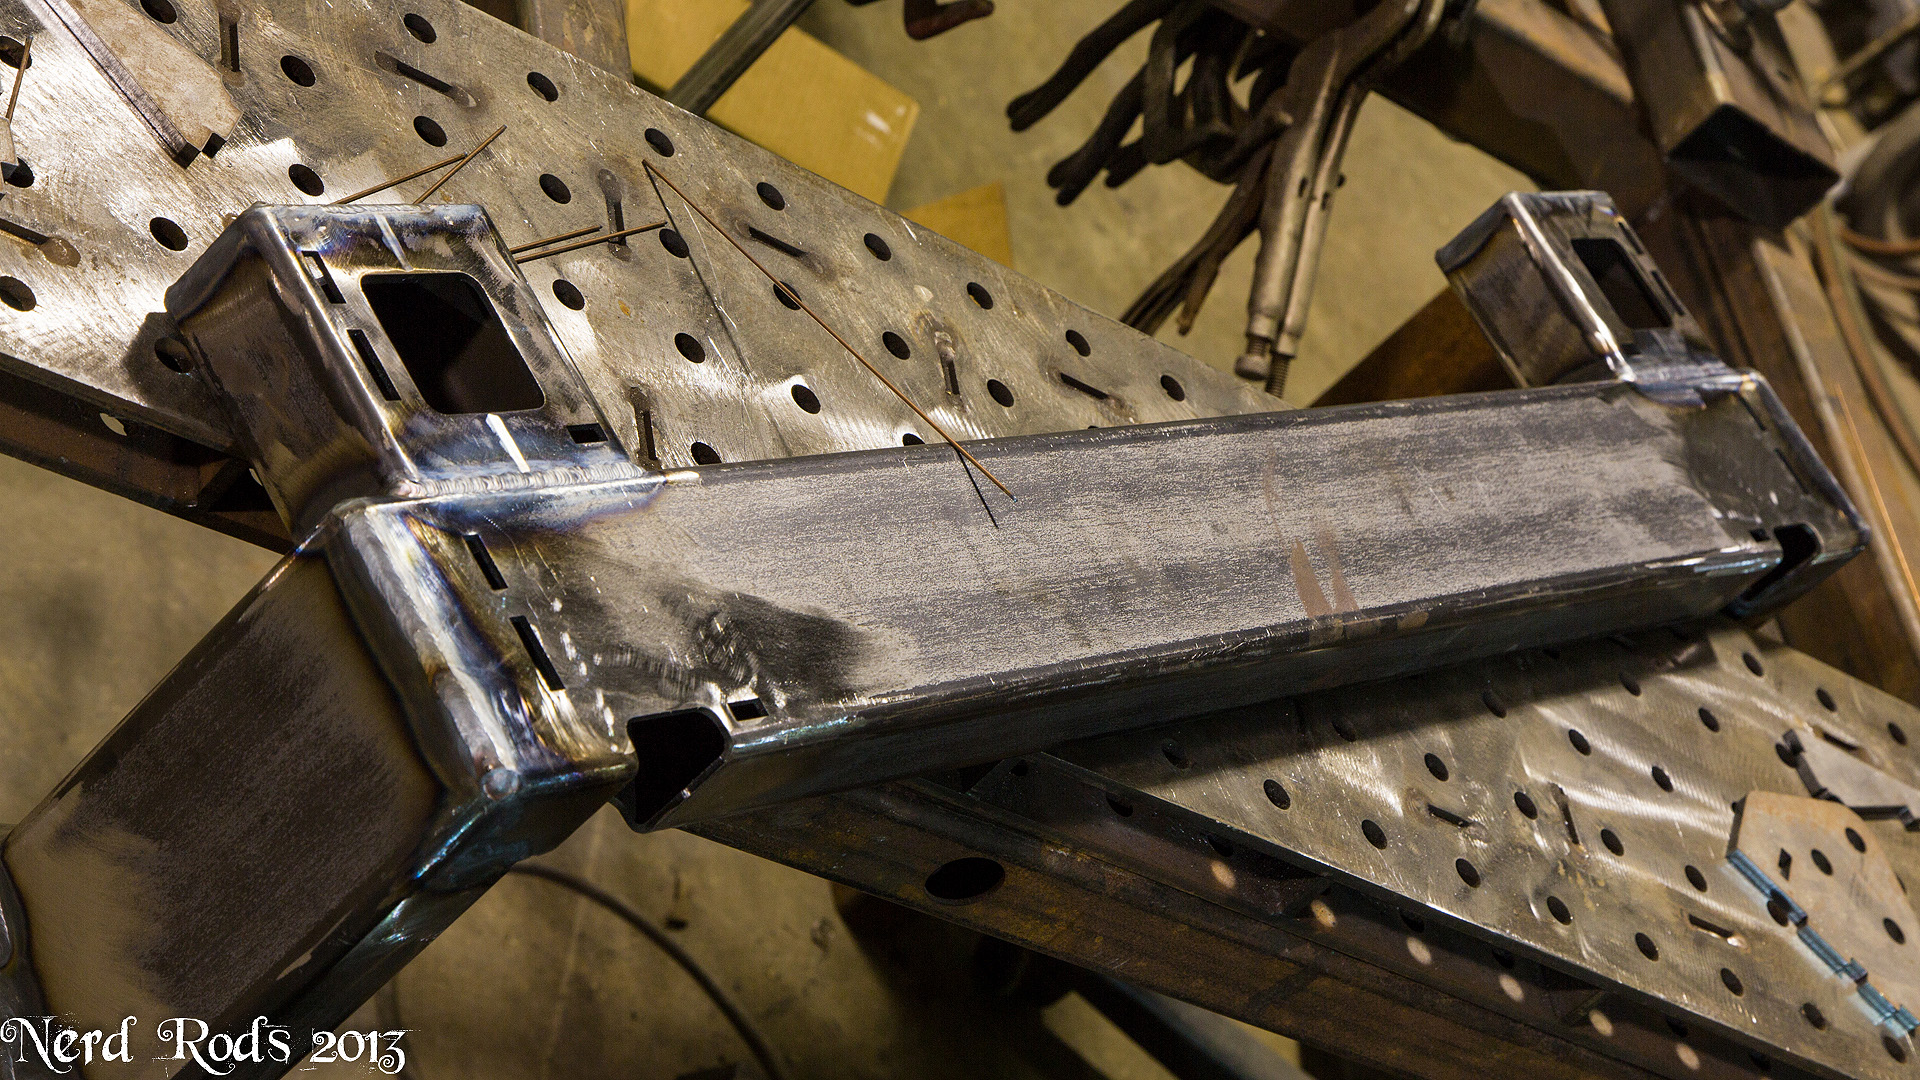
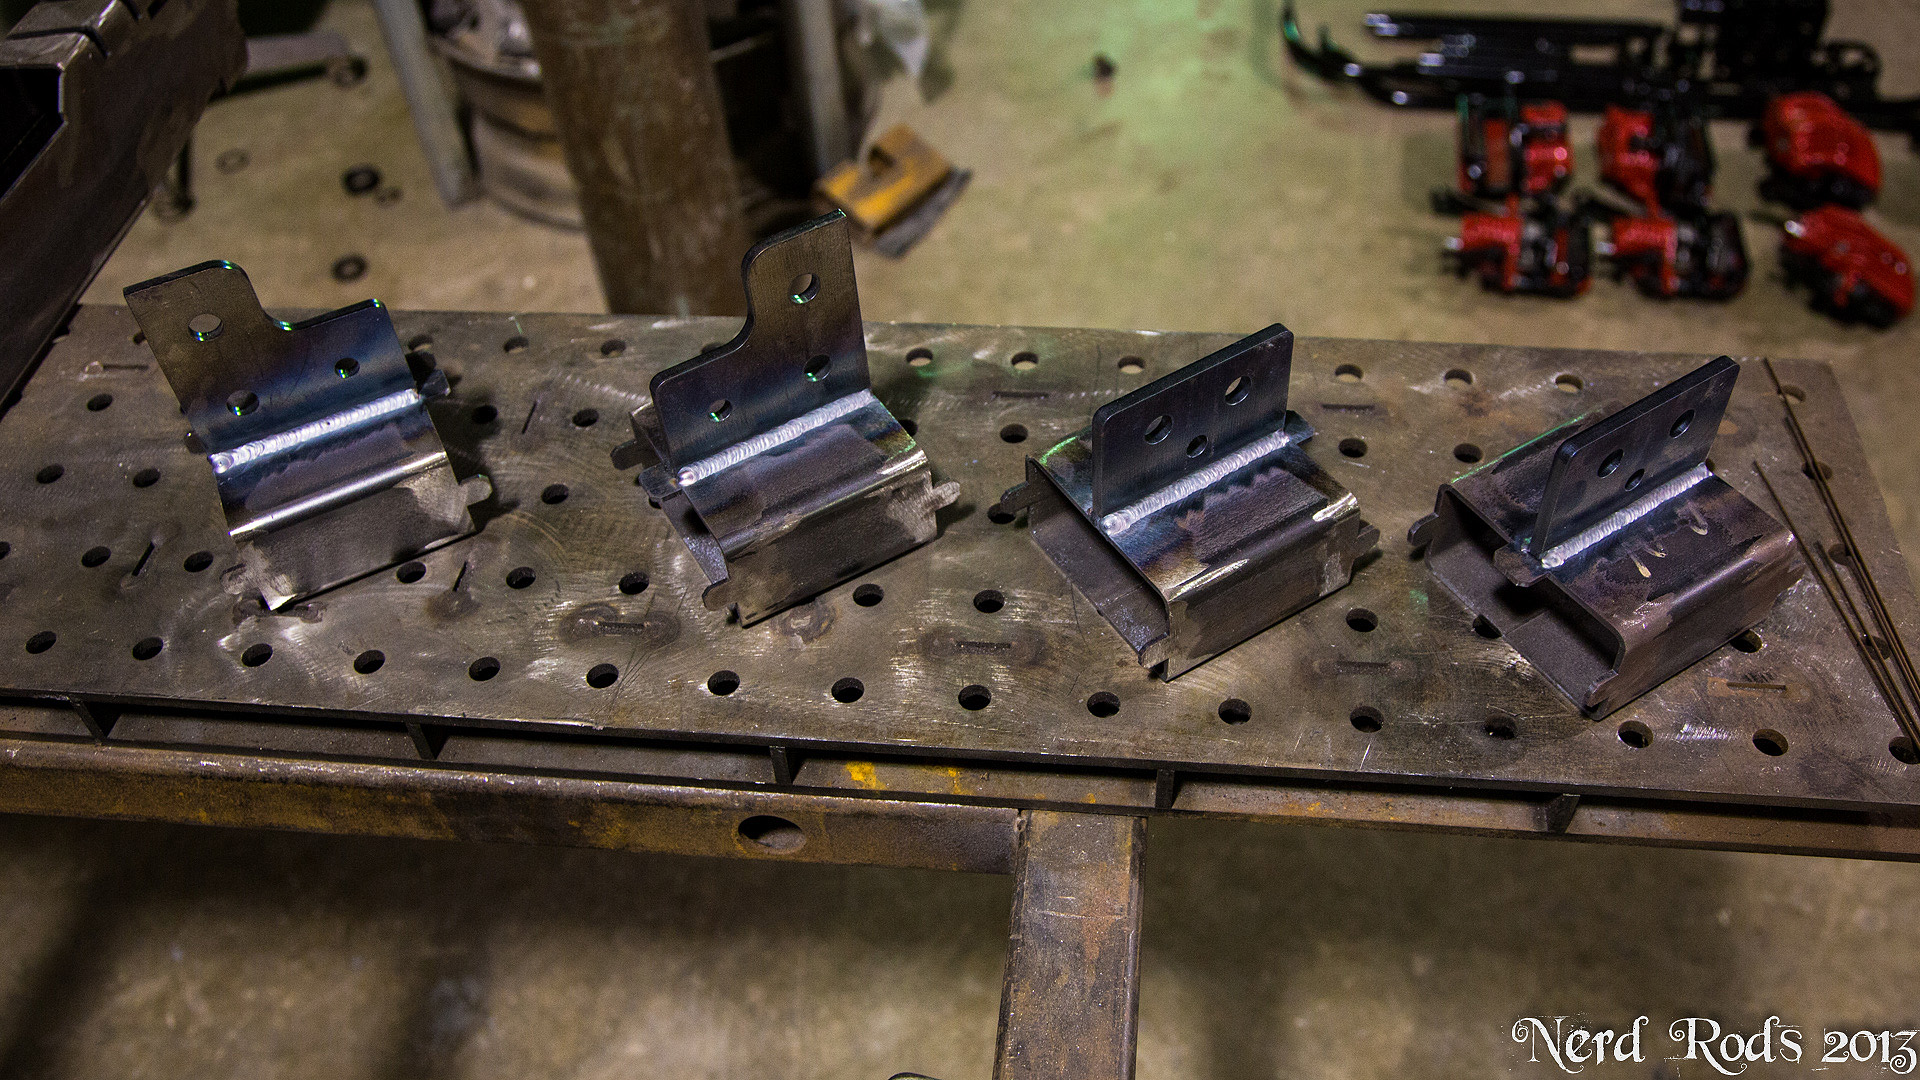
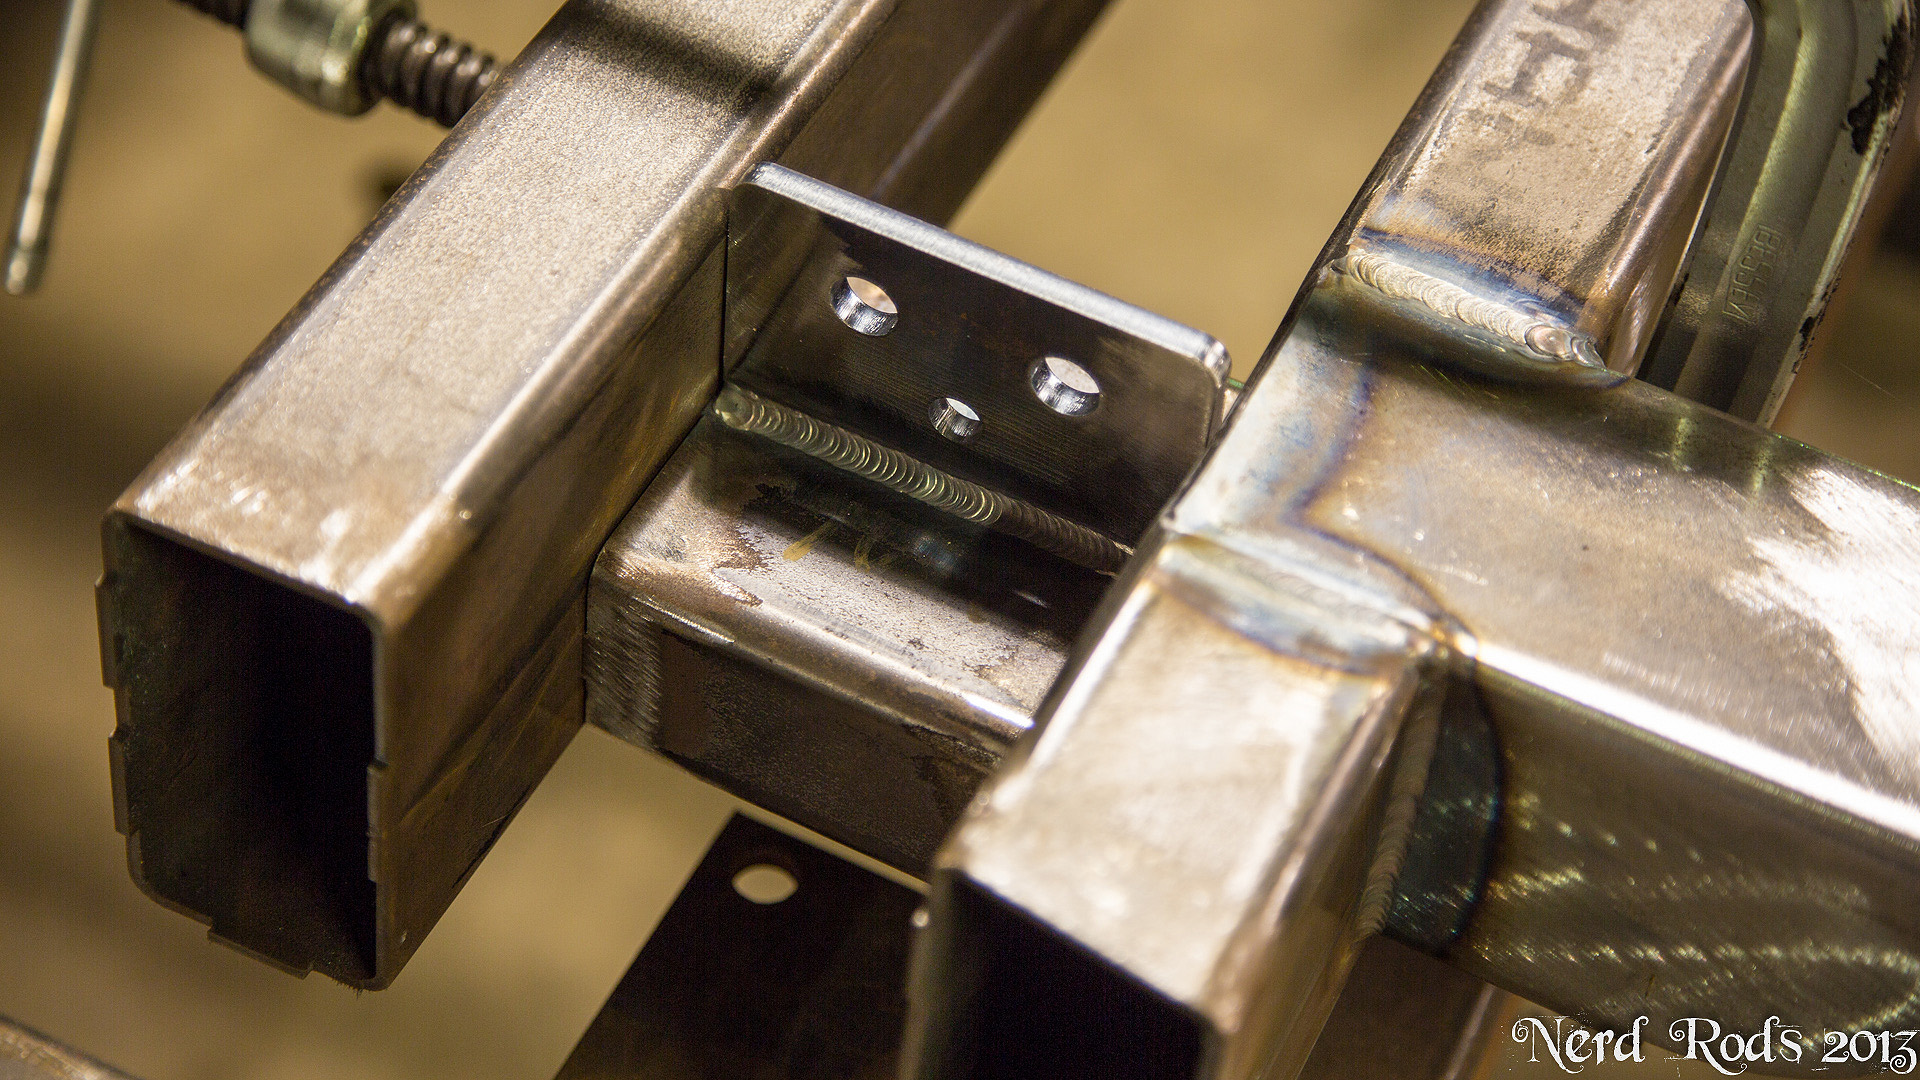
Done with the main rails now and I've moved to the front stub, radiator support cross member and bumper mounts.
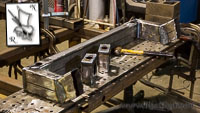
Later
-Russell
I really want to build a 930 styled car with a nice light LS motor when I get some time for my own thing.
Done with the main rails now and I've moved to the front stub, radiator support cross member and bumper mounts.


Later
-Russell
 11-11-2013, 02:30 PM
#38
Launching!
Thread Starter
Join Date: Jan 2007
Location: Luling TX In the Hot Rod Shop
Posts: 294
Likes: 0
Received 3 Likes
on
3 Posts
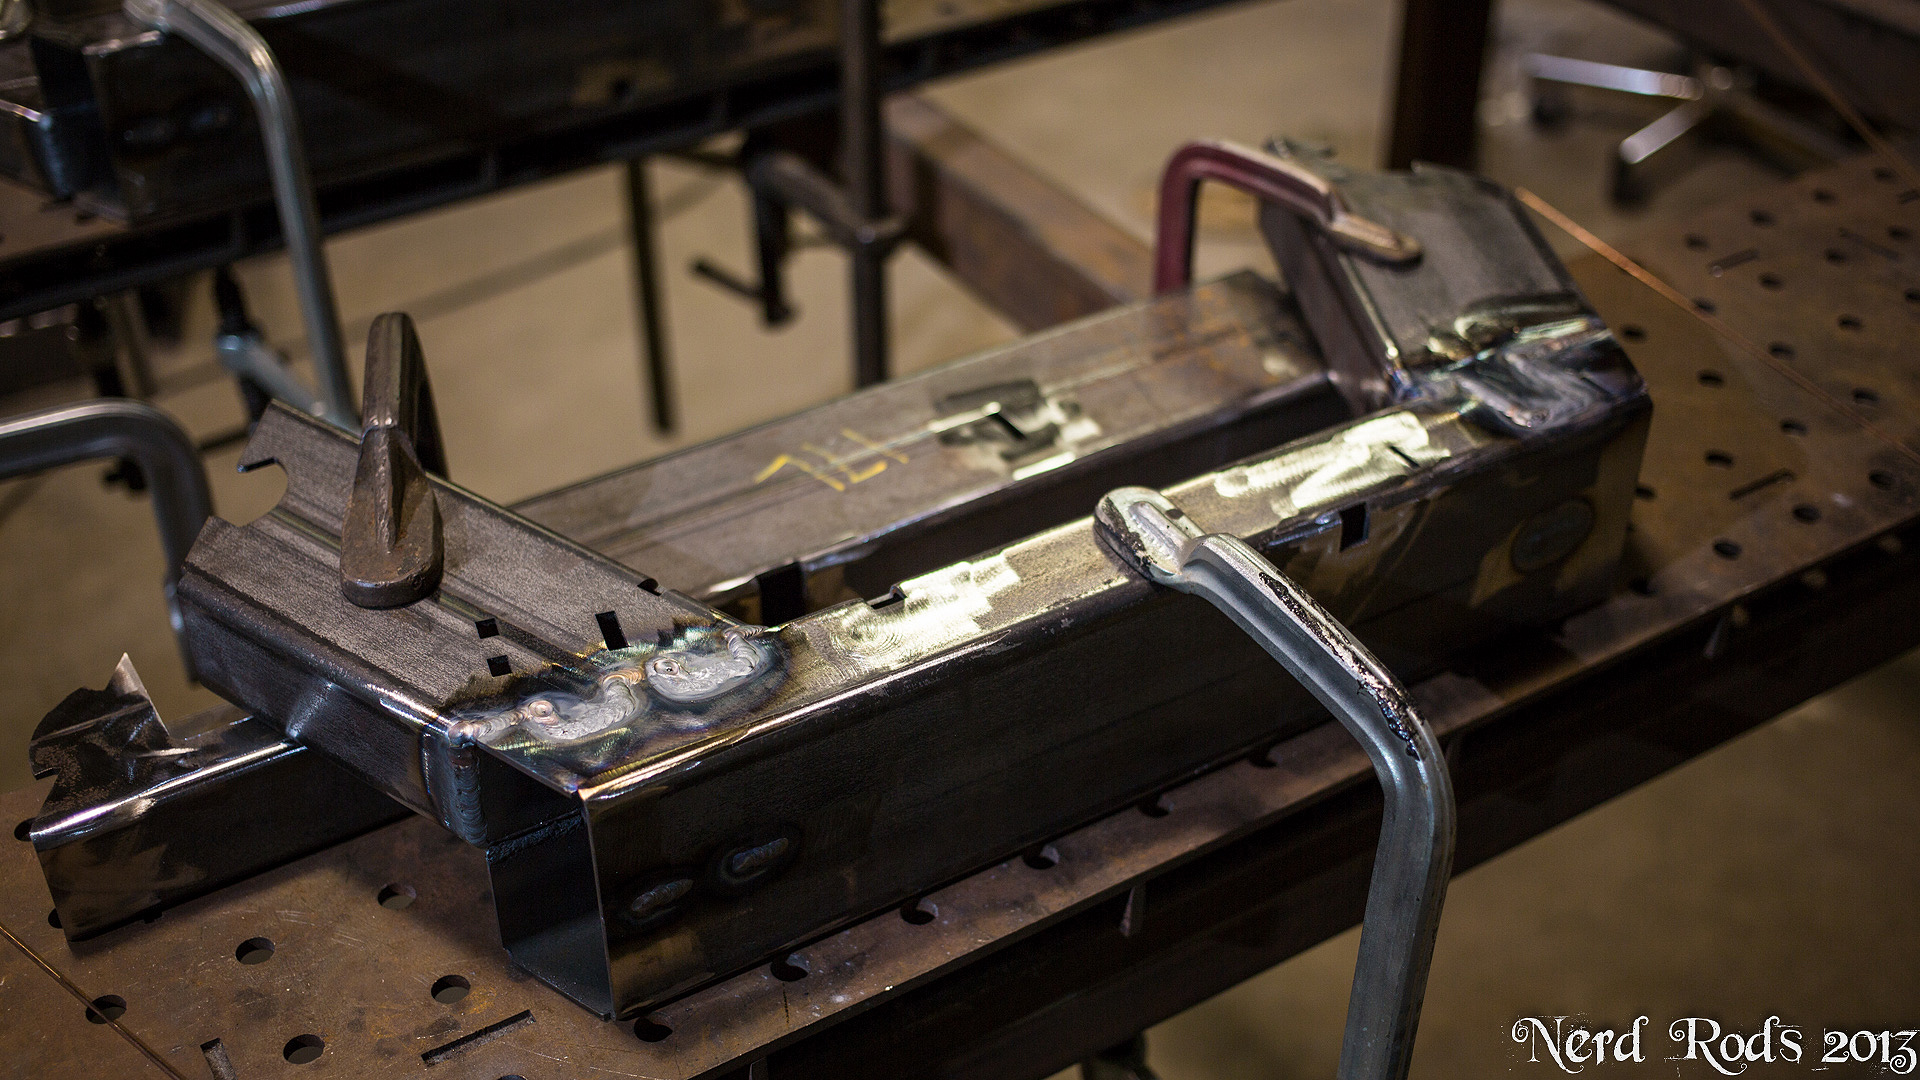
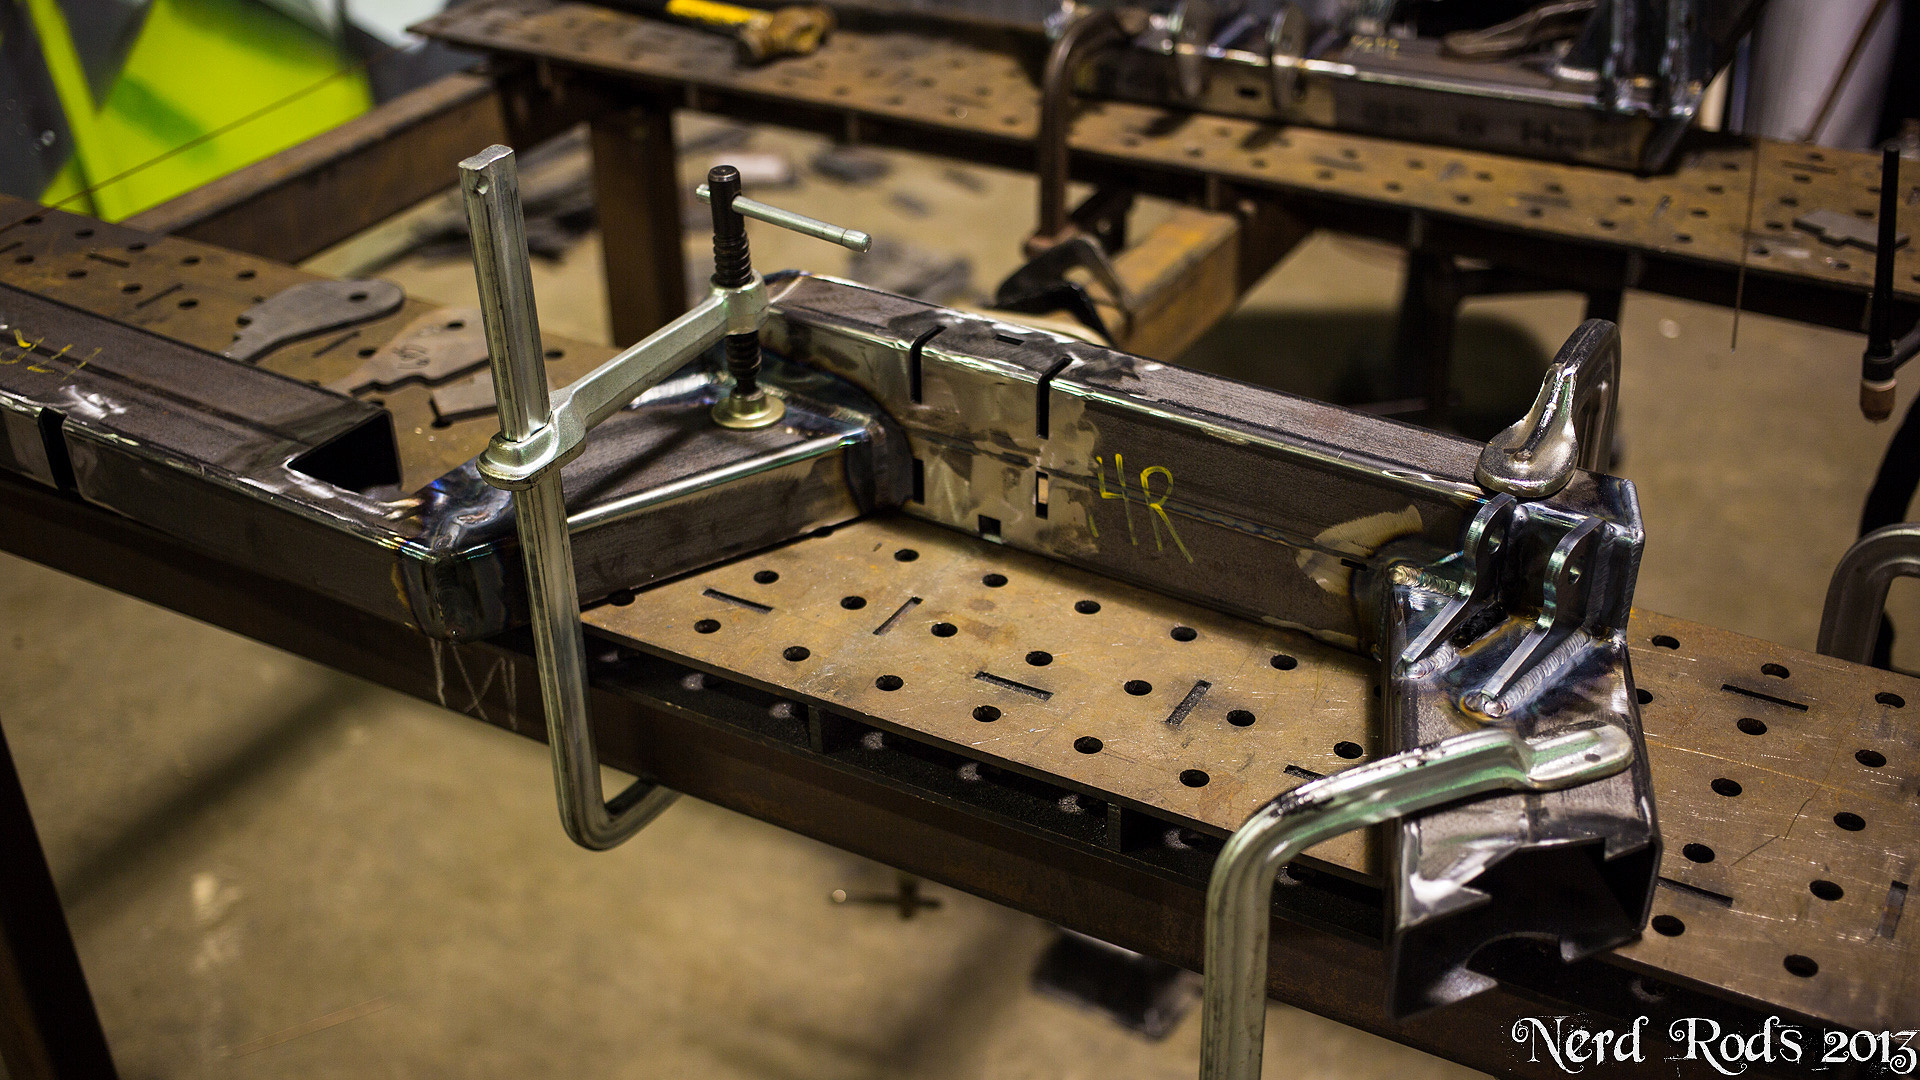
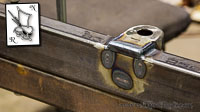
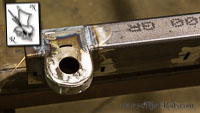
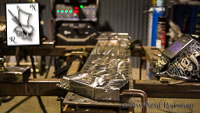
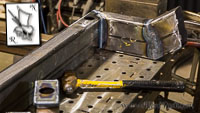
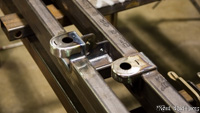
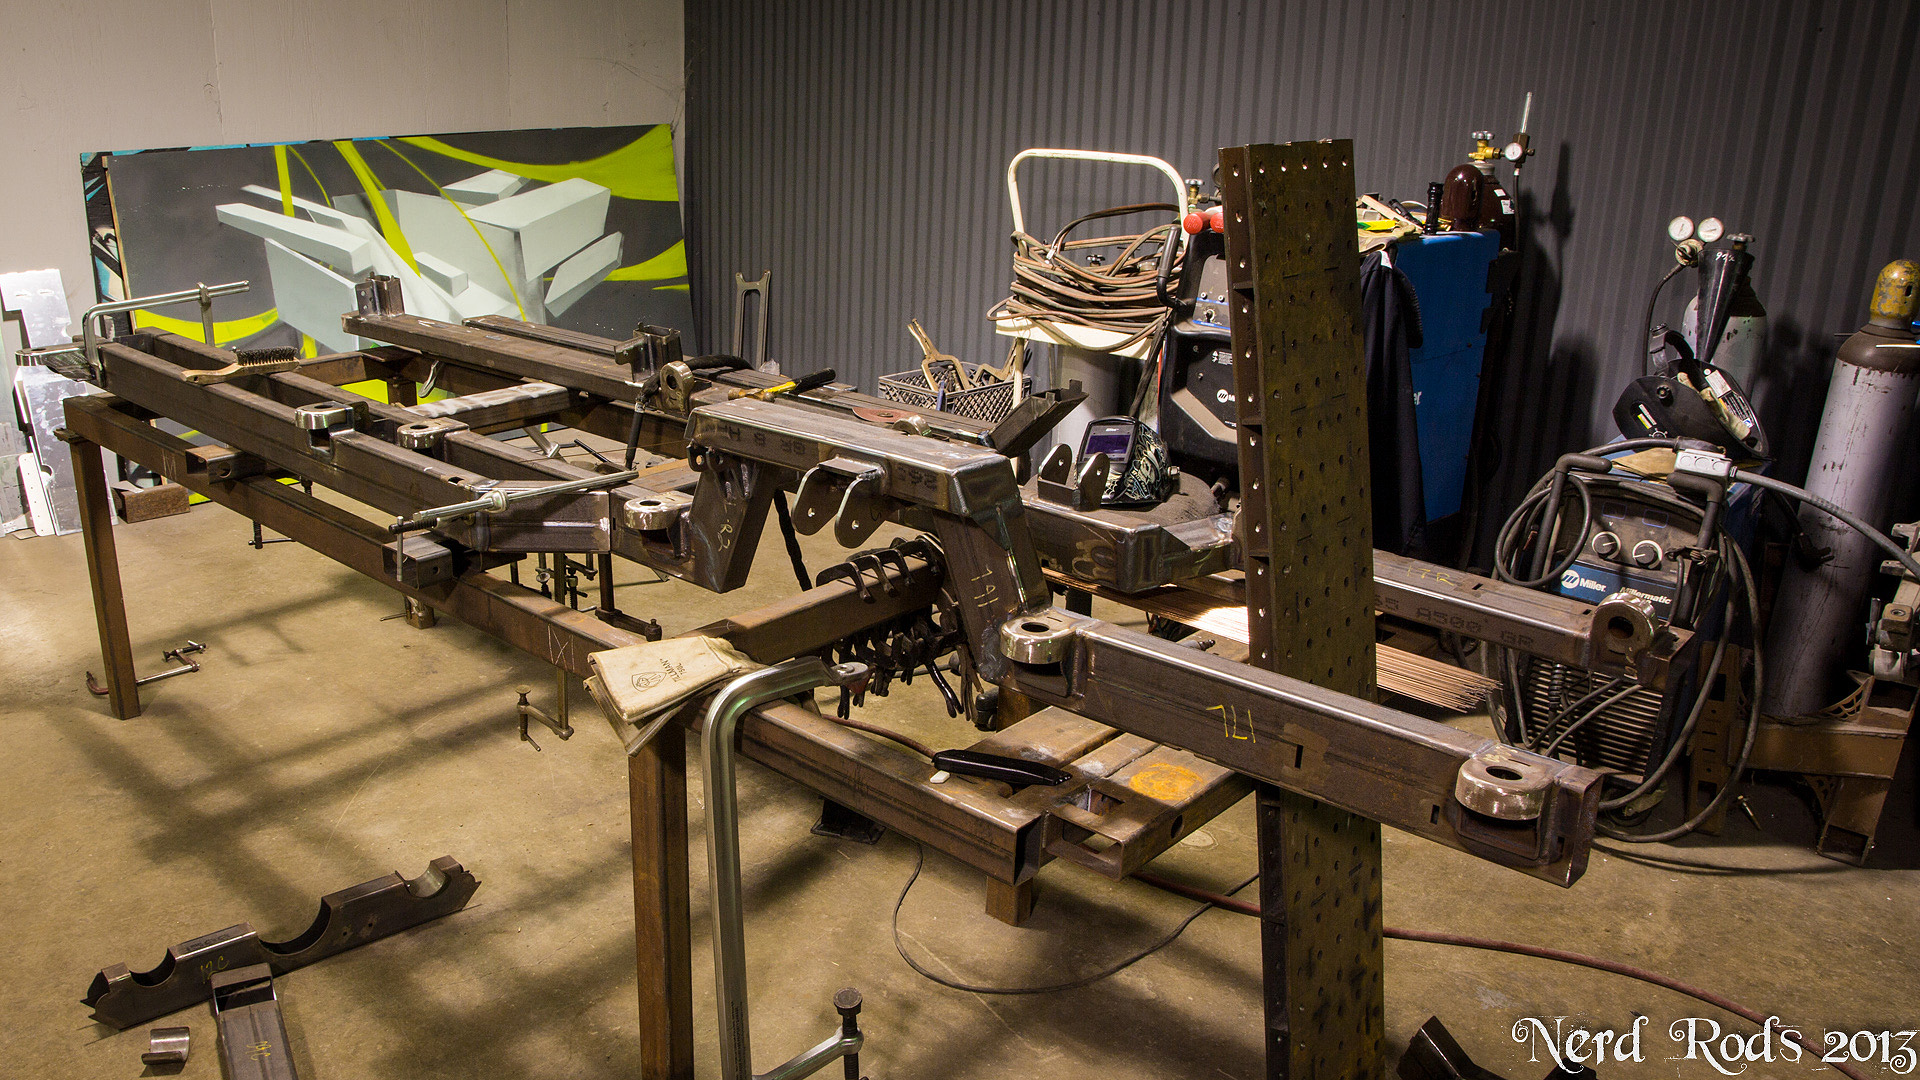
Its starting to look like a frame. Getting all the outer frame rail body mounts welded up.
Later
-Russell
11-18-2013, 07:40 AM
#39
Launching!
Thread Starter
Join Date: Jan 2007
Location: Luling TX In the Hot Rod Shop
Posts: 294
Likes: 0
Received 3 Likes
on
3 Posts
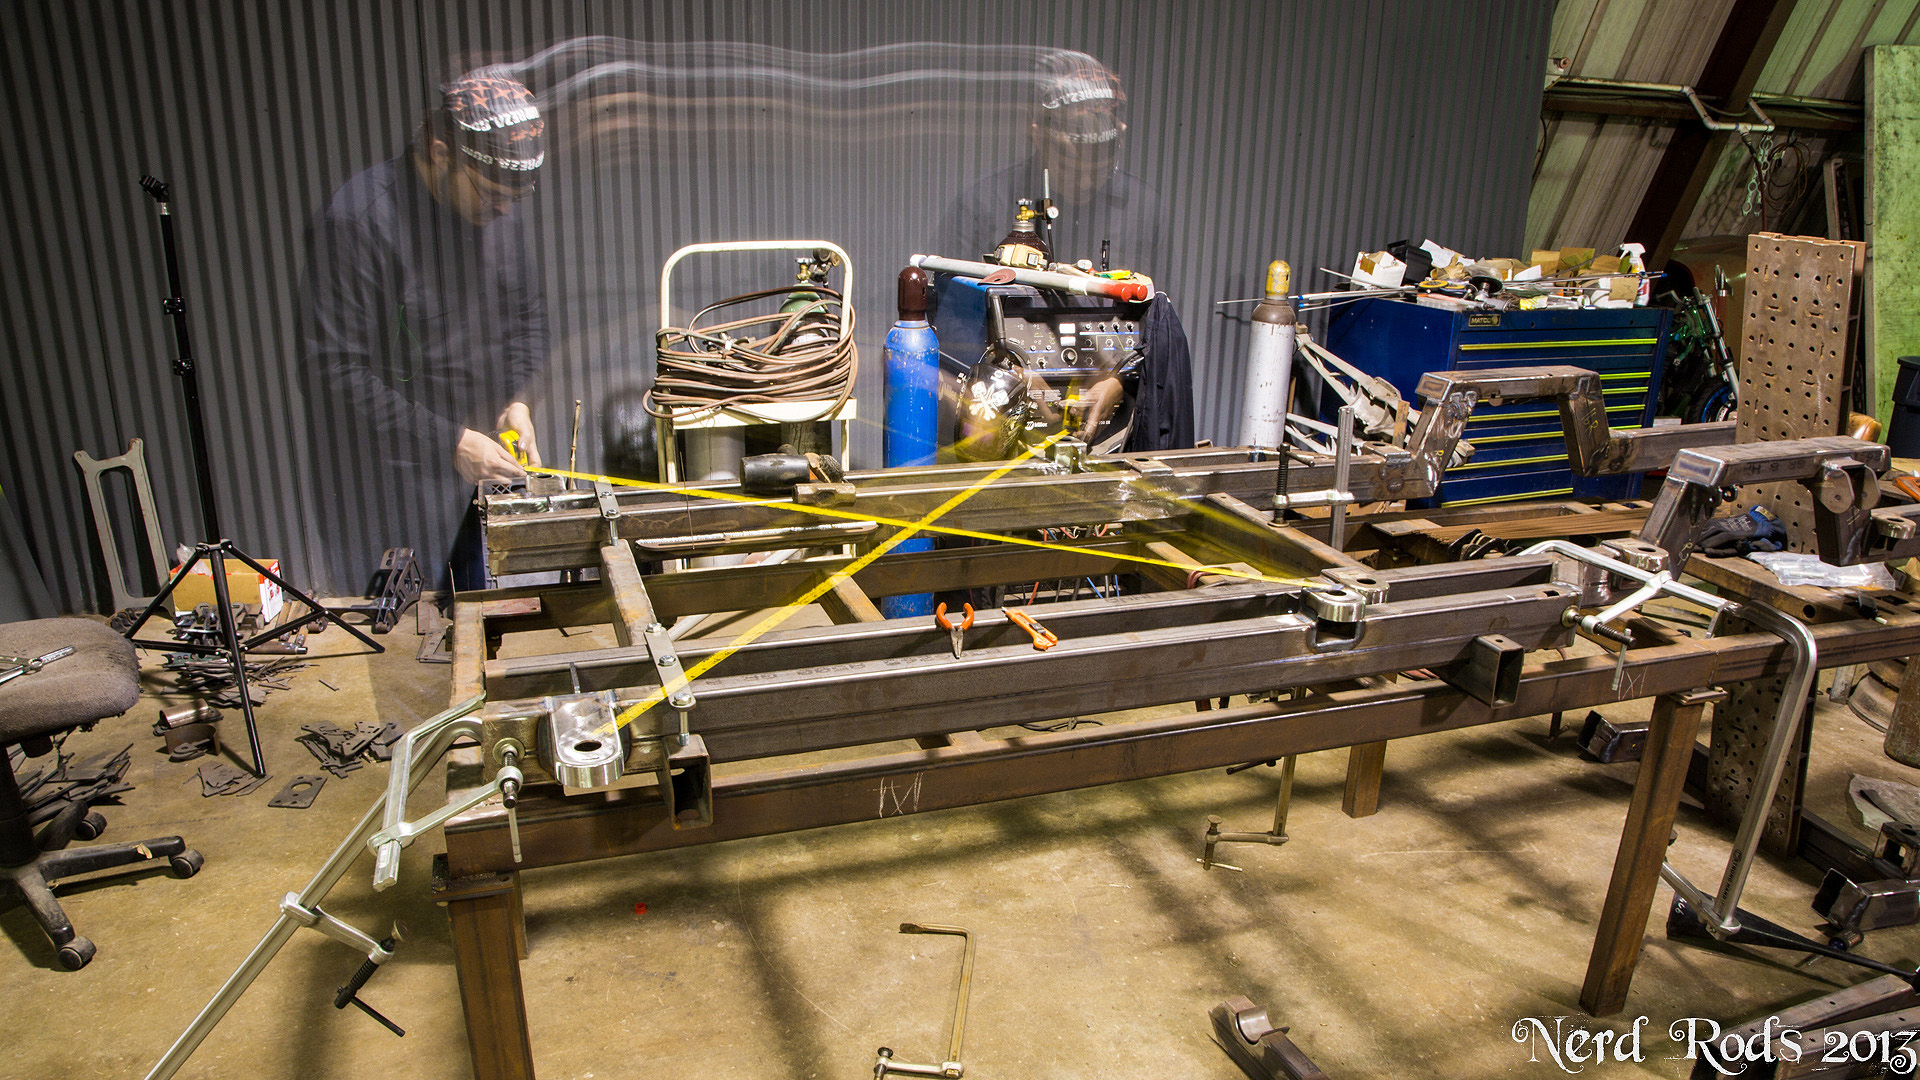
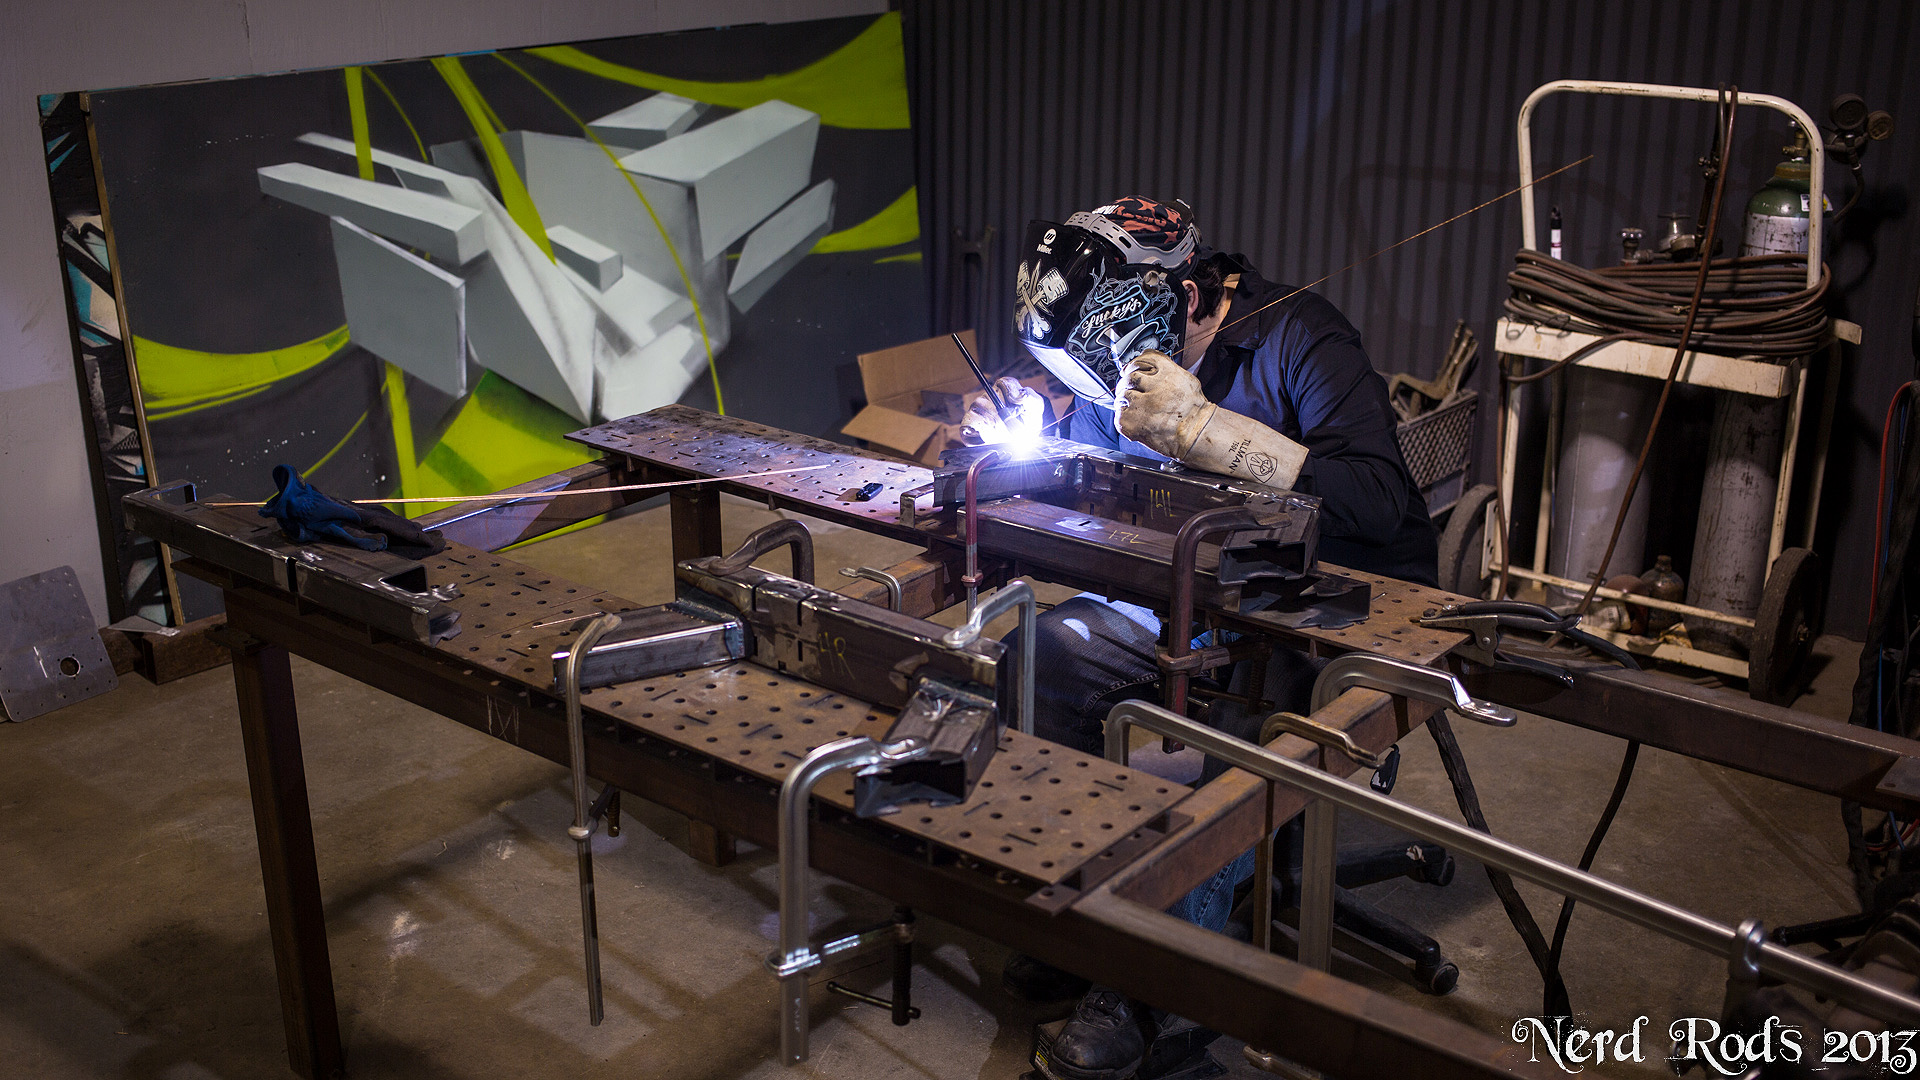
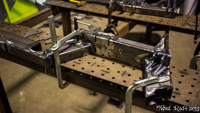
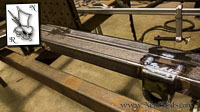
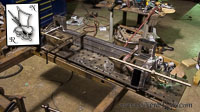
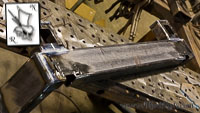
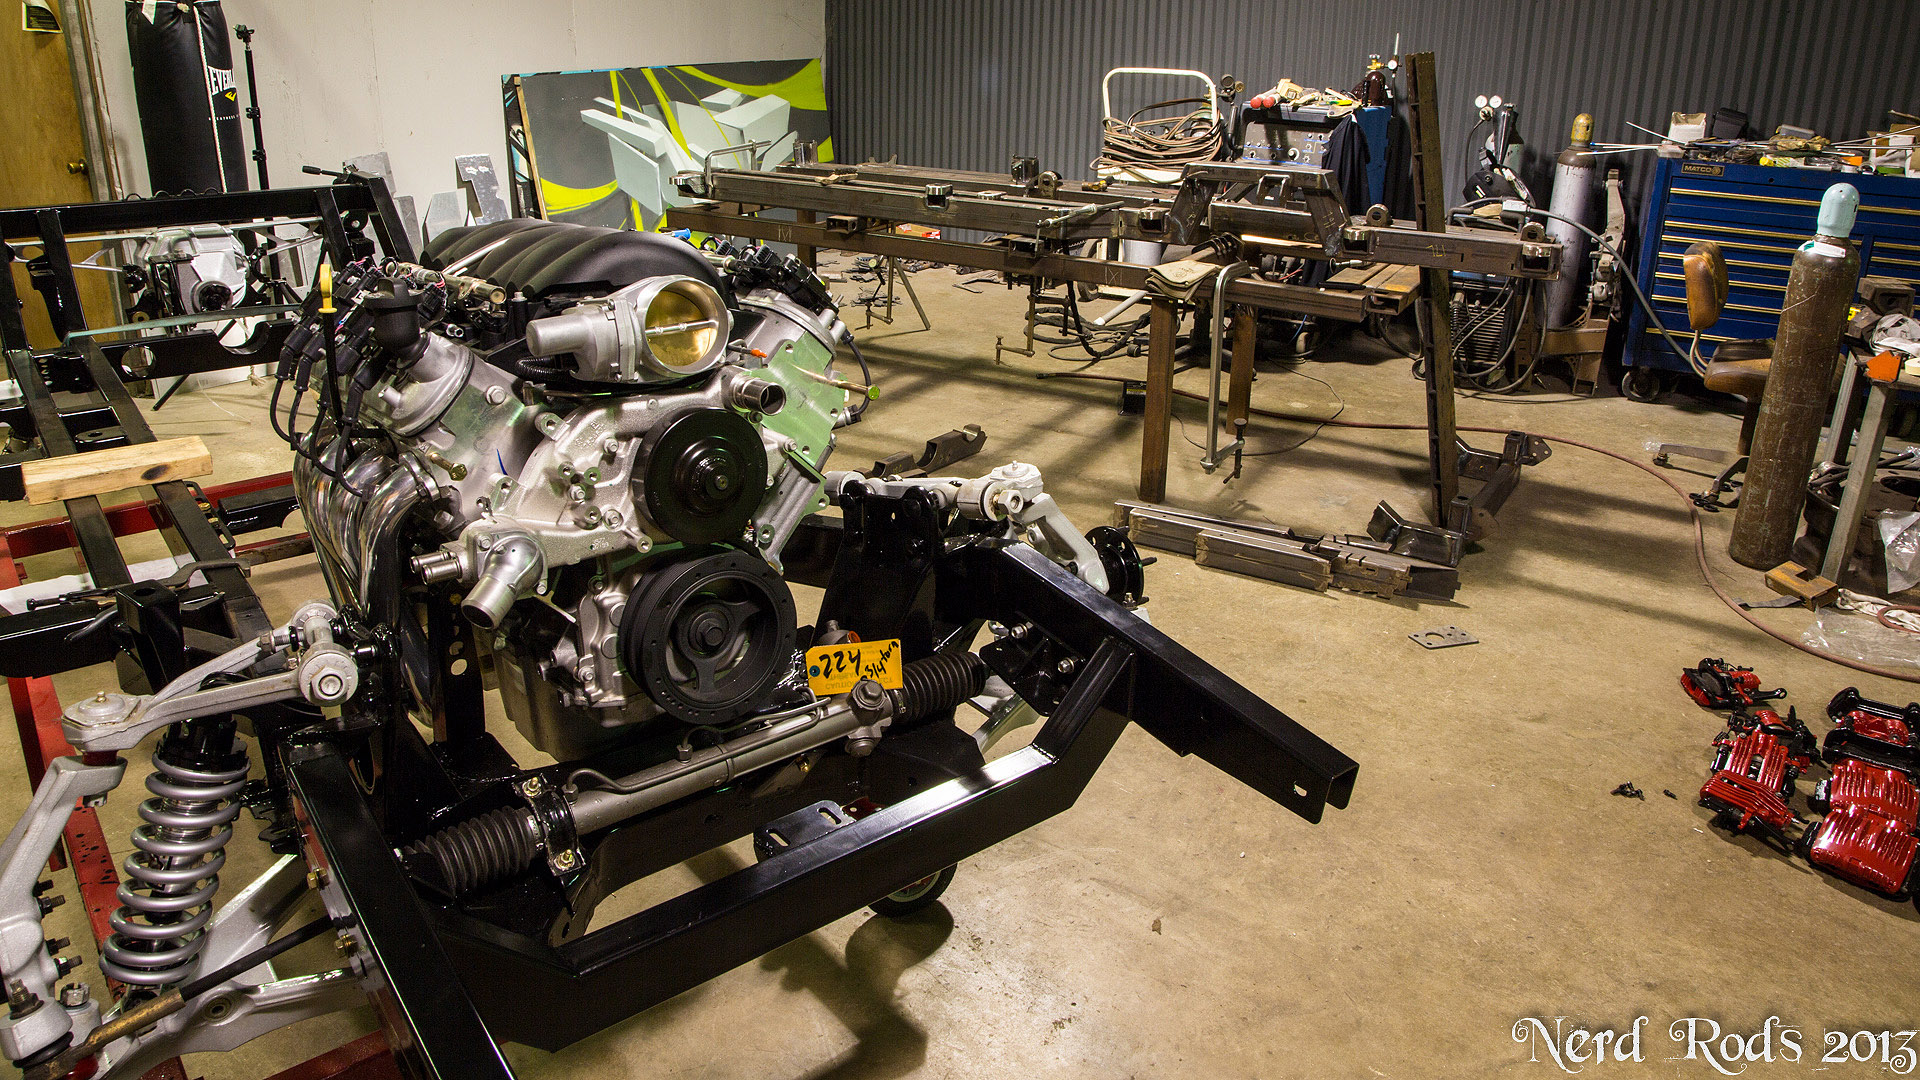
Updates! Getting the side rails married together after getting the rail spreaders nailed together. We've been thrashing on the TFC4 Stage 4 Running Chassis at the end of the page as well.

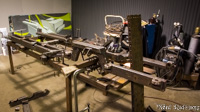


Later
-Russell

Later
-Russell