Updated: L76 VVT going in my jet boat IT RUNS!
 02-03-2014, 04:57 PM
#41
Staging Lane
Thread Starter
iTrader: (1)

Join Date: Sep 2013
Location: Alaska
Posts: 84
Likes: 0
Received 0 Likes
on
0 Posts
Thanks, I sure hope so.
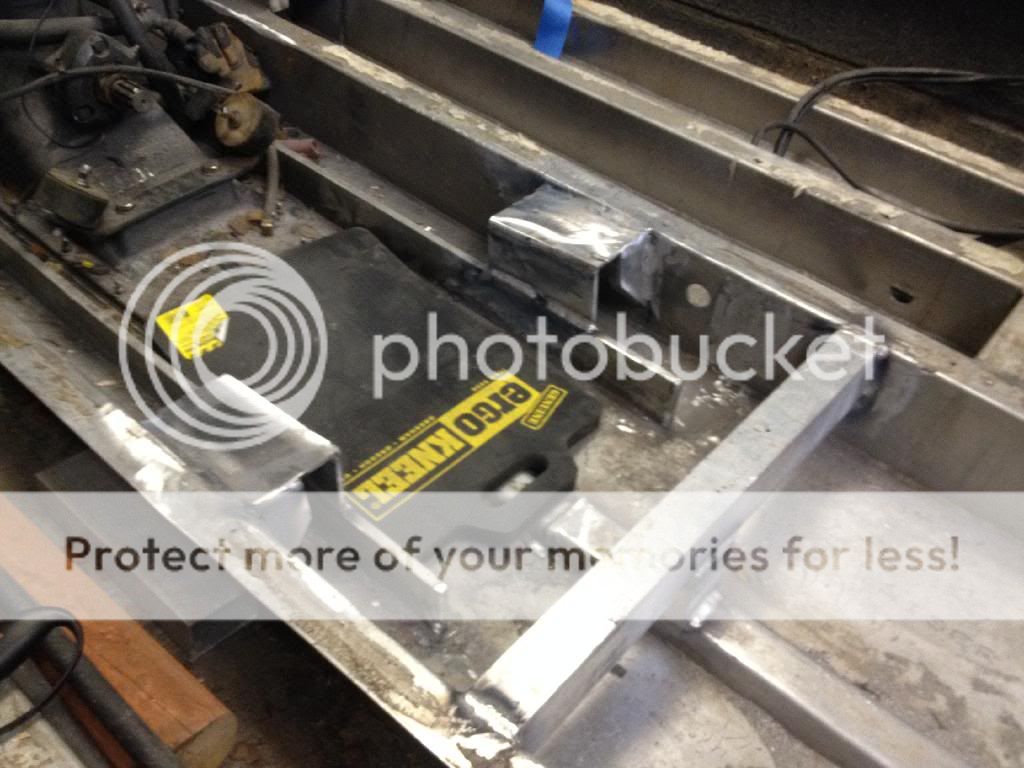
Today I took advantage of this awesome weather we are having for January. Its 28 degrees out and almost all my snow has melted. I pulled the floor and emptied the fuel tank. Im going to have to move it forward about 3 to 6 inches. I wont know exactly till I get the motor in there.
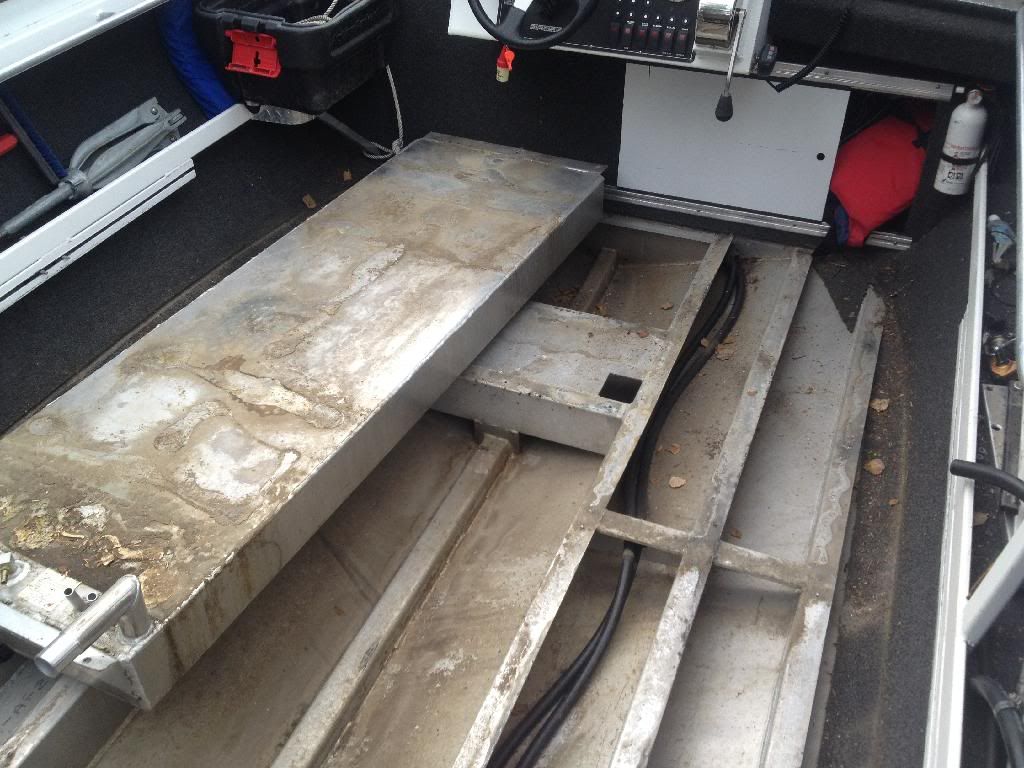
Today I took advantage of this awesome weather we are having for January. Its 28 degrees out and almost all my snow has melted. I pulled the floor and emptied the fuel tank. Im going to have to move it forward about 3 to 6 inches. I wont know exactly till I get the motor in there.


 02-08-2014, 01:13 PM
#42
Staging Lane
Thread Starter
iTrader: (1)
Join Date: Sep 2013
Location: Alaska
Posts: 84
Likes: 0
Received 0 Likes
on
0 Posts
Alright. On recommendation from another builder I trust, I went with .022/.024 for my ring gaps. The rods were all nice and right at .0025 with one just a bit tighter. I think they will be fine. I had lost my nice ring compressor, so I had to buy a cheapo band clamp style from Napa. It doesn't like to sit flush on the deck and the oil rings get a bit hung up, so I had my daughter help me. I held the compressor and caught the rod end, and she got to do the tapping. She really lacks patience for the cleaning and prep between cylinders, but managed to make a majority of them happen. She loved doing the speed handle on the rod bolts too. I think its the first time she helped me on a clean motor and she was surprised how clean she stayed...
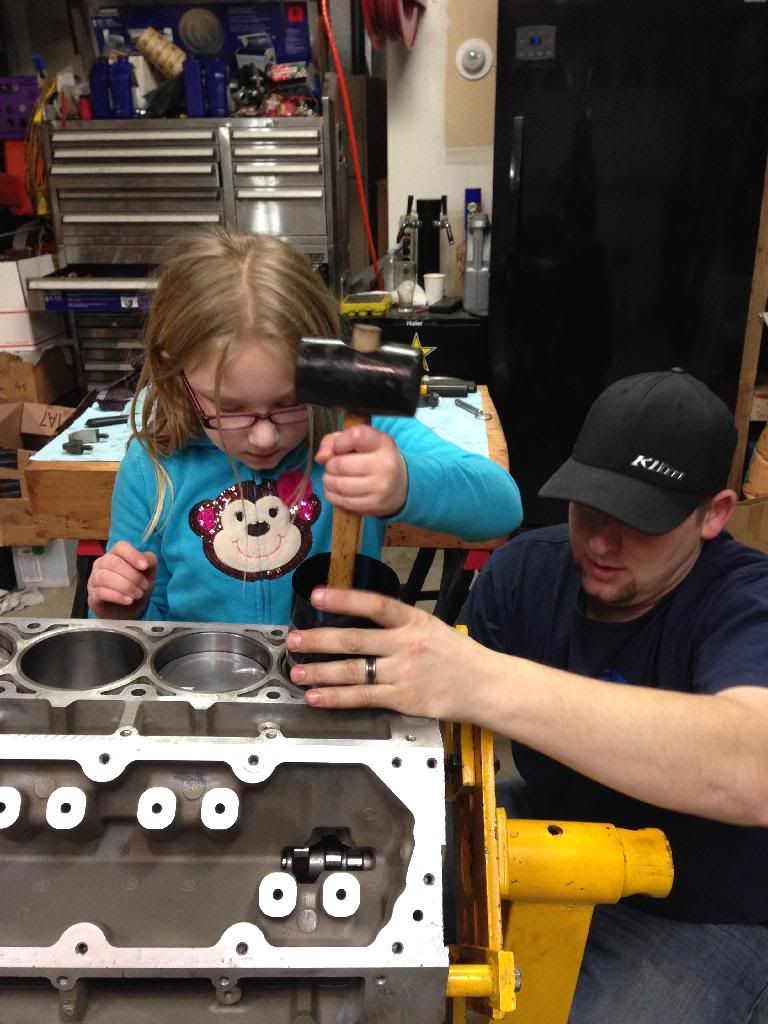
She did get a kick on how the plastigage smashed down. It took her a bit to grasp the concept, but she finally got it. I turned her loose with the hammer on the work table and she made good work of the rest of the plastigage.
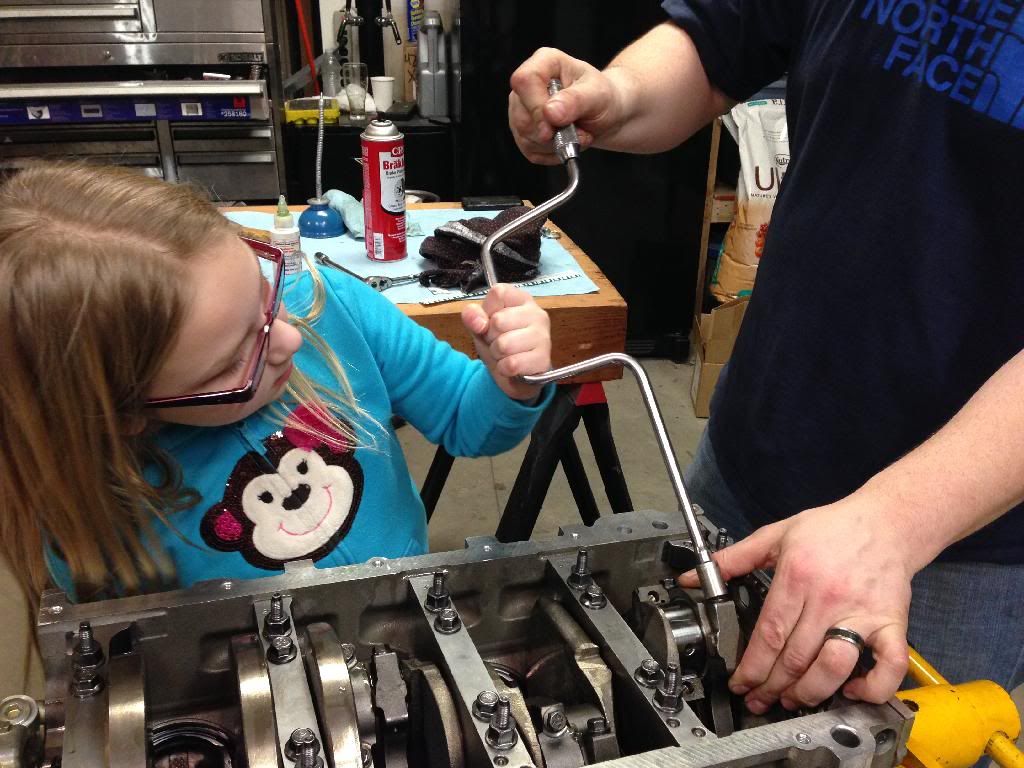

She did get a kick on how the plastigage smashed down. It took her a bit to grasp the concept, but she finally got it. I turned her loose with the hammer on the work table and she made good work of the rest of the plastigage.
 02-08-2014, 01:28 PM
#43
Staging Lane
Thread Starter
iTrader: (1)
Join Date: Sep 2013
Location: Alaska
Posts: 84
Likes: 0
Received 0 Likes
on
0 Posts
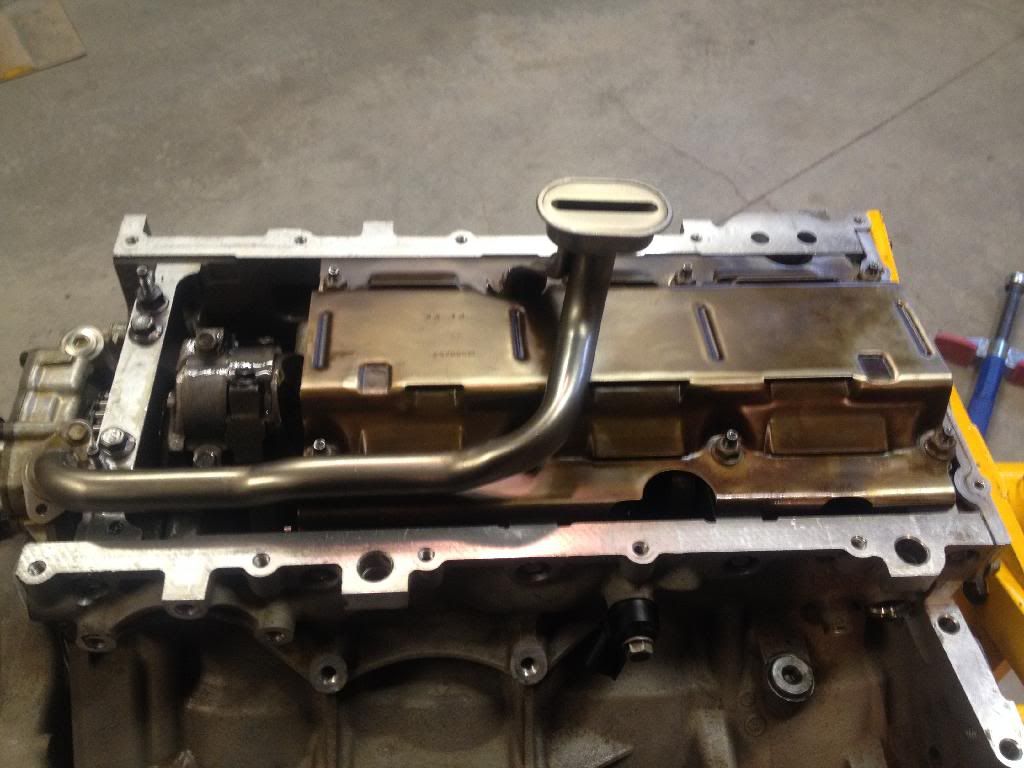
Somebody commended earlier on the oil pan. Here is a better pic or two. It doesn't have much baffling, but it works good in jet boats. I wont be pulling huge g's on an auto cross course or doing sprint boat work.
Its 4" deep at the back and tapers to 5" deep at about 6" forward from the rear. The rest is 5" deep. There is no oil filter boss, just fittings for an external filter connection and an oil pressure sensor.
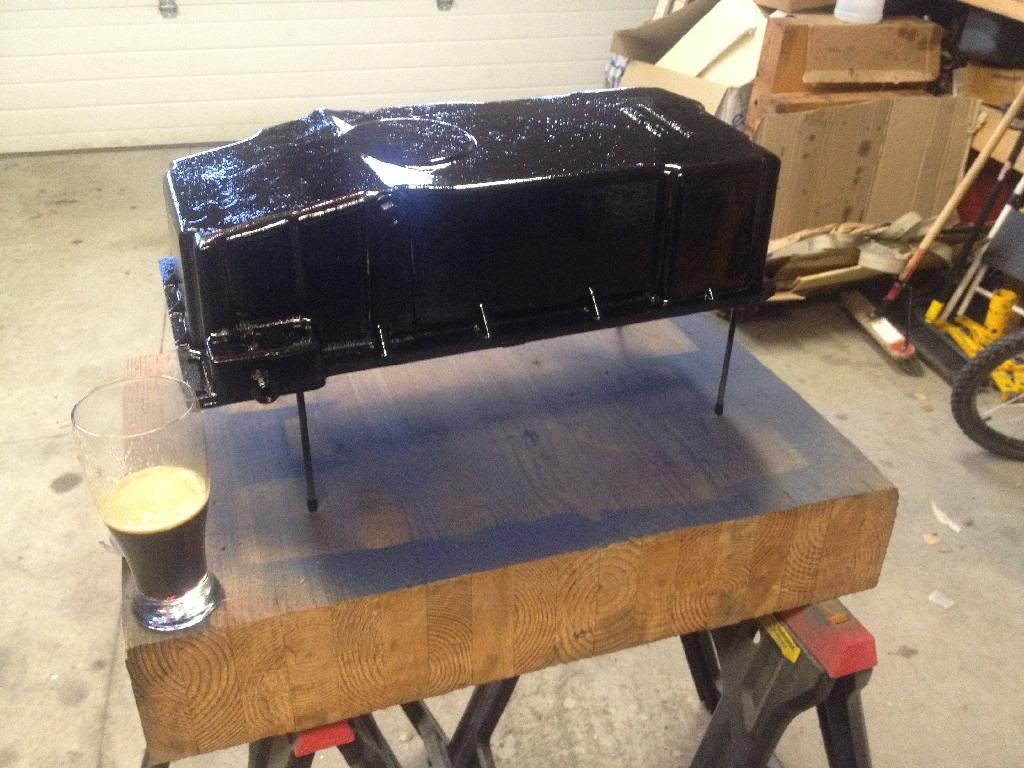
I did a little paint job on it...its not the best, but it does look better than before. I just cleaned and scrapped off the flaking paint and sprayed it down...lol
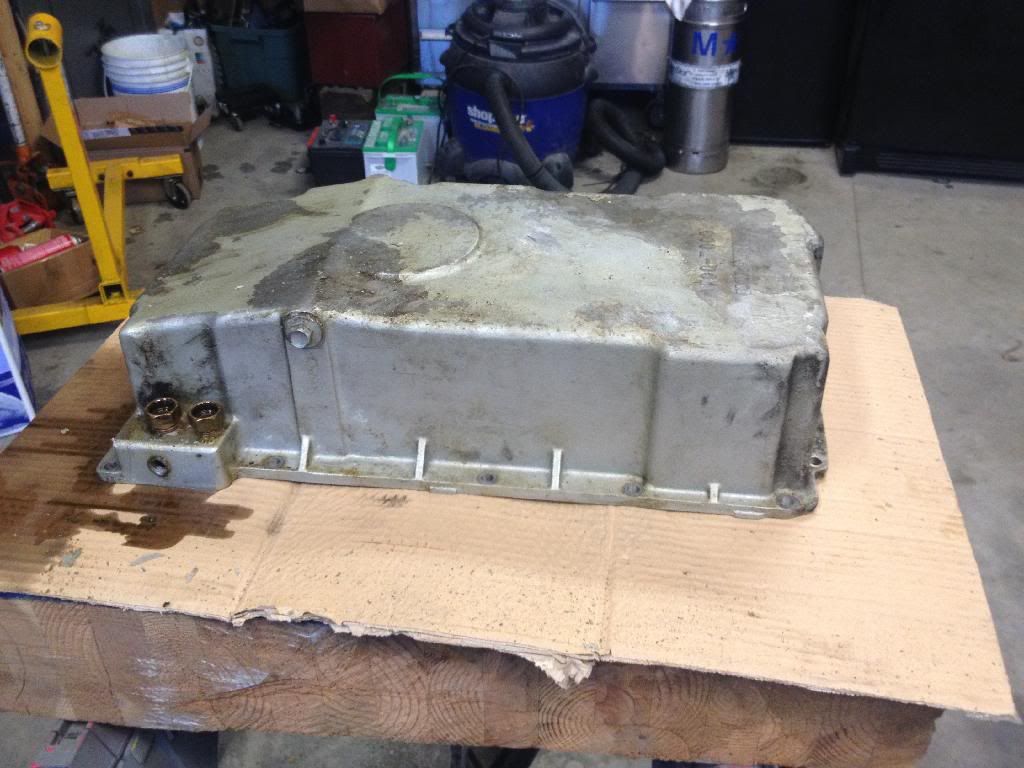
Heres a pic of the tray and pickup.
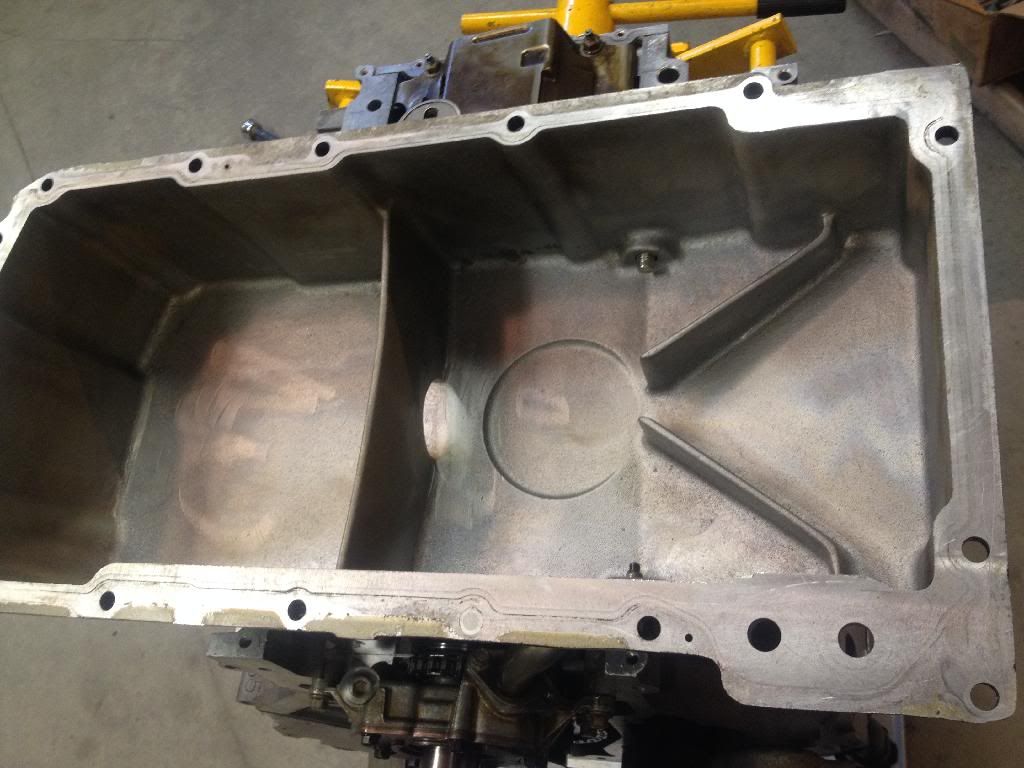
It didn't have a part number on the pickup.
Its 4" deep at the back and tapers to 5" deep at about 6" forward from the rear. The rest is 5" deep. There is no oil filter boss, just fittings for an external filter connection and an oil pressure sensor.
I did a little paint job on it...its not the best, but it does look better than before. I just cleaned and scrapped off the flaking paint and sprayed it down...lol


Heres a pic of the tray and pickup.


It didn't have a part number on the pickup.
02-08-2014, 04:47 PM
#44
Teching In

Join Date: Dec 2010
Location: Cincinnati, ohio
Posts: 39
Likes: 0
Received 0 Likes
on
0 Posts

Just wanted to say I like your project.
does that Hamilton pump have trim? I'd love to see that little booger throwing a big rooster tail.
Cool boat.
I am, lets say, an ole school jet boater. I have a 21' Taylor with a 460 BBF/Berkley combo. I want to take the LS plunge on it soon. Prob have to hang a hair dryer on it as well.
I looked on Marine Power web site. Don't seem to list parts? Just drivetrains and packages. Am I missing something?
Do you have any knowledge or have you ran across anyone that offers parts to mate LS to a Berkley pump in your research?
I guess bellhousing and PTO are the specific things. It appears exhaust should be no prob. I already have the center rise Kodiak style, instead on the common log style.
Darrell
02-08-2014, 08:18 PM
#45
Staging Lane
Thread Starter
iTrader: (1)
Join Date: Sep 2013
Location: Alaska
Posts: 84
Likes: 0
Received 0 Likes
on
0 Posts
The regular Marine Power web site is crap.
http://marineenginedepot.com/MP/Default.aspx
You can buy all kinds of marine parts there. If you call them, its actually Marine Power down in Louisiana.
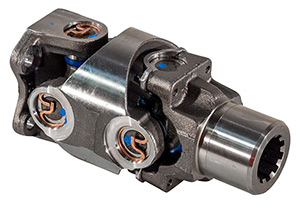
I assume you have a 7" H bar 1310 or 1350 style on your pump drive right now. like this :
You just need to get the proper adapter for the crank depending if its a flywheel or flexplate. The flexplate adapters have a recess to fit the crank shoulder that sticks out of the flexplate.
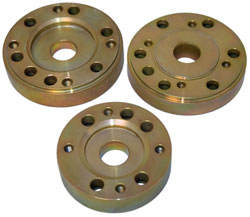
You can buy them many places online including:
http://www.berkeleyjet.com/p-14871-l...-bolt-kit.aspx
http://www.keitheickert.com/p-14870-...-flywheel.aspx
They are pretty common actually. I got mine from Riddle Marine when I bought all the other cool stuff.
Your bell housing pattern is the same, so you can reuse that and probably even your rear mount starter if you have one. You just have to make sure the flywheel or flexplate is the same size.
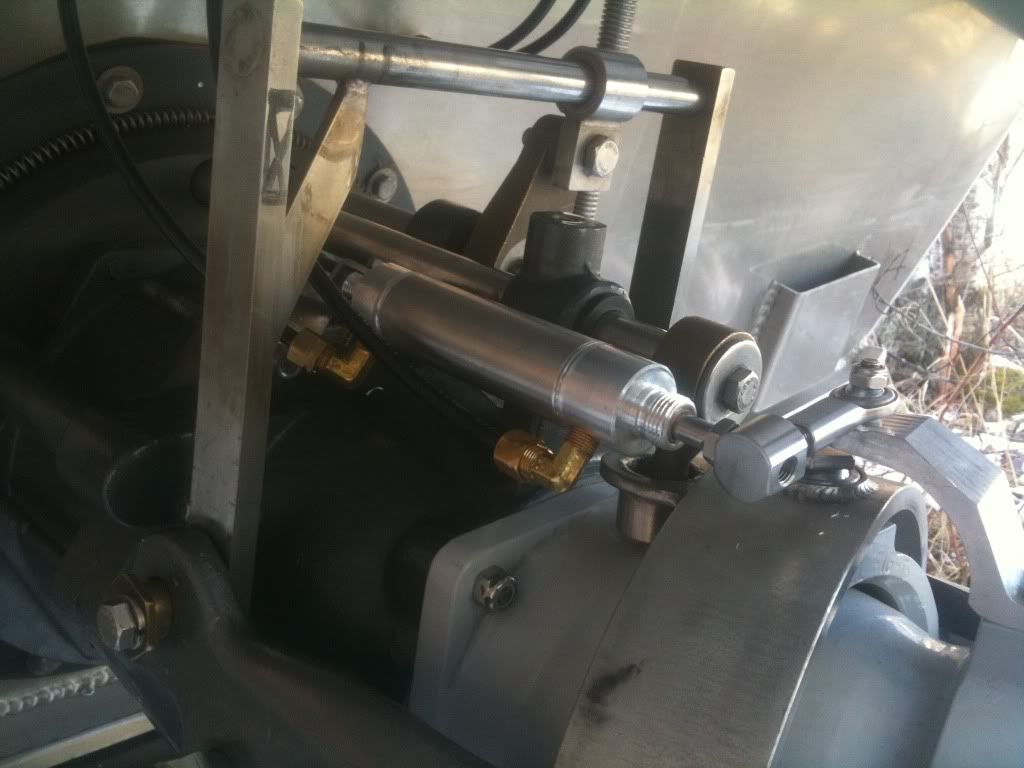
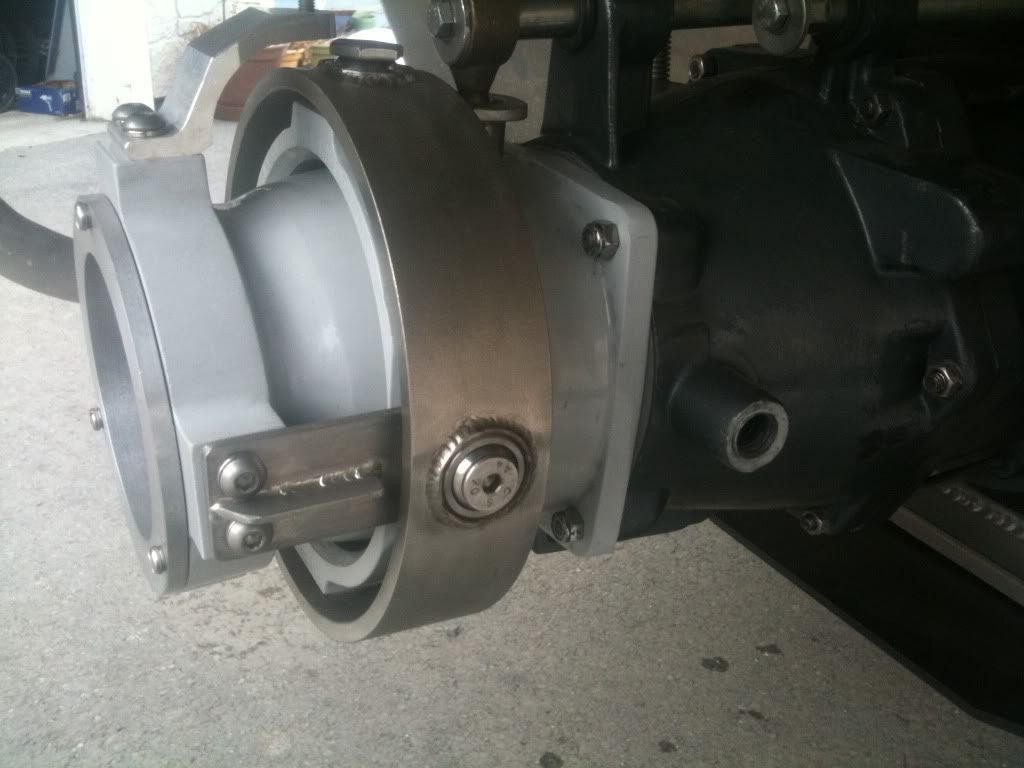
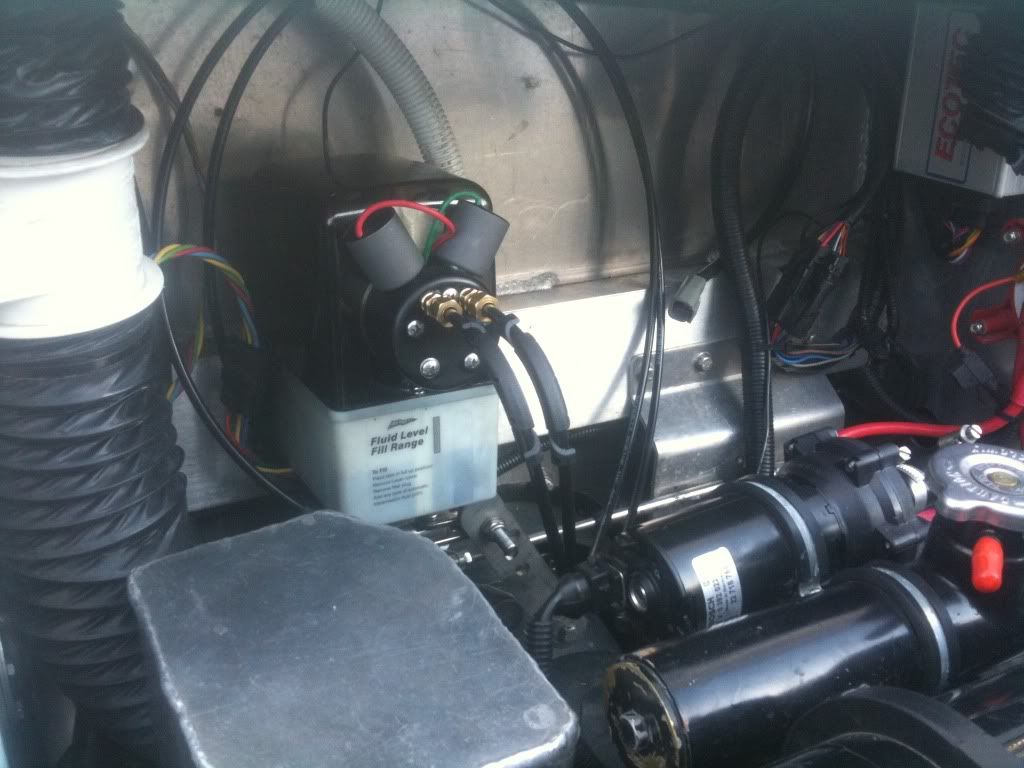
And, yes...the 3 stage has a trim nozzle. Im going to reuse the one I already have installed. Its hydraulic and is an awesome design. The manual cable Kodiak one I just bought just came with the pump and impellers and stuff...I get to sell that one.
http://marineenginedepot.com/MP/Default.aspx
You can buy all kinds of marine parts there. If you call them, its actually Marine Power down in Louisiana.
I assume you have a 7" H bar 1310 or 1350 style on your pump drive right now. like this :
You just need to get the proper adapter for the crank depending if its a flywheel or flexplate. The flexplate adapters have a recess to fit the crank shoulder that sticks out of the flexplate.
You can buy them many places online including:
http://www.berkeleyjet.com/p-14871-l...-bolt-kit.aspx
http://www.keitheickert.com/p-14870-...-flywheel.aspx
They are pretty common actually. I got mine from Riddle Marine when I bought all the other cool stuff.
Your bell housing pattern is the same, so you can reuse that and probably even your rear mount starter if you have one. You just have to make sure the flywheel or flexplate is the same size.
And, yes...the 3 stage has a trim nozzle. Im going to reuse the one I already have installed. Its hydraulic and is an awesome design. The manual cable Kodiak one I just bought just came with the pump and impellers and stuff...I get to sell that one.


 02-09-2014, 06:40 PM
#46
Teching In
Join Date: Dec 2010
Location: Cincinnati, ohio
Posts: 39
Likes: 0
Received 0 Likes
on
0 Posts
Thanks for the info.
Yea that looks like the correct style PTO. I will check em out. I will have to have the bell as well. I have BBF. Not GM.
I am going to start searching and saving. May get to play this spring.
Like the trim. Mine is electric.
Any idea what kinda MPH your new setup will yield?
I'm gonna follow this build.
Darrell
 02-10-2014, 01:50 PM
#48
Staging Lane
Thread Starter
iTrader: (1)
Join Date: Sep 2013
Location: Alaska
Posts: 84
Likes: 0
Received 0 Likes
on
0 Posts
Thanks guys. It should be mid 50's...high 50's would be nice, but Ill see. I can impeller for holeshot and loose top end, or vice versa. I'll look for a good all around package. I can play with the nozzle size and I think I only have 10 different impellers here to test.
Darrell, you can find them cheap on fleabay...50-75 bucks or so. KEM equipment makes one too, and has provisions for a rear engine mount. Mine just has an adapter that uses the 6 bolts on the bellhousing and bolts to my Hamilton. Sorry...I missed the BBF..
Darrell, you can find them cheap on fleabay...50-75 bucks or so. KEM equipment makes one too, and has provisions for a rear engine mount. Mine just has an adapter that uses the 6 bolts on the bellhousing and bolts to my Hamilton. Sorry...I missed the BBF..
02-10-2014, 02:25 PM
#49
Staging Lane
Thread Starter
iTrader: (1)
Join Date: Sep 2013
Location: Alaska
Posts: 84
Likes: 0
Received 0 Likes
on
0 Posts
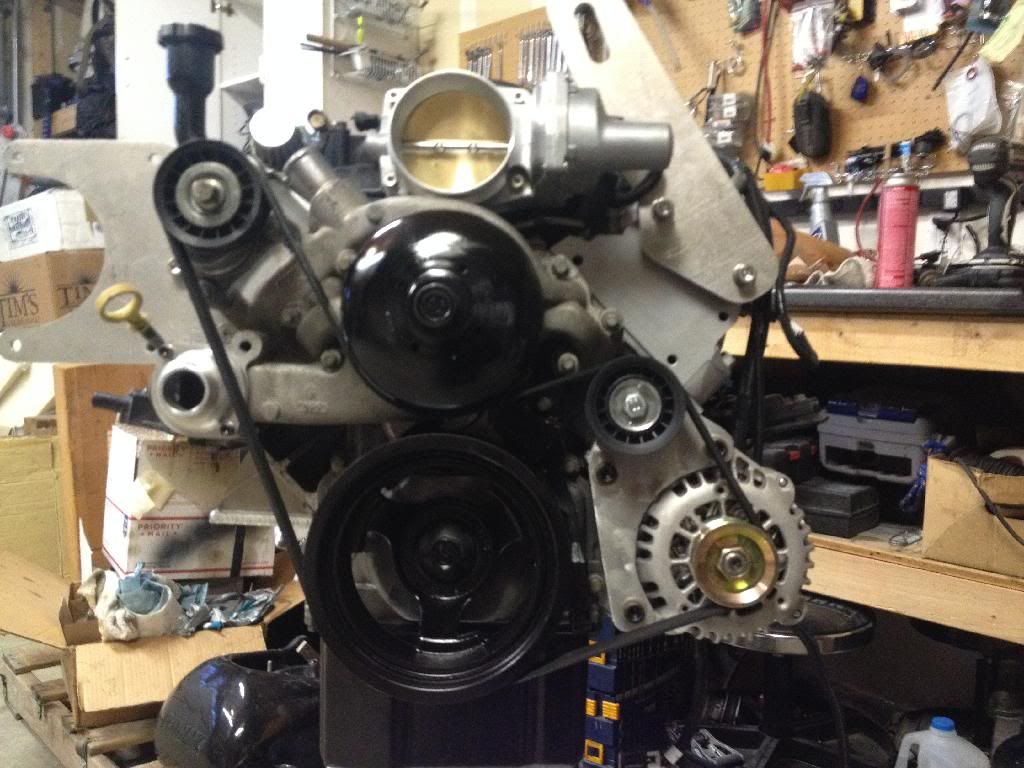
Here's some more pics of the motor coming together. Notice the cool brackets for the low mount coils? They will keep them off the valve covers for a nice clean look and then I don't have to use long plug wires. At this point, I was hoping the Mast coil harness would be long enough to reach...but...
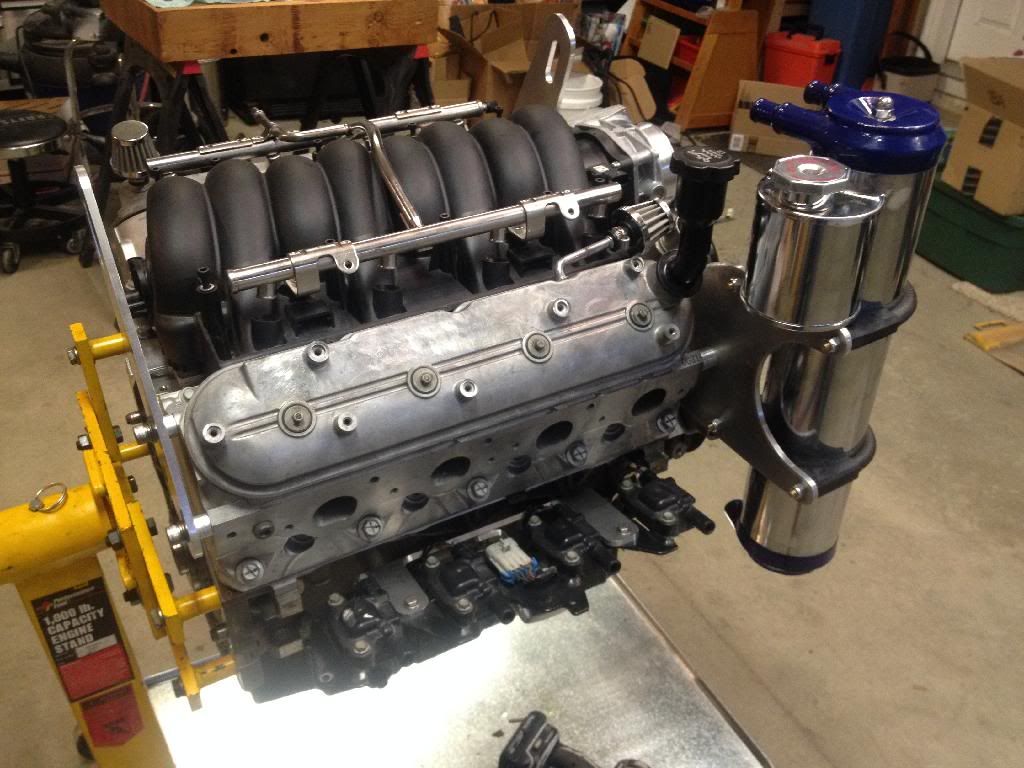
At this point I am going to run the manifold forward. Its just a lot less hassle and looks the best. I may pull it off and reverse it if I can find an oil pressure sender adapter so I can drill/tap and do the 90 degree fitting. Its still a ways from going in the boat.


At this point I am going to run the manifold forward. Its just a lot less hassle and looks the best. I may pull it off and reverse it if I can find an oil pressure sender adapter so I can drill/tap and do the 90 degree fitting. Its still a ways from going in the boat.
02-10-2014, 02:34 PM
#50
Staging Lane
Thread Starter
iTrader: (1)
Join Date: Sep 2013
Location: Alaska
Posts: 84
Likes: 0
Received 0 Likes
on
0 Posts
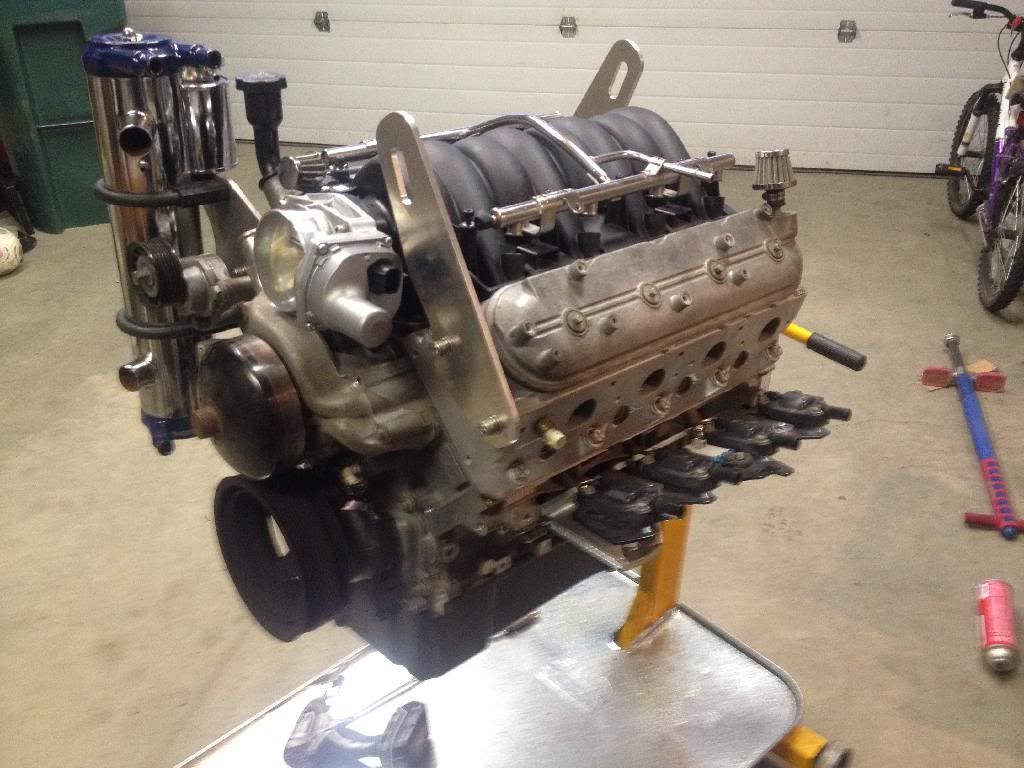
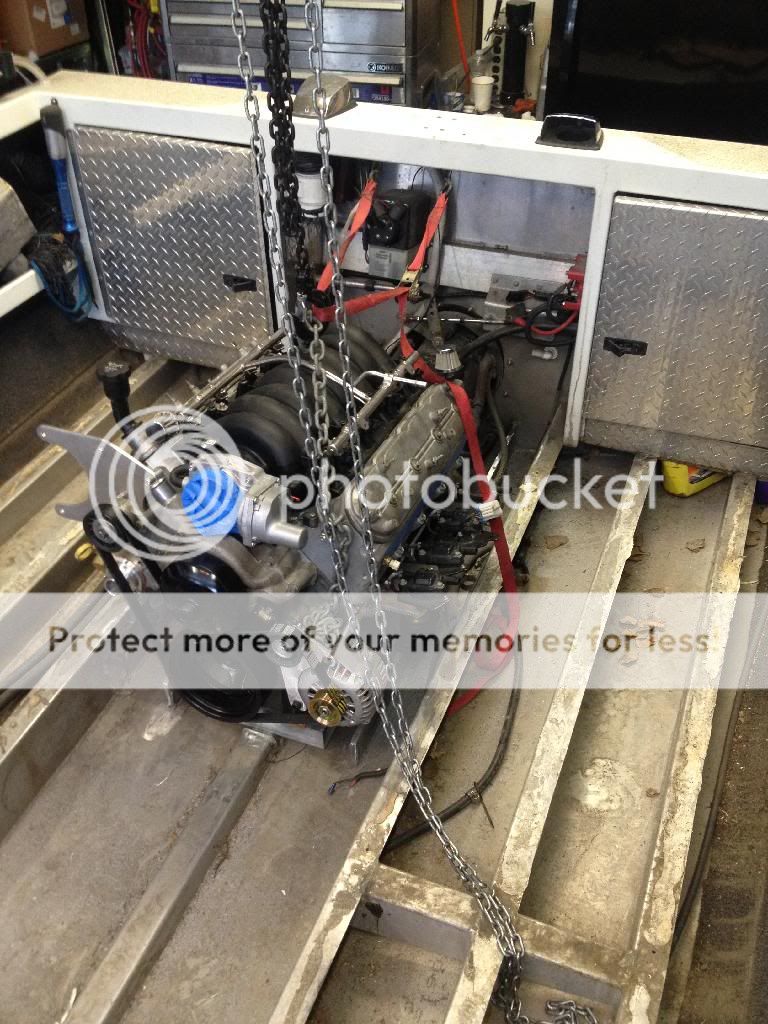
After I got this far, I couldn't help but temporarily bolt the rest of the accessories on to see what it looks like. It is going to be awesome!
Now that I look at it, I may just have to reverse the intake for engine cover clearances. Ill start looking to find an adapter to fit. Also, I discovered the coil harness to be just a bit short on the passenger side, and the throttle body wiring wouldn't reach either. I had to unwrap and rewrap a bit to make it work. Now, everything seems to fit. I put it back together with some self vulcanizing tape like I used on the airplanes when I was in the Air Force. Not sure of the correct name, but we called it "F-4 Tape". Its a little thicker than some, but it never gets sticky.


Now that I look at it, I may just have to reverse the intake for engine cover clearances. Ill start looking to find an adapter to fit. Also, I discovered the coil harness to be just a bit short on the passenger side, and the throttle body wiring wouldn't reach either. I had to unwrap and rewrap a bit to make it work. Now, everything seems to fit. I put it back together with some self vulcanizing tape like I used on the airplanes when I was in the Air Force. Not sure of the correct name, but we called it "F-4 Tape". Its a little thicker than some, but it never gets sticky.
02-10-2014, 02:37 PM
#51
Staging Lane
Thread Starter
iTrader: (1)
Join Date: Sep 2013
Location: Alaska
Posts: 84
Likes: 0
Received 0 Likes
on
0 Posts
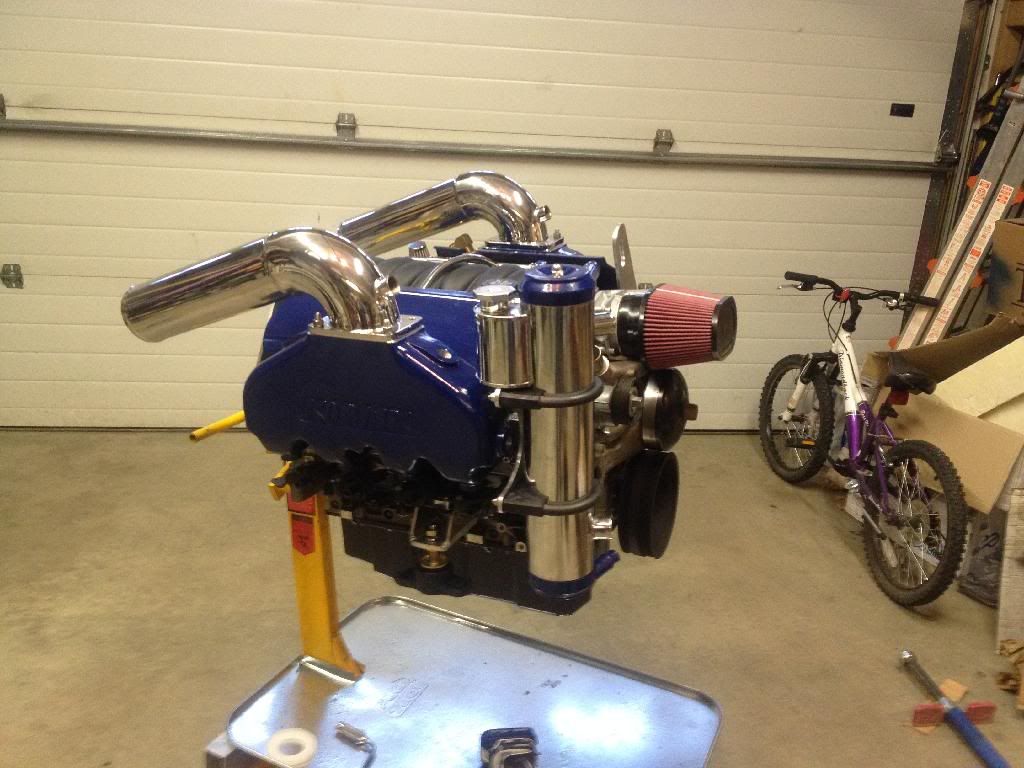
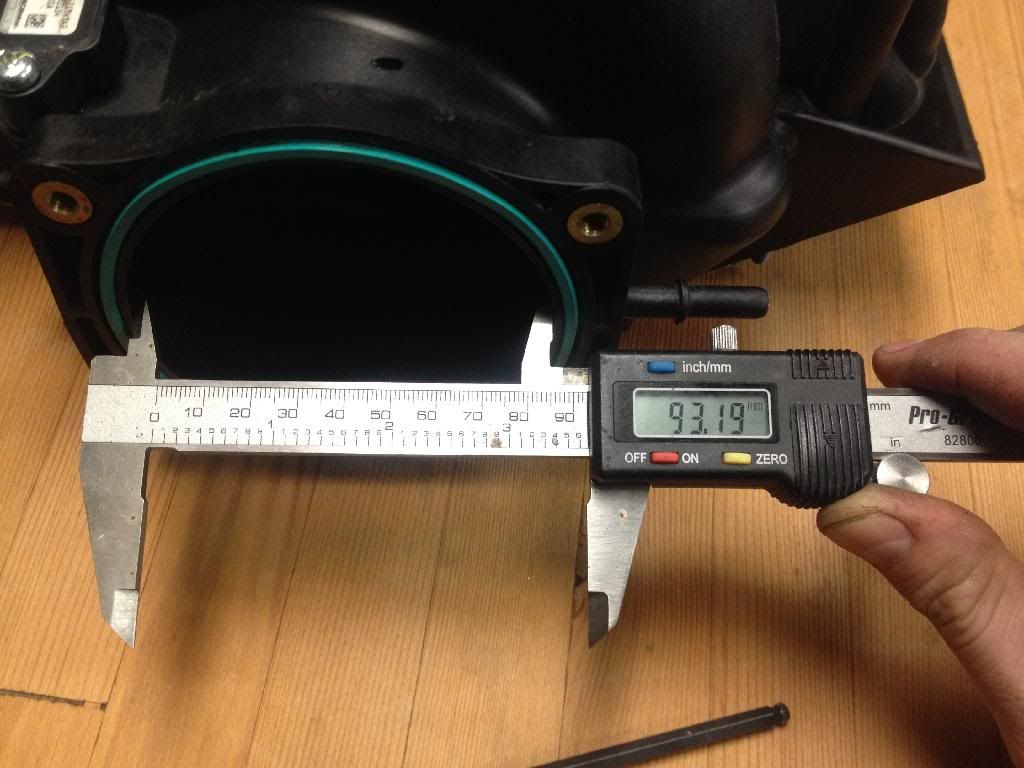
You might notice the throttle body is upside down. I had to flip it to clear the water pump neck. It took a bit of work on the water pump to fit, and also I had to enlarge the throttle body holes. Since the intake hole is a few mm larger than the tb I just moved it up a bit. I think it works nicely. My TB came out at 93mm or so...so plenty of room.

 02-10-2014, 06:29 PM
#53
Teching In
Join Date: Dec 2010
Location: Cincinnati, ohio
Posts: 39
Likes: 0
Received 0 Likes
on
0 Posts
I gotta say. That's a cool boat engine.
I like the coil idea, but, don't know how your boat acts, but mine would have a good chance of getting wet that low in the bilge.
Looks cool man
Darrell
I like the coil idea, but, don't know how your boat acts, but mine would have a good chance of getting wet that low in the bilge.
Looks cool man
Darrell
02-10-2014, 09:23 PM
#55
Staging Lane
Thread Starter
iTrader: (1)
Join Date: Sep 2013
Location: Alaska
Posts: 84
Likes: 0
Received 0 Likes
on
0 Posts
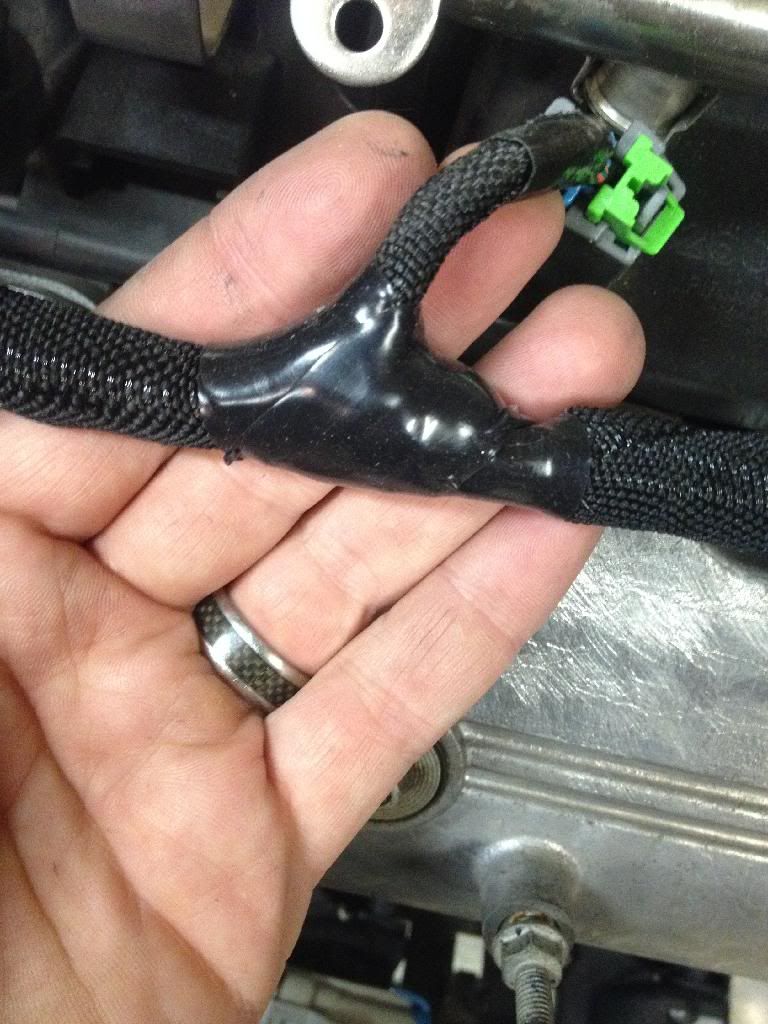
I hope I don't get that much water in the boat. That would be over a foot and I think I'd be pretty screwed at that point anyways. Riddle Marine has beed doing this for a while and has never had any issues (that they told me about) with them. Ill wrap the connector in my F-4 tape just to make sure the connector stays dry and insulated from the manifolds.
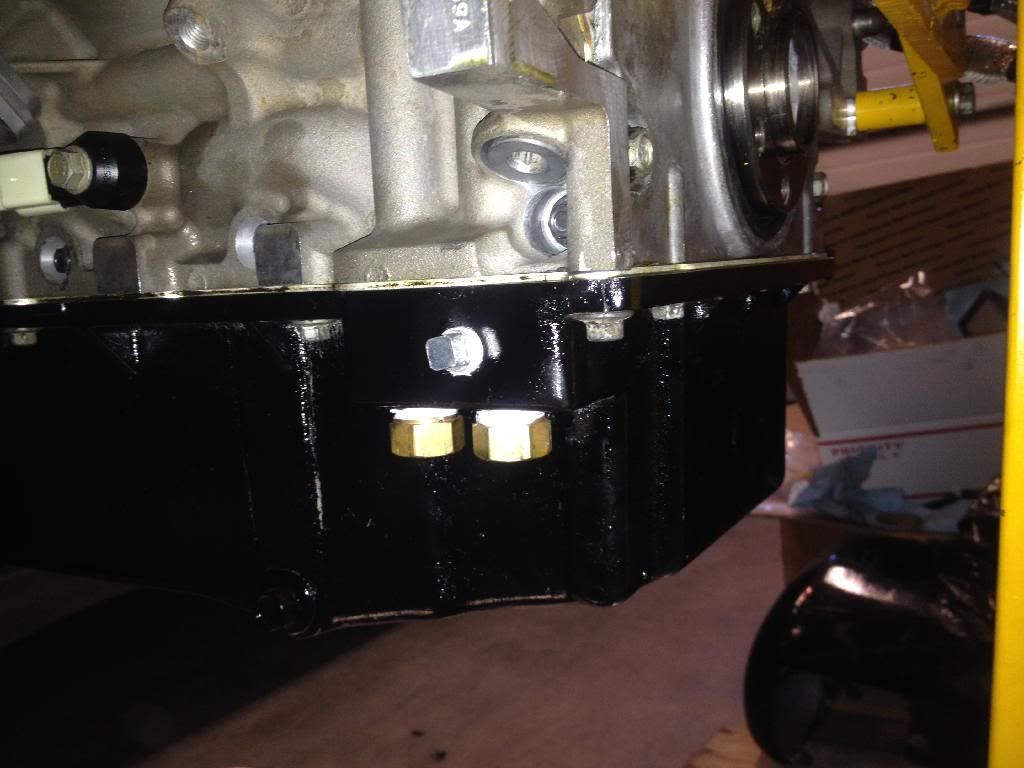
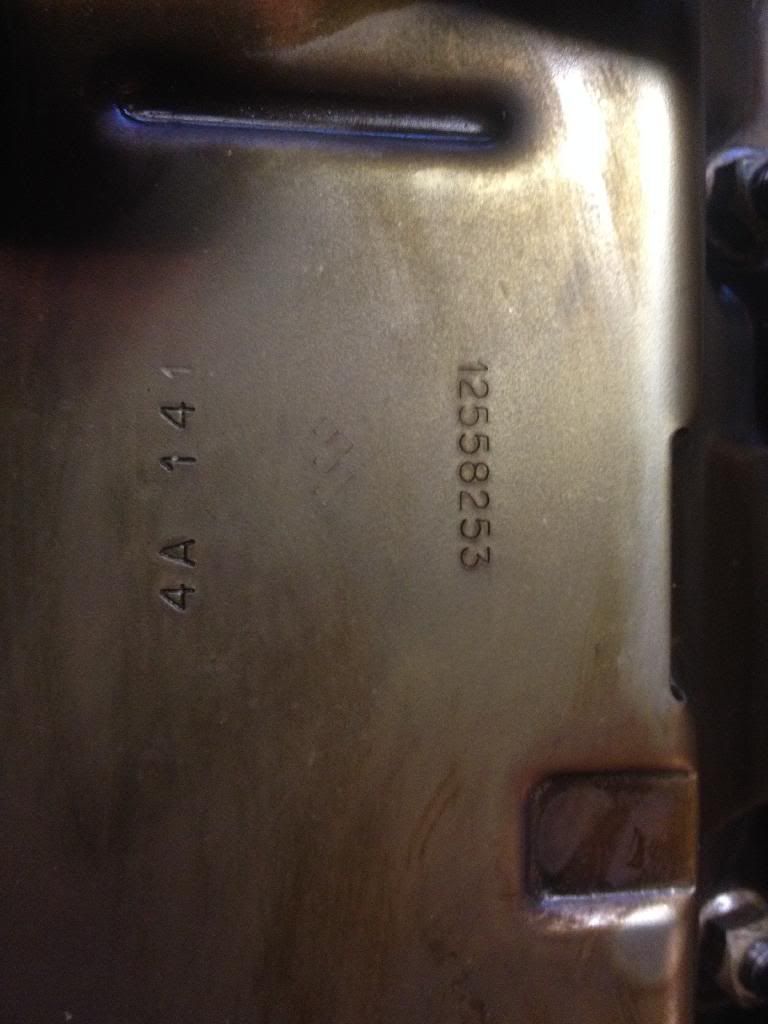
The pan is from MarinePower. Its their "Jetpac" pan. The part number on the bottom is 600L-001 if that helps. It also has dual drain plugs. It was on one of the donor MarinePower 6.0l motors I have.
I could run the oil pressure from the lower tap, but the harness is too short, and I'd need to buy the adapter fitting anyways as well as sand down the boss to tap and plug, but I'll look into it. Is there any other oem LS style plug pressure sender that is NPT?
Heres a pic of the Pan stamp and the F-4 tape on my harness.
Cam, do I really need to swap it out with the harness tape? The only thing is it is a bit more bulky then the other stuff, but its super durable and waterproof.
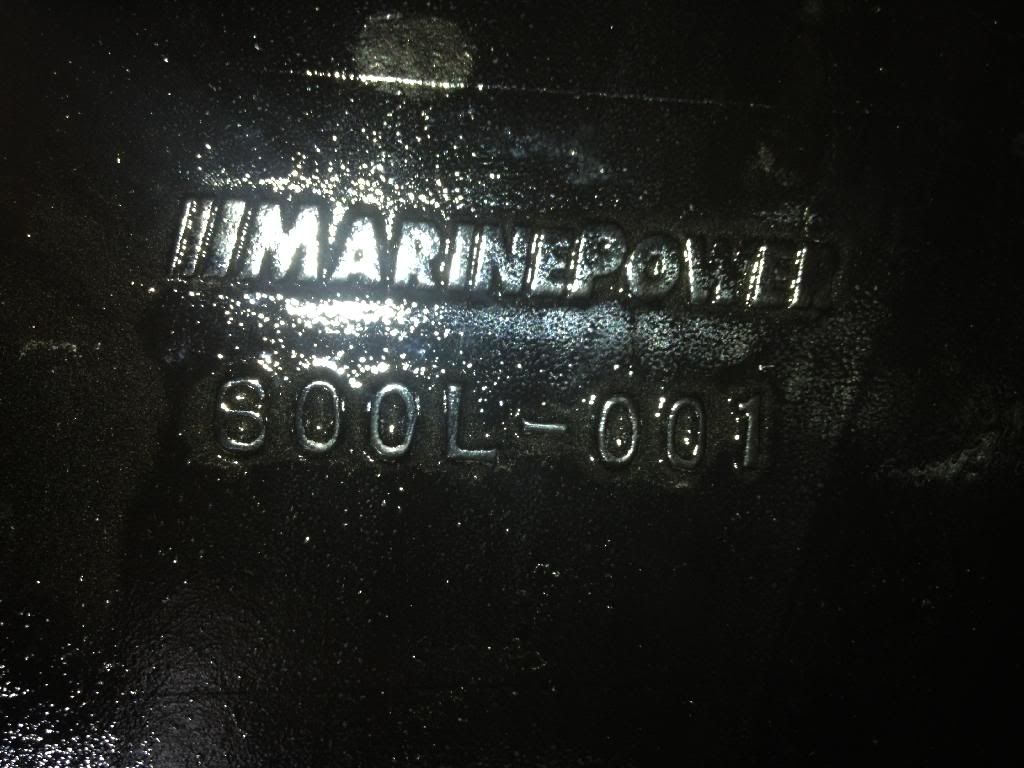

 02-10-2014, 09:33 PM
#56
Staging Lane
Thread Starter
iTrader: (1)
Join Date: Sep 2013
Location: Alaska
Posts: 84
Likes: 0
Received 0 Likes
on
0 Posts
While I'm at it here is my home made lower alternator mount bracket. I have some pieces of 1/4" plate aluminum hanging around and couldn't see paying 80 bucks for the LS1 lower tensioner. I measured the belt spacing on the crank and it was pretty dang close to 5.495" or 139.5mm from the front of the block to the front of the belt. I bolted it up and found some spacers pre made for me....on an old tensioner. I cut them off and sanded them mostly round...lol Its not perfect, but it works. I also made the bracket a bit wider than the LS1 style so I could use the other bolt hole in the front of the block. I also made another spacer for the inside bolt from the old front accessory bracket. I had to add a few washers to shim it up, but it is just for stabilization and you cant really see them too much.
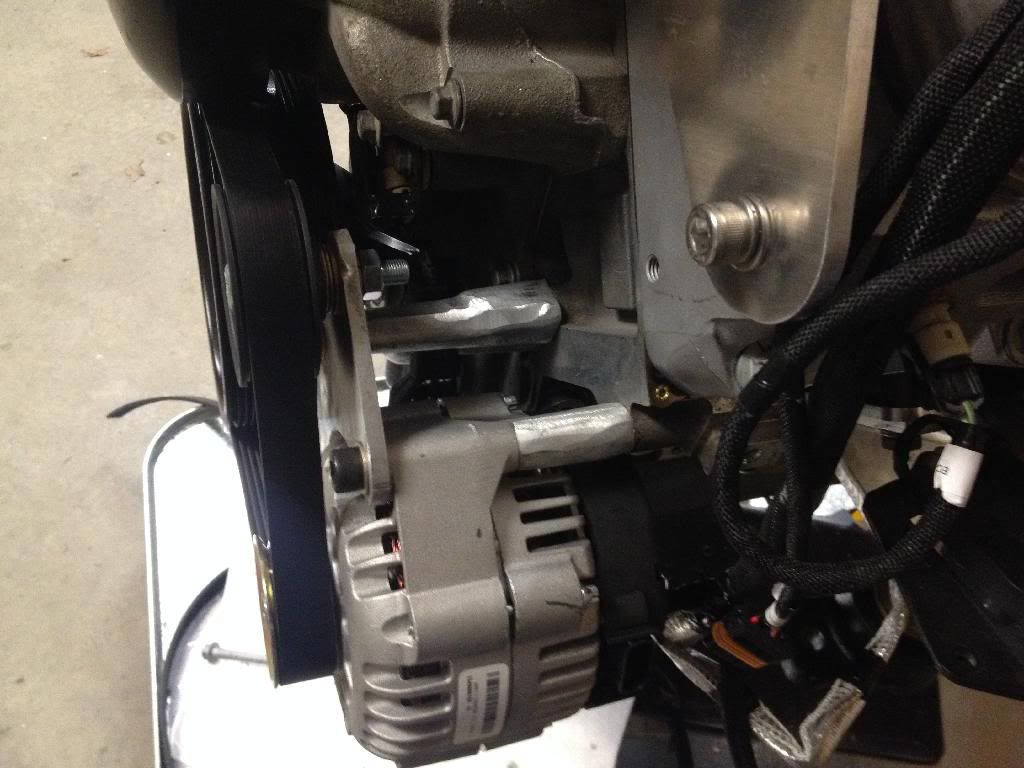
Its within .3mm of being straight all the way around according to my caliper...good enough for me


Its within .3mm of being straight all the way around according to my caliper...good enough for me
03-01-2014, 02:22 AM
#57
Staging Lane
Thread Starter
iTrader: (1)
Join Date: Sep 2013
Location: Alaska
Posts: 84
Likes: 0
Received 0 Likes
on
0 Posts
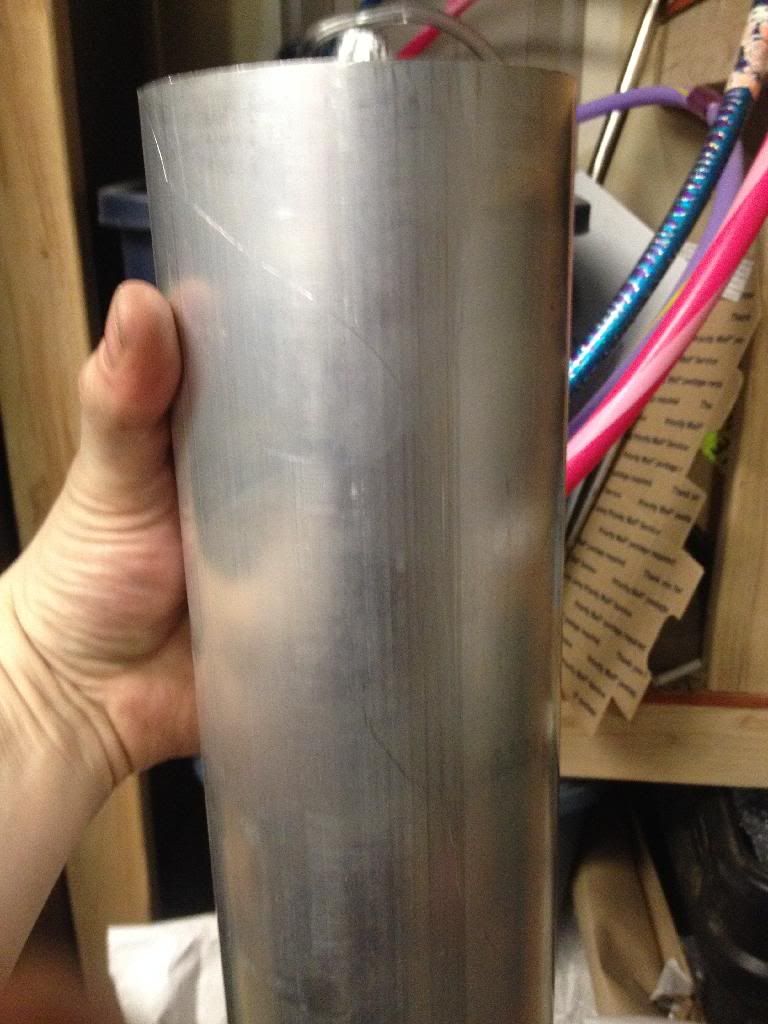
So, I got some exhaust pipe in. This should be big enough
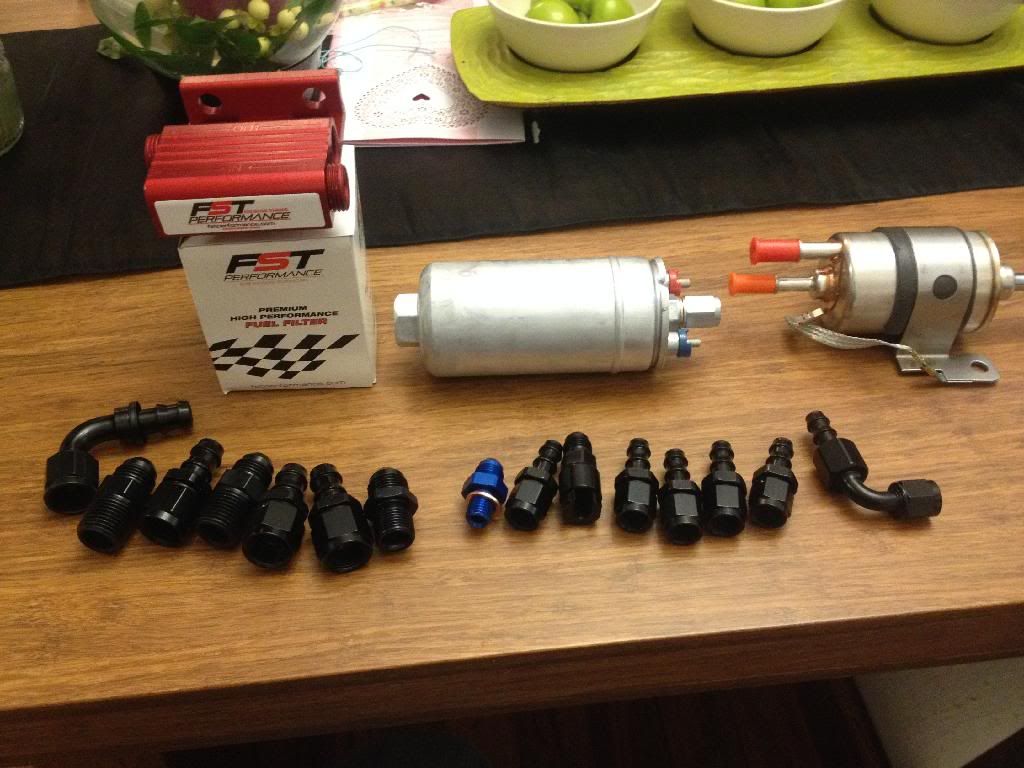
Also, I have most of my fuel system as well. 2 of my adapters for the gm fuel rail and regulator were back ordered, but I think they shipped today. Man, I definitely didn't think it was going to be this much money for the fuel components, but I wan't high flow, and I didn't want to risk a leak. So, the Bosch 044 will push the fuel nicely The FST is a pretty nice high flow fuel/water separator and I think filters down to 2 microns.
Now, this coming week I will start hacking on the hull...lol How fun!

Also, I have most of my fuel system as well. 2 of my adapters for the gm fuel rail and regulator were back ordered, but I think they shipped today. Man, I definitely didn't think it was going to be this much money for the fuel components, but I wan't high flow, and I didn't want to risk a leak. So, the Bosch 044 will push the fuel nicely
The FST is a pretty nice high flow fuel/water separator and I think filters down to 2 microns.
Now, this coming week I will start hacking on the hull...lol How fun!
03-01-2014, 02:25 PM
#58

Great to see you got your daughter to help build the engine!!@!
03-17-2014, 07:03 PM
#59
Staging Lane
Thread Starter
iTrader: (1)
Join Date: Sep 2013
Location: Alaska
Posts: 84
Likes: 0
Received 0 Likes
on
0 Posts
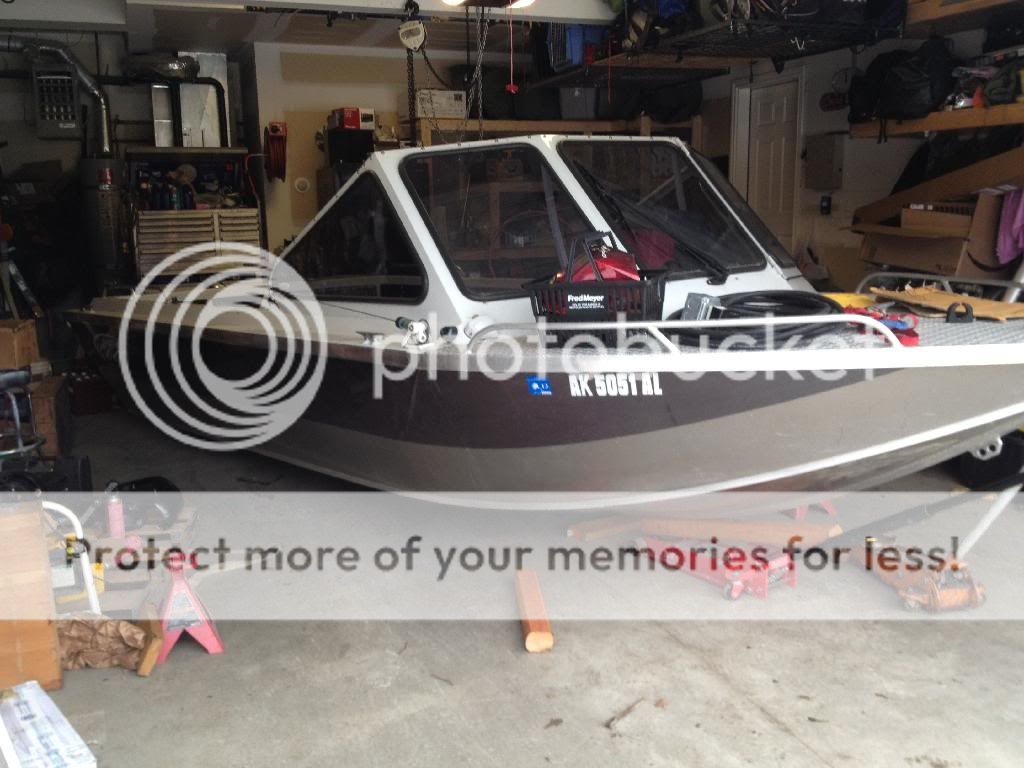
Well, I had some more time for the boat recently. I managed to pull it off the trailer and set it down...what a pain. It was much easier going back on the trailer though...
Don't judge the garage...lol I do what I can

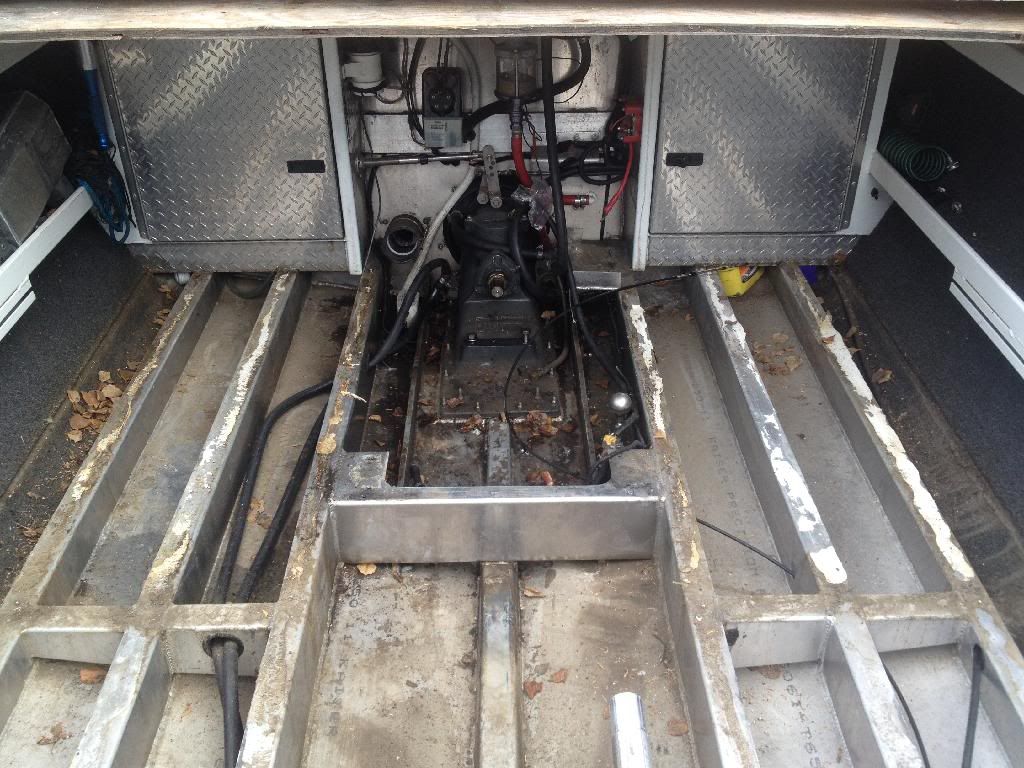
I cut the old motor mounts out and set the engine in for lineup:
Don't judge the garage...lol I do what I can


I cut the old motor mounts out and set the engine in for lineup:
 03-17-2014, 07:03 PM
#60
Staging Lane
Thread Starter
iTrader: (1)
Join Date: Sep 2013
Location: Alaska
Posts: 84
Likes: 0
Received 0 Likes
on
0 Posts
Welded some new motor mounts in. The new mounts are .250 with the gussets. I hope the welds are good enough. I couldn't weld underneath, so I added the gussets for more support. Ill keep an eye on them to make sure they don't crack. You can also see my new fuel tank supports.