
Head and Cam LQ4 build to replace busted LS1 - 86 Trans AM swap
 10-04-2013, 10:04 AM
#1

Hey all. I wasnt going to do a build thread on tech since I had one going on thirdgen.org. But after thinking about it, I realized that most of this project was LS based since the swap was already done. So...Im going to do a quick thread but only put the bigger more important parts in. Also, mixed in with the pictures, Ill post links to the videos I took. Some of it is going to seem stupid to some of you, but Im trying to get into DIY videos since Im always doing something. I figured I would try to help someone else out. And video is always better than words/pictures. Some of these pictures might be out of sync from when I did them...but the basic idea is there haha.
A little back ground on this car. It had a heads/cam LS1 T56 in it from my previous thirdgen trans am. The motor came from a donor car that I purchased on Tech back in 2006. I ended up swamping the LS1 in a huge puddle, and bent a rod. So this build is concentrated on getting an LQ4, rebuilding it, swapping on existing parts, and upgrading with some new parts. Most if not all of the swap related stuff, Ill leave out, because its already been done. It was slow going. Car is over 45 minutes away from me...and I have a (now 2 year old) son. So it was quite a balancing act.
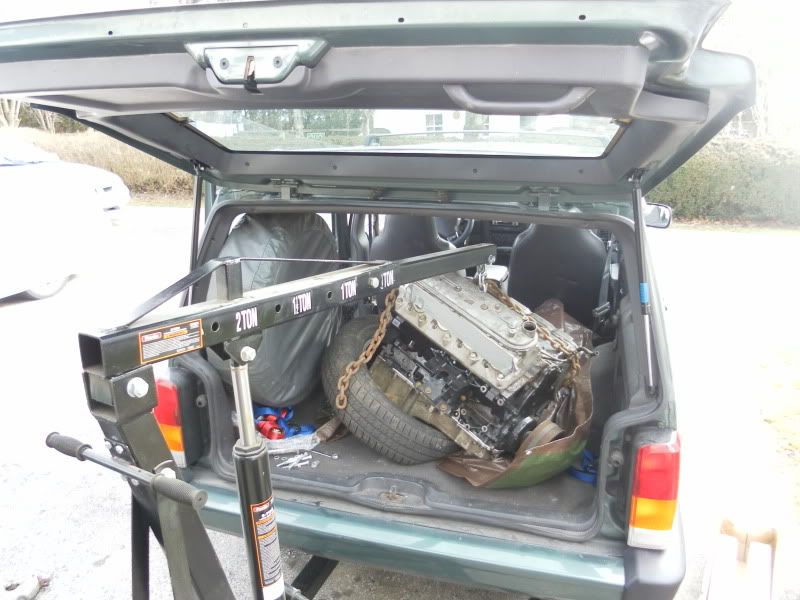
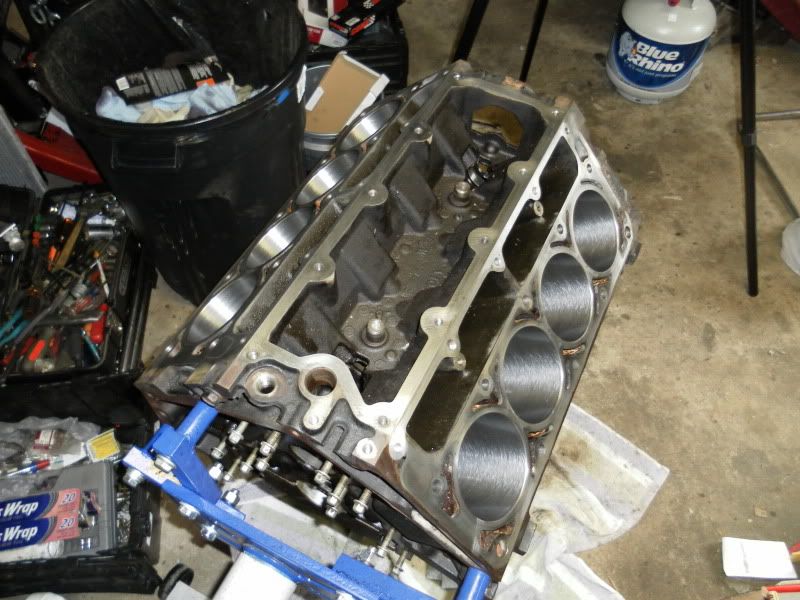
First thing I did was source an LQ4. I decided on this motor because they were cheap basically. If I could have picked up a cheap LS1 block, I would have. I found an LQ4 somewhat locally and went and grabbed it. It came with a TON of extras. More stuff than I needed, so I considered it a good deal since I was going to be able to sell a lot of it off. Was supposedly from a 2004 and had 80k miles or so. Im not sure how accurate either of those facts are, but it turns out it didnt really matter.
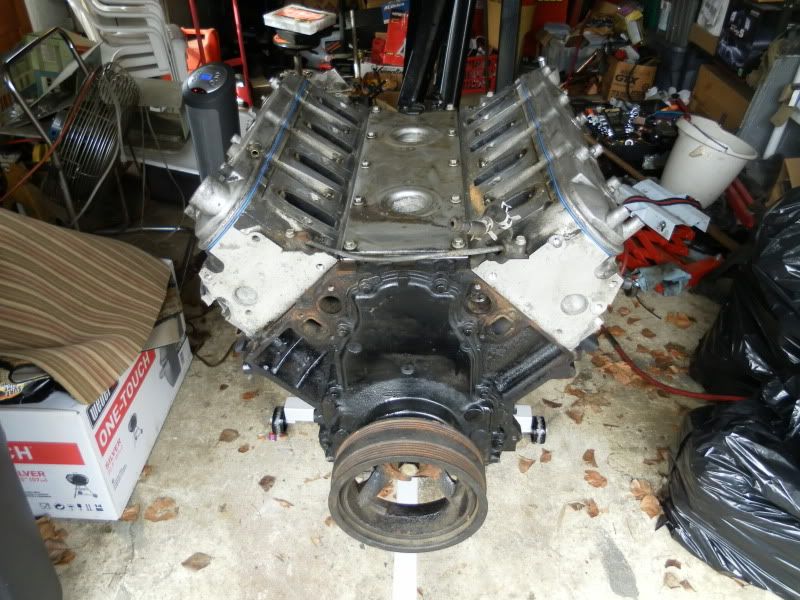
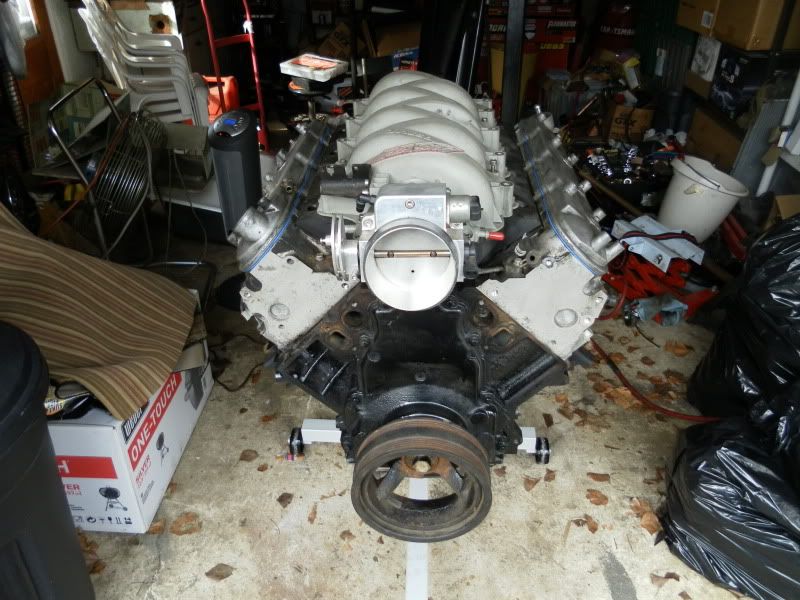
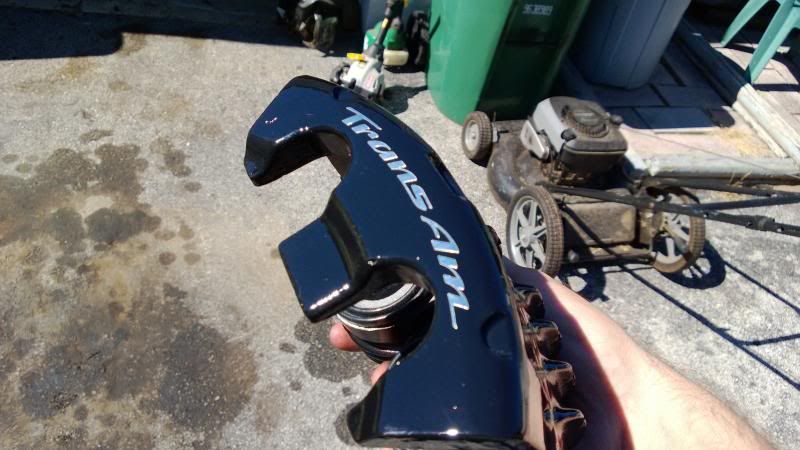
Test fitting the FAST 90 (ok i was bored)
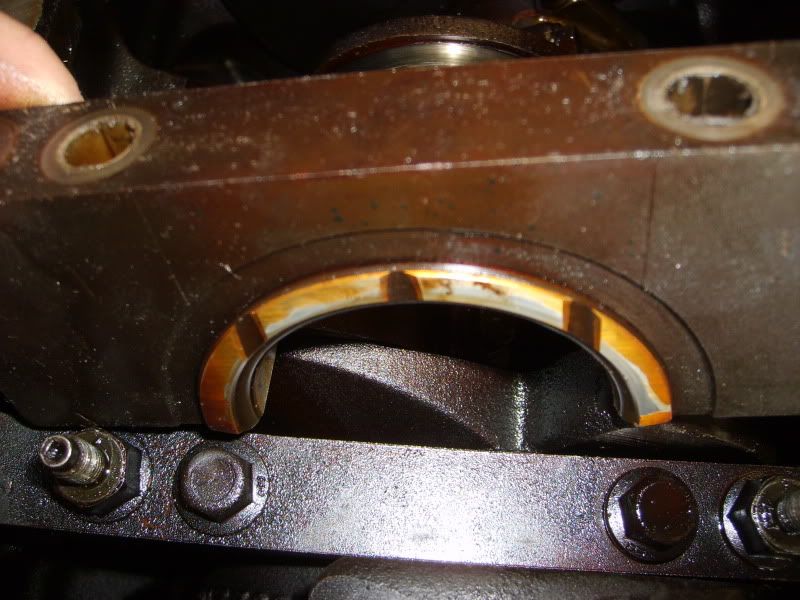
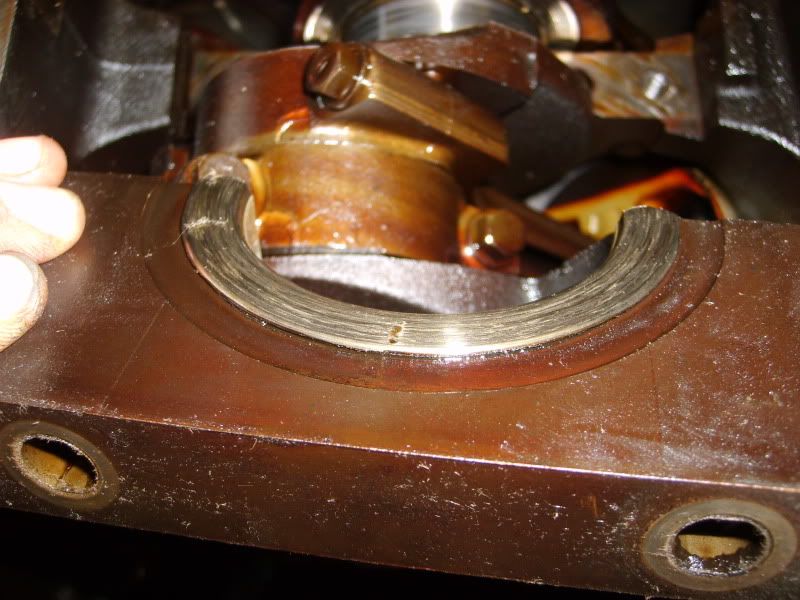
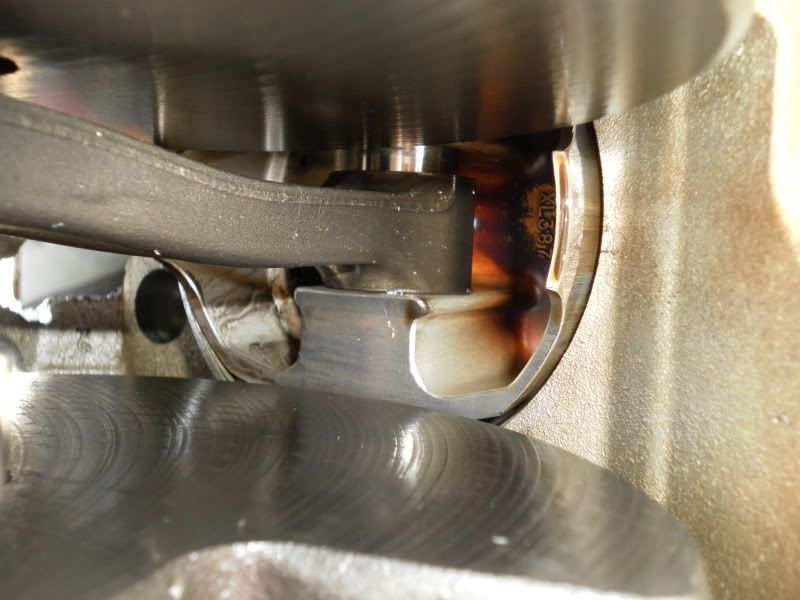
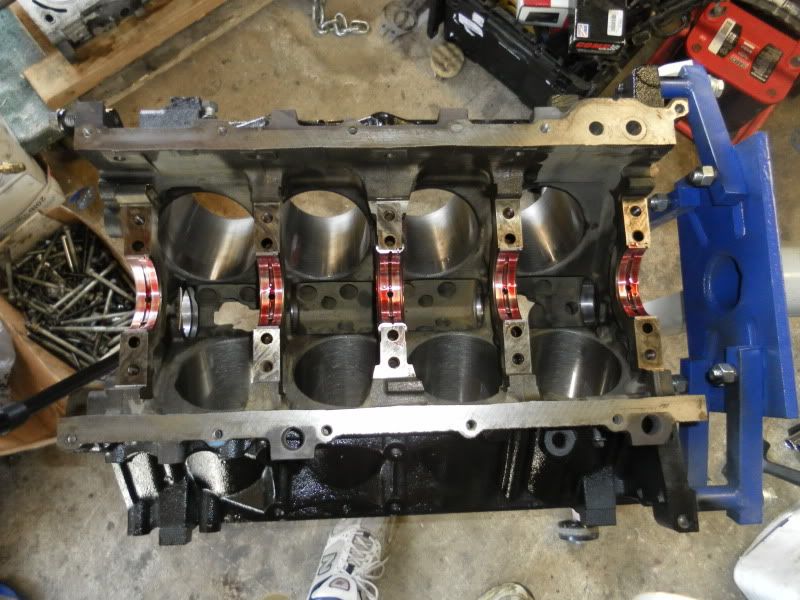
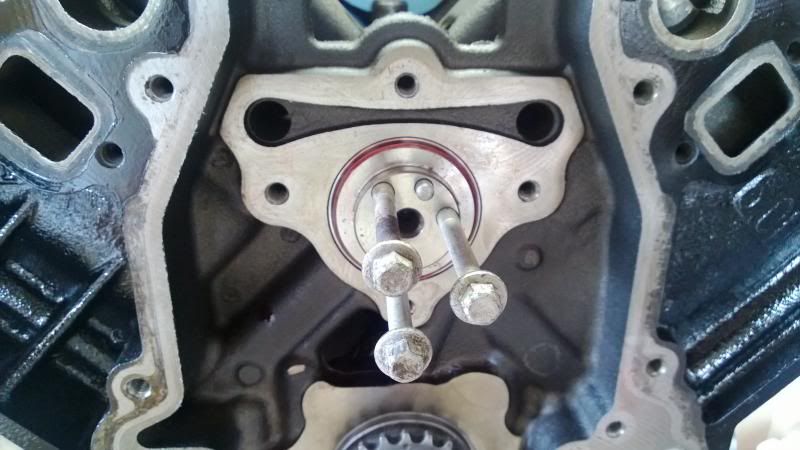
After I got into it, I realized that there was TONS of endplay in the crank. Something I didnt notice until after I started tearing it apart. After cracking the thrust main cap, this is what I found.
Front side.
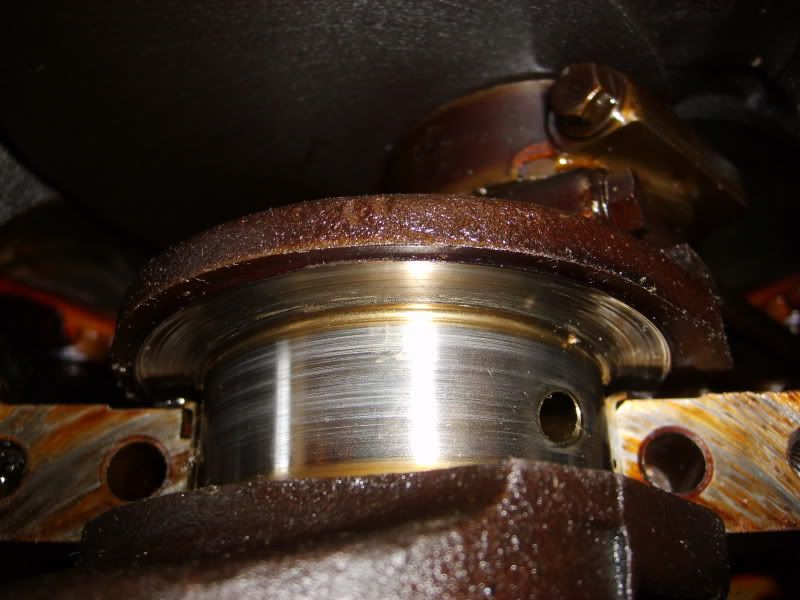
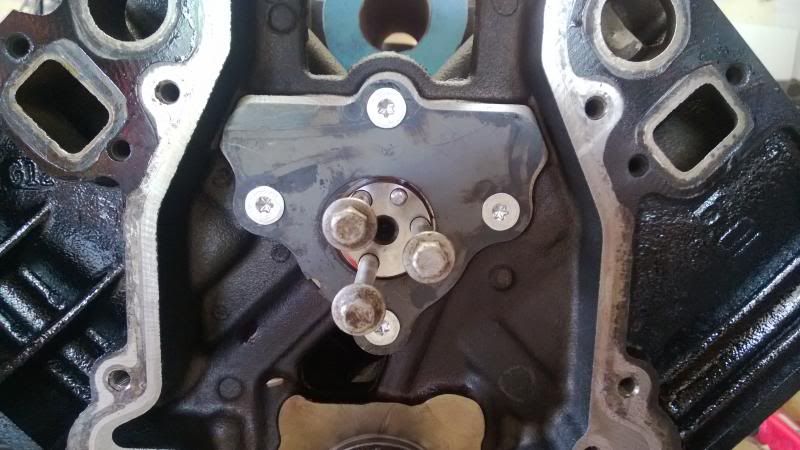
Rear side.
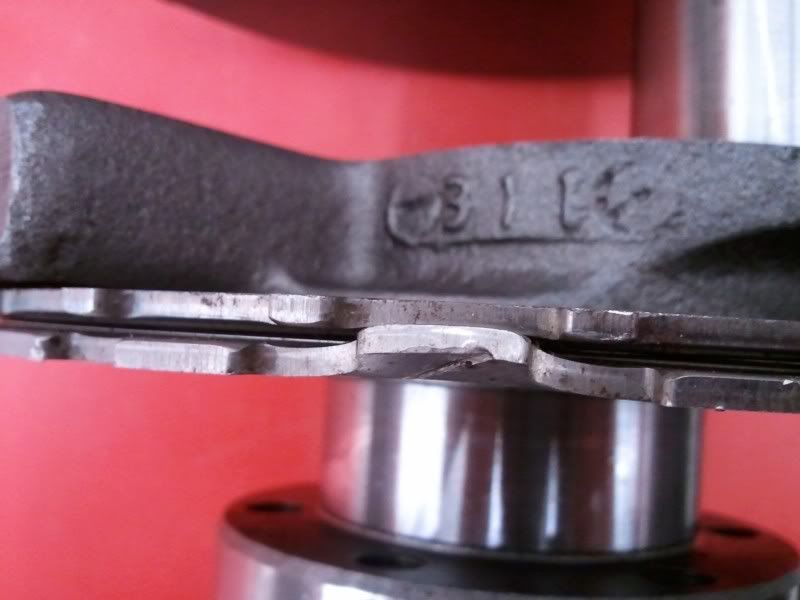
And the fun left on the crank surface.
At this point, I knew I was going to have to put money into it. Instead of having the crank welded and re-ground, I decided to try a replacement crank. Since I was working at Autozone part time at the time, I went with one of theirs. I ordered 4 cranks before I got one that I was happy with. They each had issues. The one I ended up with was clean, and only cut .010 on both rod and main journals. This was one of the worst ones that I sent back�
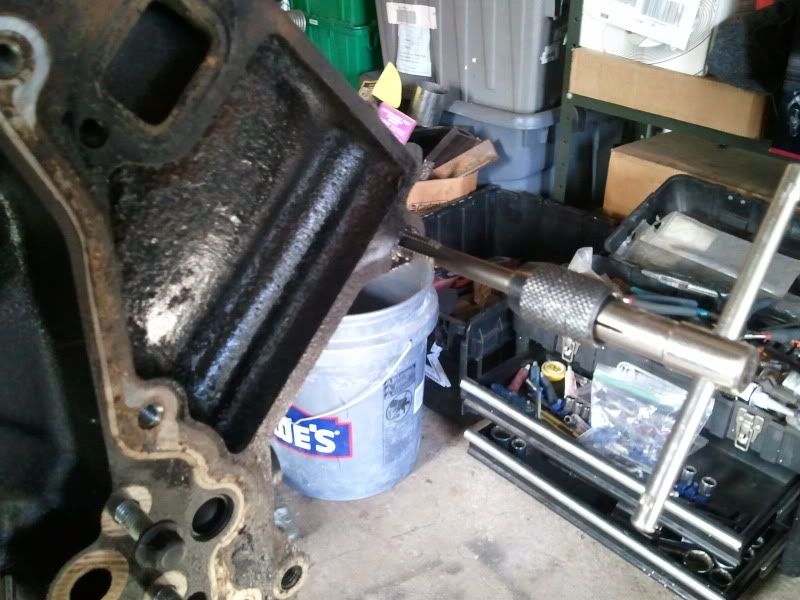
Small job...tapped the hole for the alternator bracket.
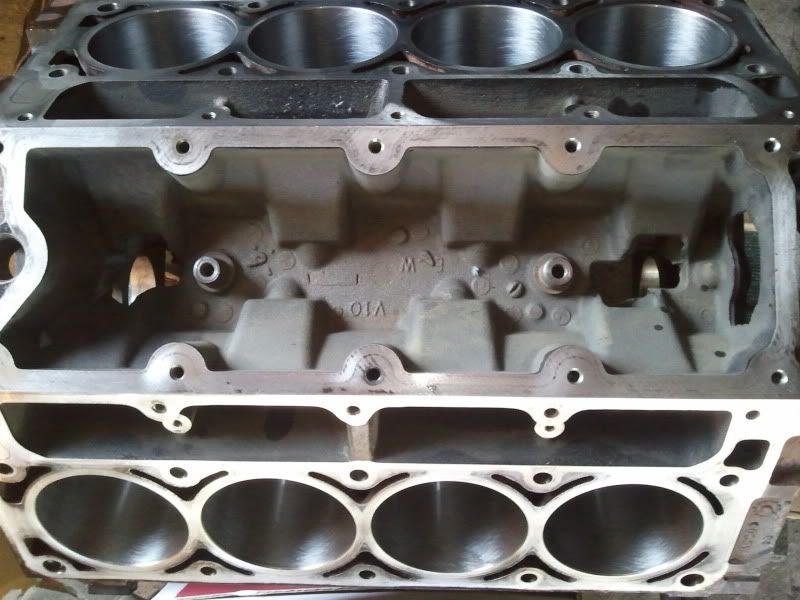
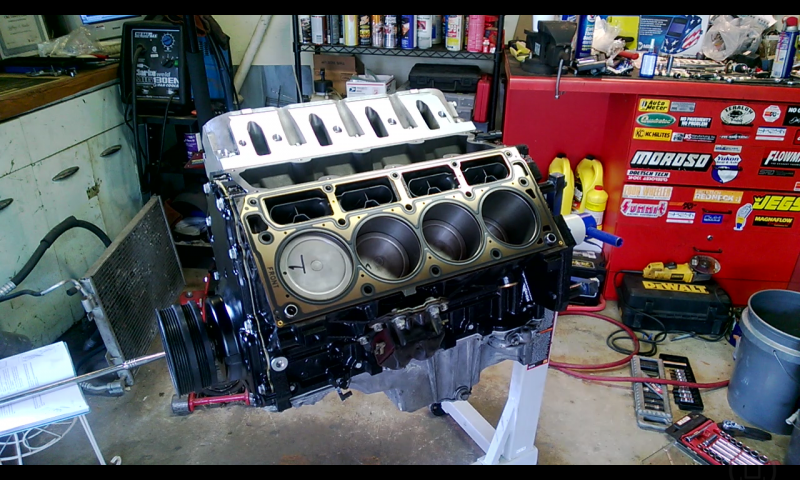
Next was kind of a leap for me. I was already doing new main and rod bearings. So I decided just to replace the rings. Nothing special, just sealed power replacements. The cylinder bores were in pretty nice shape. Still had some visible crosshatch, but they needed to be cleaned up a bit..deglazed if you will. So I ordered the tools, and went to work. Here are some pictures of the results, and a video that I took of the process I used.
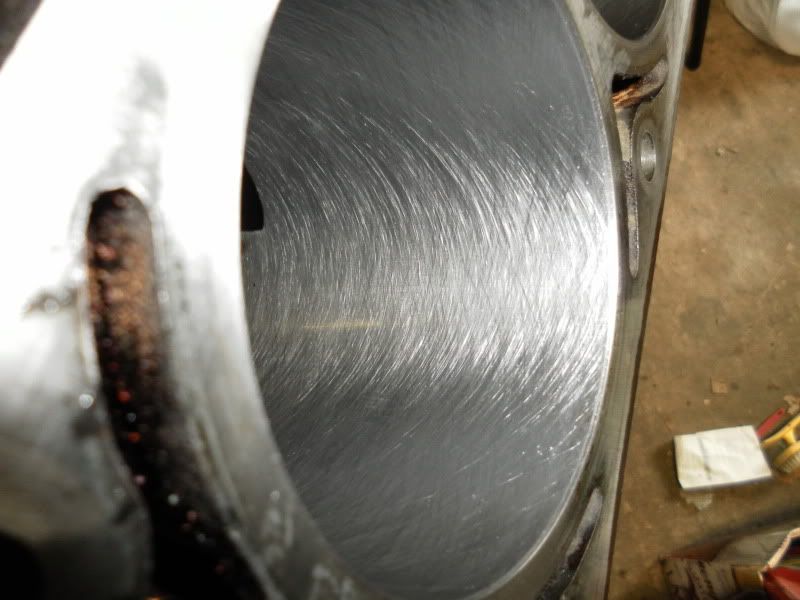
Came out pretty good IMO. All I was trying to do was give the rings something to seat in with. Hardly took any material away from the bores, if at all. The block was then taken to the machine shop to be hot tanked and have new cam bearings installed. Pics of that will come later.
Next I dropped the LS1 from my car. It was time to get that broken down, inventory what I was keeping, and see what exactly broke.

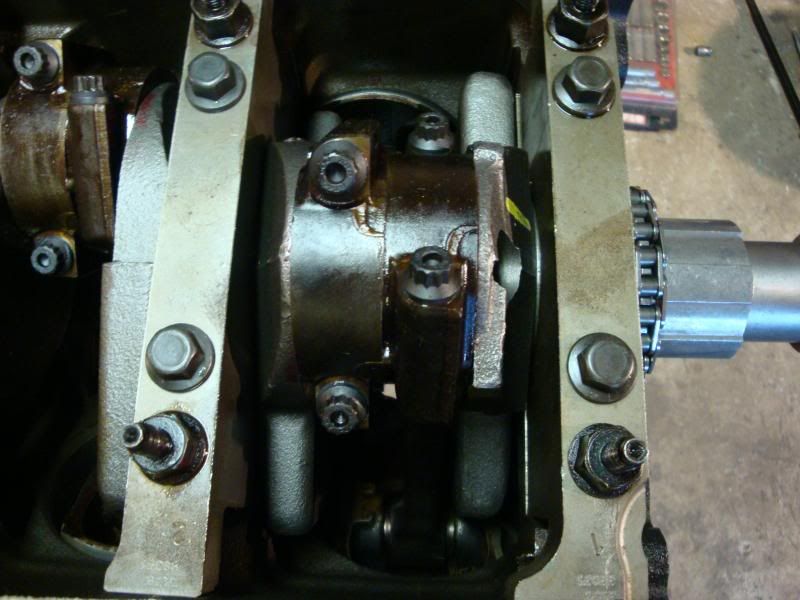
Turns out #7 rod bent very slightly. Engine could still rotate, but it was obviously toast.
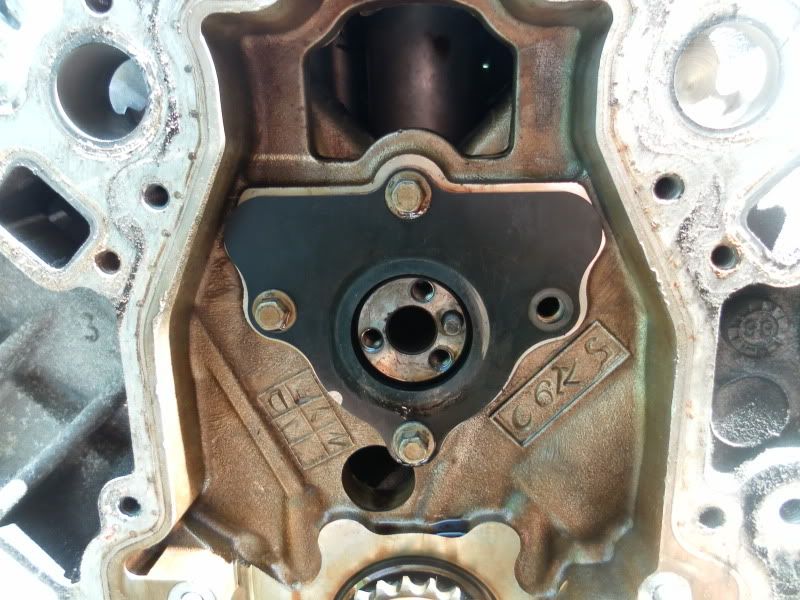
Found some other fun things when disassembling. Found a missing bolt in the cam retainer plate. No where to be found. How do you put one of these together and not install one of those bolts??
Some of the parts that I removed that will be reused were the old MTI stage II 862 heads, ported oil pump, and a couple other odds and ends. I thought I would reuse more, but ultimately decided not to.
You can see the bent rod.
Started to clean some of the parts up while I was waiting for time and money. Got the heads cleaned up pretty well.
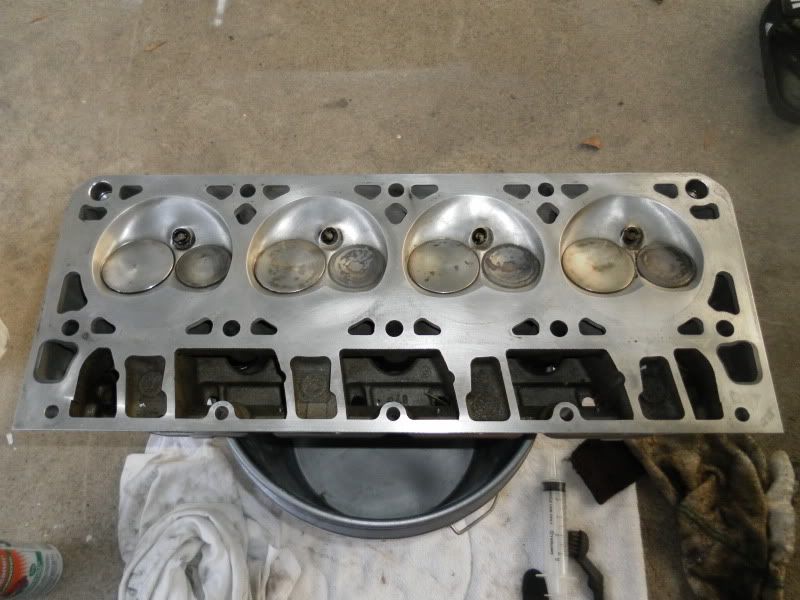
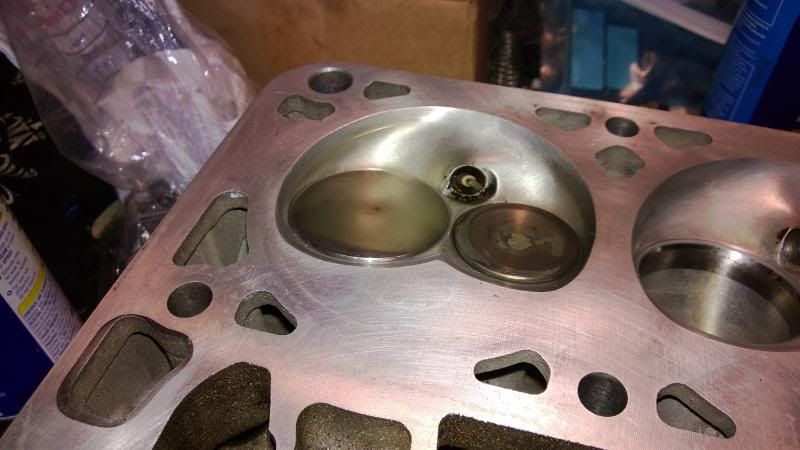
Also checked the chamber size and came up with around 60cc. Valve sizes were verified and they indeed had the 2.02 intake valves with stock exhaust. Heads are ported, polished, and have bowl work.
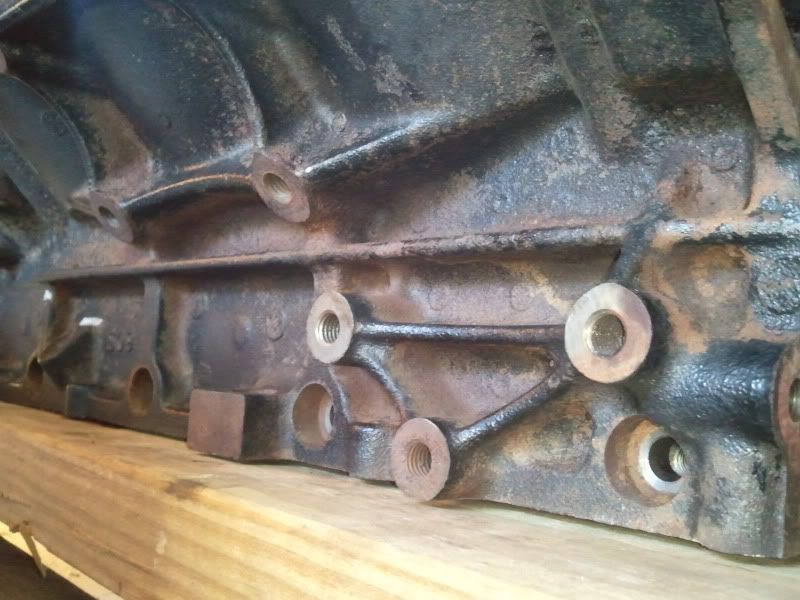
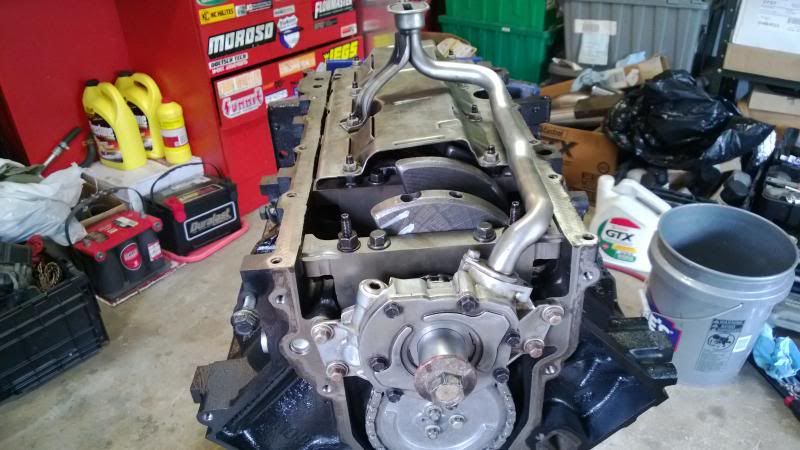
Got the LQ4 back from the shop. This is what it looked like after being hot tanked.
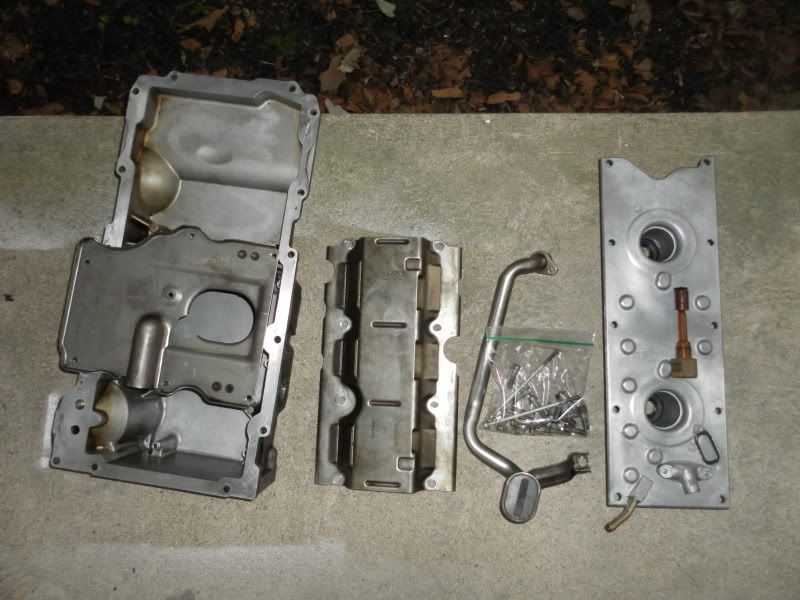
Got the oil pan, valley cover, front and rear covers cleaned up. As well as other parts.
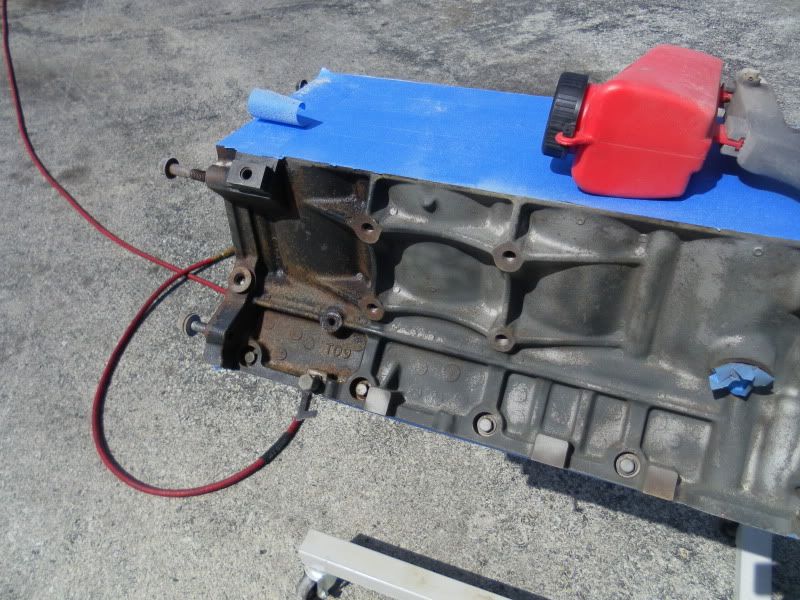
Sealed up the block really well, and used a harborfreight sand blaster to remove rust that was left. It did an exeptional job for the cost in my opinion.
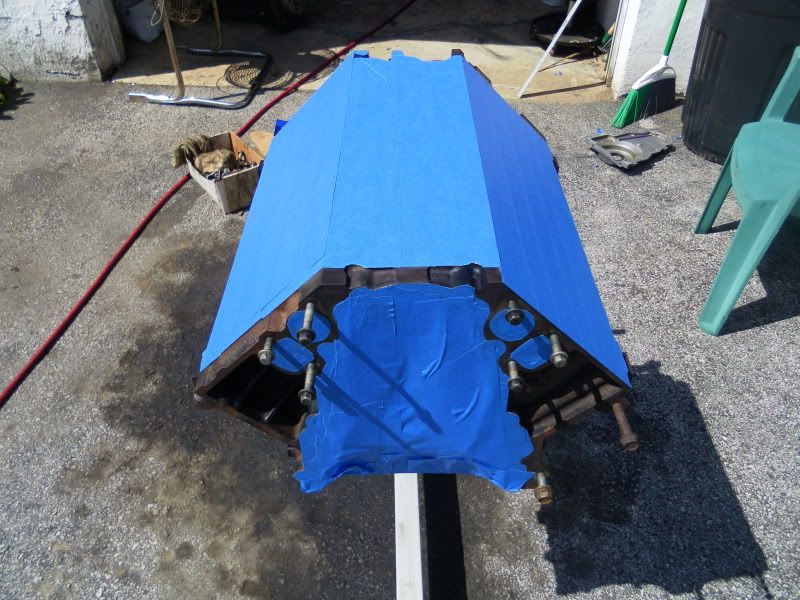
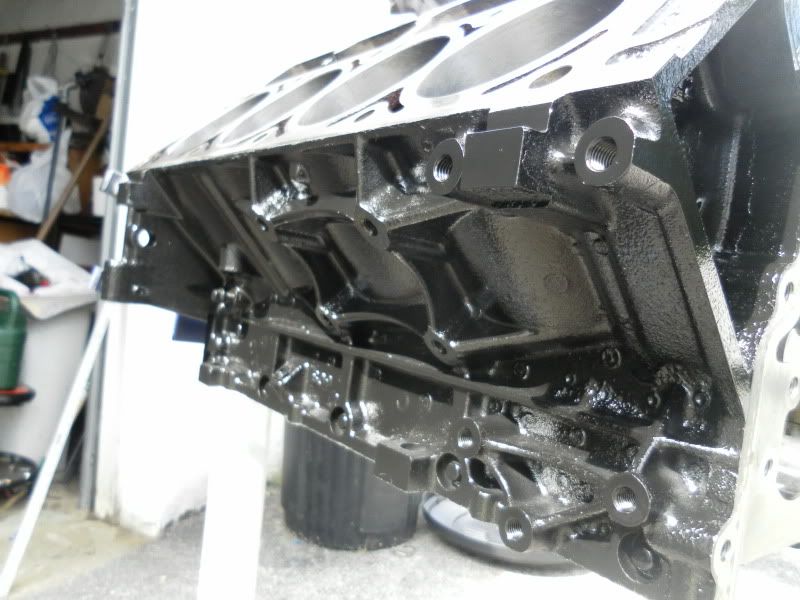
Then it was re-taped and painted with high temp black and clear.
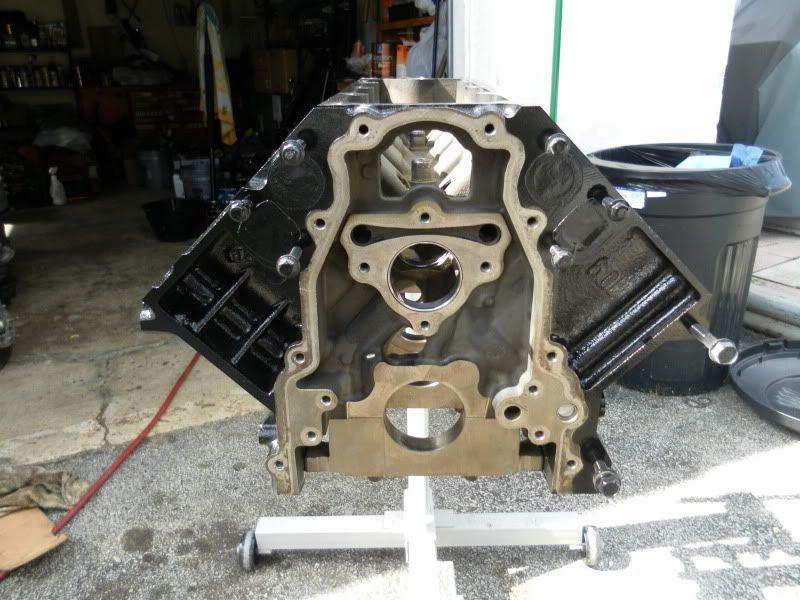
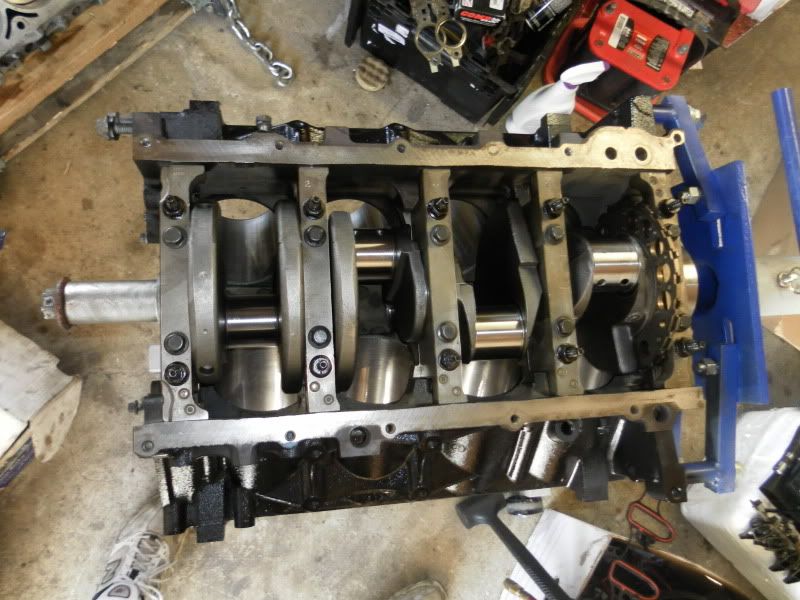
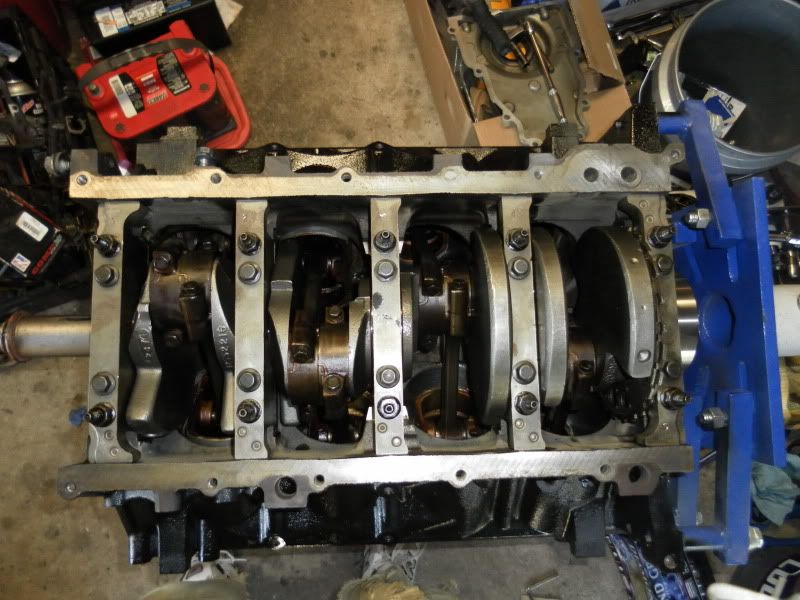
With everything painted and cleaned. Then cleaned again...and again� I checked my bearing clearances. Surprisingly, they were all great with the reman crank. And endplay was right in spec. I was able to apply some assembly lube, and install the crank.
After that I installed the new rings and put the piston/rod assemblies back into the block. I used all original rod bolts first. I later upgraded to ARP fasteners.
The first go around, was a PITA. I was using one of those POS�
As you can tell, it exploded. I was having pretty bad luck with it. But I got it all together.
Shortly after, I took all the pistons back out, because I was worried I messed up some of the rings when the ring compressor was giving me fits. I bought a new set of rings and an ARP one size ring compressor and re-did it. A little bit of extra work and money to make sure nothing was messed up. Here is a video showing the use of the ARP true round ring compressor. I will never use a clamp style again�
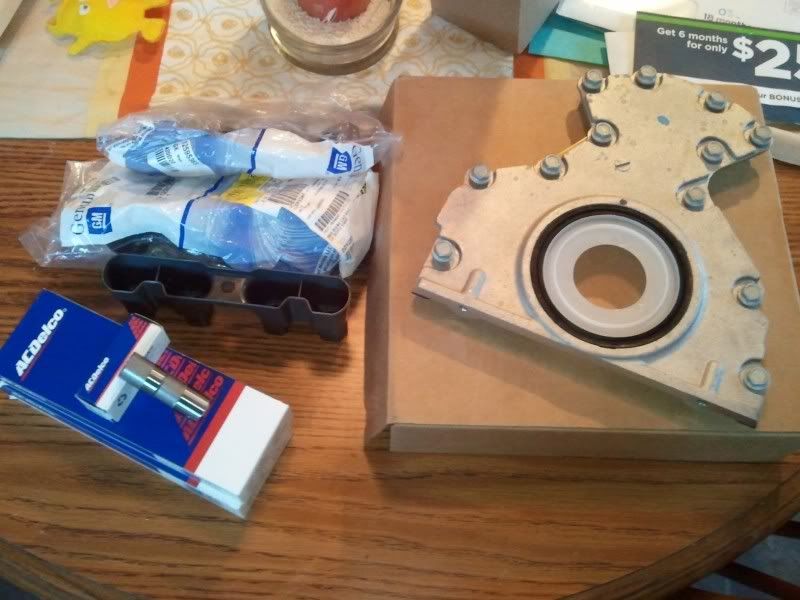
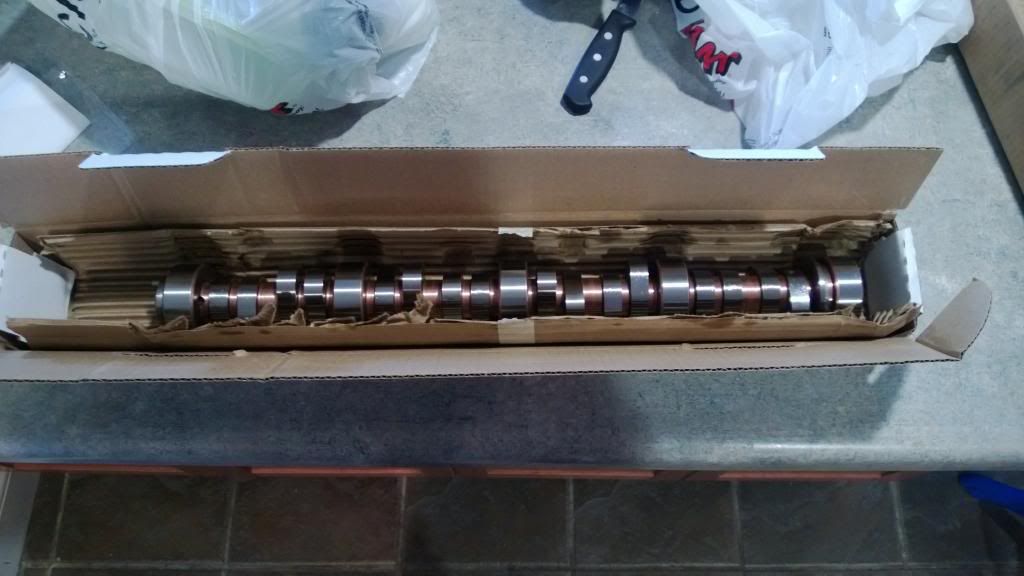
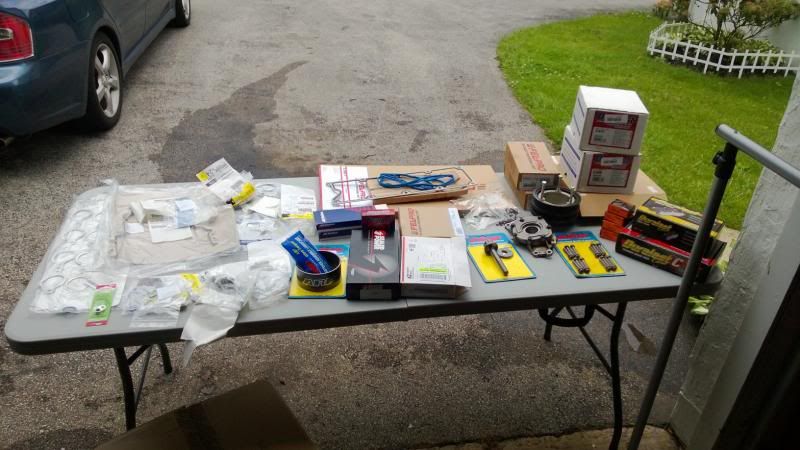
New parts were piling up. New rear cover and RMS, new LS7 lifters and trays. New cam spec�d by Pat G. And a slew of new GM bolts, gaskets, extra parts, etc to get it all back together.
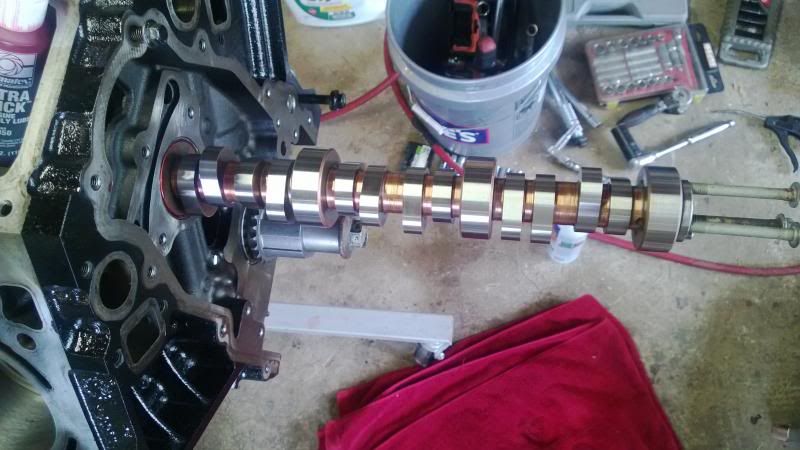
Cam installed.
New LS2 HD timing set. LS1 had a Cloyes adjustable set. While Im sure there are times when that would come in handy, I just didnt need to be adjusting or messing around with that. I wanted to install things straight up. Simple and easy.

The rod bolts were swapped out for ARP bolts.
Continued....
A little back ground on this car. It had a heads/cam LS1 T56 in it from my previous thirdgen trans am. The motor came from a donor car that I purchased on Tech back in 2006. I ended up swamping the LS1 in a huge puddle, and bent a rod. So this build is concentrated on getting an LQ4, rebuilding it, swapping on existing parts, and upgrading with some new parts. Most if not all of the swap related stuff, Ill leave out, because its already been done. It was slow going. Car is over 45 minutes away from me...and I have a (now 2 year old) son. So it was quite a balancing act.
First thing I did was source an LQ4. I decided on this motor because they were cheap basically. If I could have picked up a cheap LS1 block, I would have. I found an LQ4 somewhat locally and went and grabbed it. It came with a TON of extras. More stuff than I needed, so I considered it a good deal since I was going to be able to sell a lot of it off. Was supposedly from a 2004 and had 80k miles or so. Im not sure how accurate either of those facts are, but it turns out it didnt really matter.
Test fitting the FAST 90 (ok i was bored)
After I got into it, I realized that there was TONS of endplay in the crank. Something I didnt notice until after I started tearing it apart. After cracking the thrust main cap, this is what I found.
Front side.
Rear side.
And the fun left on the crank surface.
At this point, I knew I was going to have to put money into it. Instead of having the crank welded and re-ground, I decided to try a replacement crank. Since I was working at Autozone part time at the time, I went with one of theirs. I ordered 4 cranks before I got one that I was happy with. They each had issues. The one I ended up with was clean, and only cut .010 on both rod and main journals. This was one of the worst ones that I sent back�
Small job...tapped the hole for the alternator bracket.
Next was kind of a leap for me. I was already doing new main and rod bearings. So I decided just to replace the rings. Nothing special, just sealed power replacements. The cylinder bores were in pretty nice shape. Still had some visible crosshatch, but they needed to be cleaned up a bit..deglazed if you will. So I ordered the tools, and went to work. Here are some pictures of the results, and a video that I took of the process I used.
Came out pretty good IMO. All I was trying to do was give the rings something to seat in with. Hardly took any material away from the bores, if at all. The block was then taken to the machine shop to be hot tanked and have new cam bearings installed. Pics of that will come later.
Next I dropped the LS1 from my car. It was time to get that broken down, inventory what I was keeping, and see what exactly broke.
Turns out #7 rod bent very slightly. Engine could still rotate, but it was obviously toast.
Found some other fun things when disassembling. Found a missing bolt in the cam retainer plate. No where to be found. How do you put one of these together and not install one of those bolts??
Some of the parts that I removed that will be reused were the old MTI stage II 862 heads, ported oil pump, and a couple other odds and ends. I thought I would reuse more, but ultimately decided not to.
You can see the bent rod.
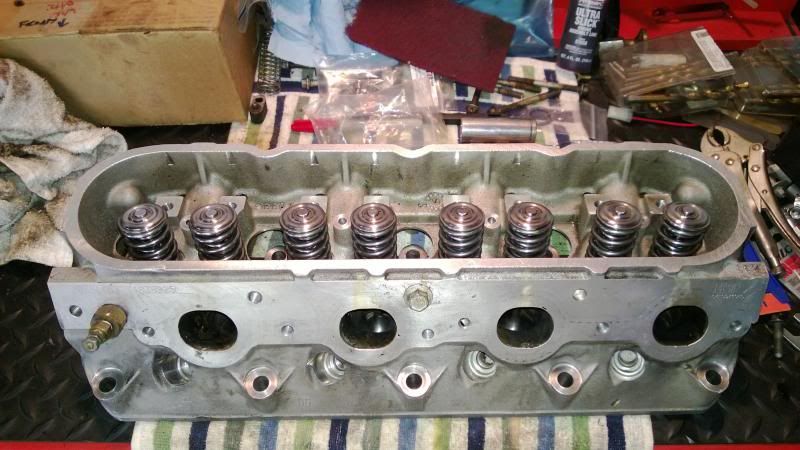
Started to clean some of the parts up while I was waiting for time and money. Got the heads cleaned up pretty well.
Also checked the chamber size and came up with around 60cc. Valve sizes were verified and they indeed had the 2.02 intake valves with stock exhaust. Heads are ported, polished, and have bowl work.
Got the LQ4 back from the shop. This is what it looked like after being hot tanked.
Got the oil pan, valley cover, front and rear covers cleaned up. As well as other parts.
Sealed up the block really well, and used a harborfreight sand blaster to remove rust that was left. It did an exeptional job for the cost in my opinion.
Then it was re-taped and painted with high temp black and clear.
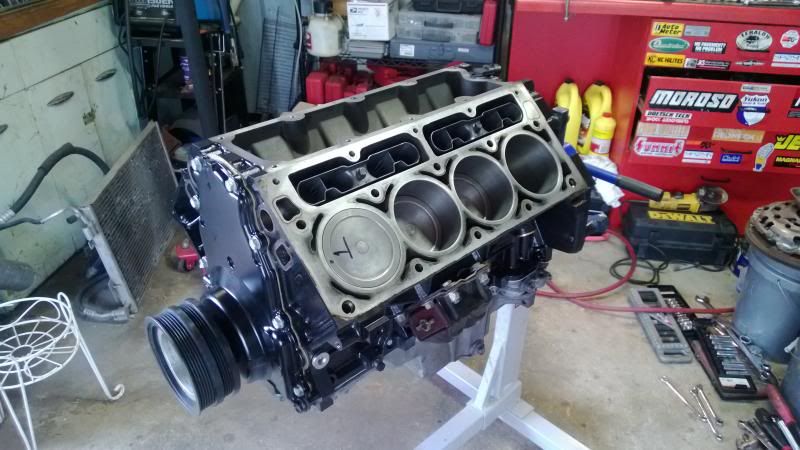
With everything painted and cleaned. Then cleaned again...and again� I checked my bearing clearances. Surprisingly, they were all great with the reman crank. And endplay was right in spec. I was able to apply some assembly lube, and install the crank.
After that I installed the new rings and put the piston/rod assemblies back into the block. I used all original rod bolts first. I later upgraded to ARP fasteners.
The first go around, was a PITA. I was using one of those POS�
As you can tell, it exploded. I was having pretty bad luck with it. But I got it all together.
Shortly after, I took all the pistons back out, because I was worried I messed up some of the rings when the ring compressor was giving me fits. I bought a new set of rings and an ARP one size ring compressor and re-did it. A little bit of extra work and money to make sure nothing was messed up. Here is a video showing the use of the ARP true round ring compressor. I will never use a clamp style again�
New parts were piling up. New rear cover and RMS, new LS7 lifters and trays. New cam spec�d by Pat G. And a slew of new GM bolts, gaskets, extra parts, etc to get it all back together.
Cam installed.
New LS2 HD timing set. LS1 had a Cloyes adjustable set. While Im sure there are times when that would come in handy, I just didnt need to be adjusting or messing around with that. I wanted to install things straight up. Simple and easy.
The rod bolts were swapped out for ARP bolts.
Continued....
 10-04-2013, 10:05 AM
#2
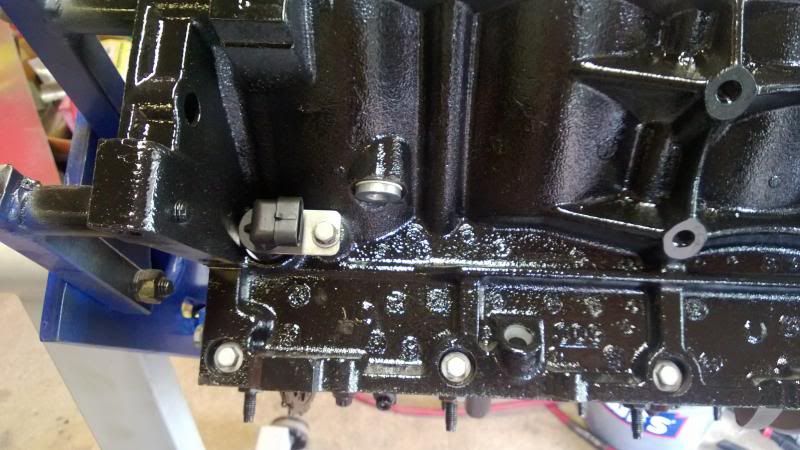
All new galley plugs were installed. And the sensors were cleaned up and installed where needed.

Oil pump, windage tray and pick up installed. A new o-ring was used, as was a new oil galley dumbell in the back.
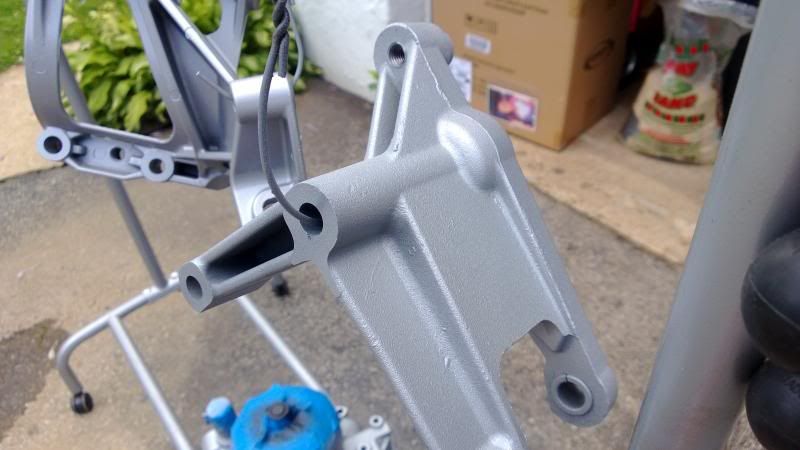
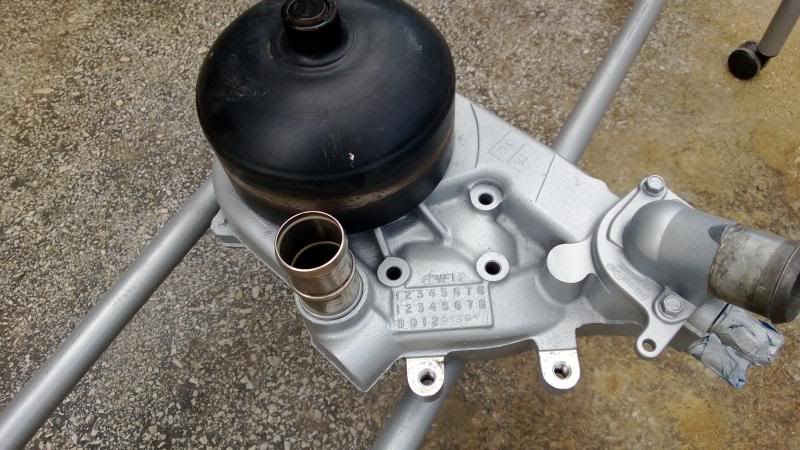
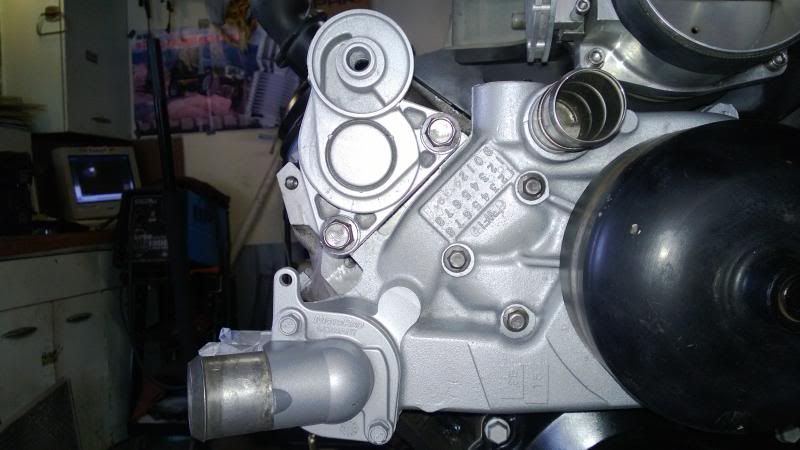
Took some time to pretty things up a bit. Painted the valley cover, front cover and valve covers a semi-gloss black. And painted most of the brackets and water pump cast aluminum...which is nice paint. Really makes it look like fresh aluminum.

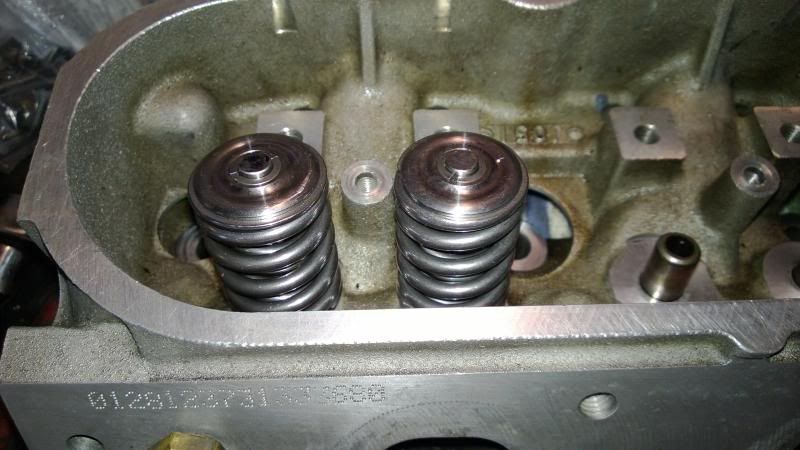
Time to turn my attention back to the heads. I cleaned everything one more time really good. Then I decided to do a light lapping just to clean up any gunk or anything from sitting apart so long. Wasnt too much work, and I felt better after doing it haha.
Since my old springs were of an unknown brand with unknown miles, I popped for a new set of Brian Tooley springs. I opted for the Ti retainers. First on went the seals.
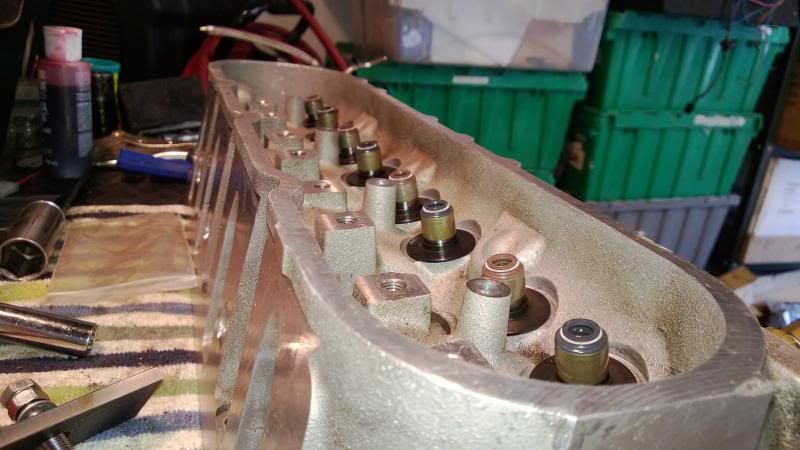
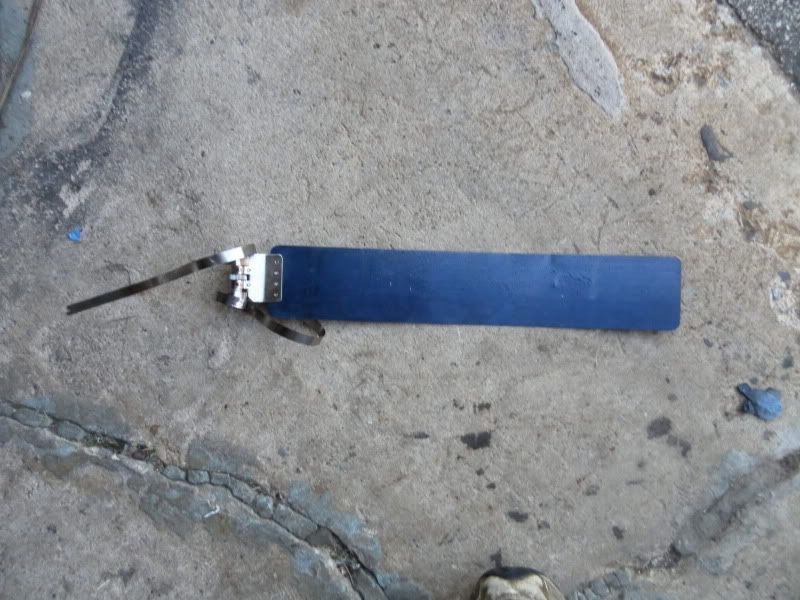
Then the springs. I used a home made spring compressor tool that many others have used. Worked great.
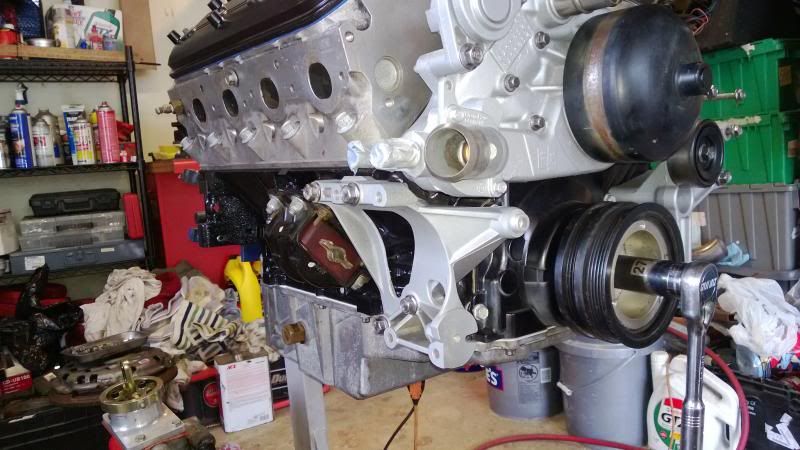
Next came the front and rear covers, oil pan, and ASP under drive pulley with new ARP balancer bolt. I used a home made tool to press on the pulley which also worked well. Might make a few more since I have a bunch of M16 rod left over that I dont know what to do with haha.
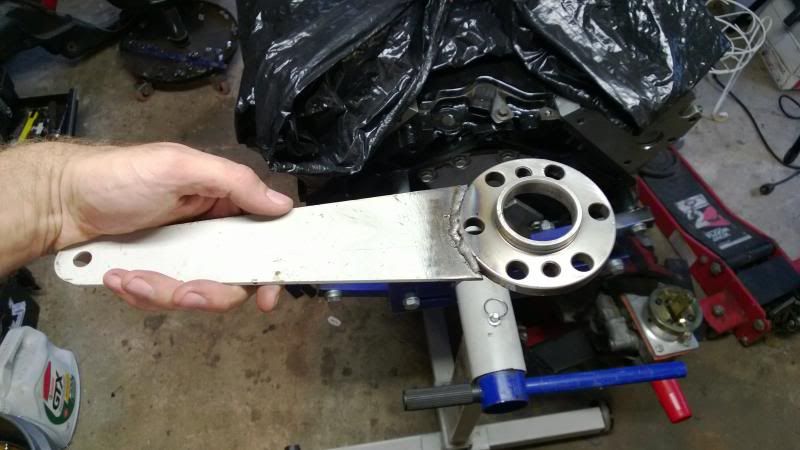
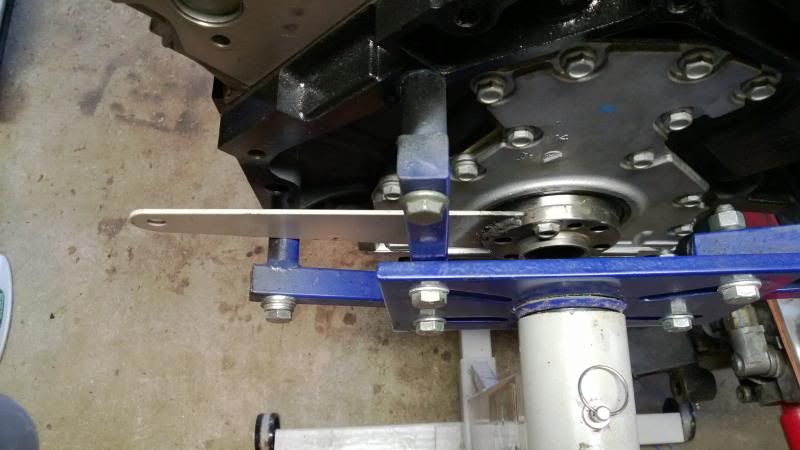
To get the ARP balancer bolt tightened to 250 ft lbs, I made a crank holder from the old LQ4 spacer. It worked very well and I was able to get the bolt to torque while on the stand without too much trouble.
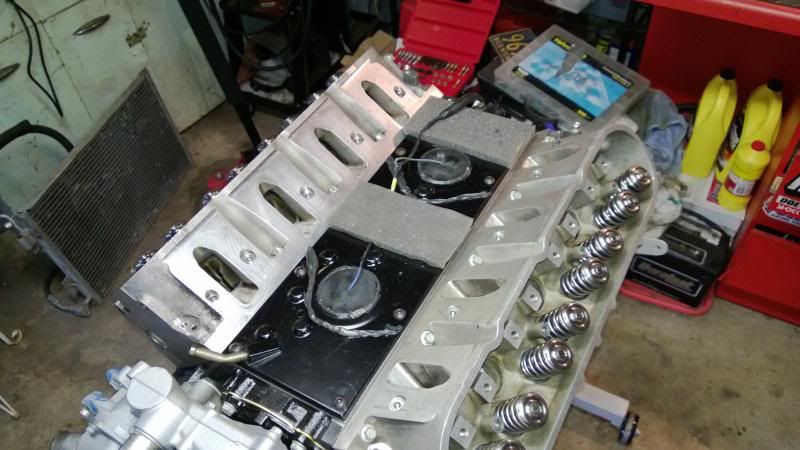
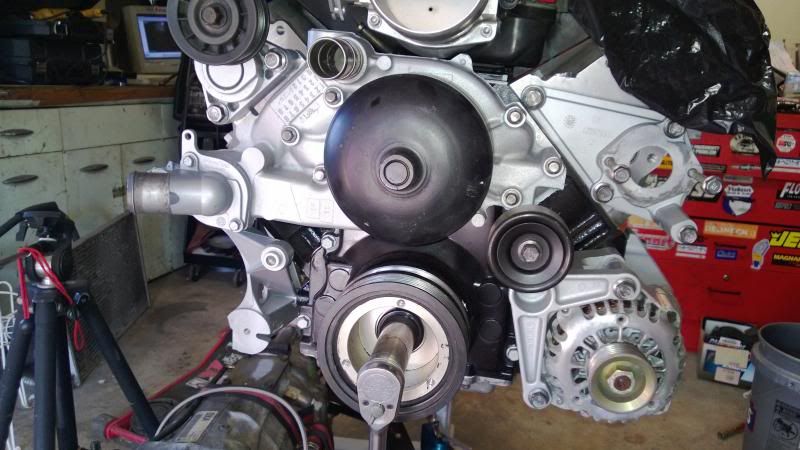
Lifters, trays and heads went on next. I used new GM MLS gaskets in standard thickness.
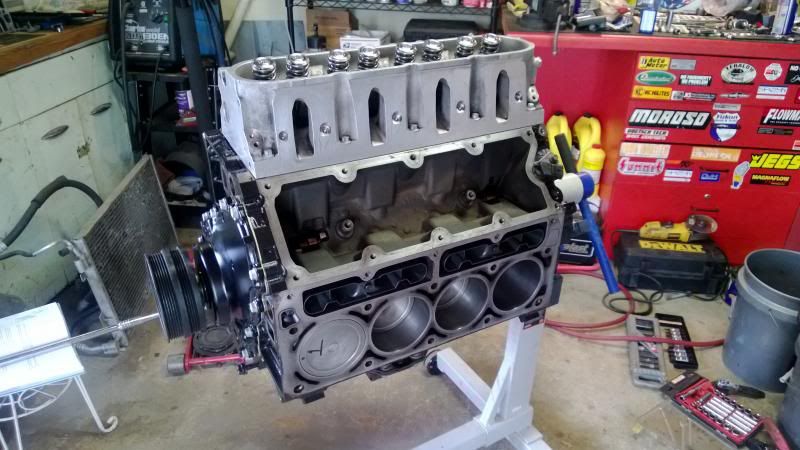

Installed knock sensors and sealed up the valley cover. Installed water pump, and started putting accessories together.

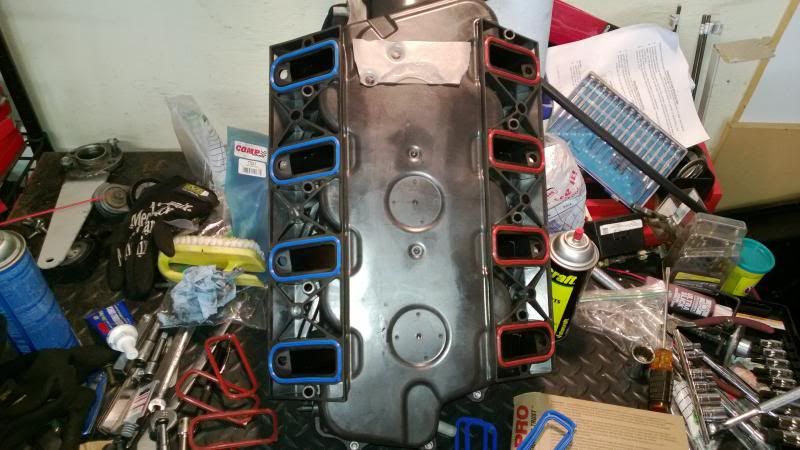
New gaskets for the FAST 90. The felpro gaskets for an LS1 fit perfect, and actually seem nicer than the ones I got from FAST years ago. The felpro ones are blue. SO much cheaper...kind of made I spent the money on the FAST branded ones before. They even come with the foam pieces for under the stock intake...which I used.
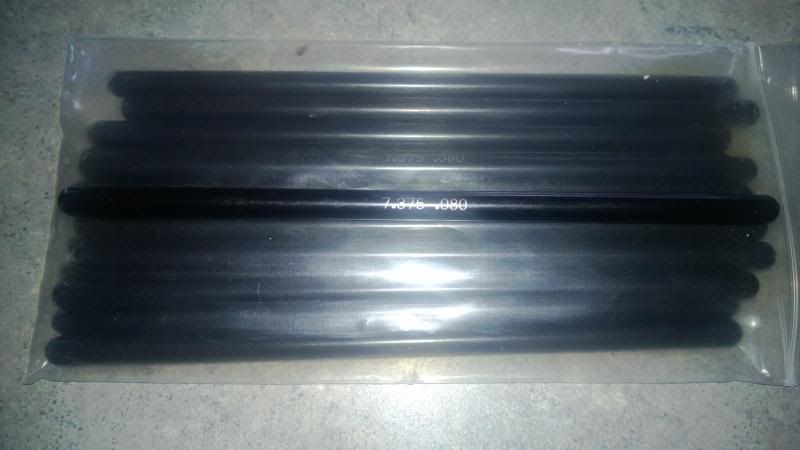
Also ordered new Brian Tooley push rods as my math was telling me that my current rods were too short for the new cam.
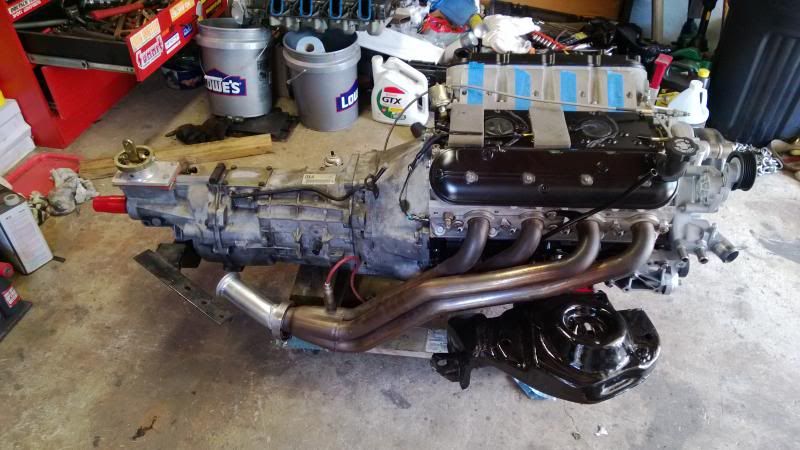
At this point, I was ready to get the motor off the stand, and start bolting up the transmission. While I had it on the hoist, I decided to spin the motor over, and see if I could get oil pressure coming out of the sender hole. I figured if I could get oil up there, I must have at least gotten some of this right. So I spun it over a couple times. Oil shot across the garage during the second ~10 second turn over. Here is a quick video showing it spinning over...because its fun.
Back to work. Old LS7 clutch installed with new pilot bushing. Bellhousing installed after heli-coiling a couple holes so I could actually use ALL of the trans to bellhousing bolts this time. Oh and heli-coiled one of the oil pan bolt holes too. I have some DIY videos on using the heli-coil on my channel if anyone is interested.

You can see in the pictures I Por-15’d my k-member as well to freshen it up.
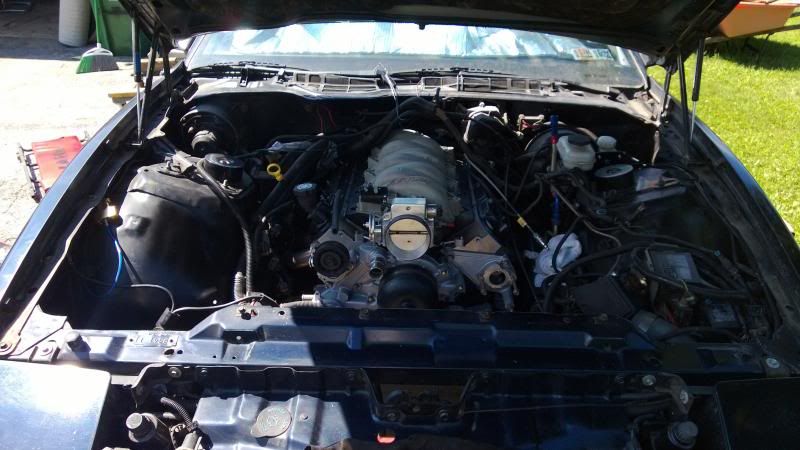
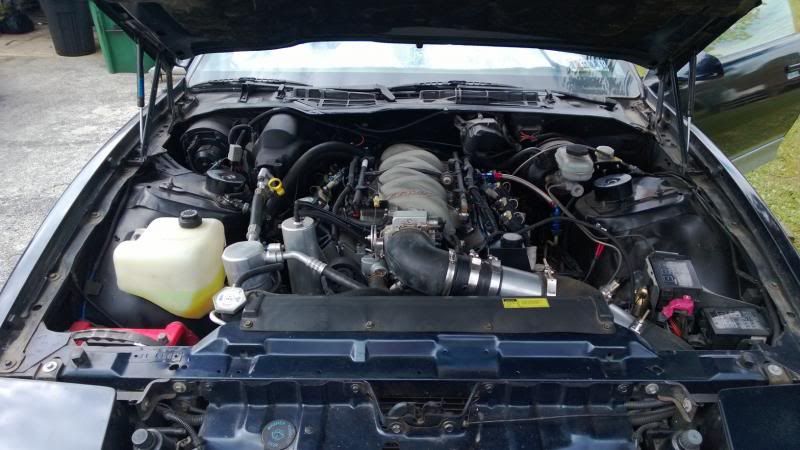
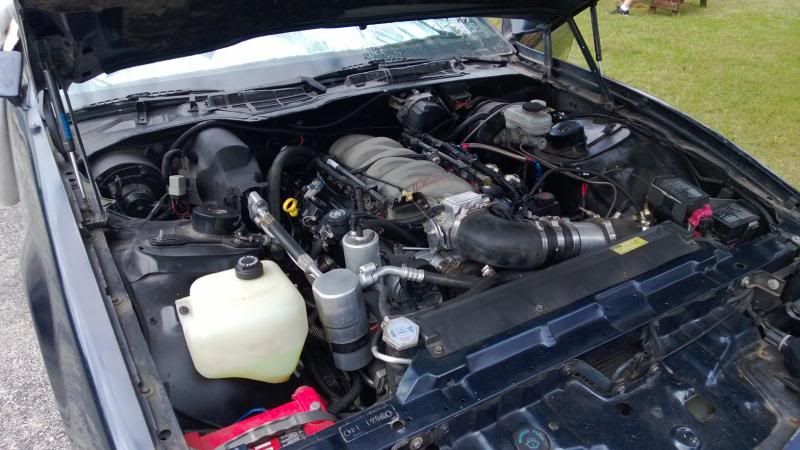
Ready to go in! Excuse the horribly dirty car. Its got peeling clear coat disease and was under a crappy cover for the last couple years.

And its in! Video of that below since its basically the same process in a 4th gen if you go from the bottom.
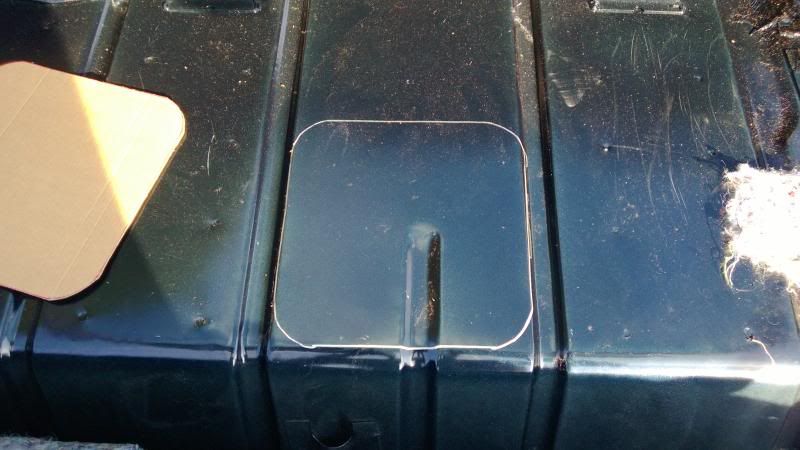
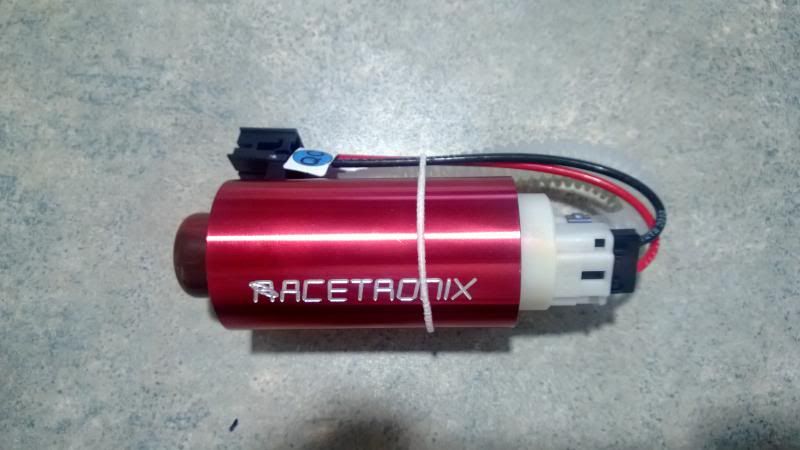
Thats it for the motor build basically! A few other thigns that kind of pertain, and some of you might find worthwhile. I upgraded to a Racetronix fuel pump and hotwire harness. In the process, I created a “fuel pump access” panel in the back. Yeah yeah...I ruined my car and hacked it up. Oh well. Here are a couple pics/videos of that since its the same on the 4th gens. And also a video of me installing the racetronix fuel pump into my fuel sender.
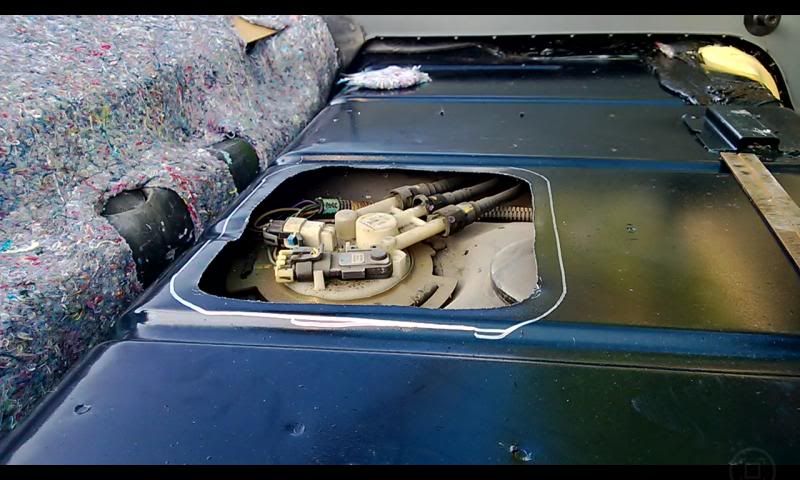
Note that in my pump install video, I neglected to reinstall the gray TPA lock sitting there on the towel. After the video, for another reason, I pulled the unit back out, and installed it. But thanks to racetronix for checking out the video and catching that for me! I might do a small addendum video that Ill link just to be thorough.
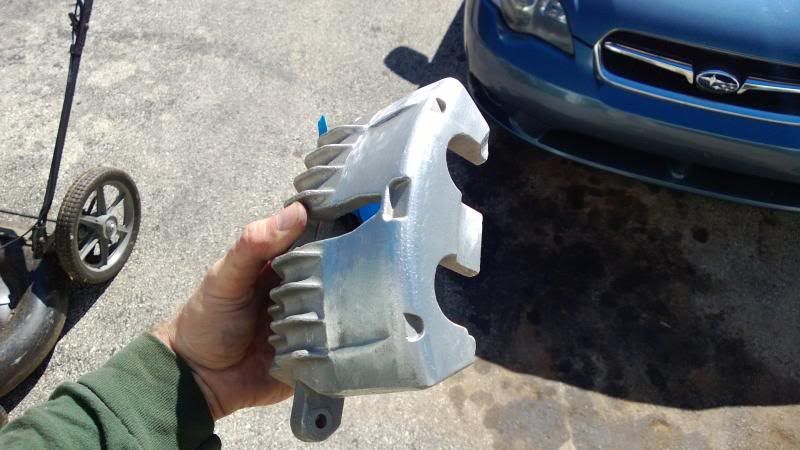
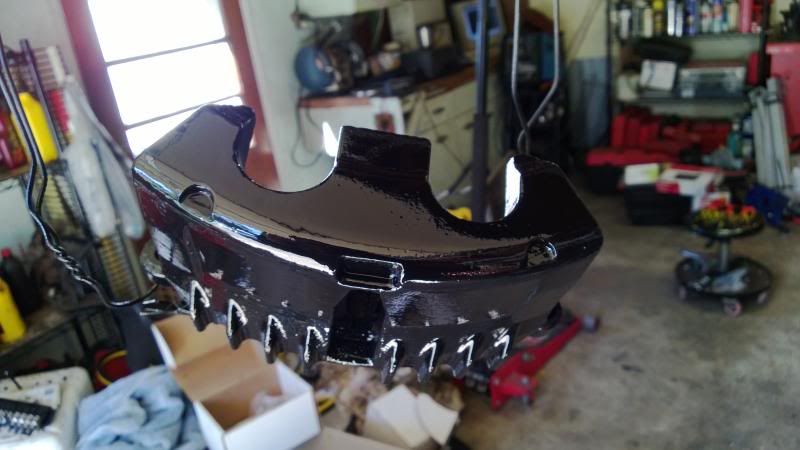
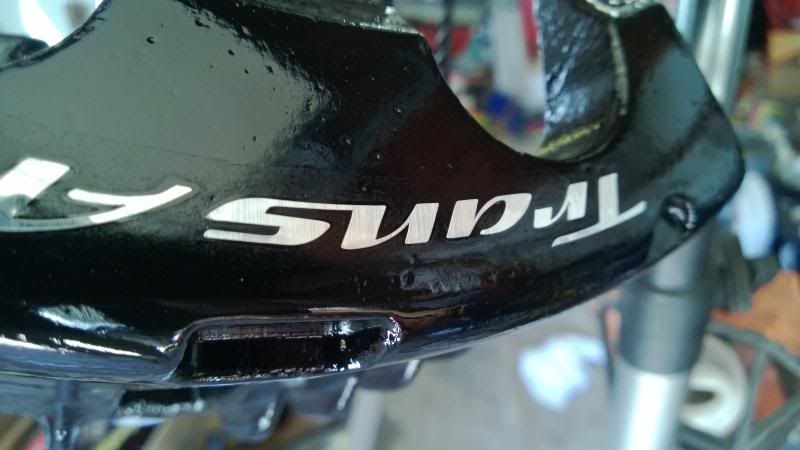
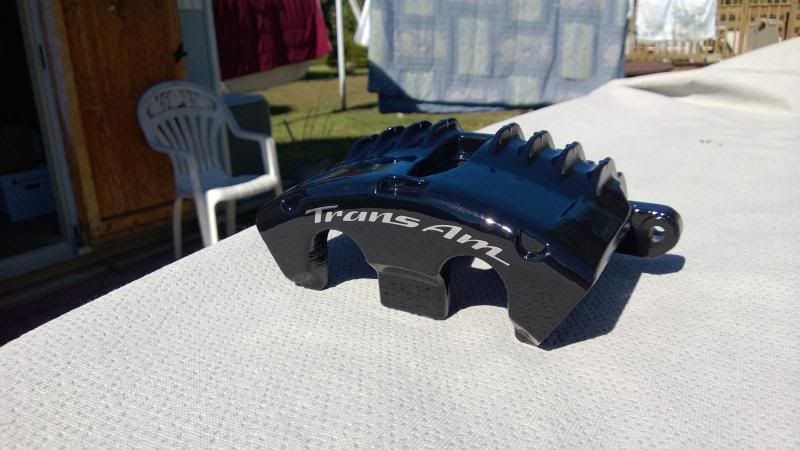
Lots of other stuff went on that was car specific. One of the bigger things I wanted to do was re-vamp my brake system. I bent new lines that go from the line lock to the wheel wells. I re-routed them so that if the k-member ever needs to be dropped again, I dont have to crack a brake line. The lines totally avoid the k-member now. I also got new front calipers, and since they were already fresh and clean, I painted them and applied decals. Then I clear coated them.
Continued...
Oil pump, windage tray and pick up installed. A new o-ring was used, as was a new oil galley dumbell in the back.
Took some time to pretty things up a bit. Painted the valley cover, front cover and valve covers a semi-gloss black. And painted most of the brackets and water pump cast aluminum...which is nice paint. Really makes it look like fresh aluminum.
Time to turn my attention back to the heads. I cleaned everything one more time really good. Then I decided to do a light lapping just to clean up any gunk or anything from sitting apart so long. Wasnt too much work, and I felt better after doing it haha.
Since my old springs were of an unknown brand with unknown miles, I popped for a new set of Brian Tooley springs. I opted for the Ti retainers. First on went the seals.
Next came the front and rear covers, oil pan, and ASP under drive pulley with new ARP balancer bolt. I used a home made tool to press on the pulley which also worked well. Might make a few more since I have a bunch of M16 rod left over that I dont know what to do with haha.
To get the ARP balancer bolt tightened to 250 ft lbs, I made a crank holder from the old LQ4 spacer. It worked very well and I was able to get the bolt to torque while on the stand without too much trouble.
Lifters, trays and heads went on next. I used new GM MLS gaskets in standard thickness.
Installed knock sensors and sealed up the valley cover. Installed water pump, and started putting accessories together.
New gaskets for the FAST 90. The felpro gaskets for an LS1 fit perfect, and actually seem nicer than the ones I got from FAST years ago. The felpro ones are blue. SO much cheaper...kind of made I spent the money on the FAST branded ones before. They even come with the foam pieces for under the stock intake...which I used.
Also ordered new Brian Tooley push rods as my math was telling me that my current rods were too short for the new cam.
At this point, I was ready to get the motor off the stand, and start bolting up the transmission. While I had it on the hoist, I decided to spin the motor over, and see if I could get oil pressure coming out of the sender hole. I figured if I could get oil up there, I must have at least gotten some of this right. So I spun it over a couple times. Oil shot across the garage during the second ~10 second turn over. Here is a quick video showing it spinning over...because its fun.
Back to work. Old LS7 clutch installed with new pilot bushing. Bellhousing installed after heli-coiling a couple holes so I could actually use ALL of the trans to bellhousing bolts this time. Oh and heli-coiled one of the oil pan bolt holes too. I have some DIY videos on using the heli-coil on my channel if anyone is interested.
You can see in the pictures I Por-15’d my k-member as well to freshen it up.
Ready to go in! Excuse the horribly dirty car. Its got peeling clear coat disease and was under a crappy cover for the last couple years.
And its in! Video of that below since its basically the same process in a 4th gen if you go from the bottom.
Thats it for the motor build basically! A few other thigns that kind of pertain, and some of you might find worthwhile. I upgraded to a Racetronix fuel pump and hotwire harness. In the process, I created a “fuel pump access” panel in the back. Yeah yeah...I ruined my car and hacked it up. Oh well. Here are a couple pics/videos of that since its the same on the 4th gens. And also a video of me installing the racetronix fuel pump into my fuel sender.
Note that in my pump install video, I neglected to reinstall the gray TPA lock sitting there on the towel. After the video, for another reason, I pulled the unit back out, and installed it. But thanks to racetronix for checking out the video and catching that for me! I might do a small addendum video that Ill link just to be thorough.
Lots of other stuff went on that was car specific. One of the bigger things I wanted to do was re-vamp my brake system. I bent new lines that go from the line lock to the wheel wells. I re-routed them so that if the k-member ever needs to be dropped again, I dont have to crack a brake line. The lines totally avoid the k-member now. I also got new front calipers, and since they were already fresh and clean, I painted them and applied decals. Then I clear coated them.
Continued...
Last edited by ghettocruiser; 10-09-2013 at 06:58 AM.
10-04-2013, 10:06 AM
#3
Finally, here are a few start up videos. I did some cranking at first to see it build oil pressure and test my new fuel system. You can see it builds 25 psi of oil pressure pretty quick. The very first start up video kind of stinks because I TOTALLY forgot my brake booster hose. So it was having fits. Once I got that sorted out, it was still not running right and was rich and idling high. Turns out the TPS had gone bad while sitting. That Aeroforce Scangauge has come in handy MULTIPLE times. That would have been hard to track down without it. So the very last start up is with everything sorted out, and it working as it should.
Thanks for reading this mess. Feel free to check out my channel. Like I said I have some other stuff on there �LS� related, thirdgen related, and random stuff. There are also �update� videos between the DIY stuff talking more about the build and all.I know my videos are kind of corny...but its been lots of fun and I plan to make more. Any input you have let me know!
Ill be sure to update with some new videos or pictures once I get a chance to get back to it. I need to reinstall the front suspension and tidy up a few things and I should be able to drive it. Needs tires. Thats a huge hurdle. And Ill need a tune, which Im not sure how Im going to afford any time soon. But we�ll see!!
Justin

 11-01-2013, 12:52 PM
#7
TECH Regular
iTrader: (2)

Join Date: Jul 2005
Location: Broomall, PA
Posts: 438
Likes: 0
Received 0 Likes
on
0 Posts

Yea I remember those days. I also remember the cherry bomb muffler that I put on which ultimately got ripped off because I liked to back into DCCC parking spots that had 5-foot snow plow mounds on them. I should have made a build thread about that car haha. I do miss it though, it was a one of a kind POS.
Anyways, I put the link to my build thread below. It is no way near as in-depth of a project as yours, but its something I am proud of. But now I got the bug, and I can't rip this Vette apart. I can't help but think a fox body with an LS swap would be fun. Maybe in a few years. Anyways, enjoy.
http://forums.corvetteforum.com/c5-g...e-results.html
Trending Topics
 11-01-2013, 07:59 PM
#9
Thanks! I kind of wish I started the thread as I was building.
Mike...dang man your vette looks nice! Sounds good too! I completely forgot you got a C5.
Foxbody swap is near the top of my list... I want to do a notch, and put a 4.8 with a turbo in it. Junkyard style. Cheap as possible. I have a couple other cars in mind before ide go for the stang though. I want a sleeper.
My Trans AM is KIND of a sleeper...since most people see it and think its just another slow thirdgen. But its still a sports car...so not a true sleeper. I wanna go with something reallll sneaky.
We still gotta meet up one of these years haha.
J.
11-03-2013, 02:40 PM
#10
TECH Regular
iTrader: (2)
Join Date: Jul 2005
Location: Broomall, PA
Posts: 438
Likes: 0
Received 0 Likes
on
0 Posts
Thanks! Unfortunately it looks like I'll be ripping half the exhaust off again to replace the dang starter. Its beginning to have an issue retracting from the flywheel on startup, especially on colder days. It had to wait for the headers to go in, didn't it? I'm hoping the heat from the headers didn't cause it. Oh well...
A notch fox with a 4.8 turbo sounds fun. I almost sprang for an 89 Camaro with a cage, a 6.0 like yours, and a big a** turbo. But the thing was built on the cheap. When I say that, I mean he was running 10.60's on a 10-bolt and the turbo 350 he had in it would stall after a run because he didn't have the vacuum lines hooked up right. So...I passed. The trip to see the car was at least worth a spin in that thing and the conversations.
And yes, we should get together sometime. Life gets in the way haha.