
03 Infiniti G35 LS1/T56 Build Thread
 10-14-2013, 12:01 AM
#1
My friend and i are putting a ls1 into a g35! he started off as a low and slow stance type person but after awhile i finally talked him over to drag racing and weve took the time to research and are gonna give it a go! everyone kept saying turbo or procharger and i got him to stick with a ls1 becuase he knows how good they run and how much stress they can take!
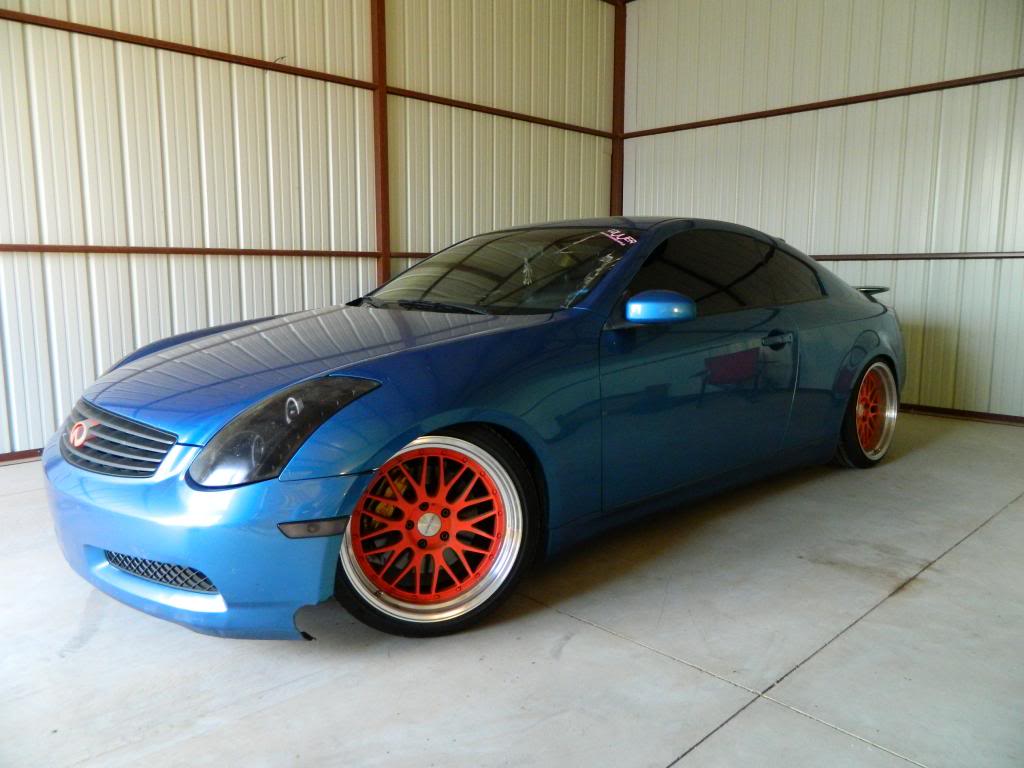
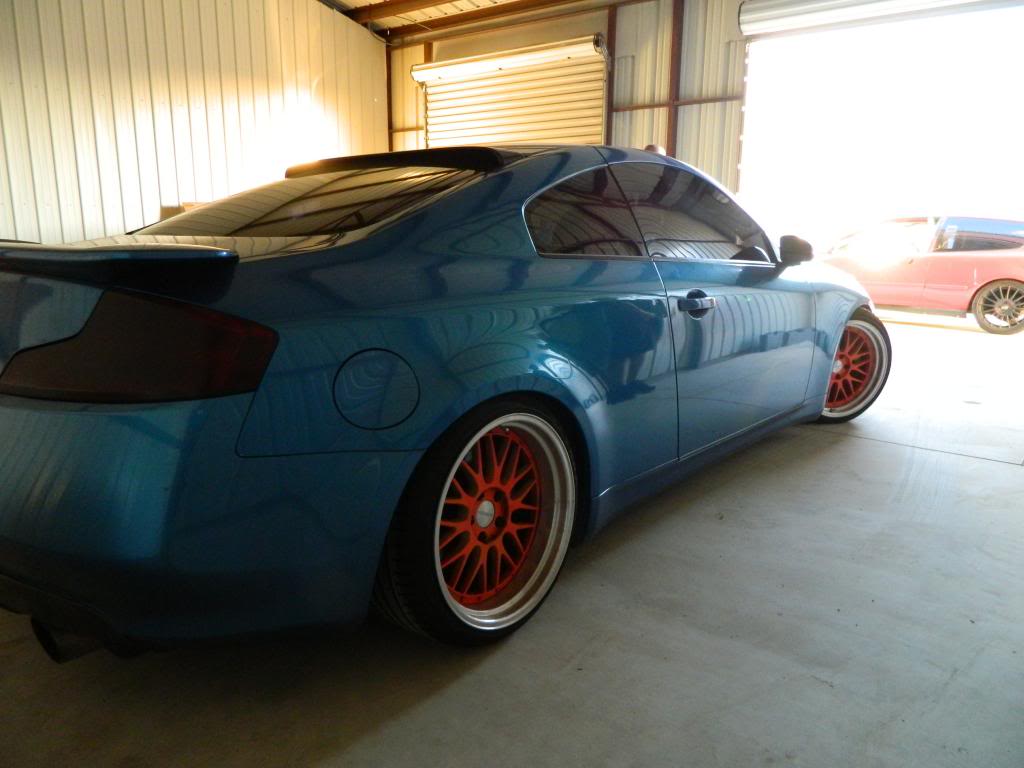
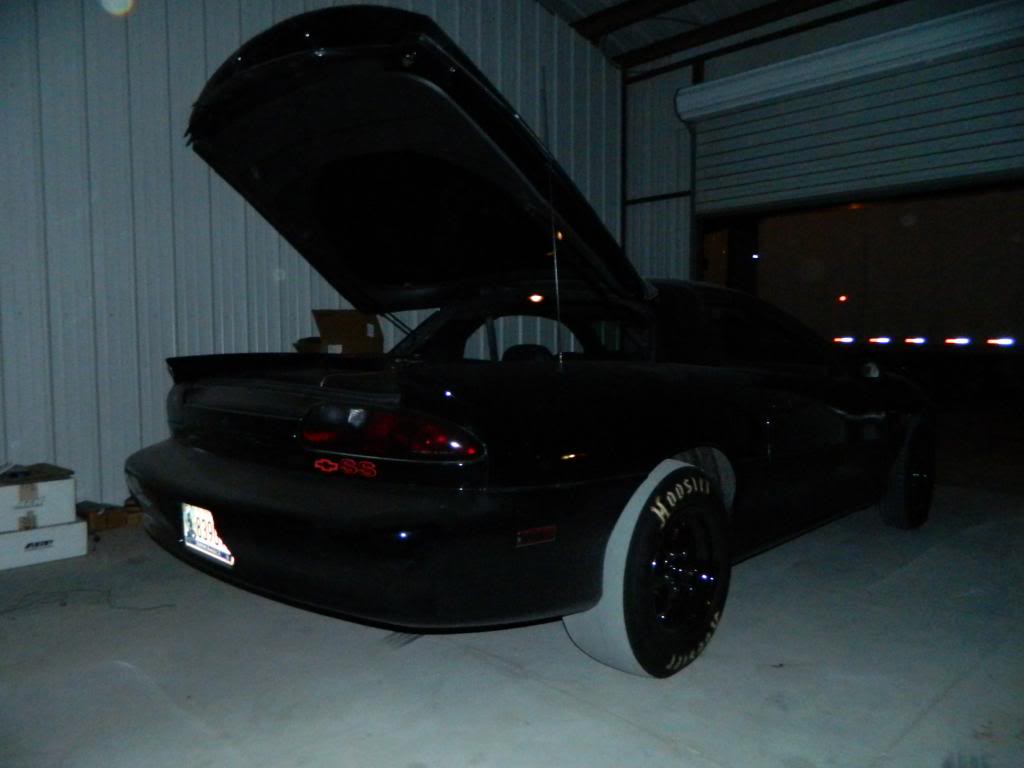
Car is a 2003 Infiniti G35 vq35de motor with 63,000 miles he sick of the slow v6 so its time for an upgrade!!
Update final video of car:
if you want a update of the new mods and stuff that he has done over the years since this build feel free to comment on the youtube video because I don't really check my ls1tech much anymore
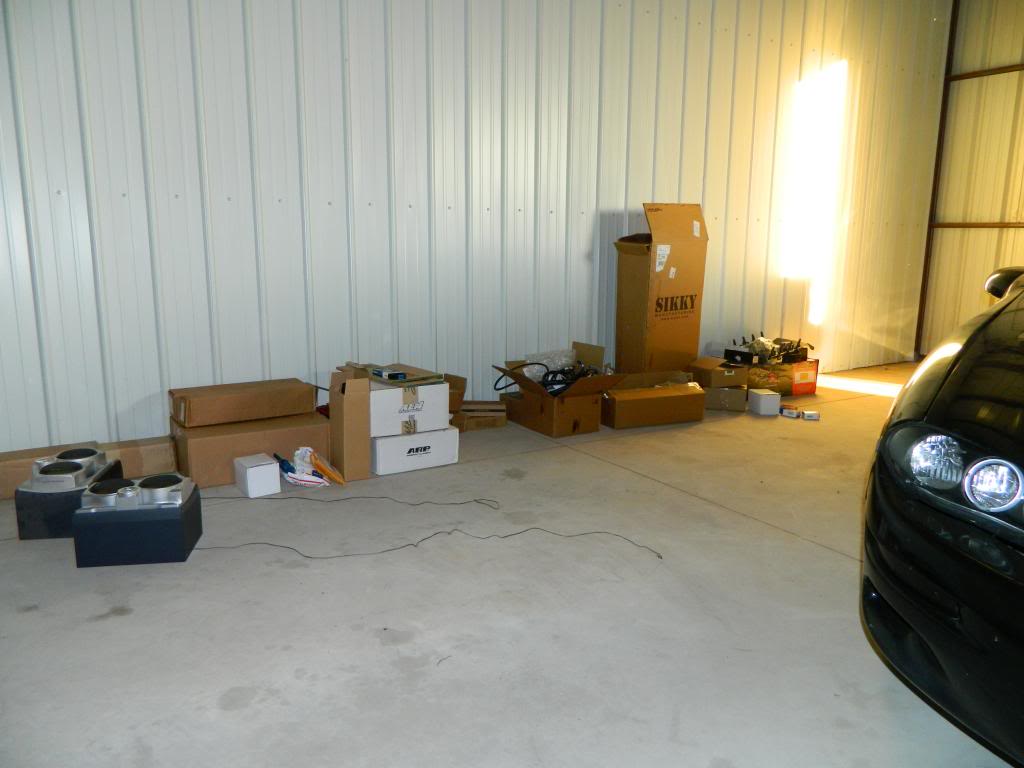
heres everything to do the swap
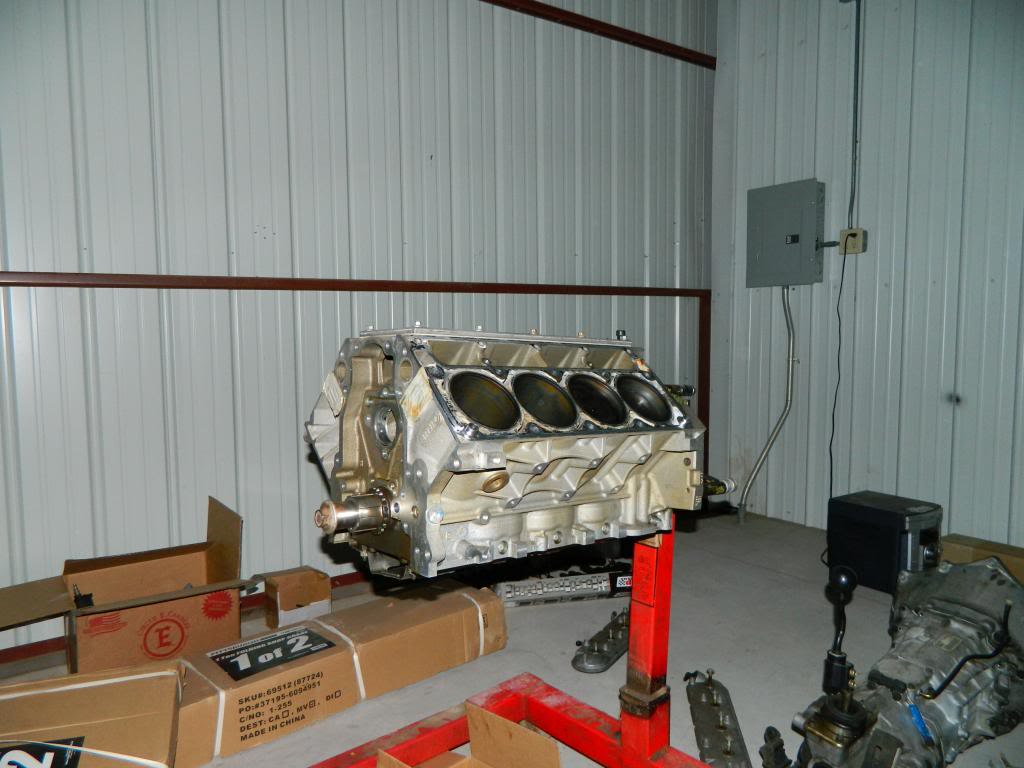
last time youll see this little thing in here
got started on friday once we got everything in the shop ignore the broke *** filter he hit a bag of dog food and messed some stuff up

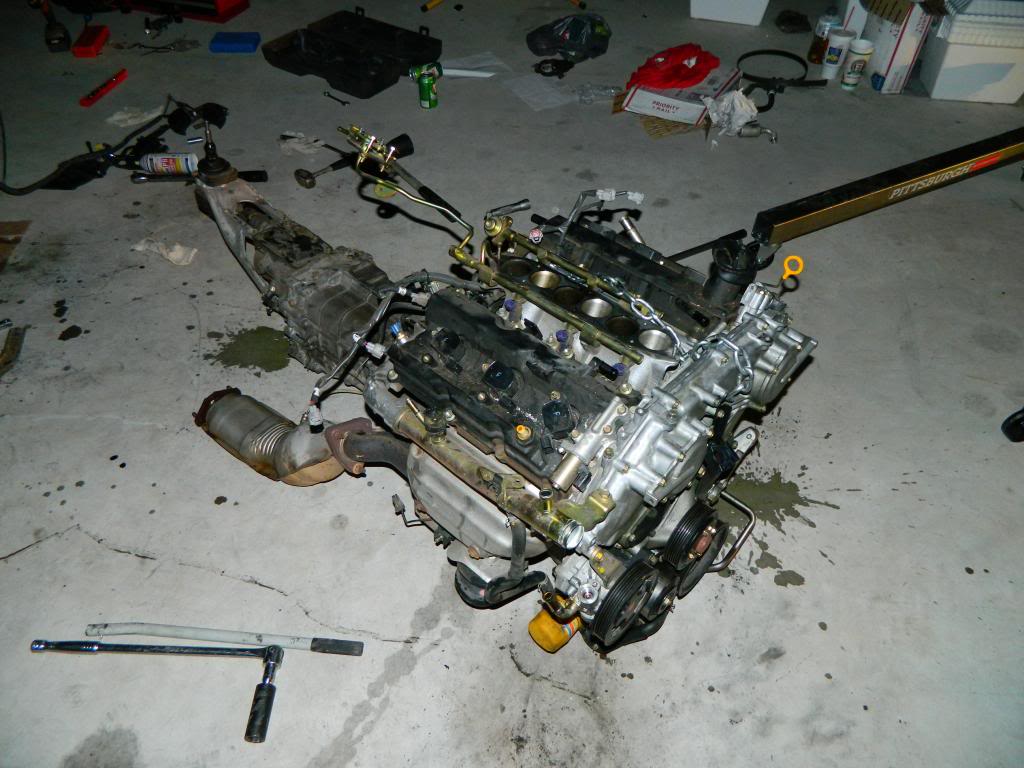
i got the ls1 torn apart pretty quick this will be the 5th or 6th one ive done now im going to teach him everything there is to know incase something happens he will know
since we dont have electric ran yet in the shop we gotta wait till monday to run lights radio ext.. so this will have to do till then for a radio
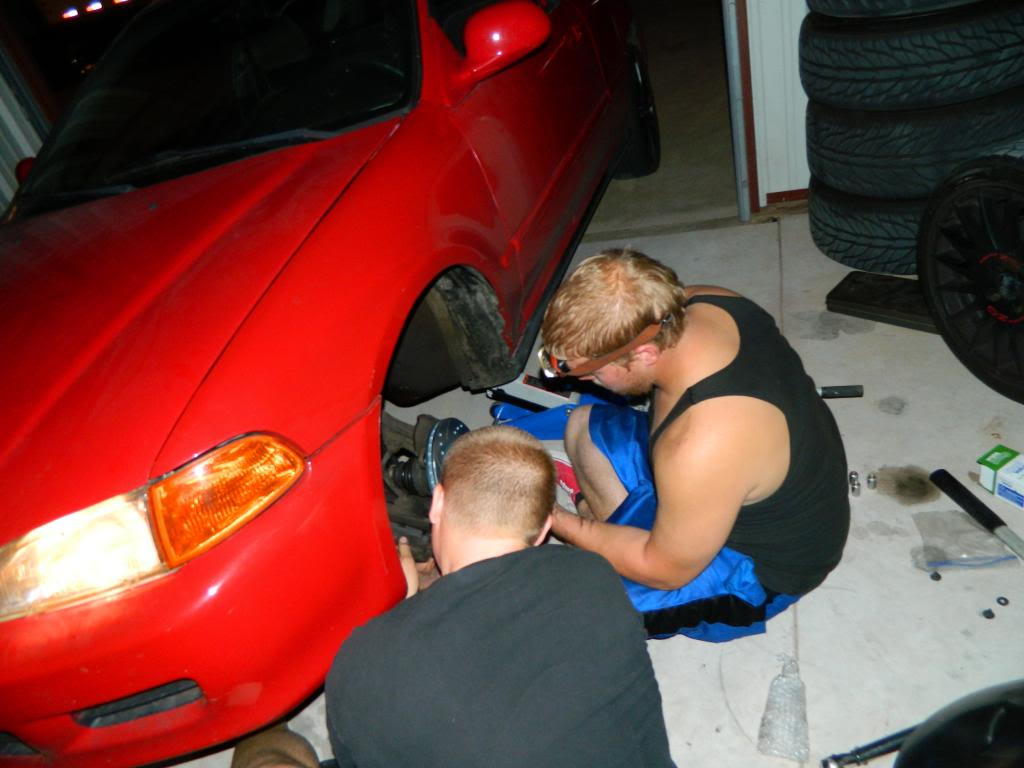
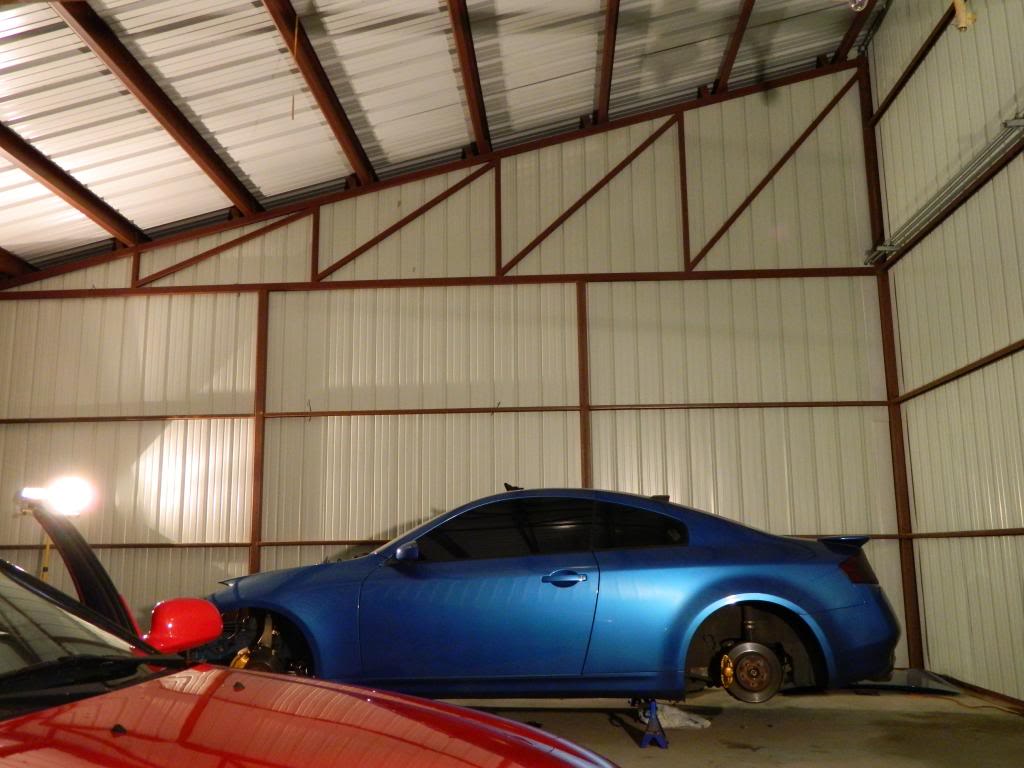
ignore how bright the flash is lol its pitch black in there so we wanted to get stuff done and we pulled the hatch in and used it for light since they were changing brakes and rotors on there anyway
theyre taking rims off since he will have a drag setup on there low and slow just turned to gofastparts =)
headlamps and flashlights to change some brakes and rotors haha
got the plenum off and radiator along with belts and a few hoses didnt have the tool for condensor yet
called it a night since it was too dark snapped a bolt on the caliper of the civic so that took a whole day running to and from autozone to fix lol
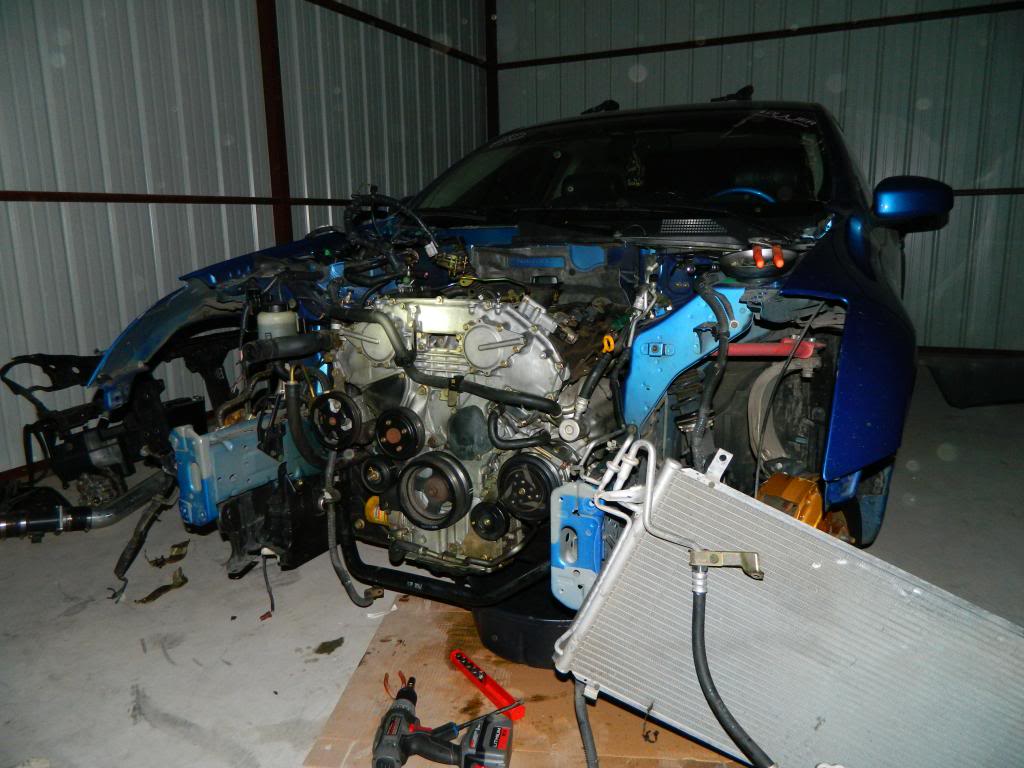
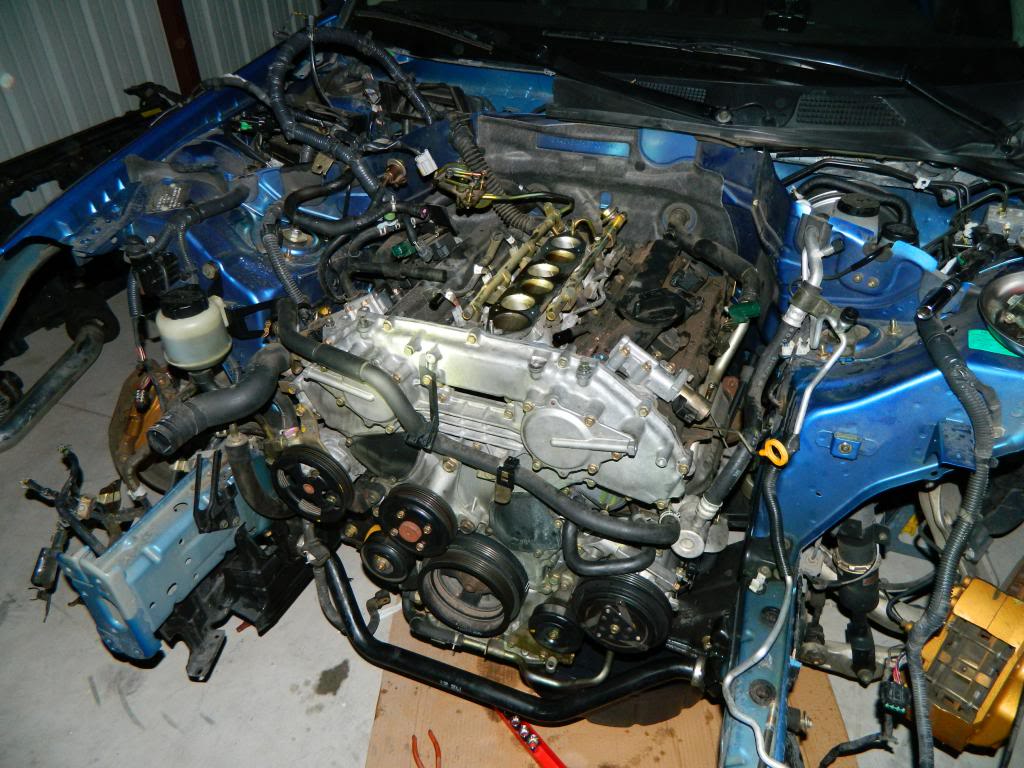
do fresh day and we removed alternator and ac compressor and condensor found out its a bitch to get the motor mounts off the motor with the header attached and saw its much easier to unbolt from underneath to just pull em completely with motor
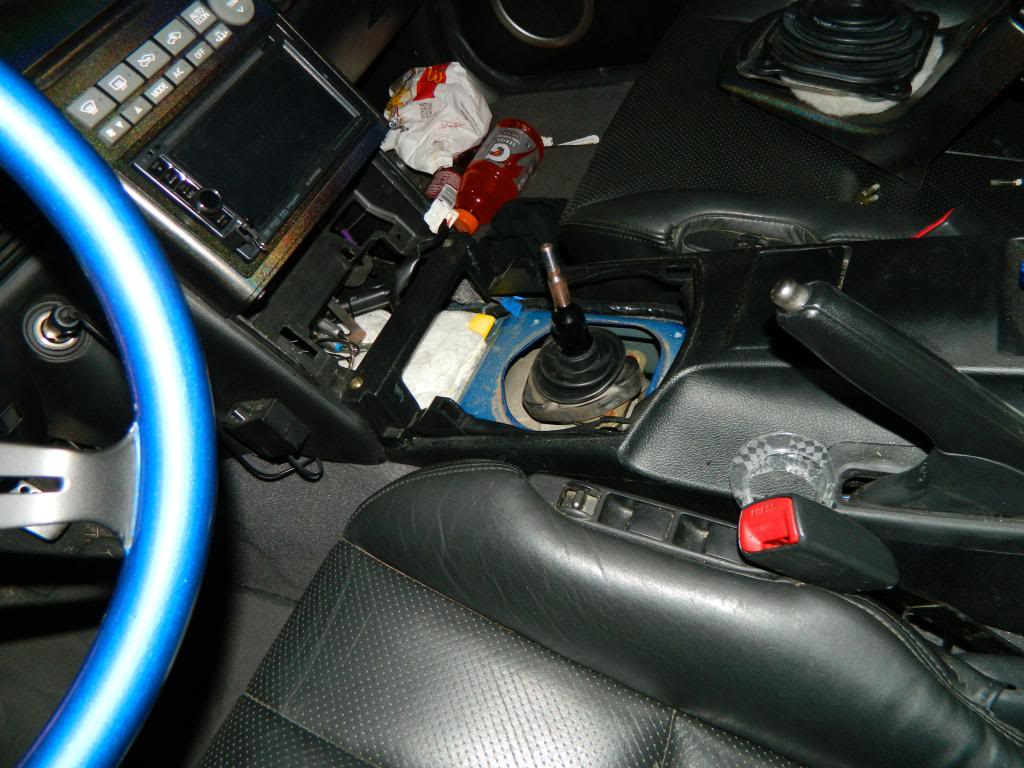
unbolted shifter driveshaft and transmount
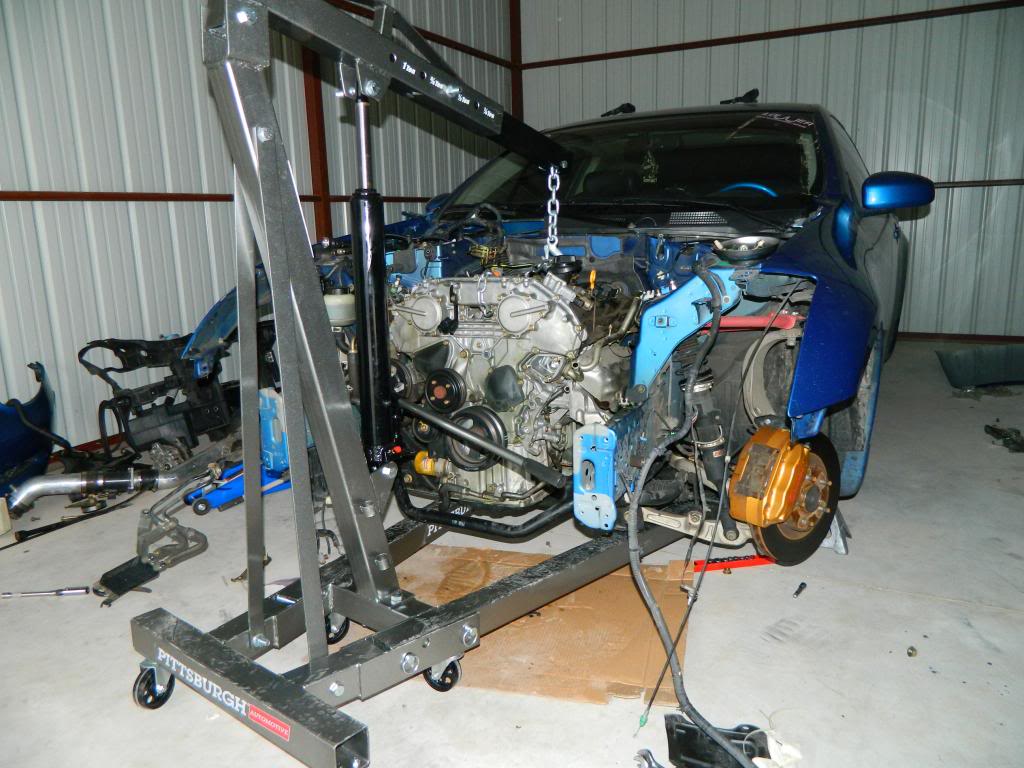
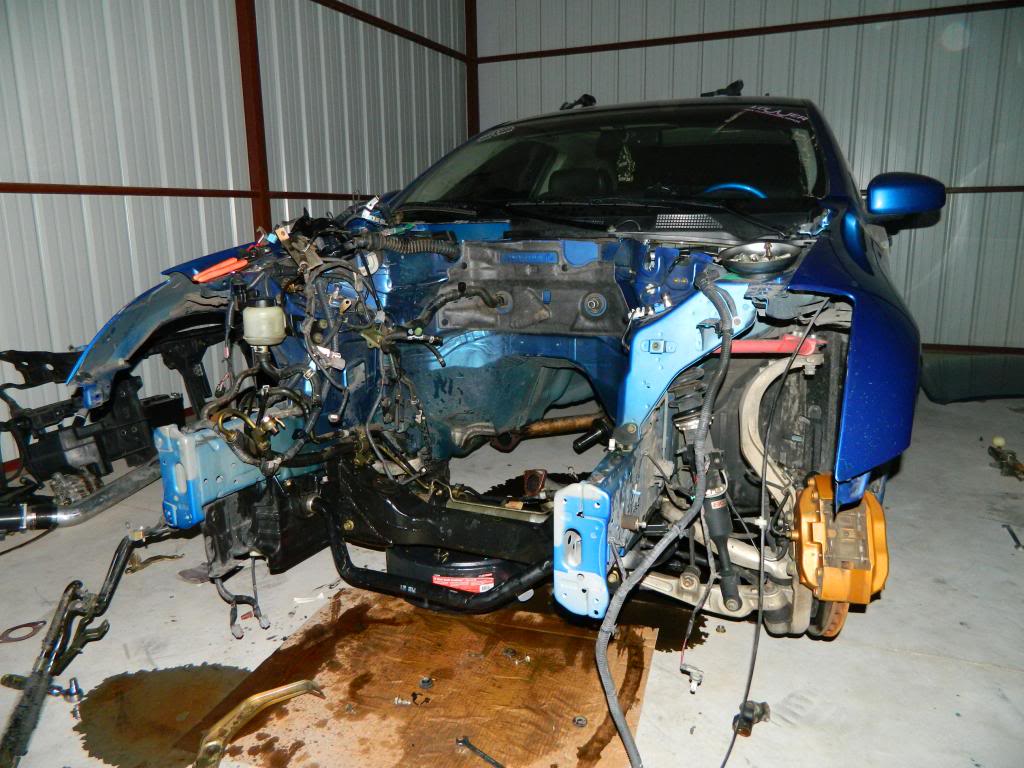
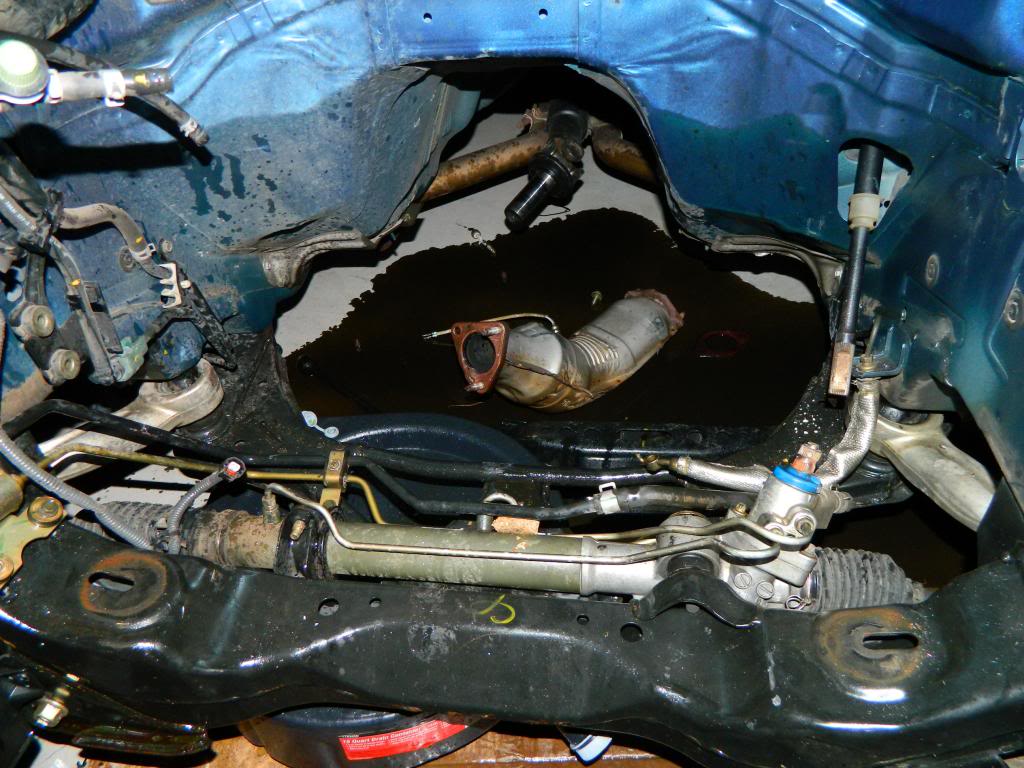
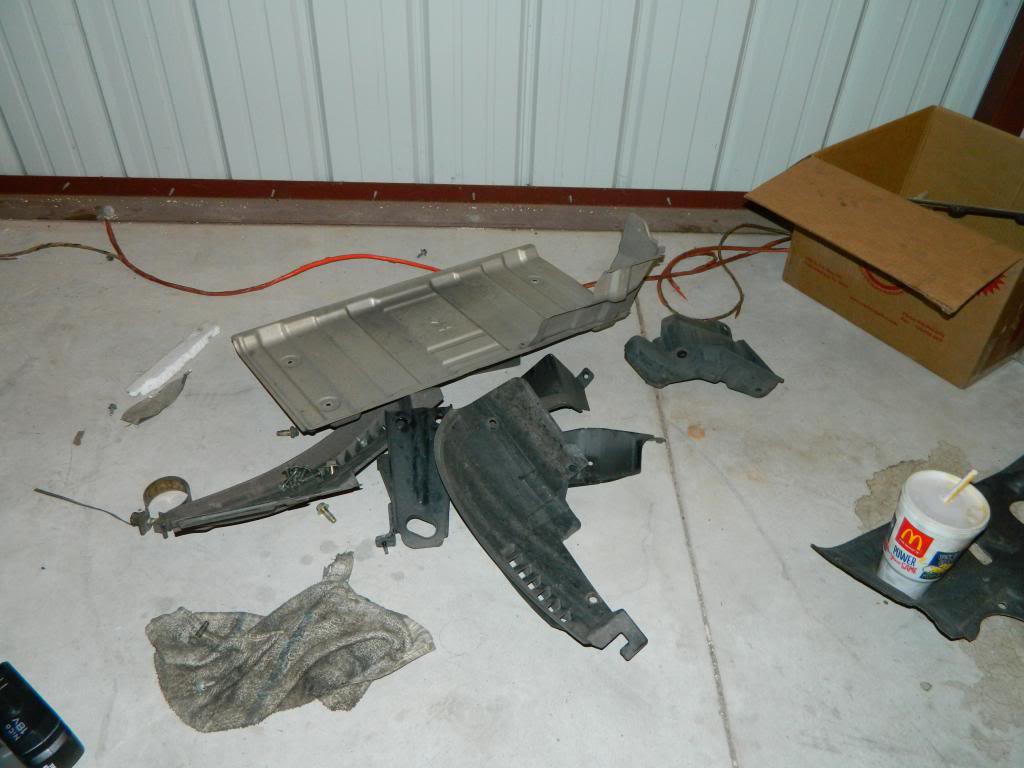
after yanking and pulling we finally got the damn thing free finding a few bumps in the road like the catalytic converters catching on steering so unbolted driver side thank god for pb blaster it was rusted beyond beleive and a bolt snapped so did alot of cussing and hammering to get it off
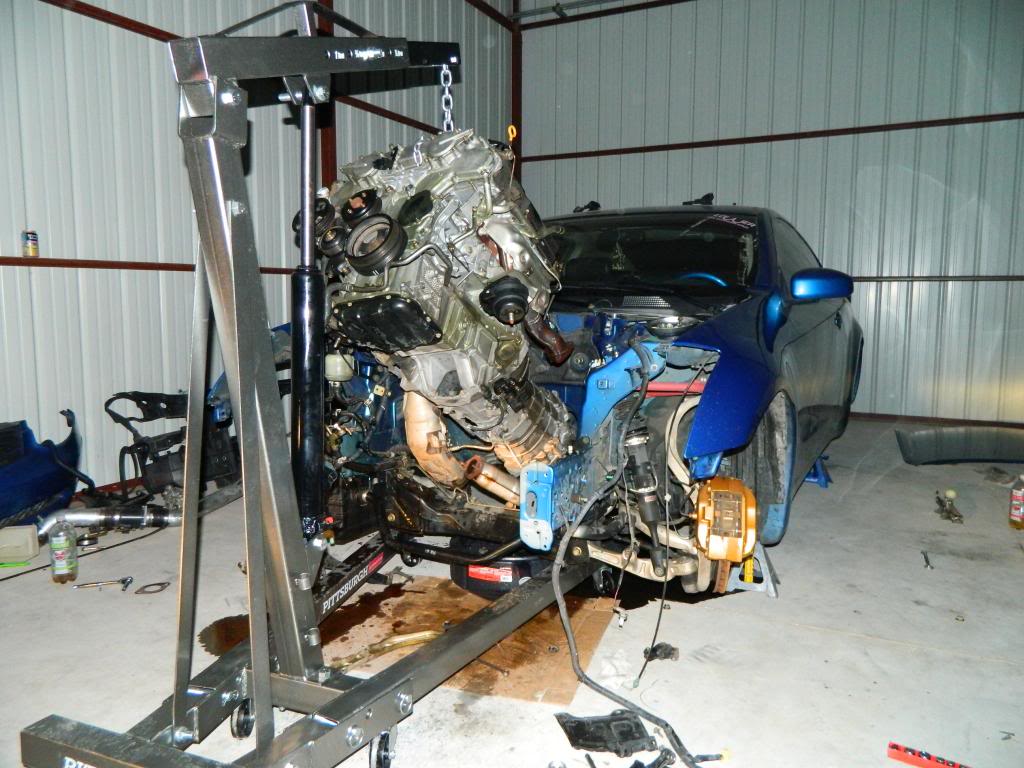
got her out after unplugging more of the harness finding it wrapped all under the trans and under the motor man are there a bunch of metal brackets on there god knows how much weight hes saving just from them and heatsheilds!

oops mess lol
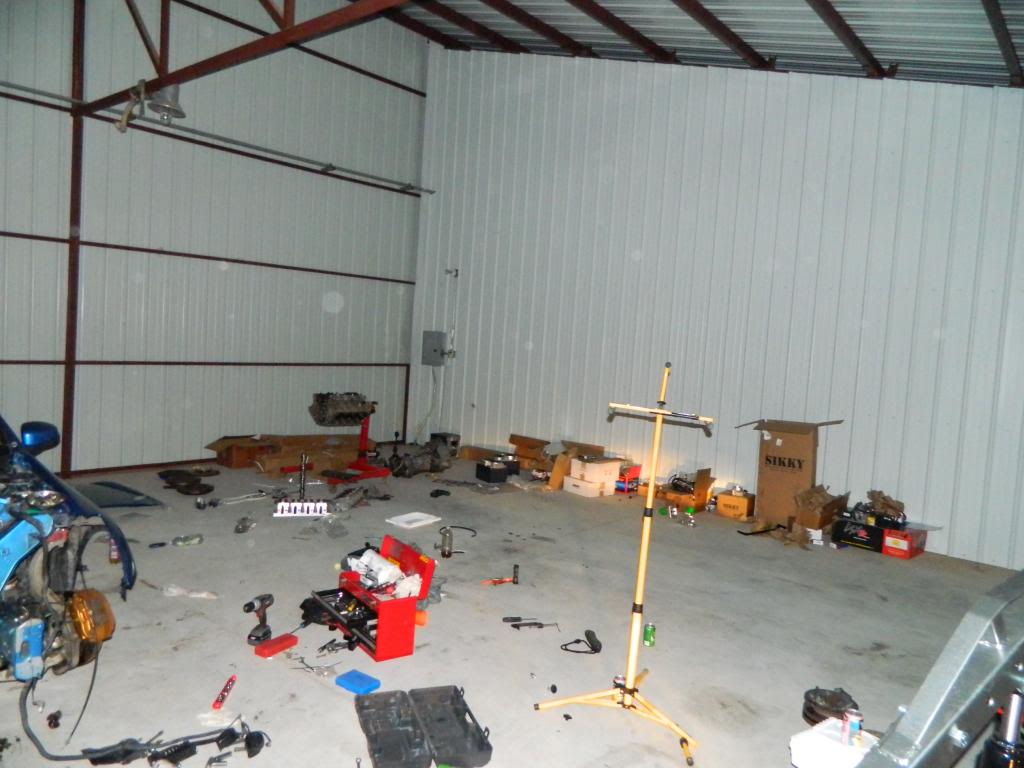
figured we would call it a night since it was getting dark again electrician is coming tomorow morning so we are going to pick up everything organize all the parts paint a few things and run our lights so we can see at night
stay tuned !!!!!
Car is a 2003 Infiniti G35 vq35de motor with 63,000 miles he sick of the slow v6 so its time for an upgrade!!
Update final video of car:
heres everything to do the swap
last time youll see this little thing in here
got started on friday once we got everything in the shop ignore the broke *** filter he hit a bag of dog food and messed some stuff up
i got the ls1 torn apart pretty quick this will be the 5th or 6th one ive done now im going to teach him everything there is to know incase something happens he will know
since we dont have electric ran yet in the shop we gotta wait till monday to run lights radio ext.. so this will have to do till then for a radio
ignore how bright the flash is lol its pitch black in there so we wanted to get stuff done and we pulled the hatch in and used it for light since they were changing brakes and rotors on there anyway
theyre taking rims off since he will have a drag setup on there low and slow just turned to gofastparts =)
headlamps and flashlights to change some brakes and rotors haha
got the plenum off and radiator along with belts and a few hoses didnt have the tool for condensor yet
called it a night since it was too dark snapped a bolt on the caliper of the civic so that took a whole day running to and from autozone to fix lol
do fresh day and we removed alternator and ac compressor and condensor found out its a bitch to get the motor mounts off the motor with the header attached and saw its much easier to unbolt from underneath to just pull em completely with motor
unbolted shifter driveshaft and transmount
after yanking and pulling we finally got the damn thing free finding a few bumps in the road like the catalytic converters catching on steering so unbolted driver side thank god for pb blaster it was rusted beyond beleive and a bolt snapped so did alot of cussing and hammering to get it off
got her out after unplugging more of the harness finding it wrapped all under the trans and under the motor man are there a bunch of metal brackets on there god knows how much weight hes saving just from them and heatsheilds!
oops mess lol
figured we would call it a night since it was getting dark again electrician is coming tomorow morning so we are going to pick up everything organize all the parts paint a few things and run our lights so we can see at night
stay tuned !!!!!
Last edited by Justinktm; 01-11-2019 at 10:36 PM.
 10-14-2013, 09:00 PM
#2
so on this rainy day we werent rushing anything just doing little stuff here and there until this weekend when we pull the all nighter and get er done !
finally got electricity and got some overhead shop lights they werent bright at all so we got 2 of these stand up lights for 30$ and the whole shop is lit up now got our radio and everything. but did find out that water gets in so we had to move everything to back wall throwing away boxes we dont need
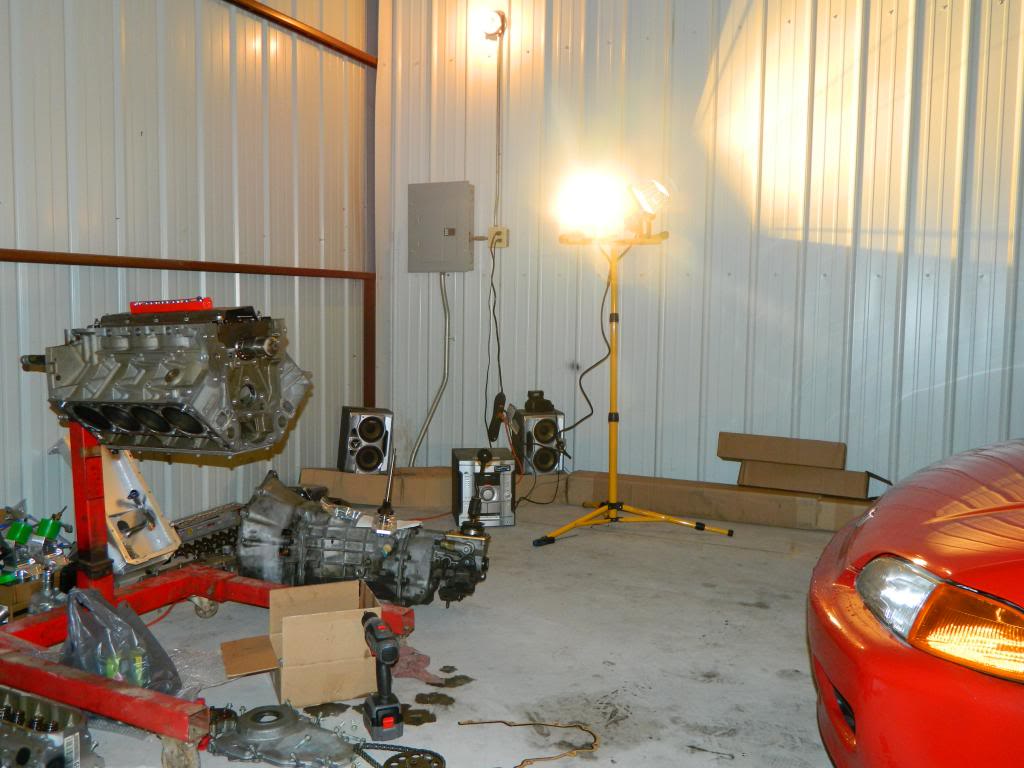
with no flash you can tell how bright it is in here so we dont have to use the hatch and a bunch of flashlights again
went ahead and removed the springs with a handy tool from advanced auto its a life saver! getting em ready to clean.
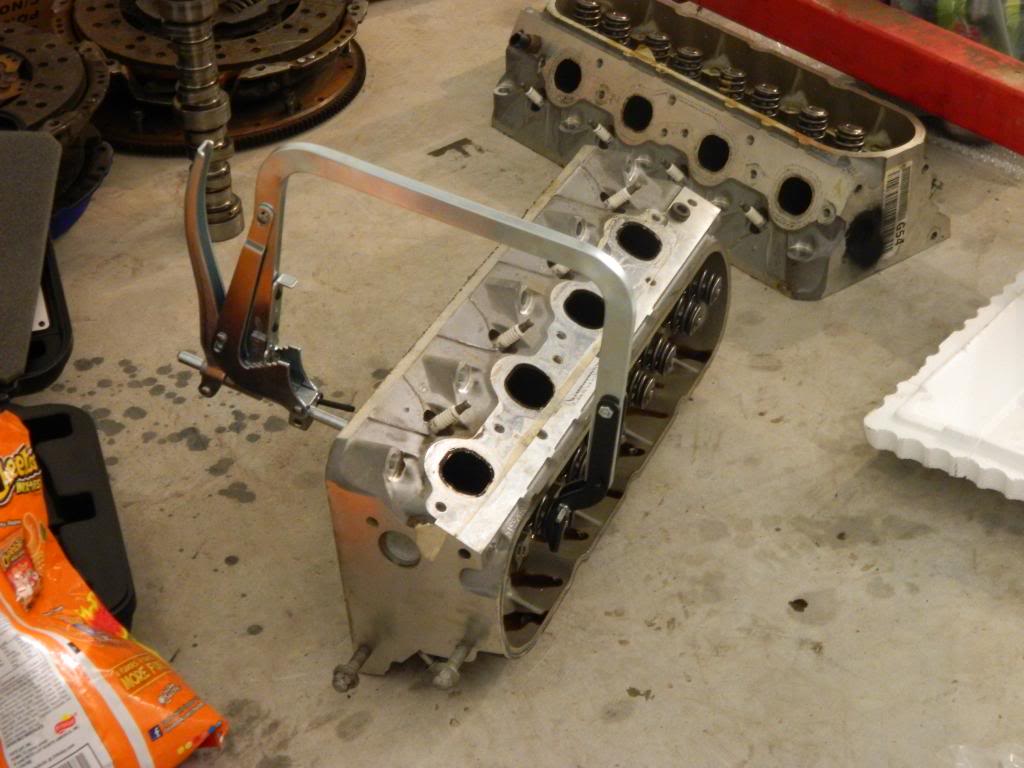
got springs off the heads and seals now theyre ready for some carb cleaner and scotchbrite dont want dirty heads on a clean motor
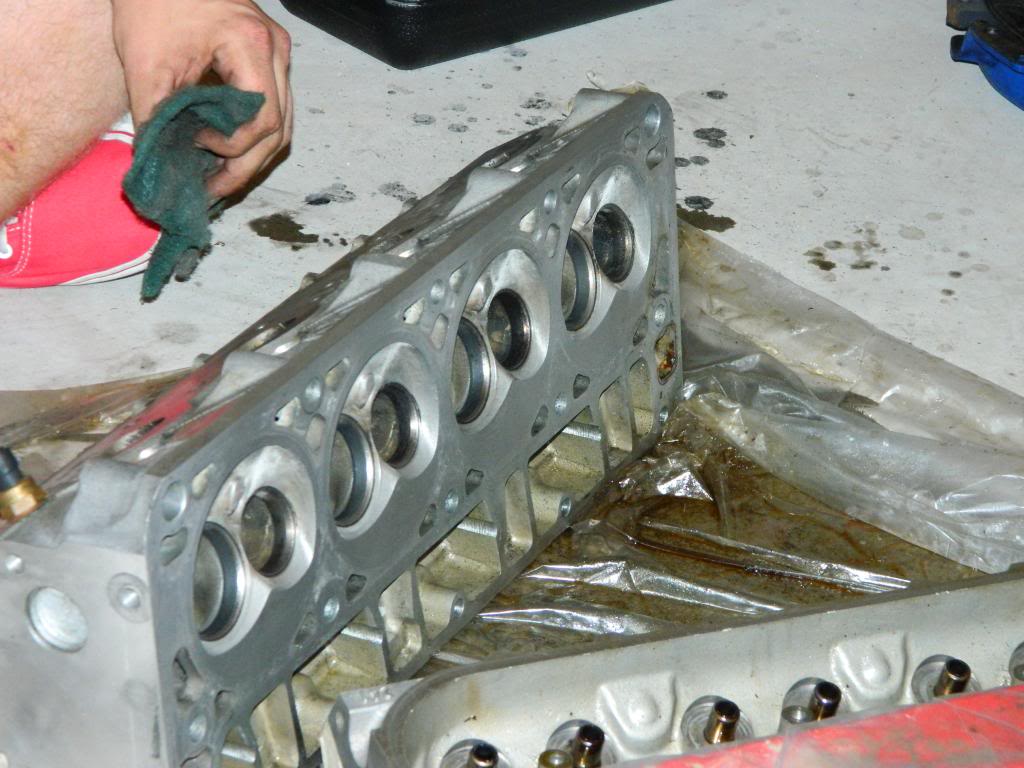
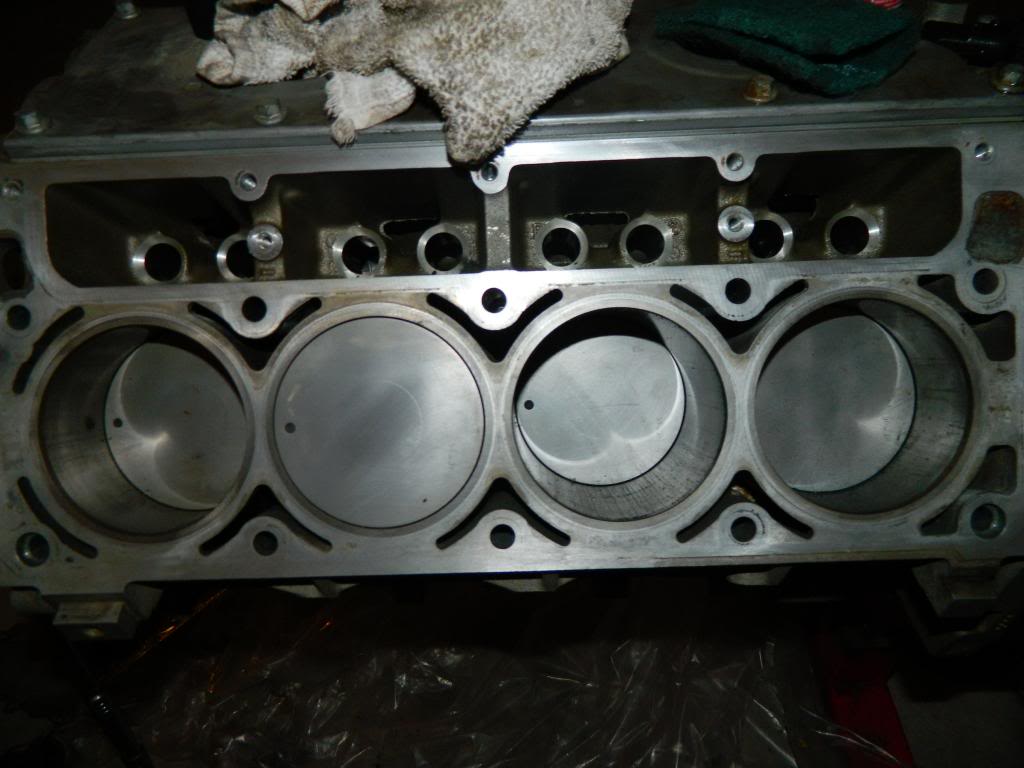
meanwhile while kyle was cleaning the heads i decided to start cleaning up the only thing dirty on the motor the nasty pistons heres a before and after with a ton of elbow grease and carb cleaner

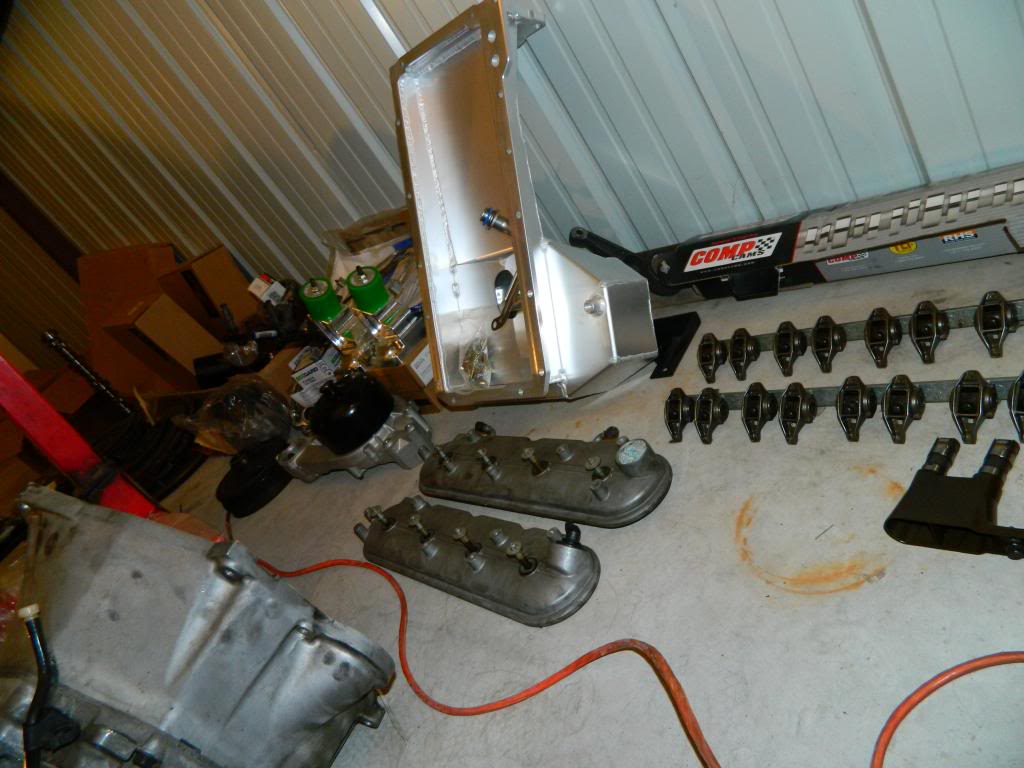
heres a pic of some parts we went through
only thing i see us having a problem with is the master cylinder and the fuel line other then that it should be smooth sailing .... hopefully !
tomorows plans are bring the air compressor over get it all set up so we can cut the exhaust off and start painting valve covers and such
finally got electricity and got some overhead shop lights they werent bright at all so we got 2 of these stand up lights for 30$ and the whole shop is lit up now got our radio and everything. but did find out that water gets in so we had to move everything to back wall throwing away boxes we dont need
with no flash you can tell how bright it is in here so we dont have to use the hatch and a bunch of flashlights again
went ahead and removed the springs with a handy tool from advanced auto its a life saver! getting em ready to clean.
got springs off the heads and seals now theyre ready for some carb cleaner and scotchbrite dont want dirty heads on a clean motor
meanwhile while kyle was cleaning the heads i decided to start cleaning up the only thing dirty on the motor the nasty pistons heres a before and after with a ton of elbow grease and carb cleaner
heres a pic of some parts we went through
only thing i see us having a problem with is the master cylinder and the fuel line other then that it should be smooth sailing .... hopefully !
tomorows plans are bring the air compressor over get it all set up so we can cut the exhaust off and start painting valve covers and such
 10-17-2013, 12:02 AM
#7
lrighty UPDATE TIME !! we got quite a bit done today we just went to hang out a bit and we didnt think we would that much in just a couple of hours
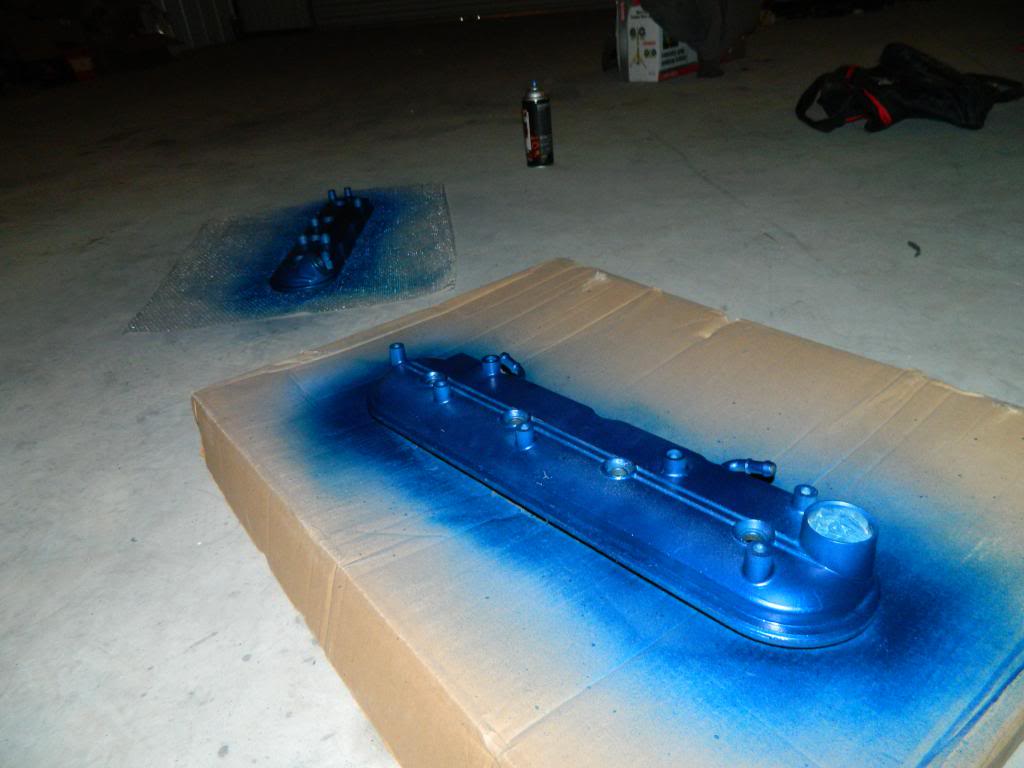
once i got there i started painting 3 coats of high heat primer 3 coats of duplicolor automotive paint and 3 coats of high heat clear it started bubbling on the clear so ill sand it down tomorow and repaint them but it matches fast intake perfect!
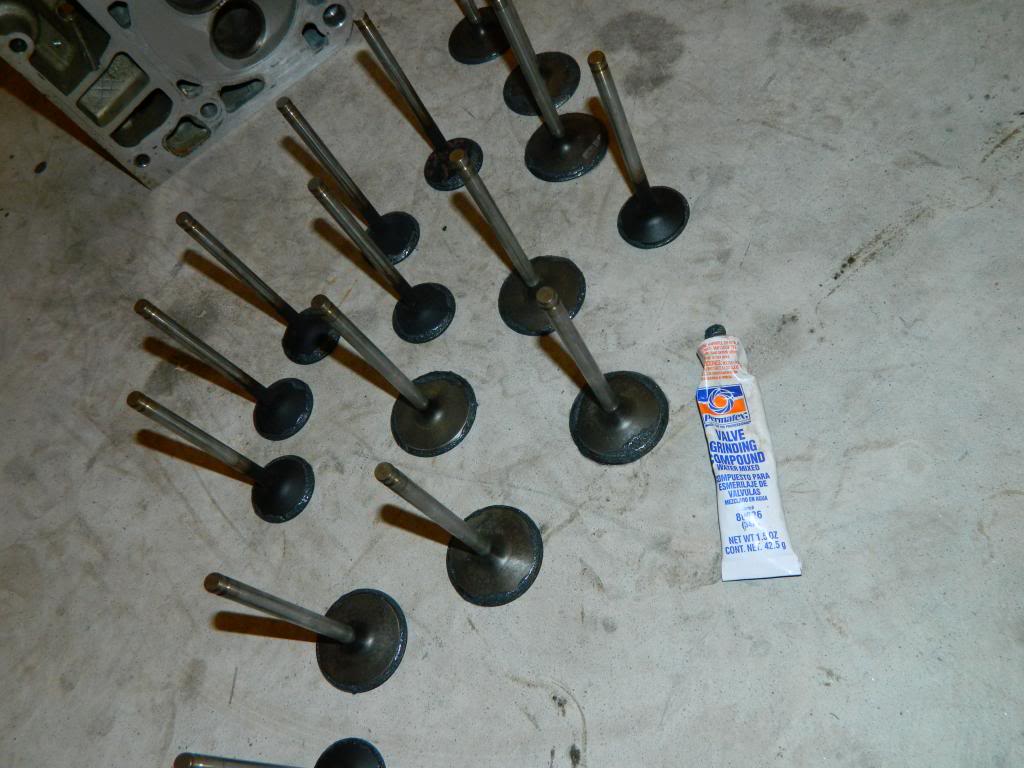
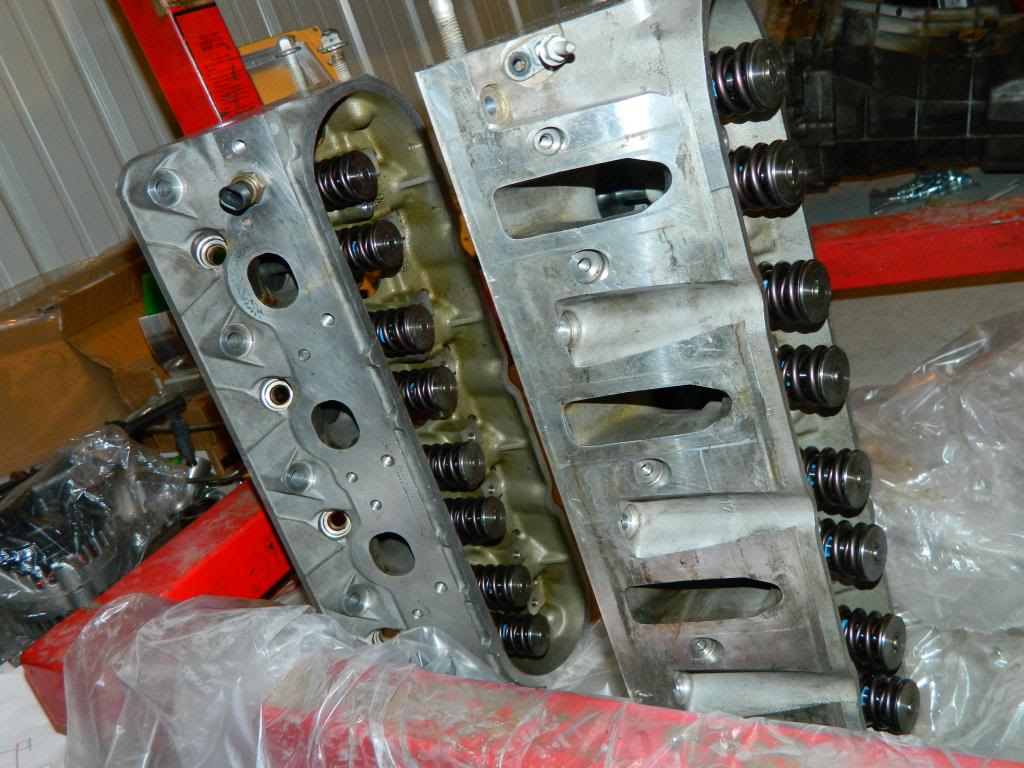
while the paint was drying kyle got started on lapping the valves to make sure they seal perfect!
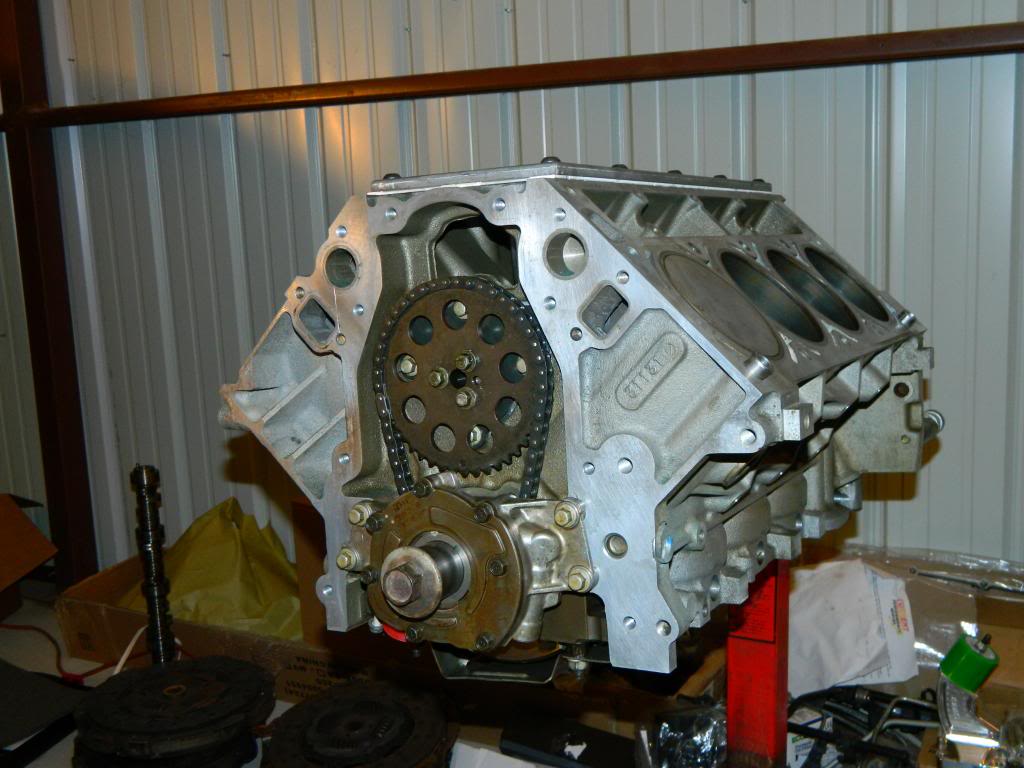
at the same time i went ahead and installed the cam with the timing chain oil pump and brand new lifters and trays
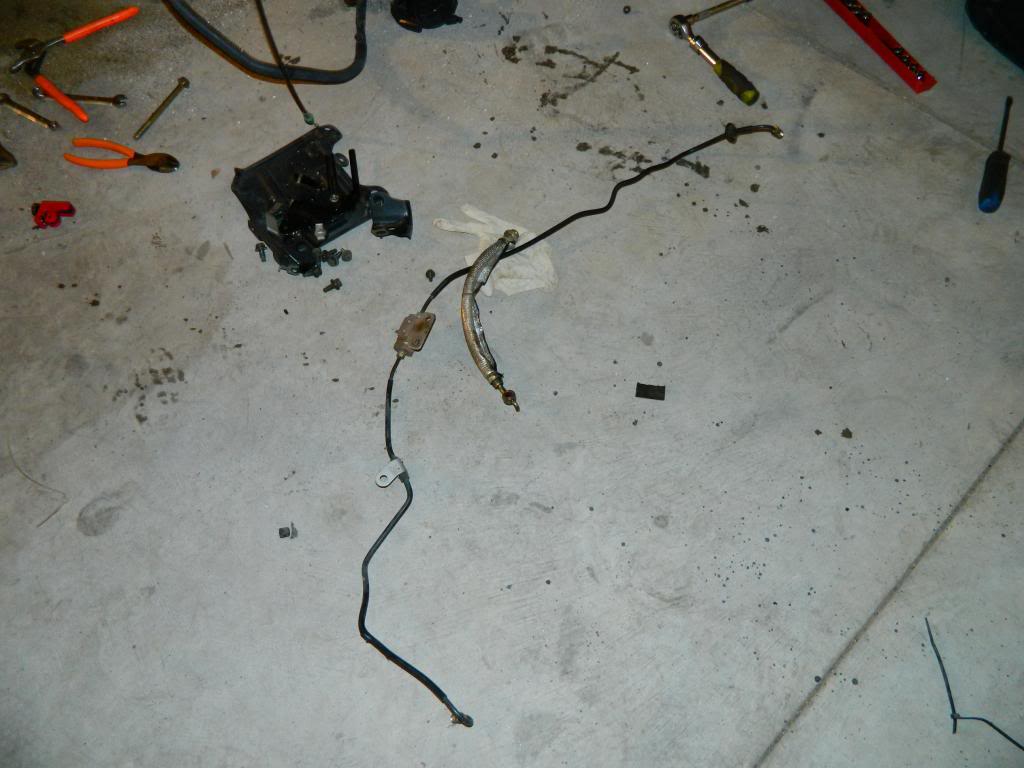
after that i decided to start removing the master cylinder see if i could figure out how the new ones going in ! once i got it pulled along with the stock lines under the fender it was easy as pie !
Picture of the factory master cylinder removed just 2 bolts and it was out !
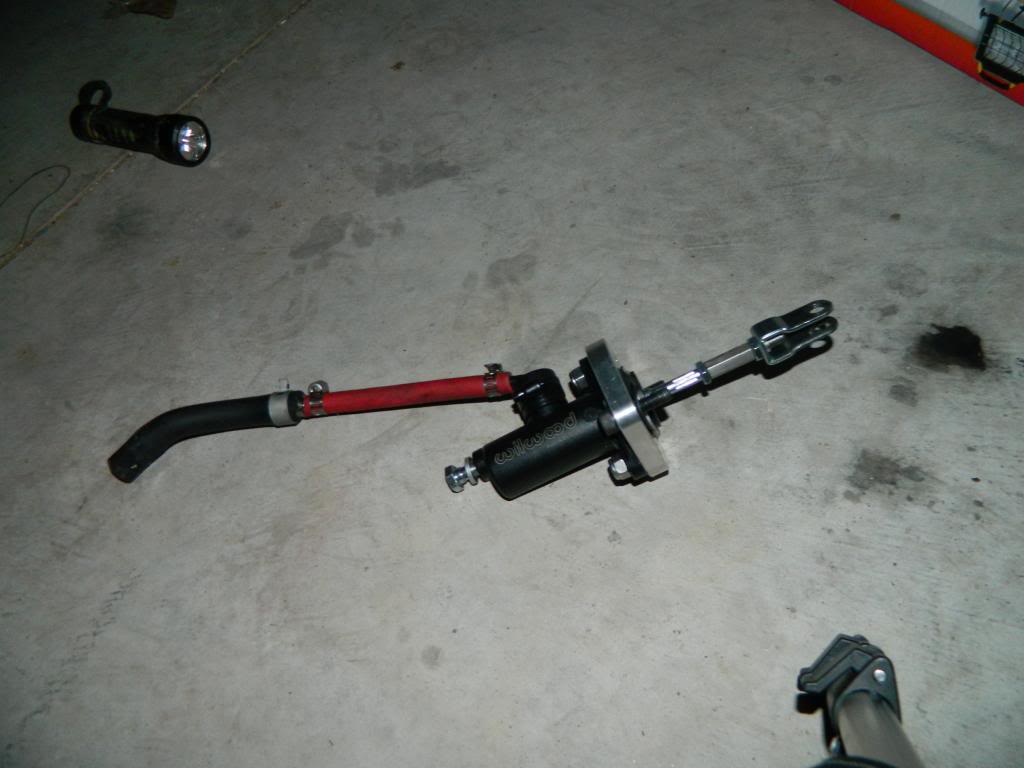
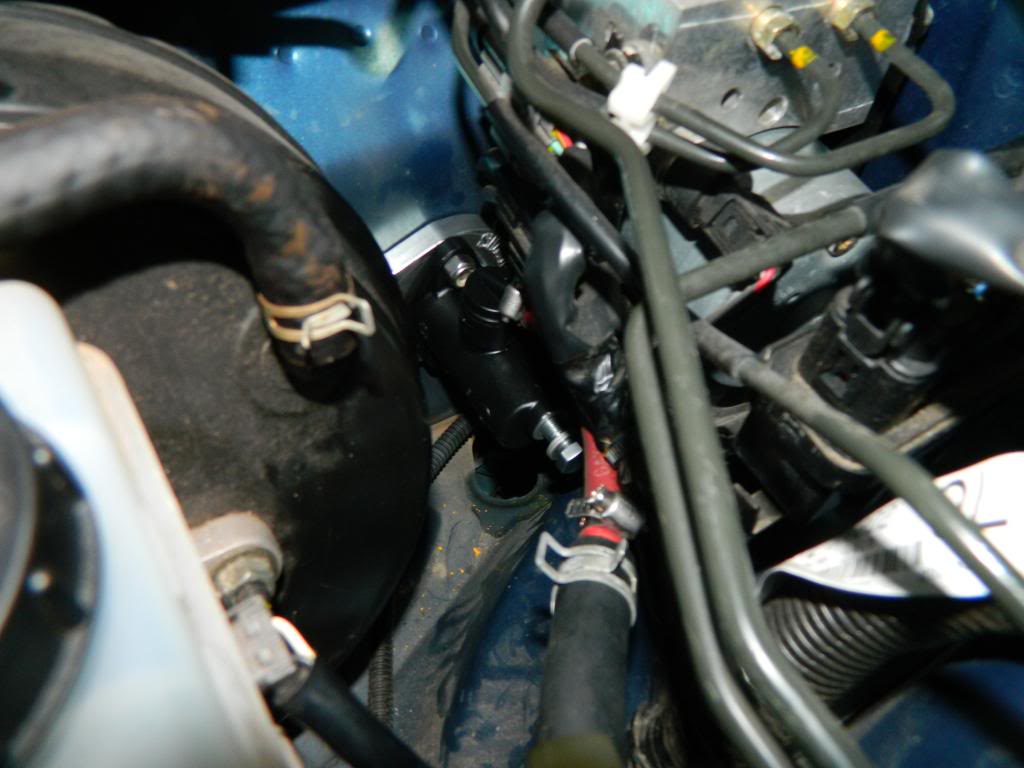
heres the factory master cylinder compared to the sikky provided willwood one its much better design all i had to do was swap the rod in the middle to the other so it will be just like factory. we will get a picture of it installed tomorow

after bending the clutch line i finally got that little POS out of there lol
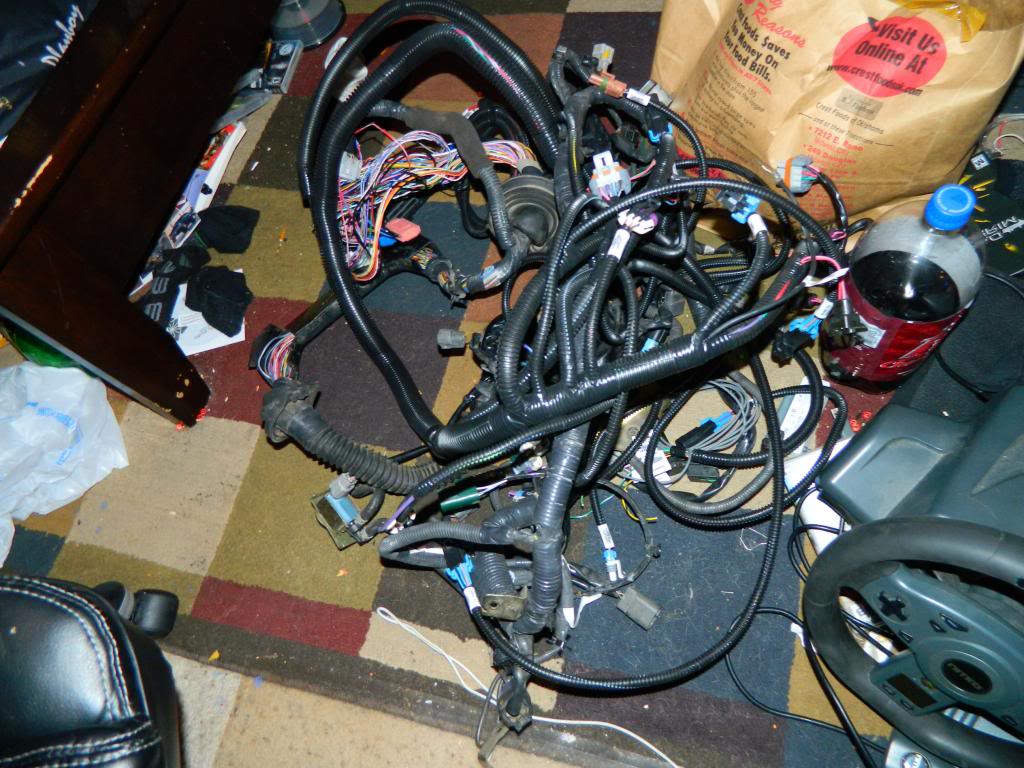
went ahead and finished pulling factory harness so it would be easier to splice the wires that we are saving for tach speedo and such and i found out the infiniti connectors are a pain in the @$$ to get off !! nothing like the chevy ones
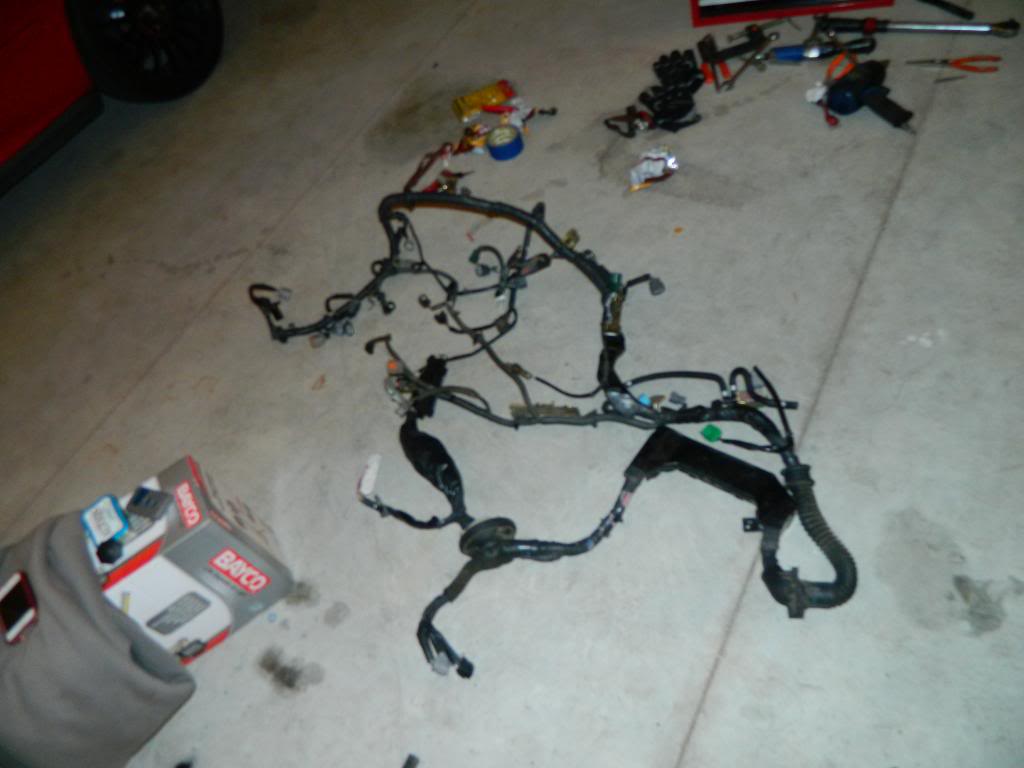
looks so much better with the cluster of a mess out of the way along with a bunch of useless brackets.

tomorow we are going to take it easy and spend sometime with the family before we stay away all weekend. our plans are to just get the factory pedal welded to the 240sx pedal we got since we are using cable driven throttle body and doing away with that stupid driveby wire electronic JUNK =) other then that we are taking it easy and gonna take the racecar to the track friday if weather lets us !!! then spend the rest of the night detailing car for the show early saturday morning after that its time for an all nighter gonnna attempt to get alot done now we have electricity and can stay over night without the use of flashlights ! cant forget we are gonna remove the borla exhaust and driveshaft this weekend and plan to put the spare g37 rims on it to roll it out and clean the huge mess we had underneath i know im not bolting no transmission up laying in kitty litter been there done that and wont happen again!
stay tuned for more and let us know what you guys think so far !
once i got there i started painting 3 coats of high heat primer 3 coats of duplicolor automotive paint and 3 coats of high heat clear it started bubbling on the clear so ill sand it down tomorow and repaint them but it matches fast intake perfect!
while the paint was drying kyle got started on lapping the valves to make sure they seal perfect!
at the same time i went ahead and installed the cam with the timing chain oil pump and brand new lifters and trays
after that i decided to start removing the master cylinder see if i could figure out how the new ones going in ! once i got it pulled along with the stock lines under the fender it was easy as pie !
Picture of the factory master cylinder removed just 2 bolts and it was out !
heres the factory master cylinder compared to the sikky provided willwood one its much better design all i had to do was swap the rod in the middle to the other so it will be just like factory. we will get a picture of it installed tomorow
after bending the clutch line i finally got that little POS out of there lol
went ahead and finished pulling factory harness so it would be easier to splice the wires that we are saving for tach speedo and such and i found out the infiniti connectors are a pain in the @$$ to get off !! nothing like the chevy ones
looks so much better with the cluster of a mess out of the way along with a bunch of useless brackets.
tomorow we are going to take it easy and spend sometime with the family before we stay away all weekend. our plans are to just get the factory pedal welded to the 240sx pedal we got since we are using cable driven throttle body and doing away with that stupid driveby wire electronic JUNK =) other then that we are taking it easy and gonna take the racecar to the track friday if weather lets us !!! then spend the rest of the night detailing car for the show early saturday morning after that its time for an all nighter gonnna attempt to get alot done now we have electricity and can stay over night without the use of flashlights ! cant forget we are gonna remove the borla exhaust and driveshaft this weekend and plan to put the spare g37 rims on it to roll it out and clean the huge mess we had underneath i know im not bolting no transmission up laying in kitty litter been there done that and wont happen again!
stay tuned for more and let us know what you guys think so far !
Trending Topics
 10-20-2013, 12:17 AM
#9
sorry for not posting anything in awhile i keep leaving camera at home or at the shop lol heres a few pictures of the update! almost ready to drop her in just a few issues gotta get our clutch tool figure out what to do with the evap hose for the fuel we have line to intake just have that extra line for nothing and the throttle cable gotta figure how we plan to route it !
went ahead and put springs and new seals on .650 springs
got the new willwood master cylinder all figured out and assembled and bolted up just gotta drill for the line to the trans and we are good to go on that part!
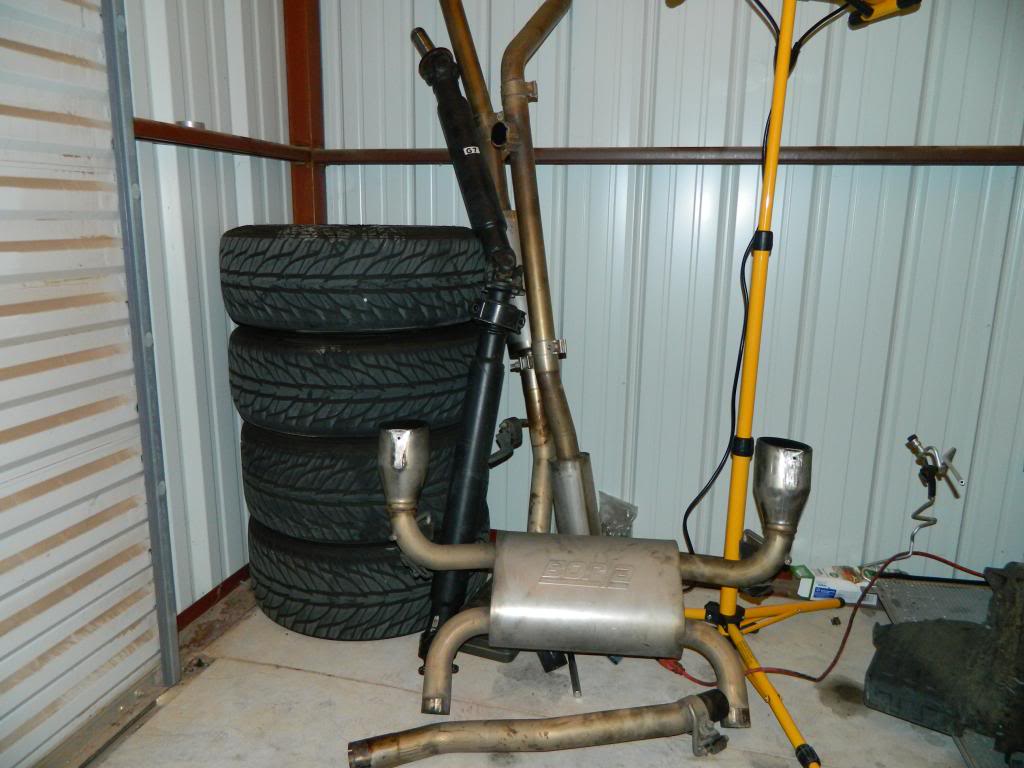
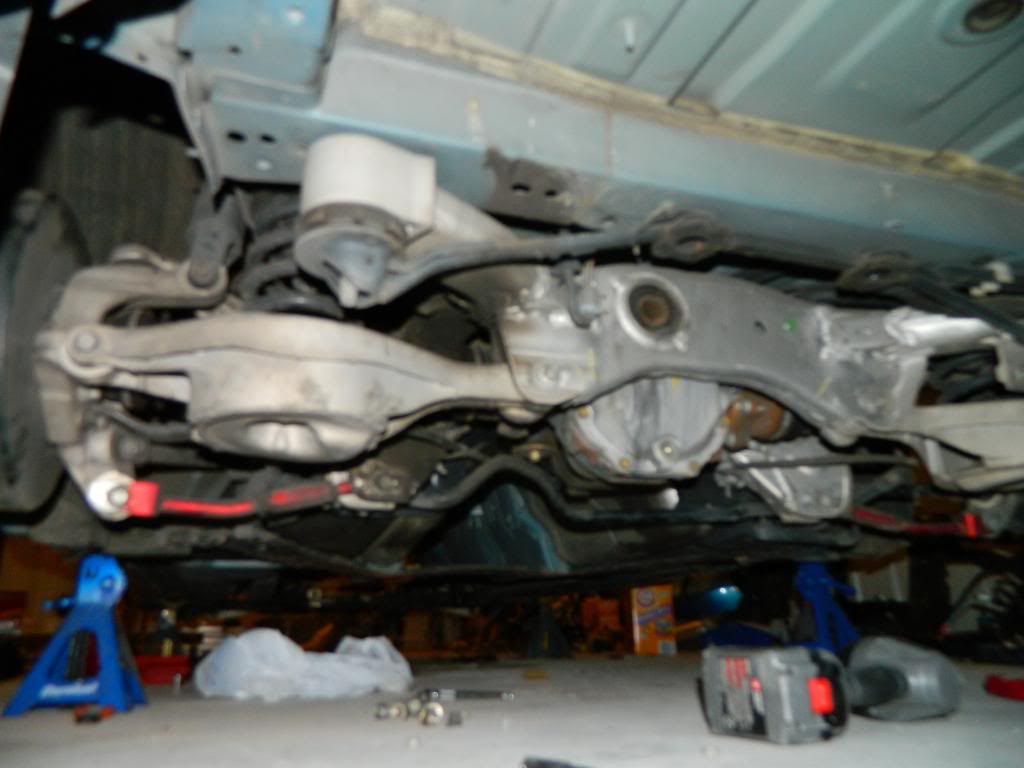
while he was putting springs on i was under the car with the impact removing the borla exhaust the heavy stock 2 piece driveshaft and a bunch of junk brackets and shields that aren't necessary
look at all that extra room now !
i bet a 9inch would set good in here ! ...... soon
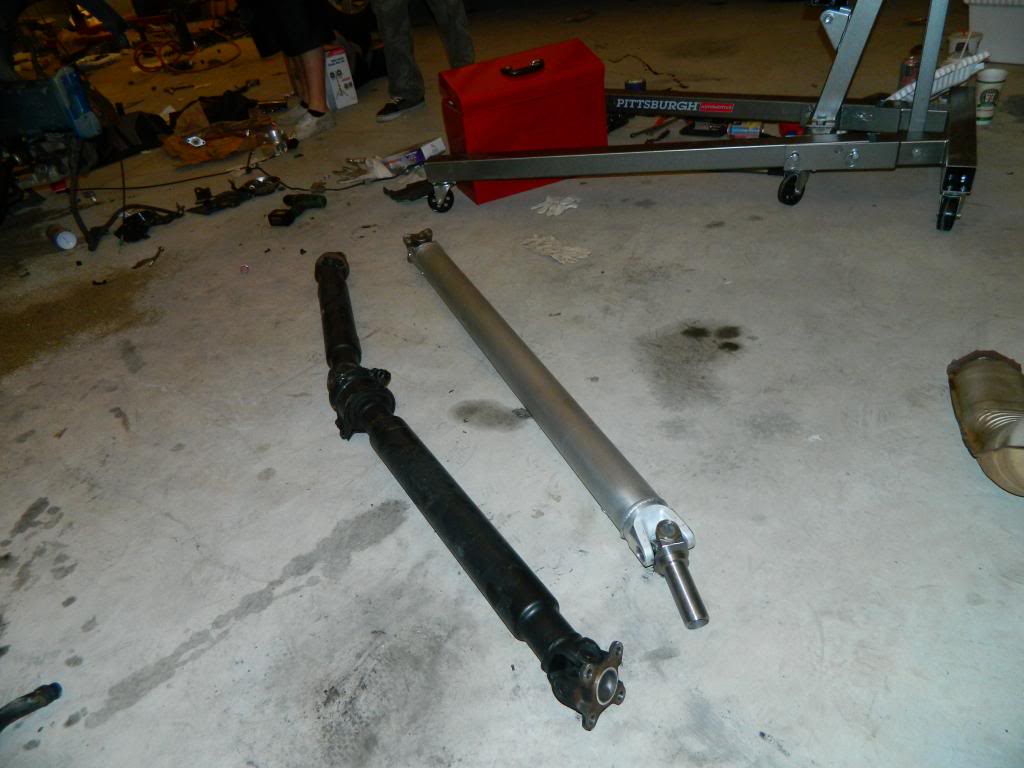
look at the difference in driveshafts its crazy the amount of weight from one another ! i cant wait to weigh these things we have removed ill get that done this week so all you weight saving freaks (me) can know !
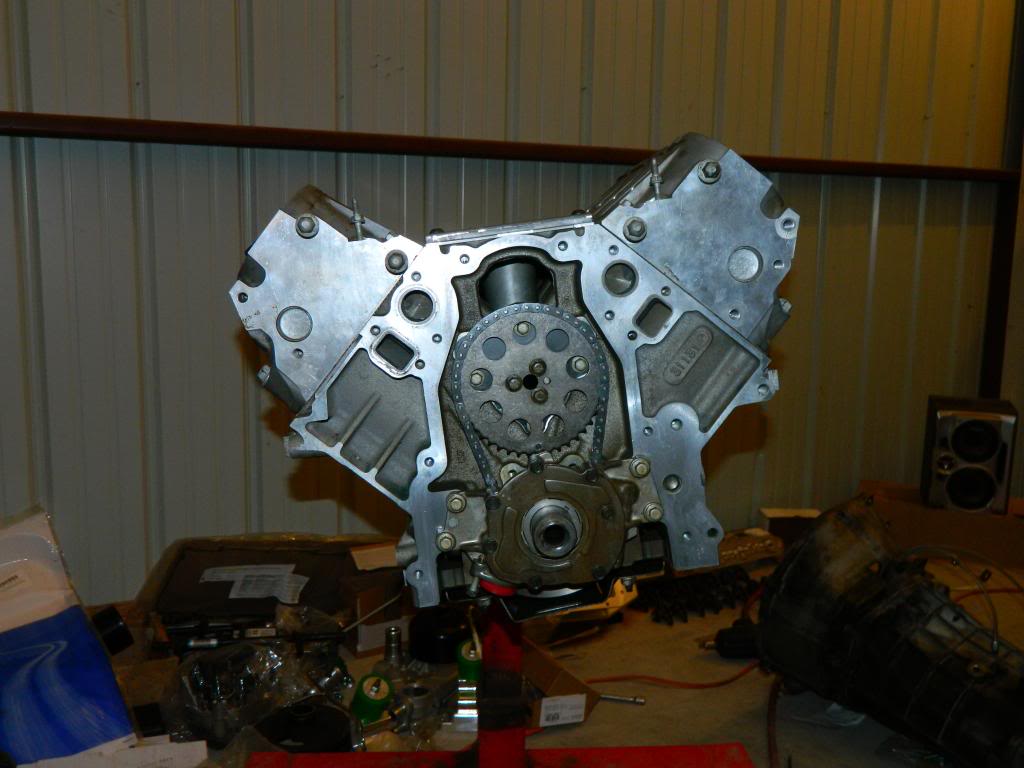
got the heads bolted up and torqued down thanks to texas speed for the headgaskets !
what does everyone NOT want to find after torquing heads ? yep 2 broken header bolts so we had to drill and heil coil them should be safe enough to run till he upgrades to some cnc 243s
we have alot more accomplished just been goofing off alot kept getting pissed one night so we had to take a break with the family have some ribs and cruise my racecar downtown just relaxing but this week we plan to have the harness cut away and spliced together tempting to use AN fittings for the heater hoses not sure yet! cant wait to see how this sets in there !
went ahead and put springs and new seals on .650 springs
got the new willwood master cylinder all figured out and assembled and bolted up just gotta drill for the line to the trans and we are good to go on that part!
while he was putting springs on i was under the car with the impact removing the borla exhaust the heavy stock 2 piece driveshaft and a bunch of junk brackets and shields that aren't necessary
look at all that extra room now !
i bet a 9inch would set good in here ! ...... soon
look at the difference in driveshafts its crazy the amount of weight from one another ! i cant wait to weigh these things we have removed ill get that done this week so all you weight saving freaks (me) can know !
got the heads bolted up and torqued down thanks to texas speed for the headgaskets !
what does everyone NOT want to find after torquing heads ? yep 2 broken header bolts so we had to drill and heil coil them should be safe enough to run till he upgrades to some cnc 243s
we have alot more accomplished just been goofing off alot kept getting pissed one night so we had to take a break with the family have some ribs and cruise my racecar downtown just relaxing but this week we plan to have the harness cut away and spliced together tempting to use AN fittings for the heater hoses not sure yet! cant wait to see how this sets in there !
 10-27-2013, 11:28 PM
#11
Well started this weekend and found out sikkys expensive oilpan pickup tube didnt work so we couldnt put the oilpan on due to it hitting the pan so that puts a hold till we get ahold of sikky =( as for the harness we found out were just junking the old harness and splicing into the stuff under the dash since current performance hasnt done a g35 they just make a harness for it not knowing what theyre doing i asked them which wires they said "idk you might need a wire schematic" so untill we hear from sikky its on hold =(
10-29-2013, 06:11 PM
#12
Teching In
iTrader: (4)
Join Date: Oct 2010
Location: Texas
Posts: 10
Likes: 0
Received 0 Likes
on
0 Posts

I would suggest buying a fuse box for the ls1 harness and making it a complete standalone. Only problem with that is you'll need to buy gauges since you'll be eliminating the vq ecu. I have a fsm for a 350z which is pretty much the same as a g35. It shows some schmateic of the wiring but isnt colored coded and makes things tuff to ring out. When you drop the motor in check to make sure the steering rack hard lines dont rub against the oil pan. Quite a few things need to be modified like one of the front oil pan bolt and believe the dip stick is too short. Good luck with the build its an awesome swap.
10-29-2013, 11:34 PM
#13
the harness we have has a fuse panel and relays we also found the speed and stuff like the with the sikky kit it should clear the steering .... should lol we shipped pan off today so should receive it next week and time for the swap! we would be done by now
11-19-2013, 03:23 AM
#16
sorry i havent updated this build in awhile been busy and lazy lol so the new update has arrived!
when we started to put oil pan on we were going to try any finish the car that weekend and ran into a problem which set us back about a week & a half.
sikky had sent us the wrong oil pickup tube we couldnt even put the pan on because it was bent completetly wrong so once we did that had to wait untill monday to even call sick and send the pan and tube back.
but finally after we received it we rested a few days and begun putting the new oilpan and pickup tube on. One thing i did find i didnt like is that the holes for oilfilter arent even aligned right and this is how the pan was made! wish they would of made it even and put the holes in the right spot and at least put a hole through the deep part of the pan like the batwing corvette pan so we can make sure that bolt is perfectly torqued but since we couldnt get a torque wrench or even a ratchet we had to kind of wing it and pray its close enough! we also tried putting the bigger bolts in front and it looked like it was crooked completely and since we had no instructions we didnt know that the allen head bolts go in the front lol
on top of our shitty weekend while torquing the oilpickup tube bolt we ended up breaking it smooth off the oil pump =( so there was another setback lol
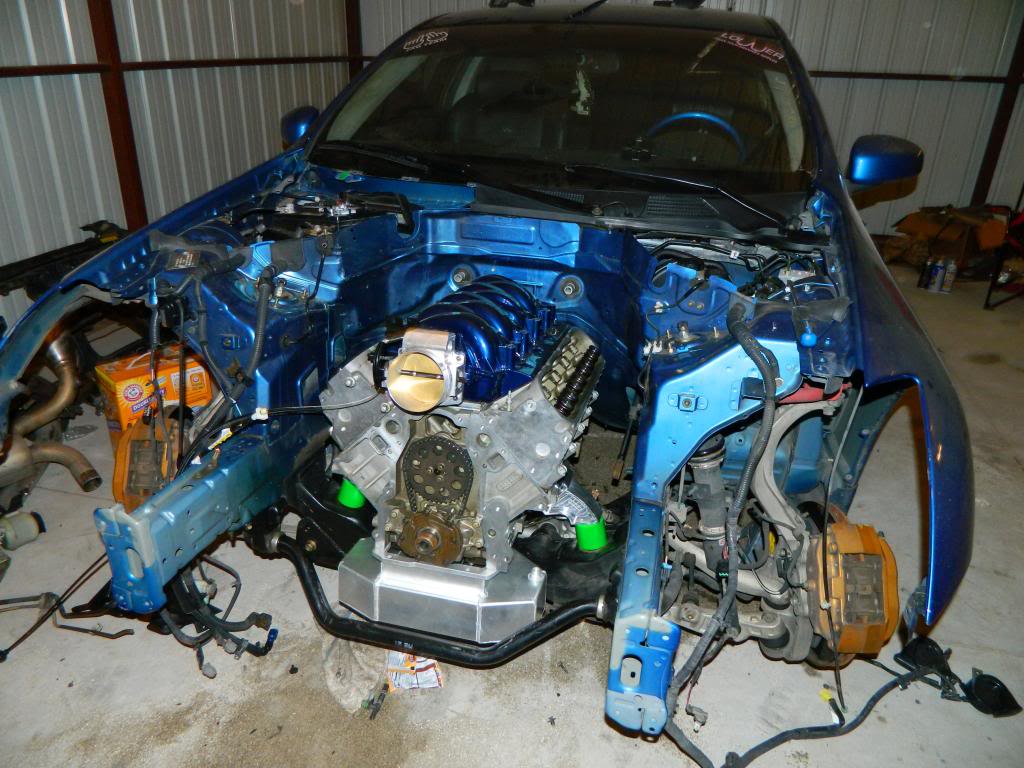
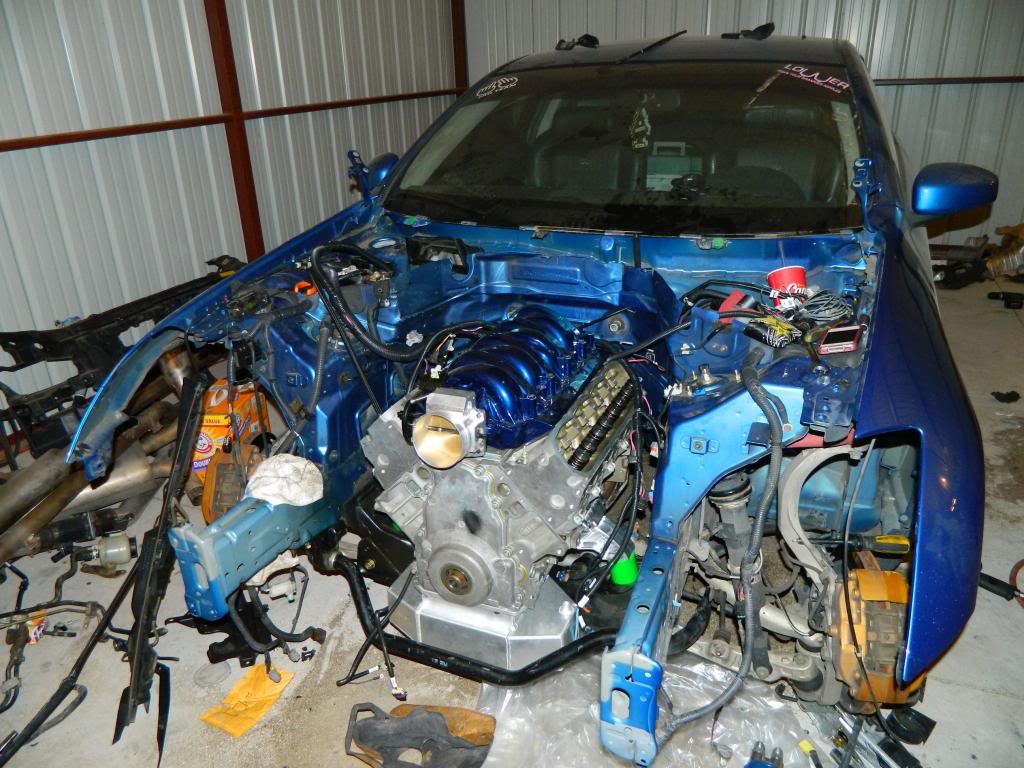
after all that mess was straightened out we put the motor into the car to see how it looked and test fit and figure out the pedal situation
after we drilled the hole and measured a bunch of times we finally got the cable ran to the interior of the car after using out "custom" pedal assembly from a 240 and g35 pedal so we can still have cable driven with stock pedal
and yes the valve covers are going to be repainted
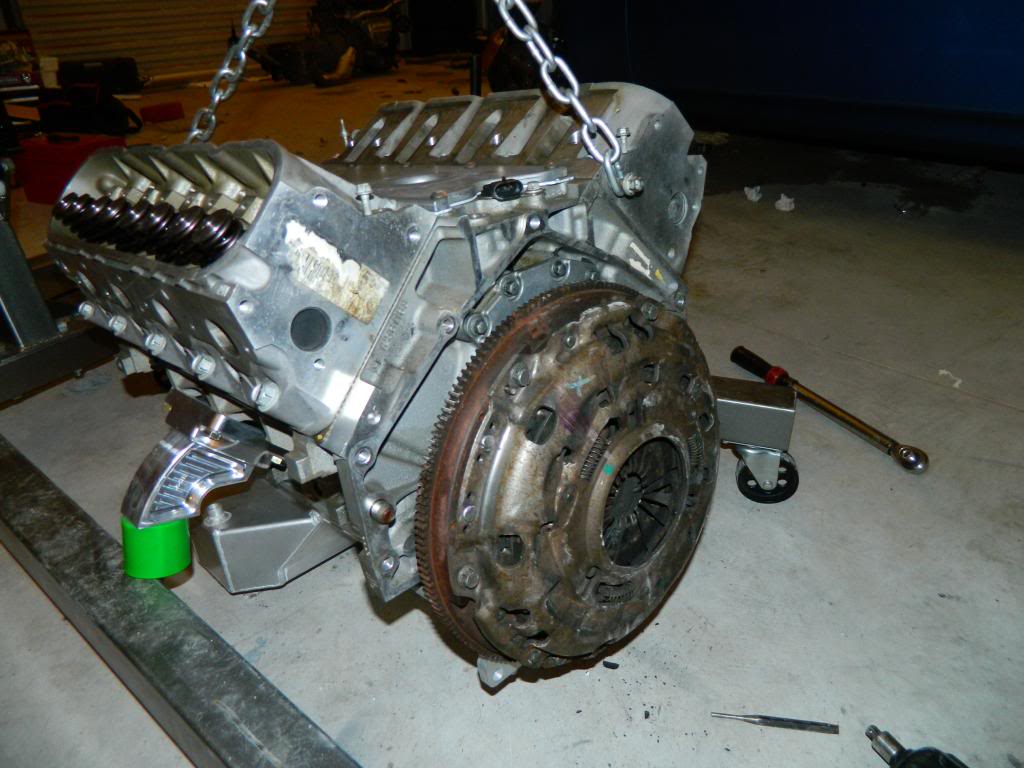
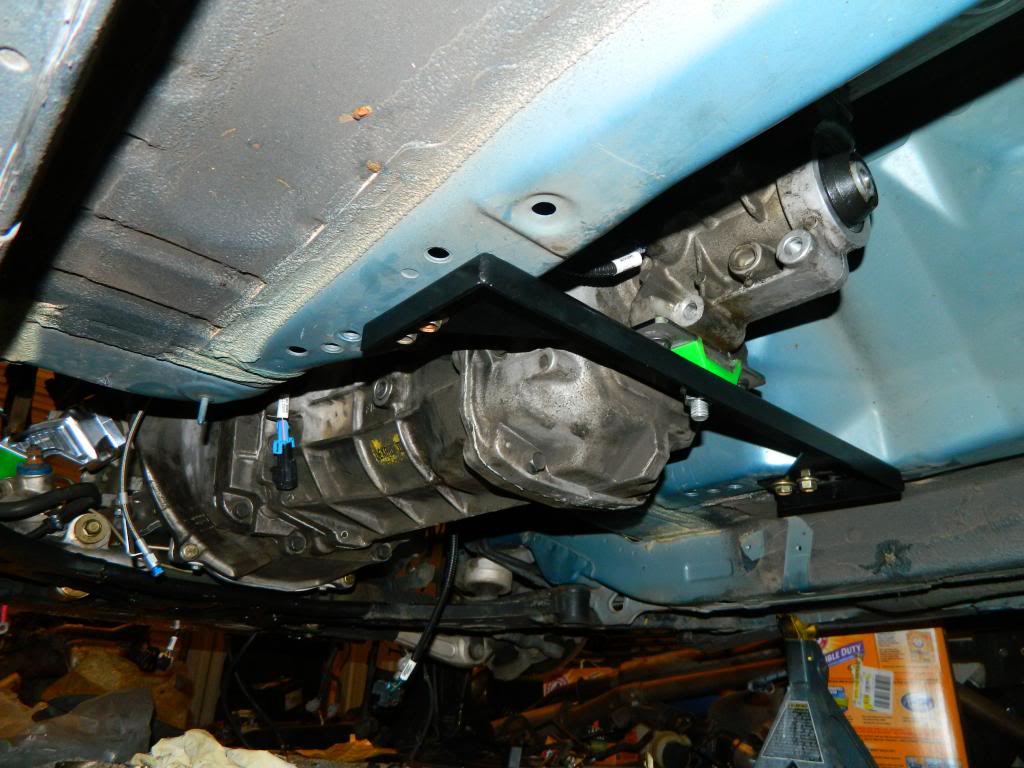
after we got the pedal and one of the hard things out of the way we pulled motor and set it on the ground so we could install flywheel and clutch for the t56. keep in mind this is my first t56 ive worked on so it was a learning experience for installing my first clutch and let me say its alot simpler then i figured it would be but putting trans onto the clutch is kind of a pain to get it on there perfect

lol here you can see how we ghetto rigged it to set up perfect so we can put the fluid in it. we got sidetracked and forgot lol
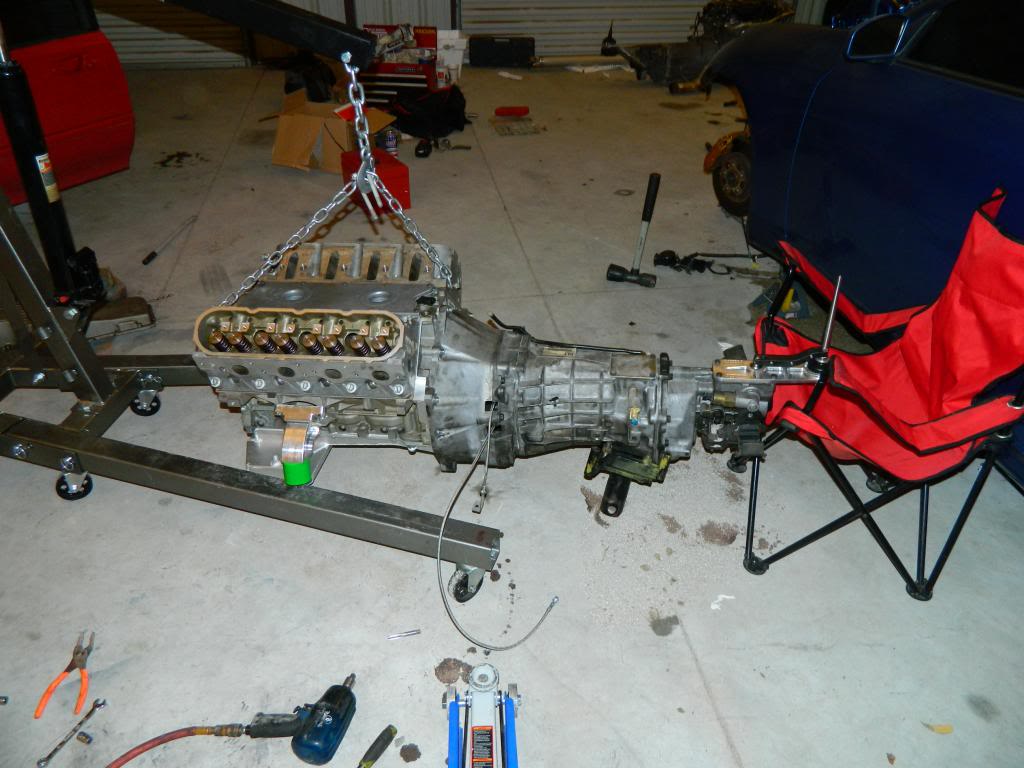
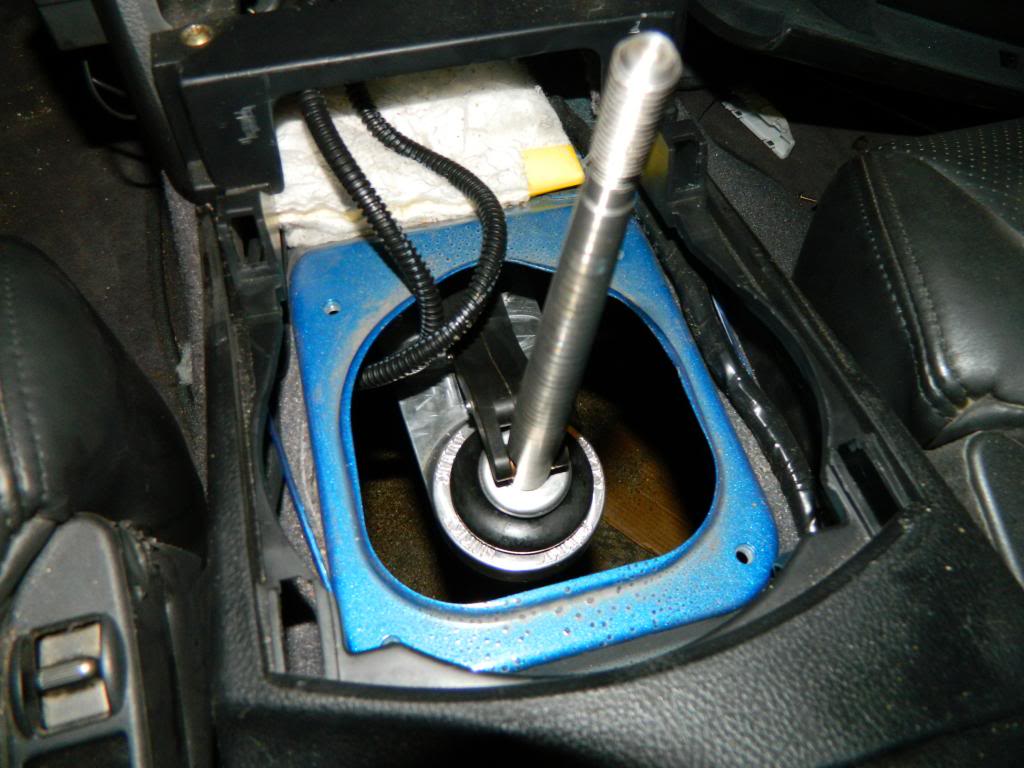
heres with the t65 on the motor and installed in the car. it wasnt that hard really we had to take the shifter off and install it from the top since it was in the way too much
after that we called it a night decided to take it easy for the next few days.
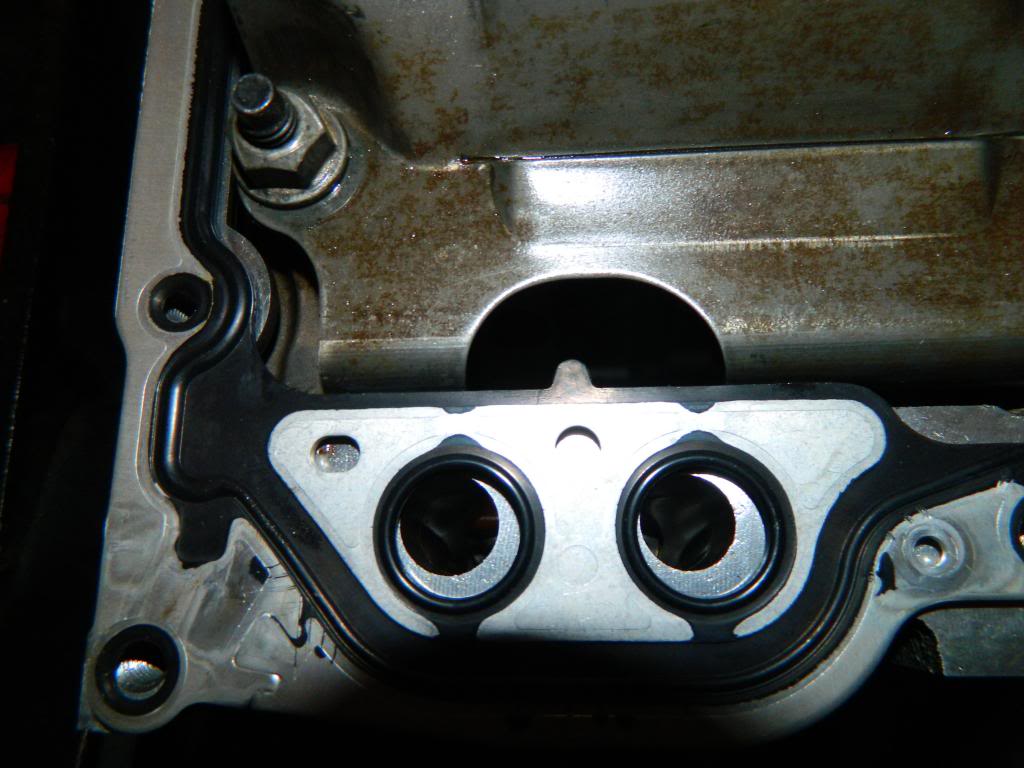
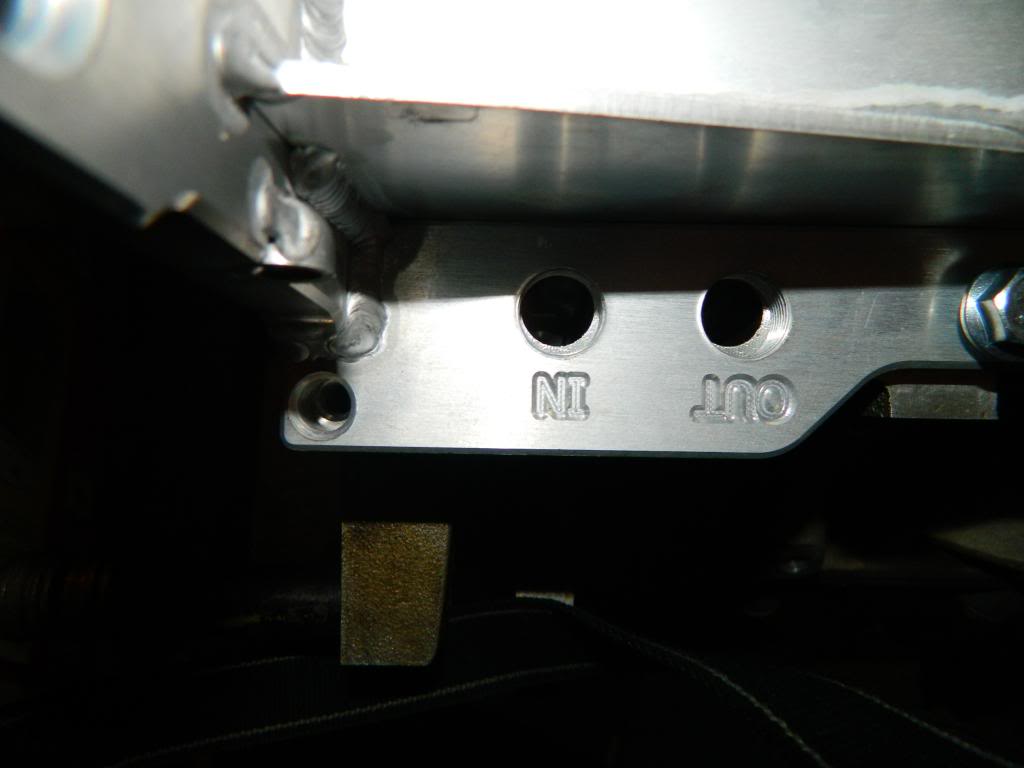
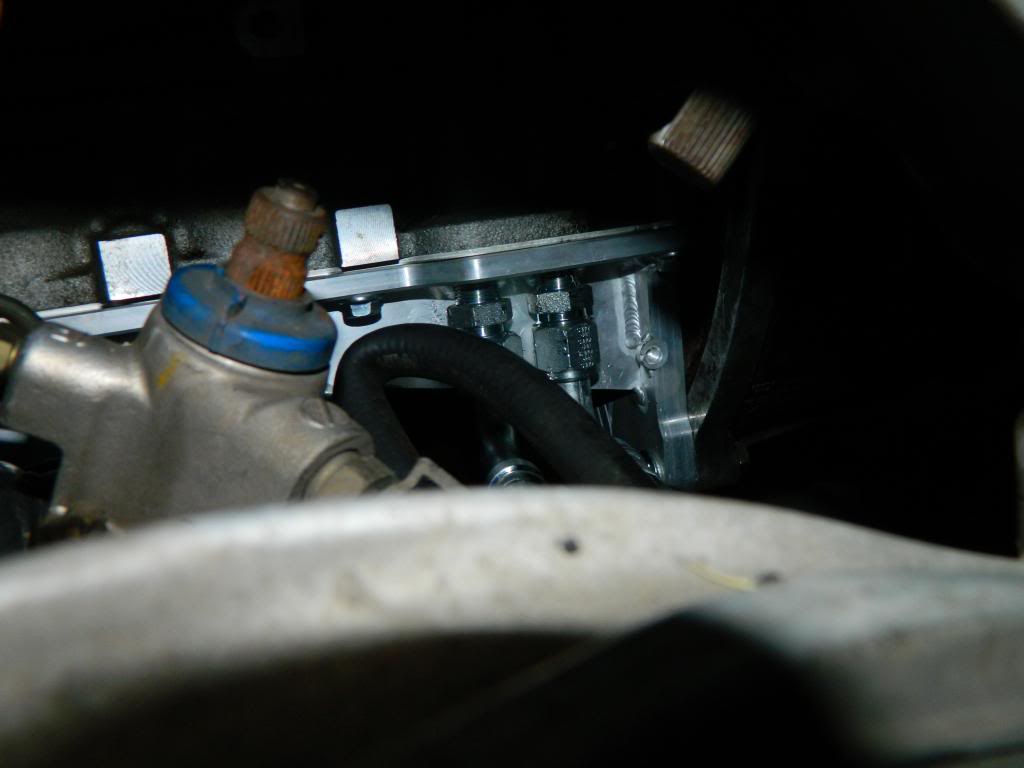
since i was bored tonight i figured id sneak over to the shop and get work done. we were having trouble finding where to mount the oil filter because those lines were HUGE we pinched one a little when lowering motor but we ended up taking them off and i got under the car and installed them tonight after i found where i wanted the filter to go.
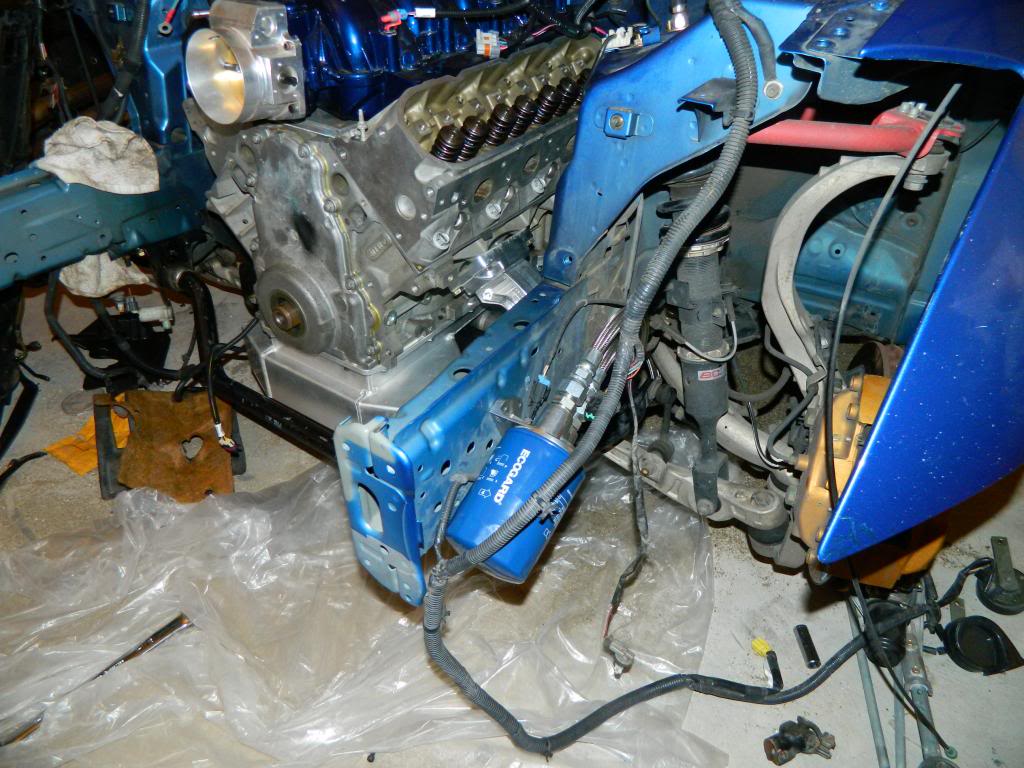
after i knocked that out i heard that the headers are the worse part of this swap and said its going to take along time but apparently theyve never installed some on a camaro haha i ended up getting both headers in the car and bolted into place in under 5 minutes didnt take much effort at all since i just jacked up one side of the motor and slid em on in there turning every way i could while doing it.
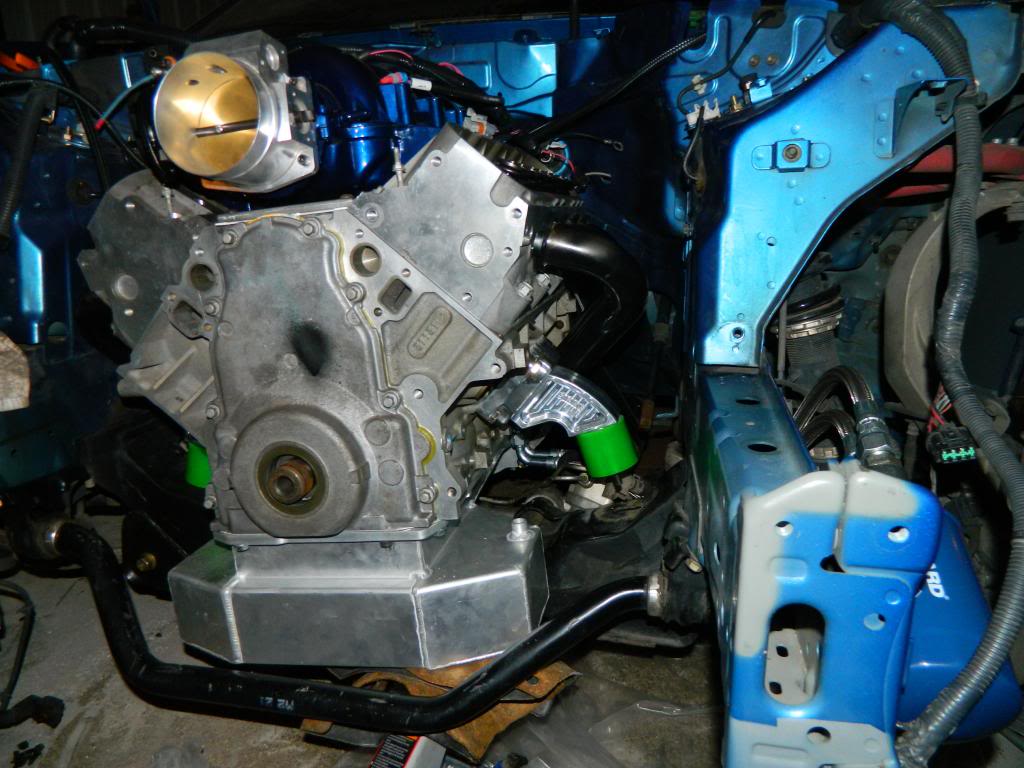
after i saw the headers in i figured why not put the alternator and front assembly on now i dont need that extra room. i managed to forget to put dipstick into trans but since theres enough clearance it will be easy to come behind the alternator.
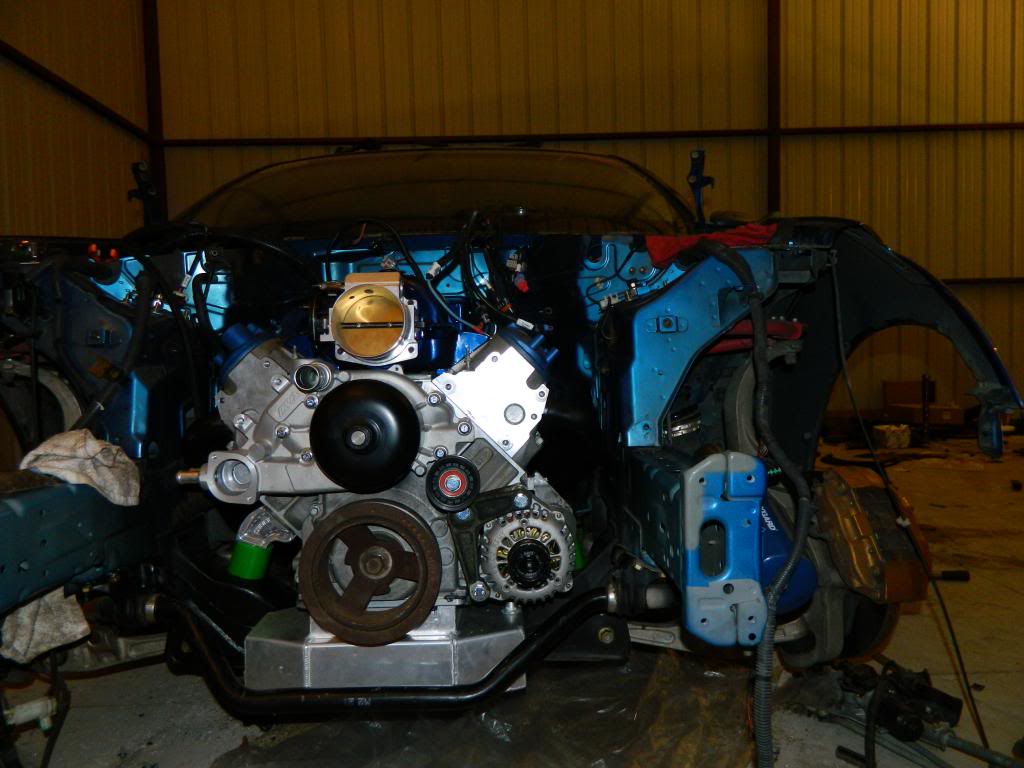
after that i decided to go ahead and install the 7.4 pushrods and torque all the rockers down to 22 ft lbs before installing the valve covers
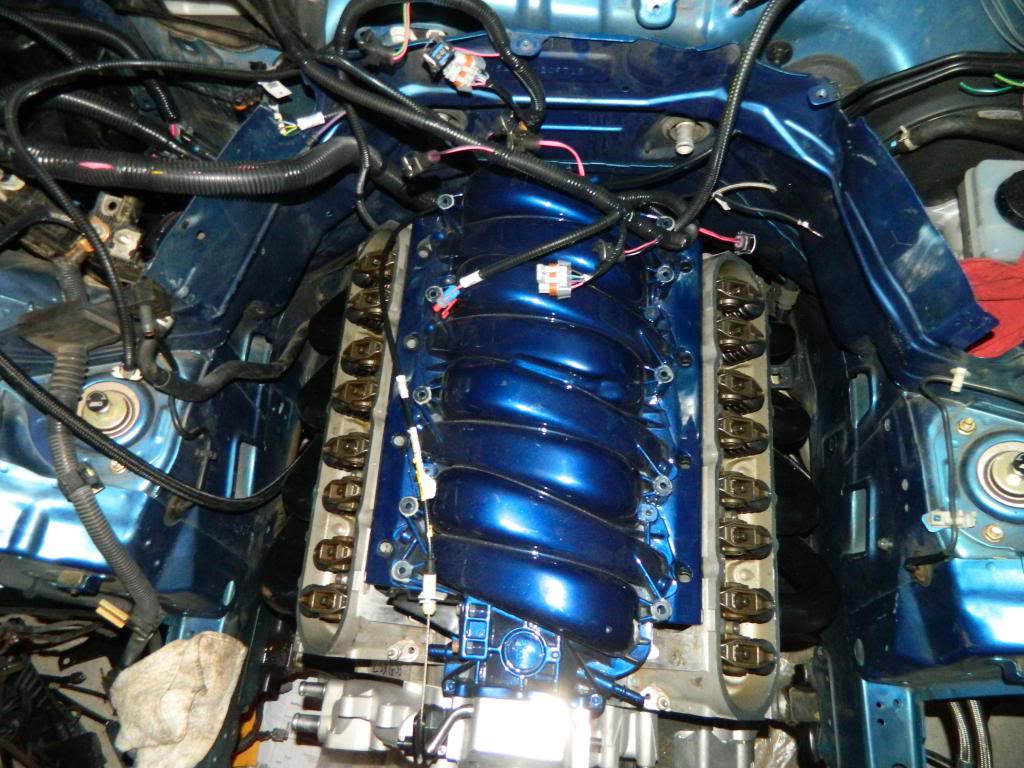
man she looks perdy! definitely looks like it belongs there! man we are so close for that first start up just gotta get the ecu tuned for a t56 and a base tune to where we can start it and figure out the bugs before we drive it to get dyno tuned !

all thats left now is install driveshaft plug up the harness and splice it all into the interior such as tach and we have to run the fuel pump wiring to the back of the car after we install the walboro 255 pump we have. So shouldnt be to much because after we do all of that we basically put the front bumper on with the radiator and the slim fans see how much clearance we have and find out how long of a hose we need from the heater core to the water pump so we can still have heat! then basic stuff like fluids and bleed clutch. thats all i can think of off the top of my head but stay tuned for the first startup and dyno numbers ! gonna be over 400 for sure!!! just need to figure out what rims and tire combo we are going to run then its time for axles because these are going to definitely snap once we show it some sticky tire.
when we started to put oil pan on we were going to try any finish the car that weekend and ran into a problem which set us back about a week & a half.
sikky had sent us the wrong oil pickup tube we couldnt even put the pan on because it was bent completetly wrong so once we did that had to wait untill monday to even call sick and send the pan and tube back.
but finally after we received it we rested a few days and begun putting the new oilpan and pickup tube on. One thing i did find i didnt like is that the holes for oilfilter arent even aligned right and this is how the pan was made! wish they would of made it even and put the holes in the right spot and at least put a hole through the deep part of the pan like the batwing corvette pan so we can make sure that bolt is perfectly torqued but since we couldnt get a torque wrench or even a ratchet we had to kind of wing it and pray its close enough! we also tried putting the bigger bolts in front and it looked like it was crooked completely and since we had no instructions we didnt know that the allen head bolts go in the front lol
on top of our shitty weekend while torquing the oilpickup tube bolt we ended up breaking it smooth off the oil pump =( so there was another setback lol
after all that mess was straightened out we put the motor into the car to see how it looked and test fit and figure out the pedal situation
after we drilled the hole and measured a bunch of times we finally got the cable ran to the interior of the car after using out "custom" pedal assembly from a 240 and g35 pedal so we can still have cable driven with stock pedal
and yes the valve covers are going to be repainted
after we got the pedal and one of the hard things out of the way we pulled motor and set it on the ground so we could install flywheel and clutch for the t56. keep in mind this is my first t56 ive worked on so it was a learning experience for installing my first clutch and let me say its alot simpler then i figured it would be but putting trans onto the clutch is kind of a pain to get it on there perfect
lol here you can see how we ghetto rigged it to set up perfect so we can put the fluid in it. we got sidetracked and forgot lol
heres with the t65 on the motor and installed in the car. it wasnt that hard really we had to take the shifter off and install it from the top since it was in the way too much
after that we called it a night decided to take it easy for the next few days.
since i was bored tonight i figured id sneak over to the shop and get work done. we were having trouble finding where to mount the oil filter because those lines were HUGE we pinched one a little when lowering motor but we ended up taking them off and i got under the car and installed them tonight after i found where i wanted the filter to go.
after i knocked that out i heard that the headers are the worse part of this swap and said its going to take along time but apparently theyve never installed some on a camaro haha i ended up getting both headers in the car and bolted into place in under 5 minutes didnt take much effort at all since i just jacked up one side of the motor and slid em on in there turning every way i could while doing it.
after i saw the headers in i figured why not put the alternator and front assembly on now i dont need that extra room. i managed to forget to put dipstick into trans but since theres enough clearance it will be easy to come behind the alternator.
after that i decided to go ahead and install the 7.4 pushrods and torque all the rockers down to 22 ft lbs before installing the valve covers
man she looks perdy! definitely looks like it belongs there! man we are so close for that first start up just gotta get the ecu tuned for a t56 and a base tune to where we can start it and figure out the bugs before we drive it to get dyno tuned !
all thats left now is install driveshaft plug up the harness and splice it all into the interior such as tach and we have to run the fuel pump wiring to the back of the car after we install the walboro 255 pump we have. So shouldnt be to much because after we do all of that we basically put the front bumper on with the radiator and the slim fans see how much clearance we have and find out how long of a hose we need from the heater core to the water pump so we can still have heat! then basic stuff like fluids and bleed clutch. thats all i can think of off the top of my head but stay tuned for the first startup and dyno numbers ! gonna be over 400 for sure!!! just need to figure out what rims and tire combo we are going to run then its time for axles because these are going to definitely snap once we show it some sticky tire.

