
65 Impala SS L92/4L80E Conversion...Update...It Runs!


 02-13-2014, 08:23 PM
#42
TECH Resident
You can find it lots of places.....all for about the same price though $4 a foot or so. Here's a link on ebay: http://www.ebay.com/itm/Pro-series-6-An-Braided-Black-Nylon-Stainless-Hose-Line-1-ft-6-an-6an-Fuel-Oil-/310866085971?pt=Motors_Car_Truck_Parts_Accessories&hash=item4861100853&vxp=mtr
02-14-2014, 07:15 AM
#43

Yeah I'd like the dynatech headers if I can but right now I'm just trying to get the engine in so I can burn some tires off!
Seems like I keep getting nickeled on everything tho. Since I'm running the car intake I found out I need a camaro (02) water pump and spacers, there's another couple hundred, Owell, do to bother me too much, it's just getting it past the warden that's more of a pain, lol. I'm camming mine right away (just an ls1) ls1 intake rail injectors and ported throttle body are already to go.
Yeah let me know what pics you have of that side, I was poking around in pictures on google and it appears mine might be smaller than stock, havnt check rotation ratio tho.
02-14-2014, 08:10 AM
#44

Yeah I'd like the dynatech headers if I can but right now I'm just trying to get the engine in so I can burn some tires off!
Seems like I keep getting nickeled on everything tho. Since I'm running the car intake I found out I need a camaro (02) water pump and spacers, there's another couple hundred, Owell, do to bother me too much, it's just getting it past the warden that's more of a pain, lol. I'm camming mine right away (just an ls1) ls1 intake rail injectors and ported throttle body are already to go.
Yeah let me know what pics you have of that side, I was poking around in pictures on google and it appears mine might be smaller than stock, havnt check rotation ratio tho.
Seems like I keep getting nickeled on everything tho. Since I'm running the car intake I found out I need a camaro (02) water pump and spacers, there's another couple hundred, Owell, do to bother me too much, it's just getting it past the warden that's more of a pain, lol. I'm camming mine right away (just an ls1) ls1 intake rail injectors and ported throttle body are already to go.
Yeah let me know what pics you have of that side, I was poking around in pictures on google and it appears mine might be smaller than stock, havnt check rotation ratio tho.
02-22-2014, 10:07 PM
#45
Launching!
Thread Starter

Got some more done on the car this weekend. Fuel system is complete, with new lines, filter/regulator, and tank installed. I also got the drive line cut and installed.
Tranny linkage is complete and shifting smoothly into all gears via my stock floor shift setup.
Besides tranny cooler lines, I'm pretty much done underneath the car, except for wiring.
Wont be long now!


-Nick
Tranny linkage is complete and shifting smoothly into all gears via my stock floor shift setup.
Besides tranny cooler lines, I'm pretty much done underneath the car, except for wiring.
Wont be long now!
-Nick
02-23-2014, 08:08 AM
#46

Getting Close........Looking Good!!!
03-09-2014, 09:55 AM
#47
Looking awesome!!!! You are a couple weeks ahead of me for sure! I did work on my tranny crossmember last night, got the alt/steering bracket trimmed for belt reroute and got one of my heads cleaned up.
Tight fit on the headers still it looks like, I hope to mock mine in next week if I get time. Also how much higher is the oil pan than the frame - the bottom of the pans lowest point in the rear) I ask because I got the GM muscle car pan and it's 2"s deeper in the rear.....I hope you tell me it clears by at least 2"s!!!
On the cooler lines I just ordered -6 an fittings for the tranny (4l60e), pretty sure I seen them for yours too, I just need to find fittings for the radiator (are you running the stock radiator from your original engine?). For lines I got steel braided -6 an lines just like the fuel line you have (I got those too) except this is higher psi. I ordered 12 feet of the steel for cooler lines for now.
03-17-2014, 11:49 AM
#48
Launching!
Thread Starter
Hope that helps!

 03-17-2014, 01:01 PM
#51
Launching!
Thread Starter
Sorry, I'll be better. 
I have been doing things, just not LS related things, so I didn't bother posting
For instance, I created some custom HID headlight projectors from a 2014 jaguar, that utilizes a D2S HID bulb, a GM ballast from a caddy, and a nice bi-xenon projector. The light is really bright and clear, and provides a really sharp cutoff, so as not to blind other drivers. I cut and modified housings for the projectors then picked up some nice H1 bulbs and clear lens housings for dedicated highs as well. (All 4 will work with highs on). Should be a nice upgrade from the T3's!


Updates like this?
-Nick
I have been doing things, just not LS related things, so I didn't bother posting
For instance, I created some custom HID headlight projectors from a 2014 jaguar, that utilizes a D2S HID bulb, a GM ballast from a caddy, and a nice bi-xenon projector. The light is really bright and clear, and provides a really sharp cutoff, so as not to blind other drivers. I cut and modified housings for the projectors then picked up some nice H1 bulbs and clear lens housings for dedicated highs as well. (All 4 will work with highs on). Should be a nice upgrade from the T3's!
Updates like this?
-Nick
03-17-2014, 01:12 PM
#52
TECH Resident
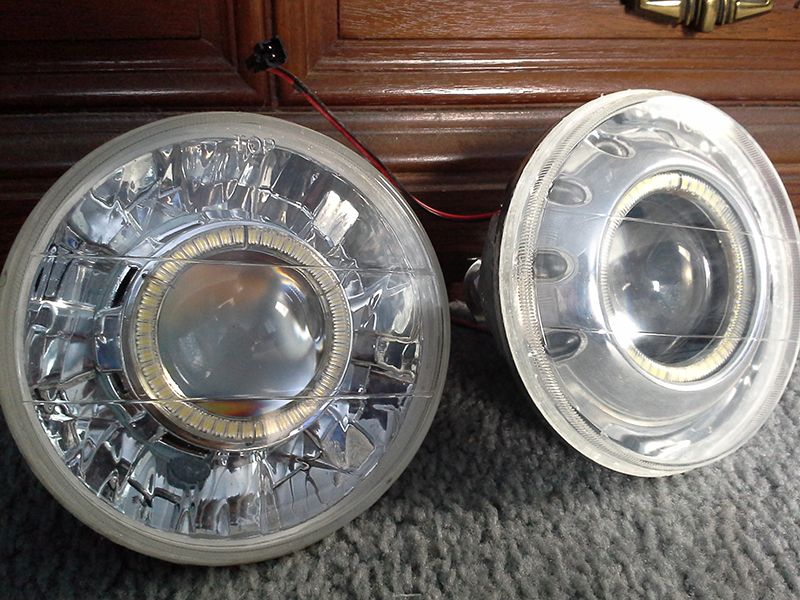
!!!!!!!! great minds MUST think alike! I have spent the last month or so doing an HID projector retrofit in mine! Mine are pieced together from various parts I bought online. WAY too expensive and difficult for me to ever try again...but it should be cool. These are highs and lows, and both have halos too (70mm on the high, and 80mm on the low. Little circles on the low beam shroud will also light up when headlights are on. Still cutting up the front of the car and making brackets to get it all to fit.
03-17-2014, 01:50 PM
#53
Launching!
Thread Starter
!!!!!!!! great minds MUST think alike! I have spent the last month or so doing an HID projector retrofit in mine! Mine are pieced together from various parts I bought online. WAY too expensive and difficult for me to ever try again...but it should be cool. These are highs and lows, and both have halos too (70mm on the high, and 80mm on the low. Little circles on the low beam shroud will also light up when headlights are on. Still cutting up the front of the car and making brackets to get it all to fit.
I tested the lights in the garage, and the difference is... dare I say.... night and day

 03-19-2014, 09:55 PM
#55
Nice update btw, slow here on my end but about to get moving.
04-01-2014, 09:12 PM
#56
Nicke- you mentioned it before and maybe I missed the end result ion but what did you do with your tcc wire?
My wiring says it needs the 12v+ on my brake switch! does that sound right to you?
My wiring says it needs the 12v+ on my brake switch! does that sound right to you?
04-02-2014, 12:13 AM
#57
TECH Resident
You'll need a new brake switch...stock won't cut it. There are other options but this is the one I bought. Instructions tell you which wires to hook lights to, and the TCC switch.
http://www.ebay.com/itm/TCC-BRAKE-SWITCH-KIT-GM-OVERDRIVE-TRANSMISSION-SWAP-/170795187396?pt=Motors_Car_Truck_Parts_Accessories&hash=item27c42fbcc4
http://www.ebay.com/itm/TCC-BRAKE-SWITCH-KIT-GM-OVERDRIVE-TRANSMISSION-SWAP-/170795187396?pt=Motors_Car_Truck_Parts_Accessories&hash=item27c42fbcc4
04-02-2014, 09:19 PM
#60
TECH Senior Member
iTrader: (7)


I wouldn't run that line through-out the whole car. The rubber inner hose will eventually start to break down with today's gas that has a lot of detergents in it. This will eventually lead to a perpetually stinky car.
I would run as mush hardline as possible and use teflon lines hose for the remainder of the short flexible runs. The teflon lines hose is not as flexible, but it is impervious to gas and just about all other automotive fluids.
Just my 2 cents...Great project!
Andrew