1990 VW Corrado - 5.3 S475 th400
 02-01-2015, 03:15 PM
#1
Launching!
Thread Starter

Join Date: Oct 2013
Posts: 239
Likes: 0
Received 0 Likes
on
0 Posts
I have been working on this car for a little while now and hopefully will be running by this spring/summer.
I will be transferring a lot of stuff from another forum so if things seem ut of context, I apologize.
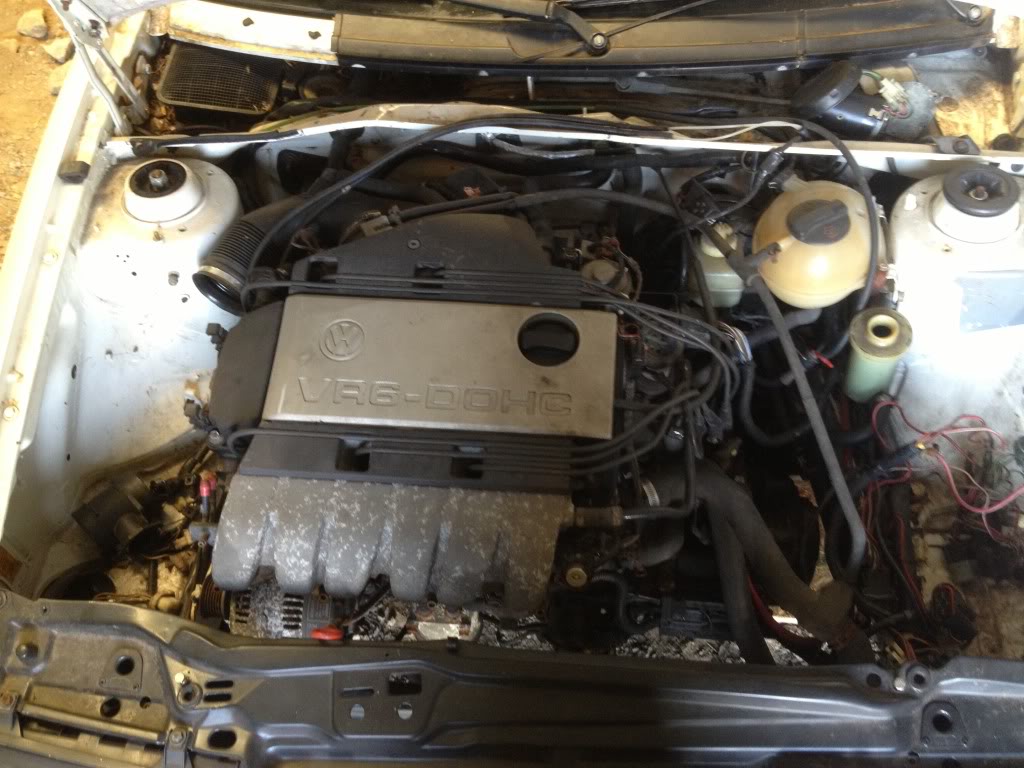
A few months ago I had purchased this from a friend that had to get rid of it. When i bought it it was being setup for dual vw vr6 engine as shown below. The intentions was to turbo the engines after is was completed to verify it was in working order. It sat for a few weeks while I decided to do with it. I decided not to finish it as I would have no idea where to start as so many different hands had messed with it. Figured I would part it out and build it back up with the profits.
With it being a cut up/modified car it was a perfect platform for a project that I have always wanted to do...
Let's put a v8 in the bitch

I thought this was going to move a little faster than it has but the engine I was using for mock up has been disassembled for new gaskets. Due to this slight problem, it has been put on hold.
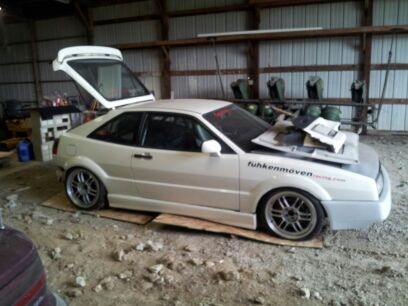
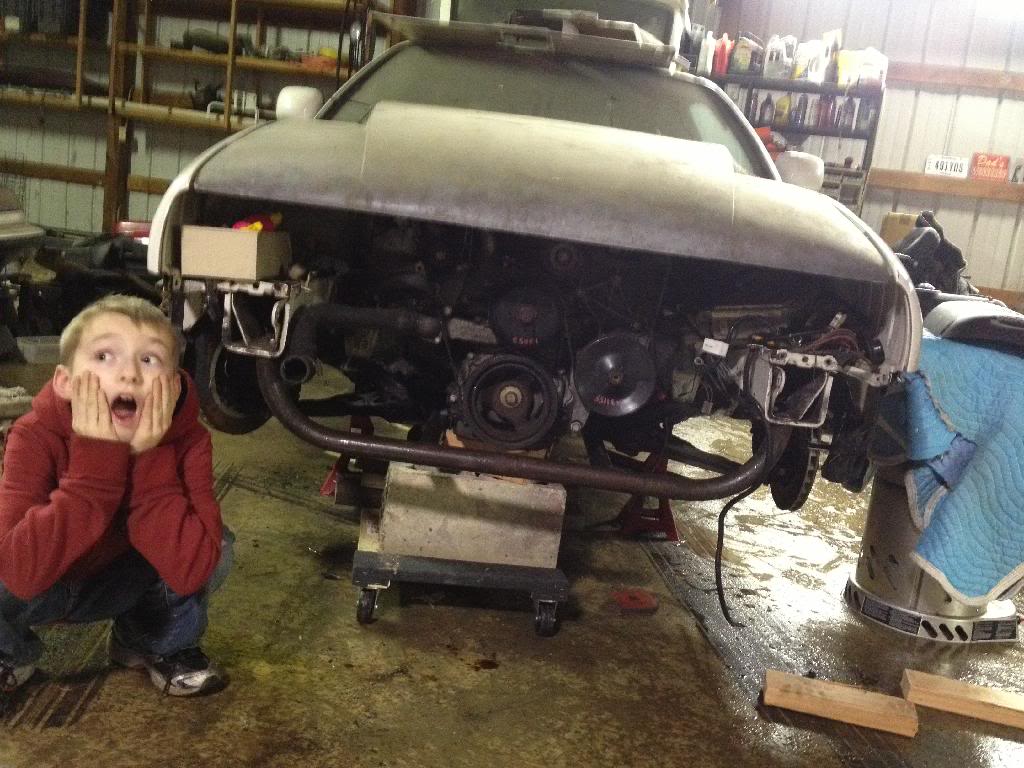
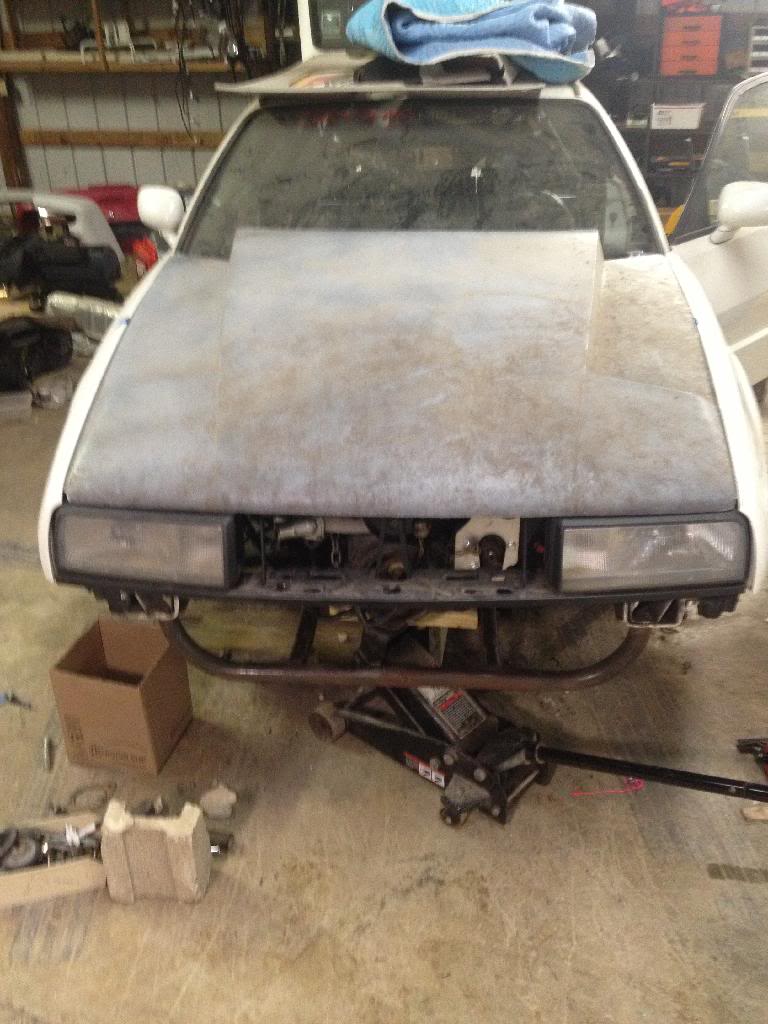
The day I brought it home.
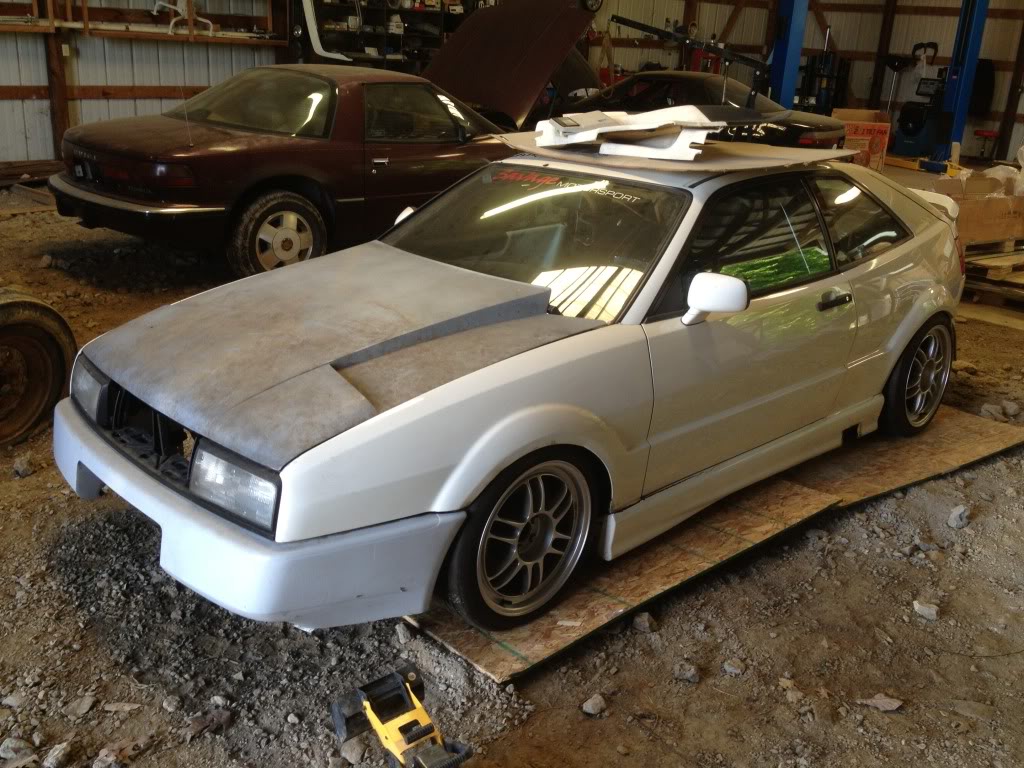

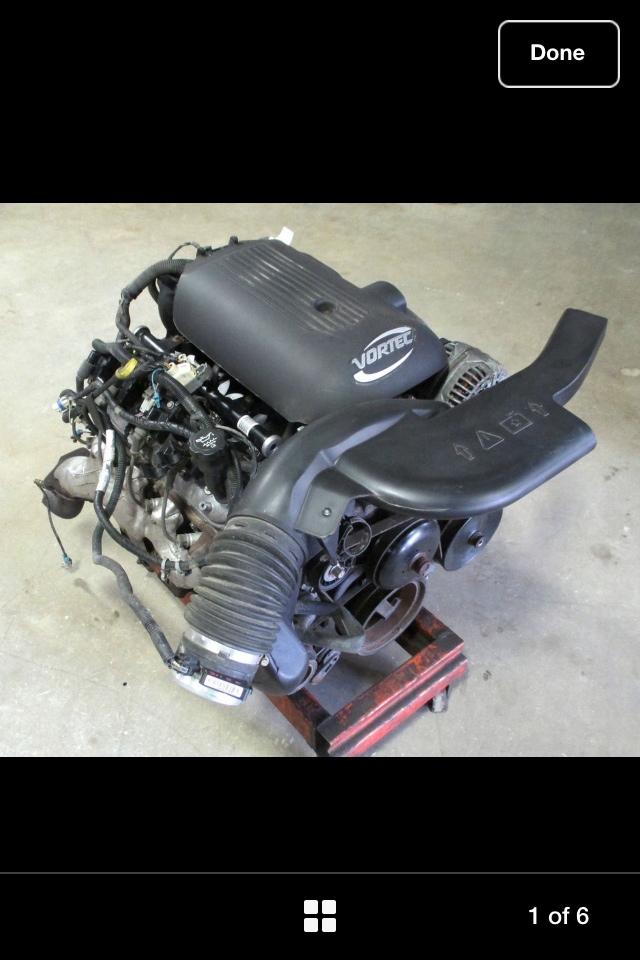
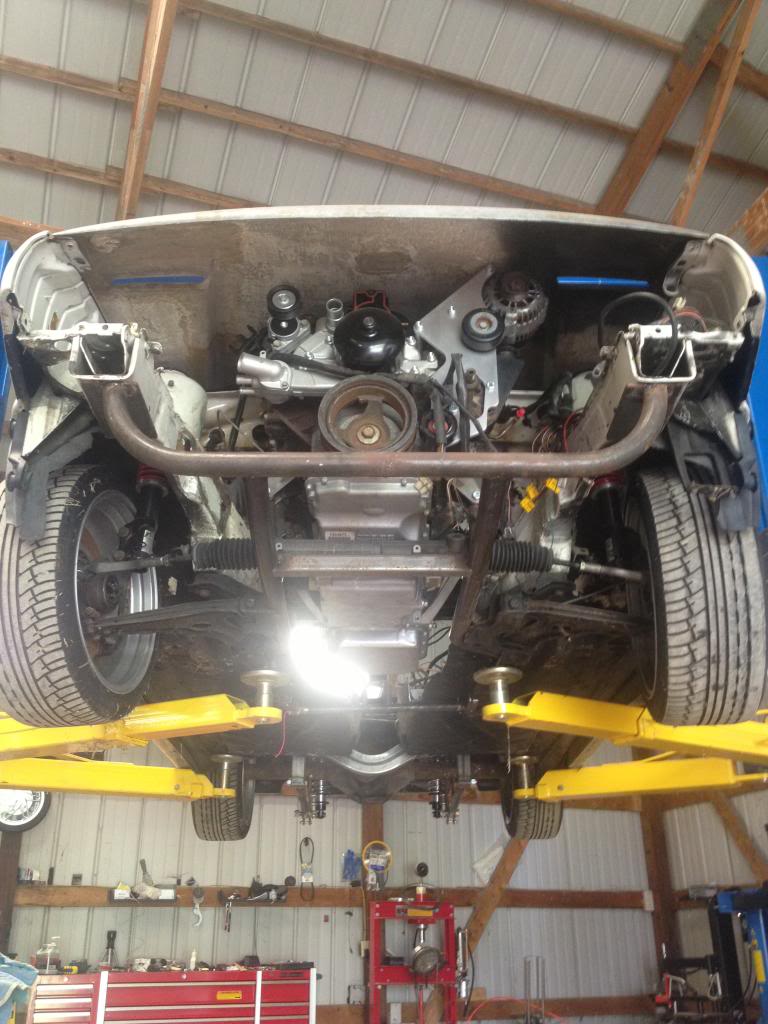
Fits good.. I have access to a complete sbc 350 but I might be swaying to a gen 3 ls engine if I can find a good deal on one. It will be ram thru a th400 in which I already have.
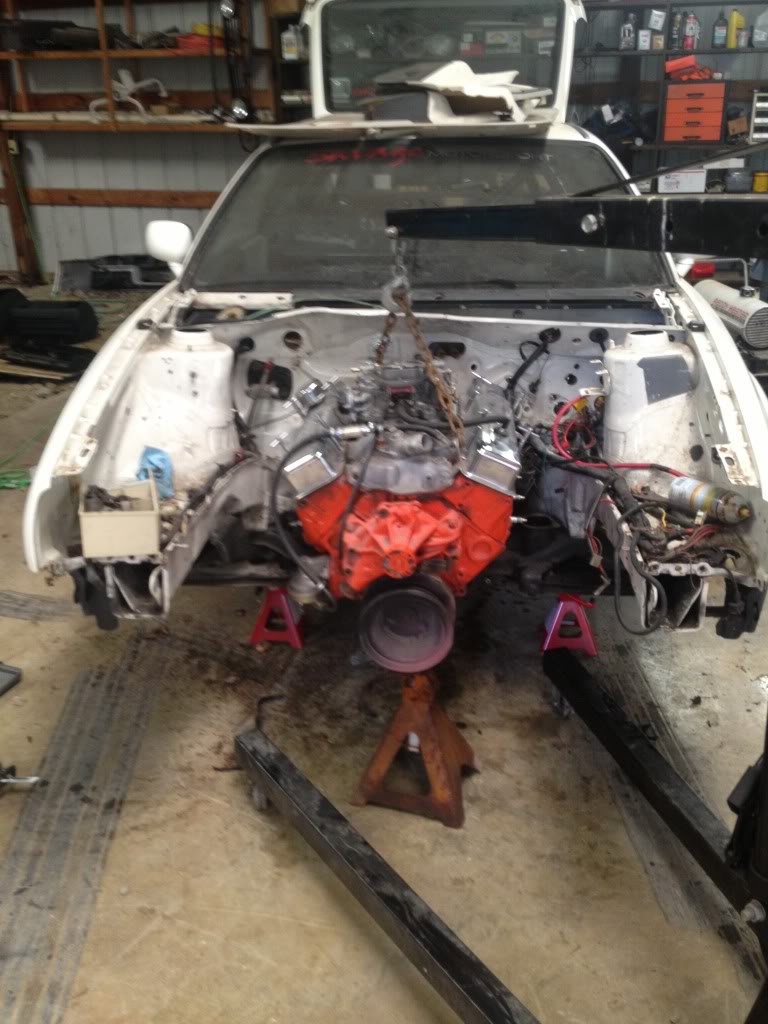
How it currently sits with the new subframe.
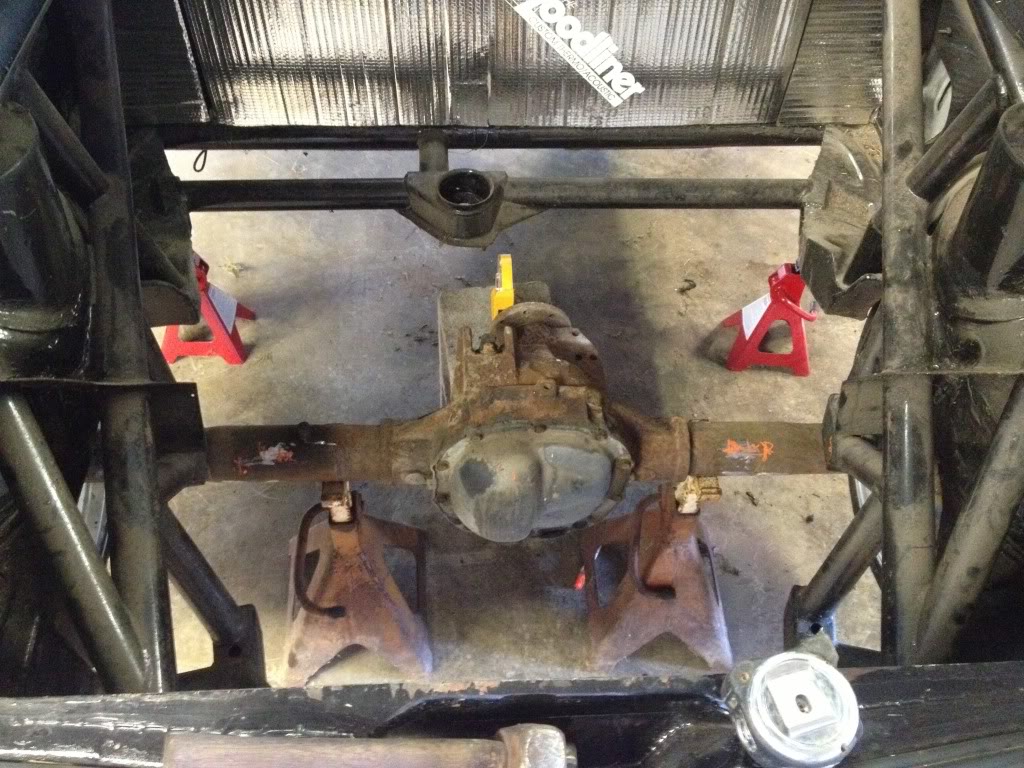
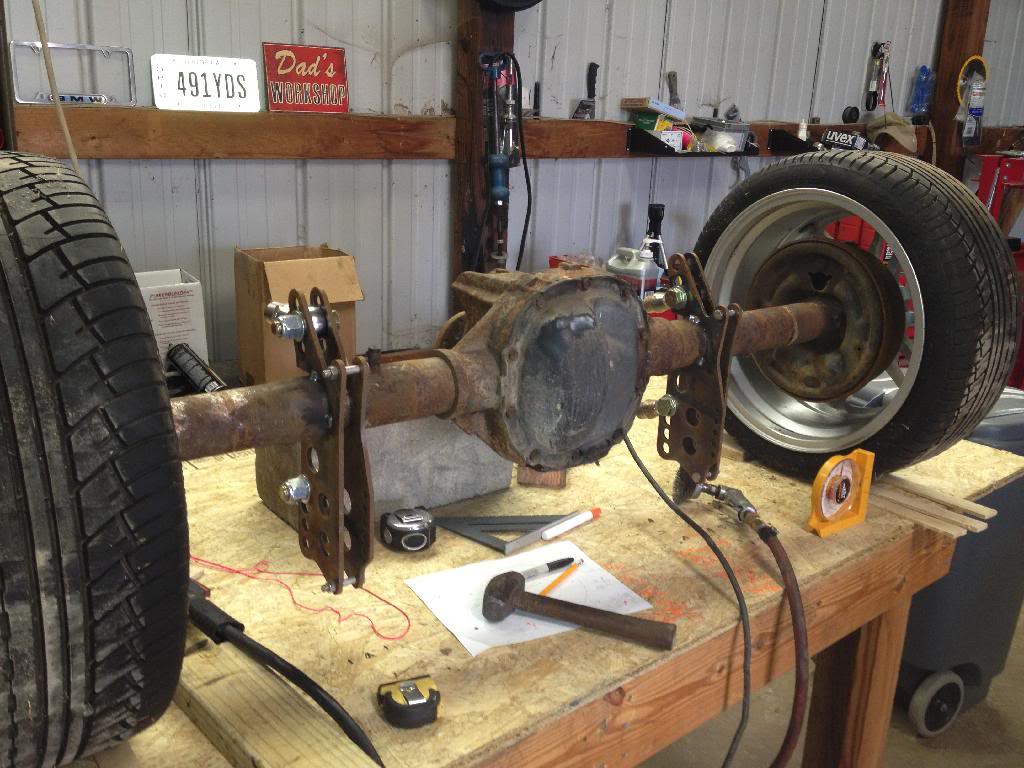
Ford 8.8
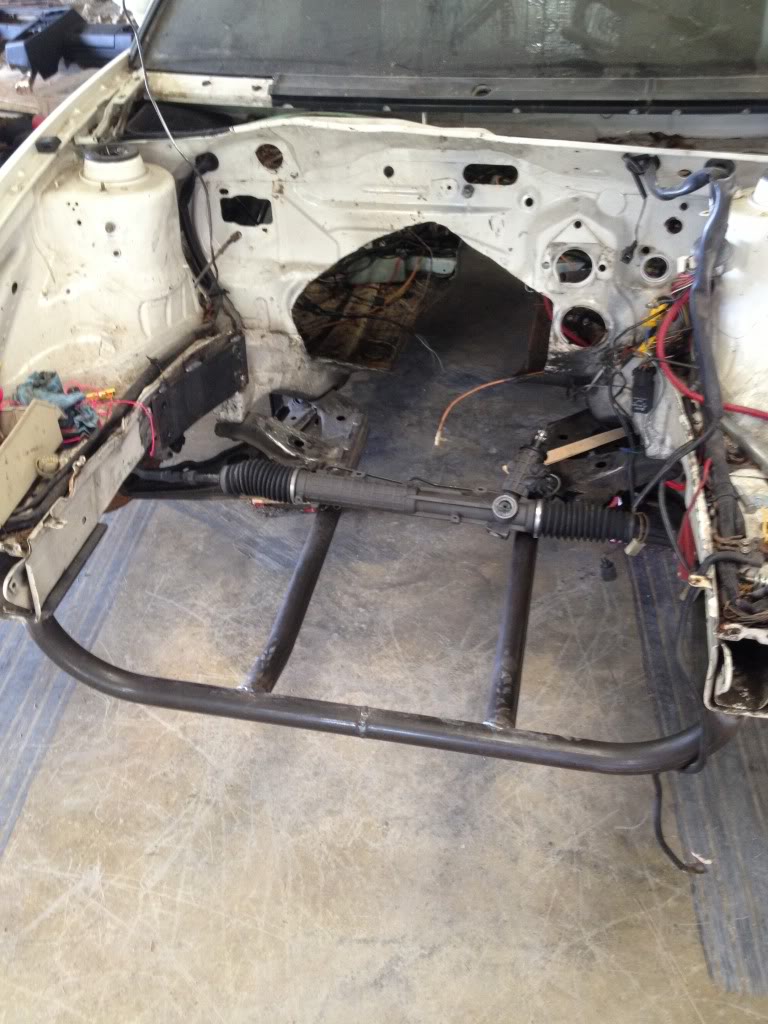
Beginning of 4 link mock up.
I will be transferring a lot of stuff from another forum so if things seem ut of context, I apologize.
A few months ago I had purchased this from a friend that had to get rid of it. When i bought it it was being setup for dual vw vr6 engine as shown below. The intentions was to turbo the engines after is was completed to verify it was in working order. It sat for a few weeks while I decided to do with it. I decided not to finish it as I would have no idea where to start as so many different hands had messed with it. Figured I would part it out and build it back up with the profits.
With it being a cut up/modified car it was a perfect platform for a project that I have always wanted to do...
Let's put a v8 in the bitch
I thought this was going to move a little faster than it has but the engine I was using for mock up has been disassembled for new gaskets. Due to this slight problem, it has been put on hold.
The day I brought it home.
Fits good.. I have access to a complete sbc 350 but I might be swaying to a gen 3 ls engine if I can find a good deal on one. It will be ram thru a th400 in which I already have.
How it currently sits with the new subframe.
Ford 8.8
Beginning of 4 link mock up.
Last edited by etijsma; 02-03-2015 at 04:24 AM.

 02-01-2015, 03:17 PM
#3
Launching!
Thread Starter
Join Date: Oct 2013
Posts: 239
Likes: 0
Received 0 Likes
on
0 Posts
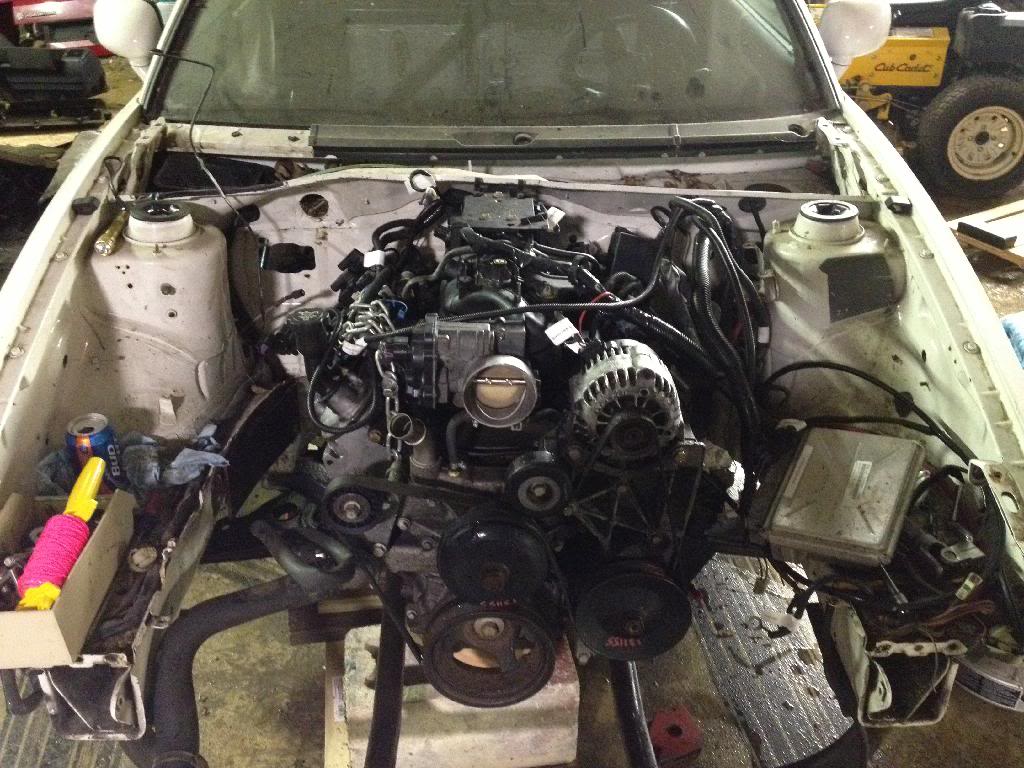
LS1 intake is here complete with injectors, fuel rails, and throttle body! I don't need the throttle body as the engine will have drive by wire.
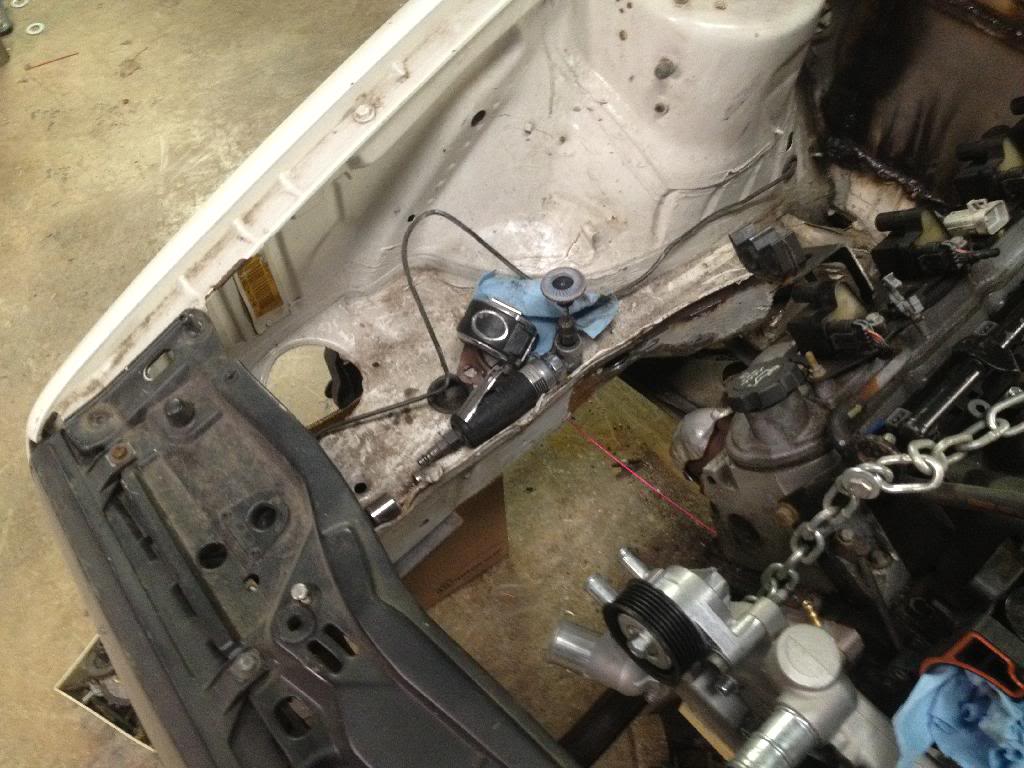
Since I got a truck engine the truck intake is much taller. In order to get it to fit in the corrado I had to get this. Next up is getting this on the engine, figure out placement of the engine/transmission and determine which oil pan I need to use to be able to clear the steering rack. Once all that happens the engine support will be fabbed up.
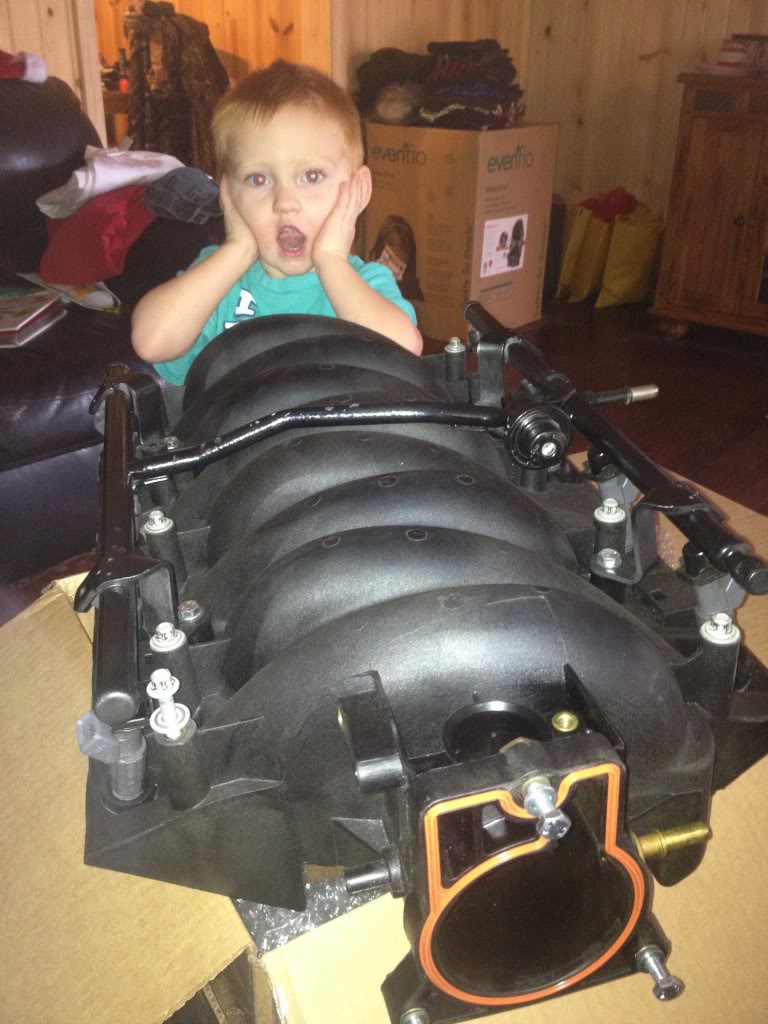
Since I got a truck engine the truck intake is much taller. In order to get it to fit in the corrado I had to get this. Next up is getting this on the engine, figure out placement of the engine/transmission and determine which oil pan I need to use to be able to clear the steering rack. Once all that happens the engine support will be fabbed up.
02-01-2015, 03:18 PM
#4
Launching!
Thread Starter
Join Date: Oct 2013
Posts: 239
Likes: 0
Received 0 Likes
on
0 Posts
Been gathering goodies slowly but surely and thinking quite a bit here in the past few months. Finally got the motivation again since deer season has slowed down.
Past few days I ha e been fabbing up an adapter to use my buick th400 on an ls engine. For it somewhat done for now and got the engine and transmission bolted together for the first time this evening.

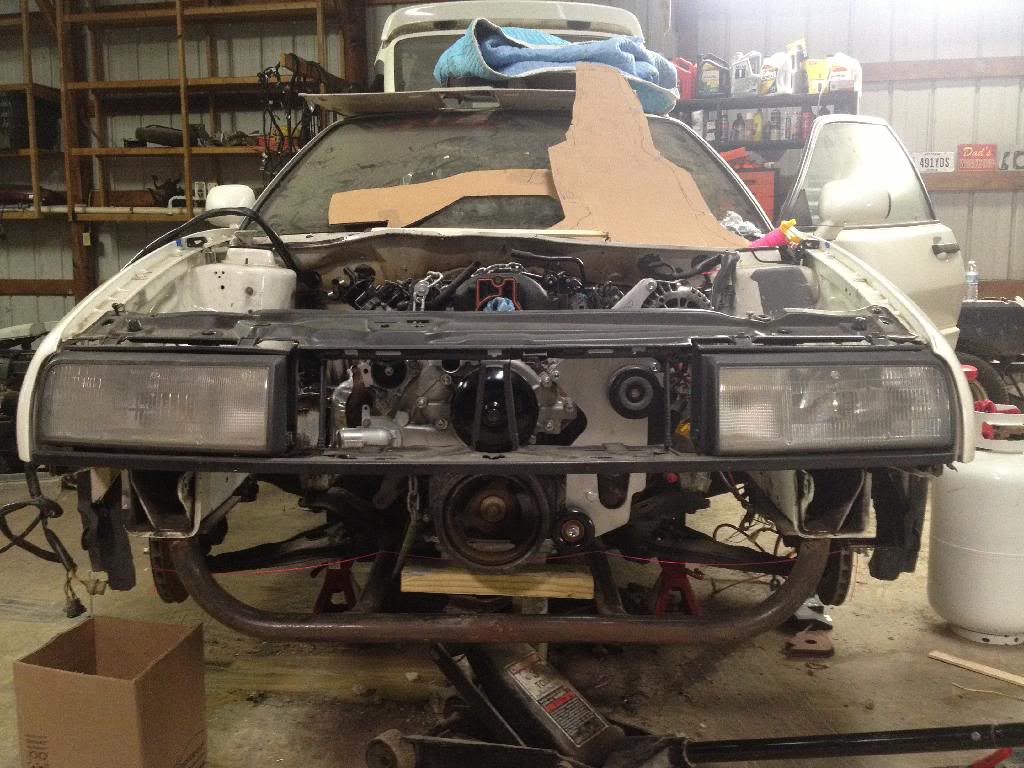
Engine sitting in bay. Had to cut some more metal out for clearing the transmission.
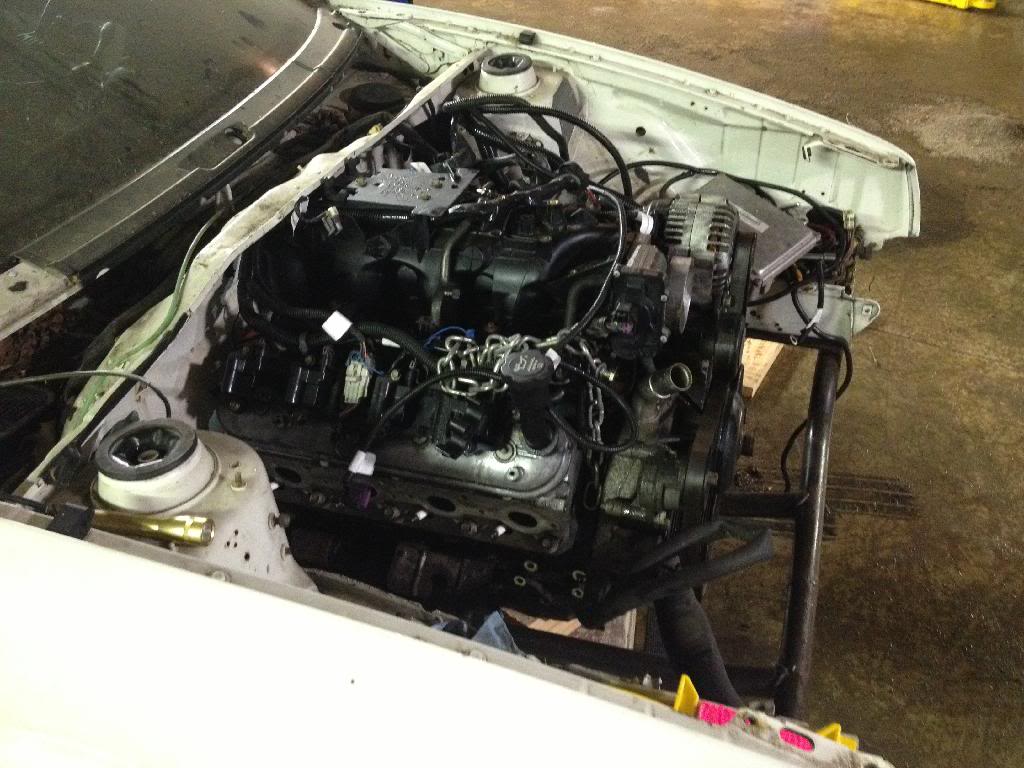
How about that ****. It clears the hood! No more holes in the hood for this car! It does have the truck intake on the engine still as I haven't gotten around to put the ls1 intake on yet. The ls1 intake is a good 4" shorter. I have about 2" of hood clearance now.
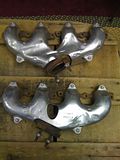
I was hoping to use the factory exhaust manifolds but it won't work and I'm going to have to fab some headers.
Floor cut out for Transmission.

Past few days I ha e been fabbing up an adapter to use my buick th400 on an ls engine. For it somewhat done for now and got the engine and transmission bolted together for the first time this evening.
Engine sitting in bay. Had to cut some more metal out for clearing the transmission.
How about that ****. It clears the hood! No more holes in the hood for this car! It does have the truck intake on the engine still as I haven't gotten around to put the ls1 intake on yet. The ls1 intake is a good 4" shorter. I have about 2" of hood clearance now.
I was hoping to use the factory exhaust manifolds but it won't work and I'm going to have to fab some headers.
Floor cut out for Transmission.
02-01-2015, 03:20 PM
#5
Launching!
Thread Starter
Join Date: Oct 2013
Posts: 239
Likes: 0
Received 0 Likes
on
0 Posts
Got a little done. Finished welding in firewall and put engine back in for fitment. Slapped on the core to see where everything lands. Sometime this week I'm going to cut more out of the tunnel to clear the transmission some more and then onto fabbing and welding in some mounts.
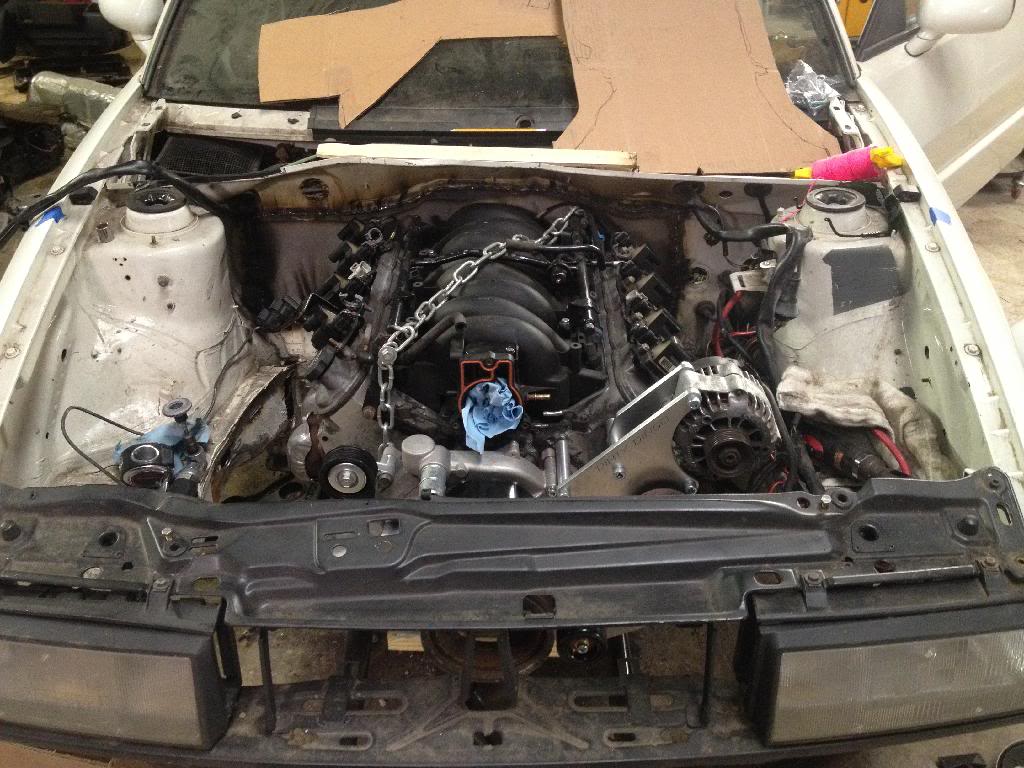
For those of you that haven't seen the custom hood.
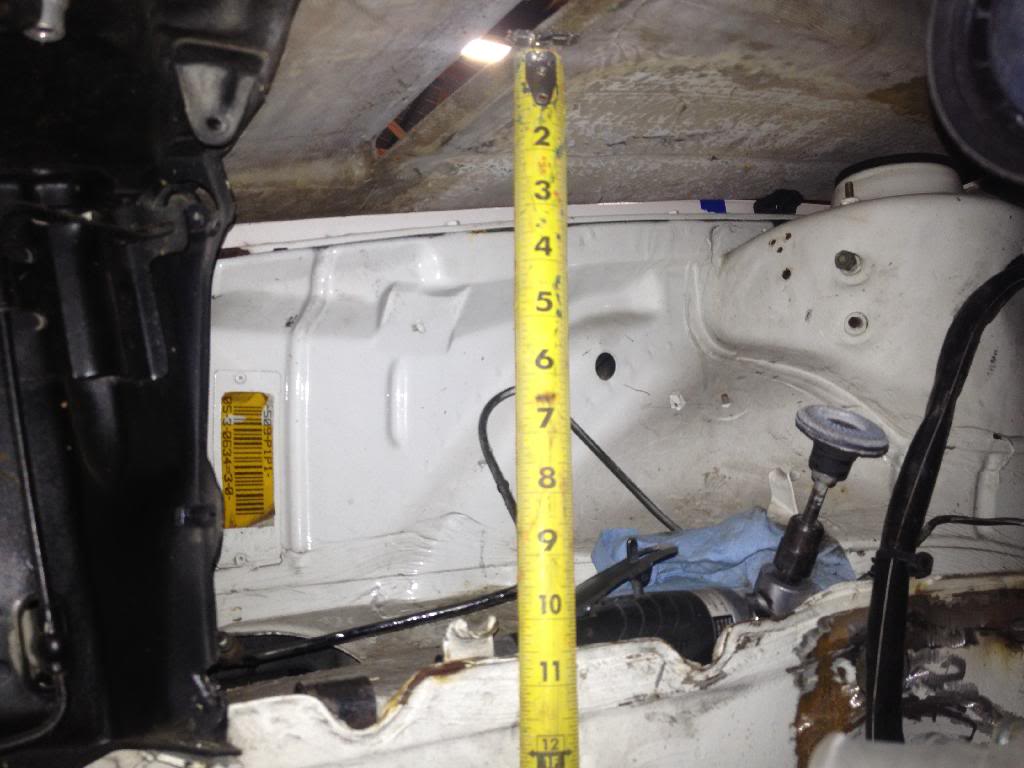
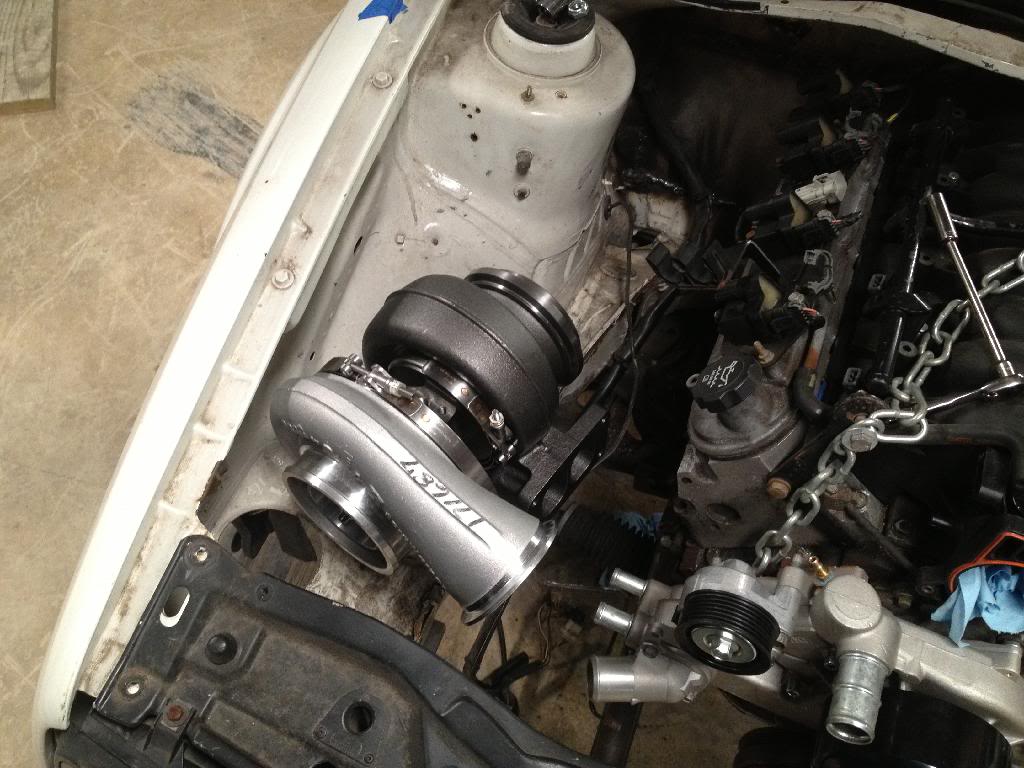
Turbo goes right here and measure at lowest part of hood.
For those of you that haven't seen the custom hood.
Turbo goes right here and measure at lowest part of hood.
02-01-2015, 03:21 PM
#6
Launching!
Thread Starter
Join Date: Oct 2013
Posts: 239
Likes: 0
Received 0 Likes
on
0 Posts
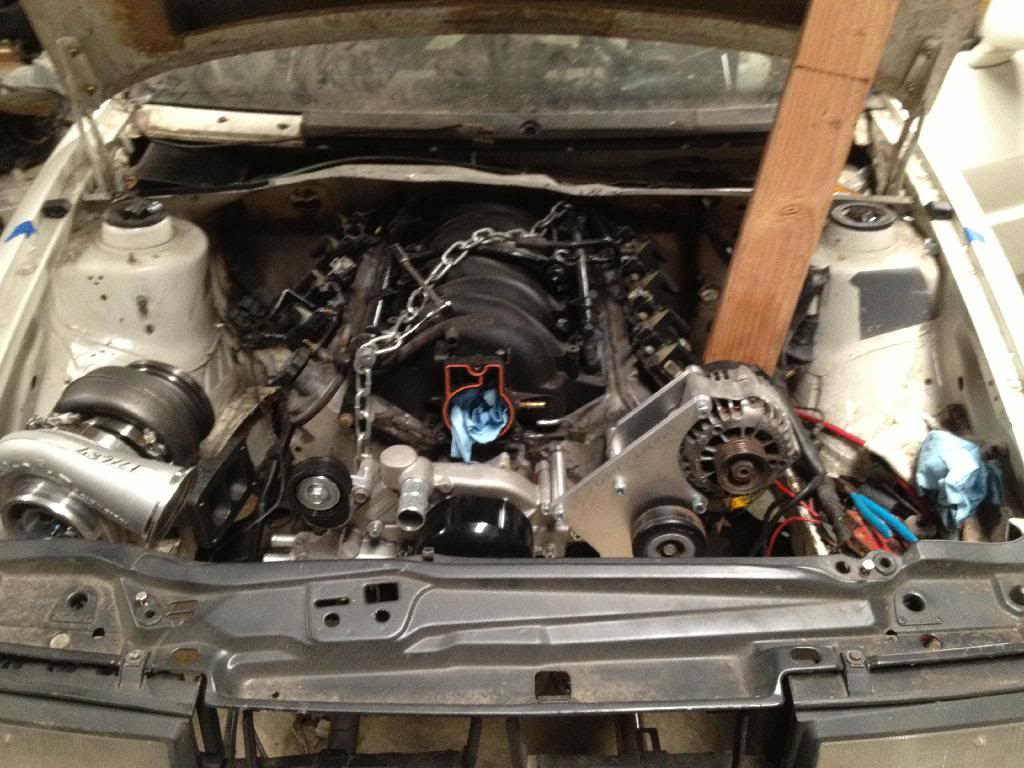
Here's where the turbo is going roughly. It has a 5" outlet for exhaust. I have absolutely no idea how I'm going to get it anywhere. I was planning to take it down to 4" to get it under the car then run dual 3" on back. The passenger side manifold will be aimed up and forward and the drivers side will be forward and down. The drivers side will go under the oil pan and up to a merge. There will be a tial wastegate on each exhaust before the merge.
02-01-2015, 03:22 PM
#7
Launching!
Thread Starter
Join Date: Oct 2013
Posts: 239
Likes: 0
Received 0 Likes
on
0 Posts
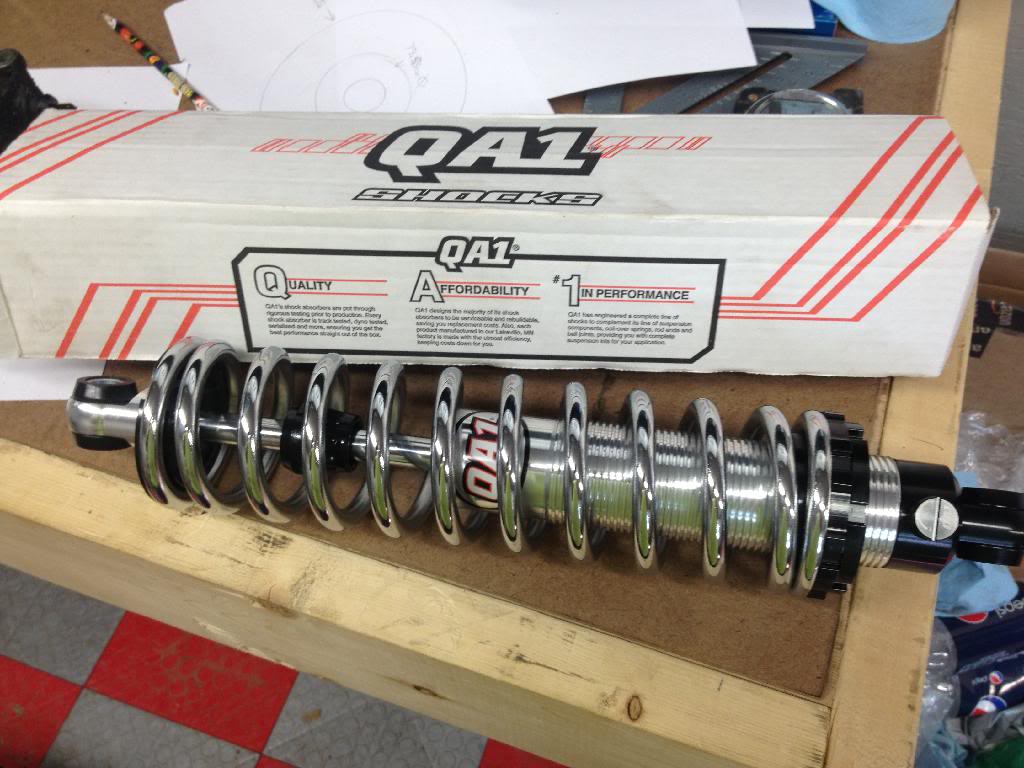
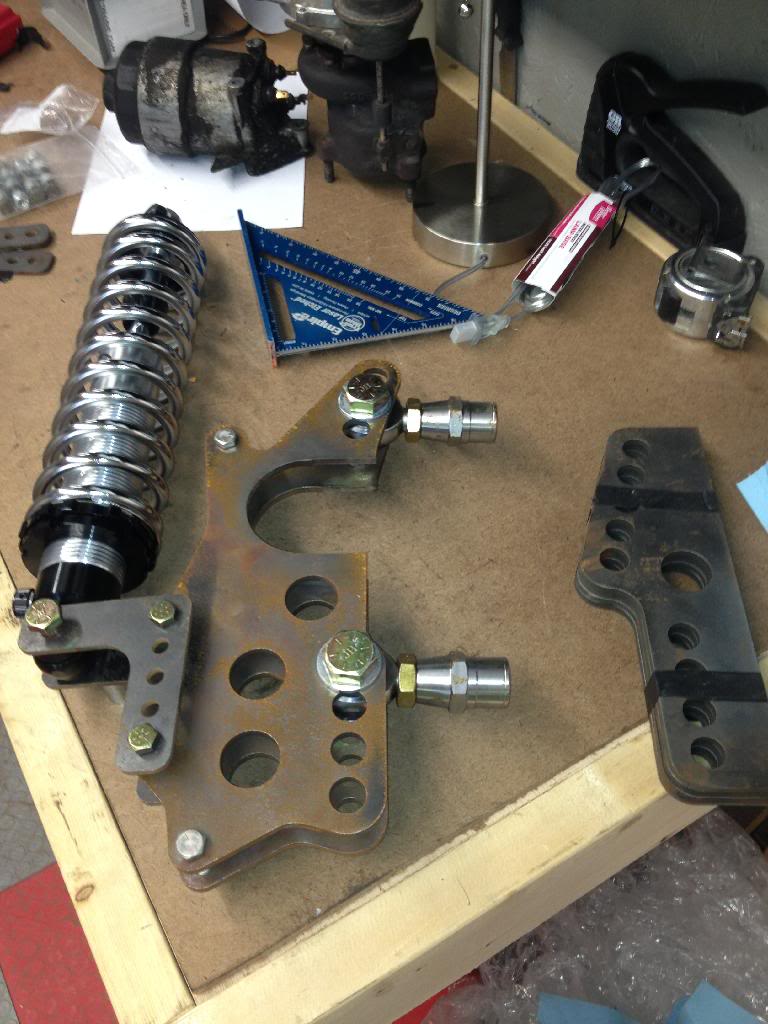
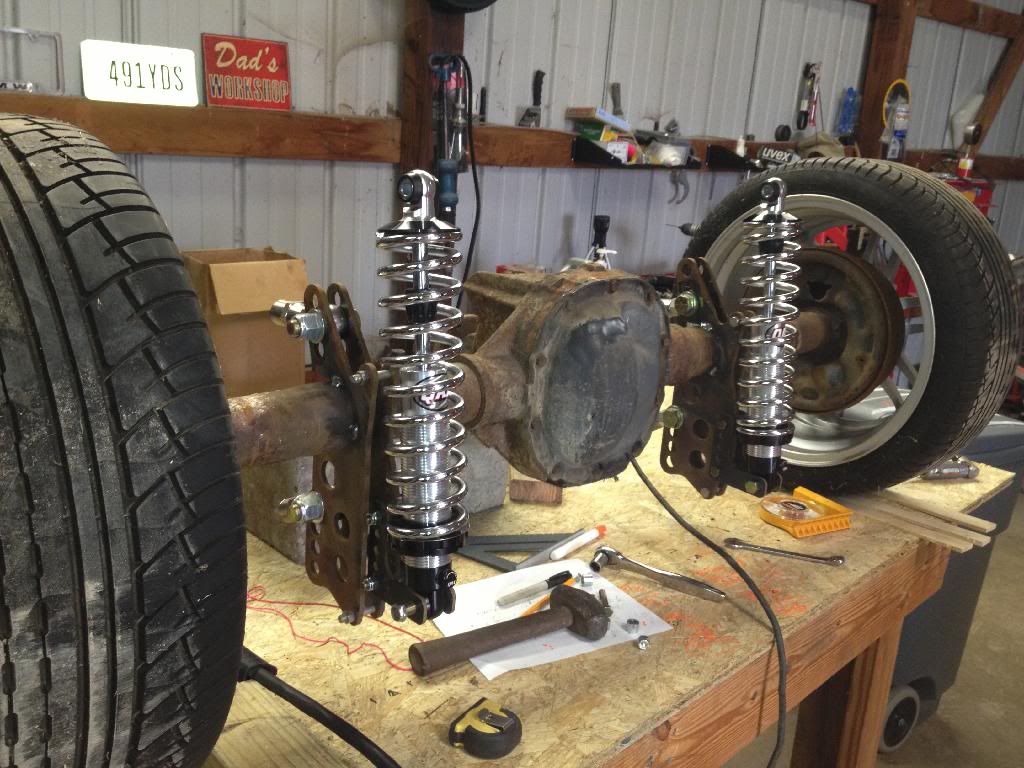
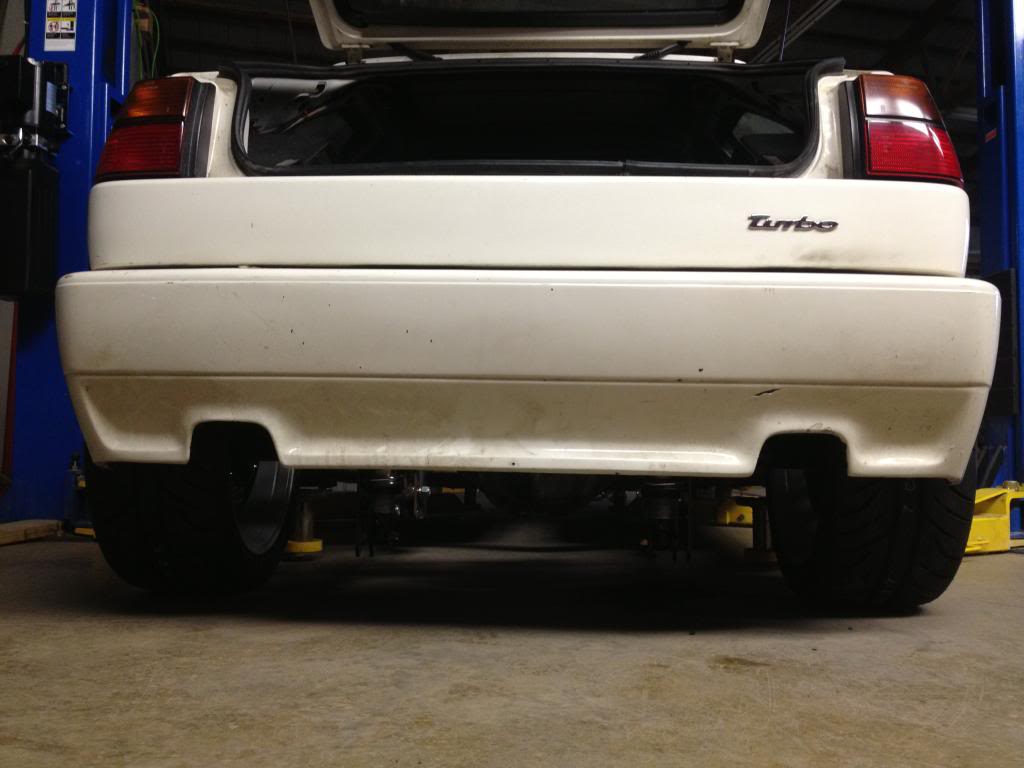
Qa1 ultraride 18 way adj coilovers for the rear. Suck it bilstein! 
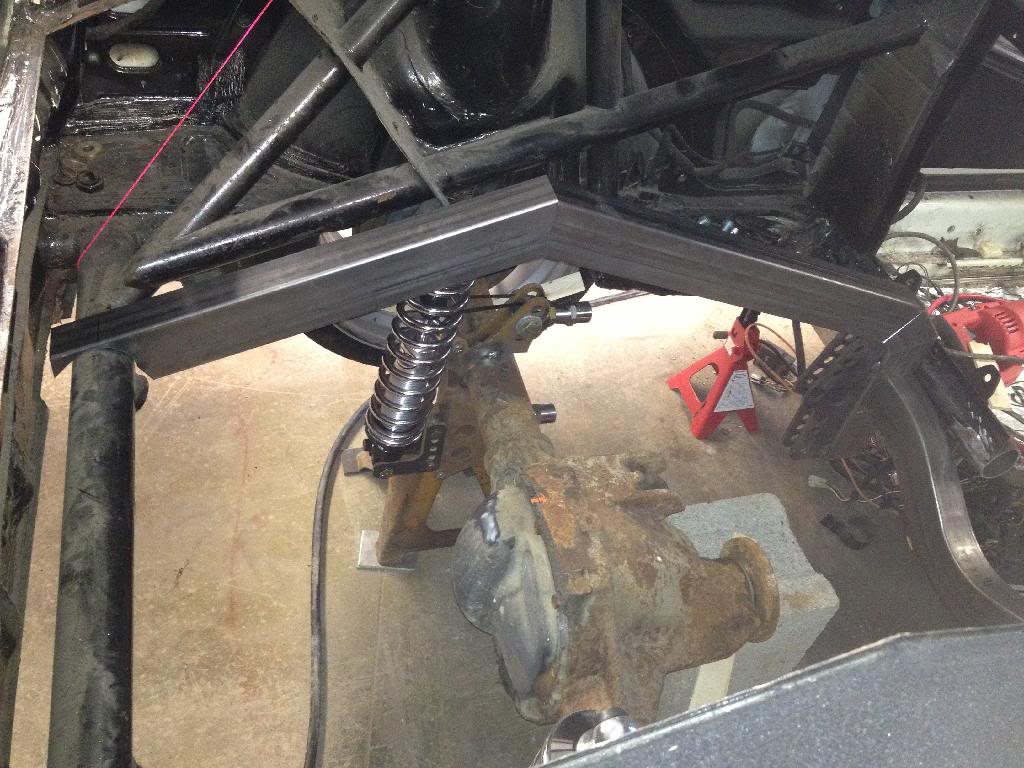
Got the rear crossmember fitted in the other week but weldied it in today. The new custom driveshaft is in place for mock up.
Also had a slight fire.
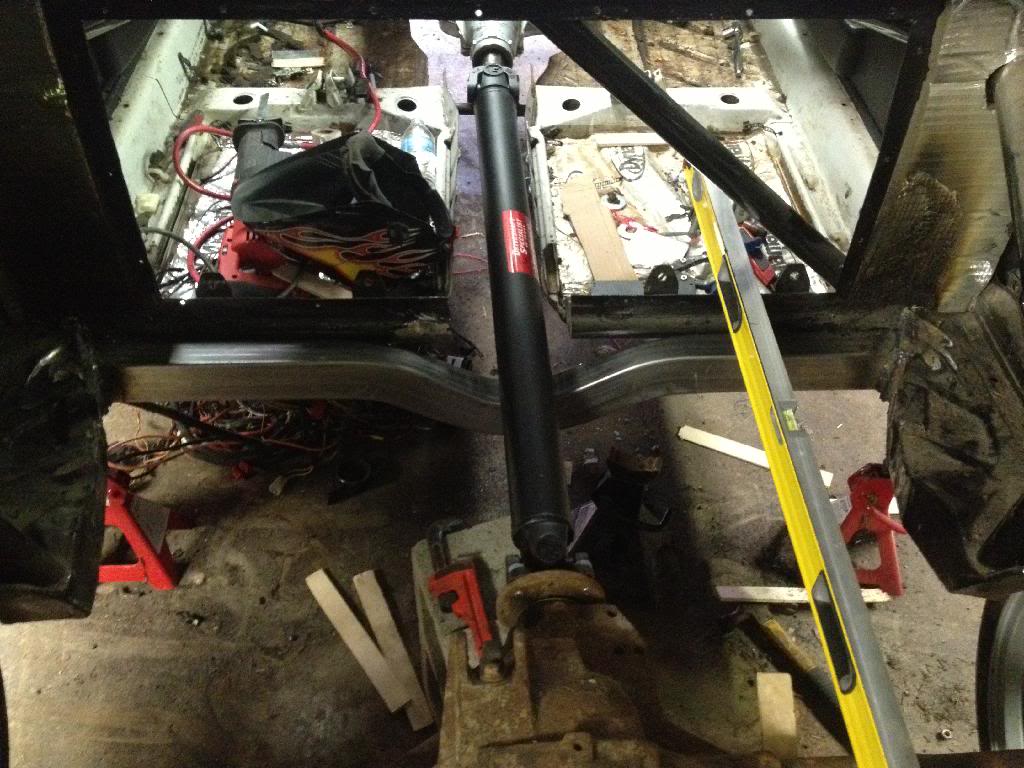
Driveshaft from driveshaft specialist of Texas. It appears to be top notch quality. I stepped up to 1350 u joints as they say it will handle 800 whp.

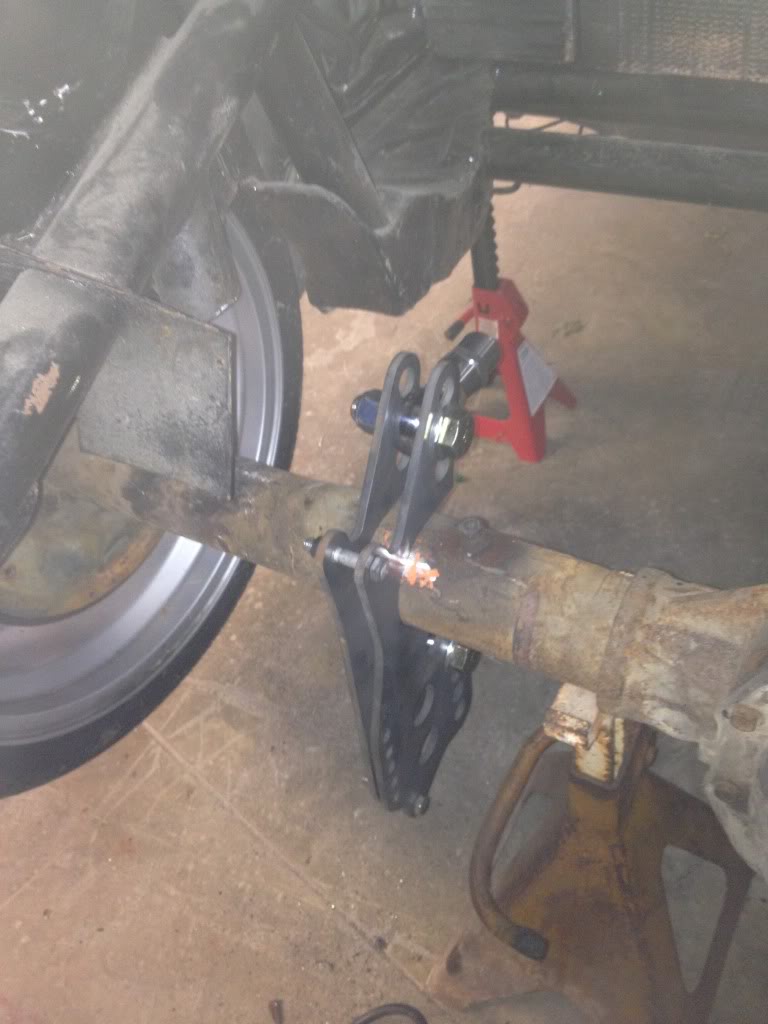
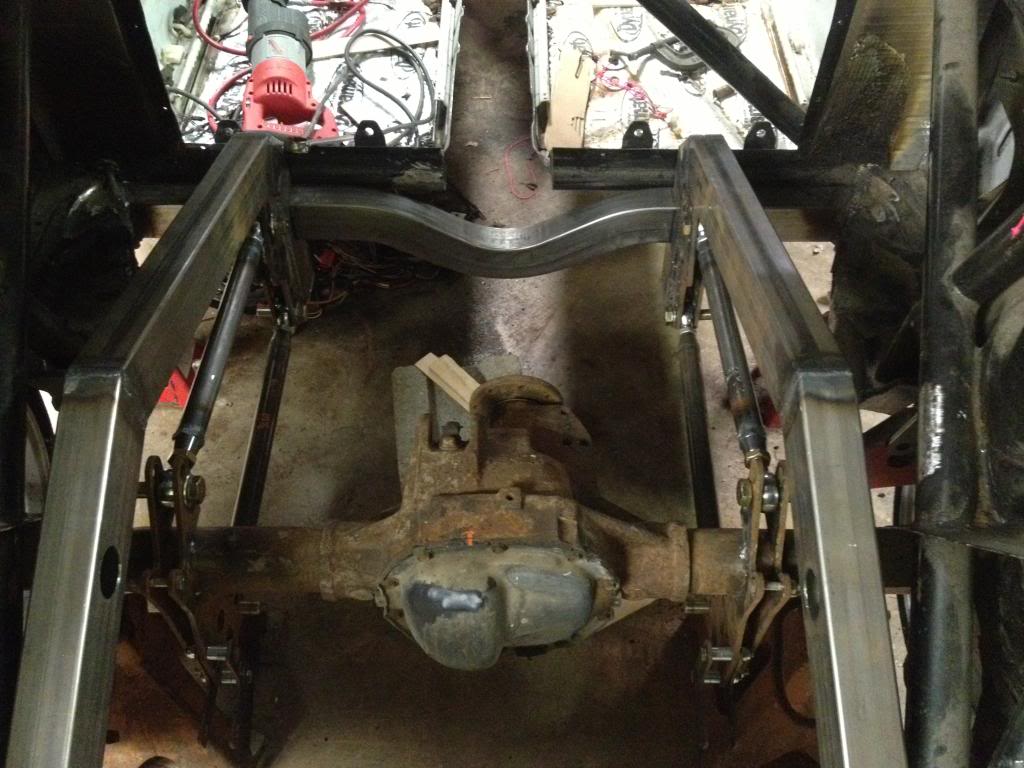
Here's the basic idea of a 4 link. The steel brackets on the right get welded to the crossmember, the brackets the shock is attached to gets welded to rear end, rod ends get bolted on them and dom tubing attaches them together. I also have the 2x3 tubing that will become rear frame rails For more strength and to mount the shocks. That will start to get measured out in the next few days.
Got the rear crossmember fitted in the other week but weldied it in today. The new custom driveshaft is in place for mock up.
Also had a slight fire.
Driveshaft from driveshaft specialist of Texas. It appears to be top notch quality. I stepped up to 1350 u joints as they say it will handle 800 whp.
Here's the basic idea of a 4 link. The steel brackets on the right get welded to the crossmember, the brackets the shock is attached to gets welded to rear end, rod ends get bolted on them and dom tubing attaches them together. I also have the 2x3 tubing that will become rear frame rails For more strength and to mount the shocks. That will start to get measured out in the next few days.
Trending Topics
02-01-2015, 03:24 PM
#8
Launching!
Thread Starter
Join Date: Oct 2013
Posts: 239
Likes: 0
Received 0 Likes
on
0 Posts
Slow progress as I haven't much time.
4 link brackets
Coilovers mounted up.
This give you a general idea of a rear frame 4 link setup. This is a pre fab unit.

Here's my frame rail I started to fab up. Got the crossmember, axle, coilover mounting points Drawn on the board for mock up. The notched part slides onto the crossmember. Nothing is set in stone yet as I'm still trying to figure out the best mounting location for the shocks either on the frame itself or on a cross tube.
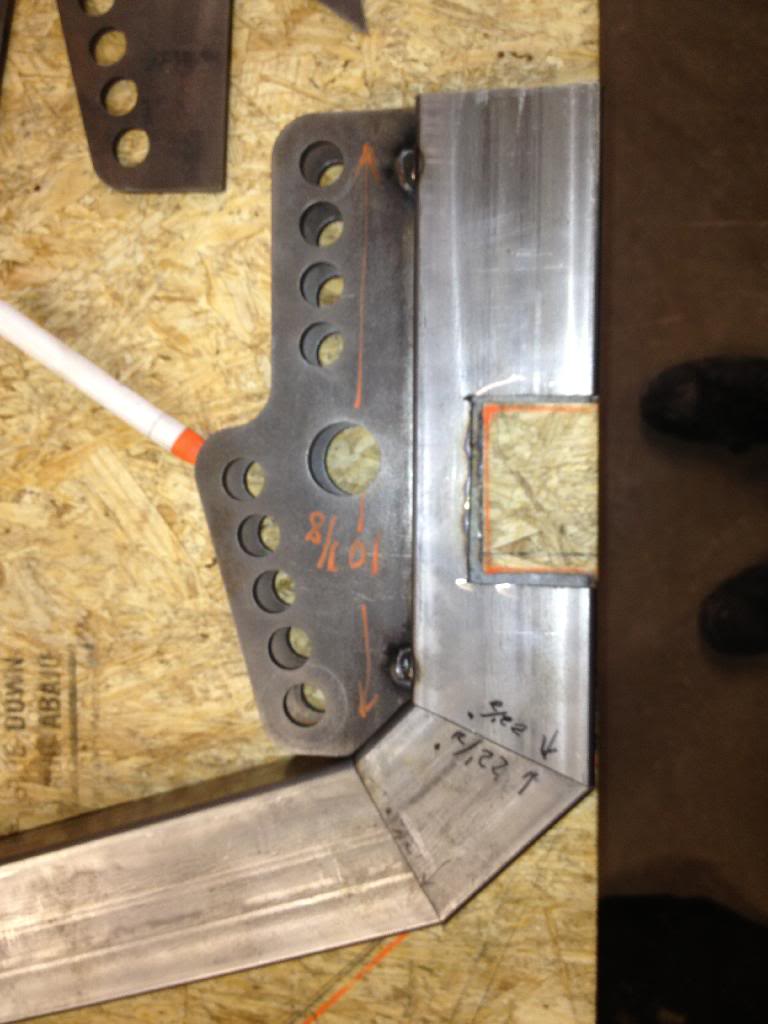

4 link brackets
Coilovers mounted up.
This give you a general idea of a rear frame 4 link setup. This is a pre fab unit.
Here's my frame rail I started to fab up. Got the crossmember, axle, coilover mounting points Drawn on the board for mock up. The notched part slides onto the crossmember. Nothing is set in stone yet as I'm still trying to figure out the best mounting location for the shocks either on the frame itself or on a cross tube.
02-01-2015, 03:24 PM
#9
Launching!
Thread Starter
Join Date: Oct 2013
Posts: 239
Likes: 0
Received 0 Likes
on
0 Posts
Already have a tig but I'm sure we can work something out.
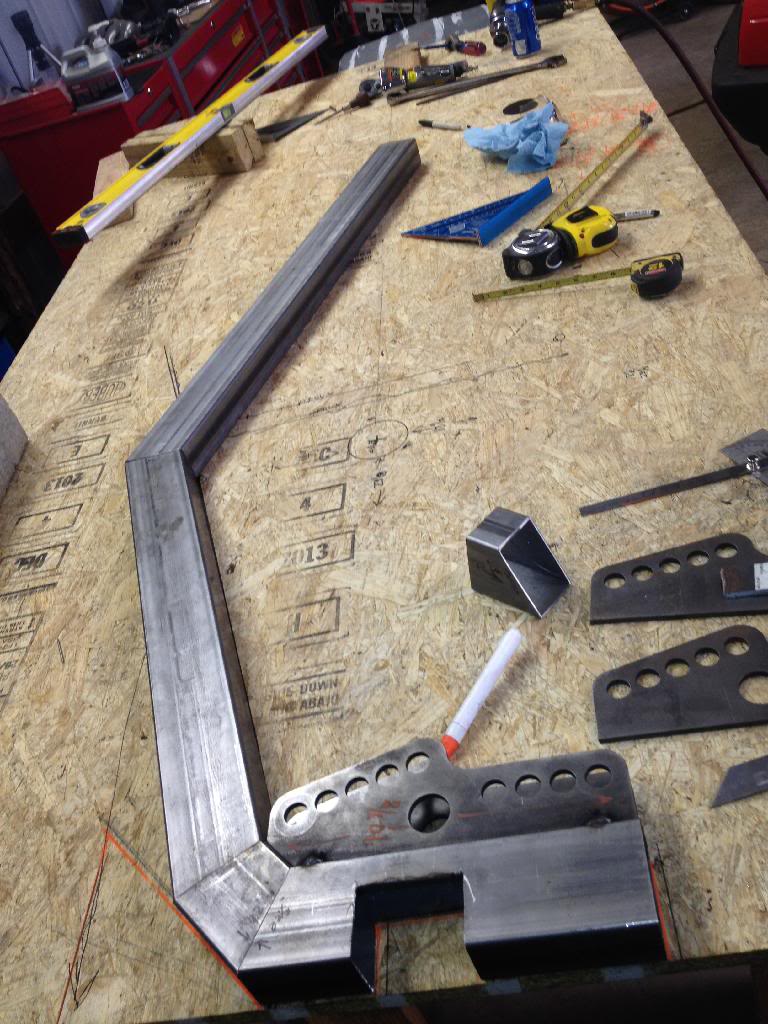
Here's a frame rail in the car for mock up. The other rail should be fabbed up today. The car should be on its own weight by next weekend.
I was thinking about rubbing it out and removing all the existing roll cage braces out of the back. I decided not to and integrate the frame rails into them. I have plenty of metal i can cut out of the wheel wells to go wider.
02-01-2015, 03:24 PM
#10
Launching!
Thread Starter
Join Date: Oct 2013
Posts: 239
Likes: 0
Received 0 Likes
on
0 Posts
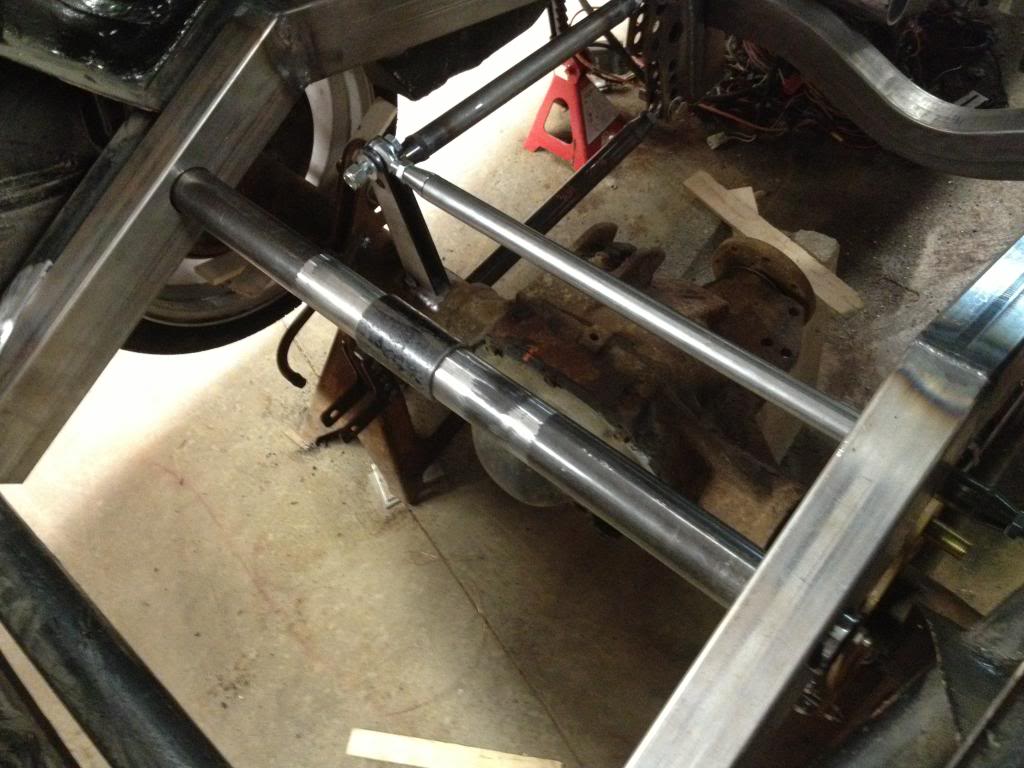
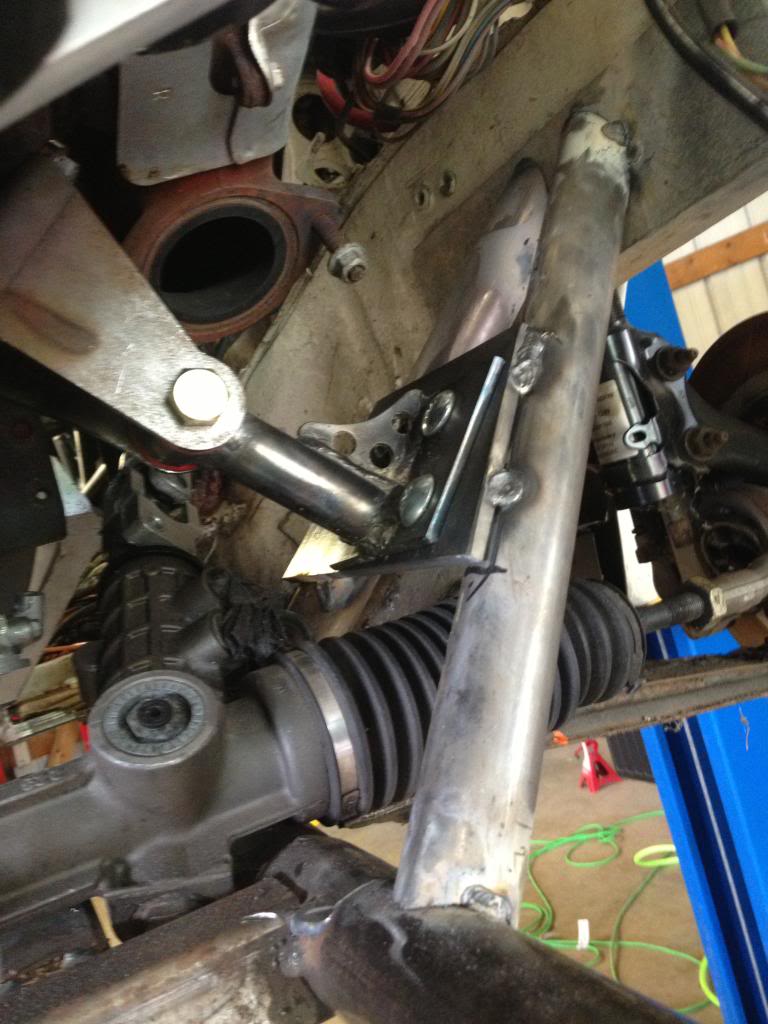
Got the upper links in and holes drilled in the frame rails for the shock mounting crossmember.

Here the panhard bar that's going in this week. The long bracket gets welded to the drivers side axle tube and runs parallel with the rear end to the drivers side. It will be tied into the roll cage. A panhard bar keeps the rear end from going left and right.
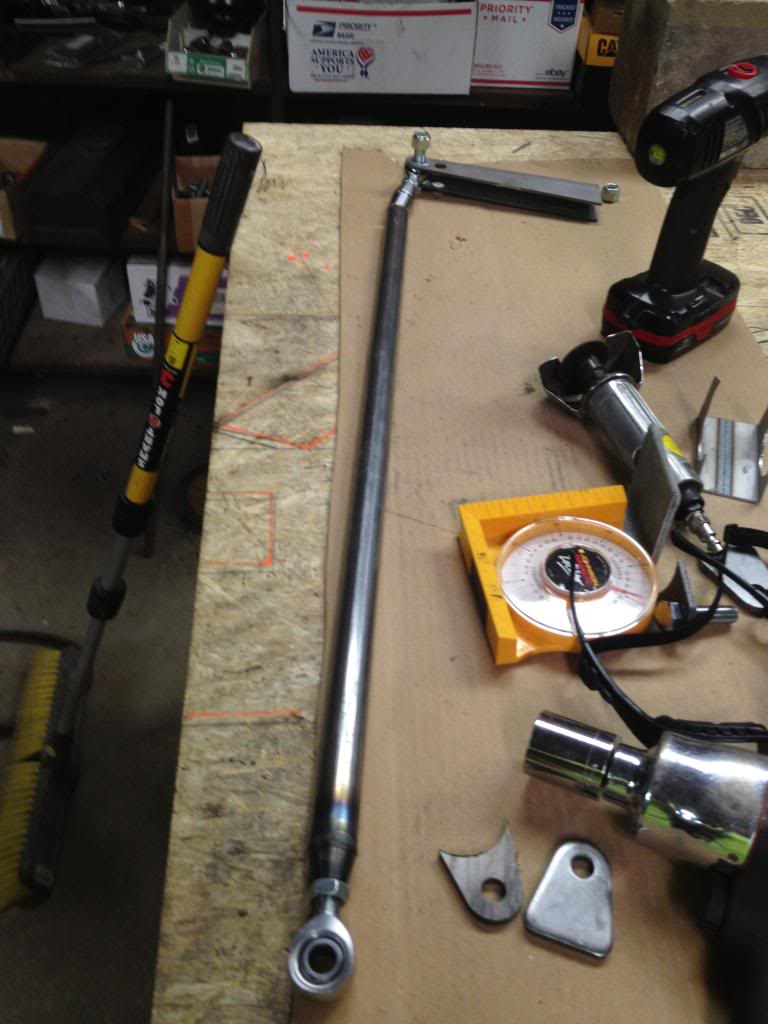
Here the panhard bar that's going in this week. The long bracket gets welded to the drivers side axle tube and runs parallel with the rear end to the drivers side. It will be tied into the roll cage. A panhard bar keeps the rear end from going left and right.
02-01-2015, 03:25 PM
#11
Launching!
Thread Starter
Join Date: Oct 2013
Posts: 239
Likes: 0
Received 0 Likes
on
0 Posts
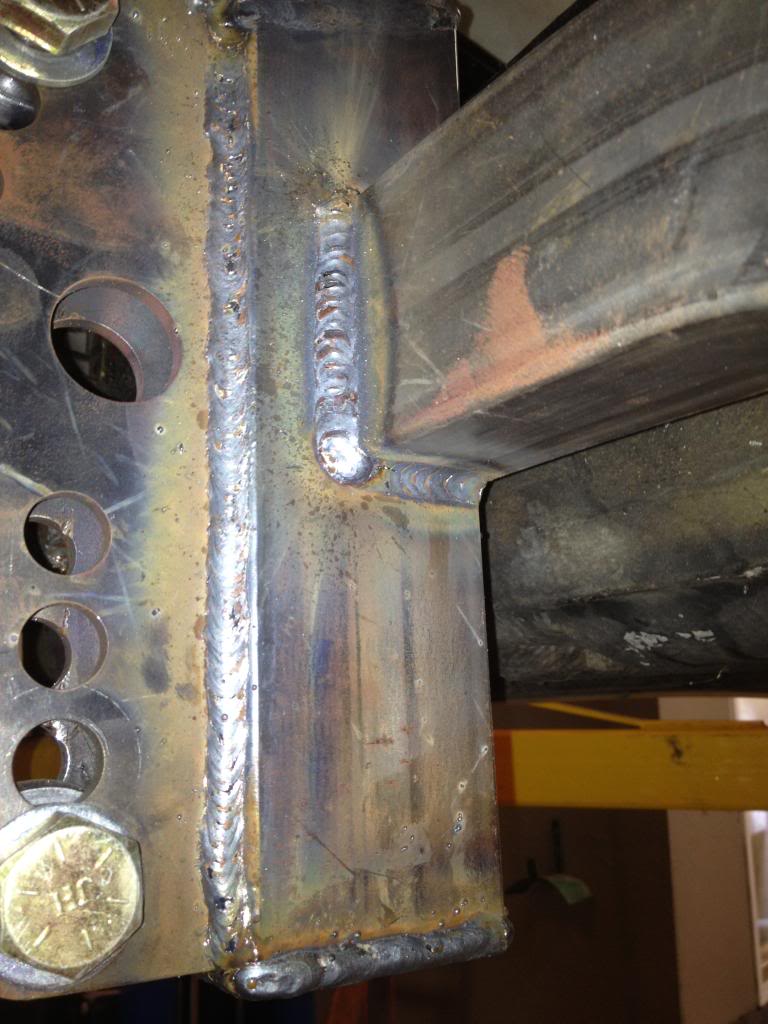
Got the shock mounting crossmember in for fitment. I had hoped to keep it in one piece but wasn't possible due to the tightness of the new rails. So I cut it in half and got a piece of 2" tubing to spice them together. I removed the paint where all the new stuff welds in at. I should start tackling that in the next few days.
 02-01-2015, 03:26 PM
#13
Launching!
Thread Starter
Join Date: Oct 2013
Posts: 239
Likes: 0
Received 0 Likes
on
0 Posts
Thanks everyone! It's hard to get anything done outside of family life and baseball games. I time i did have this past weekend was spent tearing apart the corrado parts car but i was able to get a little bit of welding in. I'm sure glad I wasnt laying down to do this.
02-01-2015, 03:27 PM
#14
Launching!
Thread Starter
Join Date: Oct 2013
Posts: 239
Likes: 0
Received 0 Likes
on
0 Posts
Unfortunately, I have no real updates as no progress has been made since I got in trouble with the wife. :unsure:
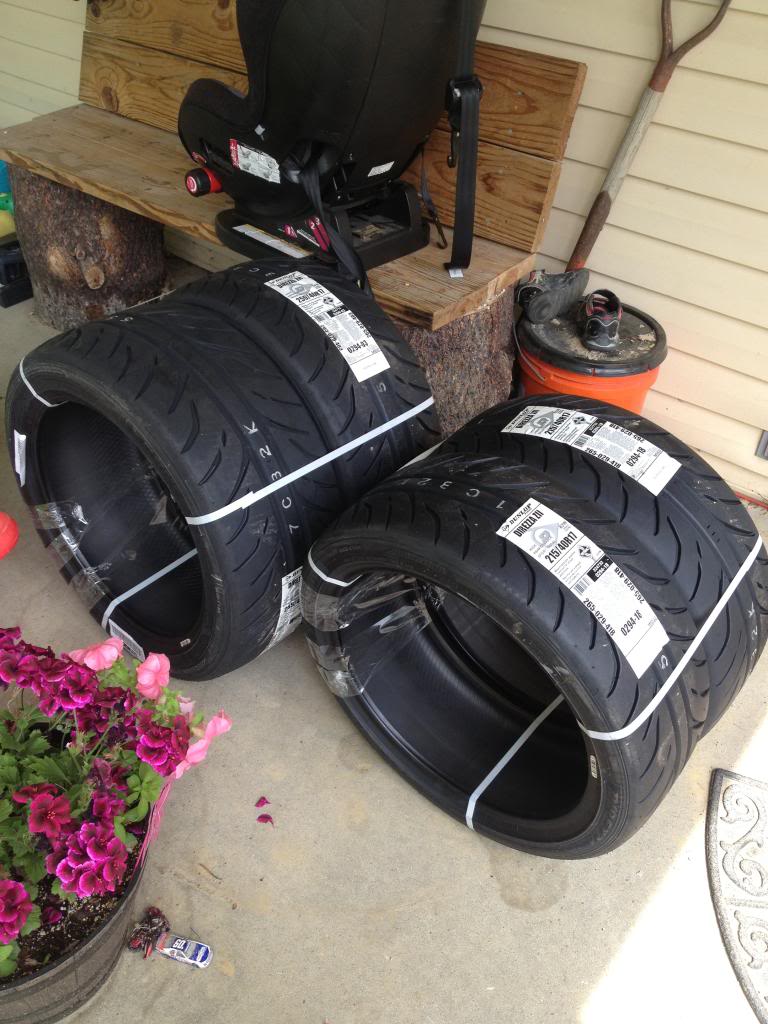
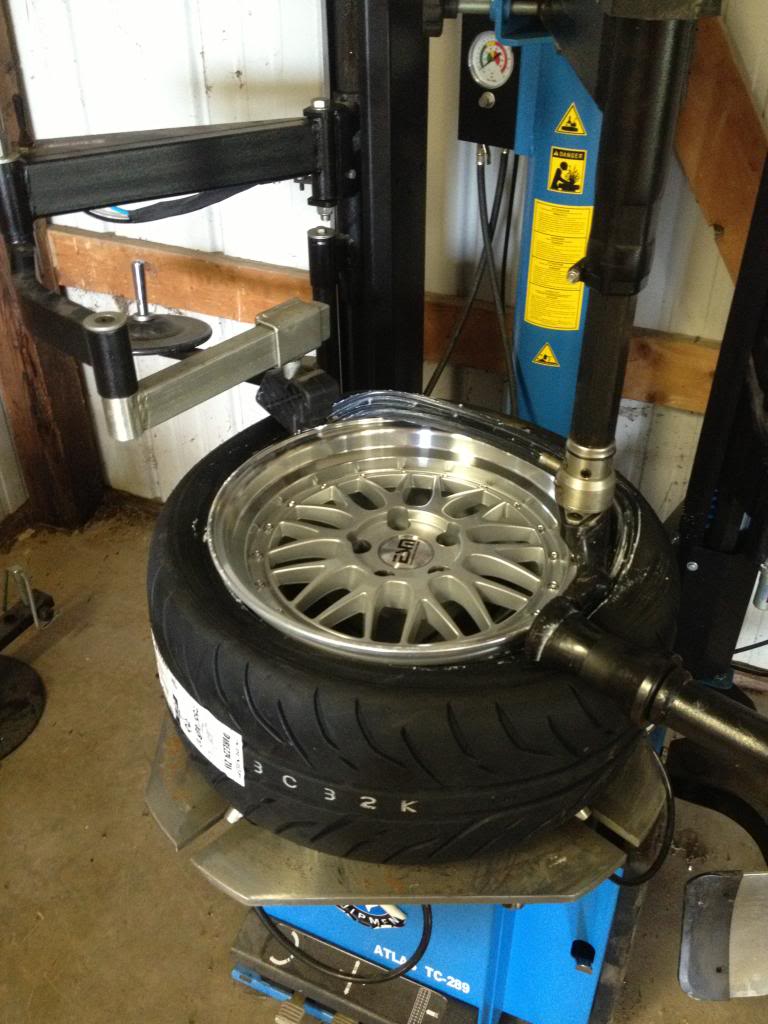
So since I got grounded, I have been selling stuff to fund more parts. It's mostly small stuff but these did show up today.
Dunlop direzza zii
255/40r17
215/40r17
The tires are lined up on the other side.
So since I got grounded, I have been selling stuff to fund more parts. It's mostly small stuff but these did show up today.
Dunlop direzza zii
255/40r17
215/40r17
The tires are lined up on the other side.
02-01-2015, 03:28 PM
#15
Launching!
Thread Starter
Join Date: Oct 2013
Posts: 239
Likes: 0
Received 0 Likes
on
0 Posts
Not much work done today as I had to fix the mower first but I did get some stuff done.
Got some flat stock welded on to the links for more strength and got 2 coats of por-15 on. Tomorrow ill assemble the drum brakes. Have I ever told anyone I hate messing with drums? This axle can be upgraded to the 98 mustang v6/gt rear disc brakes but unfortunatly, I already have all the new drum parts.
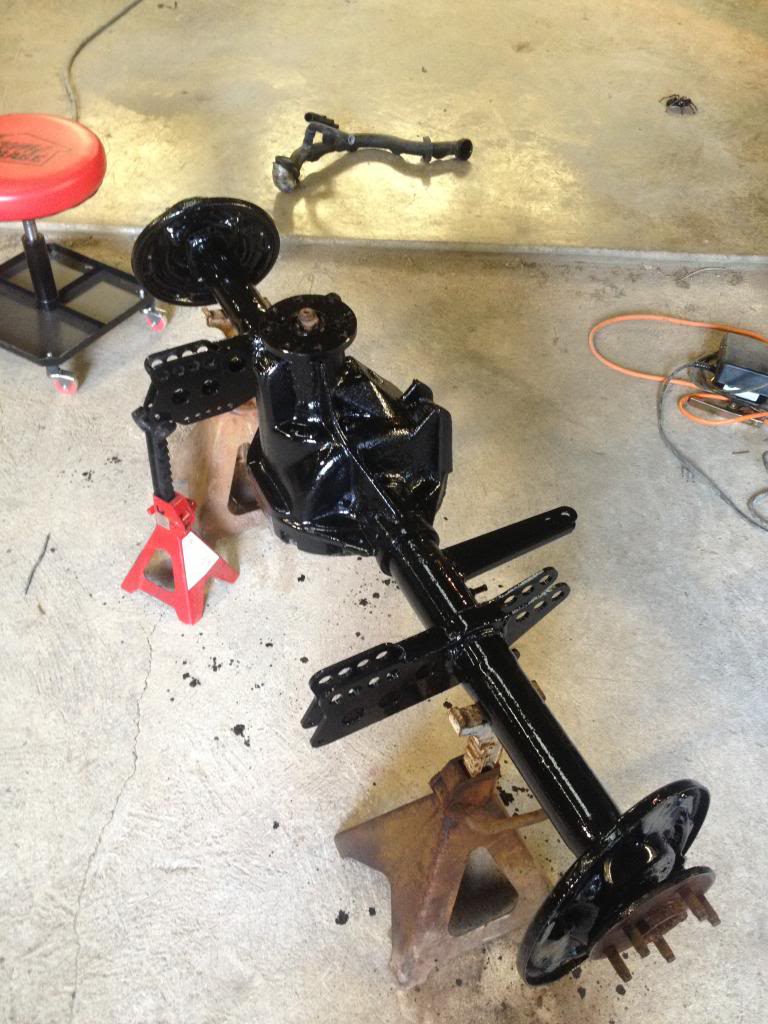
Got some flat stock welded on to the links for more strength and got 2 coats of por-15 on. Tomorrow ill assemble the drum brakes. Have I ever told anyone I hate messing with drums? This axle can be upgraded to the 98 mustang v6/gt rear disc brakes but unfortunatly, I already have all the new drum parts.
02-01-2015, 03:29 PM
#16
Launching!
Thread Starter
Join Date: Oct 2013
Posts: 239
Likes: 0
Received 0 Likes
on
0 Posts
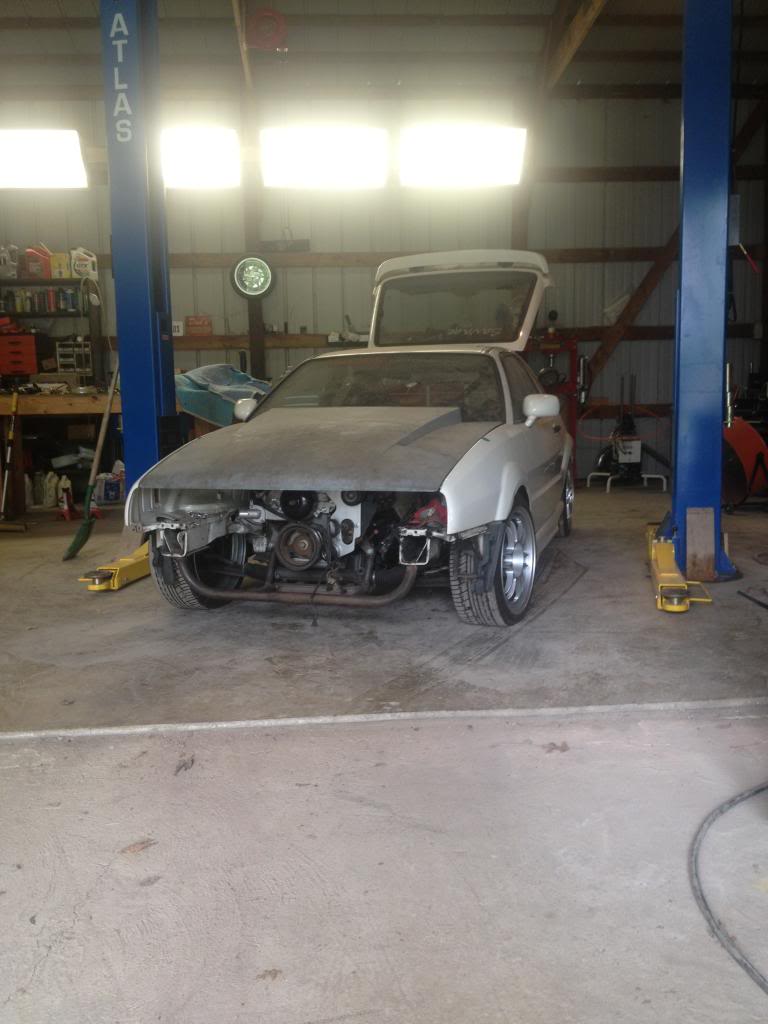
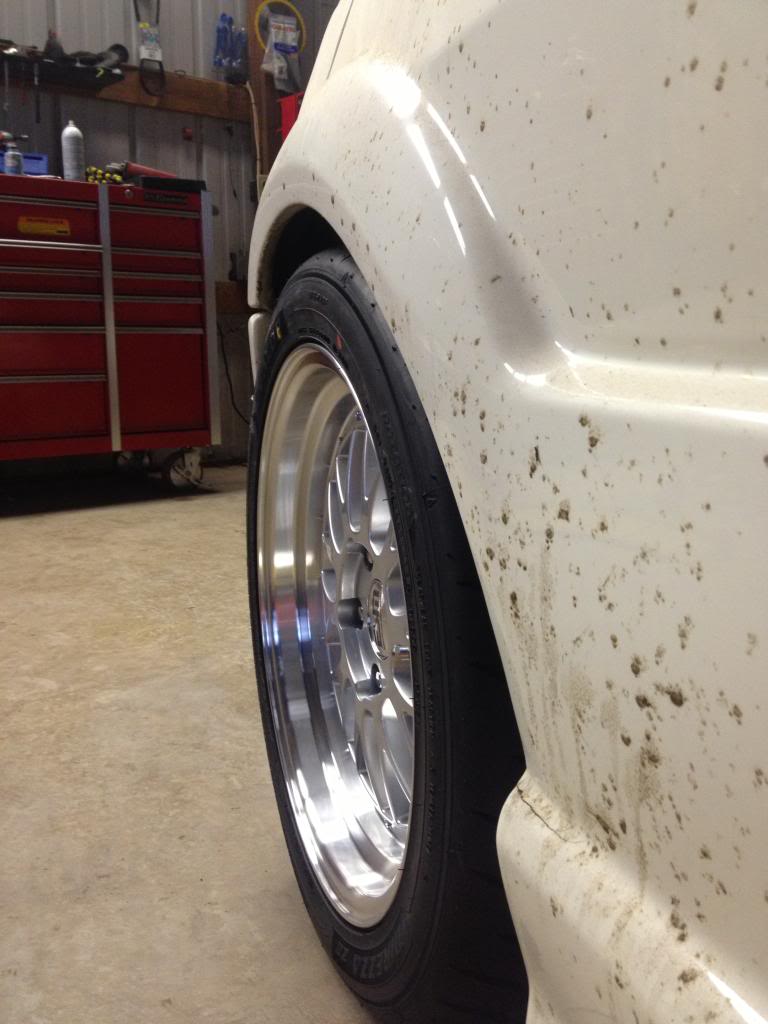
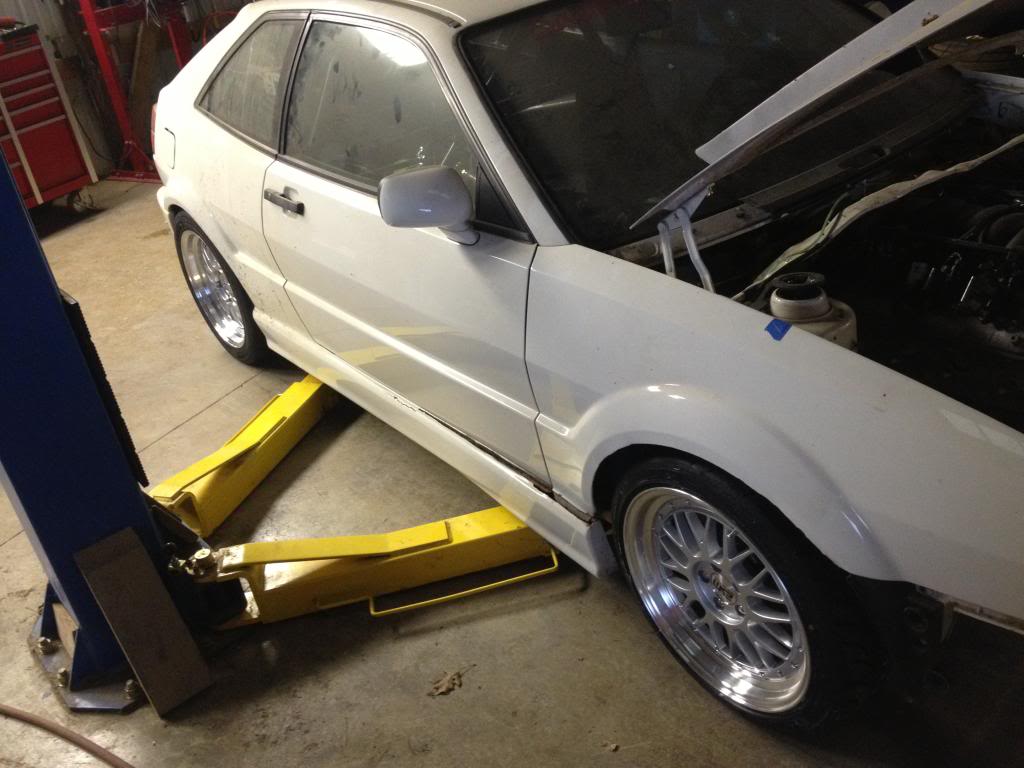
Sometimes you just gotta do what ya gotta do. While I was putting the wheels on for fitment, I marked the fender wells where I needed to cut them out. This afternoon I proceeded to cut them out. I now have enough for at least 10" wide wheels. If I cut a tube that's connected to the roll cage I can go quite a bit wider.
Just like other things in life, make sure you use plenty of lube!
255/40 r17 fill these wheels out nicely.
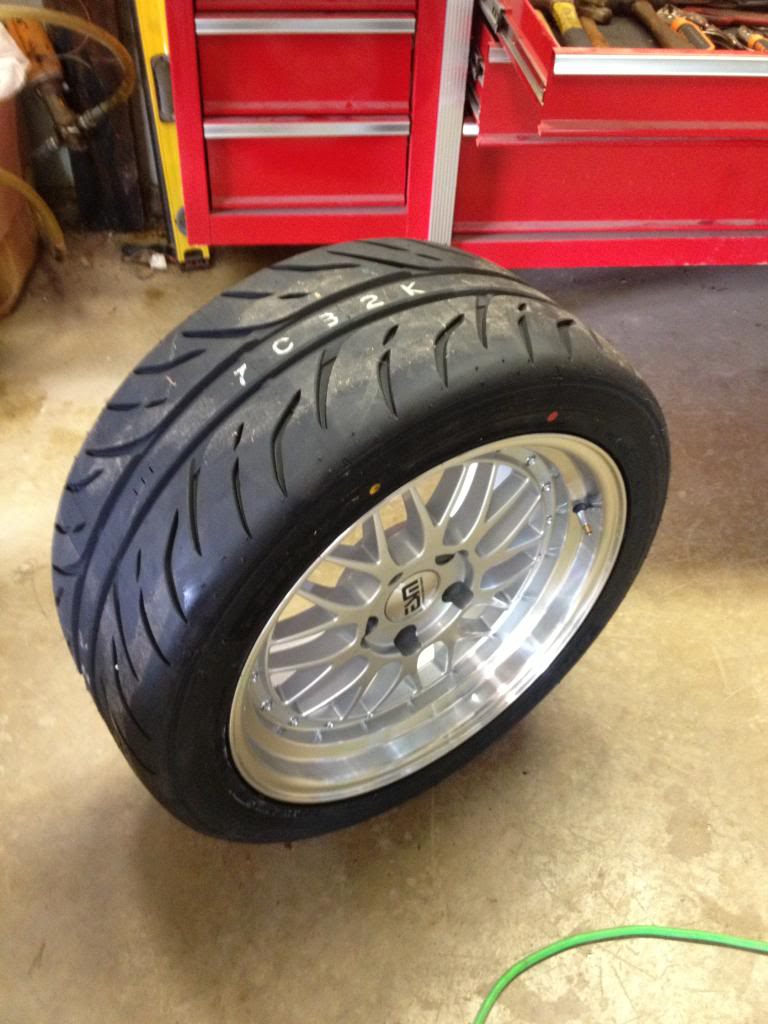
Fits perfect!
Just like other things in life, make sure you use plenty of lube!
255/40 r17 fill these wheels out nicely.
Fits perfect!
02-01-2015, 03:29 PM
#17
Launching!
Thread Starter
Join Date: Oct 2013
Posts: 239
Likes: 0
Received 0 Likes
on
0 Posts
I didn't like how the engine was mounted so it got changed up yesterday. Before it was a huge pain to remove the power train as the mounts had to be unbolted from the block and one of those bolts is under the manifolds. So I came up with the so the frame is tied in and the engine mounts bolt in at 2 places.
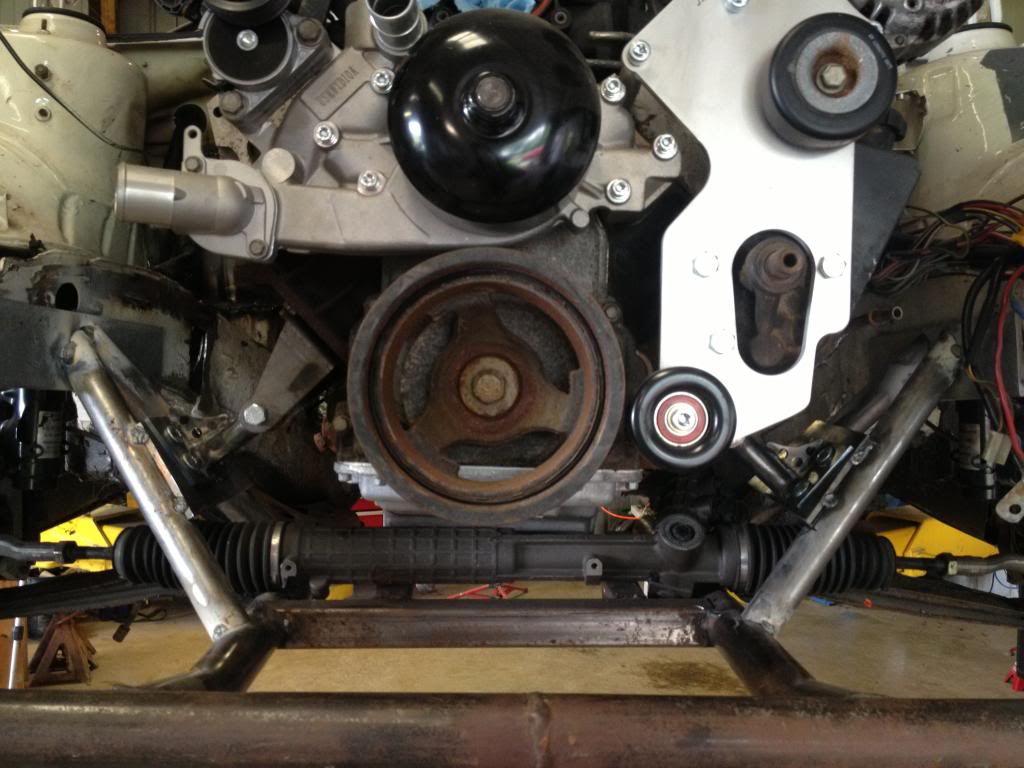
Barely enough room for exhaust.
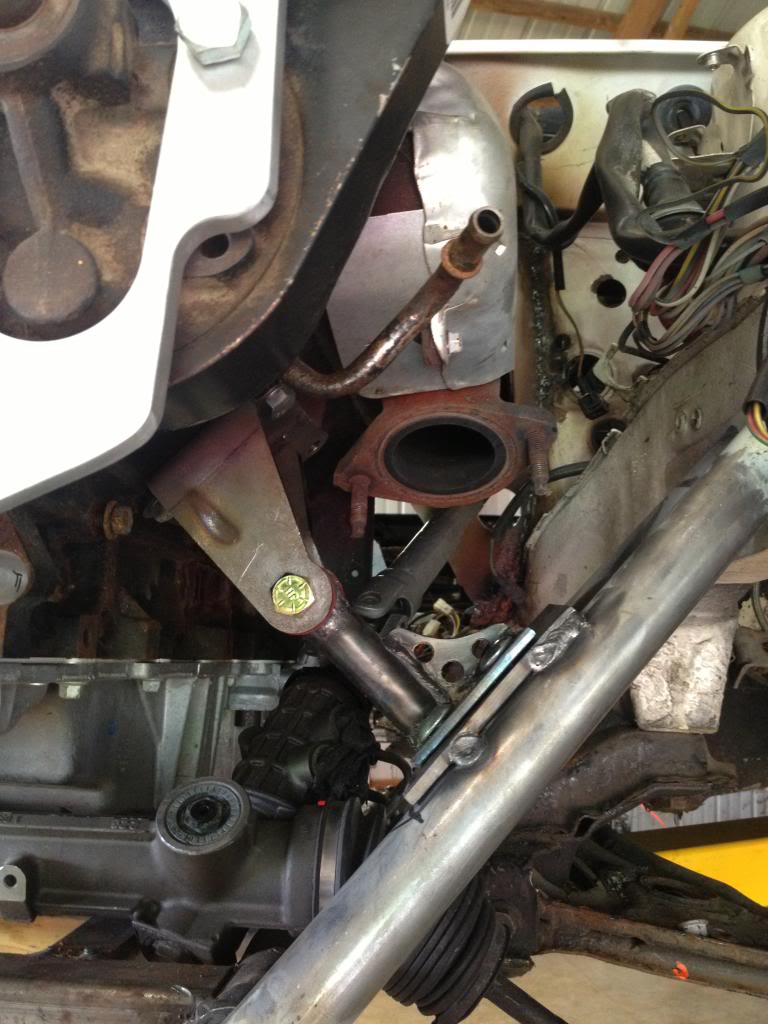
Barely enough room for exhaust.
02-01-2015, 03:30 PM
#18
Launching!
Thread Starter
Join Date: Oct 2013
Posts: 239
Likes: 0
Received 0 Likes
on
0 Posts
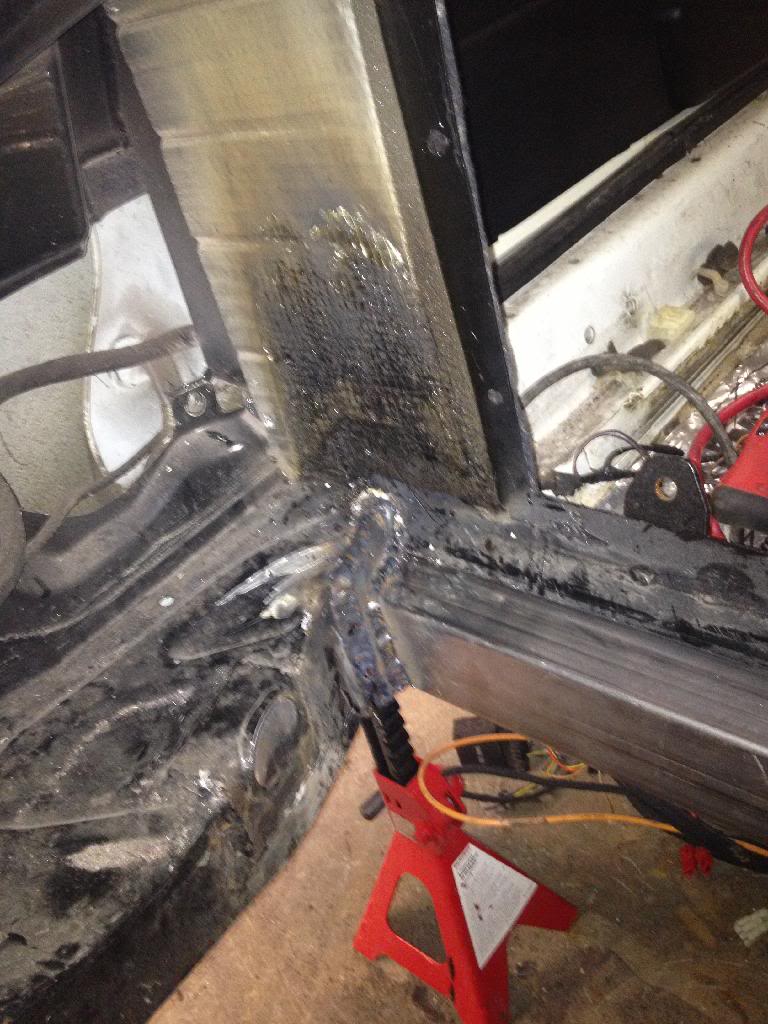
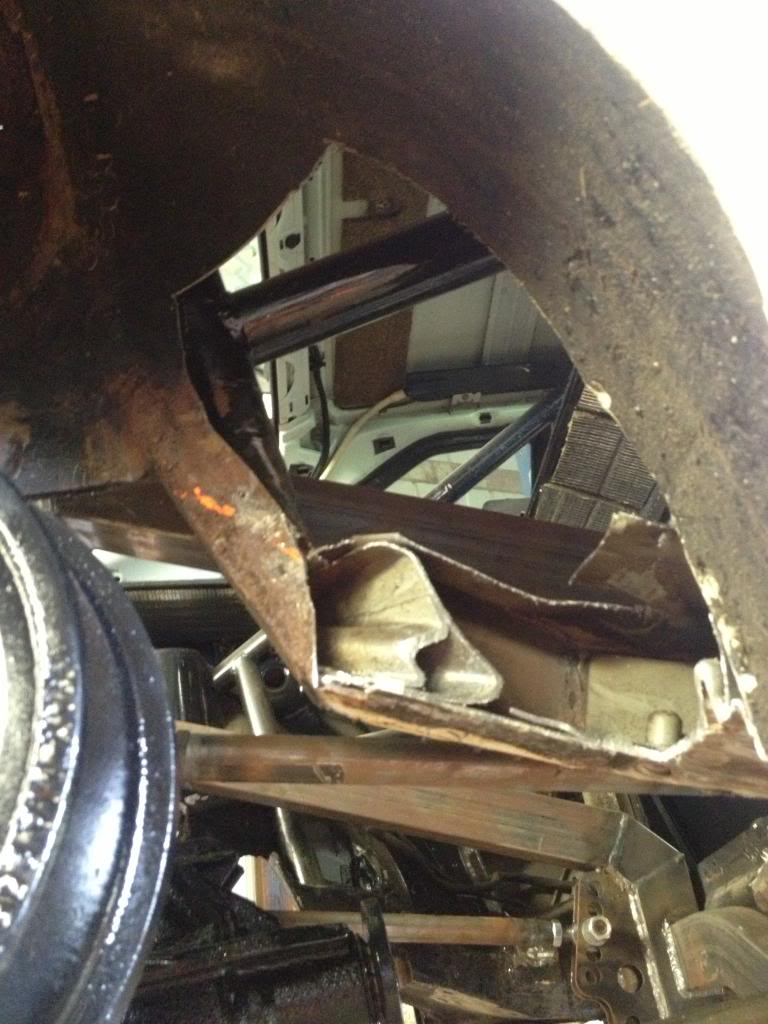
What the hell did i get myself into? Worked on the firewall and tunnel today. I'm mentioning now I don't care much for sheet metal work. It seems that I worked on it forever and got no where. Still have a lot more to go.

Added a panel to blend the original sheet metal to the tunnel. I couldn't cut further over due to the frame rail.
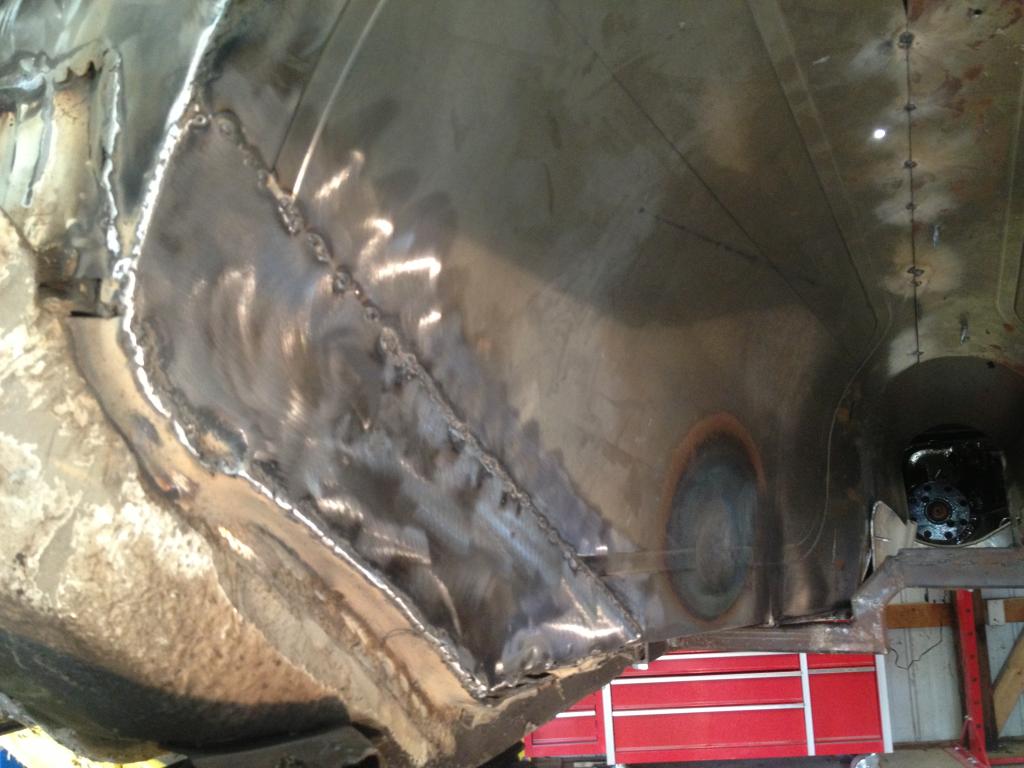
Added a panel to blend the original sheet metal to the tunnel. I couldn't cut further over due to the frame rail.
02-01-2015, 03:30 PM
#19
Launching!
Thread Starter
Join Date: Oct 2013
Posts: 239
Likes: 0
Received 0 Likes
on
0 Posts
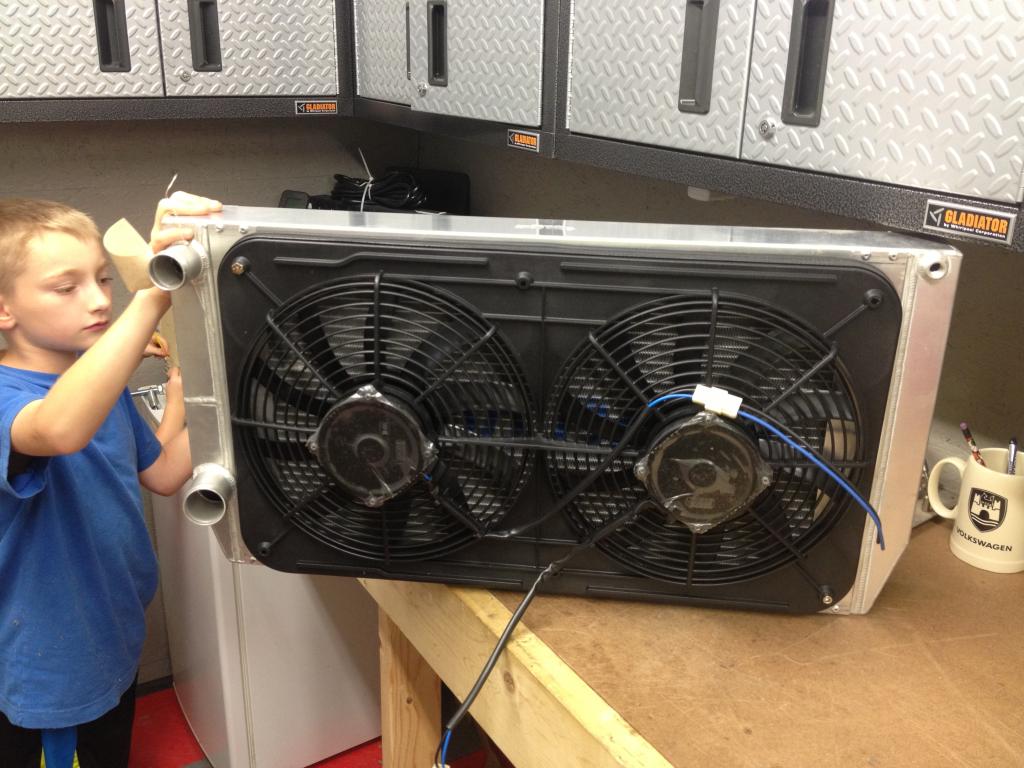
Custom built? Ron Davis radiator that came with the corrado when I bought it.
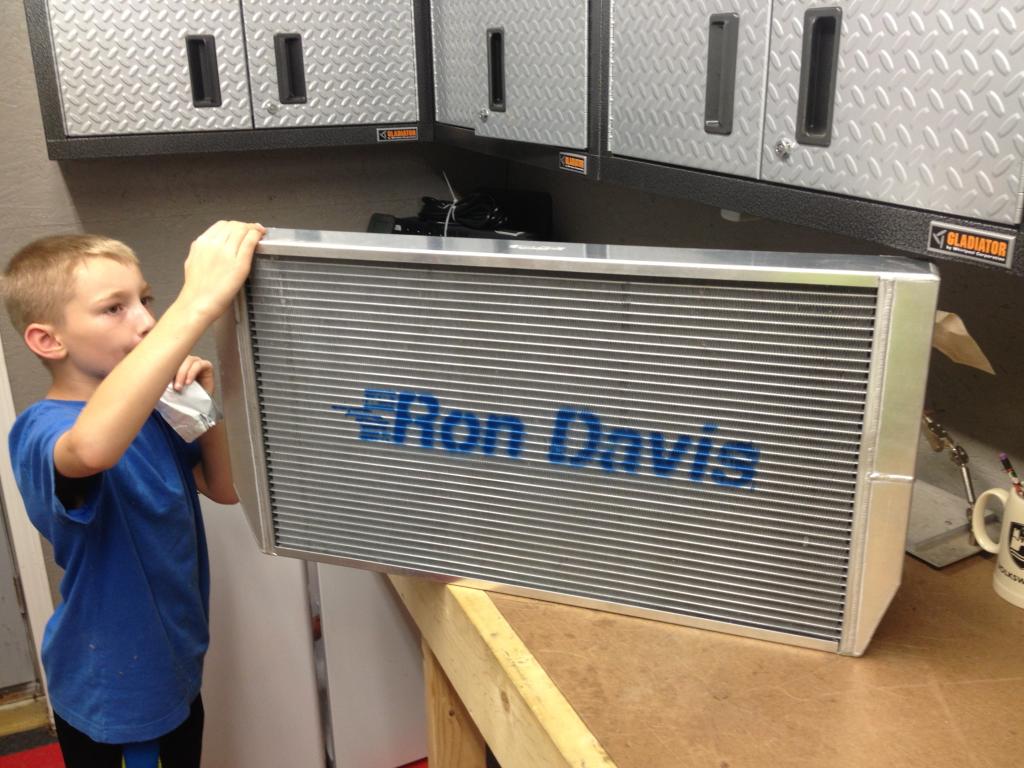
Riveted the brackets on the radiator lips and nutserts to mount the fan shroud.
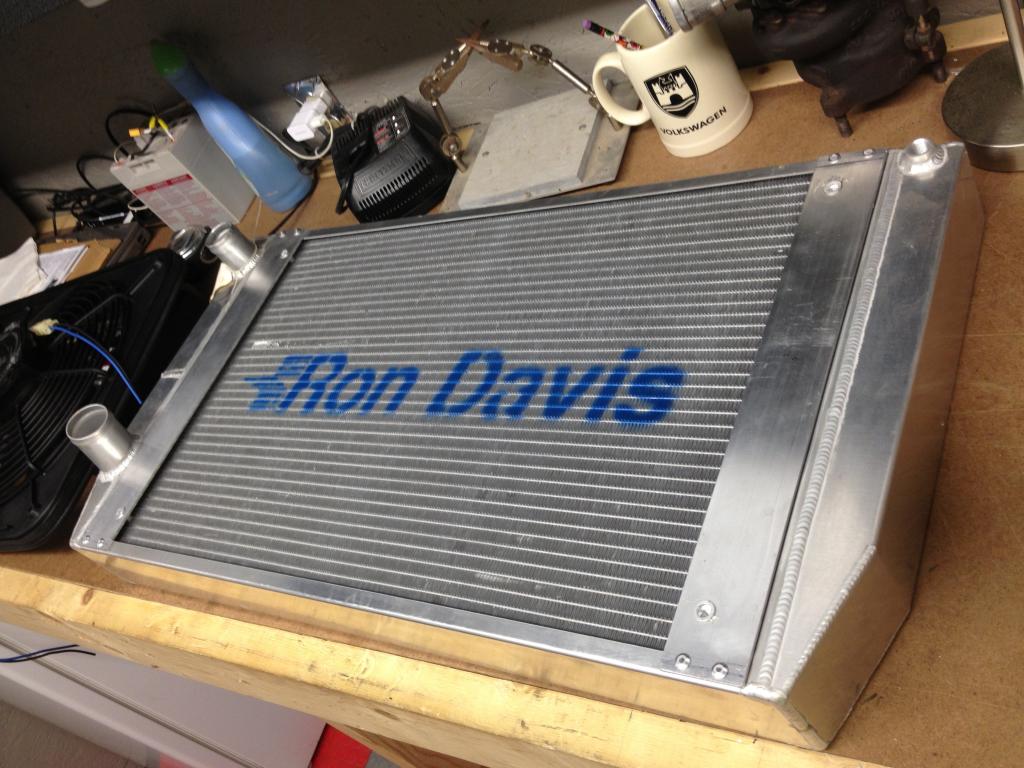
Jegs dual 12" fans/shroud. Pulls 3100 cfm. Should cool rather nicely.
Riveted the brackets on the radiator lips and nutserts to mount the fan shroud.
Jegs dual 12" fans/shroud. Pulls 3100 cfm. Should cool rather nicely.