
1937 Ford Sedan


 05-12-2019, 08:38 AM
#582
TECH Regular
Thread Starter

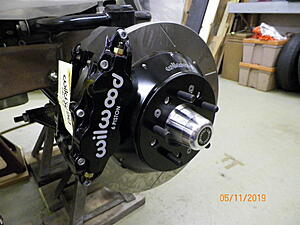
I had a little snag on my first set of front brakes, but the second set fit perfectly. For anyone using a TCI front end they don't all have TCI spindles. It was listed as a TCI/Pinto spindle so I figured that was what I needed, and Wilwood concurred. BUT what I needed was Mustang 2/PInto  . The fact that they listed PInto in the description of both was what steered us wrong, but thanks to Speedway Motors for helping me get it right!
Original brakes that came with the front end

Upgrade
. The fact that they listed PInto in the description of both was what steered us wrong, but thanks to Speedway Motors for helping me get it right!Original brakes that came with the front end

Upgrade
 05-22-2019, 08:11 PM
#584
TECH Regular
Thread Starter
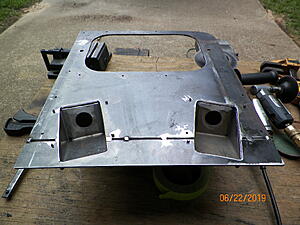
Started the fuel system. Good access to the regulator and plans for trunk access door to get to the pump...
Fuel pump and sending unit done
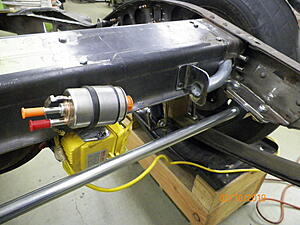
Made a transition piece to carry the fuel line outside the frame rail under the running board to get away from the exhaust.
Here is the other side where the line comes out. Of course protection with some sort of cover will come later. Maybe even hard line from here just have to look at what works the best to get to the fuel rail. This is really as far as I can go right now because the fuel line path near the fuel rail gets tight with the A/C lines that are not in place yet, so I'm stopping with the fuel line right here until I get the A/C lines roughed in at the firewall.

Fuel pump and sending unit done

Made a transition piece to carry the fuel line outside the frame rail under the running board to get away from the exhaust.

Here is the other side where the line comes out. Of course protection with some sort of cover will come later. Maybe even hard line from here just have to look at what works the best to get to the fuel rail. This is really as far as I can go right now because the fuel line path near the fuel rail gets tight with the A/C lines that are not in place yet, so I'm stopping with the fuel line right here until I get the A/C lines roughed in at the firewall.

 06-23-2019, 07:43 PM
#586
TECH Regular
Thread Starter
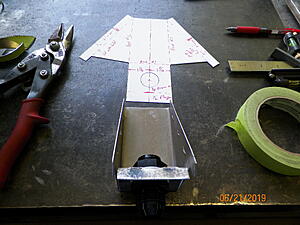
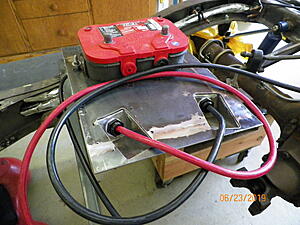
Project battery location and cable routing...... Battery is definitely not fitting up front anymore, and I didn't want to give up any space in the small trunk, SO it's under the rear seat. Built some stand offs to run the cables along the frame and miss all the bolts sticking through. Took the edges off some 1/4" plate to make it look a little nicer.
Here is where they go.
I'm taking the ground all the way to the engine block. LOTS of opinions on that so I figured I would just try to avoid grounding problems later.
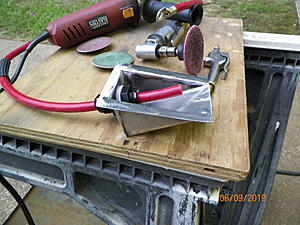
This will be a transition piece to get the cables to the inside of the rear floorboard. The Harbor Freight brake works pretty well on small 18 gauge pieces like this.
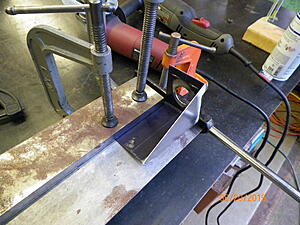
Cut some little slots to bend the flanges and just welded back up.
The battery sits above a muffler, so I'm running the battery cables inside a #12 braided line and then wrapped with another heat resistant sleeve. Then the #12 hose hose will screw on to the fuel cell bulkhead shown in the picture. Once the cables get to the frame the #12 hose will end and the cables continue.
Installed both transition pieces to the plate that is part of the battery mount.
And here is the battery mock up without the body on the frame. The battery is just a shell I used to build all the pieces. This should give me room under the seat for options such as a master disconnect, bus bars, etc, etc. I don't have any of that figured out at this point Maybe a little overkill on the cables but maybe they won't get into any trouble

Here is where they go.

I'm taking the ground all the way to the engine block. LOTS of opinions on that so I figured I would just try to avoid grounding problems later.

This will be a transition piece to get the cables to the inside of the rear floorboard. The Harbor Freight brake works pretty well on small 18 gauge pieces like this.

Cut some little slots to bend the flanges and just welded back up.

The battery sits above a muffler, so I'm running the battery cables inside a #12 braided line and then wrapped with another heat resistant sleeve. Then the #12 hose hose will screw on to the fuel cell bulkhead shown in the picture. Once the cables get to the frame the #12 hose will end and the cables continue.

Installed both transition pieces to the plate that is part of the battery mount.

And here is the battery mock up without the body on the frame. The battery is just a shell I used to build all the pieces. This should give me room under the seat for options such as a master disconnect, bus bars, etc, etc. I don't have any of that figured out at this point
Maybe a little overkill on the cables but maybe they won't get into any trouble 
 07-24-2019, 08:25 PM
#589
TECH Regular
Thread Starter
I'm heading to the Street Rod Nationals in Kentucky next week to buy some parts for the car and gather some ideas and inspiration. Anybody on here going?
Fab director shared this tip with me some time ago. Use a piece of scrap hardwood to make yourself a guide for your hole saw. Comes out so much better...
Used the tip to mount some remote battery terminals. Since the battery will be under the rear seat I mounted this under my running board just in case Thank you Ringbrothers its a nice piece!
Fab director shared this tip with me some time ago. Use a piece of scrap hardwood to make yourself a guide for your hole saw. Comes out so much better...

Used the tip to mount some remote battery terminals. Since the battery will be under the rear seat I mounted this under my running board just in case
Thank you Ringbrothers its a nice piece! 09-22-2019, 06:45 PM
#590
TECH Regular
Thread Starter
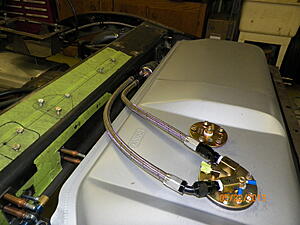
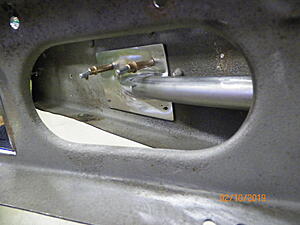
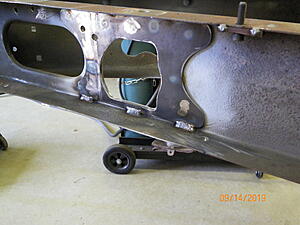
Once the motor was back out I finished the front brake lines. I knew this one little area in the pic below would be the tough one with 3 lines fighting for the same space. I made a little bracket for the Tee and just let it sit in the square hole so it could flex just a little. Also got some through frame connectors to get to the outside of the frame.
Before
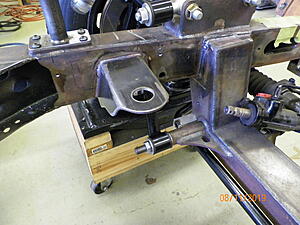
After
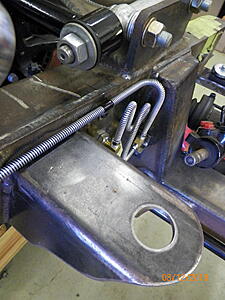
Before

After

 09-22-2019, 07:11 PM
#591
TECH Regular
Thread Starter
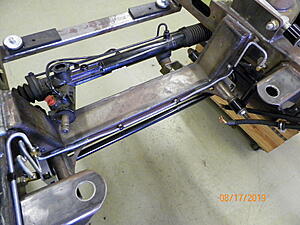
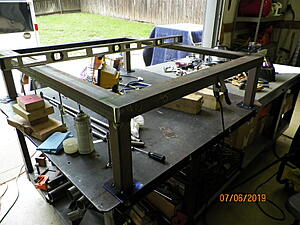
I had been compiling a list of things to finish when I got the frame back on the rotisserie like welding things out when they were much easier to get to. Here are a few highlights.....
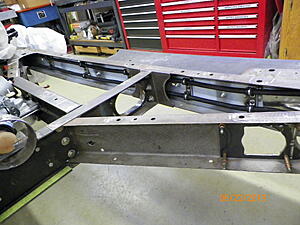
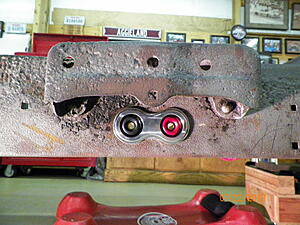
Finished the frame where the exhaust passes through.
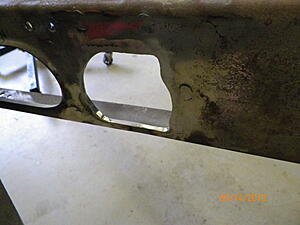
The opposite side of the same hole. Made a plate to pick up some strength.
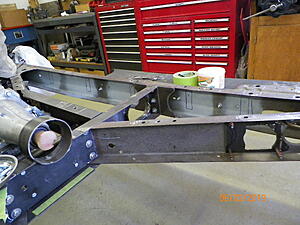
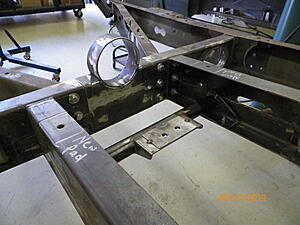
Finished mounting the transmission cross member and finished the x brace center piece. It has a piece of 1/4" plate on the backside and holds everything together. The hoop was made with a driveshaft yoke that allows good clearance and serves as a guide to finish the sheet metal floor in the car. In other words its for reference to run the tunnel to. May or may not get cut off later.
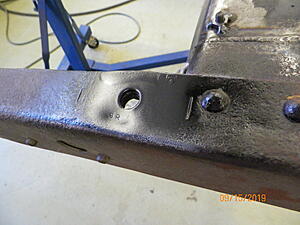
Finally just marked where all the body pads go so I don't have to scratch my head every time
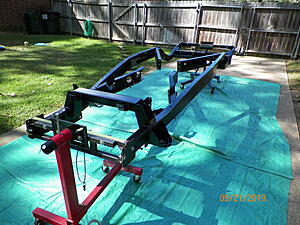
The frame hasn't seen the light of day in a LONG time
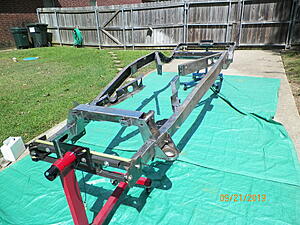
After some paint I let it cook in the sun all weekend - now its time to put on parts that will actually stay on!
Finished the frame where the exhaust passes through.

The opposite side of the same hole. Made a plate to pick up some strength.

Finished mounting the transmission cross member and finished the x brace center piece. It has a piece of 1/4" plate on the backside and holds everything together. The hoop was made with a driveshaft yoke that allows good clearance and serves as a guide to finish the sheet metal floor in the car. In other words its for reference to run the tunnel to. May or may not get cut off later.

Finally just marked where all the body pads go so I don't have to scratch my head every time

The frame hasn't seen the light of day in a LONG time

After some paint I let it cook in the sun all weekend - now its time to put on parts that will actually stay on!
 09-24-2019, 04:59 AM
#593

Great work. I love all of the custom tricks
09-24-2019, 12:11 PM
#595
TECH Regular
Thread Starter
Short answer - Rattle Can
Long answer - The frame will probably be powder coated later, but for now I want to make sure there won't be any fab changes while I'm getting the bugs out of the car. I just don't want to fight the powder paint to make changes if it doesn't drive and handle like I want. After I drive it a few thousand miles and I save some coins it will get disassembled for exterior paint, interior, etc. At that time the frame paint can be made more permanent. Much more work that way I know but hopefully it will pay off....maybe this will open a discussion for the best order to do all this and what types of frame paint is recommended???
Long answer - The frame will probably be powder coated later, but for now I want to make sure there won't be any fab changes while I'm getting the bugs out of the car. I just don't want to fight the powder paint to make changes if it doesn't drive and handle like I want. After I drive it a few thousand miles and I save some coins it will get disassembled for exterior paint, interior, etc. At that time the frame paint can be made more permanent. Much more work that way I know but hopefully it will pay off....maybe this will open a discussion for the best order to do all this and what types of frame paint is recommended???
09-28-2019, 05:49 PM
#596
TECH Regular
Thread Starter
Started this project on July 4th weekend, but I just finished it today because there were several items to gather up to get some A/C on my shop. Stand, unit, circuit, ductwork, etc.....
The beginning
The first day of Autumn doesn't mean much here in Texas because it's still pretty warm. Today the heat index was 99 and the shop A/C felt great. The impressive part to me was it took the humidity from 55% to 28%. It was soooo nice working in there this afternoon! Now back to the car

The beginning

The first day of Autumn doesn't mean much here in Texas because it's still pretty warm. Today the heat index was 99 and the shop A/C felt great. The impressive part to me was it took the humidity from 55% to 28%. It was soooo nice working in there this afternoon! Now back to the car
 10-06-2019, 05:00 PM
#597
TECH Regular
Thread Starter
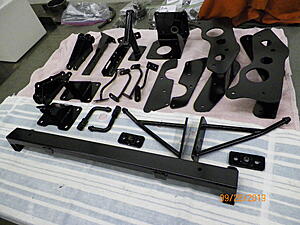
Picked up some parts from powder coat
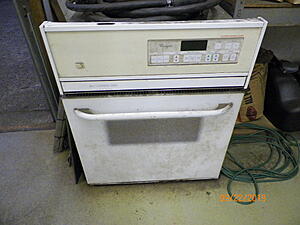
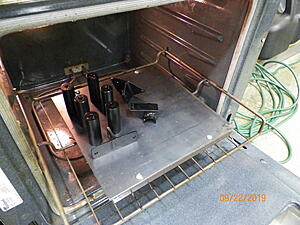
On the little nick knacks I'm using this oven to bake the paint a little. Ovens can be found pretty easily after people remodel their kitchens and are usually free for pickup. Mine comes in handy from time to time.
Time for reassembly

On the little nick knacks I'm using this oven to bake the paint a little. Ovens can be found pretty easily after people remodel their kitchens and are usually free for pickup. Mine comes in handy from time to time.


Time for reassembly
10-21-2019, 11:08 AM
#598
TECH Regular
Thread Starter
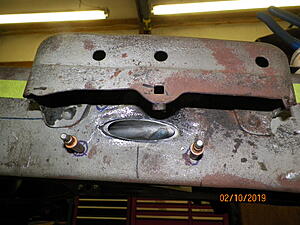
Body is back on. First thing on the list is to make a fuel pump access door. It already had a D shaped hole so I could get a starting point, but I had to fill part of it in.
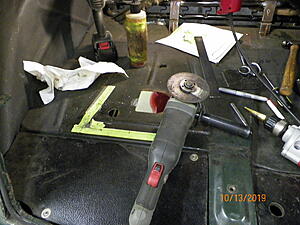
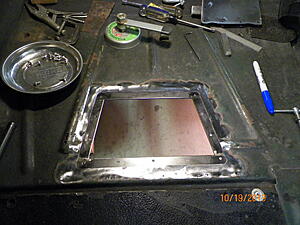
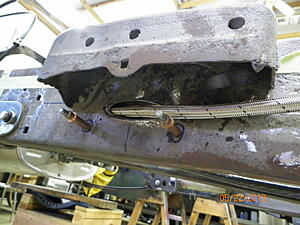
Built a frame on the bottom side.
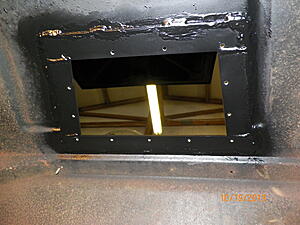
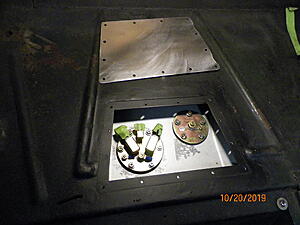
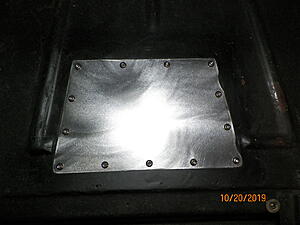


Built a frame on the bottom side.


