
D^3 Dad's Down and Dirty 1955 Pickup, Nerd Rods C4 on the Cheep
 10-18-2015, 04:30 AM
#21
Launching!
Thread Starter
Join Date: Jan 2007
Location: Luling TX In the Hot Rod Shop
Posts: 294
Likes: 0
Received 3 Likes
on
3 Posts

Click here for the large photos
http://gallery.nerdrods.com/Projects/03_D3/03/
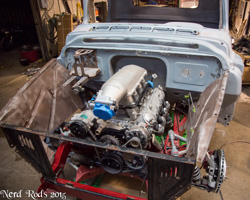
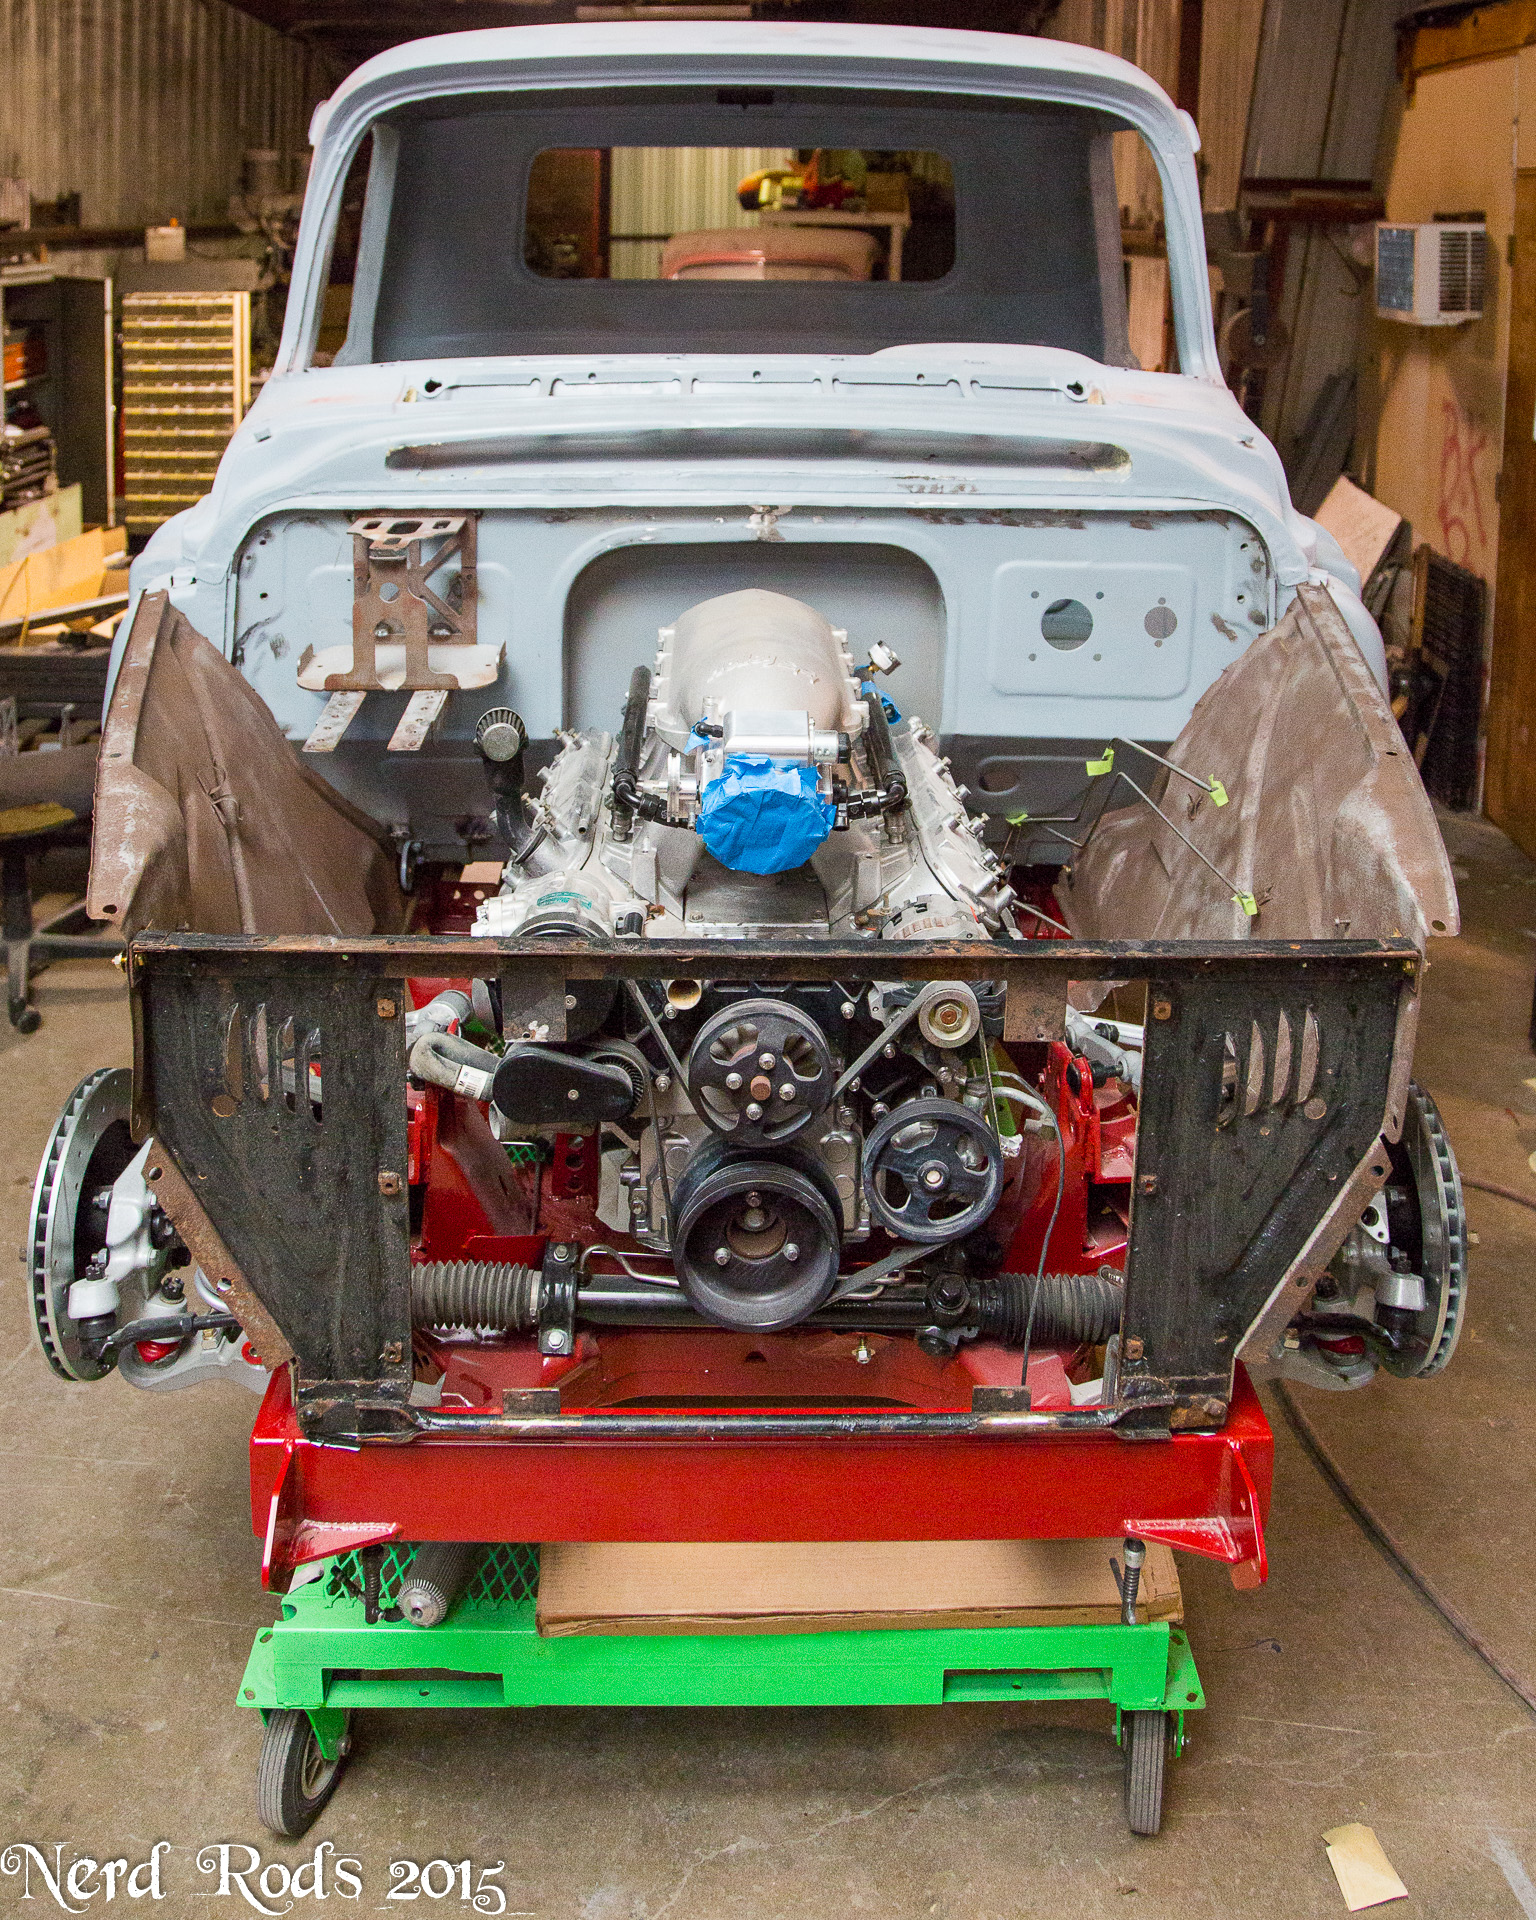
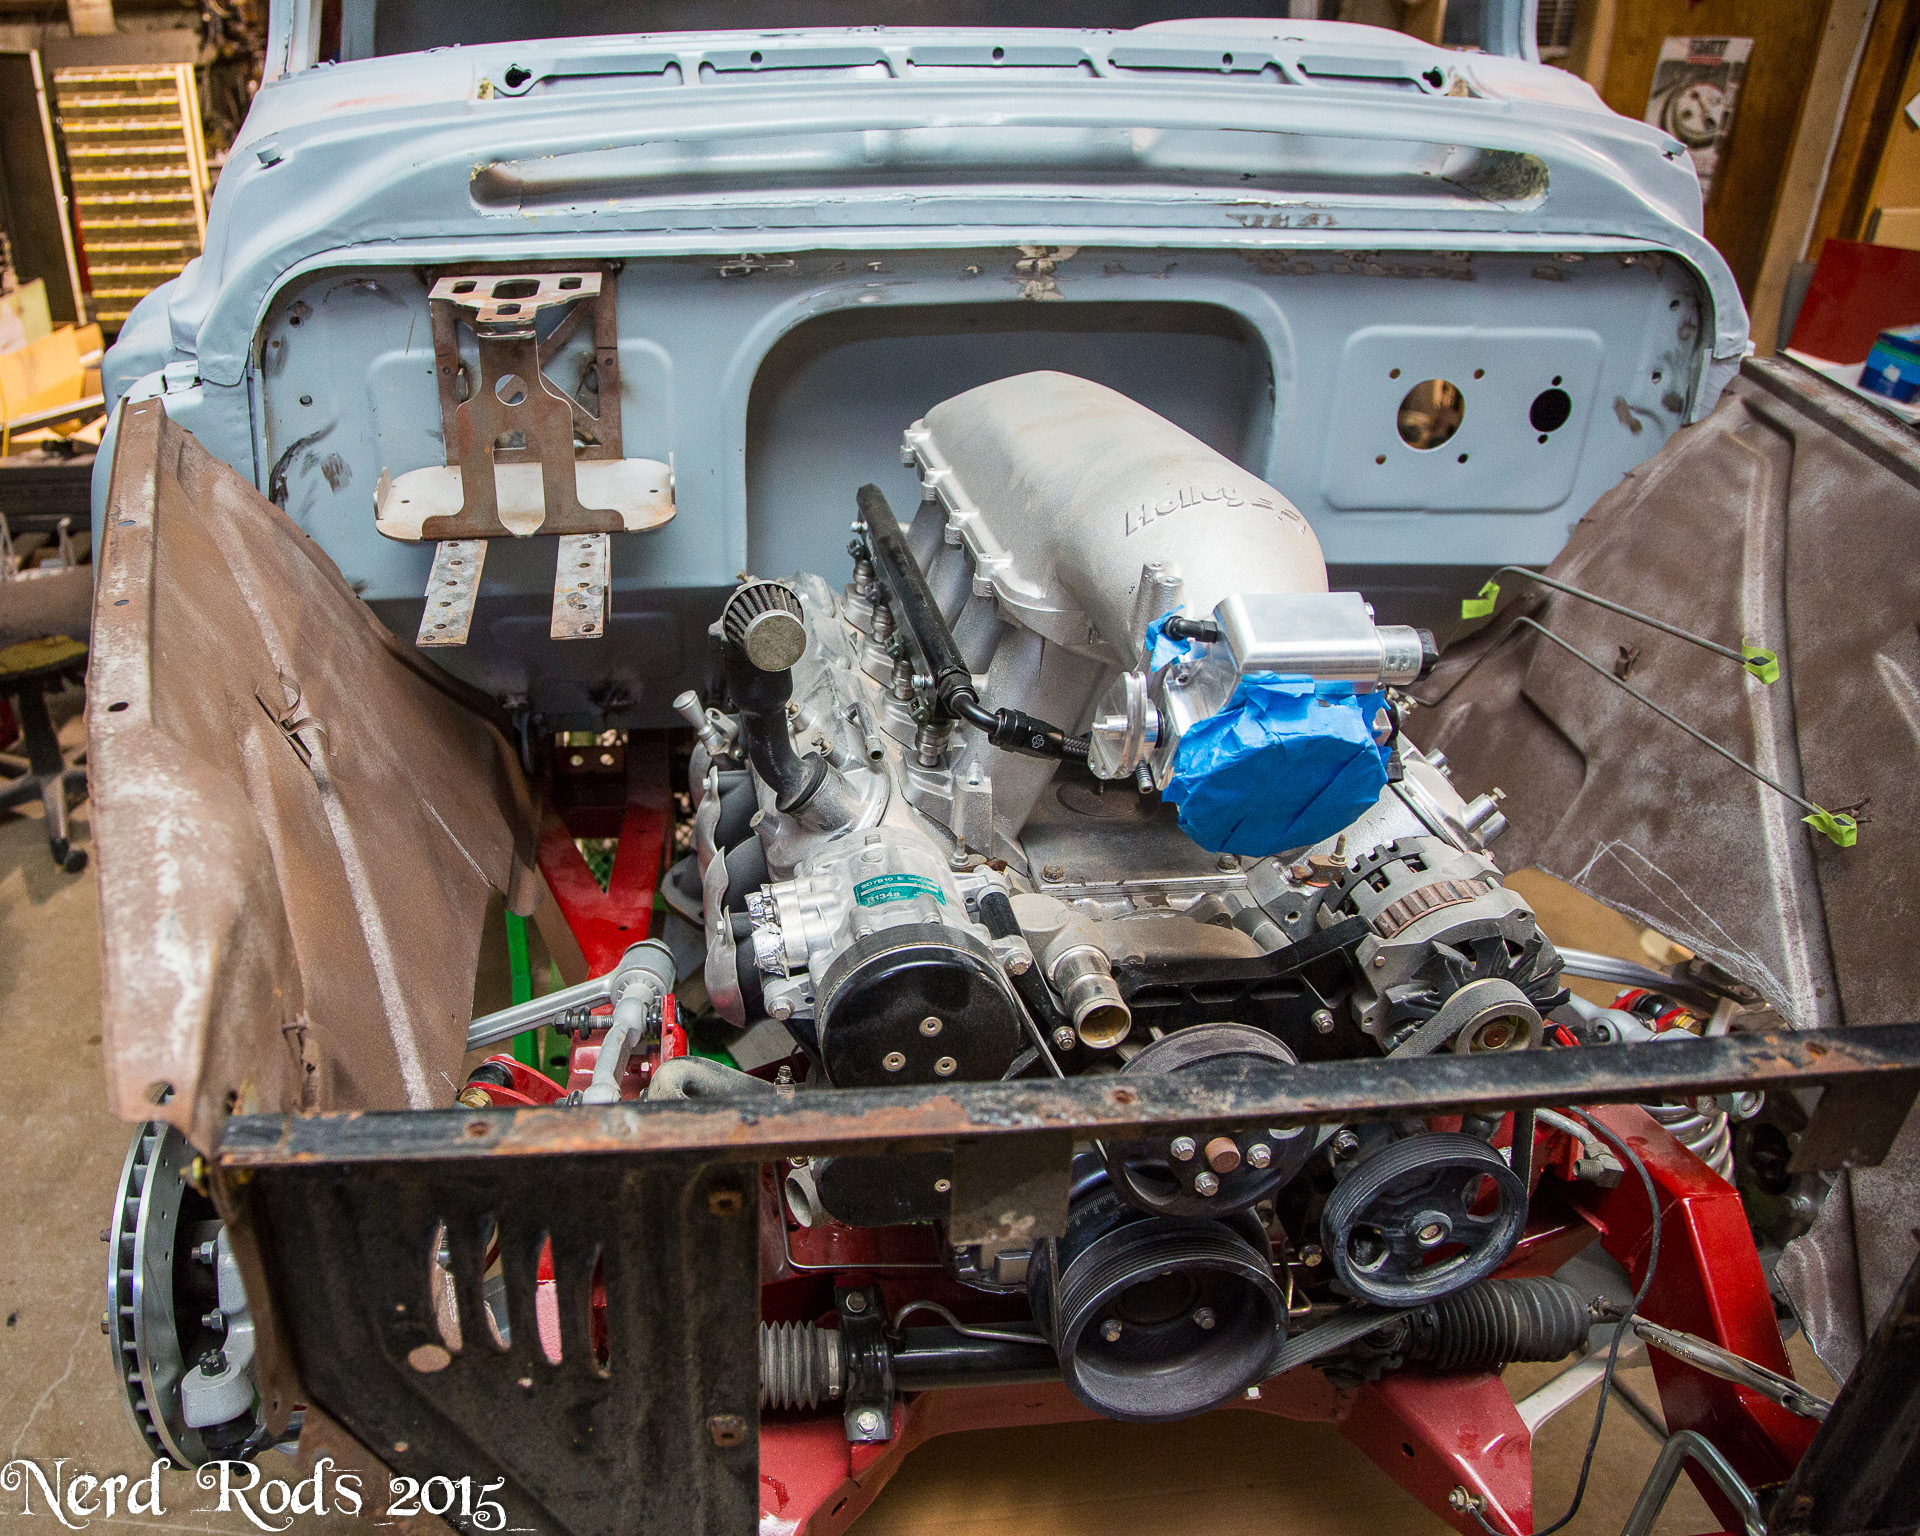
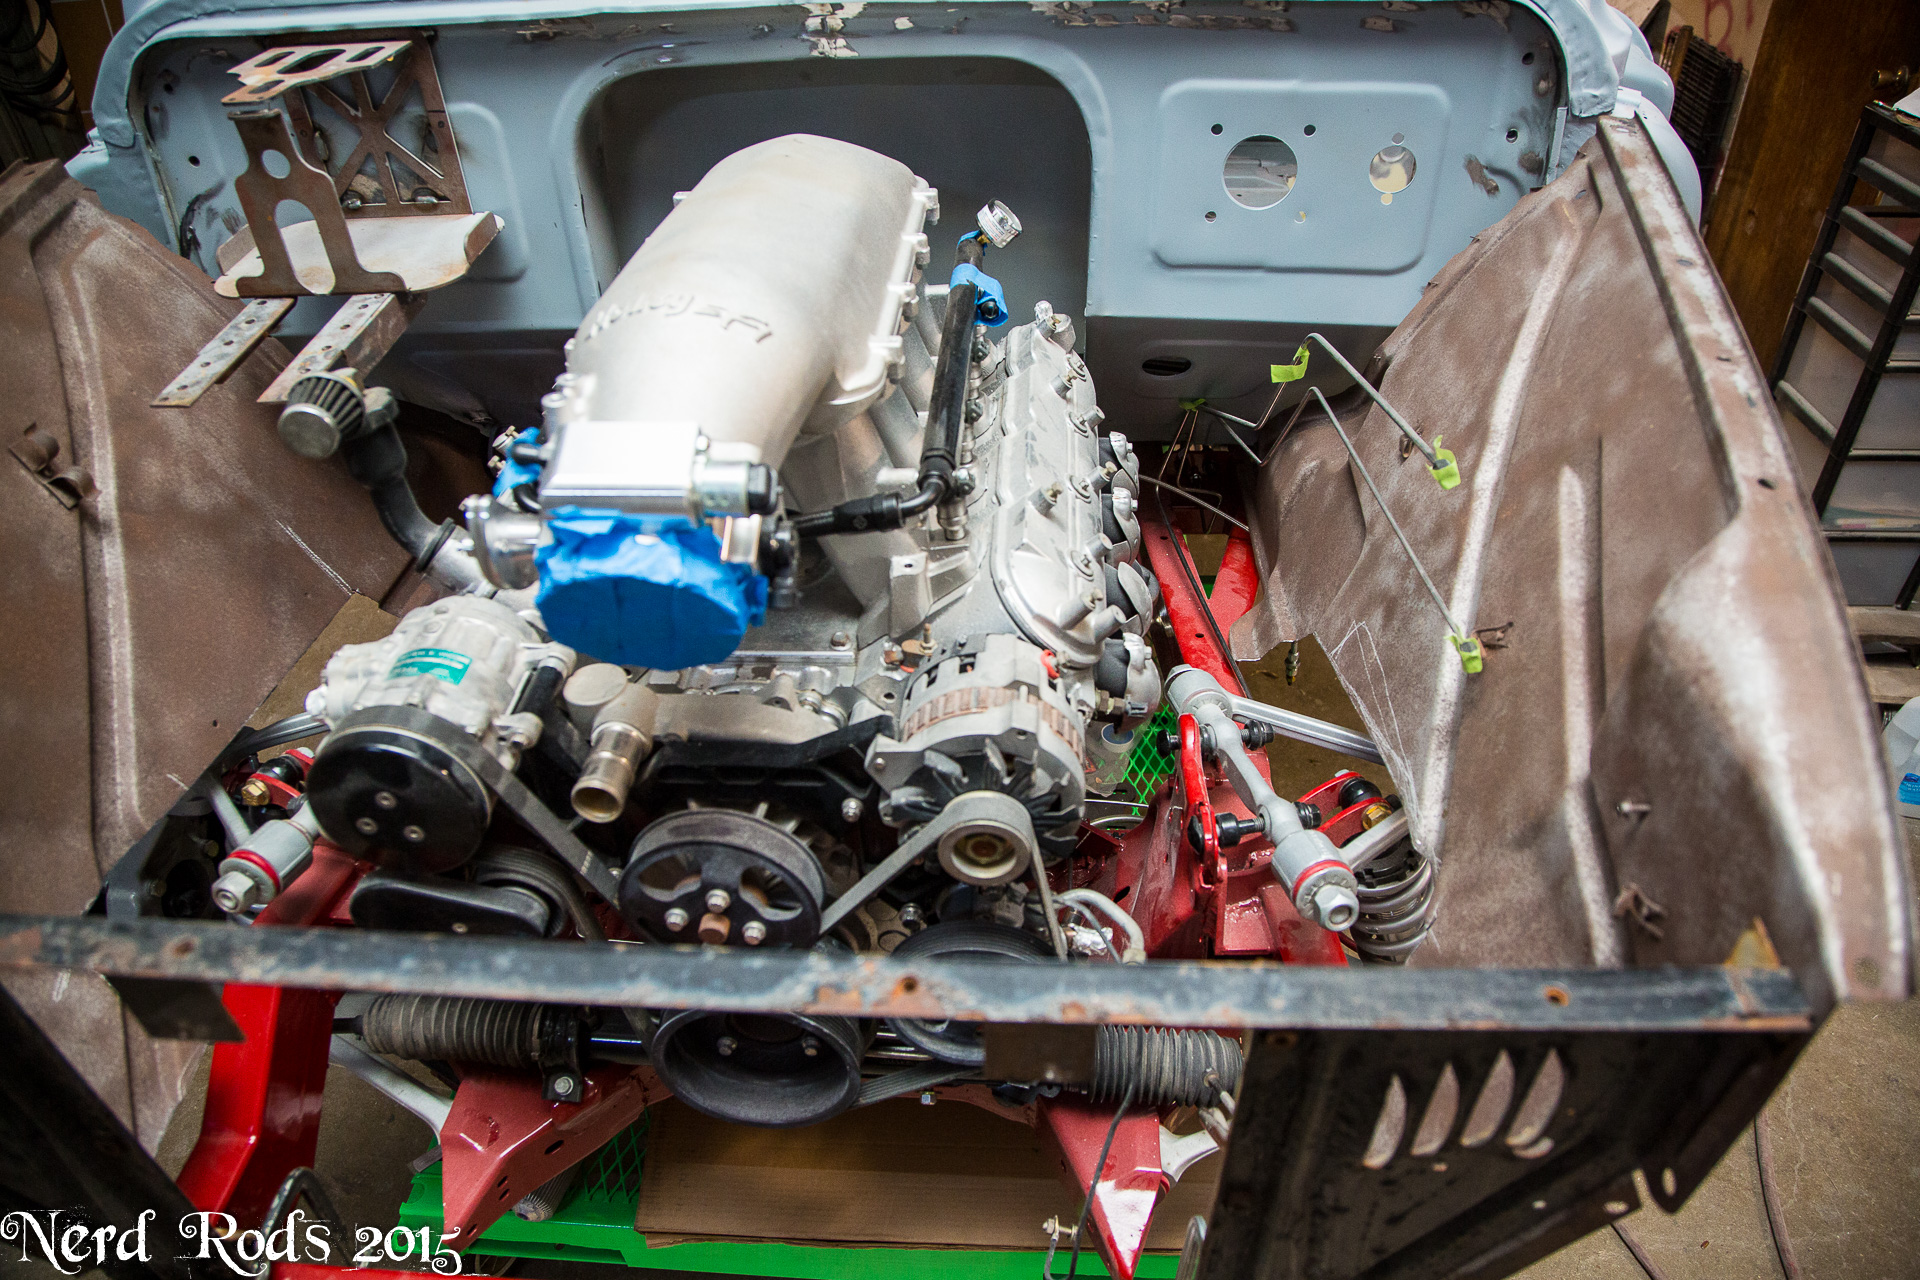
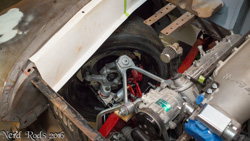
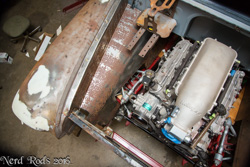
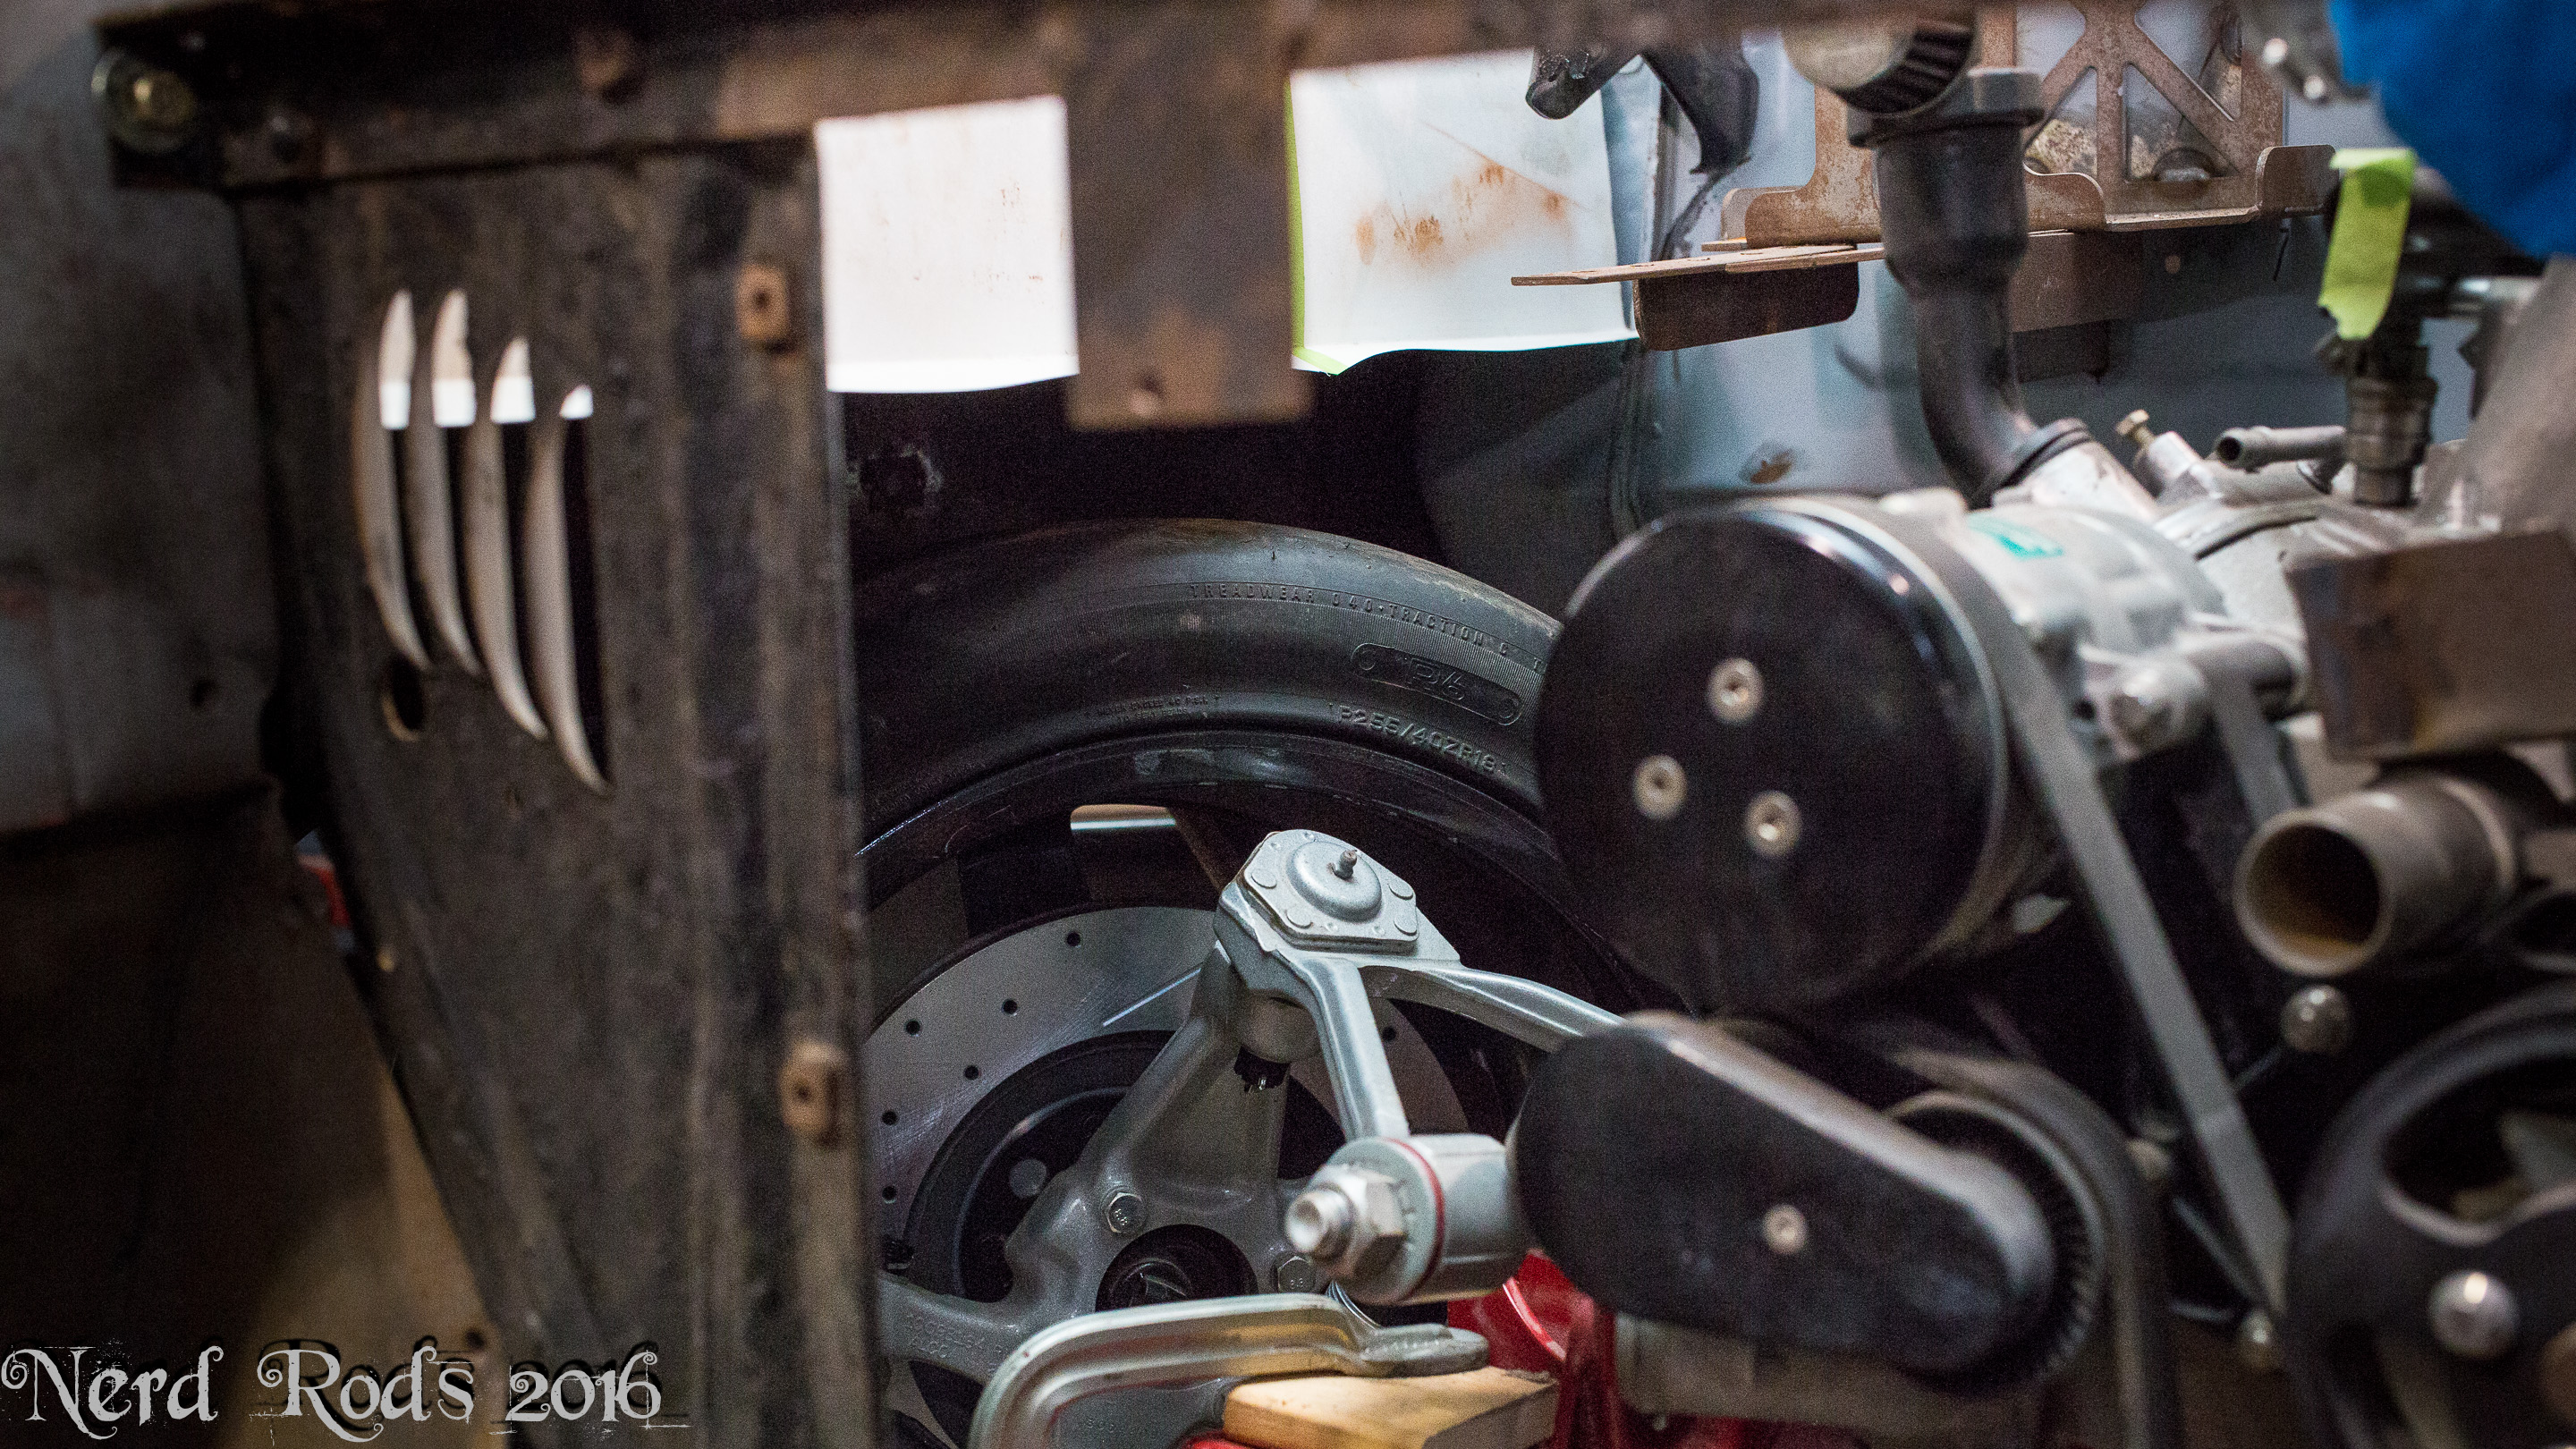
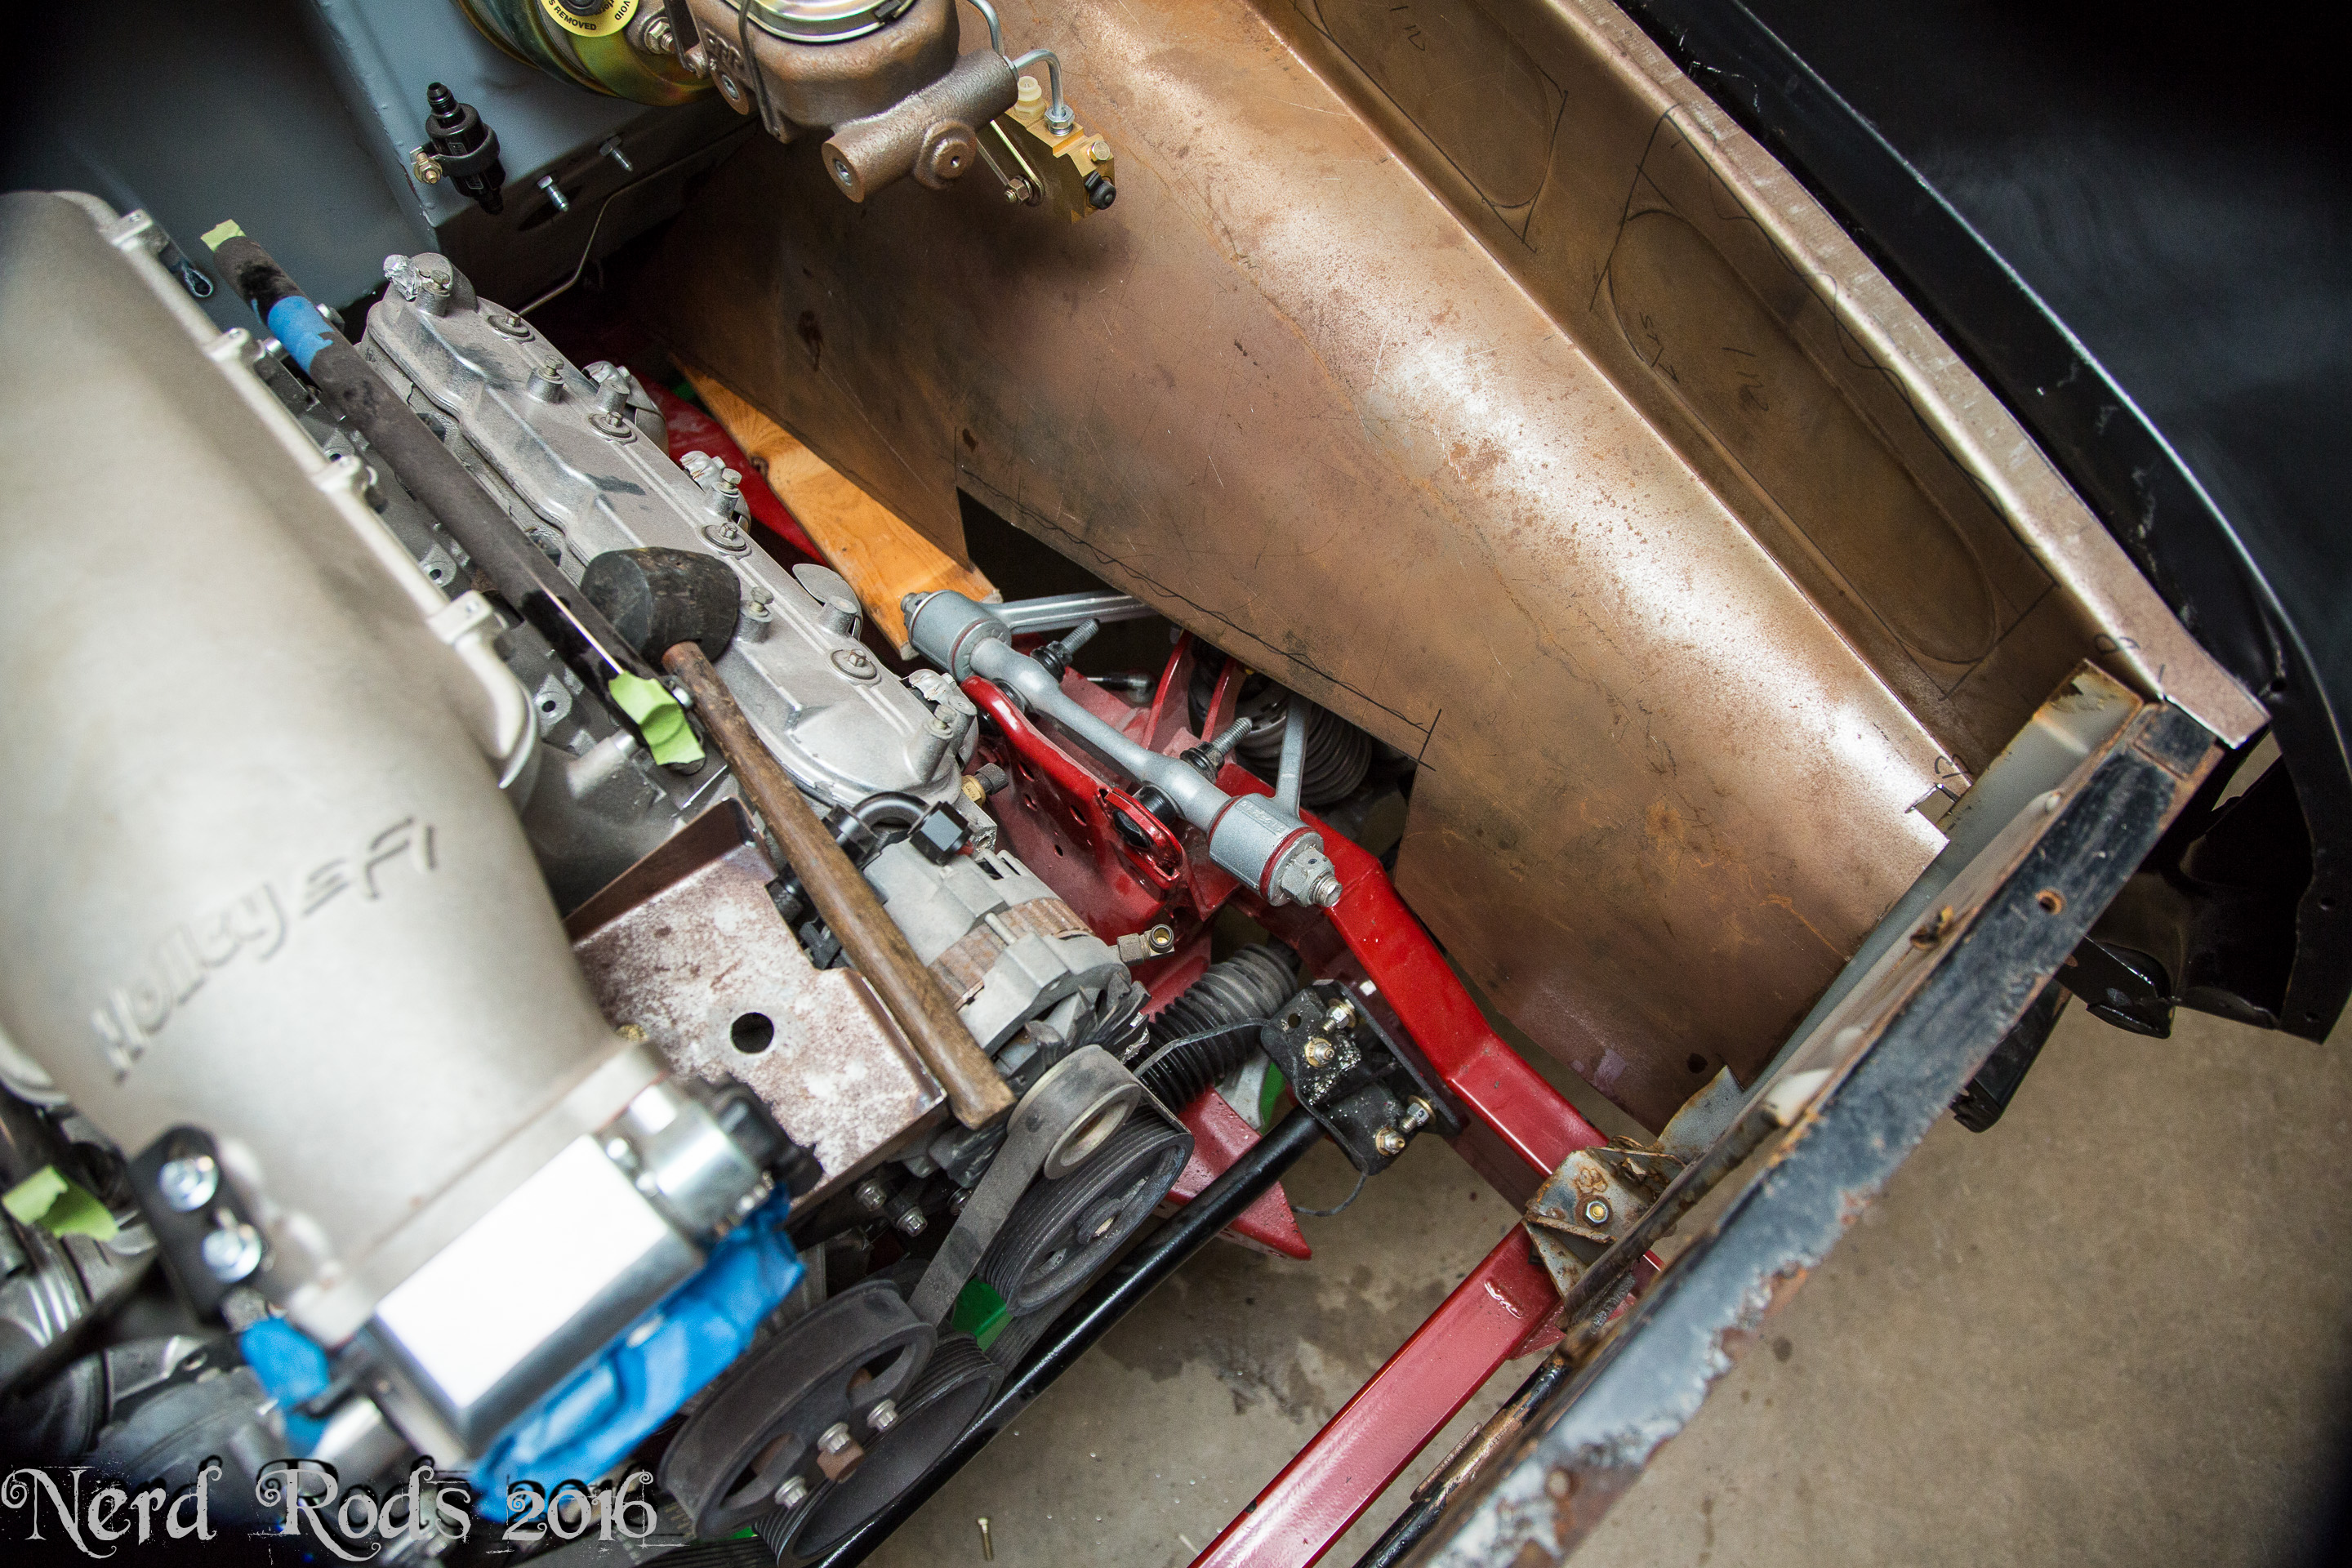
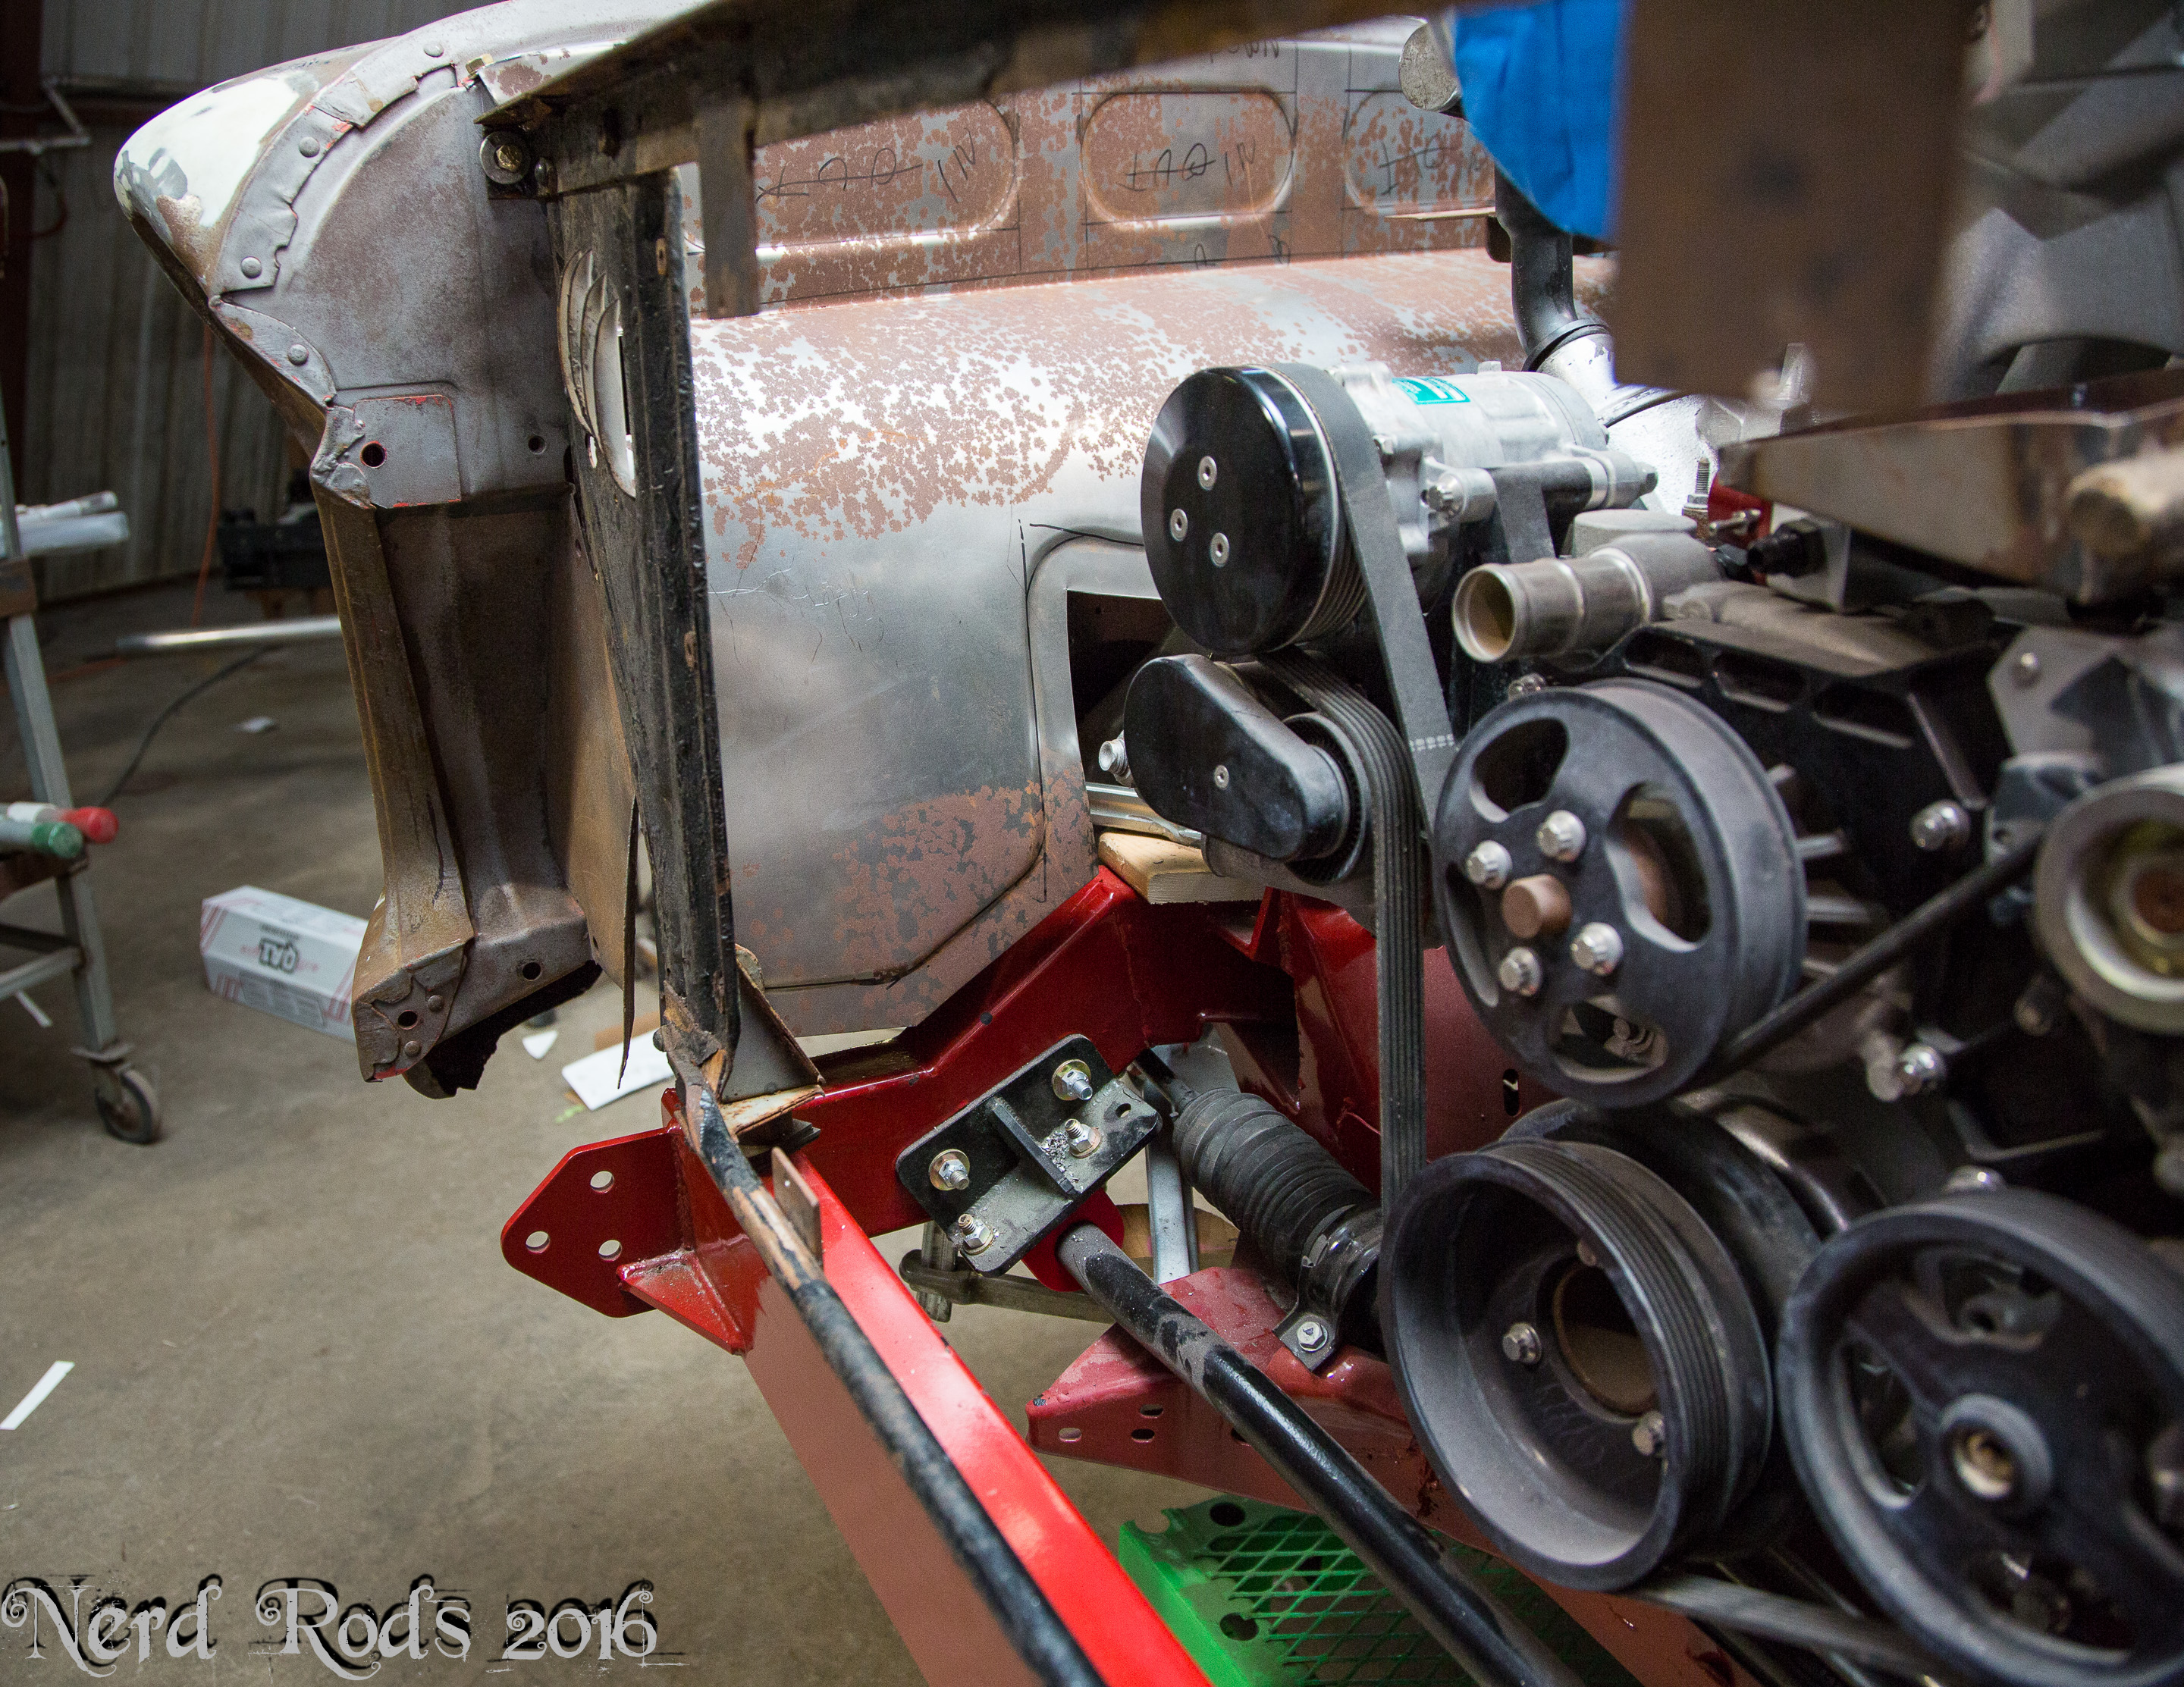
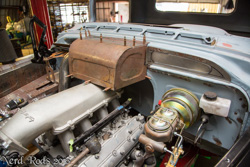
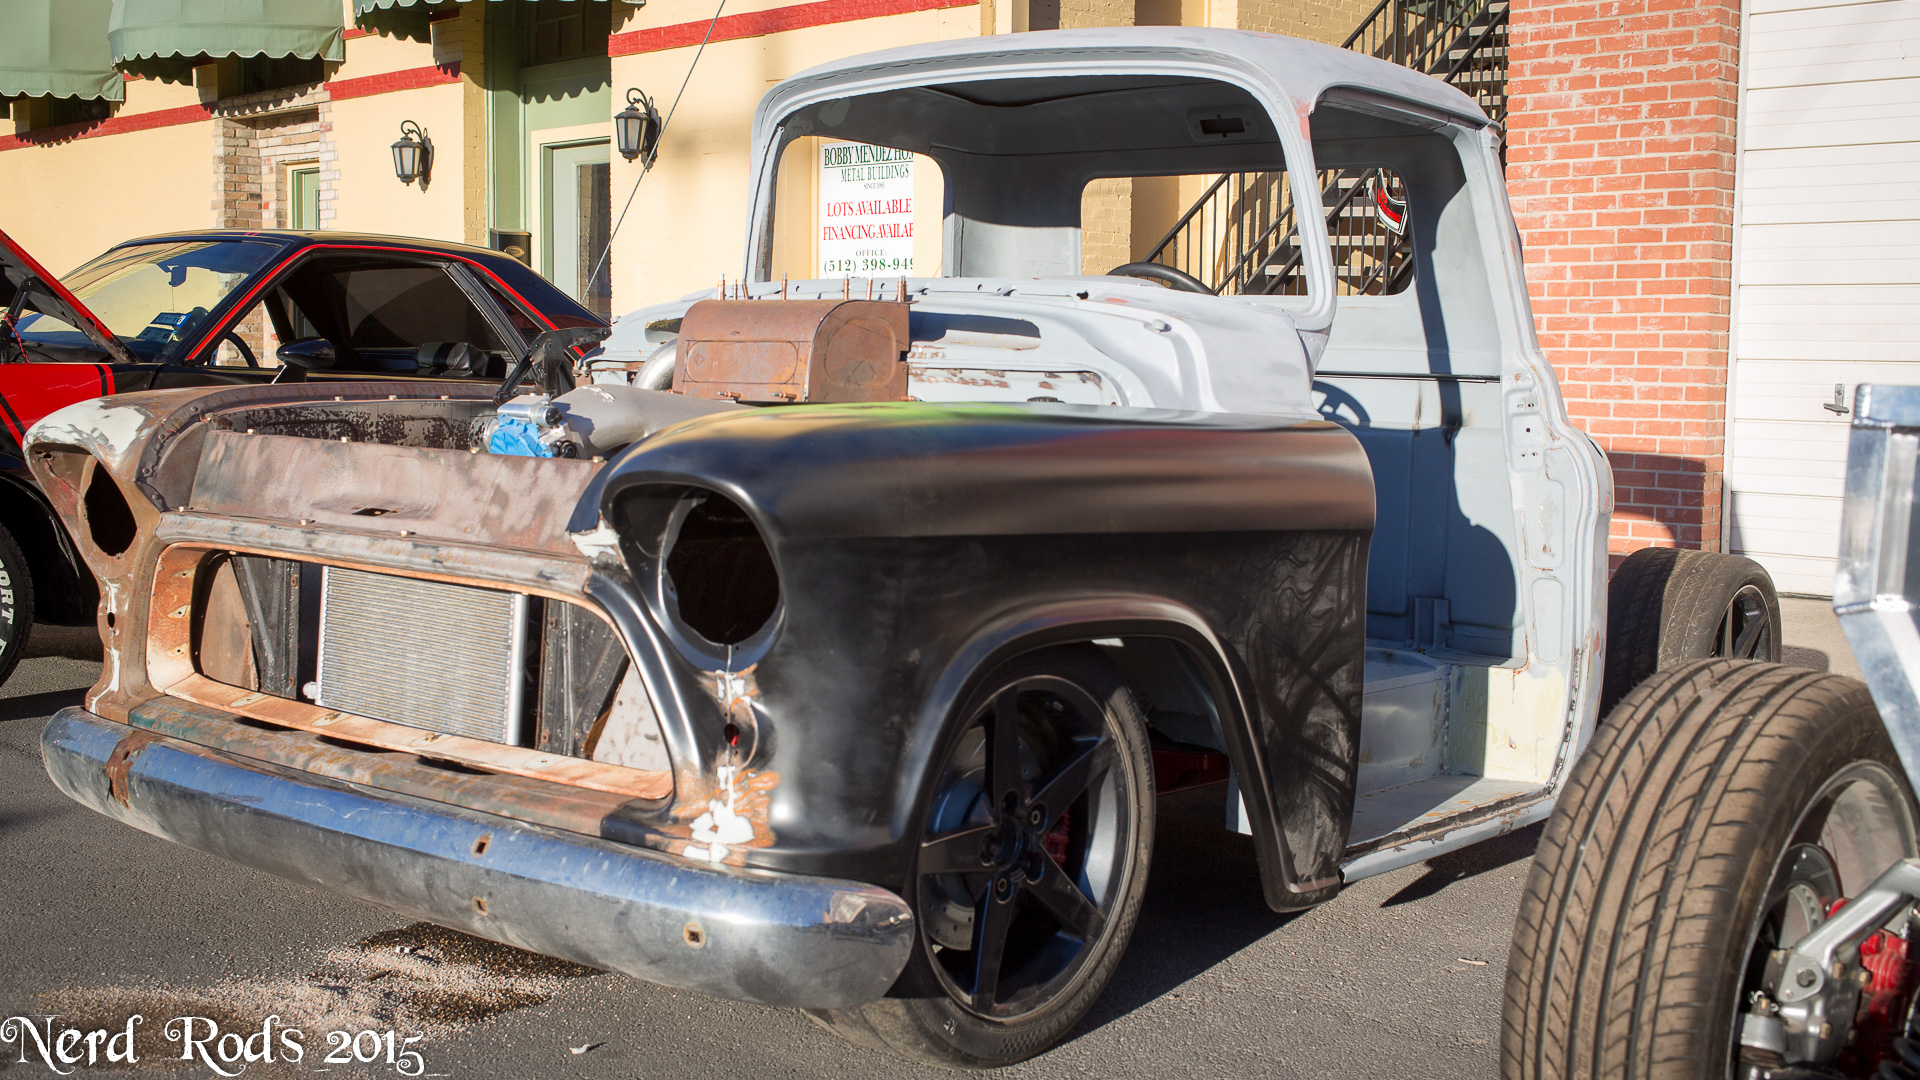
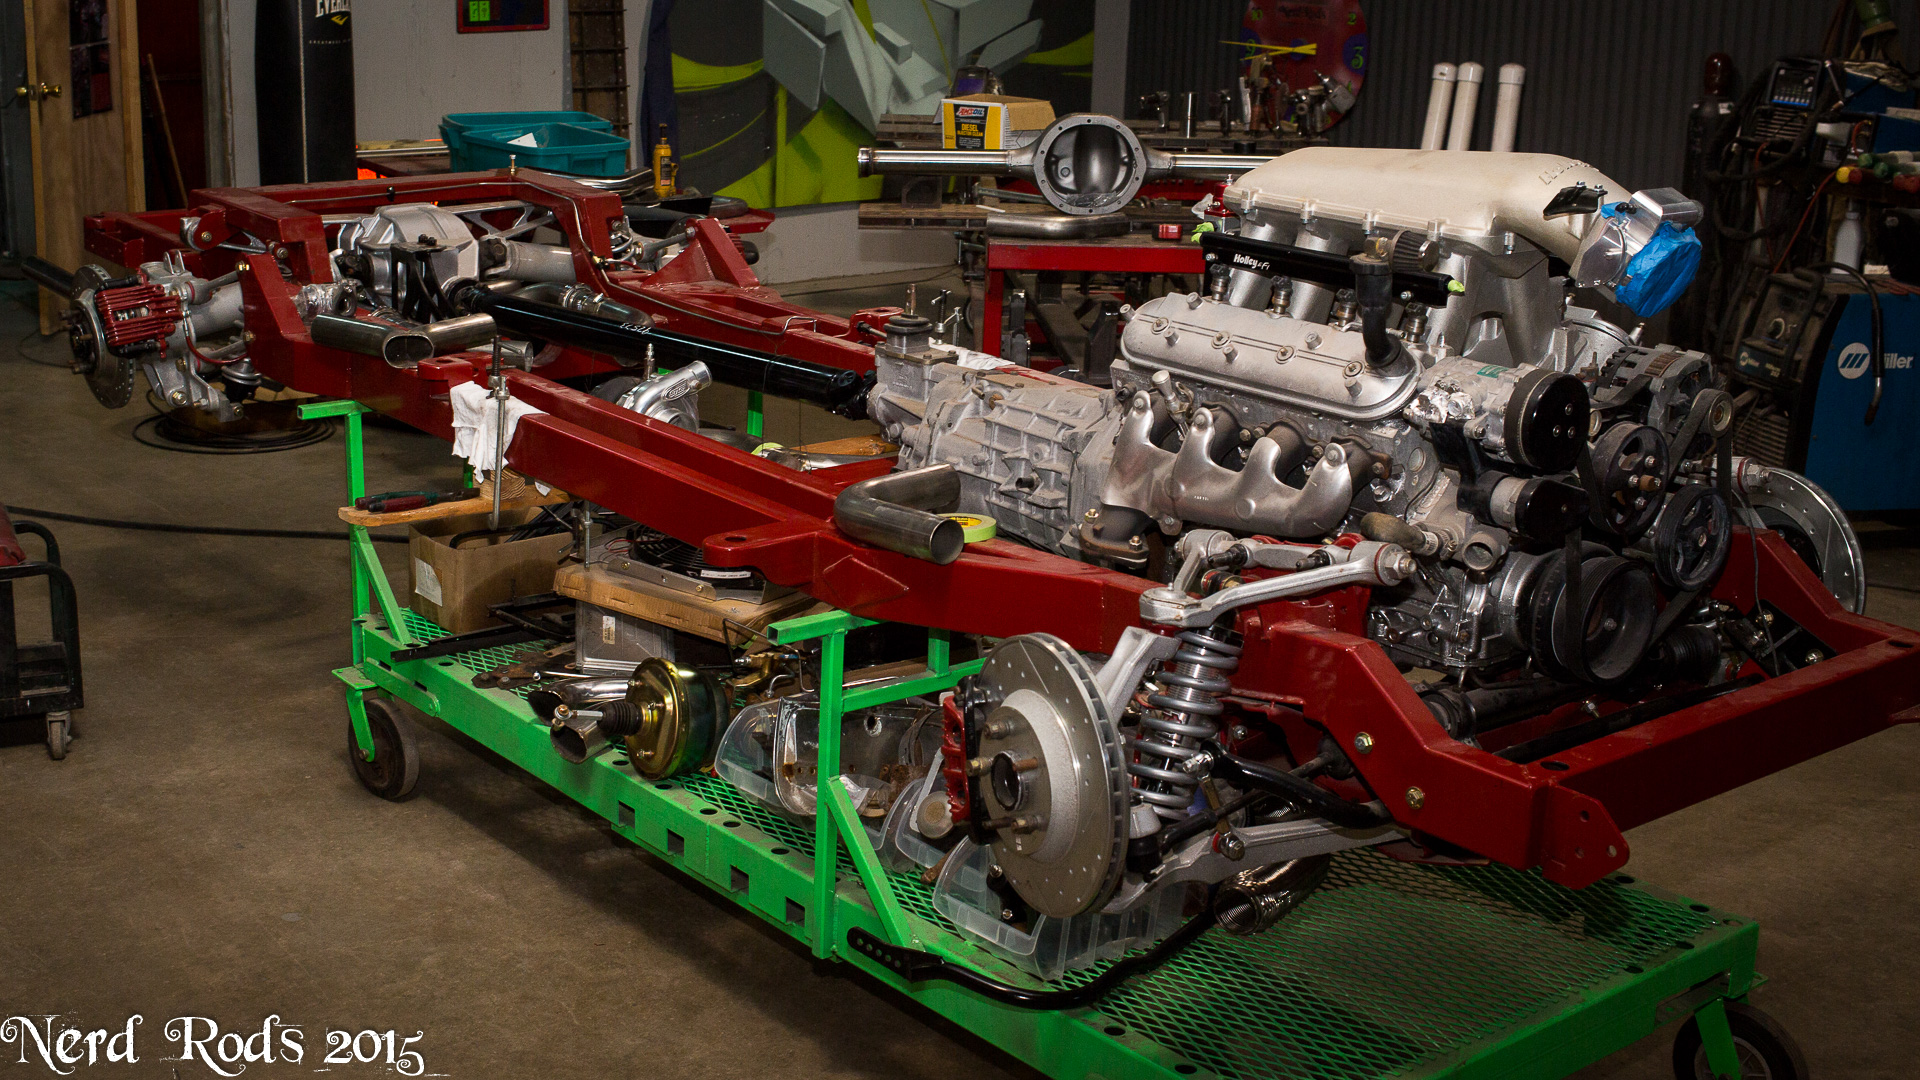
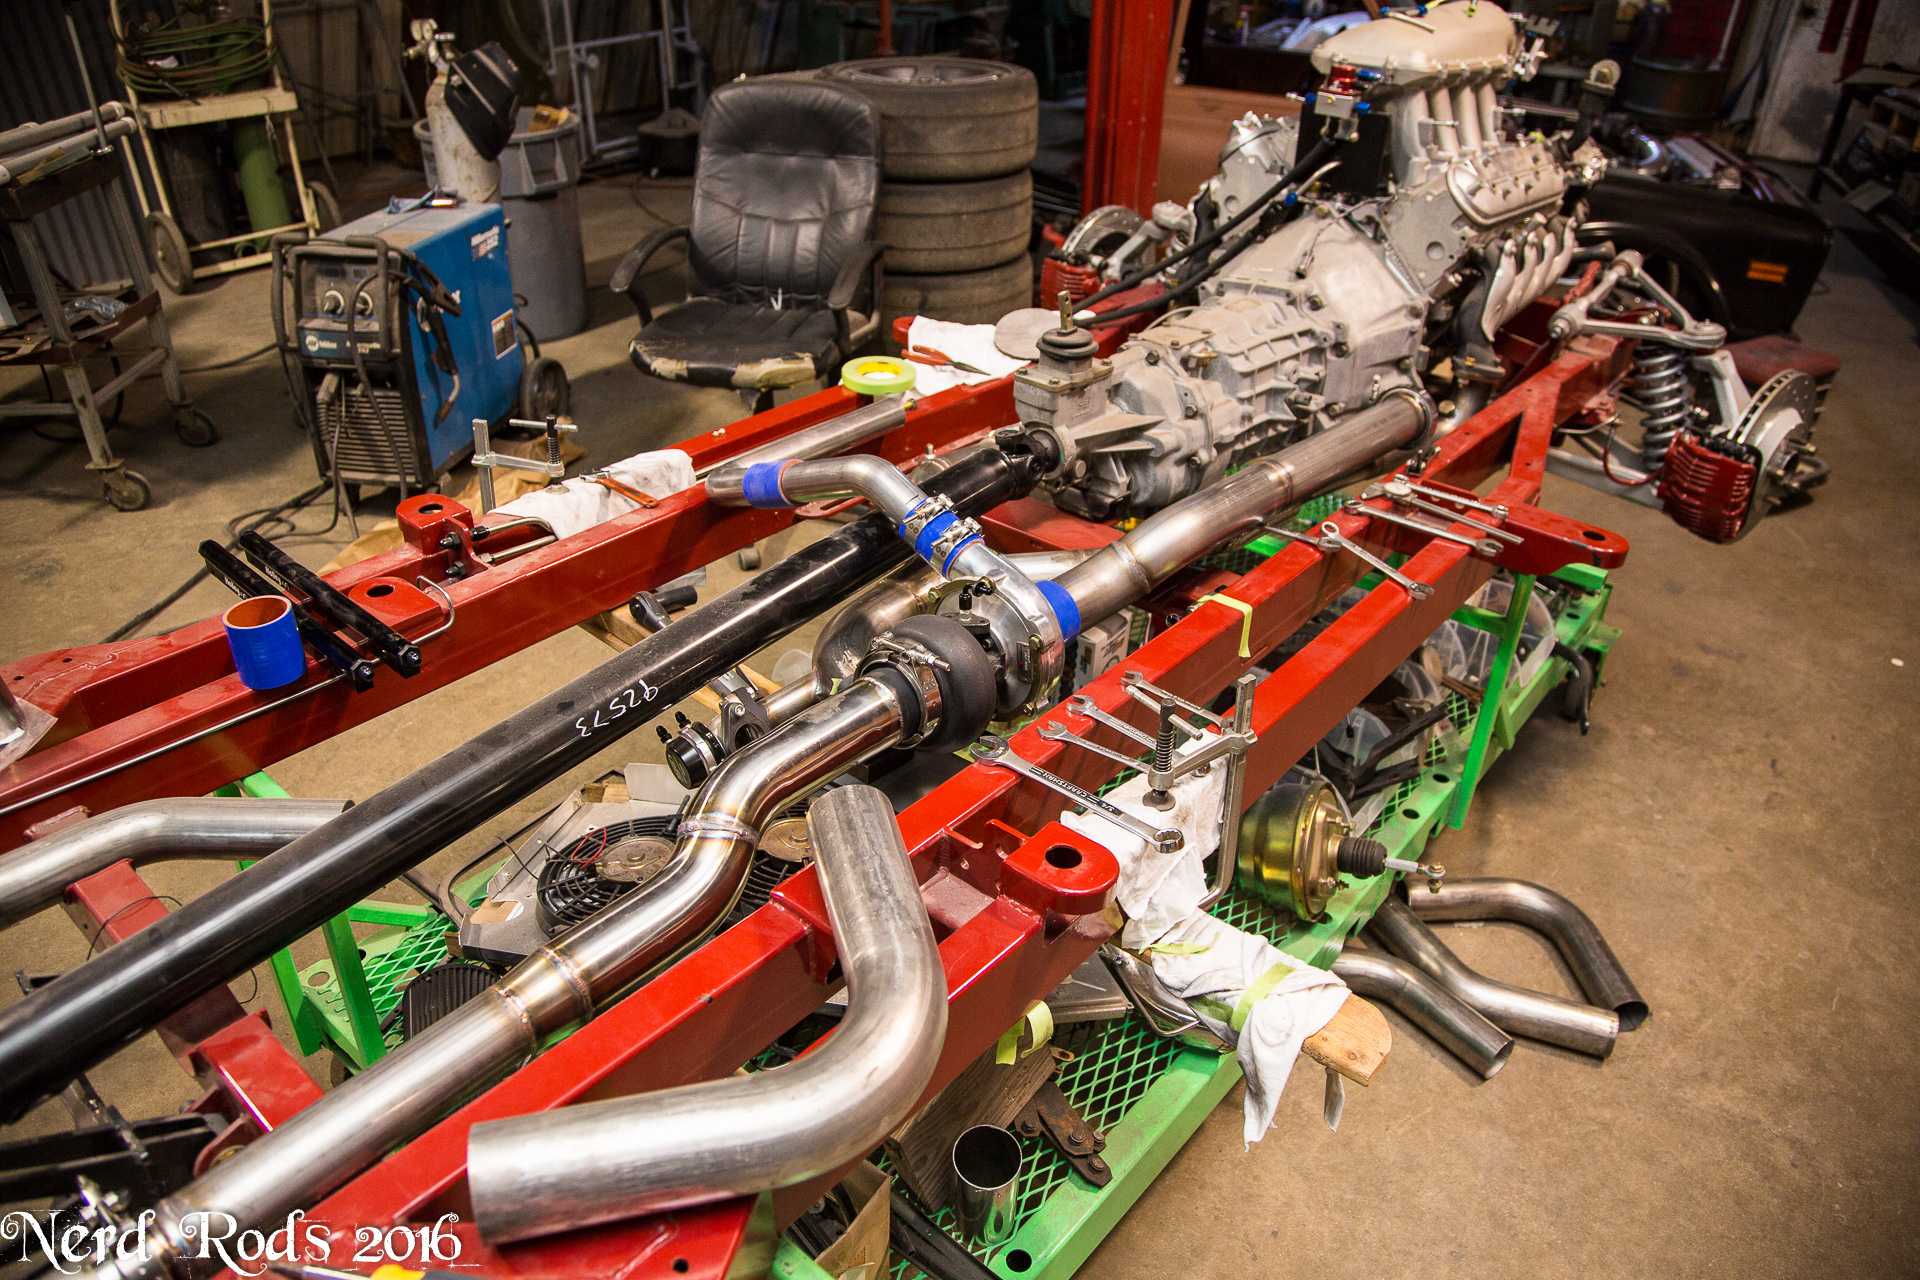
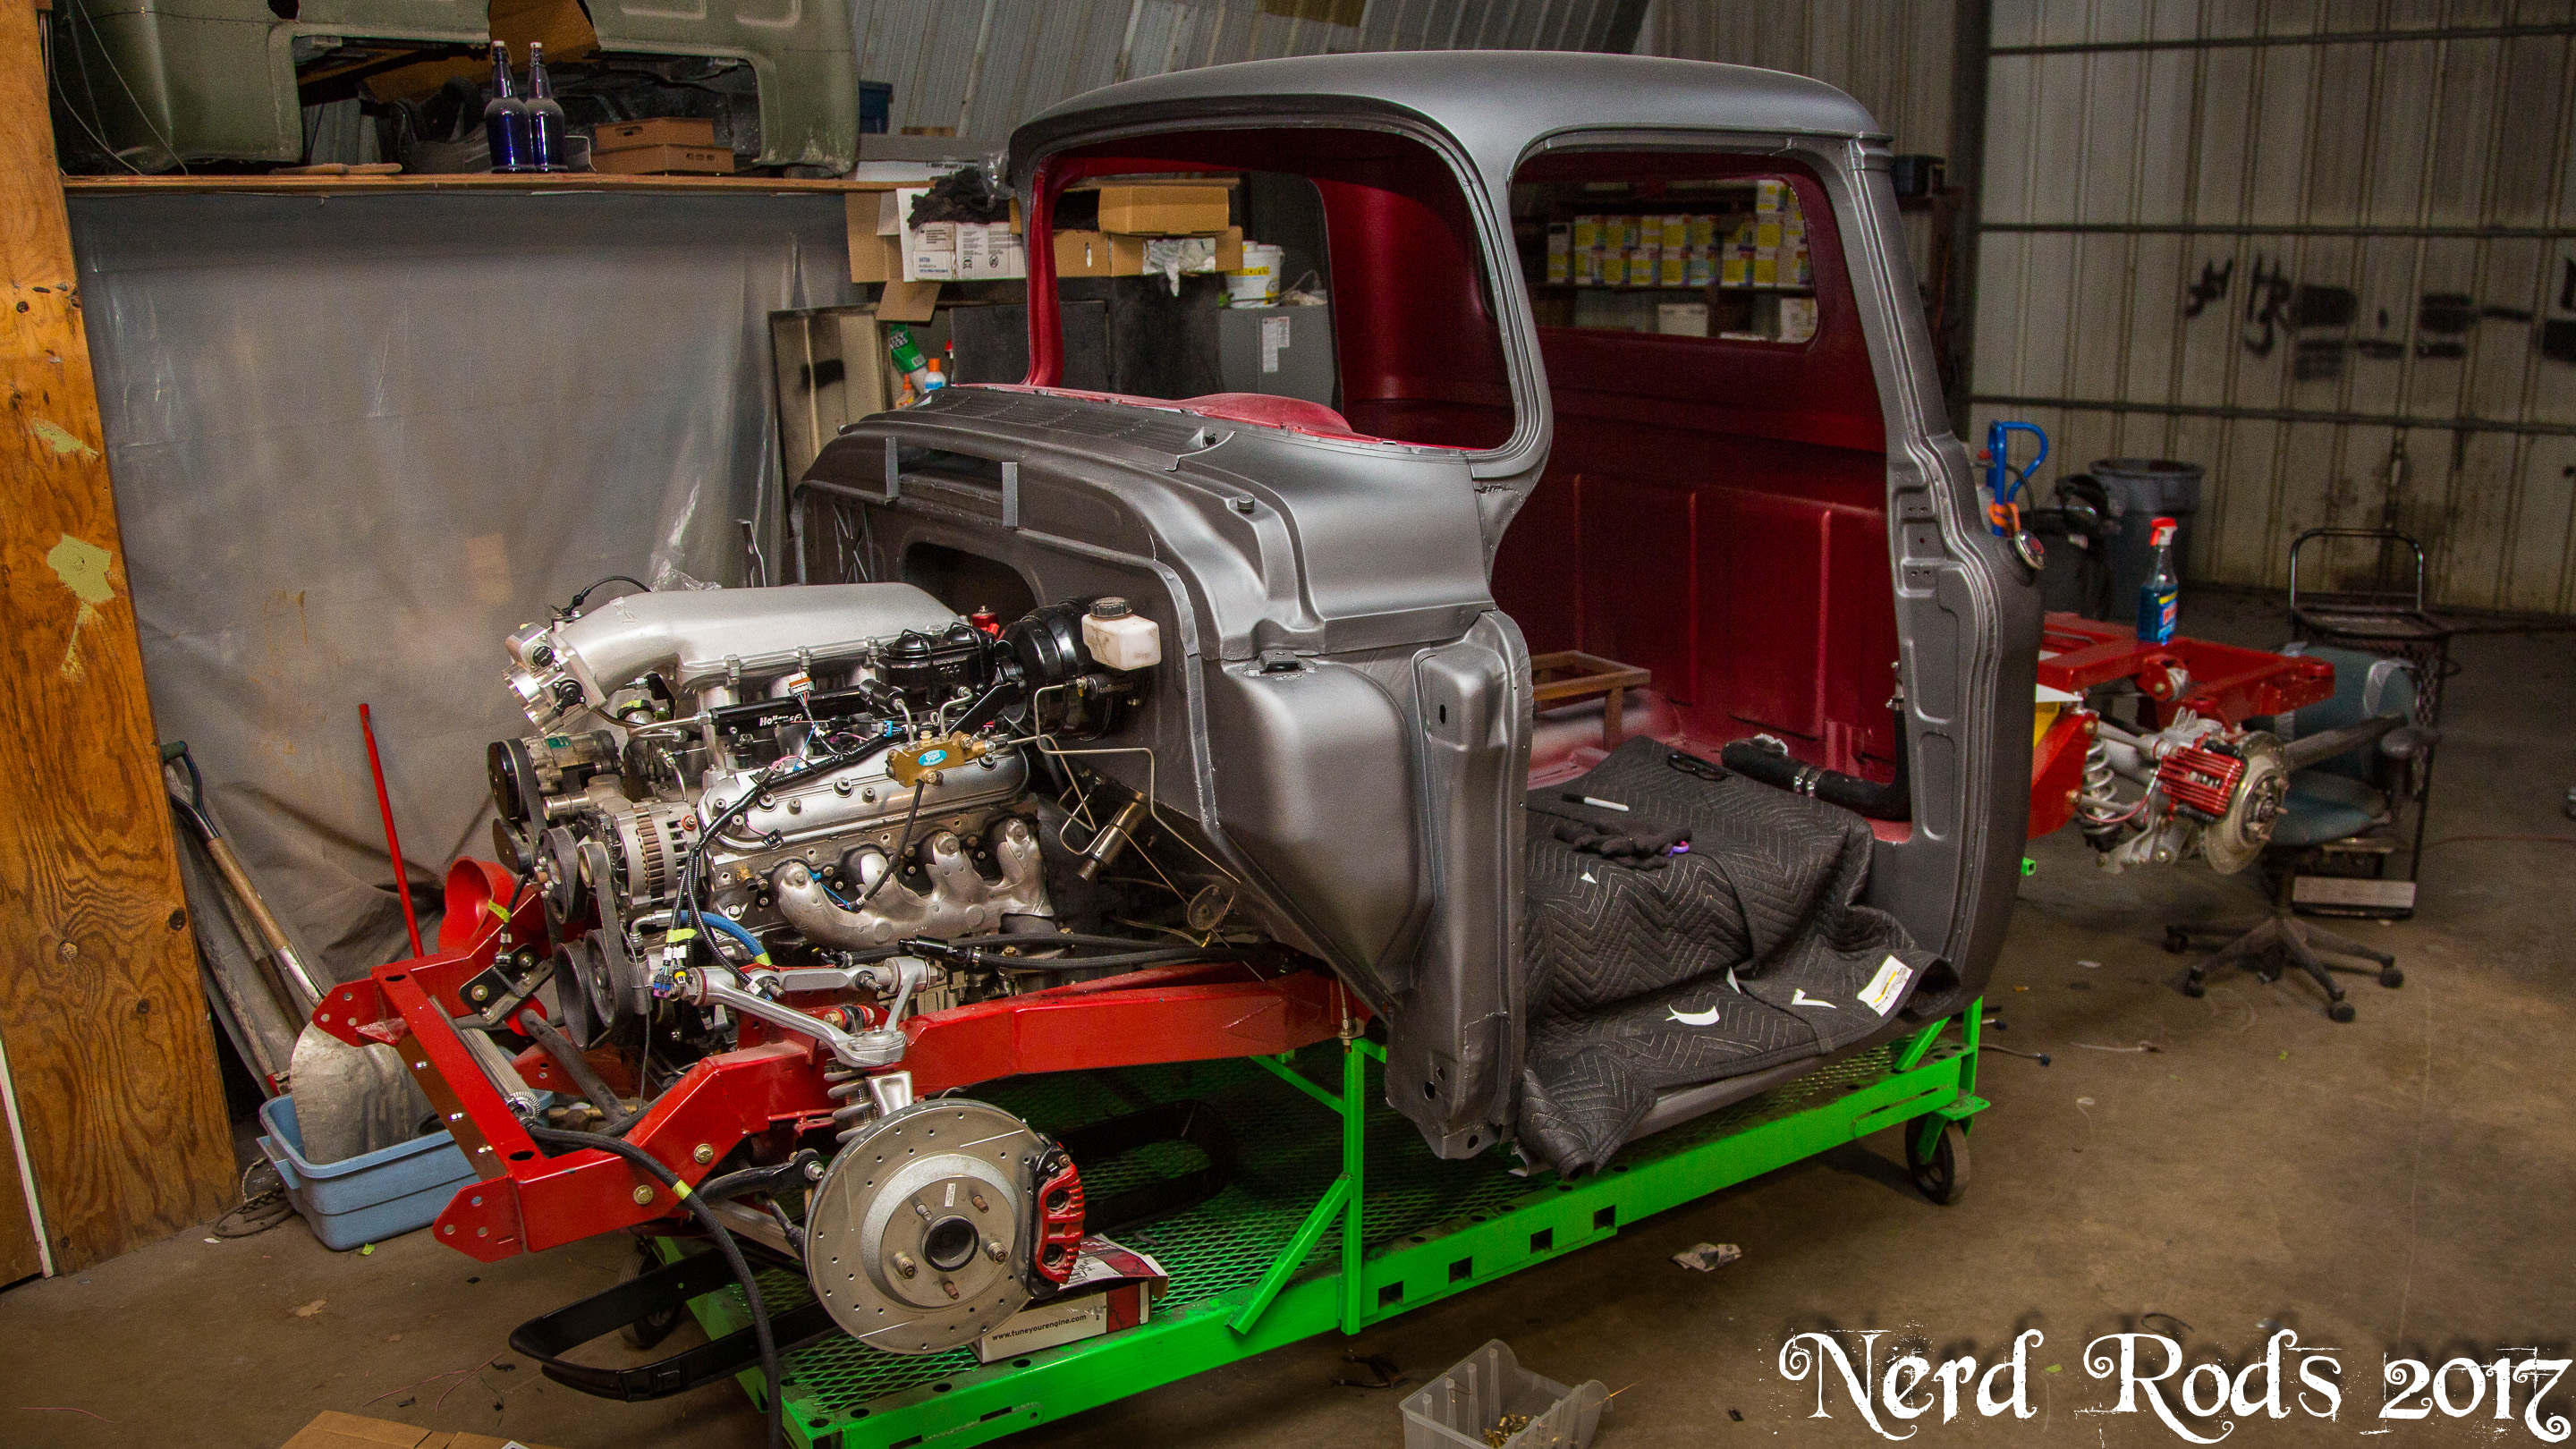
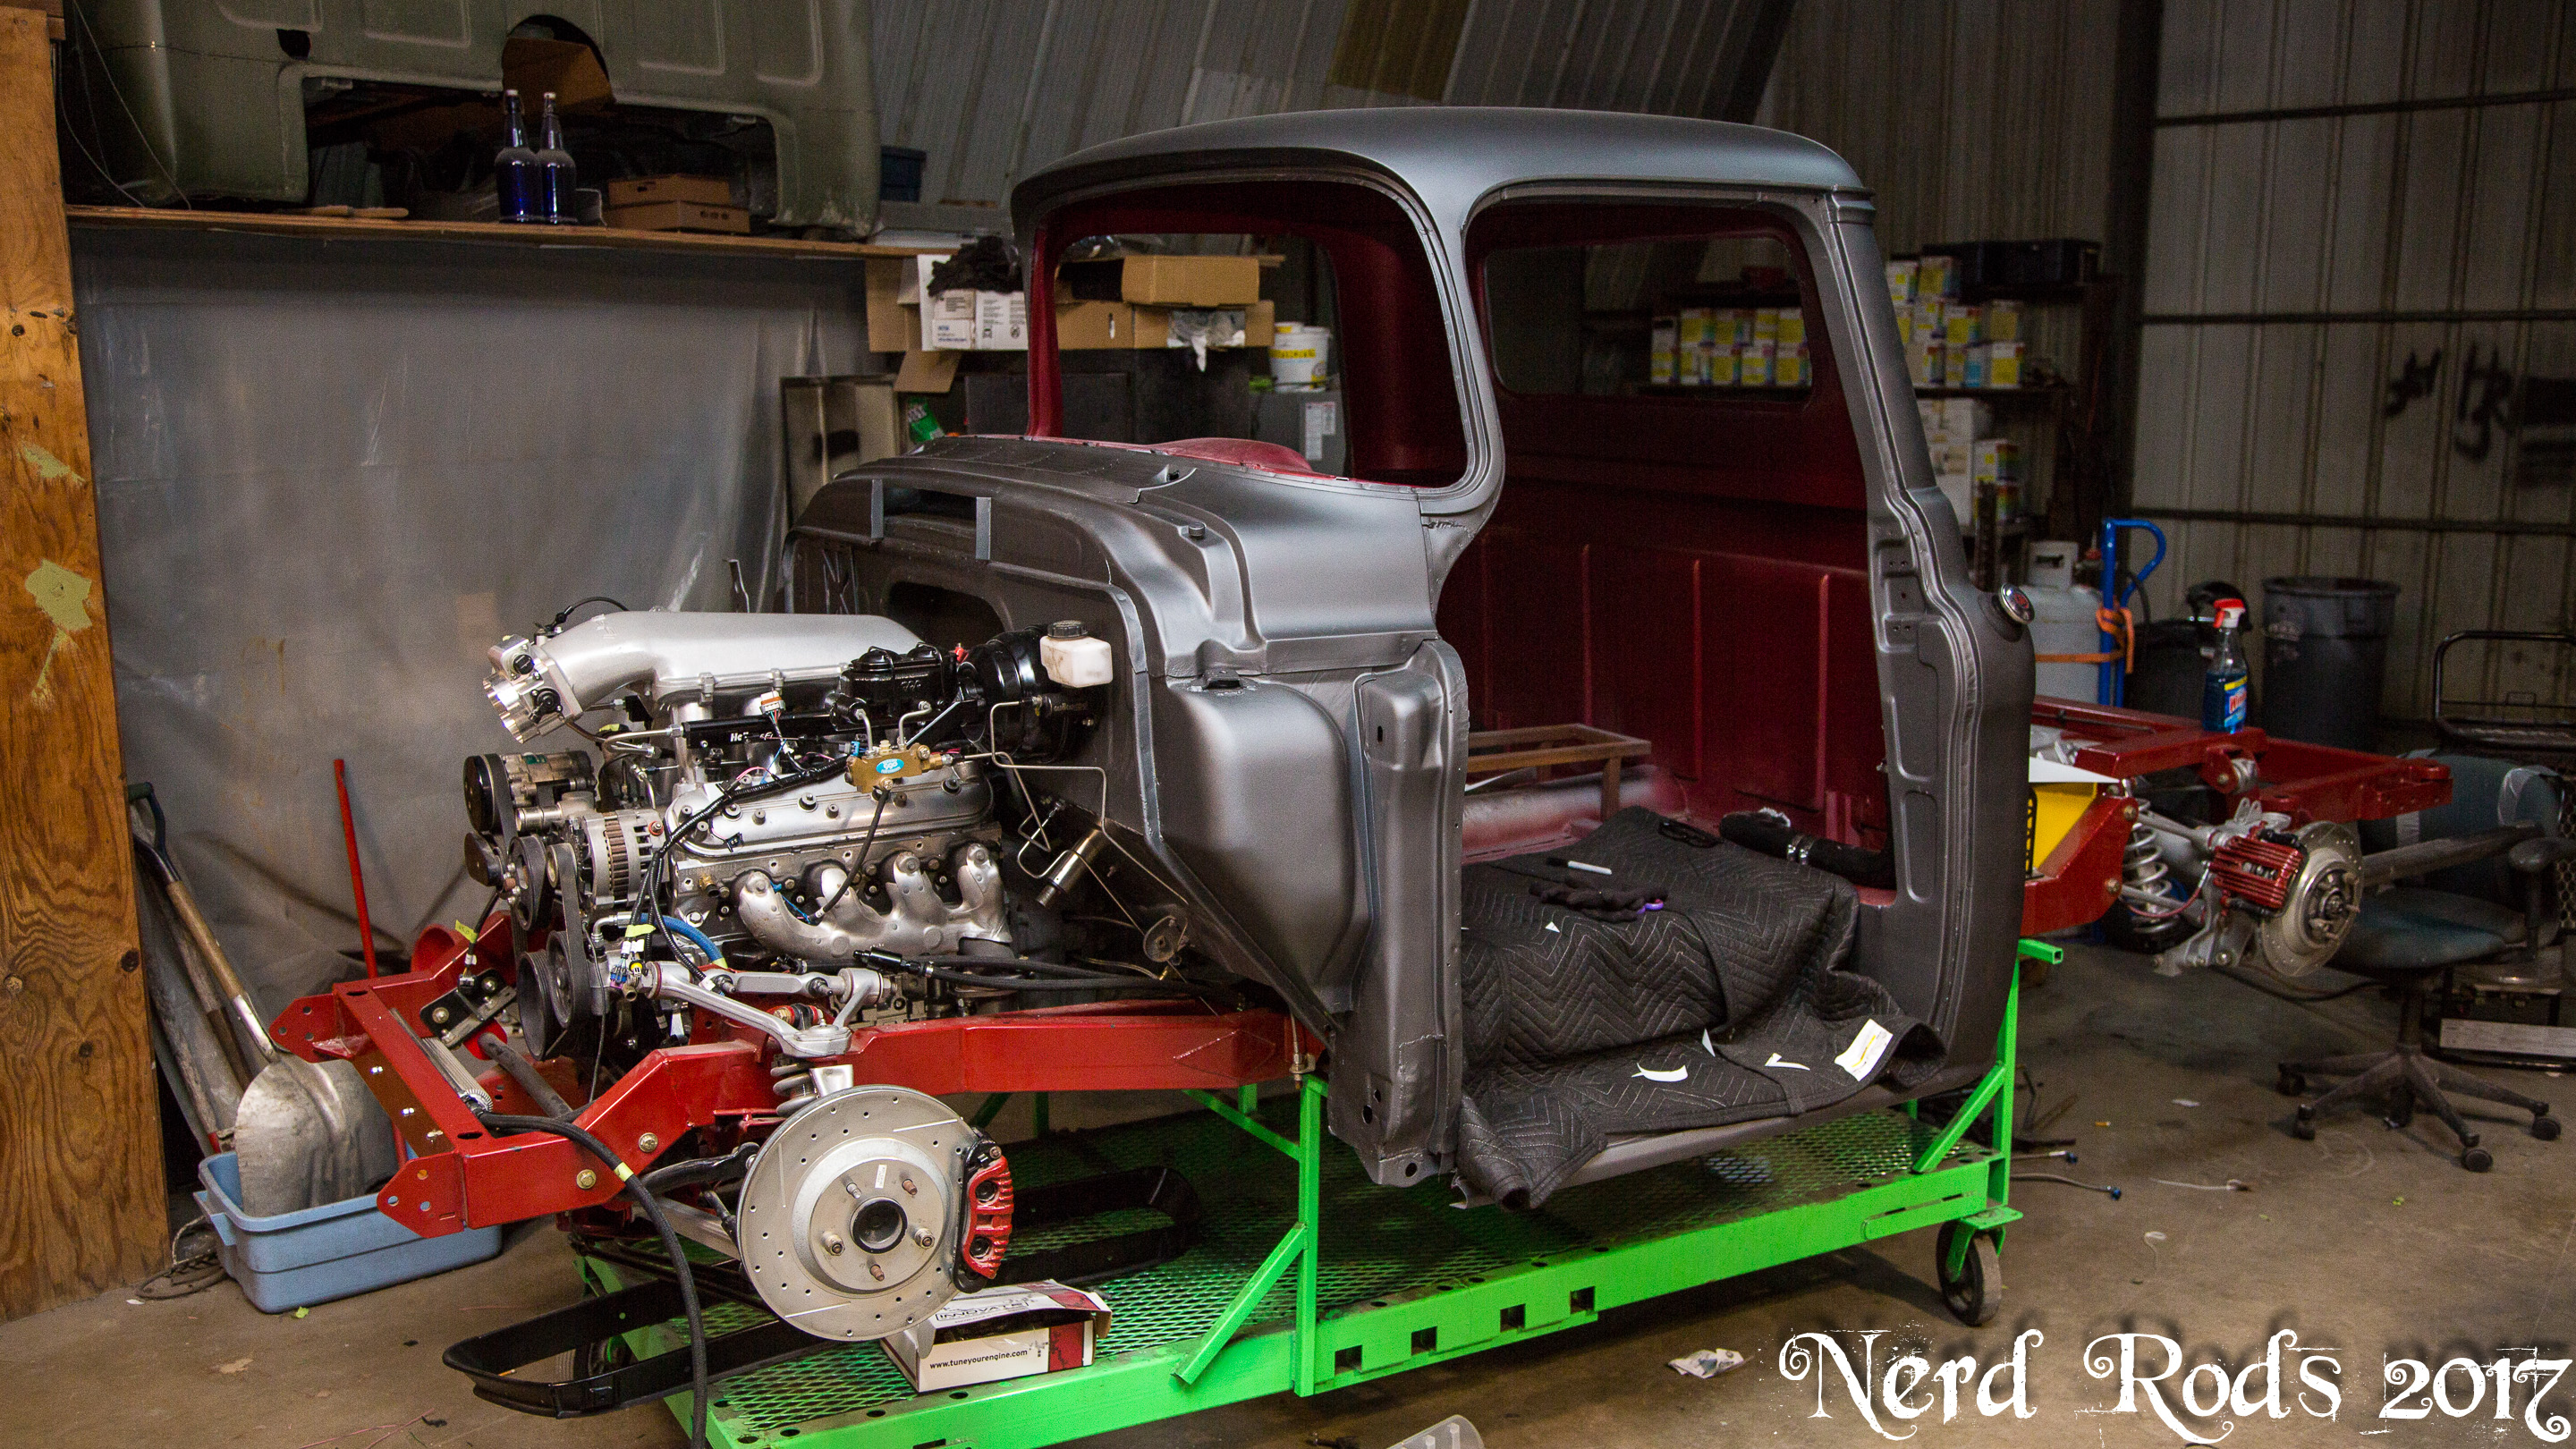
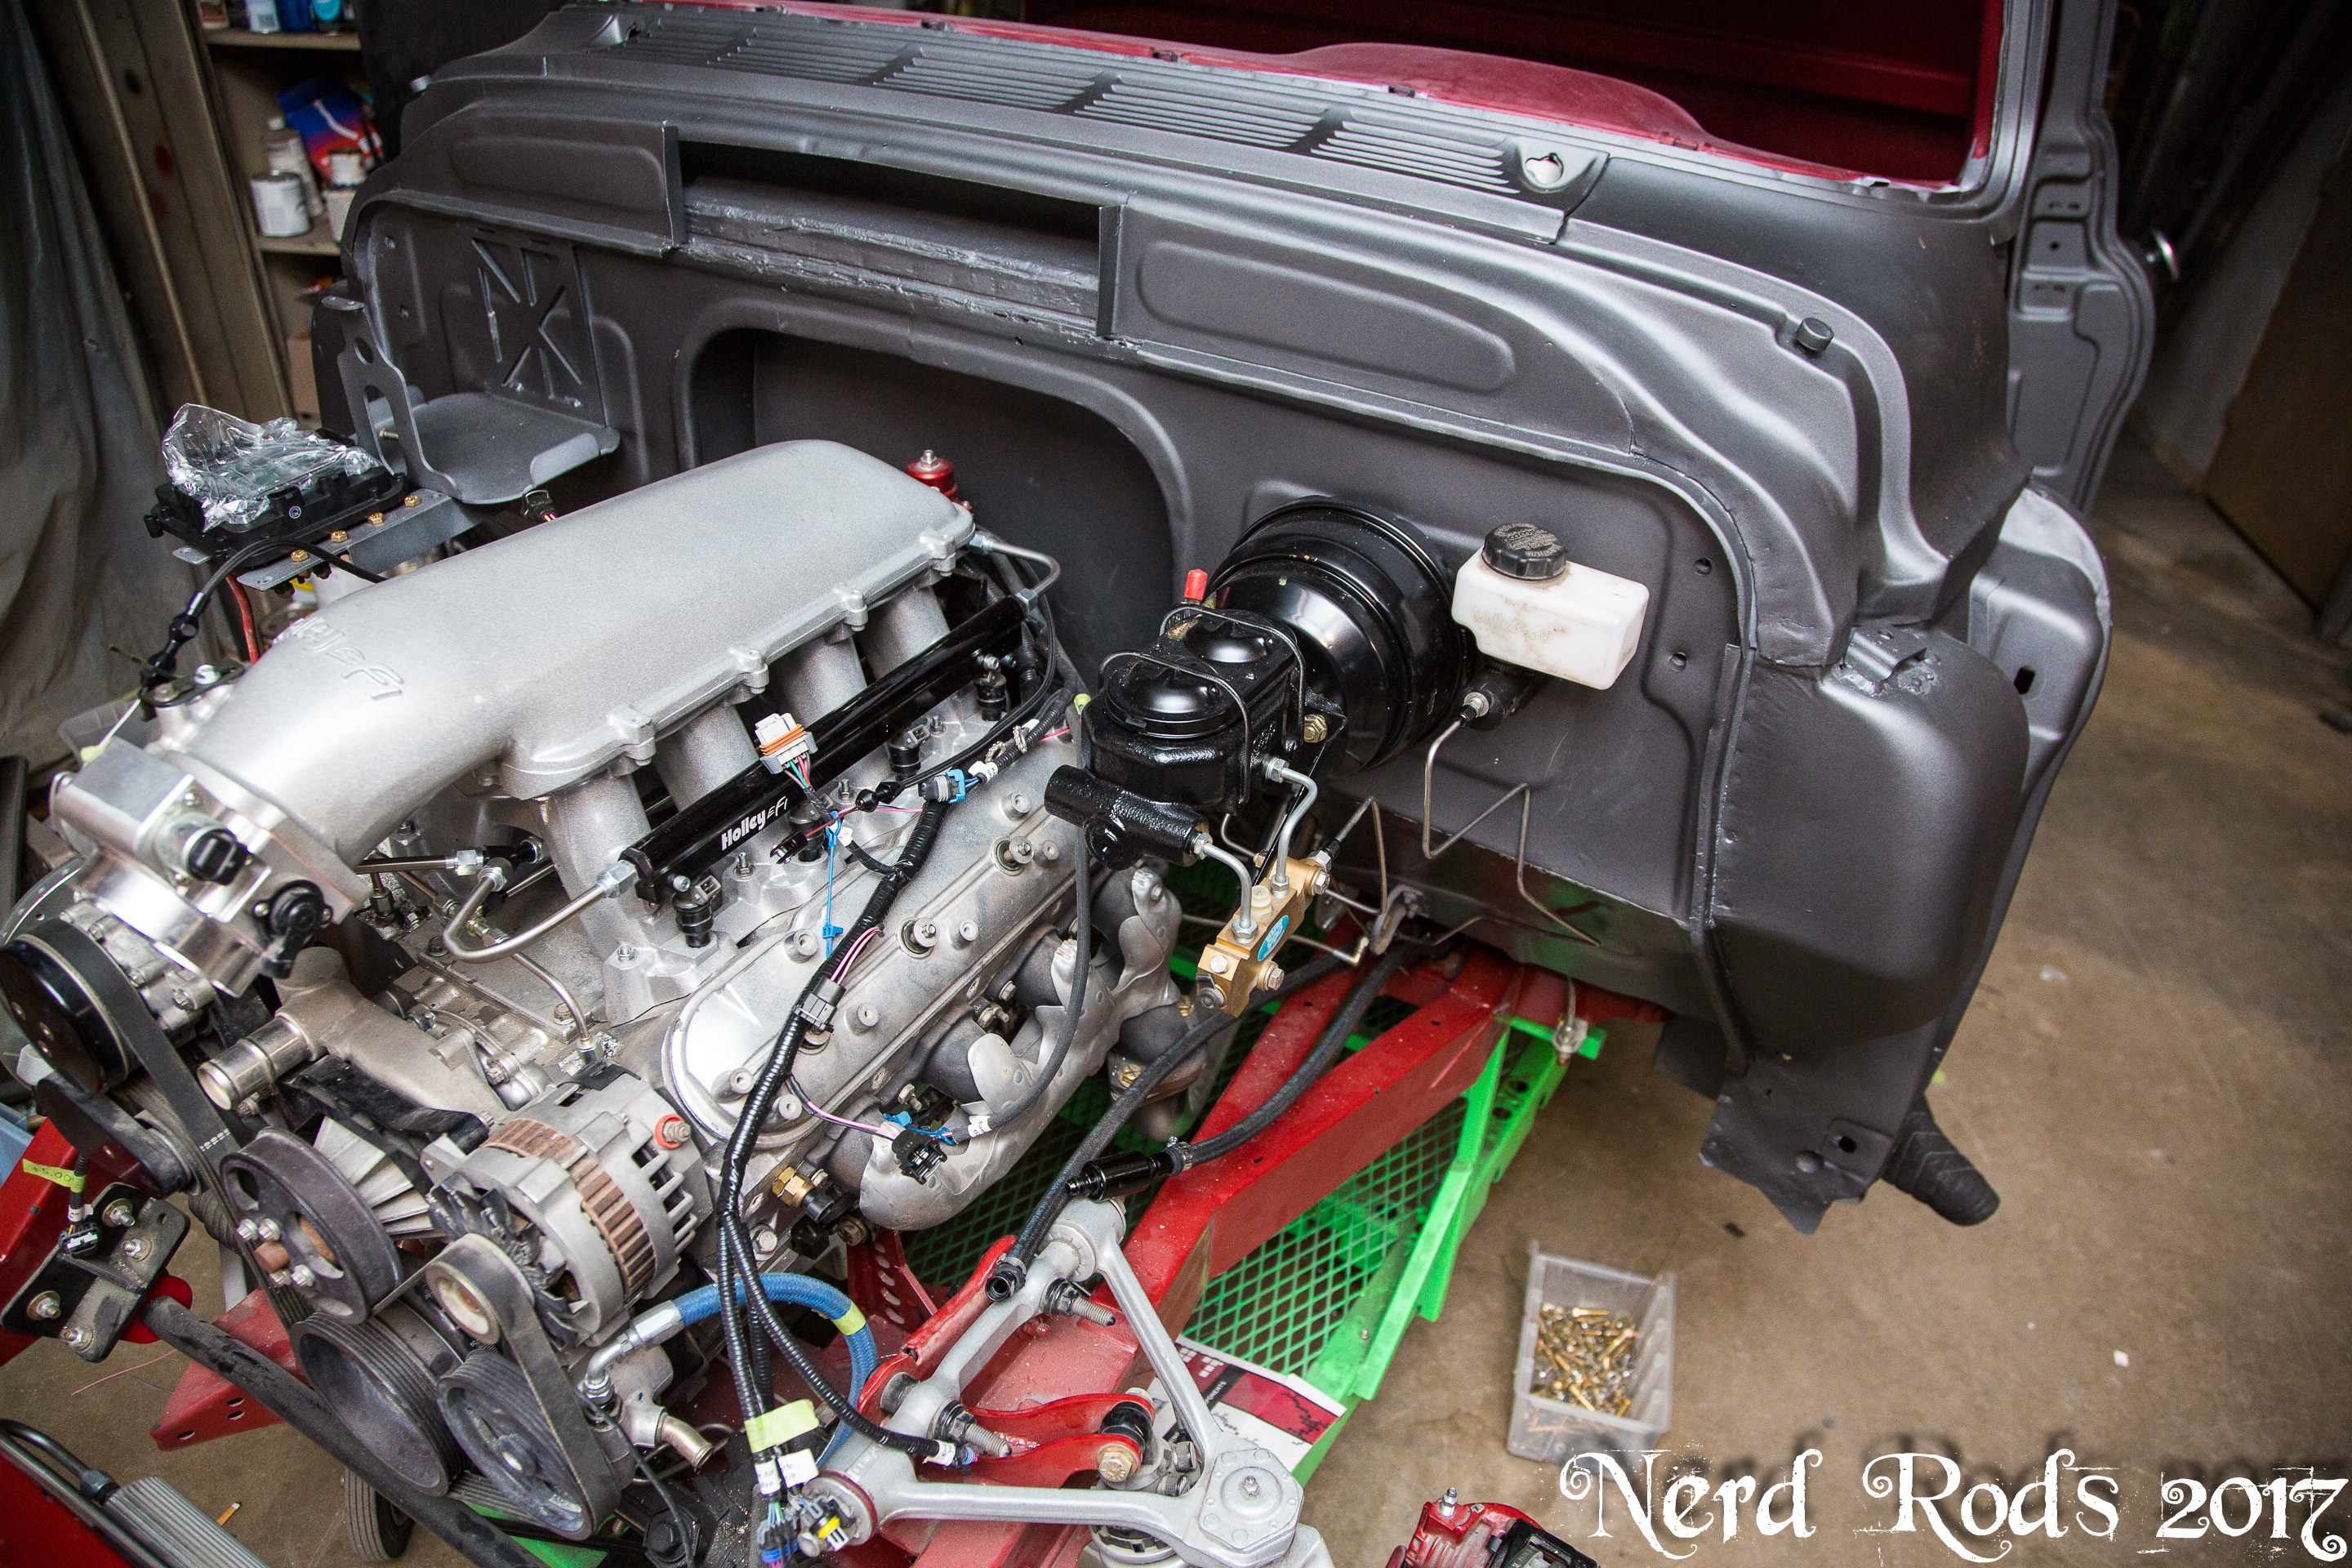
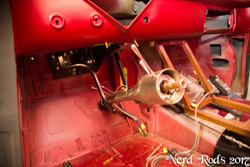
So it turns out this was part of the turbo trade since he won't need it any longer. Man that high rise and 105mm TB look mean on there. Jim also mocked up the inner fenders to get them cut down at the bottom to clear the A frames and suspension.

Full size photo galleryhttp://gallery.nerdrods.com/Projects/03_D3/03/
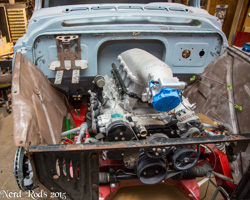
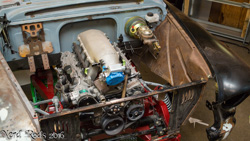
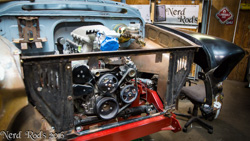
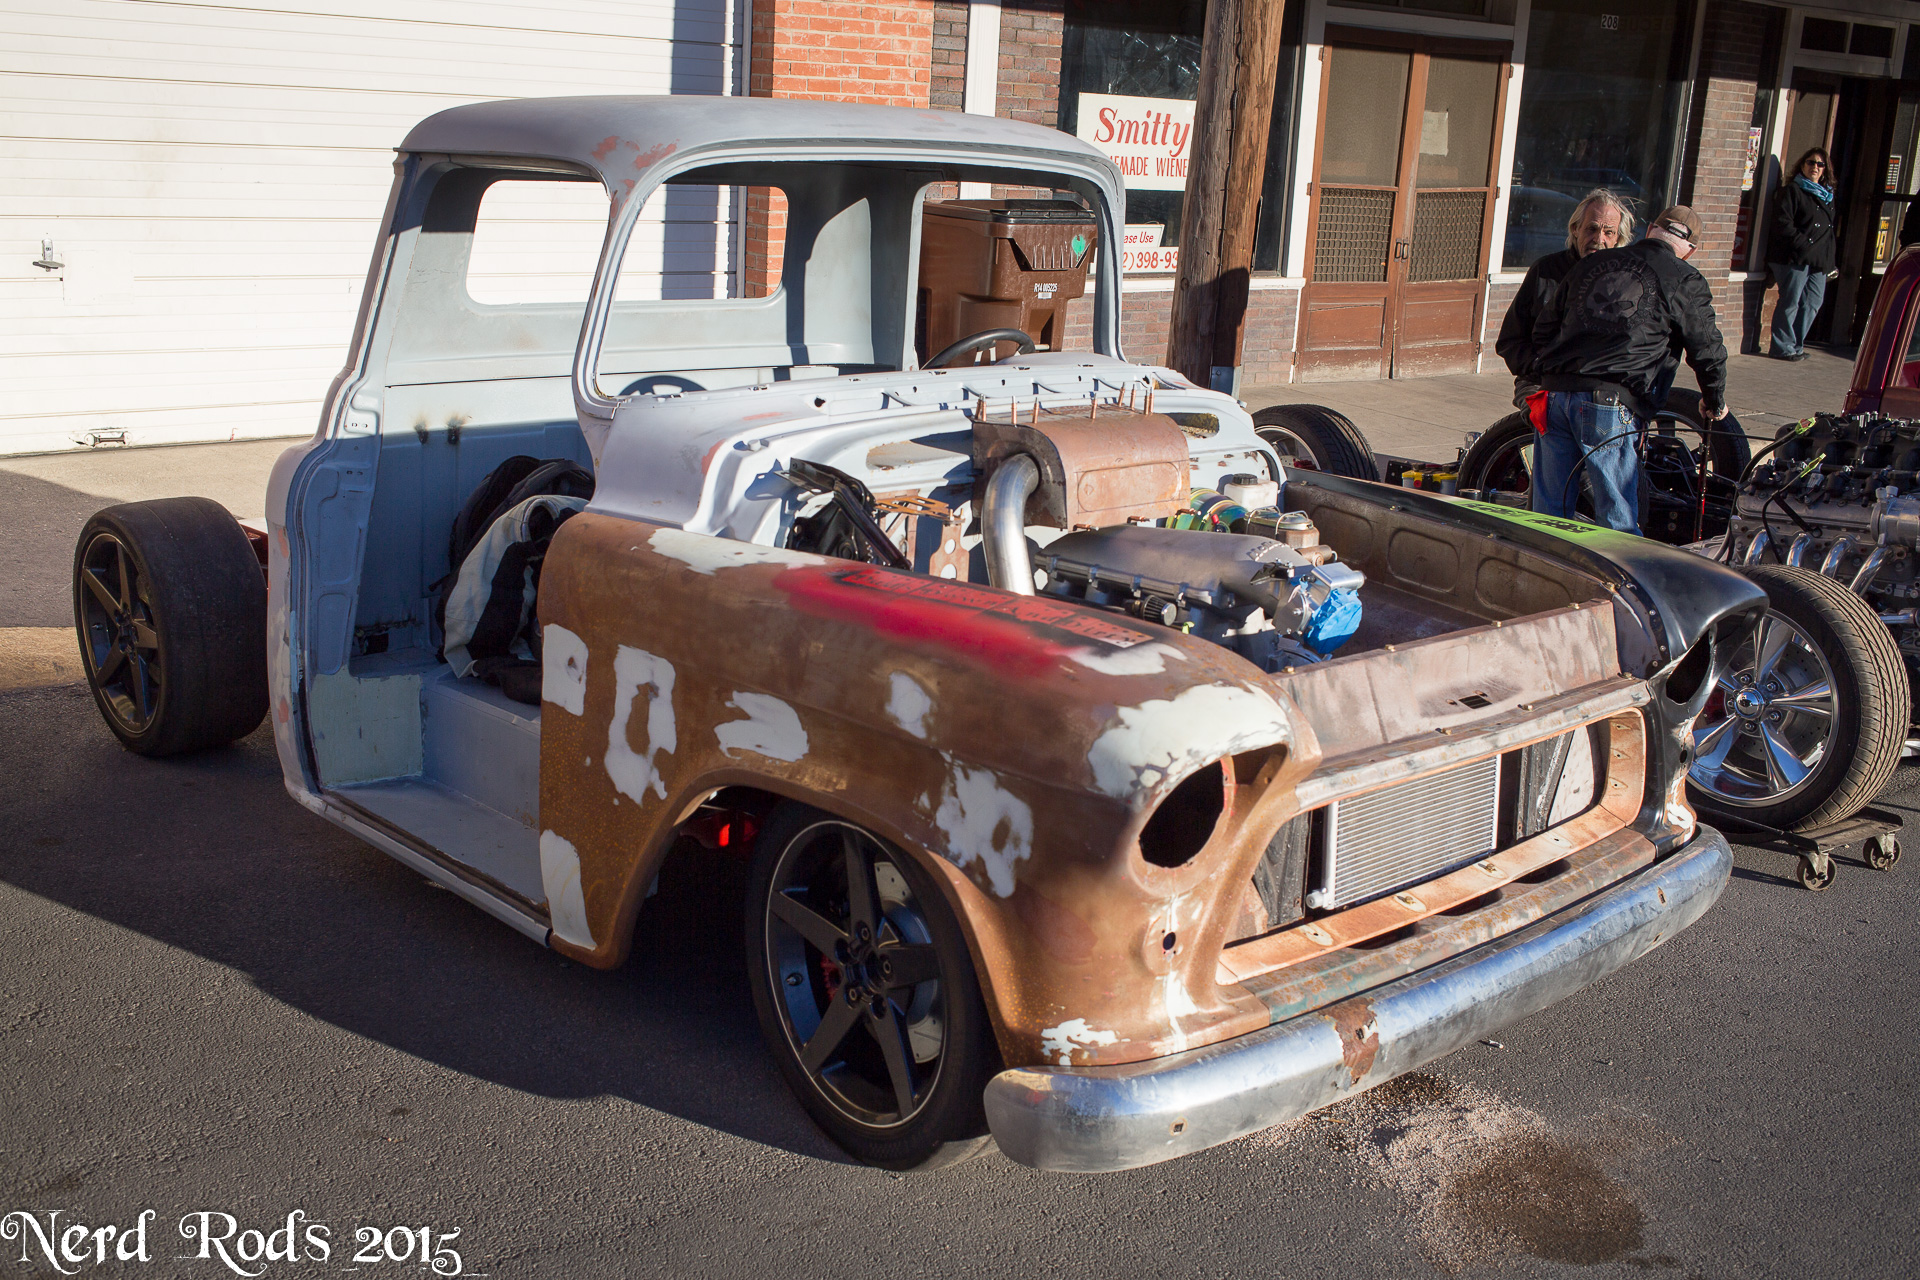
We're also looking at room for the turbo piping and other clearances on both sides of the engine. Thinking about a liquid to air intercooler as well as some other goodies under here. Mostly AC and Heater lines and dust protection from the environment. I'd like to keep it clean under the hood as best as possible.

Full size photo galleryhttp://gallery.nerdrods.com/Projects/03_D3/03/
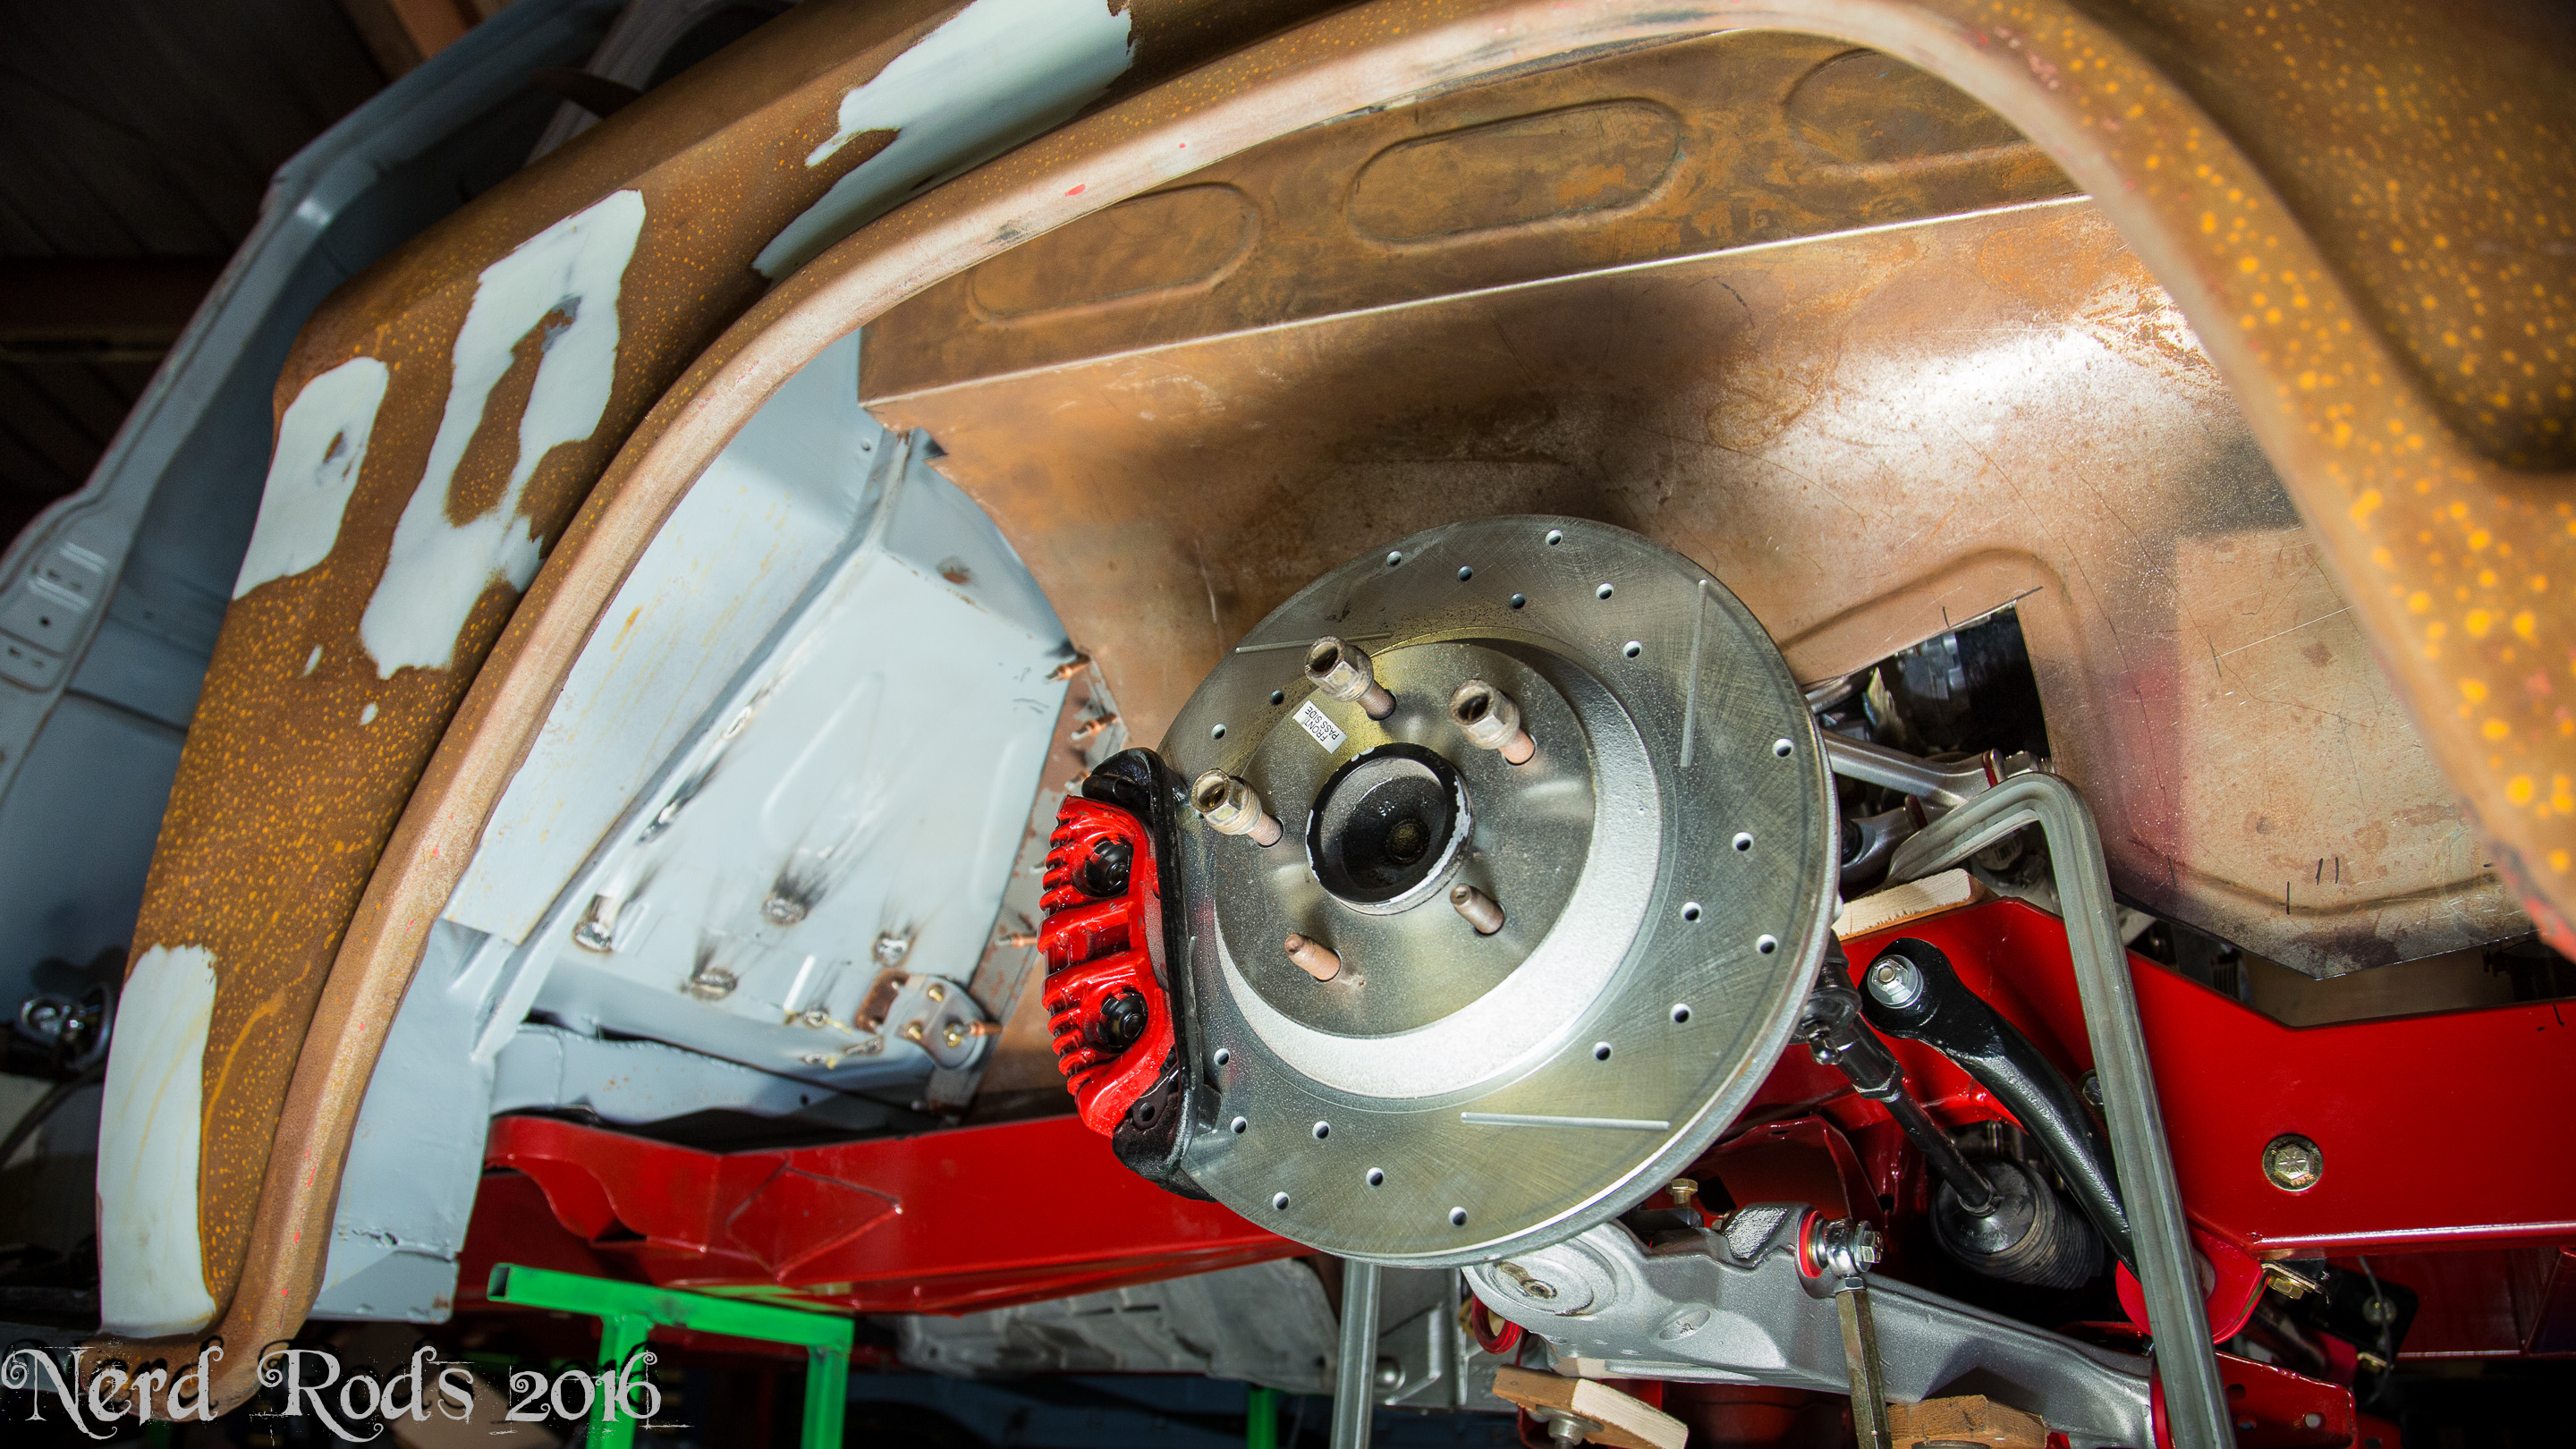
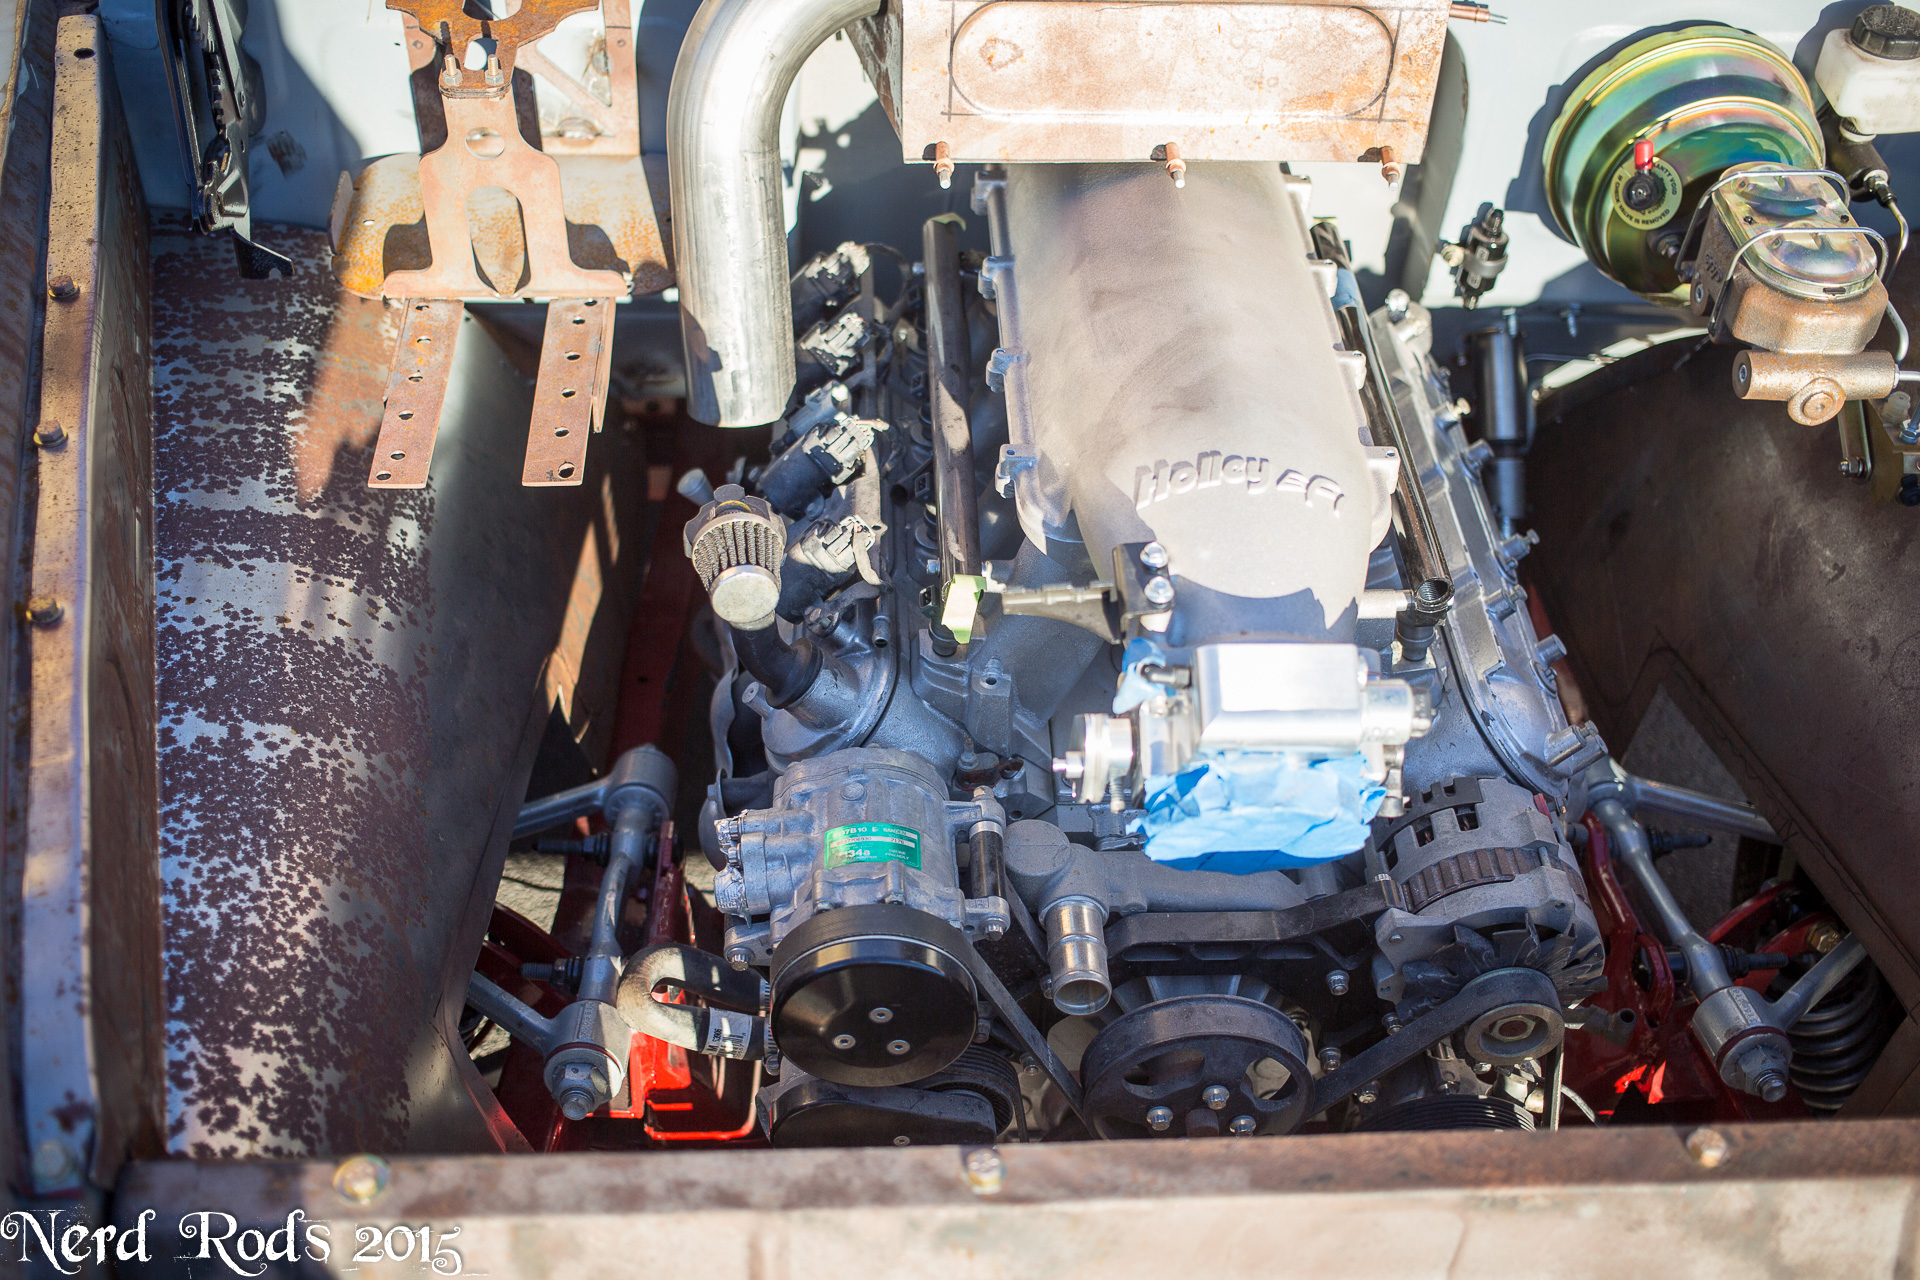
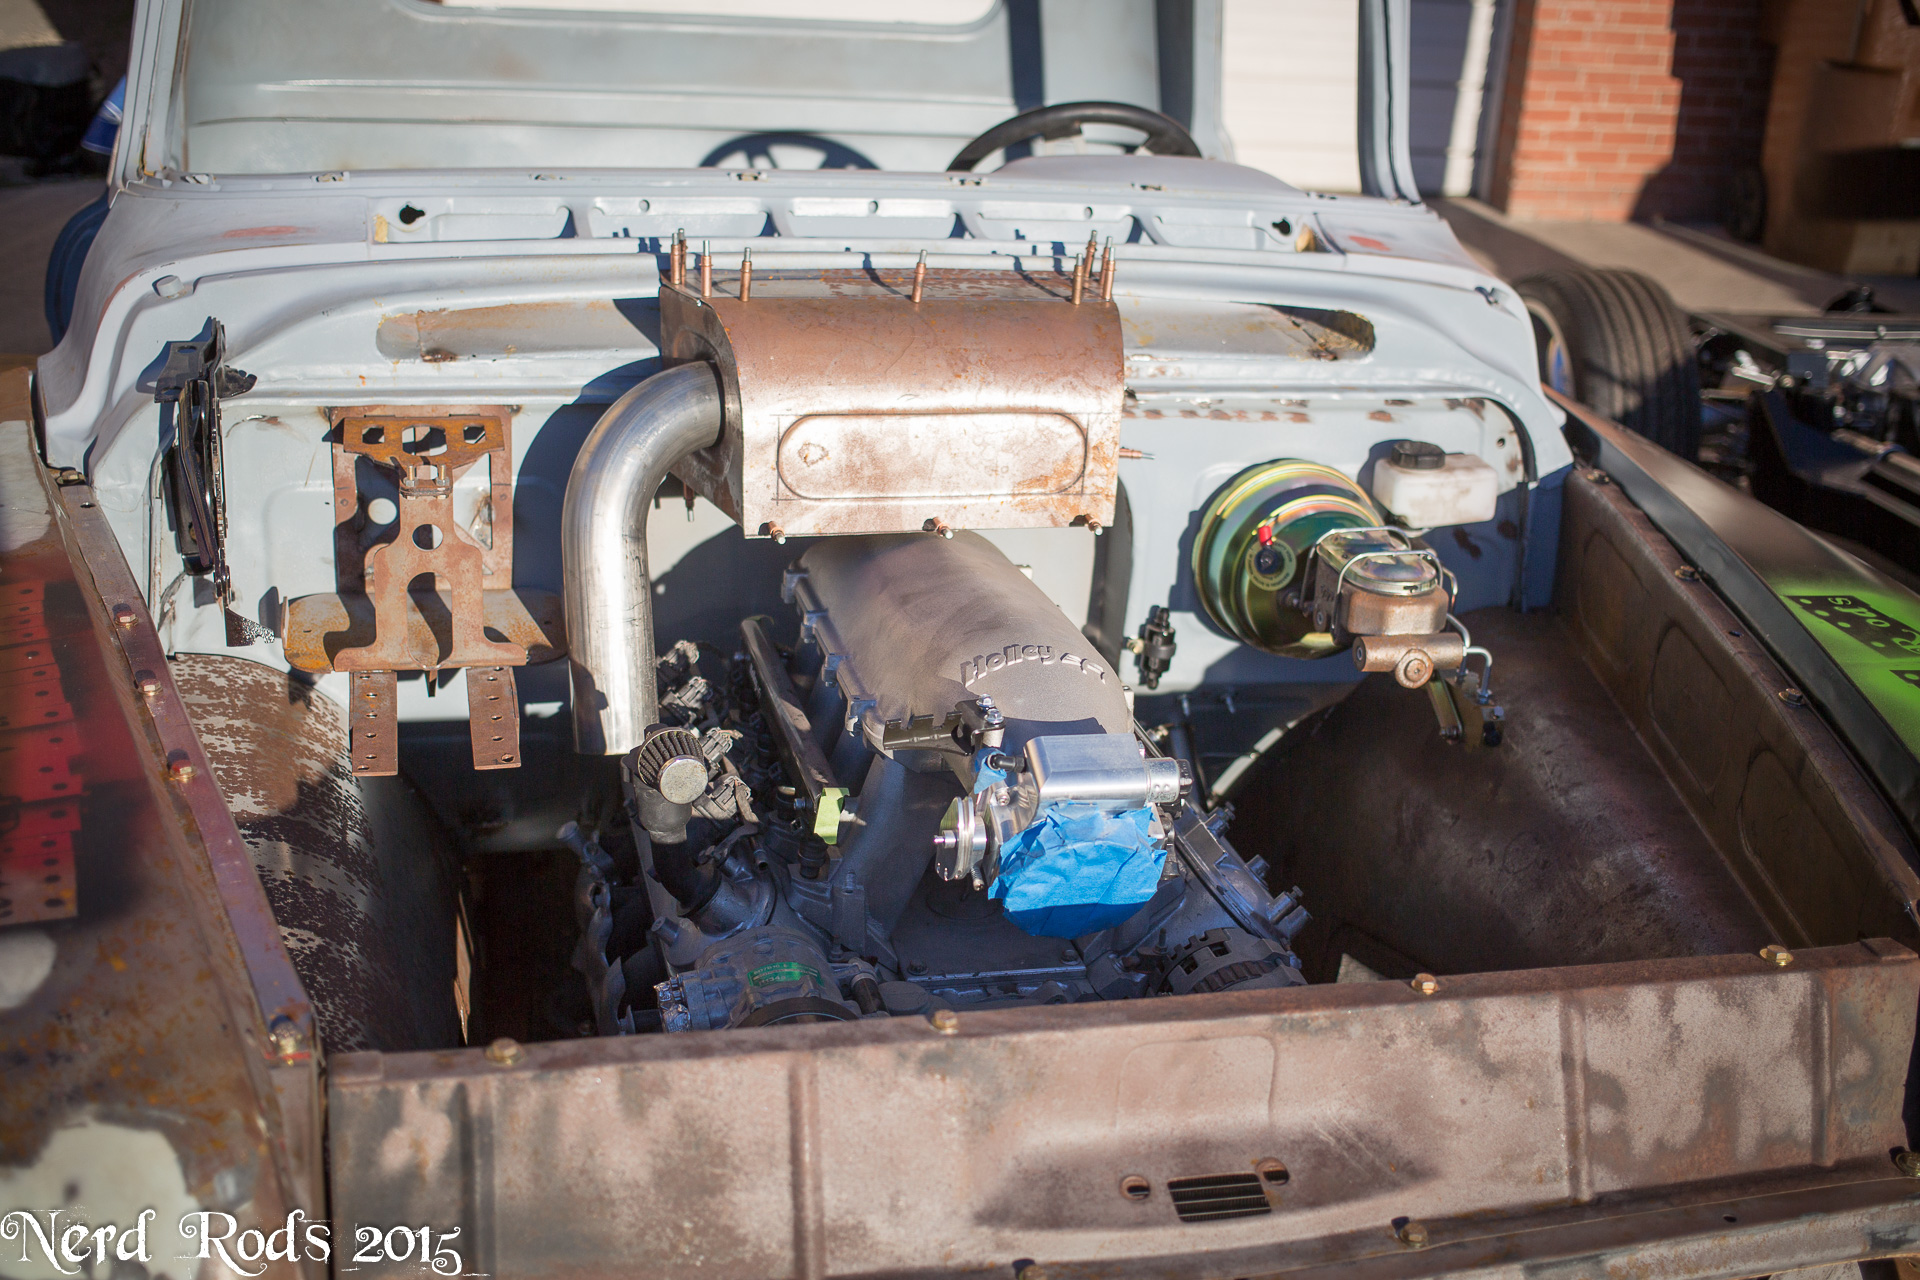
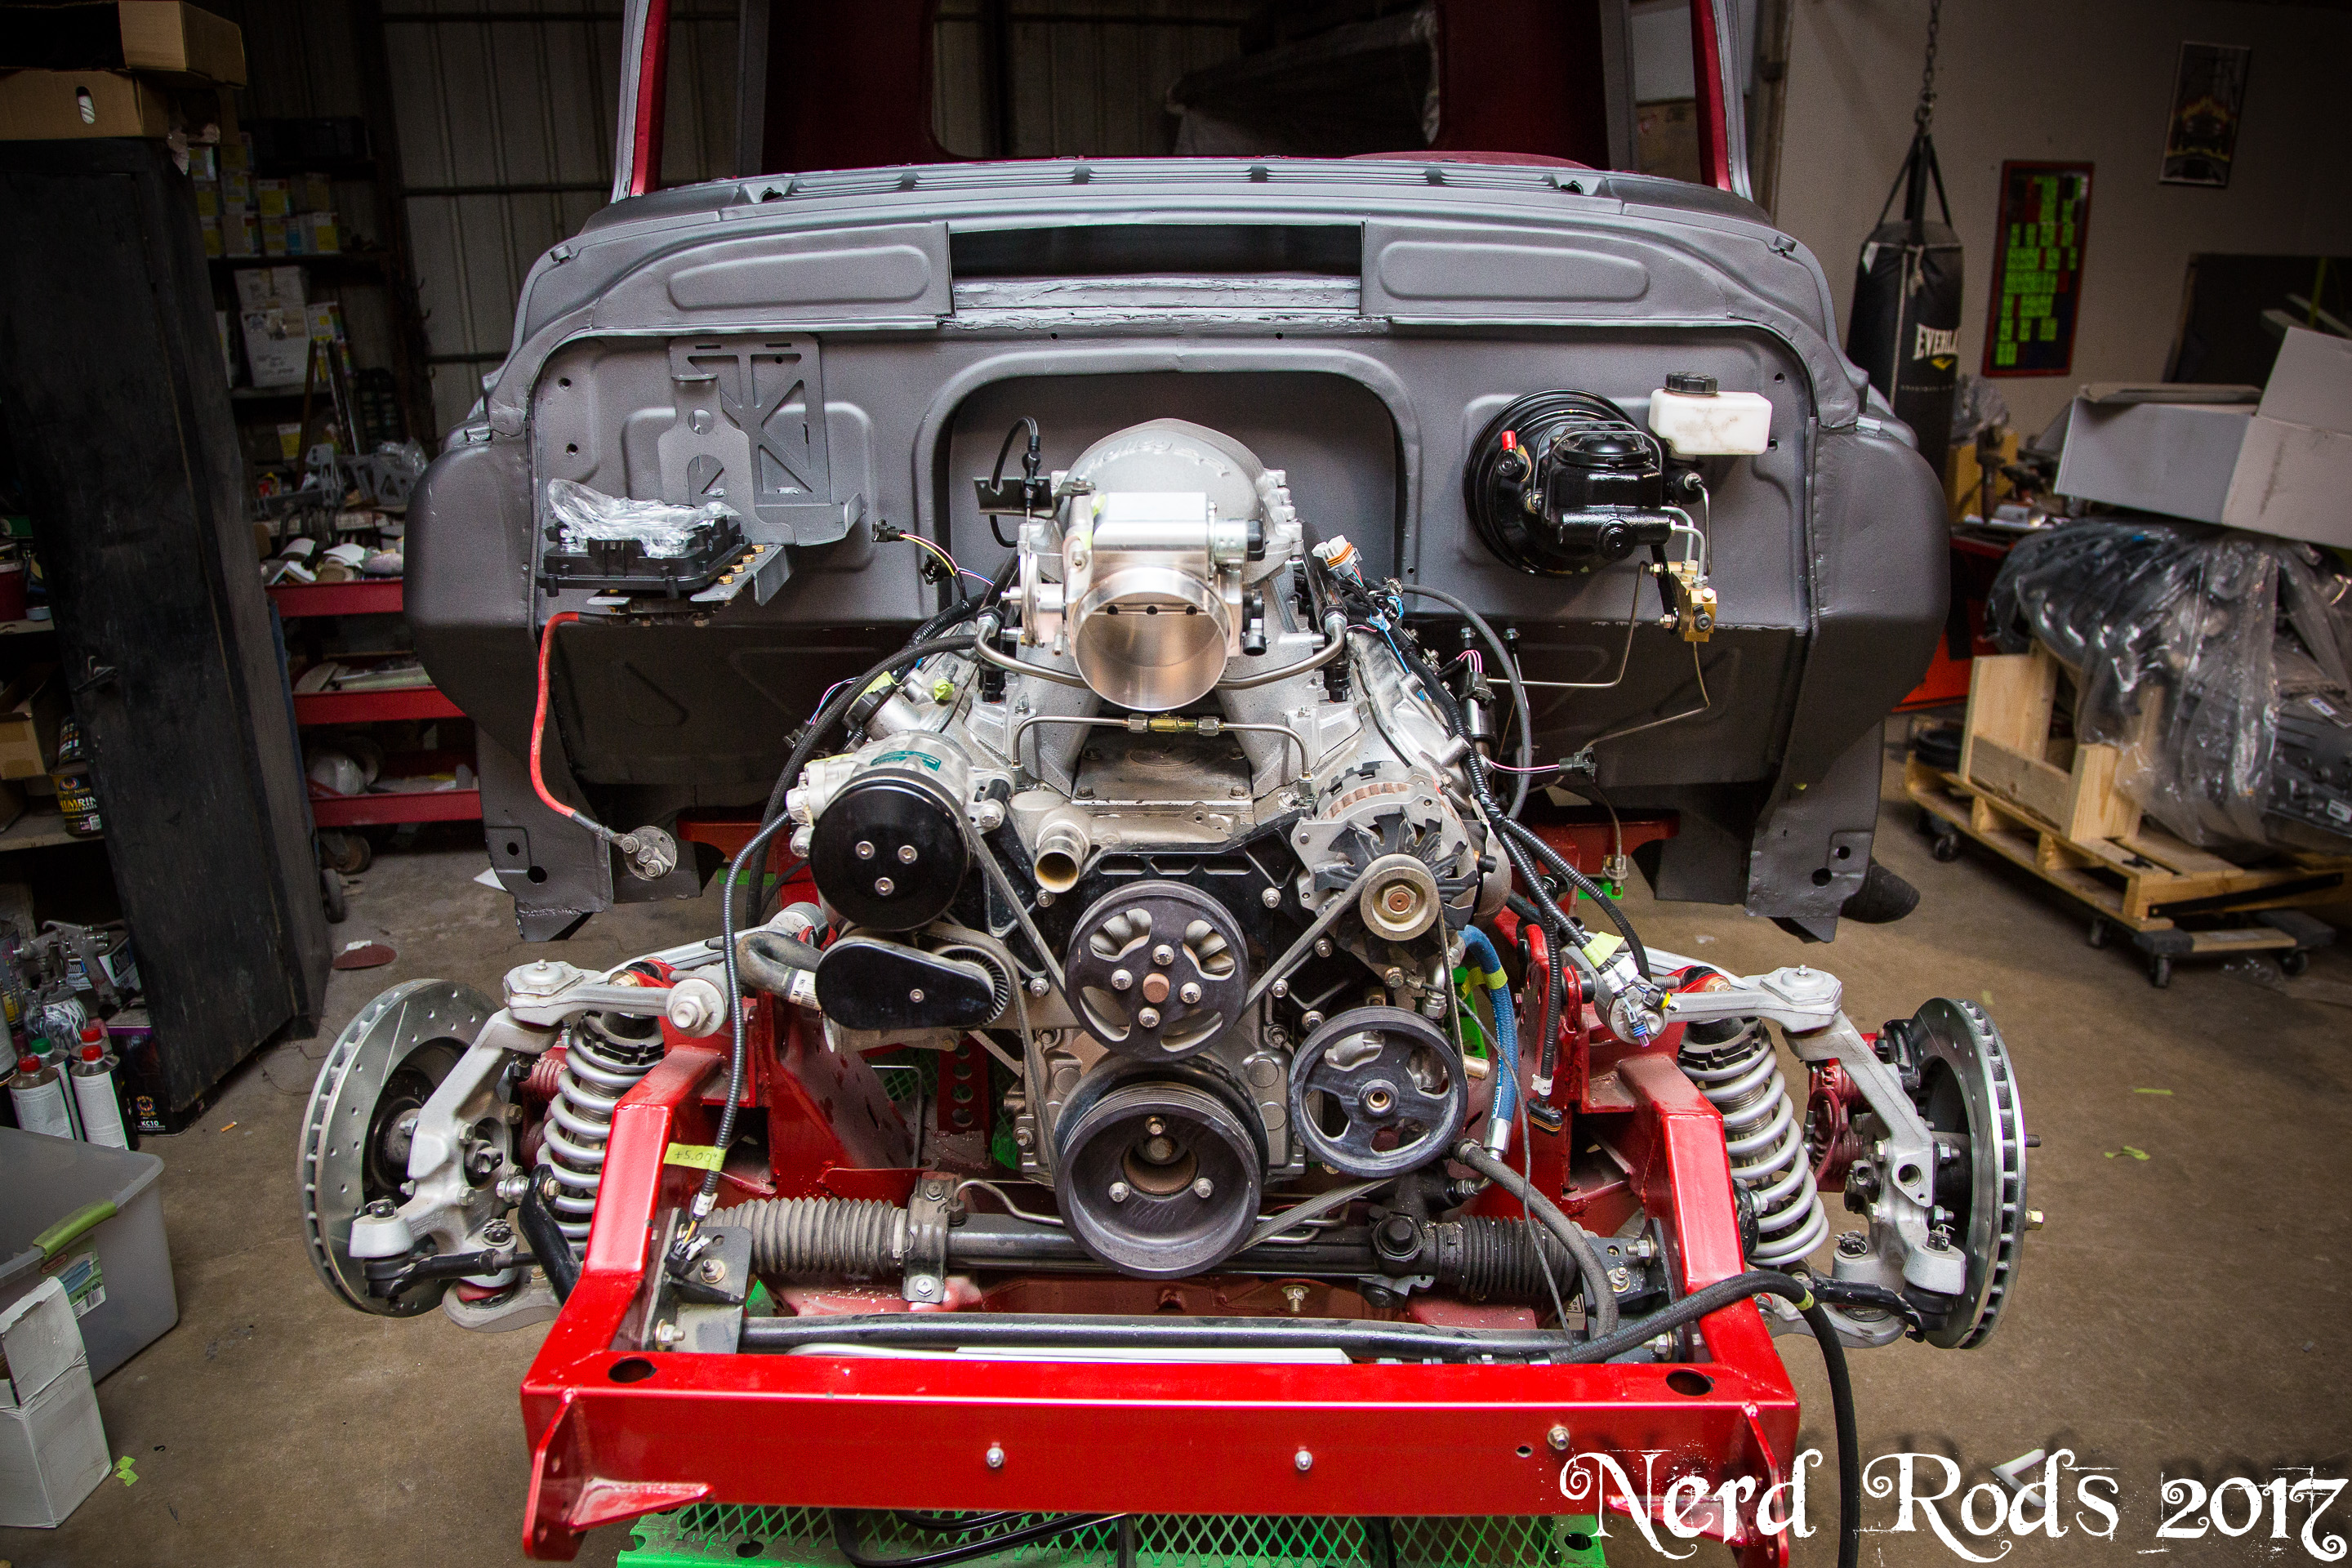
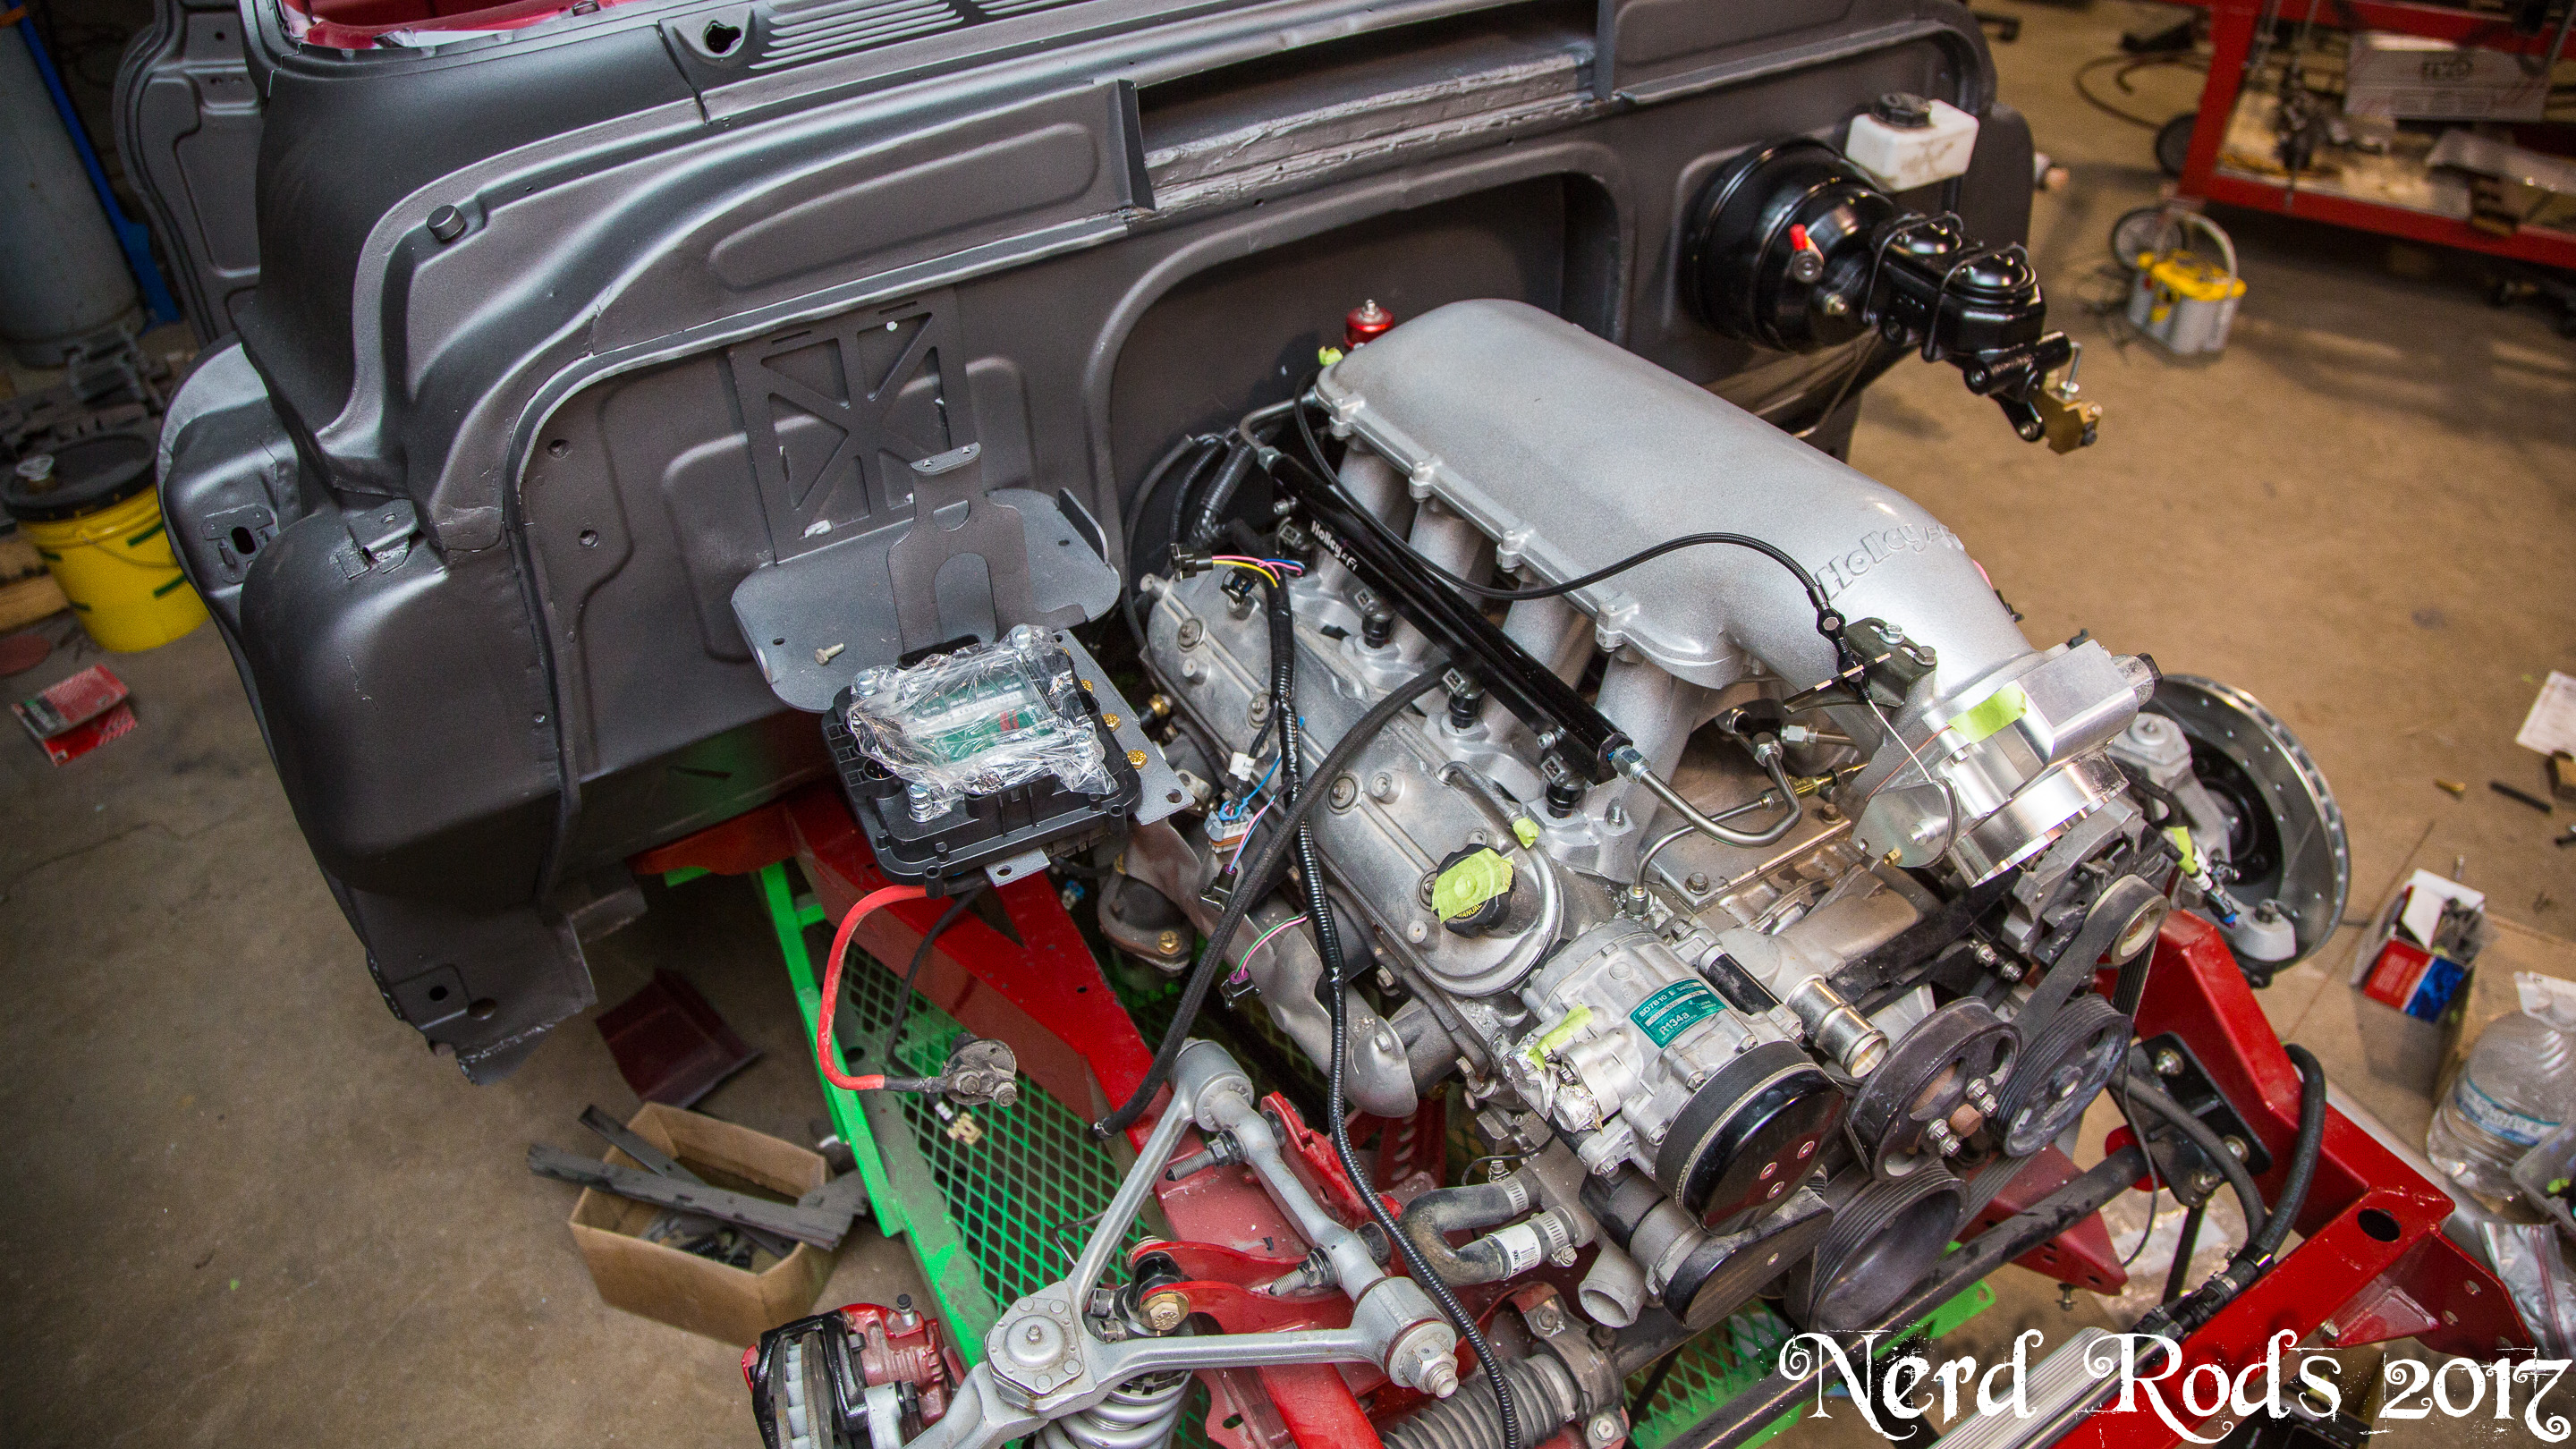
We're looking at room for the crank case breather and air oil separation as well in this setup. This is something I feel like so many people overlook so here's some math to help you think about it and to keep in mind when doing your breathers. This is a 6.0L (366 CID) motor, with peak 7 PSI of boost we will effectively have a 9.0L (549 CID) motor making 100% aspiration. Now think about the rings. They seal good but not that good. If you do a leak down test you can see 10-20% blow by on the rings and that's still acceptable for a motor to be able to run down the road. Top of the line, super fresh, racing motors might be able to hold all but 5% in the cylinder (Start a debate about this somewhere else if you want but not here). So for the sake of argument this used truck motor will leak 10% of its air into the crank case. Let me show you how much air that is.
7000 RPM's Red Line
6.0L Displacement @ 7 psi boost is about 9.0L
10% blow by
(7000 RPM's / 2) * 9.0 Liters = (31500) Liters of Air per Minute.
28.3162 Liters = 1 Cubic Foot
31500 LPM / 28.3162 CF = 1112.414 CFM Cubic Feet a Minute
1112.414 CFM * .1 (10% blow by) = 111.2414 CFM Blowing into the crank case
111.2414 CFM / 60 Seconds = 18.5402 CFS
18 cubic feet of air a second blowing past the rings and into the crank case. That's a 3'x3'x2' box of air, EVERY SECOND!
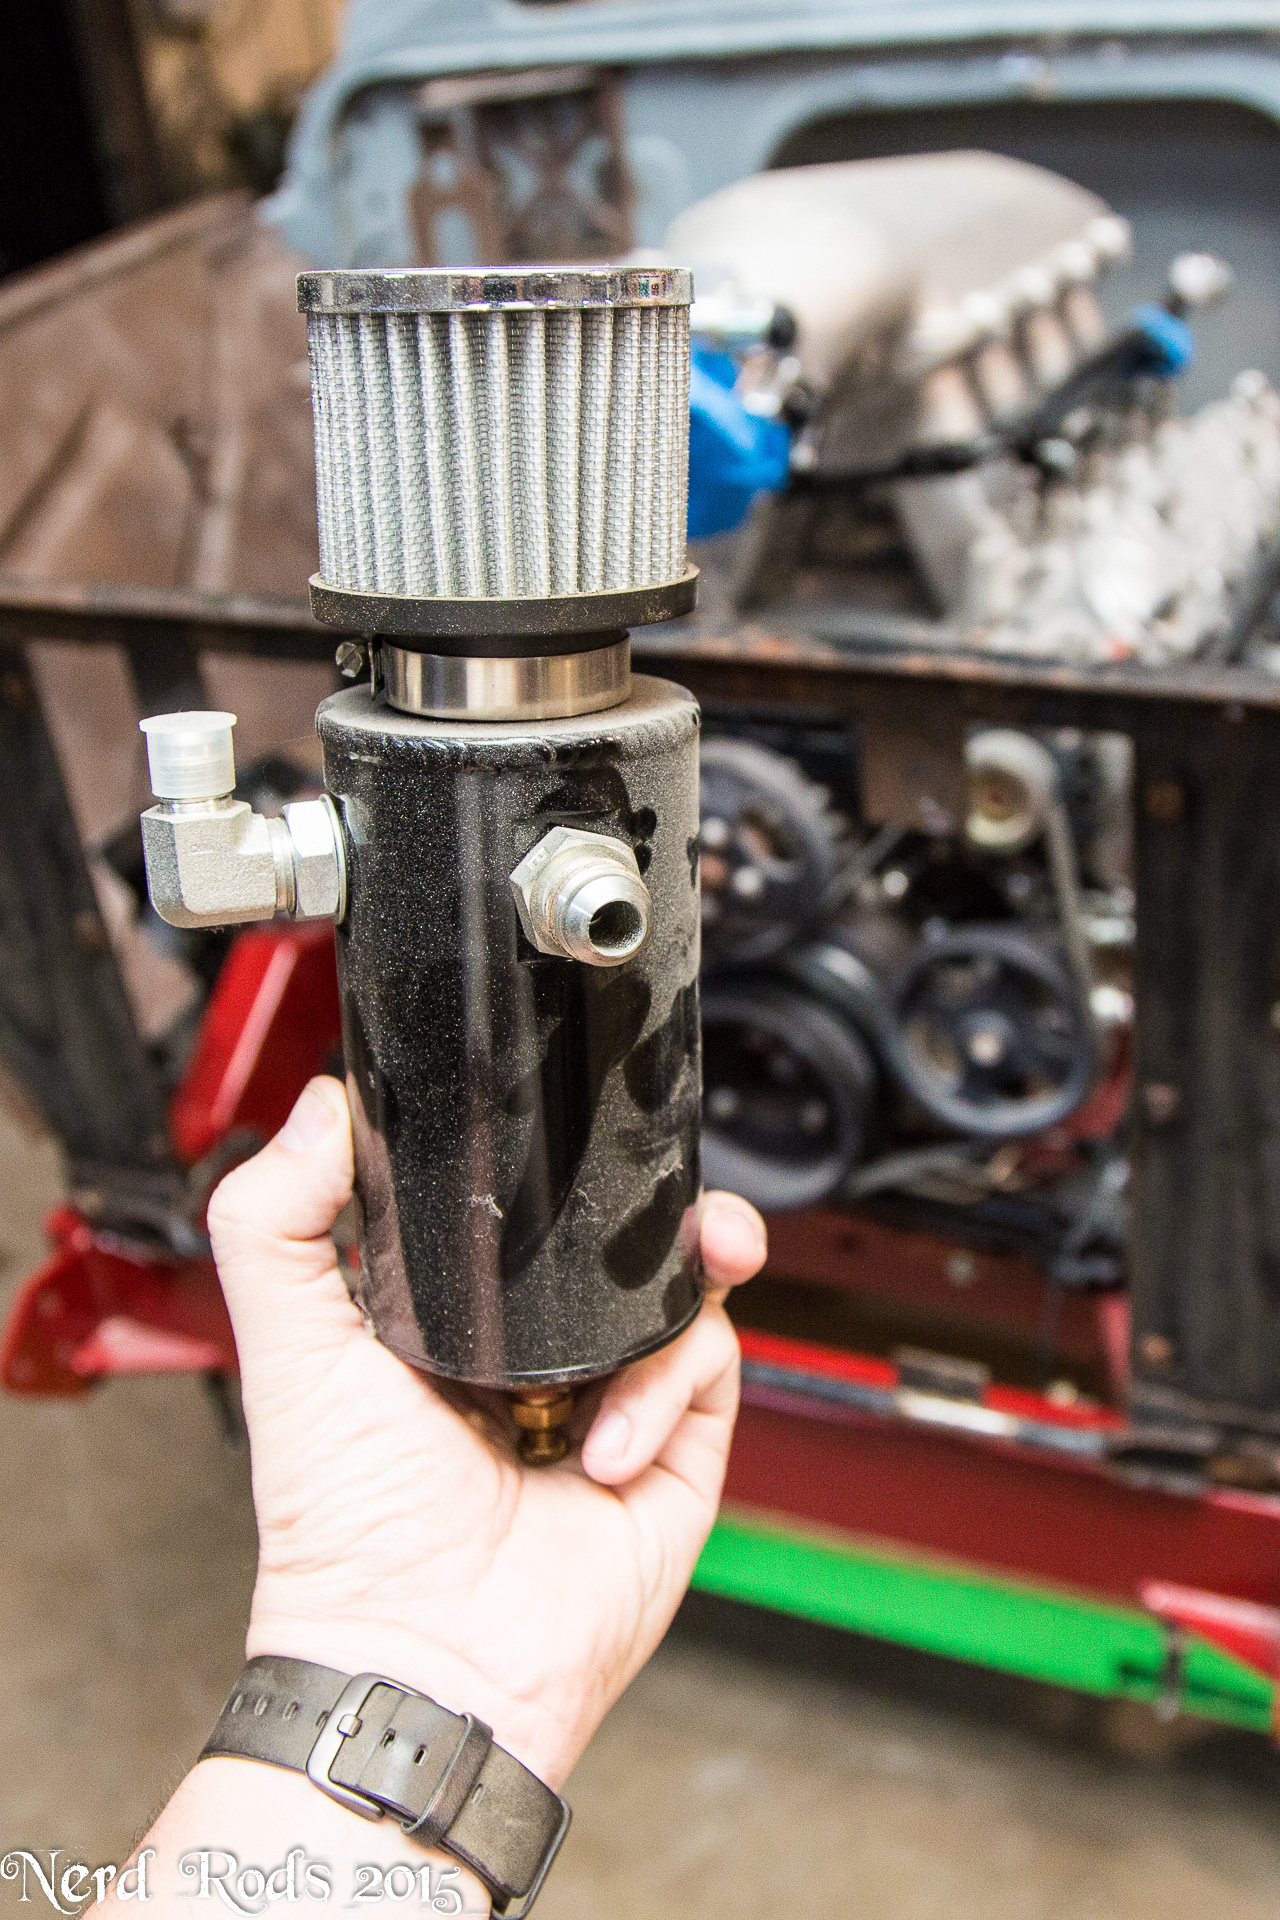
All of that has to go thorough those two little 3/8's AN-6 hoses on top of the valve covers that are pressed on their barbs by hand I might add. Back pressure galore slowing down your pistons! So we're adding AN-8 weld on bungs to the valve covers and one, possibly two, lines to the valley cover to get the air out of the crank case so the pistons will have as little resistance as possible going down. If this were an emission car I would vent the oil catch can to the front of the turbo so it could suck down the fumes but that's a long stinking way for this project so we're just going with the breather on the catch can for this one.
Amazon Find!

Full size photo galleryhttp://gallery.nerdrods.com/Projects/03_D3/03/
You just have to drain it when you change your oil.
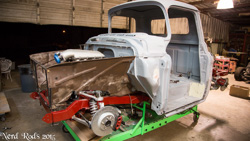
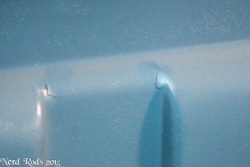
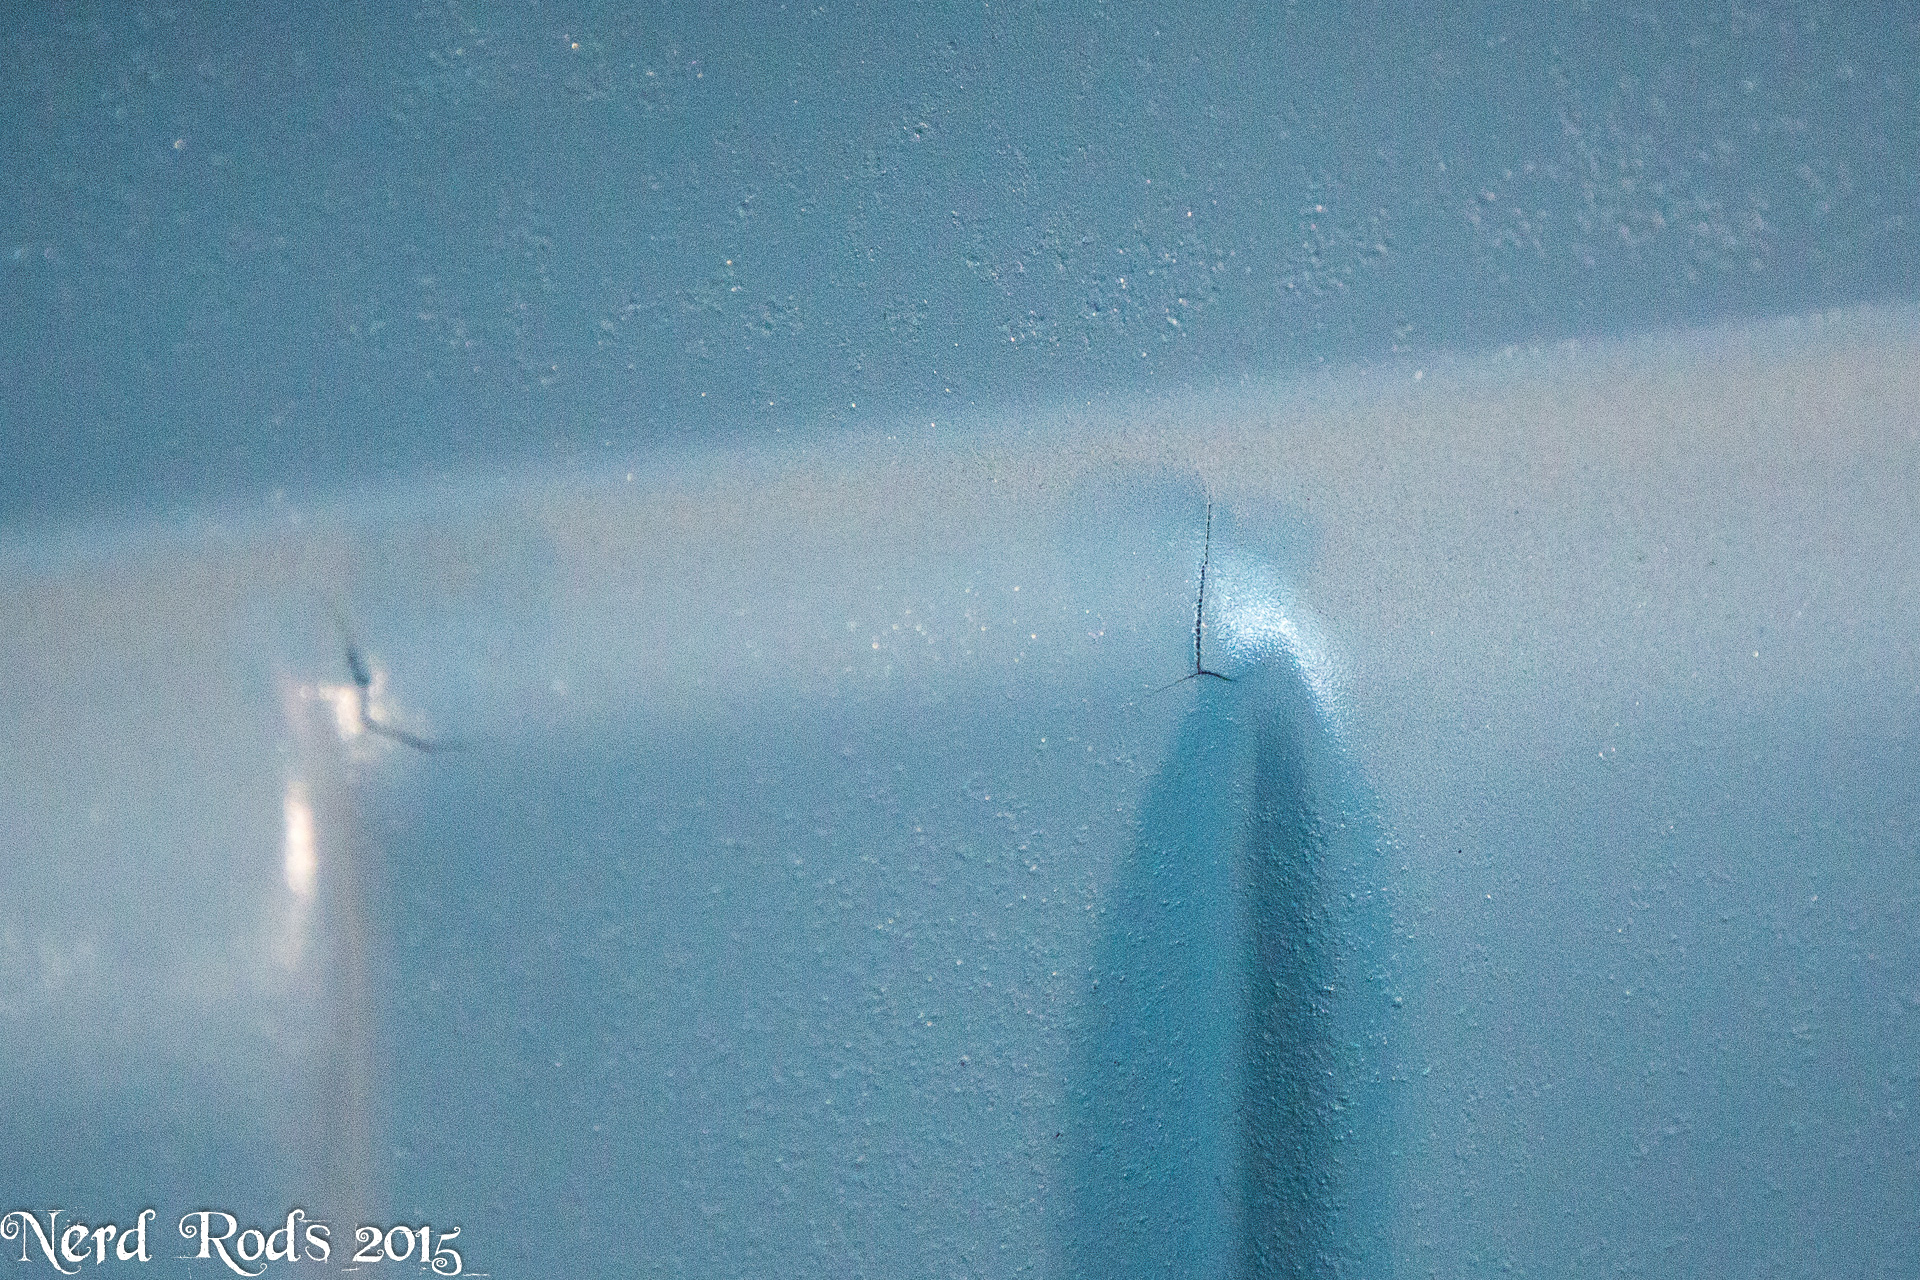
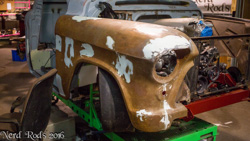
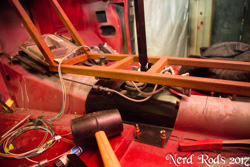
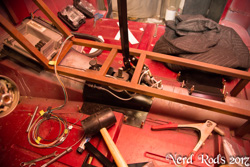
On the body work front we keep finding little things like these two cracks in the metal. But Jim's chipping away at it and working on mounts for the Infinity box wiring as well as the creature comforters.

Full size photo galleryhttp://gallery.nerdrods.com/Projects/03_D3/03/
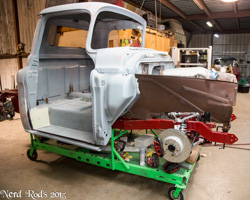
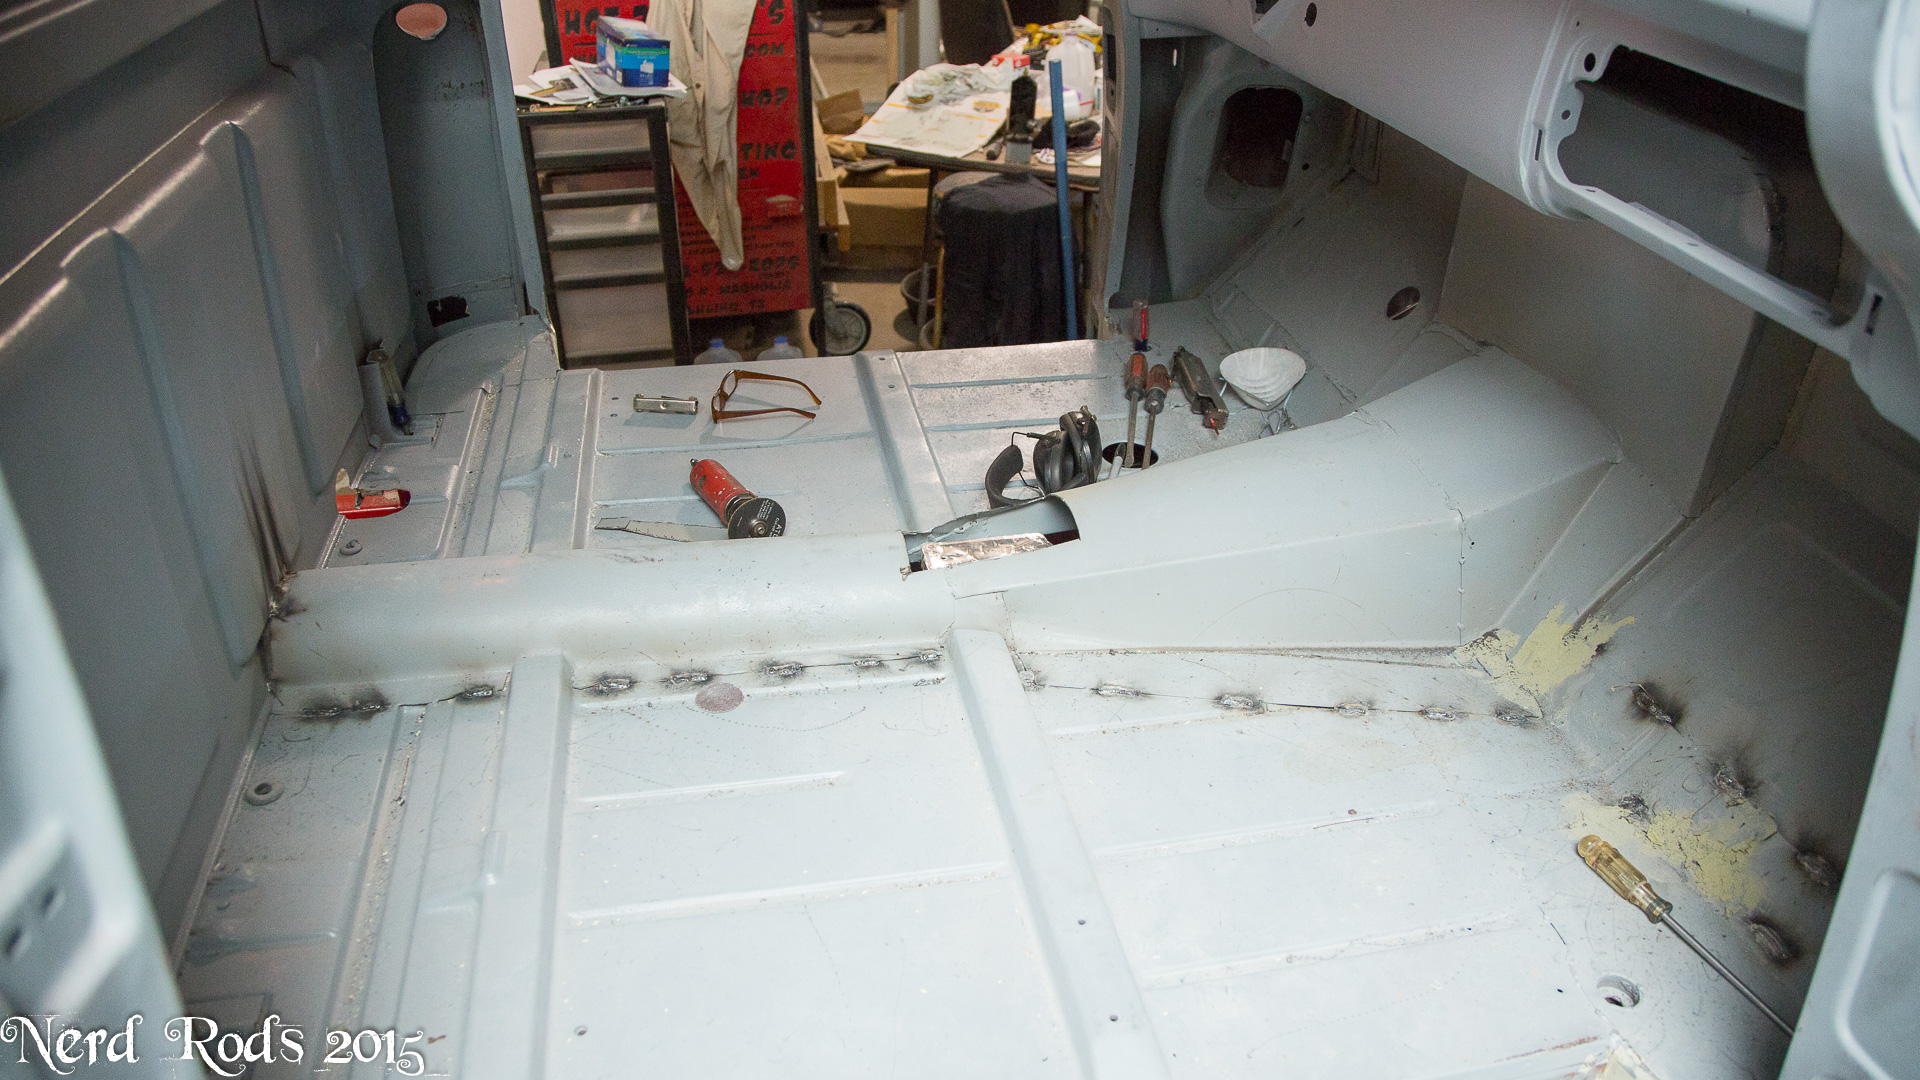
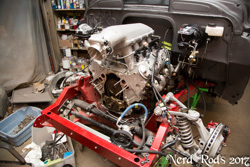
And the money shot!
Full size photo galleryhttp://gallery.nerdrods.com/Projects/03_D3/03/
Later
-Russell
http://gallery.nerdrods.com/Projects/03_D3/03/
So it turns out this was part of the turbo trade since he won't need it any longer. Man that high rise and 105mm TB look mean on there. Jim also mocked up the inner fenders to get them cut down at the bottom to clear the A frames and suspension.


Full size photo galleryhttp://gallery.nerdrods.com/Projects/03_D3/03/
We're also looking at room for the turbo piping and other clearances on both sides of the engine. Thinking about a liquid to air intercooler as well as some other goodies under here. Mostly AC and Heater lines and dust protection from the environment. I'd like to keep it clean under the hood as best as possible.

Full size photo galleryhttp://gallery.nerdrods.com/Projects/03_D3/03/
We're looking at room for the crank case breather and air oil separation as well in this setup. This is something I feel like so many people overlook so here's some math to help you think about it and to keep in mind when doing your breathers. This is a 6.0L (366 CID) motor, with peak 7 PSI of boost we will effectively have a 9.0L (549 CID) motor making 100% aspiration. Now think about the rings. They seal good but not that good. If you do a leak down test you can see 10-20% blow by on the rings and that's still acceptable for a motor to be able to run down the road. Top of the line, super fresh, racing motors might be able to hold all but 5% in the cylinder (Start a debate about this somewhere else if you want but not here). So for the sake of argument this used truck motor will leak 10% of its air into the crank case. Let me show you how much air that is.
7000 RPM's Red Line
6.0L Displacement @ 7 psi boost is about 9.0L
10% blow by
(7000 RPM's / 2) * 9.0 Liters = (31500) Liters of Air per Minute.
28.3162 Liters = 1 Cubic Foot
31500 LPM / 28.3162 CF = 1112.414 CFM Cubic Feet a Minute
1112.414 CFM * .1 (10% blow by) = 111.2414 CFM Blowing into the crank case
111.2414 CFM / 60 Seconds = 18.5402 CFS
18 cubic feet of air a second blowing past the rings and into the crank case. That's a 3'x3'x2' box of air, EVERY SECOND!
All of that has to go thorough those two little 3/8's AN-6 hoses on top of the valve covers that are pressed on their barbs by hand I might add. Back pressure galore slowing down your pistons! So we're adding AN-8 weld on bungs to the valve covers and one, possibly two, lines to the valley cover to get the air out of the crank case so the pistons will have as little resistance as possible going down. If this were an emission car I would vent the oil catch can to the front of the turbo so it could suck down the fumes but that's a long stinking way for this project so we're just going with the breather on the catch can for this one.
Amazon Find!
Full size photo galleryhttp://gallery.nerdrods.com/Projects/03_D3/03/
You just have to drain it when you change your oil.
On the body work front we keep finding little things like these two cracks in the metal. But Jim's chipping away at it and working on mounts for the Infinity box wiring as well as the creature comforters.
Full size photo galleryhttp://gallery.nerdrods.com/Projects/03_D3/03/
And the money shot!
Full size photo galleryhttp://gallery.nerdrods.com/Projects/03_D3/03/
Later
-Russell
Last edited by rat_rod_russell; 01-16-2016 at 10:27 AM.
 10-18-2015, 08:37 AM
#22

Looking great as usual Russel. Could you post pics as photo albums and in a larger size? Only the last pic came up as a album but they all are so small it's had to see anything. You have such amazing builds, it just sucks viewers can't see it.
thanks,
Jim
thanks,
Jim
10-18-2015, 11:32 AM
#23
Launching!
Thread Starter
Join Date: Jan 2007
Location: Luling TX In the Hot Rod Shop
Posts: 294
Likes: 0
Received 3 Likes
on
3 Posts
Here's the gallery so you can see them all in glorious HD!
http://gallery.nerdrods.com/Projects/03_D3/03/
I'm a bit of a quality freak. I'm actually looking at 4k cameras at the moment to start doing all my video in 4k to be ready for the guys who have that tech. Hell my phone is 3k and its only 5.5".
Later
-Russell @ Nerd Rods
10-18-2015, 05:03 PM
#24
Great pics Russel. Thanks for sharing!!!
01-11-2016, 10:53 PM
#25
Launching!
Thread Starter
Join Date: Jan 2007
Location: Luling TX In the Hot Rod Shop
Posts: 294
Likes: 0
Received 3 Likes
on
3 Posts
Wow, time for a very long overdue update. I’ve been caught doing a boat load of paperwork and the new year / holiday season decided to catch us off guard but while I’ve not been posting we have not been idle.
Gallery photos all here if you just want to look at the pretty pictures
http://gallery.nerdrods.com/Projects/03_D3/04/
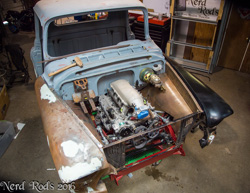
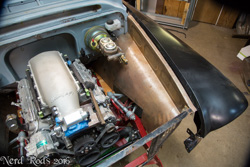
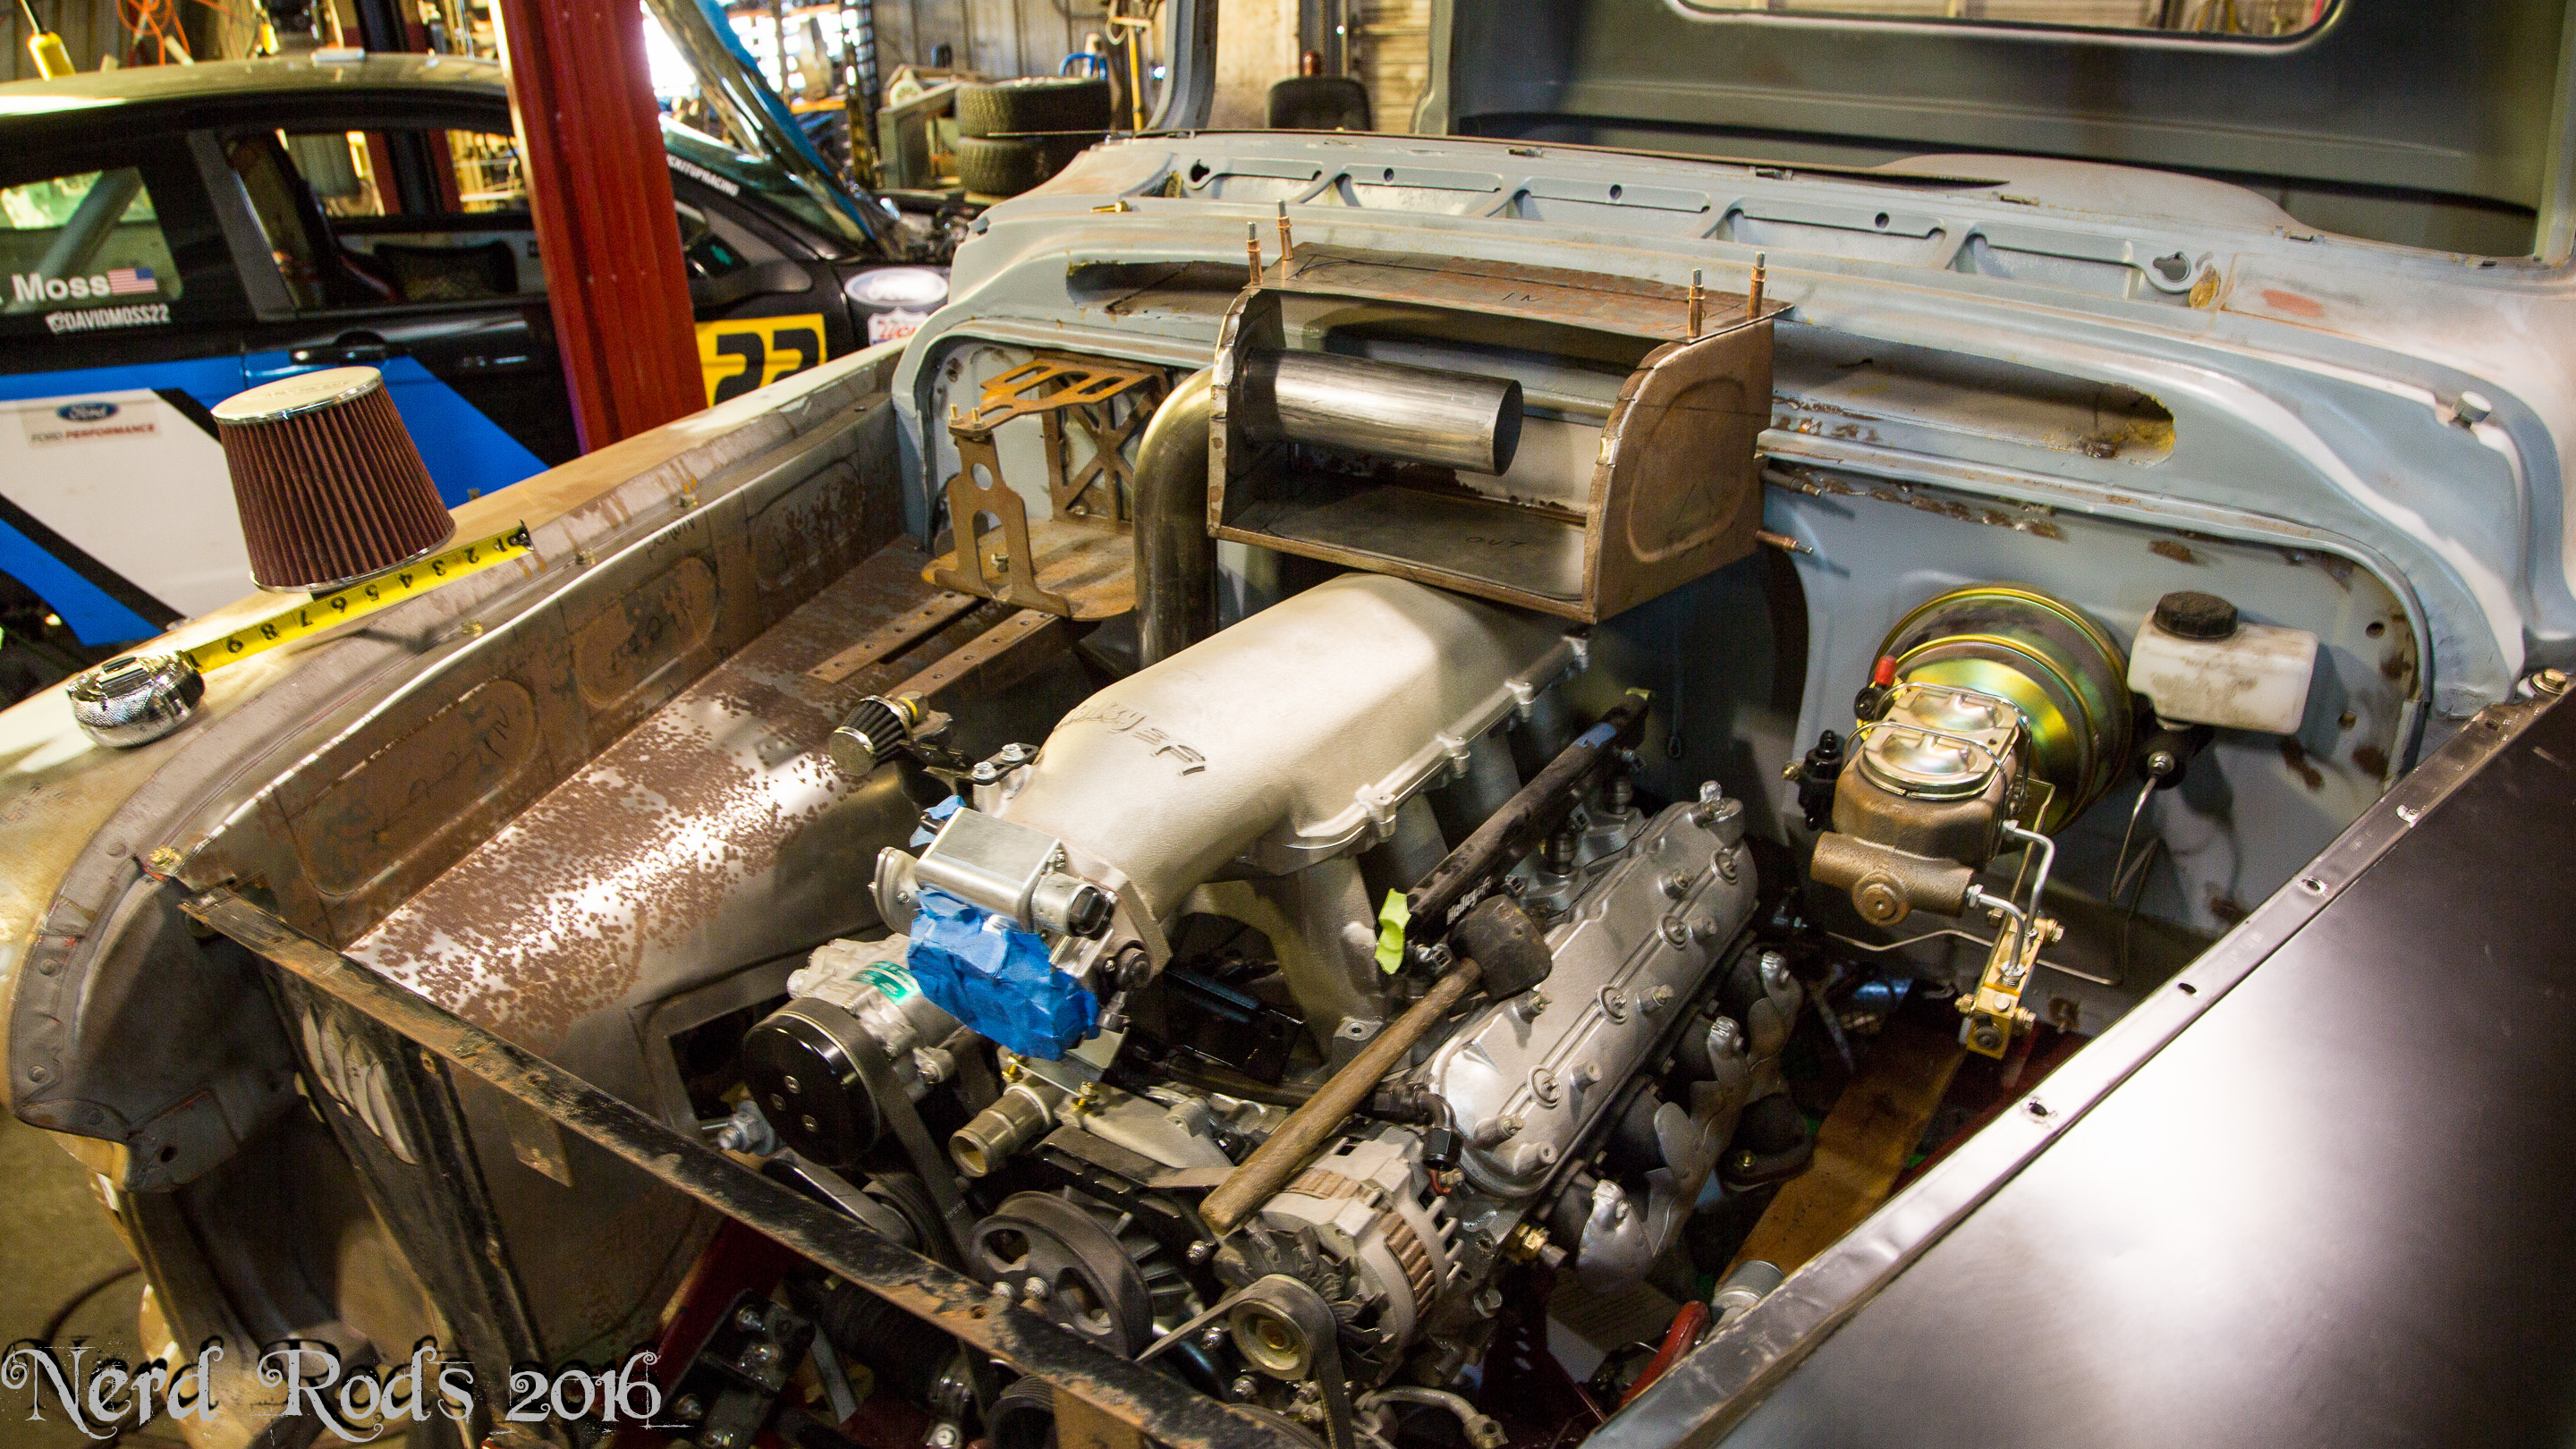
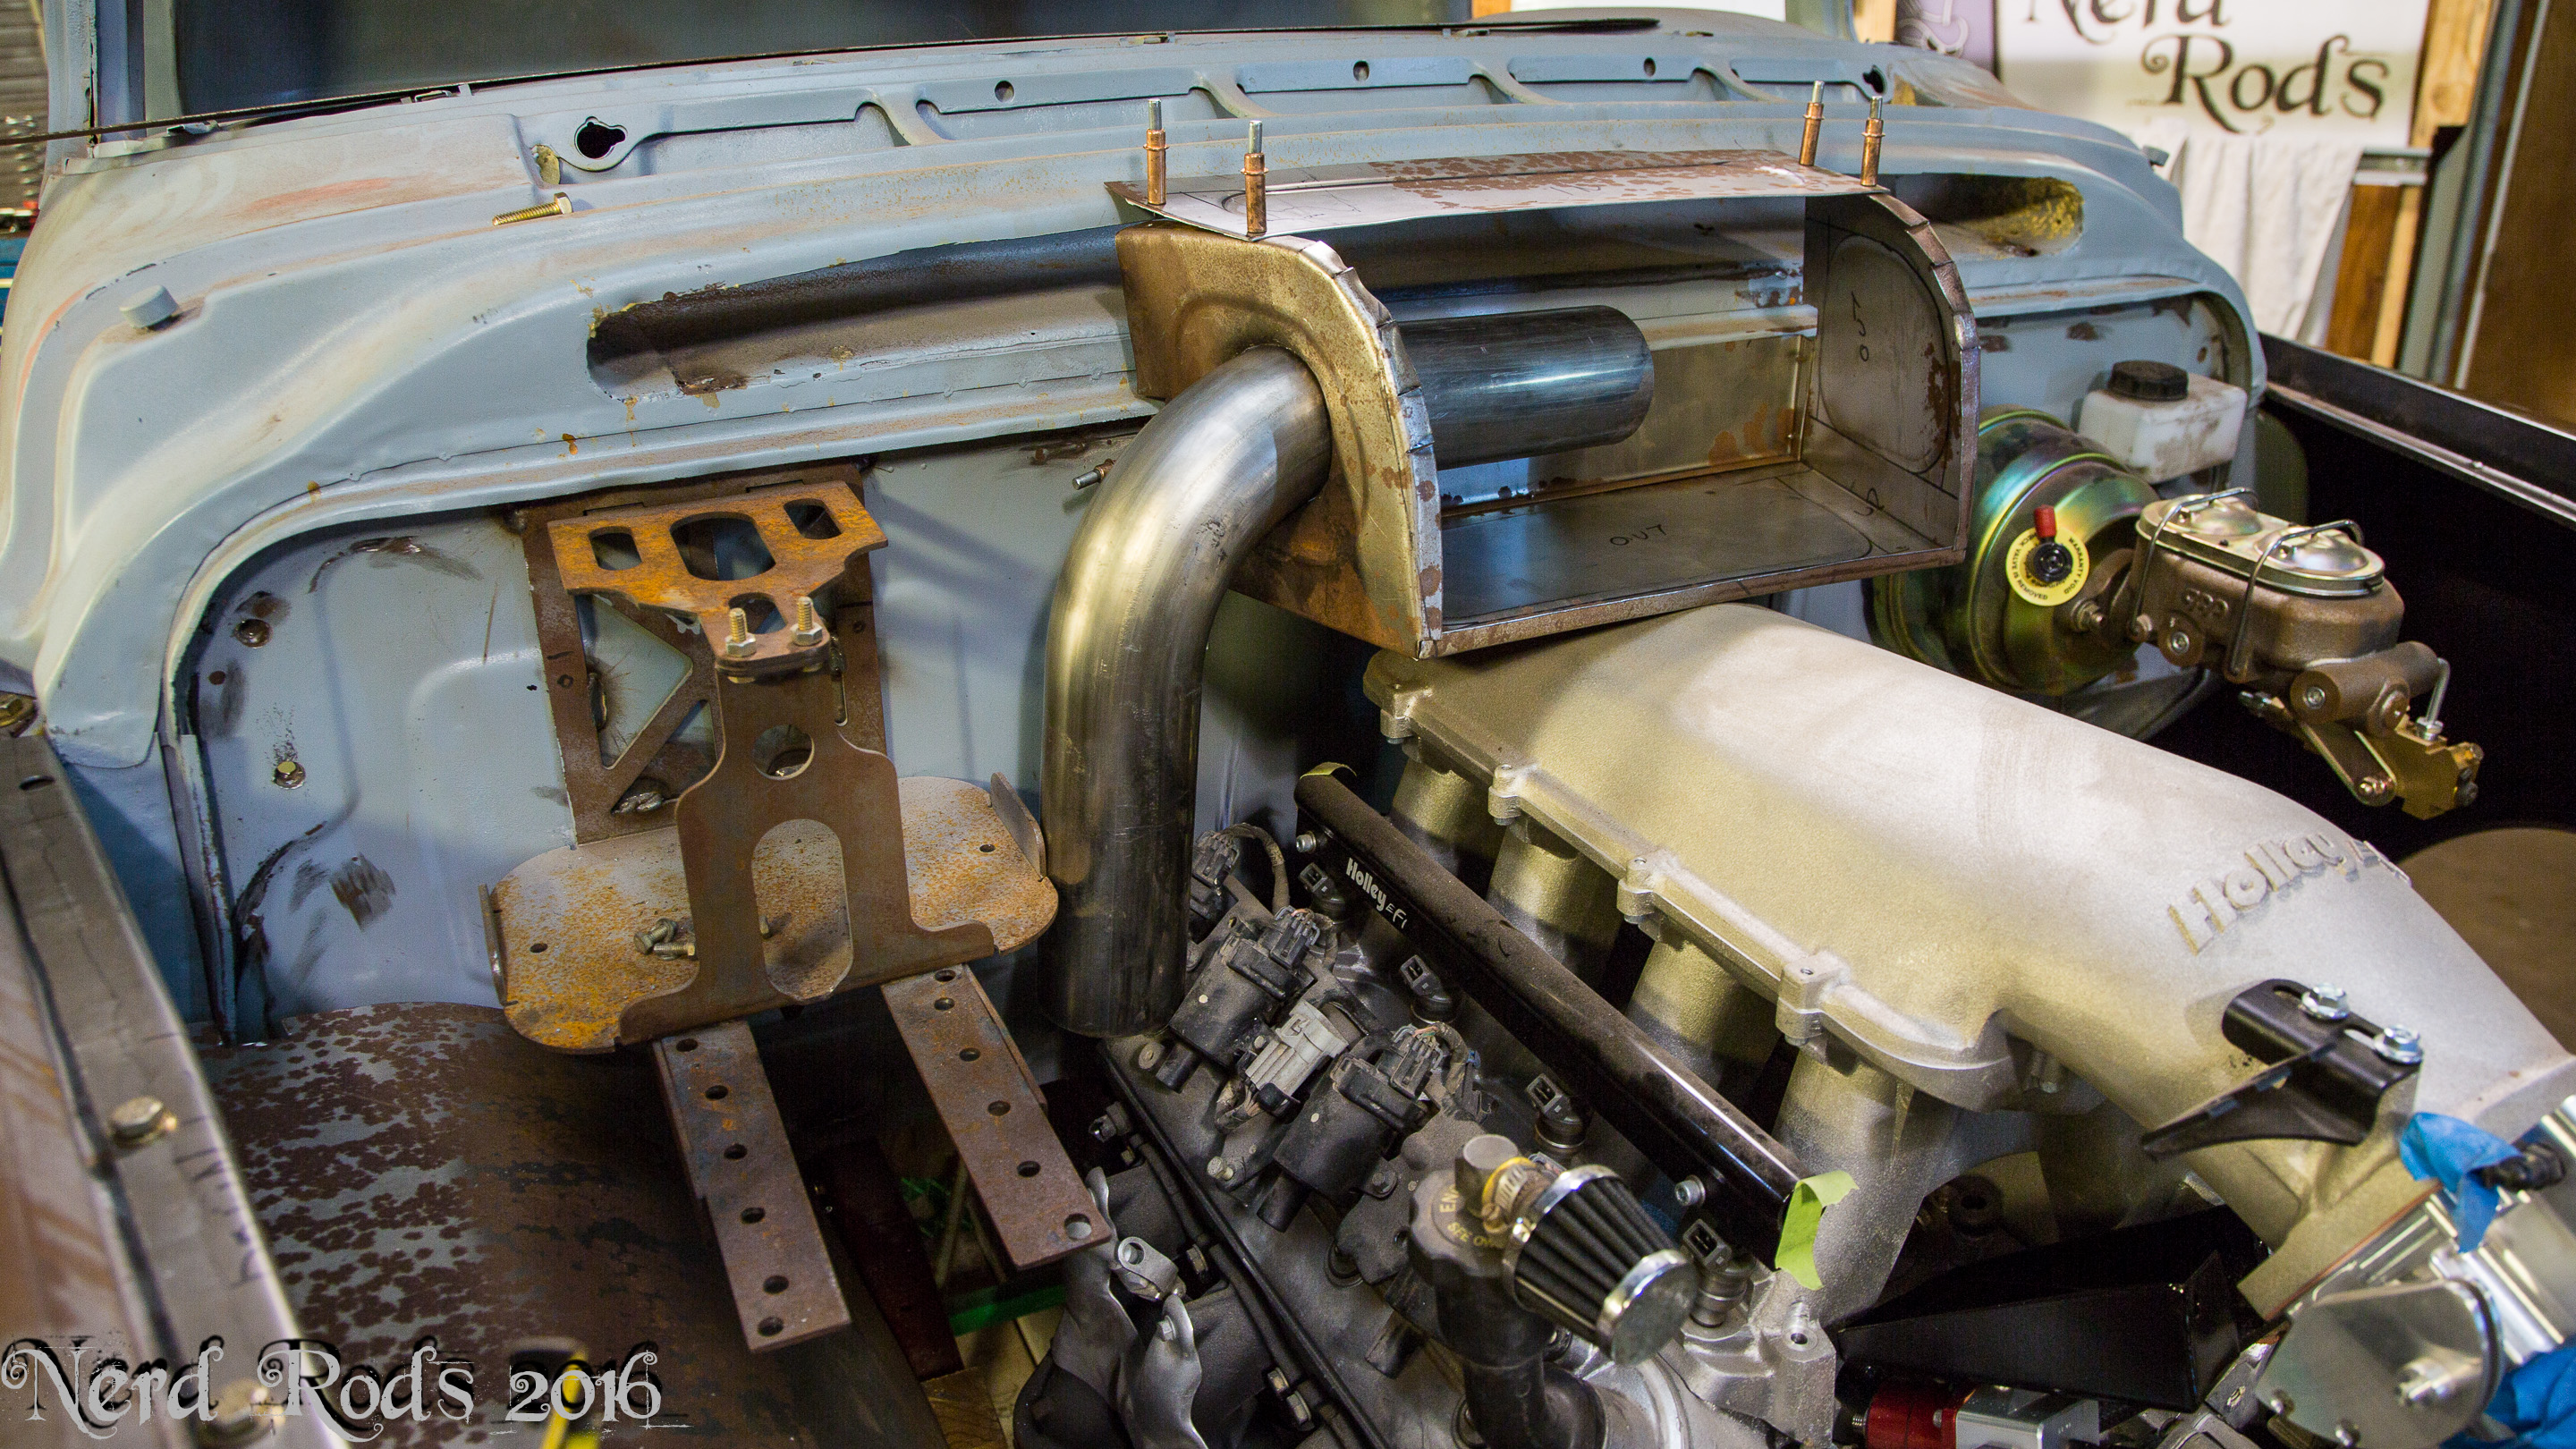
So most of this started with two things. The intake tubing because of the turbo intake and the high pressure zone Jim kept wanting to use as a vent. The pressure at the cowl might have had a tiny effect but I’m 90% sure after reading up and getting some education for you guys on the forums that if there was any heat loss it would be minor to nonexistent. So I finally found a few videos that convinced Jim of the same thing. So it was decided that this cowl vent would be used to feed the turbo under the passenger butt.
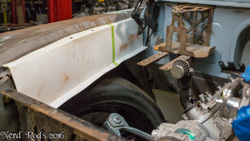
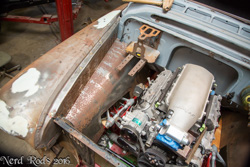
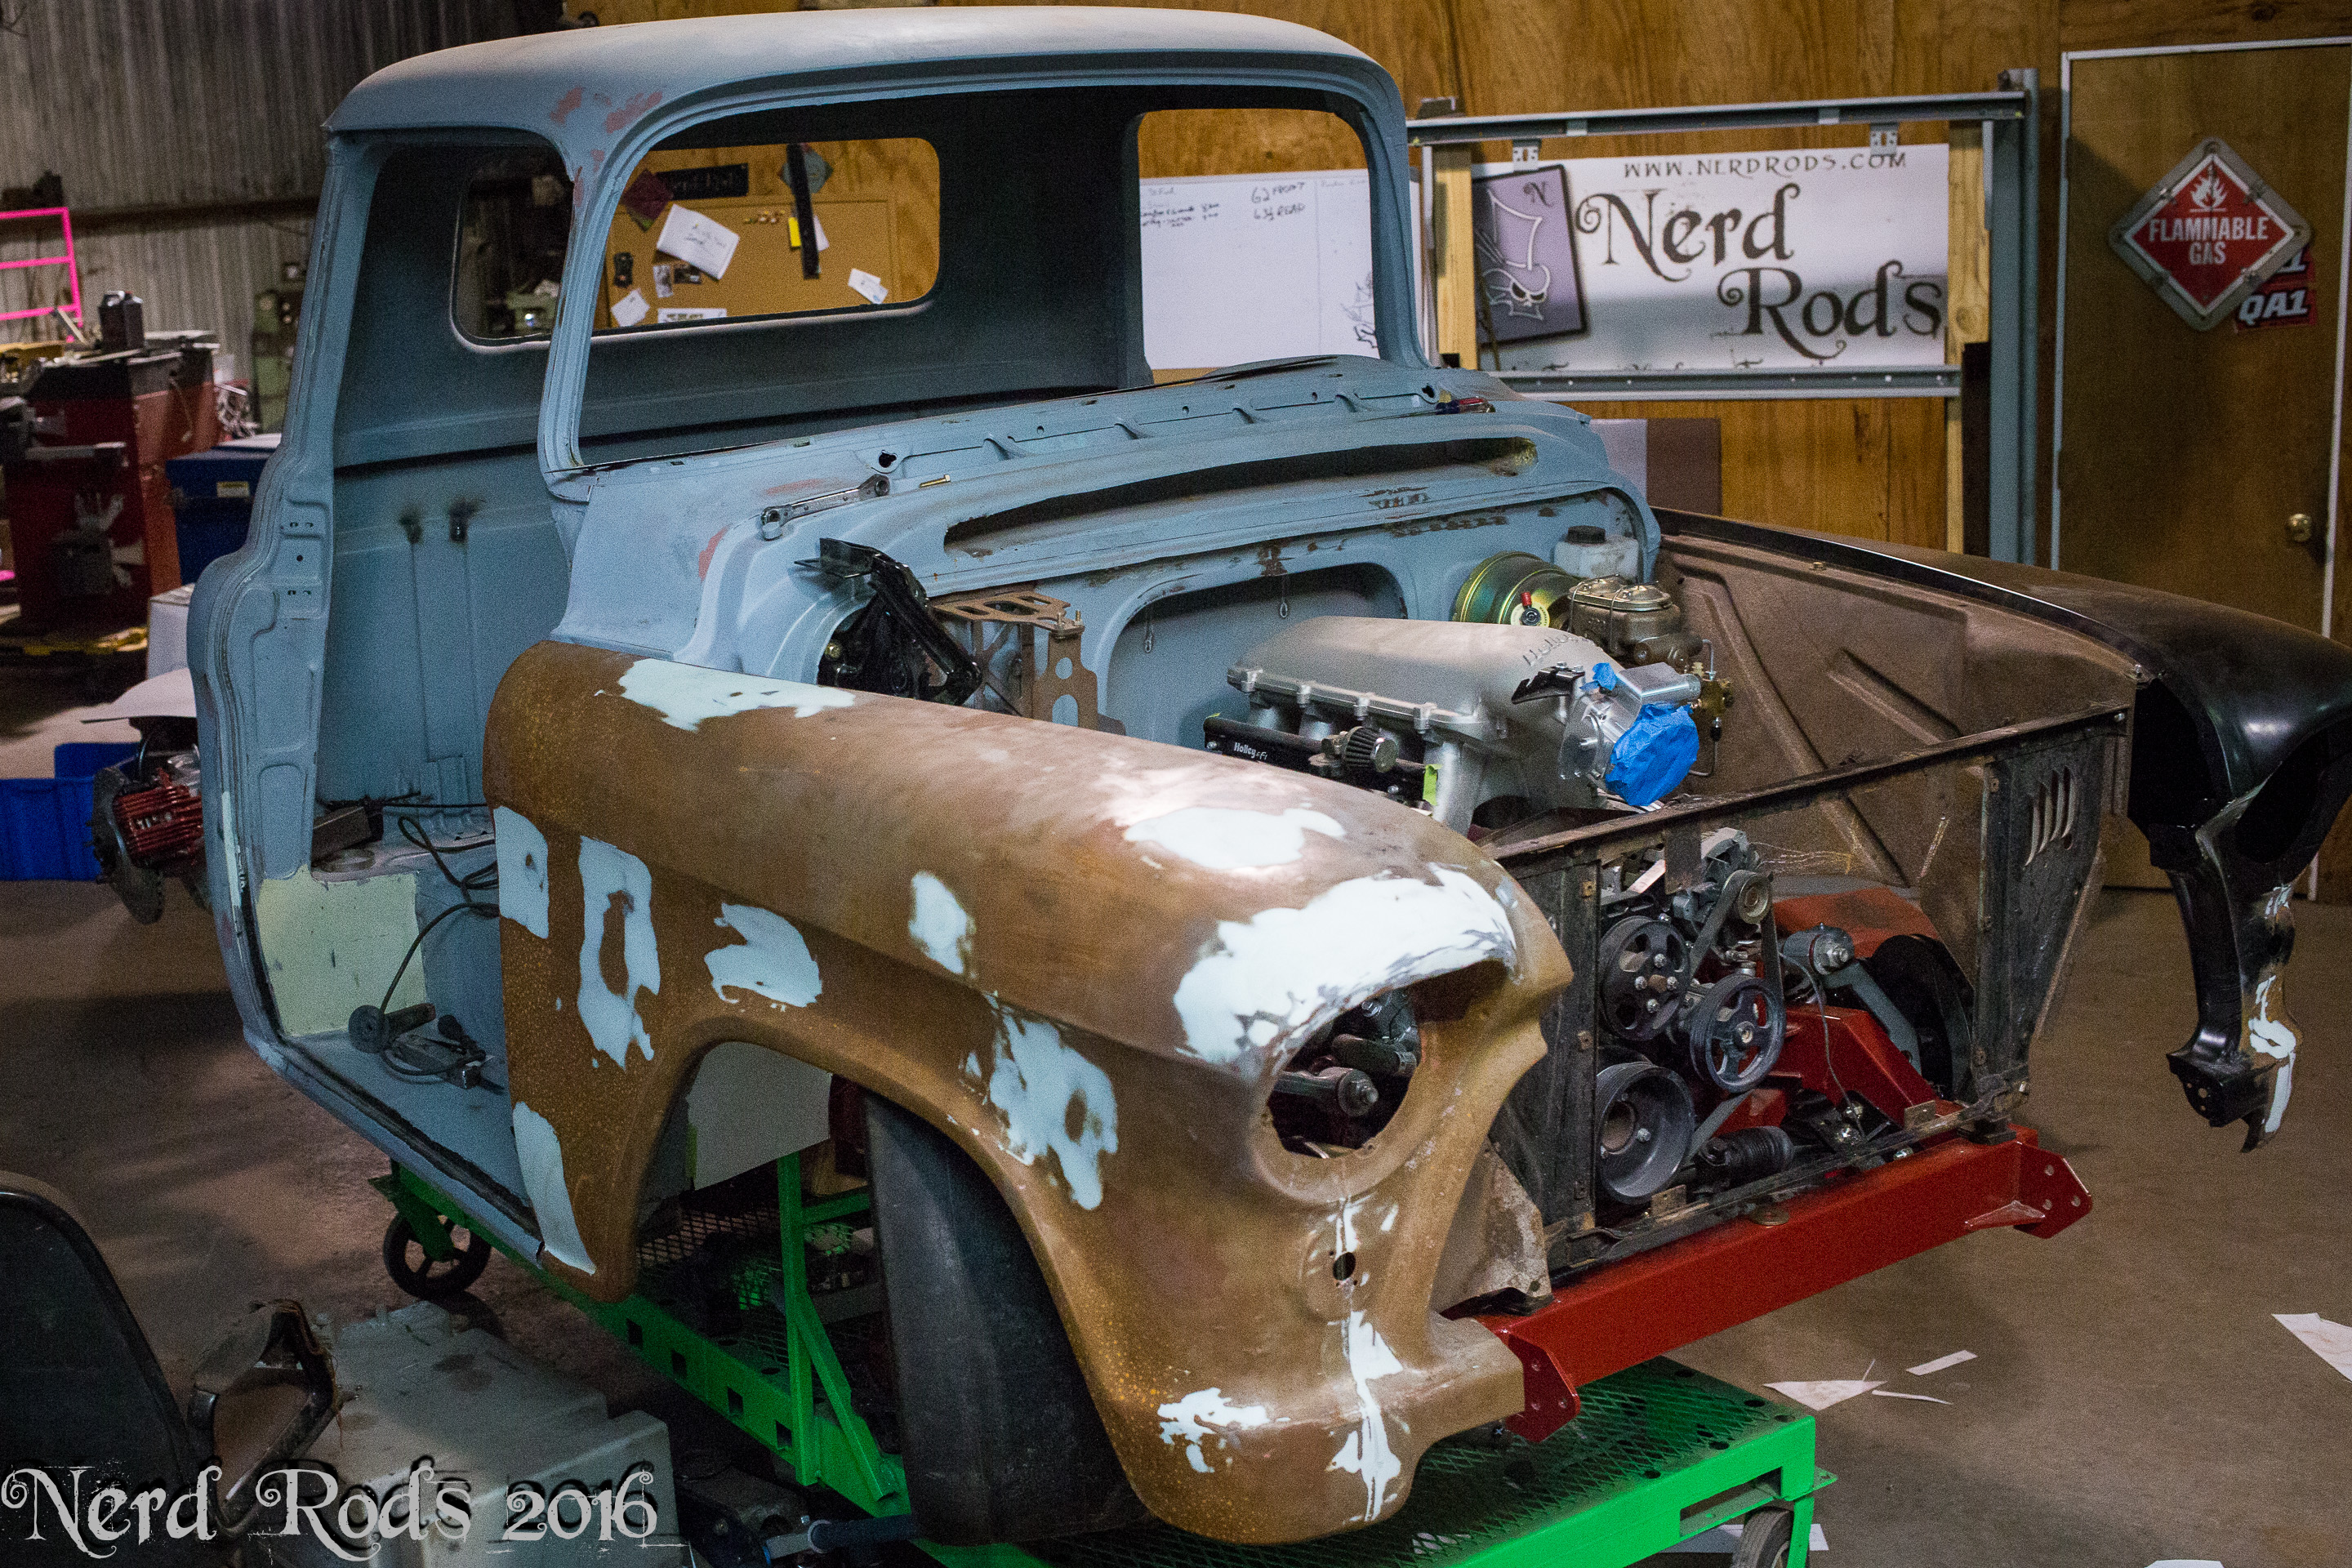
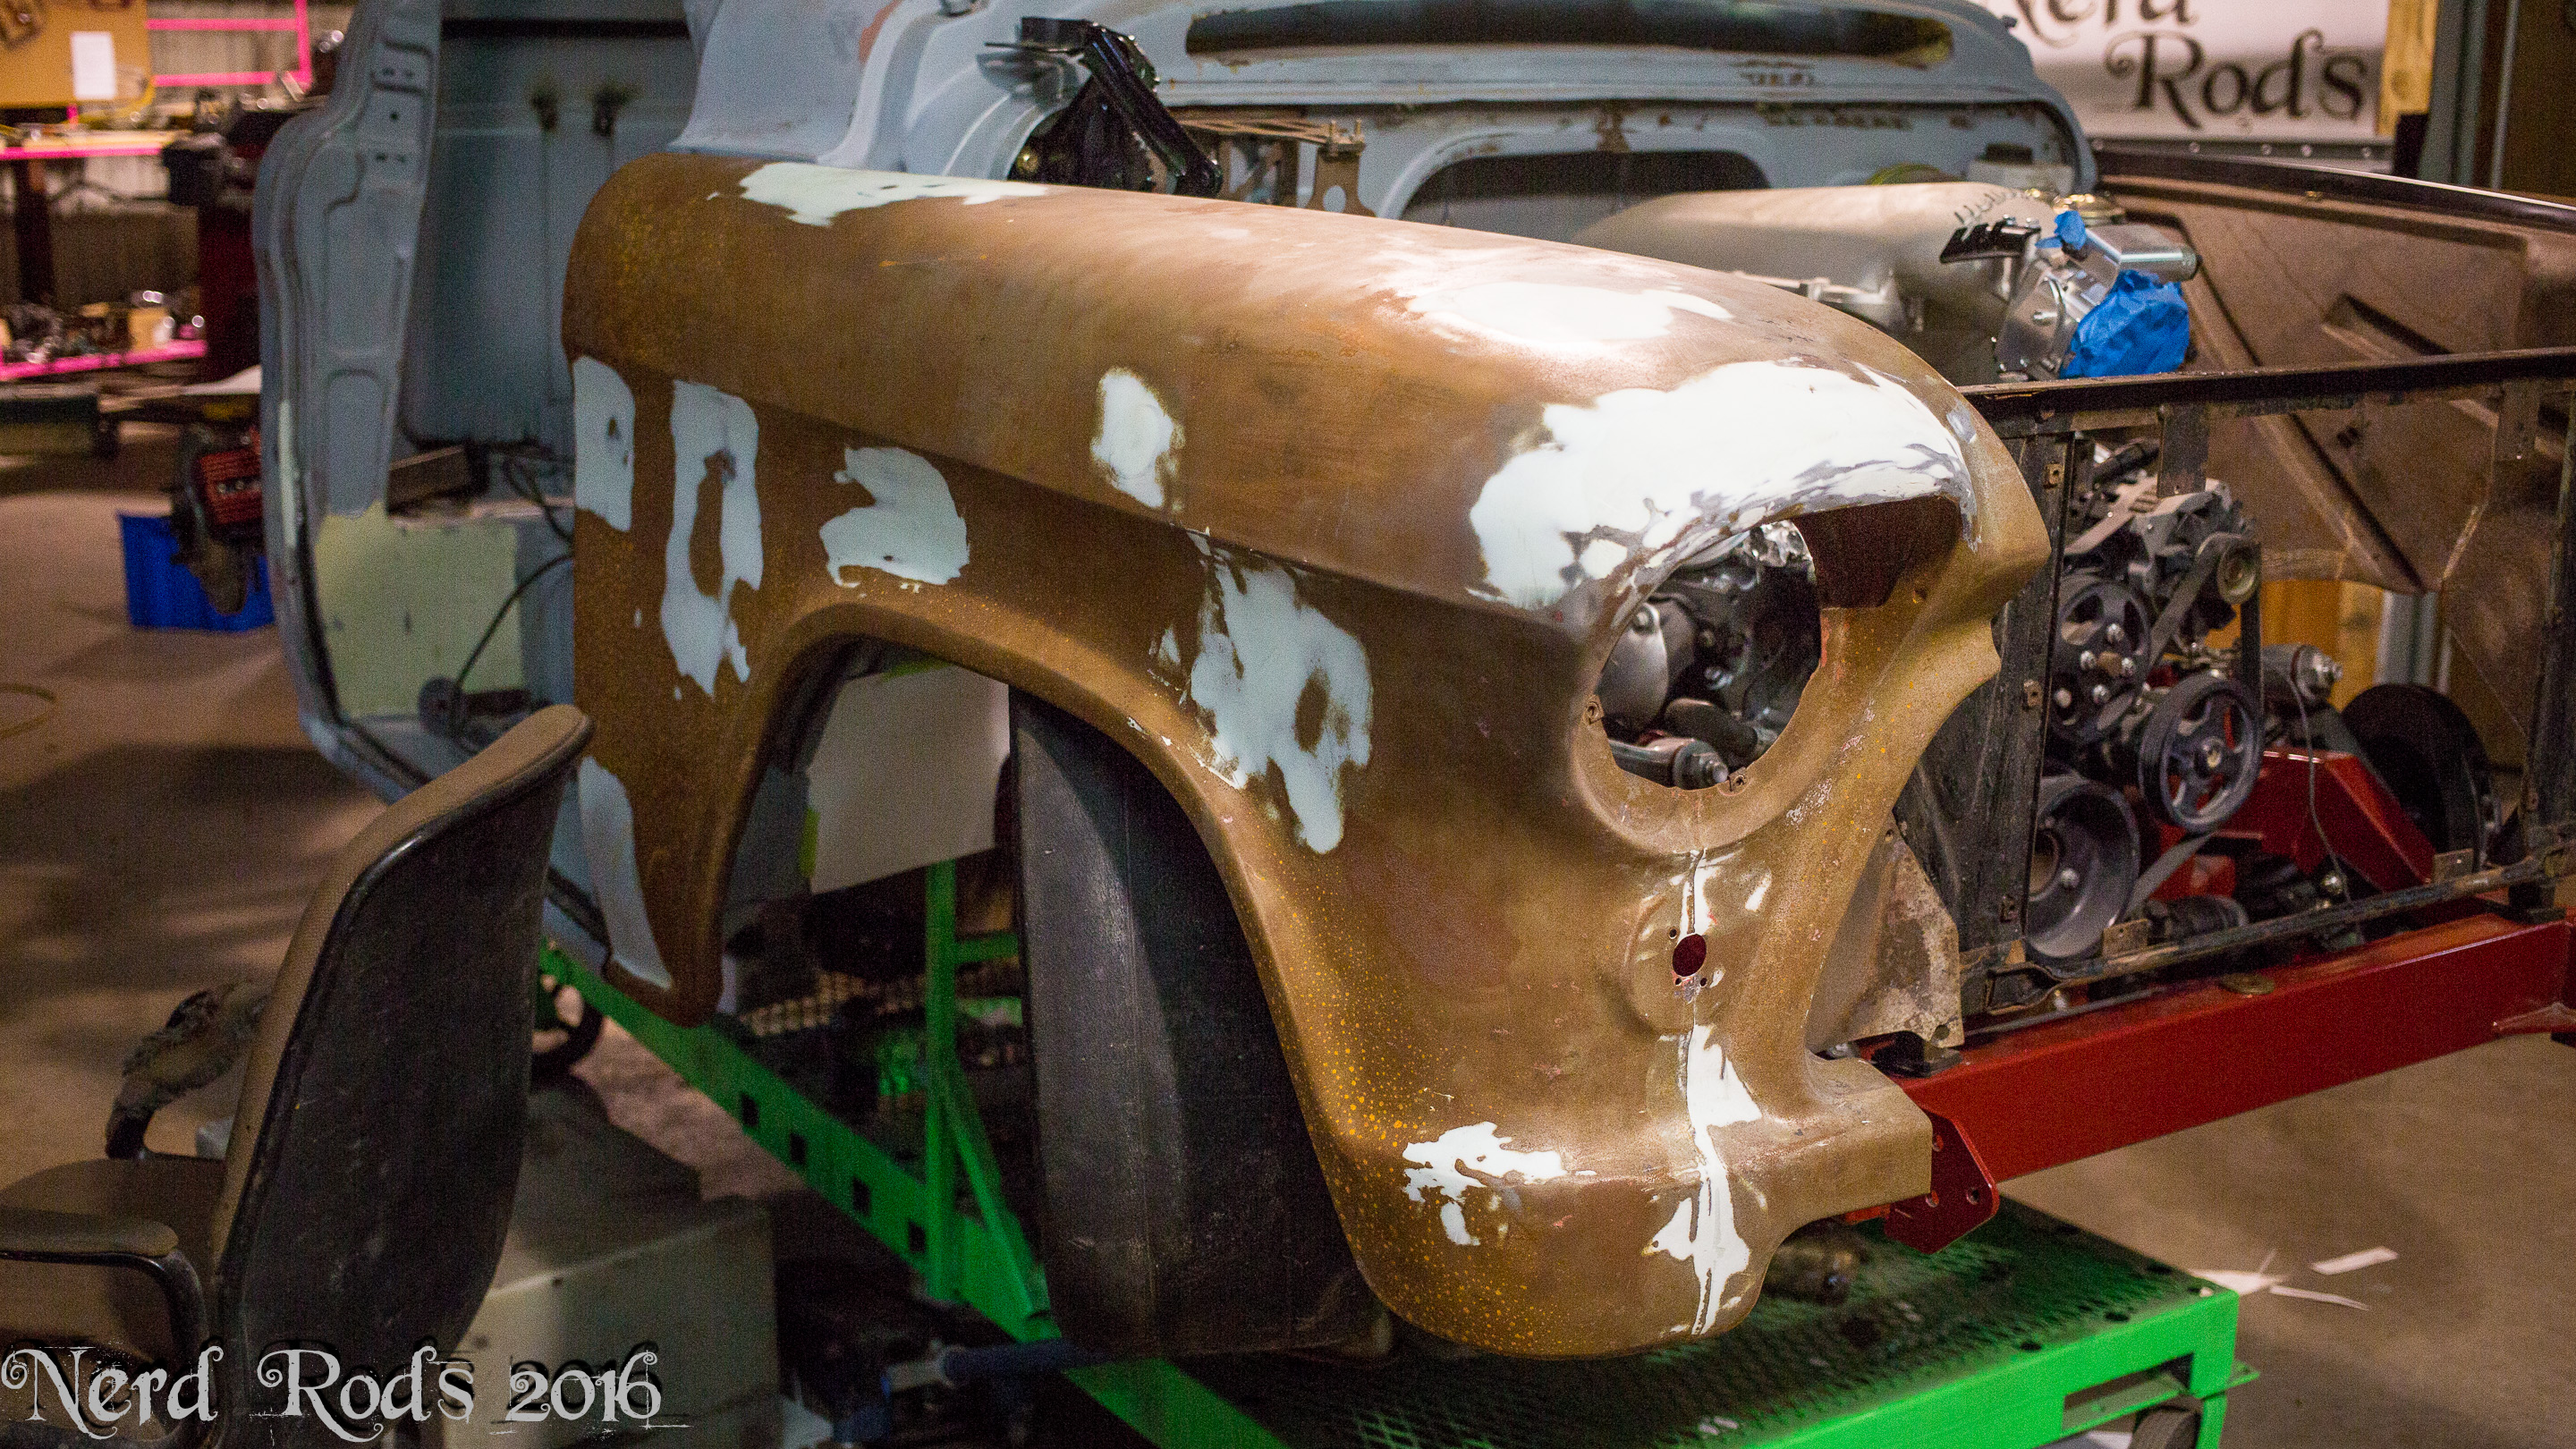
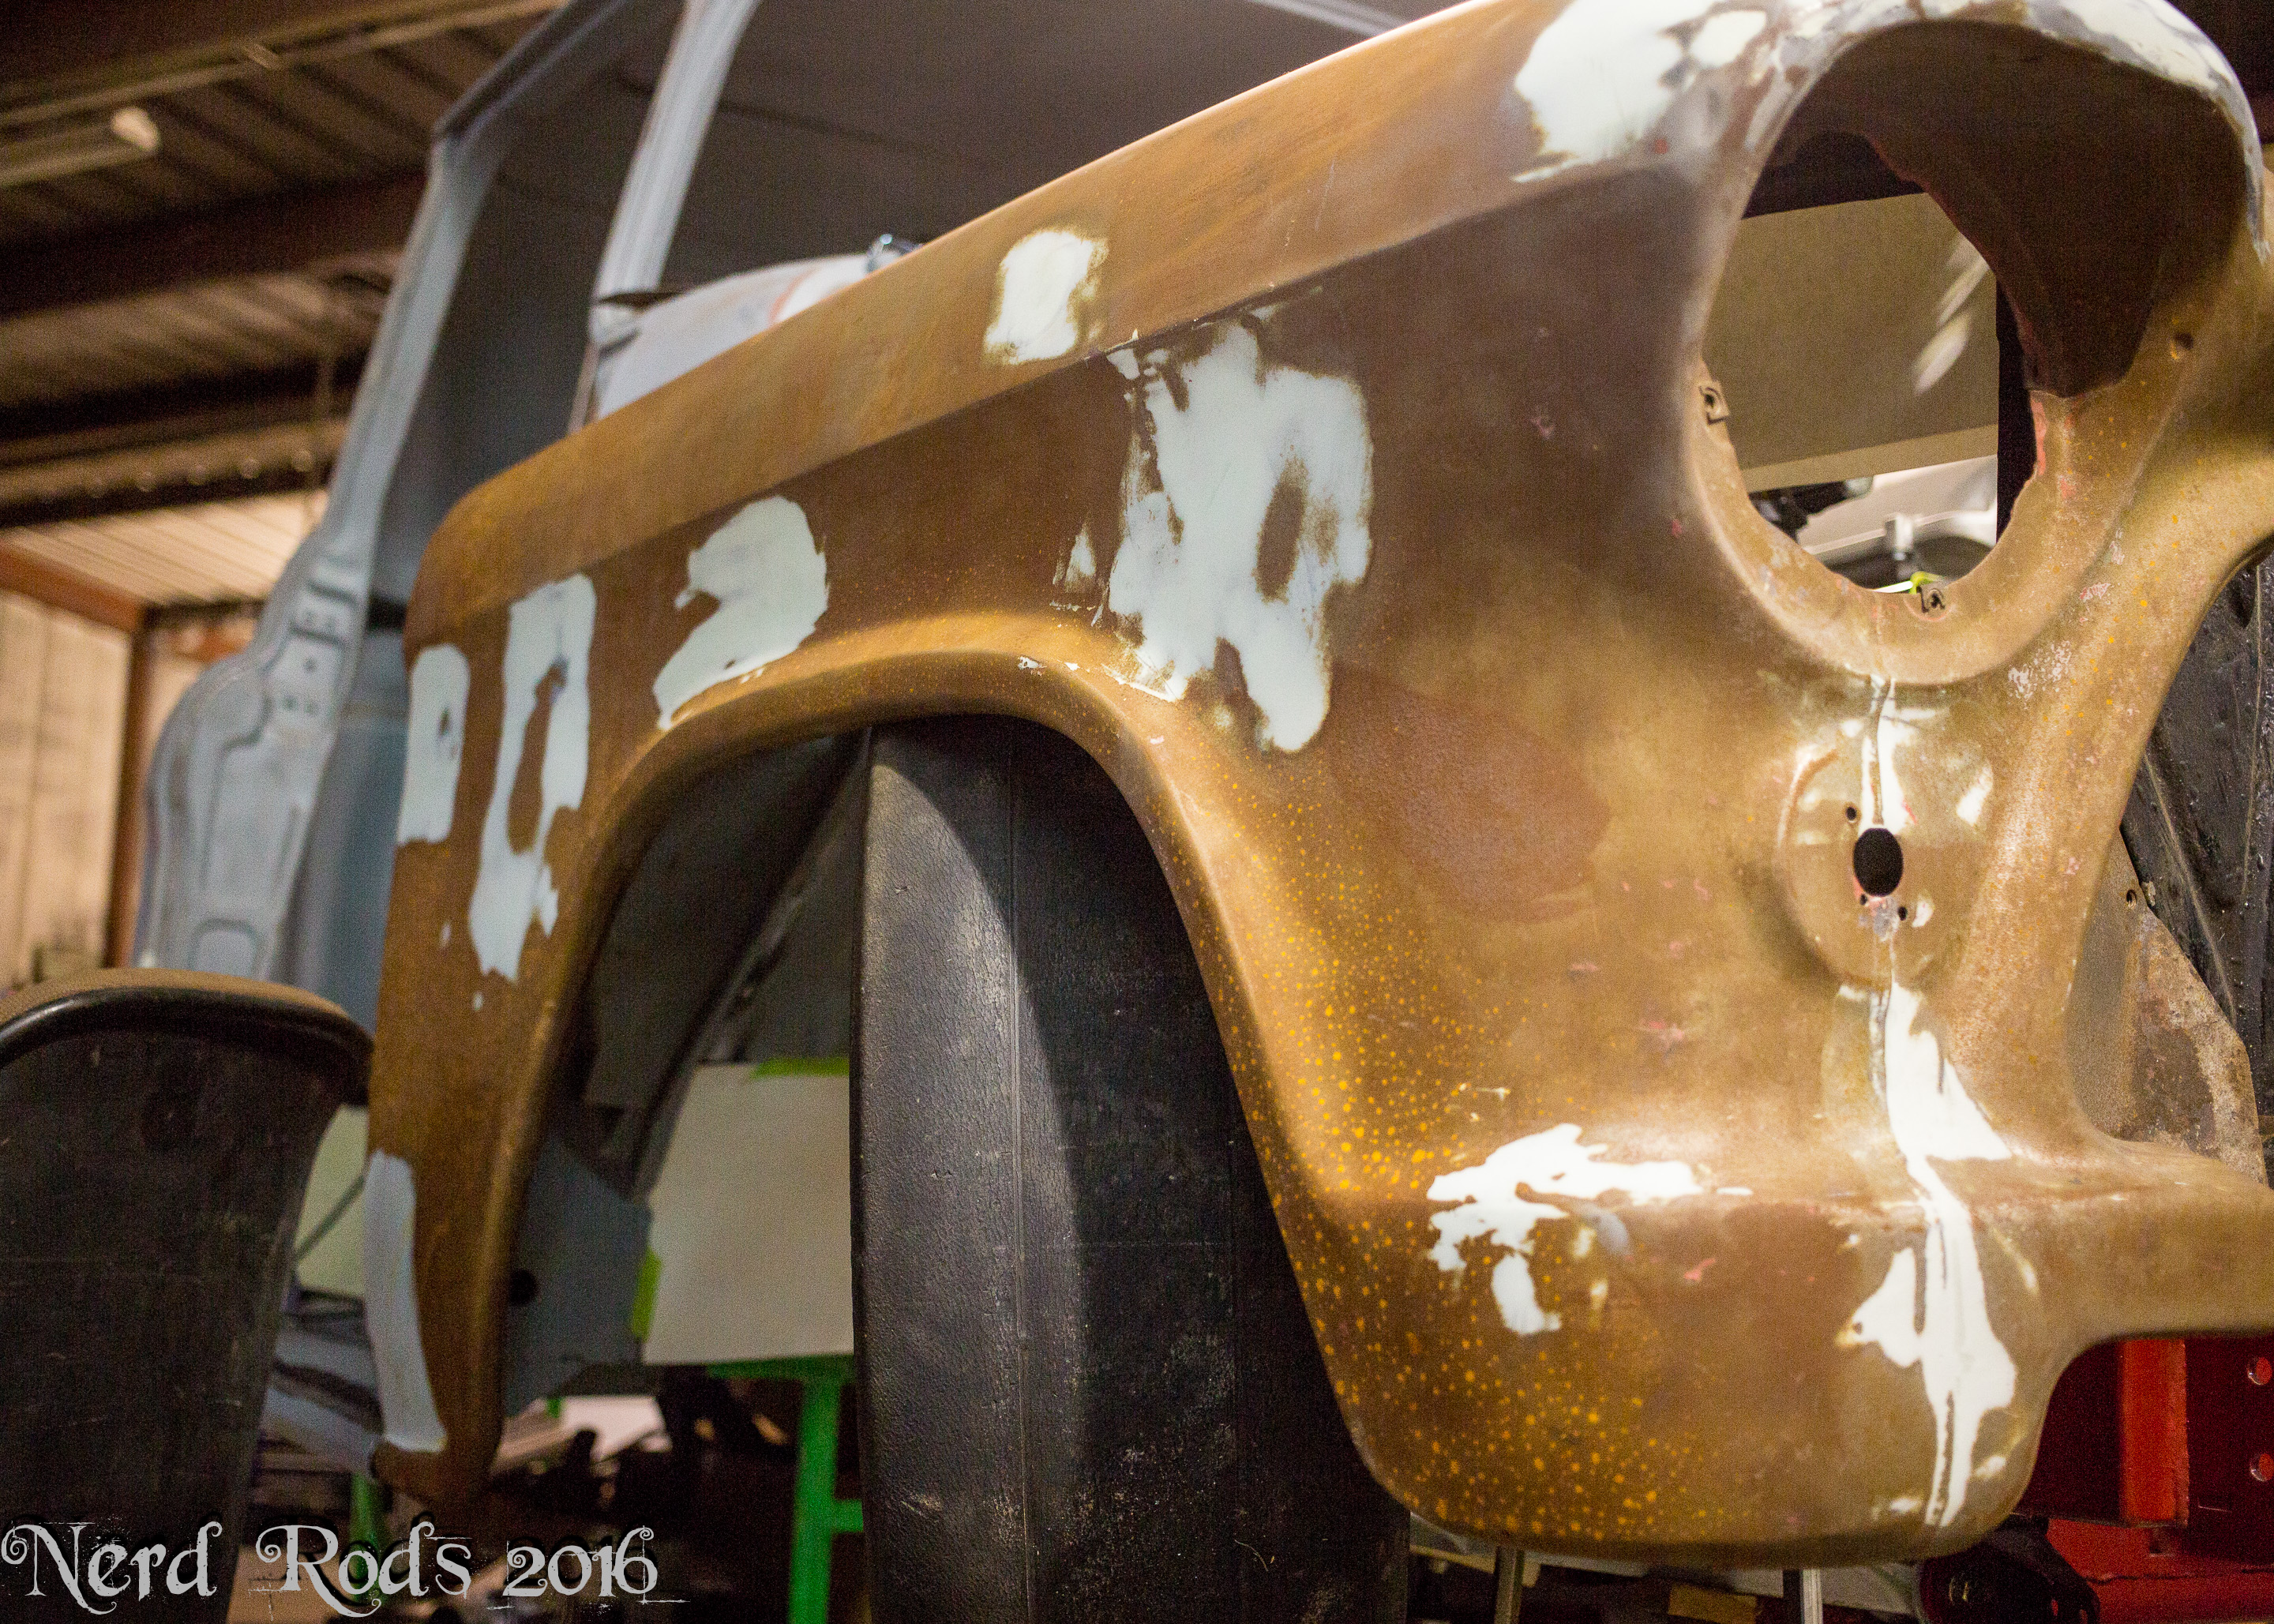
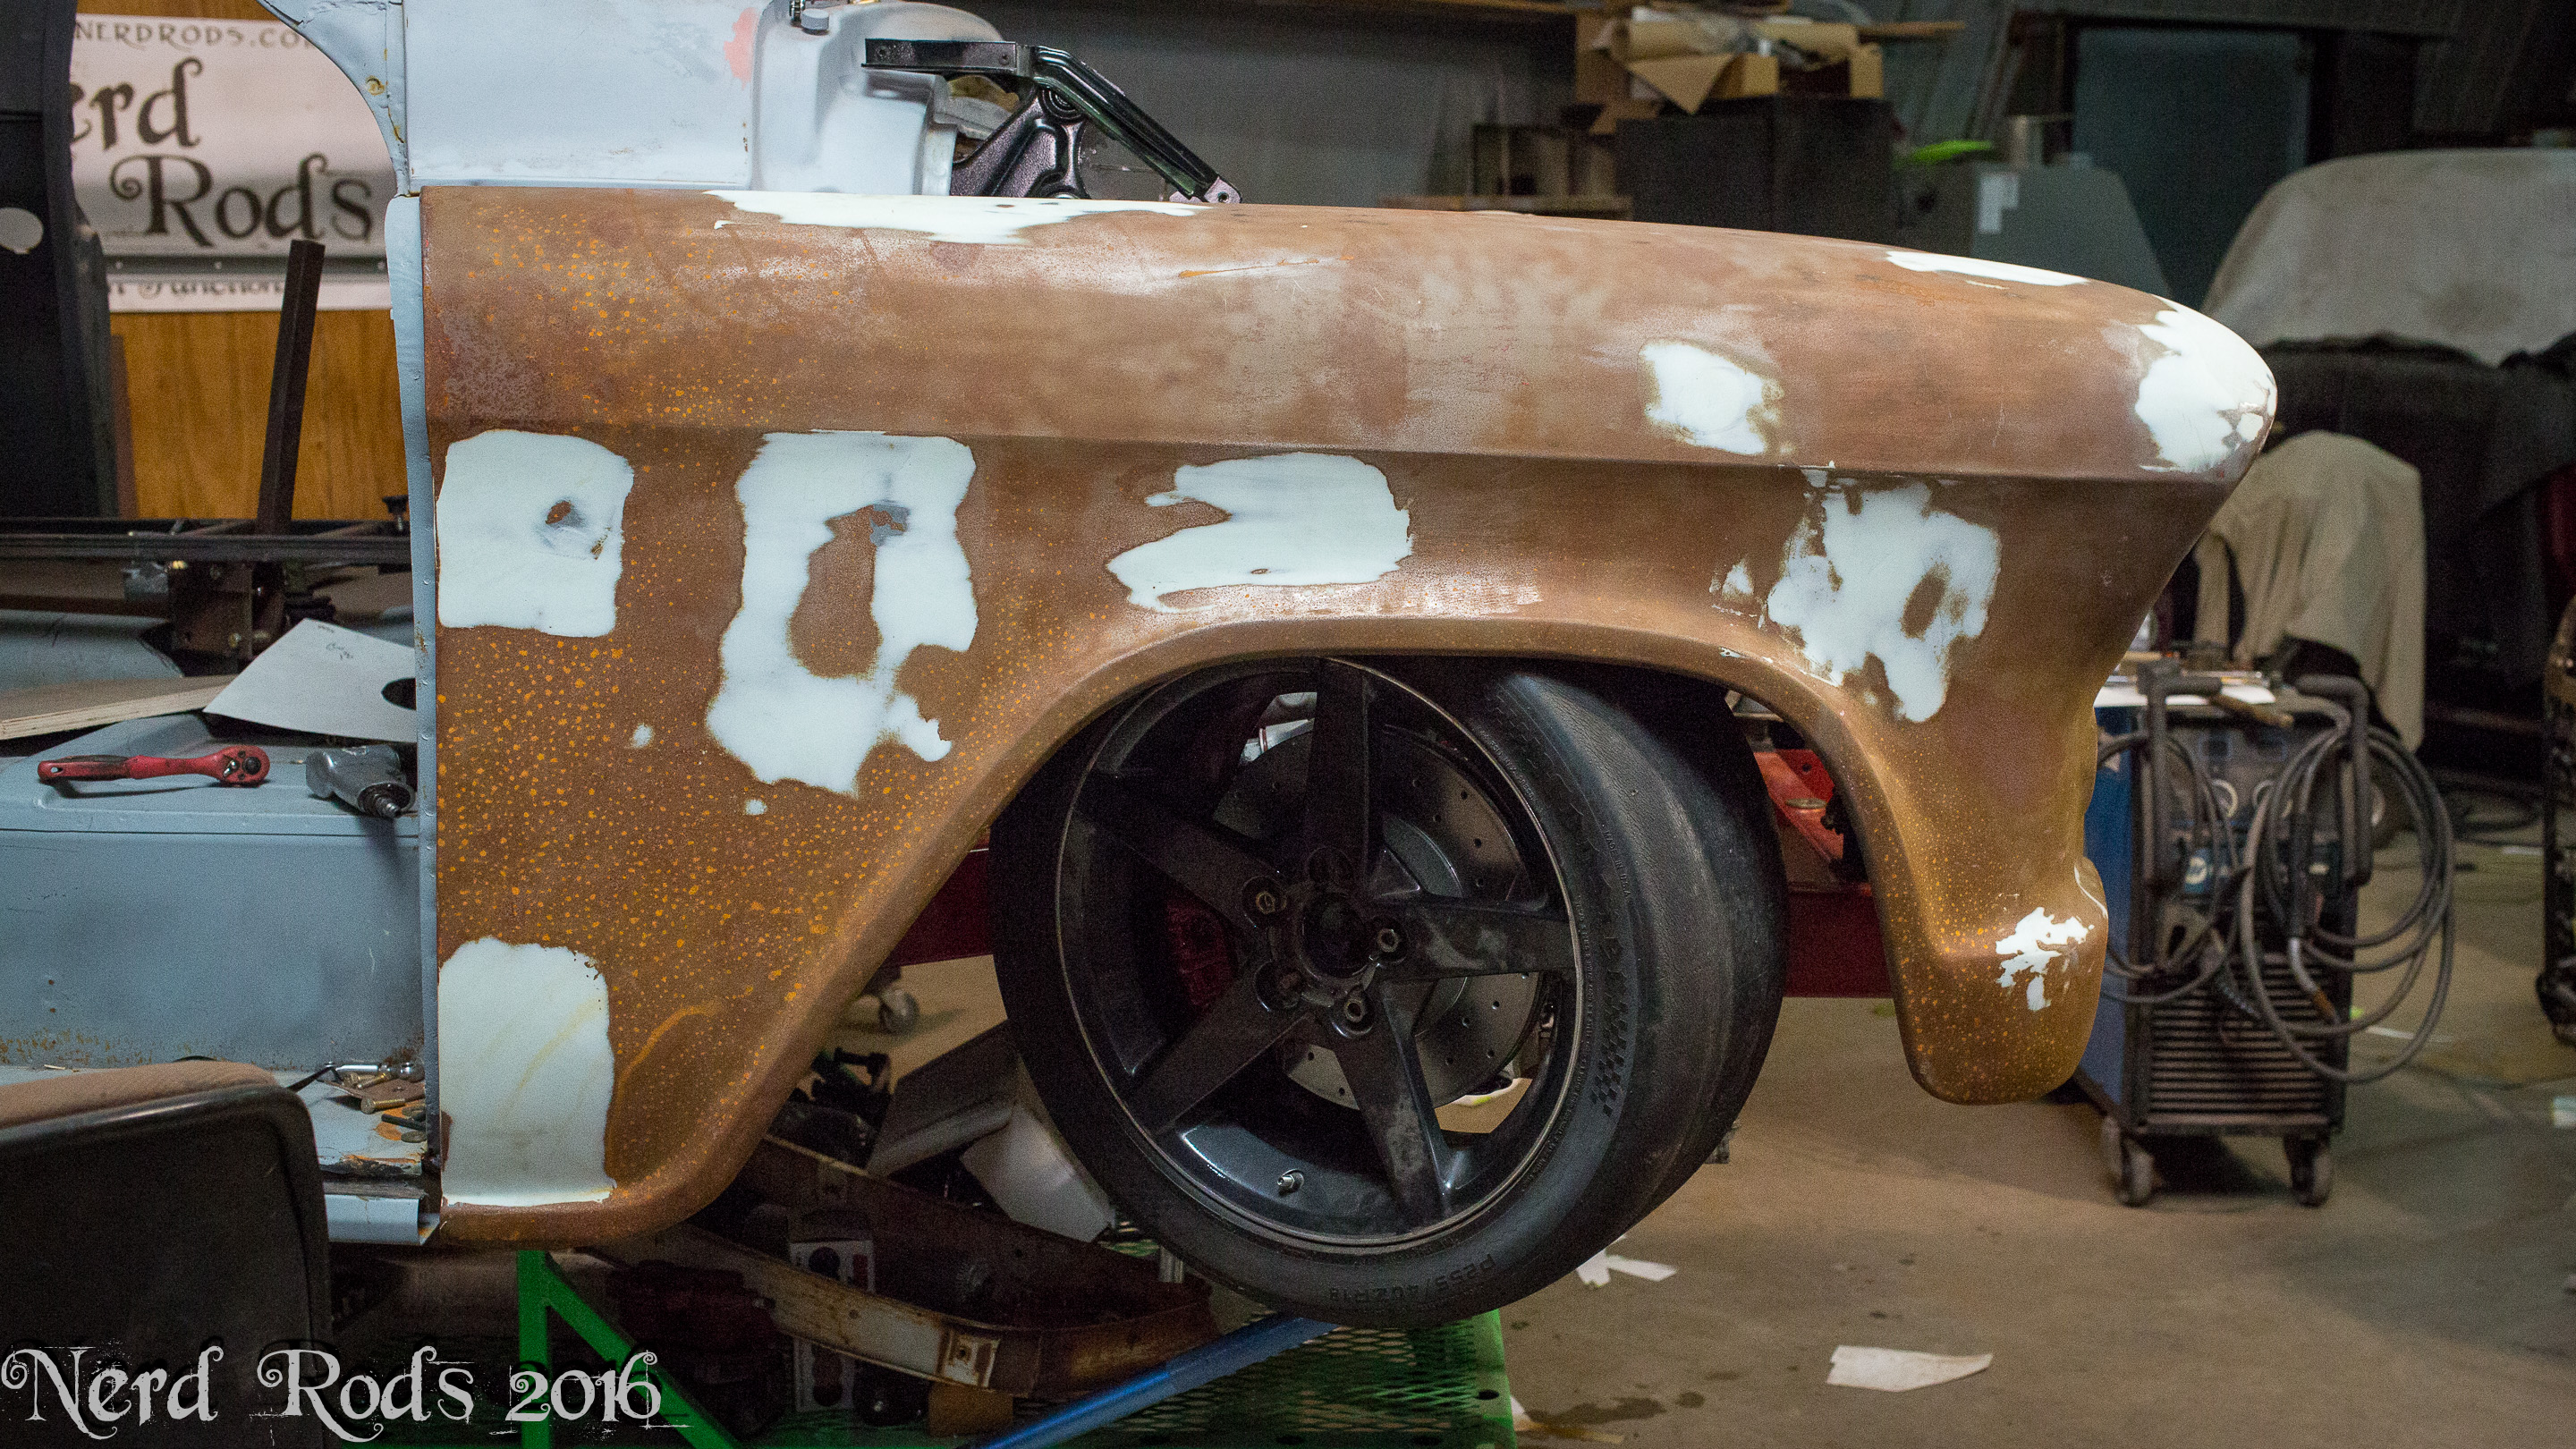
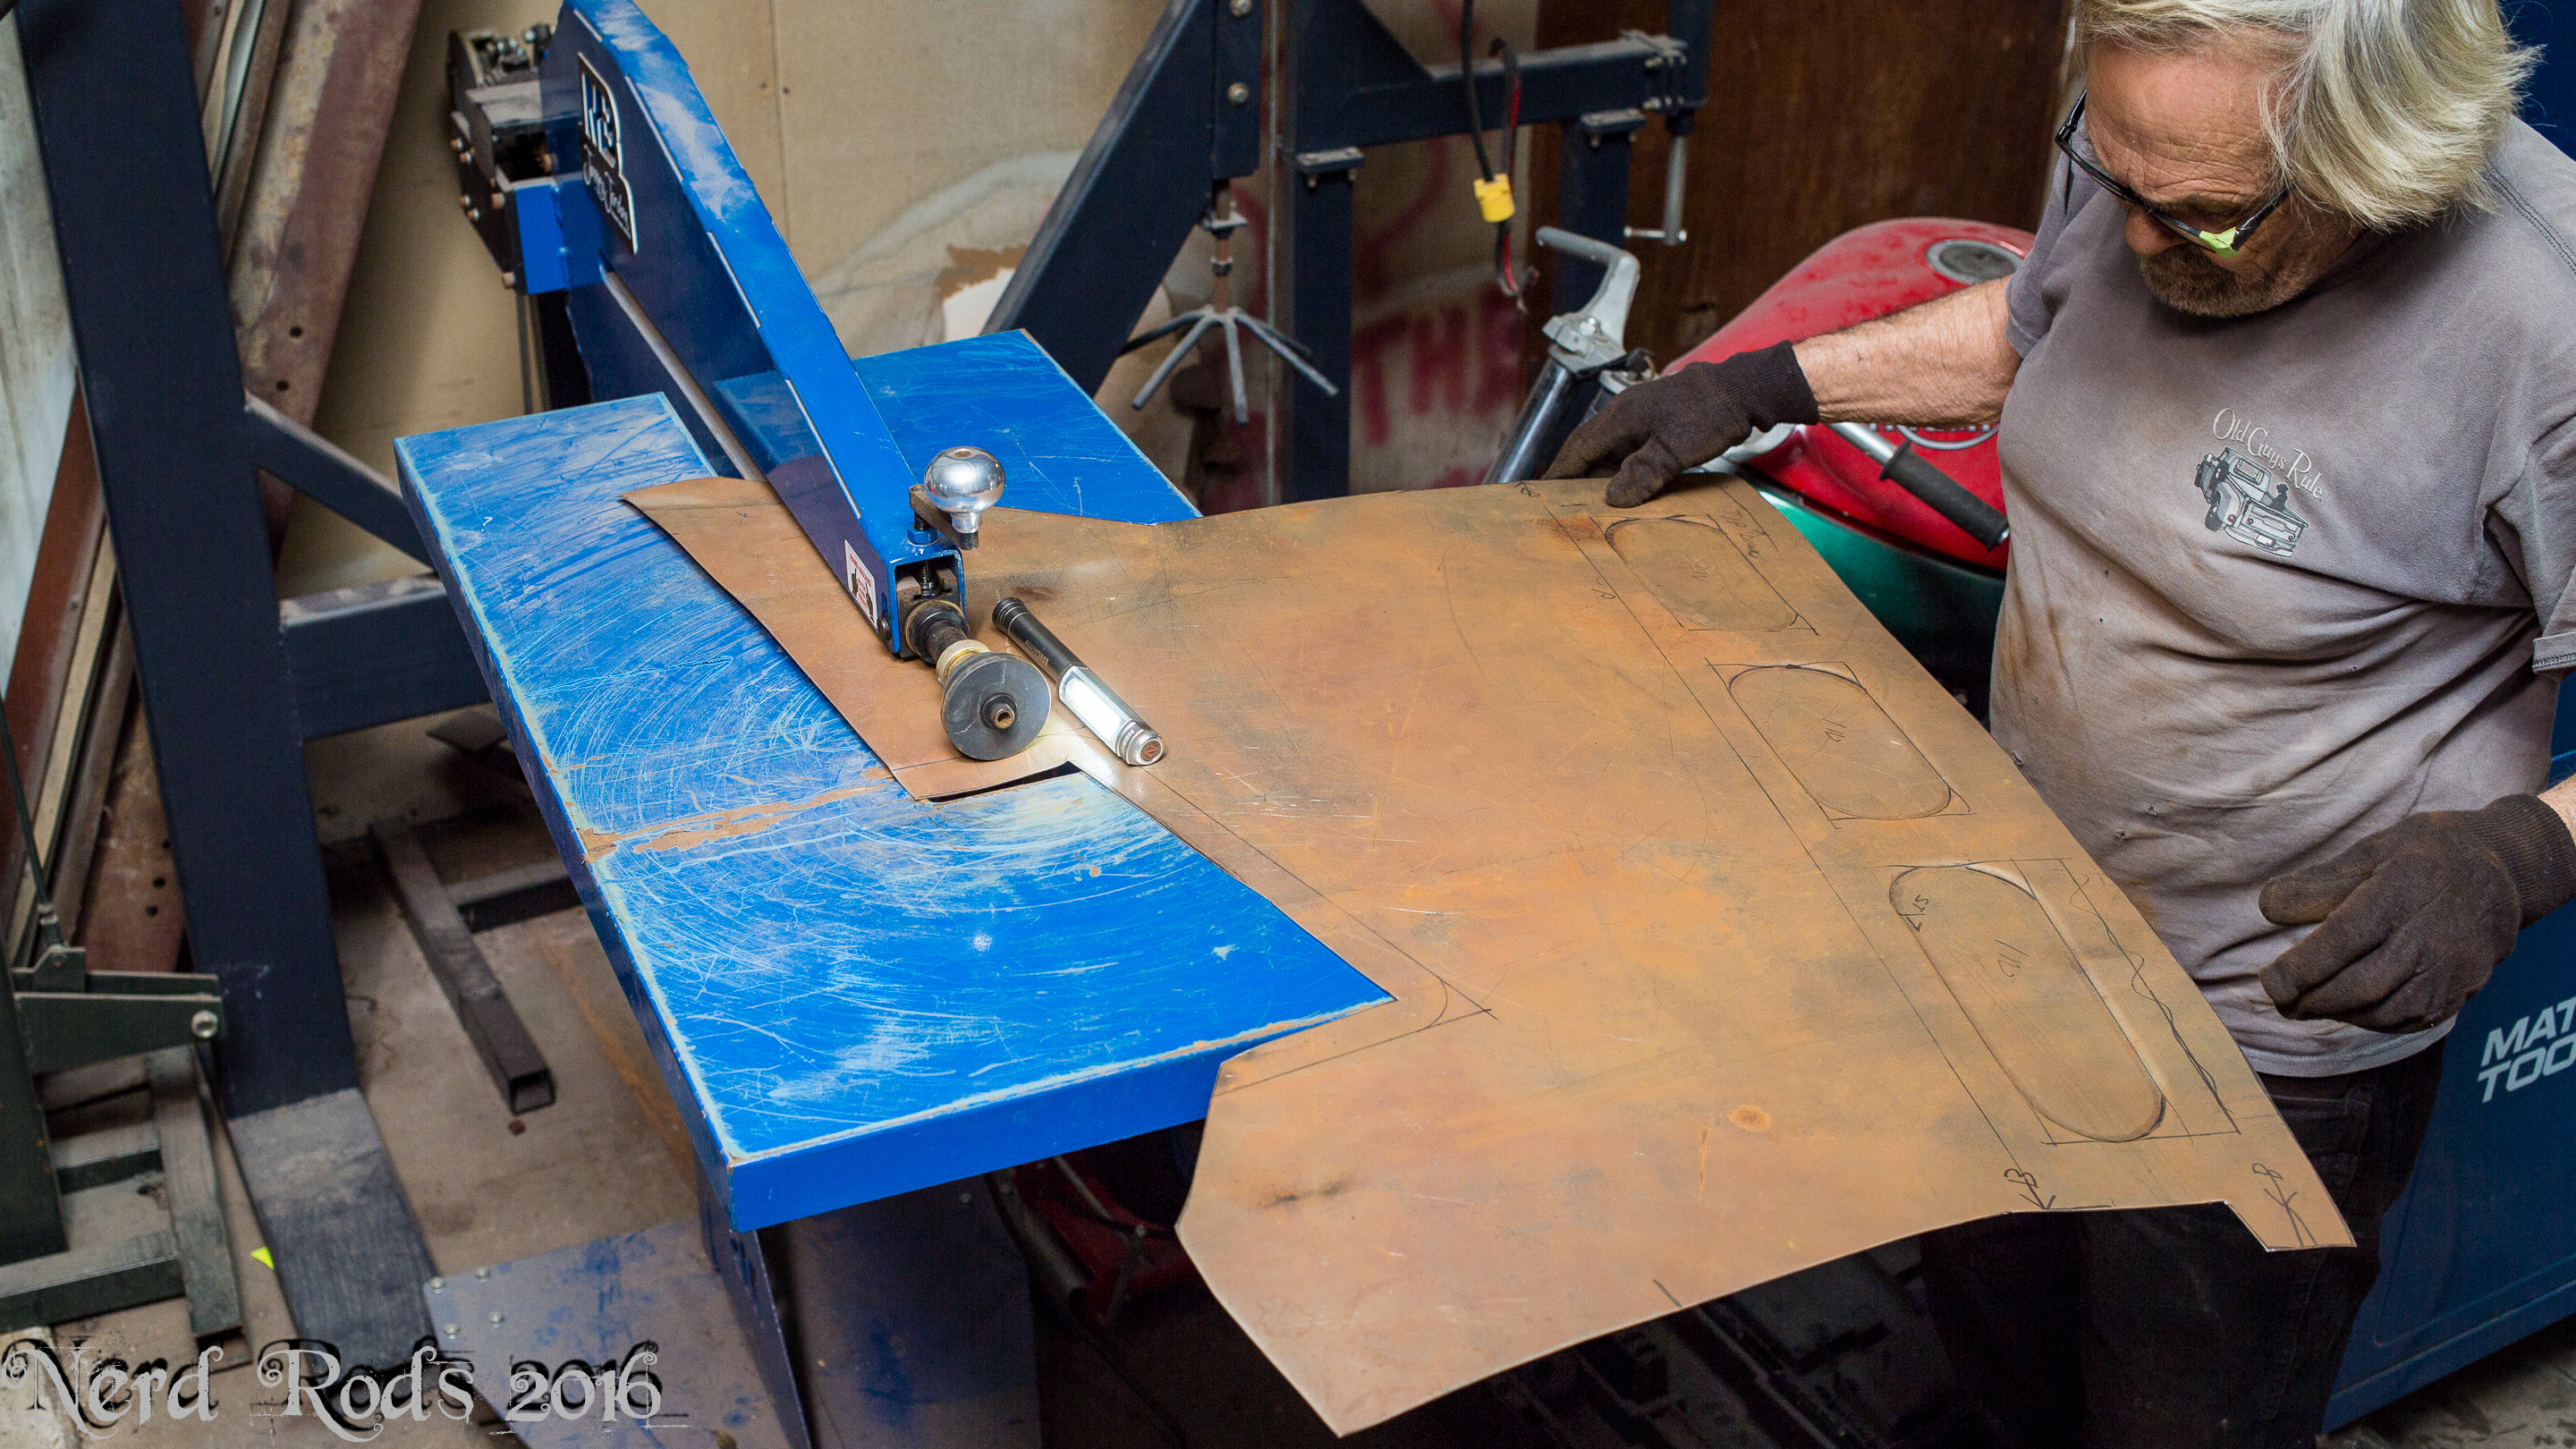
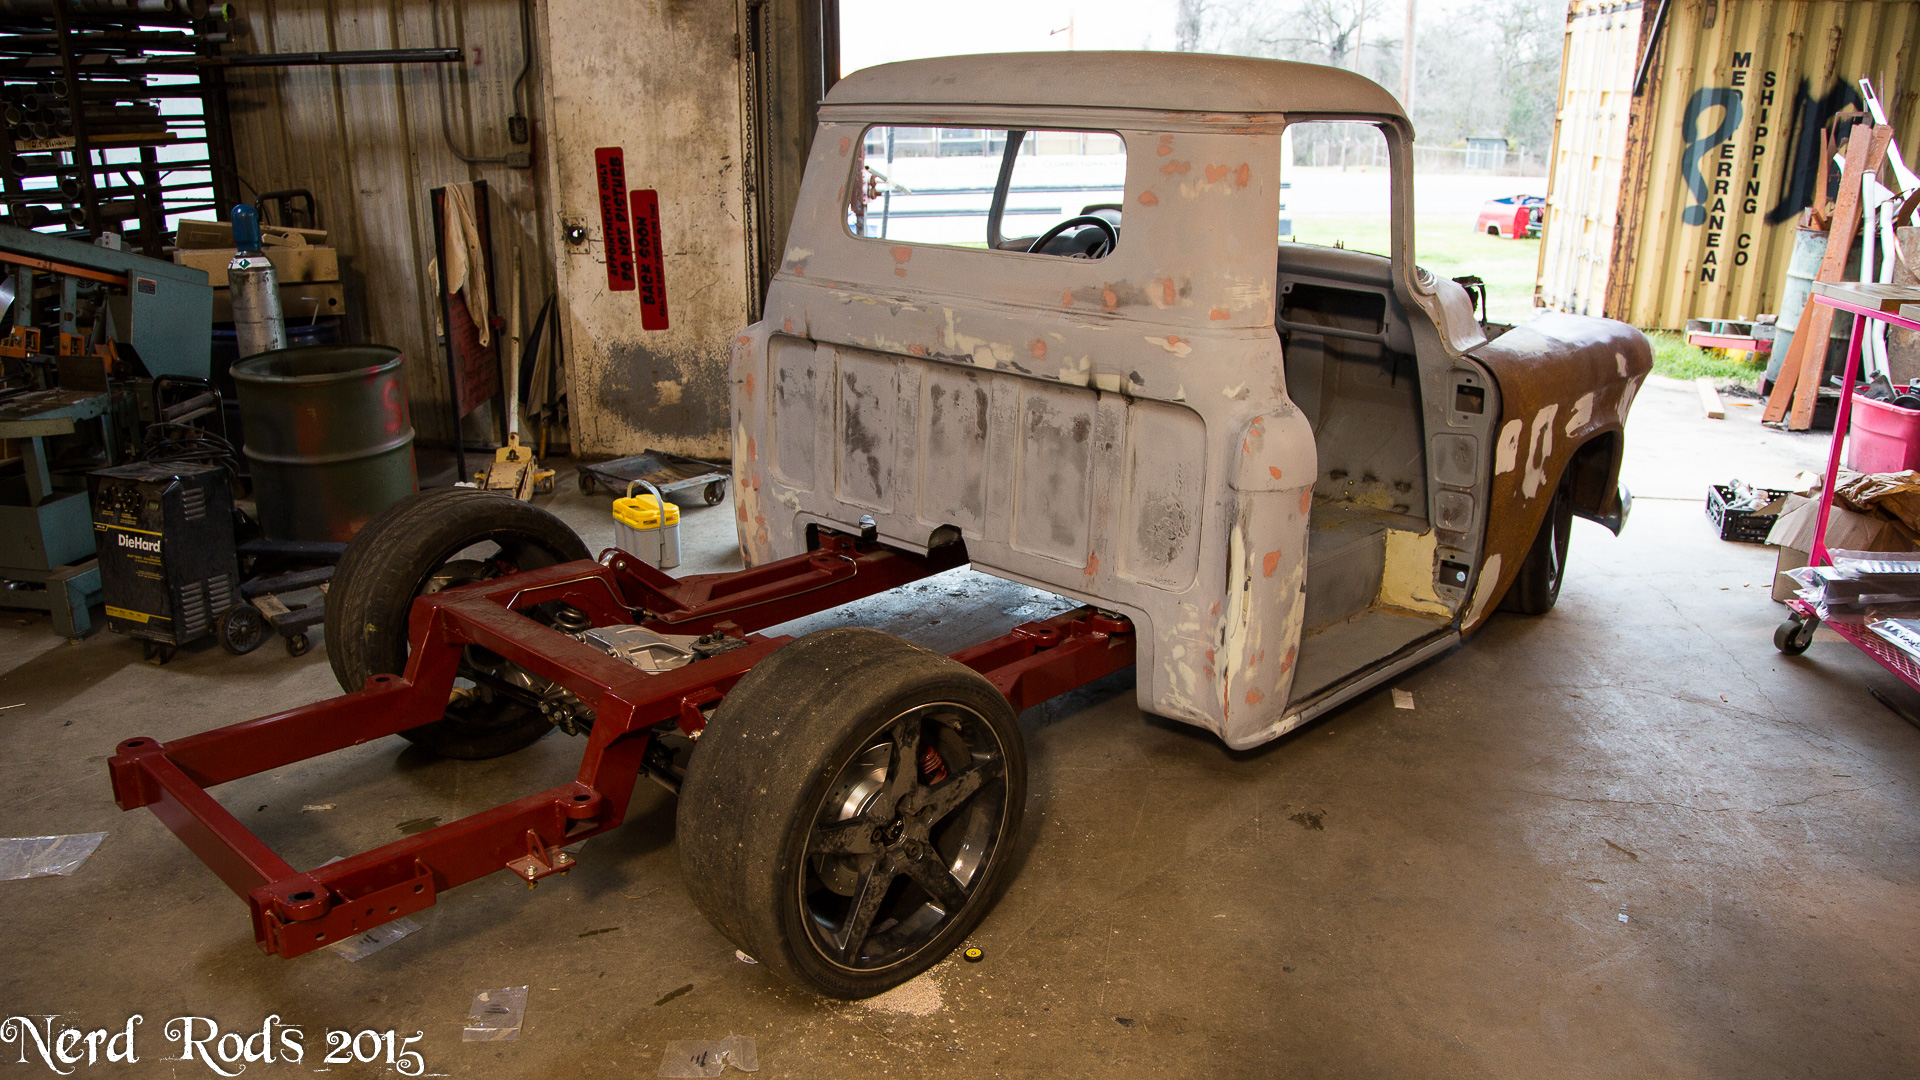
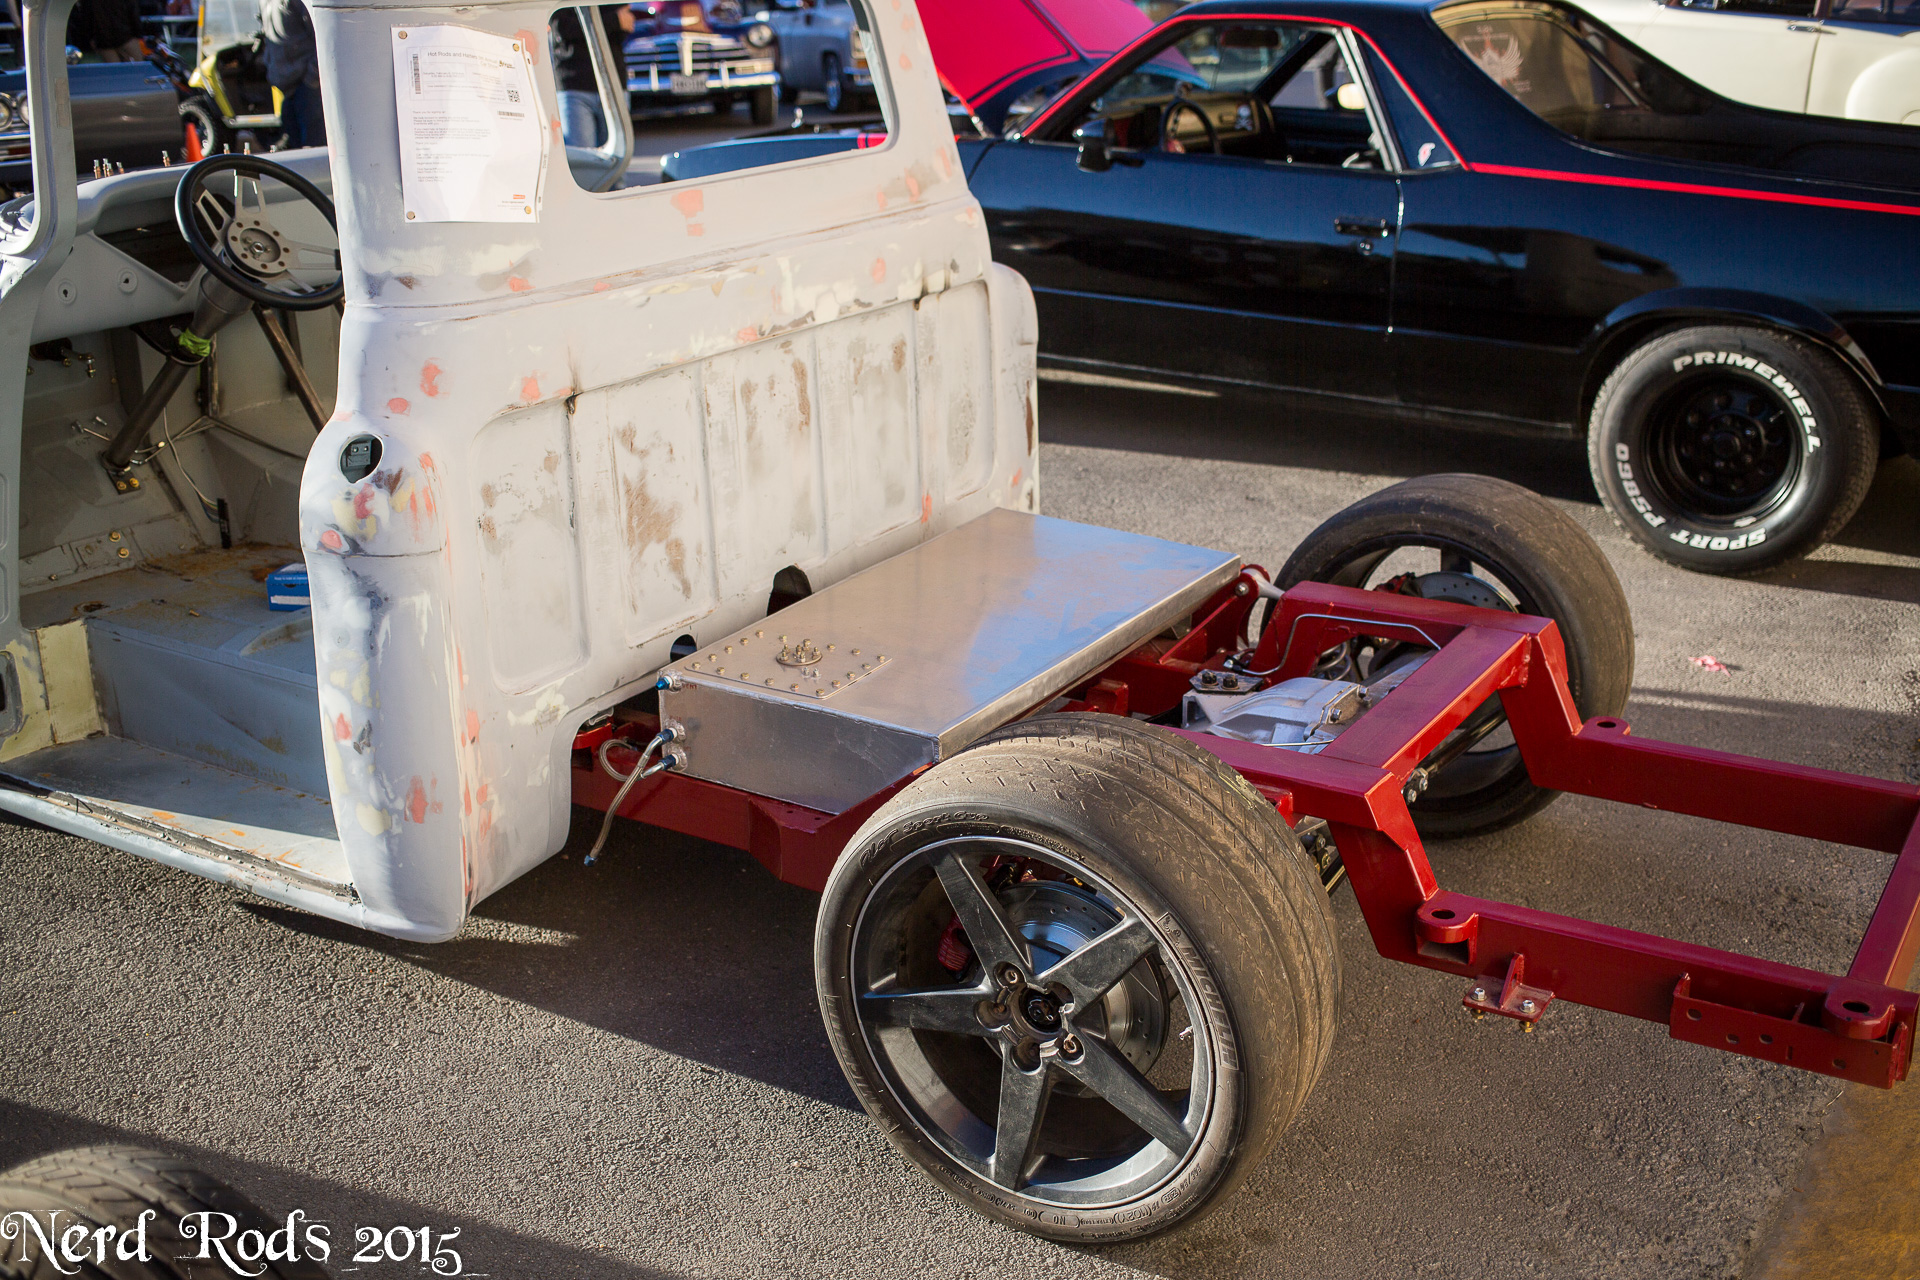
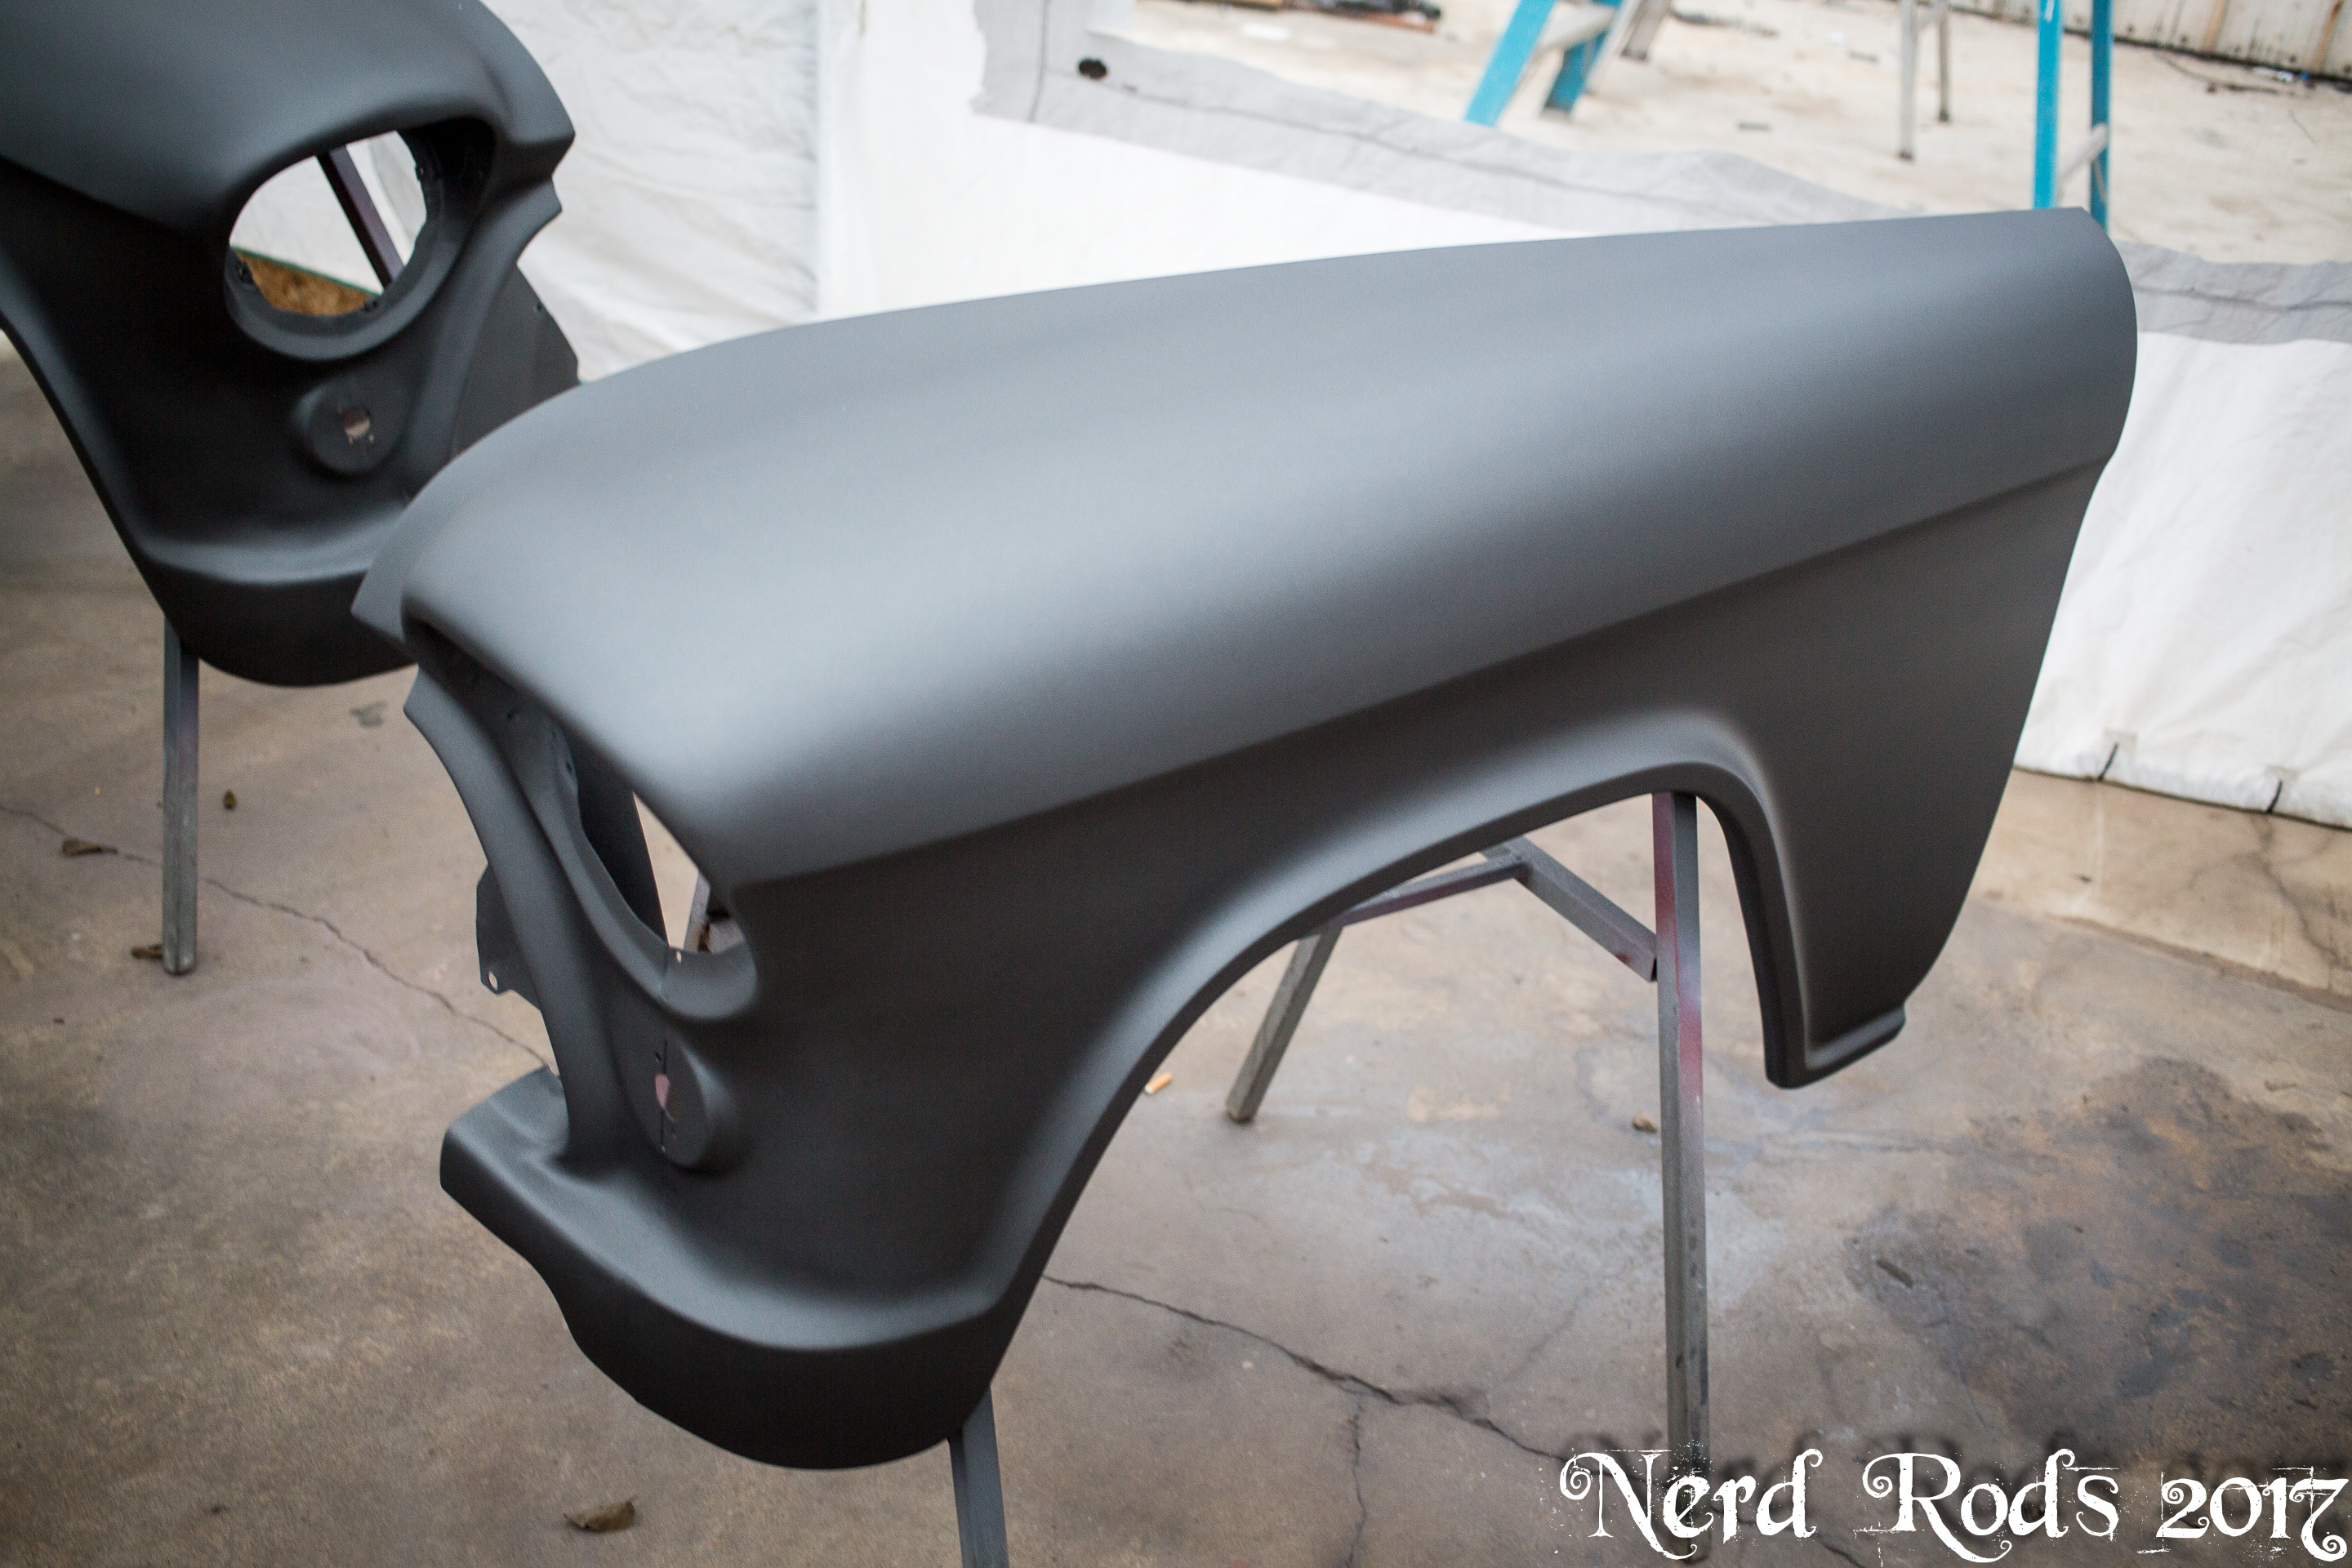
Next we decided to check for tire clearance, now that the truck would be considerably faster we wanted to make absolutely sure that we could get some larger tires on here later if we wanted to. So the worst point is full compression under full lock of turning. The spring came off and the tire went on. As you can see we found out the inner fender was going to be a problem.

Full size photo galleryhttp://gallery.nerdrods.com/Projects/03_D3/04/
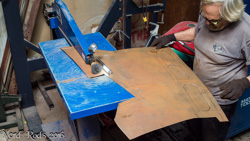
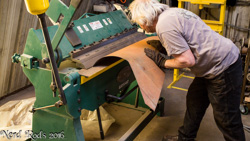
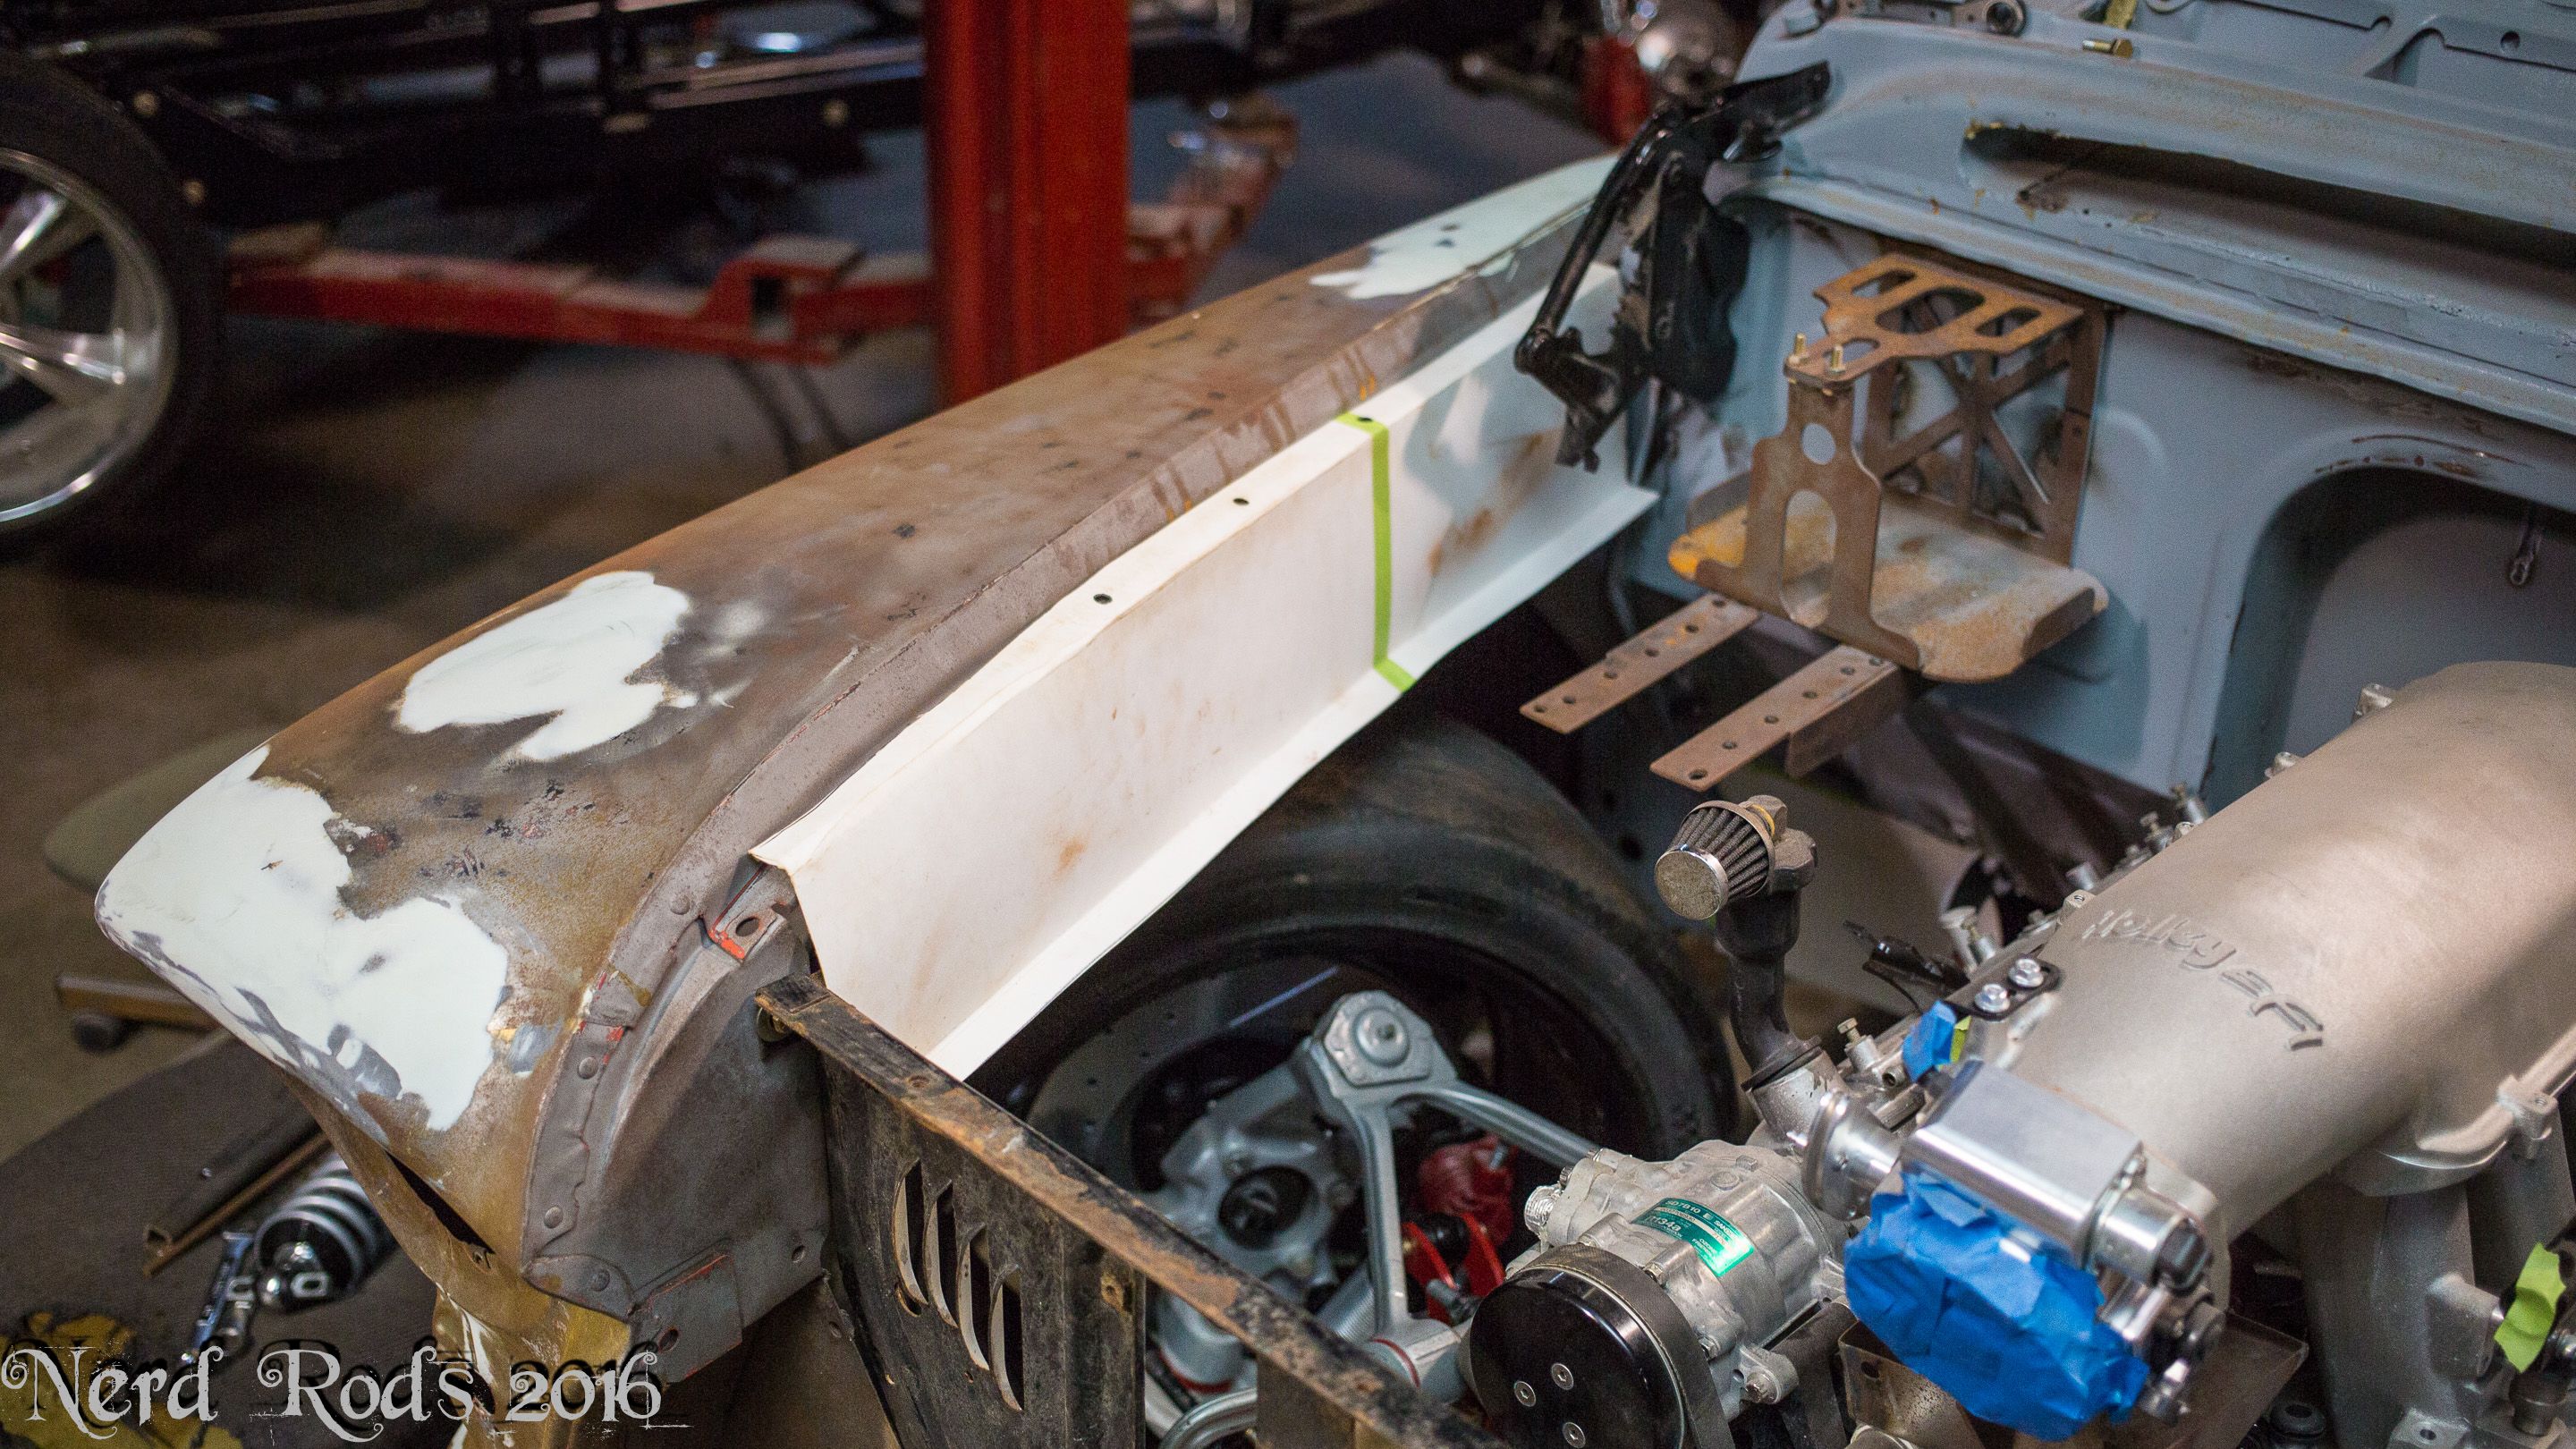
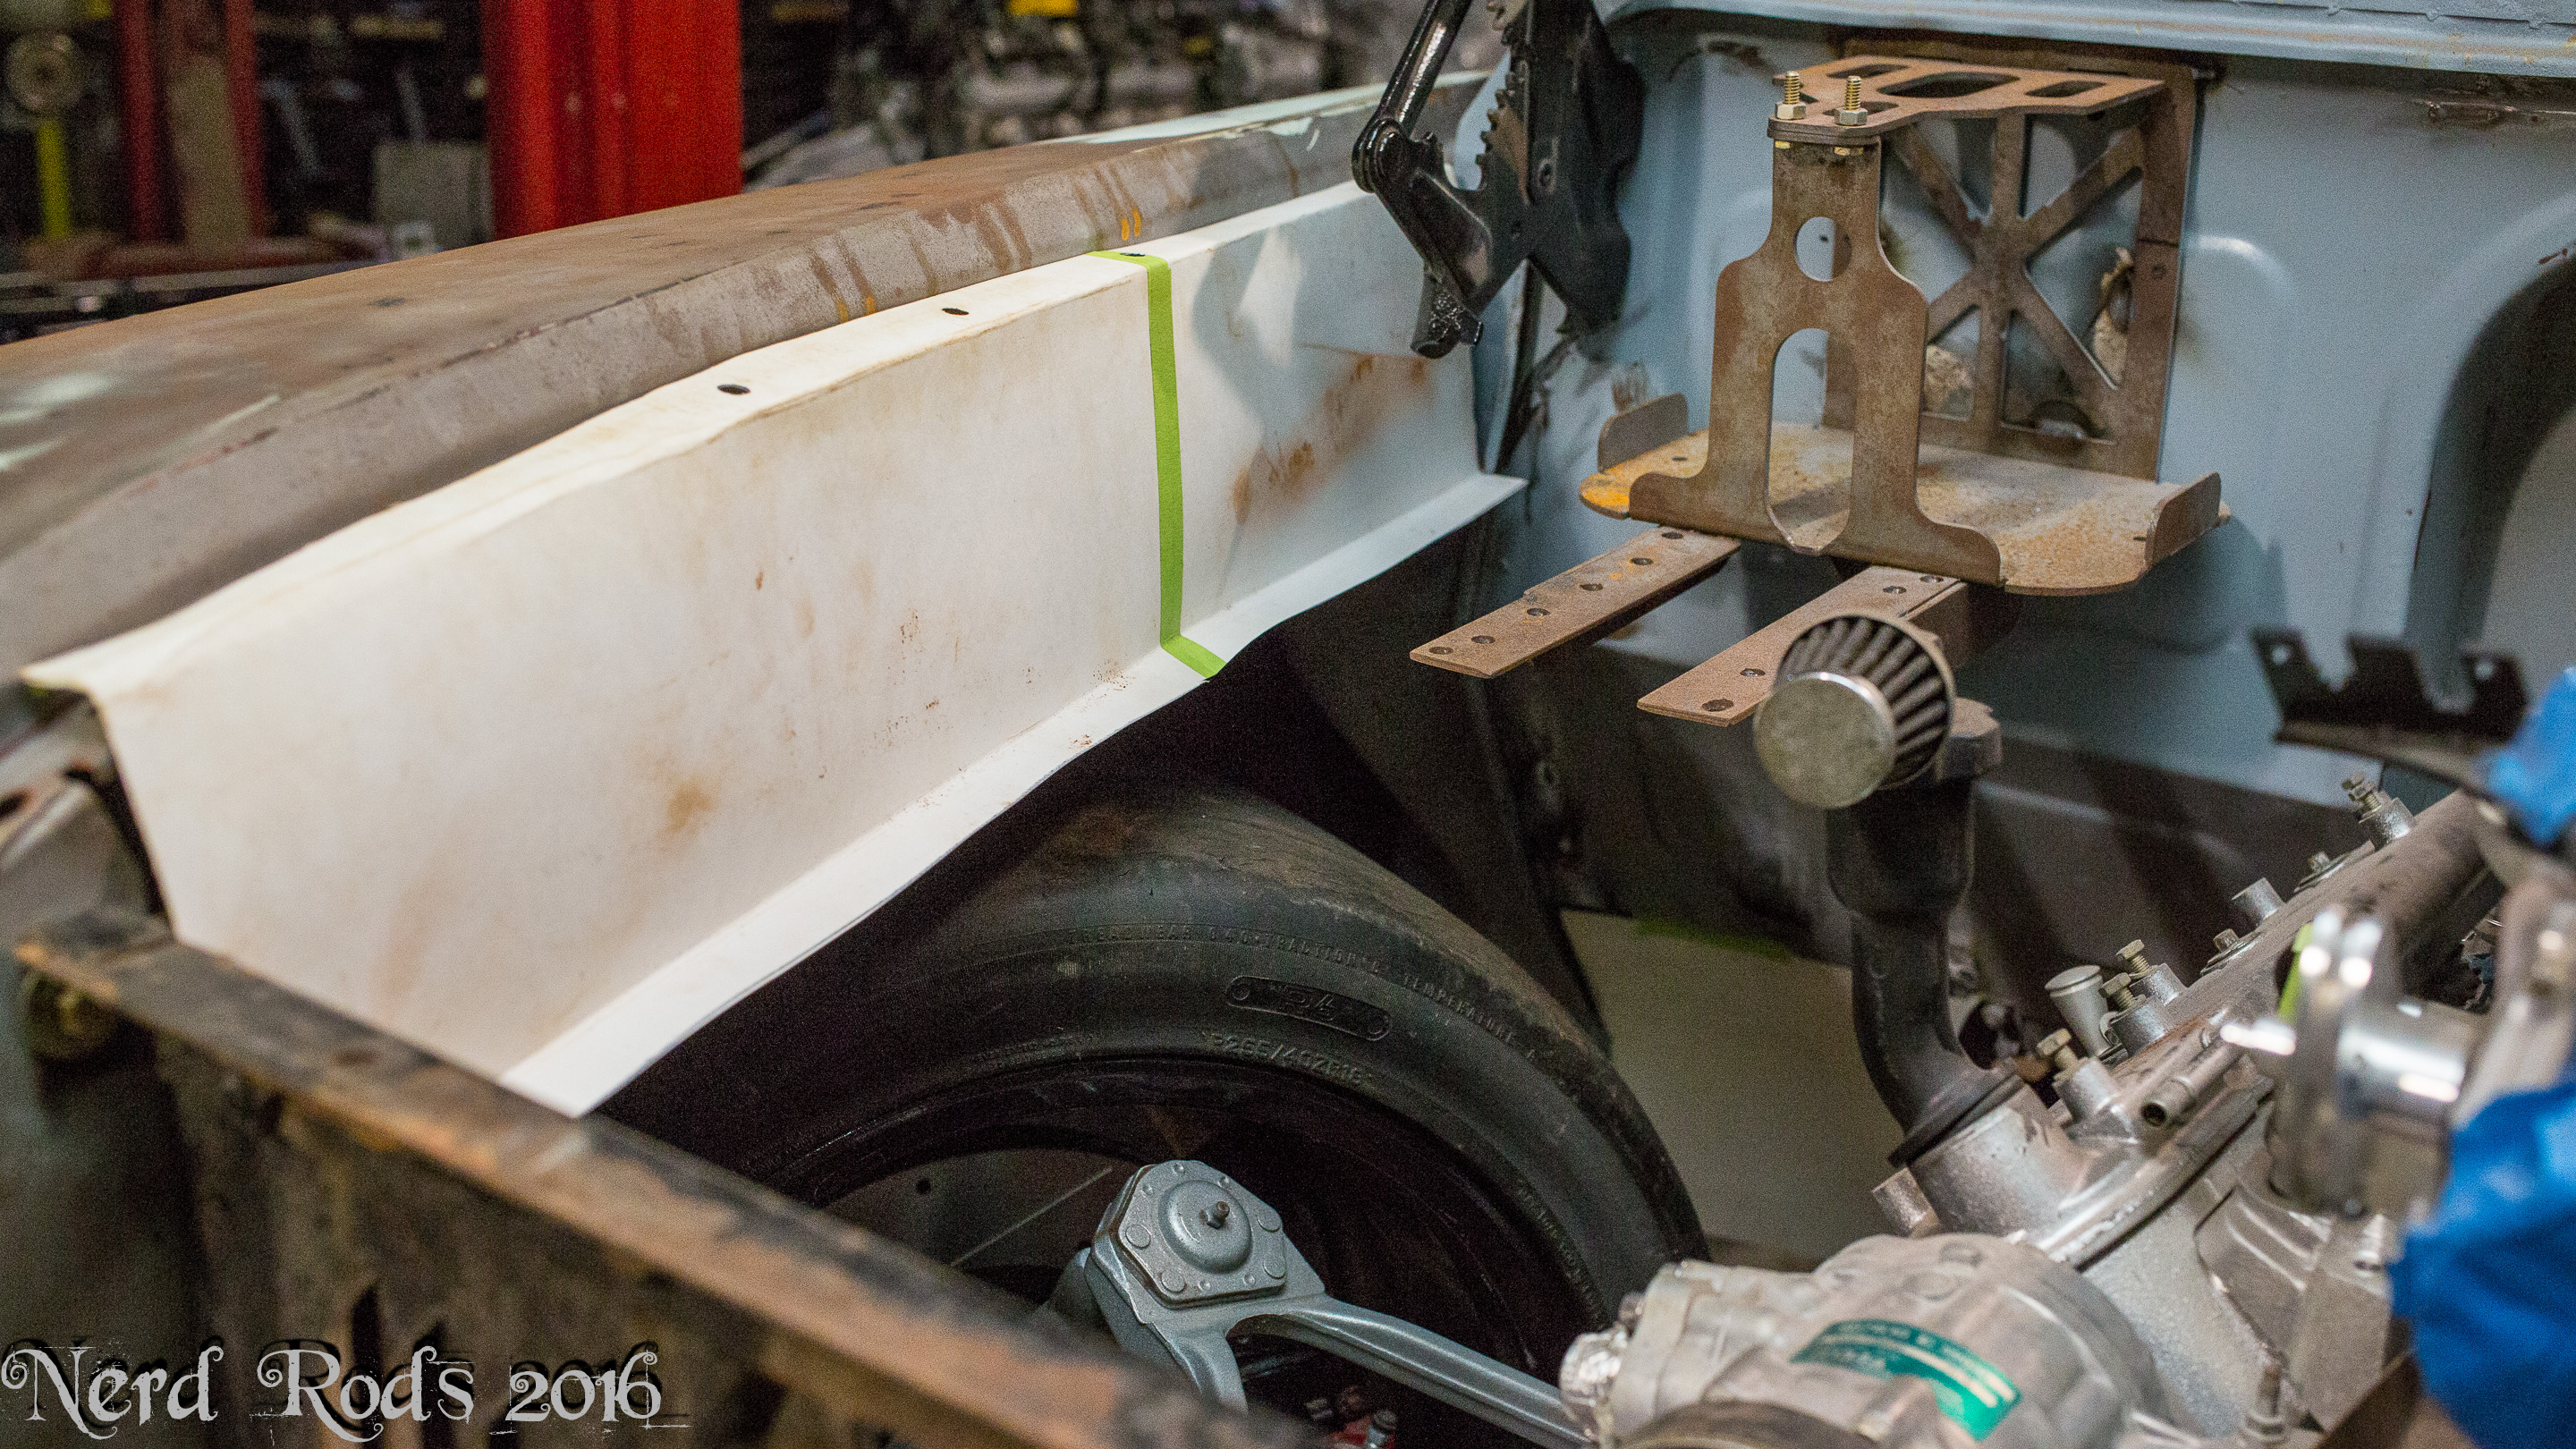
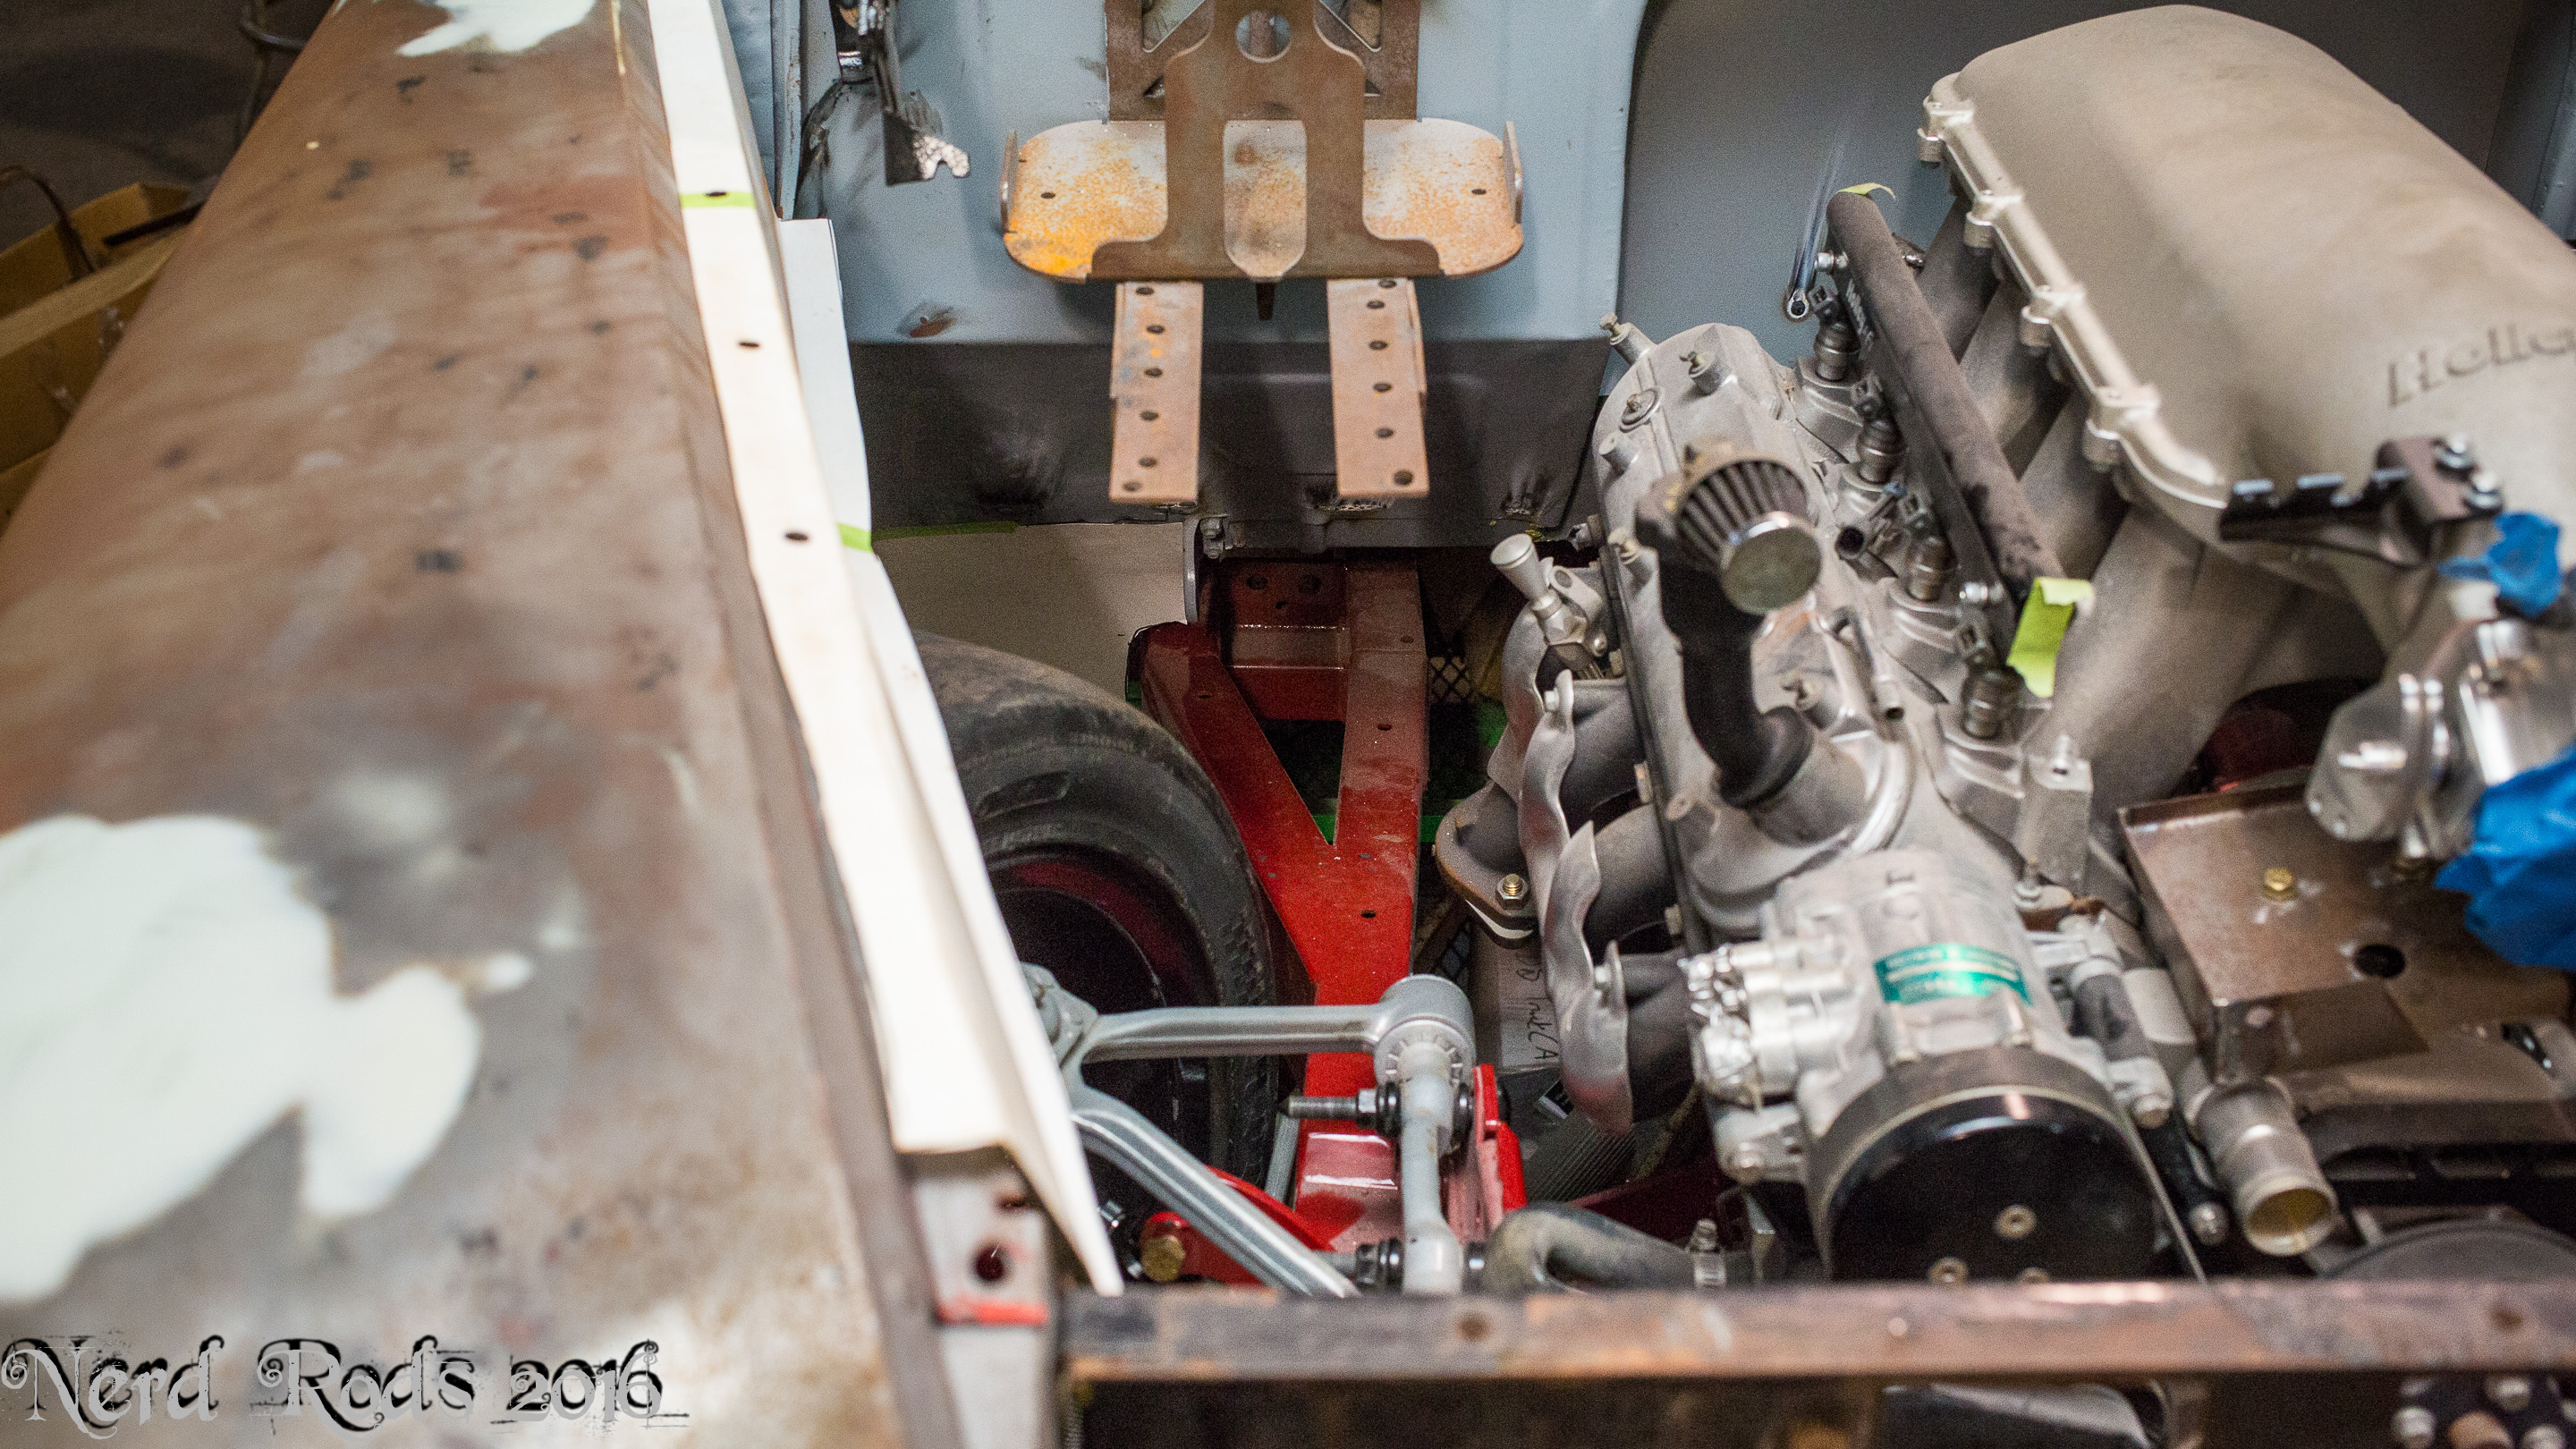
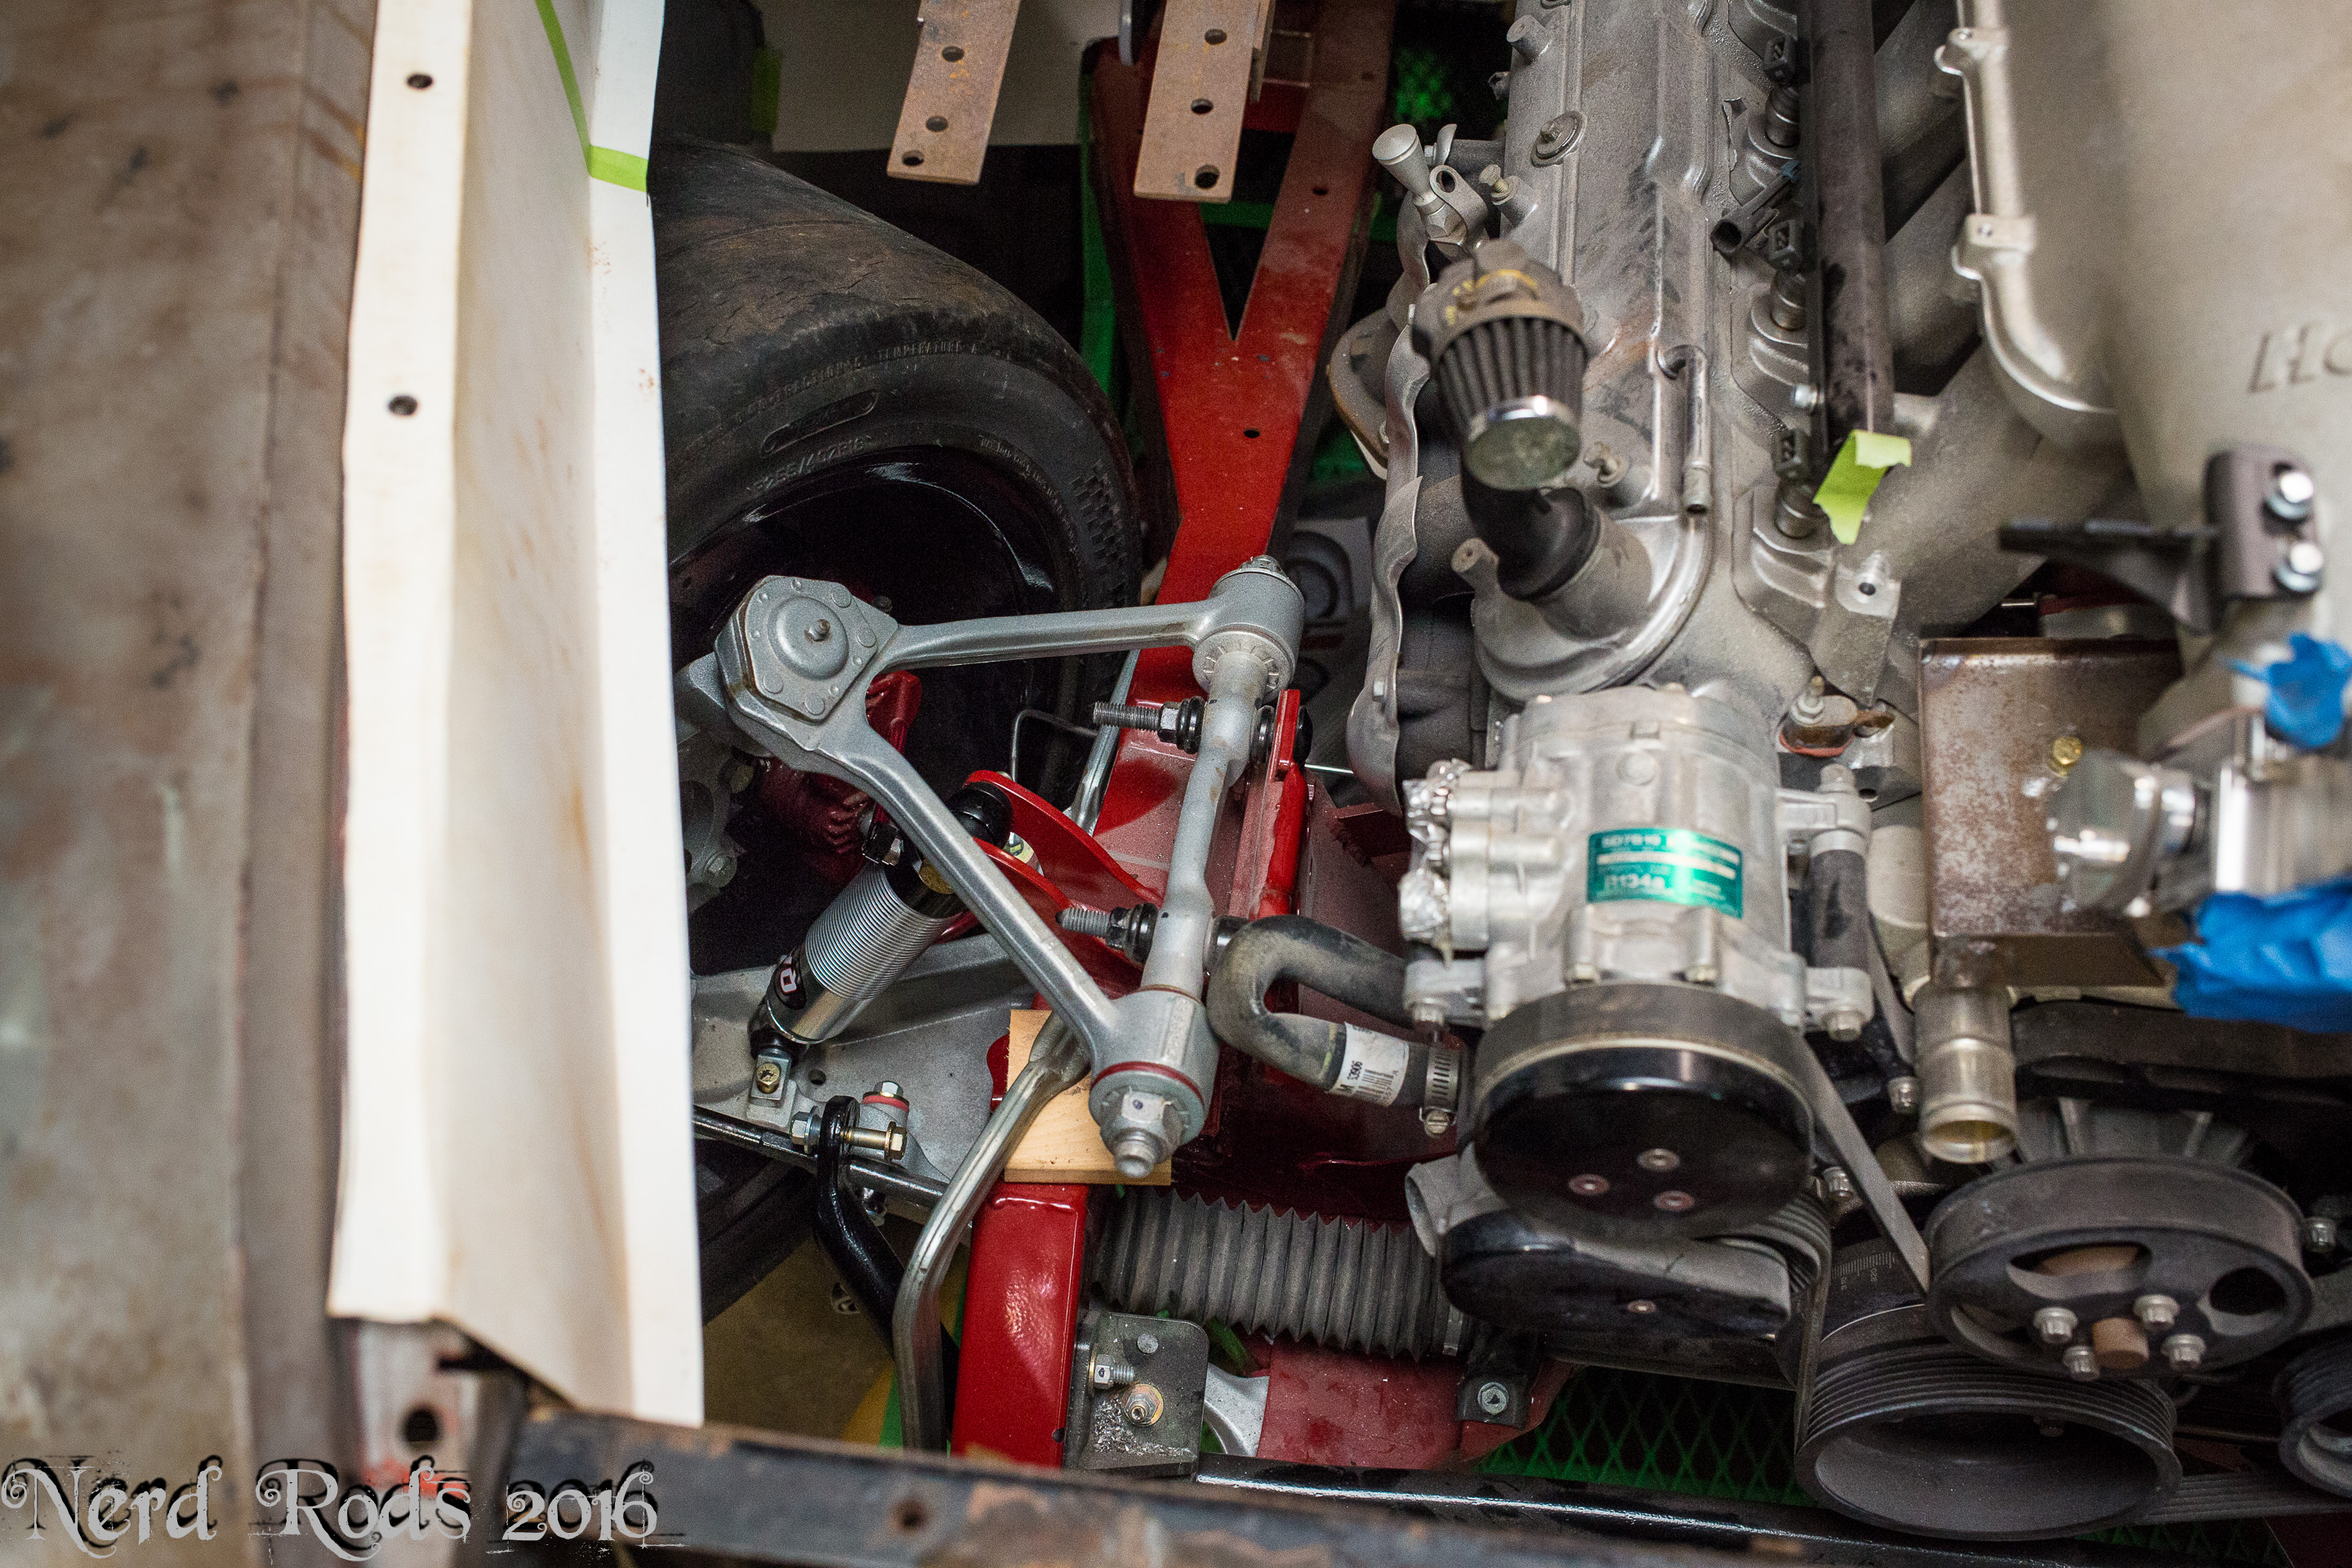
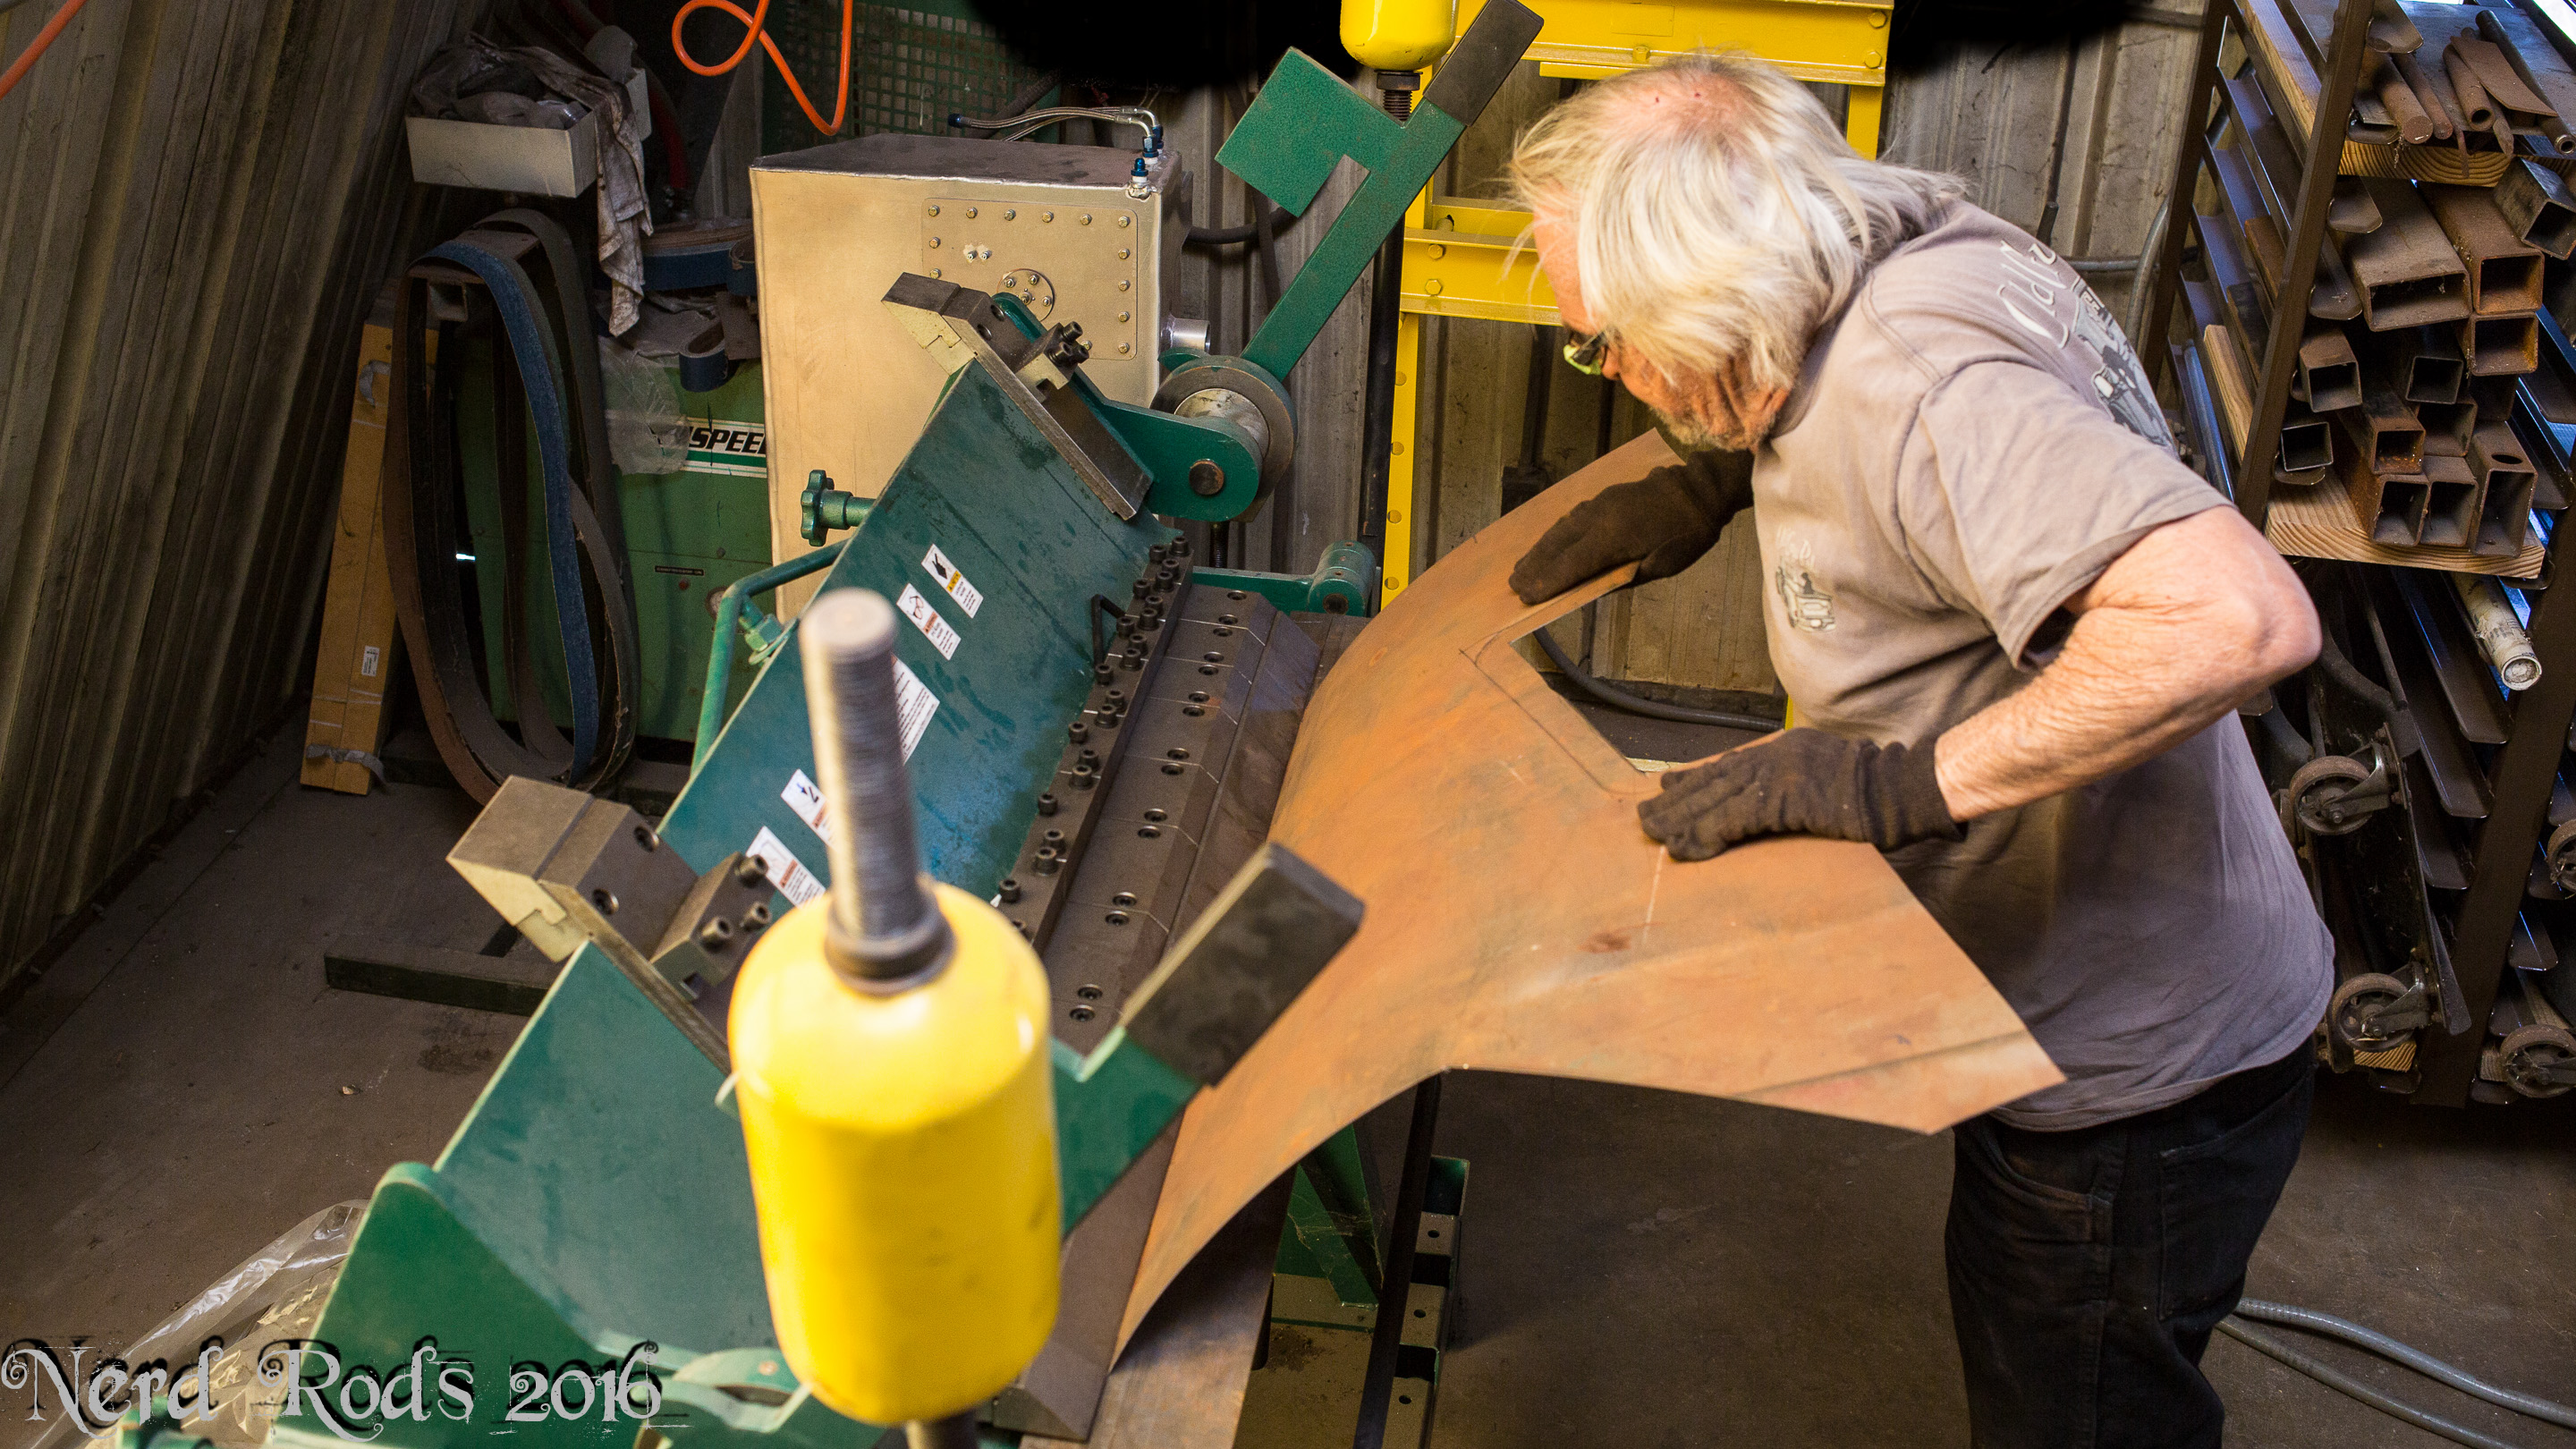
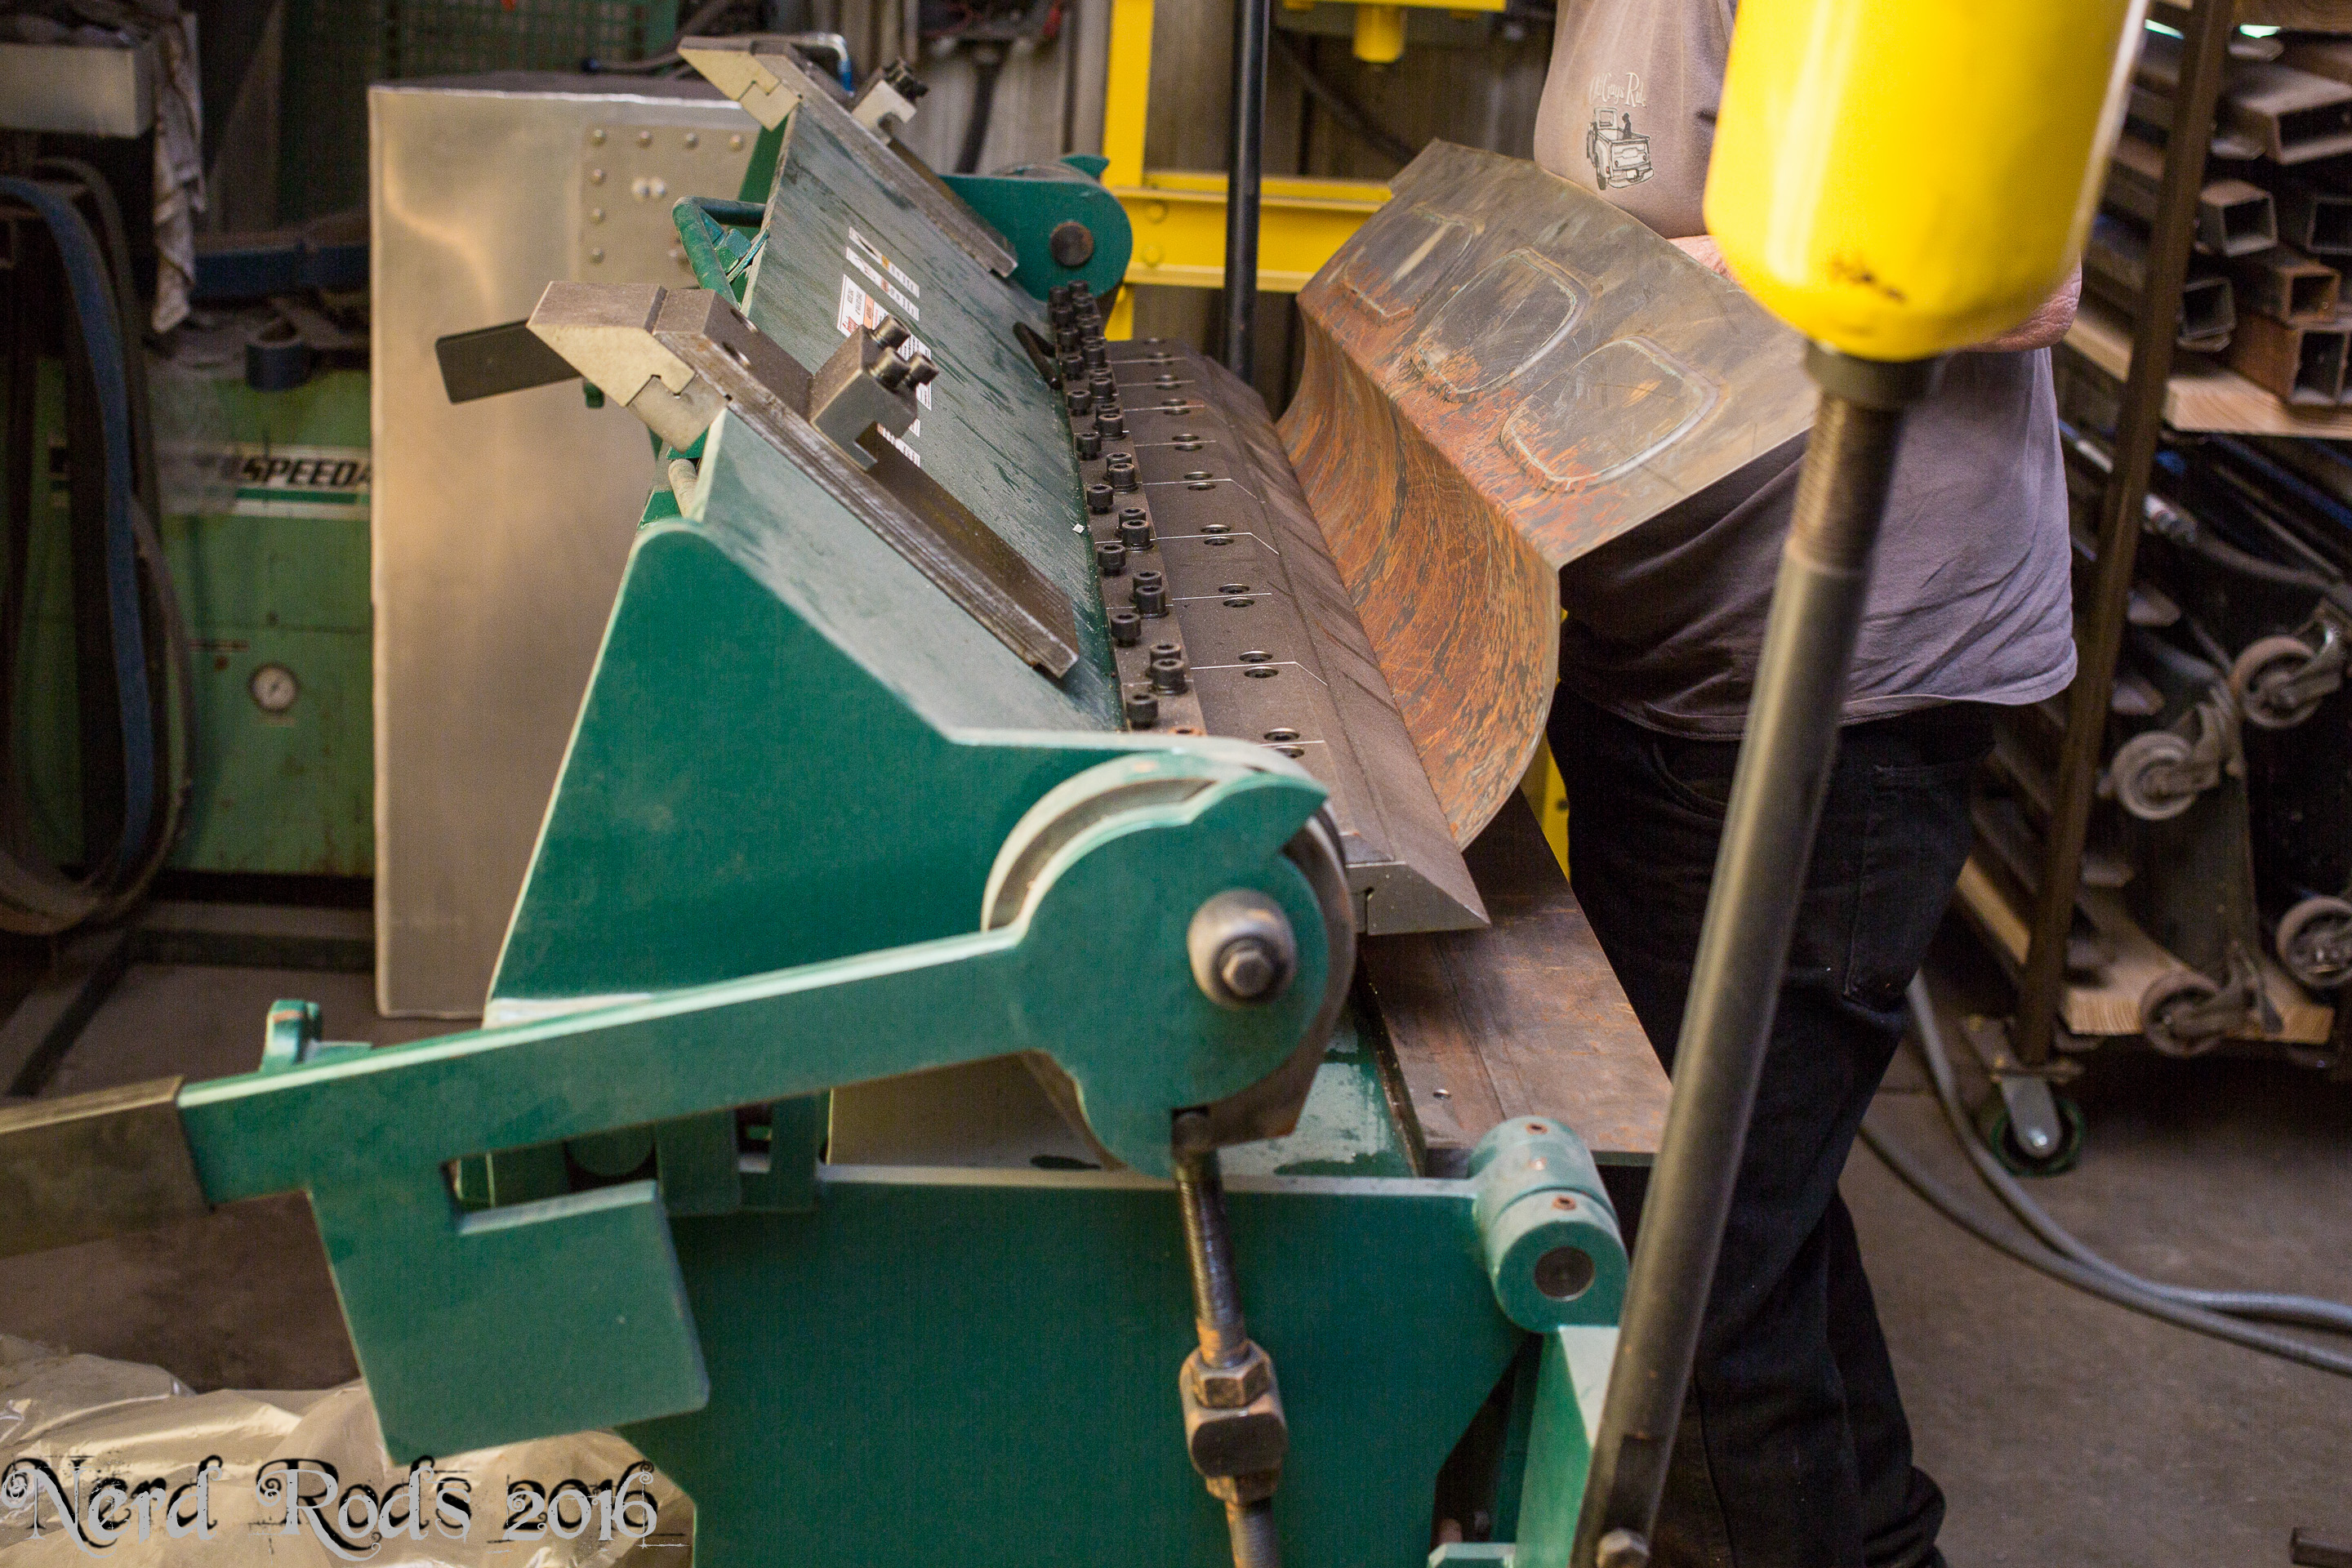
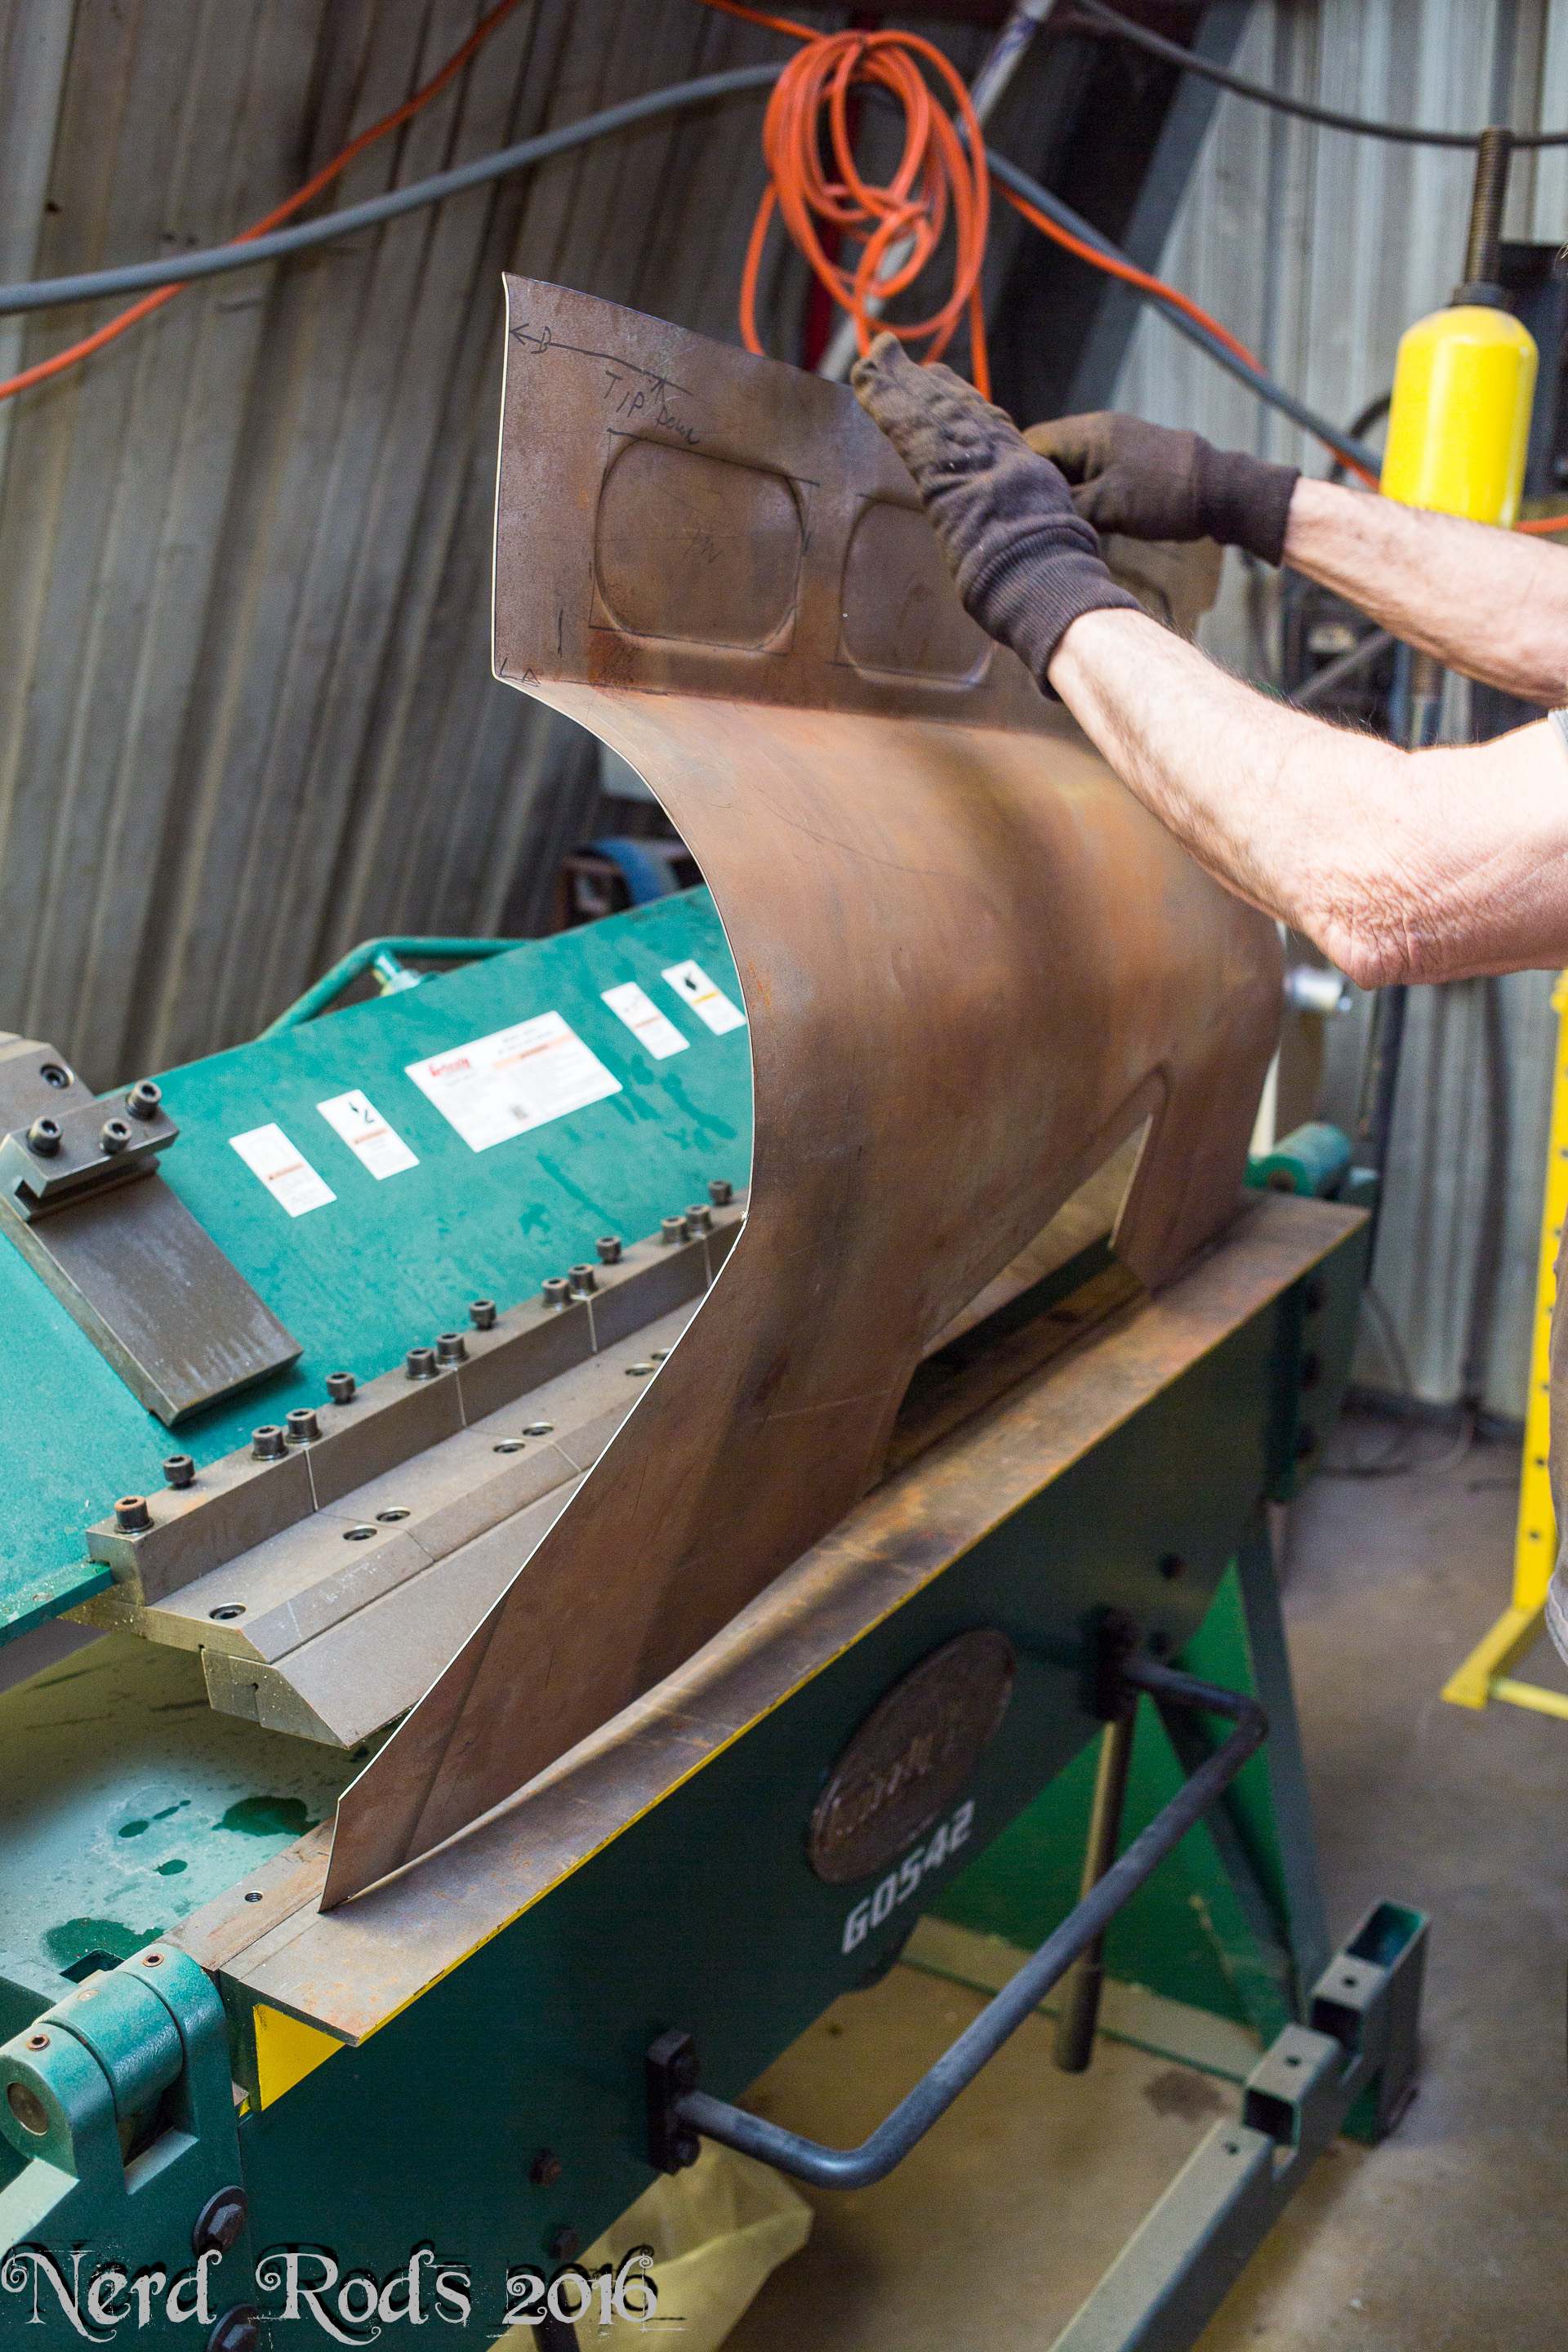
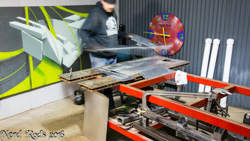
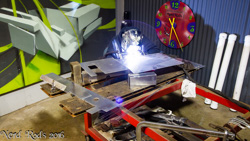
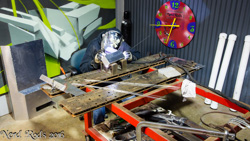
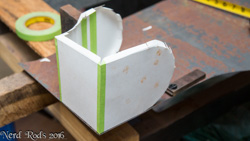
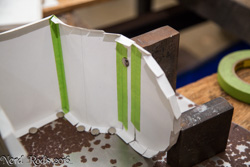
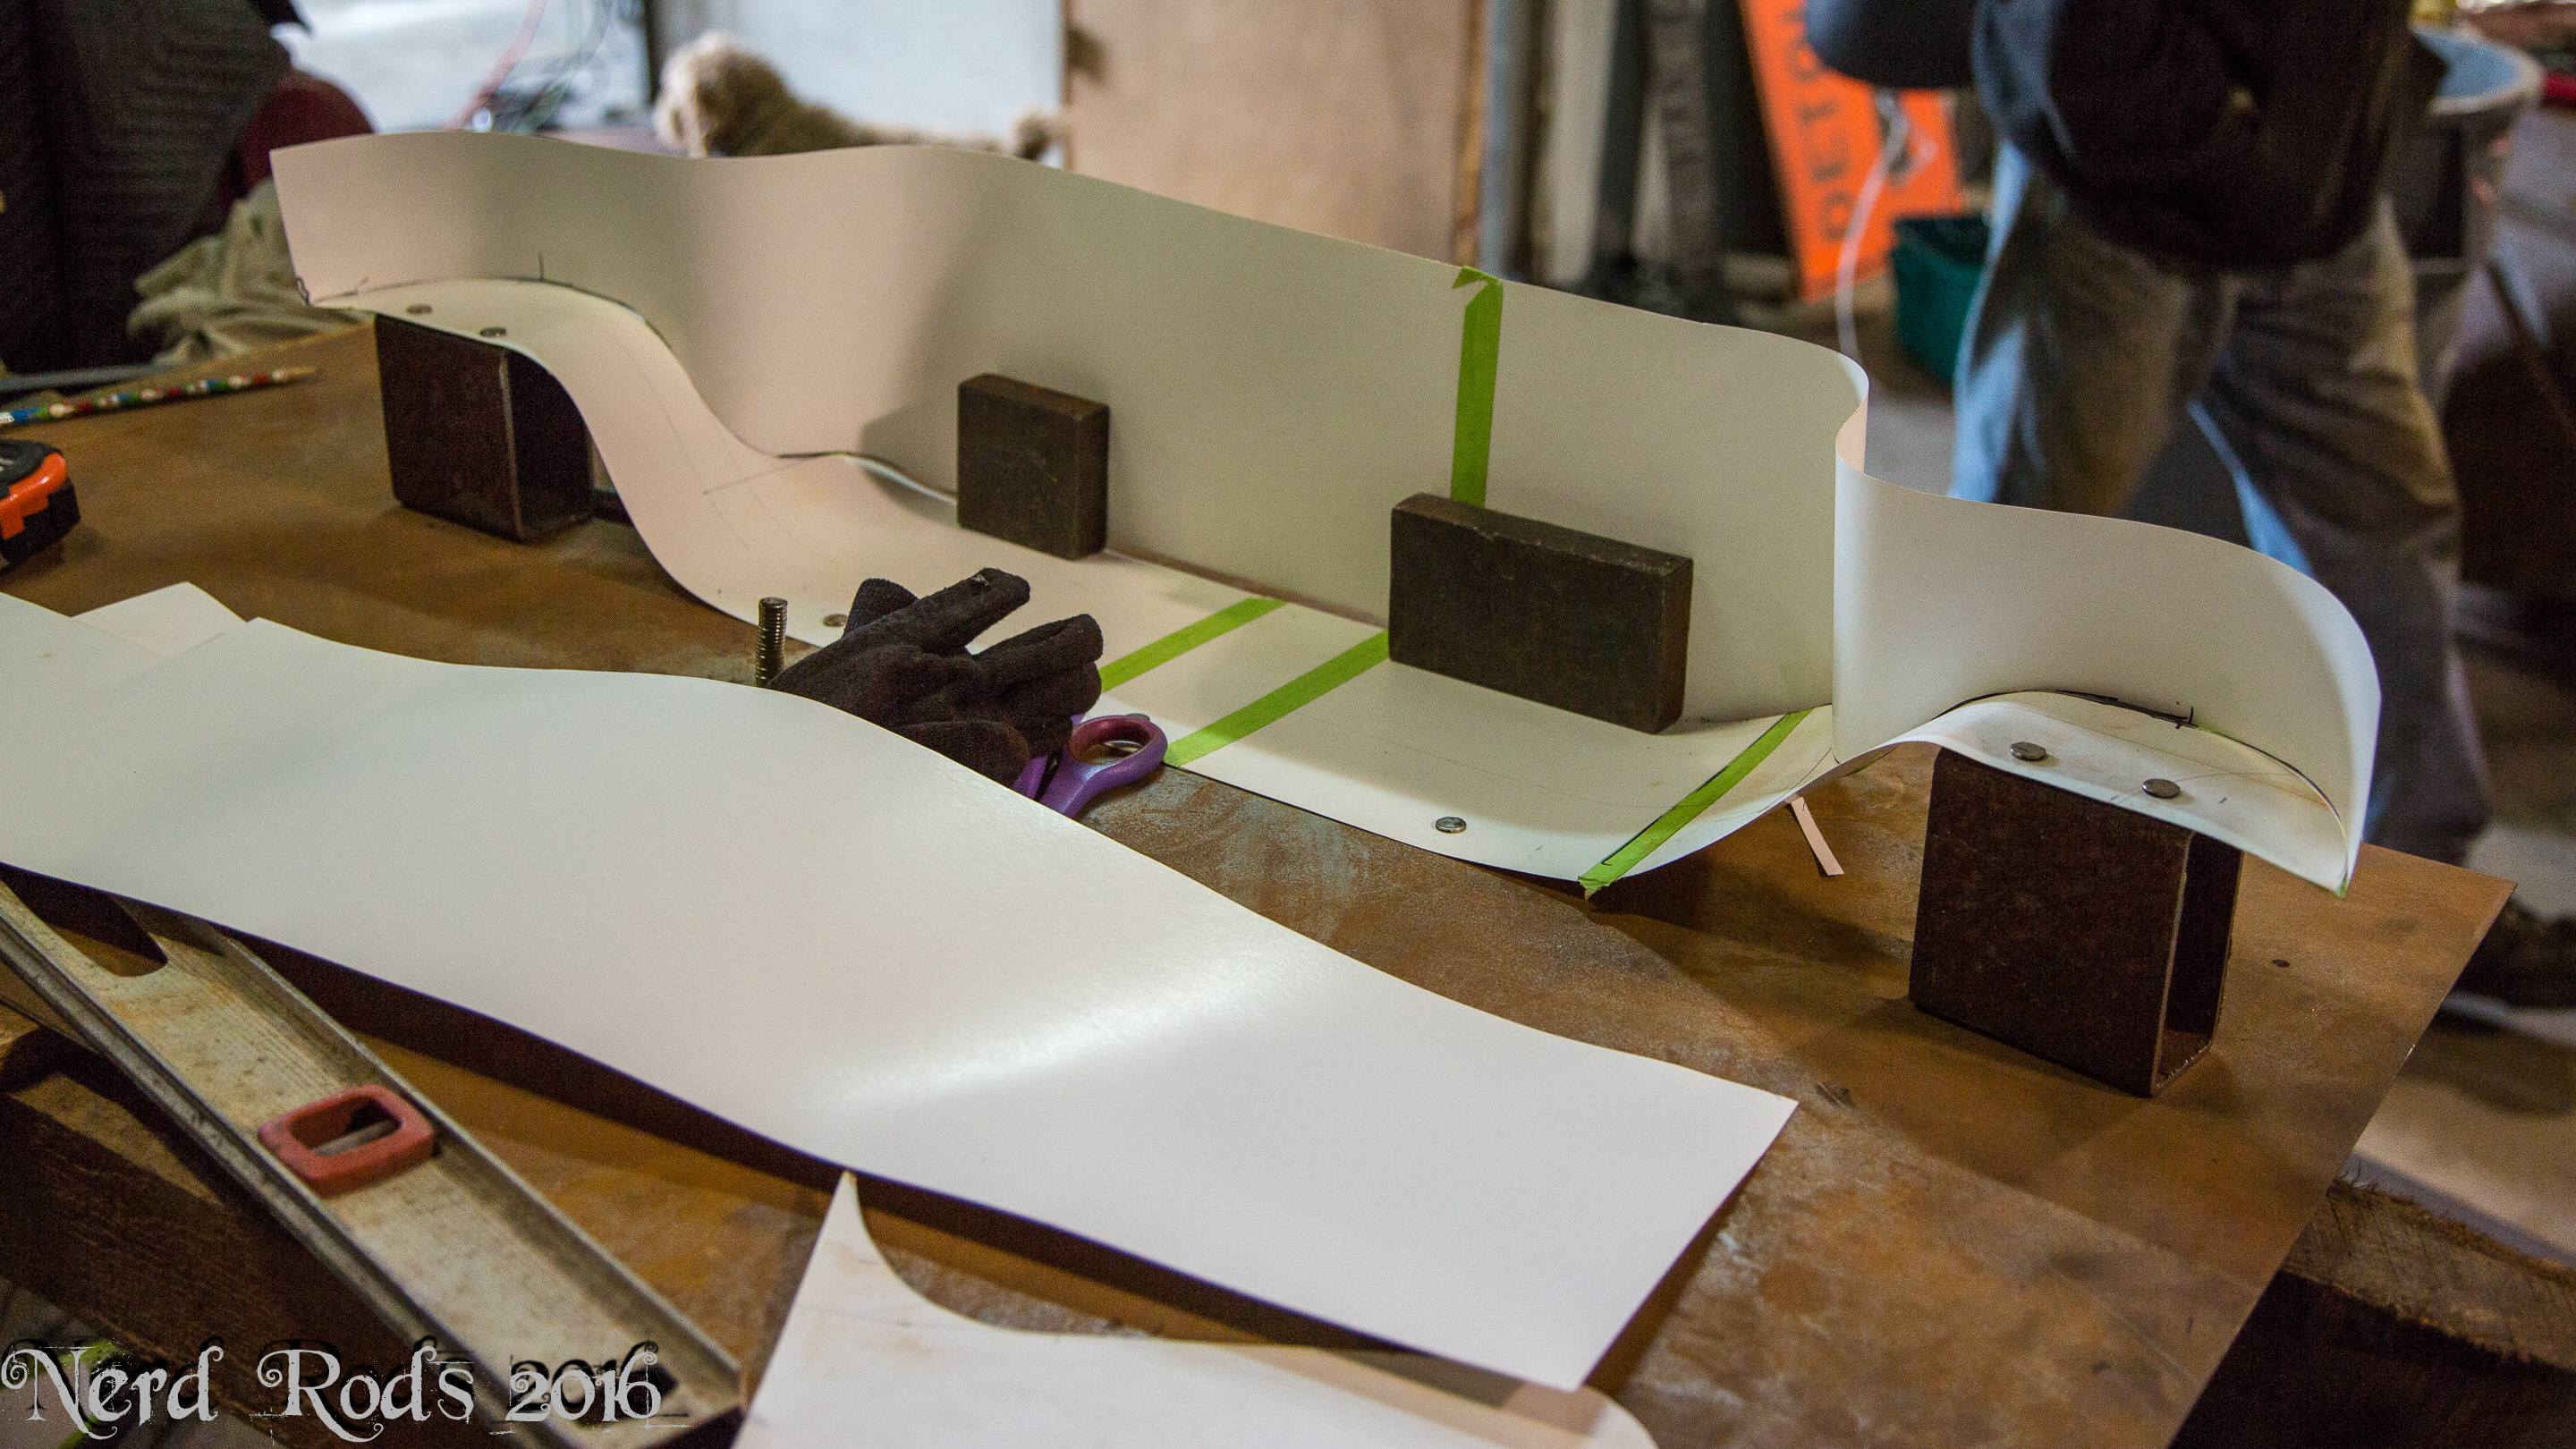
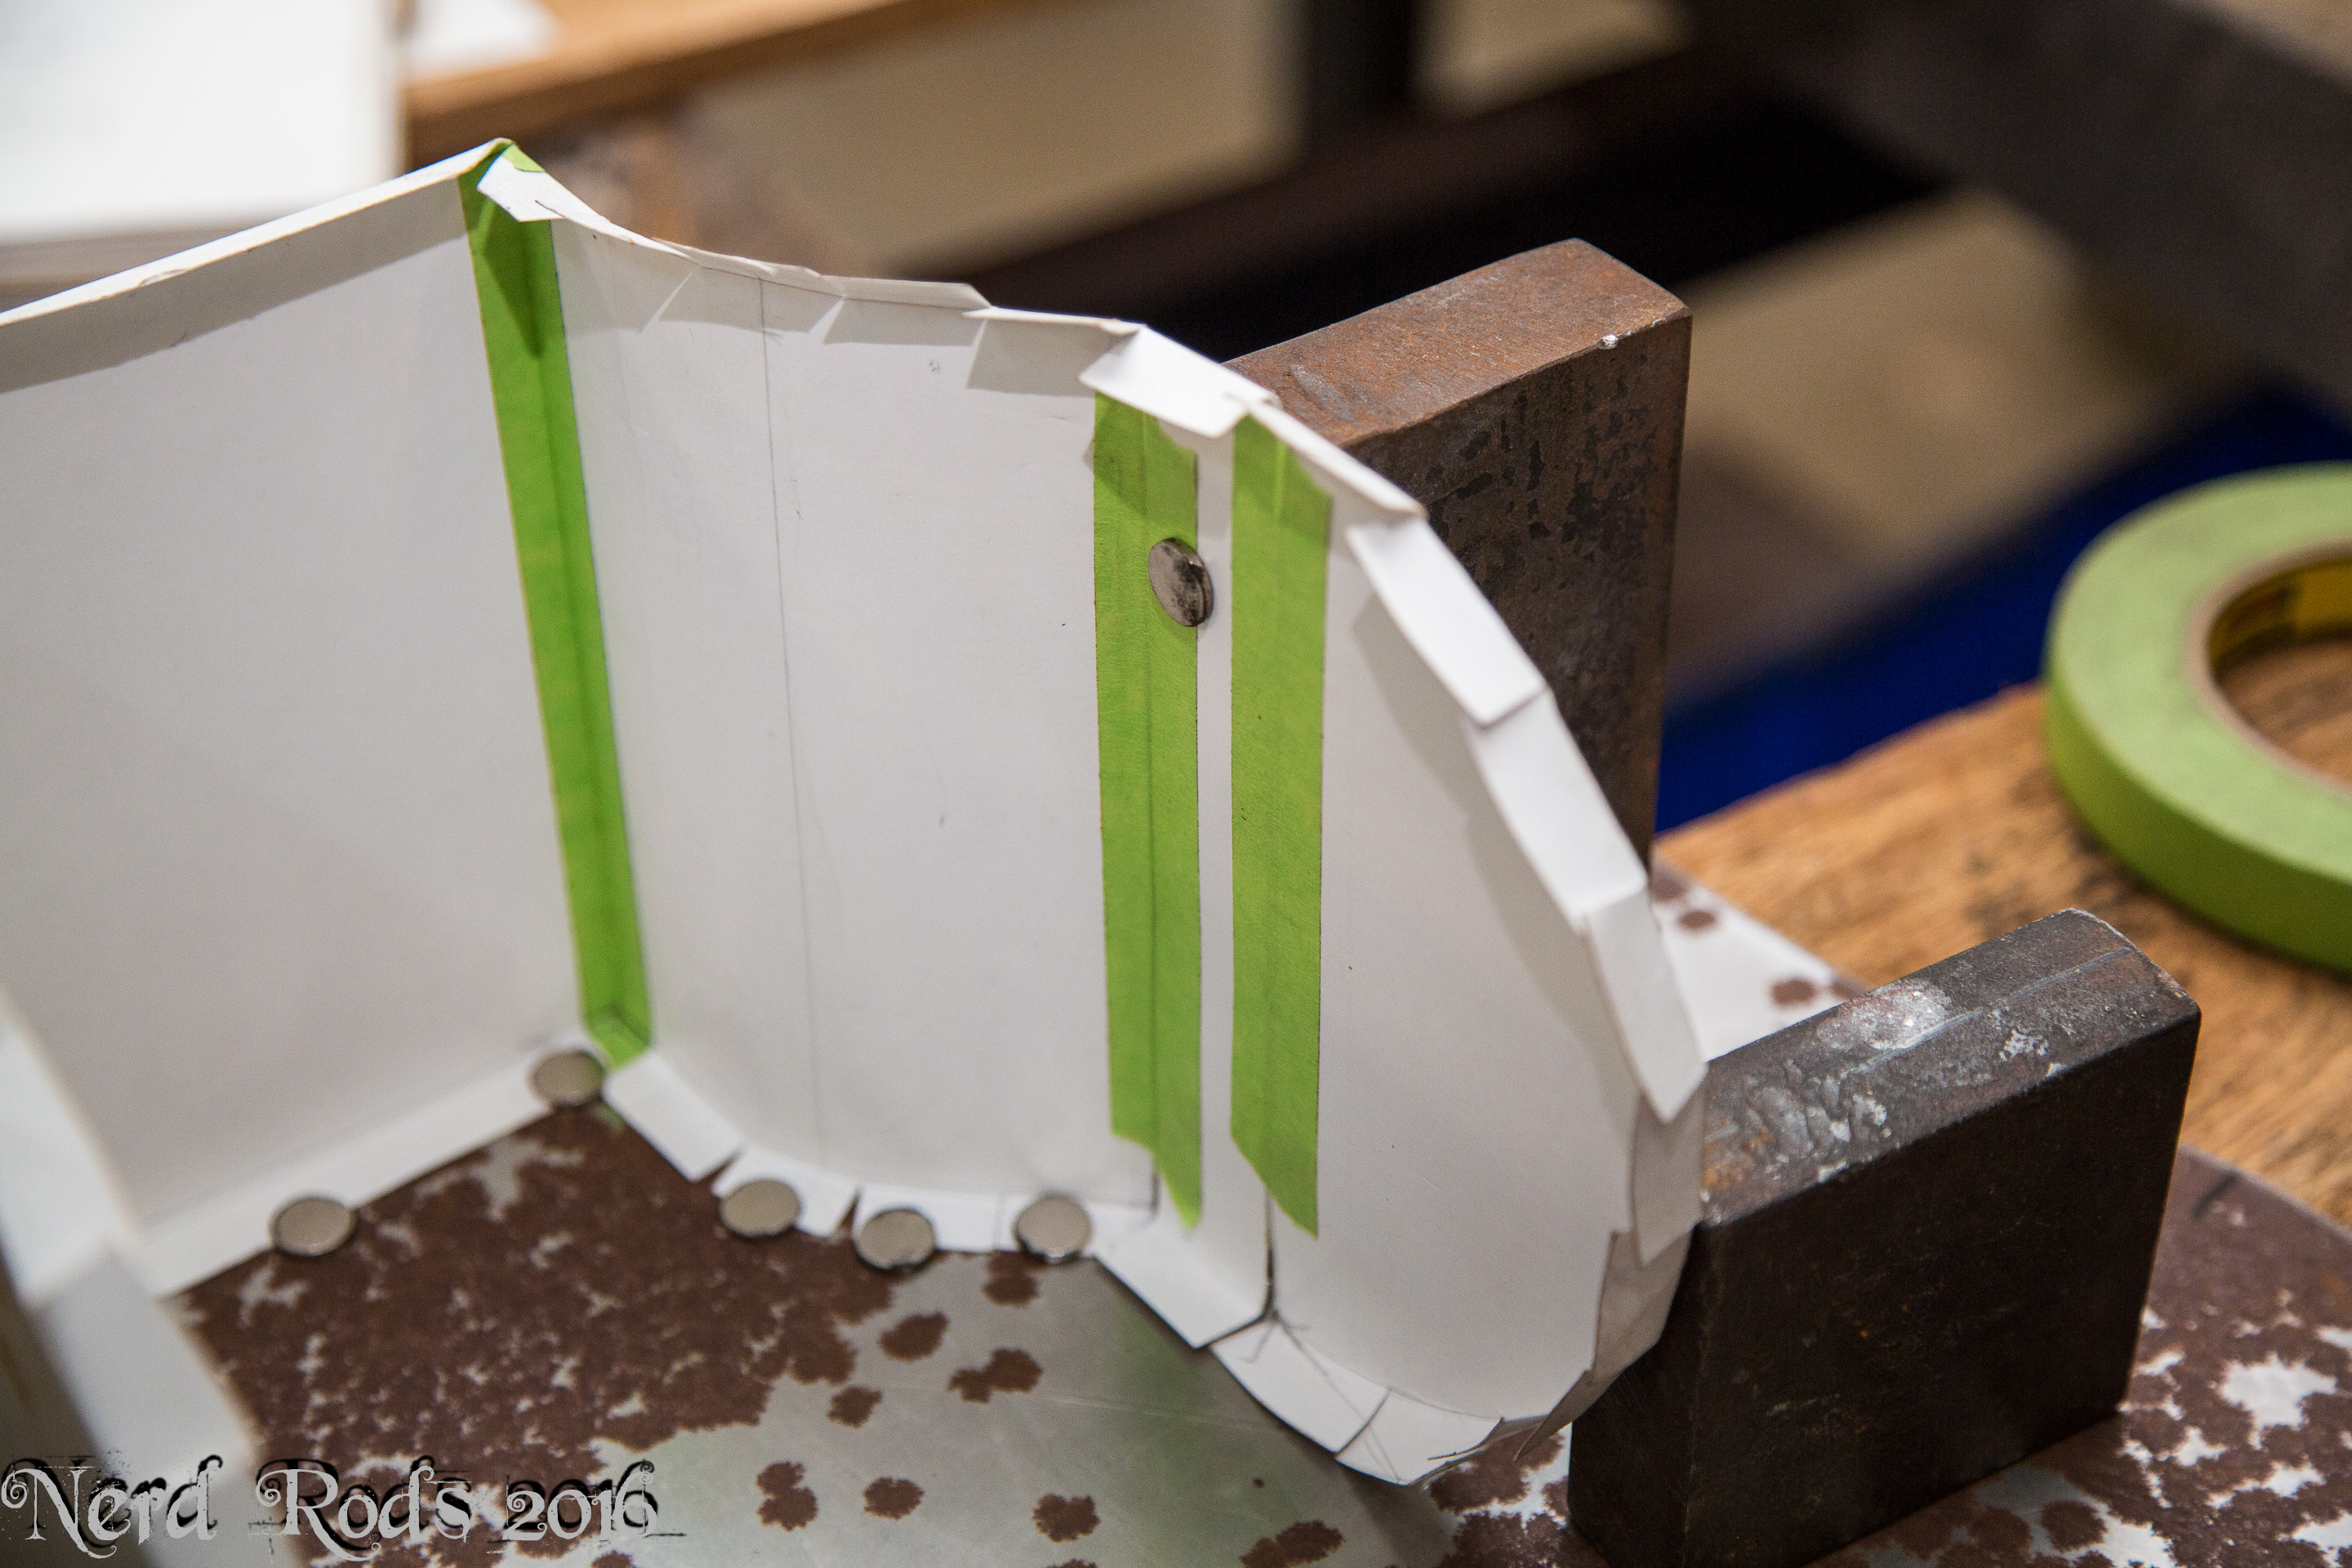
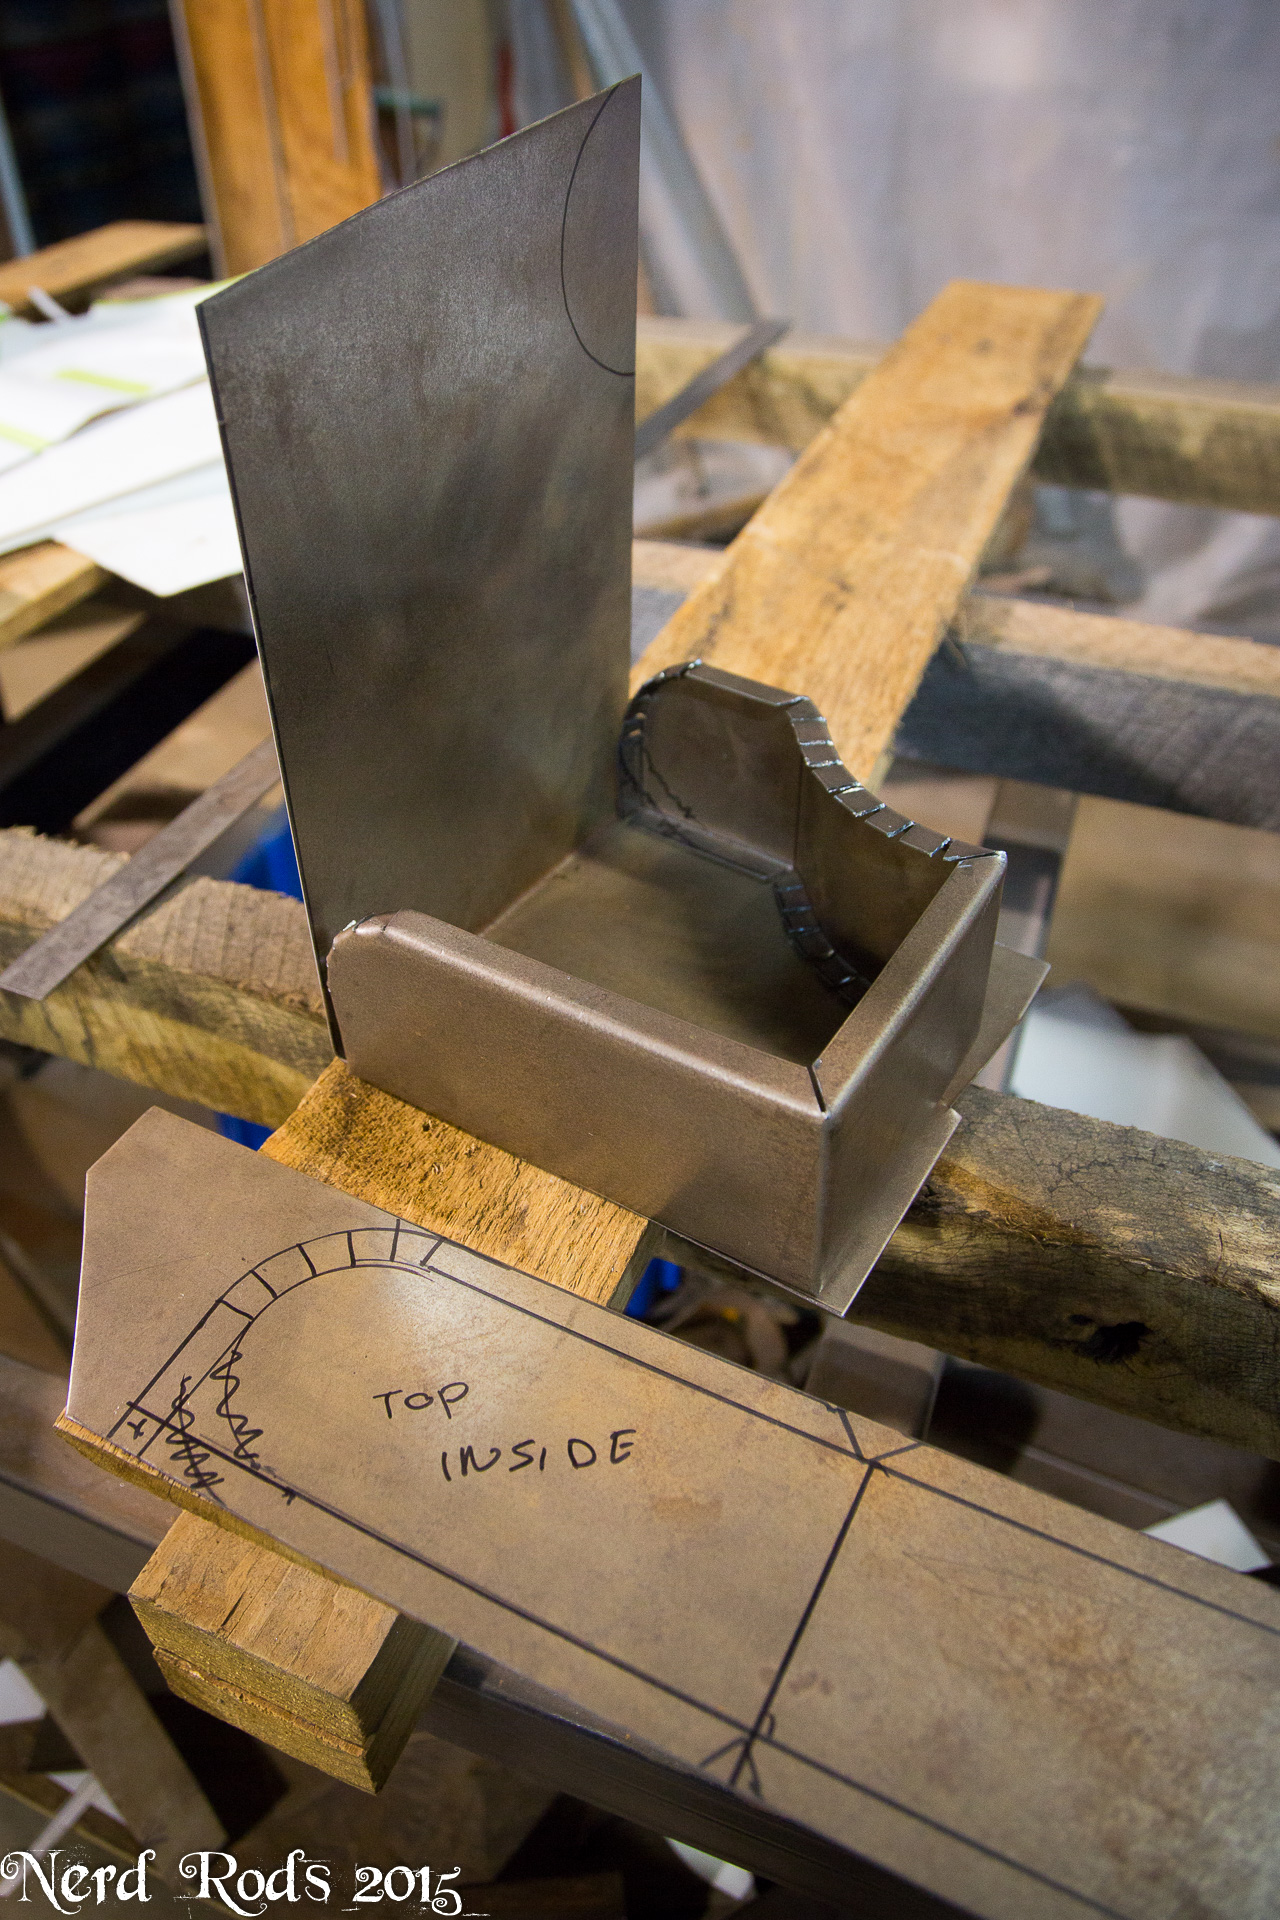
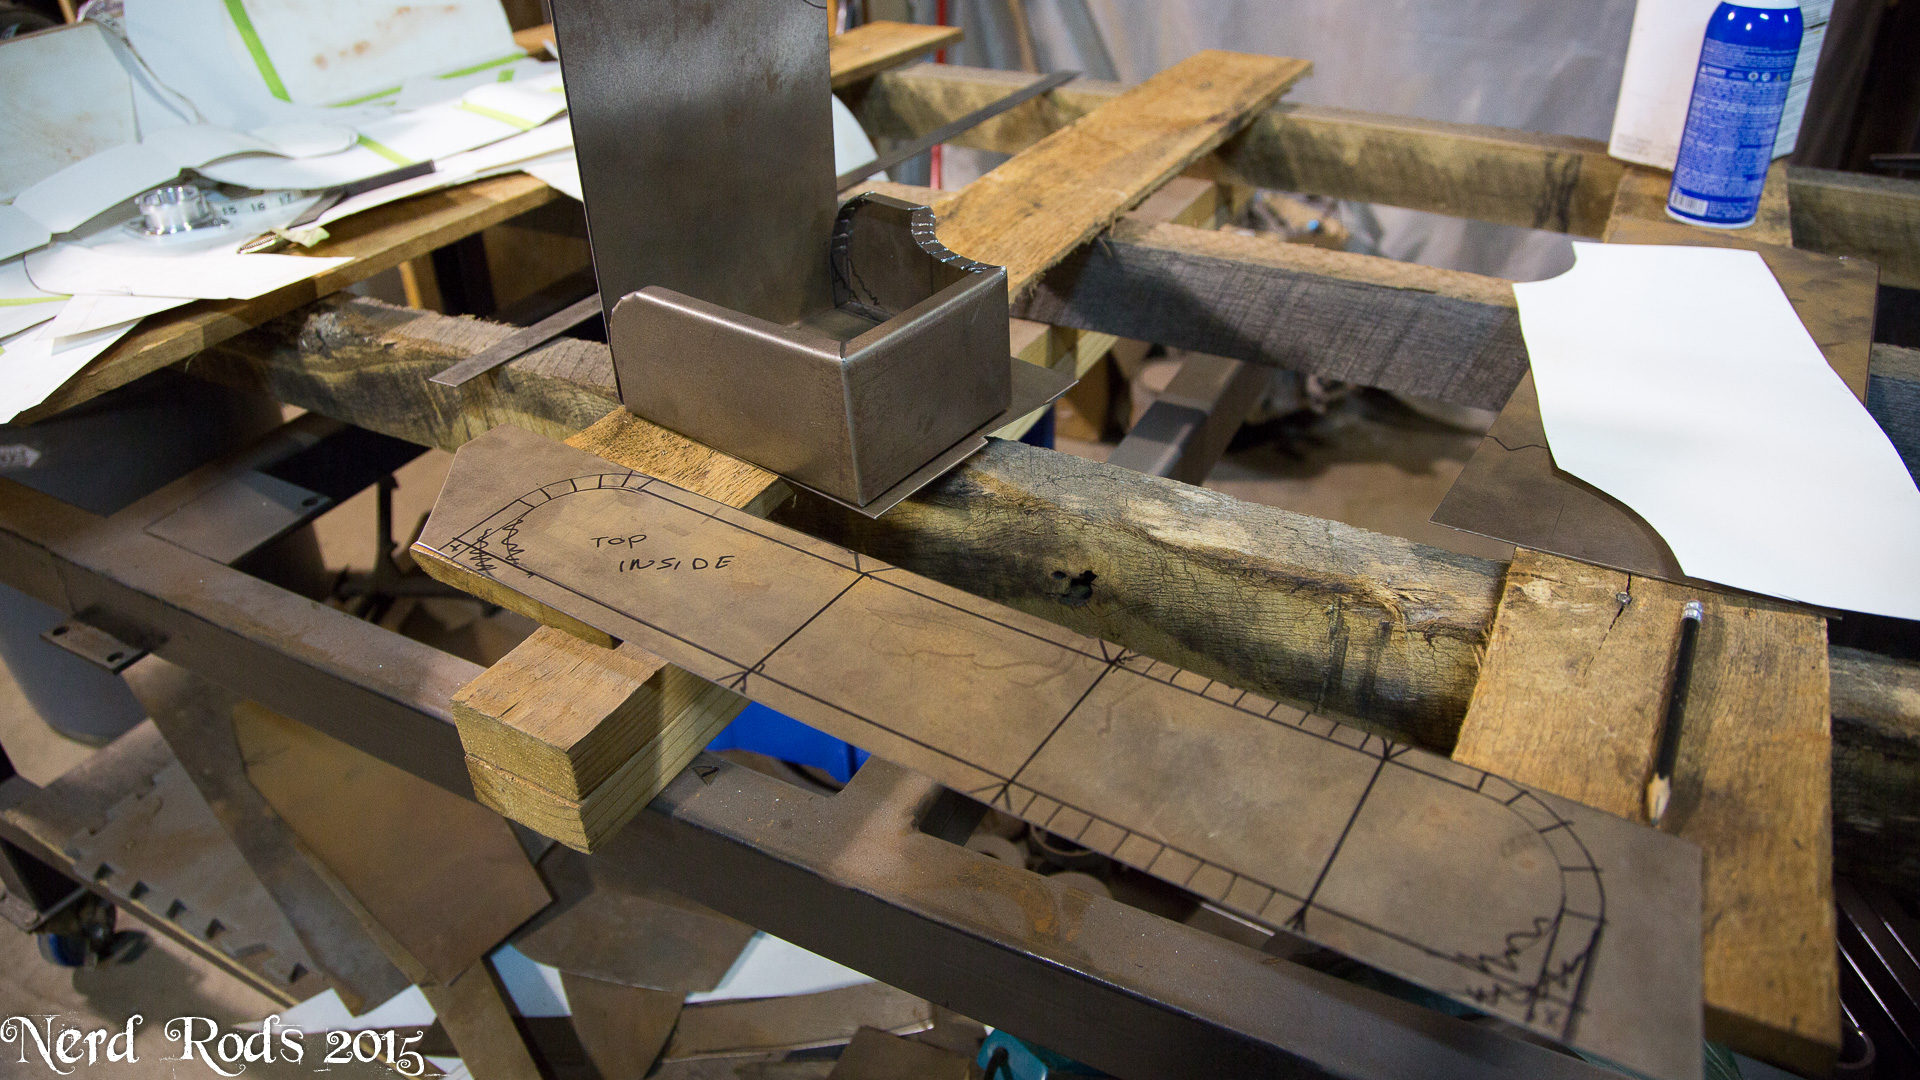
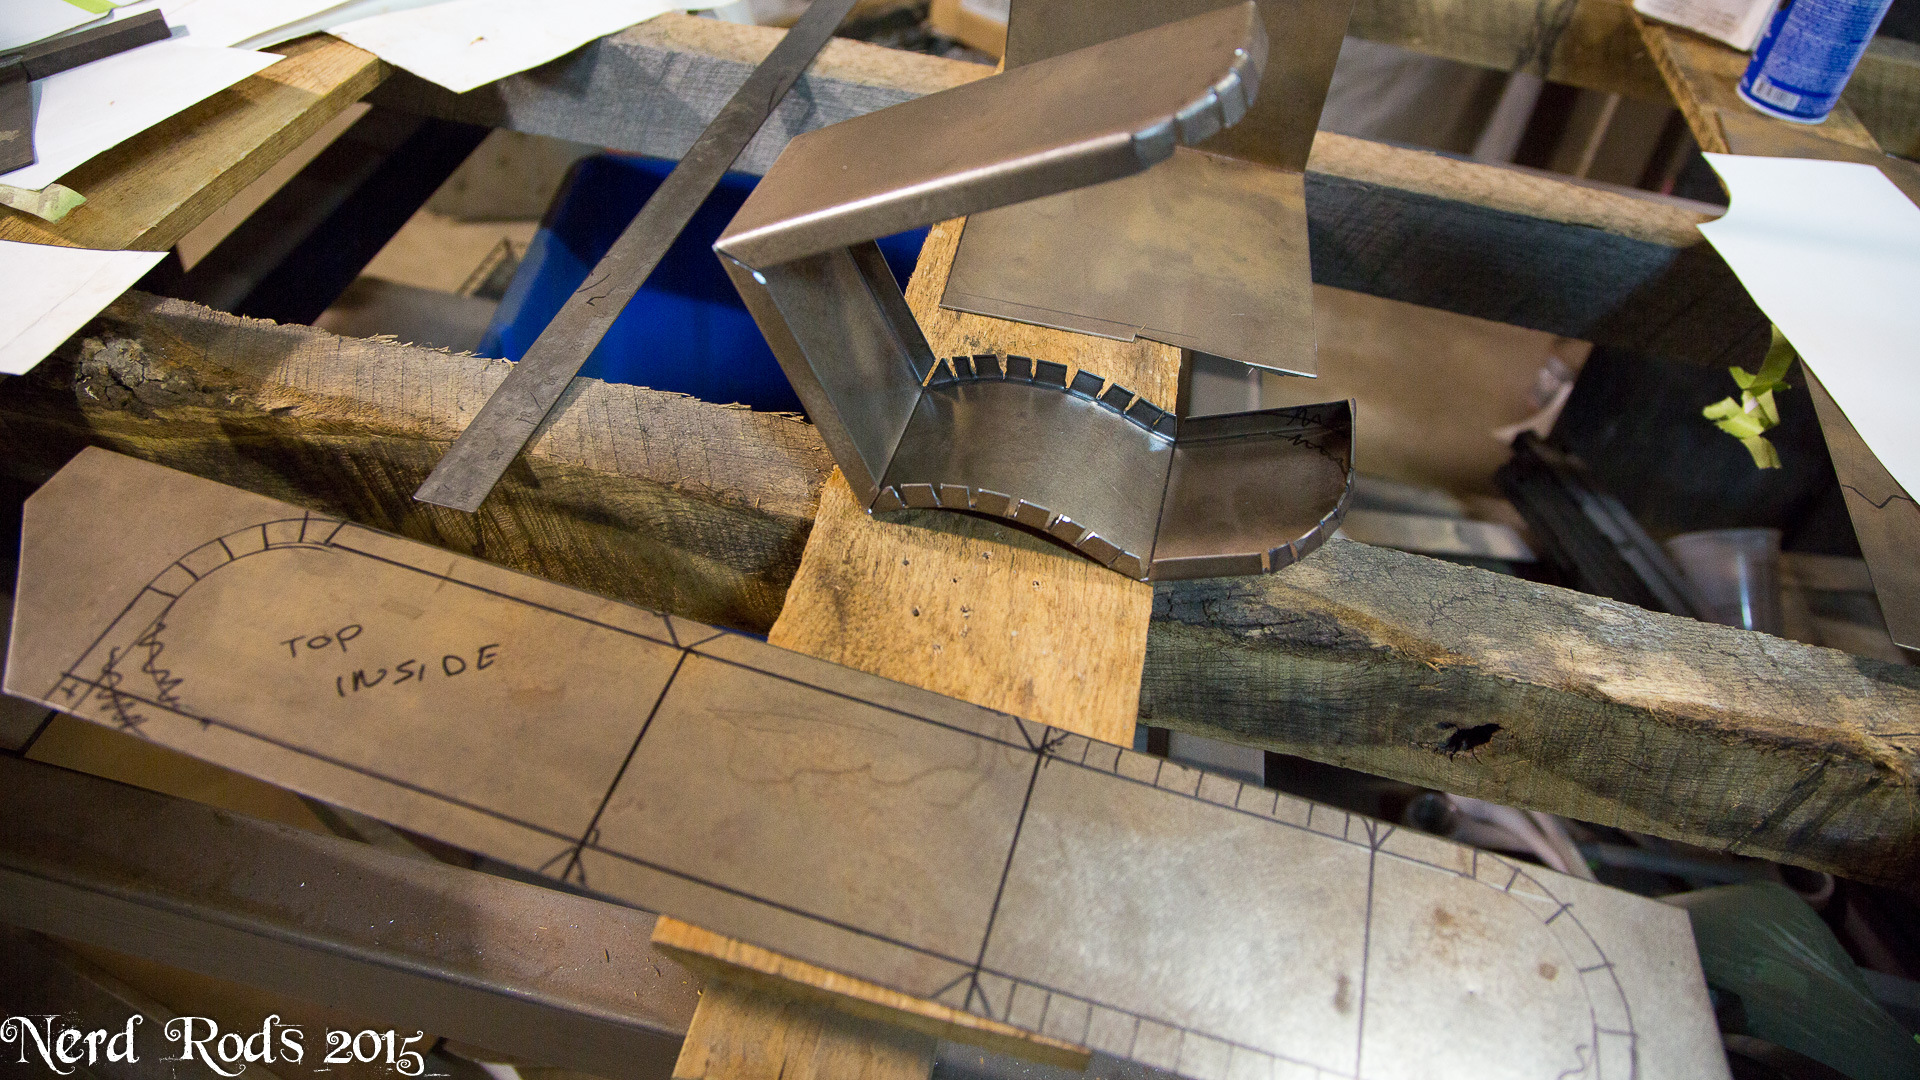
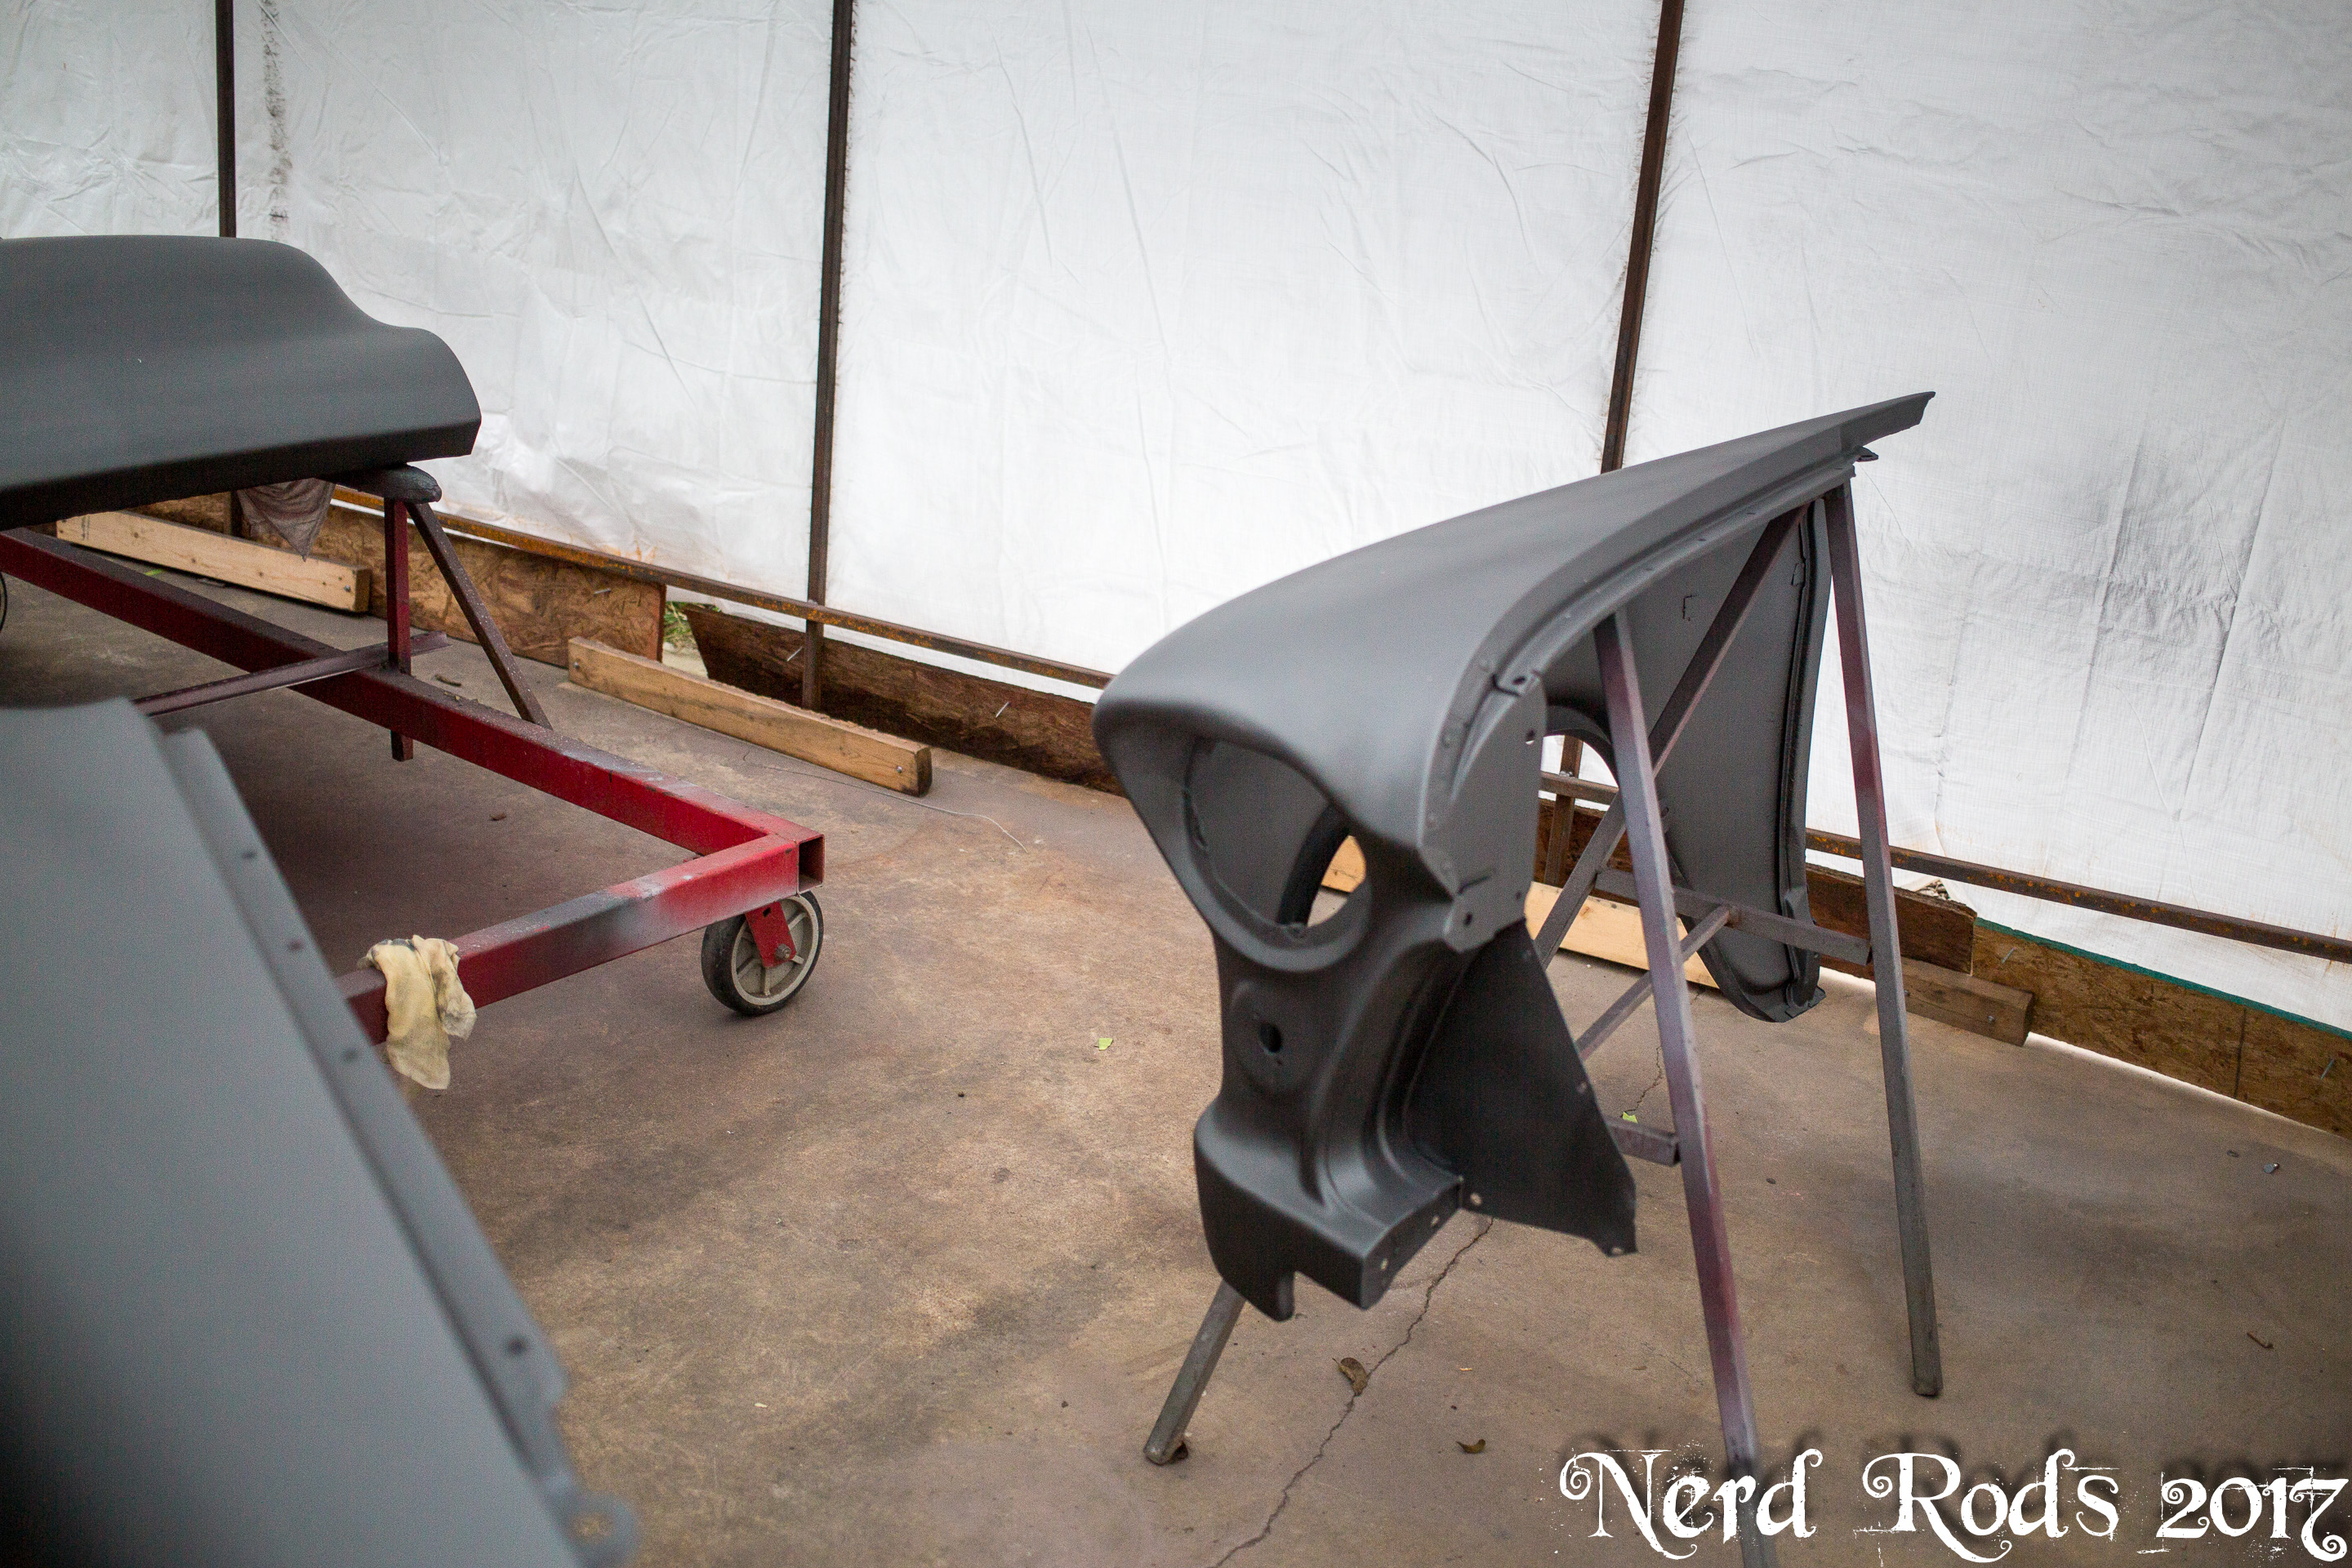
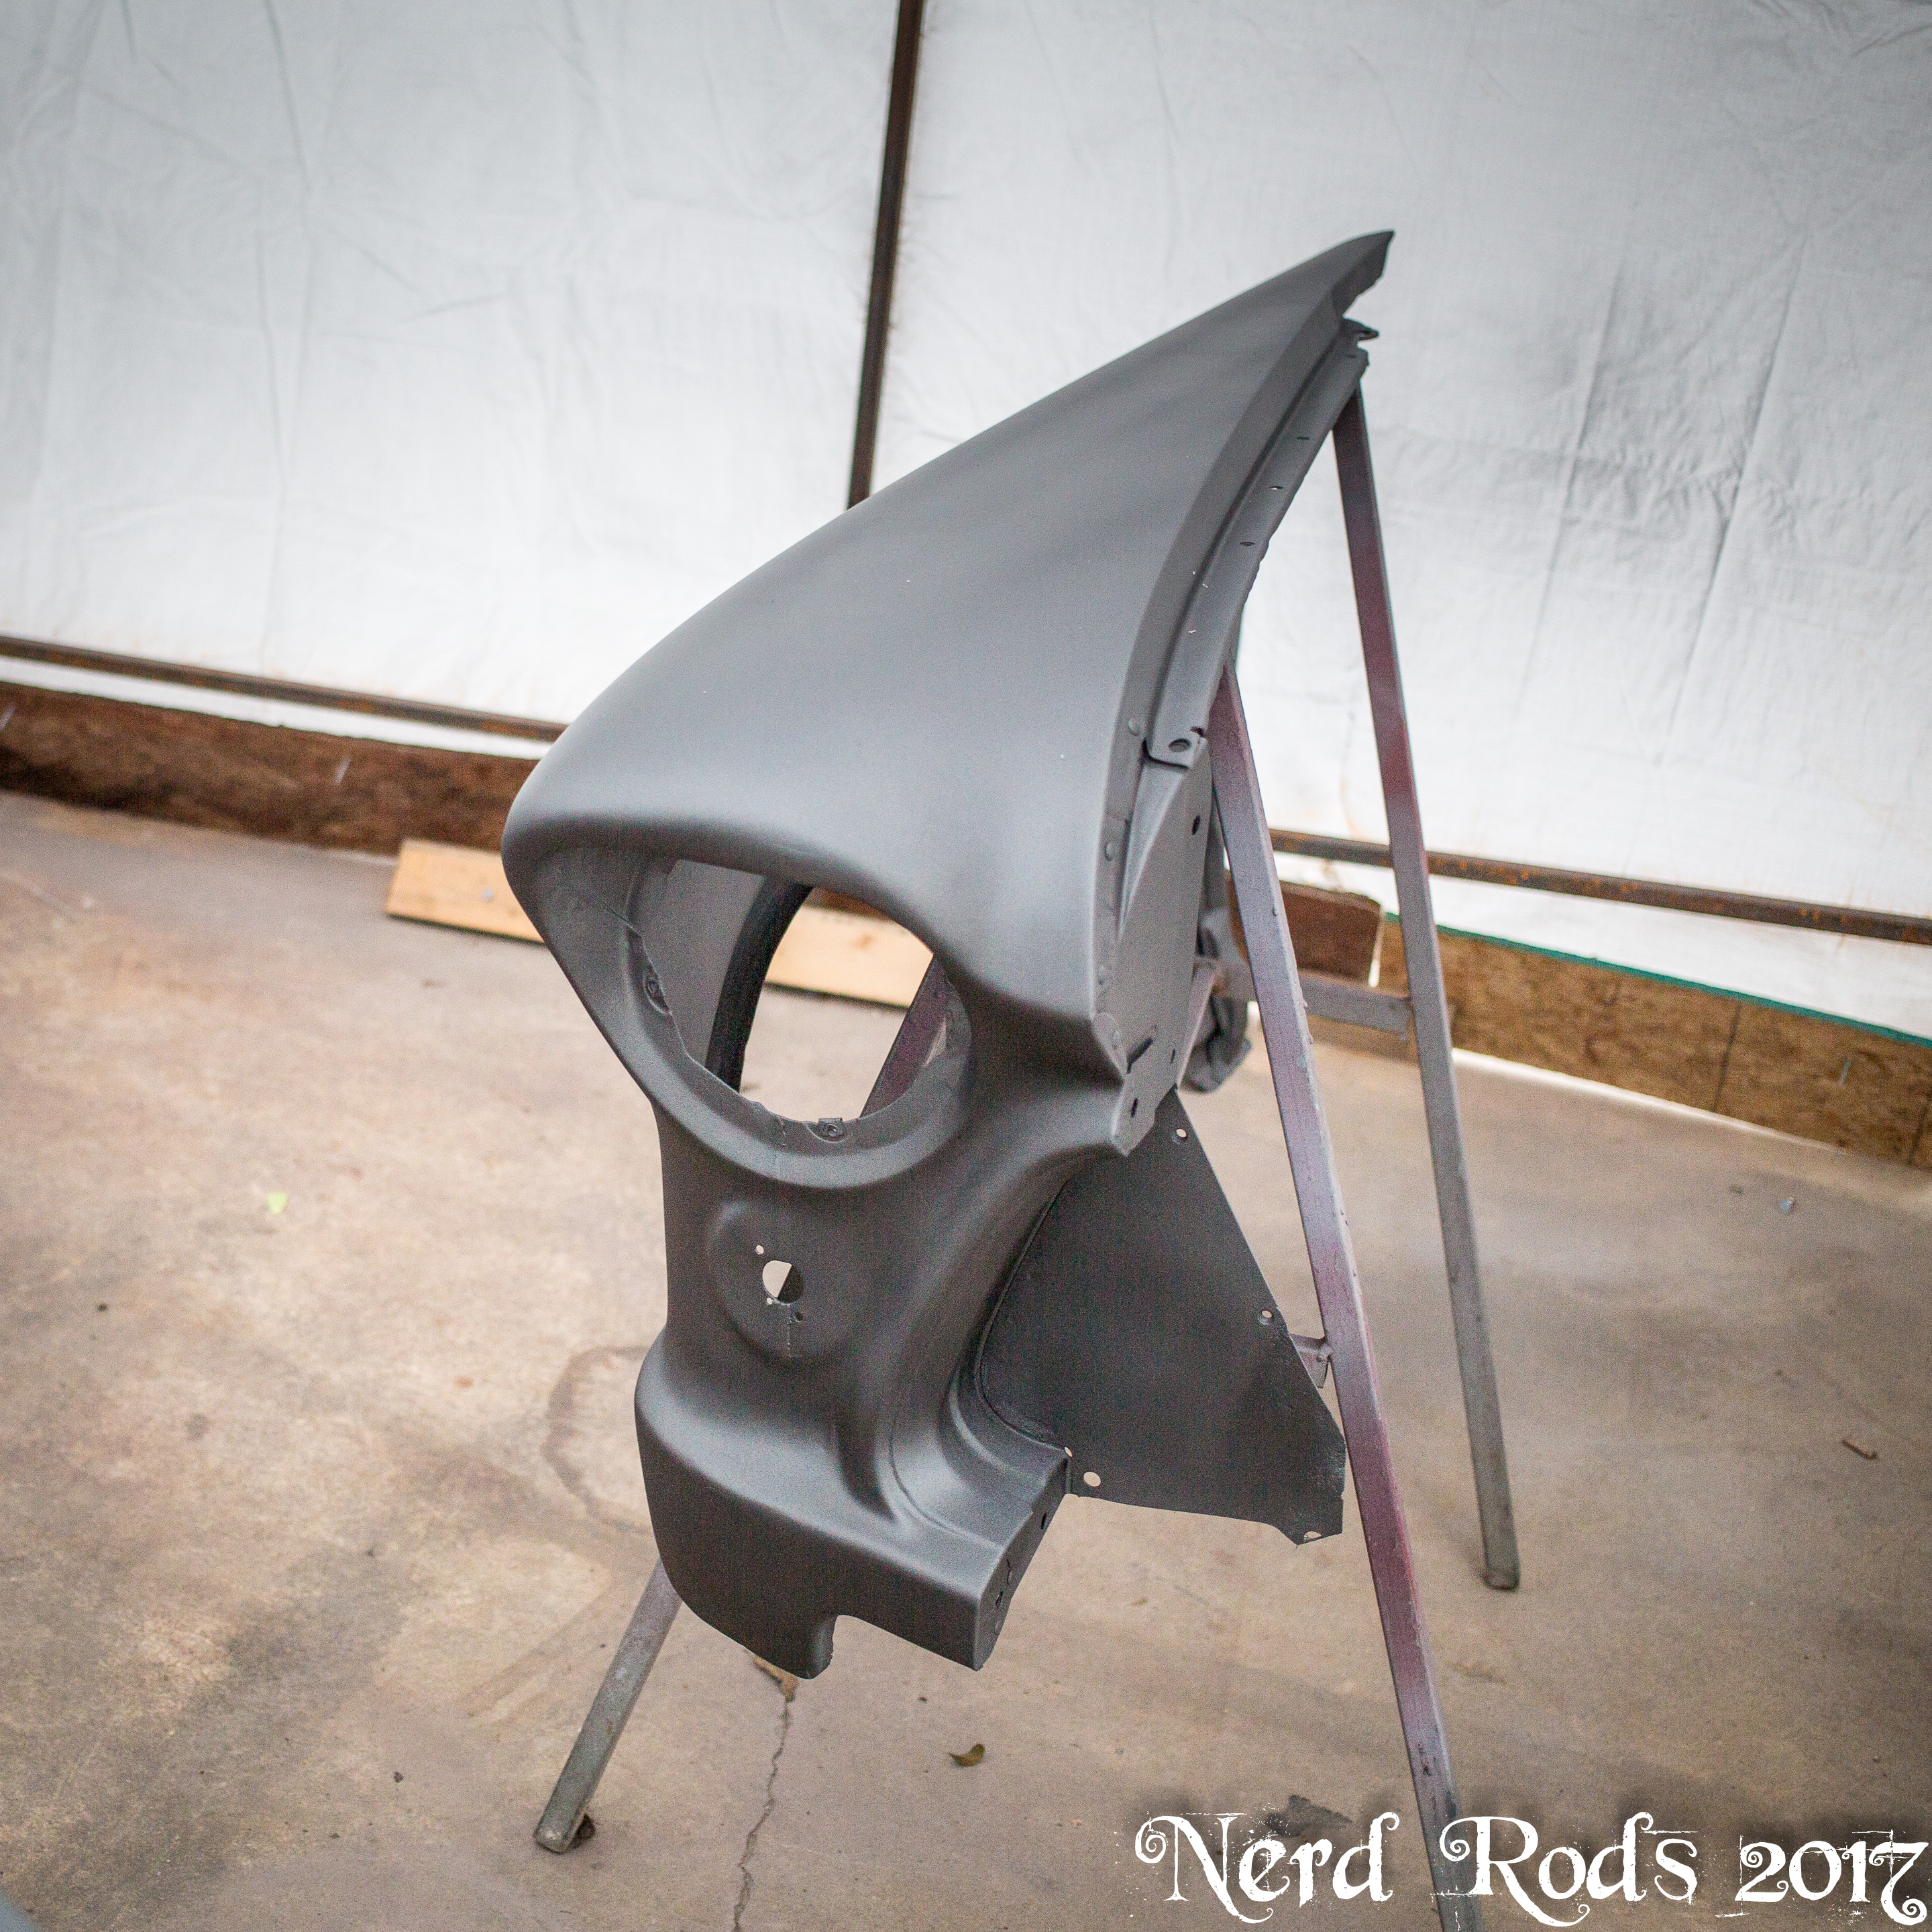
Perfect time to make something cooler and more suited to the firewall and so the custom inner fenders began. At first we planned to just modify the old ones until it became obvious to dad that making new ones would be much easier.


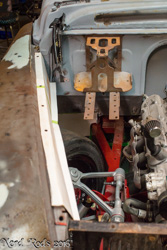
Full size photo galleryhttp://gallery.nerdrods.com/Projects/03_D3/04/


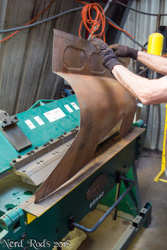
Full size photo galleryhttp://gallery.nerdrods.com/Projects/03_D3/04/
They turned out pretty epic if I do say so myself. We are talking about molding a set to make fiberglass versions later on or maybe some jigs for steel versions, we’ll see.


Full size photo galleryhttp://gallery.nerdrods.com/Projects/03_D3/04/
Gallery photos all here if you just want to look at the pretty pictures
http://gallery.nerdrods.com/Projects/03_D3/04/
So most of this started with two things. The intake tubing because of the turbo intake and the high pressure zone Jim kept wanting to use as a vent. The pressure at the cowl might have had a tiny effect but I’m 90% sure after reading up and getting some education for you guys on the forums that if there was any heat loss it would be minor to nonexistent. So I finally found a few videos that convinced Jim of the same thing. So it was decided that this cowl vent would be used to feed the turbo under the passenger butt.
Next we decided to check for tire clearance, now that the truck would be considerably faster we wanted to make absolutely sure that we could get some larger tires on here later if we wanted to. So the worst point is full compression under full lock of turning. The spring came off and the tire went on. As you can see we found out the inner fender was going to be a problem.
Full size photo galleryhttp://gallery.nerdrods.com/Projects/03_D3/04/
Perfect time to make something cooler and more suited to the firewall and so the custom inner fenders began. At first we planned to just modify the old ones until it became obvious to dad that making new ones would be much easier.


Full size photo galleryhttp://gallery.nerdrods.com/Projects/03_D3/04/


Full size photo galleryhttp://gallery.nerdrods.com/Projects/03_D3/04/
They turned out pretty epic if I do say so myself. We are talking about molding a set to make fiberglass versions later on or maybe some jigs for steel versions, we’ll see.


Full size photo galleryhttp://gallery.nerdrods.com/Projects/03_D3/04/
Last edited by rat_rod_russell; 01-16-2016 at 10:25 AM.
01-11-2016, 10:57 PM
#26
Launching!
Thread Starter
Join Date: Jan 2007
Location: Luling TX In the Hot Rod Shop
Posts: 294
Likes: 0
Received 3 Likes
on
3 Posts
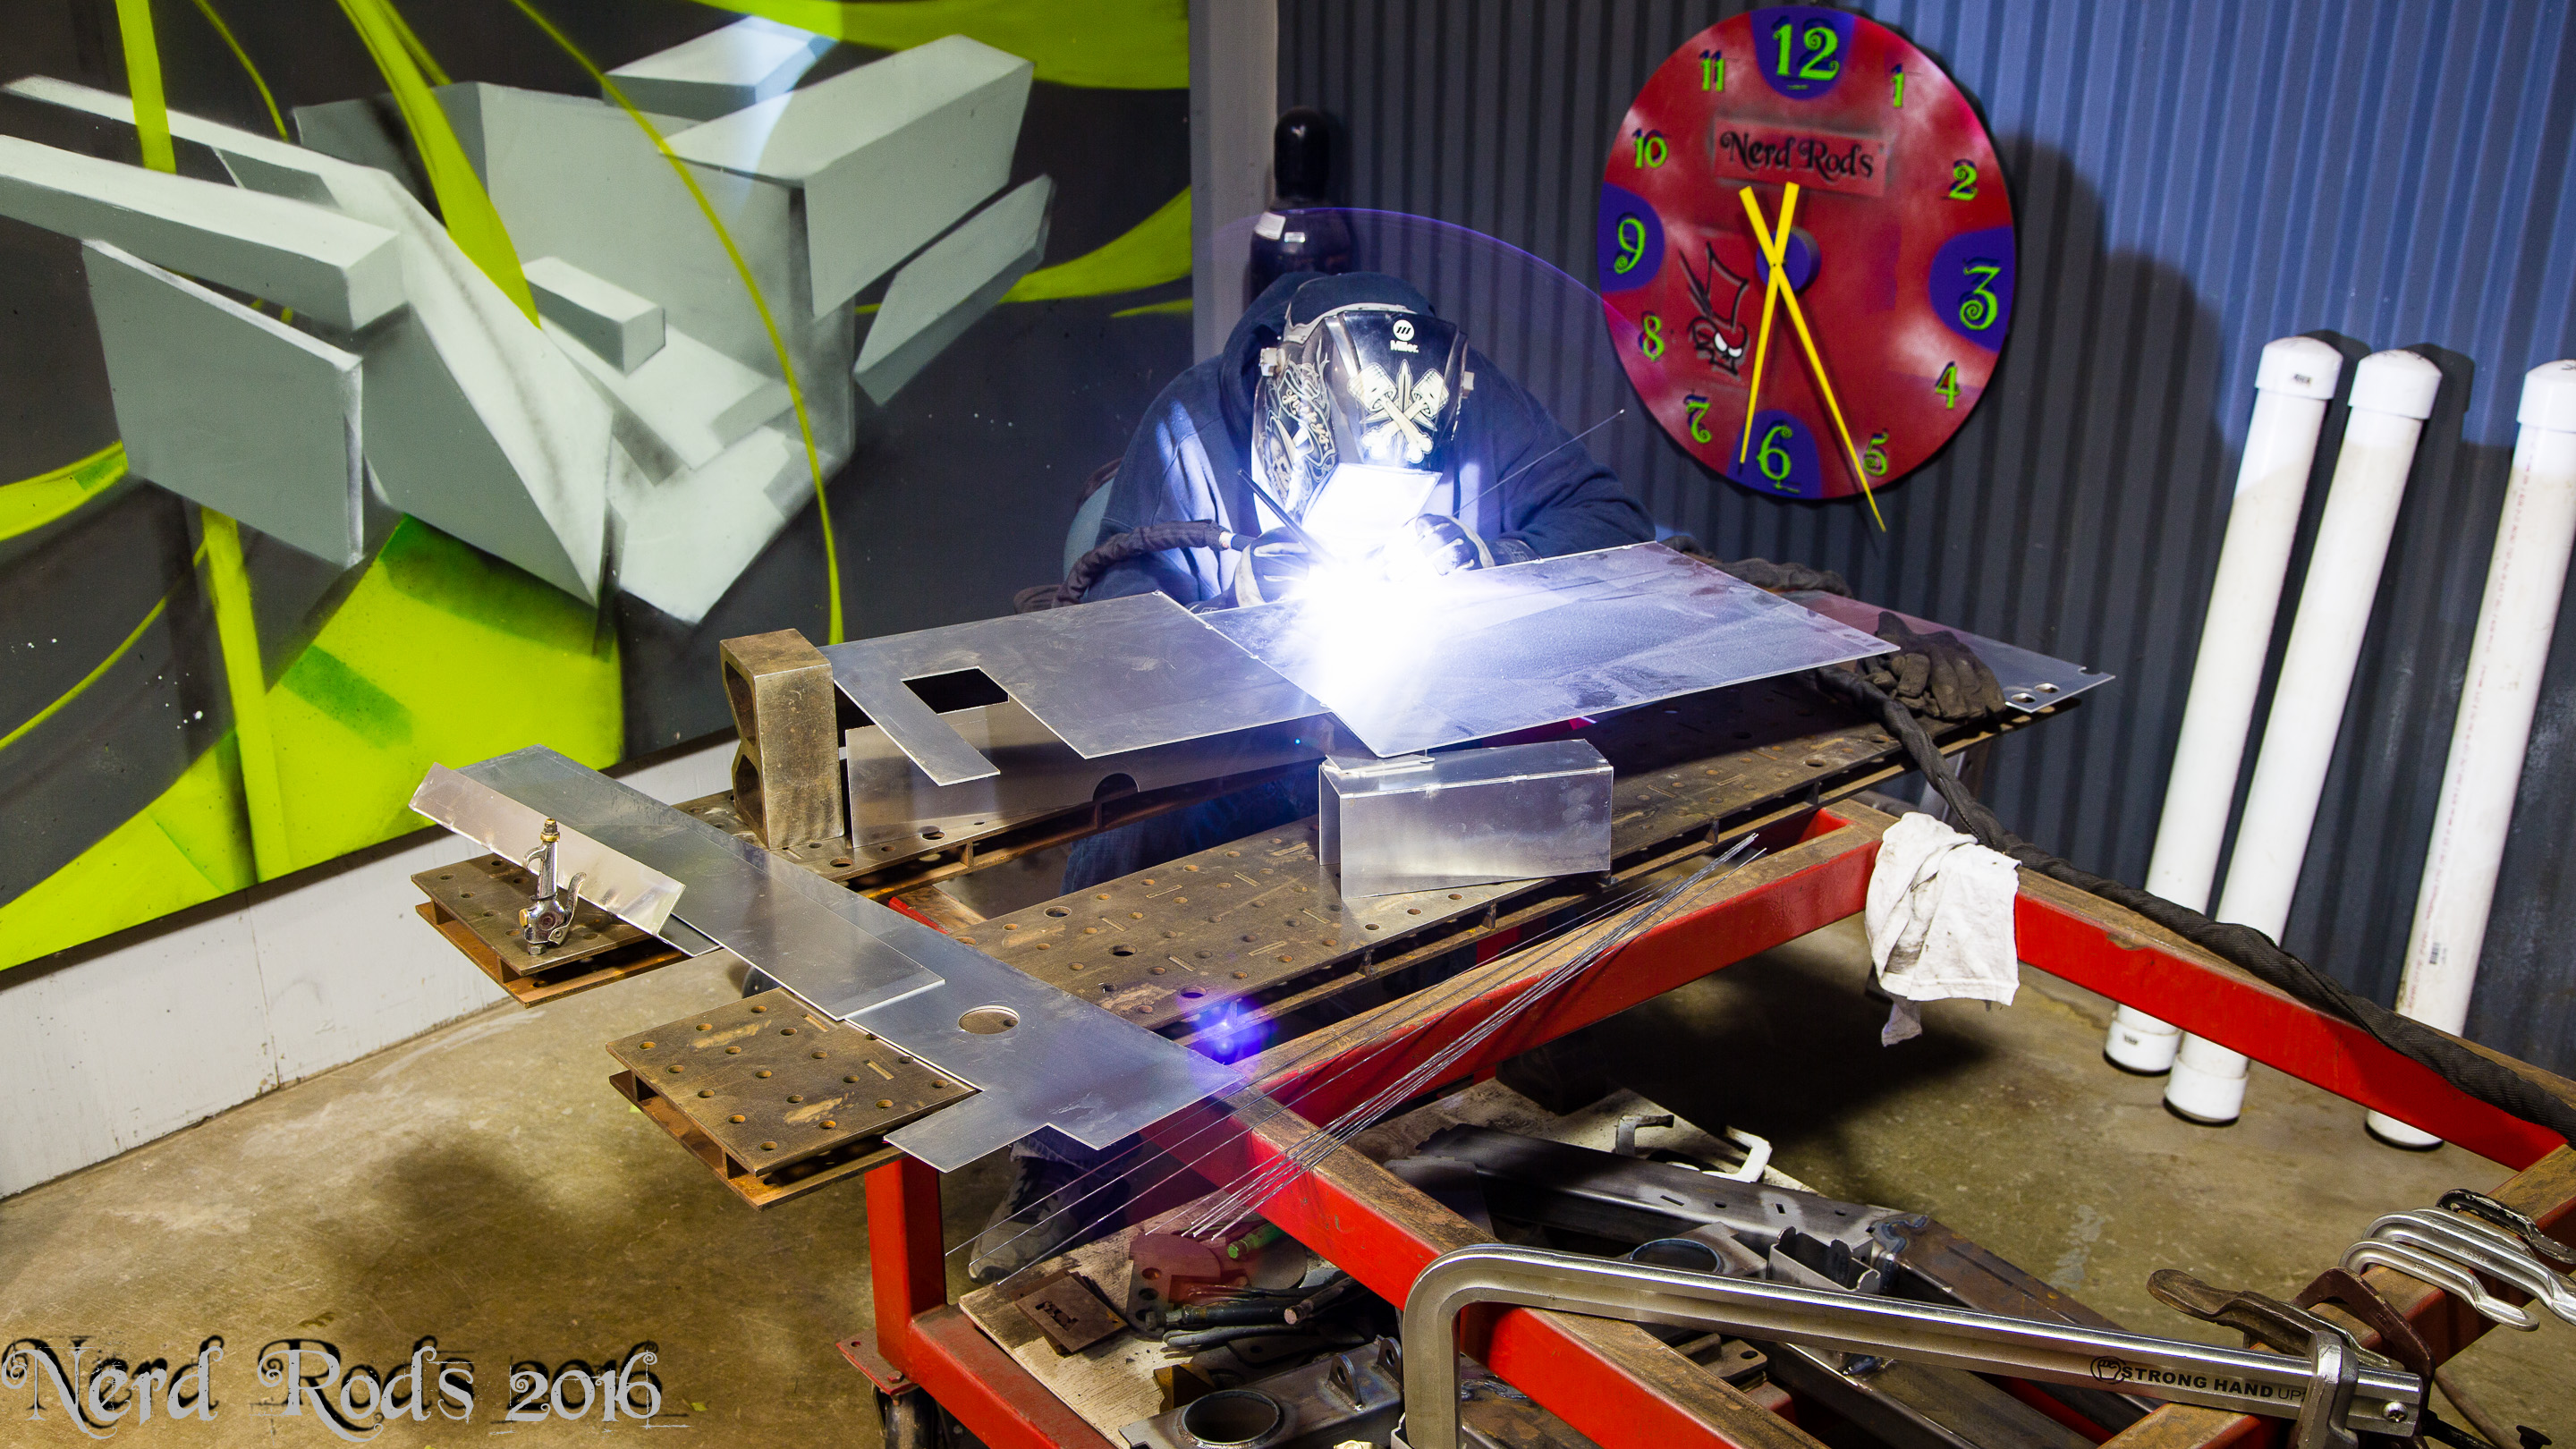
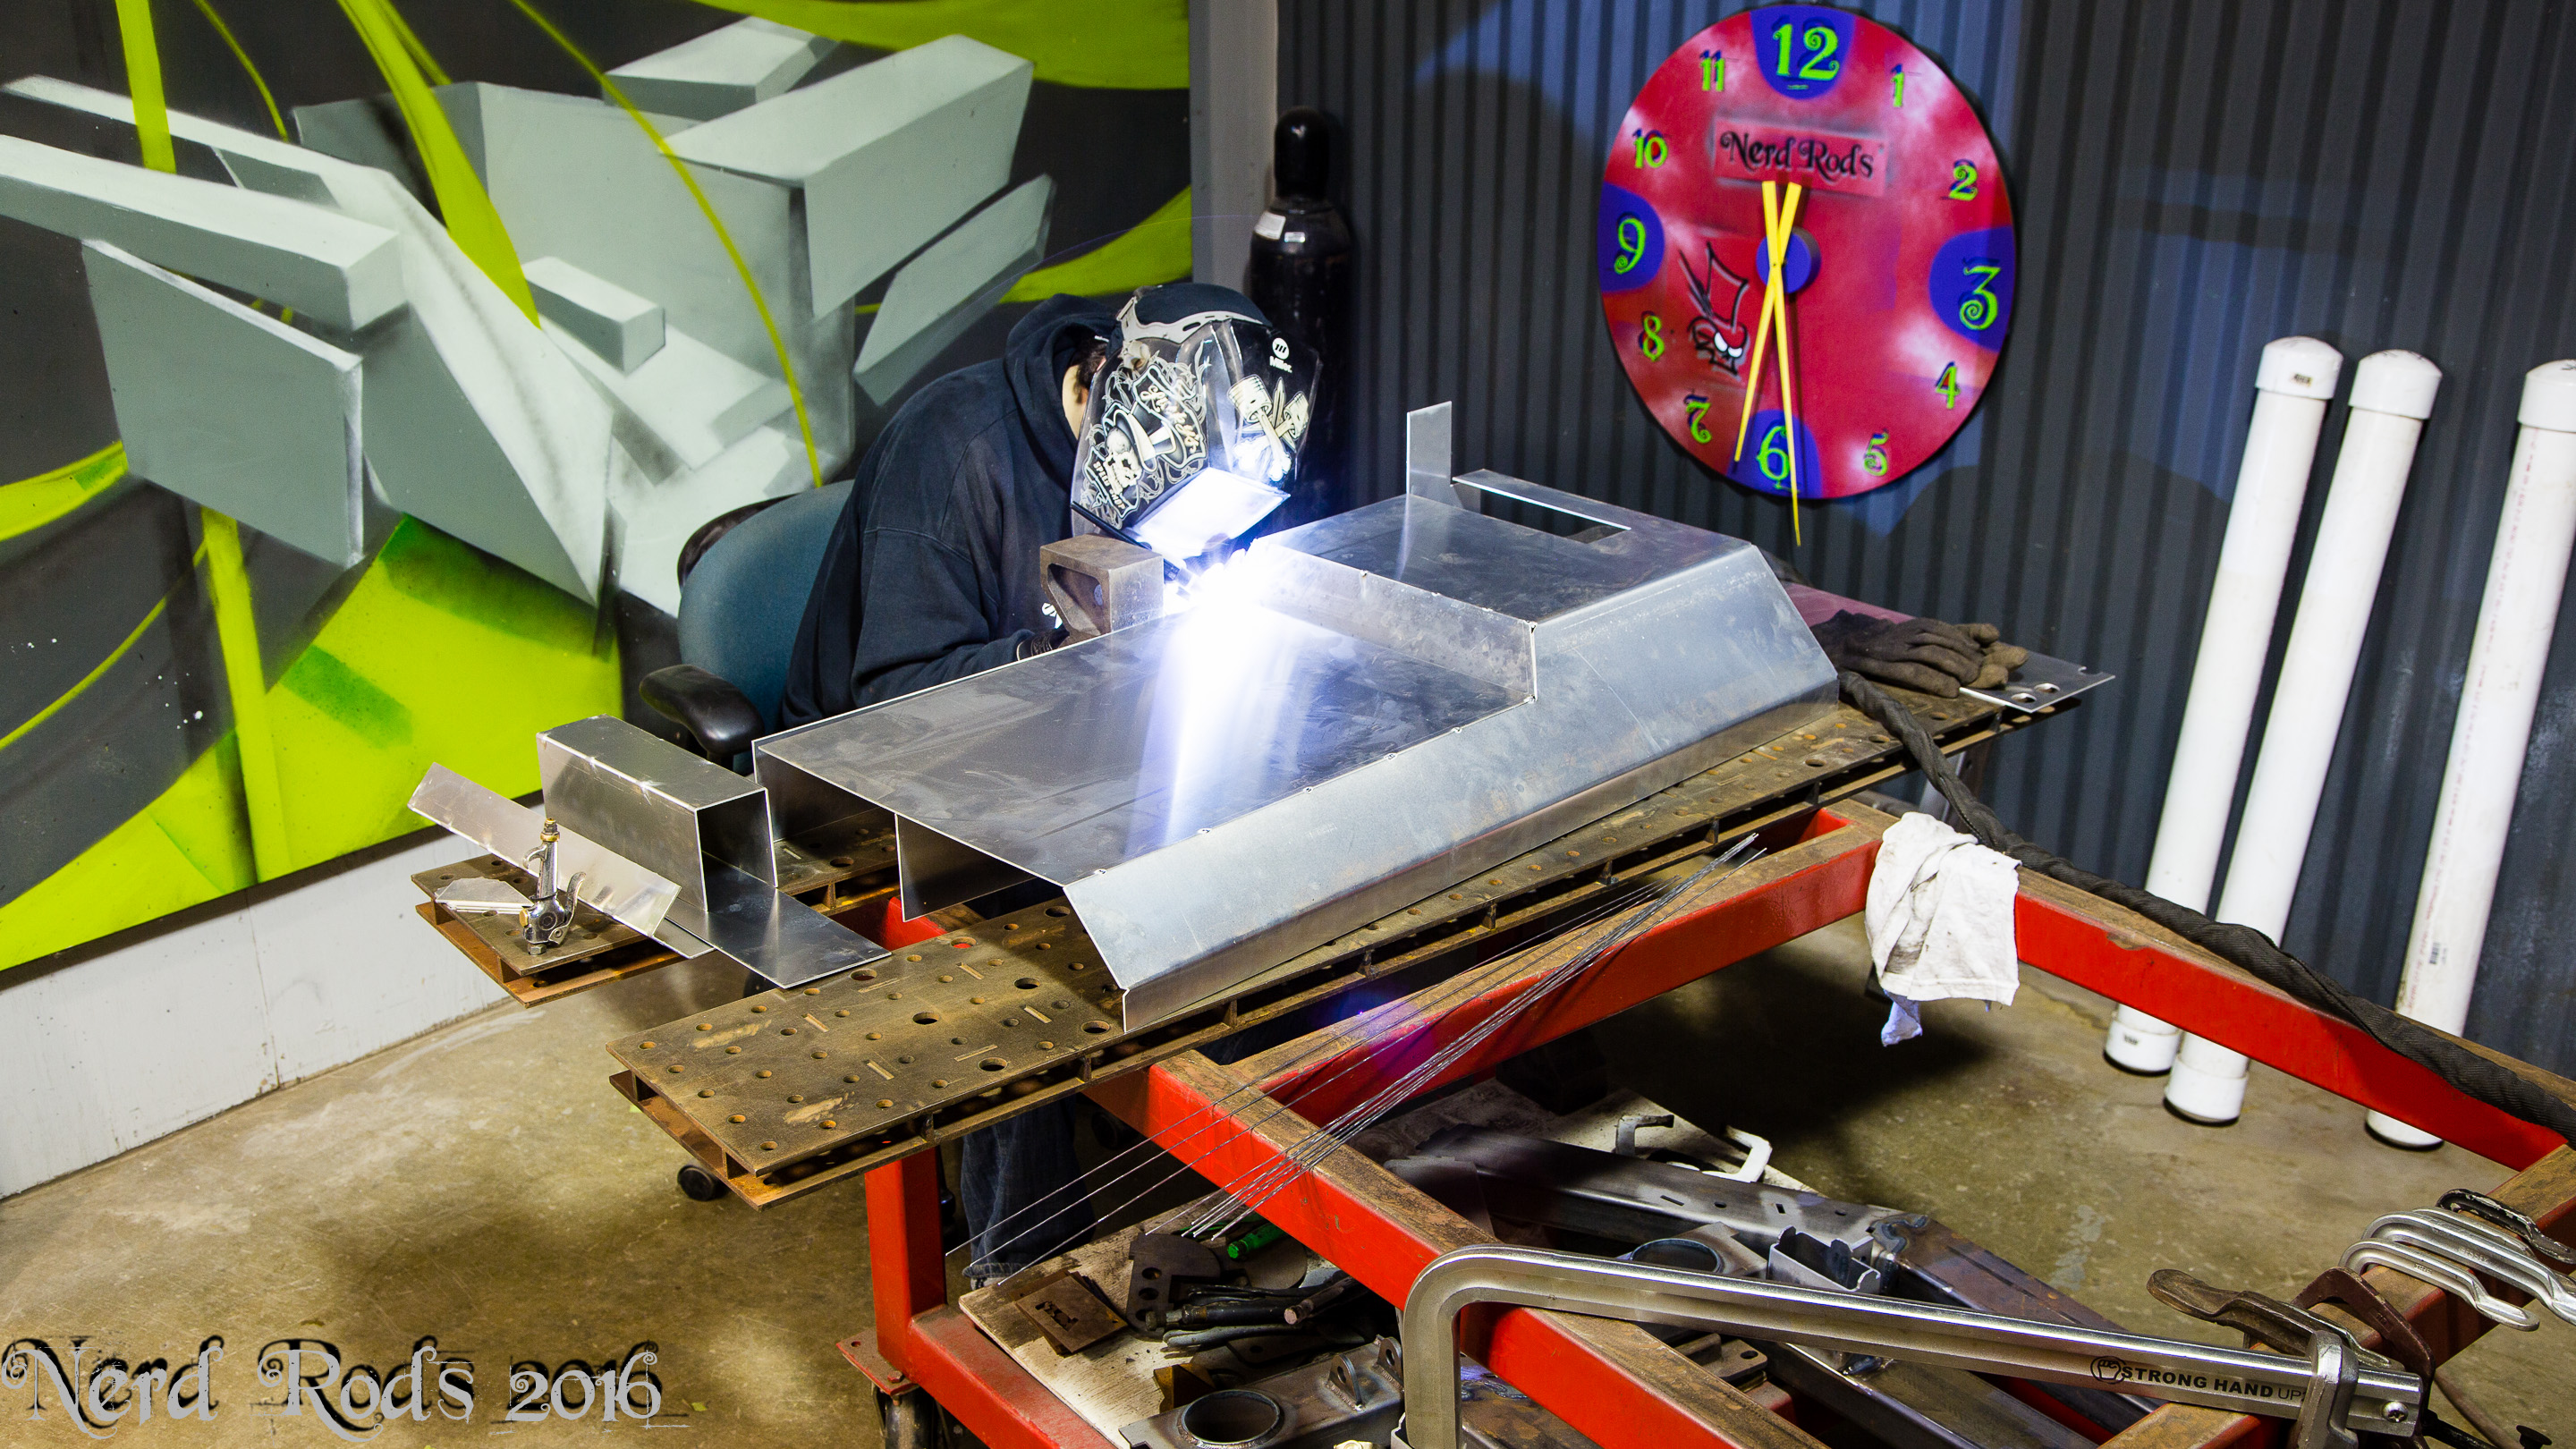
Then it was onto the boost box to feed the turbo. The paper one was the first version but it started getting way to complex so dad nixed it and ended up with the version you see here.


Full size photo galleryhttp://gallery.nerdrods.com/Projects/03_D3/04/
Meanwhile I’m working on a timelapse video of the fuel tank build.


Full size photo galleryhttp://gallery.nerdrods.com/Projects/03_D3/04/
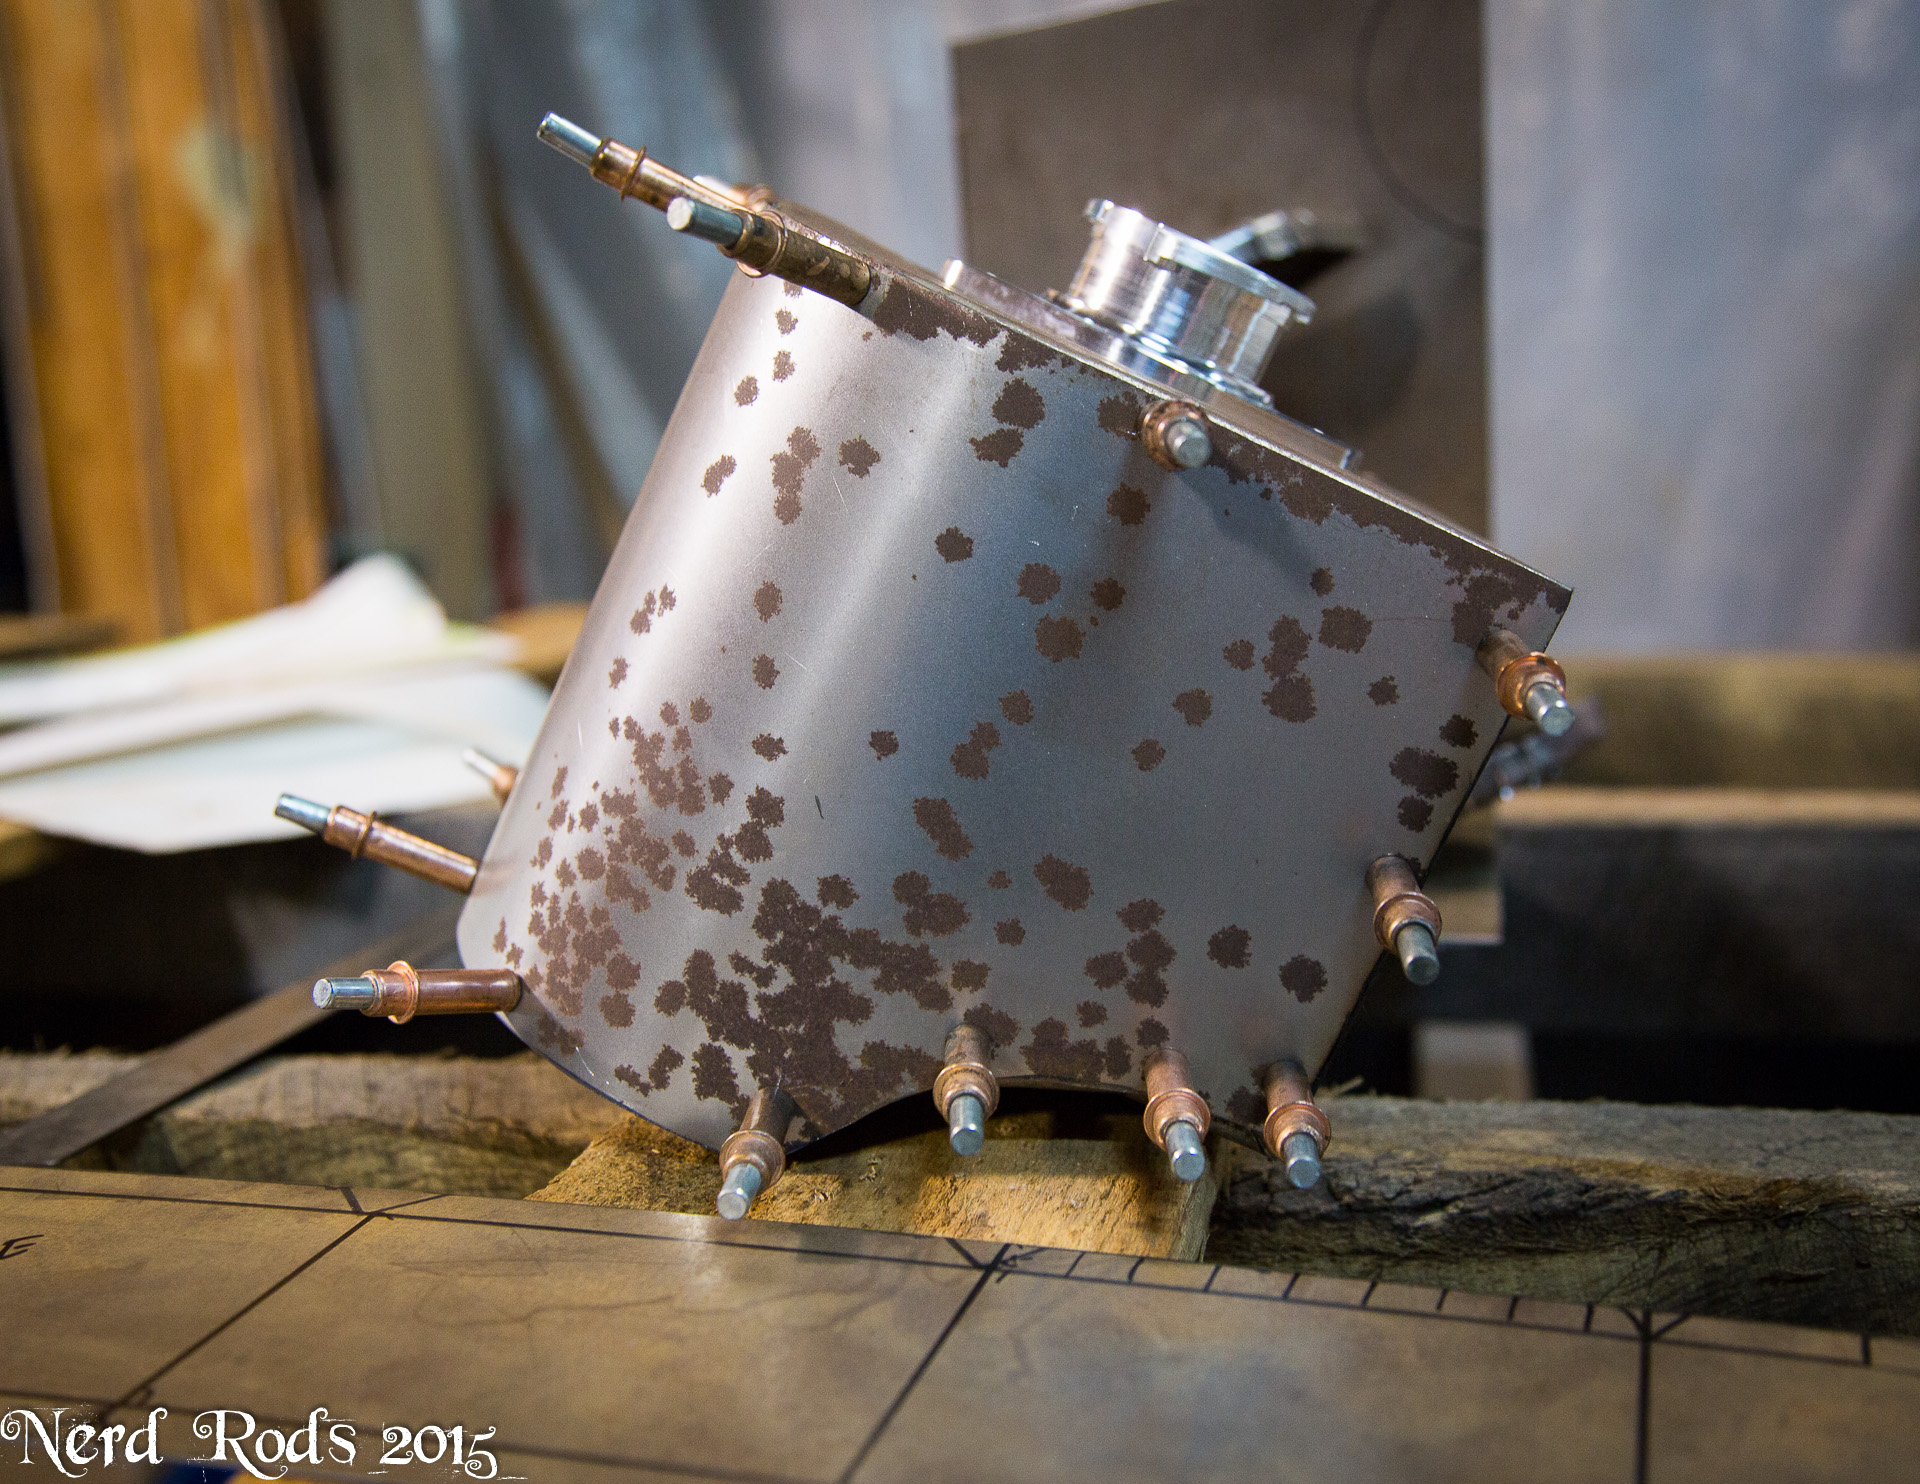
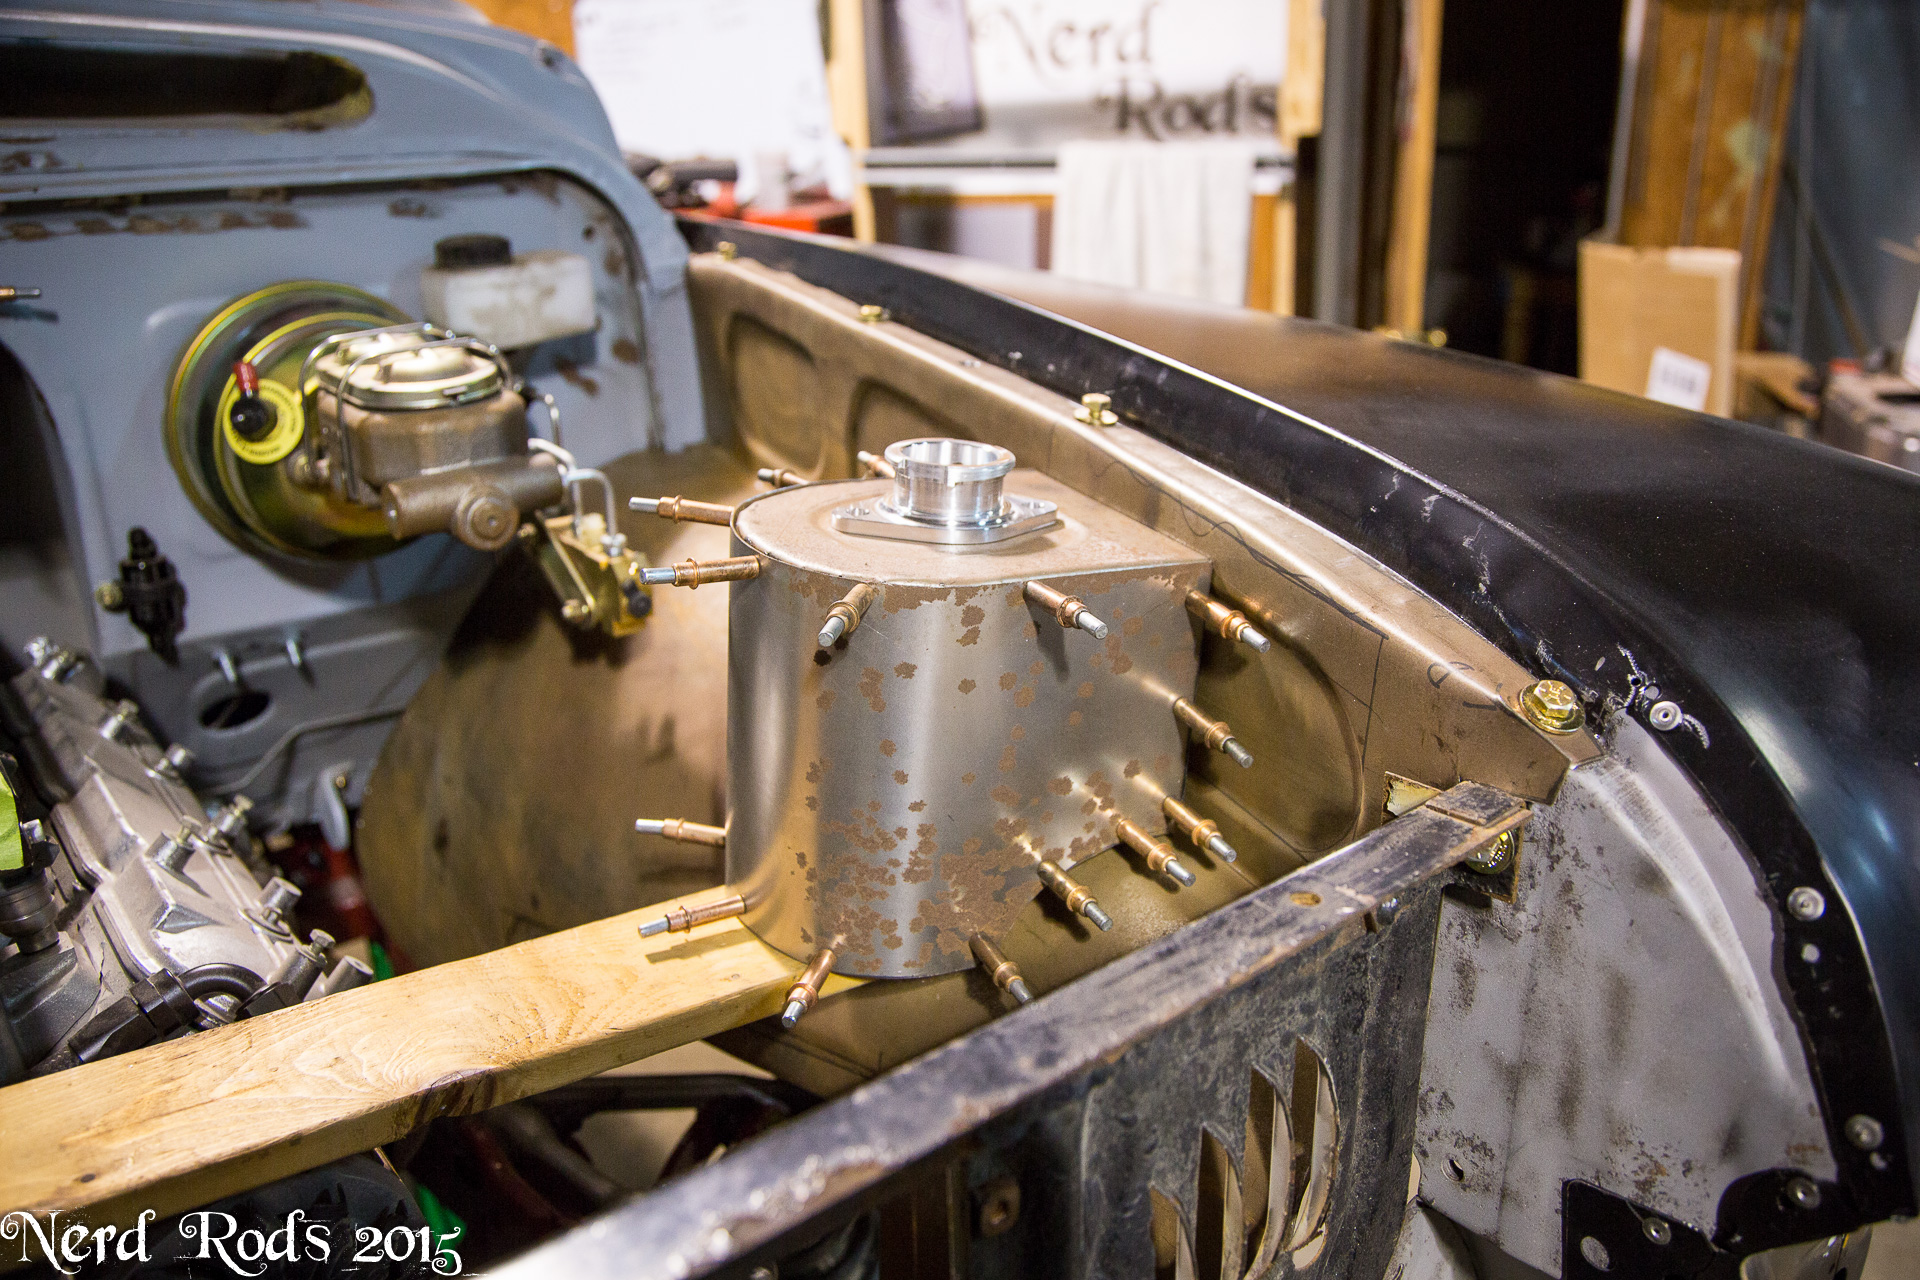
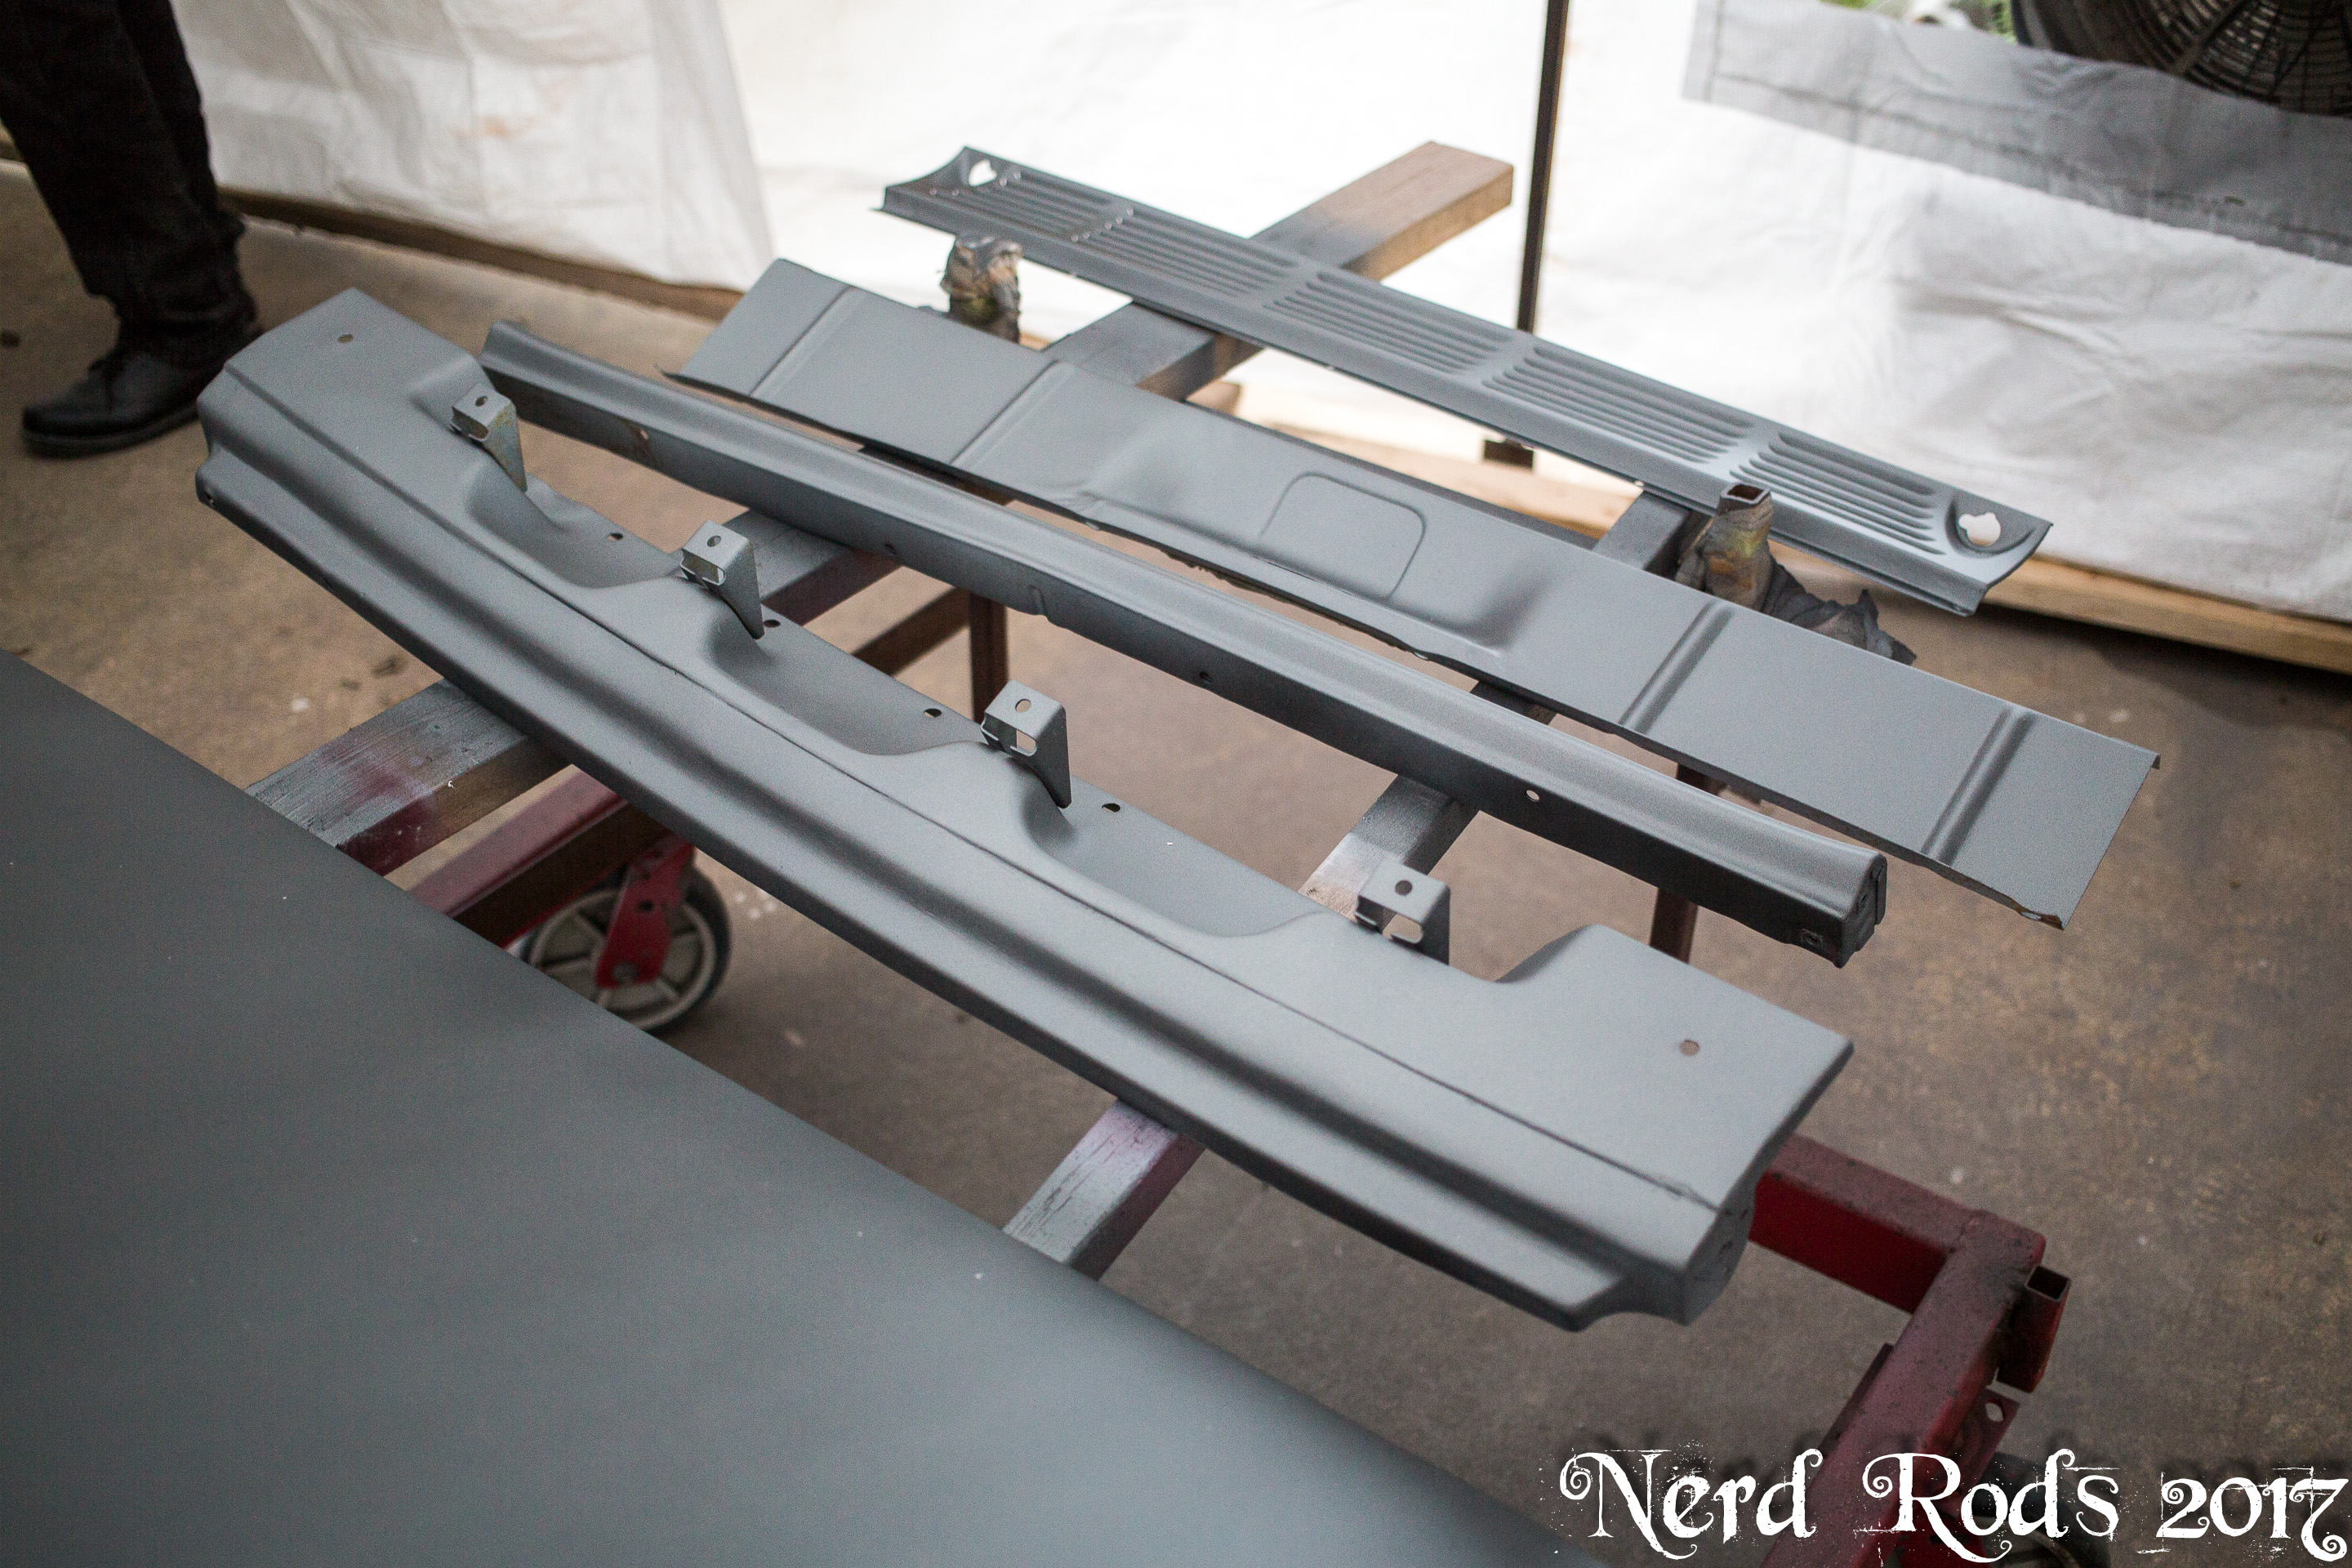
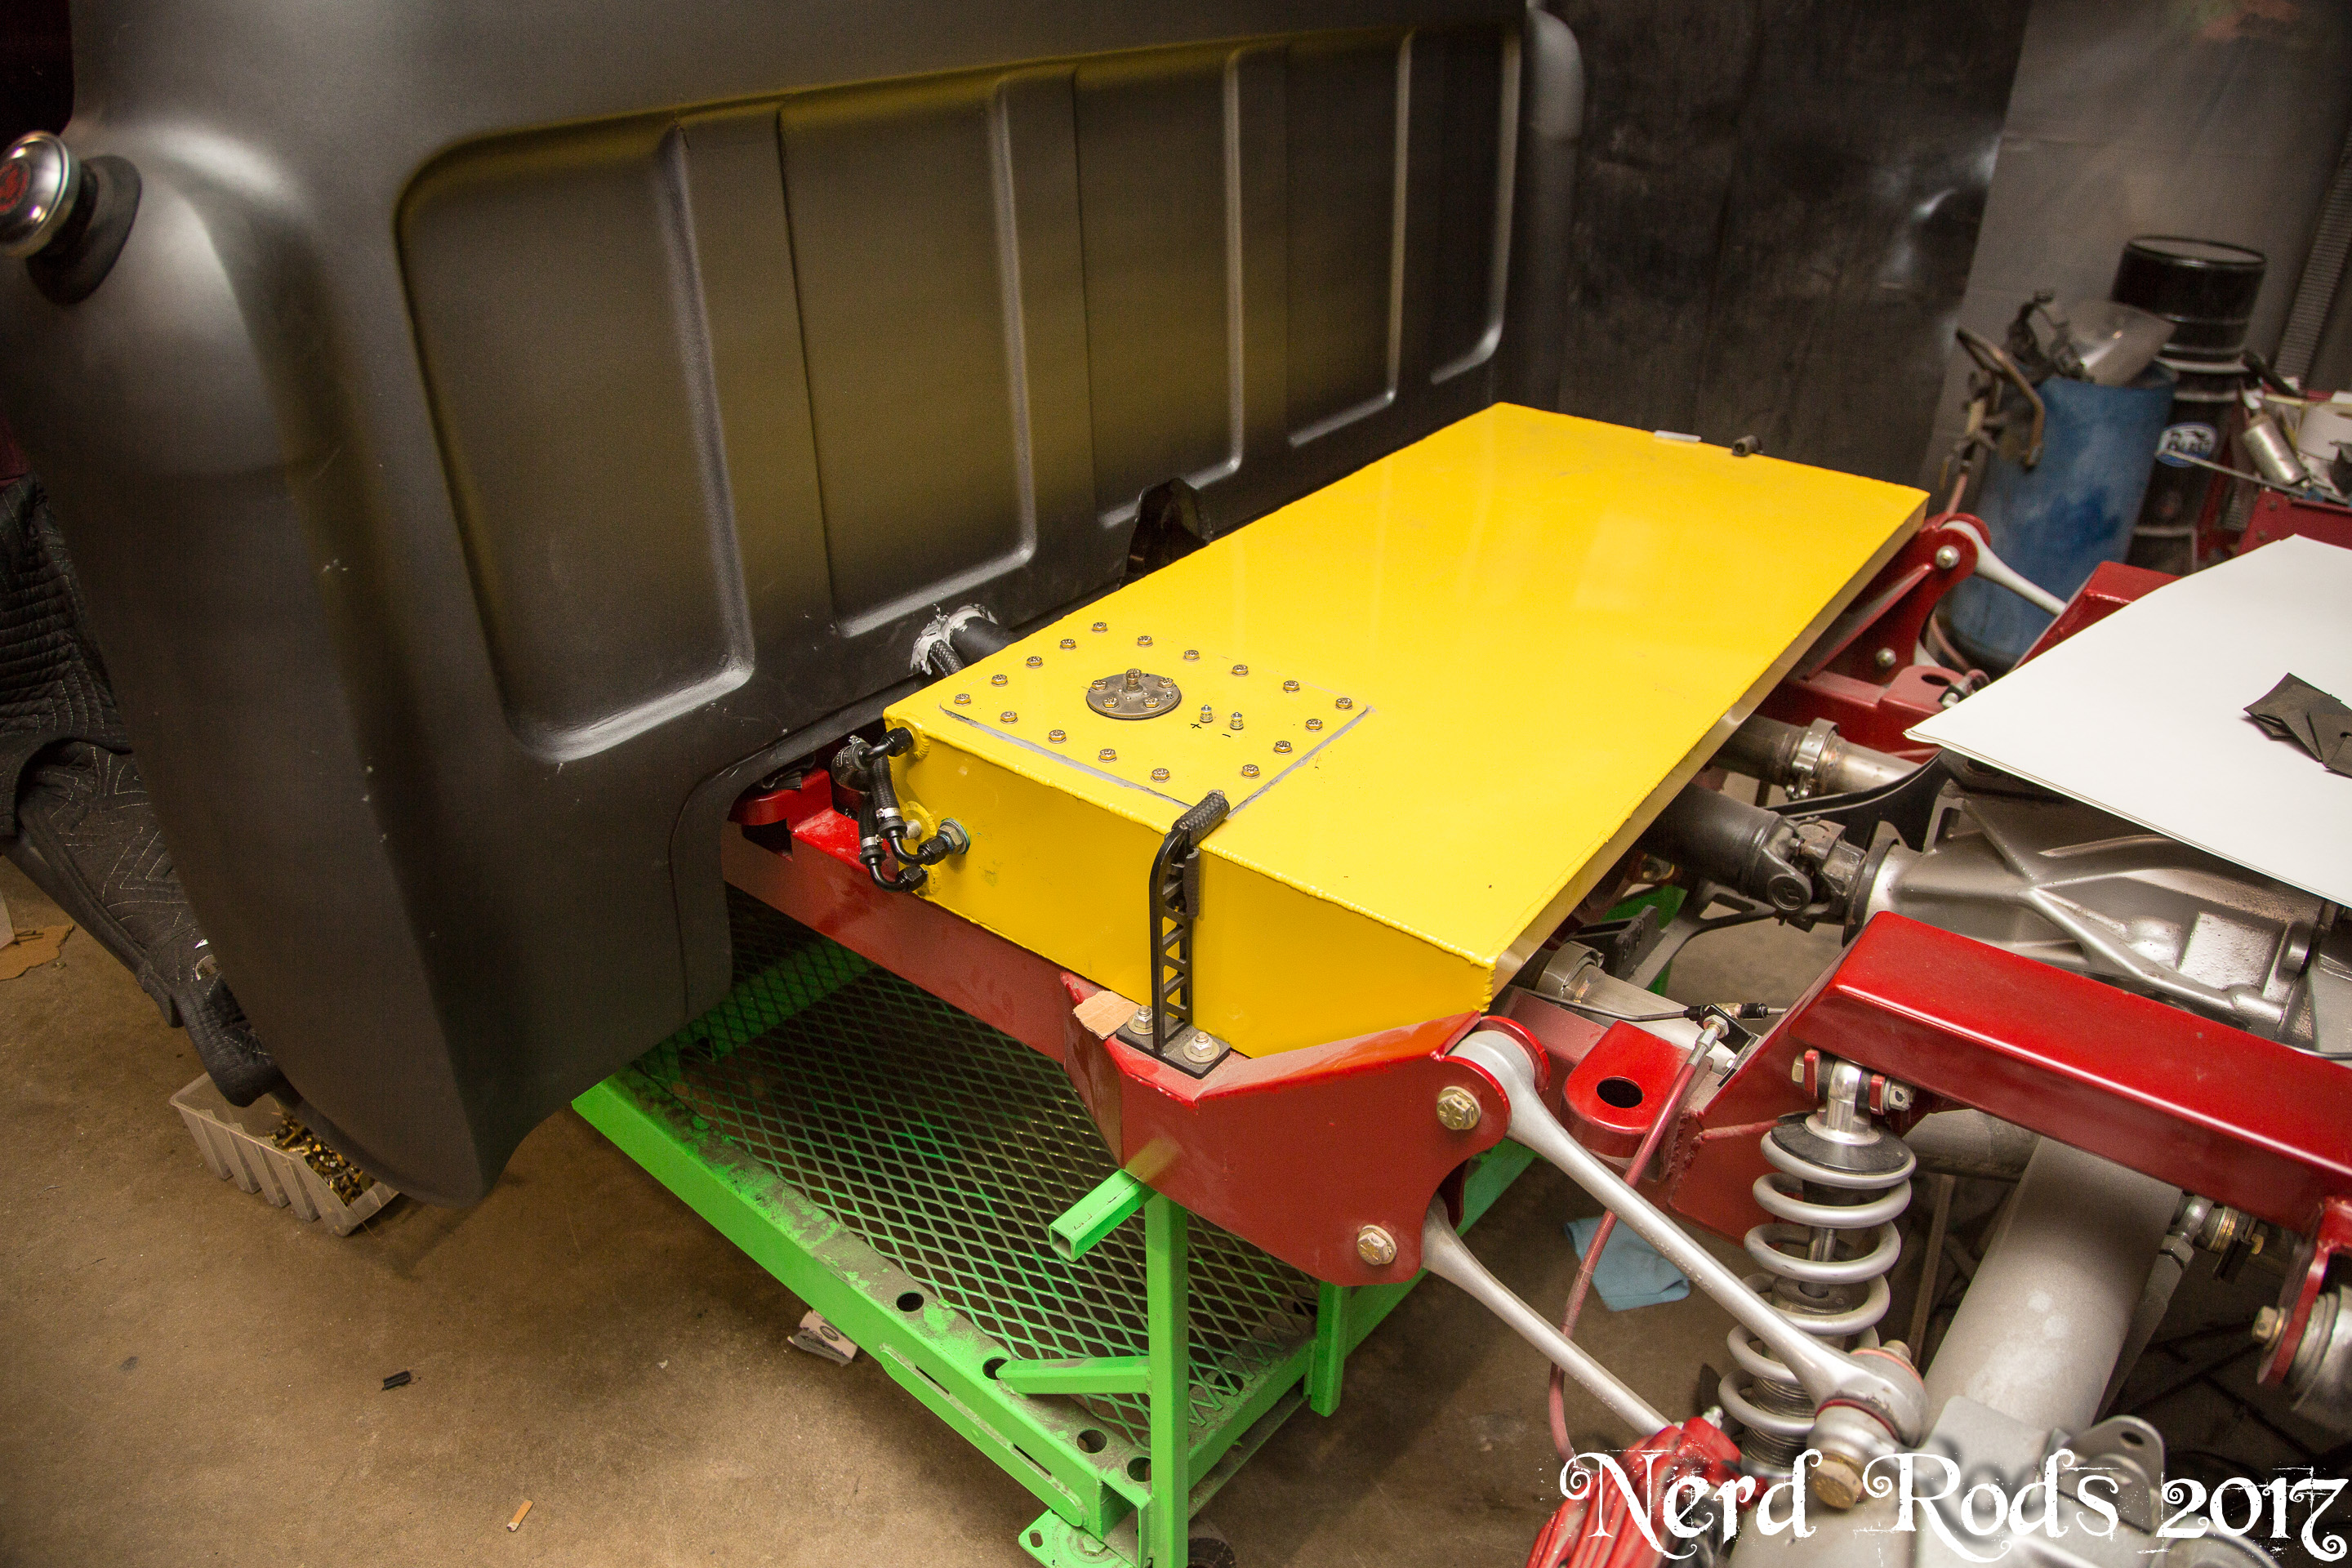
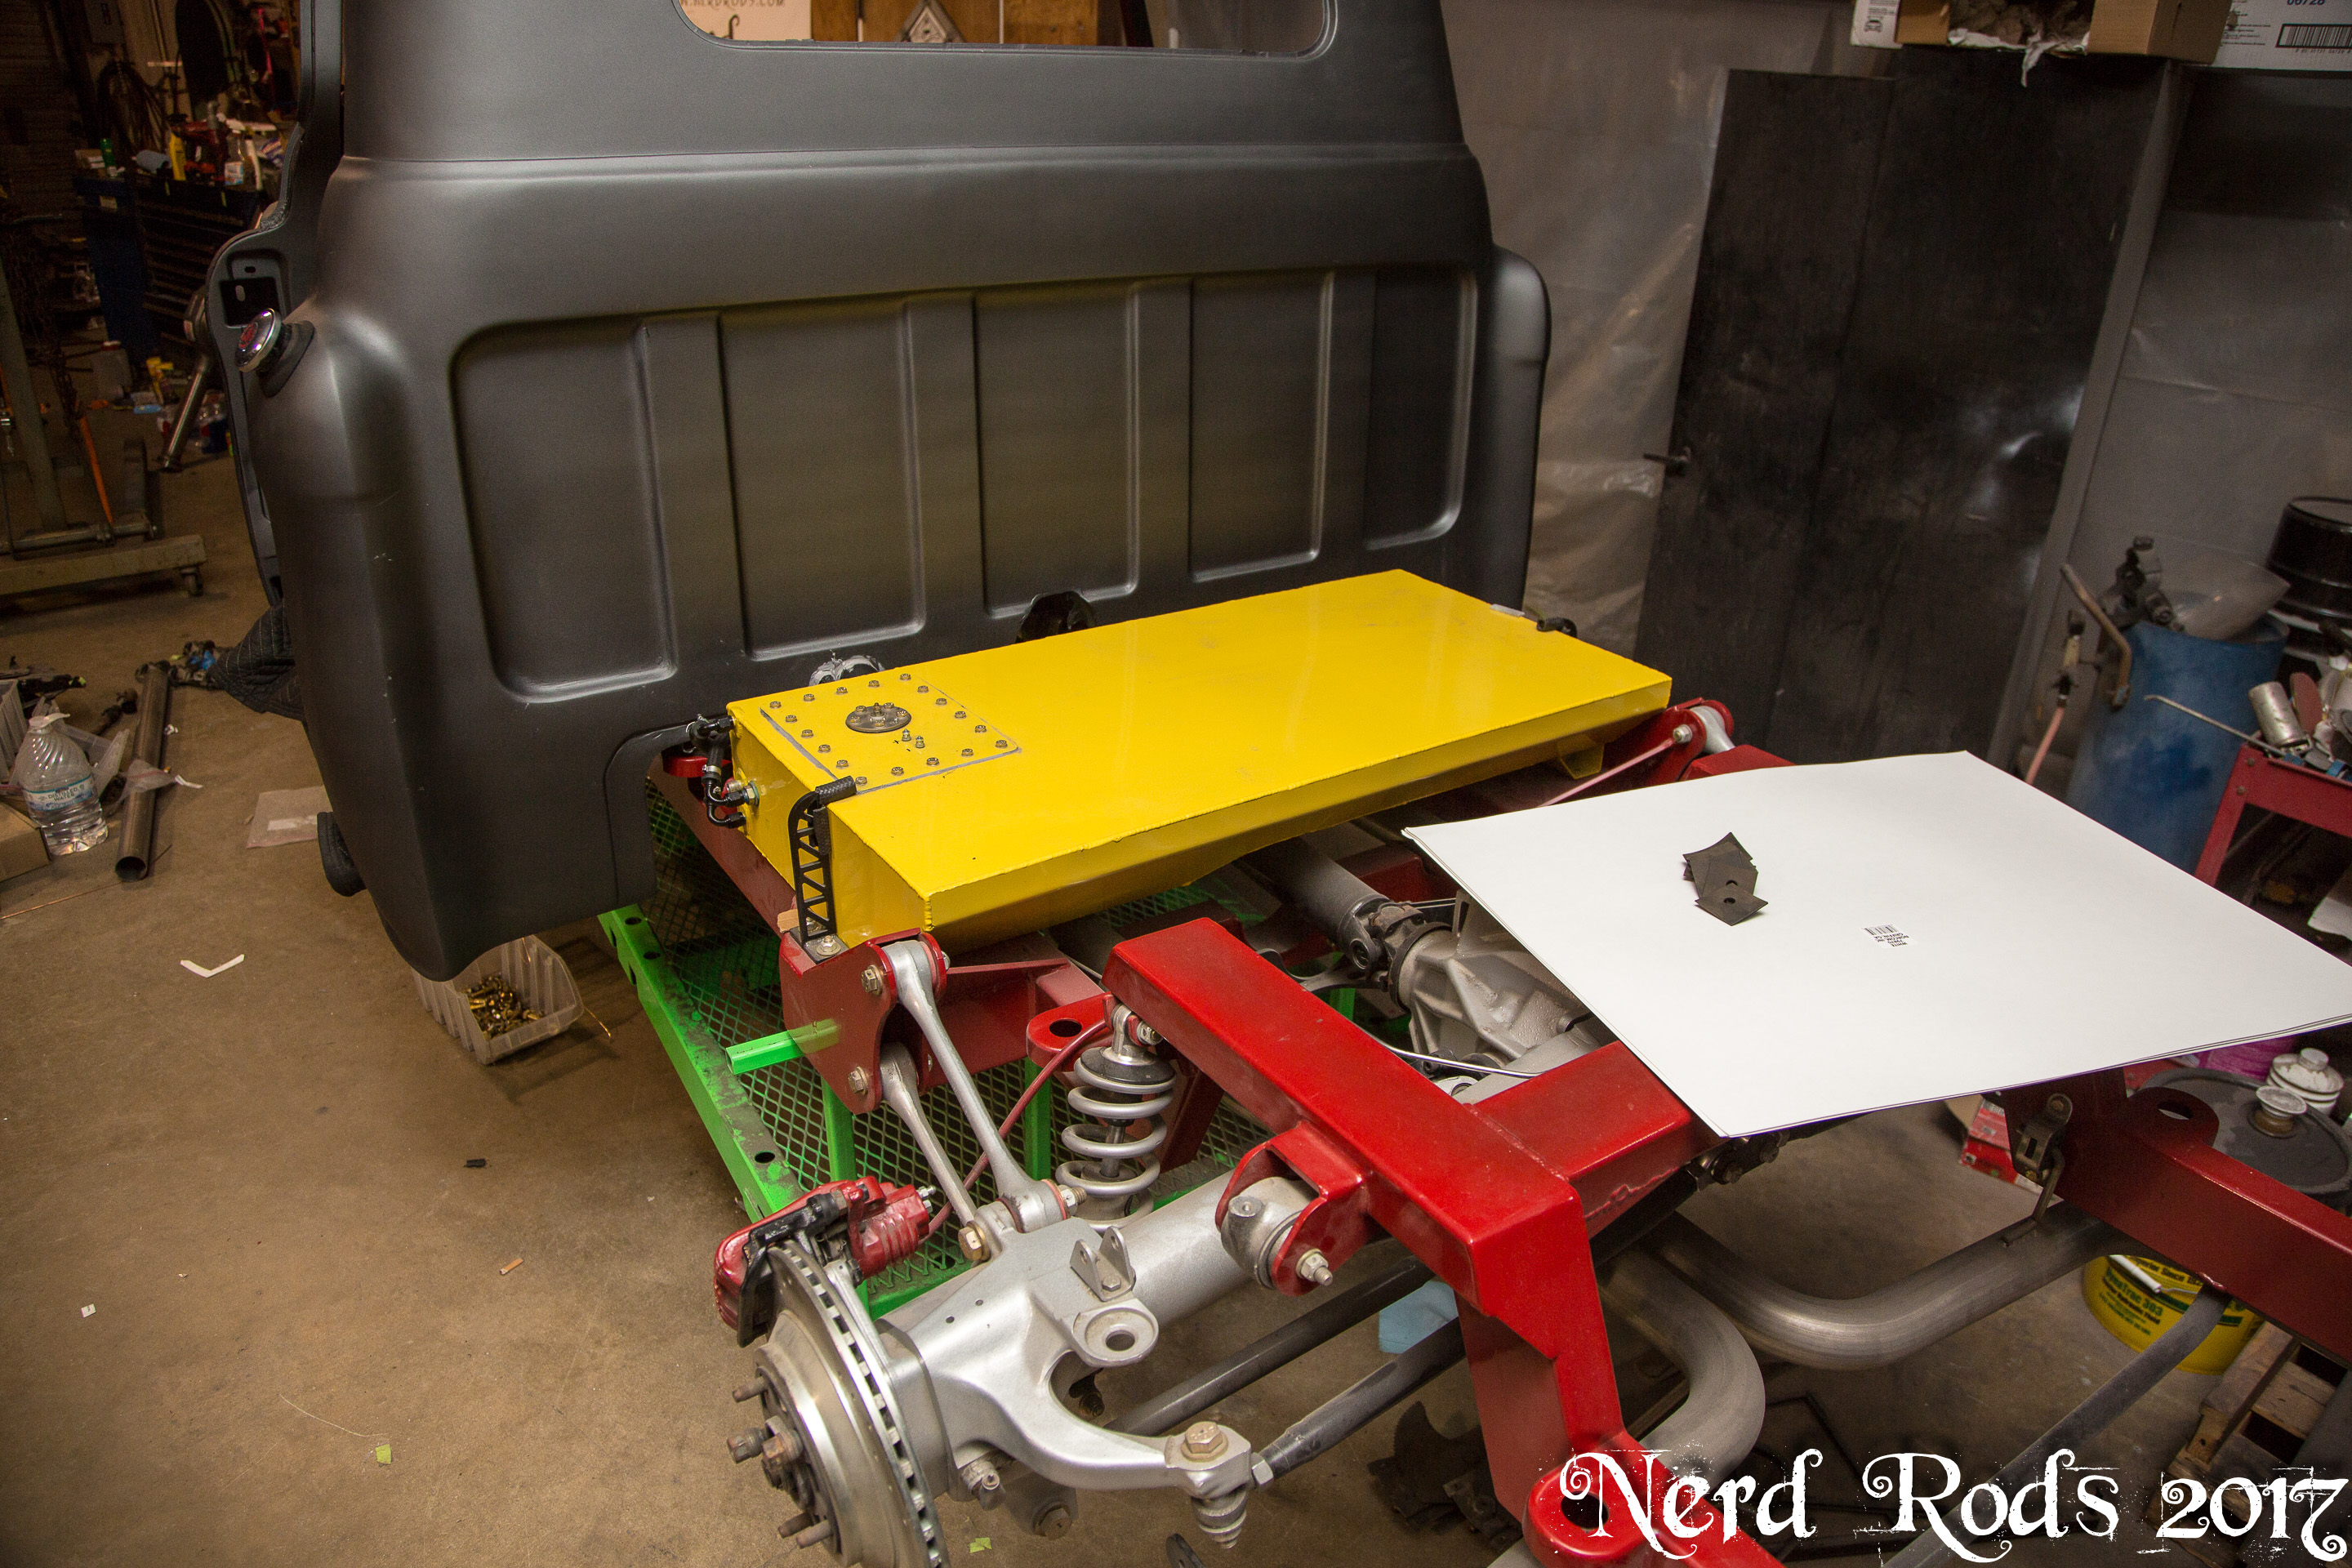
With the fenders done and the cowl induction finished we started talking about all the fluids this thing was going to need and a so Dad moved onto making matching boxes for the coolant over flow, high point steam box and power steering reservoir.

Full size photo galleryhttp://gallery.nerdrods.com/Projects/03_D3/04/
More much sooner than this last gap. I'm also going to update George's project in the next few days.
Later
-Russell @ Nerd Rods


Full size photo galleryhttp://gallery.nerdrods.com/Projects/03_D3/04/
Meanwhile I’m working on a timelapse video of the fuel tank build.


Full size photo galleryhttp://gallery.nerdrods.com/Projects/03_D3/04/
With the fenders done and the cowl induction finished we started talking about all the fluids this thing was going to need and a so Dad moved onto making matching boxes for the coolant over flow, high point steam box and power steering reservoir.


Full size photo galleryhttp://gallery.nerdrods.com/Projects/03_D3/04/
More much sooner than this last gap. I'm also going to update George's project in the next few days.
Later
-Russell @ Nerd Rods
Last edited by rat_rod_russell; 01-16-2016 at 10:26 AM.
02-18-2016, 05:50 PM
#28
Launching!
Thread Starter
Join Date: Jan 2007
Location: Luling TX In the Hot Rod Shop
Posts: 294
Likes: 0
Received 3 Likes
on
3 Posts
Full Gallery Here
http://gallery.nerdrods.com/Projects/03_D3/05/
A few things to report at the moment. We got the first of the steam tanks and reservoirs done. They turned out pretty freaking nice and will help go with the lines under the hood of the truck's custom inner fenders and forced air box.

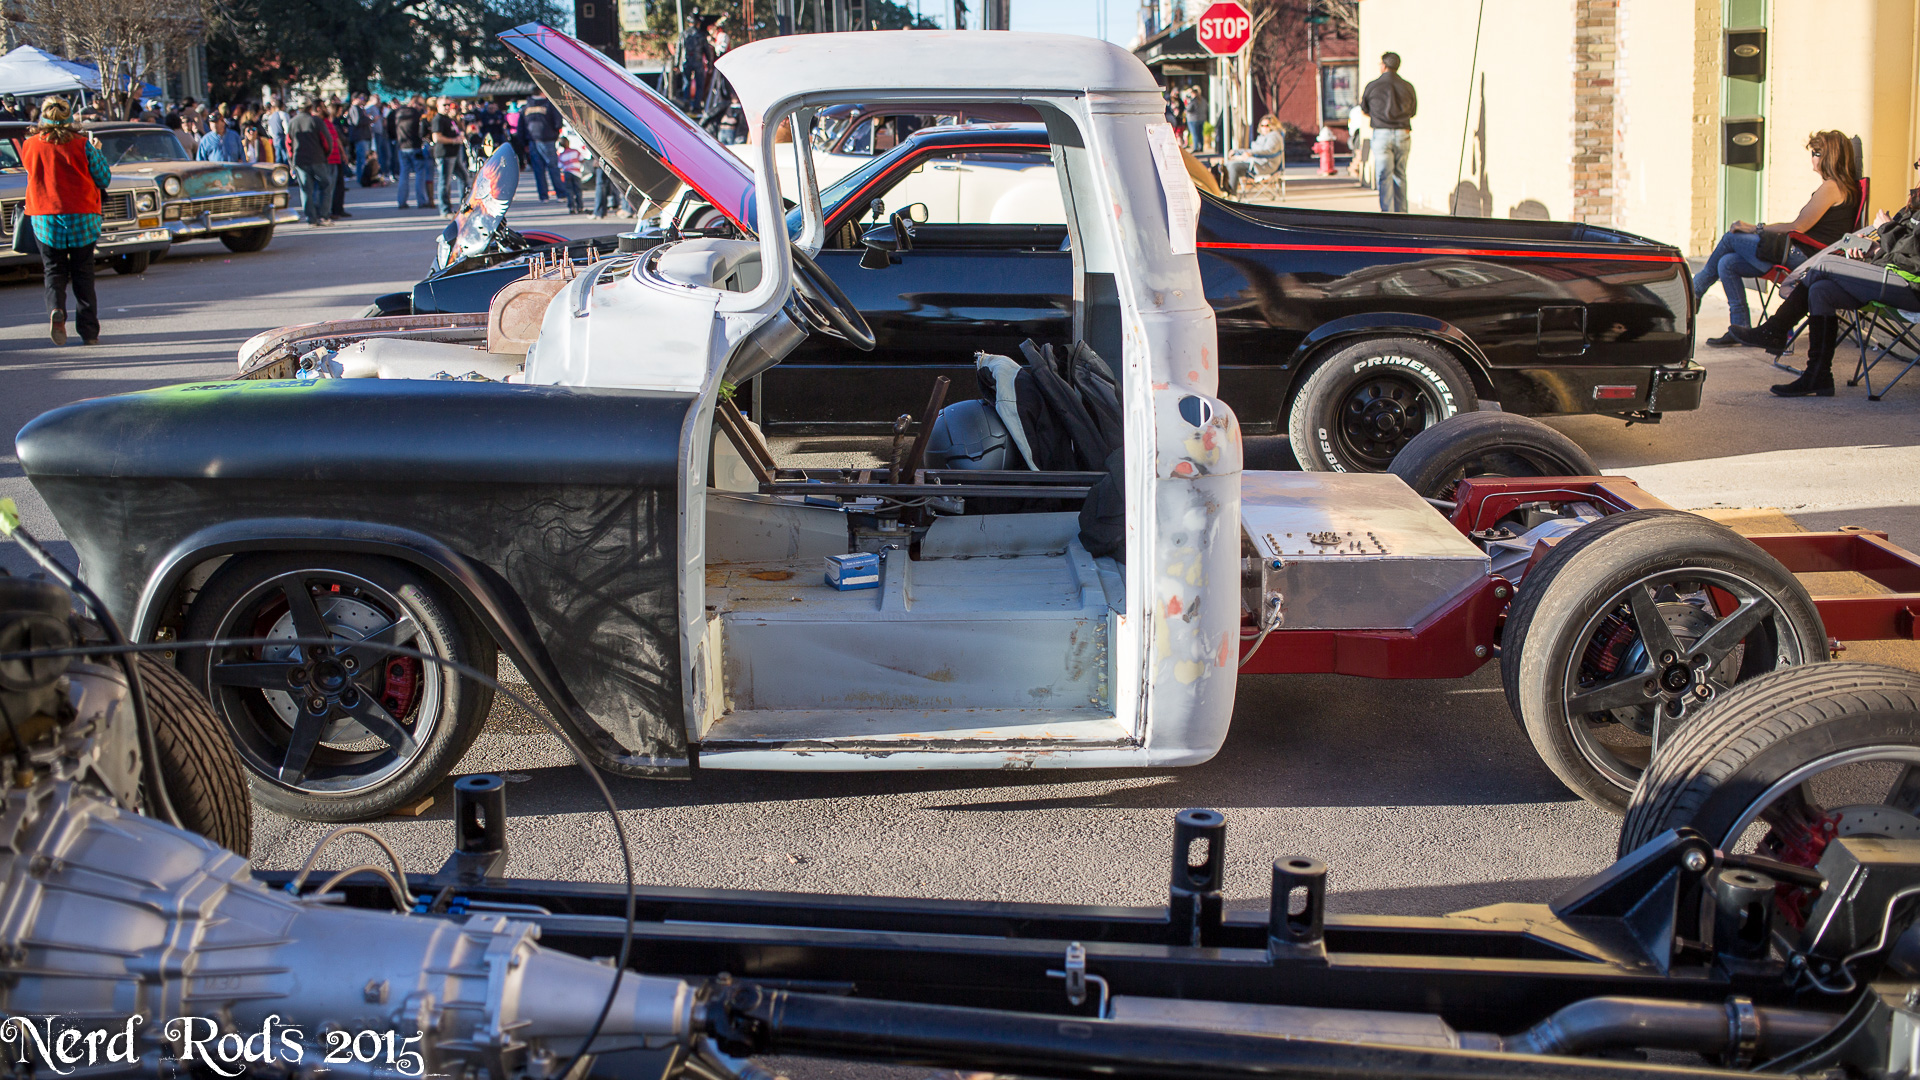
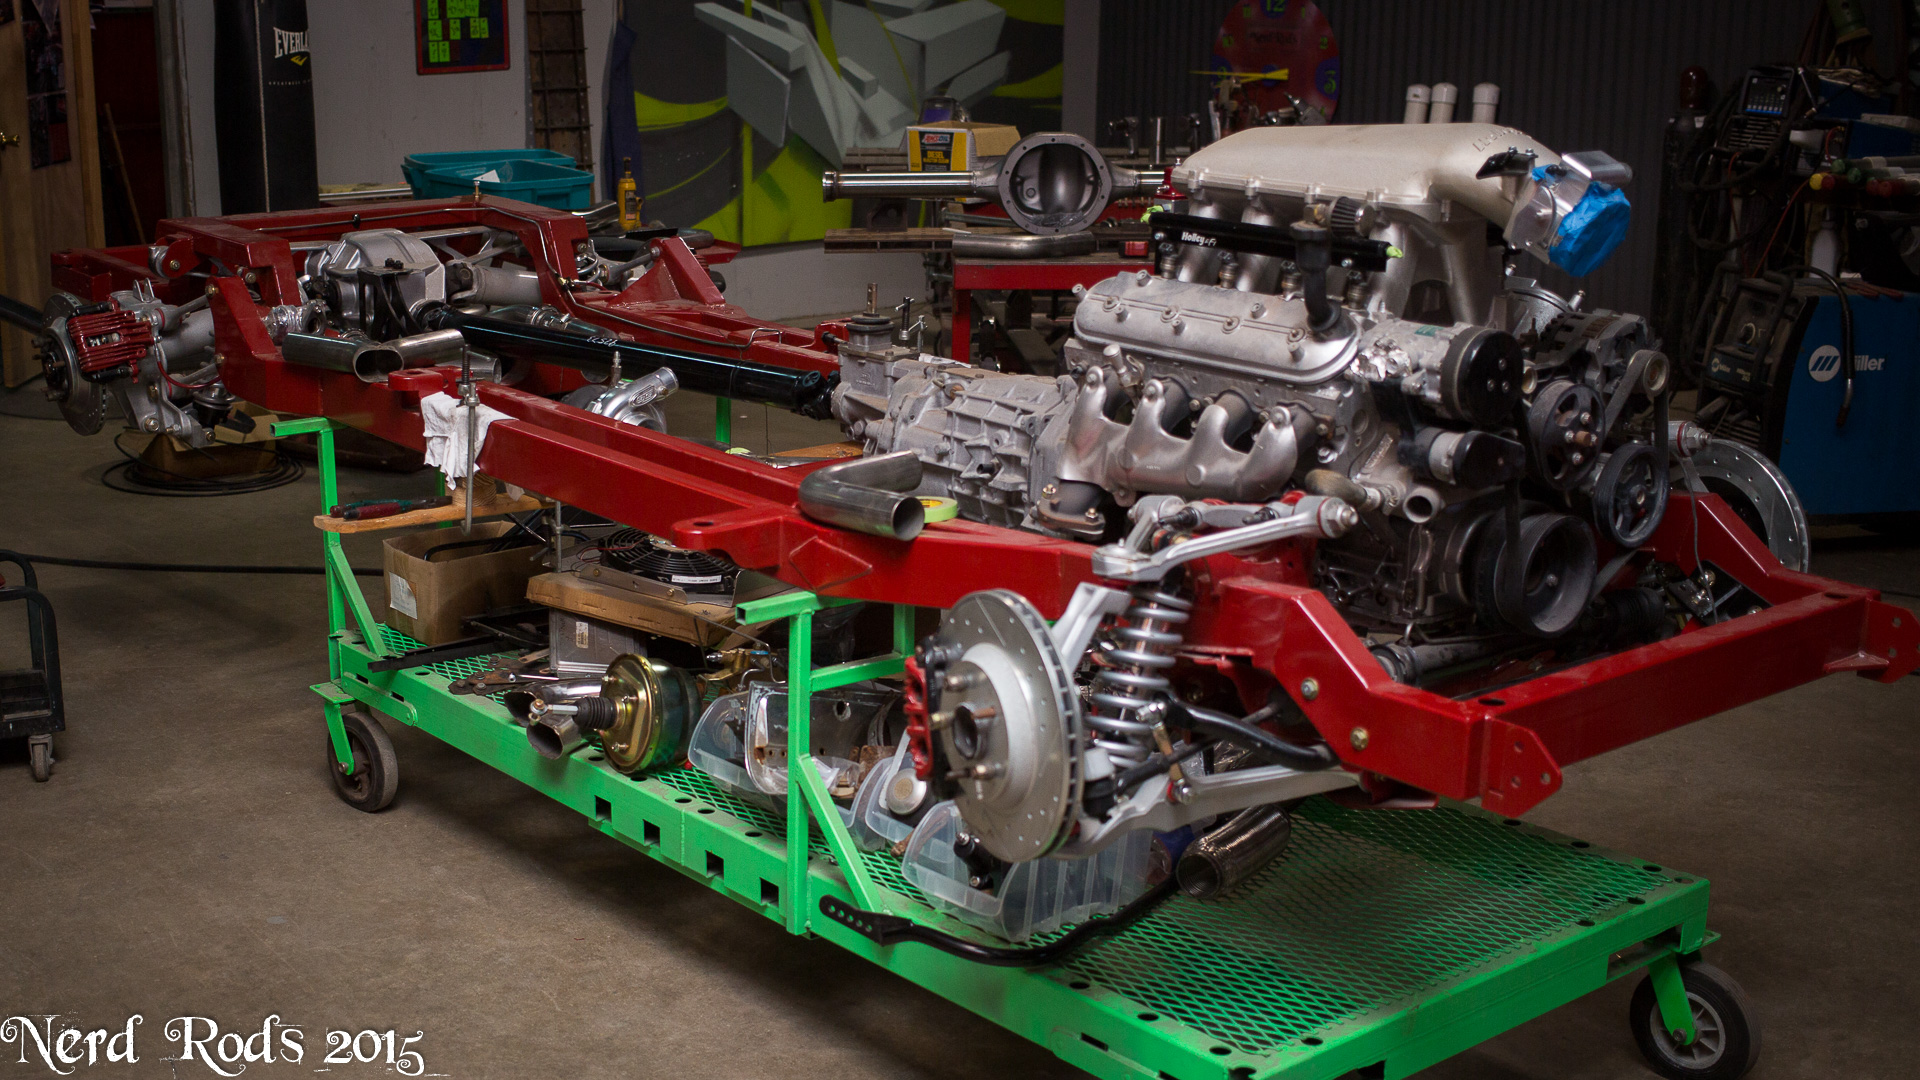
We also had a local car show pop up just 15 miles up the road from us. The Hot Rod and Hatters Show in Lockhart TX packed 500+ cars and 20k people last year so we decided it go for two reasons. First this year they had over 807 cars with over 30k people this year and the exposure wouldn't be a bad idea but more important to me was that we could get all 3 trucks out of the shop so I could clean the place. The other task force truce we've been working on was trapped with the chassis at the front and the cab at the back of the shop with 2 chassis, 4 kit frames, 2 jig tables, 2 chassis carts, and 3 engines between the two of them. So this was the perfect excuse to get those two put together and clean up some areas that require rearranging the shop to get it. But that mean's Dad's down and dirty gets some shoes and gets to stand on her own for the first time.


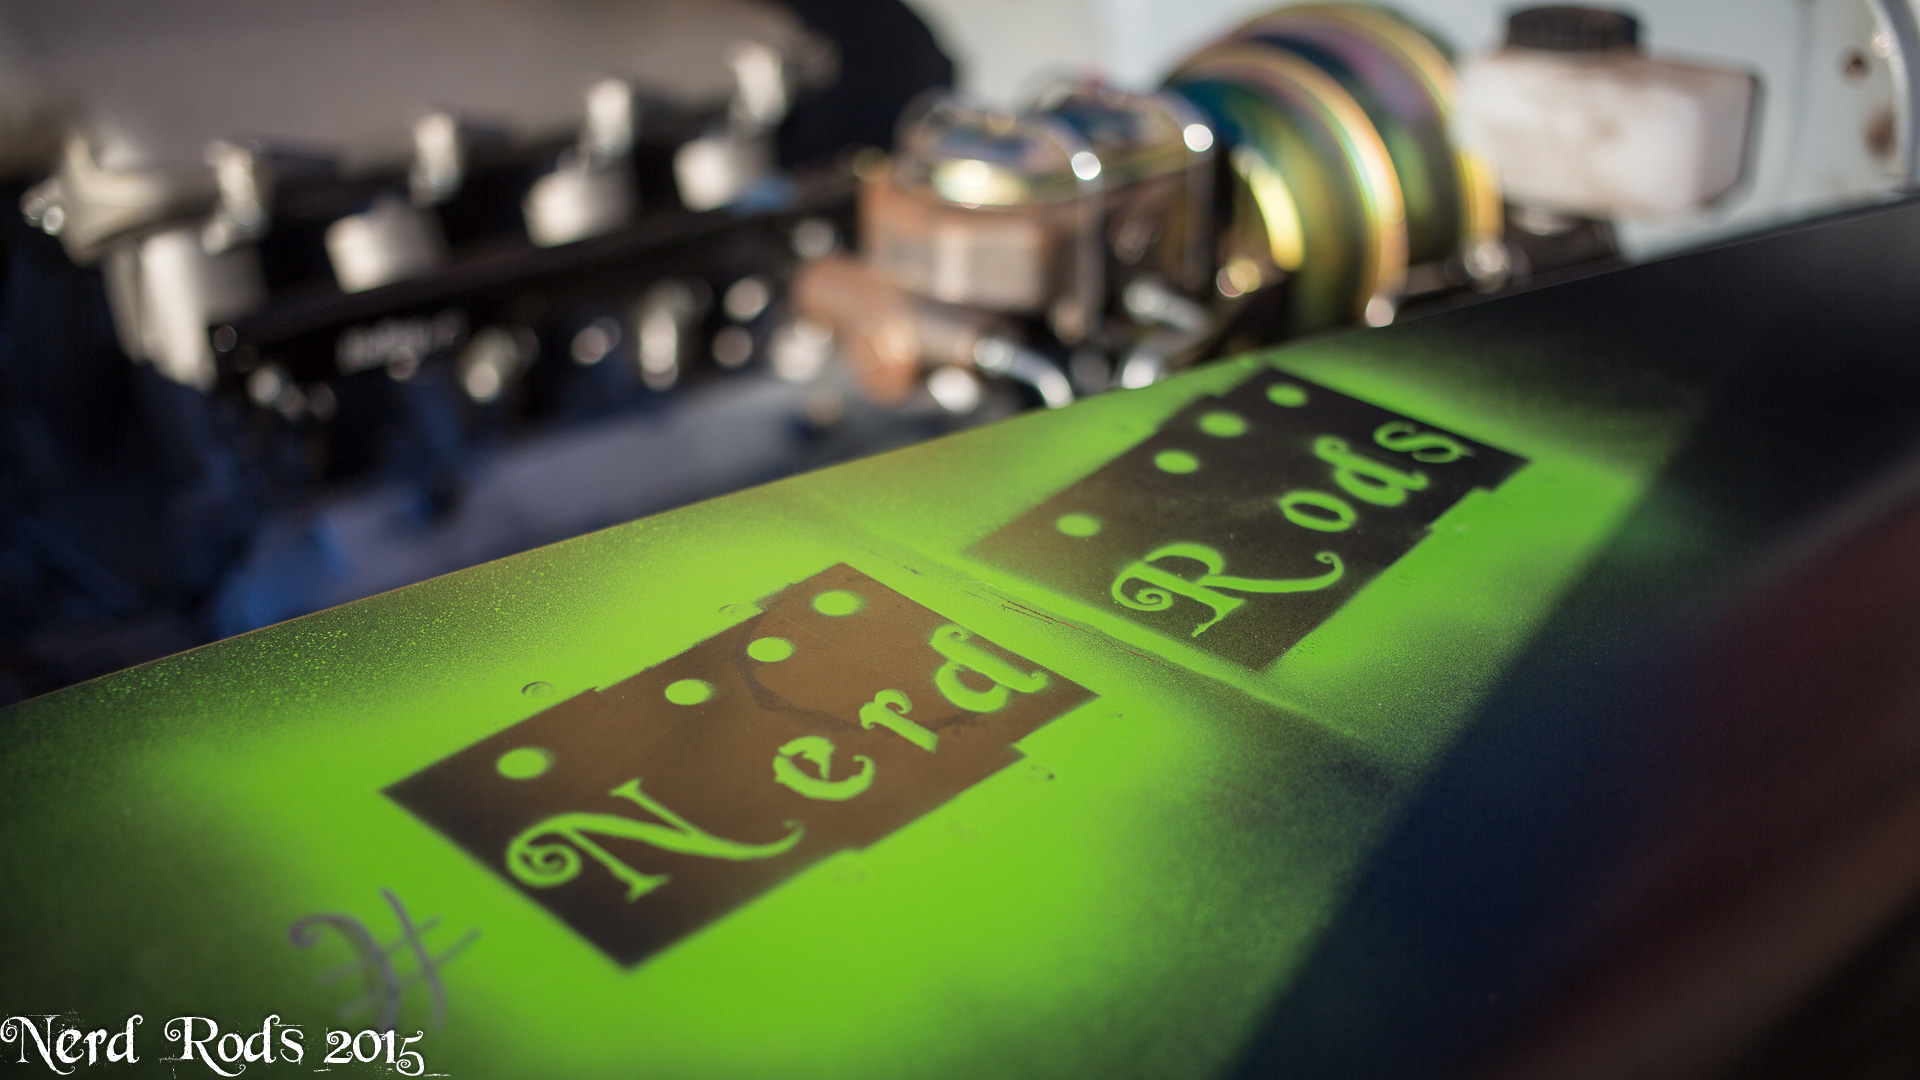
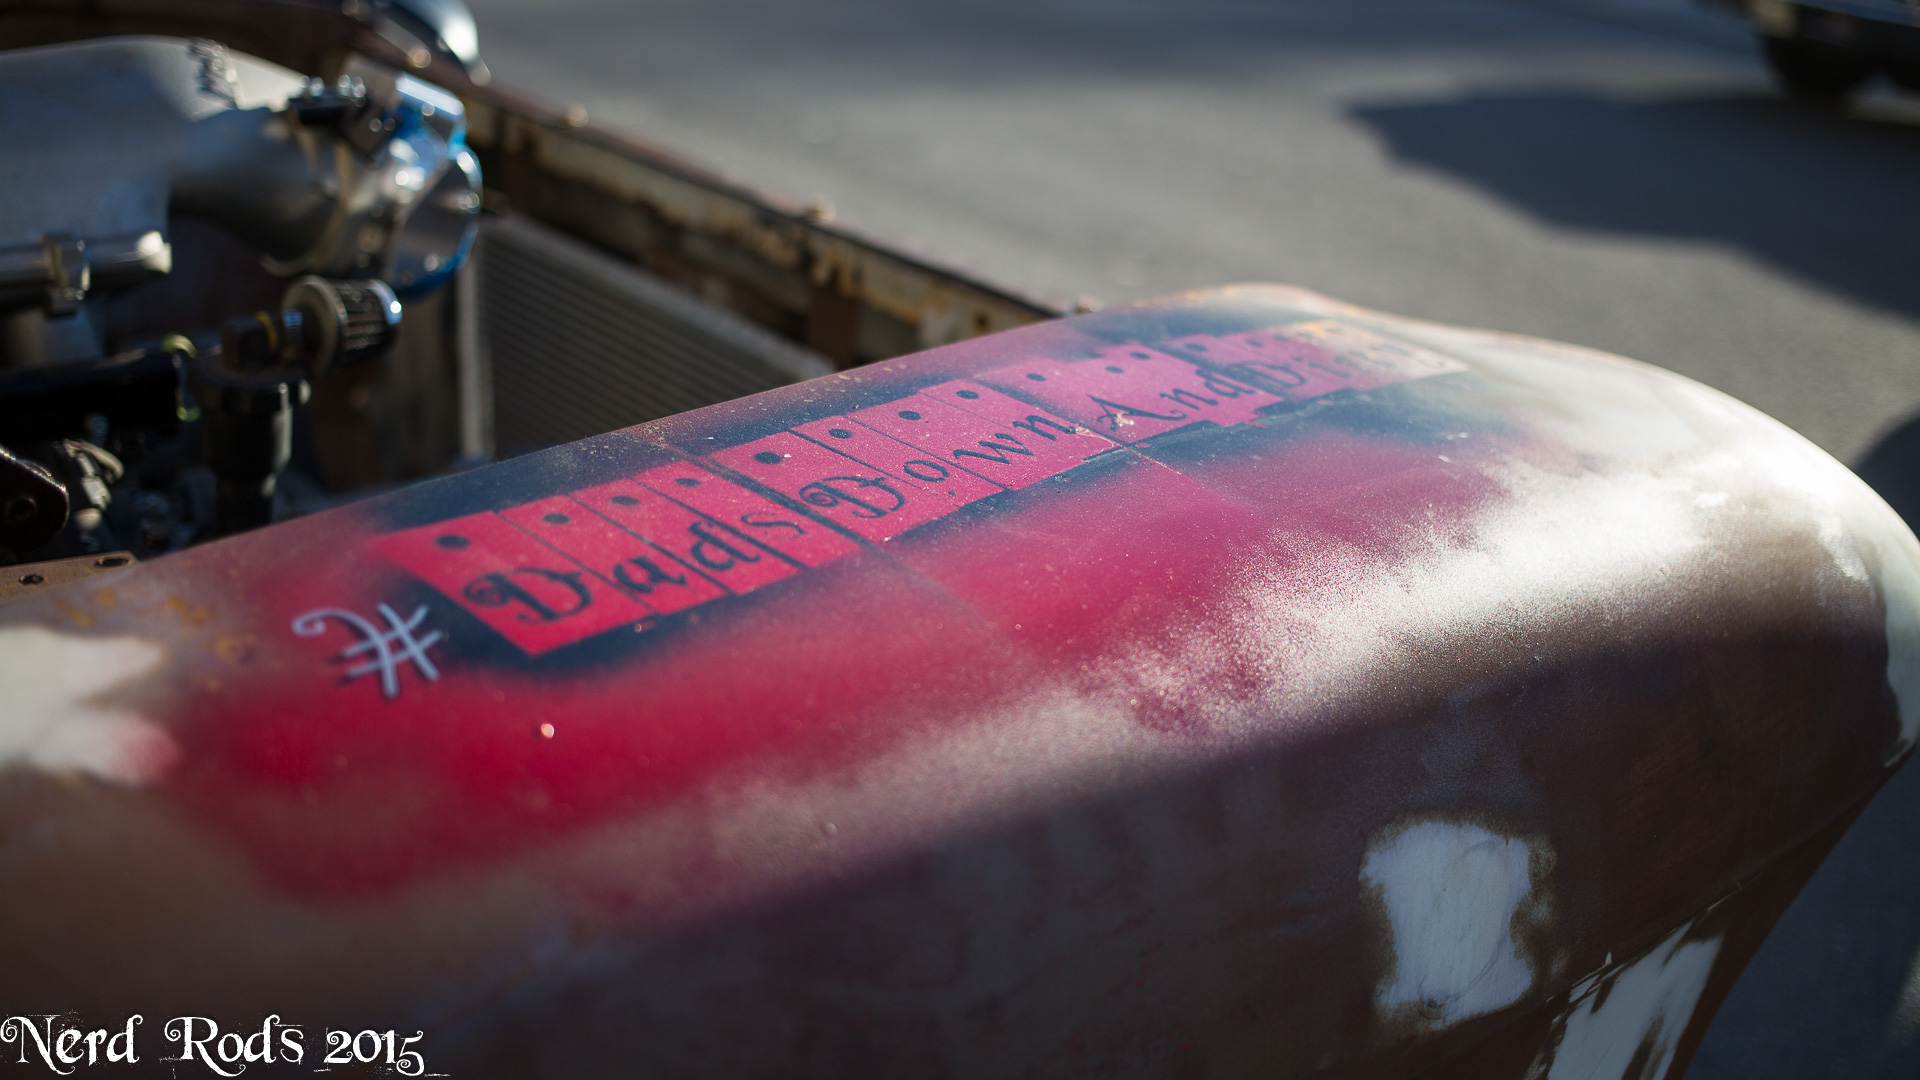
We spent a good chunk of the evening getting all the trucks moved in. The C10 is an exhaust and air bag sorting project we're helping a friend with. I don't have any Nerd Rods signs made up but I had this old HRJ sign so we just took it. Turnout was good, lots of people and I got to take to a few guys with solid protouring projects as well as road race toys so those conversation made up for the not so fun conversations of answering the same questions over and over again but hey, if you don't ask you don't learn so I glad we could help point those guys in a direction. I also rattle caned the #NerdRods and #Dadsdownanddirty hashtags on the truck for our Instagram, twitter and Facebook fans. I have to throw a huge thanks out to our minion Kevin (AKA Dreds) for helping me for 1 AM to 5 AM getting the truck moved out there and then another 2-3 hours the next day bringing them all back. With all the random little crap that happened this was a life saver! Thanks again Hoss!
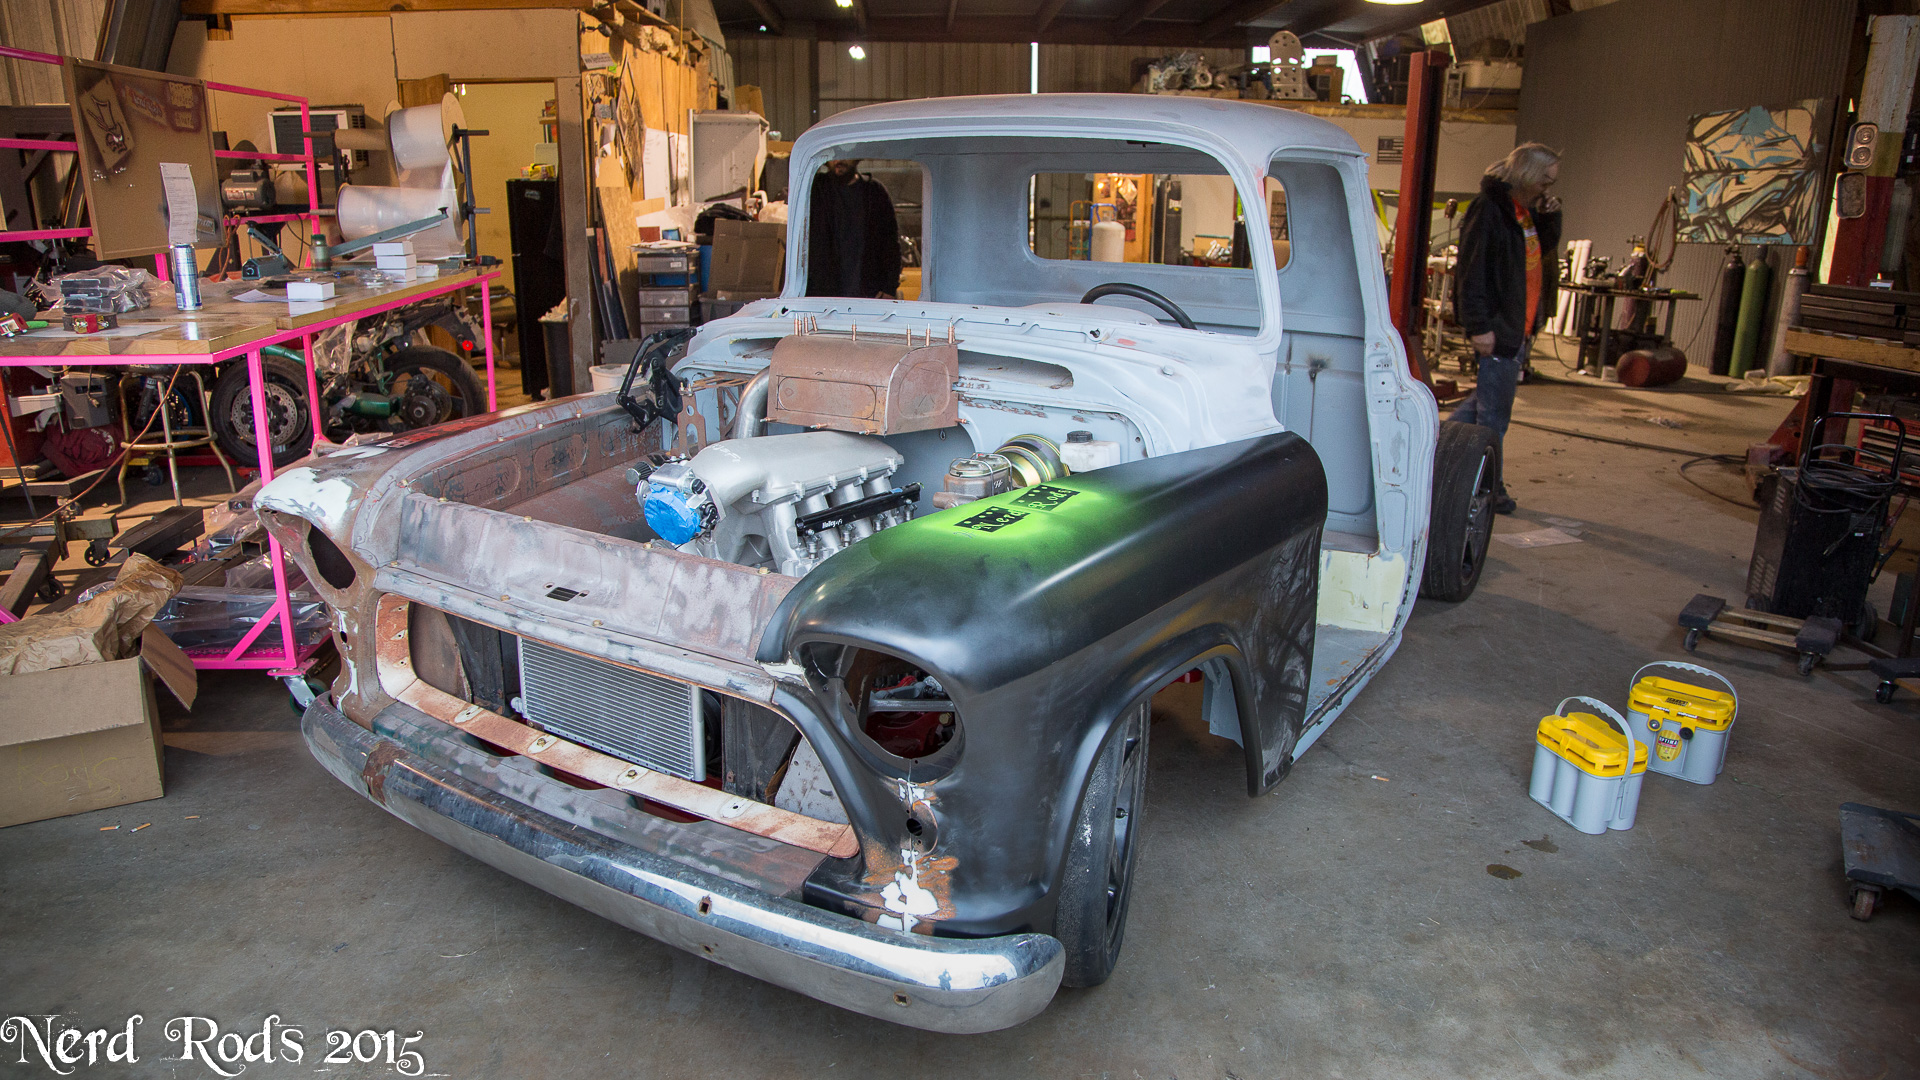
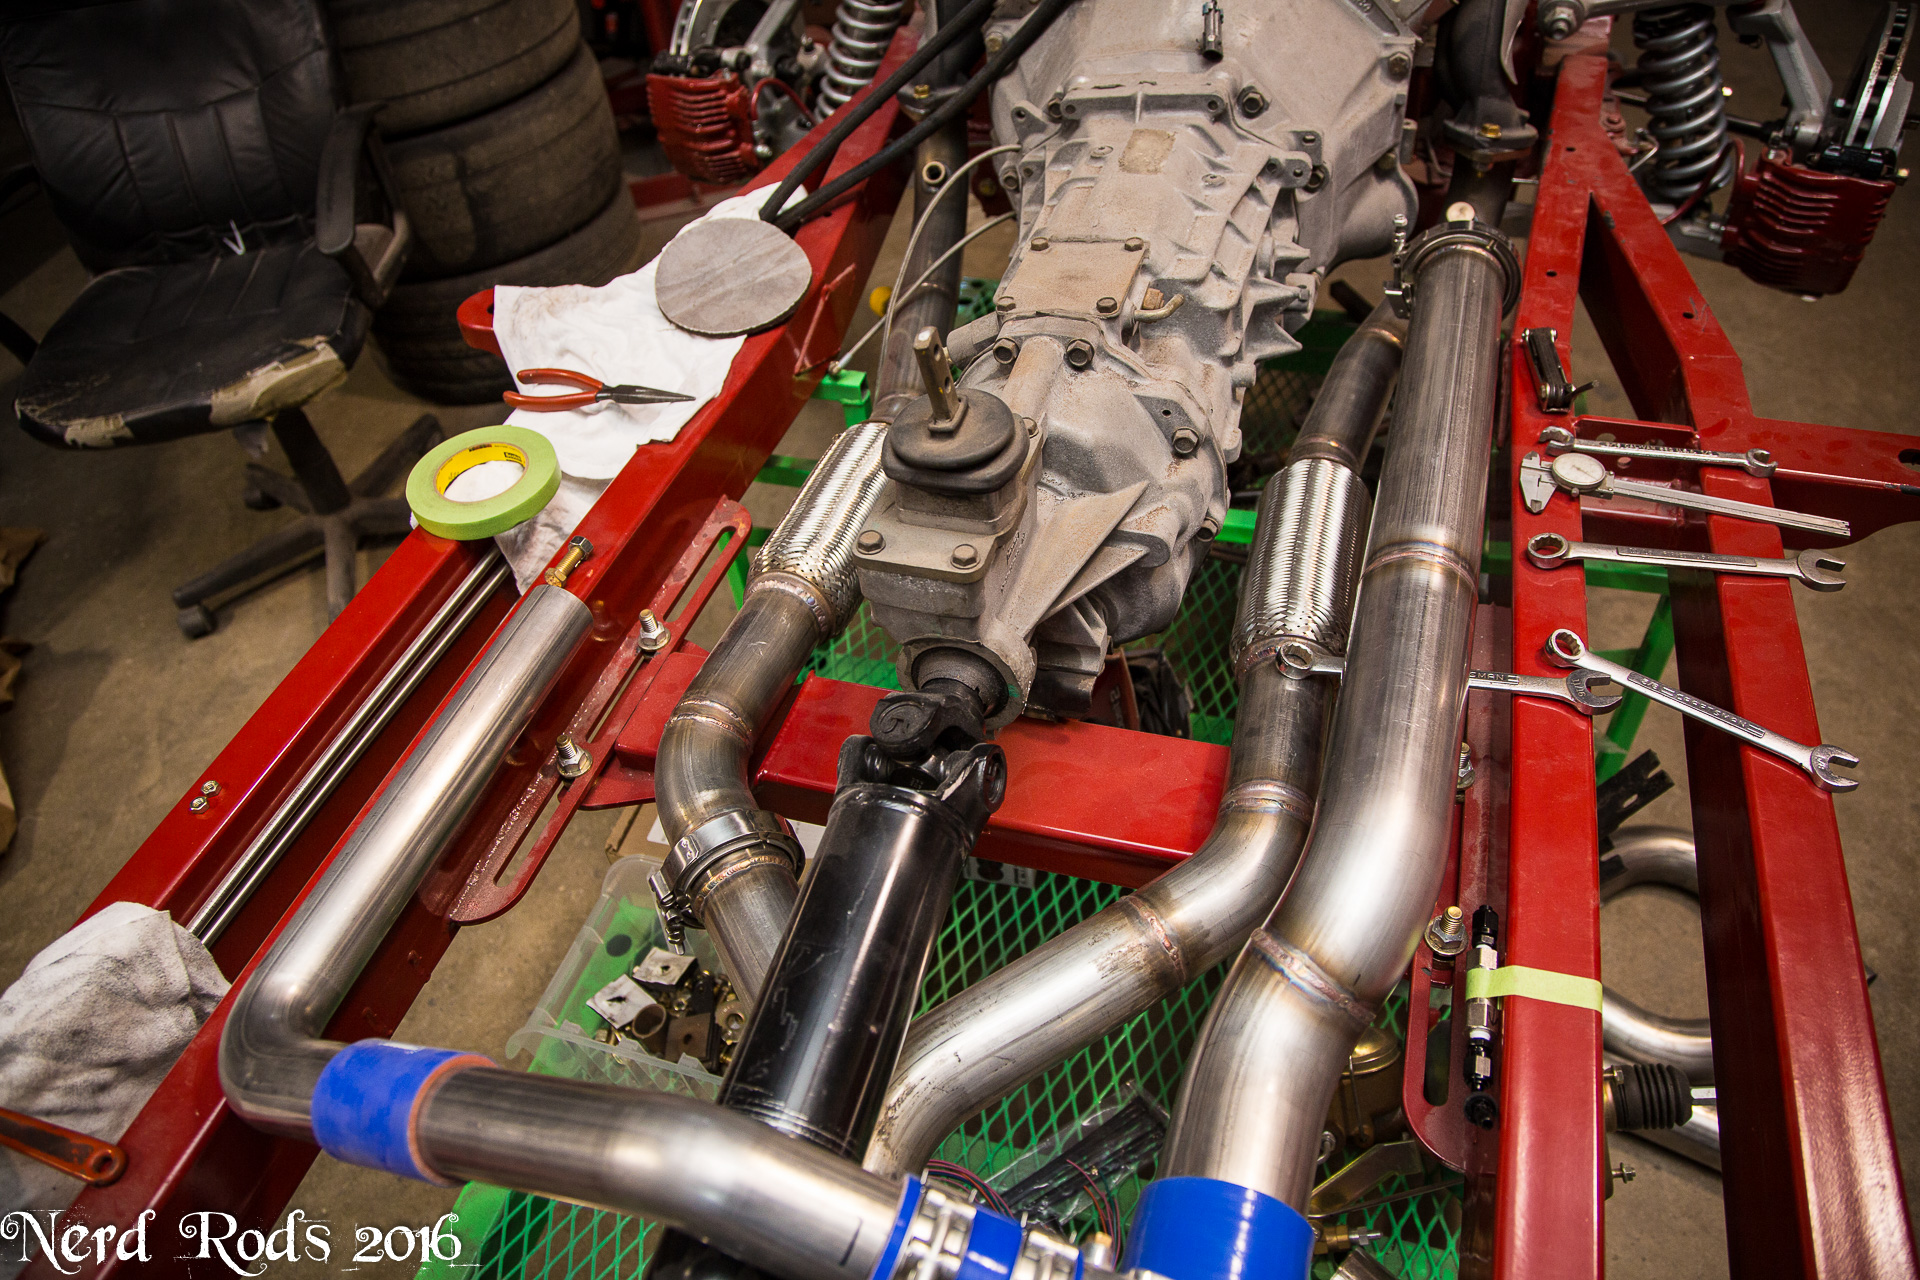
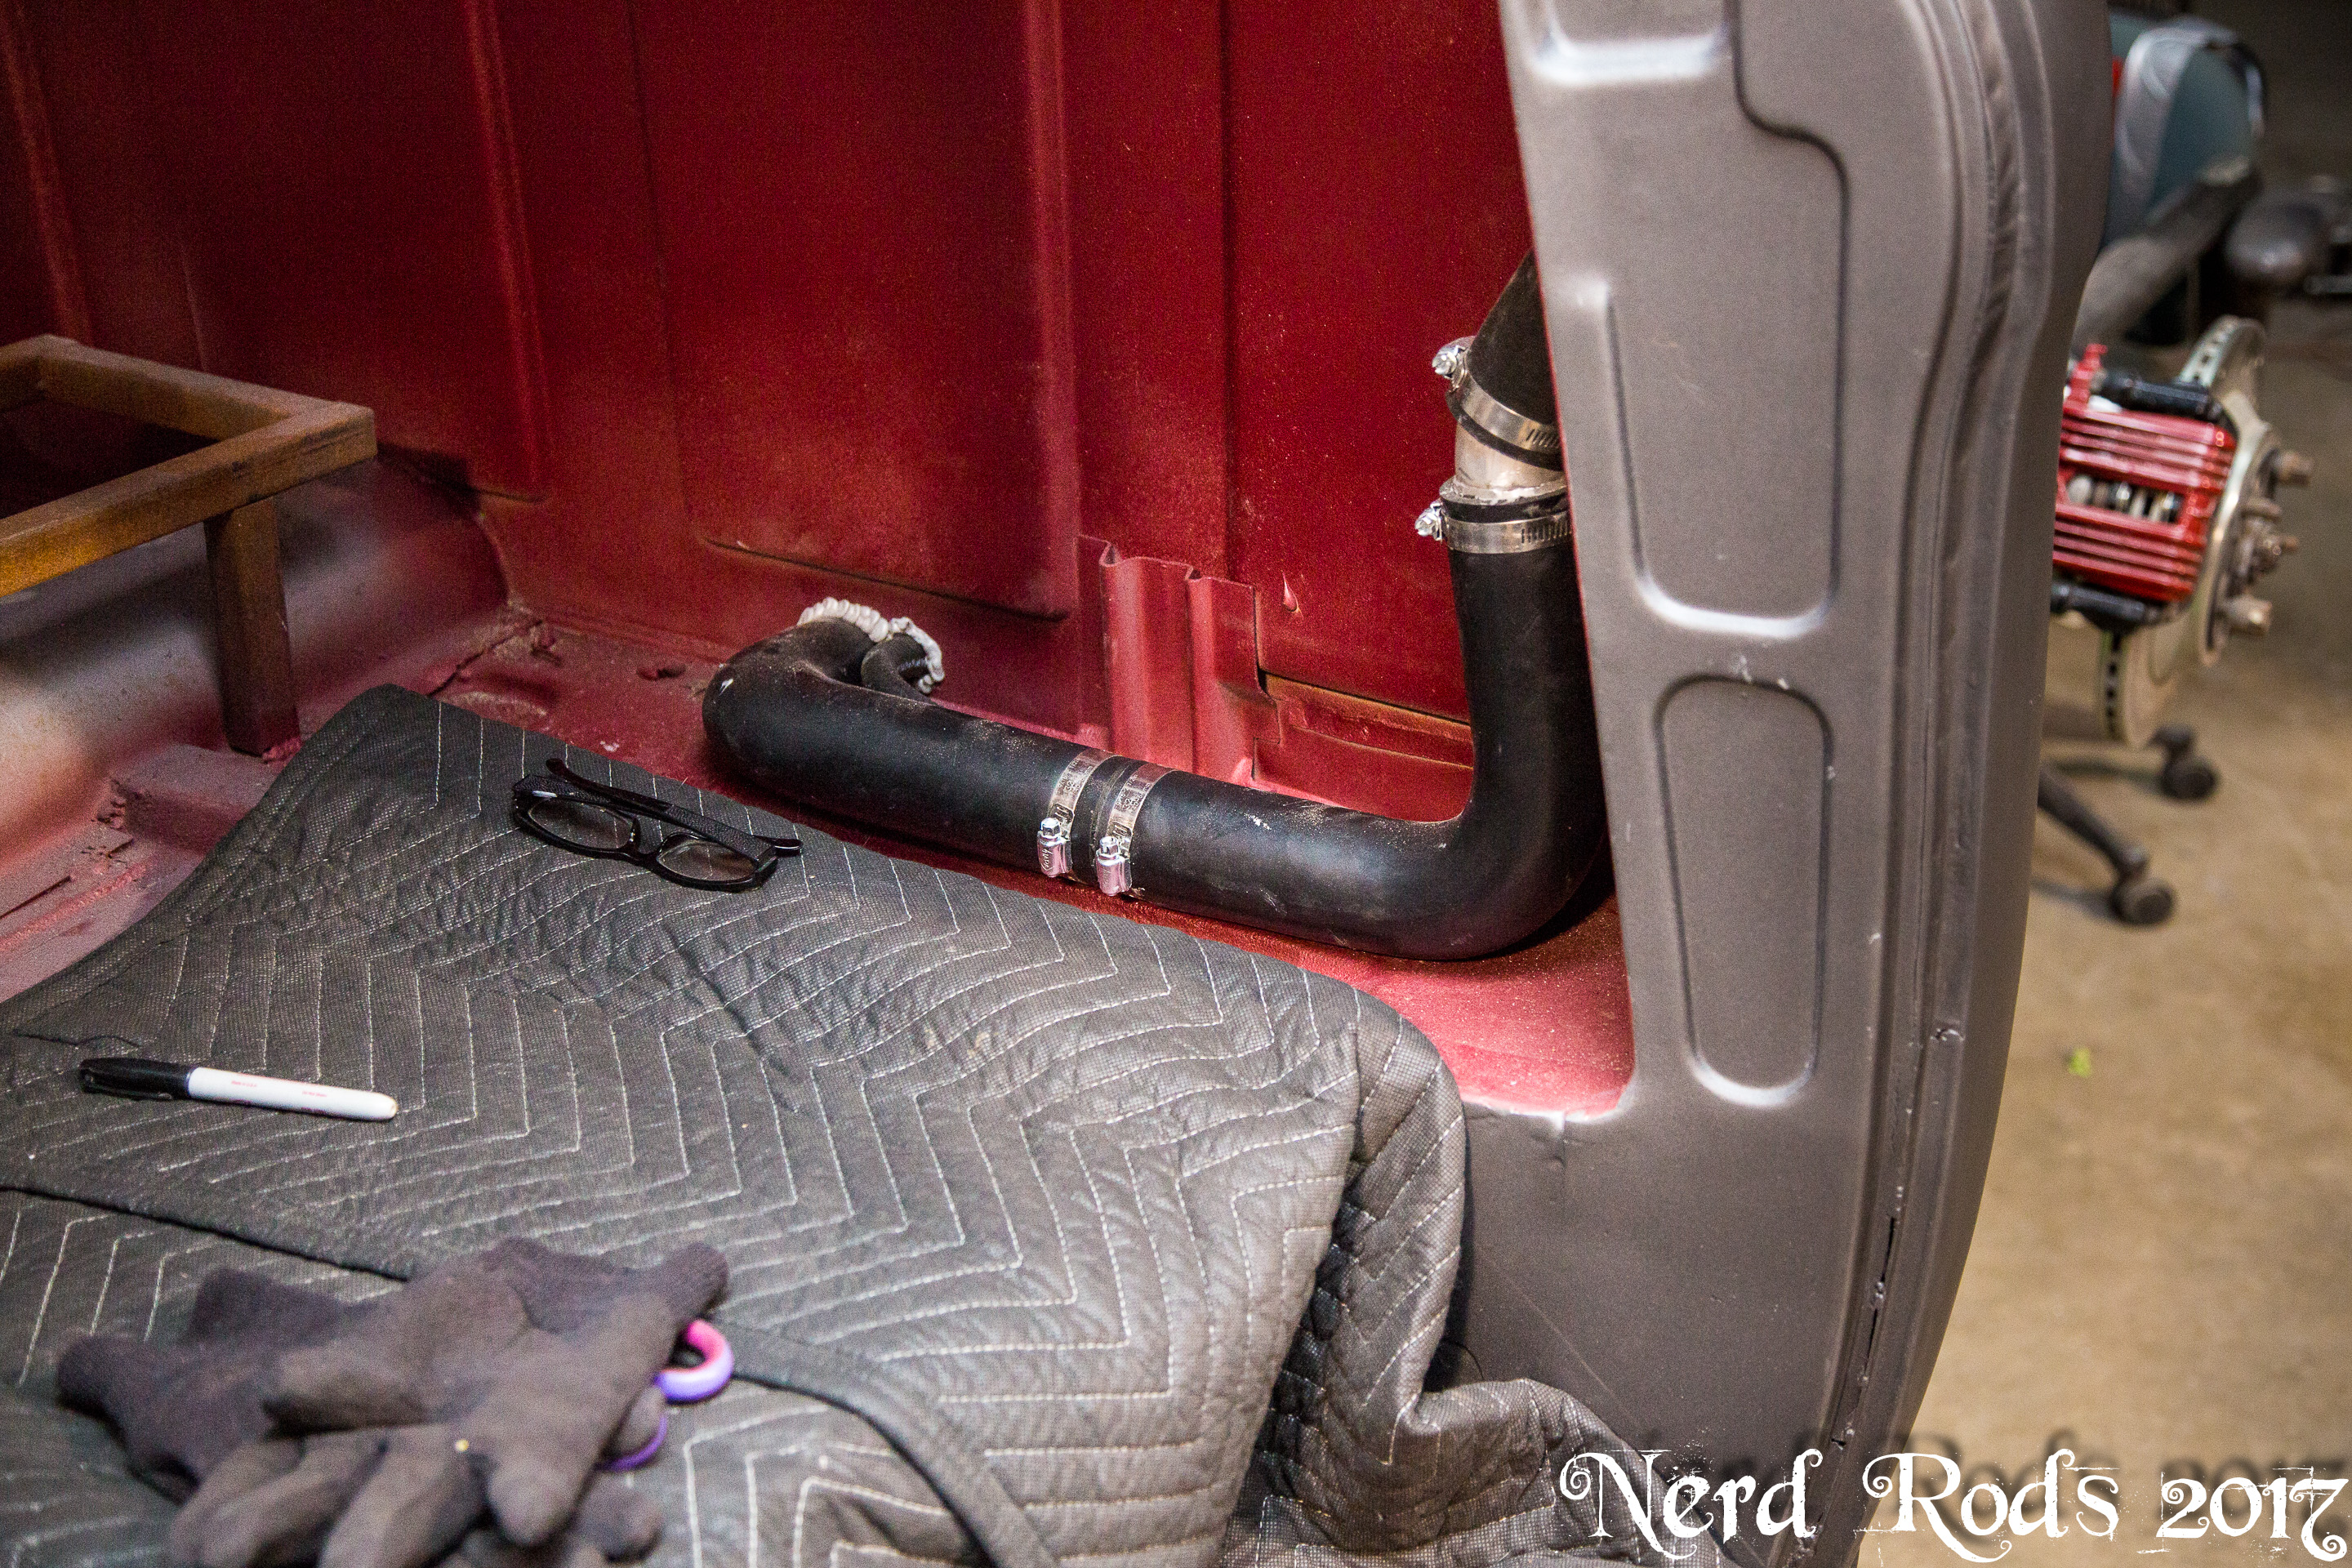
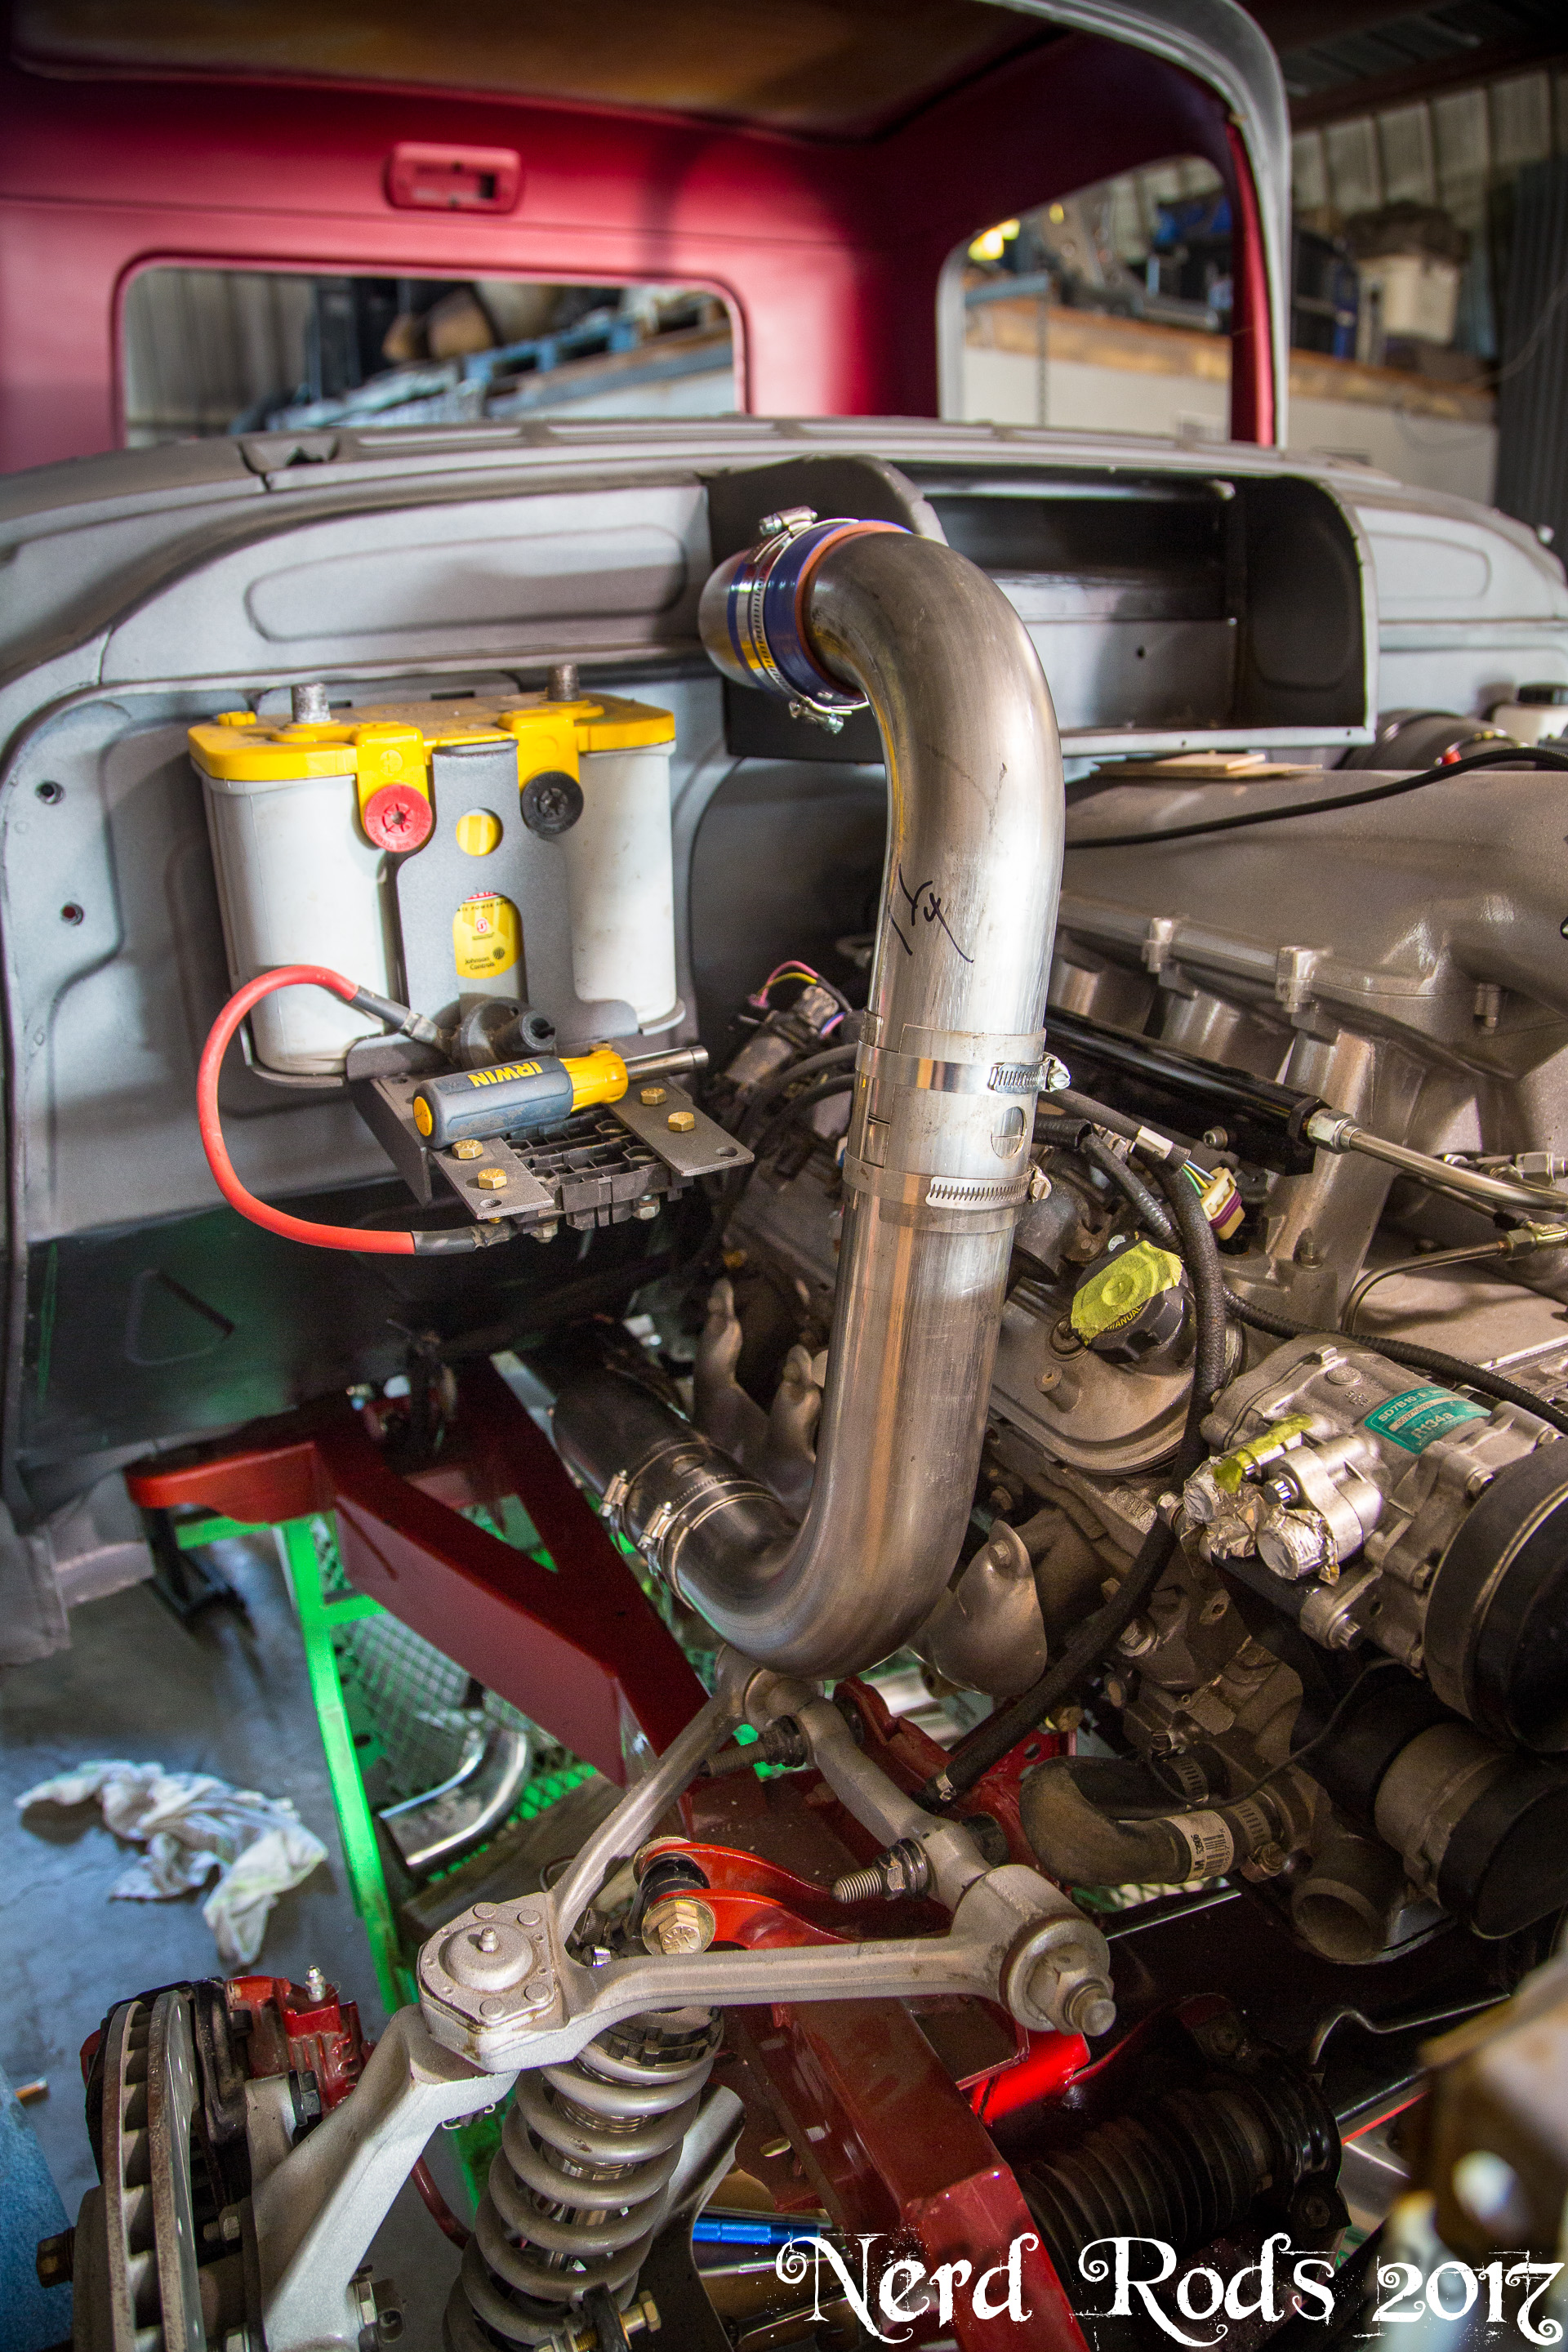
After the show we got Georges truck on the lift, The C10 wouldn't' start so the owner took it home to finish the wiring so I didn't have to work on that one's exhaust like I though I was going to. So the next step was to get the cab off Dad's truck and get started on the turbo plumbing. Here's the start of that while dad works out the cab's final sheetmetal so when it goes back on it will be with final paint.


Later
-Russell @ Nerd Rods
http://gallery.nerdrods.com/Projects/03_D3/05/
A few things to report at the moment. We got the first of the steam tanks and reservoirs done. They turned out pretty freaking nice and will help go with the lines under the hood of the truck's custom inner fenders and forced air box.
We also had a local car show pop up just 15 miles up the road from us. The Hot Rod and Hatters Show in Lockhart TX packed 500+ cars and 20k people last year so we decided it go for two reasons. First this year they had over 807 cars with over 30k people this year and the exposure wouldn't be a bad idea but more important to me was that we could get all 3 trucks out of the shop so I could clean the place. The other task force truce we've been working on was trapped with the chassis at the front and the cab at the back of the shop with 2 chassis, 4 kit frames, 2 jig tables, 2 chassis carts, and 3 engines between the two of them. So this was the perfect excuse to get those two put together and clean up some areas that require rearranging the shop to get it. But that mean's Dad's down and dirty gets some shoes and gets to stand on her own for the first time.
We spent a good chunk of the evening getting all the trucks moved in. The C10 is an exhaust and air bag sorting project we're helping a friend with. I don't have any Nerd Rods signs made up but I had this old HRJ sign so we just took it. Turnout was good, lots of people and I got to take to a few guys with solid protouring projects as well as road race toys so those conversation made up for the not so fun conversations of answering the same questions over and over again but hey, if you don't ask you don't learn so I glad we could help point those guys in a direction. I also rattle caned the #NerdRods and #Dadsdownanddirty hashtags on the truck for our Instagram, twitter and Facebook fans. I have to throw a huge thanks out to our minion Kevin (AKA Dreds) for helping me for 1 AM to 5 AM getting the truck moved out there and then another 2-3 hours the next day bringing them all back. With all the random little crap that happened this was a life saver! Thanks again Hoss!
After the show we got Georges truck on the lift, The C10 wouldn't' start so the owner took it home to finish the wiring so I didn't have to work on that one's exhaust like I though I was going to. So the next step was to get the cab off Dad's truck and get started on the turbo plumbing. Here's the start of that while dad works out the cab's final sheetmetal so when it goes back on it will be with final paint.
Later
-Russell @ Nerd Rods

 03-08-2016, 09:34 PM
#33
Launching!
Thread Starter
Join Date: Jan 2007
Location: Luling TX In the Hot Rod Shop
Posts: 294
Likes: 0
Received 3 Likes
on
3 Posts
Thanks all across the board and if you guys learn something then its all worth it in my mind.
Update 2016 Mar 09
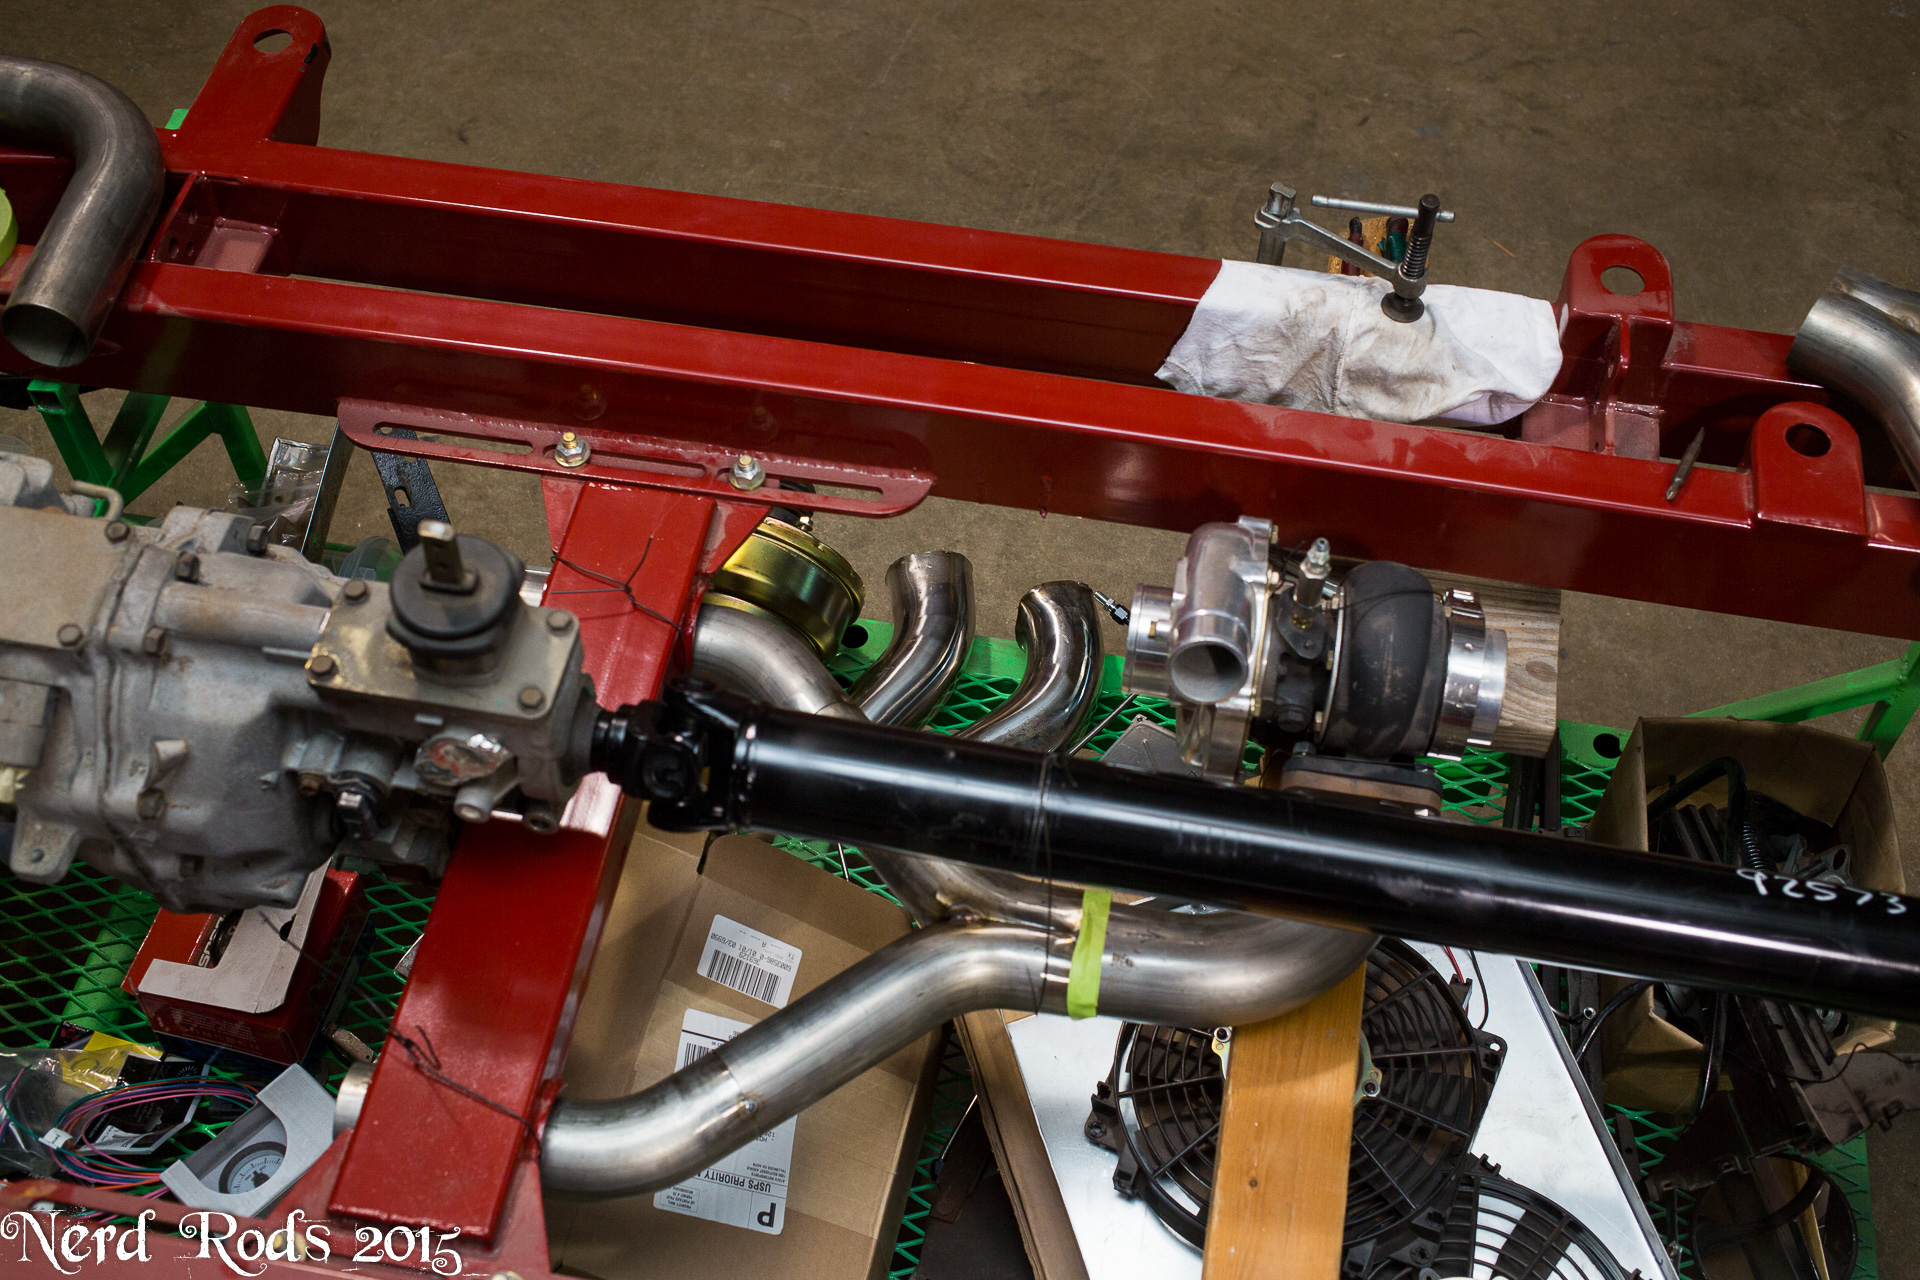
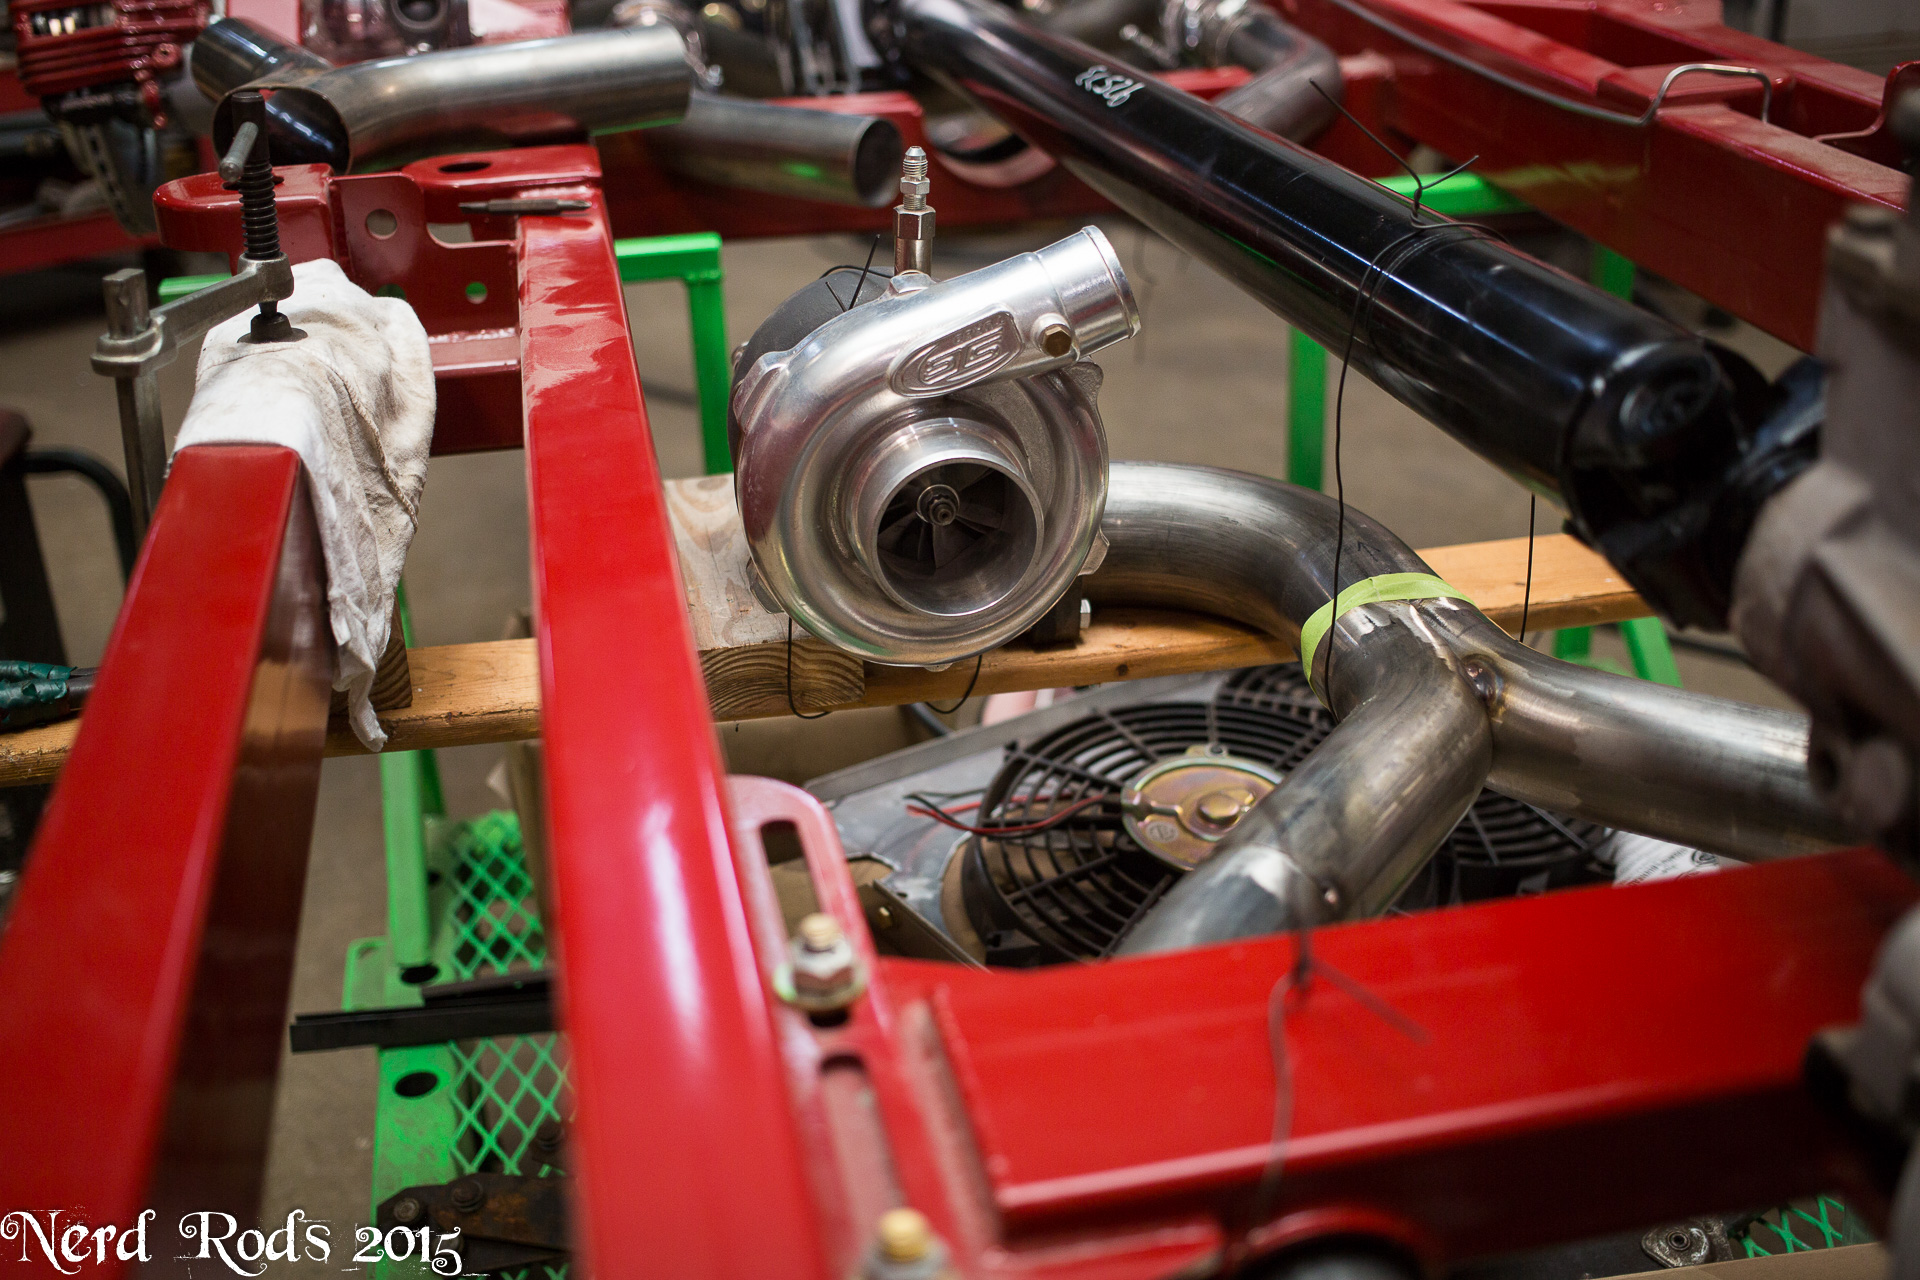
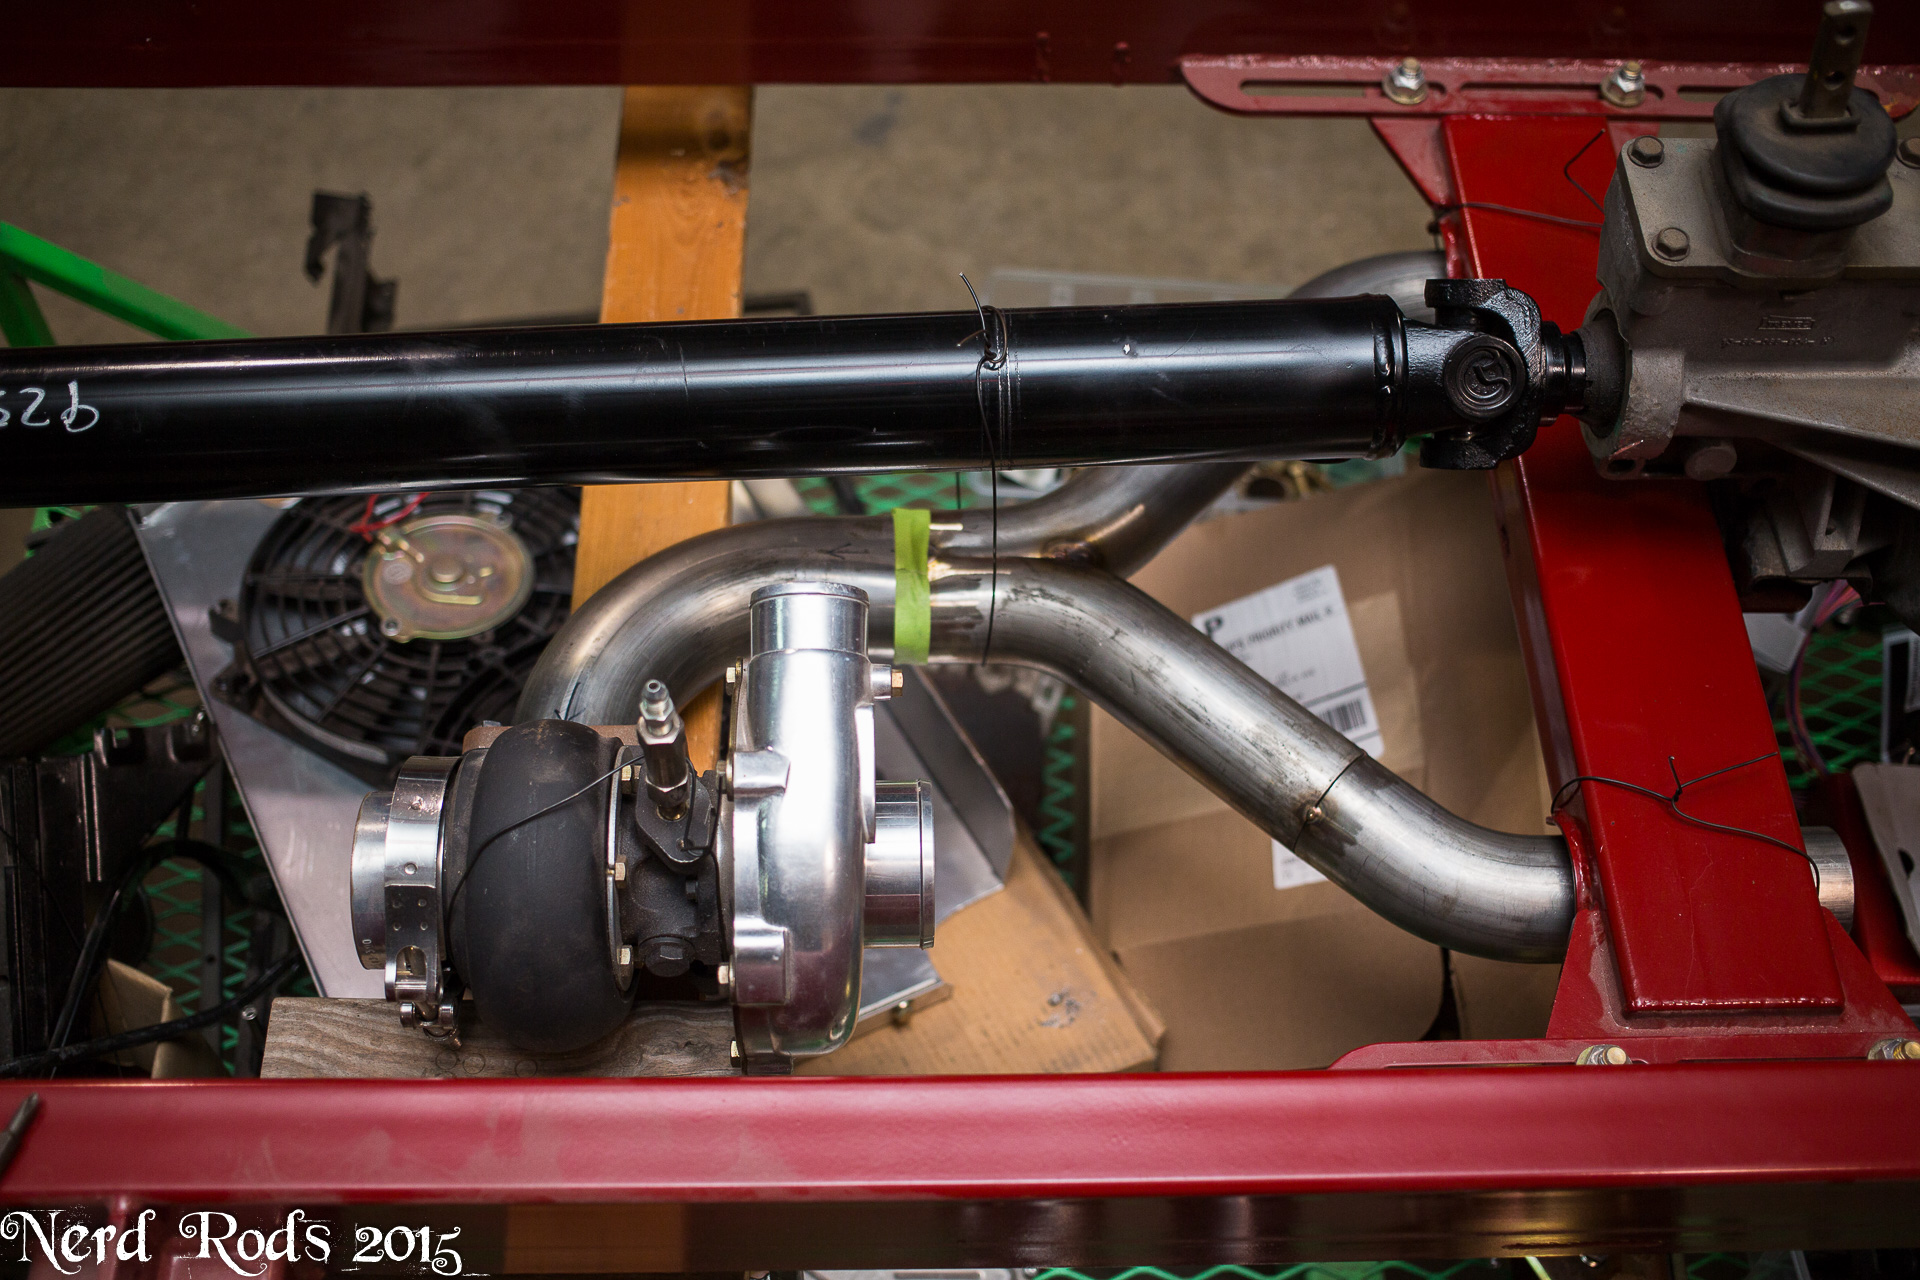
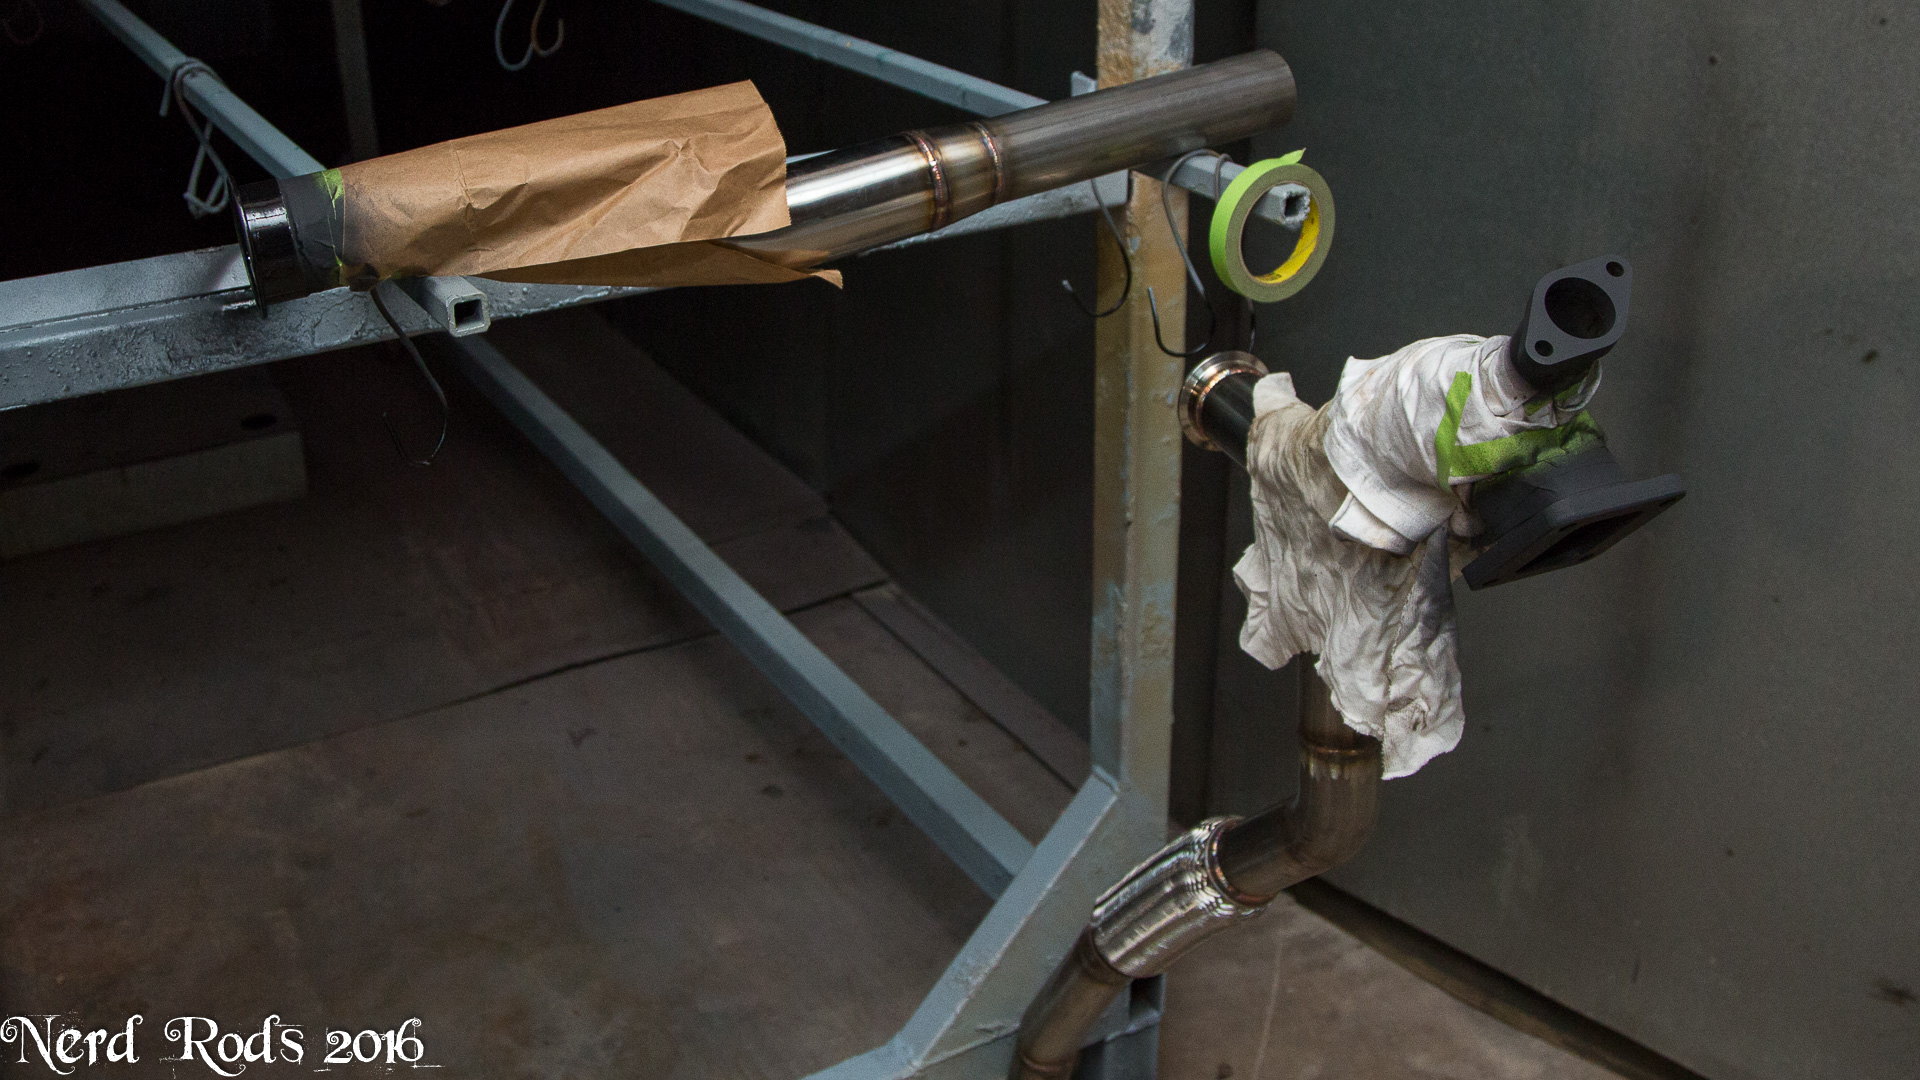
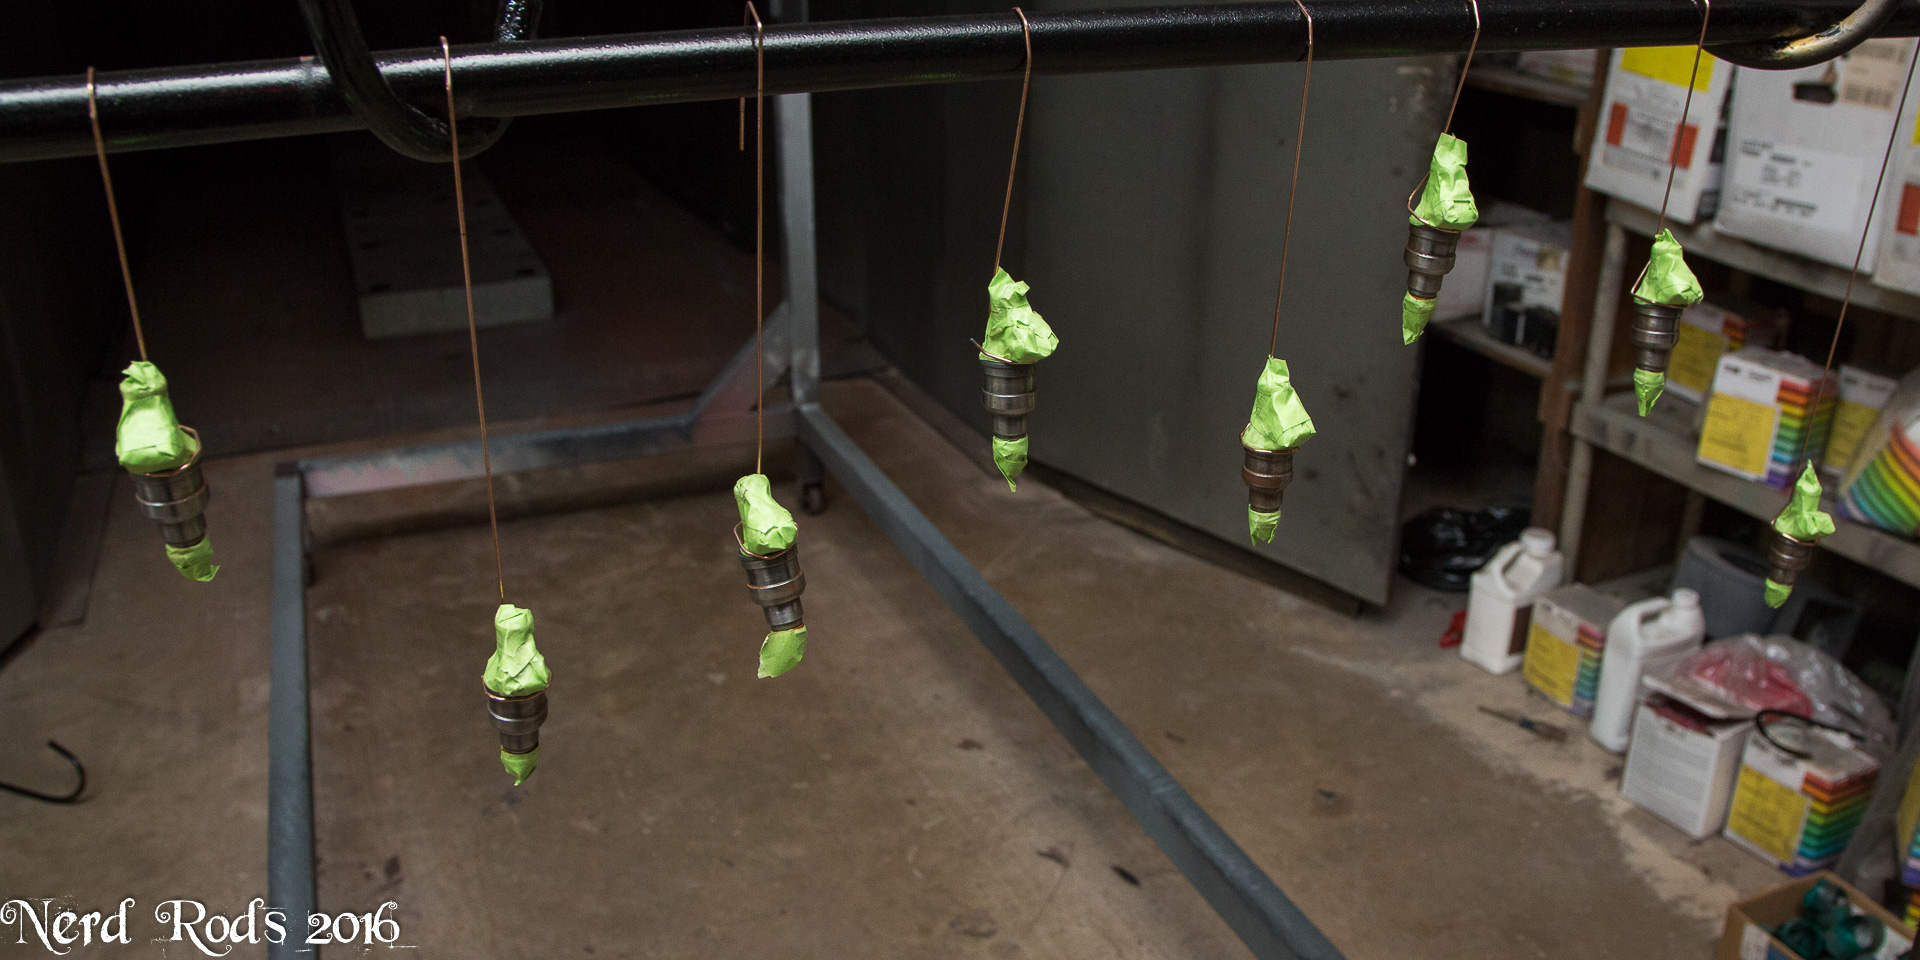
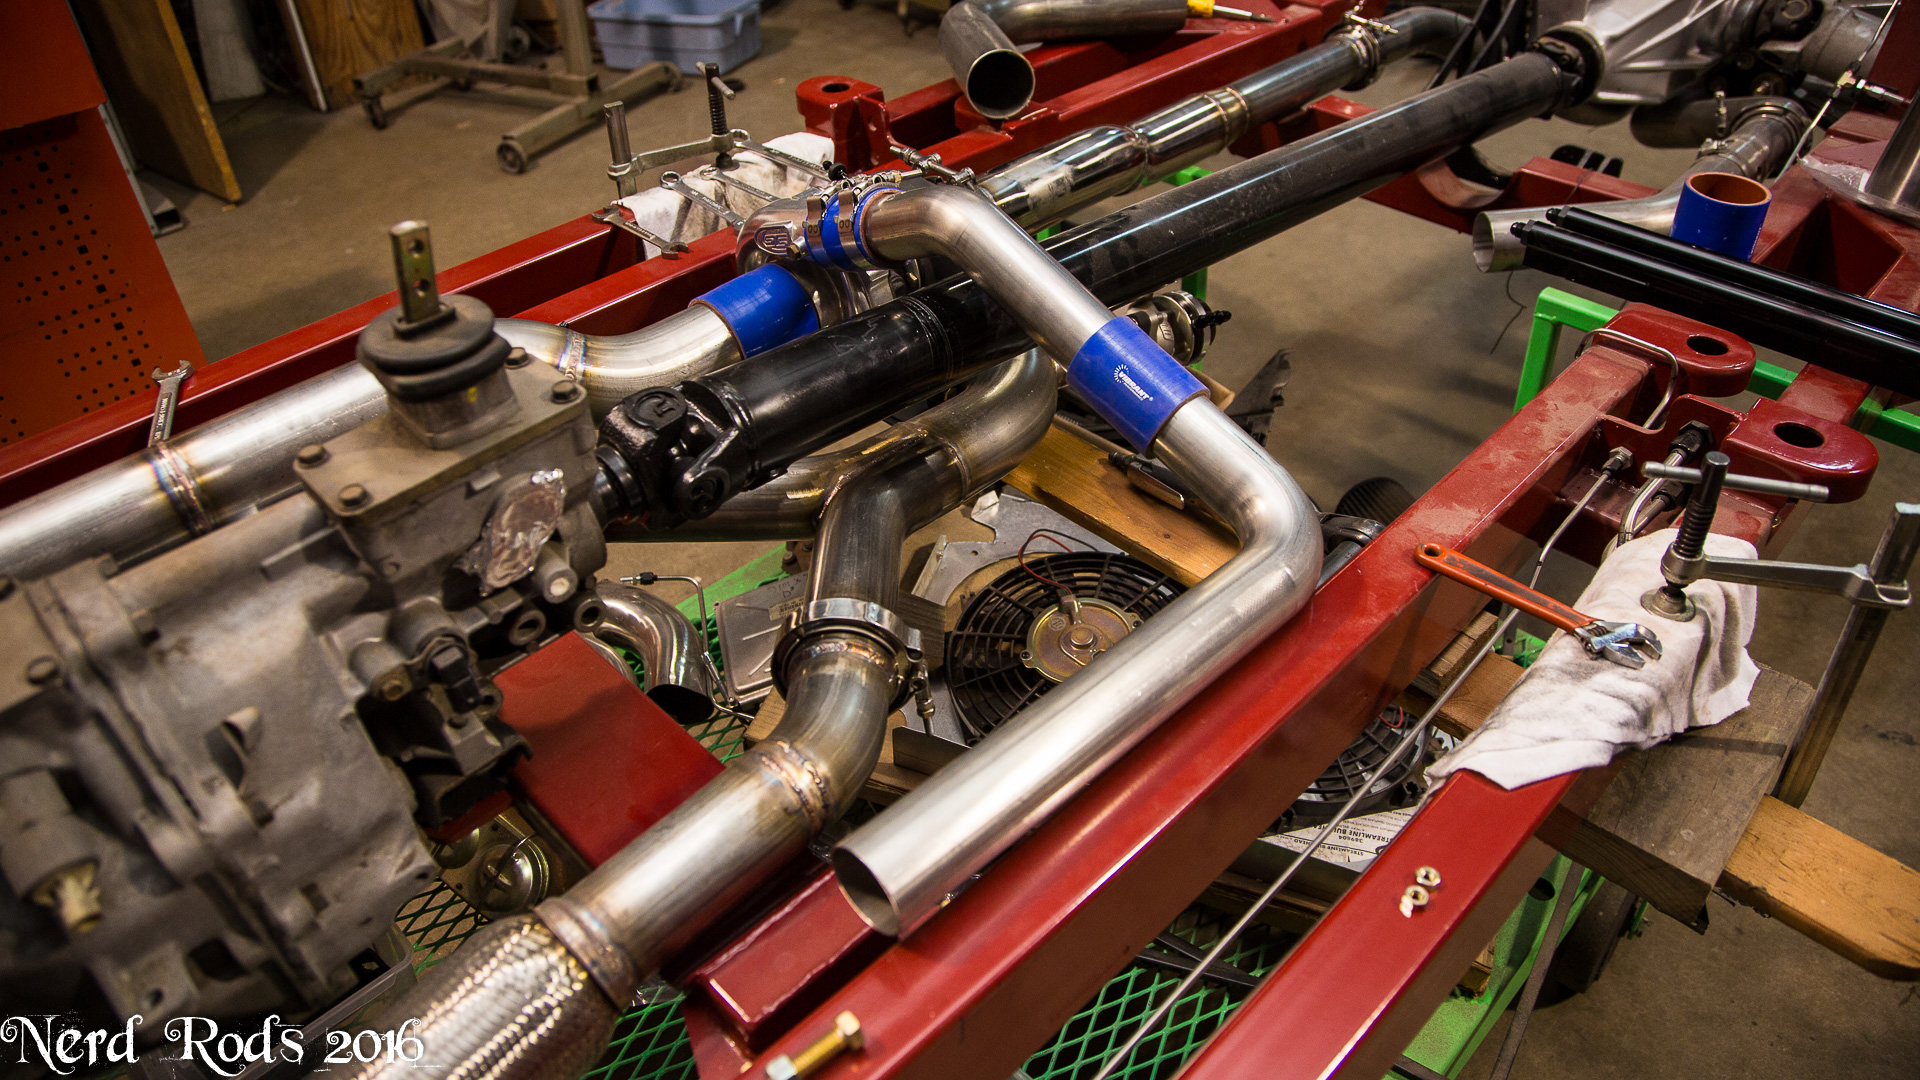
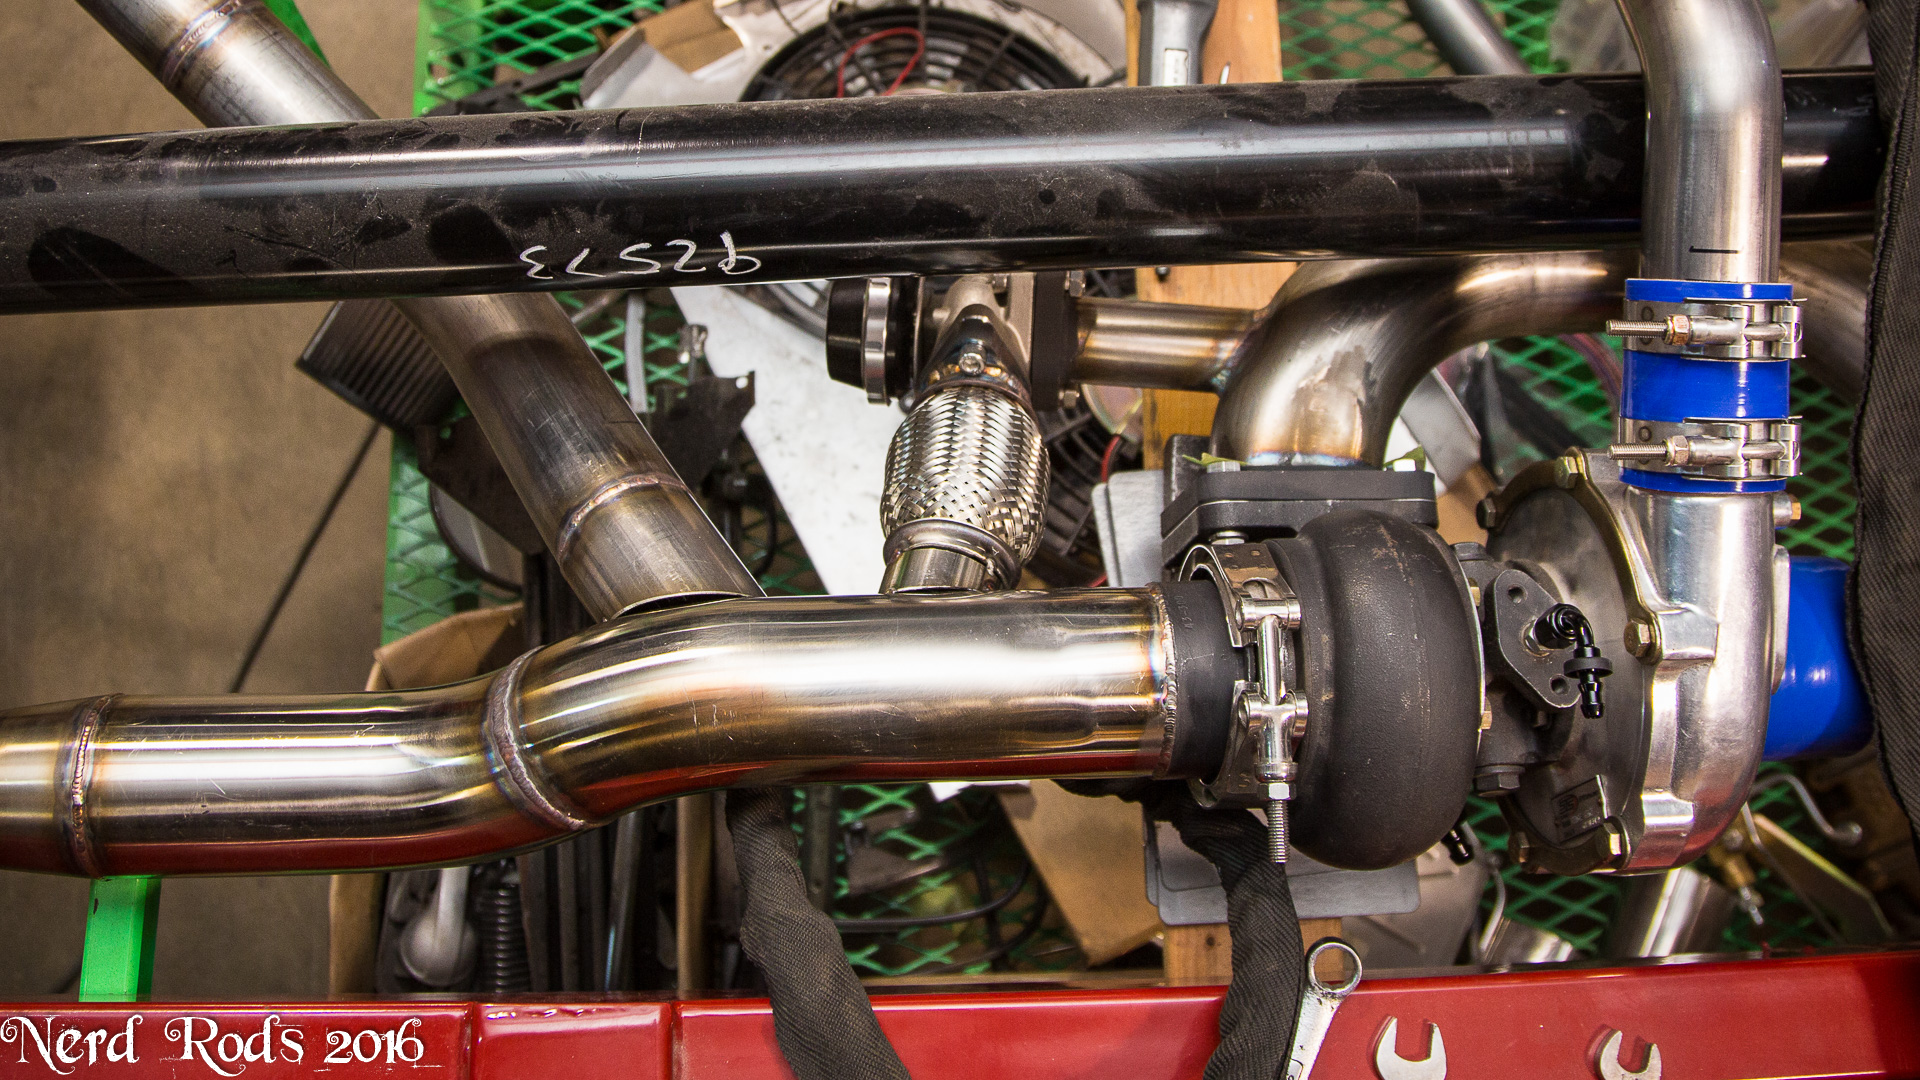
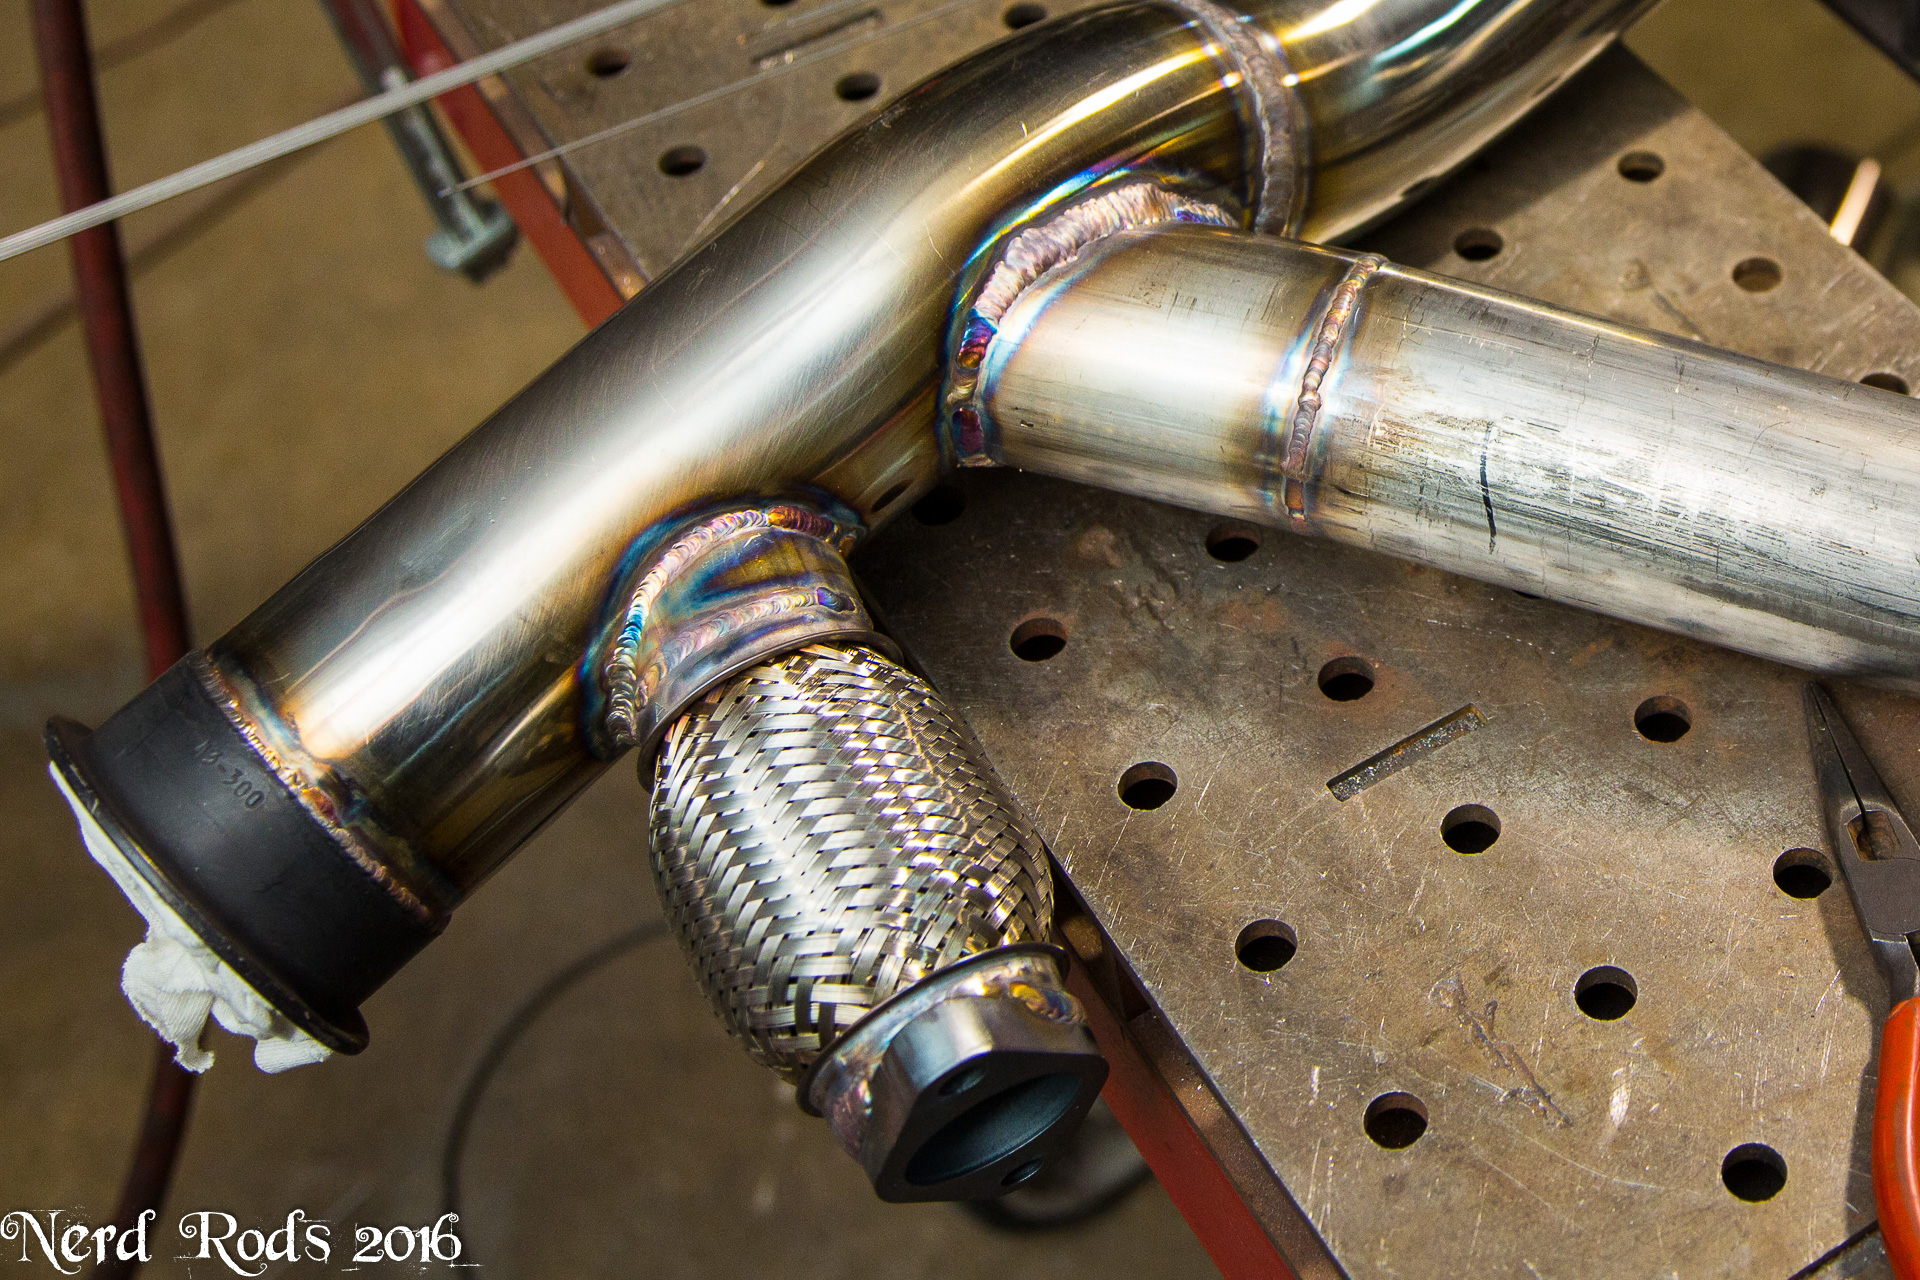
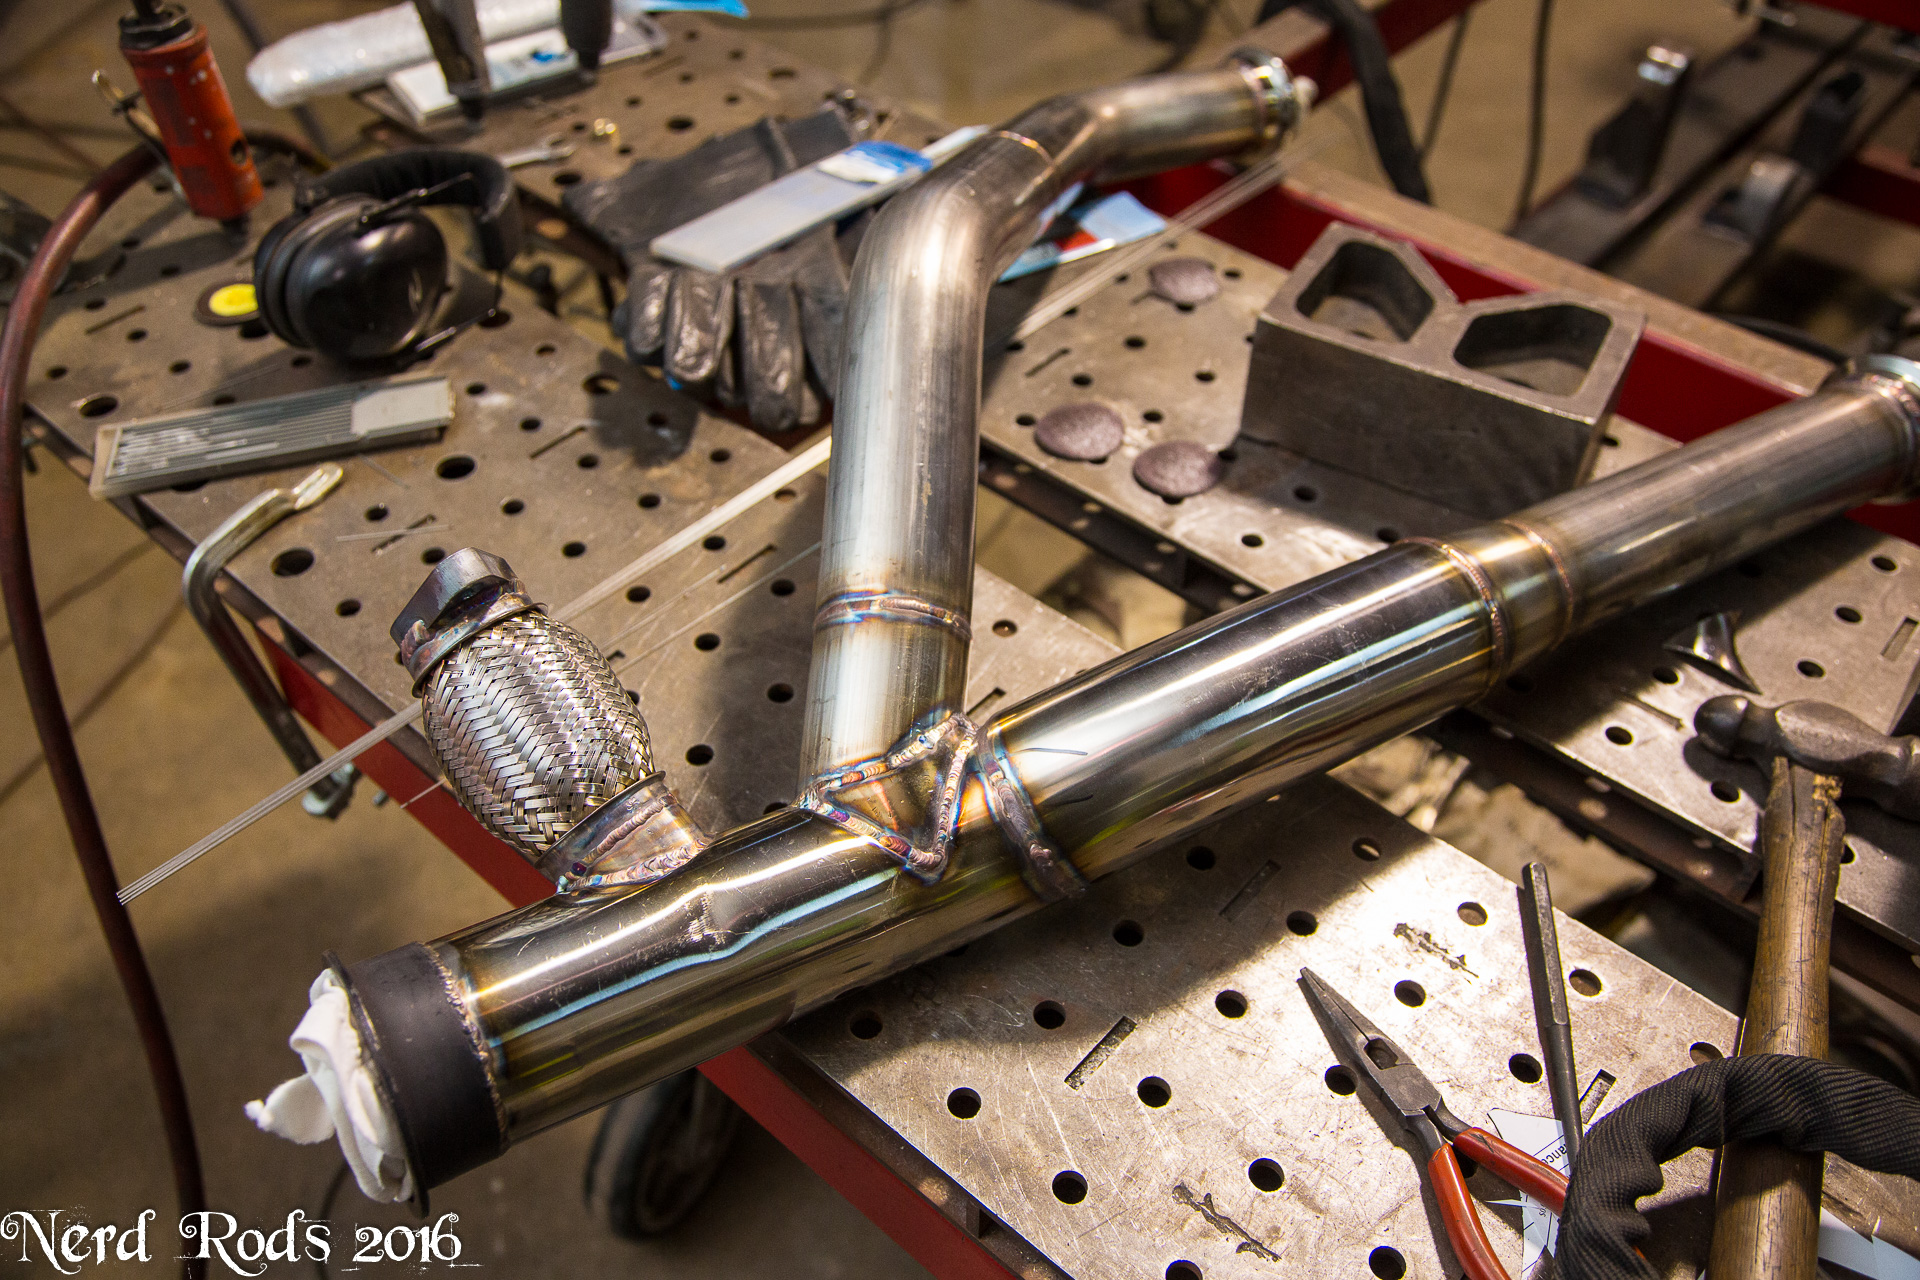
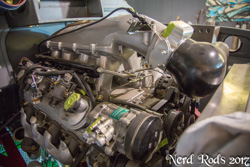
With most of the mock up done I needed to coat the mild steel parts on the exhaust. Just some 2000�F exhaust paint because in reality the turbo is going to be way hotter than that and basically nothing will survive so this just gets us by for the short future.
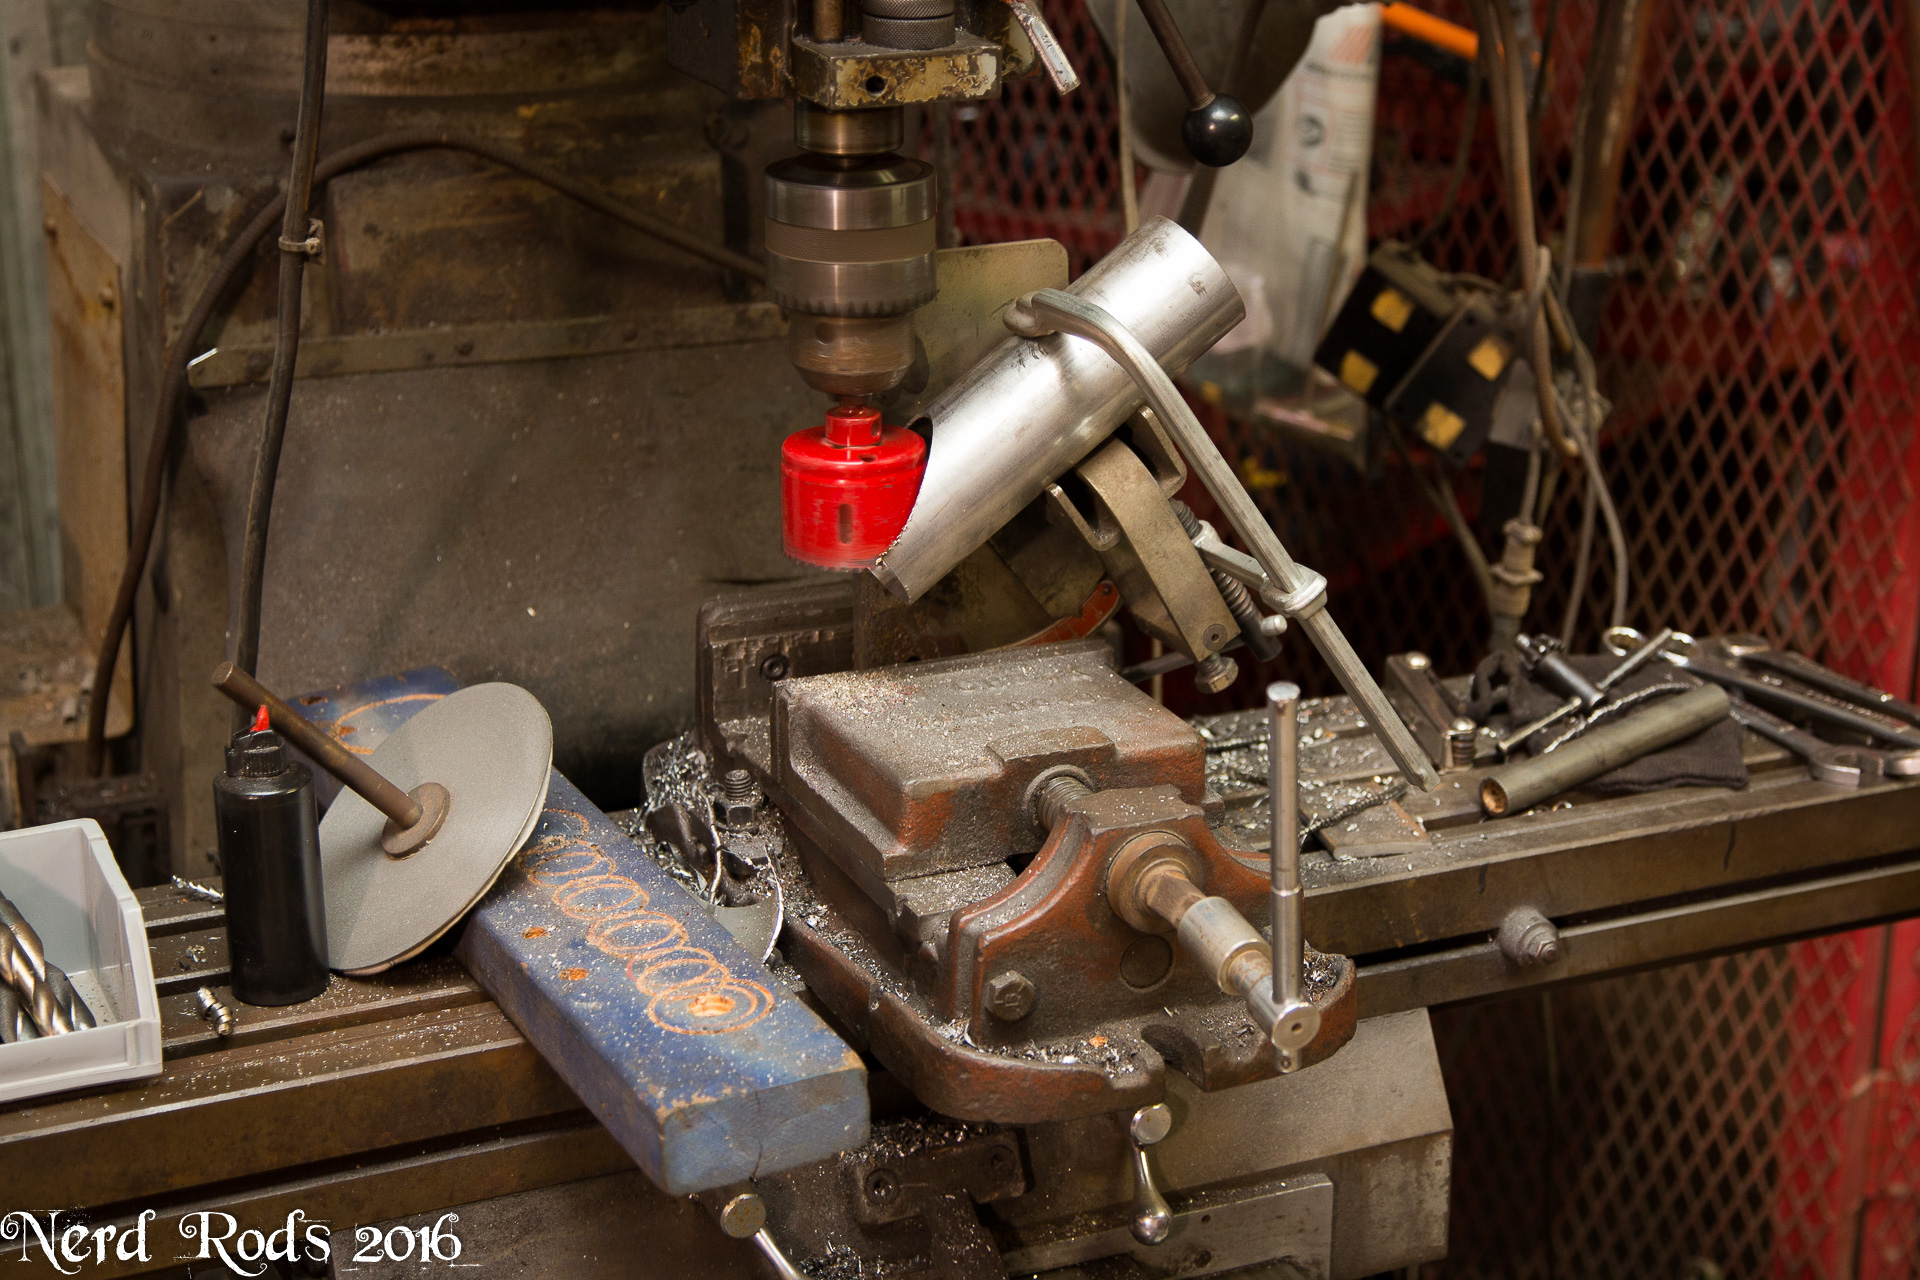
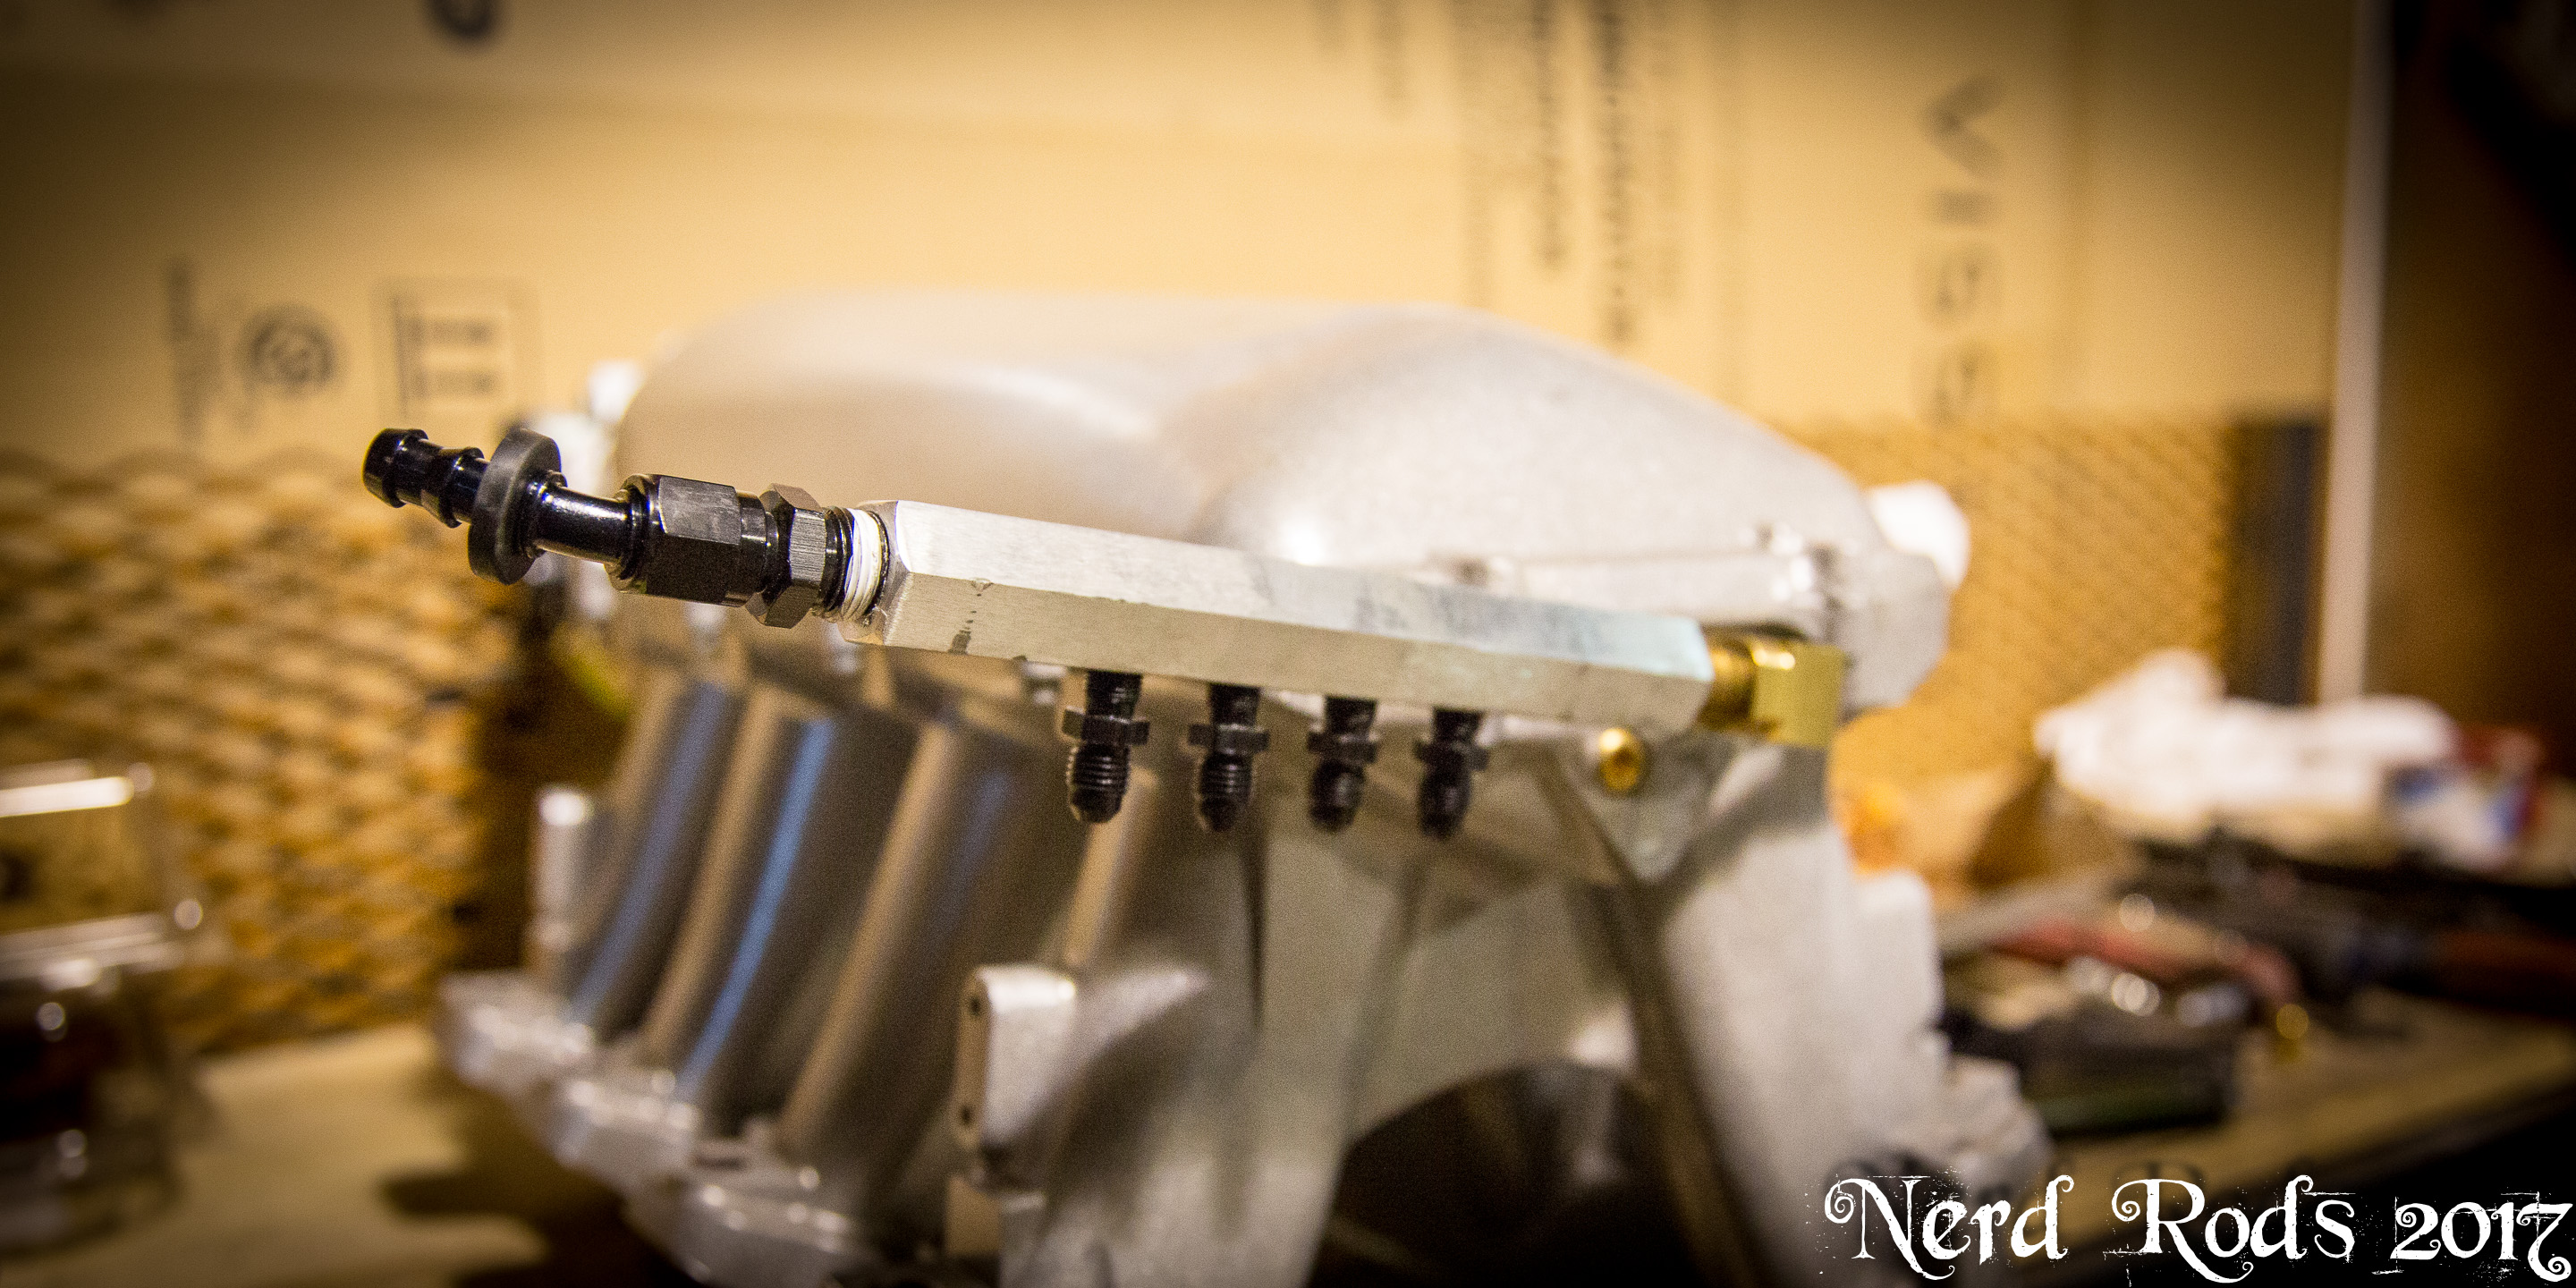
On a slightly obnoxious side, the injectors were raw steel and I only noticed because on the side facing the front door in the shop they had rust on them. So I has to blow a few hours taking them all off, sanding the rust off by hand, making them off and get them painted. Just one of those 2-3 hours added to the punch clock that we do all the time.
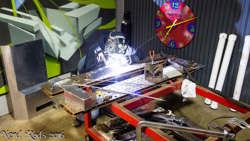
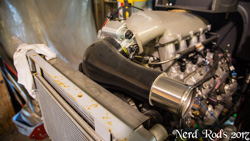
This is the intake to the turbo from the cowl induction. This is a tiny bead to work as a lock for the silicone coupler between the two. Just turn the TIG way down so the bead builds up instead of burning in.
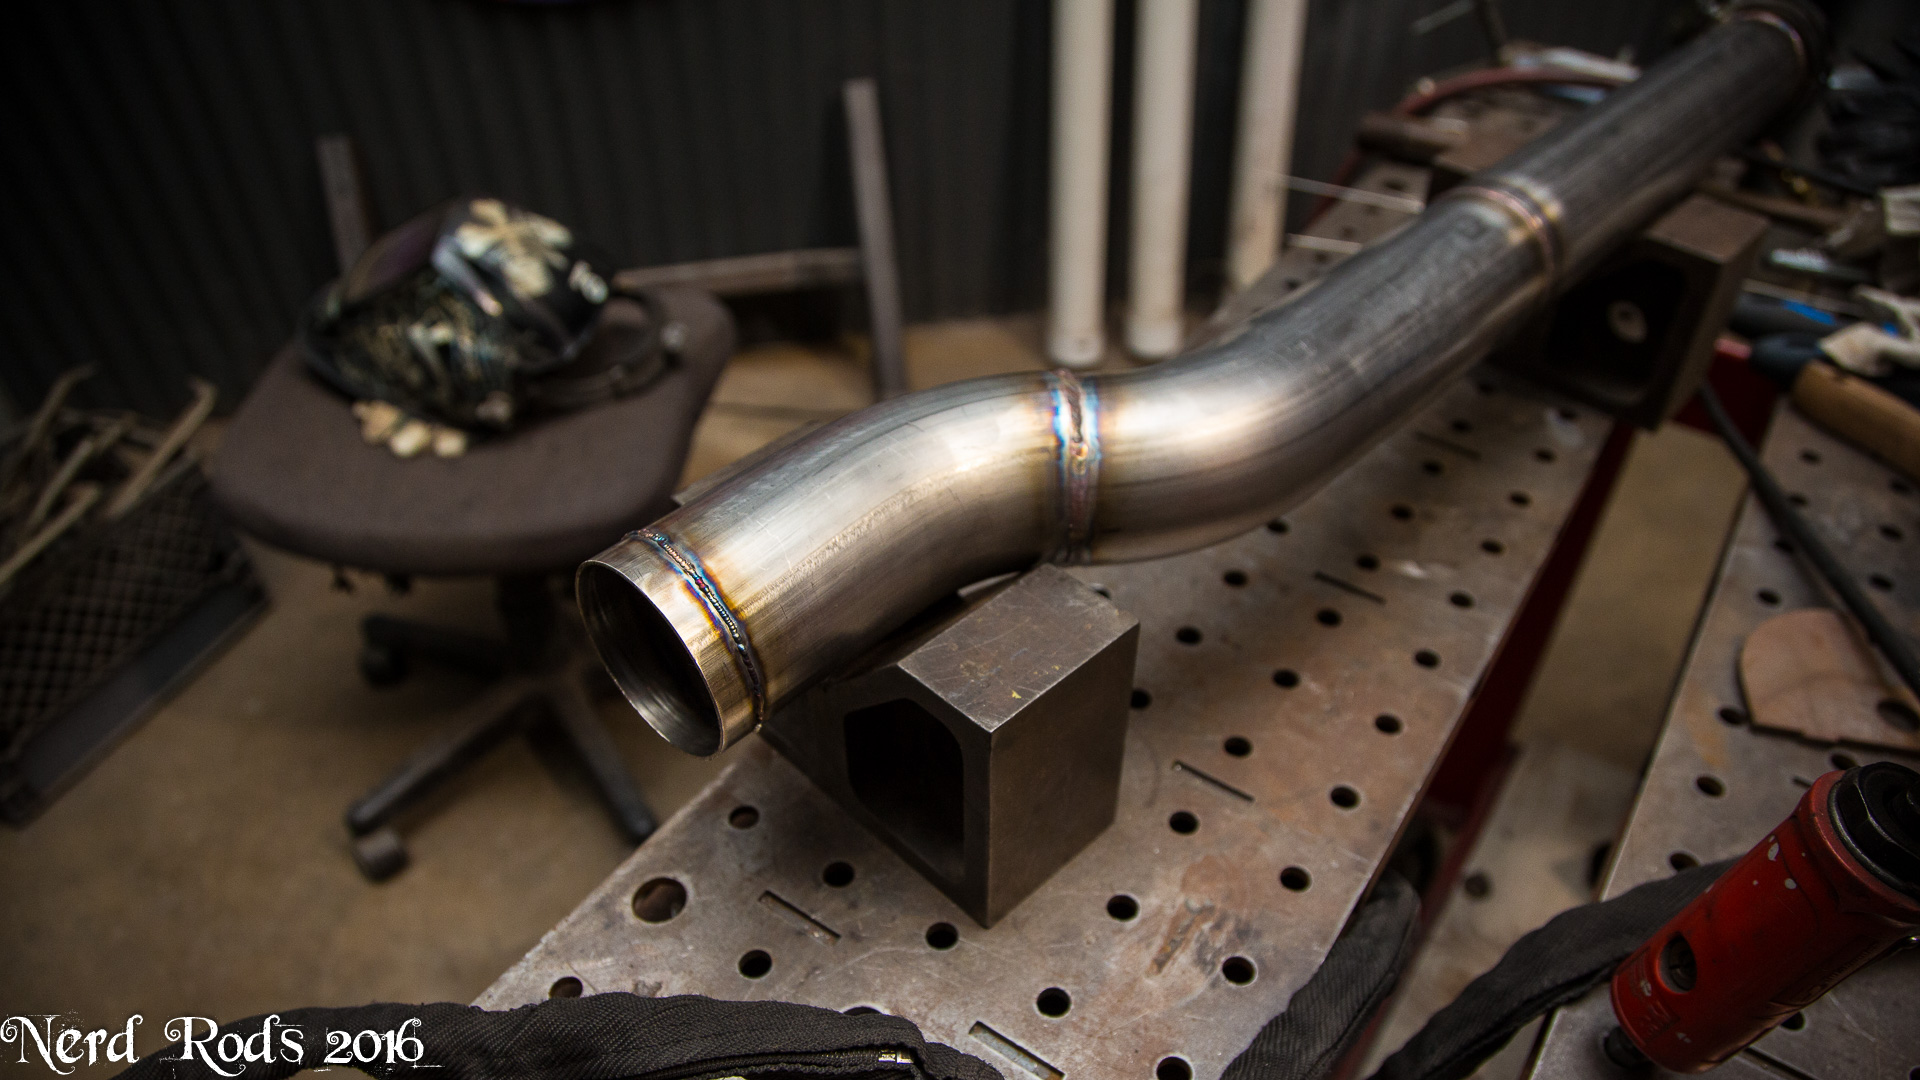
And on to a boat load of turbo and exhaust photos.
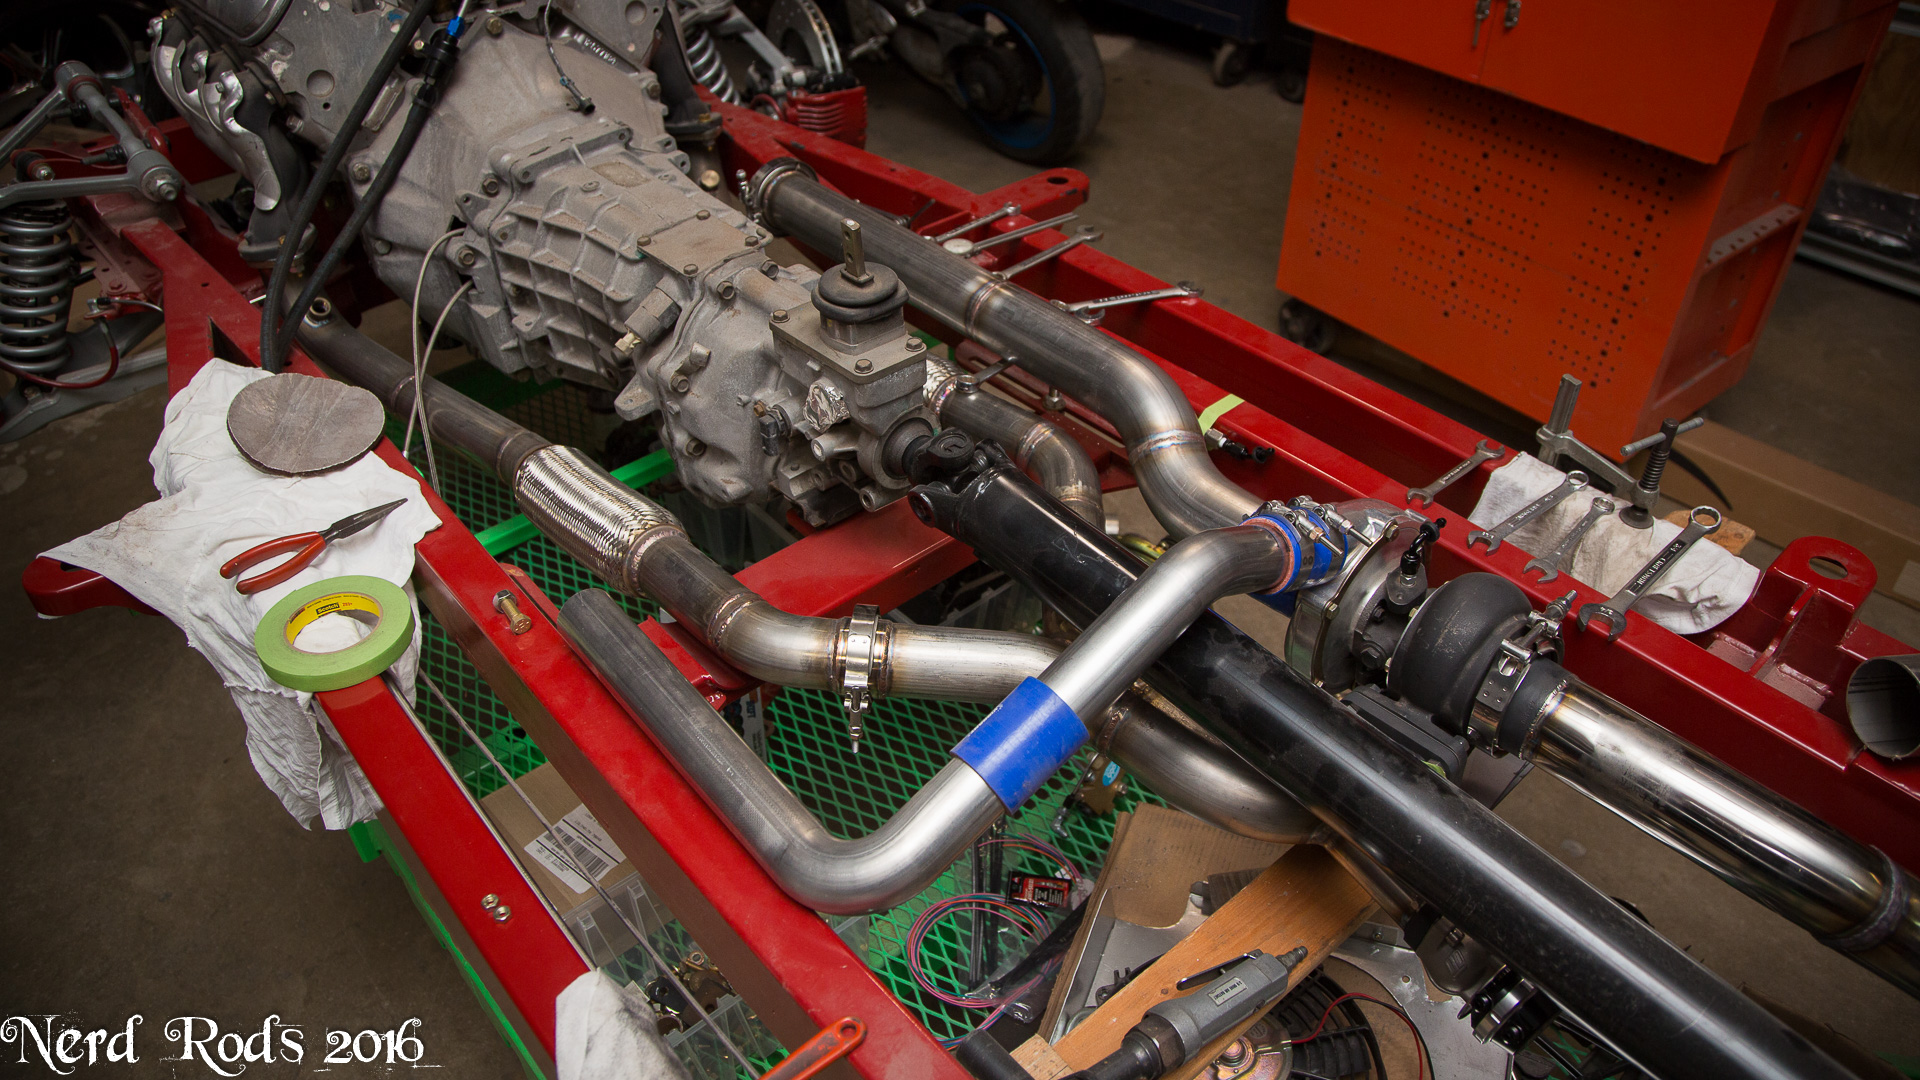
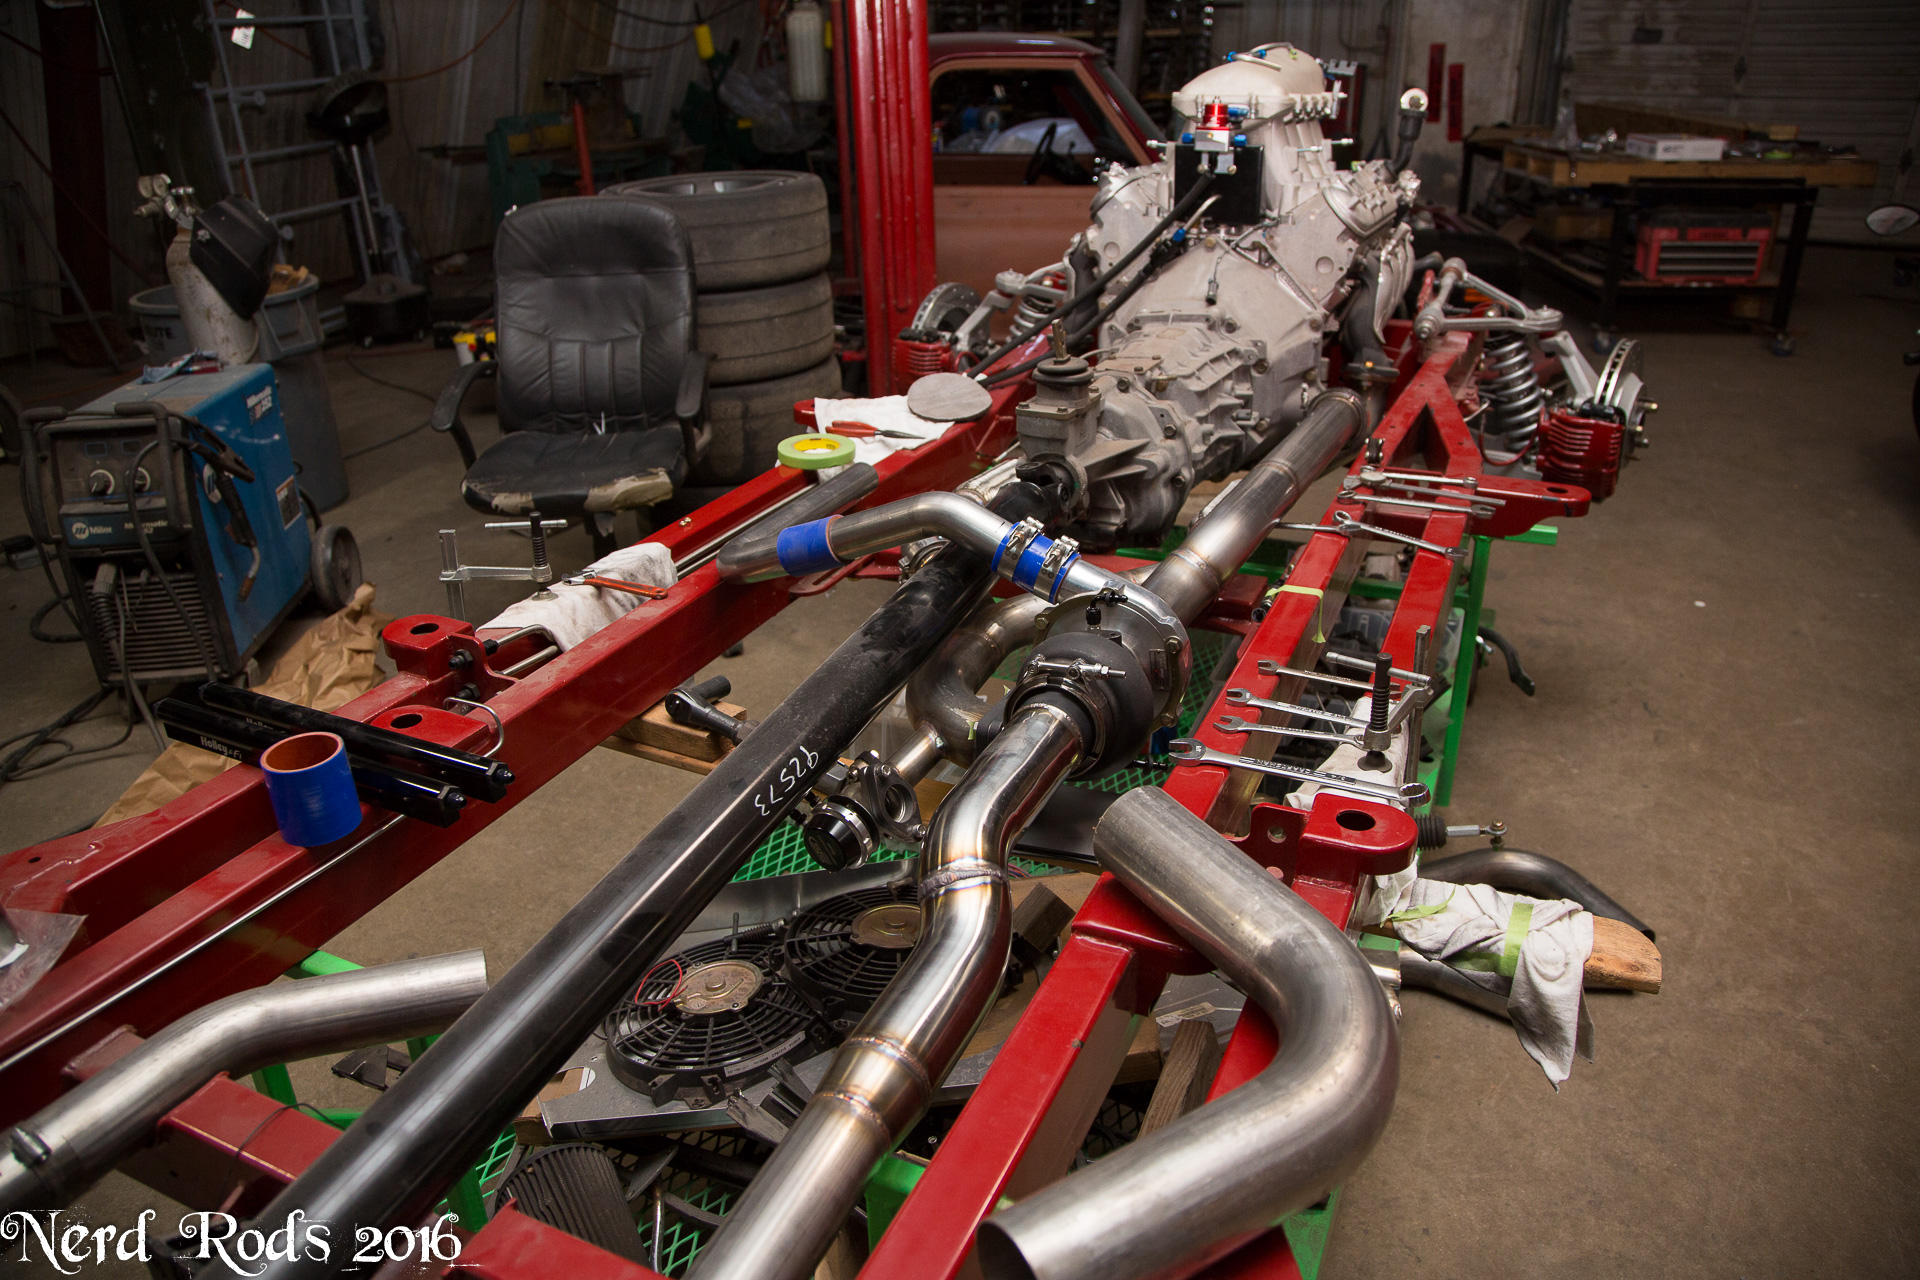
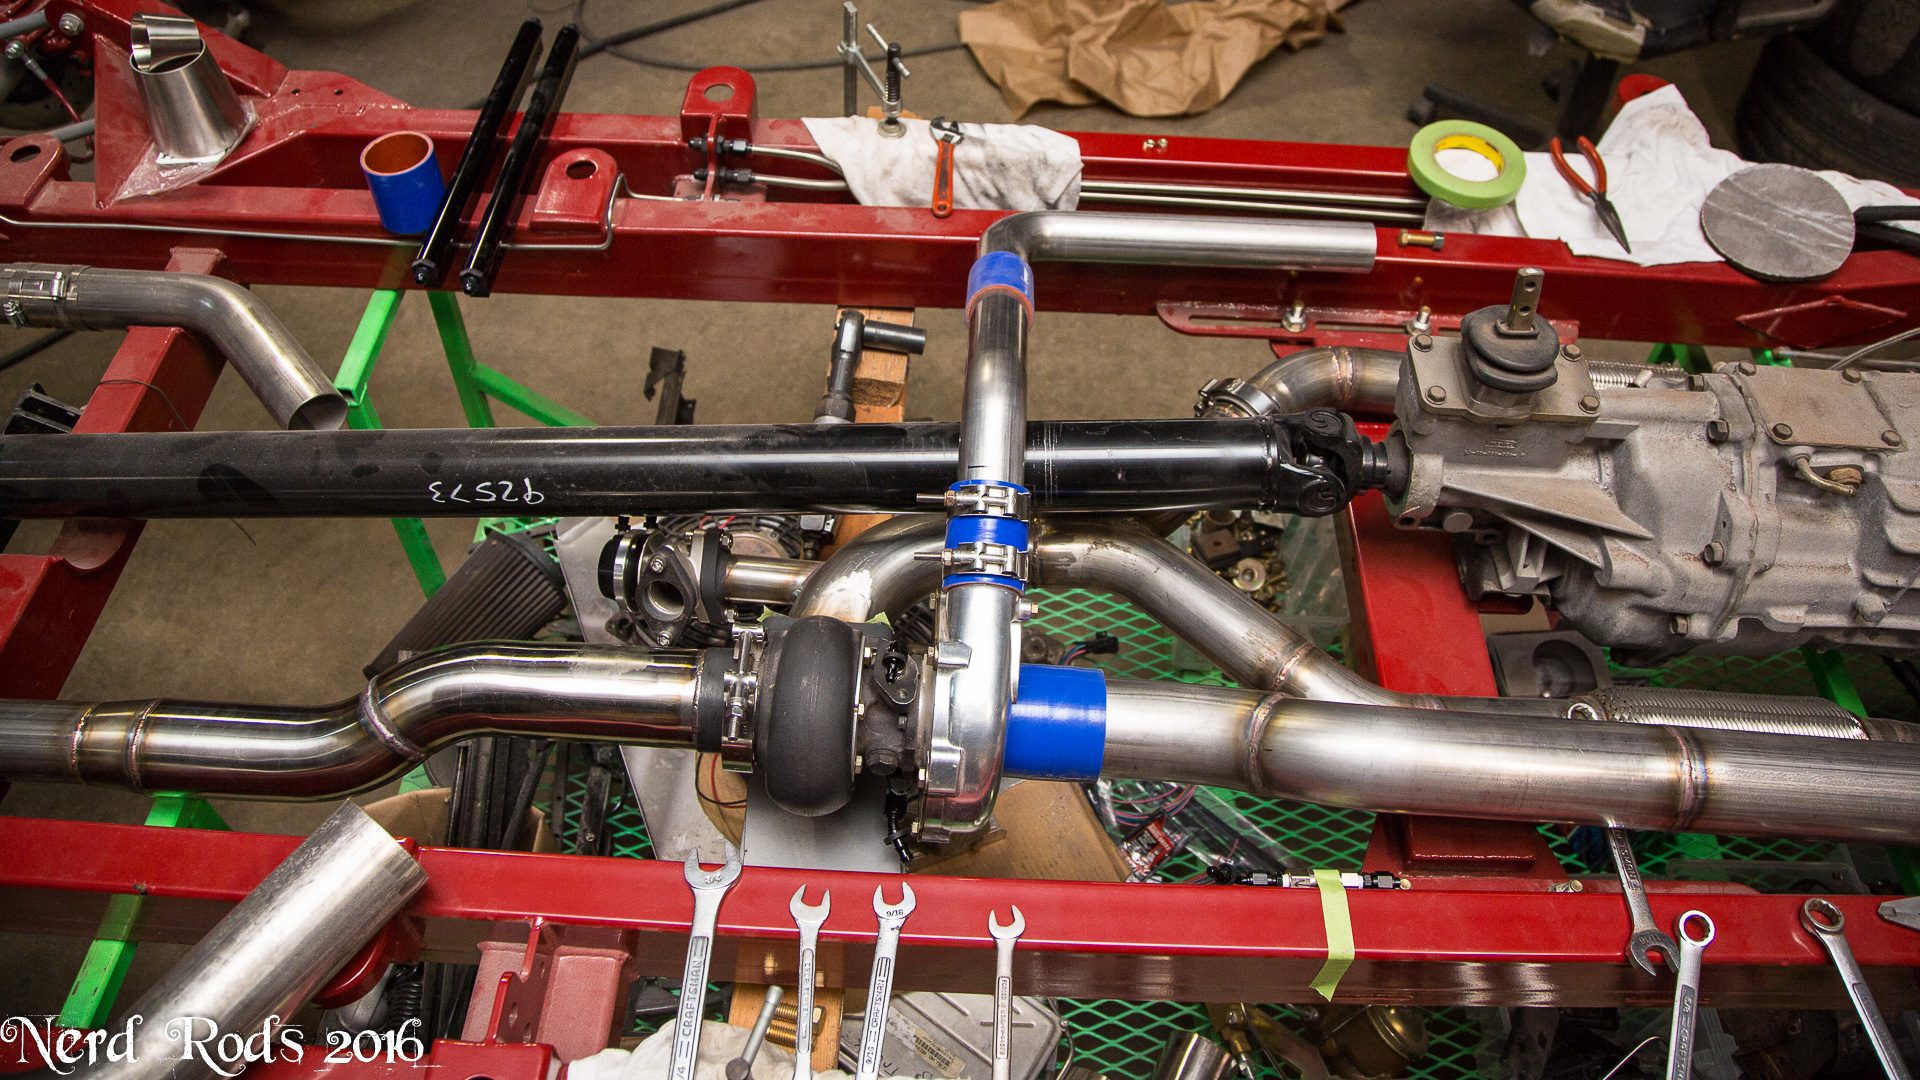
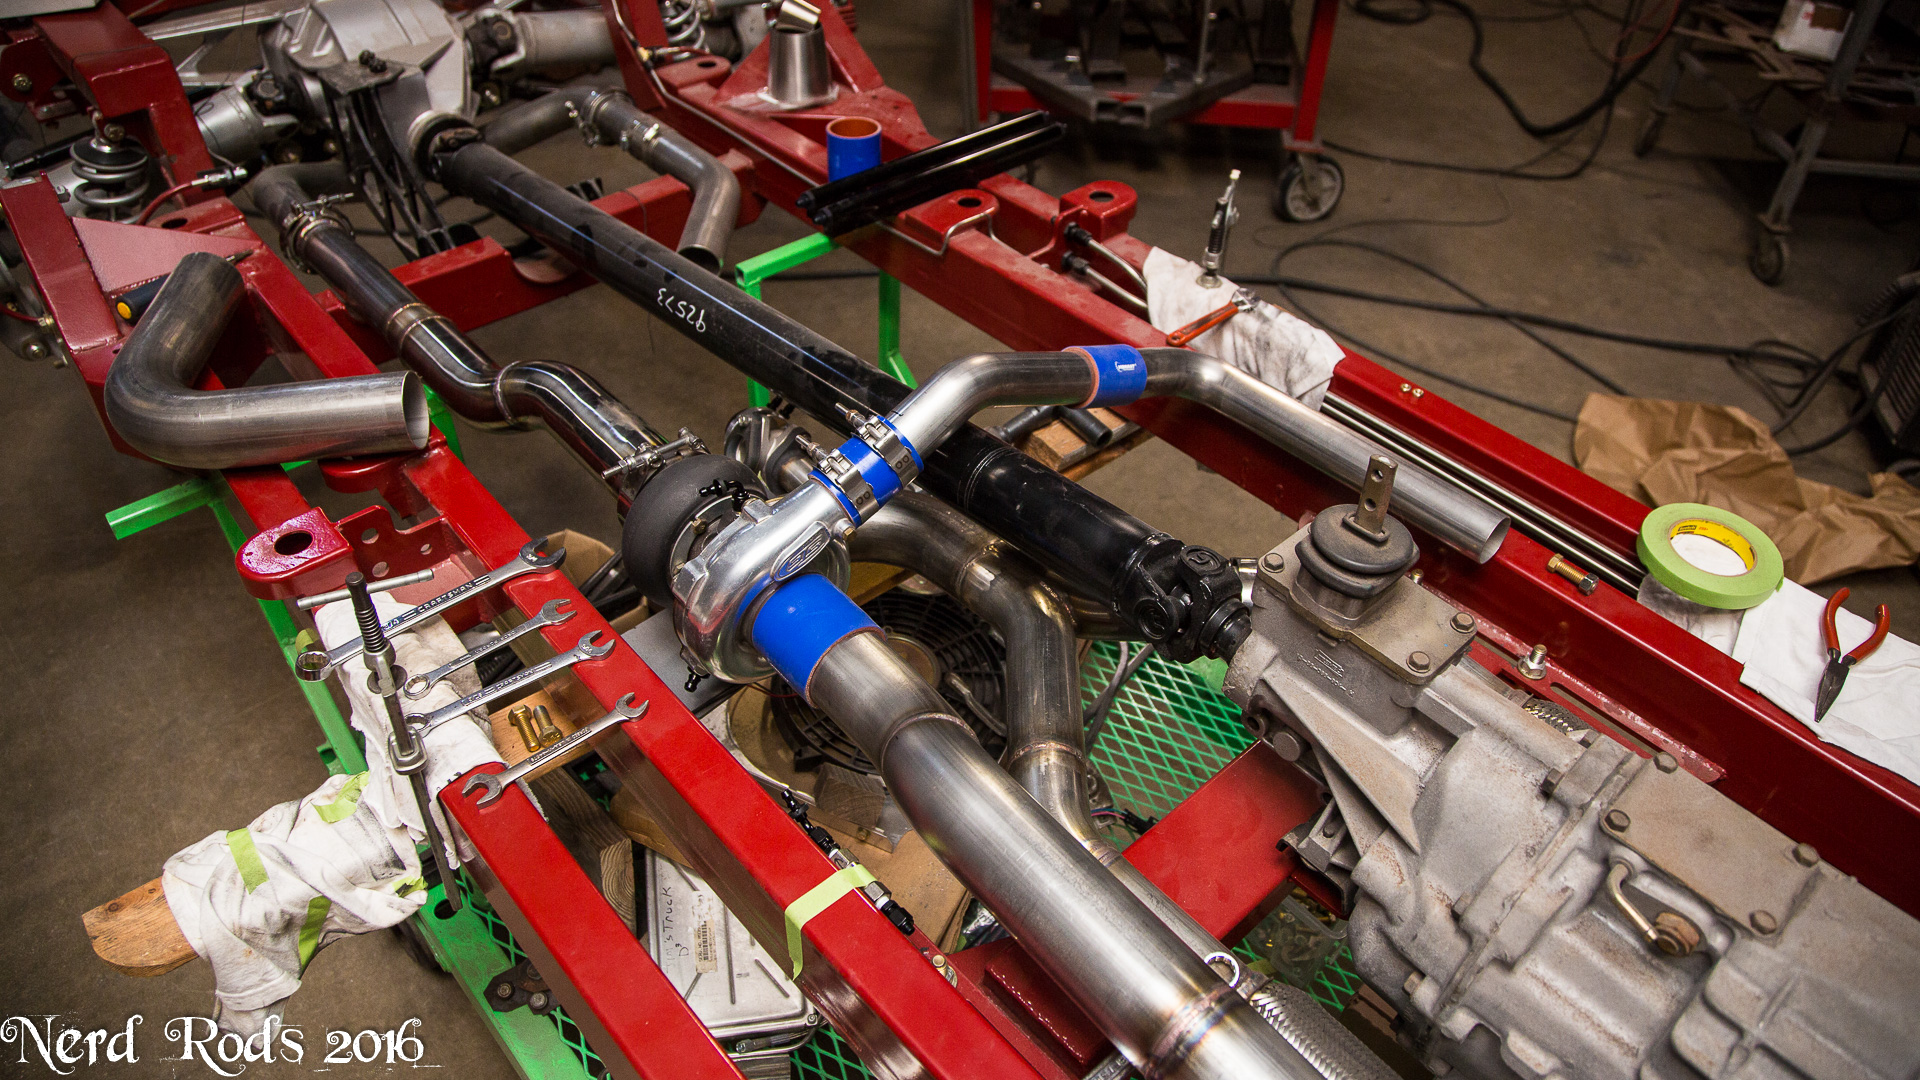
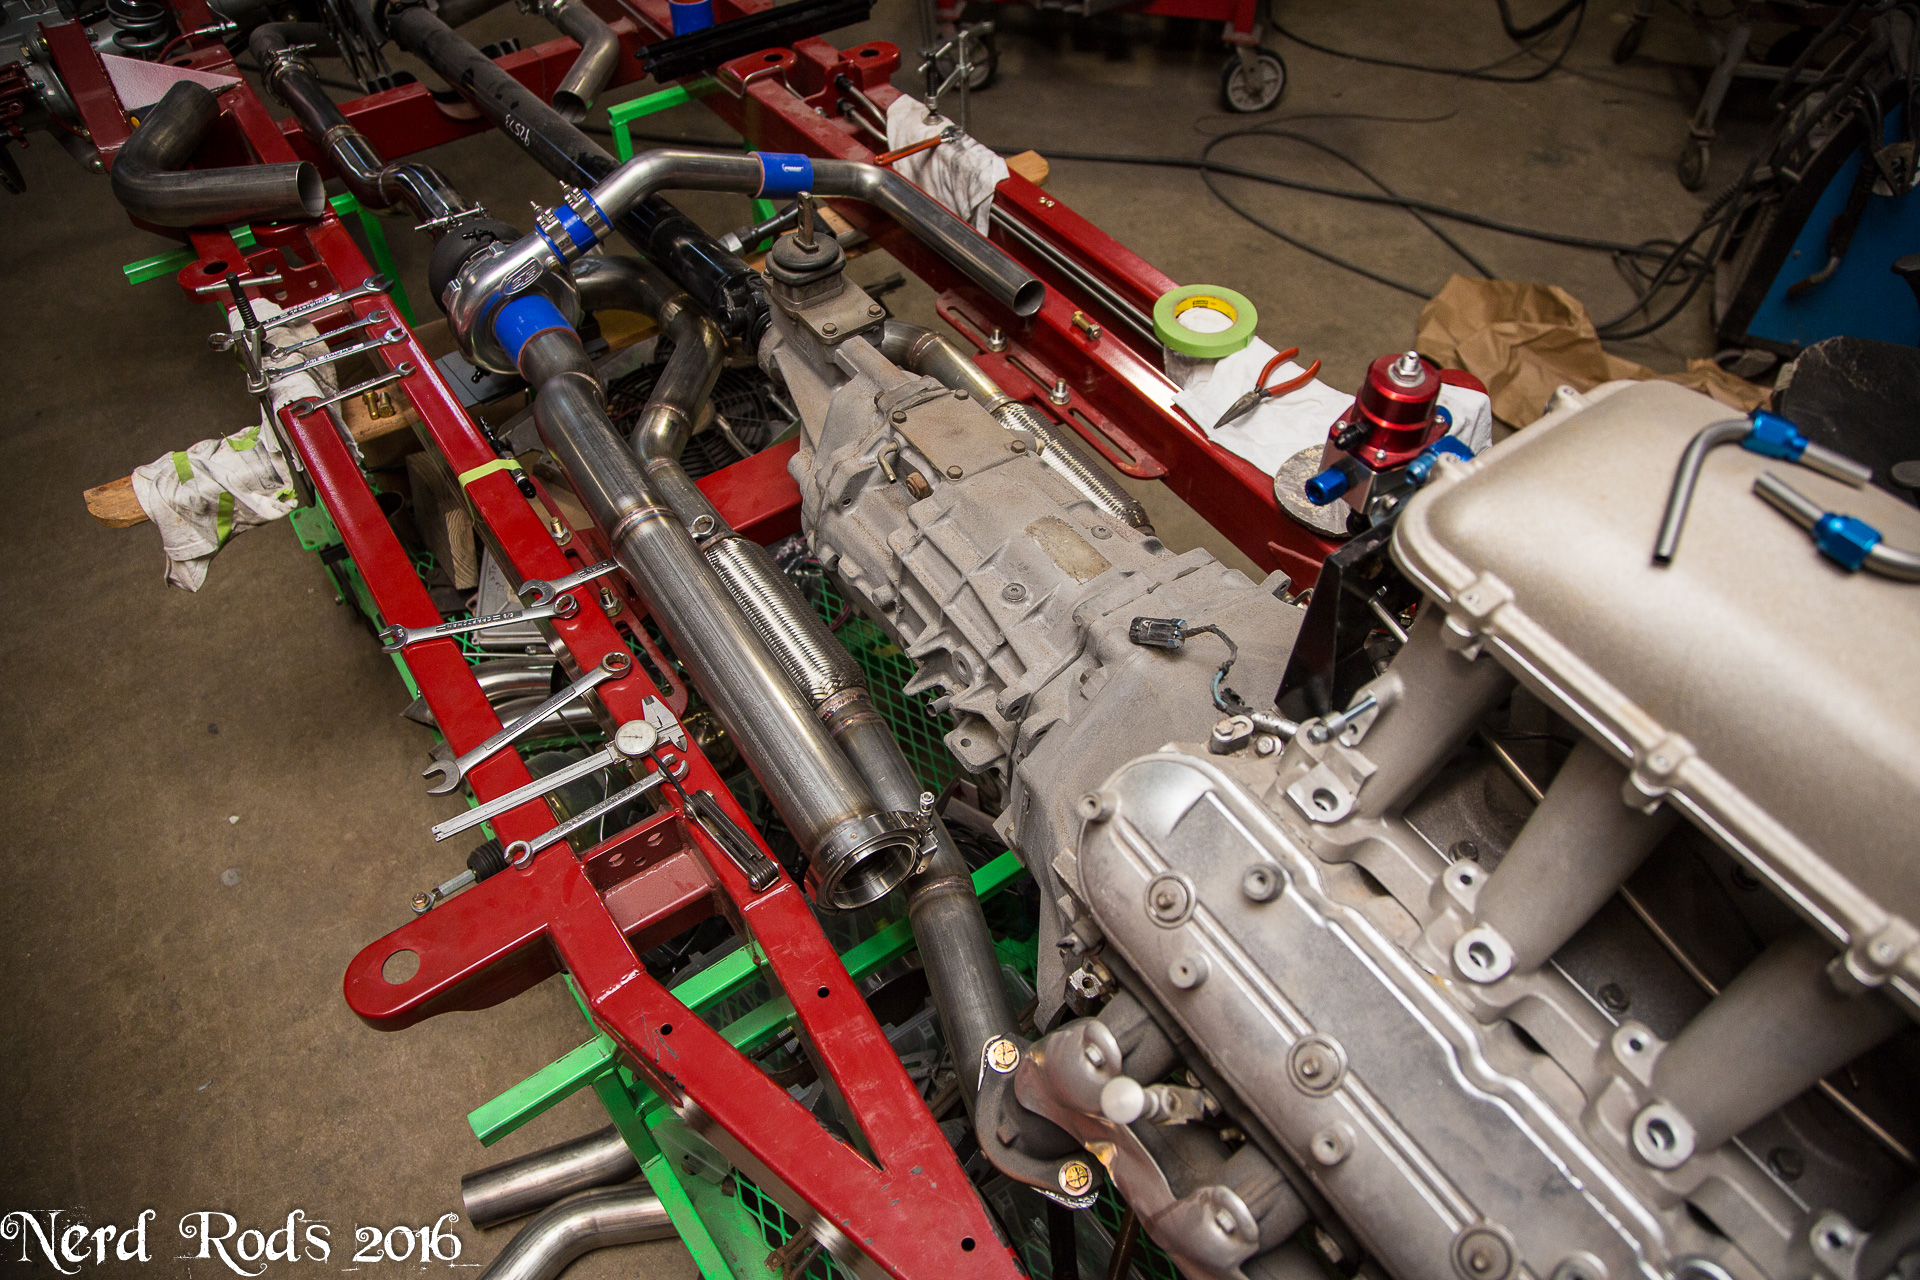
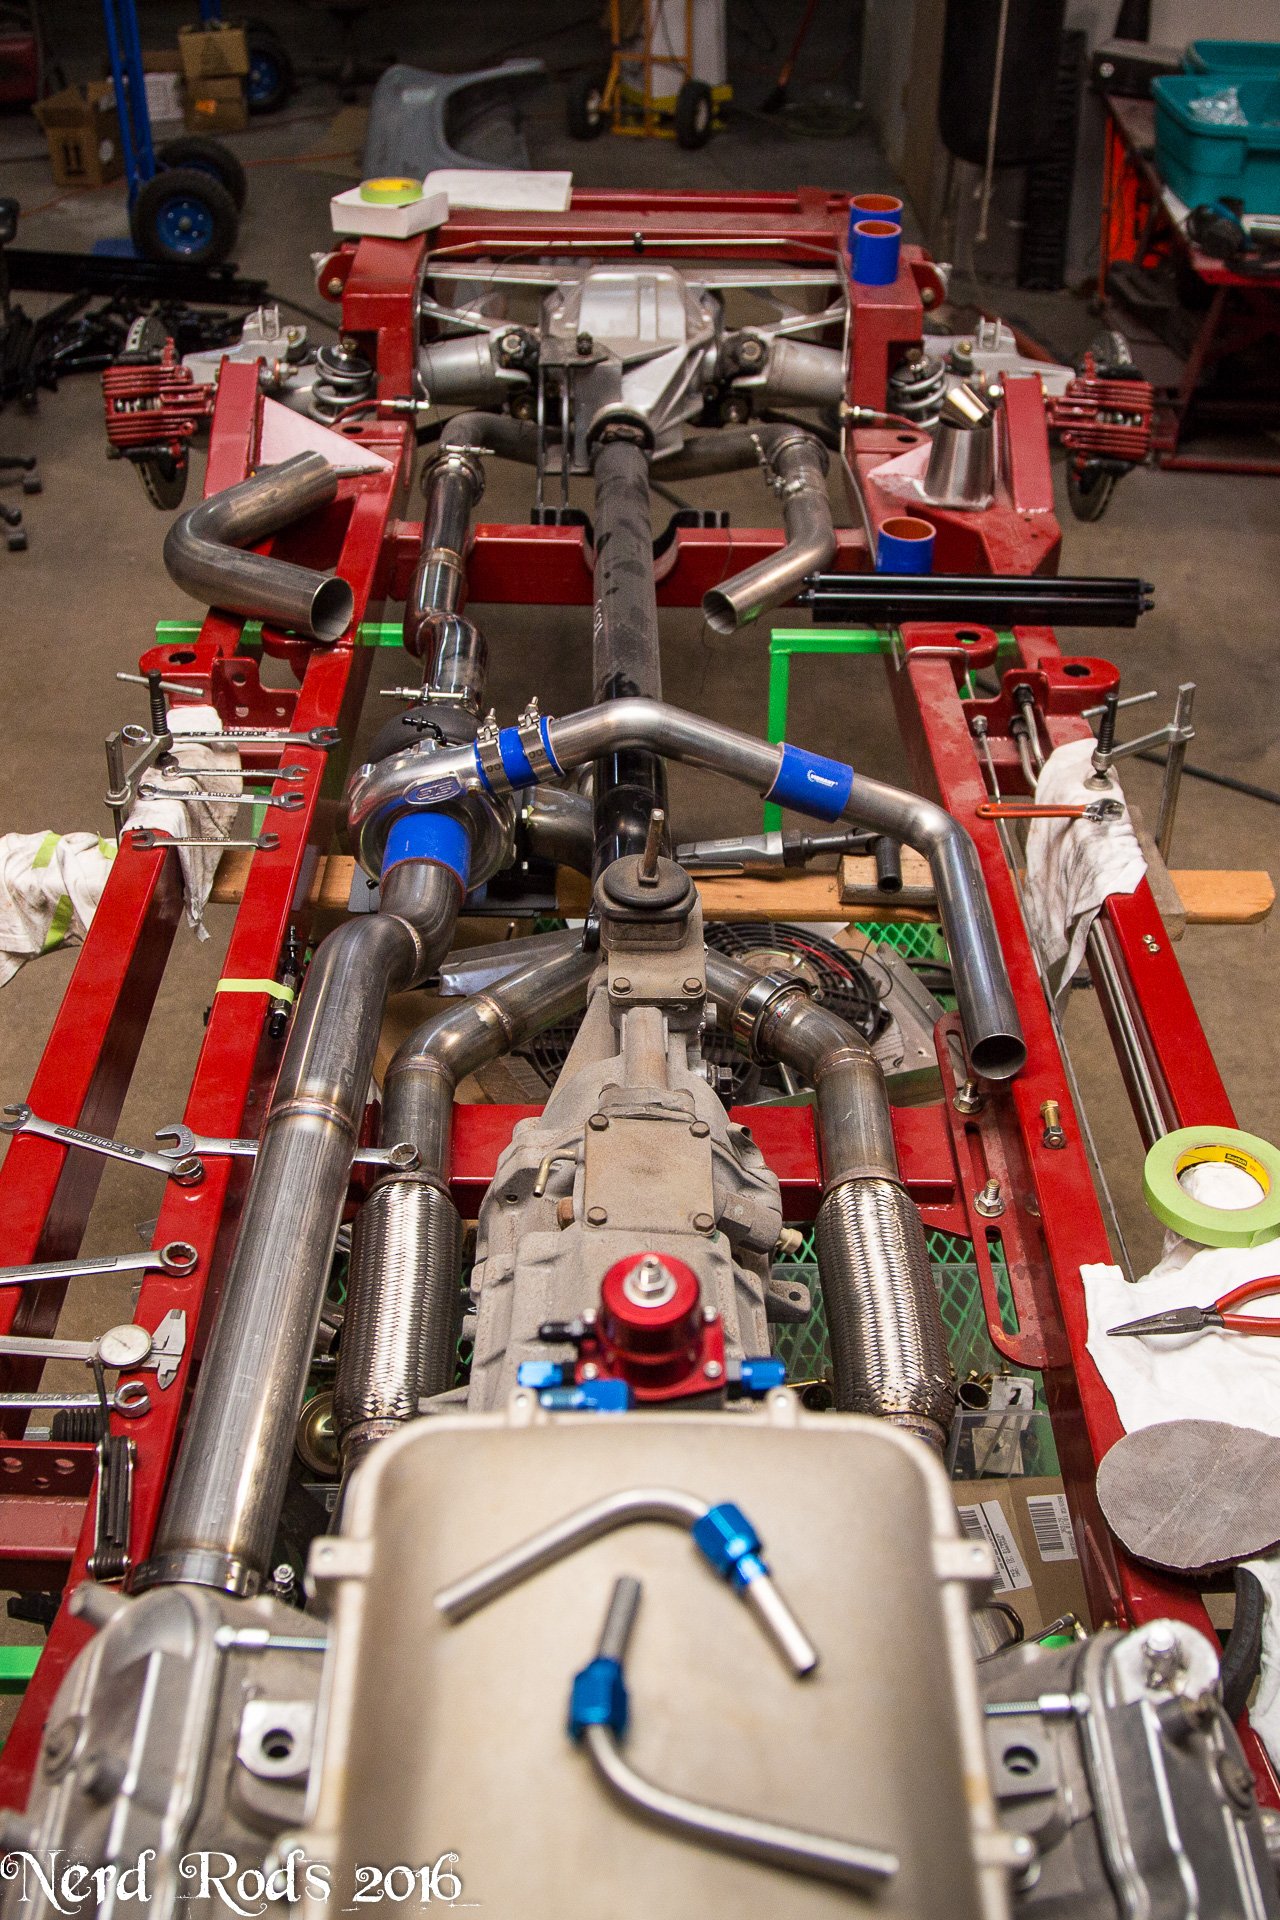
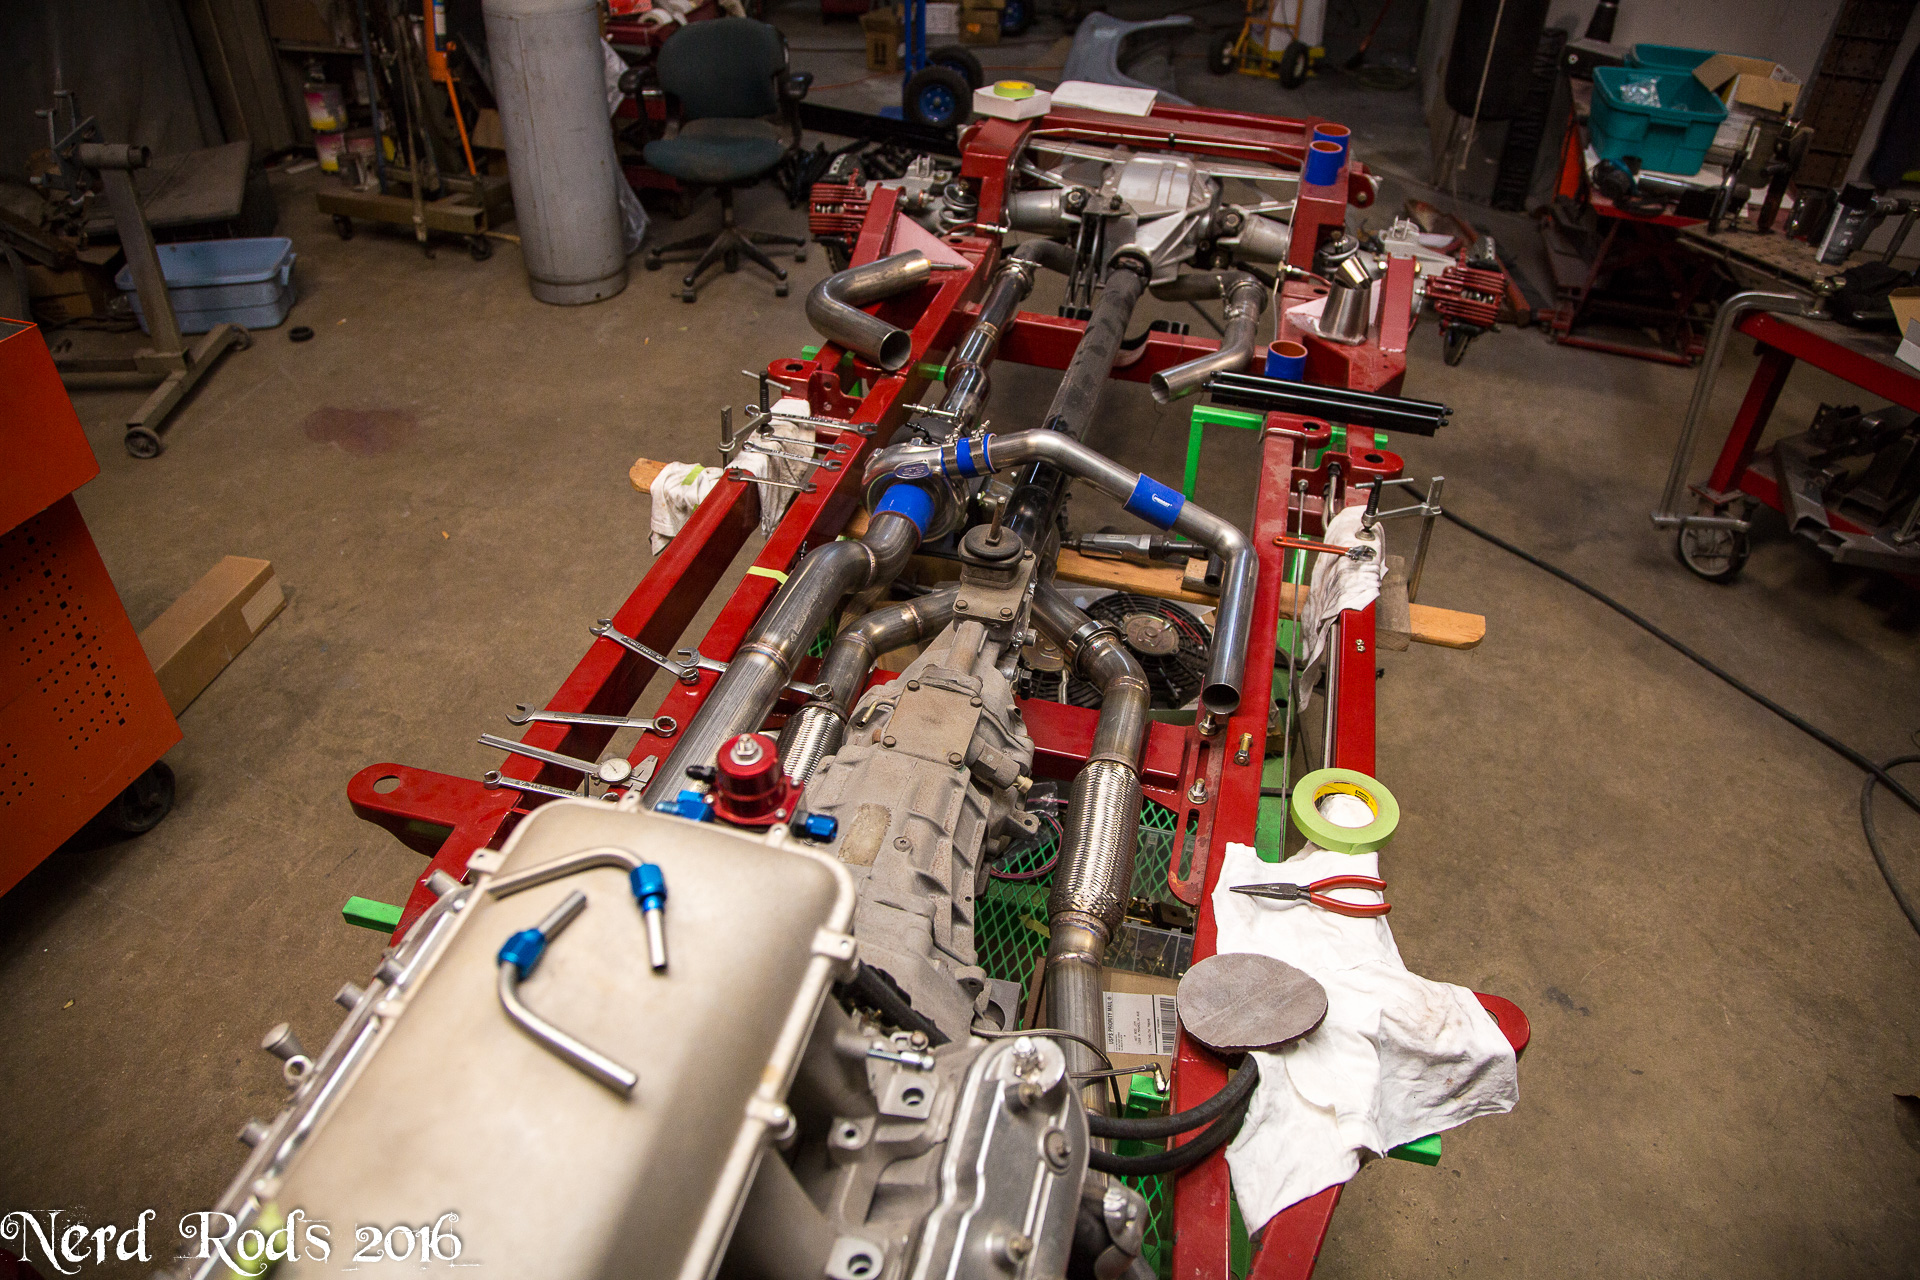
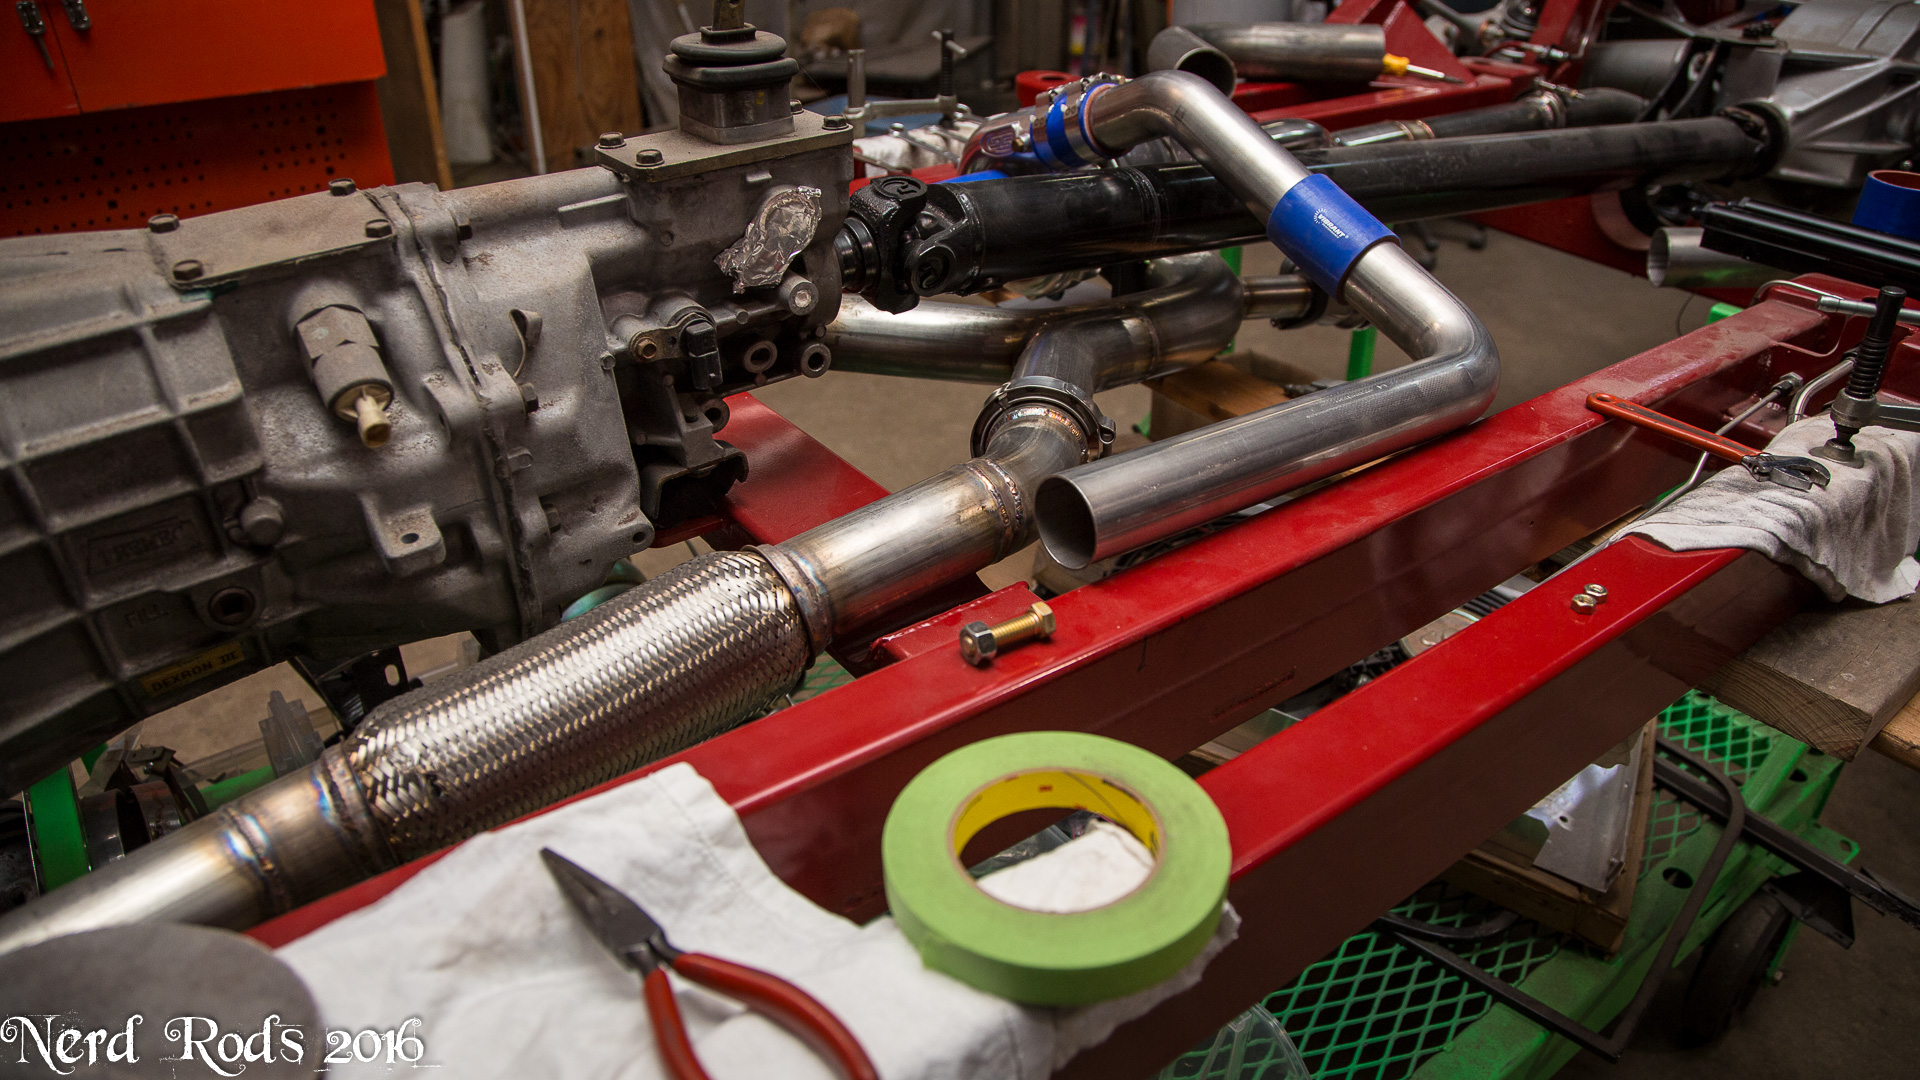
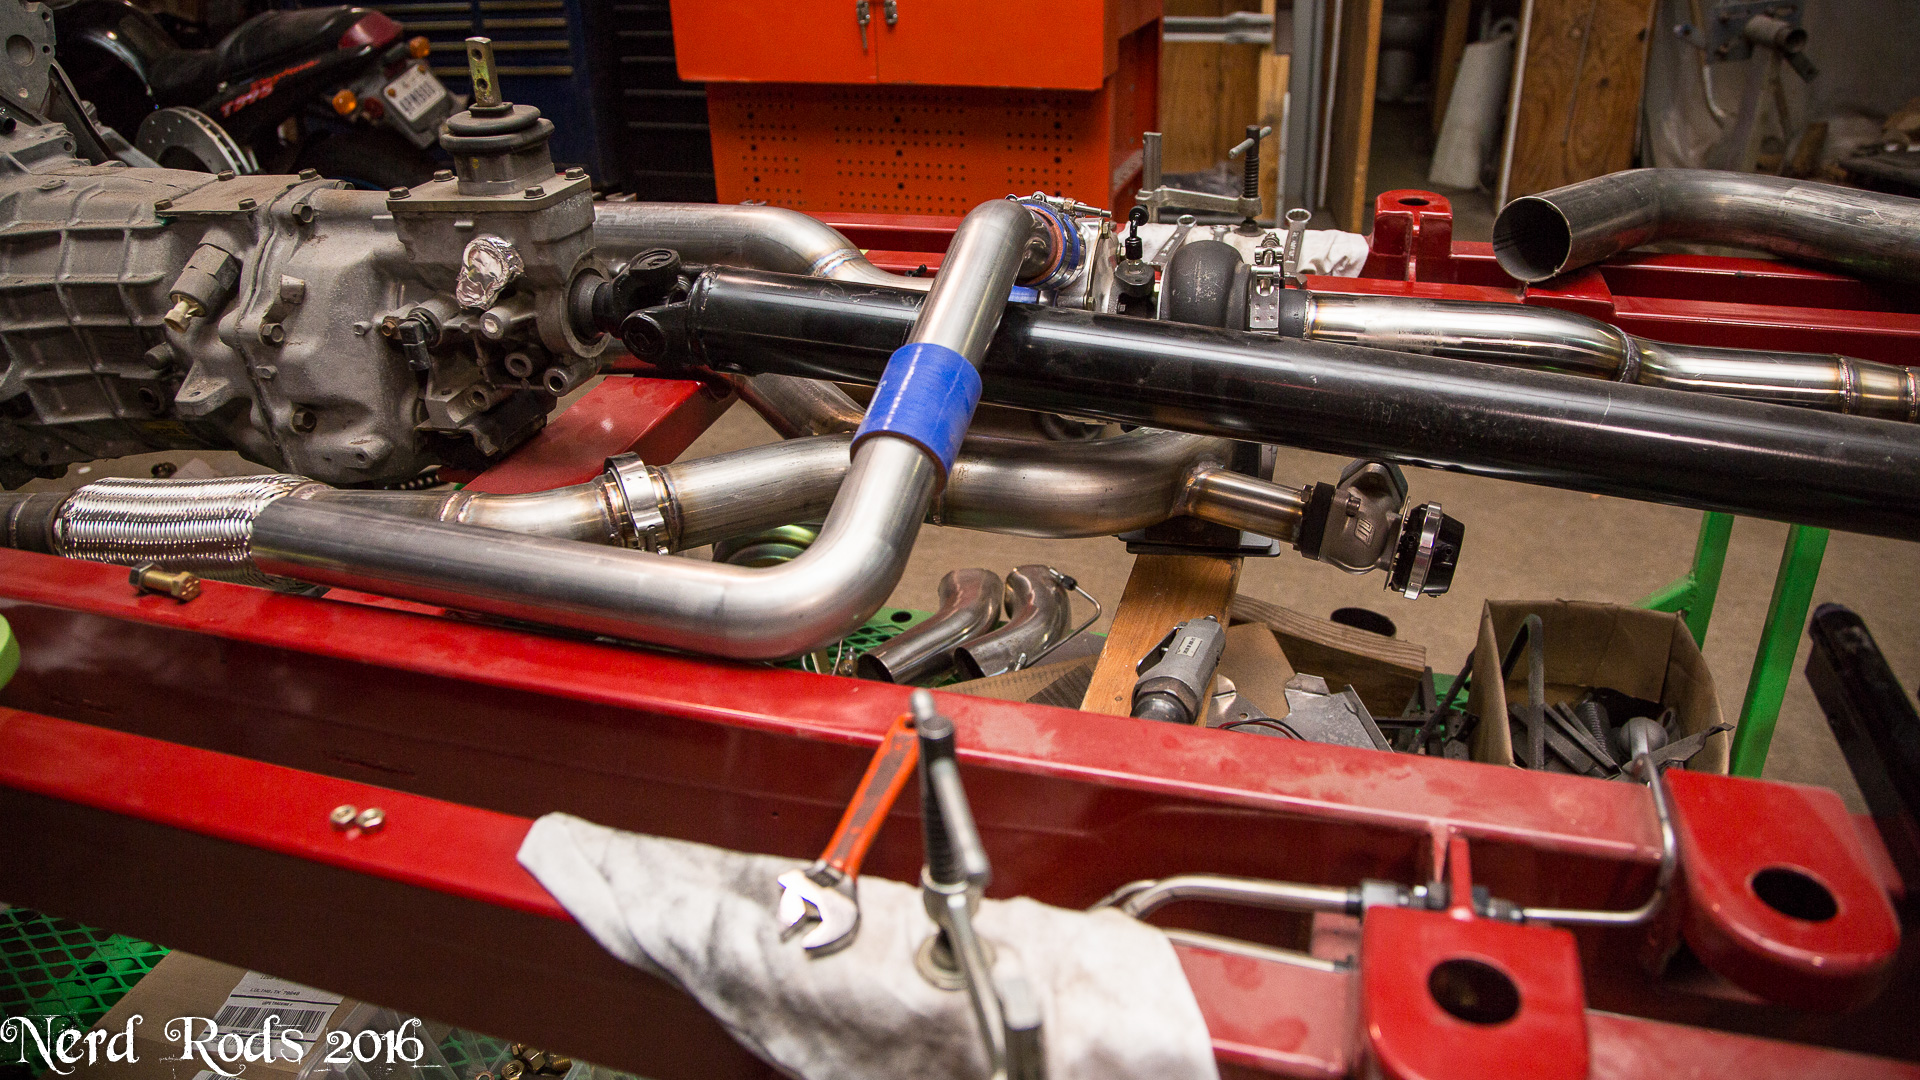
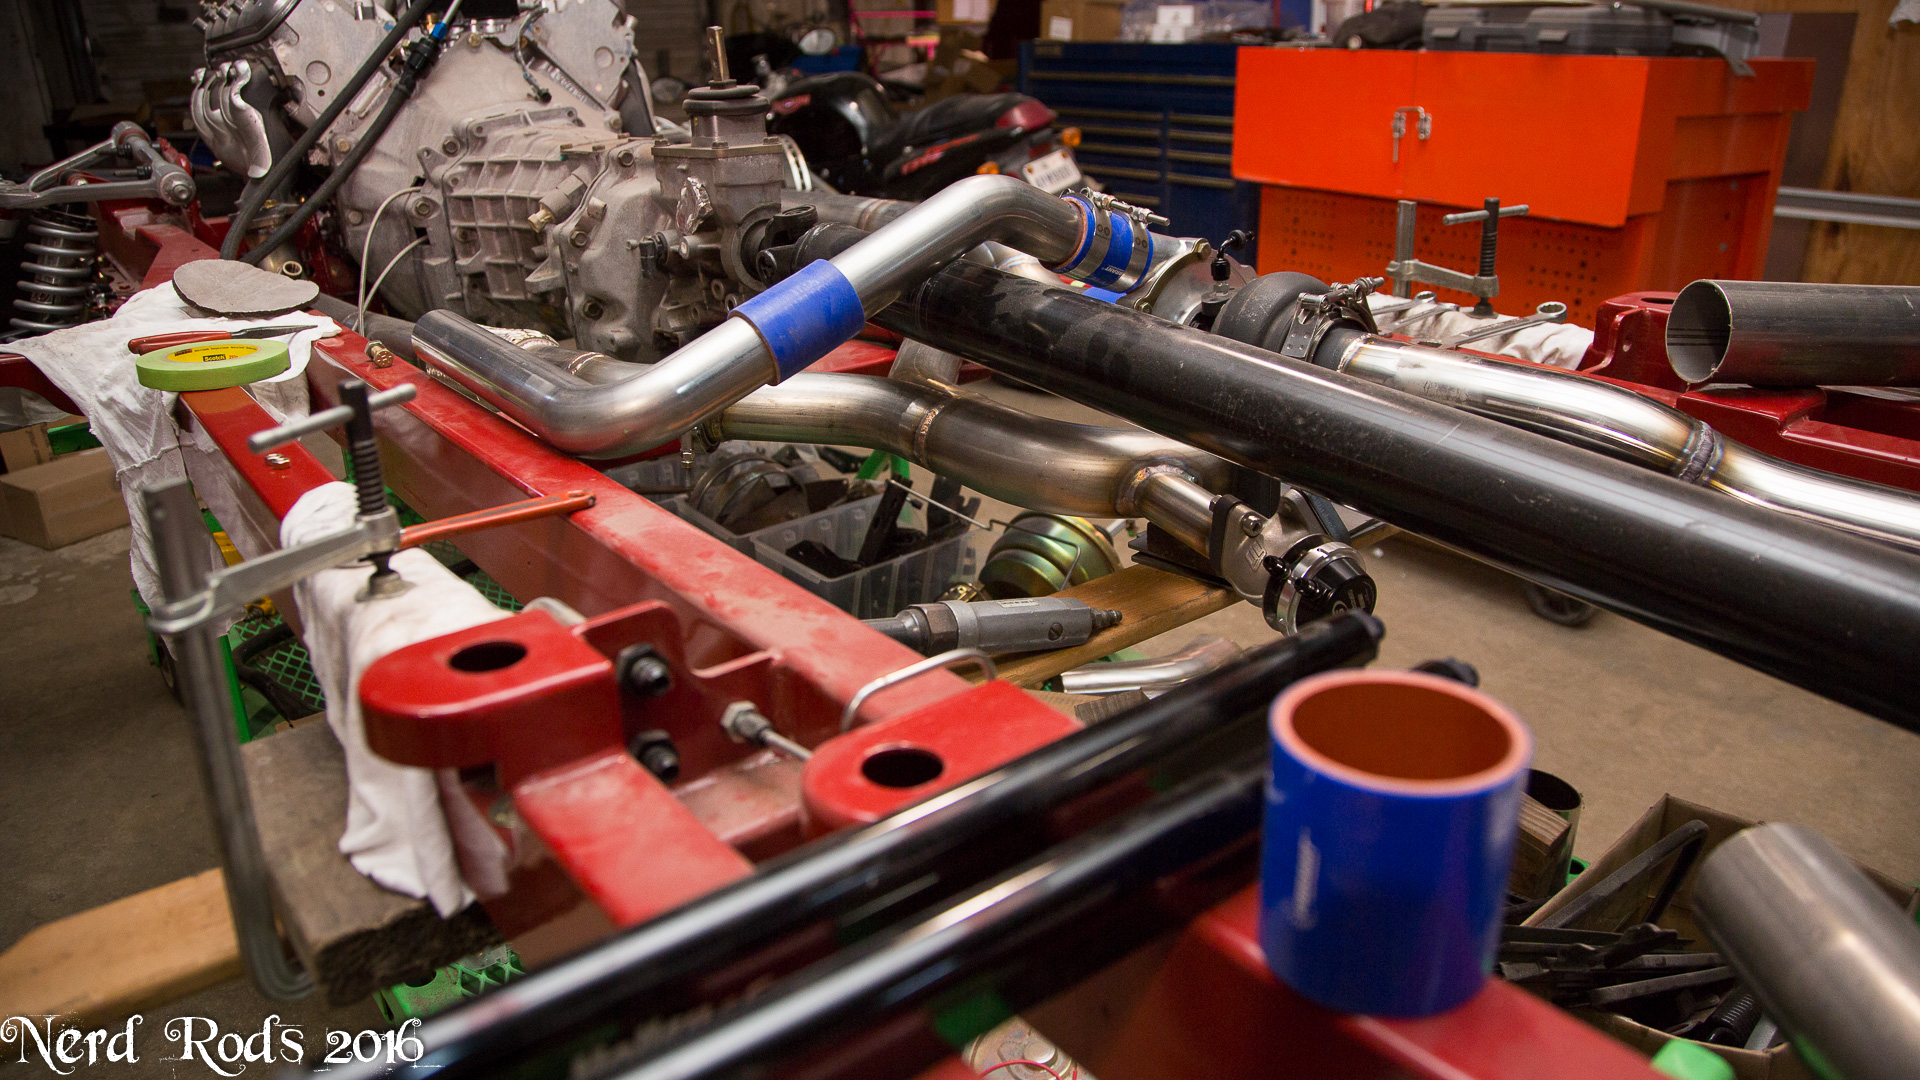
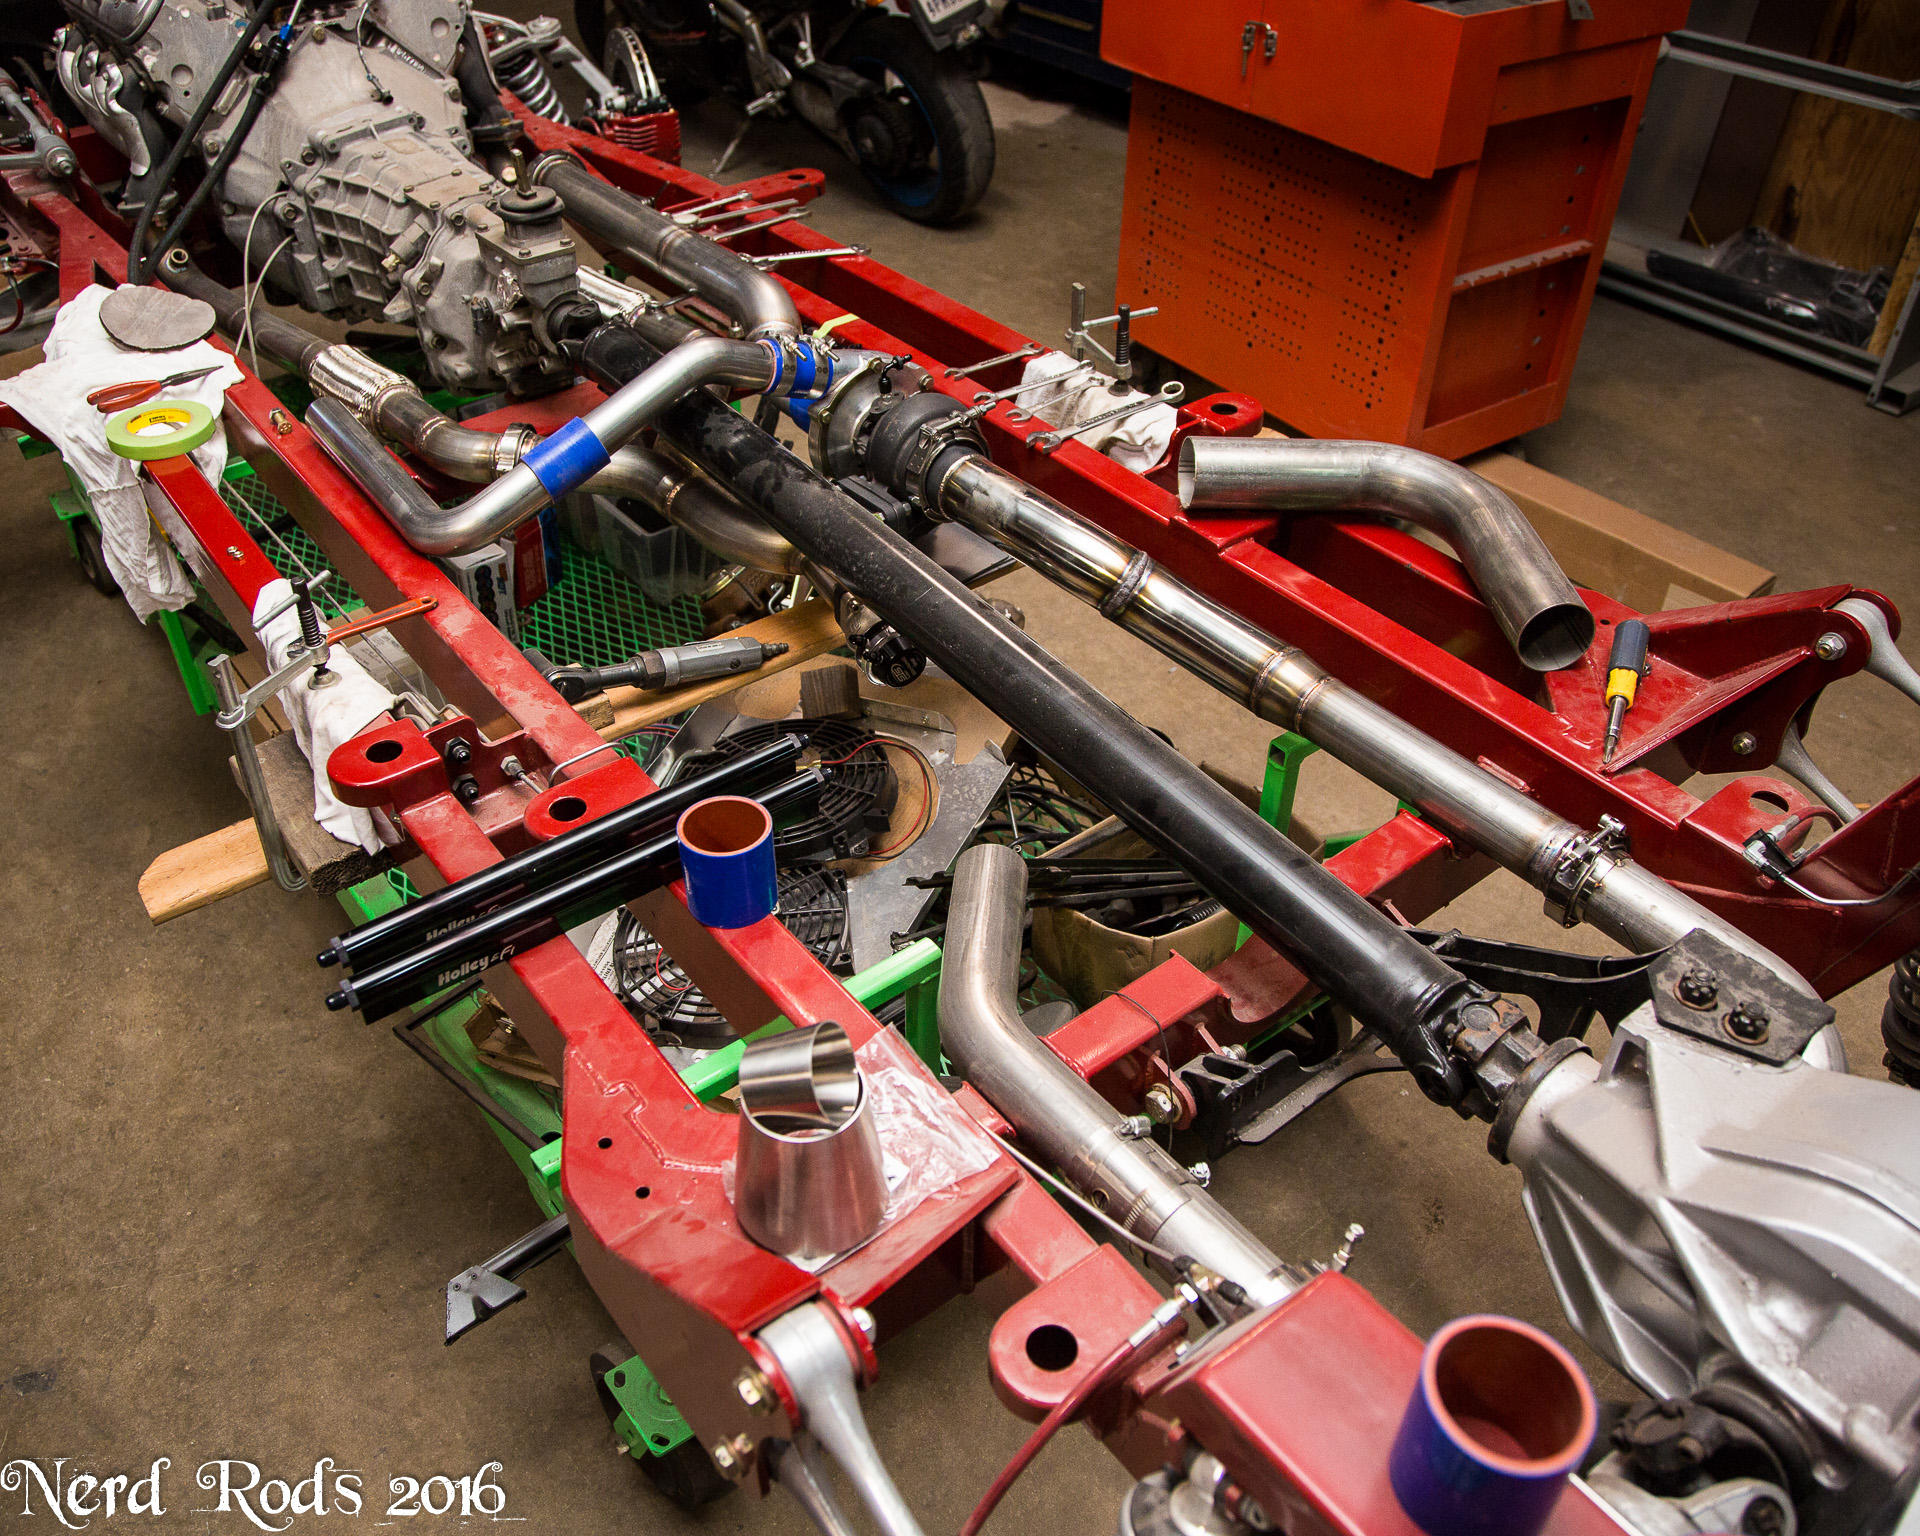
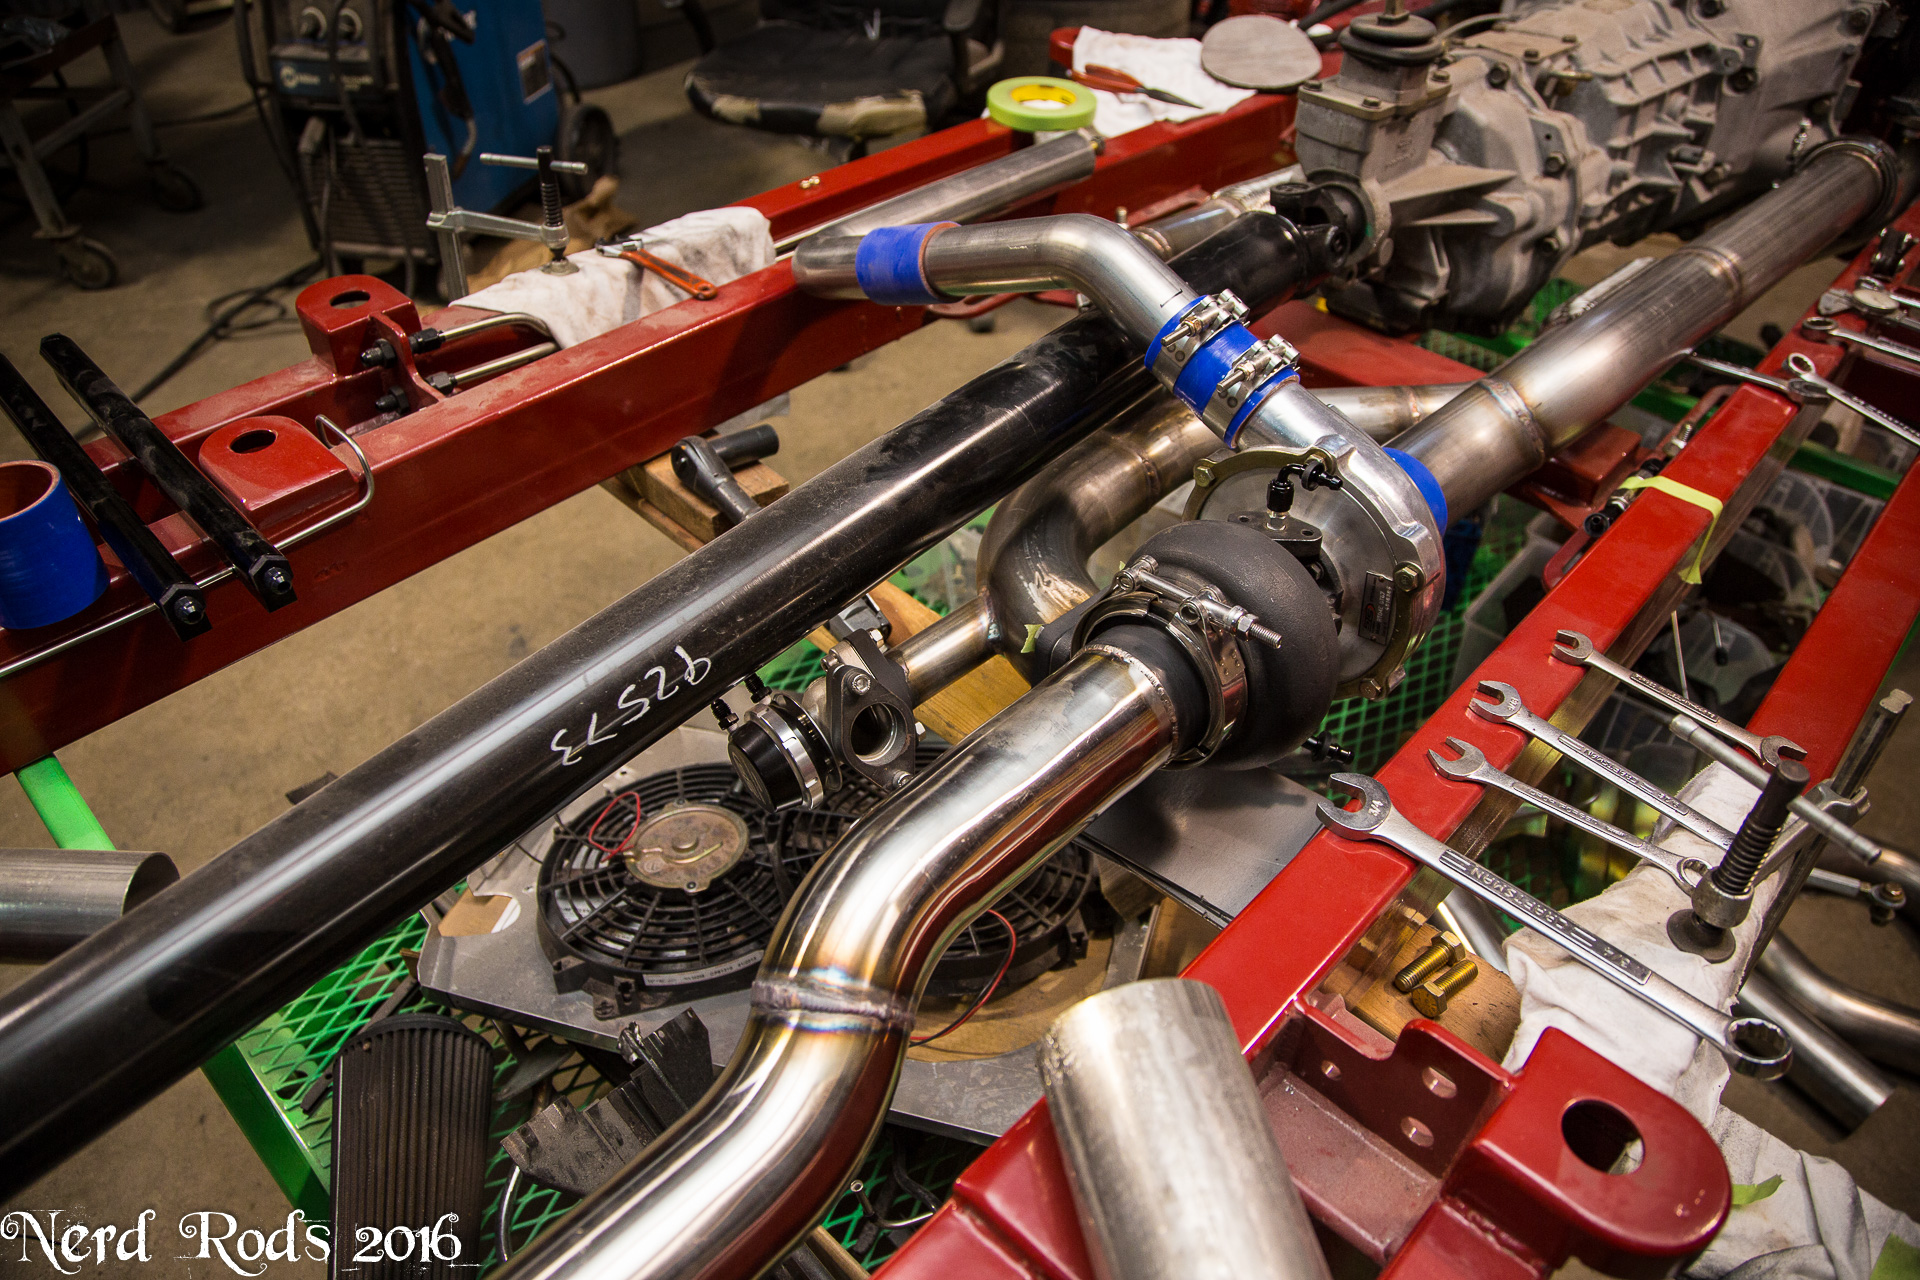

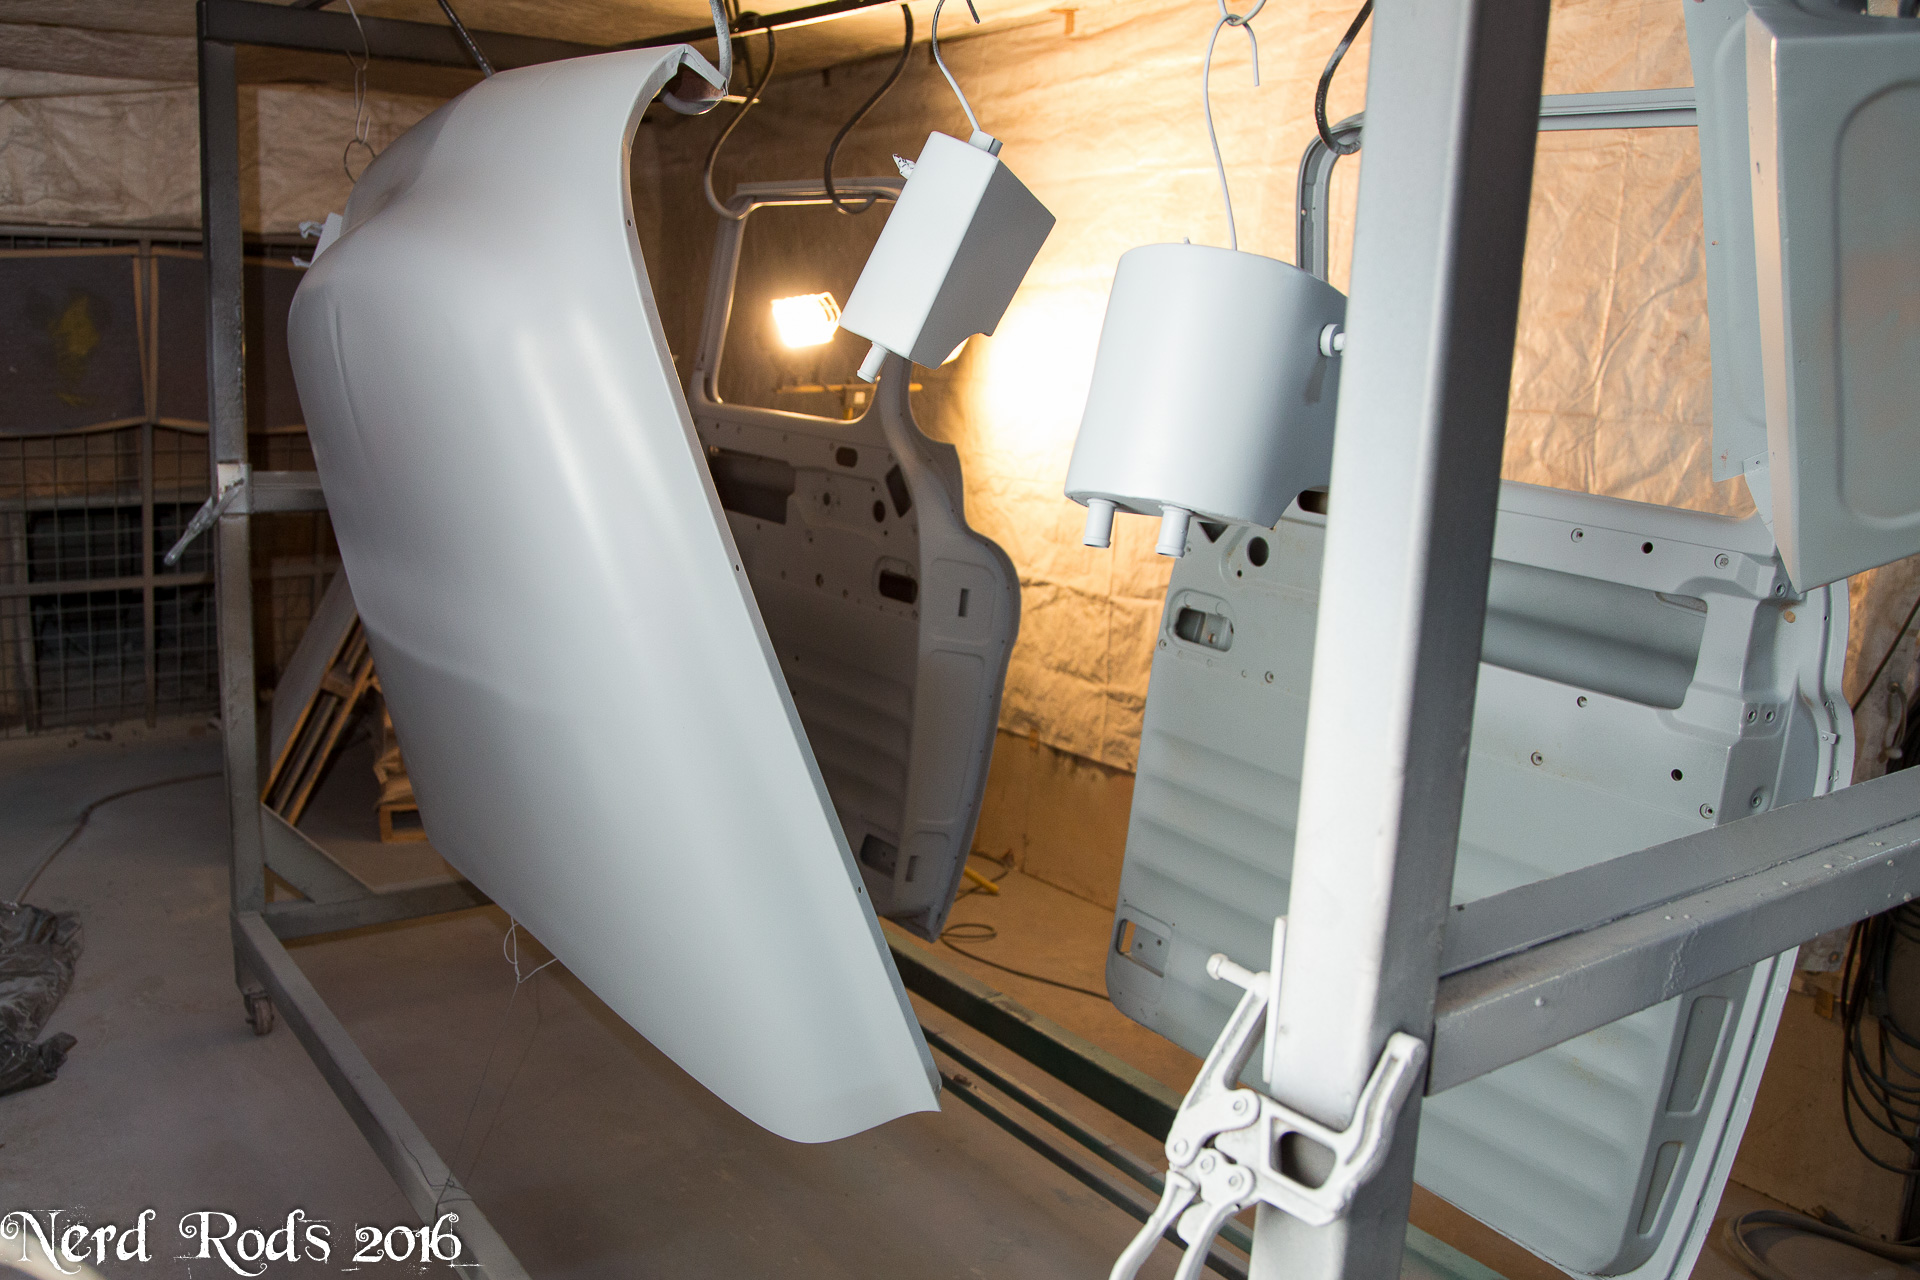
Paint prep is also going on at a rapid pace.
Later
-Russell @ Nerd Rods
Update 2016 Mar 09
With most of the mock up done I needed to coat the mild steel parts on the exhaust. Just some 2000�F exhaust paint because in reality the turbo is going to be way hotter than that and basically nothing will survive so this just gets us by for the short future.
On a slightly obnoxious side, the injectors were raw steel and I only noticed because on the side facing the front door in the shop they had rust on them. So I has to blow a few hours taking them all off, sanding the rust off by hand, making them off and get them painted. Just one of those 2-3 hours added to the punch clock that we do all the time.
This is the intake to the turbo from the cowl induction. This is a tiny bead to work as a lock for the silicone coupler between the two. Just turn the TIG way down so the bead builds up instead of burning in.
And on to a boat load of turbo and exhaust photos.
Paint prep is also going on at a rapid pace.
Later
-Russell @ Nerd Rods
03-08-2016, 10:38 PM
#34
TECH Resident

WOW! awesome job!
Curious, on the turbo placement is there more lag or some power lost because of the extra 5' of piping on each side of the turbo (hot and cold)? I realize everything is a tradeoff and that appears a very clean way to install it.
Thanks again for all of the posts you are making here.
Was the final color decided or is that a surprise?
Doug
03-08-2018, 12:02 AM
#36
Launching!
Thread Starter
Join Date: Jan 2007
Location: Luling TX In the Hot Rod Shop
Posts: 294
Likes: 0
Received 3 Likes
on
3 Posts
Update 2018 Mar 02
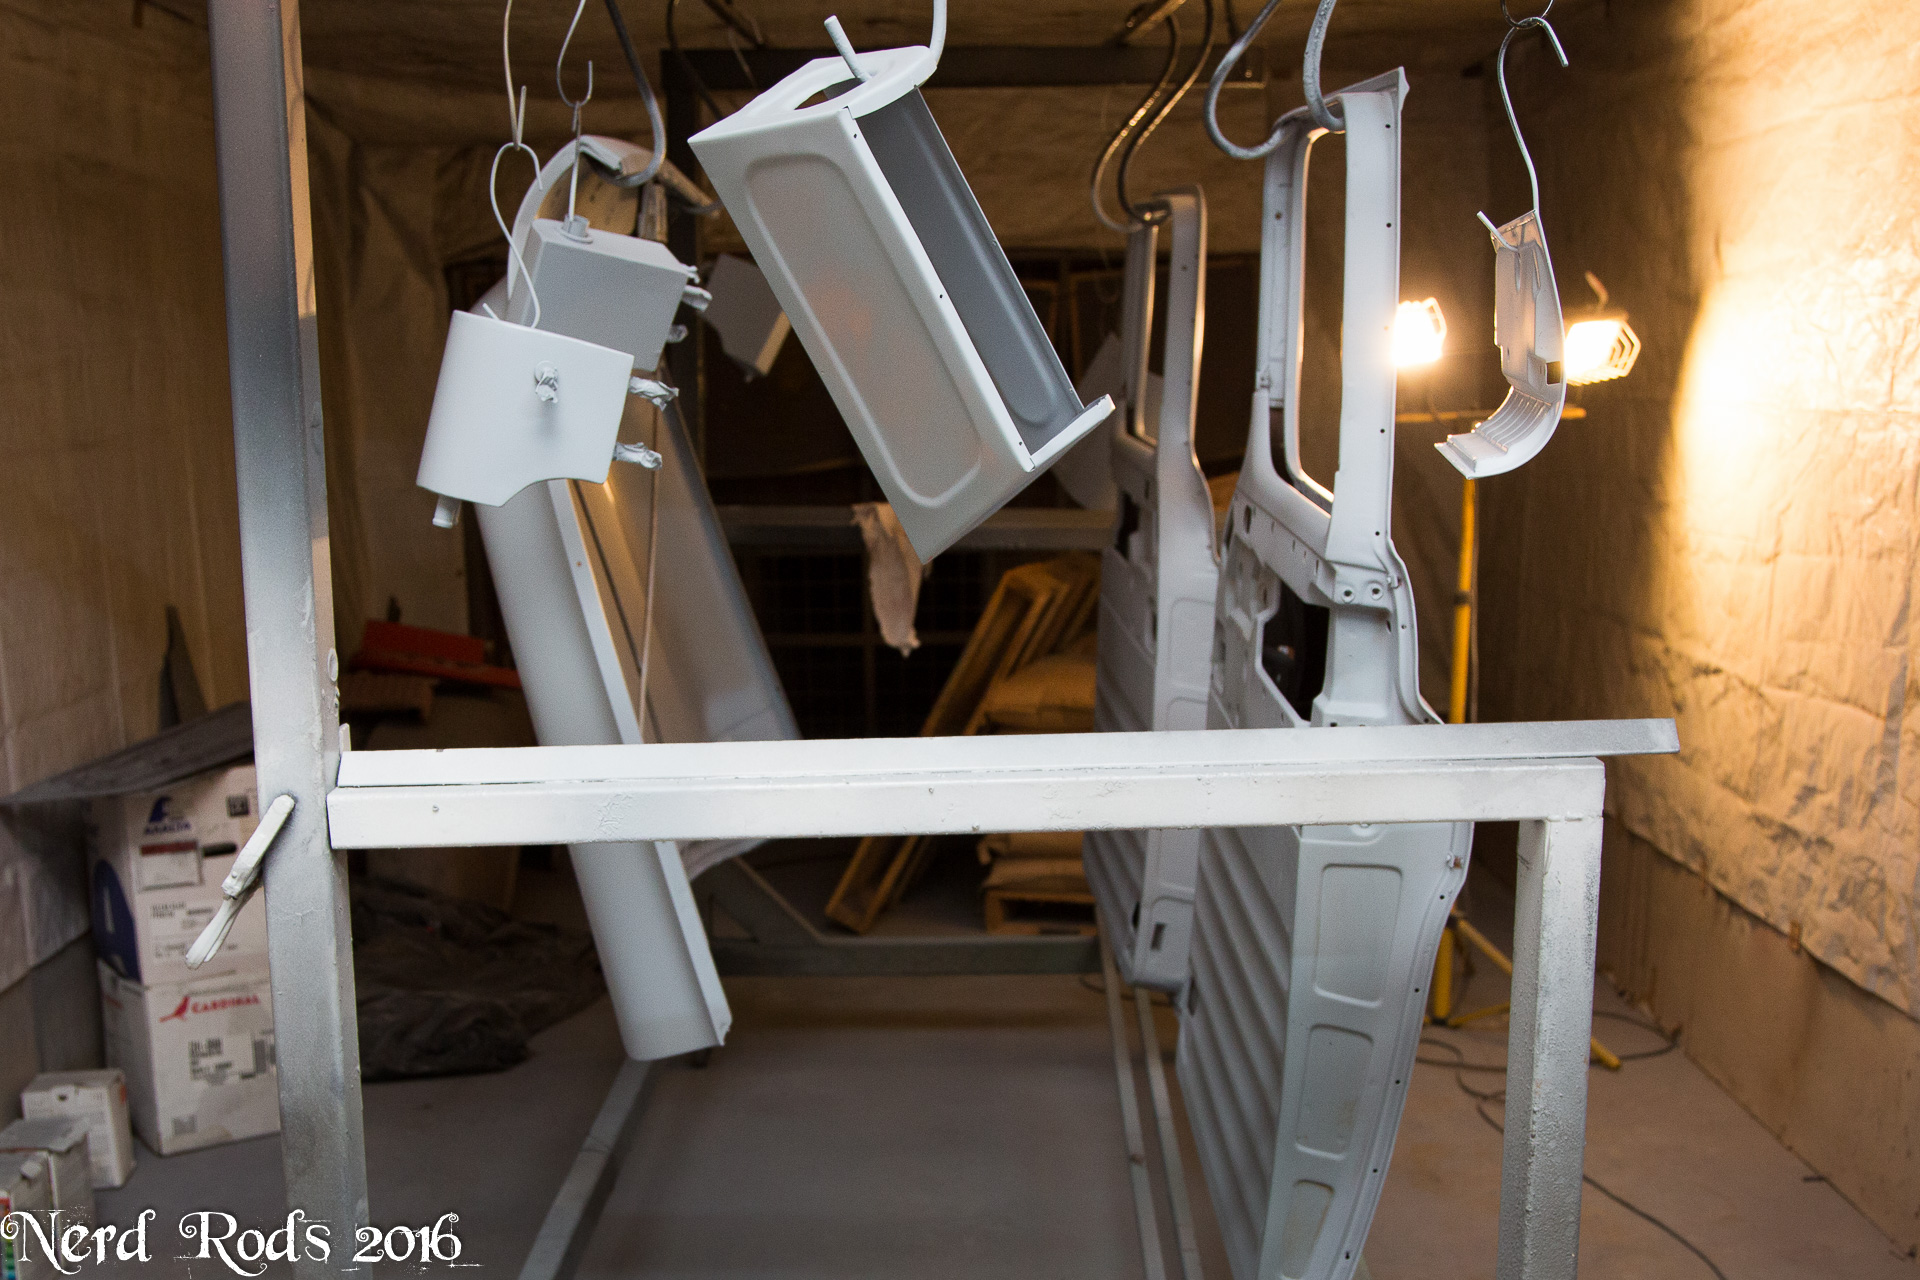
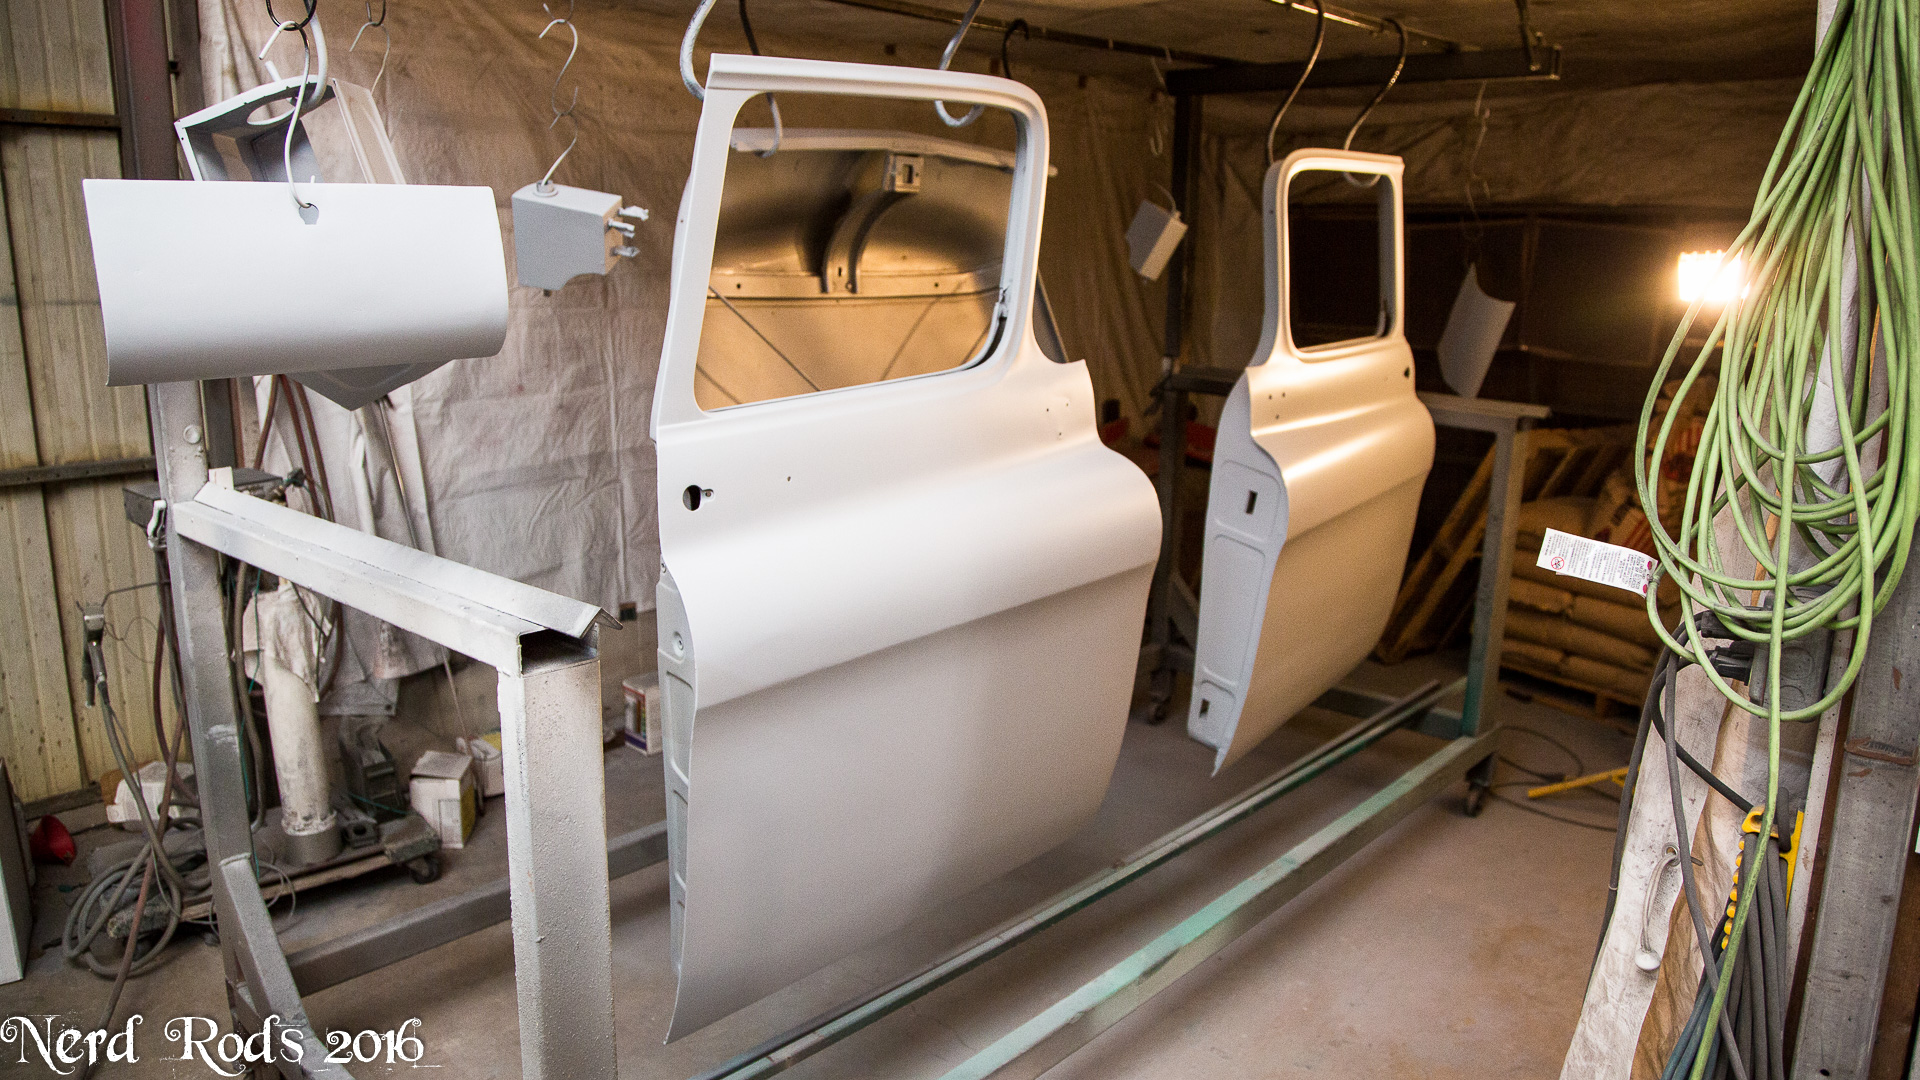
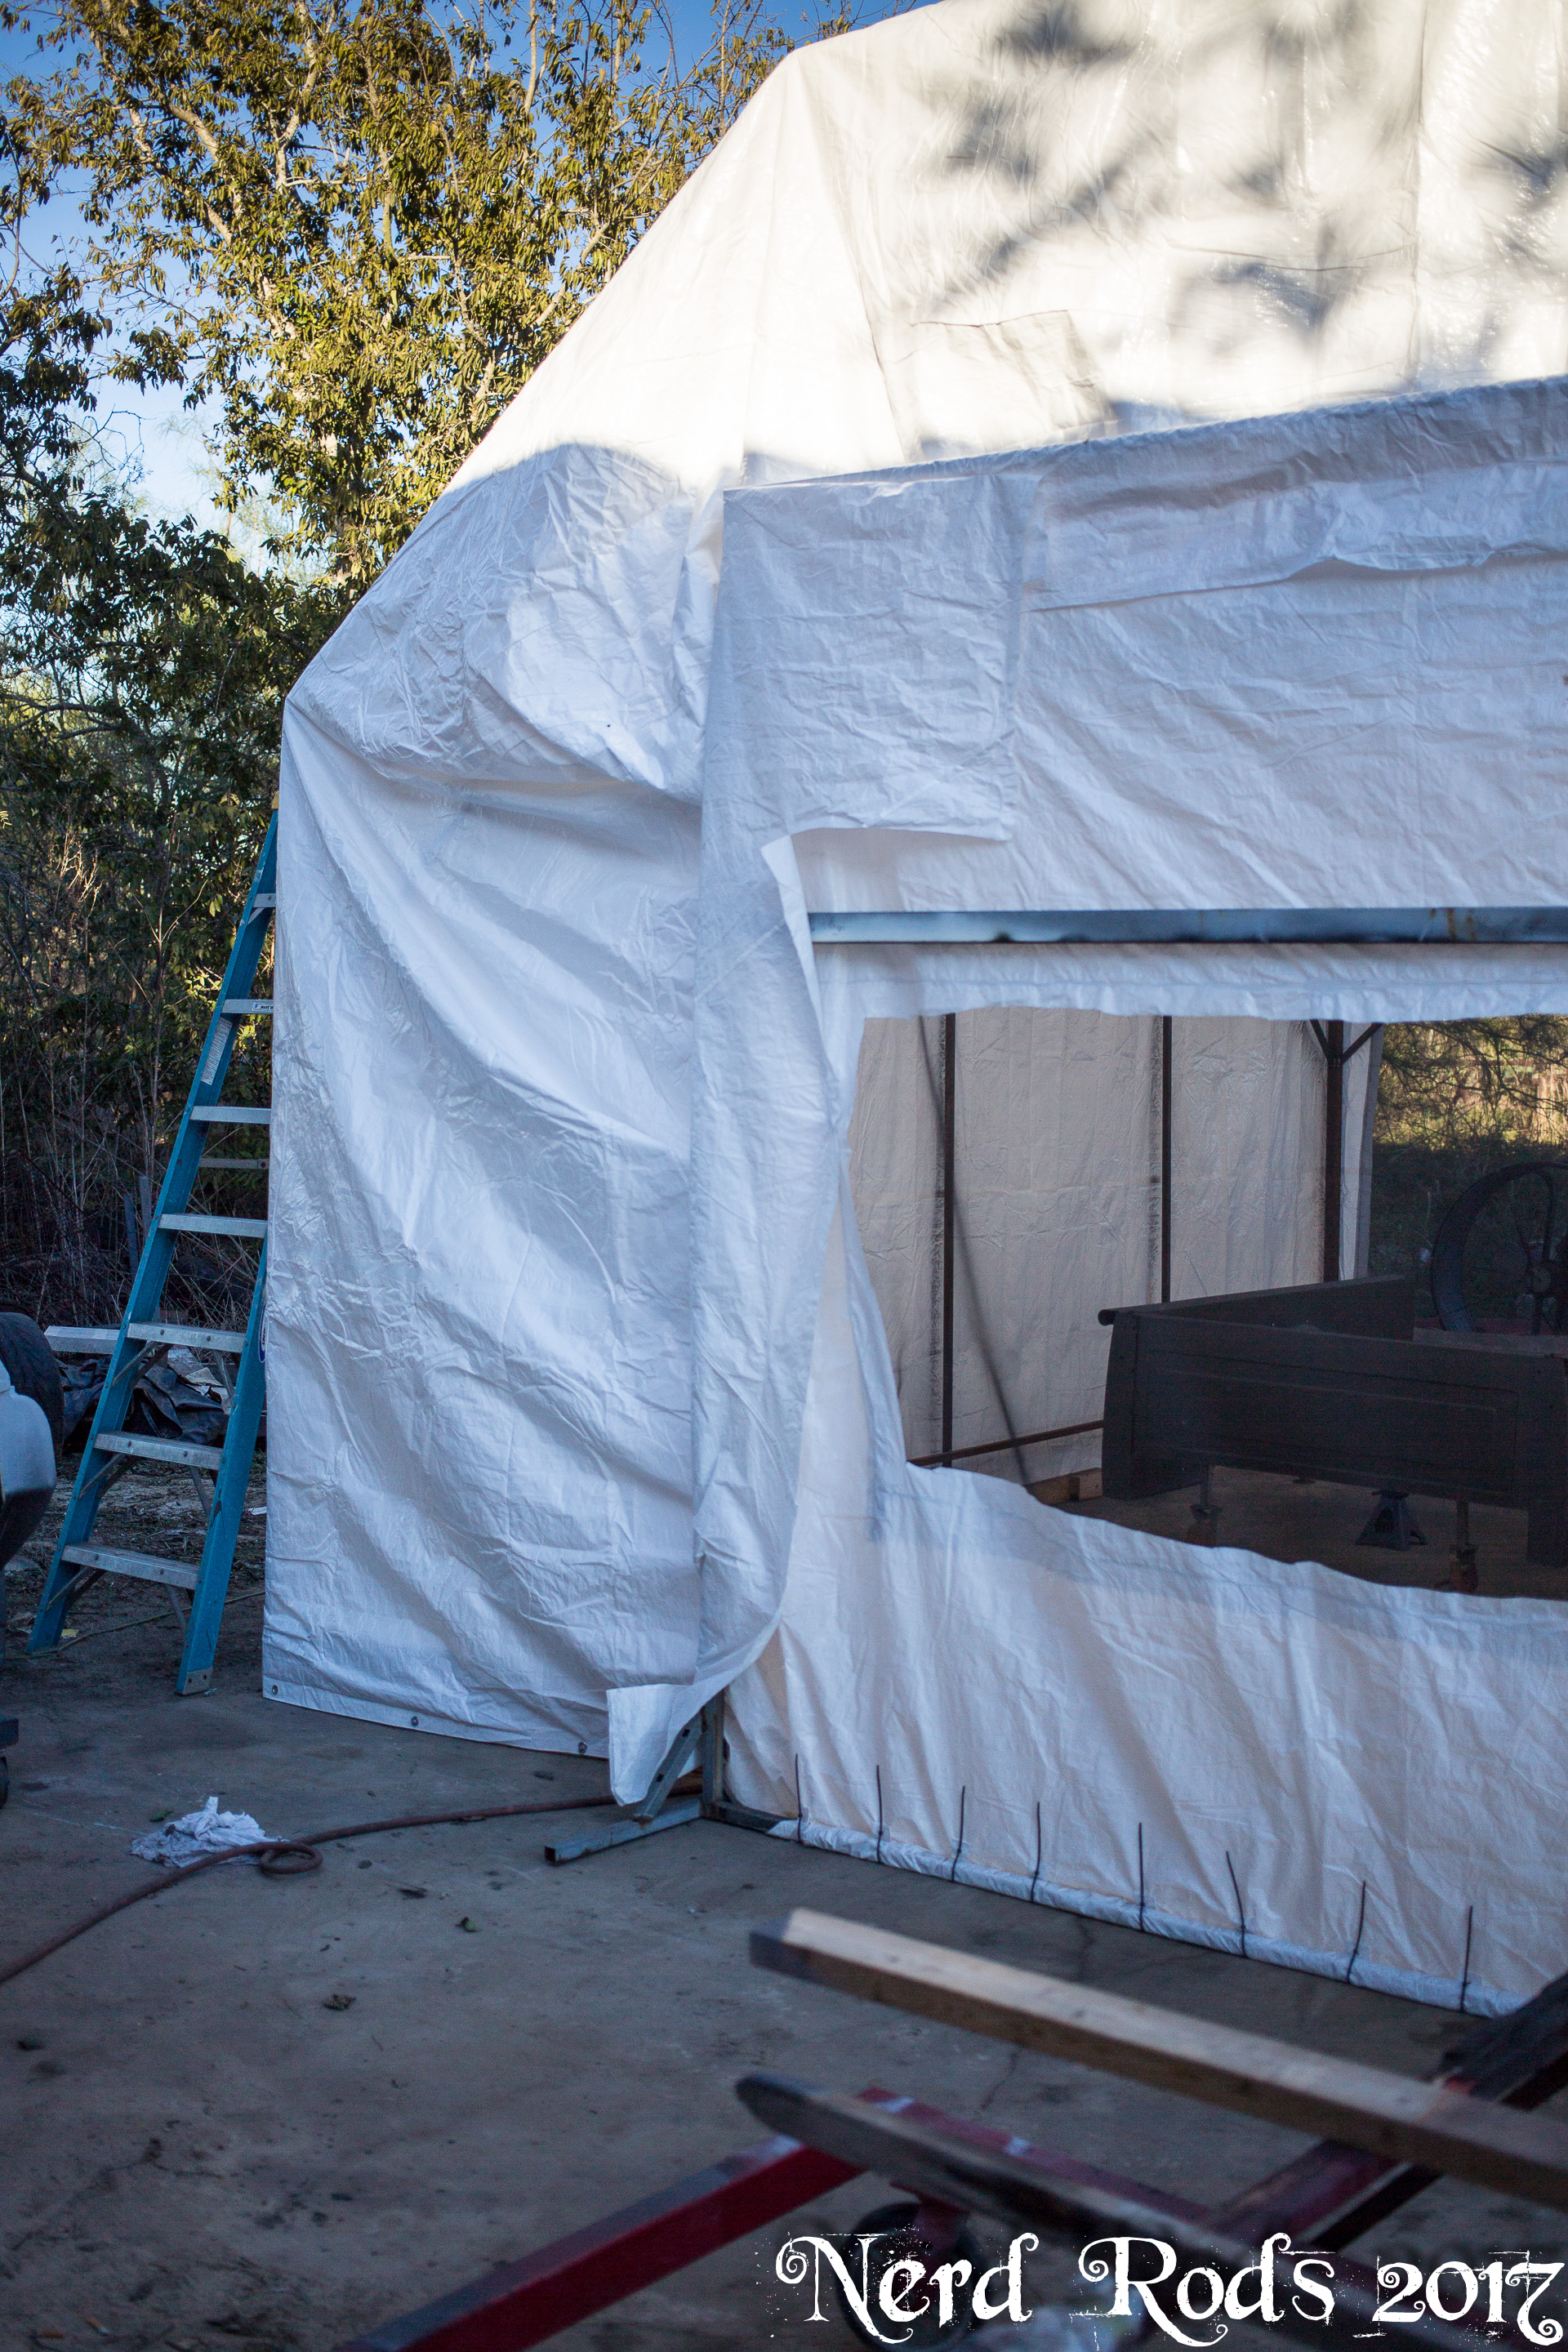
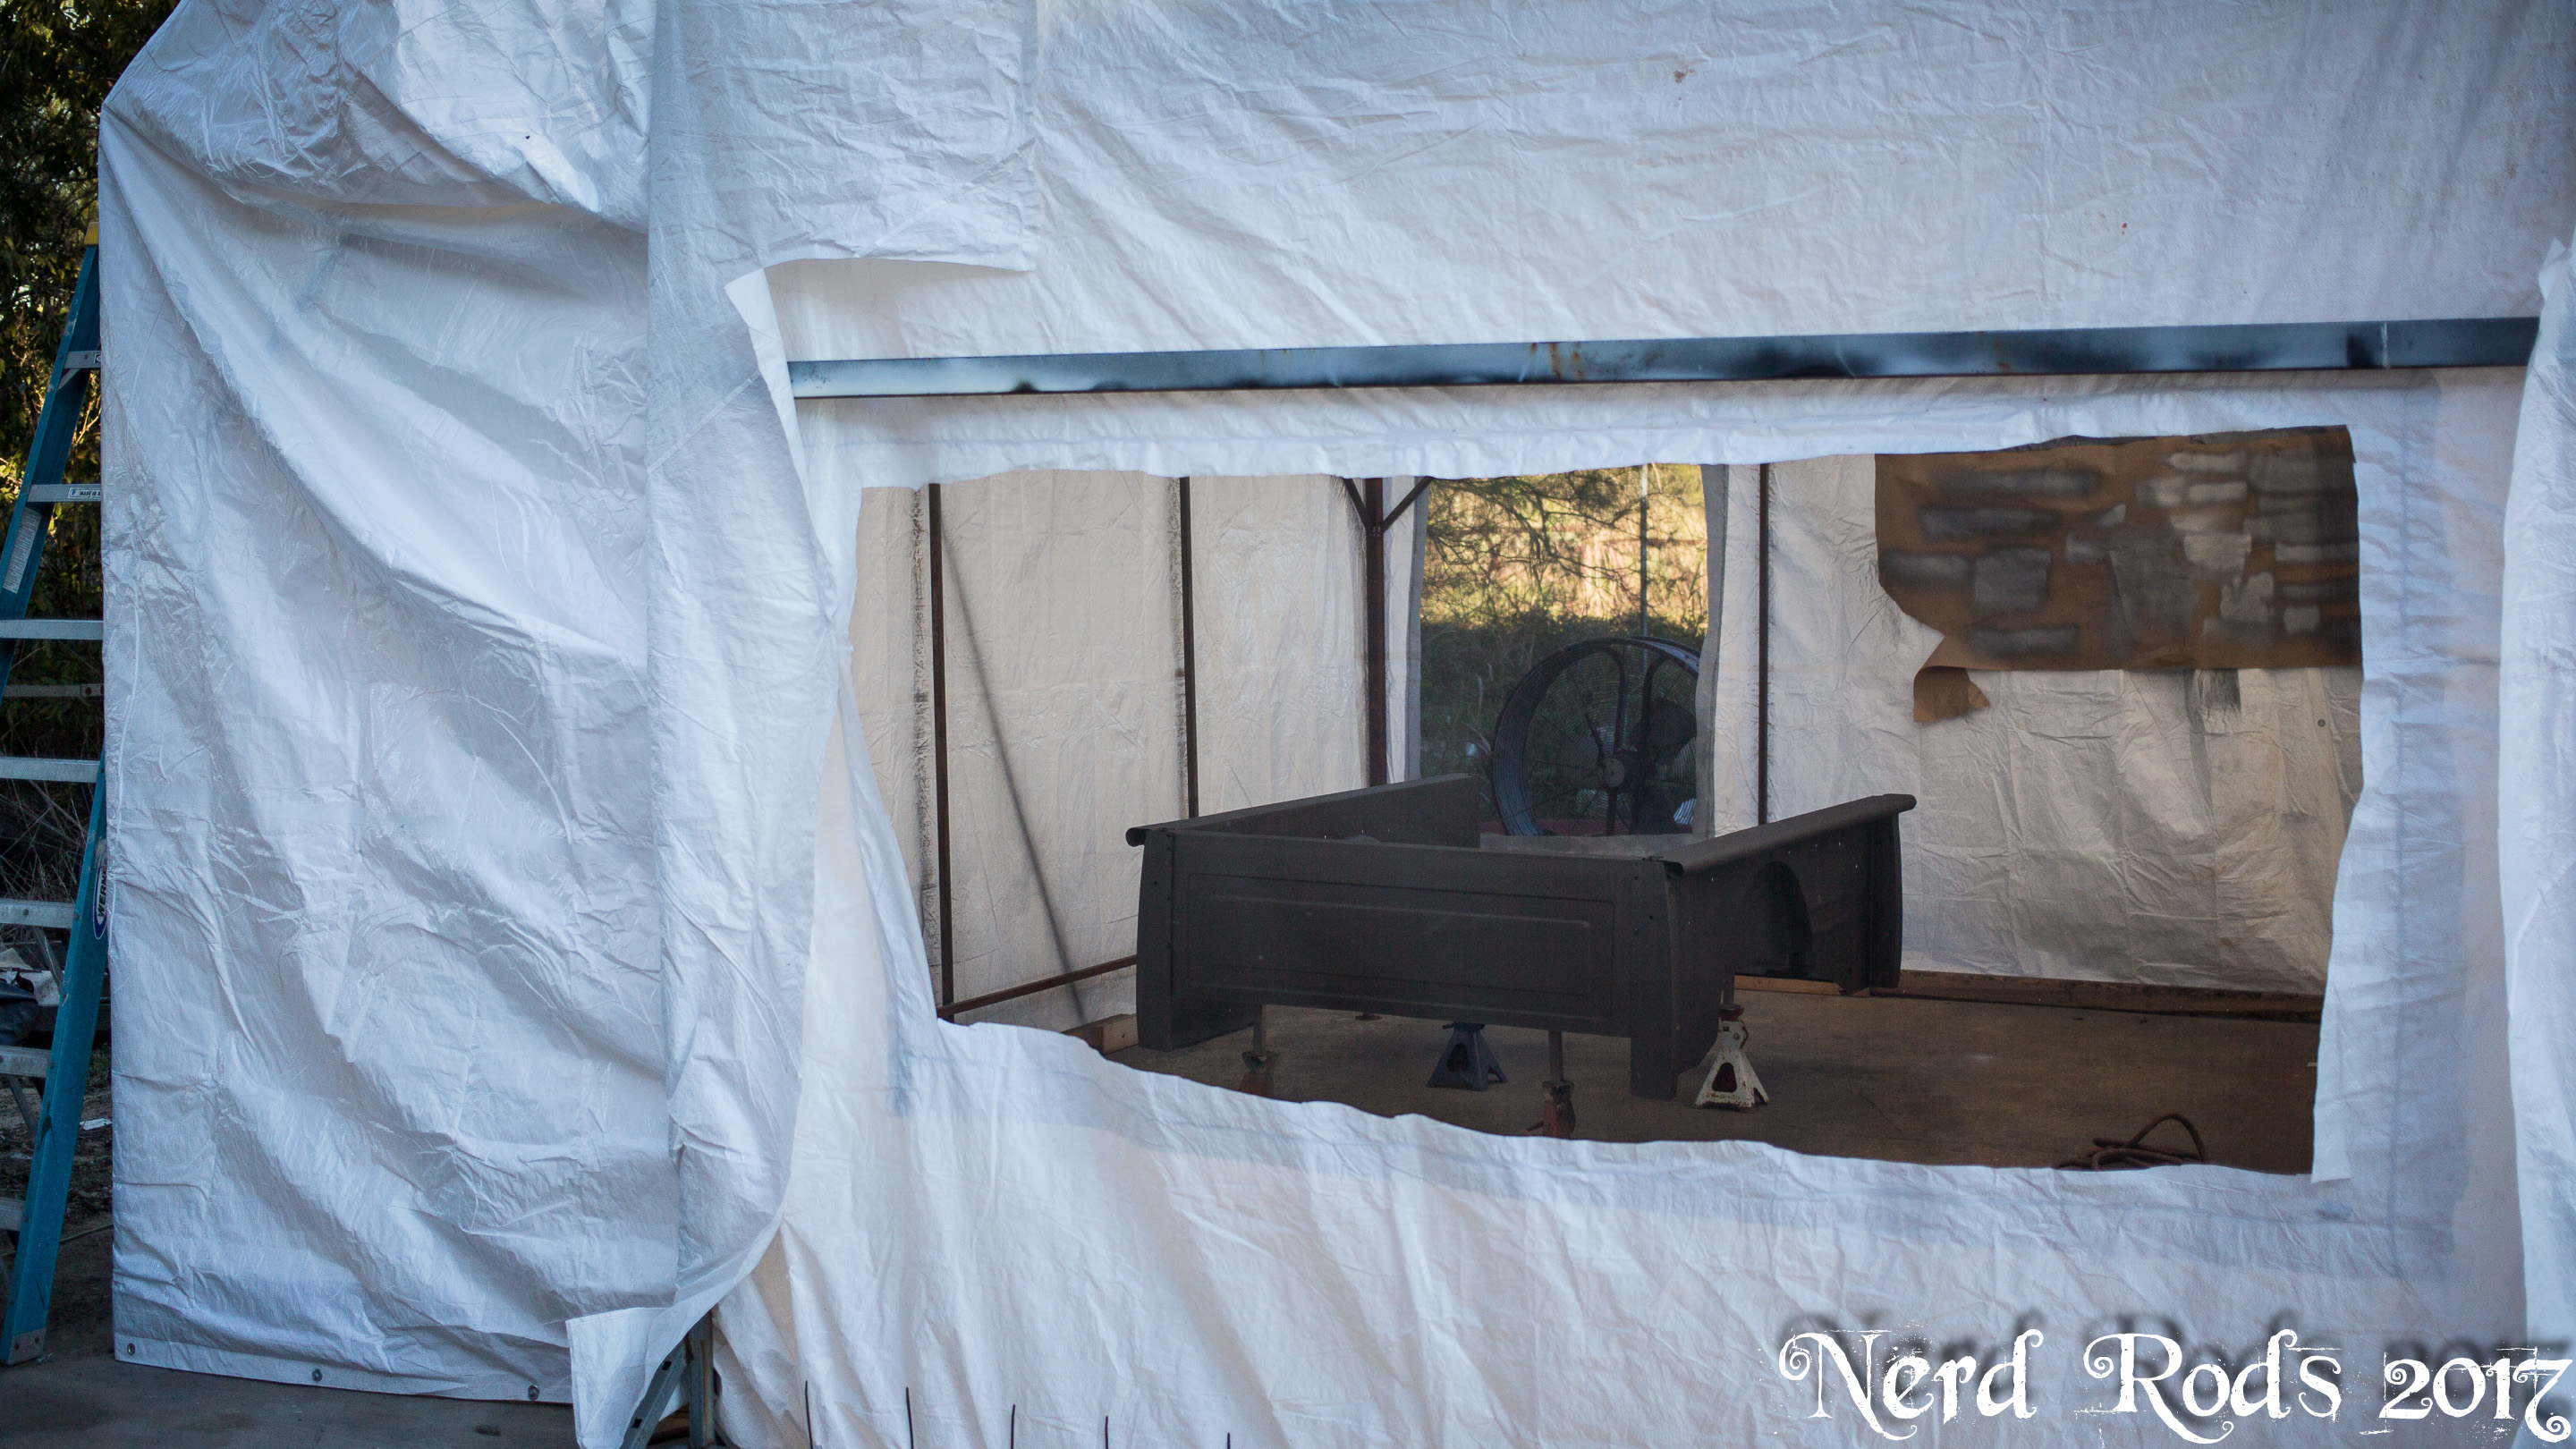
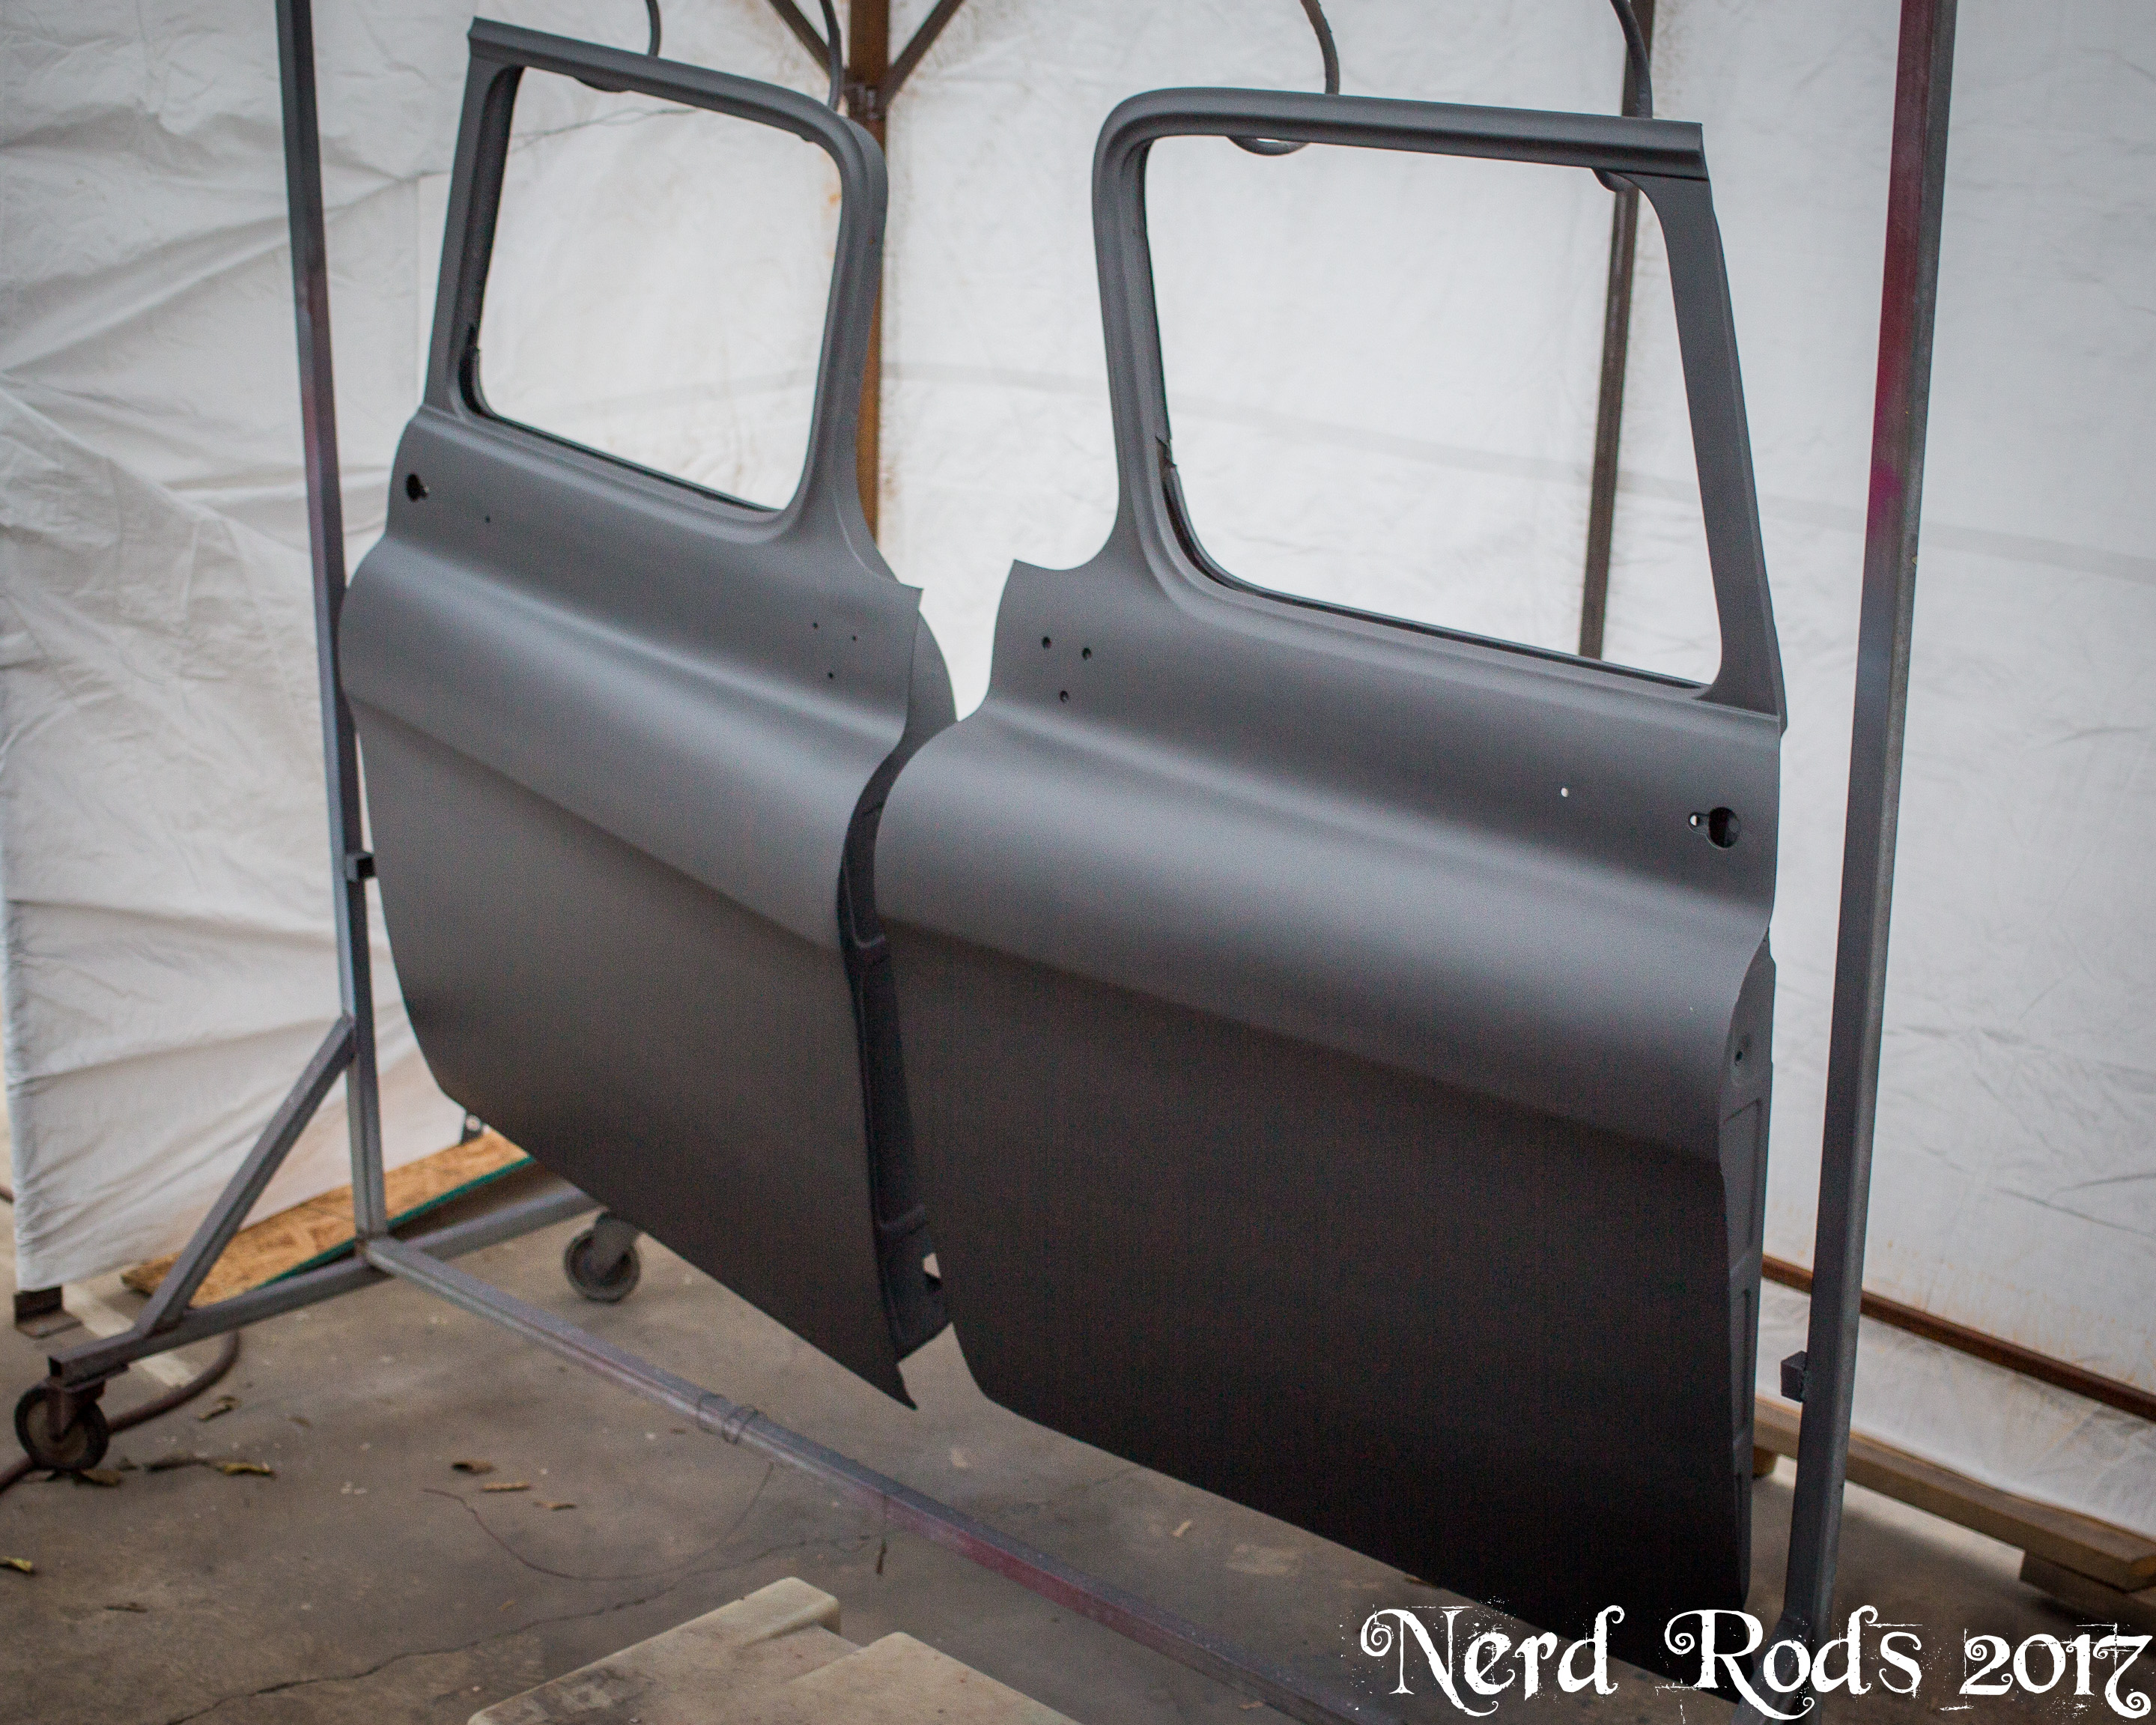
I know, I'm in trouble. I keep forgetting to post updates here. We've gotten further on the truck but I�ve just been slammed these last few years with life in general and Dad�s project has gone to the back of my head while I try to get customers projects done and delivered. So cliffnotes and photos. Acutally these photos are from most of 2017, I have more I just need to get taken care of.
All the photos in a nice little JAVA viewing deal are right here.
http://gallery.nerdrods.com/Projects/03_D3/07/
Body and Paint, we built a small paint booth out back.

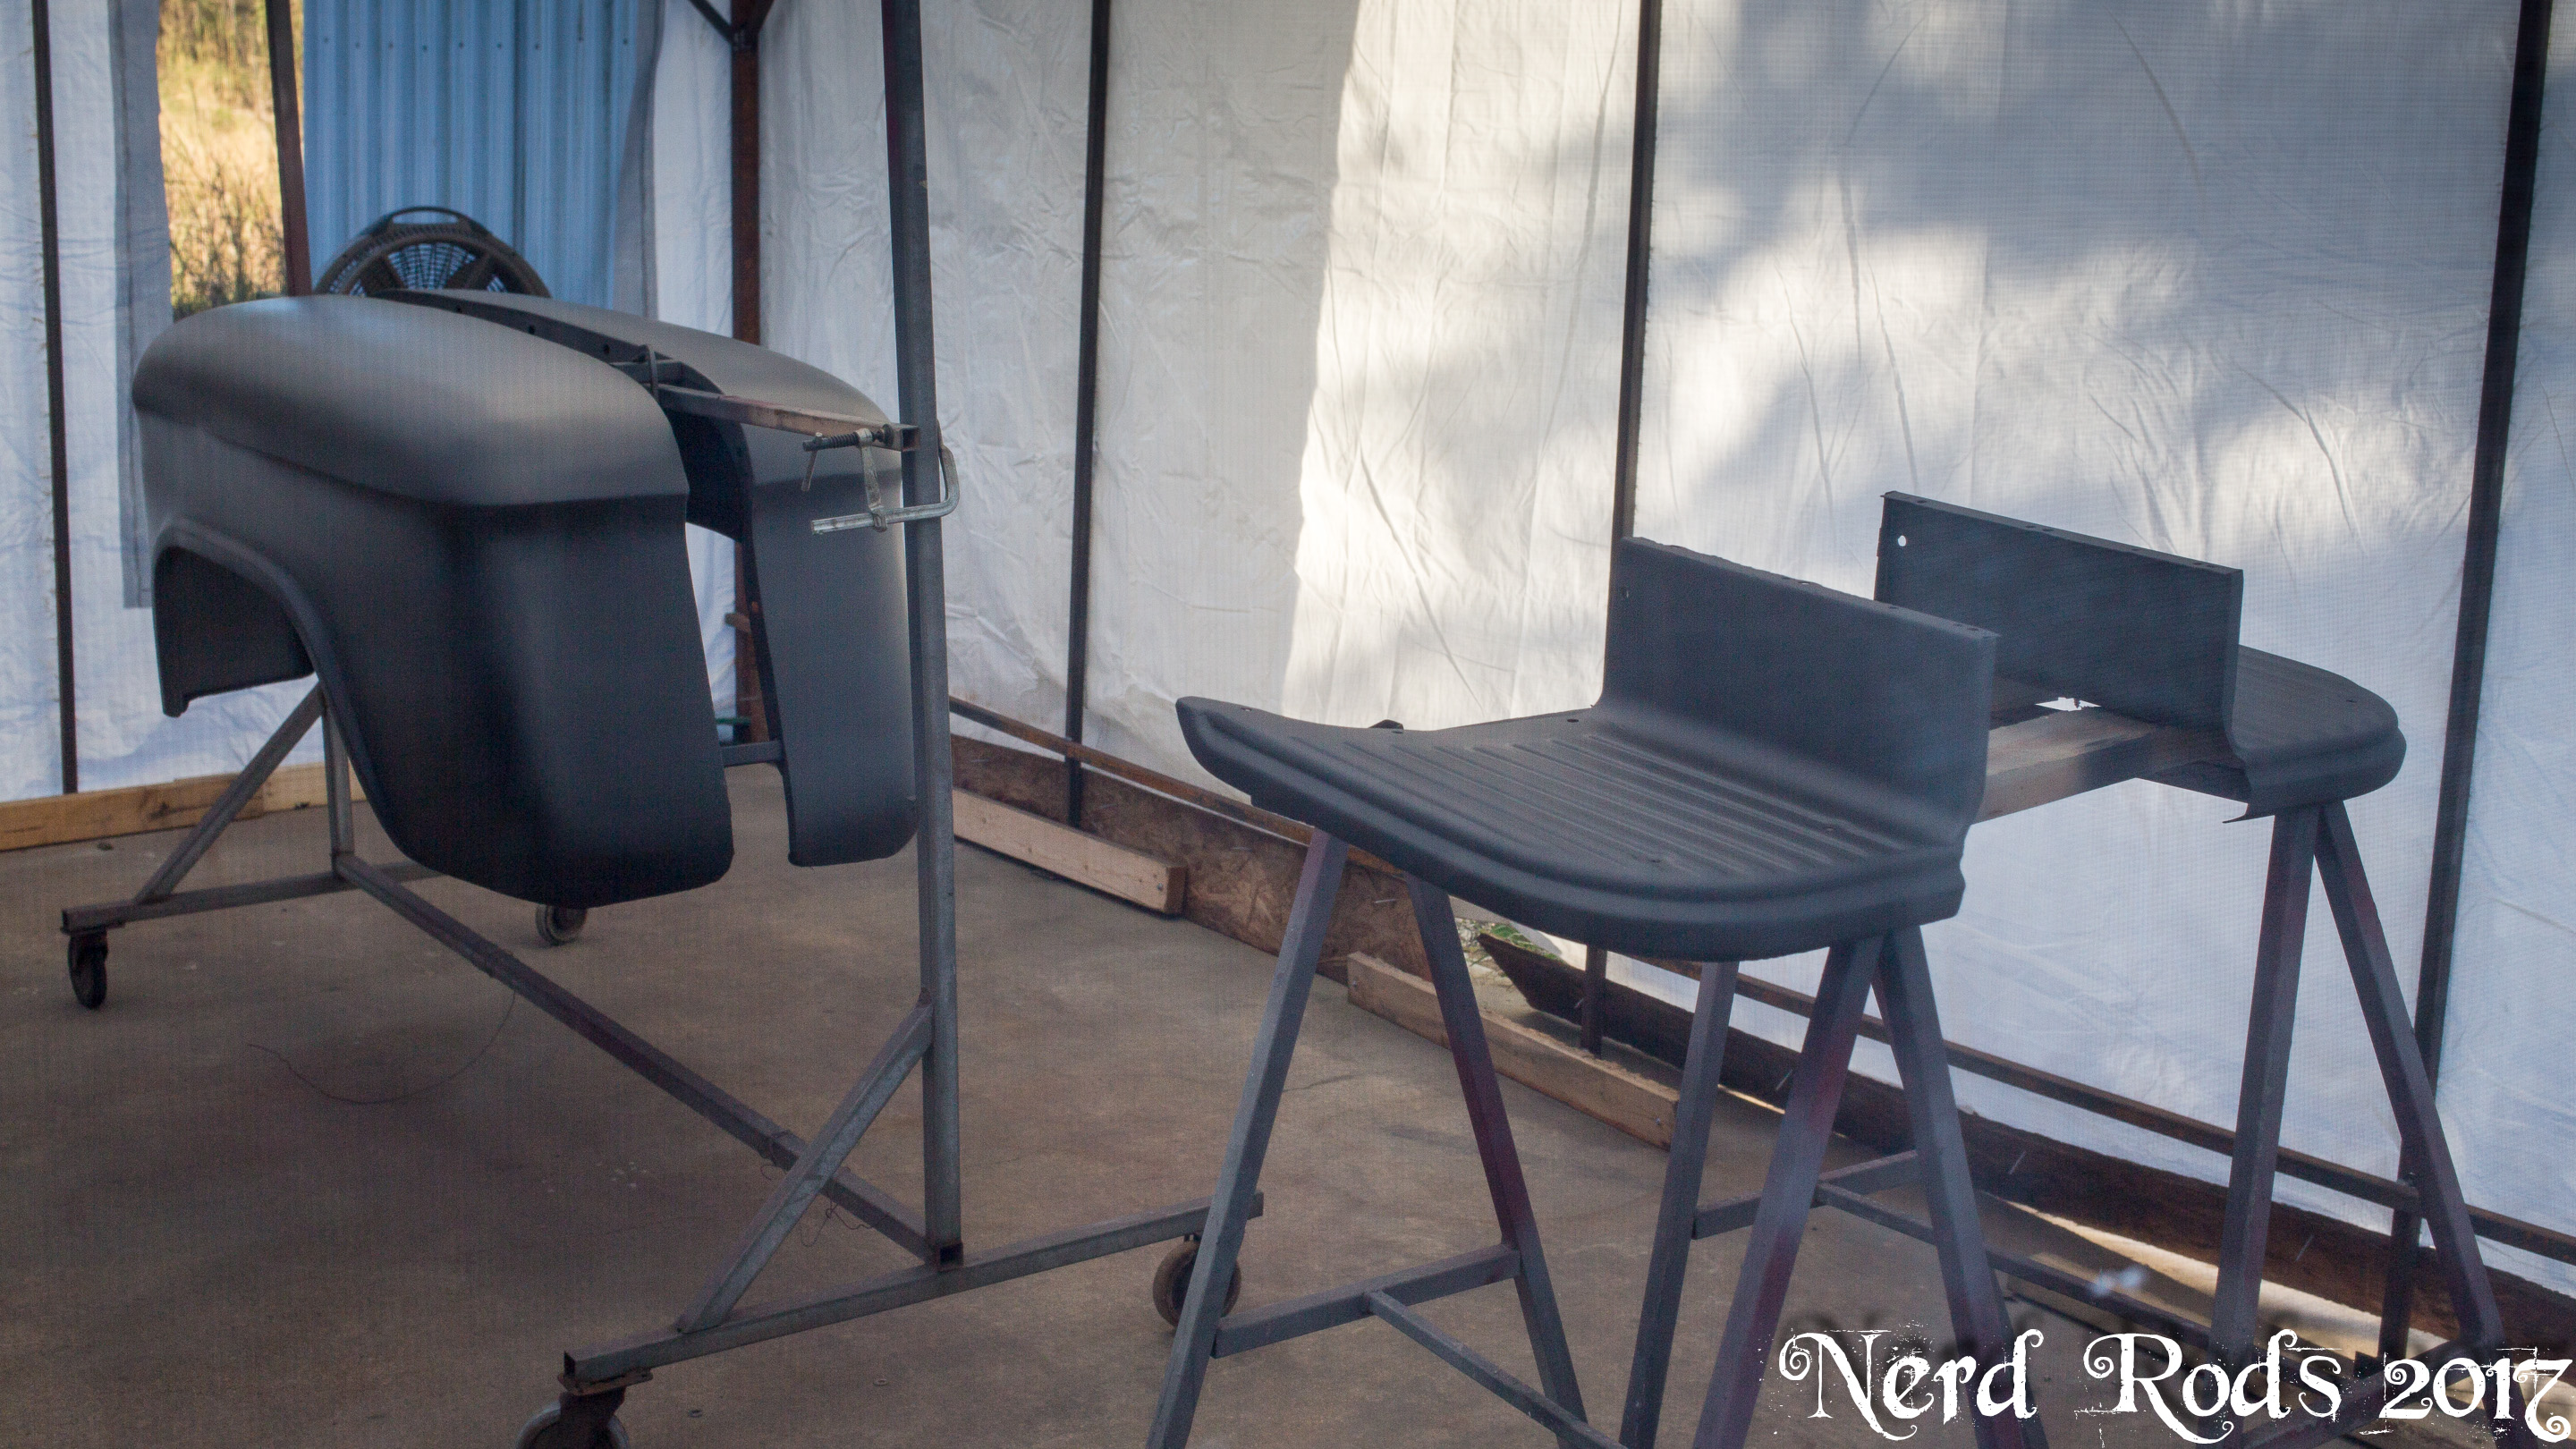
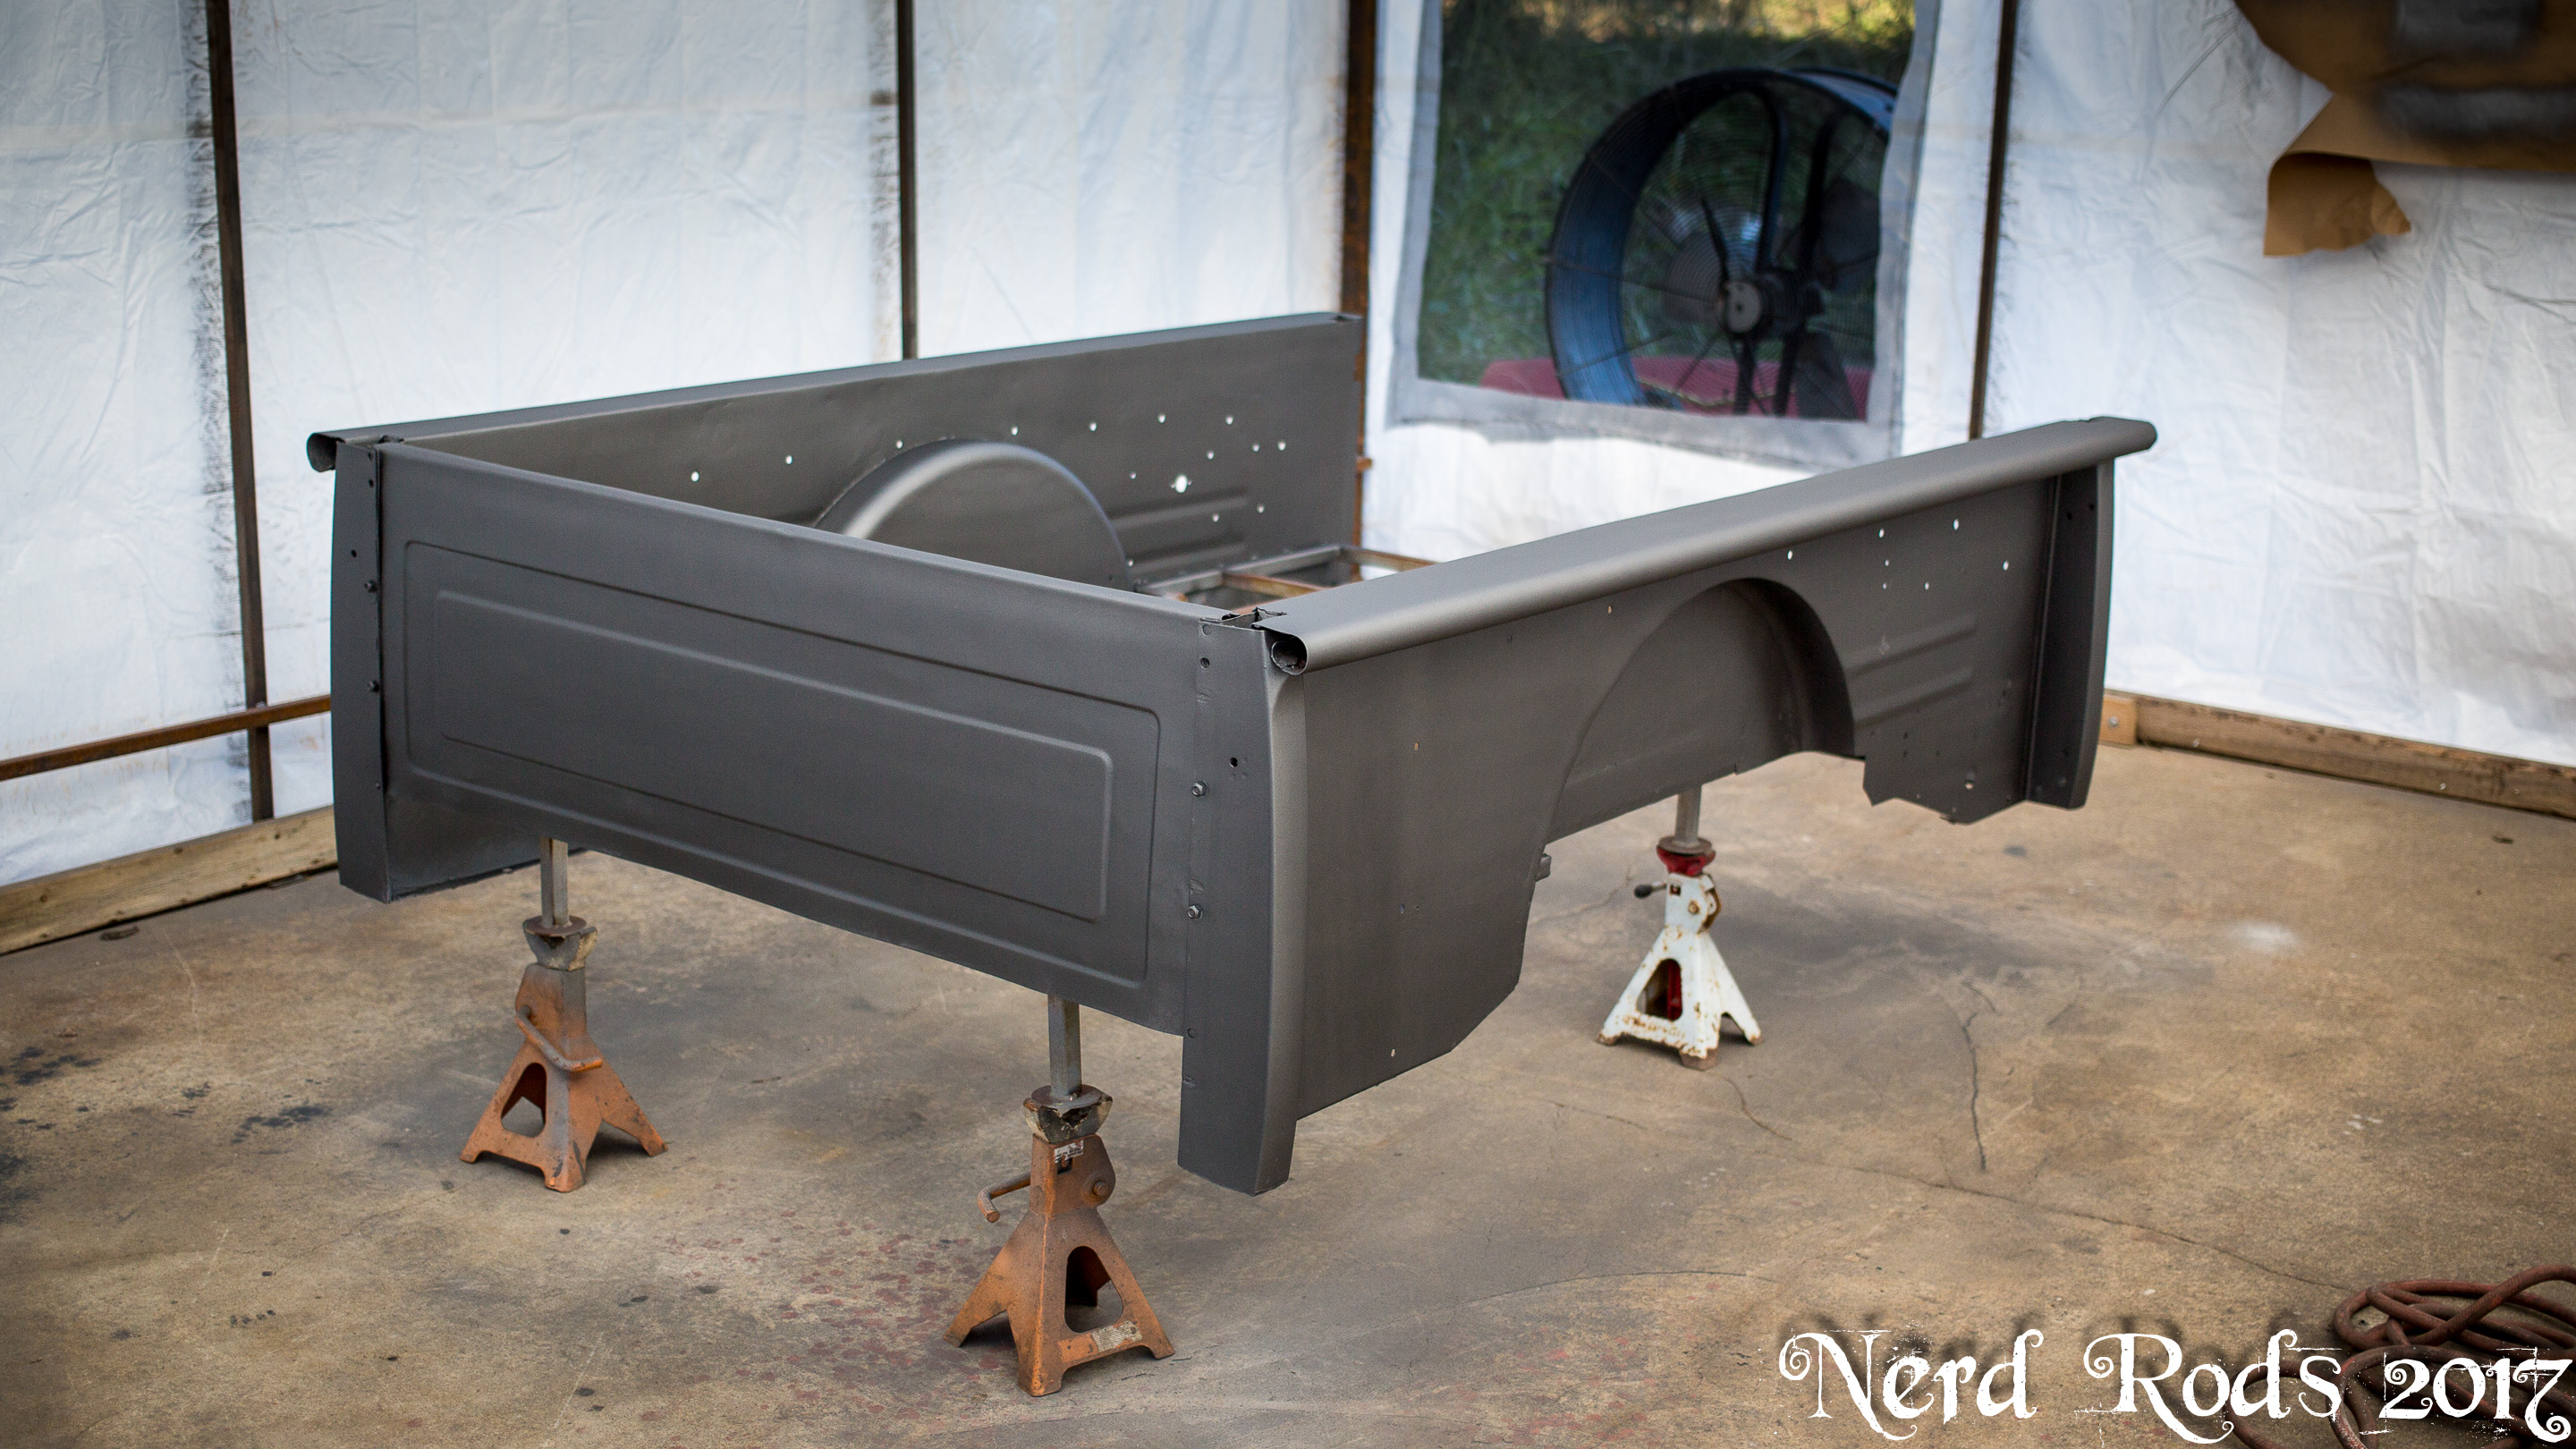
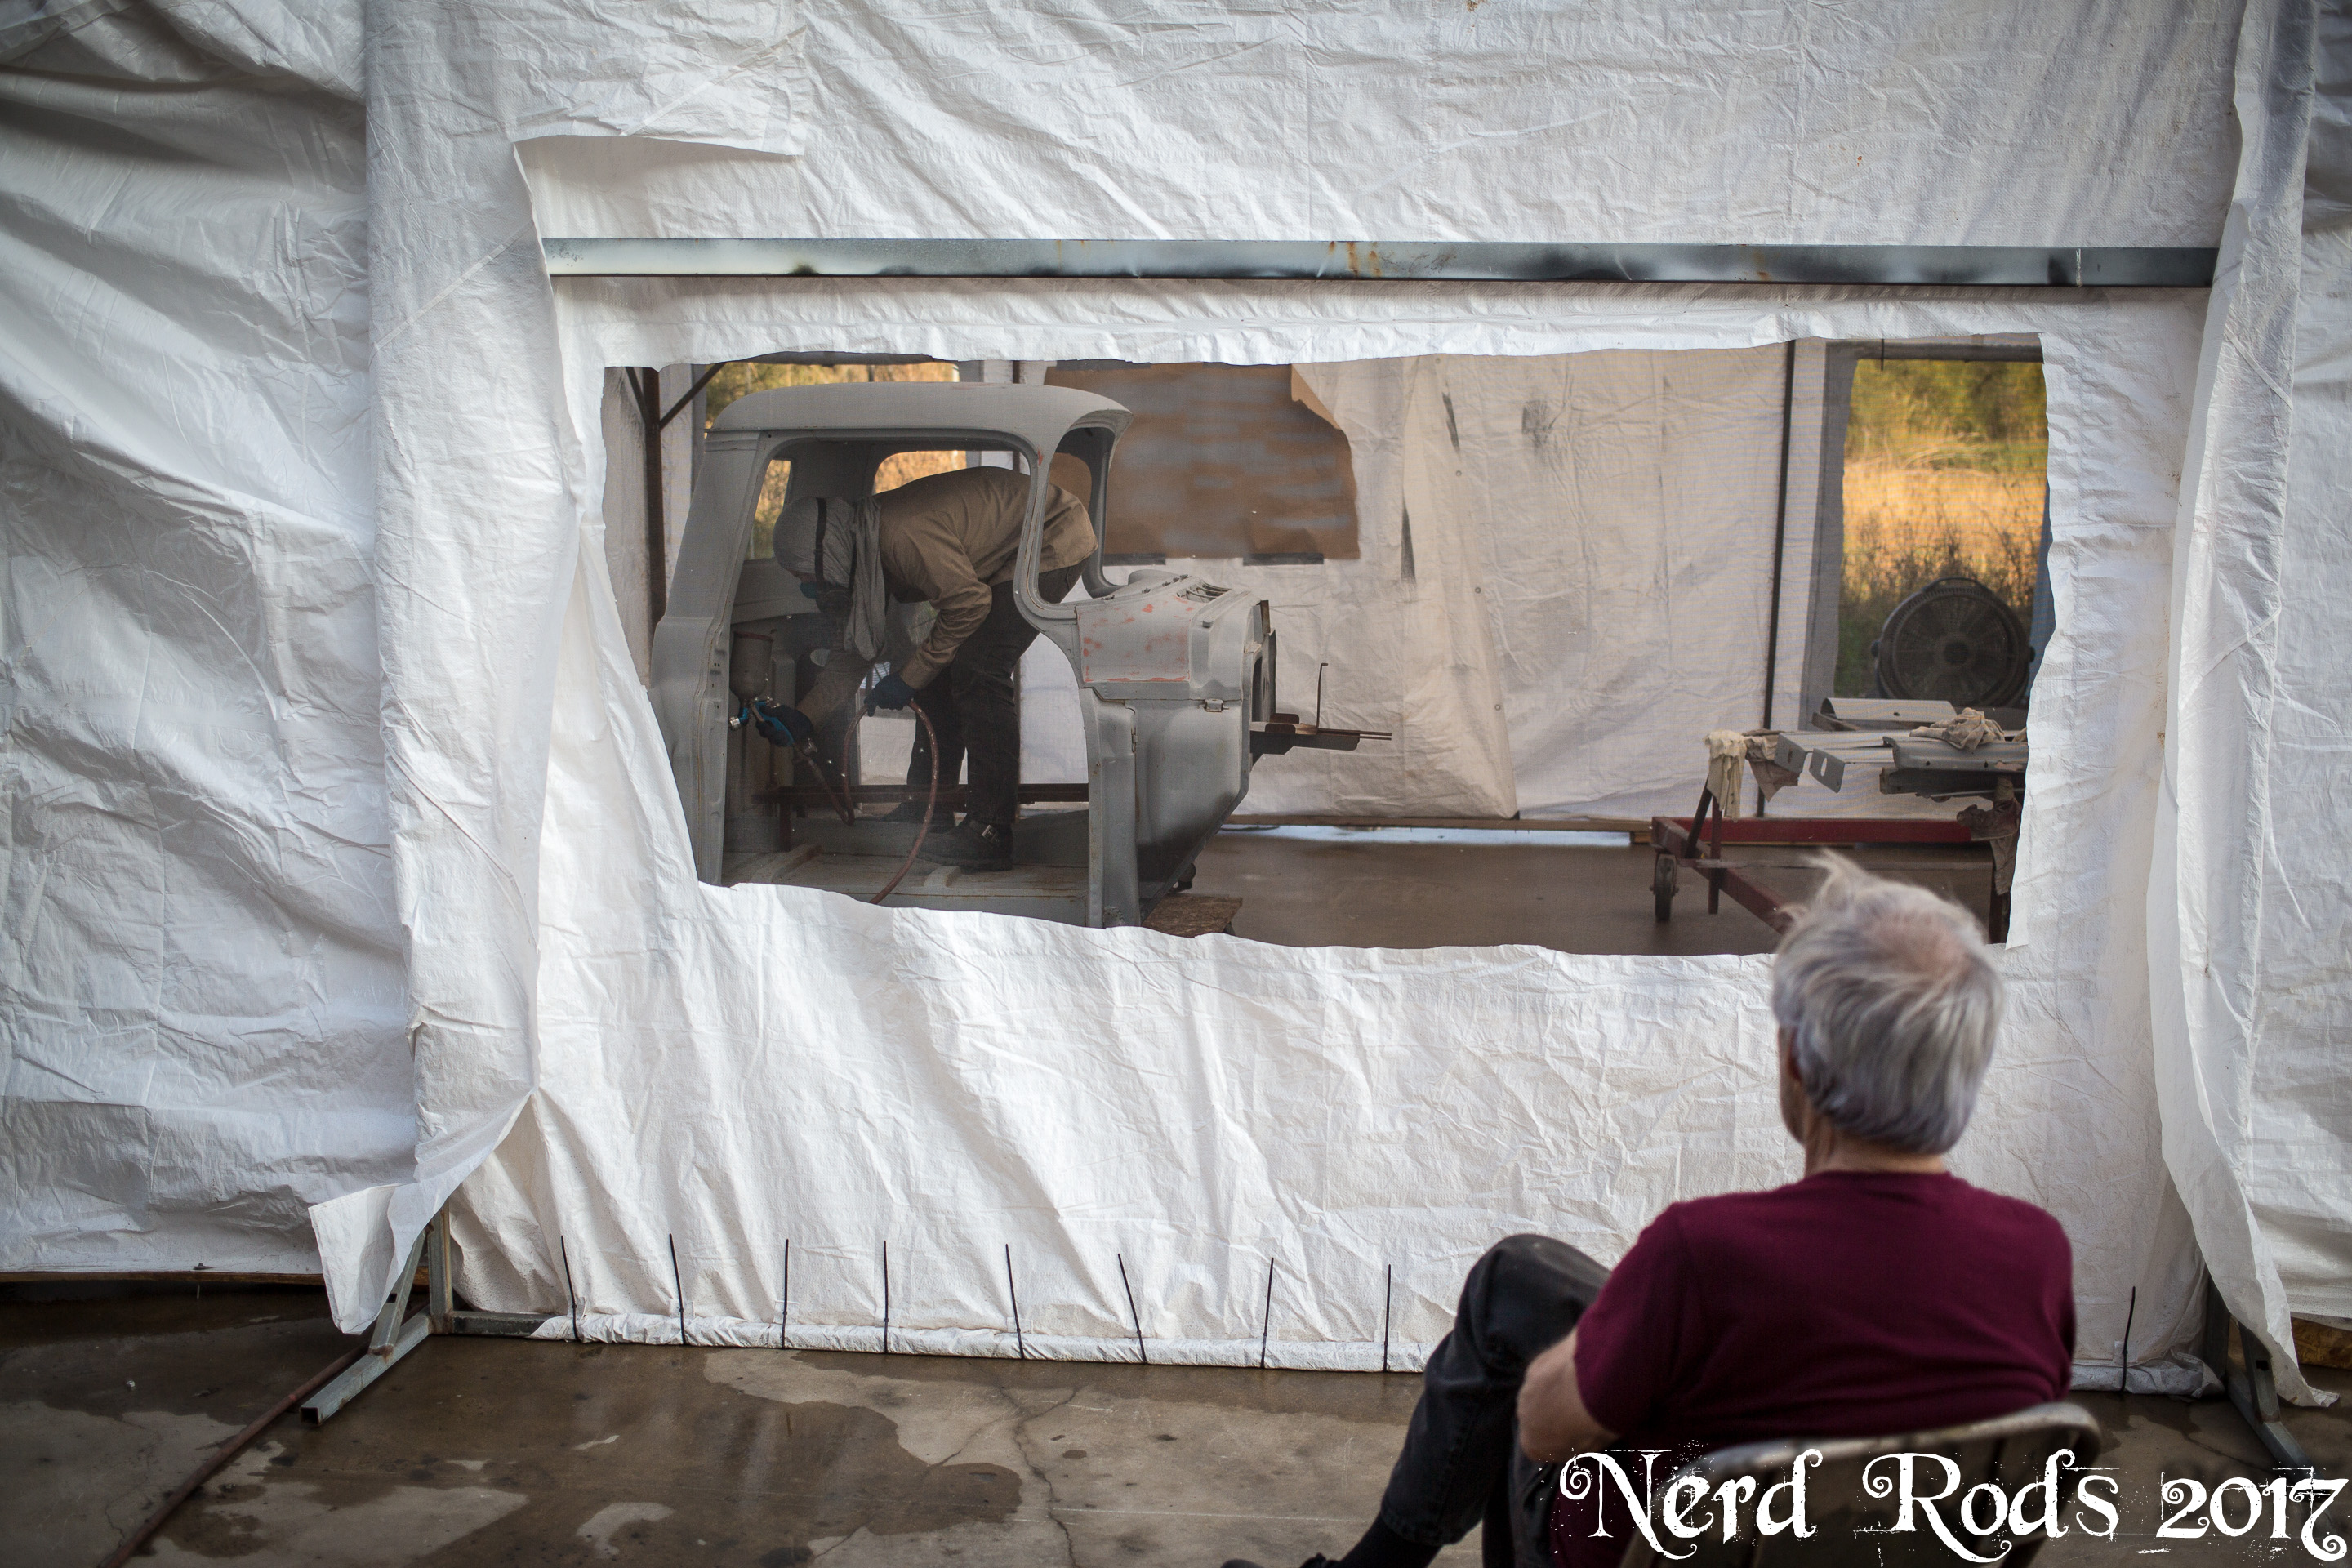
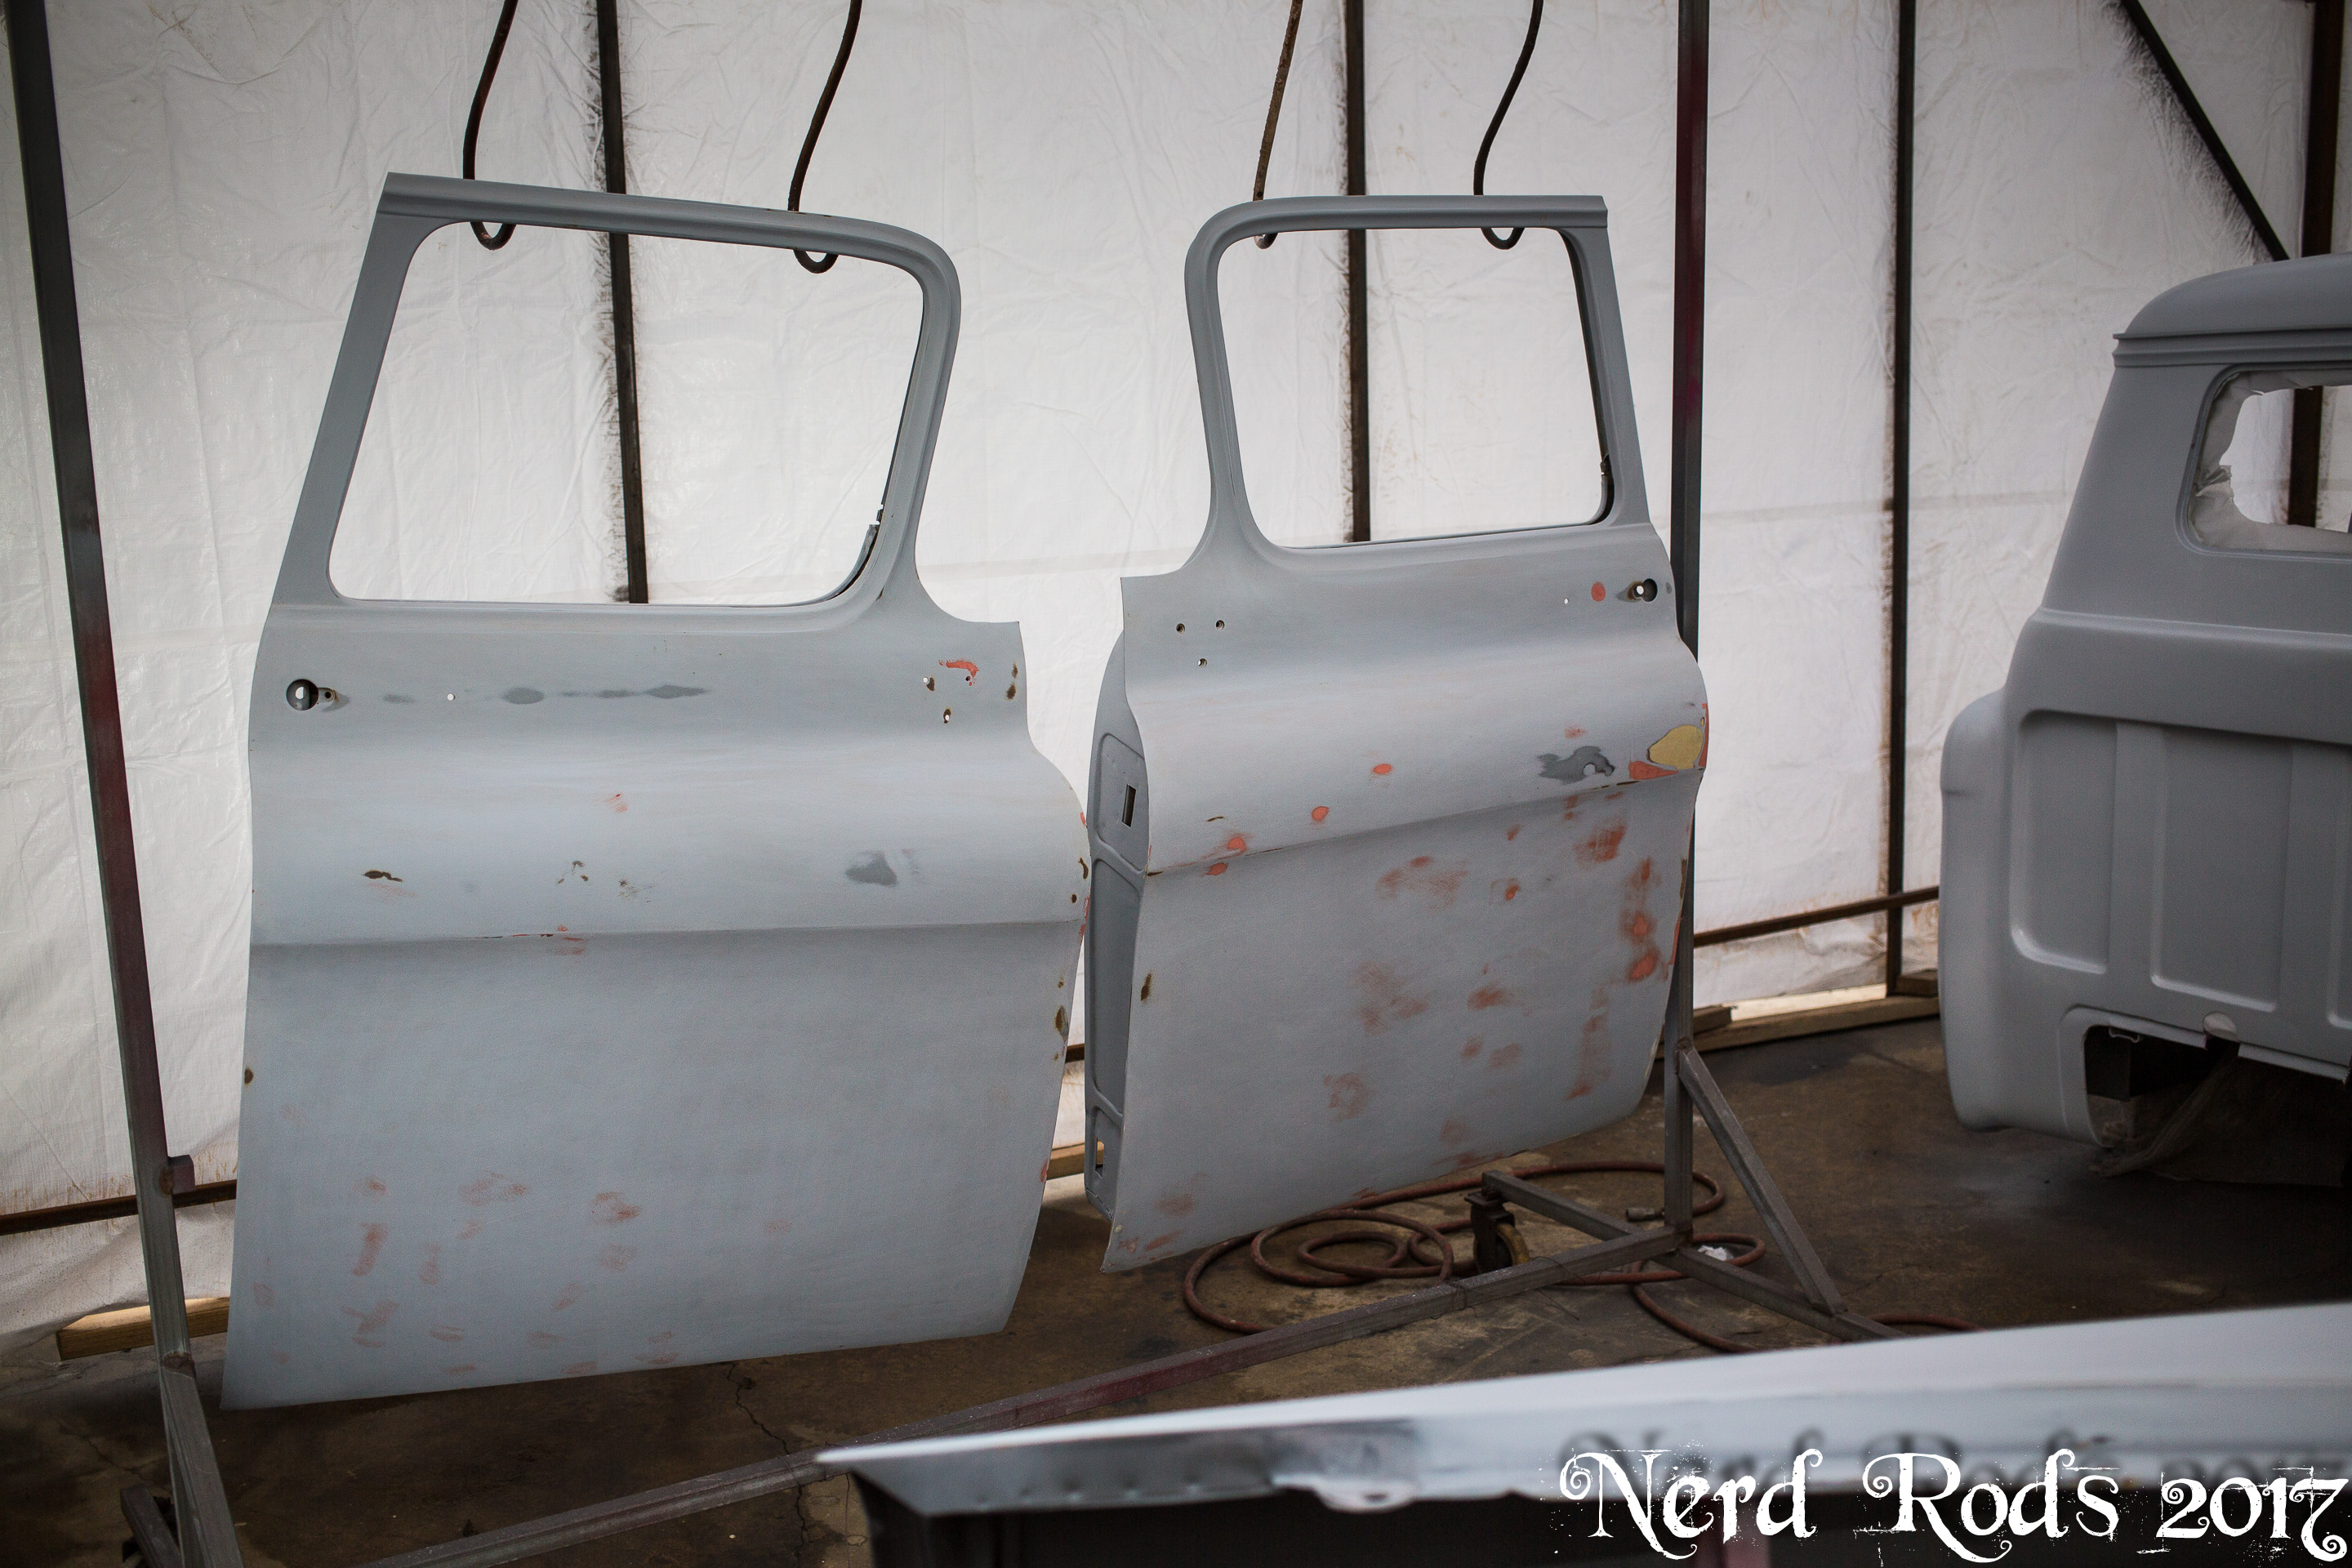
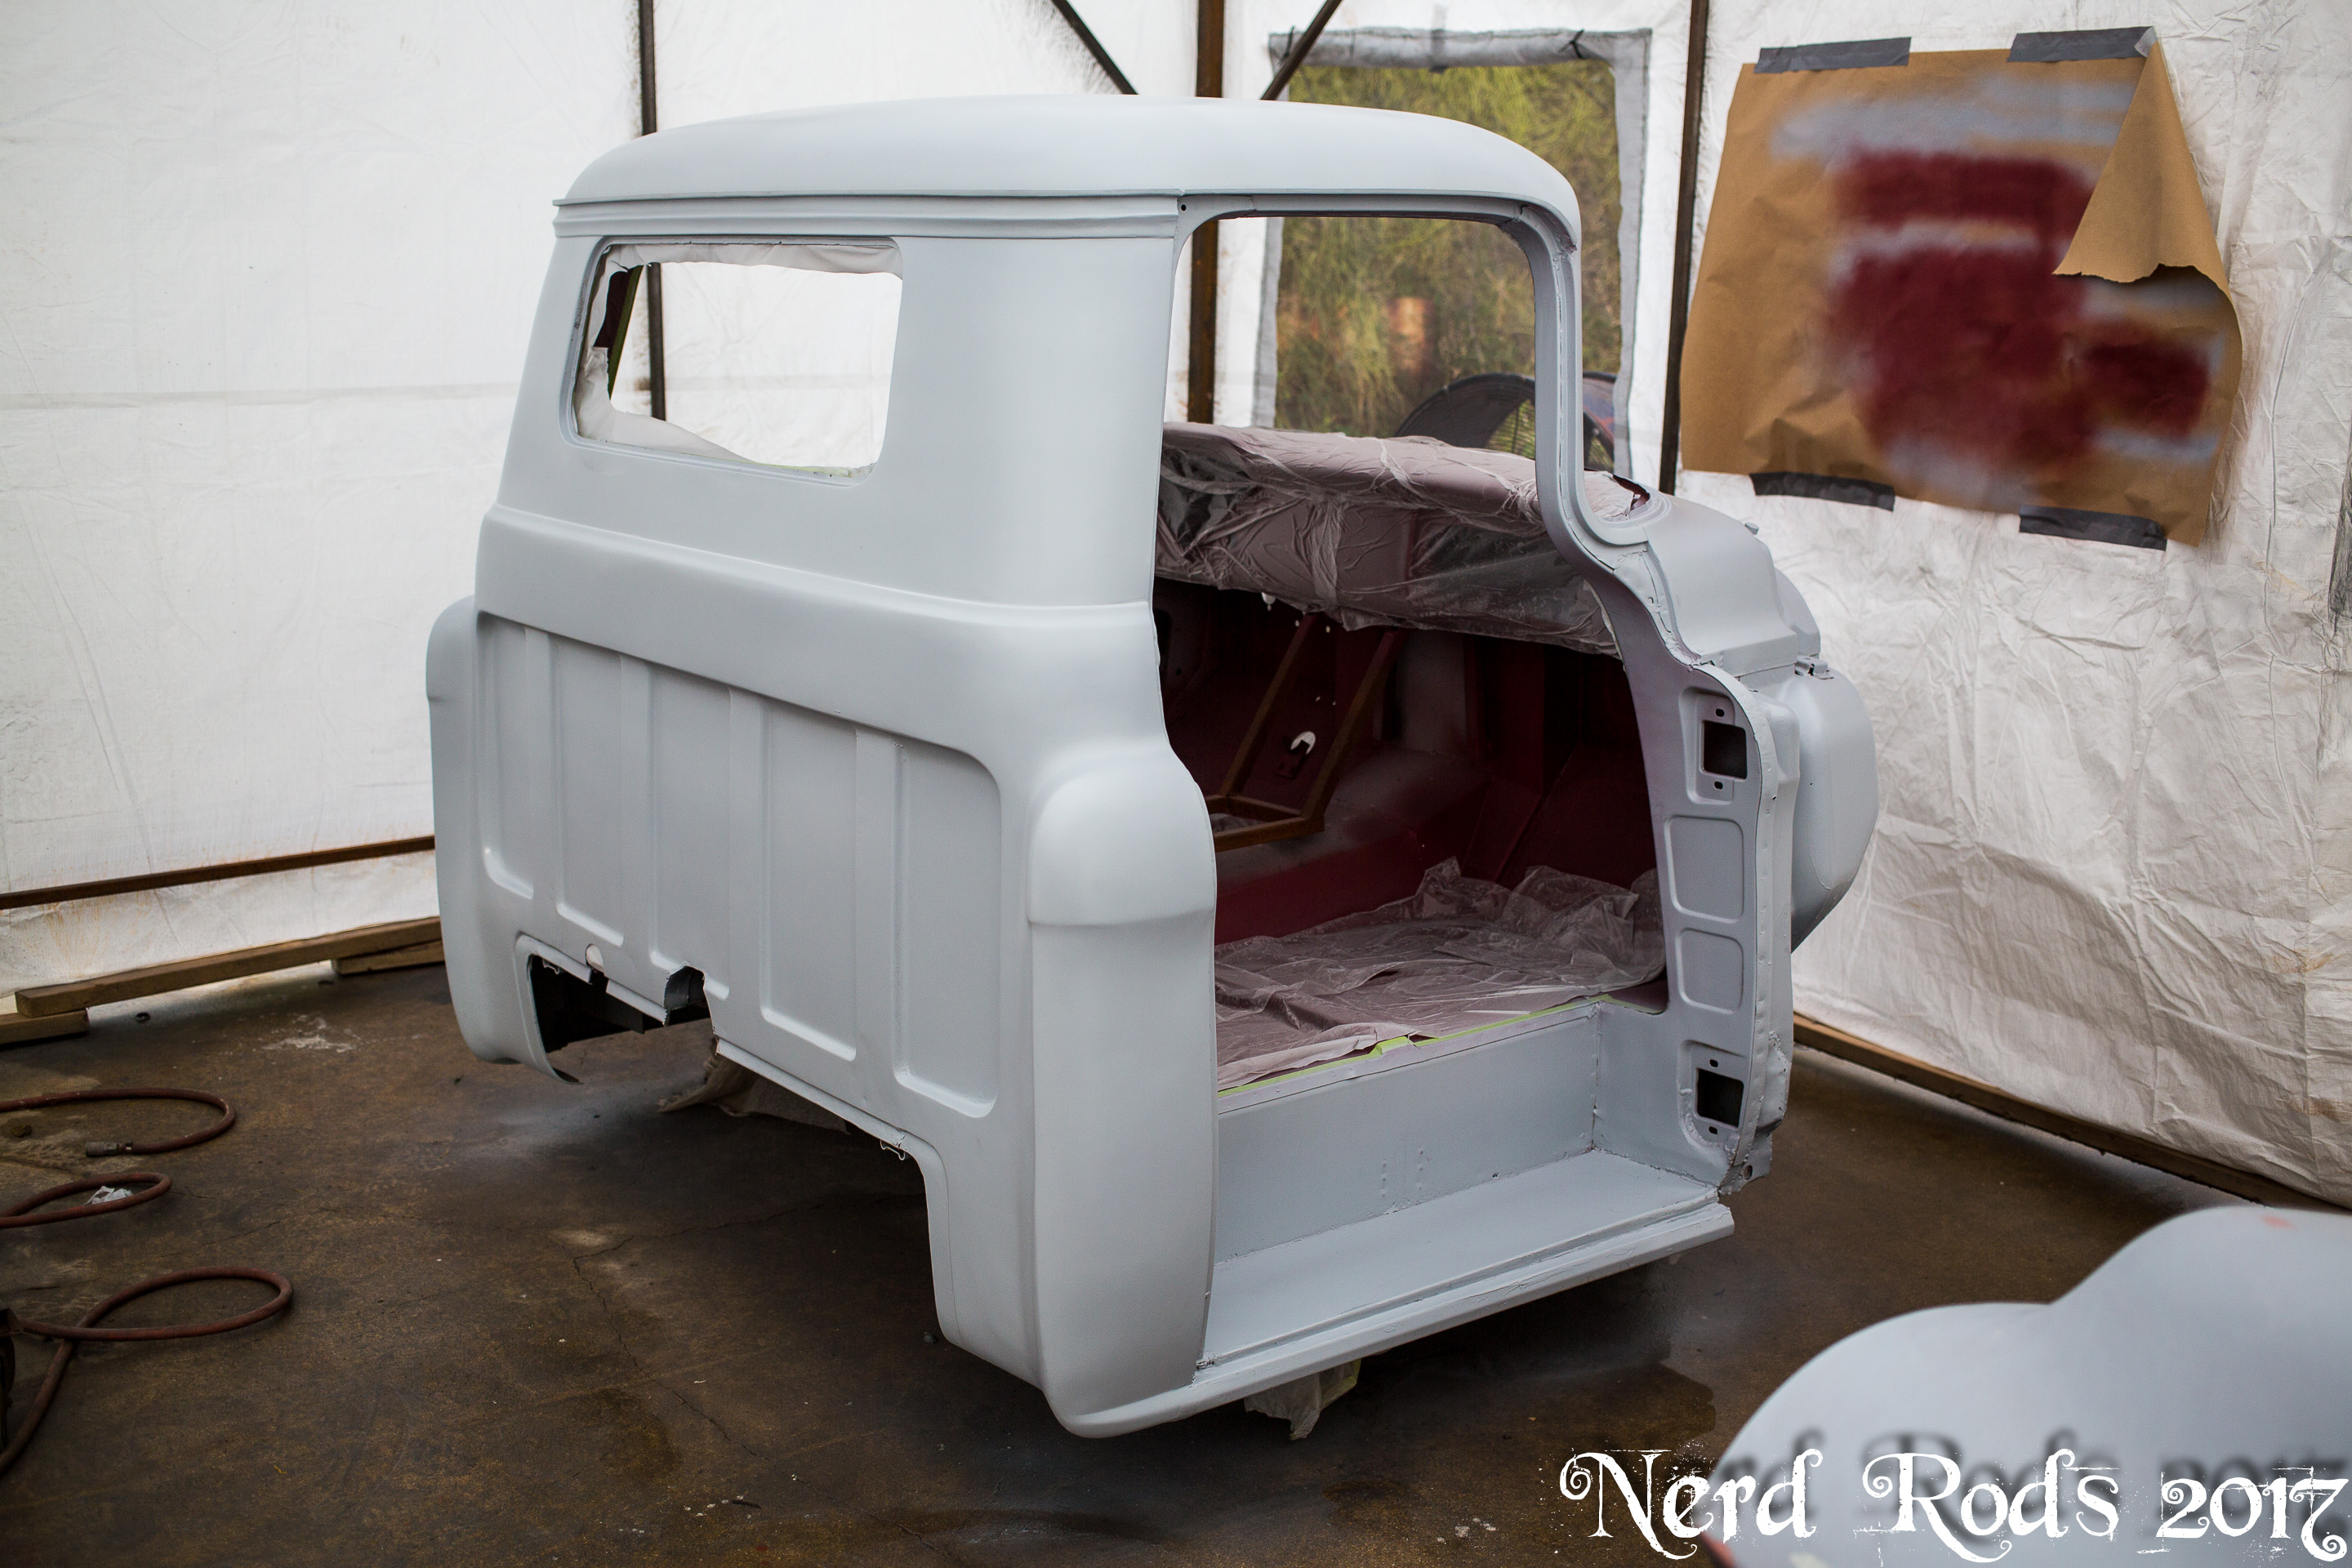
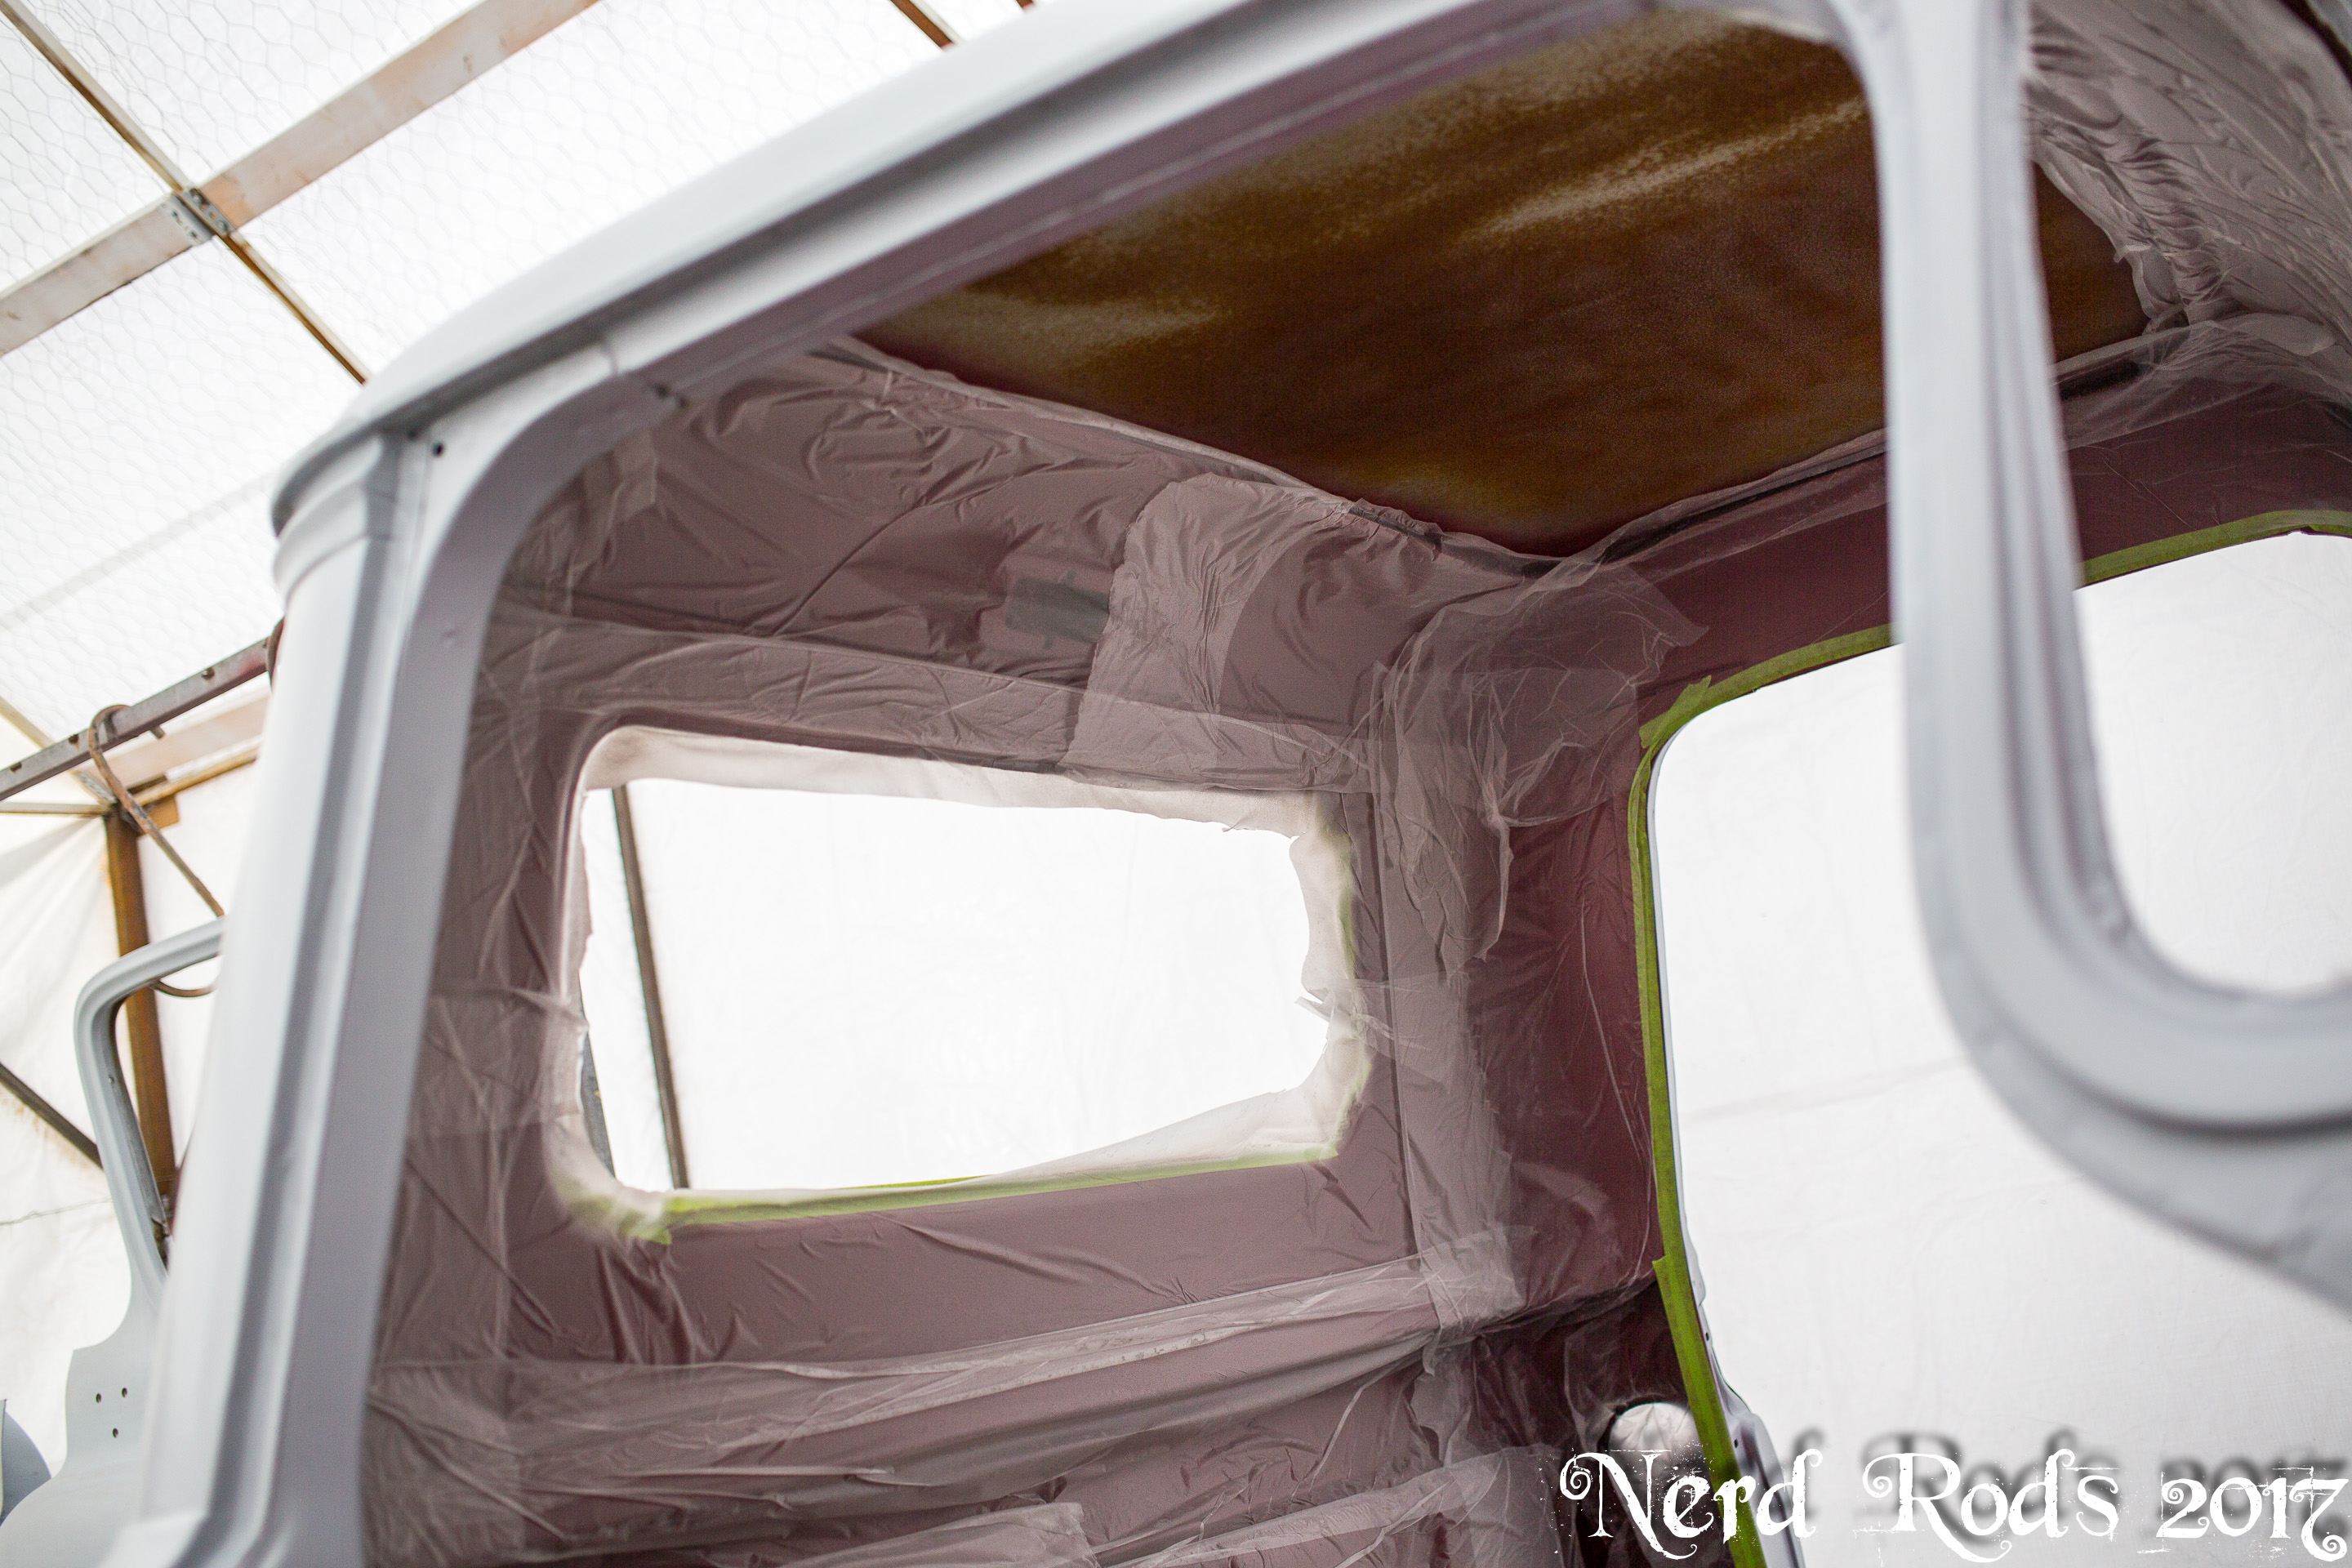
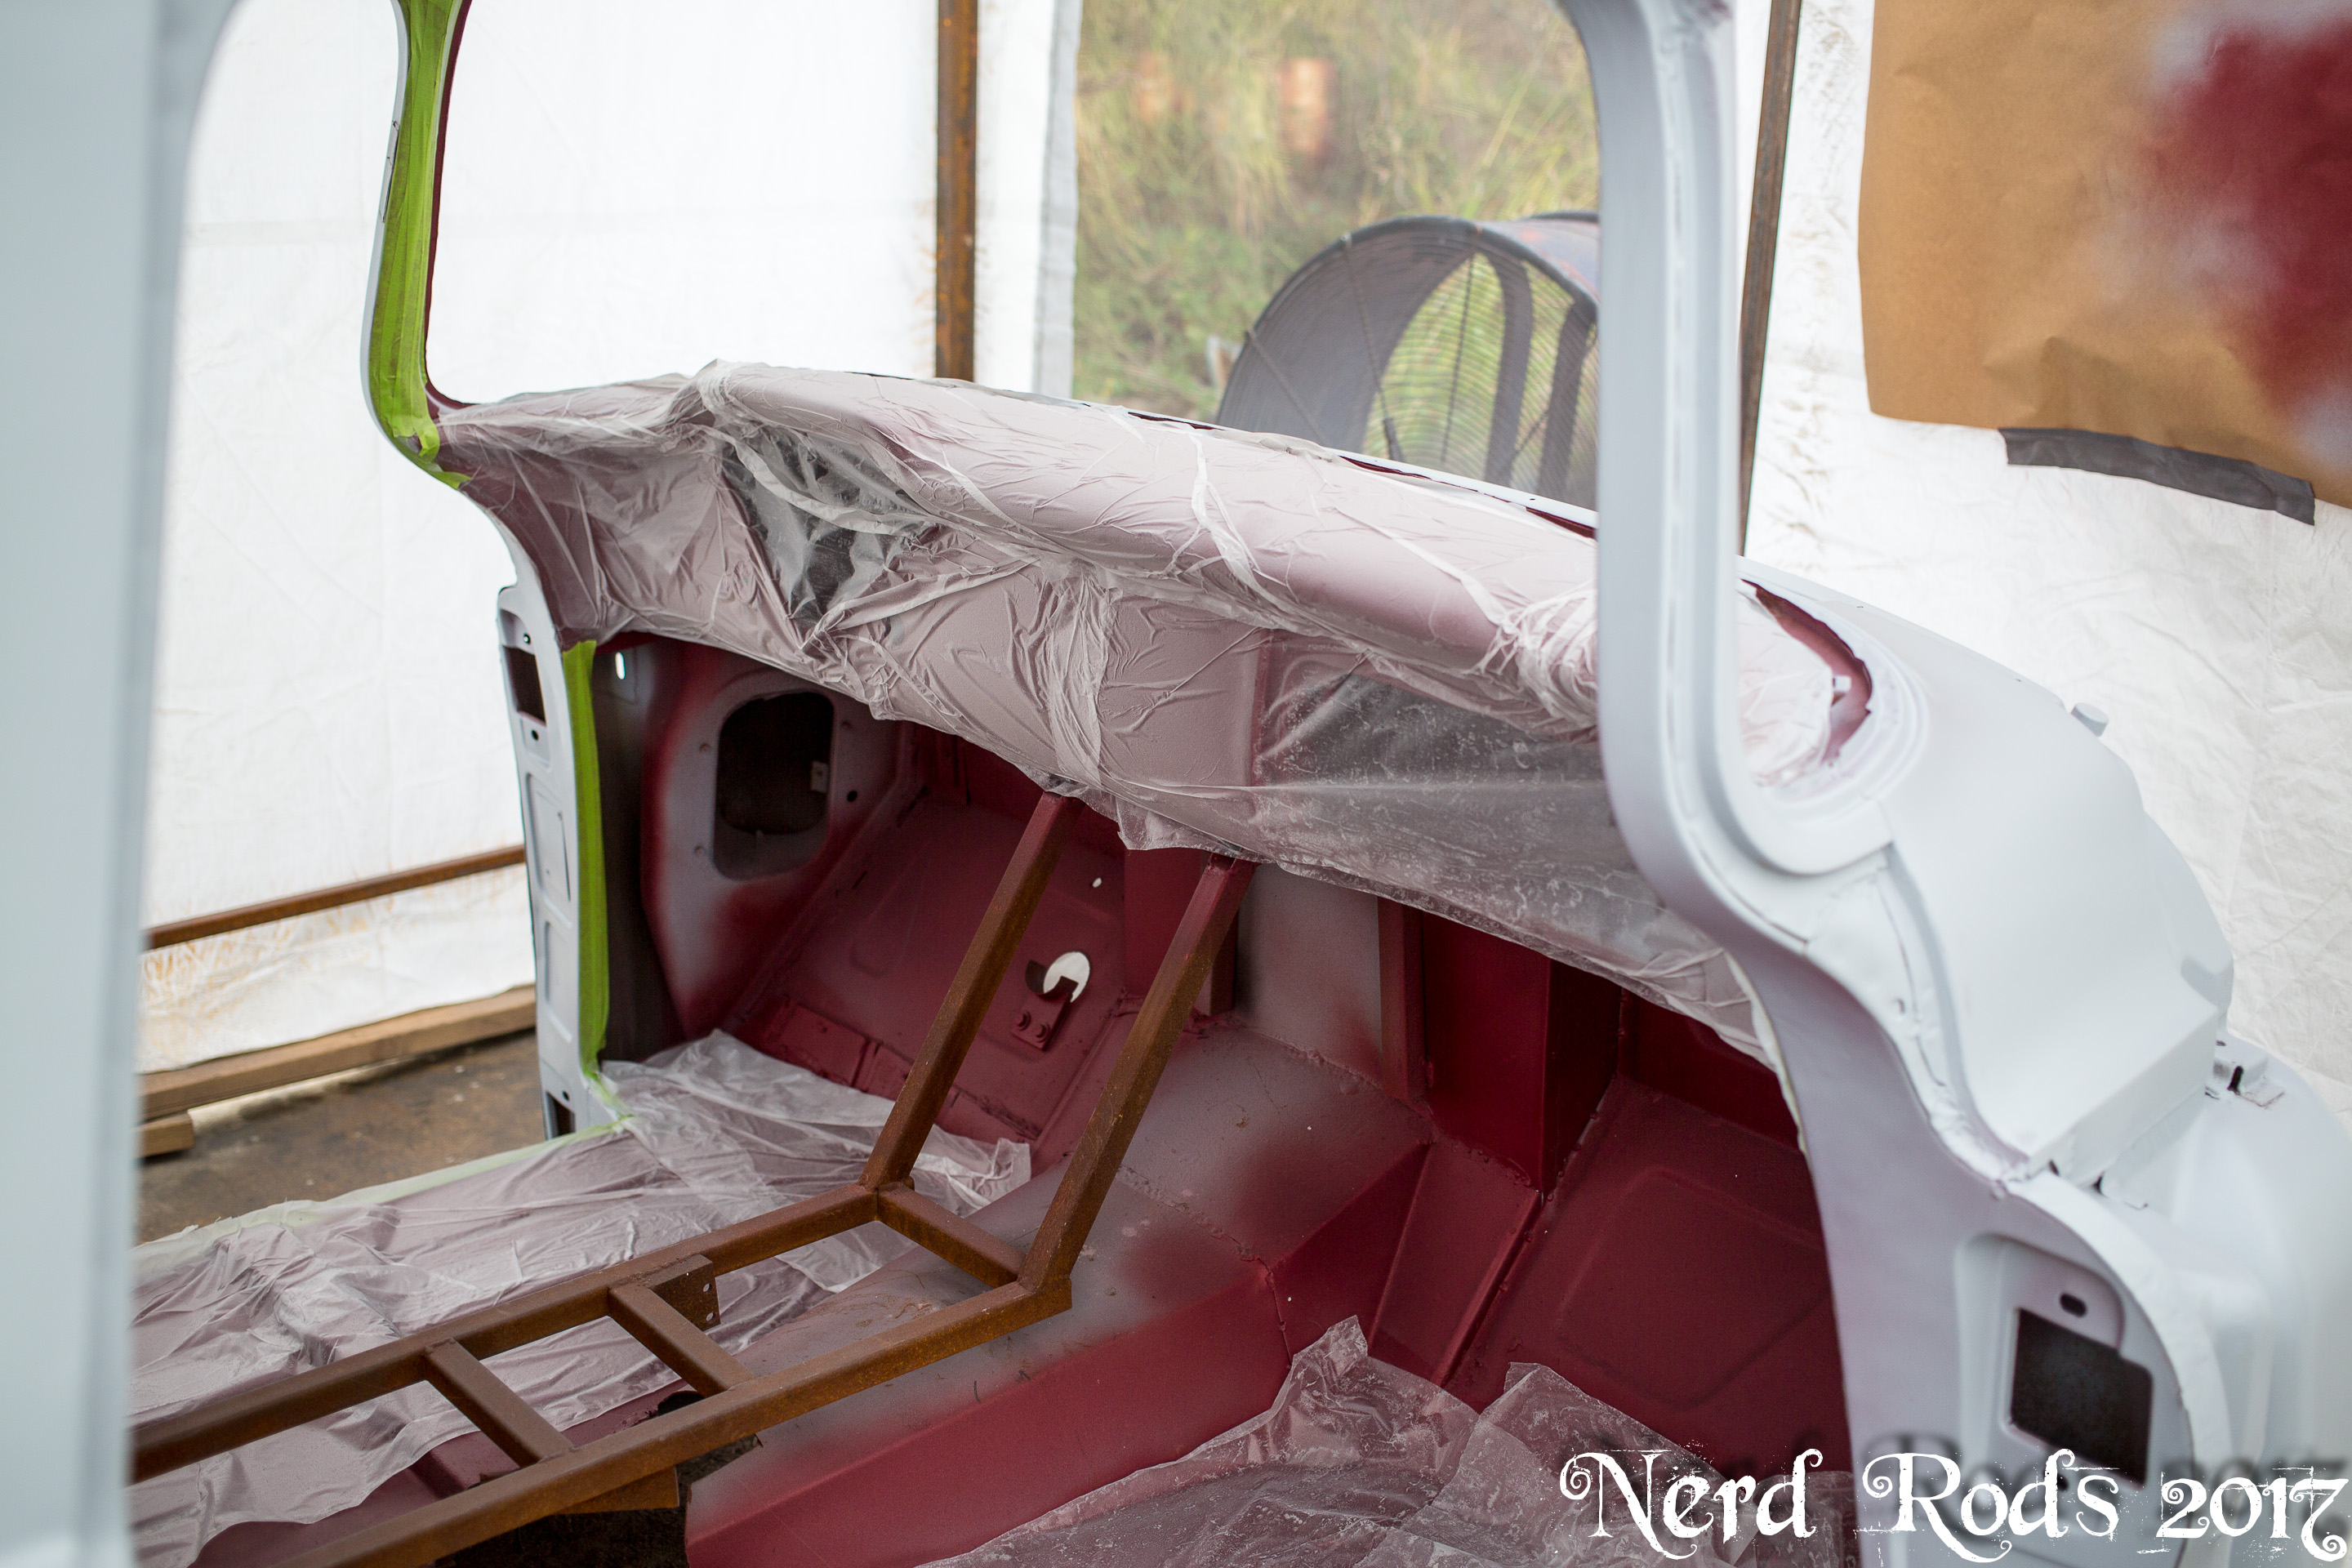
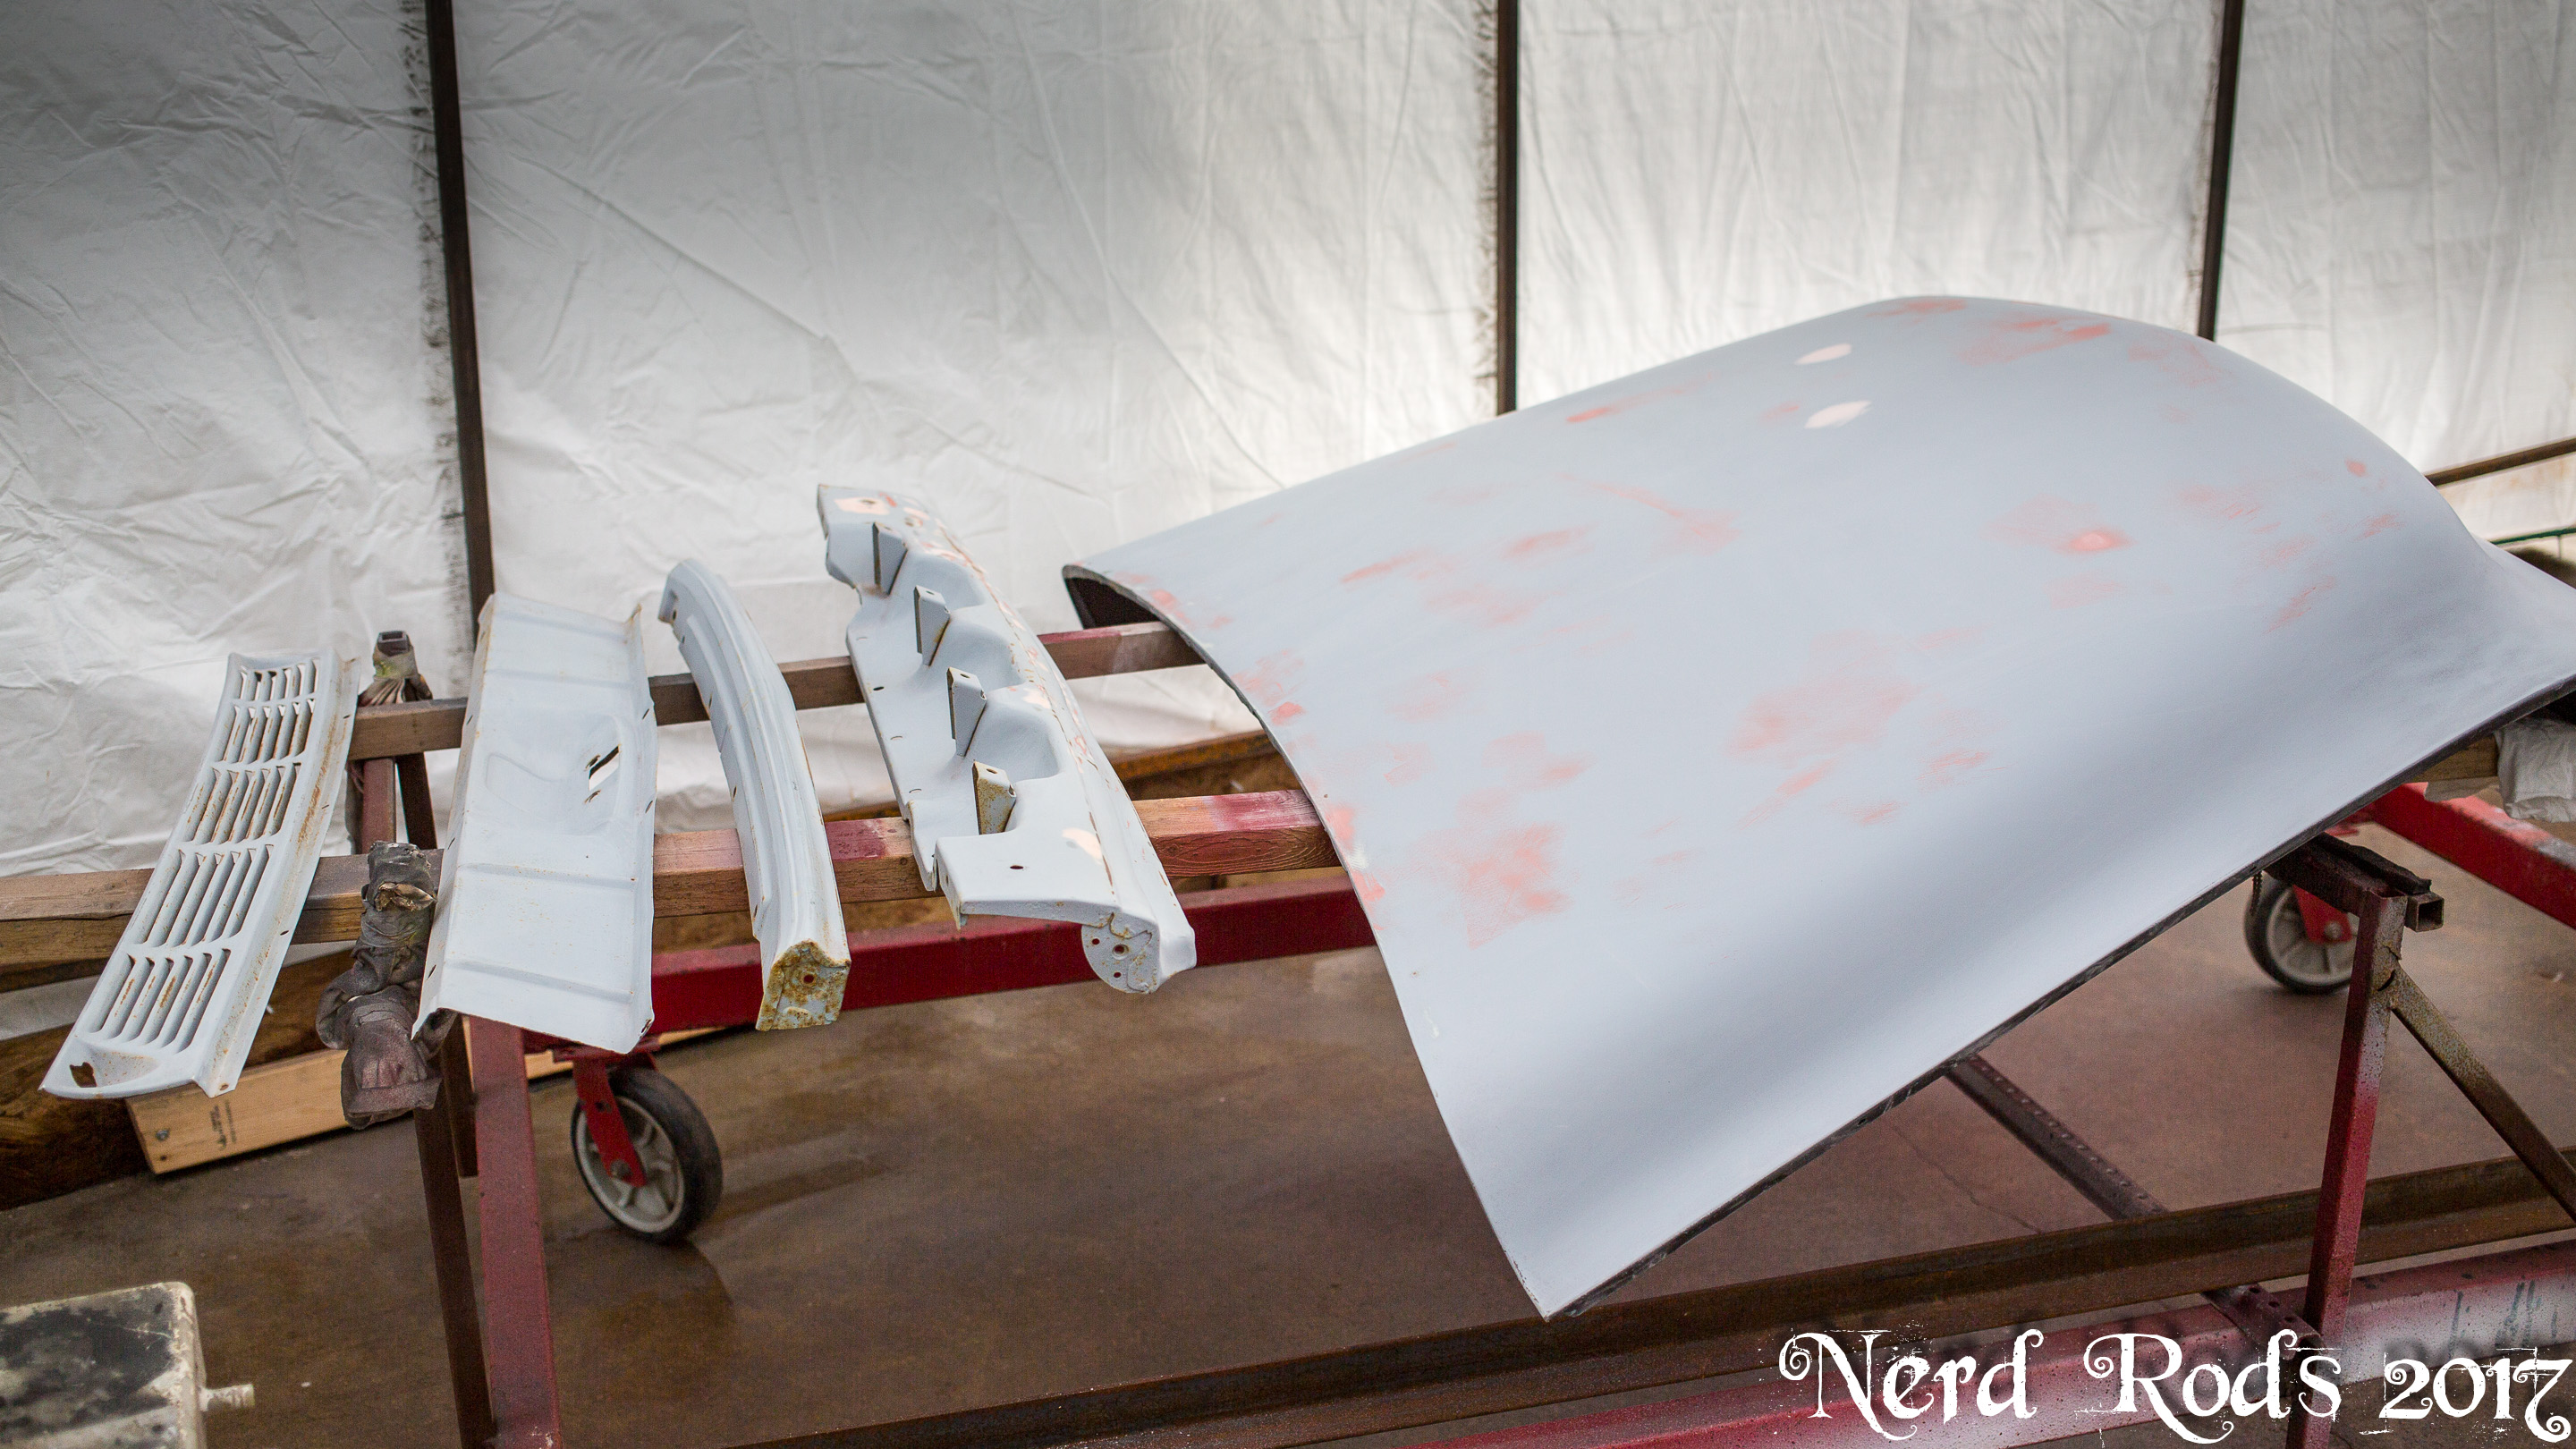
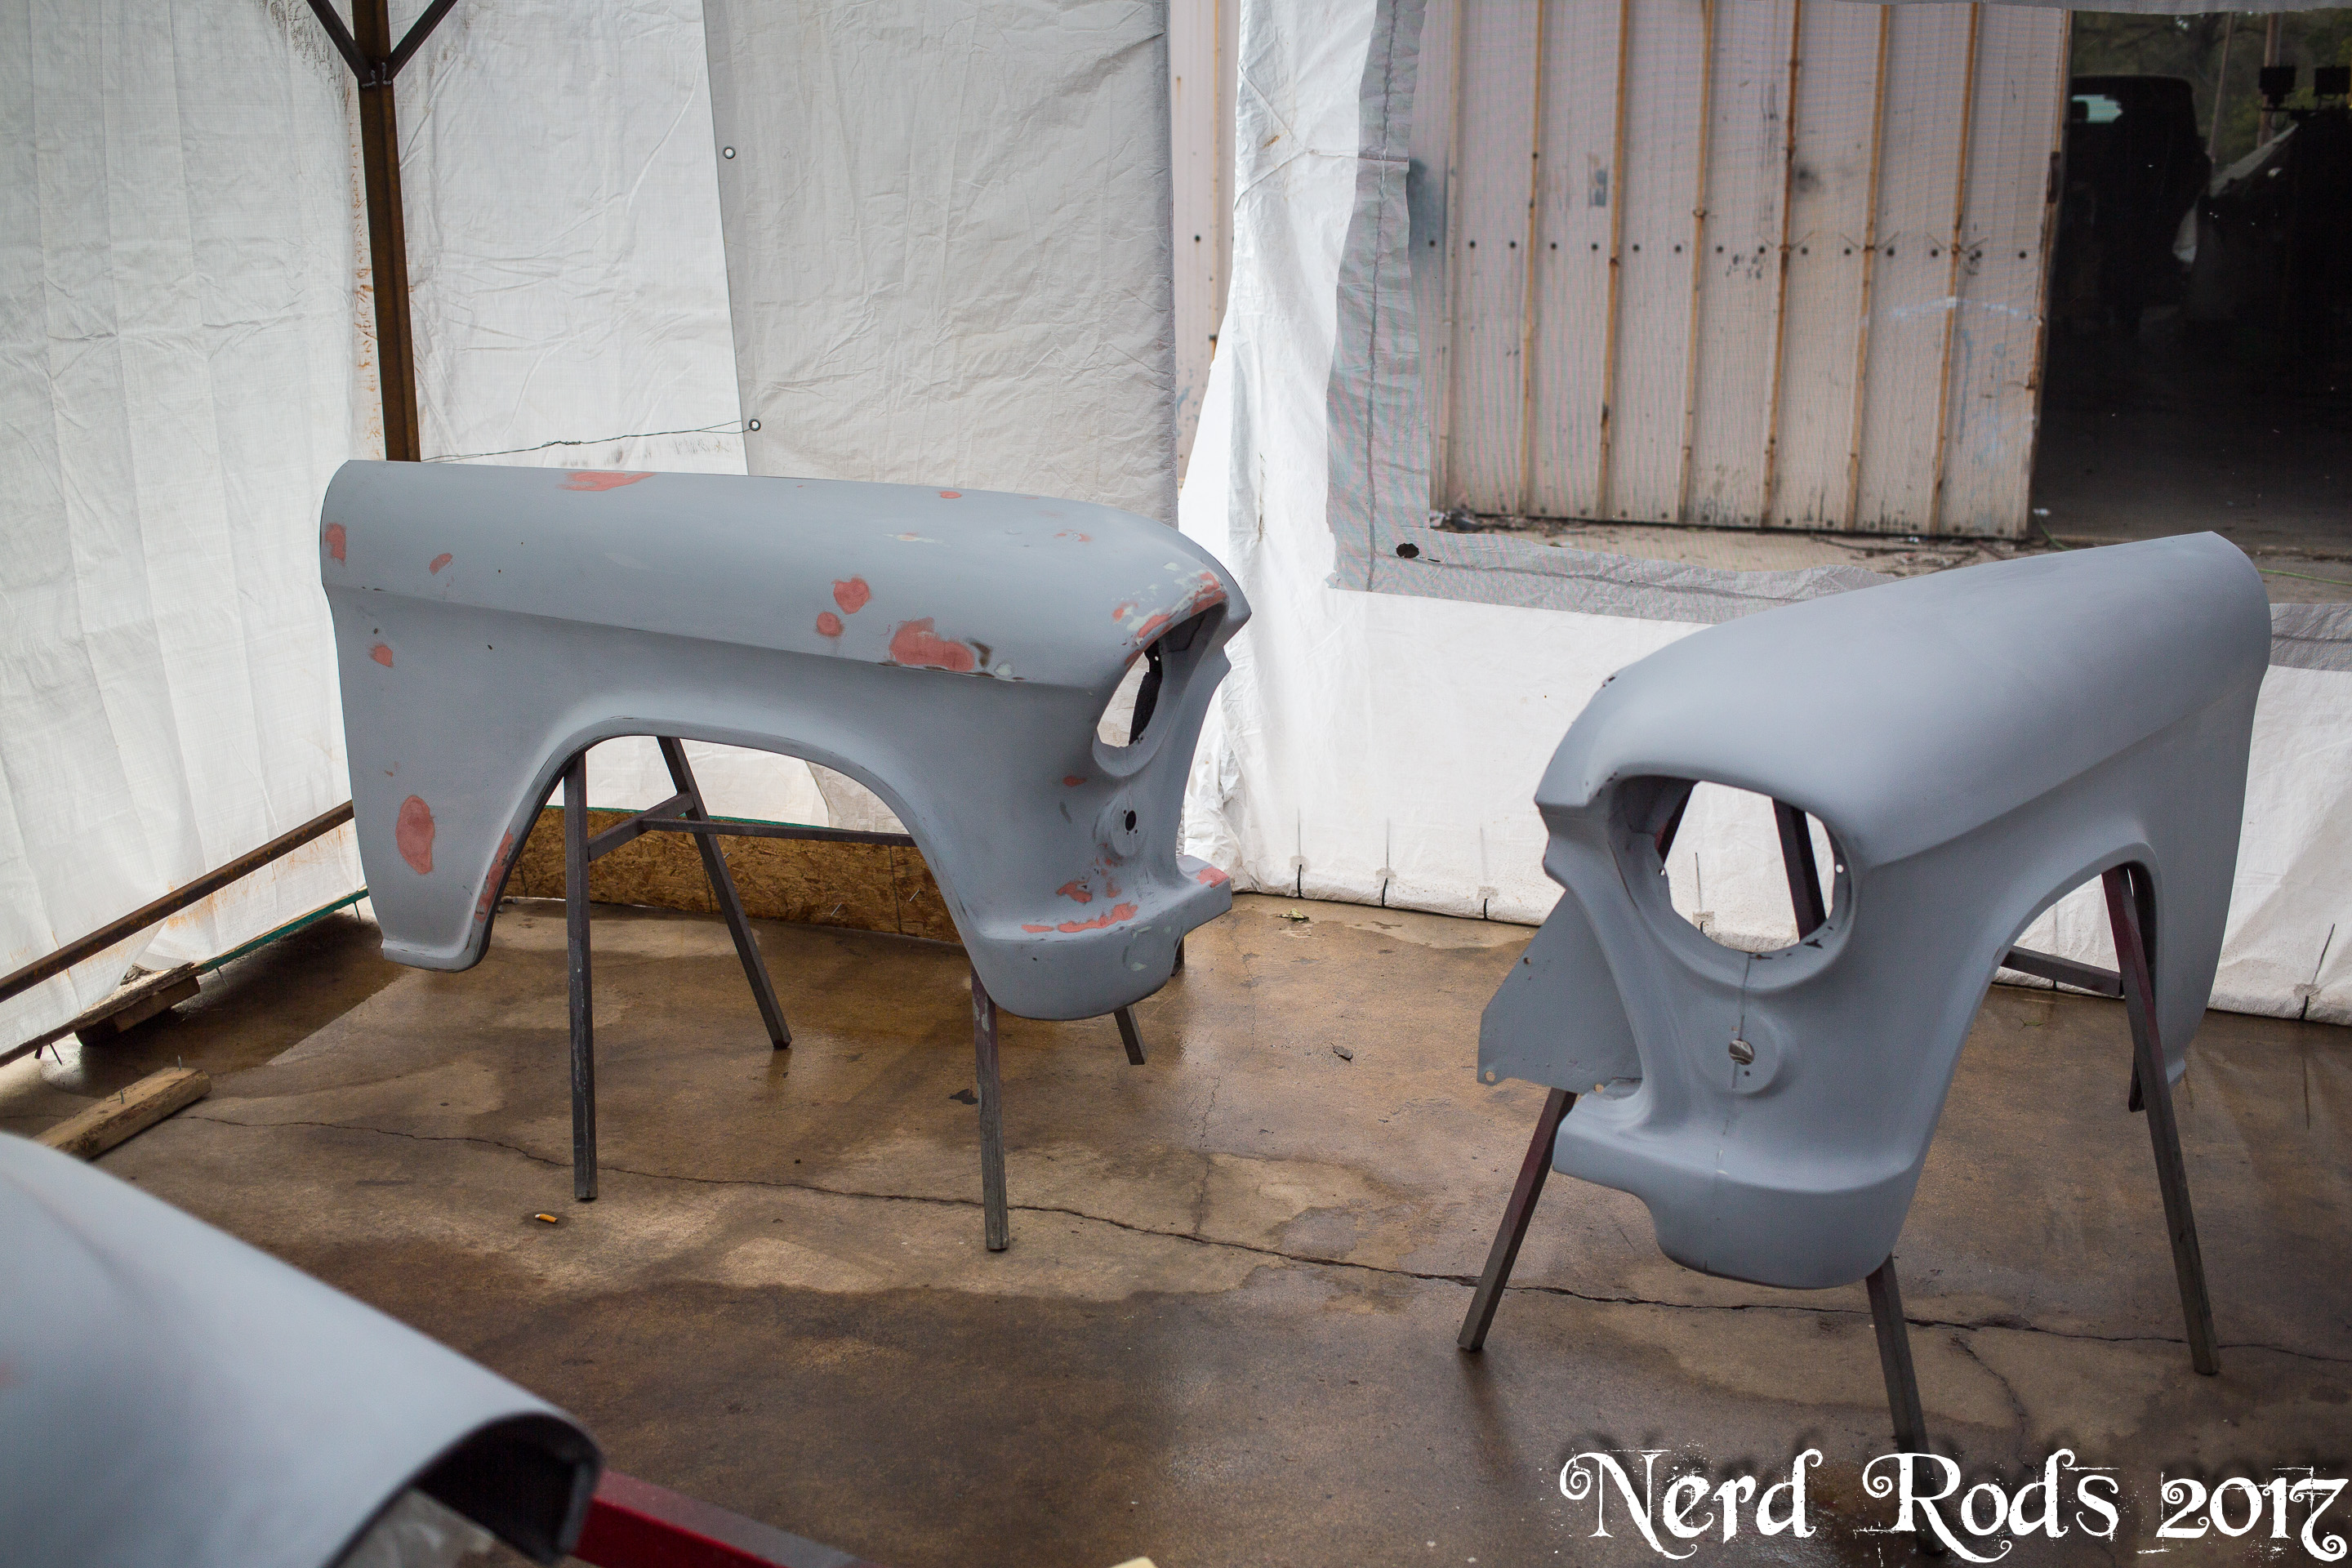
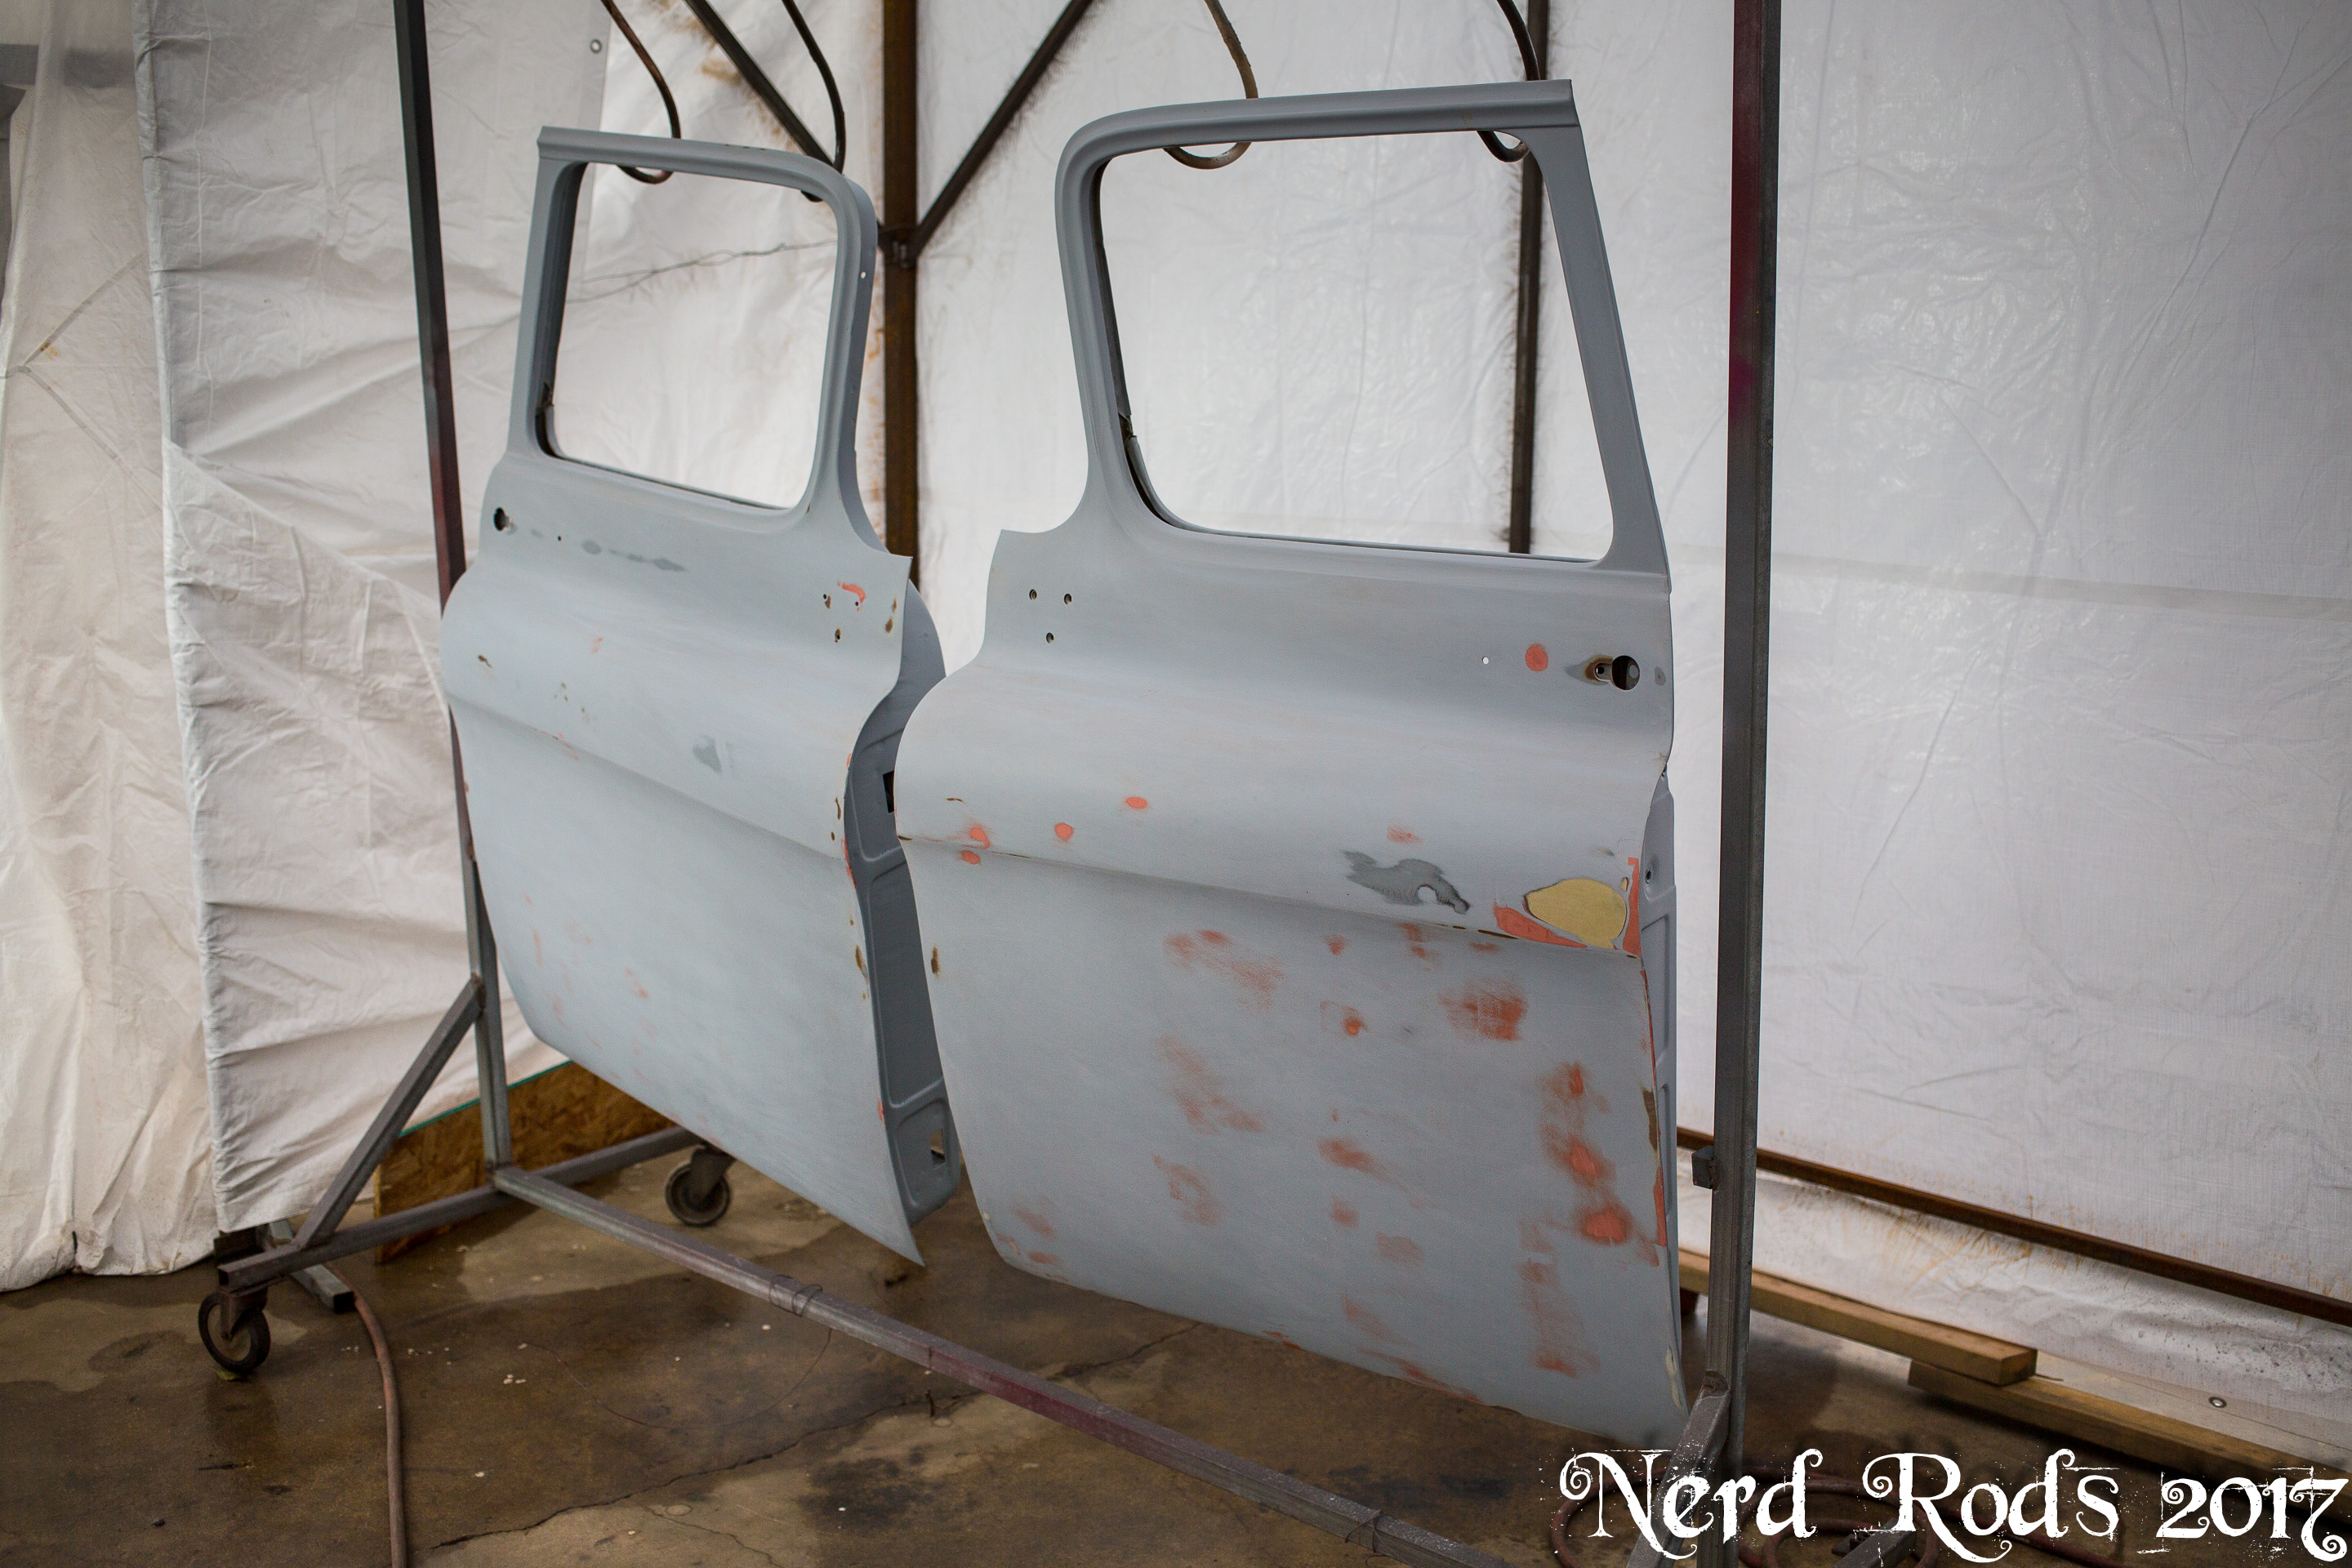
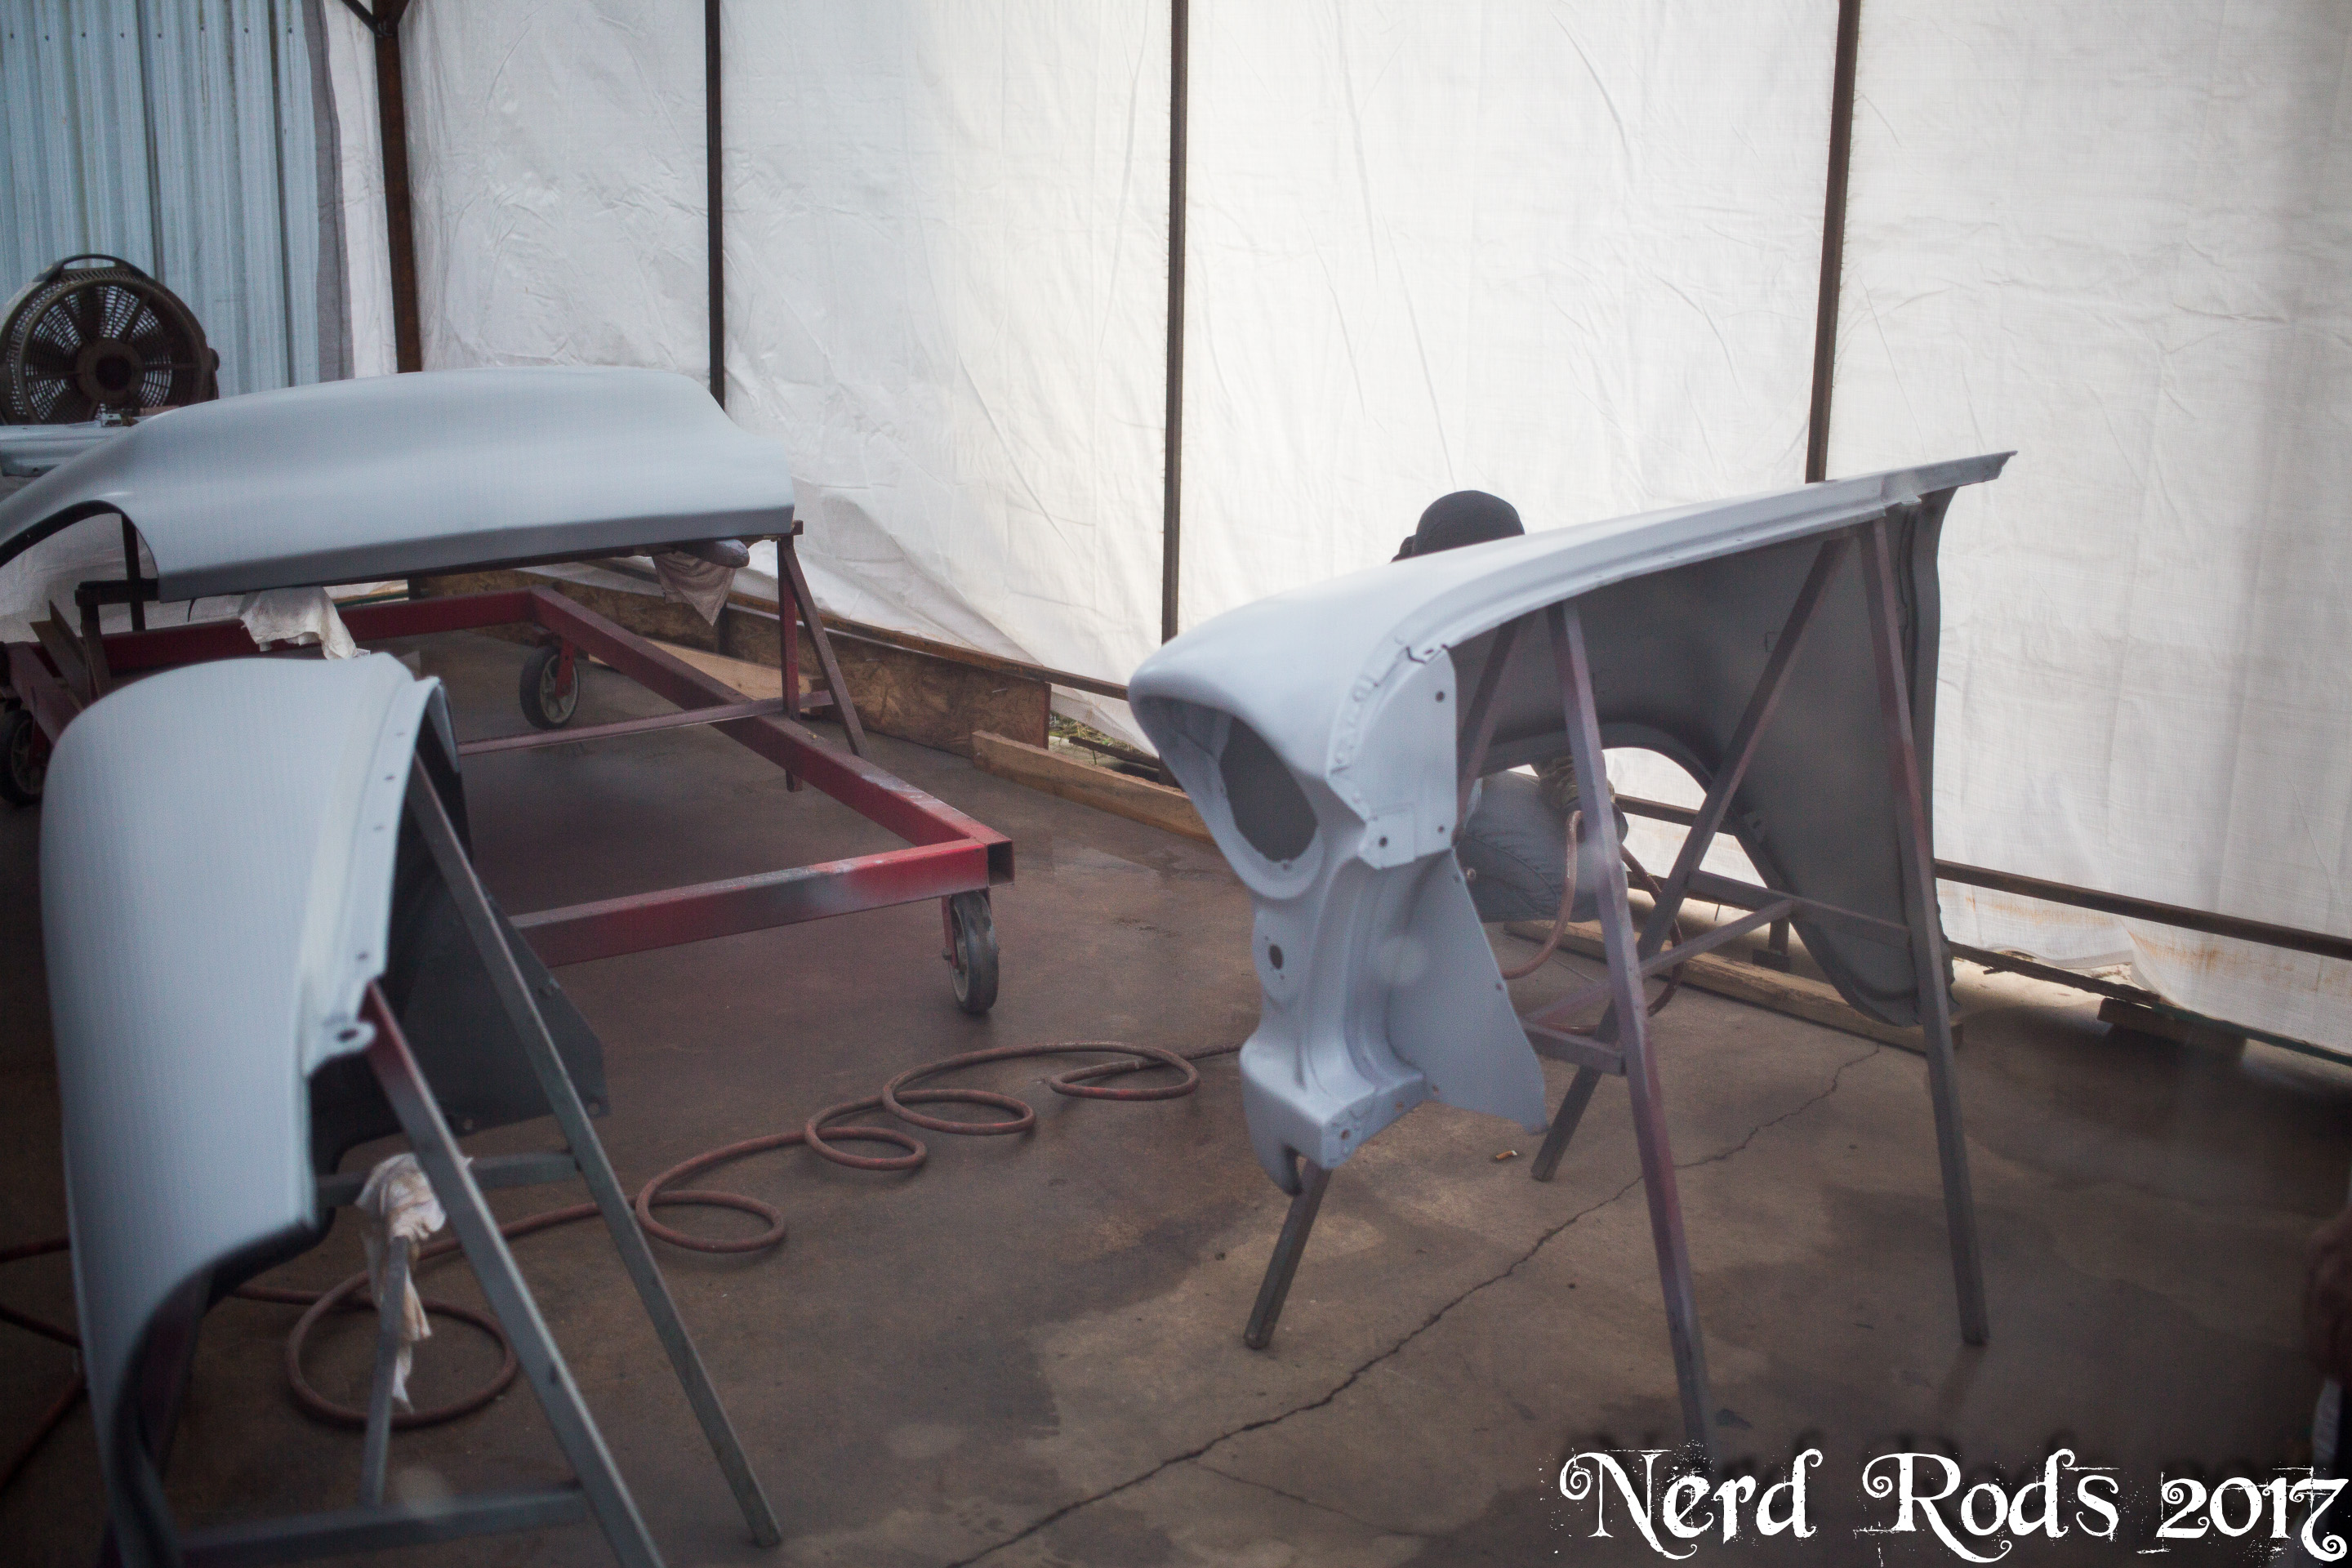
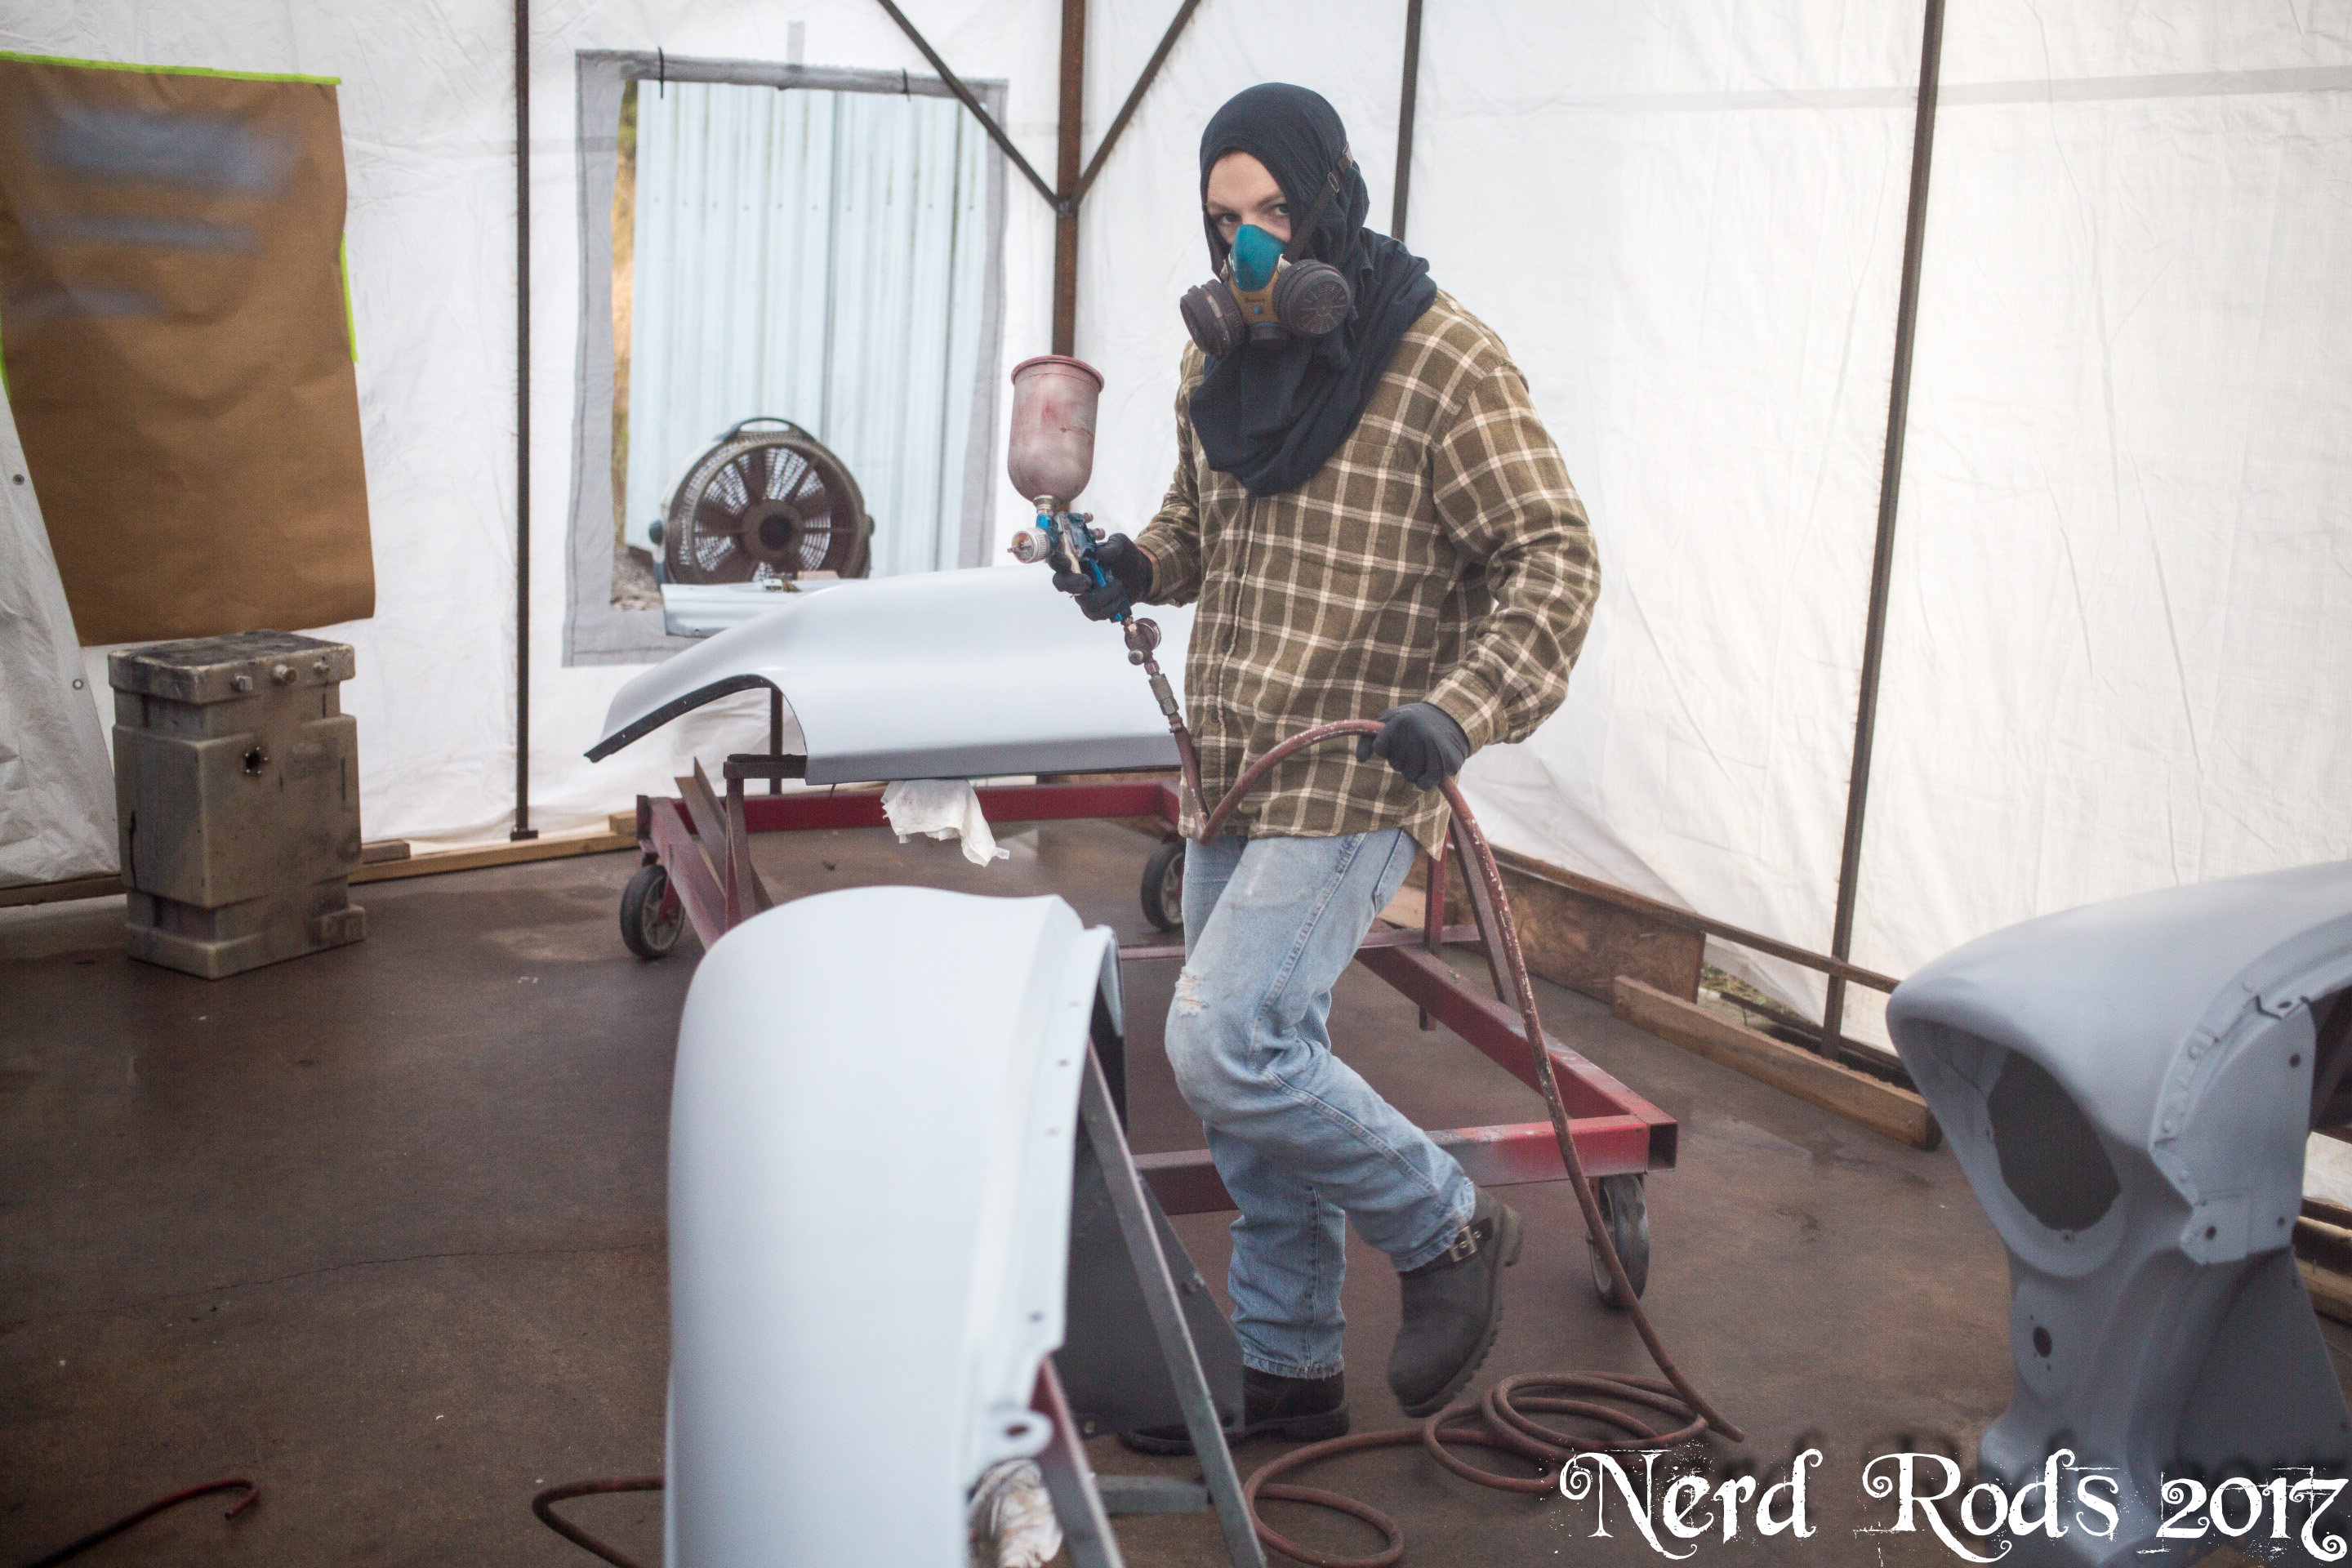

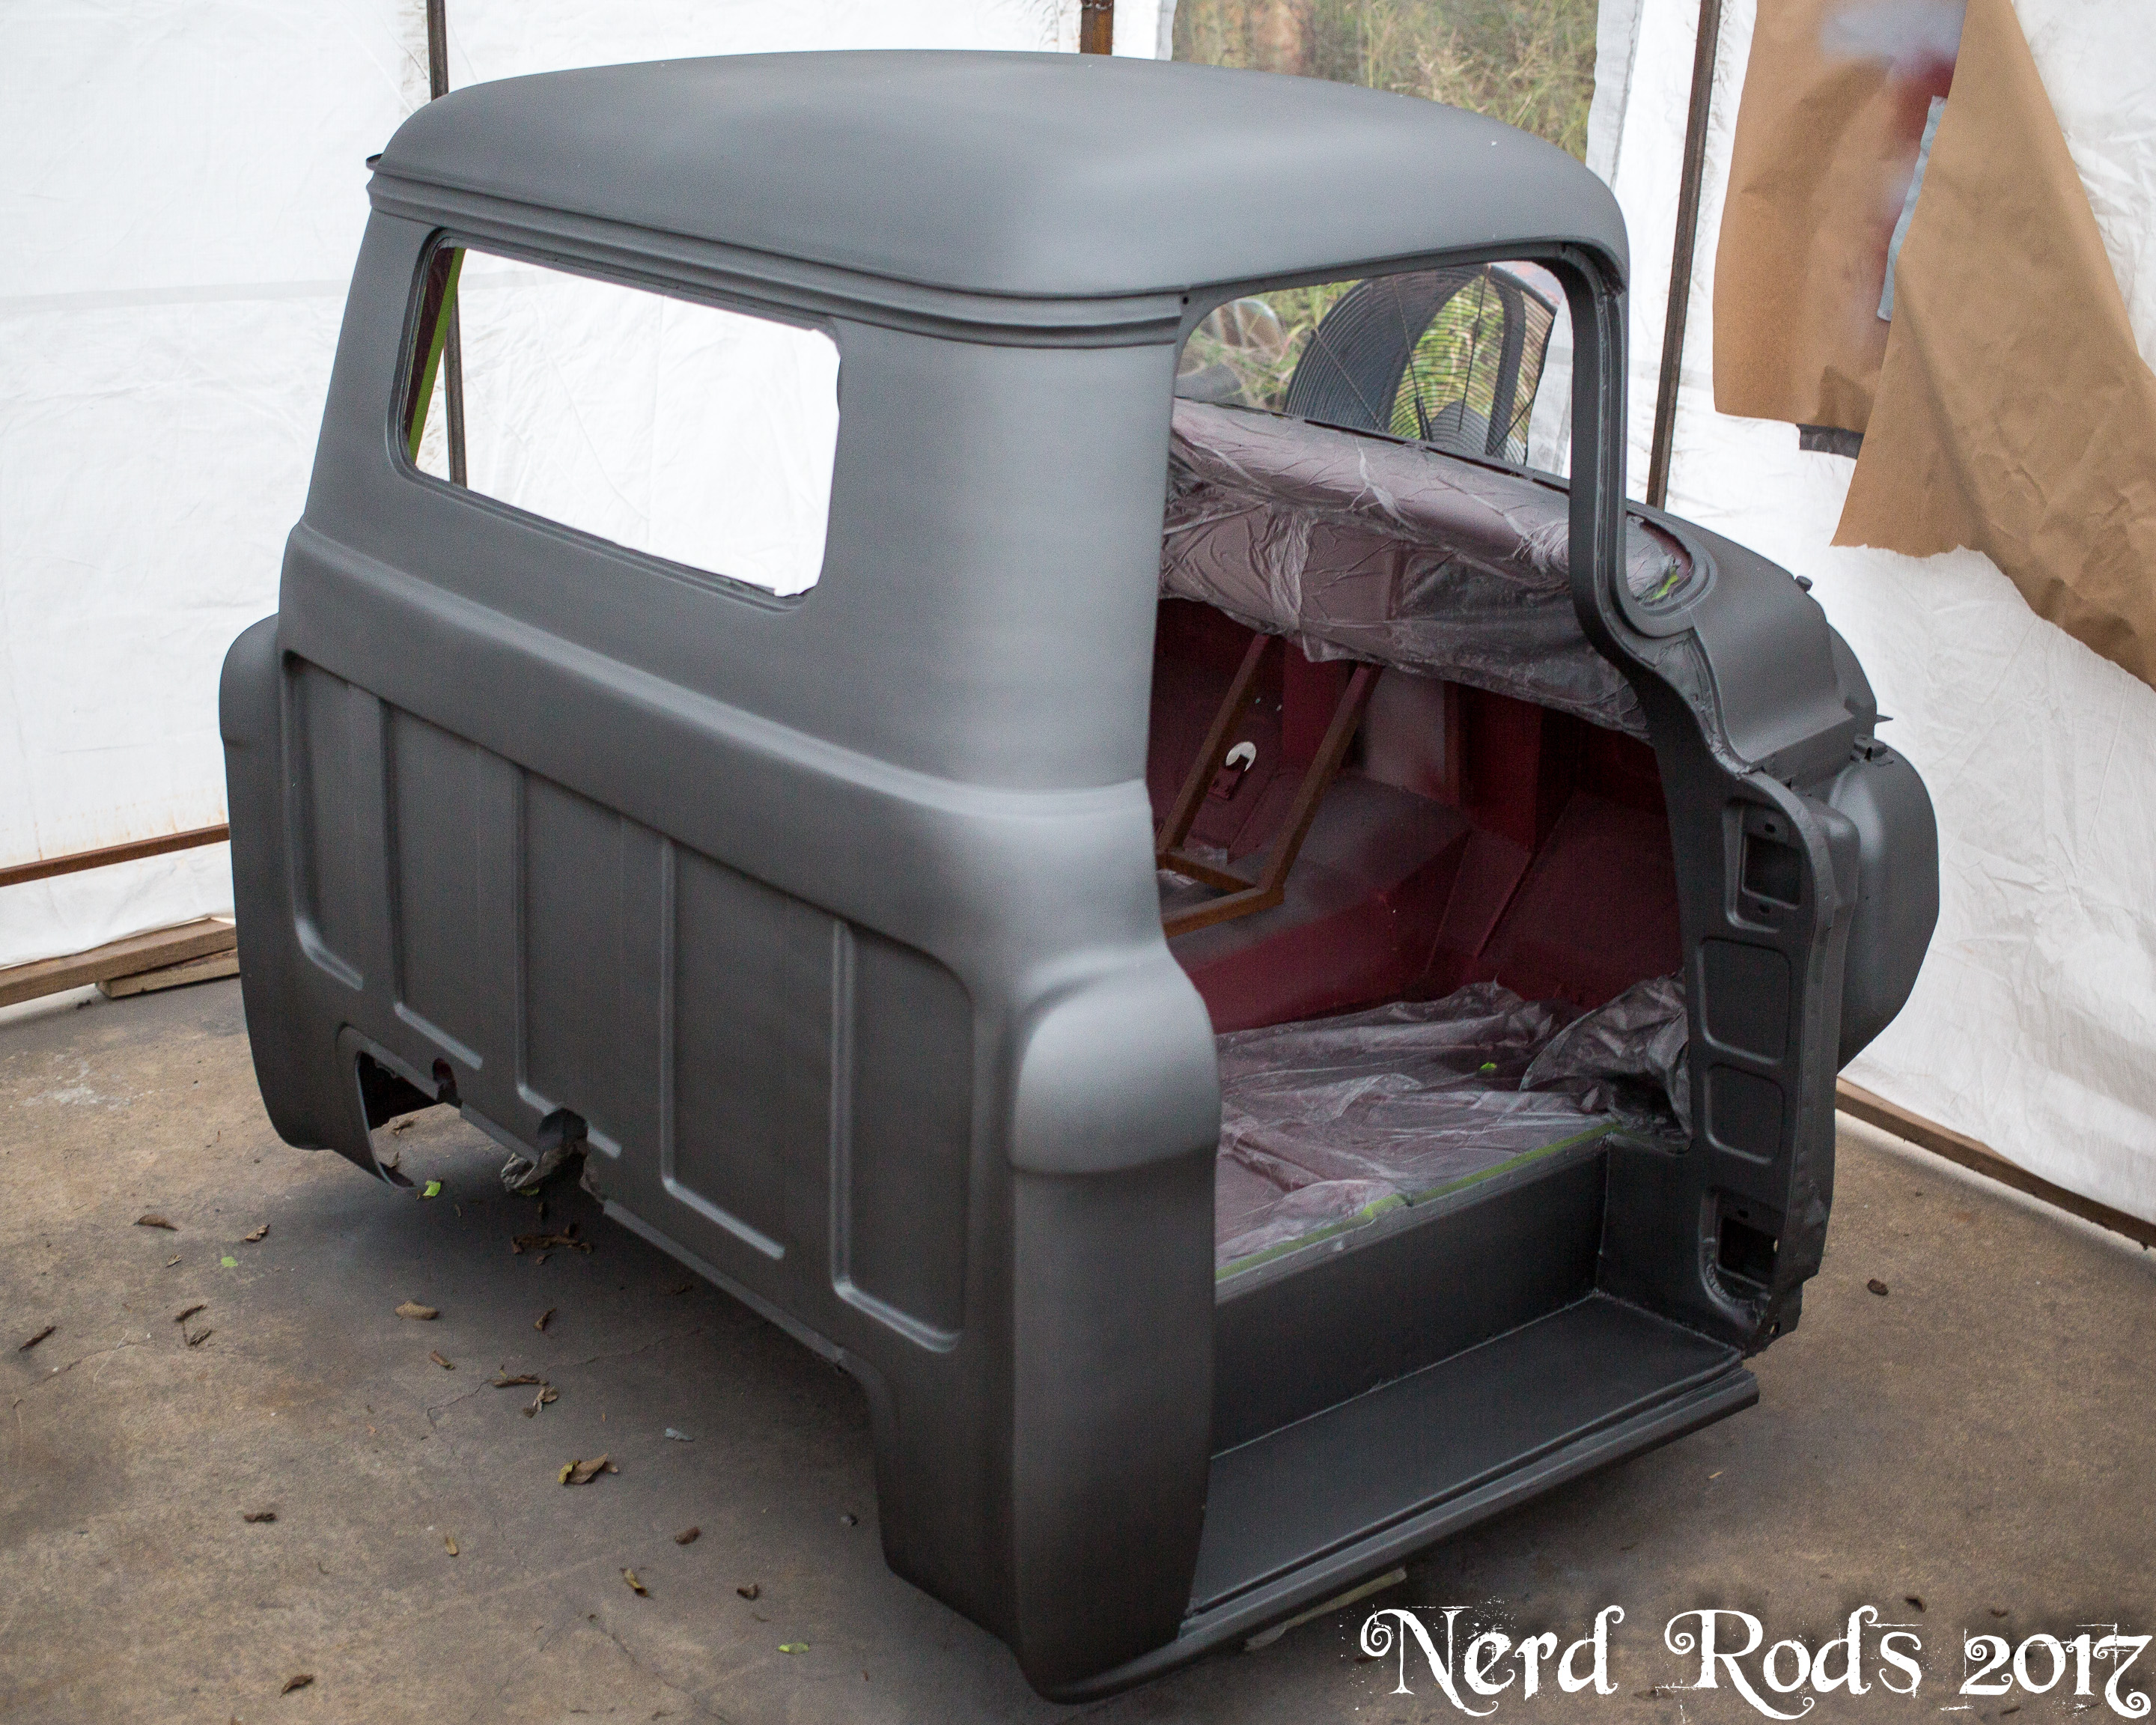

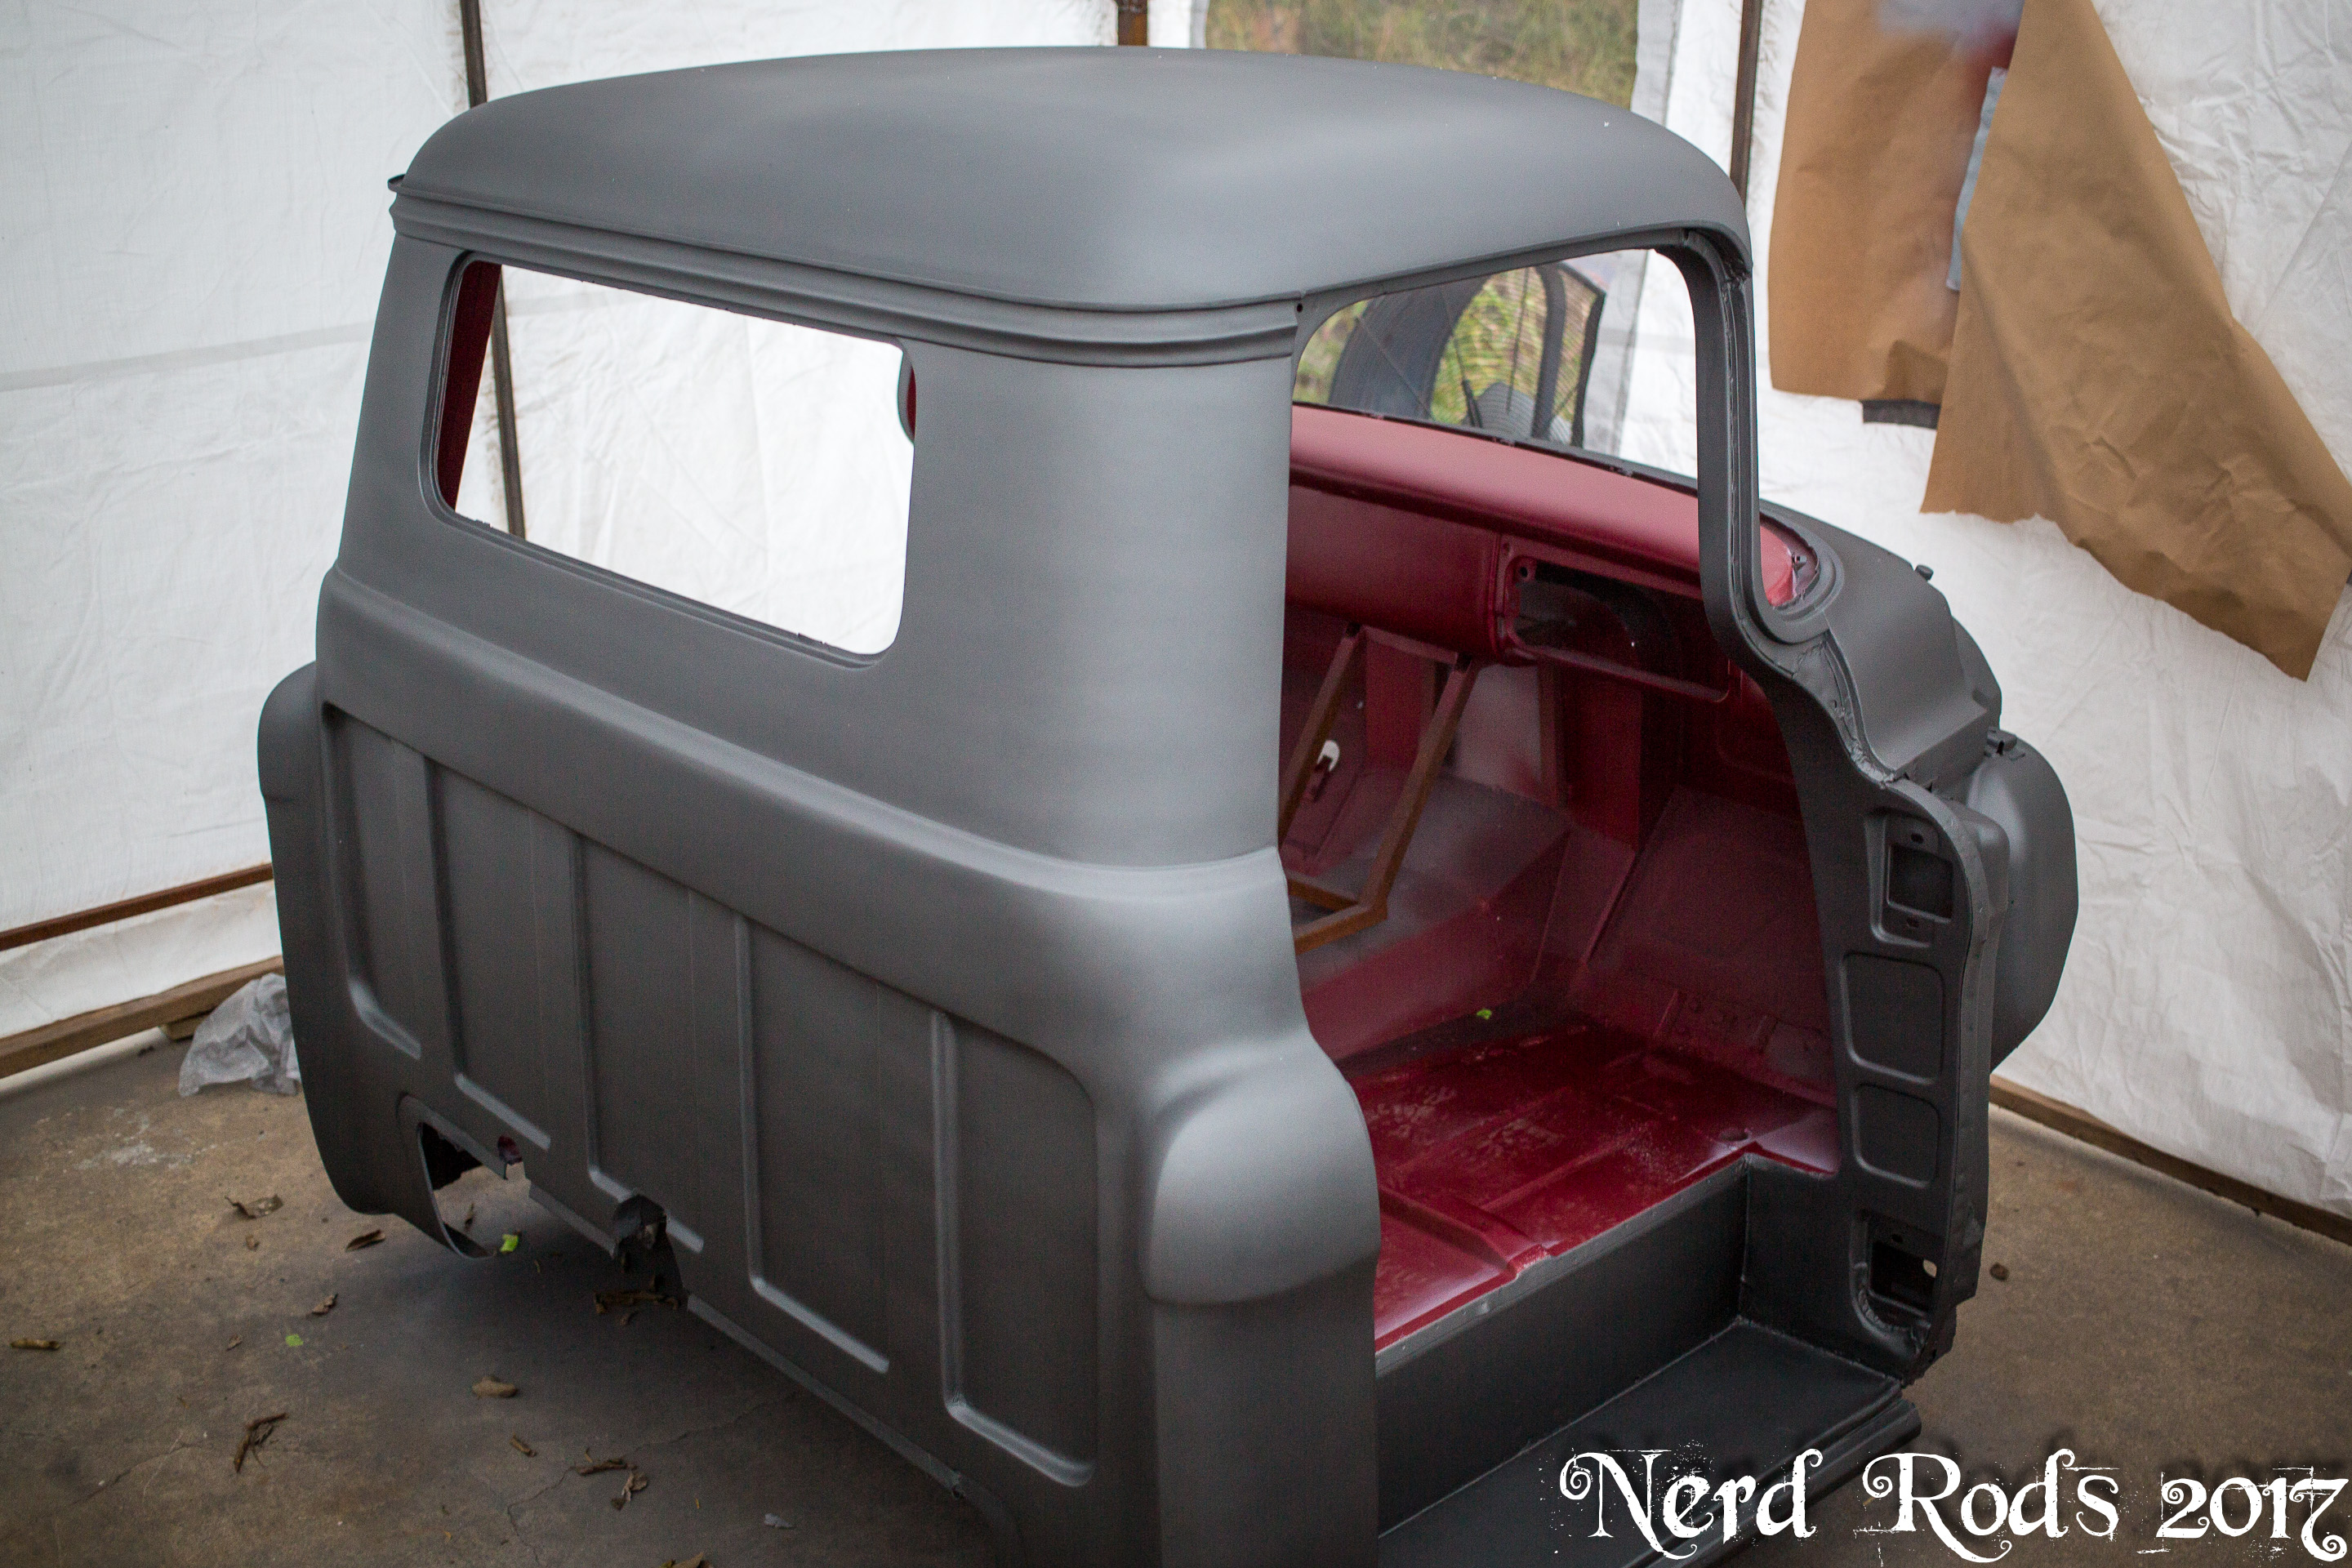
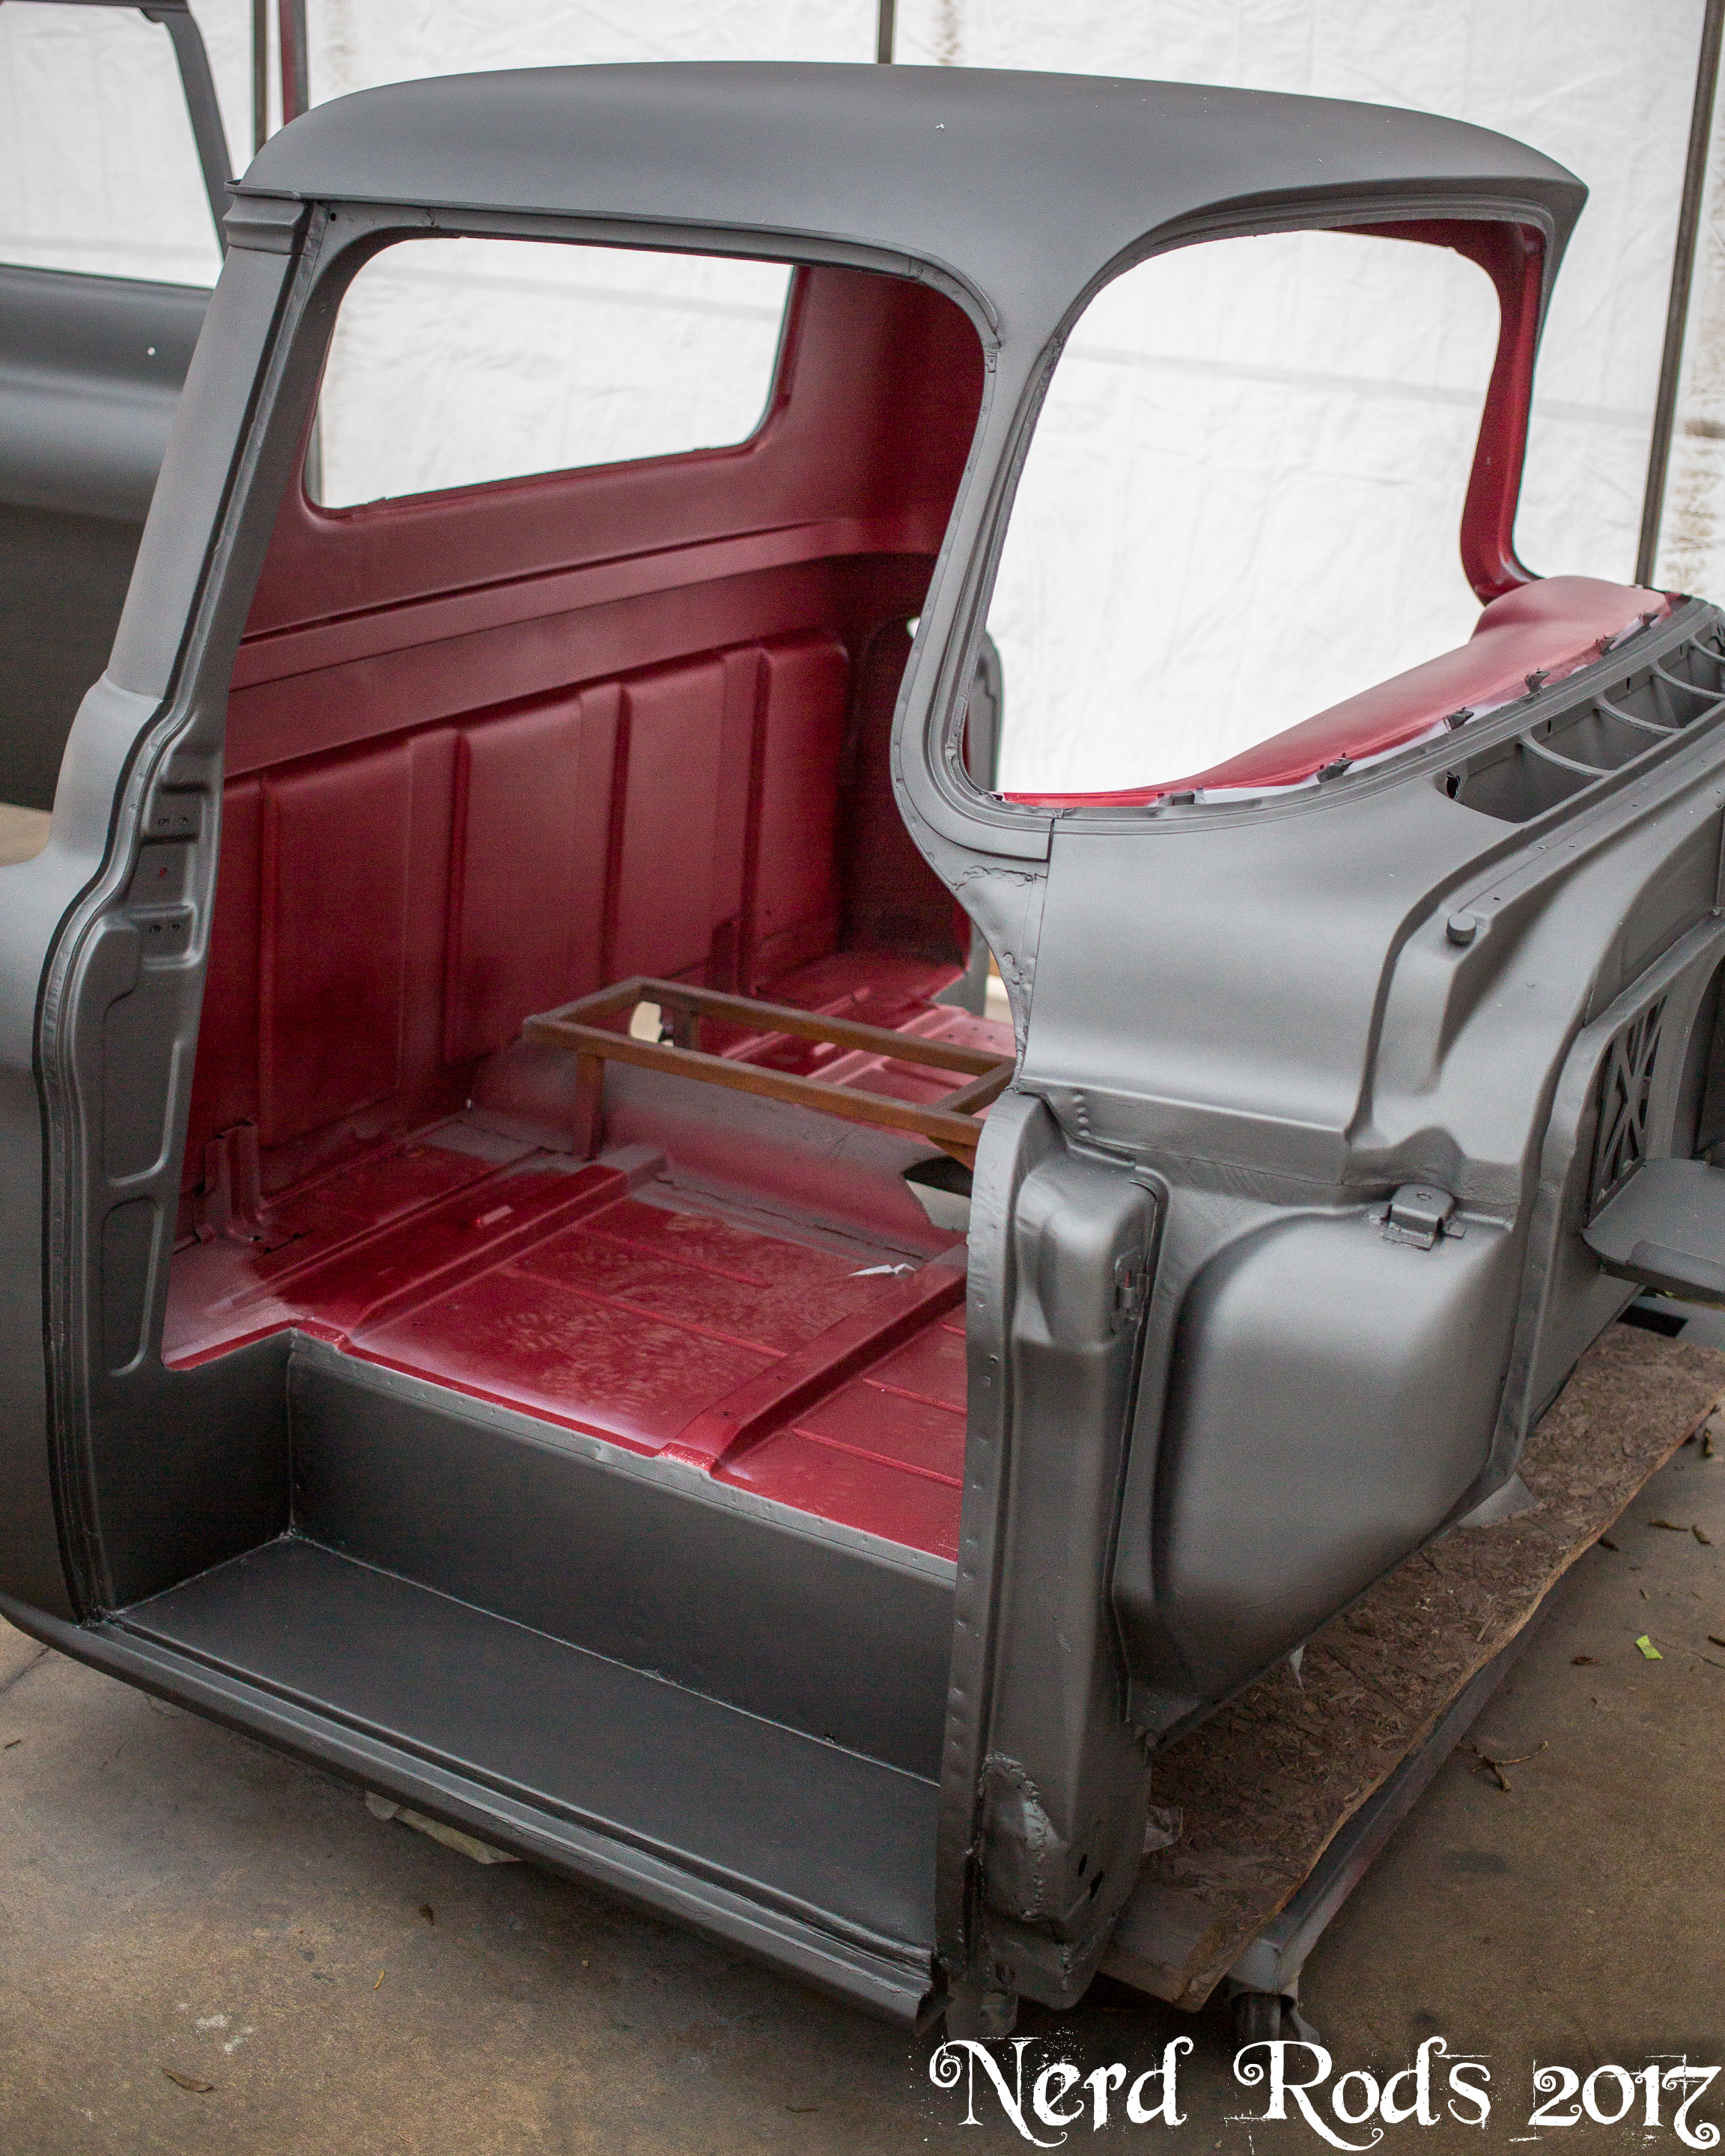
Cab Installed

Fuel Tank and remote filler neck
 03-08-2018, 12:03 AM
#37
Launching!
Thread Starter
Join Date: Jan 2007
Location: Luling TX In the Hot Rod Shop
Posts: 294
Likes: 0
Received 3 Likes
on
3 Posts
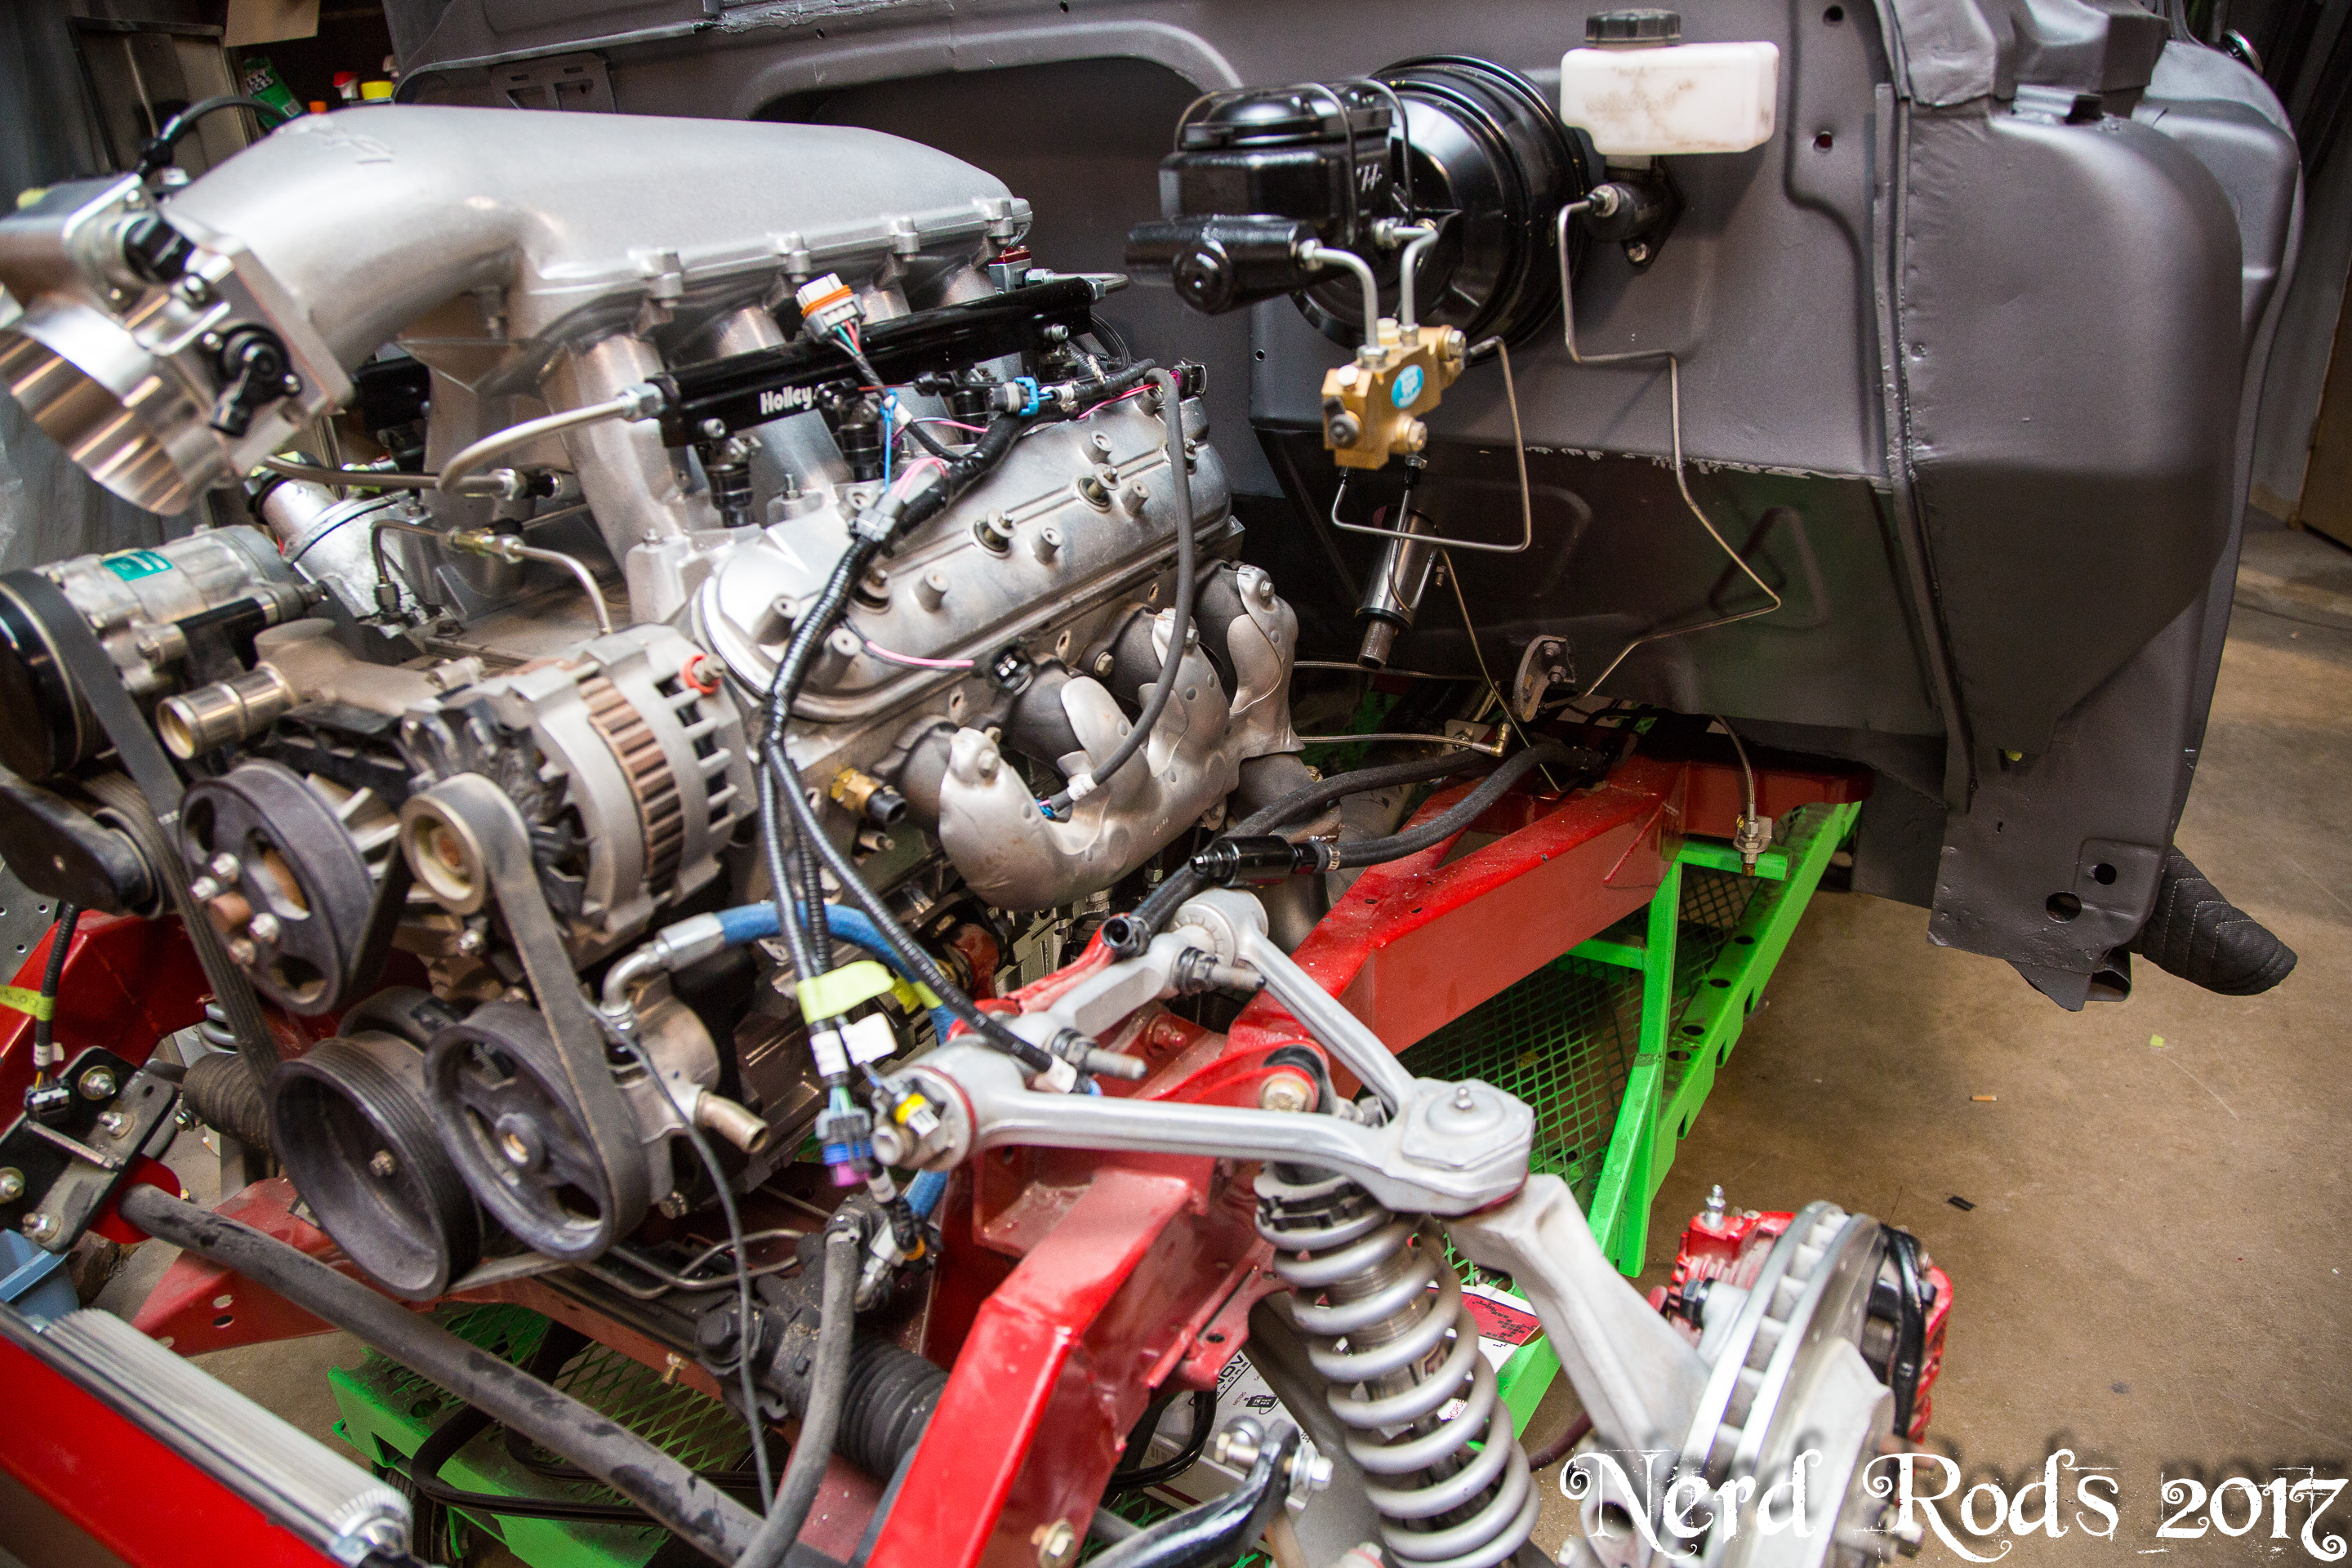
Working on the brakes and the hydro e brake


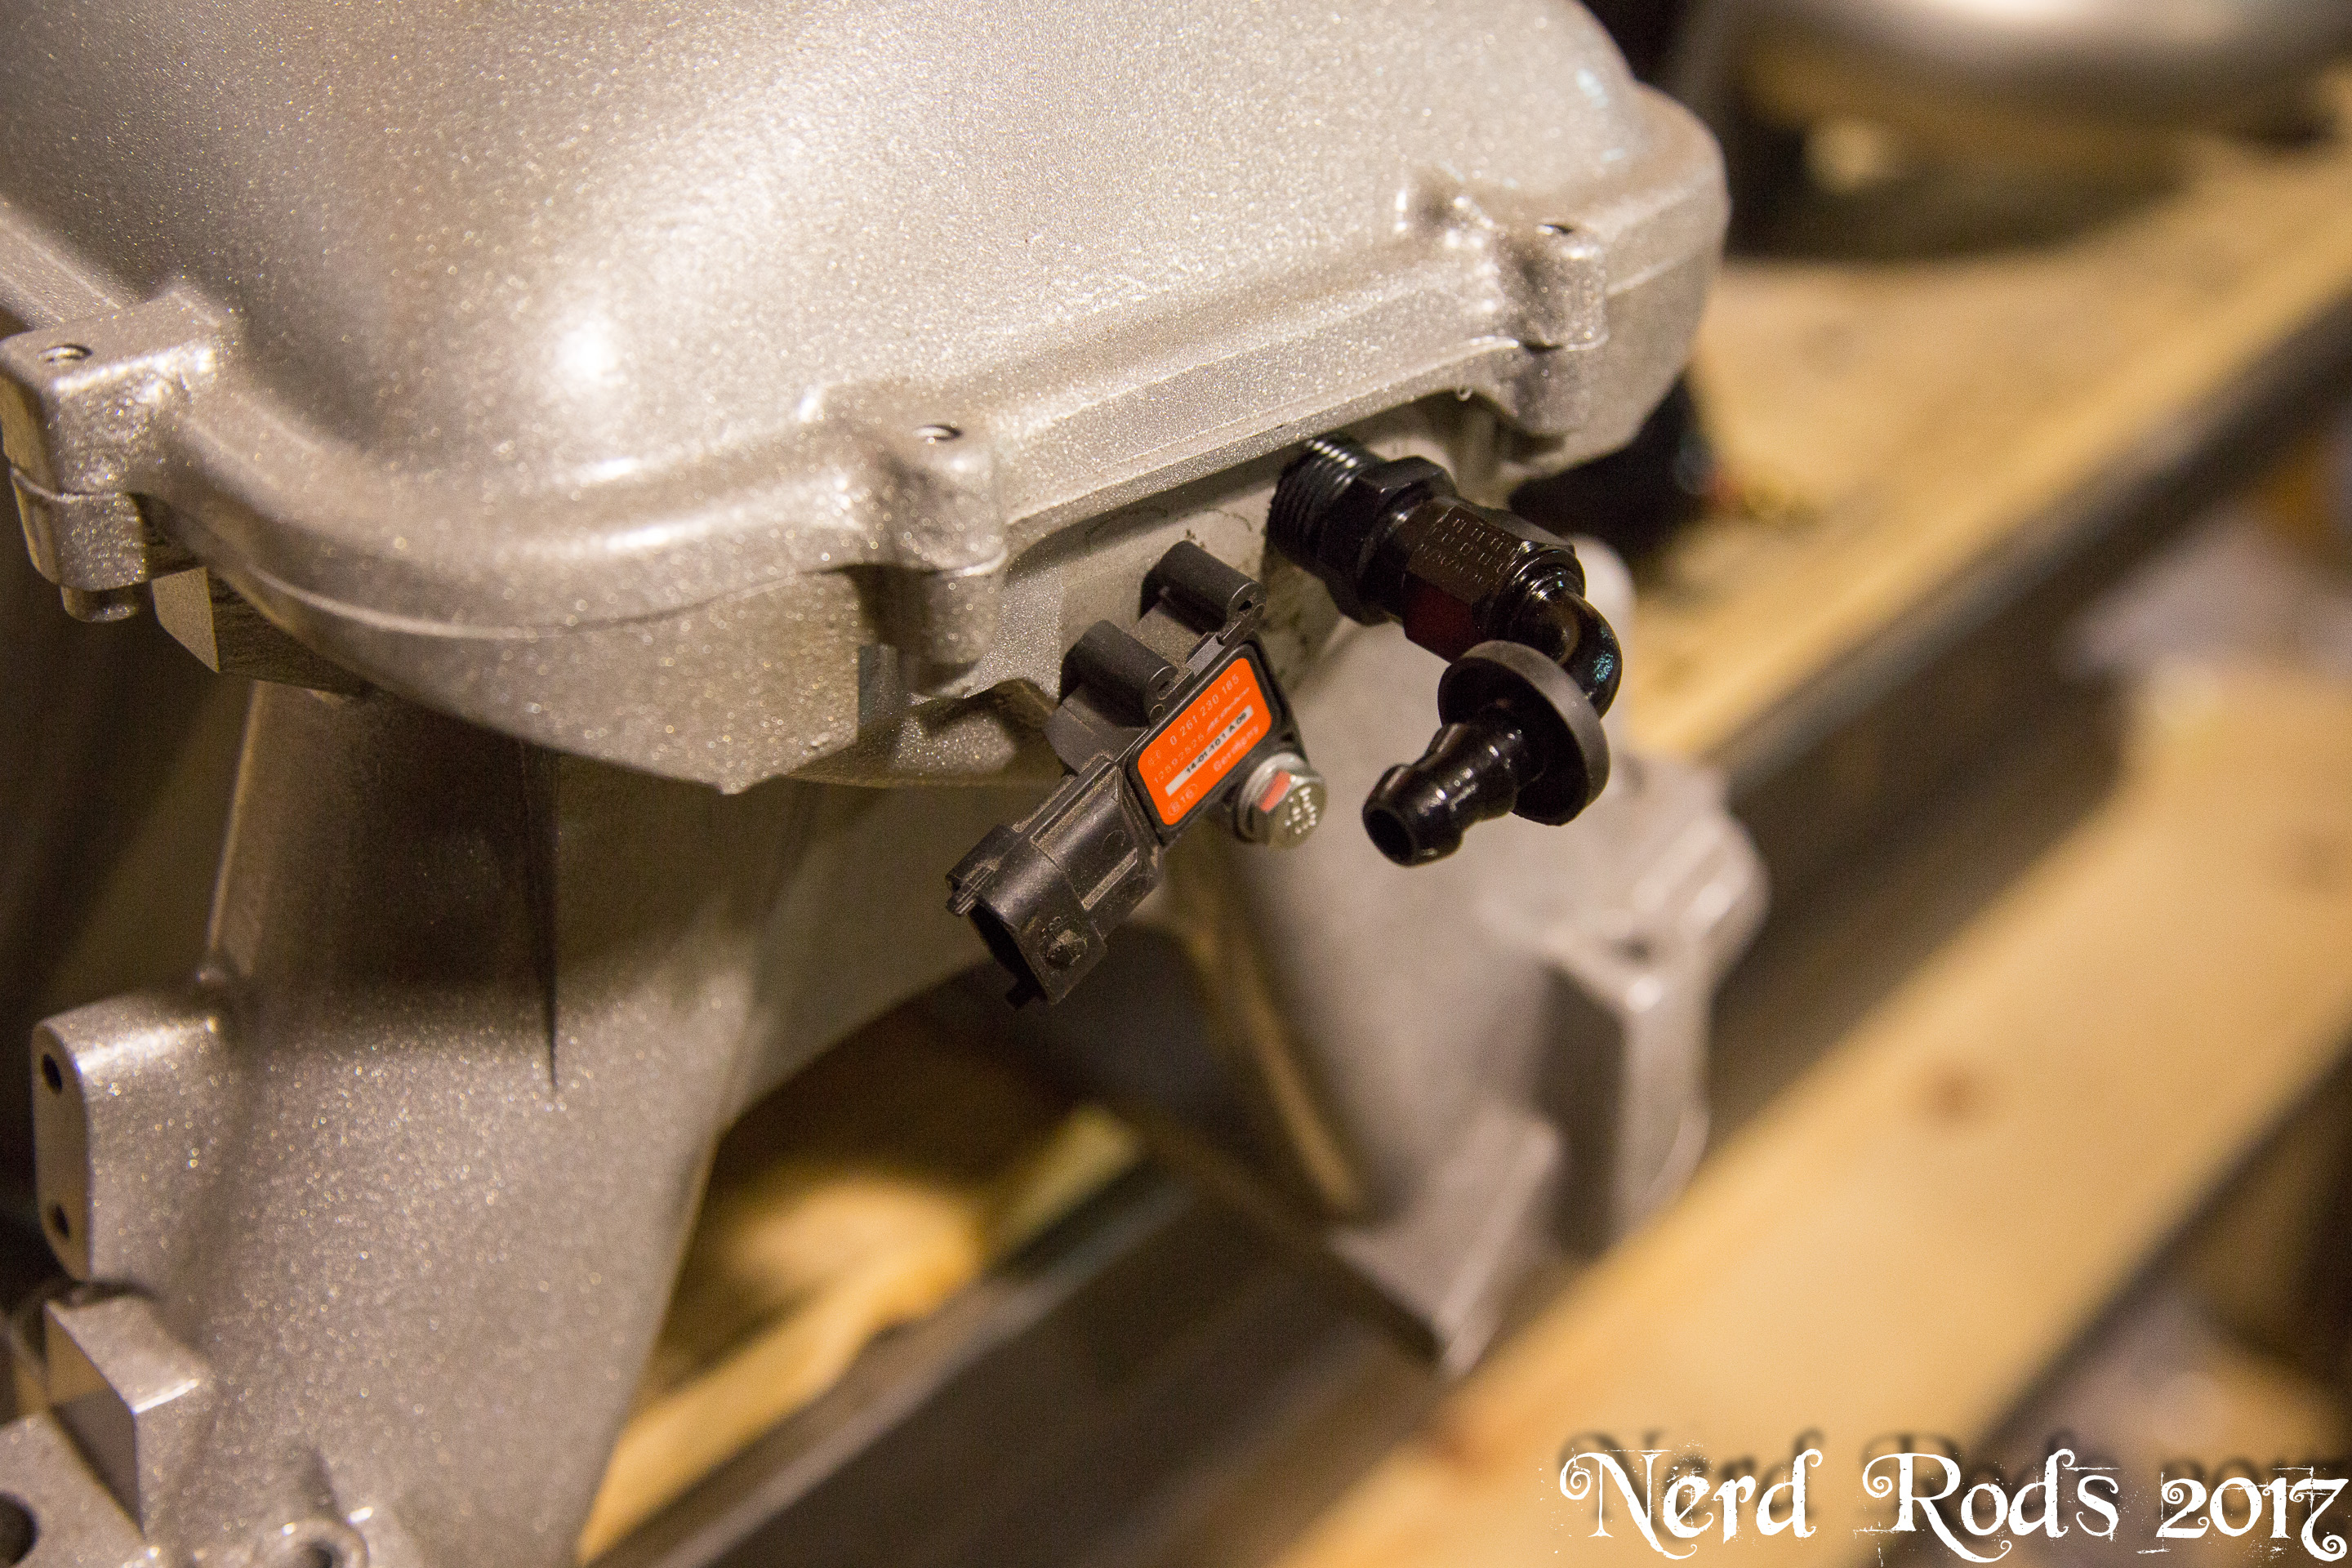
Installing a larger volumn oil pump for the turbo and oil cooler
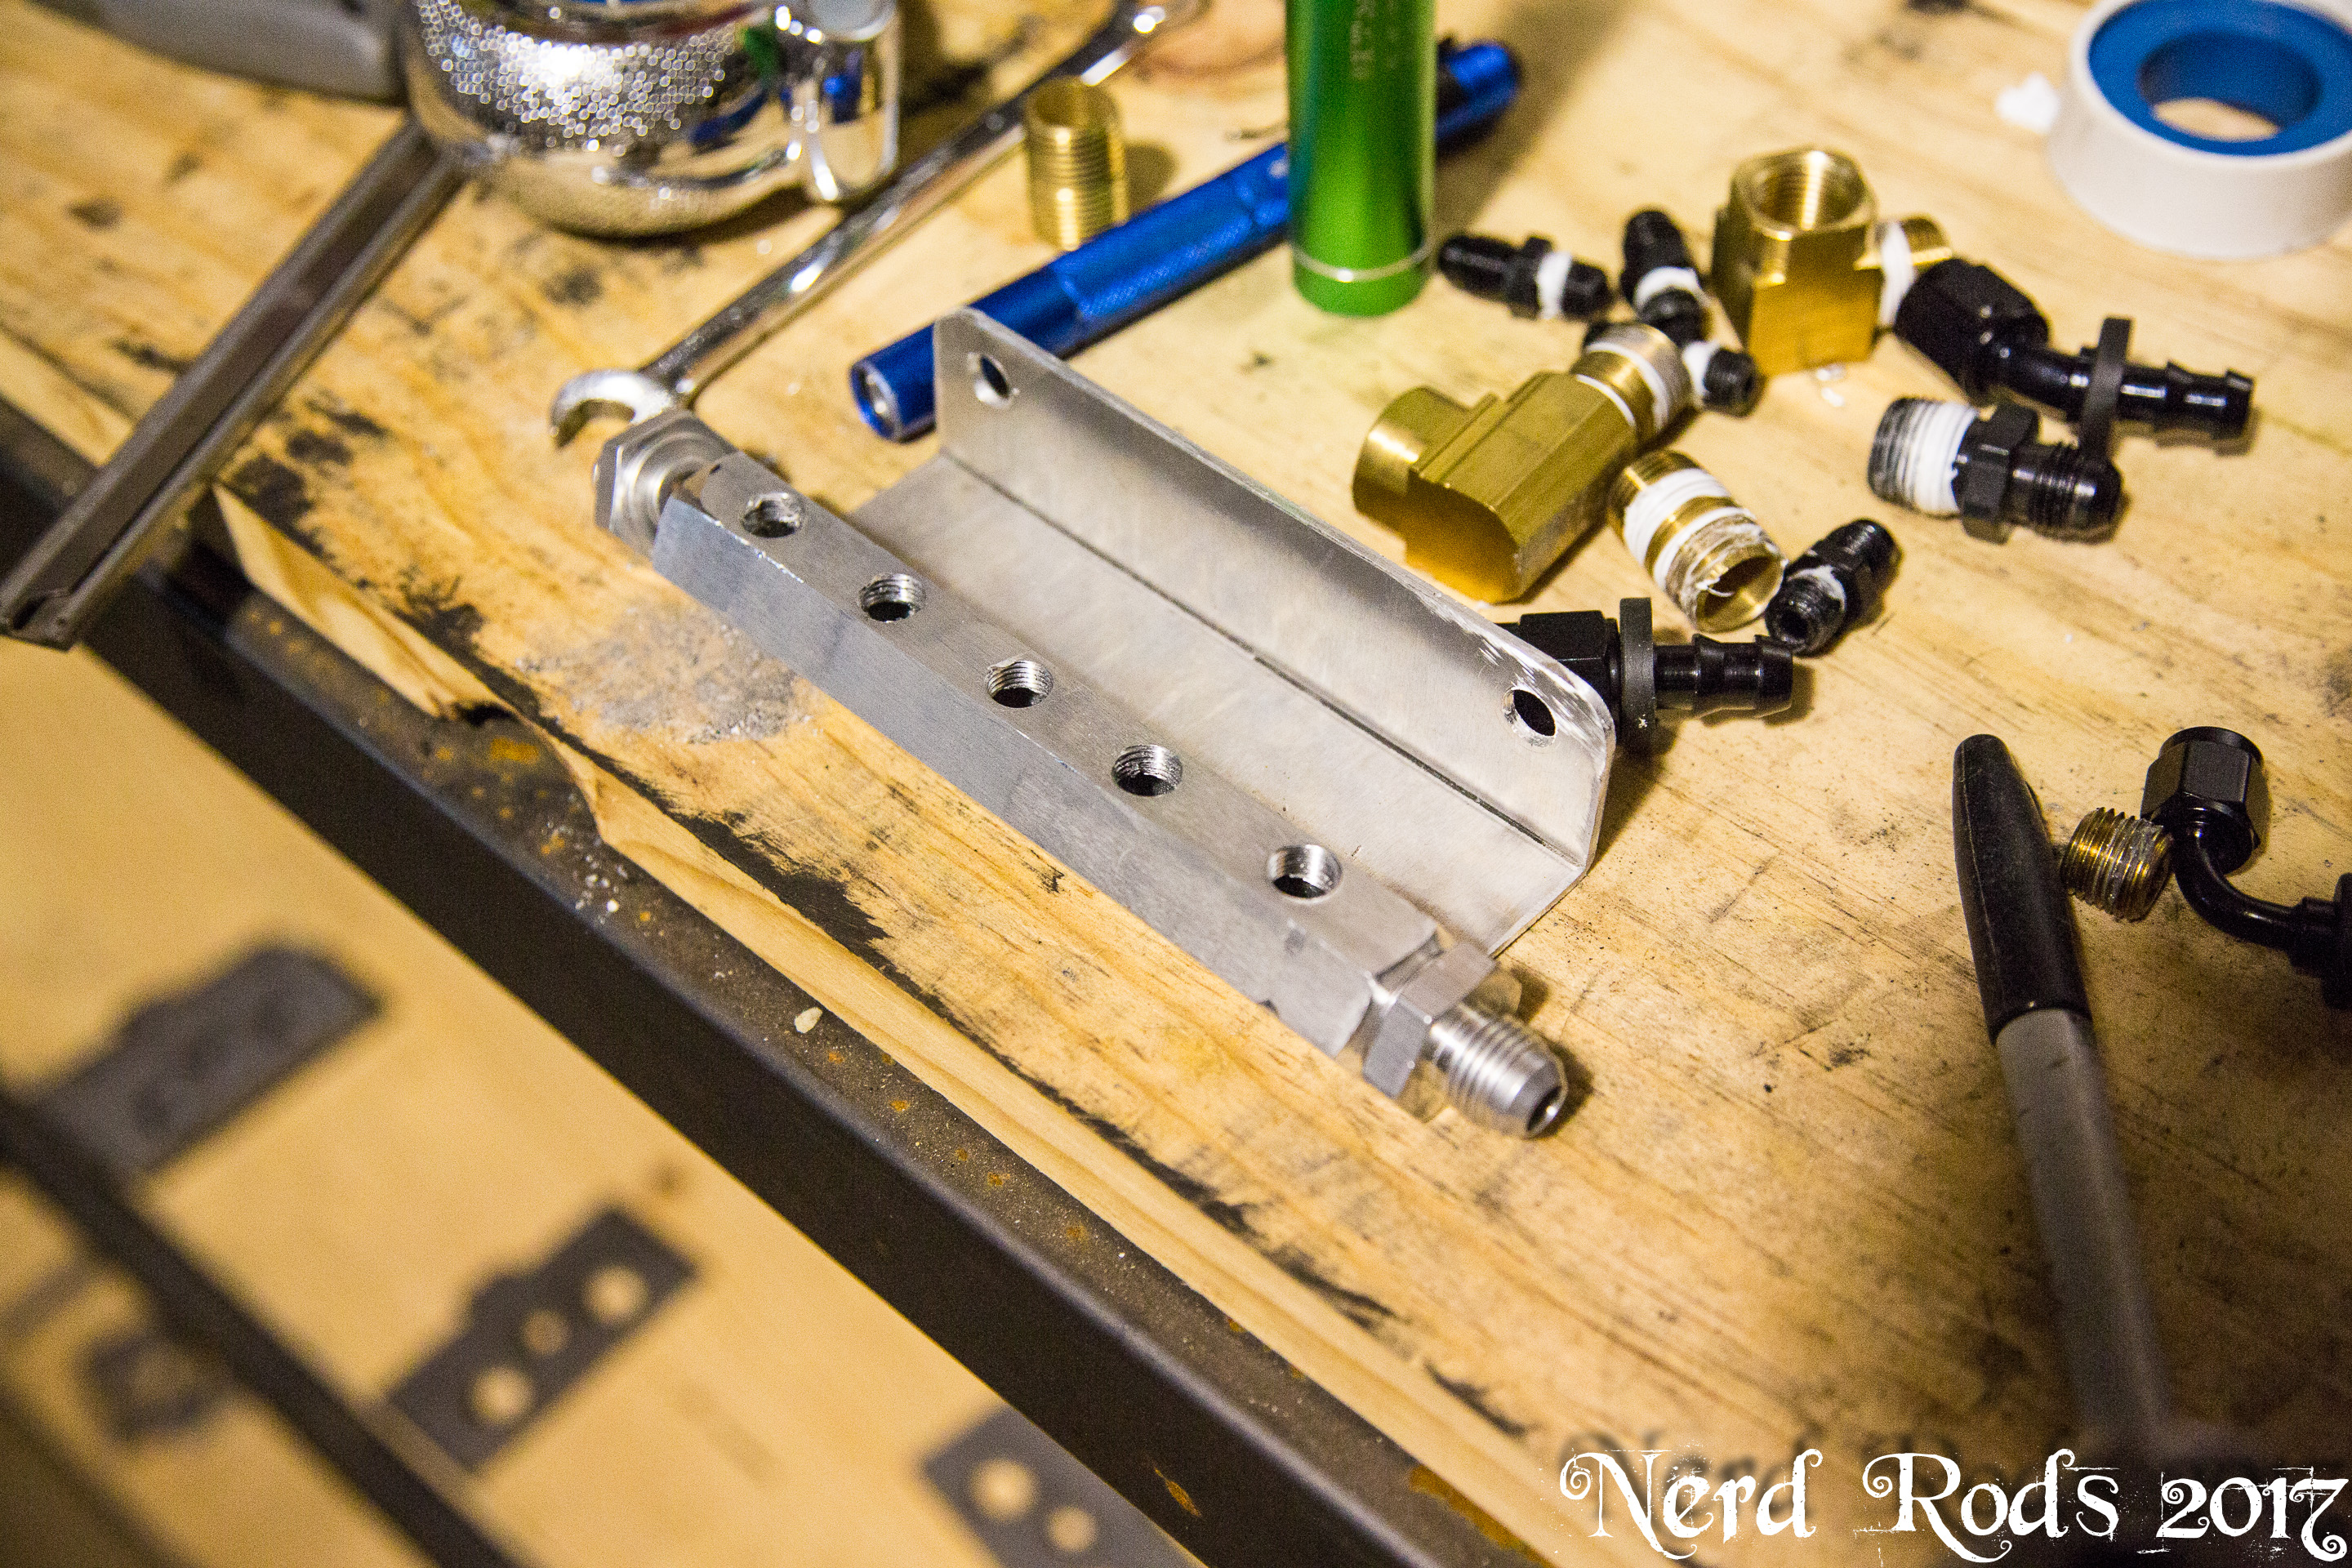
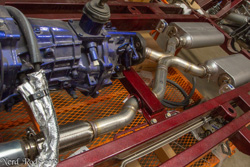
Working on the turbo inlet piping for the front side of the turbo and the cowl air induction


Lots and lots of vacuum lines and plumbing bits


More sooner than later with luck,


Installing a larger volumn oil pump for the turbo and oil cooler

Working on the turbo inlet piping for the front side of the turbo and the cowl air induction


Lots and lots of vacuum lines and plumbing bits
More sooner than later with luck,
03-08-2018, 11:16 AM
#38
Sweet looking. Keep 'em coming.
10-19-2018, 03:05 PM
#40
Launching!
Thread Starter
Join Date: Jan 2007
Location: Luling TX In the Hot Rod Shop
Posts: 294
Likes: 0
Received 3 Likes
on
3 Posts
Not dad's truck but something else to pay the bills and keep my skills honed.
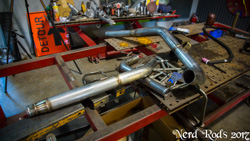
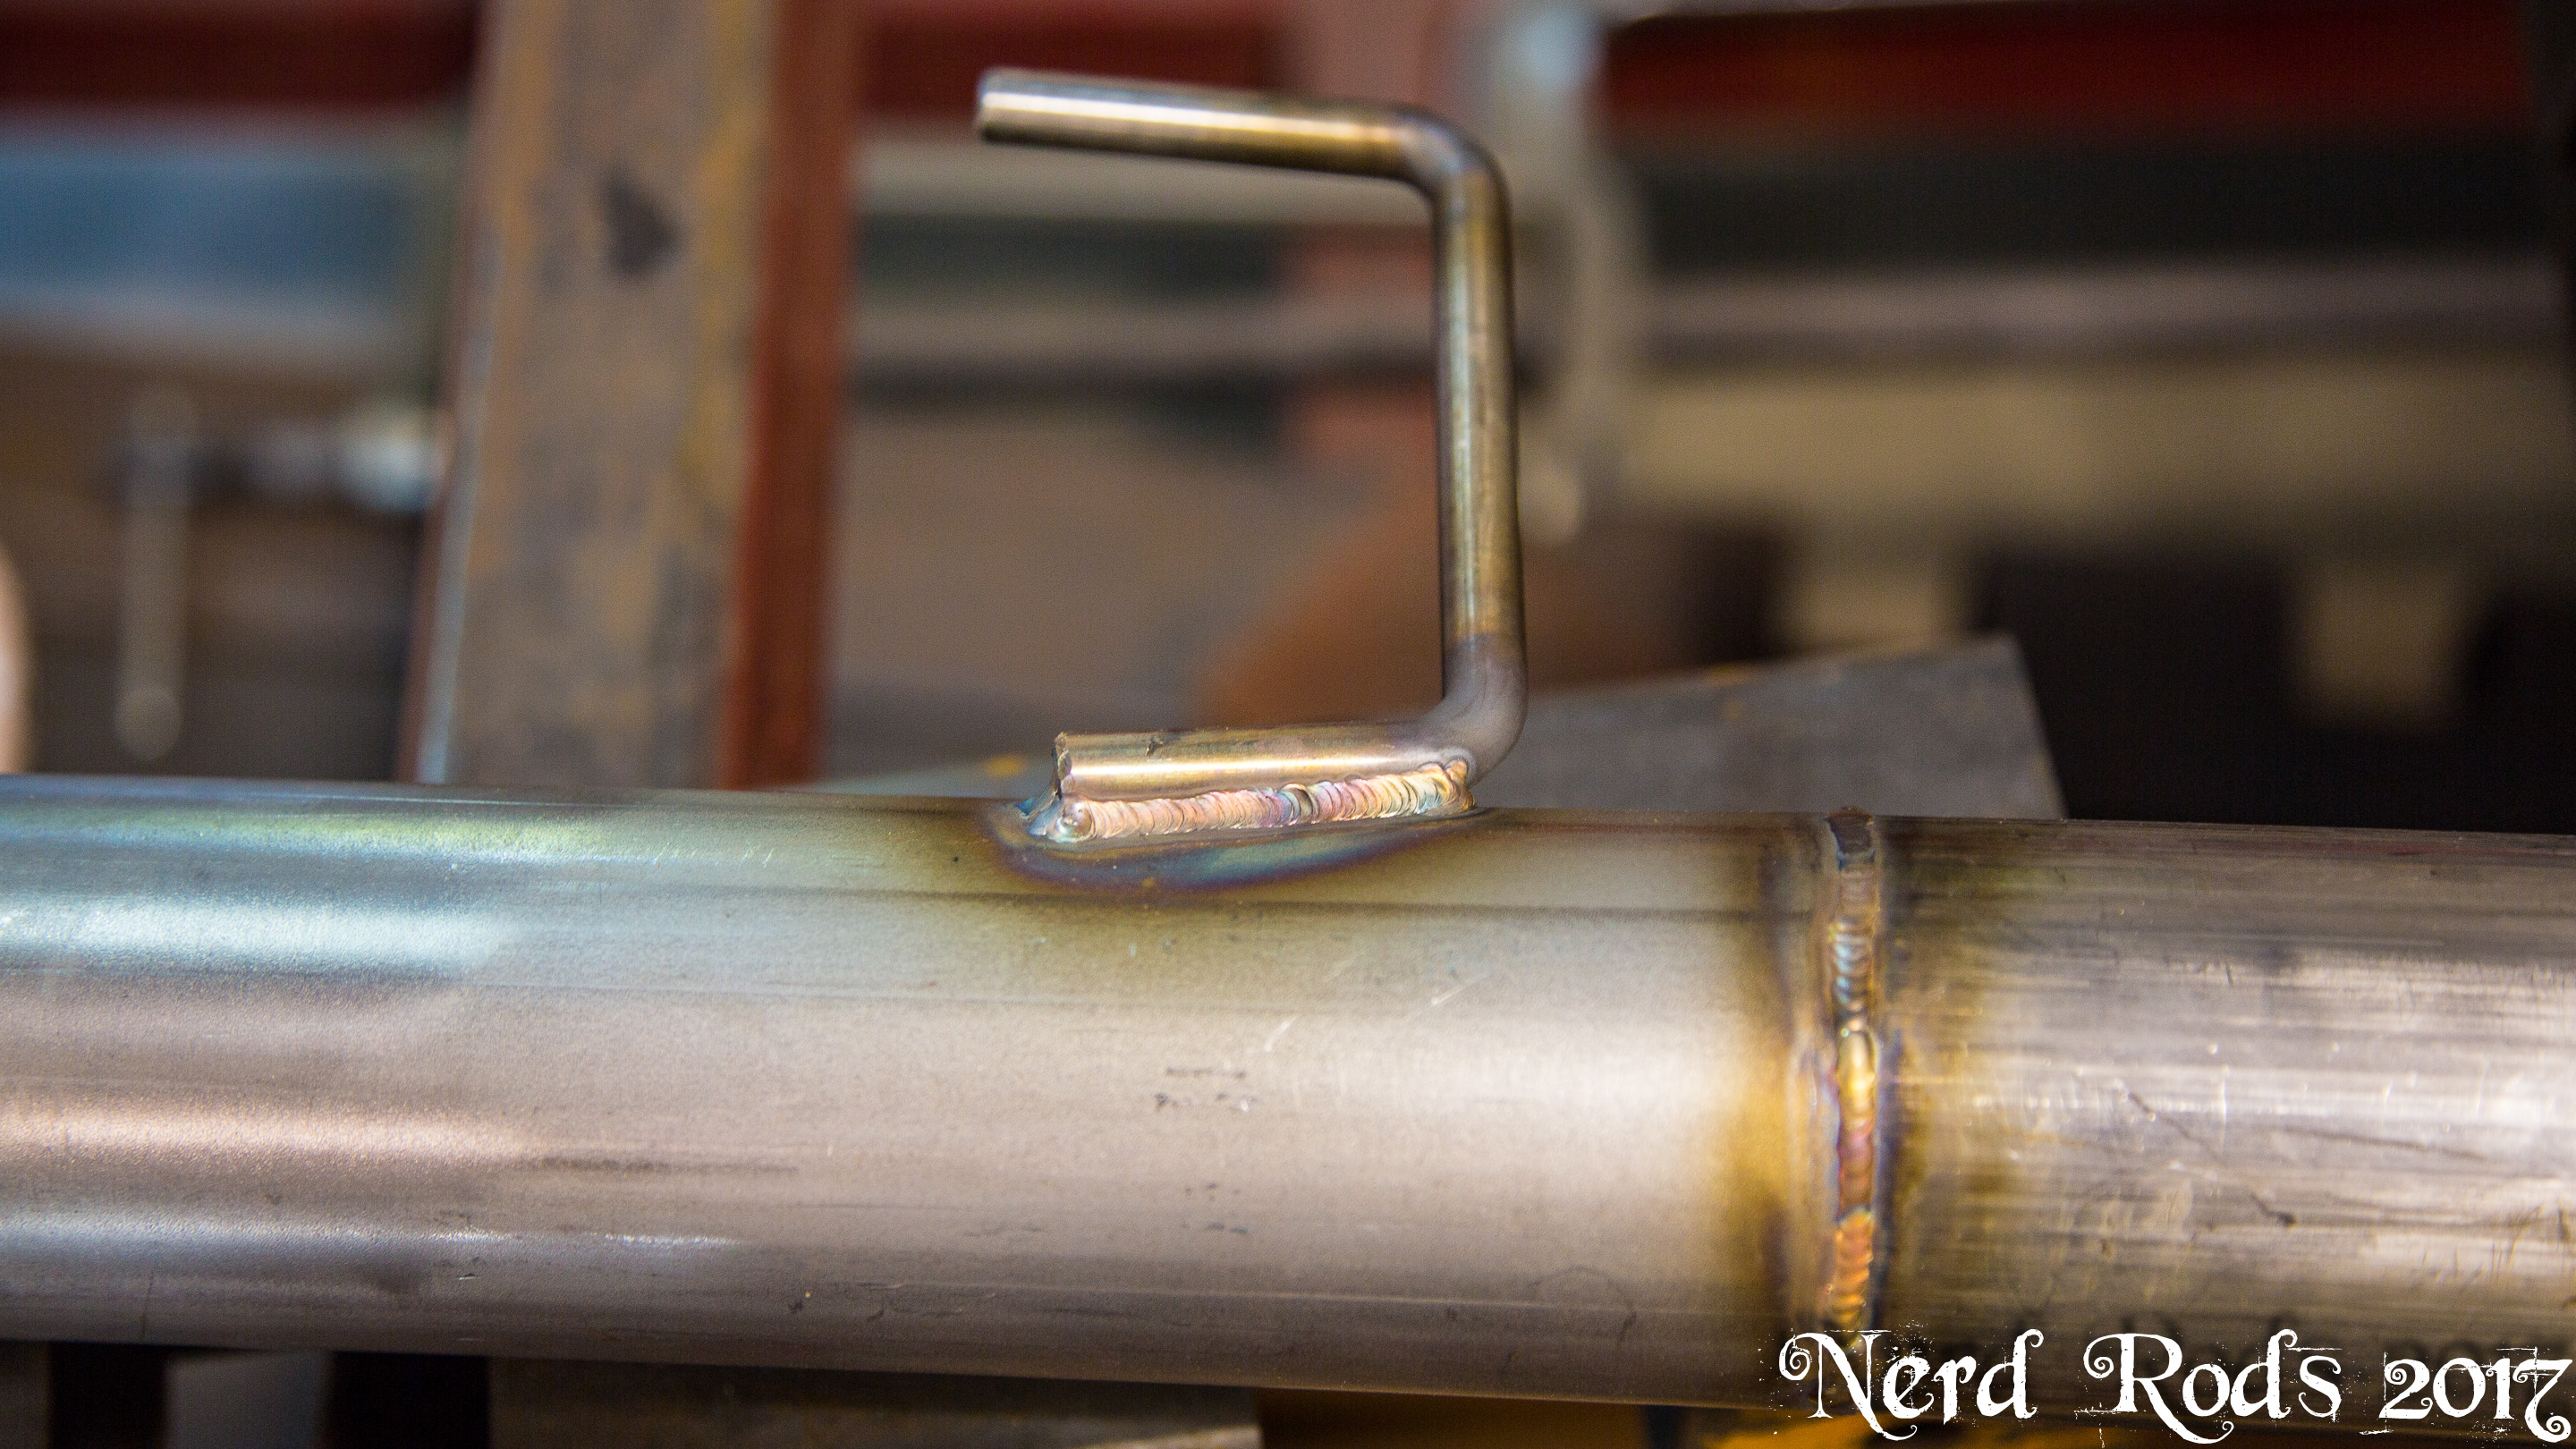
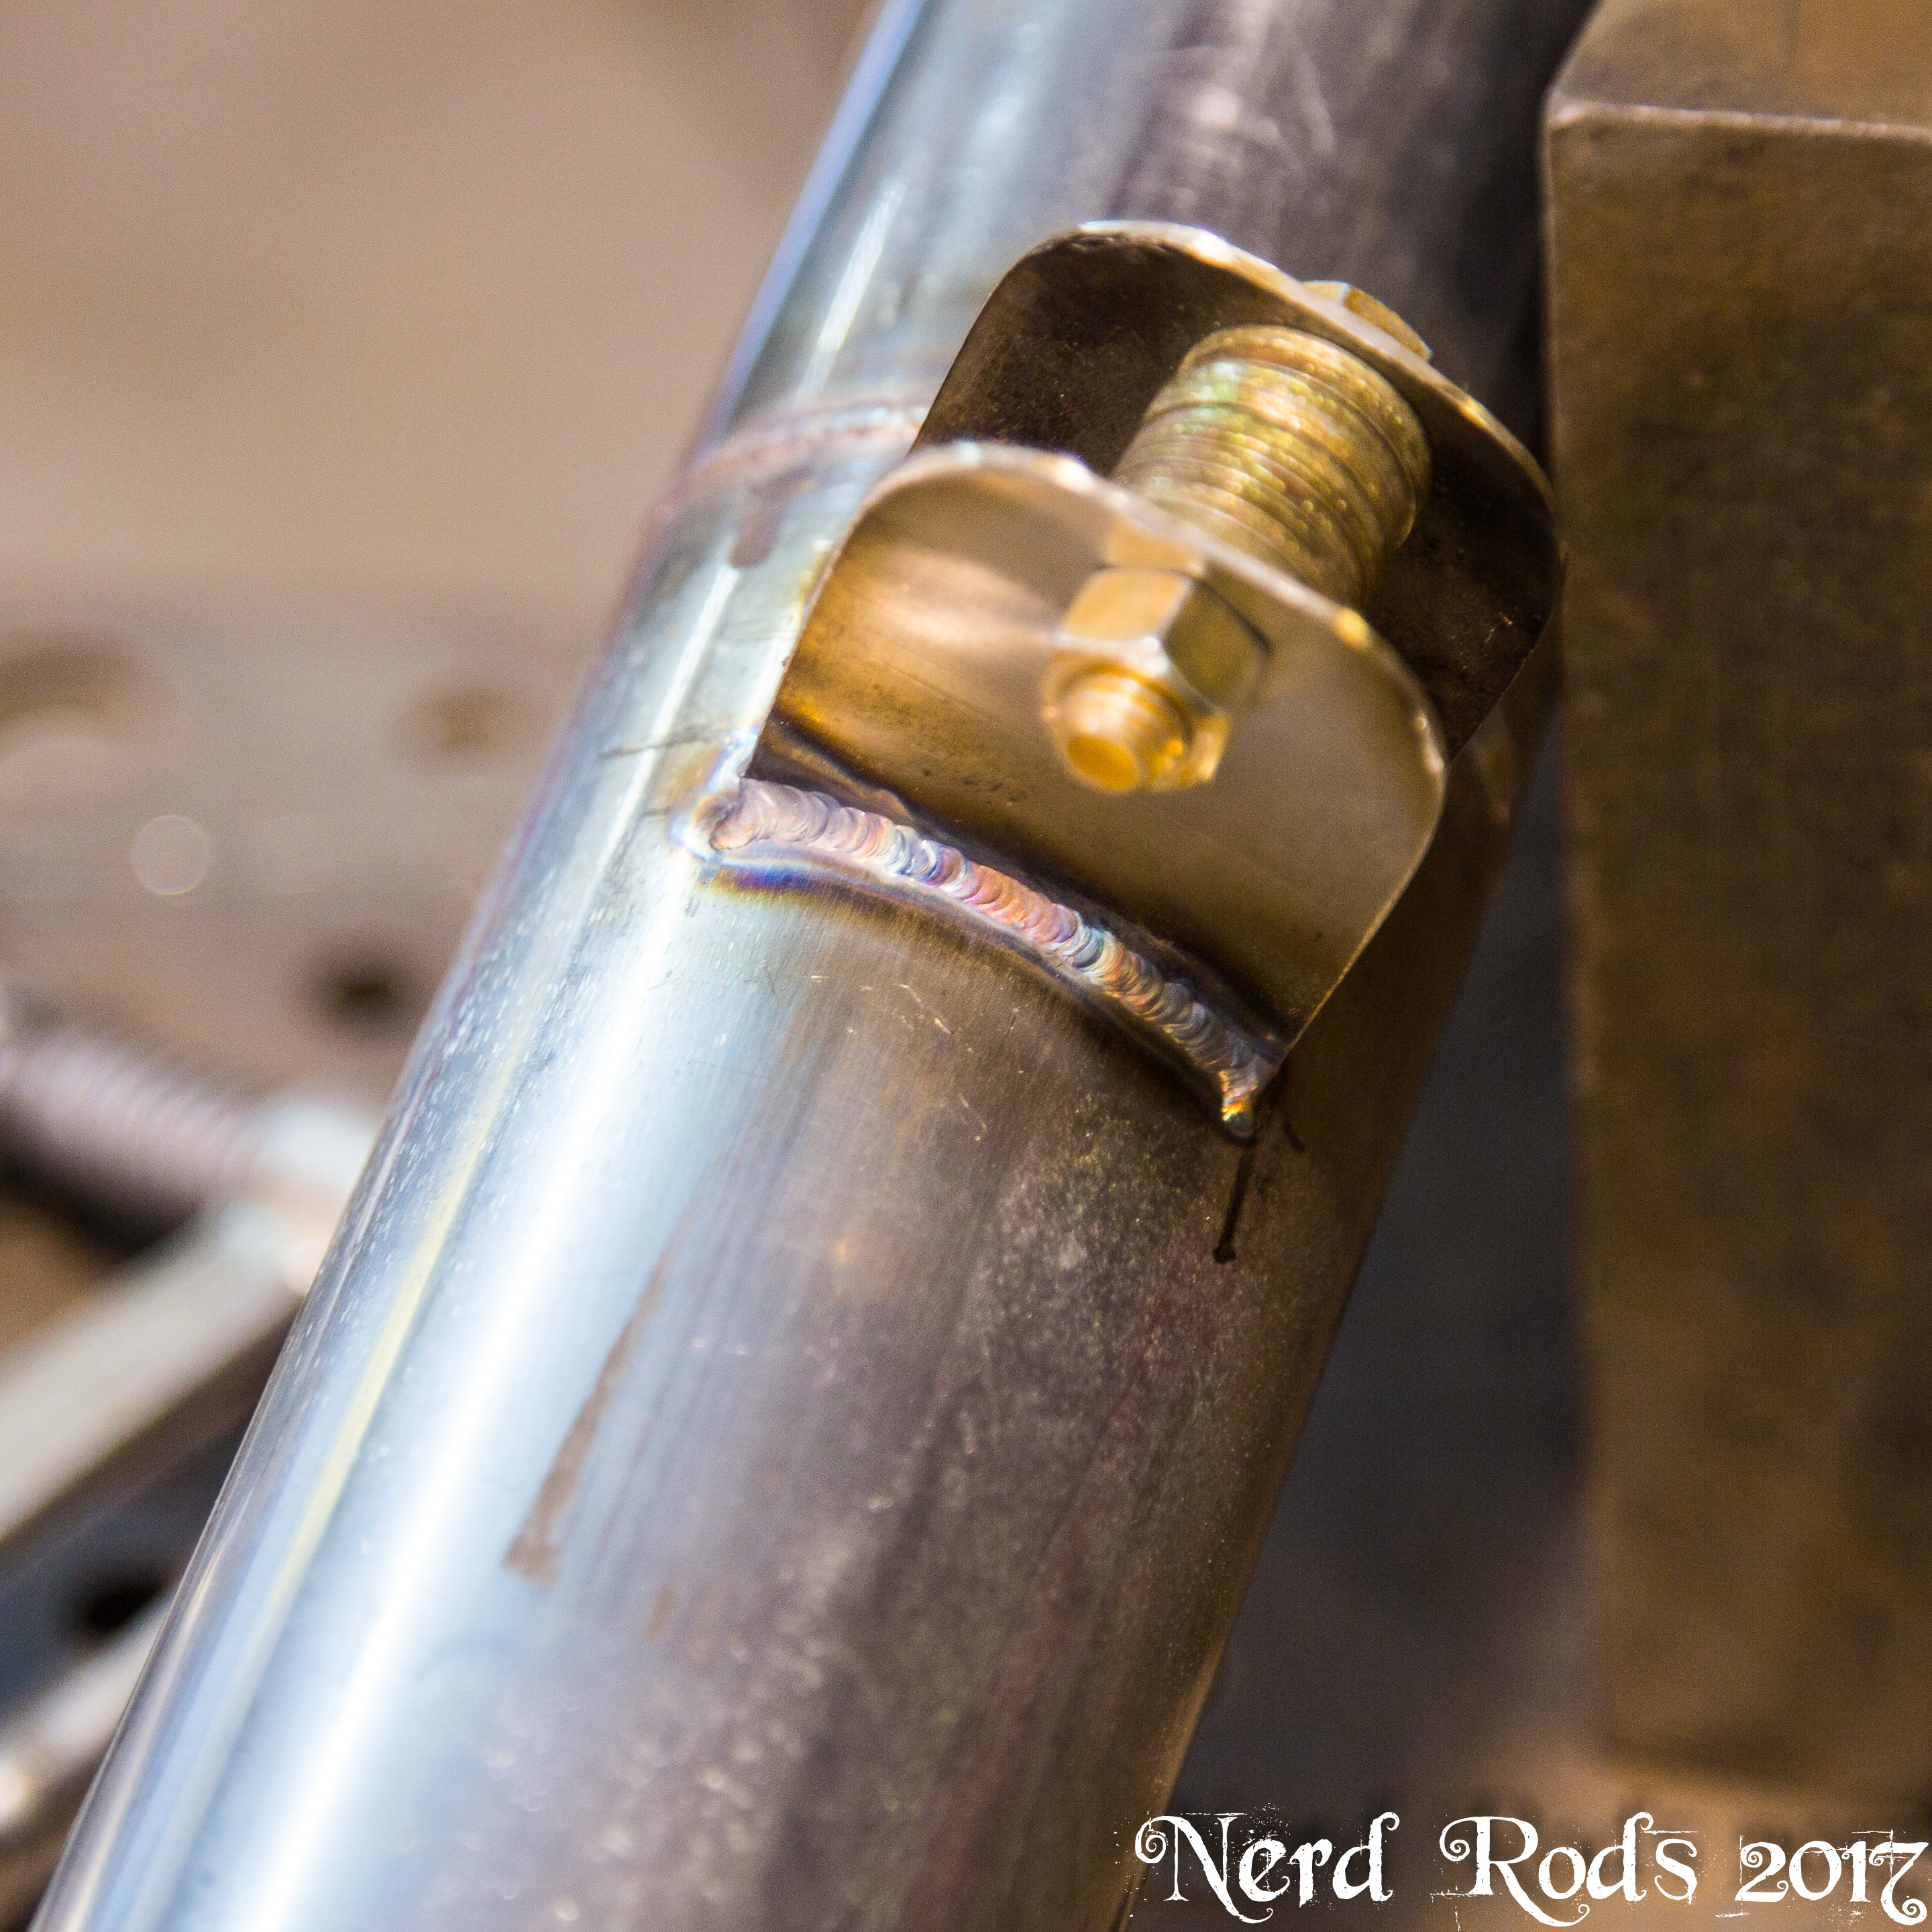
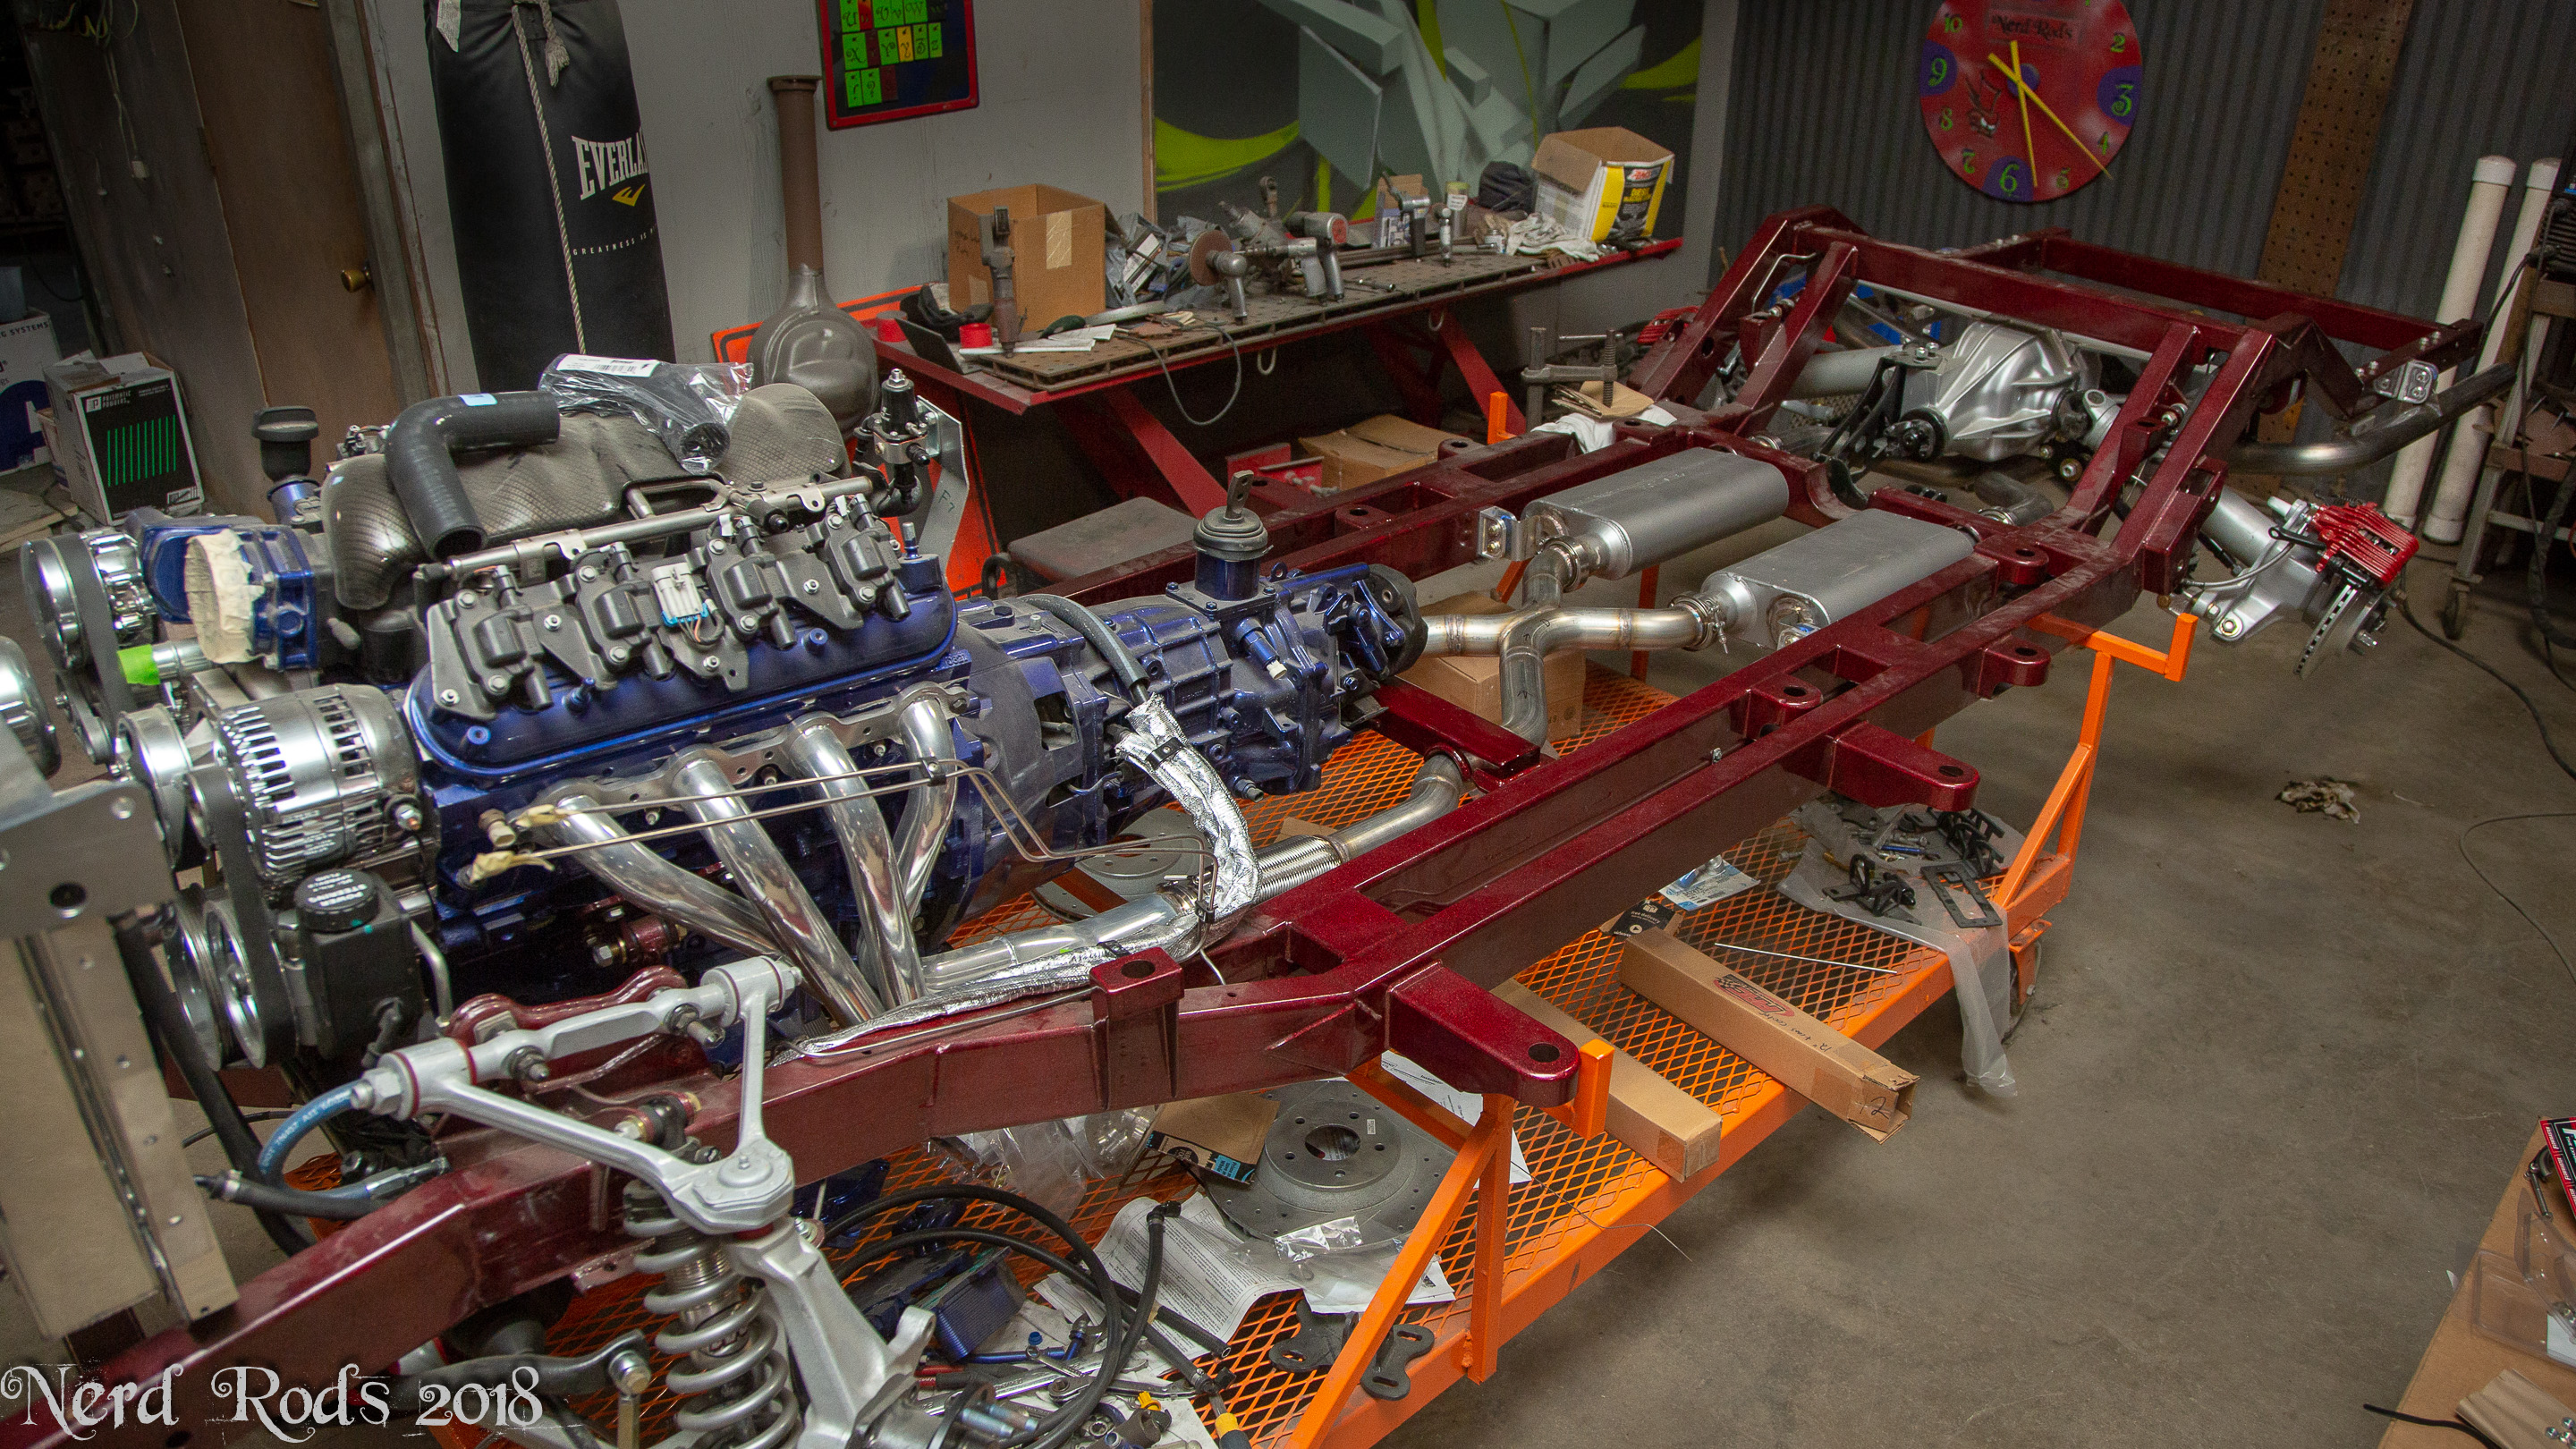
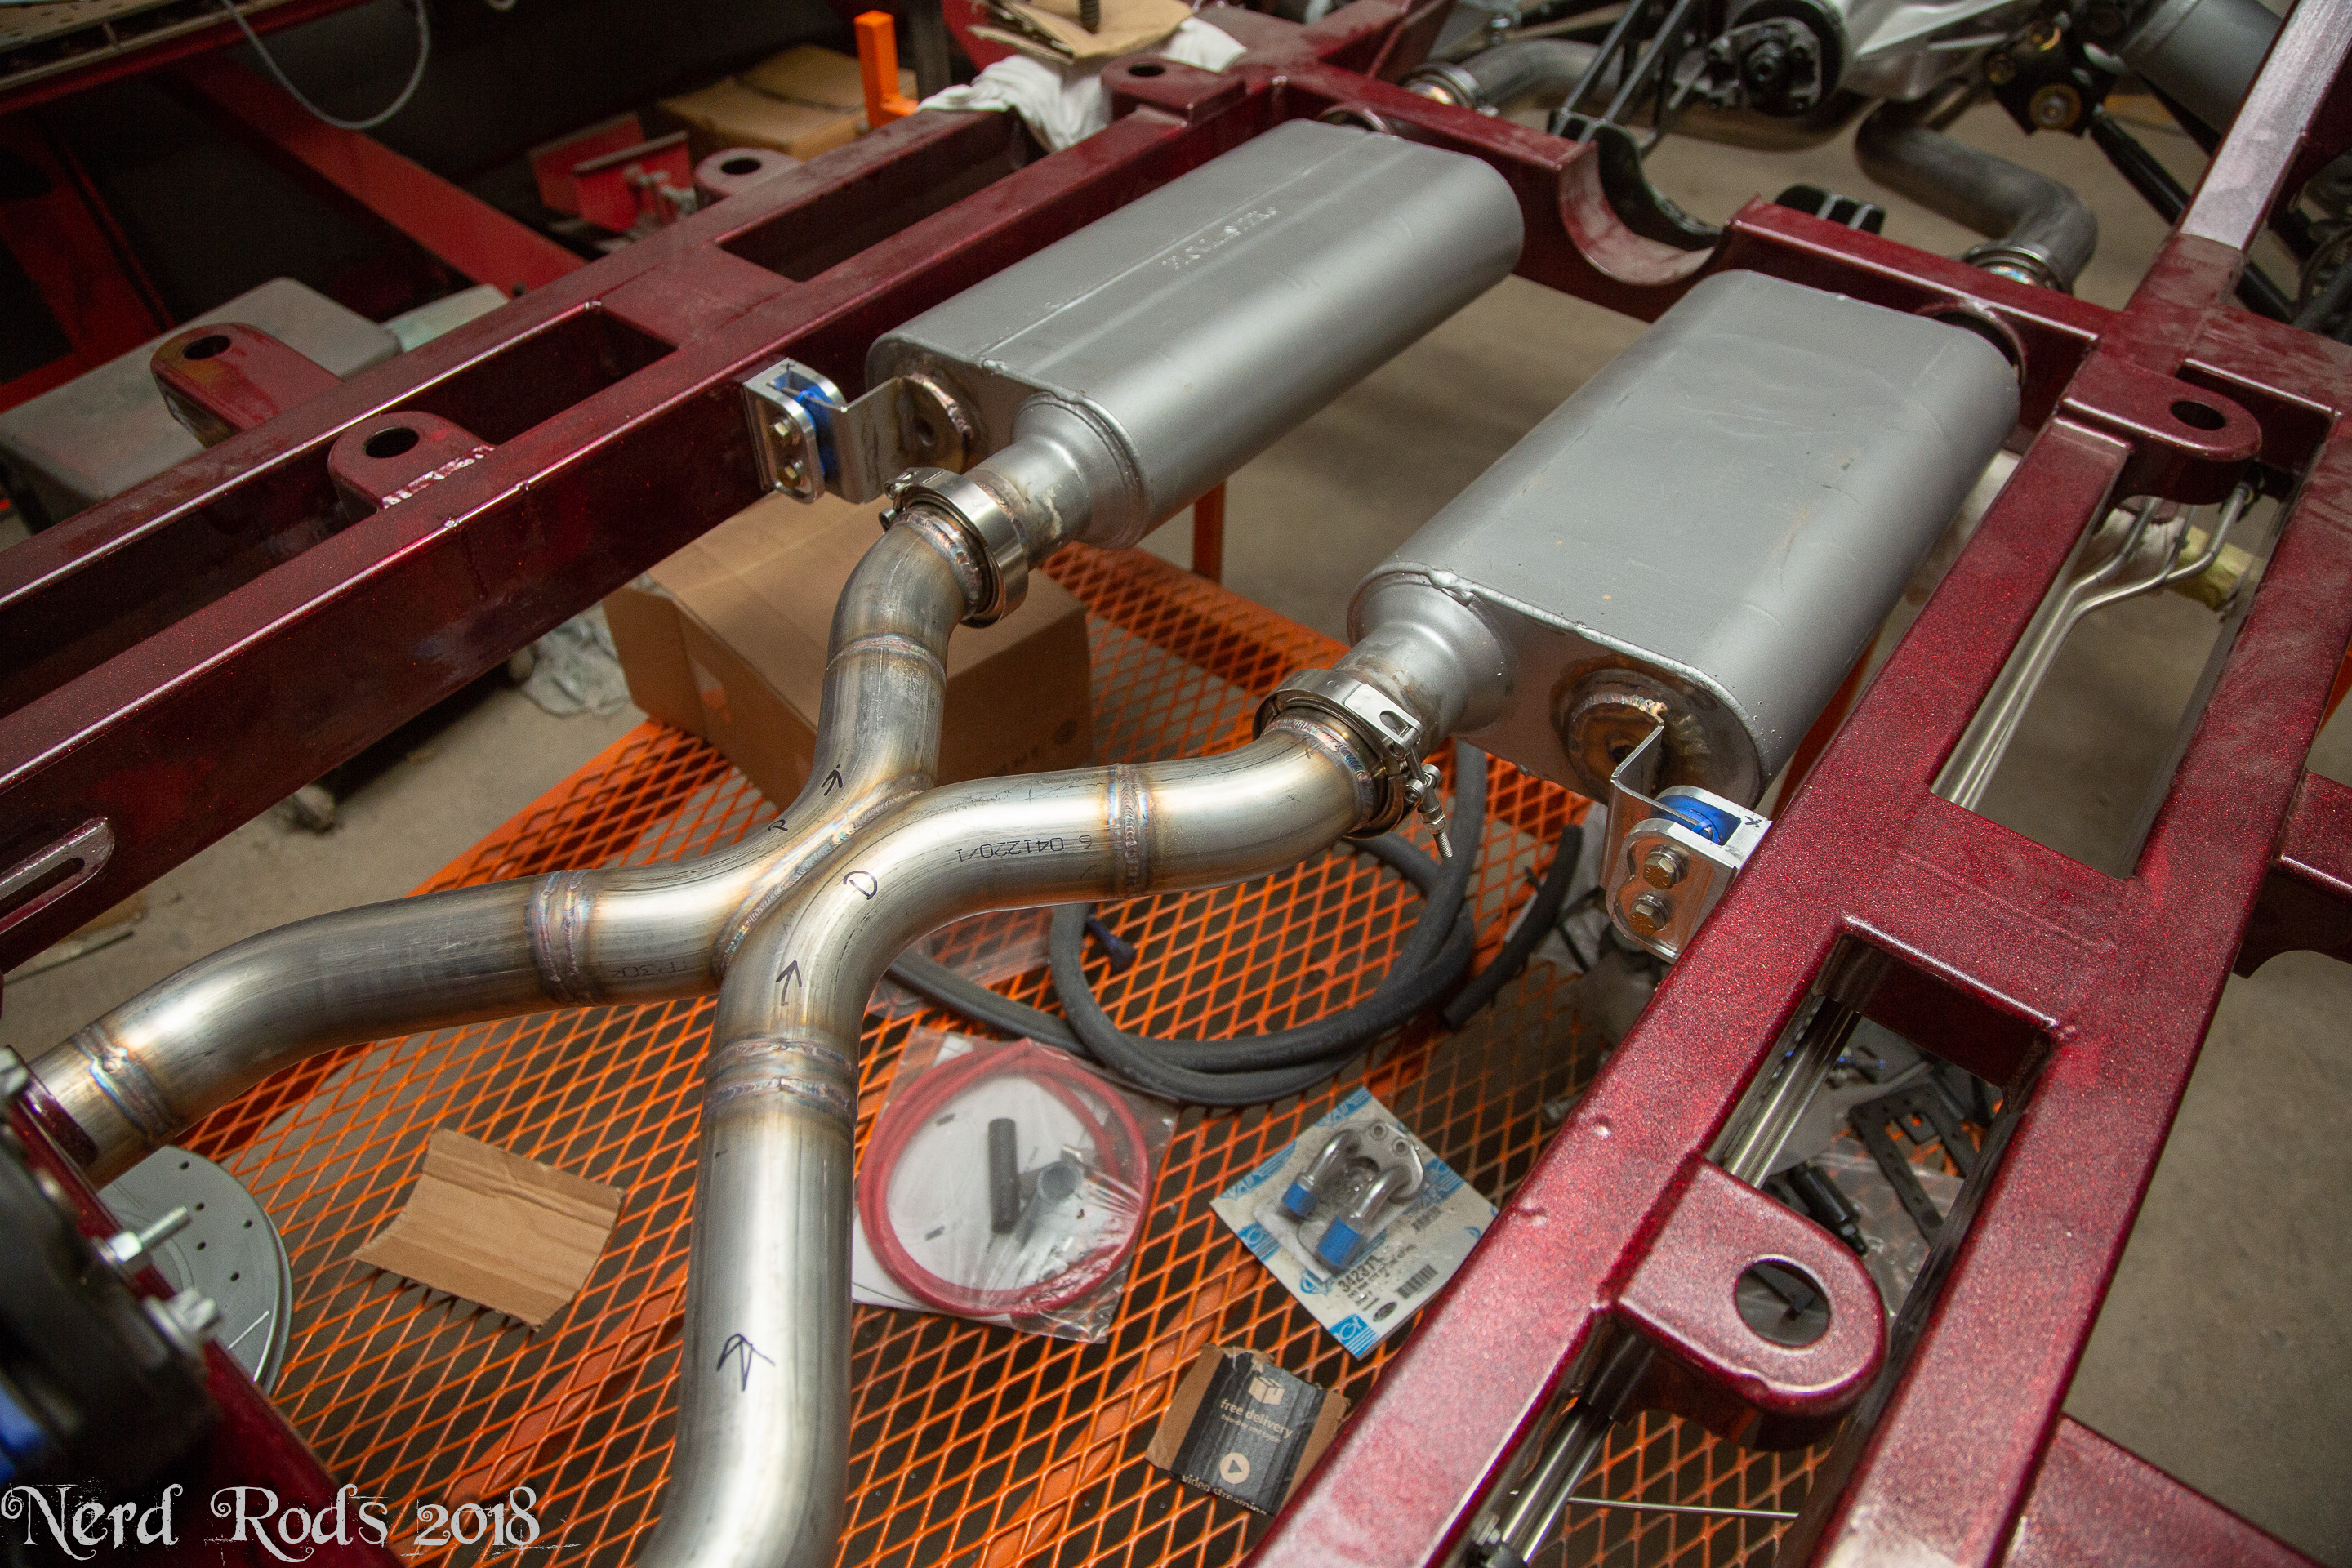
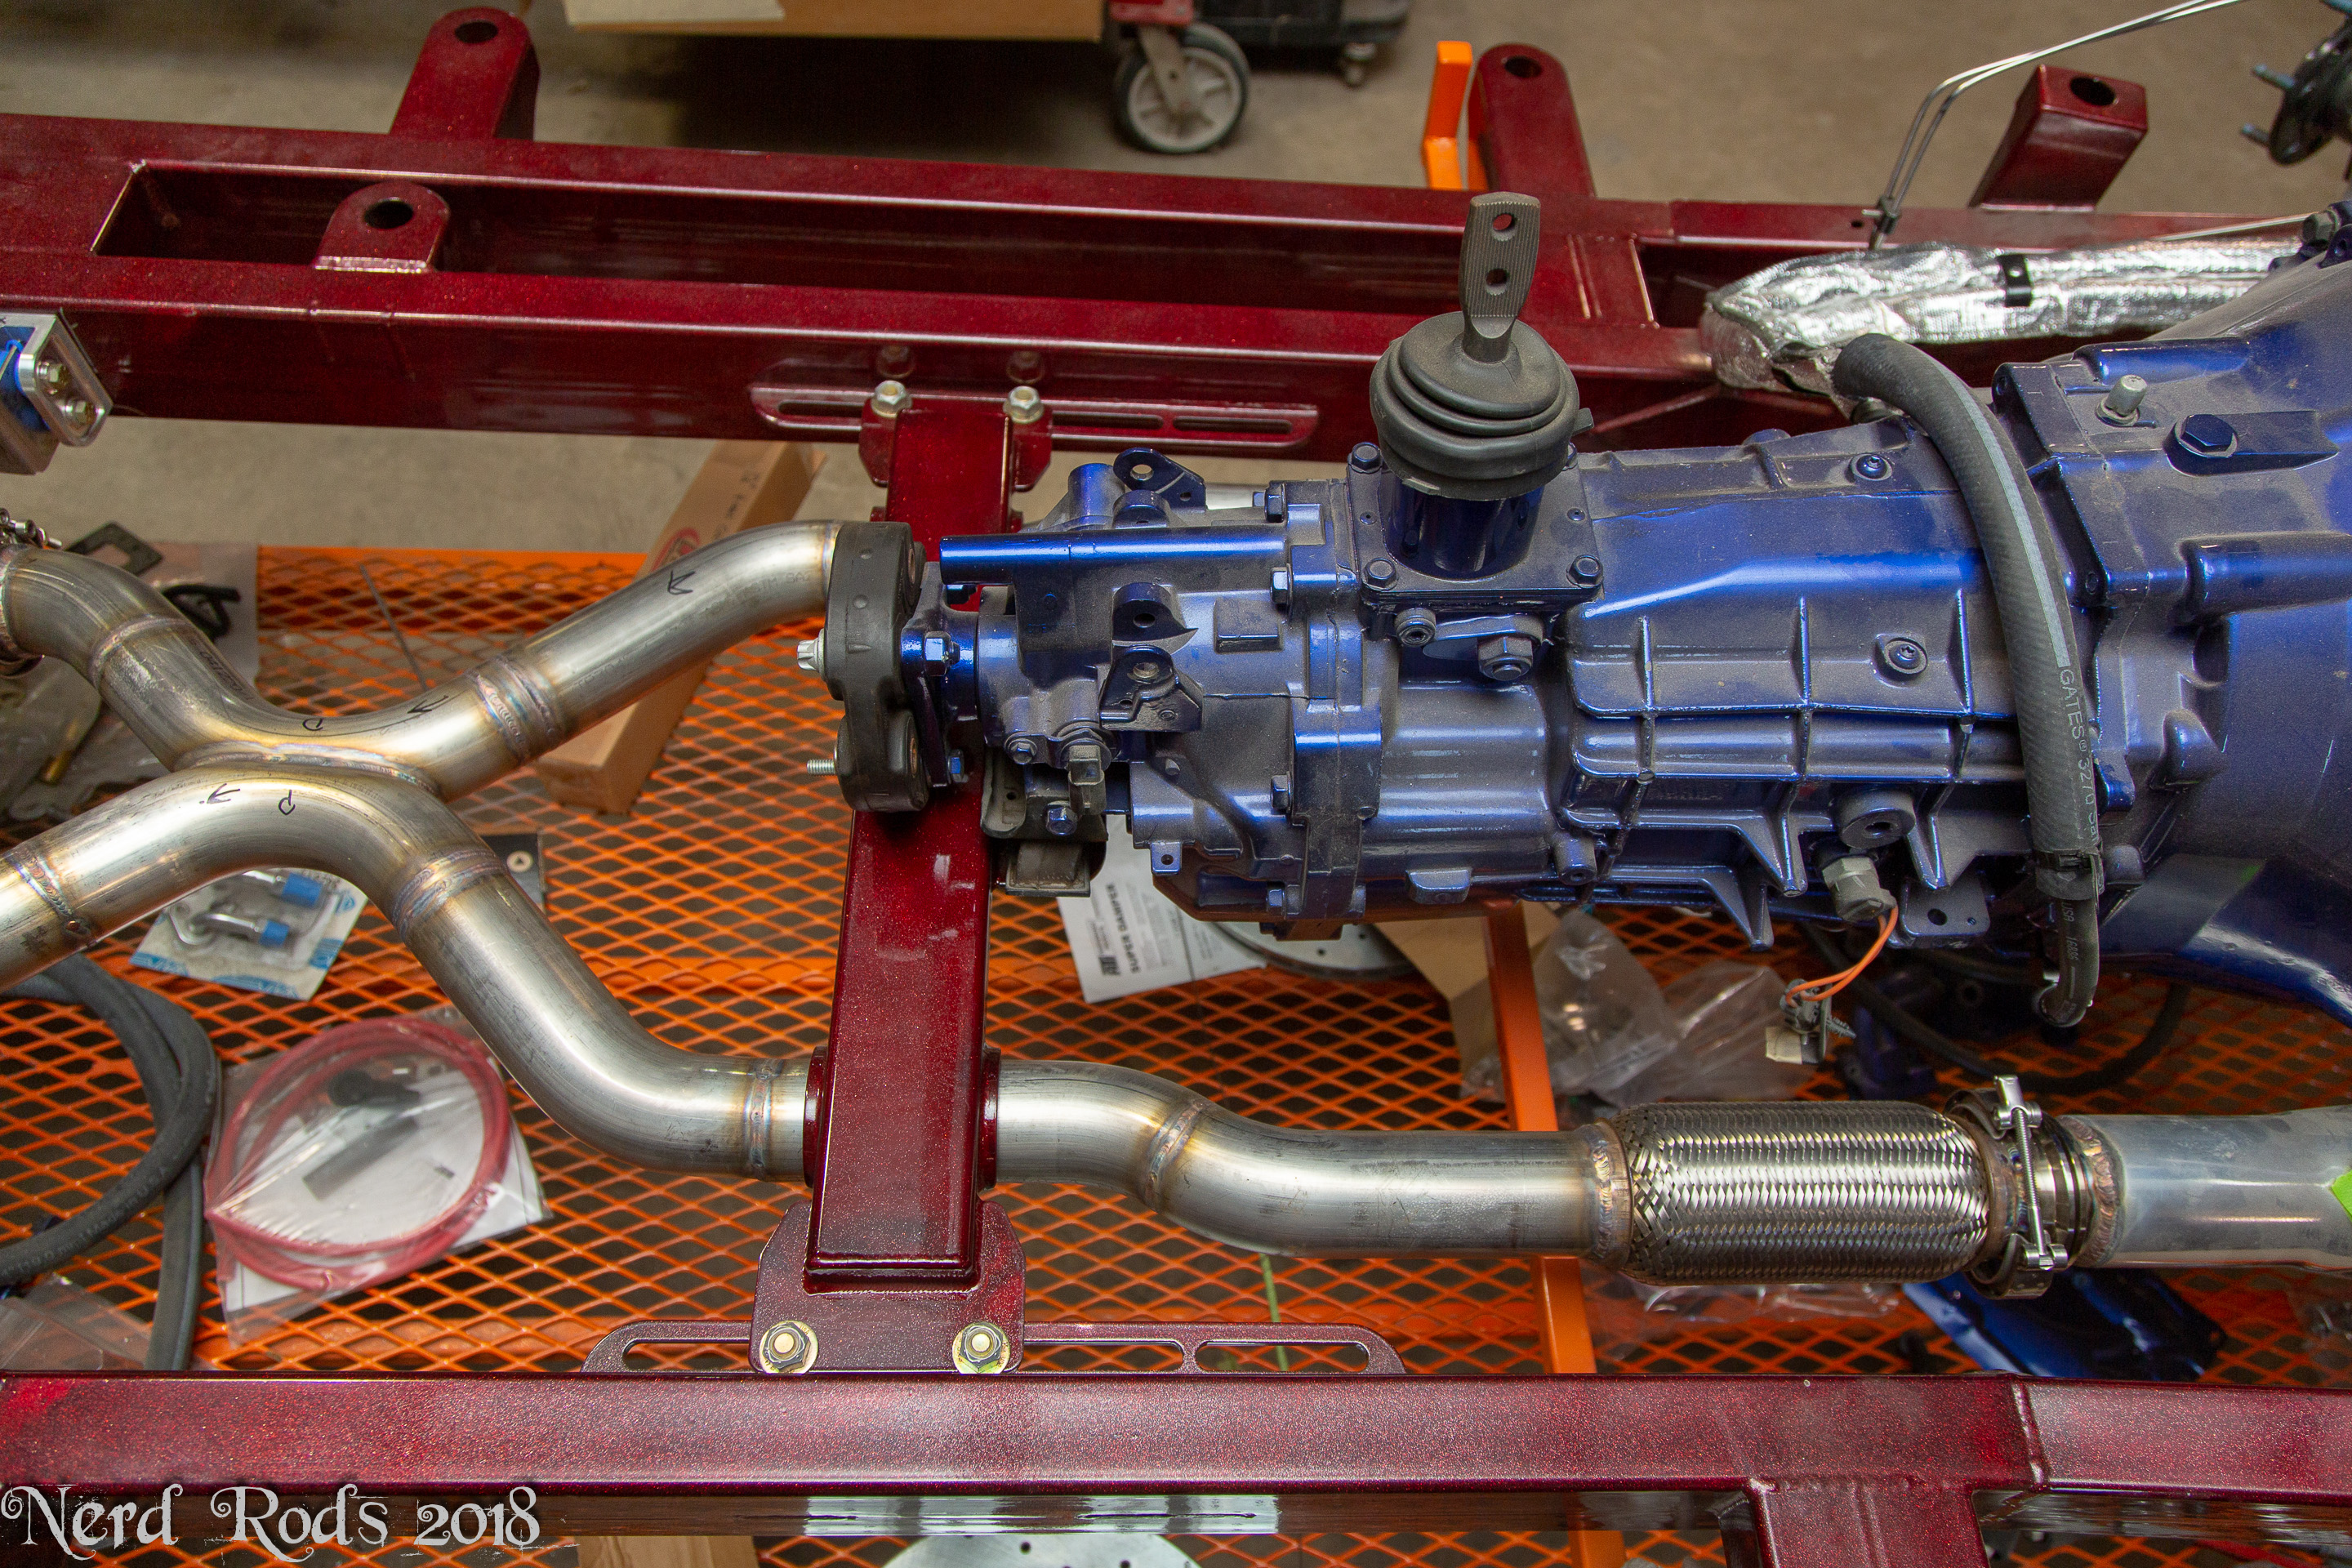
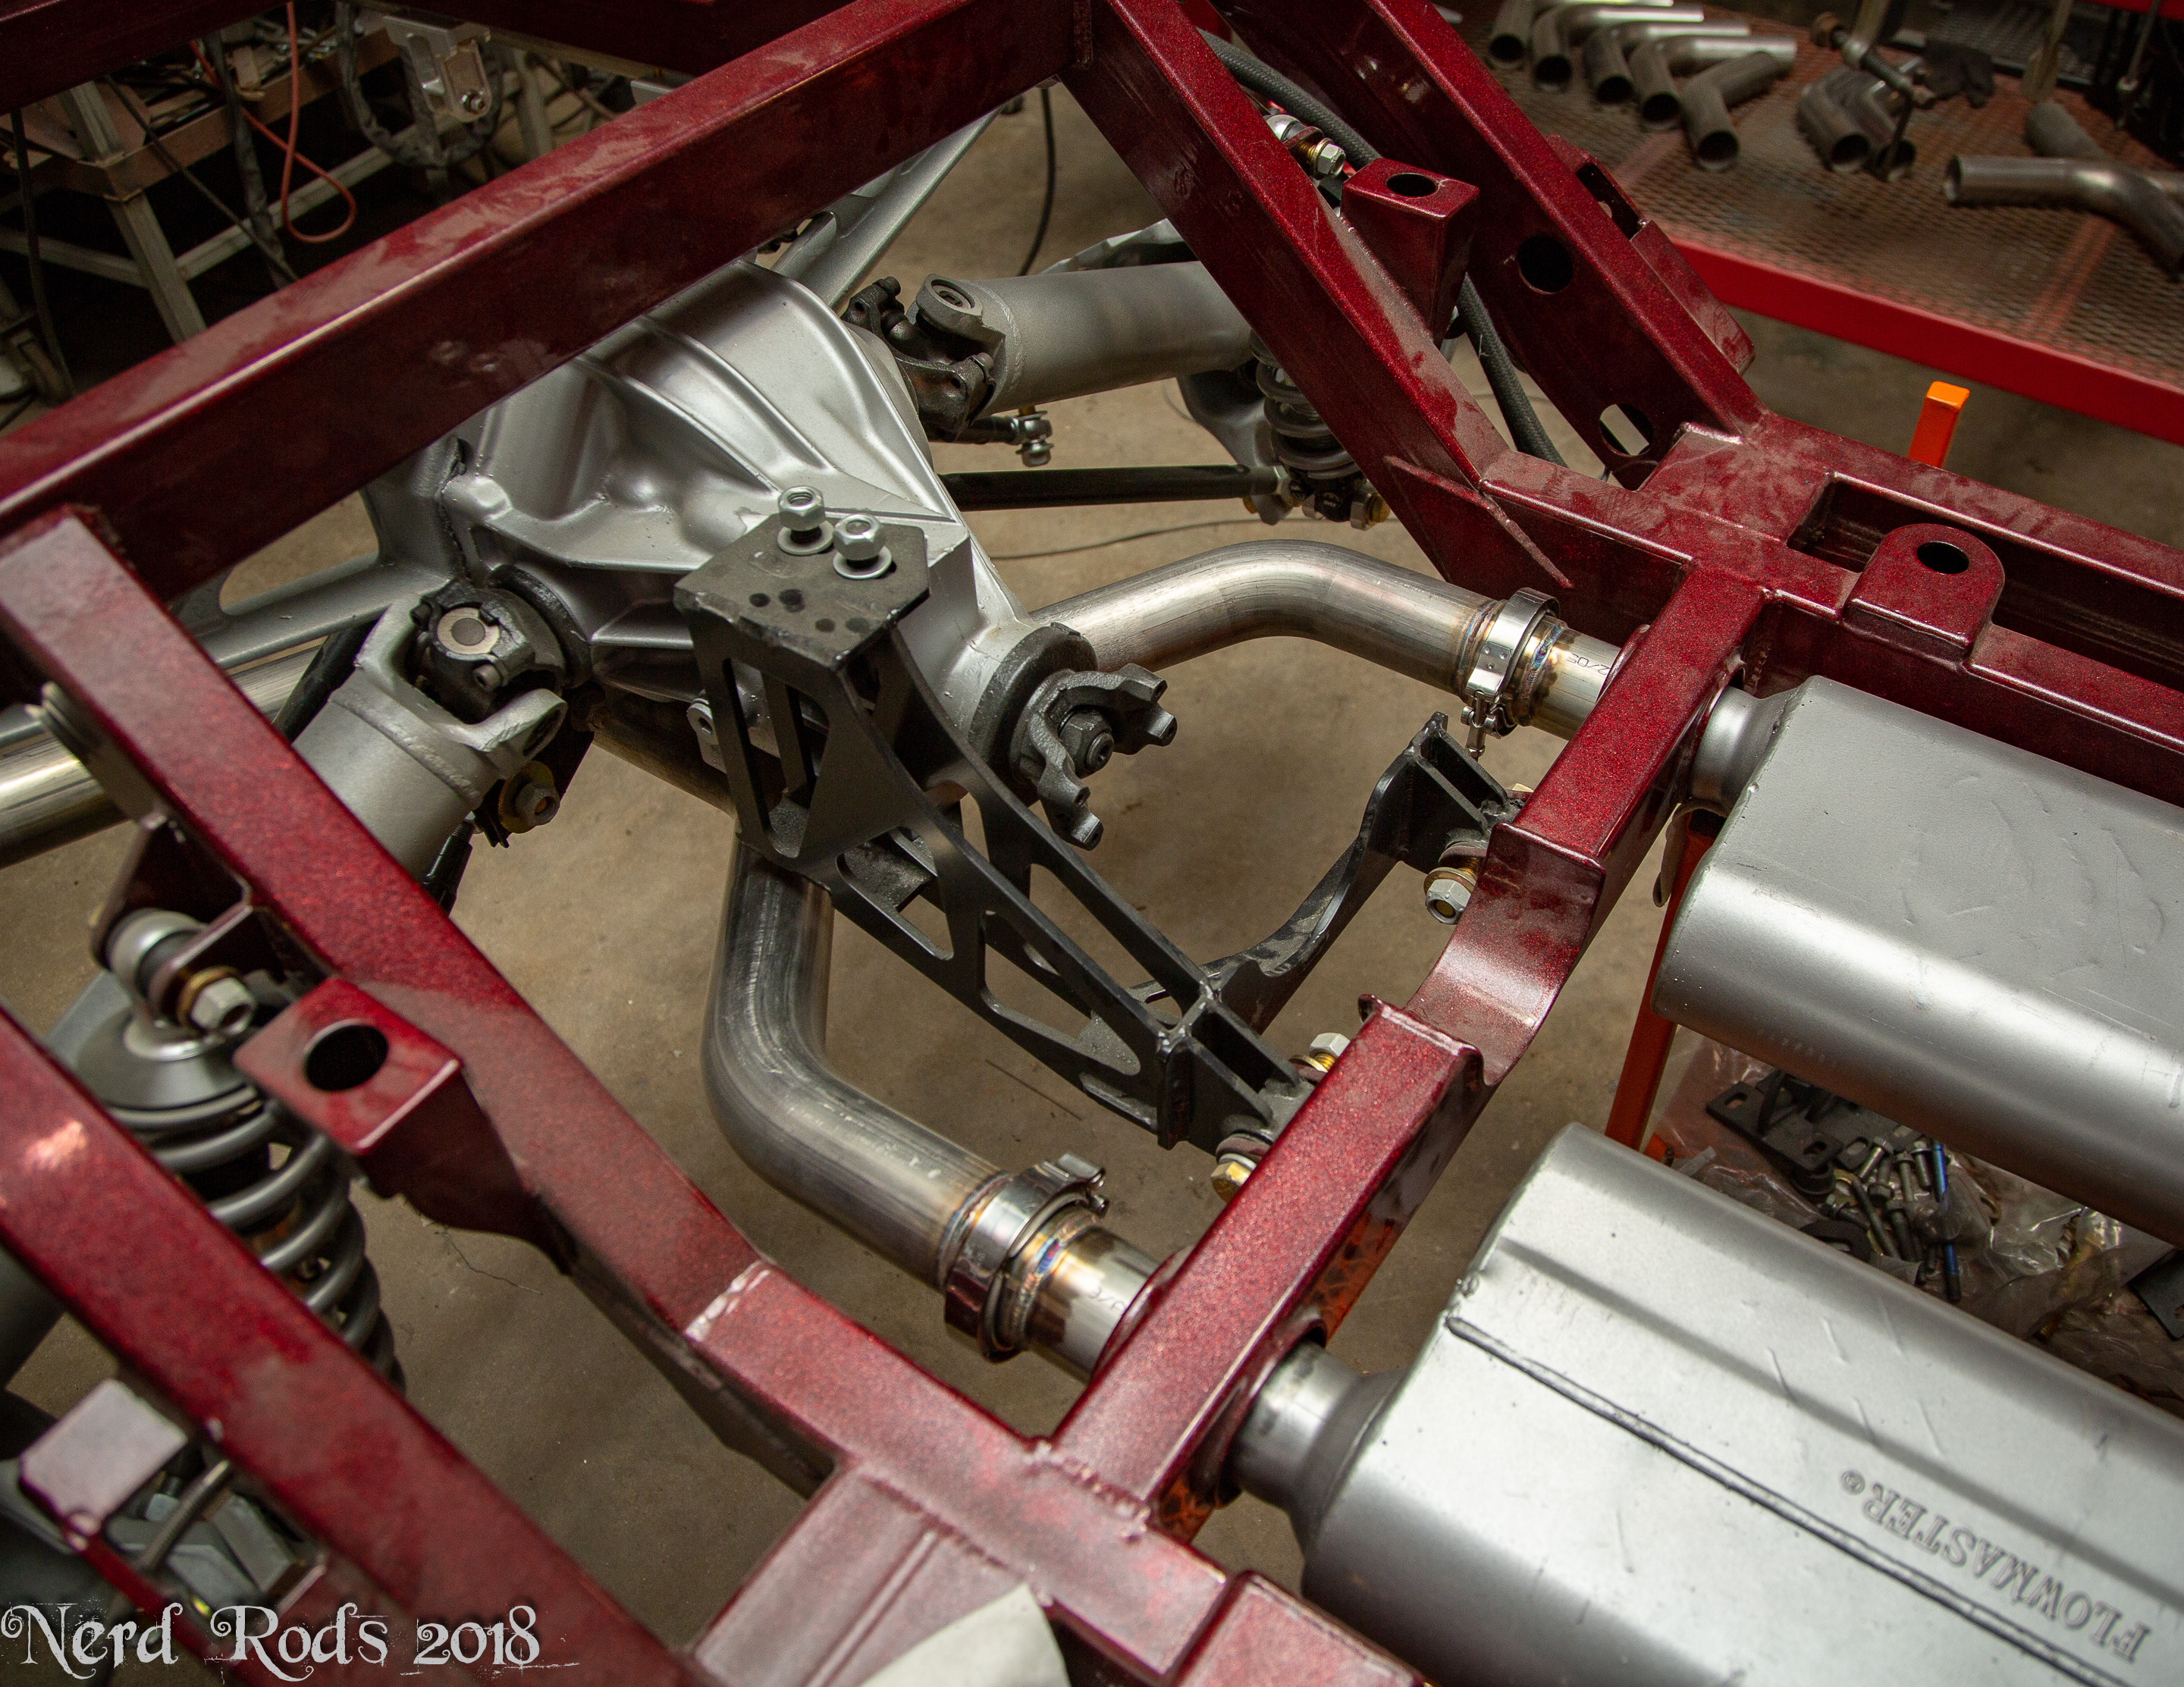
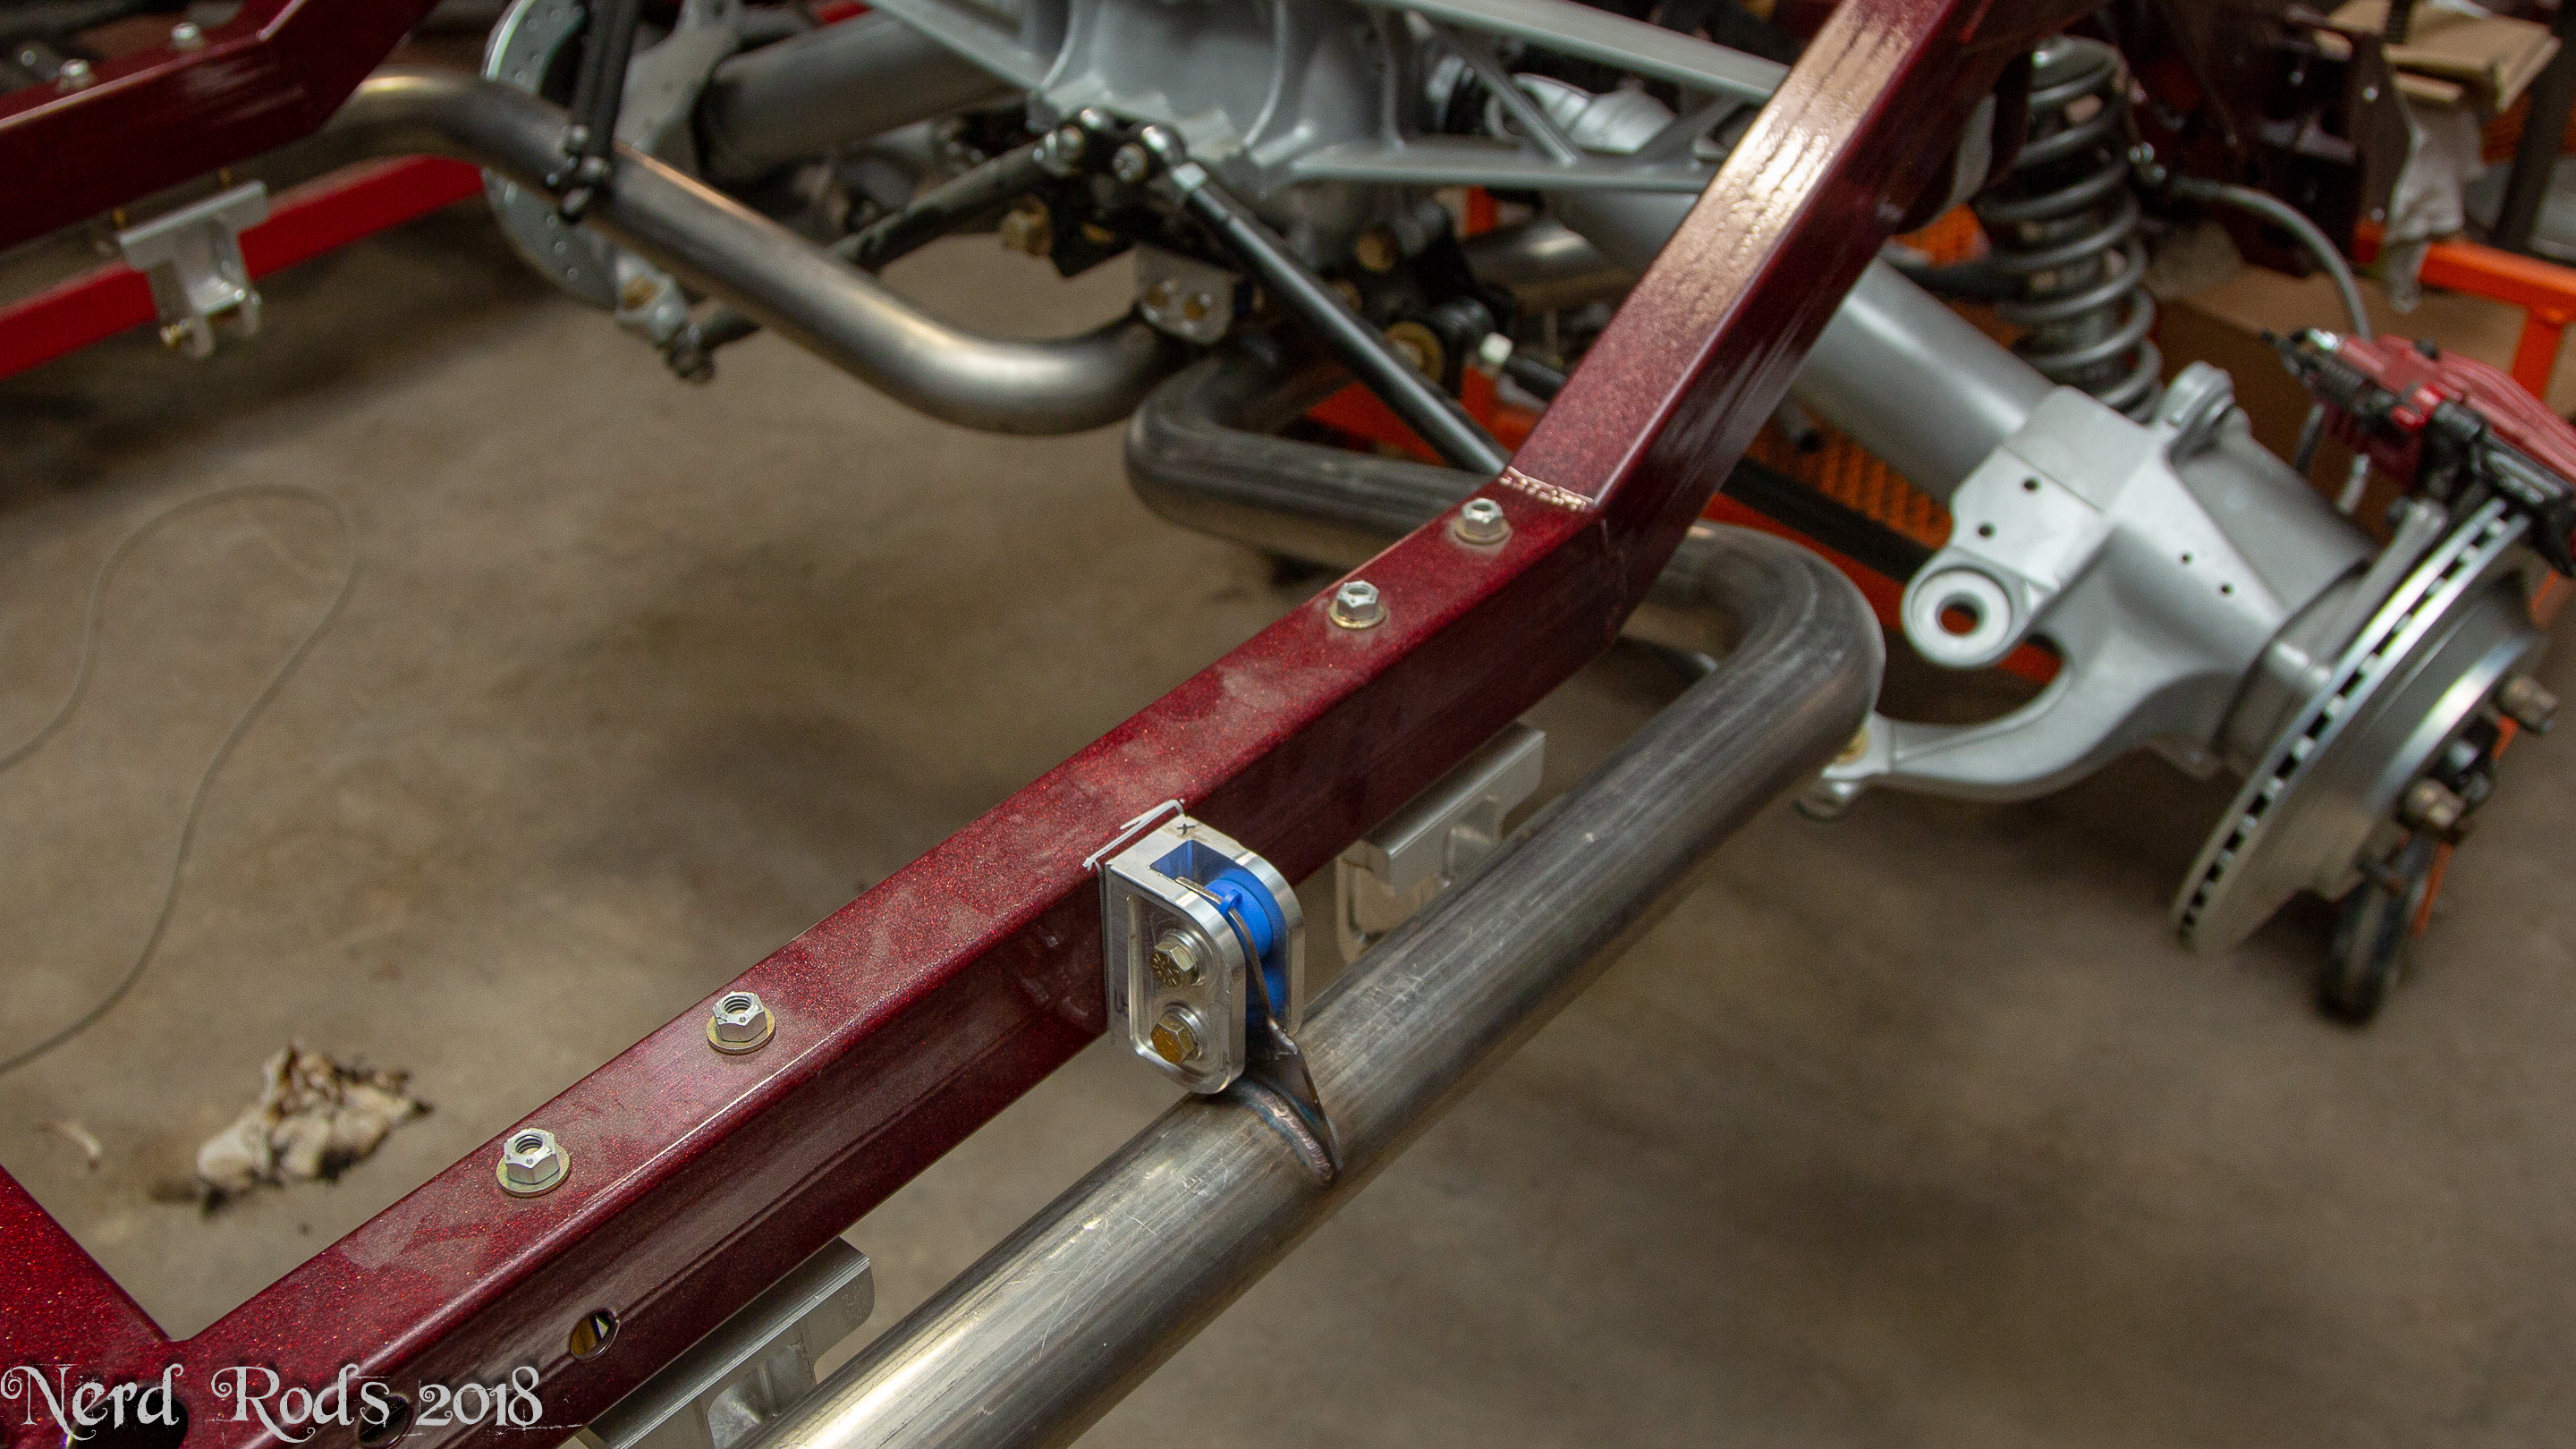
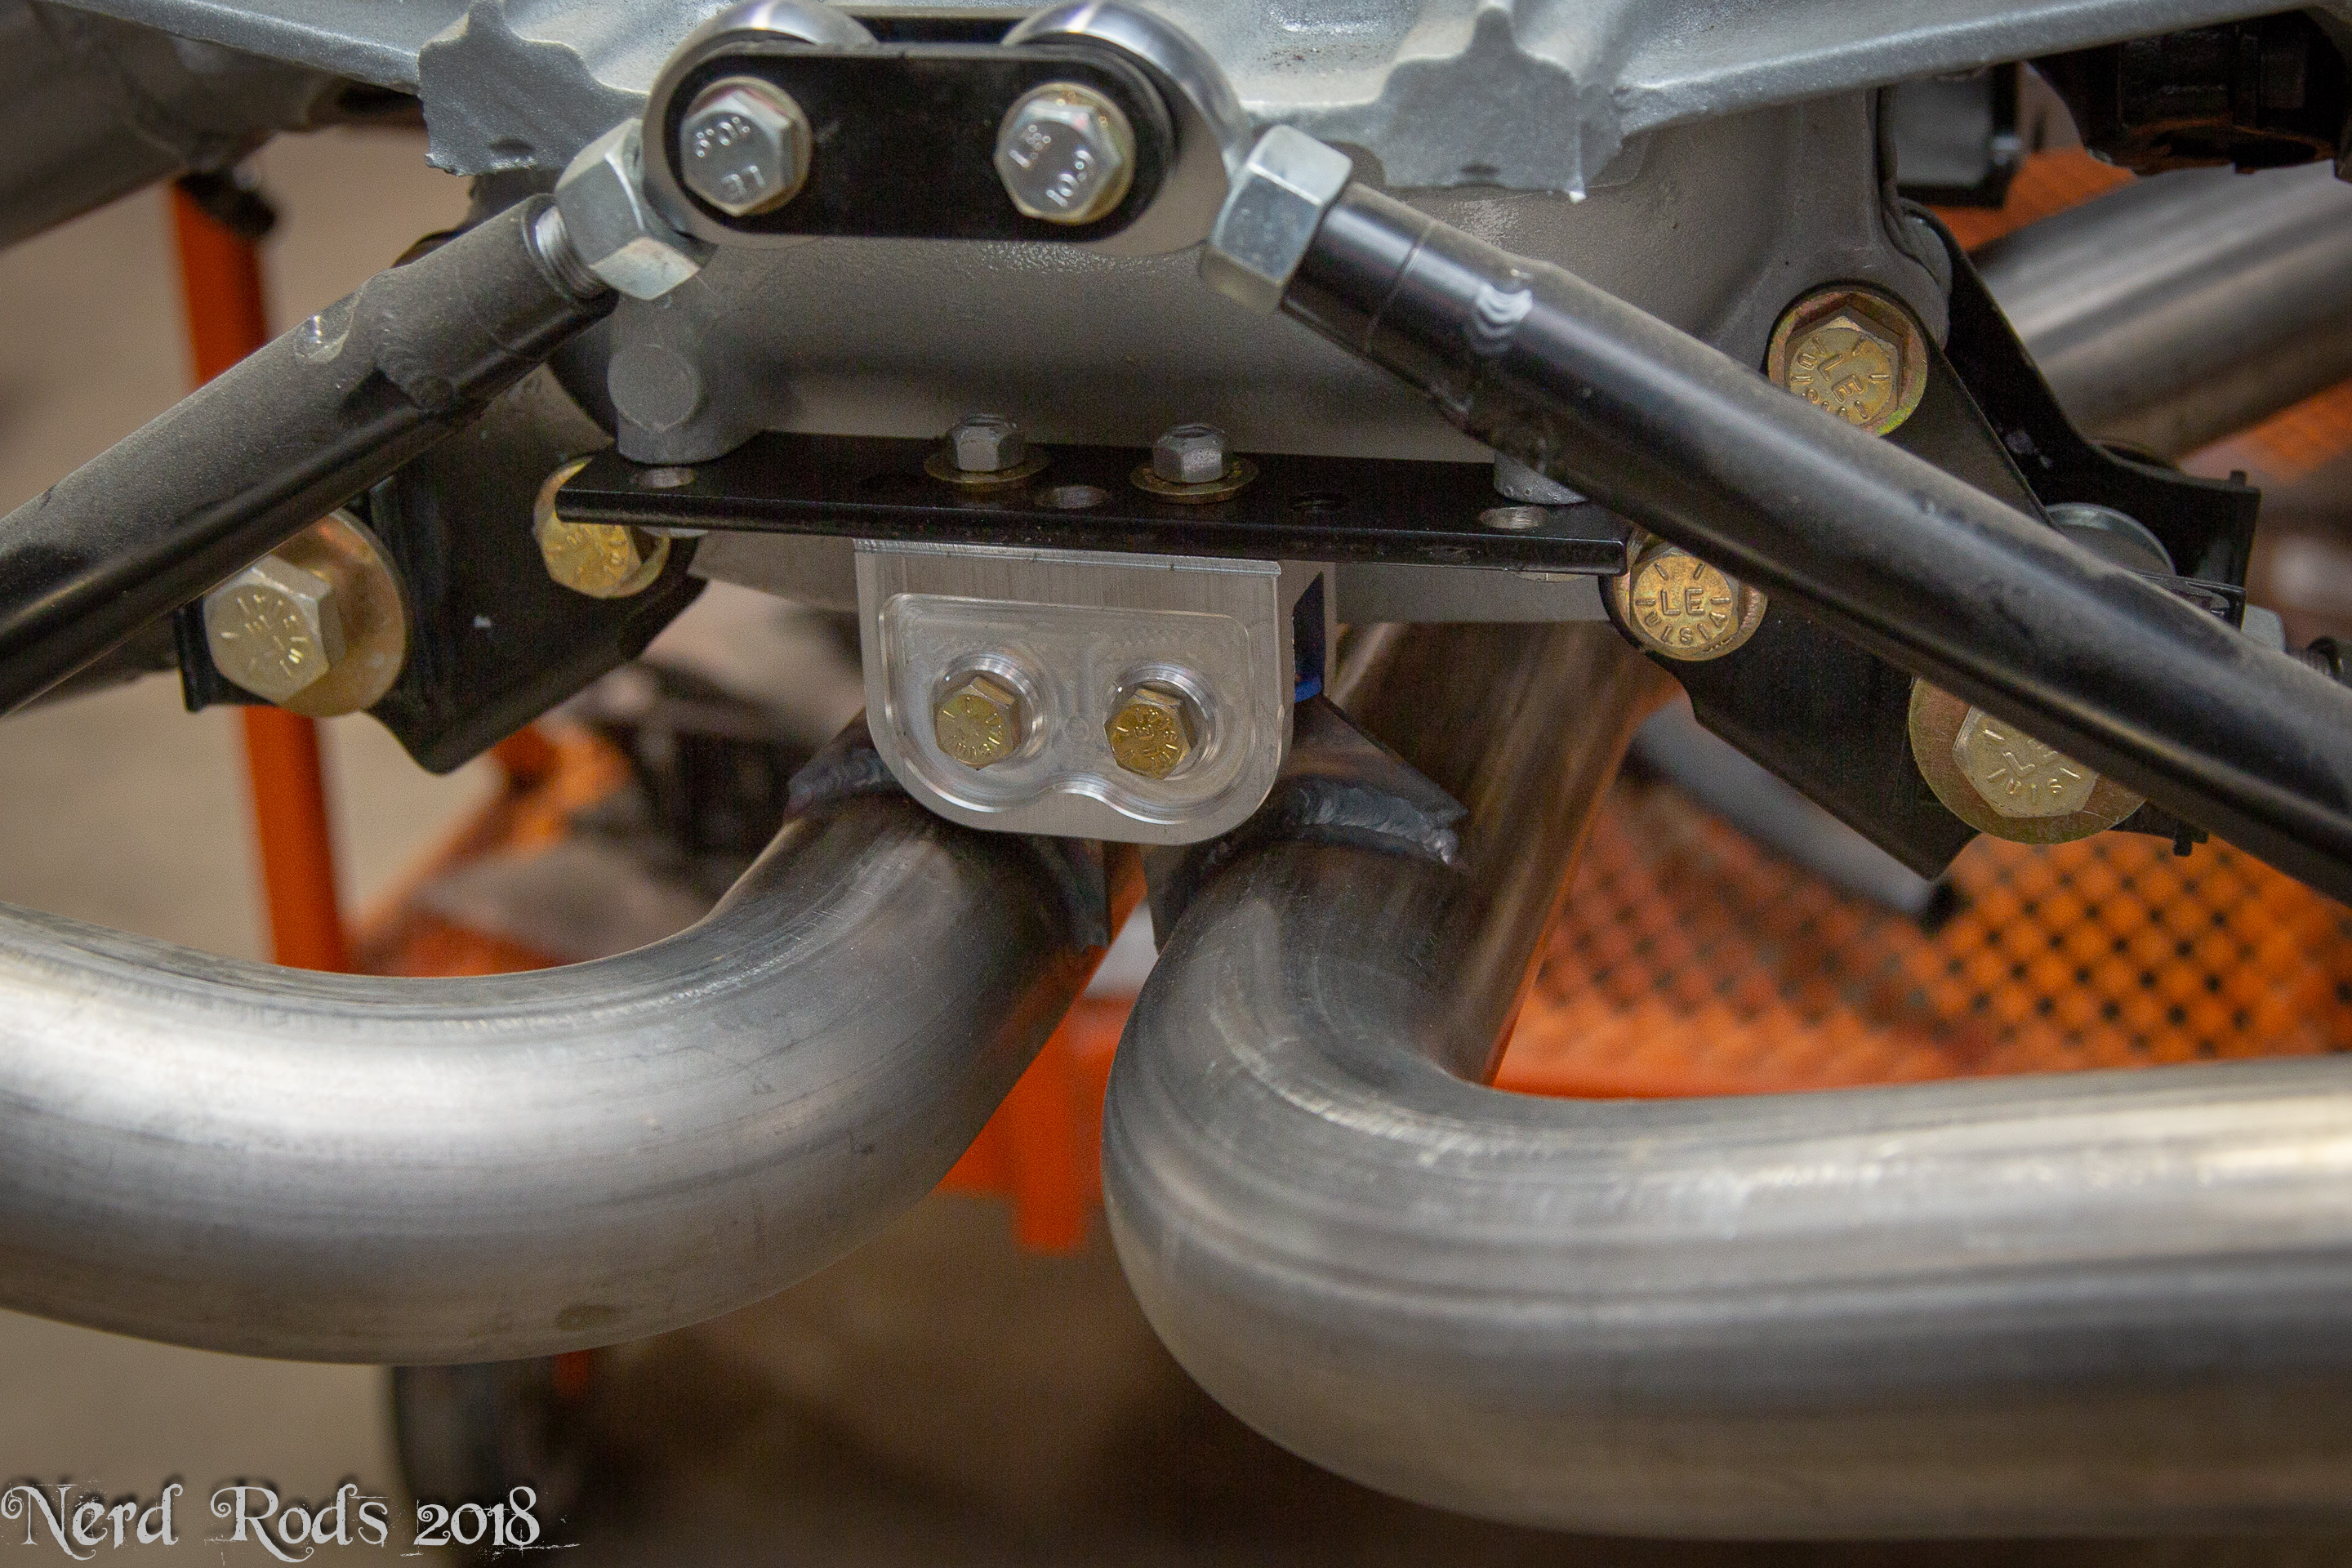
These are from a few days ago. This is probably one of the nicest exhaust I'm ever done with all the subtle details and fit. The exhaust hangers are my own billet design that use two Stainless Works exhaust bushings so you can mount them at any angle instead of having to be directly above like normal You can mount them on any surface and then have the tubes swing out from there or the mufflers as is in this case as well. You can also use it as a split like I did on the pair of pipes under the differential.
2.5" Stainless mandrel bend
Flowmaster Delta Flow 50 Series Muffler
Summit Racing V Band Clamps
Vibrant Performance Flex Joints
Melrose C4 Conversion Headers
(raw and coated, I'm looking for stainless to use on my chassis but I can't find anything that fits currently)
All back purged while tig welded.
Complete galley here.
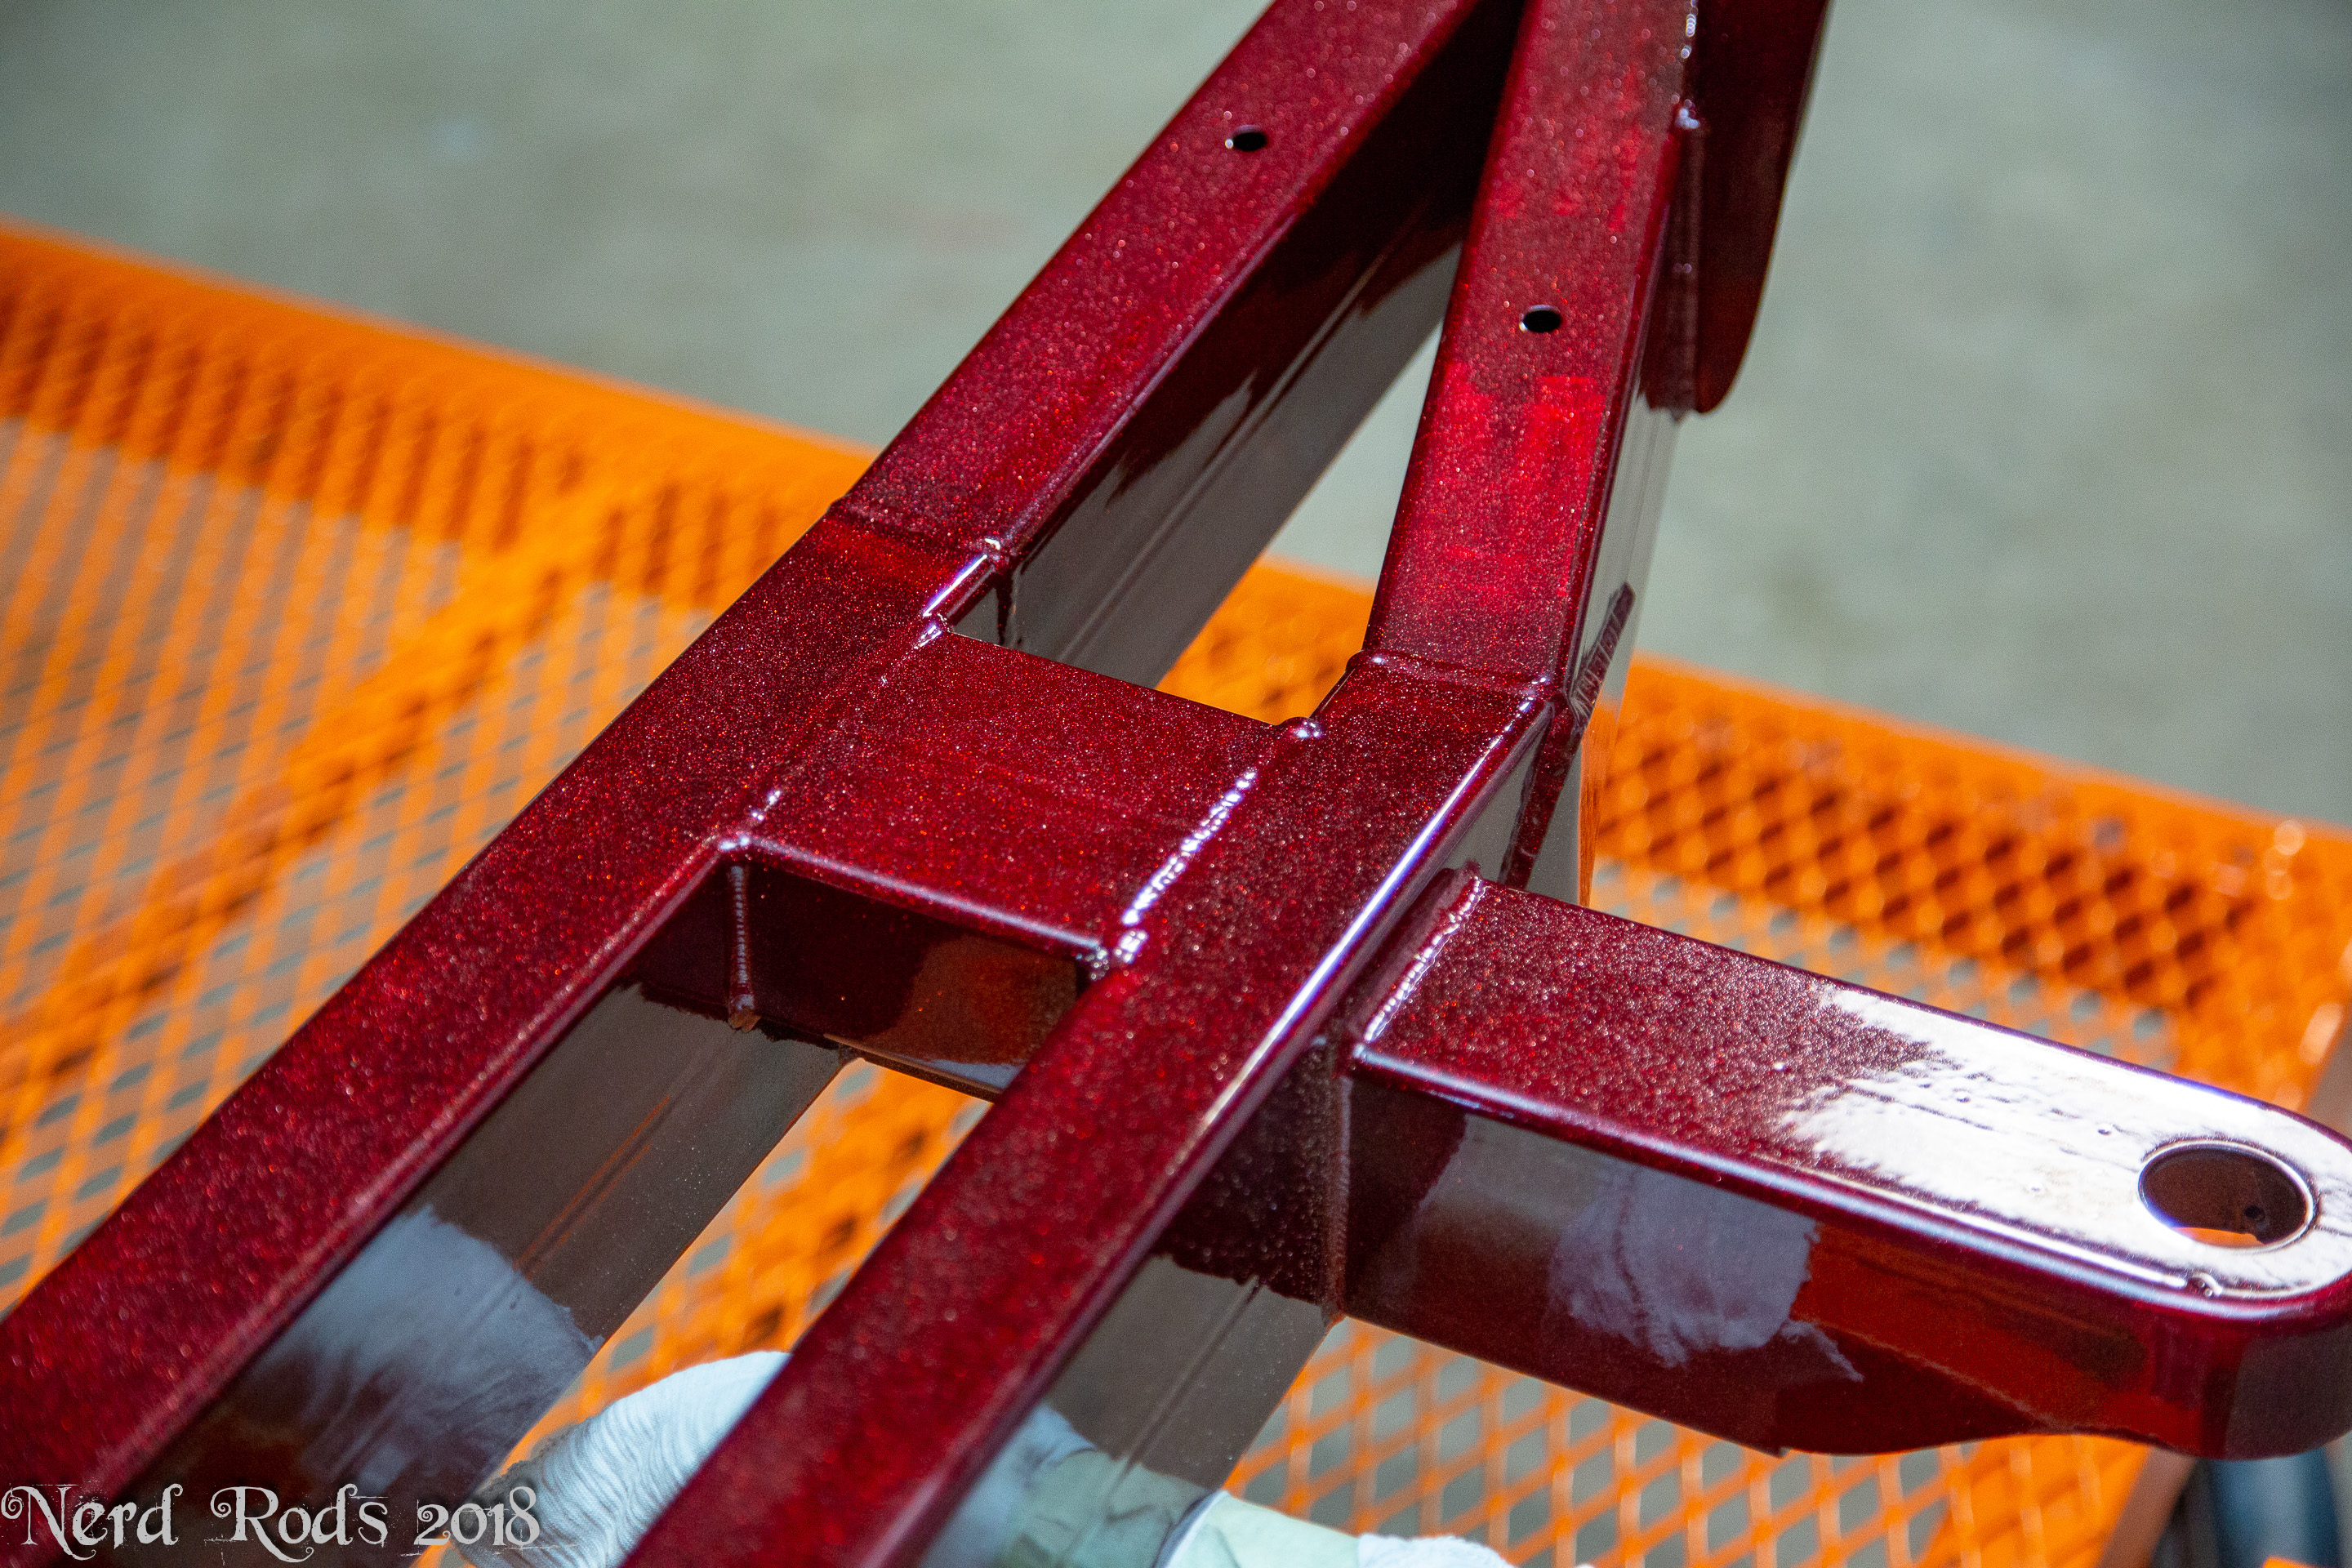
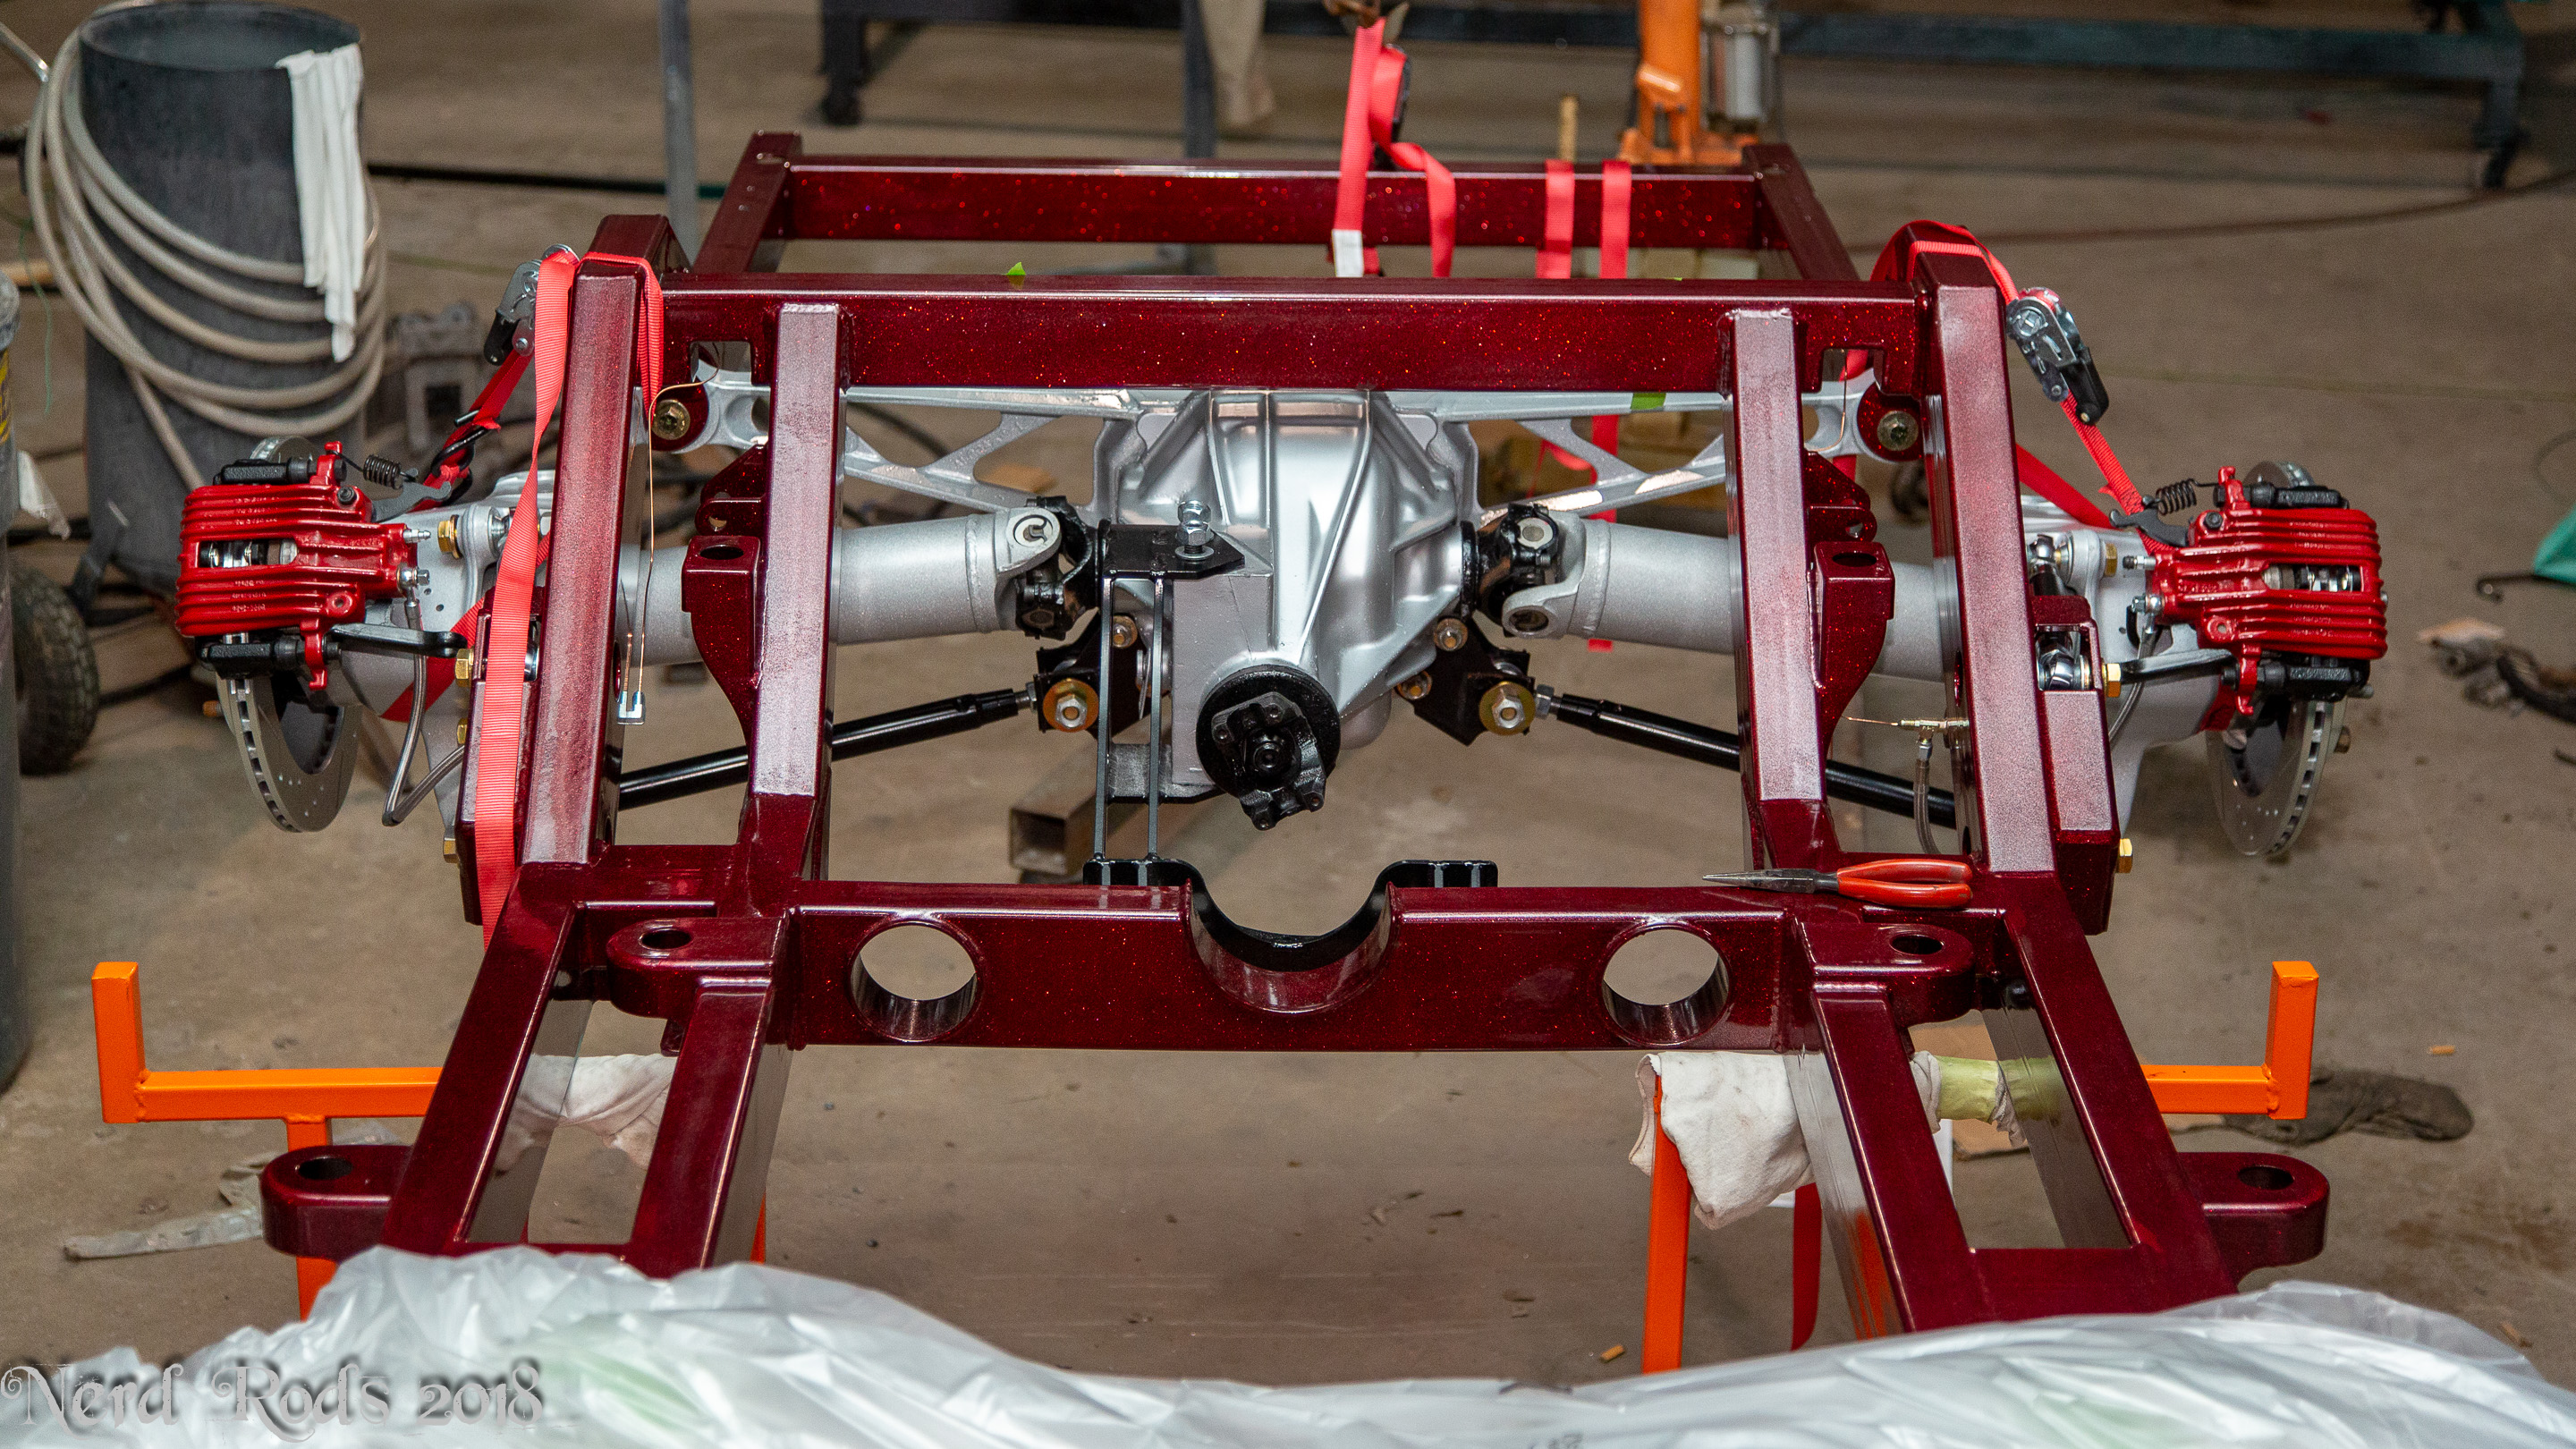
And check out the bling on the chassis. These photos don't do this metallic justice!
(these are from a few weeks ago when it came out of the oven and got its suspension installed)


__________________________________________________ __________________________________________________ _________________________
And the exhaust photos.
(These are from yesterday, October the 15th)


I need to finish up the video I did about this exhaust with a 430 and 480 horse LS3 crate engines so you can hear the difference. I have a 525 LS3 in the shop as well but I think he's going with louder mufflers on that one. We'll see.
Later
-Russell @ Nerd Rods
These are from a few days ago. This is probably one of the nicest exhaust I'm ever done with all the subtle details and fit. The exhaust hangers are my own billet design that use two Stainless Works exhaust bushings so you can mount them at any angle instead of having to be directly above like normal You can mount them on any surface and then have the tubes swing out from there or the mufflers as is in this case as well. You can also use it as a split like I did on the pair of pipes under the differential.
2.5" Stainless mandrel bend
Flowmaster Delta Flow 50 Series Muffler
Summit Racing V Band Clamps
Vibrant Performance Flex Joints
Melrose C4 Conversion Headers
(raw and coated, I'm looking for stainless to use on my chassis but I can't find anything that fits currently)
All back purged while tig welded.
Complete galley here.
And check out the bling on the chassis. These photos don't do this metallic justice!
(these are from a few weeks ago when it came out of the oven and got its suspension installed)
__________________________________________________ __________________________________________________ _________________________
And the exhaust photos.
(These are from yesterday, October the 15th)


I need to finish up the video I did about this exhaust with a 430 and 480 horse LS3 crate engines so you can hear the difference. I have a 525 LS3 in the shop as well but I think he's going with louder mufflers on that one. We'll see.
Later
-Russell @ Nerd Rods

