
D^3 Dad's Down and Dirty 1955 Pickup, Nerd Rods C4 on the Cheep


 10-23-2018, 07:18 PM
#42
TECH Senior Member
 11-17-2018, 09:23 PM
#43
Launching!
Thread Starter
Join Date: Jan 2007
Location: Luling TX In the Hot Rod Shop
Posts: 294
Likes: 0
Received 3 Likes
on
3 Posts

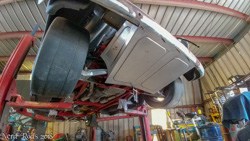
*slow heavy metal music intensifies*

We started rearranging the shop for a new toy. I flipped off the lights after moving the mill and lathe farther in and saw this. Doom metal started playing in the back of my head shortly after and I snapped this one.
We started rearranging the shop for a new toy. I flipped off the lights after moving the mill and lathe farther in and saw this. Doom metal started playing in the back of my head shortly after and I snapped this one.
11-24-2018, 11:27 PM
#44
Launching!
Thread Starter
Join Date: Jan 2007
Location: Luling TX In the Hot Rod Shop
Posts: 294
Likes: 0
Received 3 Likes
on
3 Posts
Wow, I didn't realize how bad I was behind. Forgive the mix of cell phone photos. Its been all I could do to keep up with the old dude and the shop work load.
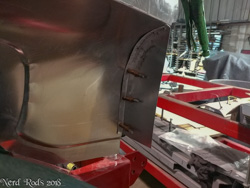
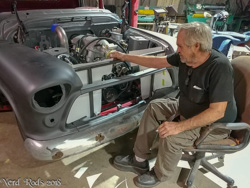
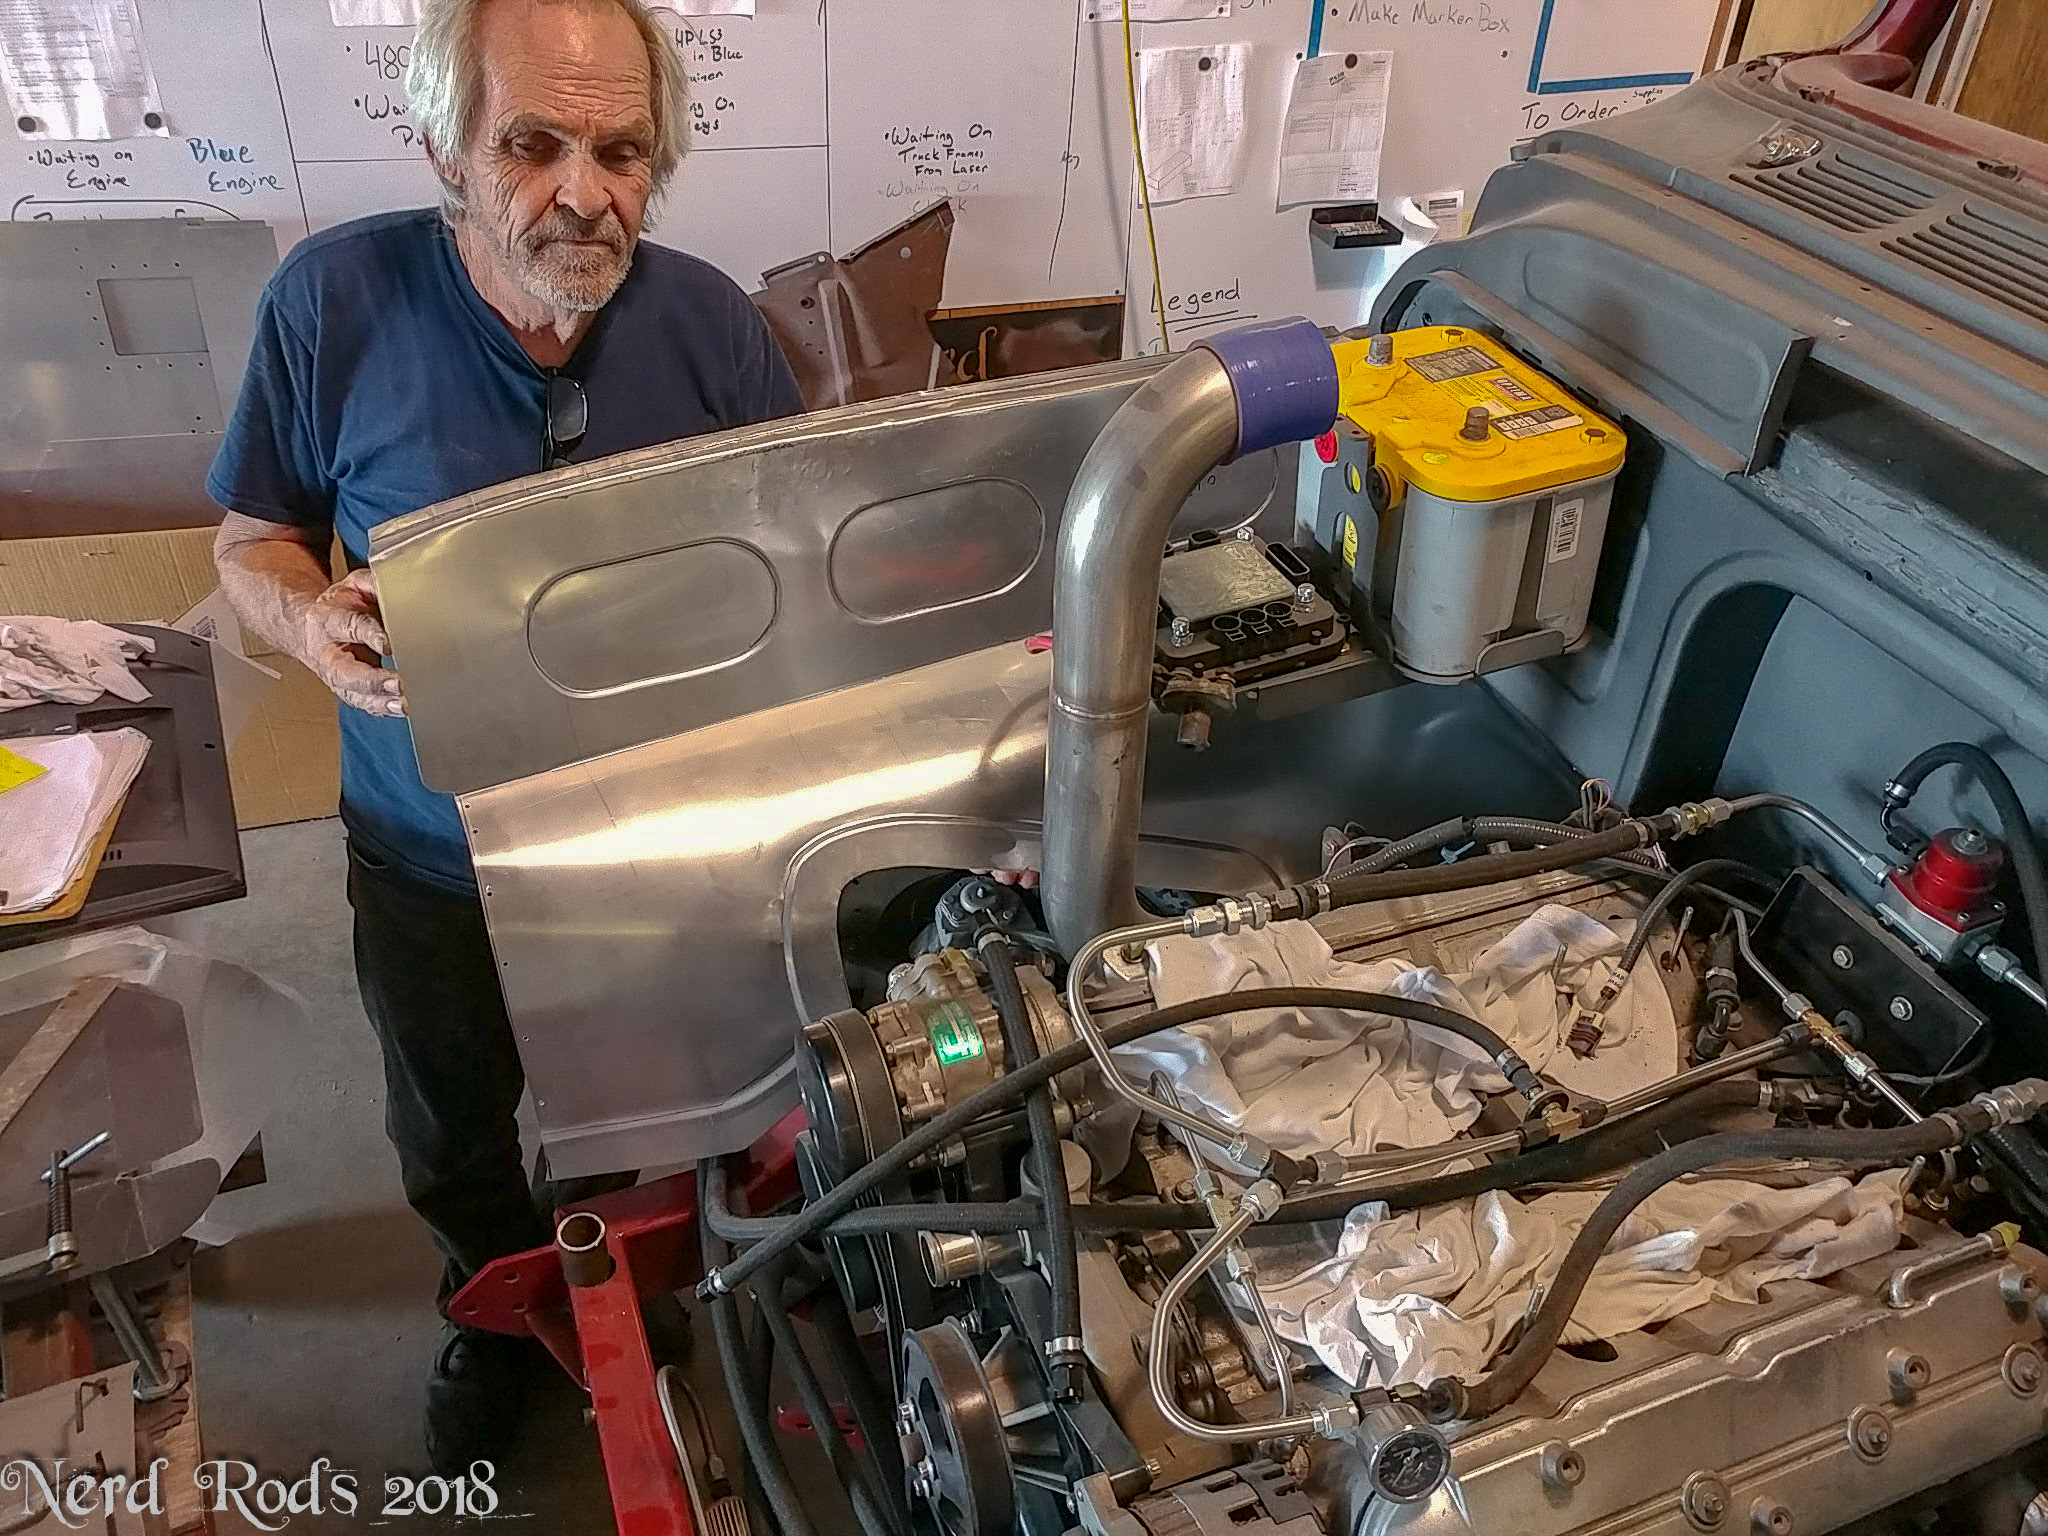
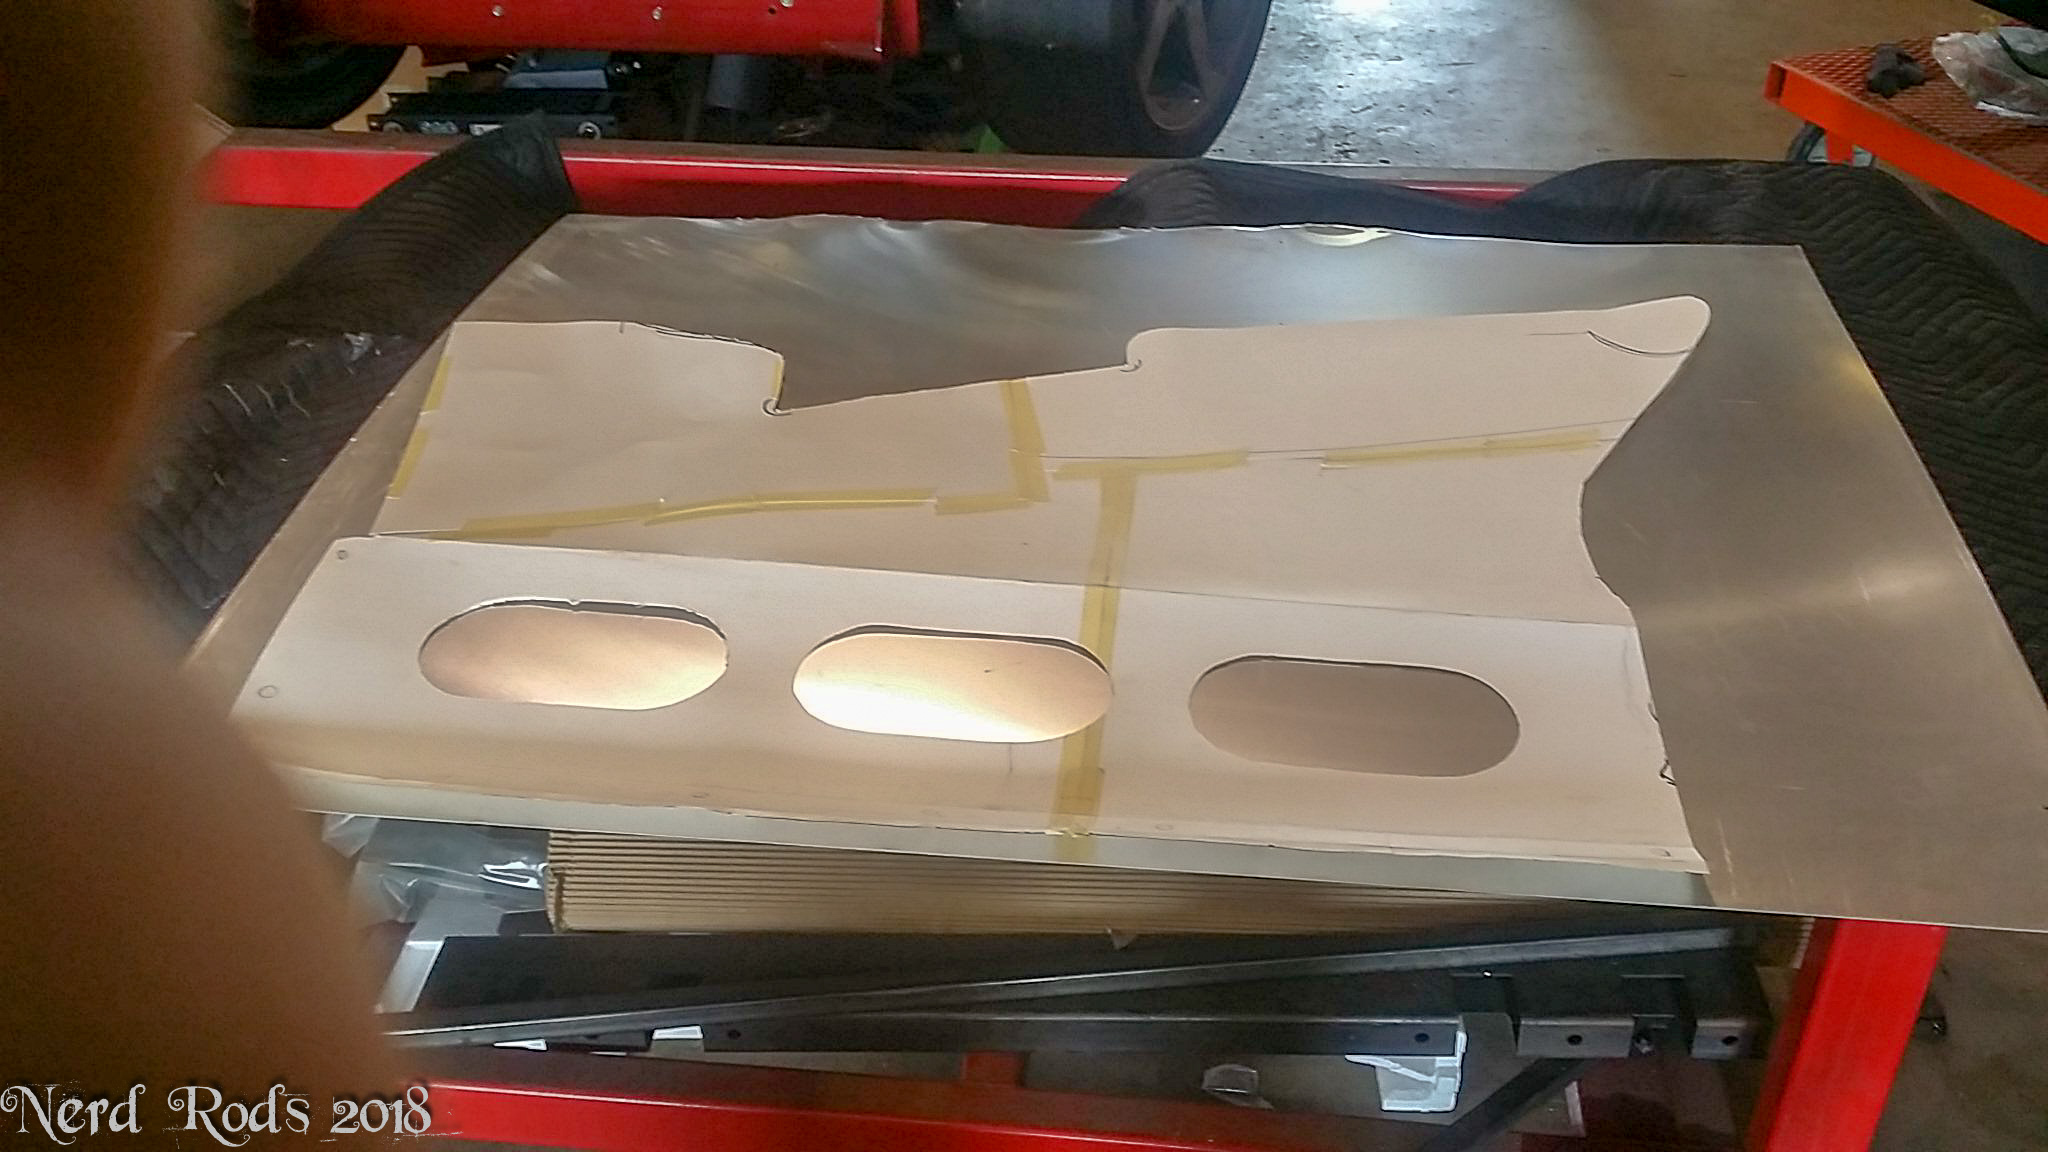
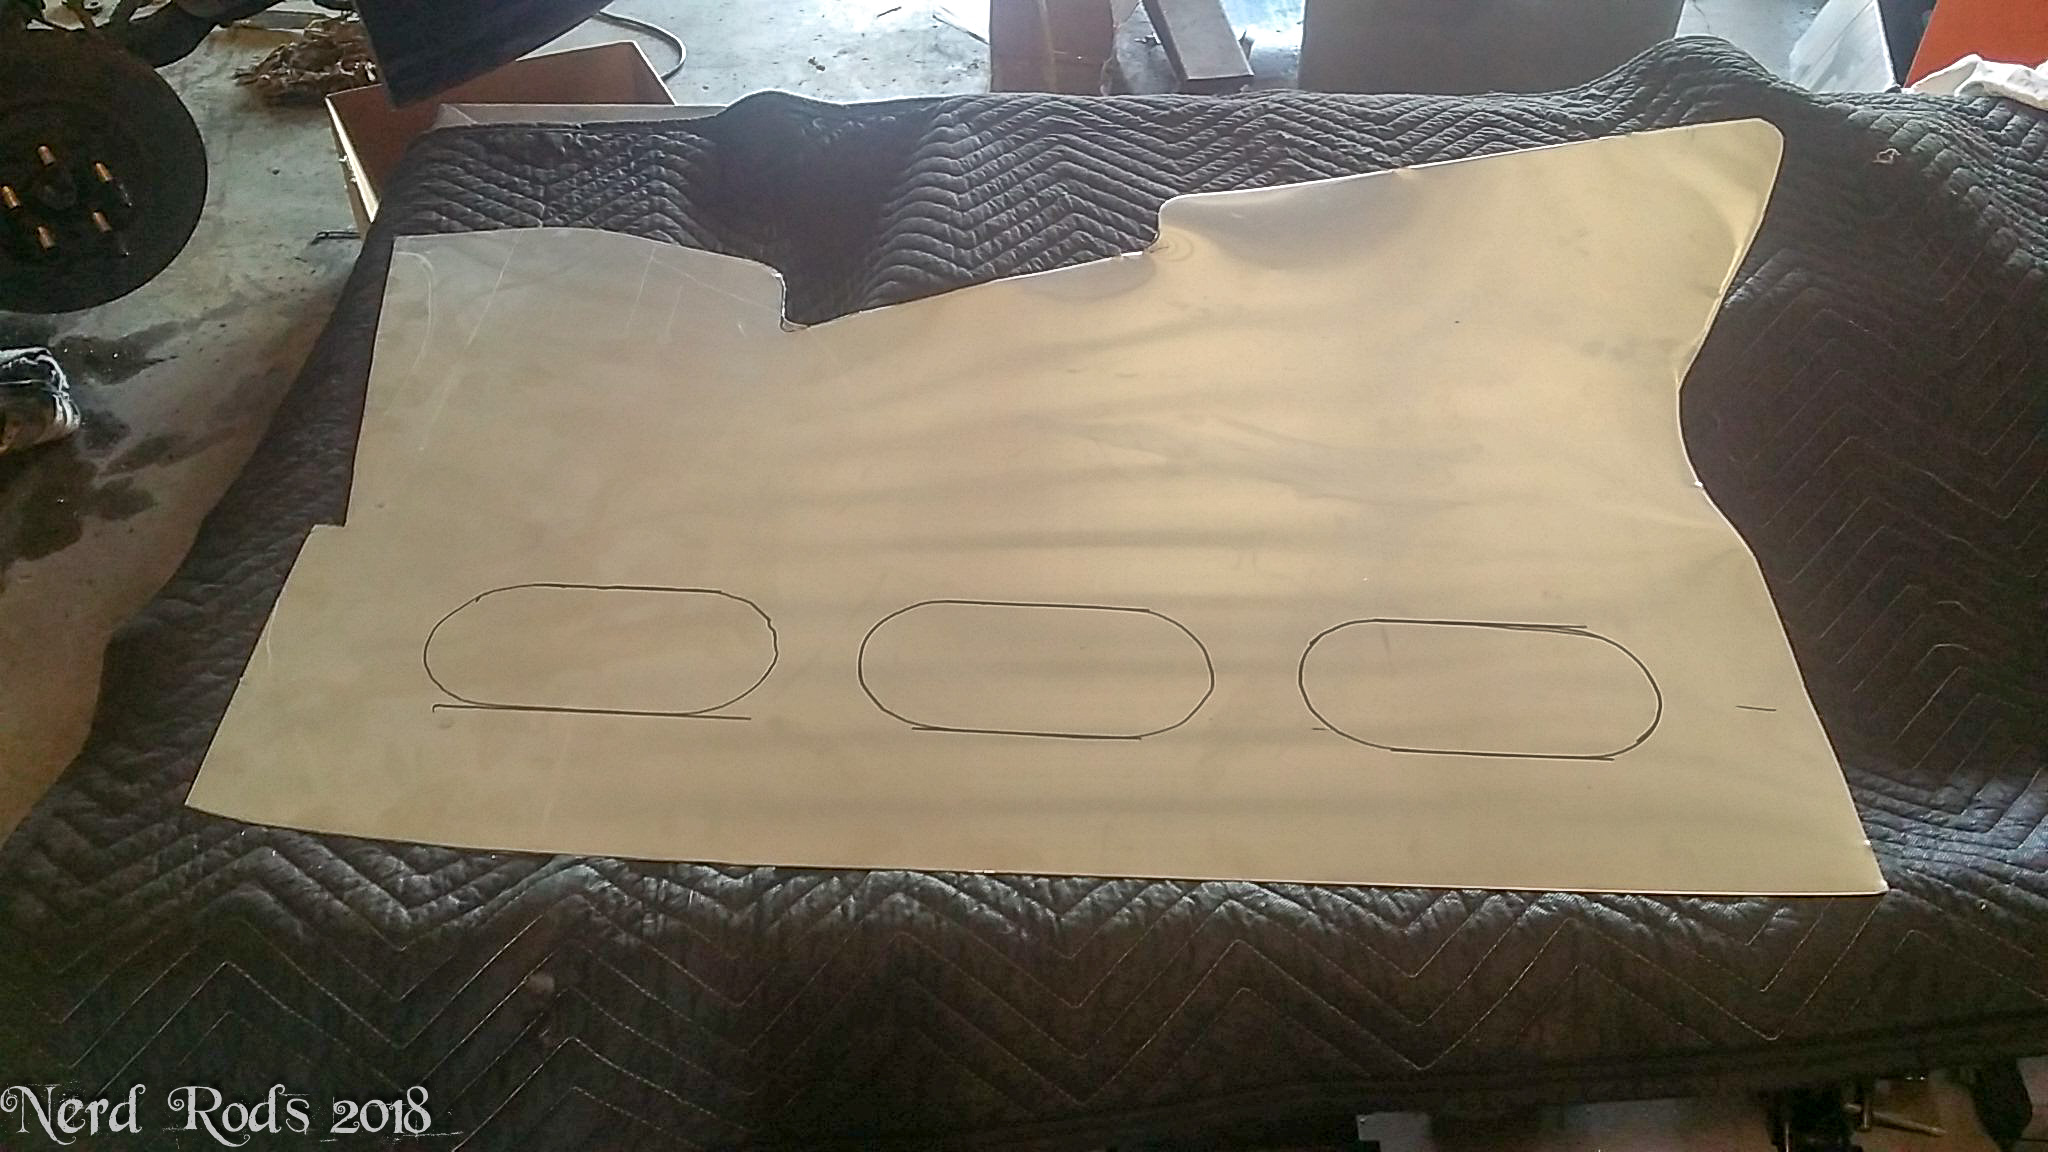
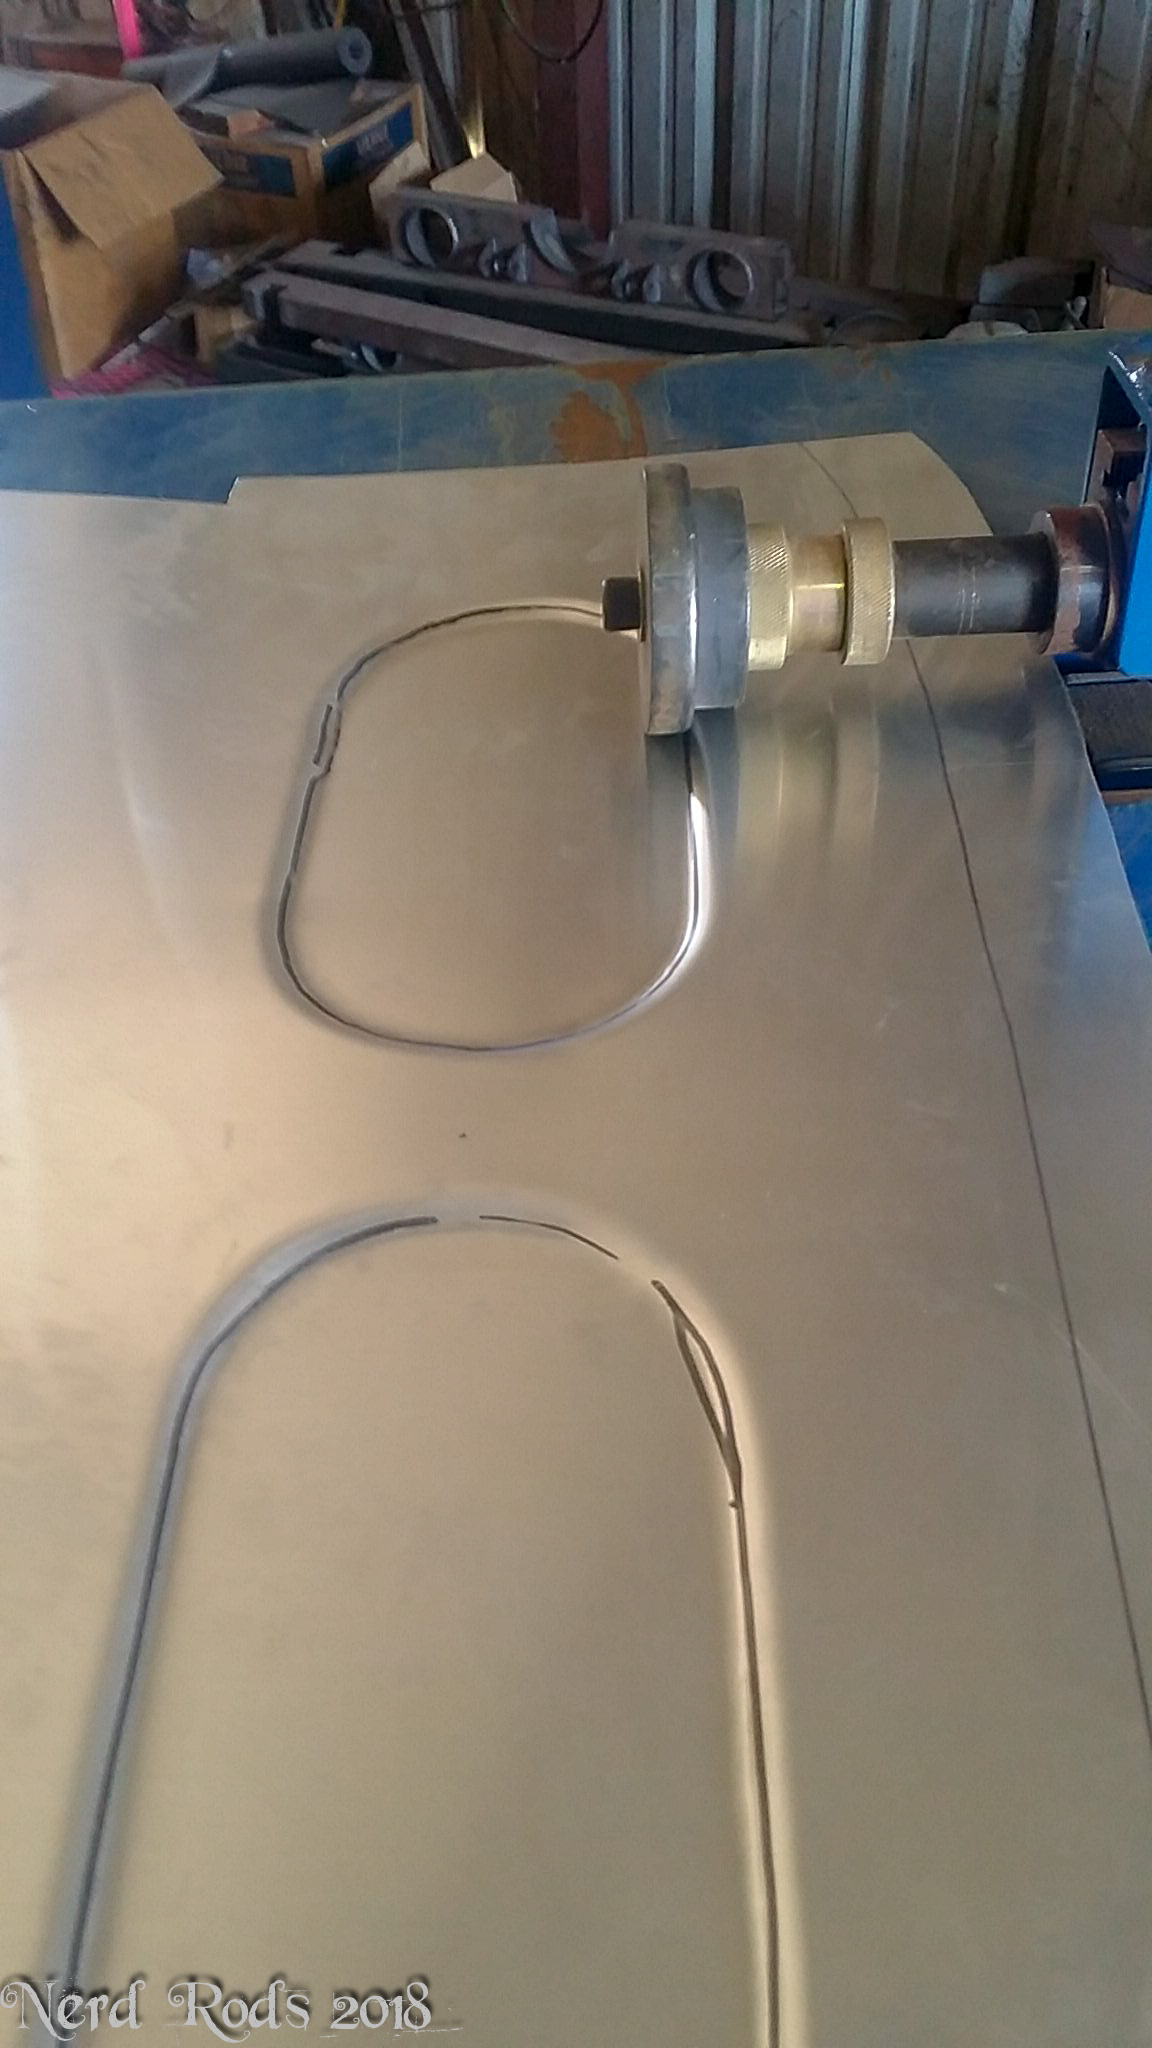
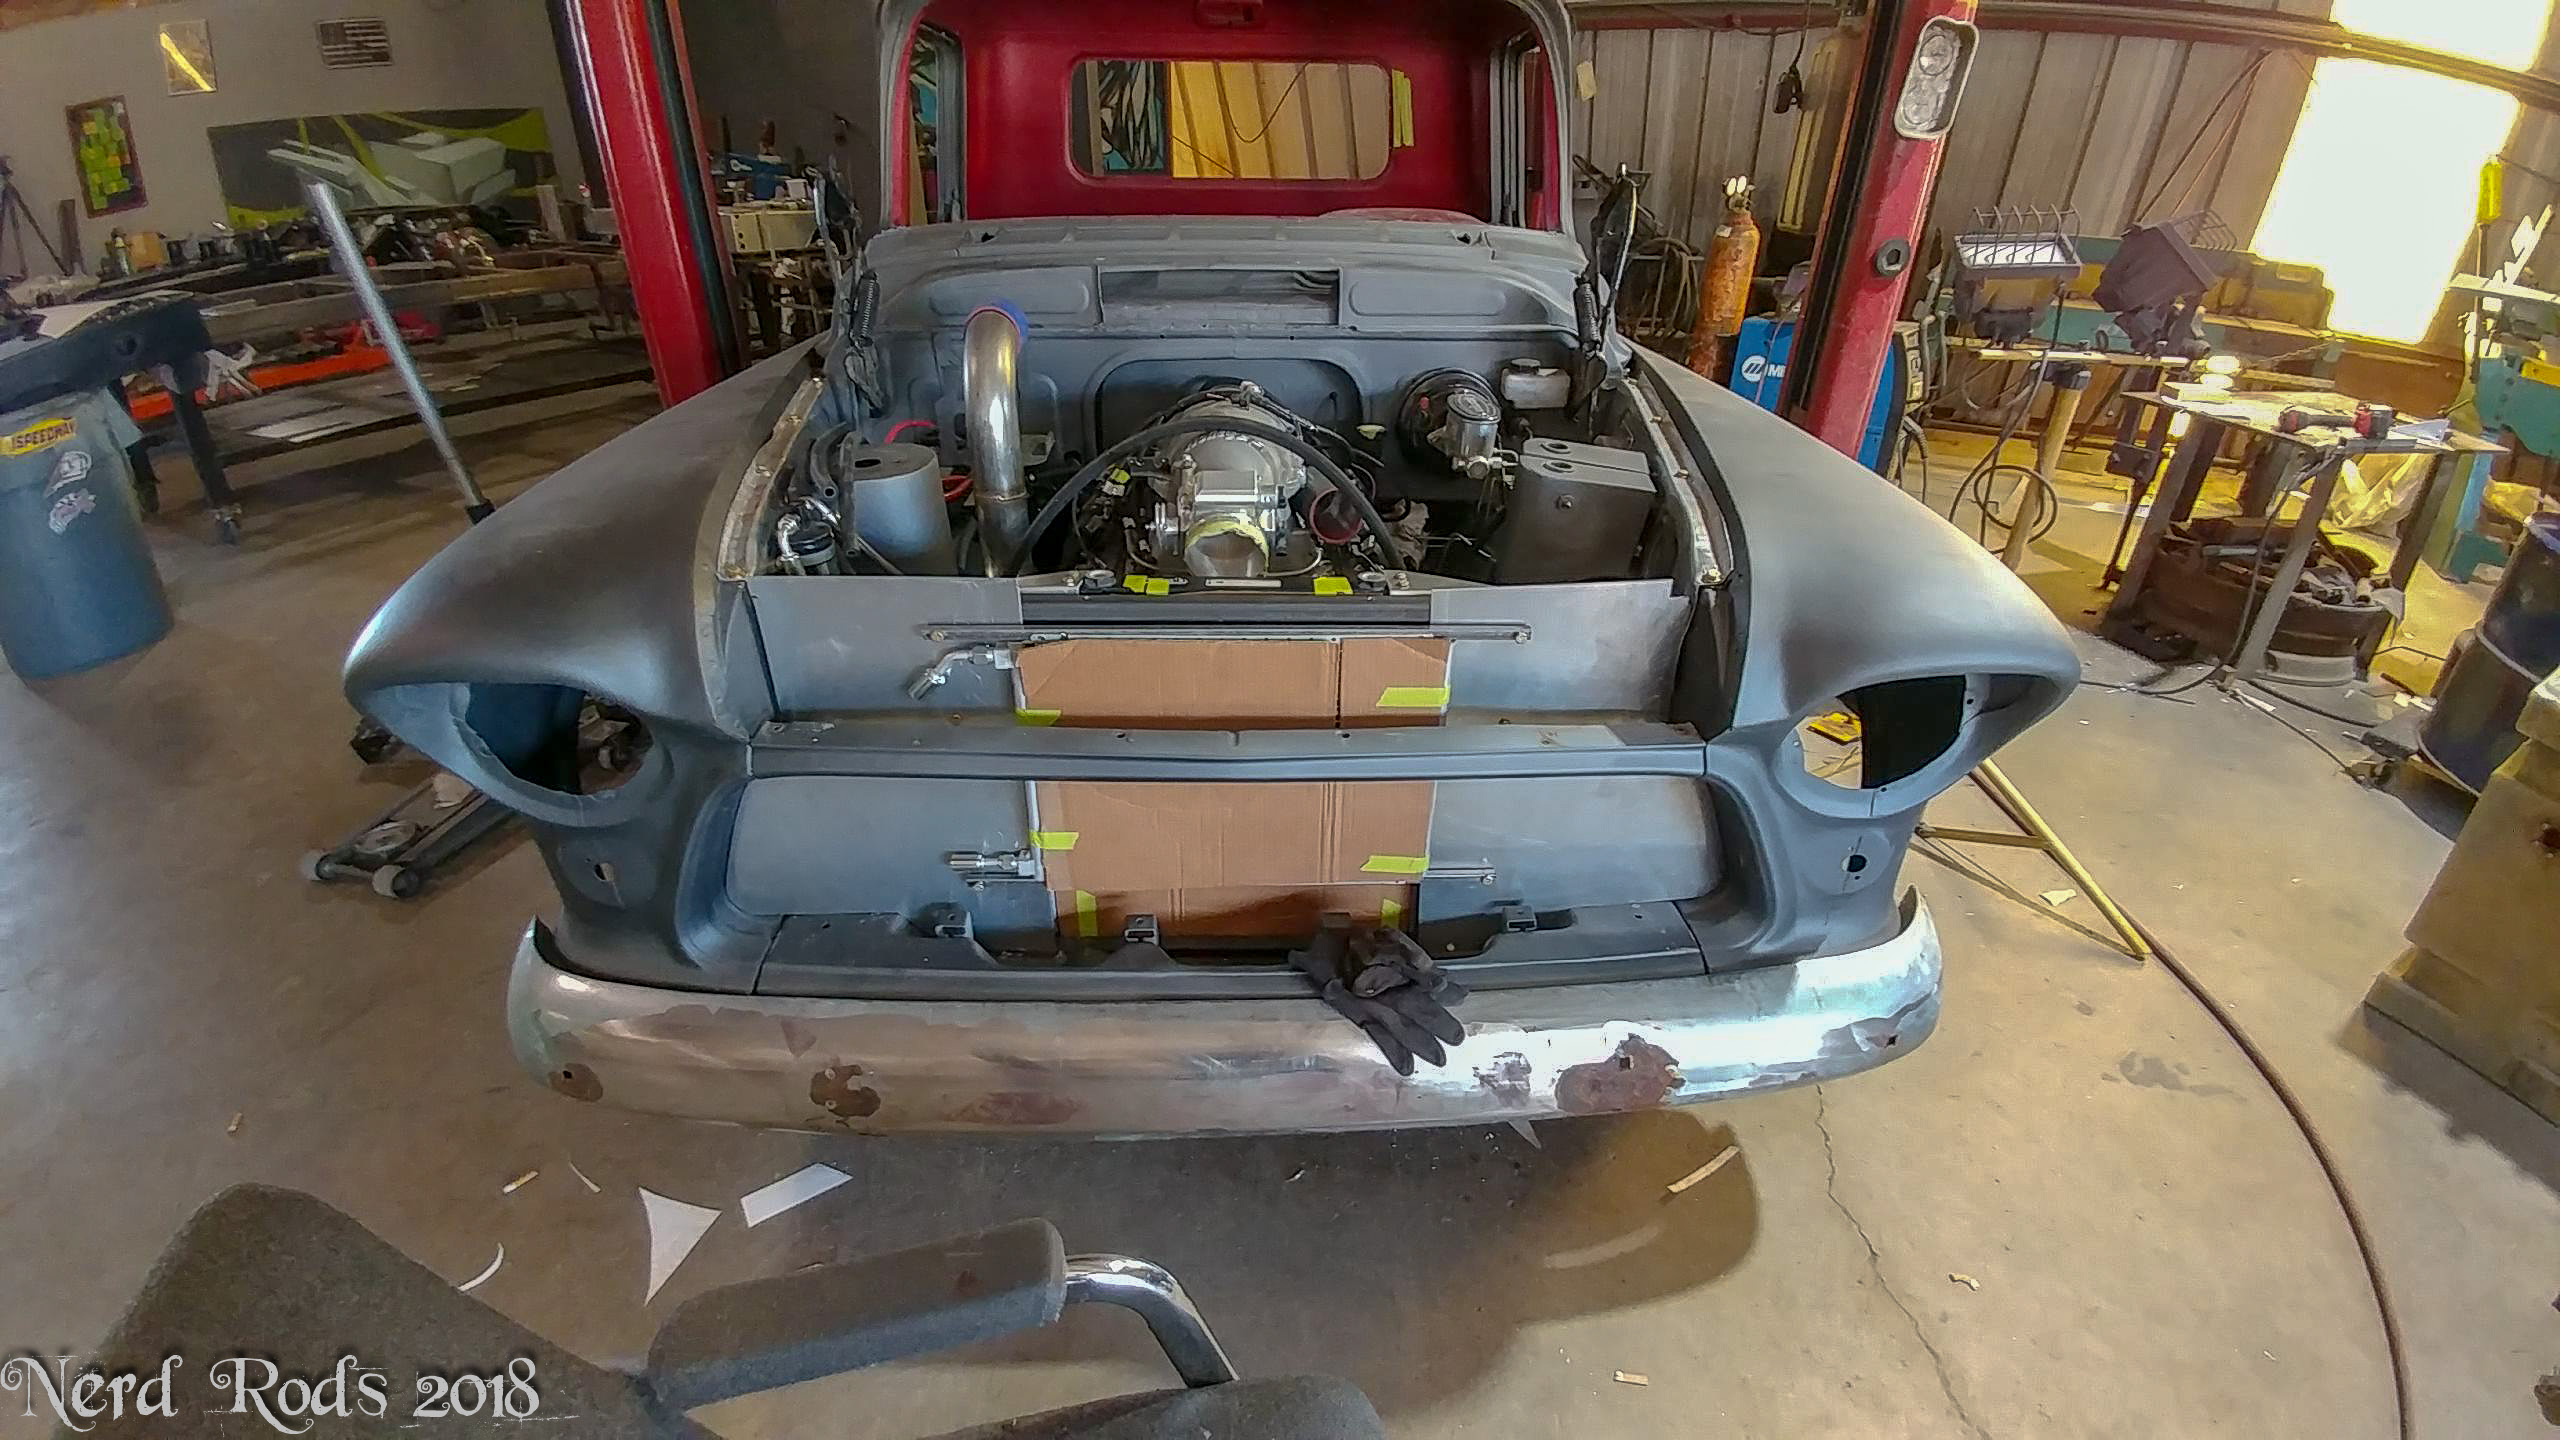
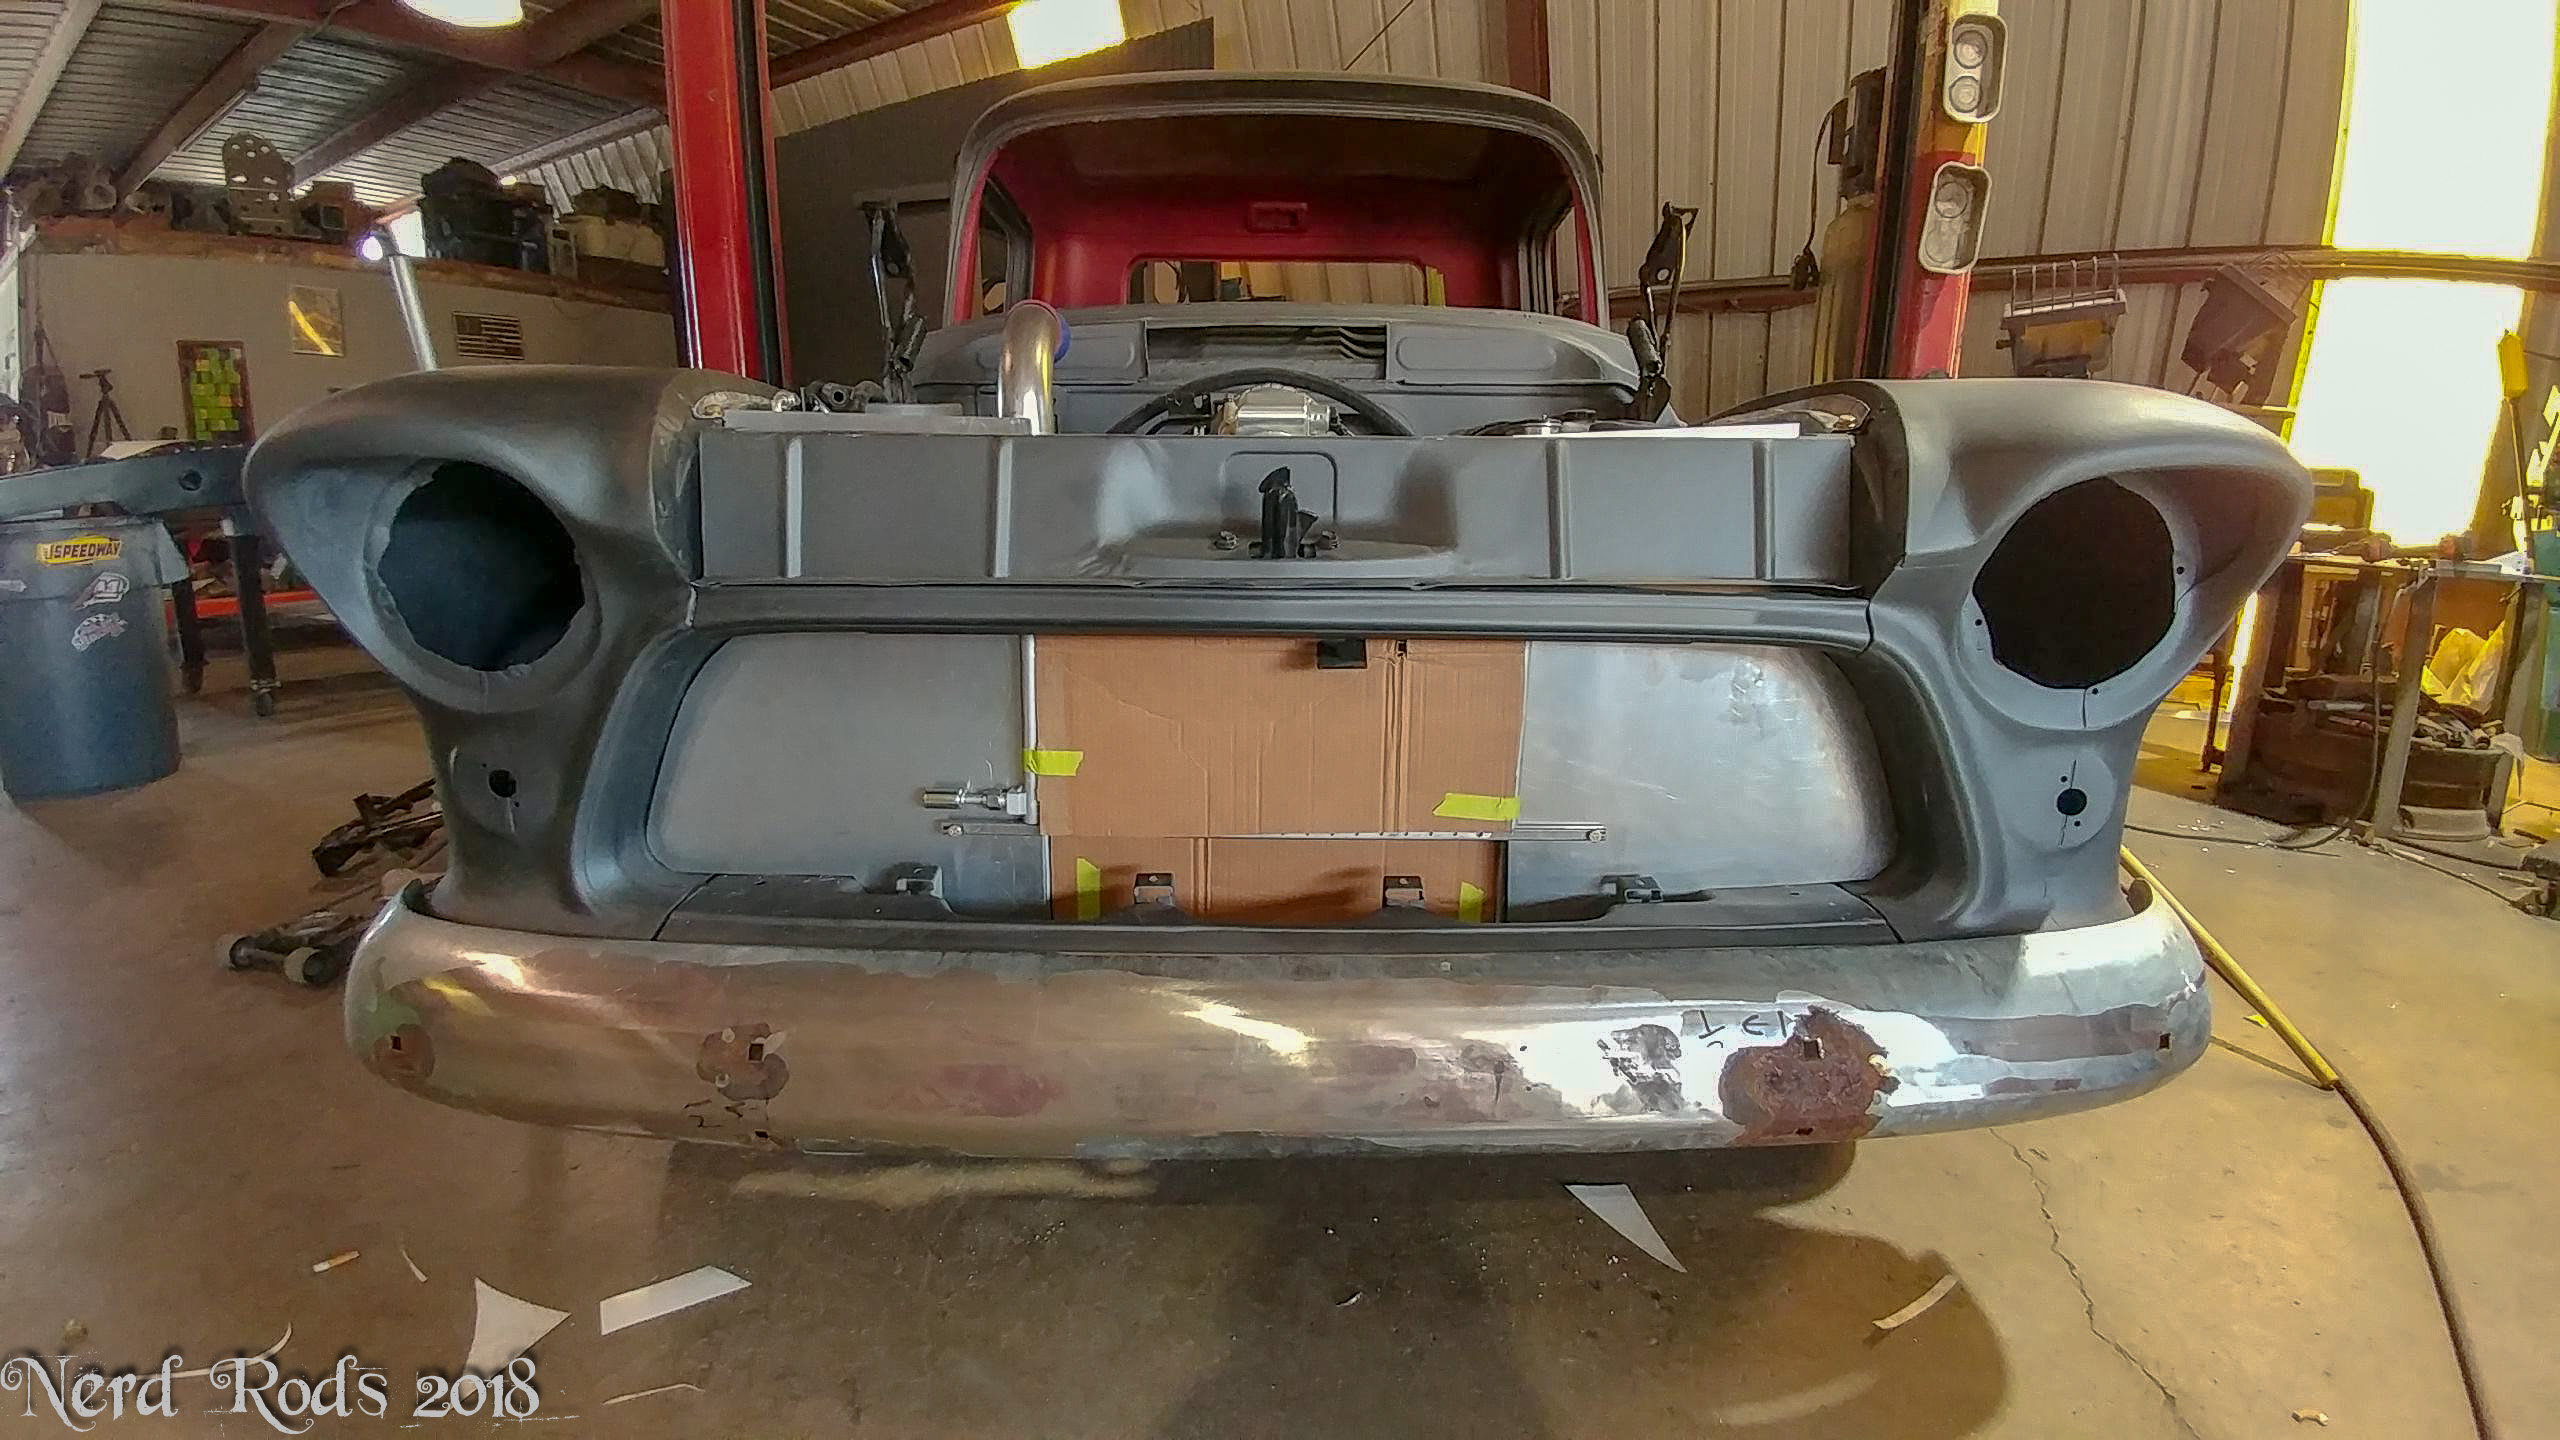
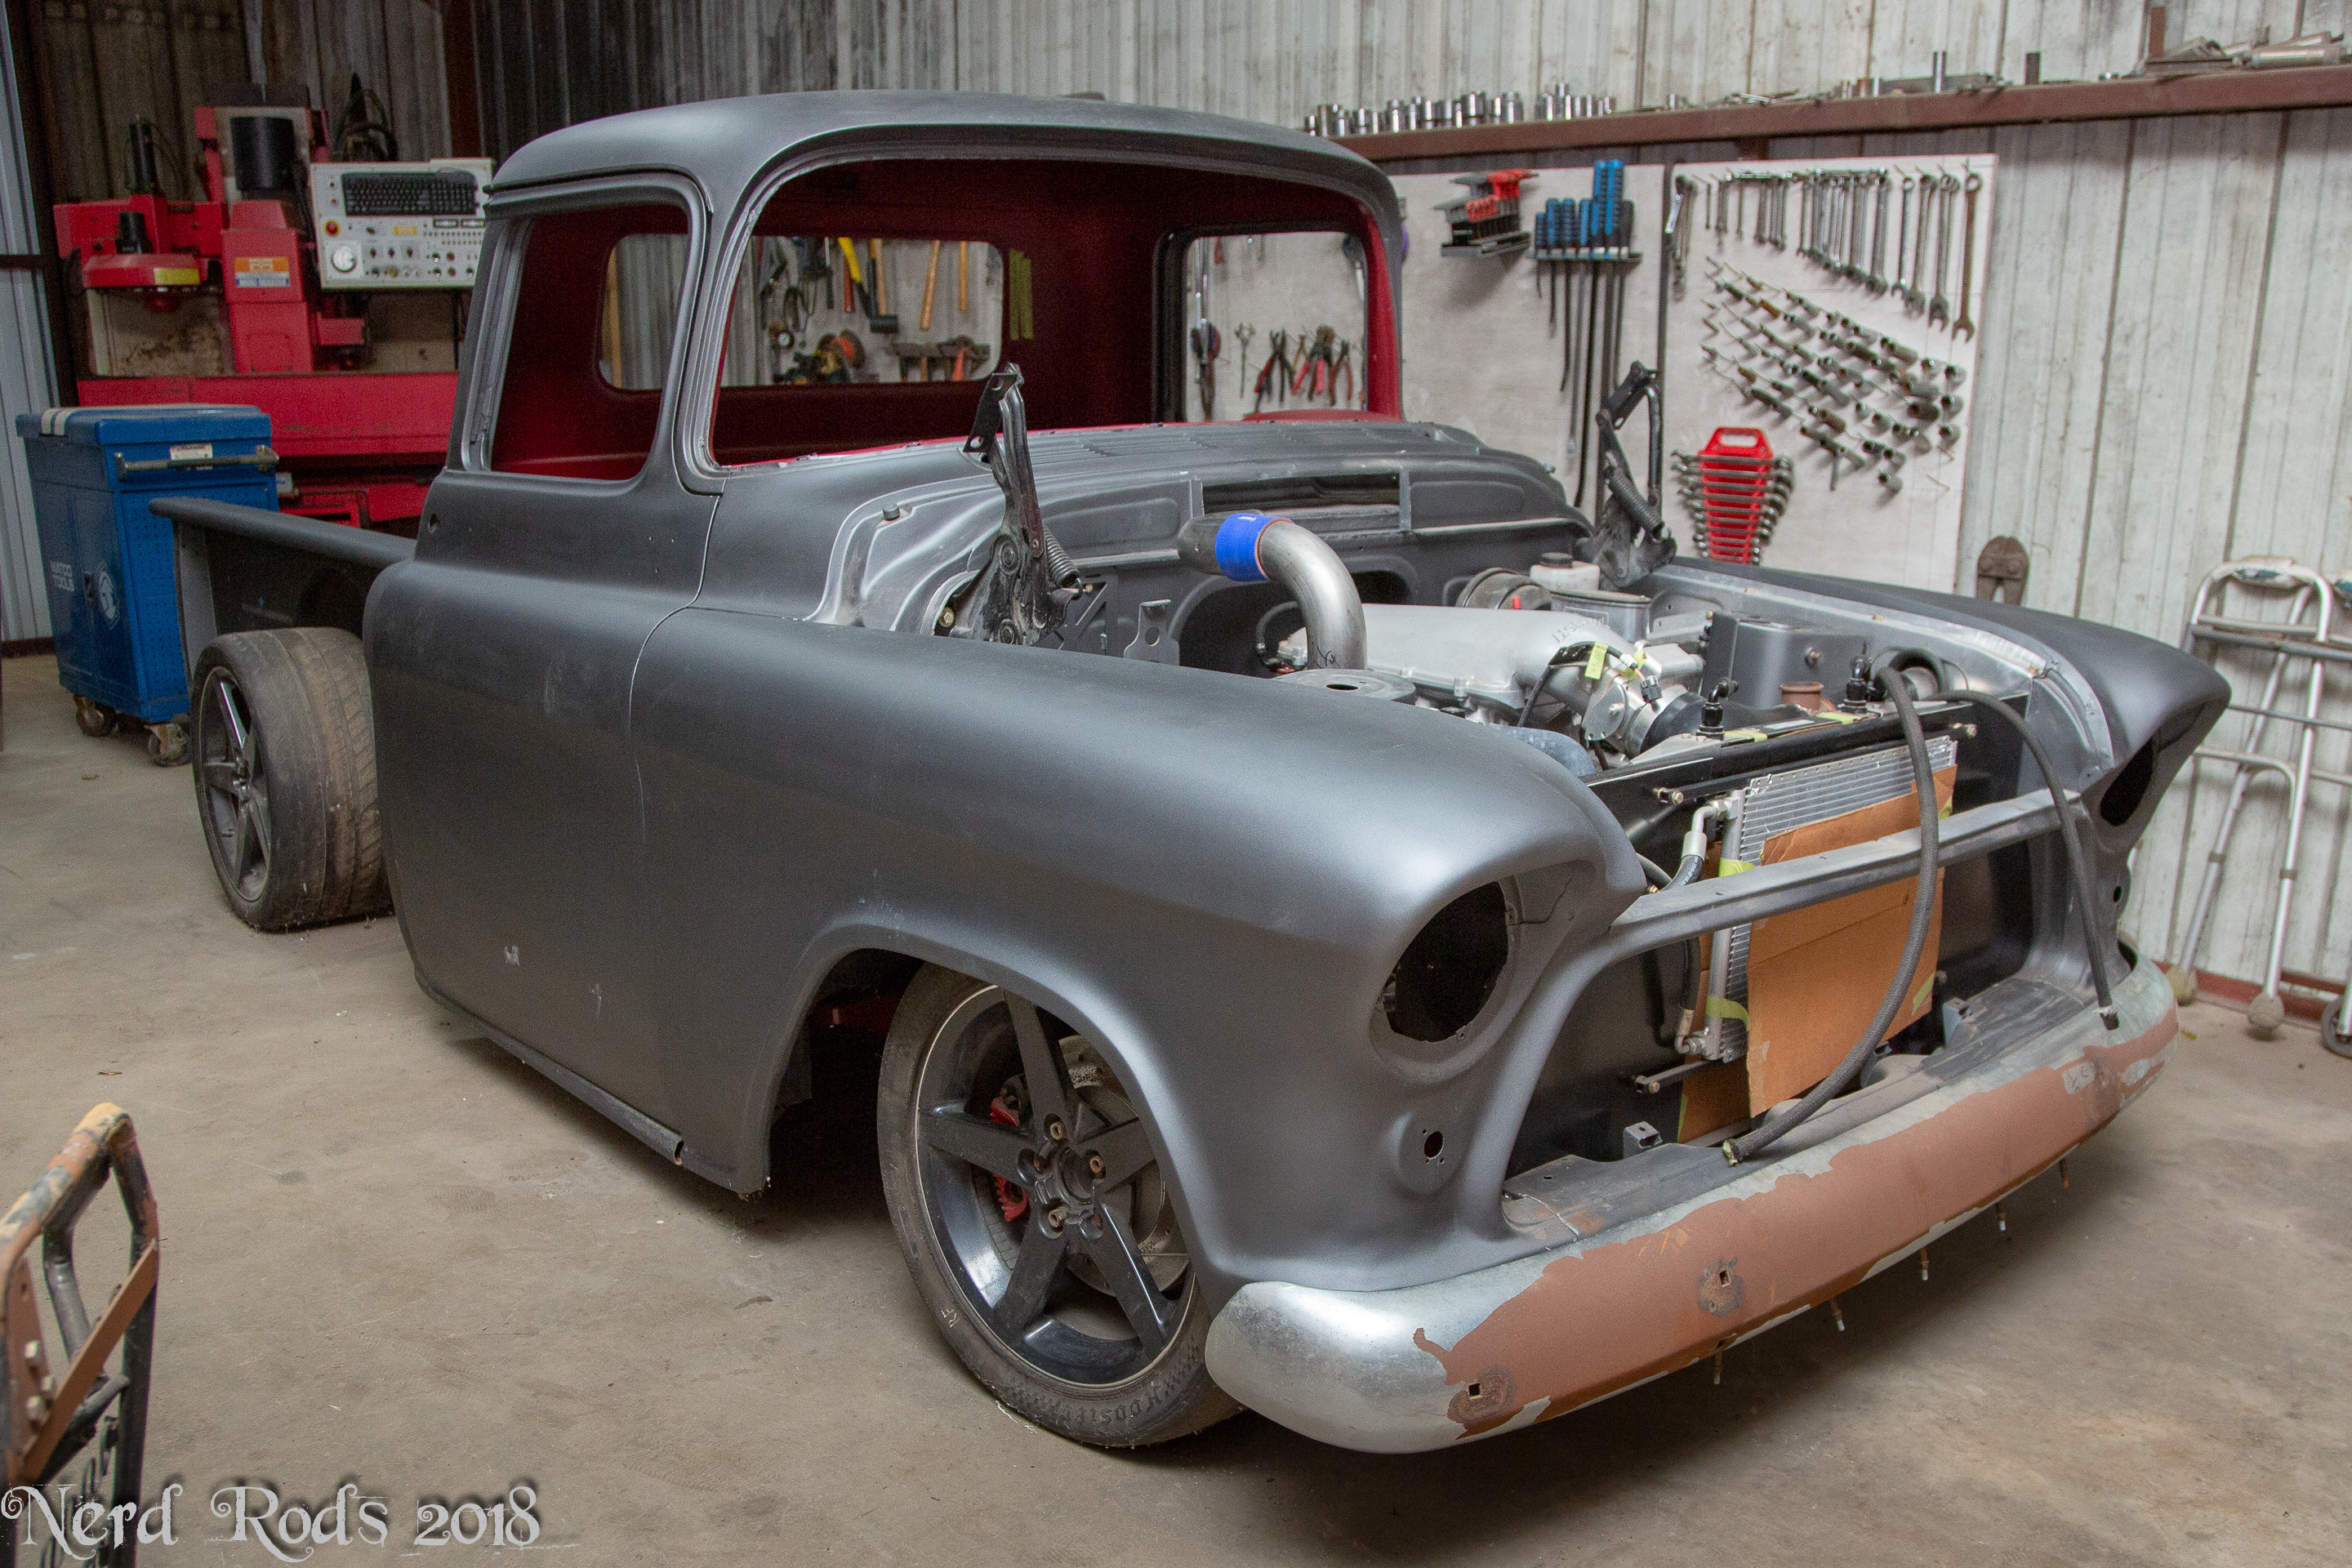
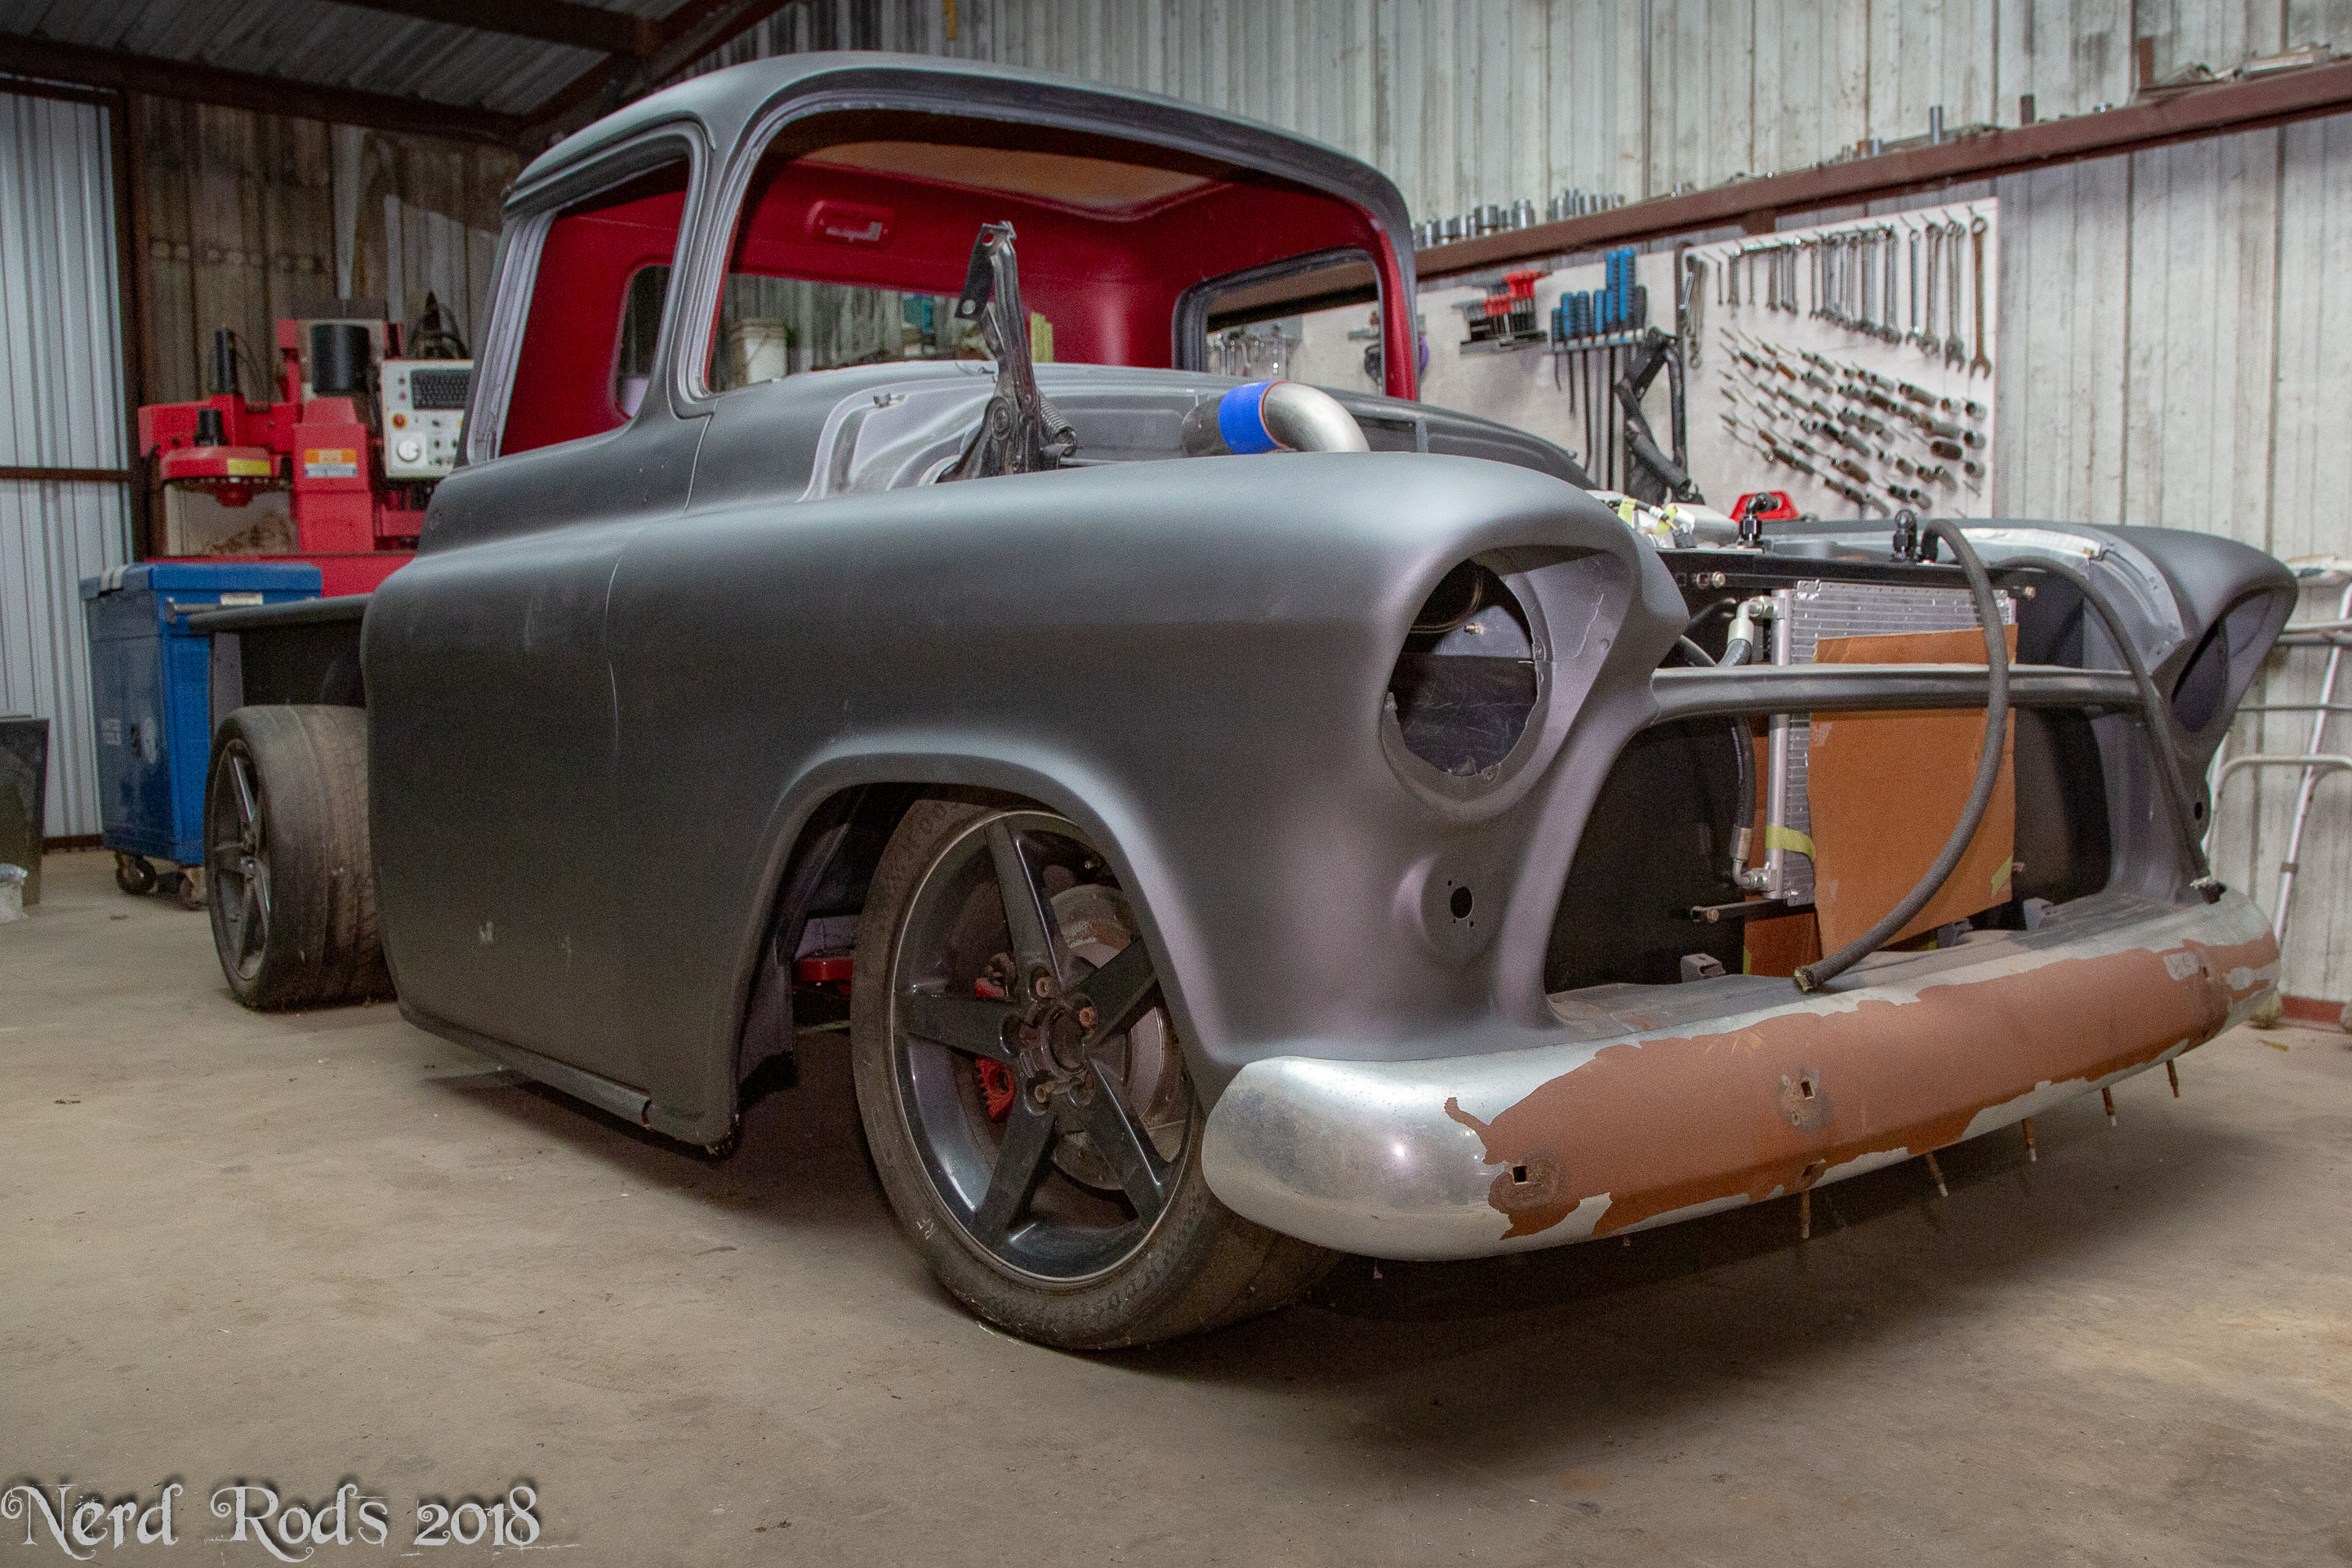
First some refined inner fenders were in order. This time out of aluminum to help shave a bit of weight off the front. There are a few revisions in these photos so if something looks a bit different one to another, its probably Dad scraping a set and moving to a fresh start for one reason or another.

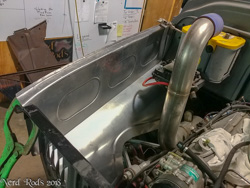


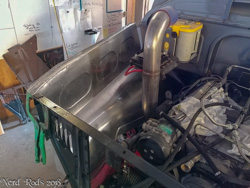
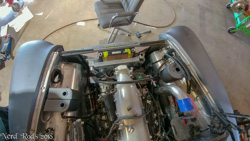
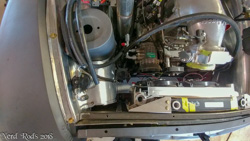
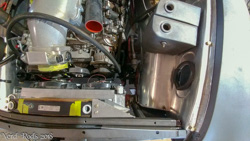
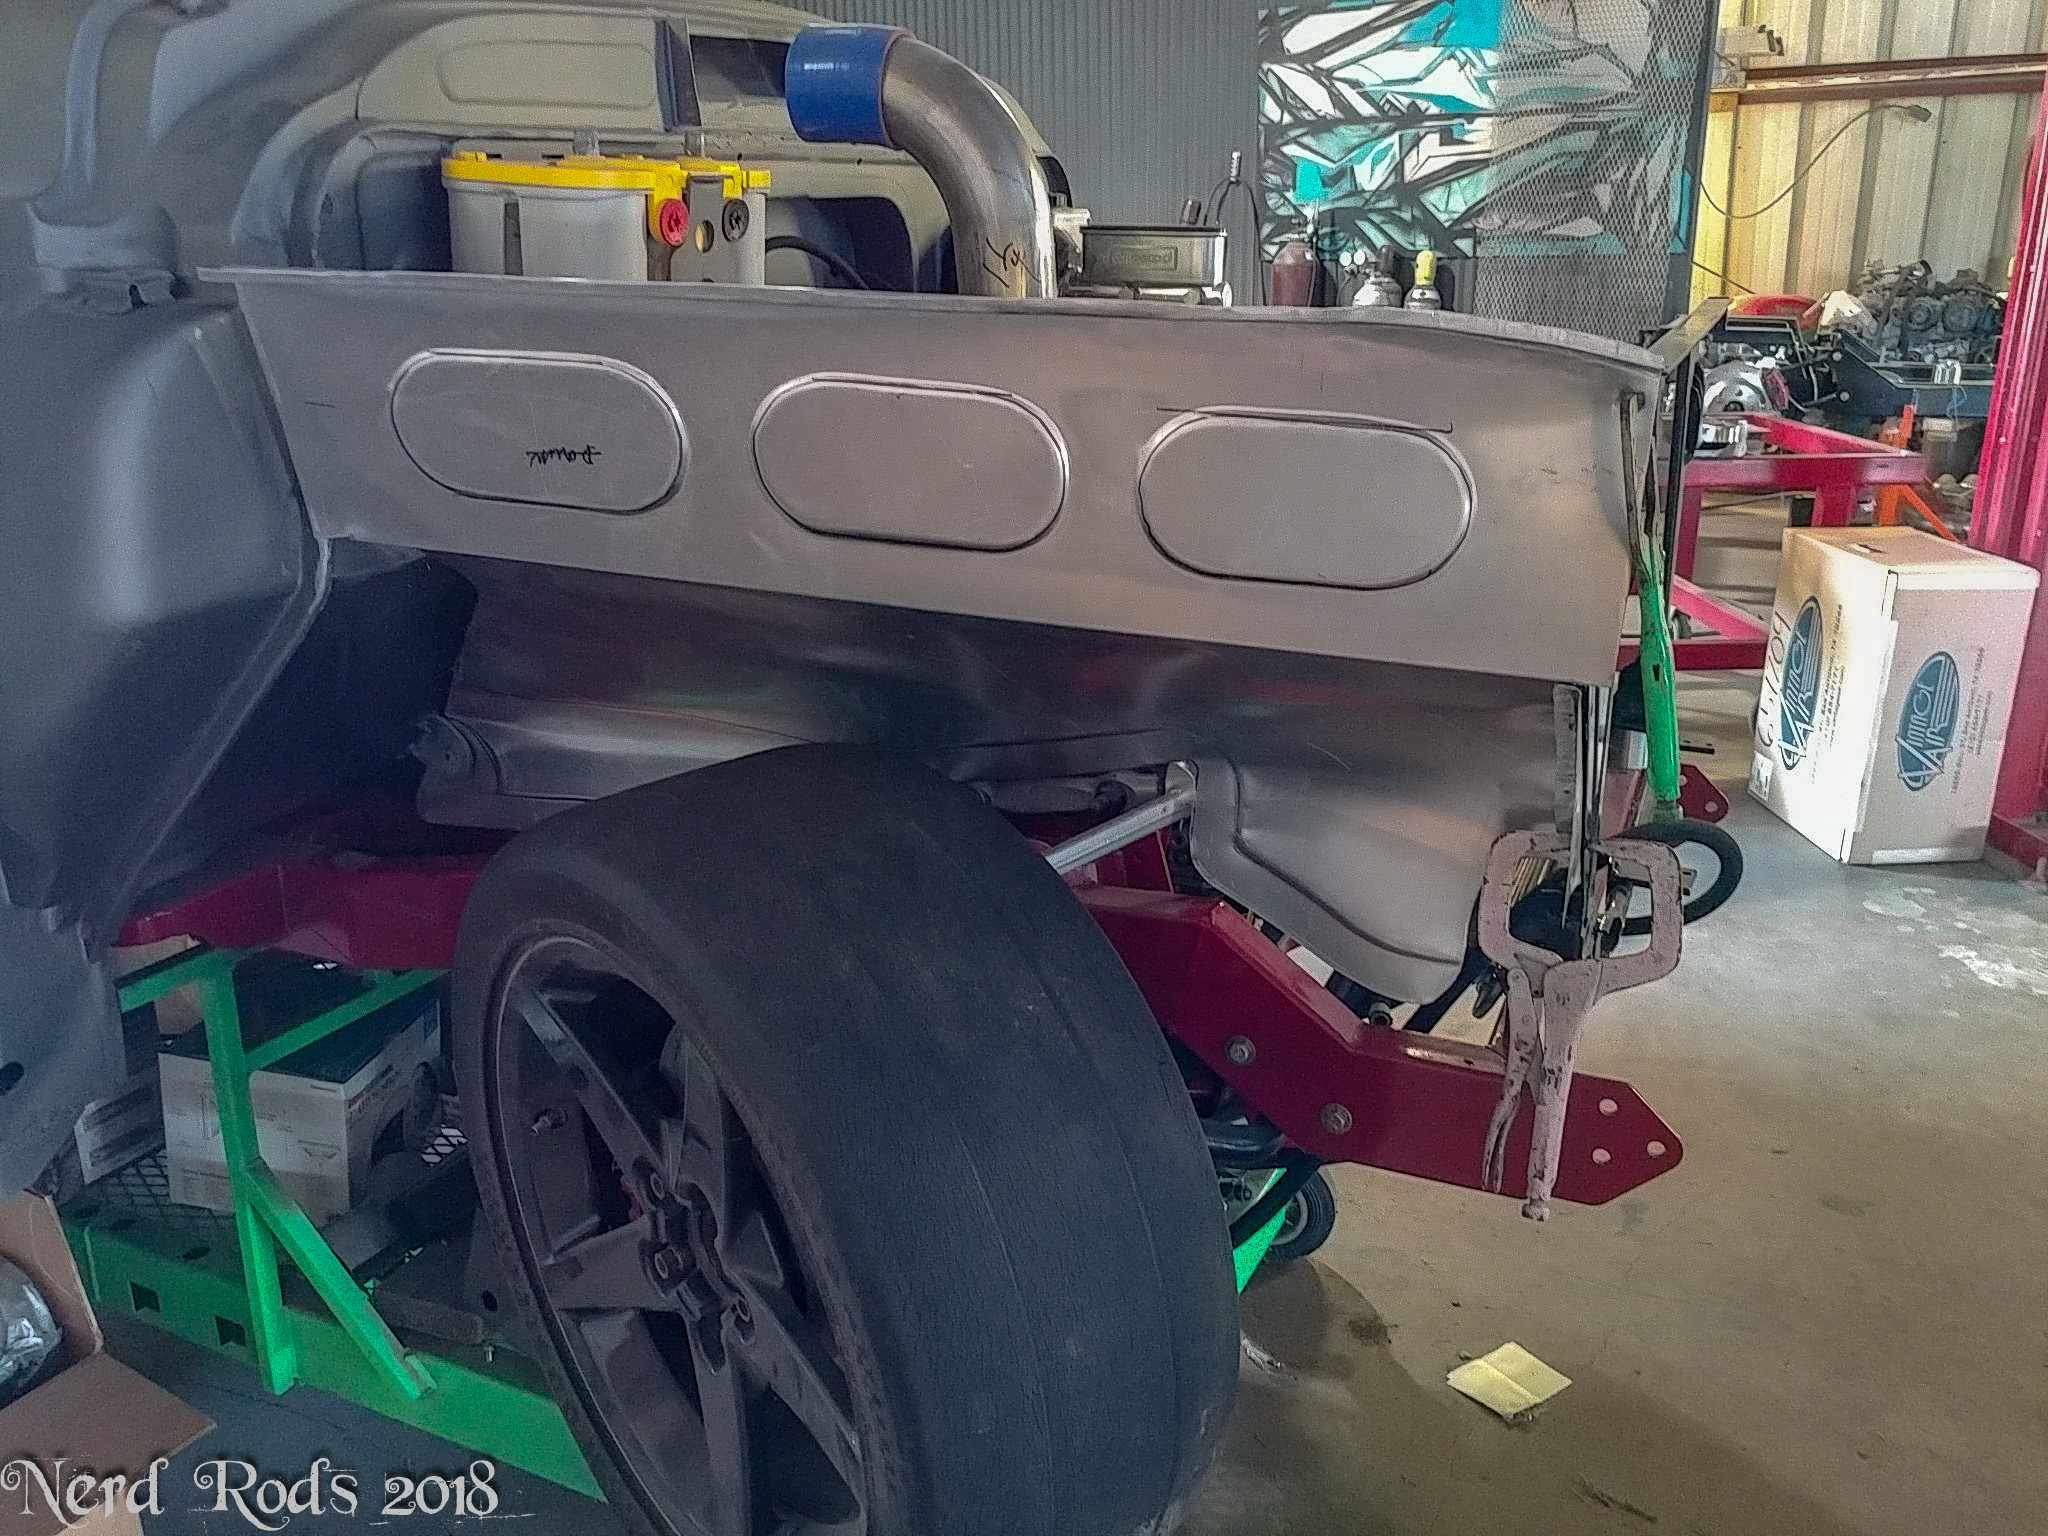
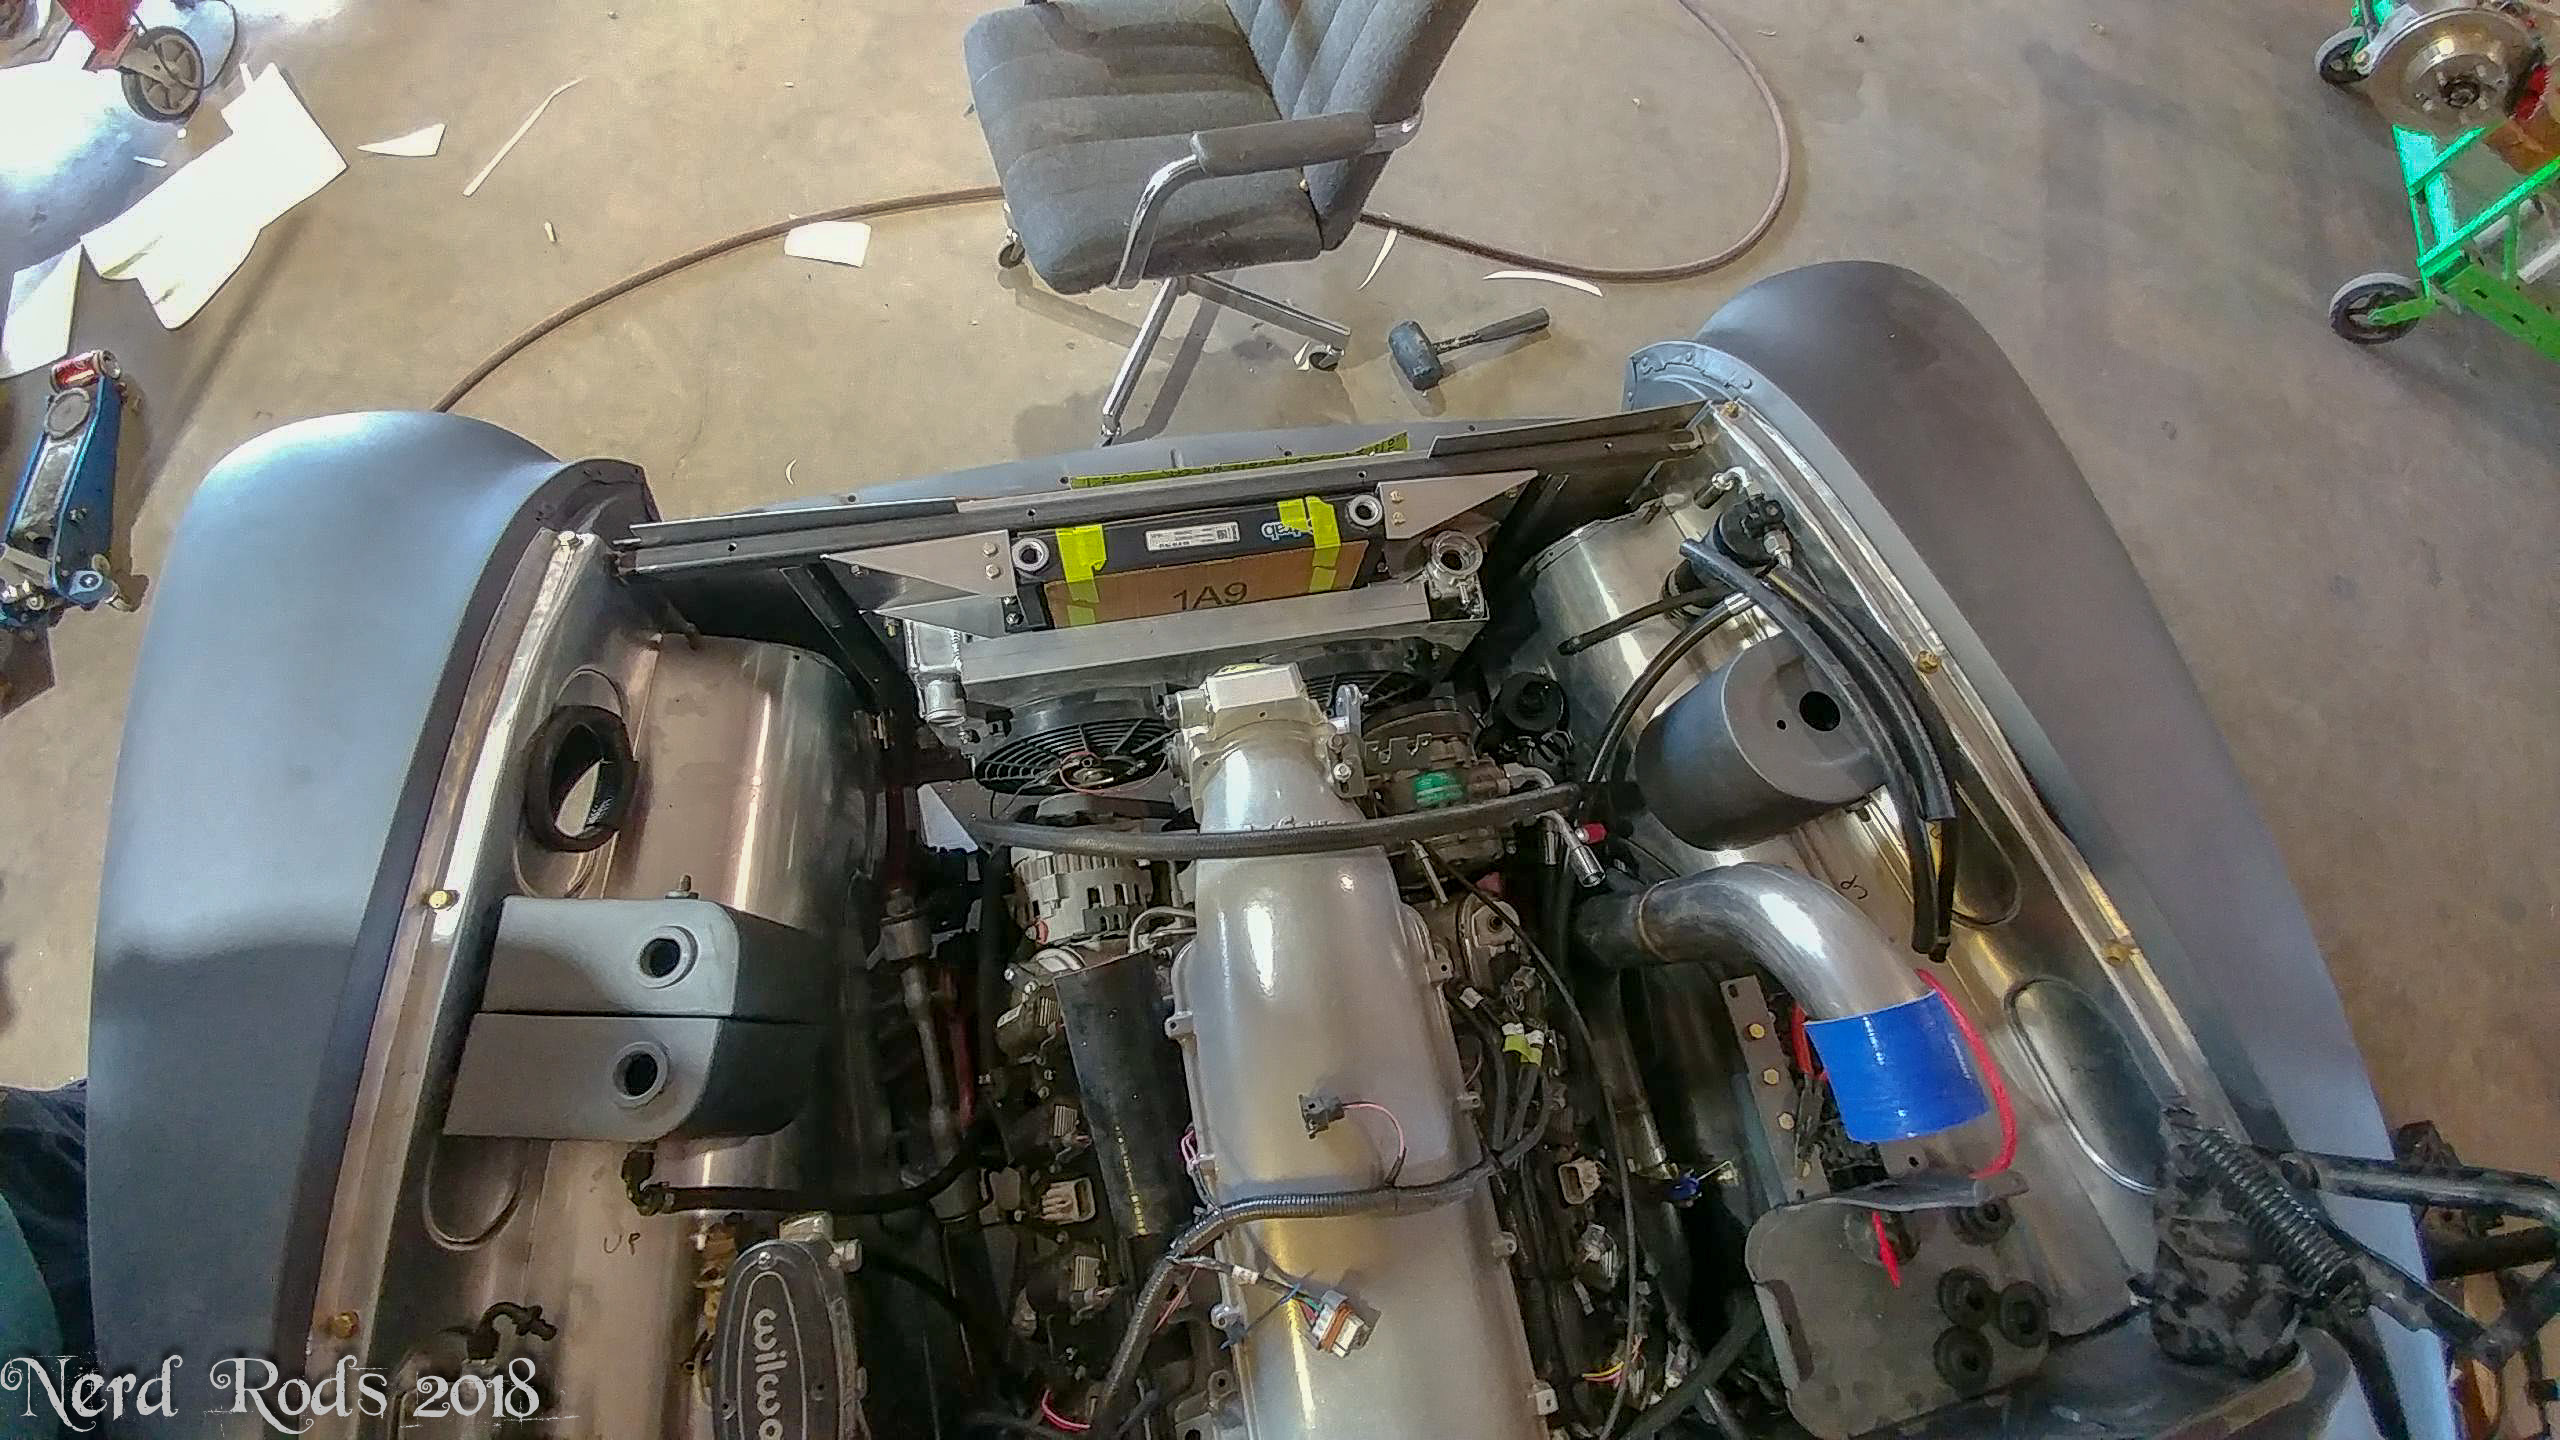
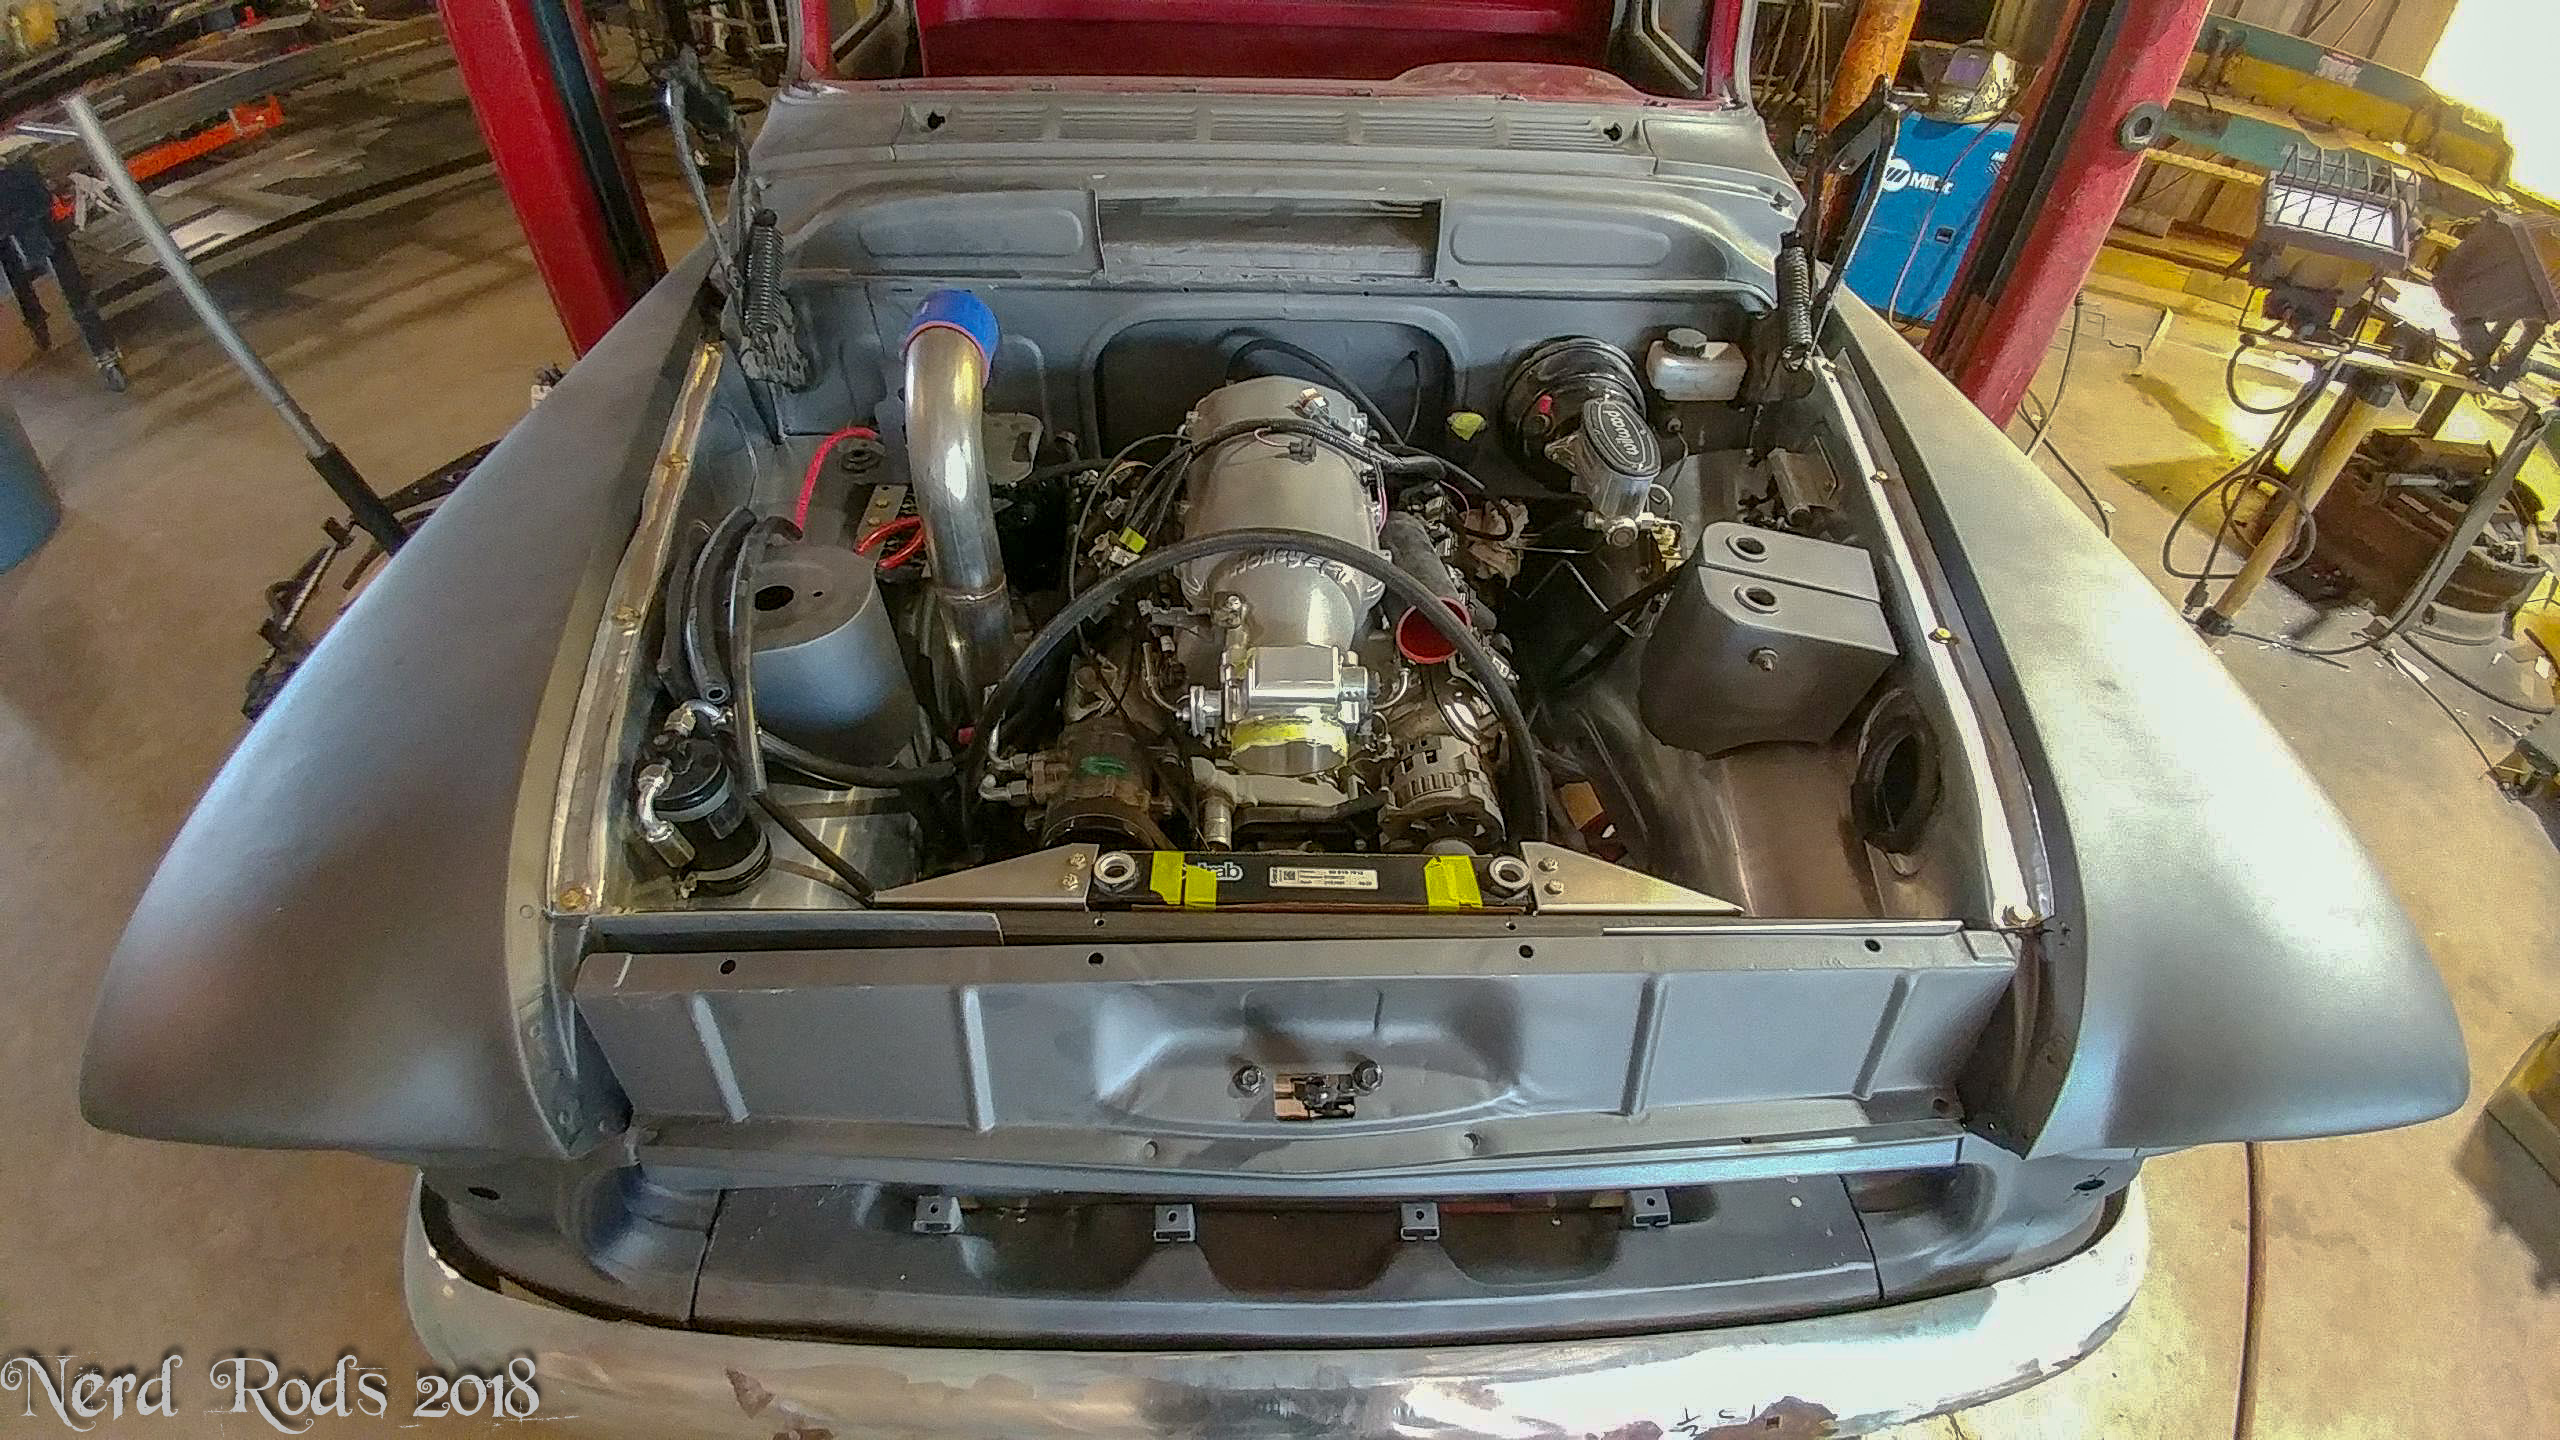
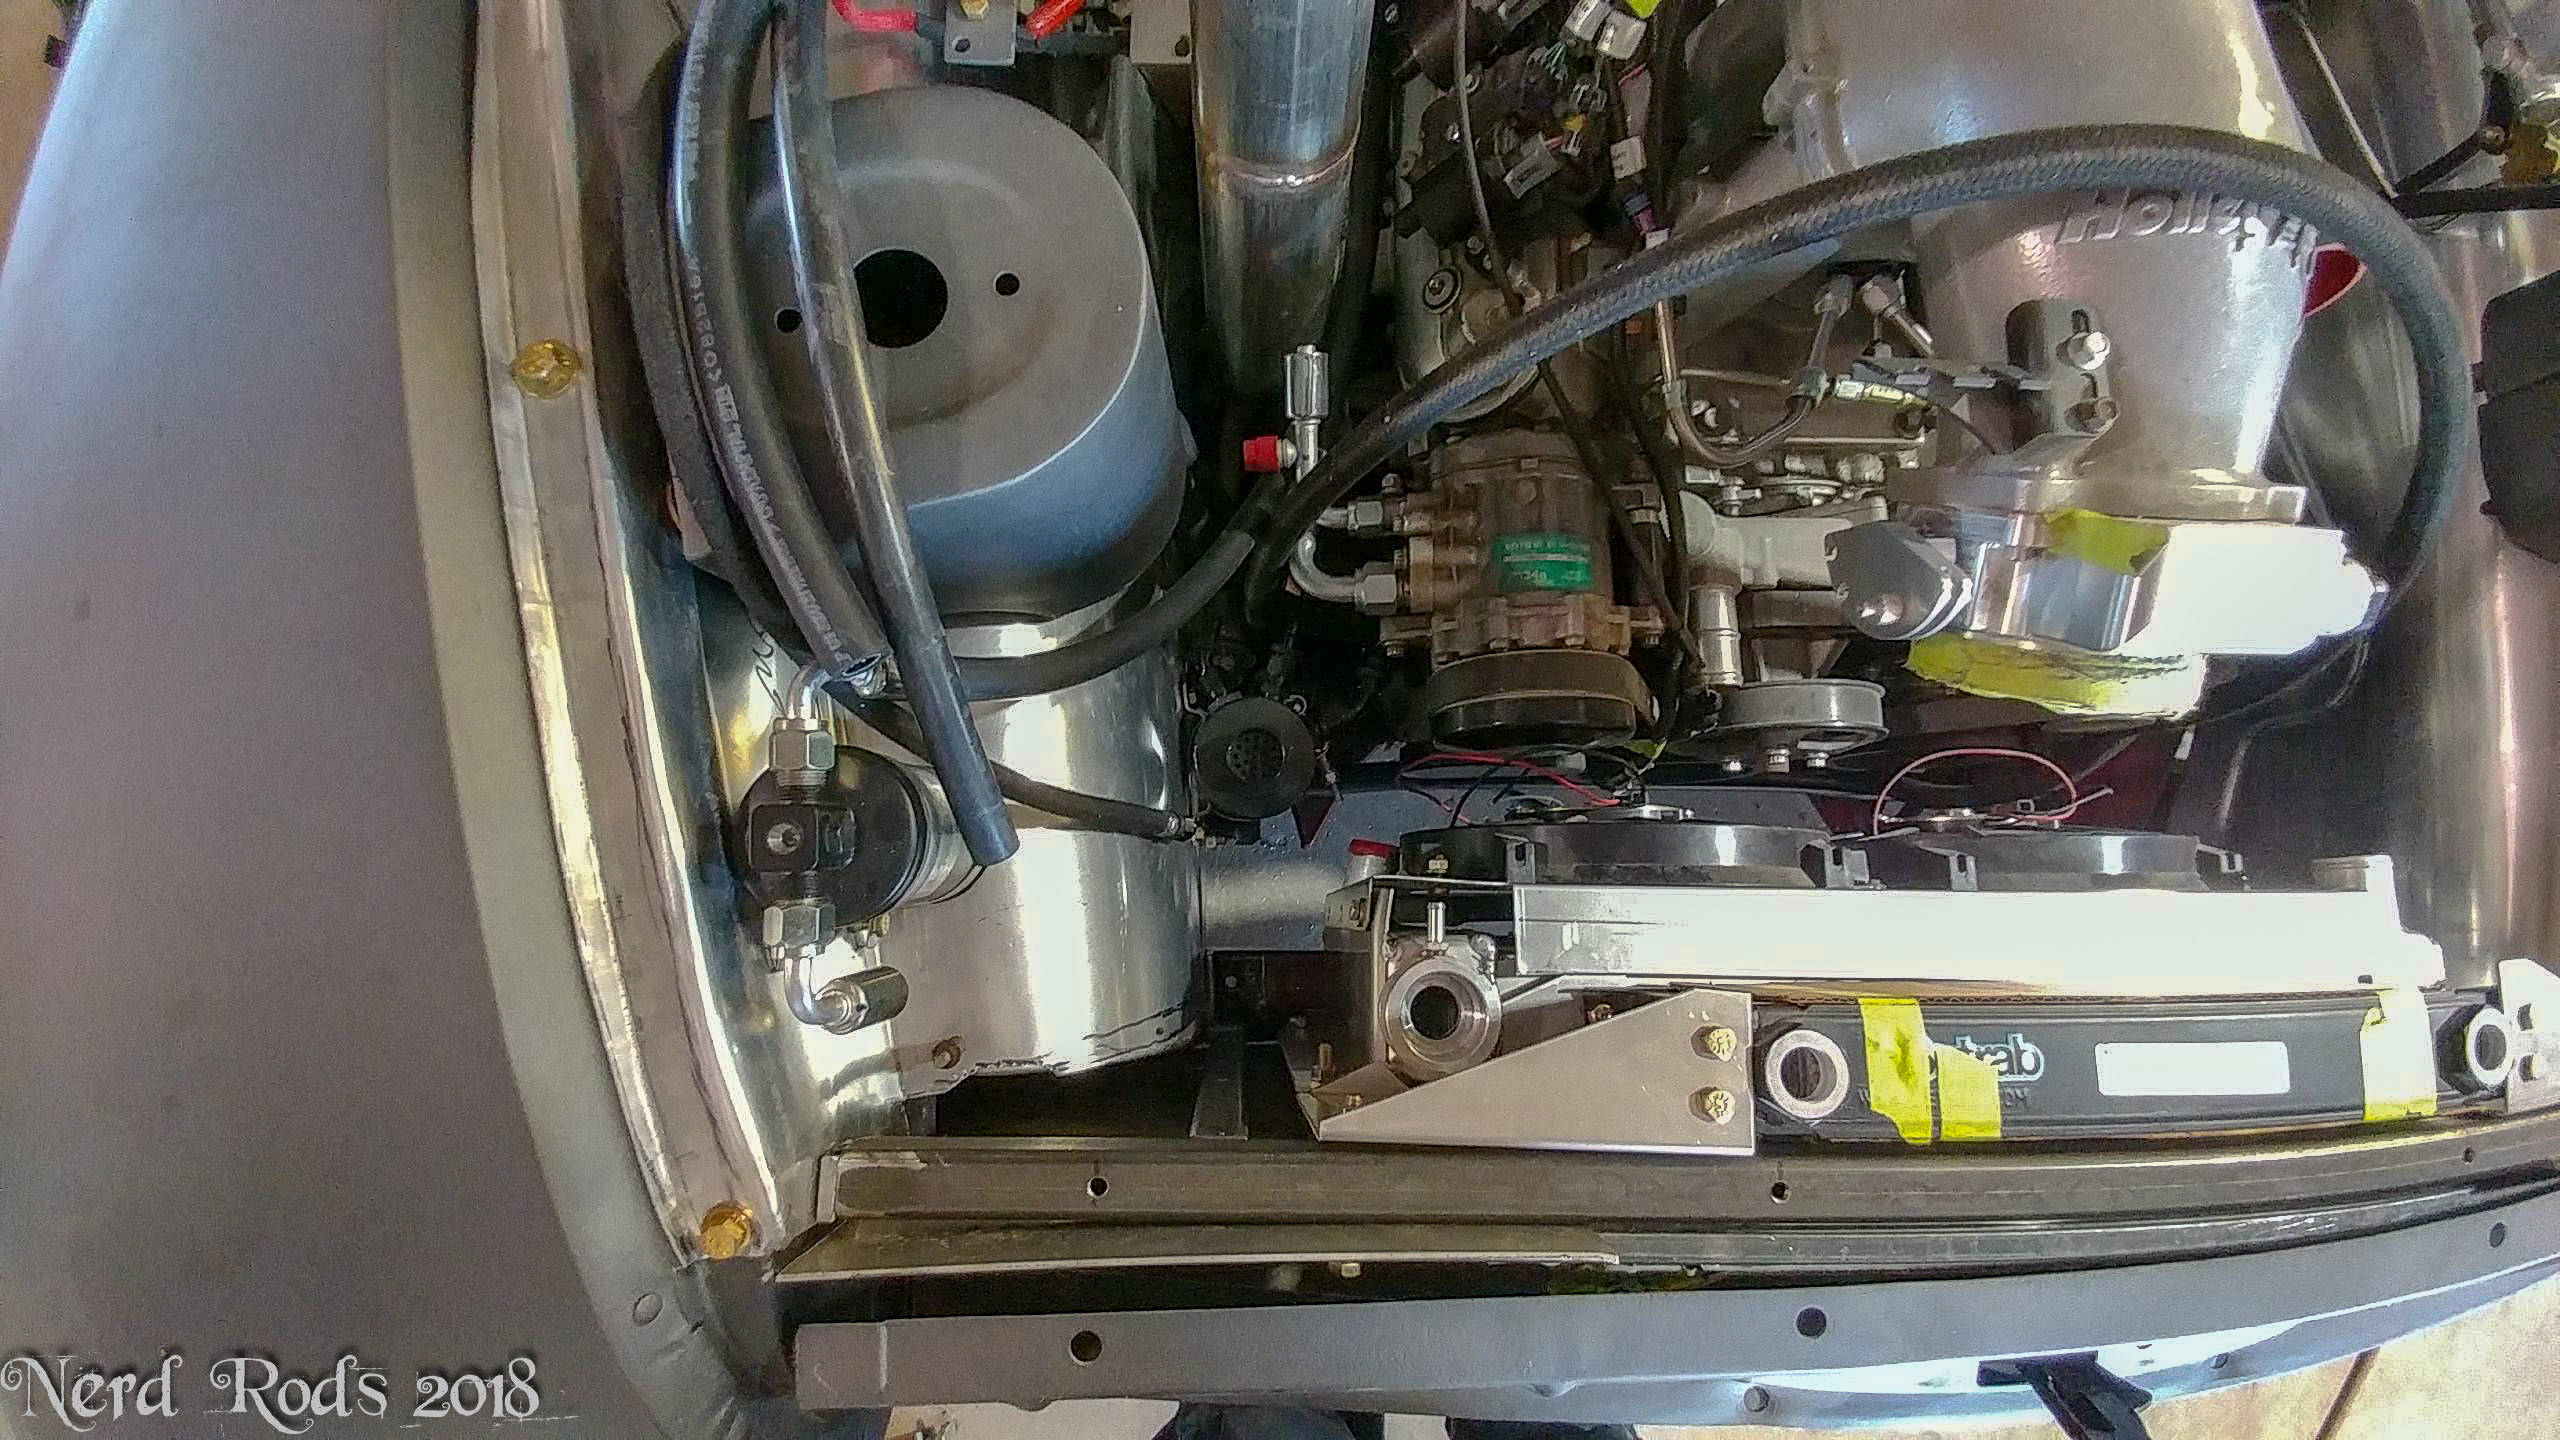
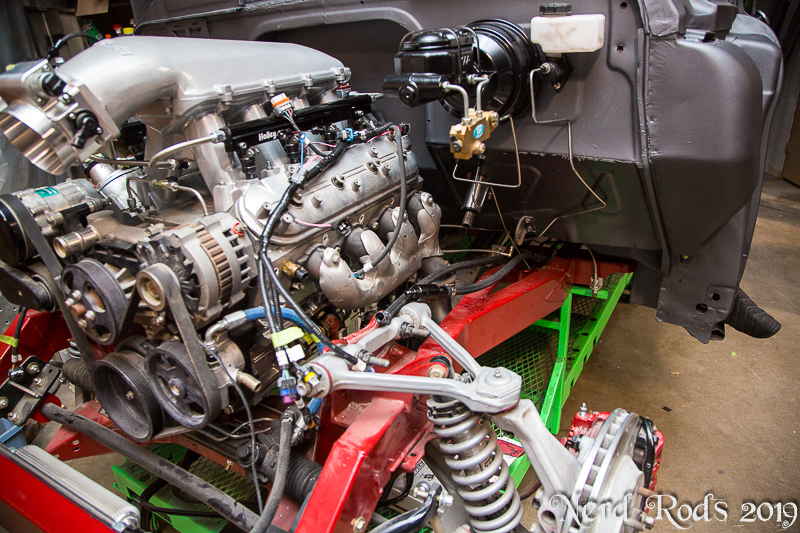
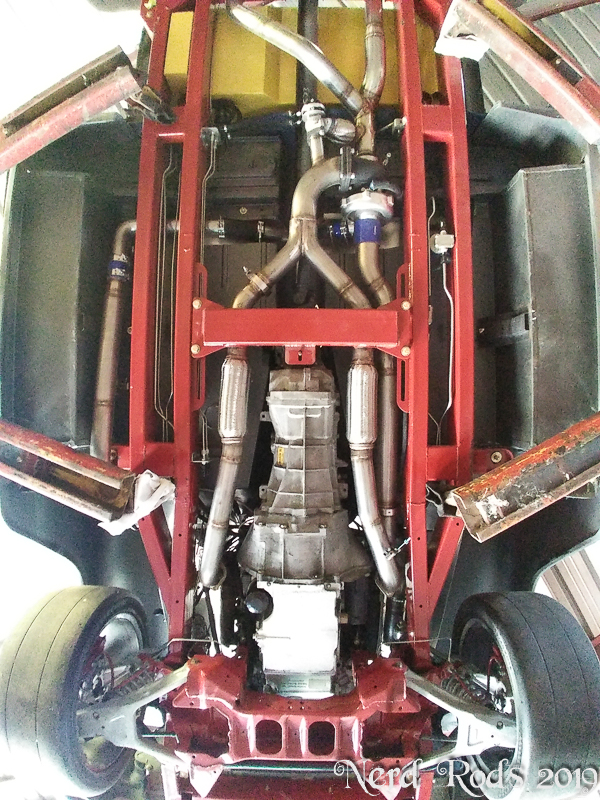
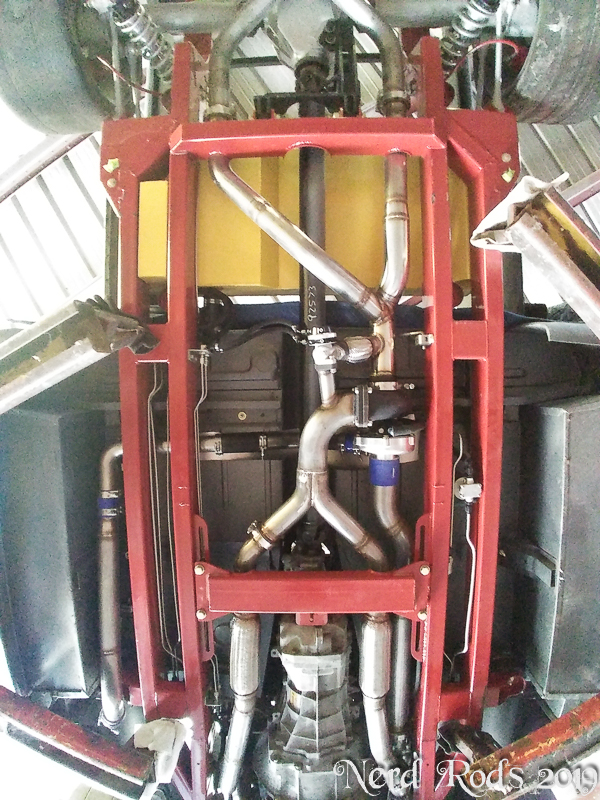
Moving onto getting all the boost tubing mounted. I opted for stainless over aluminum this time for reliability compared to my previous builds. The goal is that the truck will be Dad's daily so a few things like this are acceptable for the peace of mind if give if you hit a road gator, or small animal that will roll up under the truck and screw something up.


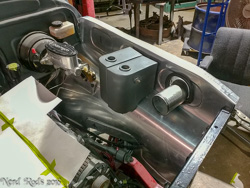
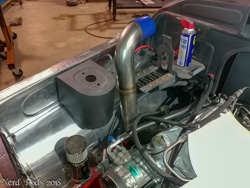
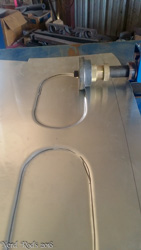
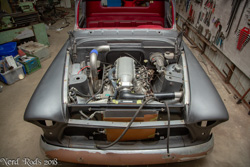
With all the items we need to hook to vacuum or boost references we had to cook up this manifold to have them all functional. Waist gate, Blow off, Boost controller, MAP sensor, Boost Gauge, and Vacuum booster but only one large port on the intake.
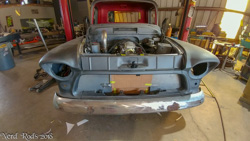
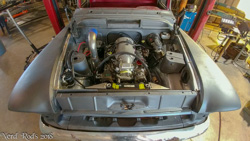
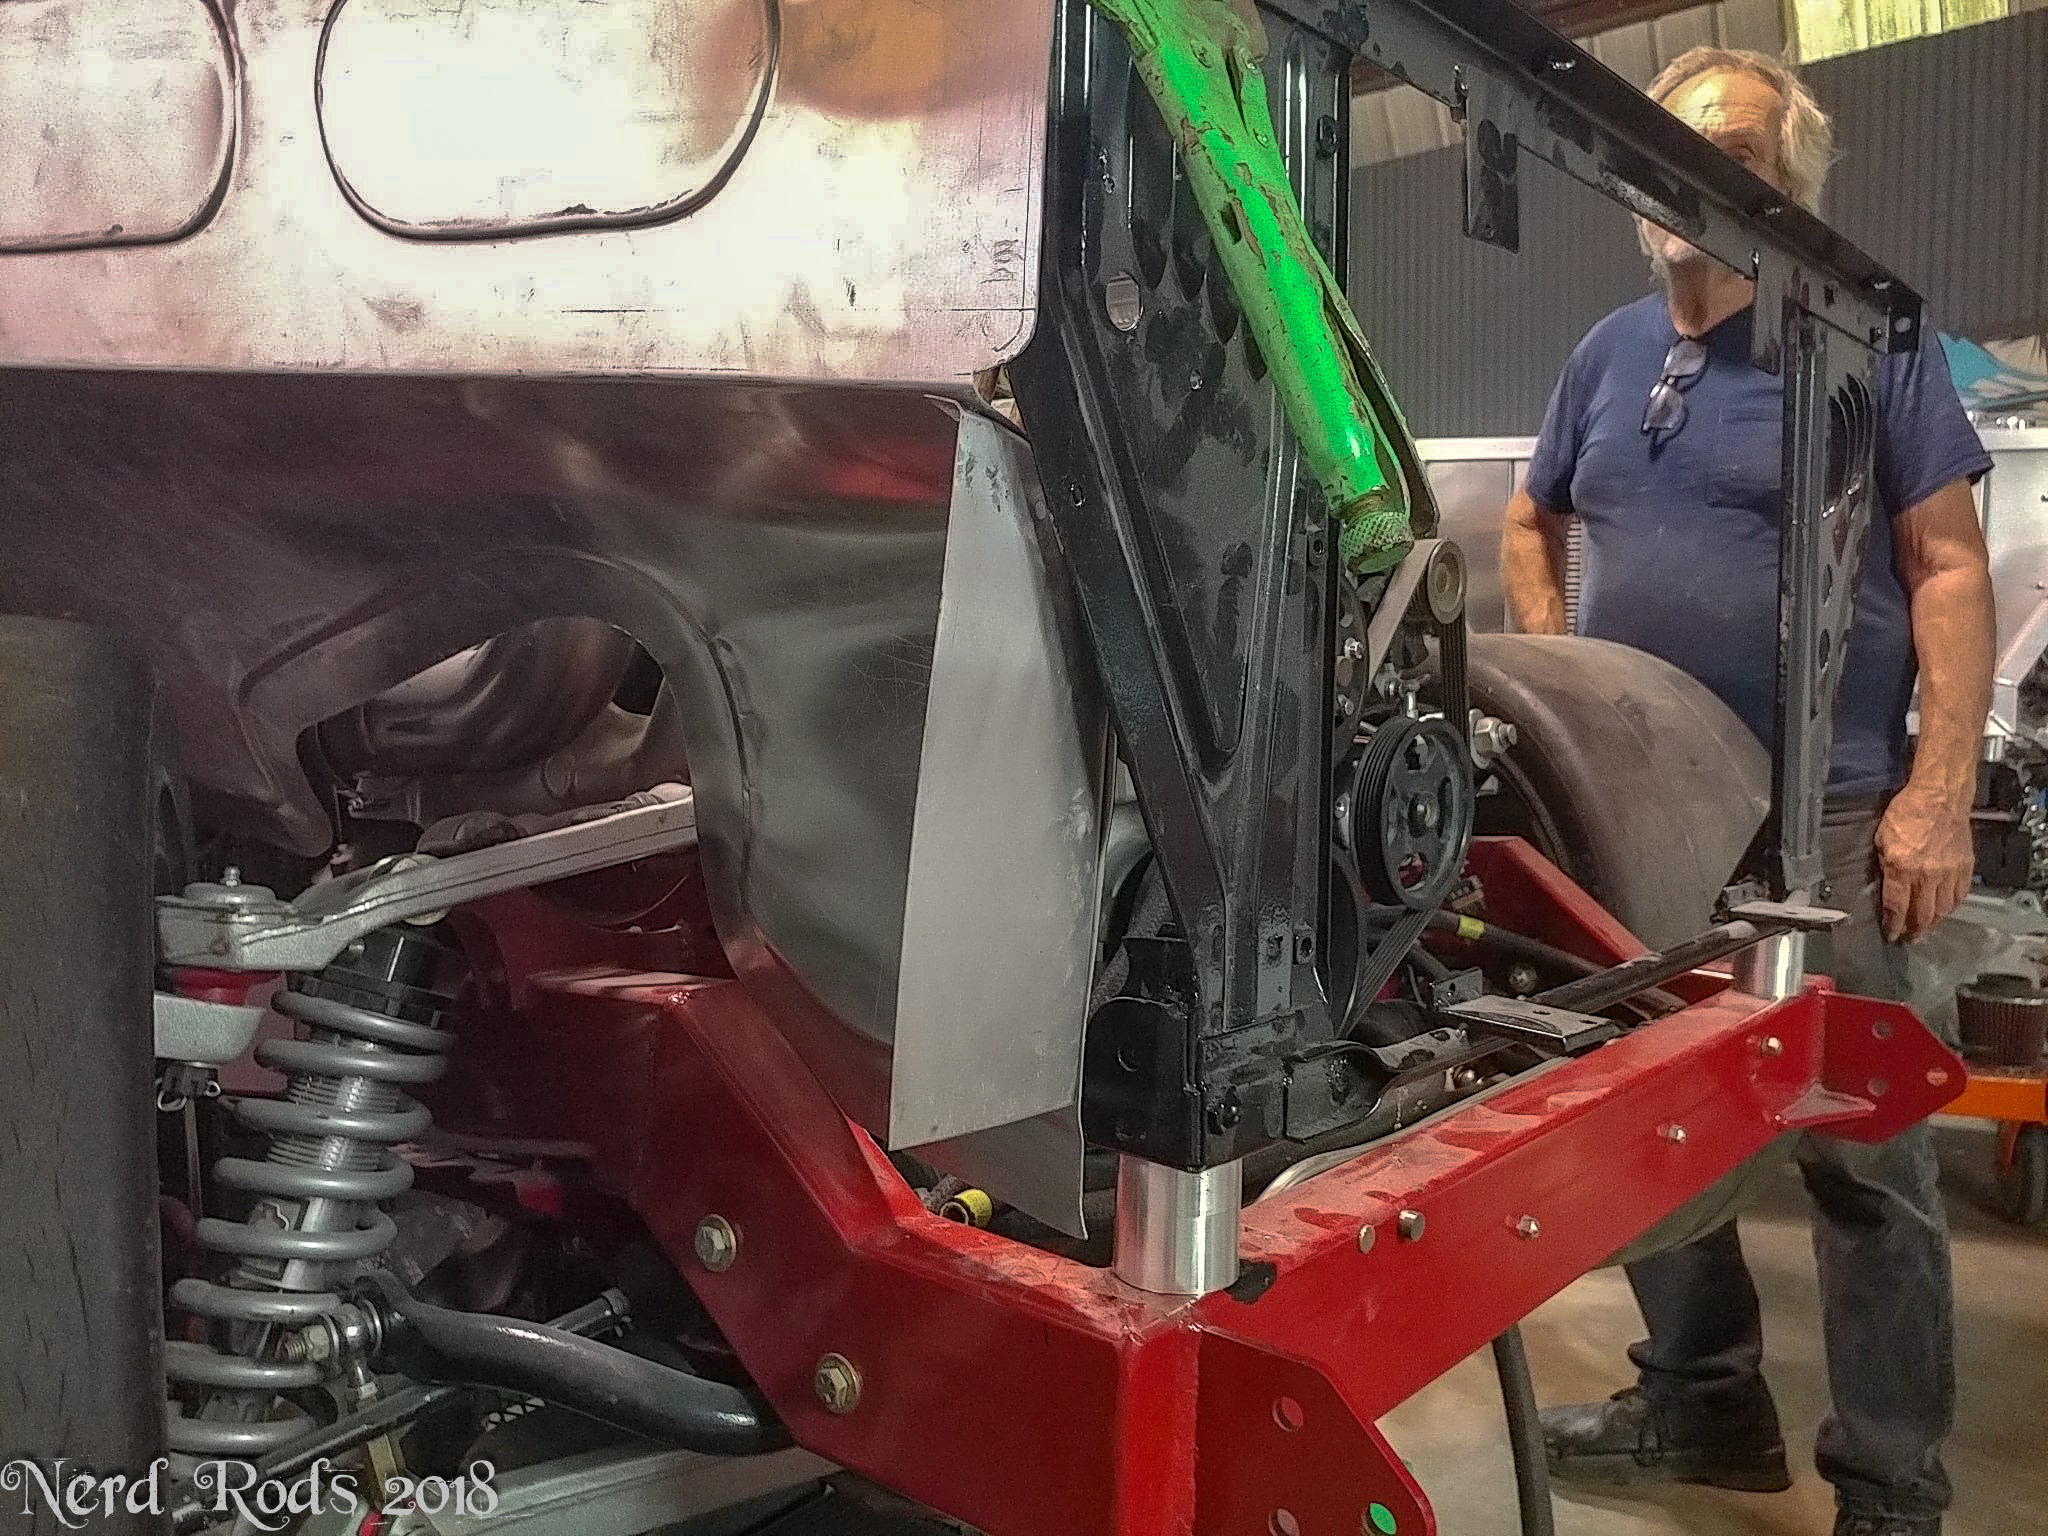
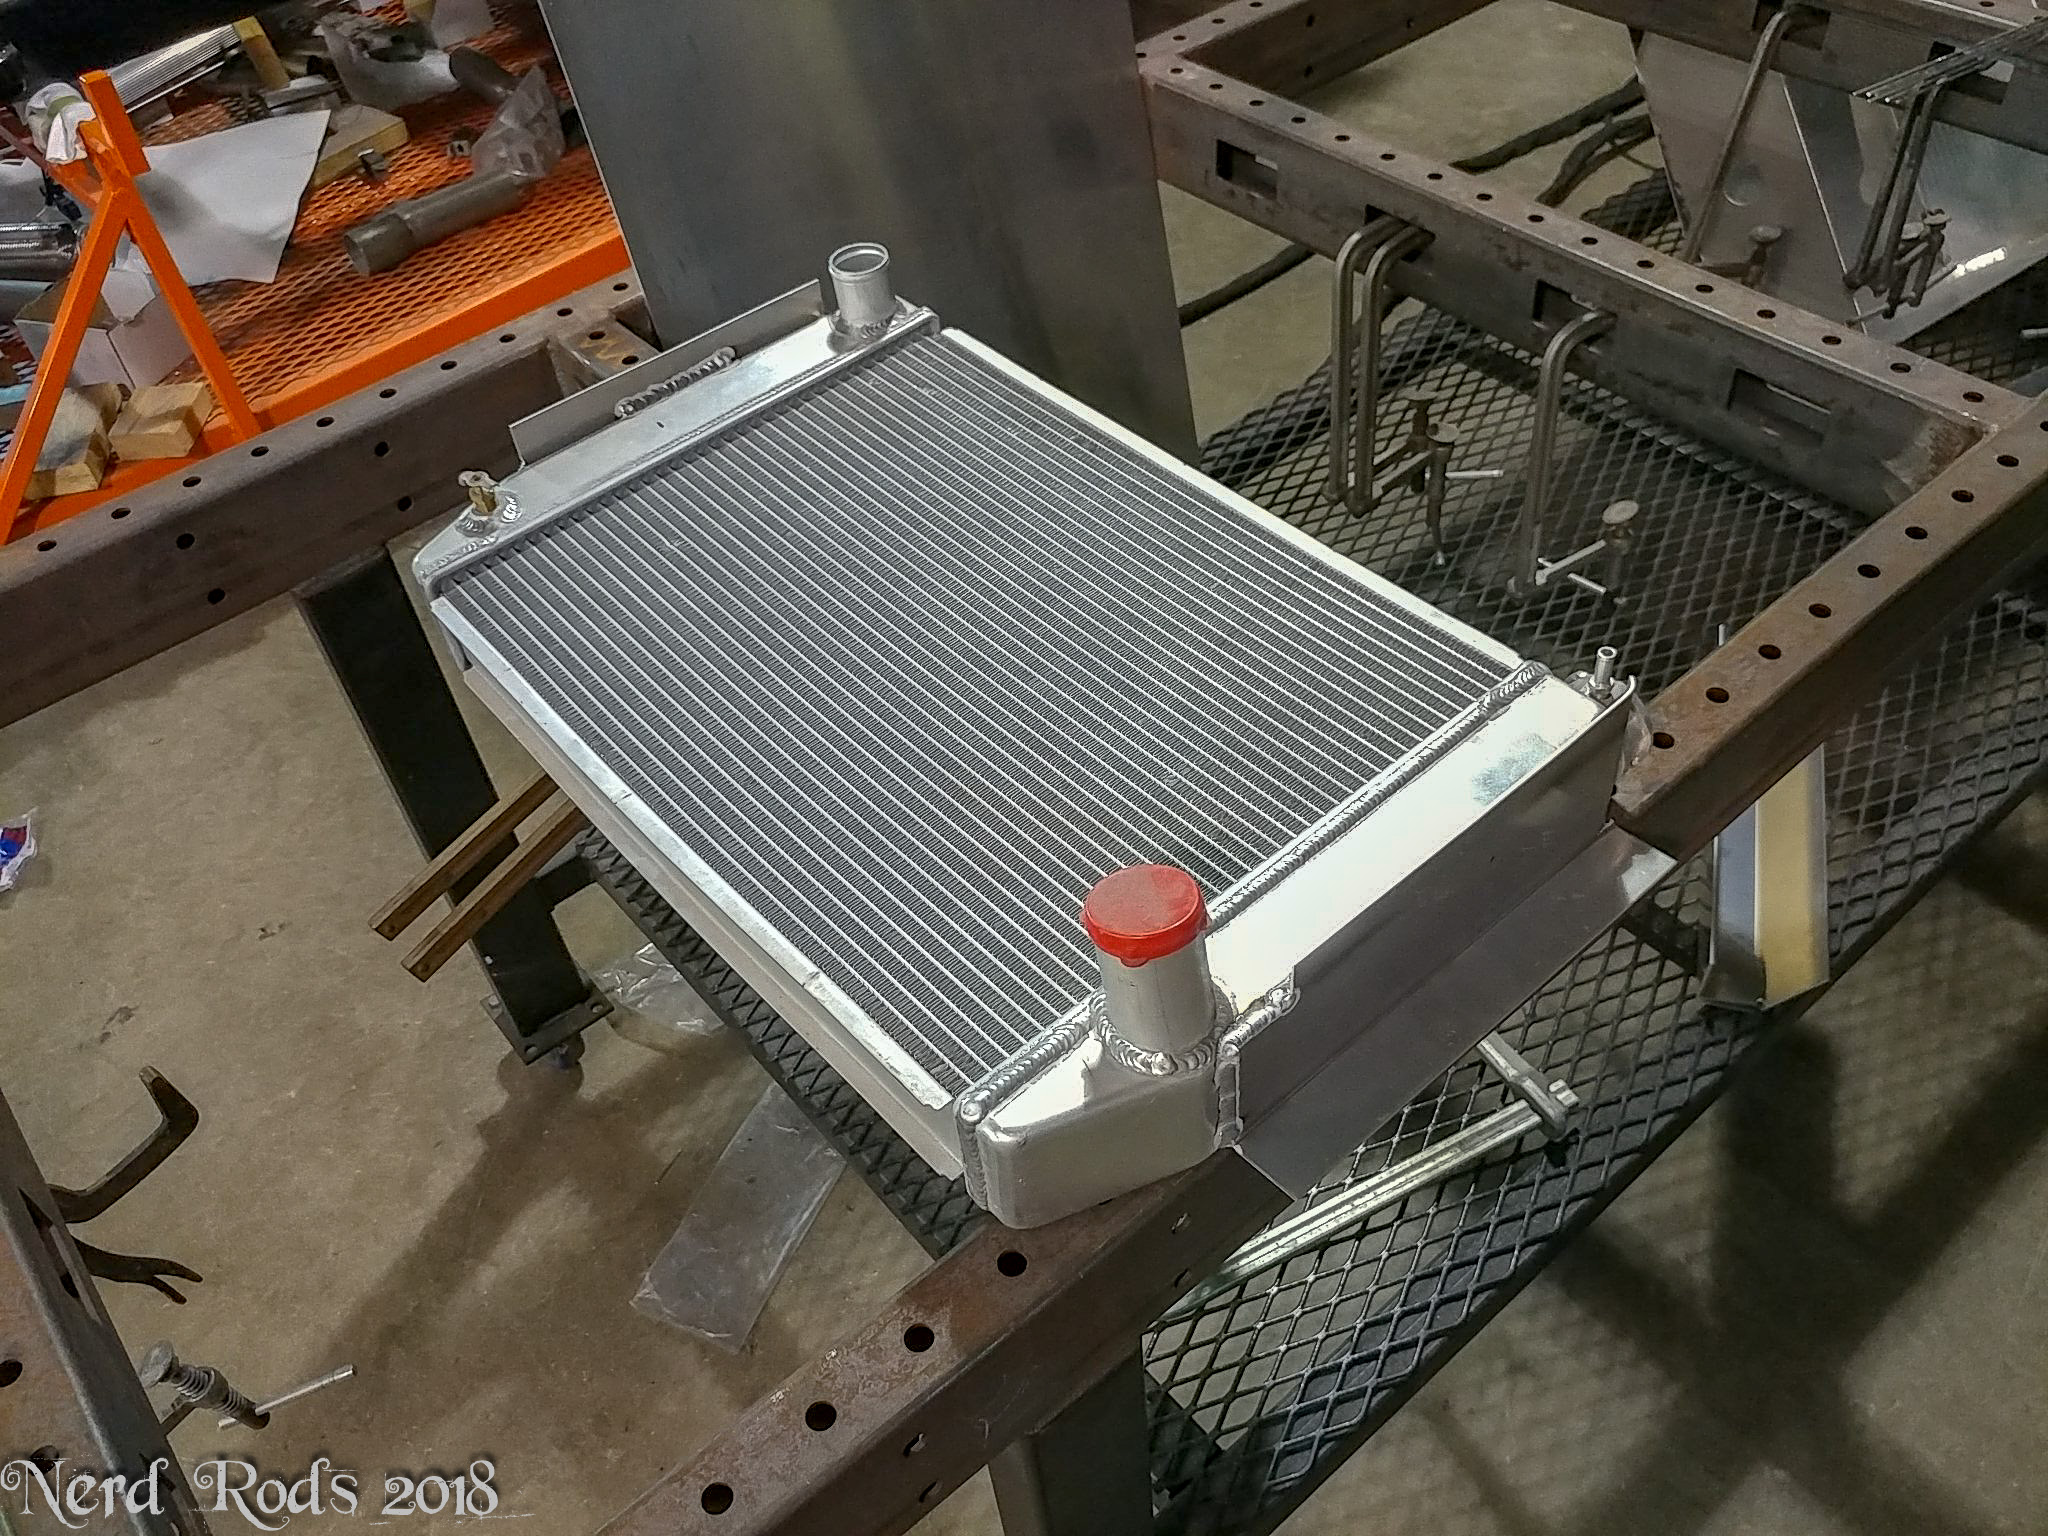
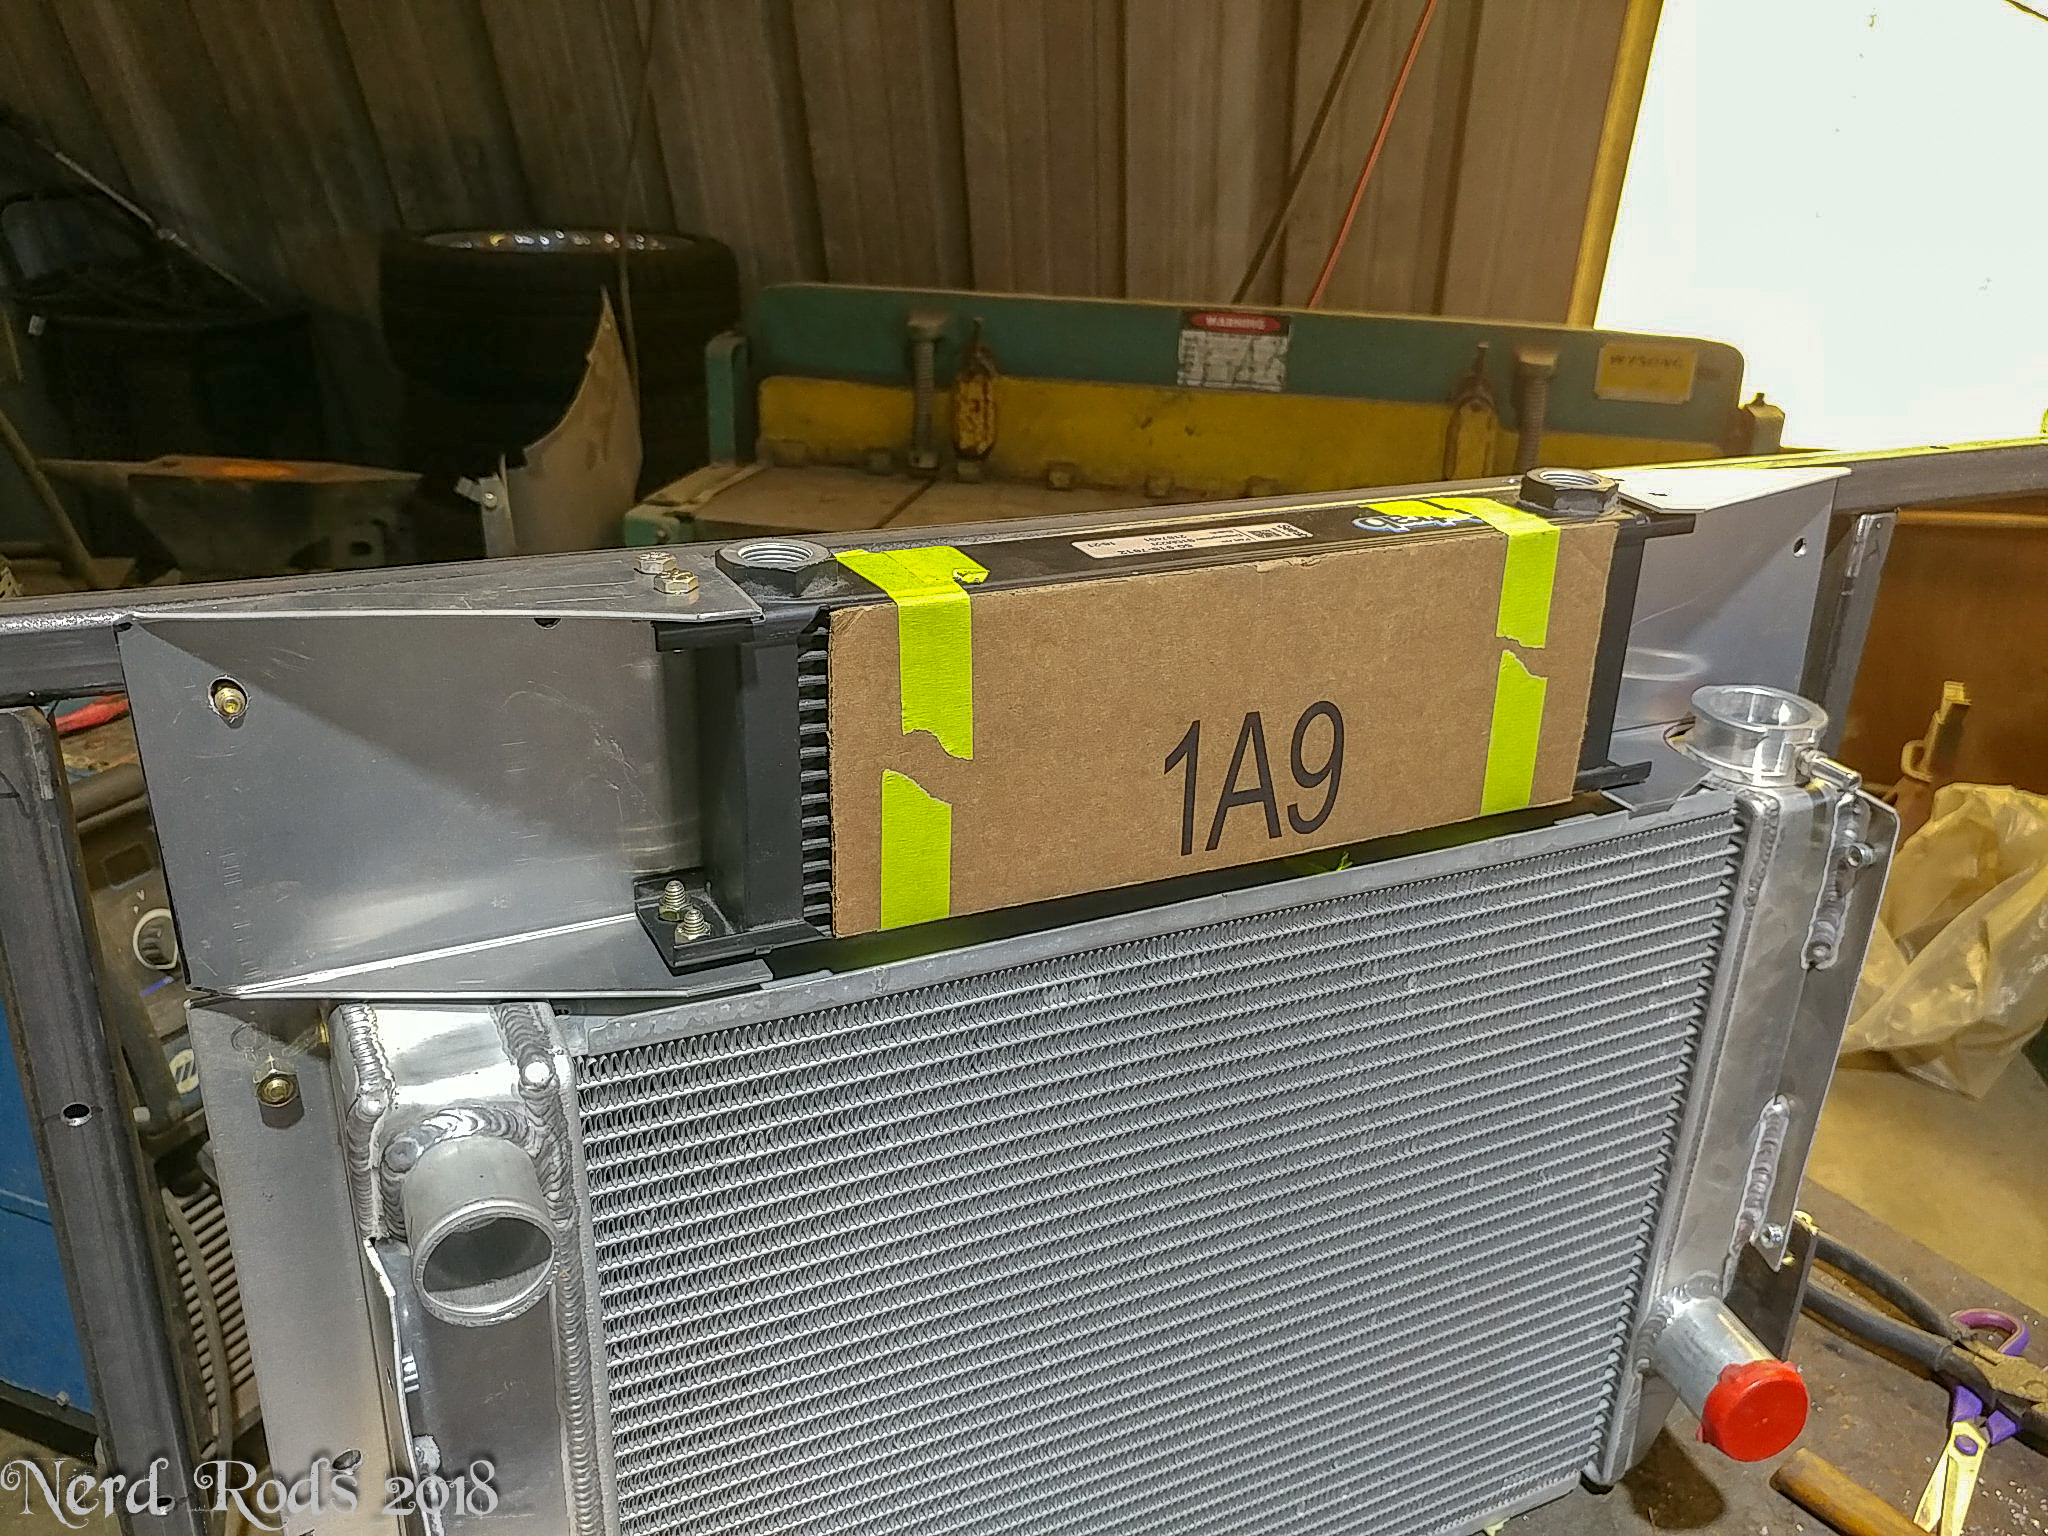
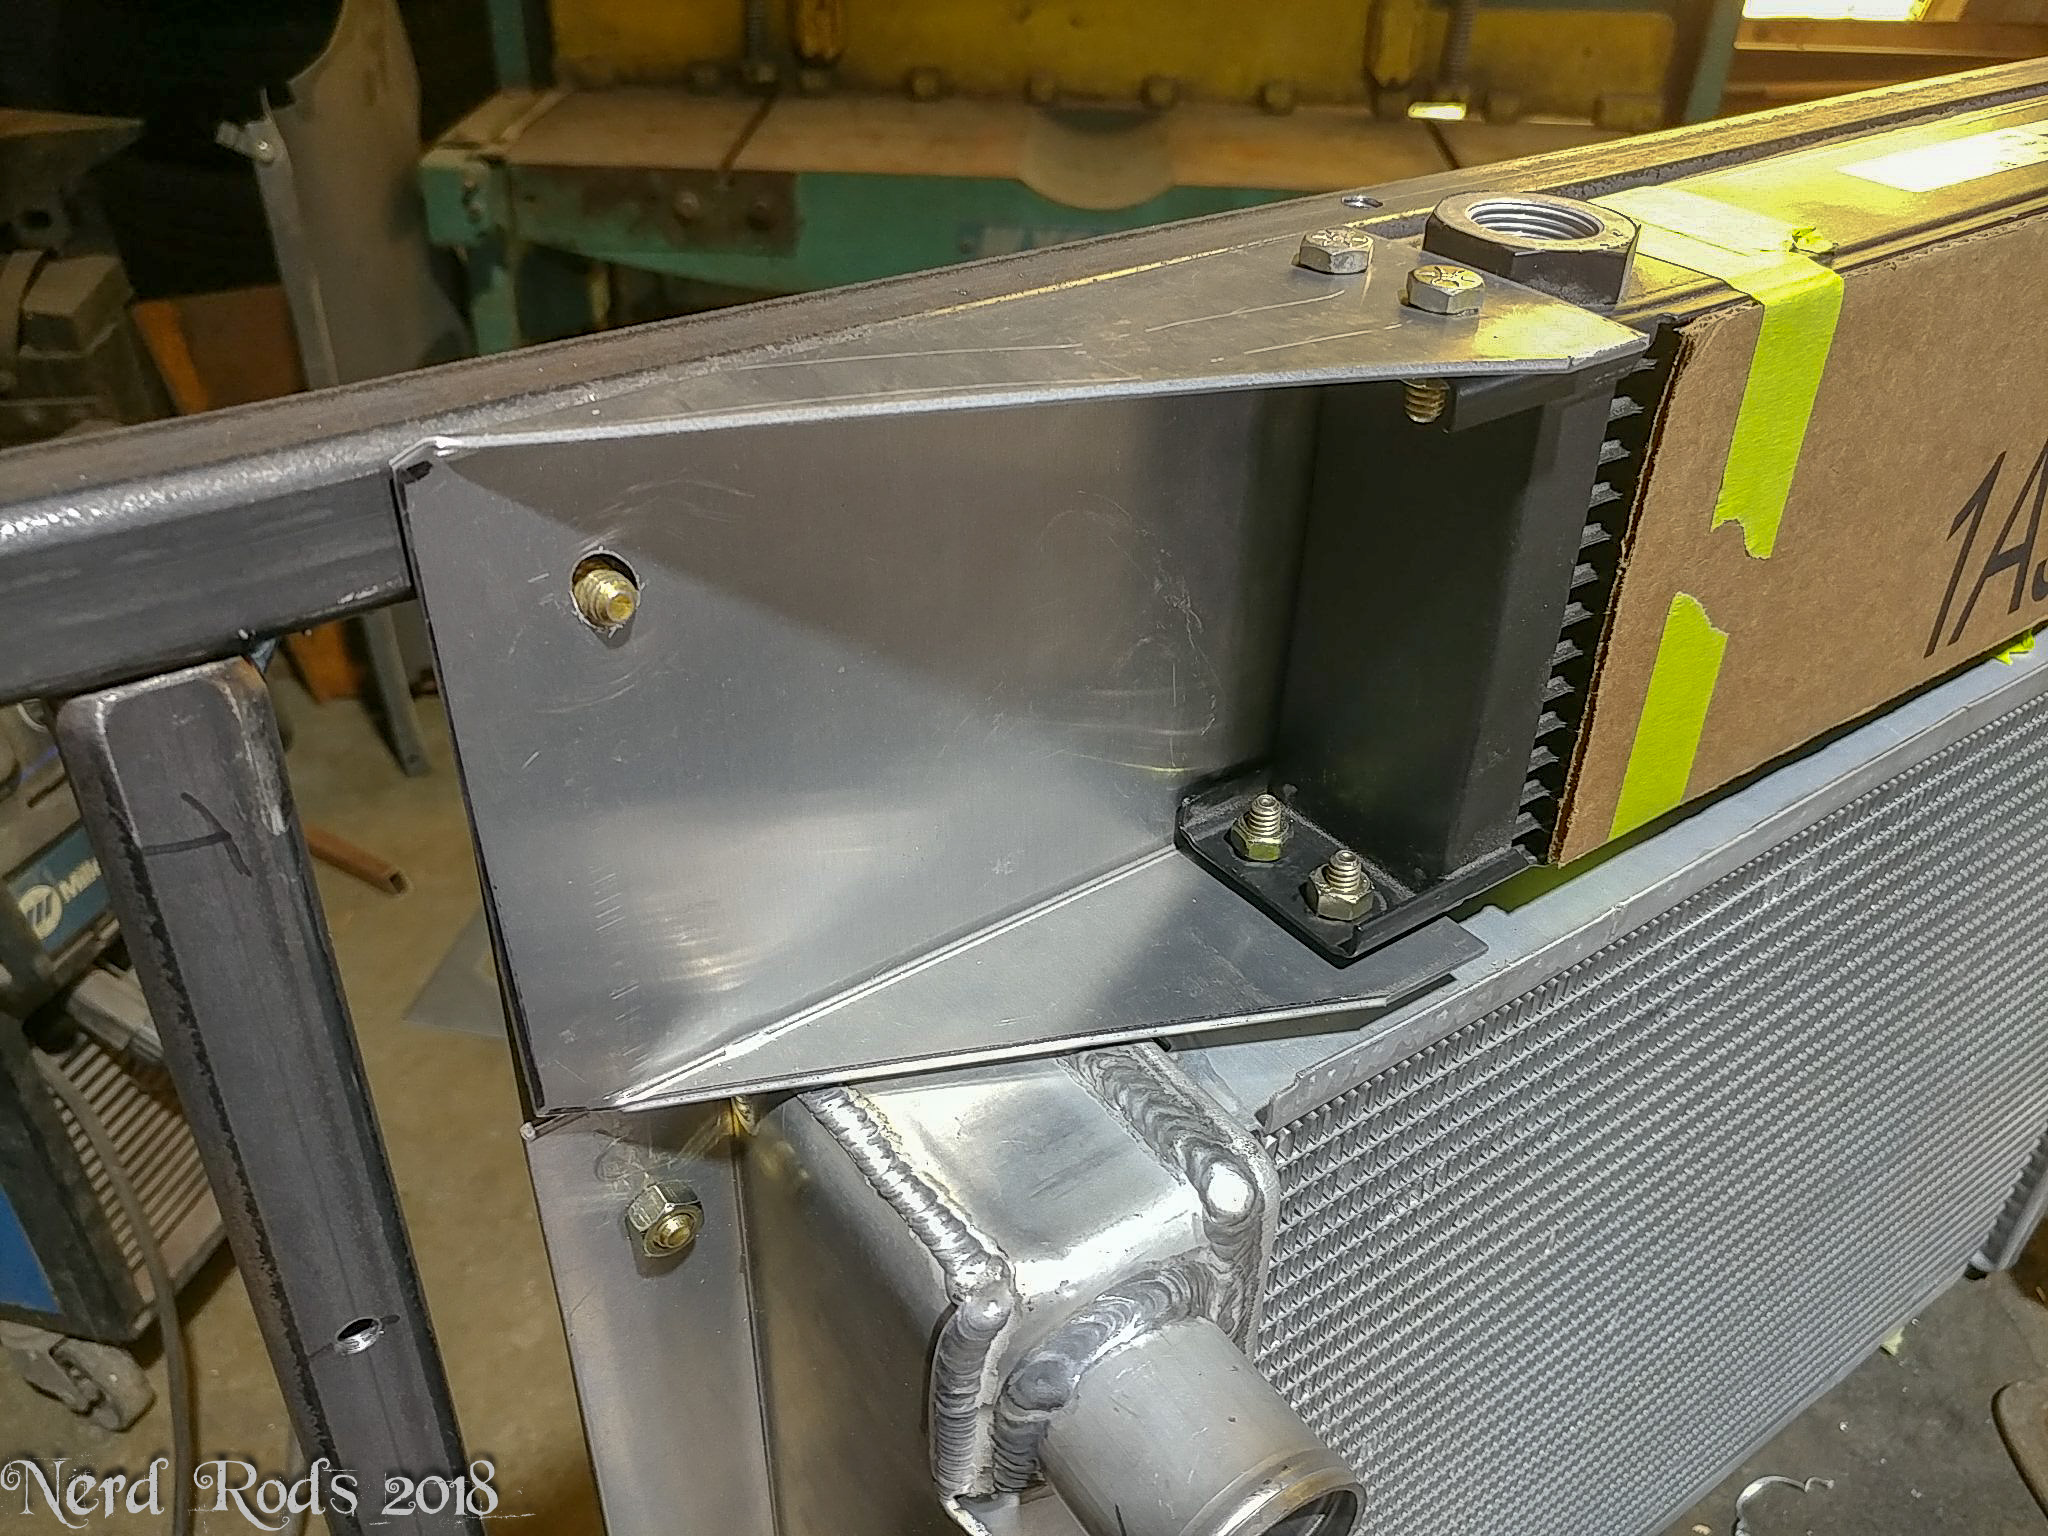
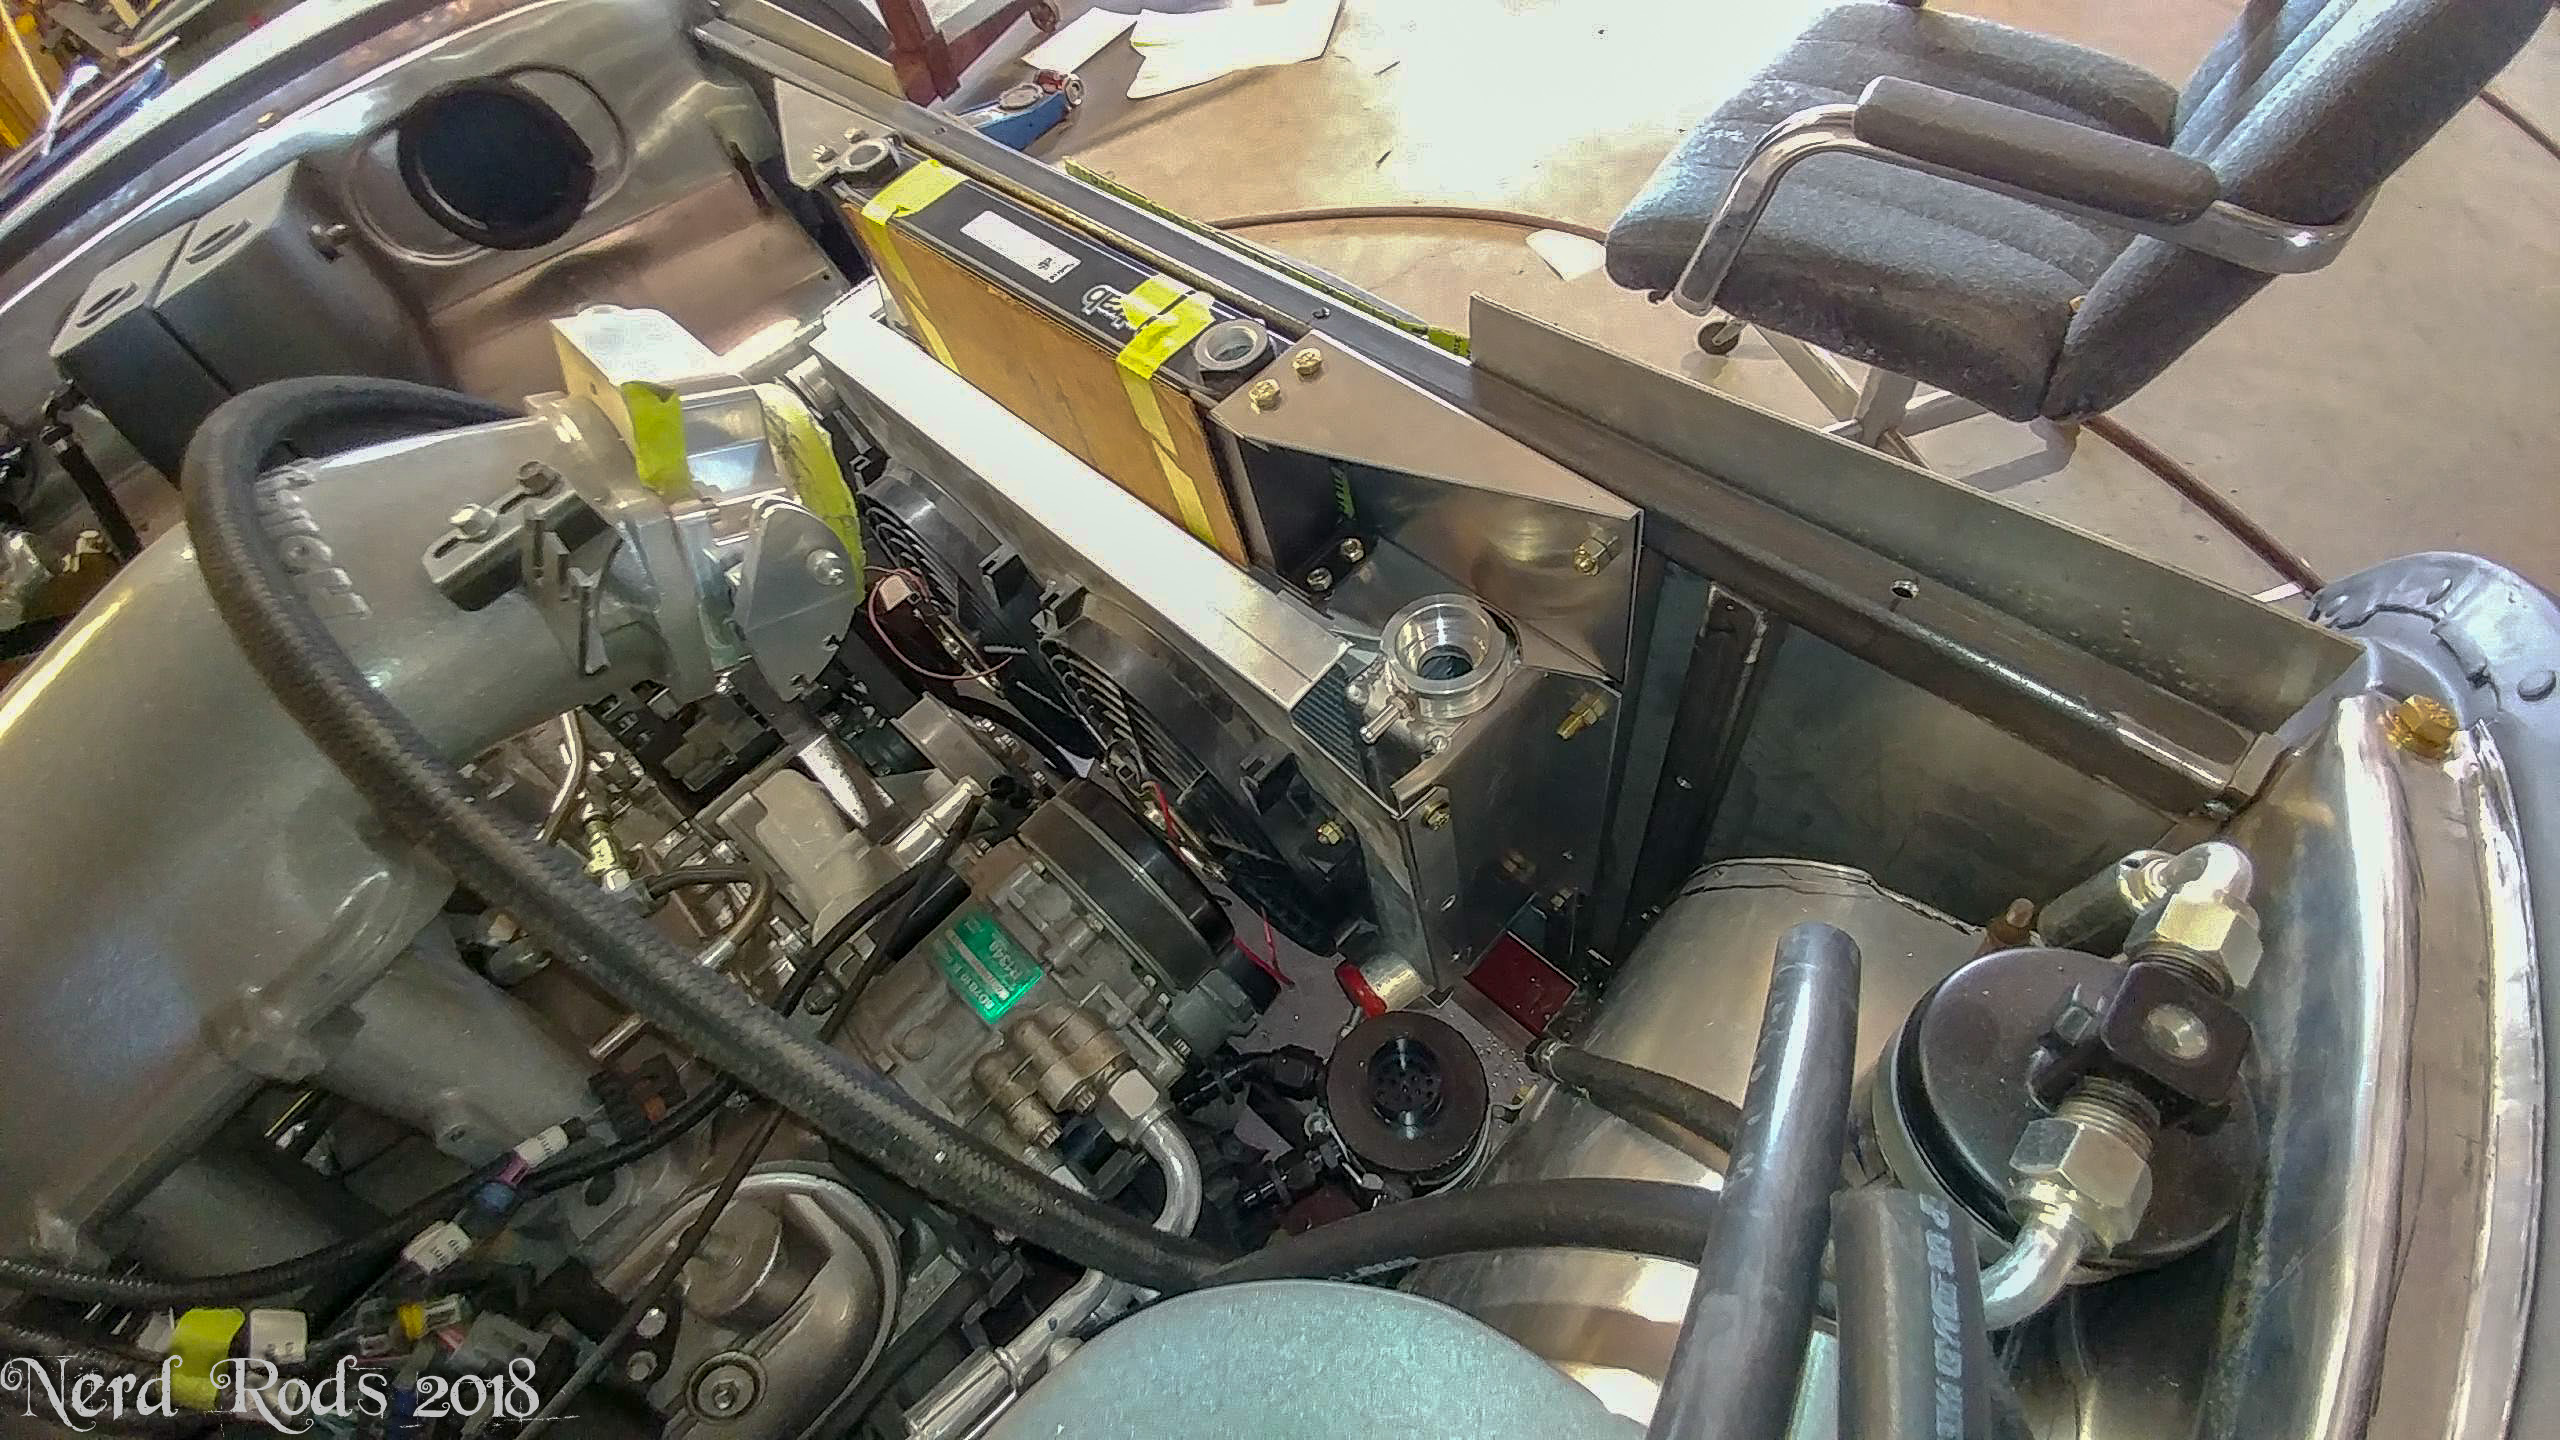
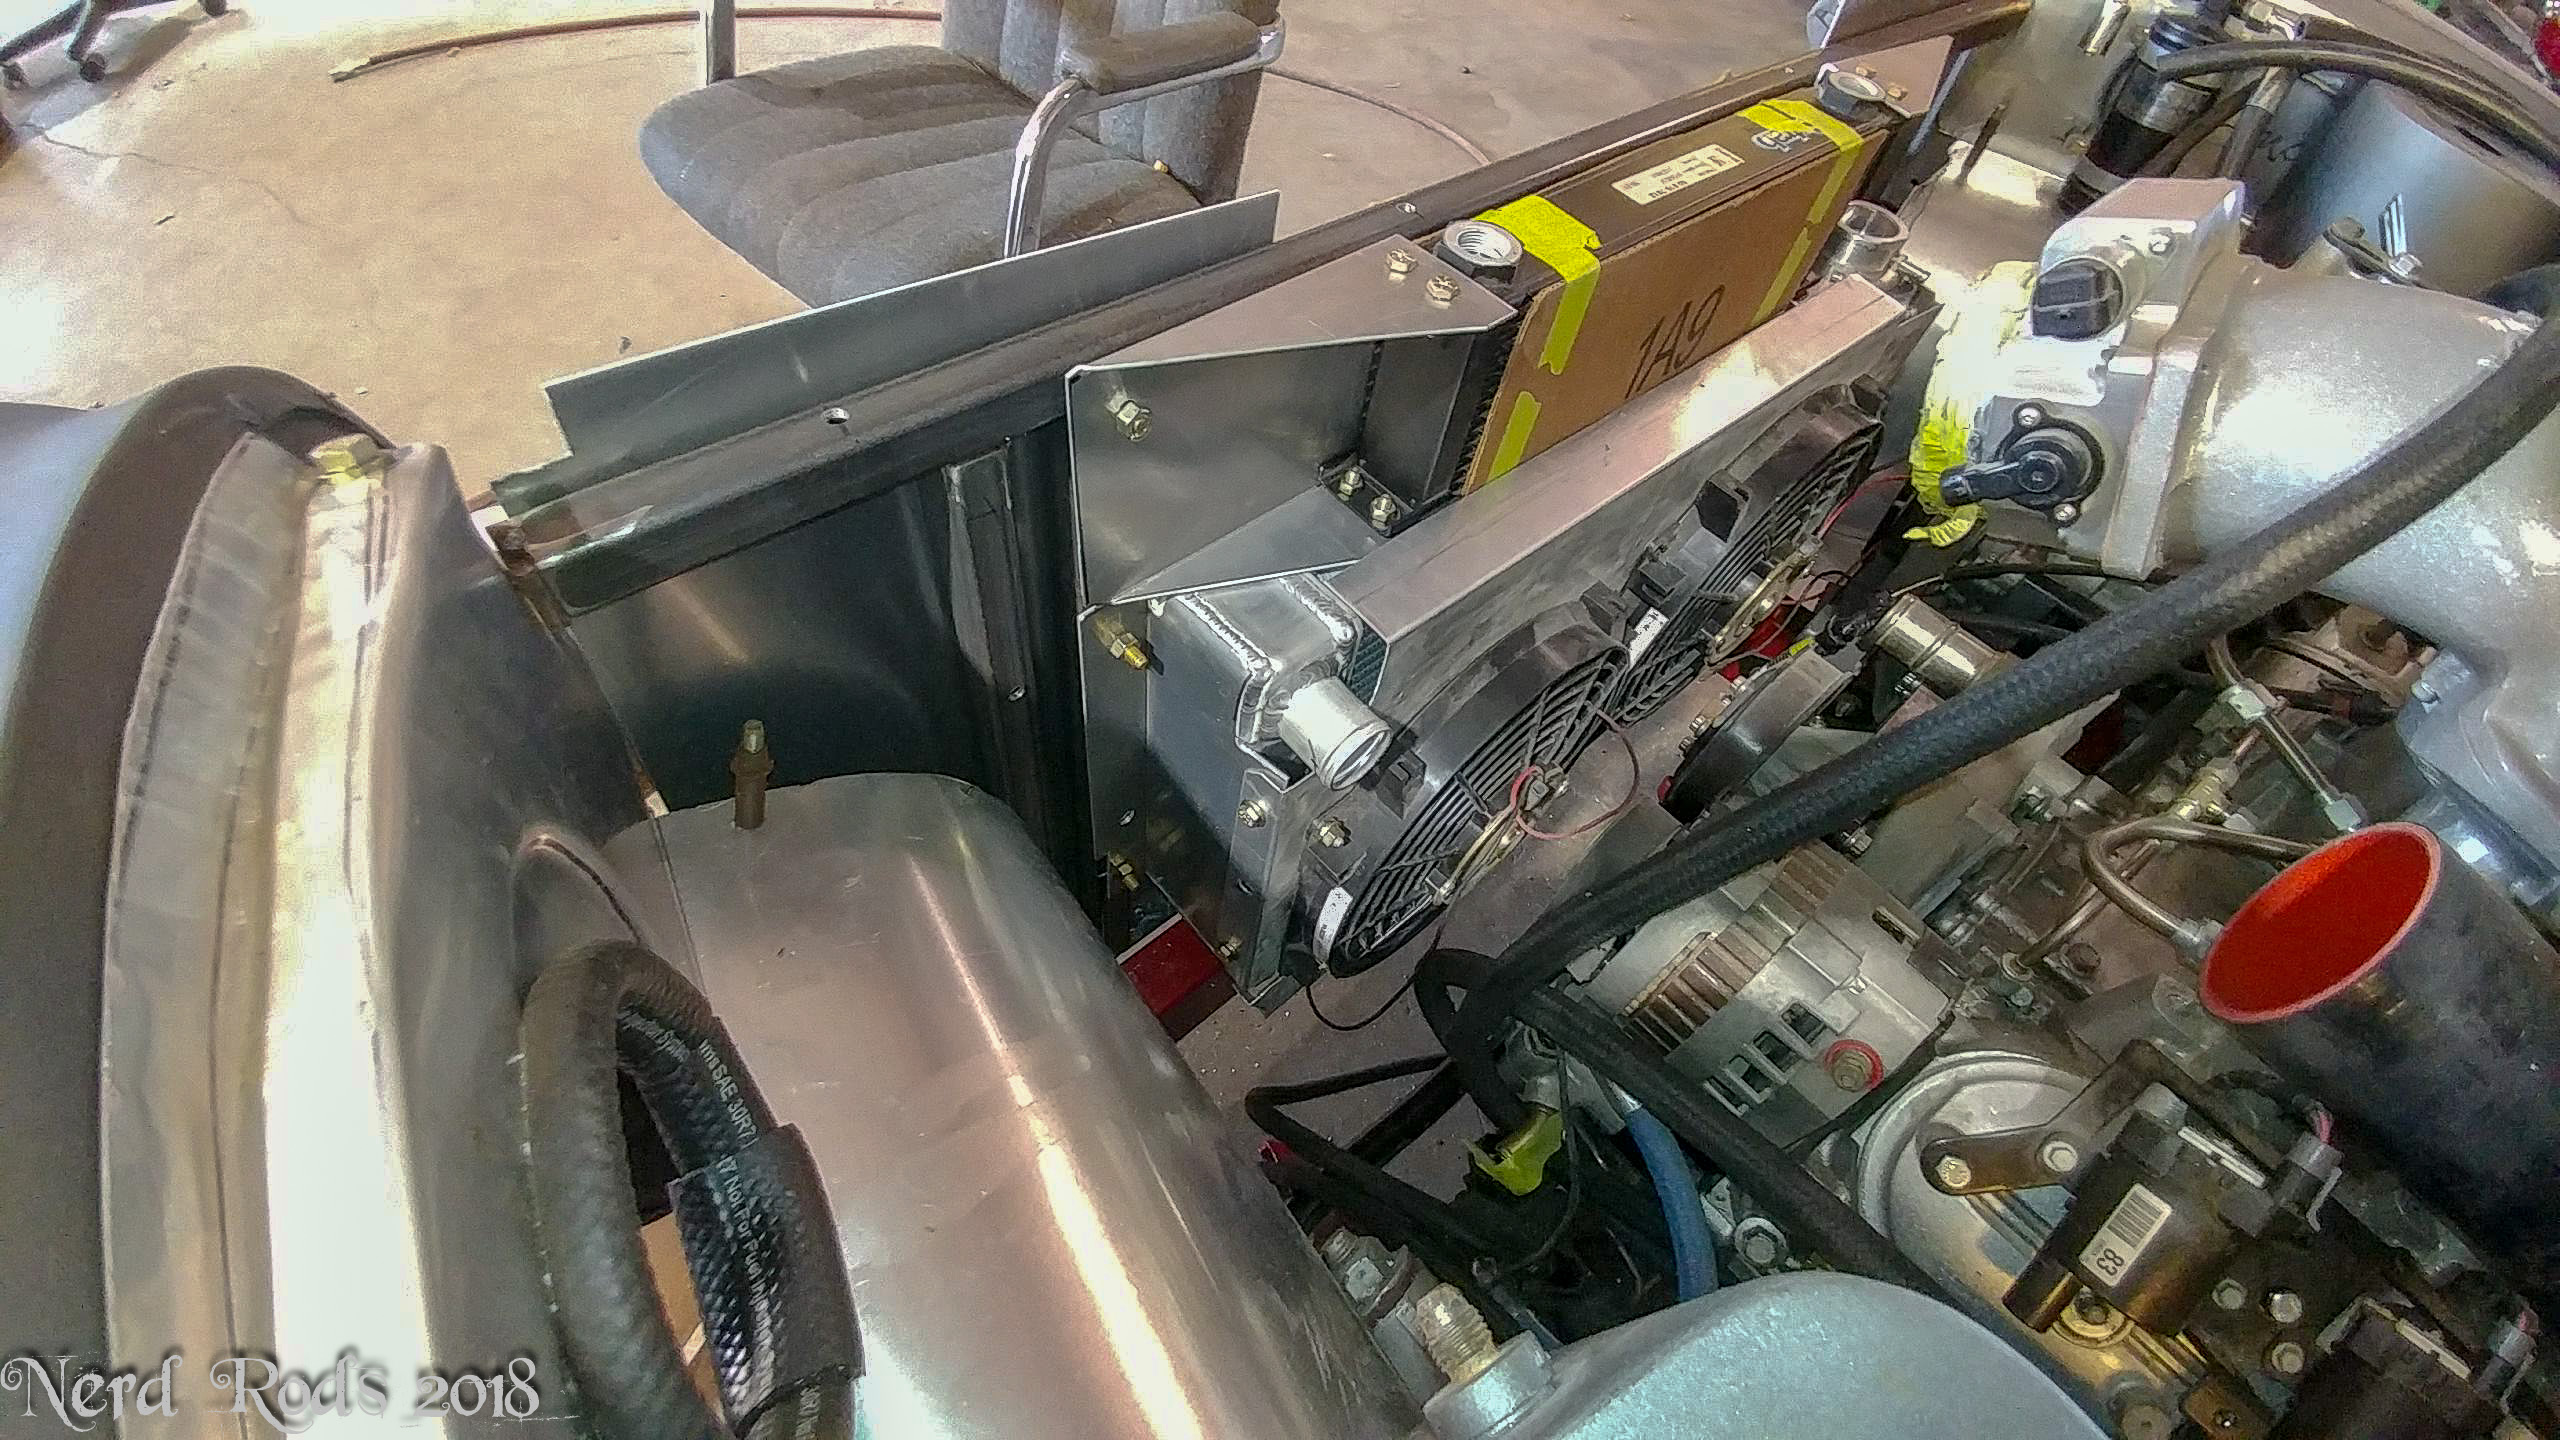
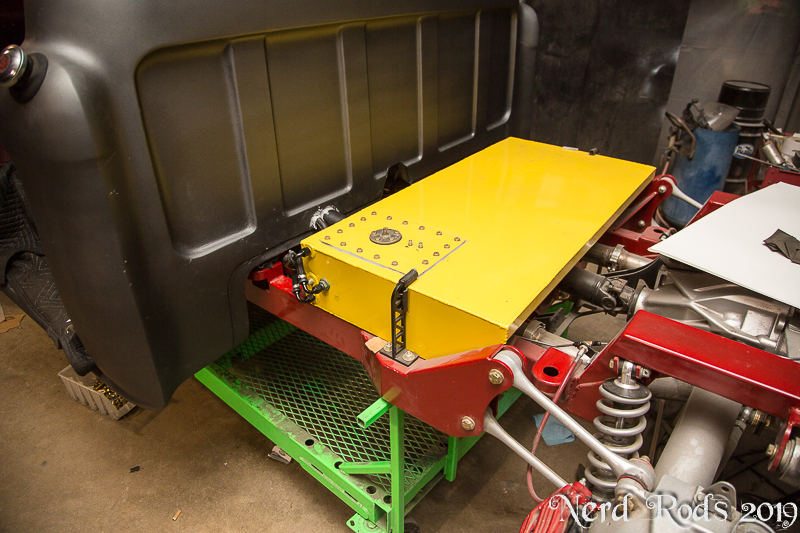
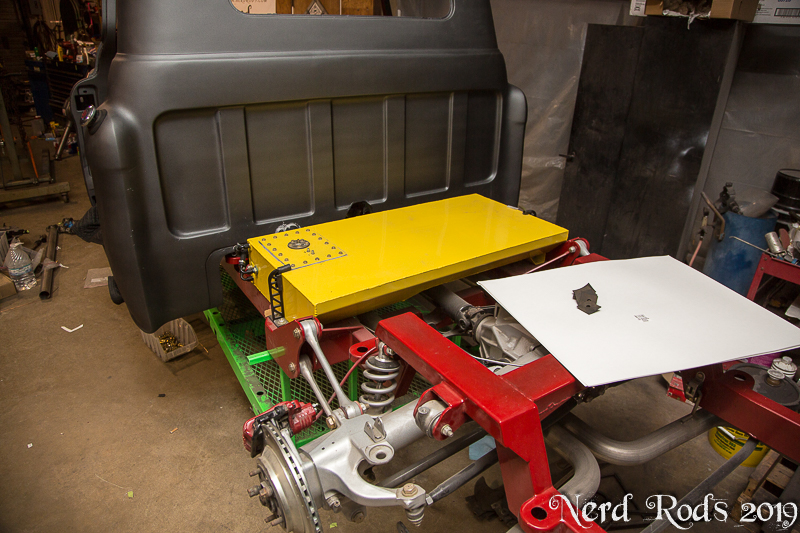
Next we finally decided to just dump the whole front core support system and just start over. It was just easier that way for this project. We have a small ish radiator but we have a very large oil cooler with an oil thermostat as well to prevent it from over cooling but we can bump that down a bit if we need to cool the engine off a bit more. The new ZR1 has a smaller radiator than this so we're not too worried about over heating. The main goal was to block off as much area and force air through the radiators. We might do some brake cooling as well with all the extra real estate under there.
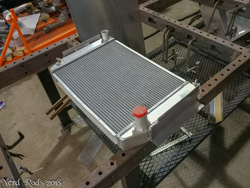

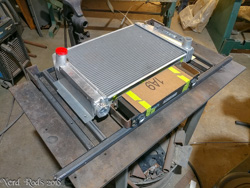


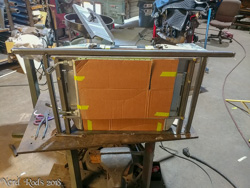


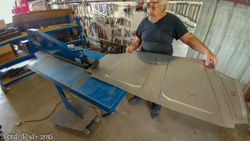
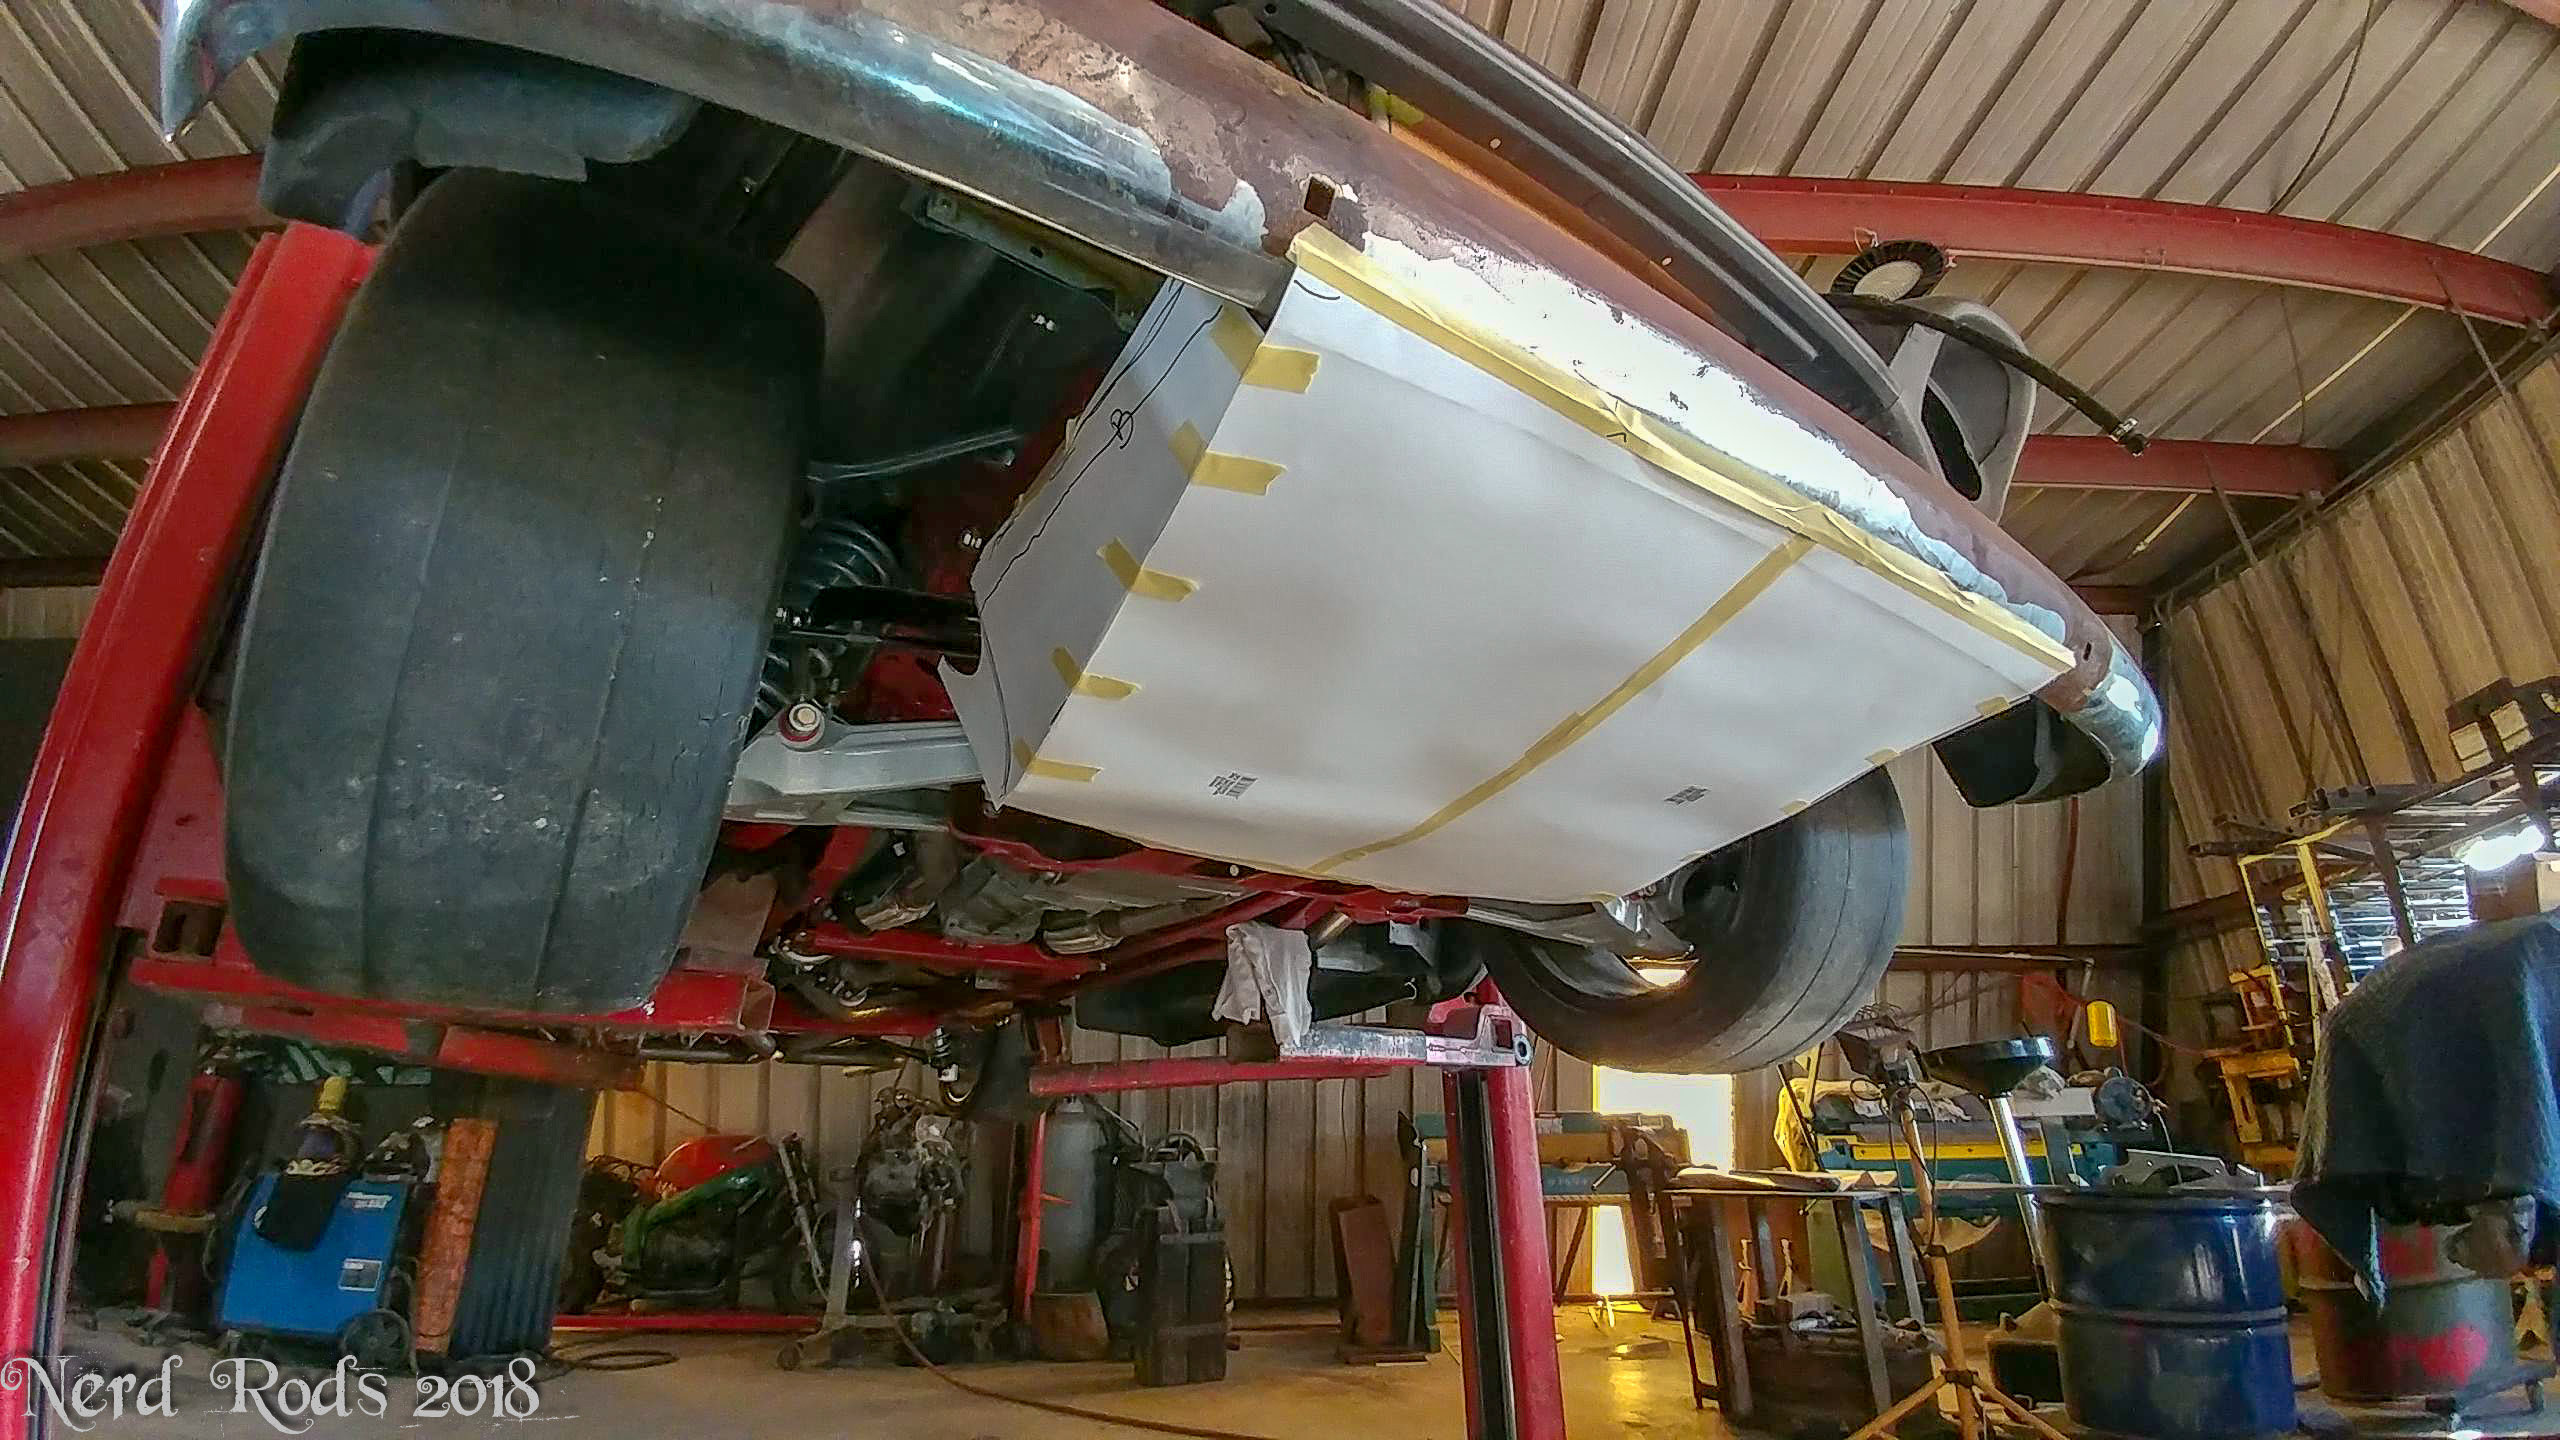
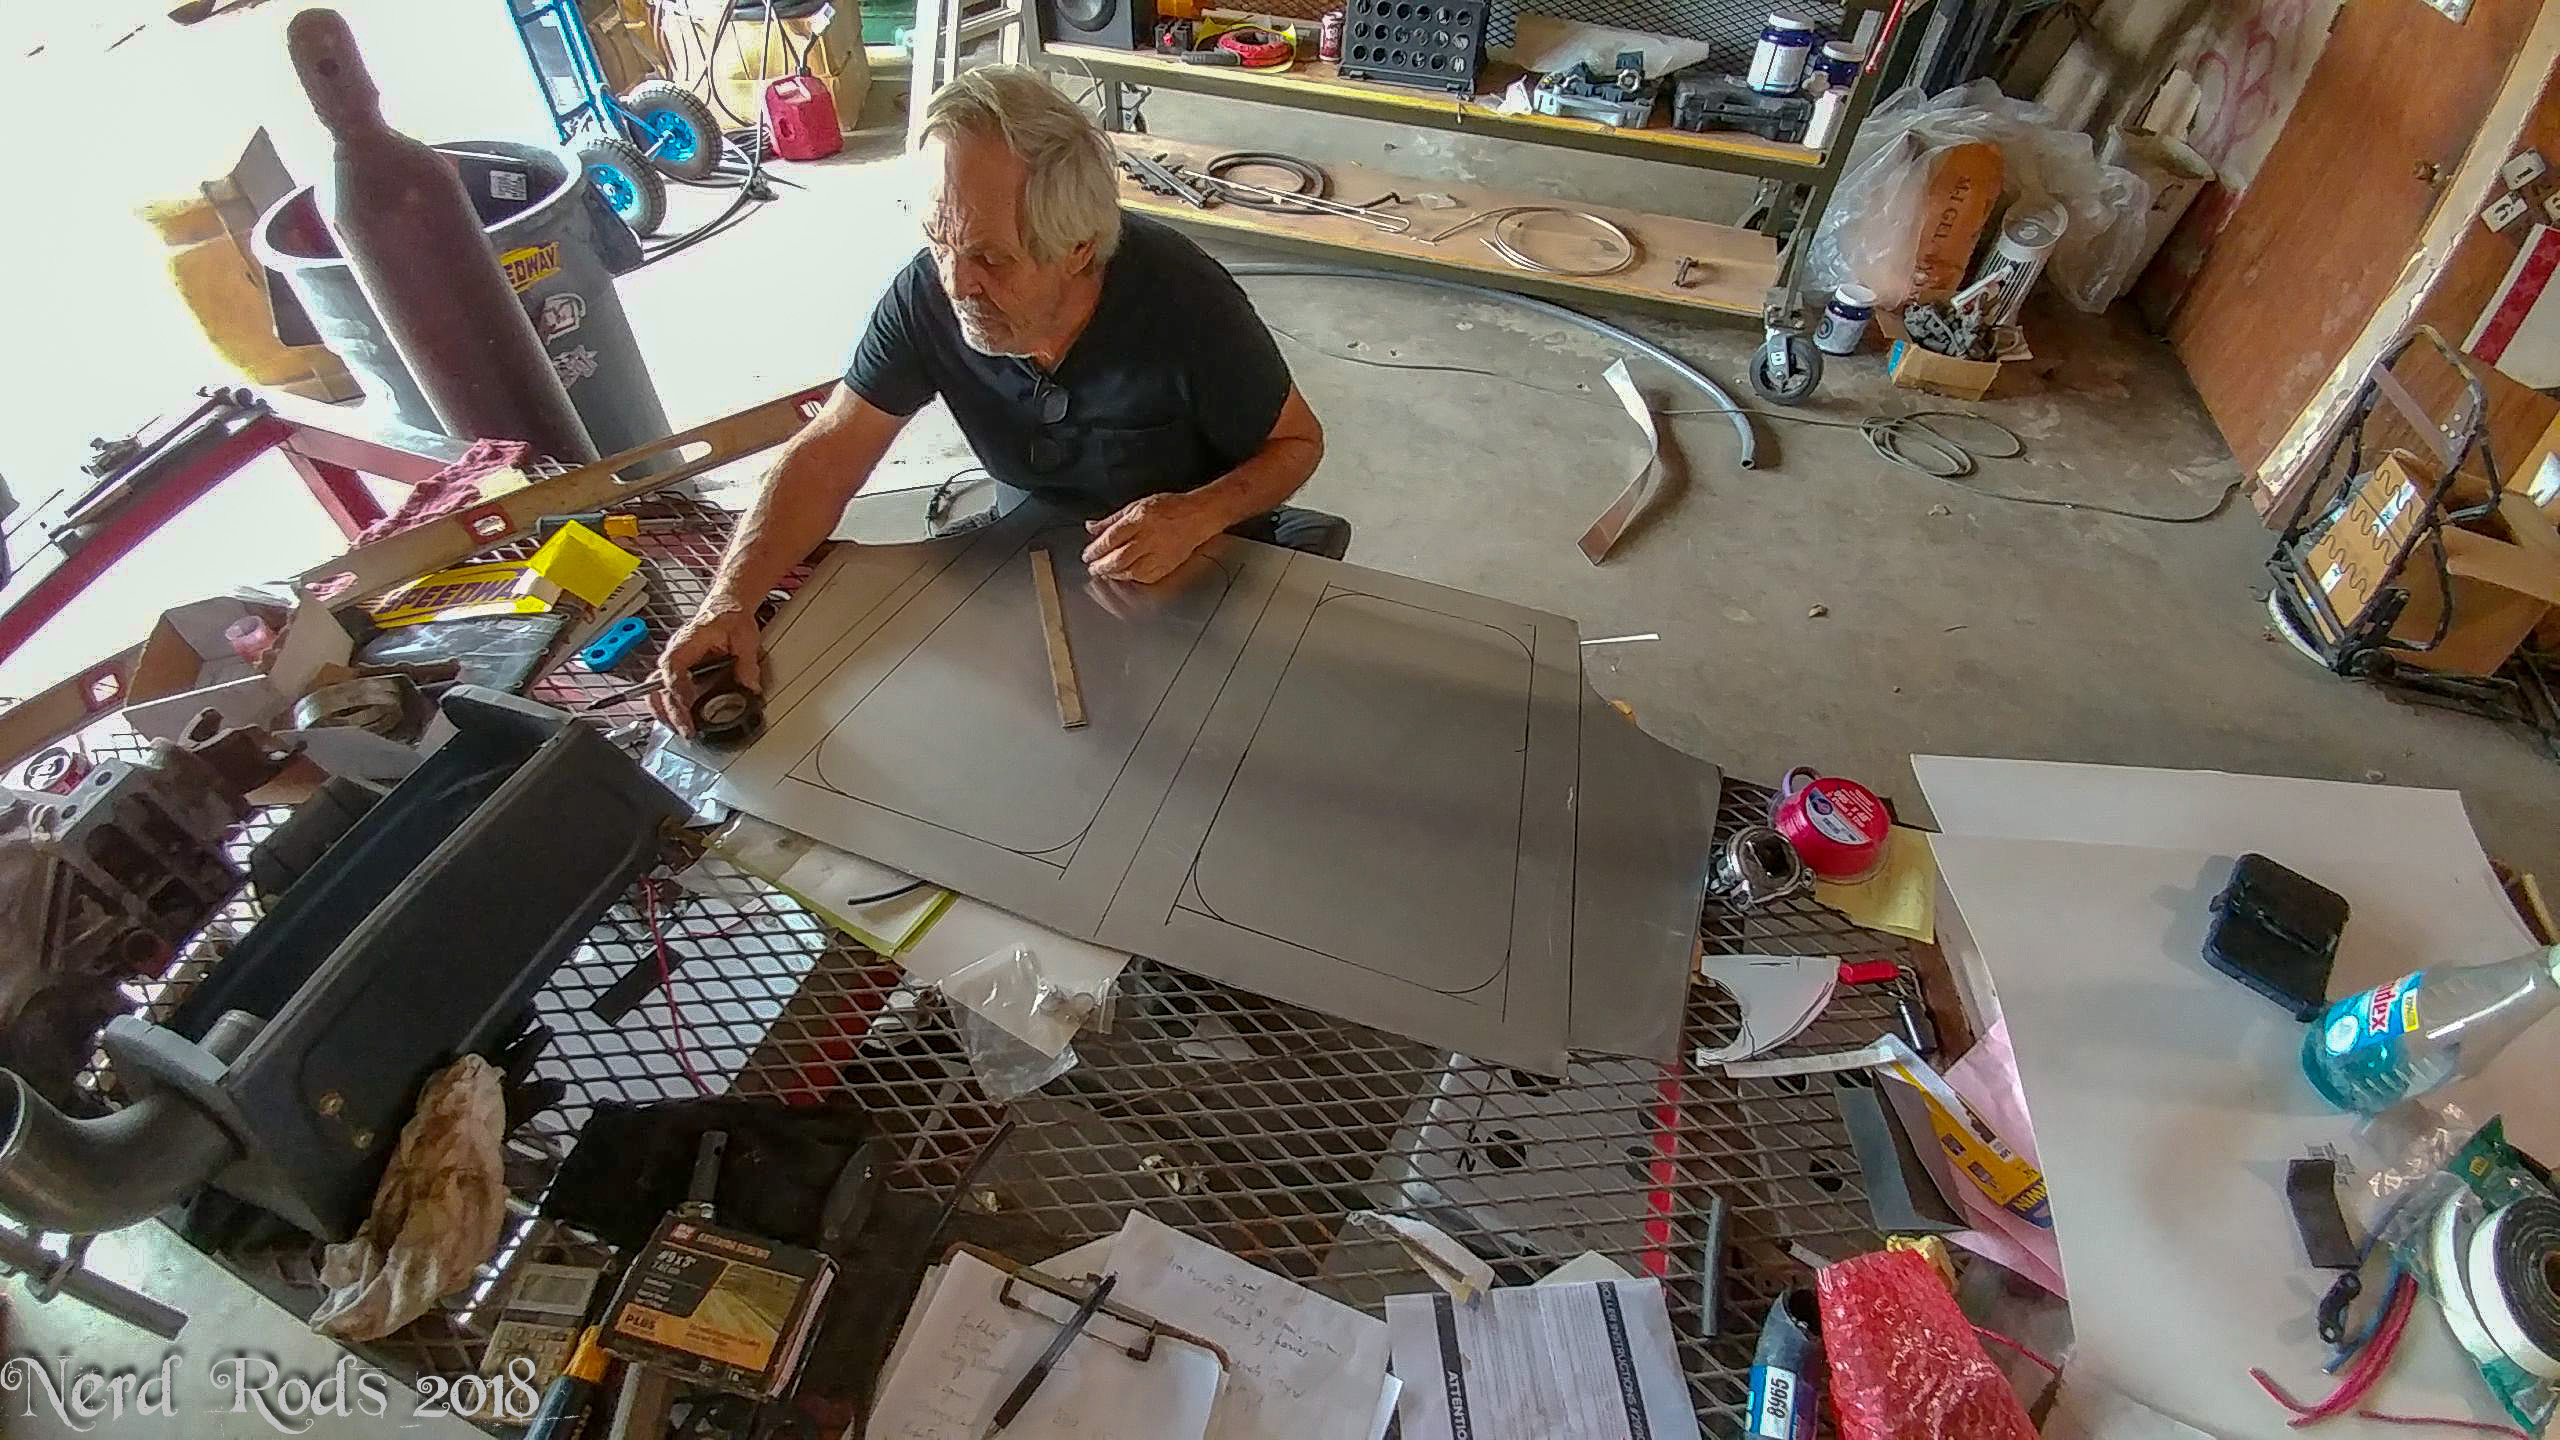
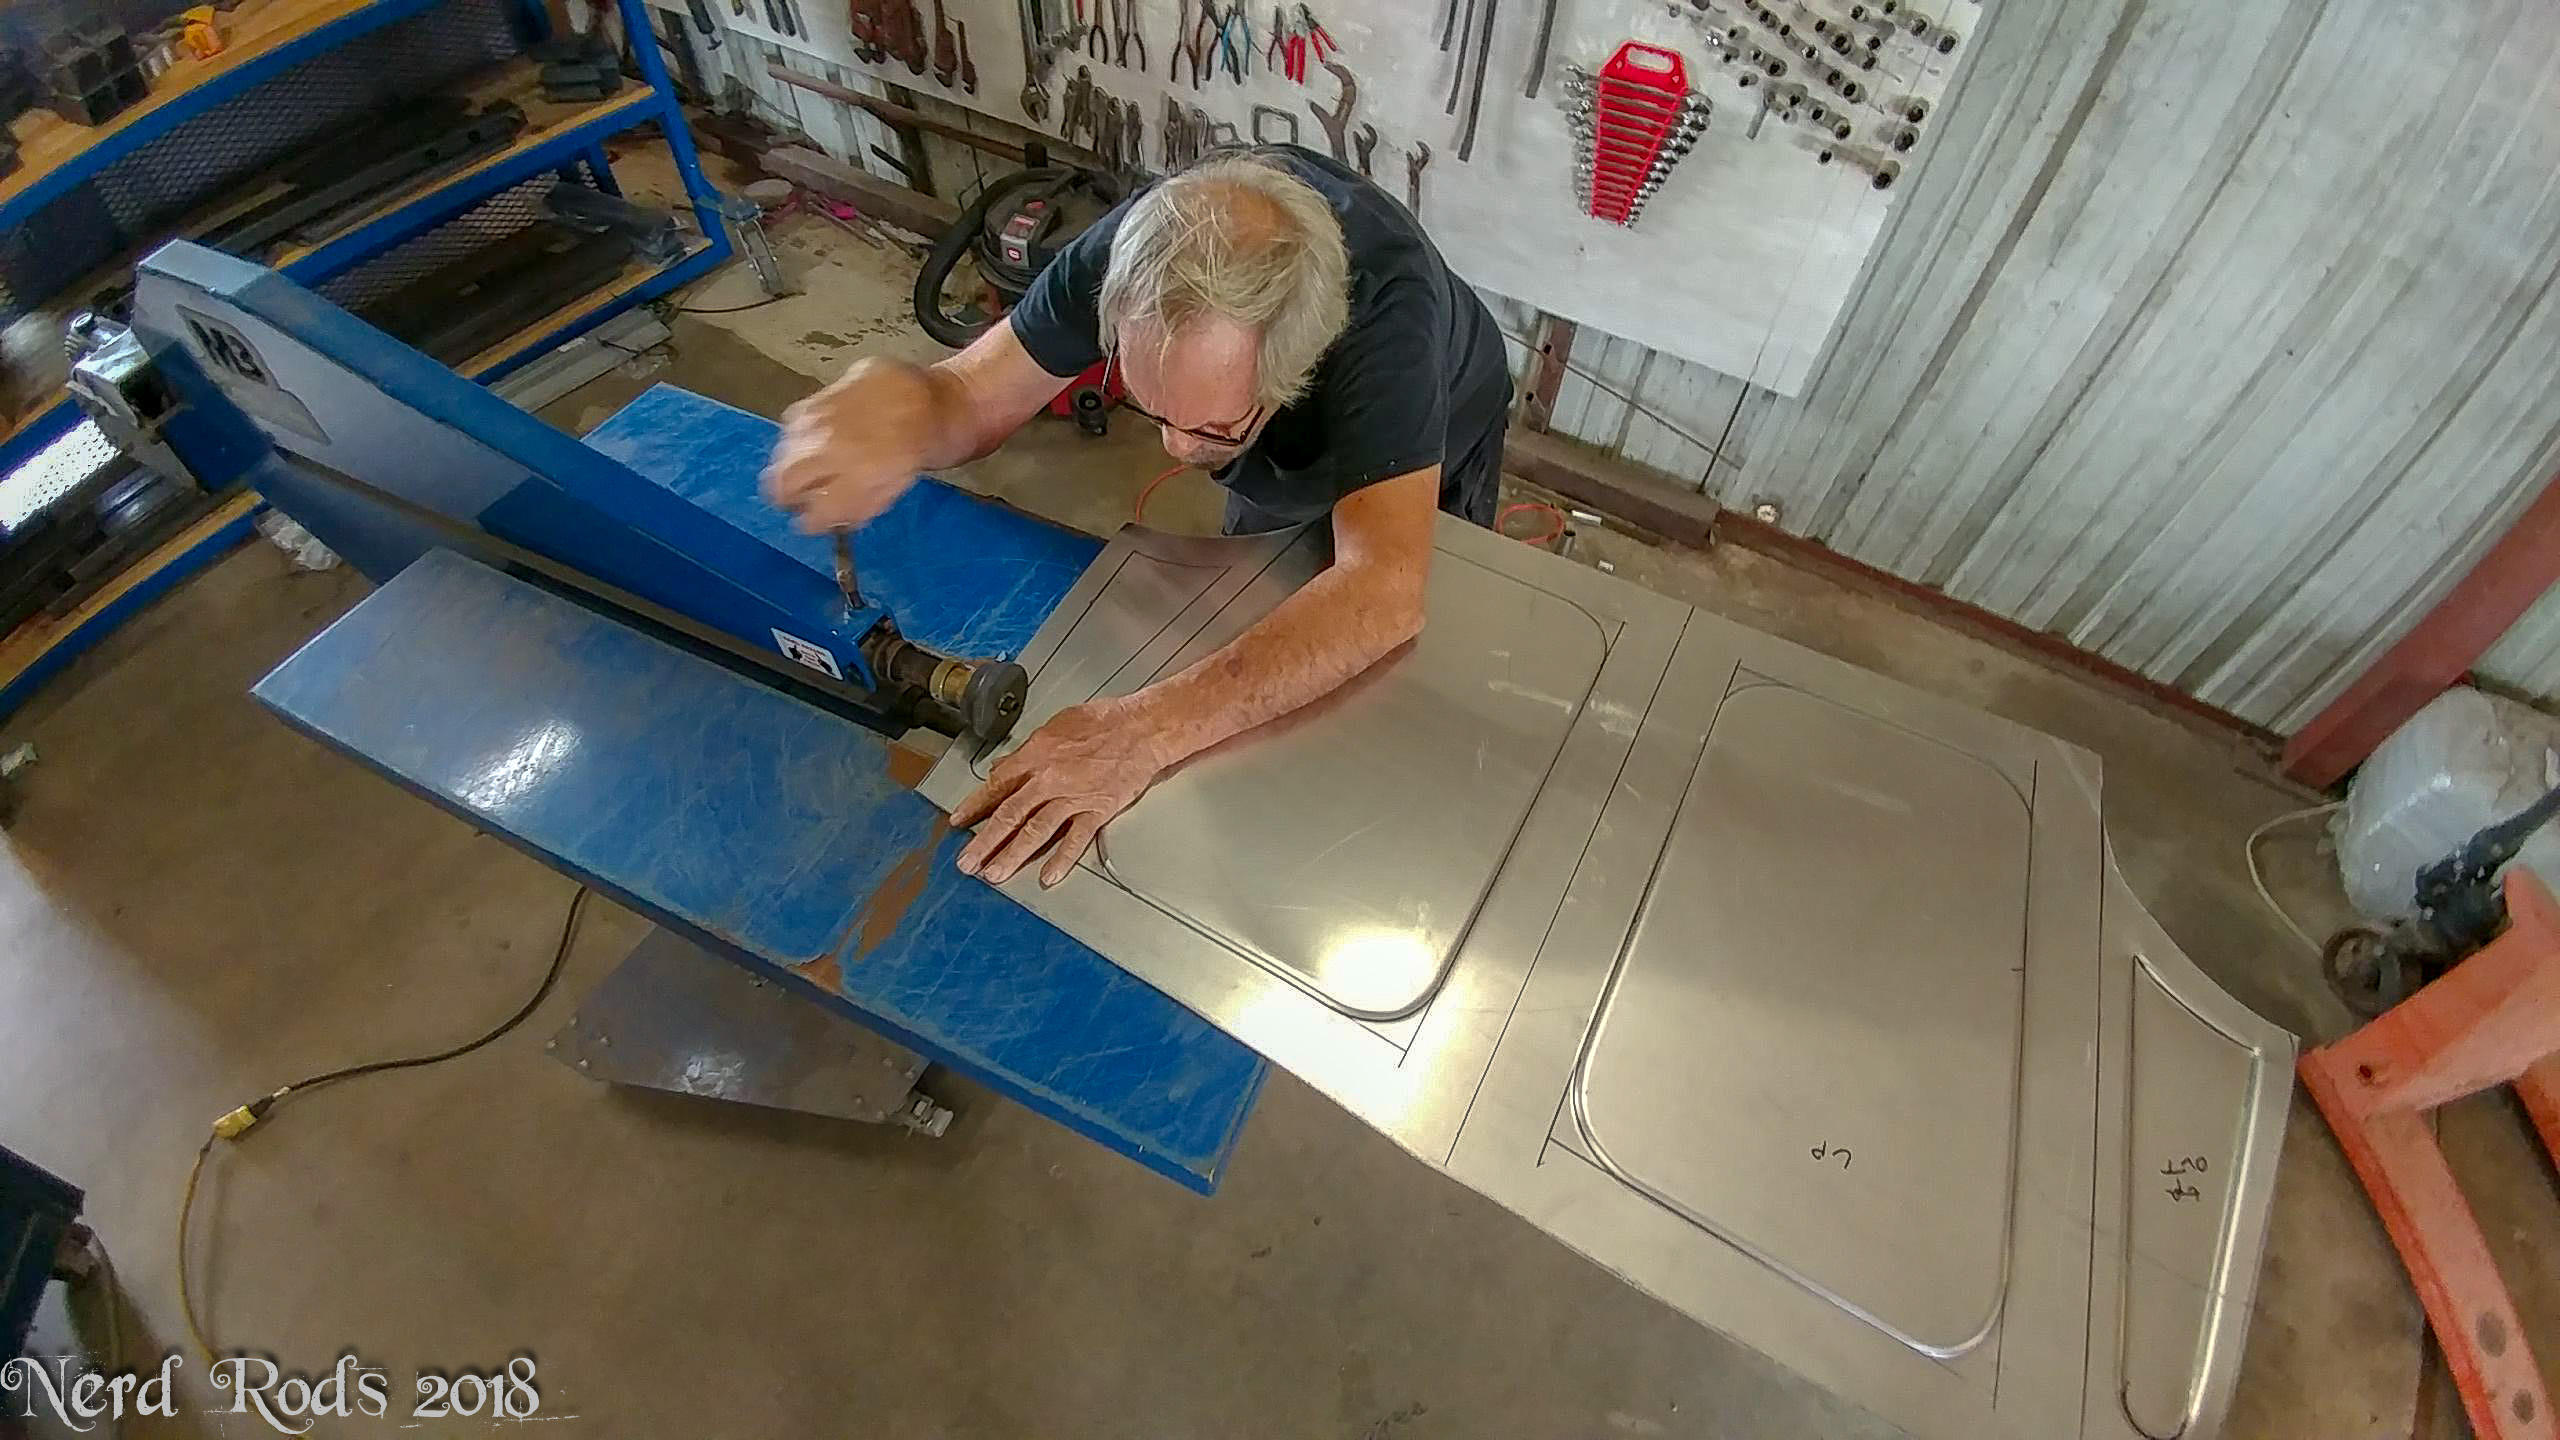
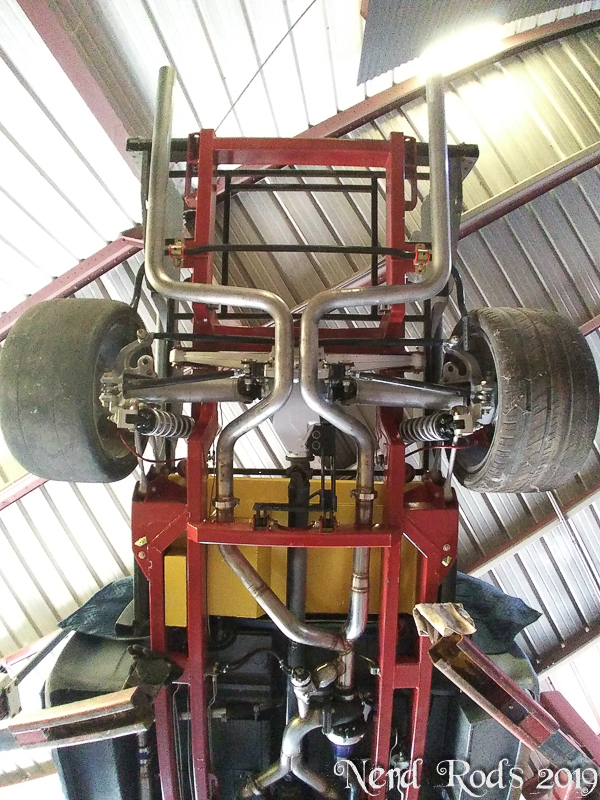
The next thing I wanted to look into was reducing drag and wind noise and the front cross member, sway bar, and frame tubes were a perfect thing to cover up to stop the harsh wind noise from hissing over the sharp edges of these components so Dad started working on a noise pan. I think we're also going to do a bit more of a belly pan as well when we get it a bit further along.


First some refined inner fenders were in order. This time out of aluminum to help shave a bit of weight off the front. There are a few revisions in these photos so if something looks a bit different one to another, its probably Dad scraping a set and moving to a fresh start for one reason or another.


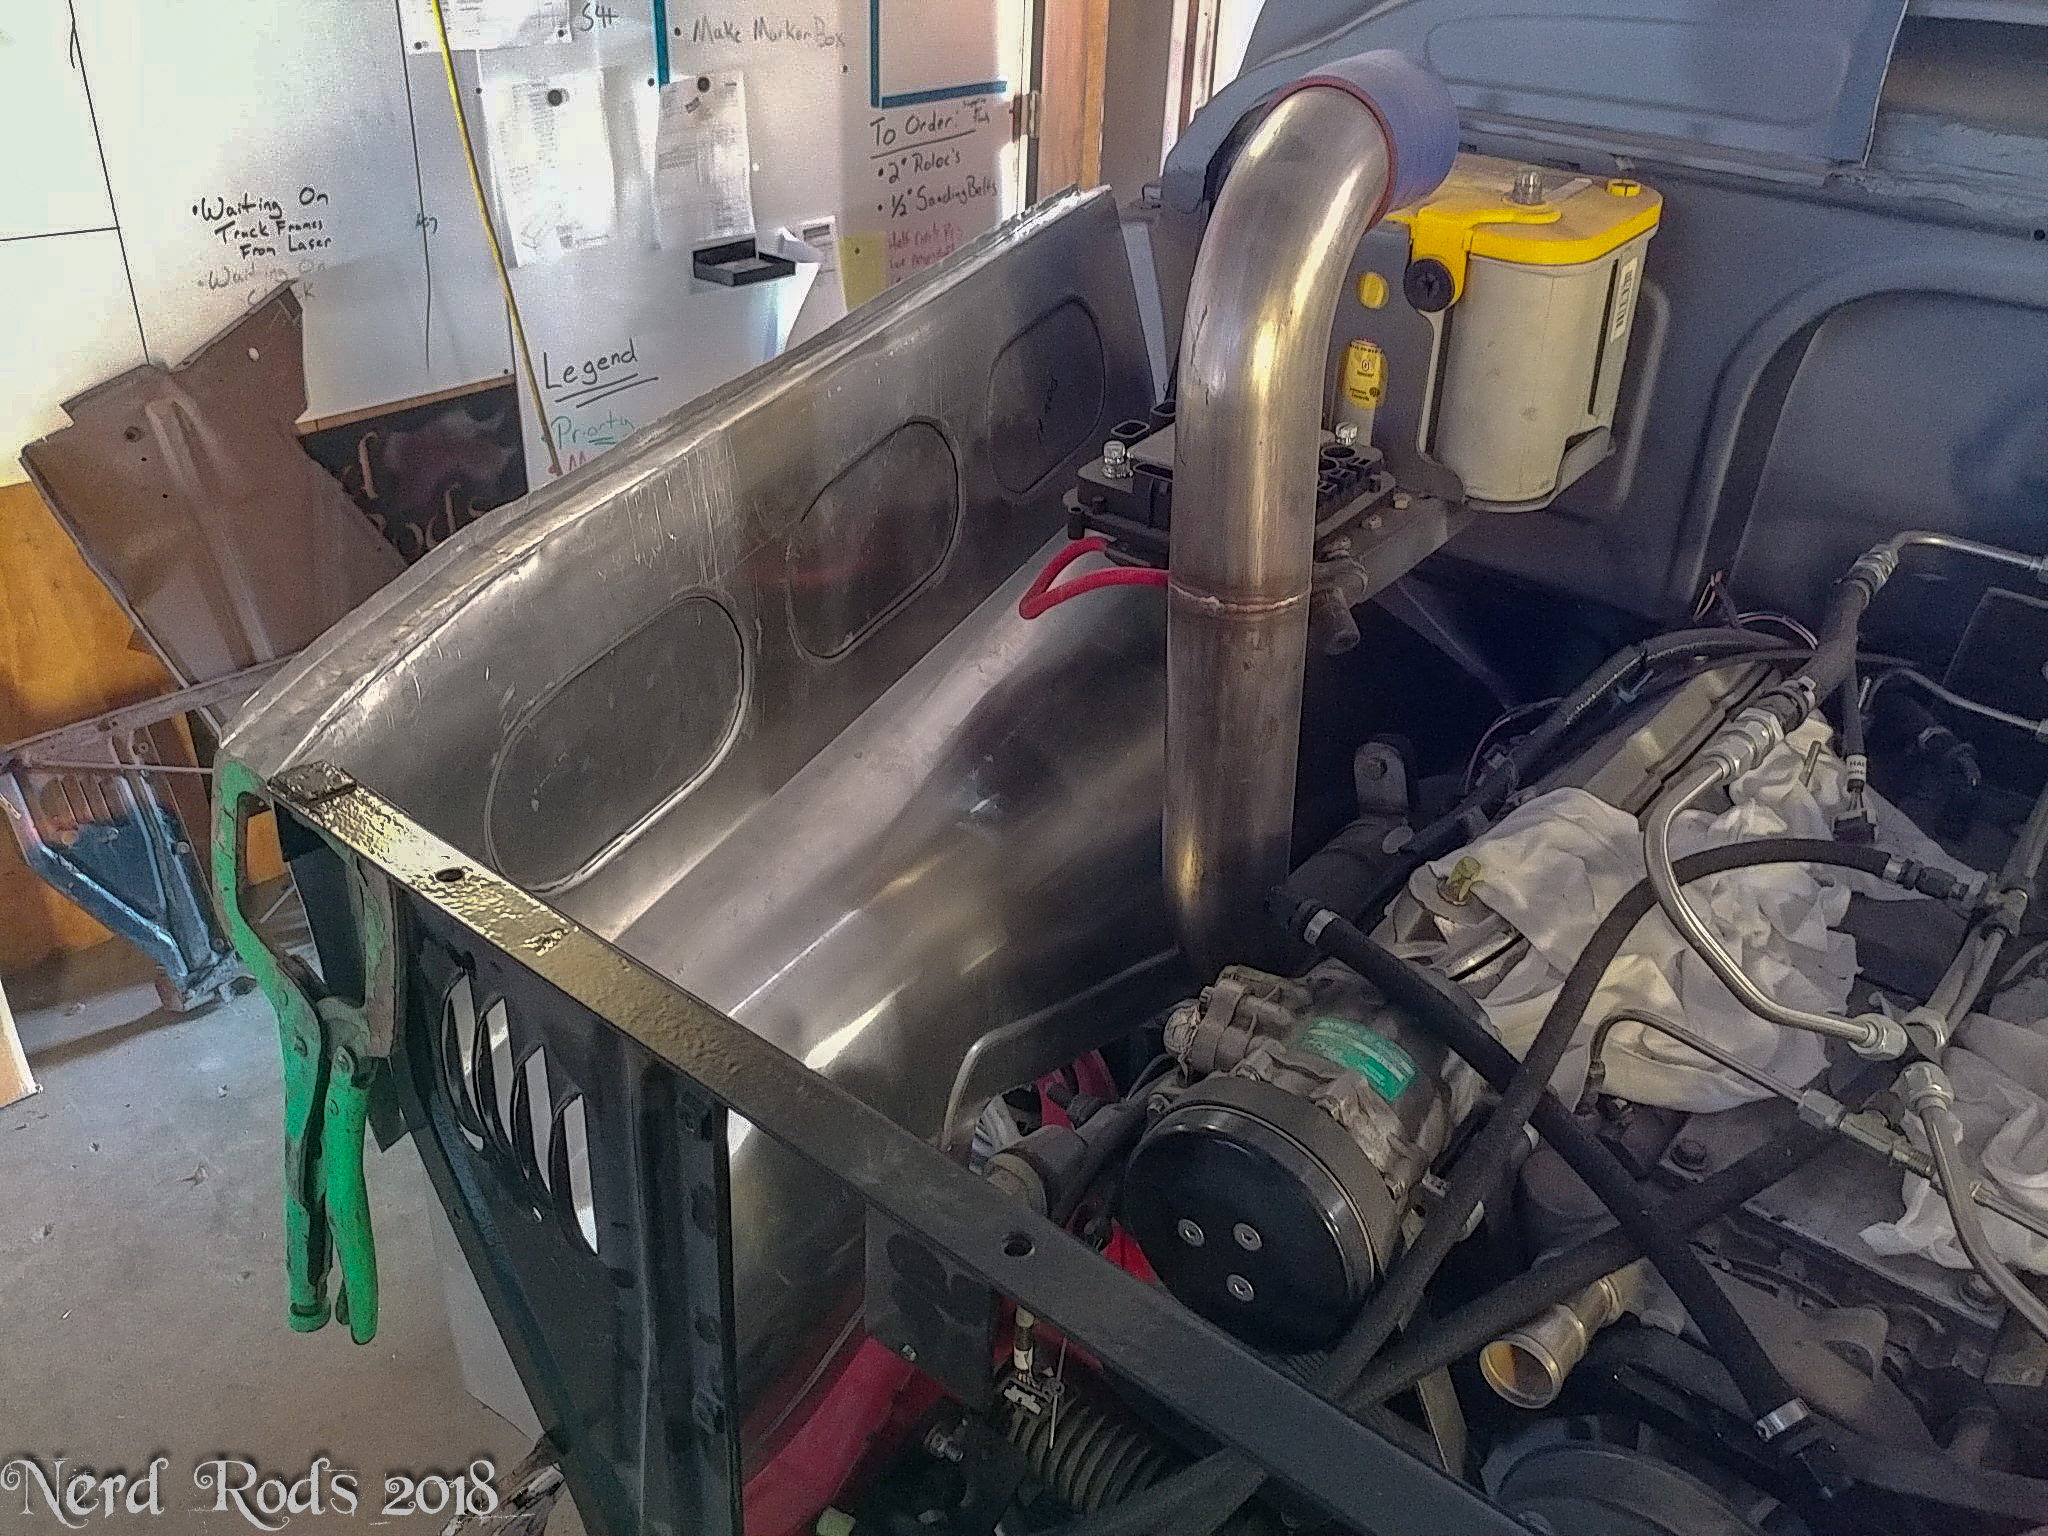
Moving onto getting all the boost tubing mounted. I opted for stainless over aluminum this time for reliability compared to my previous builds. The goal is that the truck will be Dad's daily so a few things like this are acceptable for the peace of mind if give if you hit a road gator, or small animal that will roll up under the truck and screw something up.
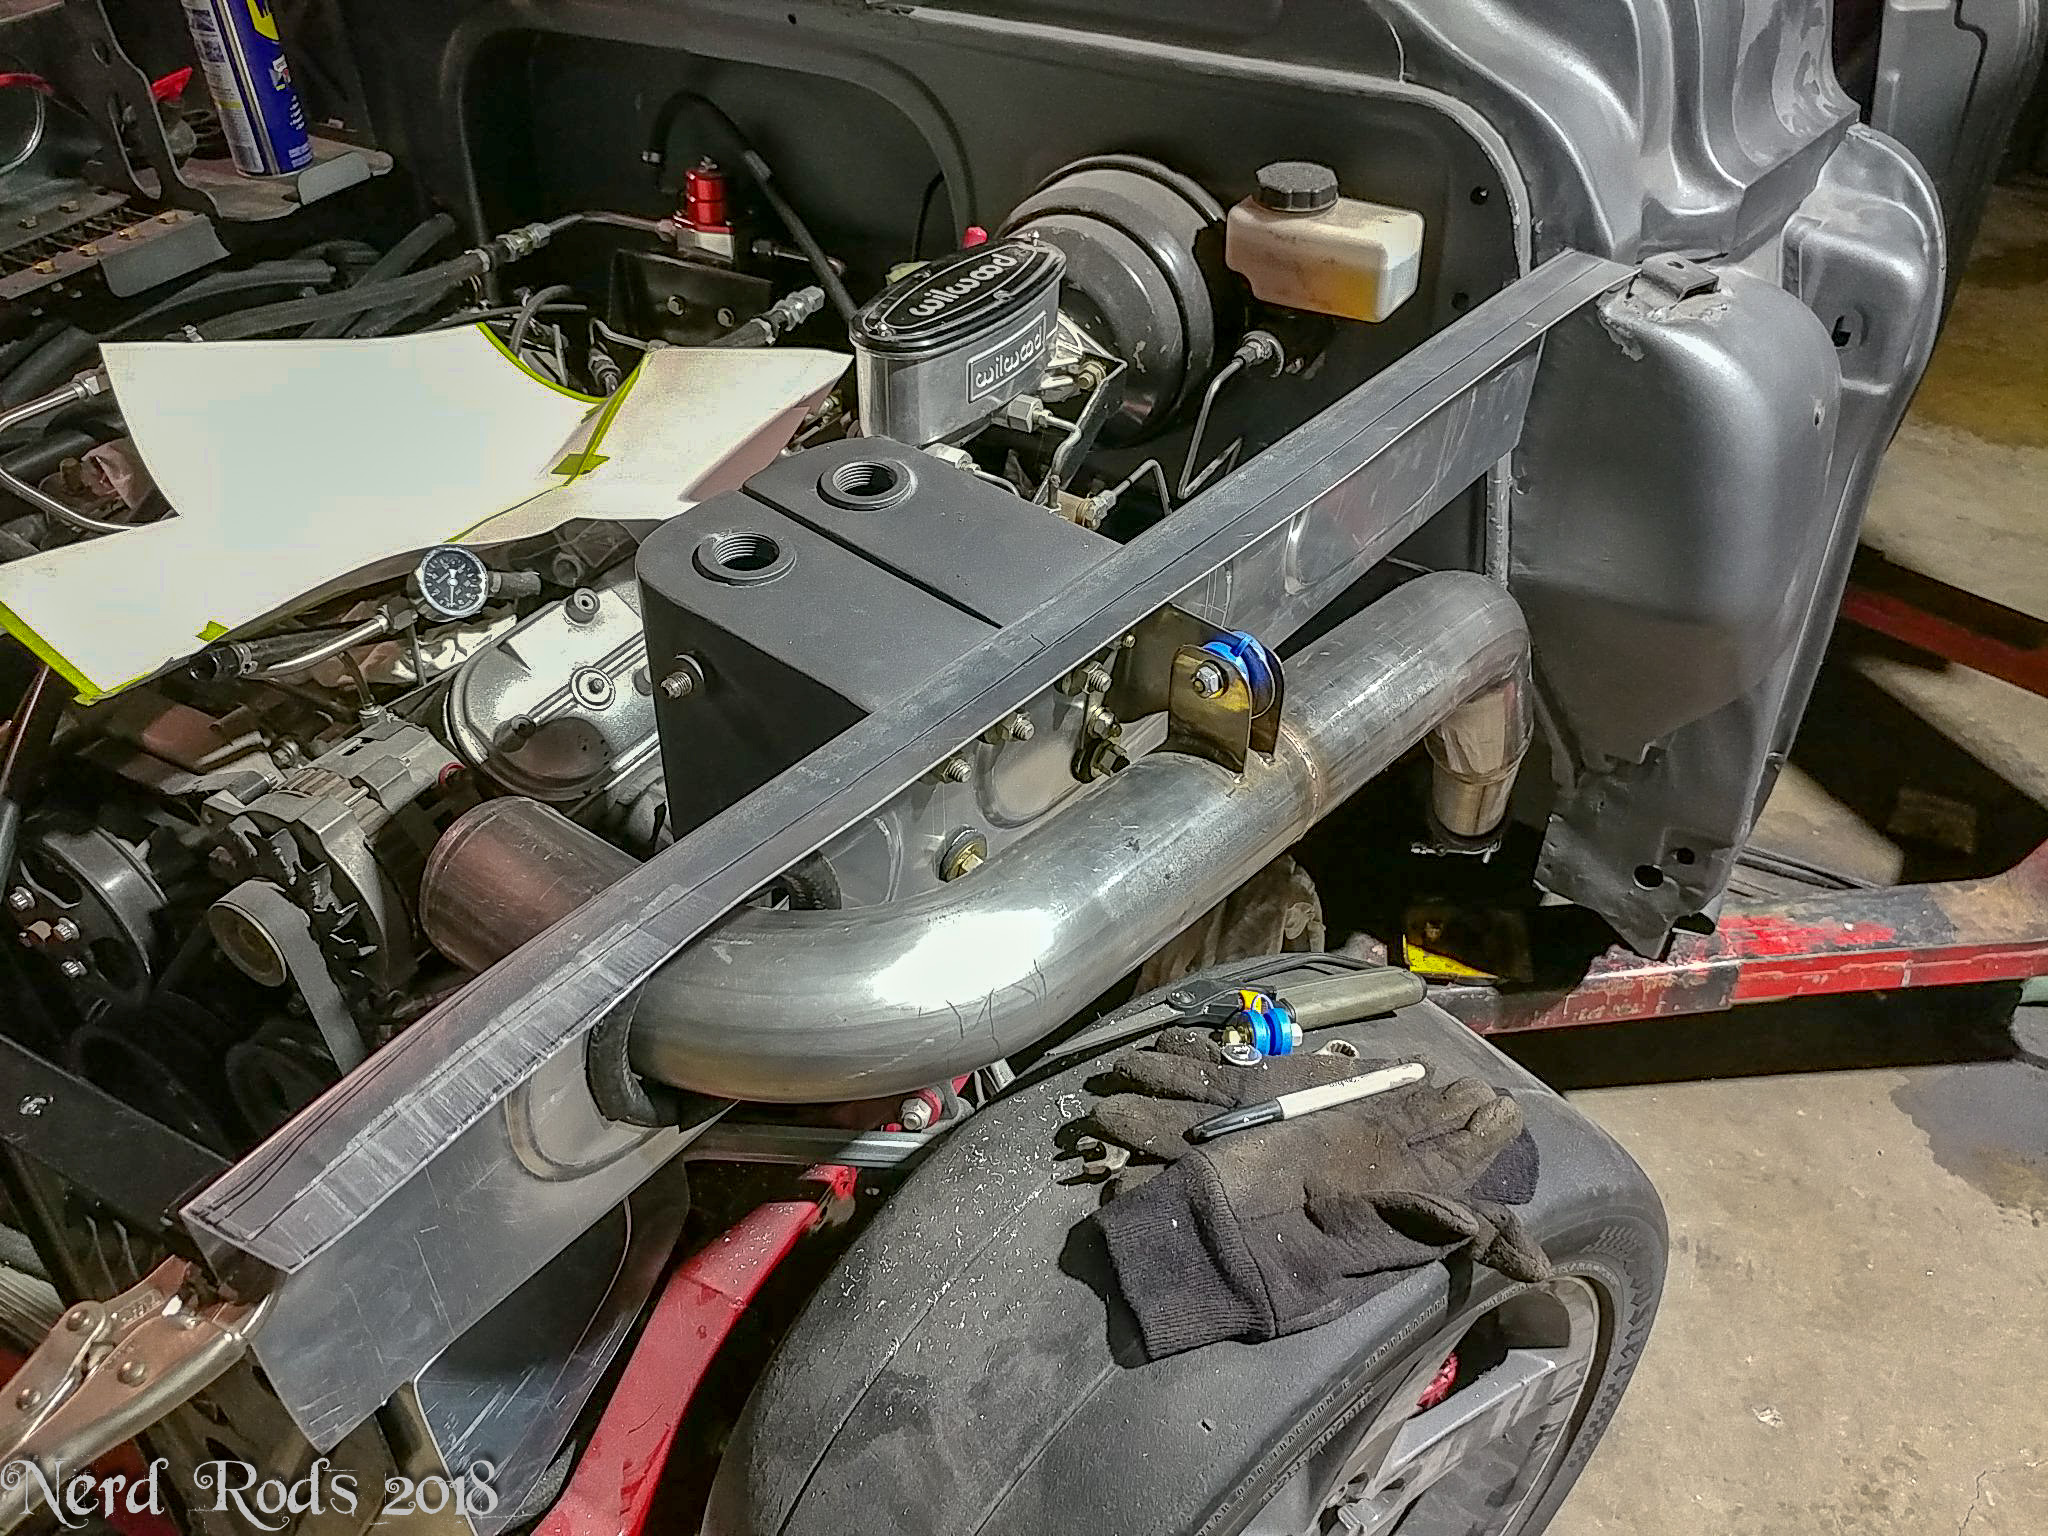
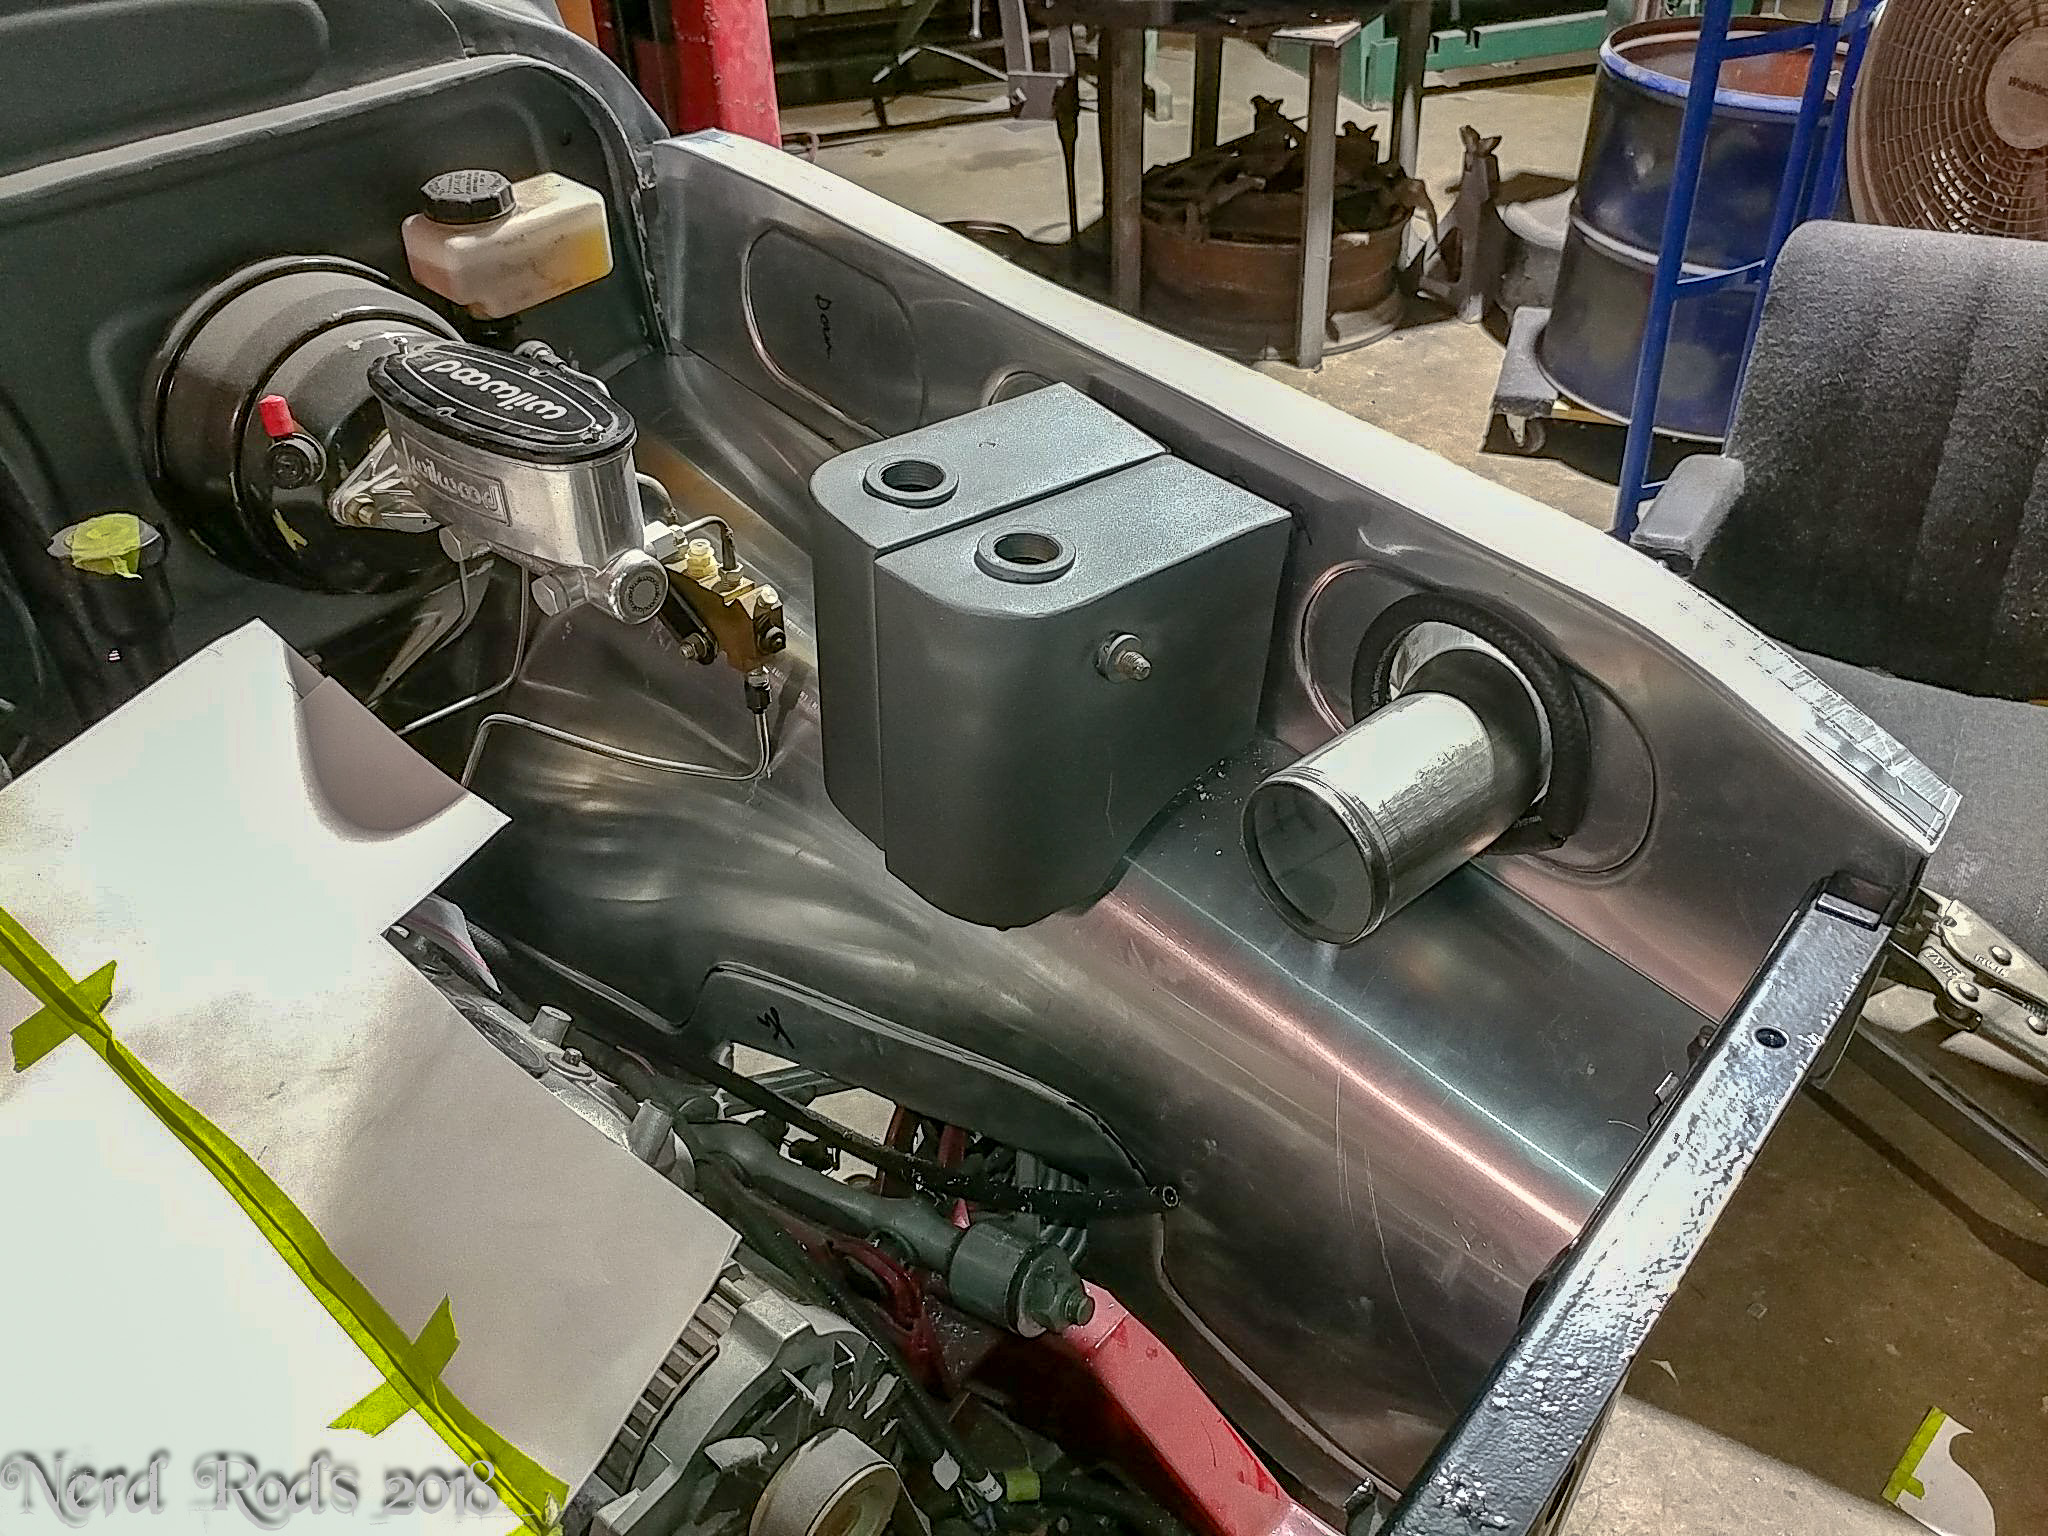

With all the items we need to hook to vacuum or boost references we had to cook up this manifold to have them all functional. Waist gate, Blow off, Boost controller, MAP sensor, Boost Gauge, and Vacuum booster but only one large port on the intake.

Next we finally decided to just dump the whole front core support system and just start over. It was just easier that way for this project. We have a small ish radiator but we have a very large oil cooler with an oil thermostat as well to prevent it from over cooling but we can bump that down a bit if we need to cool the engine off a bit more. The new ZR1 has a smaller radiator than this so we're not too worried about over heating. The main goal was to block off as much area and force air through the radiators. We might do some brake cooling as well with all the extra real estate under there.


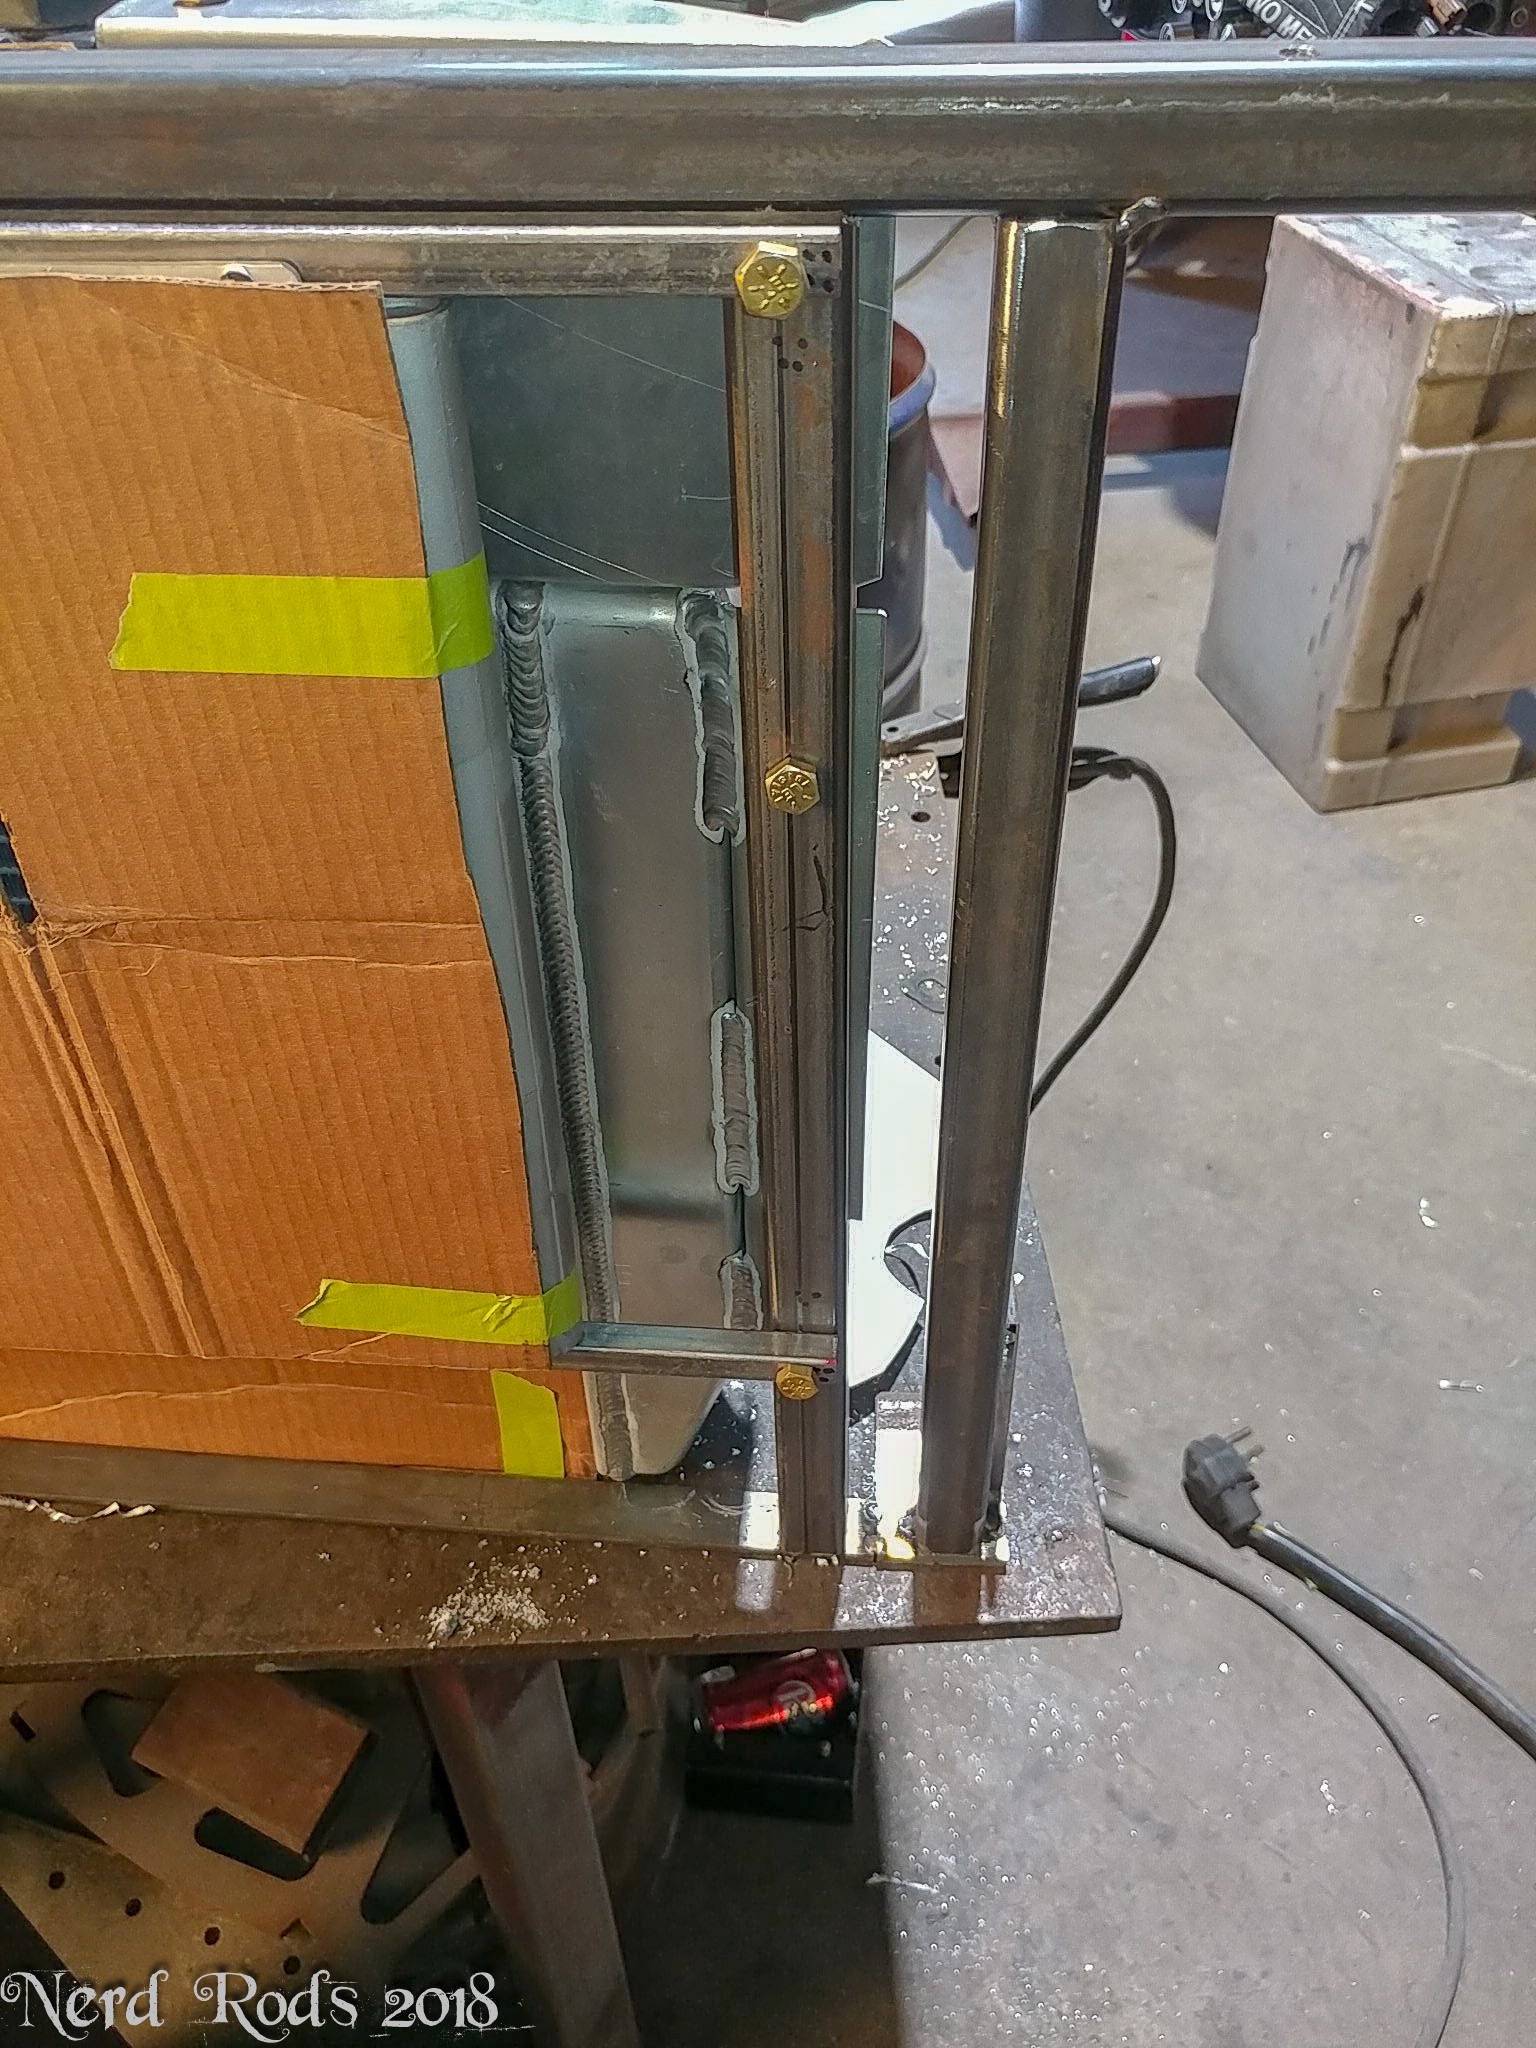


The next thing I wanted to look into was reducing drag and wind noise and the front cross member, sway bar, and frame tubes were a perfect thing to cover up to stop the harsh wind noise from hissing over the sharp edges of these components so Dad started working on a noise pan. I think we're also going to do a bit more of a belly pan as well when we get it a bit further along.


 11-24-2018, 11:27 PM
#45
Launching!
Thread Starter
Join Date: Jan 2007
Location: Luling TX In the Hot Rod Shop
Posts: 294
Likes: 0
Received 3 Likes
on
3 Posts
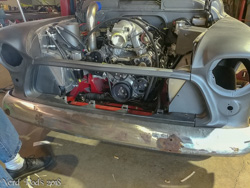
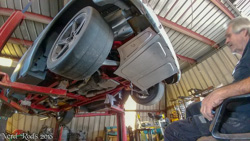
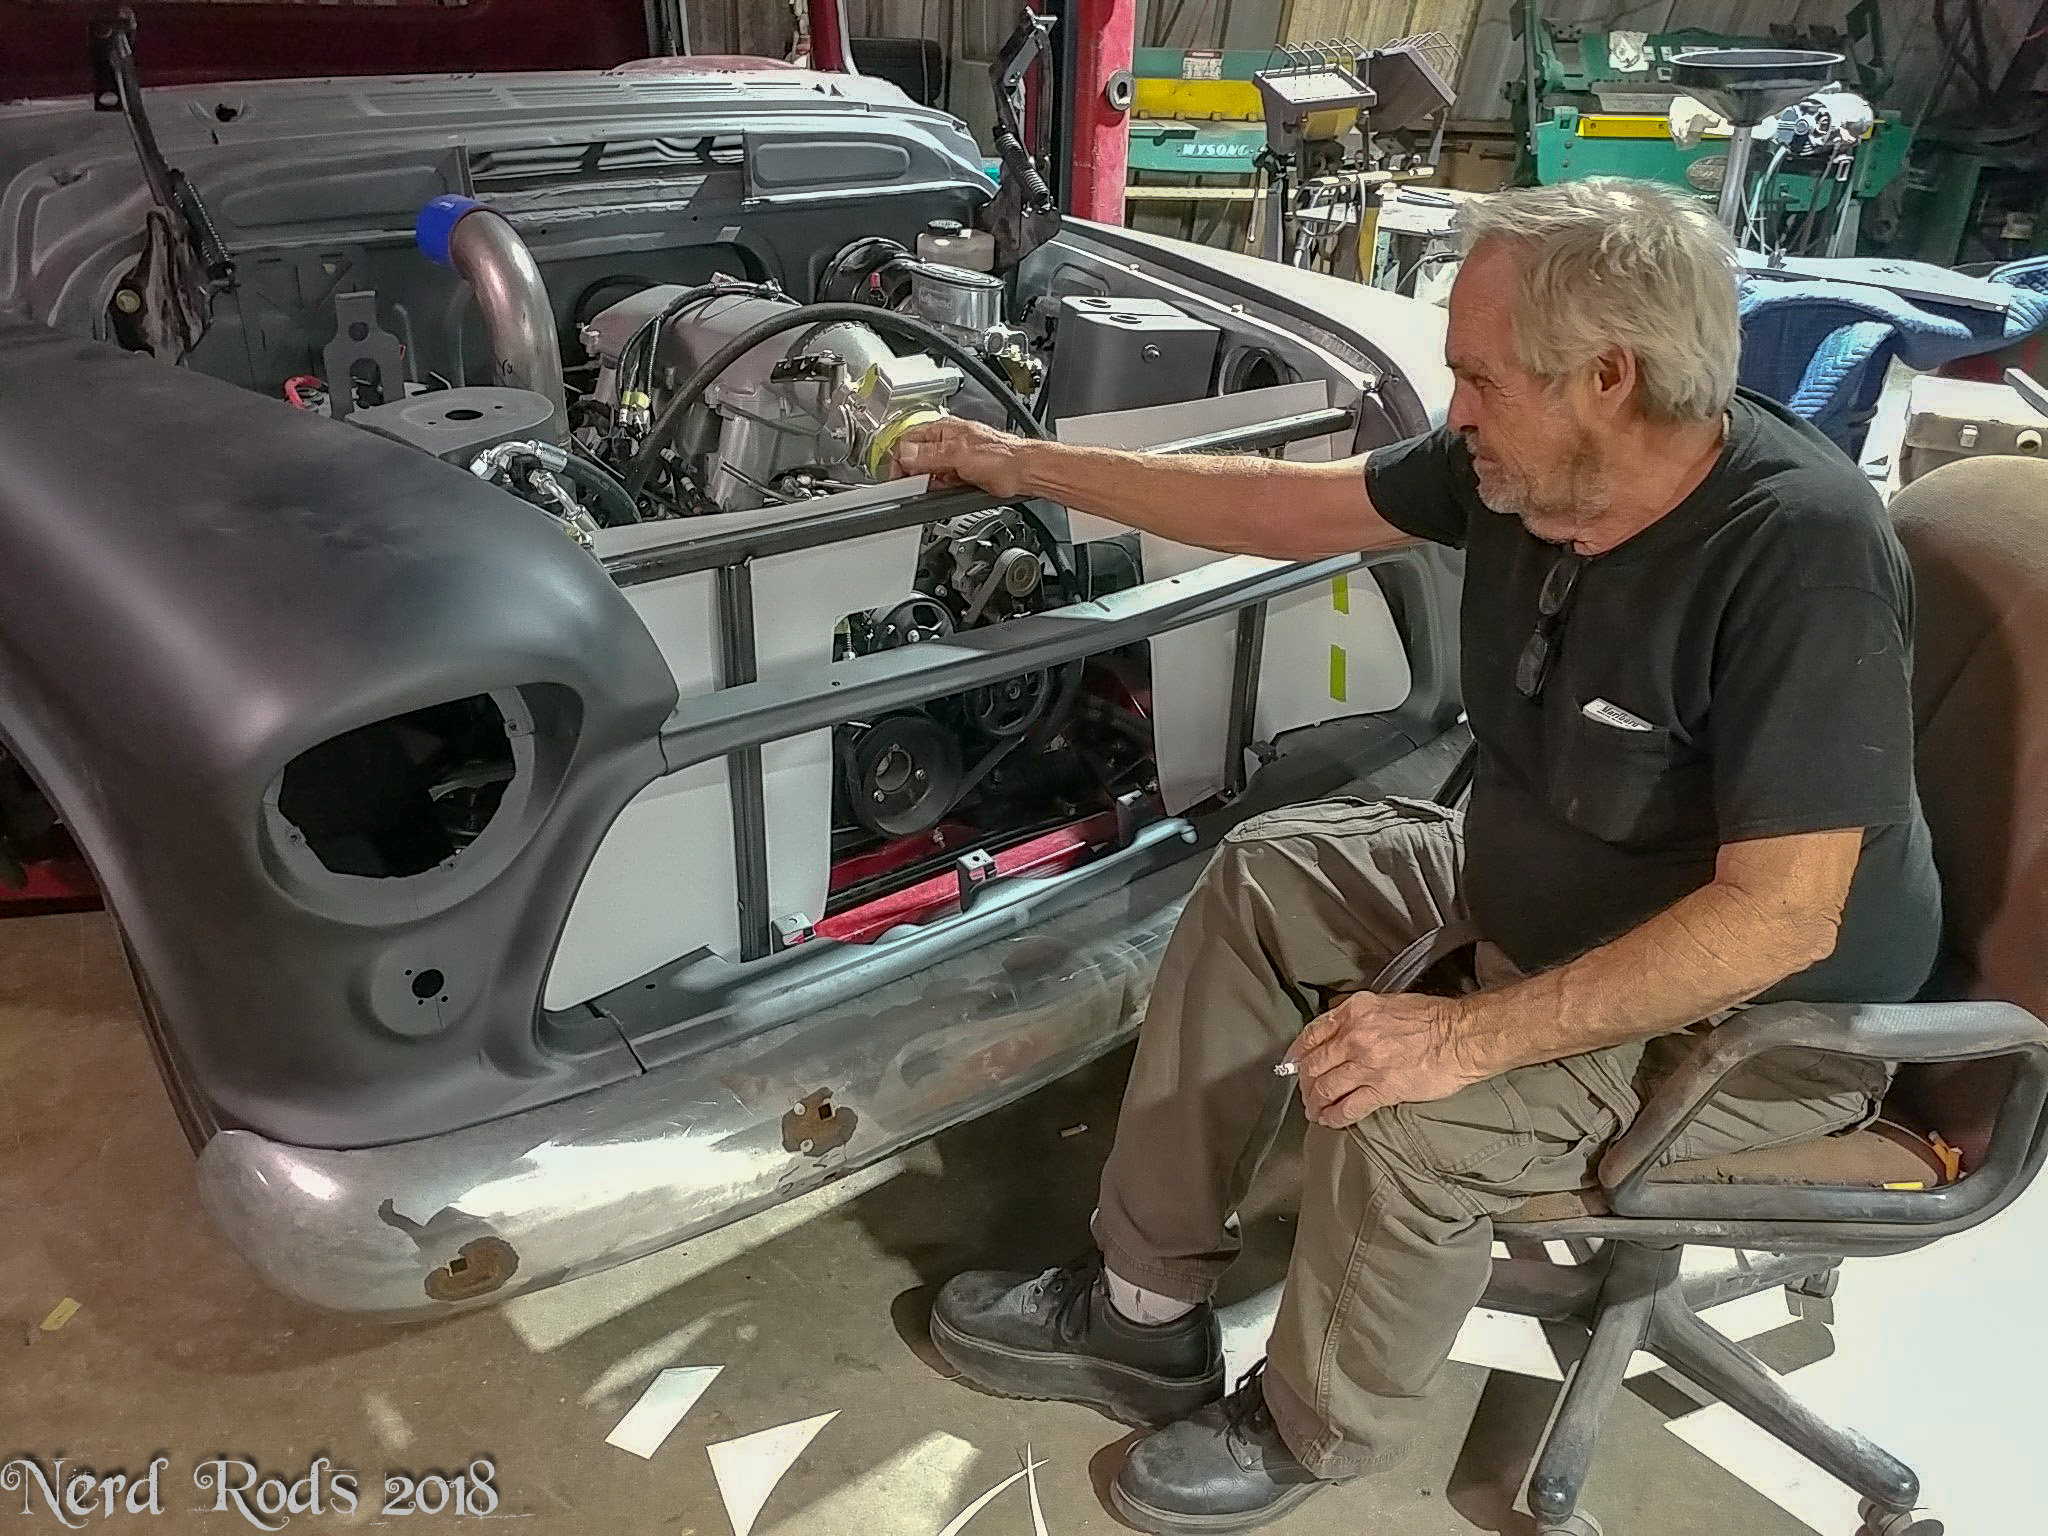
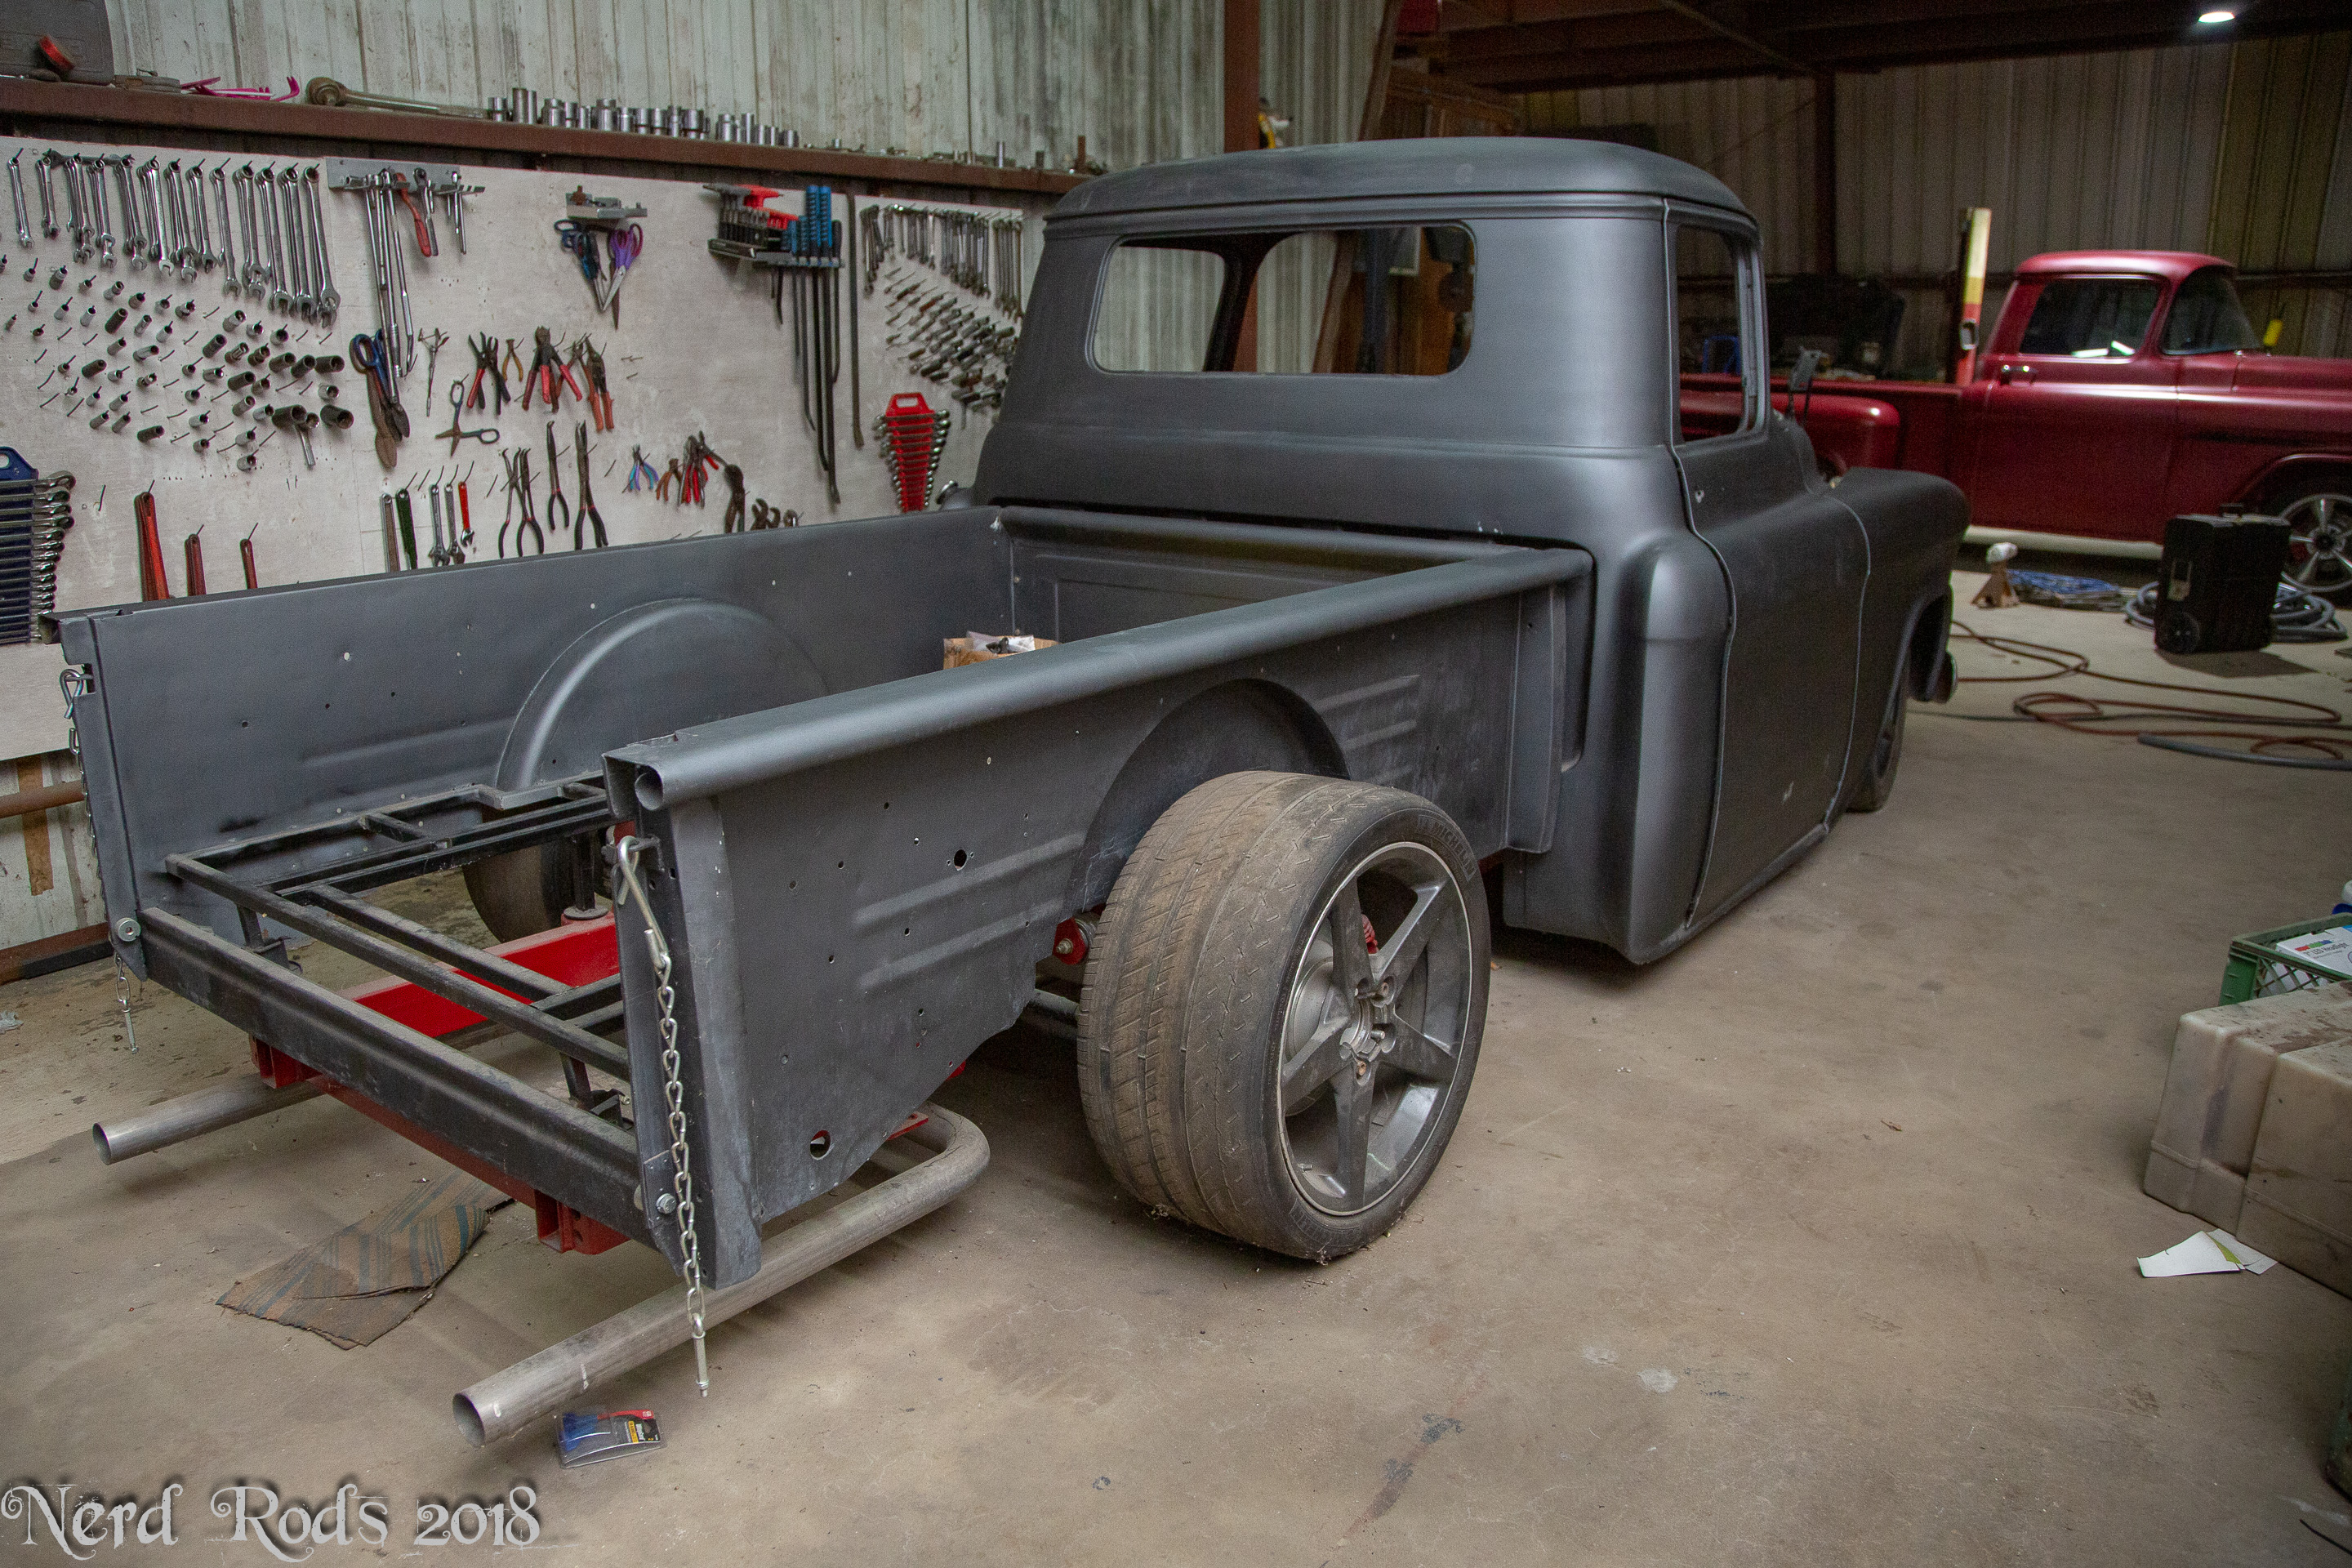
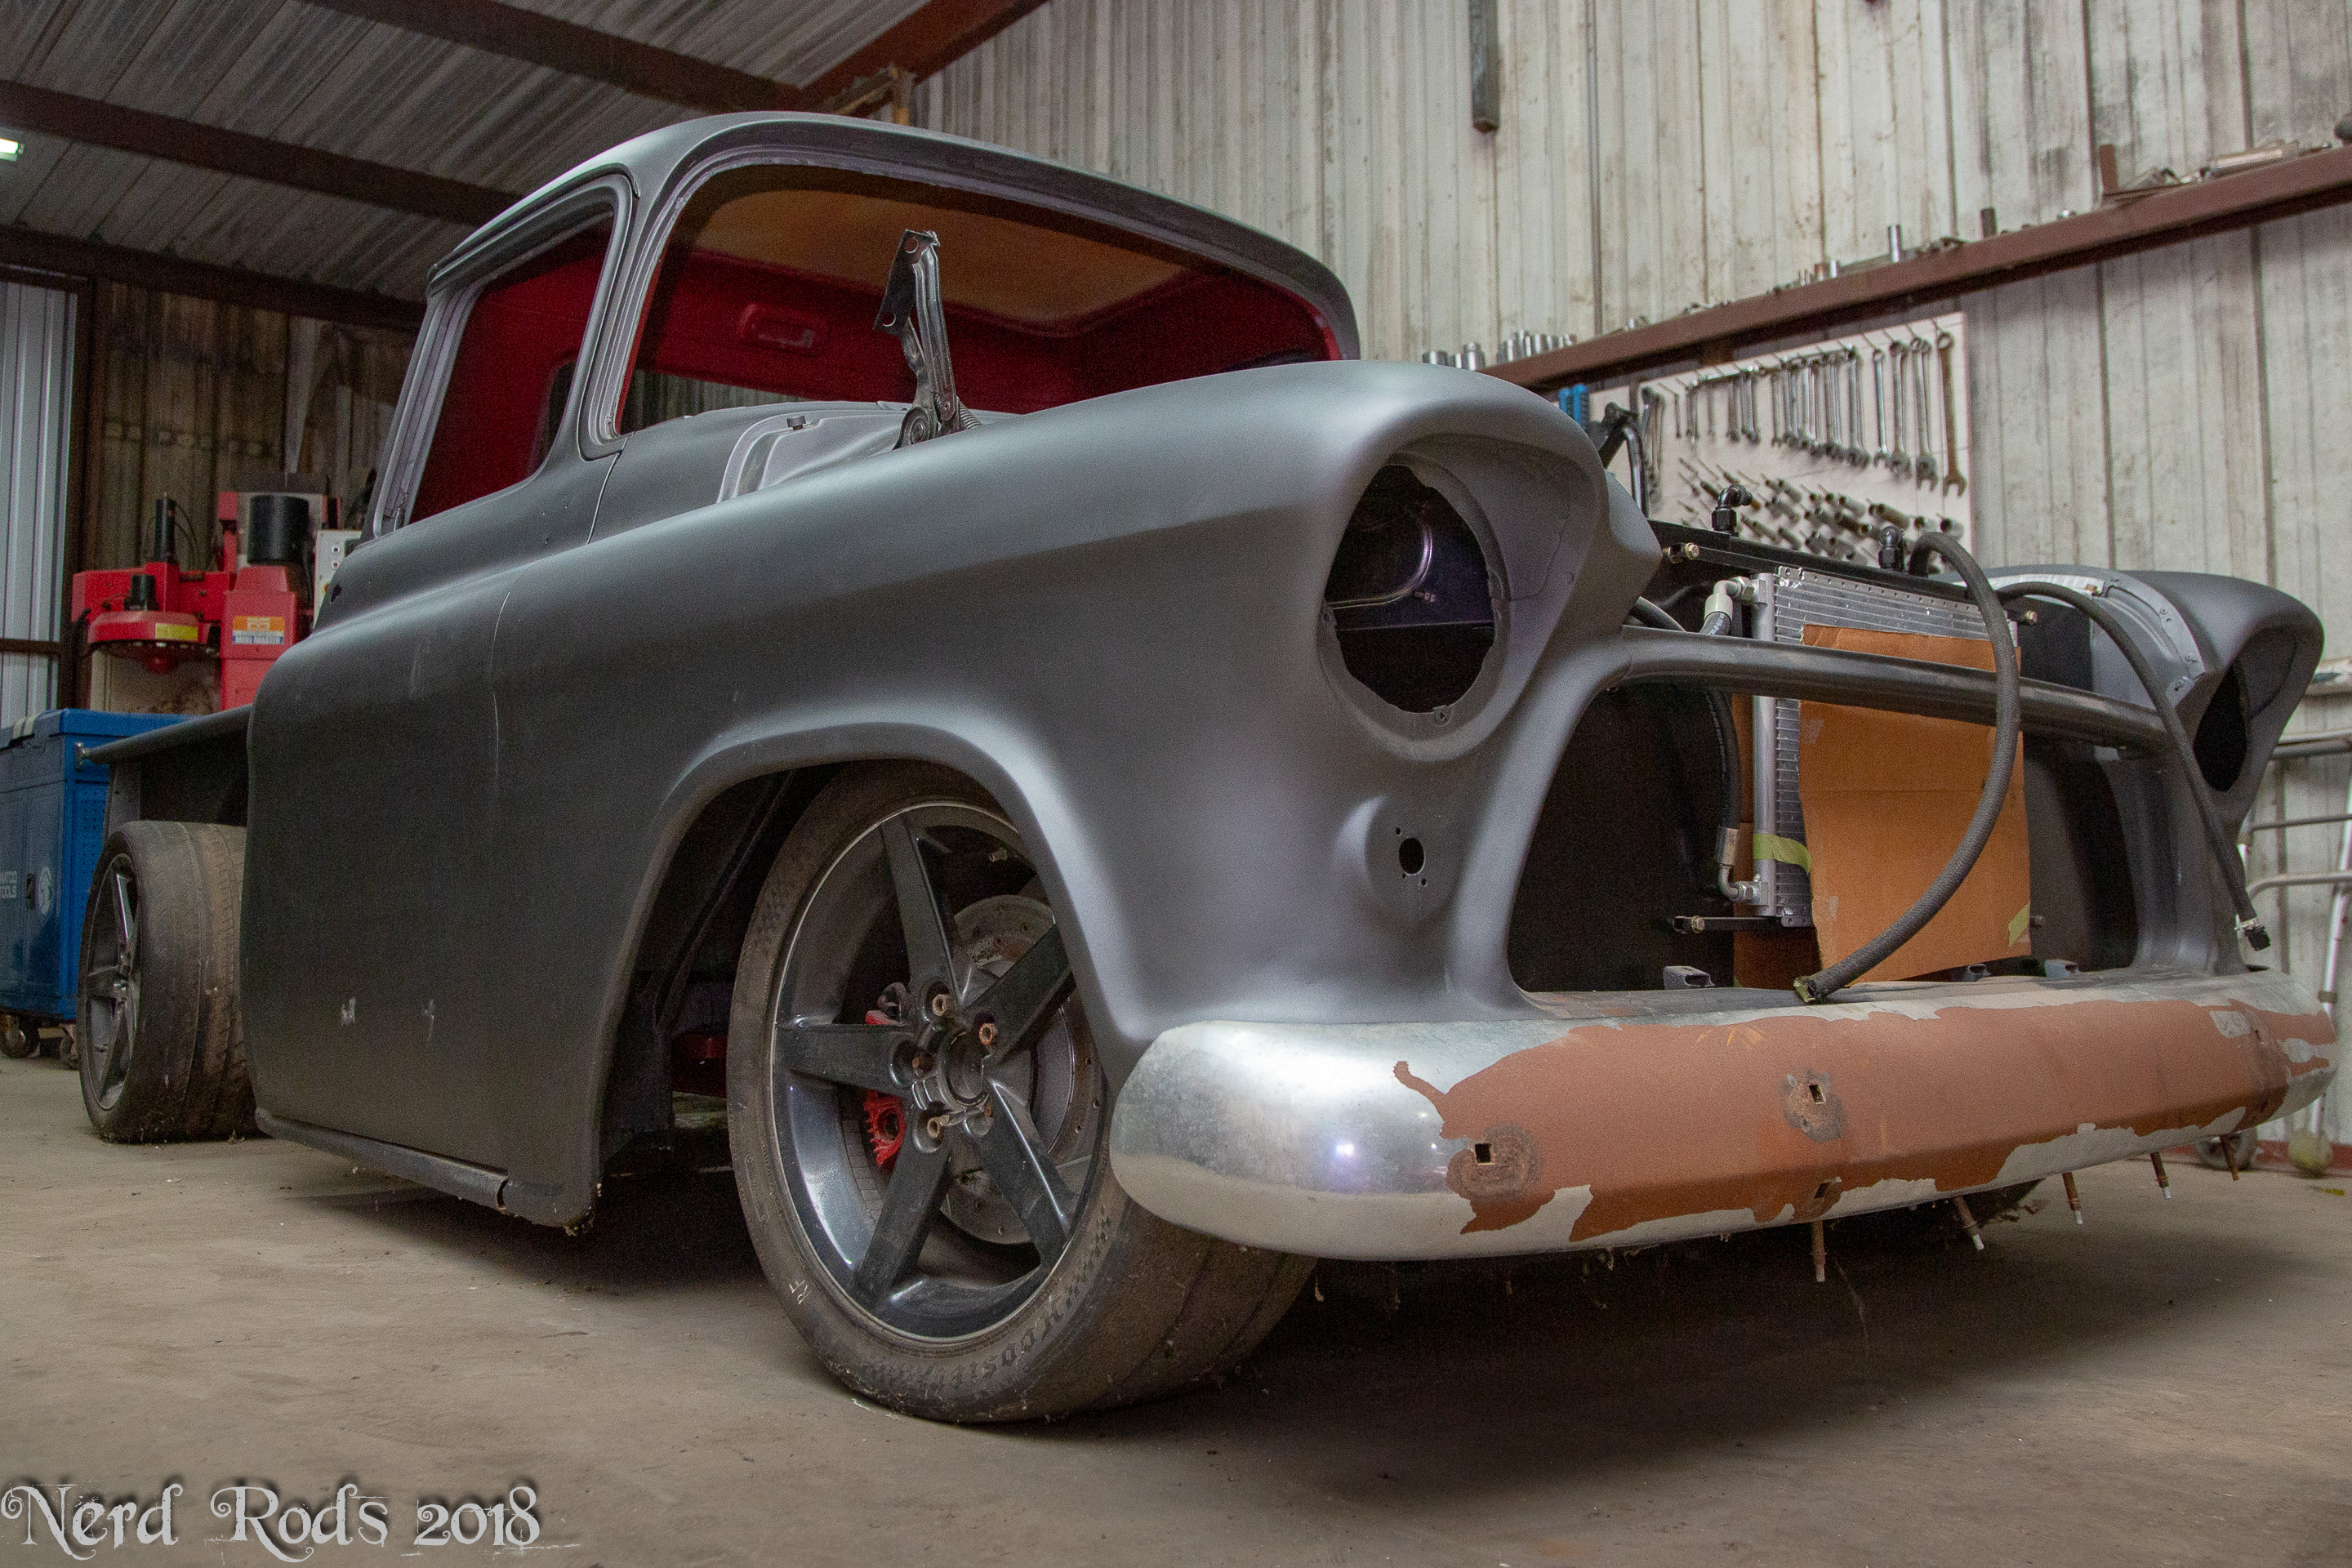
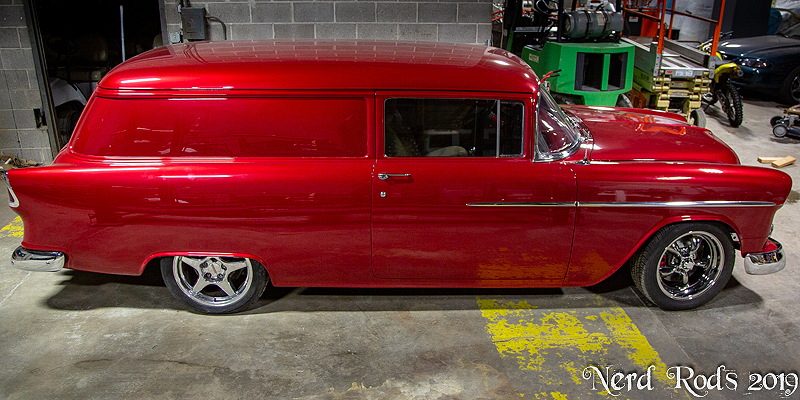
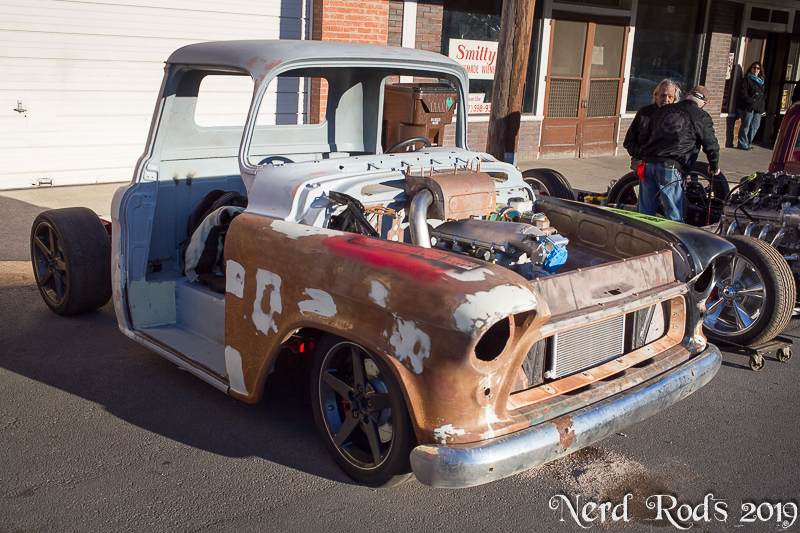
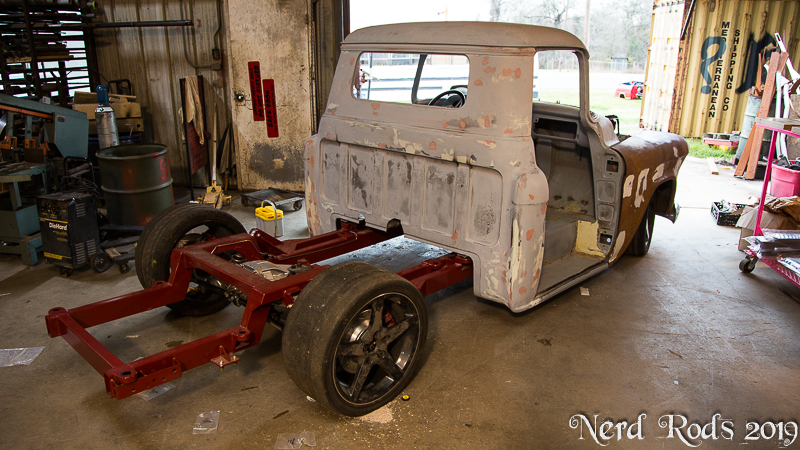
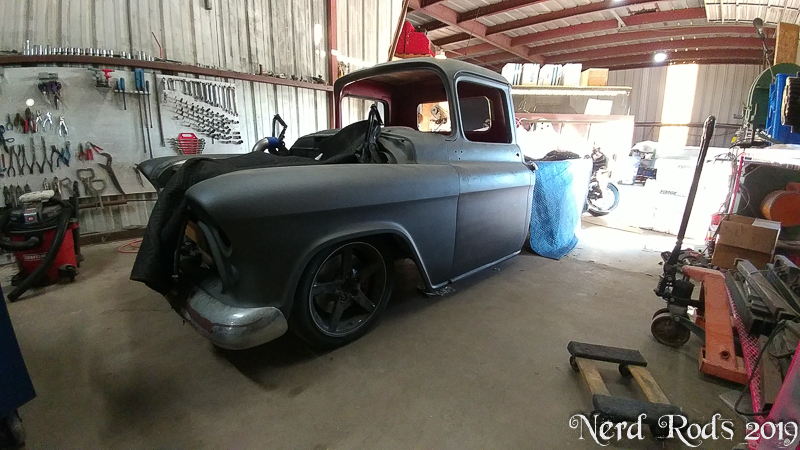
Finally after having her on the ground for a while I realized how much work we've been doing around the shop instead of on the truck so I snagged these for guys who are interested to know what the low stance will look like and this is about it.
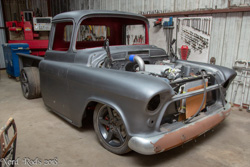


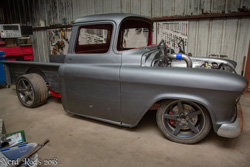
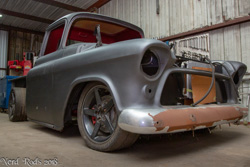
We're getting ready for new toys so the truck is getting a new home in the shop. We should have it ready to rock shortly and I can get back onto the wiring to get her fired up for the first time.
And anyone who want's an easy link to all the photos and just wants to flip through them you can click here. https://gallery.nerdrods.com/Projects/03_D3/08/
Later,
-Russell @ Nerd Rods
12-06-2018, 11:18 AM
#46
Launching!
Thread Starter
Join Date: Jan 2007
Location: Luling TX In the Hot Rod Shop
Posts: 294
Likes: 0
Received 3 Likes
on
3 Posts
Almost done with this one, then I get some time to work on Dad's truck again.
Note, So apparently facebook, and instagram links are blocked here so we'll need to do it the old copy and paste method to share the video. This is a LS3 525 we just fired up for a customers project.
instagram.com/p/BrBLgk_g-Hh/
Note, So apparently facebook, and instagram links are blocked here so we'll need to do it the old copy and paste method to share the video. This is a LS3 525 we just fired up for a customers project.
instagram.com/p/BrBLgk_g-Hh/
Last edited by rat_rod_russell; 12-06-2018 at 11:32 AM.

 12-21-2018, 11:19 AM
#49

 12-24-2018, 11:42 AM
#51
Looks pretty cool. I wonder how long the tips will last for what you plan on using it for. I cain't imagine c utting holes doesn't cut down on life exspectency of the tips. Where you going to stuff it? I thought your shop was pretty full as it was.
12-24-2018, 08:52 PM
#53
Launching!
Thread Starter
Join Date: Jan 2007
Location: Luling TX In the Hot Rod Shop
Posts: 294
Likes: 0
Received 3 Likes
on
3 Posts
01-14-2019, 10:51 AM
#54
Launching!
Thread Starter
Join Date: Jan 2007
Location: Luling TX In the Hot Rod Shop
Posts: 294
Likes: 0
Received 3 Likes
on
3 Posts
Almost ready to produce some product!
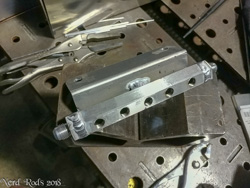
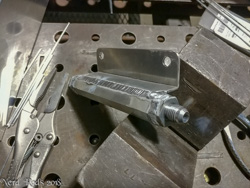
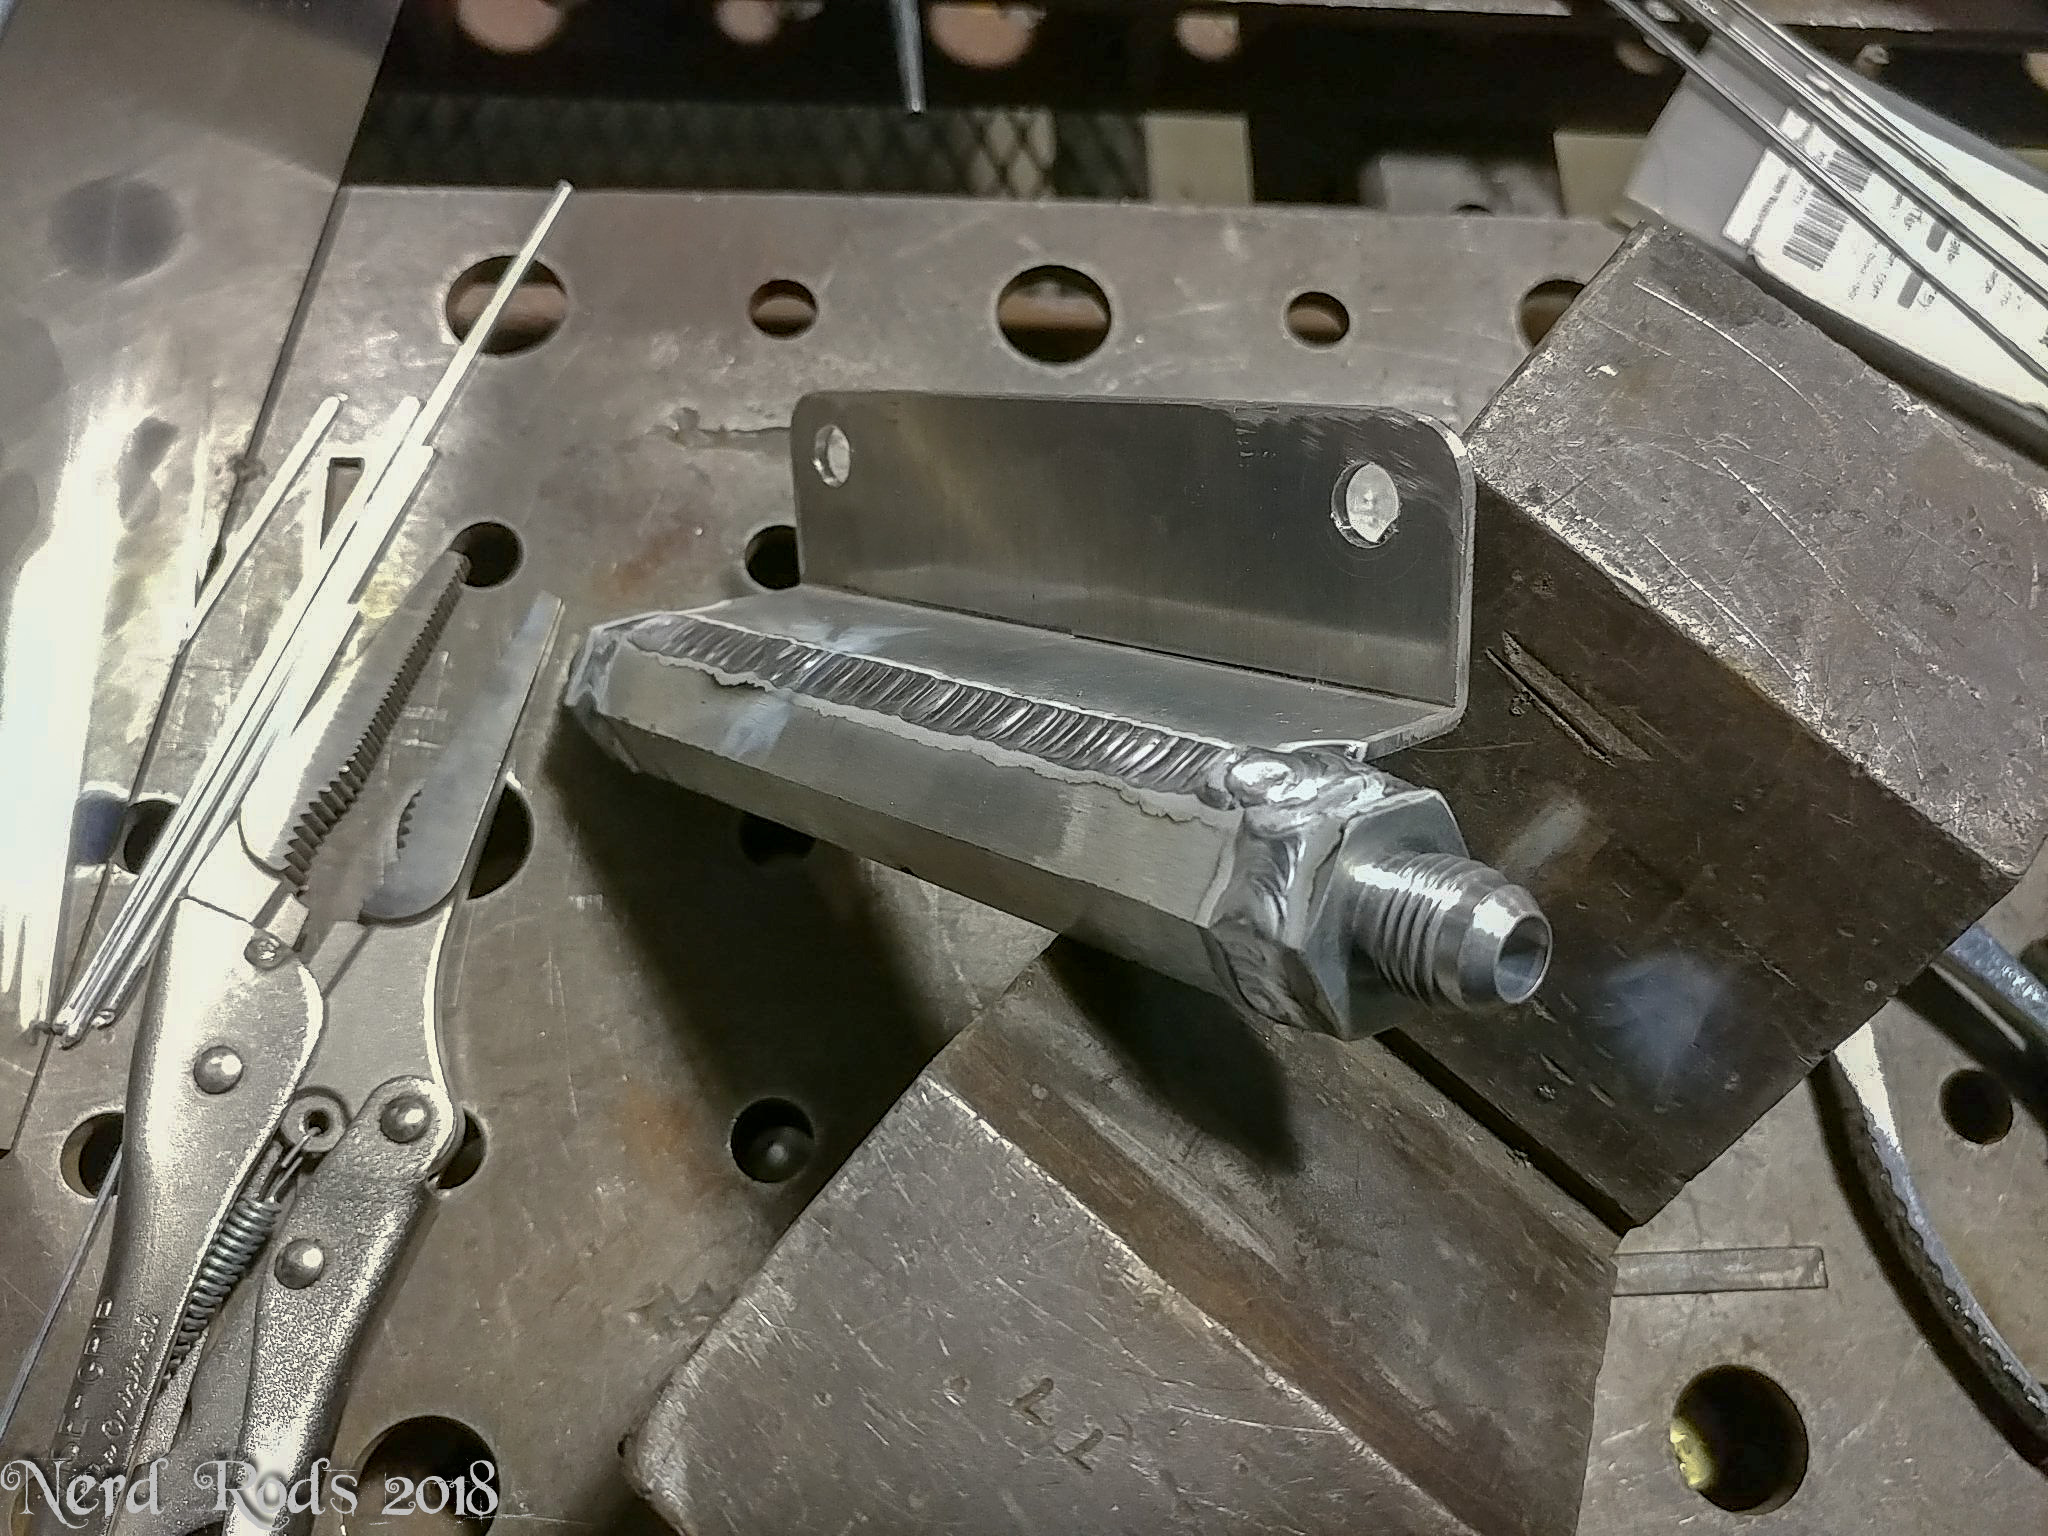
This idea to redesign two of our body mounts came to me while talking with dad looking at a customers 55 sedan on the subject of body bushings specifically. We have to grind a few of them so they will fit inside the canisters.
But what if we didn't have too?
What if I could fit it to the frame rail in such a way?
I went to the computer and cooked up these to see if I could make the idea work. From conversation to parts on the table to see if it would work, 2 hours tops and that's because we had other things to do that day as well. Having this capability in house is a dream come true after designing DIY frames for over 5 years now. Look for more redesigns and upgrades coming soon.
01-29-2019, 02:49 PM
#55
Launching!
Thread Starter
Join Date: Jan 2007
Location: Luling TX In the Hot Rod Shop
Posts: 294
Likes: 0
Received 3 Likes
on
3 Posts
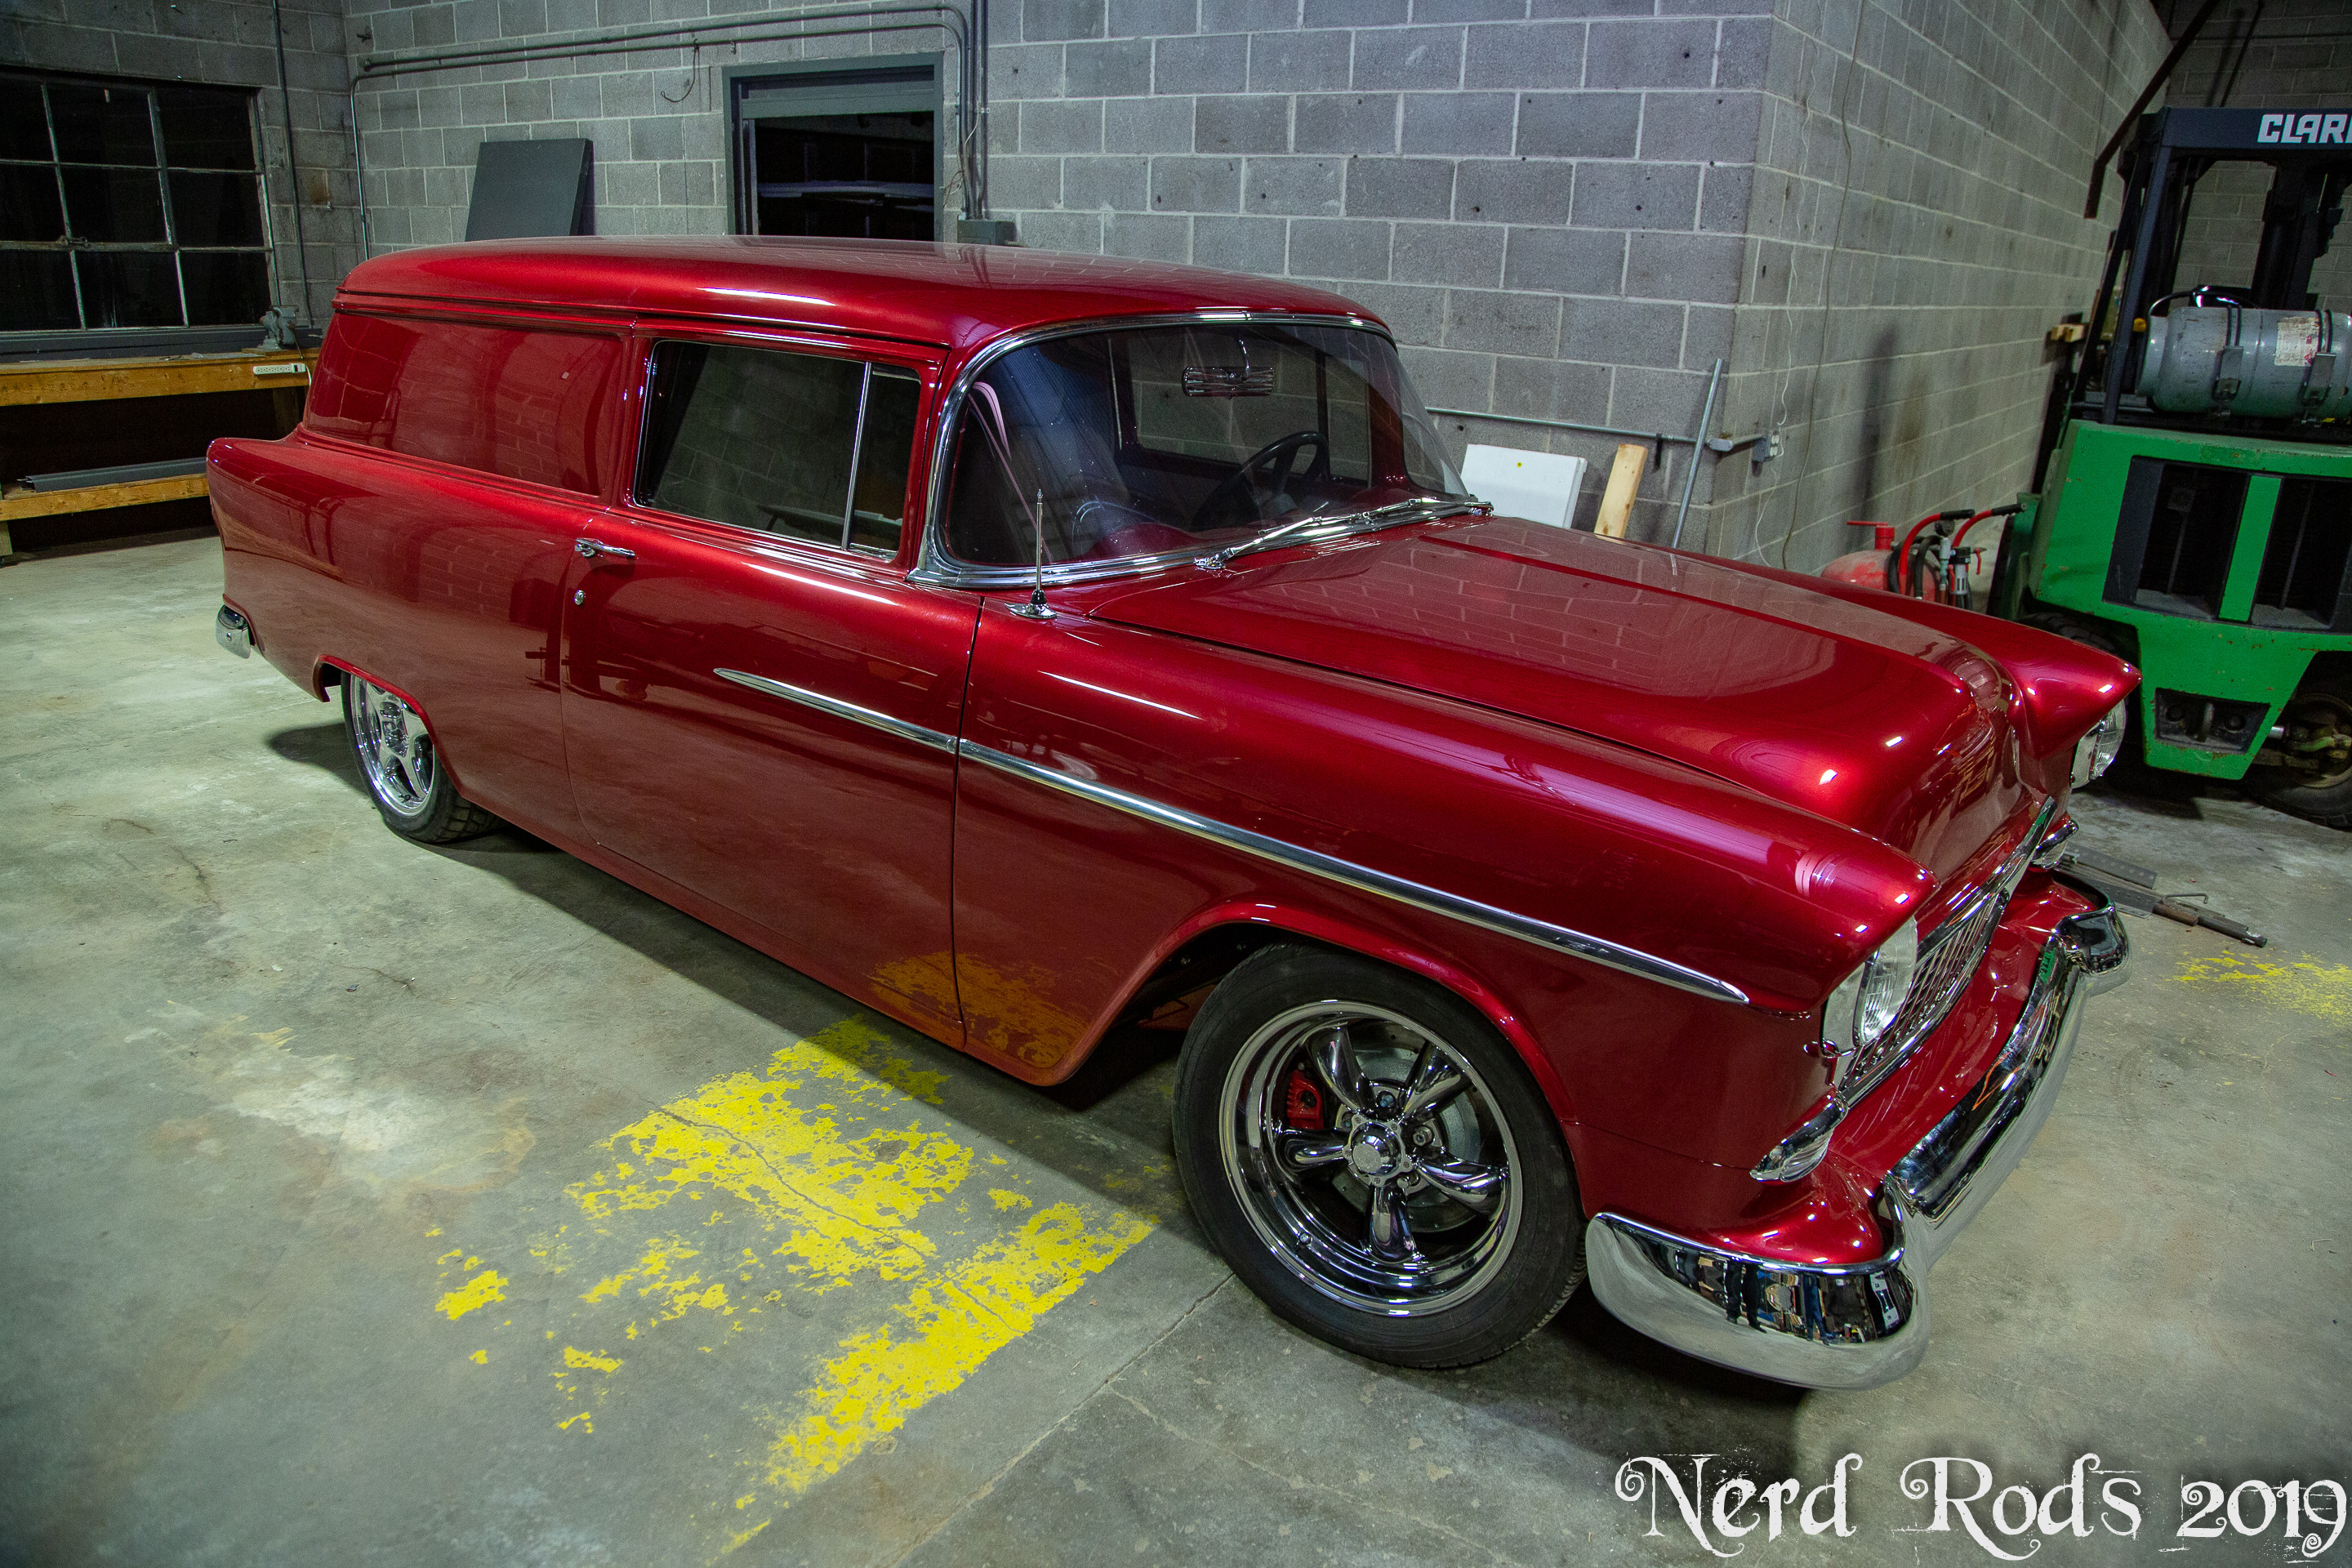
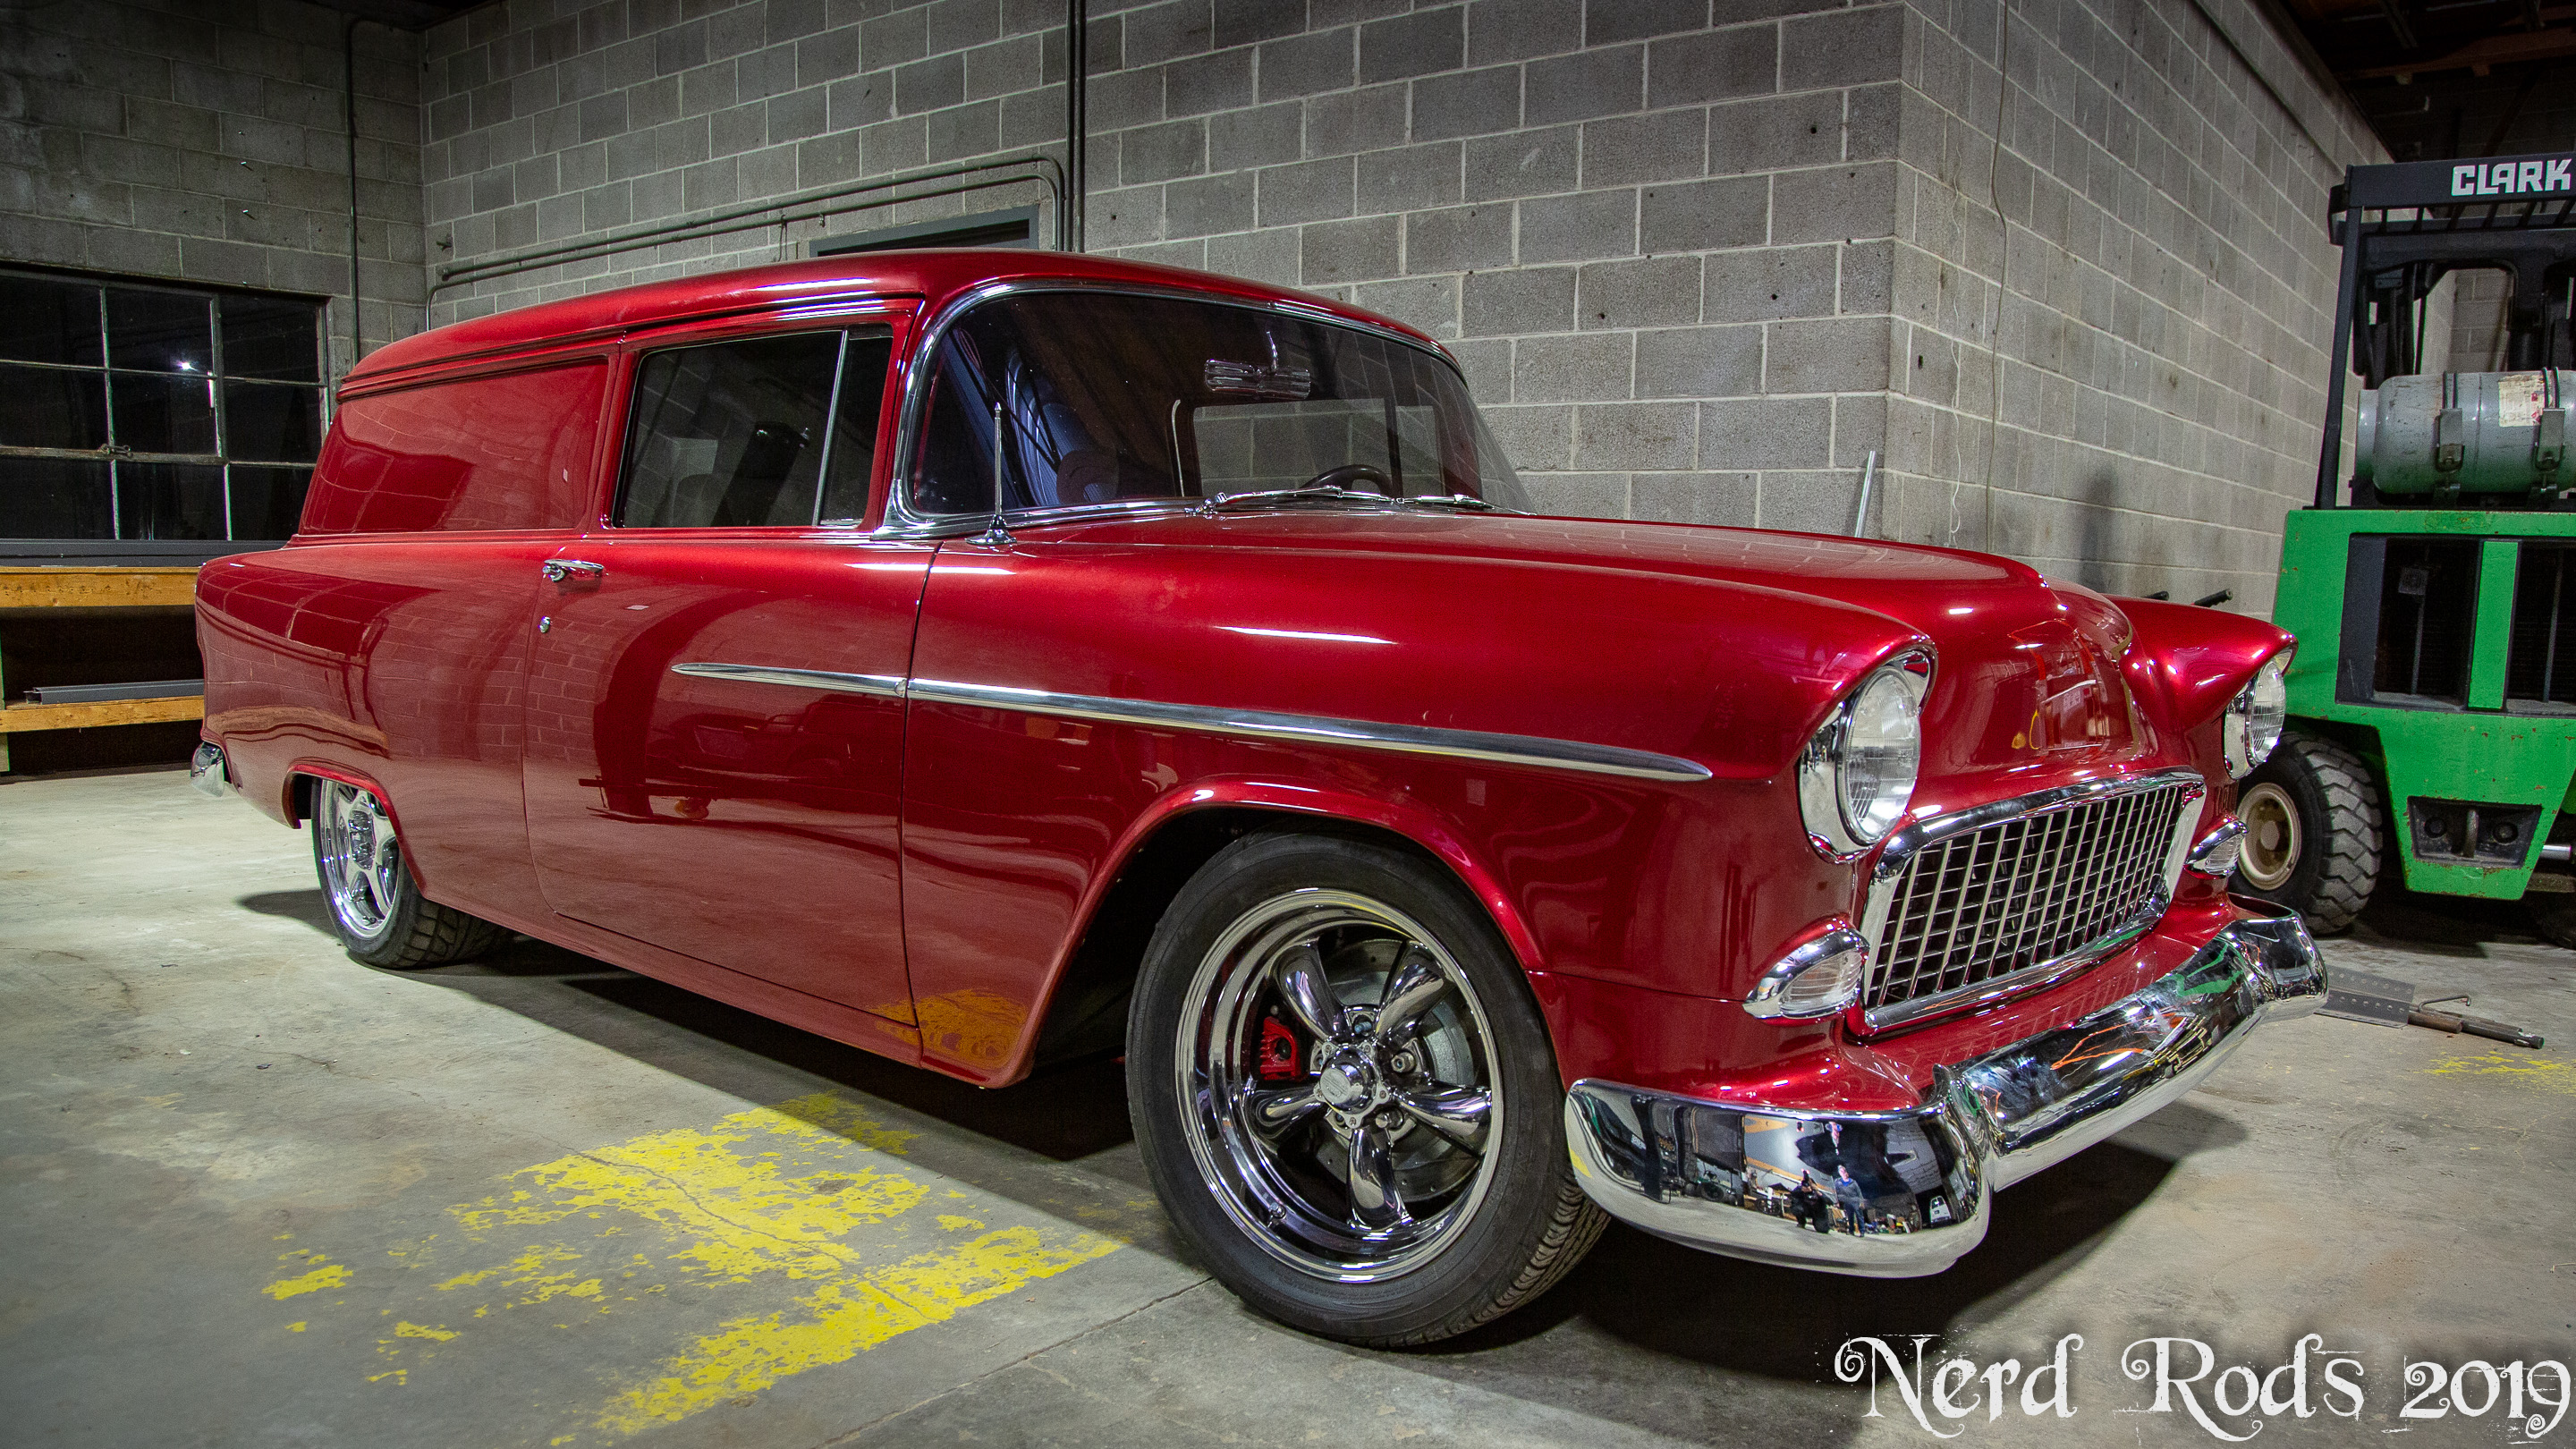
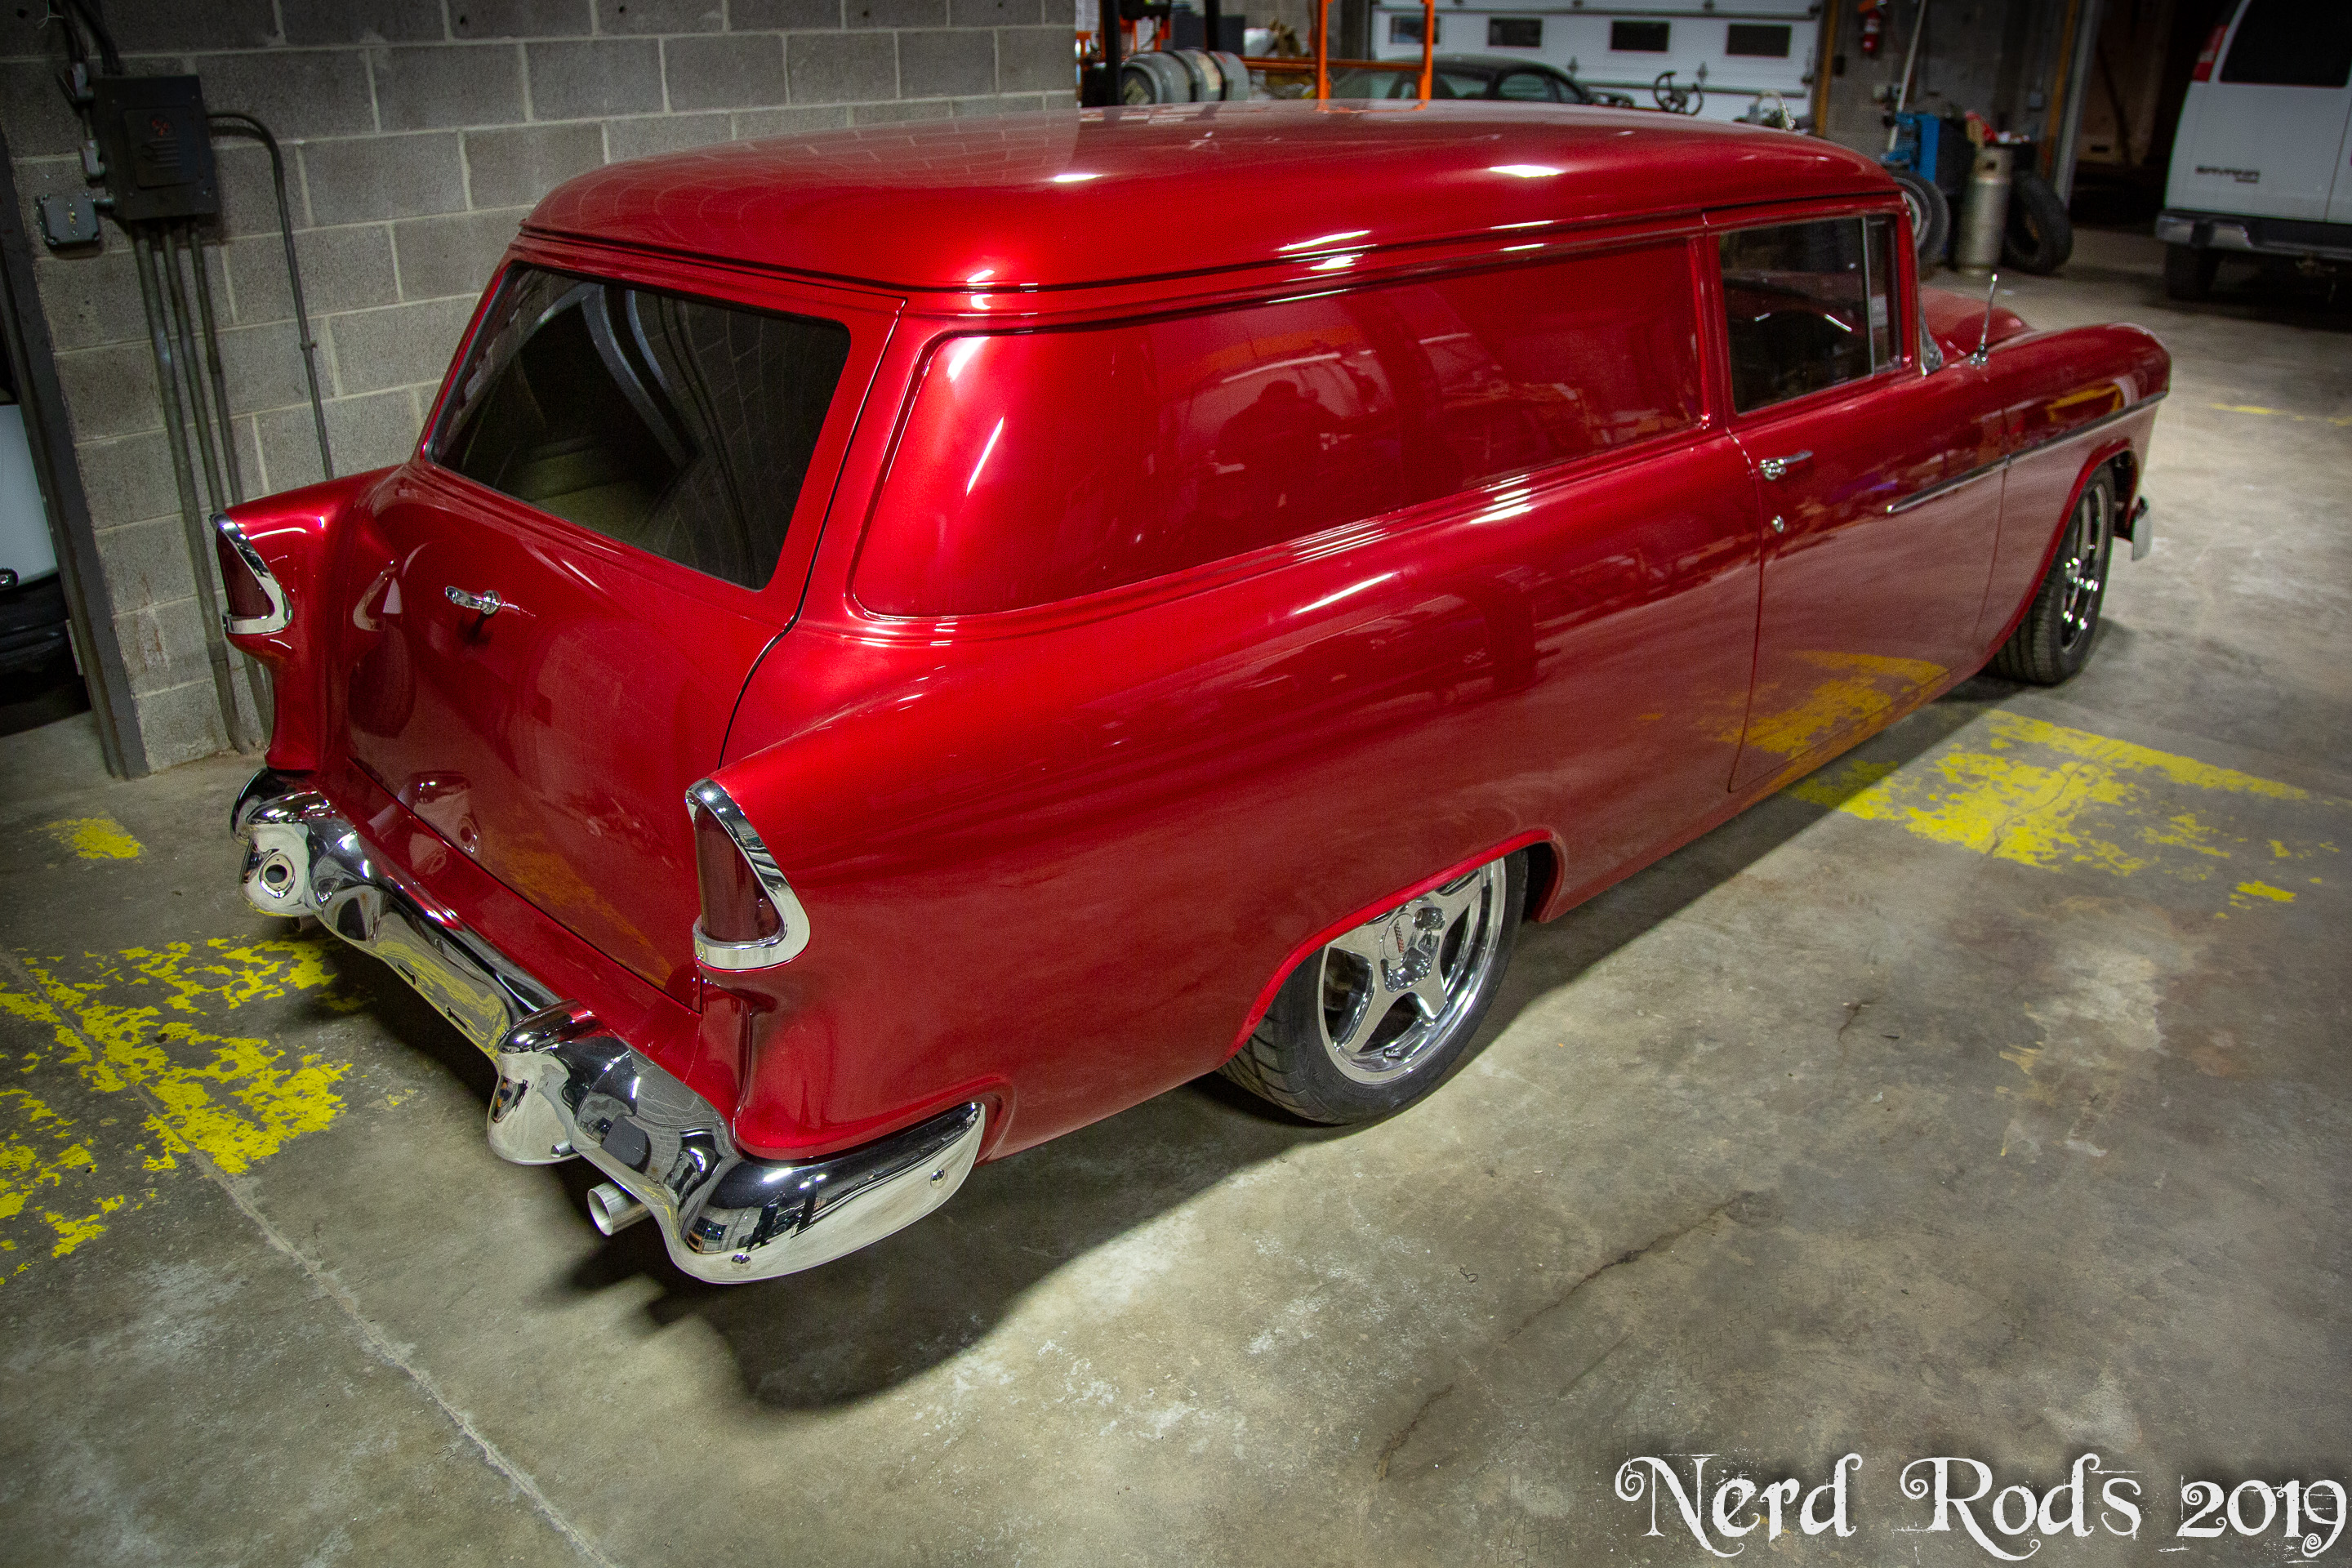
Another cool customer car I just got to see recently was up in Kansas on my way back form my recent trip to Wisconsin. Gary's 55 Sedan Delivery has been his for the last 50 years. He used to race her at the drags and won a good deal of money in the classes he ran and he always promised her he'd make it up to her after all the thrashing.
We'll that stated a few years ago when he ordered a Nerd Rods Stage 3+ chassis and got in line with Randy and his shop Old 40 Bodyworks, the expert TriFive only restoration shop near him in Kansas. The end results speak for themselves. And Randy asked me to come back after he's done, this car isn't even sanded and buffed yet. This is right out of the spray gun for Randy. Hit the link for lost of build photos as we from the assembly of the chassis and body work.
Full Gallery Here (large image warning if you have slow internet)
https://gallery.nerdrods.com/Custome...044_Gary_J_55/

 01-29-2019, 06:45 PM
#56
TECH Senior Member
Man THAT is cleeeen! Get some righteous wheels on that ride and give us another peek!
01-29-2019, 10:20 PM
#57
Launching!
Thread Starter
Join Date: Jan 2007
Location: Luling TX In the Hot Rod Shop
Posts: 294
Likes: 0
Received 3 Likes
on
3 Posts
Right! Actually he had 4 different wheels when I came to check it out. He was trying to figure out sizes, styles, and offsets and colors. Just on this side we have one chrome and one black chrome wheel on this side. The other side had a black C6 wheels and a chrome C6 Z06 wheel. It's so close to being finished though I hope to head up and help him chassis tune it in a few months.


 04-07-2019, 09:36 AM
#60
Launching!
Thread Starter
Join Date: Jan 2007
Location: Luling TX In the Hot Rod Shop
Posts: 294
Likes: 0
Received 3 Likes
on
3 Posts
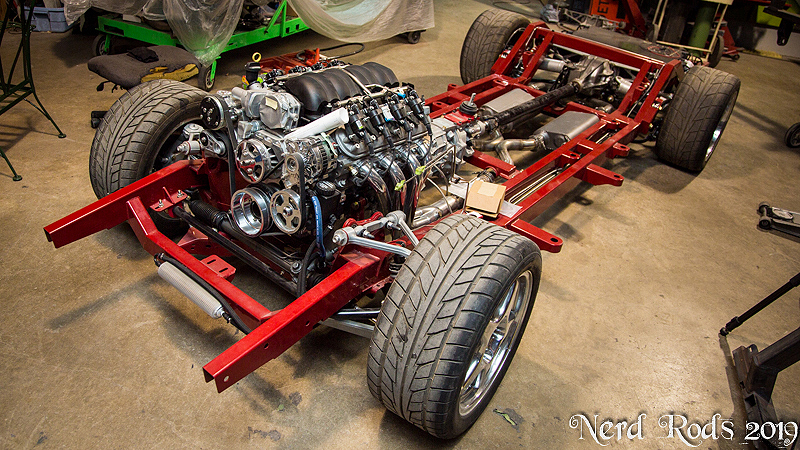
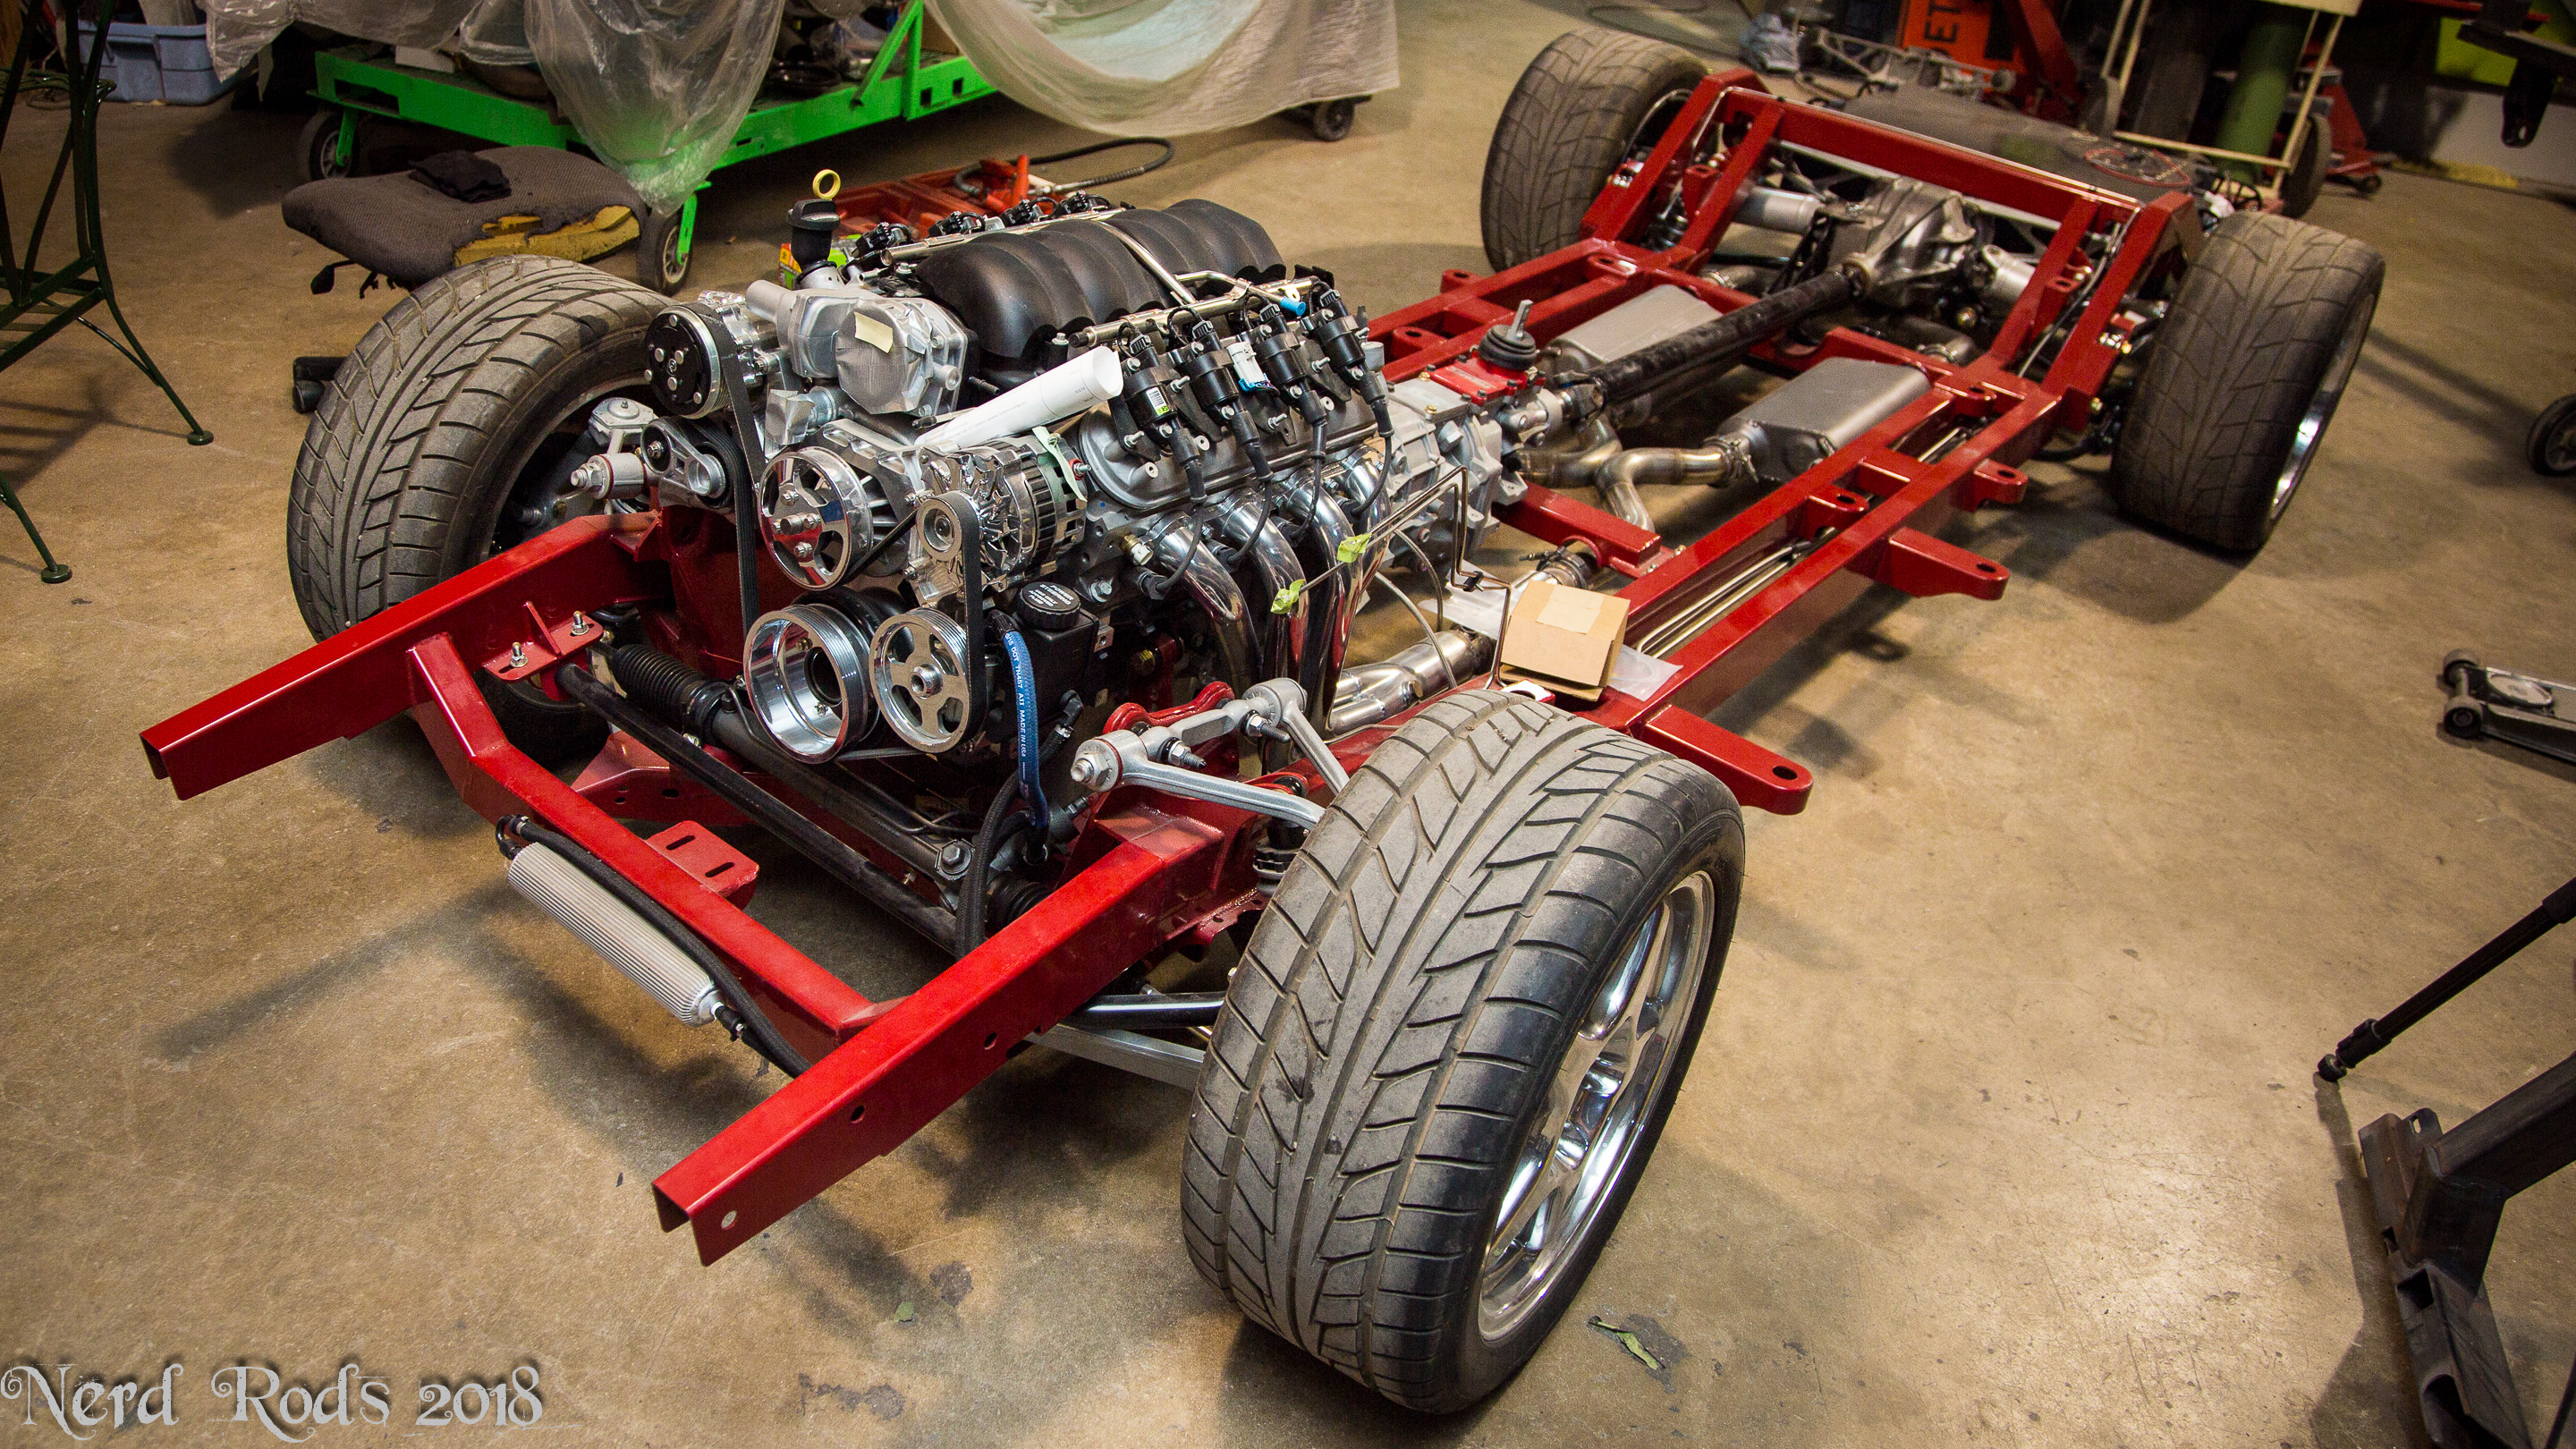
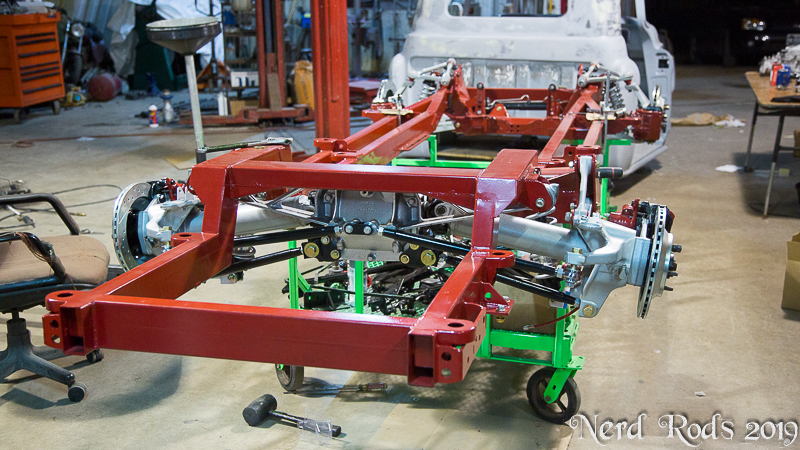
With all the new toys in the shop Dad and I keep chatting about updates to his truck to show off what we can do with the new equipment. So his old chassis goes. Other goodies are fair game if you're interested just ask. Photos of the later parts are for show only.
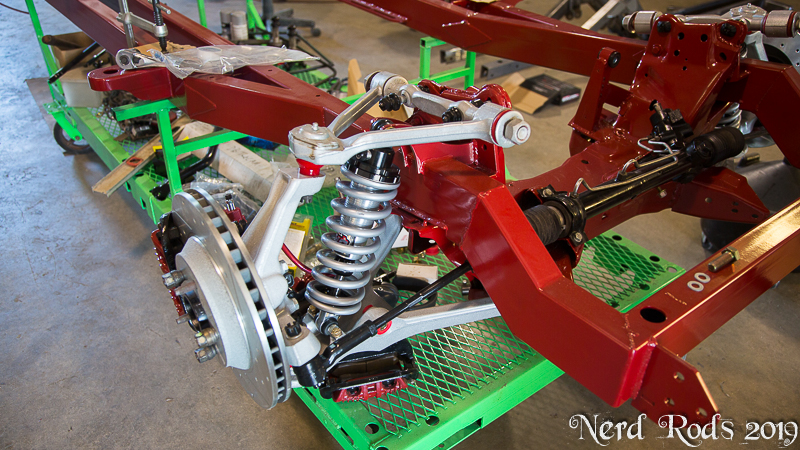
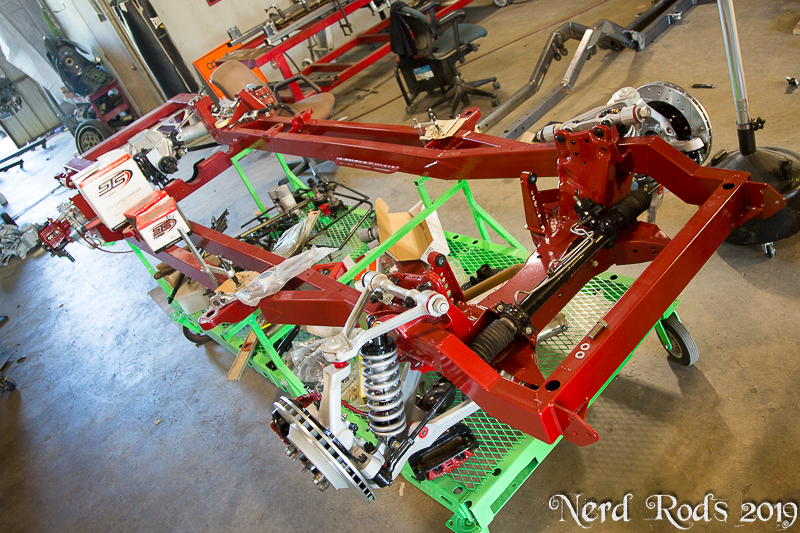
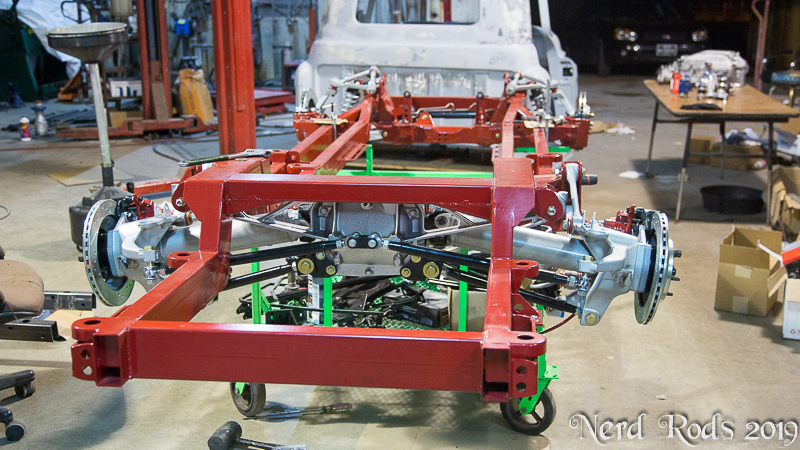
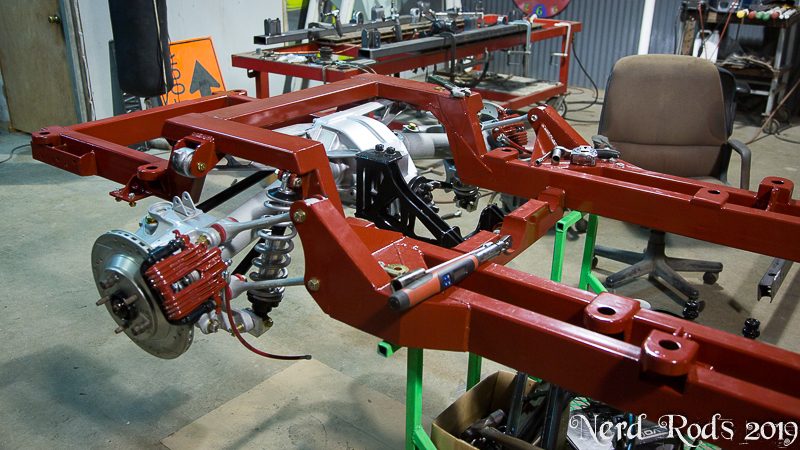
FOR SALE!!!
C4 Corvette Suspension Rolling Chassis
$15,000.00 and no wait!
Located in Luling, Texas
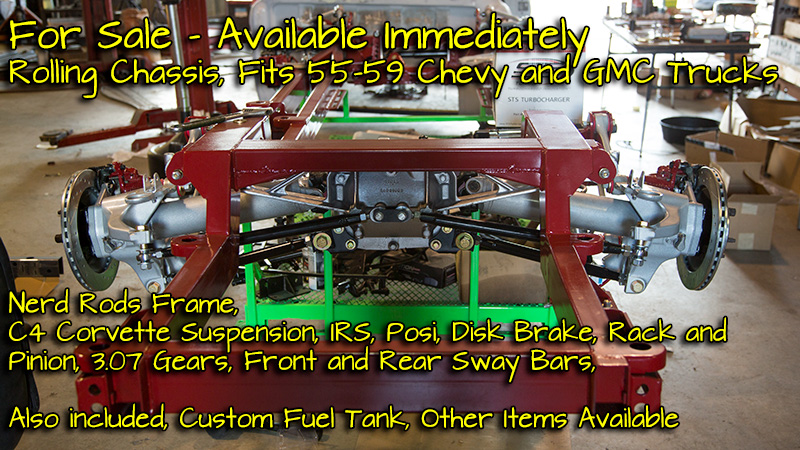
Photo Gallery Here
https://gallery.nerdrods.com/Project...ssis_For_Sale/
Nerd Rods Stage 3 Rolling Chassis
LS Fuel system
Brake like kit,
Retail - $19,140.00
VOIP, call or text 512-348-6253
What�s included
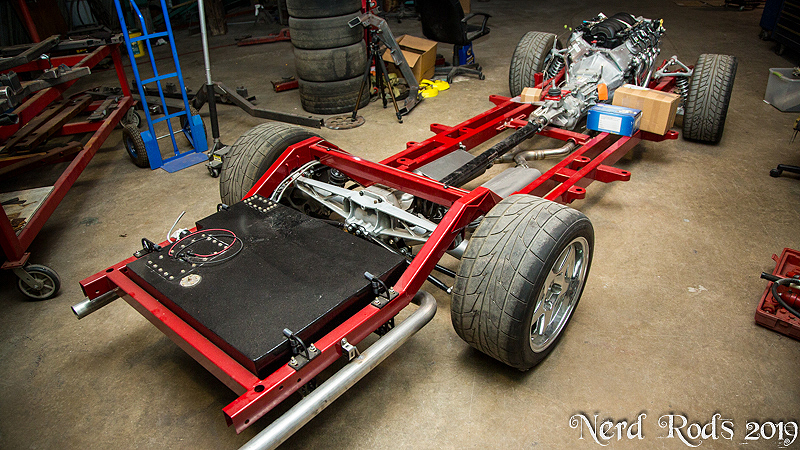
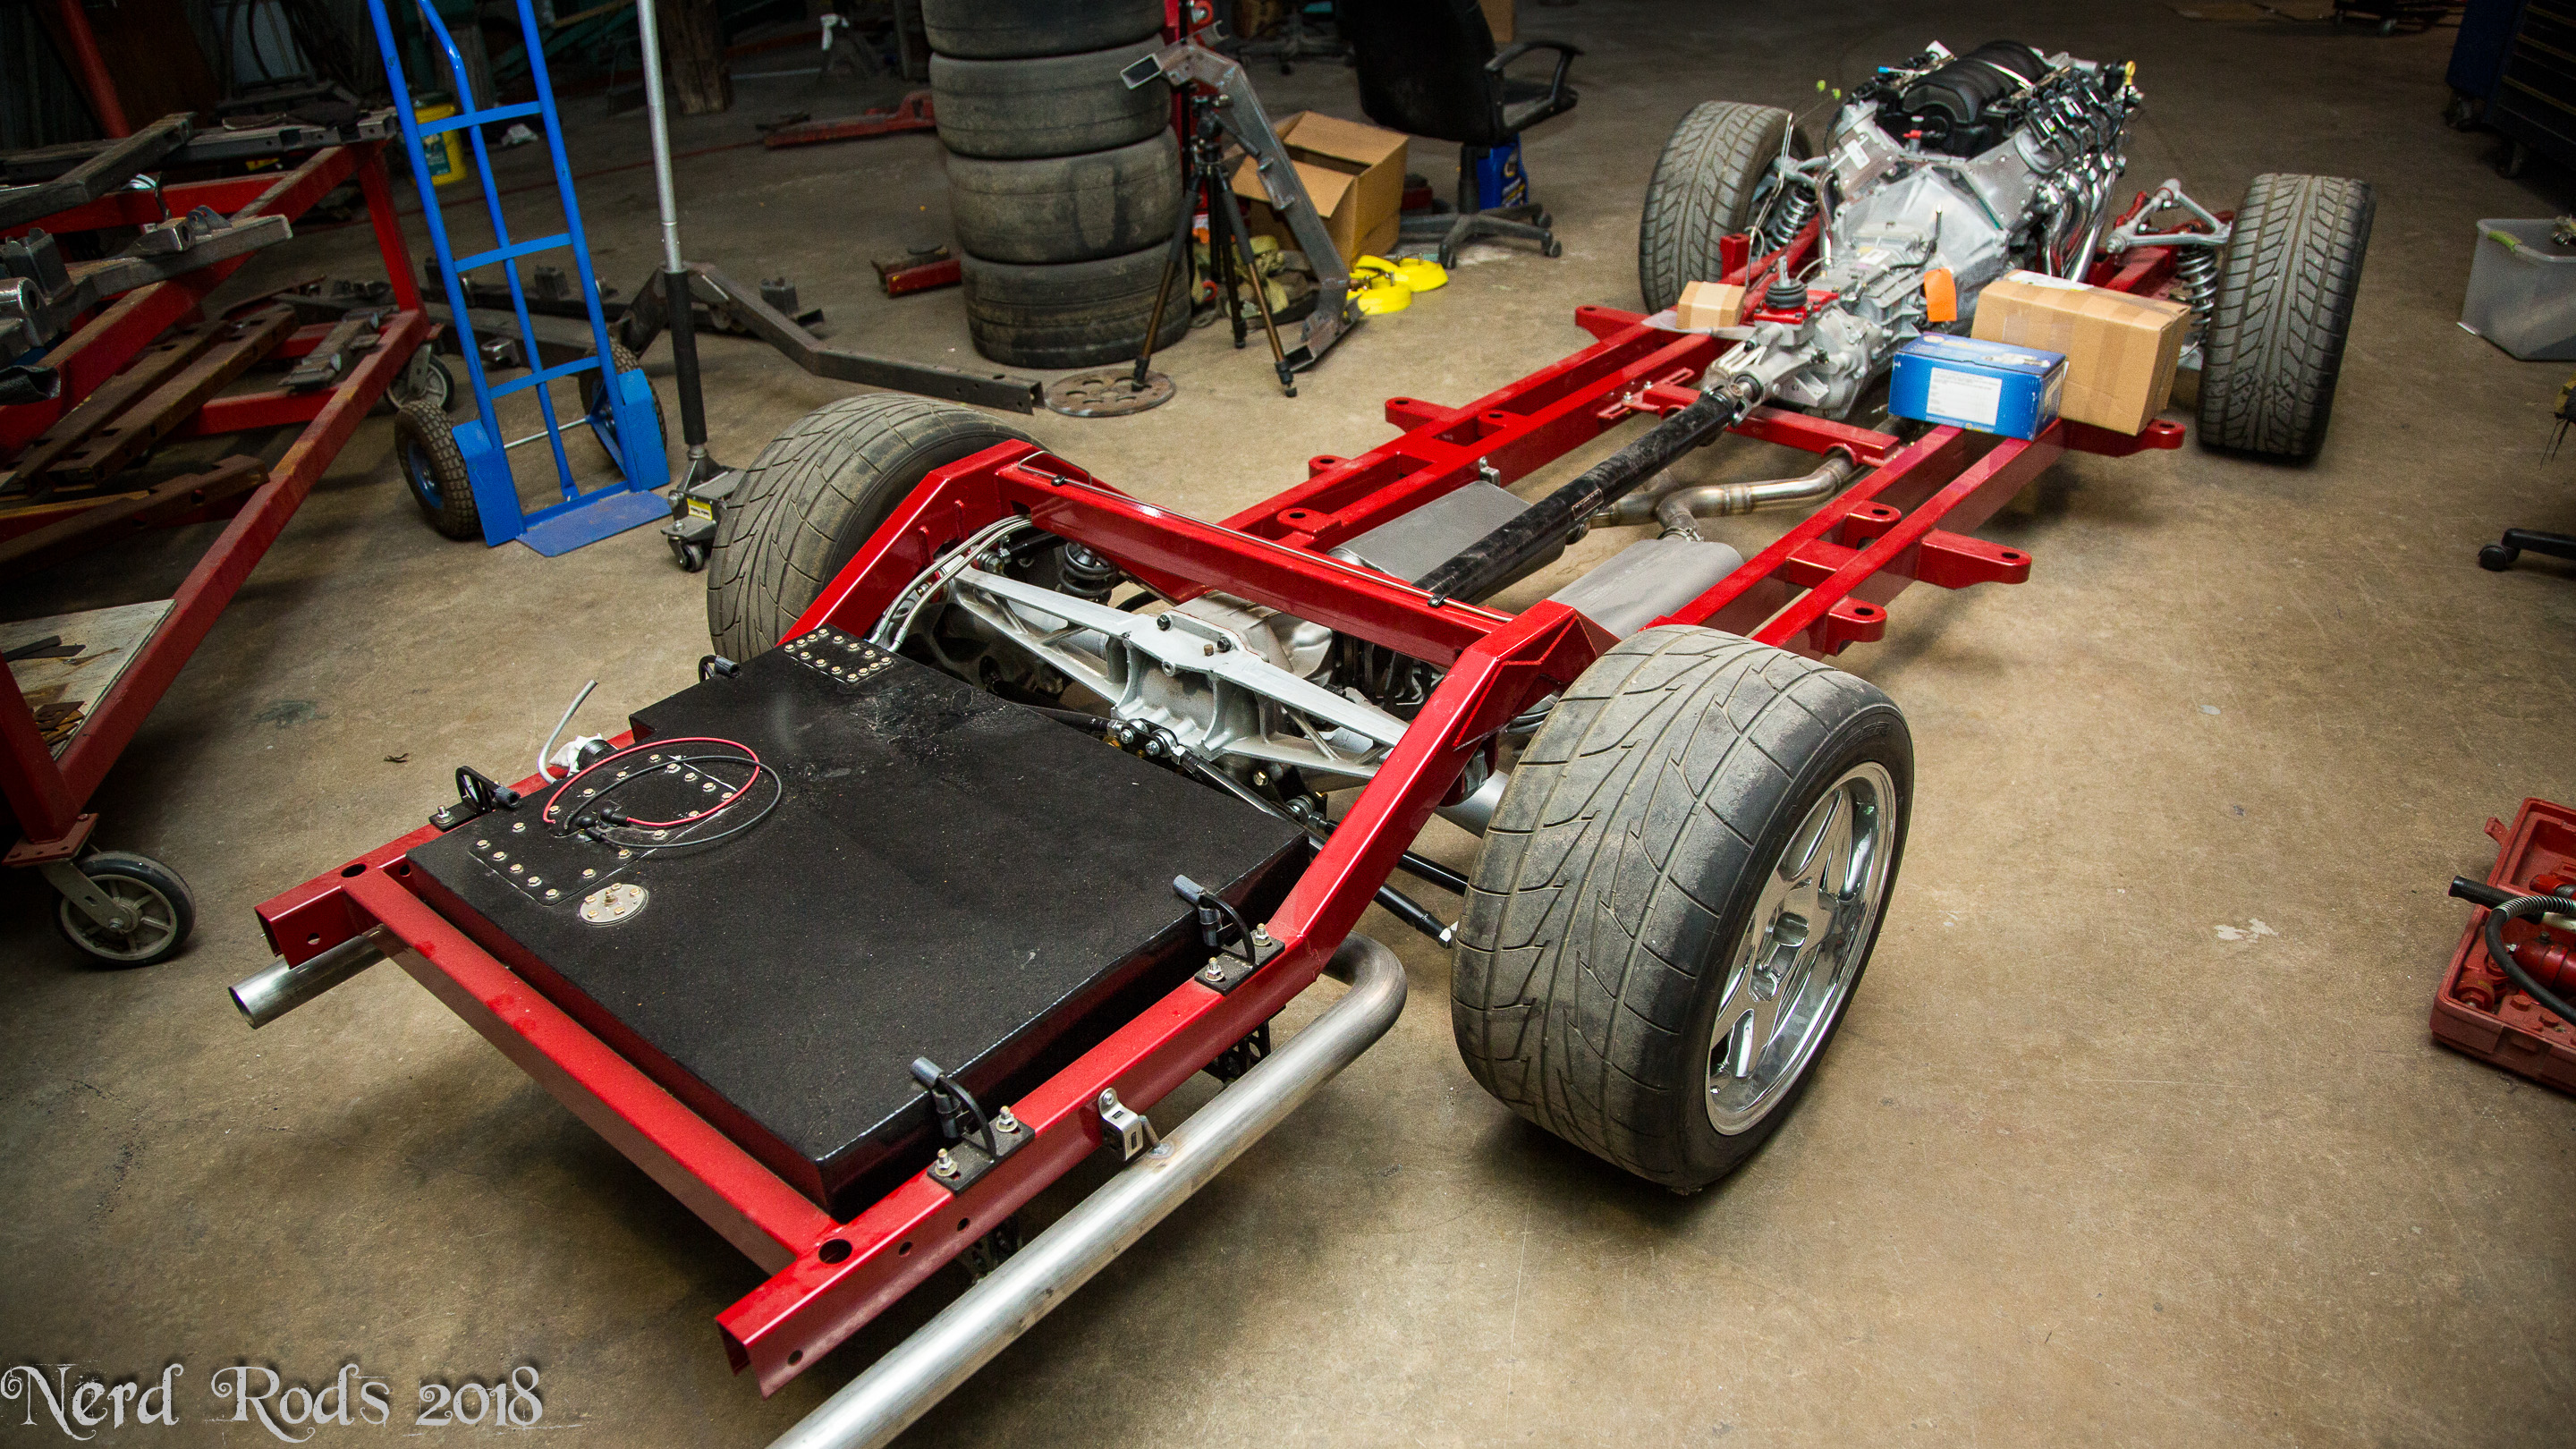
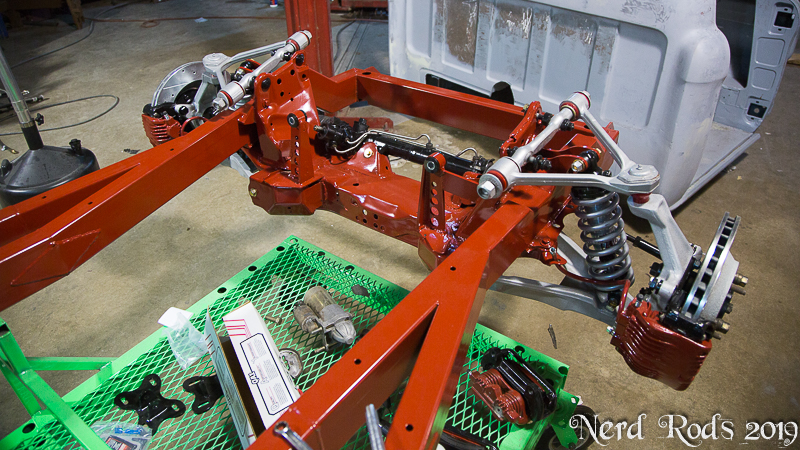
Nerd Rods C4 Corvette Suspension Rolling Chassis
Low body chassis (some sheet metal mods required, can be spaced up)
Red Powder Coat
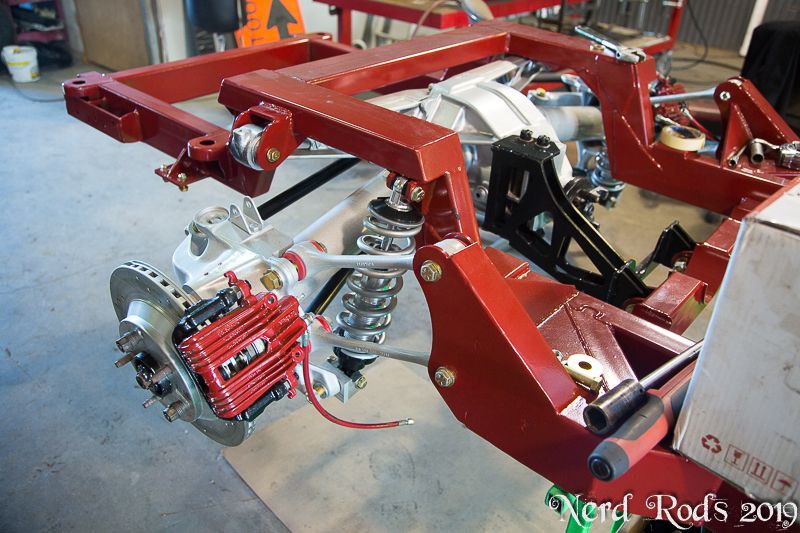
1992 Corvette Front Suspension
Rack and Pinion Steering
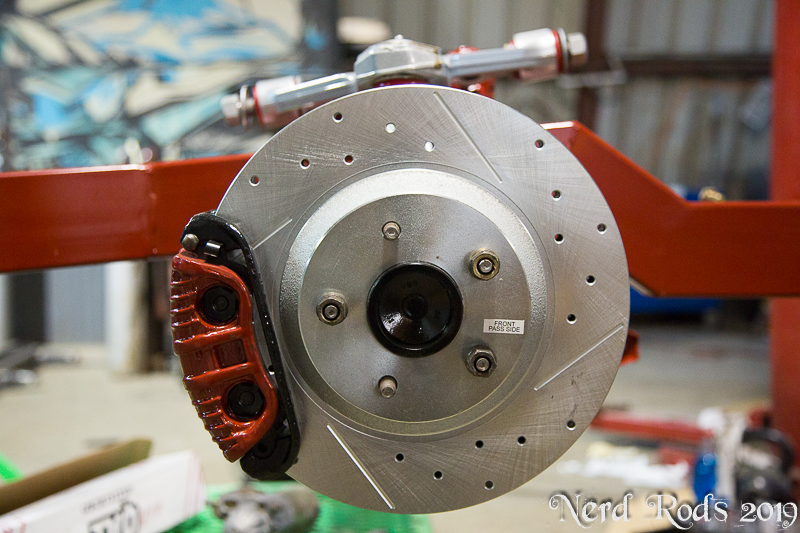
Upgraded 13� rotors and twin piston calipers
QA1 Double adjustable coil over shocks, springs, T bars and bump stops
All new urethane bushings
Blasted and powder coated Silver
Sway Bar
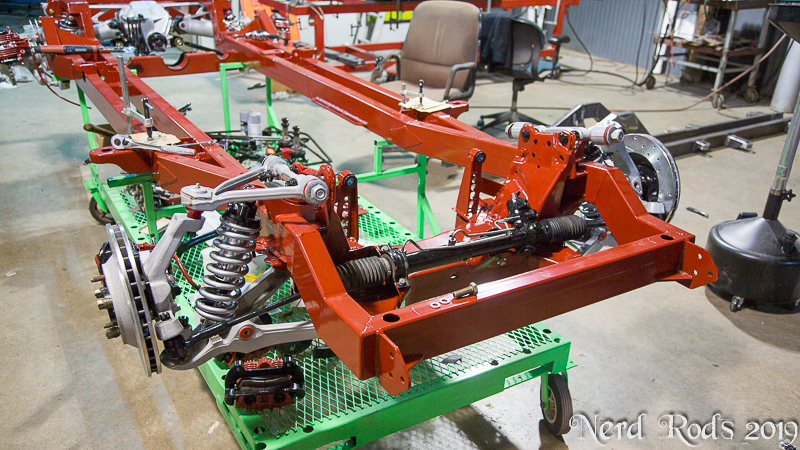
1990 Corvette IRS Suspension
Dana 36, 3.07:1 Gears
Posi traction, limited slip differential
12� Corvette Disk brakes
All new urethane bushings
QA1 Coil Over Shocks, springs and bump stops
Sway bar and custom linkage
Blasted and powder coated Silver and Black
18 Gallon Custom Fuel Tank
Uses the OEM filler neck
LSx ready with intake fuel pump
340LPH Stealth Pump
0-90 ohm sending unit
Stainless hard lines,
Flex hoses,
Regulator and adapters,
Braided Brake lines,
Stainless hard lines
Ask about anything else you see in the photos. It�s all available for the right price but it won�t be cheap or free. I plan on moving most everything to the new frame.
FOR SALE!!!
C4 Corvette Suspension Rolling Chassis
$15,000.00 and no wait!
Located in Luling, Texas
Photo Gallery Here
https://gallery.nerdrods.com/Project...ssis_For_Sale/
Nerd Rods Stage 3 Rolling Chassis
LS Fuel system
Brake like kit,
Retail - $19,140.00
VOIP, call or text 512-348-6253
What�s included
Nerd Rods C4 Corvette Suspension Rolling Chassis
Low body chassis (some sheet metal mods required, can be spaced up)
Red Powder Coat
1992 Corvette Front Suspension
Rack and Pinion Steering
Upgraded 13� rotors and twin piston calipers
QA1 Double adjustable coil over shocks, springs, T bars and bump stops
All new urethane bushings
Blasted and powder coated Silver
Sway Bar
1990 Corvette IRS Suspension
Dana 36, 3.07:1 Gears
Posi traction, limited slip differential
12� Corvette Disk brakes
All new urethane bushings
QA1 Coil Over Shocks, springs and bump stops
Sway bar and custom linkage
Blasted and powder coated Silver and Black
18 Gallon Custom Fuel Tank
Uses the OEM filler neck
LSx ready with intake fuel pump
340LPH Stealth Pump
0-90 ohm sending unit
Stainless hard lines,
Flex hoses,
Regulator and adapters,
Braided Brake lines,
Stainless hard lines
Ask about anything else you see in the photos. It�s all available for the right price but it won�t be cheap or free. I plan on moving most everything to the new frame.