
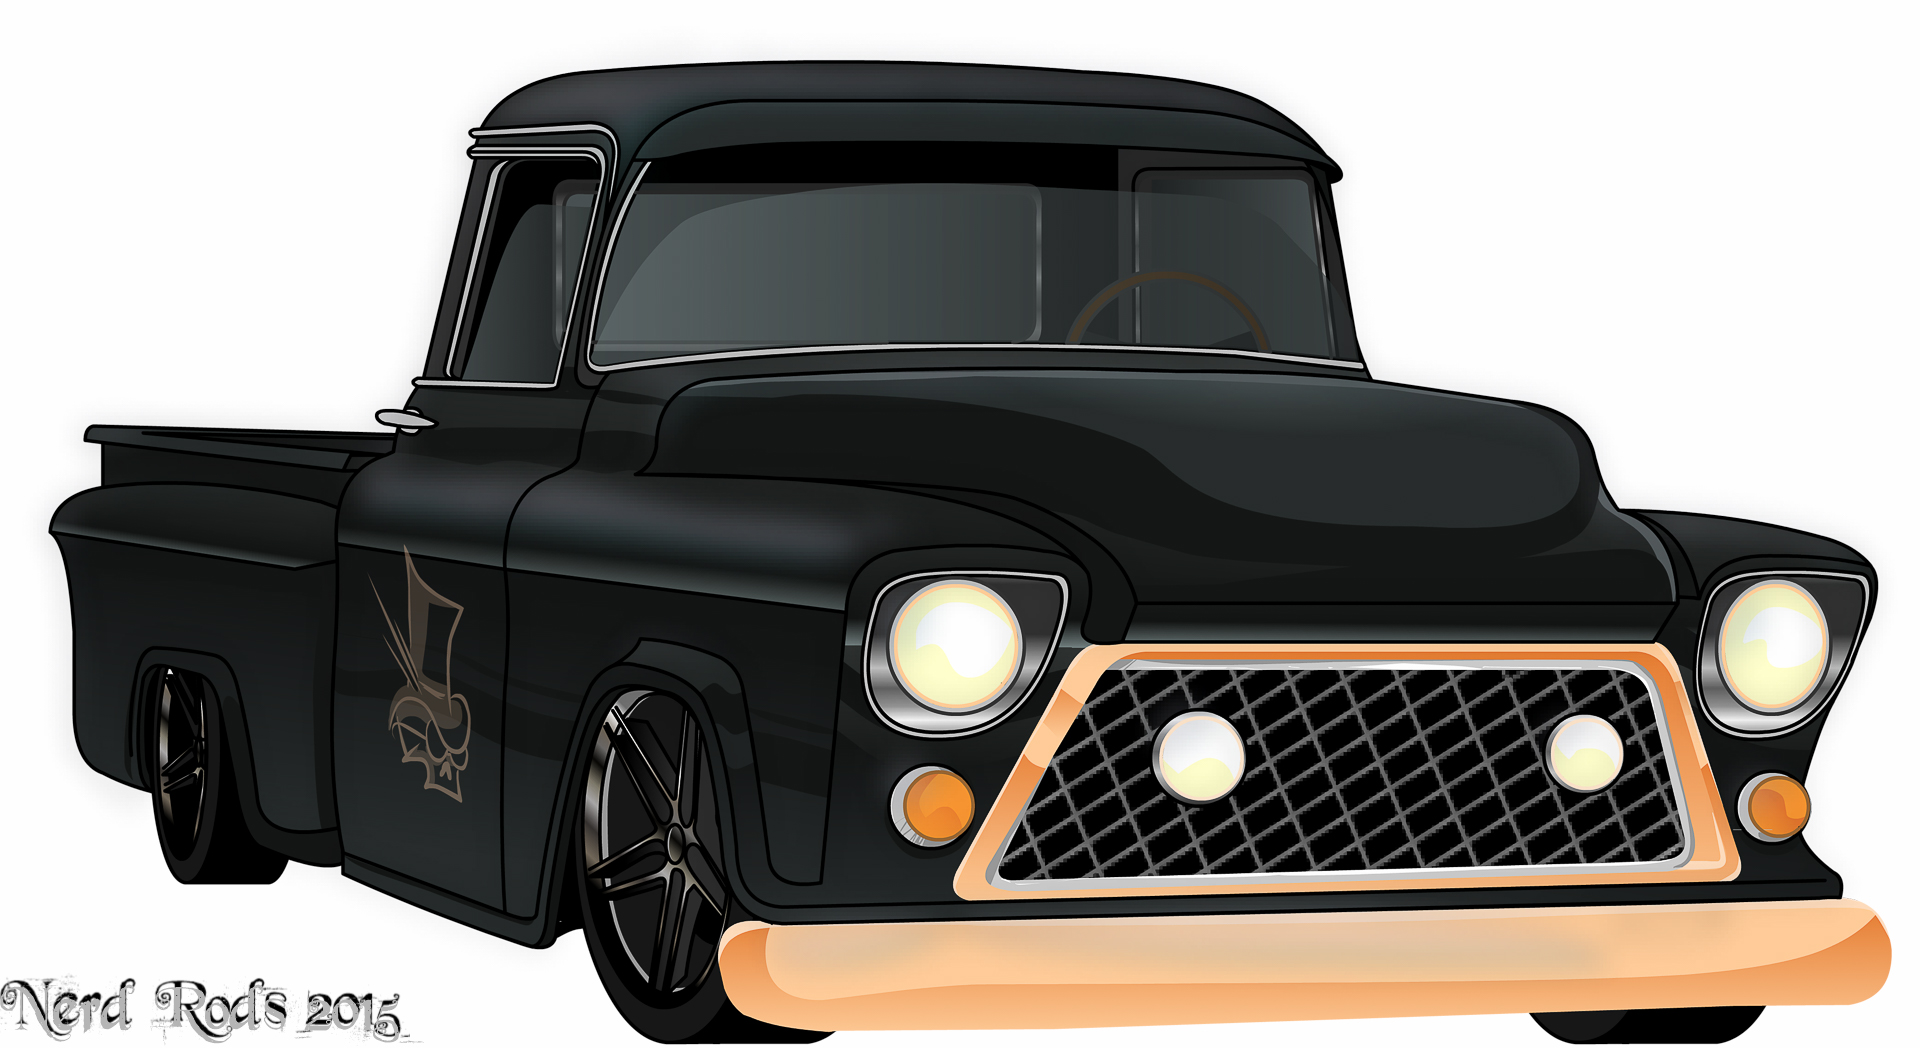
D^3 Dad's Down and Dirty 1955 Pickup, Nerd Rods C4 on the Cheep
 06-14-2015, 10:22 AM
#1
Launching!
Thread Starter
Join Date: Jan 2007
Location: Luling TX In the Hot Rod Shop
Posts: 294
Likes: 0
Received 3 Likes
on
3 Posts

Updated 2015.Sept.30
This is the running total that we’ll keep updated, So I’ll come back and edit this as we go to reflect the build cost in real numbers. Stuff I get dealer discounts on I’ll list at retail prices as well so you’ll know what to expect in reality
Body $1,638.27
* $500.00 - Our "Pile" Of Parts, This is an arbitrary price for this pile of loot
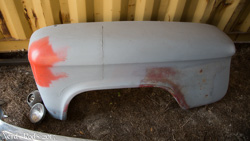
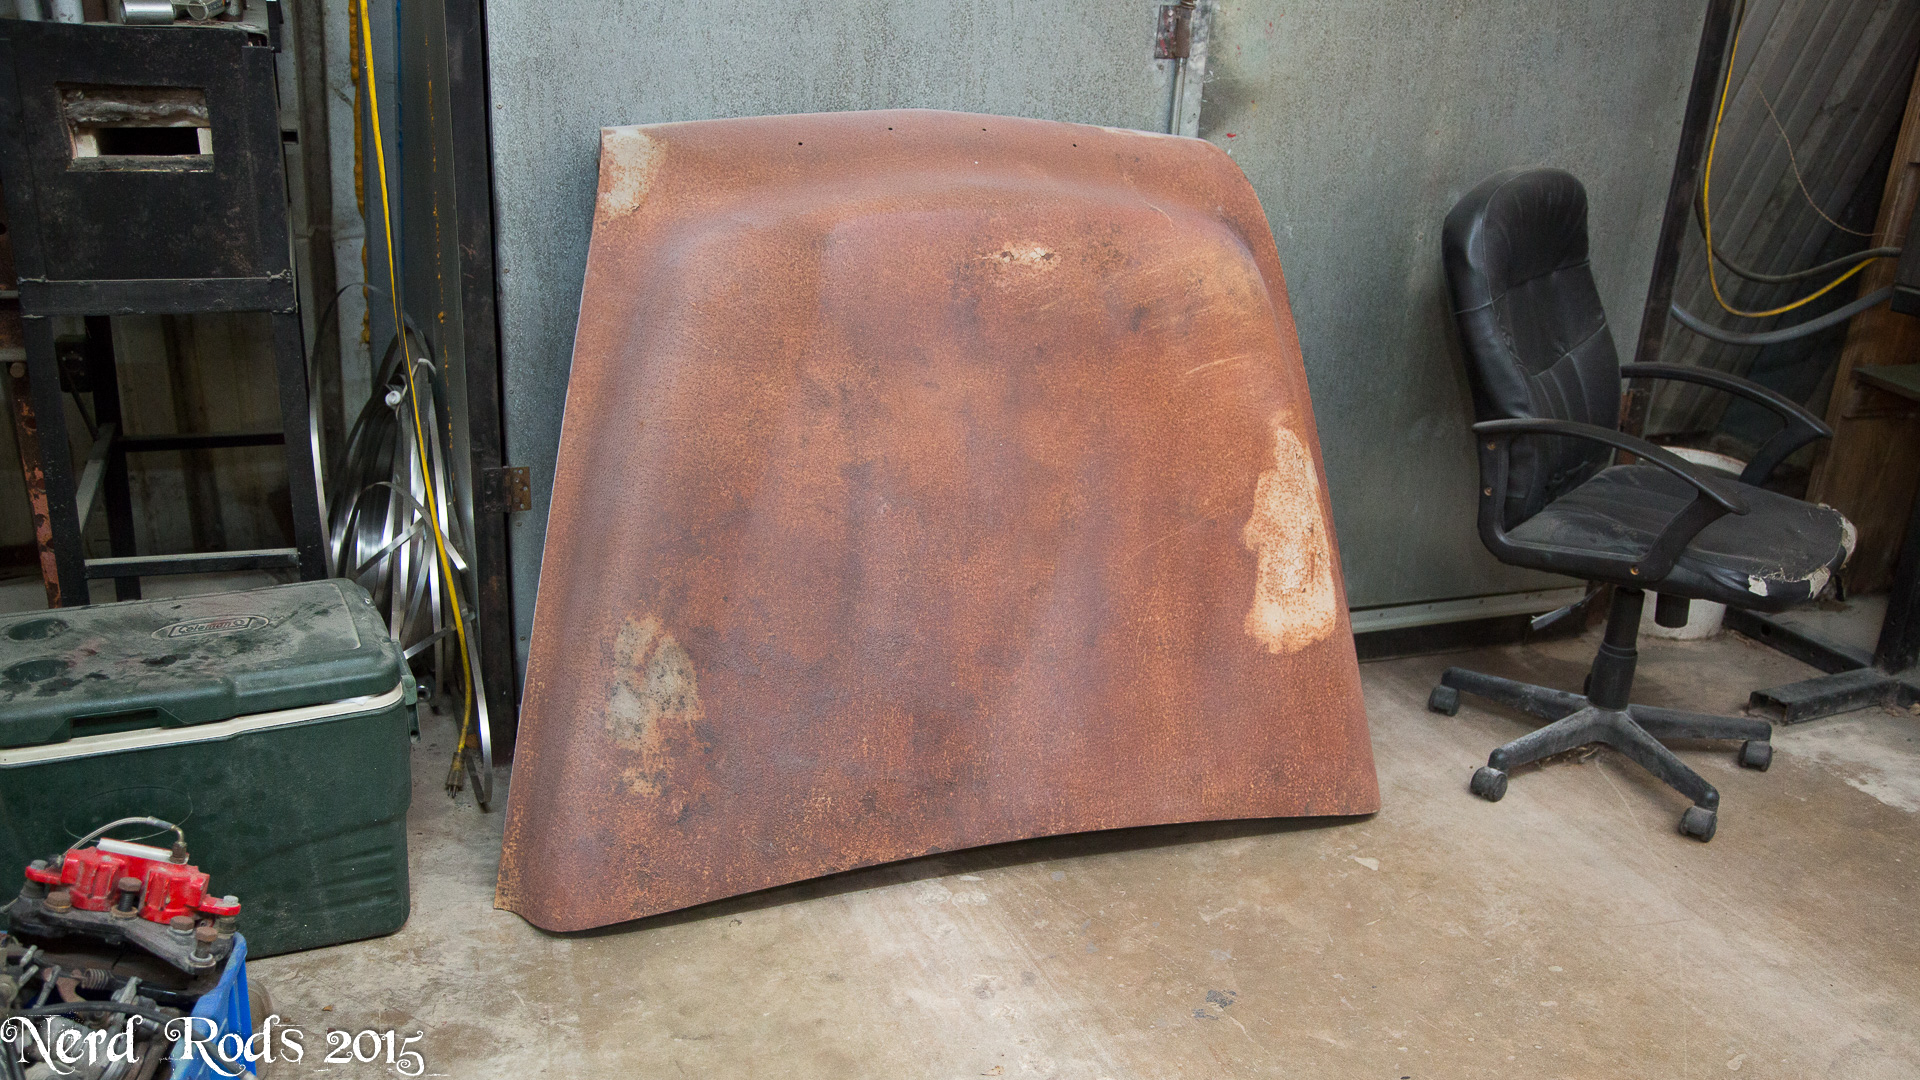
* Cab, Doors, Hood, Front Fender, Bed, Rear Fenders, and Glass
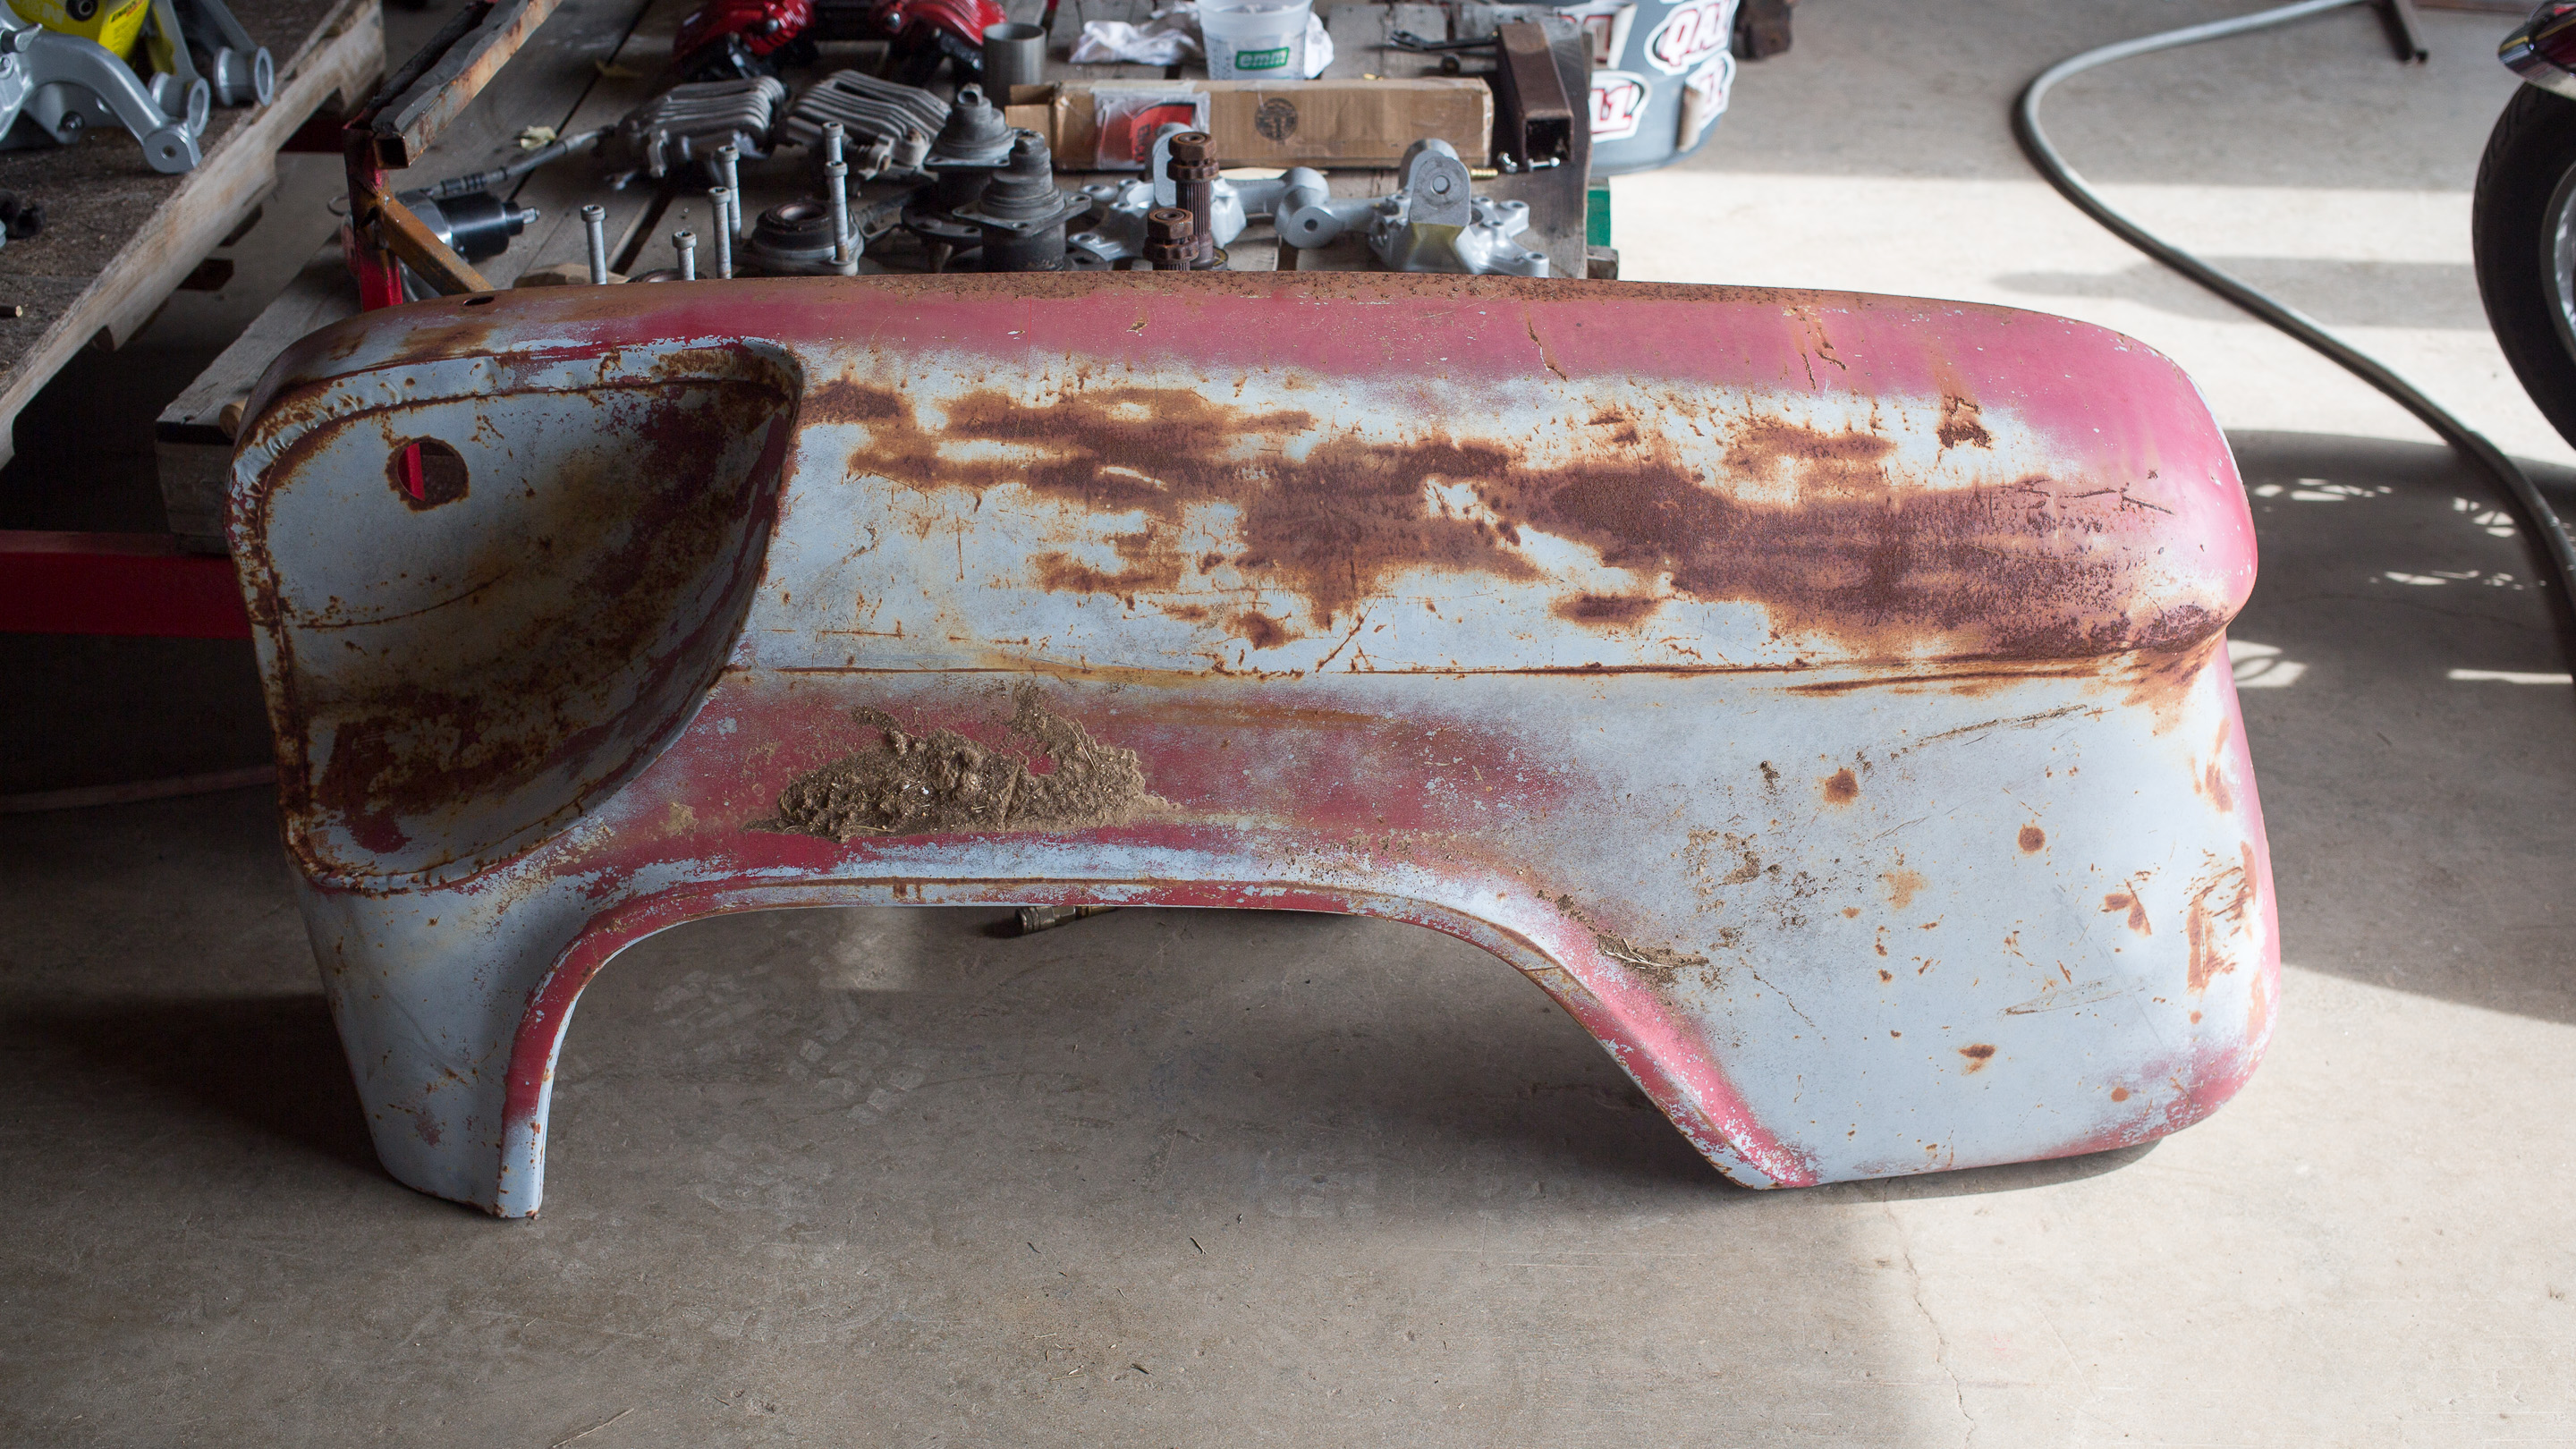
$391.49 - Front Fender, New Drivers Side
$103.90 - Cab Corner Patches
* $50.00 - Sheet metal For Custom Patches, Door reconstruction, Custom Firewall and tunnel modifications.
* $15.00 - 6" 14 gauge tubing for drive shaft hump
$157.96 - Primer, House of Color KD3000 (one gallon)
$419.92 - Hot Rod Flatz Charcoal Metallic (two gallons, lets just call me paranoid)
-
Drive Train $7,168.30
$800.00 - 5.3L LM7 and 4L60E Transmission
$(650.00) - 4L60E Sold
* - Upgraded to 6.0 (I had this laying around)
* $725.00 - Texas Speed Cam Swap Kit
* $1,000.00 - T56 Manual Transmission (2000 Camaro)
* $312.00 - LS1 Clutch
* $300.00 - LS1 Flywheel
* $975.00 - Nerd Rods Fuel Tank Stage 1 Kit
$188.17 - Griffin Radiator Part # 1-25201-X + Shipping
$85.94 Summit Racing Cooling Fans, Quantity 2, Part # SUM-G4901 42.97 Each
$120.00 - PRC AC Condenser + Shipping http://www.prchotrod.com/products/
* $2,782.20 - STS Single Turbo Kit, BB Turbo Upgrade, Waste gate, Blow off valve and Oiling system
* $479.99 - Turbo Smart Boost Controller
* $50.00 - Aluminum Sheet for Fan Shrouds
-
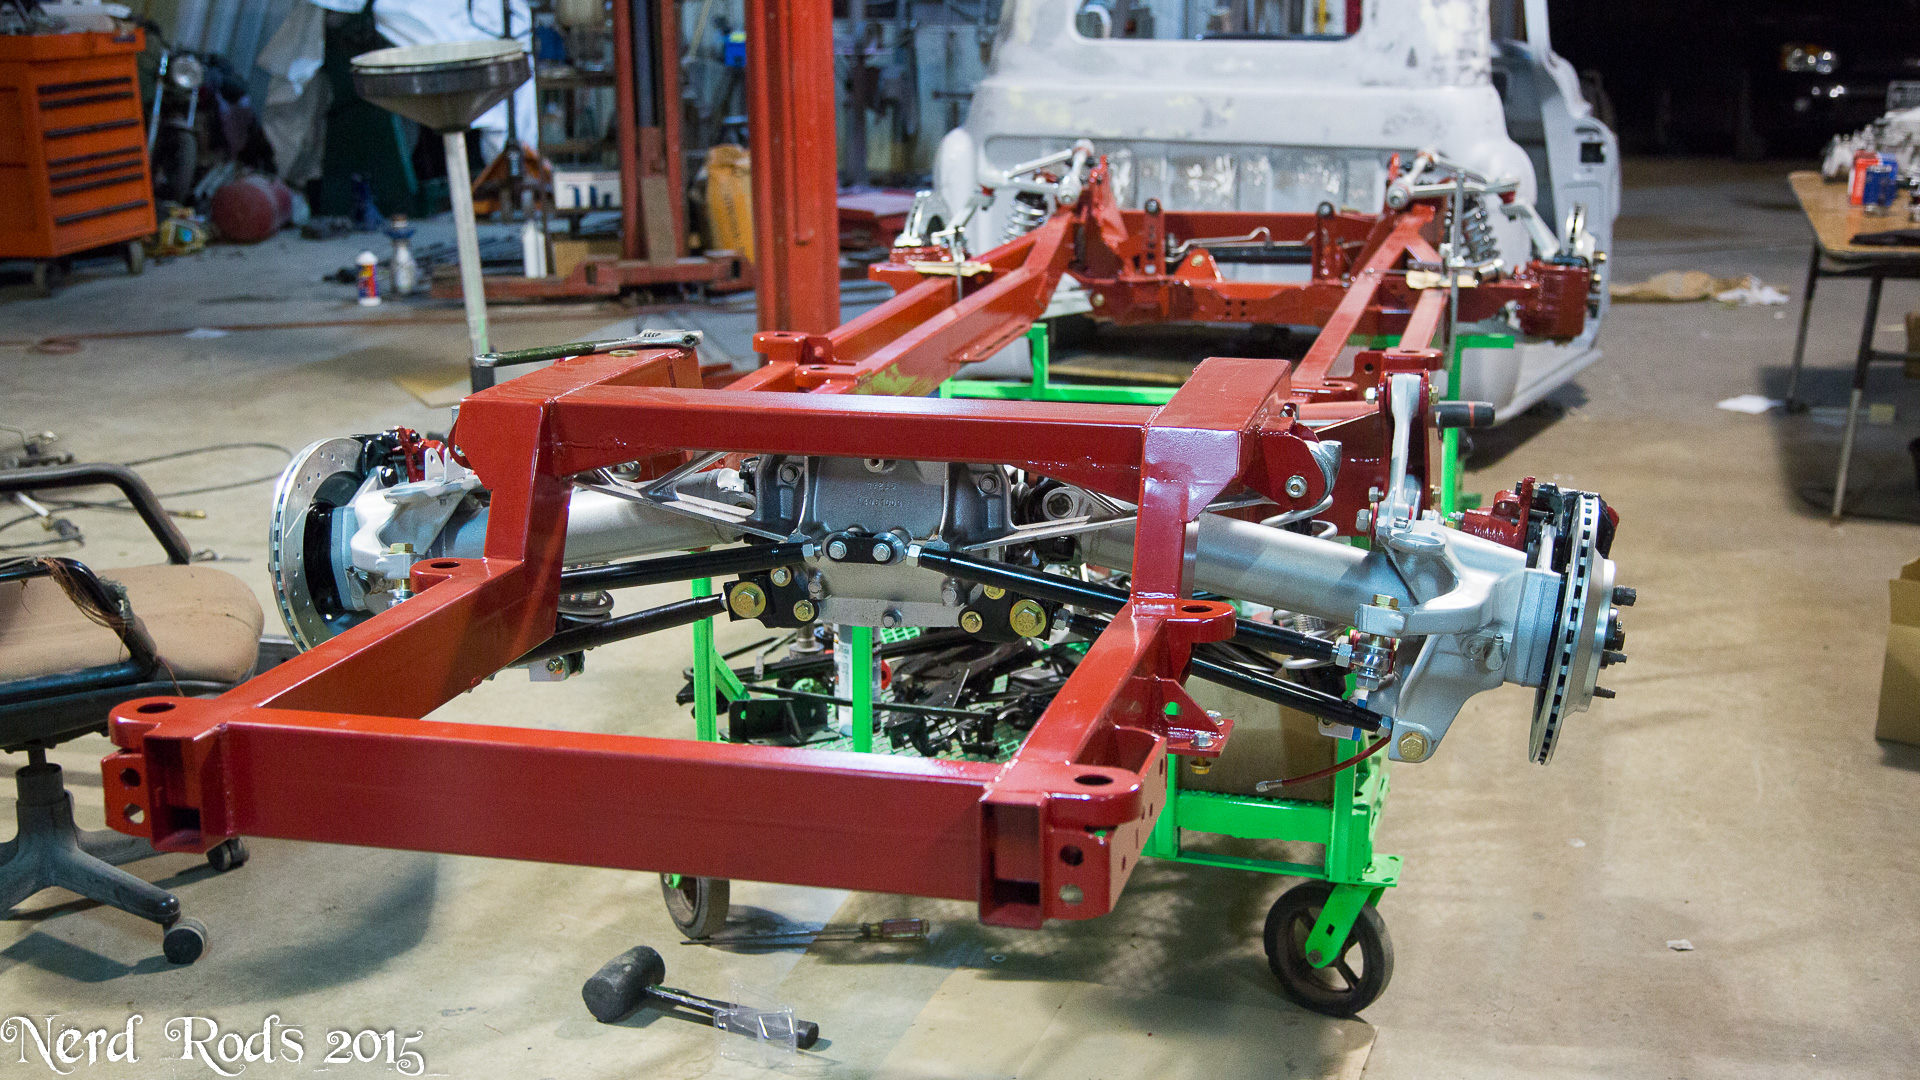
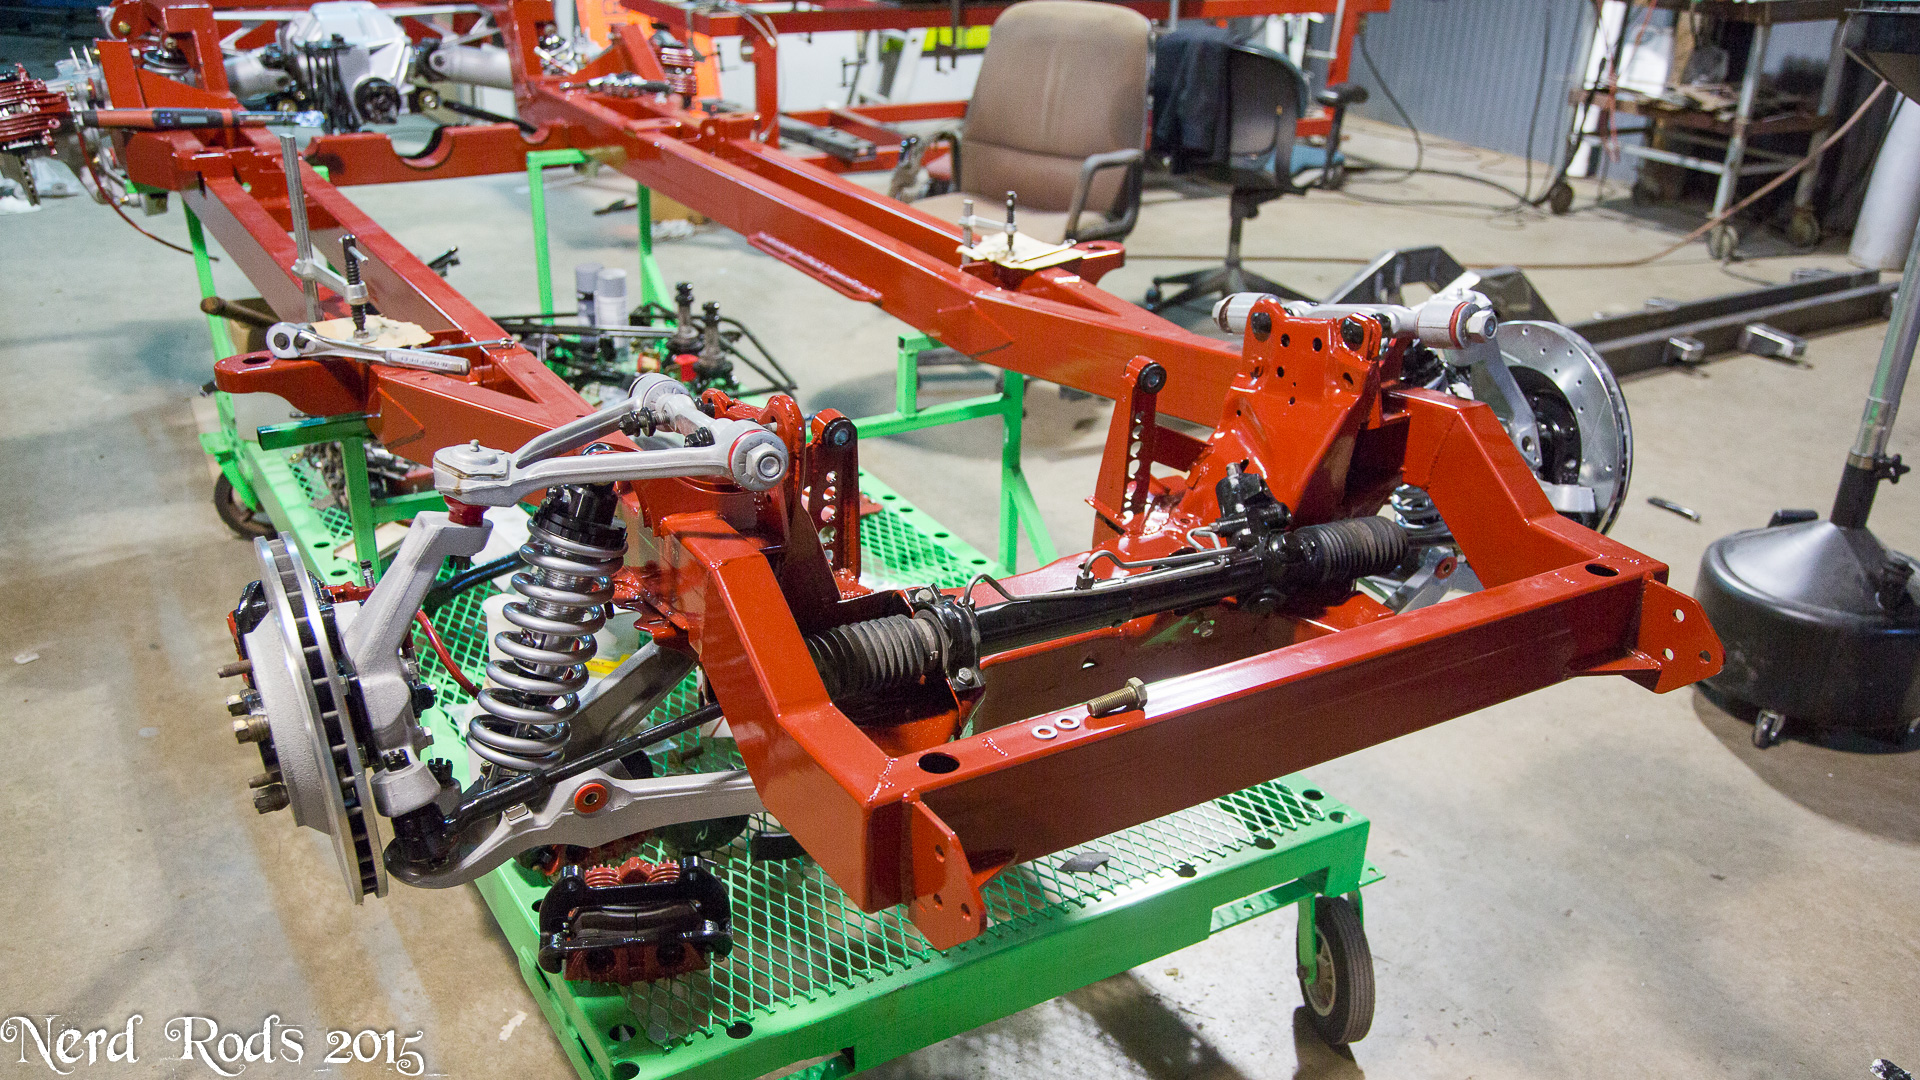
Chassis / Suspension $8,797.97
* $3,495.00 - Stage 1 Kit Frame
* $1,600.00 - C4 Corvette Suspension, Front and Rear
* $1,600.00 - Dana 44 with 4:10 gear upgrade
* $1,352.00 - QA1 Coil Over Shocks and Springs
* $75.97 - C4 Front A Frame Bushings
* $175.00 - Nerd Rods Motor Mount Kit
* $500.00 - C6 Corvette Wheels (craigslist find)
-
-
Interior $4,443.30
* $200.00 - Corbeau Adjustable Racing Seats, Used to be cut and modified,
* $25.00 - 1" Steel tubing for seat frame work
$525.00 - LS1 / T56 Wiring Harness - BP Automotive
* $69.93 - Wilwood Clutch Pedal 340-1290
* $42.50 - Clutch Master Cylinder
$325.00 - Booster Master Cylinder Firewall Pedal Bracket
$45.75 - T56 LS1 Slave Cylinder
$29.99 - Remote Bleeder Kit for T56 Slave, Speedway Part # 5151399
$13.99 - LS1 & LT1 T56 Release Bearing to AN3 Line Fitting, Speedway Part # 5151396
* $1,552.50 - Infinity Box 3 Cell System, http://infinitybox.com/
* $237.85 - Infinity Box Remote
$435.85 - Infinity Box inVIRONMENT AC controller
$819.97 - Vintage Air 4th Gen Evaporator Kit Part # 751155
$119.97 - Vintage Air AC Hose Kit Part # 31700
-
-
Total $22,047.84
What We've Actually Spent $3,932.90
This is the running total that we’ll keep updated, So I’ll come back and edit this as we go to reflect the build cost in real numbers. Stuff I get dealer discounts on I’ll list at retail prices as well so you’ll know what to expect in reality
Body $1,638.27
* $500.00 - Our "Pile" Of Parts, This is an arbitrary price for this pile of loot
* Cab, Doors, Hood, Front Fender, Bed, Rear Fenders, and Glass
$391.49 - Front Fender, New Drivers Side
$103.90 - Cab Corner Patches
* $50.00 - Sheet metal For Custom Patches, Door reconstruction, Custom Firewall and tunnel modifications.
* $15.00 - 6" 14 gauge tubing for drive shaft hump
$157.96 - Primer, House of Color KD3000 (one gallon)
$419.92 - Hot Rod Flatz Charcoal Metallic (two gallons, lets just call me paranoid)
-
Drive Train $7,168.30
$800.00 - 5.3L LM7 and 4L60E Transmission
$(650.00) - 4L60E Sold
* - Upgraded to 6.0 (I had this laying around)
* $725.00 - Texas Speed Cam Swap Kit
* $1,000.00 - T56 Manual Transmission (2000 Camaro)
* $312.00 - LS1 Clutch
* $300.00 - LS1 Flywheel
* $975.00 - Nerd Rods Fuel Tank Stage 1 Kit
$188.17 - Griffin Radiator Part # 1-25201-X + Shipping
$85.94 Summit Racing Cooling Fans, Quantity 2, Part # SUM-G4901 42.97 Each
$120.00 - PRC AC Condenser + Shipping http://www.prchotrod.com/products/
* $2,782.20 - STS Single Turbo Kit, BB Turbo Upgrade, Waste gate, Blow off valve and Oiling system
* $479.99 - Turbo Smart Boost Controller
* $50.00 - Aluminum Sheet for Fan Shrouds
-
Chassis / Suspension $8,797.97
* $3,495.00 - Stage 1 Kit Frame
* $1,600.00 - C4 Corvette Suspension, Front and Rear
* $1,600.00 - Dana 44 with 4:10 gear upgrade
* $1,352.00 - QA1 Coil Over Shocks and Springs
* $75.97 - C4 Front A Frame Bushings
* $175.00 - Nerd Rods Motor Mount Kit
* $500.00 - C6 Corvette Wheels (craigslist find)
-
-
Interior $4,443.30
* $200.00 - Corbeau Adjustable Racing Seats, Used to be cut and modified,
* $25.00 - 1" Steel tubing for seat frame work
$525.00 - LS1 / T56 Wiring Harness - BP Automotive
* $69.93 - Wilwood Clutch Pedal 340-1290
* $42.50 - Clutch Master Cylinder
$325.00 - Booster Master Cylinder Firewall Pedal Bracket
$45.75 - T56 LS1 Slave Cylinder
$29.99 - Remote Bleeder Kit for T56 Slave, Speedway Part # 5151399
$13.99 - LS1 & LT1 T56 Release Bearing to AN3 Line Fitting, Speedway Part # 5151396
* $1,552.50 - Infinity Box 3 Cell System, http://infinitybox.com/
* $237.85 - Infinity Box Remote
$435.85 - Infinity Box inVIRONMENT AC controller
$819.97 - Vintage Air 4th Gen Evaporator Kit Part # 751155
$119.97 - Vintage Air AC Hose Kit Part # 31700
-
-
Total $22,047.84
What We've Actually Spent $3,932.90
Last edited by rat_rod_russell; 09-30-2015 at 12:48 PM.
 06-14-2015, 10:22 AM
#2
Launching!
Thread Starter
Join Date: Jan 2007
Location: Luling TX In the Hot Rod Shop
Posts: 294
Likes: 0
Received 3 Likes
on
3 Posts
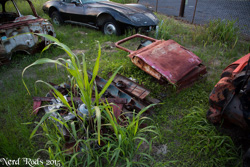
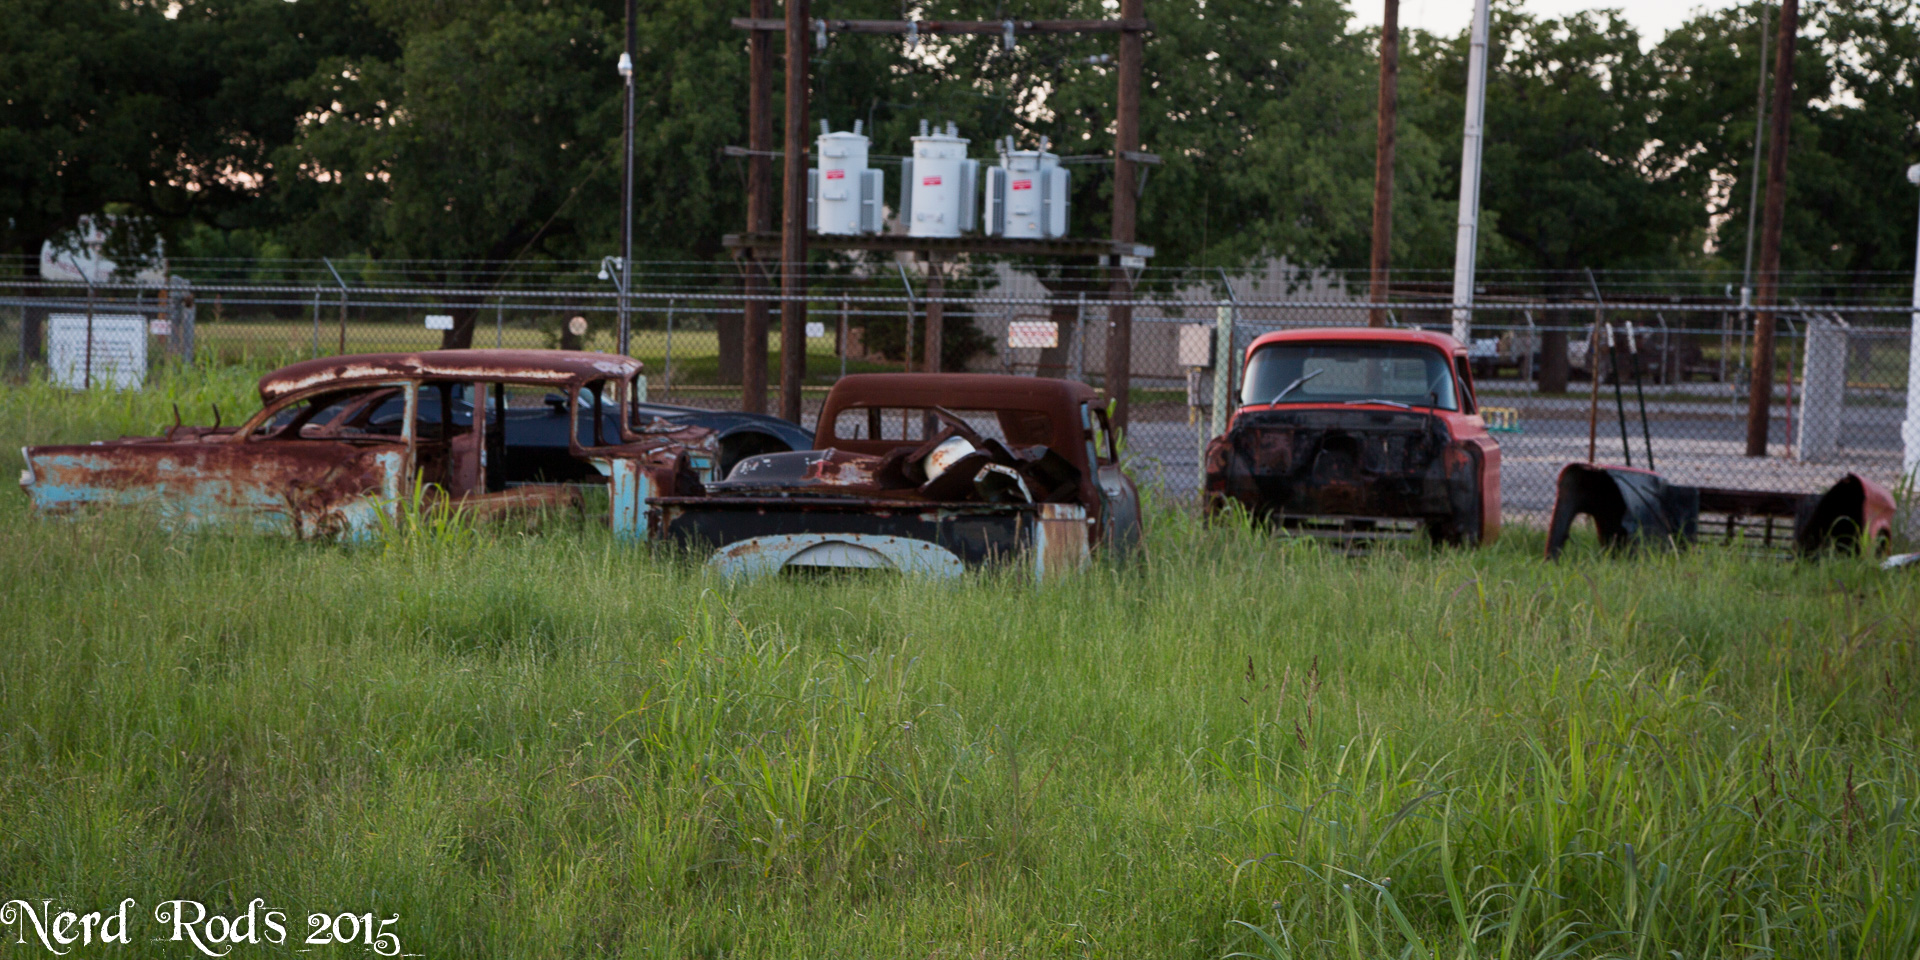
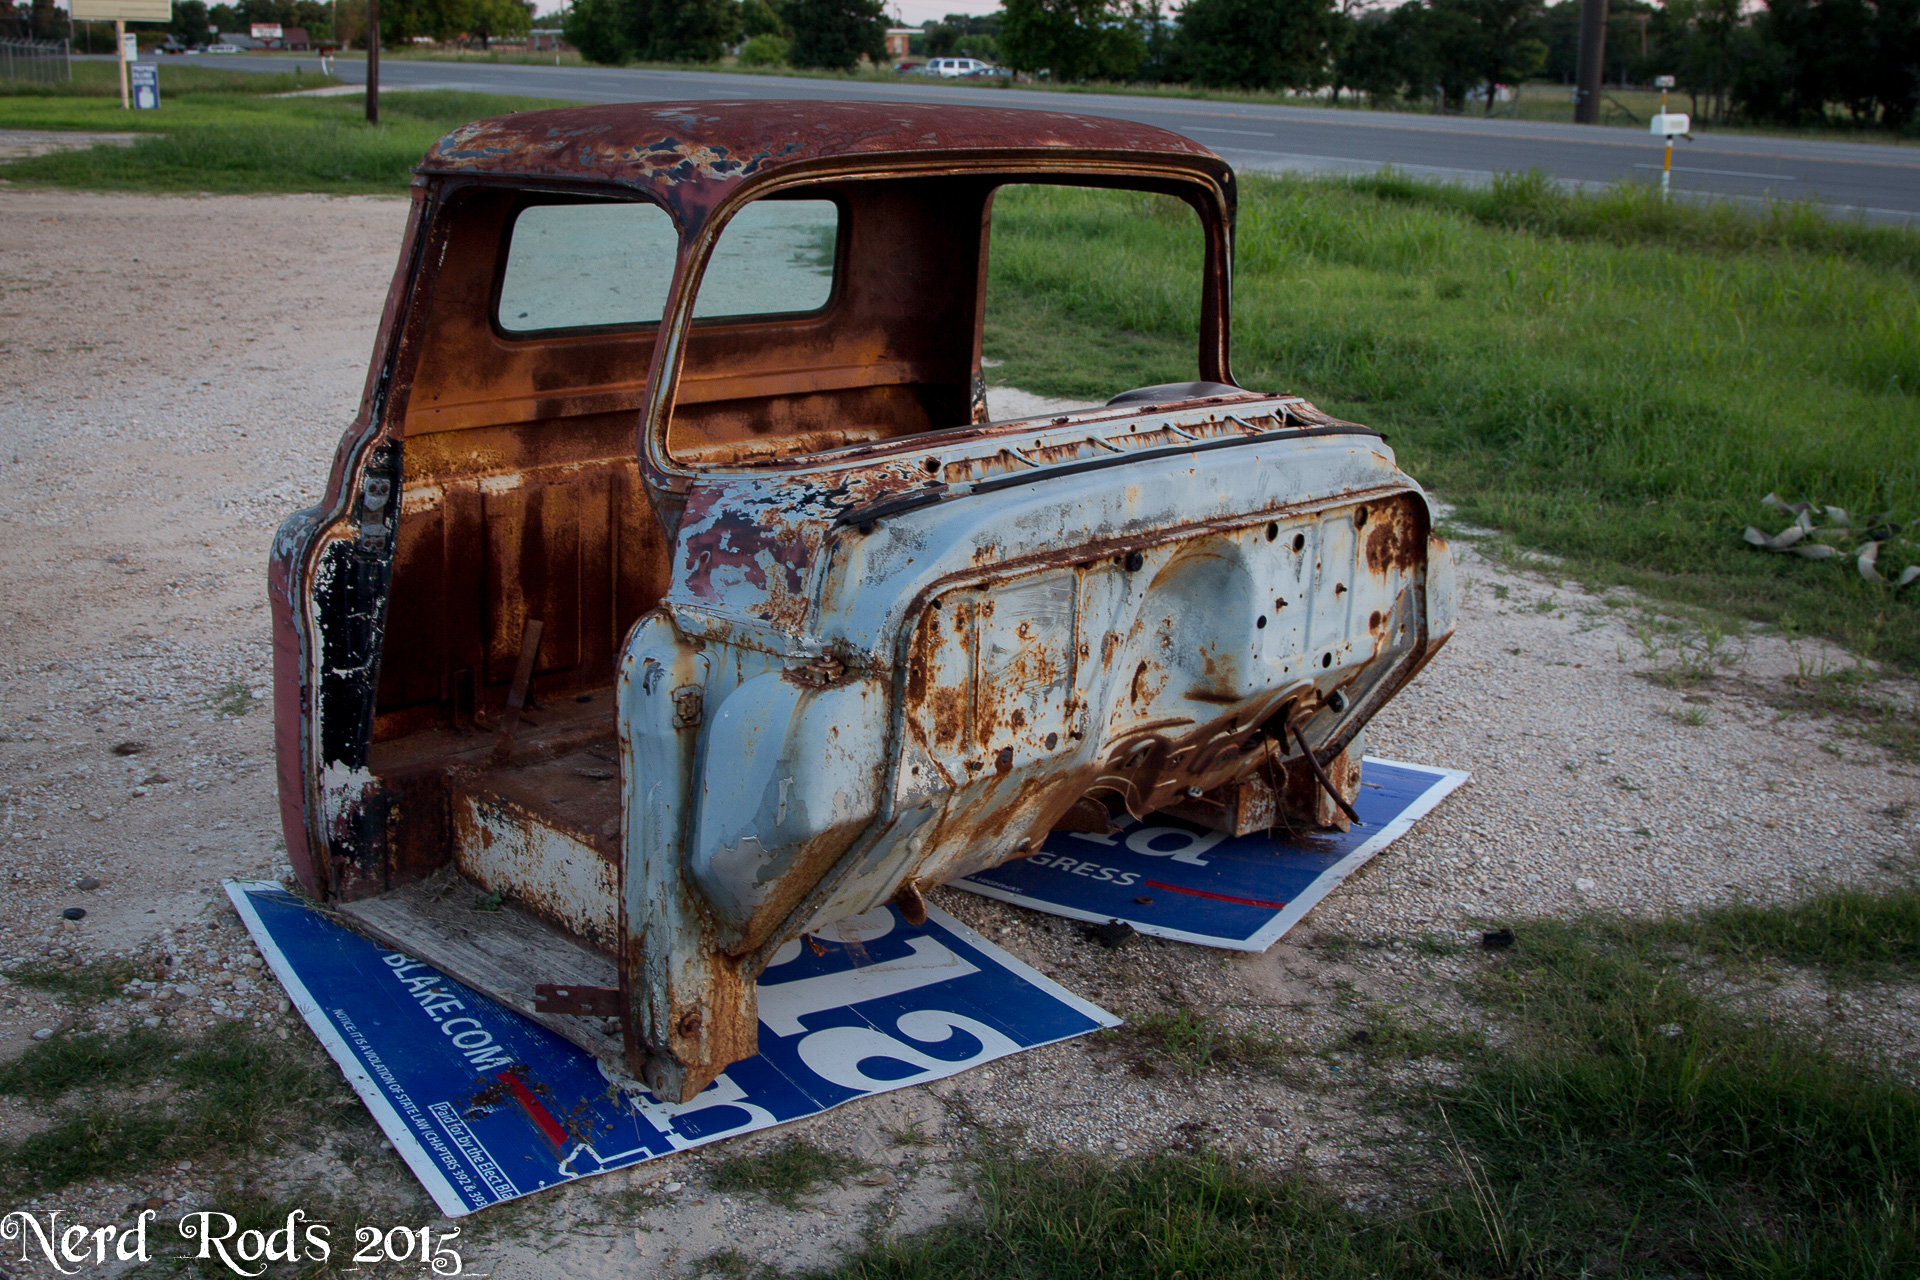
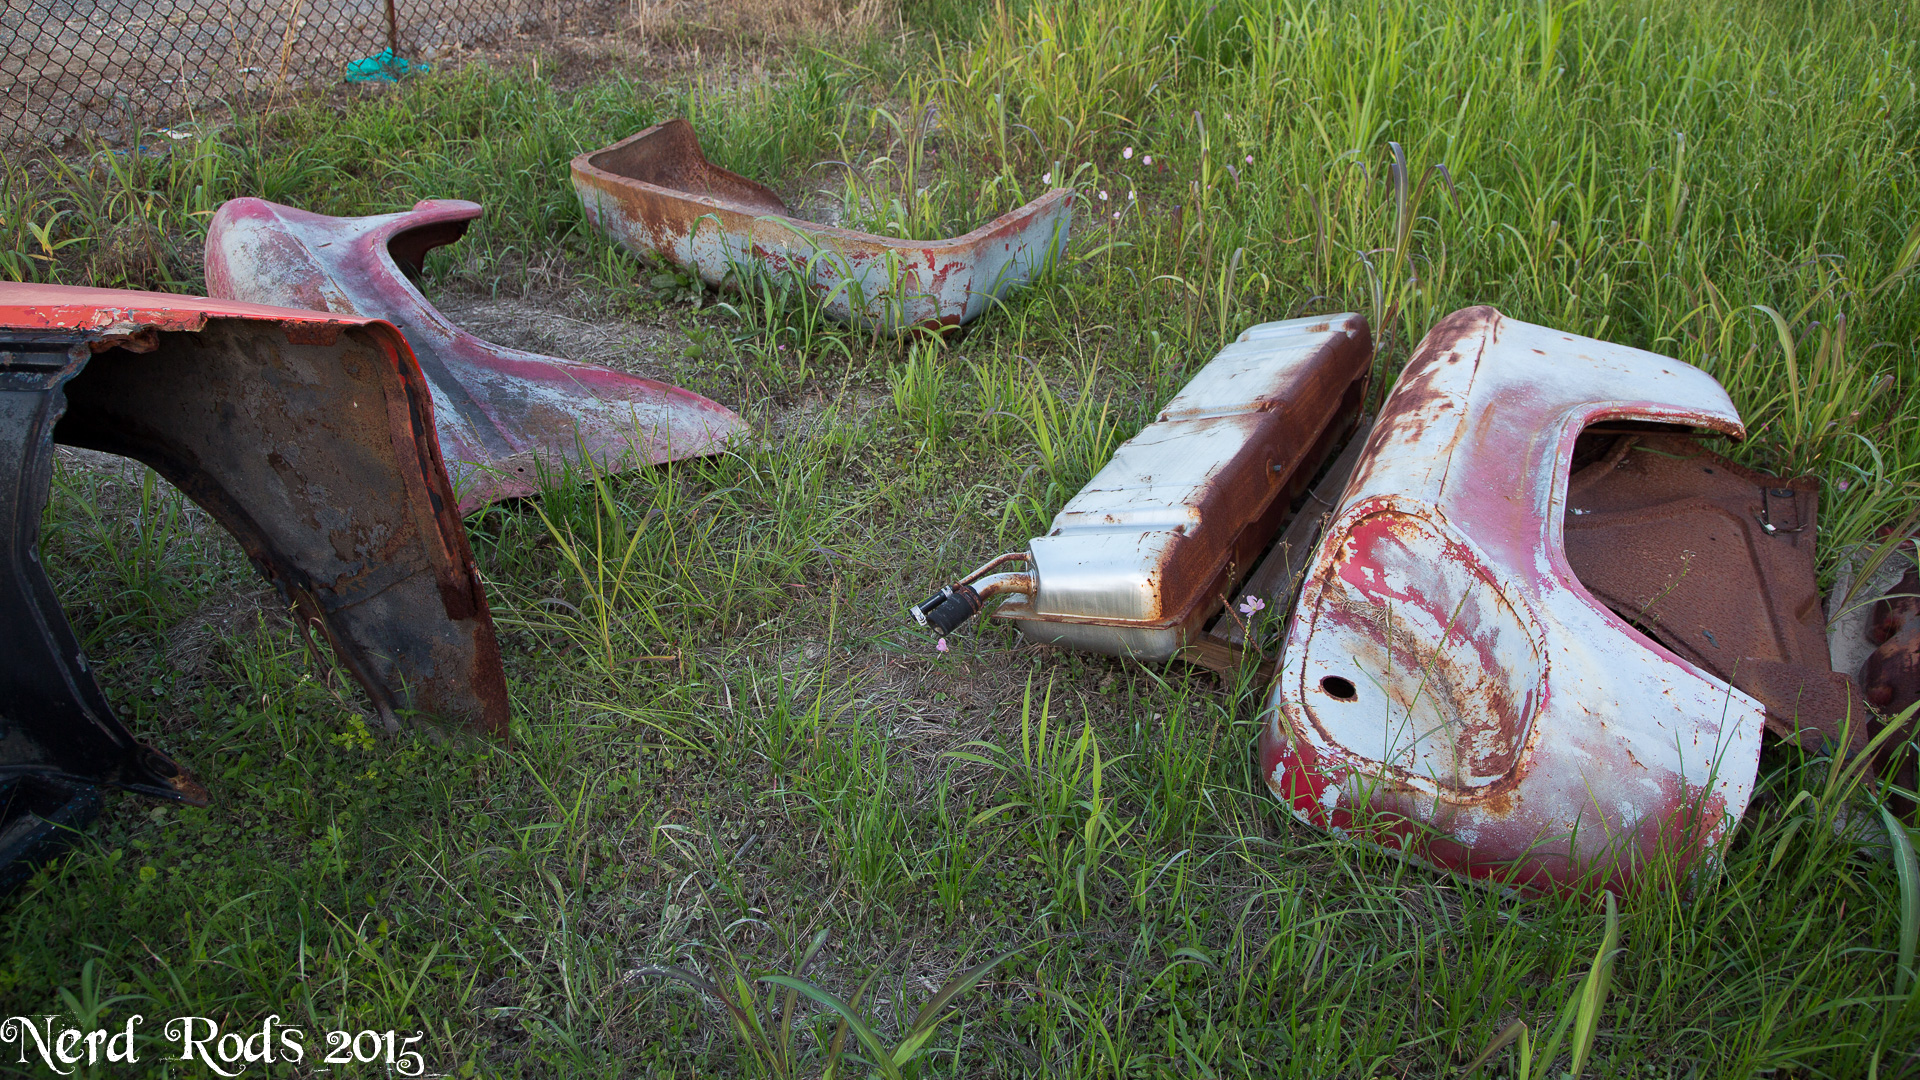
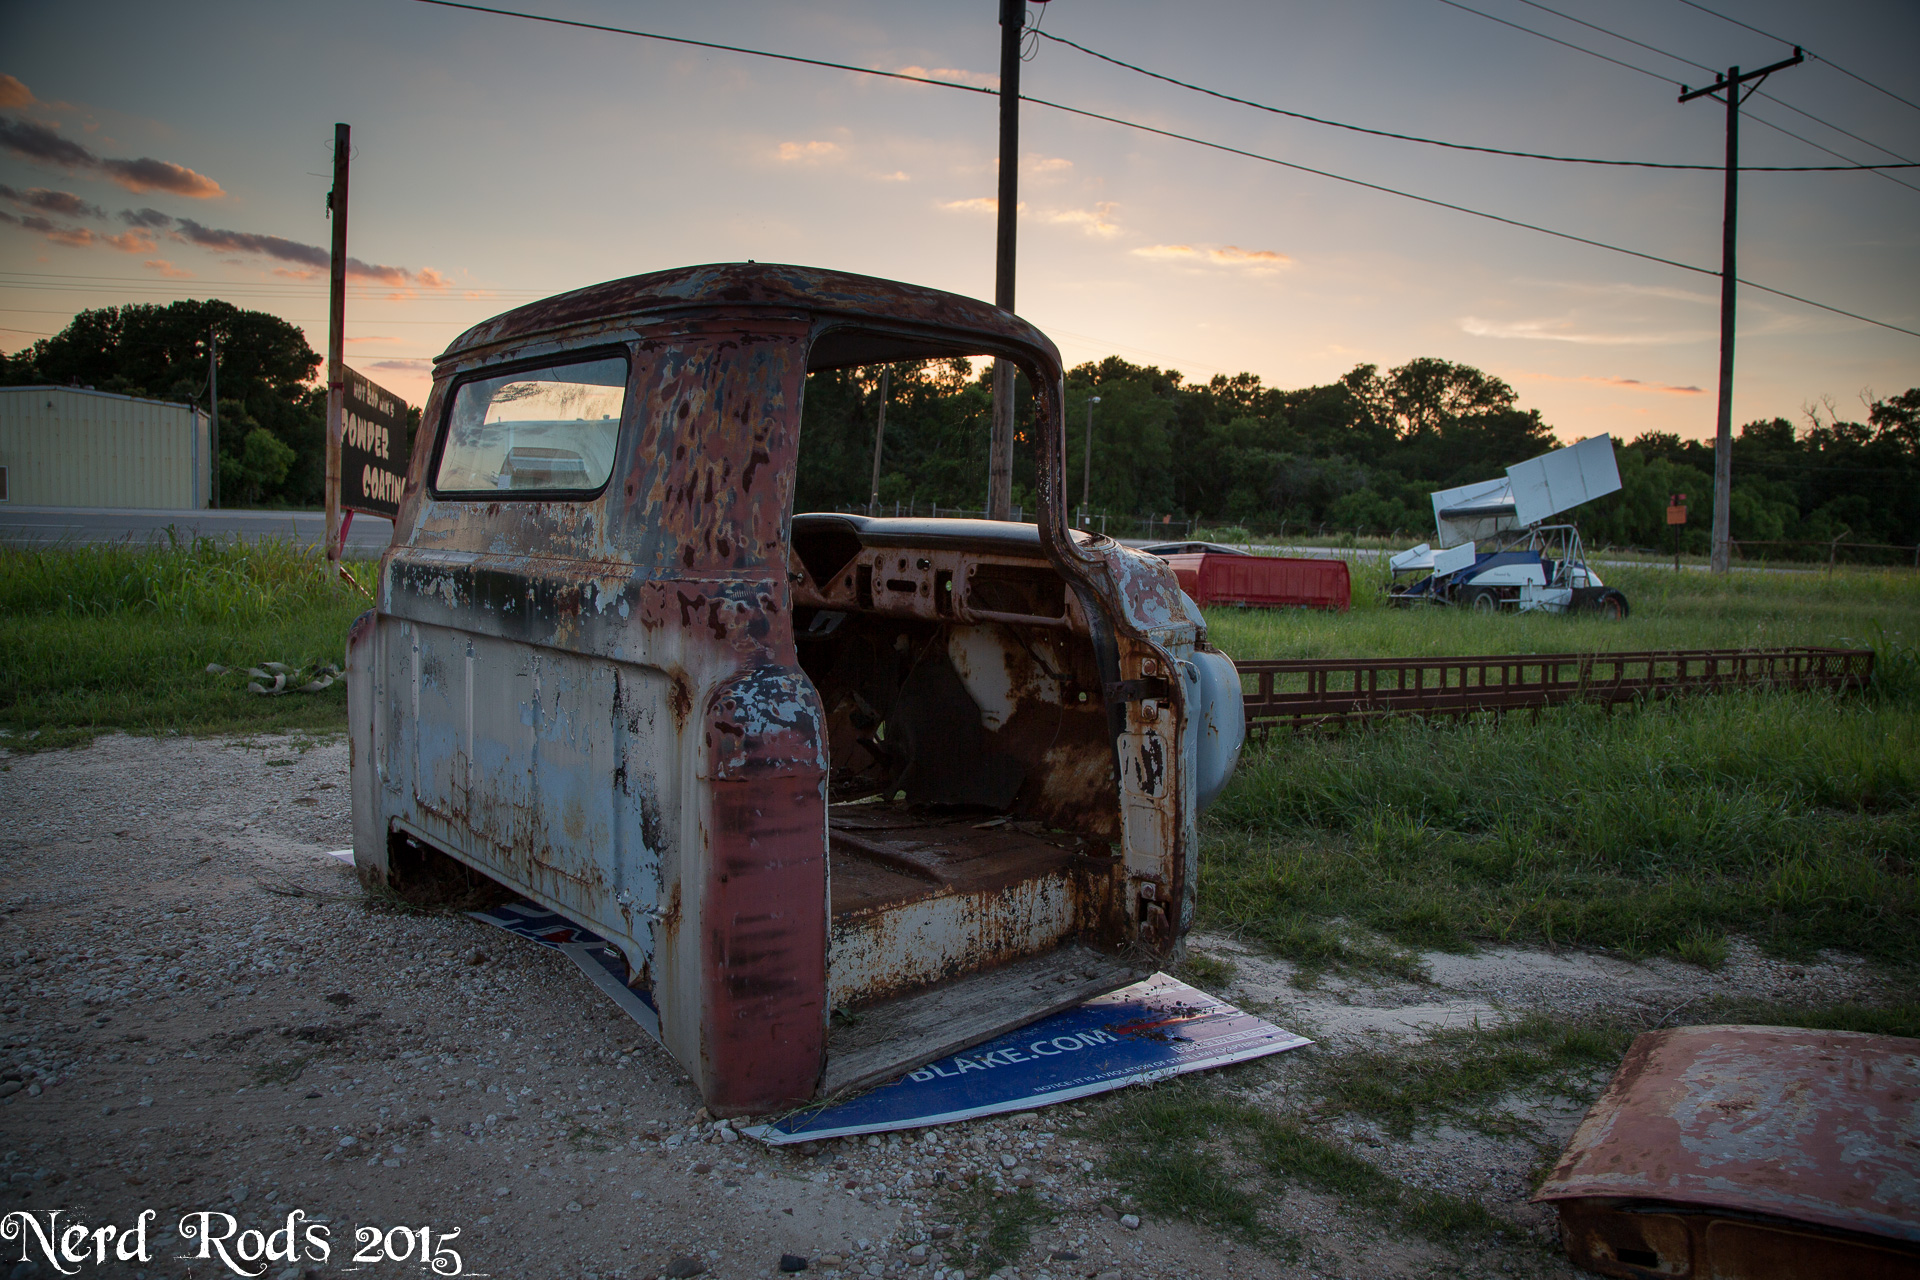
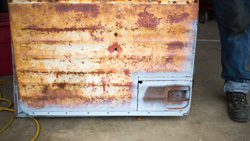
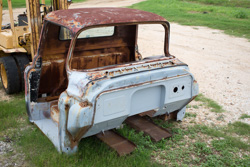
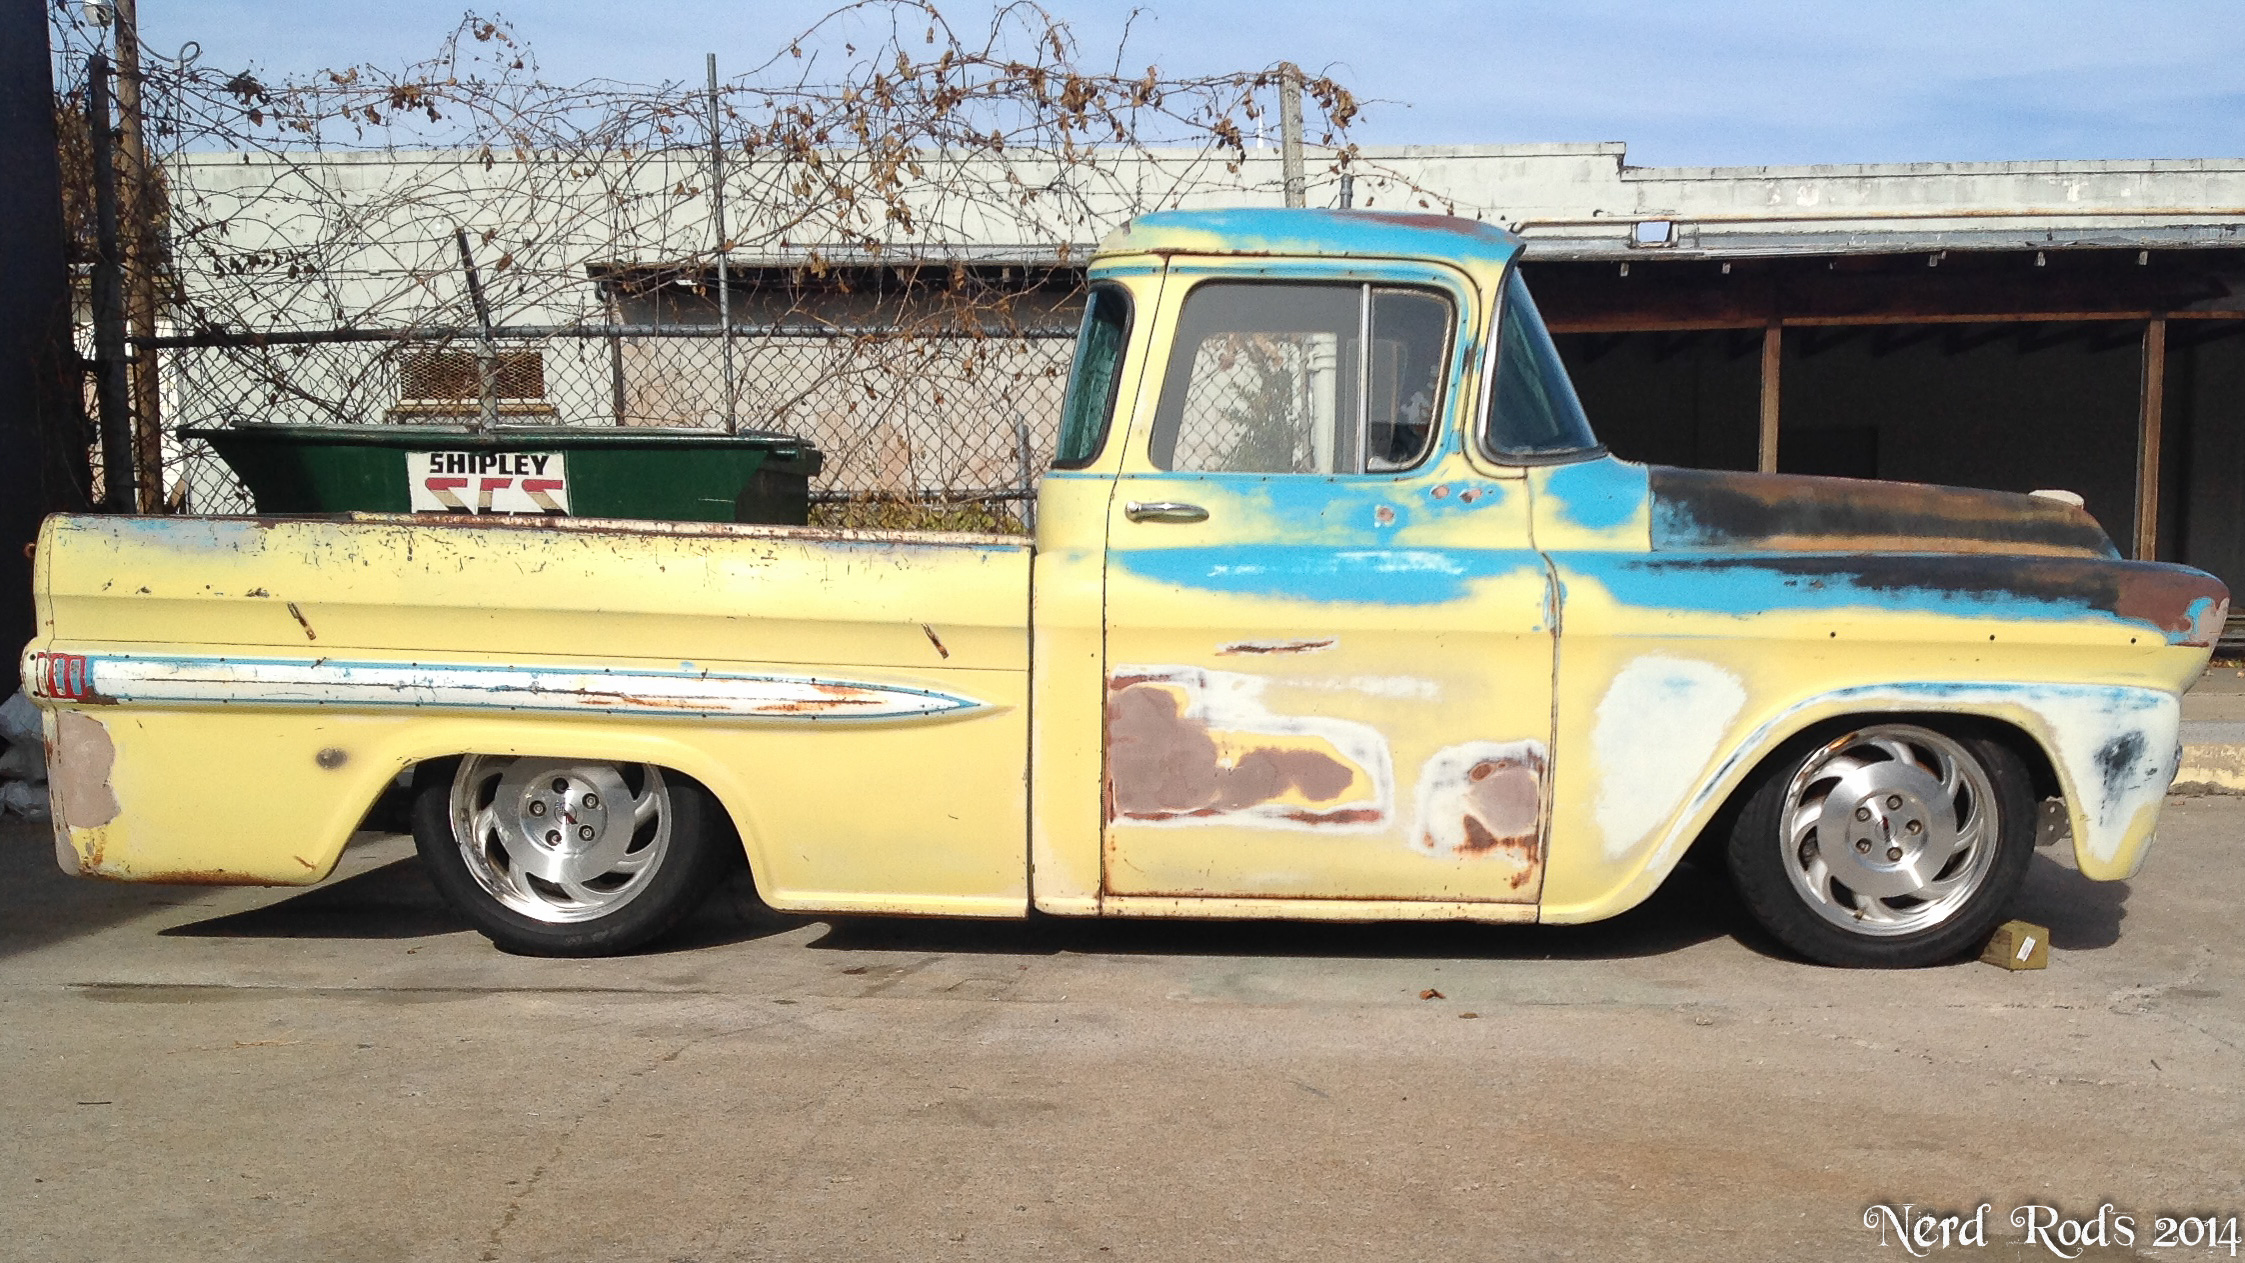
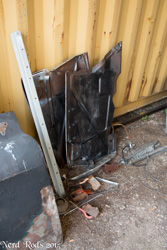
So it’s been an interesting few years for our little shop, once also known as Hot Rod Jim’s now Nerd Rods to better reflect what’s actually going on here. Dad, My little Brother Billy and I are the bulk of the work force with a few friends doing some part time work for us. To sum it up Dad had cancer, Mom had cancer, Little brother messed his back up pretty bad, Dad broke his leg and that upset his already messed up back resulting in back surgery followed shortly after that. Cross that all with spending way too much money going to the SEMA show that ultimately flopped and the bad economy and you’ll get a basic understanding as to why we’ve not had a finished shop car in quite some time. Everyone is good now and the kit frames have been a real hit with the DIY guys but we are tight on space in our little shop with all the projects going on and a real high quality build take up space we don’t have so we brain stormed what would be the best thing to do and we started looking at our collection in the front yard.
Photo Gallery 01 - Click here if you want to see the photos is large size, Apparently LS1 tech doesn't code like the other forums.
http://gallery.nerdrods.com/Projects/03_D3/01/
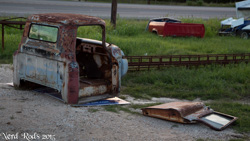
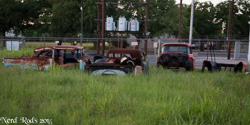


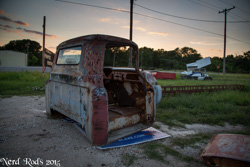
Turns out from our pile of crap out front we are only one finder shy of a complete 1955-56 truck. So with Dad’s Subaru on the frits and we want to show what someone can do on a budget we going to build Dad’s Down and Dirty 1955 Pickup, loving shortened to the D^3 project. I want to keep a running total on everything for guys to get an idea of what this actually takes
The Goal, no frills daily driver for dad on the cheap.
• 5.3L LS and 4L60E (800.00) but we can sell the transmission and make some of that back
• C4 Corvette Suspension (1200.00)
• QA1 Coil Over shocks (1352.00)
• C6 Corvette Wheels (450.00)
I do have some goodies that we’ve been stock piling and will be installing in dad’s project just to make it a bit more fun that would normally blow the budget up on a project like this but the way I see it this stuff it just taking up space at the moment so why not use it.
• Dana 44 with 4.10 Gears (+1800.00)
• T56 – 2002 Camaro Transmission (+1200.00)
Photo Gallery 01 - Click here if you want to see the photos is large size, Apparently LS1 tech doesn't code like the other forums.
http://gallery.nerdrods.com/Projects/03_D3/01/
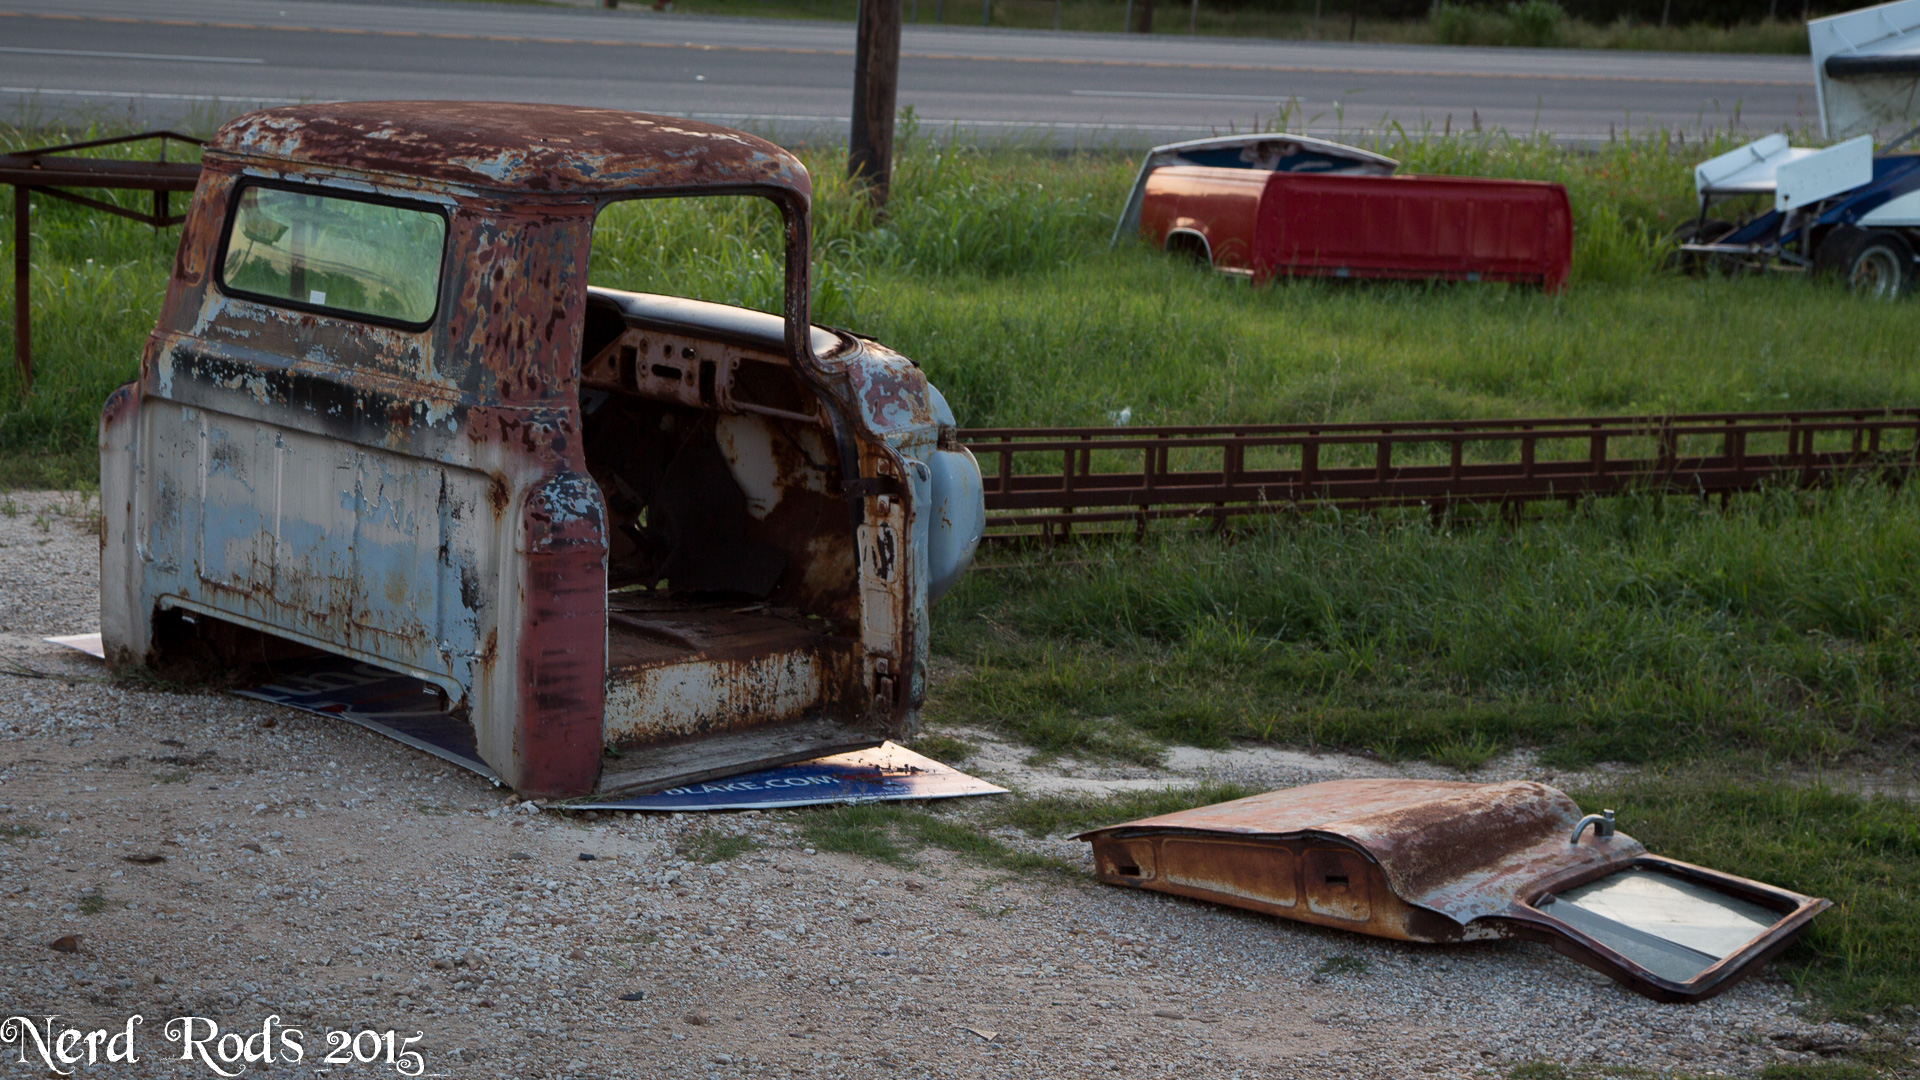
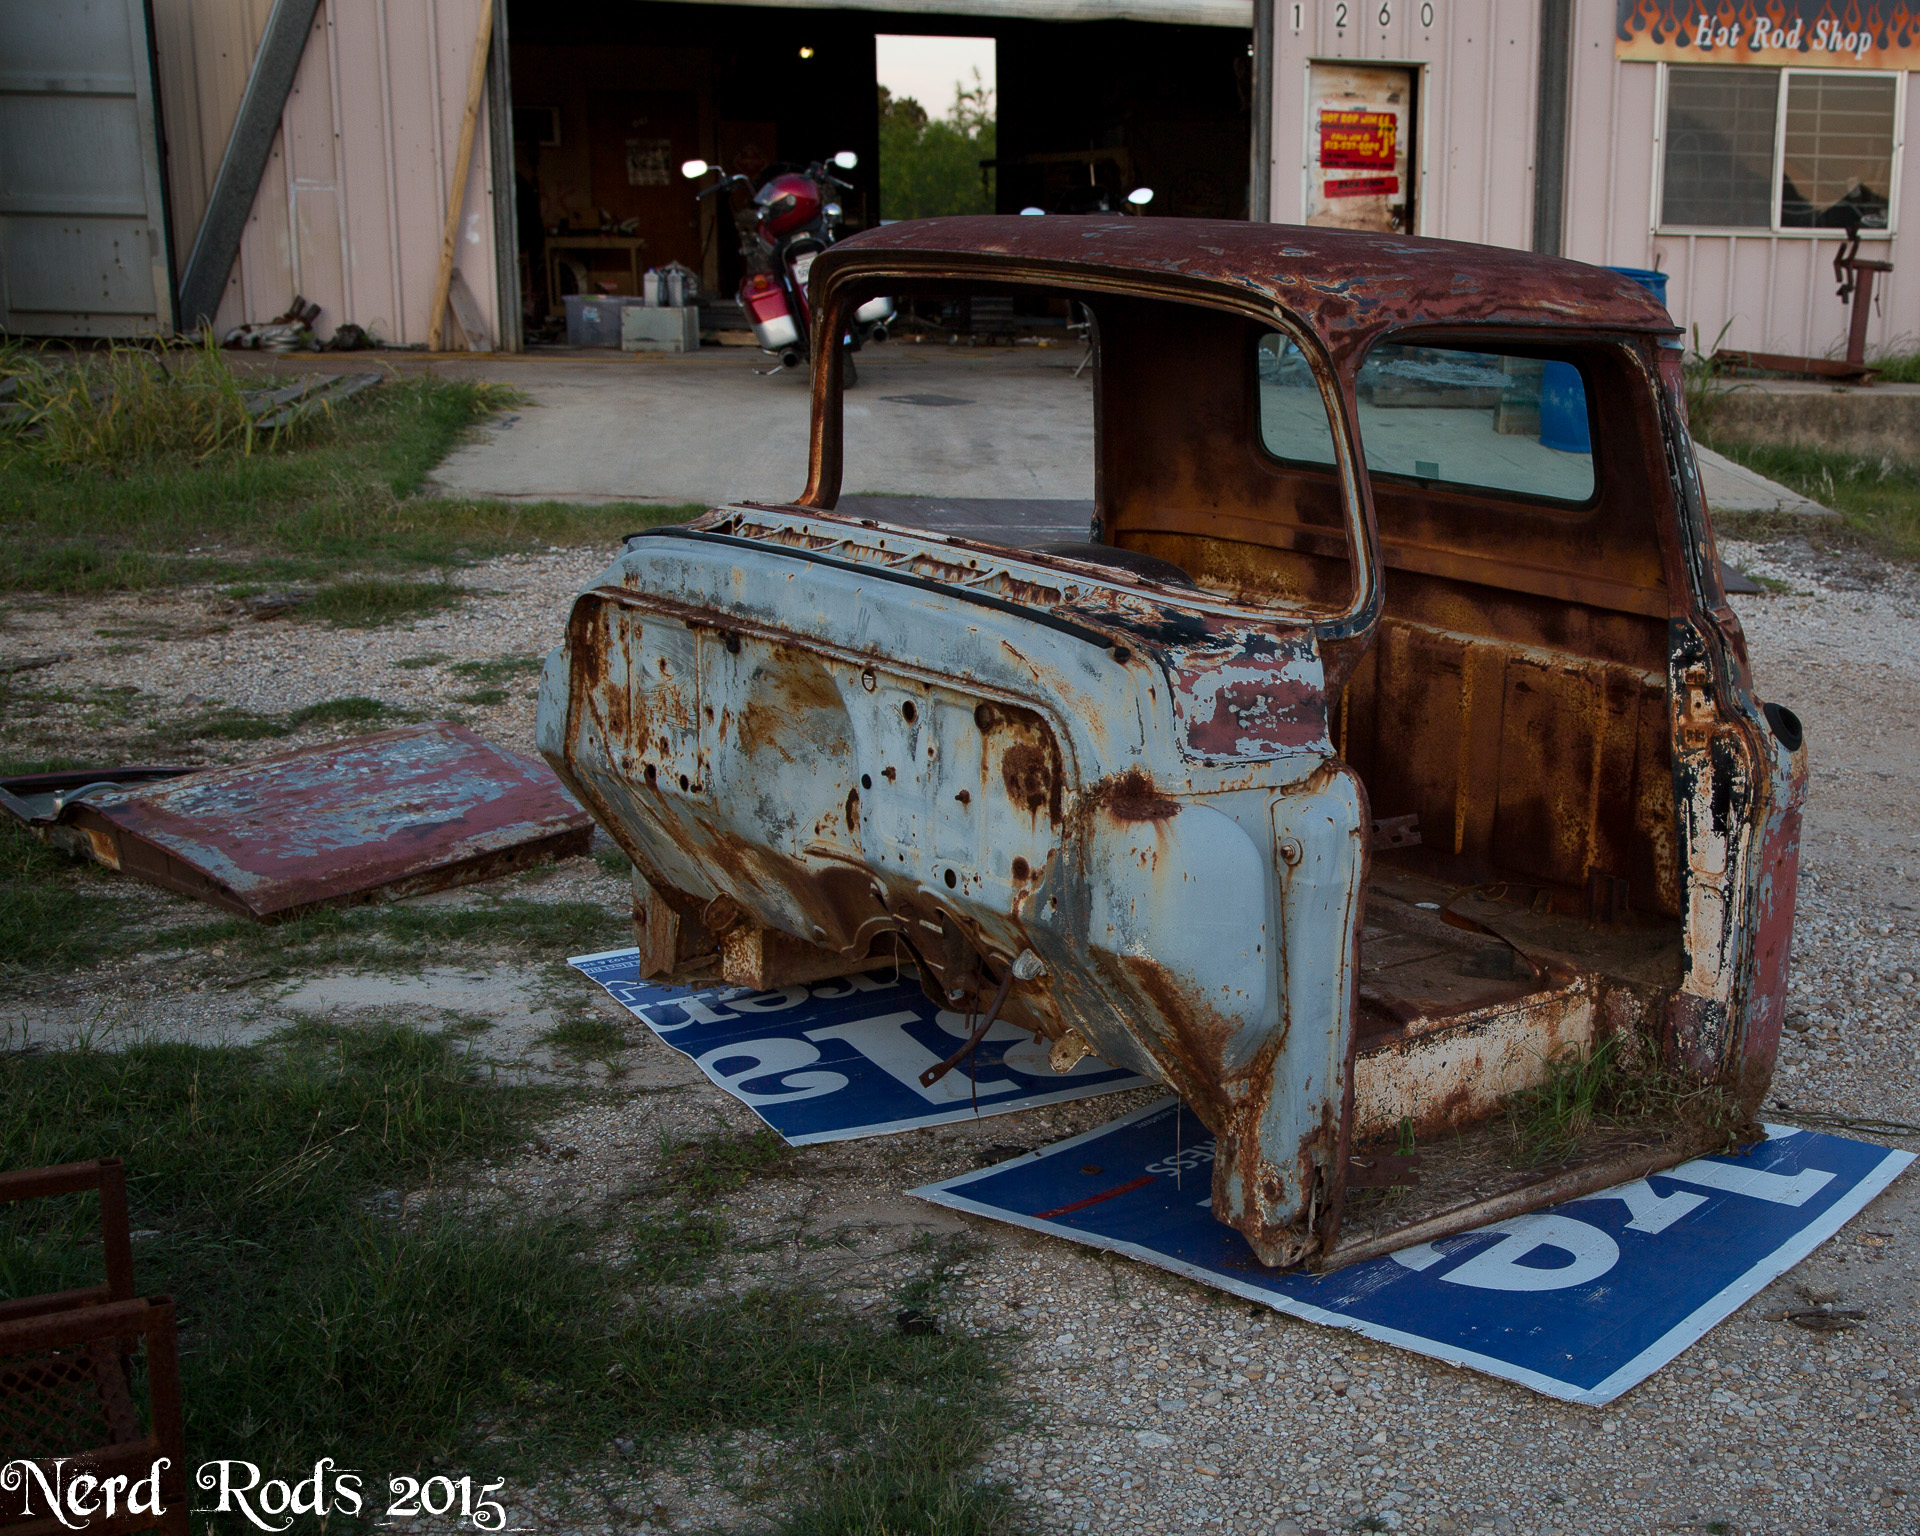


Turns out from our pile of crap out front we are only one finder shy of a complete 1955-56 truck. So with Dad’s Subaru on the frits and we want to show what someone can do on a budget we going to build Dad’s Down and Dirty 1955 Pickup, loving shortened to the D^3 project. I want to keep a running total on everything for guys to get an idea of what this actually takes
The Goal, no frills daily driver for dad on the cheap.
• 5.3L LS and 4L60E (800.00) but we can sell the transmission and make some of that back
• C4 Corvette Suspension (1200.00)
• QA1 Coil Over shocks (1352.00)
• C6 Corvette Wheels (450.00)
I do have some goodies that we’ve been stock piling and will be installing in dad’s project just to make it a bit more fun that would normally blow the budget up on a project like this but the way I see it this stuff it just taking up space at the moment so why not use it.
• Dana 44 with 4.10 Gears (+1800.00)
• T56 – 2002 Camaro Transmission (+1200.00)
Last edited by rat_rod_russell; 10-20-2015 at 11:29 AM.

 06-18-2015, 03:11 PM
#4
Launching!
Thread Starter
Join Date: Jan 2007
Location: Luling TX In the Hot Rod Shop
Posts: 294
Likes: 0
Received 3 Likes
on
3 Posts
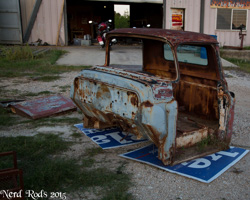
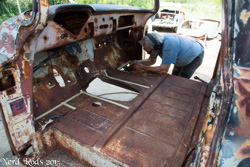
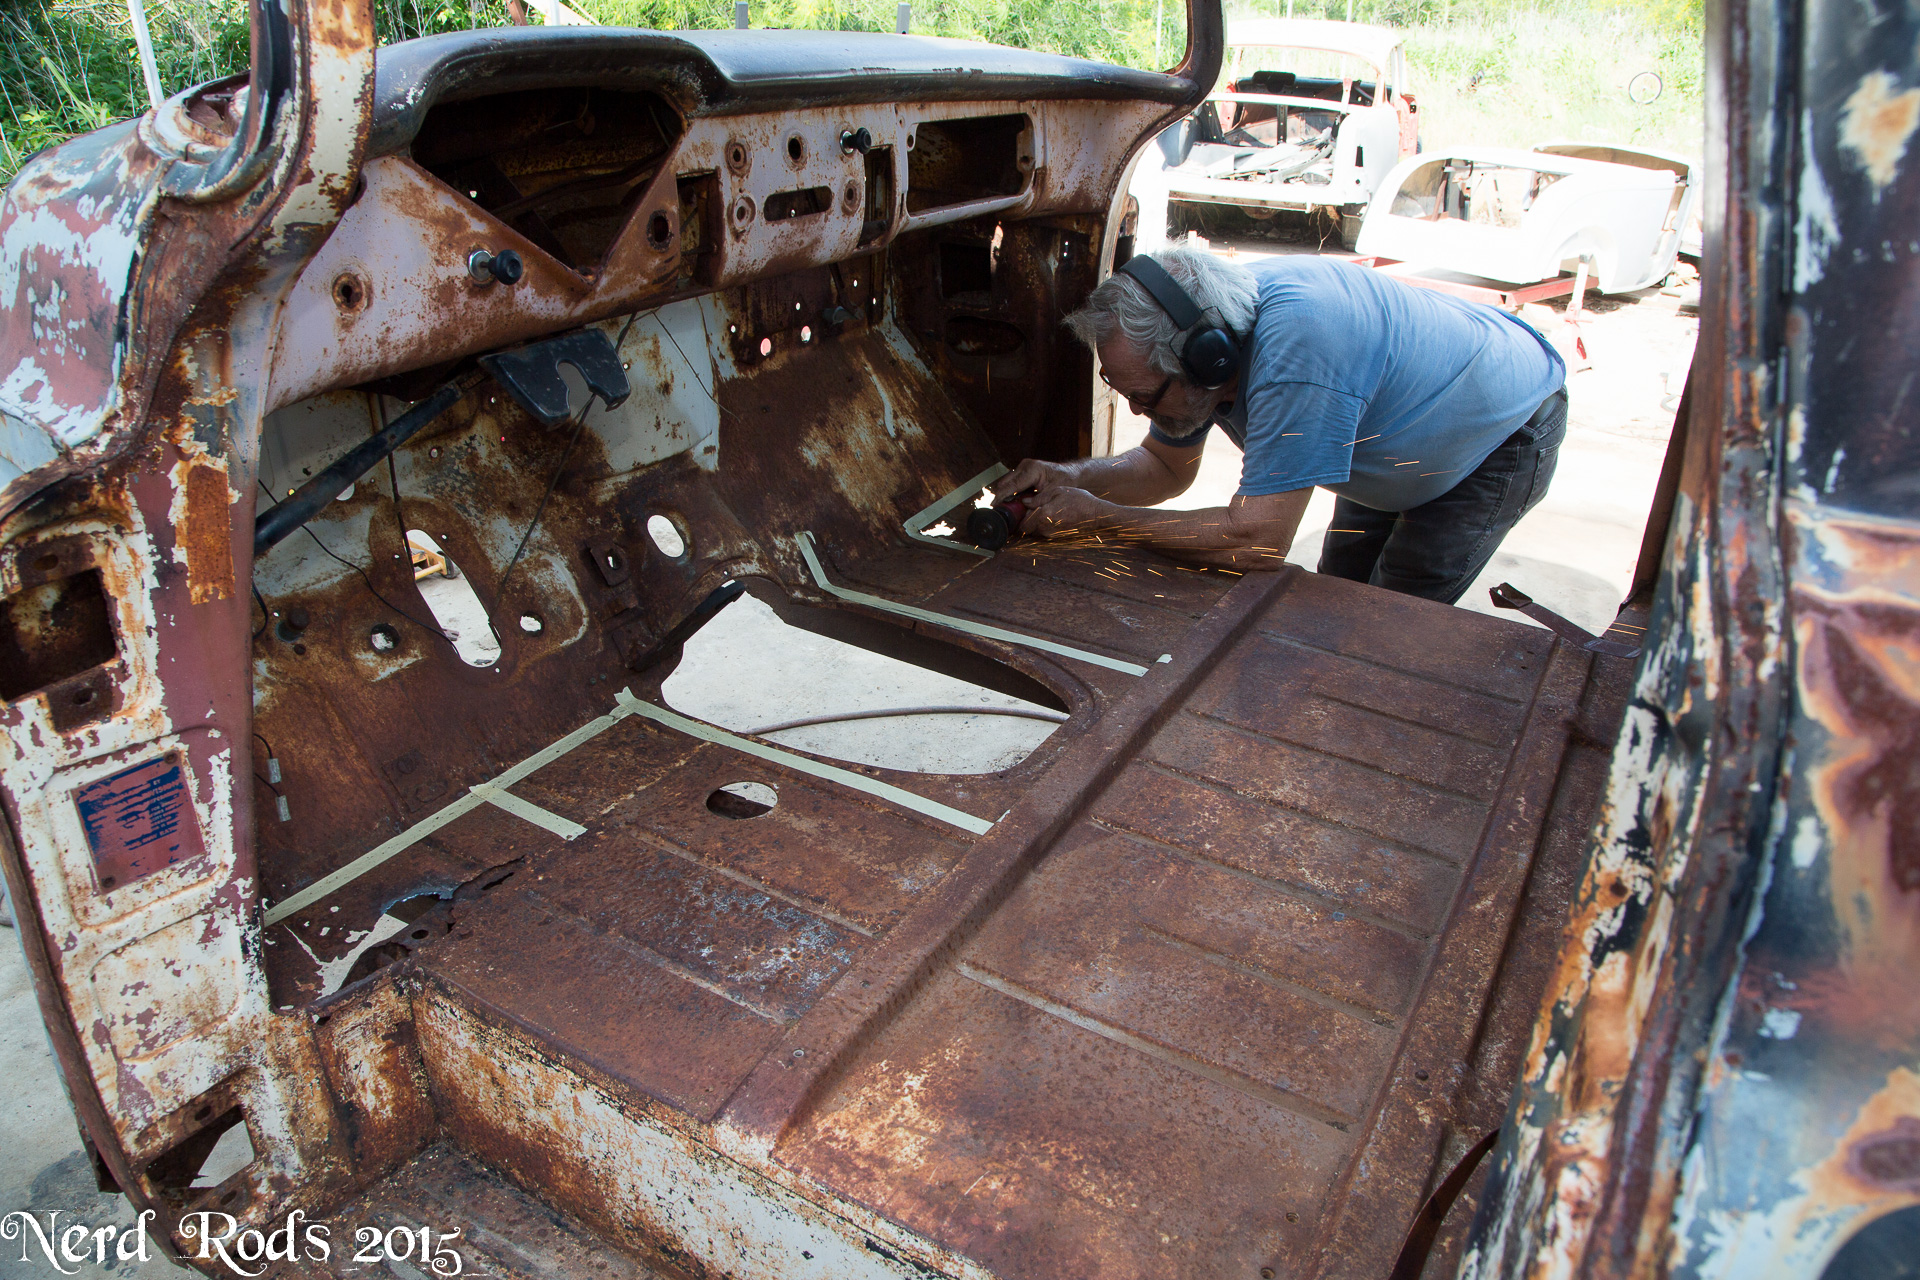
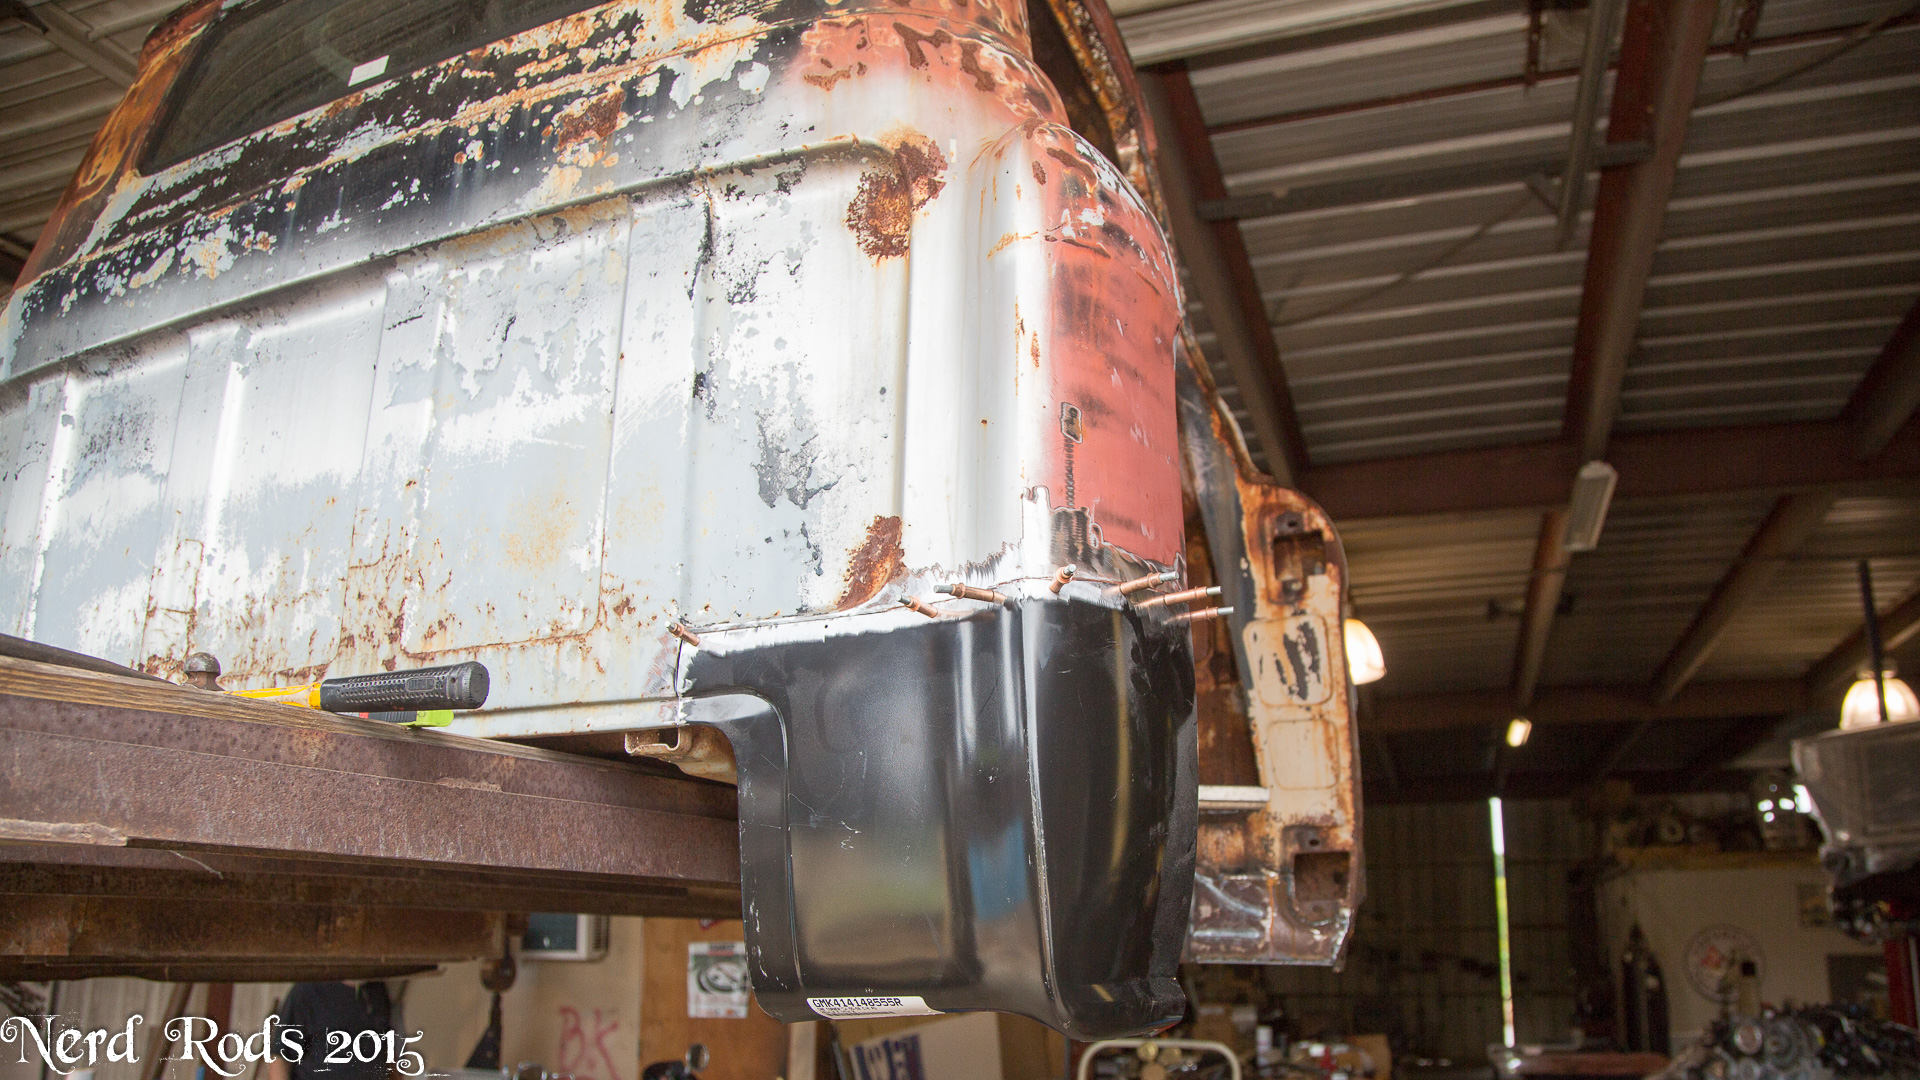
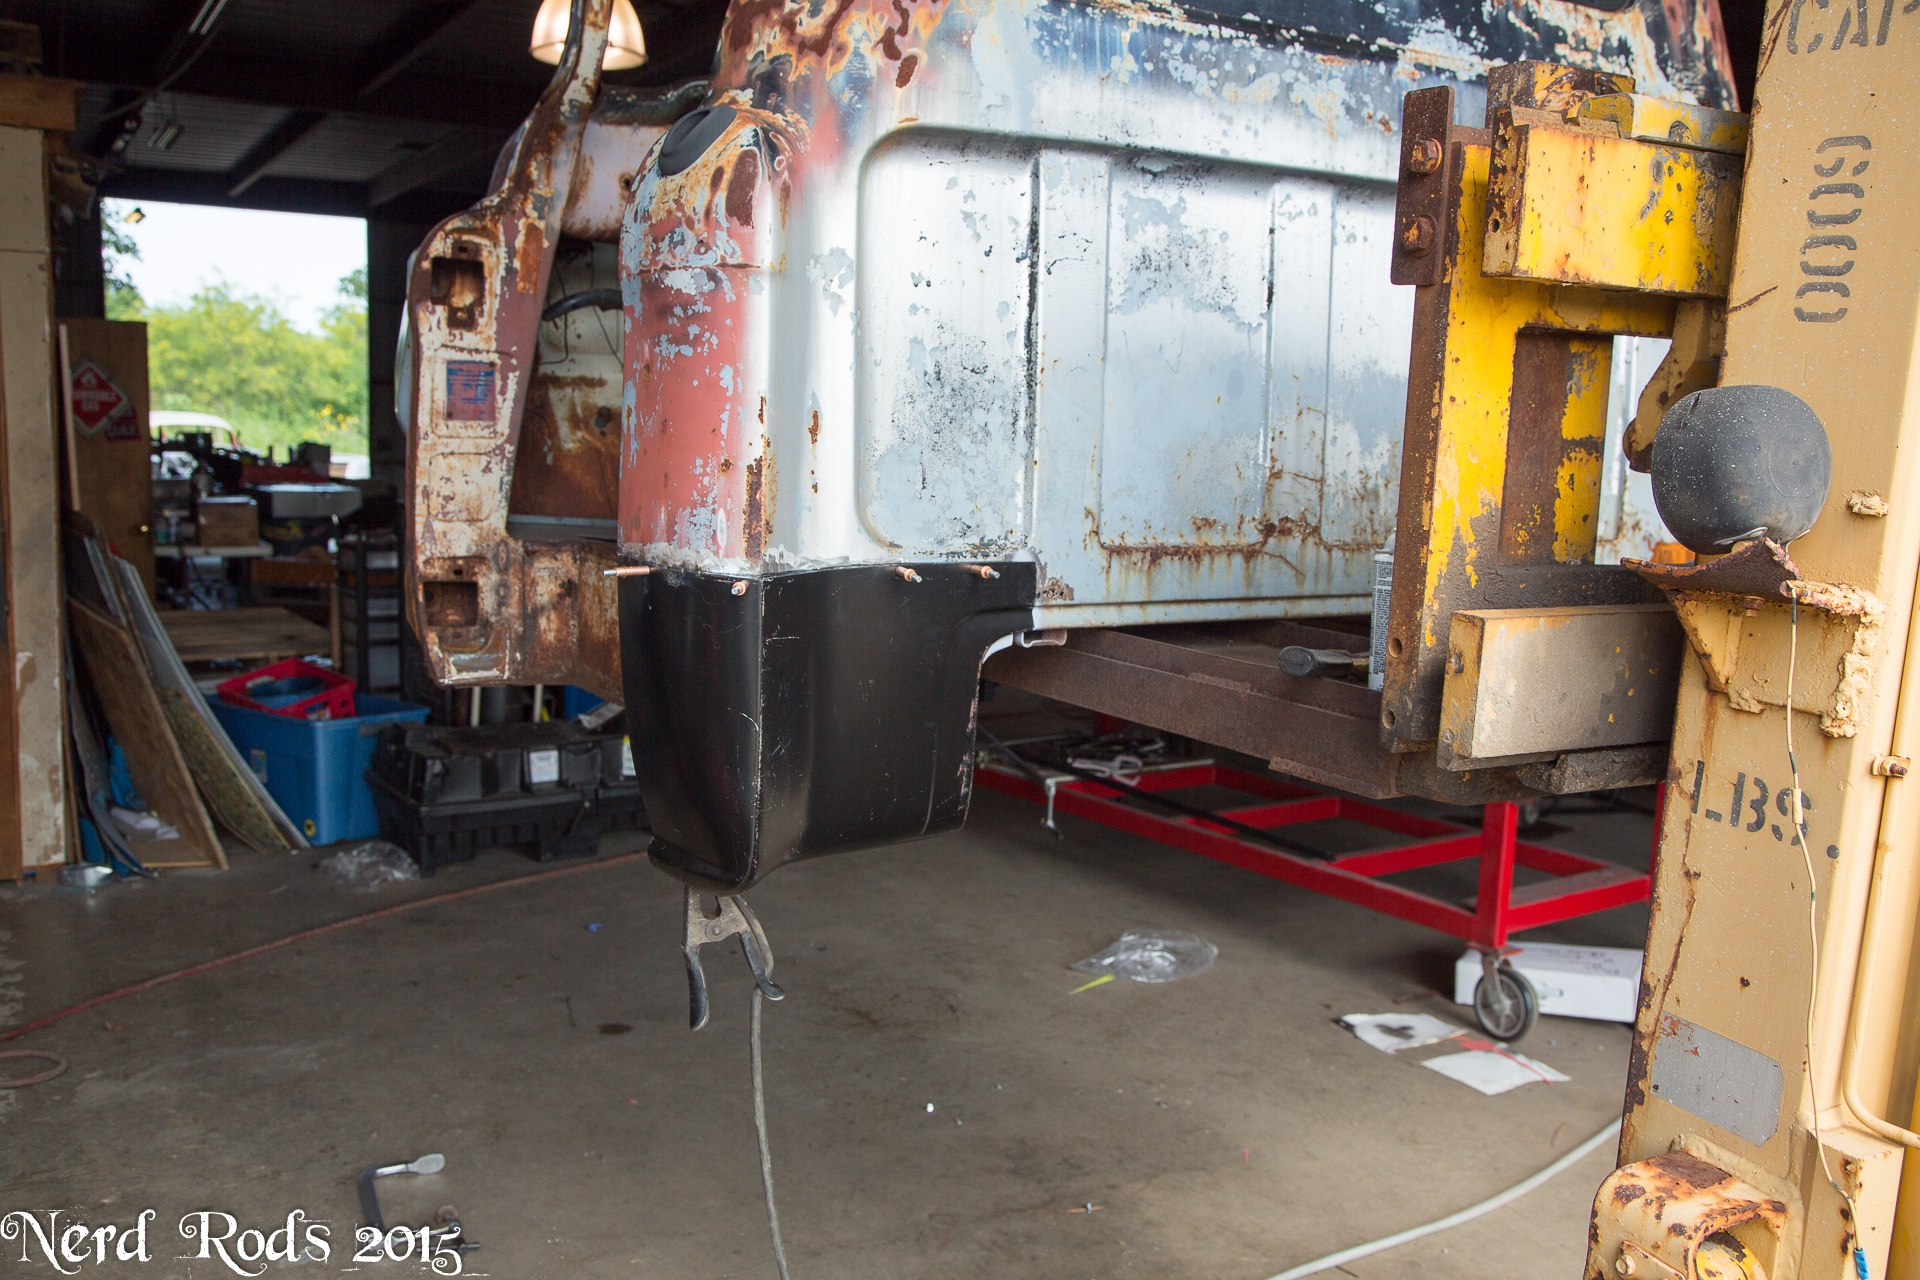
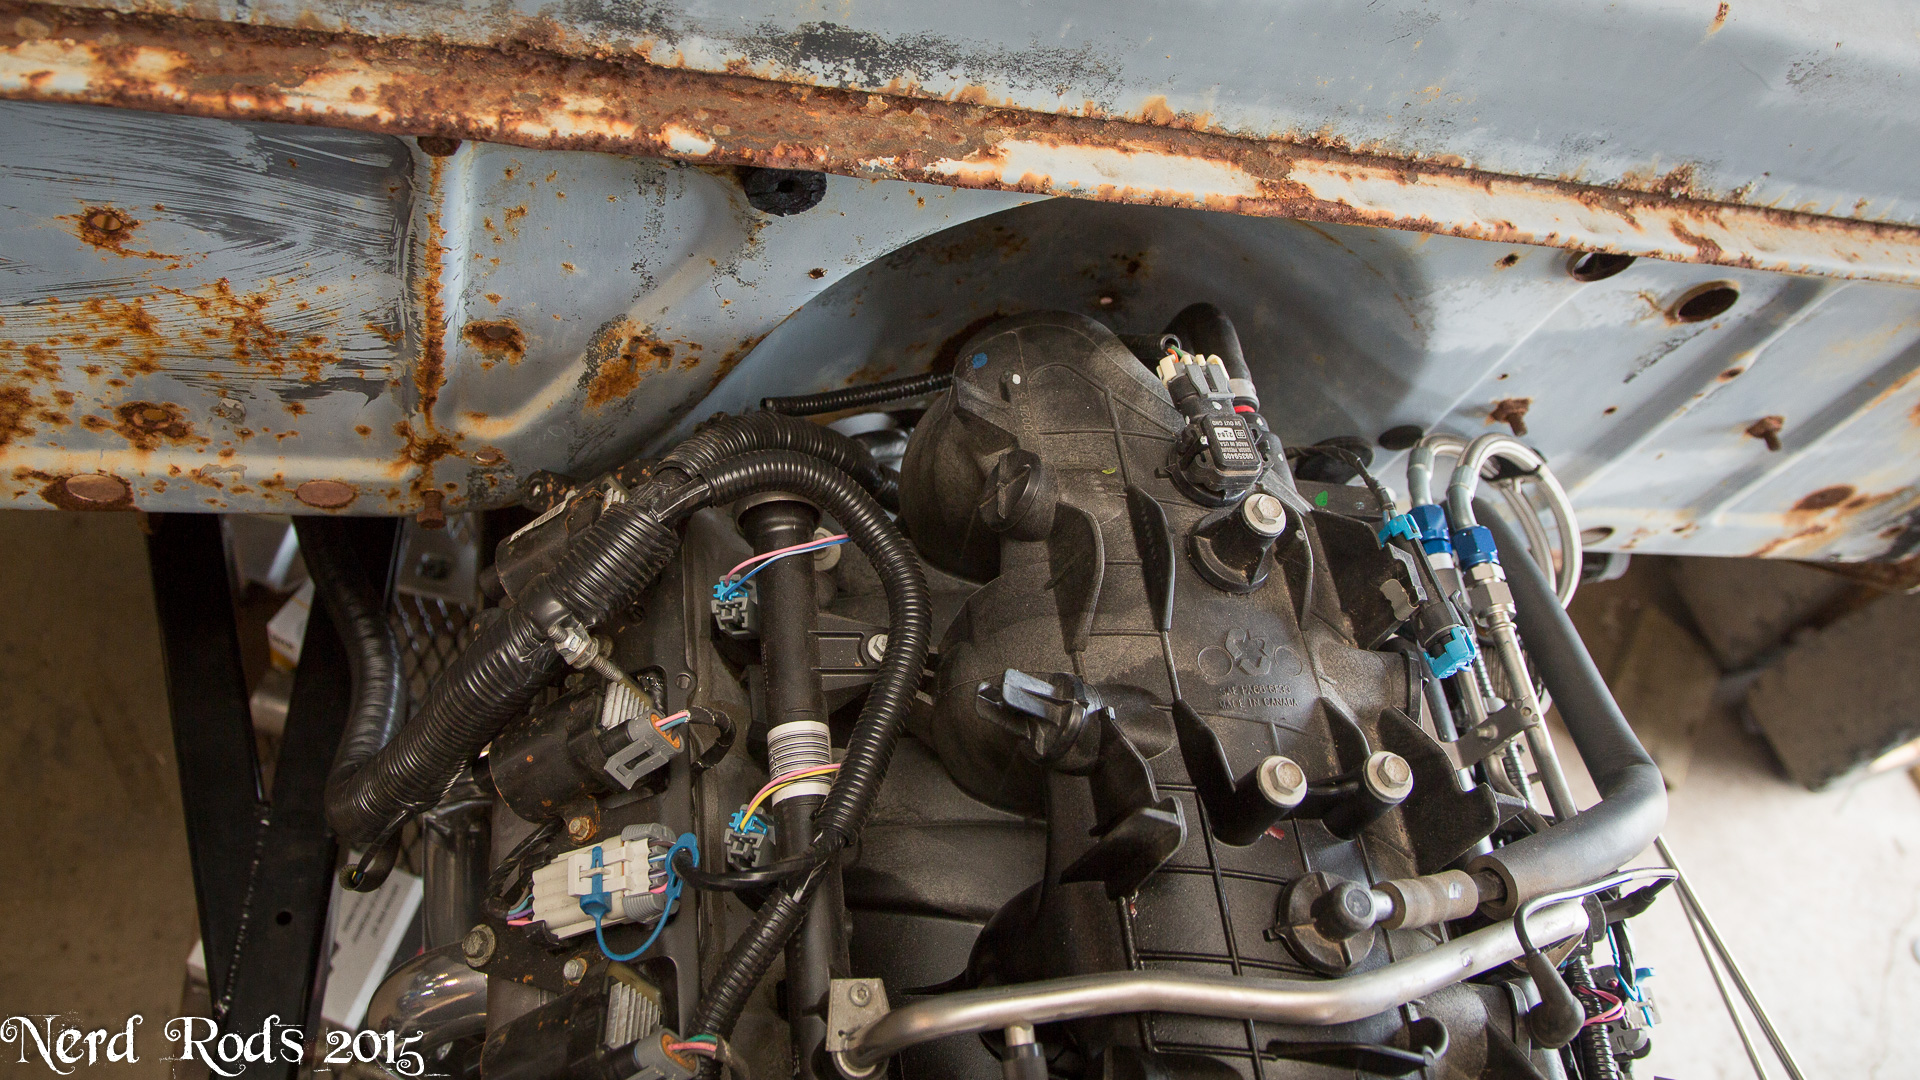
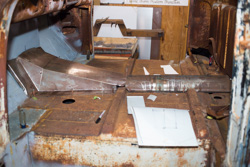
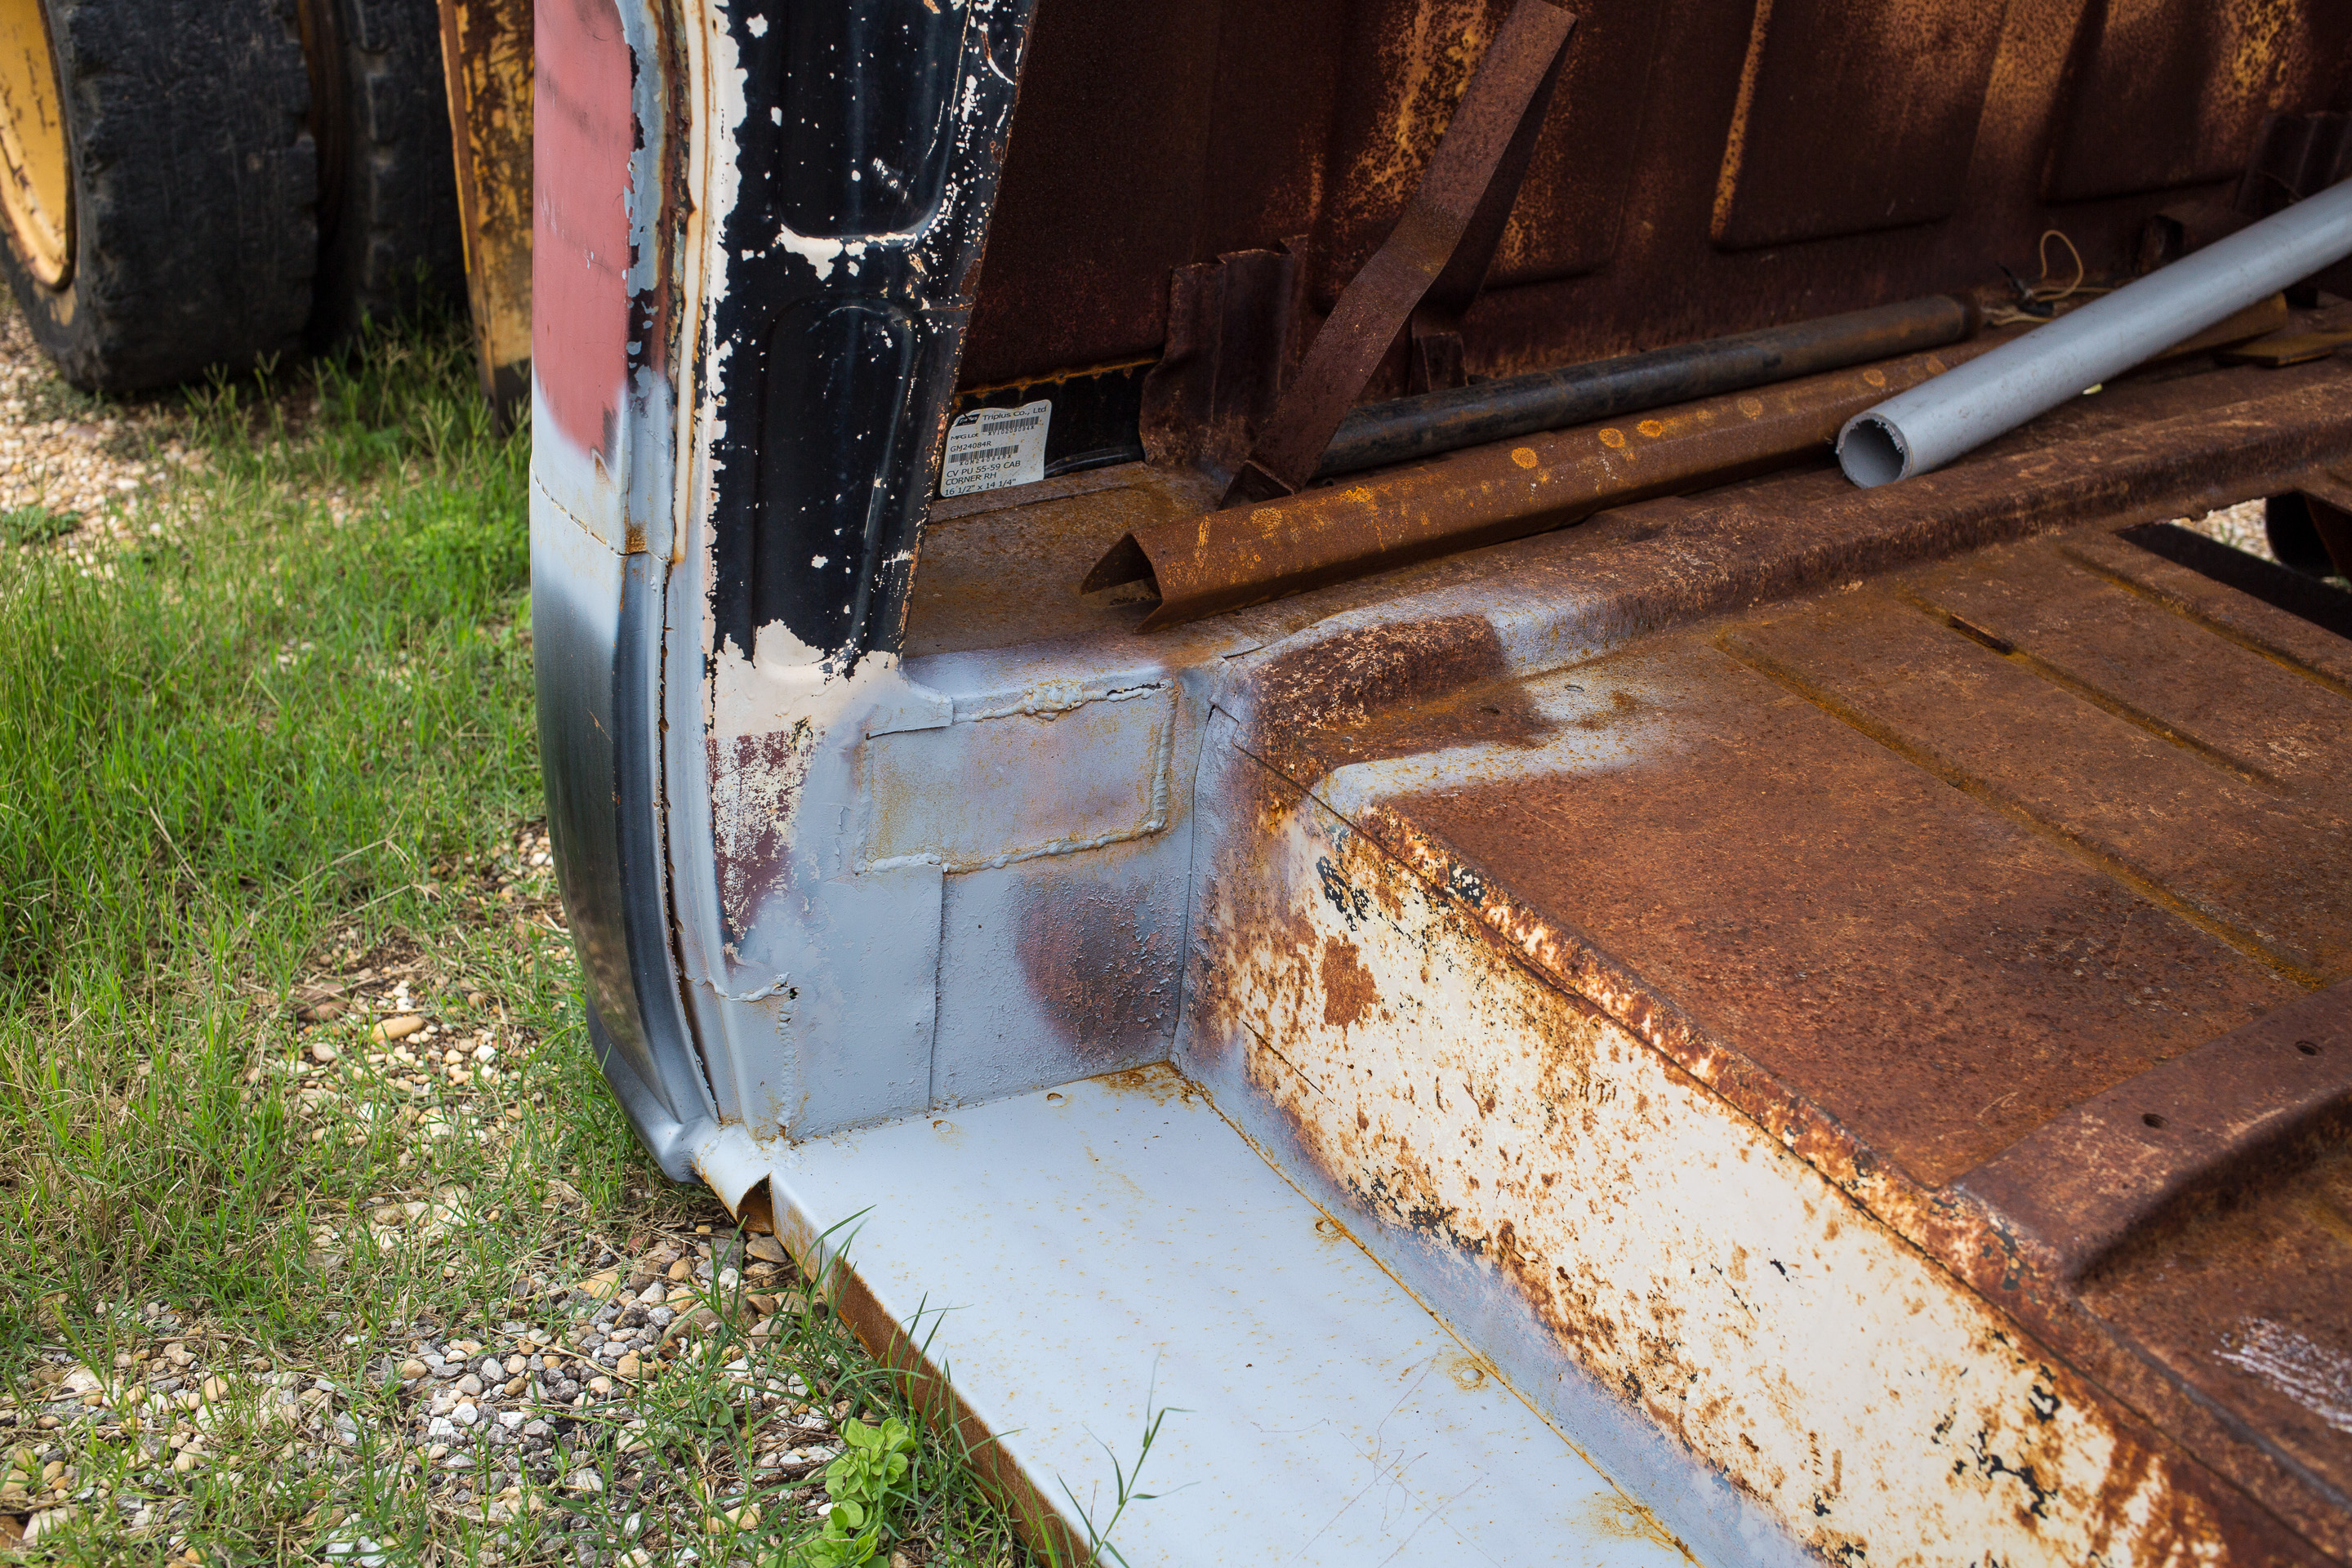
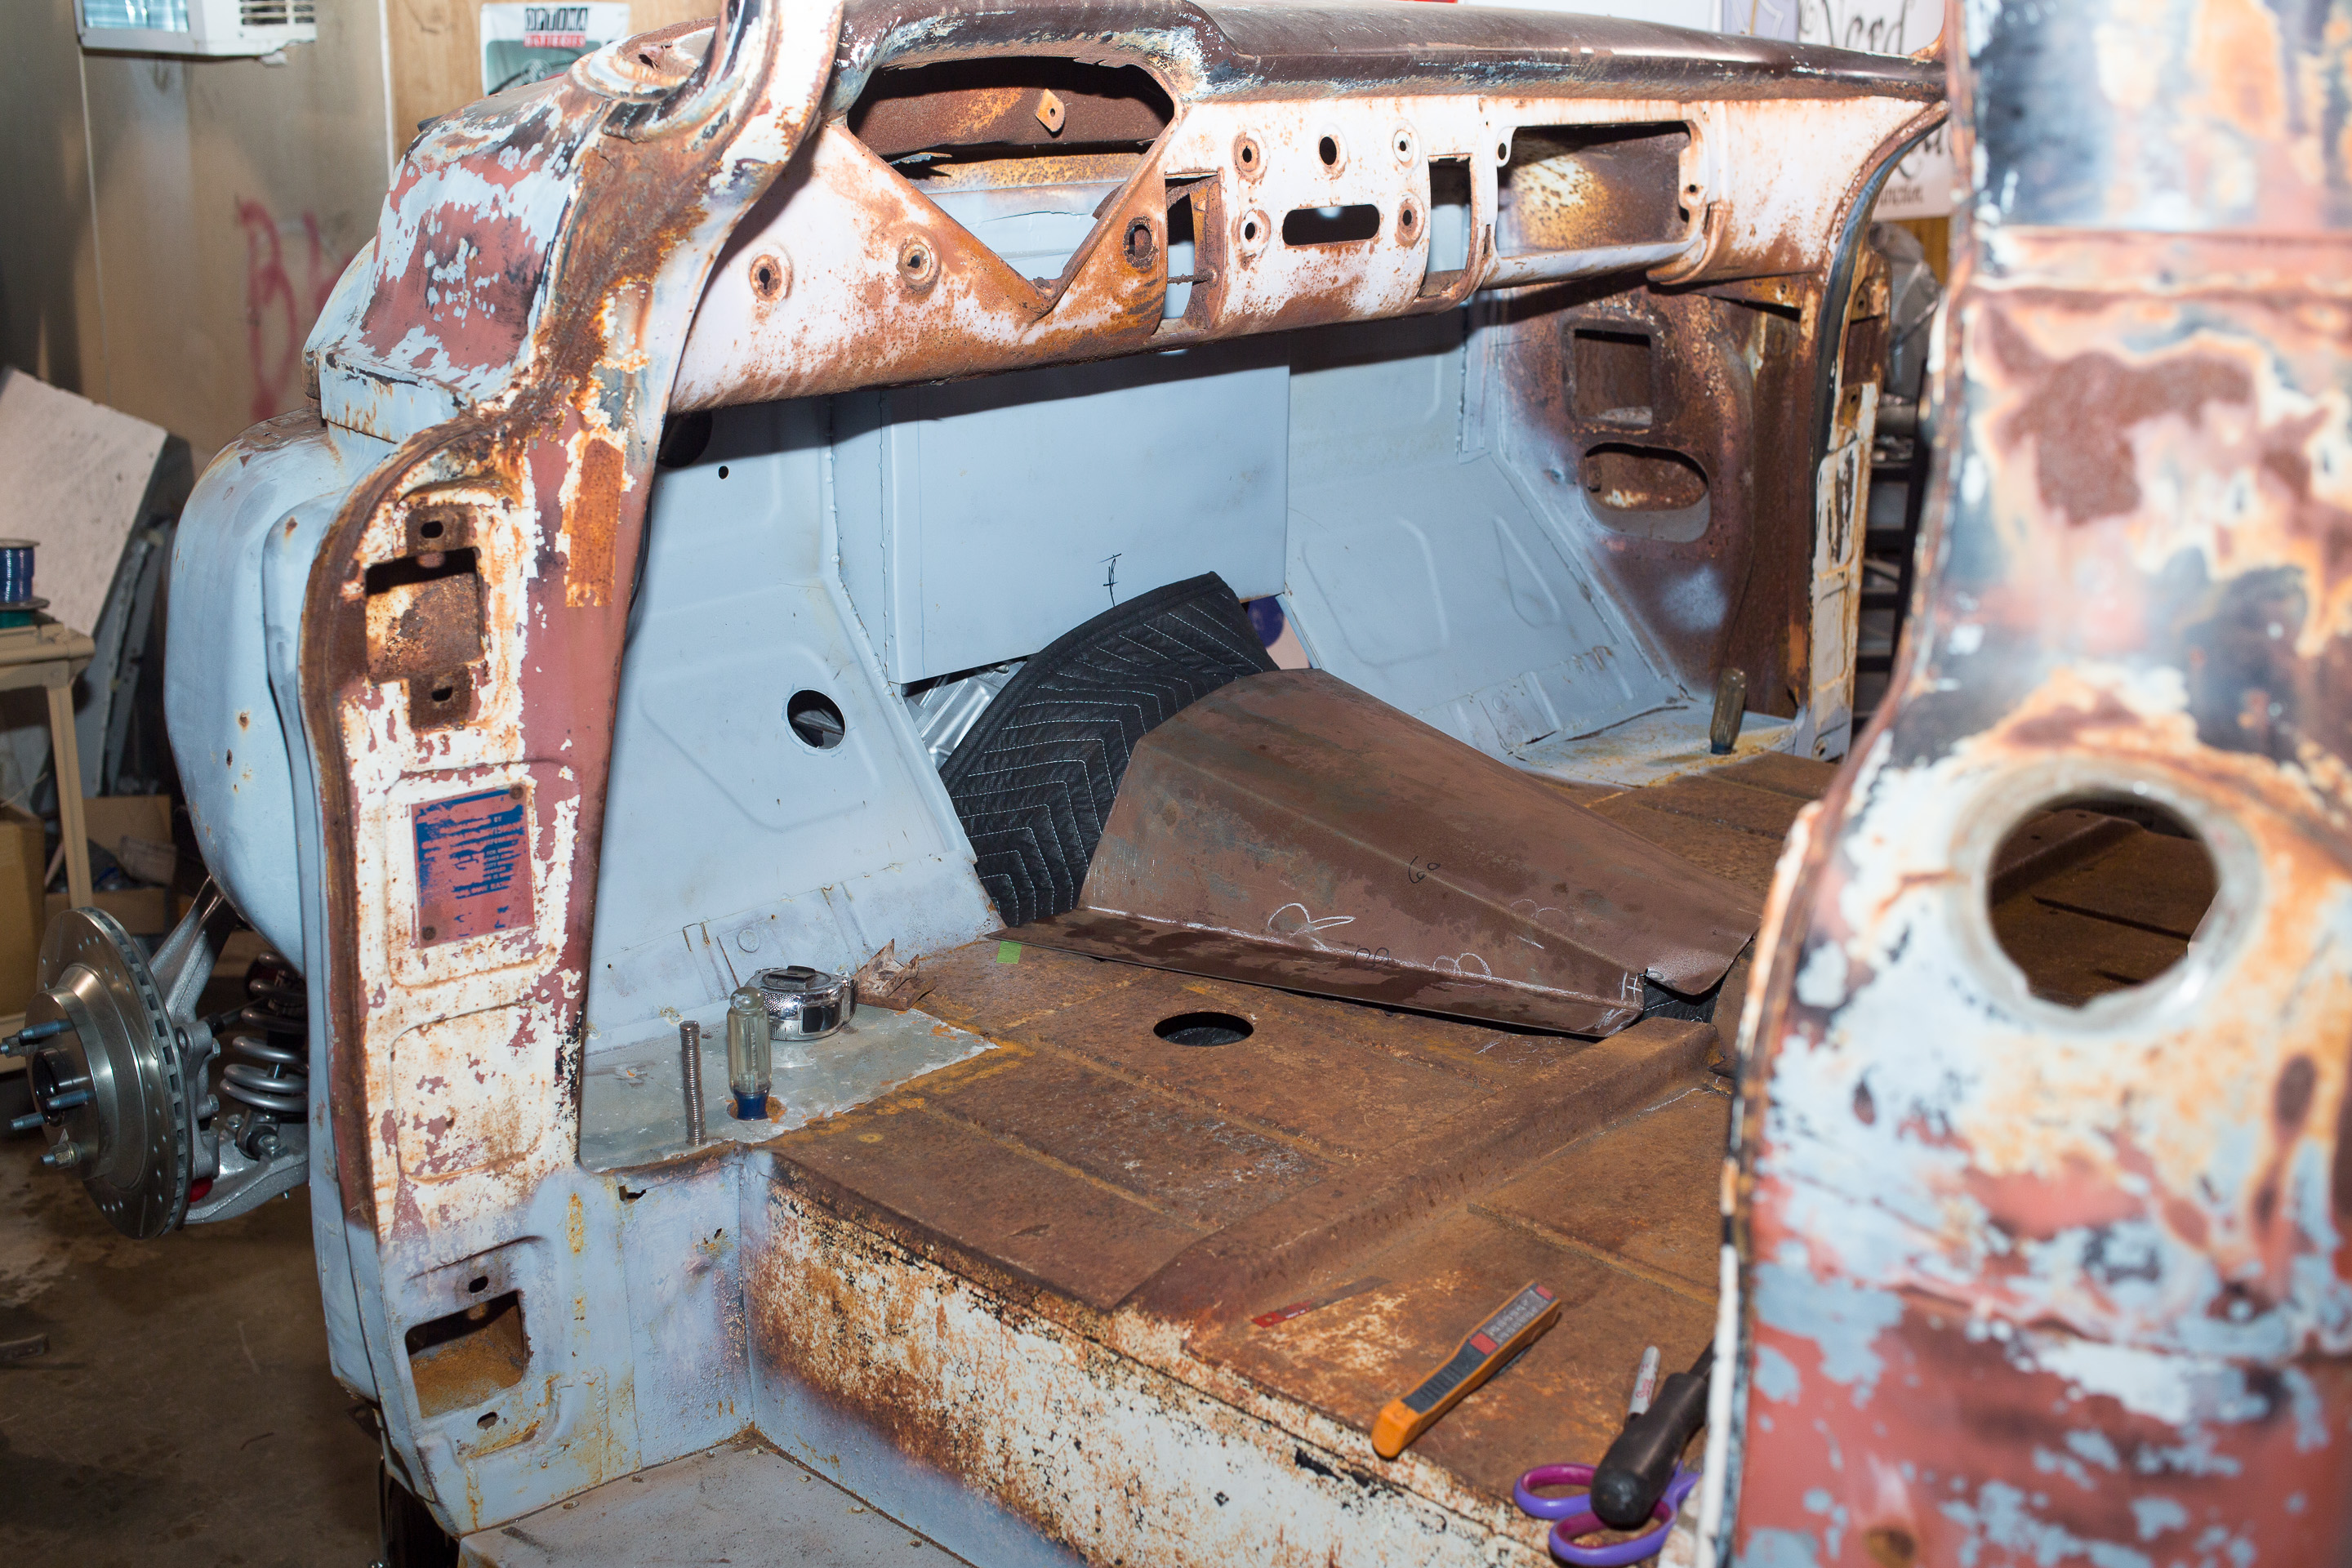
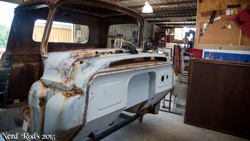
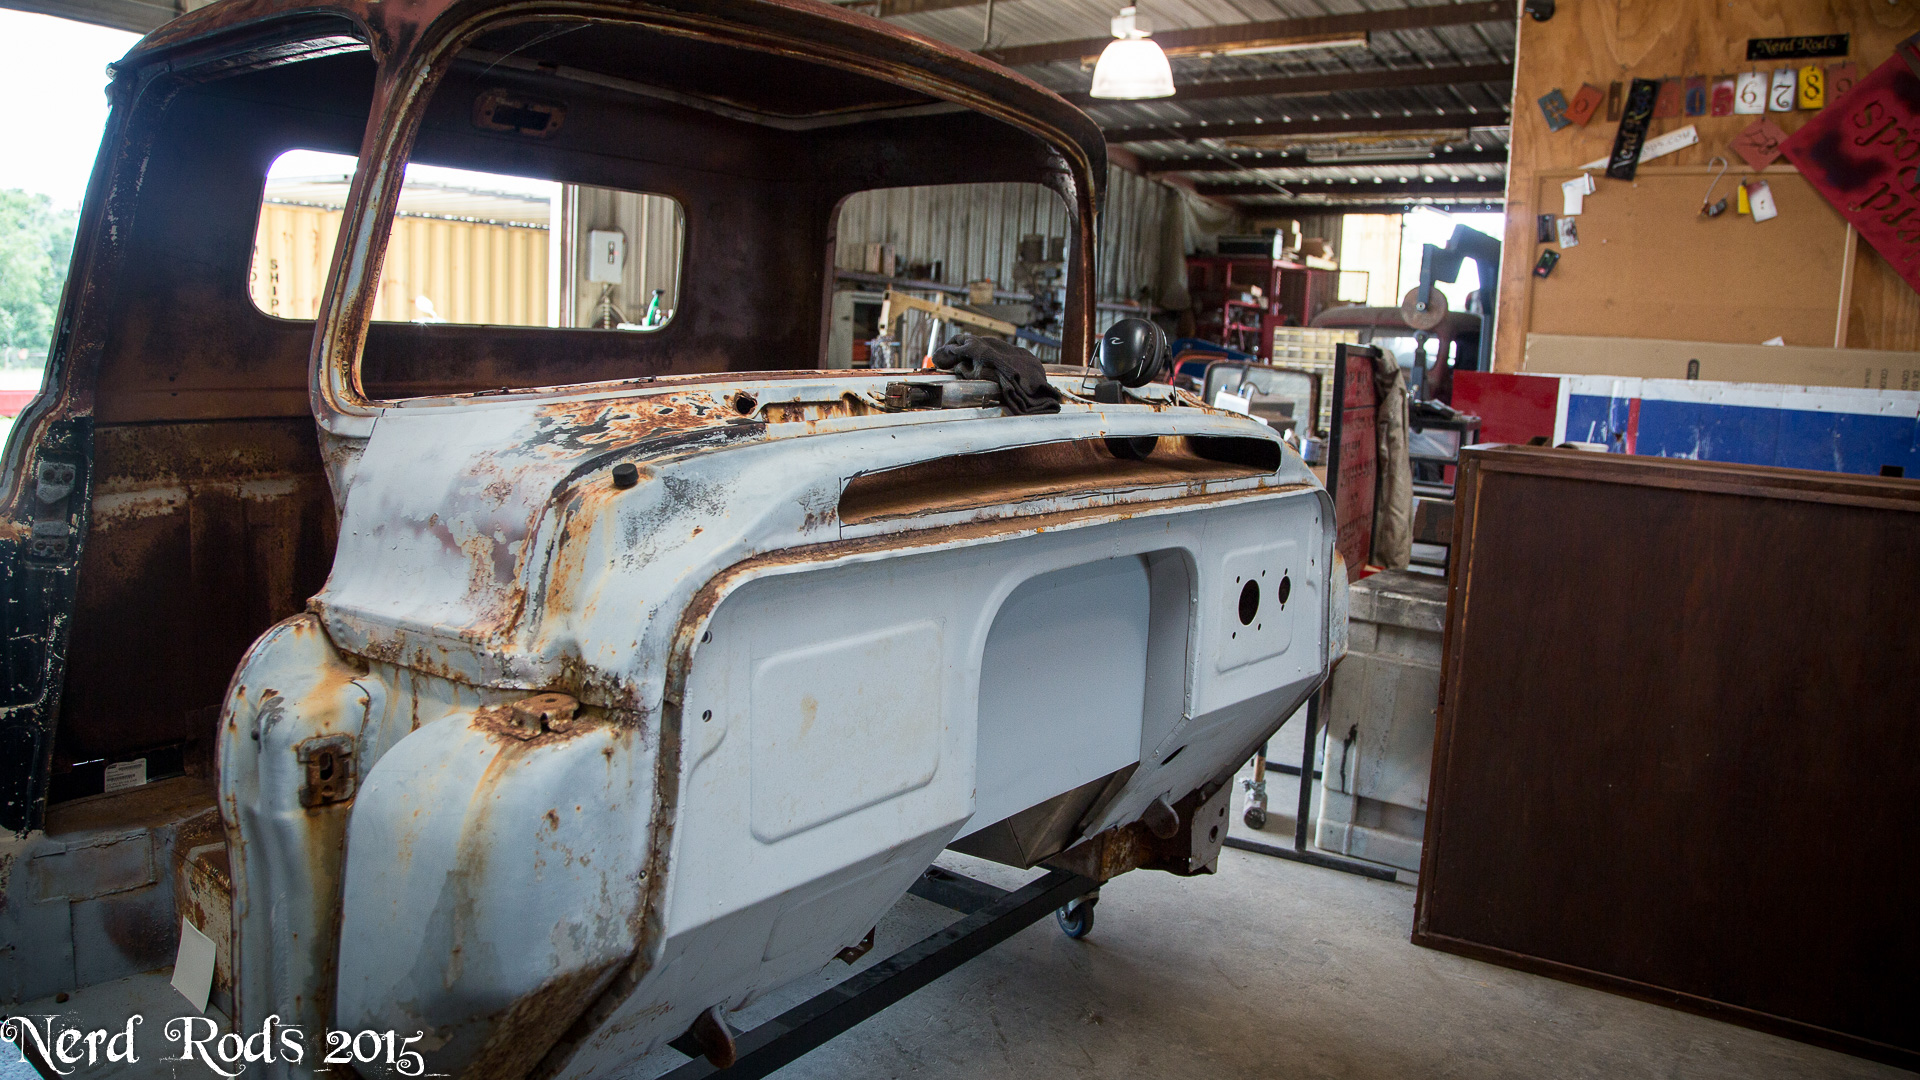
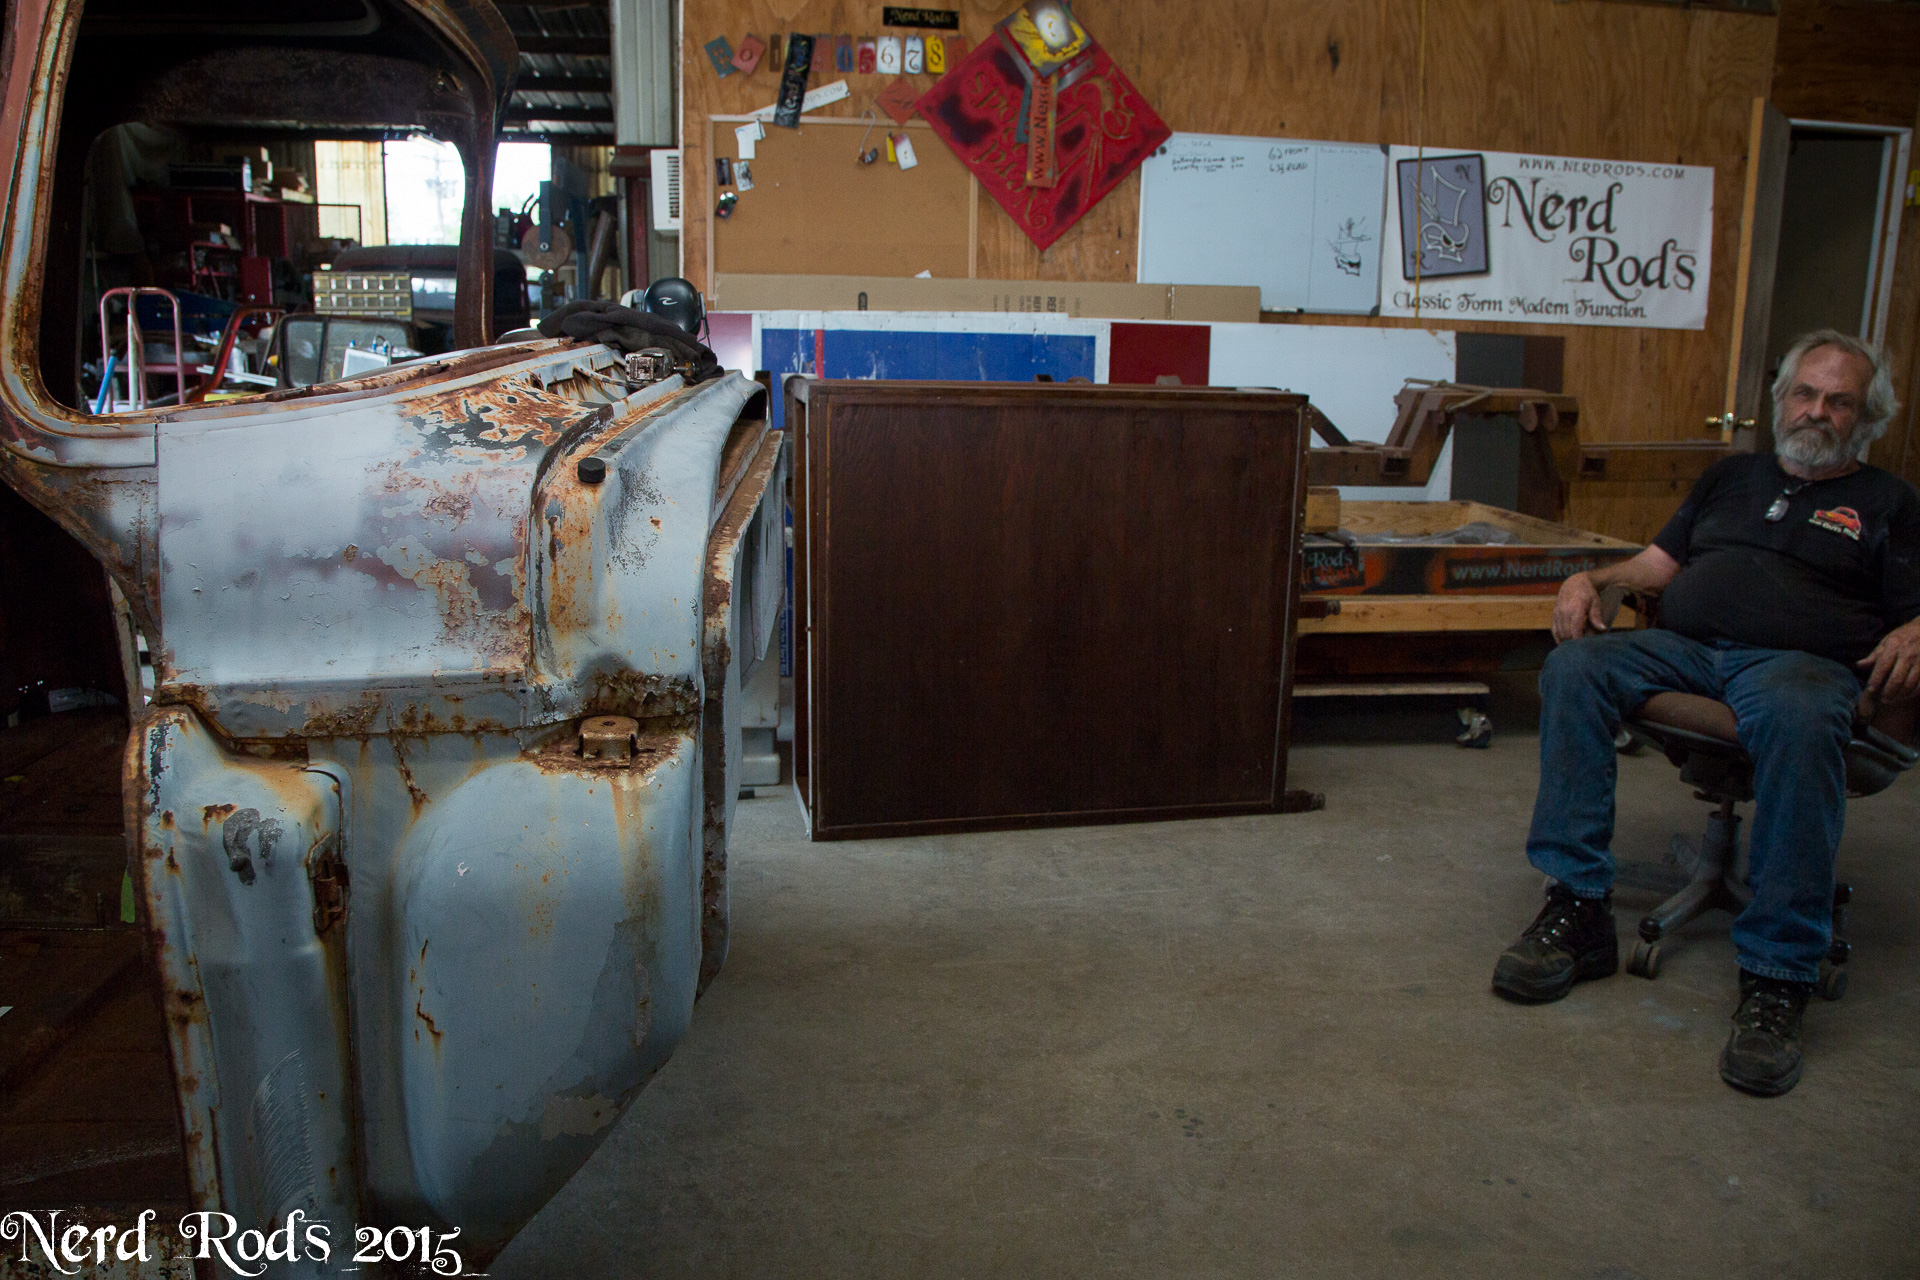
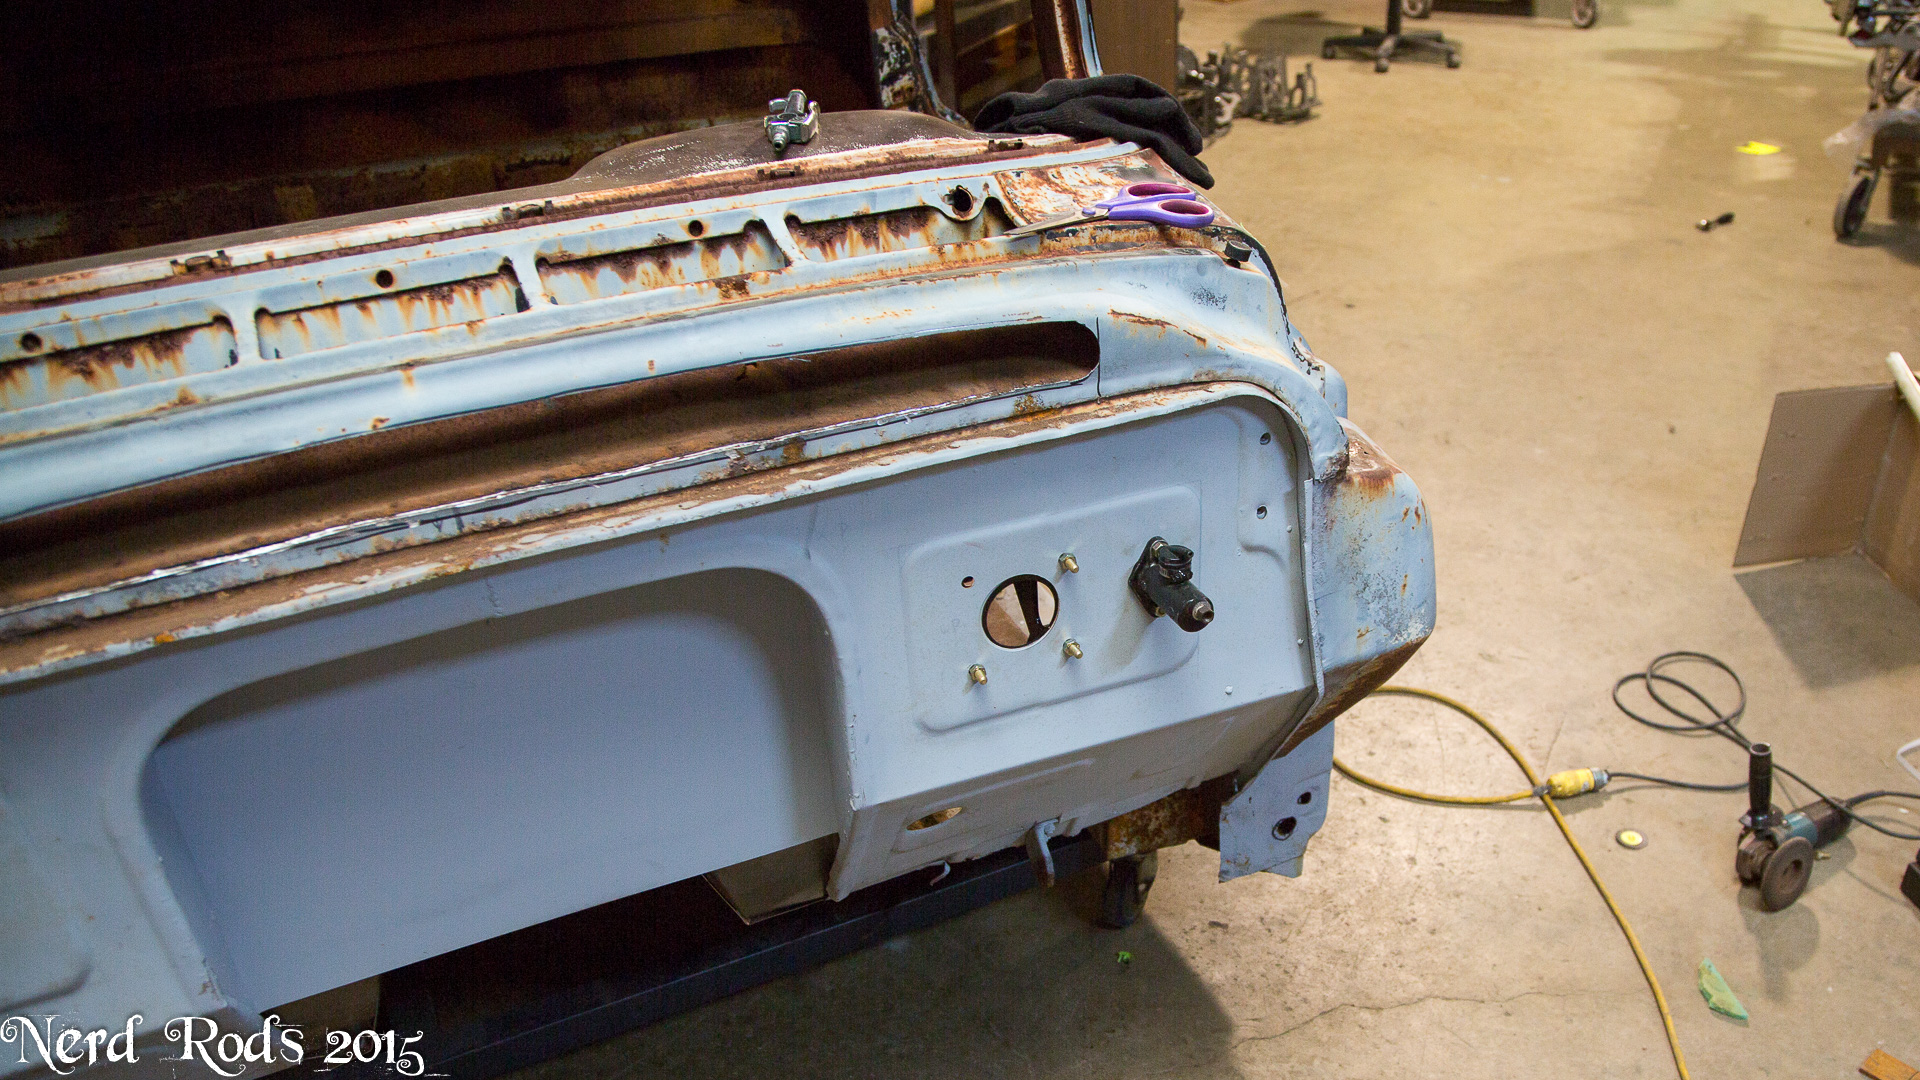
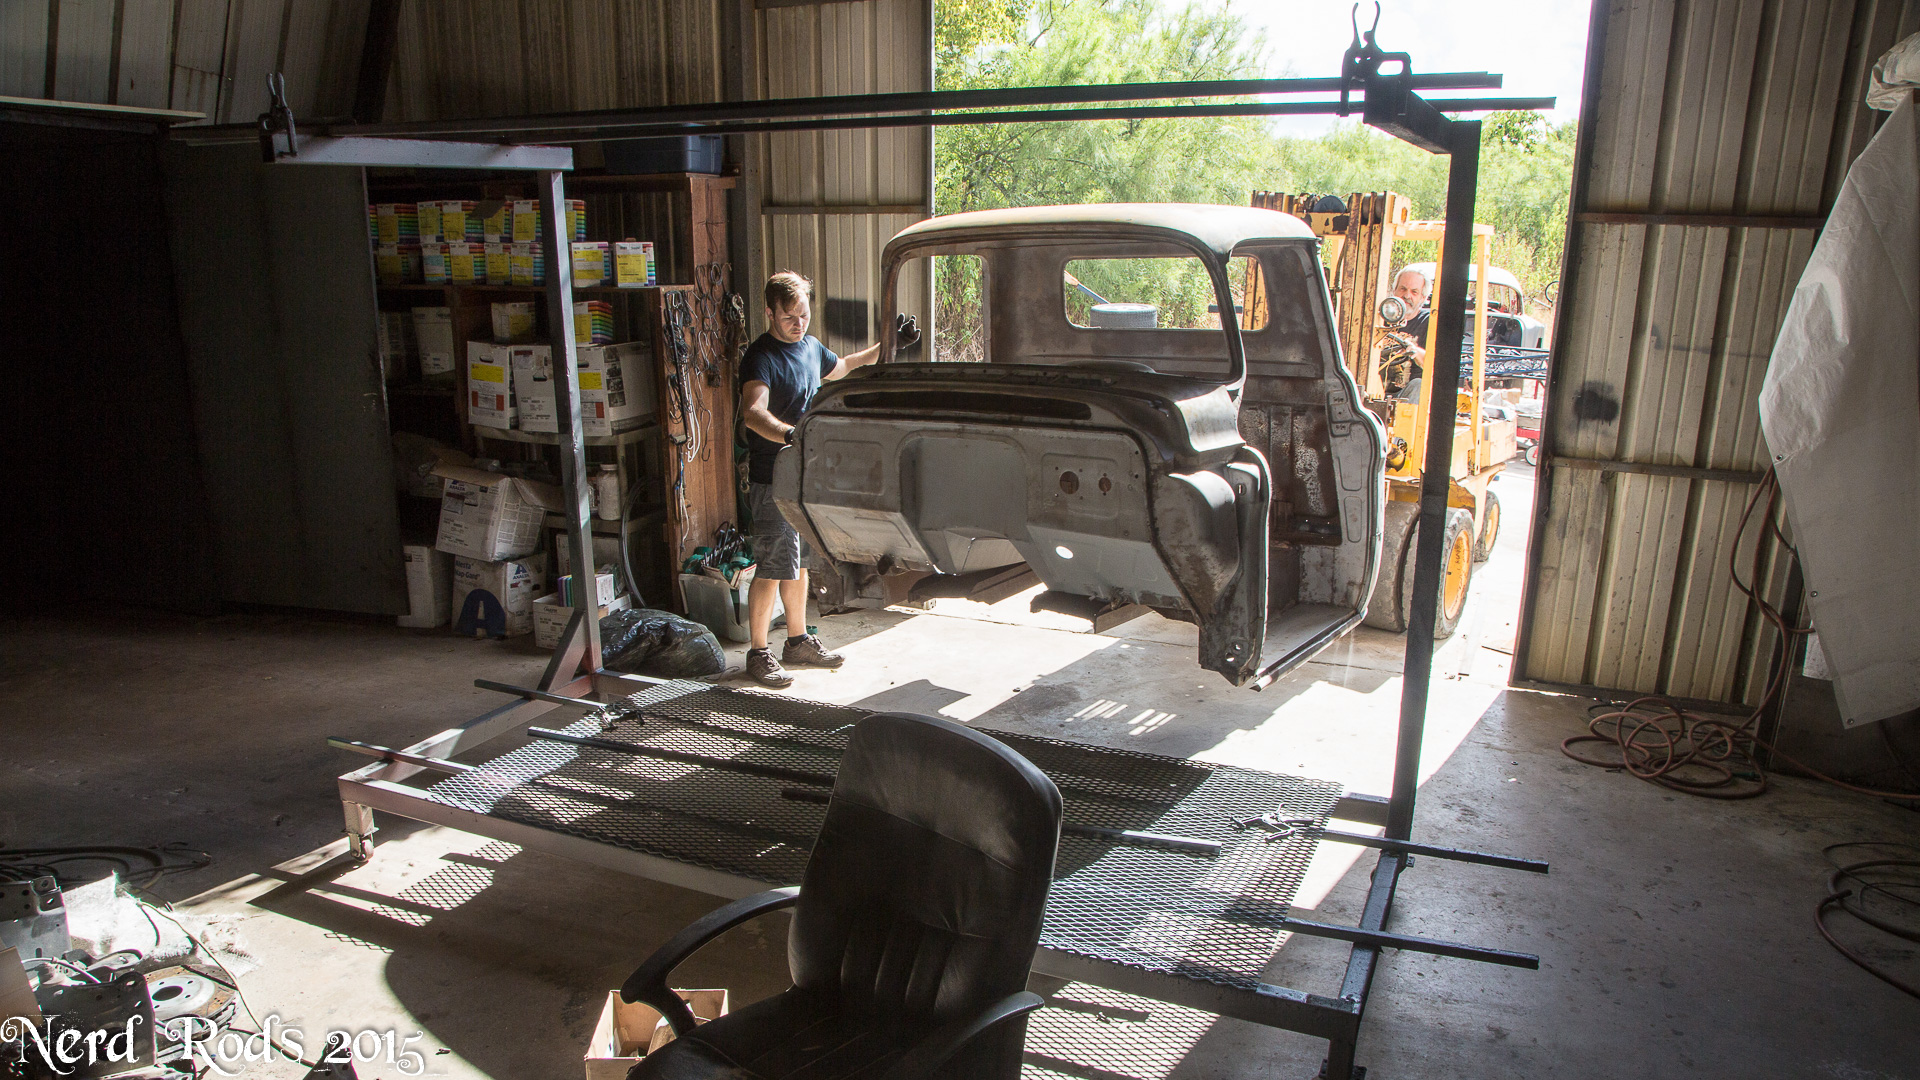
First we wanted to show customers thinking about their own low body chassis what modifications are required to make their cars fit and look good. So we used a customers completed chassis to check and show the firewall clearance. This shows the minimum you need to remove to make that happen and the basic patch work on the cab.
Photo Gallery 01 - Click here if you want to see the photos is large size, Apparently LS1 tech doesn't code like the other forums.
http://gallery.nerdrods.com/Projects/03_D3/01/index.html


Later
-Russell @ Nerd Rods
Photo Gallery 01 - Click here if you want to see the photos is large size, Apparently LS1 tech doesn't code like the other forums.
http://gallery.nerdrods.com/Projects/03_D3/01/index.html


Later
-Russell @ Nerd Rods
Last edited by rat_rod_russell; 10-20-2015 at 11:29 AM.
06-19-2015, 10:08 AM
#5
Launching!
Thread Starter
Join Date: Jan 2007
Location: Luling TX In the Hot Rod Shop
Posts: 294
Likes: 0
Received 3 Likes
on
3 Posts
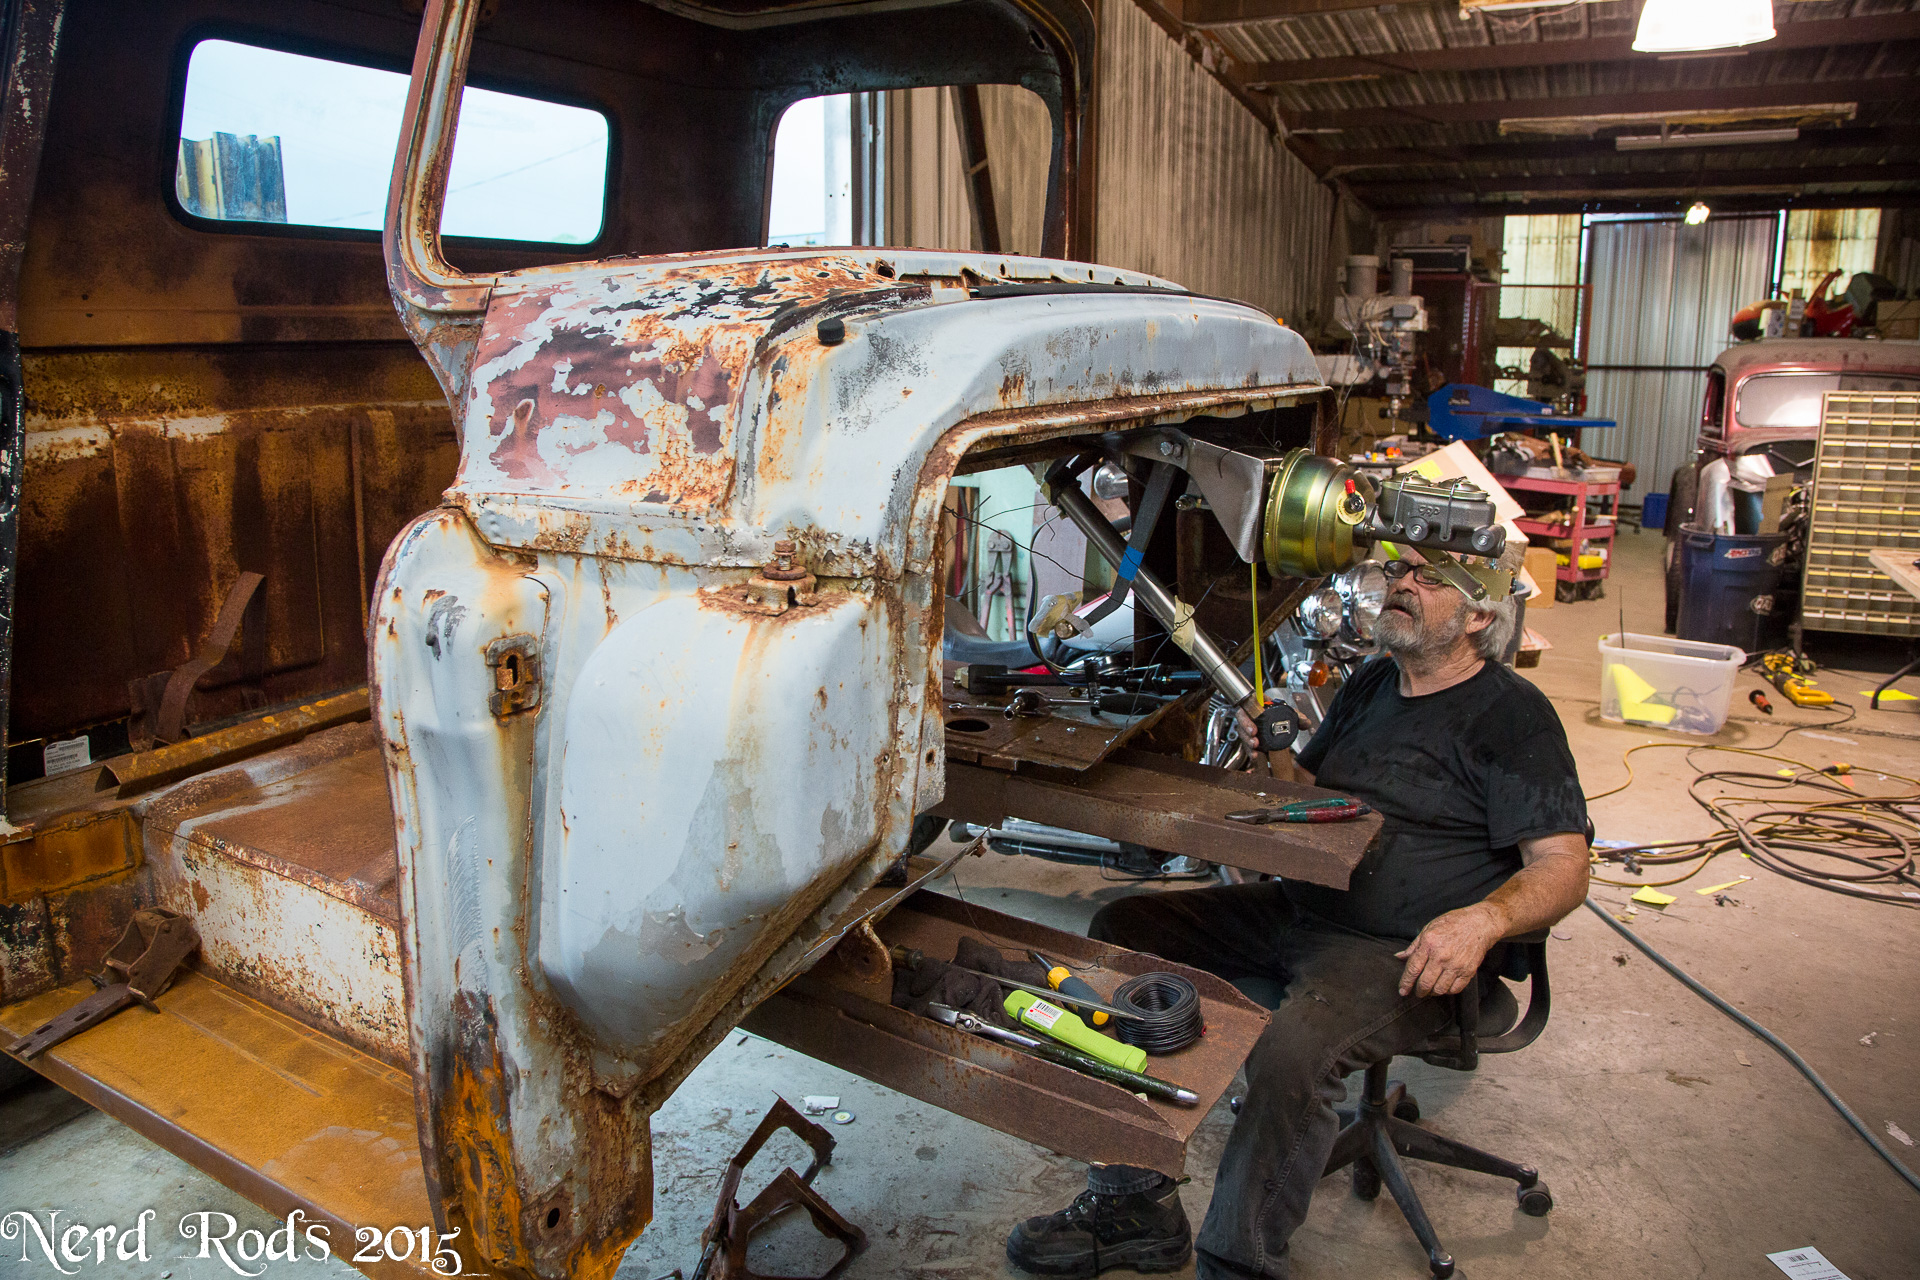
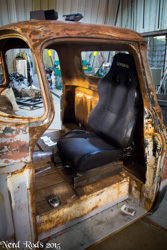
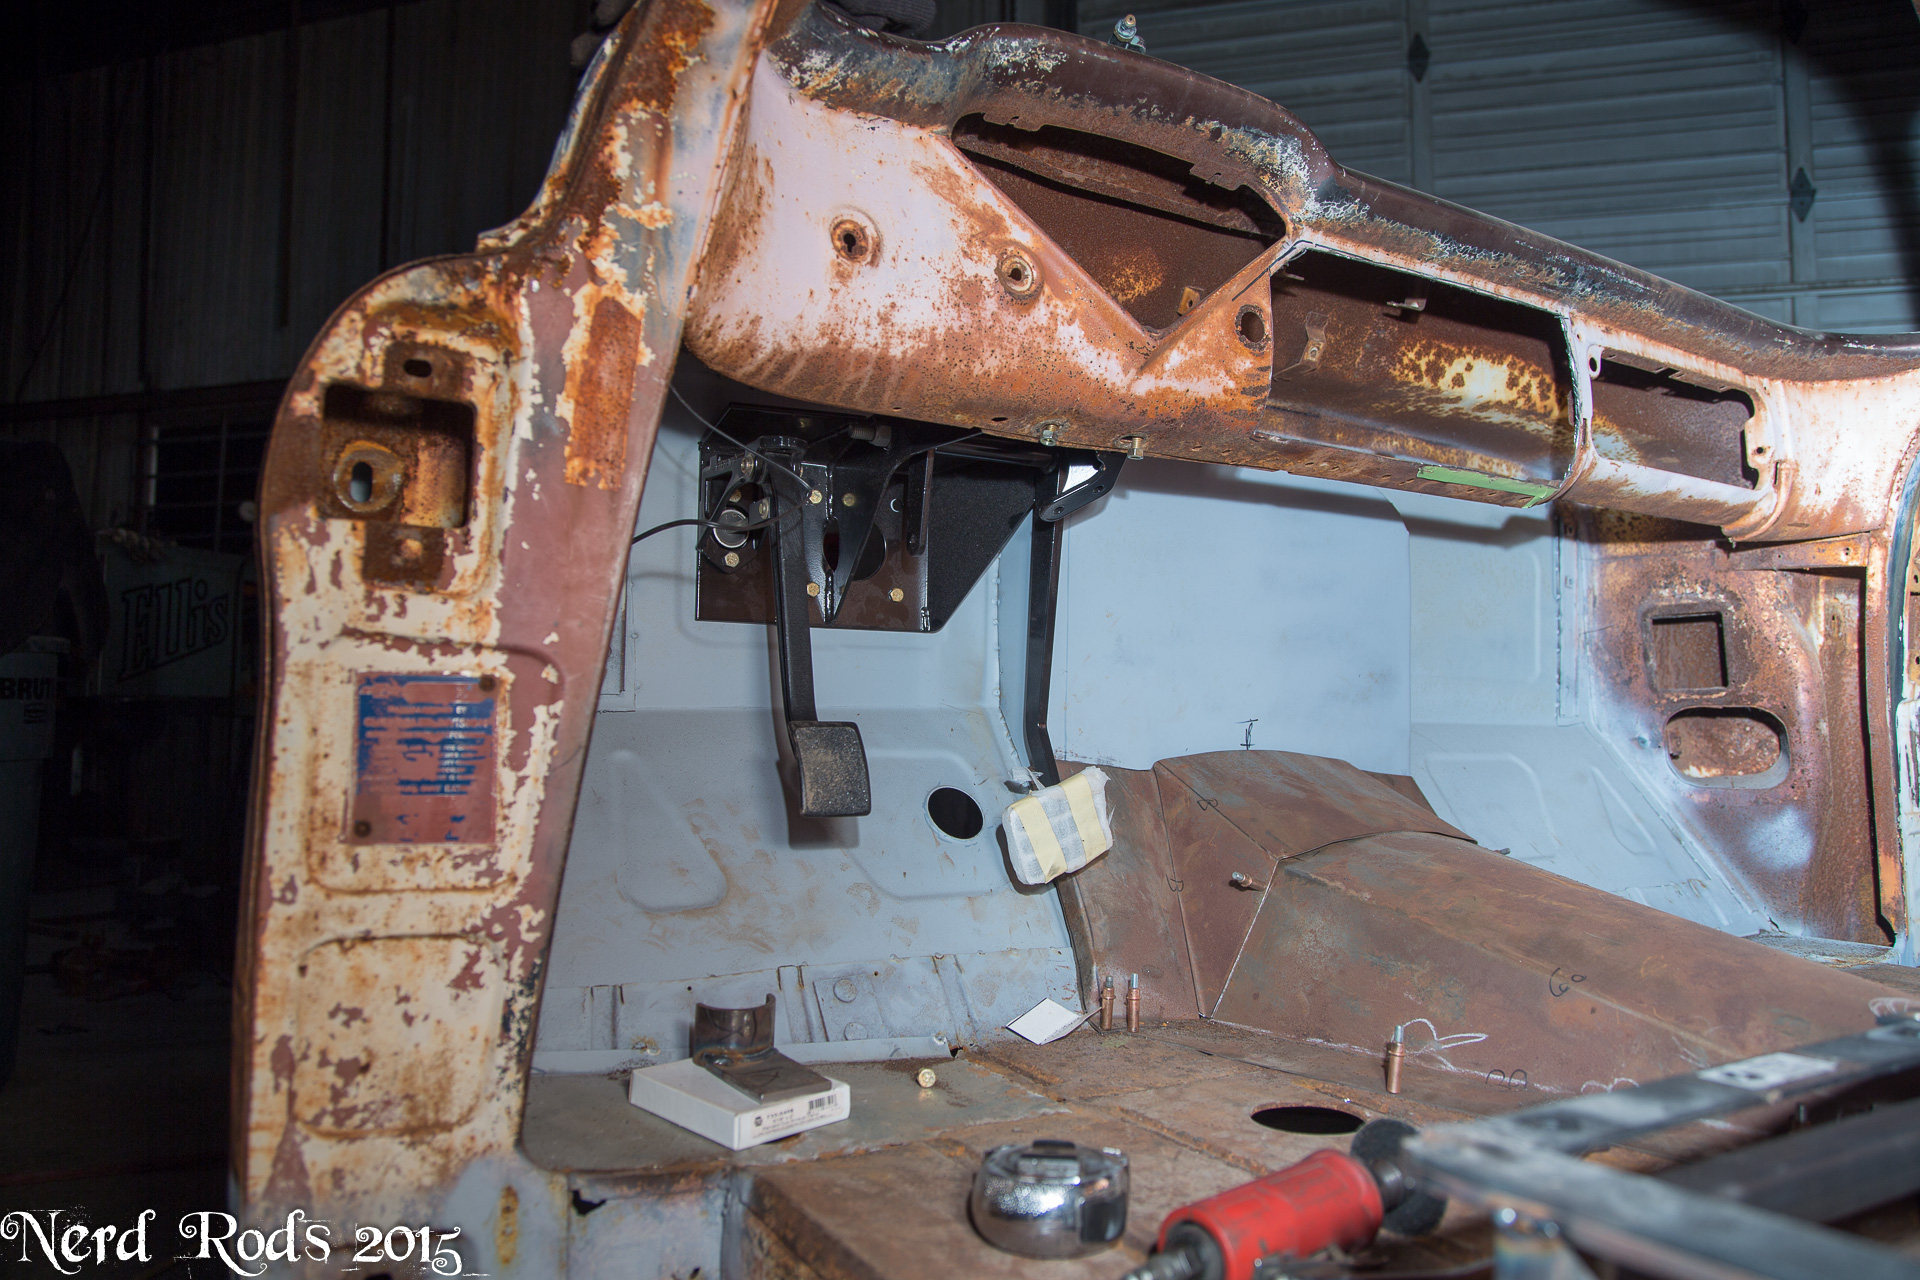
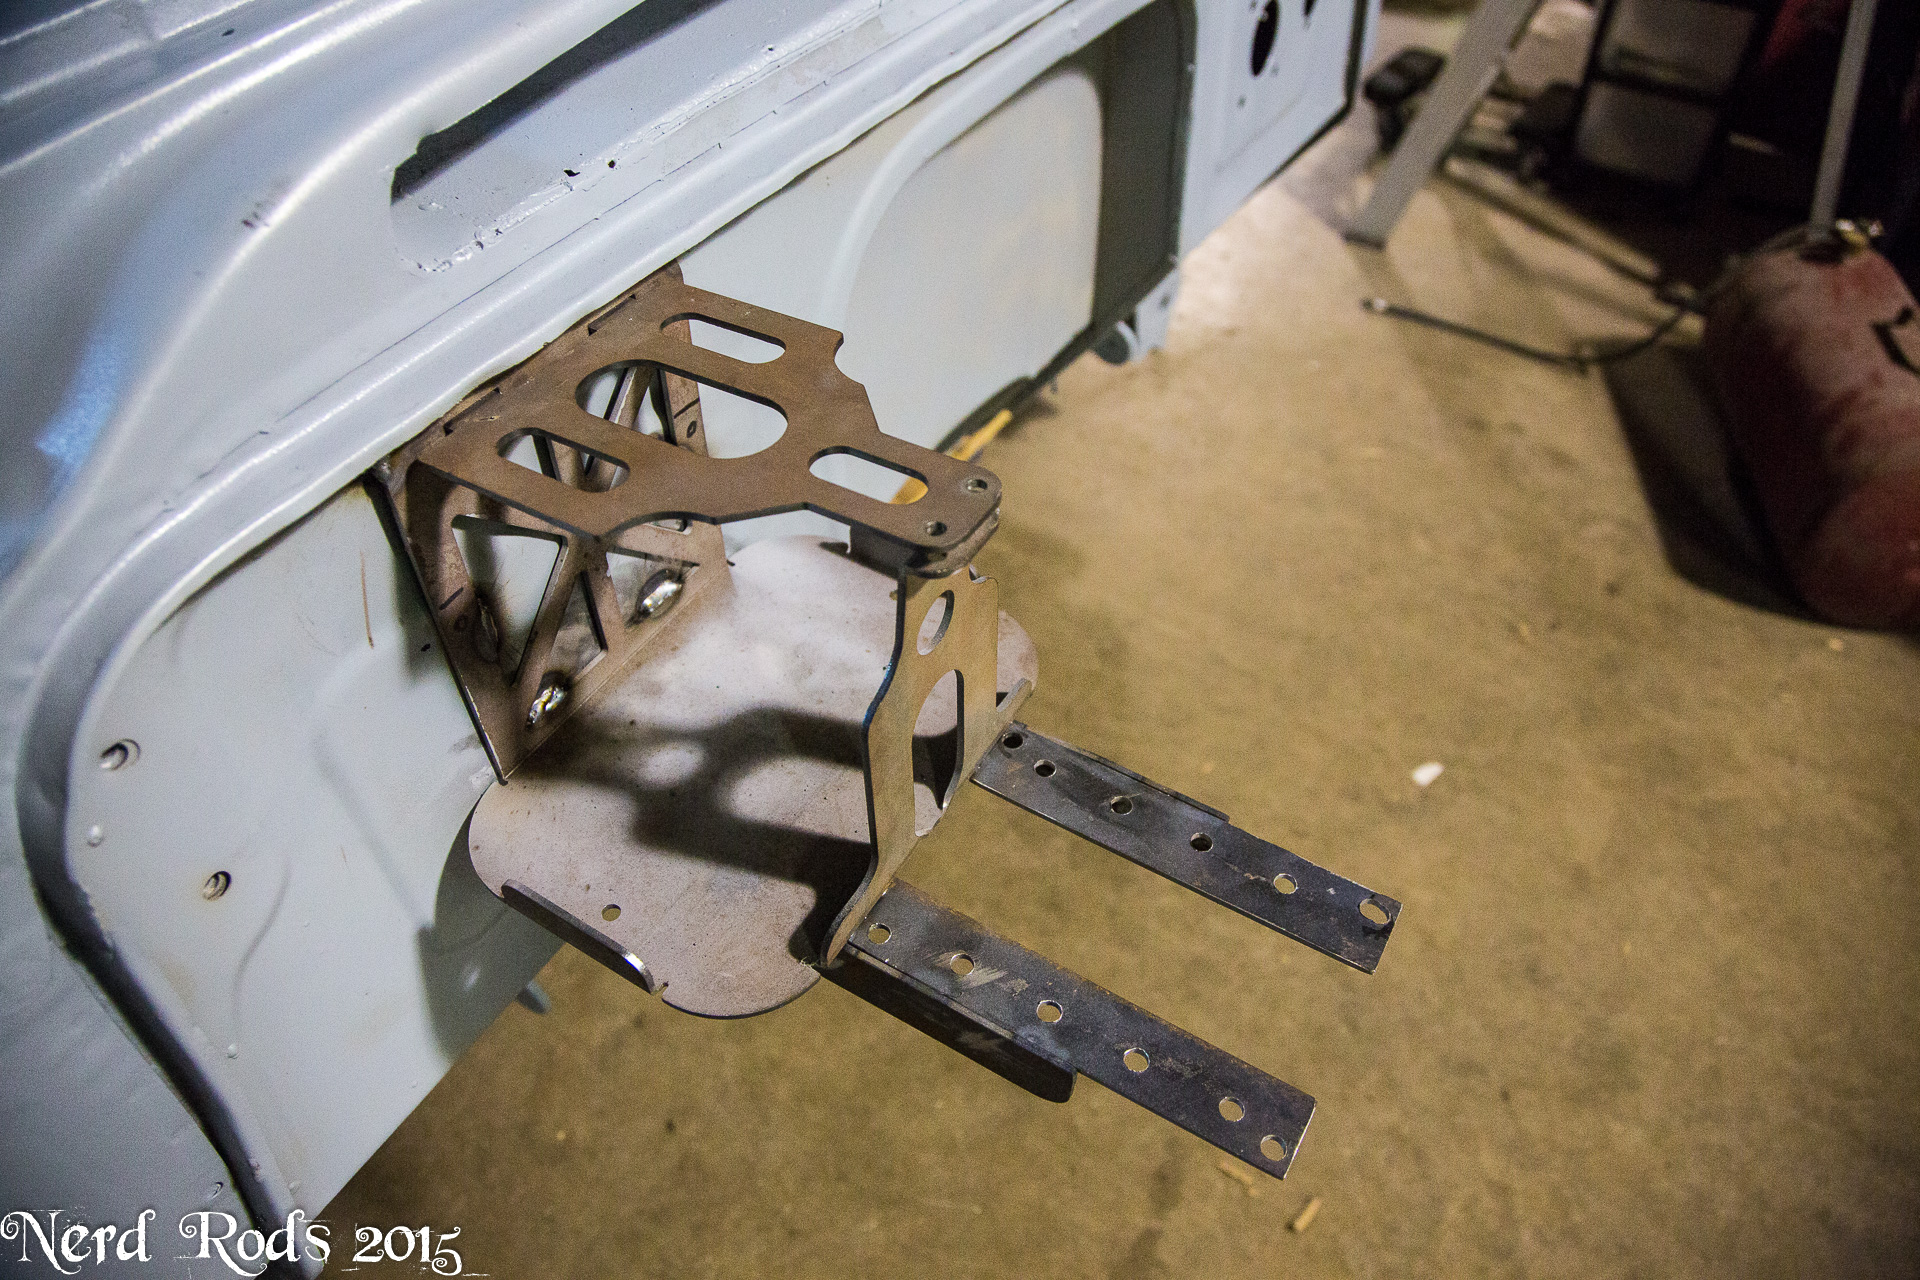
Firewall out, Master cylinder and booster with firewall mount and clutch pedal in.
Photo Gallery 01 - Click here if you want to see the photos is large size, Apparently LS1 tech doesn't code like the other forums.
http://gallery.nerdrods.com/Projects/03_D3/01/index.html

Later
-Russell @ Nerd Rods
Photo Gallery 01 - Click here if you want to see the photos is large size, Apparently LS1 tech doesn't code like the other forums.
http://gallery.nerdrods.com/Projects/03_D3/01/index.html

Later
-Russell @ Nerd Rods
Last edited by rat_rod_russell; 10-20-2015 at 11:29 AM.
06-30-2015, 06:44 PM
#6
Launching!
Thread Starter
Join Date: Jan 2007
Location: Luling TX In the Hot Rod Shop
Posts: 294
Likes: 0
Received 3 Likes
on
3 Posts
Updates
All the photos are here and then a few extras
Photo Gallery 01 - Click here if you want to see the photos is large size, Apparently LS1 tech doesn't code like the other forums.
http://gallery.nerdrods.com/Projects/03_D3/01/index.html
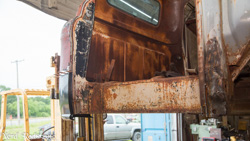
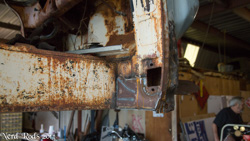
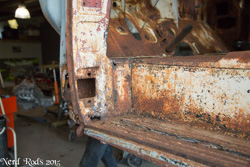
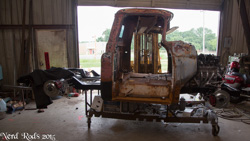
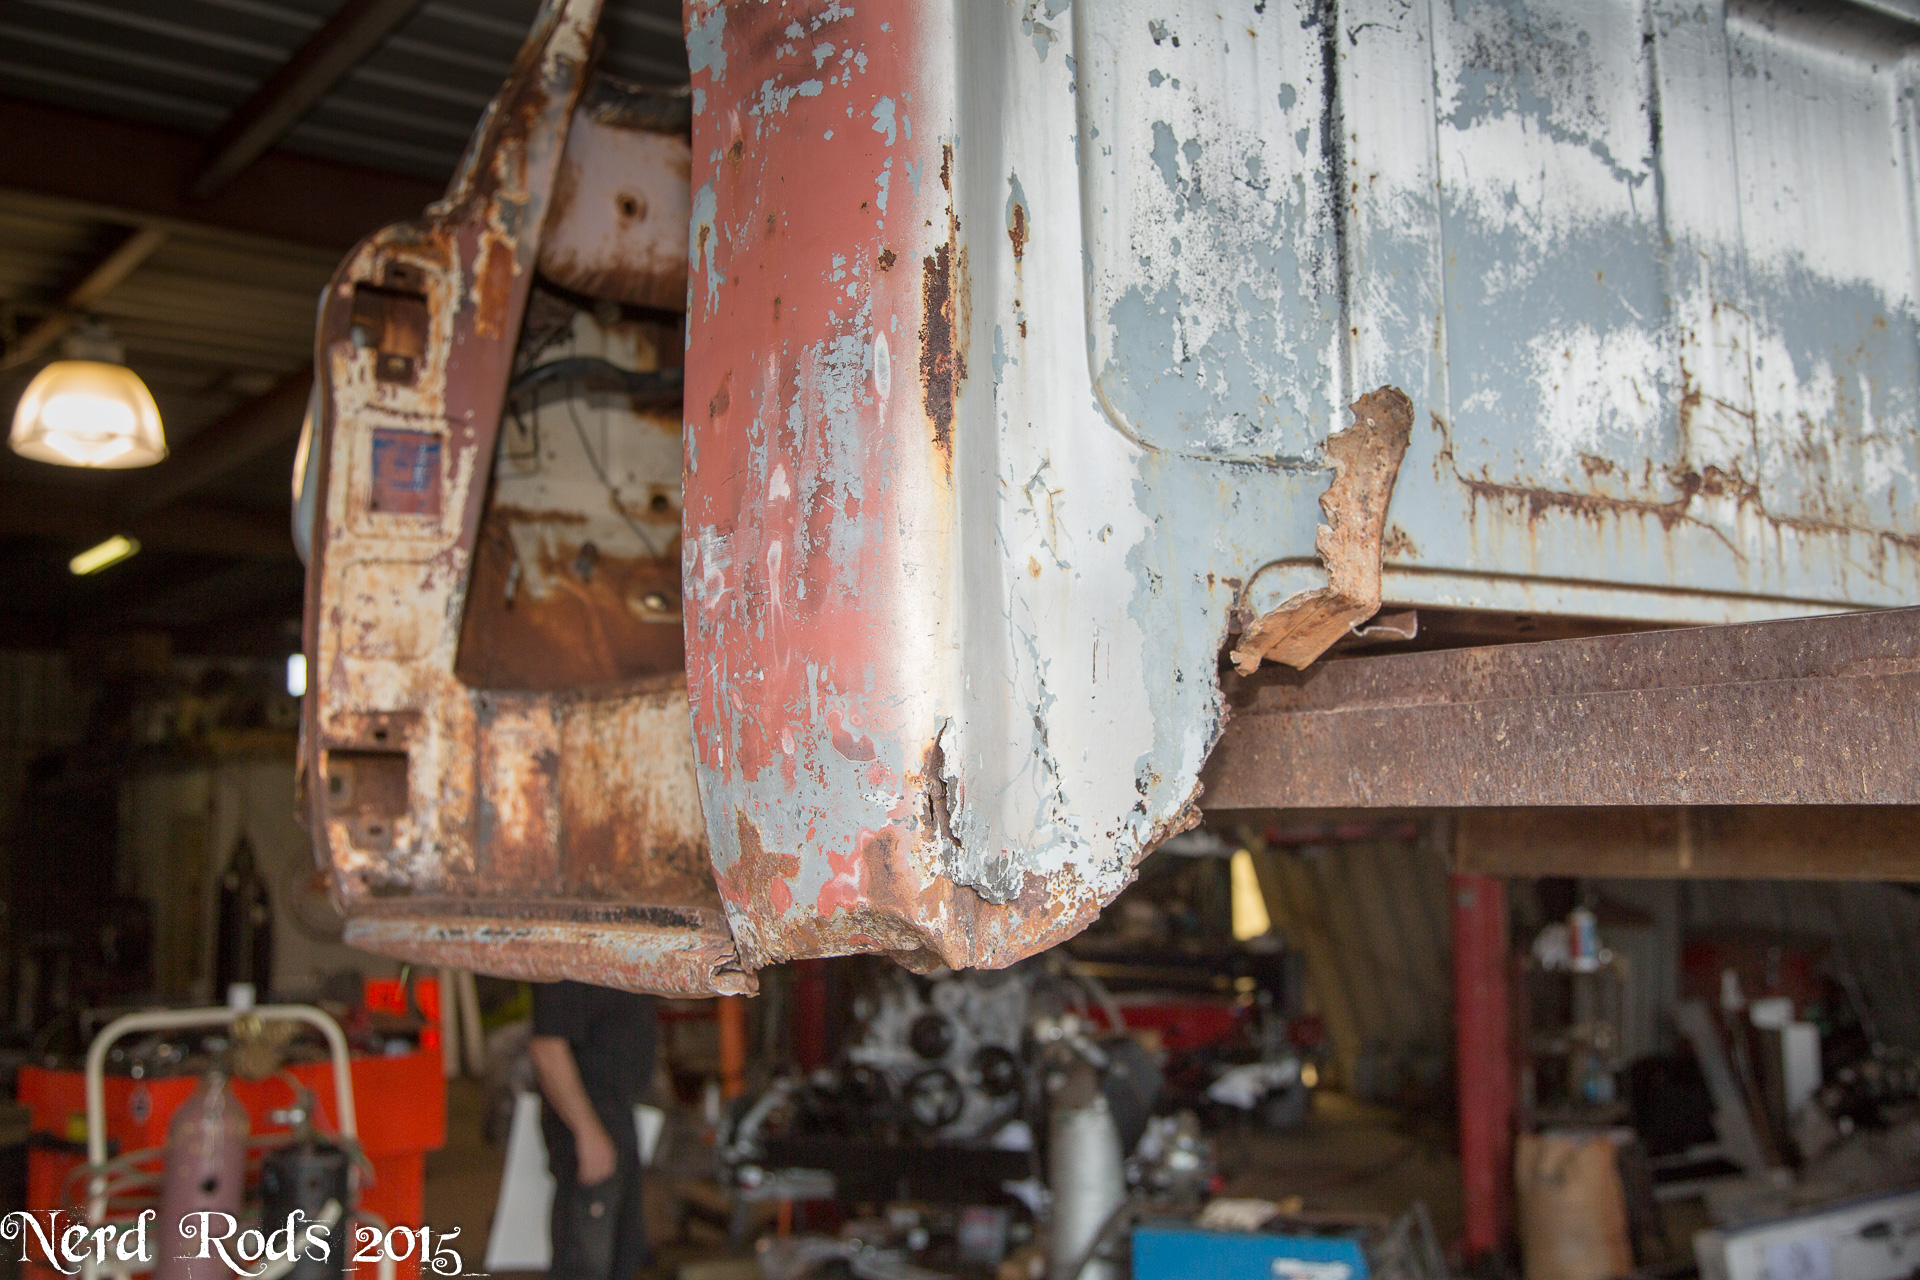
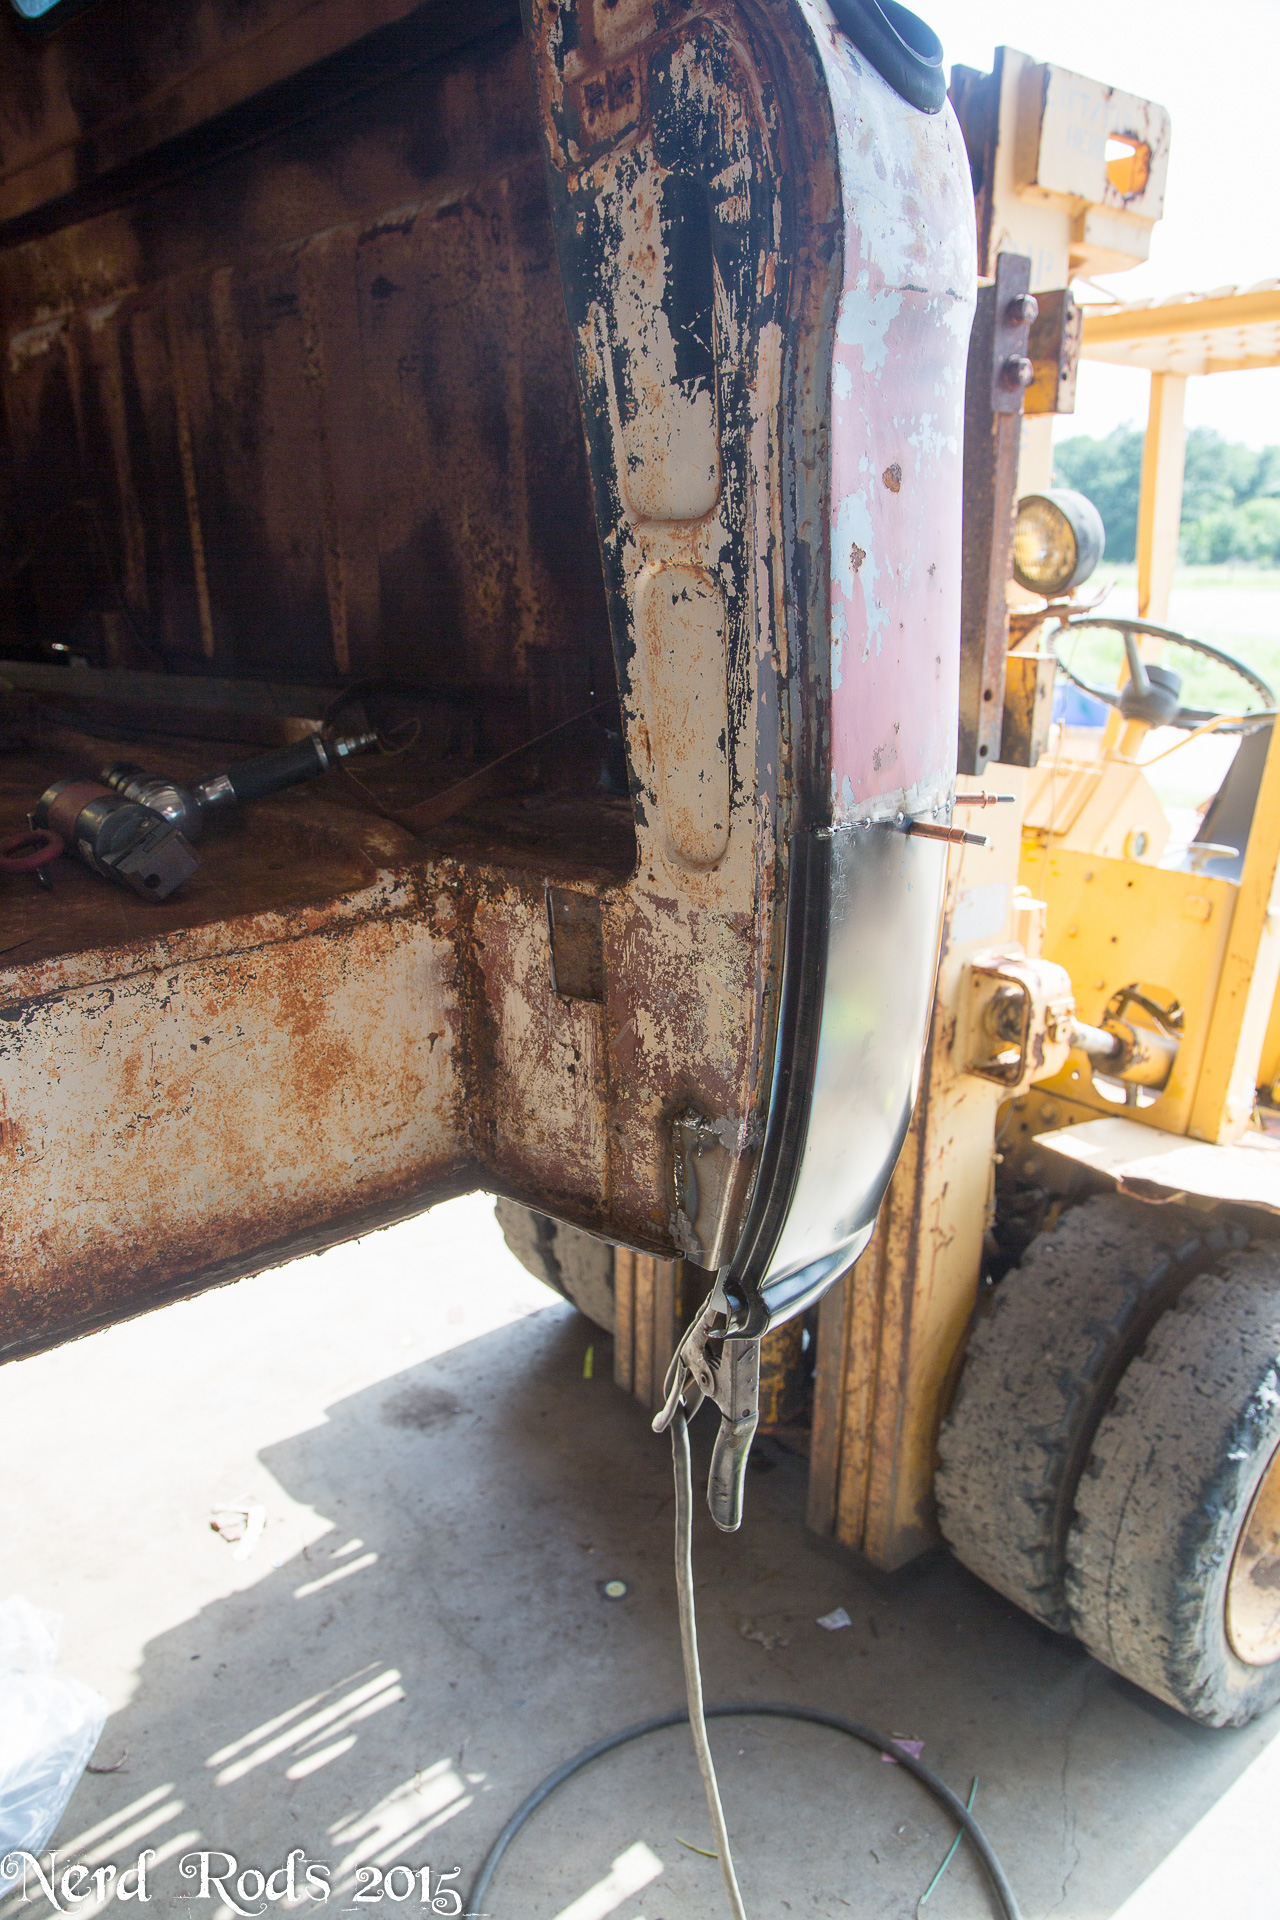
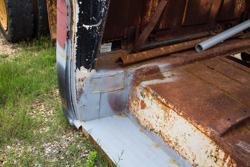
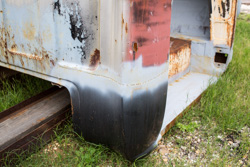
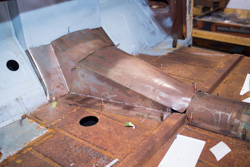
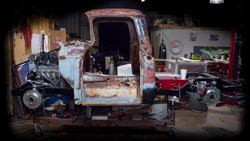
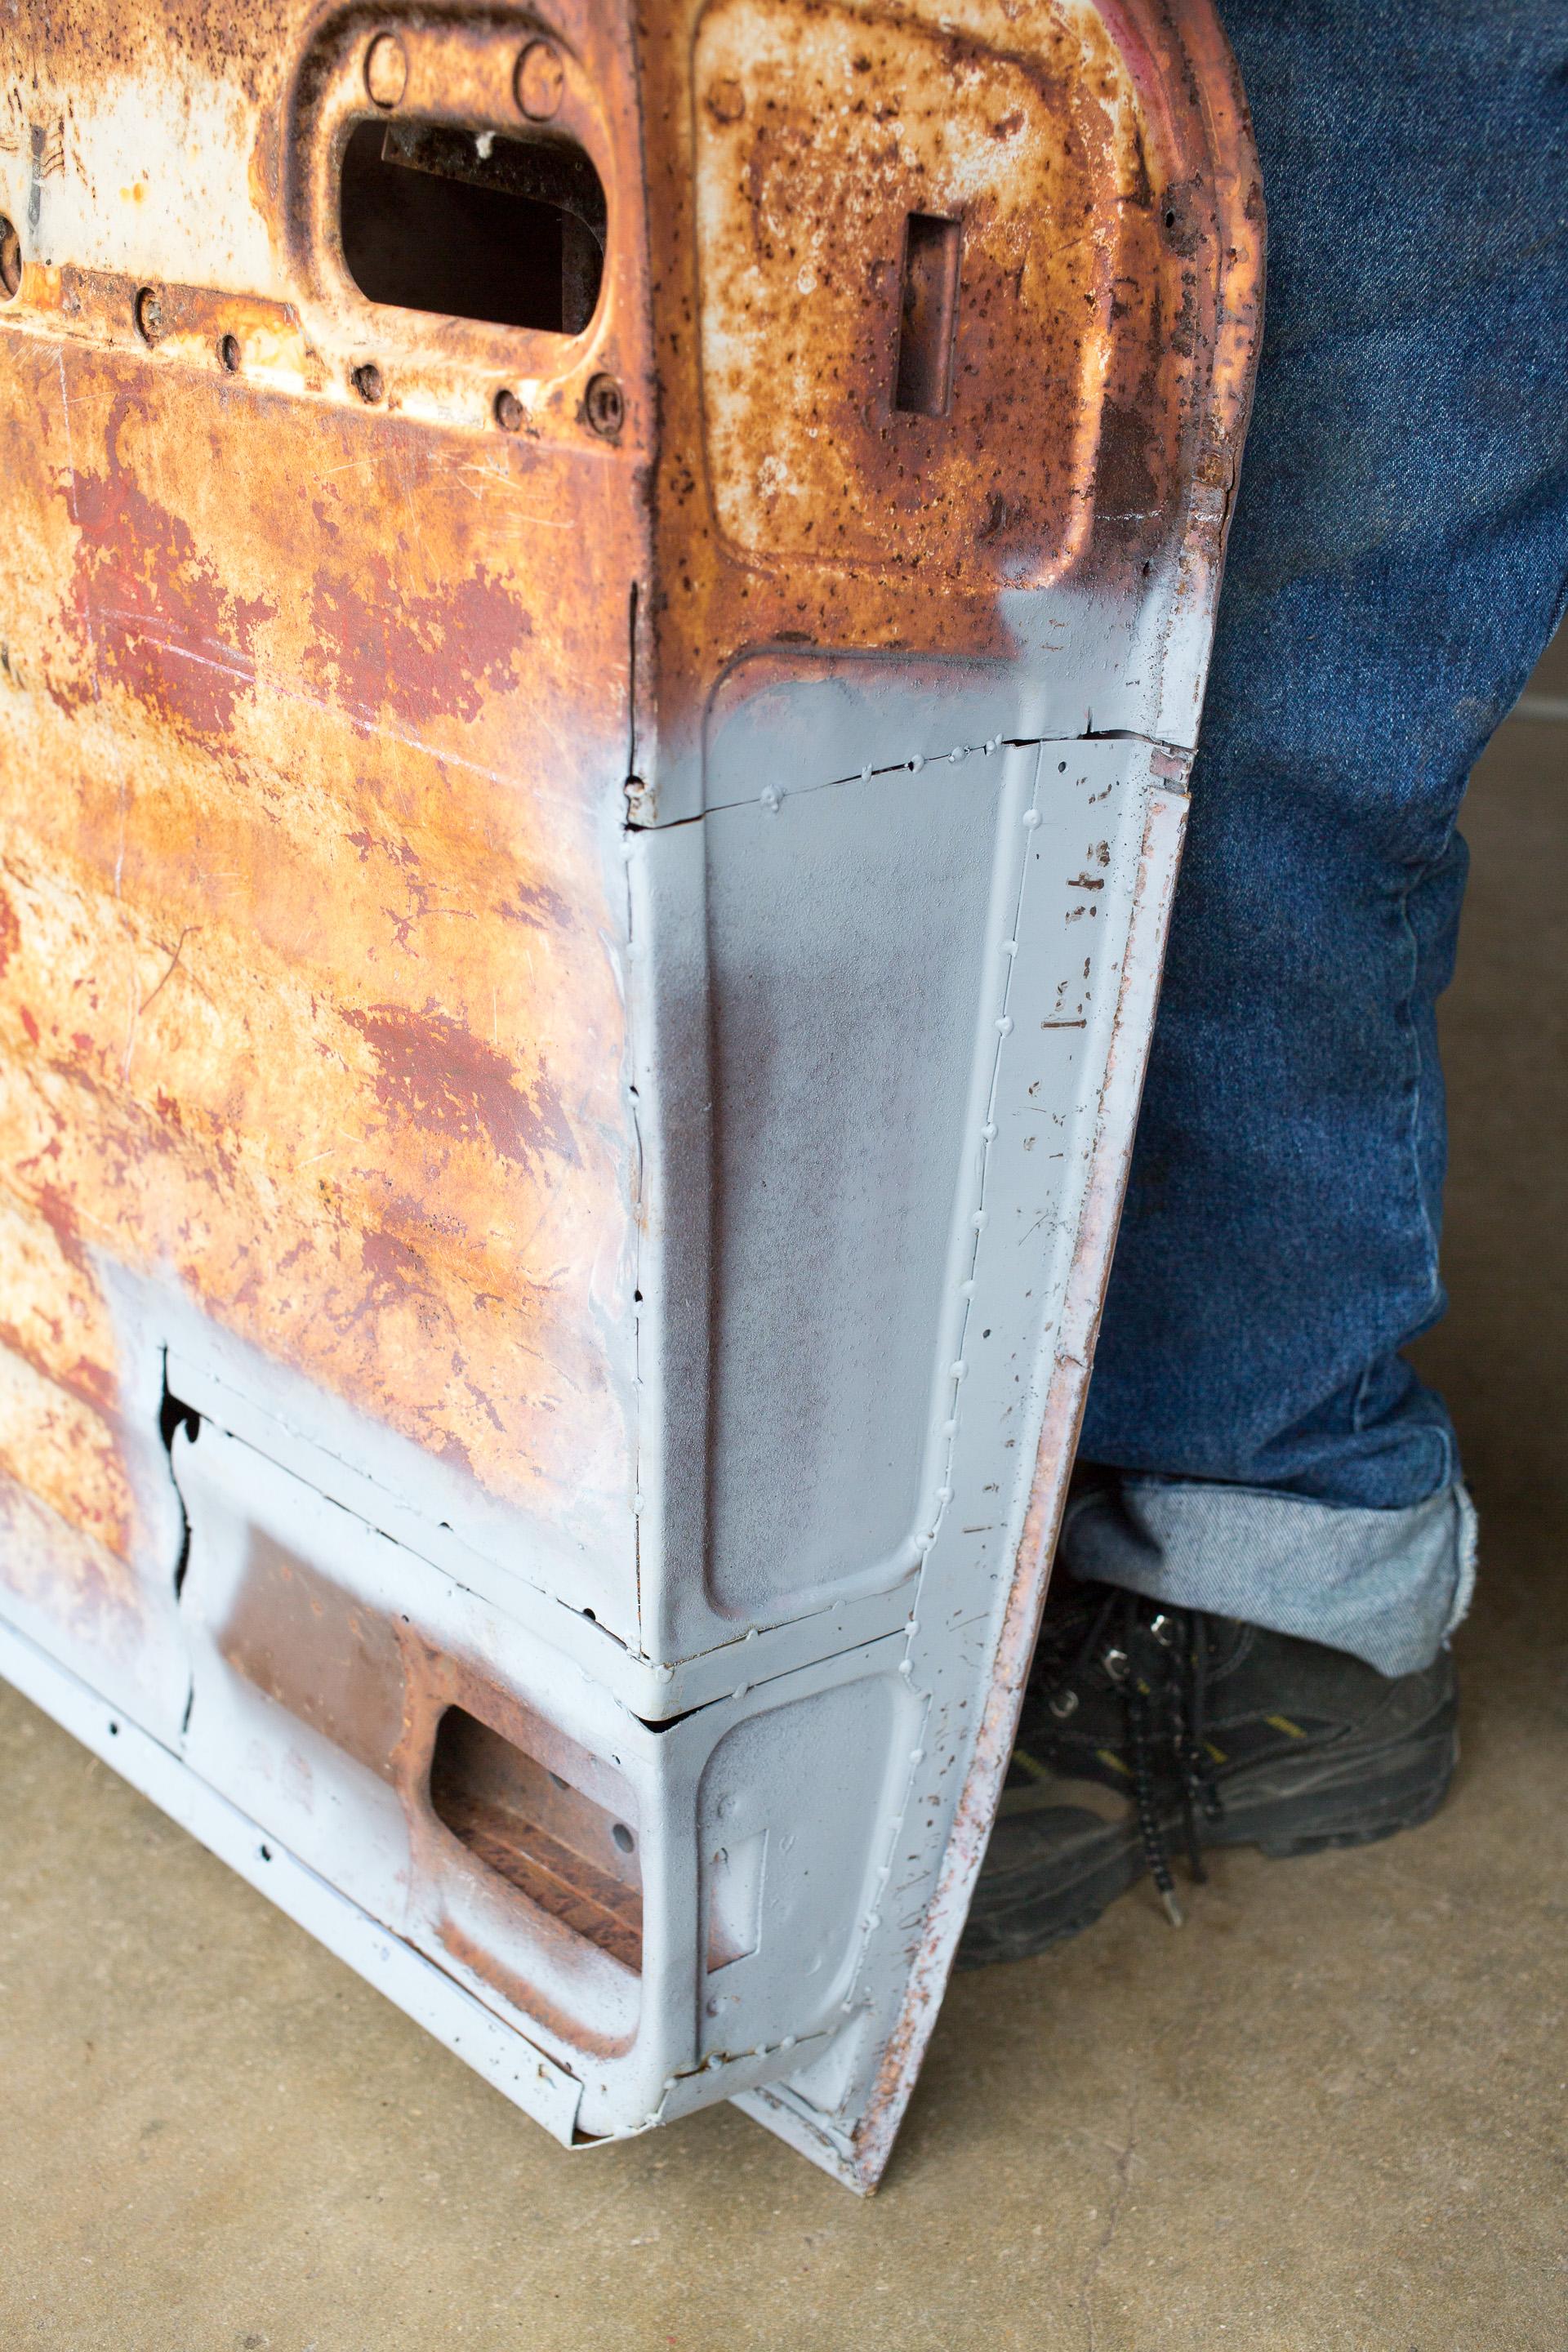
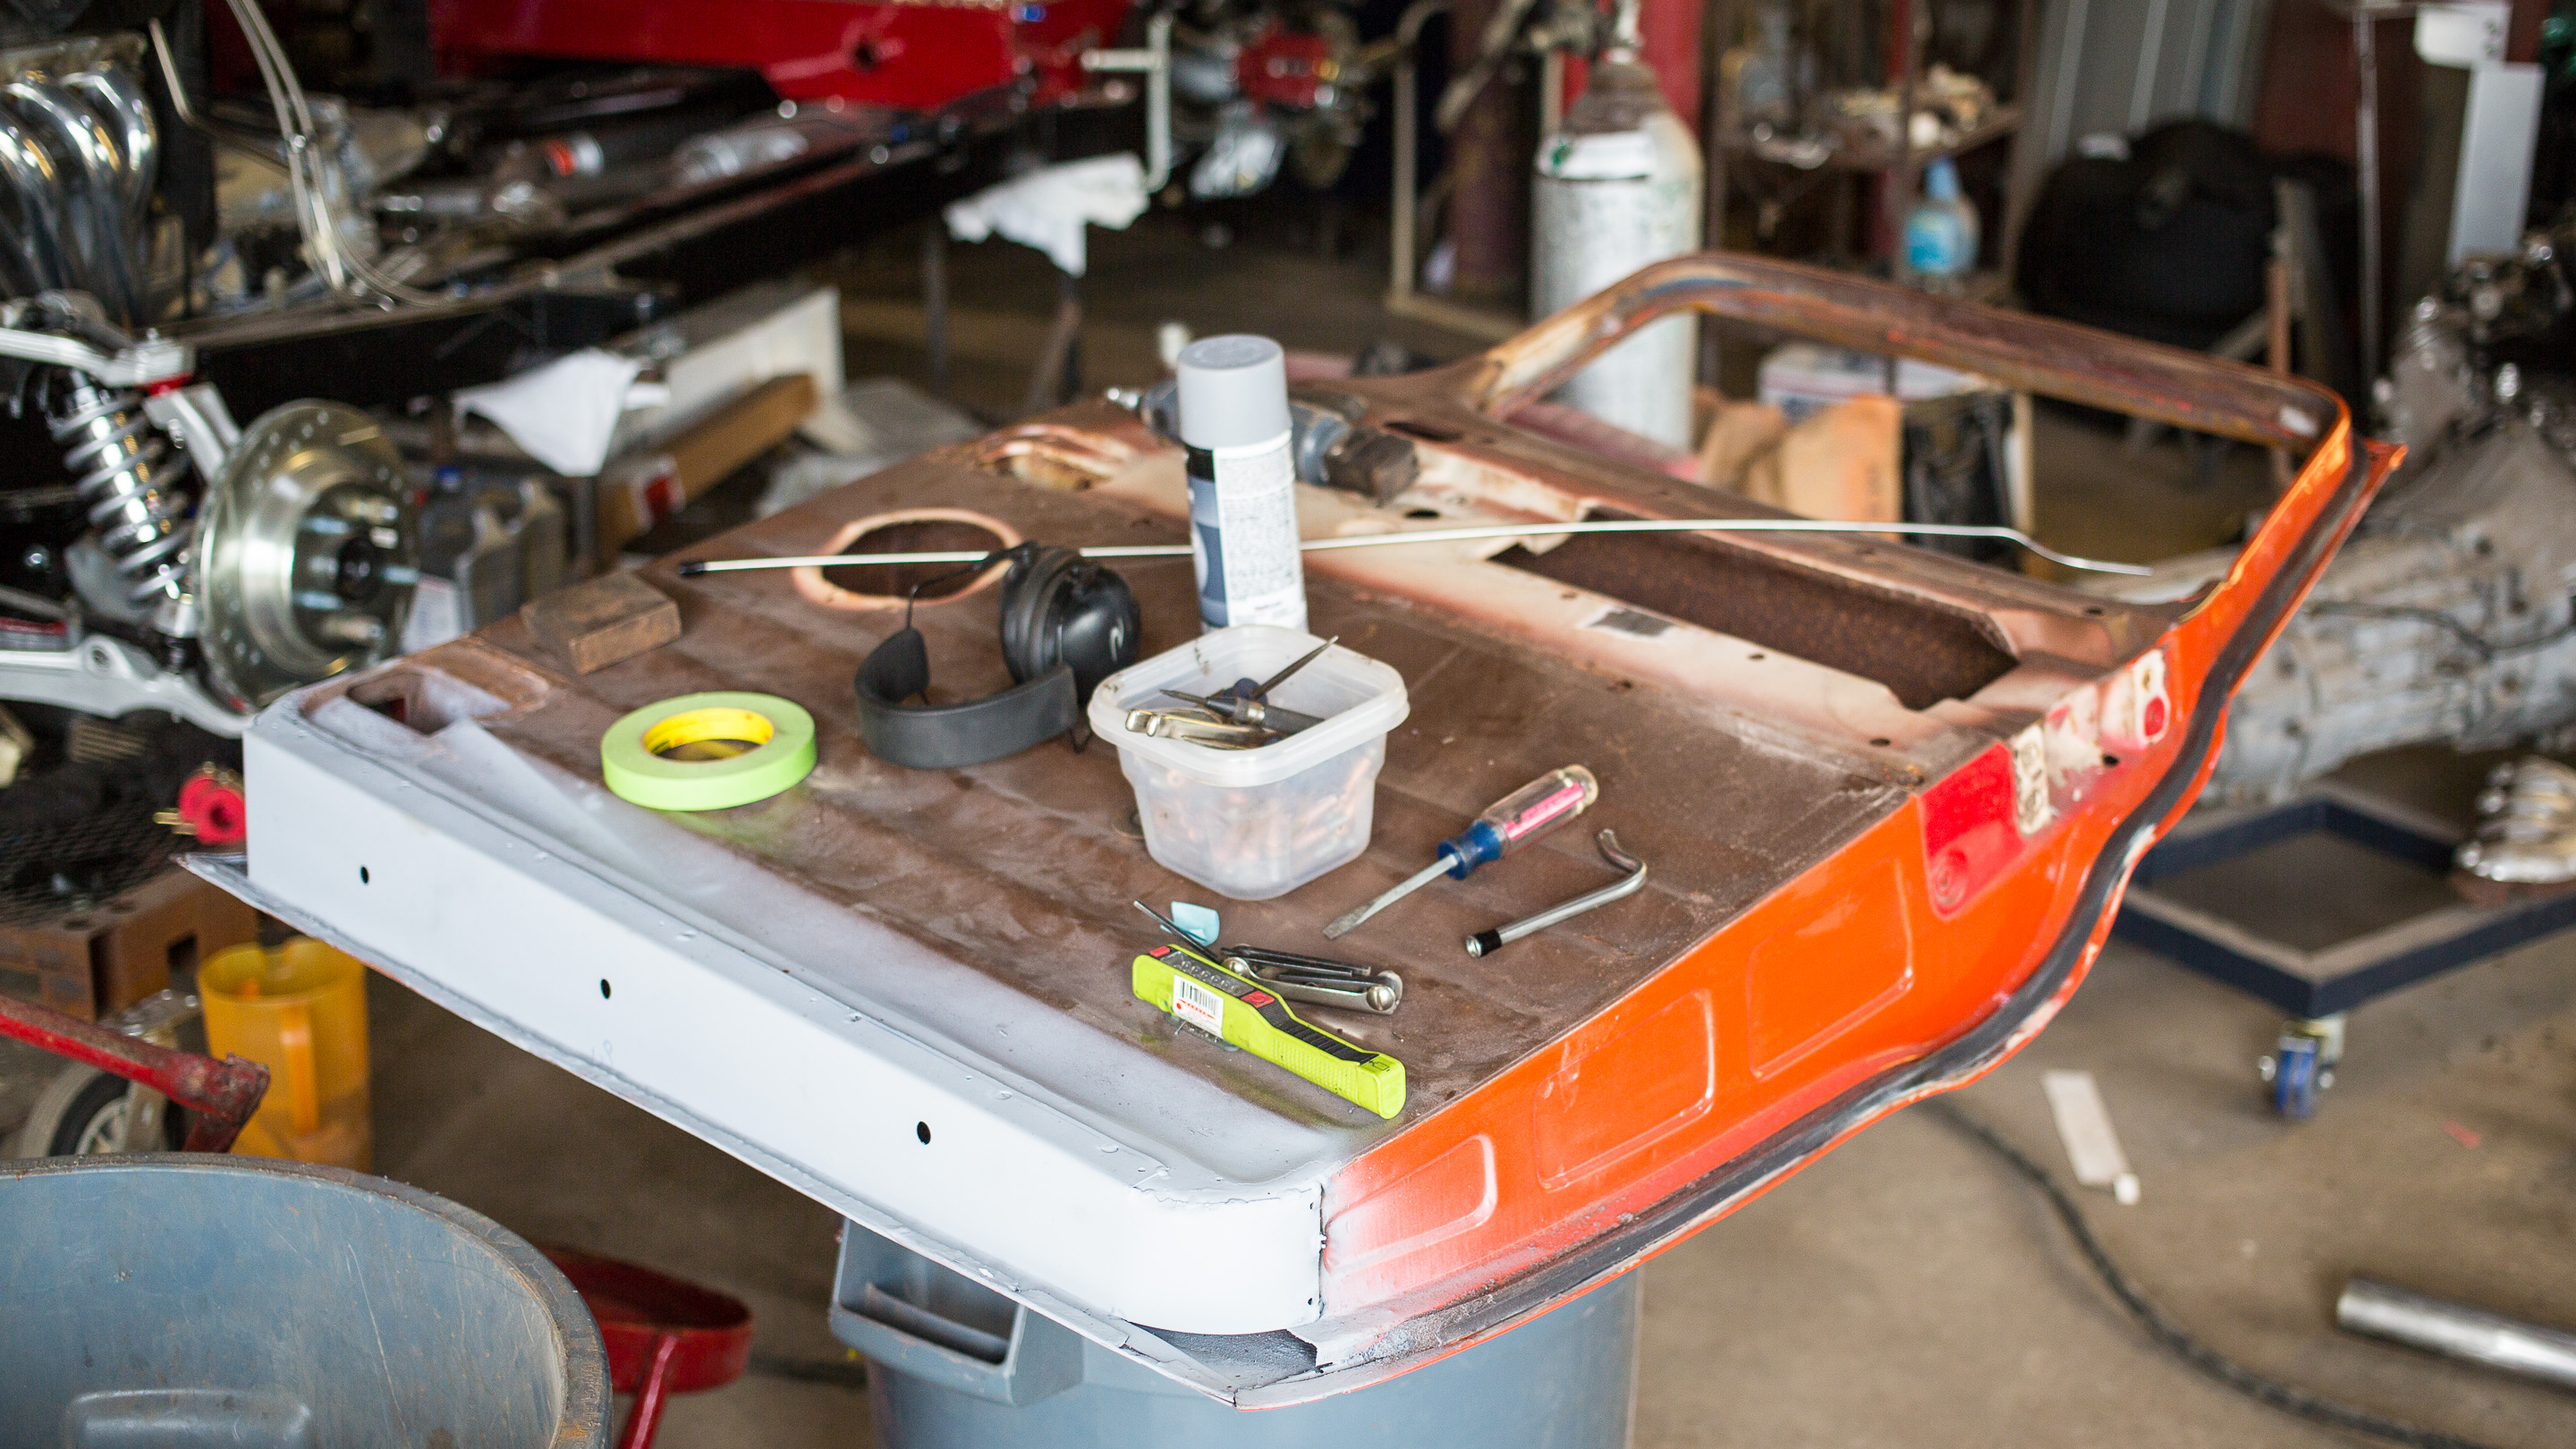
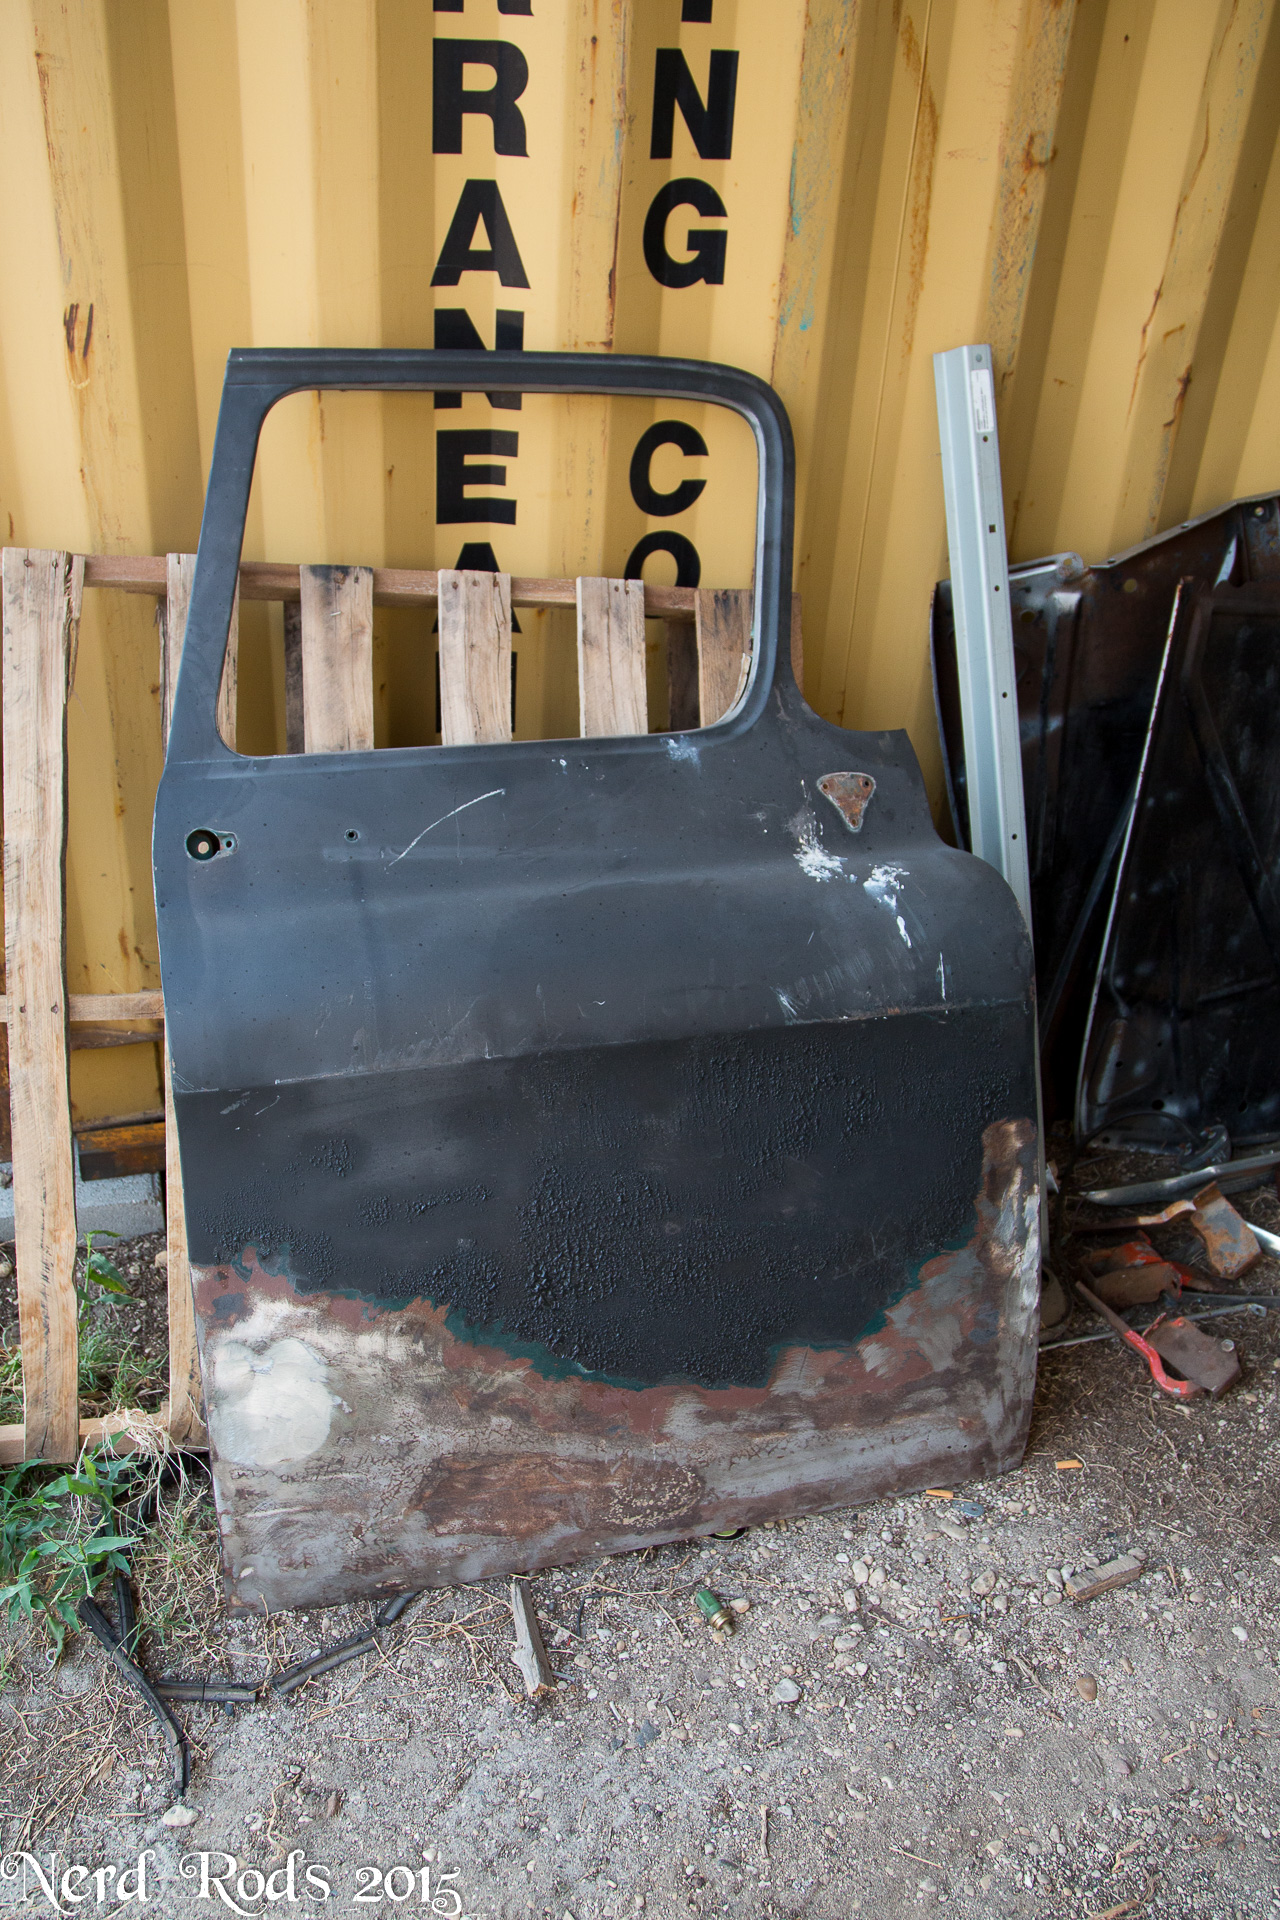
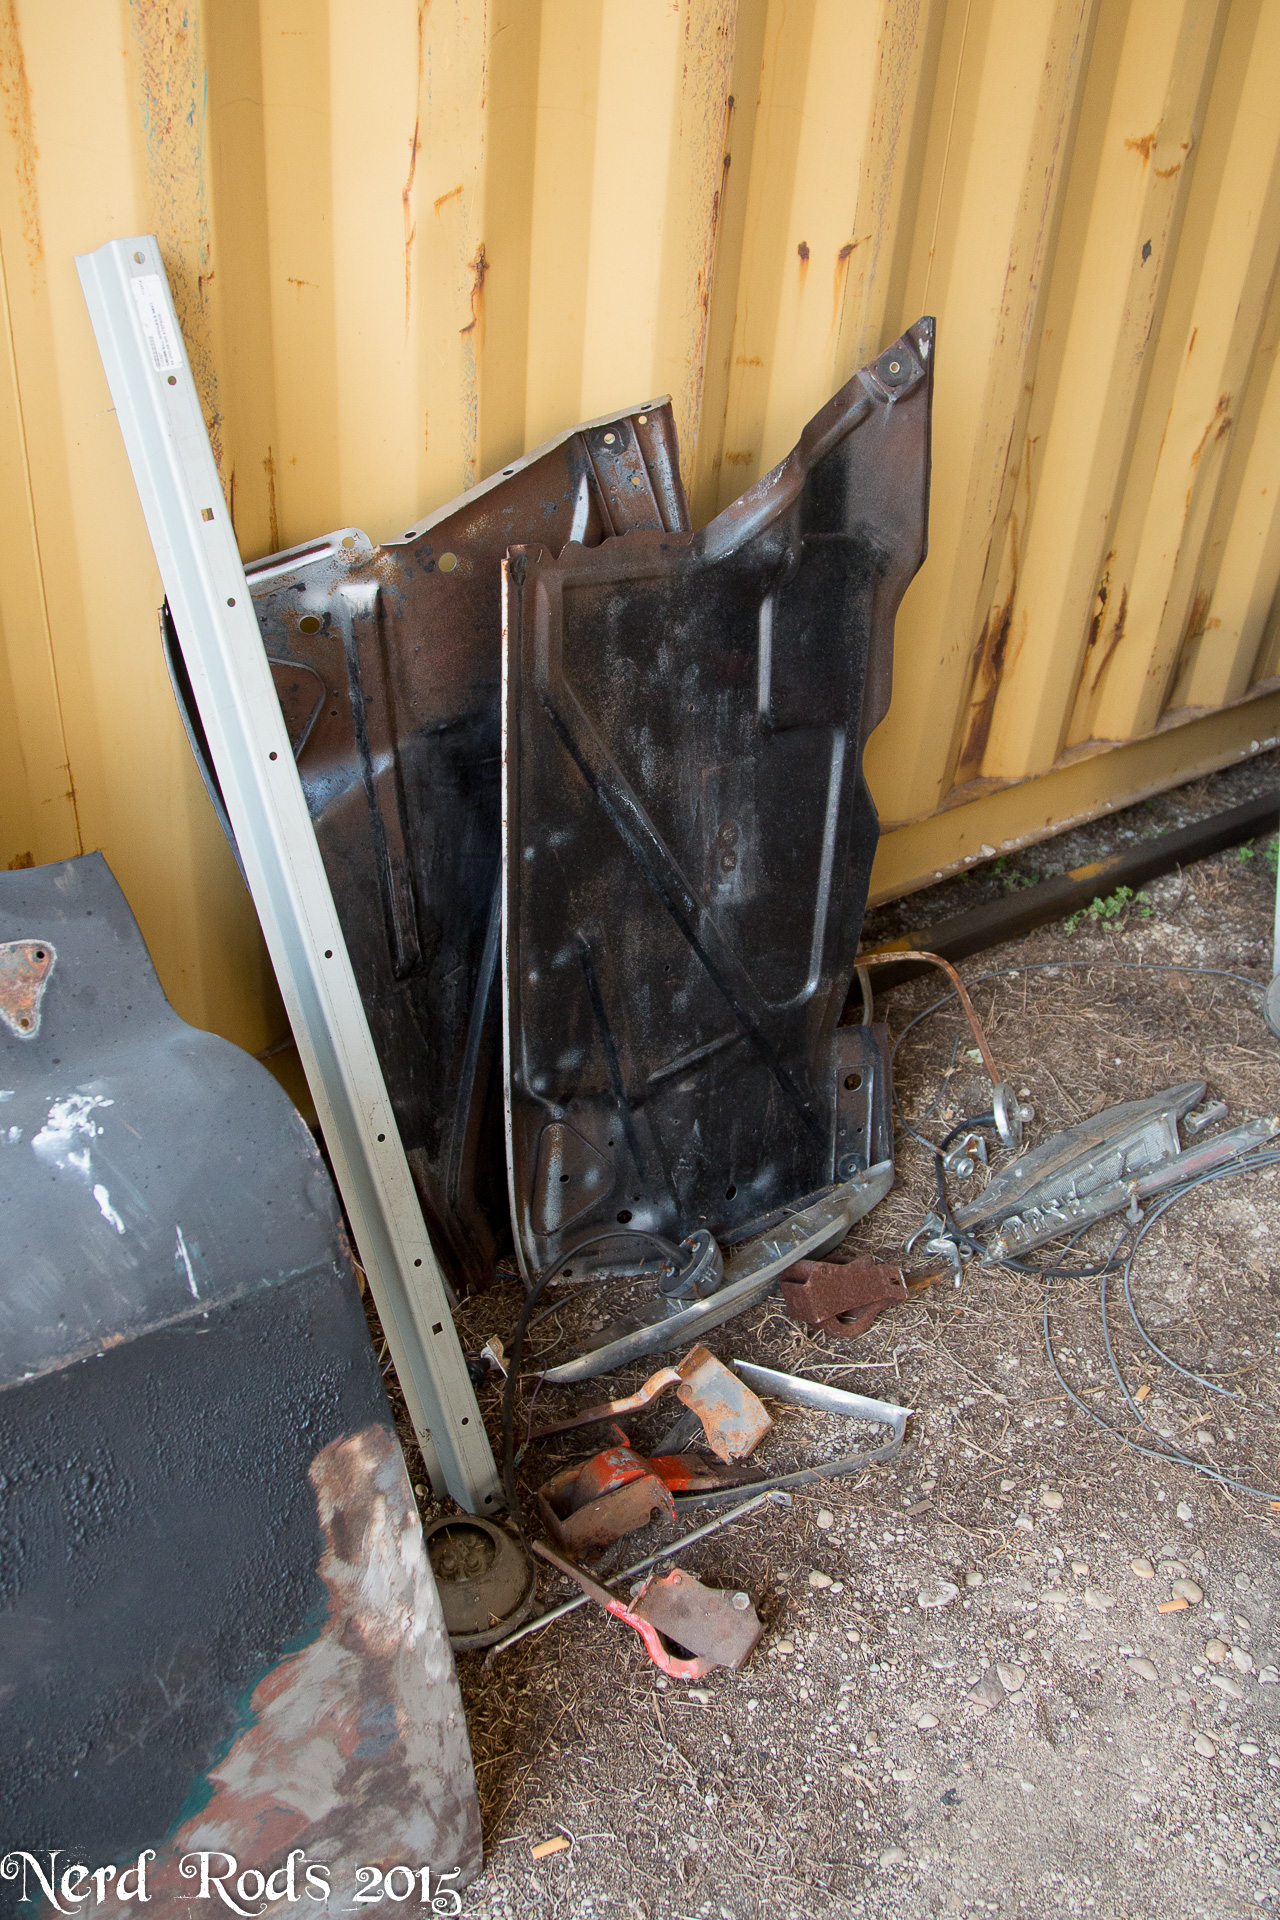
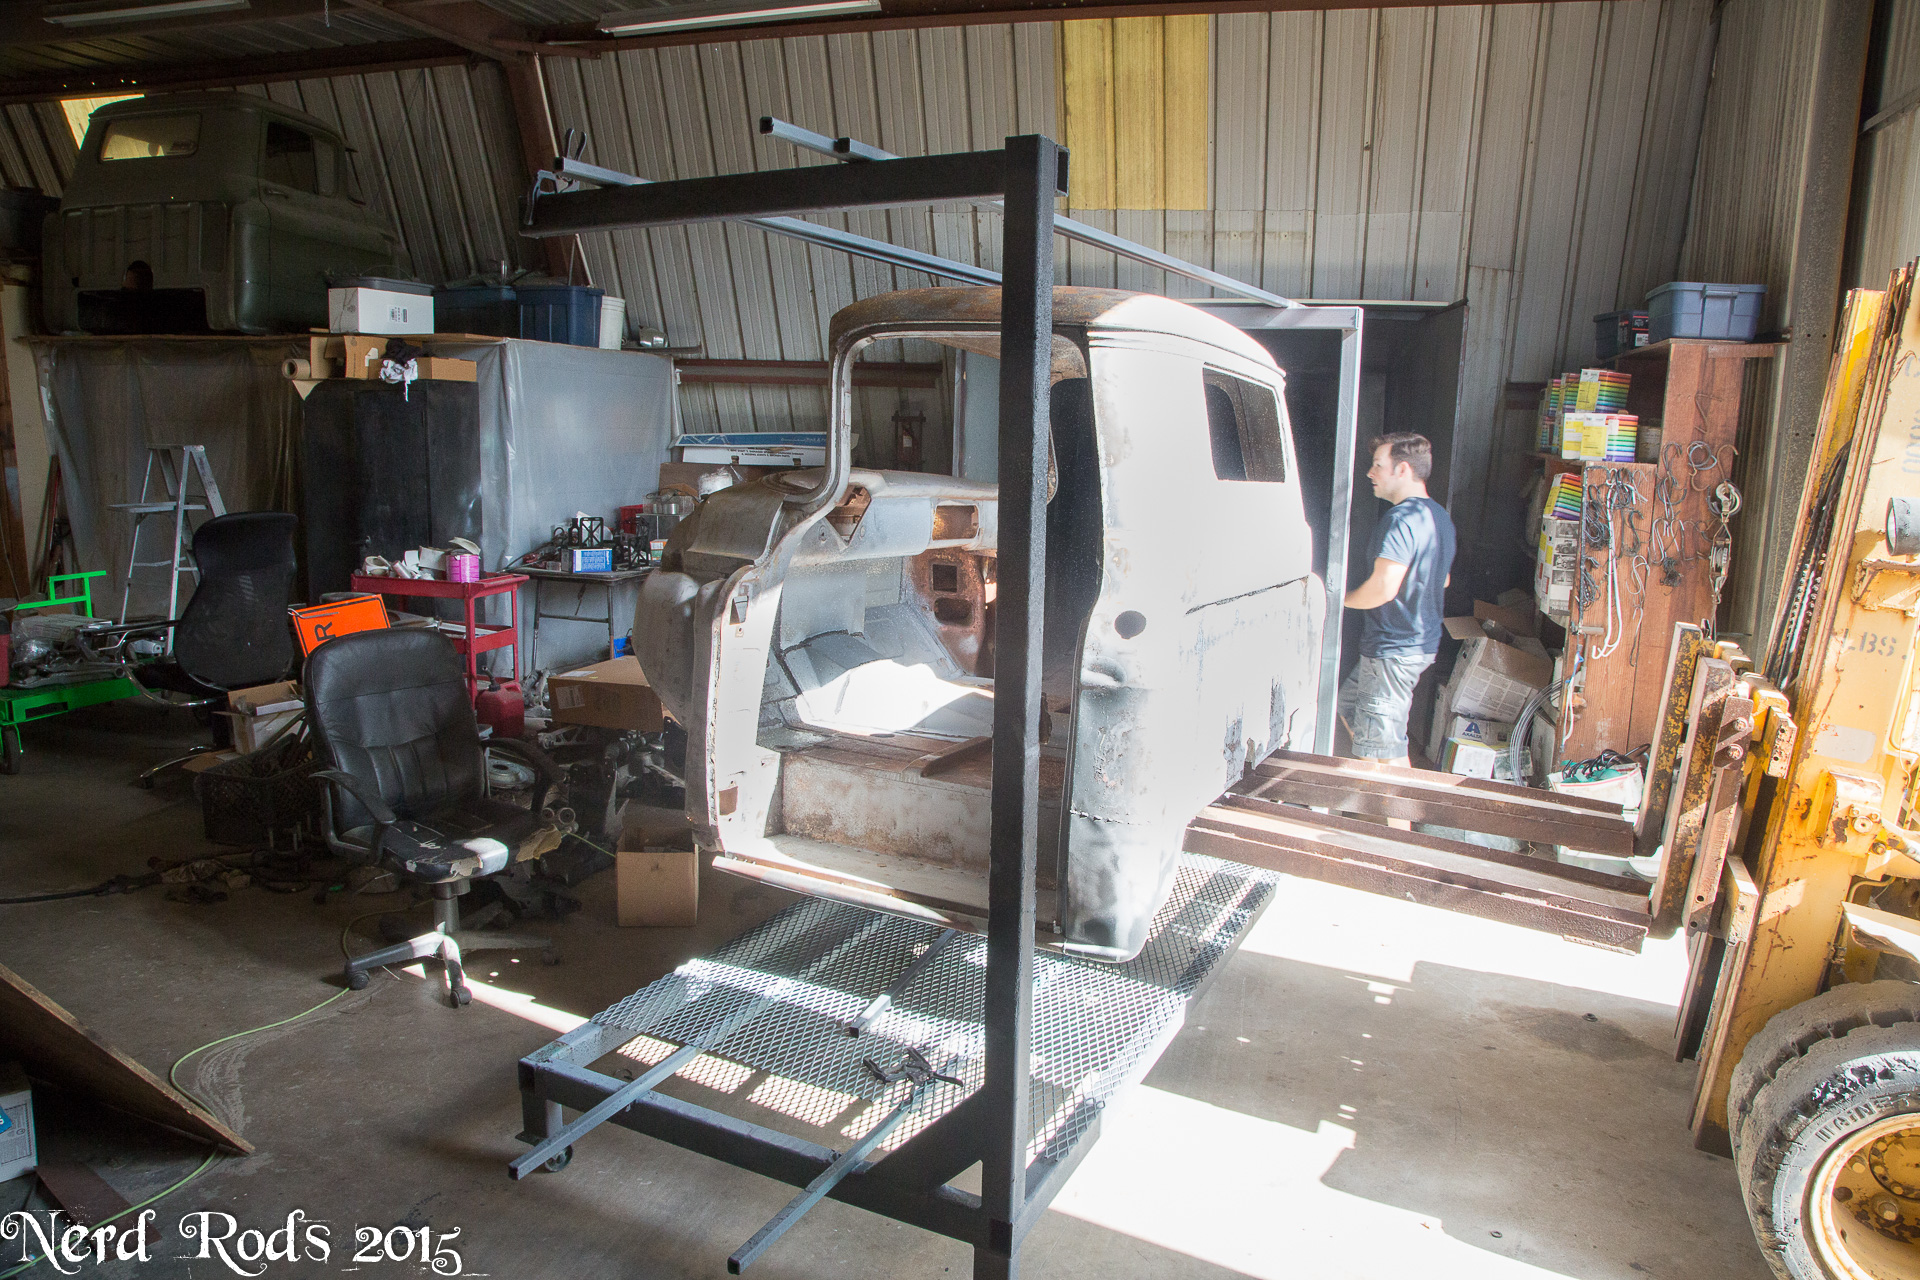
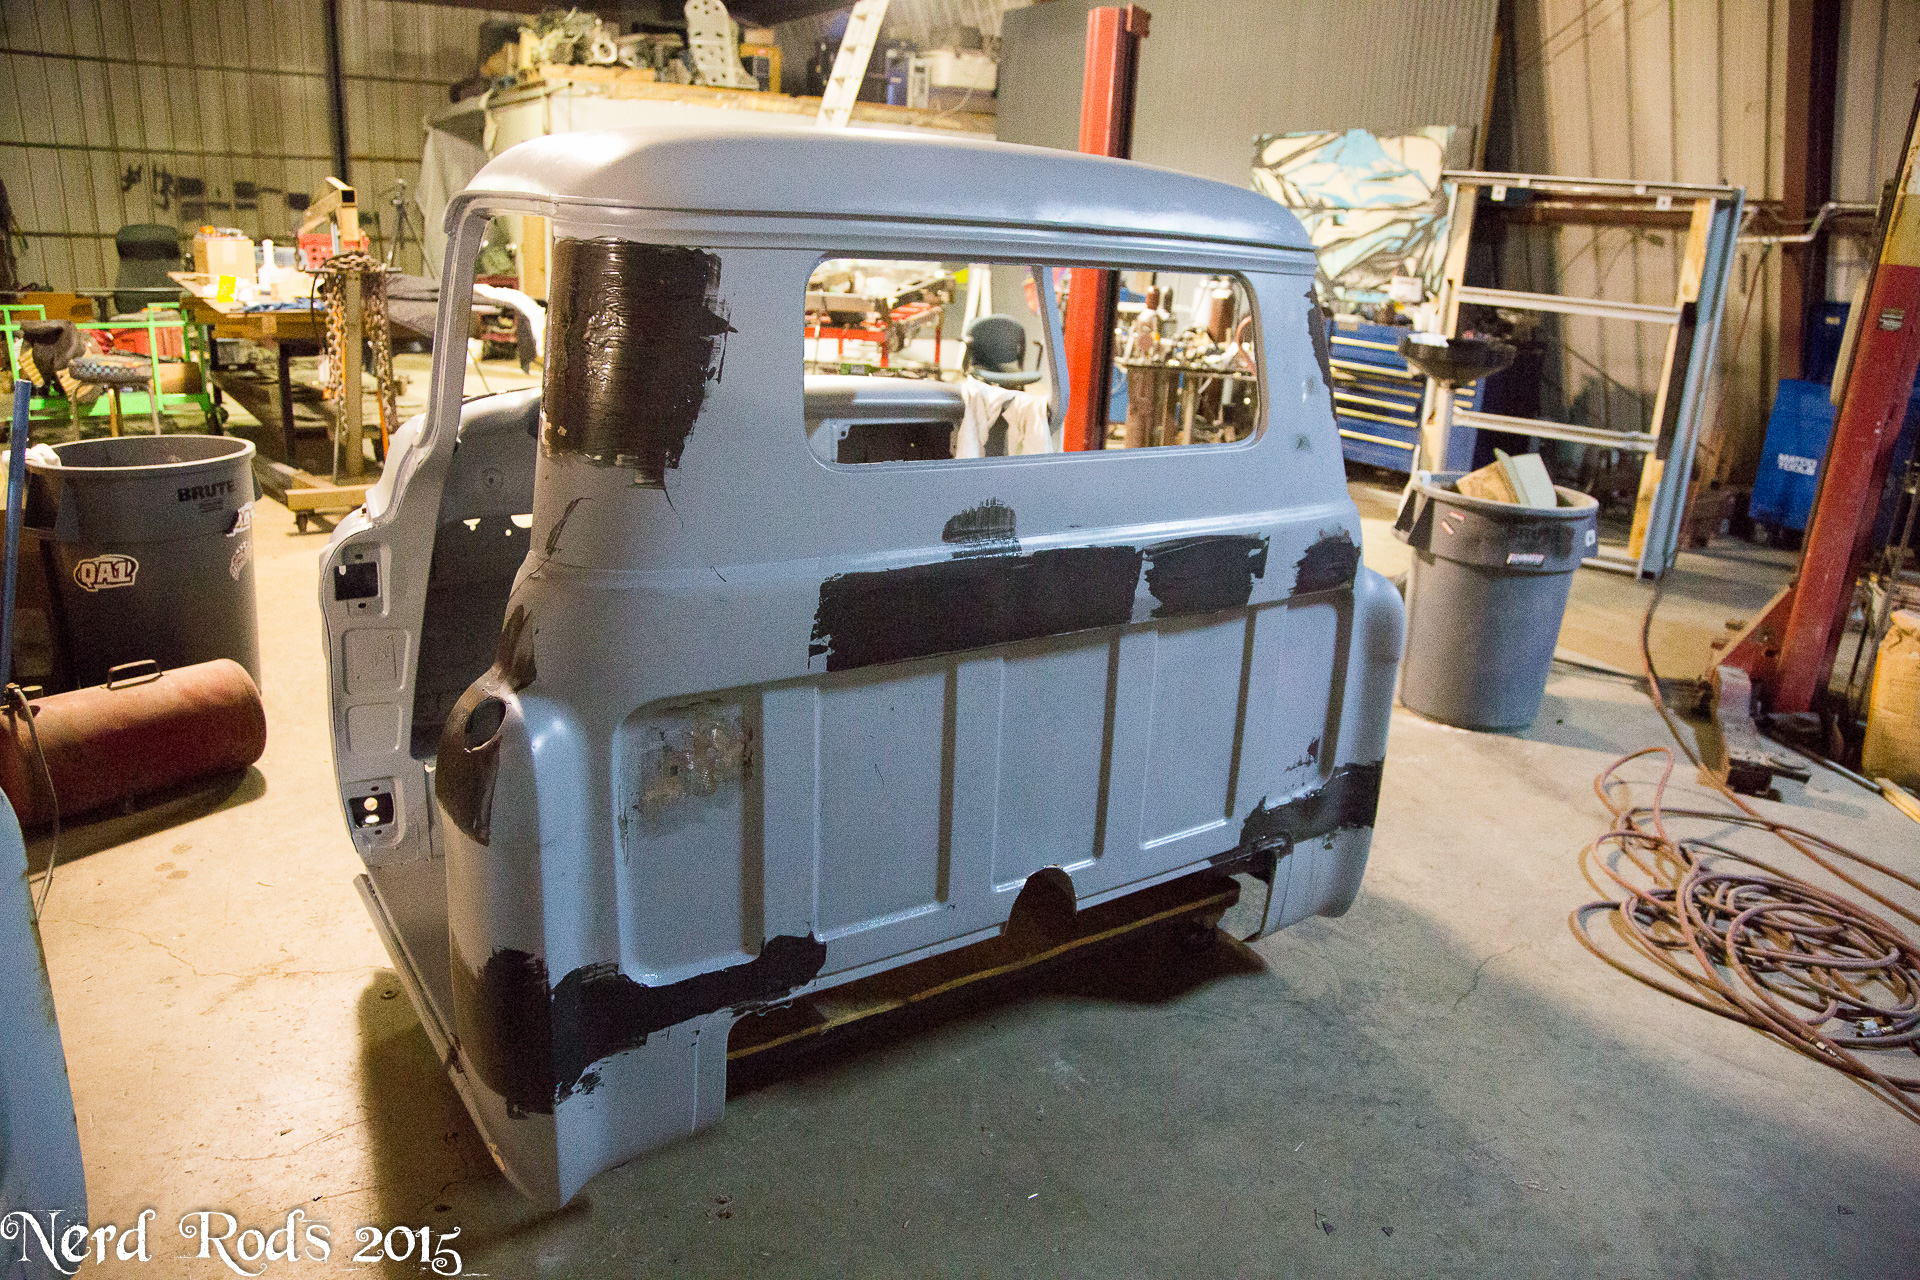
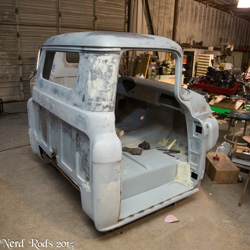
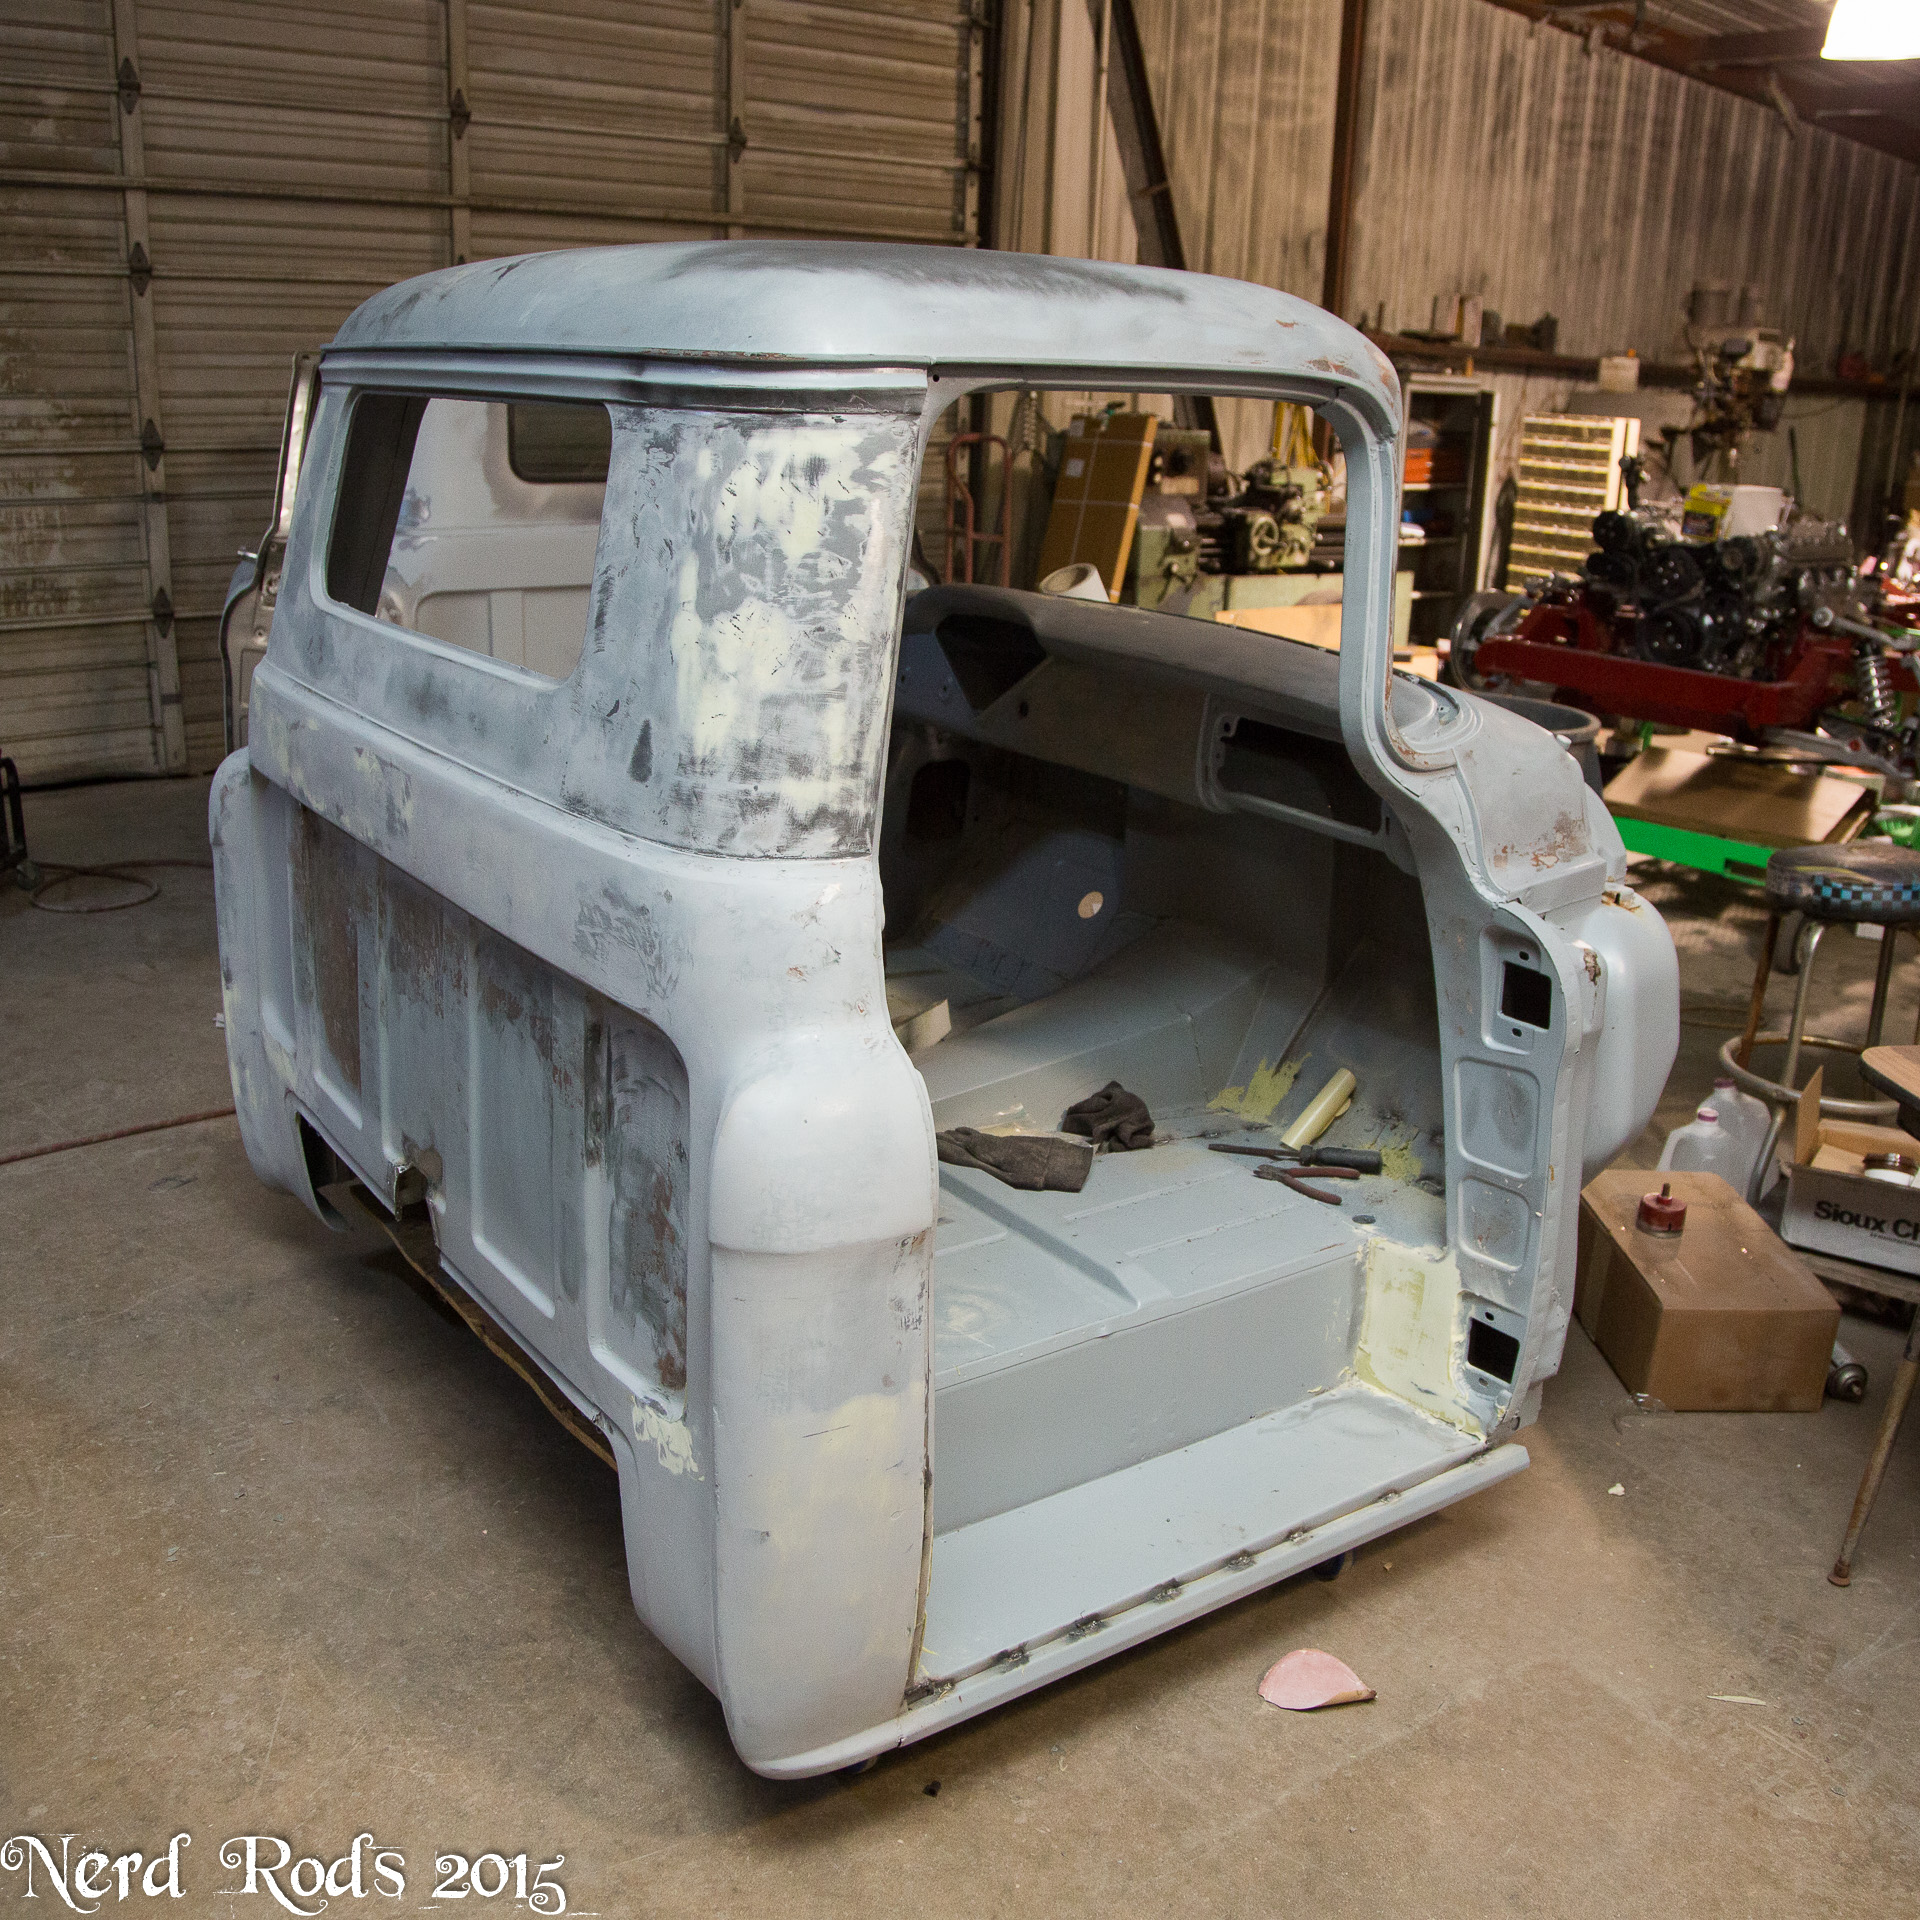
The Drives doors are a bit of a mess. We're trying to save it but we cut the best parts of 3 different doors together and the skin is still a bit worrying and we might have to break down and replace it.


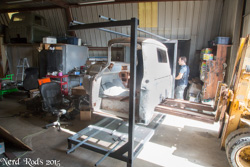
The Cab Firewall is also mostly done, I wish I had more photos of the process but I've had my own pile of stuff to do.
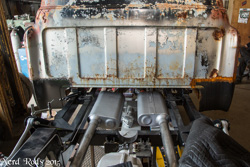
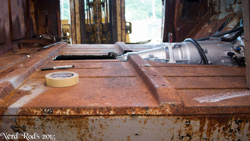
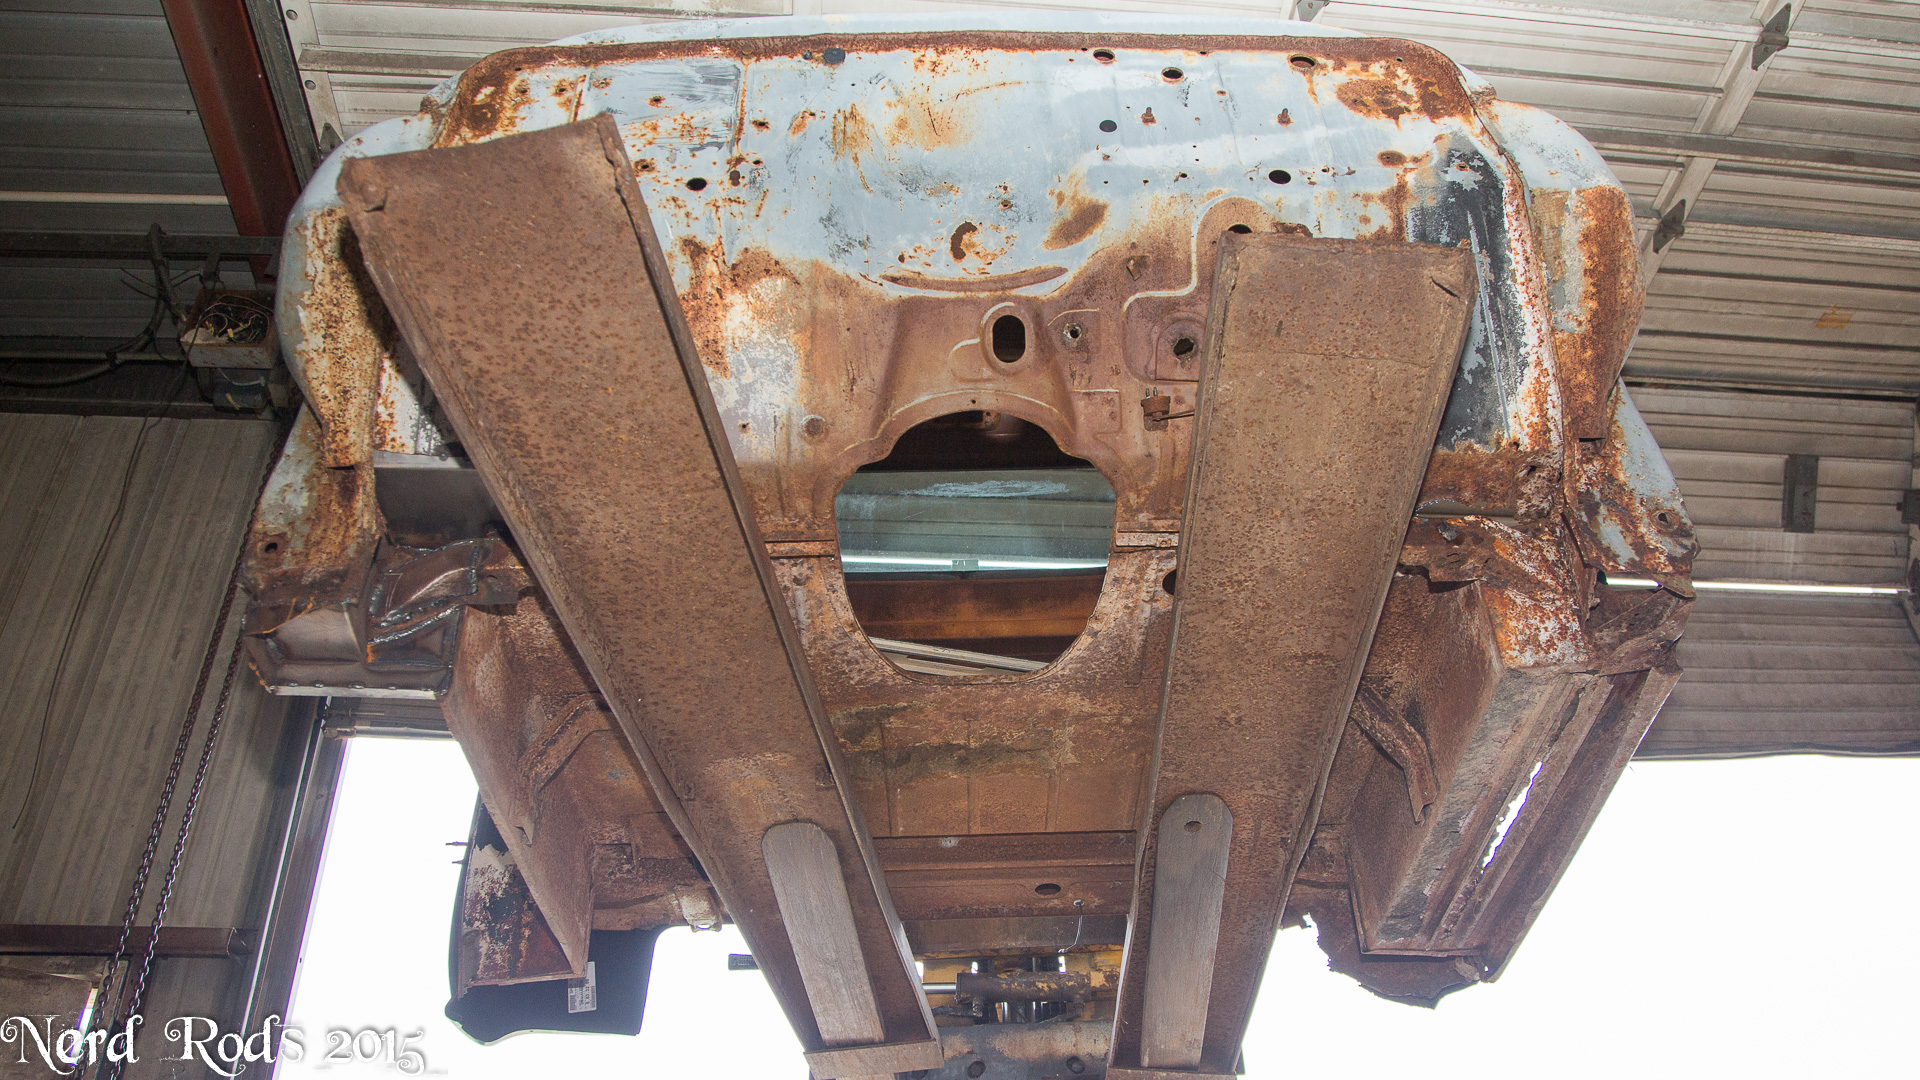
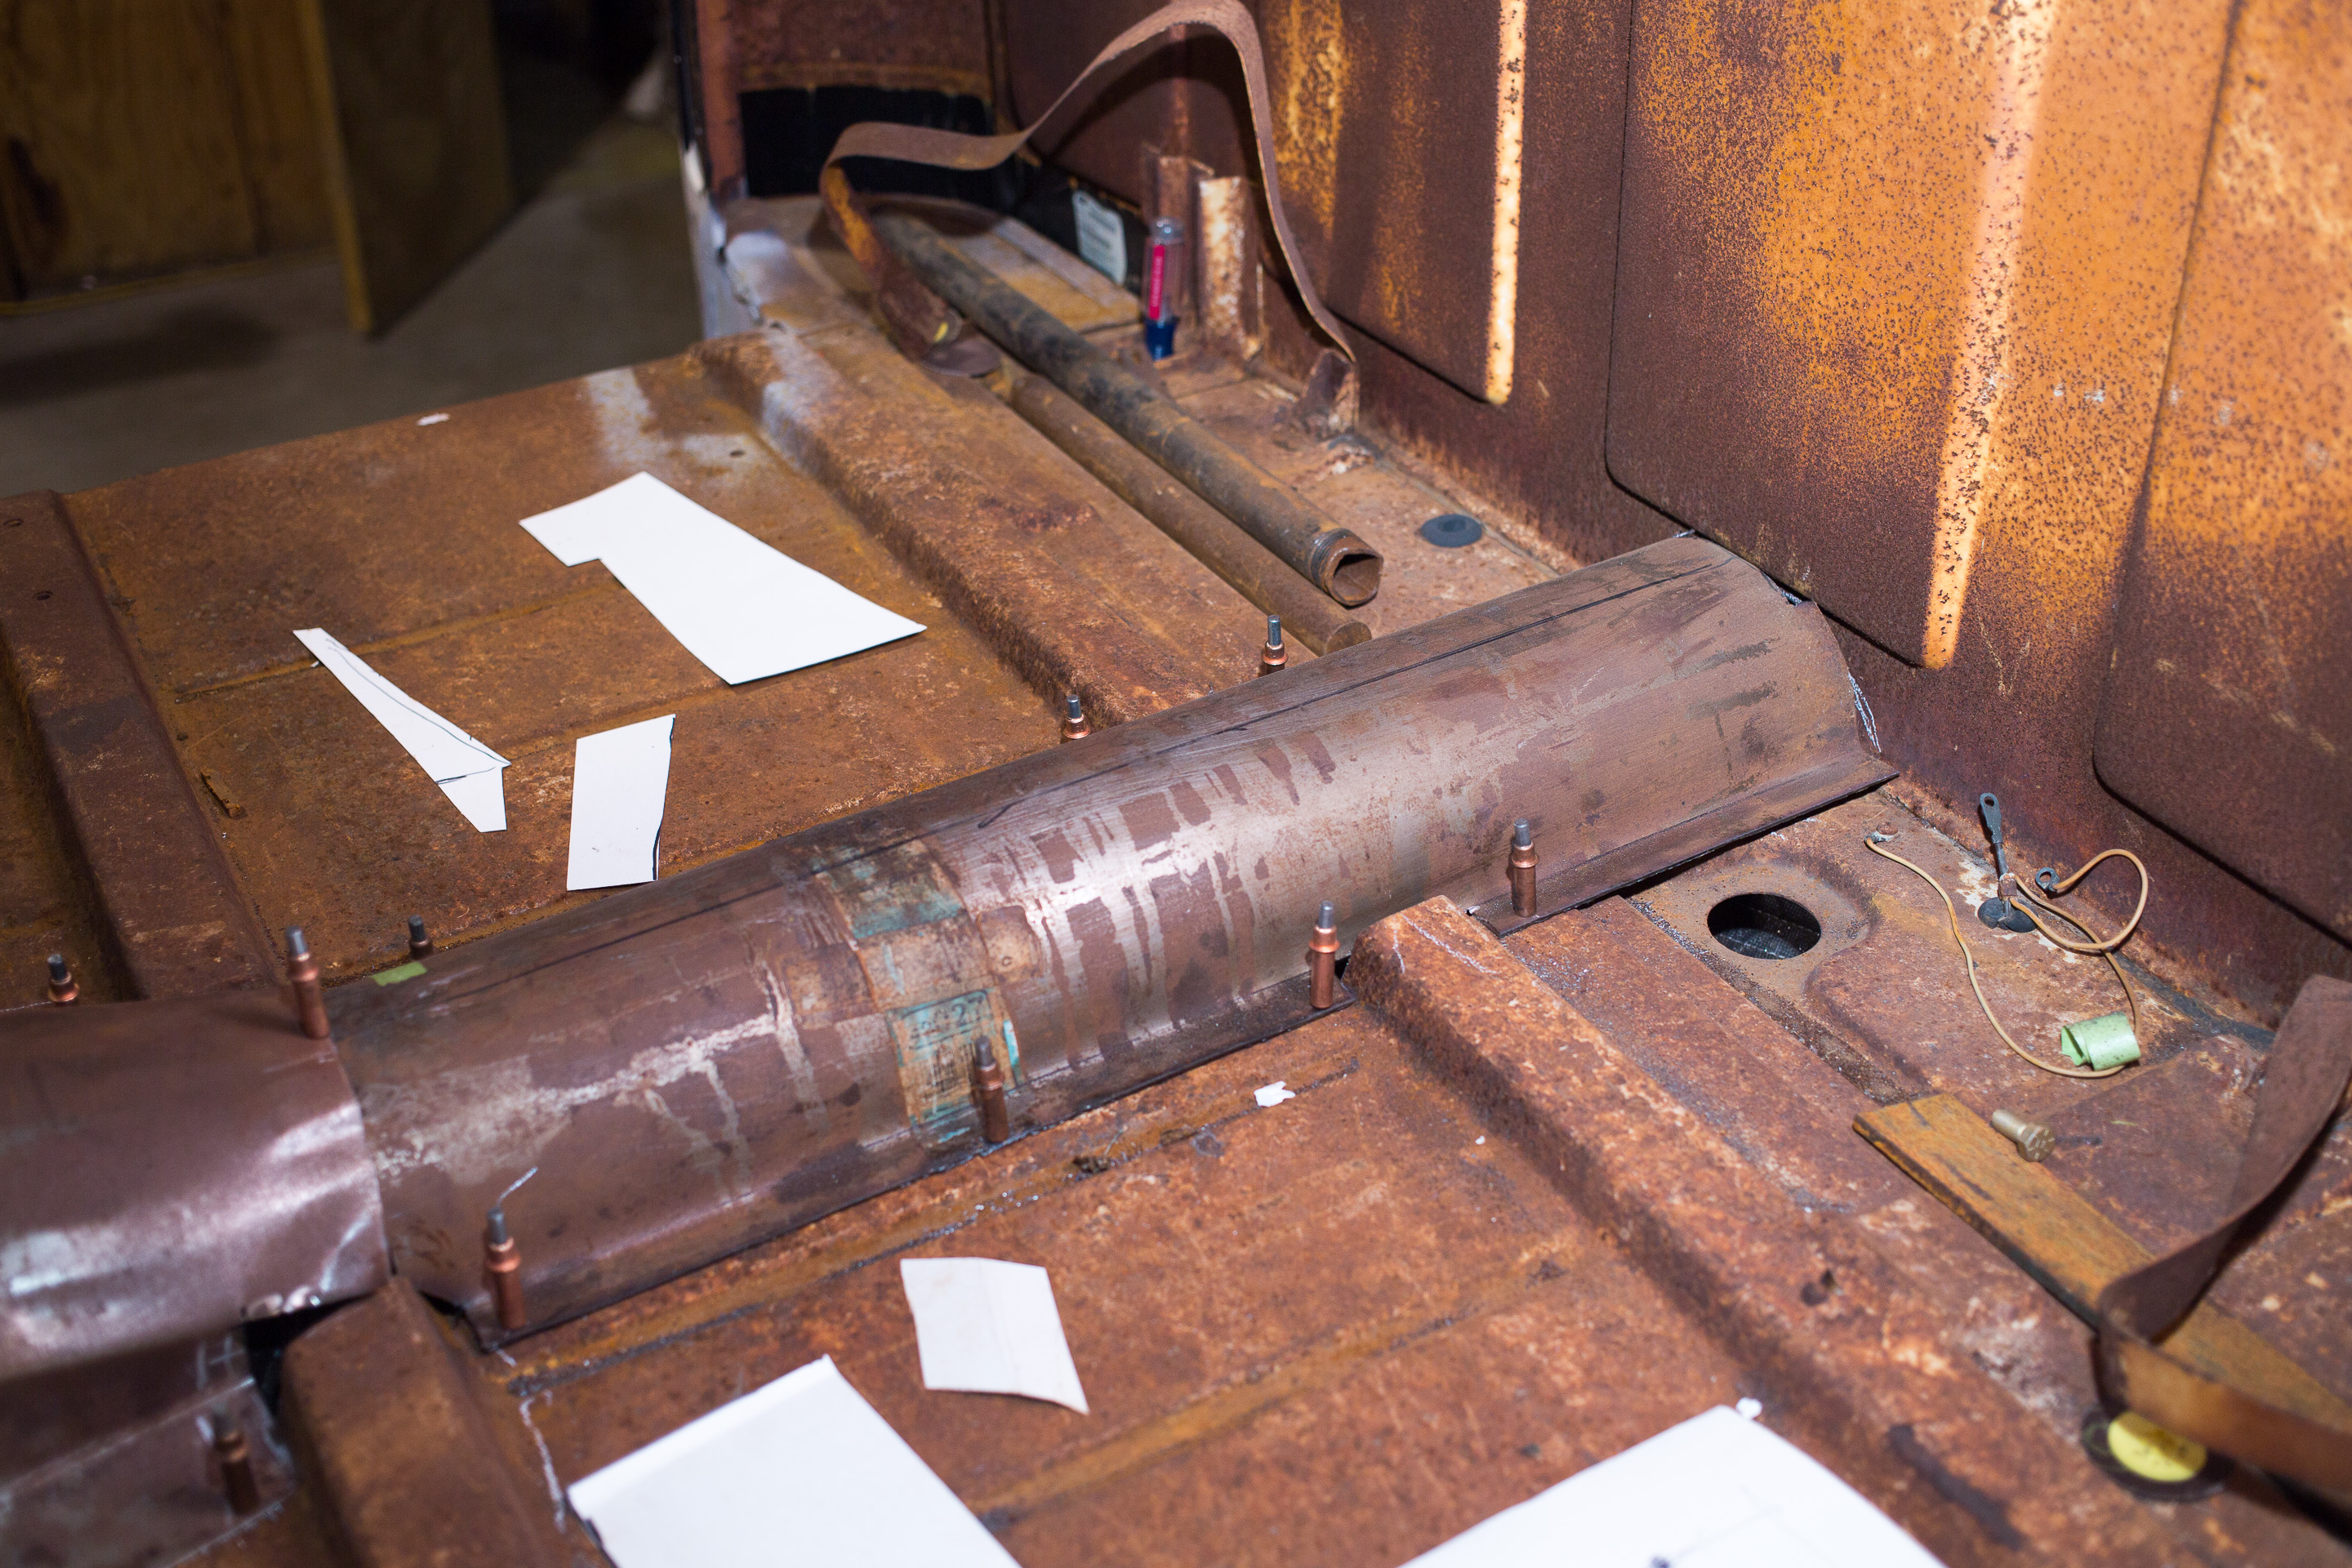
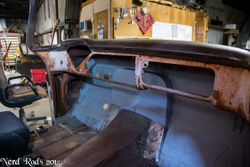
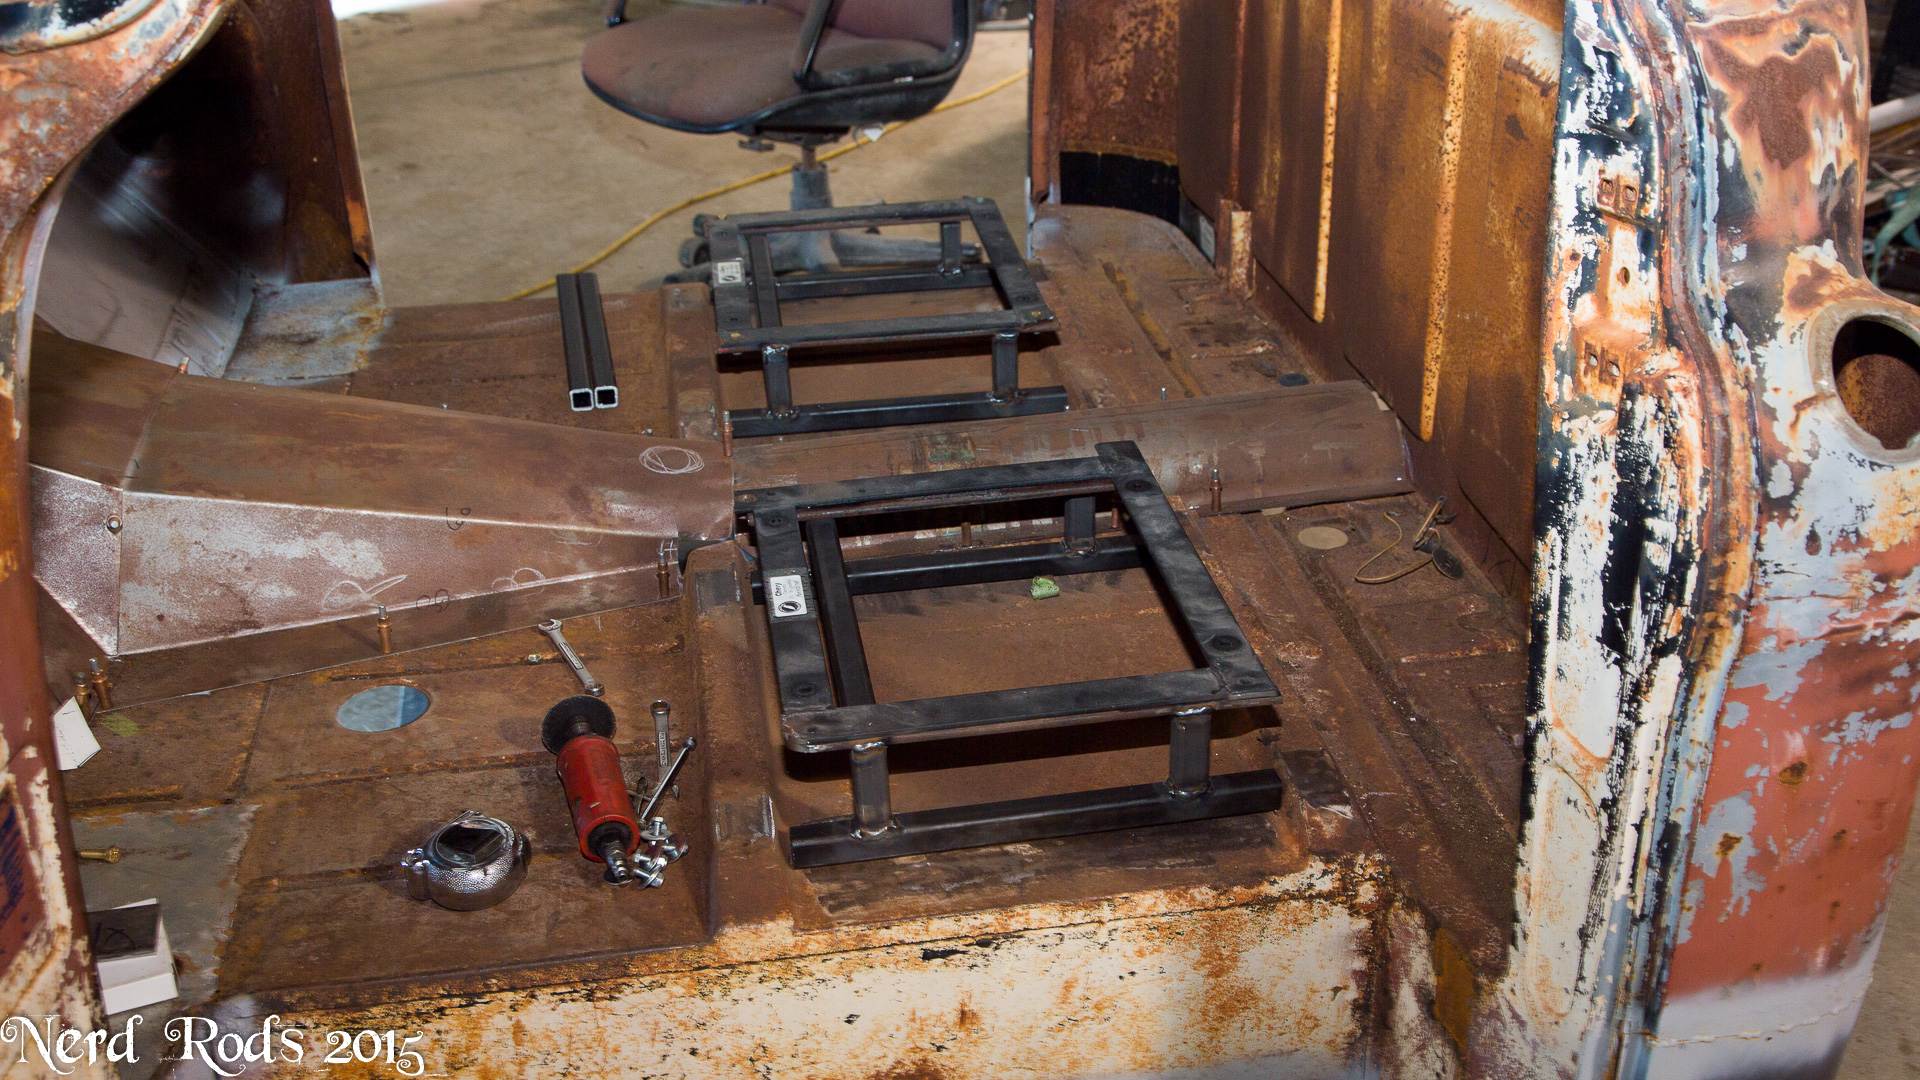
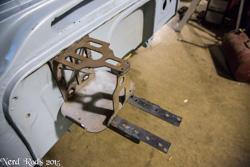
The Floor is roughed in and there are several things to note on this.
1) This is the lowest the body can sit on the chassis.
2) The Engine is higher because of the Truck oil pan so we clear the ground but still have room under the car without having to buy a new oil pan. Not good for CG but hey its a truck not a sports car.
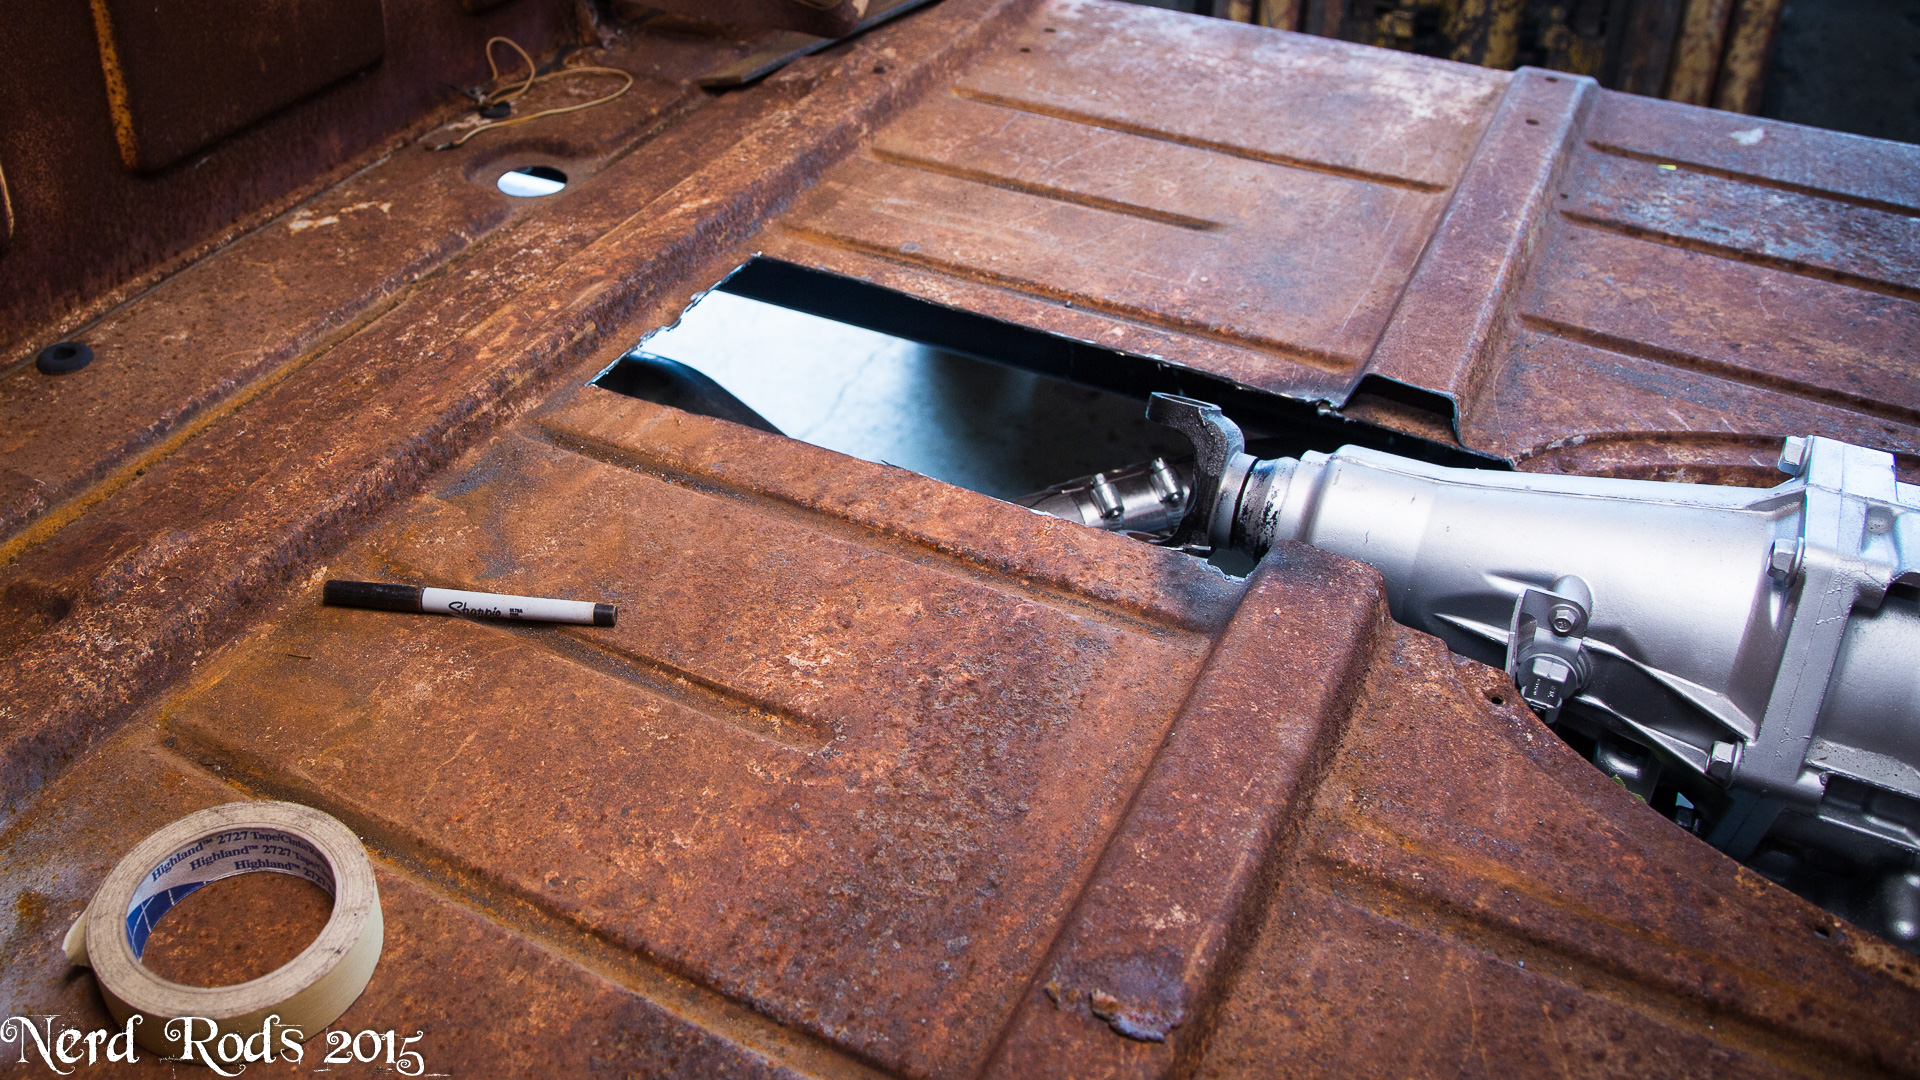
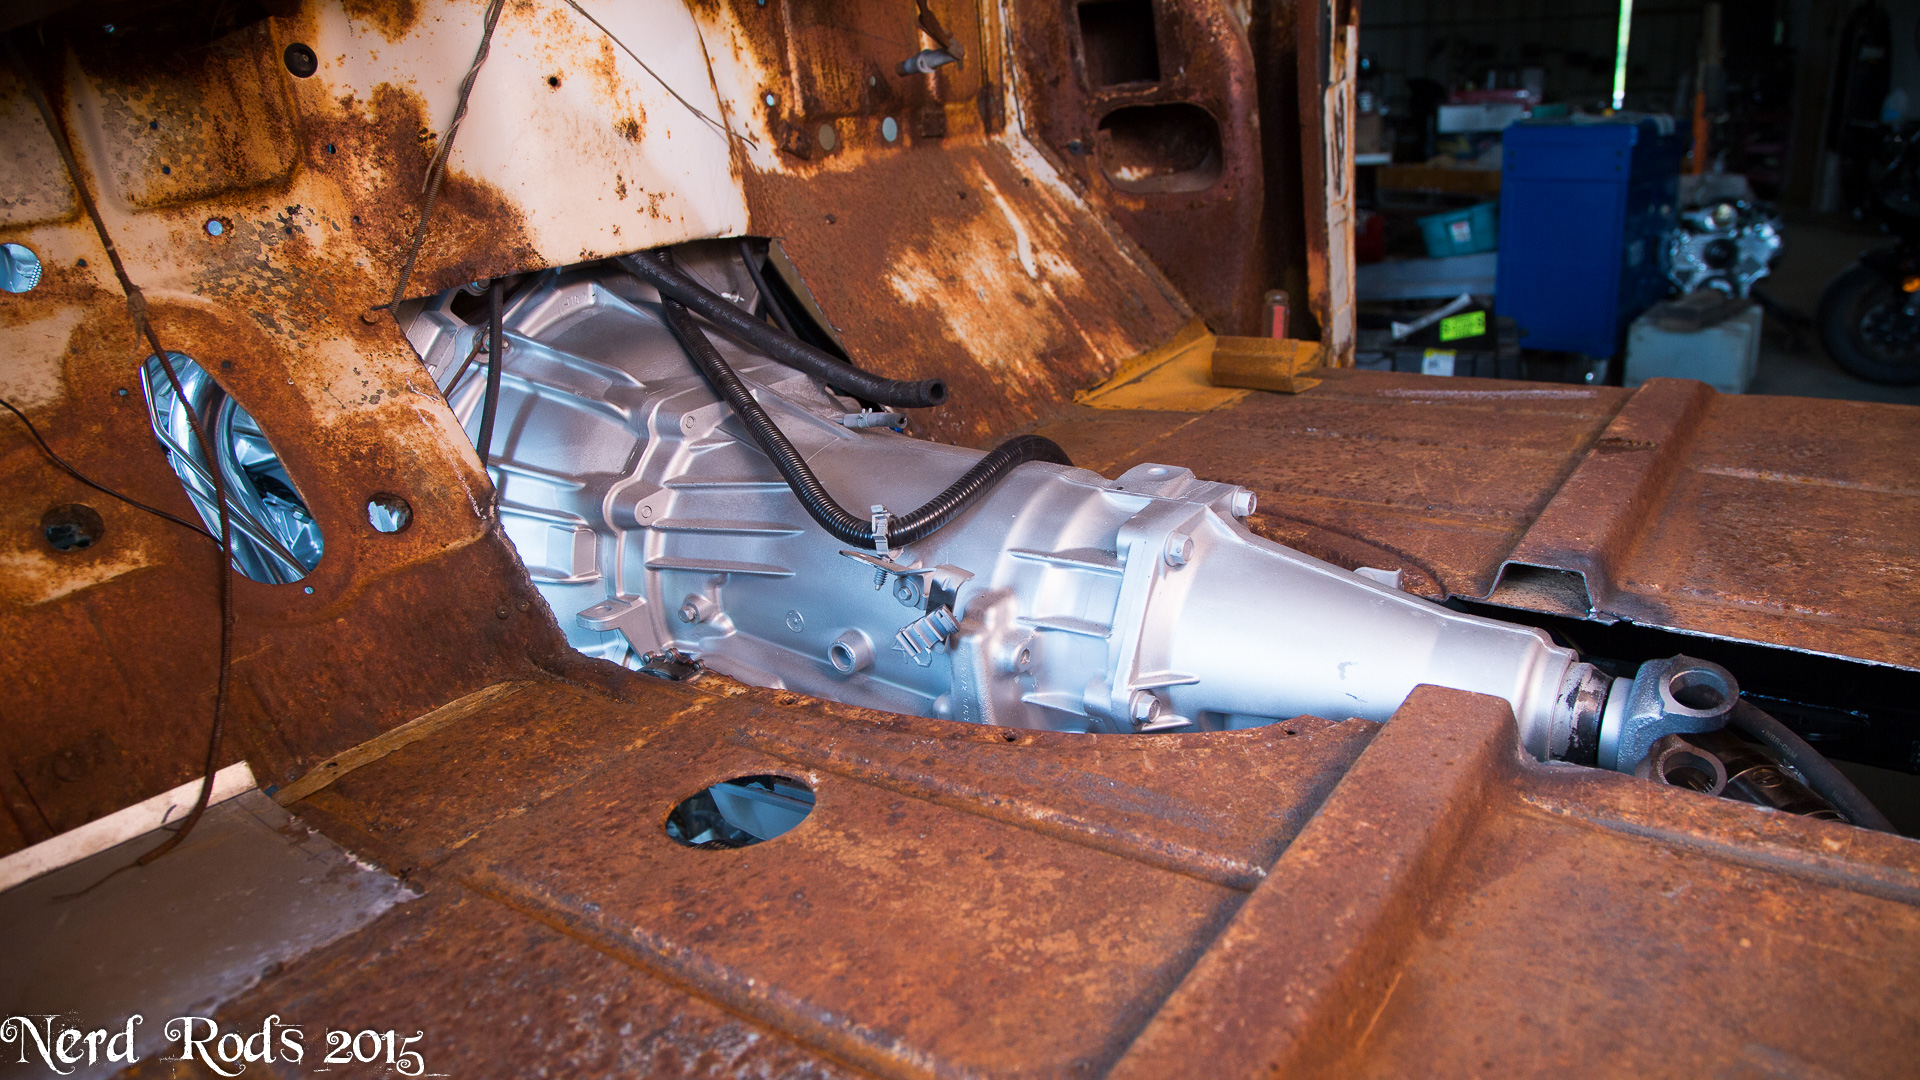
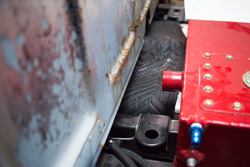
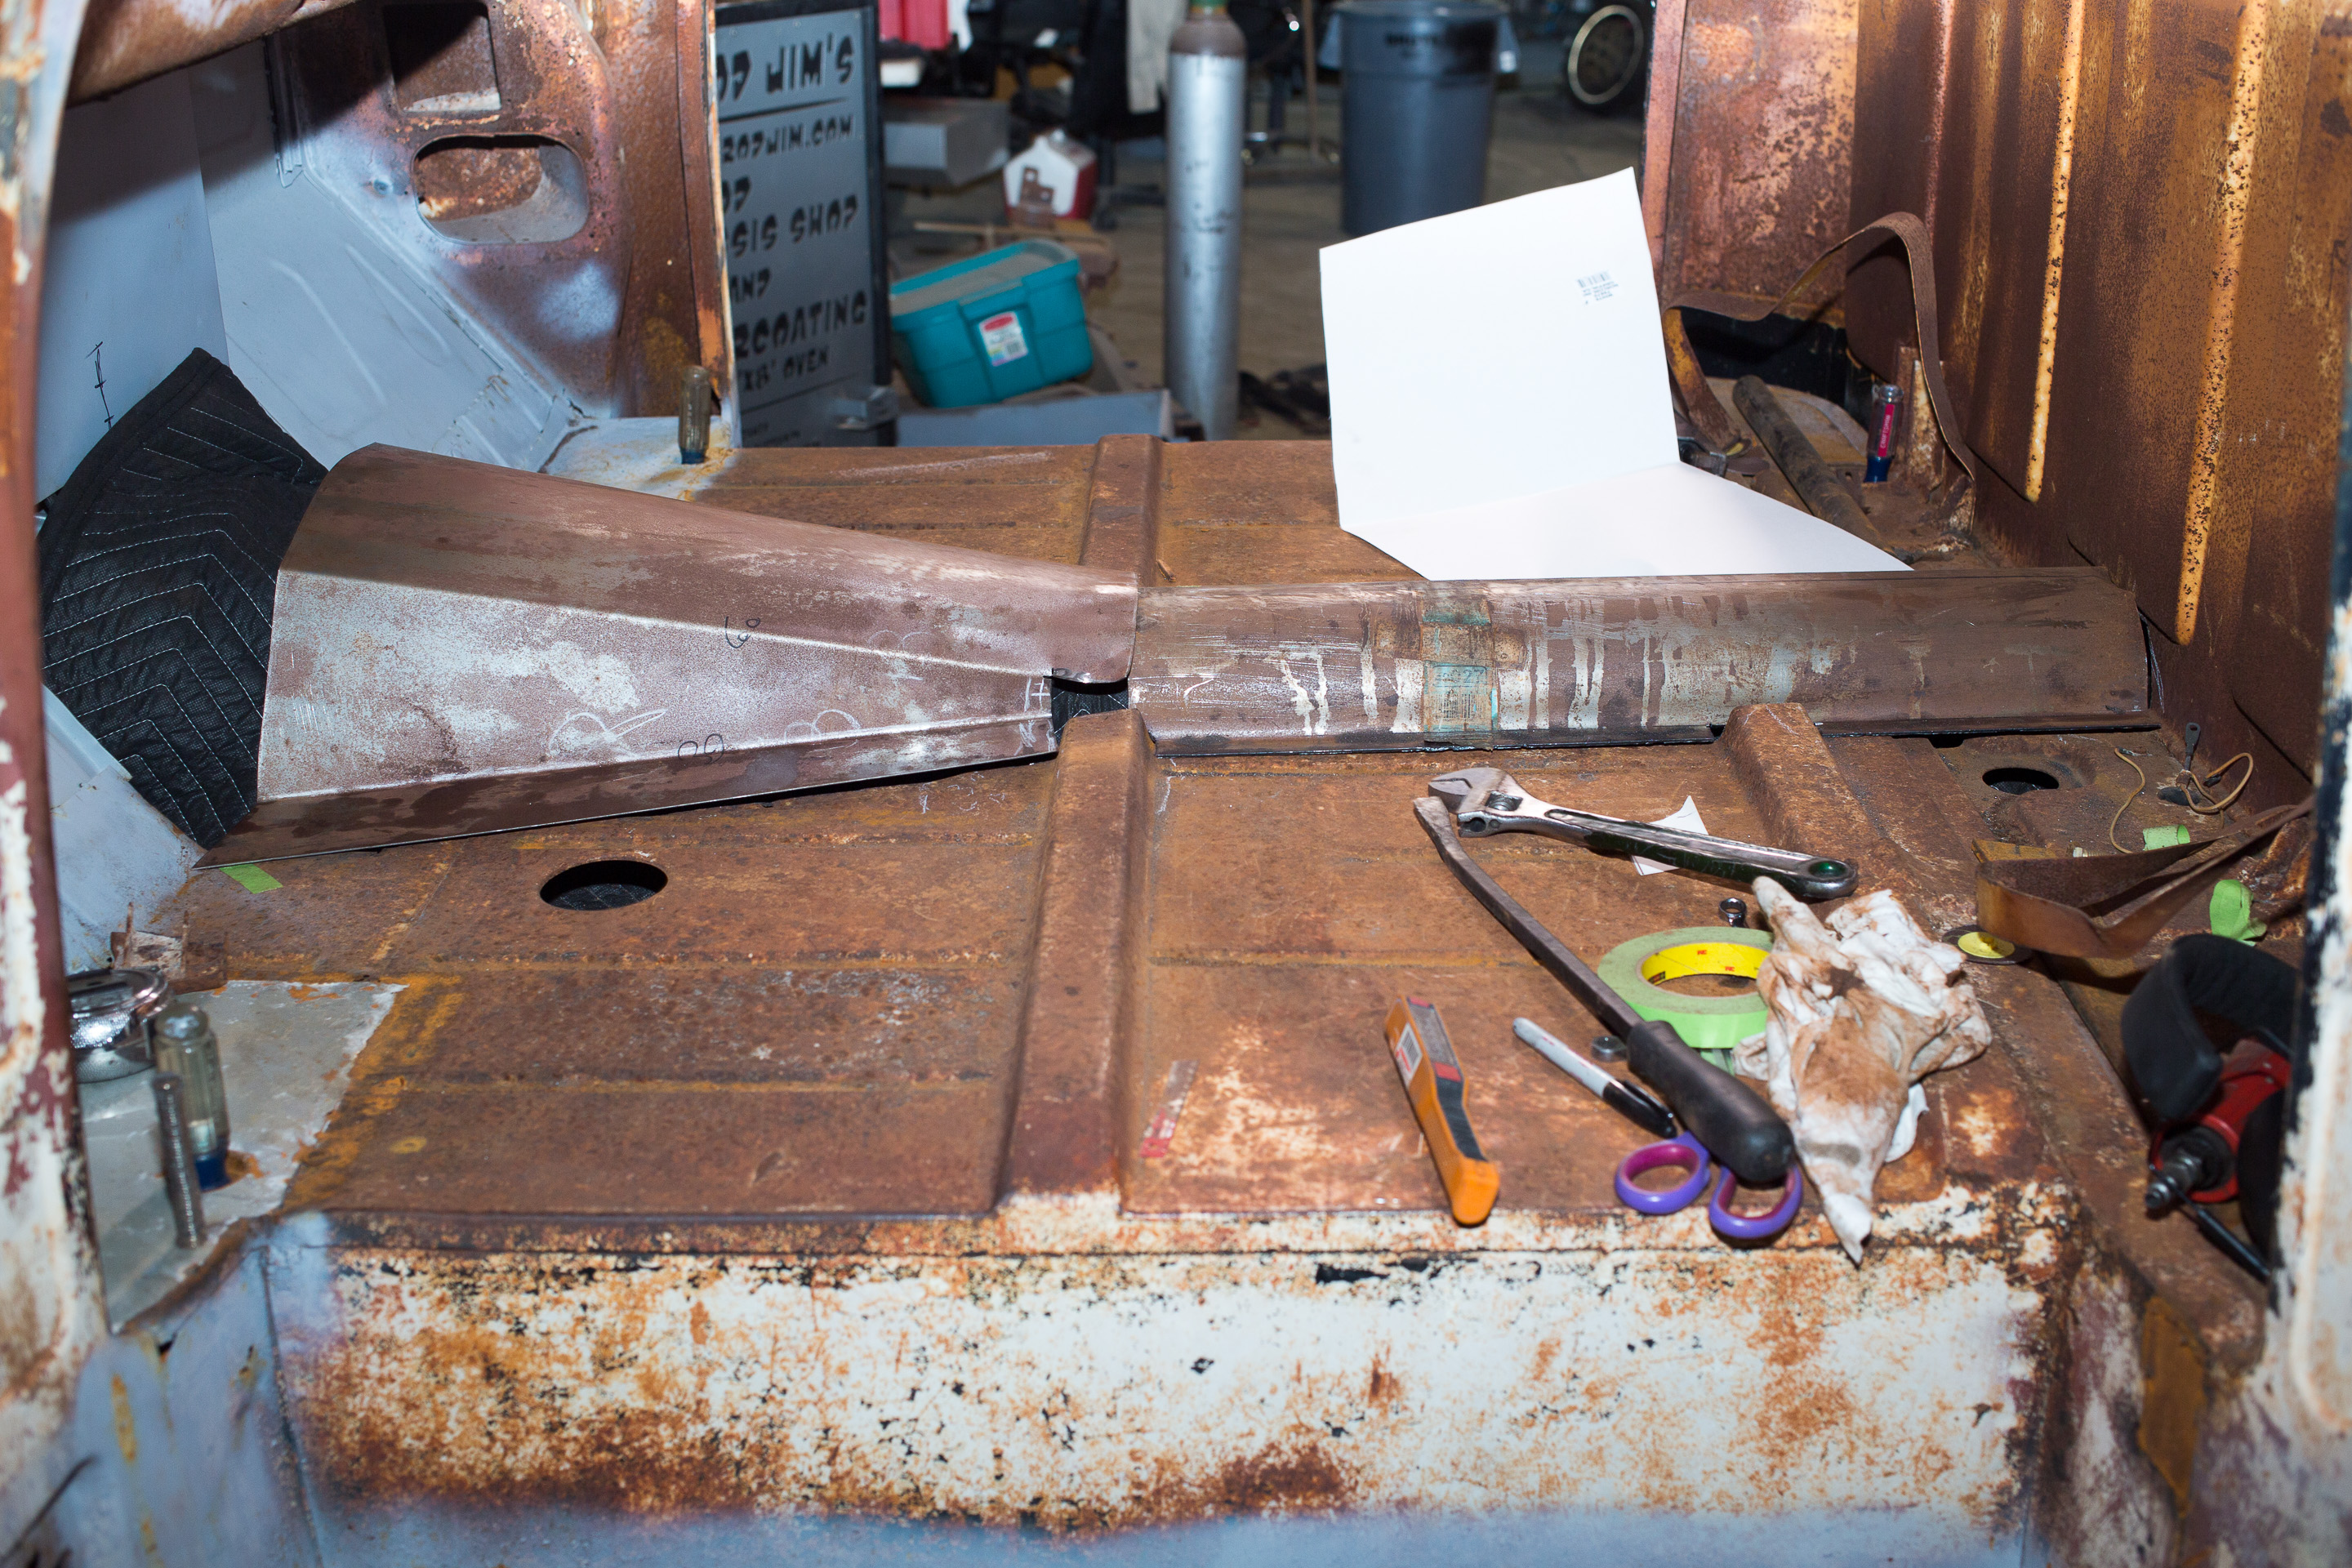
3) The drive-shaft only hit the body by a 1/4 inch so the 6" tunnel is over kill but it was easy and looks good. We might start offering all these sheet-metal parts for guys wanting to do their own slammed stance and you can use a live axle and still make it all fit and clear with this same body.


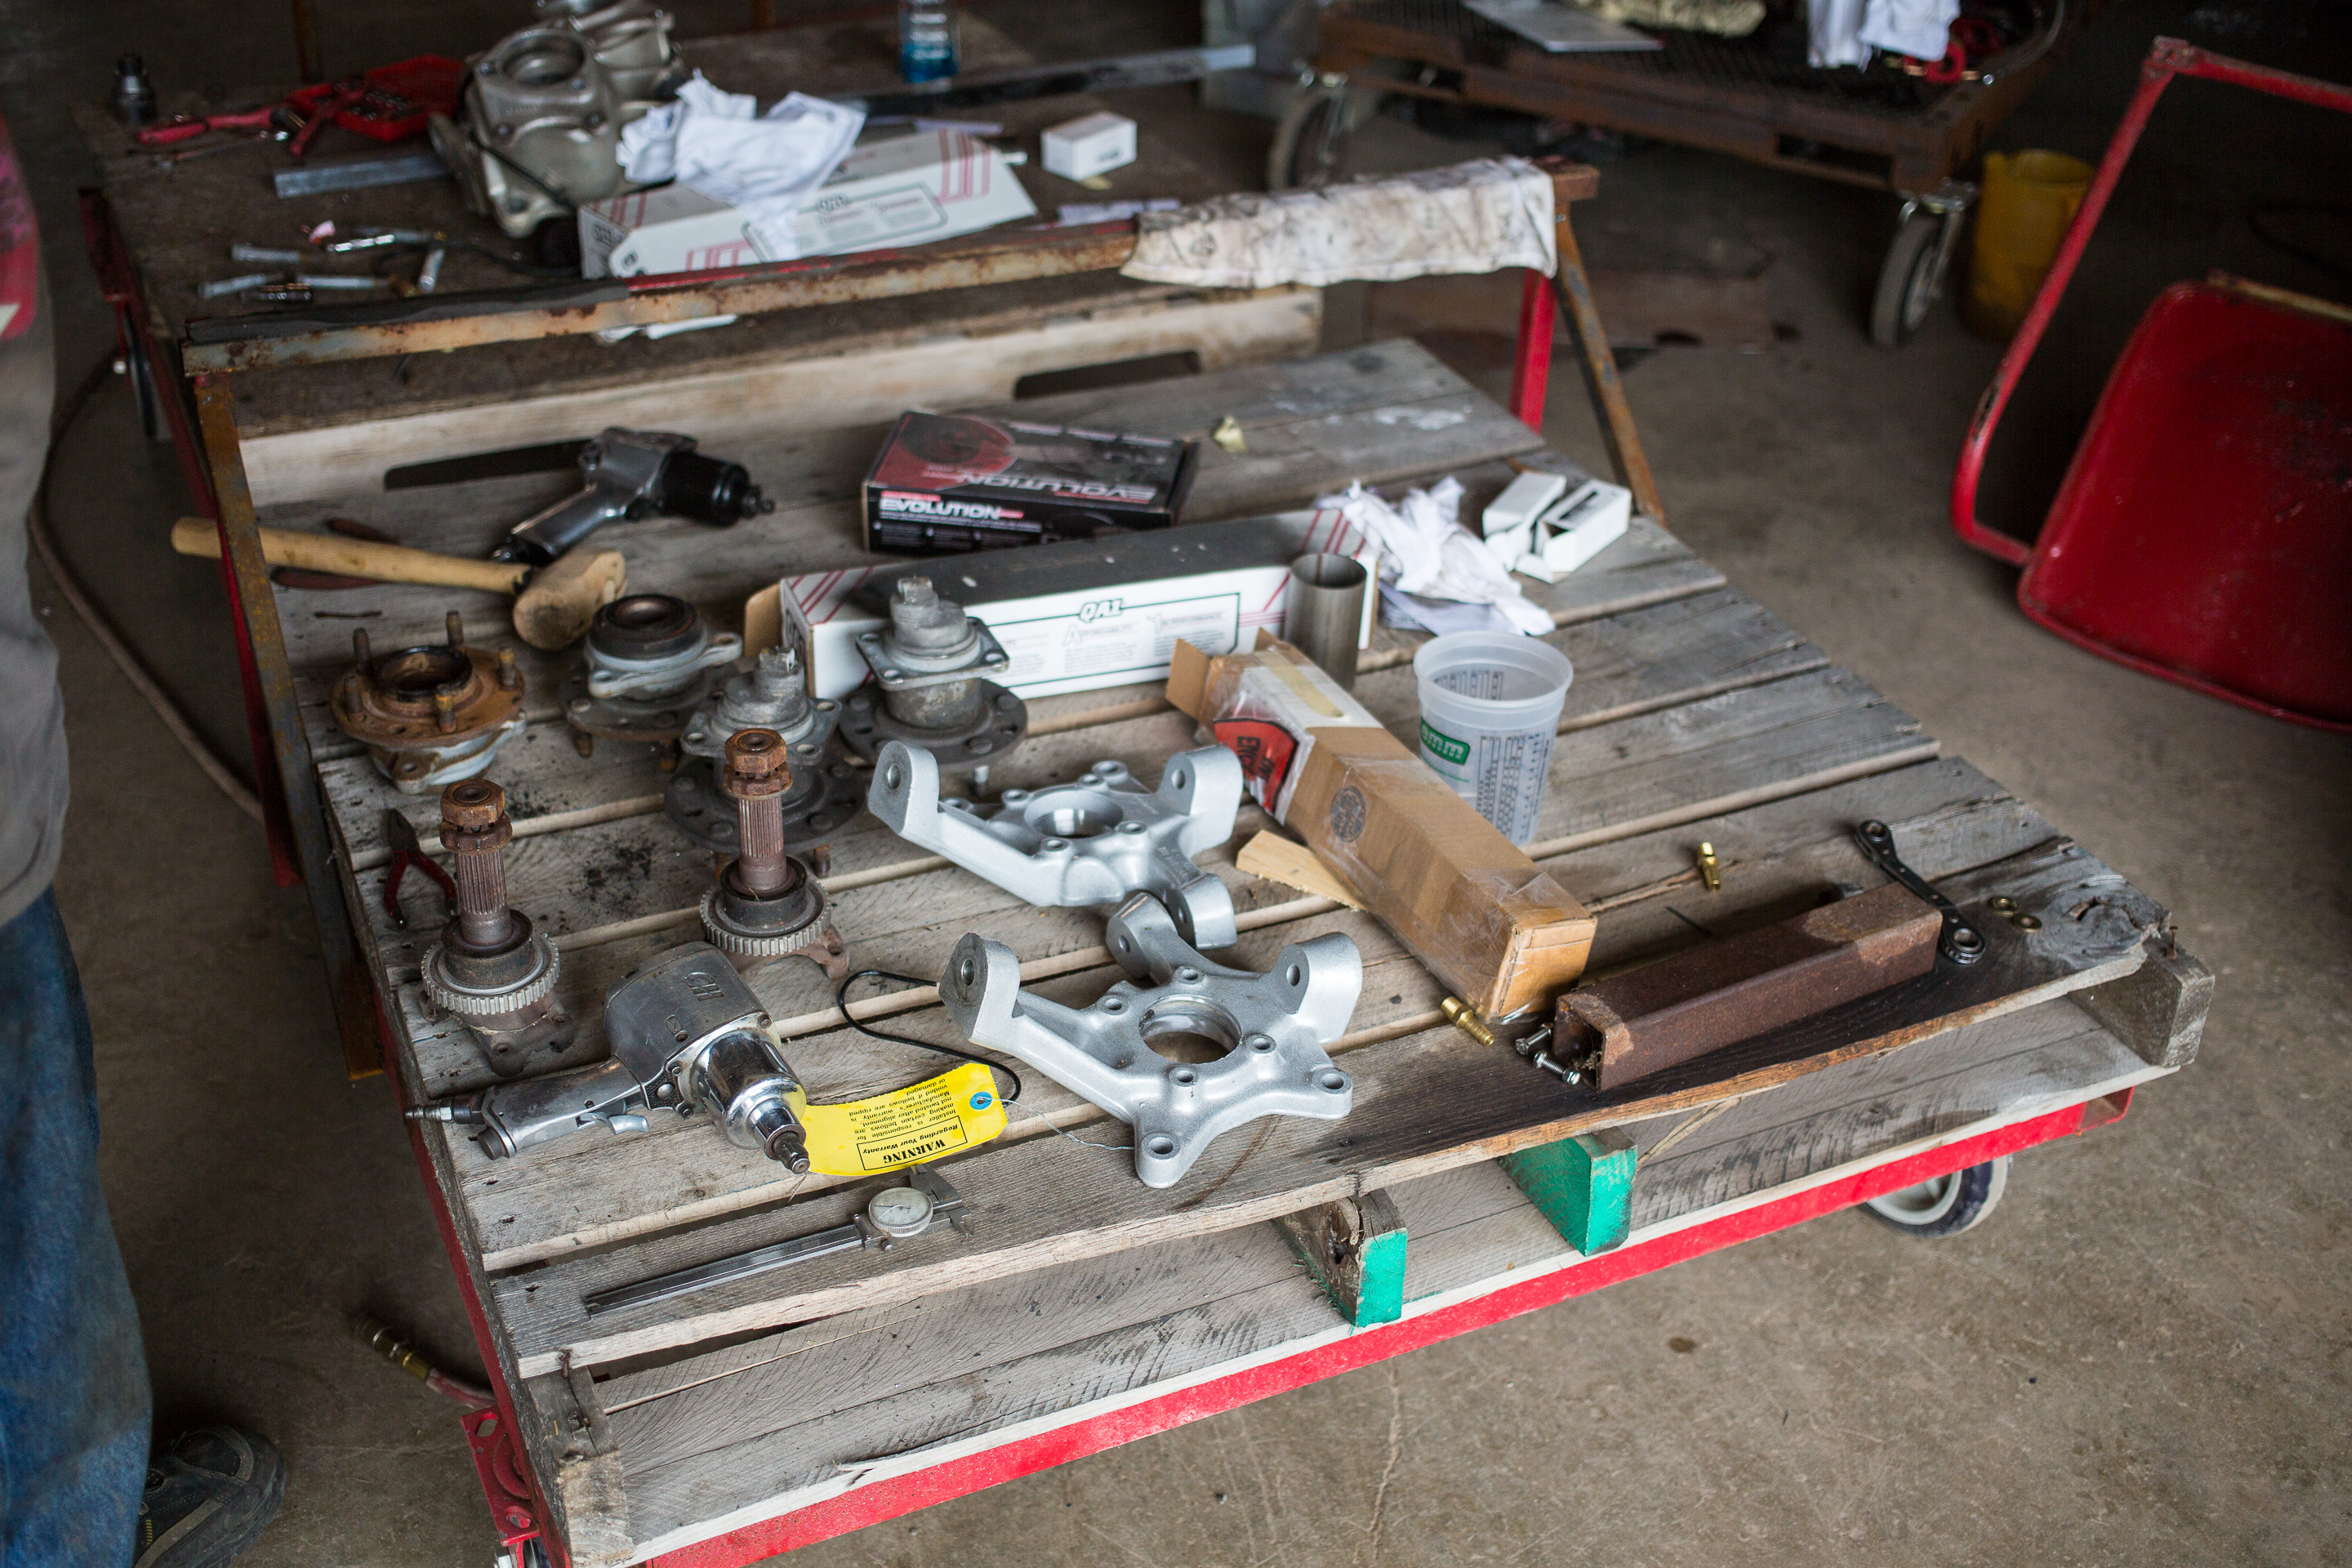
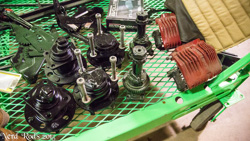
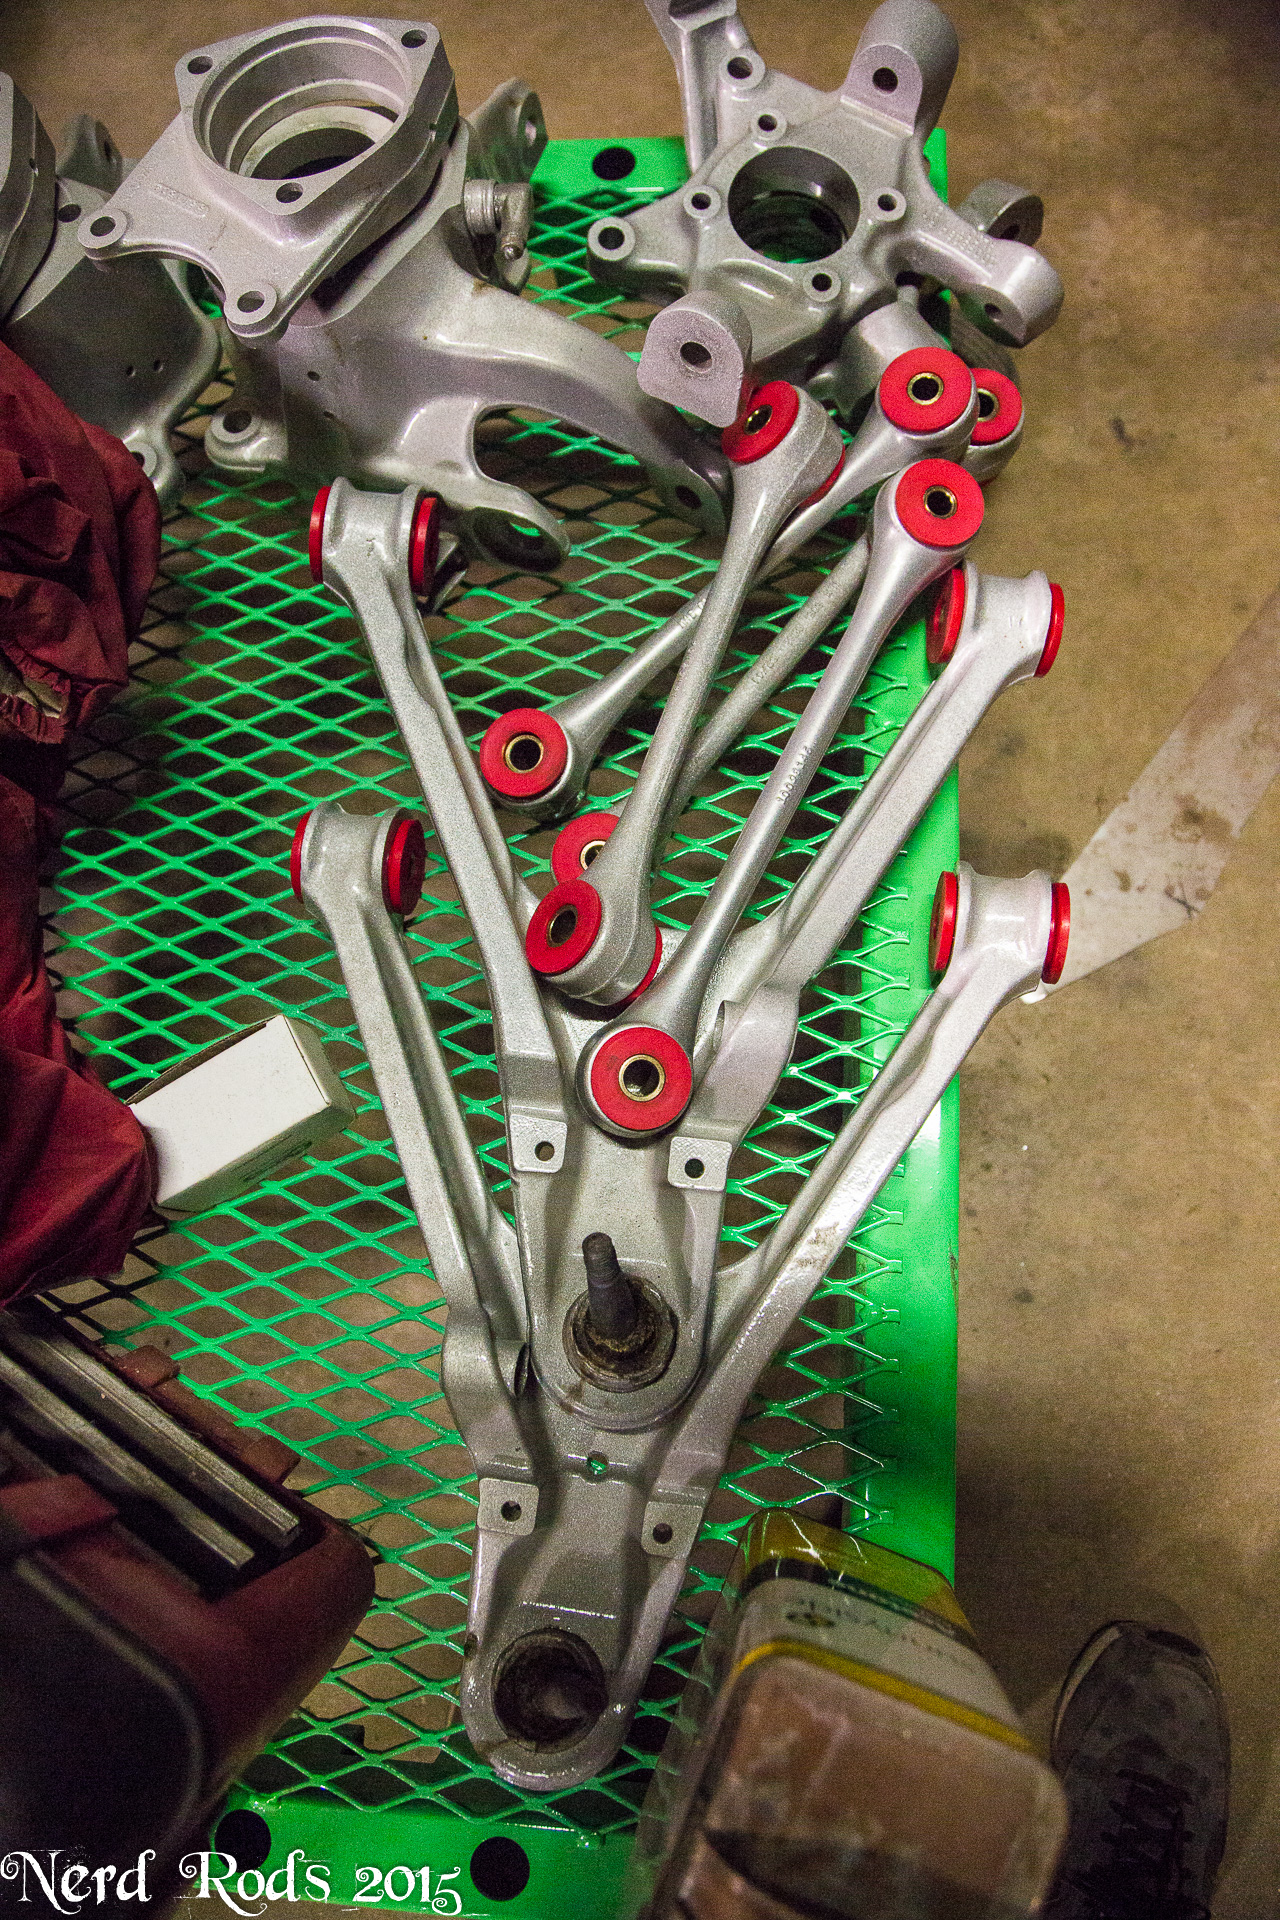
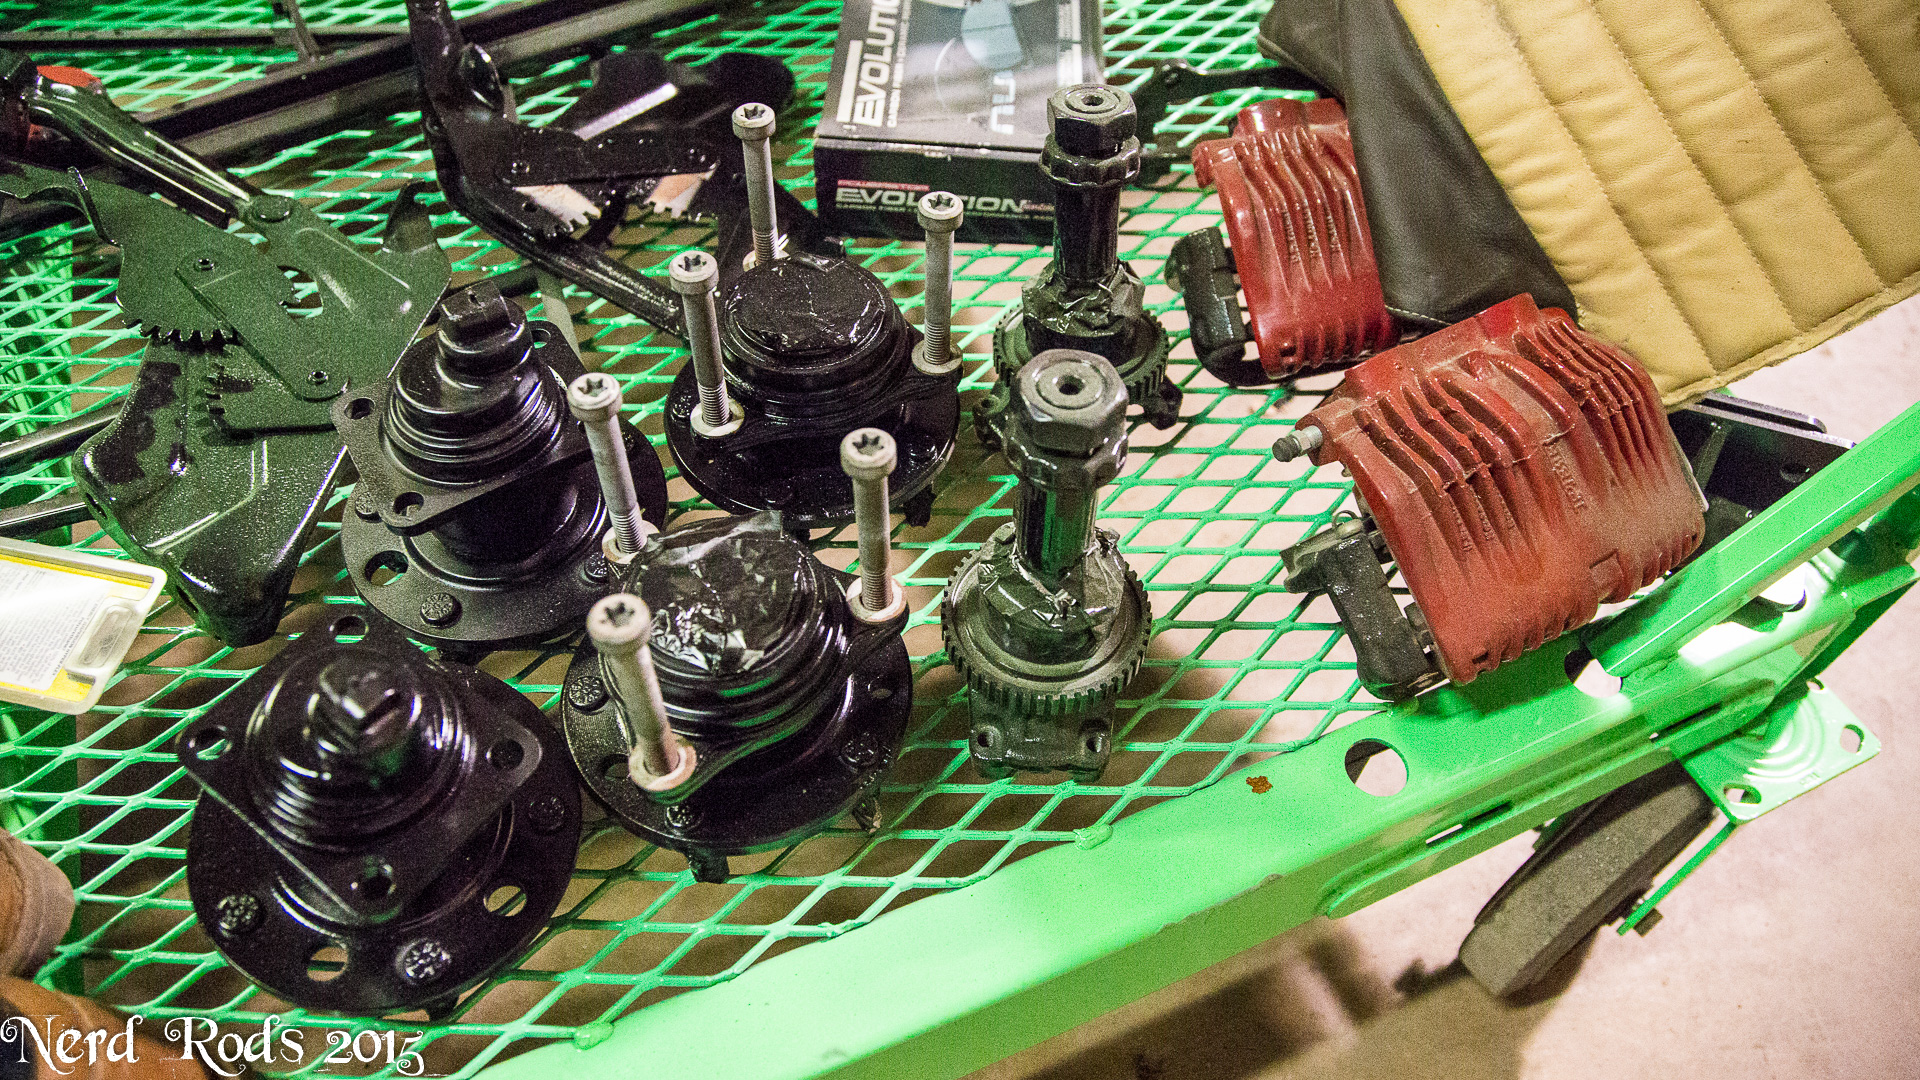
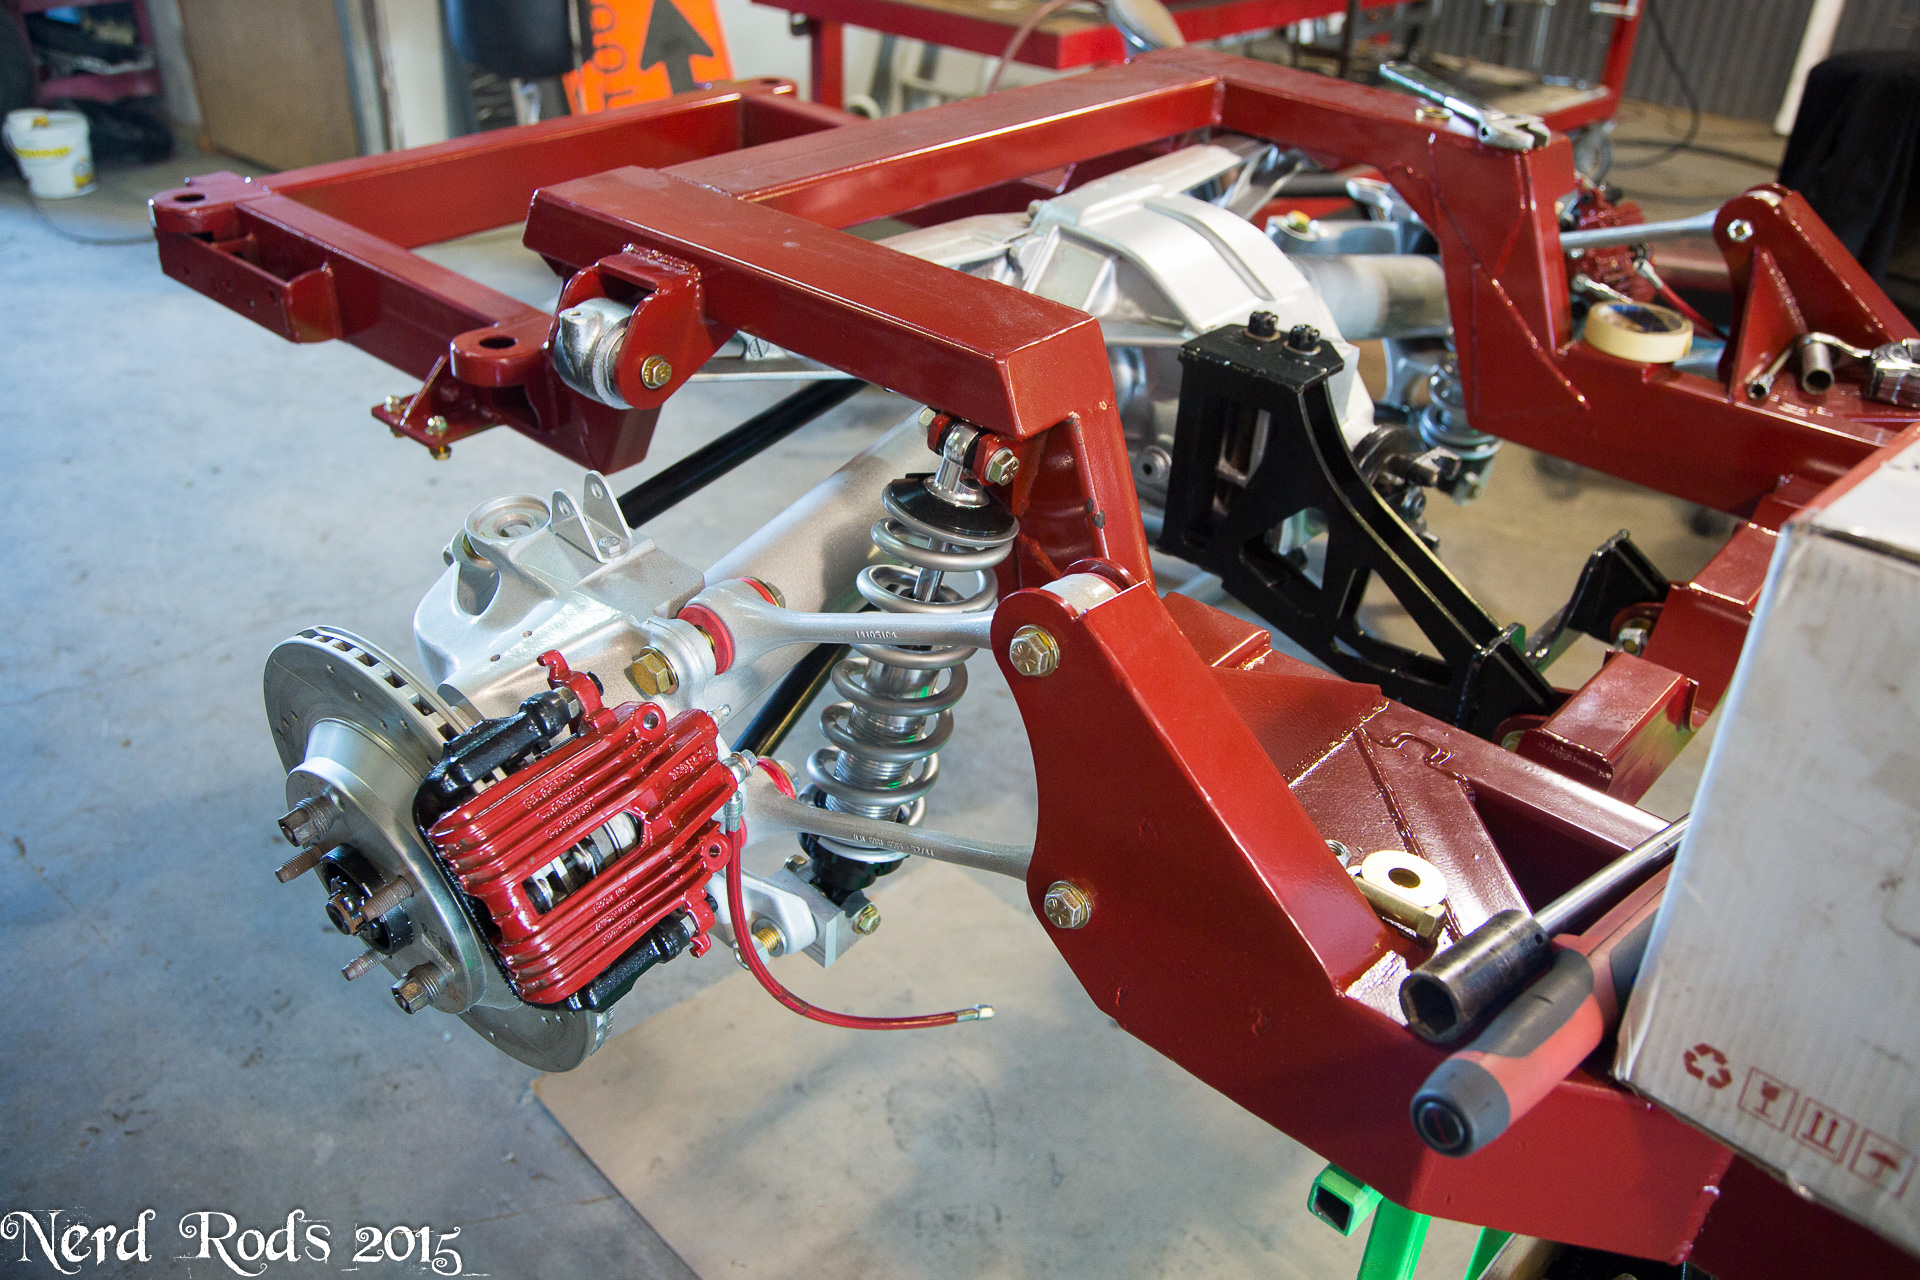
We also started piece milling our suspension from the pile, notice the 96 and 89 knuckles.

And we've got location figured out for the fuel neck through the body. I'll be right along the floor.
That's got to go.
And finally, DANG Shes going to be low. With the Suspension loaded the center of the wheel will be in the center of the lower door hinge.
More soon, I've got one frame to wrap up and ship out before I can finish up the D3's frame. Also for your guys who ask about mig welding a frame, I'll MIG and time lapse as much as possible on this frame.
Later
-Russell @ Nerd Rods
All the photos are here and then a few extras
Photo Gallery 01 - Click here if you want to see the photos is large size, Apparently LS1 tech doesn't code like the other forums.
http://gallery.nerdrods.com/Projects/03_D3/01/index.html
The Drives doors are a bit of a mess. We're trying to save it but we cut the best parts of 3 different doors together and the skin is still a bit worrying and we might have to break down and replace it.

The Cab Firewall is also mostly done, I wish I had more photos of the process but I've had my own pile of stuff to do.

The Floor is roughed in and there are several things to note on this.
1) This is the lowest the body can sit on the chassis.
2) The Engine is higher because of the Truck oil pan so we clear the ground but still have room under the car without having to buy a new oil pan. Not good for CG but hey its a truck not a sports car.
3) The drive-shaft only hit the body by a 1/4 inch so the 6" tunnel is over kill but it was easy and looks good. We might start offering all these sheet-metal parts for guys wanting to do their own slammed stance and you can use a live axle and still make it all fit and clear with this same body.


We also started piece milling our suspension from the pile, notice the 96 and 89 knuckles.
And we've got location figured out for the fuel neck through the body. I'll be right along the floor.

That's got to go.
And finally, DANG Shes going to be low. With the Suspension loaded the center of the wheel will be in the center of the lower door hinge.

More soon, I've got one frame to wrap up and ship out before I can finish up the D3's frame. Also for your guys who ask about mig welding a frame, I'll MIG and time lapse as much as possible on this frame.
Later
-Russell @ Nerd Rods
Last edited by rat_rod_russell; 10-20-2015 at 11:30 AM.

Trending Topics
06-30-2015, 09:00 PM
#8
Launching!
Thread Starter
Join Date: Jan 2007
Location: Luling TX In the Hot Rod Shop
Posts: 294
Likes: 0
Received 3 Likes
on
3 Posts
I might try messing with pan modifications one day but there is some voodoo I'm not skilled in with regard to oil baffling design and there are just places where you just pay the money and be safe. At my current comfort level this is one of them. And I have the pan sitting not being used so that helps too.
07-01-2015, 04:25 PM
#10
Launching!
Thread Starter
Join Date: Jan 2007
Location: Luling TX In the Hot Rod Shop
Posts: 294
Likes: 0
Received 3 Likes
on
3 Posts
Here are the rest of that truck
http://gallery.nerdrods.com/Customer...ard/index.html
07-01-2015, 09:28 PM
#11
FormerVendor

Join Date: Nov 2007
Posts: 201
Likes: 0
Received 0 Likes
on
0 Posts
It is were all from one car and had a patina then yes but its all from different trucks so we're going to do a semi gloss gray. Once of my customers has and EPIC patina on his truck with our chassis.
Here are the rest of that truck
http://gallery.nerdrods.com/Customer...ard/index.html
Here are the rest of that truck
http://gallery.nerdrods.com/Customer...ard/index.html
 07-07-2015, 04:46 AM
#12
Launching!
Thread Starter
Join Date: Jan 2007
Location: Luling TX In the Hot Rod Shop
Posts: 294
Likes: 0
Received 3 Likes
on
3 Posts
Just a quick FYI for some guys who've asked questions about the project, the goal is cheap not crap. So while we are reworking and saving things we would other wise tell someone to toss when the D3 is said and done I hope for it to be a 40-50k dollar truck for no where near that much in it and a project that most guys at home can look at and think "I can do that" for most of the project.
New photo gallery,
http://gallery.nerdrods.com/Projects/03_D3/02/
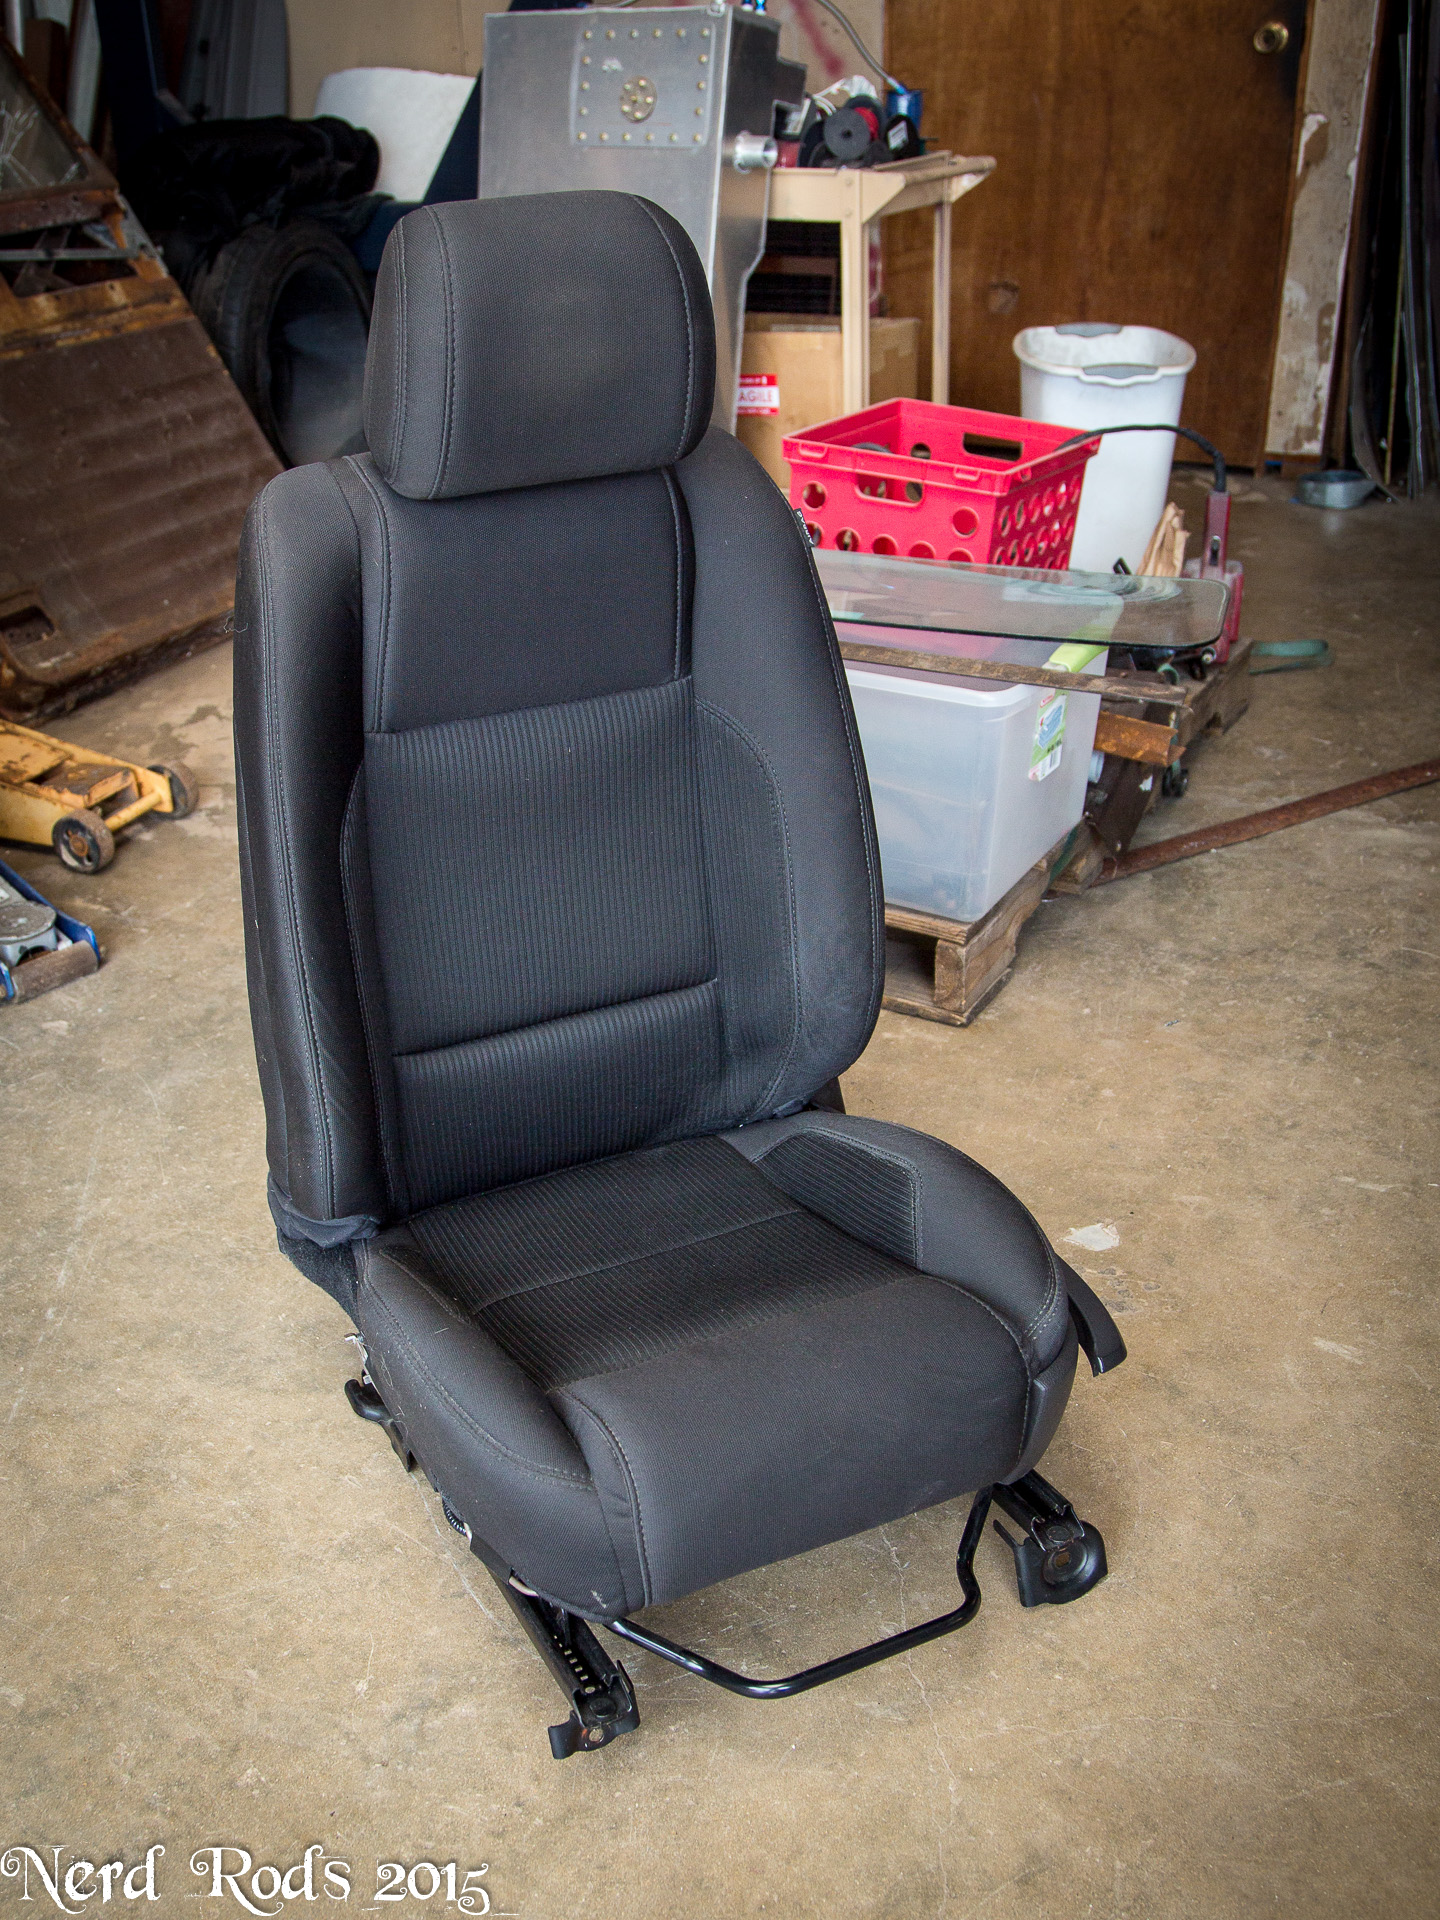
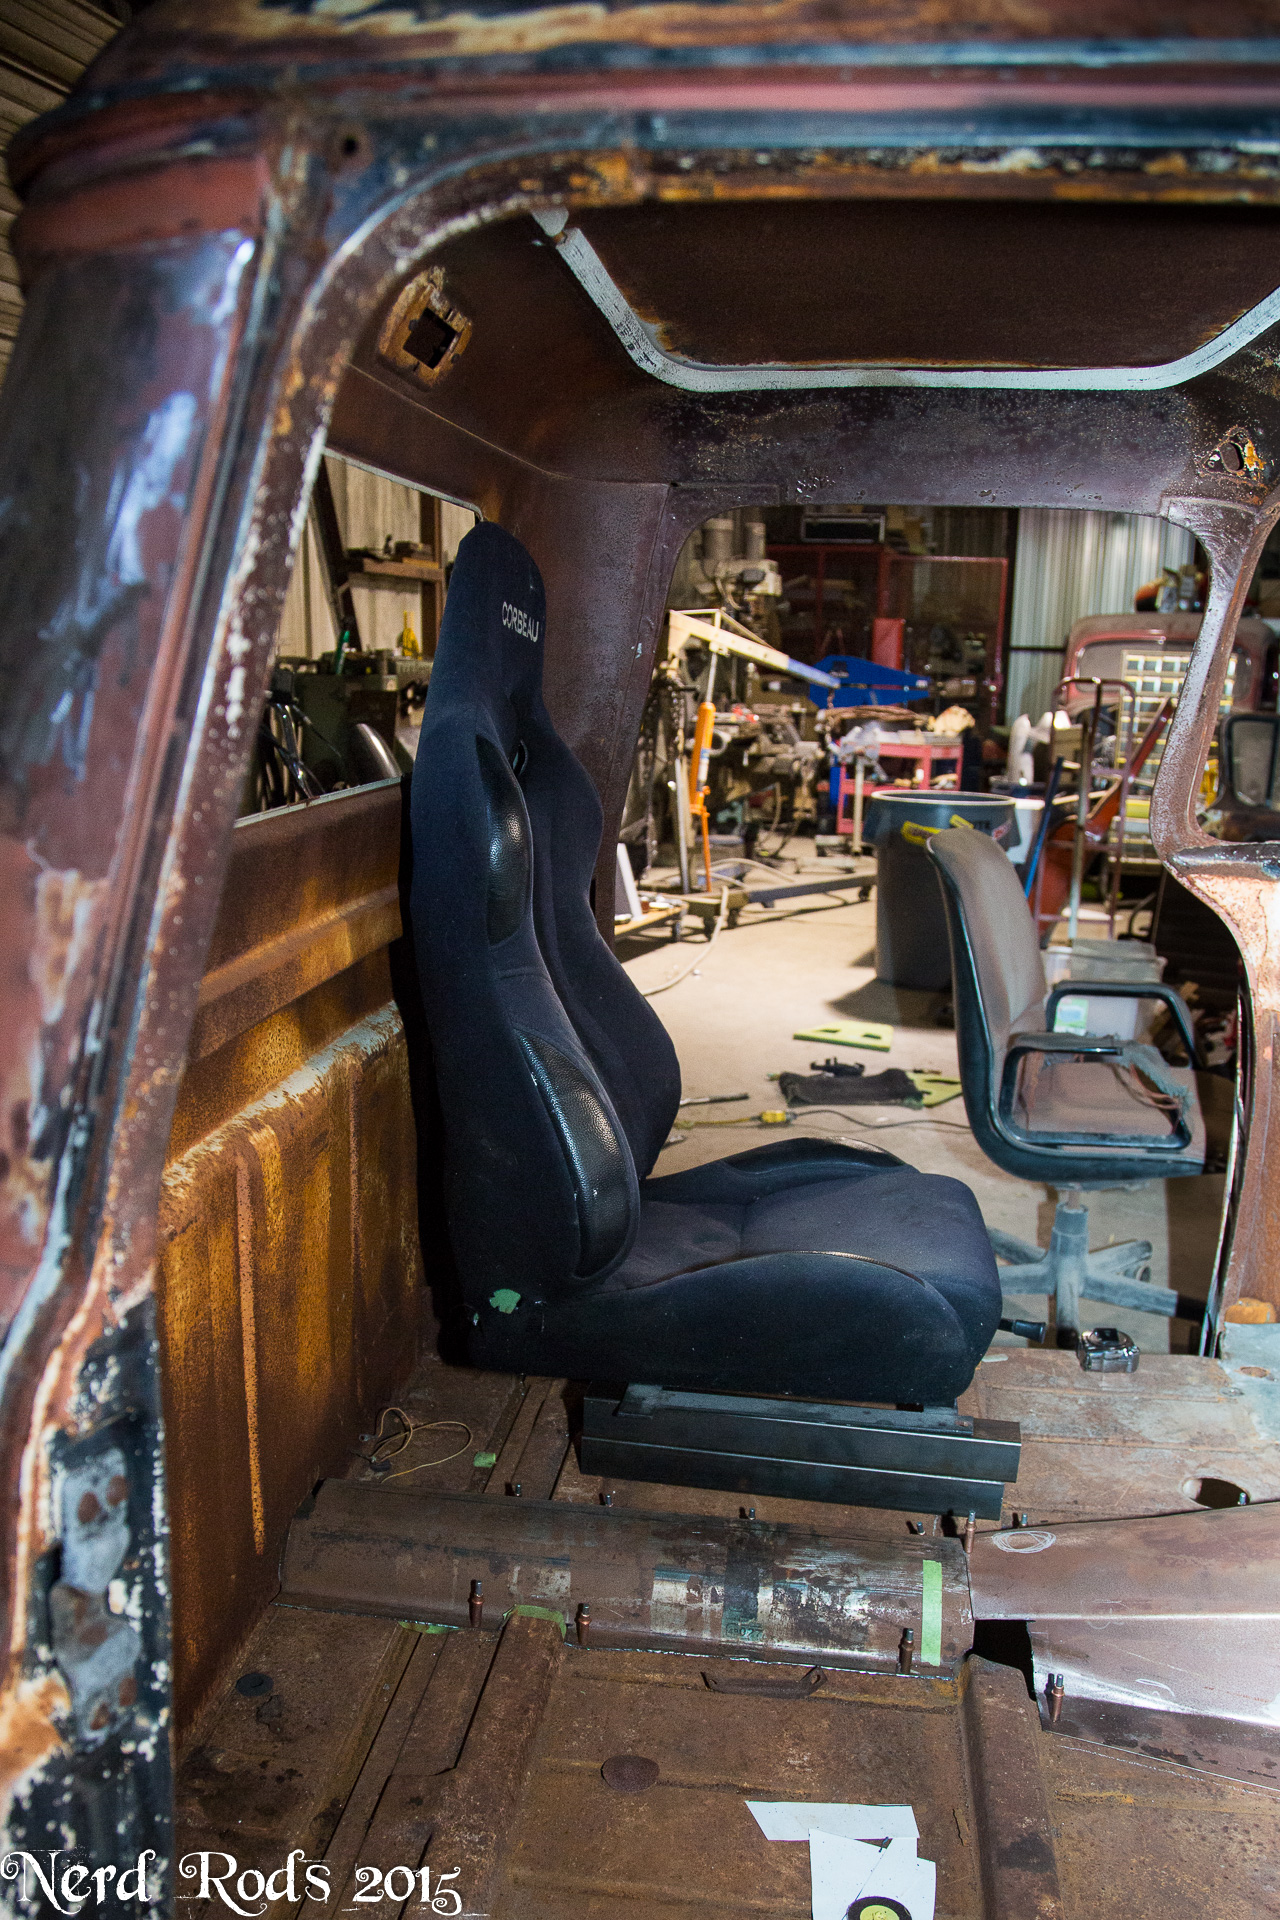
We picked up a NICE set of 2011 Mustang seats from a local guy who pulled them for race seats. These would have worked very well if they were not as thick in the back. If we were running the automatic we would have used these guys for sure but with the stick there just wasn't any room to work the pedals comfortably. I'm 6'2" with a 36" inseam so I'm the measuring stick for this stuff.

So I had this set of Corbeau racing seats that were to narrow for us fat boys (I'm 250 38 waist and Jim's 210 with a 34 waist so not that bad) and so Jim took the skin off and bent the bolsters out. We're also going to cut it down a bit and make it more shapely for the truck but the key thing is that this moved the driver back just under 6 inches and this will be Dad's new daily driver so it needs to be comfortable.

Aerodynamics and heat reduction mods!


We're blocking off the vents inside the truck and by opening this whole slot up along the dash the vent will now function as a heat exit for the truck giving a high rear location for the under hood to escape. This will stop air from going in the radiator and out under the truck where it will create lift. Next dad's also going to add a lip so that any water coming in will run off the sides instead of onto the motor.
And he's cutting an a smooth section of dash to clean the insides up a bit.
More soon,
-Russell
New photo gallery,
http://gallery.nerdrods.com/Projects/03_D3/02/
We picked up a NICE set of 2011 Mustang seats from a local guy who pulled them for race seats. These would have worked very well if they were not as thick in the back. If we were running the automatic we would have used these guys for sure but with the stick there just wasn't any room to work the pedals comfortably. I'm 6'2" with a 36" inseam so I'm the measuring stick for this stuff.
So I had this set of Corbeau racing seats that were to narrow for us fat boys (I'm 250 38 waist and Jim's 210 with a 34 waist so not that bad) and so Jim took the skin off and bent the bolsters out. We're also going to cut it down a bit and make it more shapely for the truck but the key thing is that this moved the driver back just under 6 inches and this will be Dad's new daily driver so it needs to be comfortable.

Aerodynamics and heat reduction mods!

We're blocking off the vents inside the truck and by opening this whole slot up along the dash the vent will now function as a heat exit for the truck giving a high rear location for the under hood to escape. This will stop air from going in the radiator and out under the truck where it will create lift. Next dad's also going to add a lip so that any water coming in will run off the sides instead of onto the motor.
And he's cutting an a smooth section of dash to clean the insides up a bit.

More soon,
-Russell
 08-29-2015, 05:26 PM
#14
Launching!
Thread Starter
Join Date: Jan 2007
Location: Luling TX In the Hot Rod Shop
Posts: 294
Likes: 0
Received 3 Likes
on
3 Posts
Update time.
Easy viewing gallery link here.
http://gallery.nerdrods.com/Projects/03_D3/02/
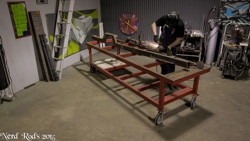
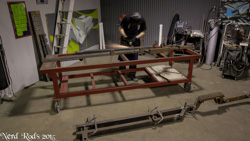
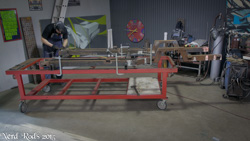
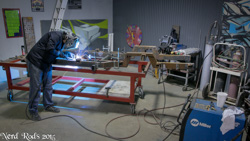
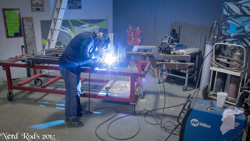
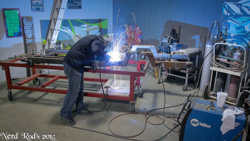
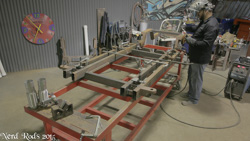
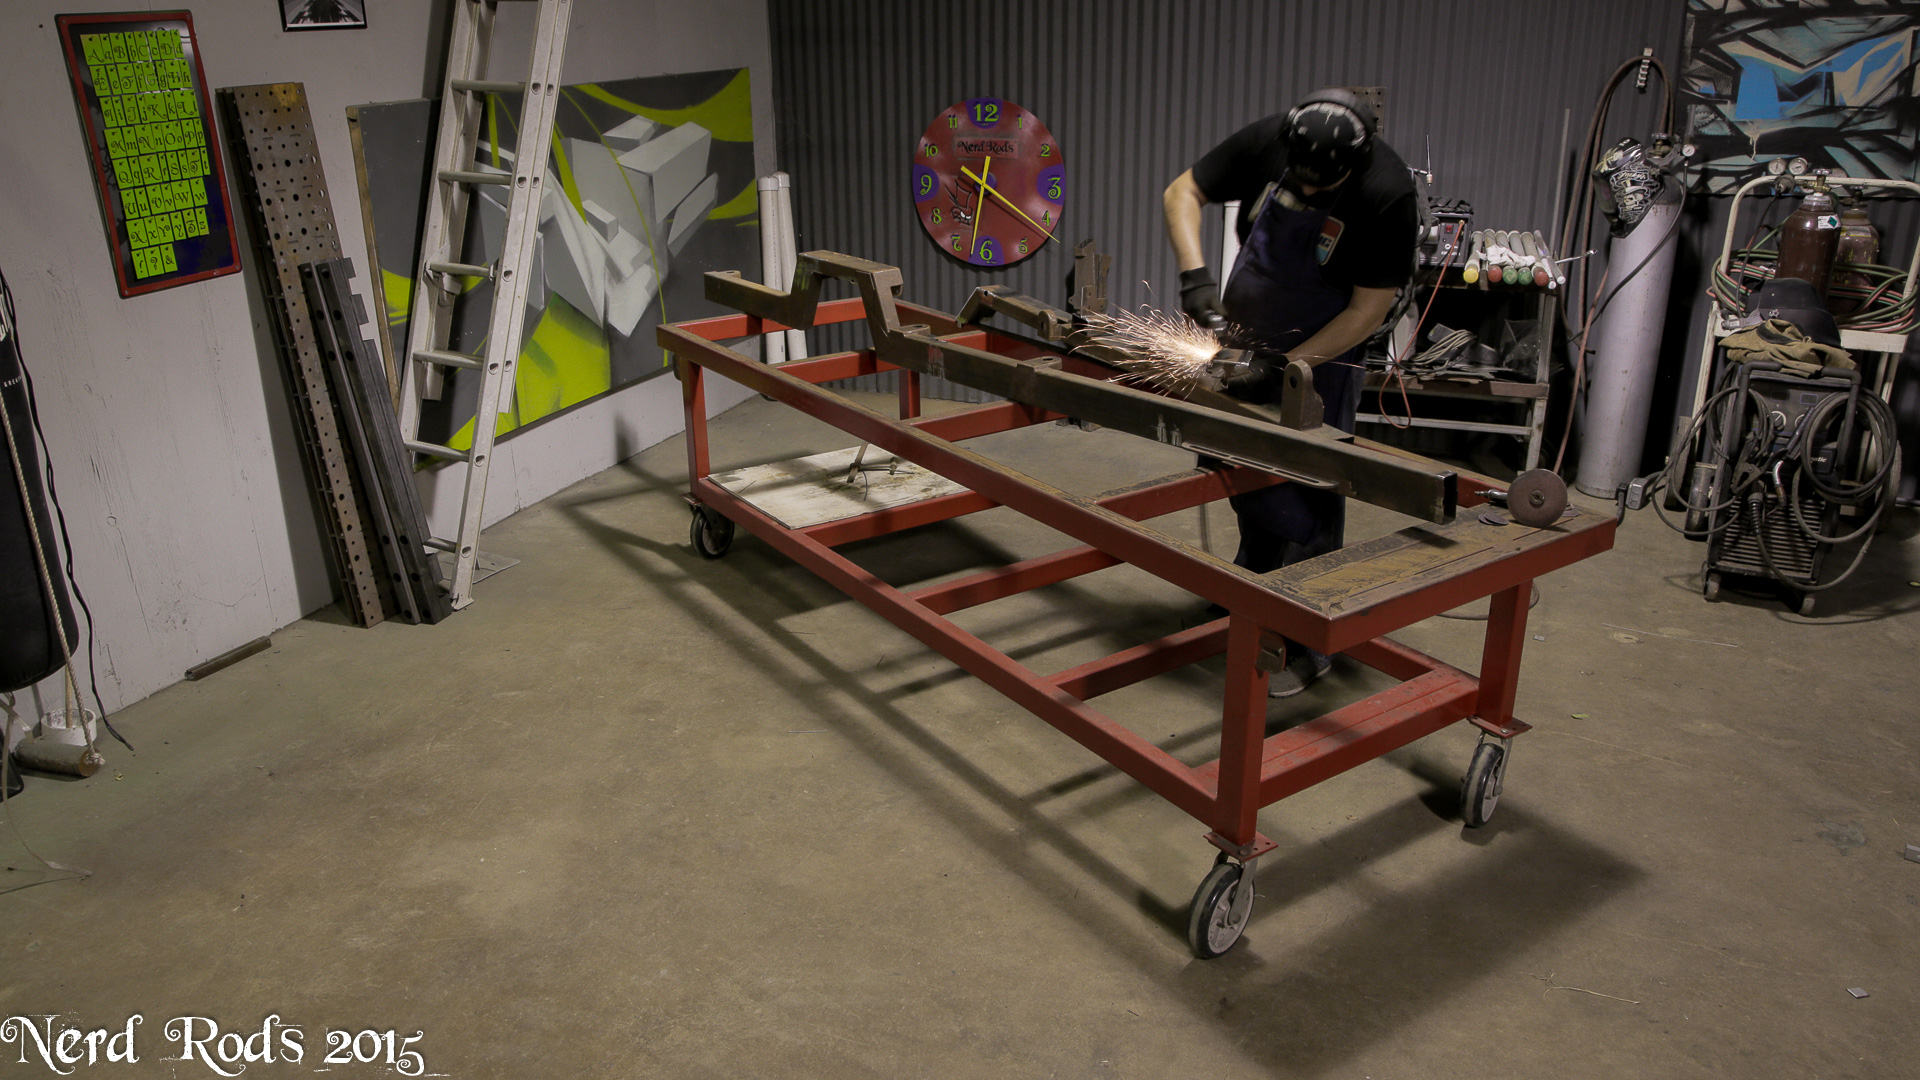
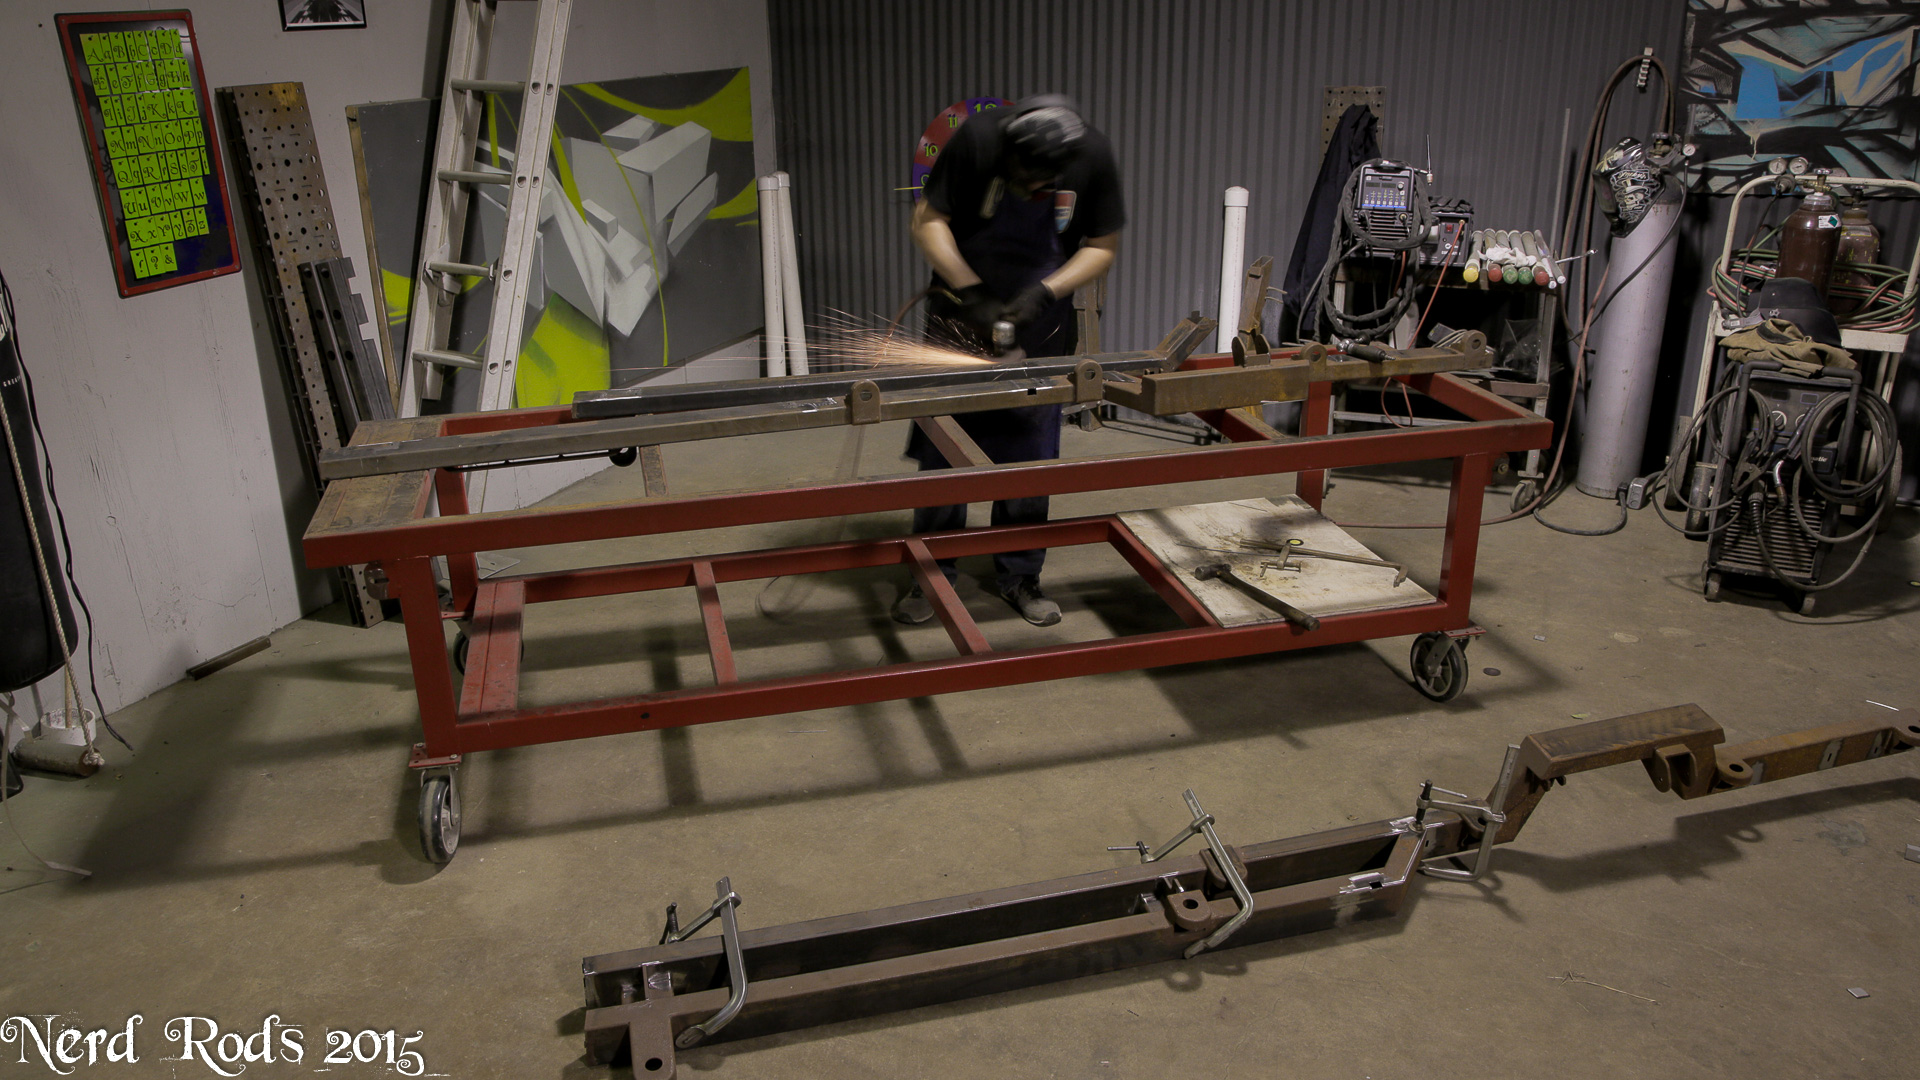
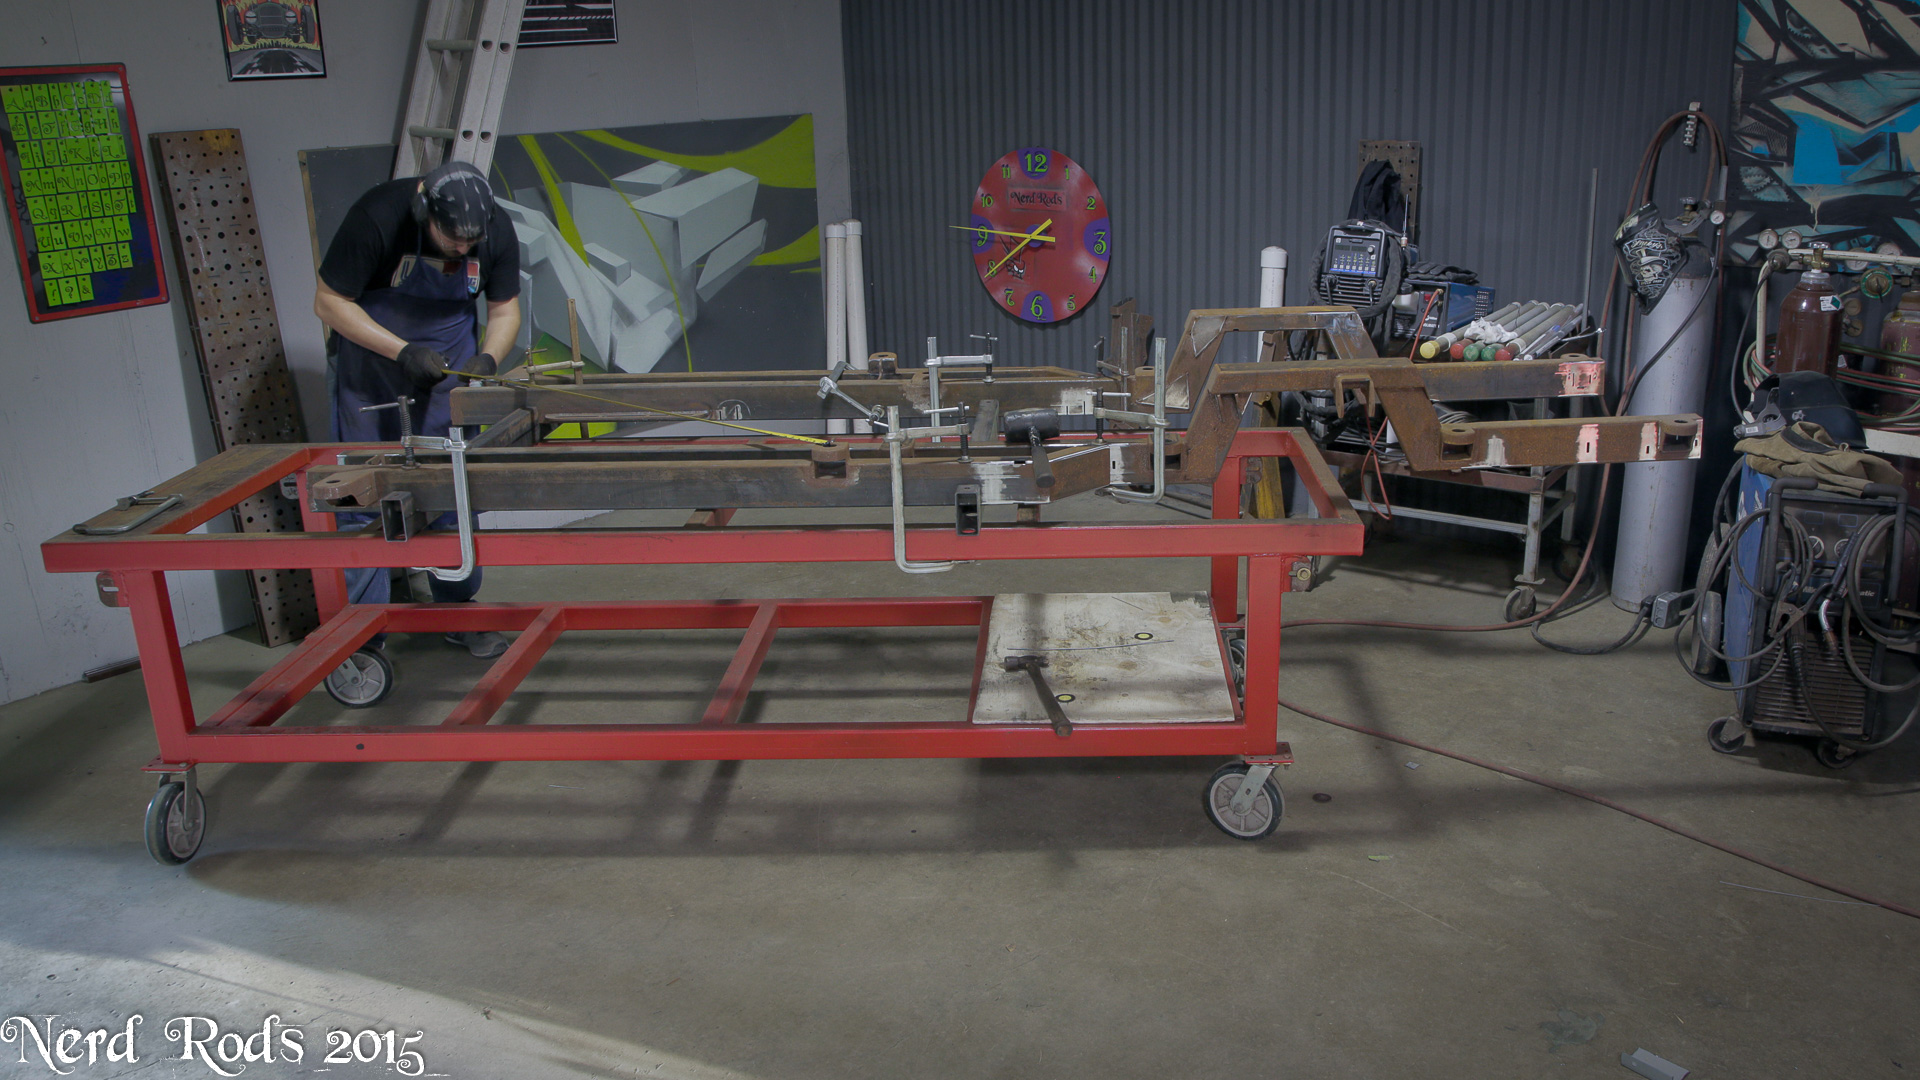
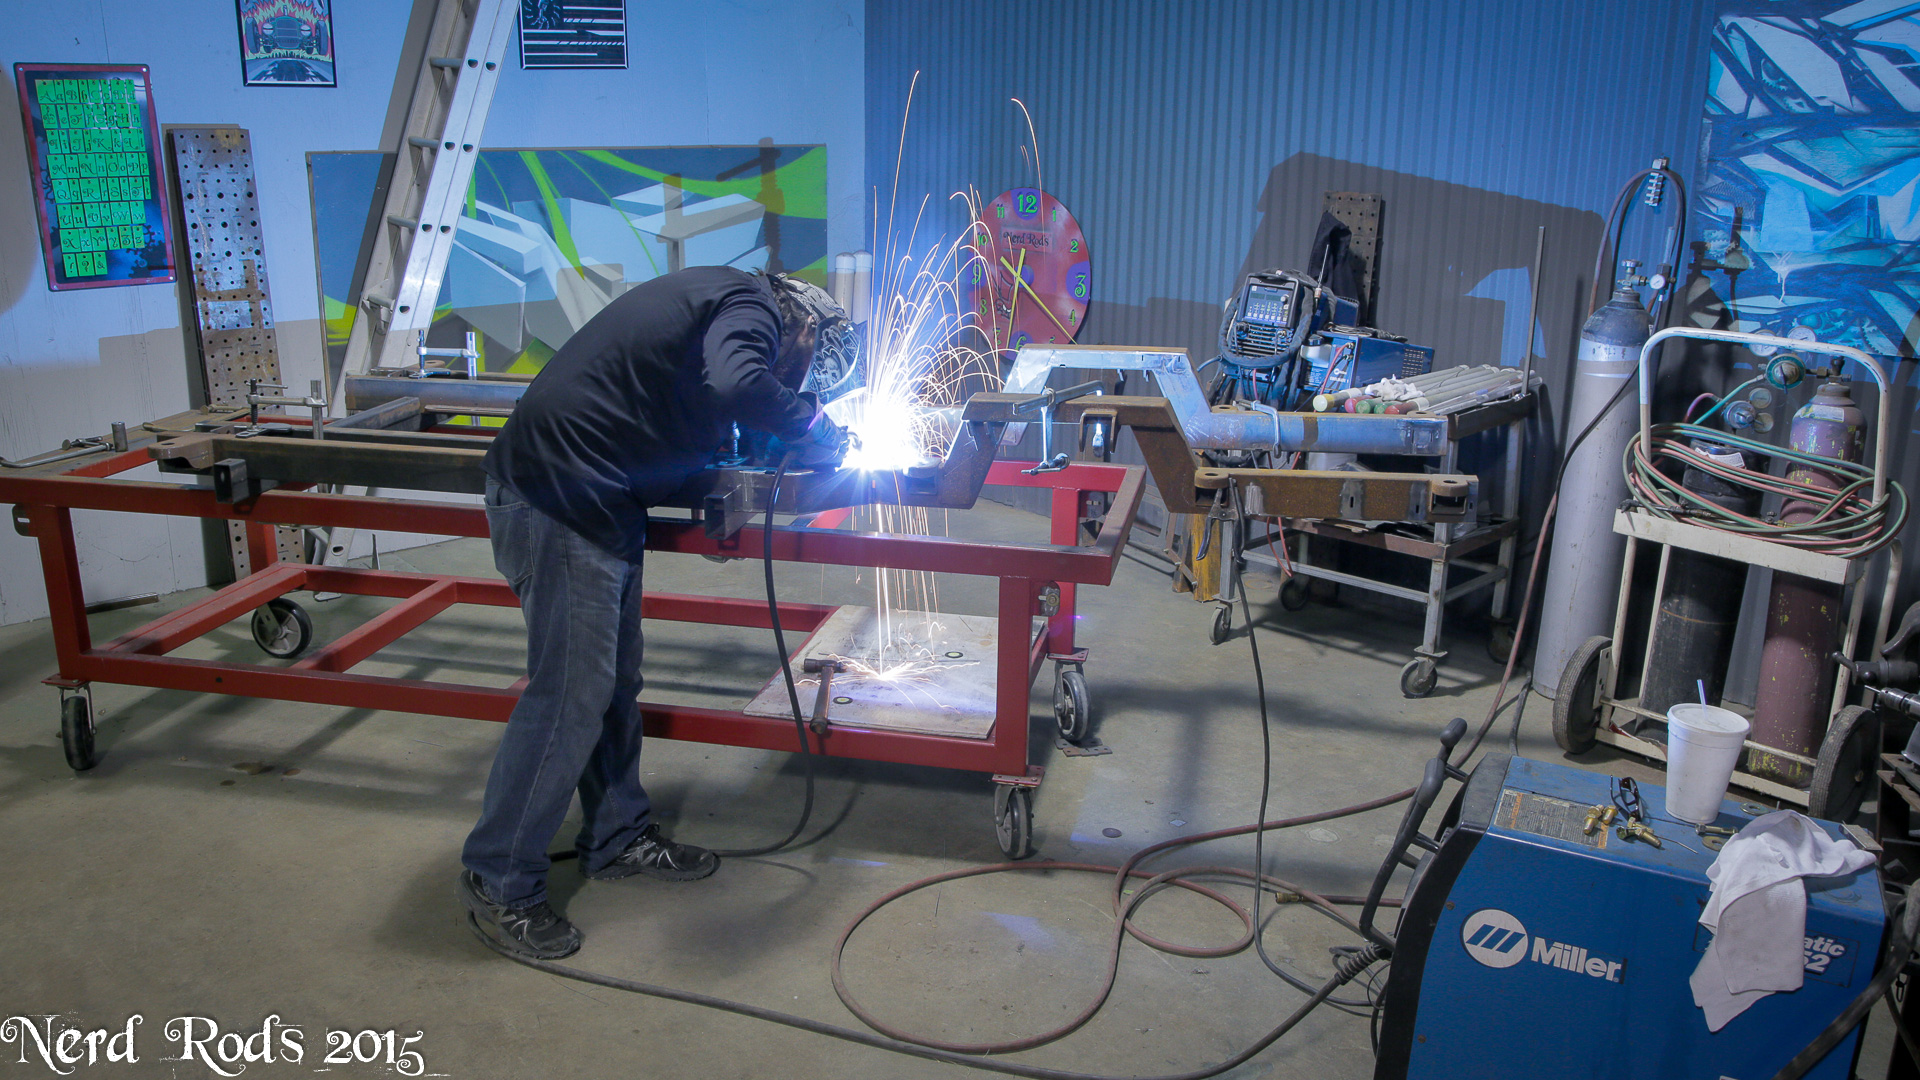
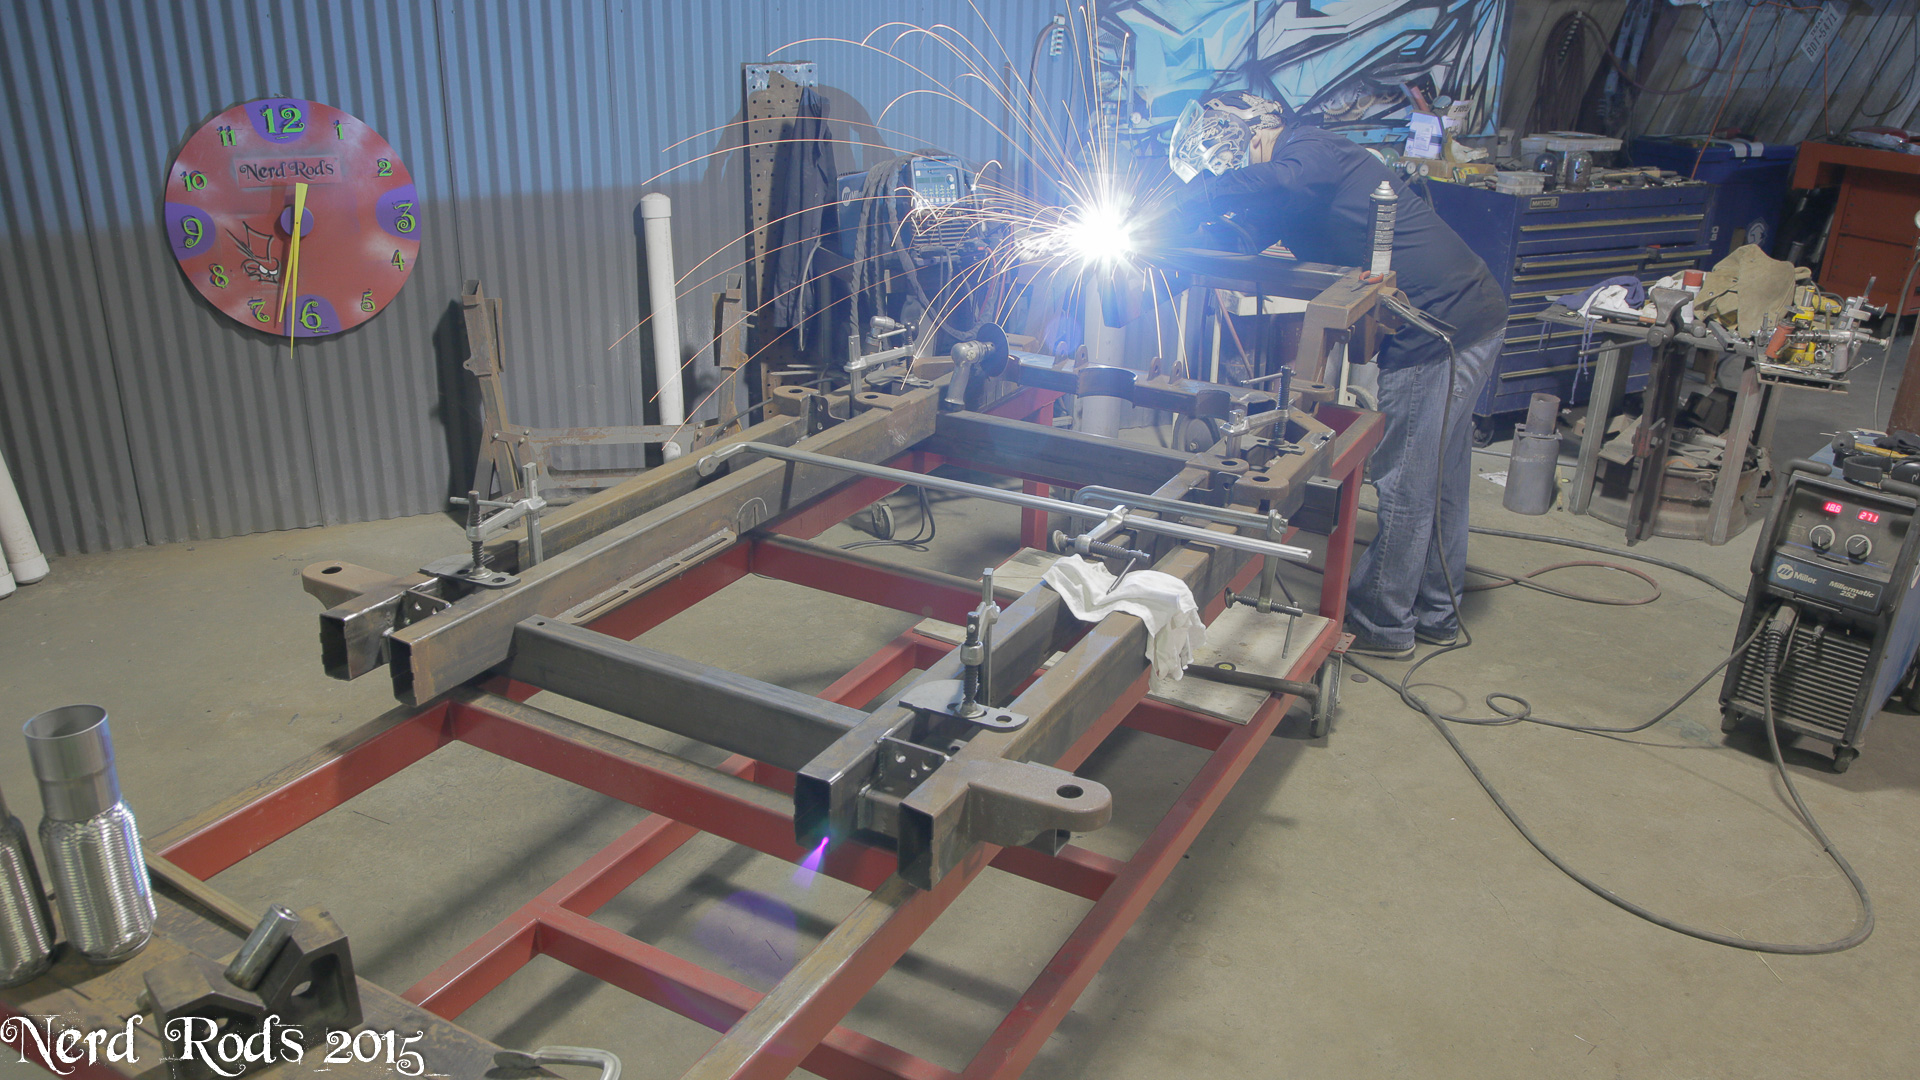
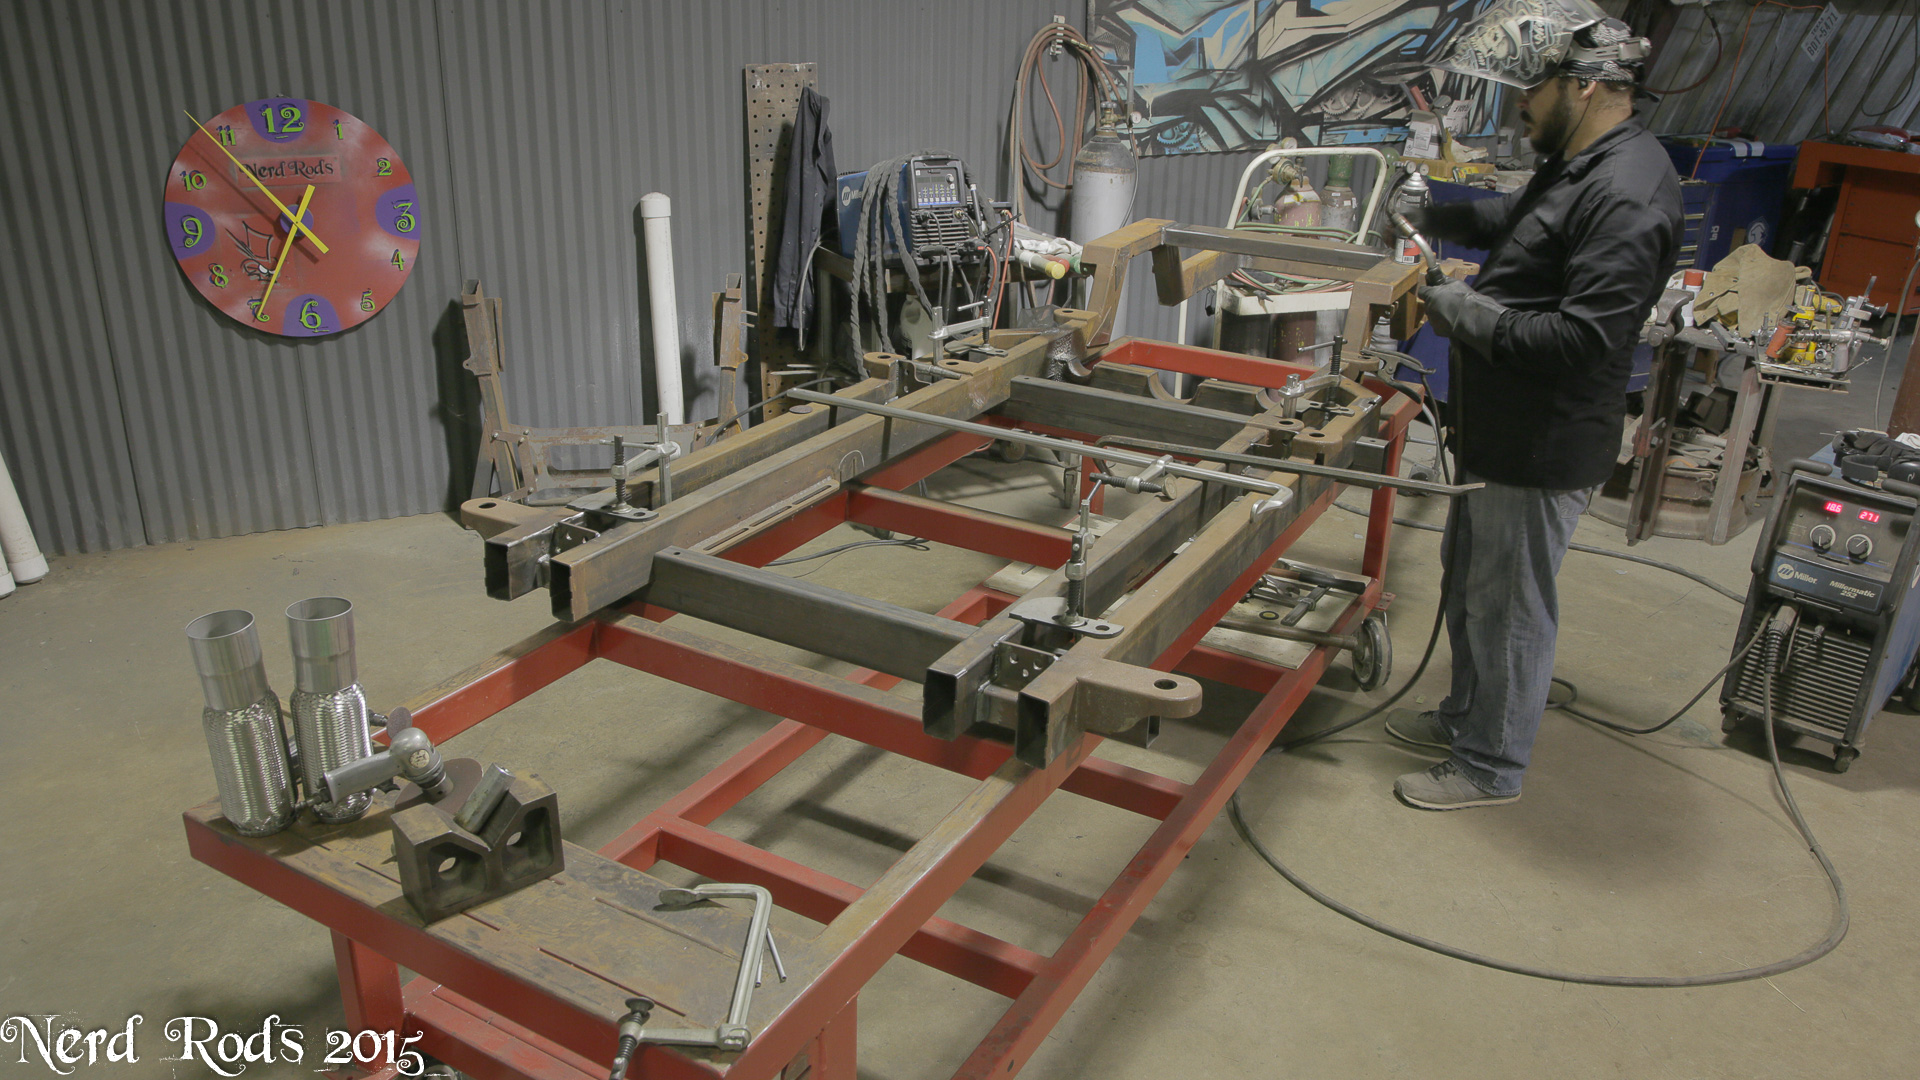
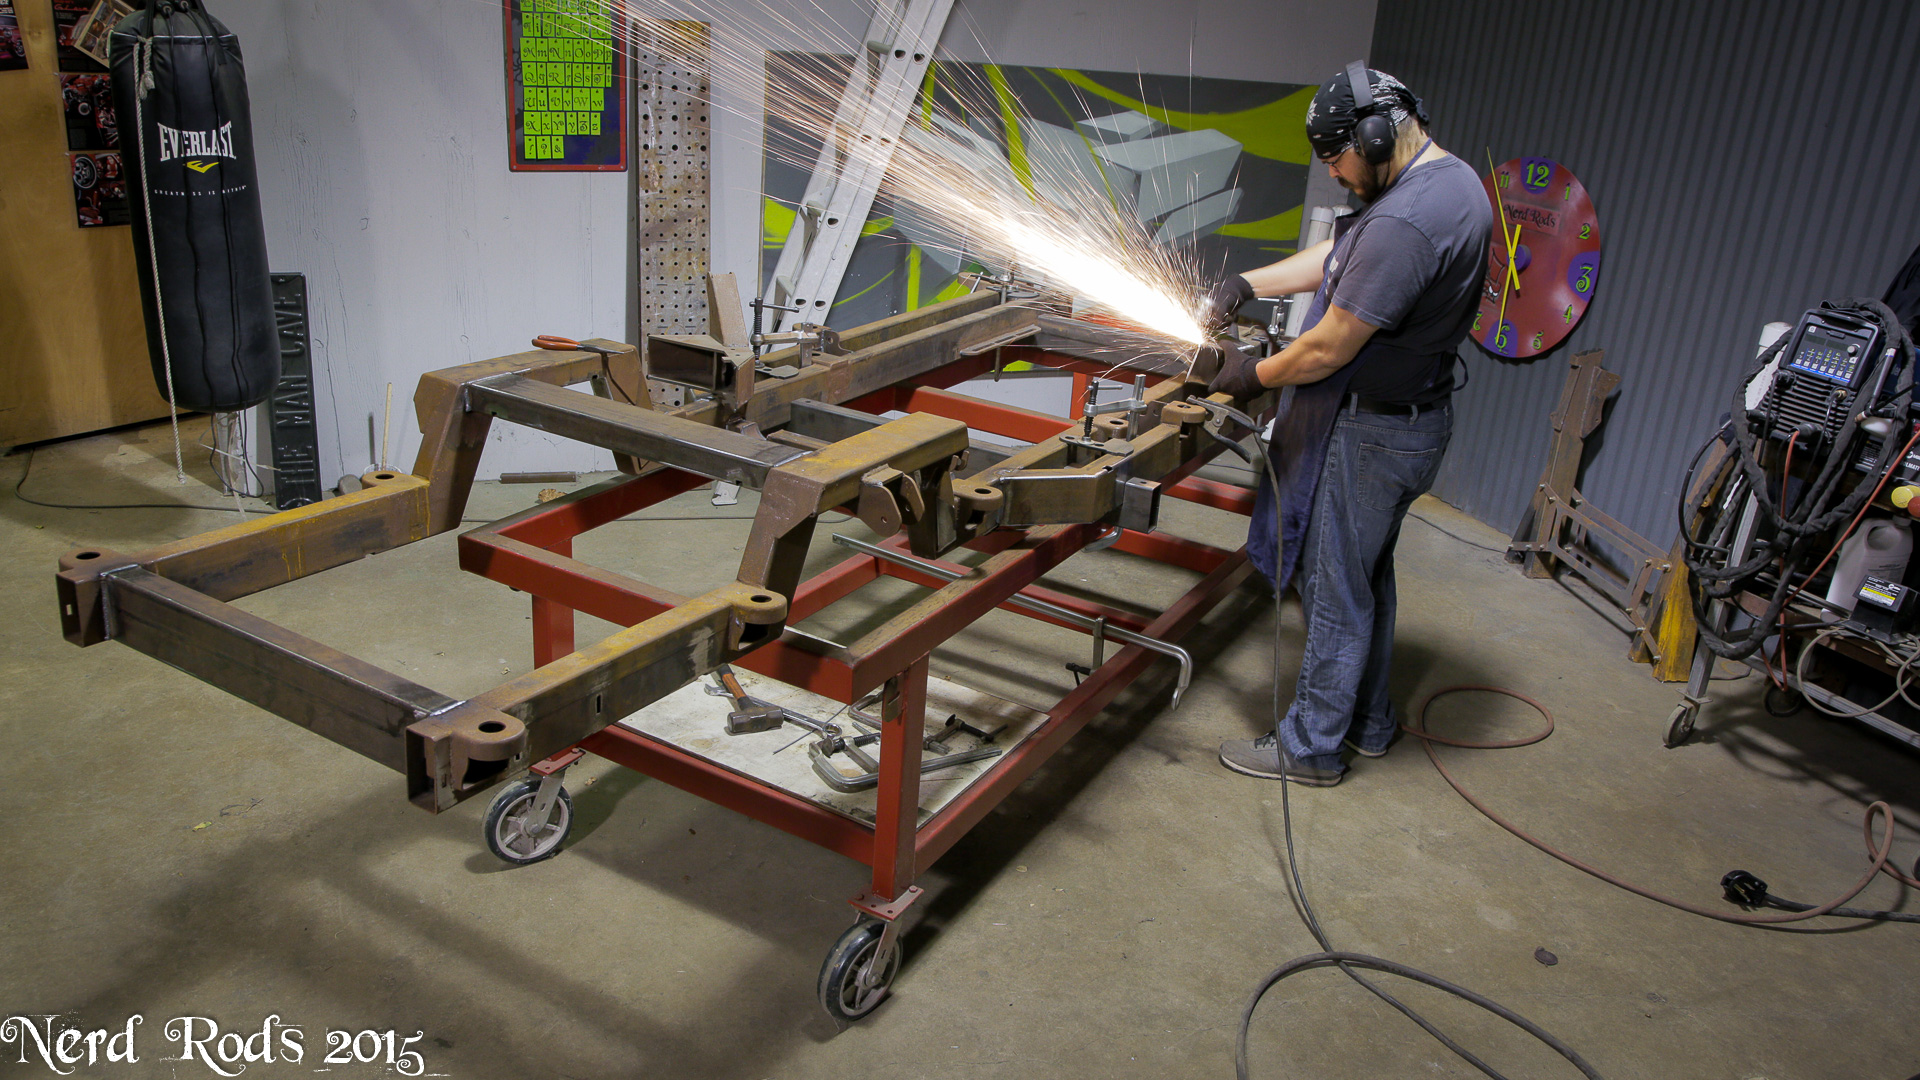
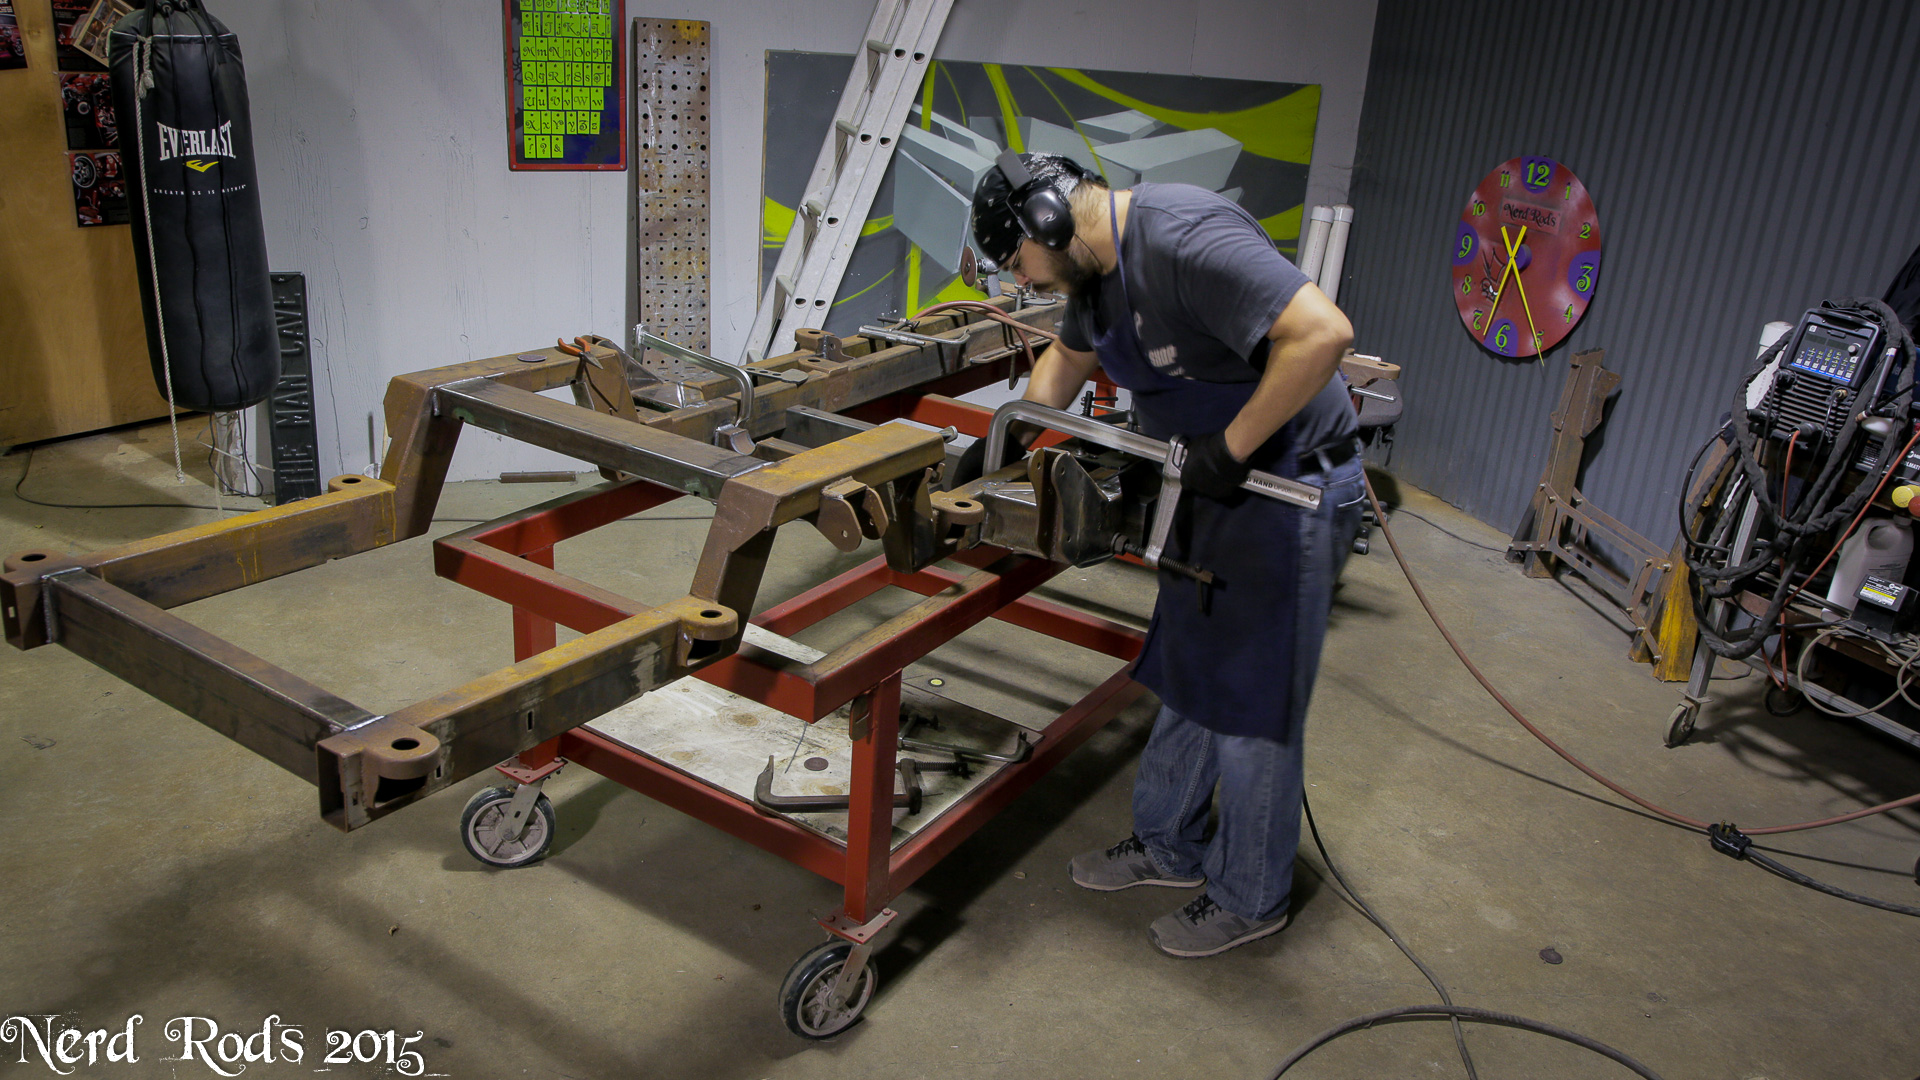
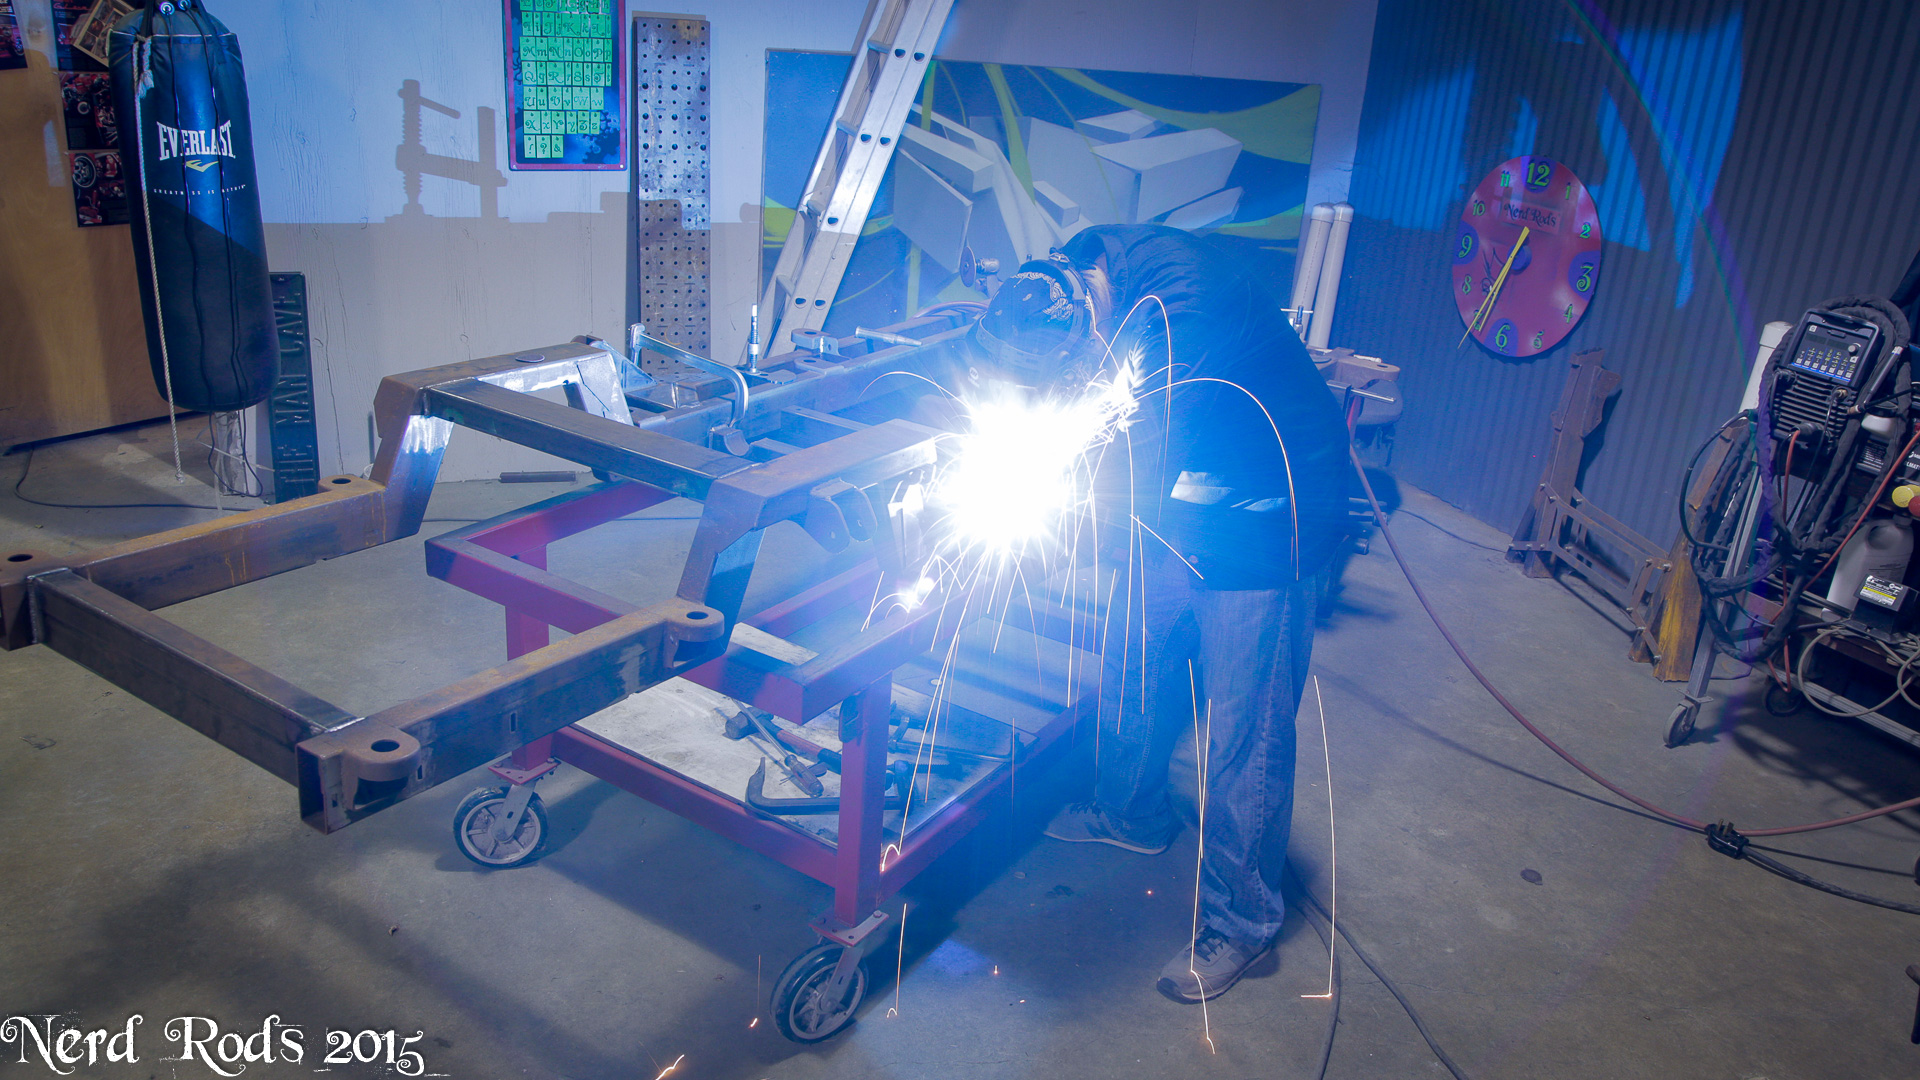
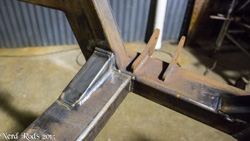
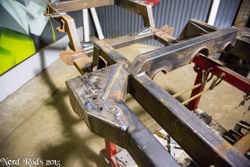
I've been working on a timelapse of Dad's frame simply because I'm MIG welding it. We get a lot of people who think you can't MIG the frames simply because I don't. So this one get's the end if its assembly MIG'd. Here are a few stills from the timelapse process.


Dad's got the clutch pedal worked out and mounted. Its all out getting powder coated


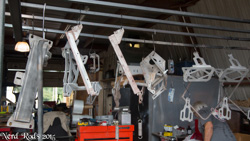
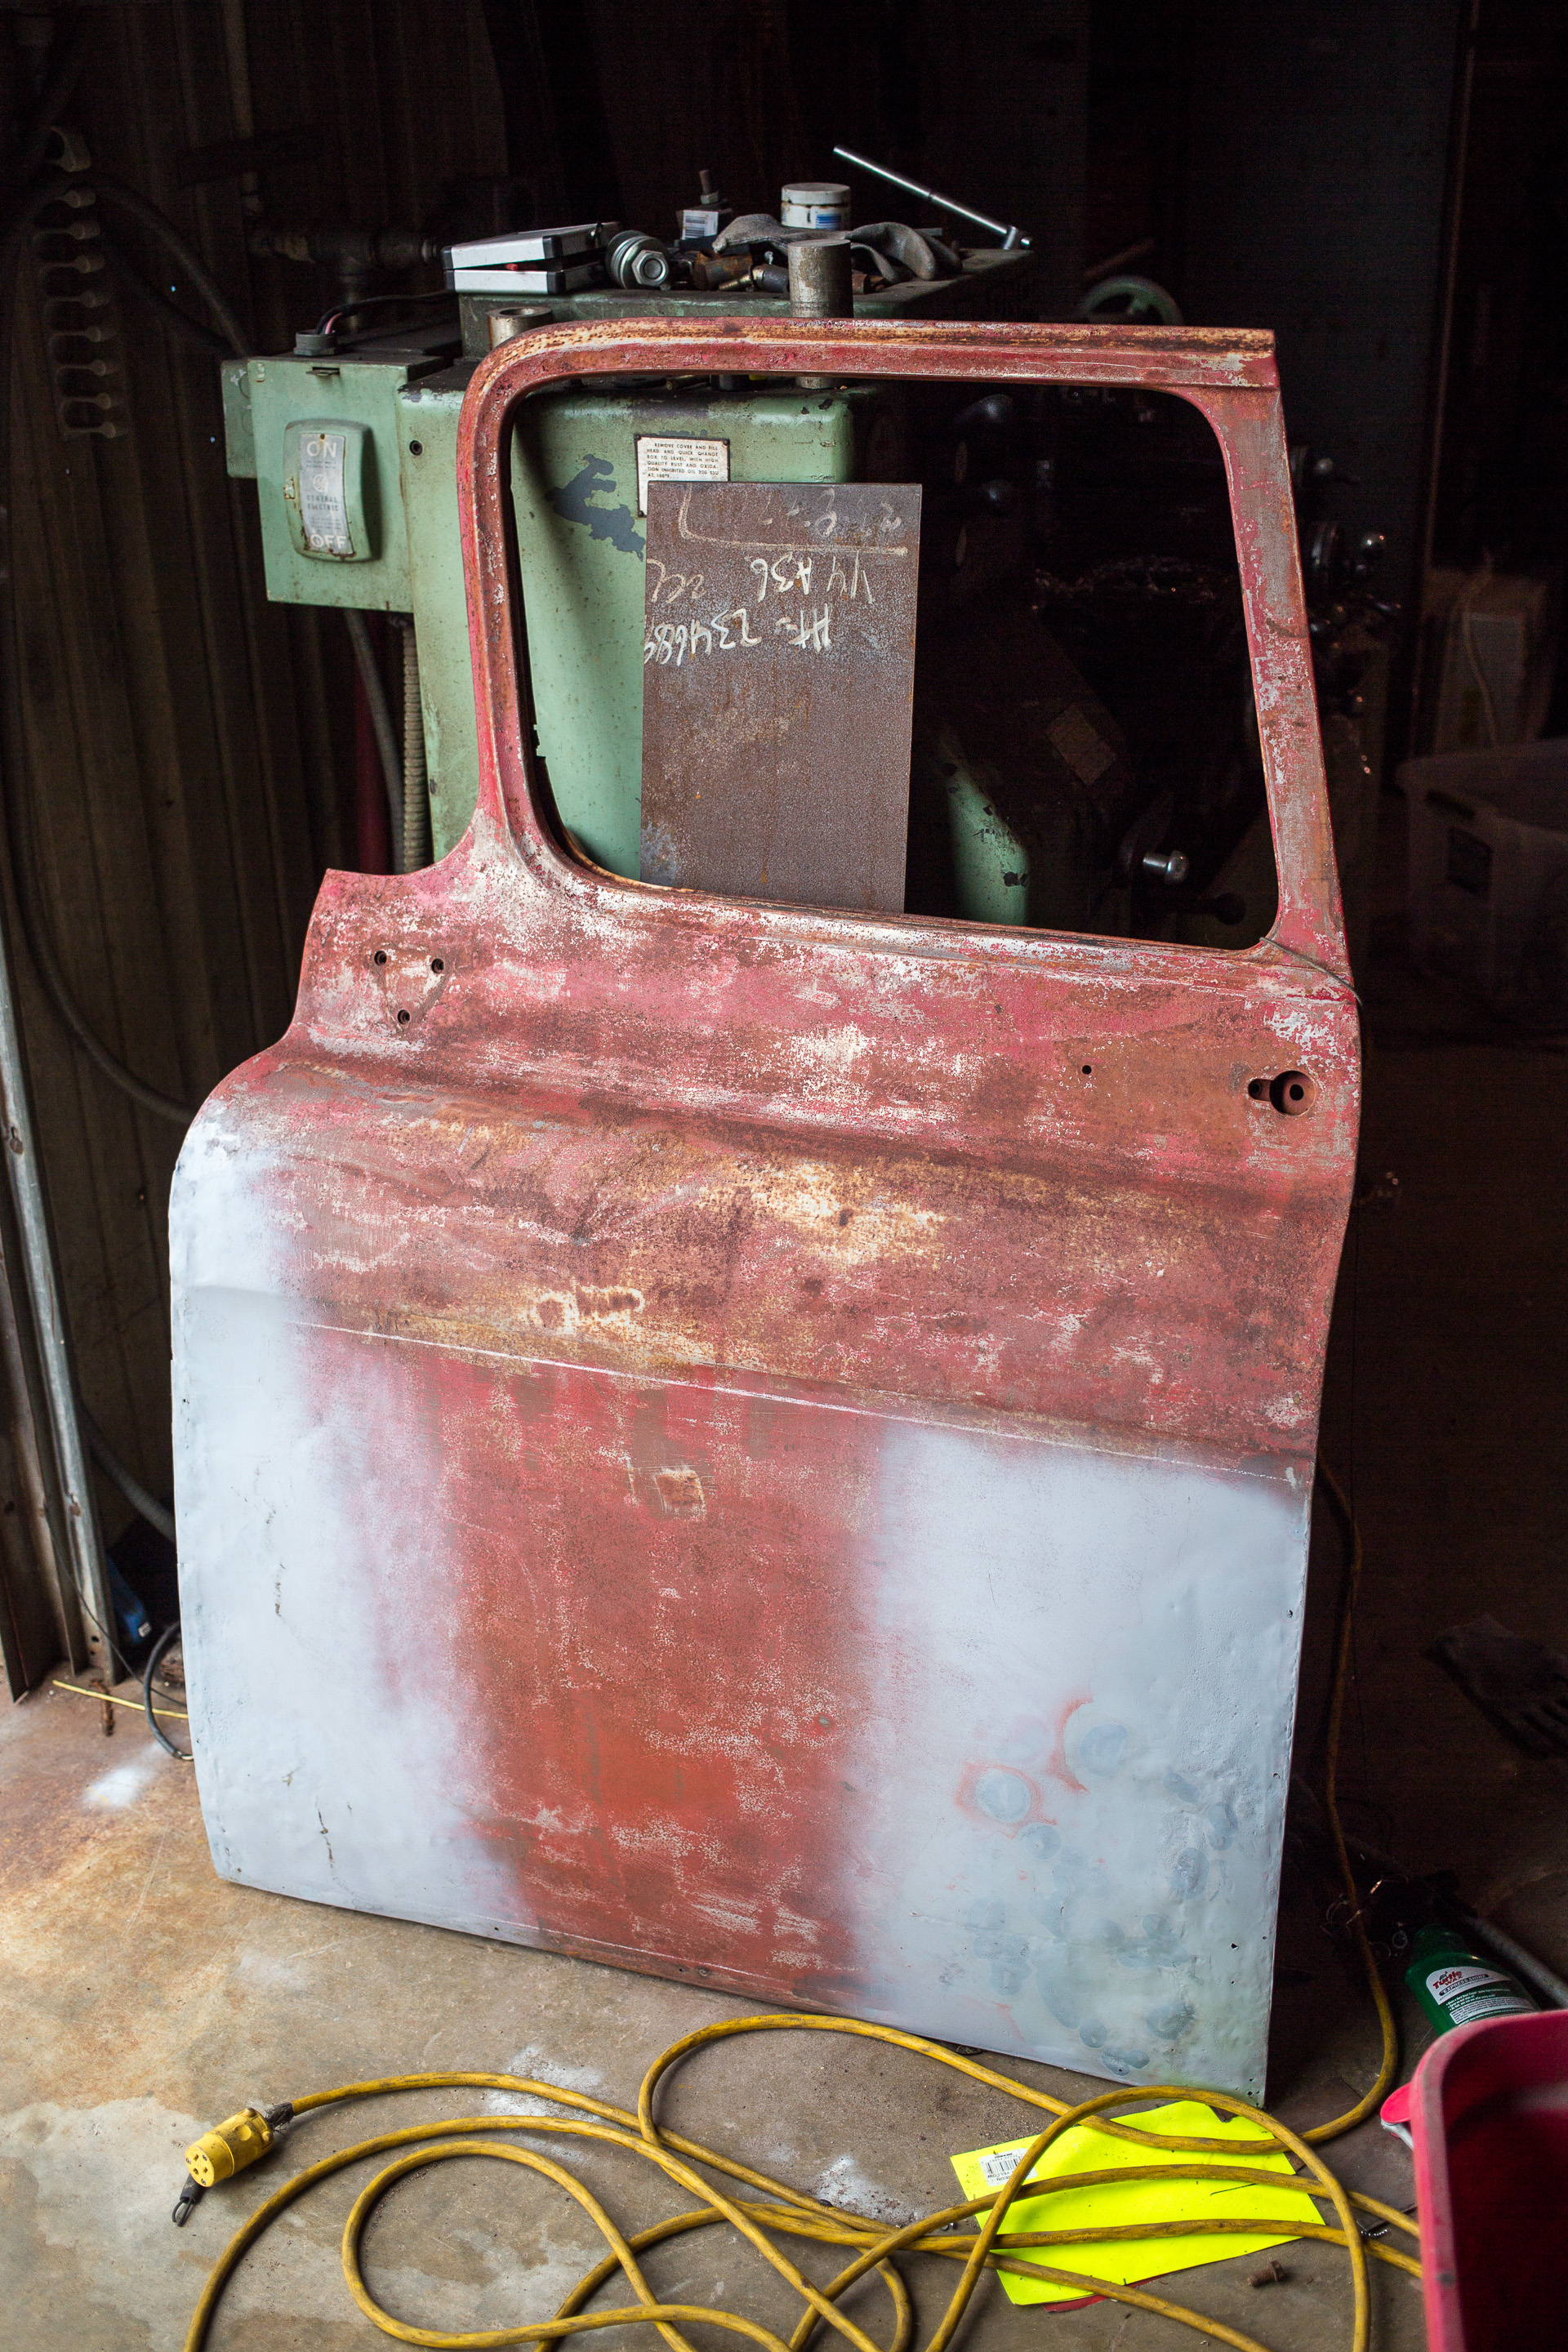
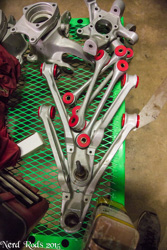
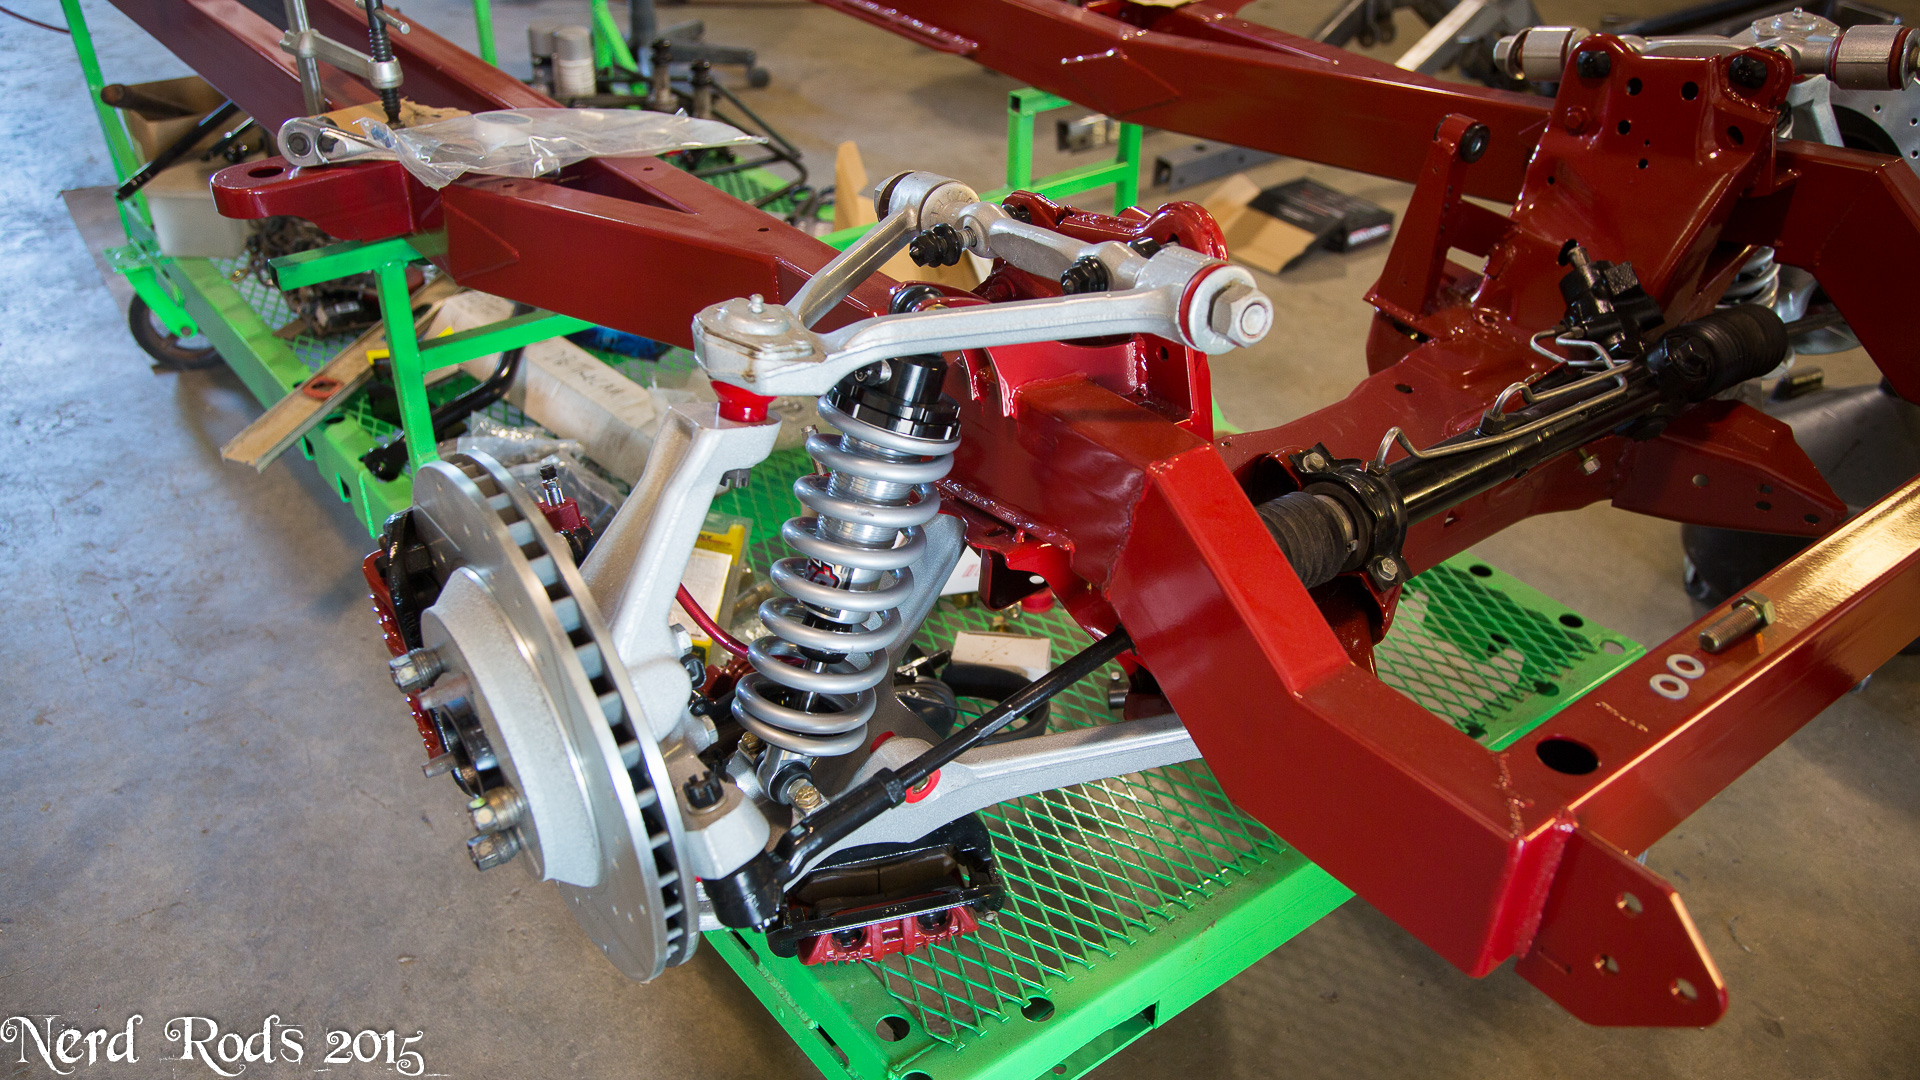
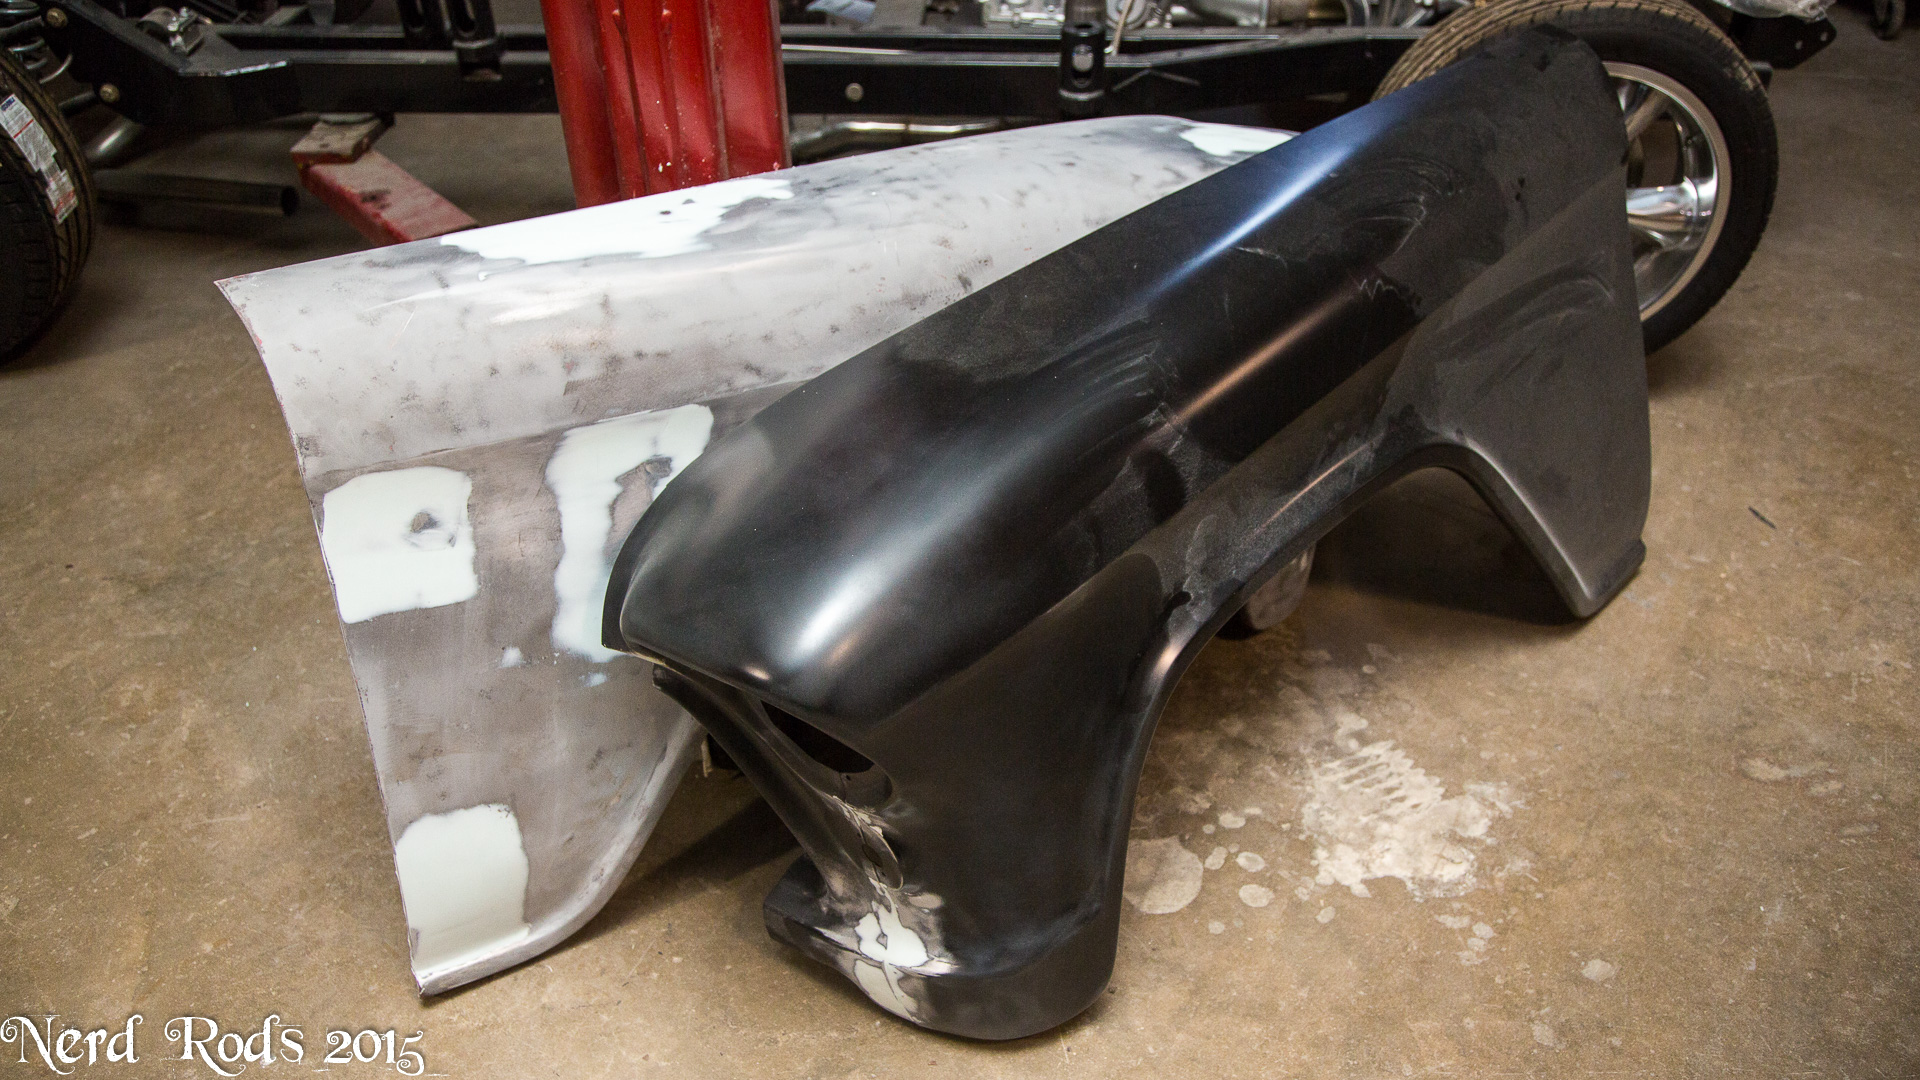
Suspension is all powder coated and getting ready to go together and the sheetmetal list is getting shorter. A customer got new doors and gave us his old ones so Jim has another door to cut pieces off of.


We also have a new toy in the shop that's probably going to end up on Dad's truck to make it a bit more fun. He turns 70 in November so I think he'll enjoy it.
Later
-Russell @ Nerd Rods
Easy viewing gallery link here.
http://gallery.nerdrods.com/Projects/03_D3/02/
I've been working on a timelapse of Dad's frame simply because I'm MIG welding it. We get a lot of people who think you can't MIG the frames simply because I don't. So this one get's the end if its assembly MIG'd. Here are a few stills from the timelapse process.


Dad's got the clutch pedal worked out and mounted. Its all out getting powder coated

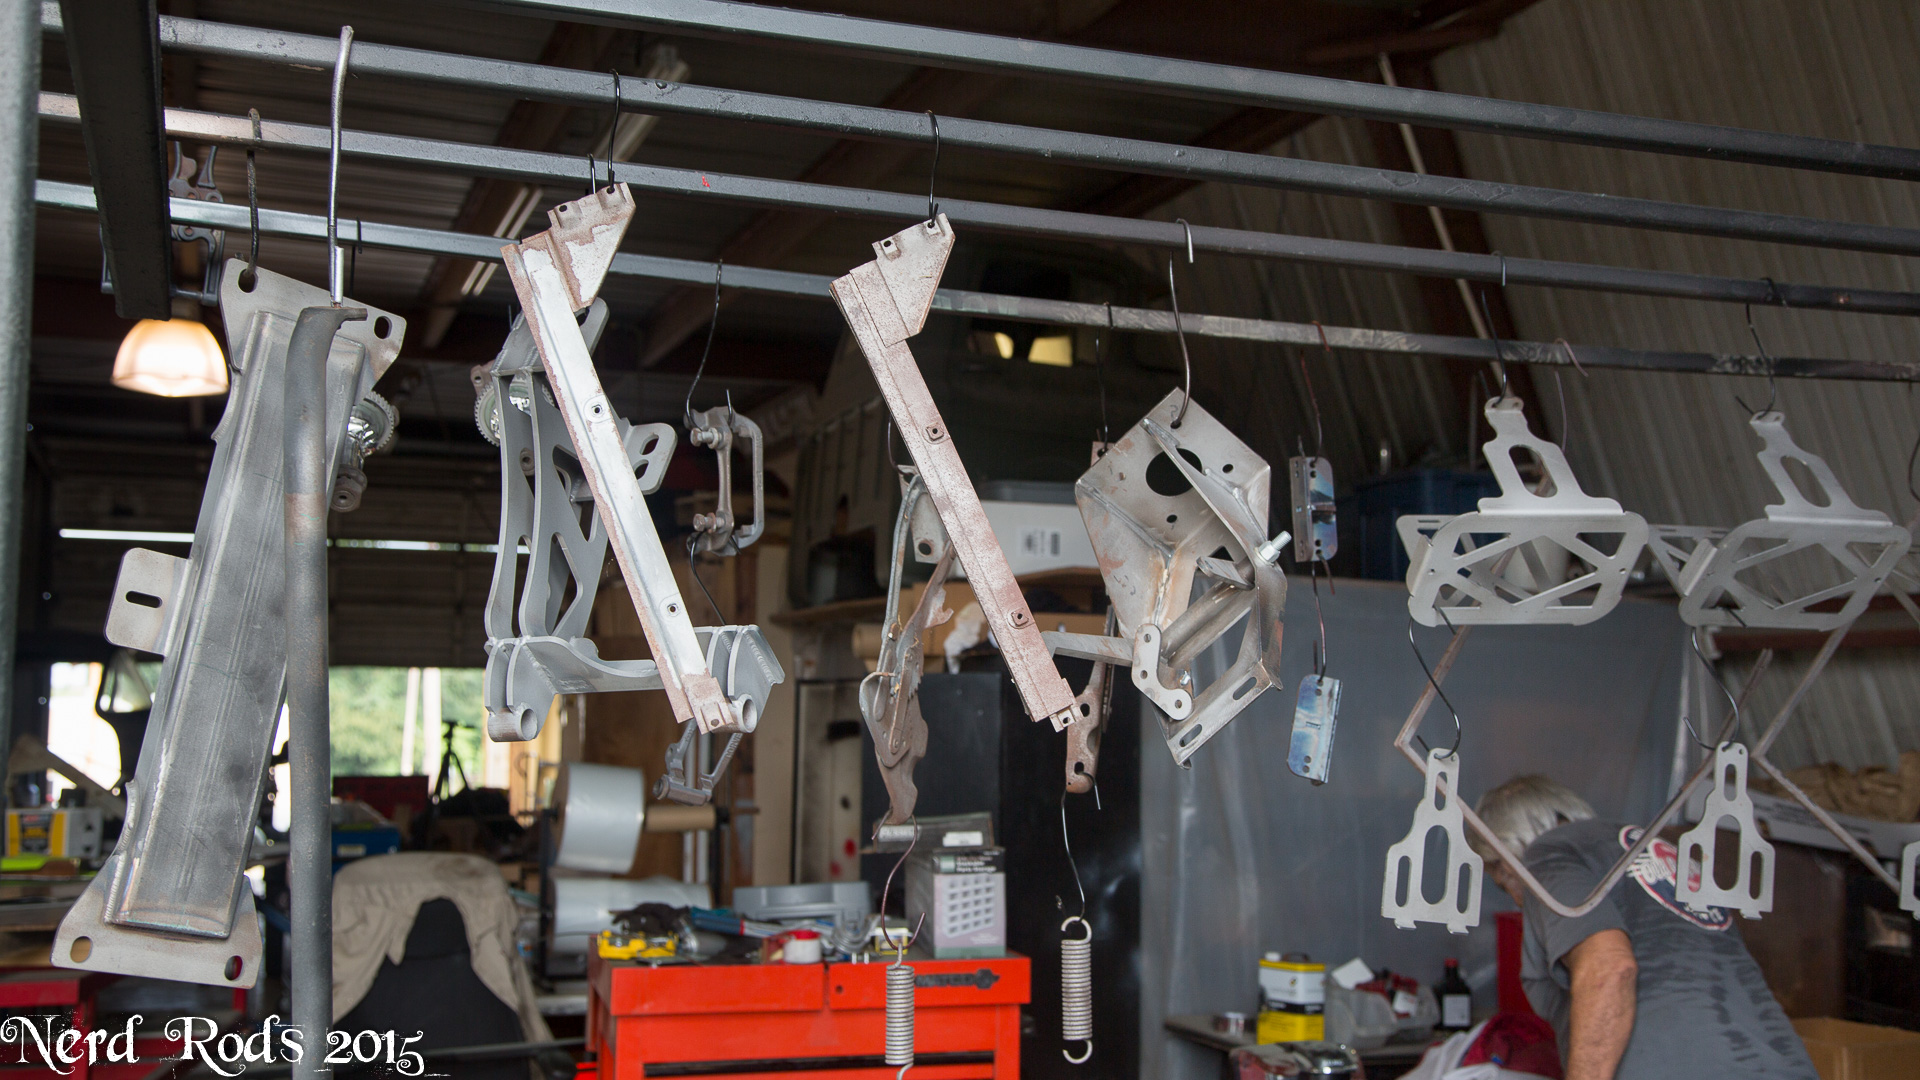
Suspension is all powder coated and getting ready to go together and the sheetmetal list is getting shorter. A customer got new doors and gave us his old ones so Jim has another door to cut pieces off of.


We also have a new toy in the shop that's probably going to end up on Dad's truck to make it a bit more fun. He turns 70 in November so I think he'll enjoy it.
Later
-Russell @ Nerd Rods
09-07-2015, 10:46 PM
#15
Launching!
Thread Starter
Join Date: Jan 2007
Location: Luling TX In the Hot Rod Shop
Posts: 294
Likes: 0
Received 3 Likes
on
3 Posts
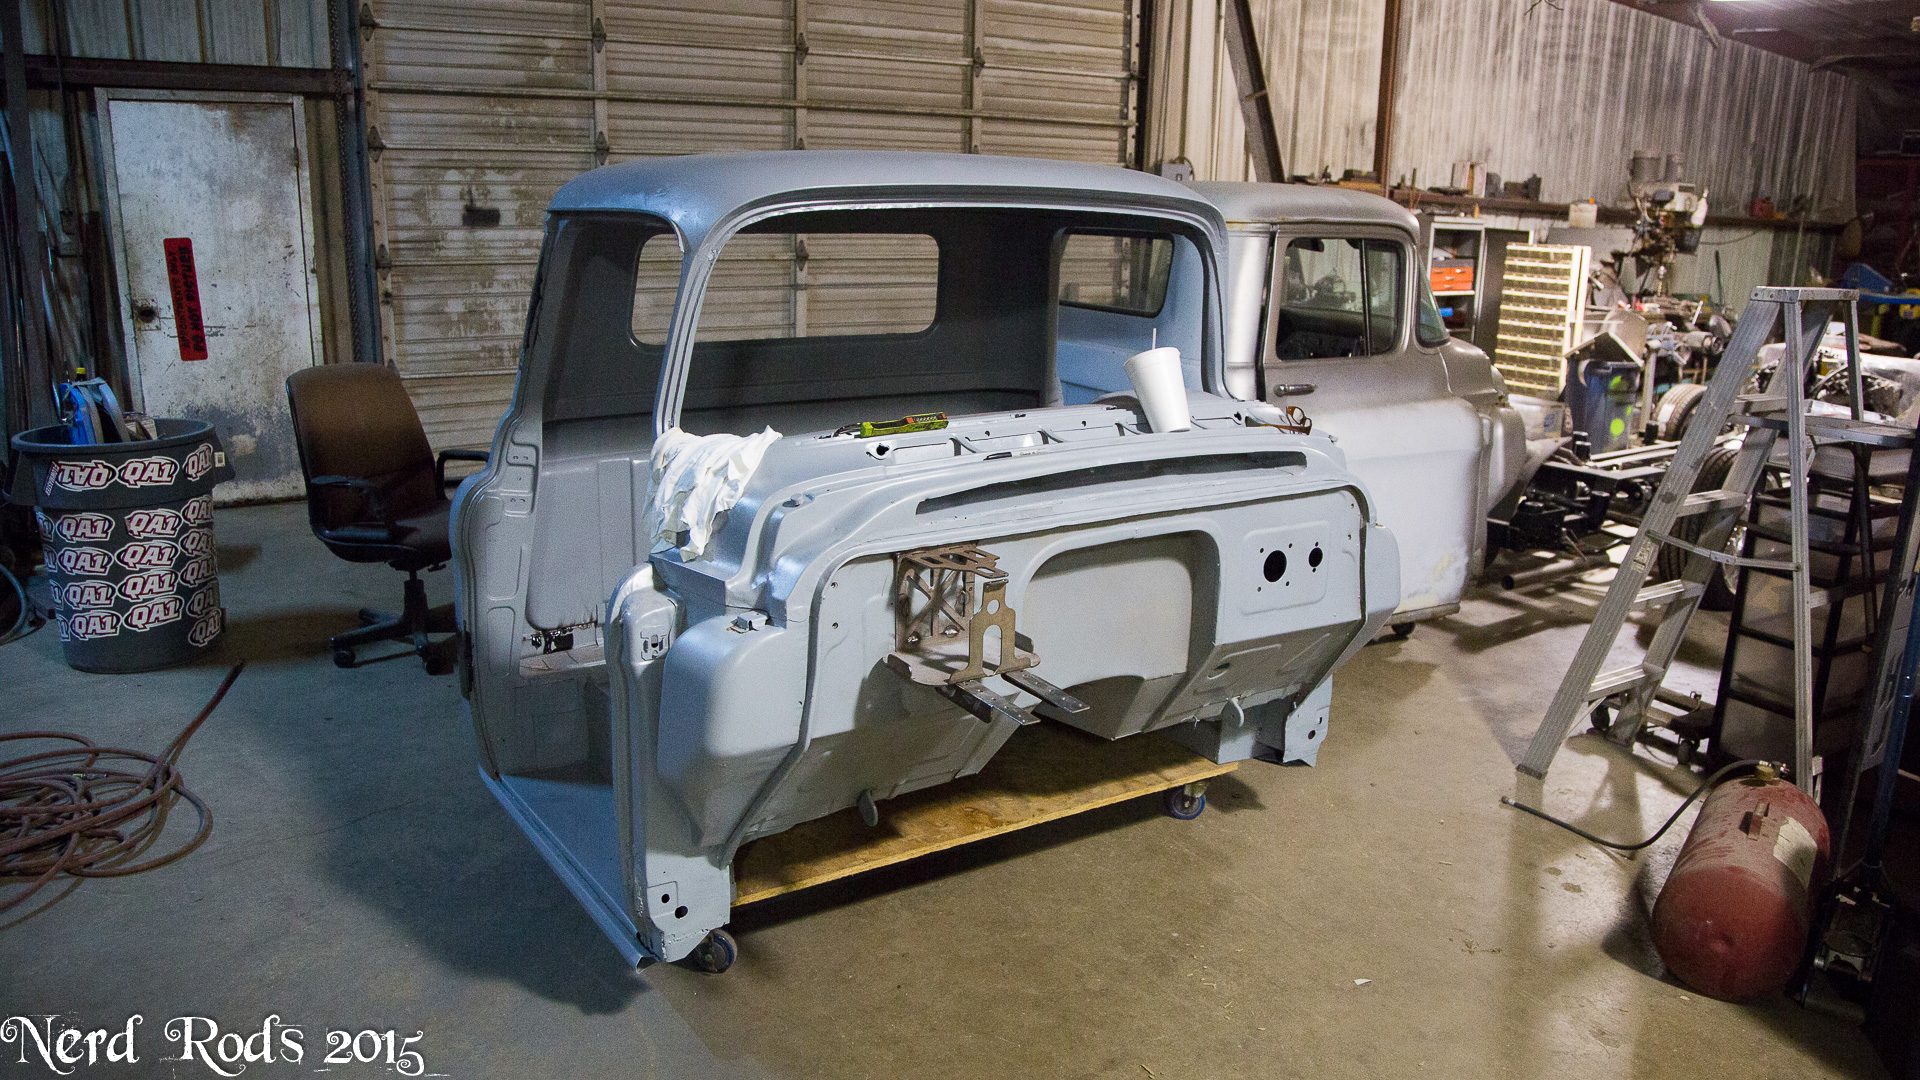
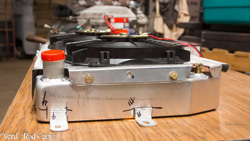
Powder coat Primed the cab so we could get as much of the tiny hard to reach inner spaces covered with the elector static powder. All under the dash and in every nook and cranny was the main goal.


Firewall mounted battery box with mounting for the Infinity Power System Power Cell and Master Fuses
Dad starting on the body work for all the little dings that couldn't be hamerd out

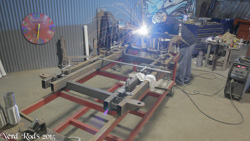
I'm almost finished with the frame and the time lapse. I hate MIG welding because it doesn't have the artistry of TIG and the welds will never be as good but it is much faster.
And my brother Billy has been assembling the suspension as well as helping dad with the powder coating and prep work.
More soon I should be done with the frame later tonight and we hope to blast and powder coat it this week.
Later
-Russell @ Nerd Rods
Firewall mounted battery box with mounting for the Infinity Power System Power Cell and Master Fuses
Dad starting on the body work for all the little dings that couldn't be hamerd out
I'm almost finished with the frame and the time lapse. I hate MIG welding because it doesn't have the artistry of TIG and the welds will never be as good but it is much faster.


And my brother Billy has been assembling the suspension as well as helping dad with the powder coating and prep work.

More soon I should be done with the frame later tonight and we hope to blast and powder coat it this week.
Later
-Russell @ Nerd Rods
 09-21-2015, 07:50 AM
#17
Launching!
Thread Starter
Join Date: Jan 2007
Location: Luling TX In the Hot Rod Shop
Posts: 294
Likes: 0
Received 3 Likes
on
3 Posts
This has been one of those weeks where one thing lead to another and its a bit long winded to explain. So if you don't feel like reading here's the easy link to the pictures.
http://gallery.nerdrods.com/Projects/03_D3/03/
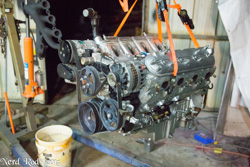
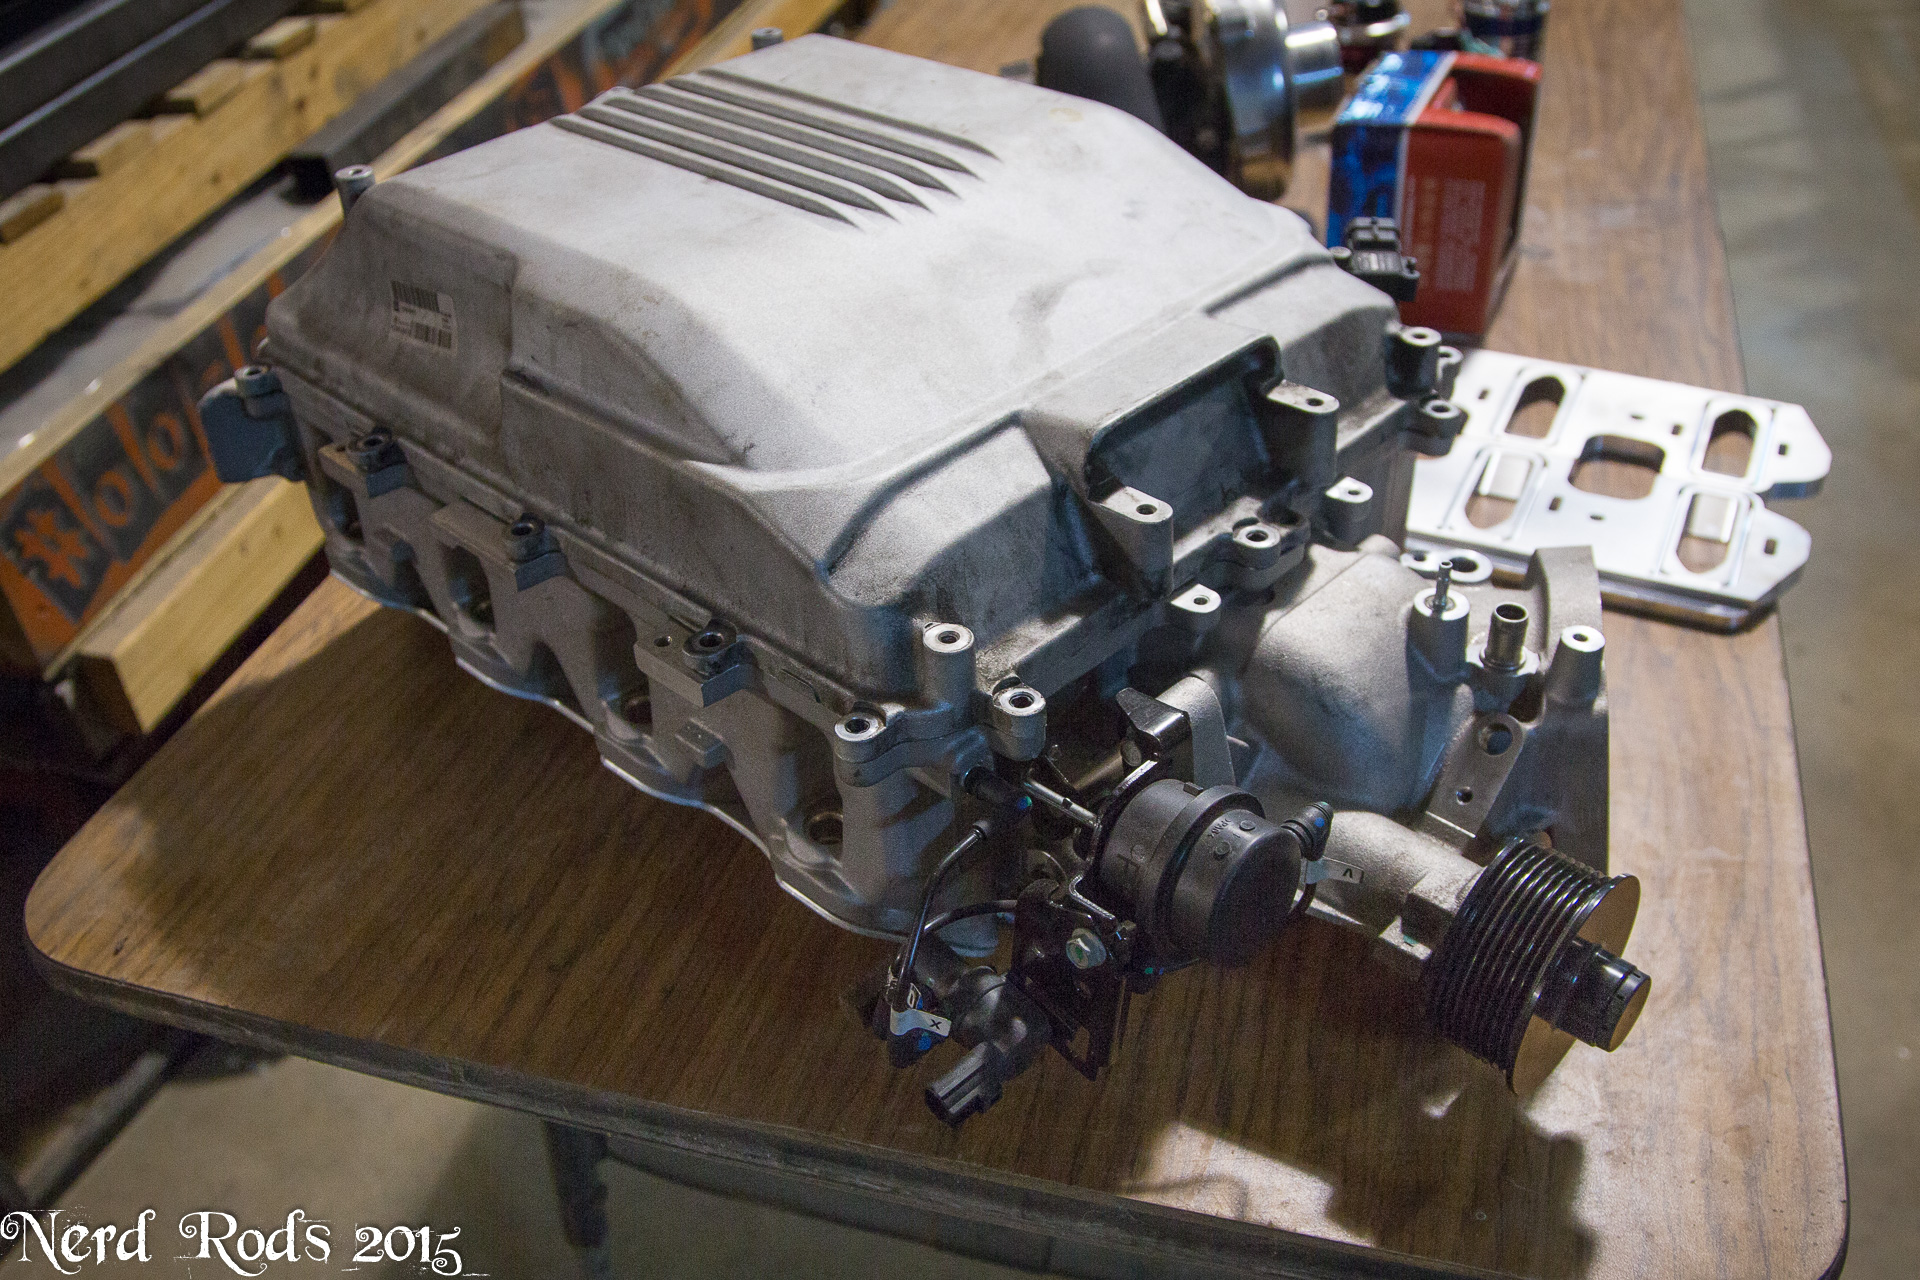
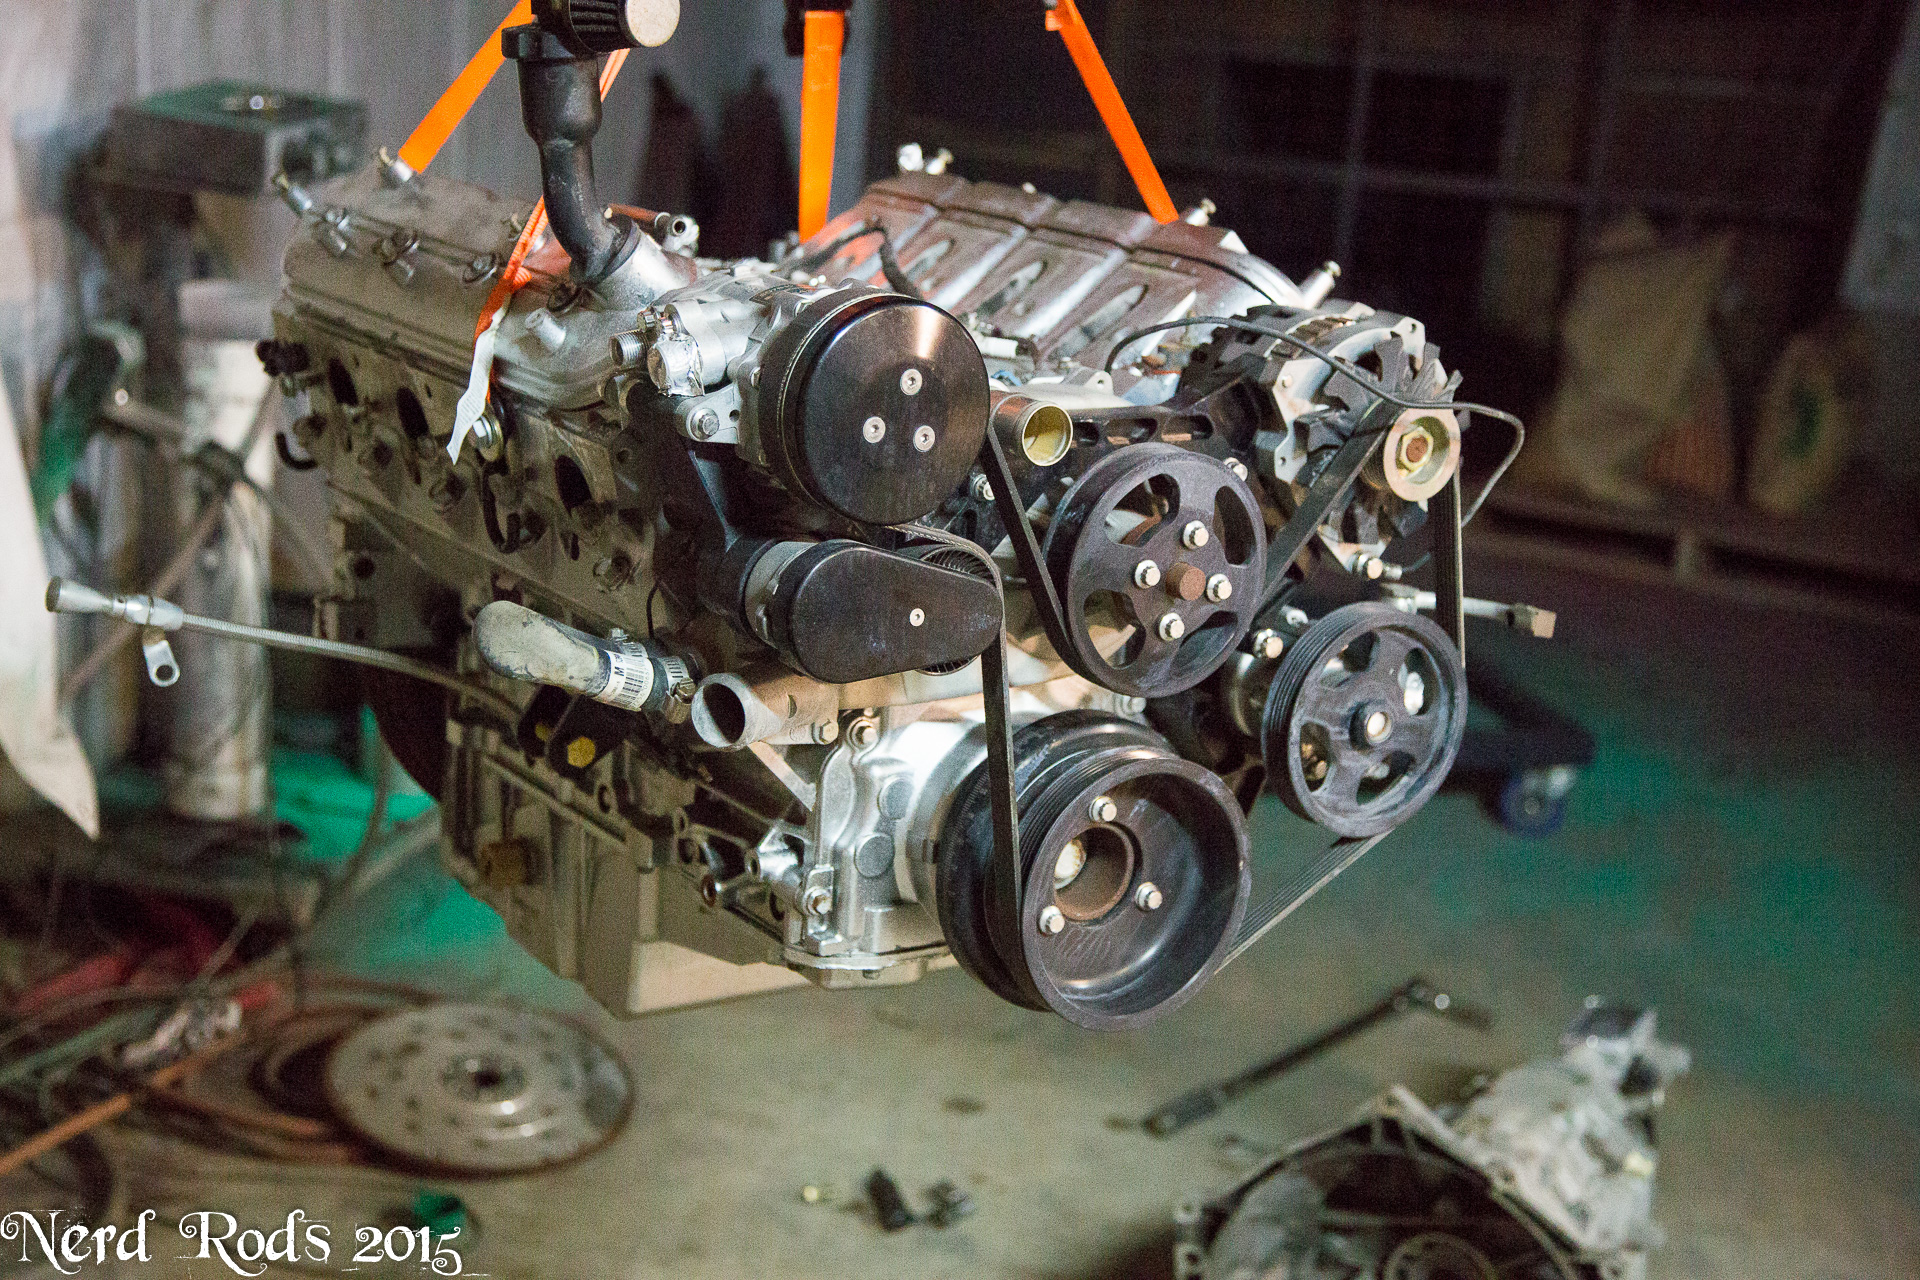
So Dad's 70th birthday is coming up and I wanted to give him something he wasn't expecting. I didn't just give him my 4:10 diff and 6 speed for no reason other than fun. I wanted to put a good power adder on it and those were necessary if they were to survive. So I got him an LSA supercharger thanks to their falling prices. I pick this guy up for less than a grand with the adapter plates so they would work on the cathedral port heads.
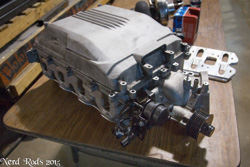
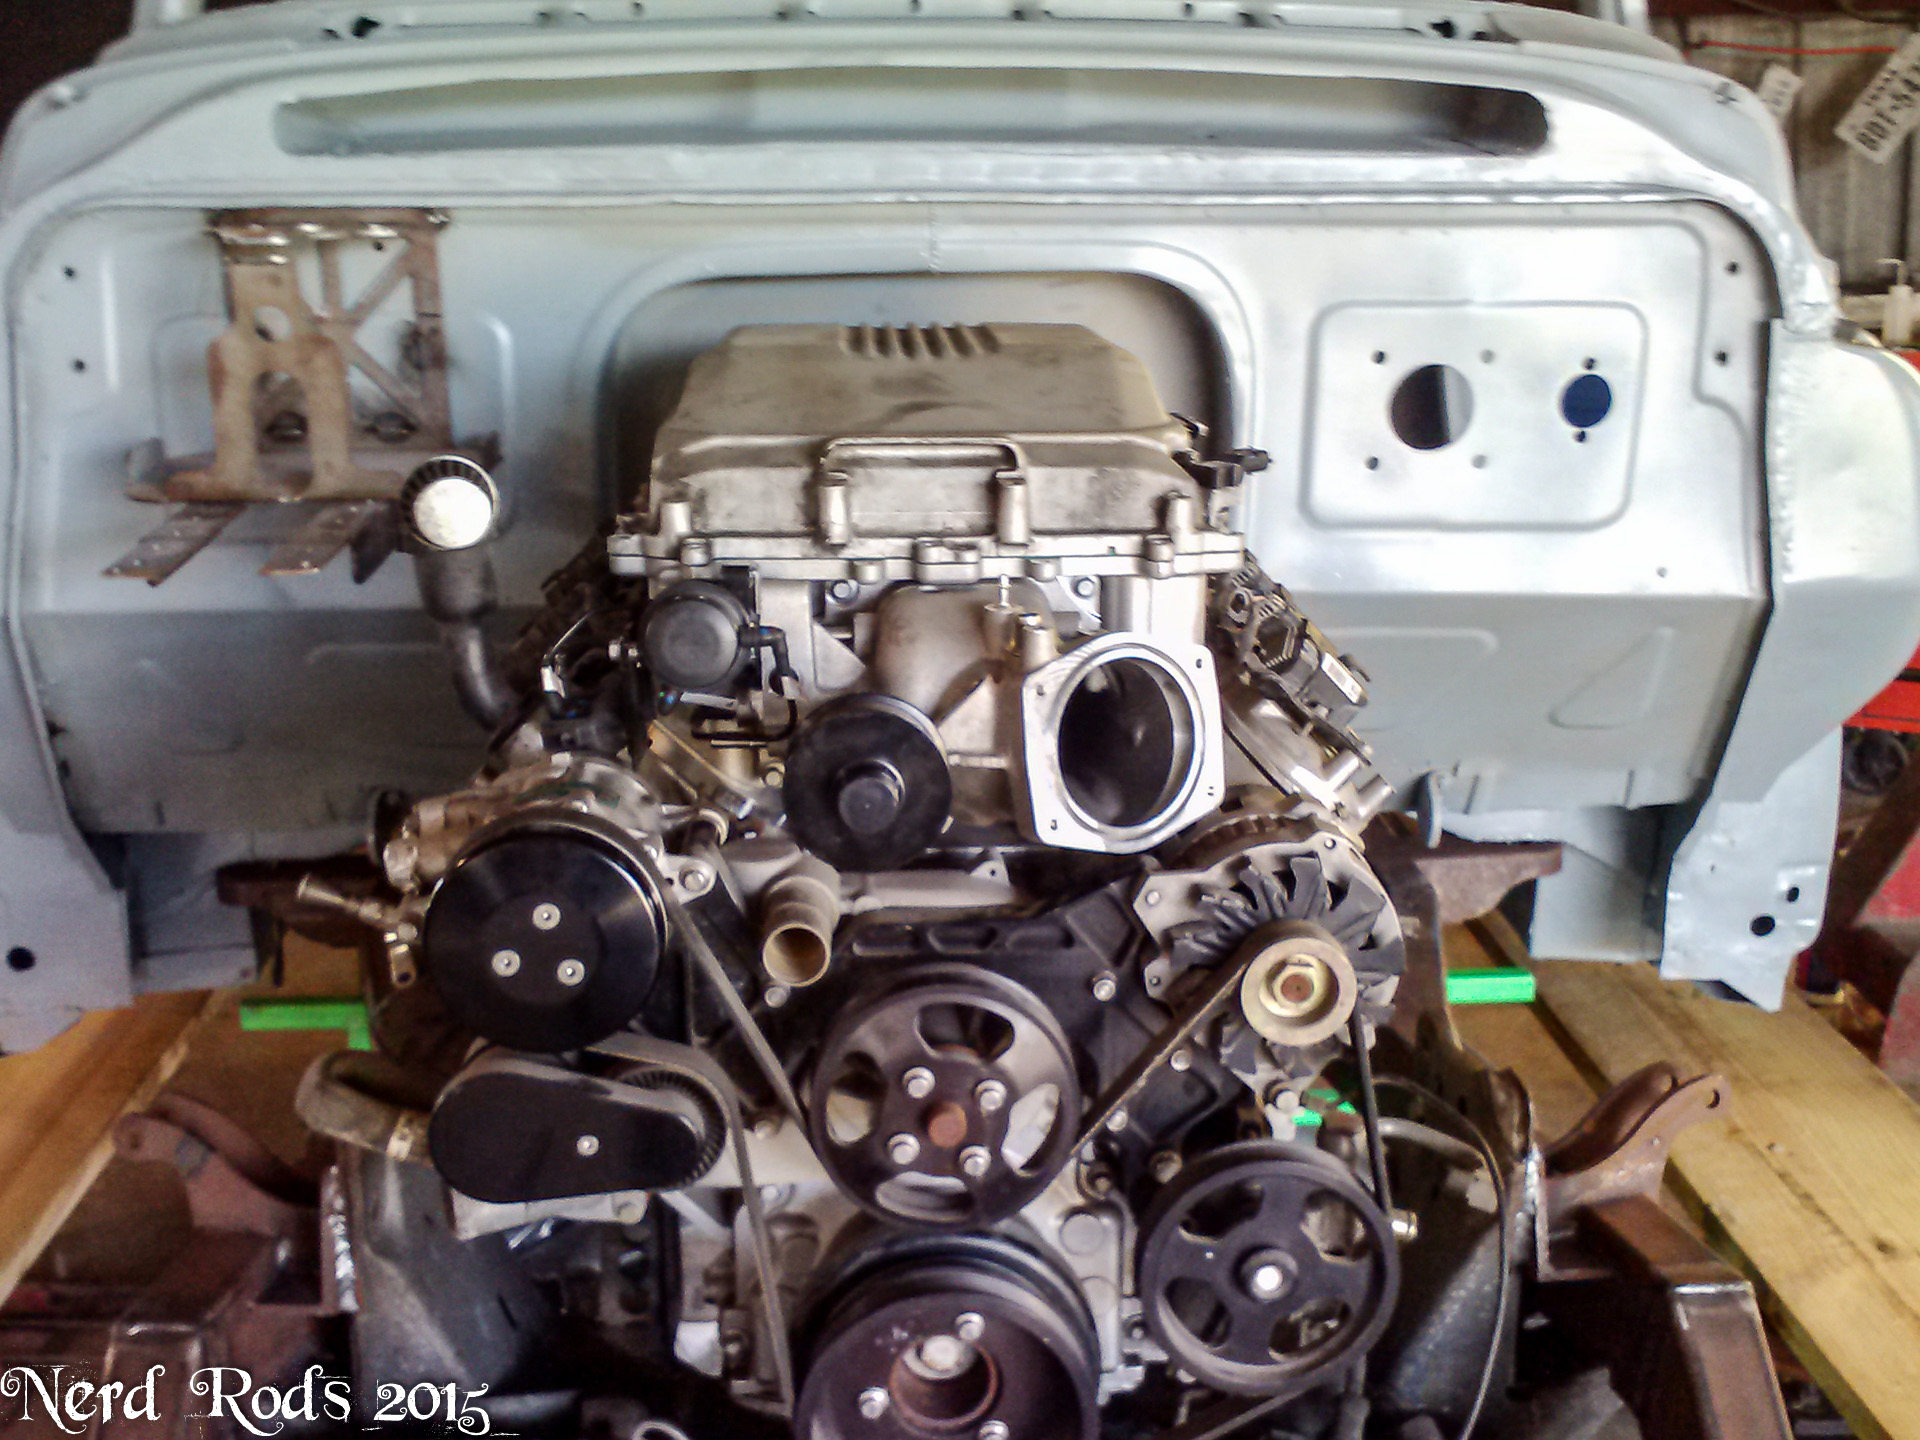
And we obviously need to make sure it fit the firewall before we went to far with the project. This is with my Vintage Air Pulley system and LS1 Camaro Oil Pan on the motor from the old PT-57. We just wanted to drop it in the frame and make sure it all worked out.


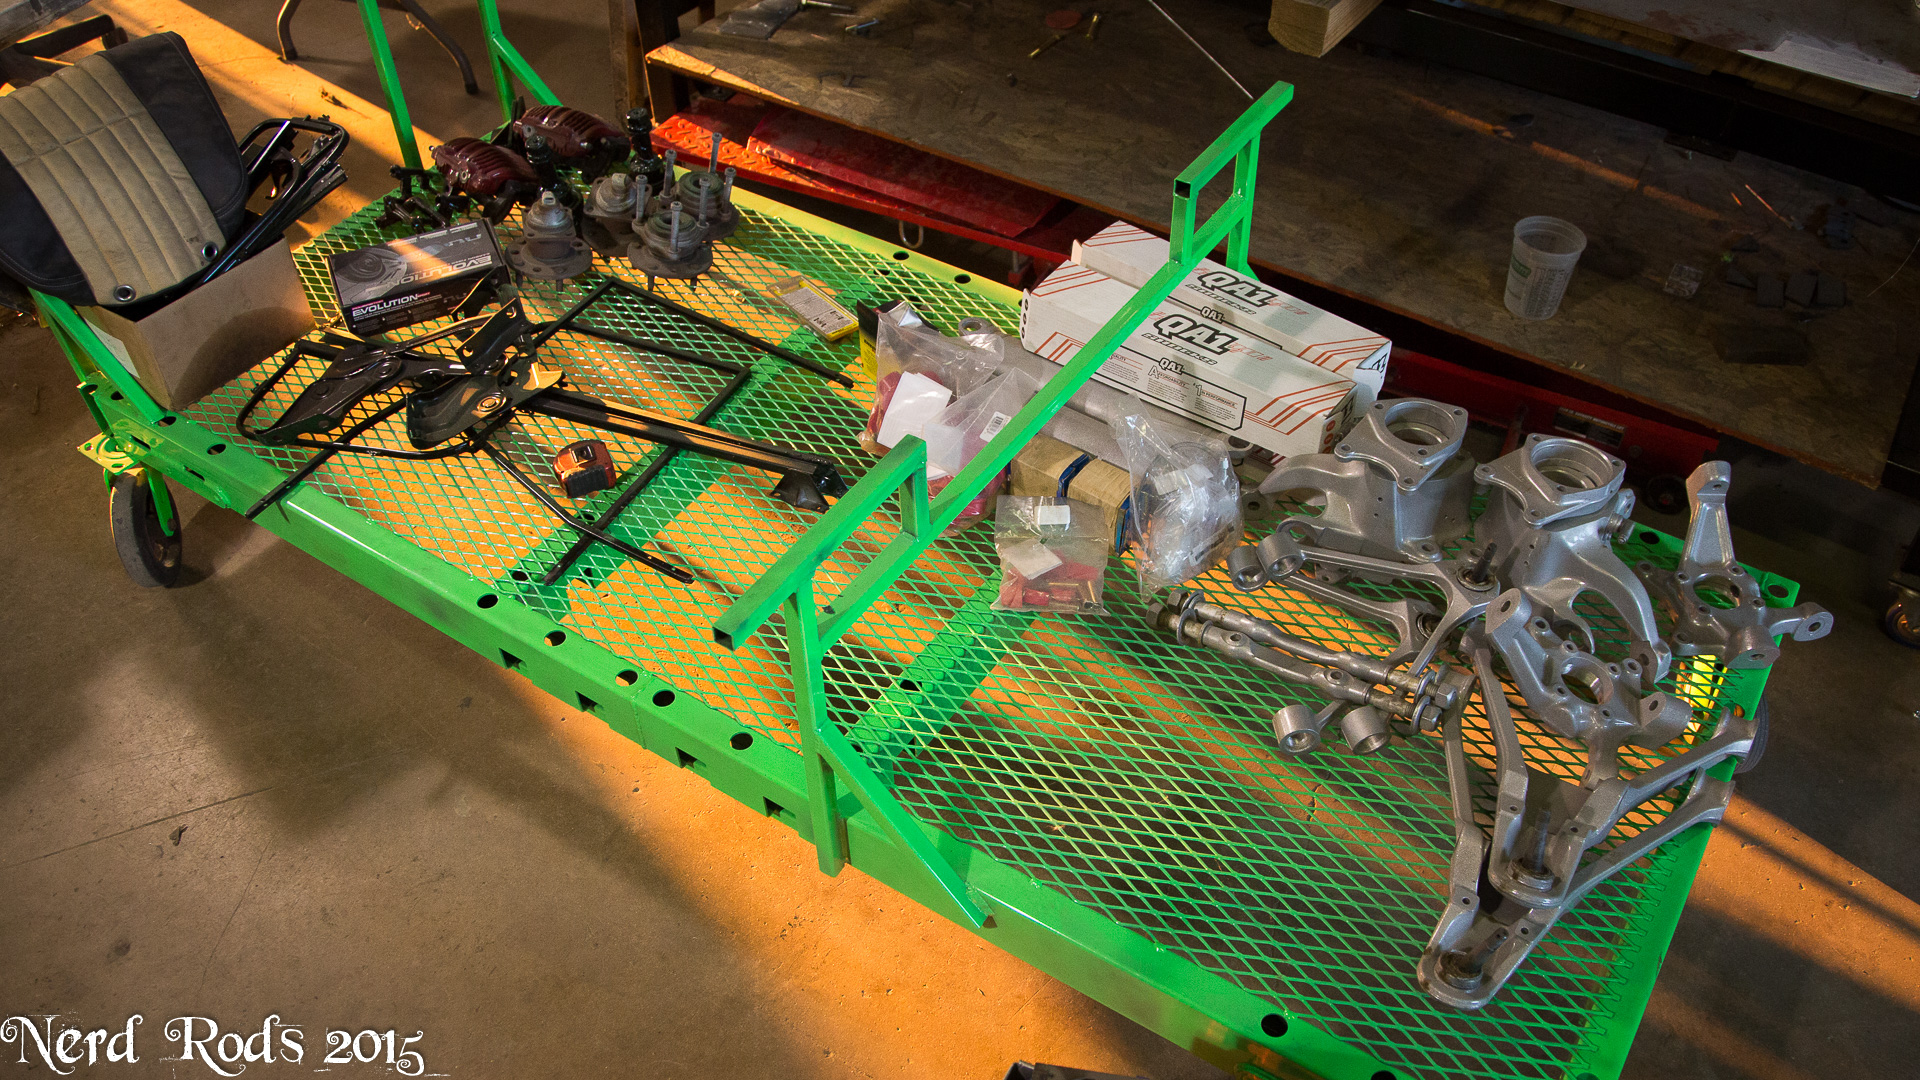
With that confirmed the frame was ready for powder coat. Dad was getting busy slamming the chassis together after it came out of the oven.


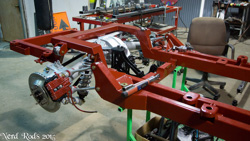

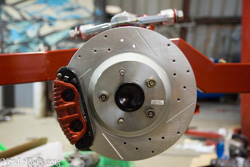
We've also been saving a set of the big 13" brakes for one of our projects.
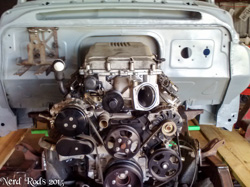
So some of you follow us on the Facetubes or Twitter and those guys get a bit more of an update since I can just snap a photos and stab it to the net nice and quick. One of my customers saw the supercharger and we started talking. He had an STS Single turbo for his project but the super charger will actually make his life easier. I was still trying to work out an affordable pulley system (www.lssimple.net is what I was looking at BTW) and the fuel rail is an additional cost I wasn't looking forward to either since the LSA has a very unique system thanks to its pocketed fuel injectors and I was going to need some real headers to keep from choking the motor. So I asked if he wanted to trade. He said yes. (insert evil laugh)

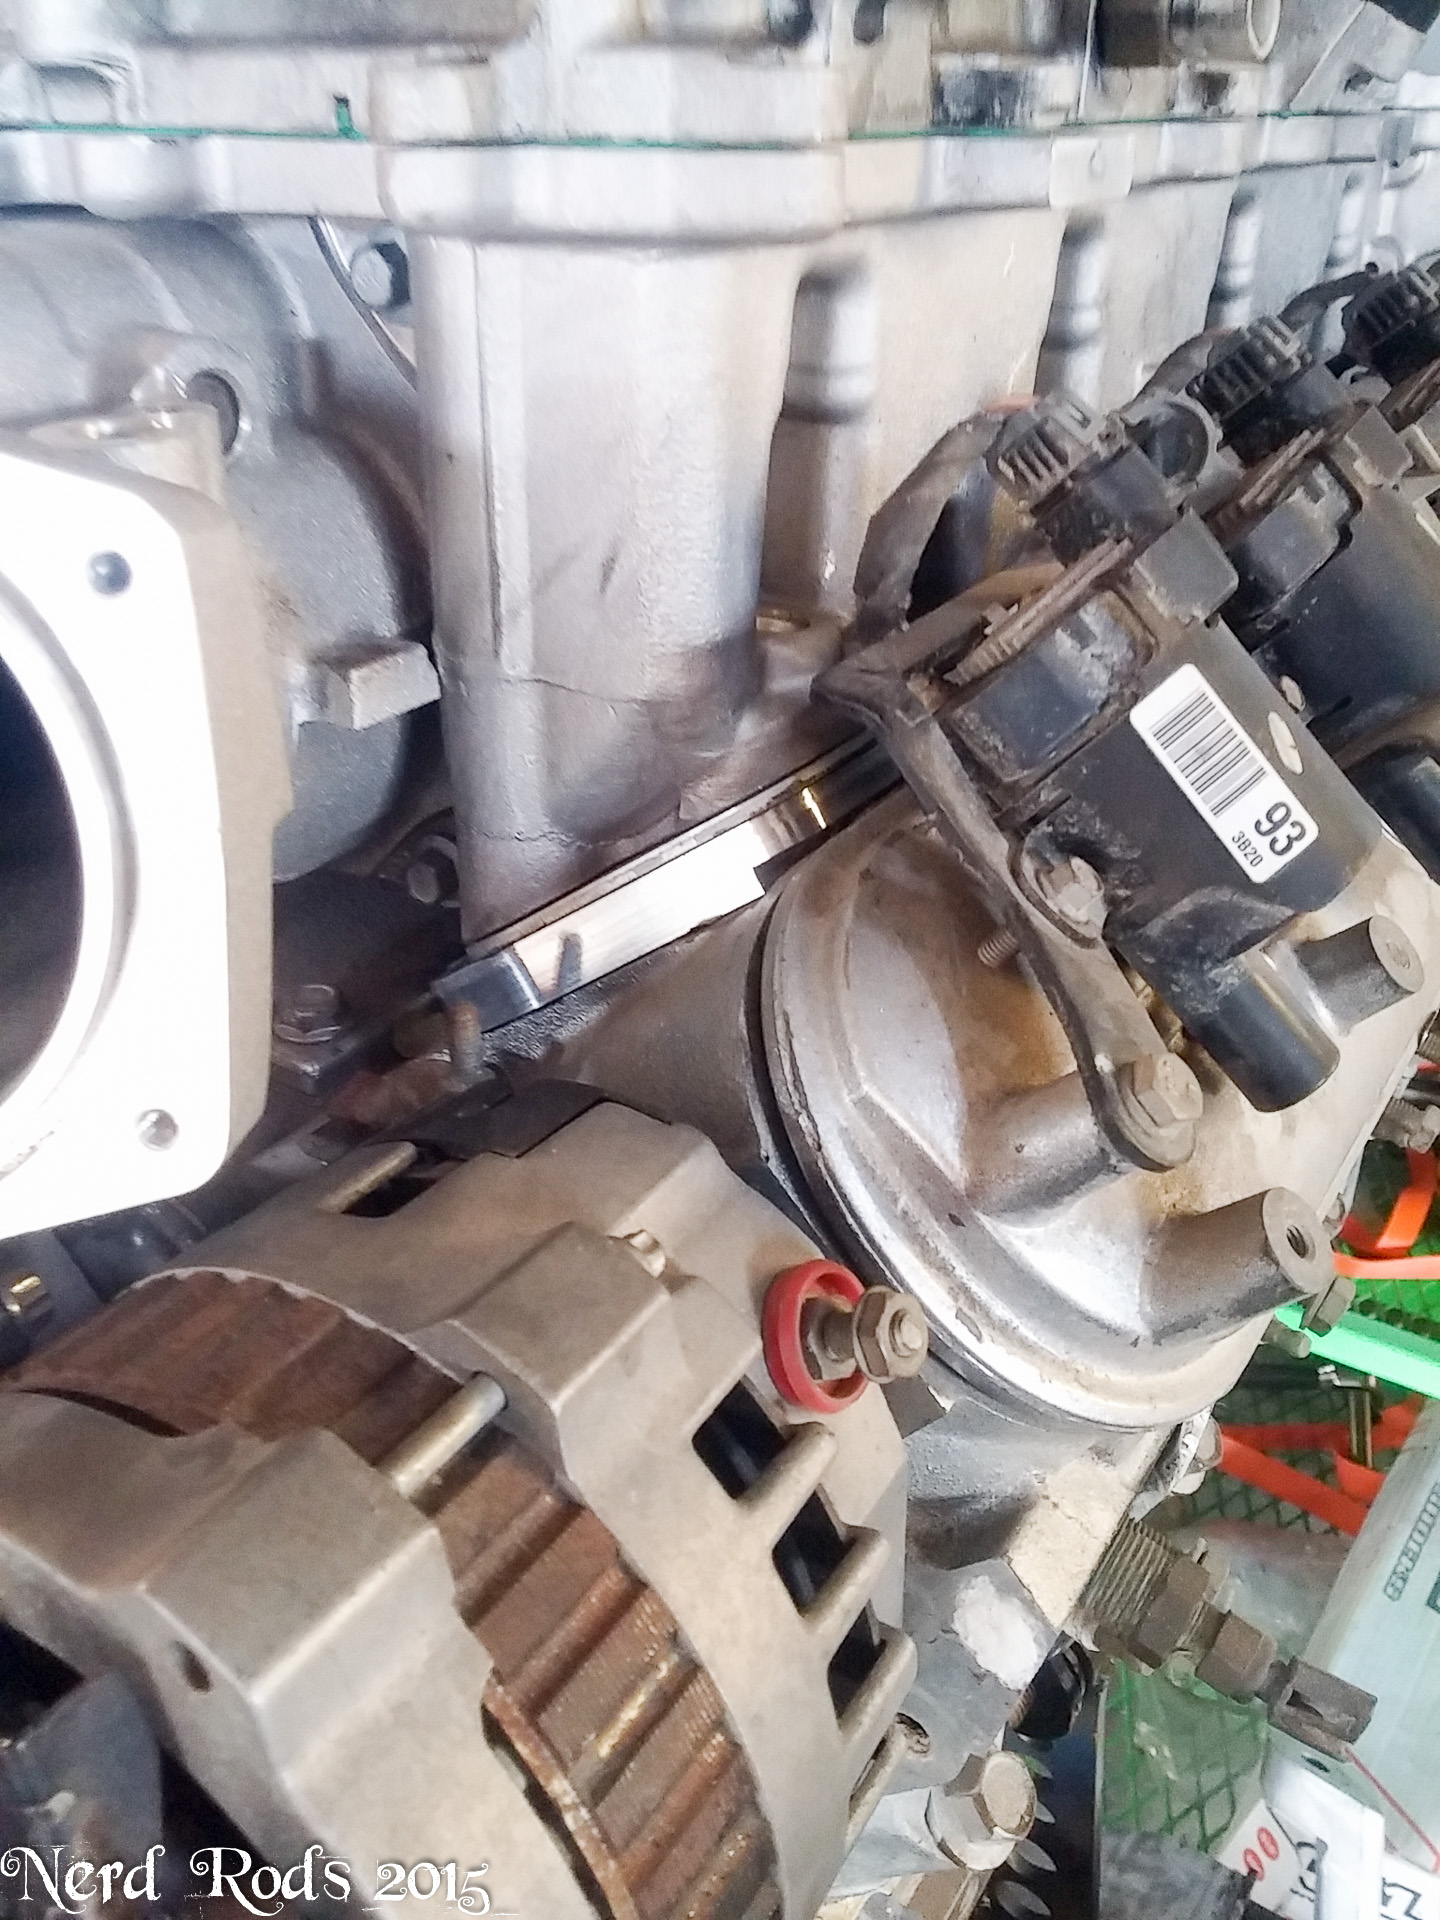
So that got me thinking "Well we'll need a turbo cam and so I'll need to pull that one out of my 6.0L in the corner from the PT-57 and then take off its pulleys and move all that over to Dad's 5.3.......... OR, I could be lazy and just put the 6.0L in his truck." And so thanks to my laziness dad now has a 6.0L LQ4 with single turbo for his truck. Should be in the 550HP range really easily. That motor with twins and the same gear ratios did well over 567RWHP on the dyno a few years back so this should be a cake walk.

The motor goes in the chassis this afternoon. More to come ASAP.
-Russell @ Nerd Rods
http://gallery.nerdrods.com/Projects/03_D3/03/
So Dad's 70th birthday is coming up and I wanted to give him something he wasn't expecting. I didn't just give him my 4:10 diff and 6 speed for no reason other than fun. I wanted to put a good power adder on it and those were necessary if they were to survive. So I got him an LSA supercharger thanks to their falling prices. I pick this guy up for less than a grand with the adapter plates so they would work on the cathedral port heads.
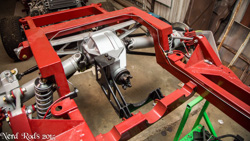
And we obviously need to make sure it fit the firewall before we went to far with the project. This is with my Vintage Air Pulley system and LS1 Camaro Oil Pan on the motor from the old PT-57. We just wanted to drop it in the frame and make sure it all worked out.

With that confirmed the frame was ready for powder coat. Dad was getting busy slamming the chassis together after it came out of the oven.
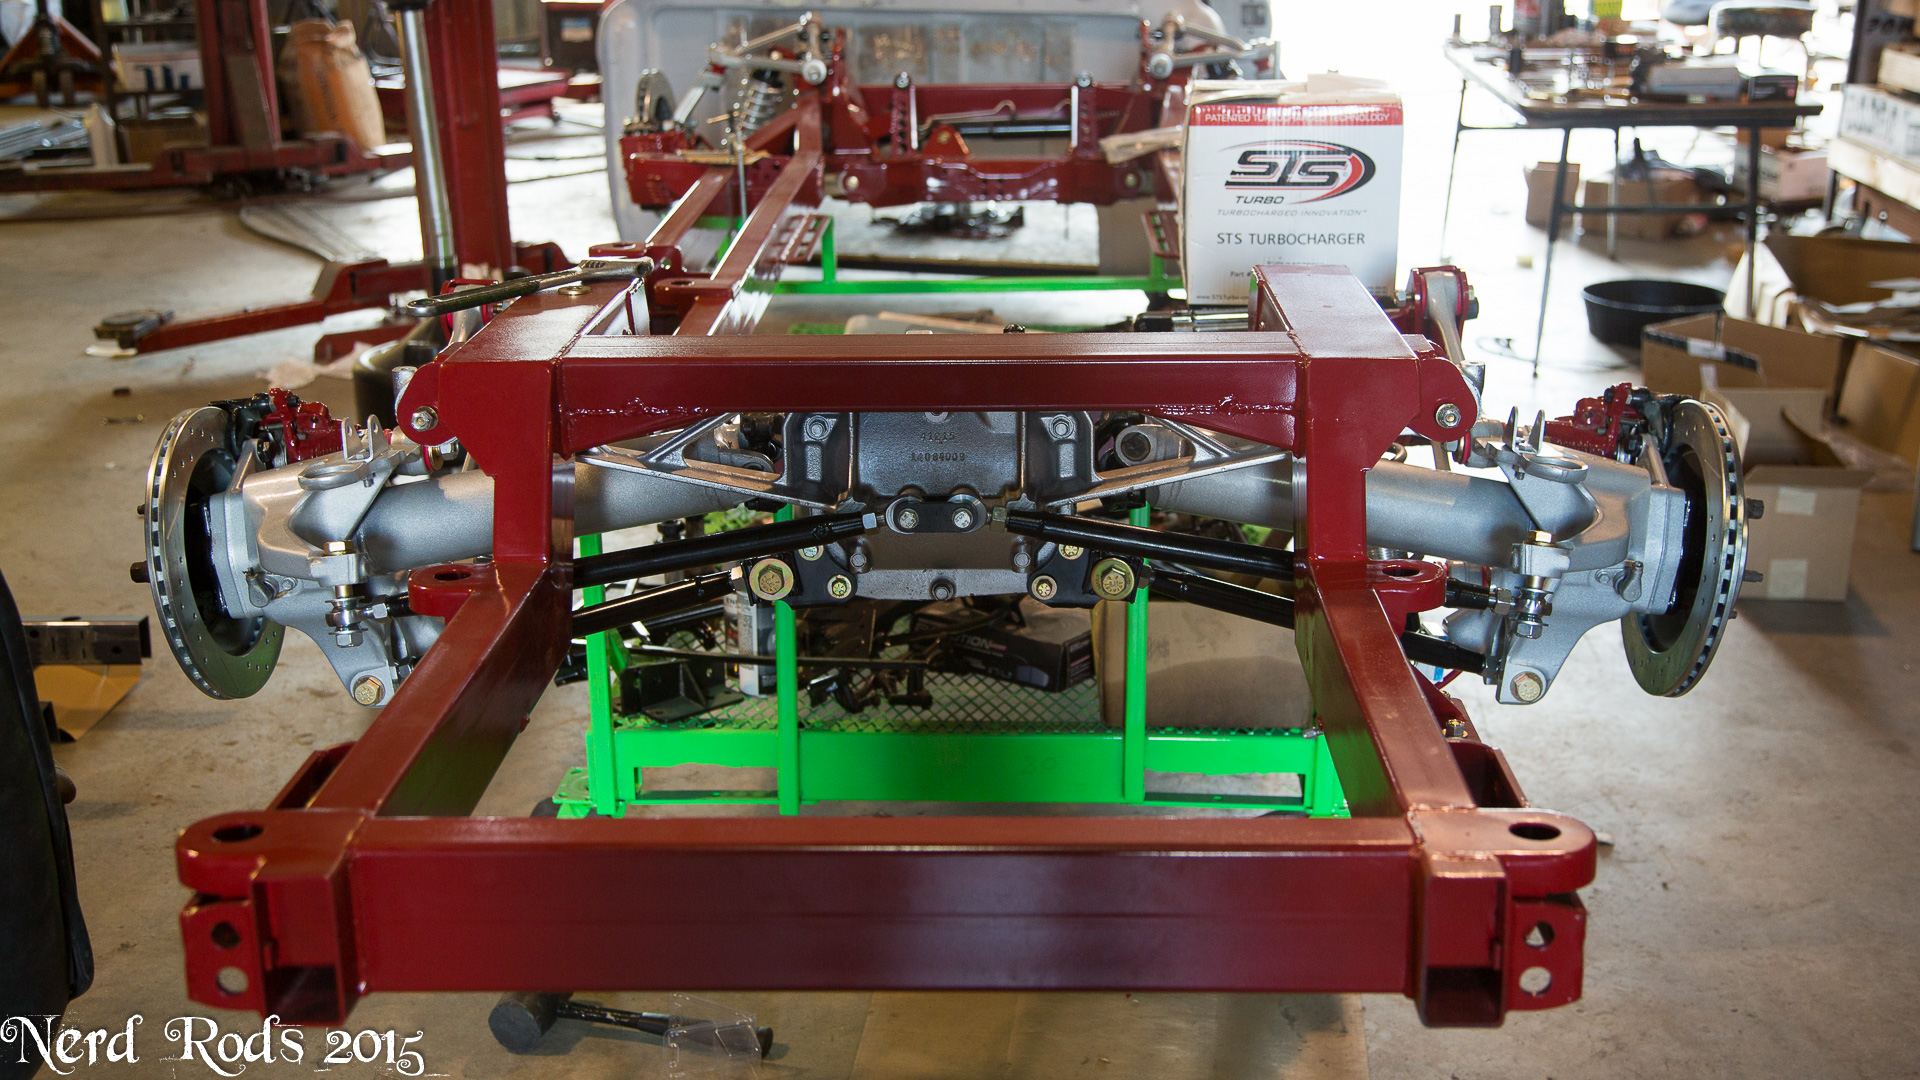
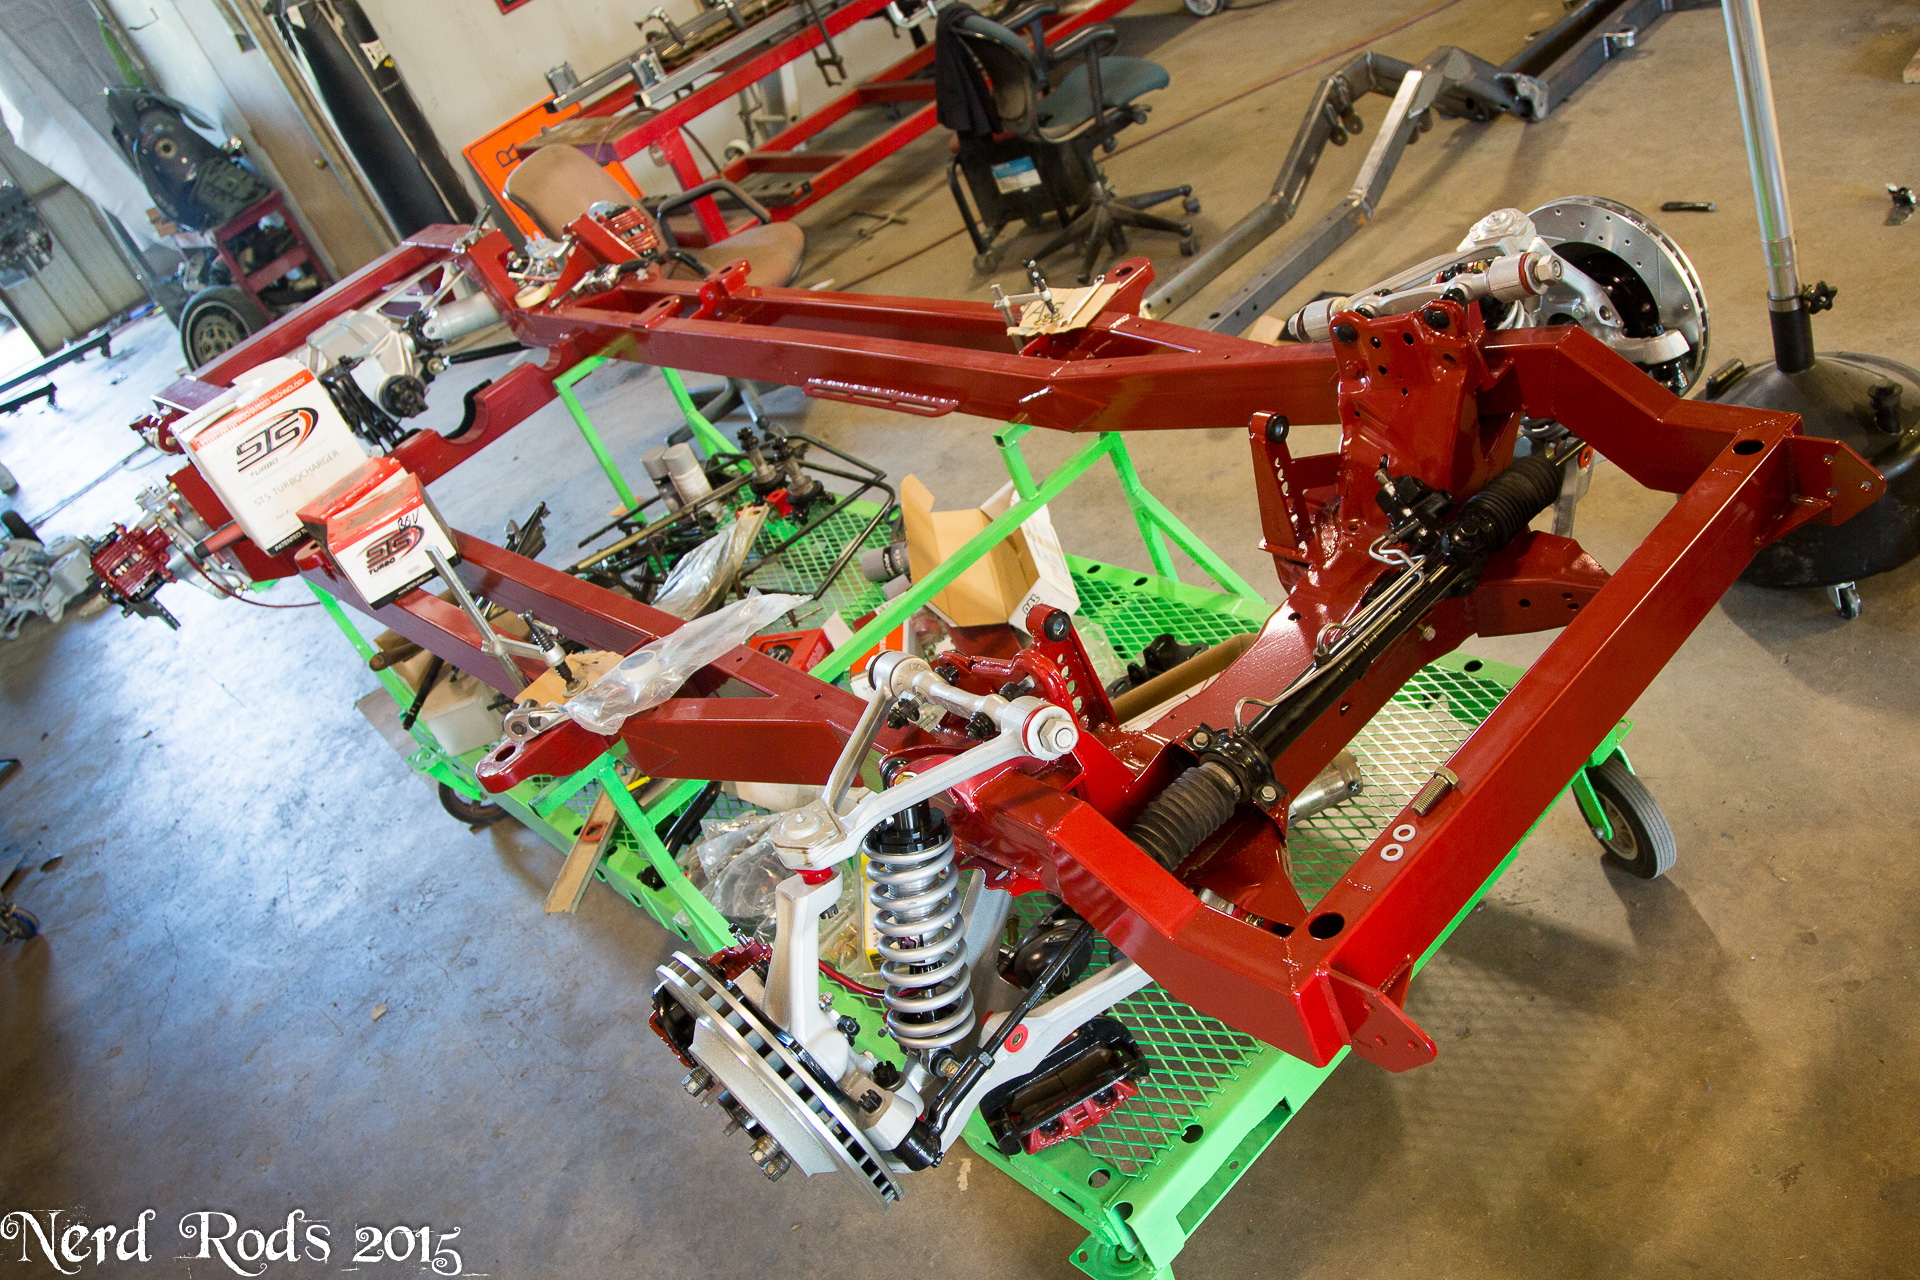


We've also been saving a set of the big 13" brakes for one of our projects.

So some of you follow us on the Facetubes or Twitter and those guys get a bit more of an update since I can just snap a photos and stab it to the net nice and quick. One of my customers saw the supercharger and we started talking. He had an STS Single turbo for his project but the super charger will actually make his life easier. I was still trying to work out an affordable pulley system (www.lssimple.net is what I was looking at BTW) and the fuel rail is an additional cost I wasn't looking forward to either since the LSA has a very unique system thanks to its pocketed fuel injectors and I was going to need some real headers to keep from choking the motor. So I asked if he wanted to trade. He said yes. (insert evil laugh)
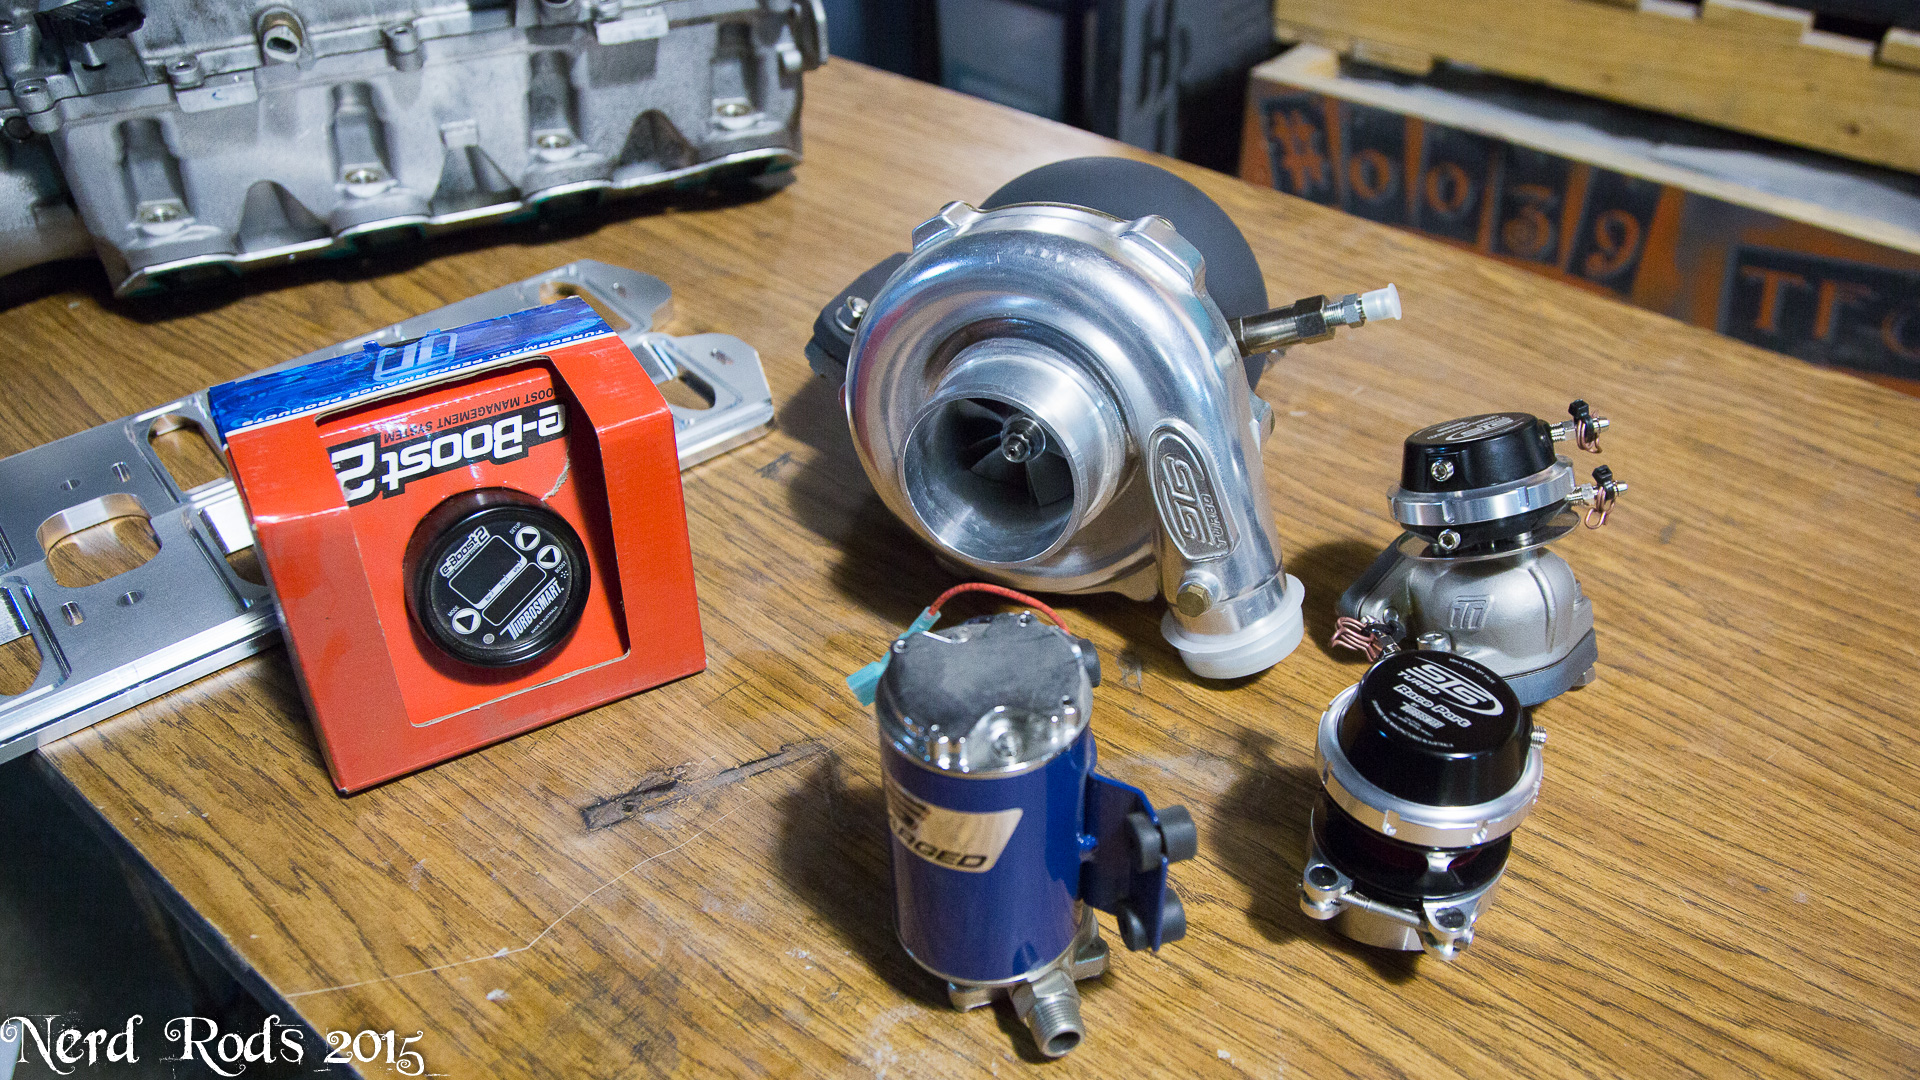
So that got me thinking "Well we'll need a turbo cam and so I'll need to pull that one out of my 6.0L in the corner from the PT-57 and then take off its pulleys and move all that over to Dad's 5.3.......... OR, I could be lazy and just put the 6.0L in his truck." And so thanks to my laziness dad now has a 6.0L LQ4 with single turbo for his truck. Should be in the 550HP range really easily. That motor with twins and the same gear ratios did well over 567RWHP on the dyno a few years back so this should be a cake walk.

The motor goes in the chassis this afternoon. More to come ASAP.
-Russell @ Nerd Rods
10-06-2015, 08:21 PM
#20
Launching!
Thread Starter
Join Date: Jan 2007
Location: Luling TX In the Hot Rod Shop
Posts: 294
Likes: 0
Received 3 Likes
on
3 Posts
Click here for the large photos
http://gallery.nerdrods.com/Projects/03_D3/03/
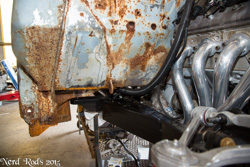
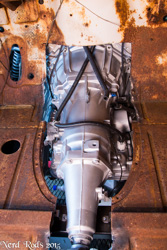
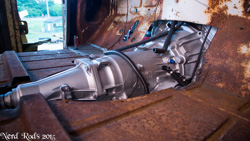
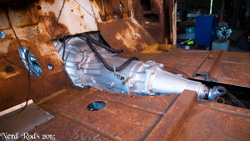
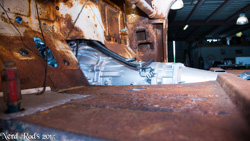
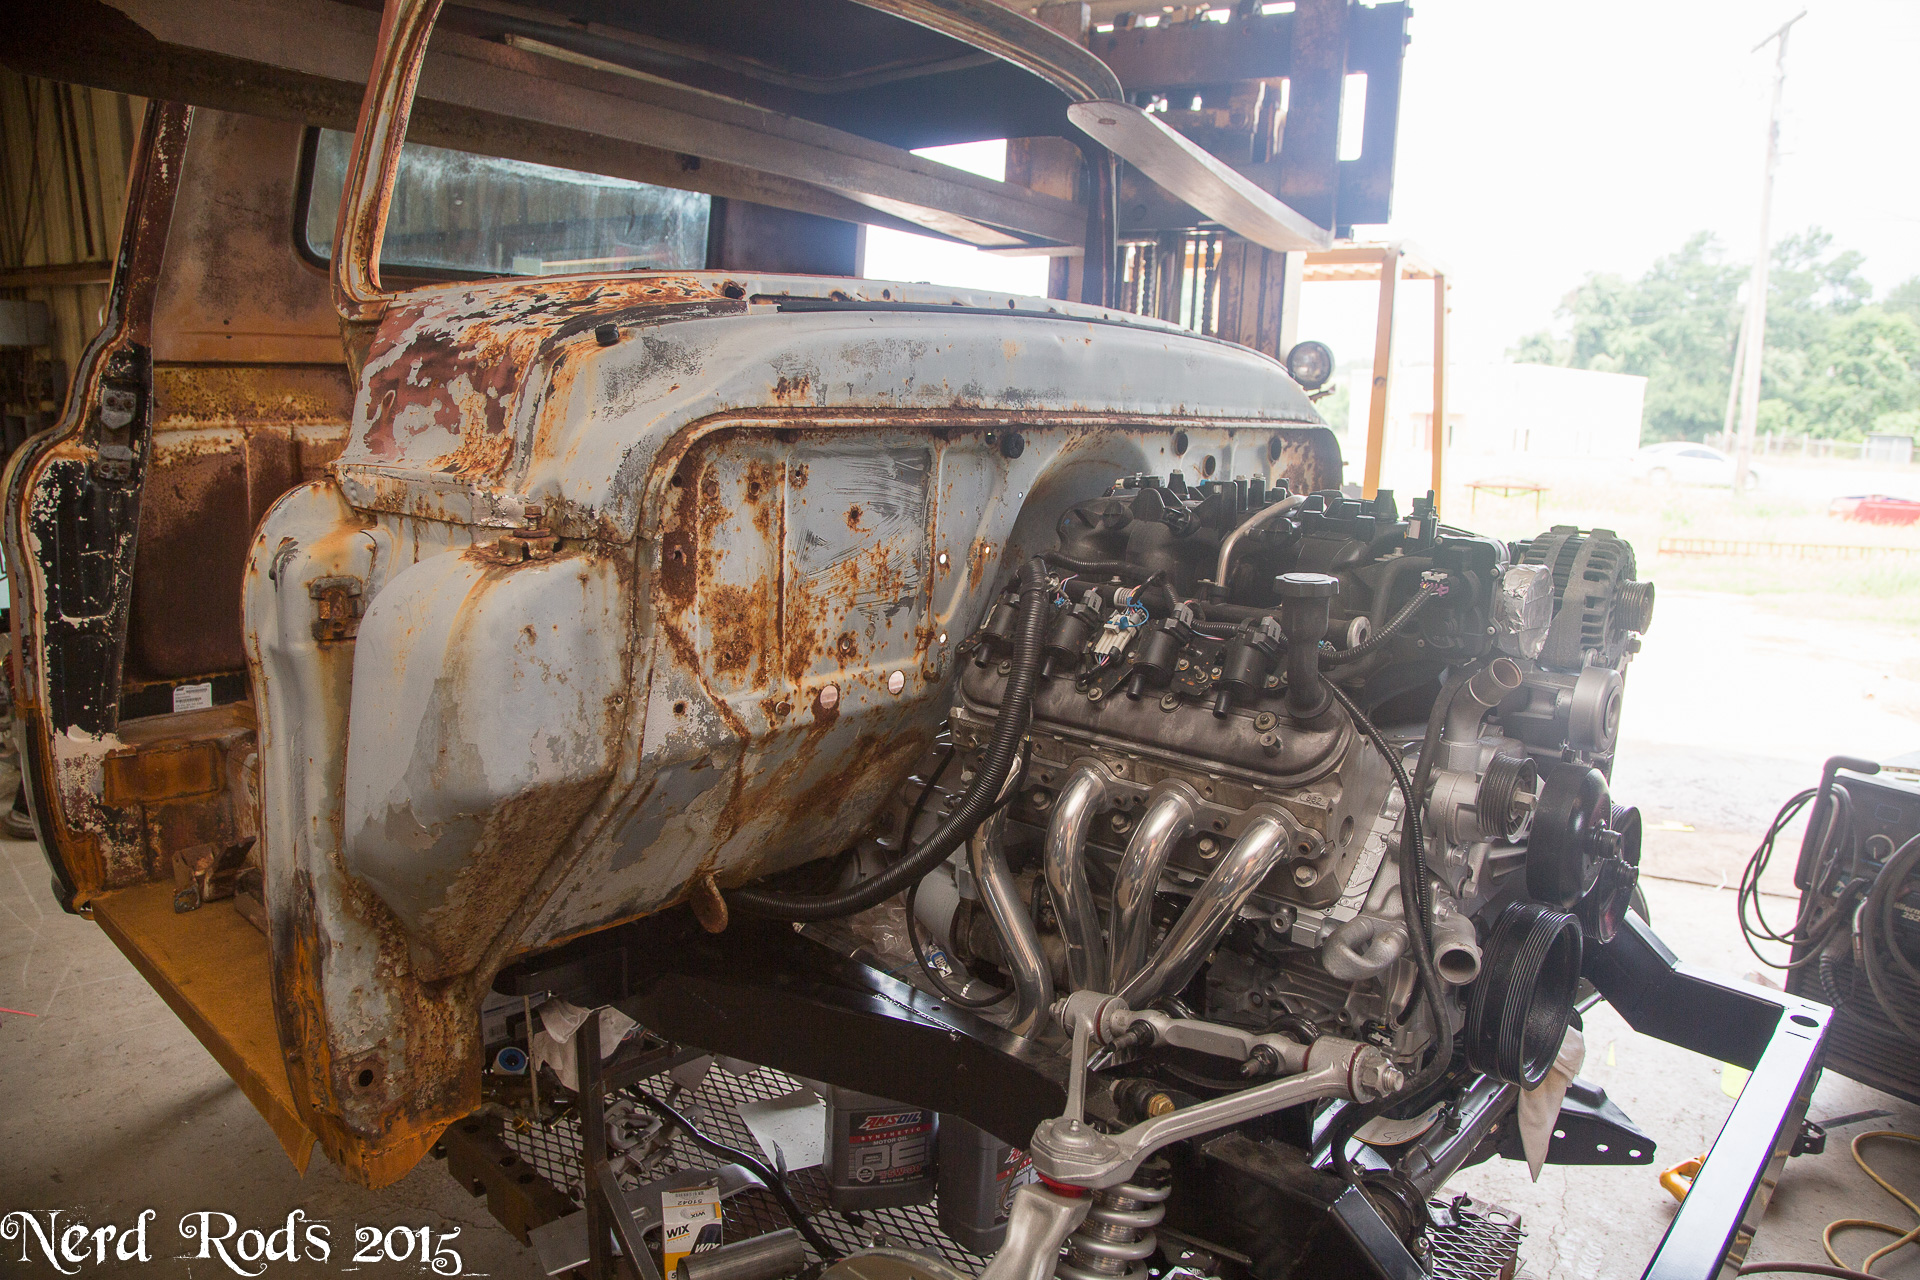
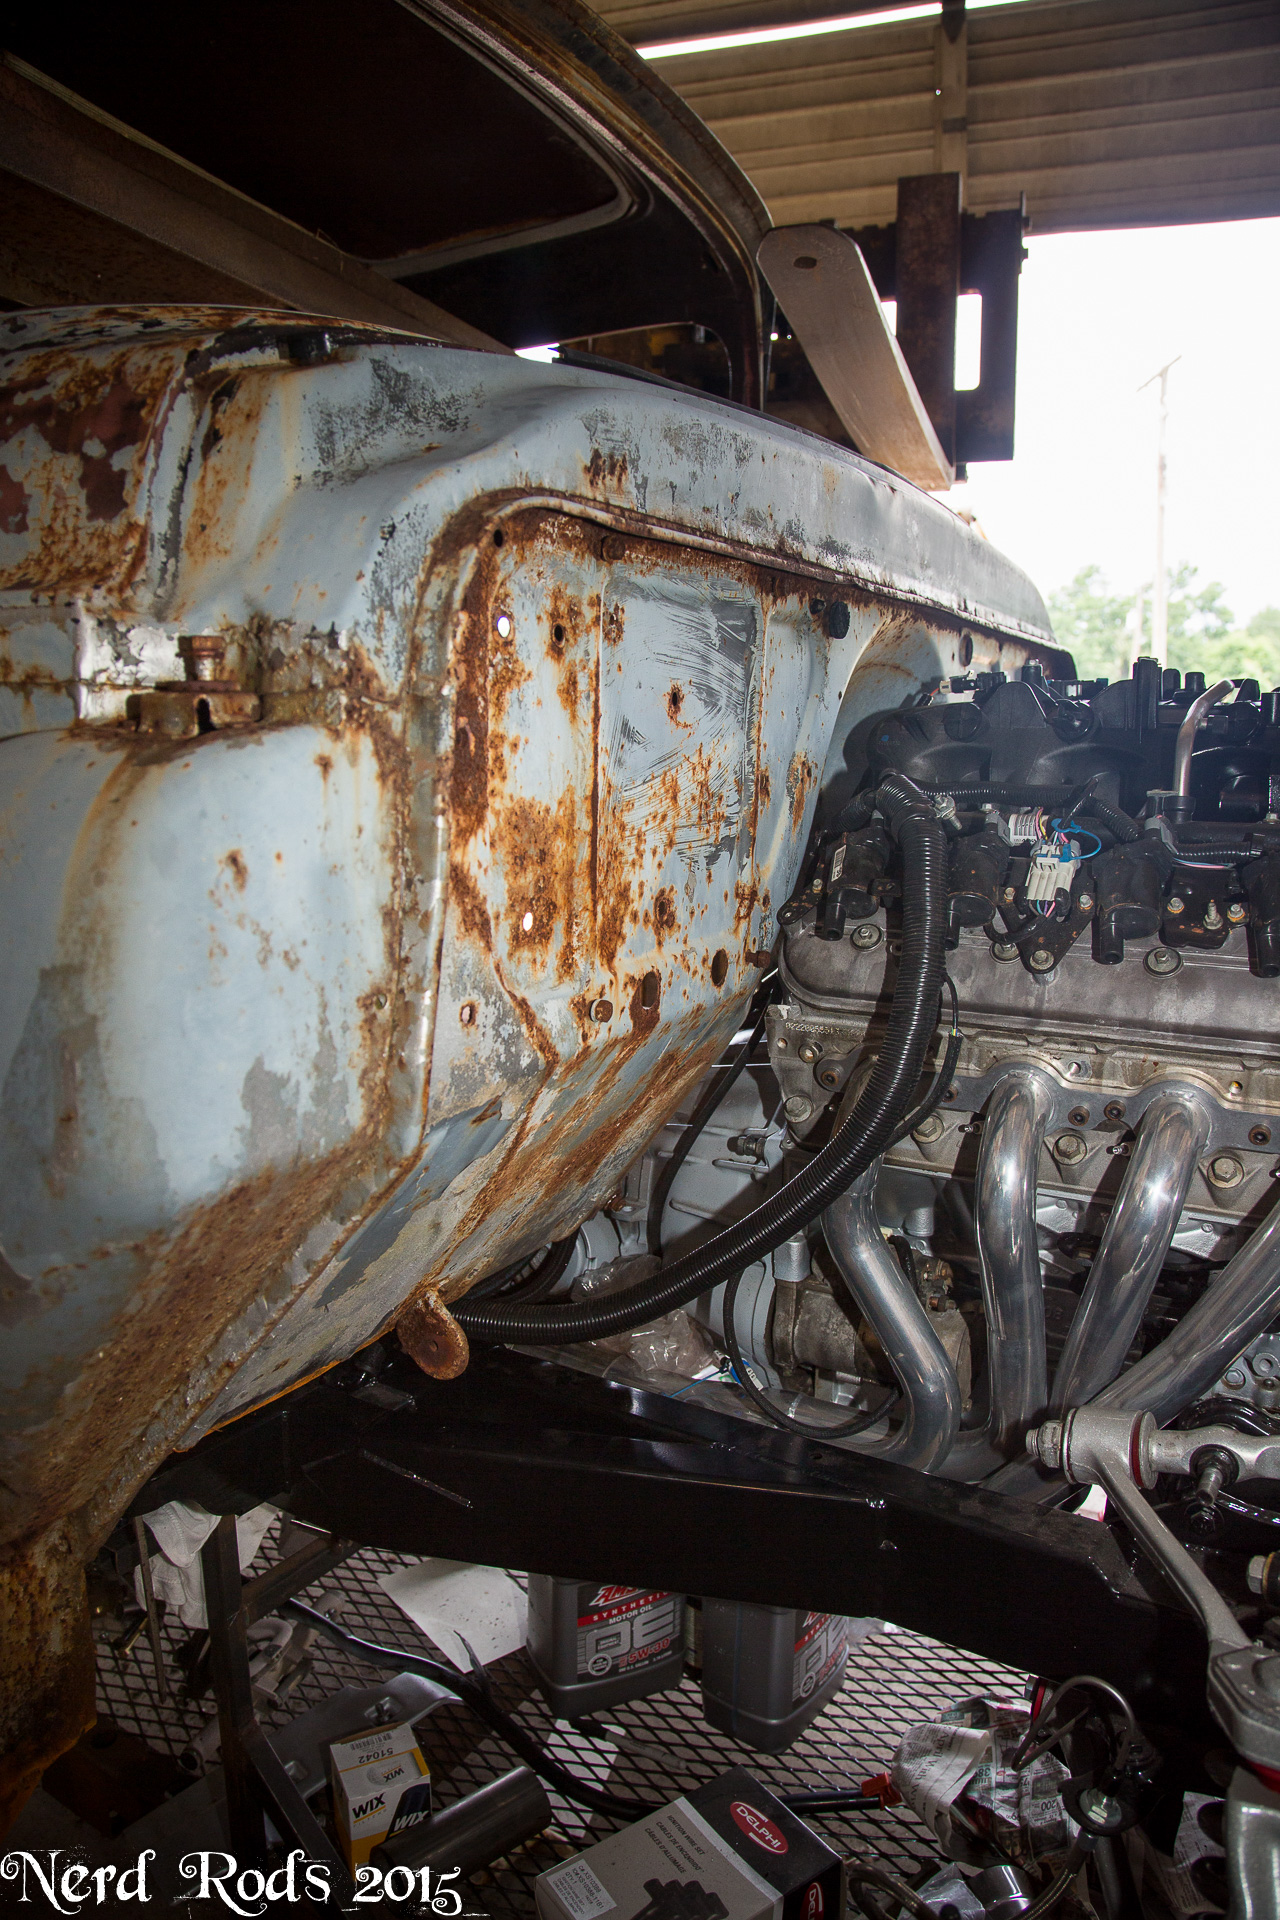
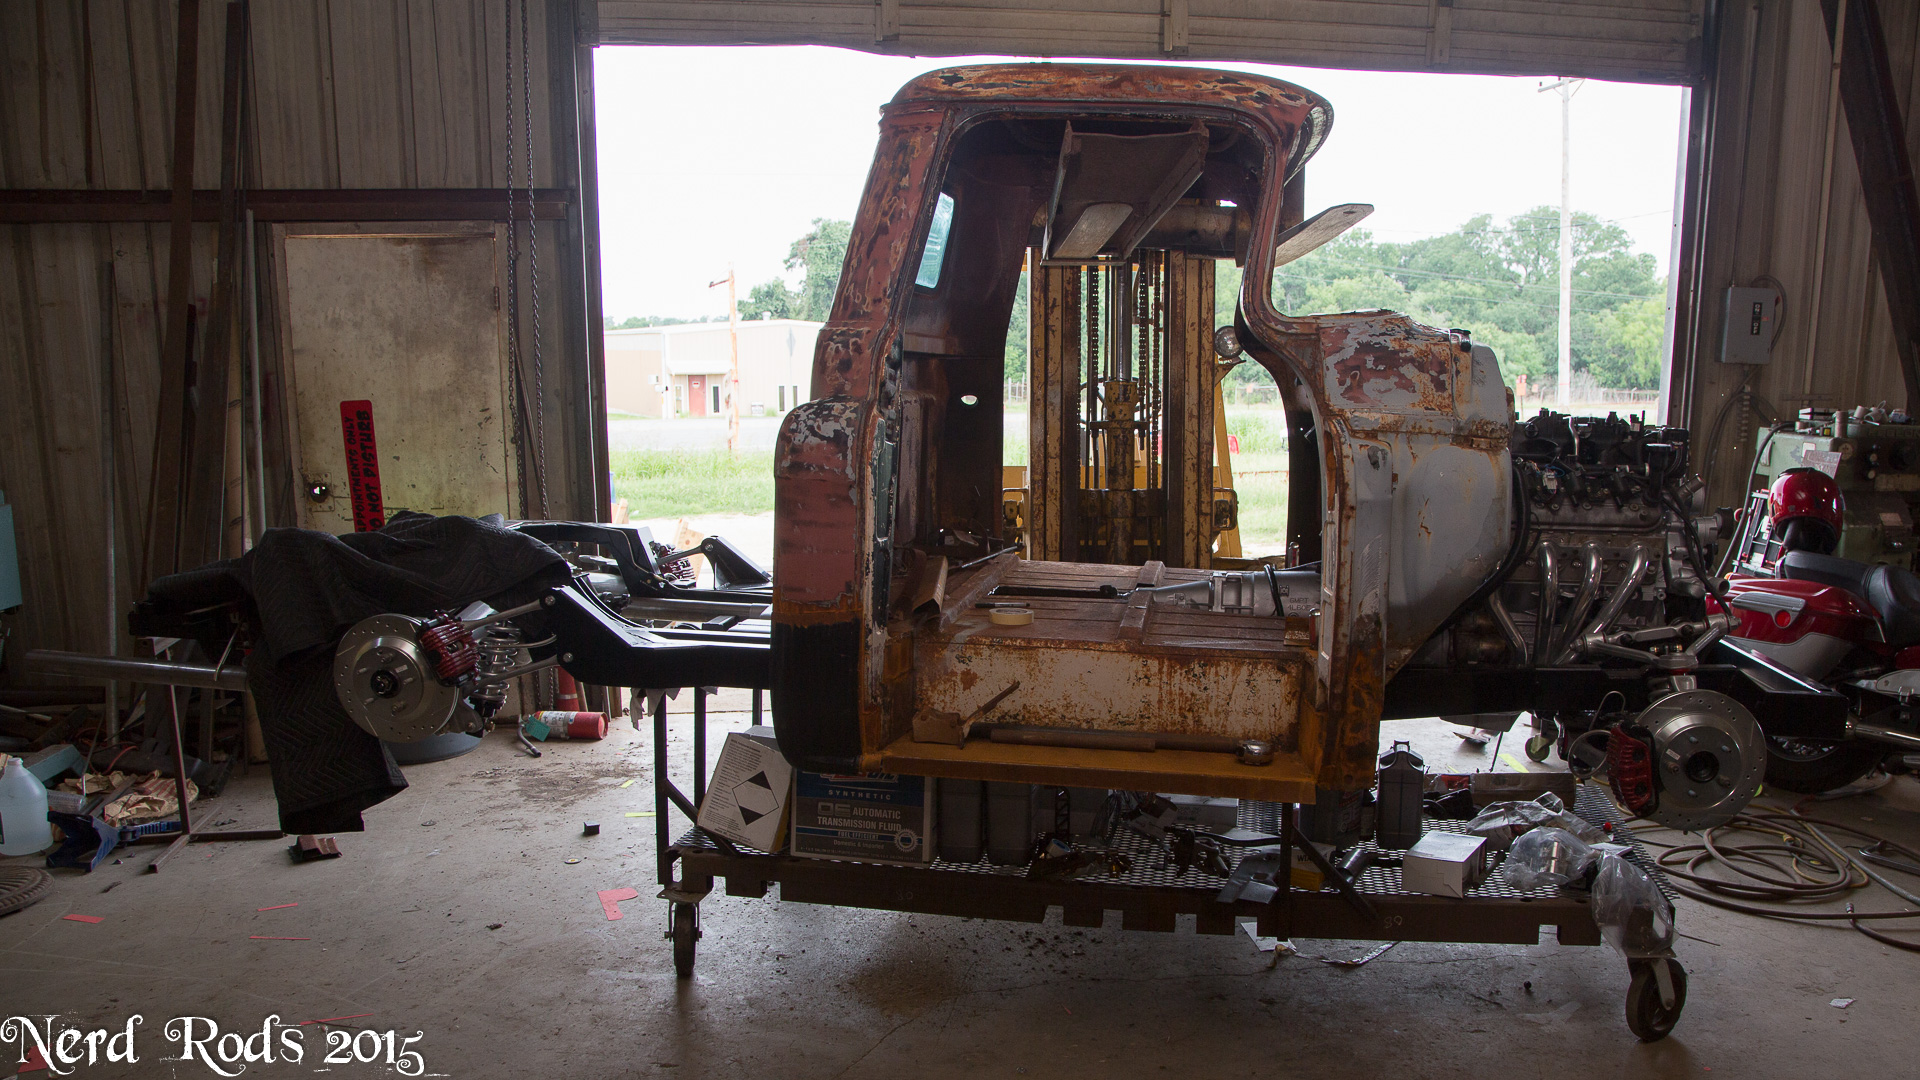
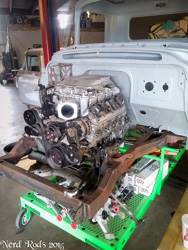
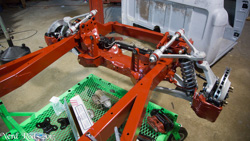
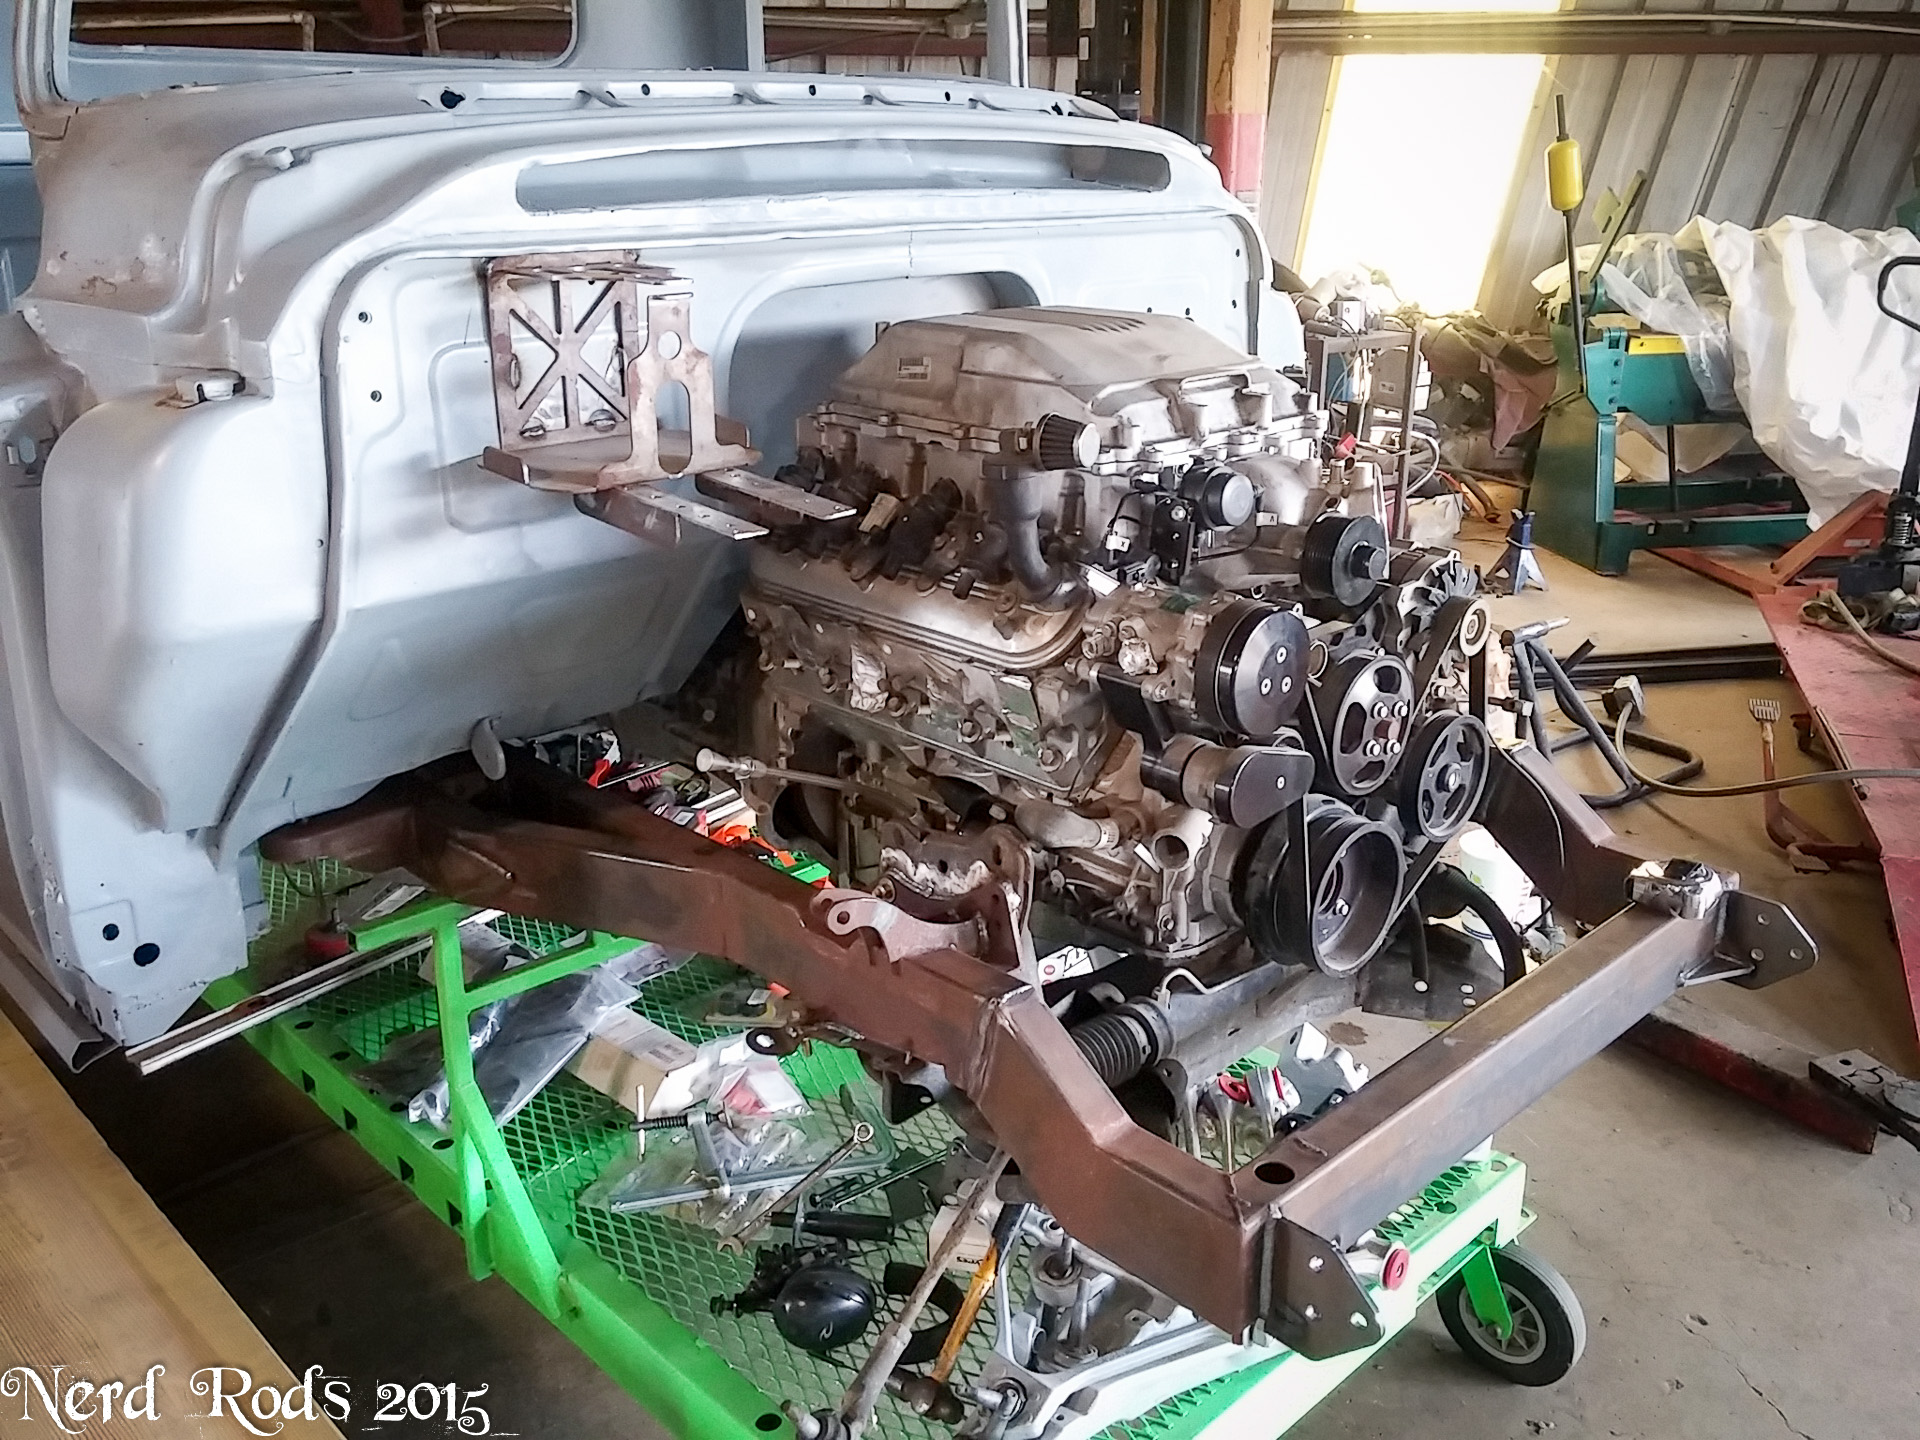
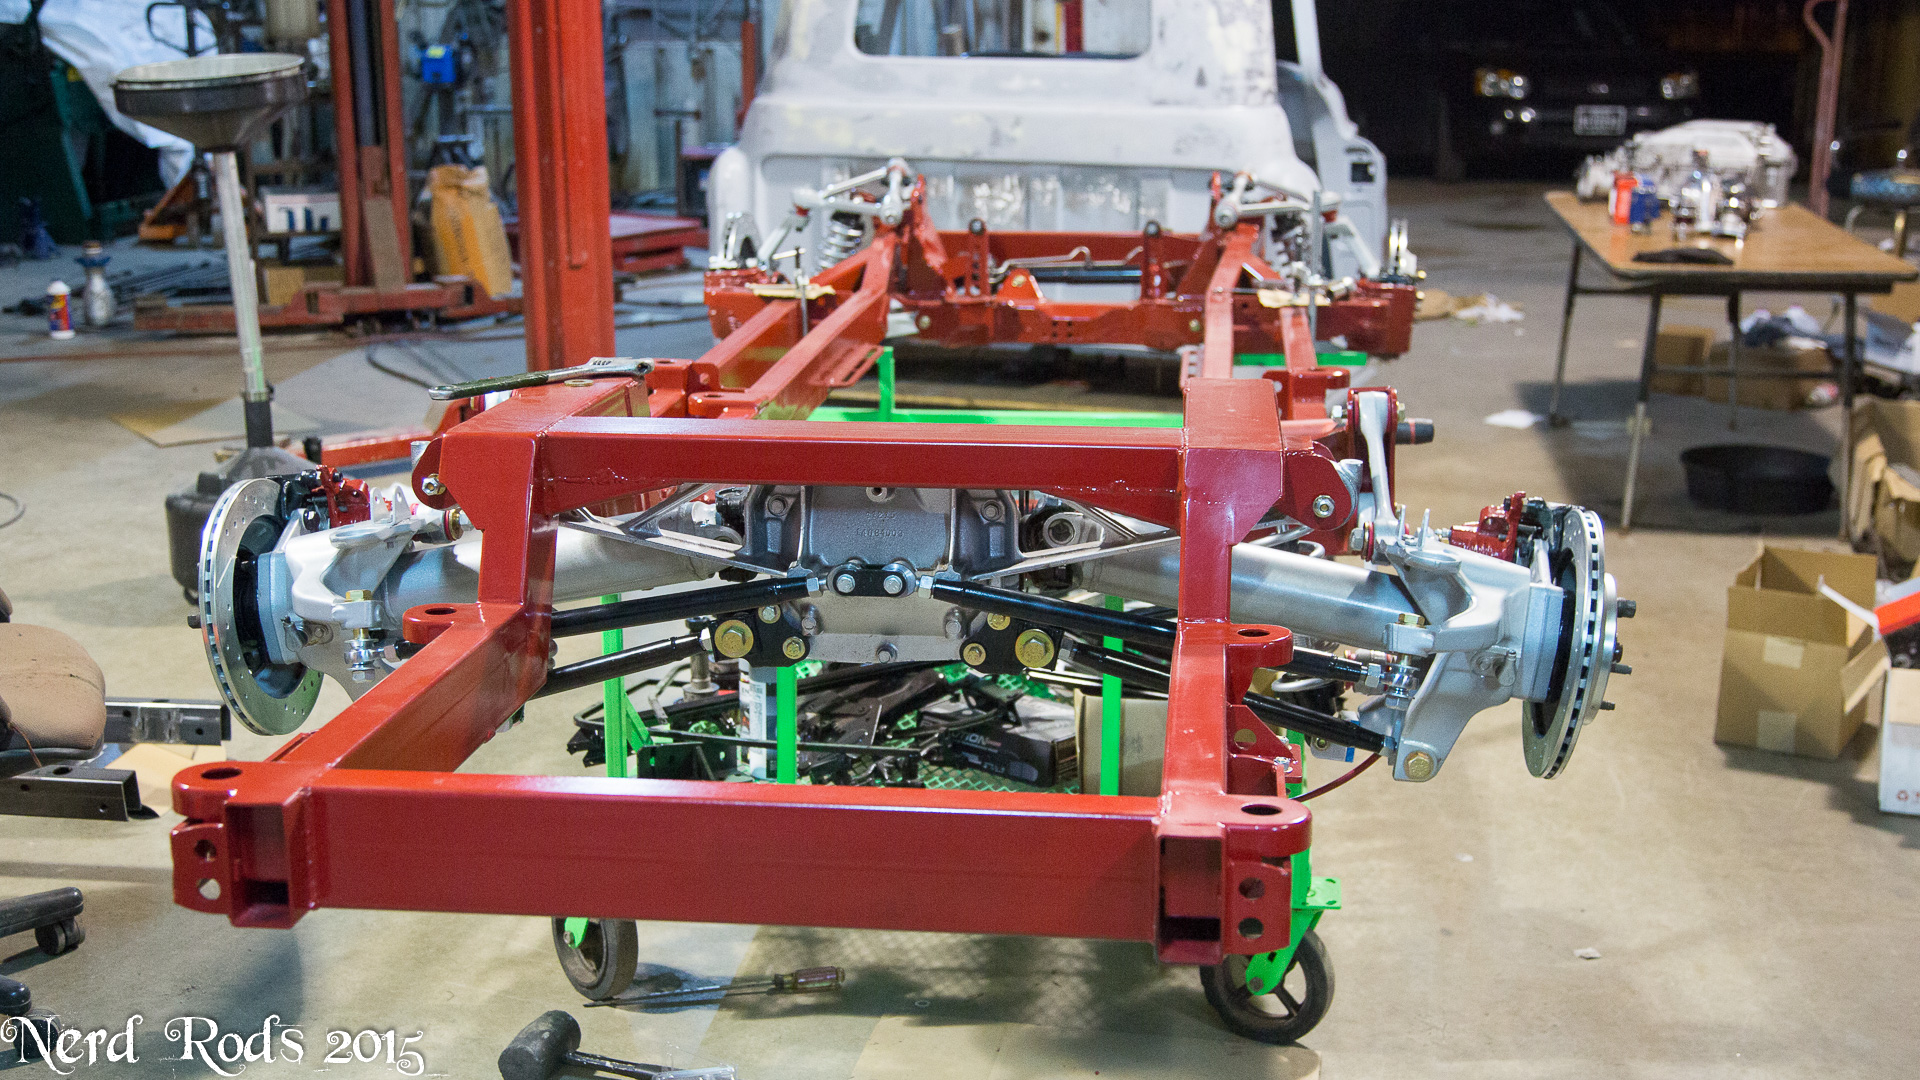
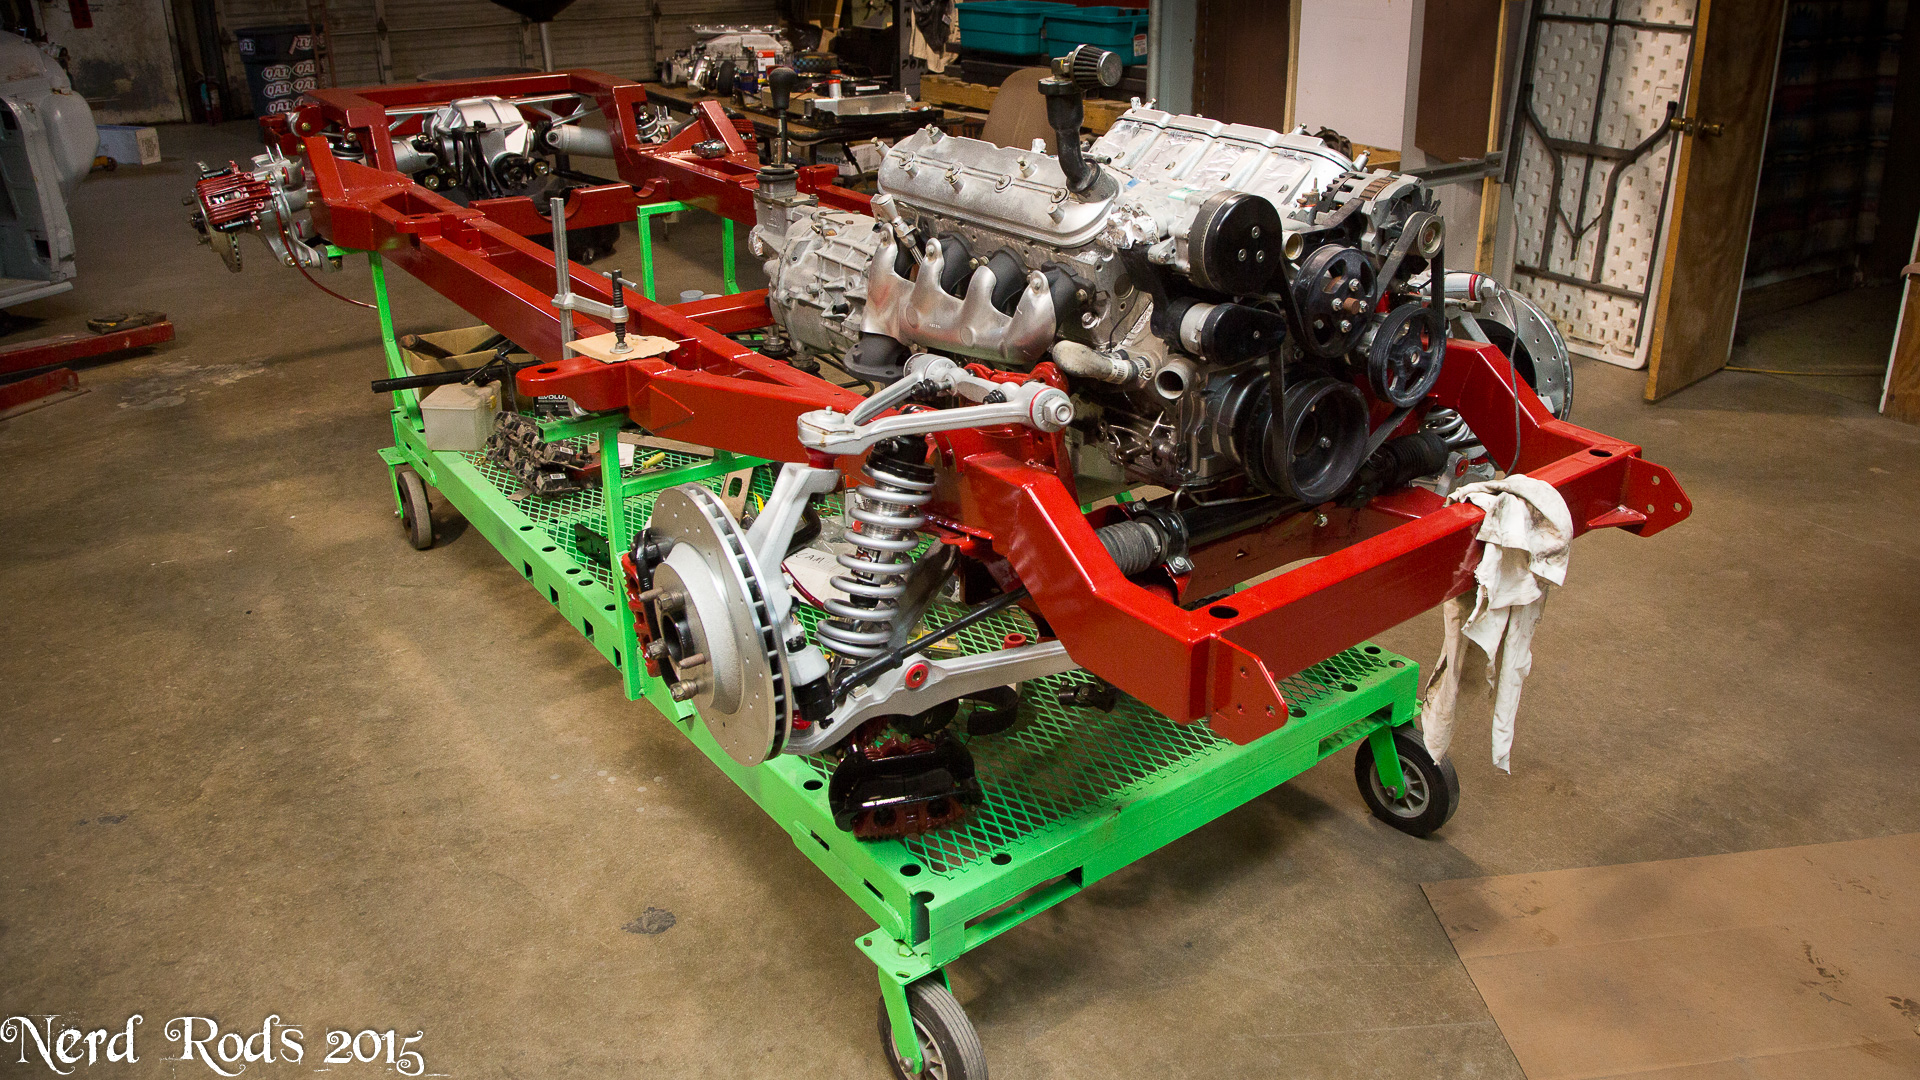
So as you might have seen in the video the chassis is together and the motor and transmission are both in.

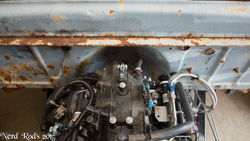
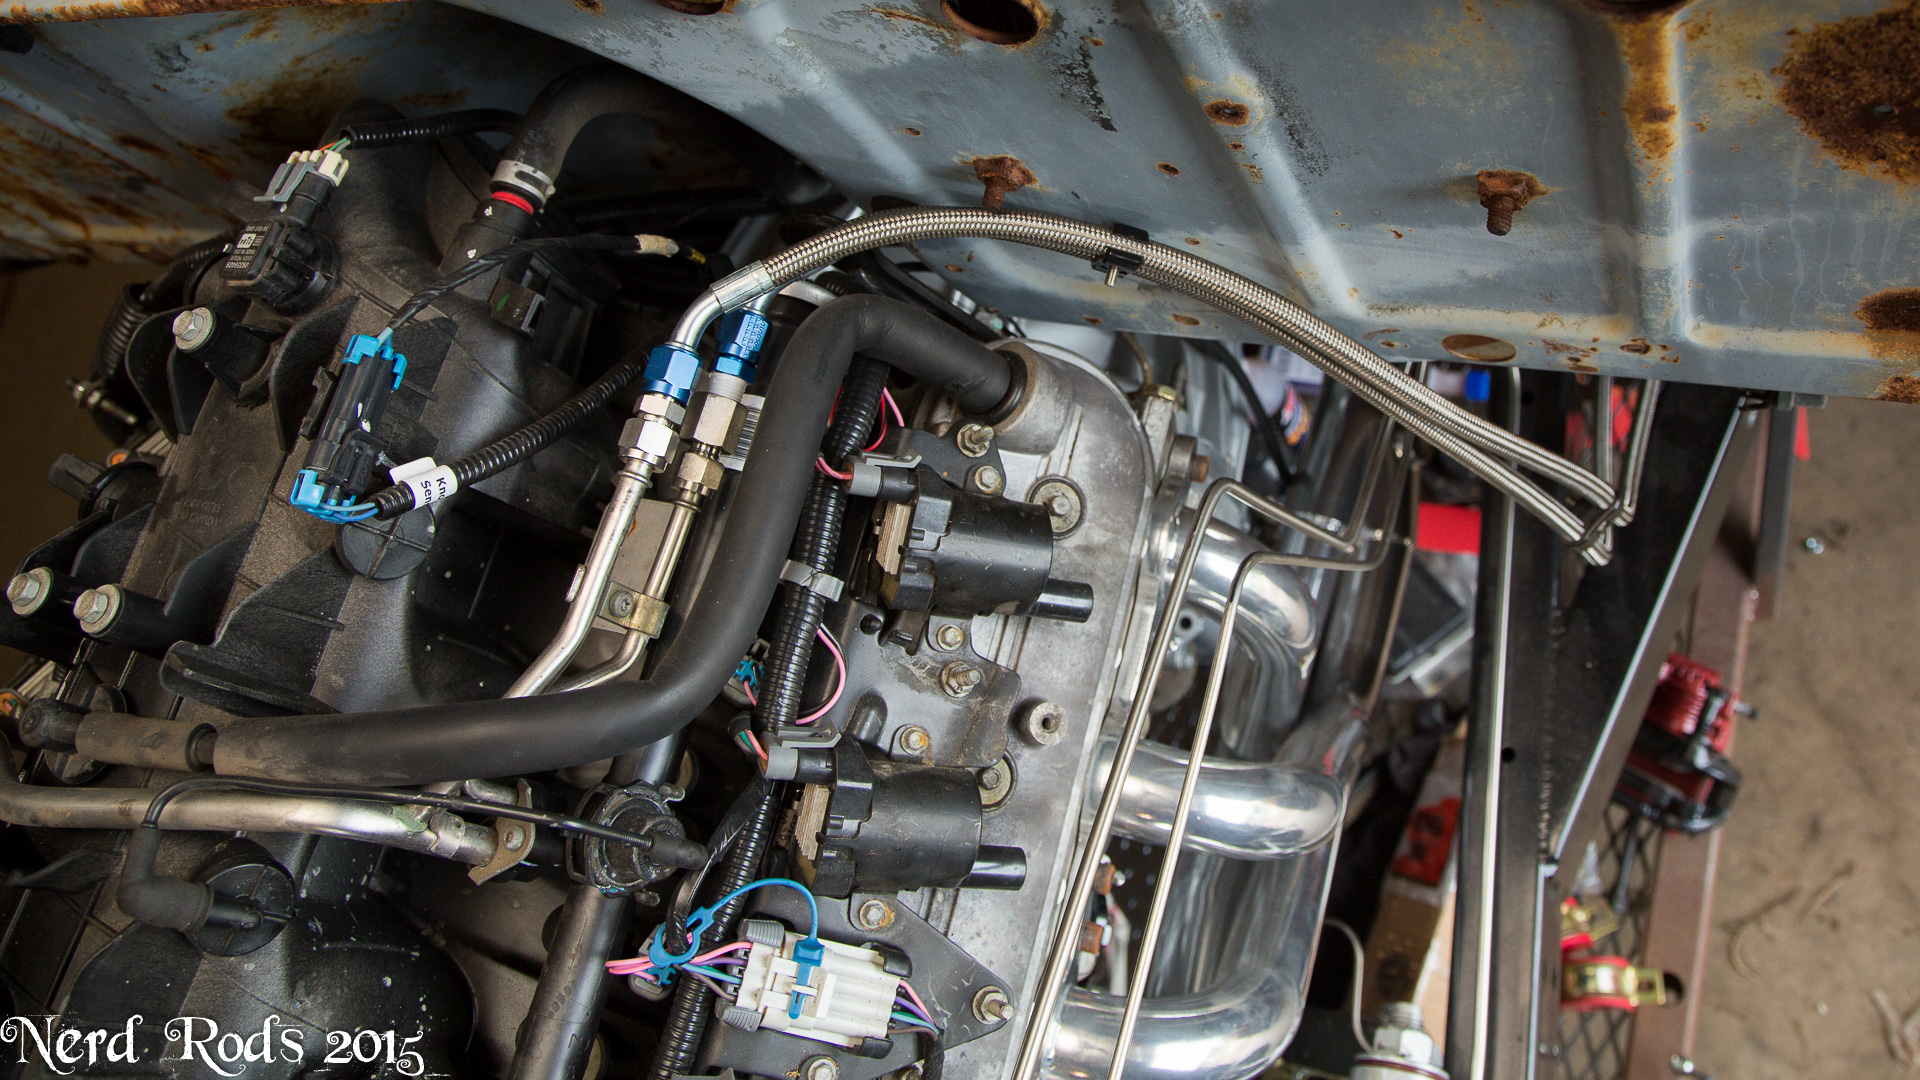
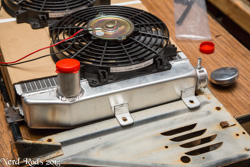
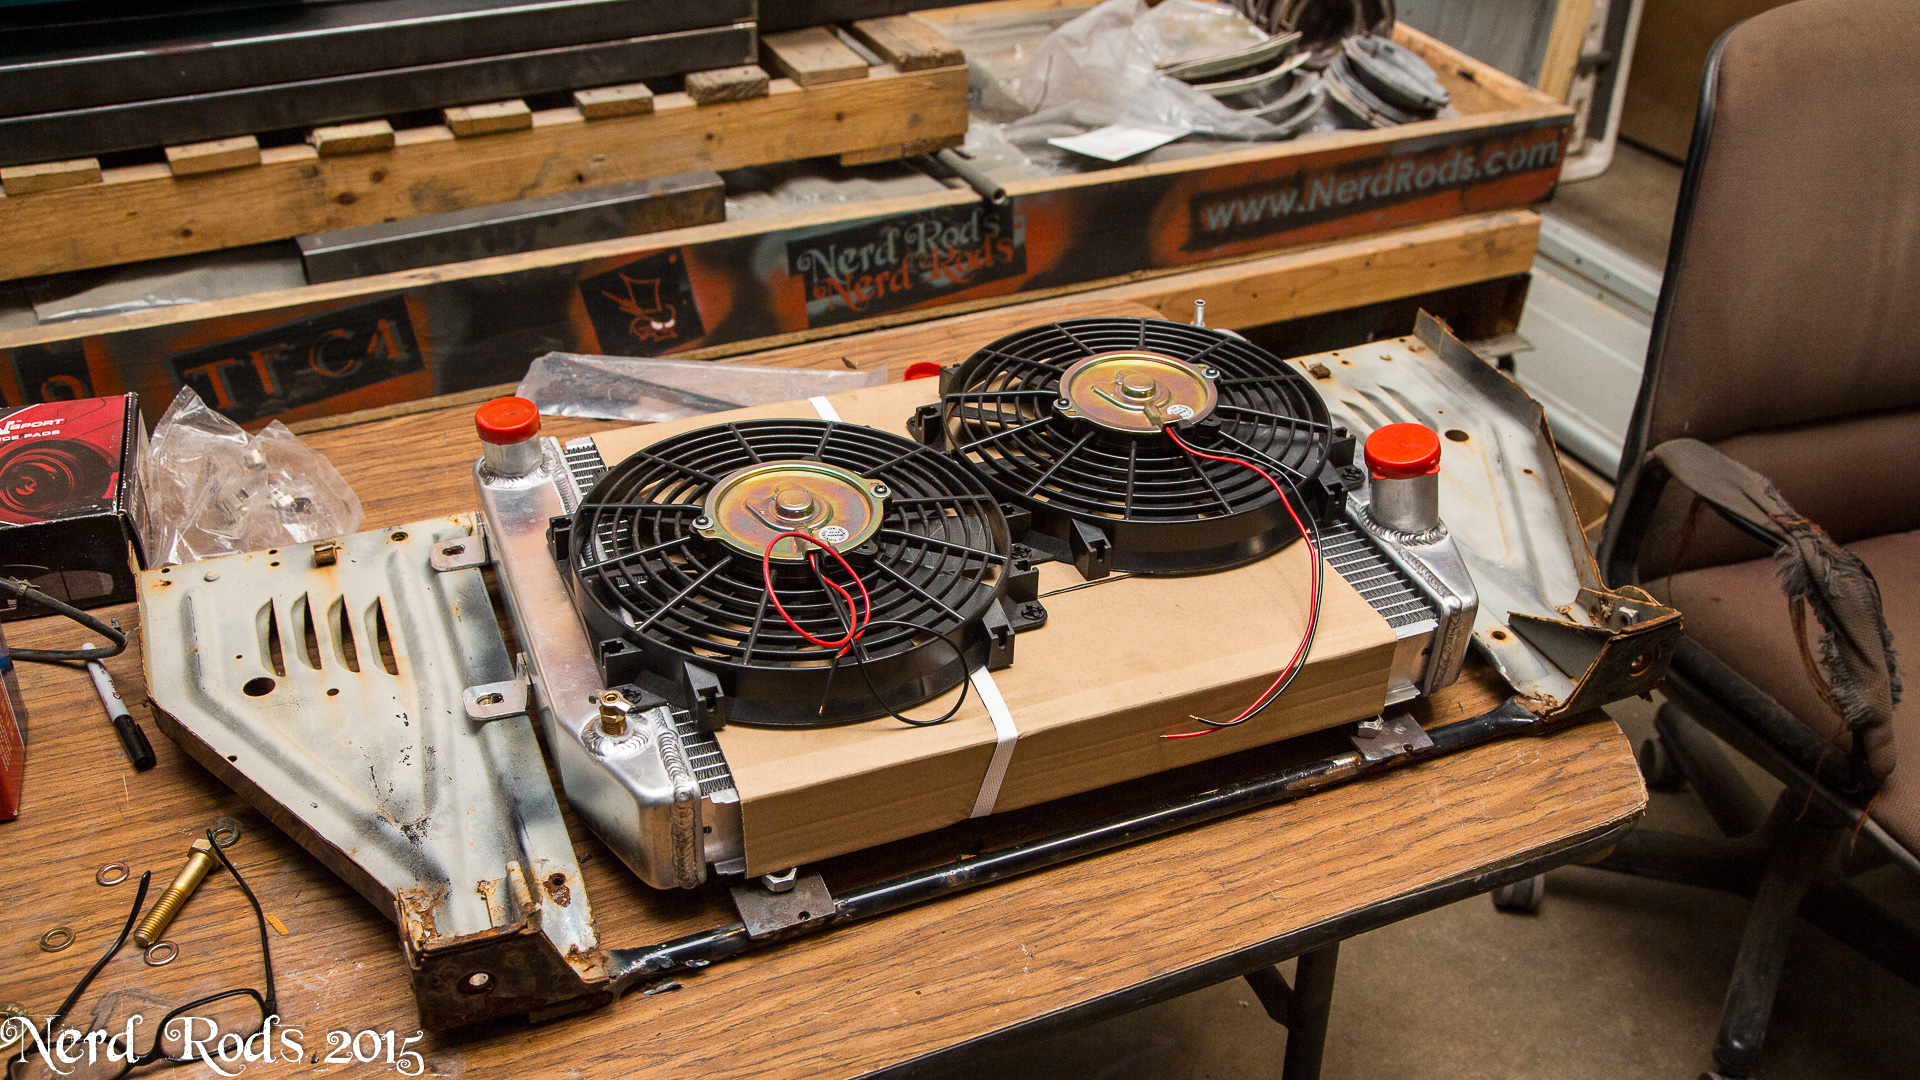
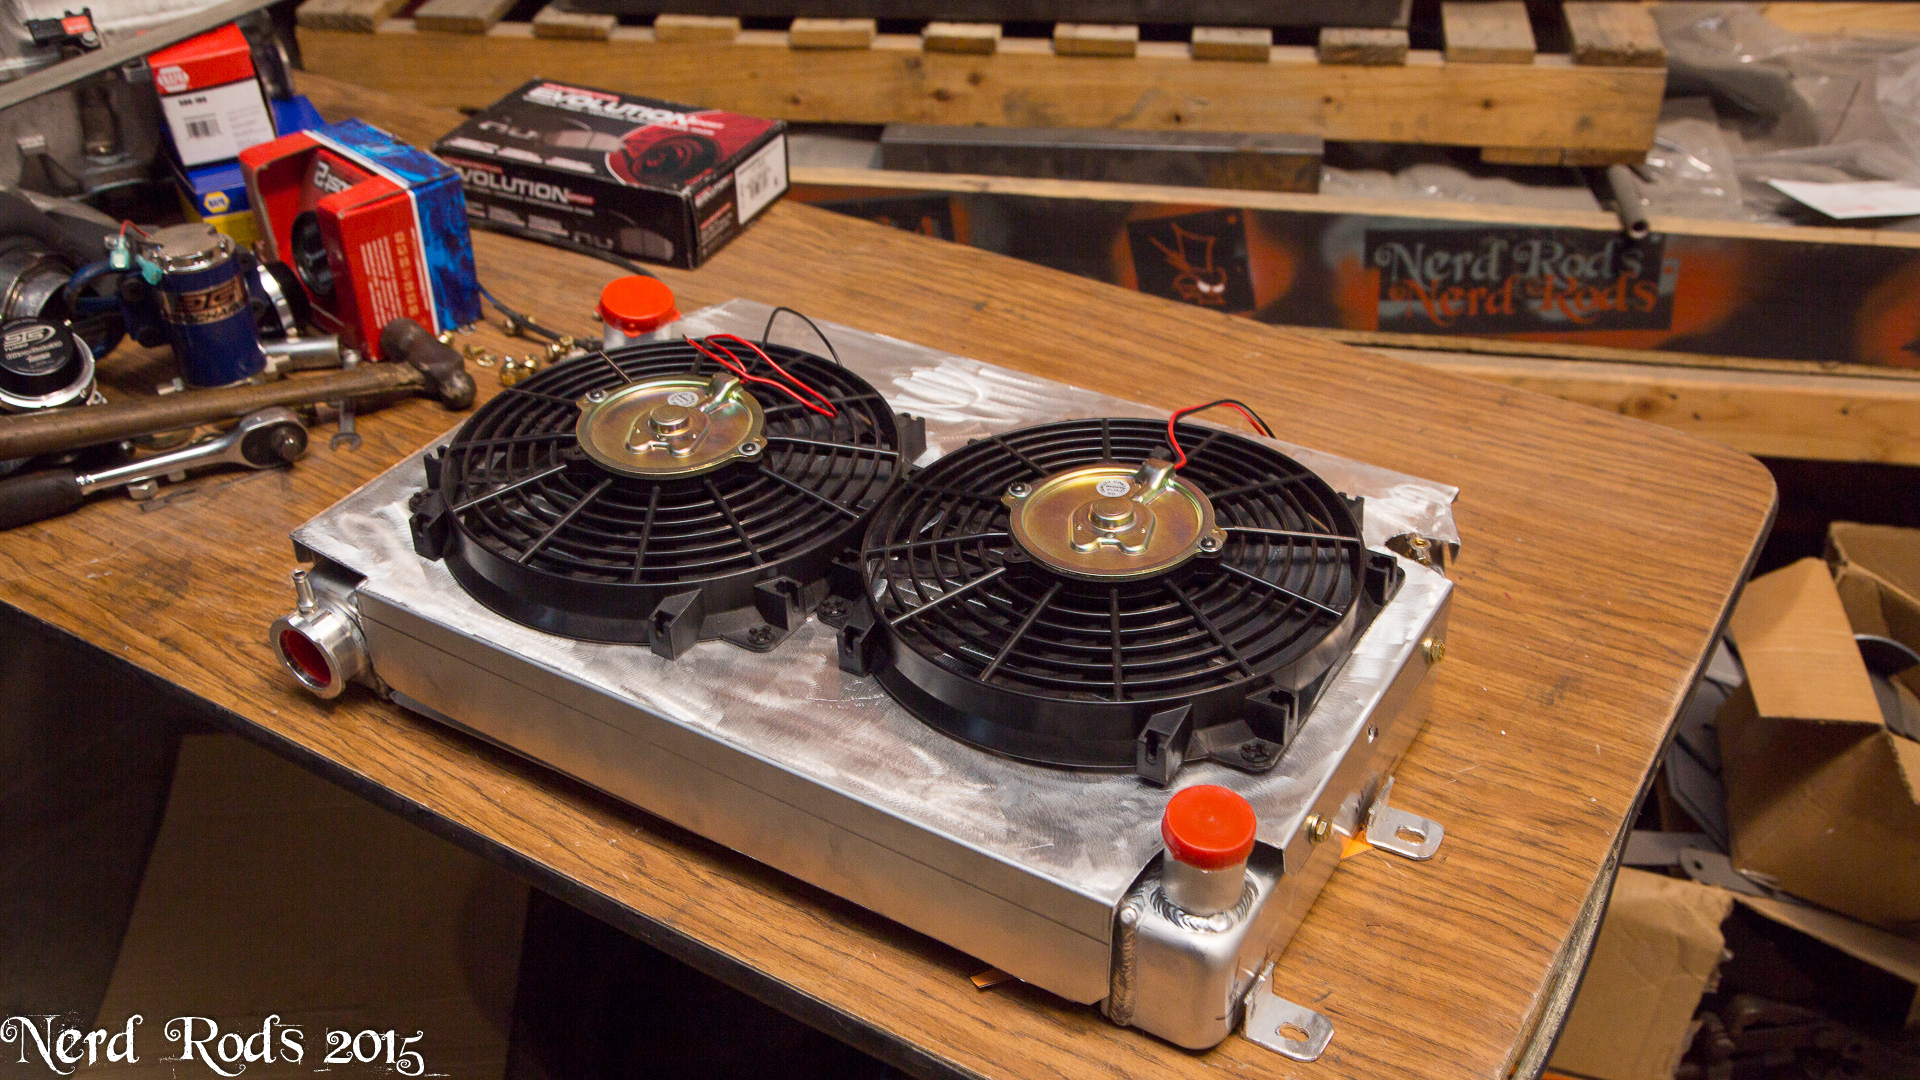
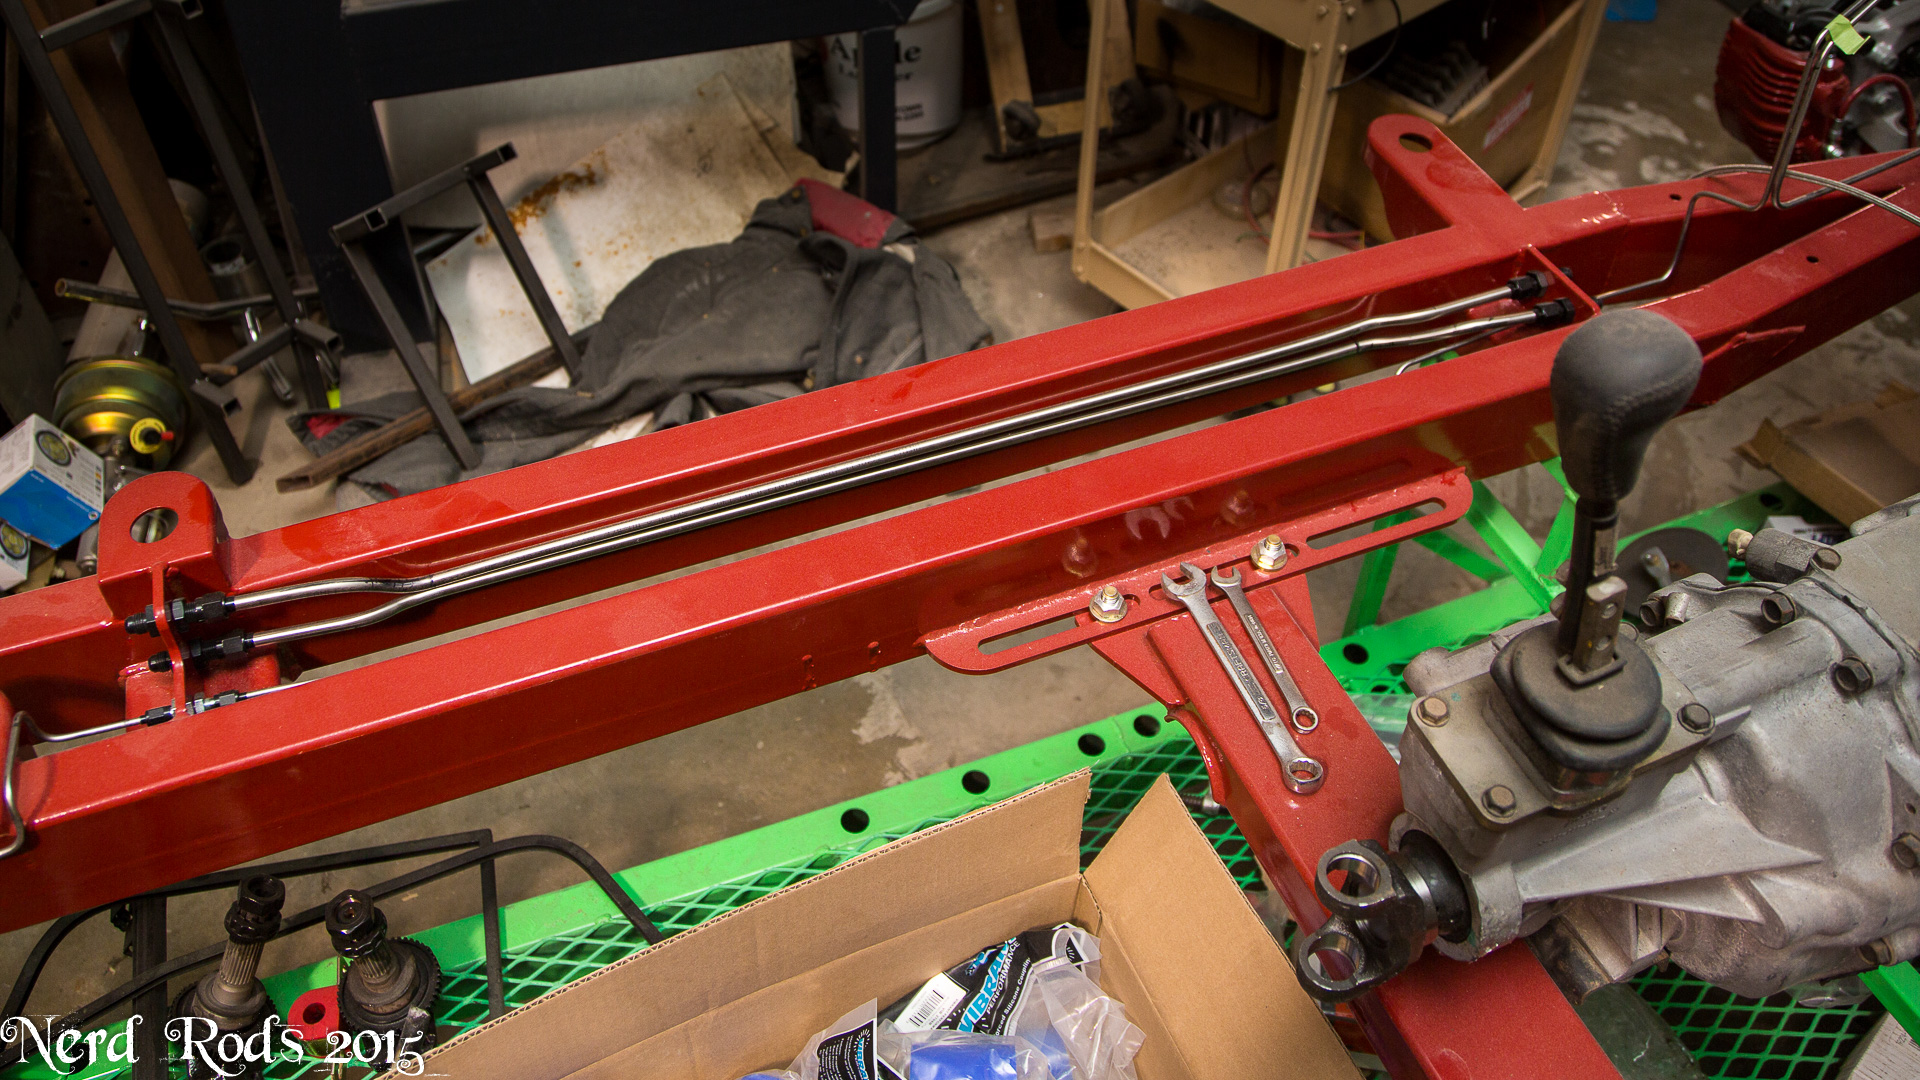
Dad got the radiator should made up to fit out generic Griffin Radiator (188.17 Part # 1-25201-X) The PRC Condenser Core ( 120.00 after shipping, its not on their site so you have to call them about it ), and some cheap summit fans (85.94 Summit Racing Cooling Fans, Quantity 2, Part # SUM-G4901 42.97 Each) I updated all this on the first page for the totals as well for people keeping up with pricing. Made up a few tabs to hold it to the stock core support and not I just need to weld it all up.


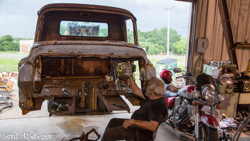
Body work continues, he keeps finding "just one more thing"..... I was afraid of this. And so Dad's Down and Dirty just became Dad's Down and Dangerous. We'll see how much longer he keeps up at it but I think its going to end up pretty darn nice when he's finished.


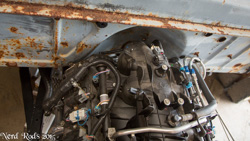
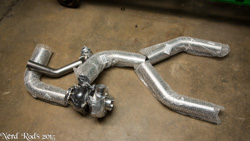
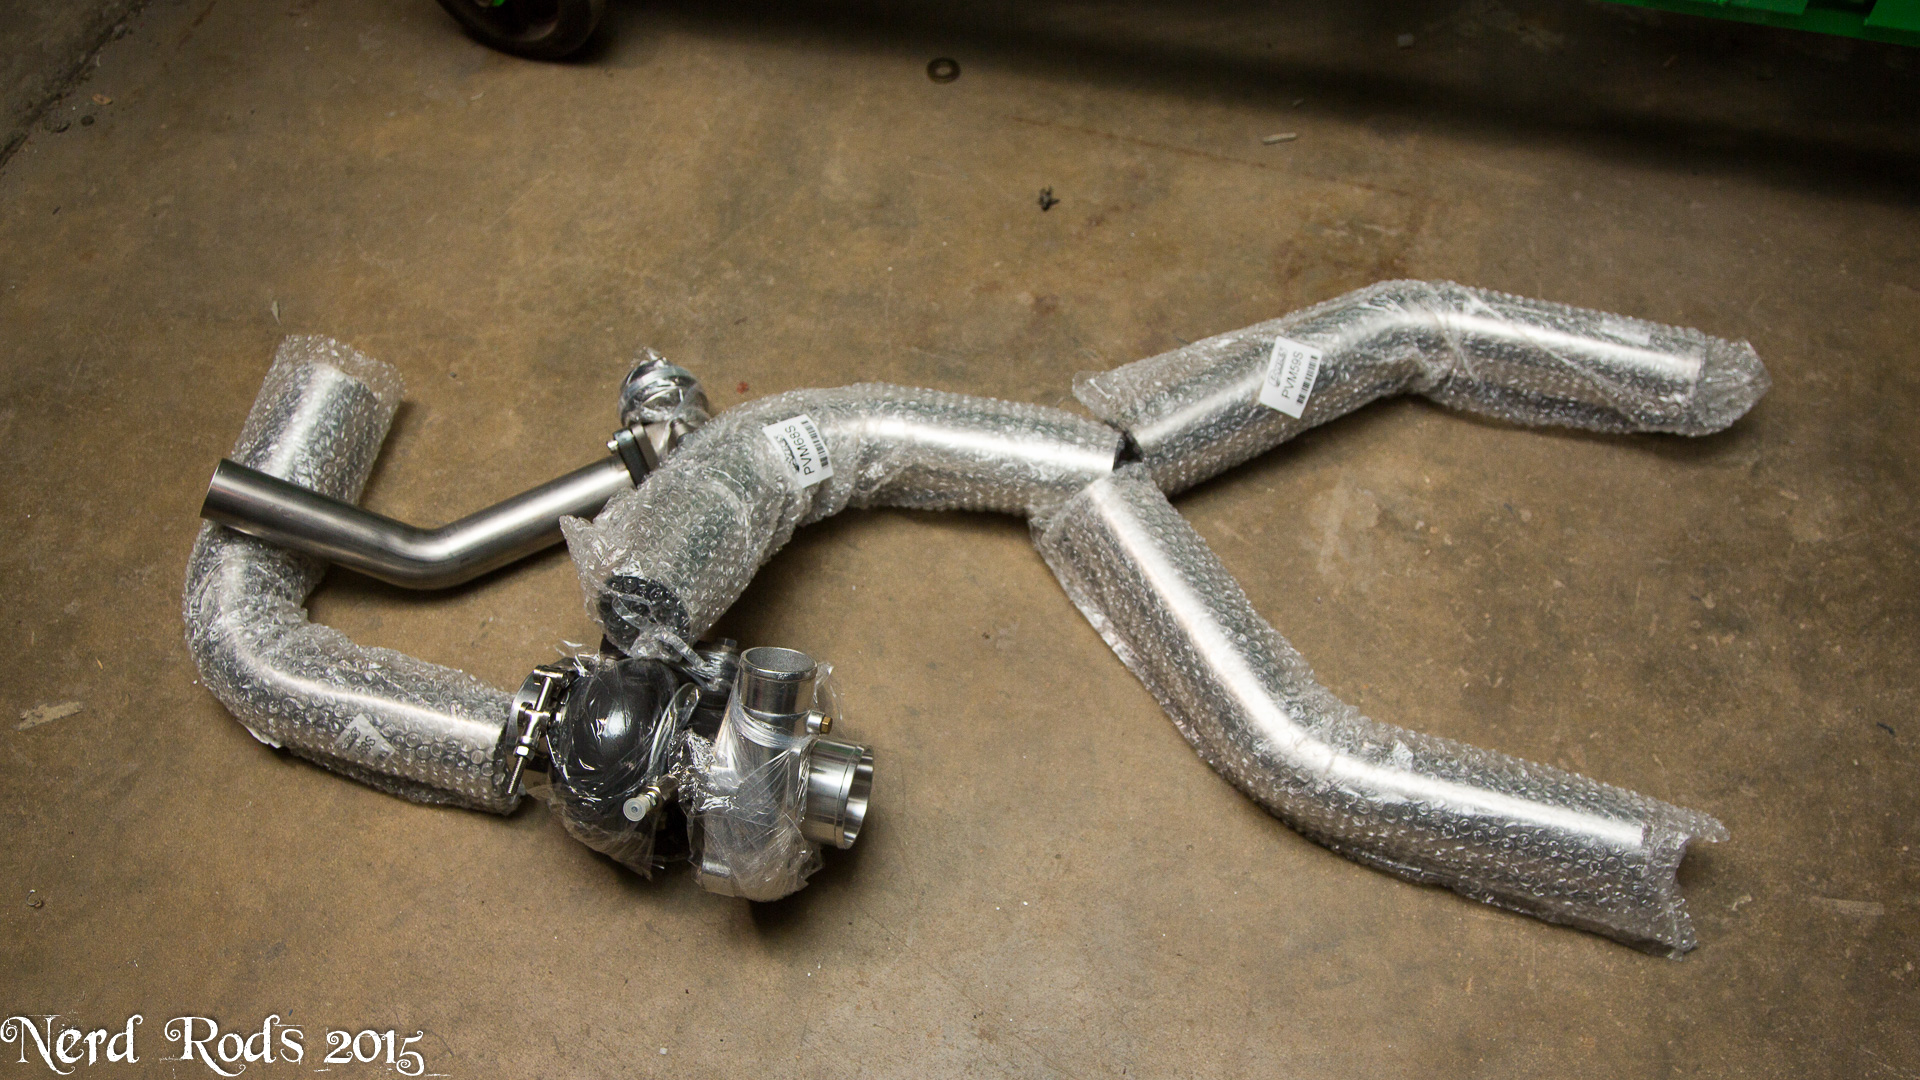
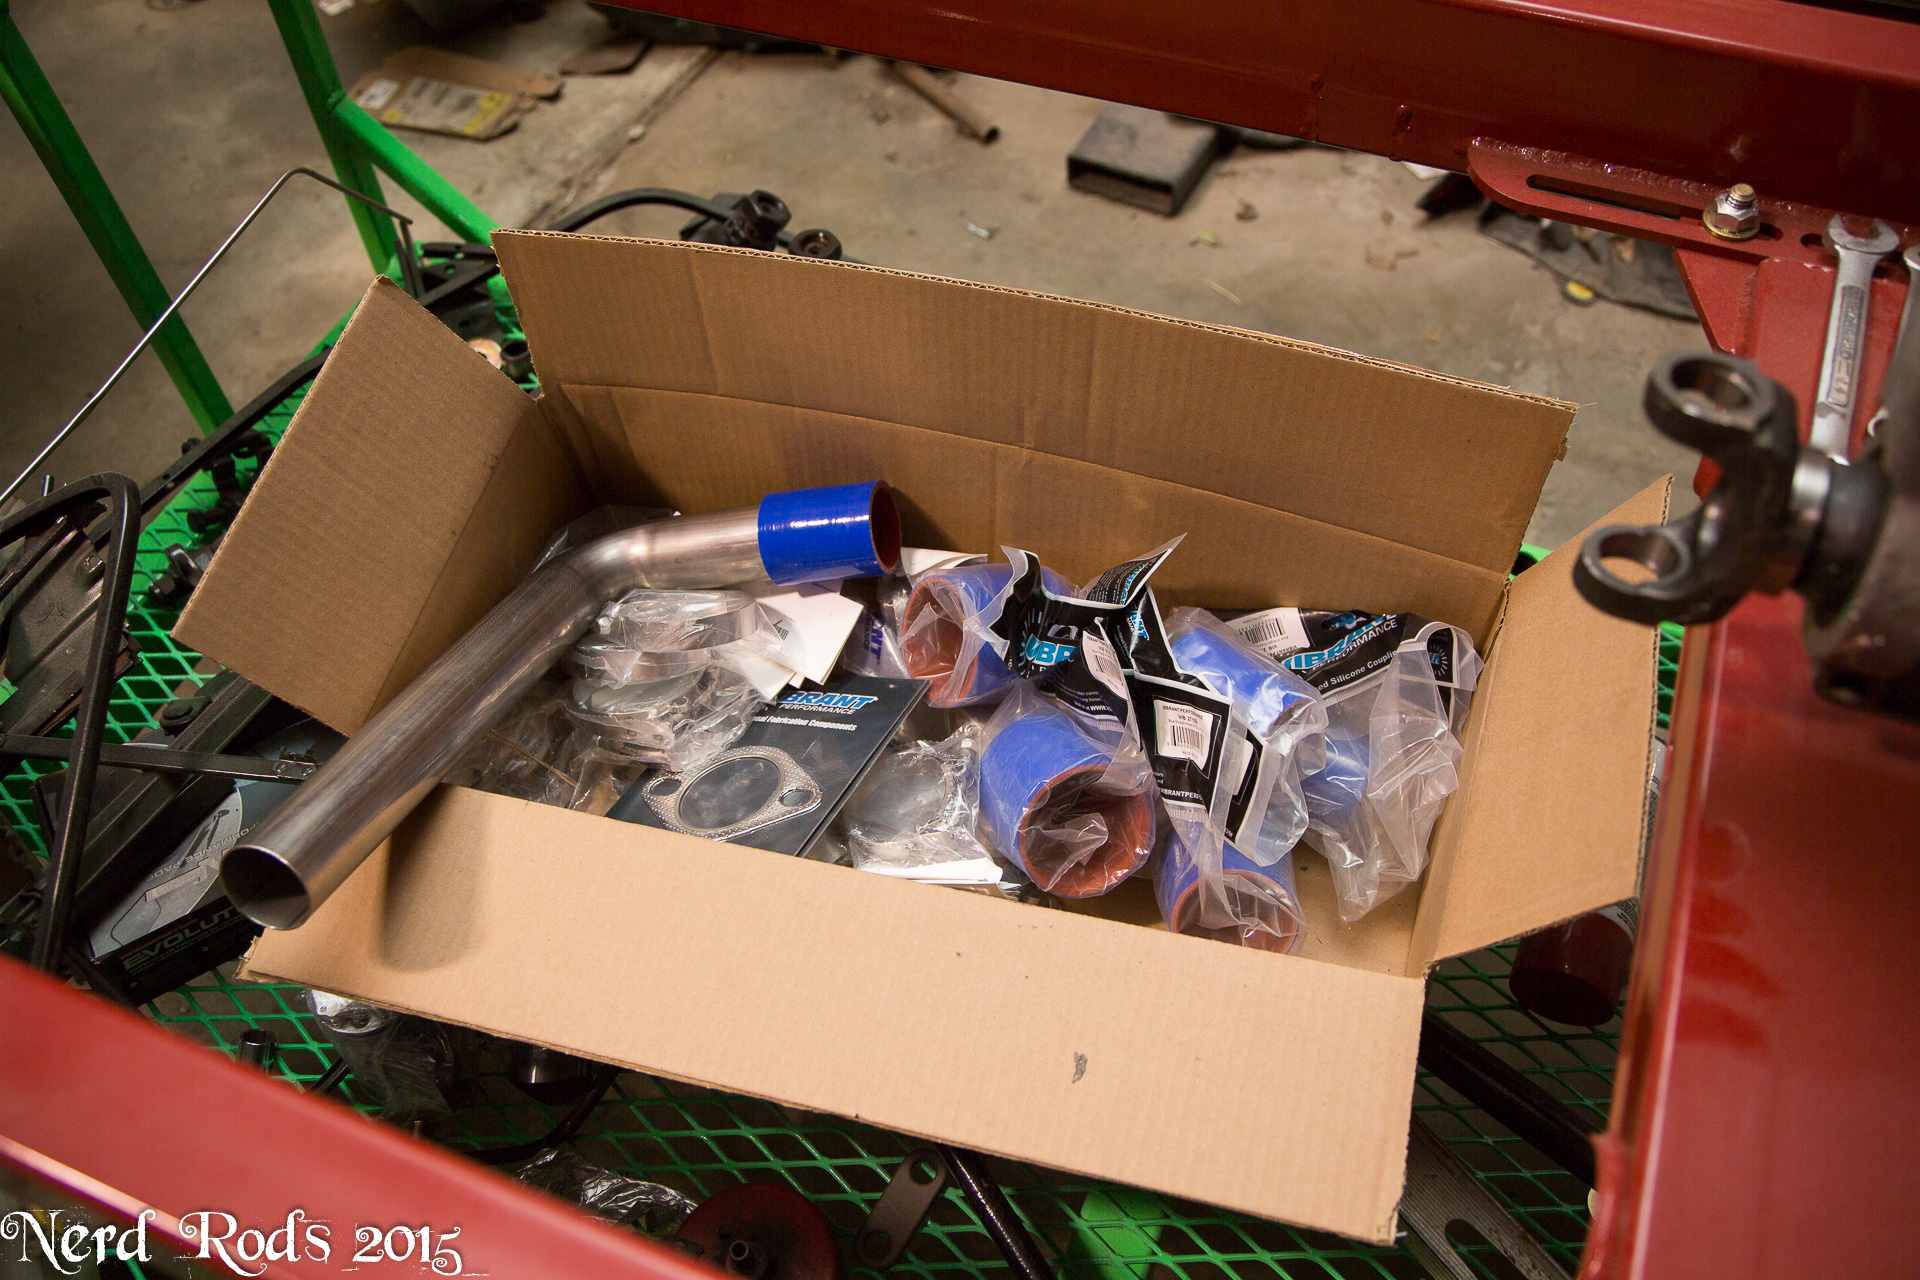
The hard lines are going down and we are getting the turbo system layout worked out as well. Should look something like this but with 2.5" off the headers into a 3" into the turbo. Then 3" out of the turbo into a dual 2.5" out the back.

Things will slow down for a bit while we get the body work wrapped up and we get 2 customer chassis's wrapped up and shipped out.
Later
-Russell @ Nerd Rods
http://gallery.nerdrods.com/Projects/03_D3/03/
So as you might have seen in the video the chassis is together and the motor and transmission are both in.
Dad got the radiator should made up to fit out generic Griffin Radiator (188.17 Part # 1-25201-X) The PRC Condenser Core ( 120.00 after shipping, its not on their site so you have to call them about it ), and some cheap summit fans (85.94 Summit Racing Cooling Fans, Quantity 2, Part # SUM-G4901 42.97 Each) I updated all this on the first page for the totals as well for people keeping up with pricing. Made up a few tabs to hold it to the stock core support and not I just need to weld it all up.


Body work continues, he keeps finding "just one more thing"..... I was afraid of this. And so Dad's Down and Dirty just became Dad's Down and Dangerous. We'll see how much longer he keeps up at it but I think its going to end up pretty darn nice when he's finished.
The hard lines are going down and we are getting the turbo system layout worked out as well. Should look something like this but with 2.5" off the headers into a 3" into the turbo. Then 3" out of the turbo into a dual 2.5" out the back.

Things will slow down for a bit while we get the body work wrapped up and we get 2 customer chassis's wrapped up and shipped out.
Later
-Russell @ Nerd Rods
Last edited by rat_rod_russell; 10-20-2015 at 11:32 AM.