
Chevy Beretta Ls1/t56 Build

 08-04-2018, 11:53 PM
#122
On The Tree
Thread Starter

Got these things a few weeks back. Havnt had a chance to touch them yet.. but I have them!
literally just tossed in the car, will need to be trimmed down and lowered. the ghetto supports will go away finally! should be really clean looking.


literally just tossed in the car, will need to be trimmed down and lowered. the ghetto supports will go away finally! should be really clean looking.
10-28-2018, 01:26 AM
#123
On The Tree
Thread Starter
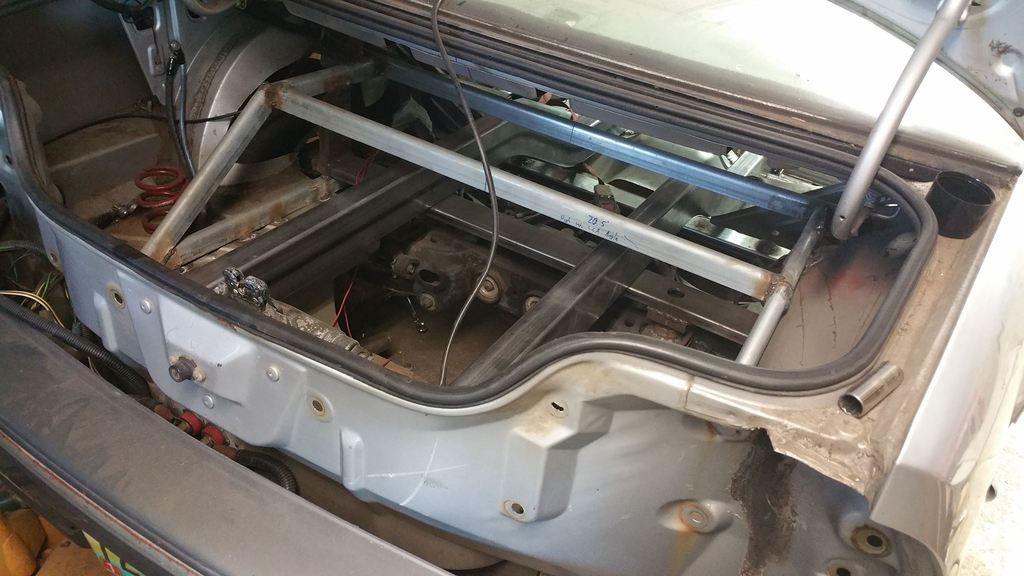
made a little bit of progress this weekend, jumped away from what I should be doing, had to take a break from reality.
FINALLY finished cutting out the drivers side for the frame rail. little bit of minor touchups to do, the rail physically fits. I think next weekend ill kill the rust and get it tacked in. Just out of time this weekend.

Also picked this thing up awhile back. Need to get a torch and pedal still but this will step up the build! few things I didnt want to use the mig welder for too so it will be nice to be able to do it myself with a tig. I foresee titanium parts in the future.

FINALLY finished cutting out the drivers side for the frame rail. little bit of minor touchups to do, the rail physically fits. I think next weekend ill kill the rust and get it tacked in. Just out of time this weekend.
Also picked this thing up awhile back. Need to get a torch and pedal still but this will step up the build! few things I didnt want to use the mig welder for too so it will be nice to be able to do it myself with a tig. I foresee titanium parts in the future.
10-28-2018, 09:38 AM
#124

Congats on the new welder. Its nice to have the ability ti tig your own stuff.
12-05-2018, 08:06 PM
#125
On The Tree
Thread Starter
update from a few weeks ago, Just been too busy to get on here.

angle Iron welded in, welds are nicer than they look in this picture dont worry. Not perfect.. but nicer lol.


This is where it sits now. Going through ideas on how im going to make the driveshaft go through the frame when I connect the rails together in the back. Im pretty sure I have it figured out, just not ready to do it yet. Cant sit too low or it will screw up the flat floor im planning, cant sit too high or it will screw up the back seat haha. Hoping to have it welded in, but its looking like it will need to have the bottom bolted in to have driveshaft access. Need to think on it a bit more, and order some metal. If im not explaining it very well ill have pictures of it in a few weeks I think.
angle Iron welded in, welds are nicer than they look in this picture dont worry. Not perfect.. but nicer lol.
This is where it sits now. Going through ideas on how im going to make the driveshaft go through the frame when I connect the rails together in the back. Im pretty sure I have it figured out, just not ready to do it yet. Cant sit too low or it will screw up the flat floor im planning, cant sit too high or it will screw up the back seat haha. Hoping to have it welded in, but its looking like it will need to have the bottom bolted in to have driveshaft access. Need to think on it a bit more, and order some metal. If im not explaining it very well ill have pictures of it in a few weeks I think.
12-25-2018, 10:21 PM
#126
On The Tree
Thread Starter
made some progress.

The design. Through frame driveshaft loop. Decided it has to be a bolt in. Mandrel bent 1x2 .120 wall. I found some well on nuts that have an OD of 3/4" (on order) and take a 1/2" bolt. I gave up on finding metric. I will drill 4 1" holes, weld 1" .120 wall DOM tube inside and then weld the nuts in on top. Tube will prevent the frame from crushing when you tighten it down.

I this is in the process of making it fit, Its currently welded. Even clamped down to 2x4 steel it warped a tad, not terrible but I need to straighten it somehow, about 1/8" off. I have the lower bolt on hoop cut, just got burnt out and called it a night. The lower loop section is the same height as the rest of the frame rails, that way It wont screw up my flat floor plans!

also got that cut out so I can weld in my new piece (at the red line, just no picture of it done).
The design. Through frame driveshaft loop. Decided it has to be a bolt in. Mandrel bent 1x2 .120 wall. I found some well on nuts that have an OD of 3/4" (on order) and take a 1/2" bolt. I gave up on finding metric. I will drill 4 1" holes, weld 1" .120 wall DOM tube inside and then weld the nuts in on top. Tube will prevent the frame from crushing when you tighten it down.
I this is in the process of making it fit, Its currently welded. Even clamped down to 2x4 steel it warped a tad, not terrible but I need to straighten it somehow, about 1/8" off. I have the lower bolt on hoop cut, just got burnt out and called it a night. The lower loop section is the same height as the rest of the frame rails, that way It wont screw up my flat floor plans!
also got that cut out so I can weld in my new piece (at the red line, just no picture of it done).
 12-26-2018, 11:53 AM
#128
Those v6 Berettas were quick back in the day. Nice cars from what I remember.
12-26-2018, 01:37 PM
#129
TECH Senior Member
 12-31-2018, 06:45 PM
#130
On The Tree
Thread Starter
Thanks!
yeah I think from the era they were build in they were decent for what they were. I had a blast with mine in fwd form! The biggest downfall for me was the cars literally fall apart, just poorly made. Finding one with a good dash is basically not possible, and the older style interior likes to fall apart too.. I mean they are getting pretty old tho.
My update:

Sadly couldnt grind this one smooth.. The shape on the mandrel bent loop isnt quite flat so it doesnt match up perfectly. Oh well.


All welded up and straight. Had to straighten everything to make it fit together perfectly. I hate how metal moves when you weld it regardless of how secure it is!

Measured out ready to drill.

Perfect fit!


The basic Idea. Pipe is just tossed in, needs prep and welded. I did screw up on the bolt in part, I should have used 3/4" .120 wall and not the same 1"... Ill have to sleeve it with some 3/4 so its aligned when its bolted in and not moving around. no biggie I guess but wtf lol, not sure how I missed that..
ill probably weld the pipe in when I get the weld in nuts this next week. But thats where it stands. Probably have 30 or so hours into that driveshaft loop so far..
yeah I think from the era they were build in they were decent for what they were. I had a blast with mine in fwd form! The biggest downfall for me was the cars literally fall apart, just poorly made. Finding one with a good dash is basically not possible, and the older style interior likes to fall apart too.. I mean they are getting pretty old tho.
My update:
Sadly couldnt grind this one smooth.. The shape on the mandrel bent loop isnt quite flat so it doesnt match up perfectly. Oh well.
All welded up and straight. Had to straighten everything to make it fit together perfectly. I hate how metal moves when you weld it regardless of how secure it is!
Measured out ready to drill.
Perfect fit!
The basic Idea. Pipe is just tossed in, needs prep and welded. I did screw up on the bolt in part, I should have used 3/4" .120 wall and not the same 1"... Ill have to sleeve it with some 3/4 so its aligned when its bolted in and not moving around. no biggie I guess but wtf lol, not sure how I missed that..
ill probably weld the pipe in when I get the weld in nuts this next week. But thats where it stands. Probably have 30 or so hours into that driveshaft loop so far..
01-27-2019, 03:53 PM
#131
Staging Lane

Join Date: Jan 2009
Location: Wichita Falls,TEXAS/ Bamberg, GERMANY
Posts: 89
Likes: 0
Received 0 Likes
on
0 Posts

Nice to see someone finally do a ls swap in a beretta. I had 2 of these back in the day. A 96 base and a 94 base. I enjoyed them for what they were.


 04-15-2019, 03:38 PM
#133
On The Tree
Thread Starter

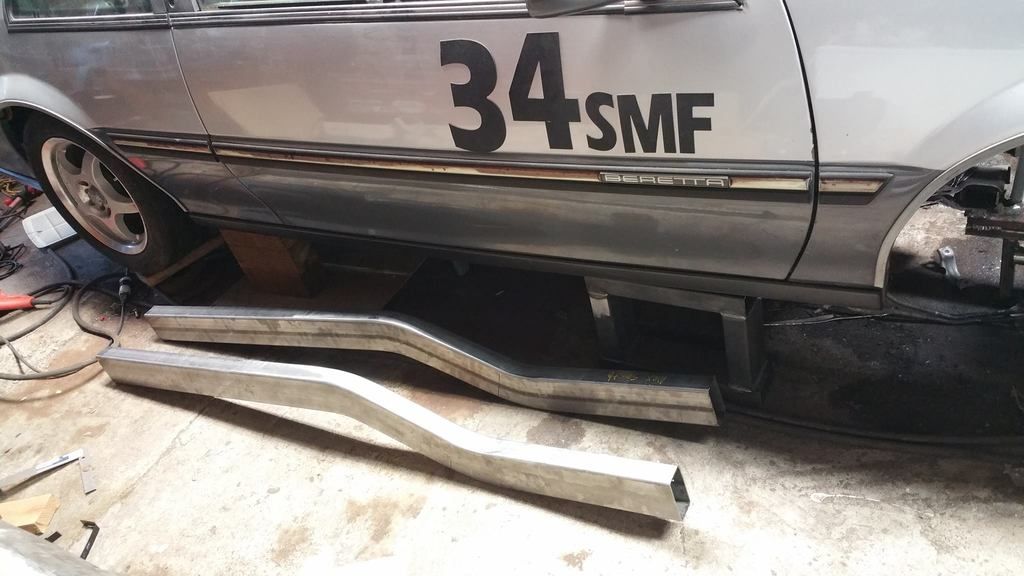
decided to build a quick stand for the subframe so it wouldn't move when I cut the supports out, its exactly where I want it and it needs to stay!


measuring out the frame rail to cut it

the car just happen to be perfect height!


rail poking through


test fitting the rail
04-15-2019, 03:39 PM
#134
On The Tree
Thread Starter


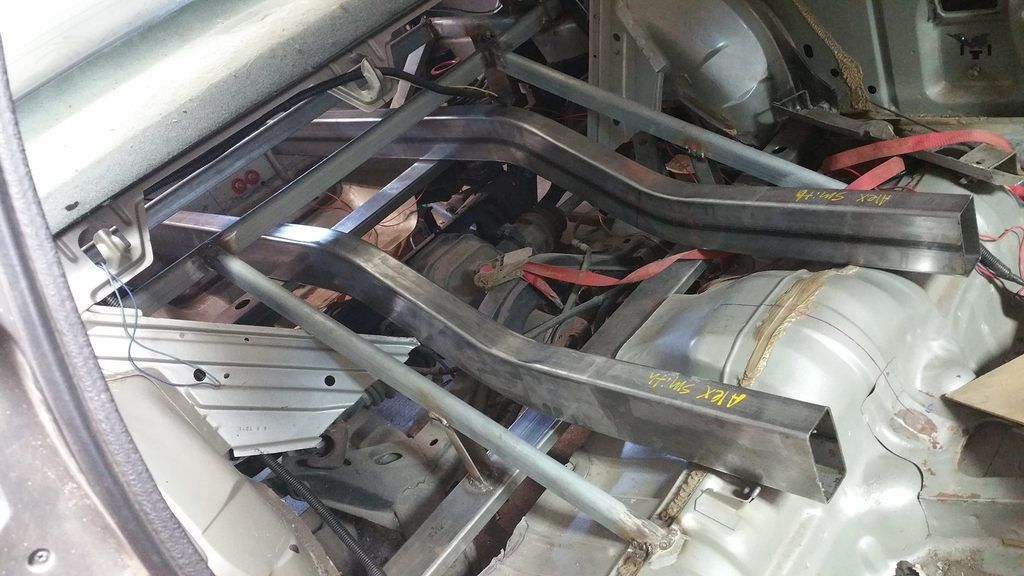
drawing out the other side to cut


sitting "in place"

ready to weld! level, plumb, and square.


got carried away. welded it all up!

its better than the picture lol. doesnt look that great with all the weld through primer splatter.


 04-16-2019, 07:45 PM
#138

Are there supposed to be pictures? I've tried multiple times, over 2 days, on multiple networks, and there don't seem to be any pics, or links to pics.
Am I missing something?
Edit: OK, that's weird. I can see the pics, but only if I quote the post. And the window is so small, I can't see a whole pic at one time.
Jay
Am I missing something?
Edit: OK, that's weird. I can see the pics, but only if I quote the post. And the window is so small, I can't see a whole pic at one time.
Jay
04-16-2019, 11:26 PM
#139
On The Tree
Thread Starter
Thanks! It should be very solid! I dont want any movement. Thats the goal anyways.
Jay- Thats weird. I can see them on chrome and internet explorer. Its still on photobucket, maybe thats an issue still??
Jay- Thats weird. I can see them on chrome and internet explorer. Its still on photobucket, maybe thats an issue still??
04-17-2019, 01:18 PM
#140