
LQ4/LQ9 into 2nd Gen Camaro
 11-08-2015, 11:52 AM
#1

I picked up a new LQ9 block, 317 heads and some other parts at a swap meet for about $400 around 9 months ago. Before this I had been planning on a twin turbo SBC project, but this offer seemed too good to pass up.
Being in the UK means this stuff (any LS) is hard to come by and very expensive (a crate LS2 will cost you well over $10k here).
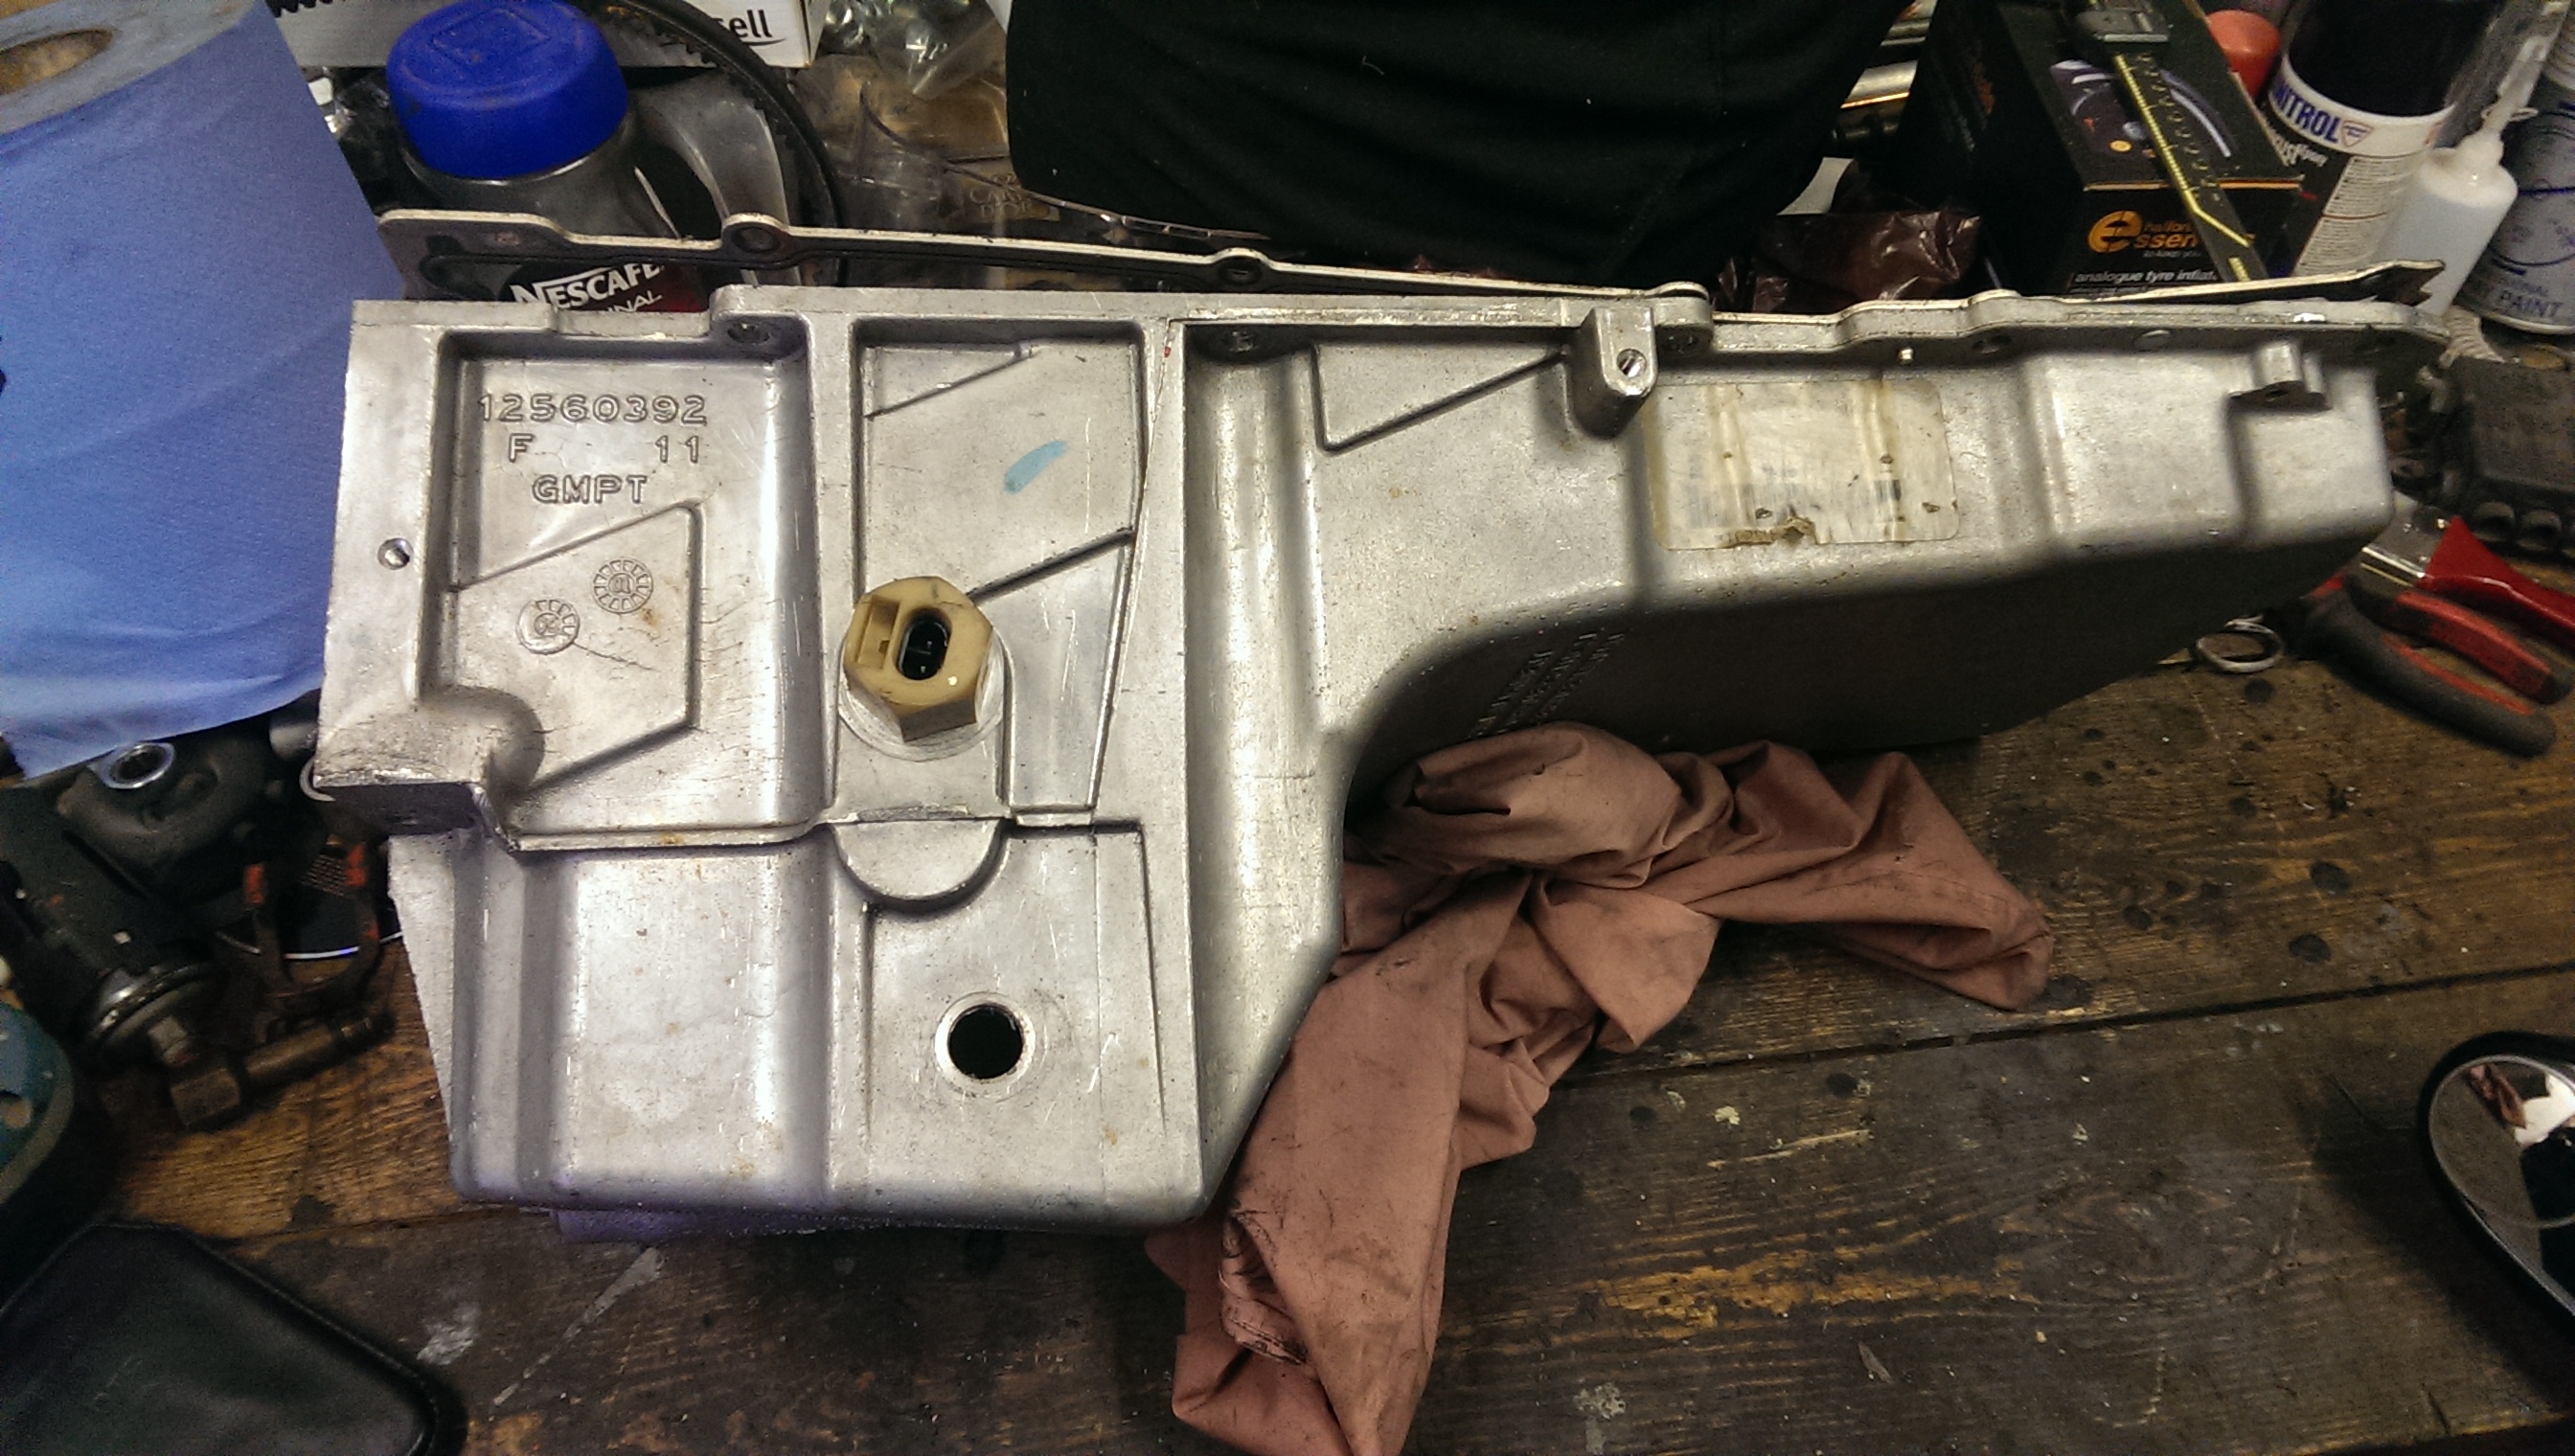
This is the oil pan I got with the engine, think it's a stock truck/escalade one. It's approx 8" deep.
Things have been progressing slowly and I've now got most of the parts together to build my new motor
I got the minor damage on the block brazed up and sorted.
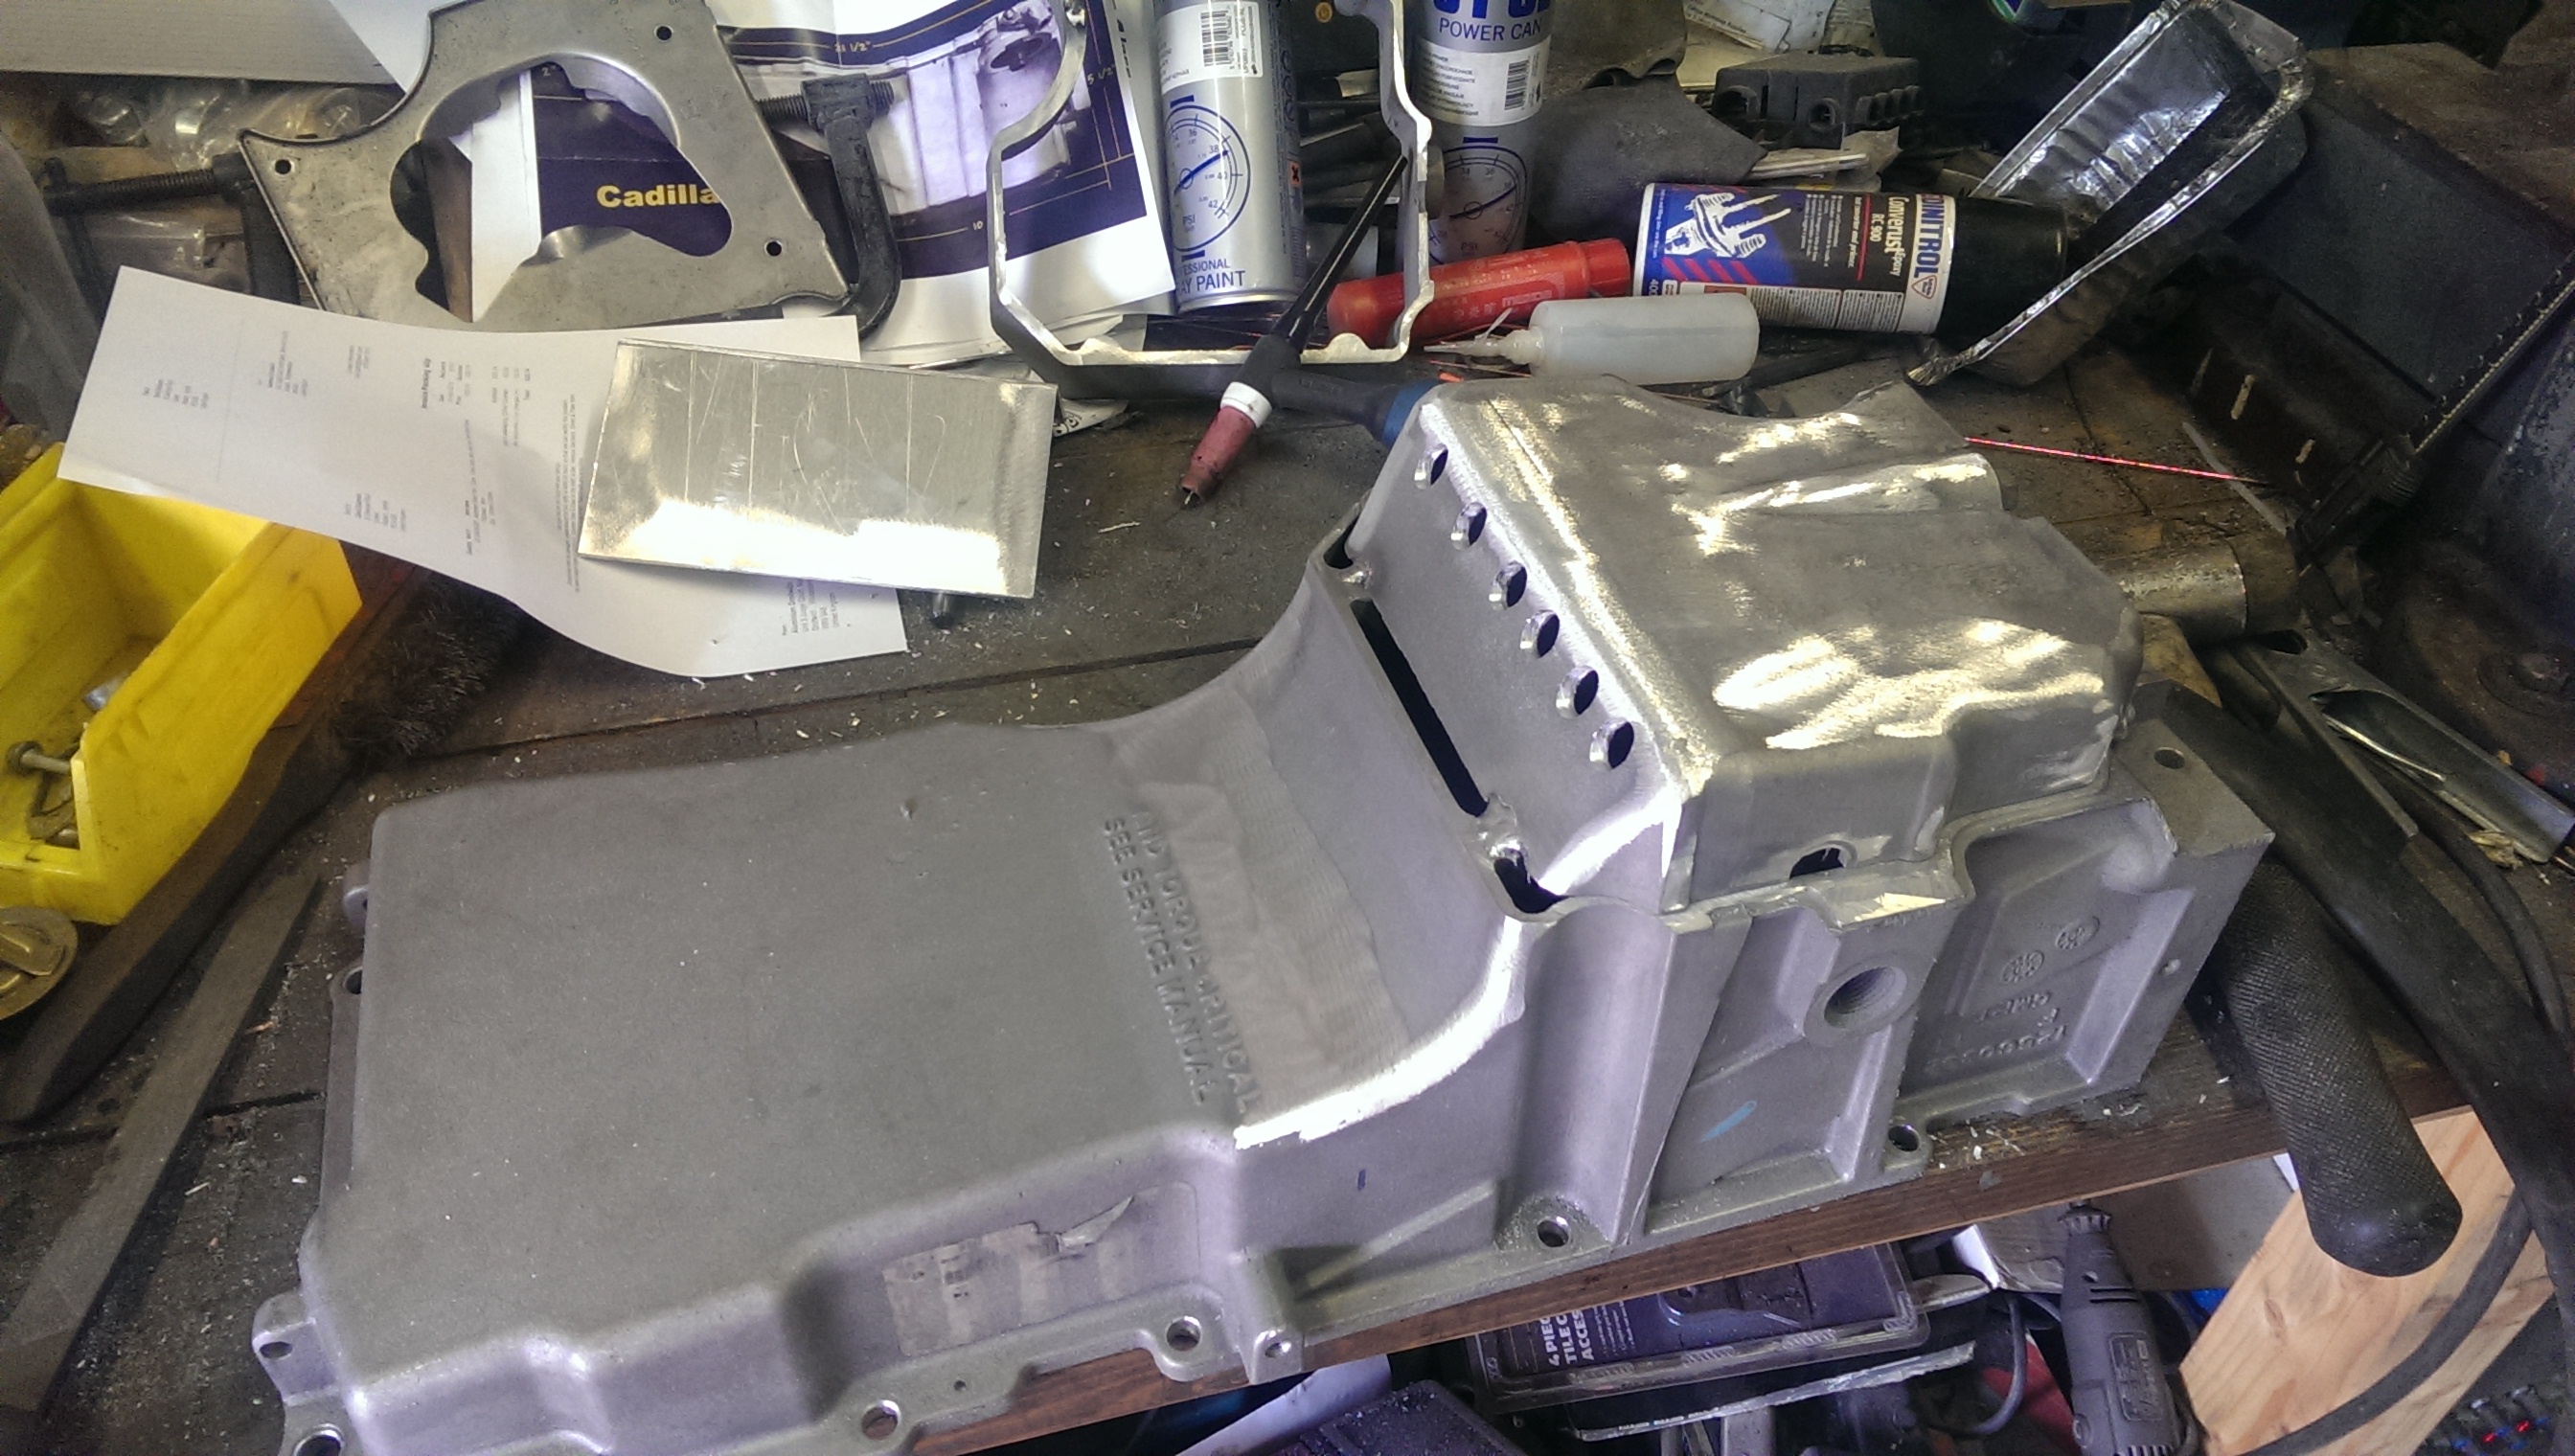
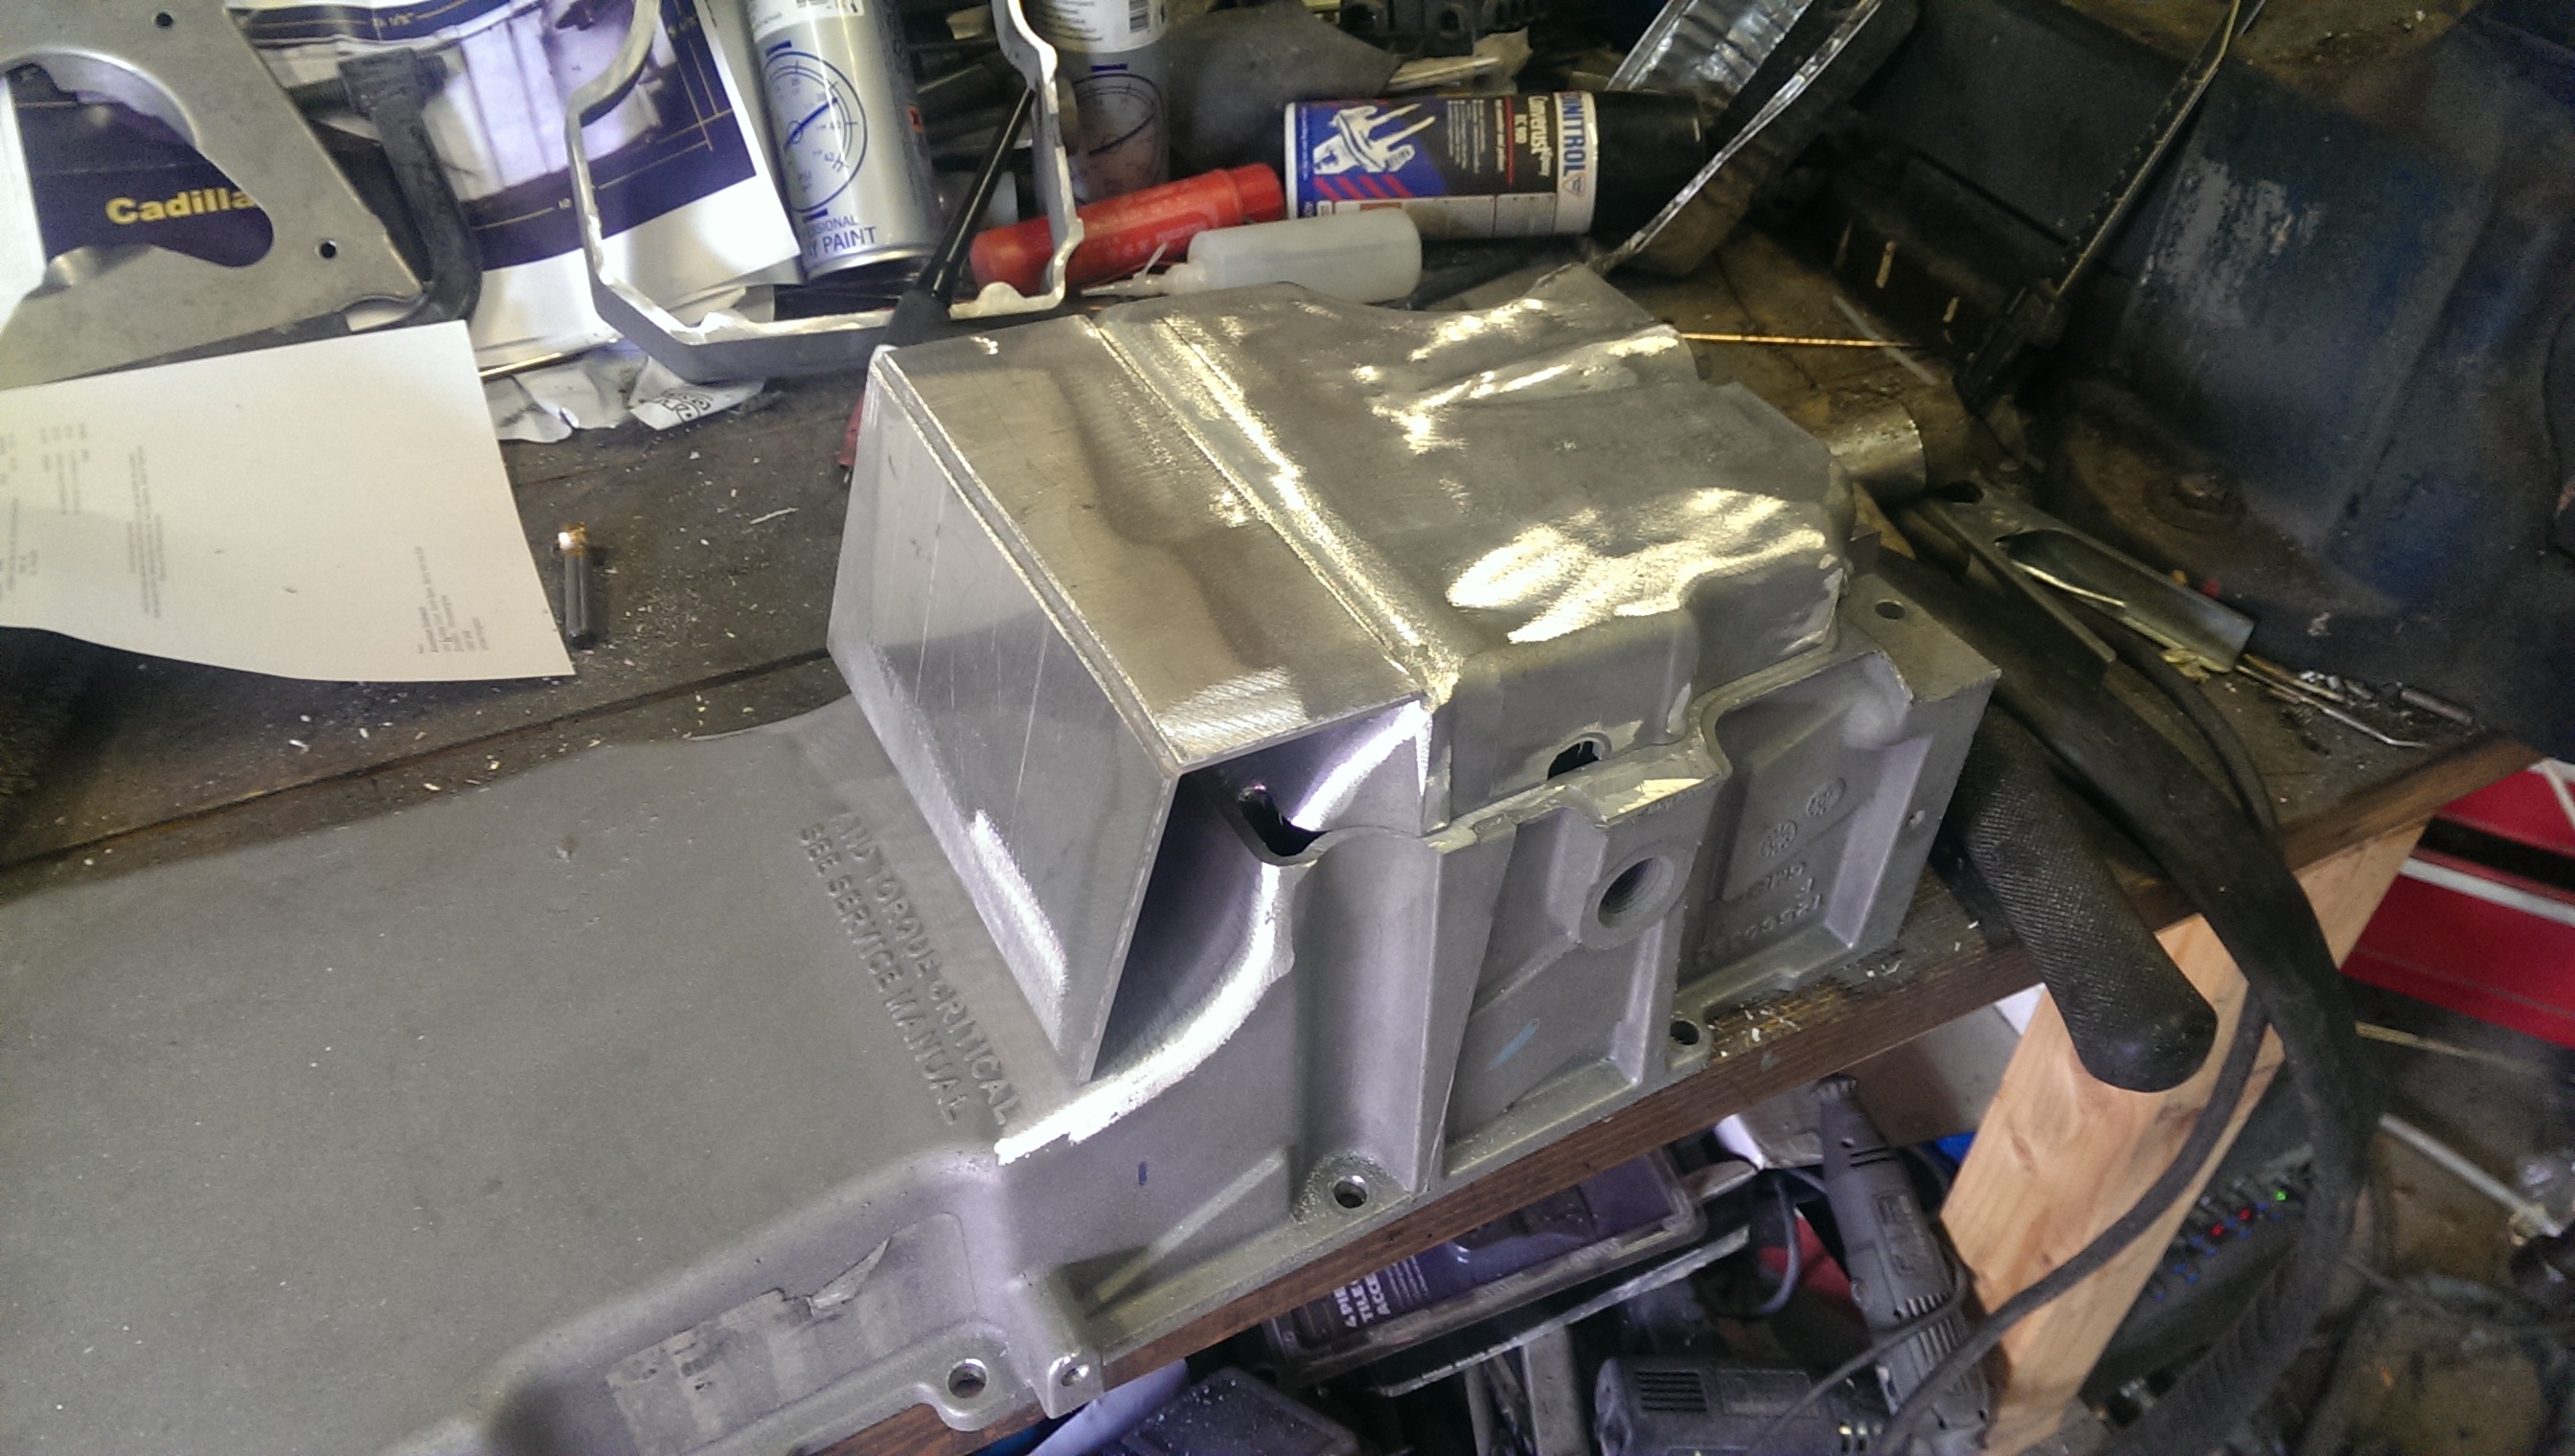
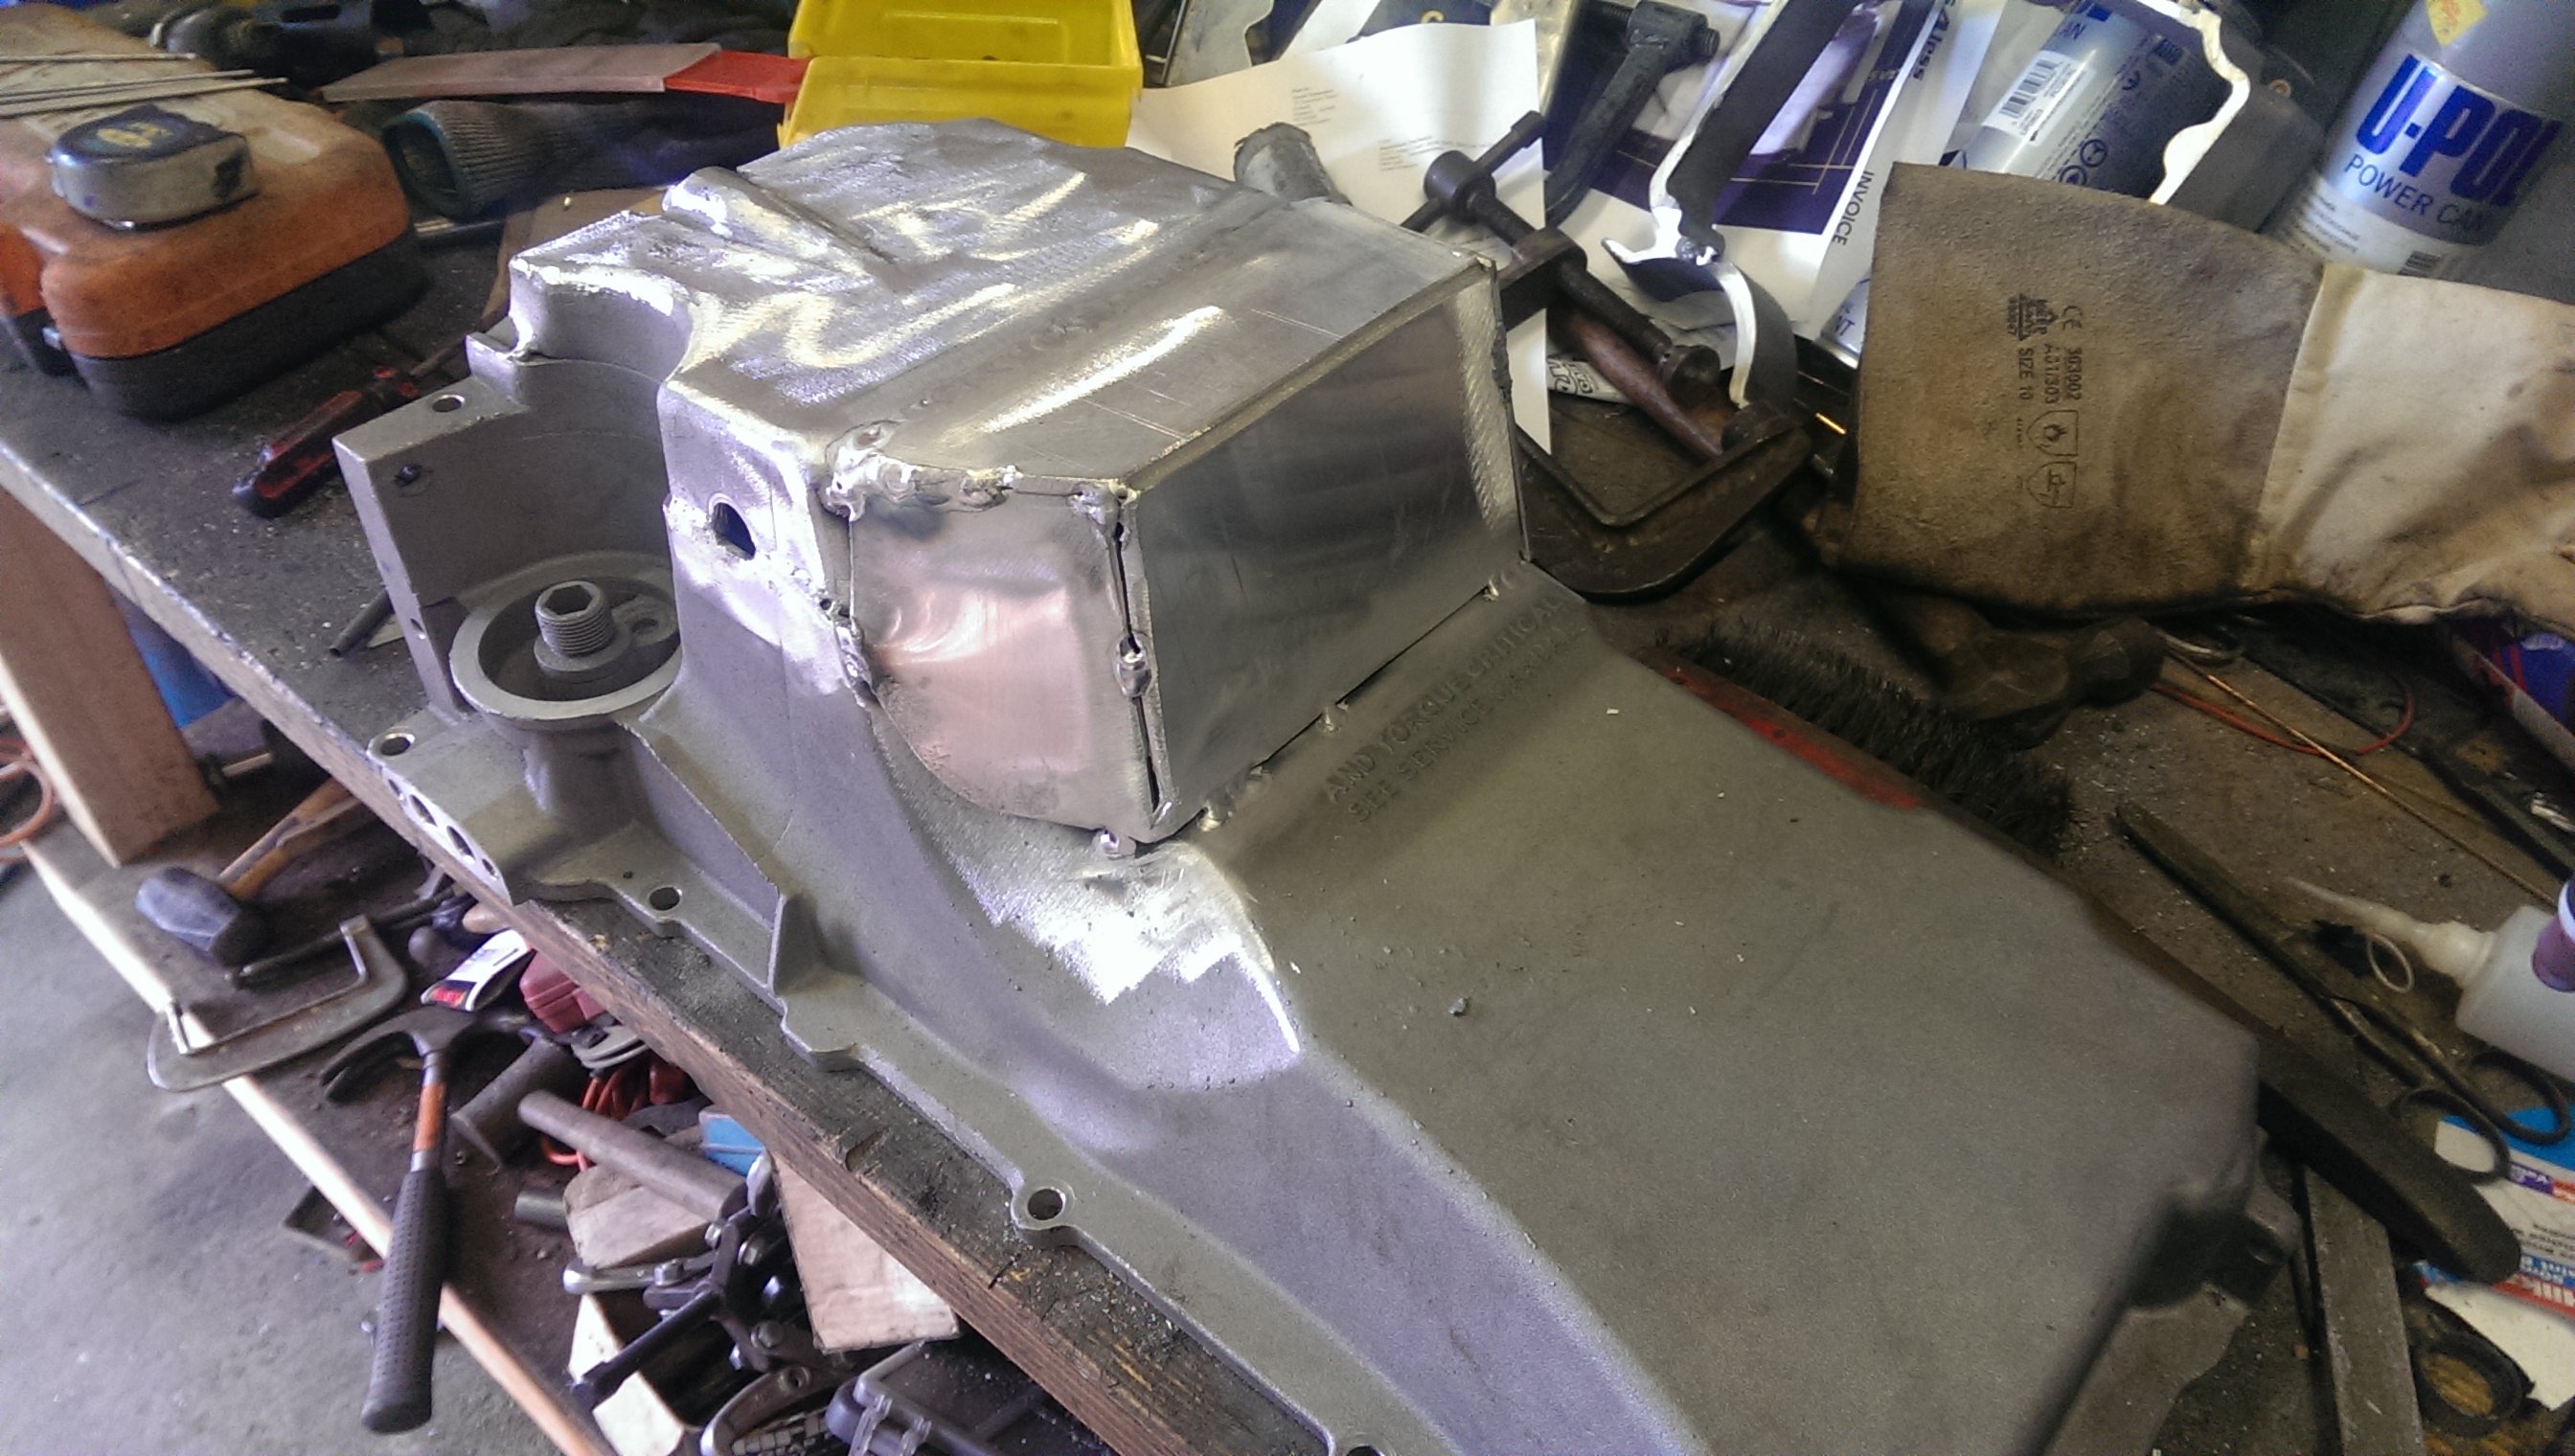
I've chopped and modified the oil pan so it's now the same dimensions (roughly) as a CTS-V pan. Didn't cost me anything except some time and effort
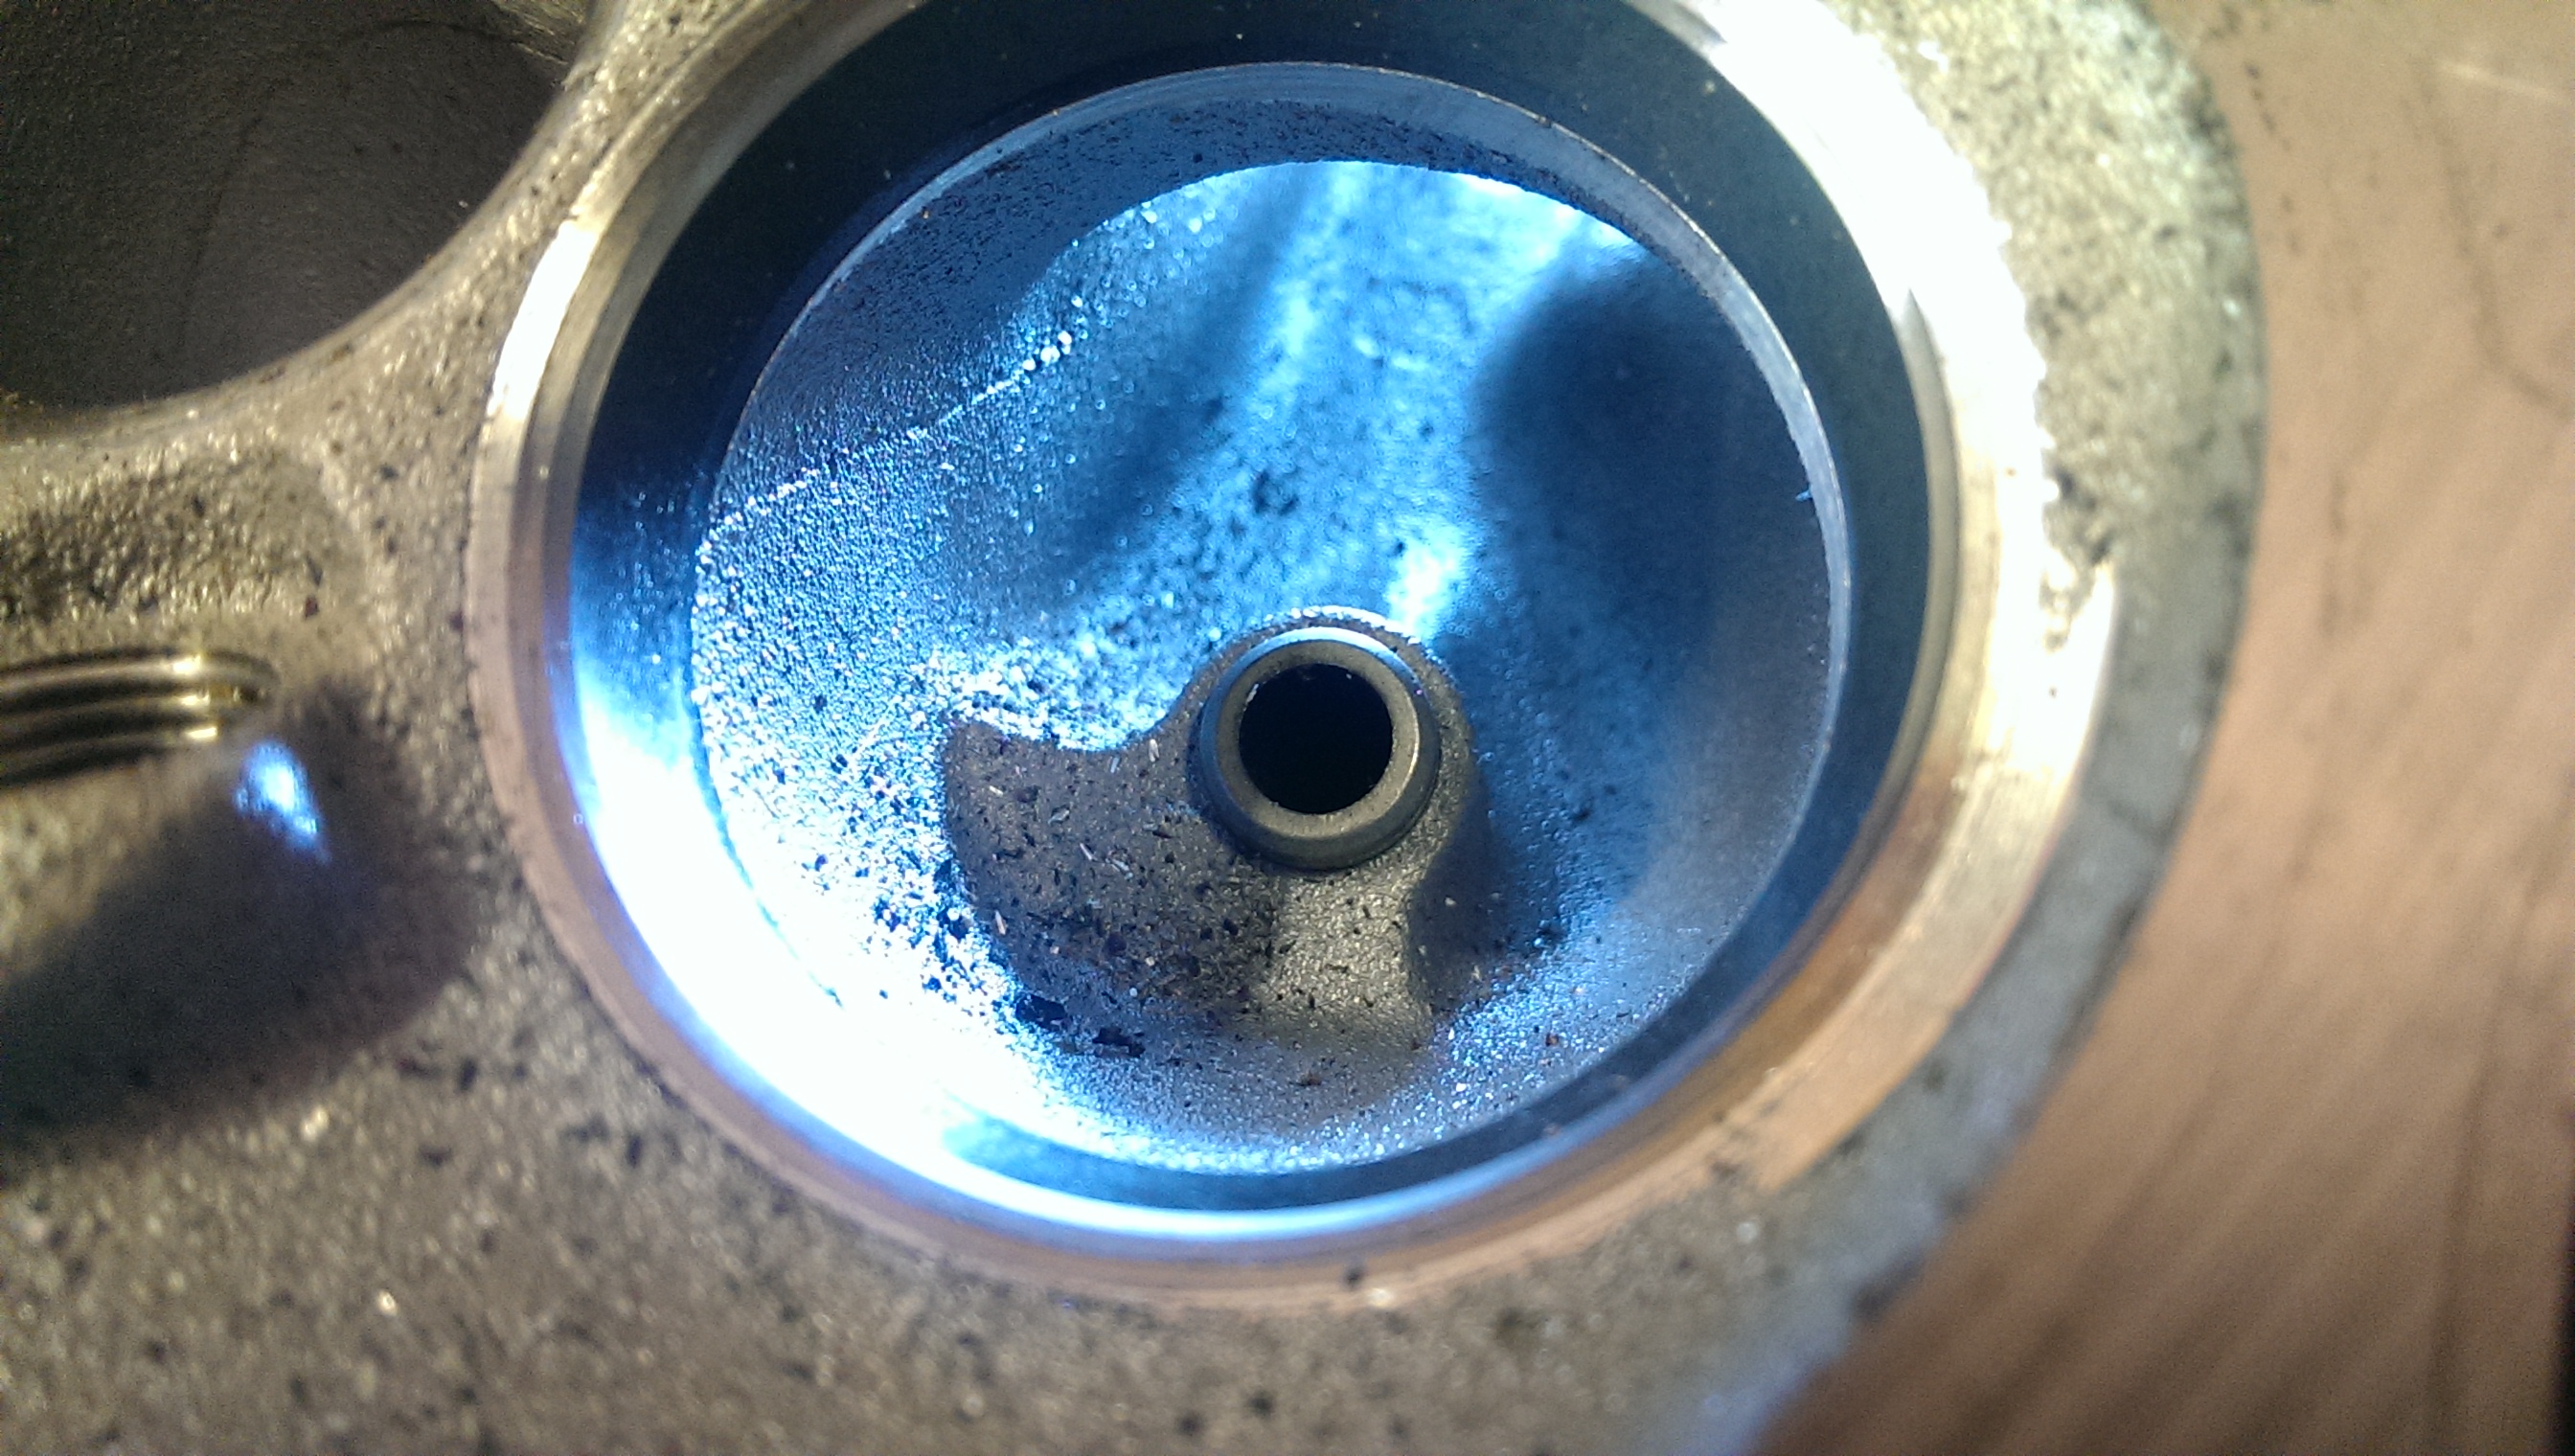
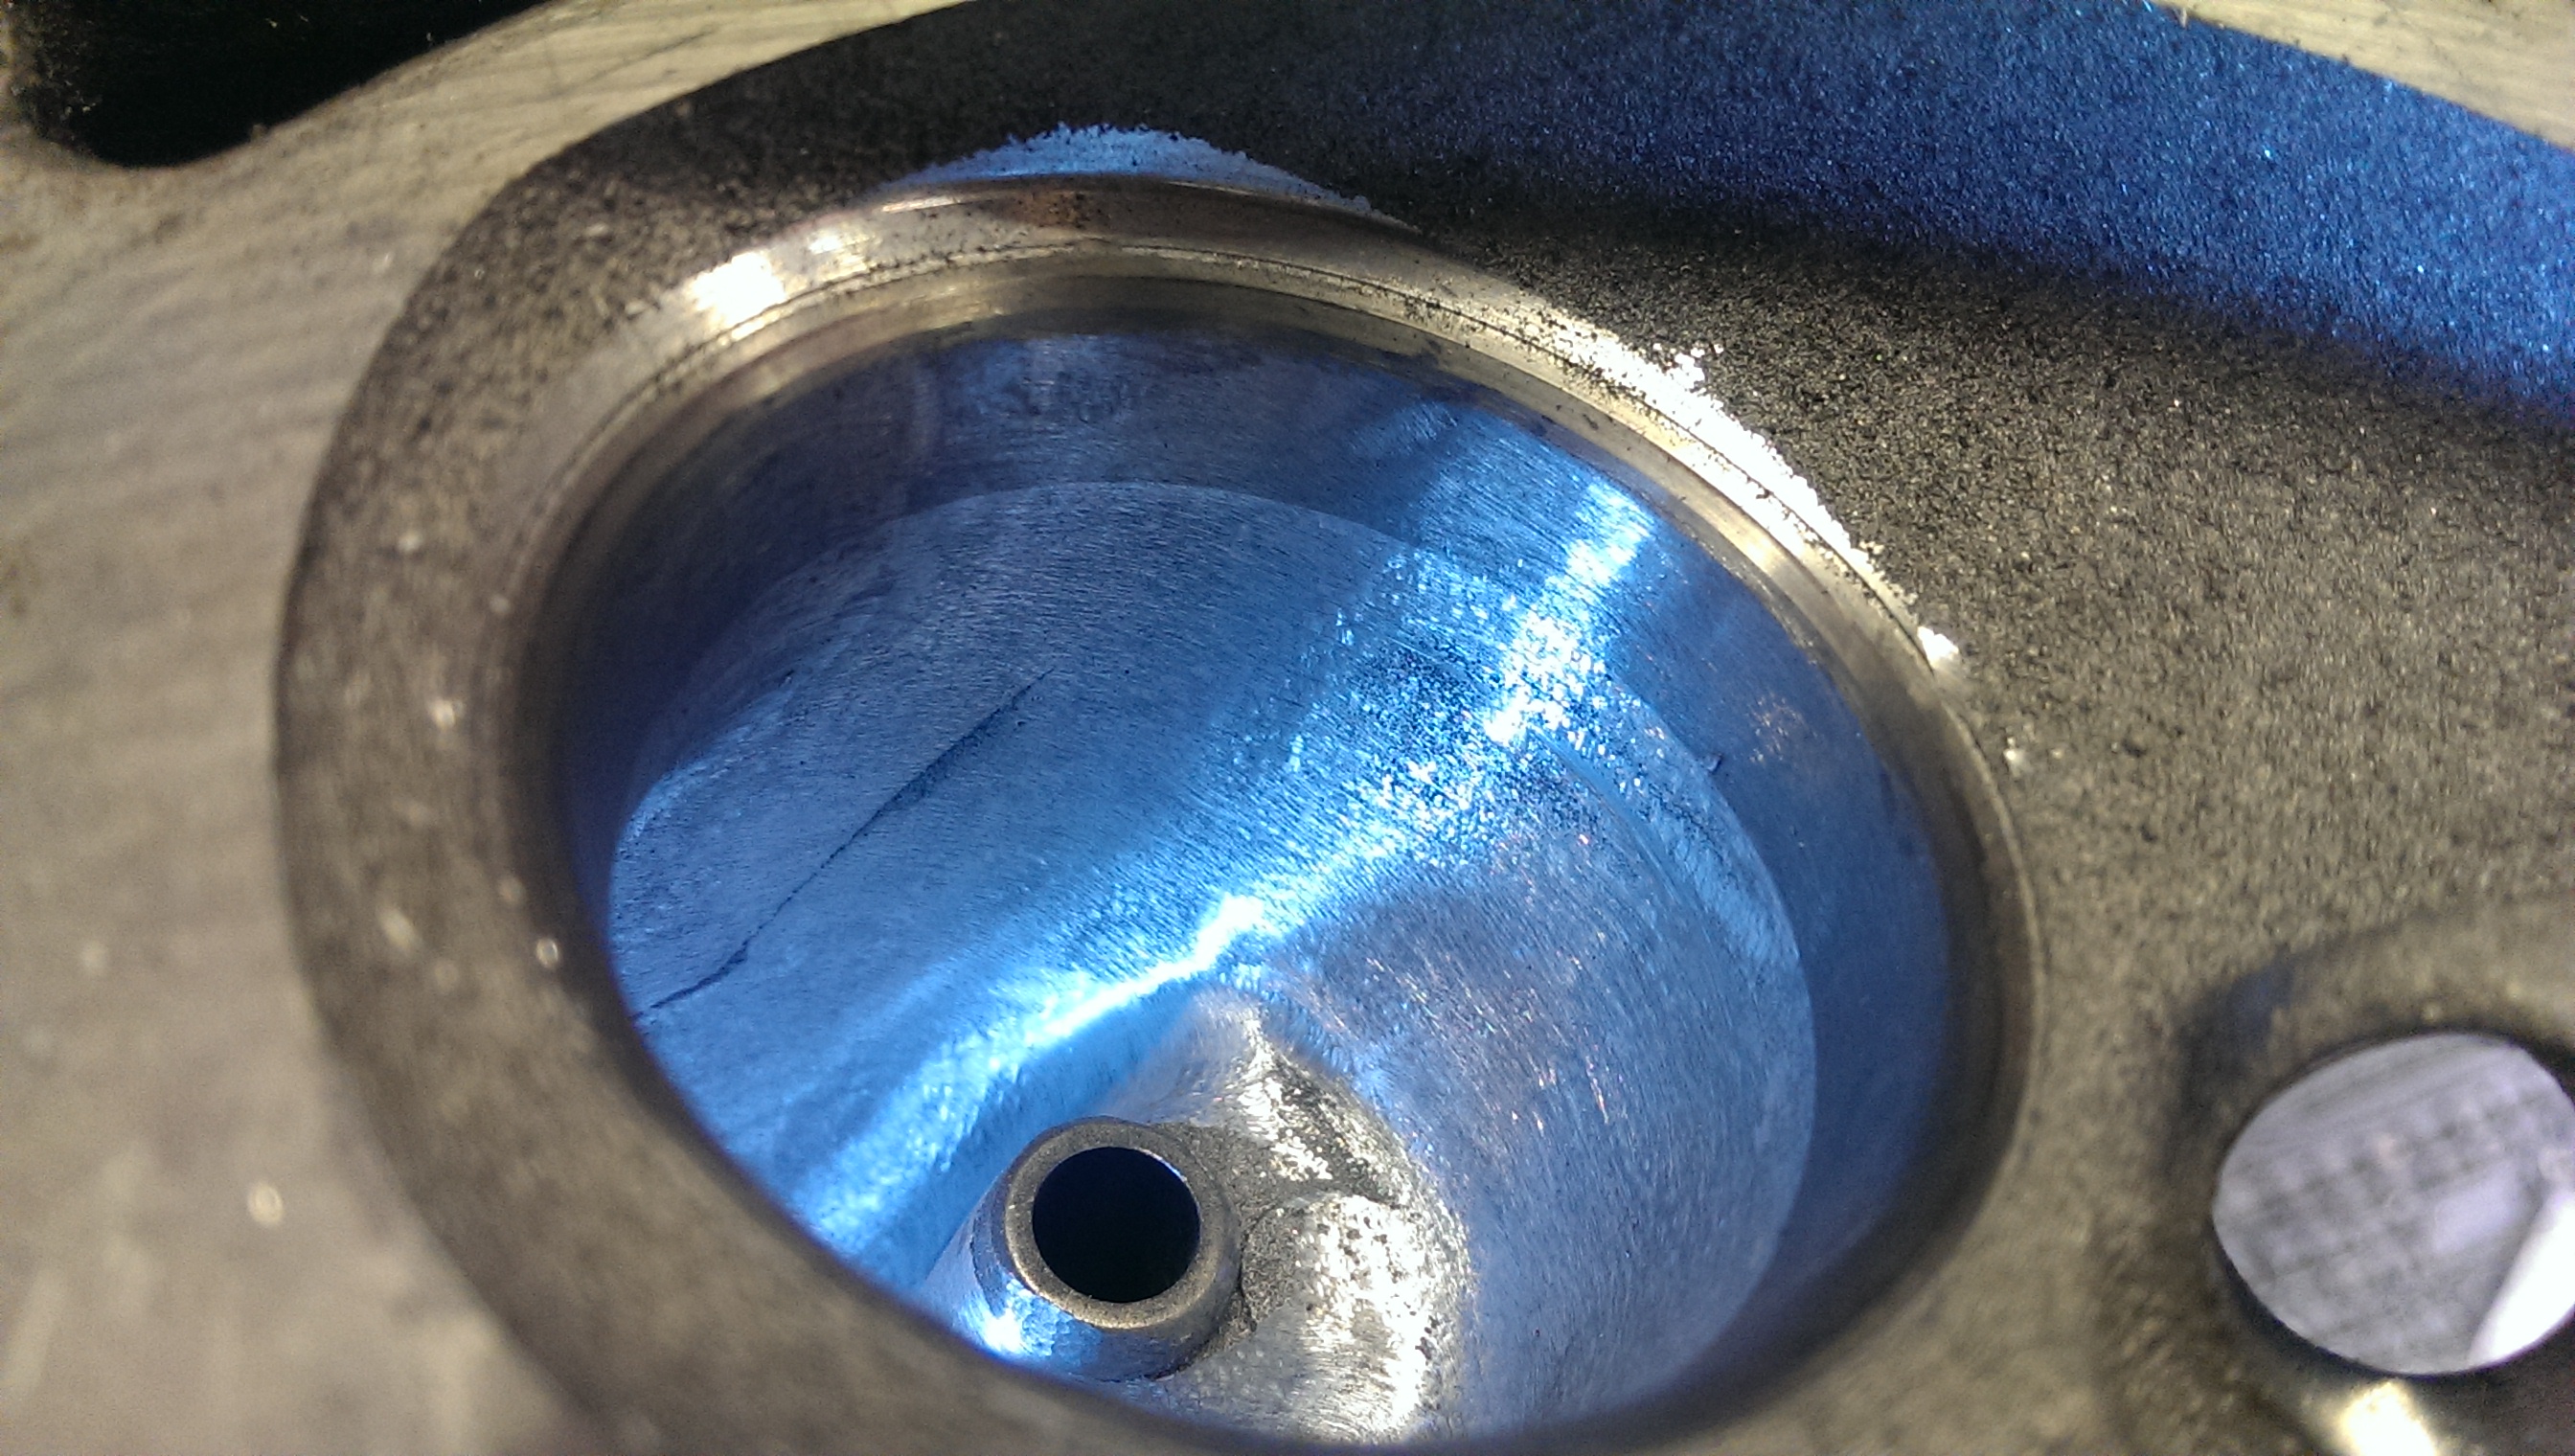
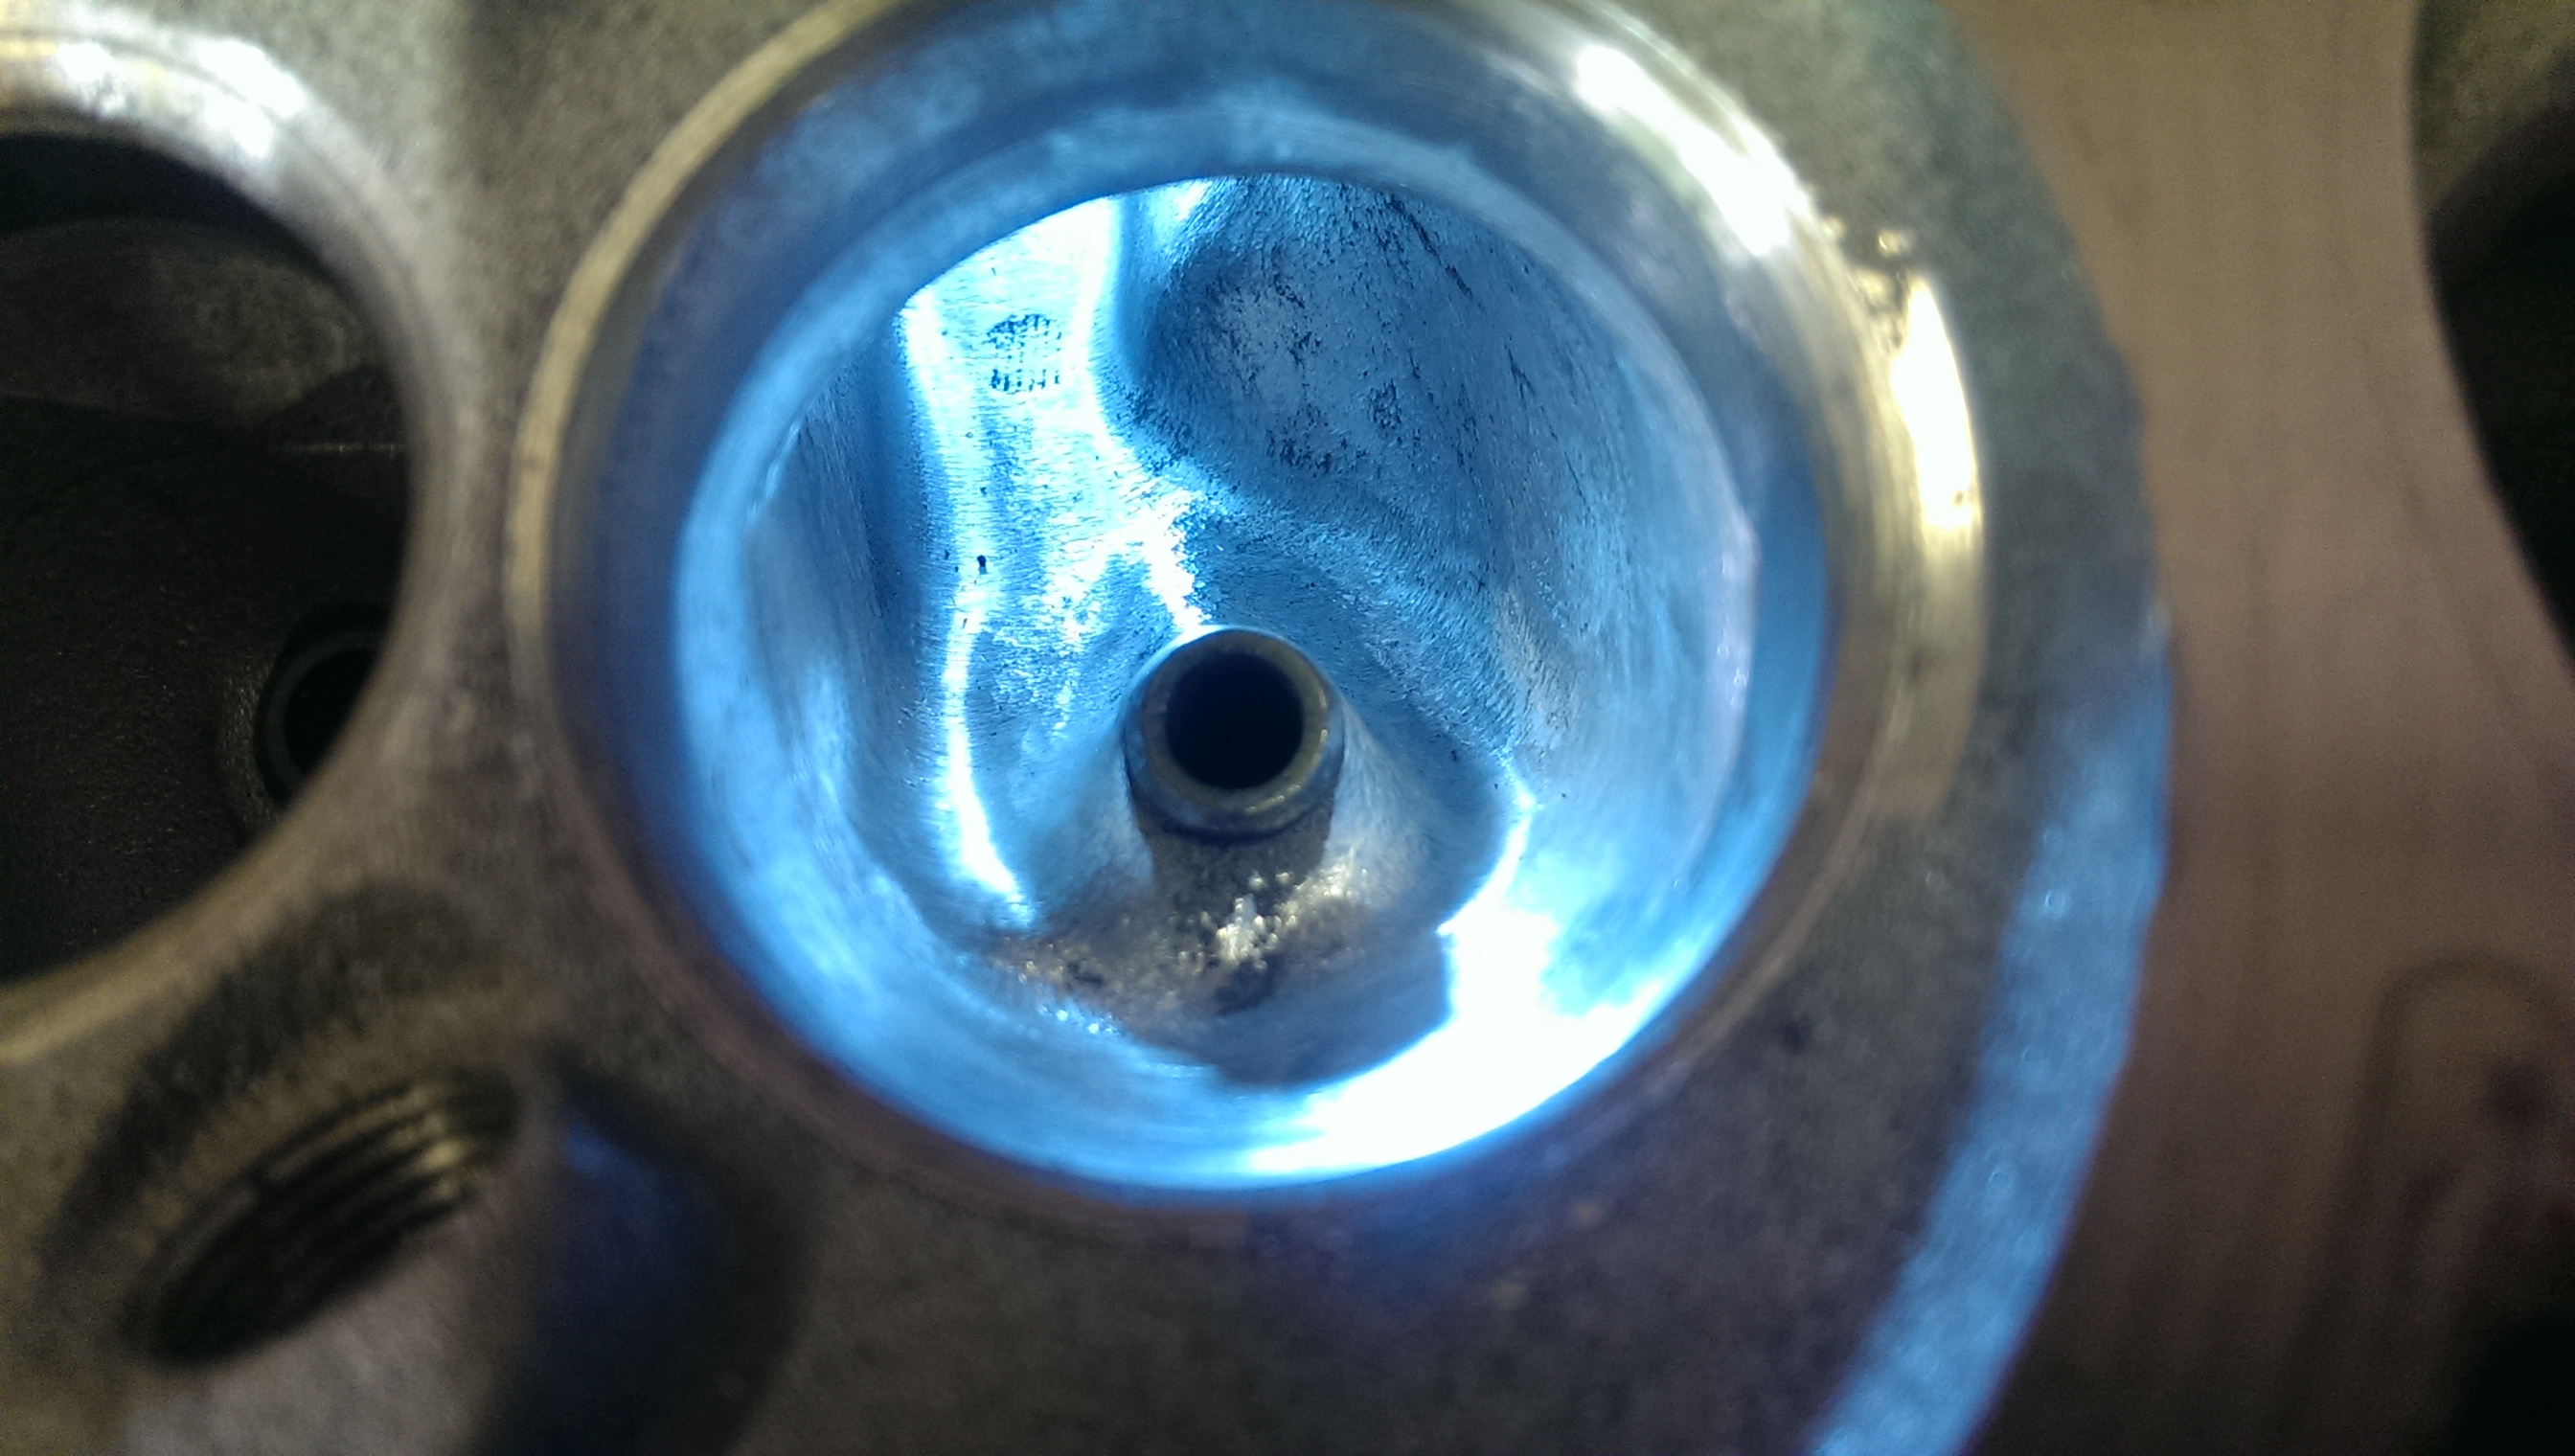
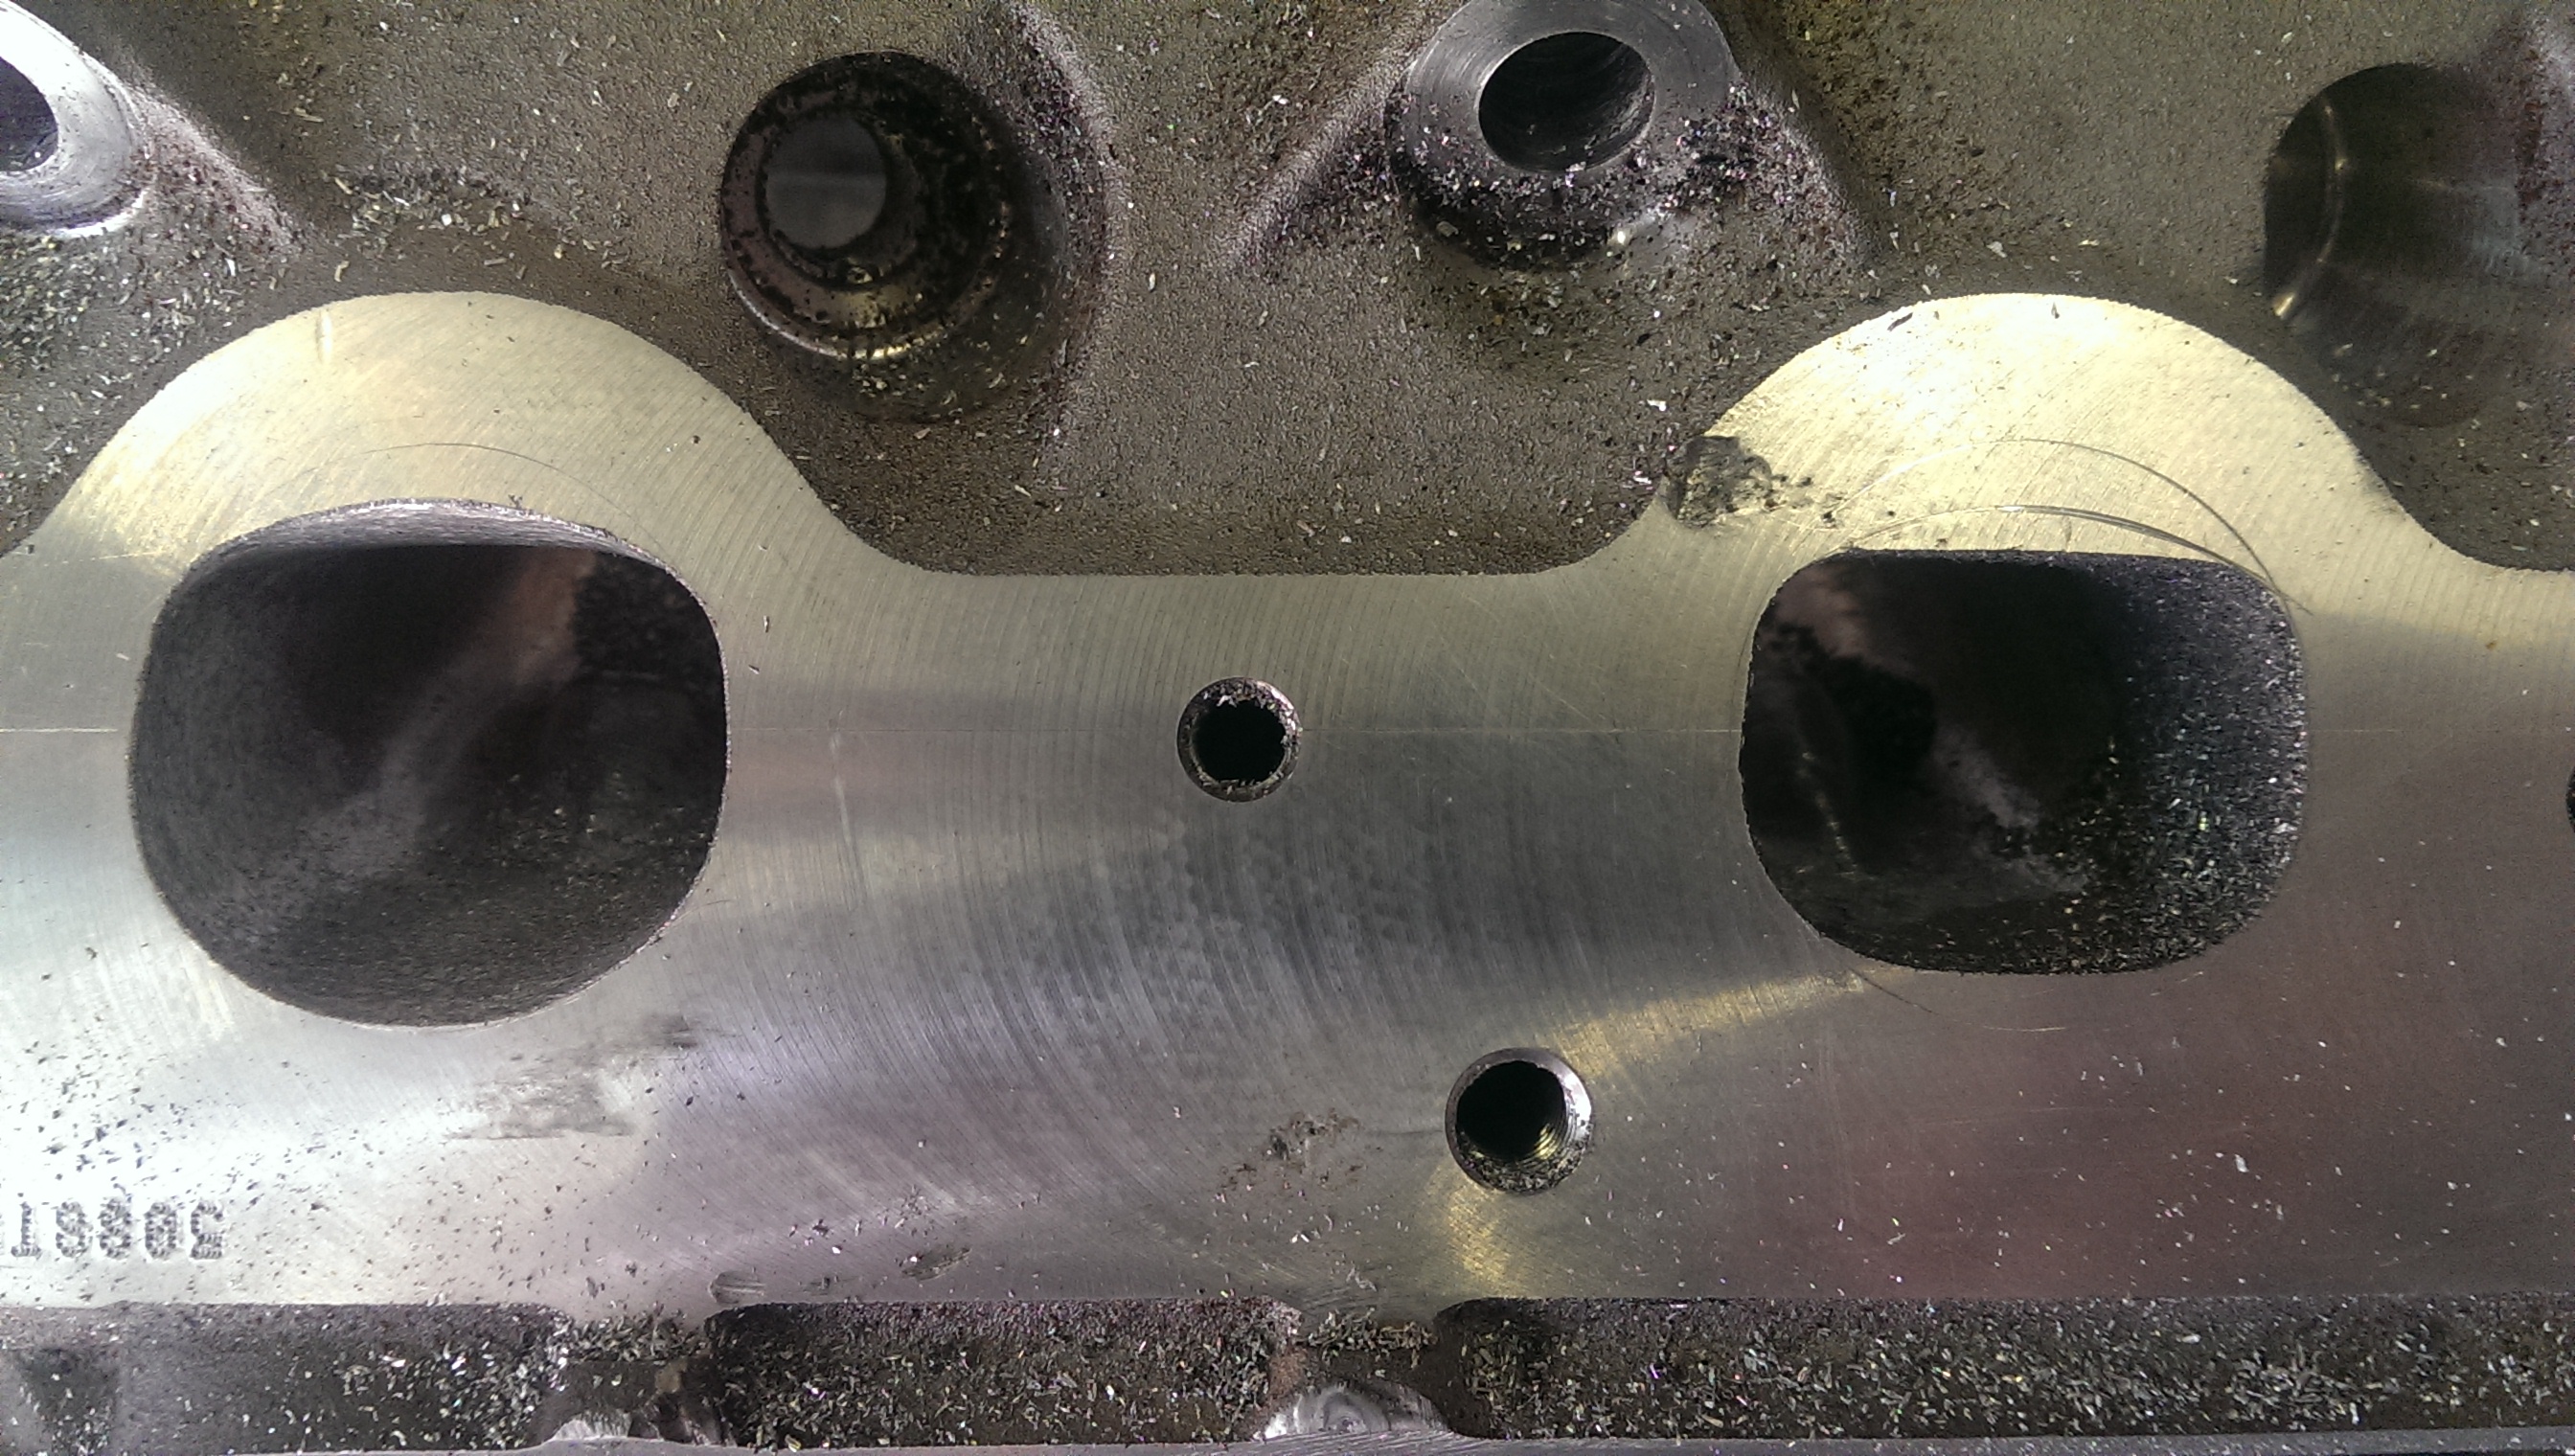
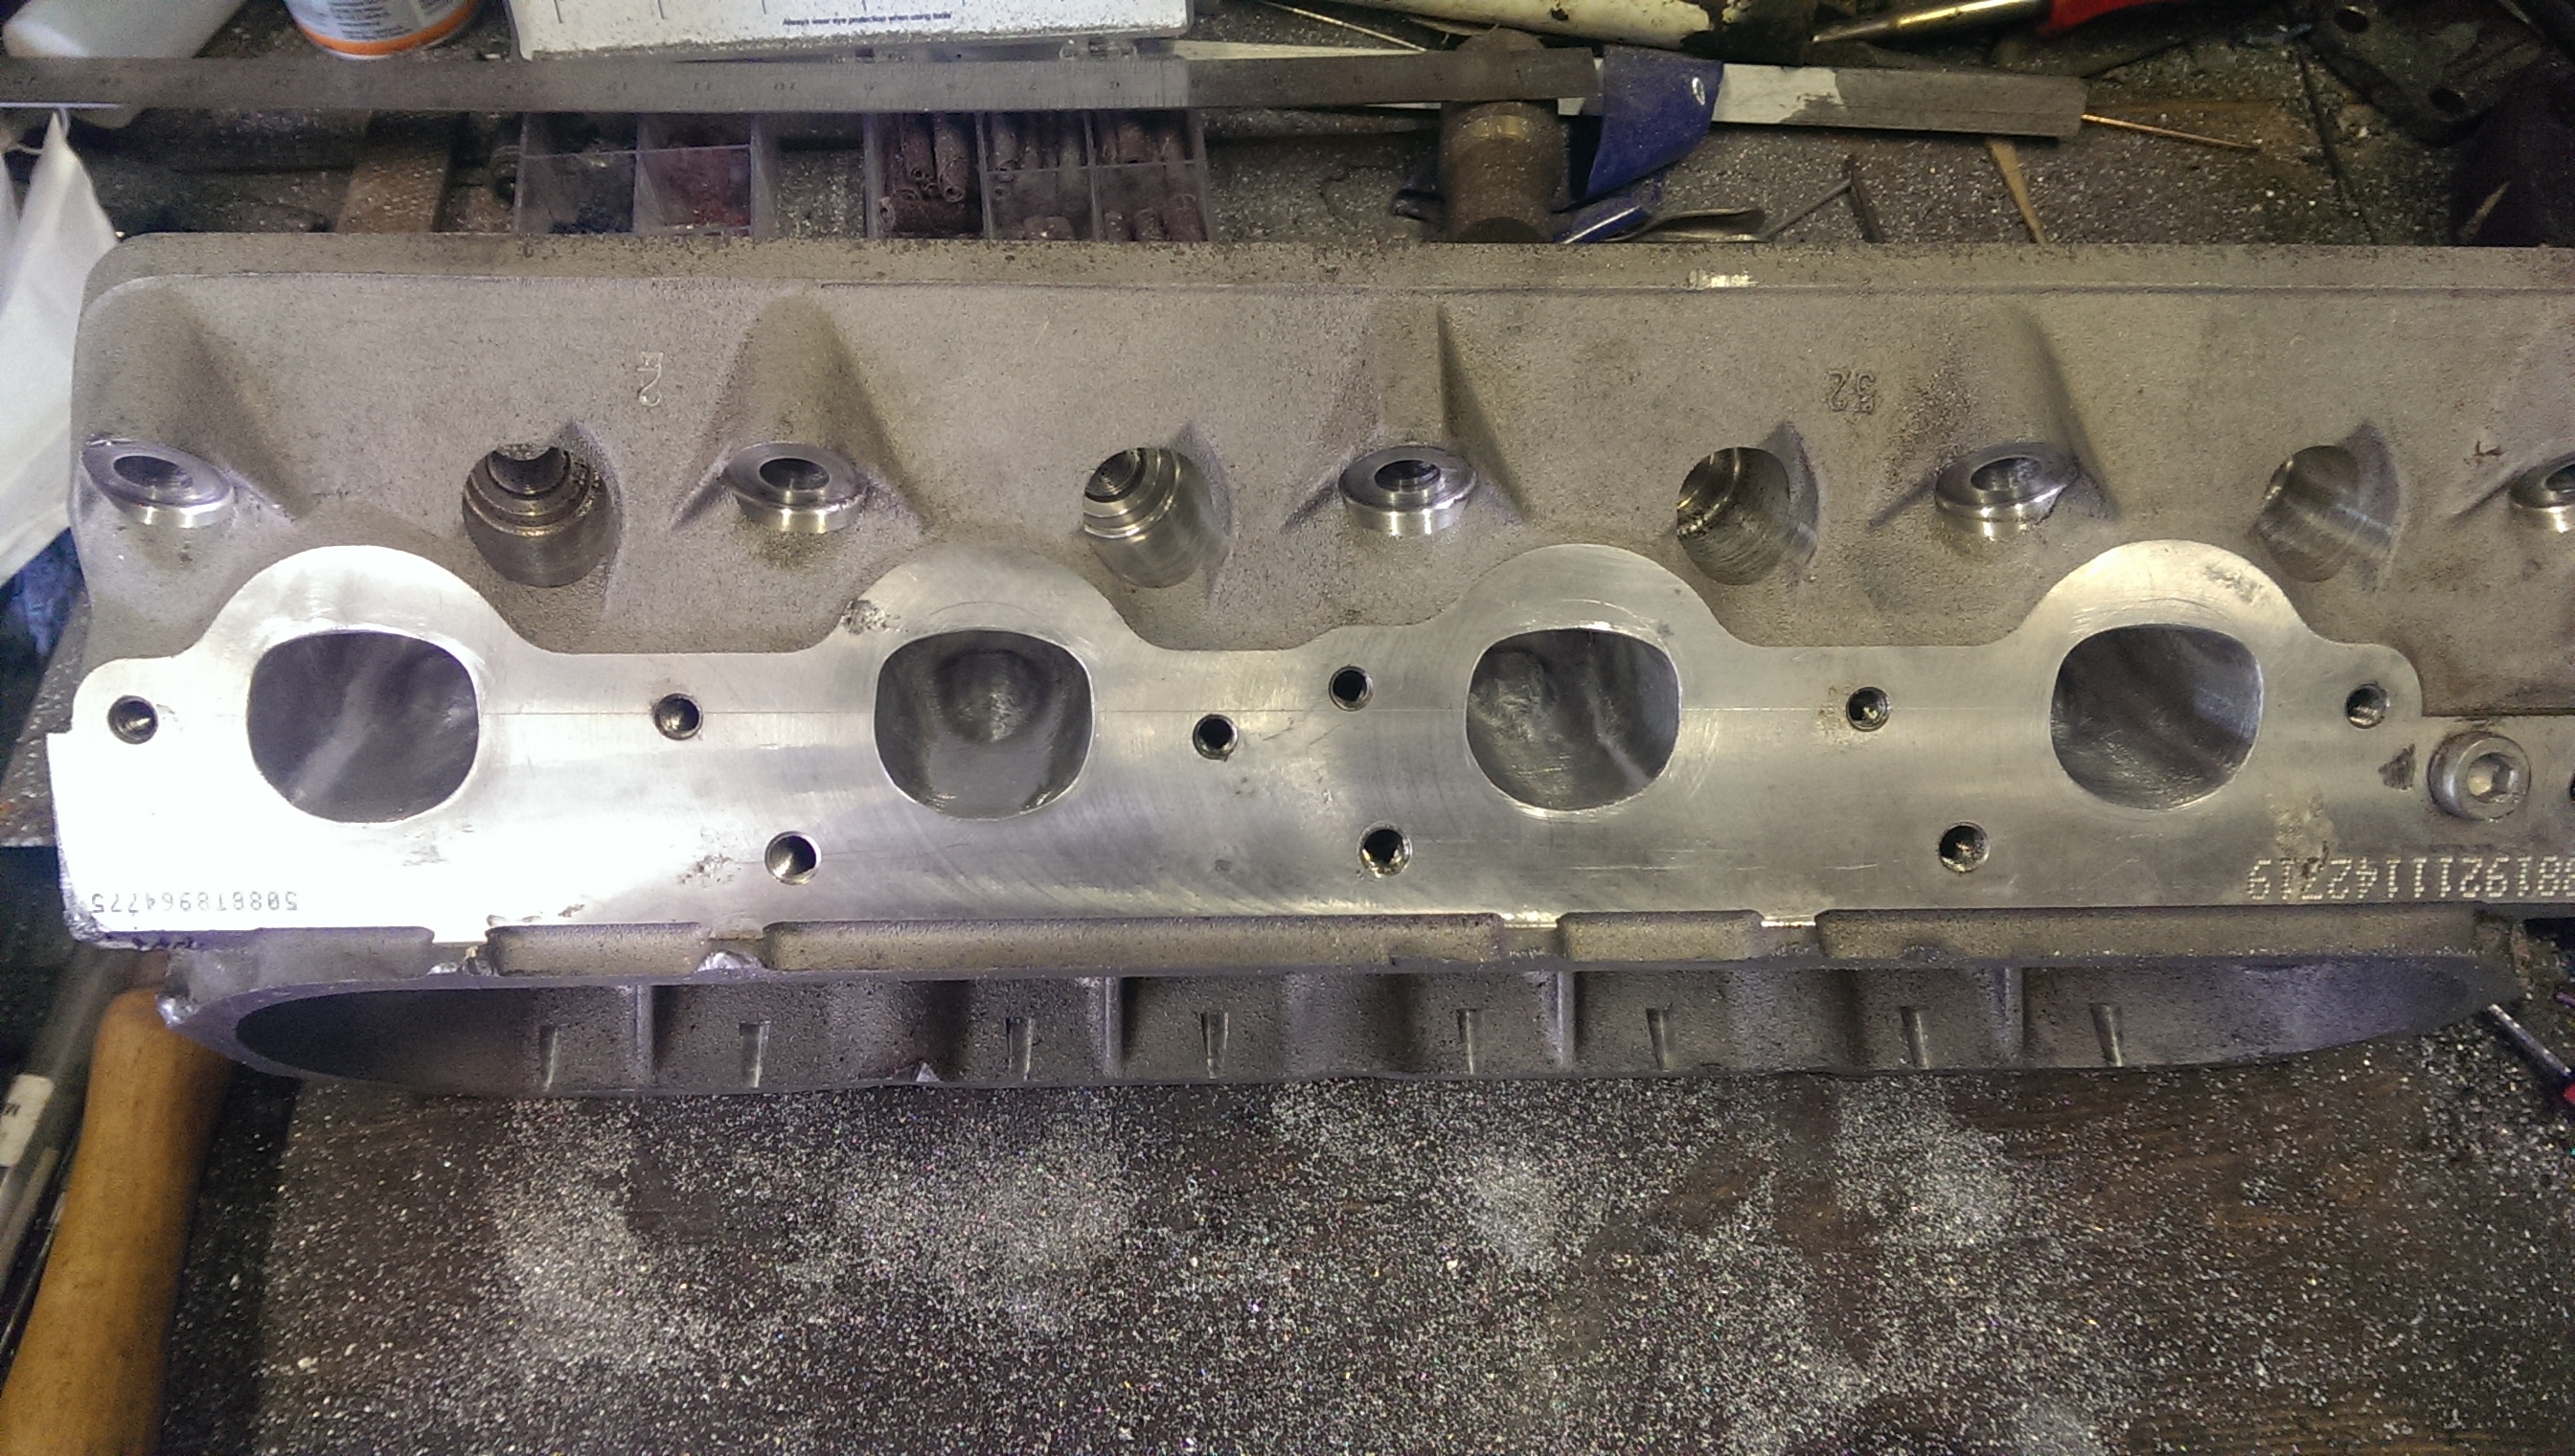
I got stuck into porting the 317 heads and took quite a lot of material out of them in the end. I'm picking them up from the machine shop later today and just need to finish the chambers off. Had 0.040" machined from the deck face.
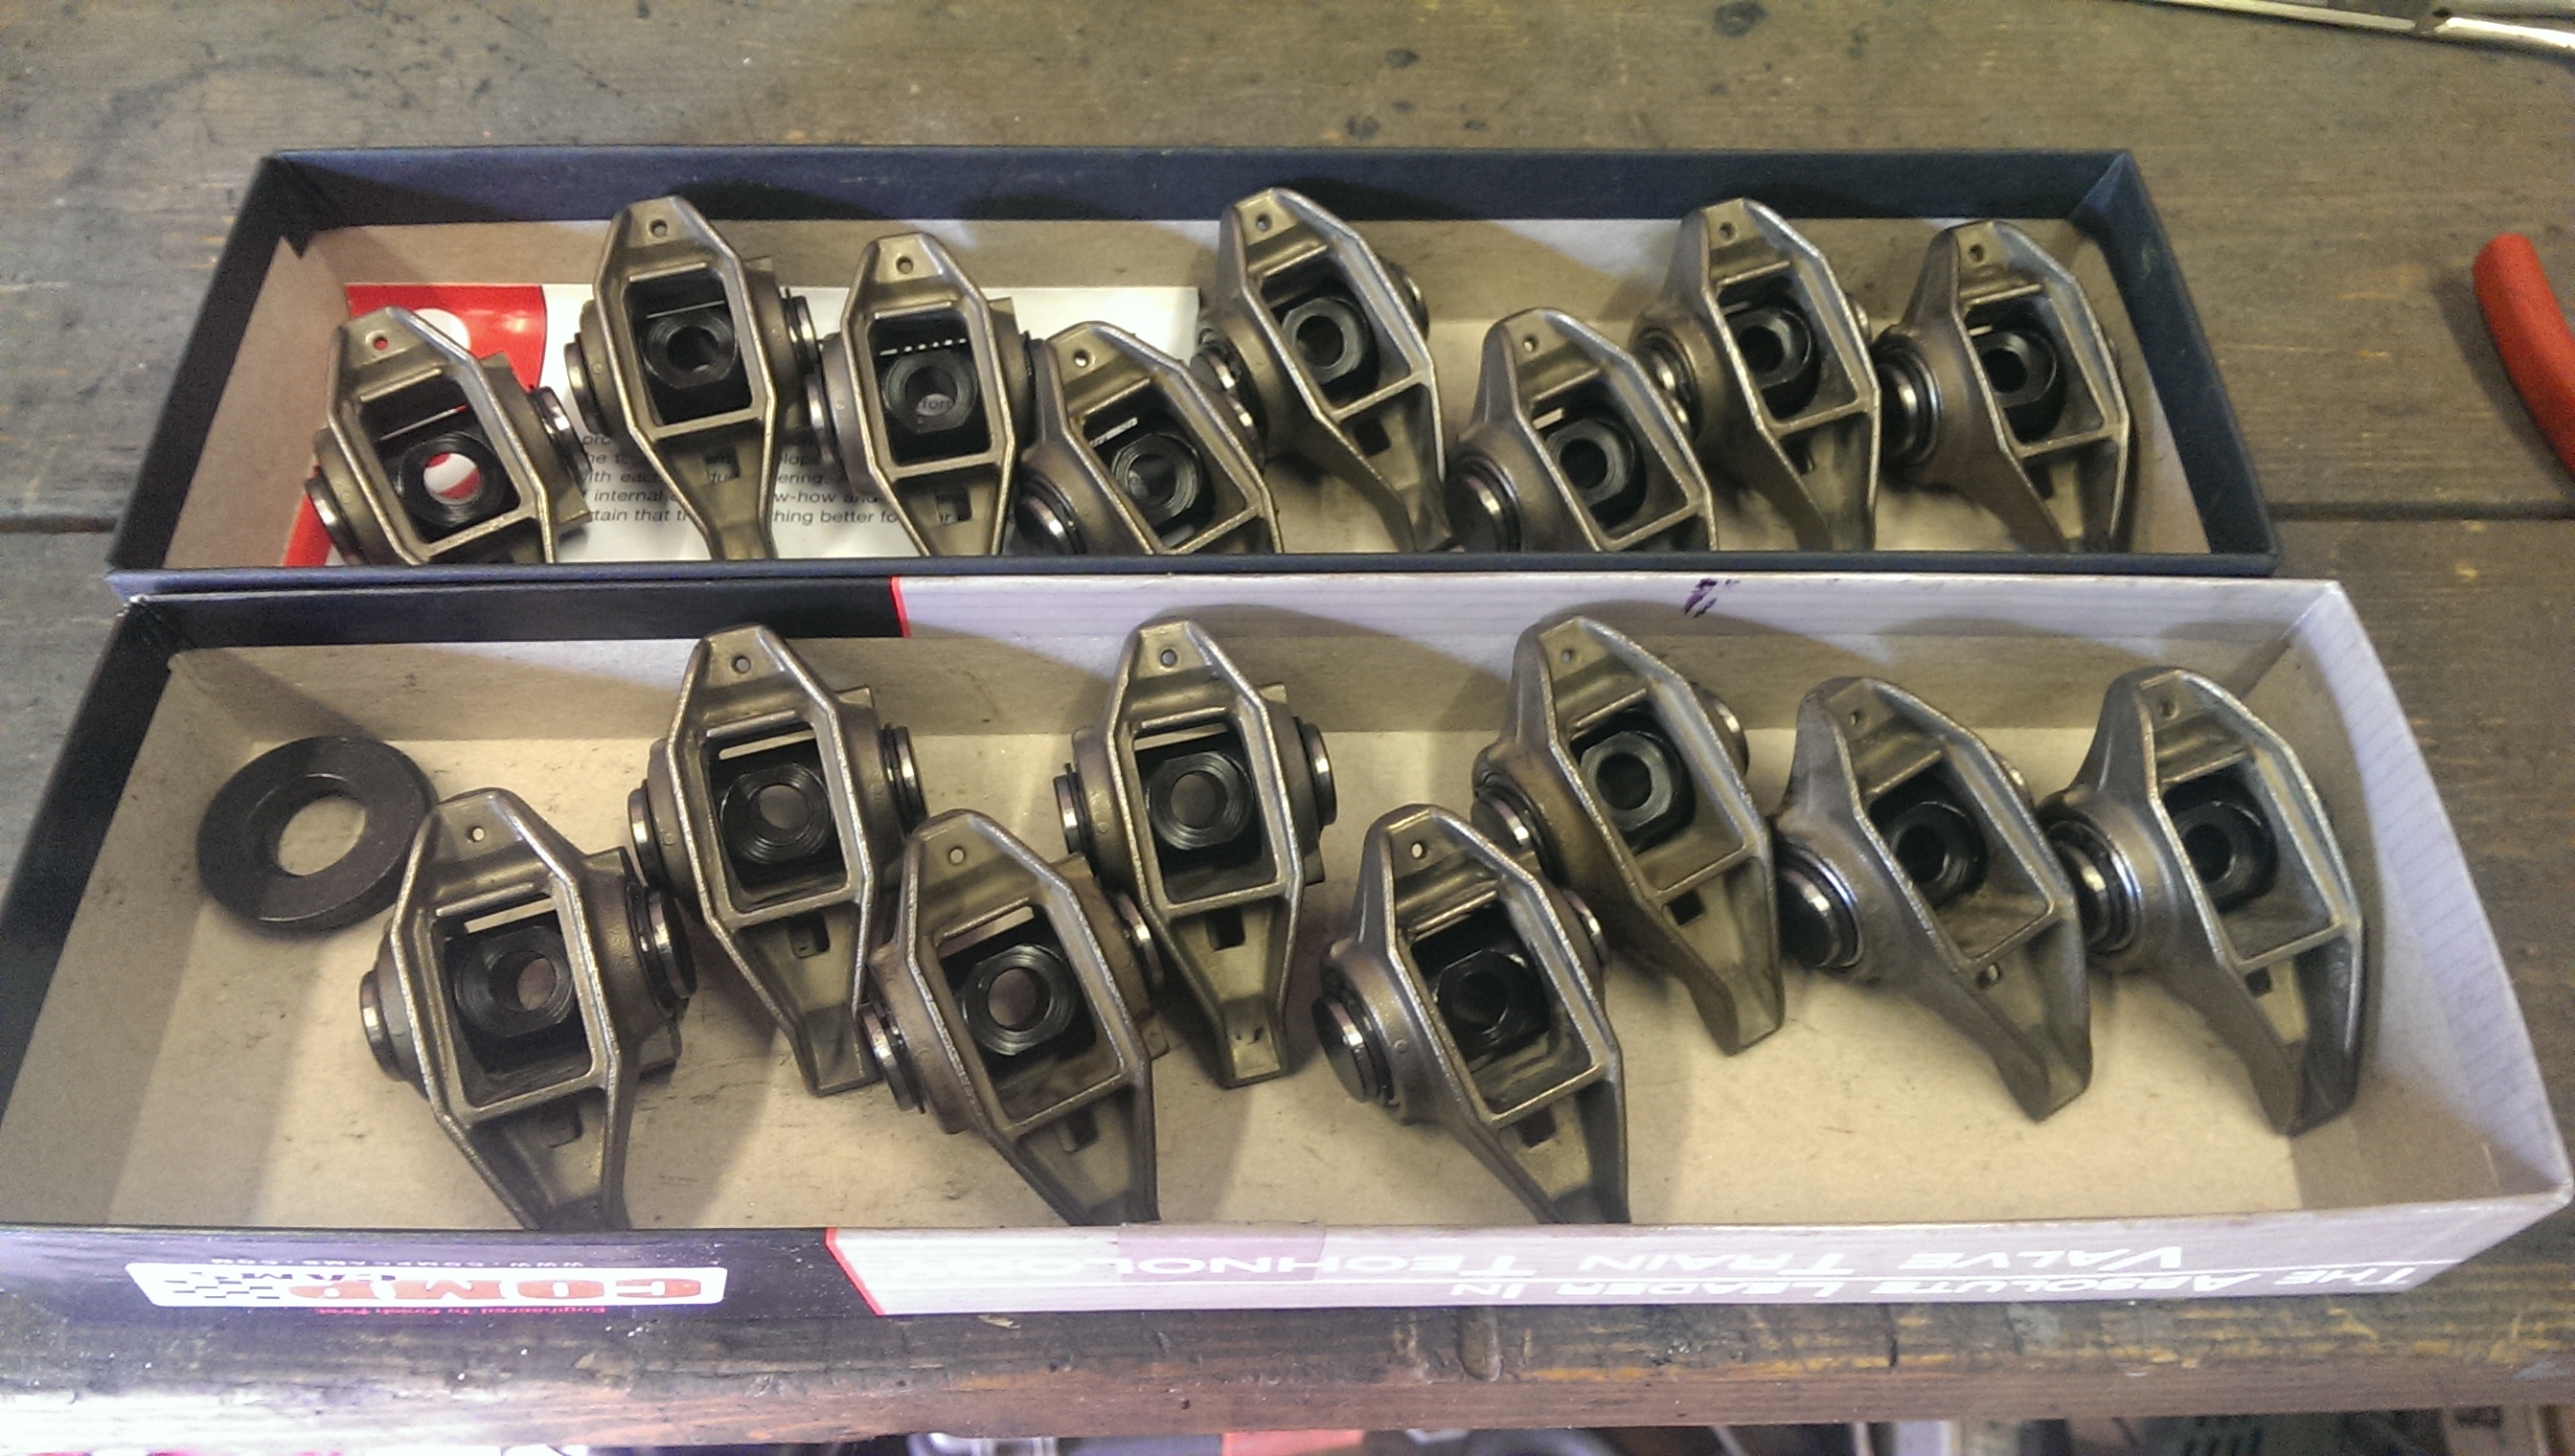
Comp cams roller trunion upgrade done
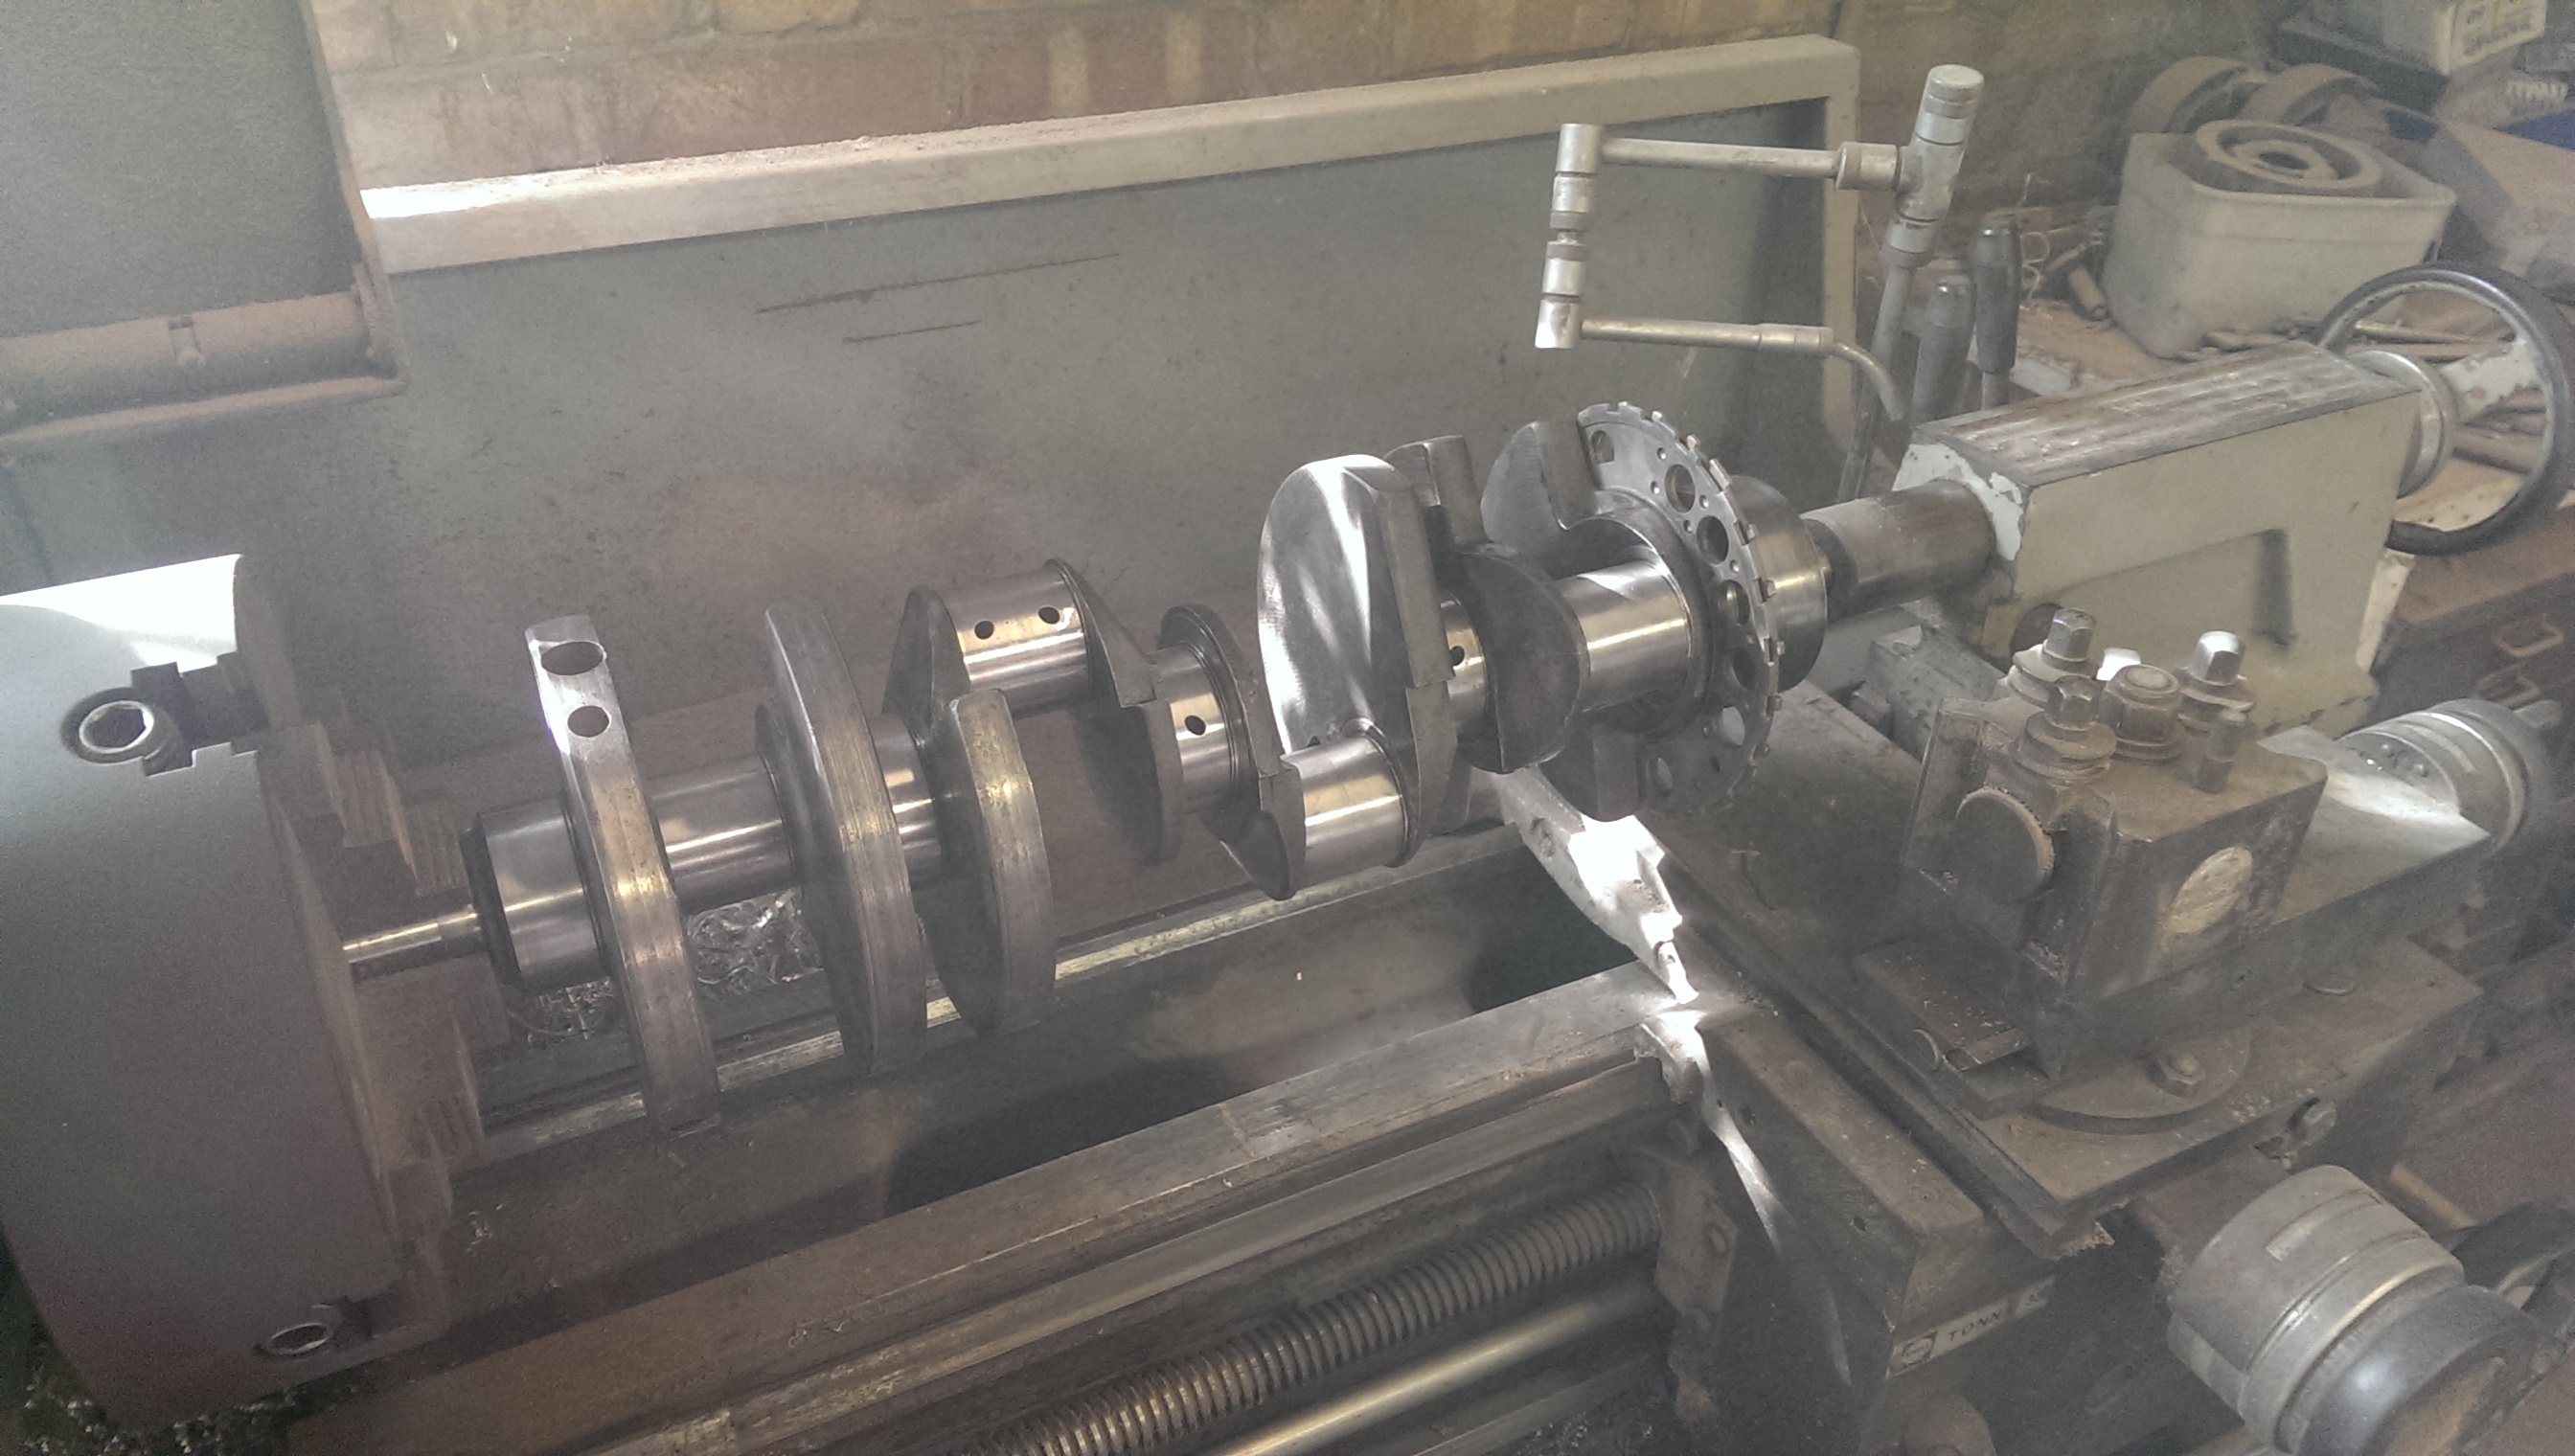
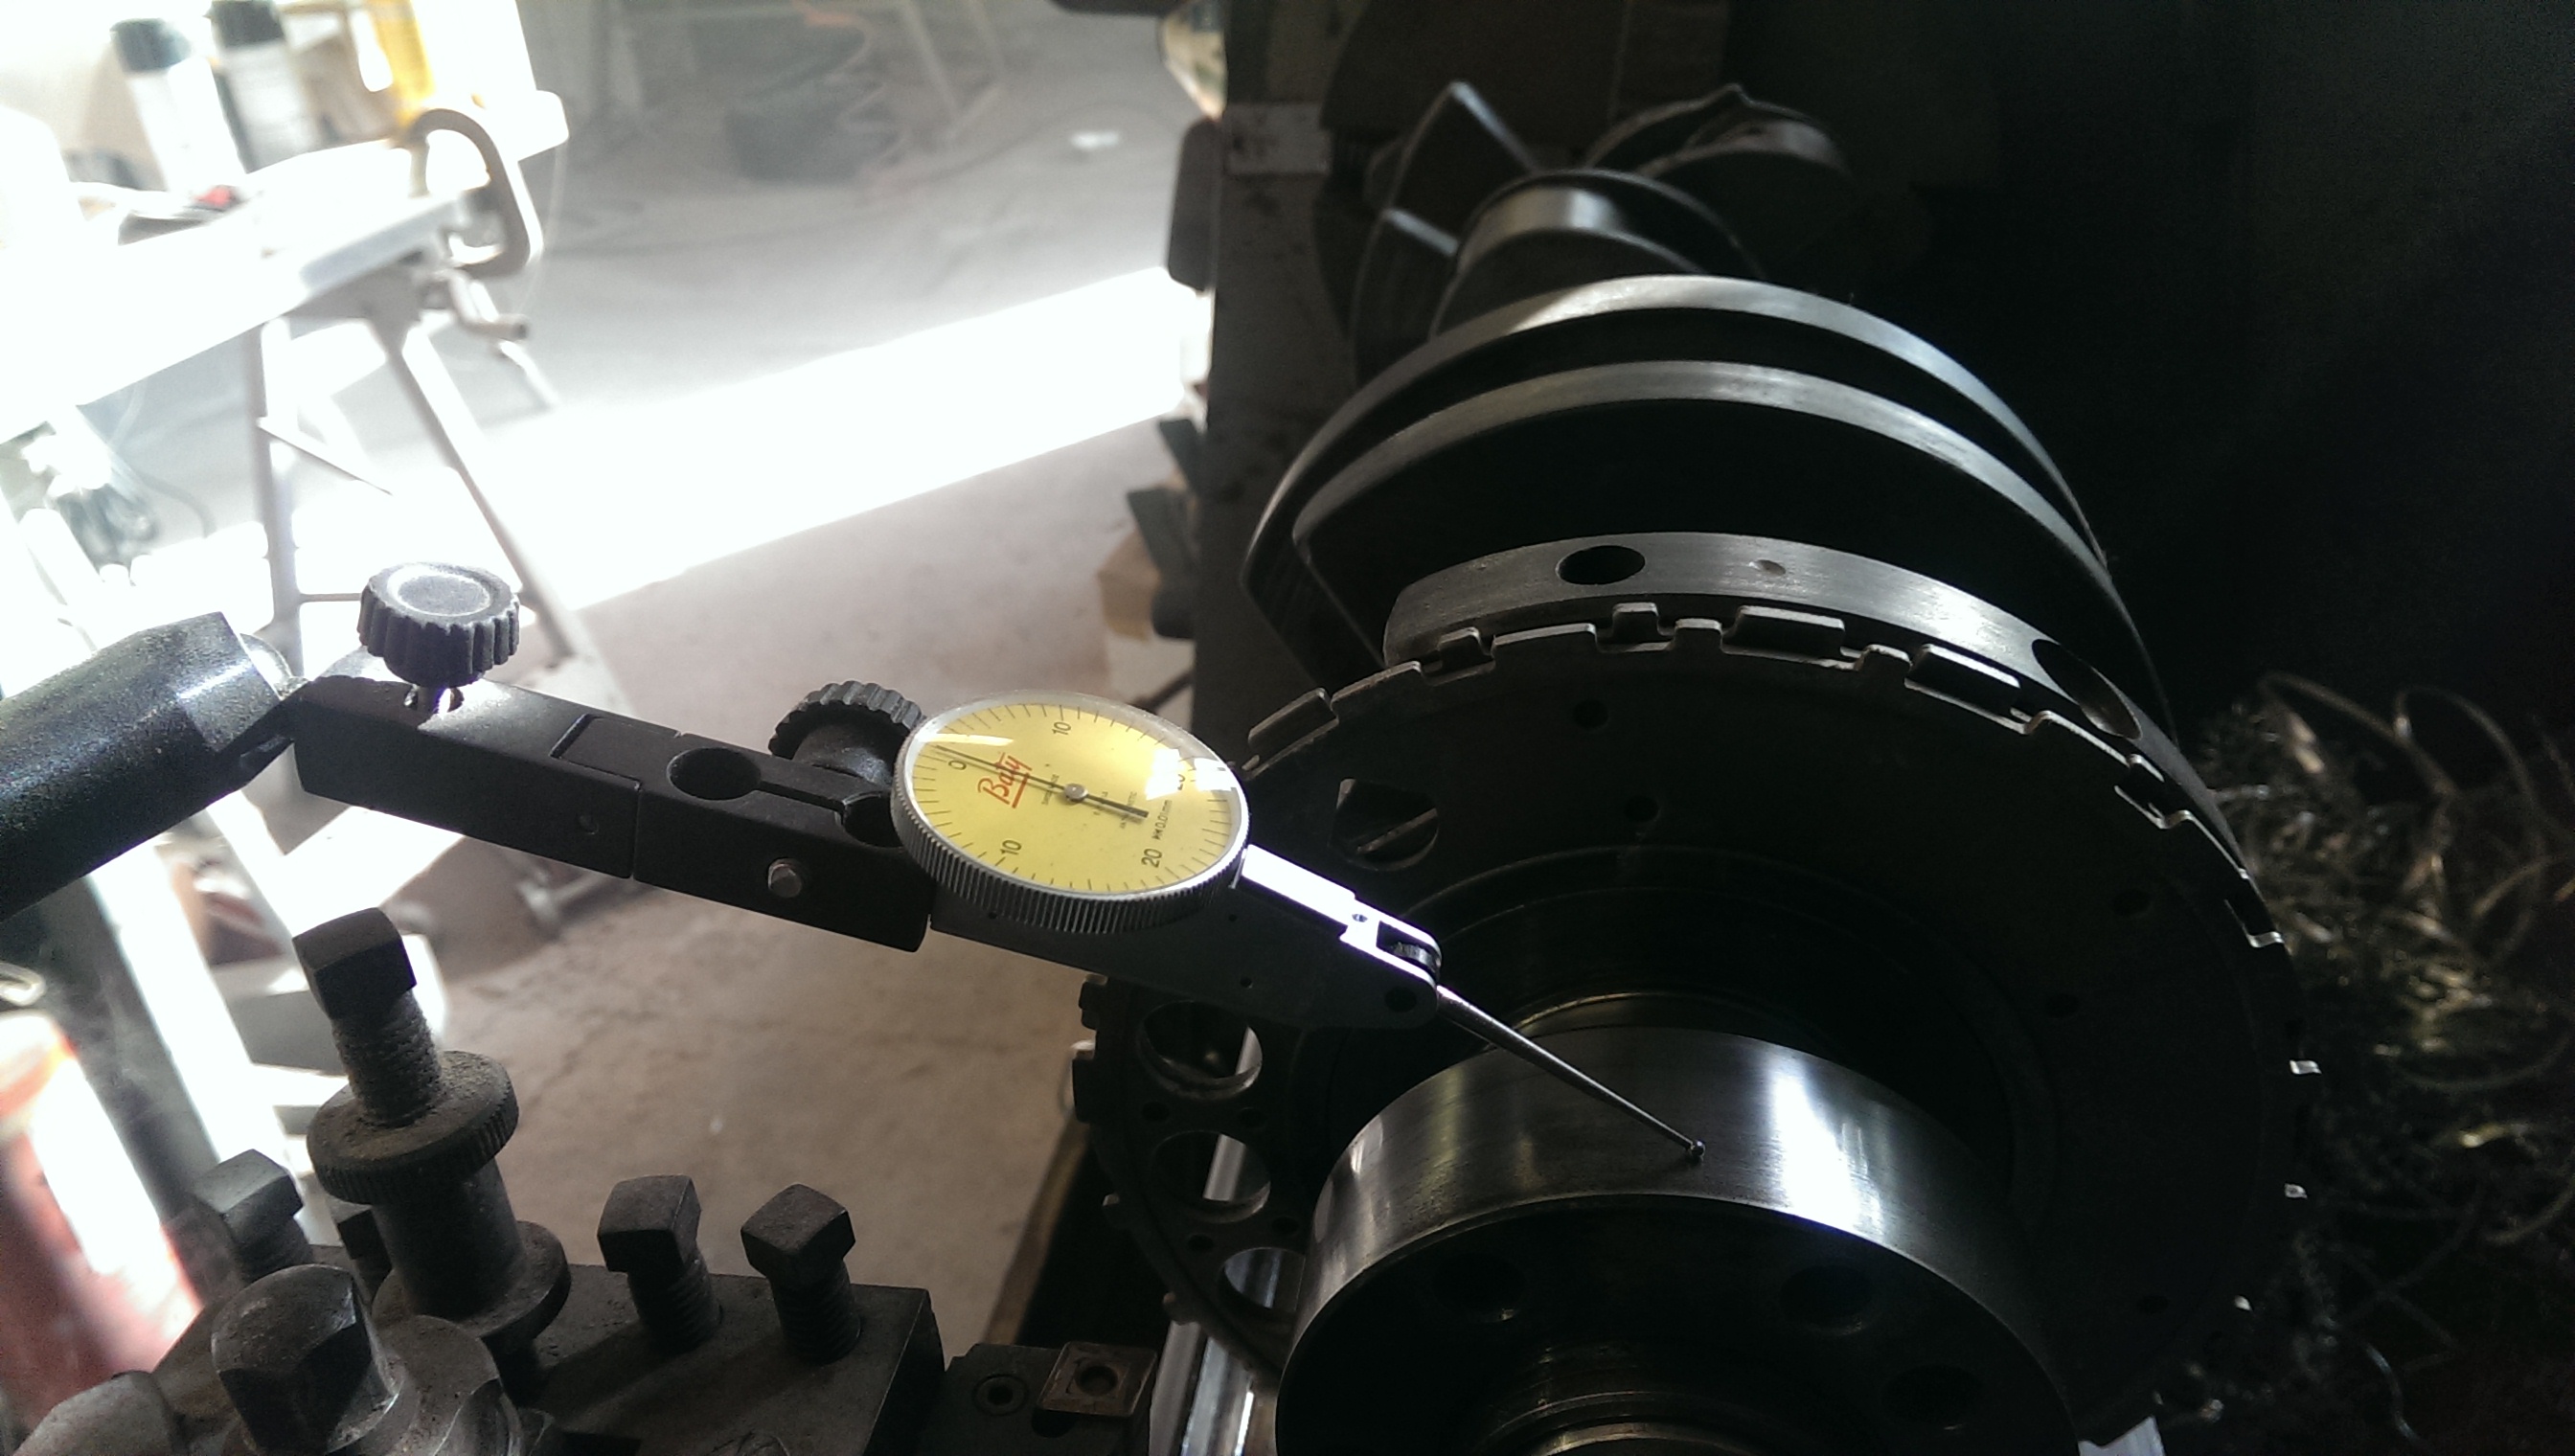
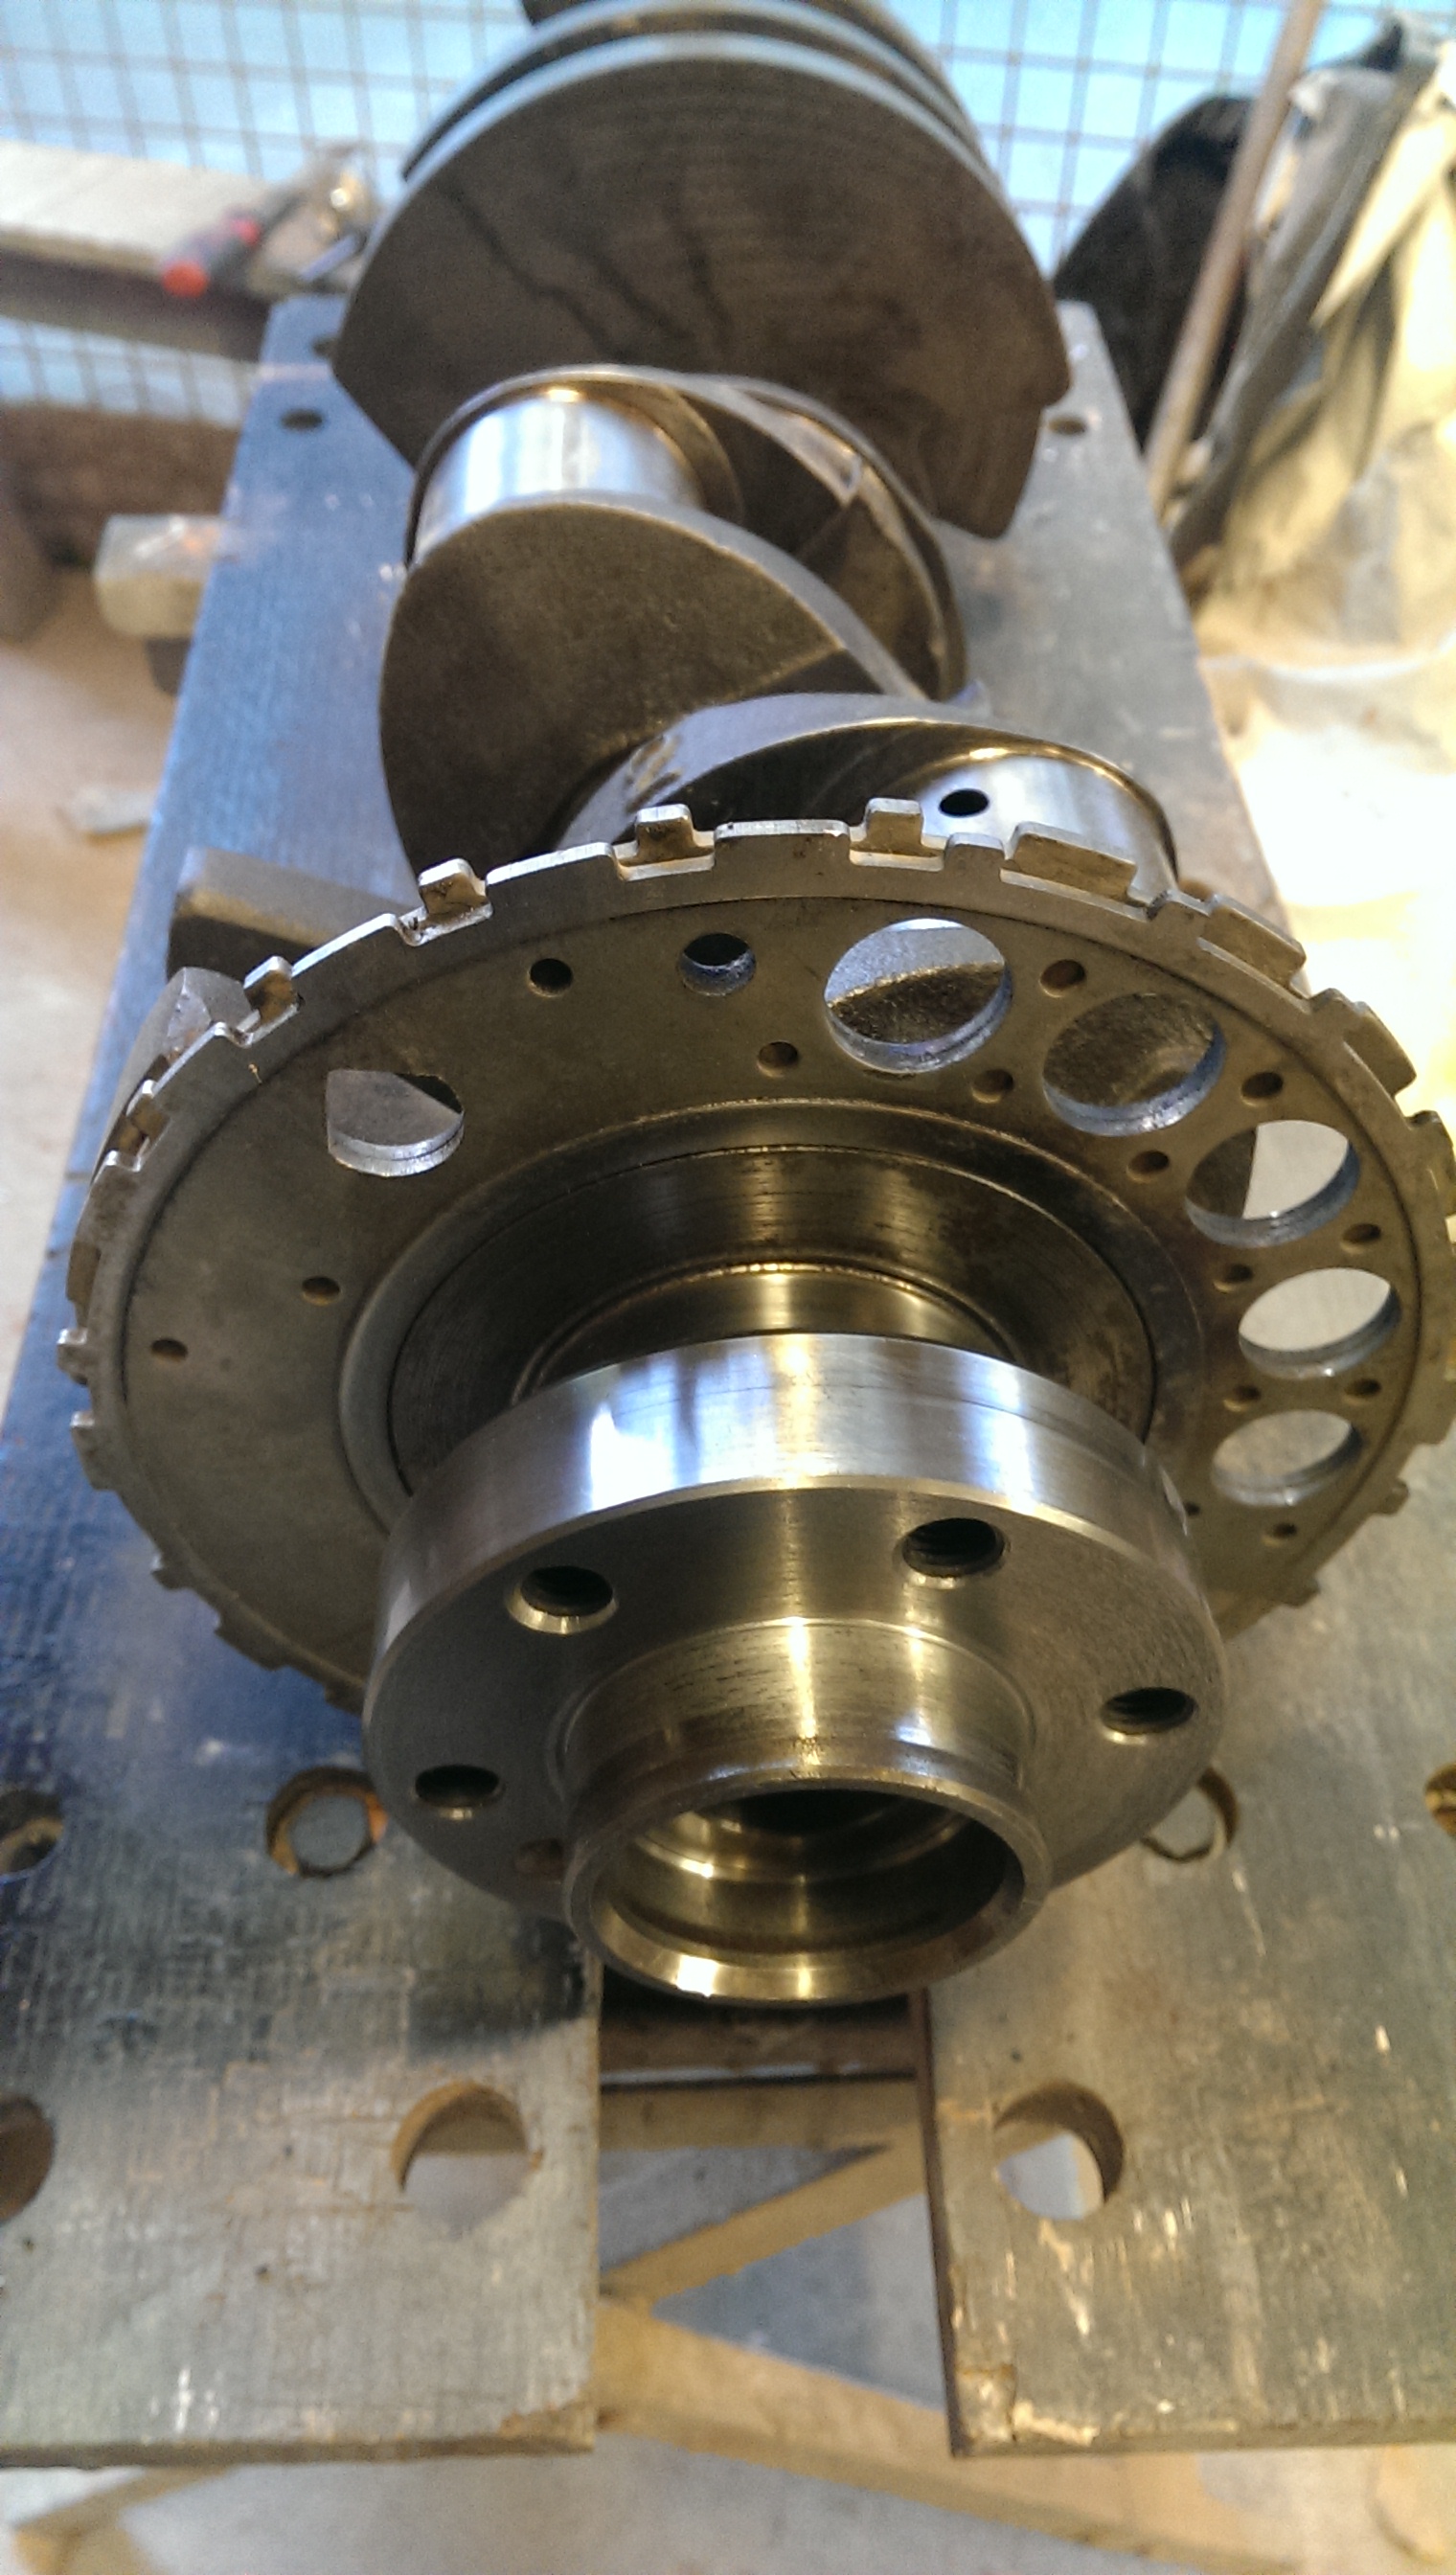
I ended up with a long truck style crank, which is a nightmare for after market flex plates etc. So I did a bit of modification on it so that I can use the readily available SFI flex plates and an old style 4L80E converter with no adapters or spacers
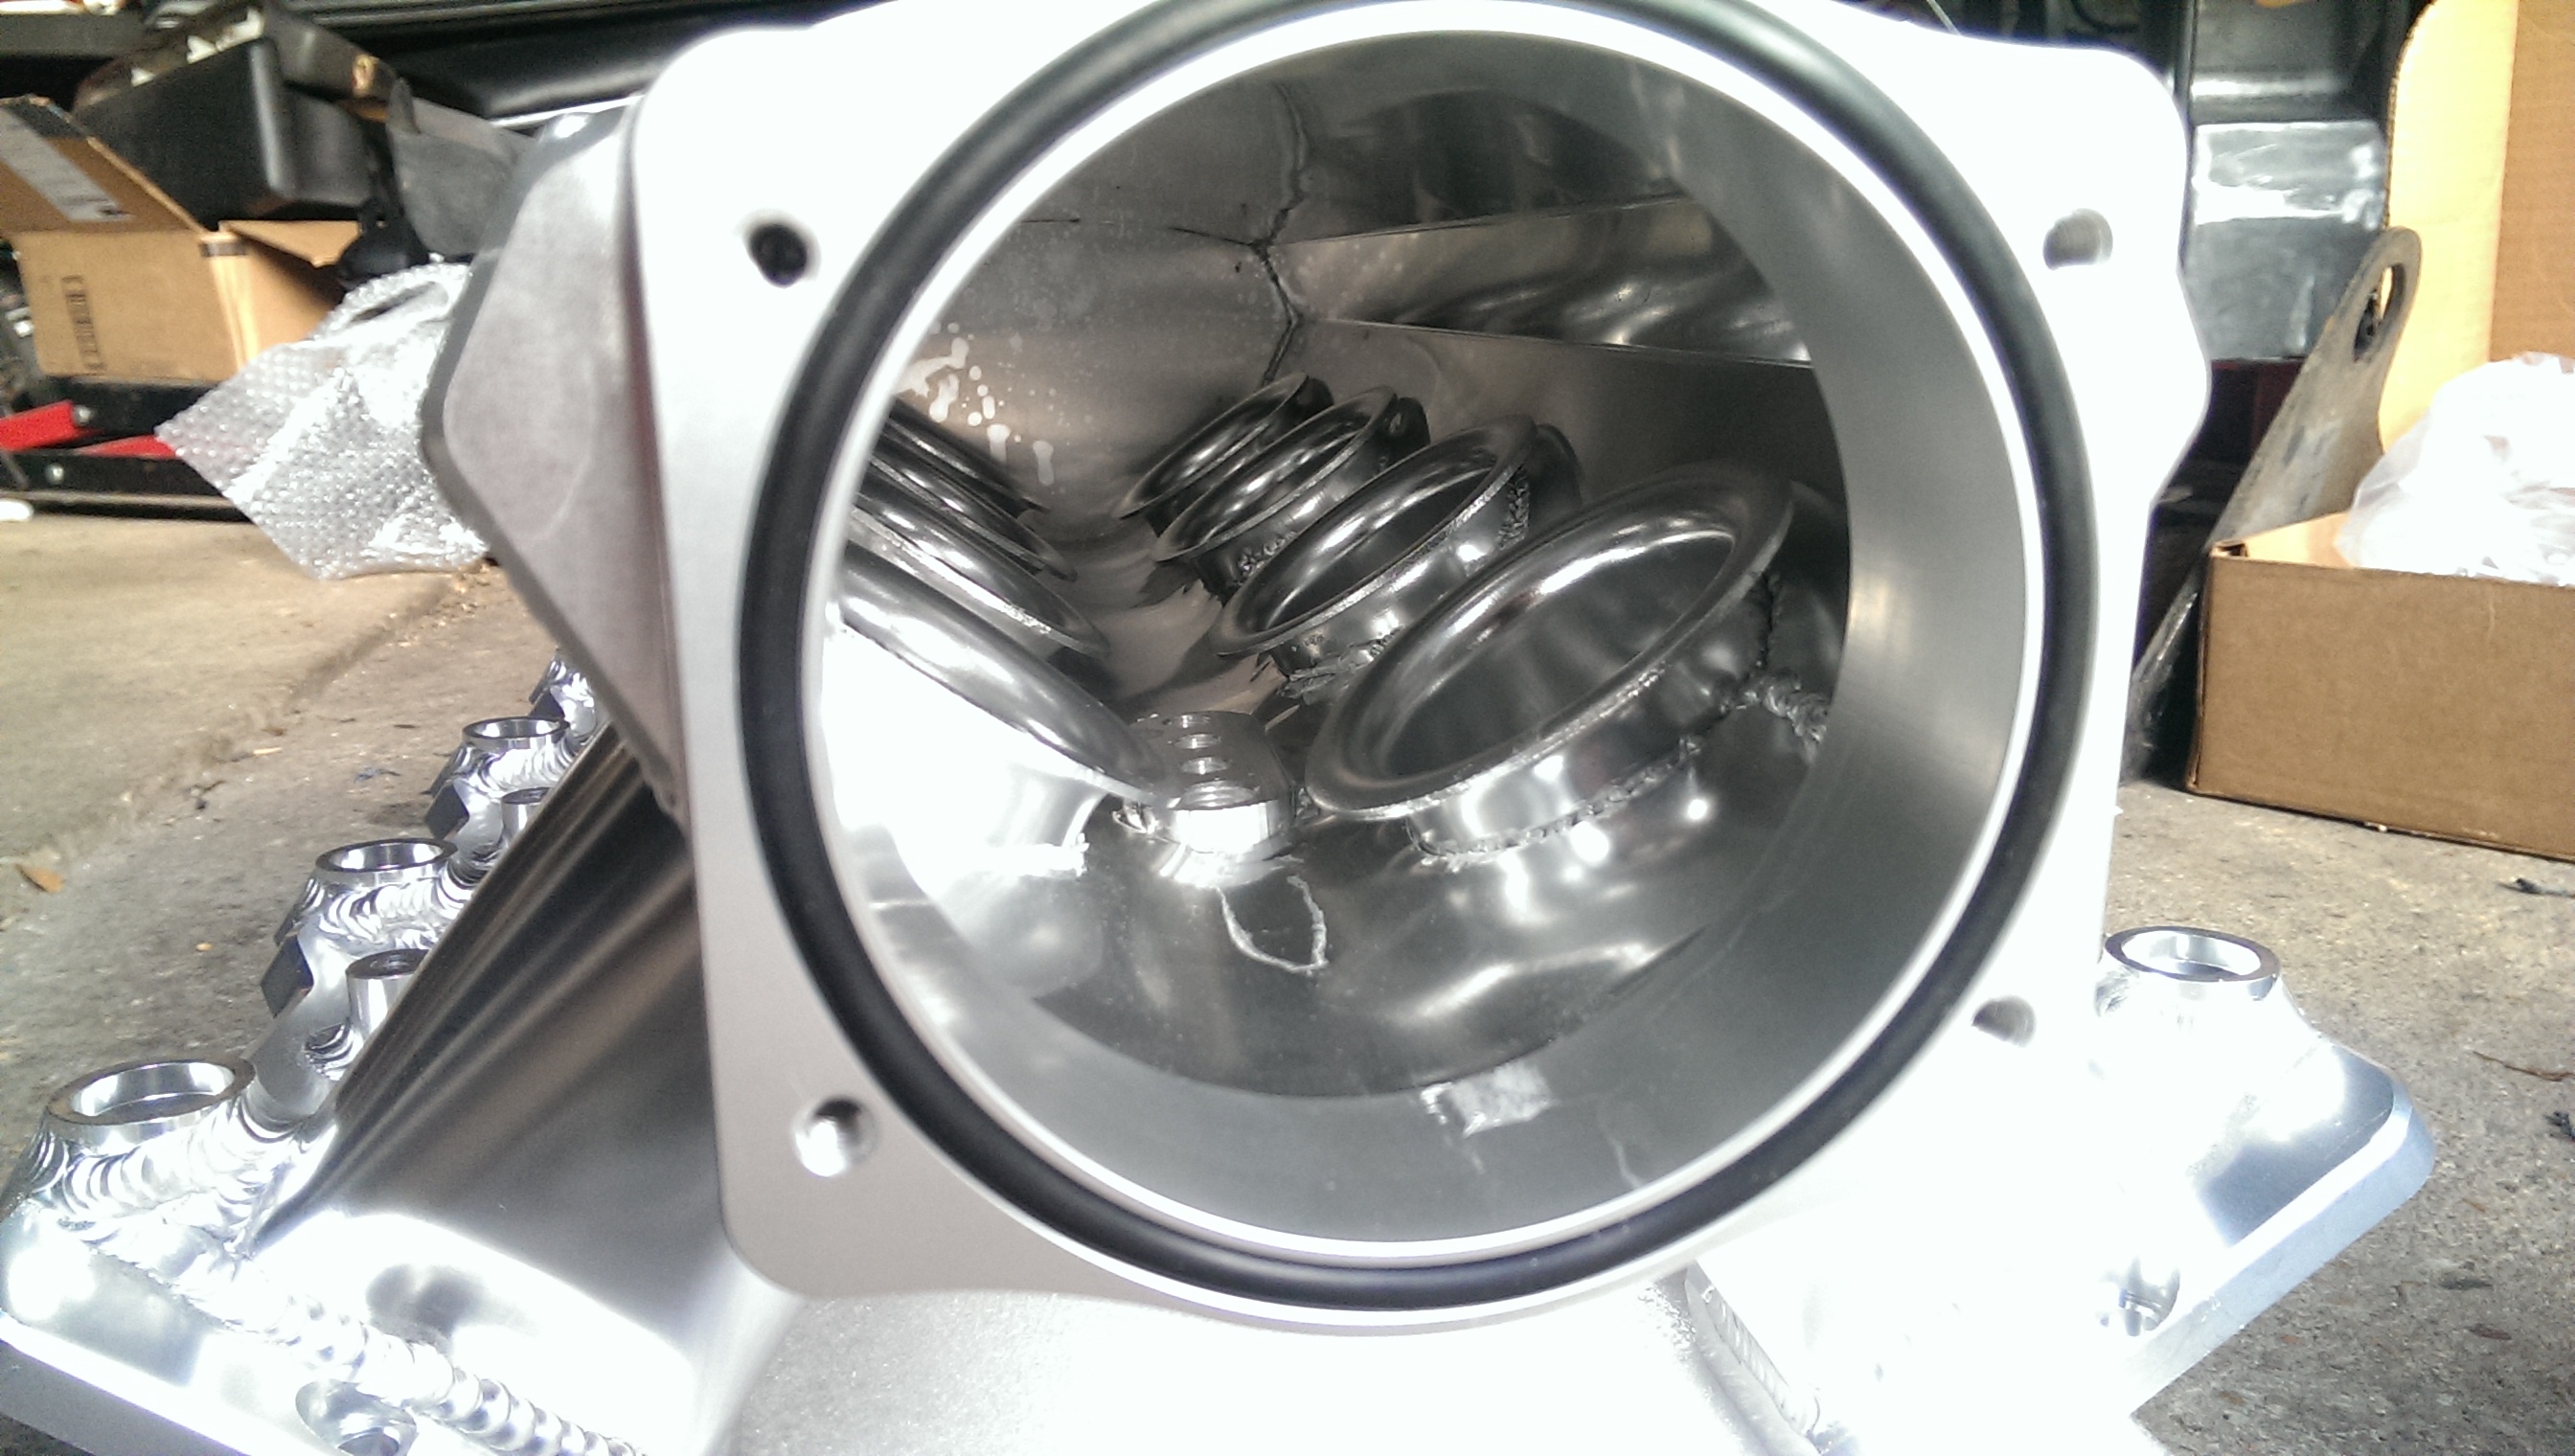
Bought myself a rather shiny inlet manifold, which will fit under my hood as I have a 4" scoop

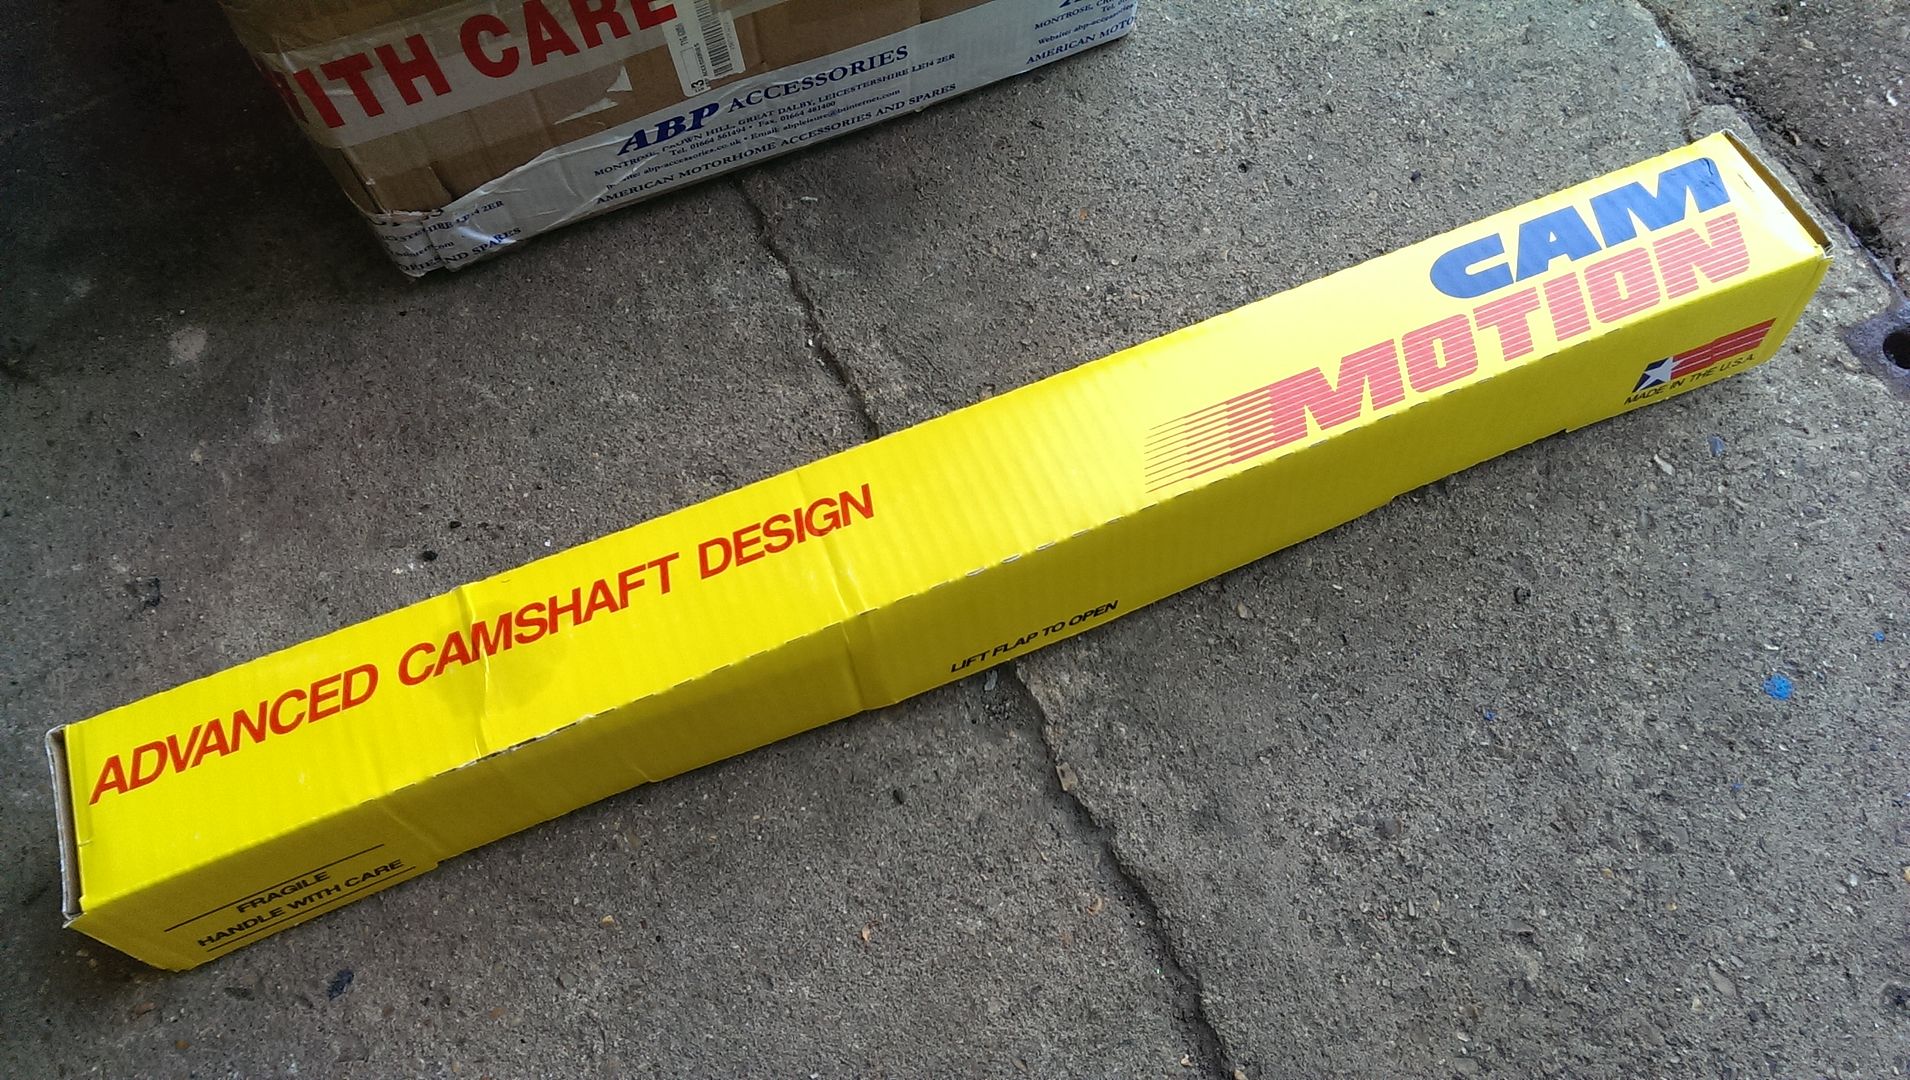
Cam Motion did a custom grind camshaft for me
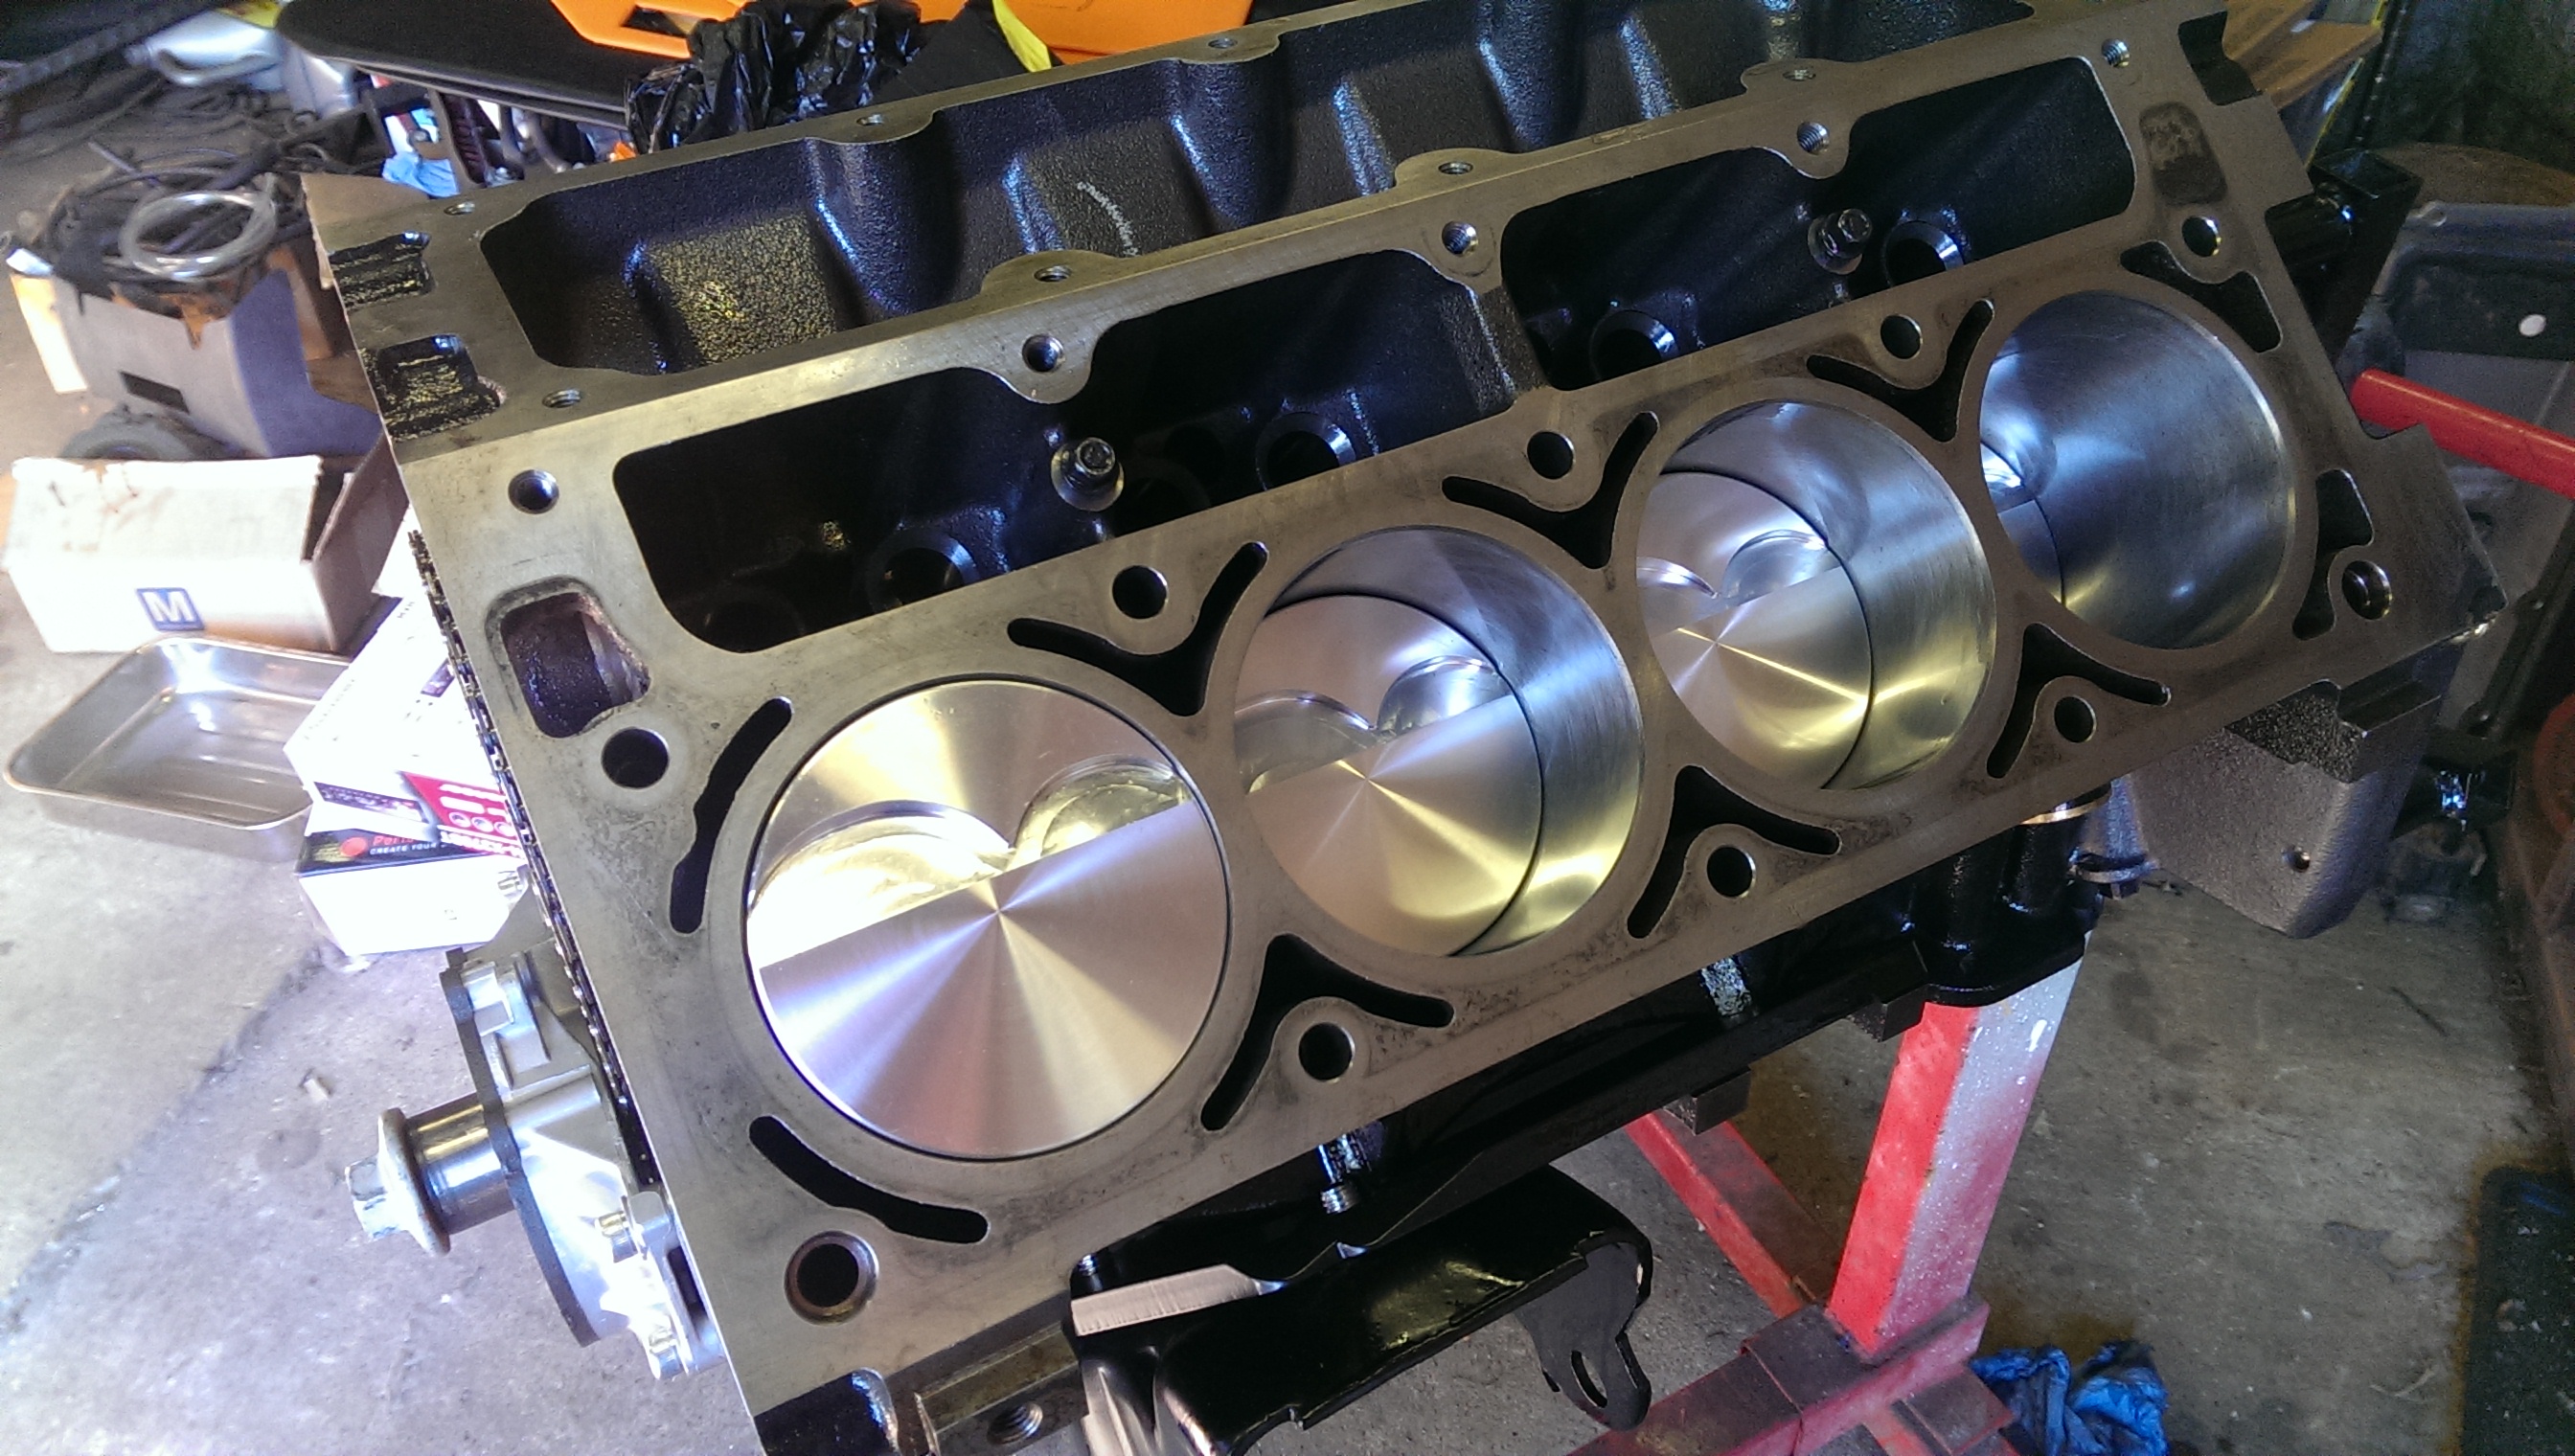
Building the short block:... crank is in

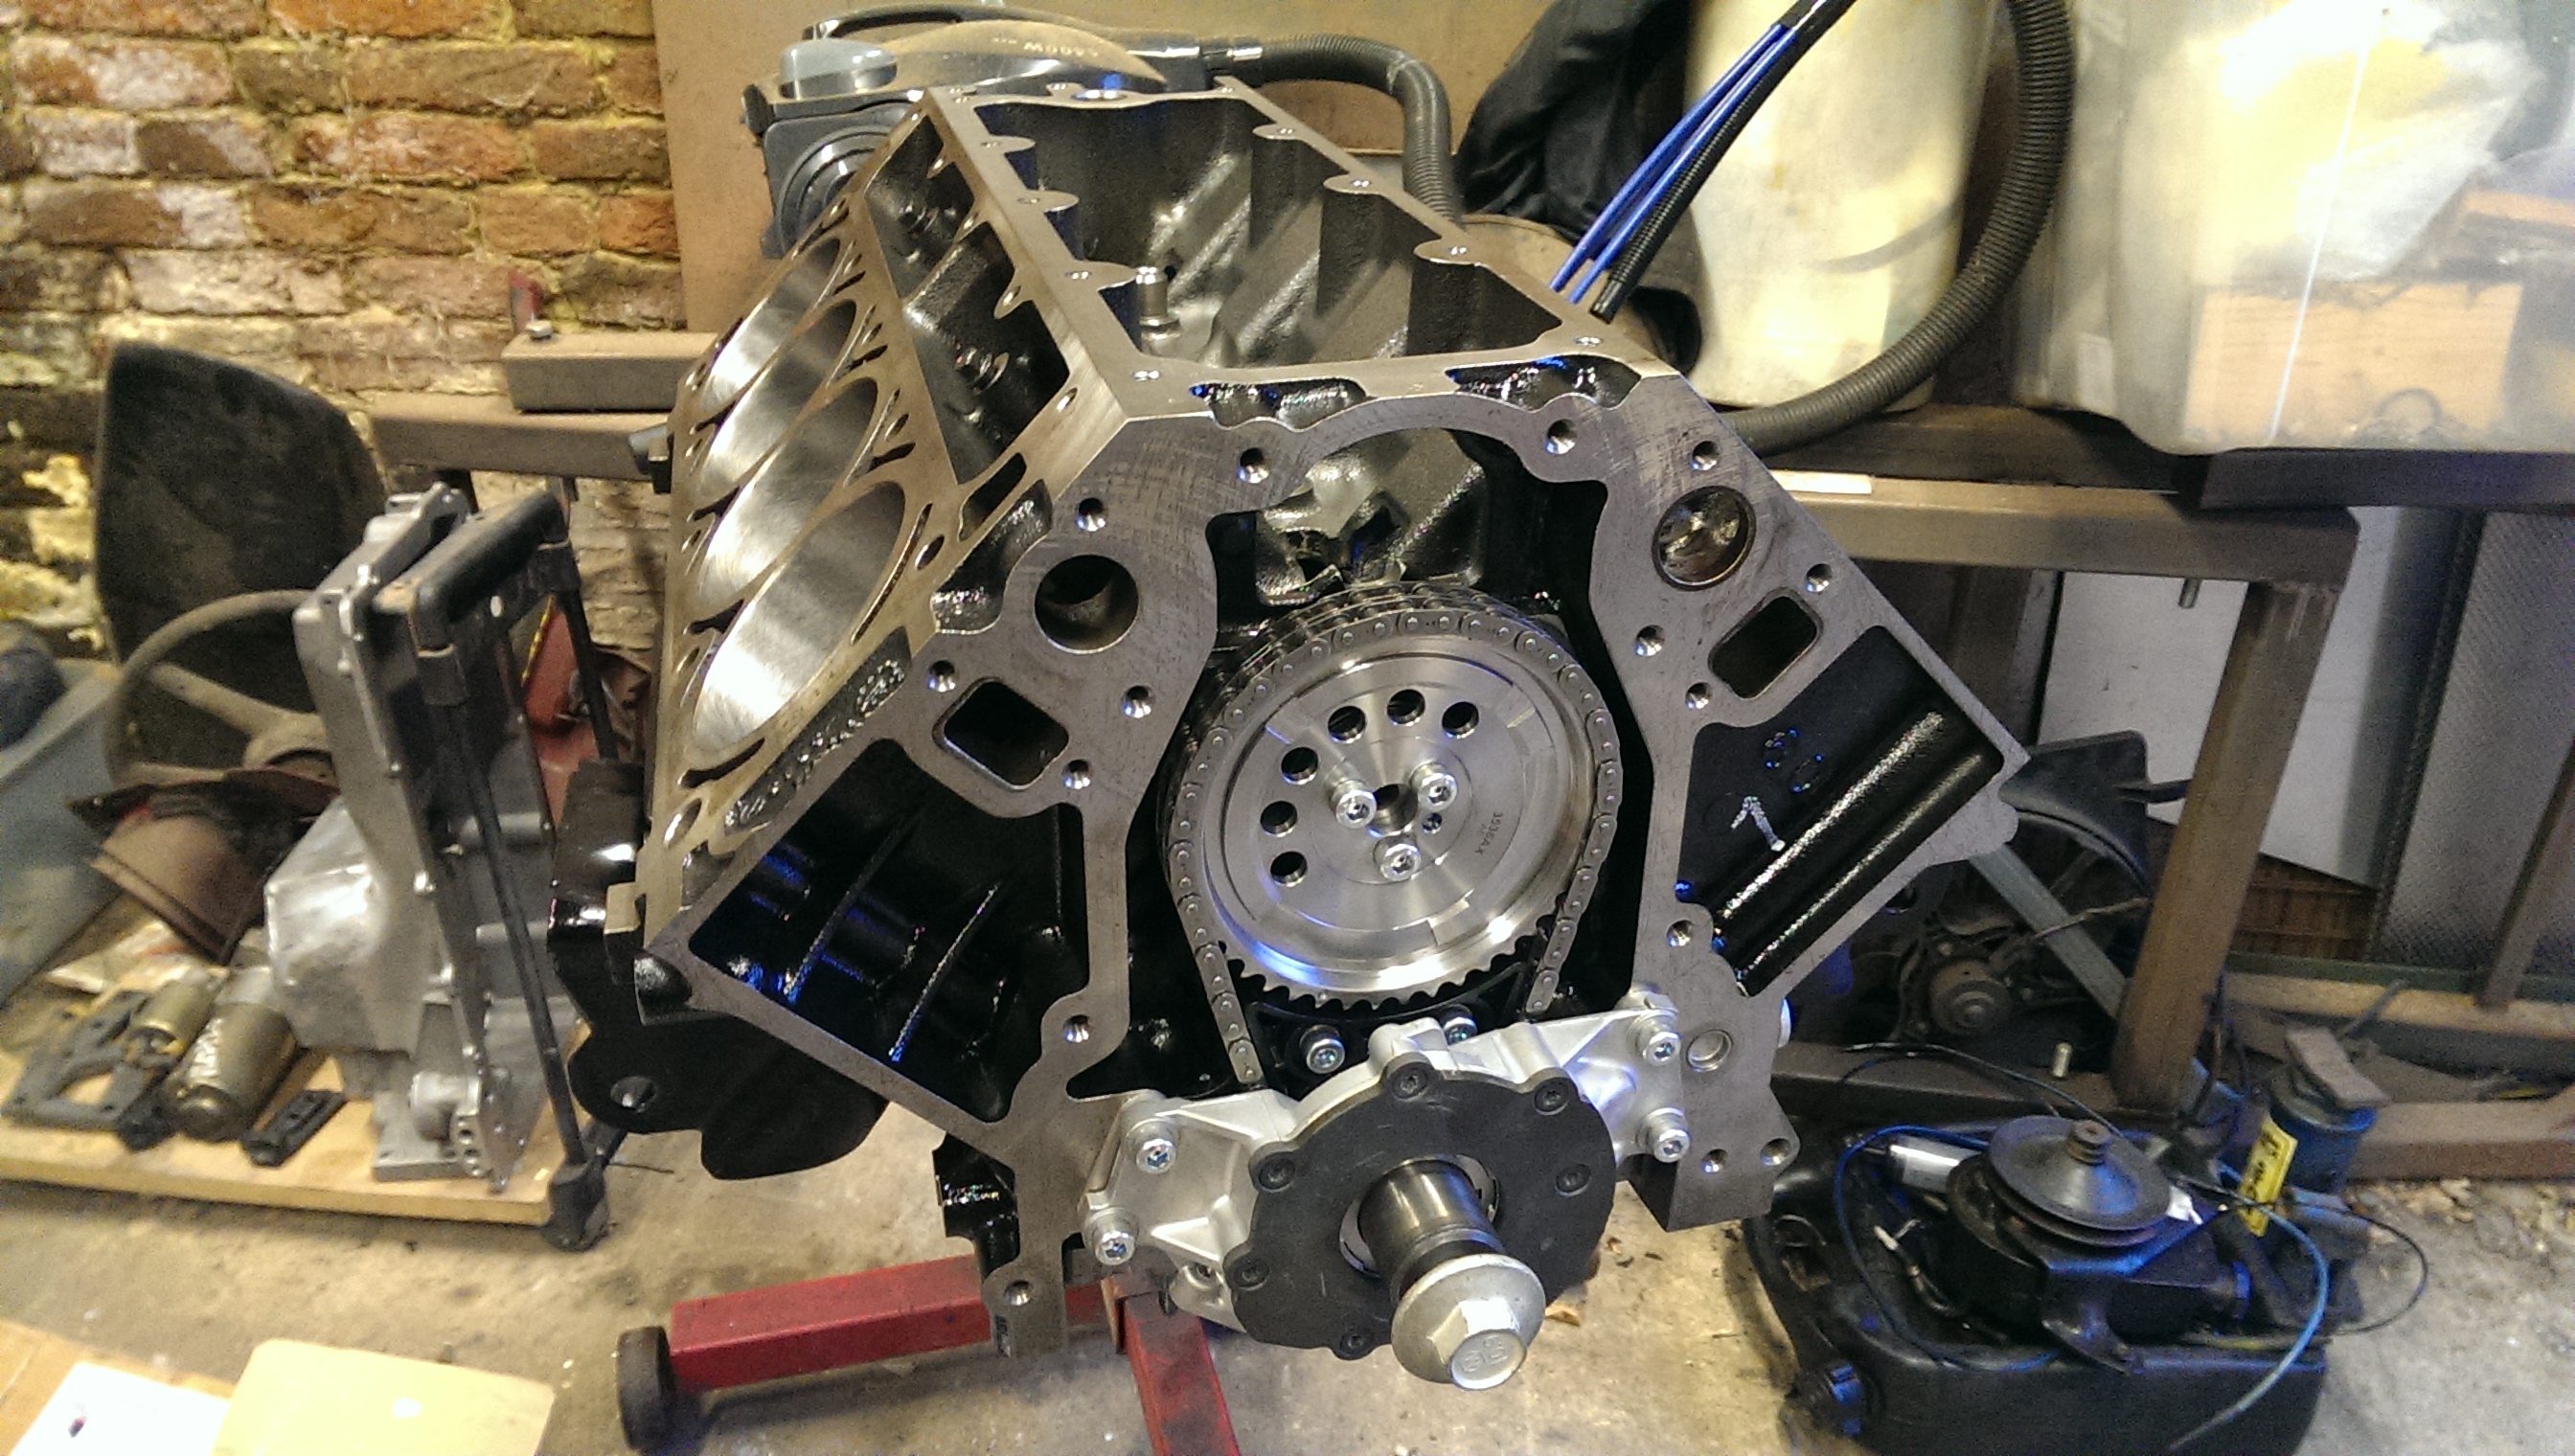
Then I had to do some disassembly to drill and tap the block to fit an LS2 cam chain damper as my block didn't have the necessary holes as it originally had the LS3 style tensioner which are notoriously unreliable.
Then I fitted the oil pump only to find something was binding up. Stripped the brand new pump to find a chunk of swarf inside... Not great for a new part from a respectable manufacturer.
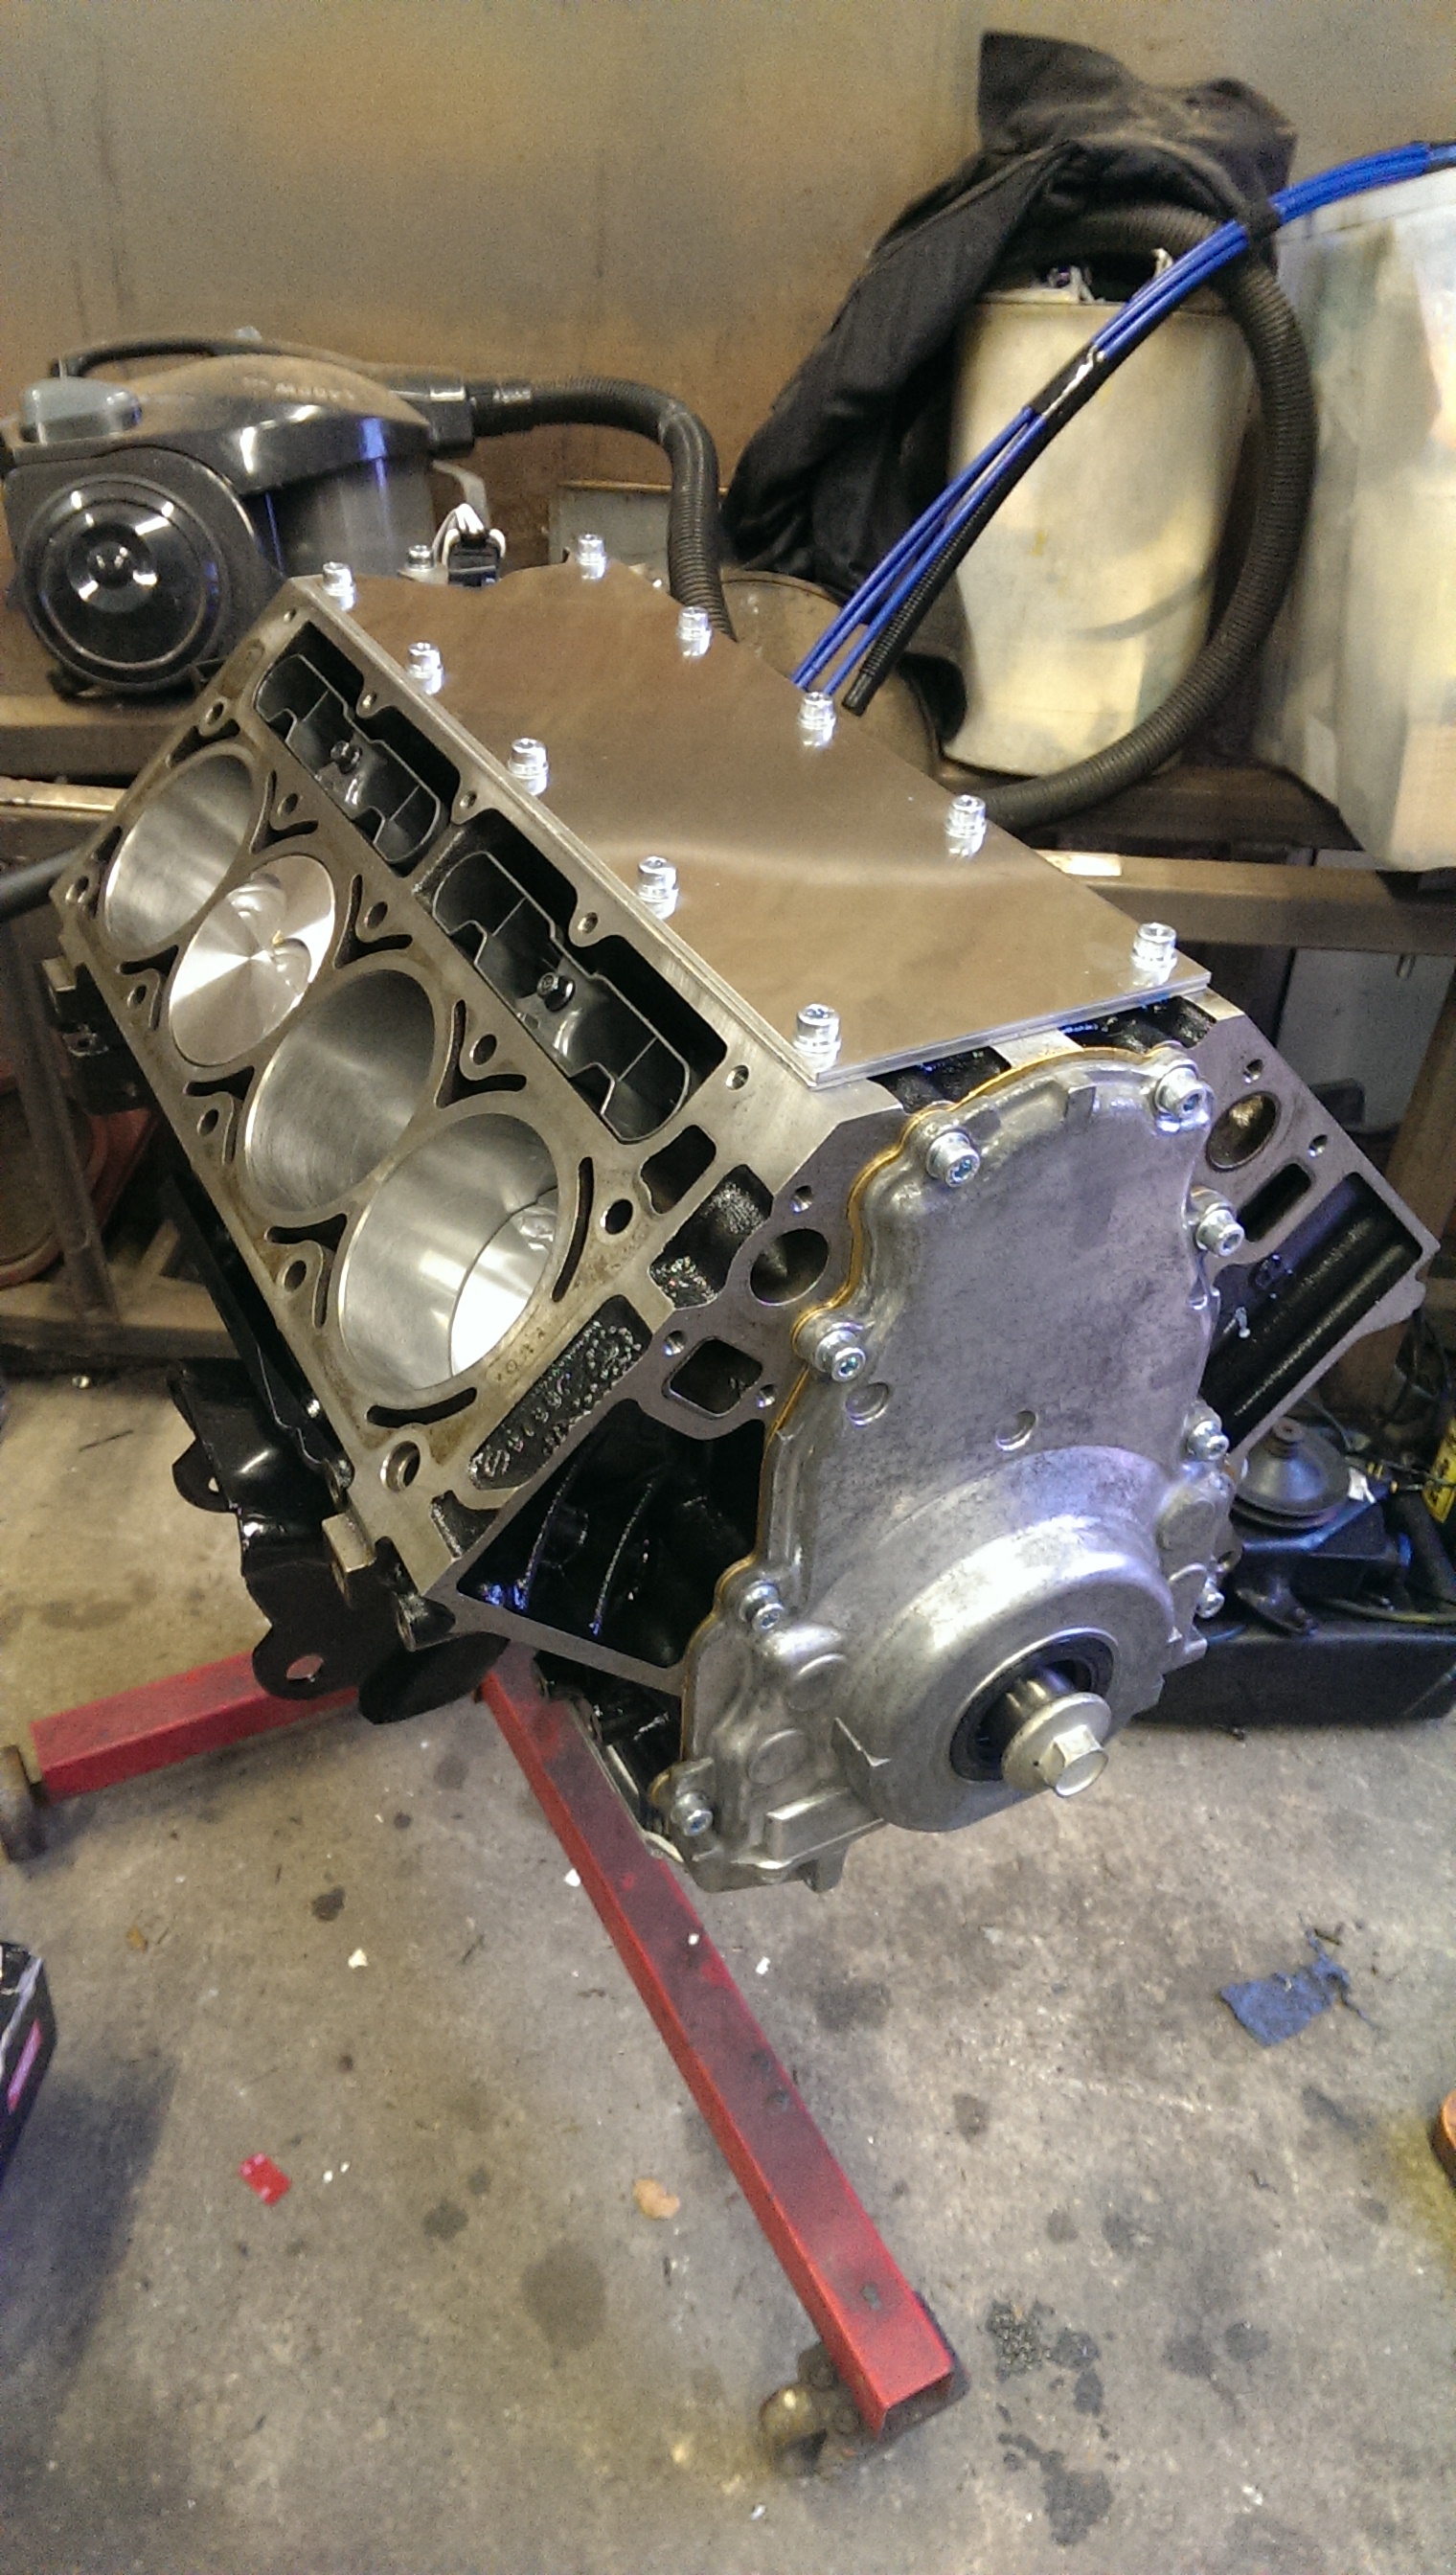
Then on to fitting DSS forged pistons to the LS2 rods with ARP bolts. Had the big ends honed 0.002" oversize to round them up for the new special OD bearings.
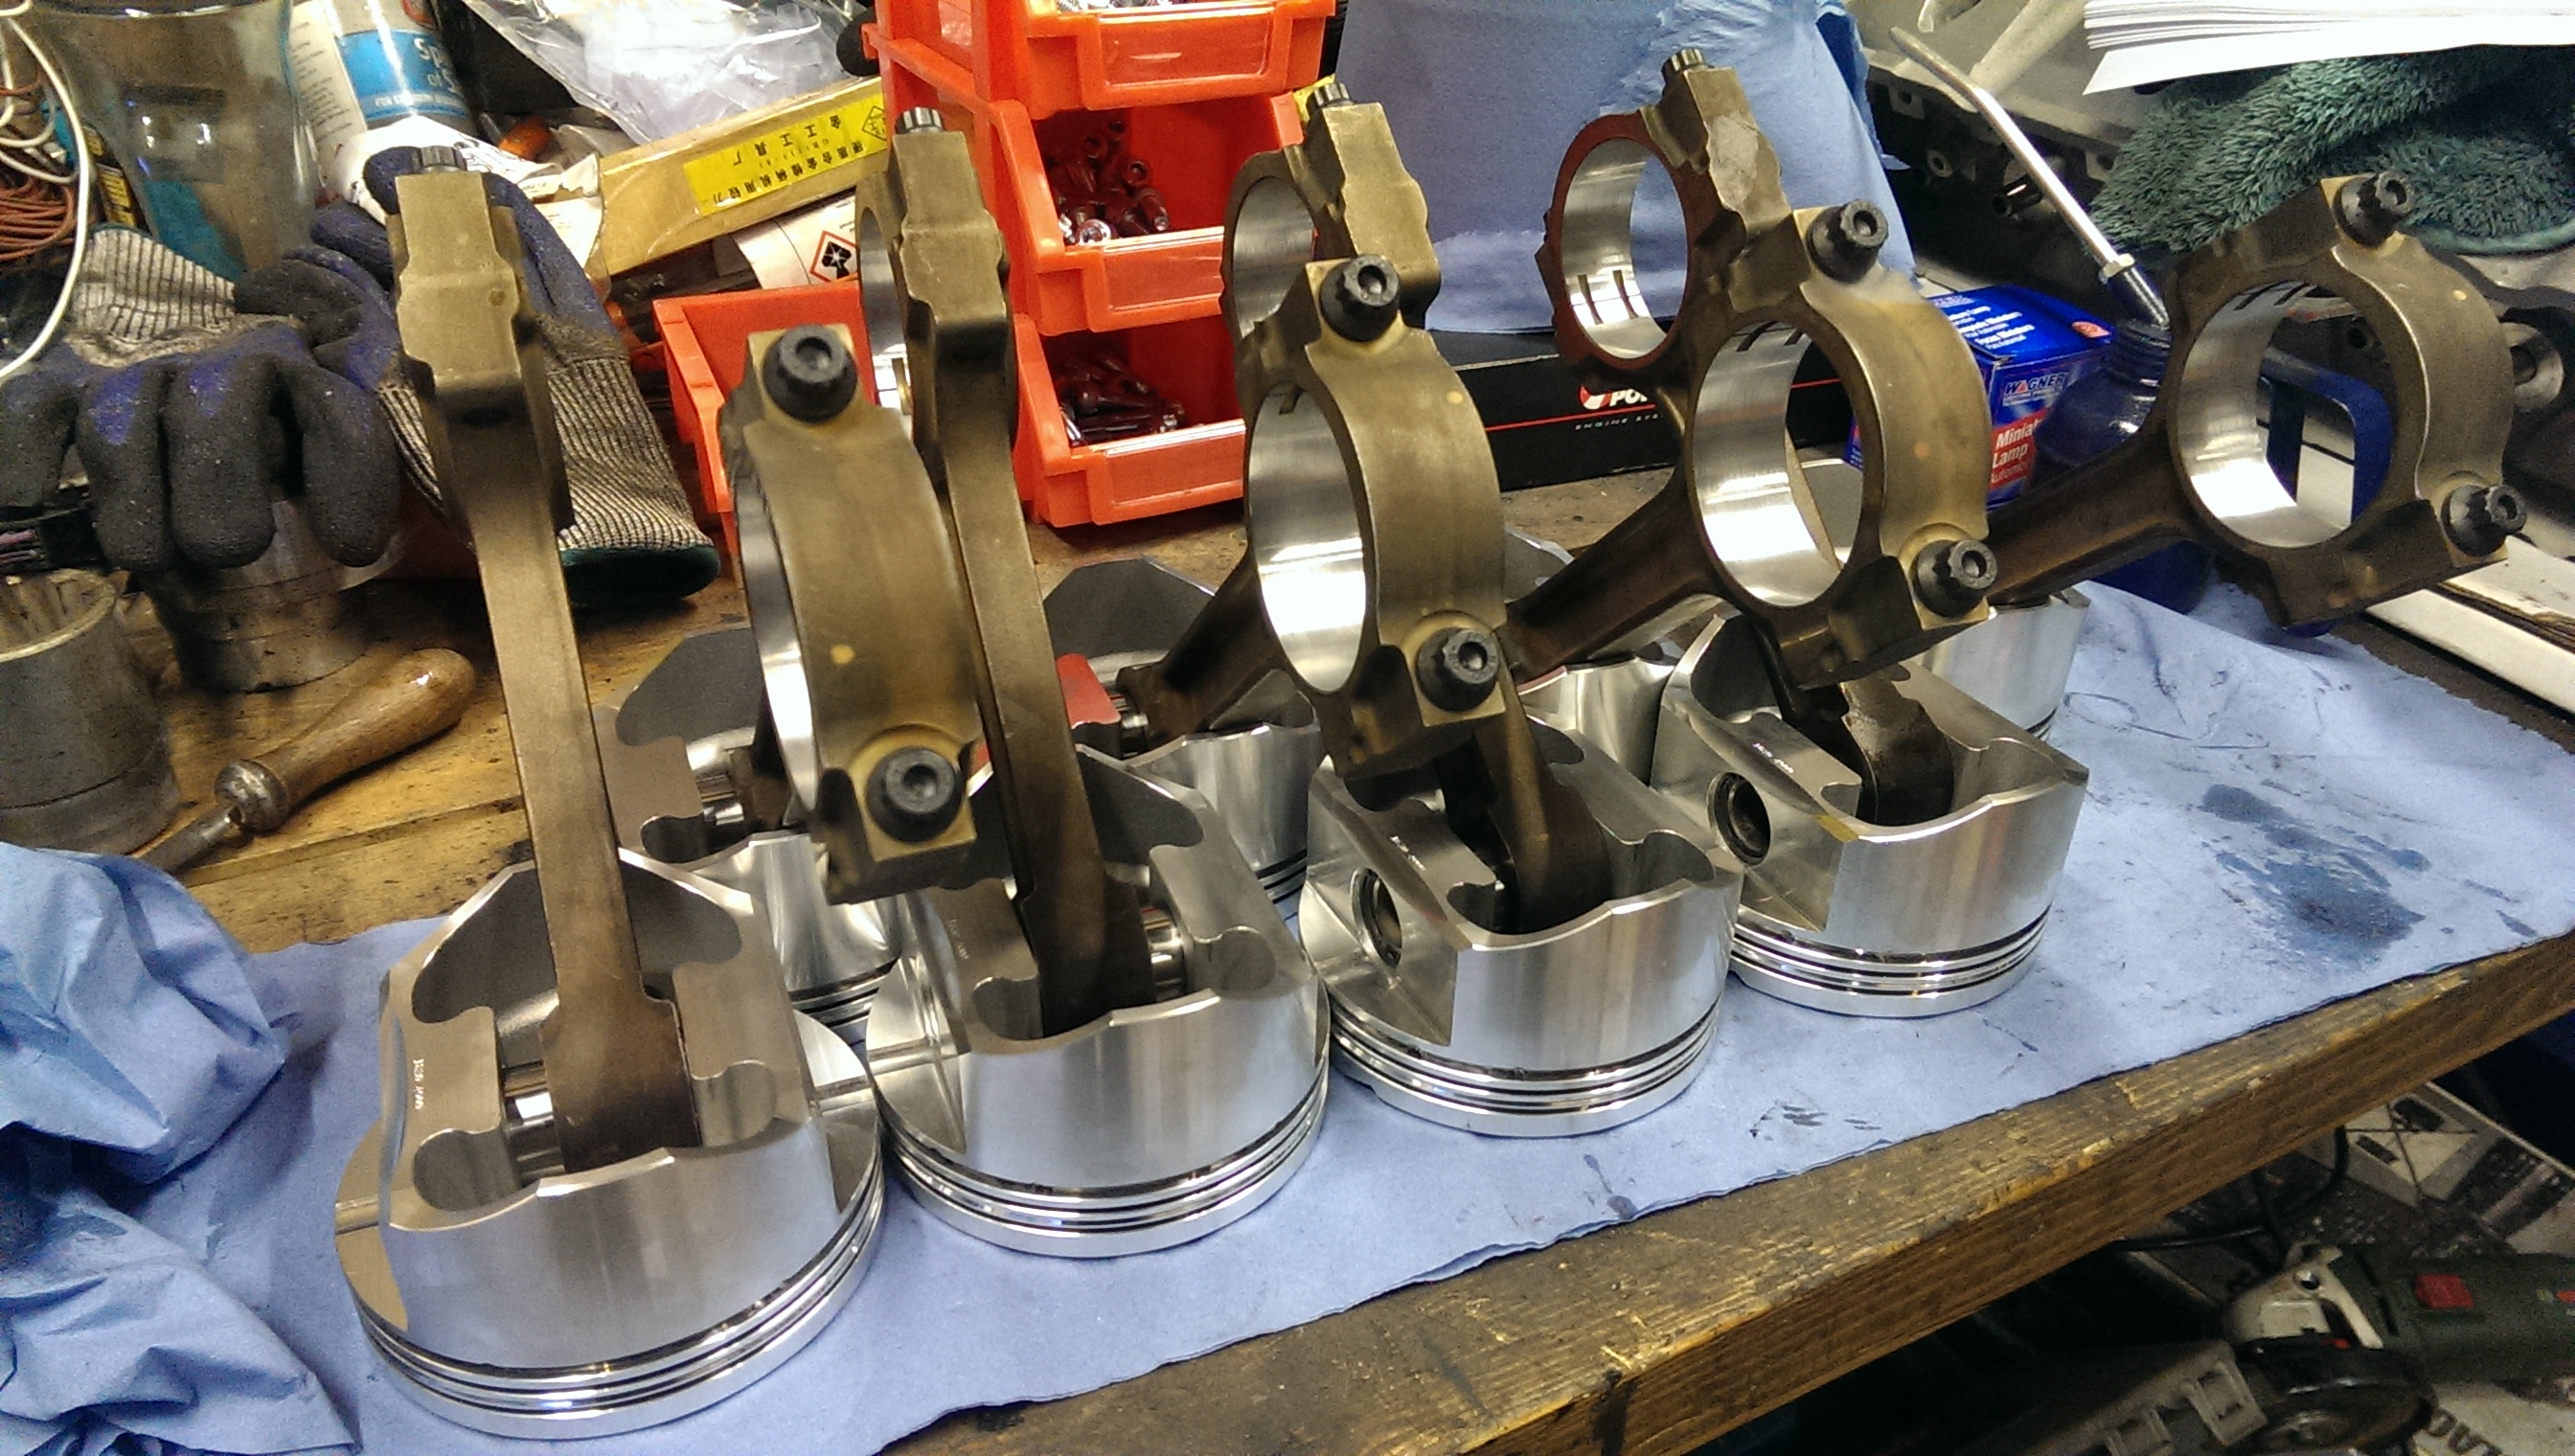
Gratuitous shot of completed rotating assembly...
Assembled the oil baffle, pick up pipe and front cover onto the engine. I did think about polishing the timing cover, but decided it was too much effort for something you can't really see once the whole engine is built.
After that I cleaned the oil pan out and fitted that. Nice to have the bottom end all done.
Next up, assembly of the heads. Checked all the valves were straight as I knew there was a high likely hood of at least one being bent. Turned out there were 4 bent ones. Just as well I had some spares. What was a bit unexpected was finding a broken intake valve guide. So I need to look at making myself a new one and fitting that tomorrow.
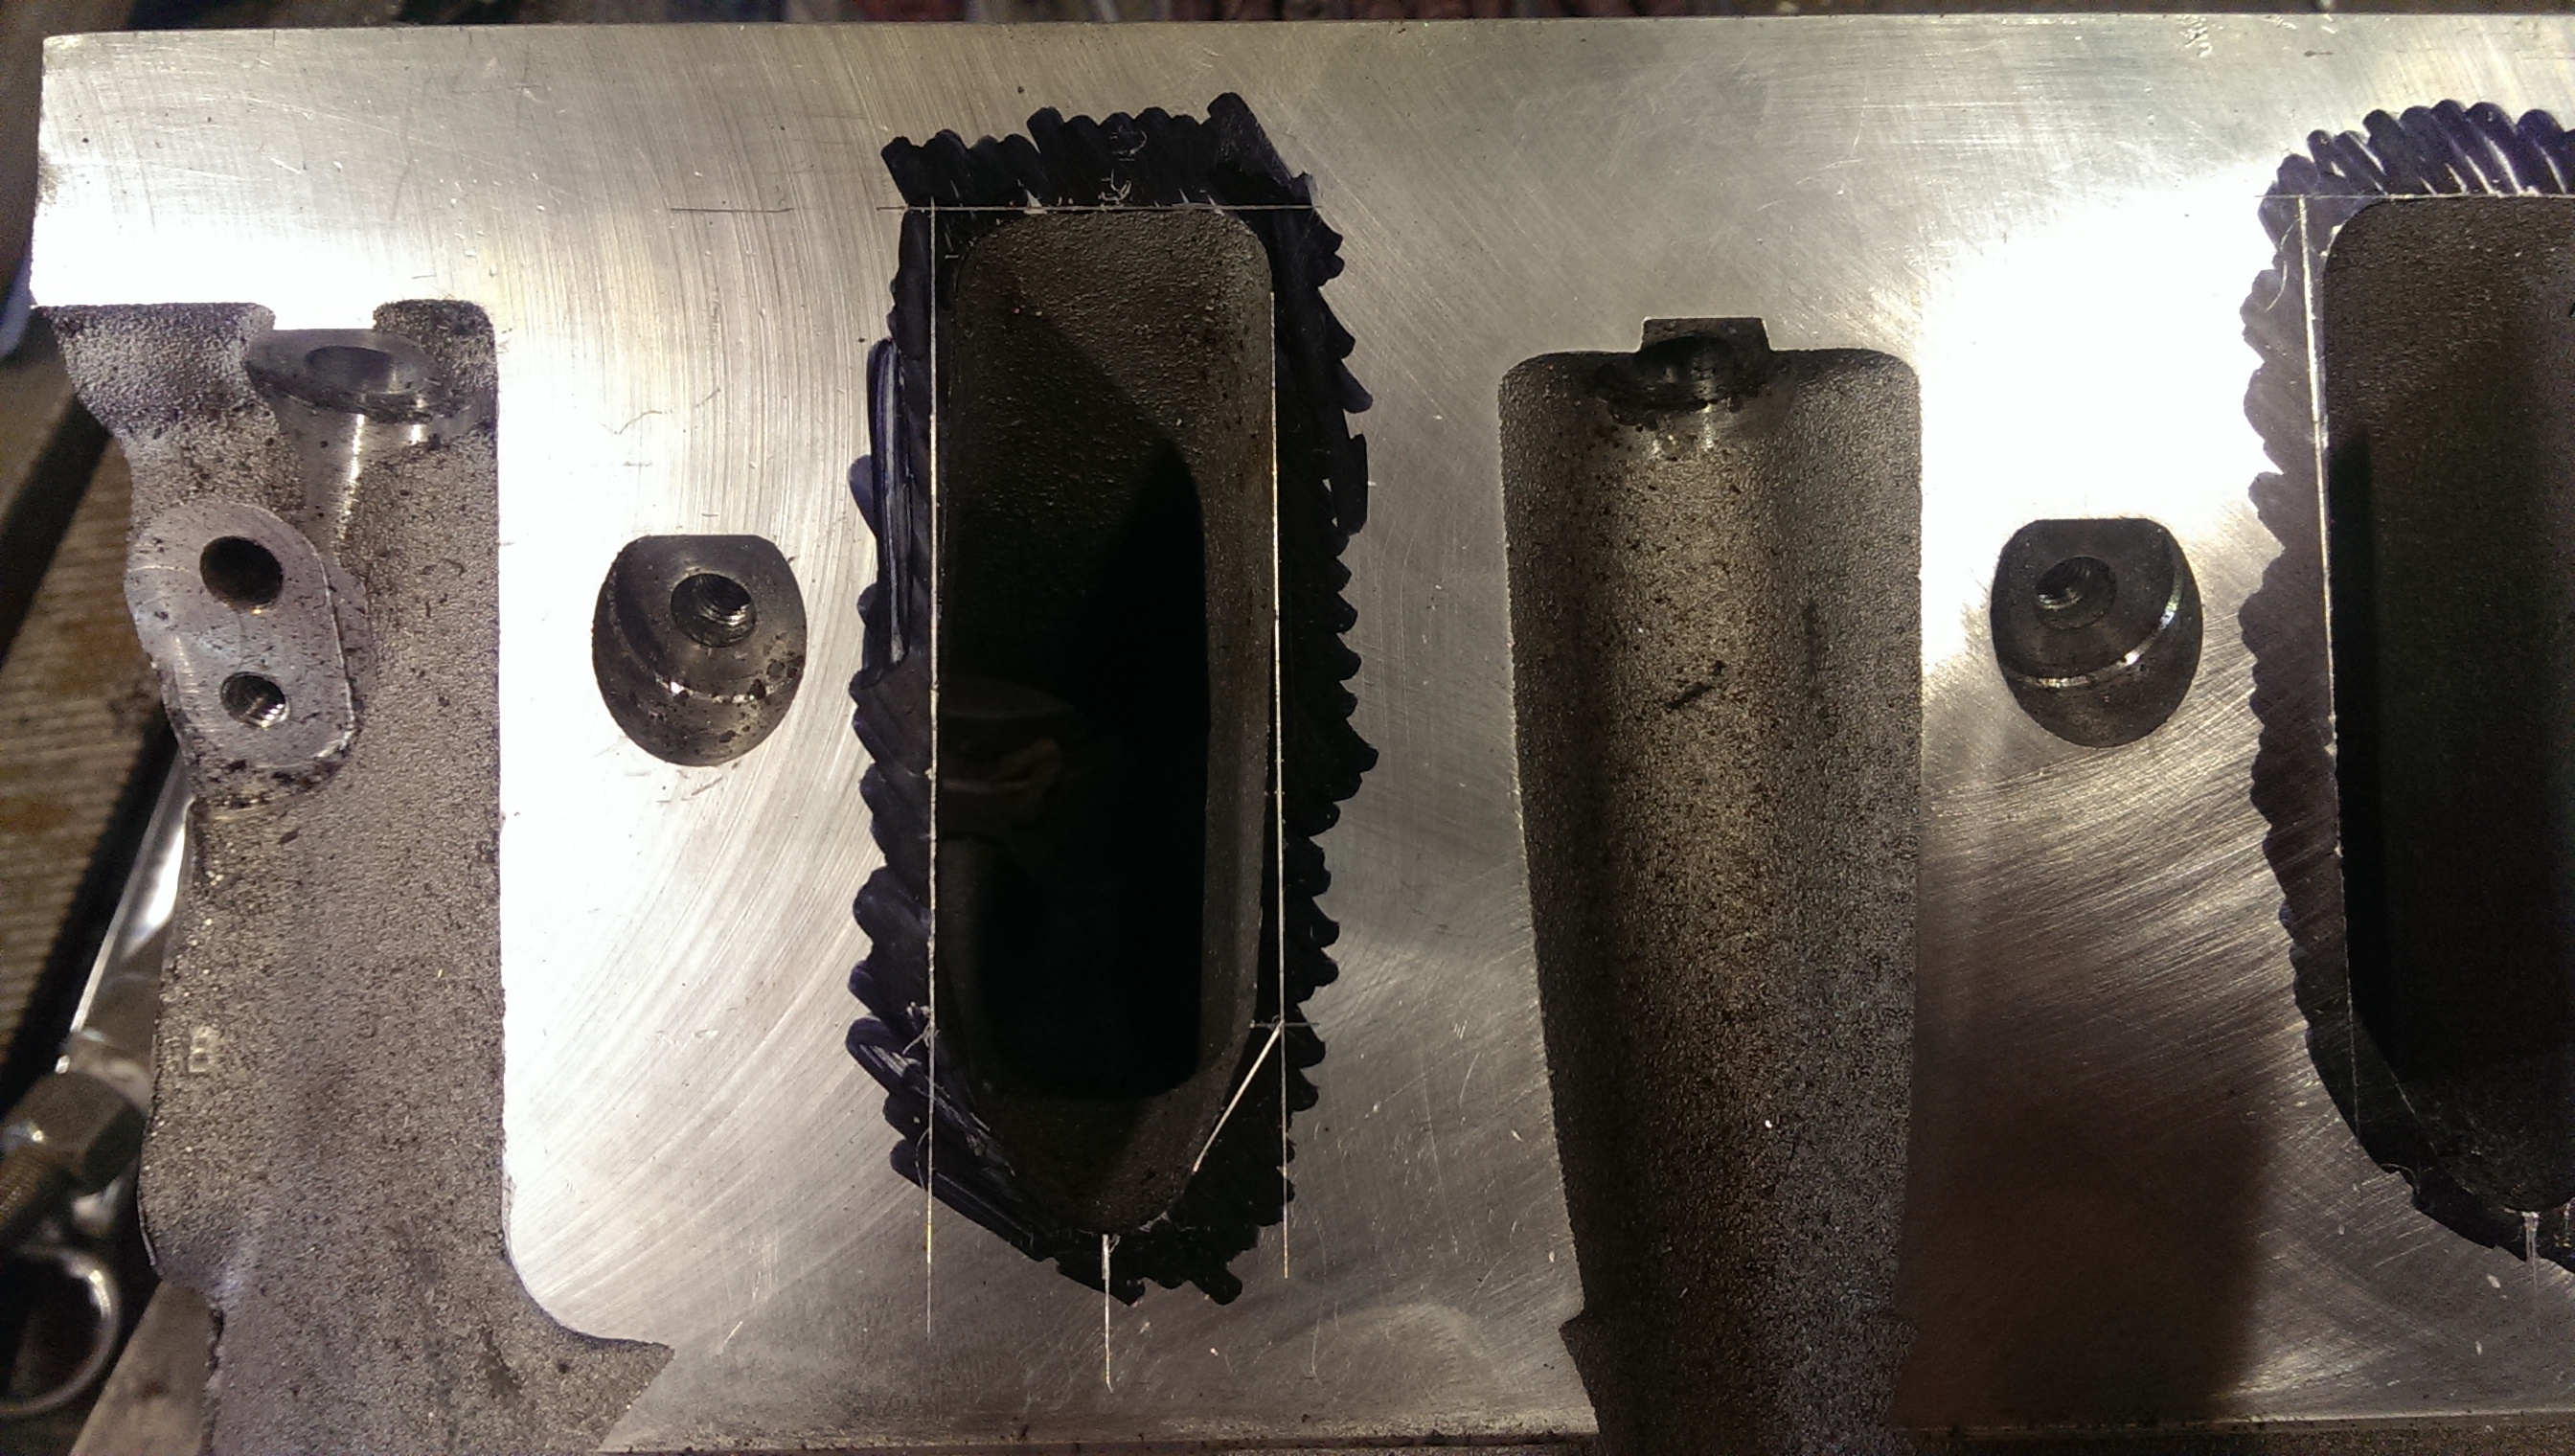
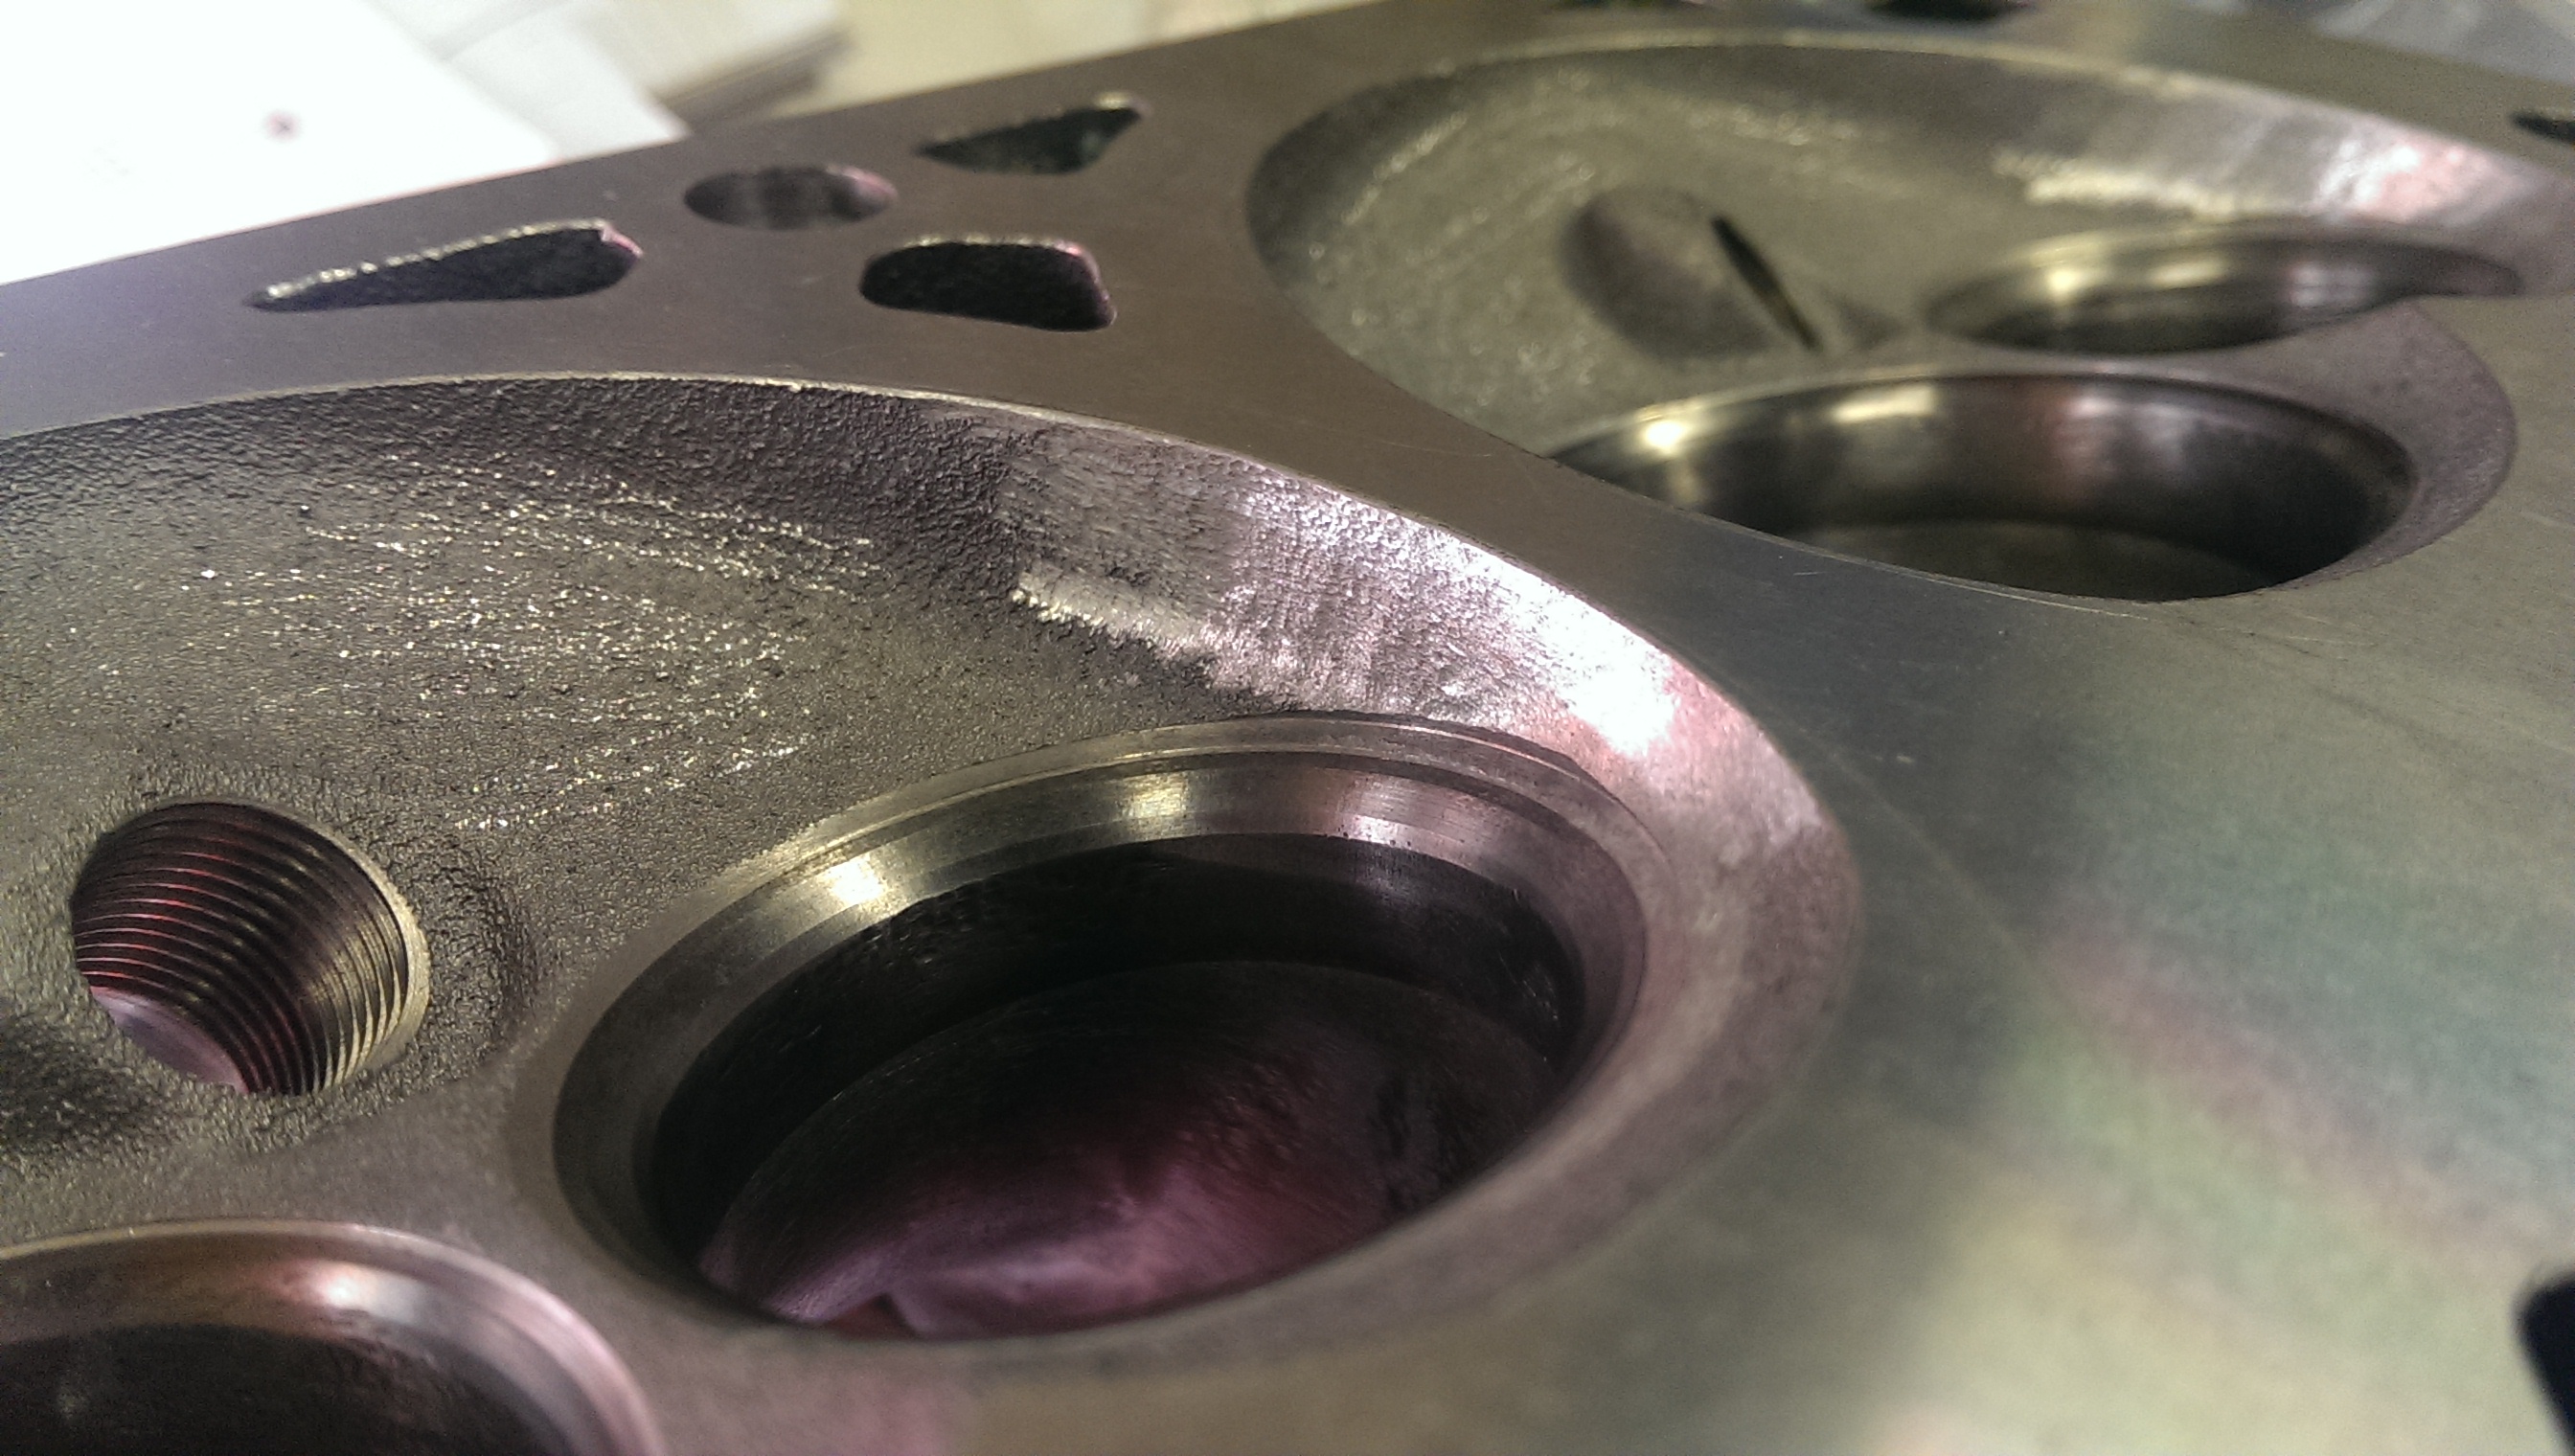
Then I marked out the combustion chambers to see how much material I could remove to un-shroud the valves. Turned out more on the exhaust side, but generally not very much. So it didn't take long to get that seen to on both the heads.
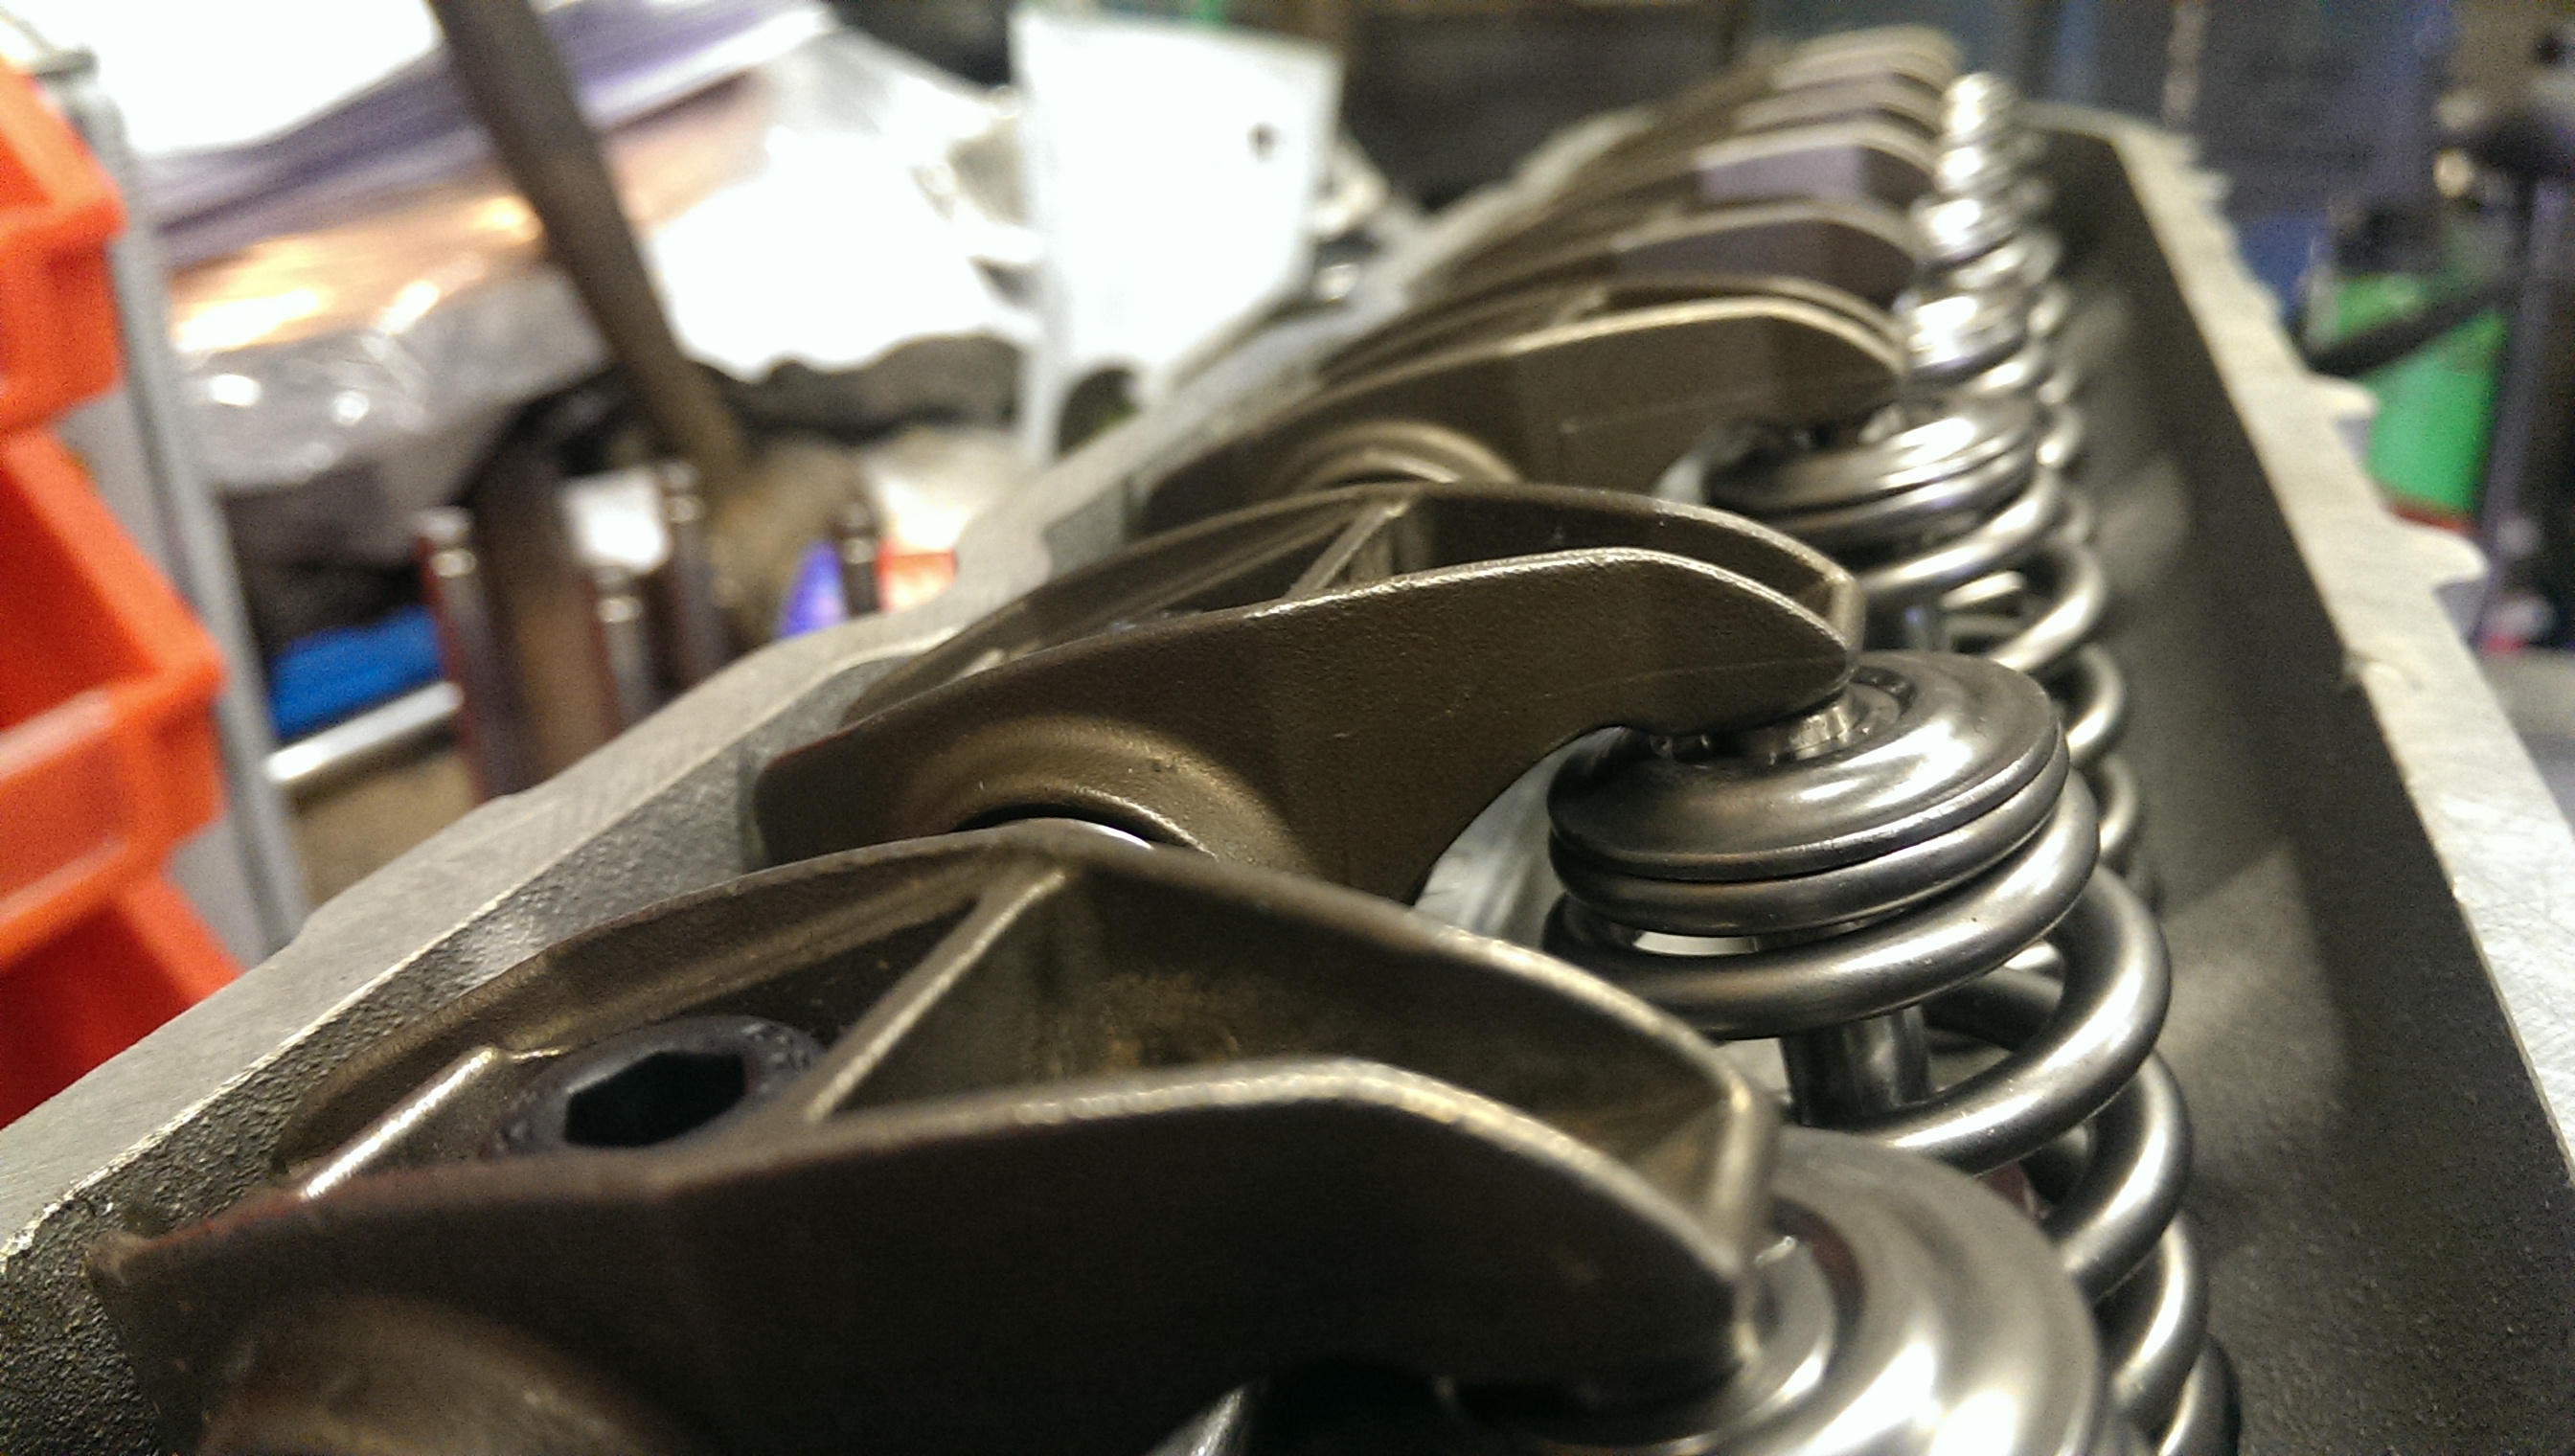
After all that I did have enough parts to get one head fully cleaned and assembled.
After that I soaked the lifters in a tub of oil and then fitted them to their retainers and into the block.
Then made myself a valley cover. I didn't have one with my engine parts and it only took 30 mins to make one.
After that I got the assembled head fitted. It gets it off the floor, and makes it easier to keep everything clean!
Next up making a new valve guide. I found a piece of cast iron to machine one from. I did consider making a bronze one, as I have some, but it seemed a bit pointless unless I made 16 new ones, which I wasn't about to do! It took about an hour to machine one up, pleased with the result... spot the home-made one.

This was the extent of the chamber work, unshrouding the valves a bit. Don't want to remove too much material, this was about 3mm blended back toward the valve seat.
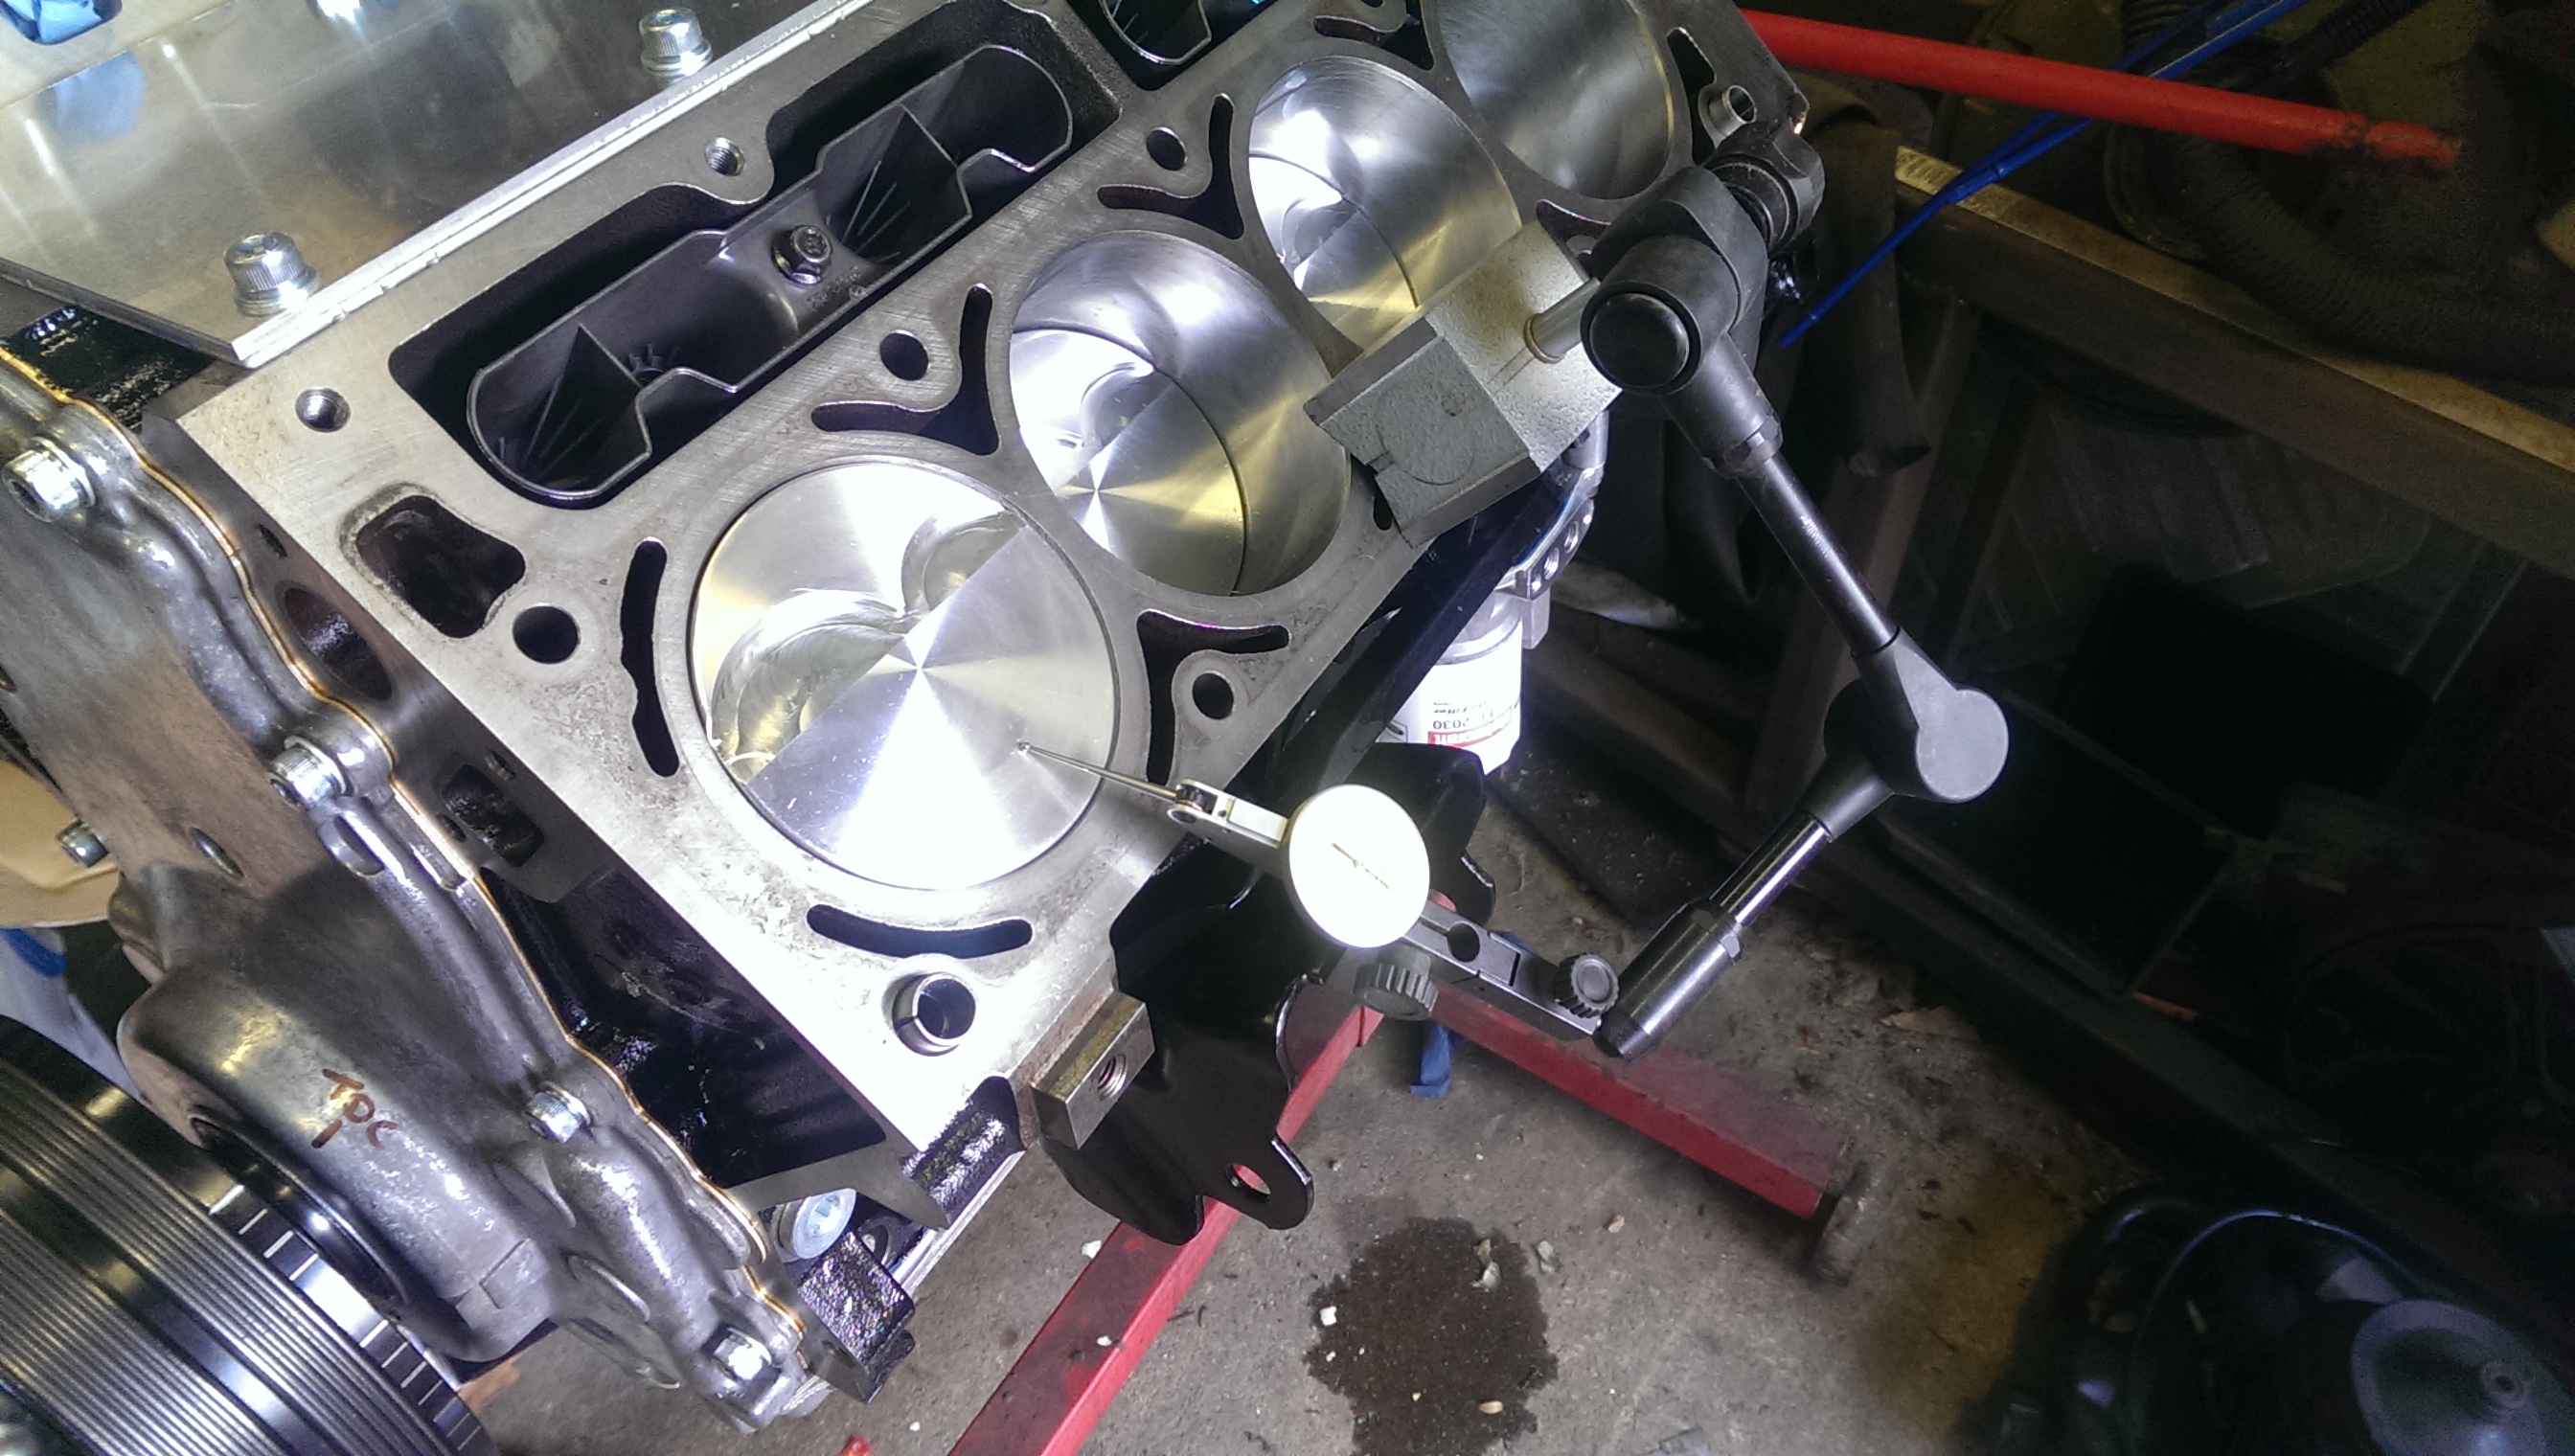
Next thing was to fit the crank damper and then find true TDC, shouldn't need it, but it's always handy for troubleshooting later on
Assembled the other head

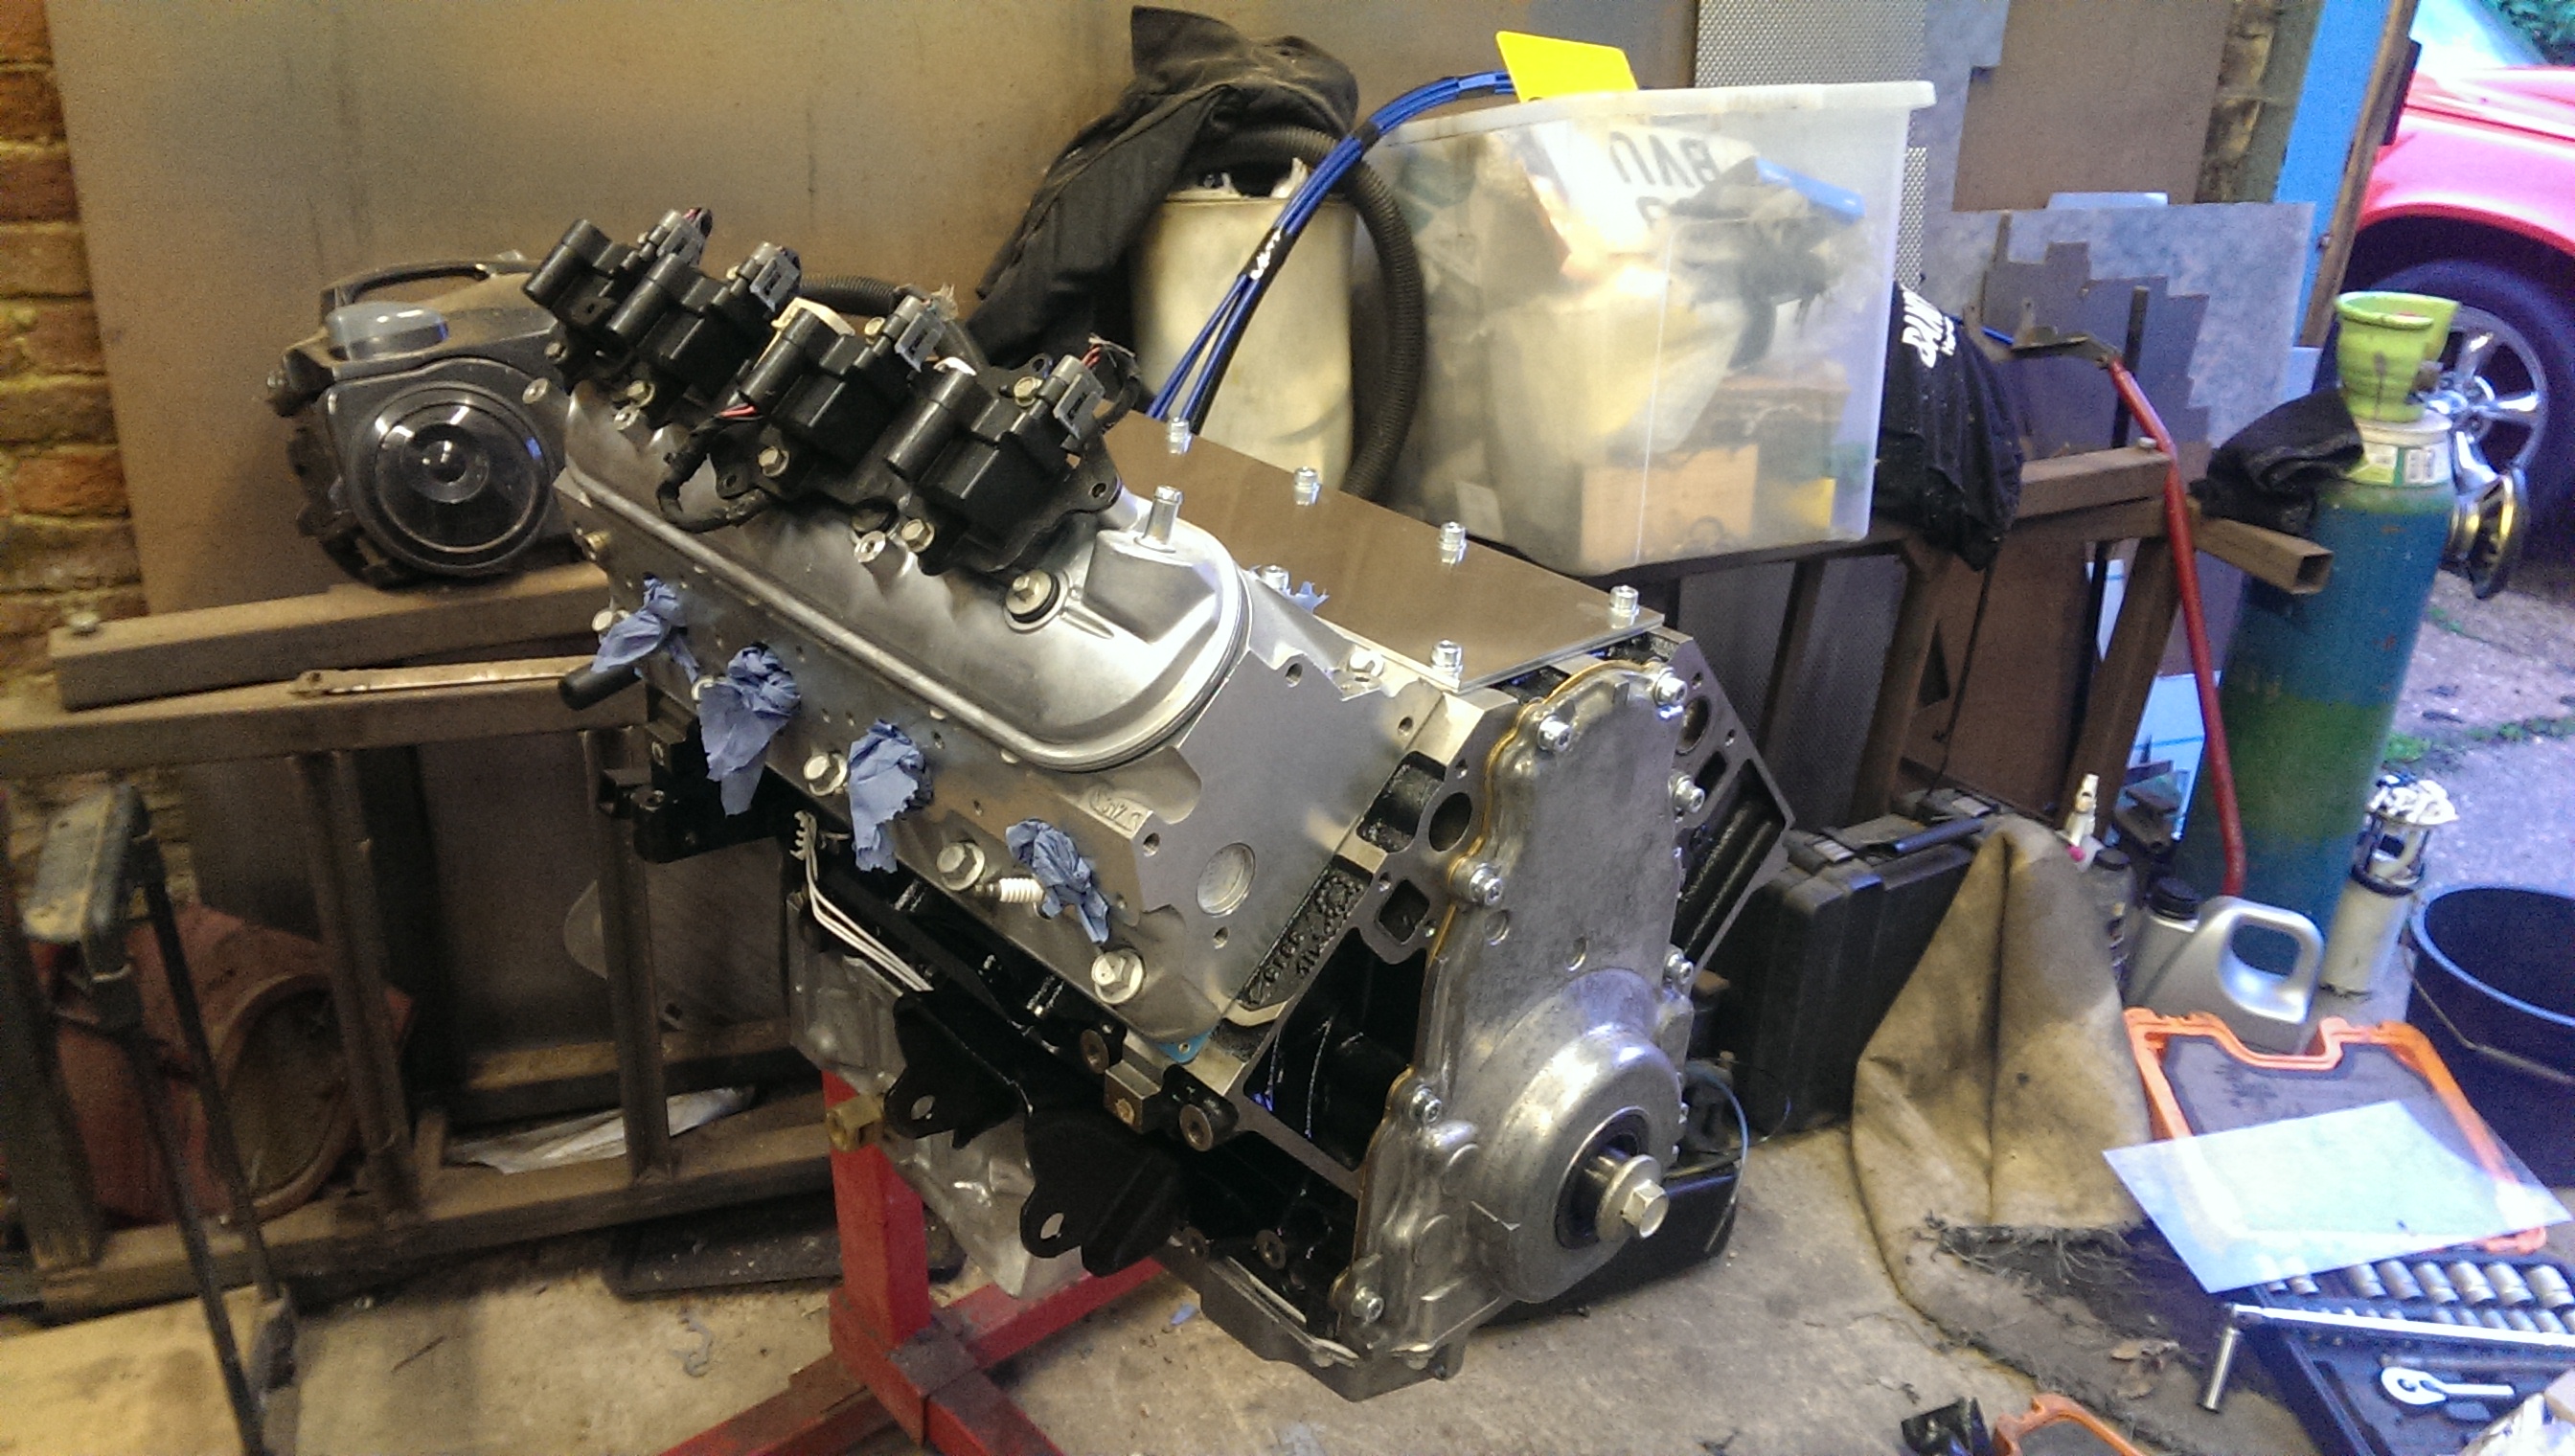
Popped it on the block, torqued it down and then installed the steam pipes
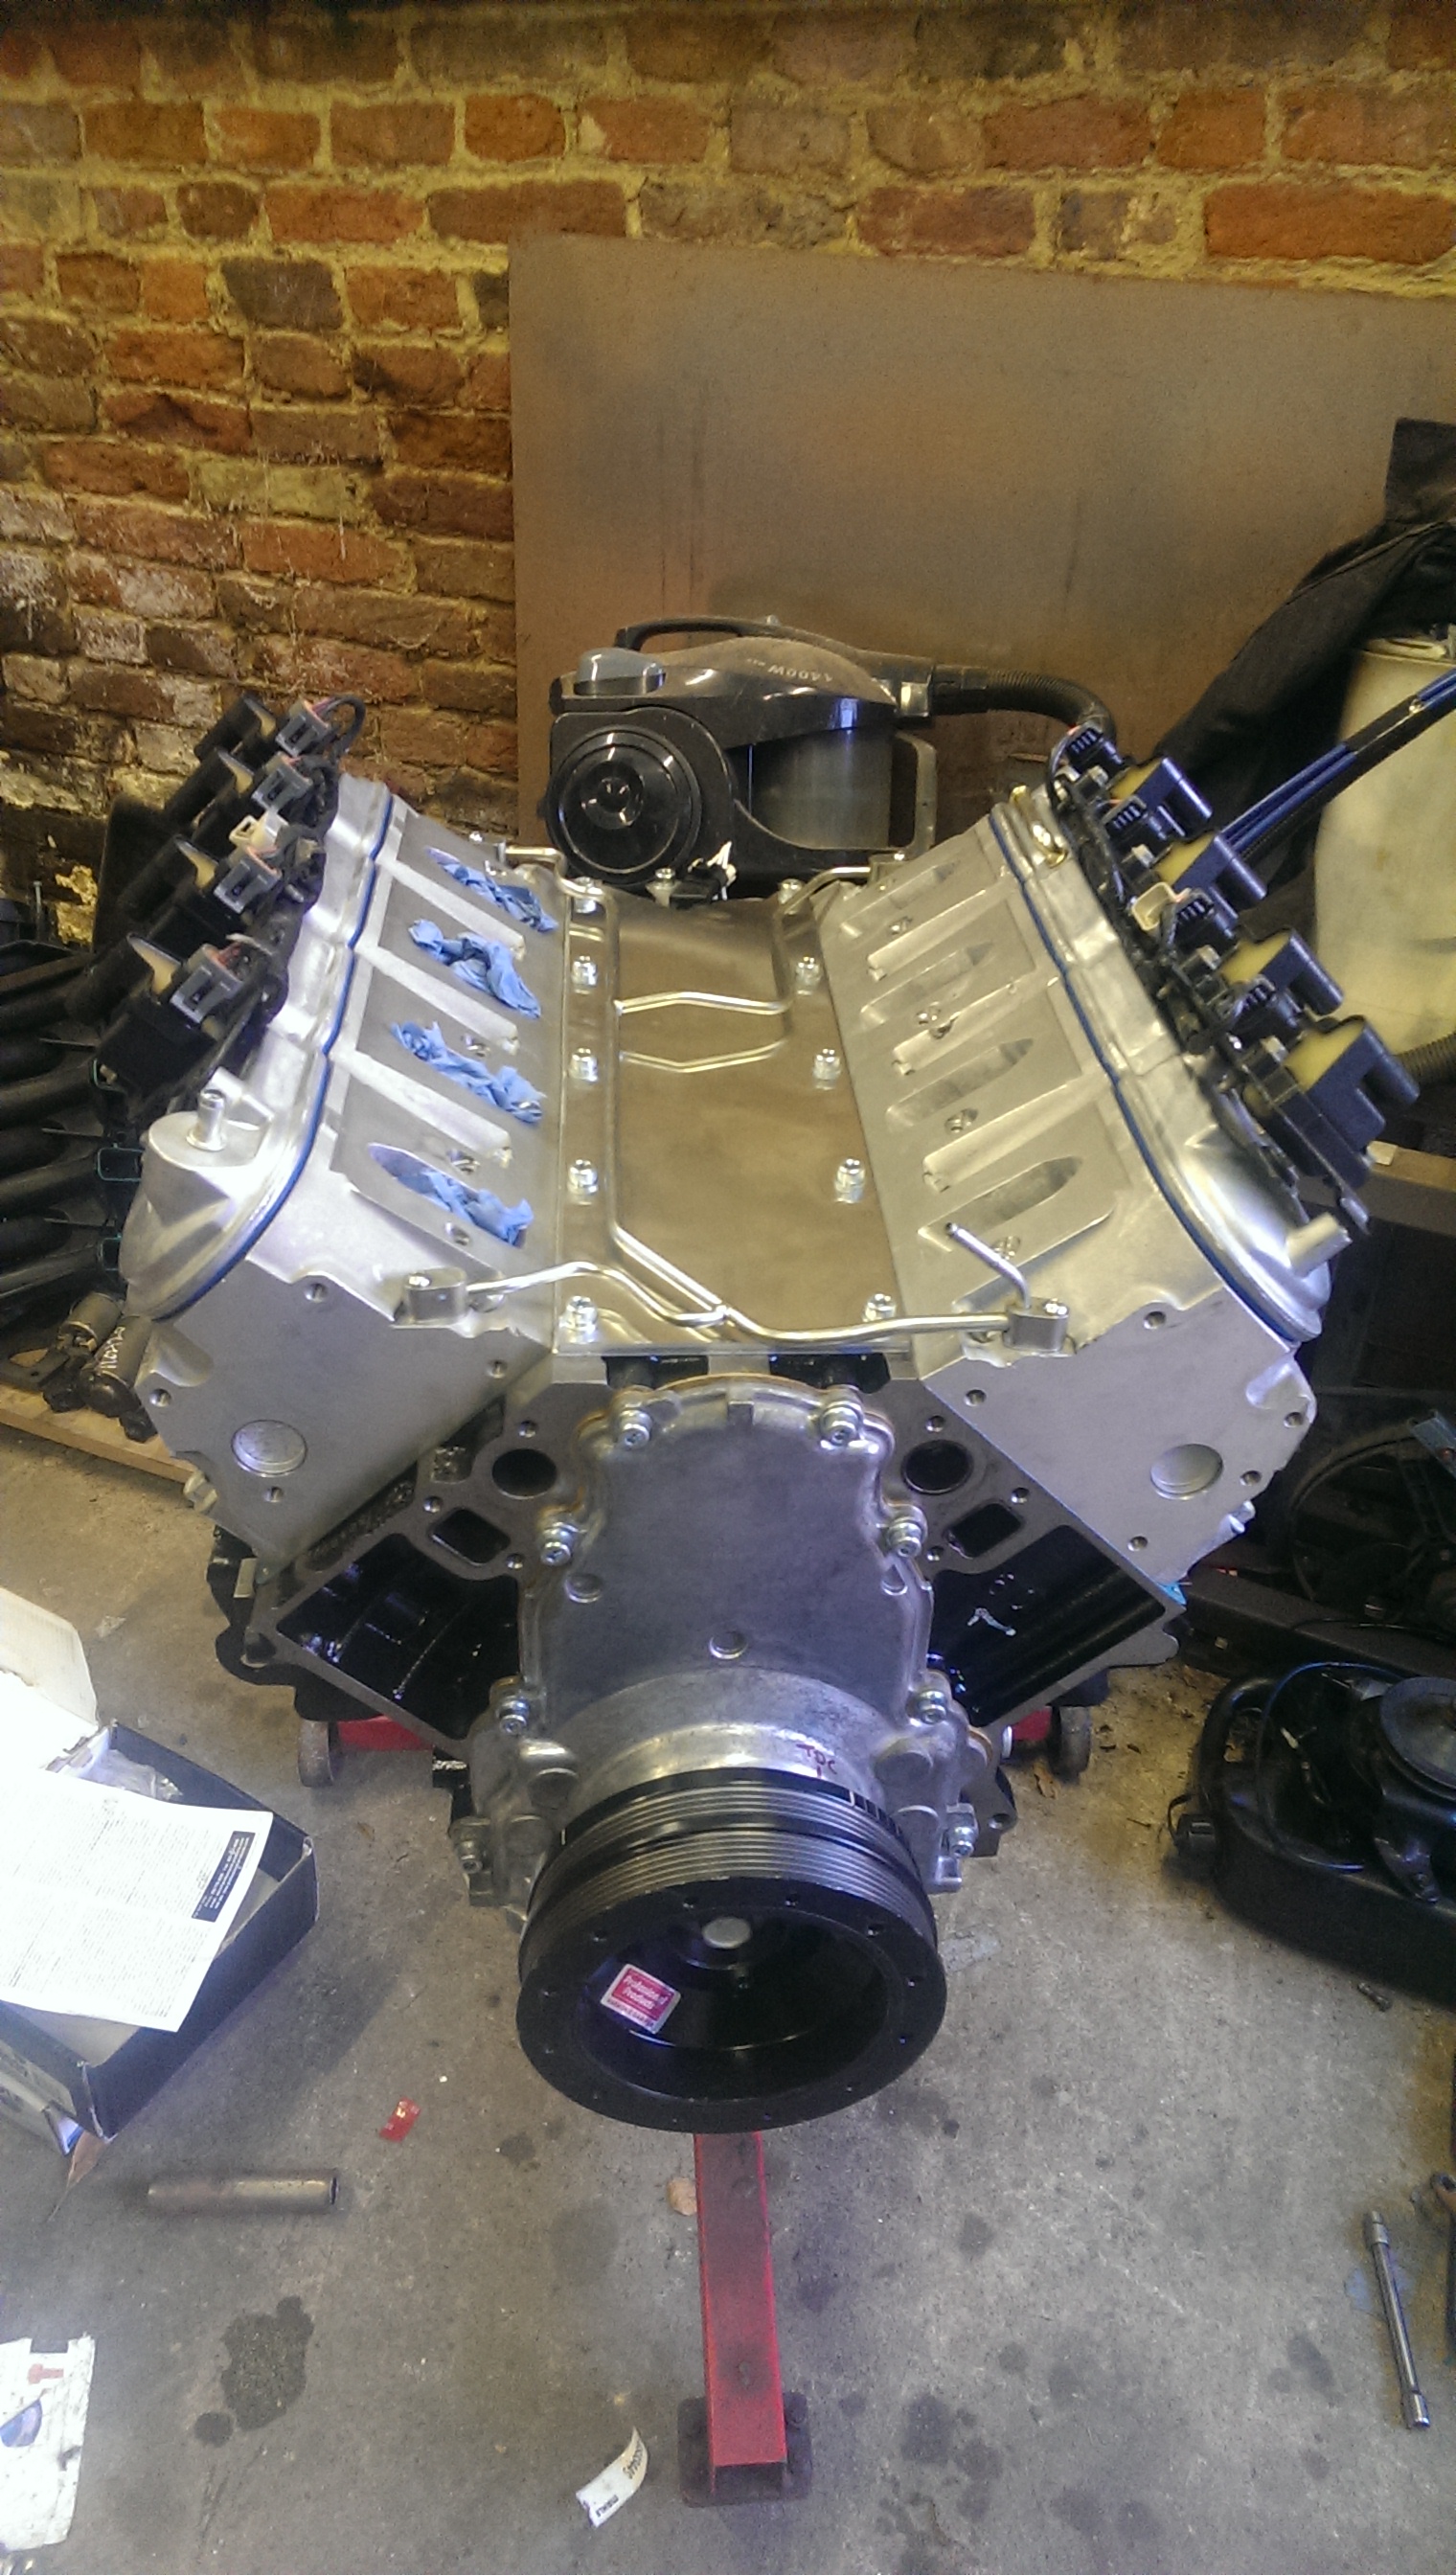
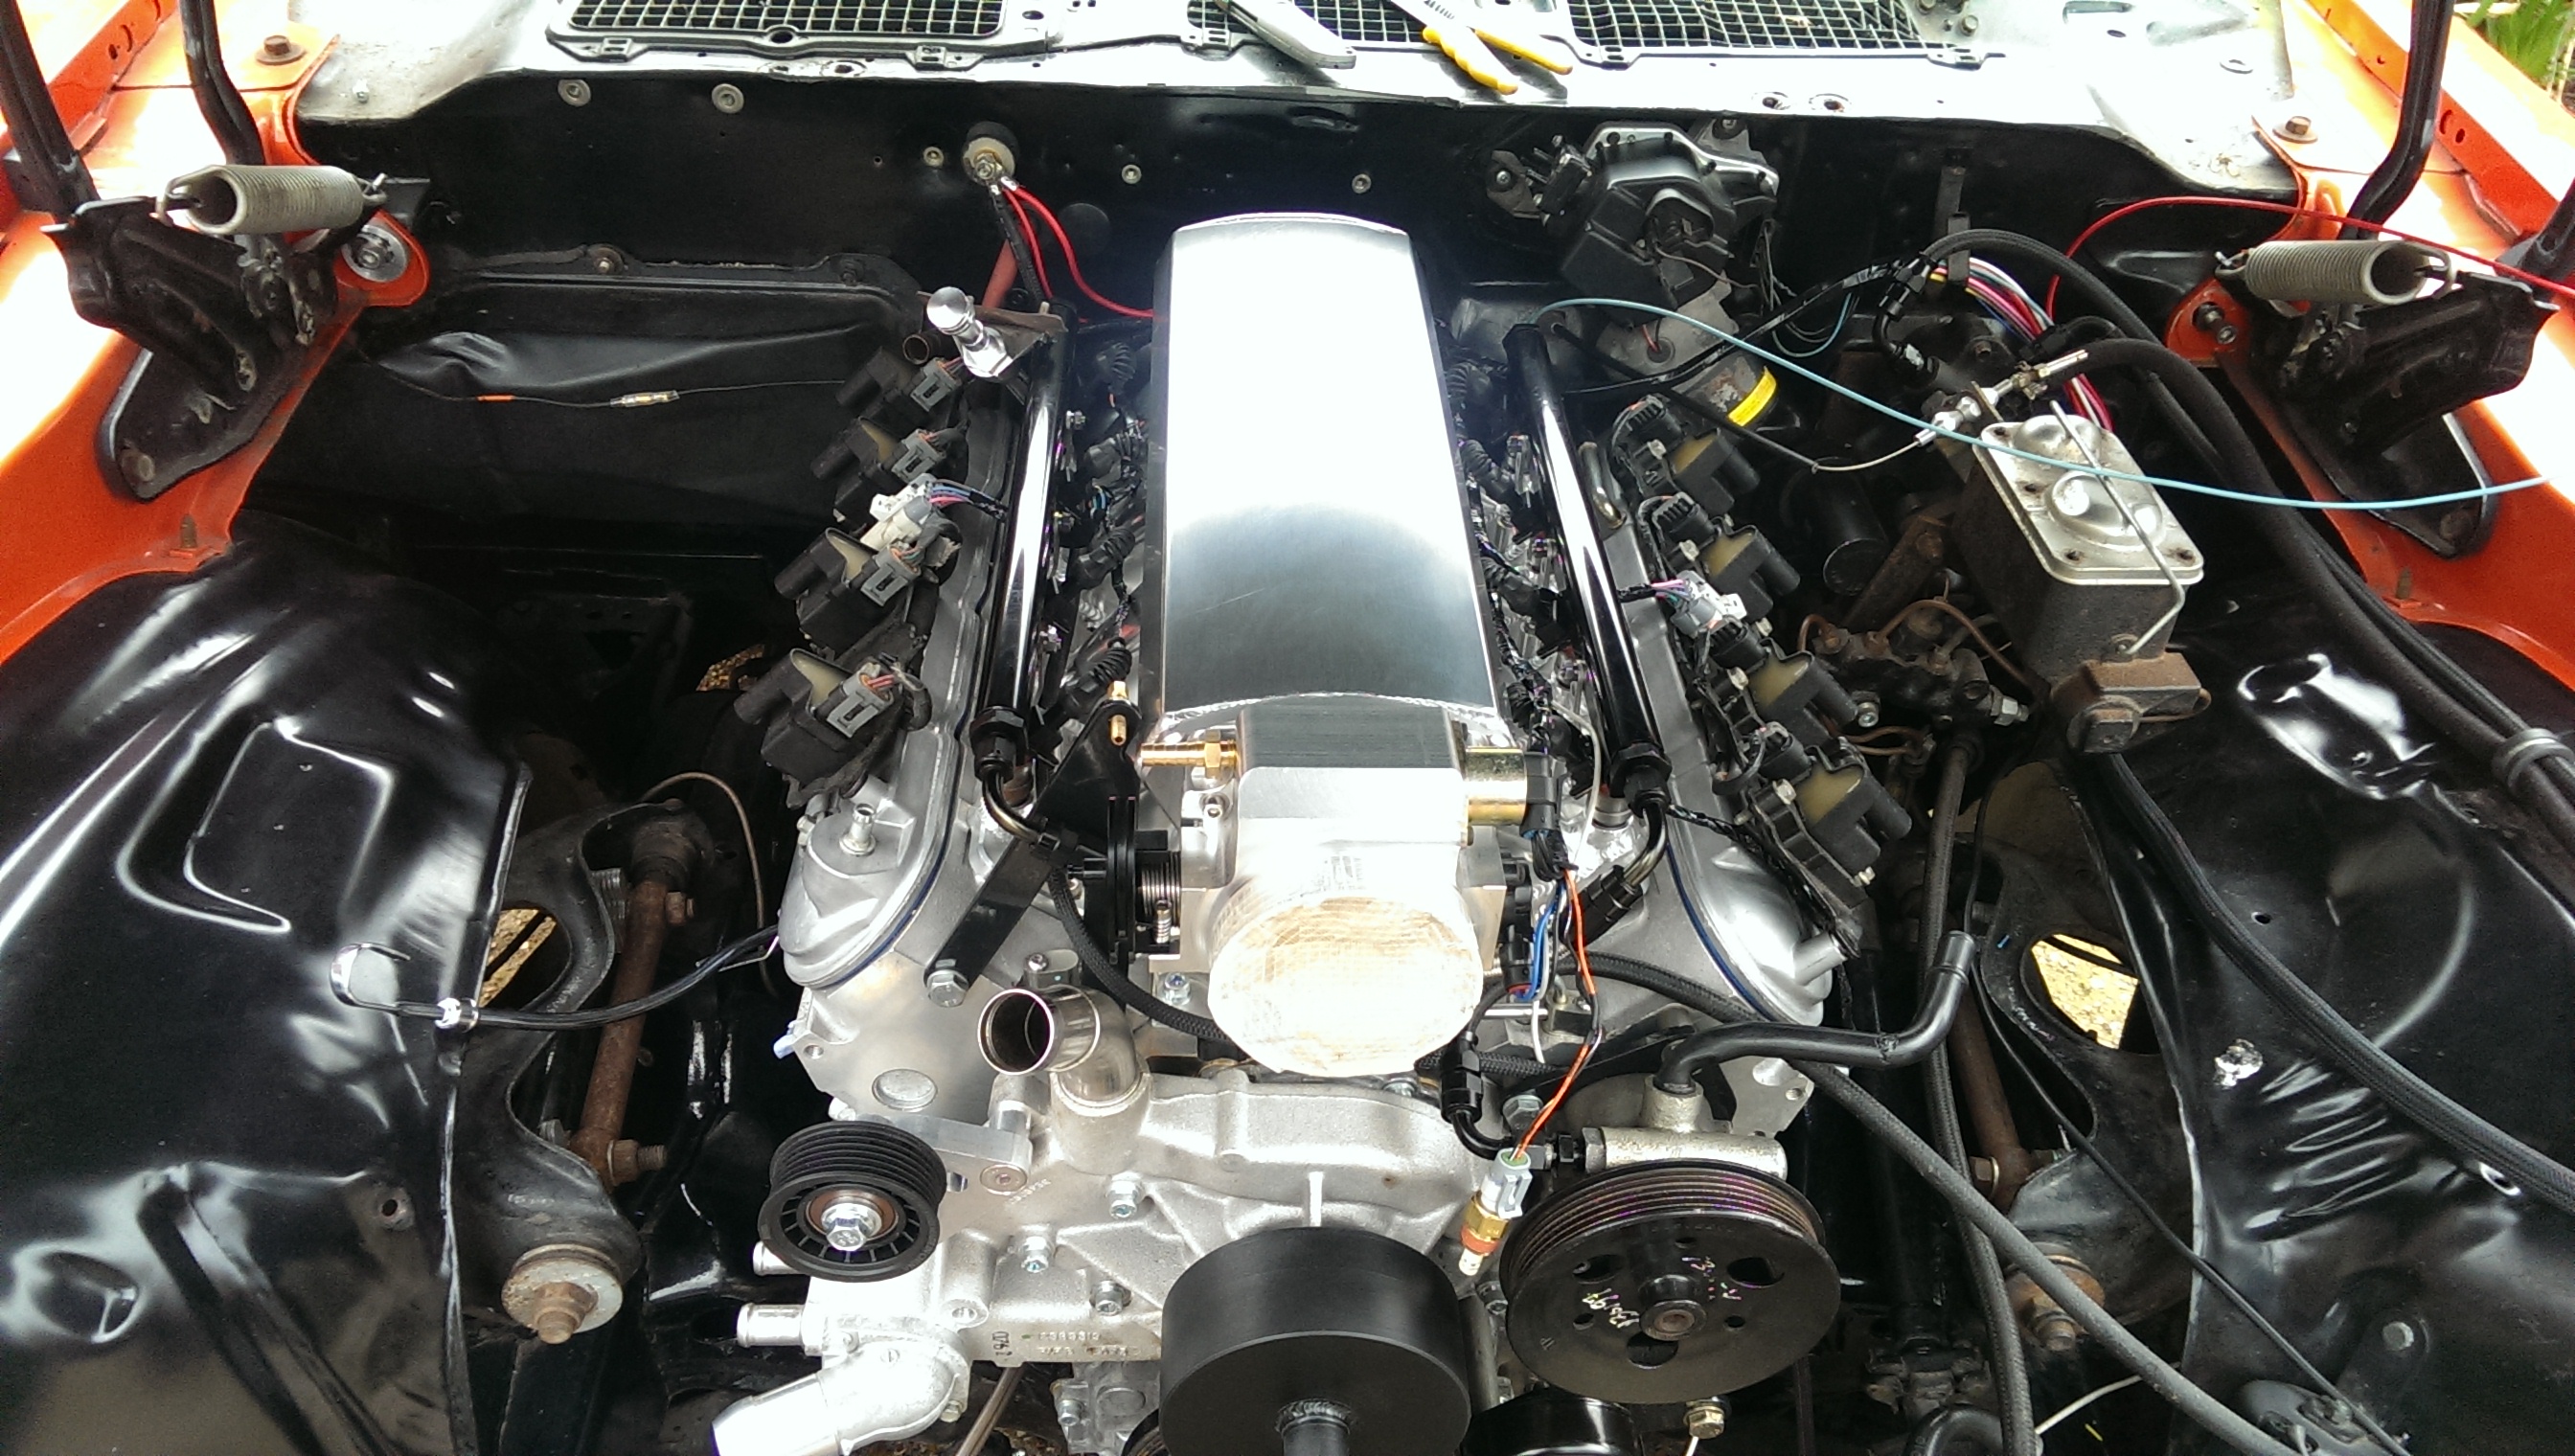
Finally the inlet manifold and throttle body. Thankfully it still fits fine after skimming 0.050" off each head - bolts were a little tight in the holes, but it seems to work. 102mm throttle body fitted to the front, should flow ok...
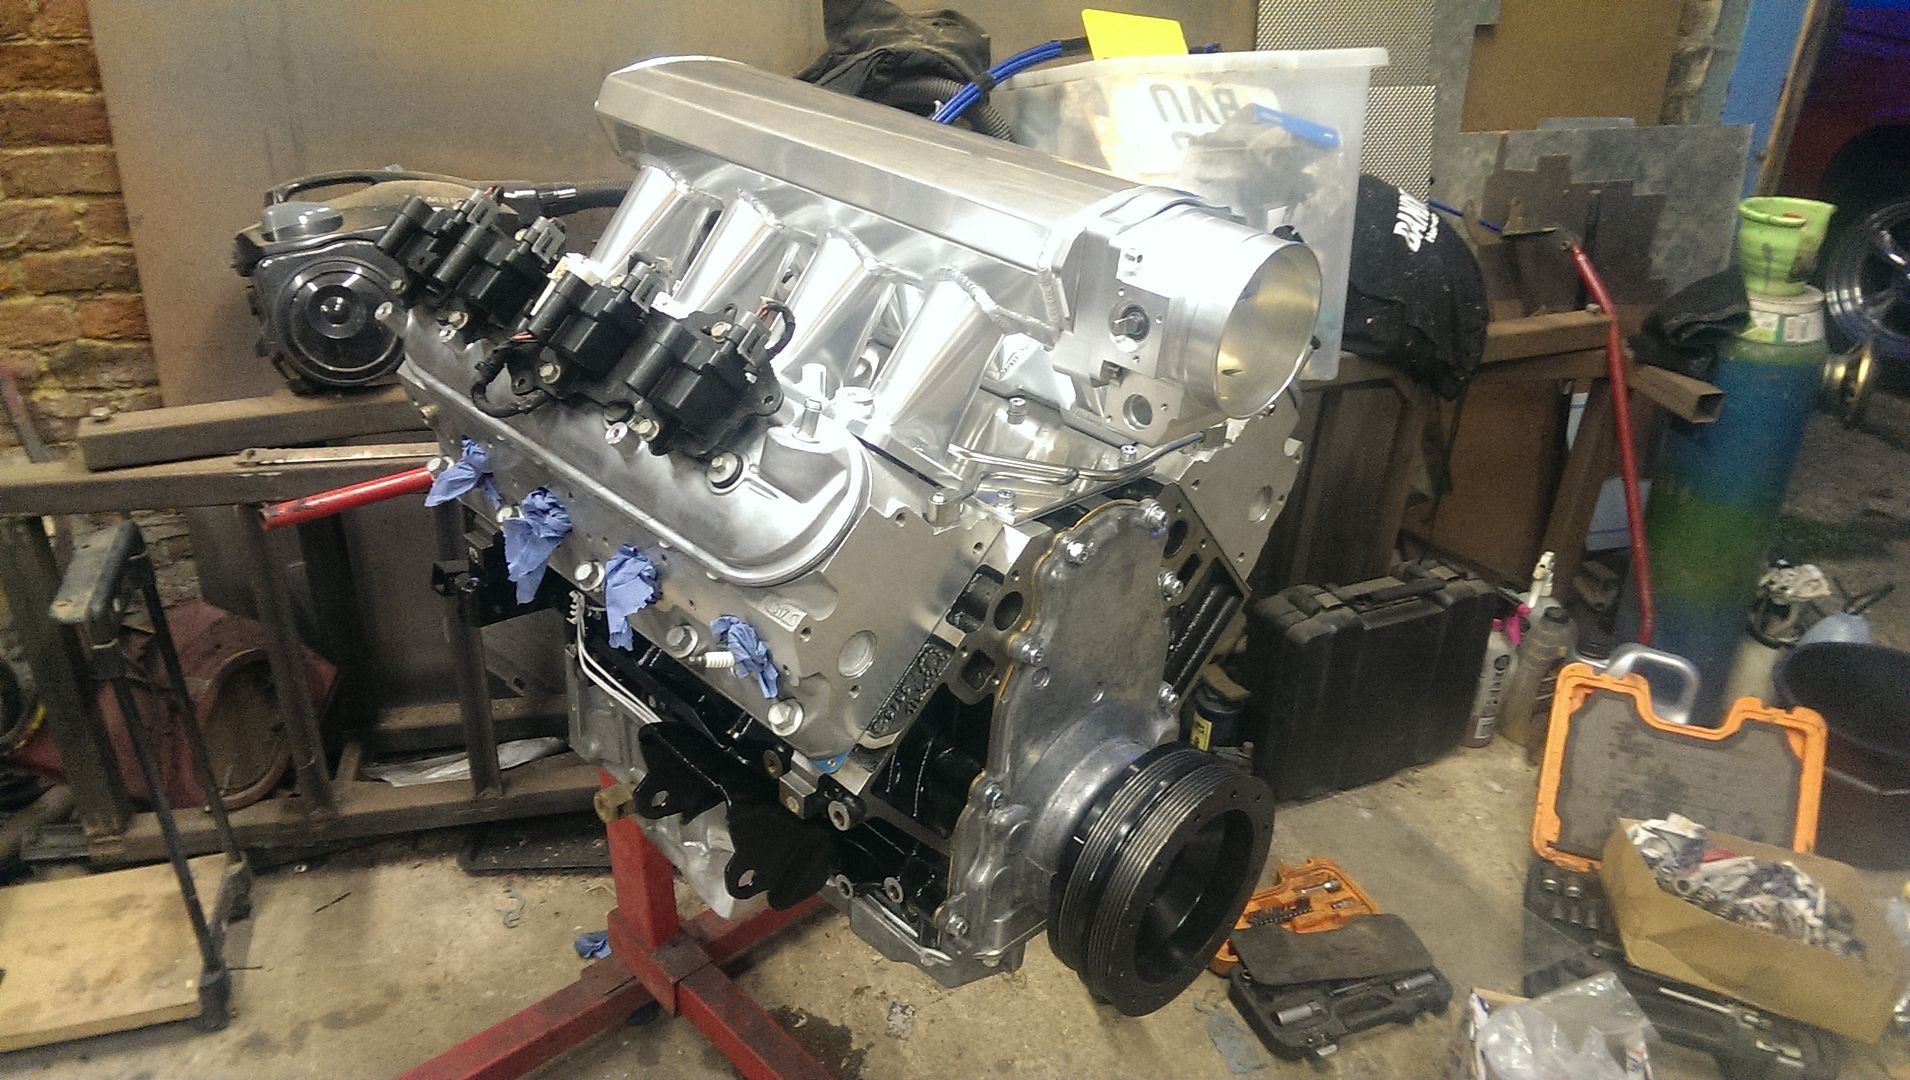
Whether it works or not, I don't know. But it looks kinda cool...
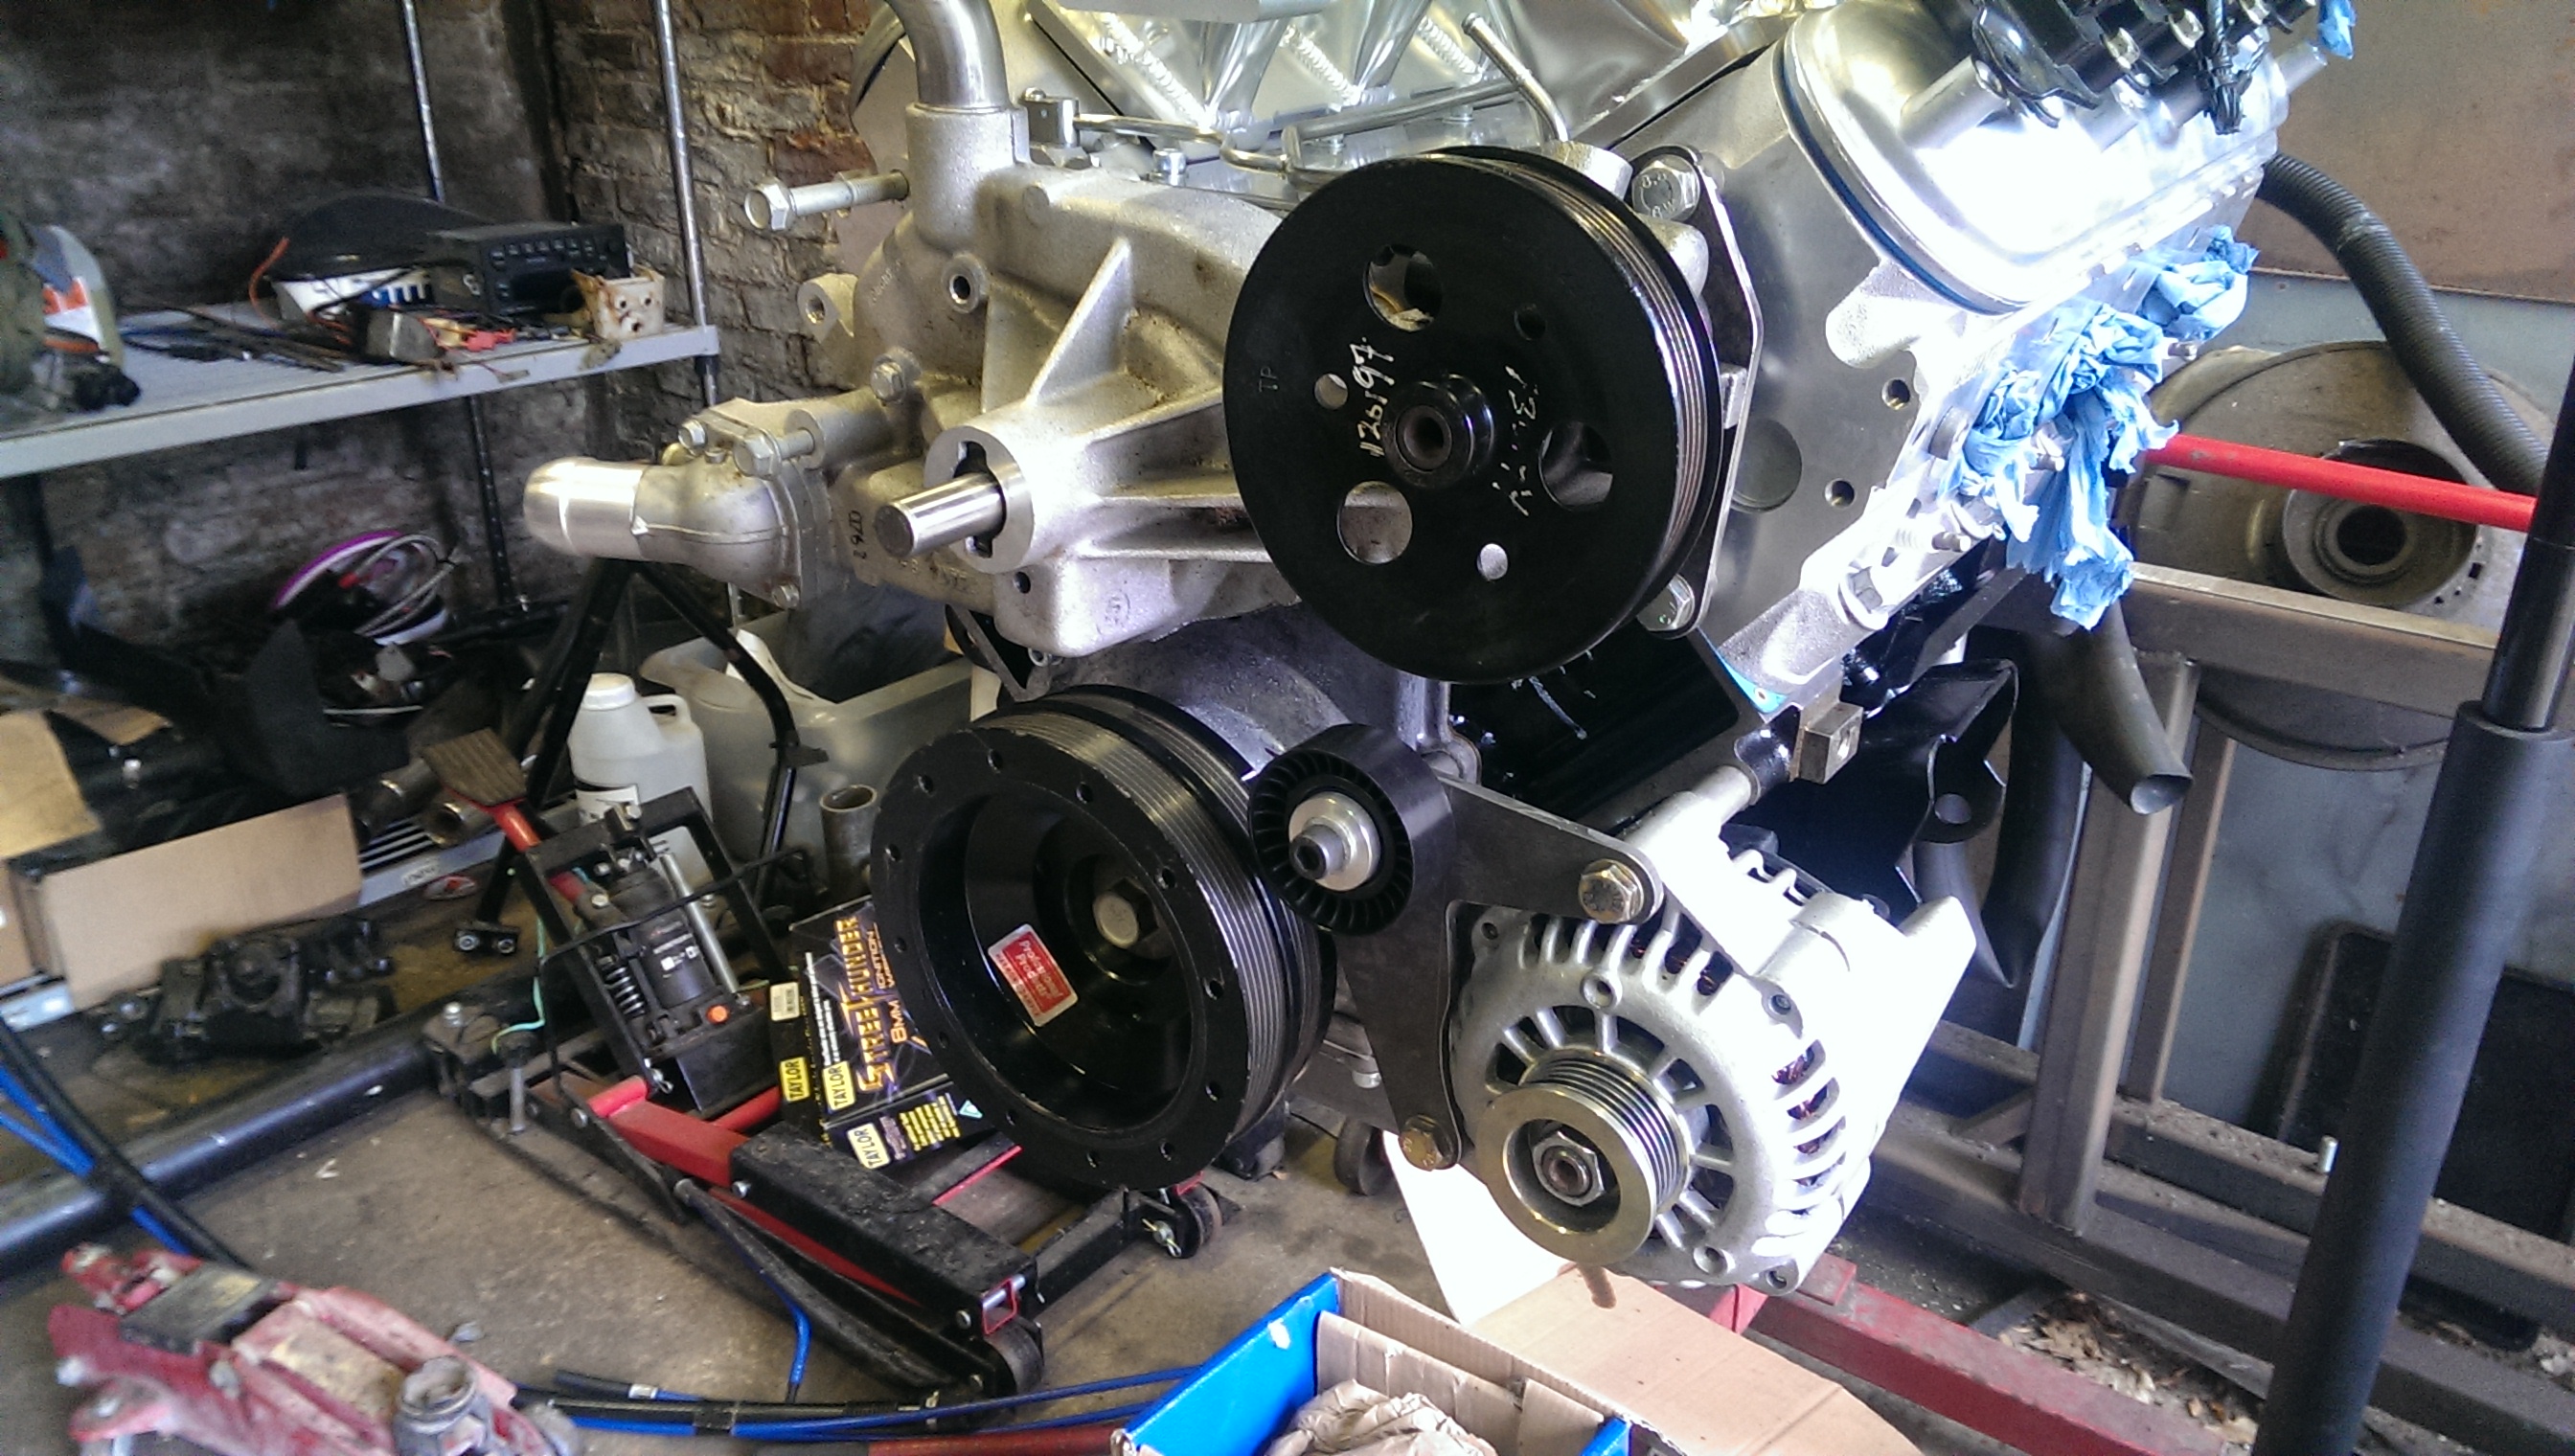
The LS Camaro uses a low mount alternator to help with hood clearance. But the LQ block isn't drilled and tapped for the mounts, so I did that first this morning. I also discovered that the Blazer alternator uses identical mounts to the LS one. And I have a spare one, and it only needs 2 wires to make it work.
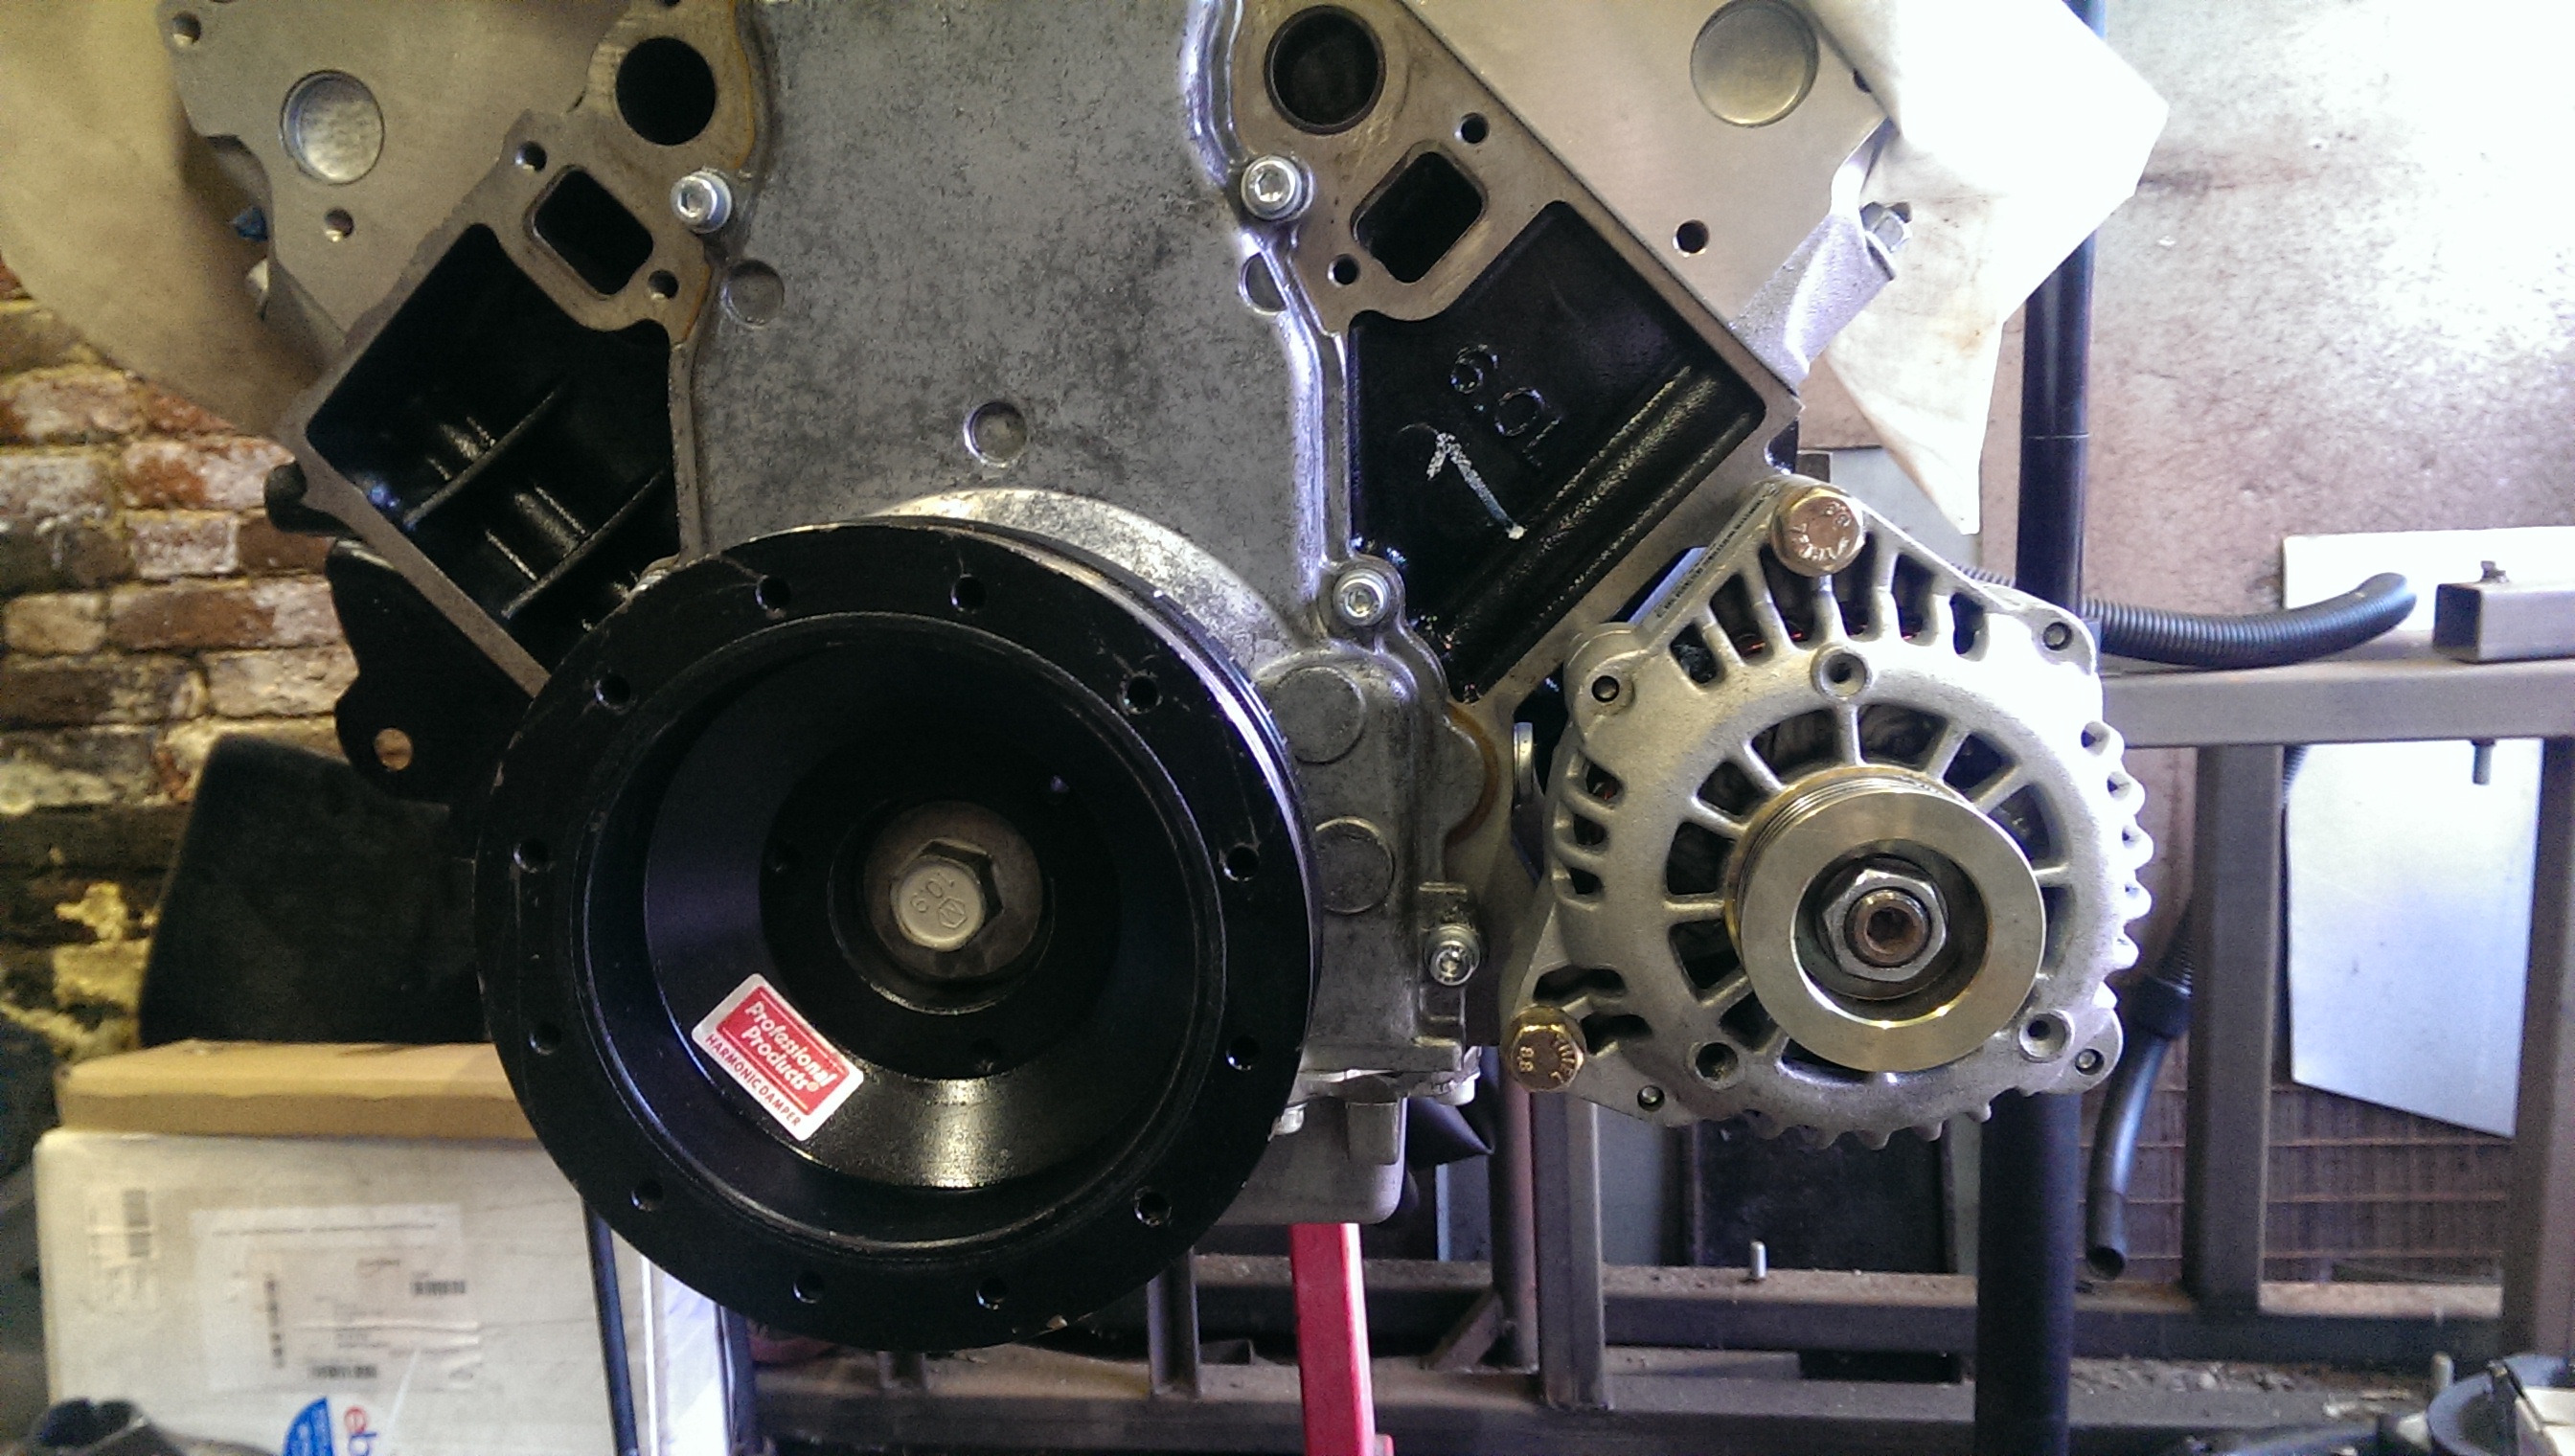
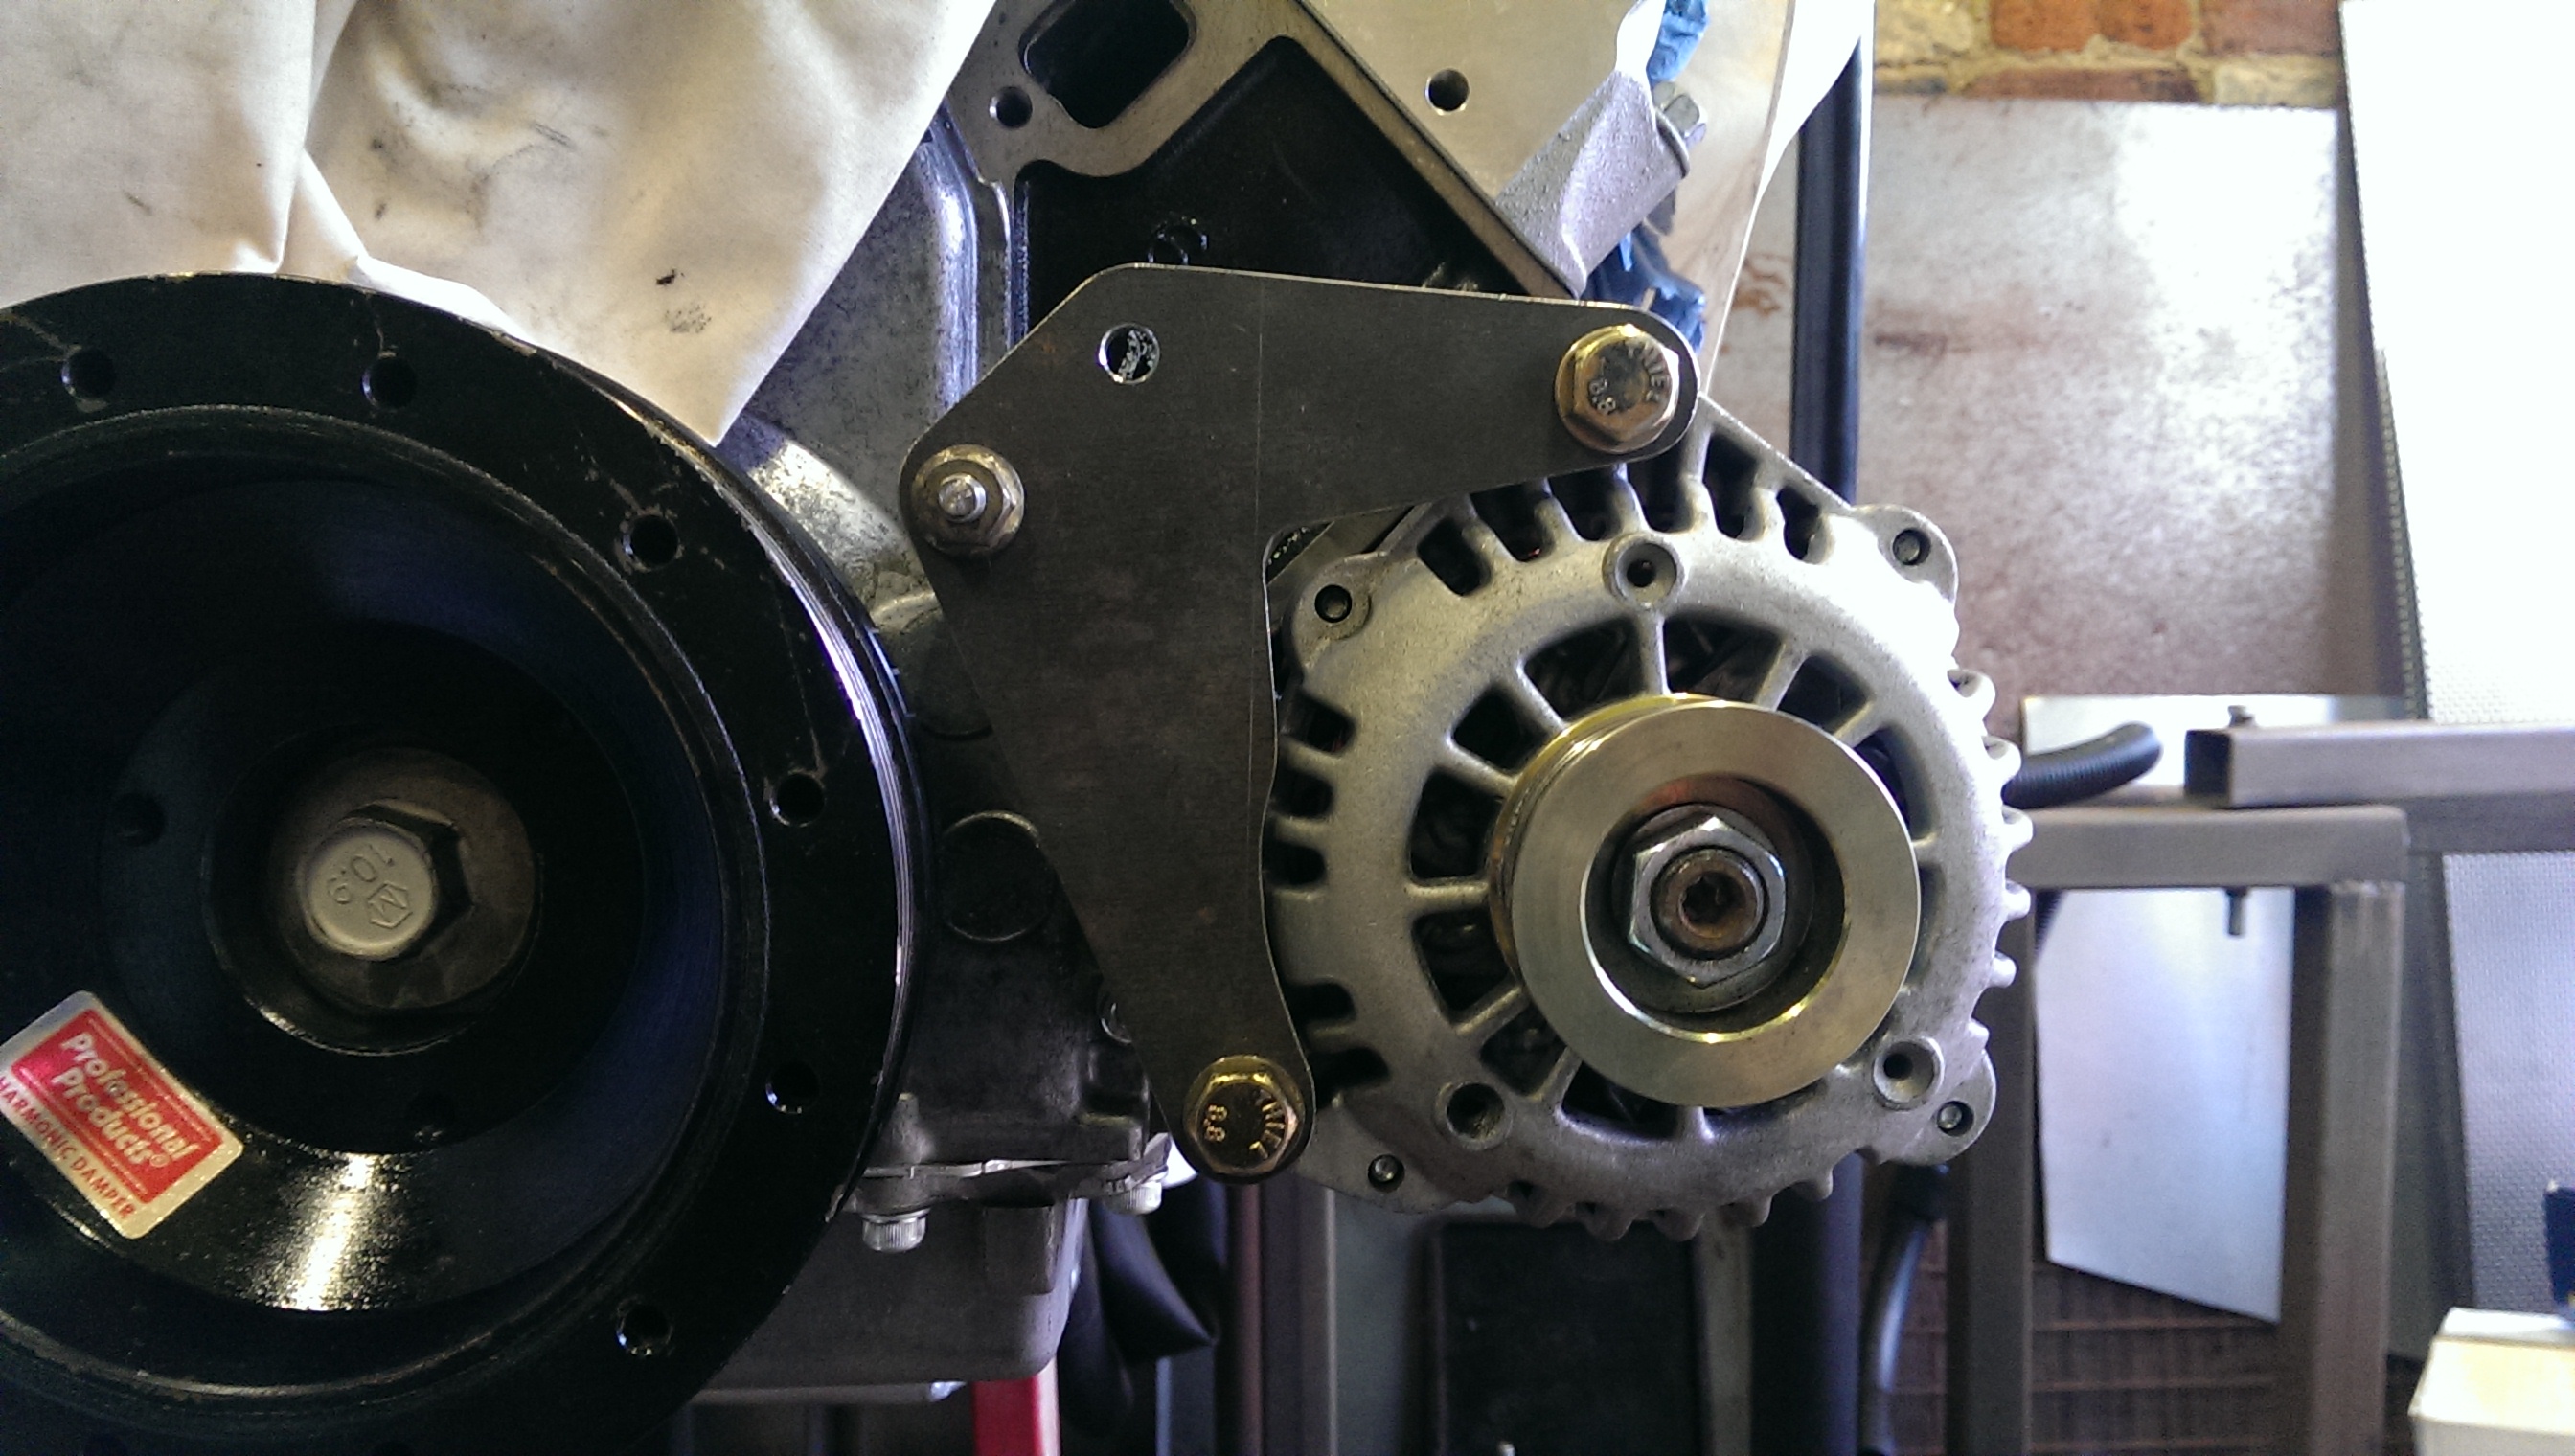
Worked in an idler to help with belt wrap too. It was a new one I had laying around, should be fine.
Using a steering pump from a late model V6 Camaro modified the original feed hose so that it will work properly. The remote tank will mount on the inner fender, after a quick measure up.
I also got the injectors and fuel rails installed. I'm using the 72lb/hr injectors that I had fitted on my injected SBC. They should be more than adequate and fit perfectly.
Being in the UK means this stuff (any LS) is hard to come by and very expensive (a crate LS2 will cost you well over $10k here).
This is the oil pan I got with the engine, think it's a stock truck/escalade one. It's approx 8" deep.

Things have been progressing slowly and I've now got most of the parts together to build my new motor
I got the minor damage on the block brazed up and sorted.
I've chopped and modified the oil pan so it's now the same dimensions (roughly) as a CTS-V pan. Didn't cost me anything except some time and effort
I got stuck into porting the 317 heads and took quite a lot of material out of them in the end. I'm picking them up from the machine shop later today and just need to finish the chambers off. Had 0.040" machined from the deck face.
Comp cams roller trunion upgrade done
I ended up with a long truck style crank, which is a nightmare for after market flex plates etc. So I did a bit of modification on it so that I can use the readily available SFI flex plates and an old style 4L80E converter with no adapters or spacers
Bought myself a rather shiny inlet manifold, which will fit under my hood as I have a 4" scoop
Cam Motion did a custom grind camshaft for me
Building the short block:... crank is in
Then I had to do some disassembly to drill and tap the block to fit an LS2 cam chain damper as my block didn't have the necessary holes as it originally had the LS3 style tensioner which are notoriously unreliable.
Then I fitted the oil pump only to find something was binding up. Stripped the brand new pump to find a chunk of swarf inside... Not great for a new part from a respectable manufacturer.
Then on to fitting DSS forged pistons to the LS2 rods with ARP bolts. Had the big ends honed 0.002" oversize to round them up for the new special OD bearings.
Gratuitous shot of completed rotating assembly...
Assembled the oil baffle, pick up pipe and front cover onto the engine. I did think about polishing the timing cover, but decided it was too much effort for something you can't really see once the whole engine is built.
After that I cleaned the oil pan out and fitted that. Nice to have the bottom end all done.
Next up, assembly of the heads. Checked all the valves were straight as I knew there was a high likely hood of at least one being bent. Turned out there were 4 bent ones. Just as well I had some spares. What was a bit unexpected was finding a broken intake valve guide. So I need to look at making myself a new one and fitting that tomorrow.
Then I marked out the combustion chambers to see how much material I could remove to un-shroud the valves. Turned out more on the exhaust side, but generally not very much. So it didn't take long to get that seen to on both the heads.
After all that I did have enough parts to get one head fully cleaned and assembled.
After that I soaked the lifters in a tub of oil and then fitted them to their retainers and into the block.
Then made myself a valley cover. I didn't have one with my engine parts and it only took 30 mins to make one.
After that I got the assembled head fitted. It gets it off the floor, and makes it easier to keep everything clean!
Next up making a new valve guide. I found a piece of cast iron to machine one from. I did consider making a bronze one, as I have some, but it seemed a bit pointless unless I made 16 new ones, which I wasn't about to do! It took about an hour to machine one up, pleased with the result... spot the home-made one.
This was the extent of the chamber work, unshrouding the valves a bit. Don't want to remove too much material, this was about 3mm blended back toward the valve seat.
Next thing was to fit the crank damper and then find true TDC, shouldn't need it, but it's always handy for troubleshooting later on
Assembled the other head
Popped it on the block, torqued it down and then installed the steam pipes
Finally the inlet manifold and throttle body. Thankfully it still fits fine after skimming 0.050" off each head - bolts were a little tight in the holes, but it seems to work. 102mm throttle body fitted to the front, should flow ok...
Whether it works or not, I don't know. But it looks kinda cool...
The LS Camaro uses a low mount alternator to help with hood clearance. But the LQ block isn't drilled and tapped for the mounts, so I did that first this morning. I also discovered that the Blazer alternator uses identical mounts to the LS one. And I have a spare one, and it only needs 2 wires to make it work.
Worked in an idler to help with belt wrap too. It was a new one I had laying around, should be fine.
Using a steering pump from a late model V6 Camaro modified the original feed hose so that it will work properly. The remote tank will mount on the inner fender, after a quick measure up.
I also got the injectors and fuel rails installed. I'm using the 72lb/hr injectors that I had fitted on my injected SBC. They should be more than adequate and fit perfectly.
 11-08-2015, 11:54 AM
#2
The last job today was to apply some permanent loctite to the screws on the throttle blade. It was either this or peening the ends to retain them. It's one of the things that I wanted to do to the Chinese throttle body. Other than that and a few sharp edges I can't really fault it for less than $100...

 02-21-2016, 11:06 AM
#5
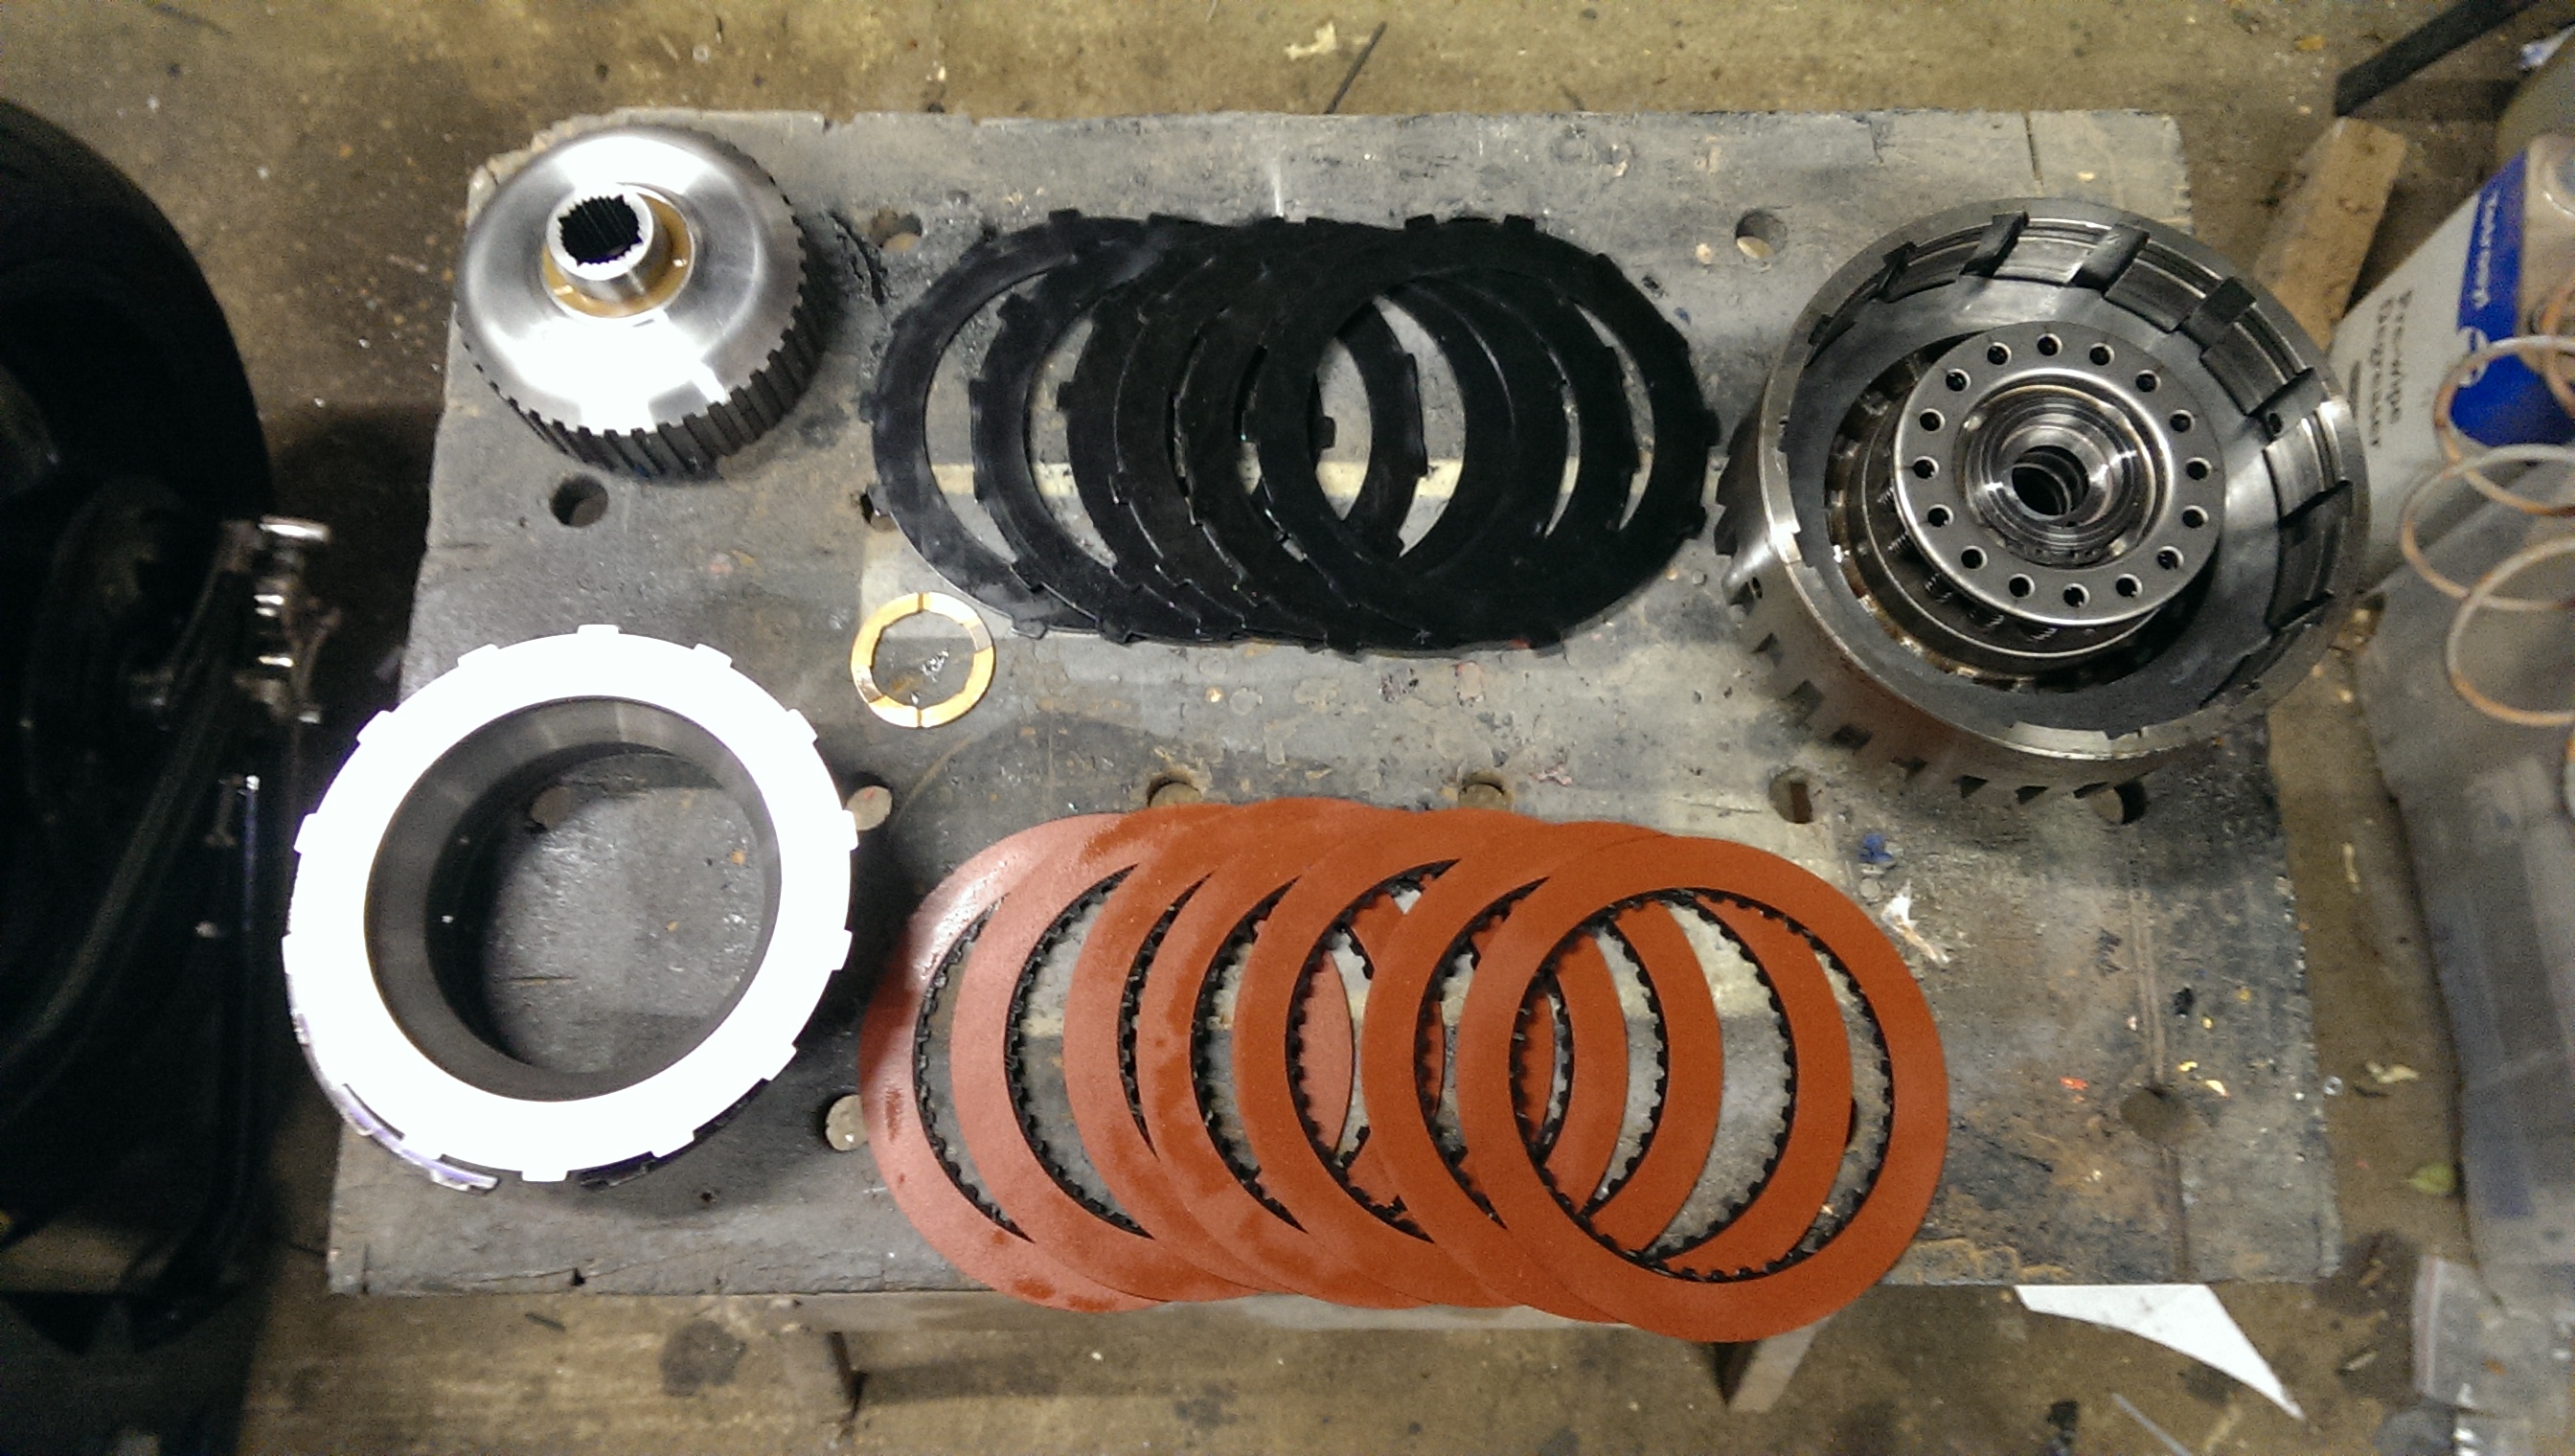
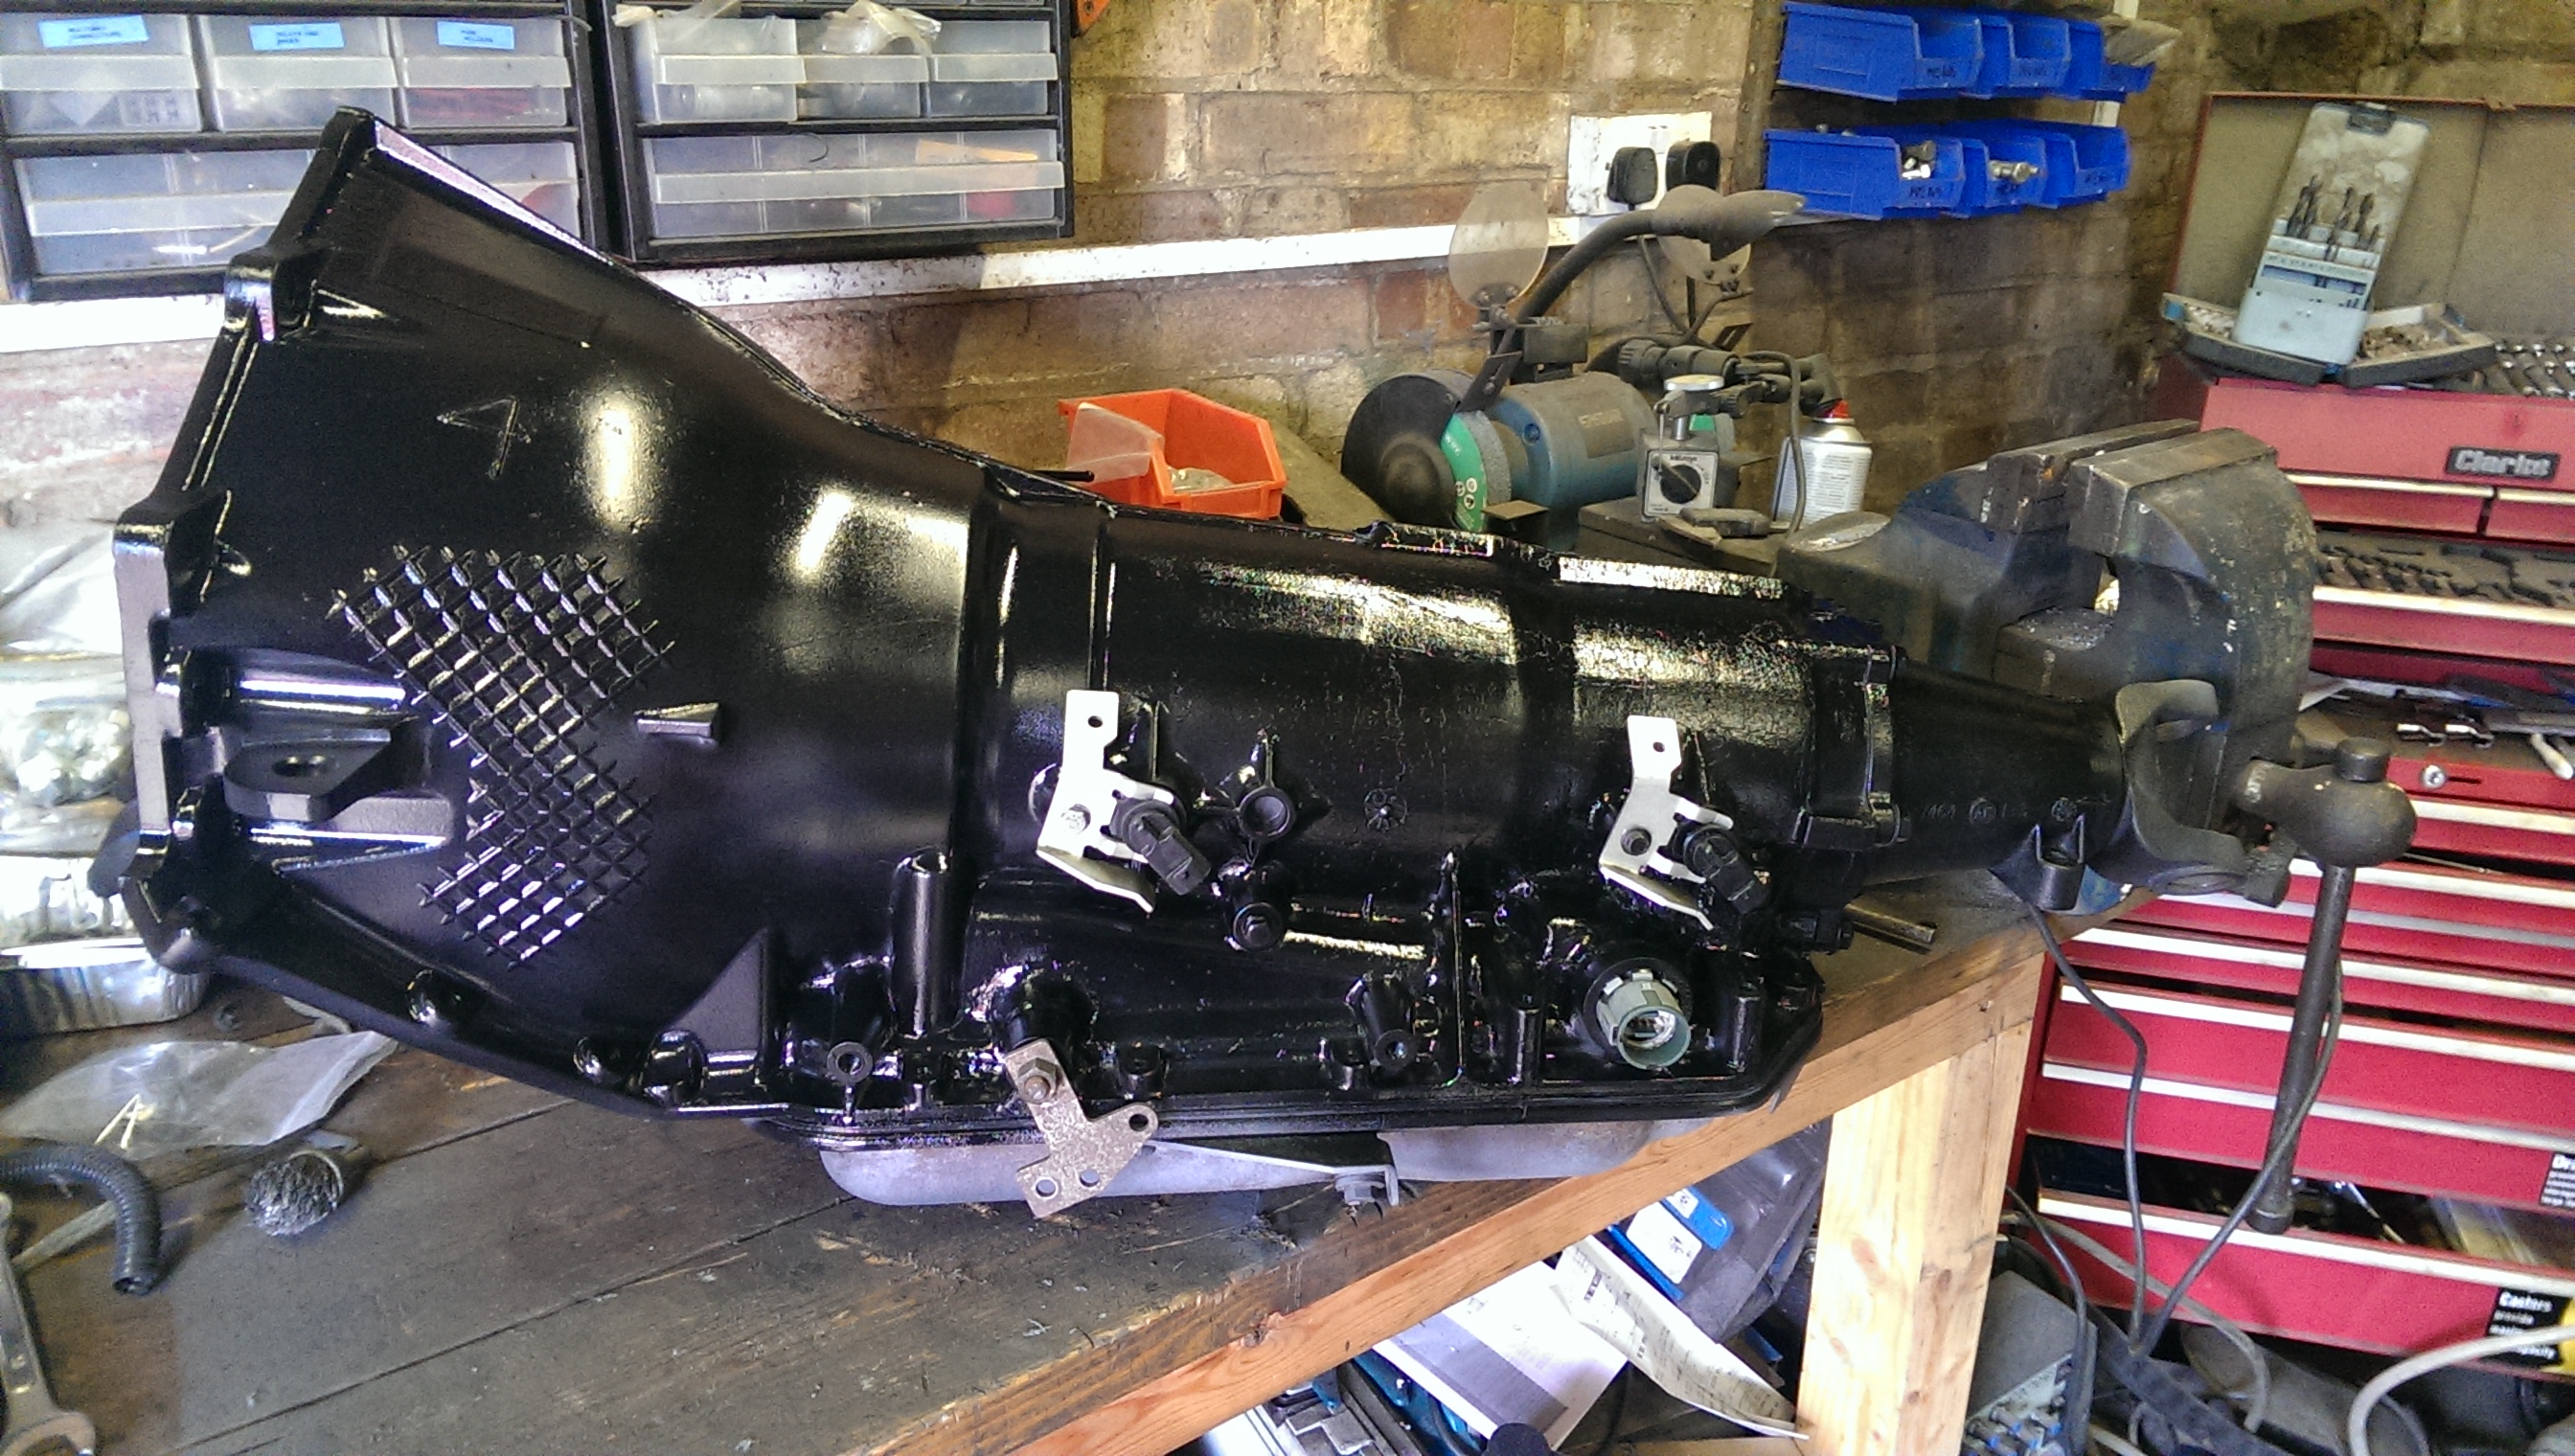
I pulled the 4L80 out of the car a few weeks ago, to find that the fluid had a bit of water in it. So I thought it was best to pull it apart again, for the sake of a gasket set, to check it over and make sure it wasn't too sludged up. Frictions can also get damaged in contact with water, so I thought a visual inspection was worthwhile.
Overrun clutch assembly with Alto frictions, billet input shaft and new sprag
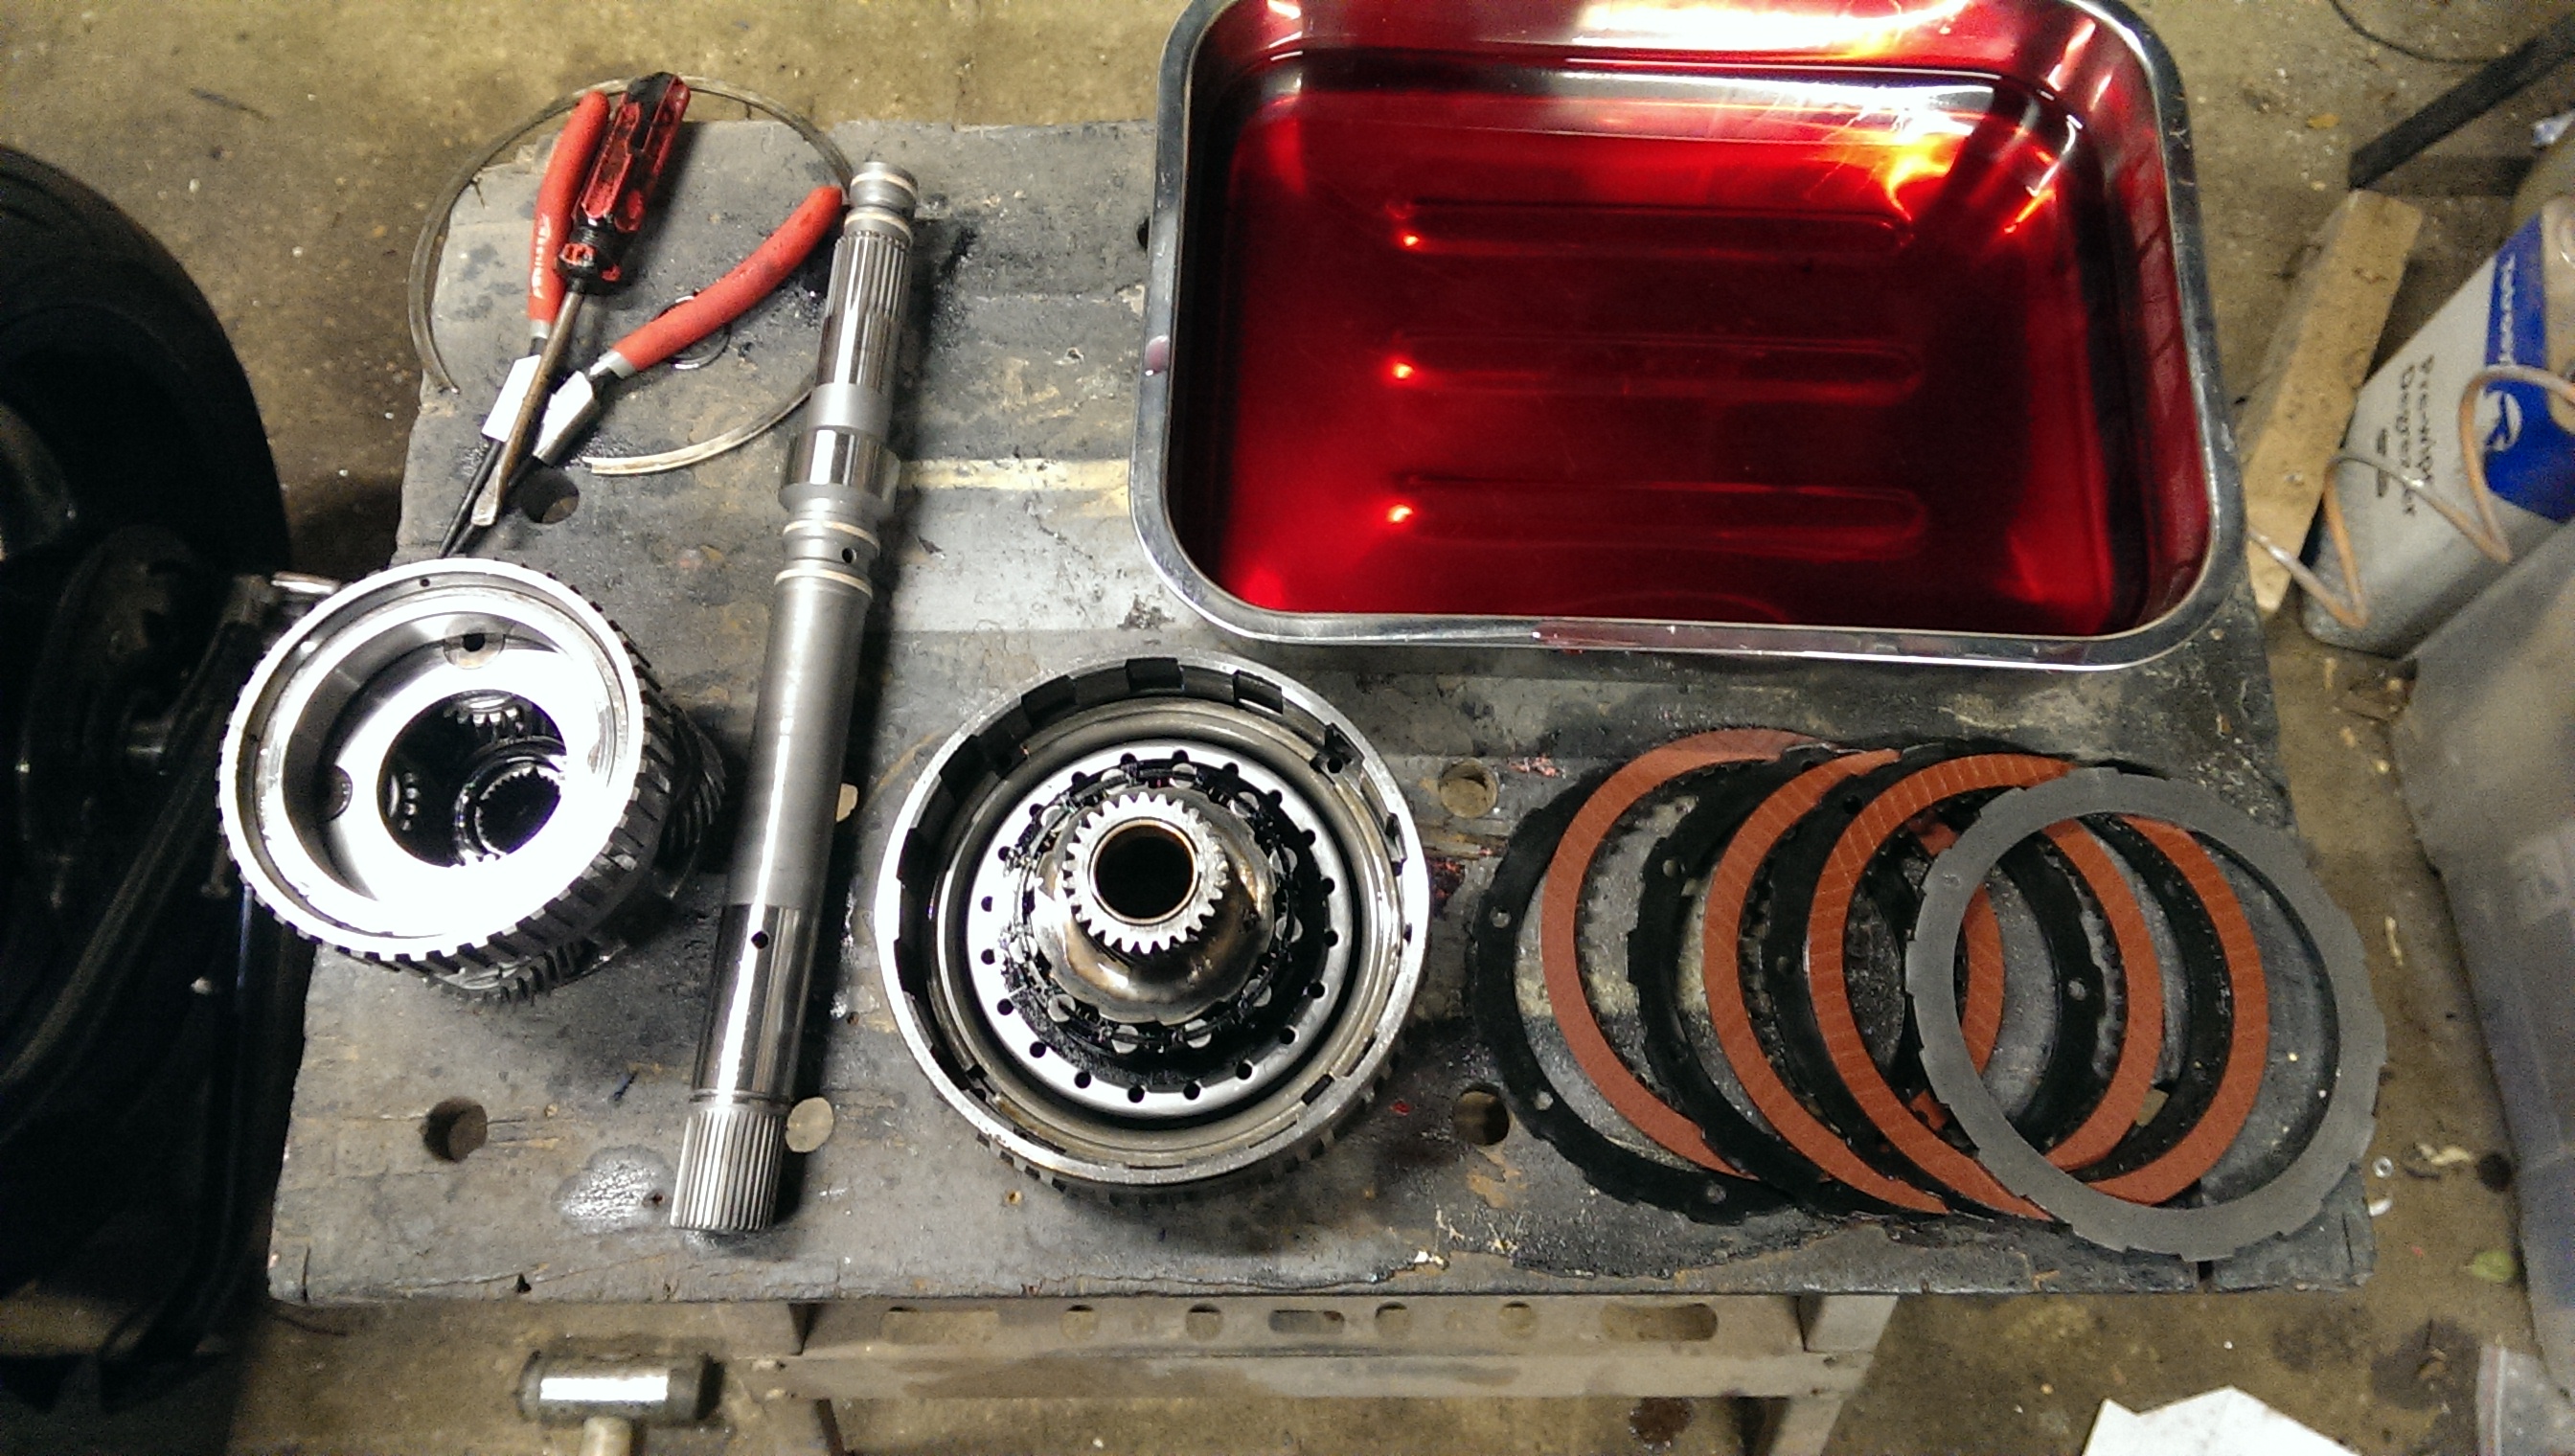
Forward clutch assembly, Alto power pack (7 frictions instead of 5), billet clutch hub
Started rewiring the car too. Pulled out the old harness and removed the necessary connectors.
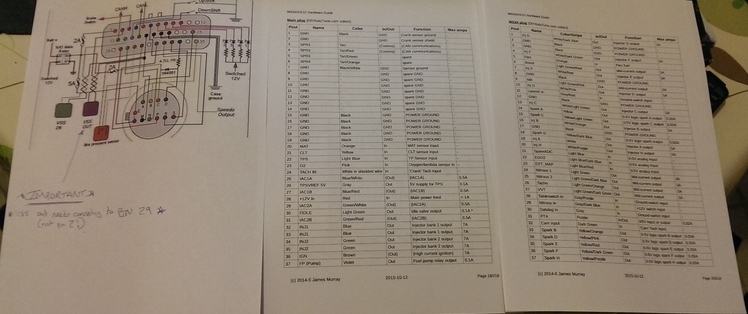
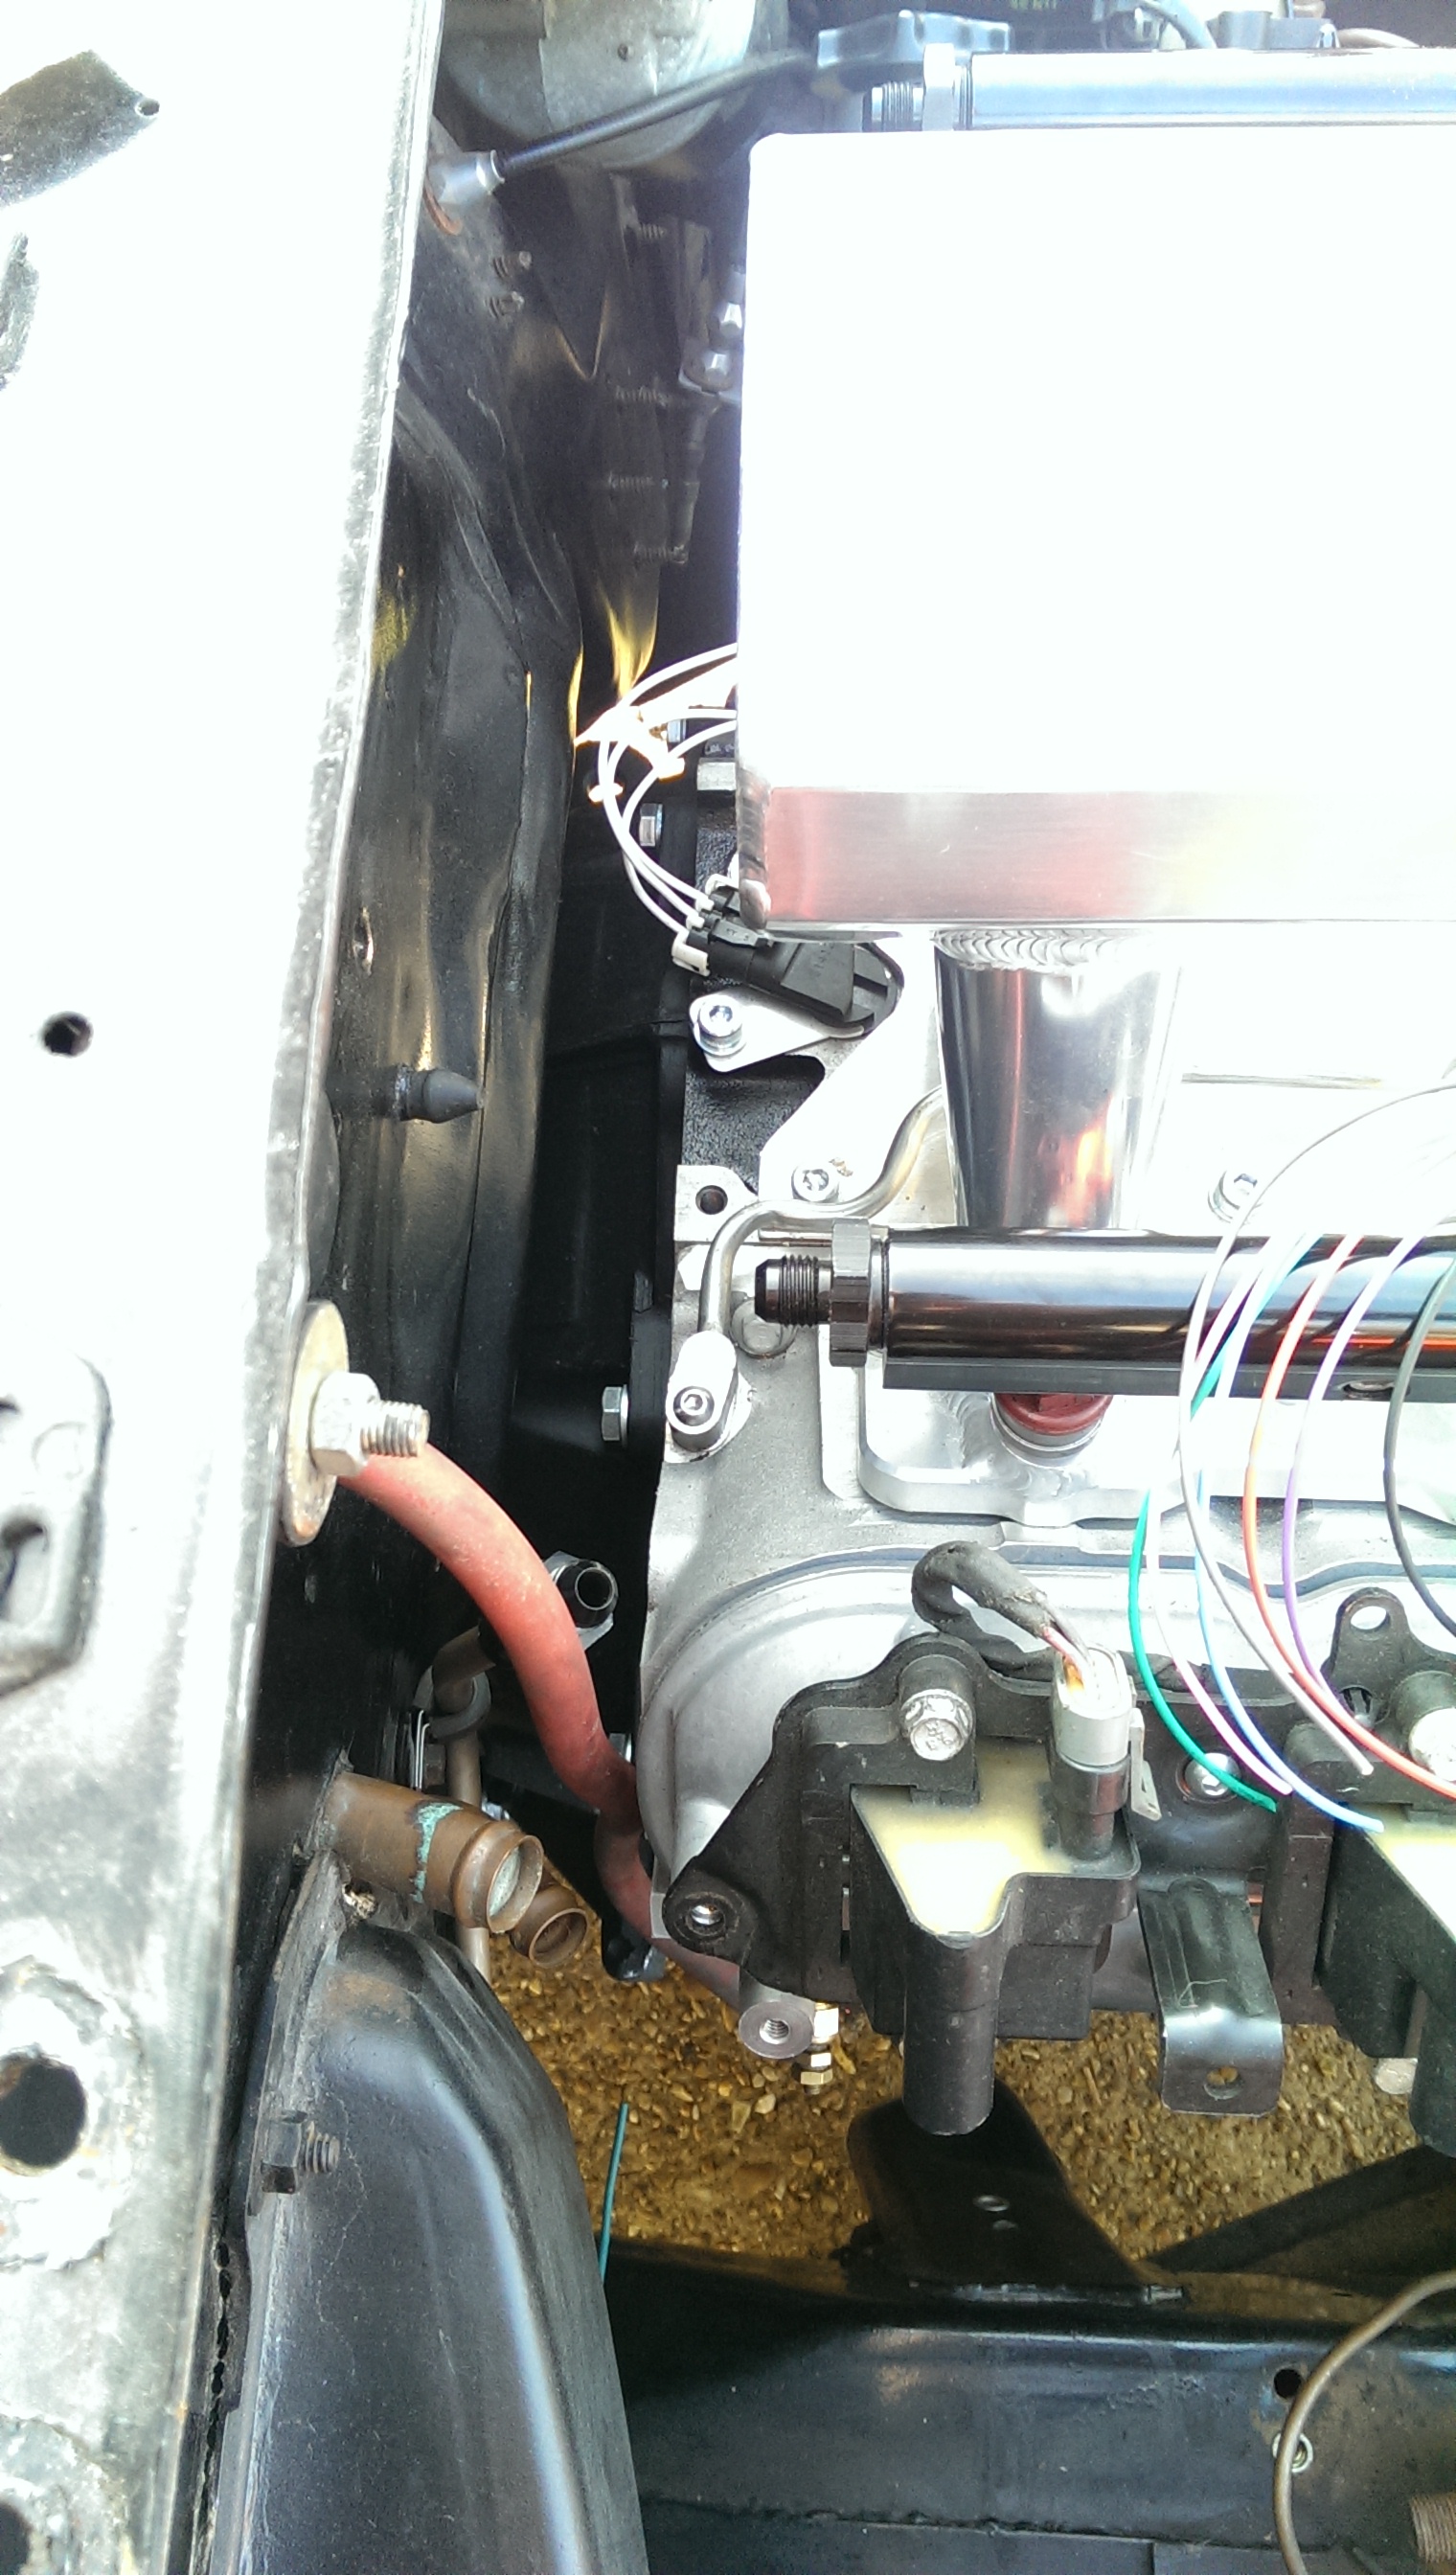
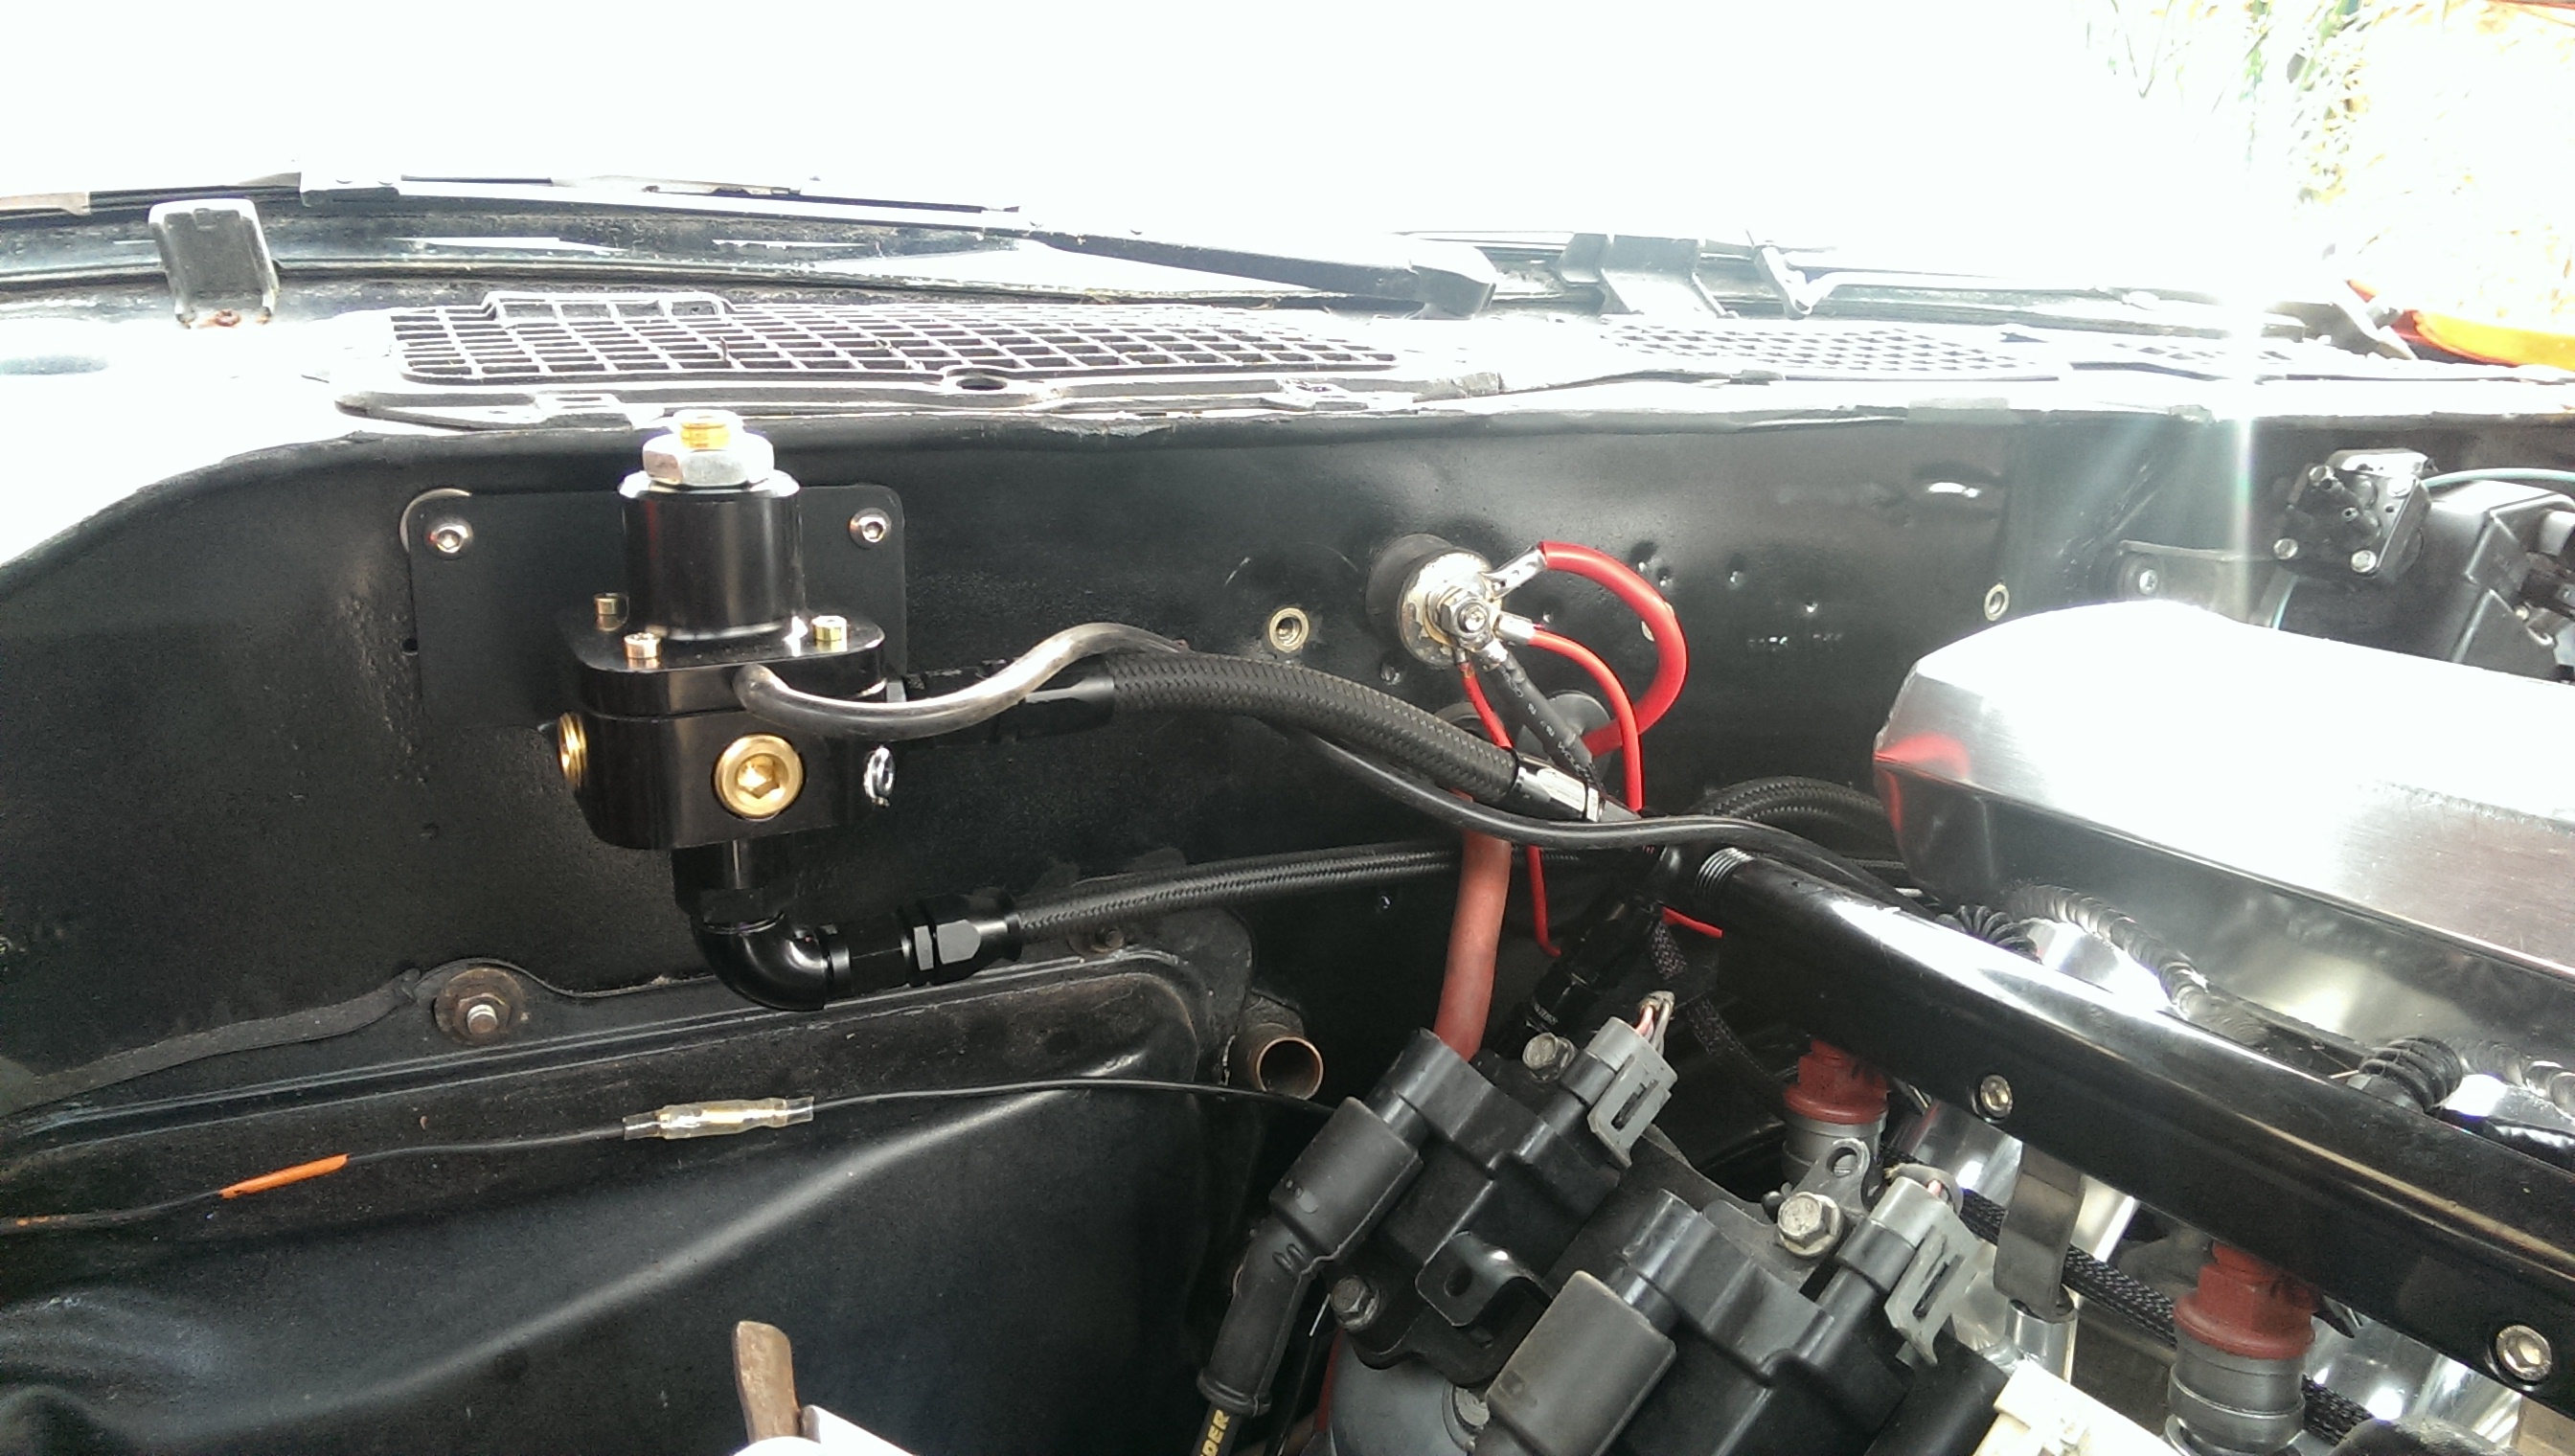
I bought an EZ Wiring harness last year, but kept putting off actually making a start on putting it in. I made a stainless adapter plate for the firewall to block up the hole left by the stock connector and passed the engine section of the harness through a grommet in the center of it. I'll seal it with polyurethane sealant once I am happy that I haven't missed any cables that I might need.
The reason for changing the harness was that I was never really happy using a 37 year old harness in the car, and I'd had to add so much to it in order to run the EFI and transmission controllers that it was completely hacked up anyway.
So a new loom with a lot of extra circuits that I'll never use (like power locks, windows, cruise and A/C) was perfect as that gives me lots of extra fuse power supplies direct from the harness that I can repurpose for the other things I need.
The only downside of modern running gear? Just the wiring for that makes up quite a list!
I had to strip the ignition switch out of the car as I had a dodgy connection inside in the 'run' position. Thankfully being old technology it was full of copper bars and little springs which were all gummed up with old dielectric grease. Cleaned it all out and now it works perfectly again
I also had to make a few changes to the power feeds to the fuse box, as the only power out which was live in the cranking position was the coil feed - no use at all with injection....Fixed that, now everything except the lights stays live. Not a problem with new battery technology...
The dash section is more or less finished now, I can move on to the engine bay next where I also need to move the fuel feed line to a more sensible location.
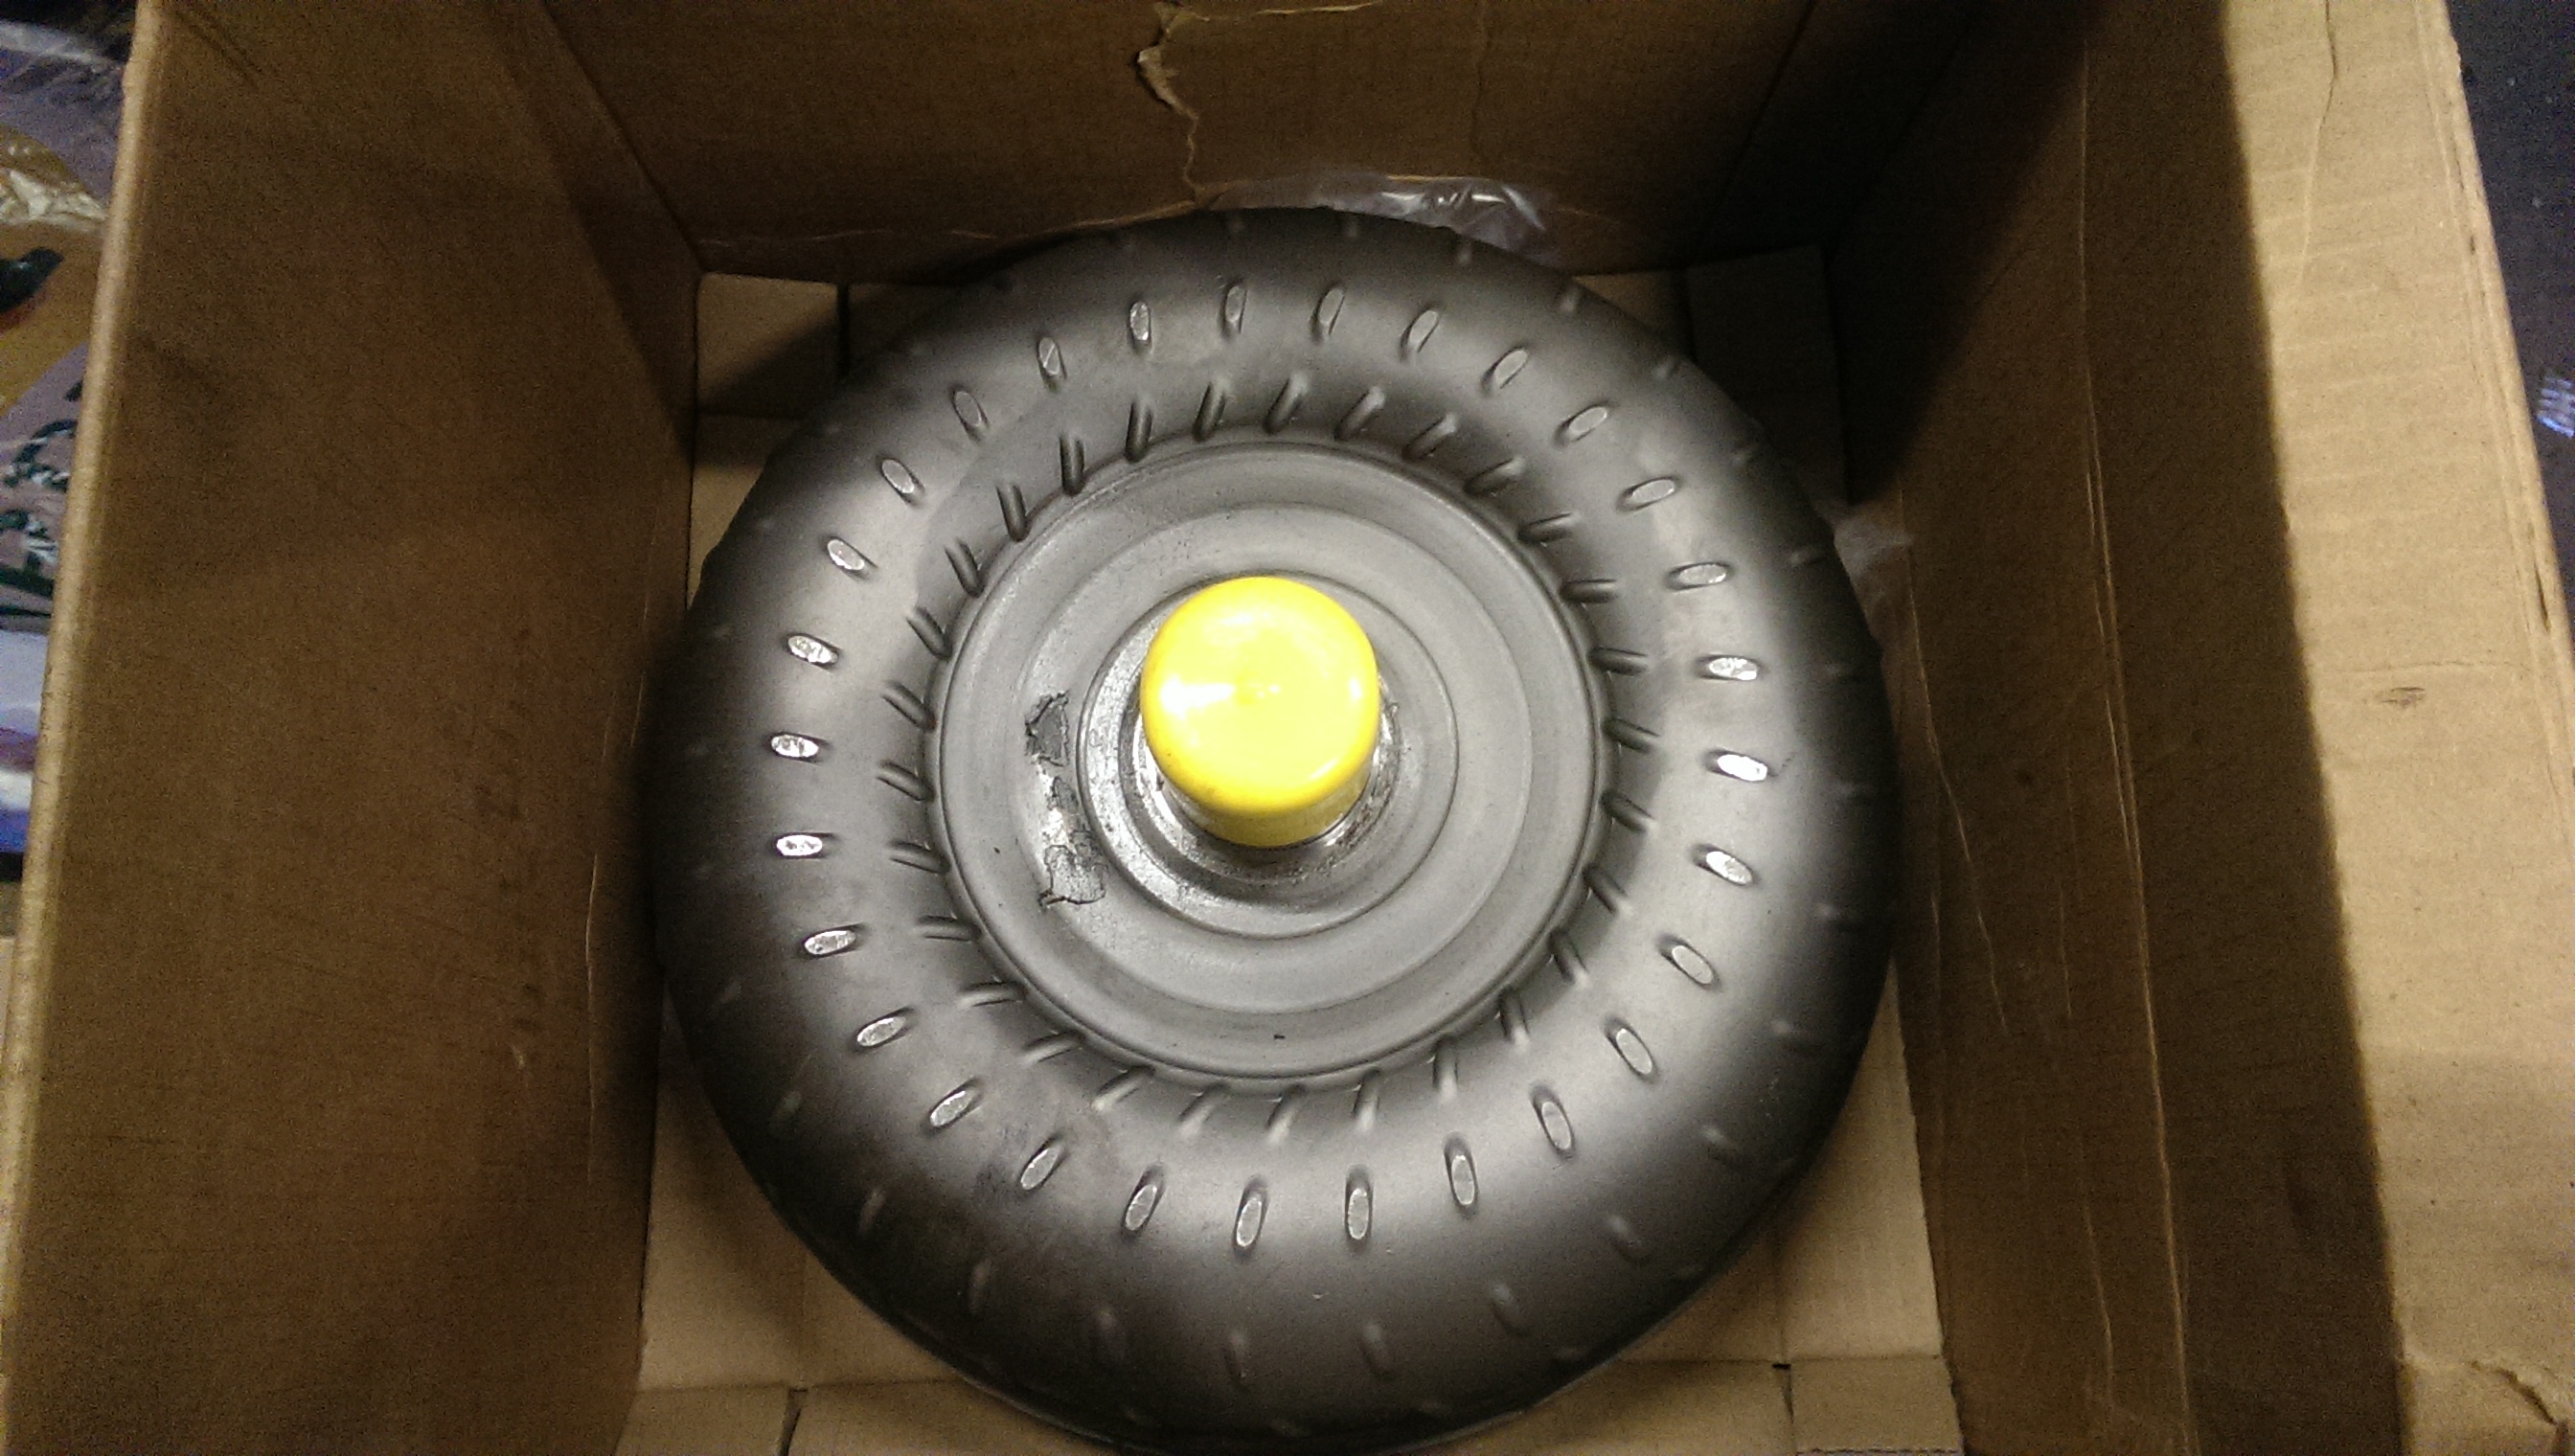
My torque converter also arrived back, very quick turnaround, 7 days door to door. Cleaned, new seals throughout, new lock up clutch lining and stall speed increased to approx 3000rpm. Not bad service at all.
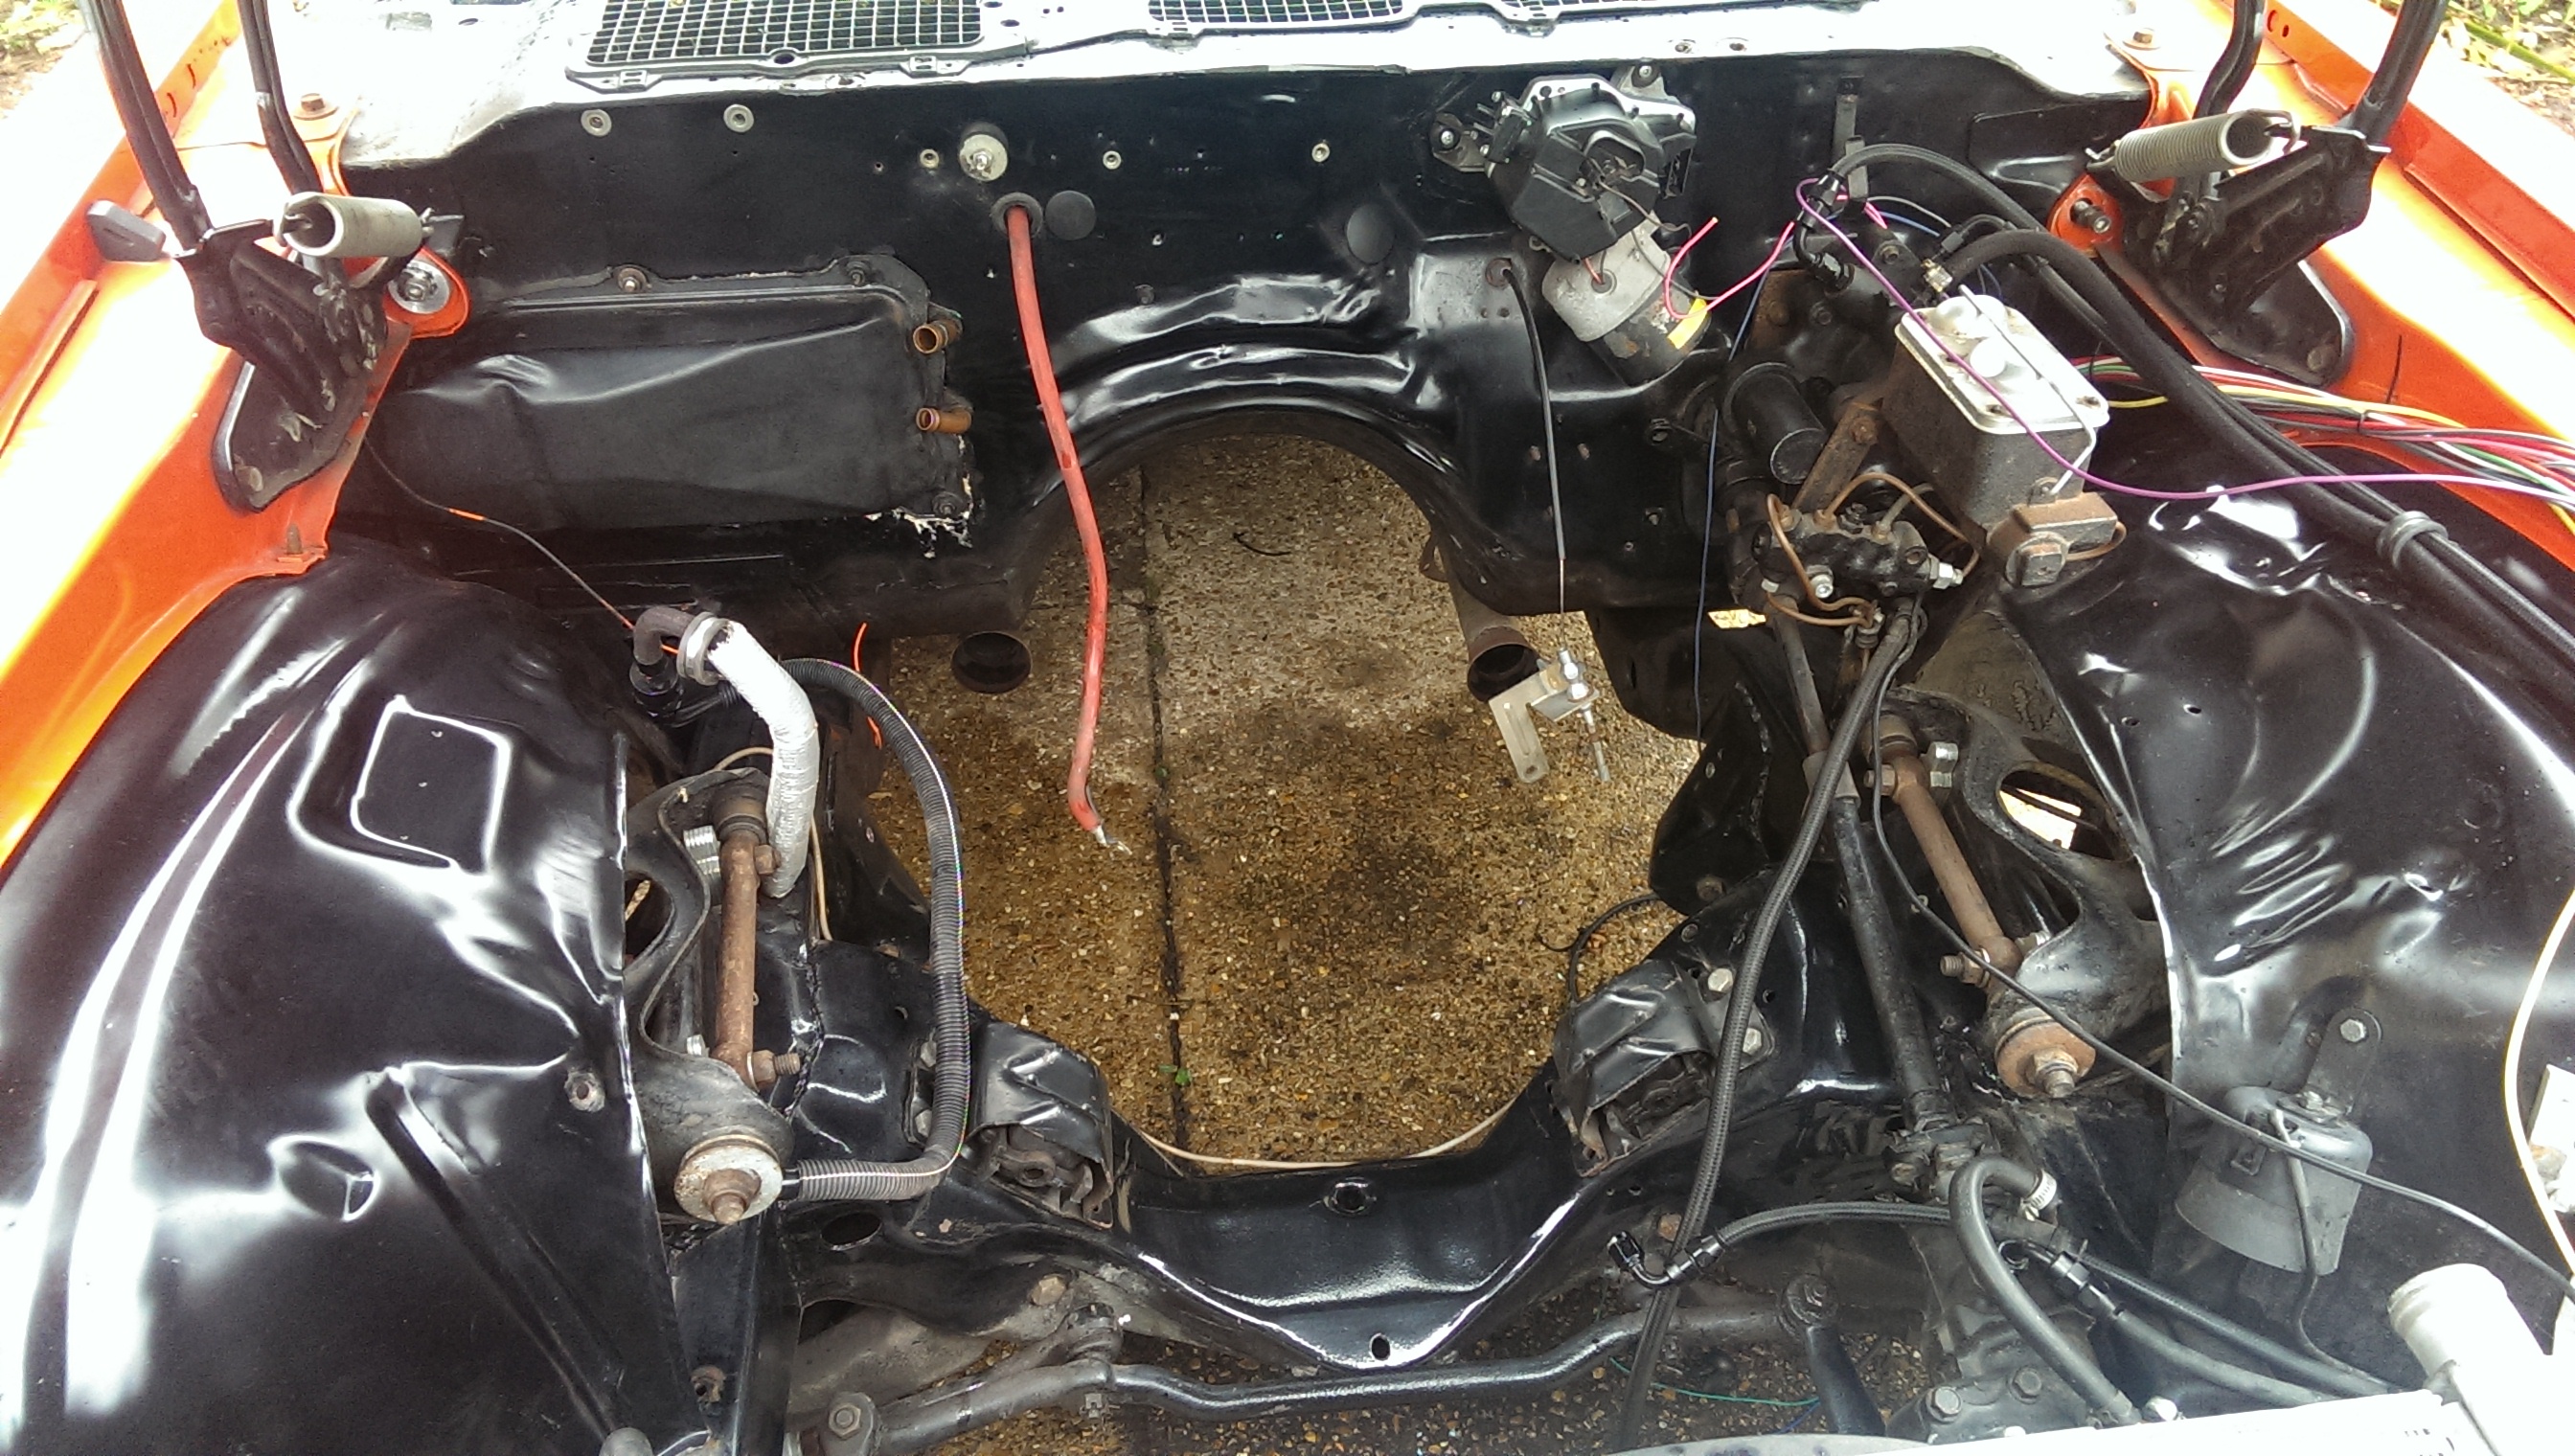
Been spending a bit of time getting the engine bay ready for the new engine to be dropped it. I also need to reroute the fuel feed line across the bulkhead, shorten the return line and finish the cabling. I'm planning to refit the hydroboost as well, as I had a few issues with the installation the first time around. Much easier to do with the engine out of the way.
It was a bit grubby in there, 3k miles with a slightly leaky small block, and dust from paint prep.
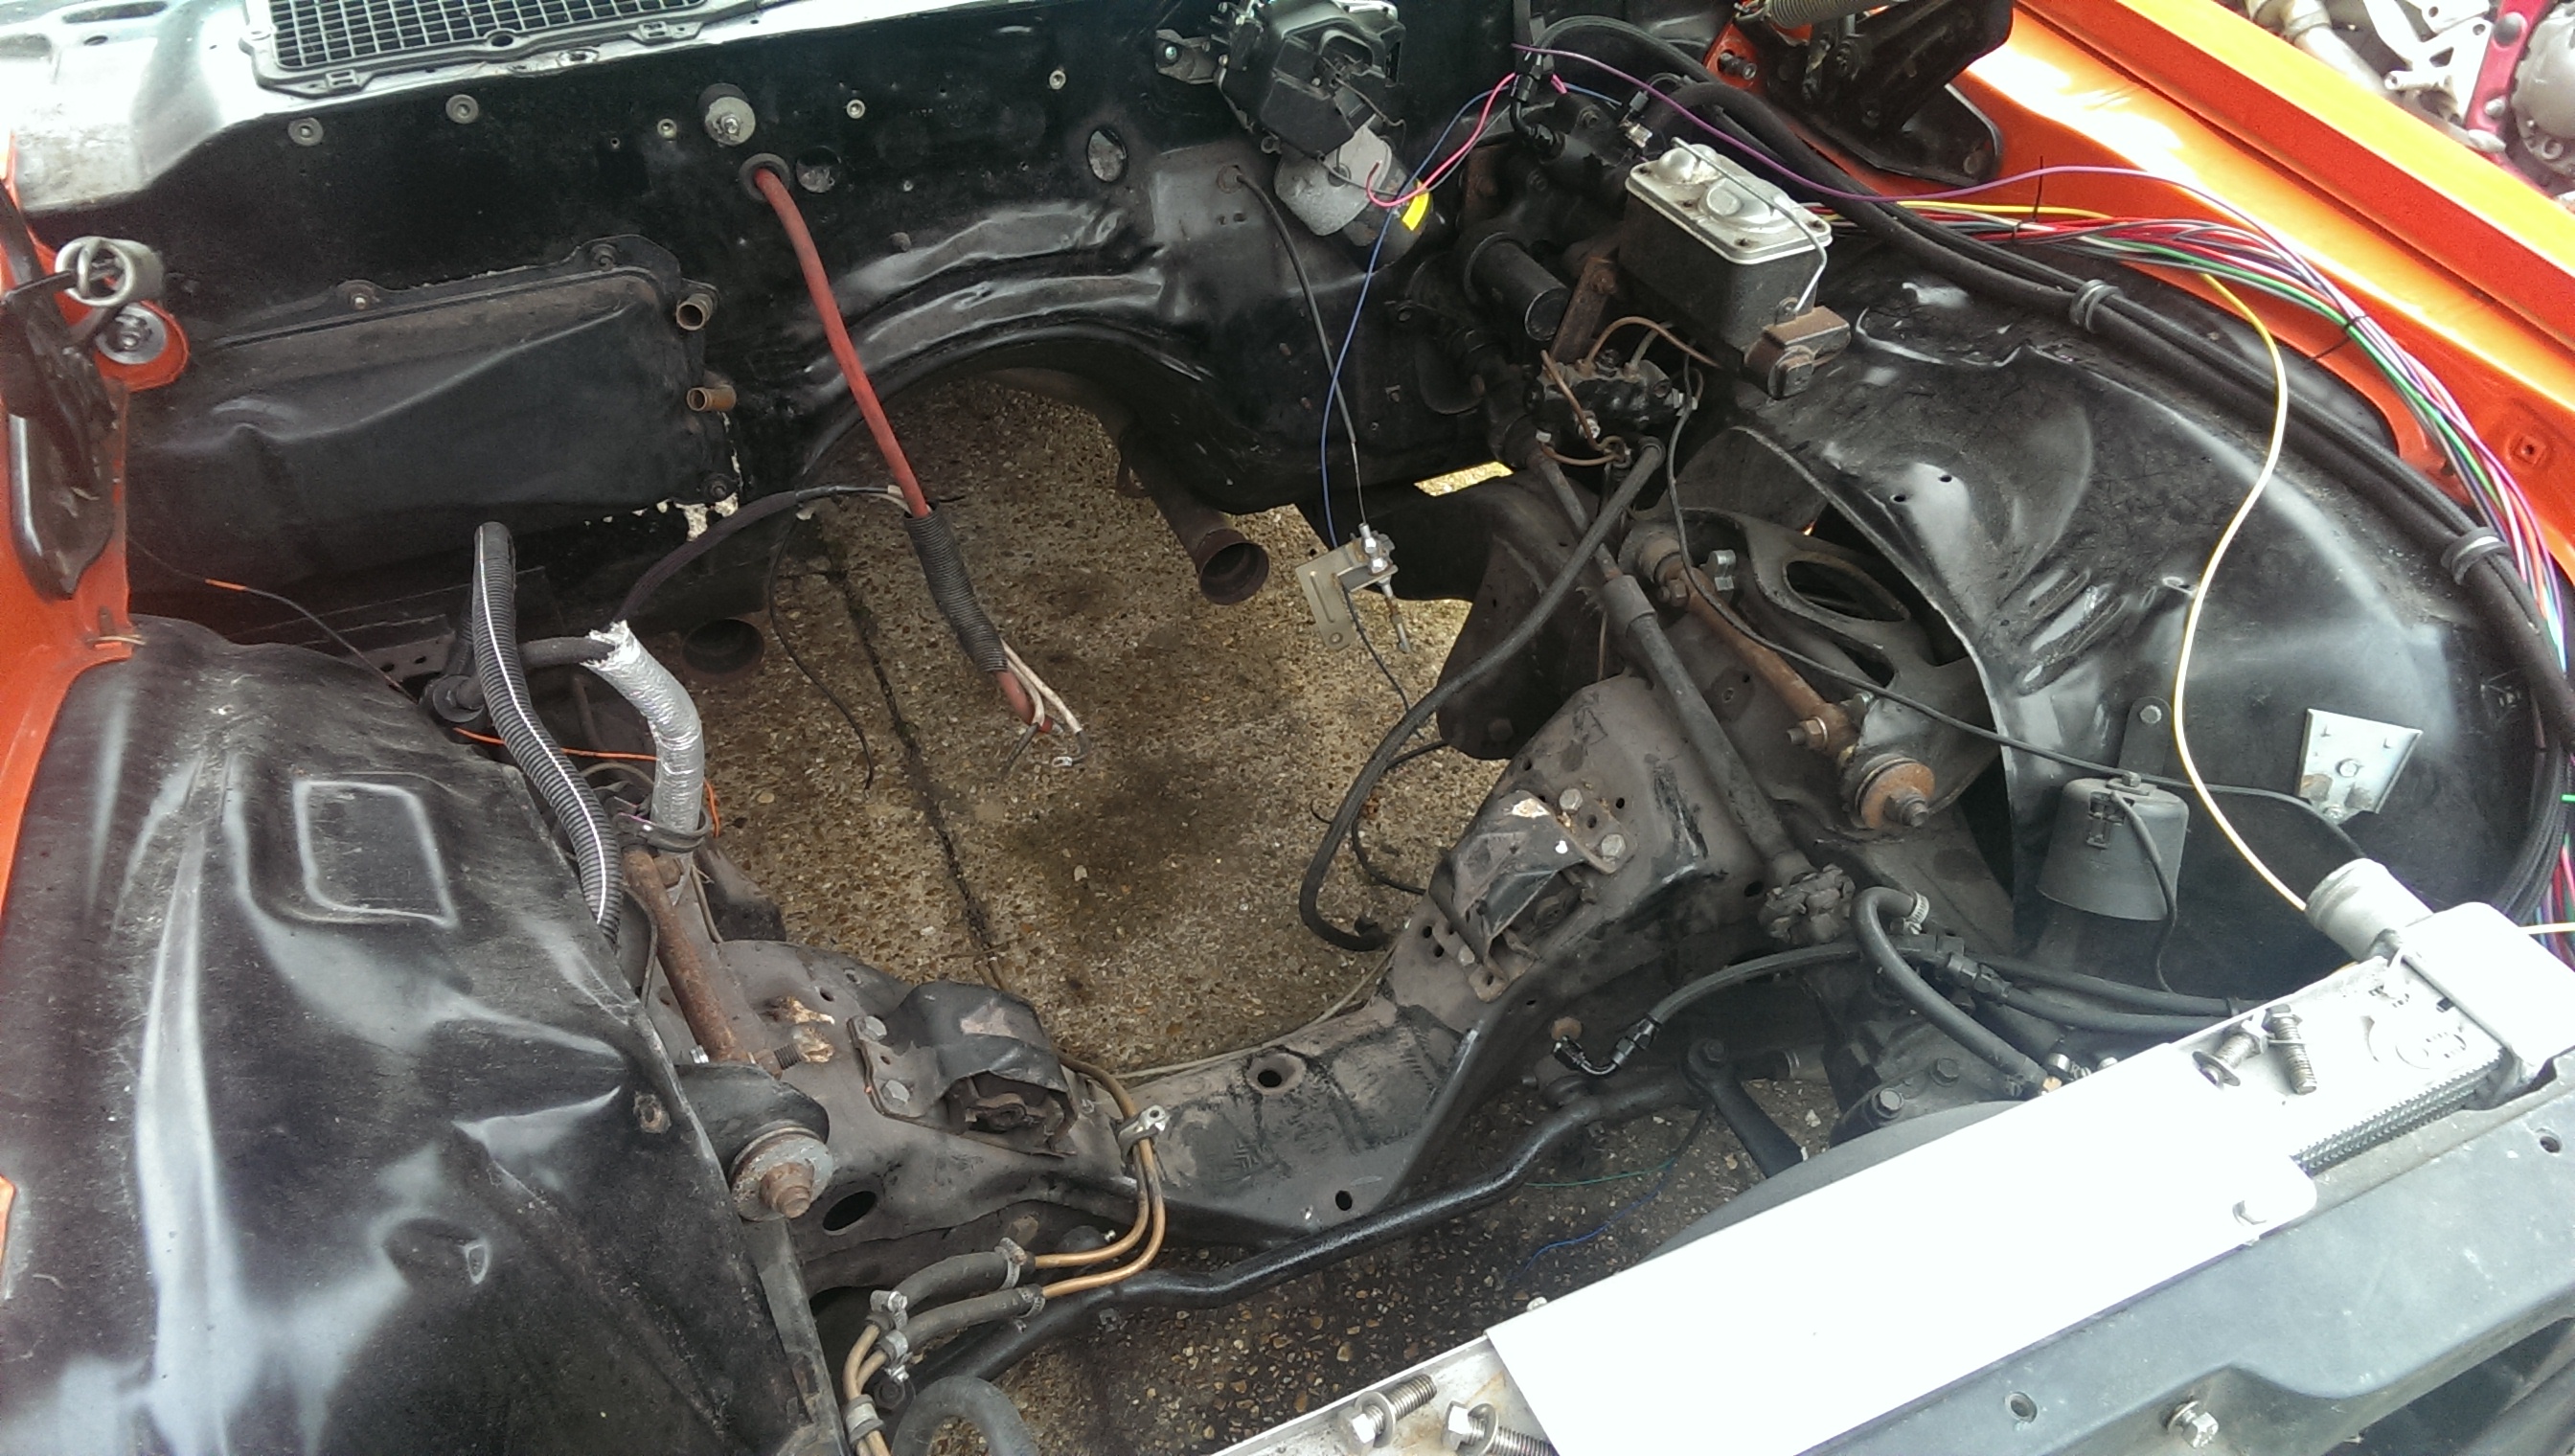
Looks better for an hour with some detergent and a brush
Cleaned up the transmission and gave it a coat of satin black. Looks much better now!
Overrun clutch assembly with Alto frictions, billet input shaft and new sprag
Forward clutch assembly, Alto power pack (7 frictions instead of 5), billet clutch hub
Started rewiring the car too. Pulled out the old harness and removed the necessary connectors.
I bought an EZ Wiring harness last year, but kept putting off actually making a start on putting it in. I made a stainless adapter plate for the firewall to block up the hole left by the stock connector and passed the engine section of the harness through a grommet in the center of it. I'll seal it with polyurethane sealant once I am happy that I haven't missed any cables that I might need.
The reason for changing the harness was that I was never really happy using a 37 year old harness in the car, and I'd had to add so much to it in order to run the EFI and transmission controllers that it was completely hacked up anyway.
So a new loom with a lot of extra circuits that I'll never use (like power locks, windows, cruise and A/C) was perfect as that gives me lots of extra fuse power supplies direct from the harness that I can repurpose for the other things I need.
The only downside of modern running gear? Just the wiring for that makes up quite a list!
I had to strip the ignition switch out of the car as I had a dodgy connection inside in the 'run' position. Thankfully being old technology it was full of copper bars and little springs which were all gummed up with old dielectric grease. Cleaned it all out and now it works perfectly again
I also had to make a few changes to the power feeds to the fuse box, as the only power out which was live in the cranking position was the coil feed - no use at all with injection....Fixed that, now everything except the lights stays live. Not a problem with new battery technology...
The dash section is more or less finished now, I can move on to the engine bay next where I also need to move the fuel feed line to a more sensible location.
My torque converter also arrived back, very quick turnaround, 7 days door to door. Cleaned, new seals throughout, new lock up clutch lining and stall speed increased to approx 3000rpm. Not bad service at all.
Been spending a bit of time getting the engine bay ready for the new engine to be dropped it. I also need to reroute the fuel feed line across the bulkhead, shorten the return line and finish the cabling. I'm planning to refit the hydroboost as well, as I had a few issues with the installation the first time around. Much easier to do with the engine out of the way.
It was a bit grubby in there, 3k miles with a slightly leaky small block, and dust from paint prep.
Looks better for an hour with some detergent and a brush
Cleaned up the transmission and gave it a coat of satin black. Looks much better now!
03-05-2016, 12:54 PM
#7
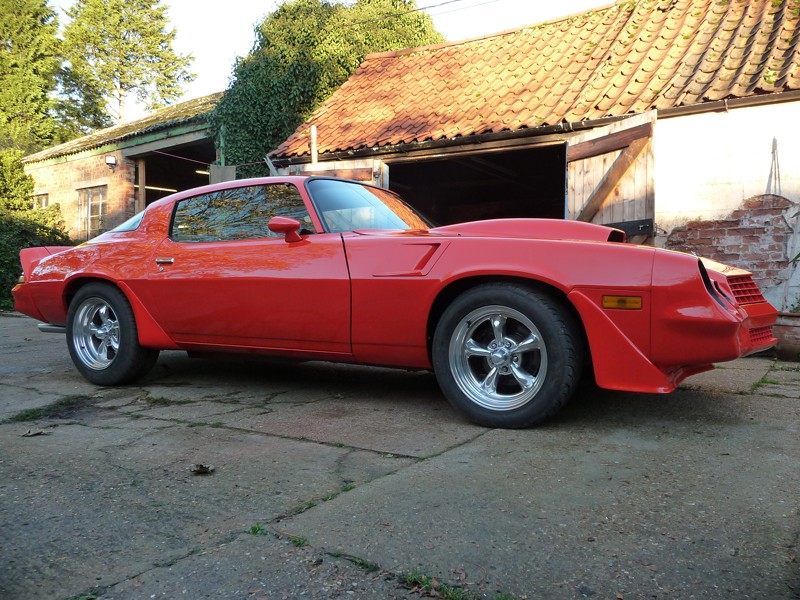
Yes it's going in my 2nd gen
Been working away on a few bits and pieces - the weather is holding me up more than anything else now.
Found out why my engine mounts didn't line up properly when I dropped my original engine in. The 'heavy duty' type engine mounts aren't correct for a Camaro - and they offset the mounting bolts by about 1/4". So I got hold of some of the correct mounts, which I will fit poly inserts into before I fit them to the car. Trouble is getting to the bolts is a complete nightmare.
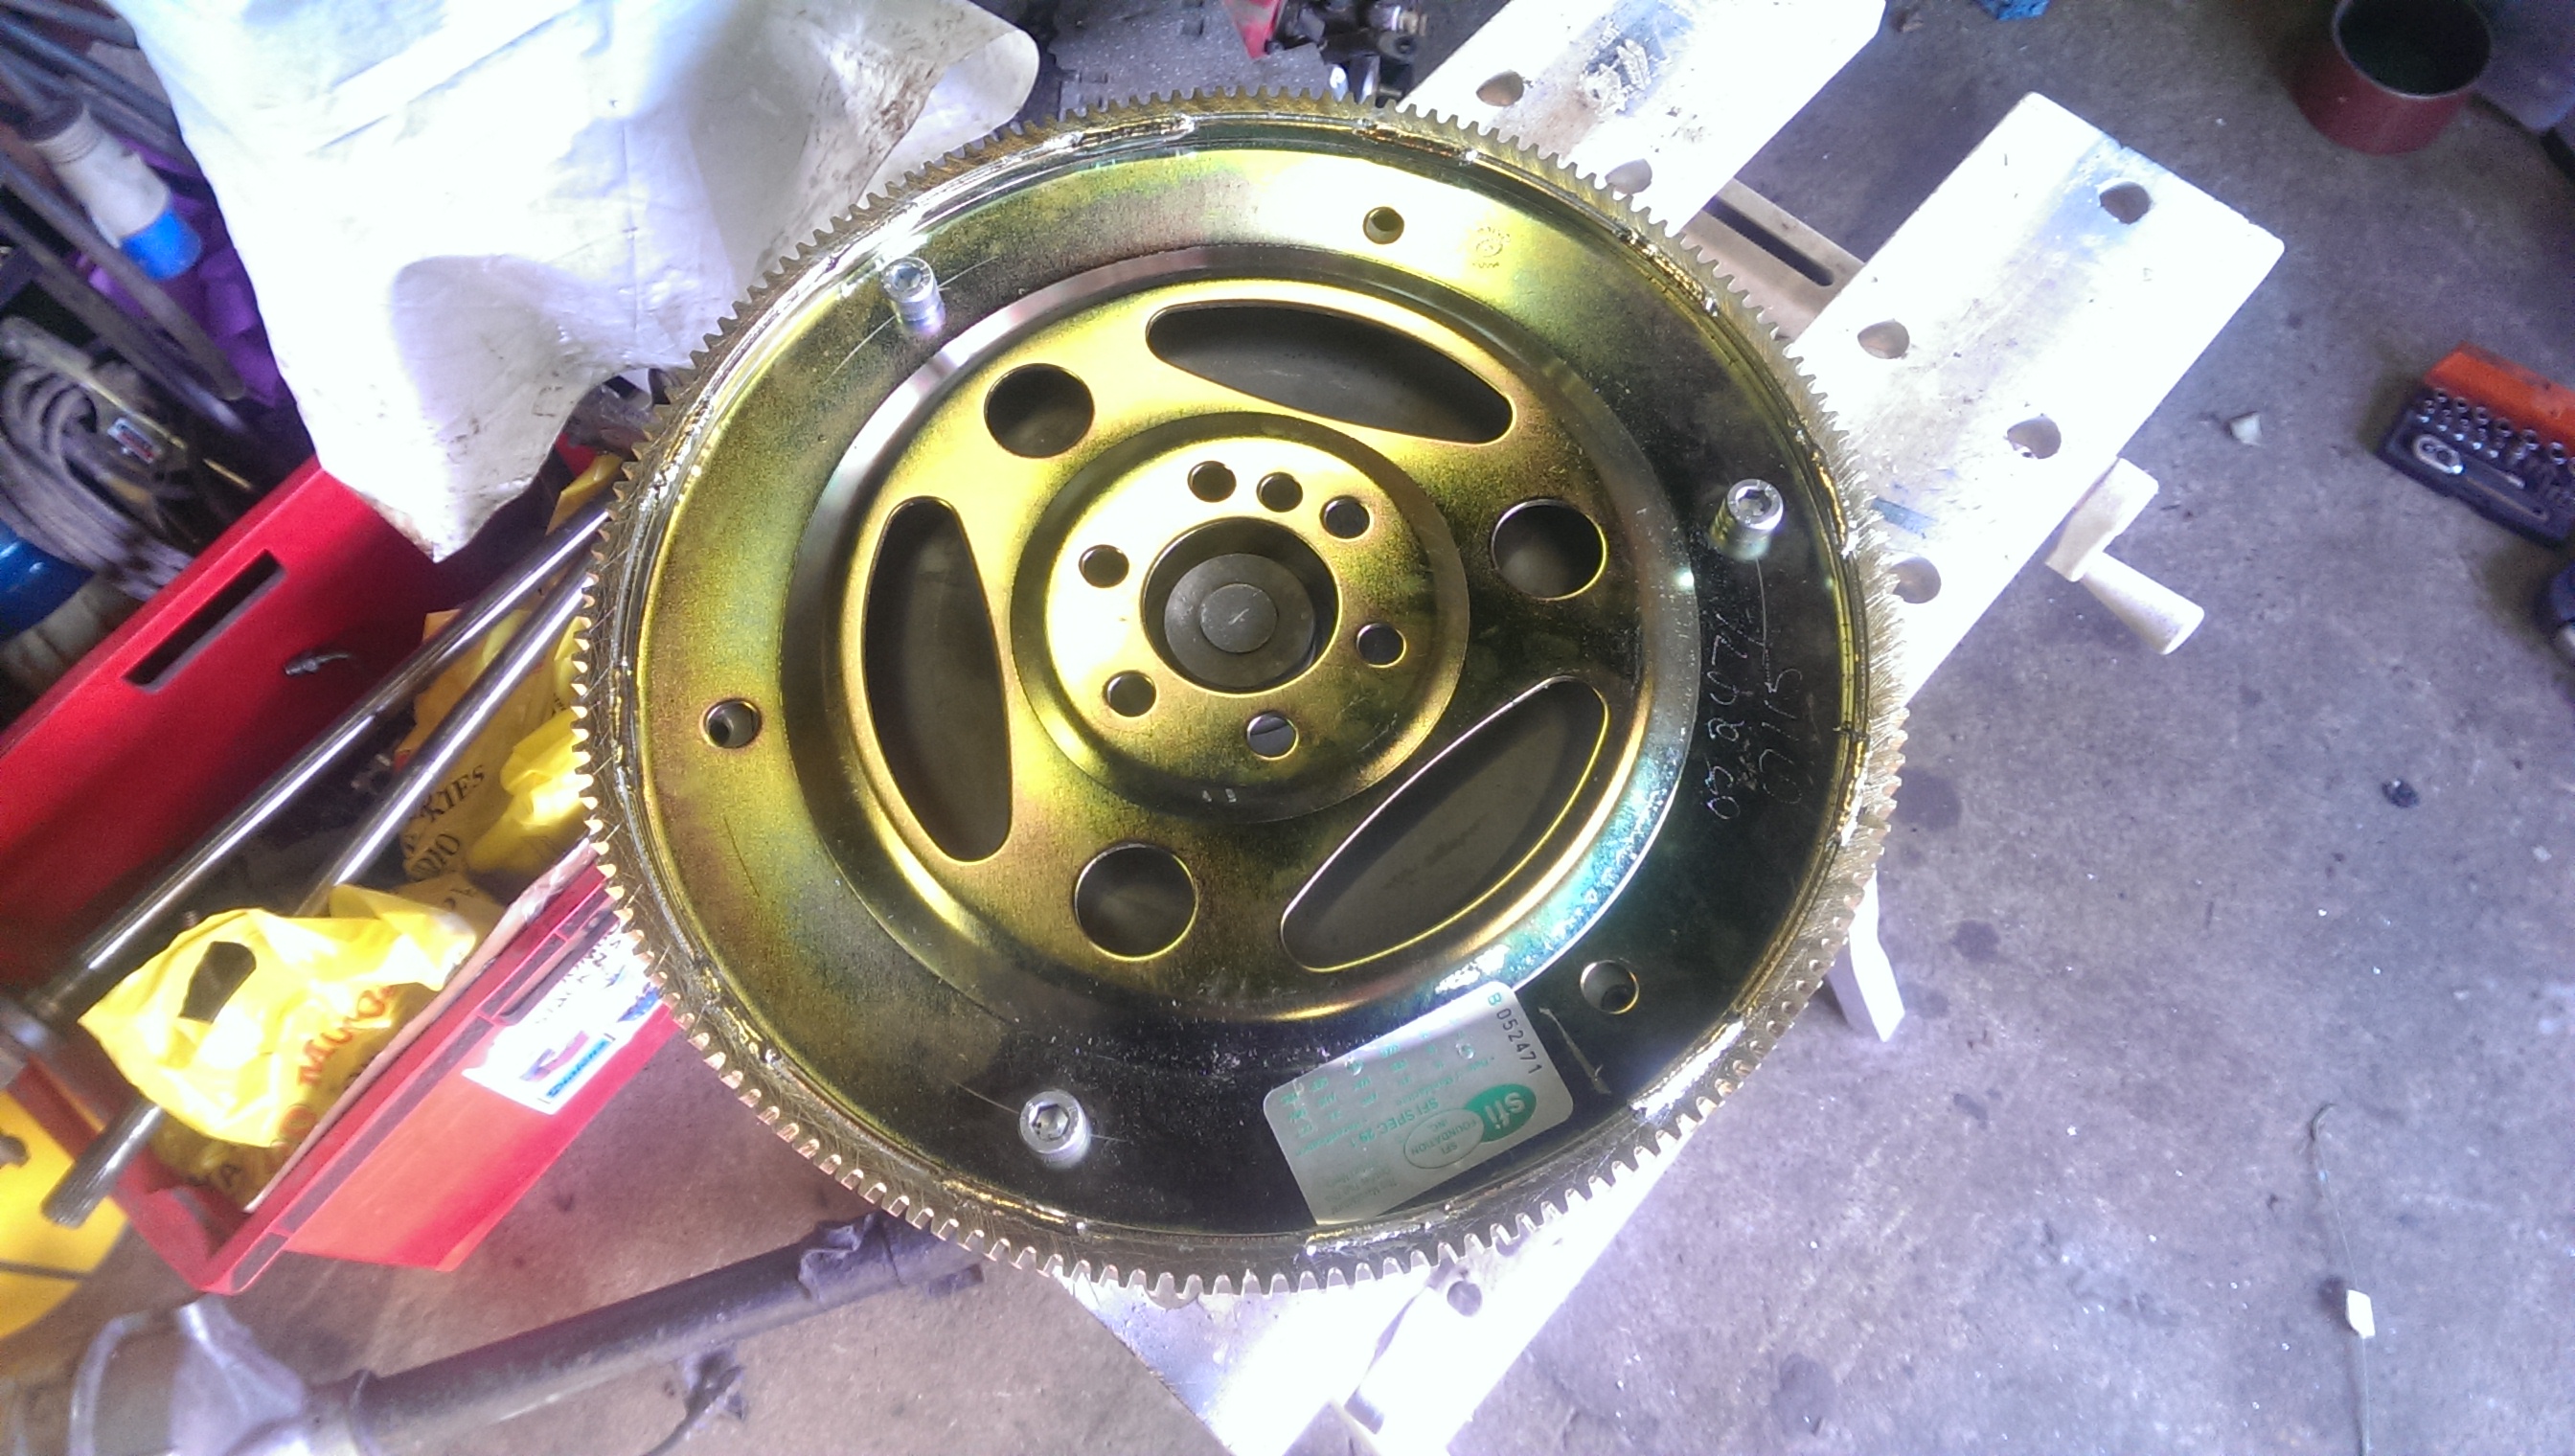
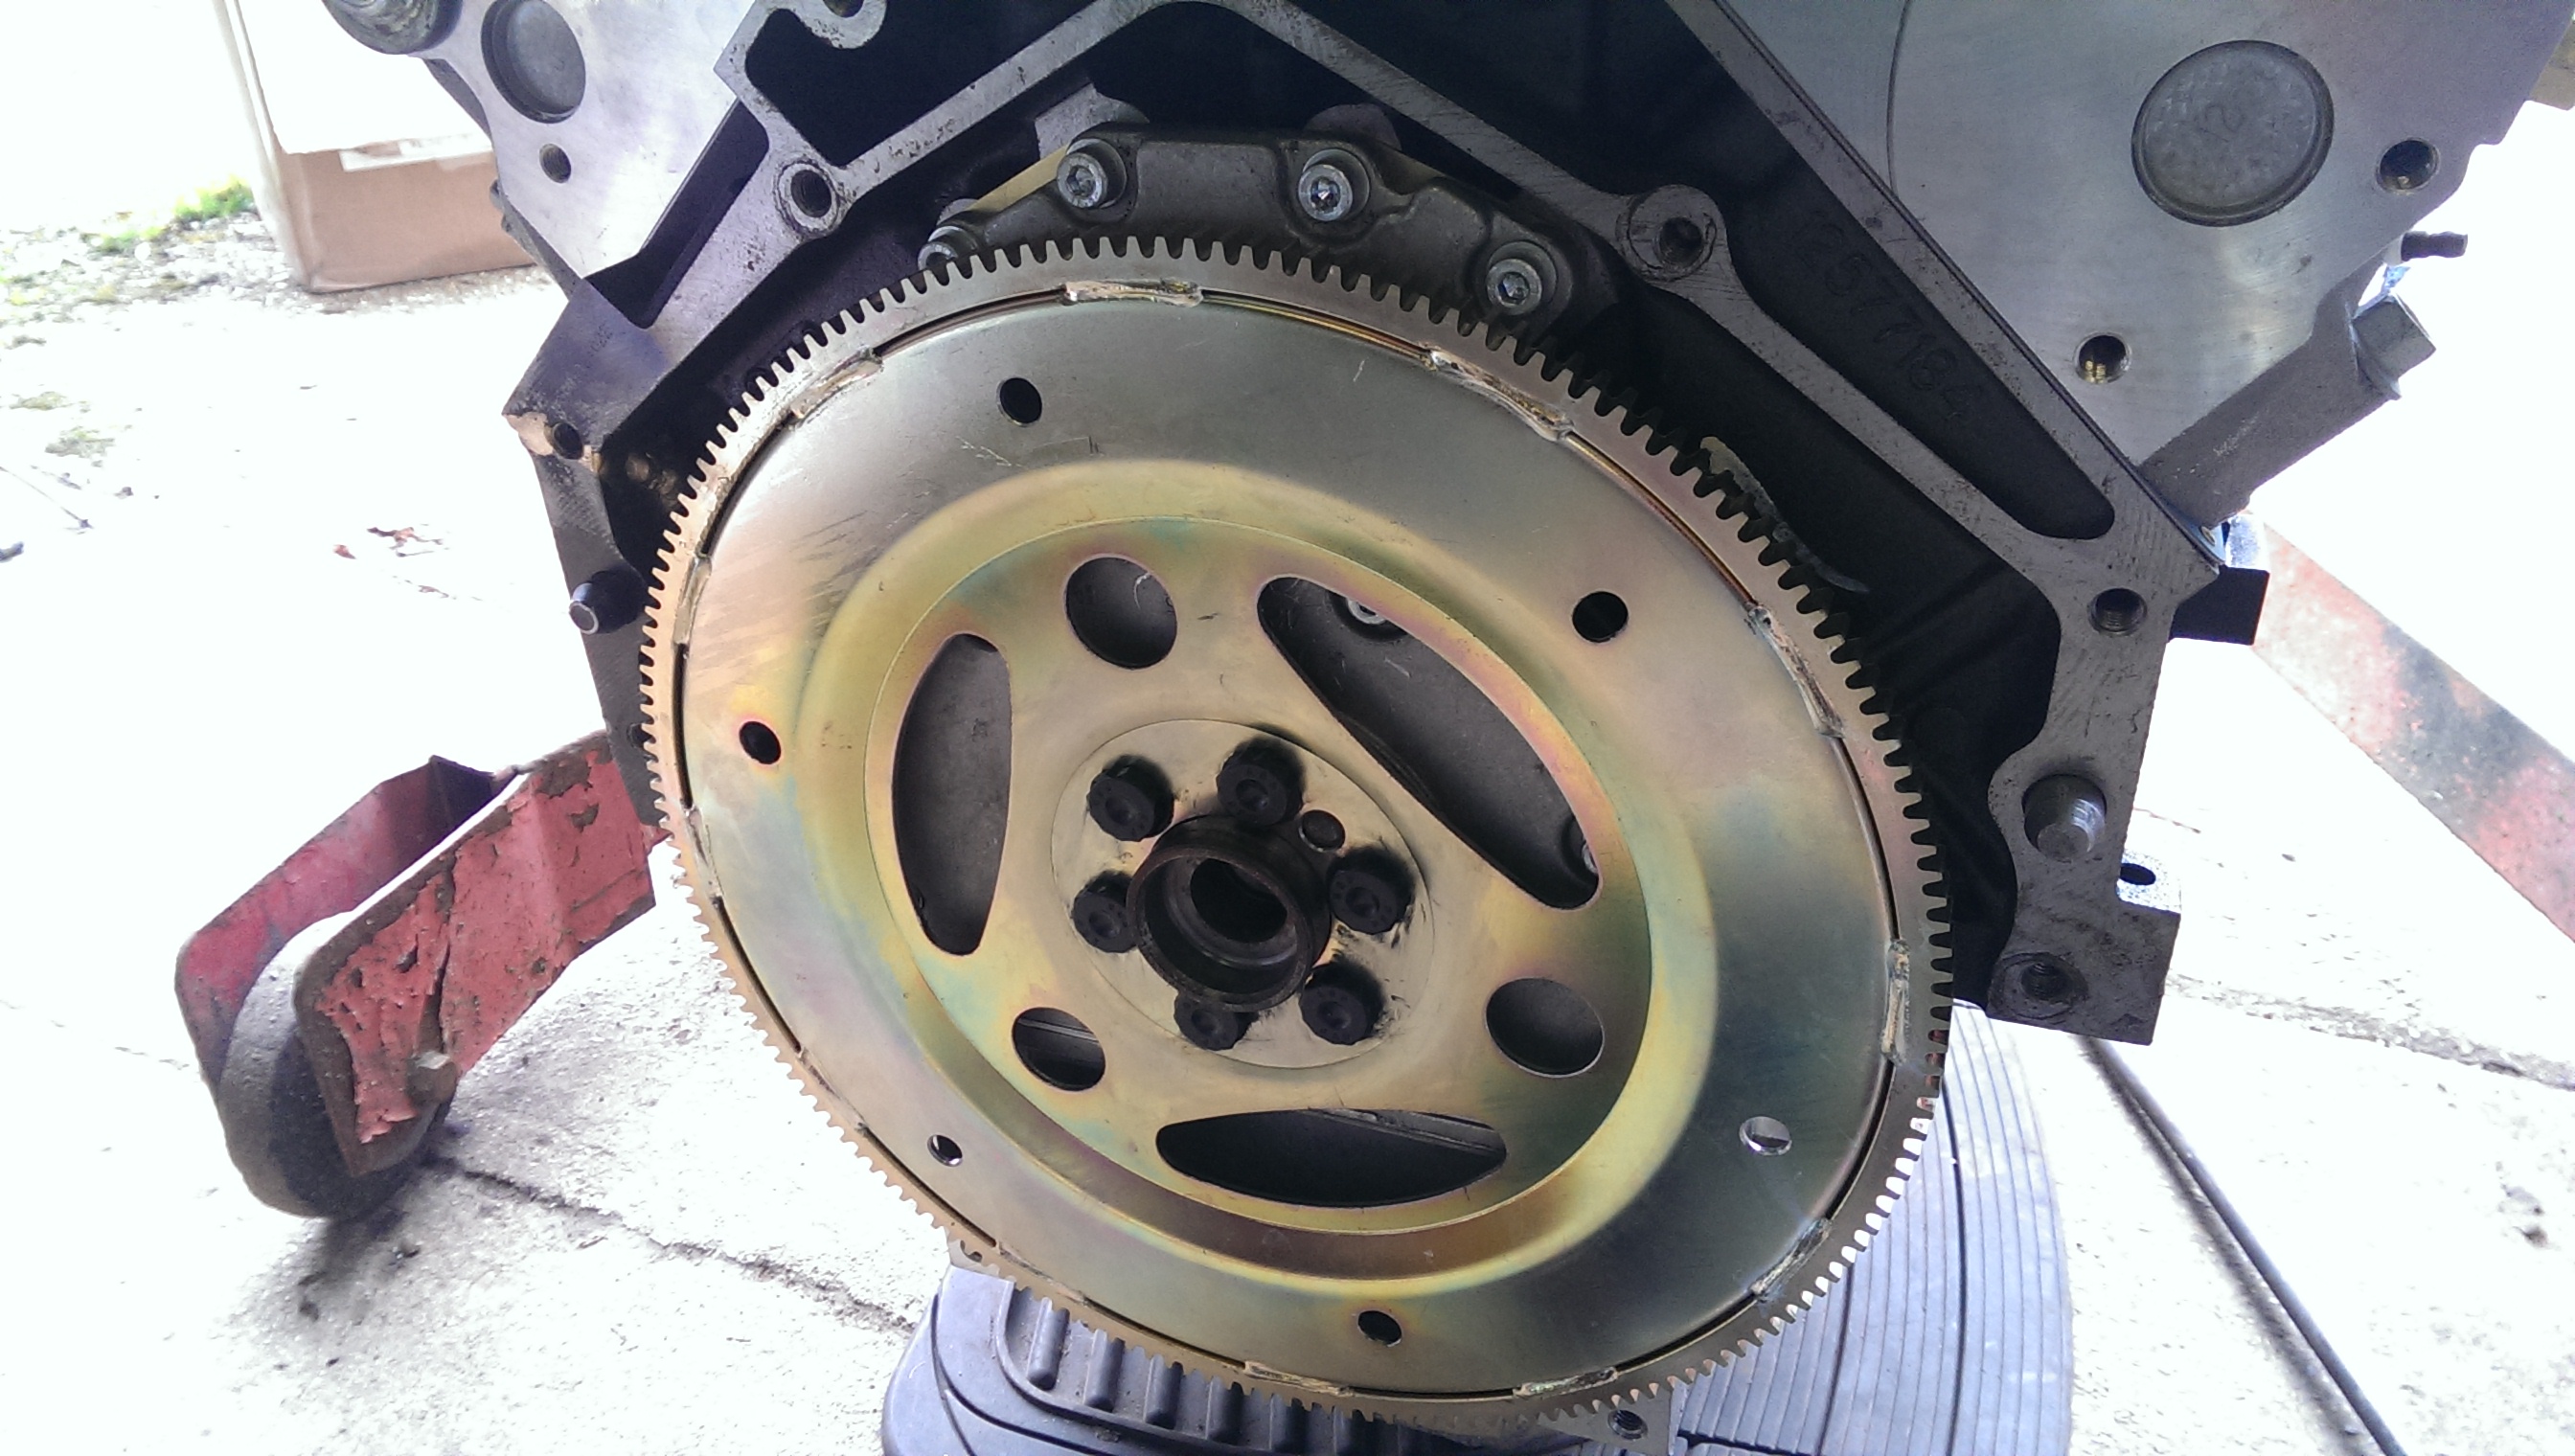
One of the the last jobs I needed to do before I could actually put the engine and transmission in the car was to sort out the flex plate. You might remember I machined the back of my truck crank so that I could use the standard LS type flex plate as they are far more common and cheaper to buy than the flat ones. Only problem is they come drilled for the standard LS converter, which has something like an 11" PCD for the converter bolts.
I have a 4L80E and a 'normal' converter for it which has the large 11.5" PCD for the bolts...No problem, I just marked out the flex plate and drilled another set of bolt holes between the others.
I've seen other people just elongate the holes in the plate, but I really didn't like that idea. You can see from the photo below just how far you'd have to go, as my converter has 6 bolt holes.
I might yet elongate the other holes and put bolts and large washers in just for the sake of it, although 3 bolts will be more than adequate.
With that job done, there's nothing really stopping it all going into the car - with the exception of the fact that it's been raining heavily for what seems like an eternity...
Other than that I have started making a pulley for my water pump - I just need to make the boss which will be a light press fit onto the shaft of the pump. I'll then heat it up and drop it onto the shaft so it doesn't go anywhere.
Been working away on a few bits and pieces - the weather is holding me up more than anything else now.
Found out why my engine mounts didn't line up properly when I dropped my original engine in. The 'heavy duty' type engine mounts aren't correct for a Camaro - and they offset the mounting bolts by about 1/4". So I got hold of some of the correct mounts, which I will fit poly inserts into before I fit them to the car. Trouble is getting to the bolts is a complete nightmare.
One of the the last jobs I needed to do before I could actually put the engine and transmission in the car was to sort out the flex plate. You might remember I machined the back of my truck crank so that I could use the standard LS type flex plate as they are far more common and cheaper to buy than the flat ones. Only problem is they come drilled for the standard LS converter, which has something like an 11" PCD for the converter bolts.
I have a 4L80E and a 'normal' converter for it which has the large 11.5" PCD for the bolts...No problem, I just marked out the flex plate and drilled another set of bolt holes between the others.
I've seen other people just elongate the holes in the plate, but I really didn't like that idea. You can see from the photo below just how far you'd have to go, as my converter has 6 bolt holes.
I might yet elongate the other holes and put bolts and large washers in just for the sake of it, although 3 bolts will be more than adequate.
With that job done, there's nothing really stopping it all going into the car - with the exception of the fact that it's been raining heavily for what seems like an eternity...
Other than that I have started making a pulley for my water pump - I just need to make the boss which will be a light press fit onto the shaft of the pump. I'll then heat it up and drop it onto the shaft so it doesn't go anywhere.
Trending Topics
03-06-2016, 12:14 PM
#8


Is it a 80 0r 81? I really like those. I always wanted another 80 Z28. White w/gold stripes & interior. Of course a LS or LT power. Any plans to add AC?
03-12-2016, 04:06 PM
#10
Today has been ups and downs...
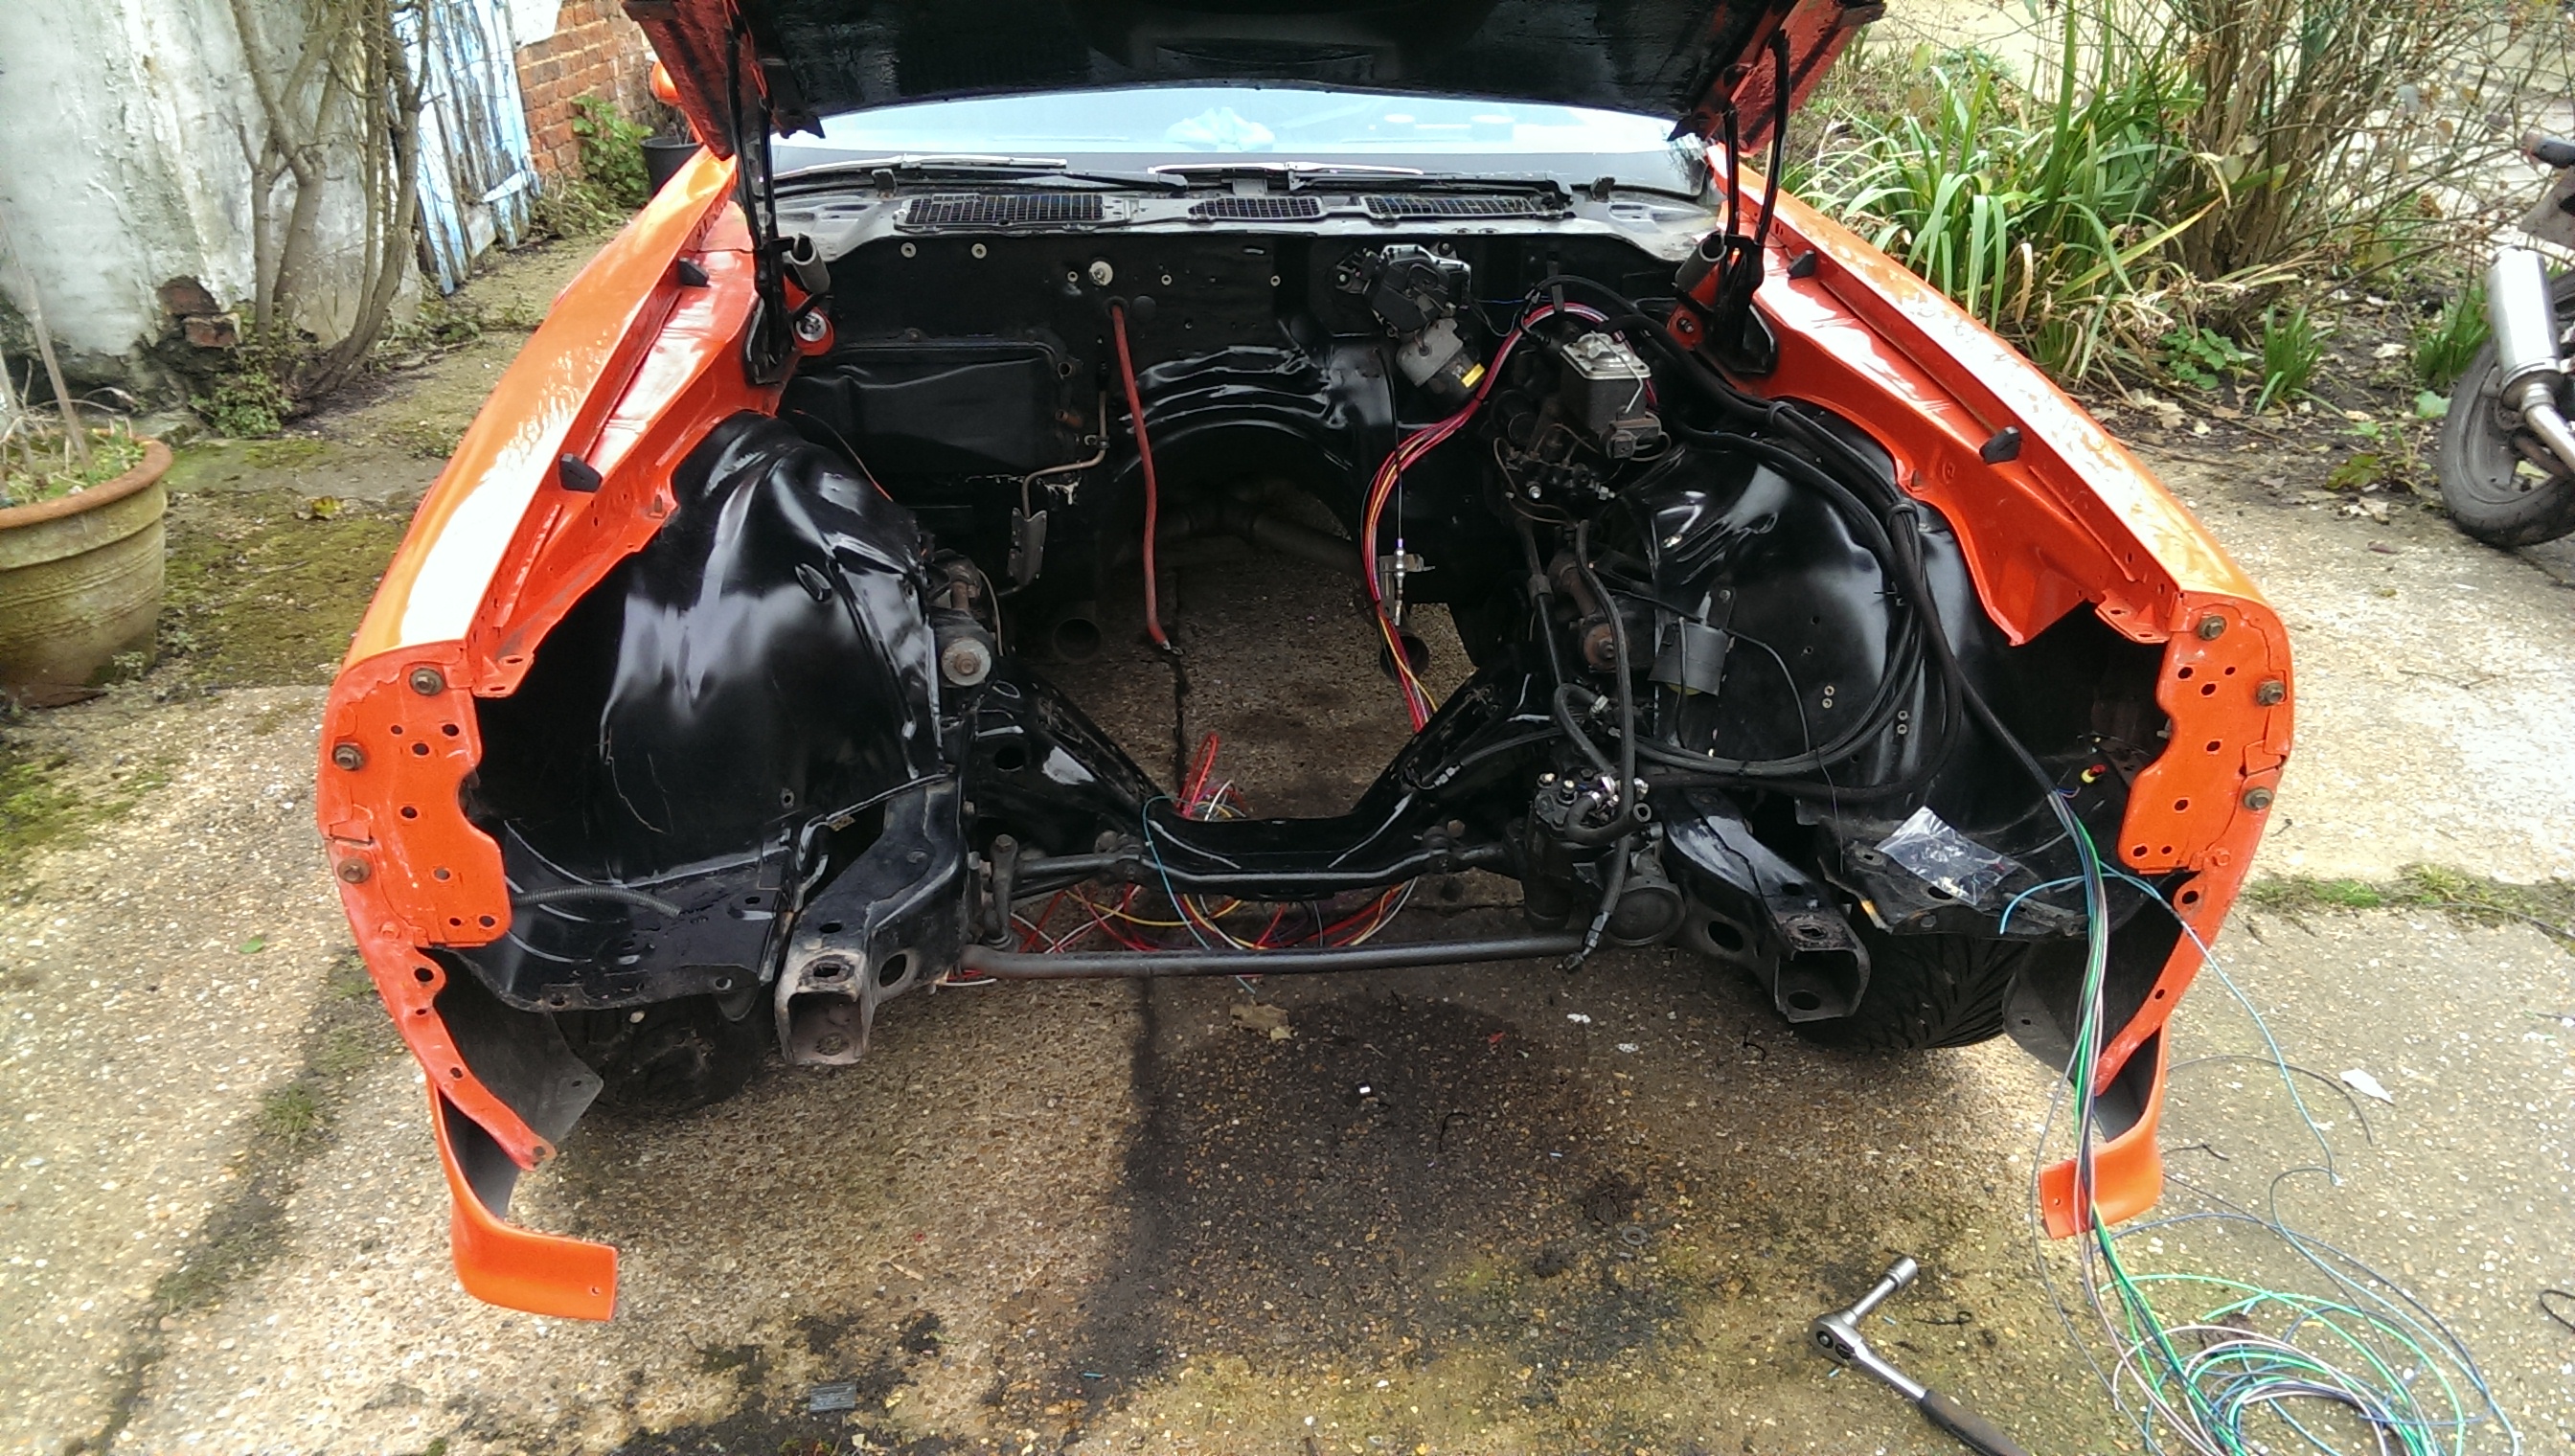
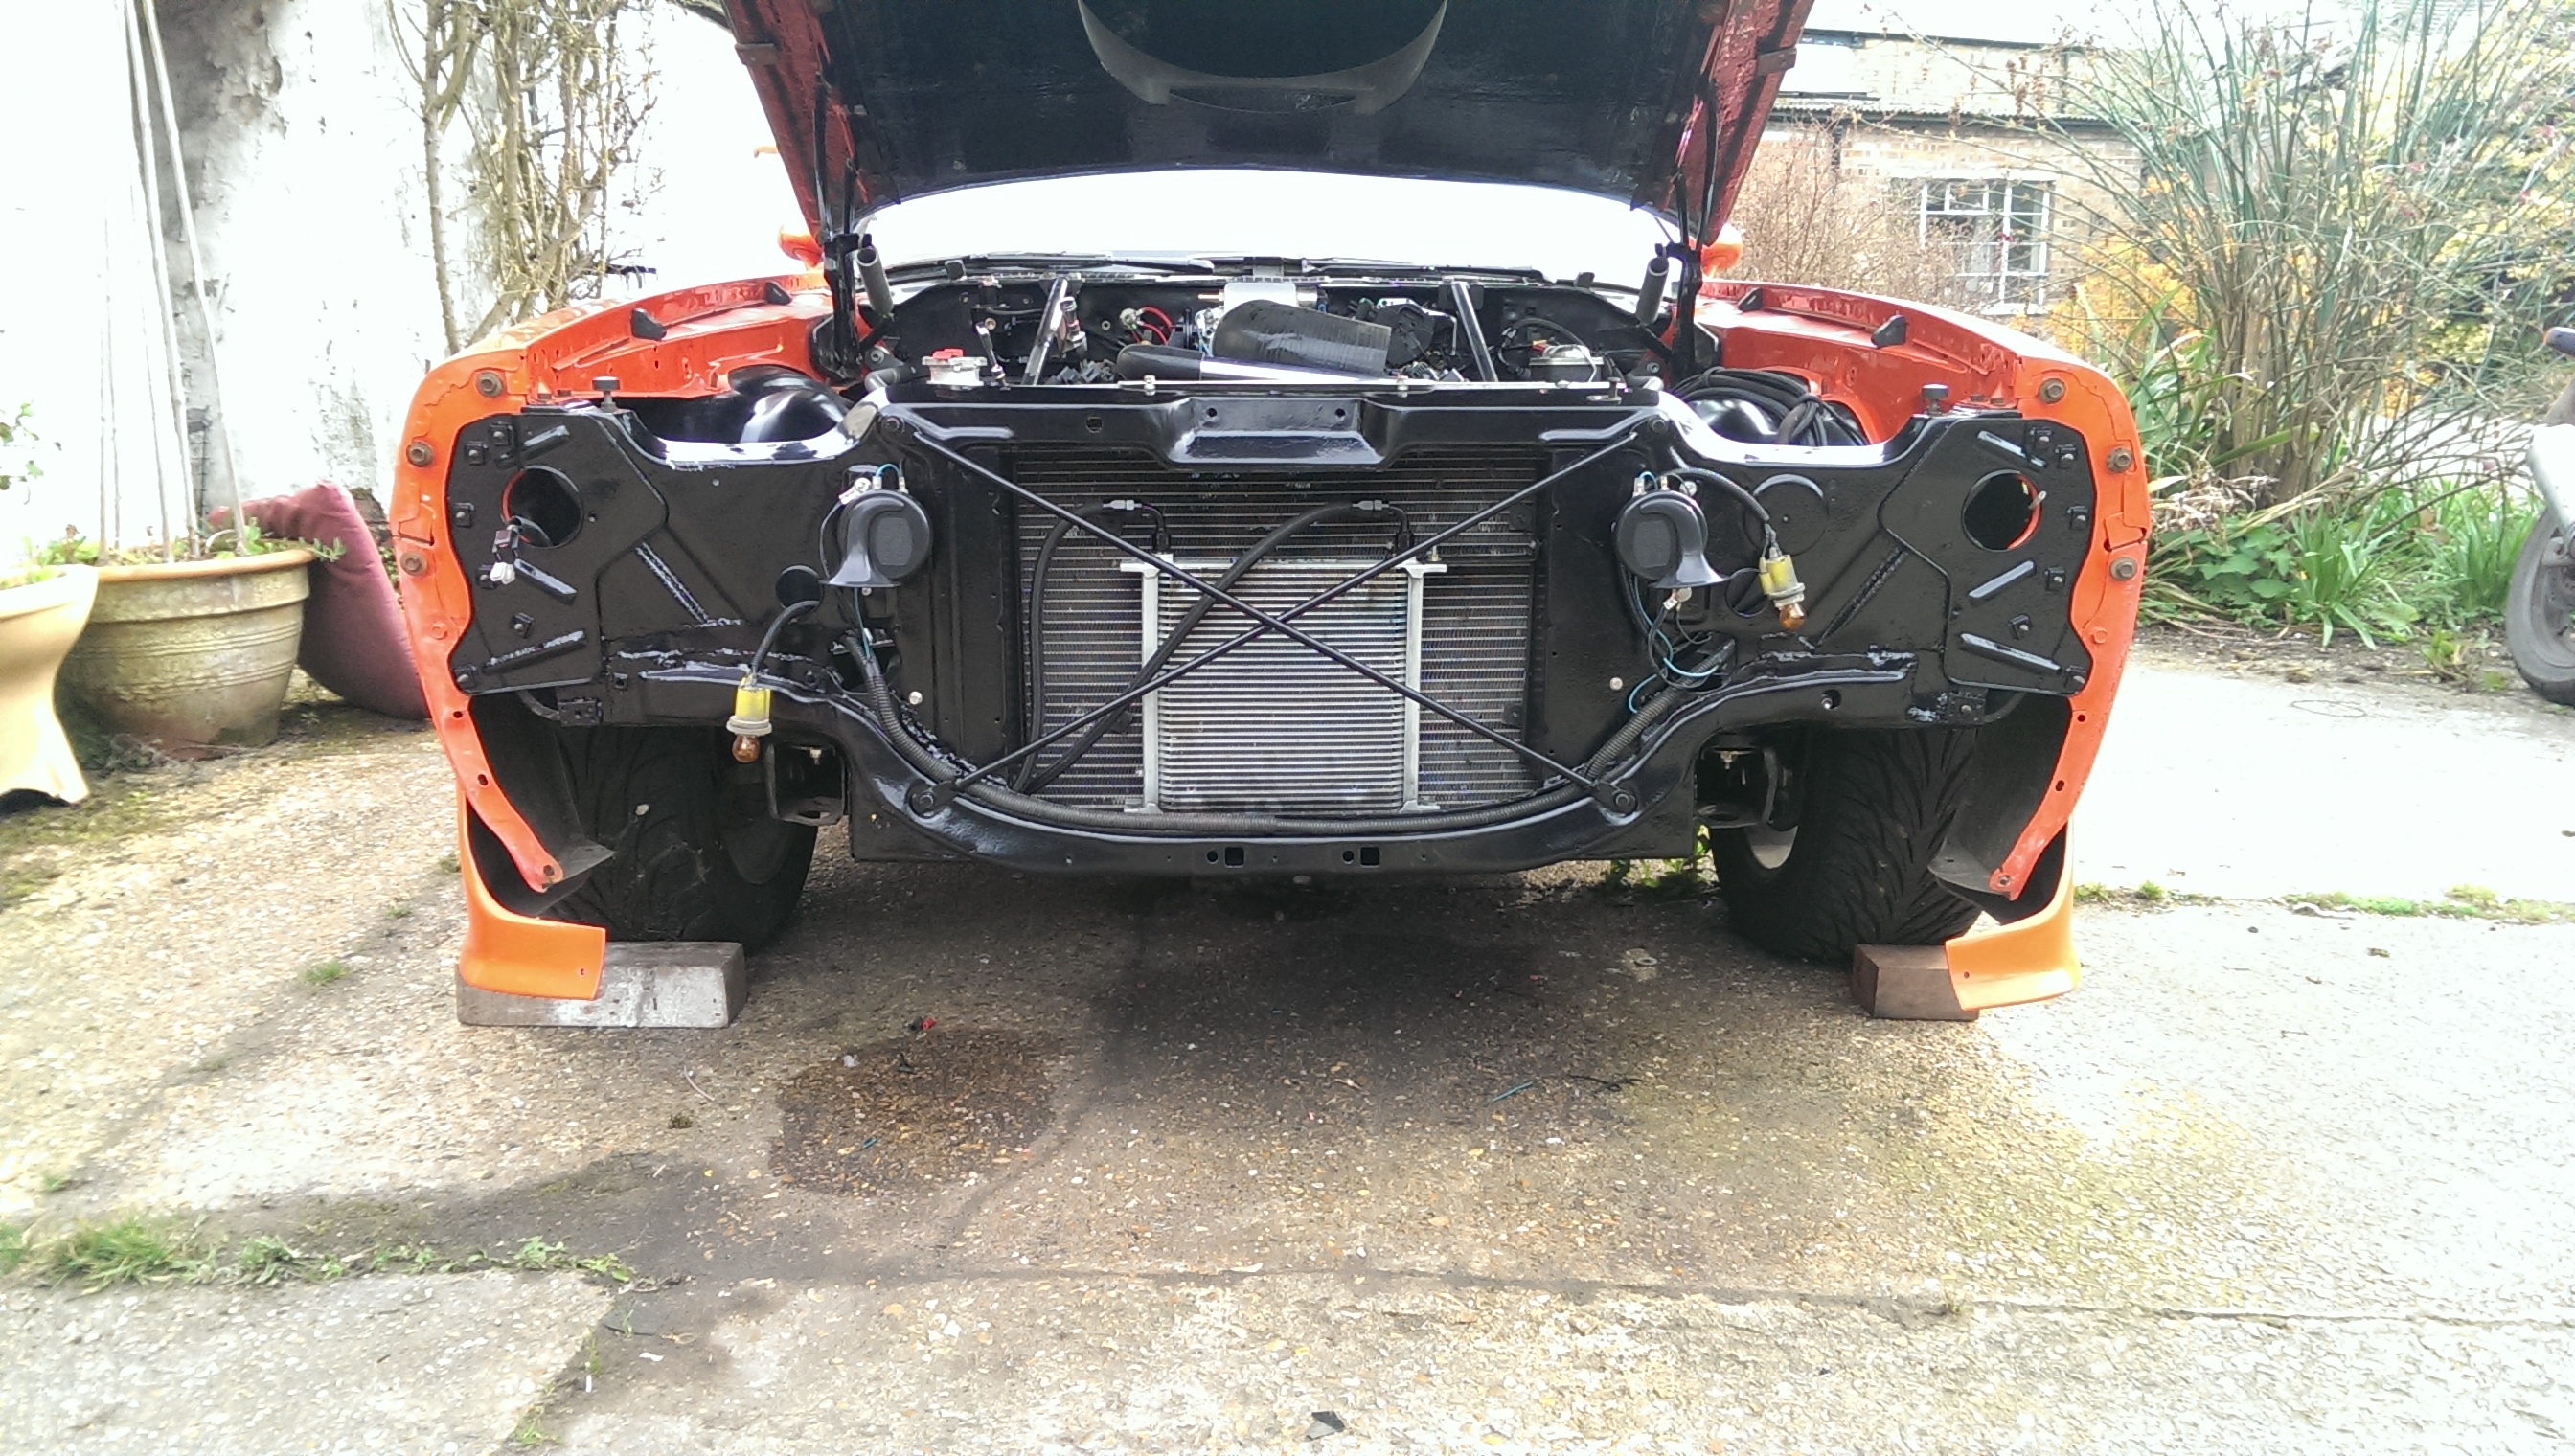
First job was remove the core support from the car - easy enough
Next up was getting the engine off the stand and the flex plate fitted and the transmission bolted up. No real issues there except that I needed to tap the holes a little deeper in the crank and chop around 2mm off the bolts. I machined a truck crank and they aren't quite drilled as deep as the standard short car crank it seems. Thankfully I have a set of M11x1.5 taps handy...
After that the transmission and converter were fitted with no real dramas.
That's when the fun started, as much my own fault as anything. The mounts wouldn't line up, but then I figured I'd assembled them wrong, oops. Never mind.
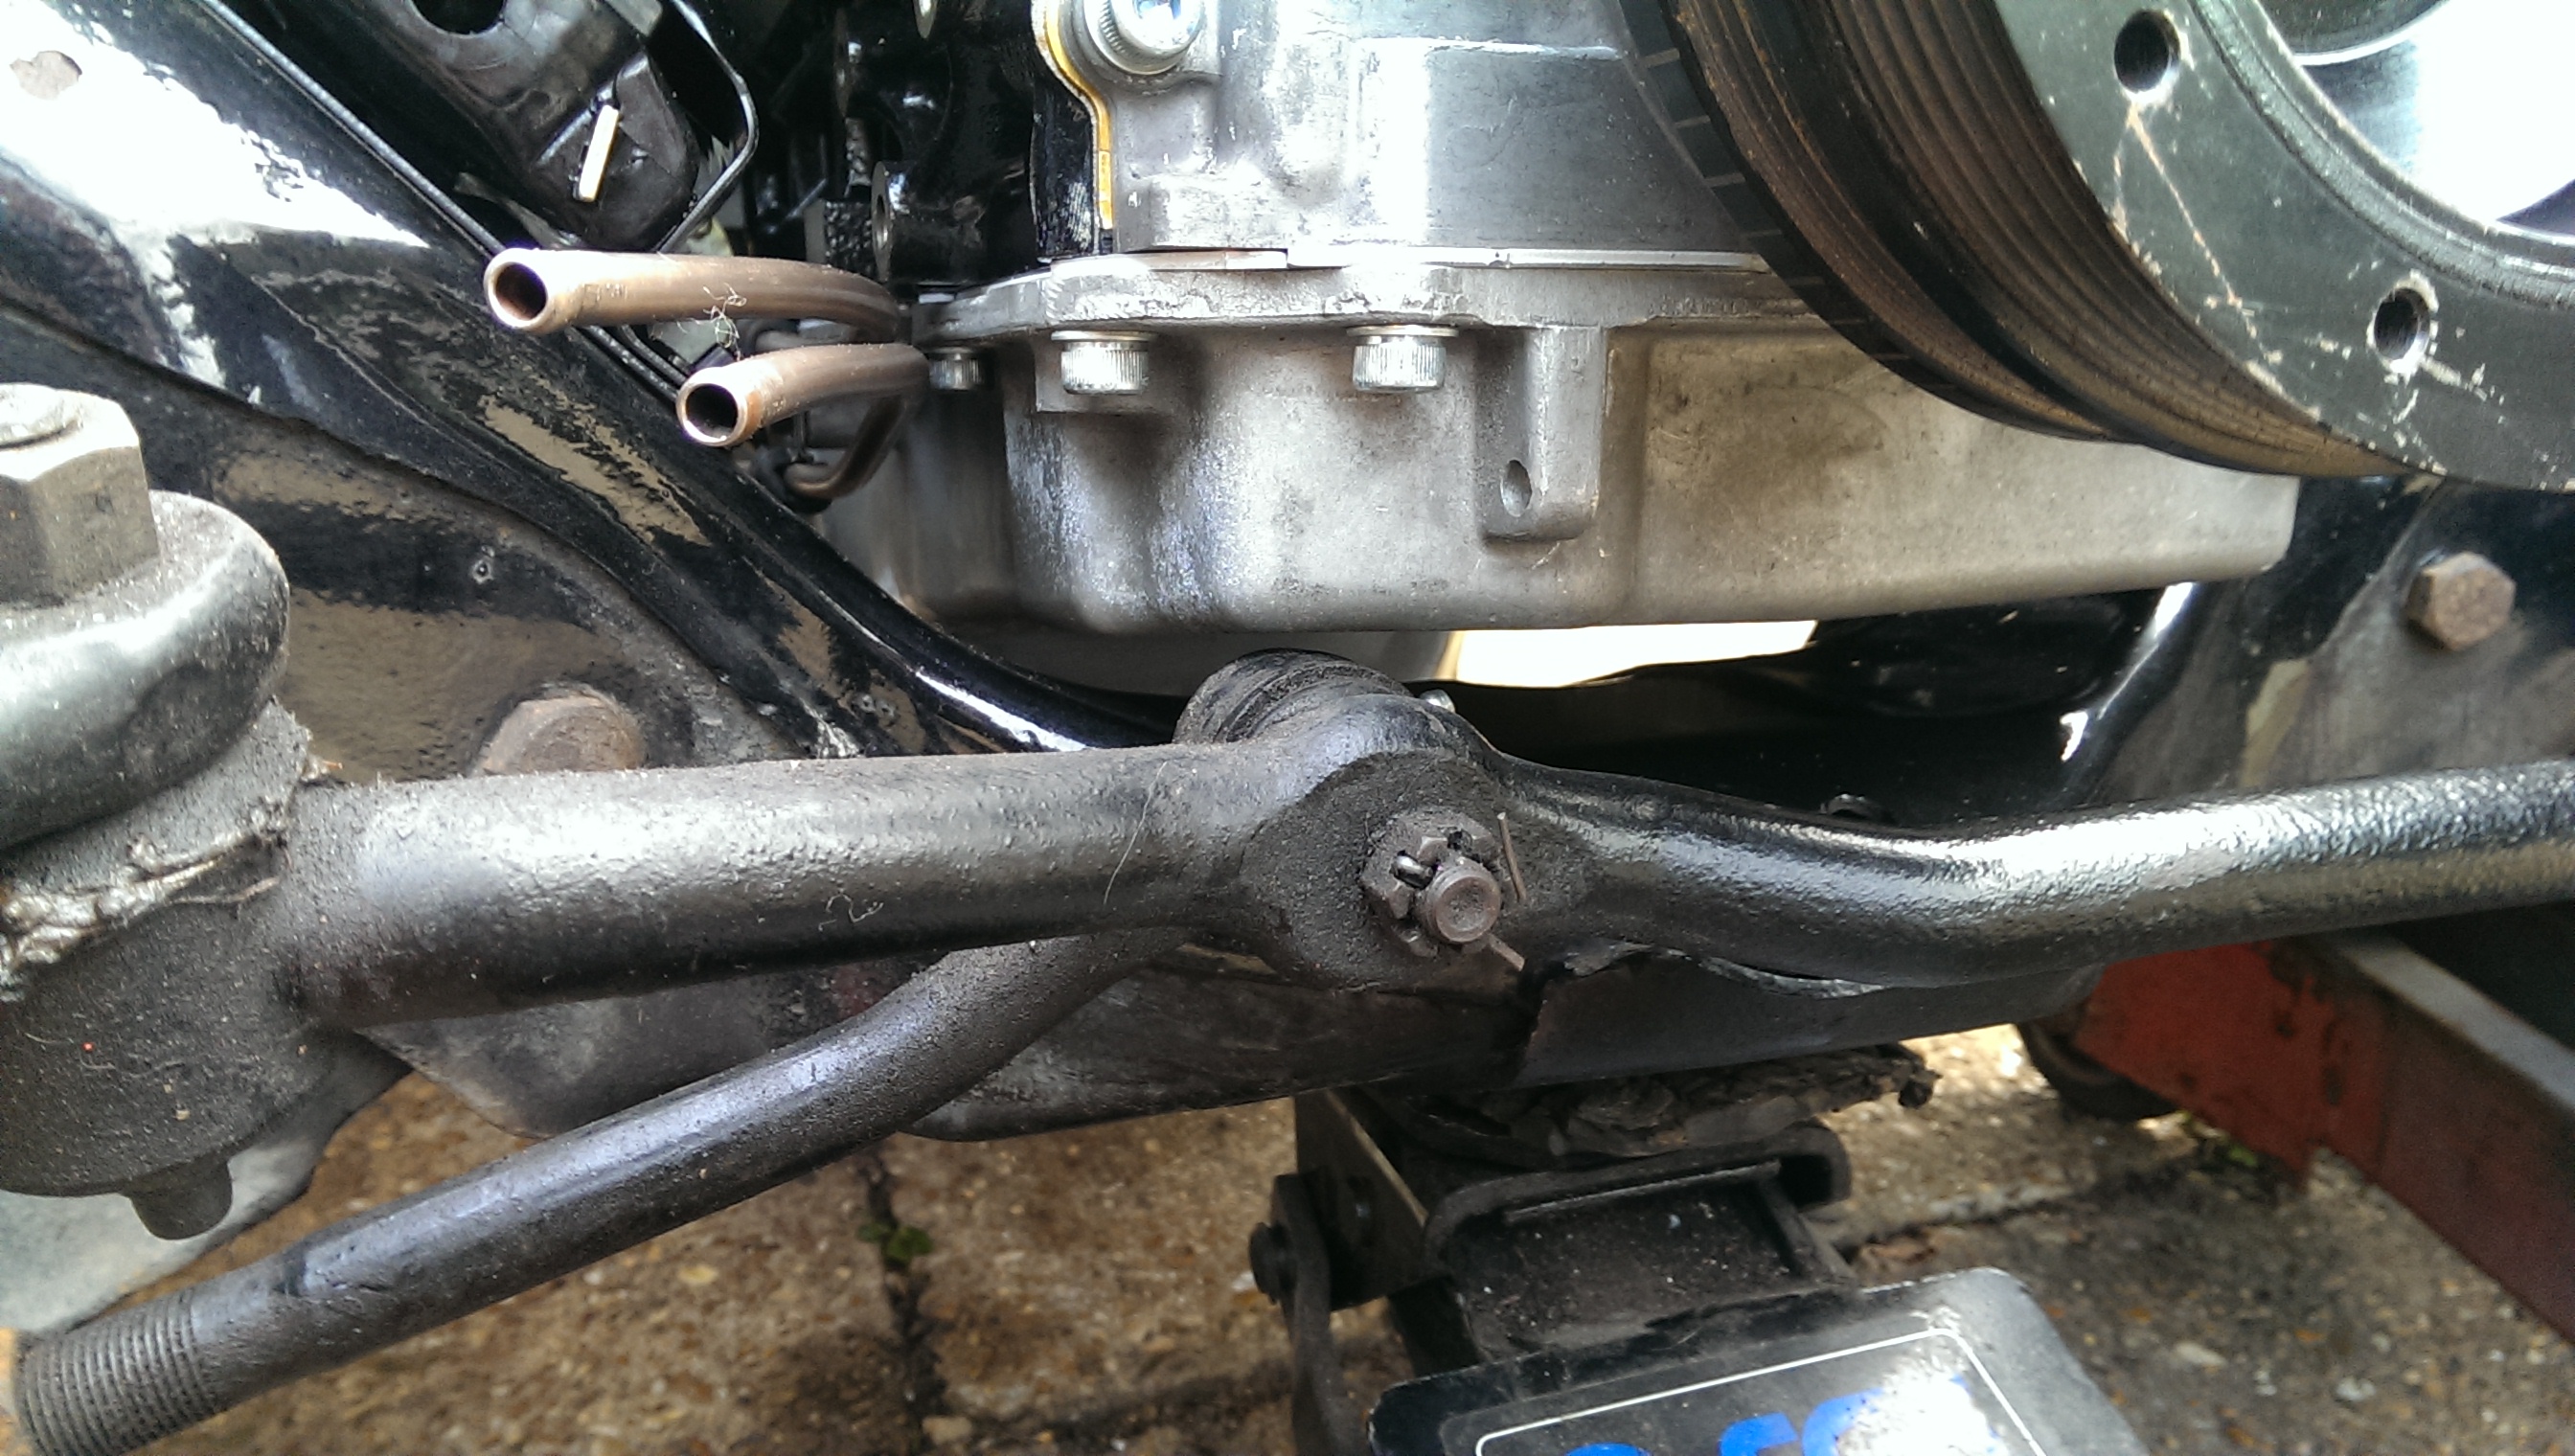
The good news is that I don't need to move the engine forward at all, it will fit in the stock position. The bad news is that I think I might have a slight issue with clearance on the steering linkage. I could gain a few mm if I make myself a new set of engine mounts.... seems like a lot of effort, but it might be the only way.
Oh and my transmission cross member fits right up...
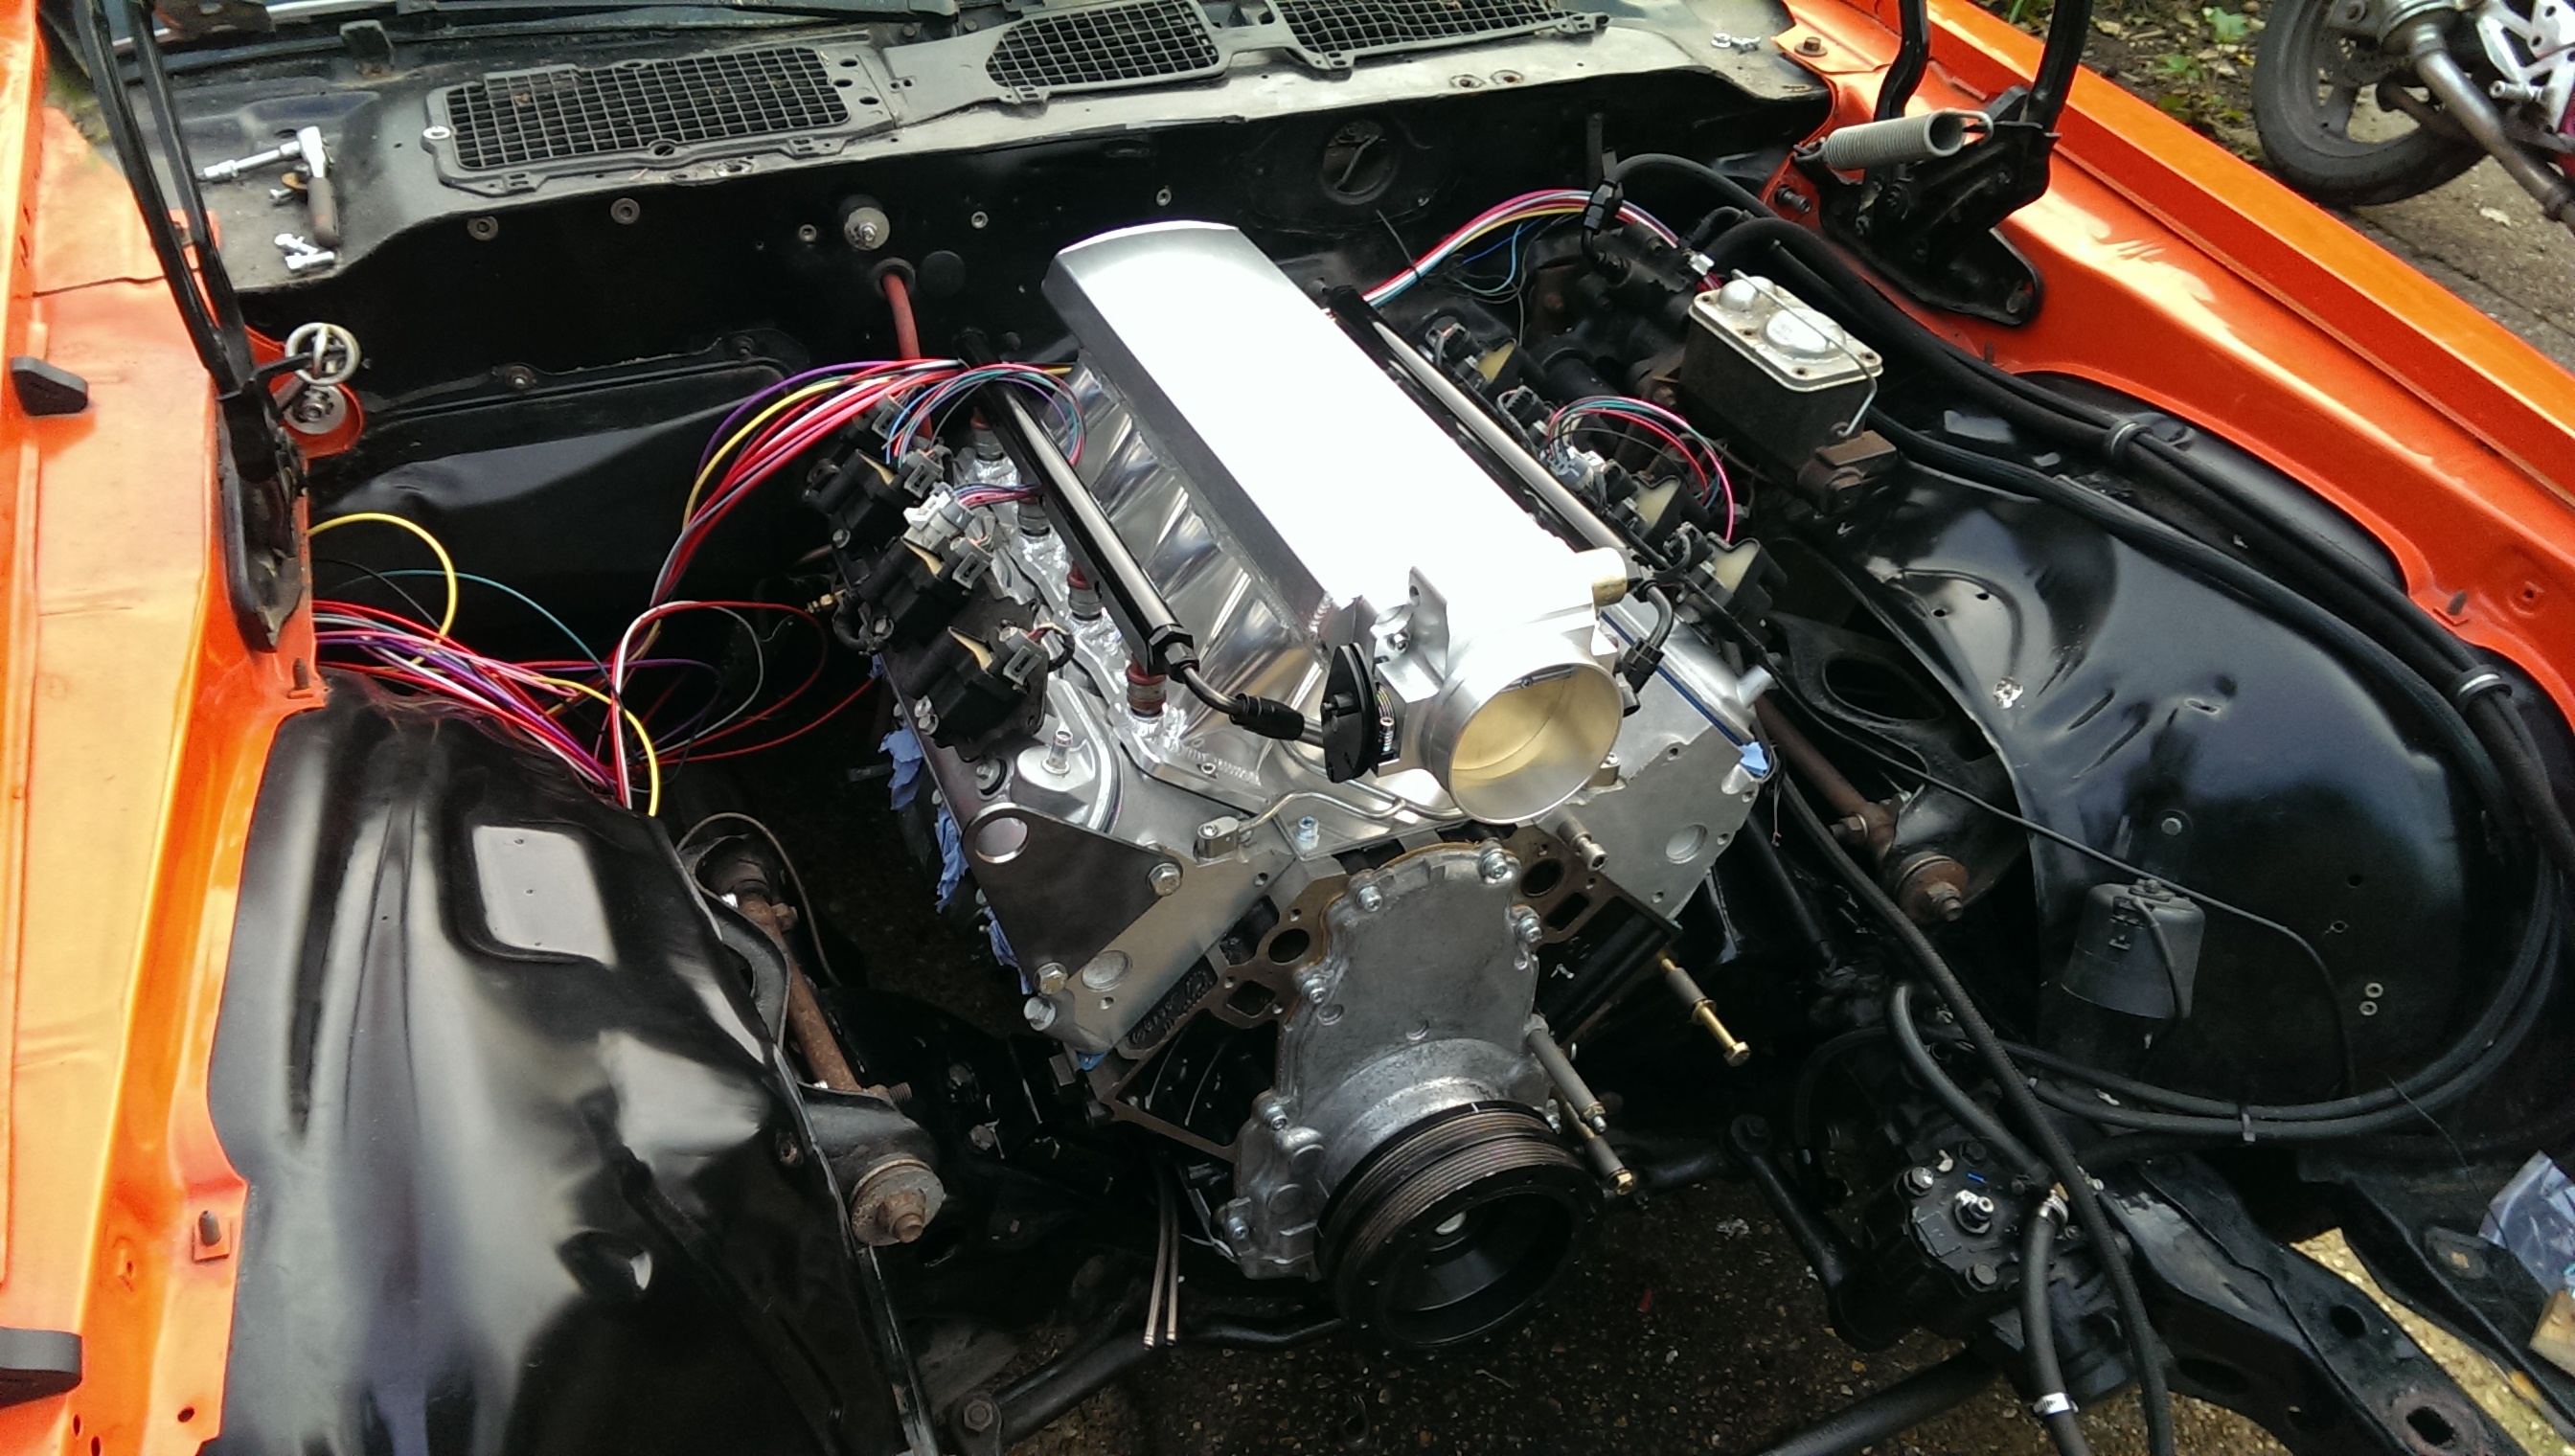
So yes, it's sort of in there, I still need to finish off mounting it properly. Ran out of daylight today
First job was remove the core support from the car - easy enough
Next up was getting the engine off the stand and the flex plate fitted and the transmission bolted up. No real issues there except that I needed to tap the holes a little deeper in the crank and chop around 2mm off the bolts. I machined a truck crank and they aren't quite drilled as deep as the standard short car crank it seems. Thankfully I have a set of M11x1.5 taps handy...
After that the transmission and converter were fitted with no real dramas.
That's when the fun started, as much my own fault as anything. The mounts wouldn't line up, but then I figured I'd assembled them wrong, oops. Never mind.
The good news is that I don't need to move the engine forward at all, it will fit in the stock position. The bad news is that I think I might have a slight issue with clearance on the steering linkage. I could gain a few mm if I make myself a new set of engine mounts.... seems like a lot of effort, but it might be the only way.
Oh and my transmission cross member fits right up...
So yes, it's sort of in there, I still need to finish off mounting it properly. Ran out of daylight today
03-14-2016, 01:54 AM
#11
Today started with pulling the whole engine and transmission back out again - at least that's easy with the core support removed.
I reconfigured all of the mounts and put it all back together again. I also made a small adjustment to the idler arm and now have around 3/8" steering clearance! Yay!
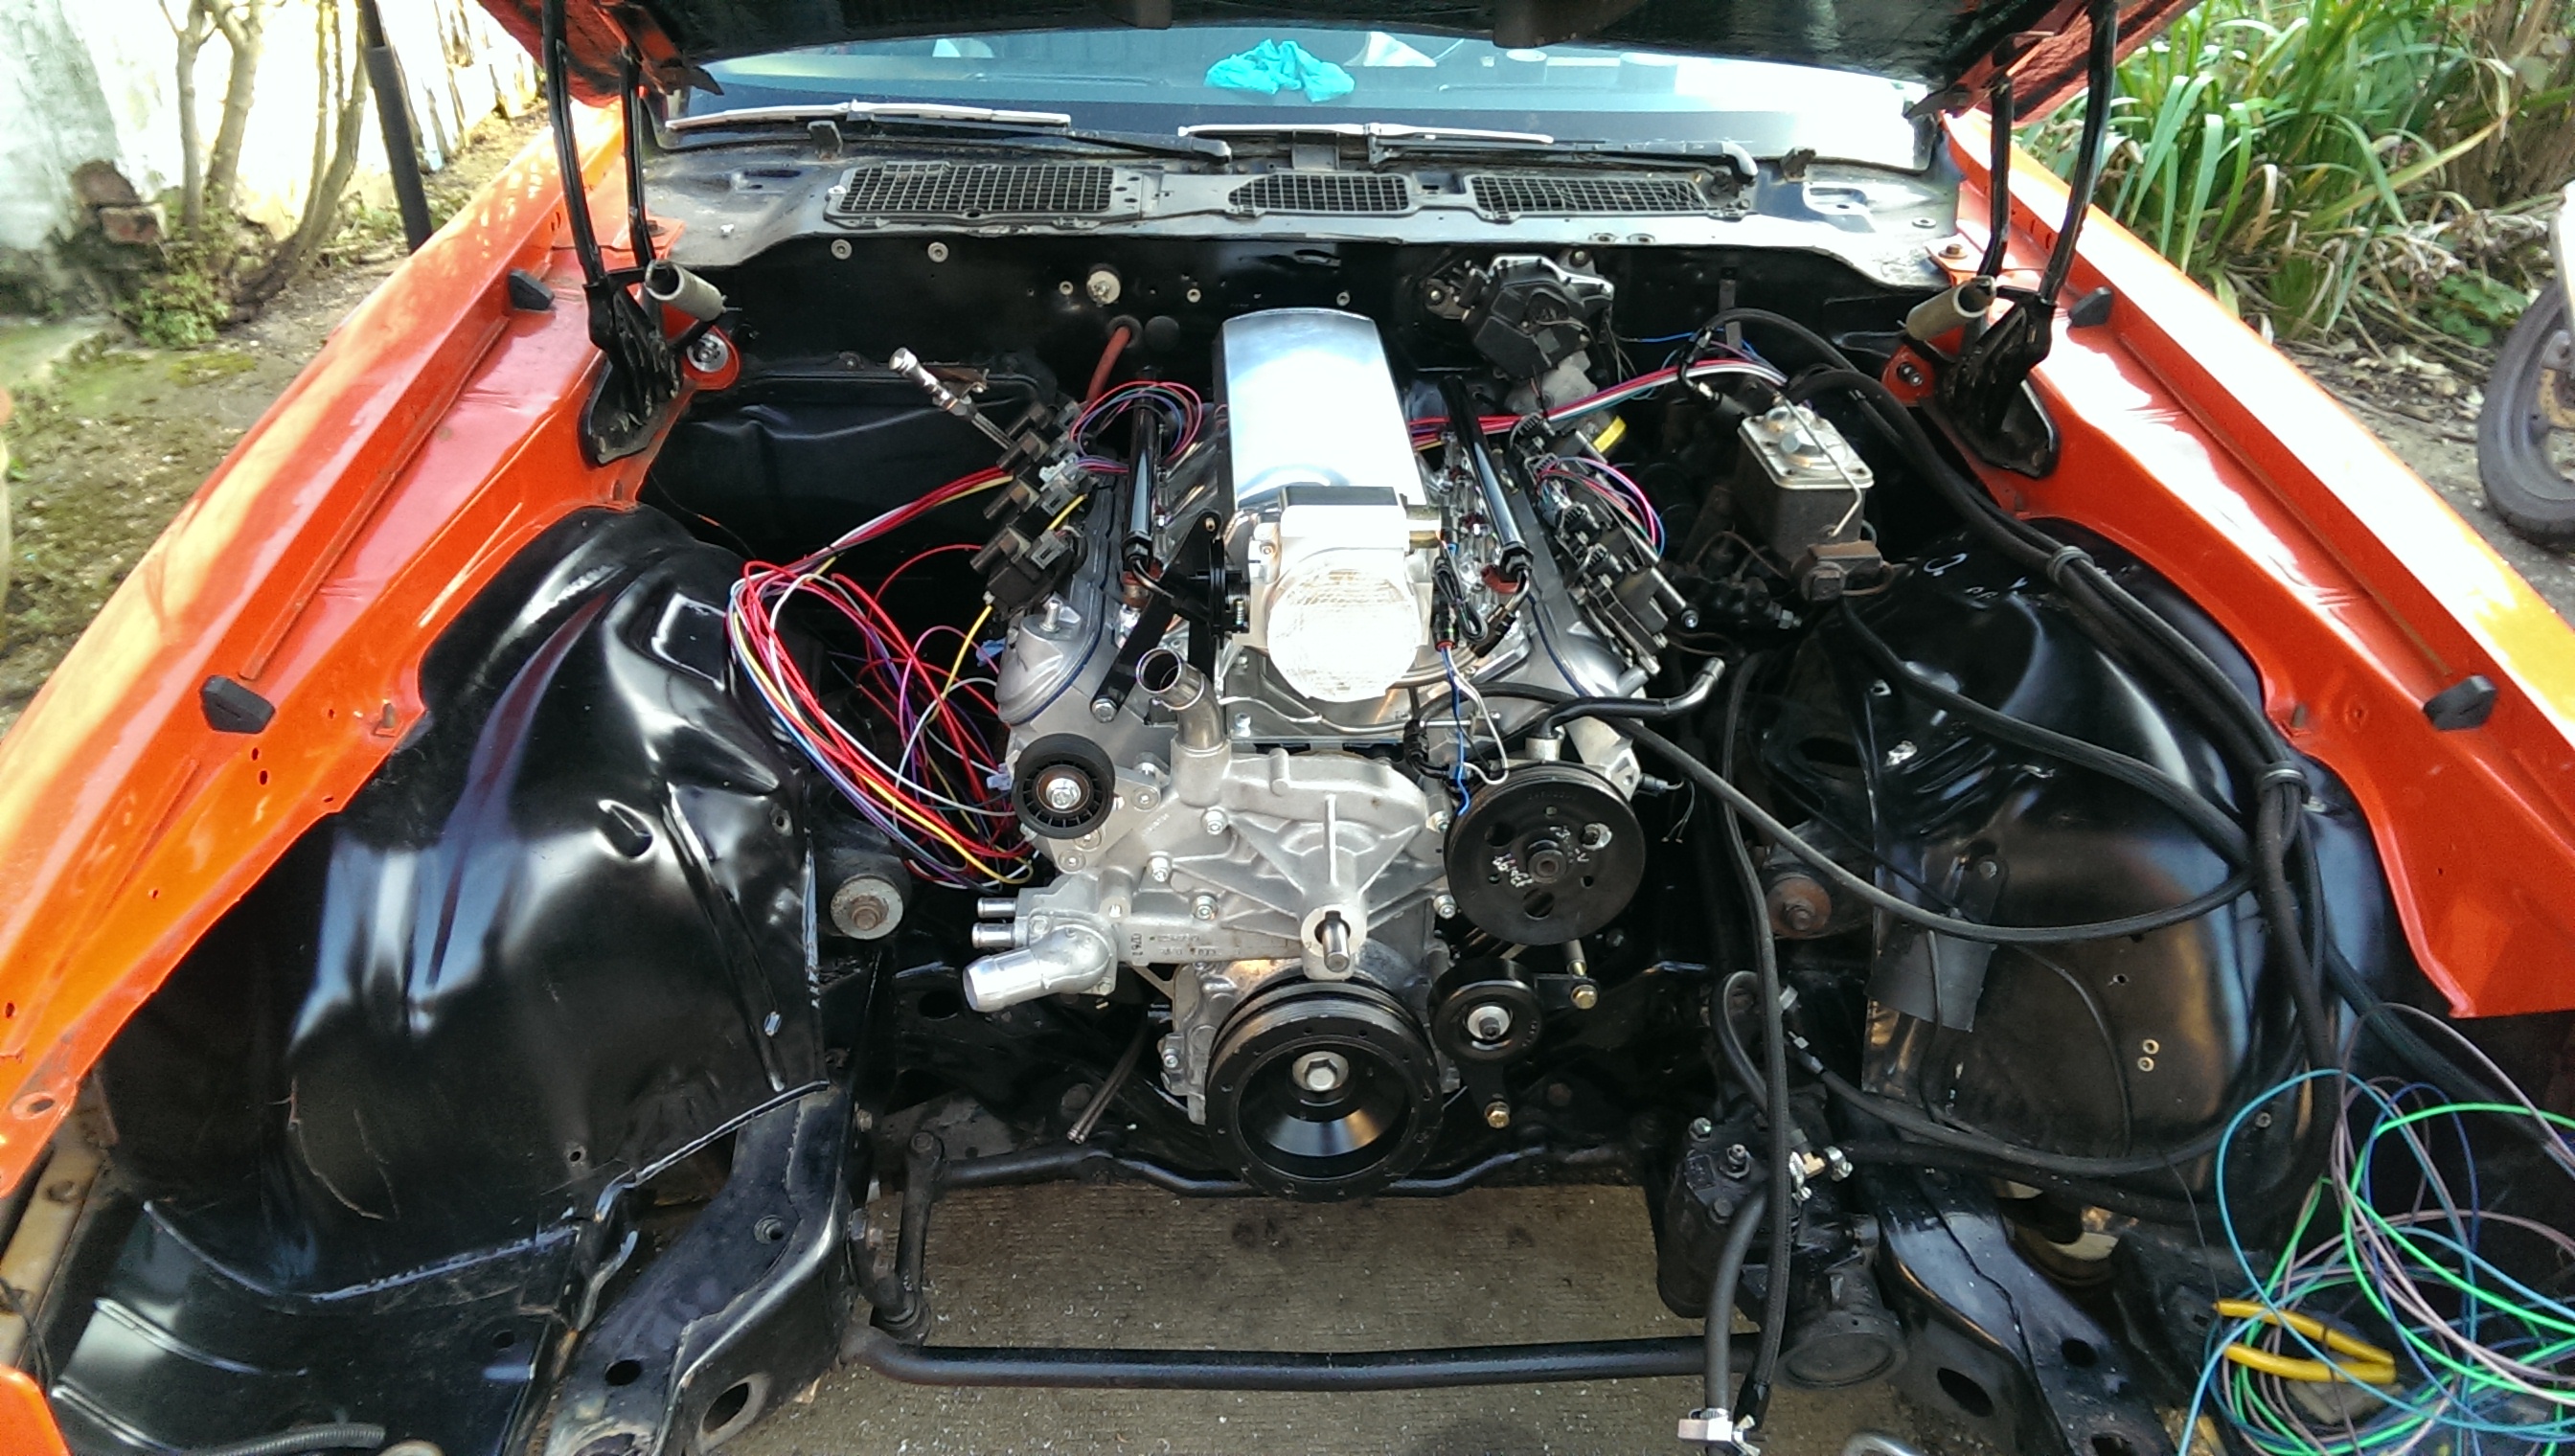
Helped by a number of things, including moving the engine as far back as it will go on the mounts. I followed other peoples advice initially and set it in the 1" forward position. But I think it works nicely in the stock position.... this is using Hooker adapter plates.
After that I got the transmission crossmember installed, this confirmed the transmission is in the same place as it was with the small block. If anything it's slightly further back...
The the driveshaft and a few other bits were hooked up.
The 1st gen headers just do not fit, so I need to get some second gen correct ones. More expense!
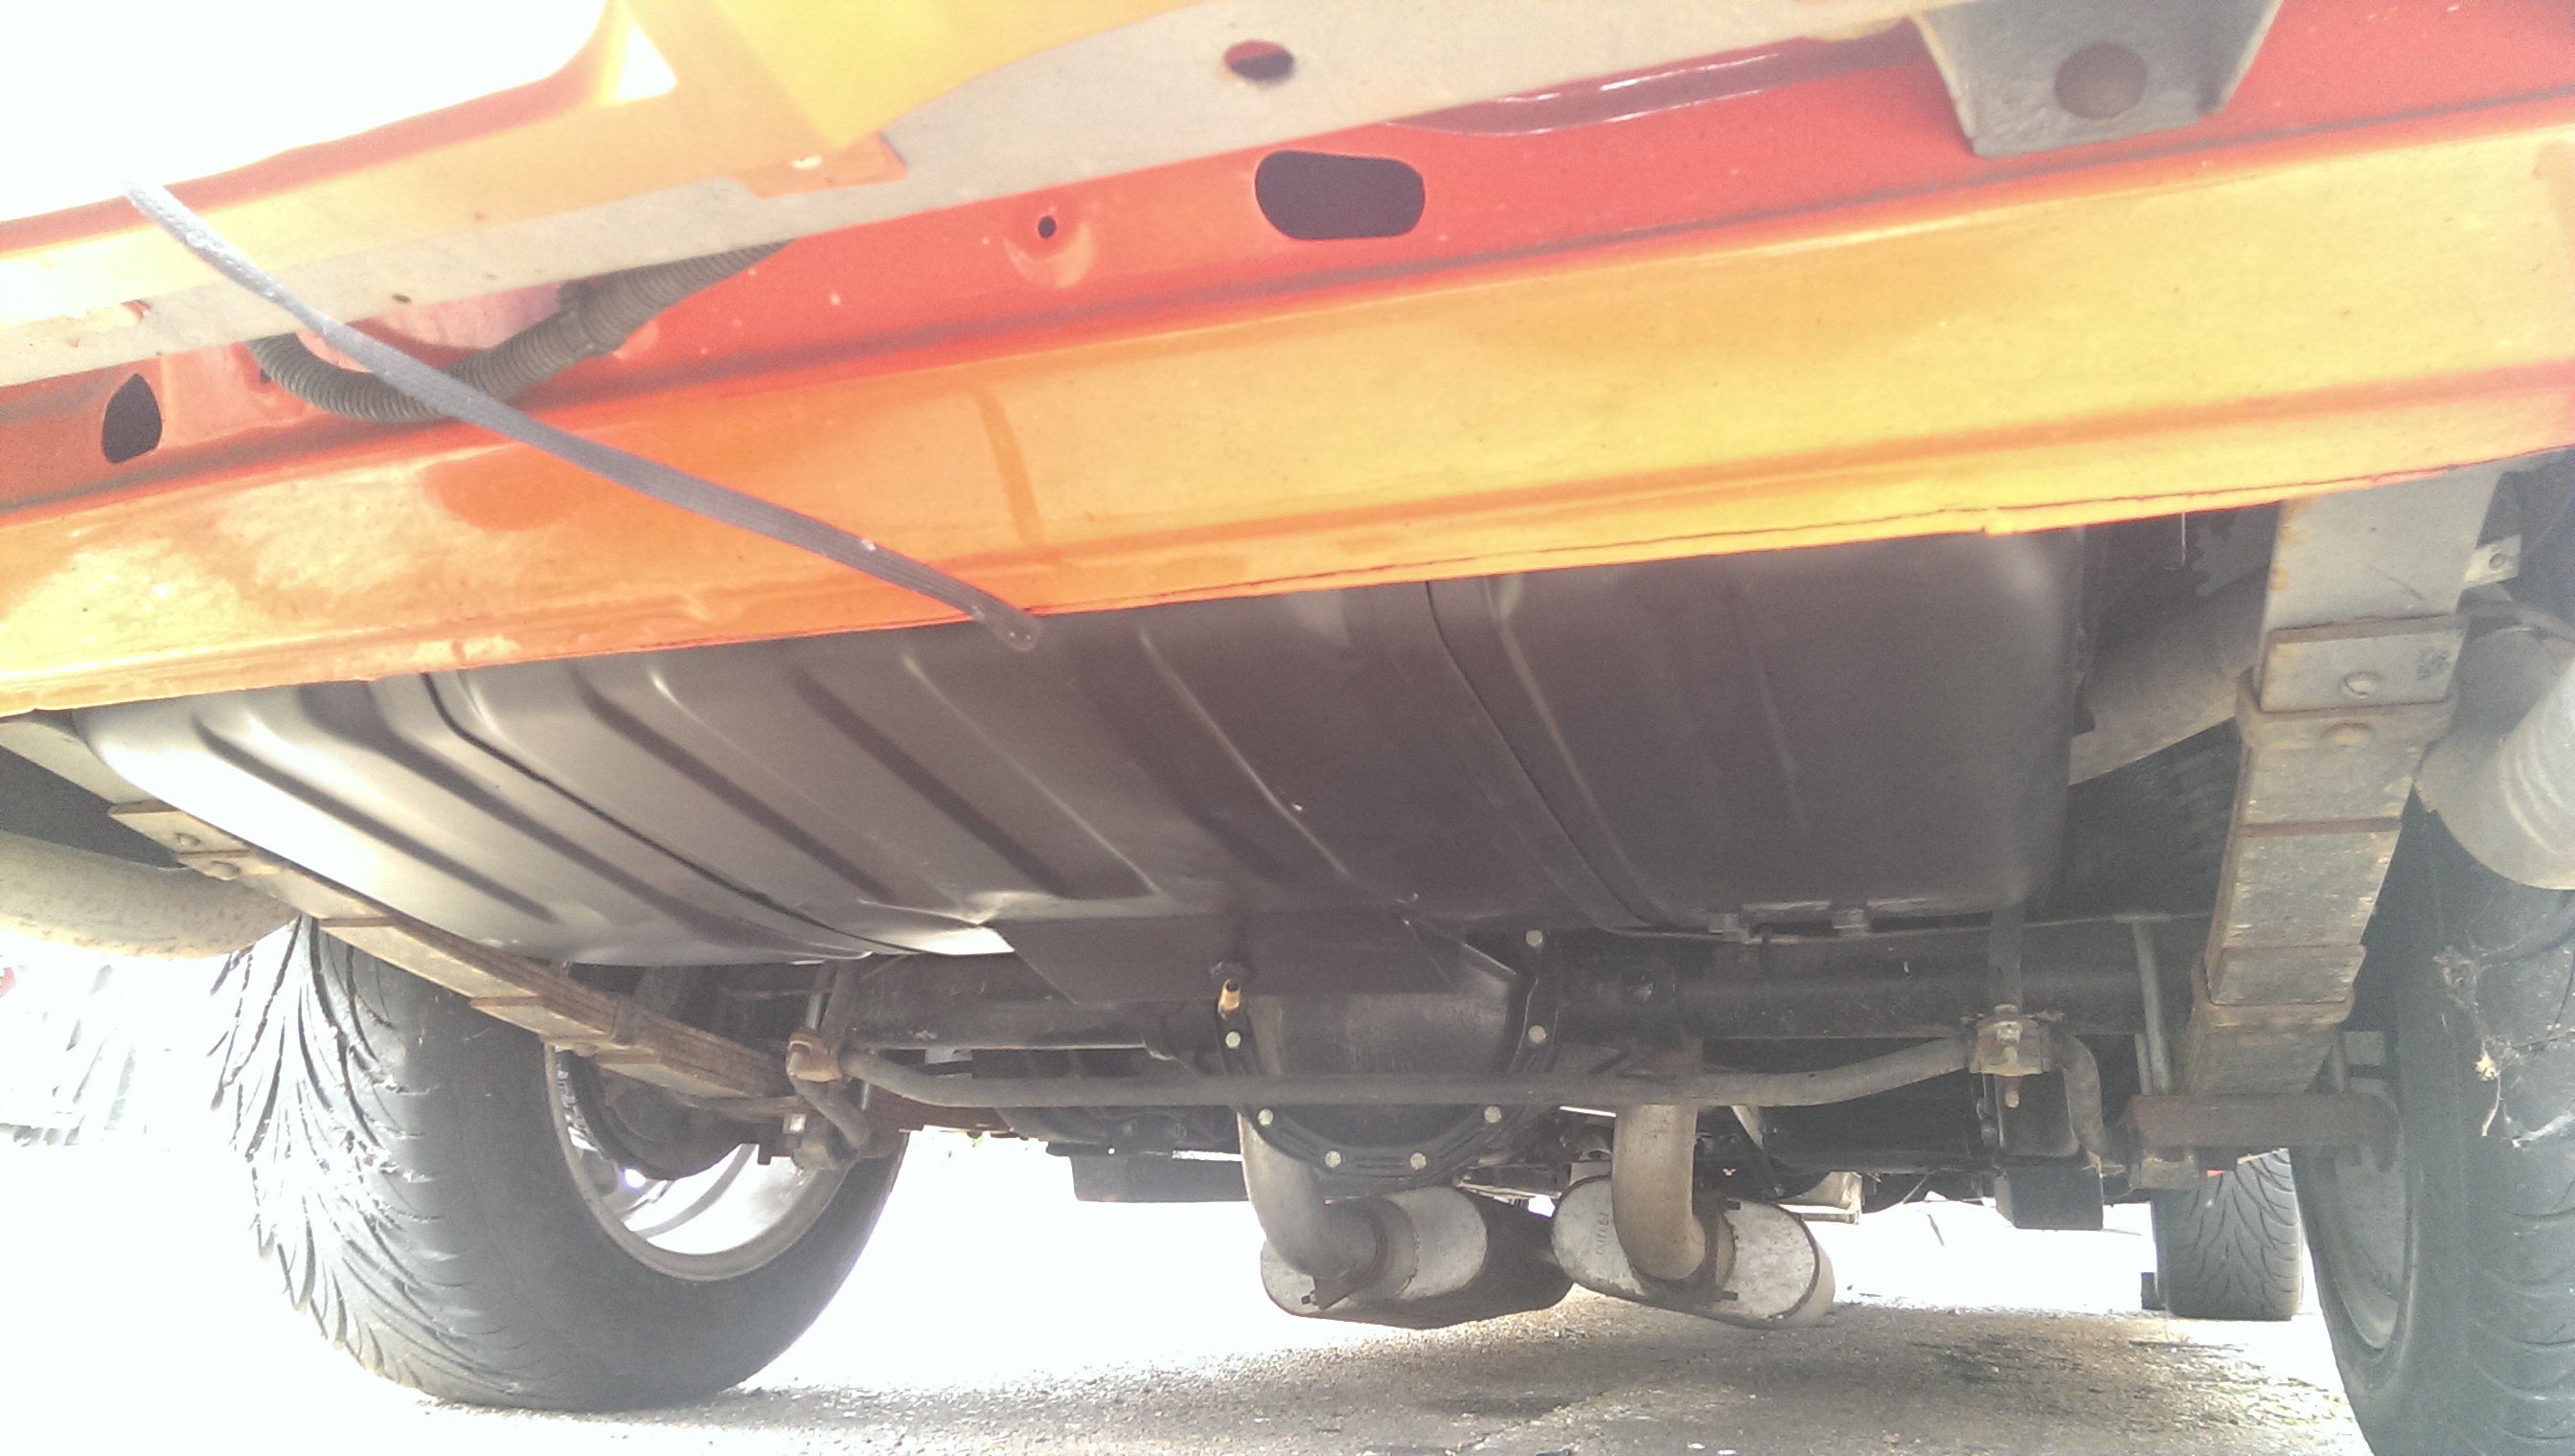
The oil pan that I modified hangs just below the crossmember - I made this to the same height as the CTS-V pan knowing that this would happen. I don't run the car too low anyway, so it should be fine.
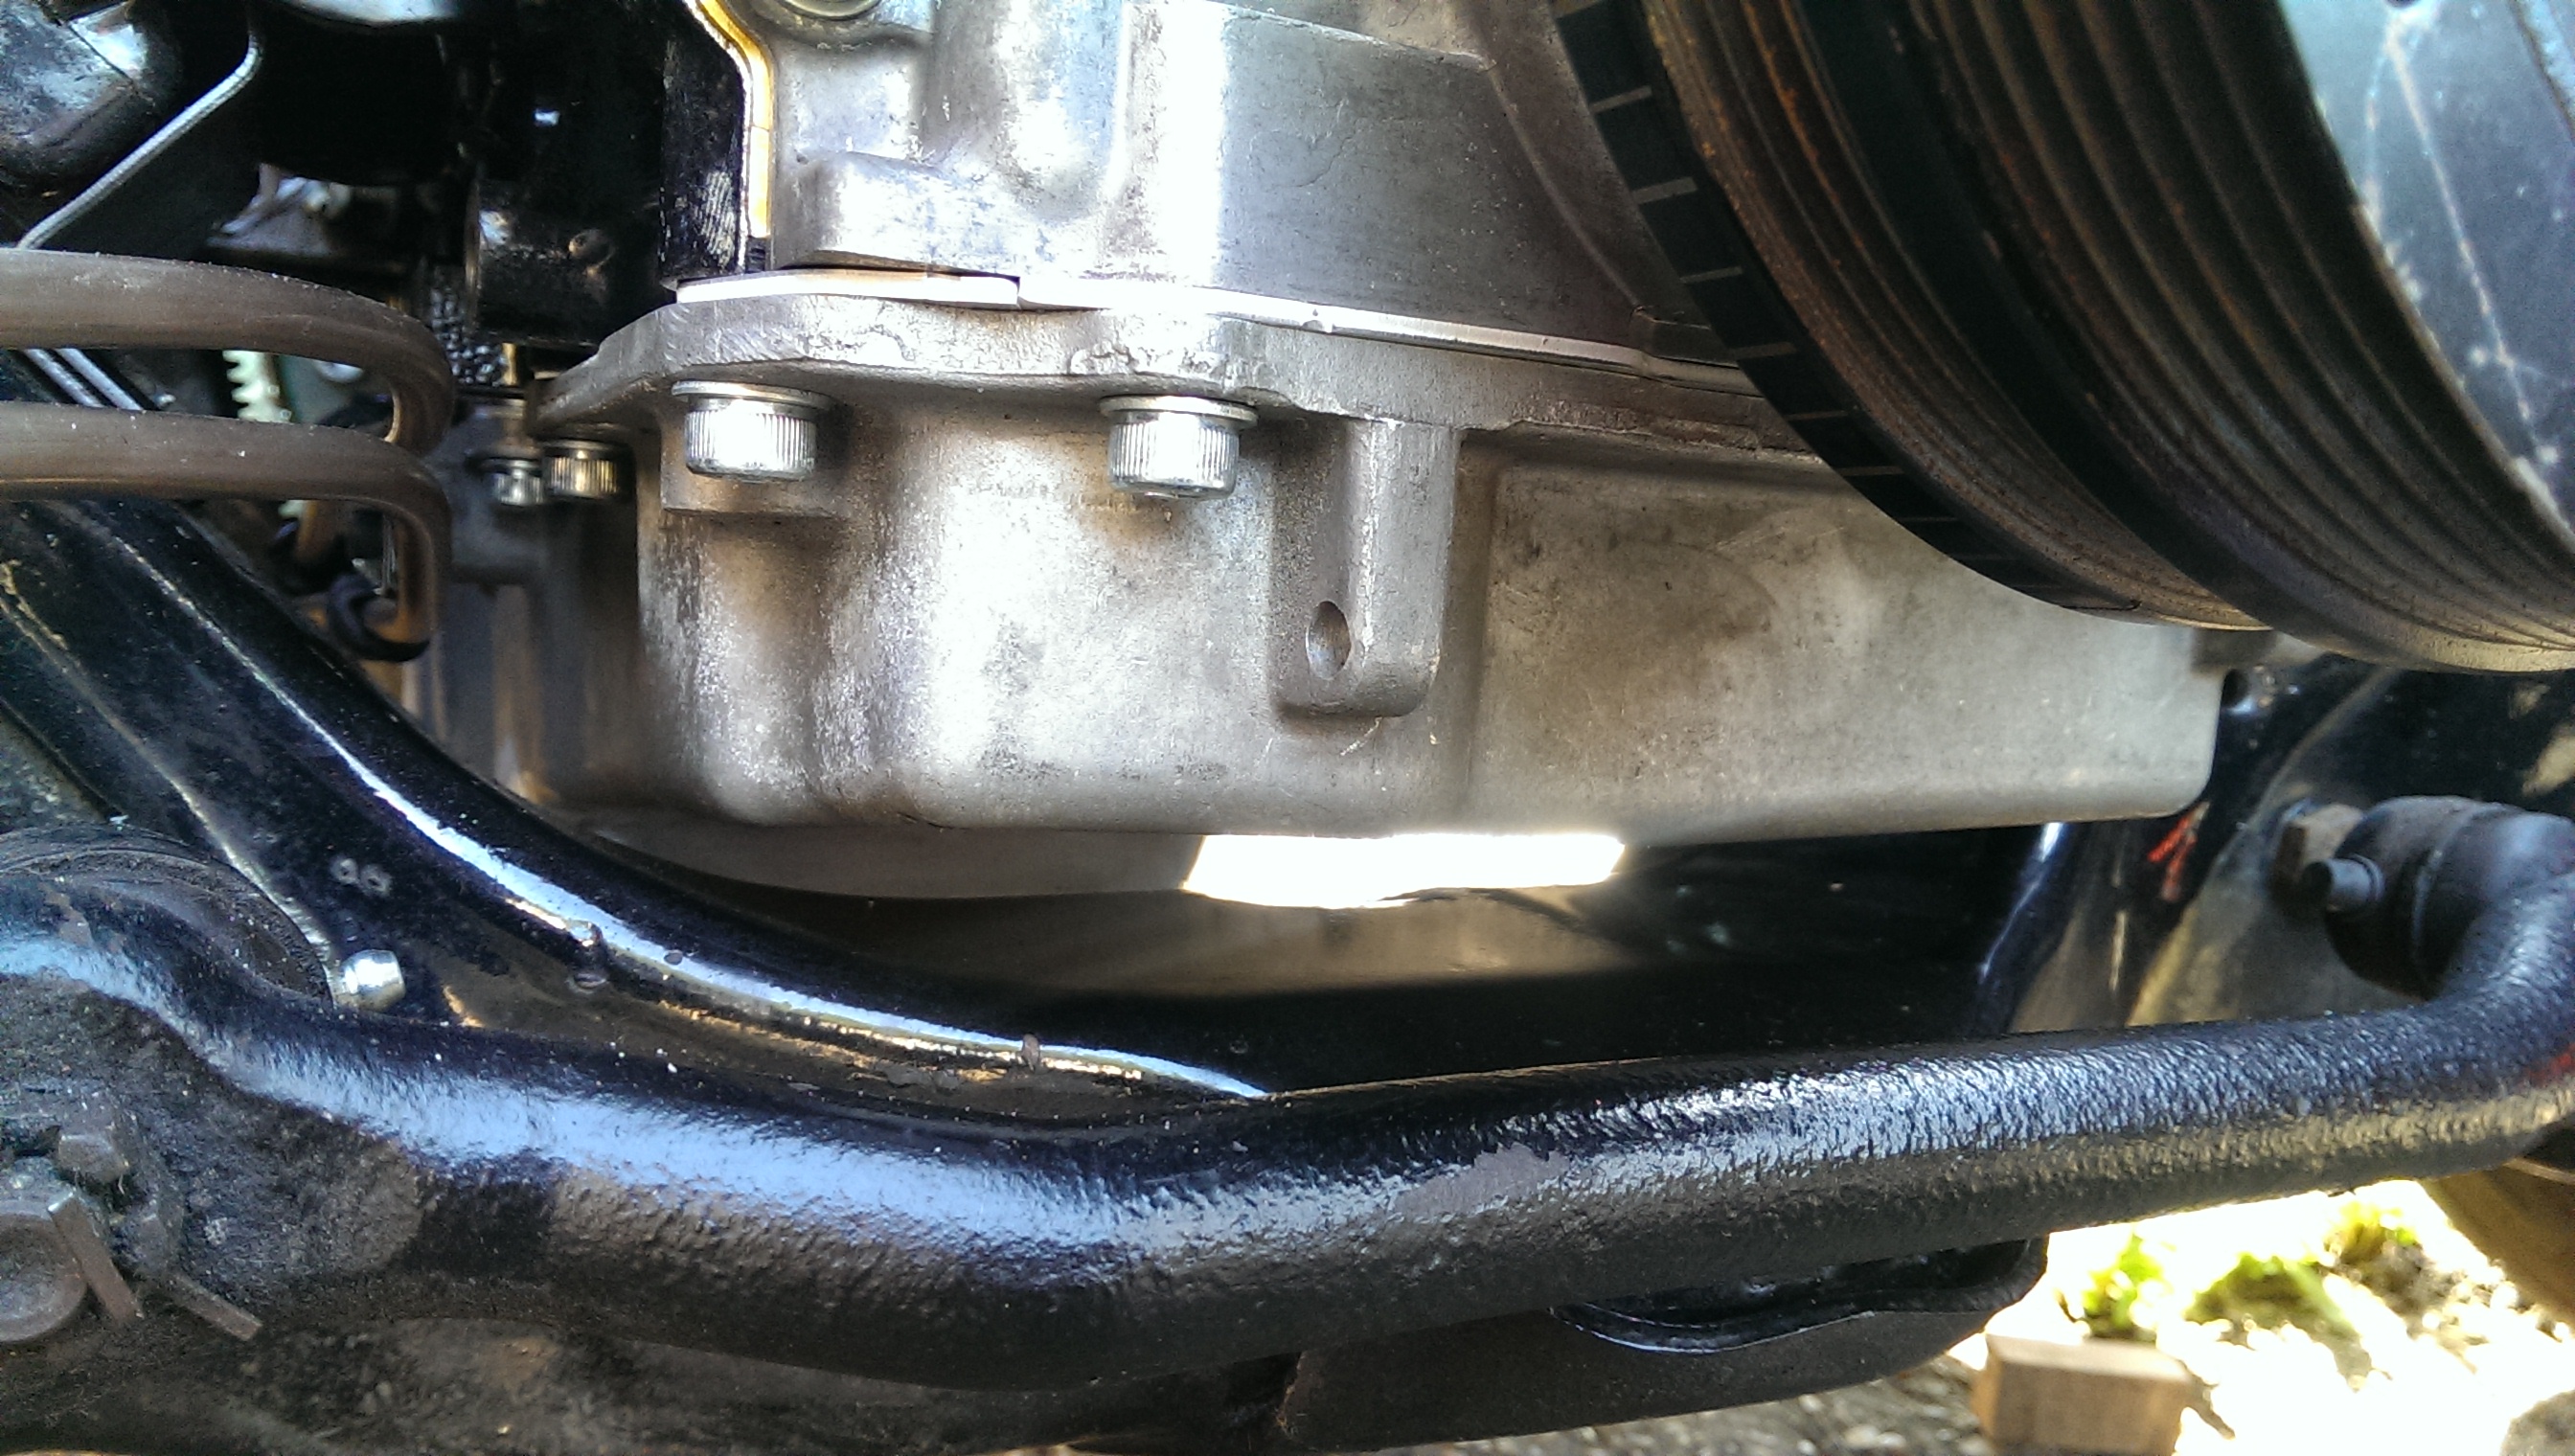
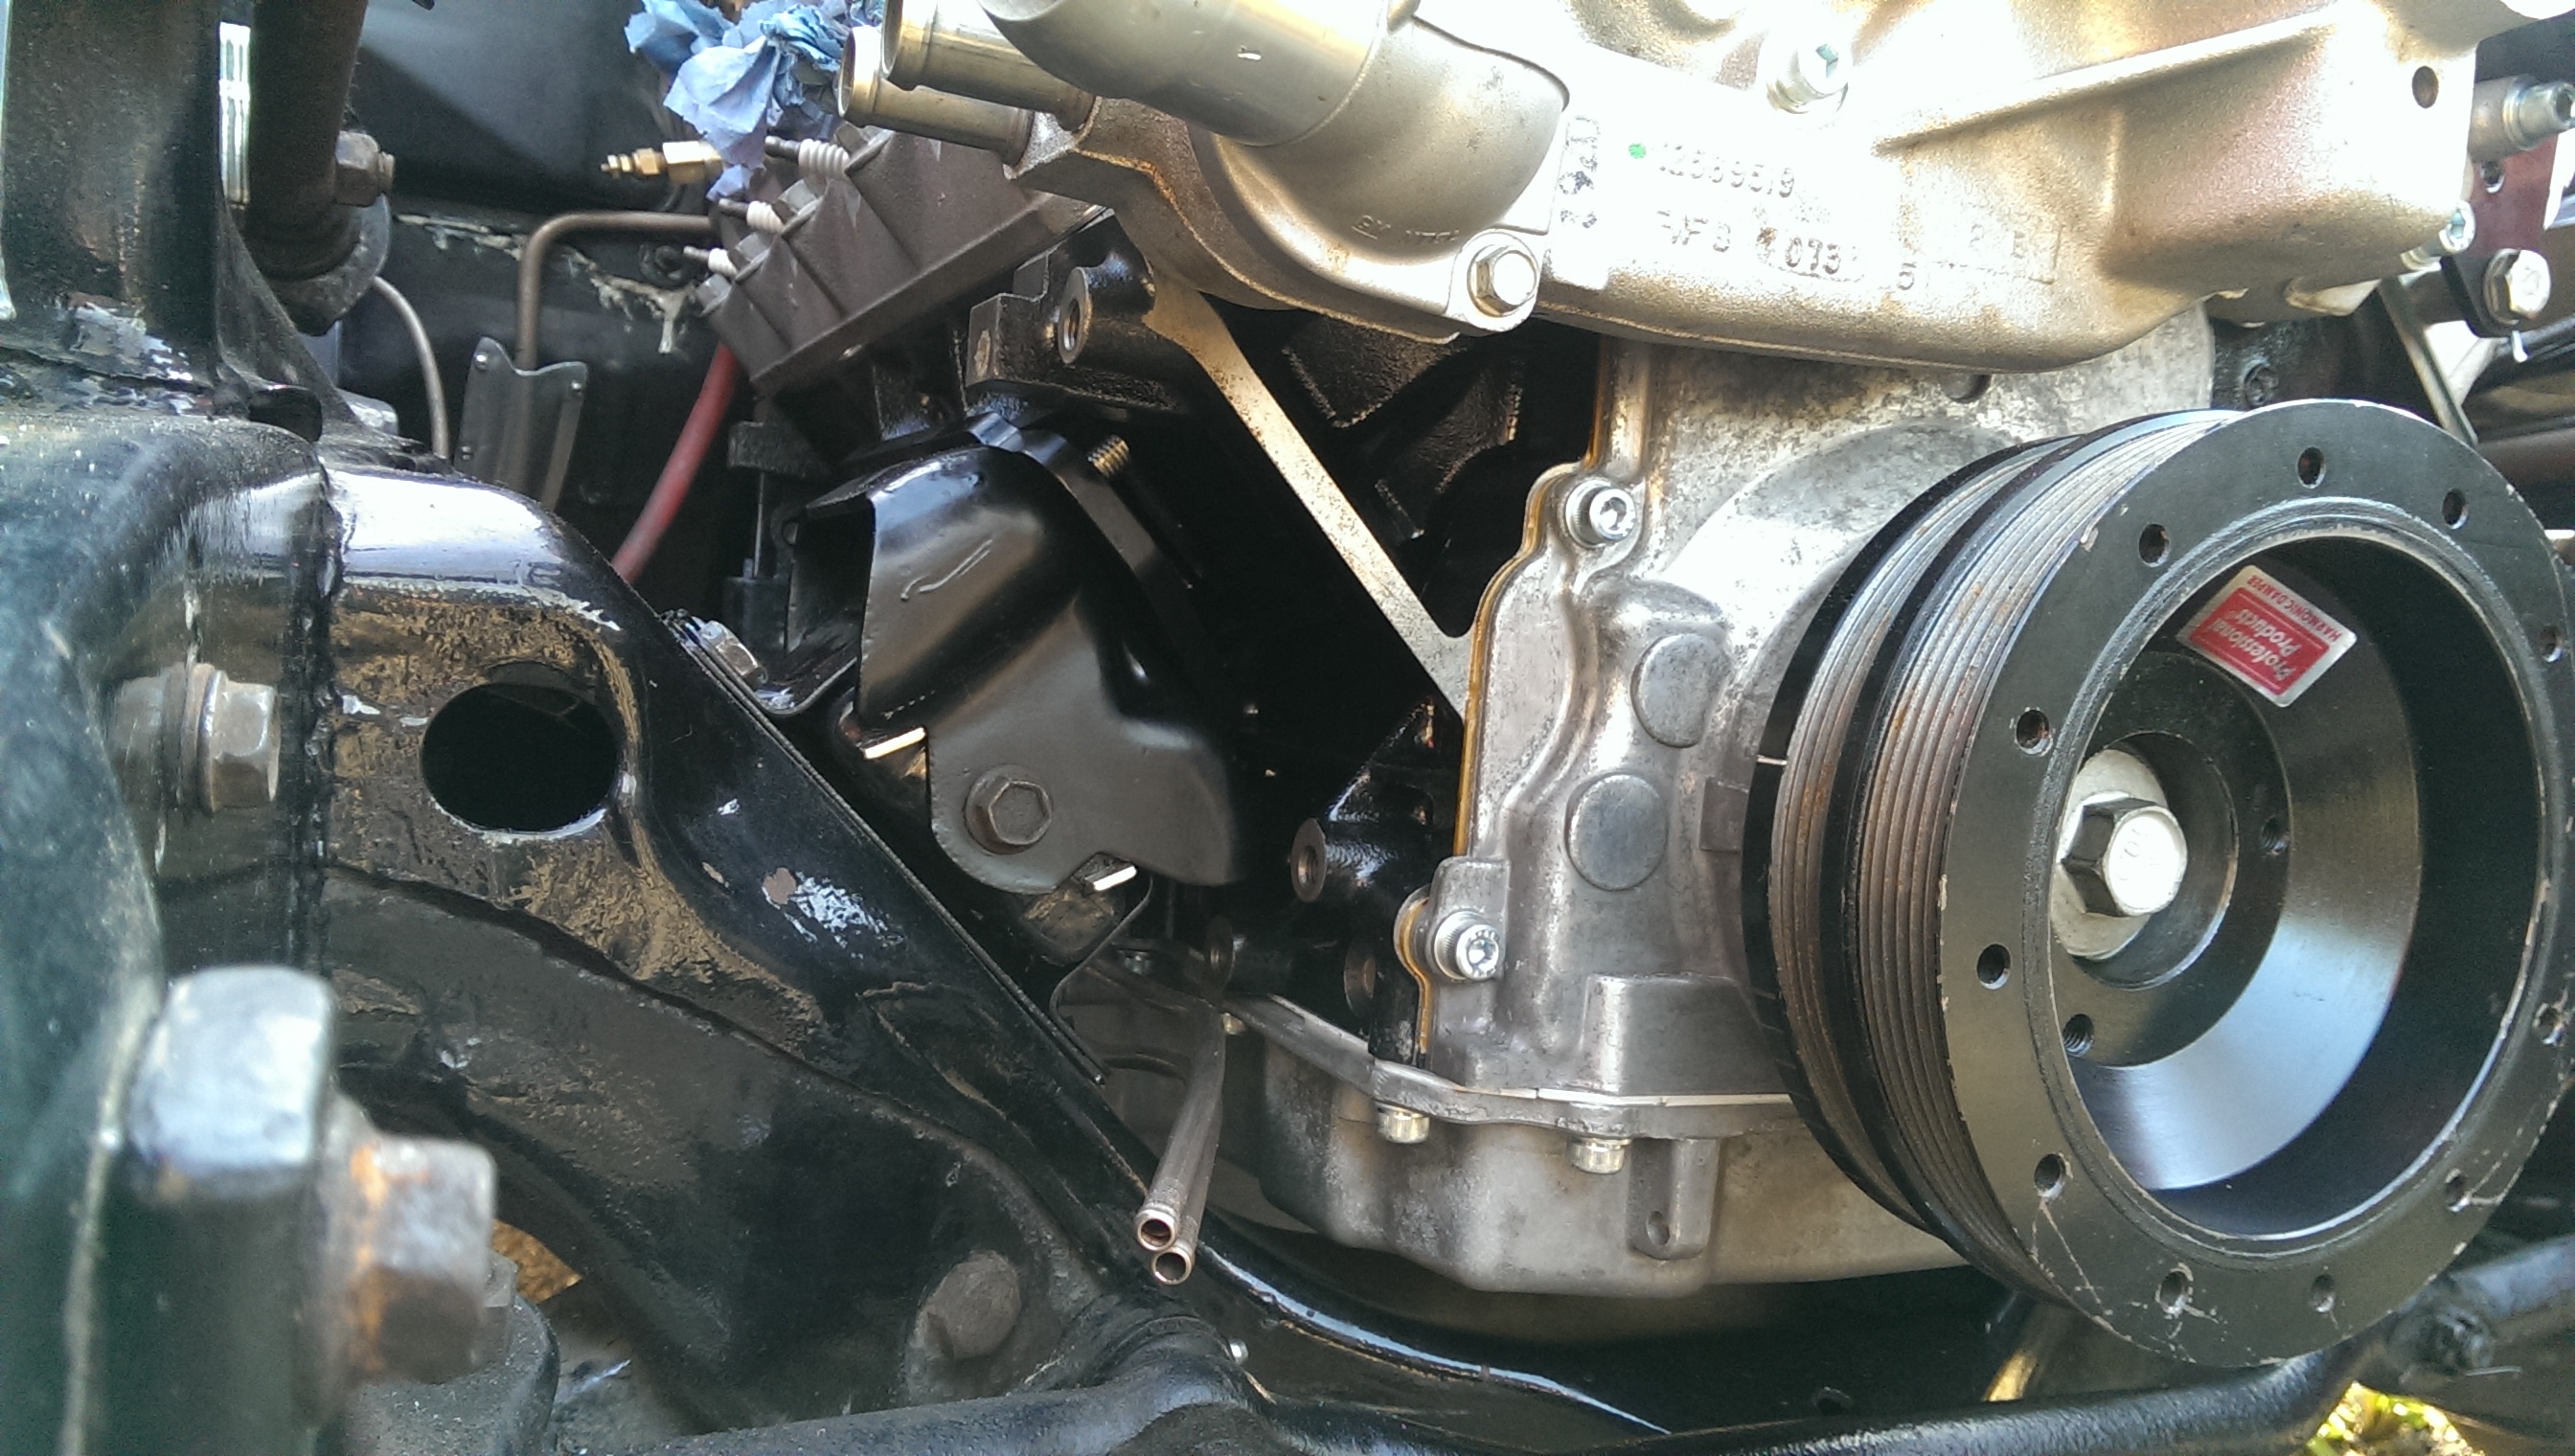
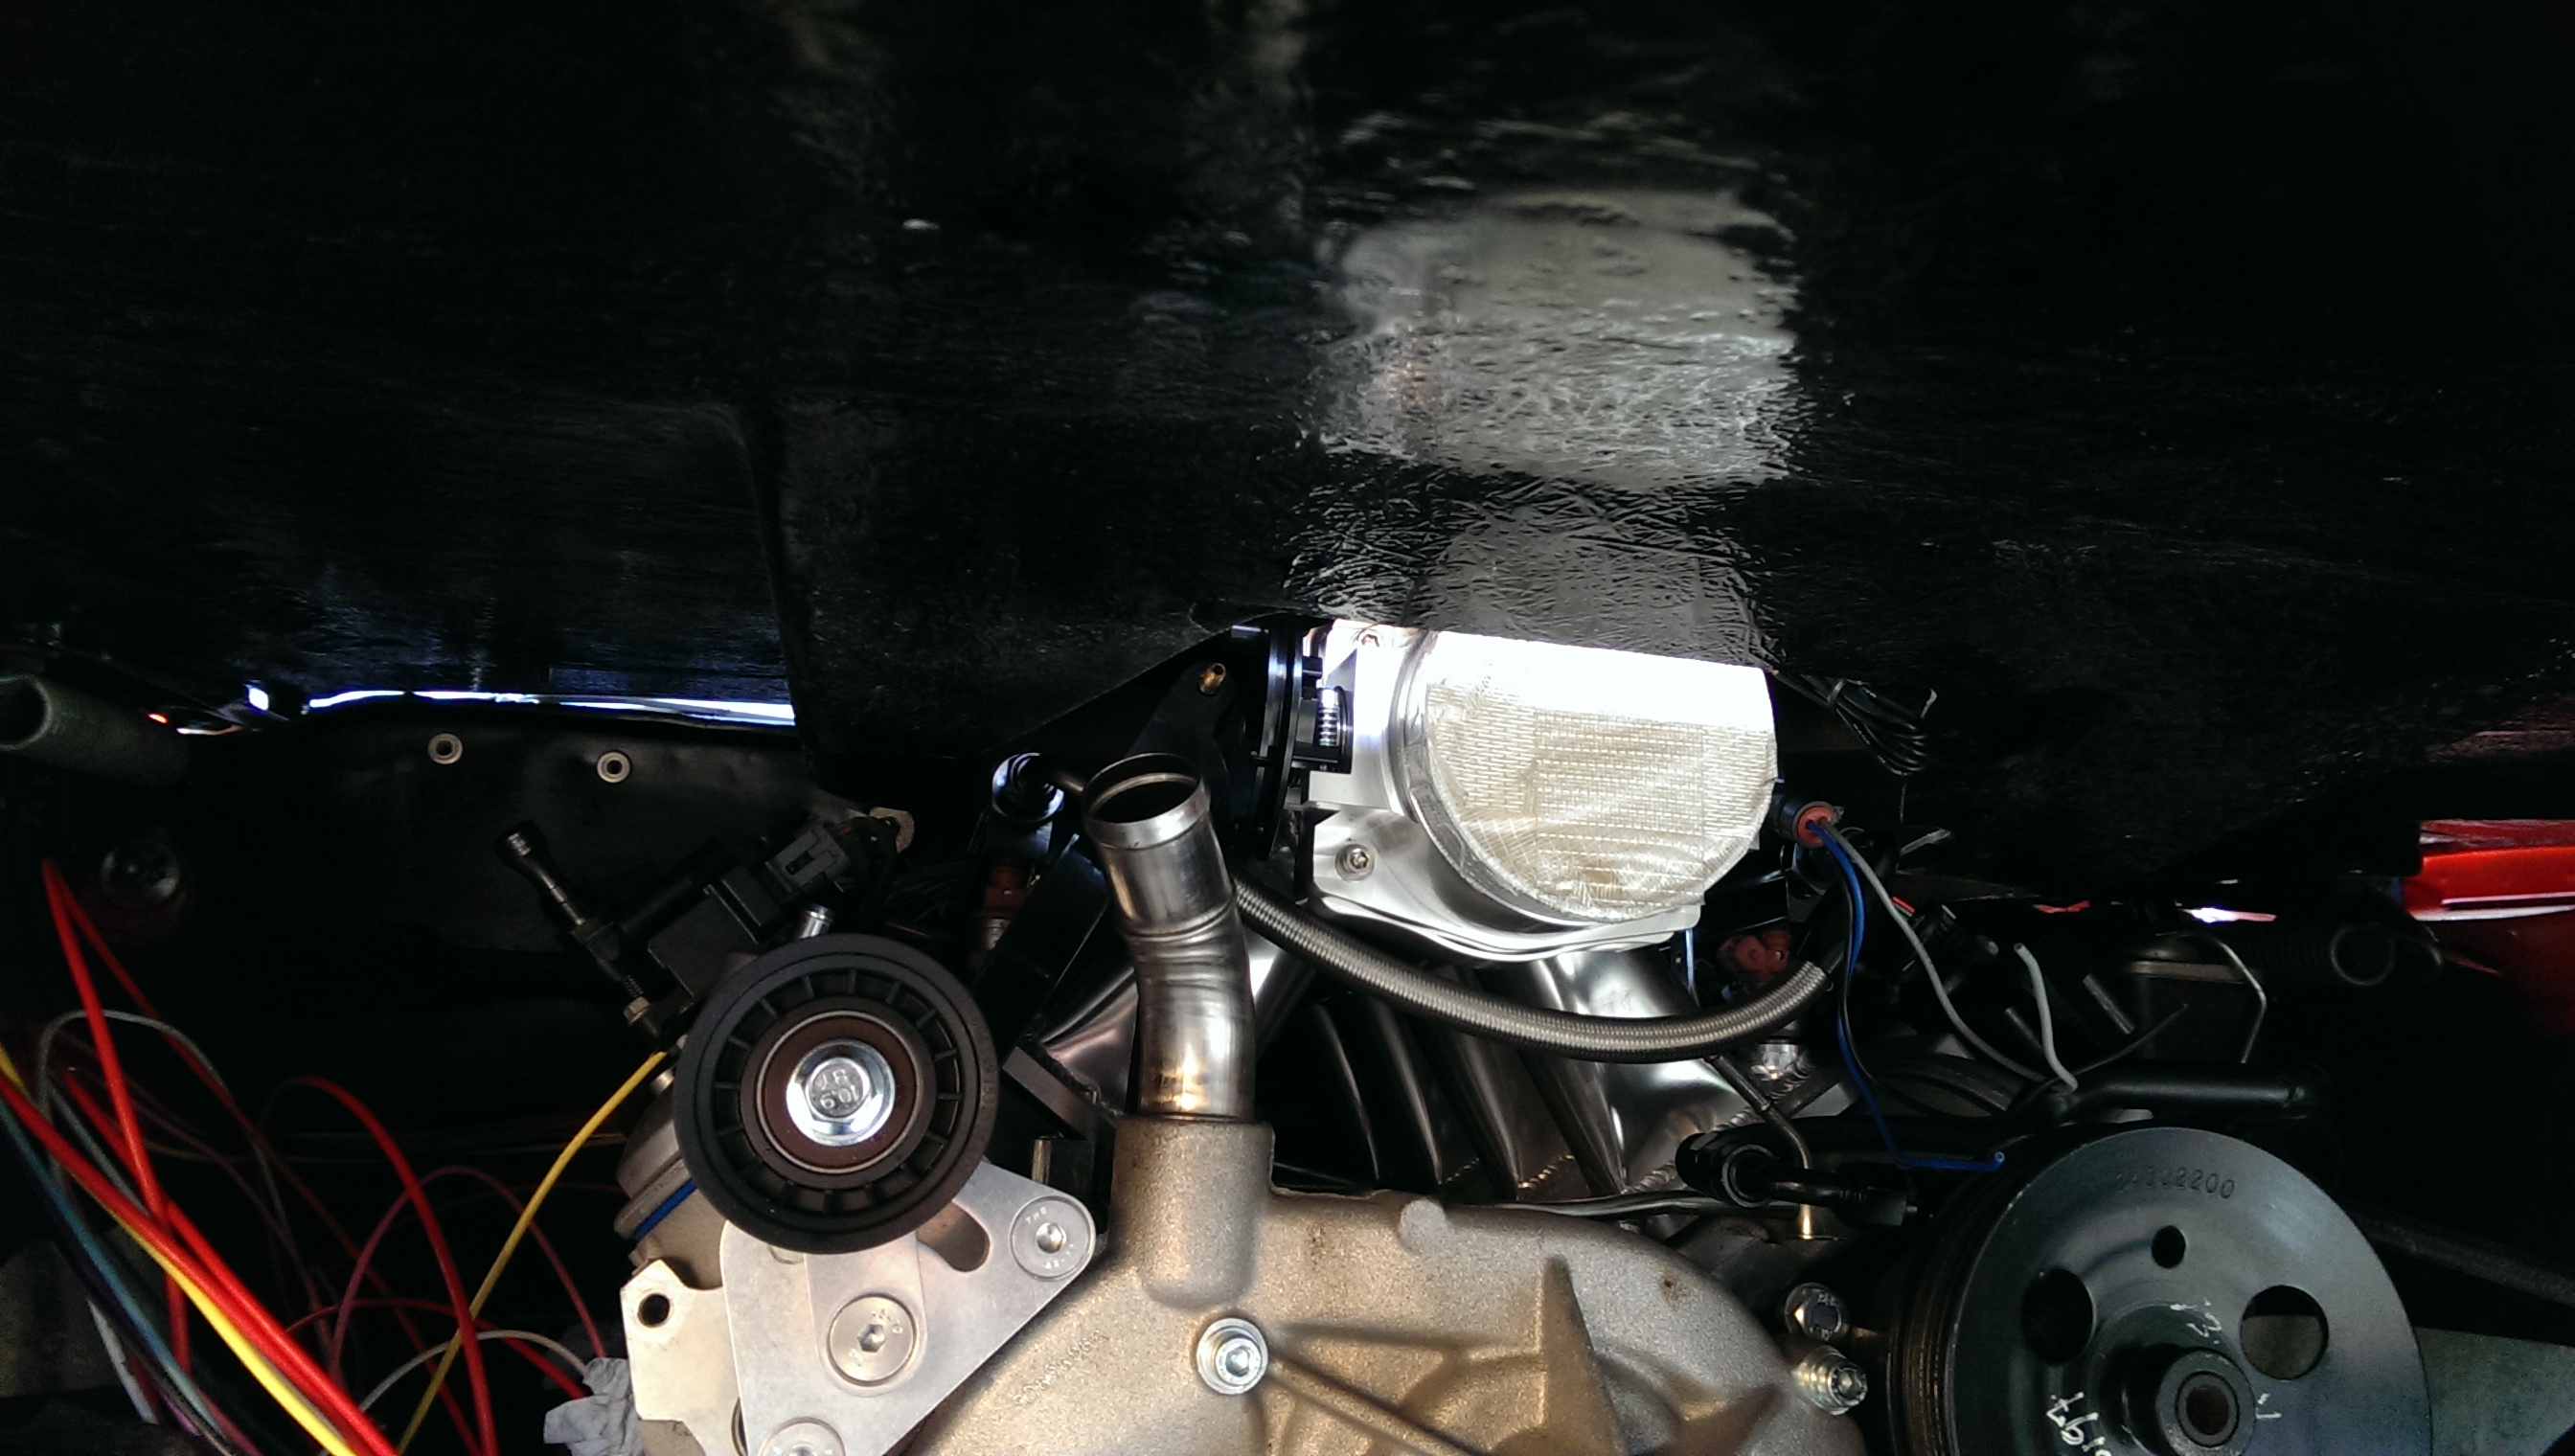
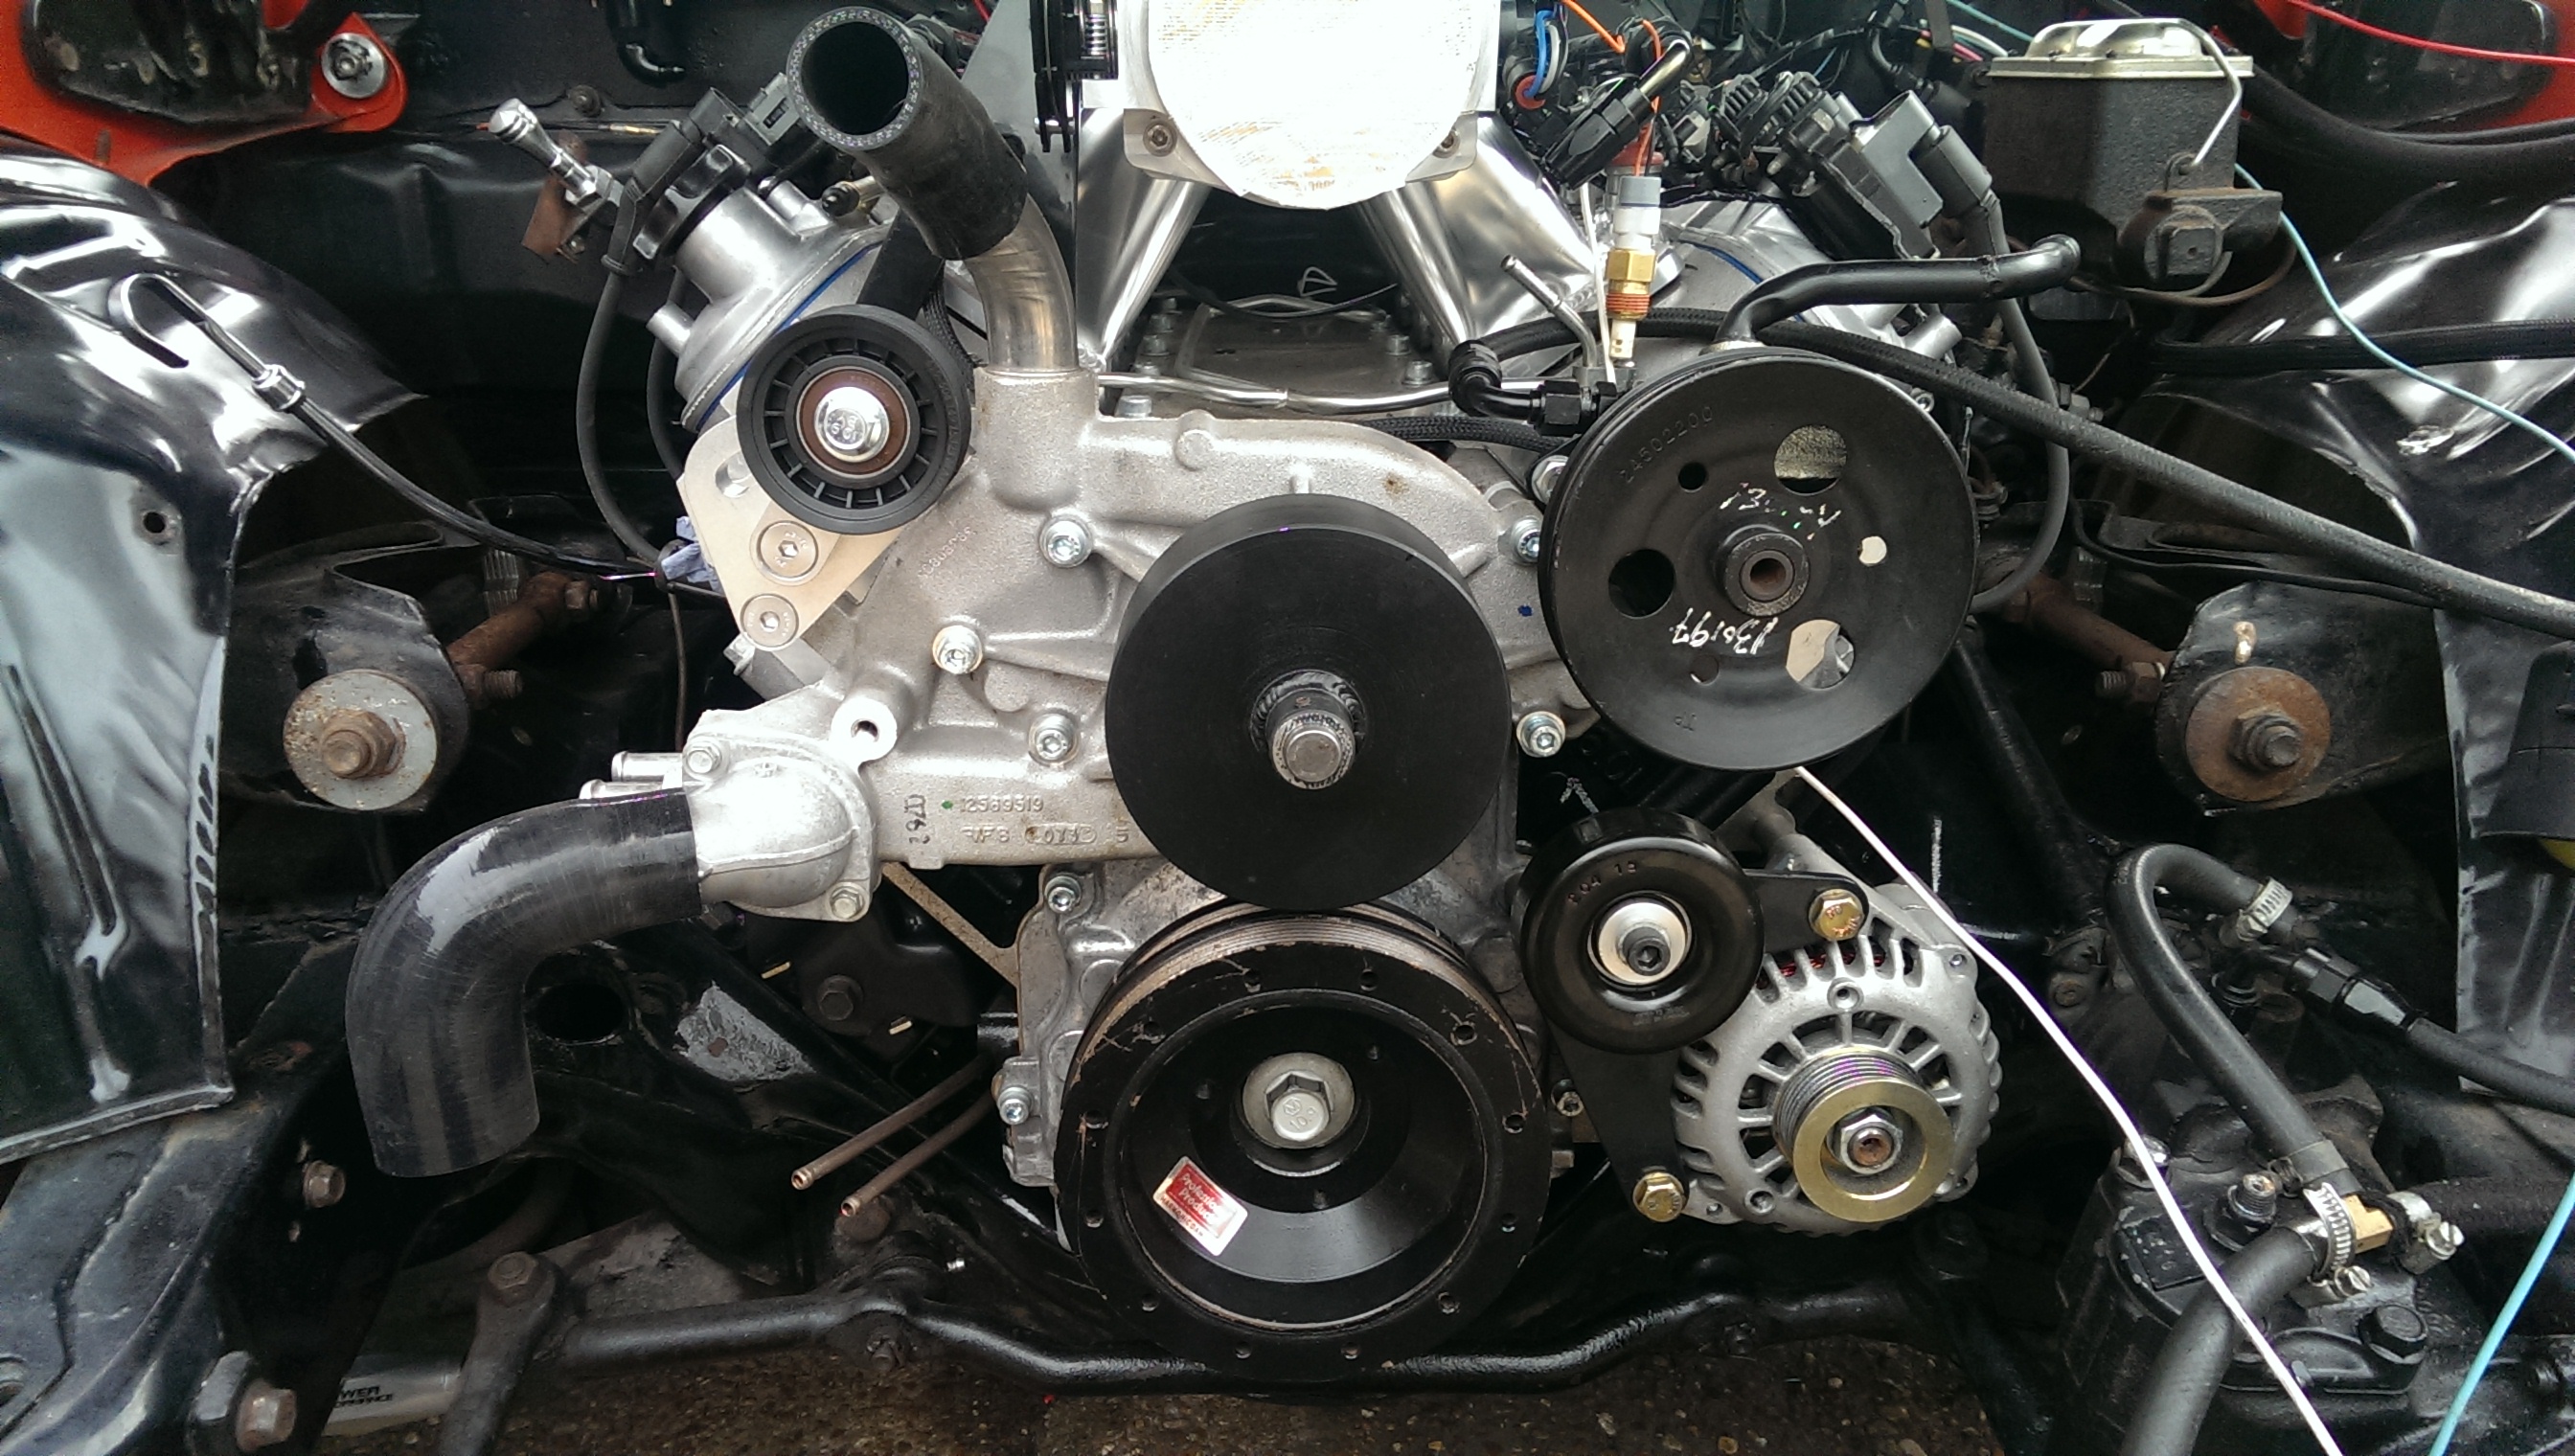
Next up I fitted the water pump and power steering pump, no real dramas there. The alternator is very close to the sub-frame but there is enough clearance for everything to work. I've left it off until I have primed the oil system as I need access to the port on the side of the block
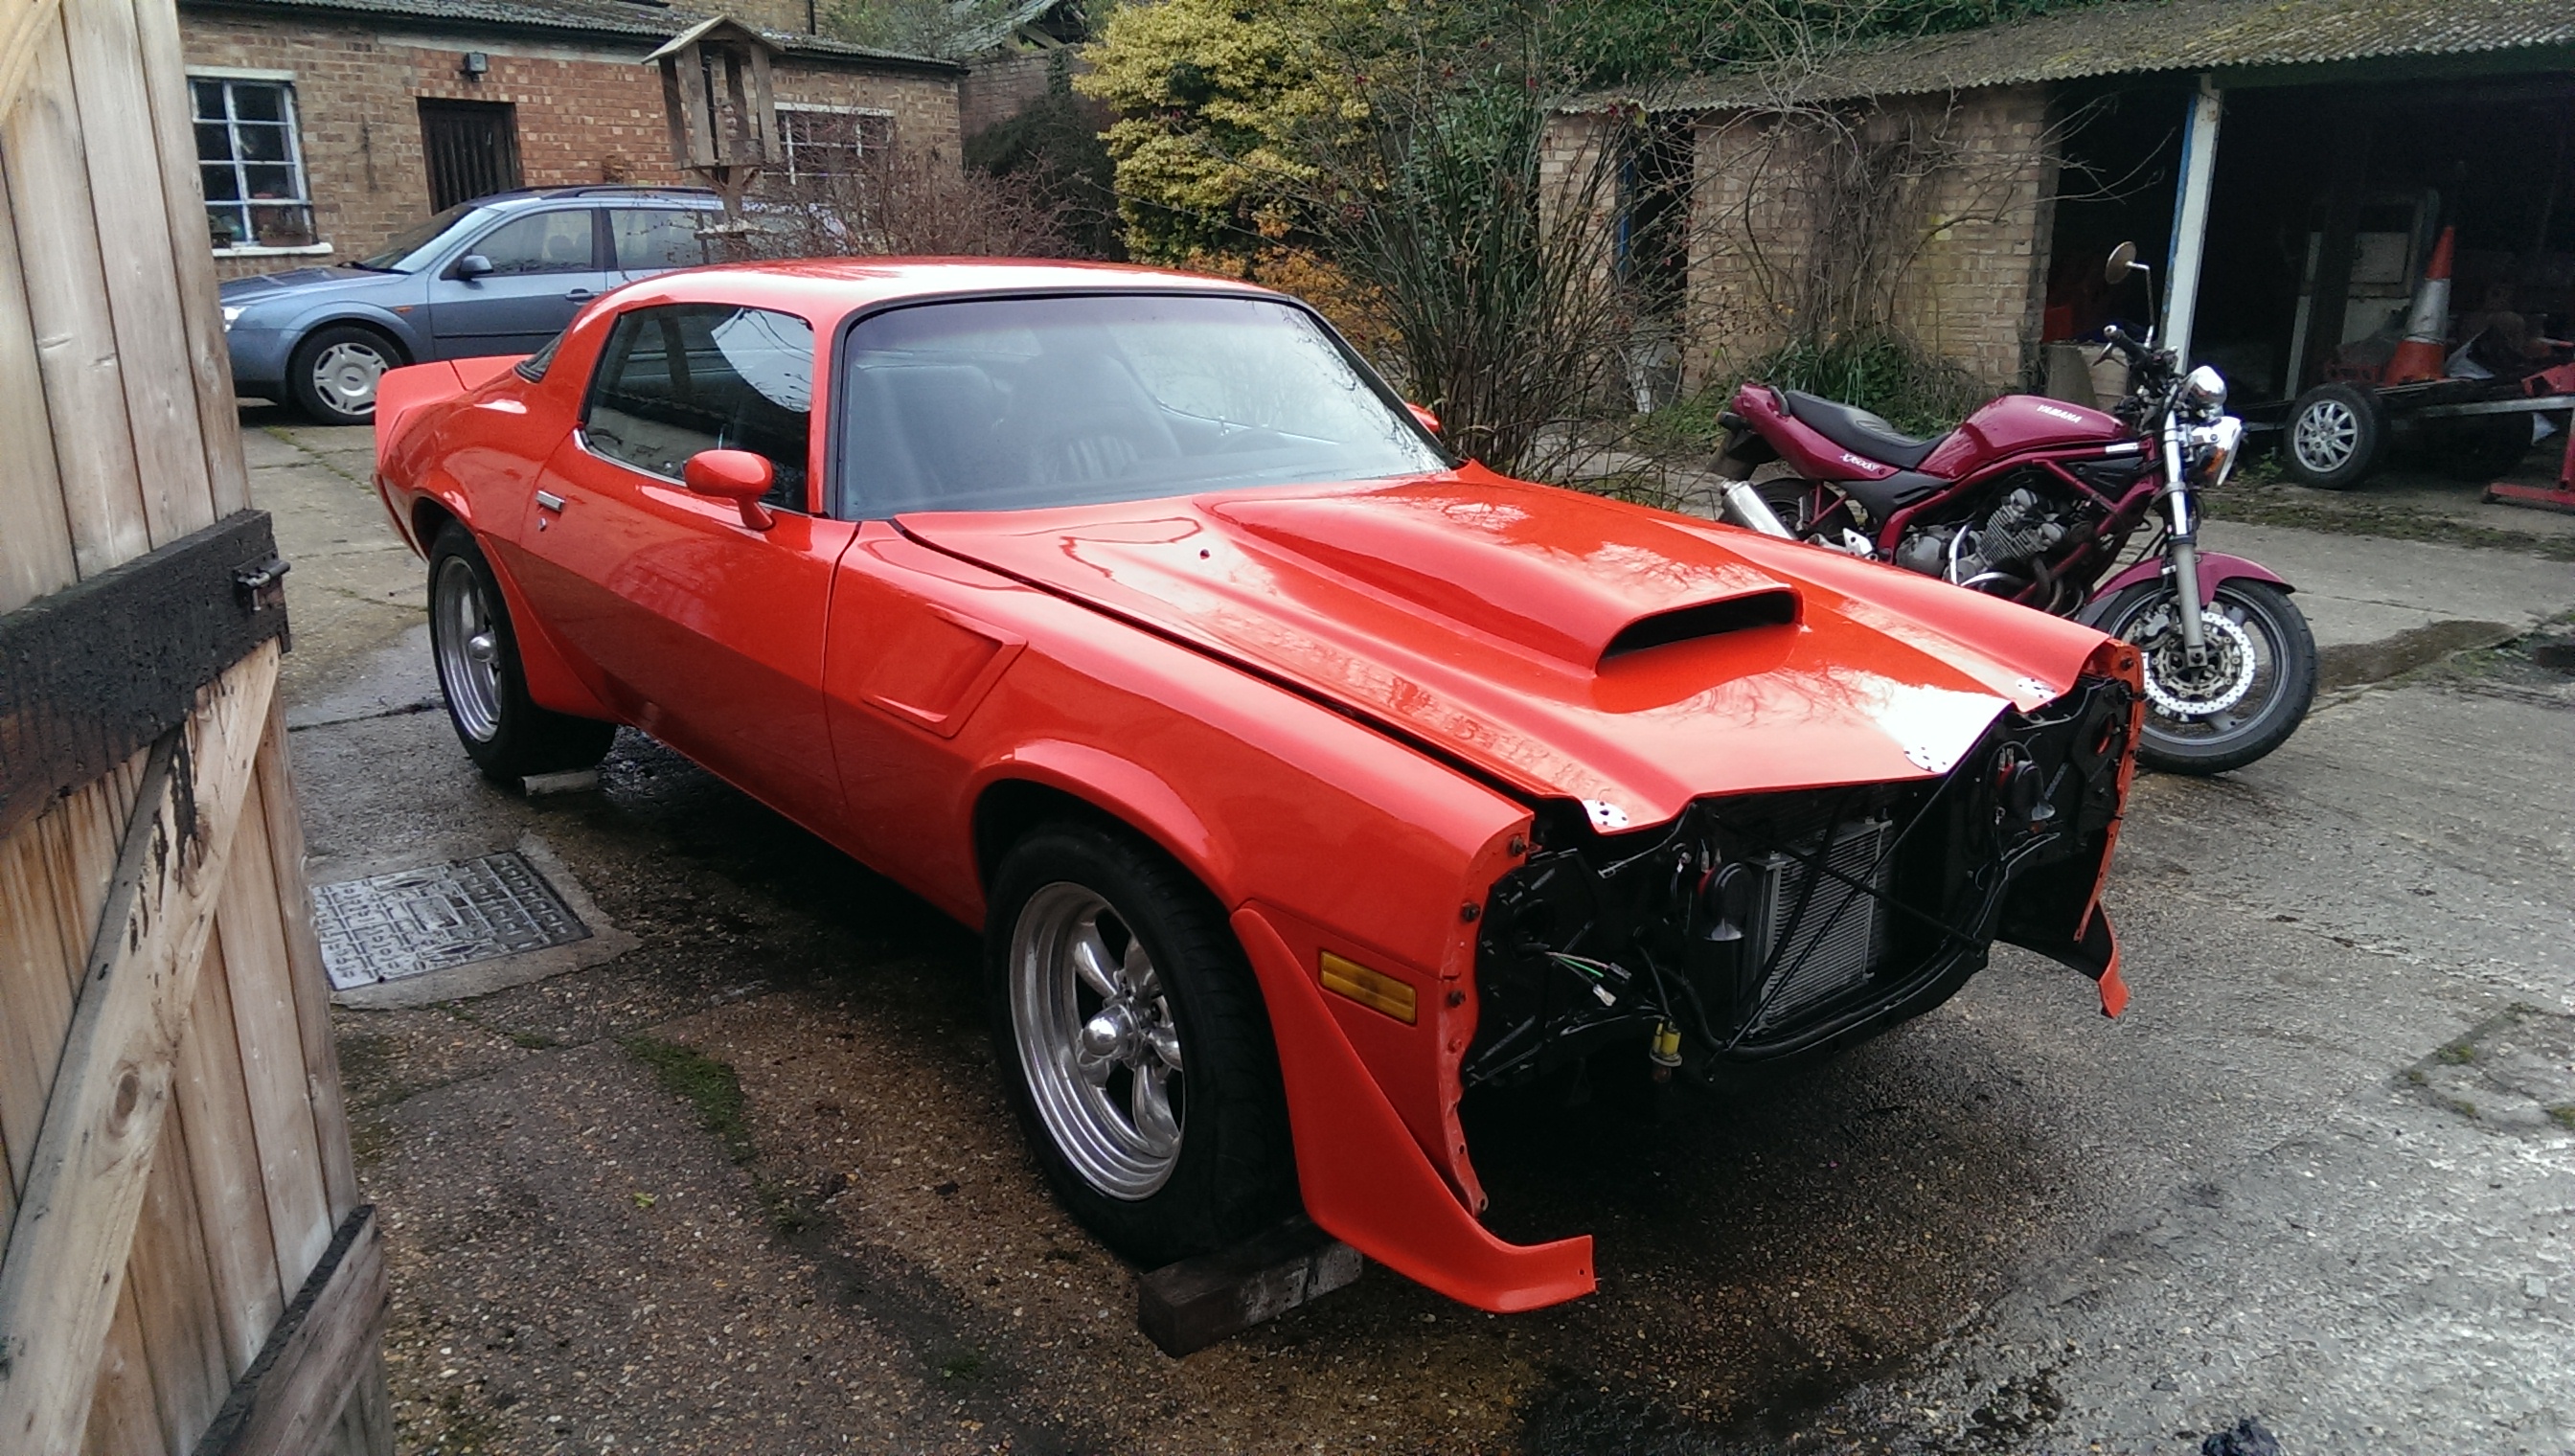
Last job was to refit the hood and chop a bit out to clear the intake, I'll need to cut some more once I have the hoses and filter fitted, but it should all sit under the scoop nicely
I reconfigured all of the mounts and put it all back together again. I also made a small adjustment to the idler arm and now have around 3/8" steering clearance! Yay!
Helped by a number of things, including moving the engine as far back as it will go on the mounts. I followed other peoples advice initially and set it in the 1" forward position. But I think it works nicely in the stock position.... this is using Hooker adapter plates.
After that I got the transmission crossmember installed, this confirmed the transmission is in the same place as it was with the small block. If anything it's slightly further back...
The the driveshaft and a few other bits were hooked up.
The 1st gen headers just do not fit, so I need to get some second gen correct ones. More expense!
The oil pan that I modified hangs just below the crossmember - I made this to the same height as the CTS-V pan knowing that this would happen. I don't run the car too low anyway, so it should be fine.
Next up I fitted the water pump and power steering pump, no real dramas there. The alternator is very close to the sub-frame but there is enough clearance for everything to work. I've left it off until I have primed the oil system as I need access to the port on the side of the block
Last job was to refit the hood and chop a bit out to clear the intake, I'll need to cut some more once I have the hoses and filter fitted, but it should all sit under the scoop nicely
03-14-2016, 04:05 AM
#12
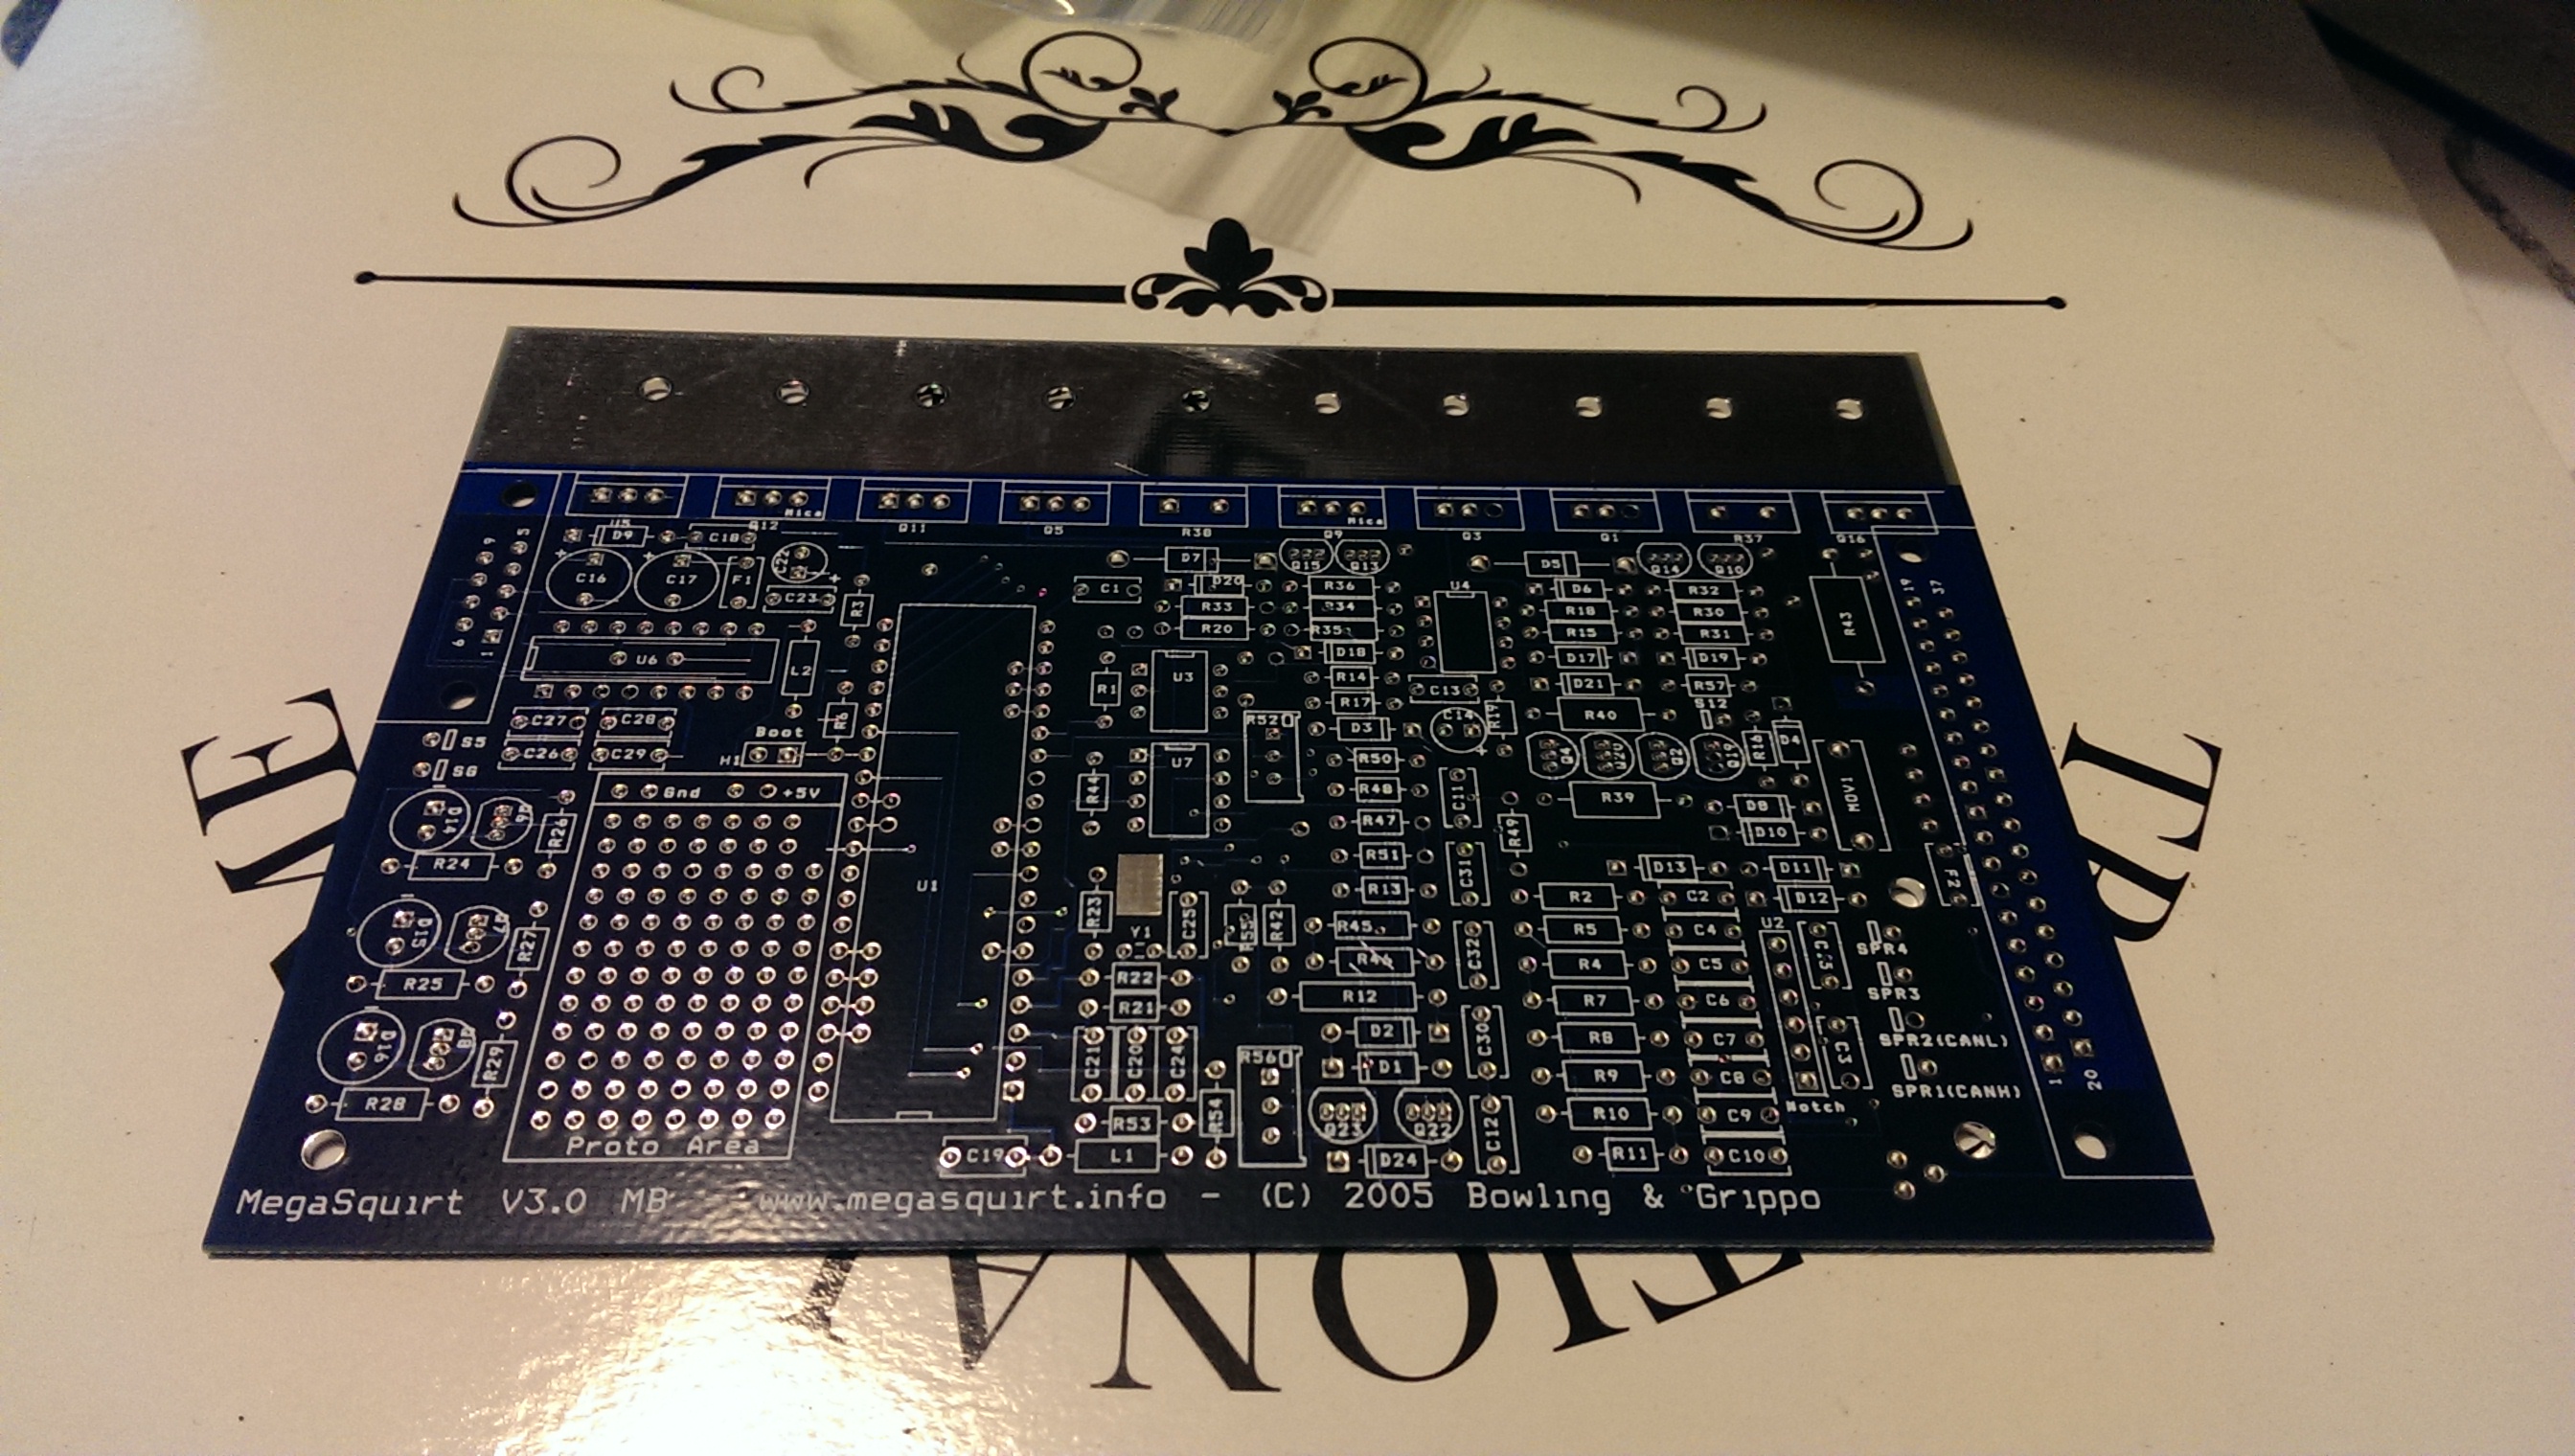
After its too cold and dark outside I've been working on building the ECU up for this. I'm using Megasquirt 3x so I can run sequential fuel and spark. It's got more features than I need but it's future proof. It will also communicate directly with my Megashift transmission controller via CAN so it keeps things simple.
Take one bare board
Do a bit of electrical witchcraft
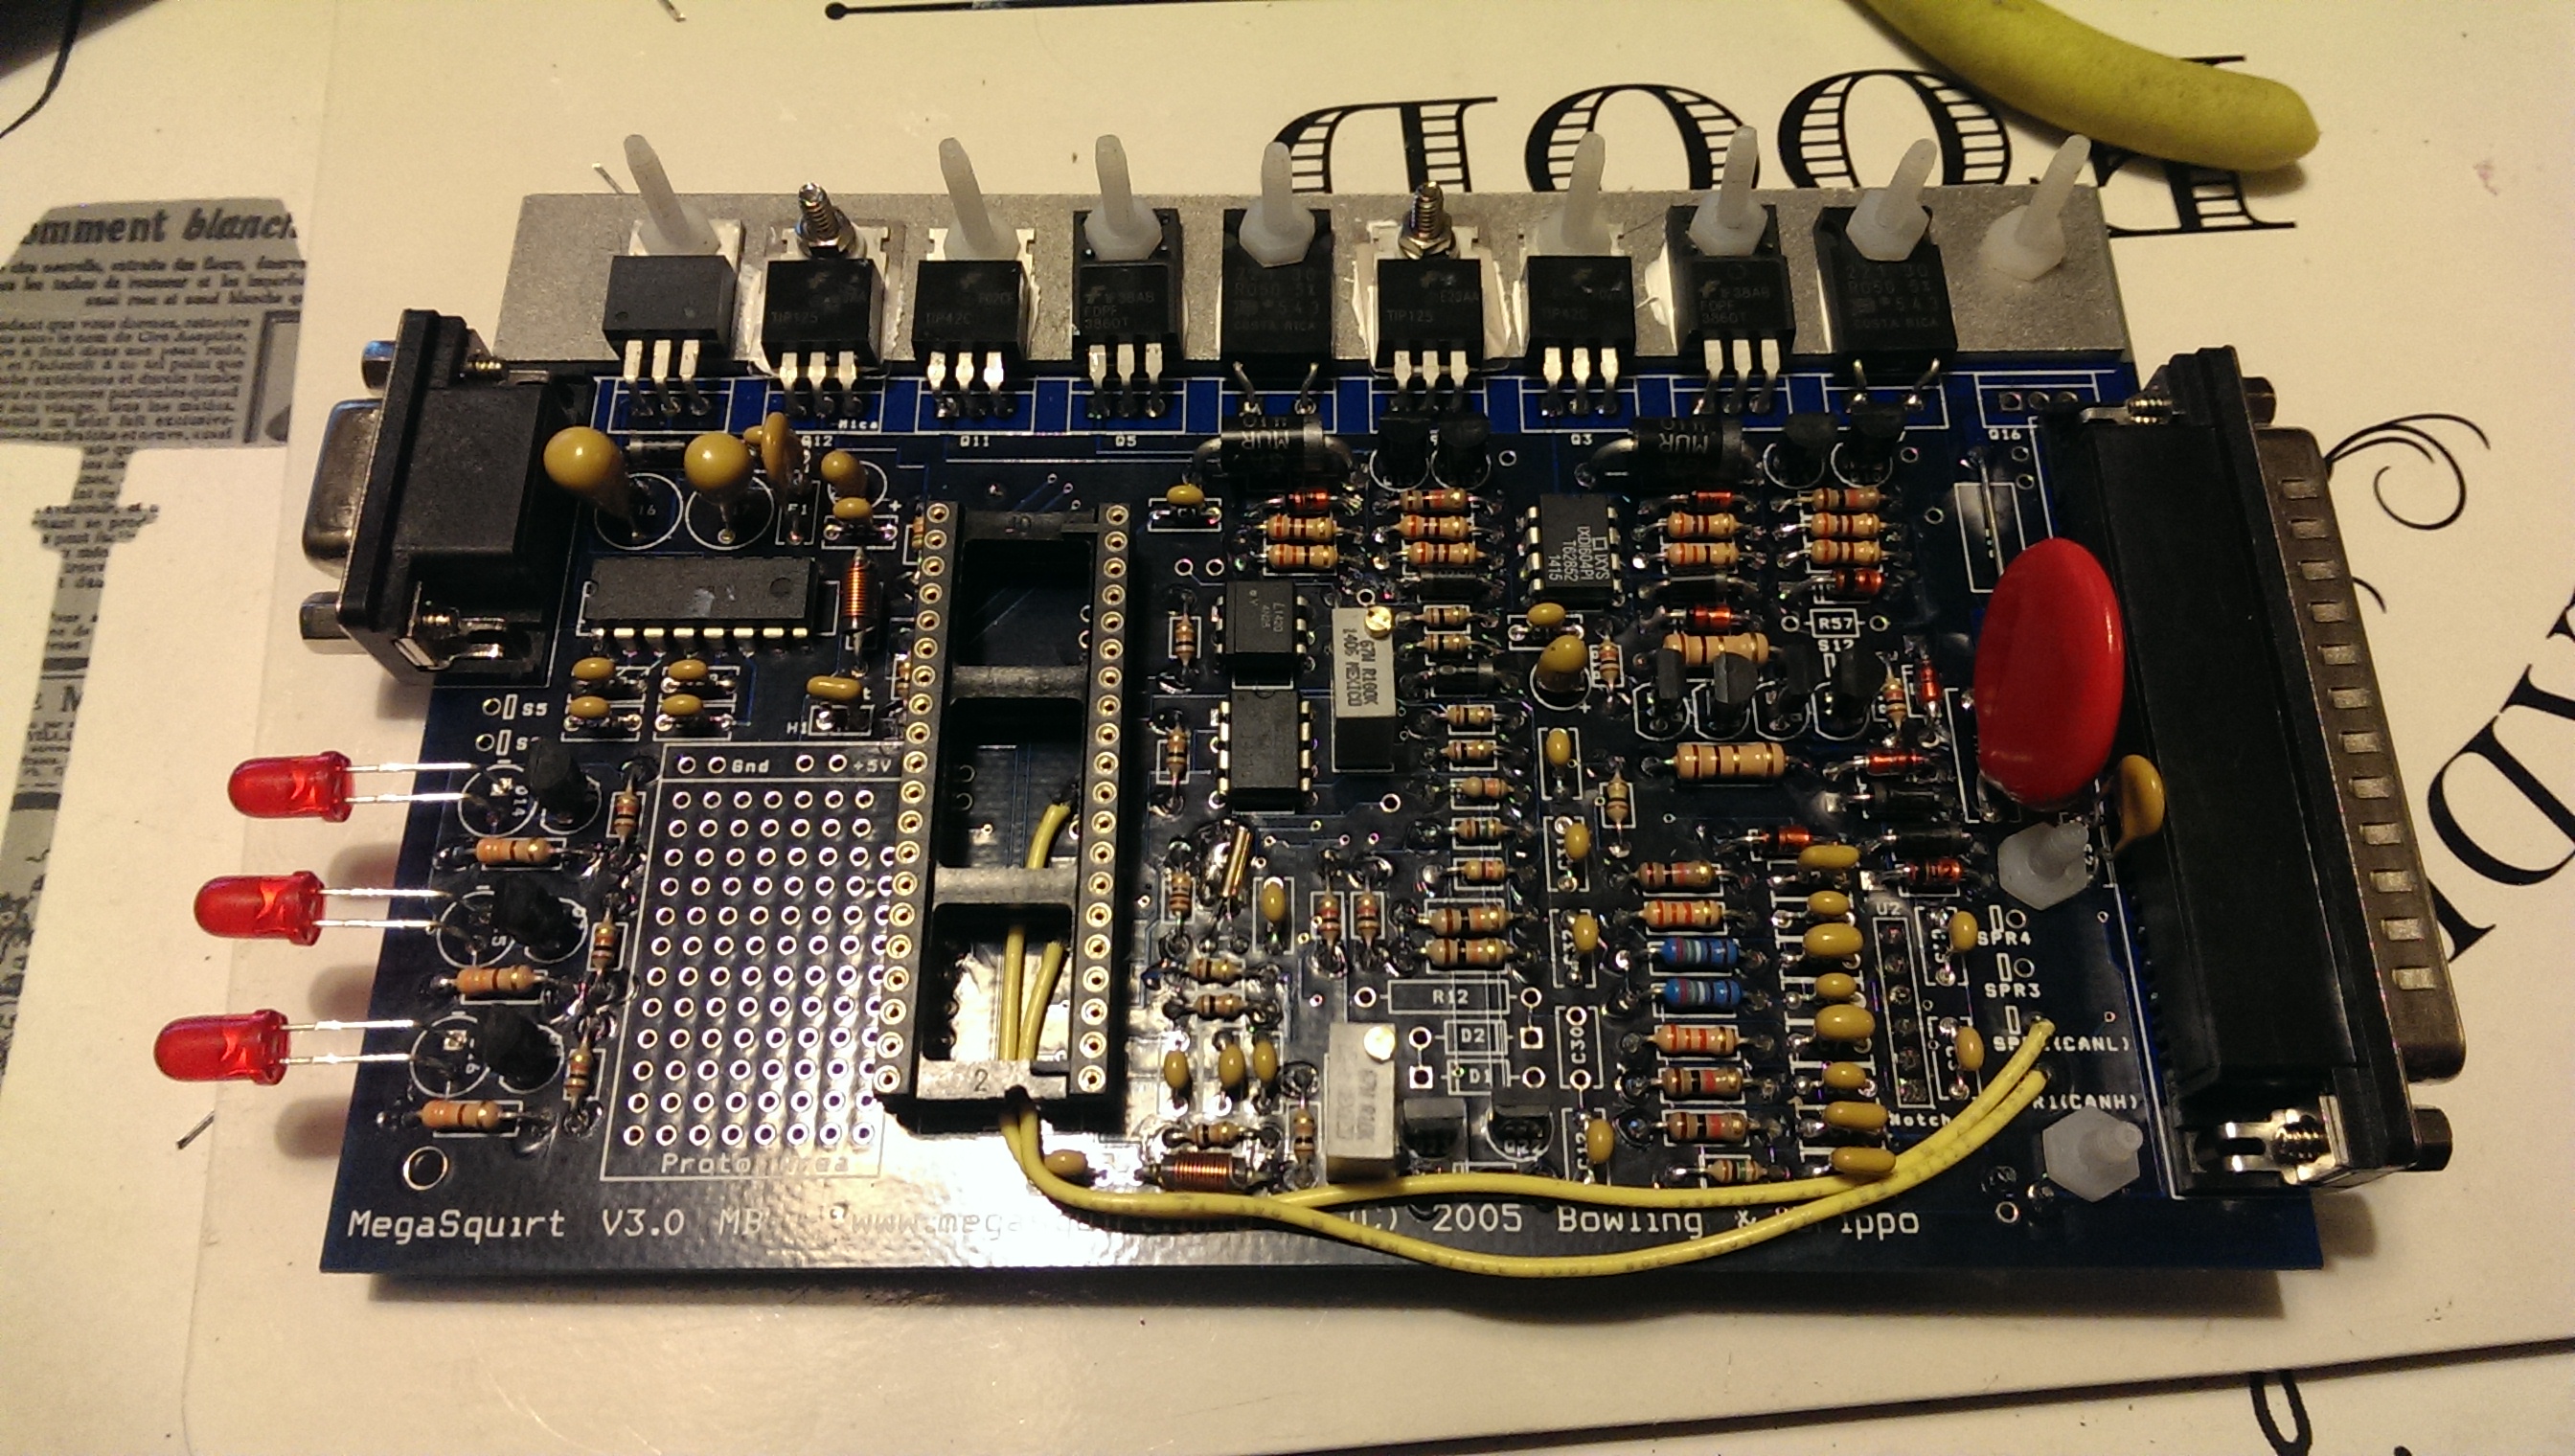
At the stage of testing and cleaning the board now, before finally fitting the processor and cramming it all into its case.
Take one bare board
Do a bit of electrical witchcraft
At the stage of testing and cleaning the board now, before finally fitting the processor and cramming it all into its case.
03-17-2016, 02:46 PM
#13
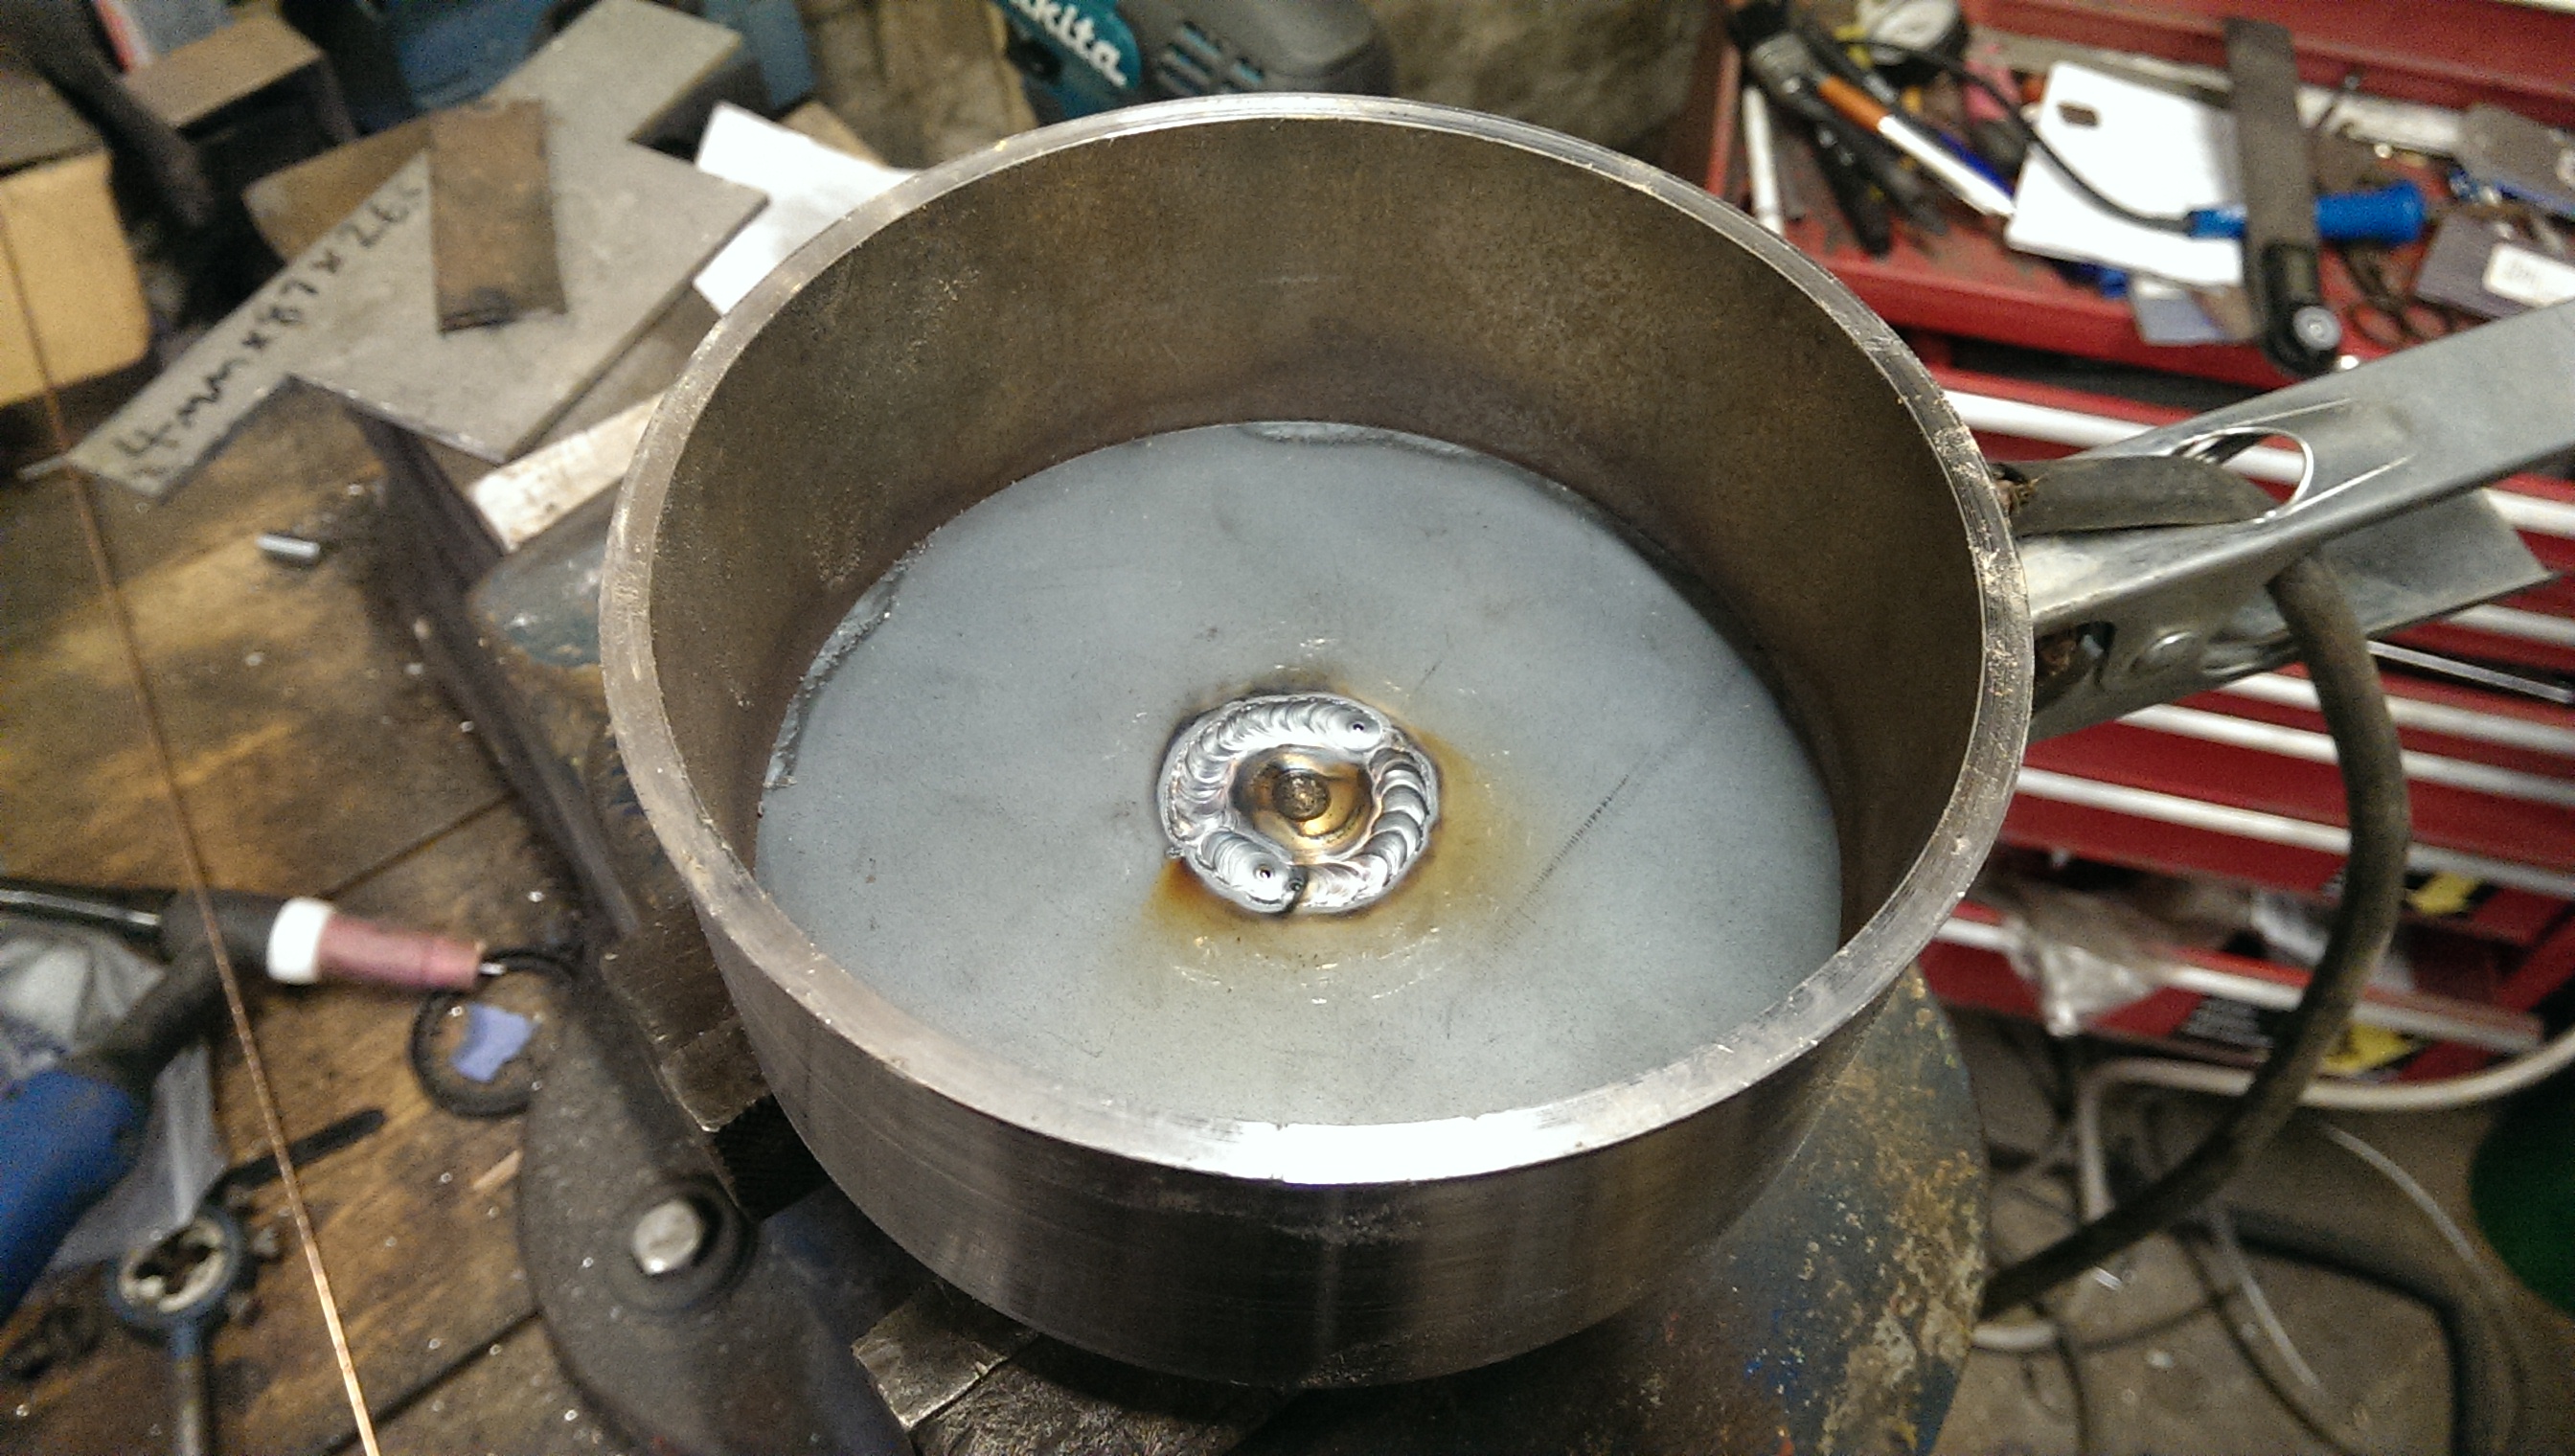
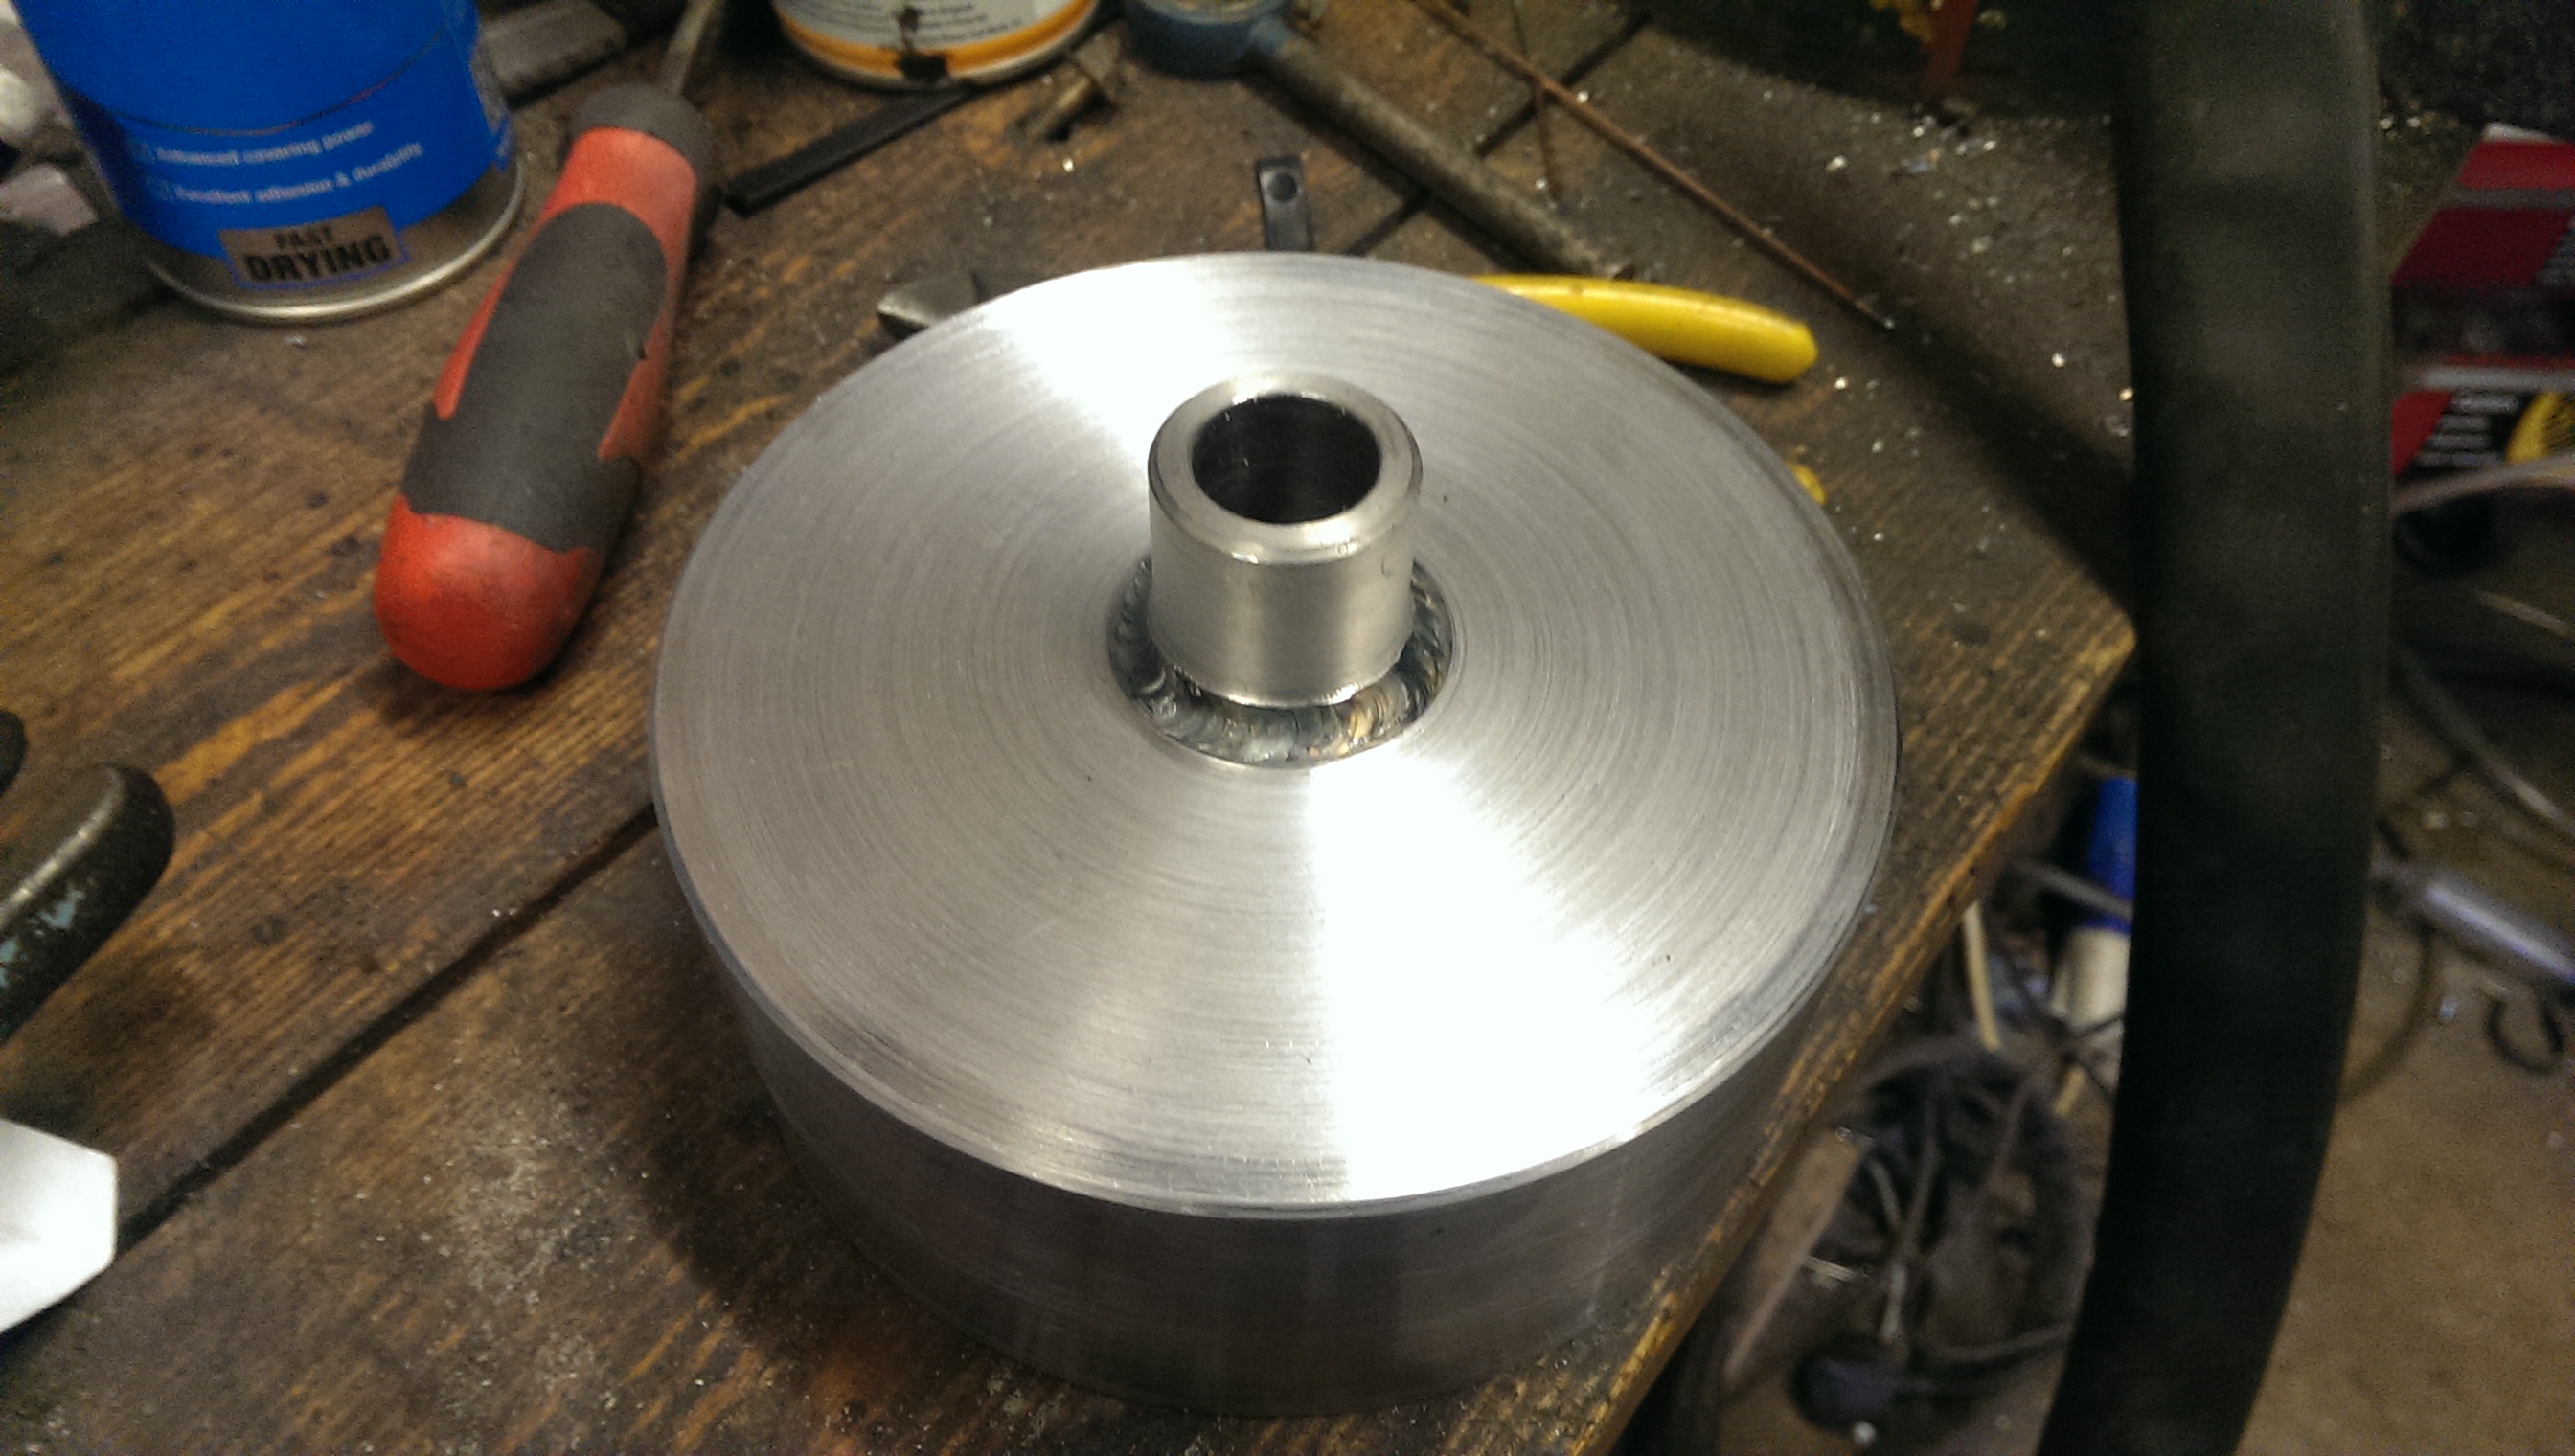
The last couple of evenings I've made the water pump pulley. I had a brand new water pump with the engine, but it had no pulley fitted. Seemed silly to spend a fortune on a new pump when I could make a pulley easily.
Used a piece of thick walled steel pipe, had a blank laser cut to fit in the end and welded it in. Then turned up a boss to fit in the centre before putting it all in the lathe and skimmed it up all over. I welded the plate to the tube inside too. I've just painted it and I'll fit it over the weekend. Took a couple of hours
And this evening I've made myself a priming tool. The LS has no distributor, so you can't prime it like the old SBC. You can buy tools for about $250 to do it, but for a few bucks you can make your own. Loads of ideas on youtube for different options. I had an old disposable welding gas bottle, which has a 1 litre capacity. Bigger would have been better, but it will just take a bit longer with this one as I'll have to refill it a few times, most people seem to use about a gallon of oil during the priming process.
I just drilled and tapped a few holes in it (it's good thick wall section) and screwed in some hose fittings and some for a sight gauge too. I'll unscrew the top airline fitting, fill it with oil and connect it to the port on the side of the block with an adapter before connecting it to an airline to pressurise it with about 25psi to force oil around the block, fill the lifters and get oil up to the rockers.
Pretty simple, and I used stuff I had in the workshop.
03-19-2016, 01:11 PM
#14
I've spent all day wiring again, and the engine is completely wired up. Hopefully I'll be able to check the function of everything tomorrow if I can get some power on the loom. Still have quite a lot more to do yet, but shouldn't be too long before it's ready to be fired up...
04-02-2016, 01:29 PM
#15
Had a good few days doing odd little jobs. Got the fuel tank back in. Made the mount for the new fuel pump and prefilter.
Fitted the pushrods and the motor and primed the oil system through the port on the side of the block. Mounted the alternator and wired it up. Measured up for the belt too.
Mounted the solenoid in the trunk and hooked up the battery. Cranked it over to check I was getting a signal to the ECU and it all look ok so far. Had some issues the with the transmission controller, but seem to have fixed that.
Mounted the new wideband controller in the dash and tested it. All ok.
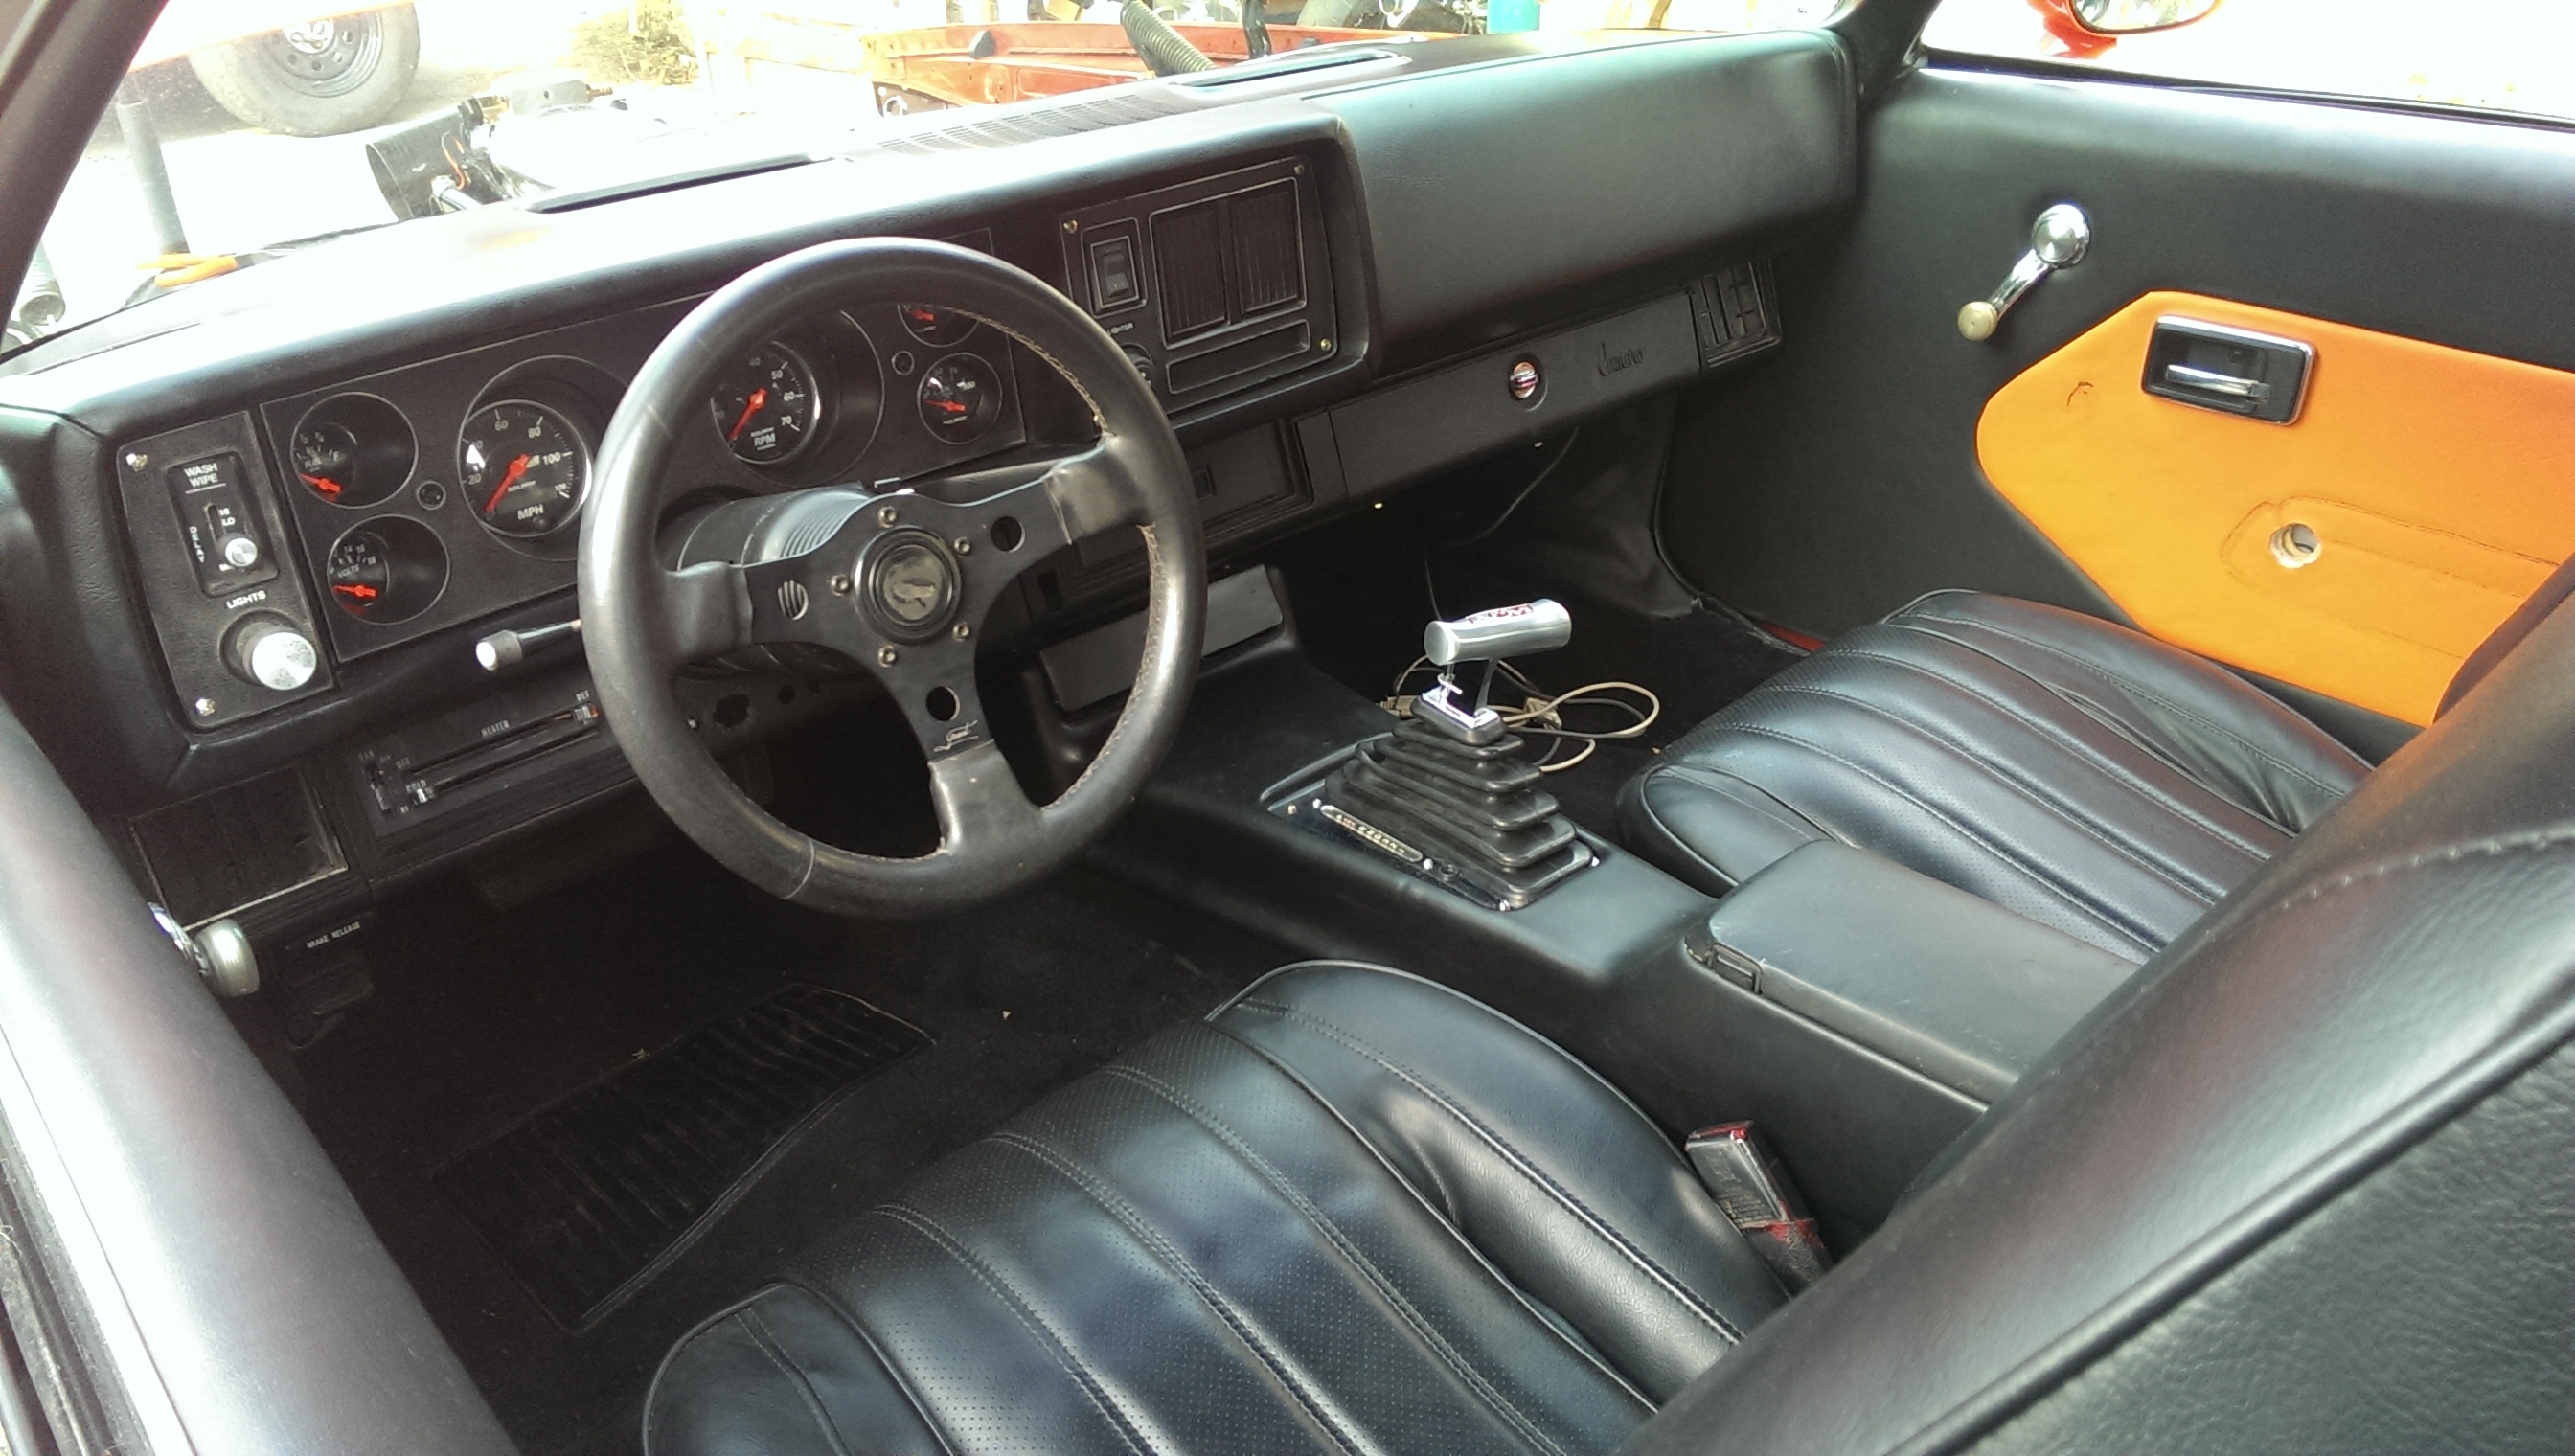
Refitted most of the interior, just need to fix the door handles and re-dye the backs of the seats. Put some polythene sheeting behind the door panels this time. Should keep them dry.
Also mostly finished plumbing the fuel system. Got a few more bits to do yet, but its nearly there....
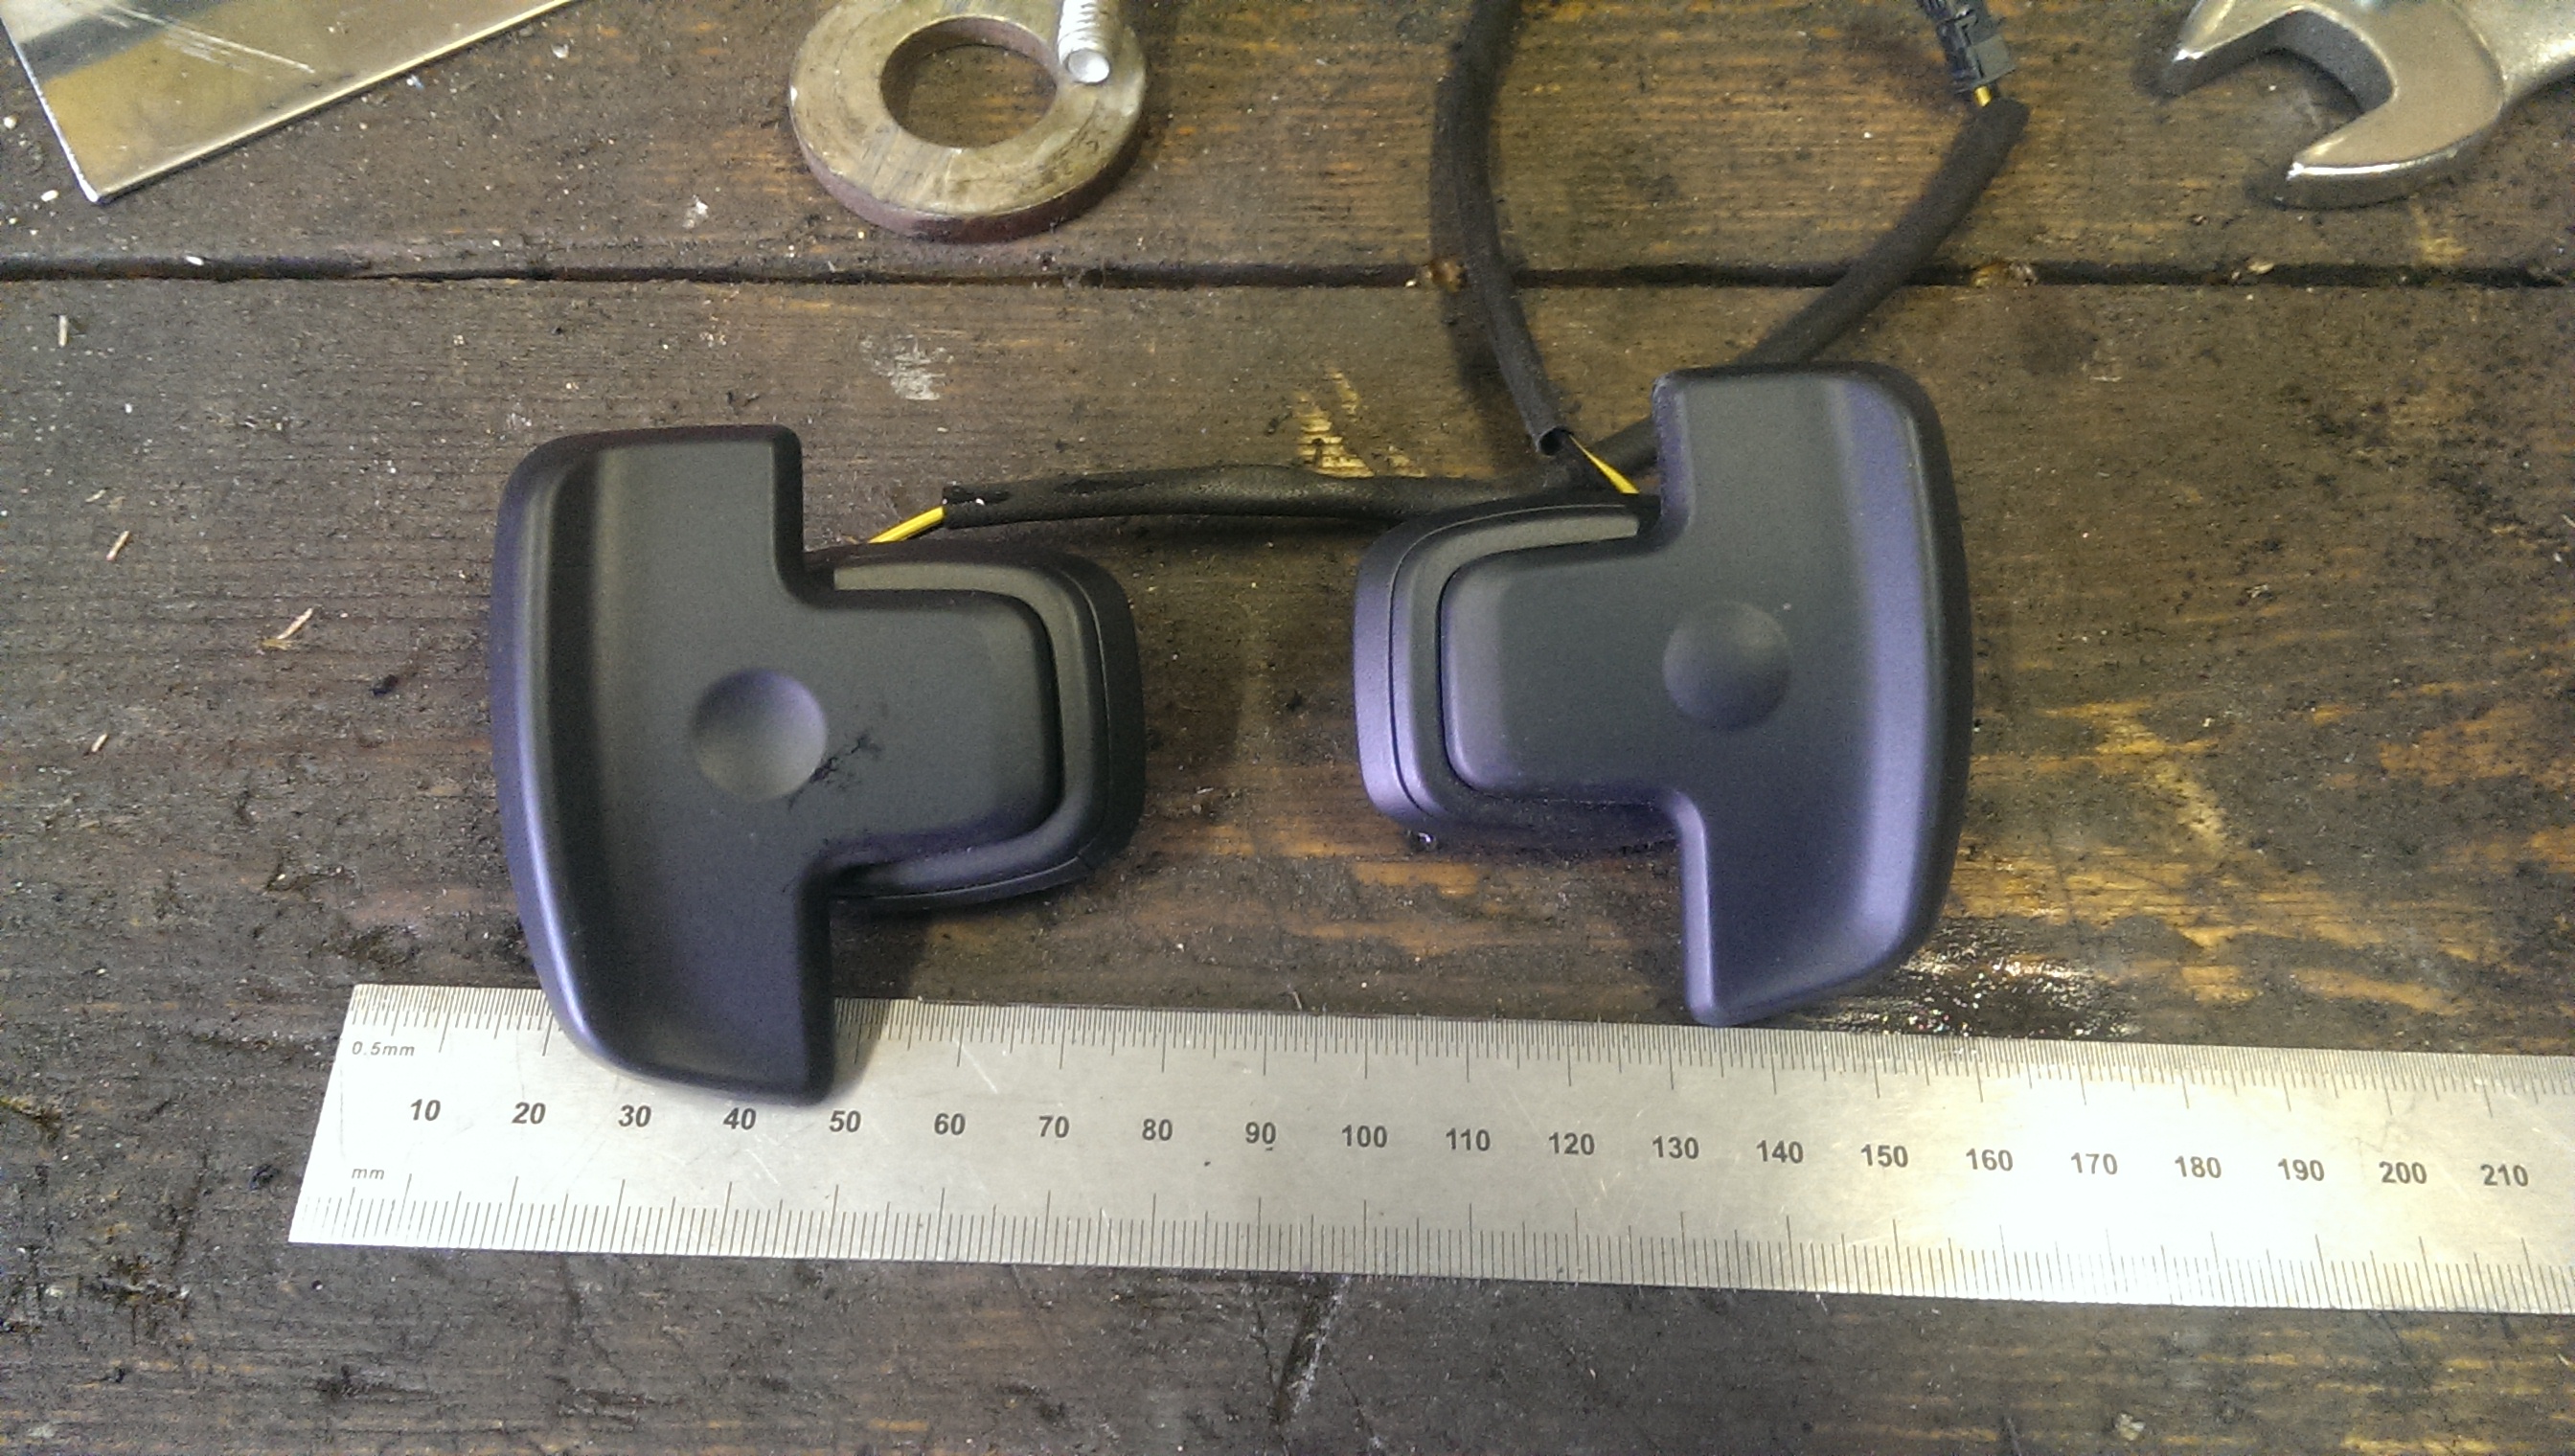
Managed to nab a pair of gear shift paddles for cheap too. Will be really easy to mount and they are super neat.
Fitted the pushrods and the motor and primed the oil system through the port on the side of the block. Mounted the alternator and wired it up. Measured up for the belt too.
Mounted the solenoid in the trunk and hooked up the battery. Cranked it over to check I was getting a signal to the ECU and it all look ok so far. Had some issues the with the transmission controller, but seem to have fixed that.
Mounted the new wideband controller in the dash and tested it. All ok.
Refitted most of the interior, just need to fix the door handles and re-dye the backs of the seats. Put some polythene sheeting behind the door panels this time. Should keep them dry.
Also mostly finished plumbing the fuel system. Got a few more bits to do yet, but its nearly there....
Managed to nab a pair of gear shift paddles for cheap too. Will be really easy to mount and they are super neat.


 04-05-2016, 02:53 PM
#17
Thanks 
Quick job for the evening - mounting the new fuel pump. I thought an upgrade would be beneficial with the new engine. The new one being an AEM 340lph/100gph (@43psi) pump. Enough to support my HP goals with some to spare...
Cut a stainless plate which bolted to the mounts I'd previously welded to my tank when I fitted my original pump, fitted a decent sized pre-filter, just need to finish the fuel lines off and I can stick some fuel in it and see if it leaks
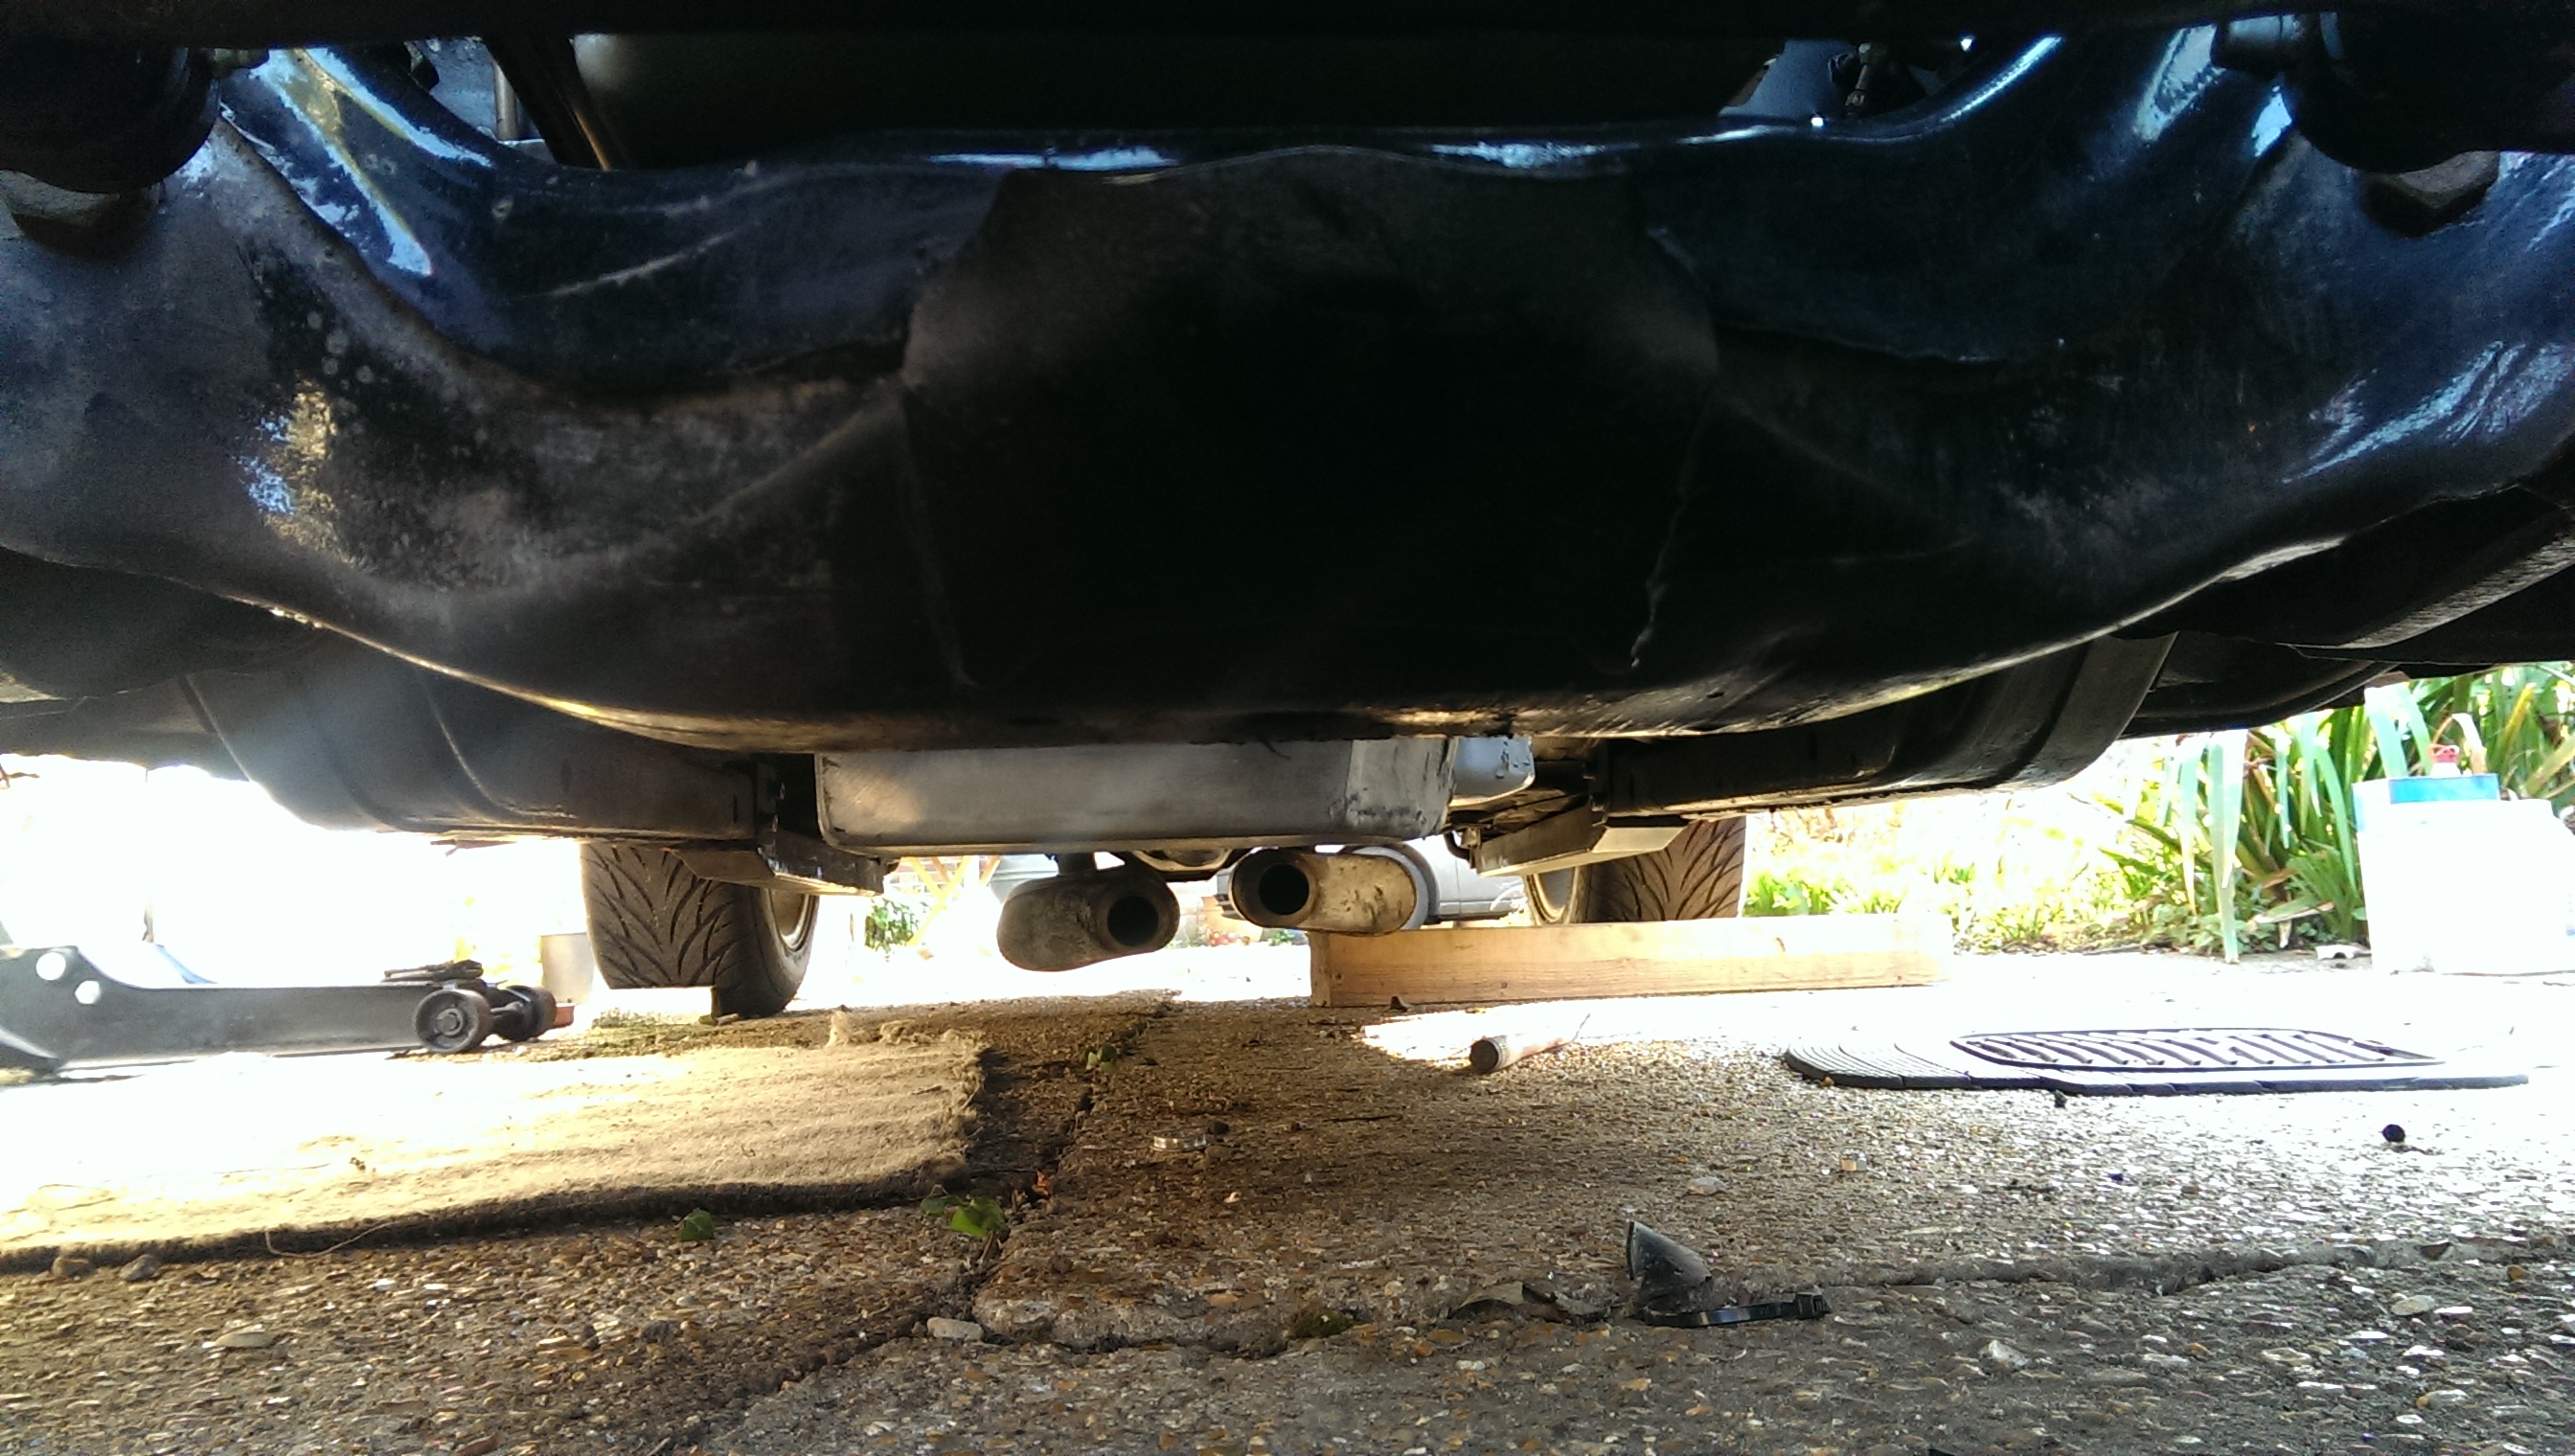
Ignore the low hanging mufflers, nothing connected the other side just yet...
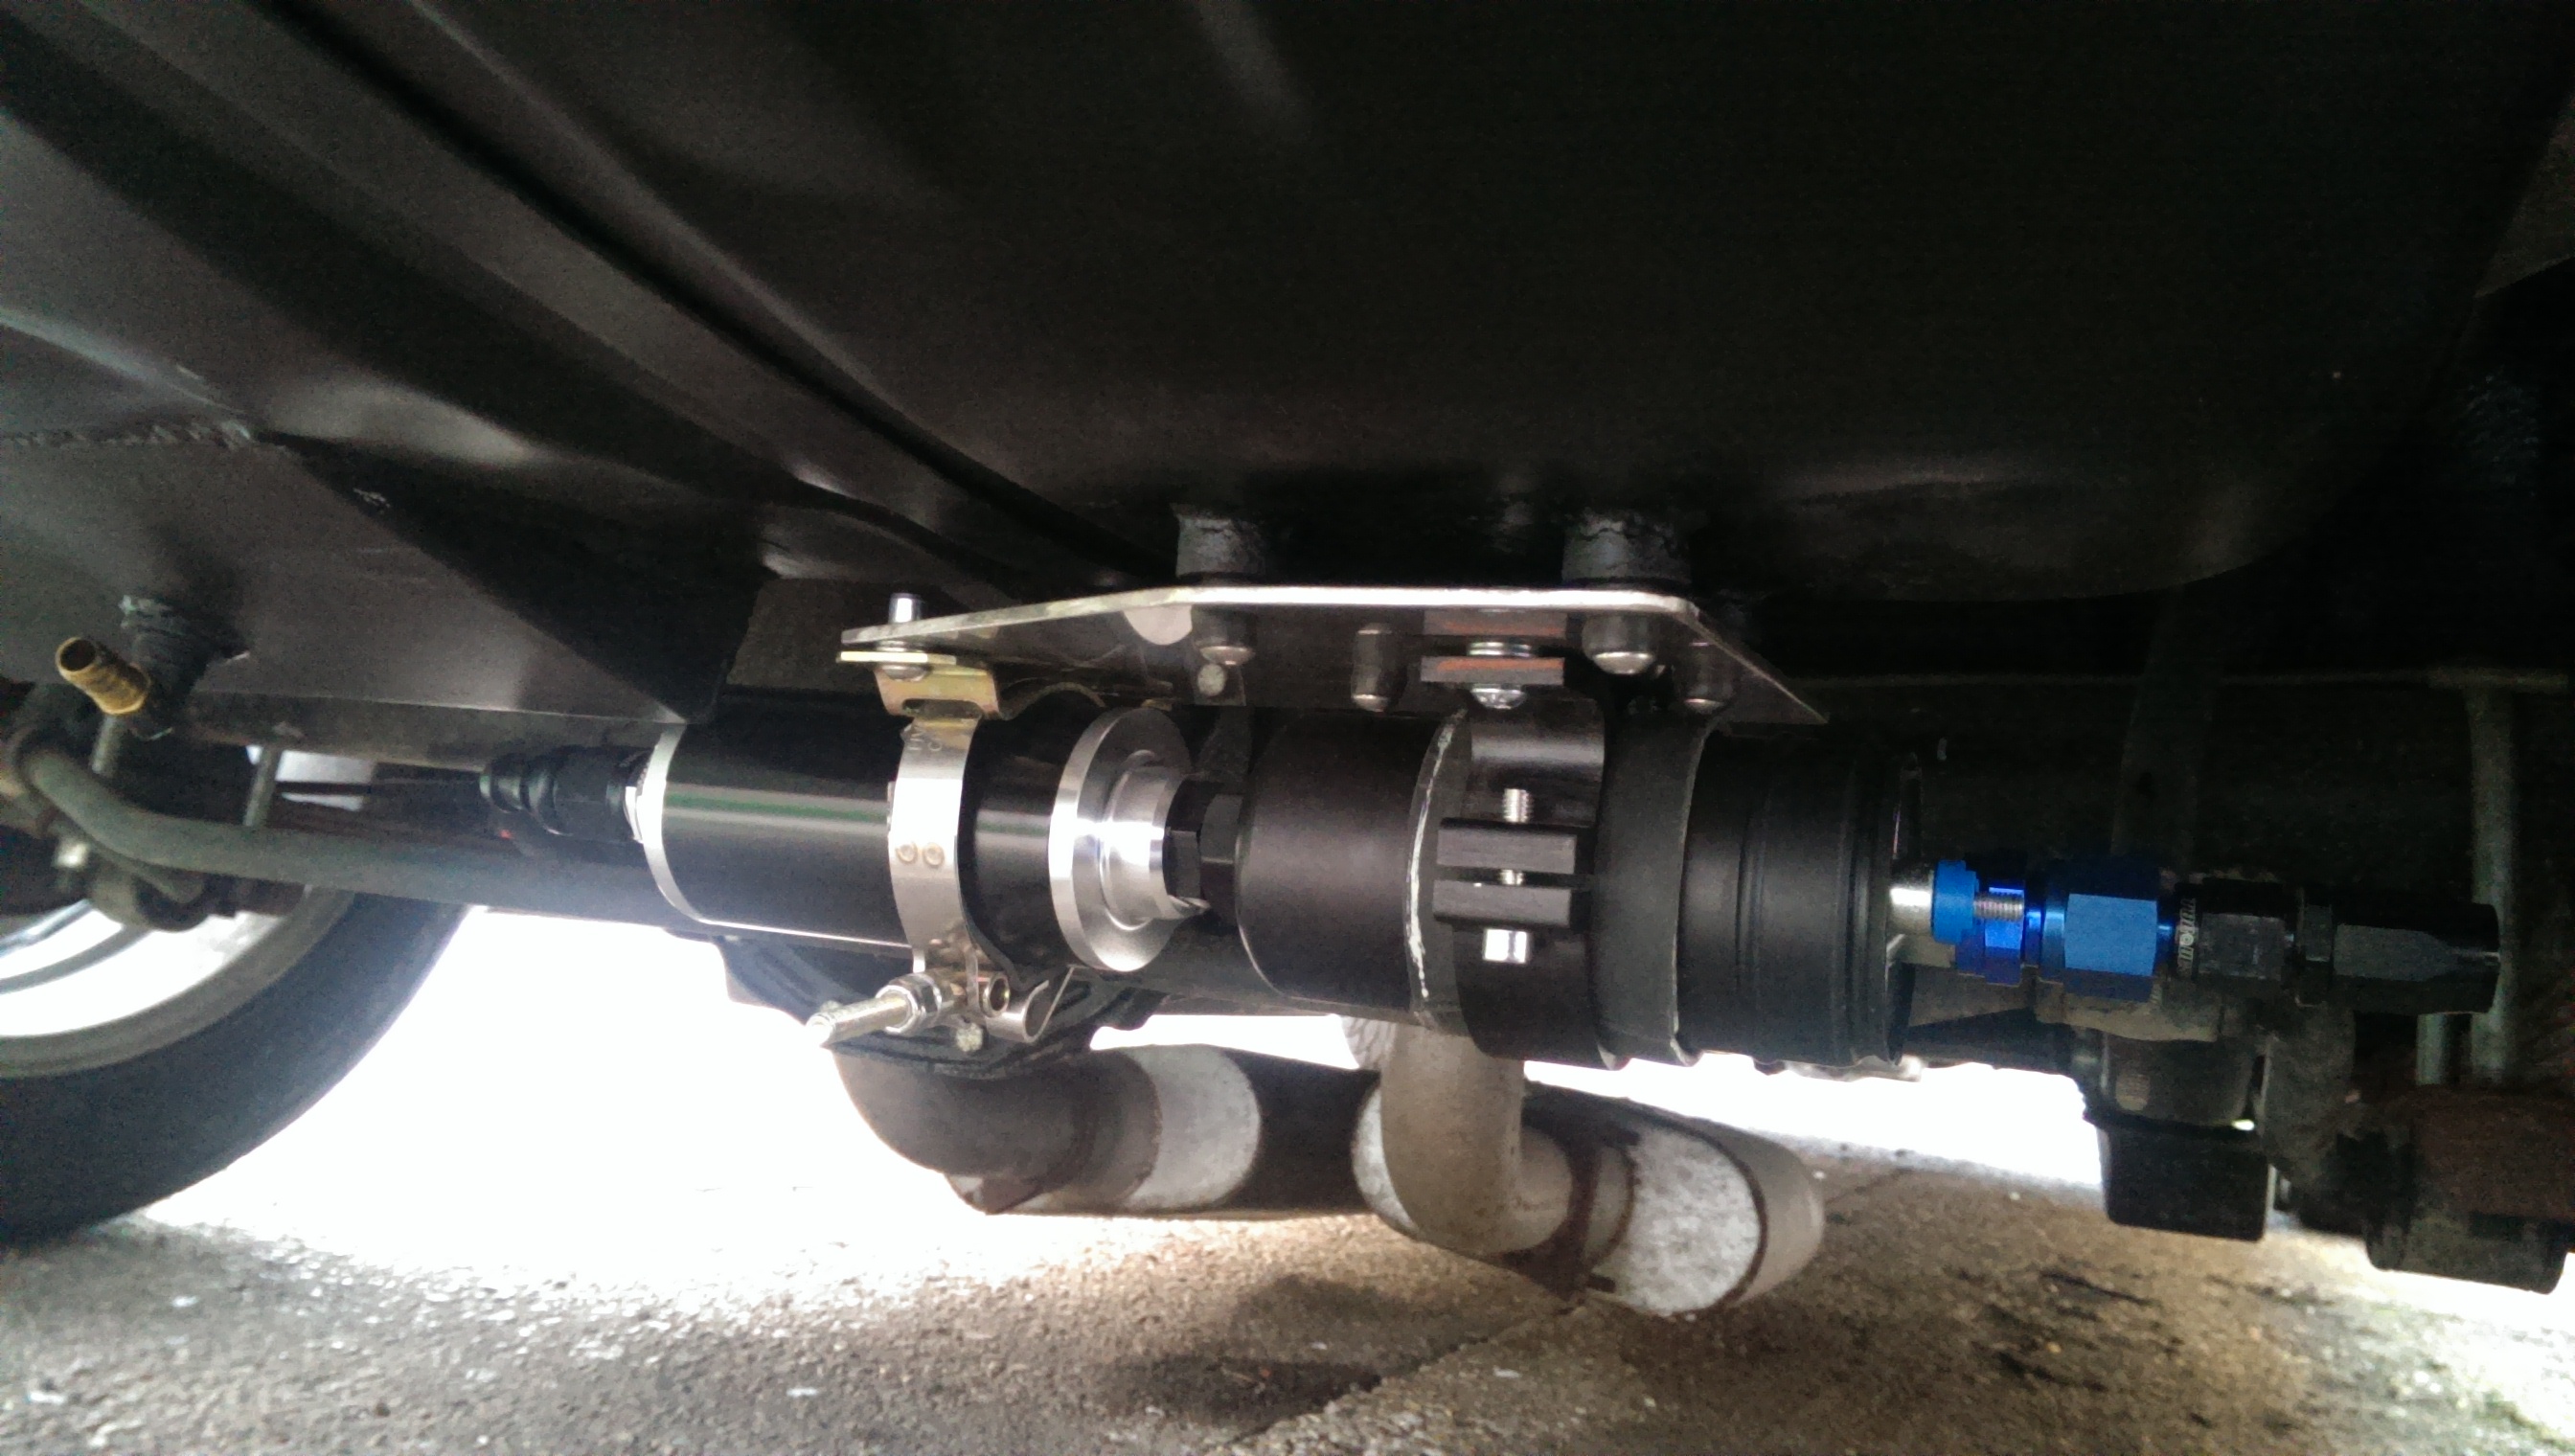
Quick job for the evening - mounting the new fuel pump. I thought an upgrade would be beneficial with the new engine. The new one being an AEM 340lph/100gph (@43psi) pump. Enough to support my HP goals with some to spare...
Cut a stainless plate which bolted to the mounts I'd previously welded to my tank when I fitted my original pump, fitted a decent sized pre-filter, just need to finish the fuel lines off and I can stick some fuel in it and see if it leaks
Ignore the low hanging mufflers, nothing connected the other side just yet...
04-07-2016, 01:39 PM
#18
Another quick evening job.
The top radiator hose is the highest point in my system, so needed a bleed point, and a take off for the hose from the steam ports on the heads so I welded some bosses to the aluminium hose joiner and tapped them for a hose fitting and a schrader valve that I had in a drawer of parts. Should work.
Hoping to have the cooling system hooked up by the end of the day tomorrow and get the transmission cooler re-mounted and connected too.
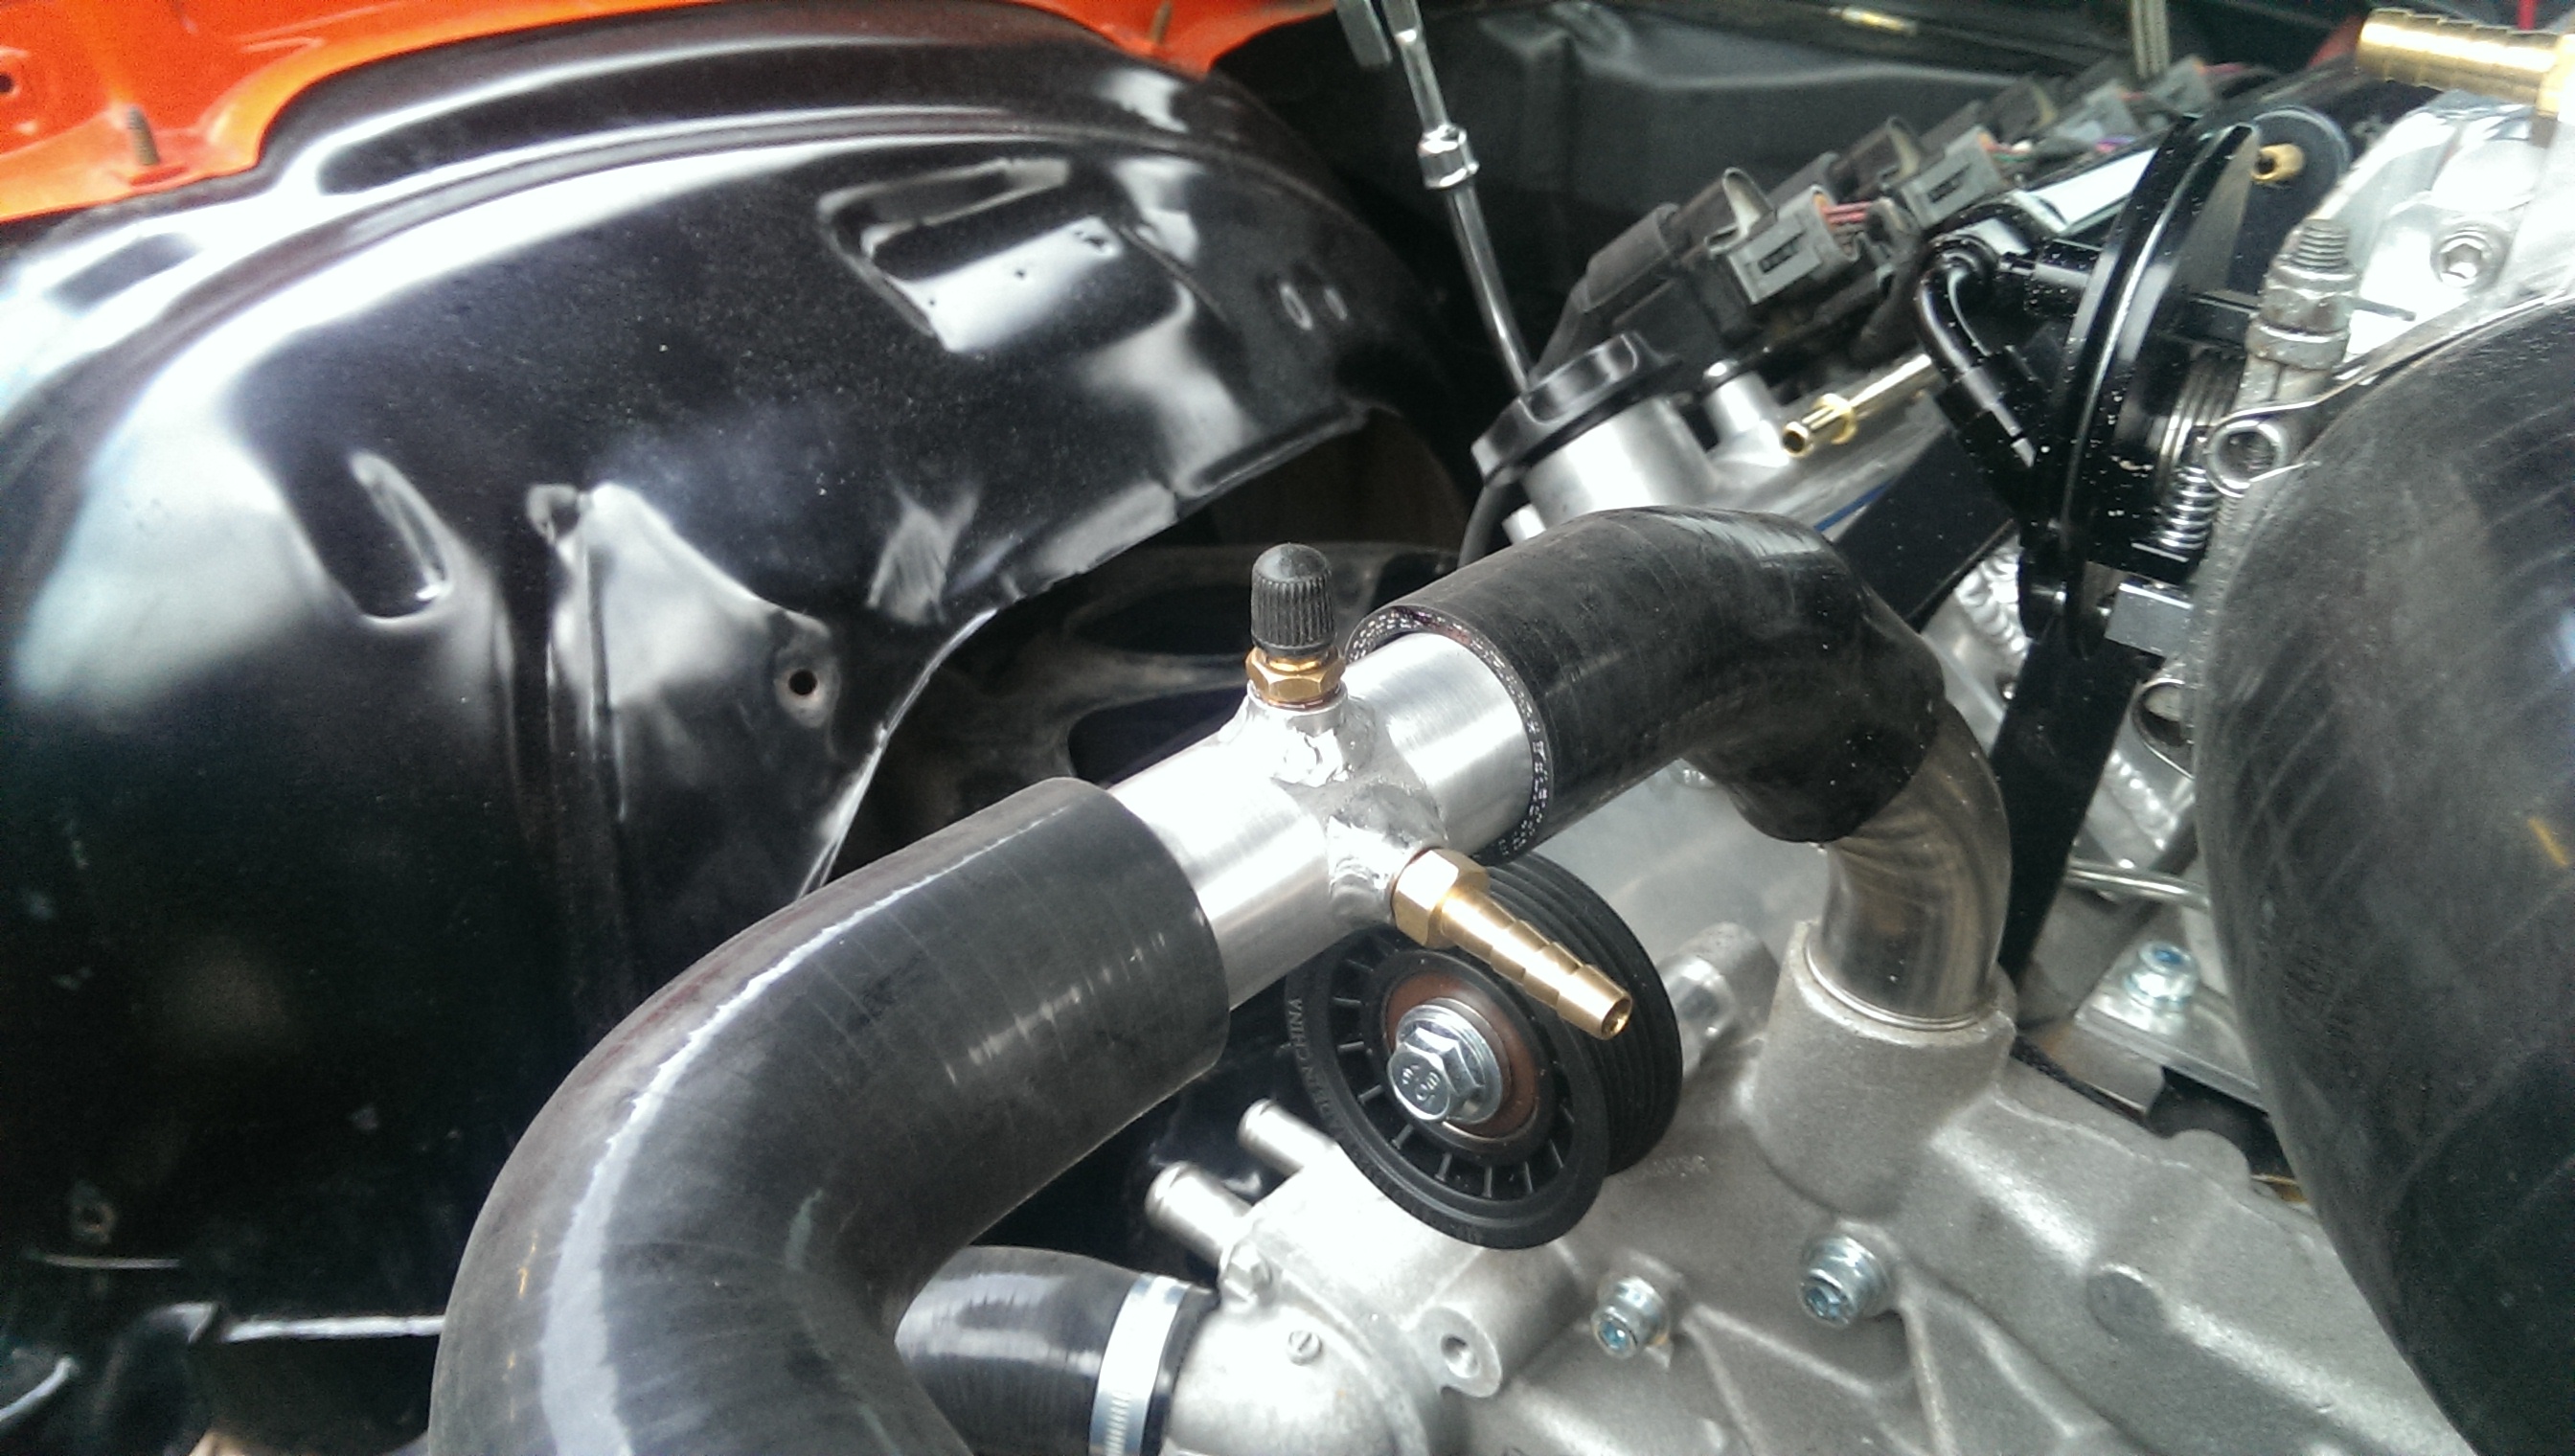
04-09-2016, 12:32 PM
#19
Got quite a lot of fabrication done today.
Was never happy with the g-braces I made the first time around, it was a rush job and they clashed with the hood hinges. So I cut them up and remade them - this time I didn't have the brake booster to worry about as I now have hydroboost. I'll get them powder coated this week I expect.
A also made myself a stainless steel tank for the power steering fluid, just need to polish it up.
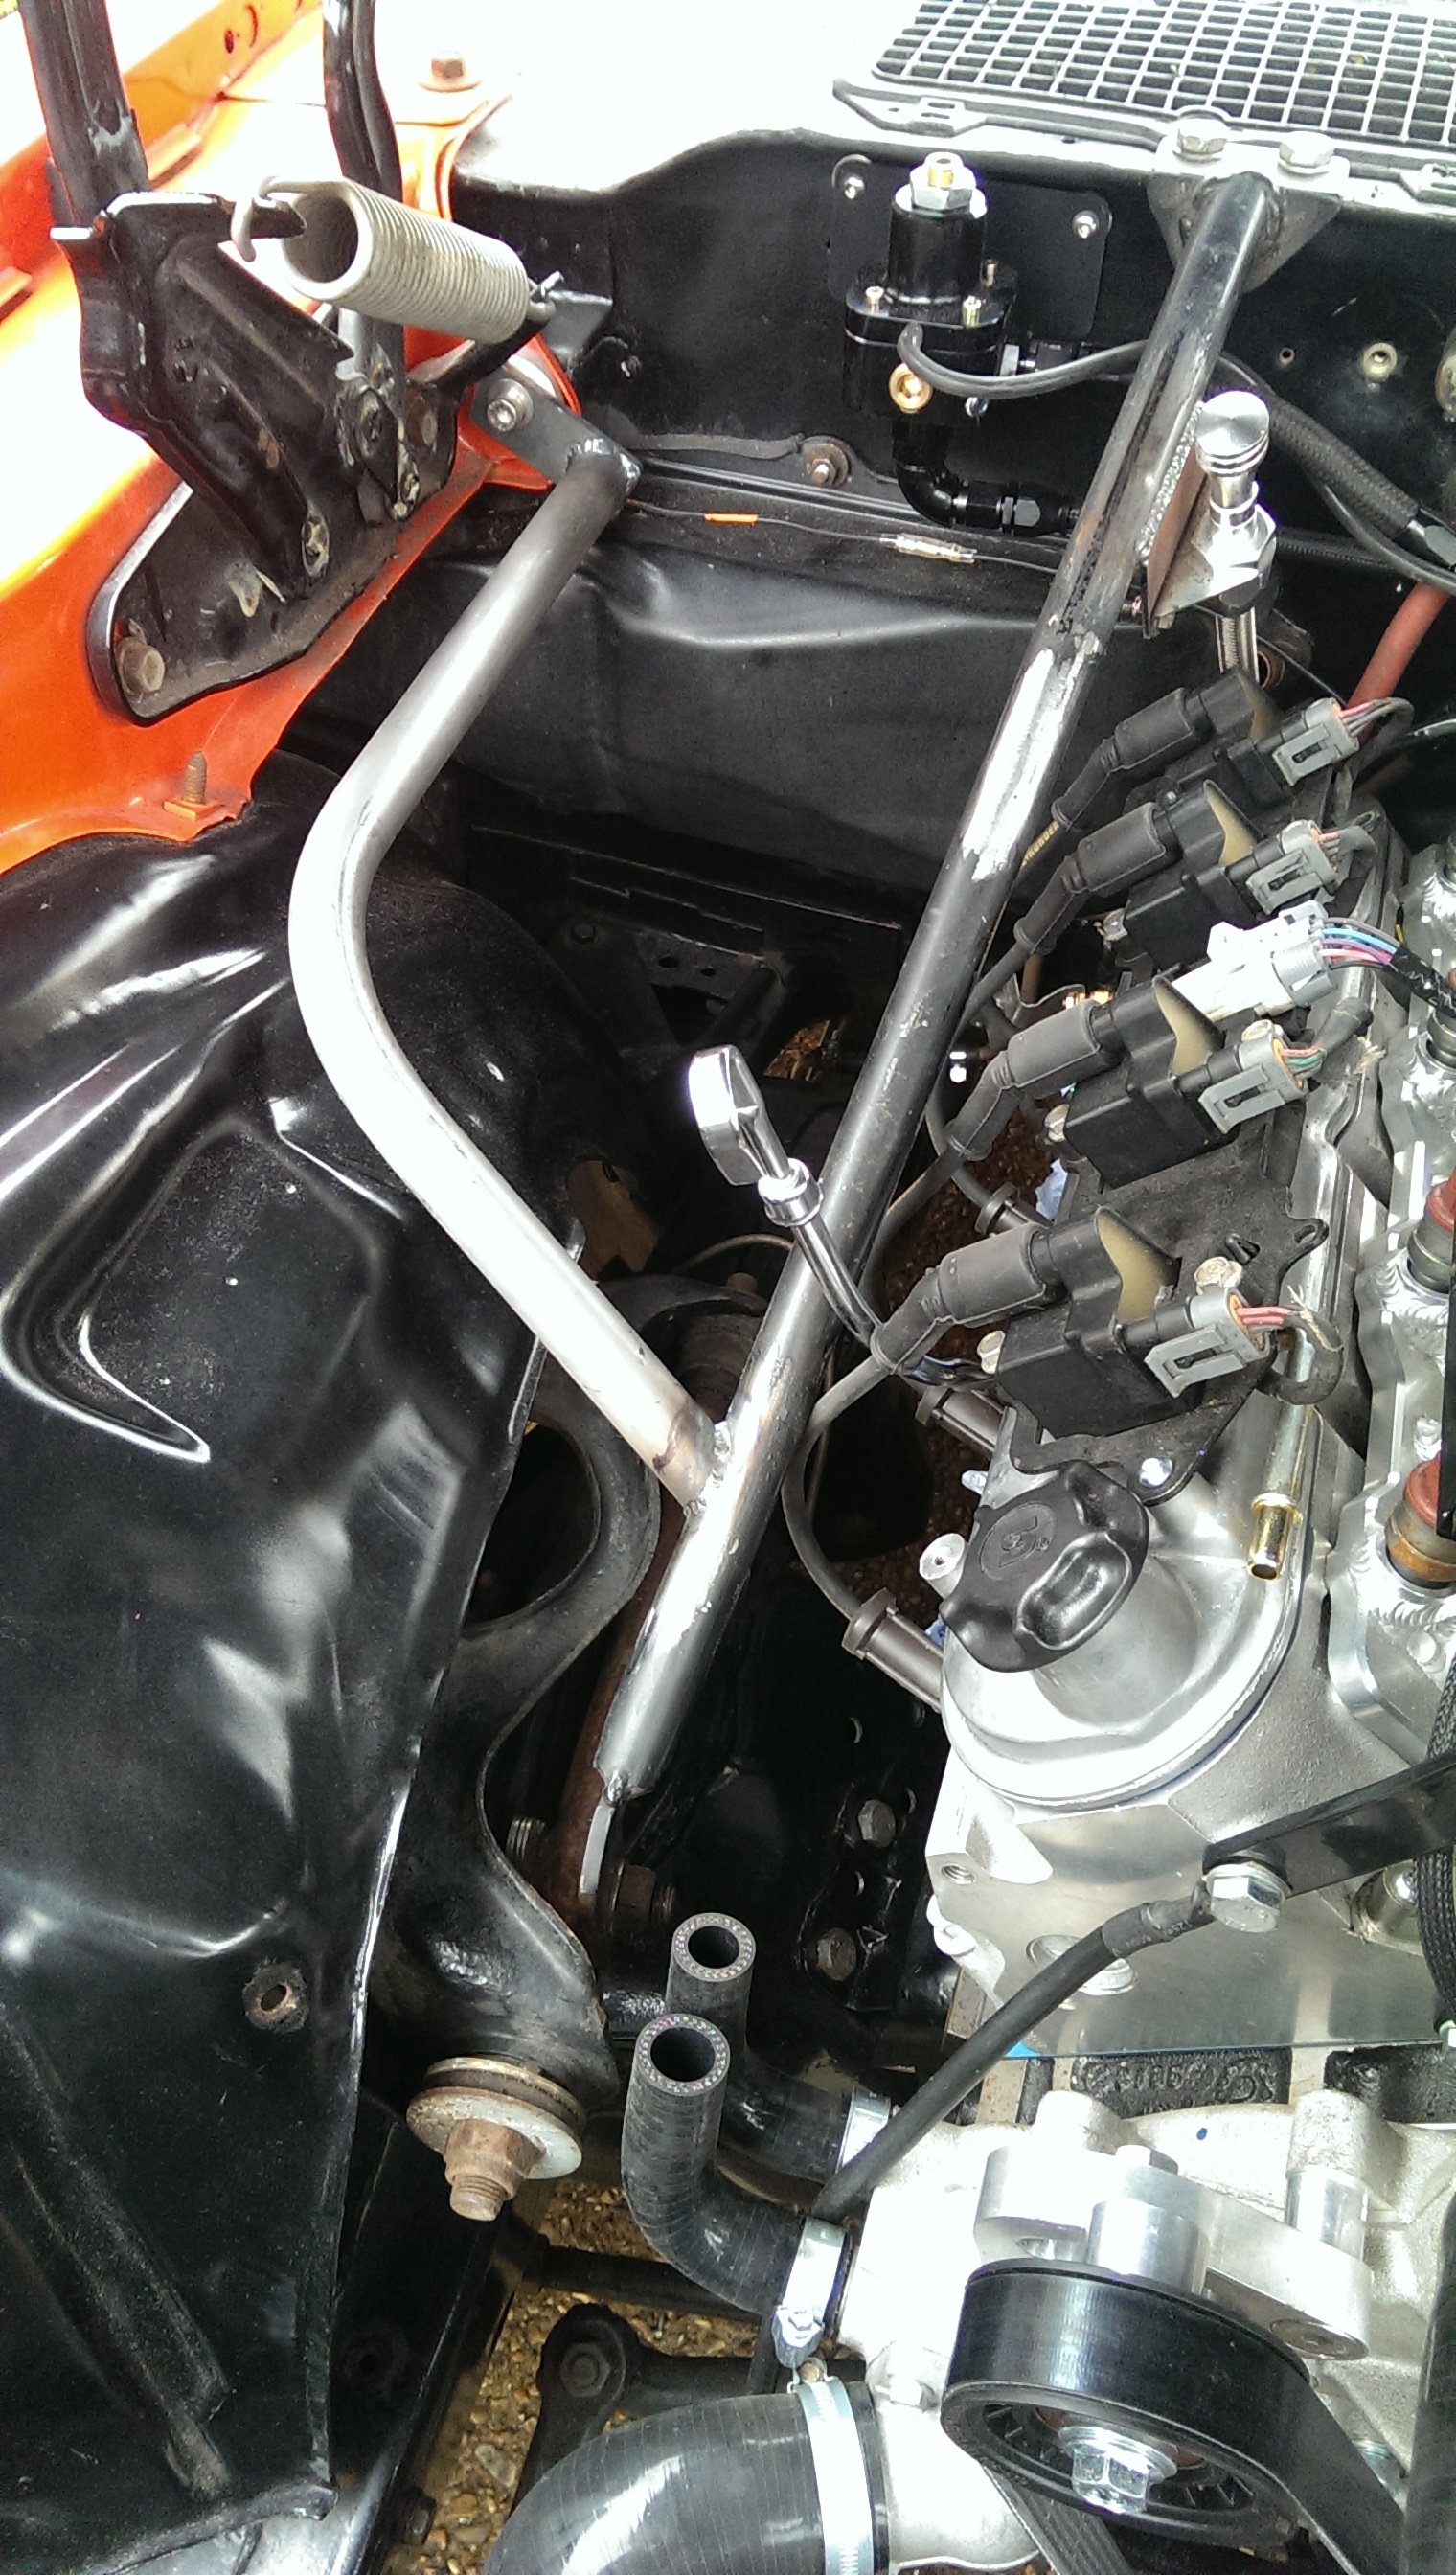
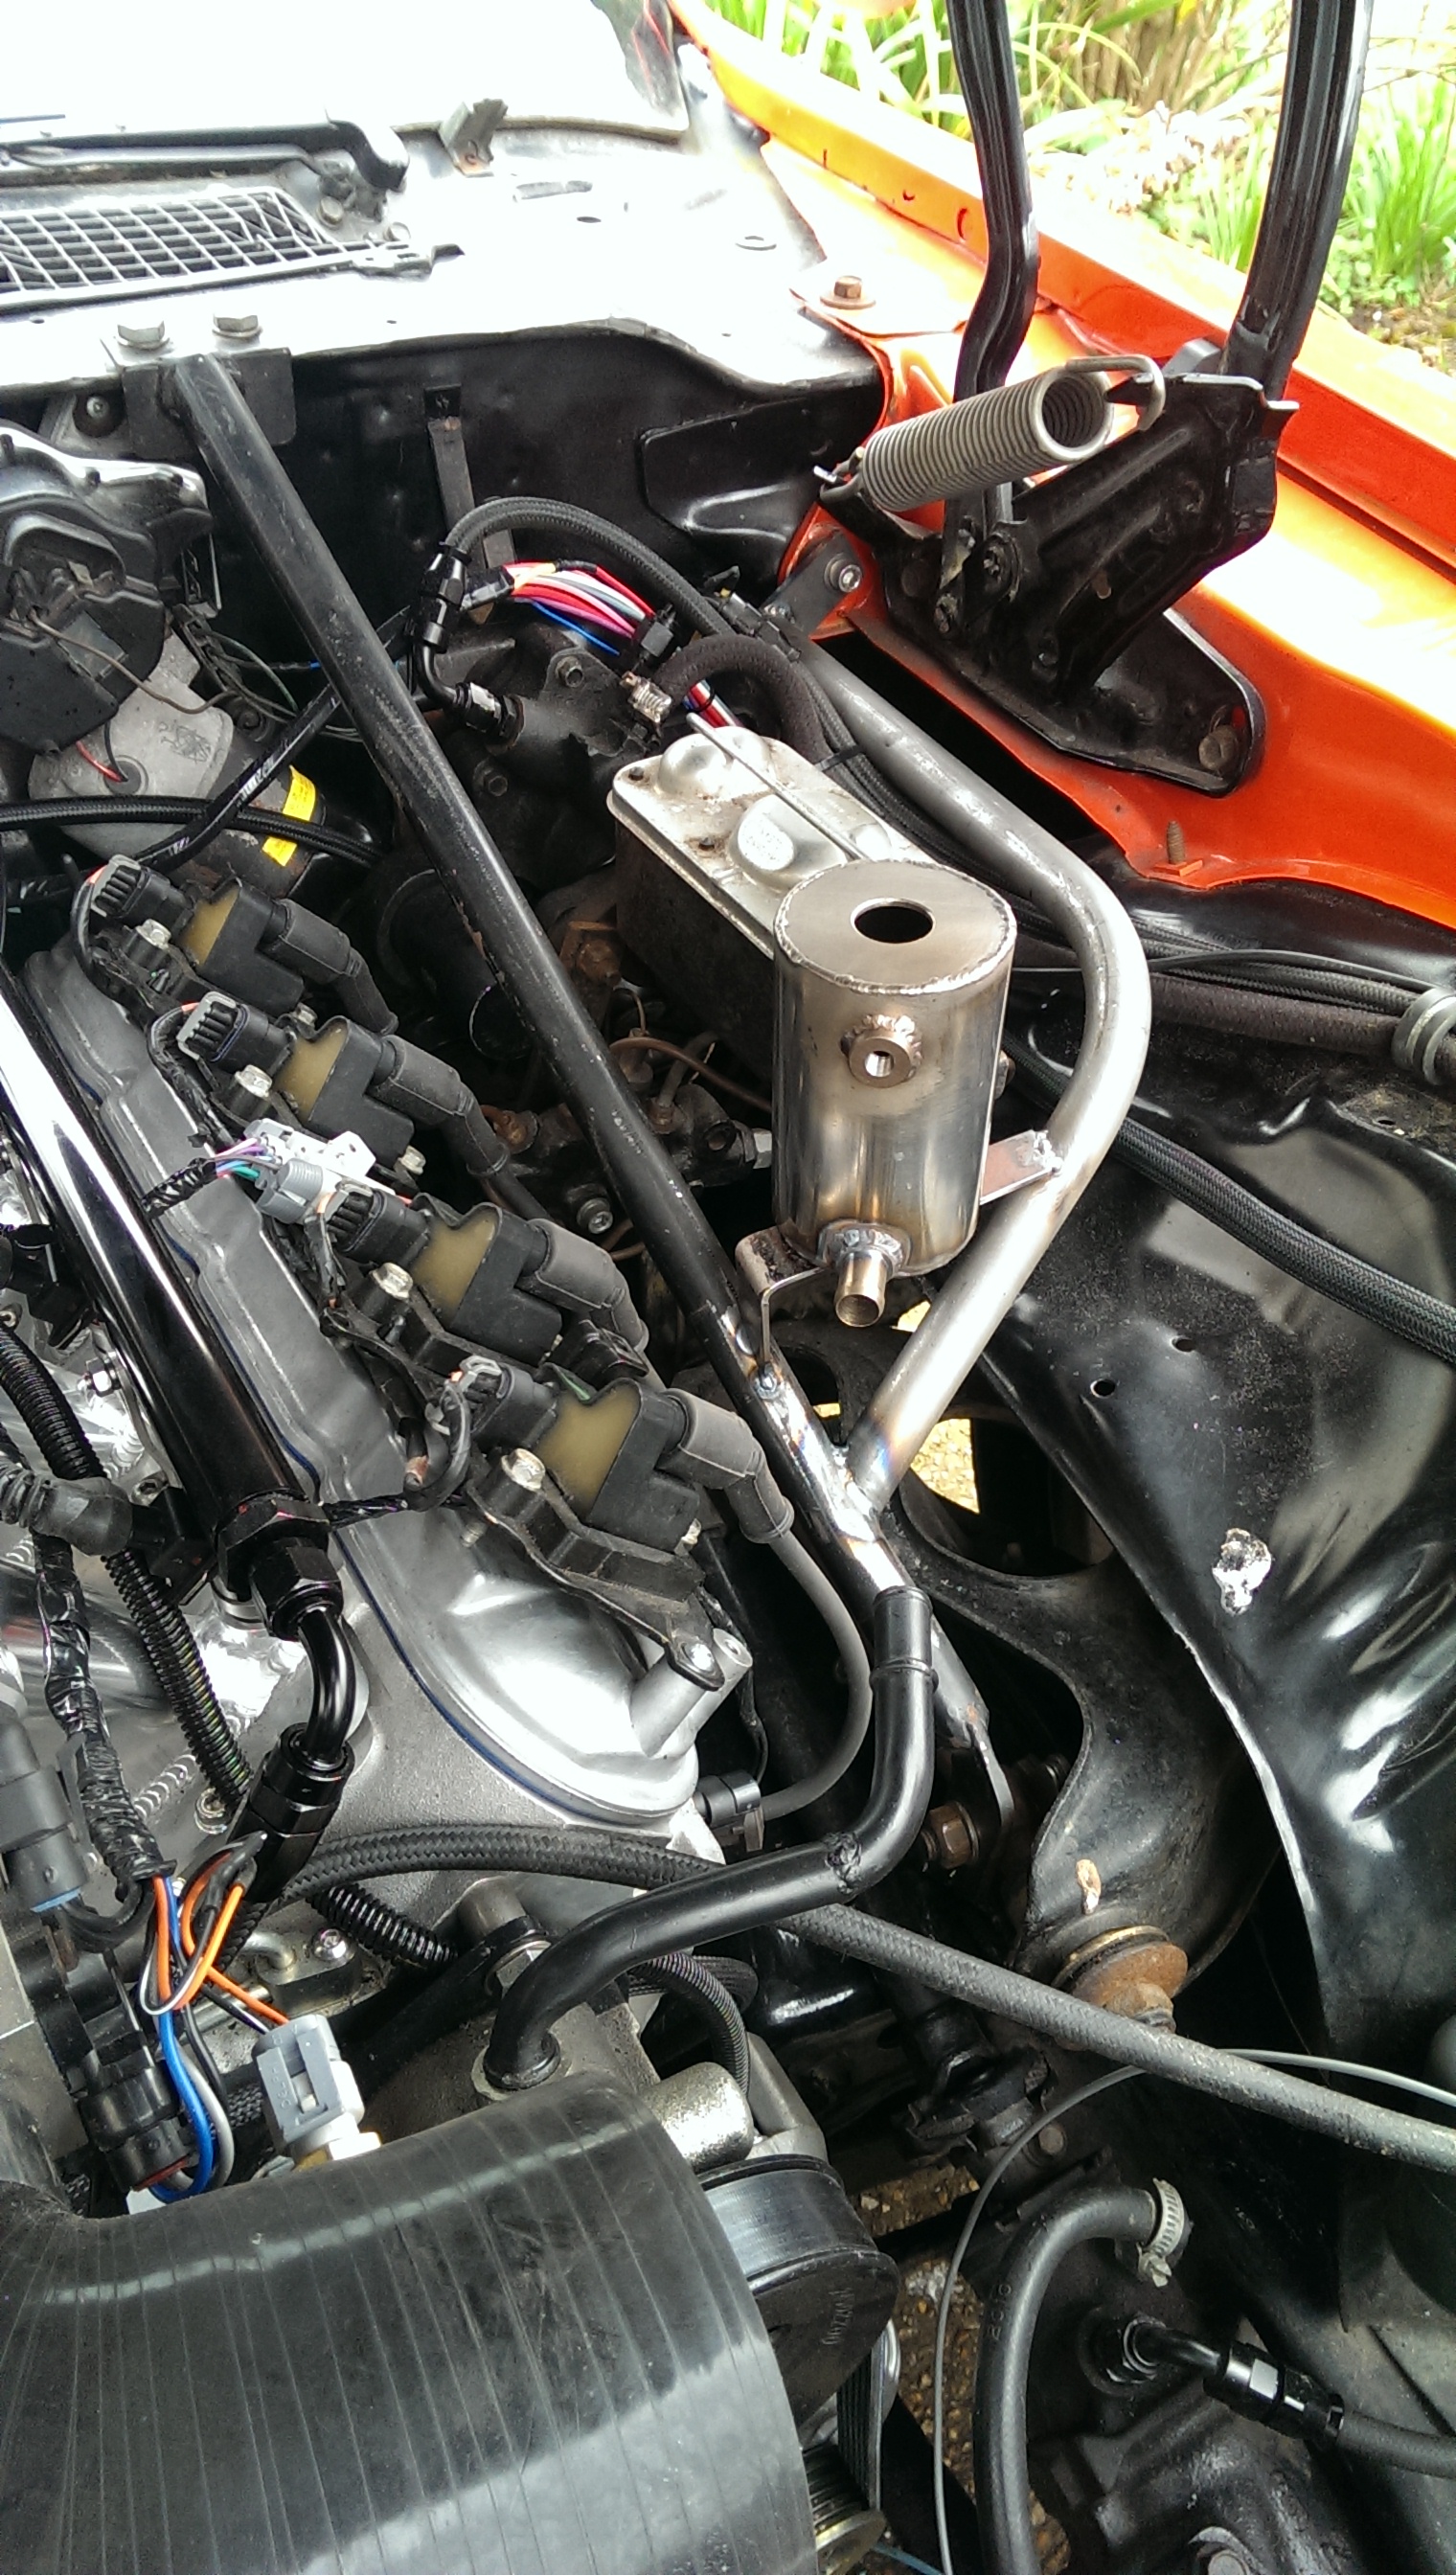
04-10-2016, 01:18 PM
#20
Done a few little jobs today.
Re-dyed the seat backs - I ran out of dye when I did them the first time so the red was still showing through.
Fixed the retractor on the passenger seat belt - was full of fluff and a bit tight. Cleaned it all up and rewound the spring, works really well now...
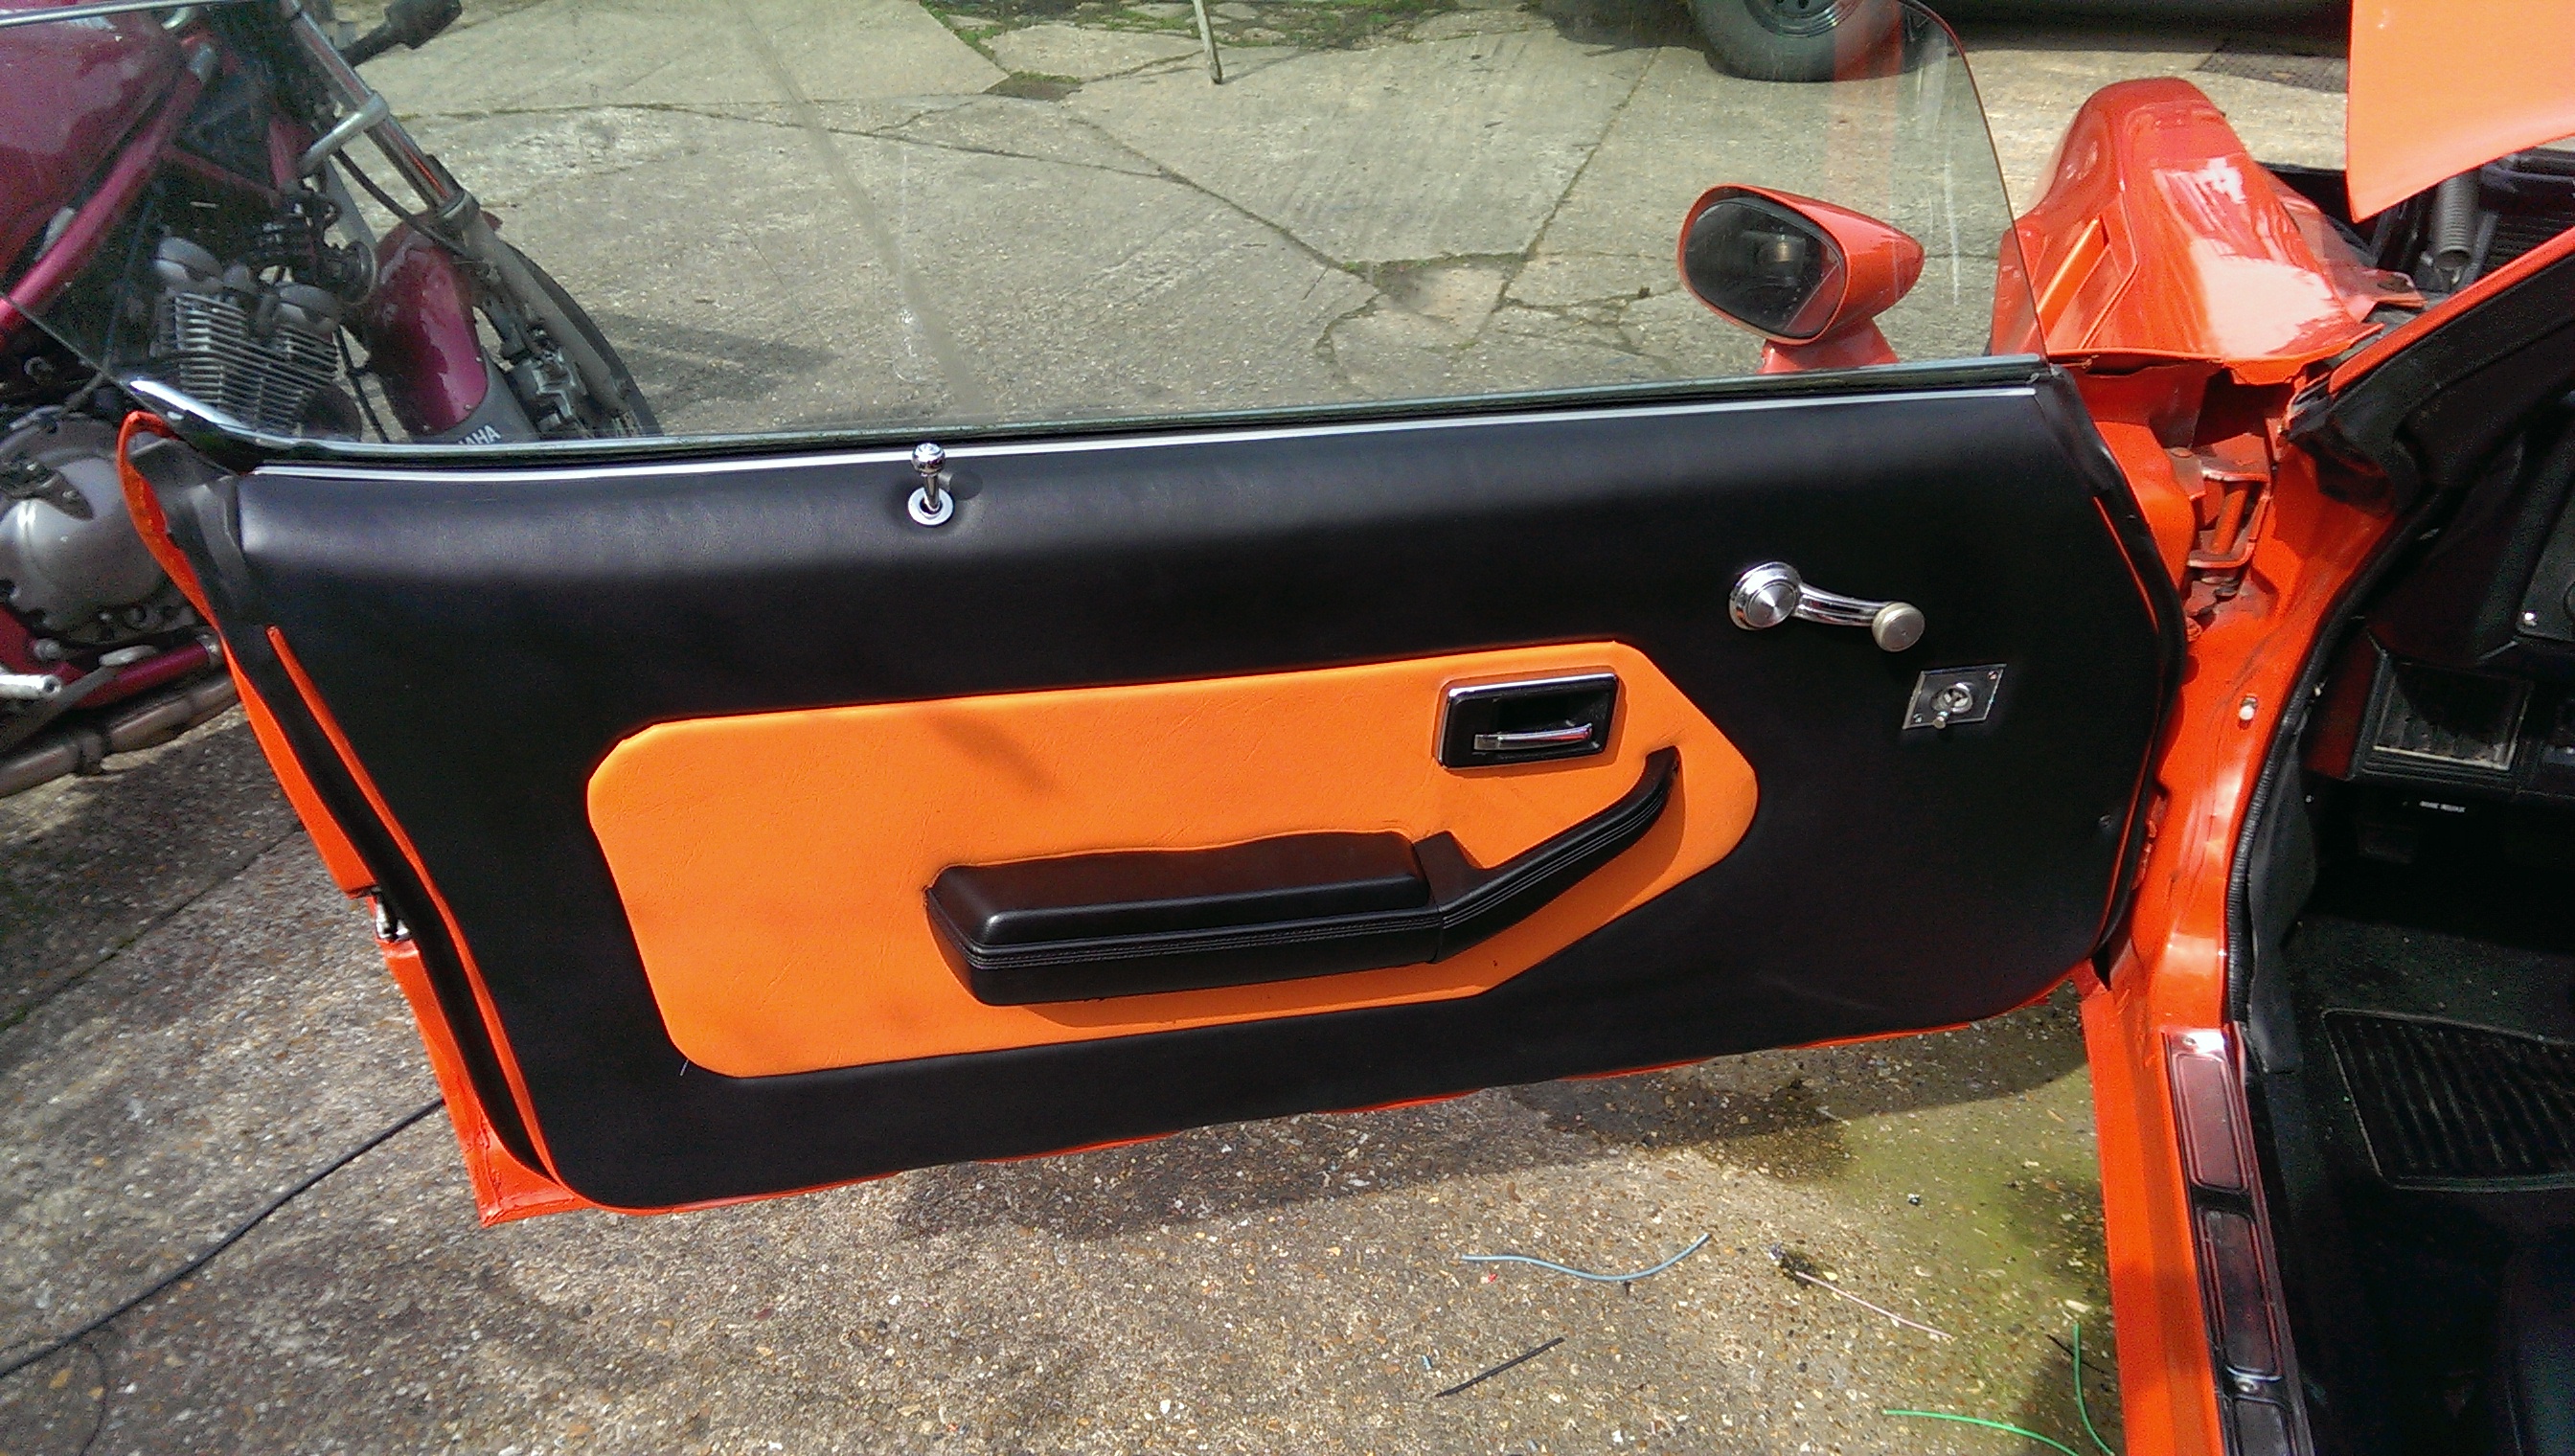
Fixed the door pulls/handles, cleaned the sticky old dye off them from the previous owner with cellulose thinners. Fixed the handles and then re-dyed them.
Finished the wiring of the front lights, also sorted out the washer pump and reservoir. Forgot to take a pic, it's all hidden up. Determined to make it clean and neat under the hood this time around.
Last job was giving it a quick clean. It had got a bit green having sat in the yard for 18 months, surprisingly still shiny underneath. Desperately needs a polish though.
I'm filling the time until my headers arrive now. Still have quite a lot of little jobs to do though, many that I should have done the first time around but never got around to.

Re-dyed the seat backs - I ran out of dye when I did them the first time so the red was still showing through.
Fixed the retractor on the passenger seat belt - was full of fluff and a bit tight. Cleaned it all up and rewound the spring, works really well now...
Fixed the door pulls/handles, cleaned the sticky old dye off them from the previous owner with cellulose thinners. Fixed the handles and then re-dyed them.
Finished the wiring of the front lights, also sorted out the washer pump and reservoir. Forgot to take a pic, it's all hidden up. Determined to make it clean and neat under the hood this time around.
Last job was giving it a quick clean. It had got a bit green having sat in the yard for 18 months, surprisingly still shiny underneath. Desperately needs a polish though.
I'm filling the time until my headers arrive now. Still have quite a lot of little jobs to do though, many that I should have done the first time around but never got around to.

