
1966 Chevy II Nova mordor build... LM7/TH400...78/75 turbo...
 11-01-2016, 09:37 PM
#61
On The Tree
Thread Starter
Join Date: Aug 2013
Location: Lake Stevens, WA
Posts: 174
Likes: 0
Received 0 Likes
on
0 Posts
UPDATES..... ok not much.
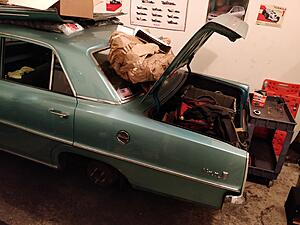
i didnt want to put the battery in the trunk for a bunch of reasons. so i made a spot up front for it.
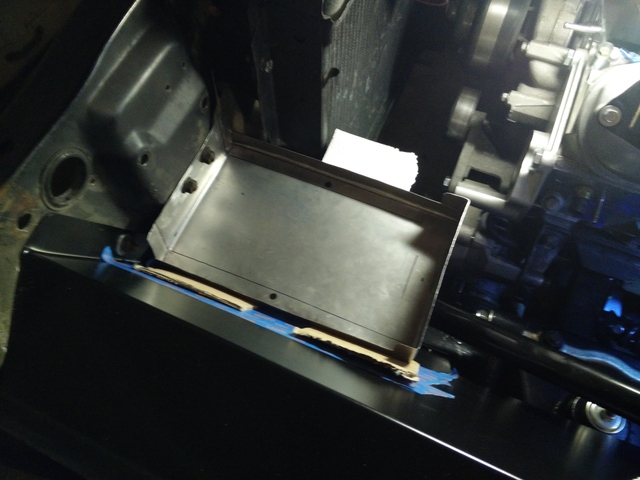
not 100% finished. want to drill a couple drain holes, and it needs the lower support welded in. probably some paint... anyway i like this thing. turned out, well how i pictured it, but wasnt nearly as hard as i thought. did take some time.
speaking of taking time... well this one was me being lazy any working on it 10-20mins at a time.
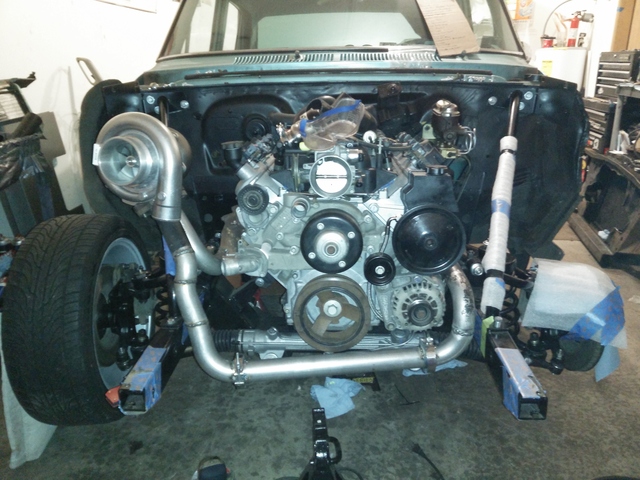
HOTSIDE! again, not 100% (i dont think anything is on this car yet lol). i still want to grind a bunch of crap off the manifolds, and i need to finalize wastegate placement. but otherwise pretty much welded up and ready.
oh i also made a little turbo manifold brace, that does from the rear T4 bolt to the cylinder head. little extra to keep vibration down. but im sure its useless and the turbo will still try to fall off the car...

i didnt want to put the battery in the trunk for a bunch of reasons. so i made a spot up front for it.
not 100% finished. want to drill a couple drain holes, and it needs the lower support welded in. probably some paint... anyway i like this thing. turned out, well how i pictured it, but wasnt nearly as hard as i thought. did take some time.
speaking of taking time... well this one was me being lazy any working on it 10-20mins at a time.
HOTSIDE!
again, not 100% (i dont think anything is on this car yet lol). i still want to grind a bunch of crap off the manifolds, and i need to finalize wastegate placement. but otherwise pretty much welded up and ready.oh i also made a little turbo manifold brace, that does from the rear T4 bolt to the cylinder head. little extra to keep vibration down. but im sure its useless and the turbo will still try to fall off the car...
 02-20-2017, 09:43 PM
#62
On The Tree
Thread Starter
Join Date: Aug 2013
Location: Lake Stevens, WA
Posts: 174
Likes: 0
Received 0 Likes
on
0 Posts
WORK!!!!
ok, 2 steps back... but work is taking place.
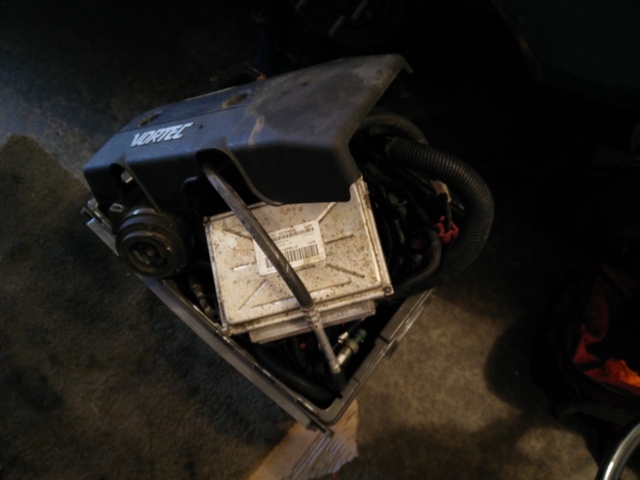
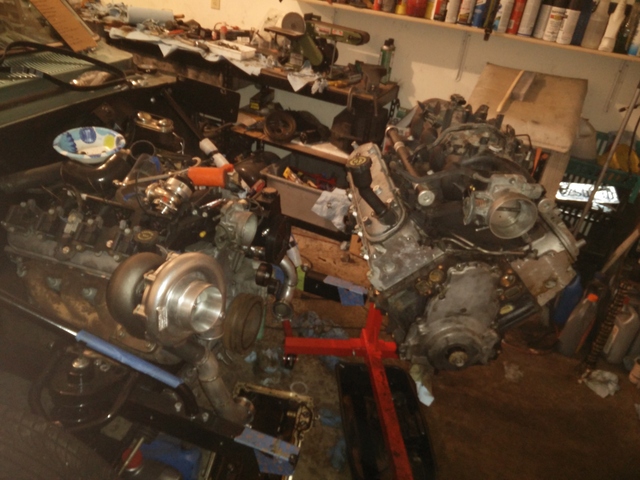
i bought this:
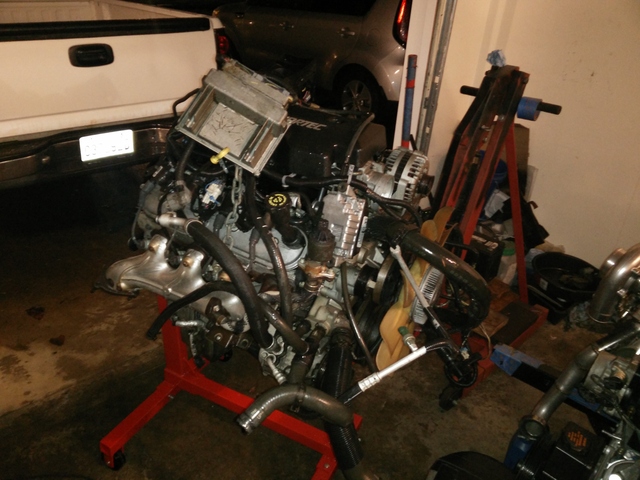
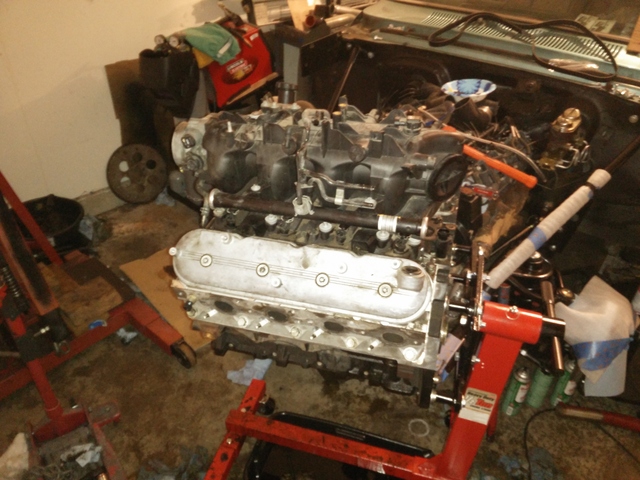
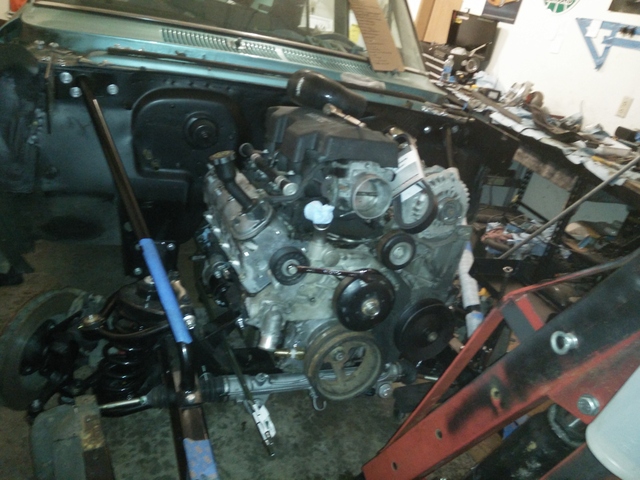
picture sucks. but its a COMPLETE LM7/5.3L from a rolled Tahoe. it has full harness, ecu, ac compressor, starter, hell its got radiator hoses... couple bads: cracked oil pan (dont care, there was oil in it though, looked like it was time for oil change, no glitter), bent PS pulley that in turn tossed the belt. bent coil bracket. broken bung on the intake manifold (just another thing i need to cap off). what else? thats the jist.
oh, yeah, why the motor change? well i have some serious automotive ADD... so i have decided to swap the iron 5.3 in over the LS6. lots of reasons and blah blah, etc. but short point is that a 4.8 with minimal boost will destroy 235-245 tires all day long. and i wont feel bad when i break a truck motor vs my fancy one. so im going to save the LS6 and find a nice 6speed to bolt to it and throw in my next daily driver (looking to sell my Galant, thats far from being 'daily driver' for some time)
random pics:
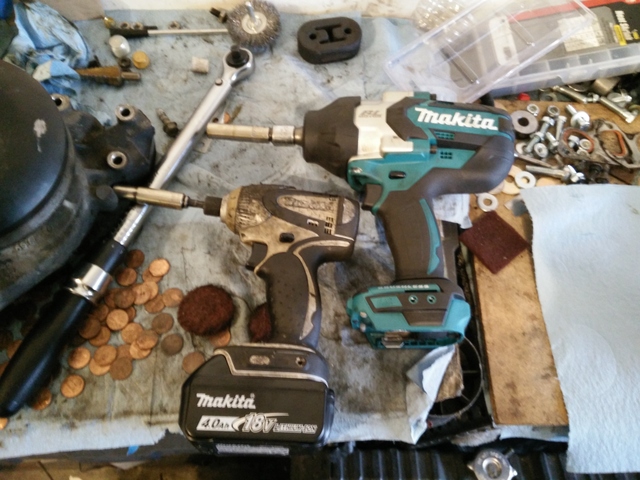
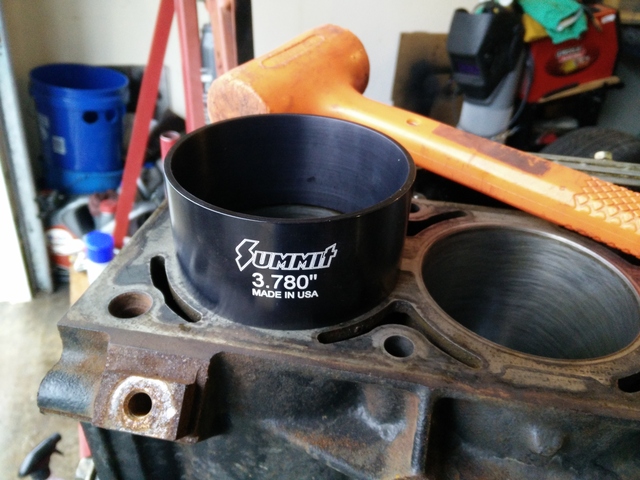
oh yeah, so while i was buying ****. i bought that beast on the right. like 740/1180ft tq 1/2" drive. little one is 3/8 i have had forever. couple new 4mh batteries. took the crank pulley bolt off after a couple hits, spun the head bolts right out.
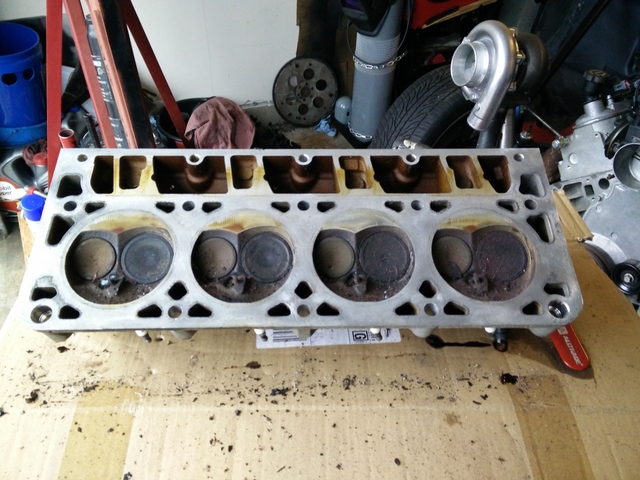
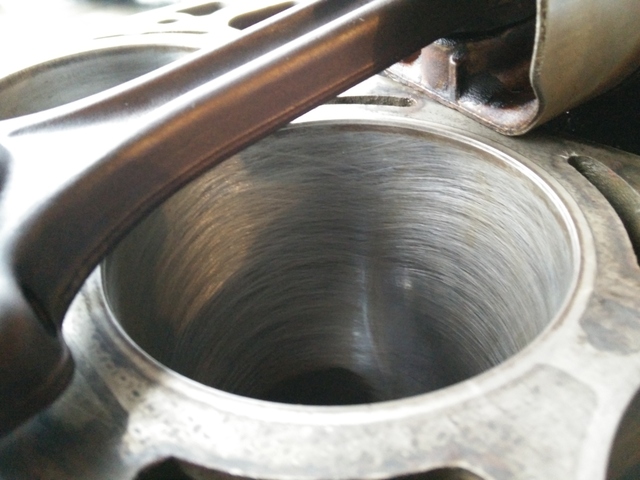
i have a hone, so i dropped it down the holes.
if i NEVER use that stupid *** band clamp ever again i will be a happy man. buying the right tools makes life, and this 'hobby' so much more enjoyable. even though it hurts to spend money some times.
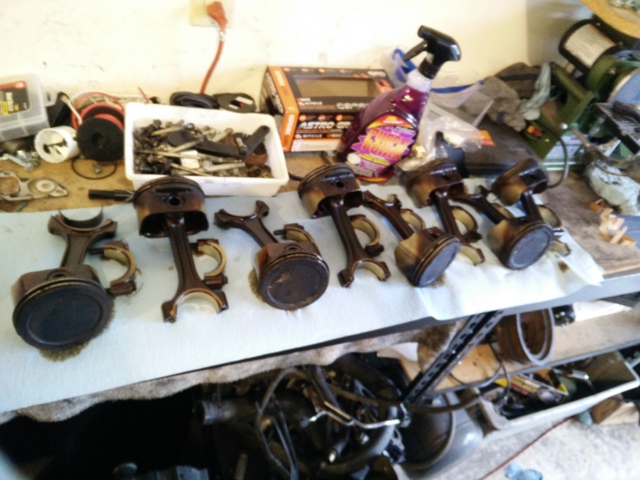
going sloppymechanics rebuild on this. well i did clean some things. but i didnt bother pulling the mains, pretended i didnt look at the rods or cam bearings.
speaking of, parts here/on the way:
PAC 1218 springs (probably be pics of install tomorrow)
'sloppy stage 2' Jegs cam. Lift: 0.585"/0.585" Duration @ 0.050": 228�/230� Advertised Duration: 283�/286� Lobe Separation: 112� (still waiting for this, tracking shows a couple days)
i did buy some MLS head gaskets, will reuse the rest. and head/rod bolts, etc.
and i gapped the rings. (btw be careful when using circular sander to gap, takes material quickly off 2nd ring)
i will probably be waiting for payday before buying anymore big stuff. hopefully be fuel tank crap.
ok, 2 steps back... but work is taking place.
i bought this:
picture sucks. but its a COMPLETE LM7/5.3L from a rolled Tahoe. it has full harness, ecu, ac compressor, starter, hell its got radiator hoses... couple bads: cracked oil pan (dont care, there was oil in it though, looked like it was time for oil change, no glitter), bent PS pulley that in turn tossed the belt. bent coil bracket. broken bung on the intake manifold (just another thing i need to cap off). what else? thats the jist.
oh, yeah, why the motor change? well i have some serious automotive ADD... so i have decided to swap the iron 5.3 in over the LS6. lots of reasons and blah blah, etc. but short point is that a 4.8 with minimal boost will destroy 235-245 tires all day long. and i wont feel bad when i break a truck motor vs my fancy one. so im going to save the LS6 and find a nice 6speed to bolt to it and throw in my next daily driver (looking to sell my Galant, thats far from being 'daily driver' for some time)
random pics:
oh yeah, so while i was buying ****. i bought that beast on the right. like 740/1180ft tq 1/2" drive. little one is 3/8 i have had forever. couple new 4mh batteries. took the crank pulley bolt off after a couple hits, spun the head bolts right out.
i have a hone, so i dropped it down the holes.
if i NEVER use that stupid *** band clamp ever again i will be a happy man. buying the right tools makes life, and this 'hobby' so much more enjoyable. even though it hurts to spend money some times.
going sloppymechanics rebuild on this. well i did clean some things. but i didnt bother pulling the mains, pretended i didnt look at the rods or cam bearings.
speaking of, parts here/on the way:
PAC 1218 springs (probably be pics of install tomorrow)
'sloppy stage 2' Jegs cam. Lift: 0.585"/0.585" Duration @ 0.050": 228�/230� Advertised Duration: 283�/286� Lobe Separation: 112� (still waiting for this, tracking shows a couple days)
i did buy some MLS head gaskets, will reuse the rest. and head/rod bolts, etc.
and i gapped the rings. (btw be careful when using circular sander to gap, takes material quickly off 2nd ring)
i will probably be waiting for payday before buying anymore big stuff. hopefully be fuel tank crap.
02-28-2017, 11:29 PM
#63
On The Tree
Thread Starter
Join Date: Aug 2013
Location: Lake Stevens, WA
Posts: 174
Likes: 0
Received 0 Likes
on
0 Posts
ok.
"rebuild kit"
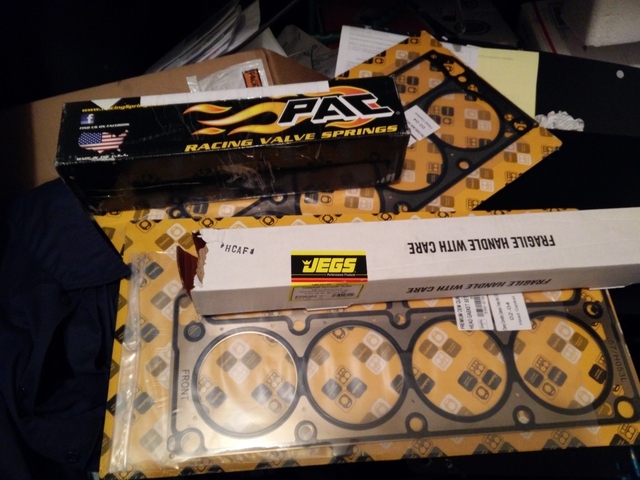
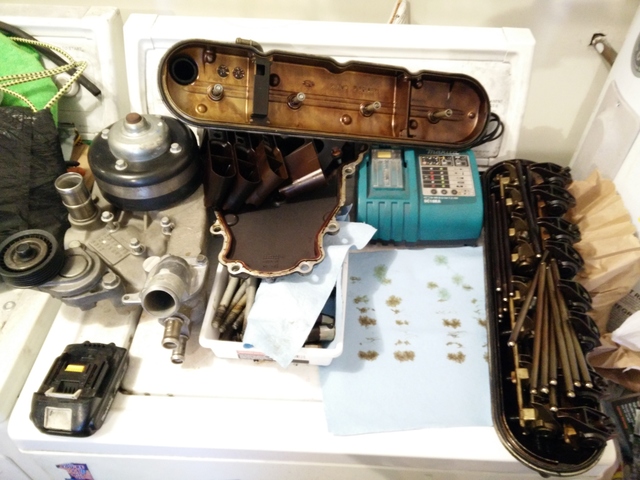
 couple of not GM headgaskets i guess. i should have read the ad more carefully, i just cross referenced off the part number i wanted. oh well. i have been running random ebay MLS gaskets on Honda **** for years with no issue (well, other than reusing them). some PAC 1218 springs. and the Jegs cam (aka Sloppy Stage 2). specs are in the last post...and on jegs website.
HG's = 35
springs = 135
cam = 287
i gapped the rings to "that will work" and "oops". bearings looked, well, 'used'. clean, lube, reinstall. and you seen i dropped the ball/flex hone down the holes. oh cam bearings. i did look, forgot i wasnt suppose to per sloppy instructions, lubed cam and poked it in.
this motor is going to run at least 10w30. lol.... quite honestly i plan on driving this a lot. but my drive to work is 8miles each way. and i was thinking the other day when i drove 30some miles in my Galant, that it was probably the furthest it has ever ventured from home in that. probably not going drive in the rain on purpose. maybe 4k miles, which i doubt even the galant does and i drive it in the rain.
oh, i show you my new ring gapper?
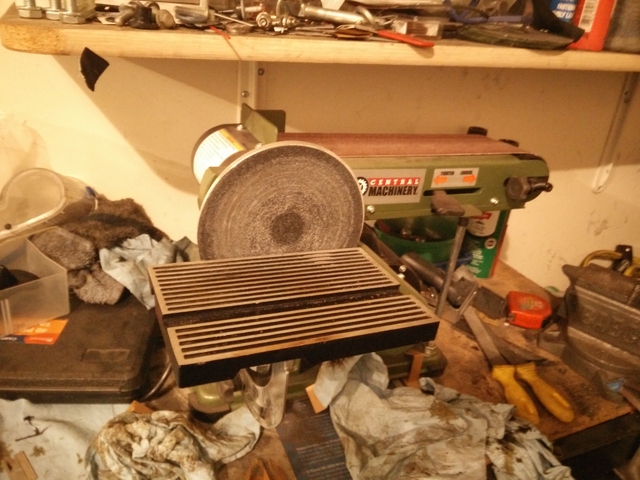
works great. watch out for the 2nd ring. its iron? it grinds QUICK.
****, my attention span sucks. works less when alcohol...
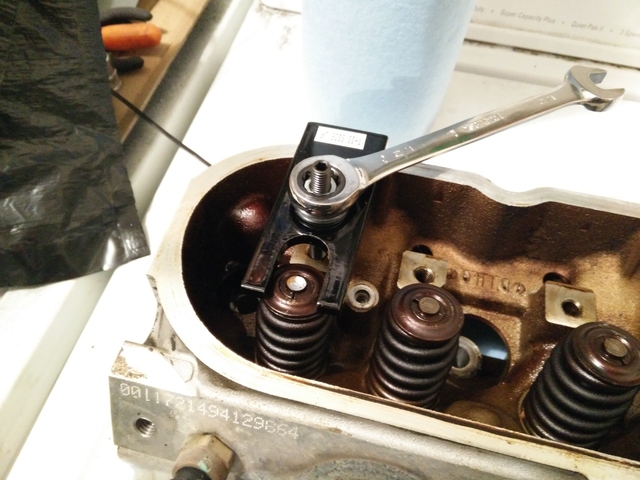
"correct" valve spring compressor. works mint. BUT word of warning. i love my makita impacts. the nut on the tool there did not like it as much as i do. luckily standard metric nut (tons of leftover flanged honda ones, that i love to swap in place of galant ones). it made it 14 springs... of course this was the cheapest one on ebay, like 22bucks. just be careful of the nut.
oh yeah. so this engine came from a rolled Tahoe. so a couple things where broken/bent...
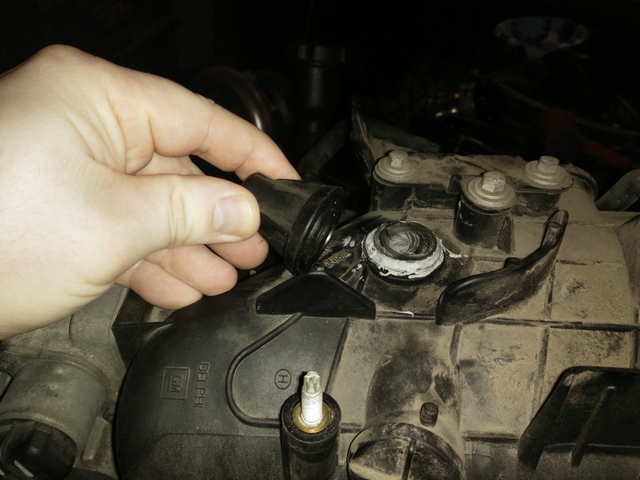
little trip to my favorite racing shop aka Ace Hardware. little Hondabond and a hammer and she is sealed again. think im going to order the billet egr/evap blockoff kit off ebay. like 22bucks, seams easier for the rest of the holes.
looks like thats all the pics. wasnt really taking many. taking my sweet time with progress. when i was doing the valve springs i thought my fingers where going to freeze off. hard to do delicate work with frozen fingers.
in the next couple days i plan to pull the manifolds off the engine in the car, test them on the truck motor with its accessories to double check some clearances, order some more parts.
"rebuild kit"
couple of not GM headgaskets i guess. i should have read the ad more carefully, i just cross referenced off the part number i wanted. oh well. i have been running random ebay MLS gaskets on Honda **** for years with no issue (well, other than reusing them). some PAC 1218 springs. and the Jegs cam (aka Sloppy Stage 2). specs are in the last post...and on jegs website.HG's = 35
springs = 135
cam = 287
i gapped the rings to "that will work" and "oops". bearings looked, well, 'used'. clean, lube, reinstall. and you seen i dropped the ball/flex hone down the holes. oh cam bearings. i did look, forgot i wasnt suppose to per sloppy instructions, lubed cam and poked it in.
this motor is going to run at least 10w30. lol.... quite honestly i plan on driving this a lot. but my drive to work is 8miles each way. and i was thinking the other day when i drove 30some miles in my Galant, that it was probably the furthest it has ever ventured from home in that. probably not going drive in the rain on purpose. maybe 4k miles, which i doubt even the galant does and i drive it in the rain.
oh, i show you my new ring gapper?
works great. watch out for the 2nd ring. its iron? it grinds QUICK.
****, my attention span sucks. works less when alcohol...
"correct" valve spring compressor. works mint. BUT word of warning. i love my makita impacts. the nut on the tool there did not like it as much as i do. luckily standard metric nut (tons of leftover flanged honda ones, that i love to swap in place of galant ones). it made it 14 springs... of course this was the cheapest one on ebay, like 22bucks. just be careful of the nut.
oh yeah. so this engine came from a rolled Tahoe. so a couple things where broken/bent...
little trip to my favorite racing shop aka Ace Hardware. little Hondabond and a hammer and she is sealed again. think im going to order the billet egr/evap blockoff kit off ebay. like 22bucks, seams easier for the rest of the holes.
looks like thats all the pics. wasnt really taking many. taking my sweet time with progress. when i was doing the valve springs i thought my fingers where going to freeze off. hard to do delicate work with frozen fingers.
in the next couple days i plan to pull the manifolds off the engine in the car, test them on the truck motor with its accessories to double check some clearances, order some more parts.
03-07-2017, 09:52 PM
#64
On The Tree
Thread Starter
Join Date: Aug 2013
Location: Lake Stevens, WA
Posts: 174
Likes: 0
Received 0 Likes
on
0 Posts
didnt make nearly as much progress i would have liked. but it was cold and snowing. i should buy a heater, broke the last couple that worked well in the garage...
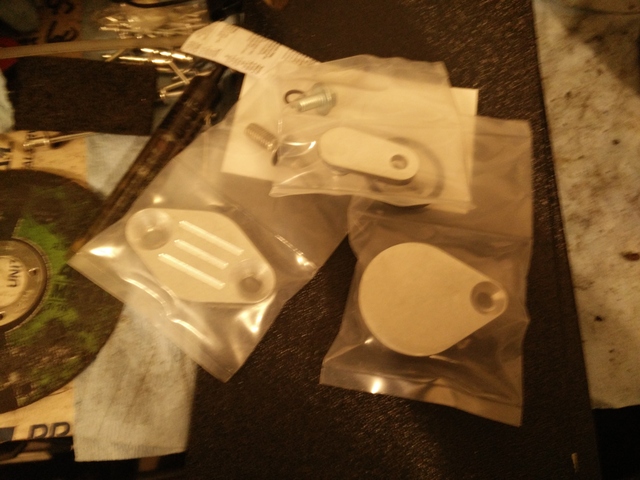
bought those. seemed simpler. only 20bucks shipped. one for giant EGR hole in intake manifold, small one for EVAP something in the intake. and the other is for the EGR on the exhaust manifold. was going to cut it off and weld the hole/etc, but again, simpler... need to paint these black before installing.
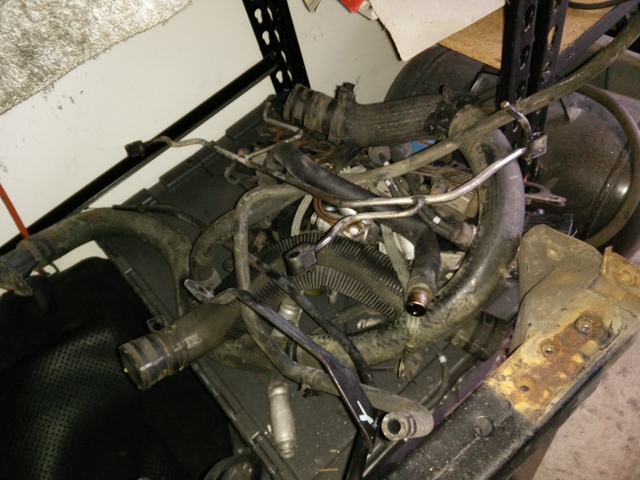
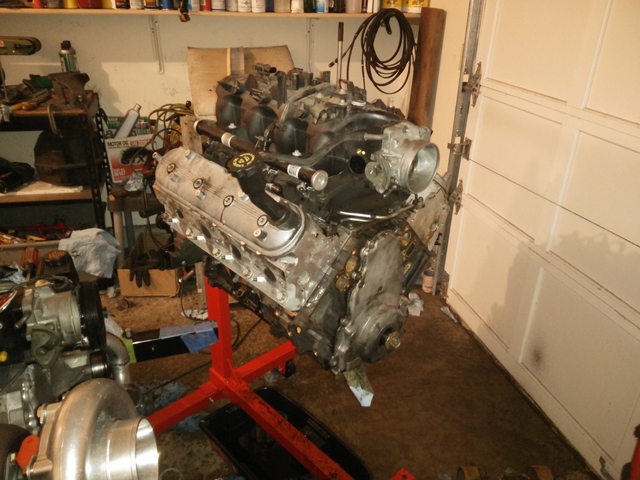
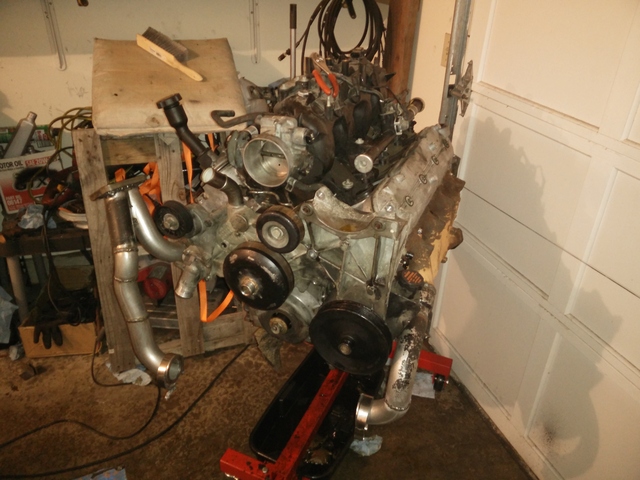
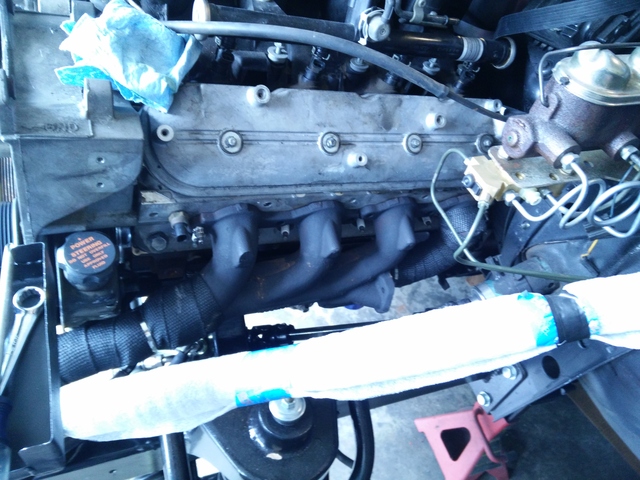
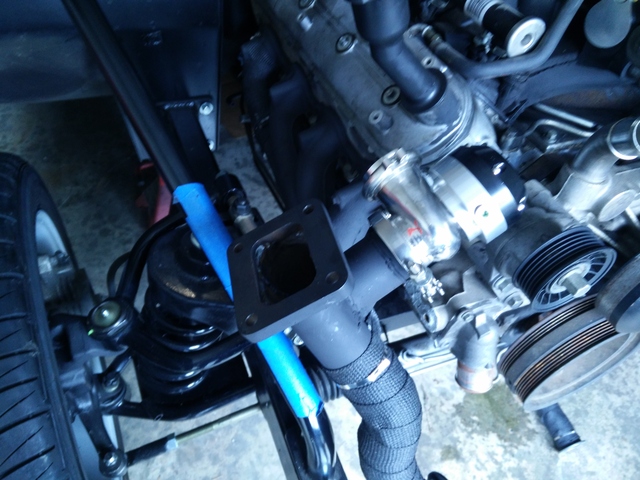
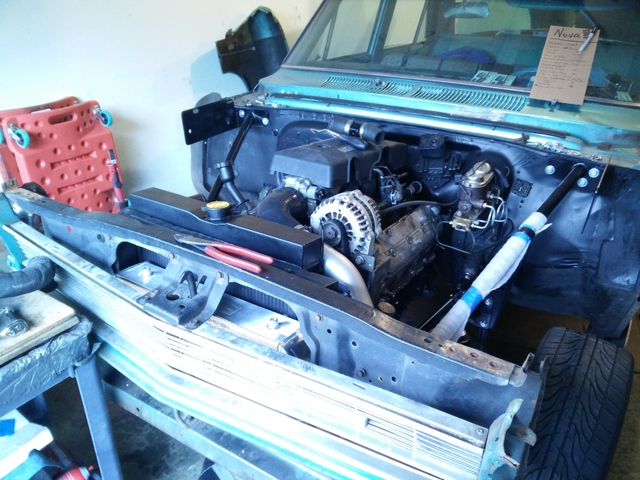
went to test fit manifolds... threw on the water pump to check some clearances, threw the accessory drive on to make sure it cleared drivers manifold...

took some work... ok i just removed some extra brackets, the PS hose, and bent the other PS fitting out the way. ill need to figure something out for the PS.
as you can see its DAMN close. i plan to header wrap that. probably will be fine.
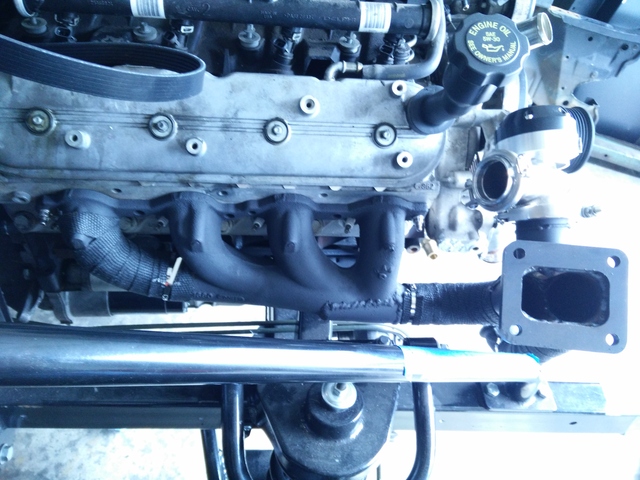
yup.... think i have the passenger side figured out. little issue with oil drain, and the heater core hoses.
heater core = blocked off
oil drain = creative with the fittings i dont have and cant seem to find. but a 90 and straight, with my usual NAPA hose will do fine. oh and allen bolts for the drain flange, then sent regulars, what a PITA.

bought those. seemed simpler. only 20bucks shipped. one for giant EGR hole in intake manifold, small one for EVAP something in the intake. and the other is for the EGR on the exhaust manifold. was going to cut it off and weld the hole/etc, but again, simpler... need to paint these black before installing.
went to test fit manifolds... threw on the water pump to check some clearances, threw the accessory drive on to make sure it cleared drivers manifold...
took some work... ok i just removed some extra brackets, the PS hose, and bent the other PS fitting out the way. ill need to figure something out for the PS.
as you can see its DAMN close. i plan to header wrap that. probably will be fine.
yup.... think i have the passenger side figured out. little issue with oil drain, and the heater core hoses.
heater core = blocked off
oil drain = creative with the fittings i dont have and cant seem to find. but a 90 and straight, with my usual NAPA hose will do fine. oh and allen bolts for the drain flange, then sent regulars, what a PITA.
 04-16-2017, 09:49 PM
#66
On The Tree
Thread Starter
Join Date: Aug 2013
Location: Lake Stevens, WA
Posts: 174
Likes: 0
Received 0 Likes
on
0 Posts
ok. so i have been watching too many youtube vids and not enough working. but couple of those guys are getting me motivated to work on my pile. big thing is me probably overthinking and stressing on **** that probably isnt an issue? just need to hammer it out (maybe literally? sometimes its lots of cutting, and welding too)
so in todays installment of Dustin grabs the saw/welder and makes **** happen...
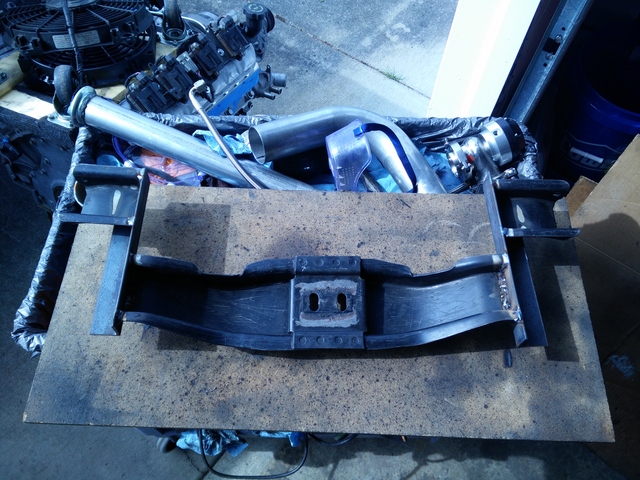
we now have a TH400 crossmemeber..yes it does look a lot like the PG crossmember...
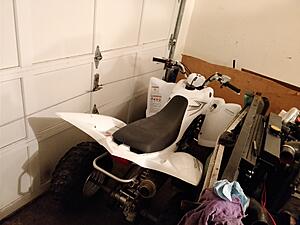
was checking things out (downpipe/exhaust clearance), had put a fender on. figured i would throw some wheels on and check how those would actually fit (never bothered till now) with the new front end.
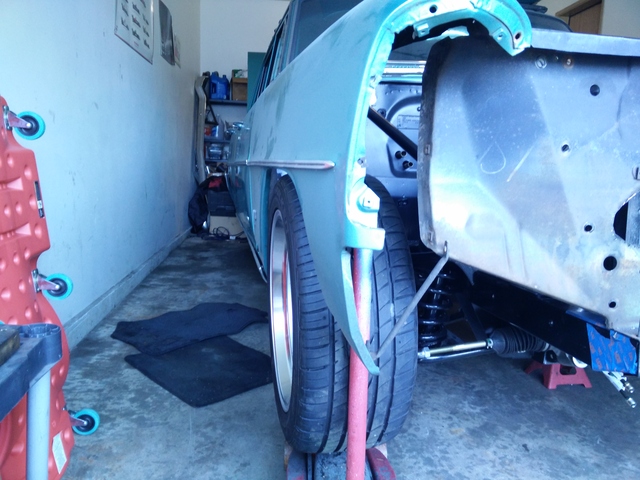
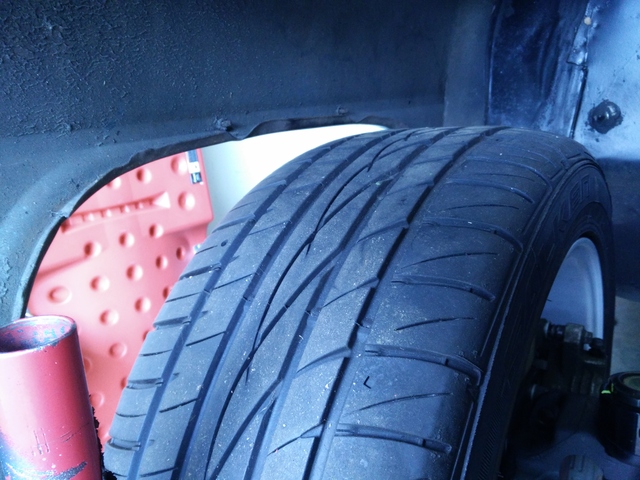
thats the 17x8 zero offset with a 245/45 tire. and the jack is under it giving some load.... might need 2 more 8" wheels... fronts i have are 7's i think, with 215/45s.
OH...

this thing was an utter pain in the *** to remove. probably welded a dozen nuts to it. broke off an easy out thing (need to throw these stupid things away). but i won!
i dont remember what these pics where? but i uploaded them anyway...
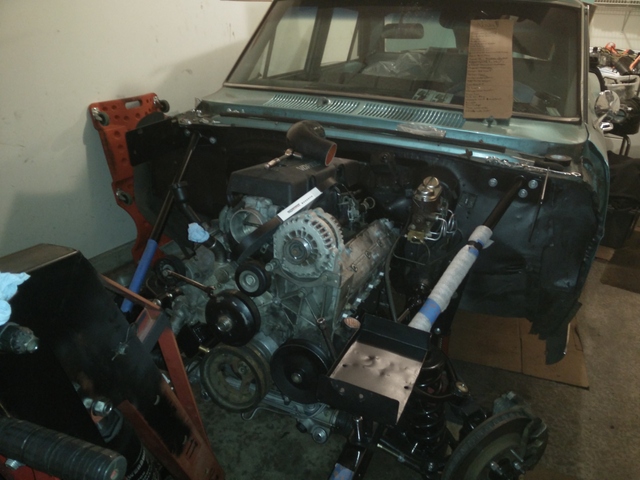
i took them last week i think. probably showing that the 5.3L is installed...
i also bought this...
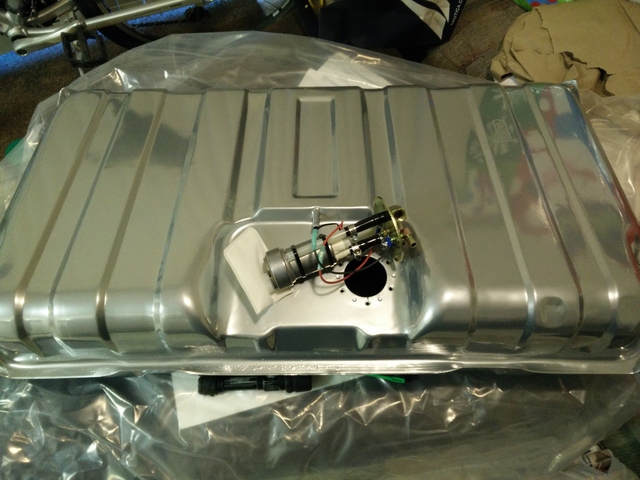
i have to say i am really impressed. i didnt realize that there was a baffle splitting the tank in 2 with about 5 1.5" holes in it to keep fuel to the front of the tank in acceleration or whatever. plus the little pan that the pump sits in of course (i thought thats all it had).
my issue with the tank brings us to the next pic...
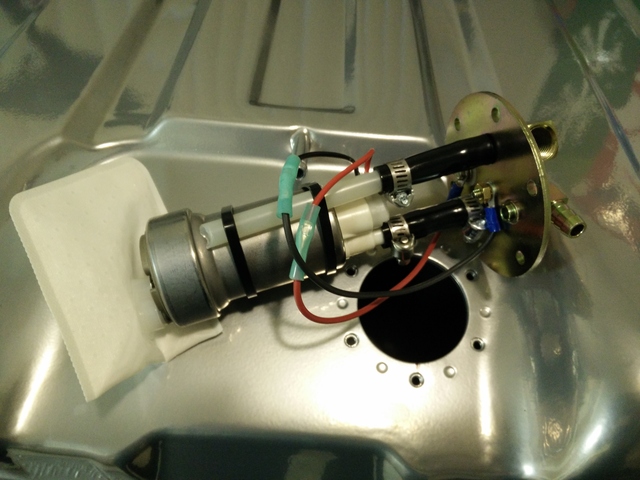
i got a Walbro 450lph pump... 400/450 i am told are the same externally.
the issue is that when Tanks Inc made these, and from the looks of it all the others. they only put a 2" opening in the tanks?!?! im sure with a standard walbro 255 pump its a tight fit and a wiggle to get it in. but the 450 is even tighter. you got to make sure everything is clocked just perfect, a twist, wiggle, little angle, etc... anyway. they should have built in some future proofing.
i did get a fuel level sender also. looks like it will be tight as all hell too. but from the looks of it, its a standard aftermarket universal piece.
anyway. thats all the pics. should be one more of the radiator outlet pointing right into the alternator, but im not going to look for it. new radiator will be here tuesday, you know, after my weekend is over. stupid drop shipped parts via UPS. if it would have shipped out of california like the listing said....oh and UPS is still the slowest shipper ever.
end of ranting/rambling... tomorrow, more welding, cutting, maybe a gas tank install...
so in todays installment of Dustin grabs the saw/welder and makes **** happen...
we now have a TH400 crossmemeber..yes it does look a lot like the PG crossmember...
was checking things out (downpipe/exhaust clearance), had put a fender on. figured i would throw some wheels on and check how those would actually fit (never bothered till now) with the new front end.
thats the 17x8 zero offset with a 245/45 tire. and the jack is under it giving some load.... might need 2 more 8" wheels... fronts i have are 7's i think, with 215/45s.
OH...
this thing was an utter pain in the *** to remove. probably welded a dozen nuts to it. broke off an easy out thing (need to throw these stupid things away). but i won!
i dont remember what these pics where? but i uploaded them anyway...
i took them last week i think. probably showing that the 5.3L is installed...
i also bought this...
i have to say i am really impressed. i didnt realize that there was a baffle splitting the tank in 2 with about 5 1.5" holes in it to keep fuel to the front of the tank in acceleration or whatever. plus the little pan that the pump sits in of course (i thought thats all it had).
my issue with the tank brings us to the next pic...
i got a Walbro 450lph pump... 400/450 i am told are the same externally.
the issue is that when Tanks Inc made these, and from the looks of it all the others. they only put a 2" opening in the tanks?!?! im sure with a standard walbro 255 pump its a tight fit and a wiggle to get it in. but the 450 is even tighter. you got to make sure everything is clocked just perfect, a twist, wiggle, little angle, etc... anyway. they should have built in some future proofing.
i did get a fuel level sender also. looks like it will be tight as all hell too. but from the looks of it, its a standard aftermarket universal piece.
anyway. thats all the pics. should be one more of the radiator outlet pointing right into the alternator, but im not going to look for it. new radiator will be here tuesday, you know, after my weekend is over. stupid drop shipped parts via UPS. if it would have shipped out of california like the listing said....oh and UPS is still the slowest shipper ever.
end of ranting/rambling... tomorrow, more welding, cutting, maybe a gas tank install...
04-16-2017, 11:30 PM
#67

just a heads up on the tanks inc gaskets...not sure if they fixed this issue but some guys had problems with the rubber gaskets leaking with certain fuel mixes/additives. i belive the solution is cork gaskets with some permatex aviation sealant. might not be an issue anymore but figued id mention it if it's easier to prevent now. keep up the good work
04-17-2017, 12:53 AM
#68
On The Tree
Thread Starter
Join Date: Aug 2013
Location: Lake Stevens, WA
Posts: 174
Likes: 0
Received 0 Likes
on
0 Posts
yeah i was reading that on the nova forum. was just going to rail down the rubber gaskets and call it good. they made it sound like the gas would slightly weep past the gasket. maybe making a gas smell...funny, with carb on the car she smelt like dripping fuel all the time.
exhaust will be going out the side, so no where near the tank. so even if it did get a drip or two, its just going to hit the ground and evap. i should be safe.
exhaust will be going out the side, so no where near the tank. so even if it did get a drip or two, its just going to hit the ground and evap. i should be safe.
05-02-2017, 10:23 PM
#70
On The Tree
Thread Starter
Join Date: Aug 2013
Location: Lake Stevens, WA
Posts: 174
Likes: 0
Received 0 Likes
on
0 Posts
05-02-2017, 11:02 PM
#71
On The Tree
Thread Starter
Join Date: Aug 2013
Location: Lake Stevens, WA
Posts: 174
Likes: 0
Received 0 Likes
on
0 Posts
ok i made a new to-do list... and an order to work on stuff list. that way not just random small projects are done, bigger projects or areas of the car are complete...
i think where i left off i did do a little bit more. but it seems im taking less pics. sometimes its because the progress seems small, and its stuff i have taken pics of before...or hopefully its because im working.
lets see what i uploaded....
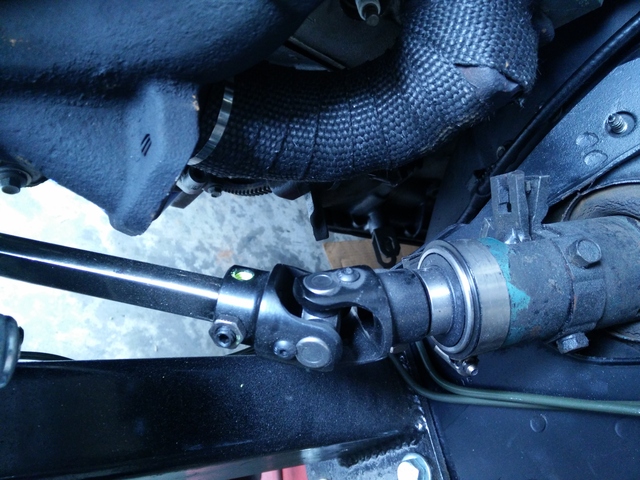
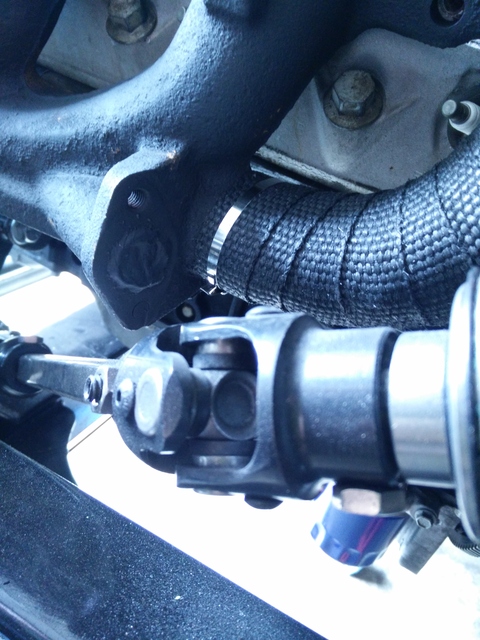
looks like drivers manifold just about done... i forgot that the guy i was buying parts from was in PA...well i guess the part i forgot is that all the **** would be rusty. so one of the EGR plate bolts didnt want to come out. so F-it. just welded that hole shut... finish welded both the manifolds, as i guess i didnt weld the v-bands. probably being last and didnt want to remove the manifolds again... i header wrapped the 2" cross over stuff with 2" black DEI wrap. and i did some stuff in 1", but that stuff sucks and luckily i didnt buy nearly enough. so, im done. what else is in those pics... plenty of steering shaft clearance. cut the column shift thing off as it hits the manifold. ill be going to a Lokar floor shift i think. *any thing else out there that doesnt look racecar?*
that reminds me, i didnt take pics of the big pile of crap i bought... ehh.

on the right we have "return" PS hose that will be going to a cooler (after too much thought). on the left, the pressure hose. that really just needed to do a 180 and be 4" long. yes, i wrap all SS braided crap in electrical tape, it keeps it from sawing threw everything it touches.

yup. passenger side. mounted my wastegate. a brace for it. some paint on manifold, some wrap. etc.
OH... remember when there was a LS6 in the car with Fbody accessories and i build that turbo crap? yeah... truck accessories now... i do own several hammers, so all is good.
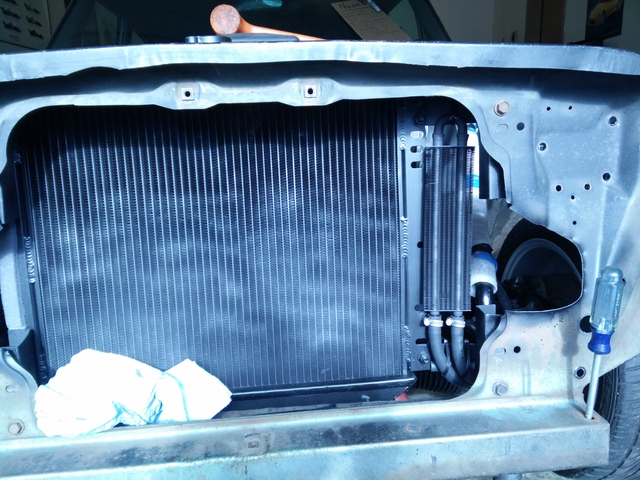
did i mention that my upper radiator inlet pointed directly at my alternator?
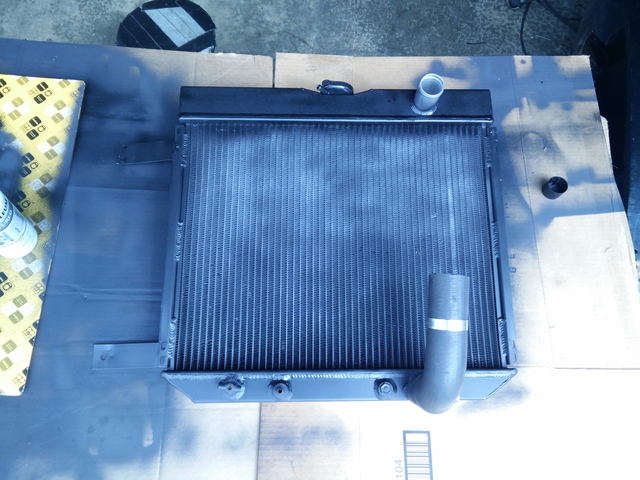
this is an aluminum radiator old *** cougar/mustang. it takes some work.... im amazed at my fabrication skills, then my lack there of. i can get that to fit. but cant get a radiator hose in there to fit.
PS cooler mounted!!! nope. intercooler hit it there. think it will be horizontal on the bottom now. but there it is. you can get them for like 25bucks at parts store. read of people boil there fluid after a while.
and thats where i left her tonight....

i think where i left off i did do a little bit more. but it seems im taking less pics. sometimes its because the progress seems small, and its stuff i have taken pics of before...or hopefully its because im working.
lets see what i uploaded....
looks like drivers manifold just about done... i forgot that the guy i was buying parts from was in PA...well i guess the part i forgot is that all the **** would be rusty. so one of the EGR plate bolts didnt want to come out. so F-it. just welded that hole shut... finish welded both the manifolds, as i guess i didnt weld the v-bands. probably being last and didnt want to remove the manifolds again... i header wrapped the 2" cross over stuff with 2" black DEI wrap. and i did some stuff in 1", but that stuff sucks and luckily i didnt buy nearly enough. so, im done.
what else is in those pics... plenty of steering shaft clearance. cut the column shift thing off as it hits the manifold. ill be going to a Lokar floor shift i think. *any thing else out there that doesnt look racecar?*that reminds me, i didnt take pics of the big pile of crap i bought... ehh.
on the right we have "return" PS hose that will be going to a cooler (after too much thought). on the left, the pressure hose. that really just needed to do a 180 and be 4" long. yes, i wrap all SS braided crap in electrical tape, it keeps it from sawing threw everything it touches.
yup. passenger side. mounted my wastegate. a brace for it. some paint on manifold, some wrap. etc.
OH... remember when there was a LS6 in the car with Fbody accessories and i build that turbo crap? yeah... truck accessories now... i do own several hammers, so all is good.
did i mention that my upper radiator inlet pointed directly at my alternator?
this is an aluminum radiator old *** cougar/mustang. it takes some work.... im amazed at my fabrication skills, then my lack there of. i can get that to fit. but cant get a radiator hose in there to fit.
PS cooler mounted!!! nope. intercooler hit it there. think it will be horizontal on the bottom now. but there it is. you can get them for like 25bucks at parts store. read of people boil there fluid after a while.
and thats where i left her tonight....
05-03-2017, 01:41 AM
#72

Nice work so far. Looking for help on my power steering hoses, its really tight in there like yours. Which pressure hose did you use? Where'd you get it from ? Link? The stock one with that low rpm assist fitting is huge and is really screwing me over. Any guidance is appreciated.
05-03-2017, 11:42 AM
#73
On The Tree
Thread Starter
Join Date: Aug 2013
Location: Lake Stevens, WA
Posts: 174
Likes: 0
Received 0 Likes
on
0 Posts
Nice work so far. Looking for help on my power steering hoses, its really tight in there like yours. Which pressure hose did you use? Where'd you get it from ? Link? The stock one with that low rpm assist fitting is huge and is really screwing me over. Any guidance is appreciated.
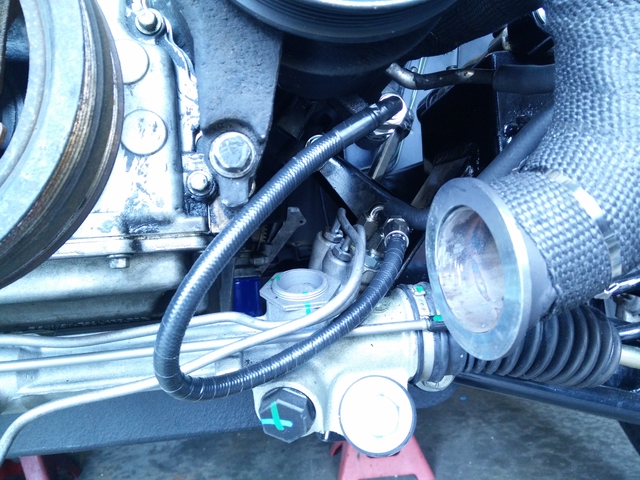
there is another pic for you. not sure what brand it is. I got it when I bought my front end, was ordered for my SBC not the LS. its a trim to fit pressure. and a clamp on return?!? with AN on one side. I cut the fitting off the return to make it a slip/clamp on. used the rubber hose that came with the cooler. worked mint.
06-06-2017, 12:31 AM
#74
On The Tree
Thread Starter
Join Date: Aug 2013
Location: Lake Stevens, WA
Posts: 174
Likes: 0
Received 0 Likes
on
0 Posts
well i spent some time cleaning up the garage yesterday, dug the 8.8 out and drug that heavy bastard up front of the car for some room to take it apart and cut it up...later. (it was also under the car/fuel tank)
proof of some work taking place...
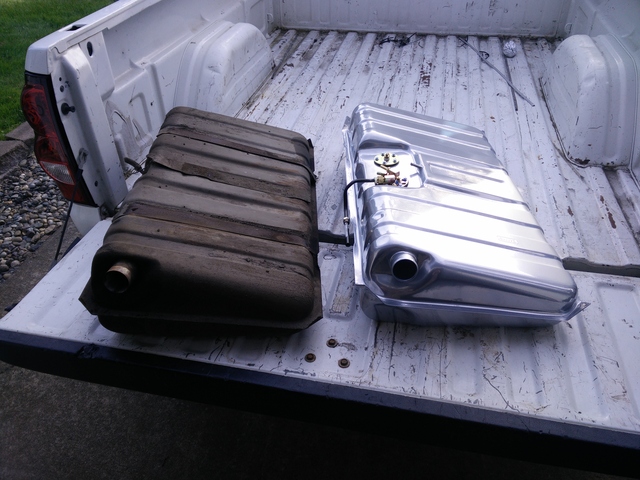
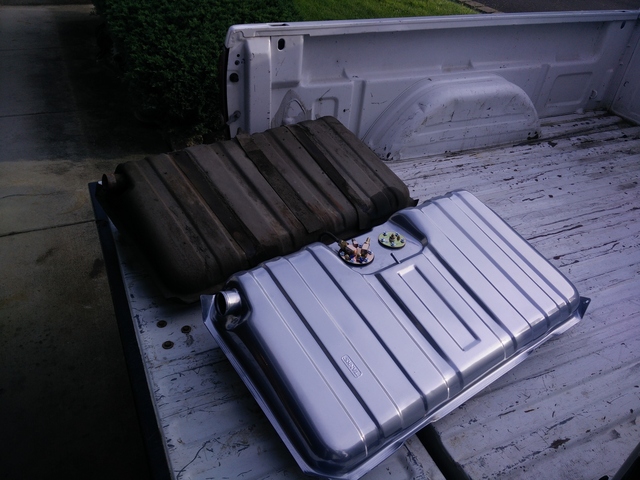
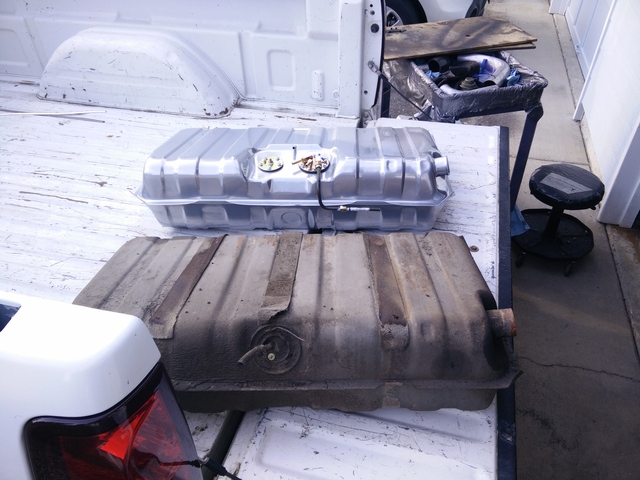
obviously the old tank (guessing original) vs the new Tanks Inc EFI tank.

little peak inside the OLD tank. hell, it doesnt look bad at all in there!.... FOR SALE, CHEAP! local only obviously.
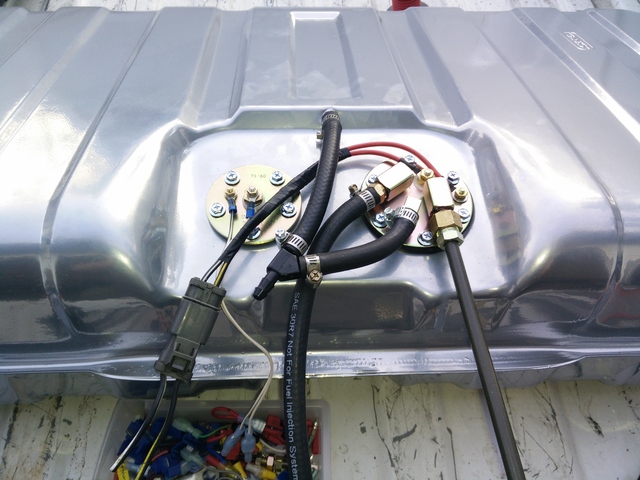
spent too much time on this probably. but it looks nice, i like it. put a OE plug on the fuel pump (Honda fan/distributor plug), sender is just some random wire with slip connectors (didnt look too hard for small 2pin plug set). hard line got bent after pic.
shortly bit later after some fighting with the straps, fill hose, the junk harbor freight creeper that cant roll over light dirt/dust, i have the tank hanging, fill hose ripped, pressure fuel line pointing towards the front of the car...
proof of some work taking place...
obviously the old tank (guessing original) vs the new Tanks Inc EFI tank.
little peak inside the OLD tank. hell, it doesnt look bad at all in there!.... FOR SALE, CHEAP! local only obviously.
spent too much time on this probably. but it looks nice, i like it. put a OE plug on the fuel pump (Honda fan/distributor plug), sender is just some random wire with slip connectors (didnt look too hard for small 2pin plug set). hard line got bent after pic.
shortly bit later after some fighting with the straps, fill hose, the junk harbor freight creeper that cant roll over light dirt/dust, i have the tank hanging, fill hose ripped, pressure fuel line pointing towards the front of the car...
 06-08-2017, 08:39 PM
#77
On The Tree
Thread Starter
Join Date: Aug 2013
Location: Lake Stevens, WA
Posts: 174
Likes: 0
Received 0 Likes
on
0 Posts
thanks. yeah i had thought about that, probably work with a low profile lokar setup, and some grinding/notching of the manifold. and after the Engine Master header bash, dont see it being an issue at all.
02-05-2018, 08:20 PM
#78
On The Tree
Thread Starter
Join Date: Aug 2013
Location: Lake Stevens, WA
Posts: 174
Likes: 0
Received 0 Likes
on
0 Posts
i still have this car. its sitting just the same. while it looks like i have made no progress at all...well i kinda havent. but i have done some things.
not sure if its progress or an update, as its neither really... just current state of things...
i cleaned up... less **** on the NOVA, and in the trunk, etc.
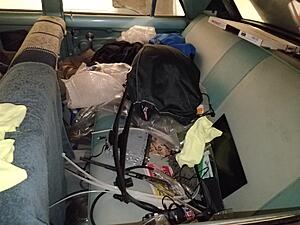
ok still bunch of **** inside the back seat...
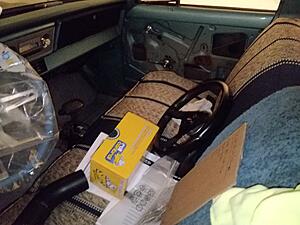
spoon wheel might be going on the NOVA... seriously tho. you can also see the new floor shifter just sitting there, think i will try to get some buckets in the car before mounting it. yellow box is some bushings for the G8.
well, i HAD plenty of room to work. (lies, there was **** there before i had to move out the way to work)
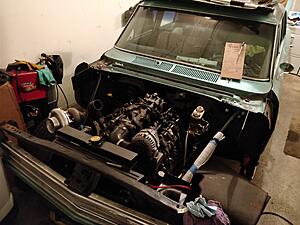
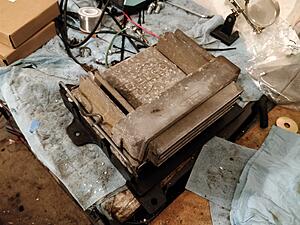
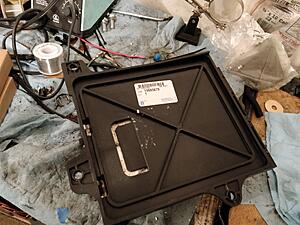
found part number for this badass oem ecu bracket (s10 or something) stock truck ecu snaps right in.
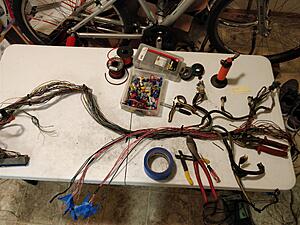
oh yeah, PAY SOMEONE ELSE TO DO YOUR HARNESS FOR YOU... not that bad, but still time consuming.
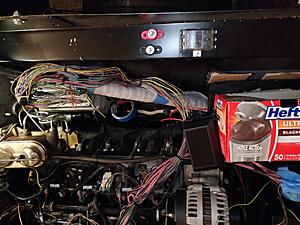
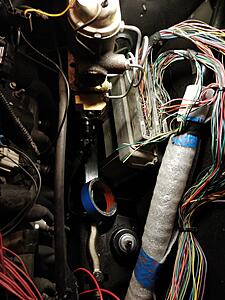
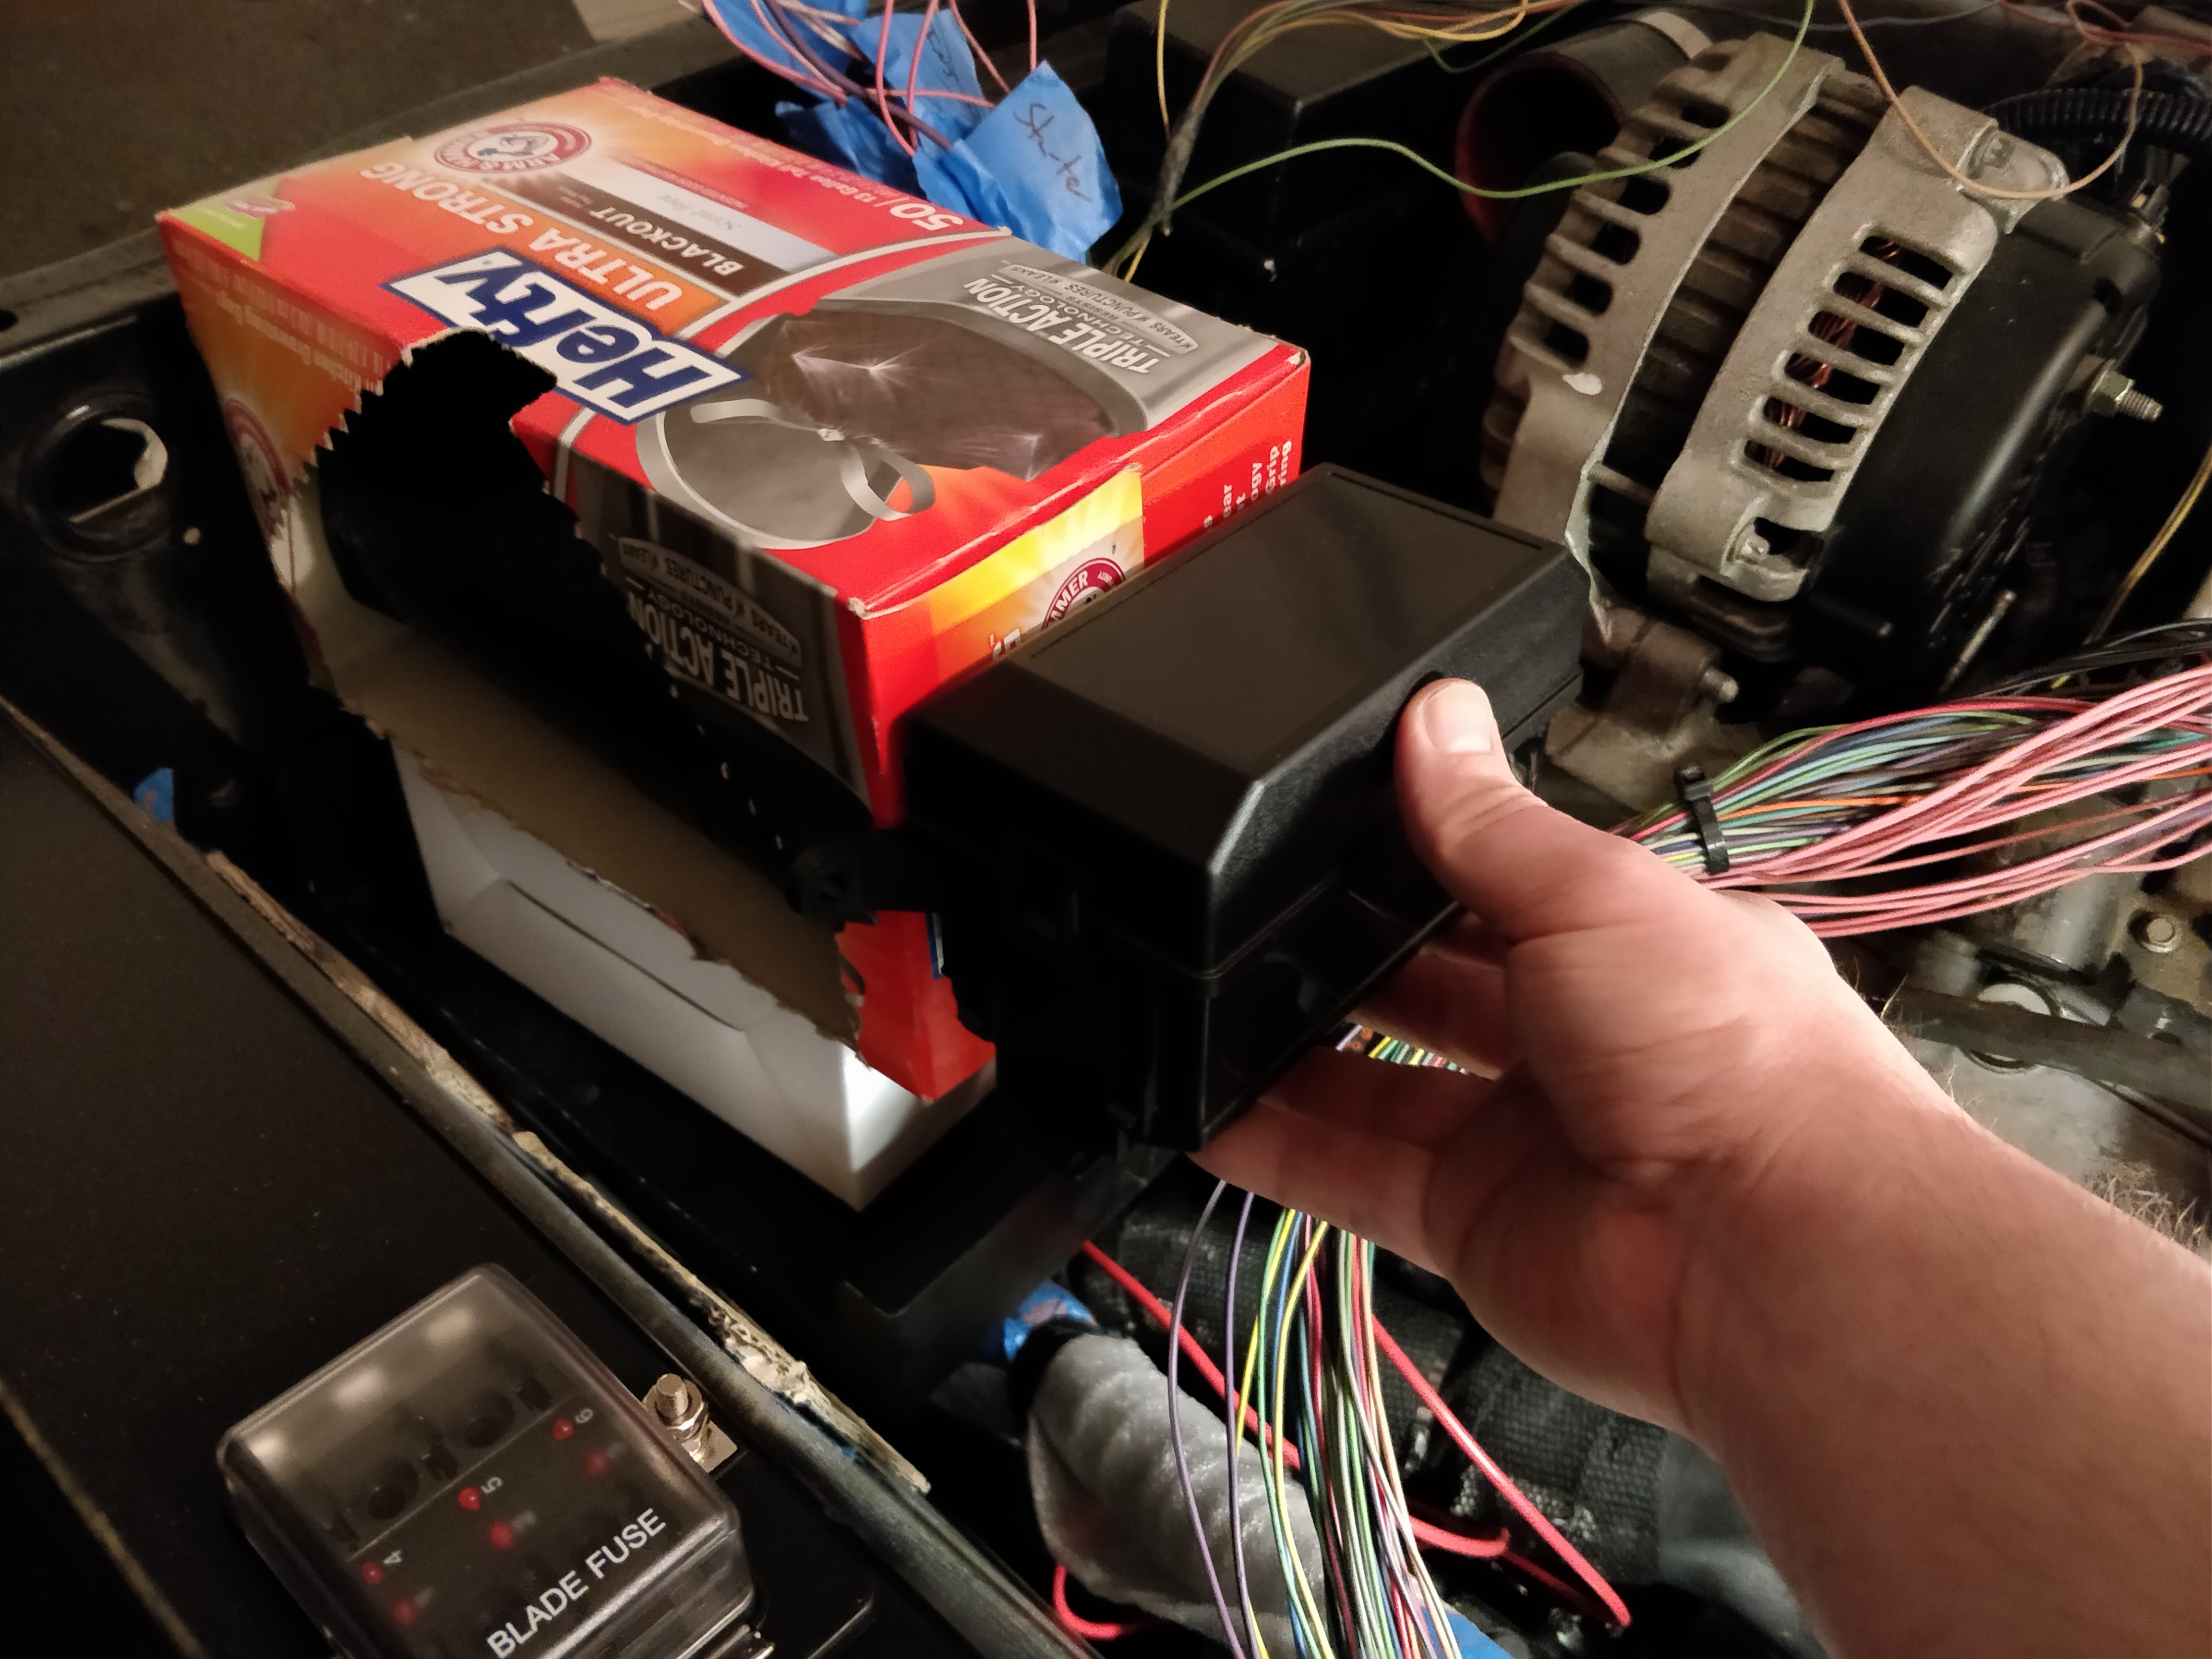
can you even see wtf im doing in these pics? im trying to tuck the ecu under/beside the brake master, but not in the way of the suspension or steering...it fits. and i think i can get the plus out if needed.
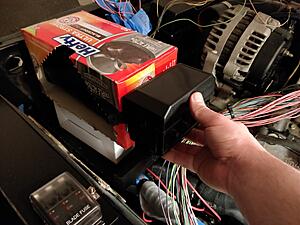
trash bag box is actually a battery...obviously. the box im holding is a 6 relay/fuse box. was cheap off amazon. looks like it might be legit and tidy.
also got some other battery lugs, and another small fuse block for aux i might use too.
think the engine harness is mostly sorted. need to put IAT plug on, and make sure the MAF **** i cut out isnt needed lol. then wire in the fuse/relay box stuff.
maybe ill make some more progress this weekend...or maybe there will be a post in 6months (but seriously i want this running soon)
not sure if its progress or an update, as its neither really... just current state of things...

i cleaned up... less **** on the NOVA, and in the trunk, etc.

ok still bunch of **** inside the back seat...

spoon wheel might be going on the NOVA
... seriously tho. you can also see the new floor shifter just sitting there, think i will try to get some buckets in the car before mounting it. yellow box is some bushings for the G8.
well, i HAD plenty of room to work. (lies, there was **** there before i had to move out the way to work)


found part number for this badass oem ecu bracket (s10 or something) stock truck ecu snaps right in.

oh yeah, PAY SOMEONE ELSE TO DO YOUR HARNESS FOR YOU... not that bad, but still time consuming.


can you even see wtf im doing in these pics? im trying to tuck the ecu under/beside the brake master, but not in the way of the suspension or steering...it fits. and i think i can get the plus out if needed.
trash bag box is actually a battery...obviously. the box im holding is a 6 relay/fuse box. was cheap off amazon. looks like it might be legit and tidy.
also got some other battery lugs, and another small fuse block for aux i might use too.
think the engine harness is mostly sorted. need to put IAT plug on, and make sure the MAF **** i cut out isnt needed lol. then wire in the fuse/relay box stuff.
maybe ill make some more progress this weekend...or maybe there will be a post in 6months (but seriously i want this running soon)
02-05-2018, 08:21 PM
#79
On The Tree
Thread Starter
Join Date: Aug 2013
Location: Lake Stevens, WA
Posts: 174
Likes: 0
Received 0 Likes
on
0 Posts
so i have been watching some vids and getting a little motivated.
i didnt feel like messing with the wiring or little engine things (that i should probably be doing). felt that the motivation i had was larger? and i needed a bigger project? or i just wanted to take some more **** apart and grind...
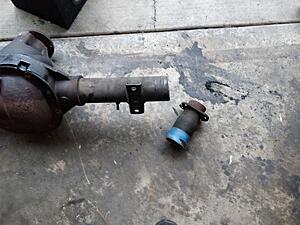
cut out about 3" or so. cleaned up the ends, tapered them. but did not weld them as i dont have gas, or some angle iron to hold them. the section i cut out had the spring perch and i cut off one of the 4link mounts, forgot to do the other as i was focusing on the long slide. and i also stripped it down completely obviously. picture taken shortly after it fell of the jackstands :
note: calipers, and brackets are light...rest of that **** is heavy. axles, diff, housing...all adds up to one heavy ****.
oh yeah.
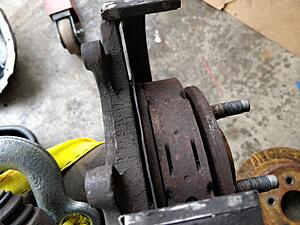
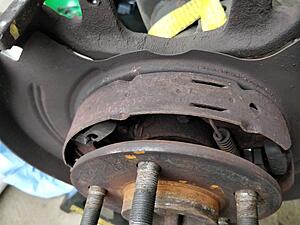
so those are the parking brakes shoes... guess i wont be bothering with hooking that crap up for now (ok probably ever). ill just let the parking pall hold her in place (works fine in the truck and G8)...
also, the factory parking brake handle was broken (and i didnt like it anyway, think i tossed it). i have an idea of how i would do the parking brake, but maybe ill get to it later. worry about getting her on the road.
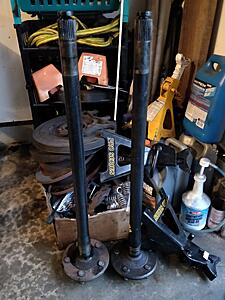
i dug out the other short axle i got at the junkyard like a year ago.