When you click on links to various merchants on this site and make a purchase, this can result in this site earning a commission. Affiliate programs and affiliations include, but are not limited to, the eBay Partner Network.
Could you go in to a little more detail? I'm doing a 4L80E in my S10, and I grabbed a Trailblazer (4L60E OR 4L65E, I think) shifter. I'm hoping I won't have to mod it, but if I did, I would love to see what kind of thinks I could expect.
Jay
I had to shorten the shifter arm on the 4l80e to make the throw of the shifter match the throw of the transmission. I'll get some pictures.
I would think that you're probably closer to having it work right with a 4l60E shifter, but that's just a guess.
Usually those guys want the cheapest garbage equipment and are super cheap about labor. And then they don't want to pay use to fix the hacked wiring "fixes" they did because "it works fine."
Jay
That's true. Right to the point where their car has intermittent electrical issues or burns to the ground due to a wiring fault. Oh the stories we could probably share.
If I remember properly the 4L60E and 4L80E used the same throw shifter arm on the transmission but I could be incorrect on that. I just find one in the salvage yard, measure the distance and make what I need if the stock one won't fit.
That's true. Right to the point where their car has intermittent electrical issues or burns to the ground due to a wiring fault. Oh the stories we could probably share.
.
My son just brought a project car, that he just bought, to my garage. Here is a picture of the fan connector.
The fan connector only has a few strands of wire left in the ferrule and the plastic shield slid back exposing the power to the chassis. Obviously the guy who did this did not have the right tools. Did I mention I'm not a fan of mechanical butt splices.
That's true. Right to the point where their car has intermittent electrical issues or burns to the ground due to a wiring fault. Oh the stories we could probably share.
If I remember properly the 4L60E and 4L80E used the same throw shifter arm on the transmission but I could be incorrect on that. I just find one in the salvage yard, measure the distance and make what I need if the stock one won't fit.
I figured that since the Silverado donor I have was available with 4L60E's and 80E's and used the same steering column, that I *should* be OK. But it would be nice to have an idea how to deal with it if I'm wrong. But I'm reasonably sure it'll work fine.
My son just brought a project car, that he just bought, to my garage. Here is a picture of the fan connector.
The fan connector only has a few strands of wire left in the ferrule and the plastic shield slid back exposing the power to the chassis. Obviously the guy who did this did not have the right tools. Did I mention I'm not a fan of mechanical butt splices.
I'll be honest, when I first started in the car audio industry (25 years ago) we used to butt connect everything, including starter kill wiring. (That was a long time ago...) I had a customer come in at the previous location I was at for the company I work for now (we have 5 stores). Anyway, he had had an alarm installed some 15 years before, and was having a problem (exactly what, we didn't know, initially) so he took it to the old company I used to work for. Even tho he had a lifetime warranty, the company wouldn't honor it because they changed suppliers. We were a dealer for the alarm company the customer had, and we offered to look into it for him. Turns out I had done the install 15 years before, and it had butt connected wiring. The issue was a bad remote. lol. Done properly, butt connectors are as reliable as anything else. But I prefer to solder and heat shrink. Or crimp proper connector ends and use sealed connectors (like Deutsch connectors, or GM PCM connectors and avoid random splices when possible. The problem usually comes from people crimping with pliers or the cheapest crimpers they can find.
I finished wiring up most of the new fusebox yesterday and fired it up. Started right up but had some engine surging. Couldn't keep it on long, because my garage CO2 sensor wasn't happy.
Have to put in brake fluid and bleed entire system, put the steering wheel back on the column, re-calibrate the computer to the throttle pedal, transfer the latest code to the transmission controller/body module, drop it off the jack stands and the car will hopefully move on it's own for the first time in 20 years.
Now for the exhaust. Only the passenger side will get an exhaust since it's a single turbo car.
I already had a 3.5" stainless downpipe completed earlier, with a V band flange at the end. For the external part, I decided to go with a 4" aluminum because 4" gives me options for inserts if I find that it's too loud. My Plymouth Neon exhaust was 4" aluminum and was no longer being used, so I reused some of the tubing and all I needed was one 180 degree bend to complete the vette exhaust.
Also 4" give me options for heat shields. I went with a 46" Patriot heat shield. Very reasonable.
I was planning on painting the aluminum part black, but now I'm not sure. My buddy had all black side pipes and I kinda liked them. Opinions welcome.
I was short about 2" of straight tube, but it will do for now. I can always add in a little more if it bugs me.
If it's too loud, I might add a V band flange, right where the straight part starts so I can pop inserts in and out or just easily swap in a quieter exhaust for those long cruises with my honey.
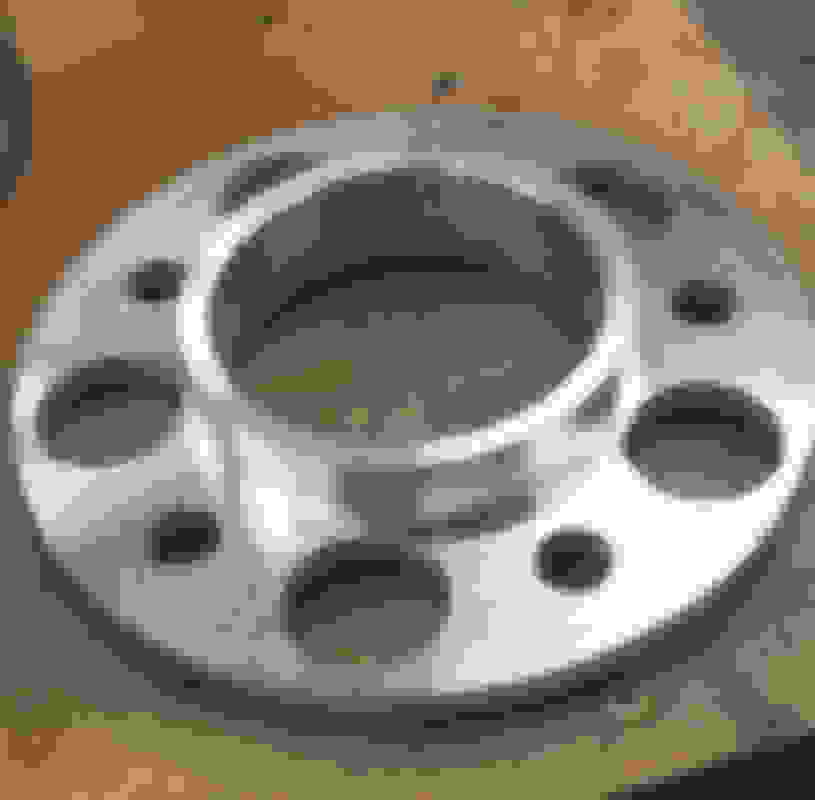
Got a pair of Jegs 15x8 4.5" setback JEGS Sport Star wheels for the front to match the back ones. They don't make a 4" setback and the 4.5" ones rubs against the brake caliper. So I machined a pair of spacers I had laying around to a .300 spacer and hubcentric.
Nice, thats awesome. Im jealous. Im hopn to drop mine off at my buddies for wiring and exhaust work. Still waitn on my new motor to be built. Engine guy kinda forgot about me while i was building the new house. Im hopn to drop it off memorial day weekend
I'm back off to the garage to figure out one of my re-wiring bugs. Completely forgot about the flashers switch and wired them to be on all the time. Two steps forward and one back.
Hello could you share the link of the 4 link kit you bought and then modified. Also if you have a picture of how you modified the frame side. I'm about to do this on a 78 twin turbo vette. Plan on using an explorer rear end with out shortening the one side and hope the offset is not too bad. Any more pics or comments on doing the 4 link would be very helpful.
Hello could you share the link of the 4 link kit you bought and then modified. Also if you have a picture of how you modified the frame side. I'm about to do this on a 78 twin turbo vette. Plan on using an explorer rear end with out shortening the one side and hope the offset is not too bad. Any more pics or comments on doing the 4 link would be very helpful.
The web links for the each of the 4 link tube and end parts don't work anymore, but I used https://www.qscomponents.com/
I think you may end up having to shorten both sides of the axle. There's not much wiggle room to locate the pumpkin because the driveshaft tunnel is narrow. If you're in NJ, you can borrow the 8.8 narrowing jig.
Also I had to cut open the body, above the pumpkin to add room for the pumpkin to move up and down.
Hope these help. I can take pics of any specific parts you might be interested in.

 01-21-2019, 10:57 PM