
LS swapping my LS - L92/LS3 into C5
 10-03-2017, 08:06 PM
#21


Yes, aluminum heads - the only iron-headed LS engines I know of are the very early (99-00) 6.0 LQ4s that also have a different crank (longer tail).
The bolt snaps because the friction holding the steel threads of the bolt against the aluminum threads of the head is greater than the shear strength of the bolt, which is weakened by thousands of heat cycles and corrosion.
Once the bolt snaps, there is actually very little friction left between the threads, so it's just a matter of turning the "stud" out of the hole. On the one that stuck up out of the hole, I probably could have used a set of vise grips very tightly clamped to turn it loose, but it's a one shot deal - every bit of material on the stud that you grind off, can't be easily put back. A nut "hex" head has a LOT more surface area to grab onto (it's why all fasteners use that design) and won't slip, so welding a nut onto that stud made sense. In addition, the welding superheats the base metal of the stud (steel), which then I rapidly cooled with water in an attempt to "shock" any corrosion between the steel and aluminum.
The same concept exists on the one that broke below the surface, but the downside is that you don't have the convenient stud to locate the nut on; you have to "build" up the surface of the steel until it sticks up past the head face; then you can place a nut on, and weld that together. The nice part is that aluminum and steel are dissimilar metals so you can't weld them together - and that works in your favor here. You wouldn't want to weld the stud to the head, which would certainly be possibly with an iron head and steel stud.
I would seriously doubt that the aluminum would be heated enough by the welding to get damaged - remember that combustion occurs directly against the face of the aluminum combustion chamber for dozens of years and many hundreds of thousands of miles with no adverse effects. The aluminum head has so much thermal mass that you'd need a WILD about of heat to get it to melt. The area within 2 inches of the weld area was cool to the touch immediately after welding the nut on, which was cherry red.
Enough rambling, this video explains the process way better than I could
Although I would have welded nuts on instead of wrestling with the vise grips

The following users liked this post:
Slugworth45 (01-16-2022)
10-03-2017, 08:32 PM
#22
Thx - after I posted it occurred to me that the mass of aluminum would wick a ton of heat away. FWIW - I’ve used a reverse rotation drill bit often works quite well in that situation. As soon as the bit “bites”, it usually spins the remaining portion of the fastener right out. Boogered up threads - different deal, or ordeal.
10-03-2017, 11:23 PM
#23
TECH Senior Member

Wow. I just learned a lot! As usual for me around here... It just keeps getting better for noobs like me!
11-06-2017, 11:43 AM
#24
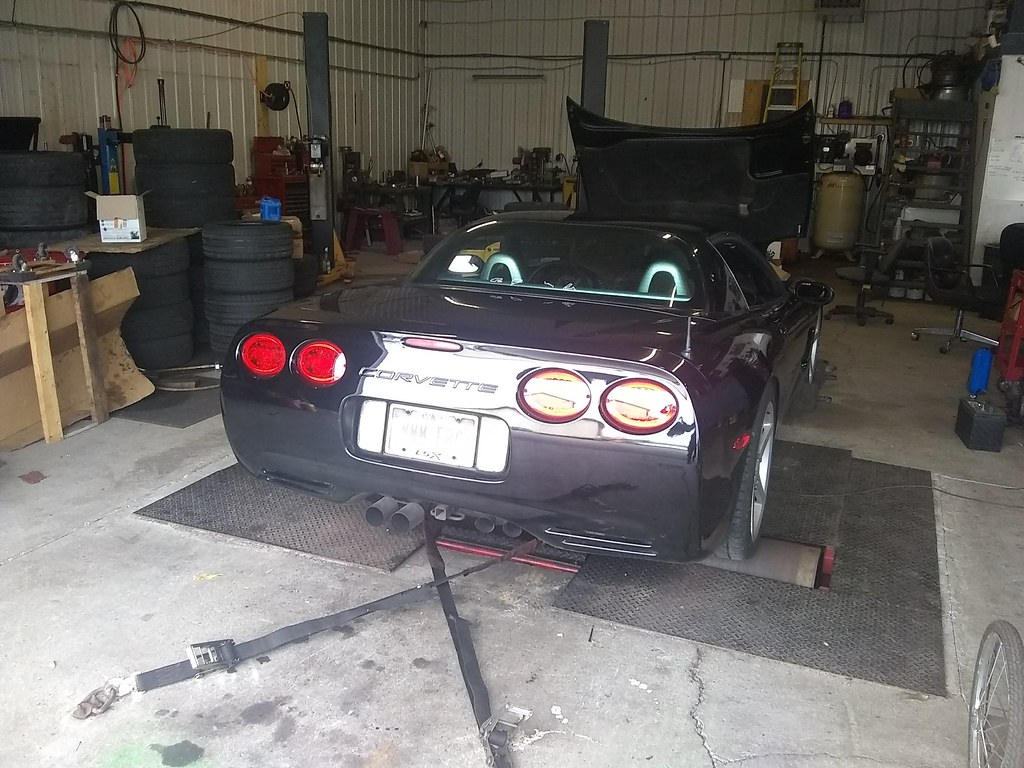
I am planning to swap an L92/LS3 into my C5 this winter, so I thought it was a great time to get some baseline figures. She's a 2000 C5 Fixed Roof Coupe, with all the options (HUD, dual zone automatic climate control, etc).
Power modifications:
Flip Tie Mod
LS6 intake manifold
XS Power Longtube headers with 3" cutouts before the axleback.
Catless 3" x-pipe
Stock C5 catback
ECS Mail Order Tune
4.10 gears
The engine is completely stock internally - no changes to heads, cam, etc.
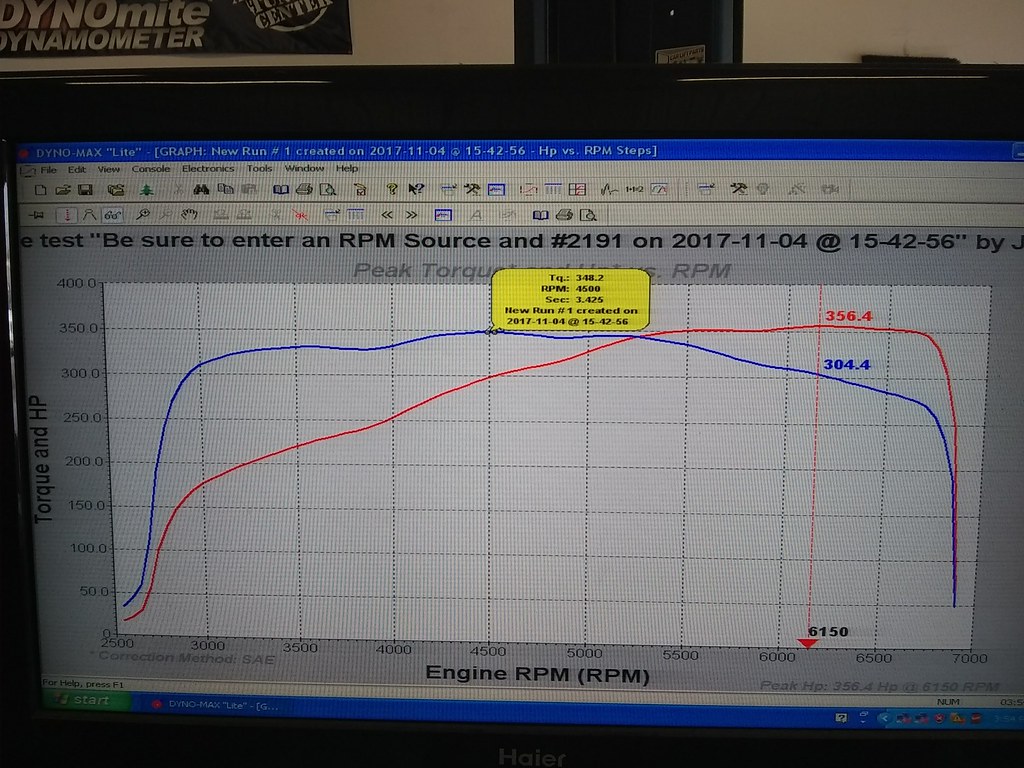
Cutouts Closed:
356rwhp at 6150rpm and 348 ft-lbs of torque at 4500rpm.
Cutouts Open:
363rwhp at 6200rpm and 355 ft-lbs of torque at 4500rpm.
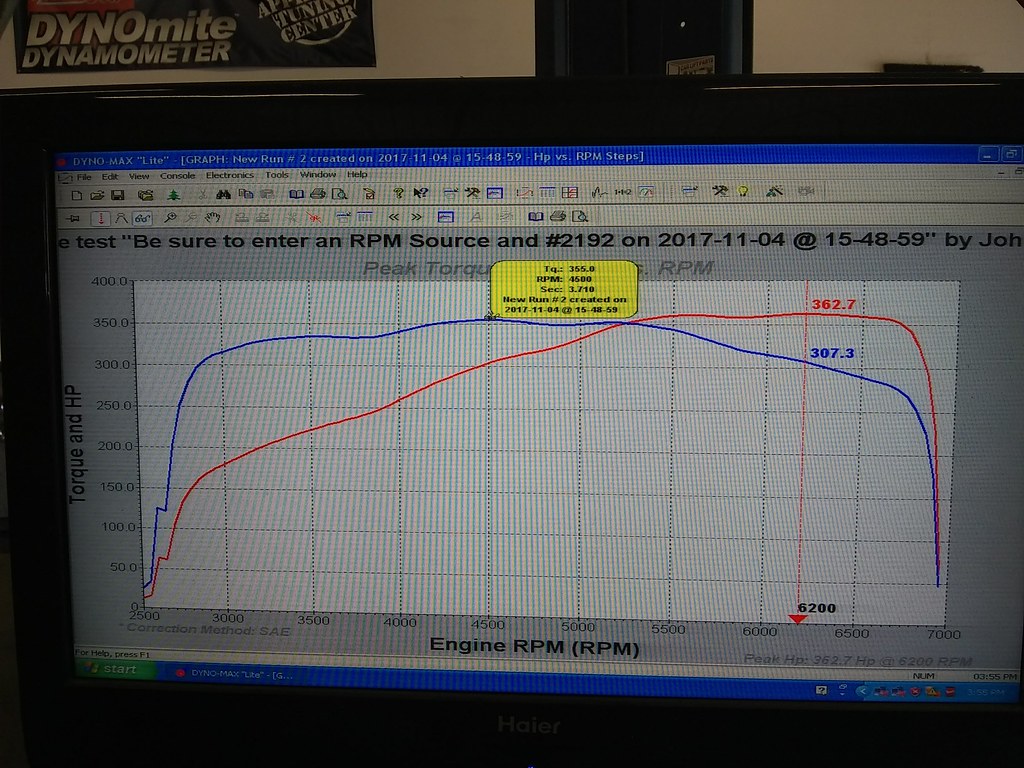
So, cutouts are worth about 7 whp and 7 ft-lbs on the dyno (at least, on a stock displacement LS1 with no internal mods).

3220 lbs with a full tank of gas, but no driver. The only things that would affect the weight are the C6 wheels (18/19) which are probably heavier than the original N73 Magnesiums that were optioned on the car. This might be offset by the S2000 seats I installed, which are fully manual and a bit lighter than the stock C5 seats.
Power modifications:
Flip Tie Mod
LS6 intake manifold
XS Power Longtube headers with 3" cutouts before the axleback.
Catless 3" x-pipe
Stock C5 catback
ECS Mail Order Tune
4.10 gears
The engine is completely stock internally - no changes to heads, cam, etc.
Cutouts Closed:
356rwhp at 6150rpm and 348 ft-lbs of torque at 4500rpm.
Cutouts Open:
363rwhp at 6200rpm and 355 ft-lbs of torque at 4500rpm.
So, cutouts are worth about 7 whp and 7 ft-lbs on the dyno (at least, on a stock displacement LS1 with no internal mods).
3220 lbs with a full tank of gas, but no driver. The only things that would affect the weight are the C6 wheels (18/19) which are probably heavier than the original N73 Magnesiums that were optioned on the car. This might be offset by the S2000 seats I installed, which are fully manual and a bit lighter than the stock C5 seats.
11-06-2017, 12:18 PM
#25
The only things that would affect the weight are the C6 wheels (18/19) which are probably heavier than the original N73 Magnesiums that were optioned on the car. This might be offset by the S2000 seats I installed, which are fully manual and a bit lighter than the stock C5 seats.
11-06-2017, 06:54 PM
#26
While the seats may offset the static weight of the heavier wheels/tires - you�ve rotational inertia to deal with. I�ve made moves to significantly lighter wheel/tire packages over the years with very noticeable gains in acceleration, fuel mileage and handling (reduced unsprung). The big dia wheels look great but often actually degrade performance. Just something to think about.
11-15-2017, 08:18 AM
#28
Some quick updates. Bought HPTuners to make some "fun" changes to the tune. Total noob so I'm just logging and learning for now but I'll post up my findings as I go along. Took the car out for a spin to get familiarized and develop some log parameters. During the short ride I got a bad miss, the engine started cutting out completely, and was very hard to restart. Threw a P0336 Crank Position Sensor code, I was barely able to limp it home. Not fun, but I have a new ACDelco sensor on the way which will hopefully fix the issue. I'm hoping the wiring harness isn't burnt on the longtubes, but if they've made it this far it should be fine.
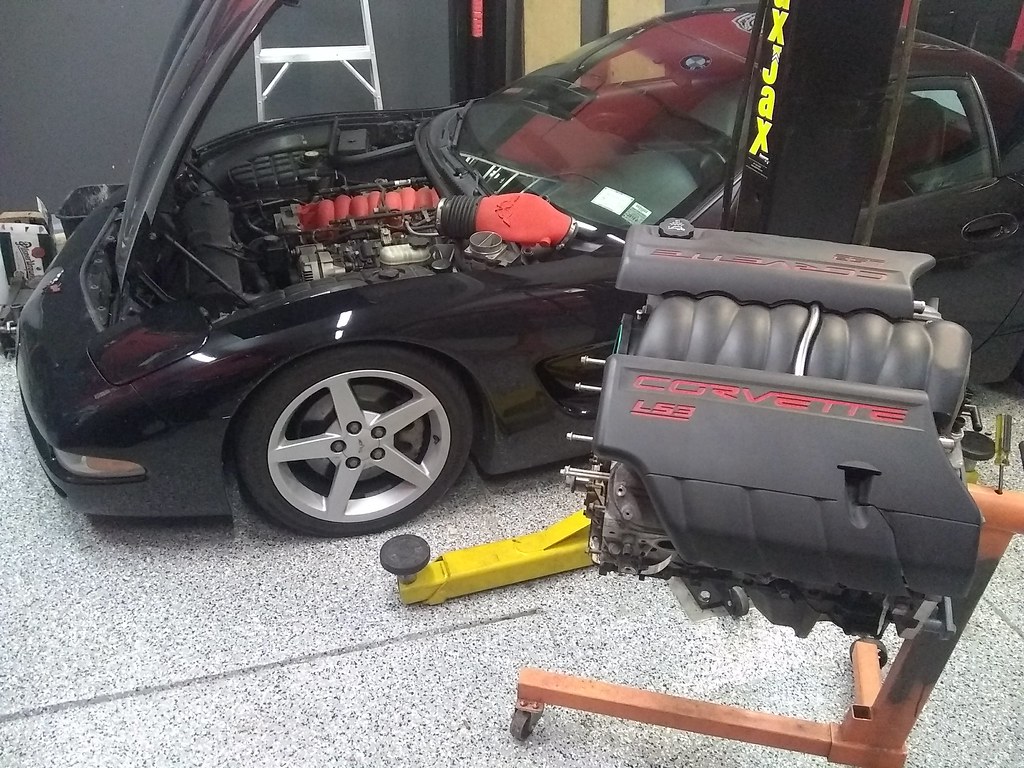
On a positive note my used LS3 intake/rail/injectors came in so I plopped that on top of the L92 and it looks purdy.
On a positive note my used LS3 intake/rail/injectors came in so I plopped that on top of the L92 and it looks purdy.
11-21-2017, 10:54 AM
#29
So during some initial datalogging a few days ago with HPTuners, the car begin to sputter and run roughly. It began hard to restart and wouldn't stay running, even with gas input. P0336 indicated a bad crank position sensor and the wildly swinging tach when it cut out confirmed that.
I threw in the new sensor last night. Not hard, but I did have to partially swing the longtube out of the way, and unbolt the starter.

Part of the challenge of working blind is that you can't always see what something is hung up on. The plug got beat up by the header flange moving around up top while I was under the lift.

I will continue to datalog tonight and maybe make some changes in the tune to play around.
I threw in the new sensor last night. Not hard, but I did have to partially swing the longtube out of the way, and unbolt the starter.
Part of the challenge of working blind is that you can't always see what something is hung up on. The plug got beat up by the header flange moving around up top while I was under the lift.
I will continue to datalog tonight and maybe make some changes in the tune to play around.
12-18-2017, 10:43 AM
#30
I haven't done squat on this since I've been busy with home projects but nobody is in here to hear about that.
The L92 uses a different mounting system for the Cadillac engine cover, so in order to mount the LS3 covers I bought, I had to pick up some of these mounting studs.
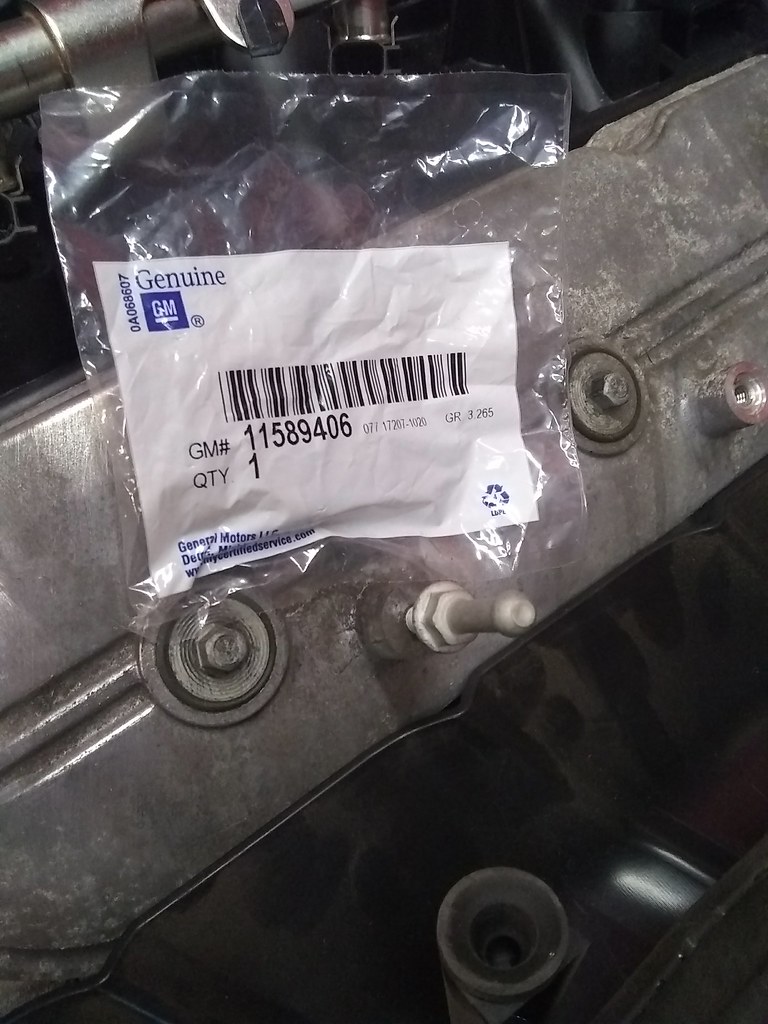
Looks at least a little more complete now.

Next up was stripping off other L92 specific stuff, like the truck balancer, front cover, and VVT components.
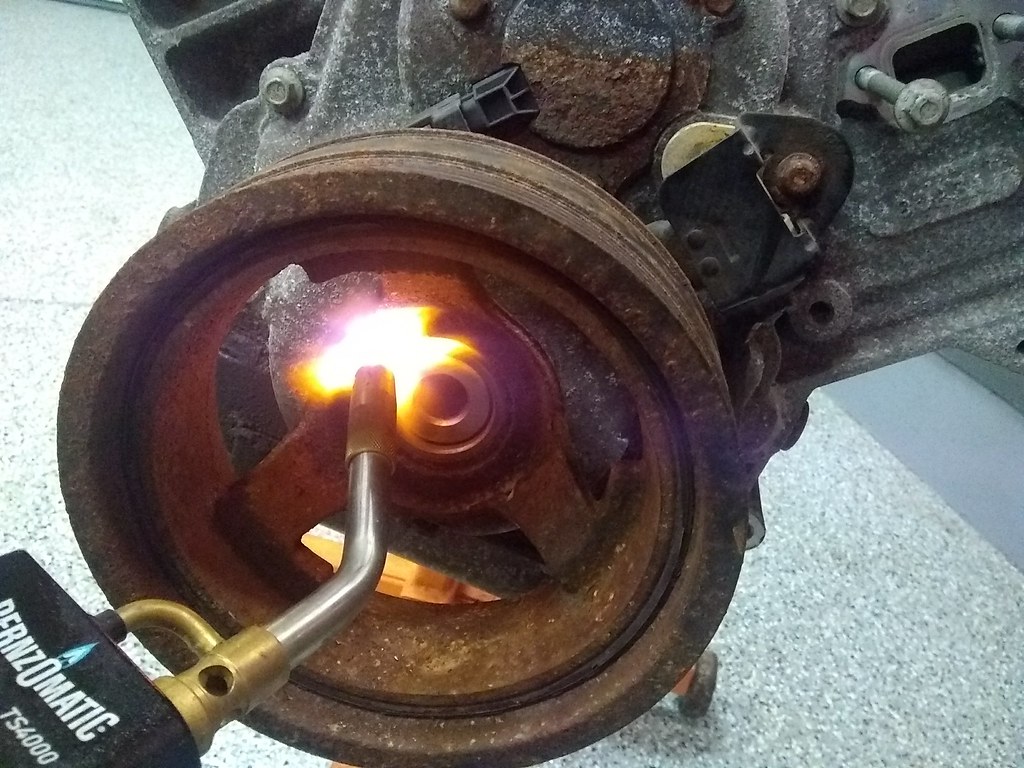
Removing the Jesus bolt actually wasn't that bad

A touch of heat to help the balancer expand (I don't think this did anything but it was fun.)
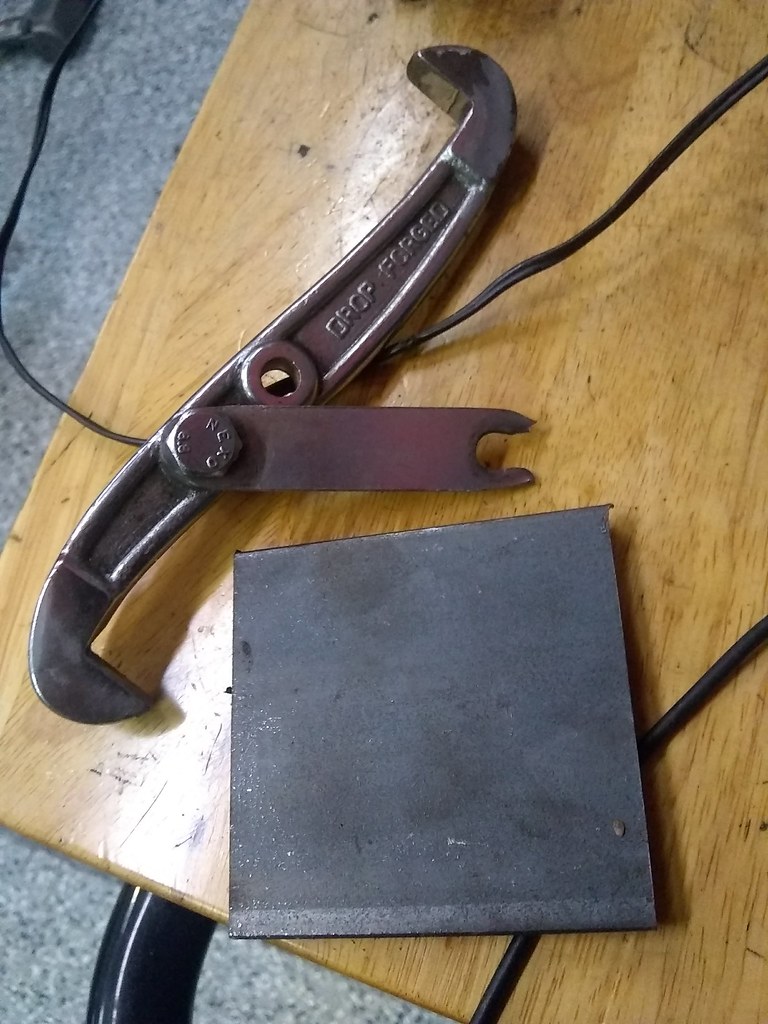
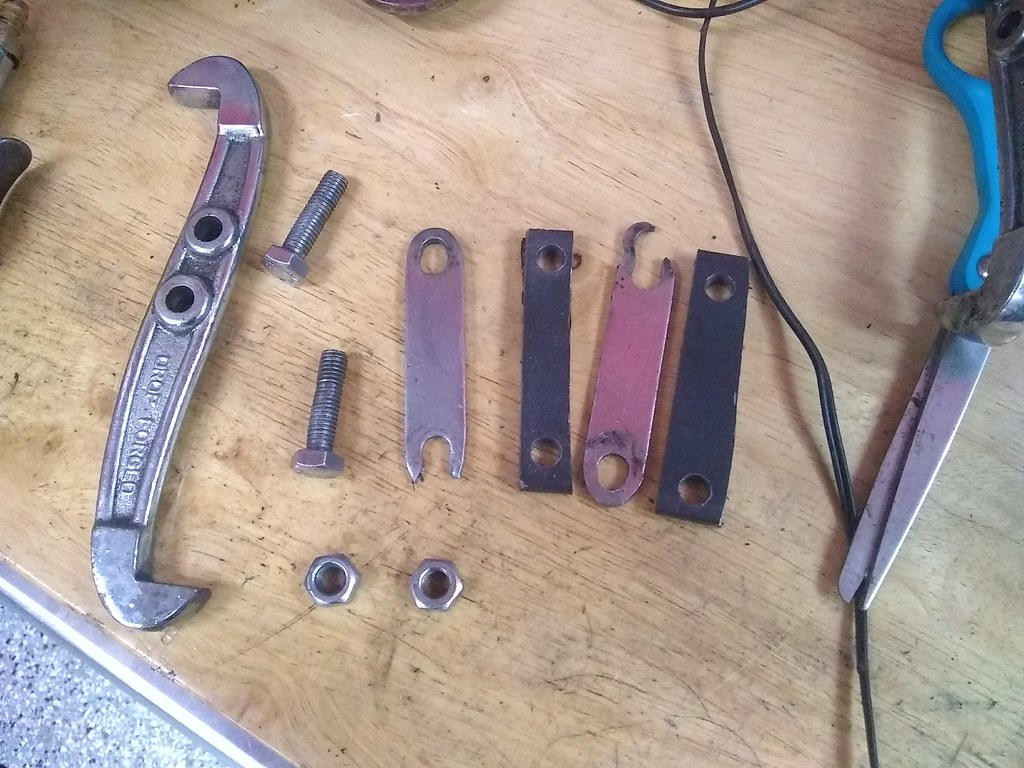
I dug my old 3 jaw puller out of the toolbox and found that whatever I used it on last didn't end well. Time to make up some new links.
1 cutoff wheel, some time on the drill press, and 2 beers later, good as new.
Off came the balancer and timing cover to expose the VVT that will be getting deleted in favor of the traditional 3 bolt system.

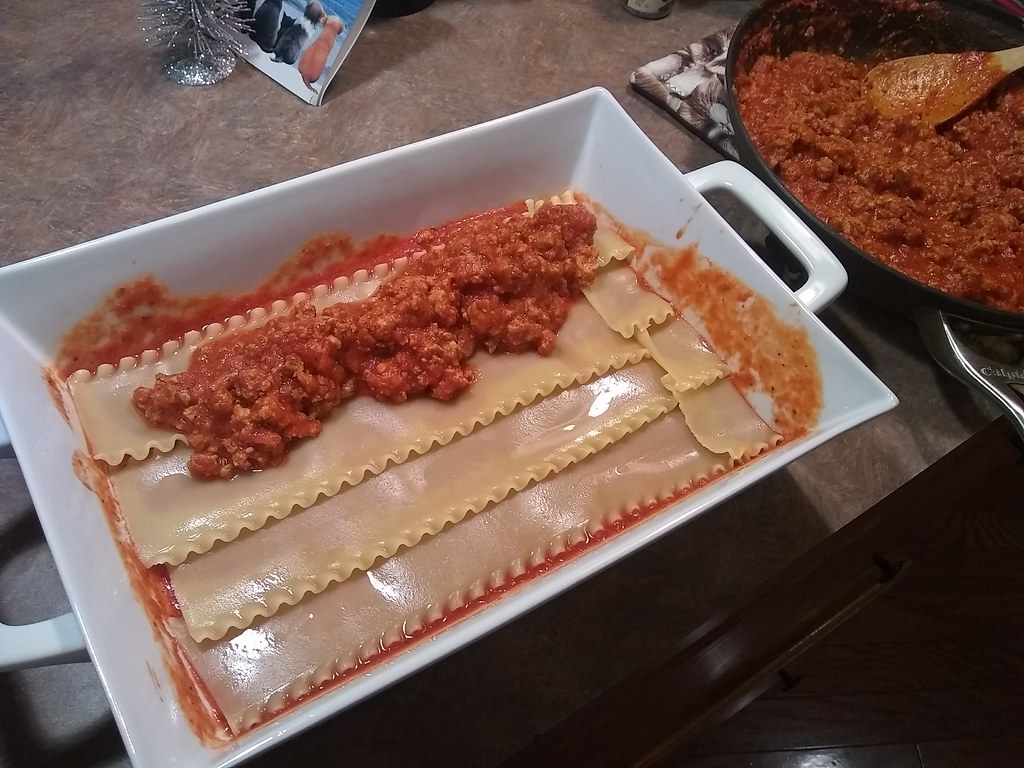
That was as far as I made it for the evening - went inside and made an awesome lasagna.

The L92 uses a different mounting system for the Cadillac engine cover, so in order to mount the LS3 covers I bought, I had to pick up some of these mounting studs.
Looks at least a little more complete now.
Next up was stripping off other L92 specific stuff, like the truck balancer, front cover, and VVT components.
Removing the Jesus bolt actually wasn't that bad
A touch of heat to help the balancer expand (I don't think this did anything but it was fun.)
I dug my old 3 jaw puller out of the toolbox and found that whatever I used it on last didn't end well. Time to make up some new links.
1 cutoff wheel, some time on the drill press, and 2 beers later, good as new.
Off came the balancer and timing cover to expose the VVT that will be getting deleted in favor of the traditional 3 bolt system.
That was as far as I made it for the evening - went inside and made an awesome lasagna.
12-18-2017, 11:29 AM
#31
TECH Senior Member
Talk about food ****....
12-18-2017, 03:44 PM
#32
If the heat doesn't work getting the pulley back on, this is the tool I used to seat mine. Heat didn't have much effect on the ATI dampener I used.
https://www.autozone.com/loan-a-tool...ler/787830_0_0
https://www.autozone.com/loan-a-tool...ler/787830_0_0
12-21-2017, 07:44 AM
#33
The teardown continued last night. I was really interested in seeing how the valvetrain looked after 9 years and 78K miles. Opening up these engines that haven't been touched since they left the plant is always interesting, never know what you're going to find.
Since I already had the front cover off, it was a good time to line up the timing dots. Hasn't changed much from the Gen 3 stuff, minus the VVT looking way different.

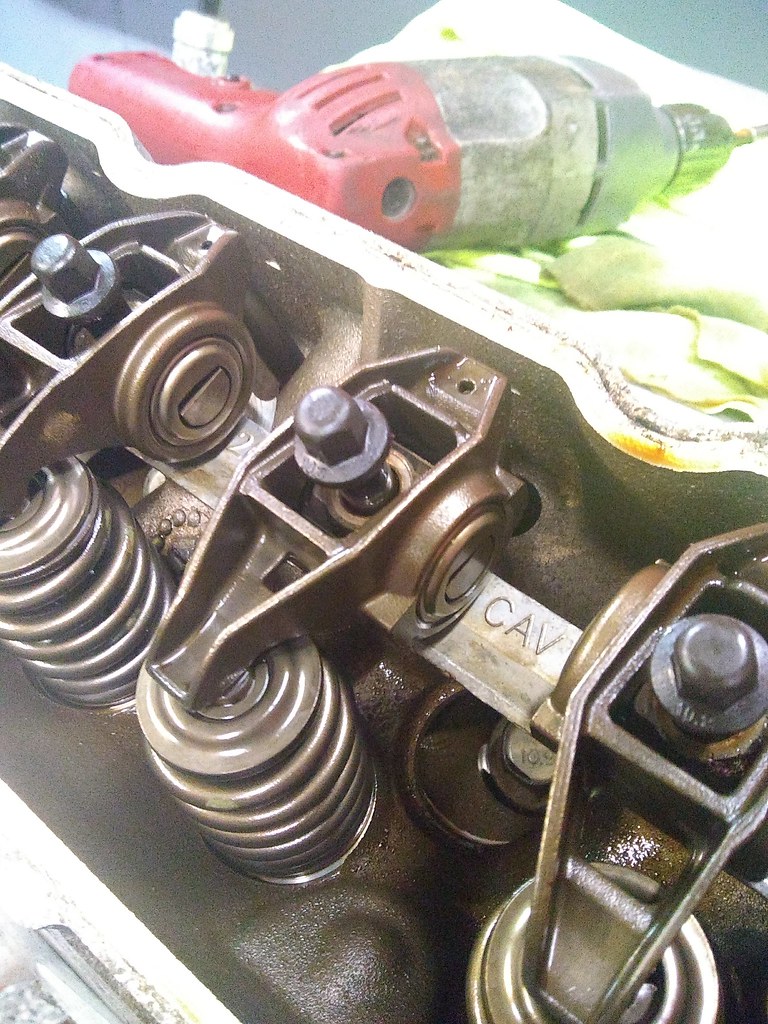
Zip off the valve covers. Seeing those offset intake rockers is weird...
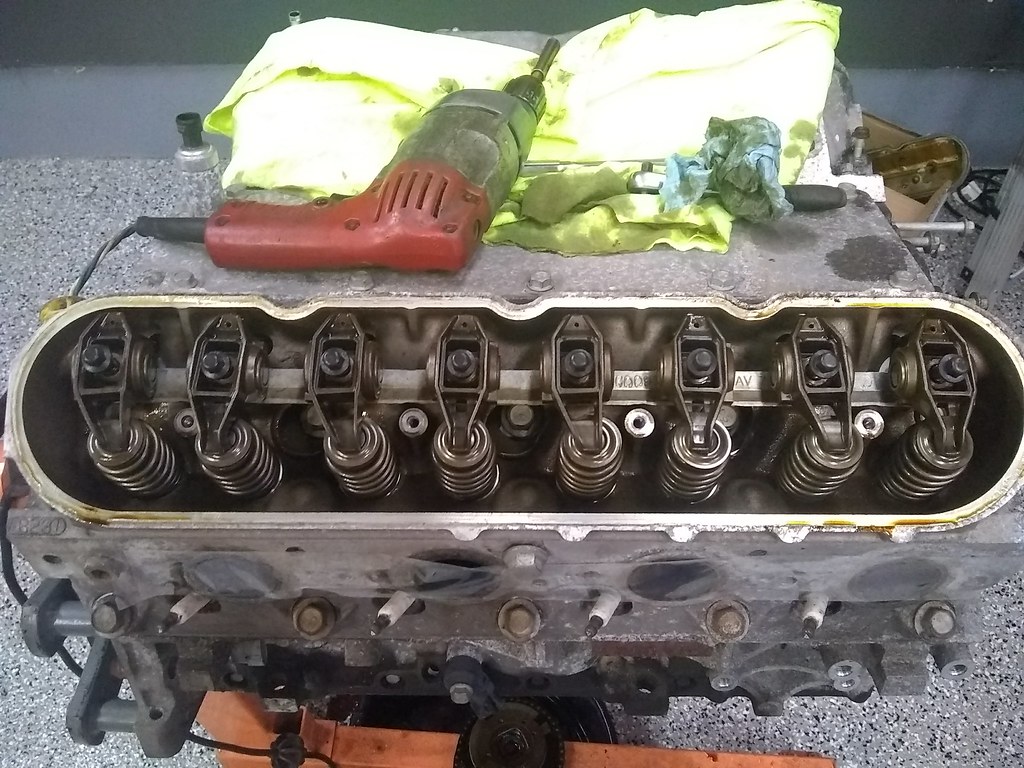
Overall pretty clean for the age and mileage.
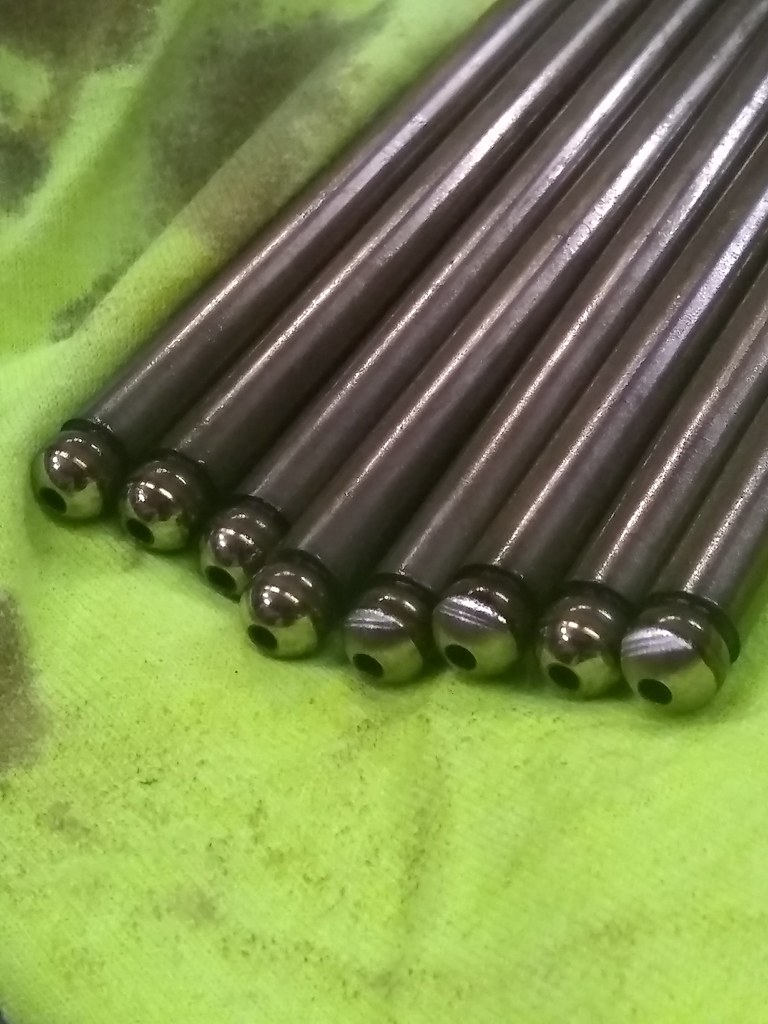
One area of concern is the pushrods. We are looking at the rocker end. Notice how #5, 6, and 8 all have a "brushed" finish on the tip, where the rest have the usual polished mirror finish. They're smooth to the touch and don't catch a fingernail, but when you look at the direction of the marks, you can almost see a football/oval shape to them. I thought this might be due to the offset of the intake rockers, but I found this scenario on a couple exhaust rods also. The pushrods are getting chucked anyways for beefier chromoly parts, but I need to inspect the underside of the rocker to make sure there's no unusual wear there.
At this point I was ready to pull the heads, but saw something else...

Who's got the magic decoder ring? No clue what this is.

Flip her on her back so the lifters don't fall out when removing the VVT cam.

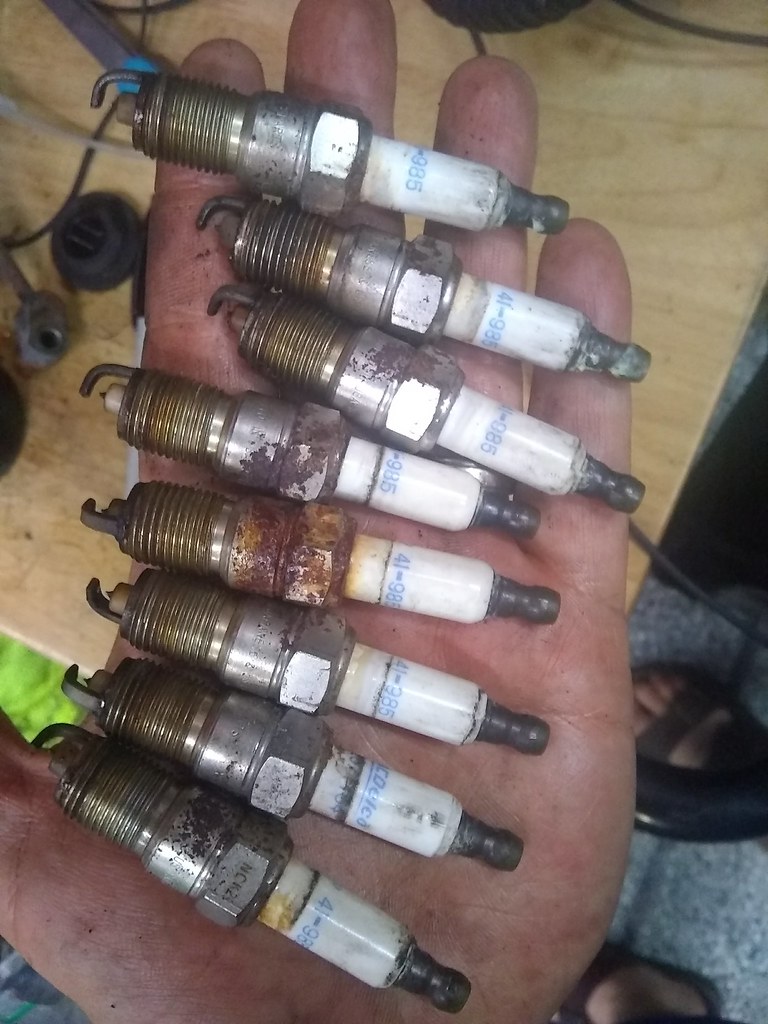
Original plugs. This thing had definitely been sitting for a bit.
I originally wasn't going to pull the heads but seeing how cheap new headgaskets and lifters are, it's peace of mind to inspect that stuff. That's up next.
Since I already had the front cover off, it was a good time to line up the timing dots. Hasn't changed much from the Gen 3 stuff, minus the VVT looking way different.
Zip off the valve covers. Seeing those offset intake rockers is weird...
Overall pretty clean for the age and mileage.
One area of concern is the pushrods. We are looking at the rocker end. Notice how #5, 6, and 8 all have a "brushed" finish on the tip, where the rest have the usual polished mirror finish. They're smooth to the touch and don't catch a fingernail, but when you look at the direction of the marks, you can almost see a football/oval shape to them. I thought this might be due to the offset of the intake rockers, but I found this scenario on a couple exhaust rods also. The pushrods are getting chucked anyways for beefier chromoly parts, but I need to inspect the underside of the rocker to make sure there's no unusual wear there.
At this point I was ready to pull the heads, but saw something else...
Who's got the magic decoder ring? No clue what this is.
Flip her on her back so the lifters don't fall out when removing the VVT cam.
Original plugs. This thing had definitely been sitting for a bit.
I originally wasn't going to pull the heads but seeing how cheap new headgaskets and lifters are, it's peace of mind to inspect that stuff. That's up next.
12-23-2017, 11:01 AM
#35
TECH Senior Member
iTrader: (7)

Personally, I would not pull the heads, unless you're planning on boost. LS engines are not known to have head gasket issues related to mileage. I'd run it...
The pushrod wear also seems pretty normal.
Andrew
The pushrod wear also seems pretty normal.
Andrew
12-25-2017, 09:02 AM
#36
 12-29-2017, 03:42 PM
#38
I contacted 4 manufacturers and gave them all the same info when asking for a cam/hardware setup.
CamMotion recommended their Titan Stage 3
http://www.cammotion.com/camshafts/t...7-237-113-3-5/
Tick recommended their Street Heat Stage 1
http://www.tickperformance.com/tick-...3-l99-engines/
Texas Speed recommended their Stage 2
https://www.texas-speed.com/p-5761-n...-camshaft.aspx
Brian Tooley Racing recommended their Stage 2 NA LS3 cam.
https://www.briantooleyracing.com/ls...-bolt-cam.html
I put together a spreadsheet of all the parts needed and found that BTR had the best prices for the whole package I needed (keep in mind I am also deleting VVT, etc) along with free shipping.
So, I ordered:
All vendors responded within a day or two and were helpful in providing me with information on not just the cam but supporting hardware (springs, lifters etc), but I'm kind of surprised that nobody suggested a custom grind. Maybe my application just isn't that specialized, I'm sure the short gears and light weight help it get up and go.
LS3 Stage II 3 Bolt Cam 225/238 .612"/.585" 113+3
"This cam has made over 470rwhp in LS3 Camaro and Corvettes." I was told this cam would drive much nicer than the Stage III at the expense of 10-20 rwhp which I'm fine with.
.660" Lift BTR Platinum Springs, Titanium retainers
BTR GM LS ROCKER ARM TRUNNION UPGRADE KIT TK001
Delphi LS7 Lifters, Set of 16
BTR Basic VVT Delete Kit
Regardless it's a great time to be an LS enthusiast, the aftermarket is rich with good information and selection.