
1984 K10 w/ 2001 LM7 Build
 09-20-2018, 10:41 PM
#61
On The Tree
Thread Starter
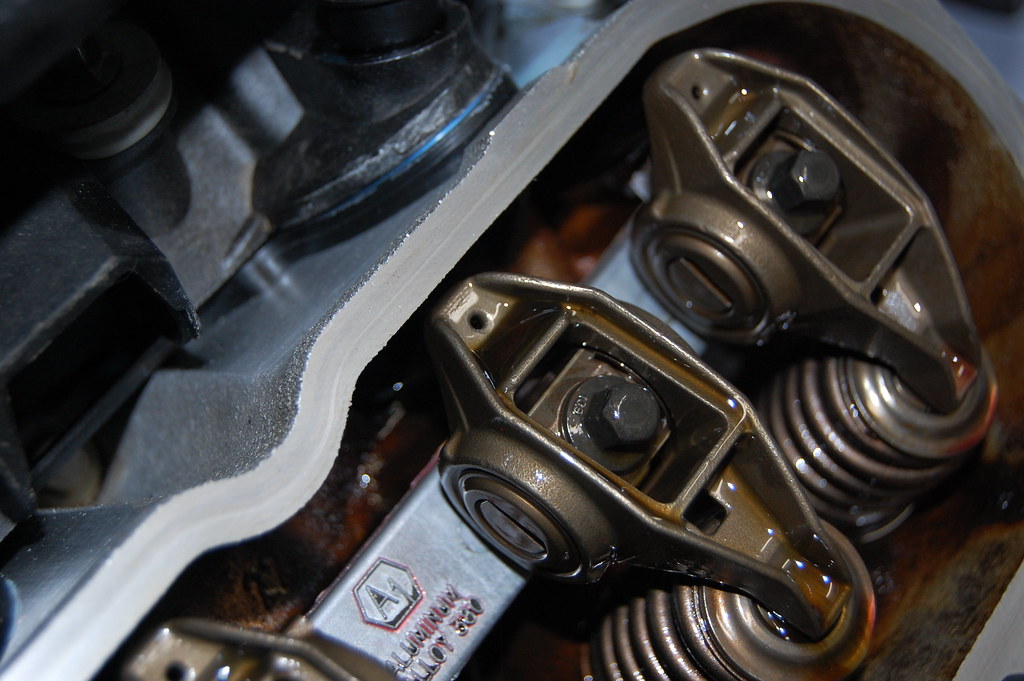
Pushrods came today. Seem decent. Definitely heavier than the stock ones.
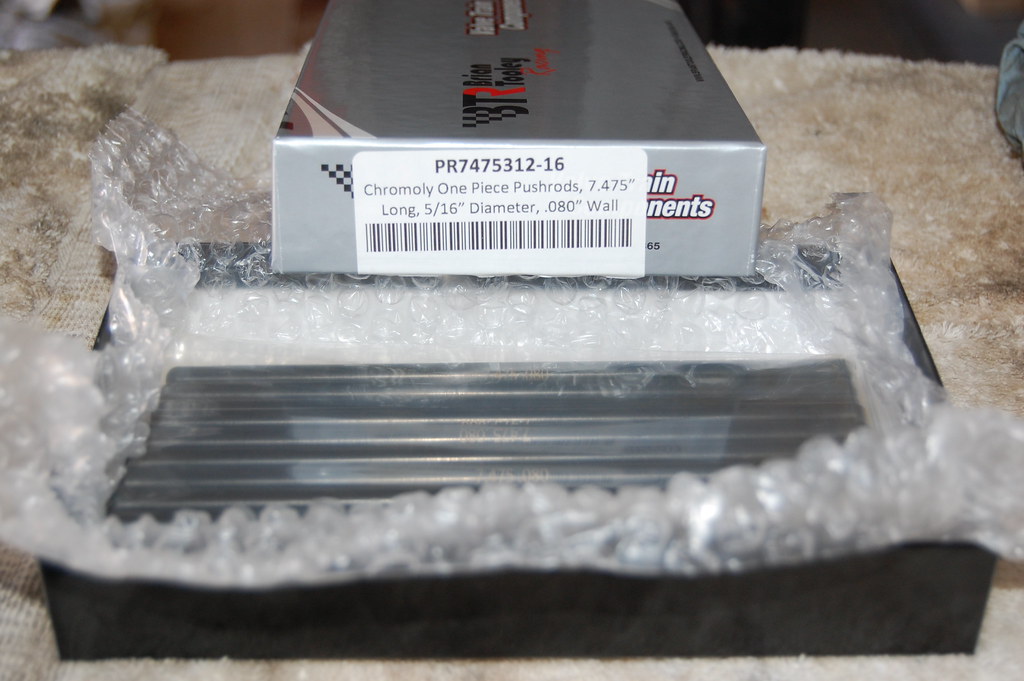
And they are longer than the stock ones, so that's good.

They actually measured about 0.010" longer than advertised.
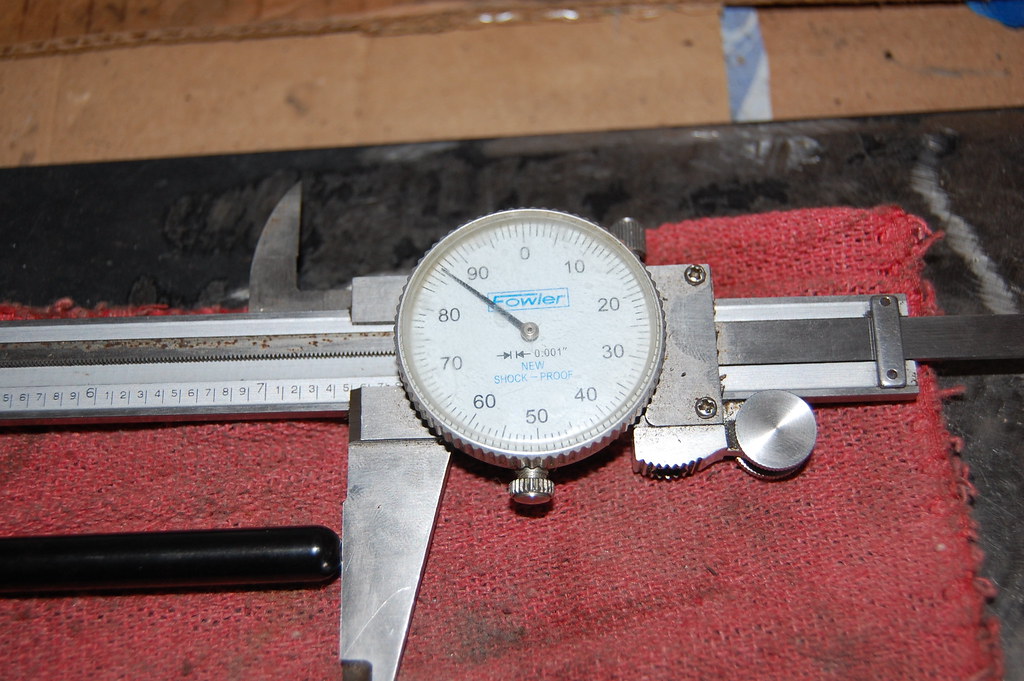
All back together. Most of them ended up at zero lash plus 1-1/4 turns. One was less than one full turn, and a couple were 1-1/2 turns, but all within spec (as I understand...).
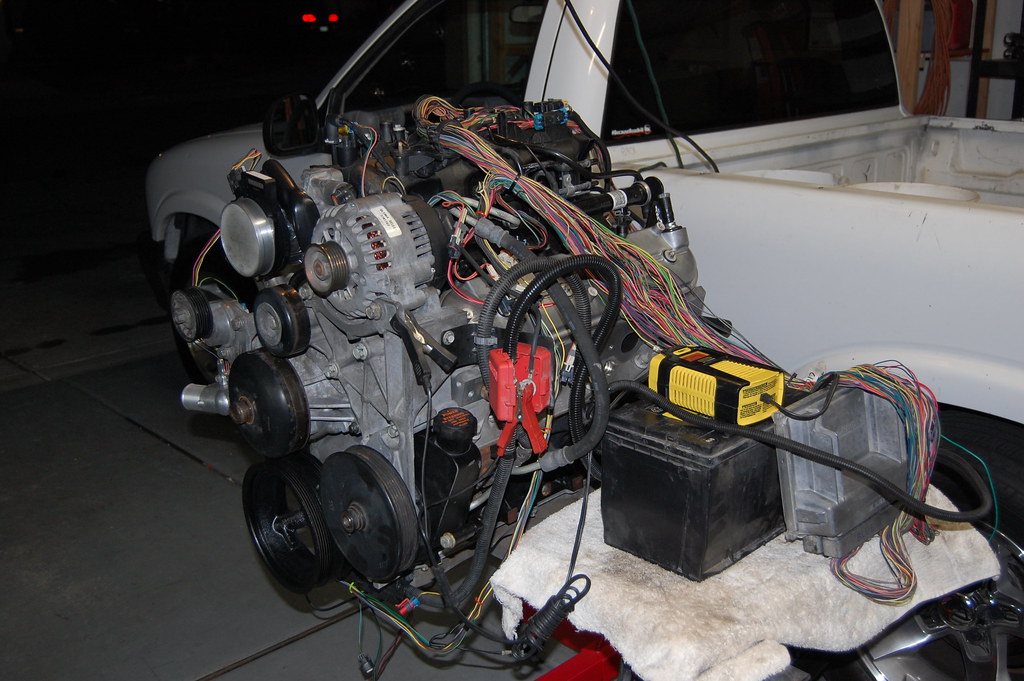
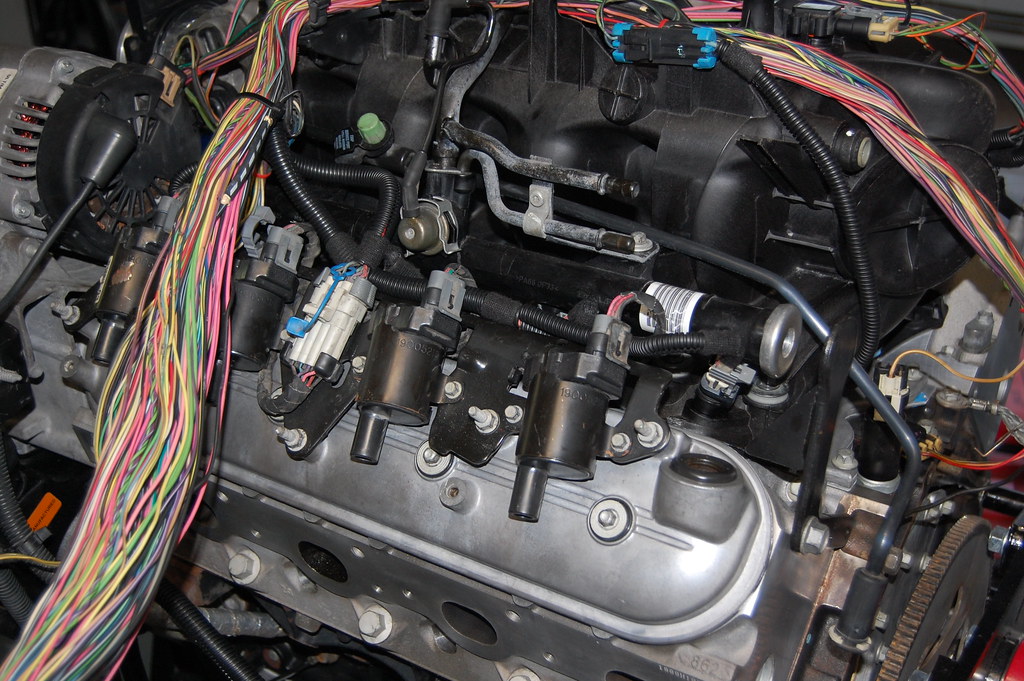
Back to the harness.
And they are longer than the stock ones, so that's good.
They actually measured about 0.010" longer than advertised.
All back together. Most of them ended up at zero lash plus 1-1/4 turns. One was less than one full turn, and a couple were 1-1/2 turns, but all within spec (as I understand...).
Back to the harness.
 09-21-2018, 11:00 PM
#62
On The Tree
Thread Starter
I got all the loom stripped off the harness. Tomorrow I should be able to get the grimy/greasy plug ends cleaned and all the unnecessary circuits pulled out. Found something interesting on the alternator pigtail.
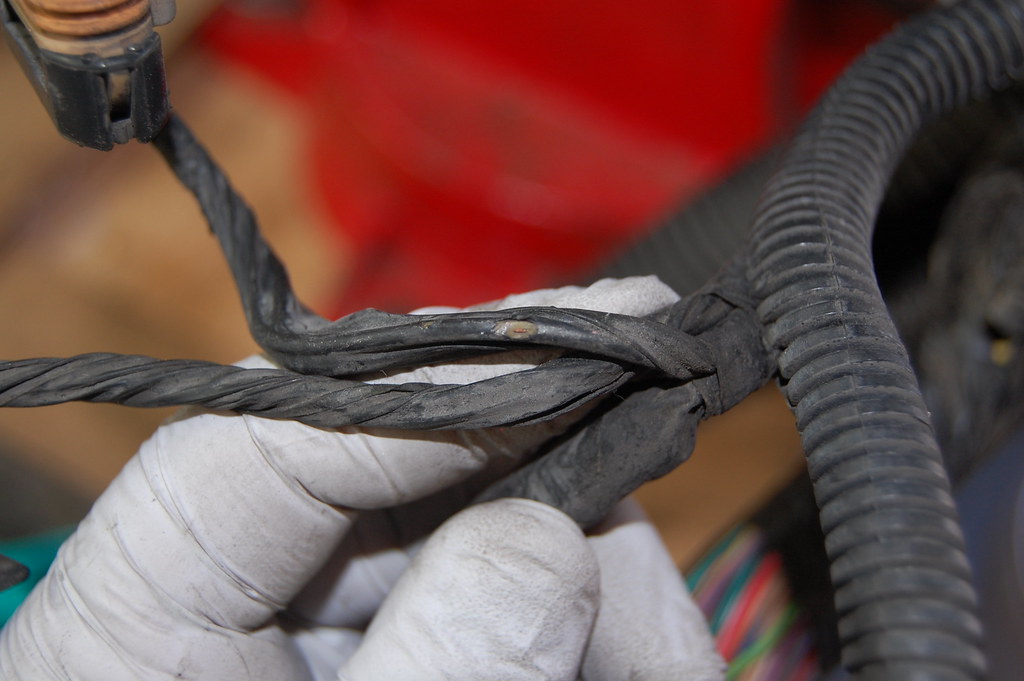
Fixed with a little bit of liquid electrical tape and some heat shrink tube.
Fixed with a little bit of liquid electrical tape and some heat shrink tube.
09-22-2018, 11:48 PM
#63
On The Tree
Thread Starter
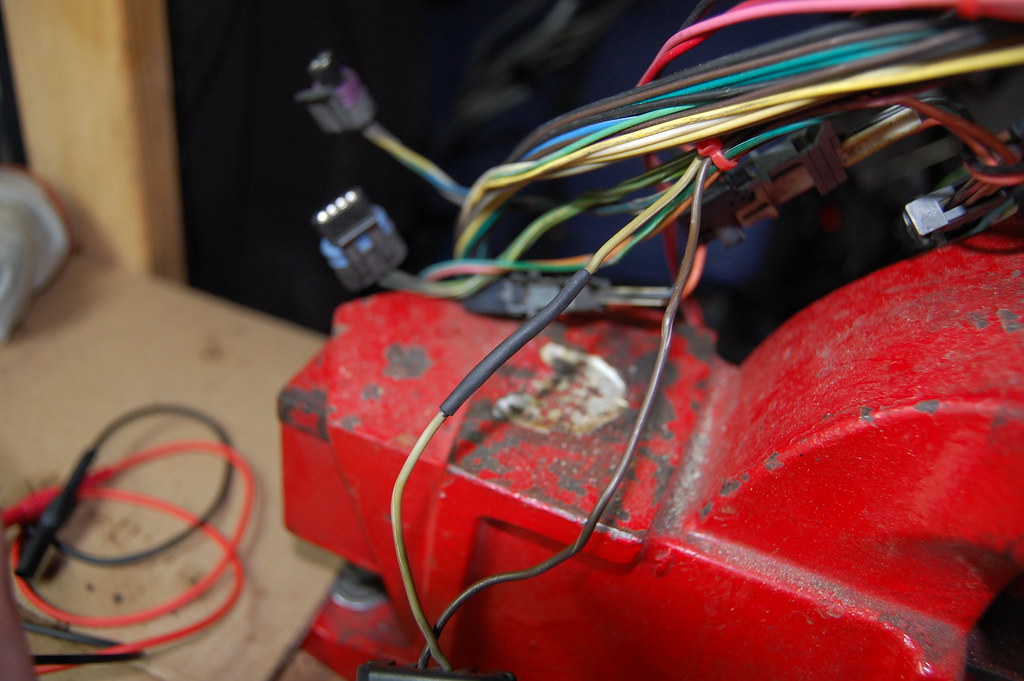
Got the harness trimmed down. Pretty much just pulled out the EGR connector and the C100, C152 and C153 plugs.

Before I laid the harness back on the engine, I wanted to spin it over to build oil pressure. I cranked it till I saw a max of something in the high 40's for ohms.
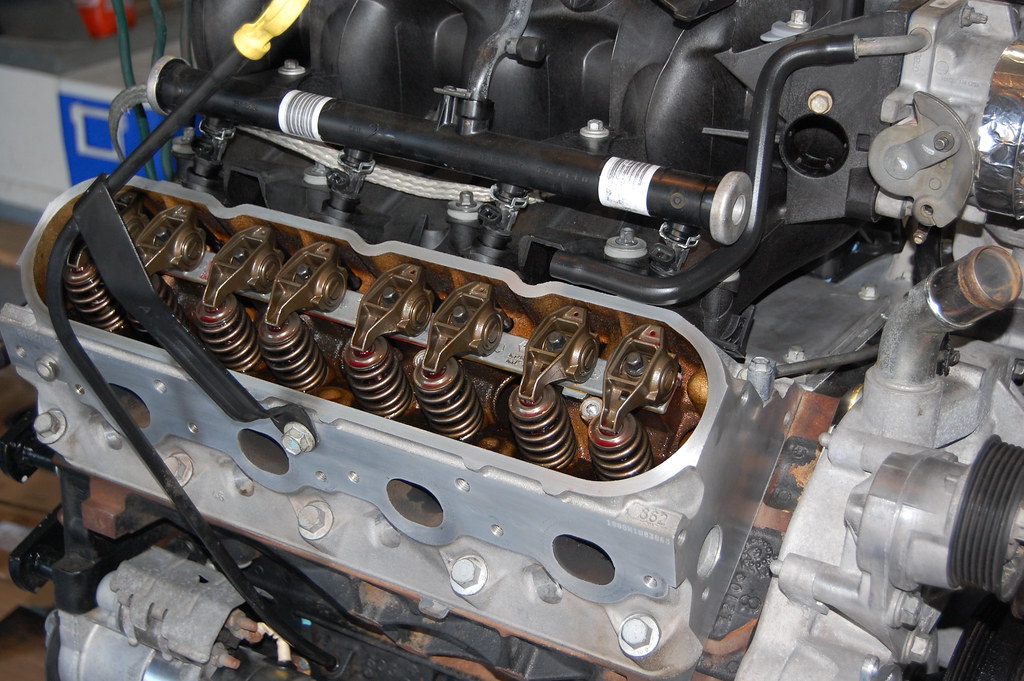
And the reason I waited on the laying the harness was so I could leave the valve covers off and verify the top end was getting oil. Looks good.
I'll start rewrapping the harness with some clean loom. Once I get my headers and EGR block off, I should be able to test fire this pig on the stand.
Before I laid the harness back on the engine, I wanted to spin it over to build oil pressure. I cranked it till I saw a max of something in the high 40's for ohms.
And the reason I waited on the laying the harness was so I could leave the valve covers off and verify the top end was getting oil. Looks good.
I'll start rewrapping the harness with some clean loom. Once I get my headers and EGR block off, I should be able to test fire this pig on the stand.

 09-24-2018, 10:24 PM
#65
On The Tree
Thread Starter
Thanks man! I appreciate the encouragement.
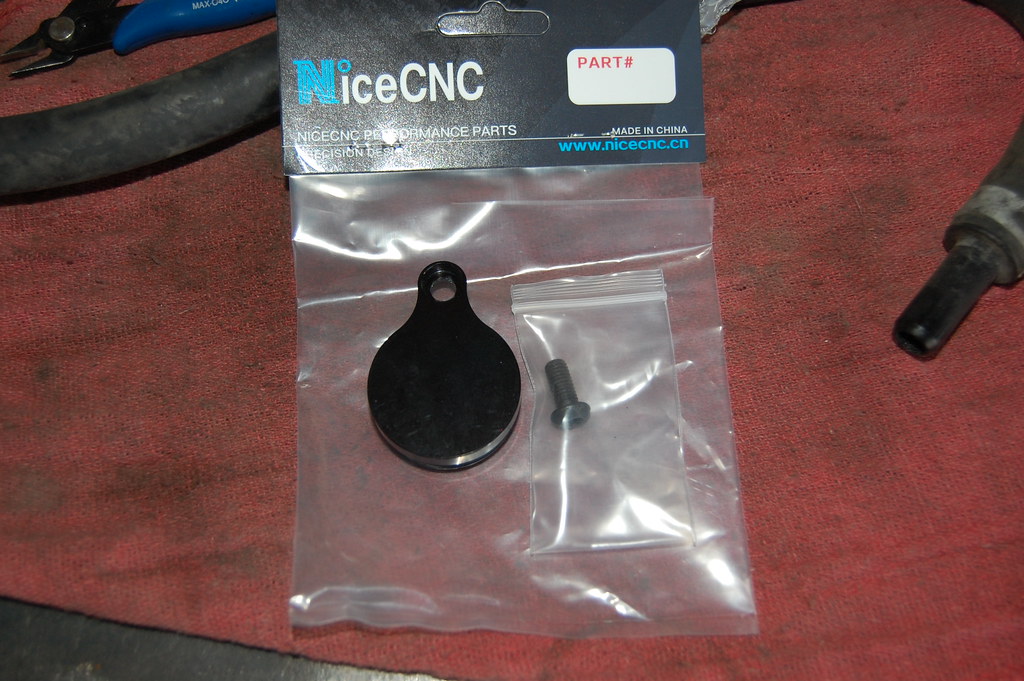
EGR block off came today. Probably be the only emissions system I delete since it has to pass the sniffer. I'm even leaving in the post cat O2's
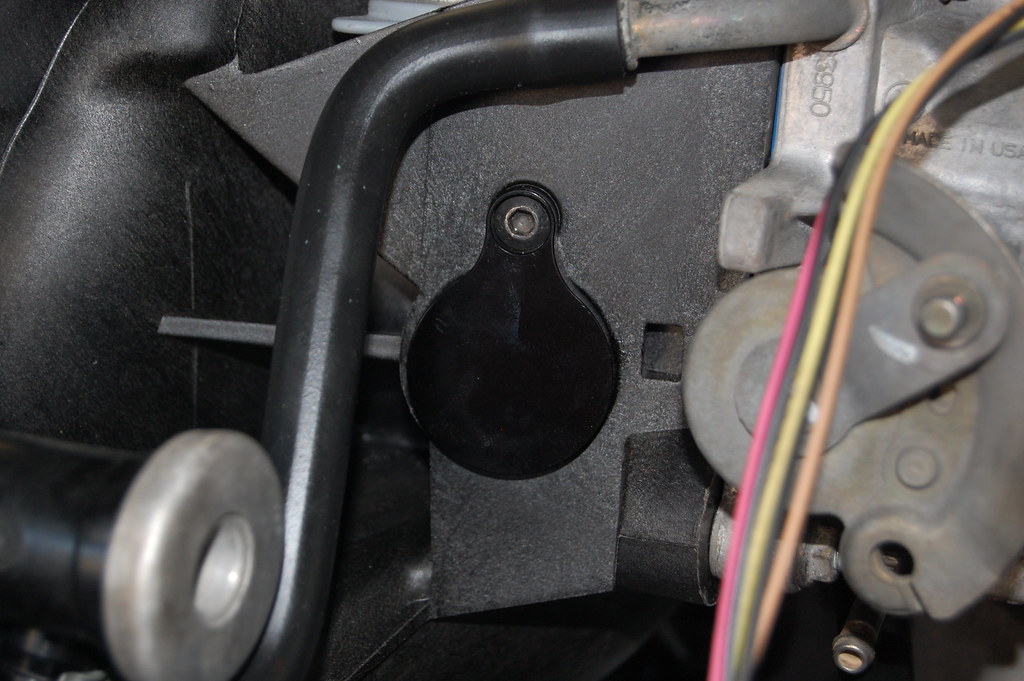
I really like the black. Almost disappears.
More loom work.

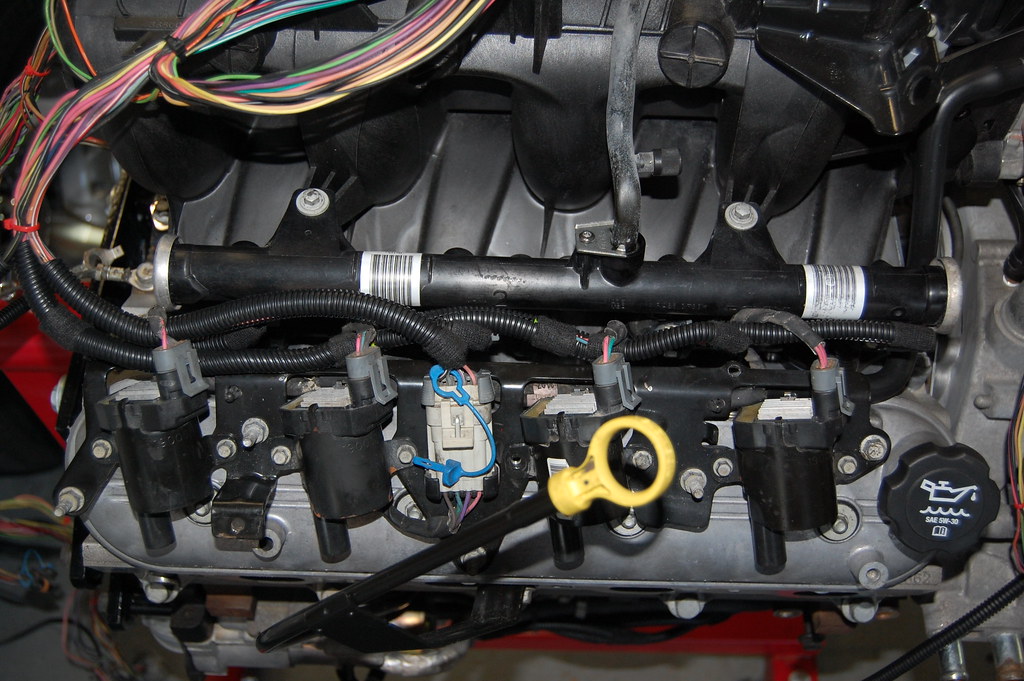
There's probably about one more evenings worth of work on looming pigtails before I call it good enough for now. I'm not going to loom the larger harness sections until it's in the truck. I still need to add wires for things like the OBDII plug, MIL, tach output, TCC/brake switch, 4wd signal switch etc. And even though I'm not running AC or electric fans right now, I'm going to run the control wires.
EGR block off came today. Probably be the only emissions system I delete since it has to pass the sniffer. I'm even leaving in the post cat O2's
I really like the black. Almost disappears.
More loom work.
There's probably about one more evenings worth of work on looming pigtails before I call it good enough for now. I'm not going to loom the larger harness sections until it's in the truck. I still need to add wires for things like the OBDII plug, MIL, tach output, TCC/brake switch, 4wd signal switch etc. And even though I'm not running AC or electric fans right now, I'm going to run the control wires.
09-26-2018, 12:00 AM
#66
On The Tree
Thread Starter
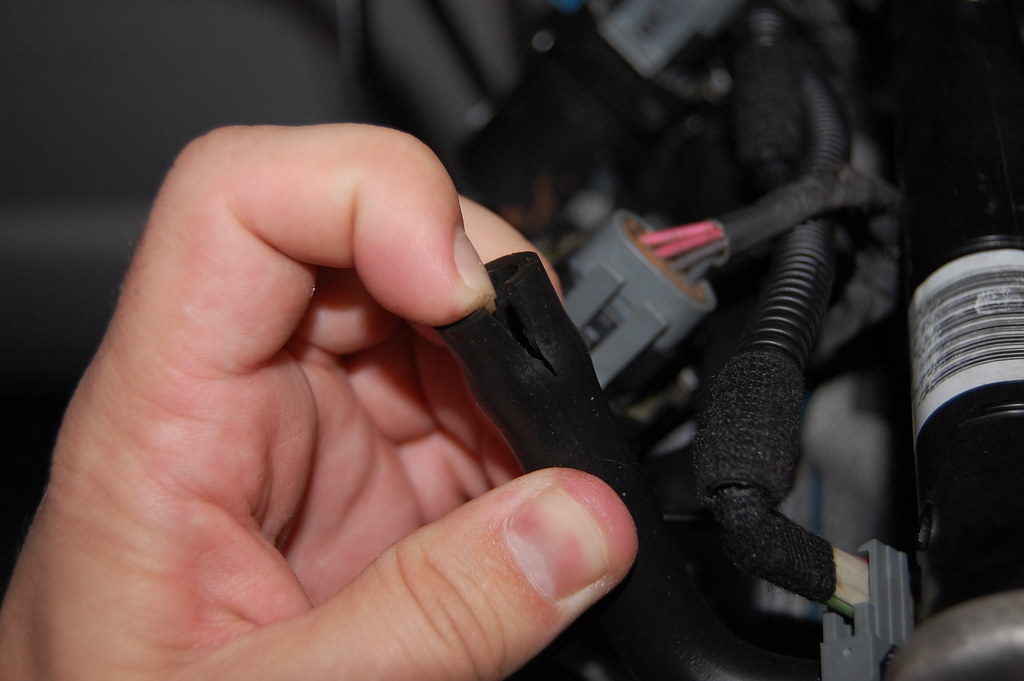
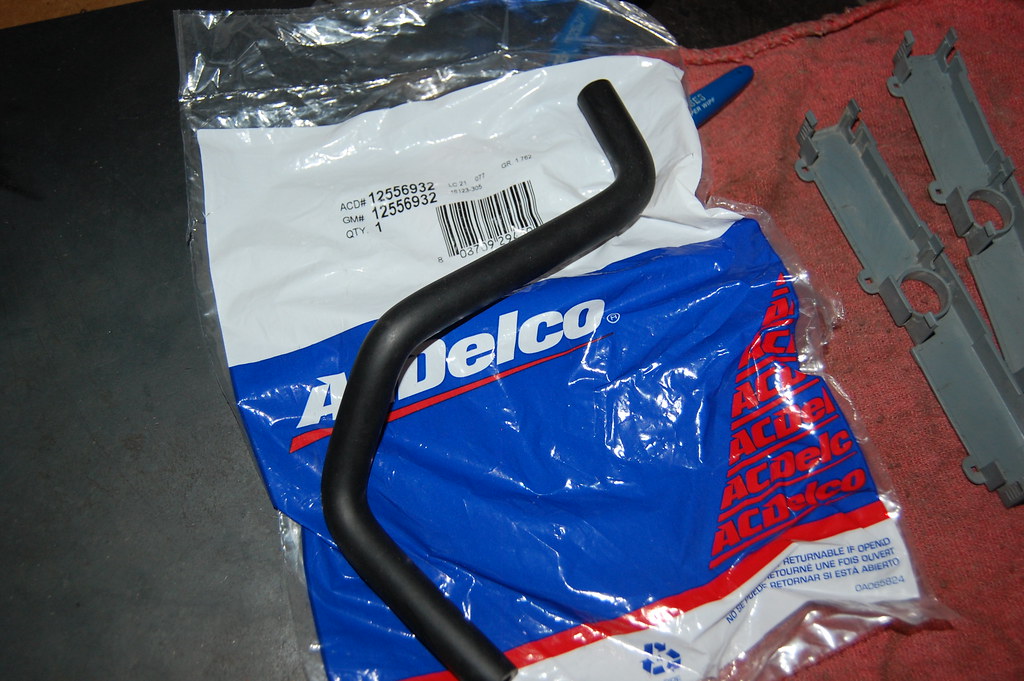
Well, I got absolutely nothing done on the engine. Had to take the boy to soccer practice. yay. I did get some parts though. Right side PCV hose was badly cracked. Surely would have been a vacuum leak.
New hose was like $9, so I went for it.
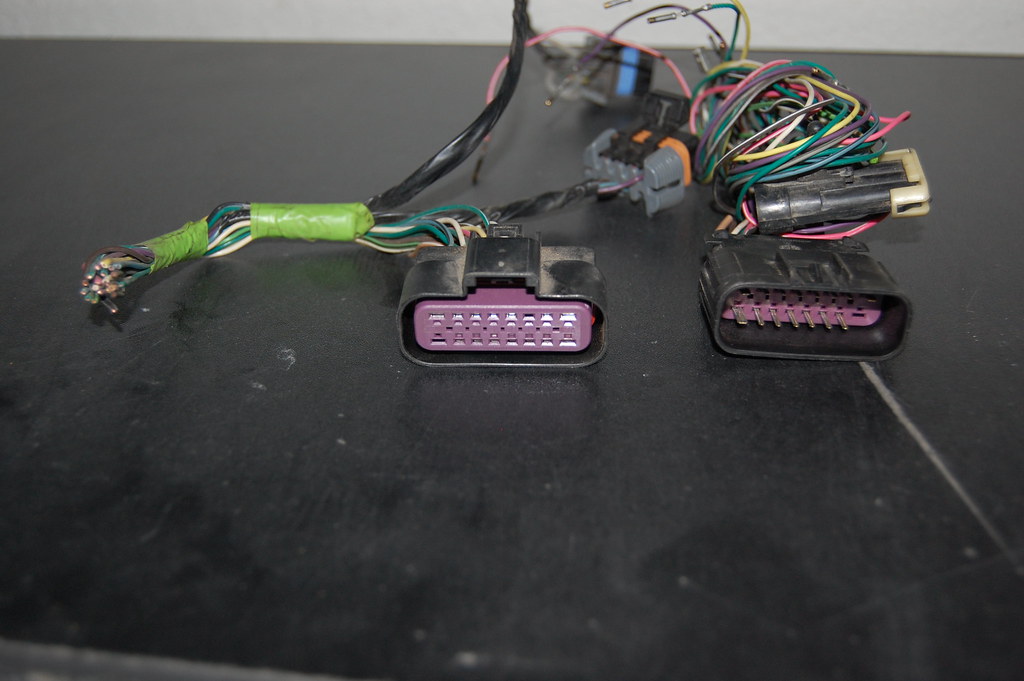
Also chopped one plug off the old Yukon harness. I'll use this to make a break in the K10 harness for all the things I mentioned earlier that need to feed into the cab. (OBDII plug, MIL, tach output, TCC/brake switch...)
New hose was like $9, so I went for it.
Also chopped one plug off the old Yukon harness. I'll use this to make a break in the K10 harness for all the things I mentioned earlier that need to feed into the cab. (OBDII plug, MIL, tach output, TCC/brake switch...)
 09-26-2018, 10:00 PM
#68
On The Tree
Thread Starter
I like doing a western union splice with solder and a couple layers of heat shrink. I've heard guys say crimp connectors are better for an automotive application, but I have terrible luck with them. Probably user error, but the solder joint has never let me down.
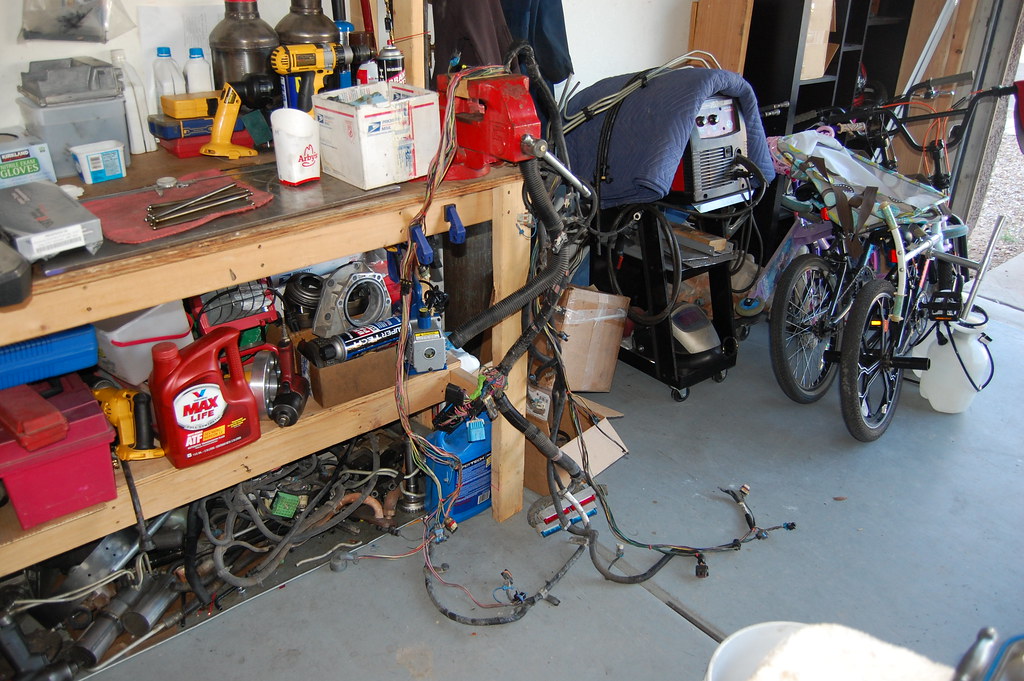
I want the Yukon out of here before I rip the K10 apart, so it needs to go SOON. Pulled off the last couple things I think I'll need. Am I forgetting anything? (Trans cooler and PS cooler not pictured)

Got some more parts today. Biggest thing was the headers, but I didn't even unwrap them. Not going to mount them until the better header bolts I ordered arrive. Also got the coolant temp sensor pigtail. I want to keep all the factory gauges working. Once that's soldered in, I can loom that section of harness.

I want the Yukon out of here before I rip the K10 apart, so it needs to go SOON. Pulled off the last couple things I think I'll need. Am I forgetting anything? (Trans cooler and PS cooler not pictured)
Got some more parts today. Biggest thing was the headers, but I didn't even unwrap them. Not going to mount them until the better header bolts I ordered arrive. Also got the coolant temp sensor pigtail. I want to keep all the factory gauges working. Once that's soldered in, I can loom that section of harness.
09-28-2018, 12:26 AM
#70
On The Tree
Thread Starter
GMT 800 rollers are a dime a dozen out there. Half of the Craigslist ads are "No motor, no trans" listings. I'll consider it a win if I get $300 for what's left. On the flip side, I'm going to bet you can get a low mile Gen 3 motor and harness a LOT cheaper out there. 9/10 times the engine will out live the truck in the rustbelt, Not the case here.
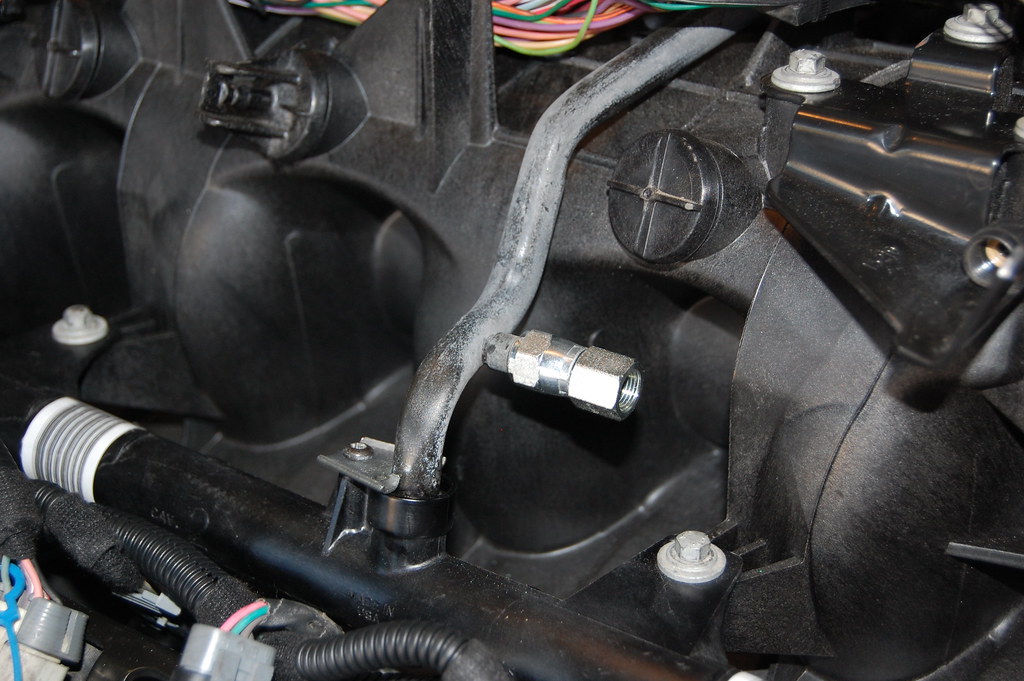
Got my fancy $7 fuel rail gauge fitting. Hydraulic fittings are great!
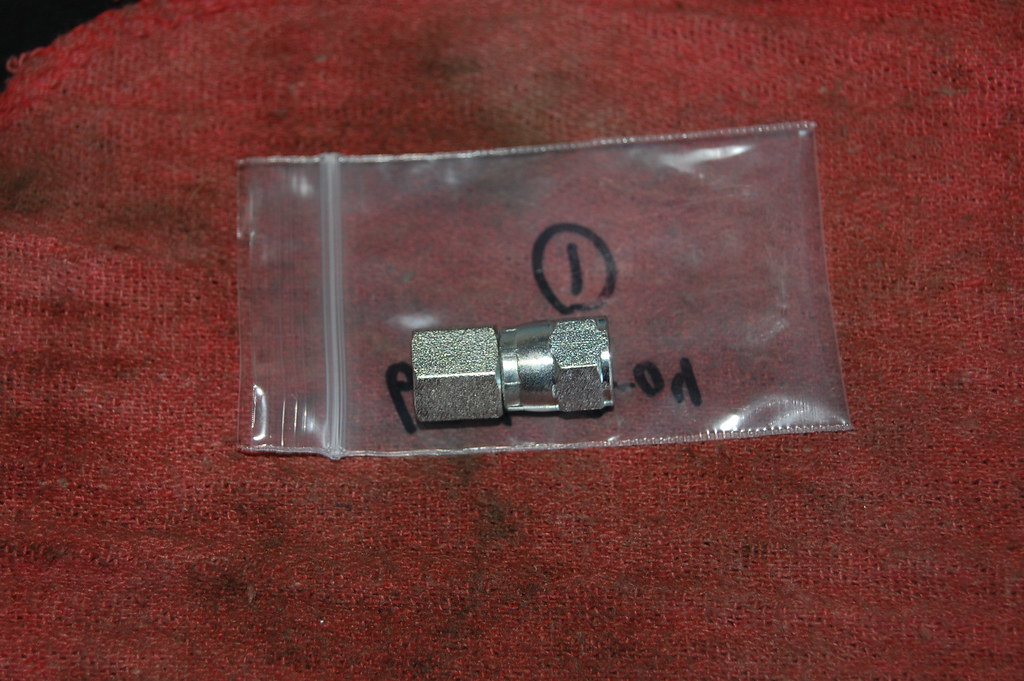
Just need my $20 Jegs gauge. I really like knowing the pressure at the rail.
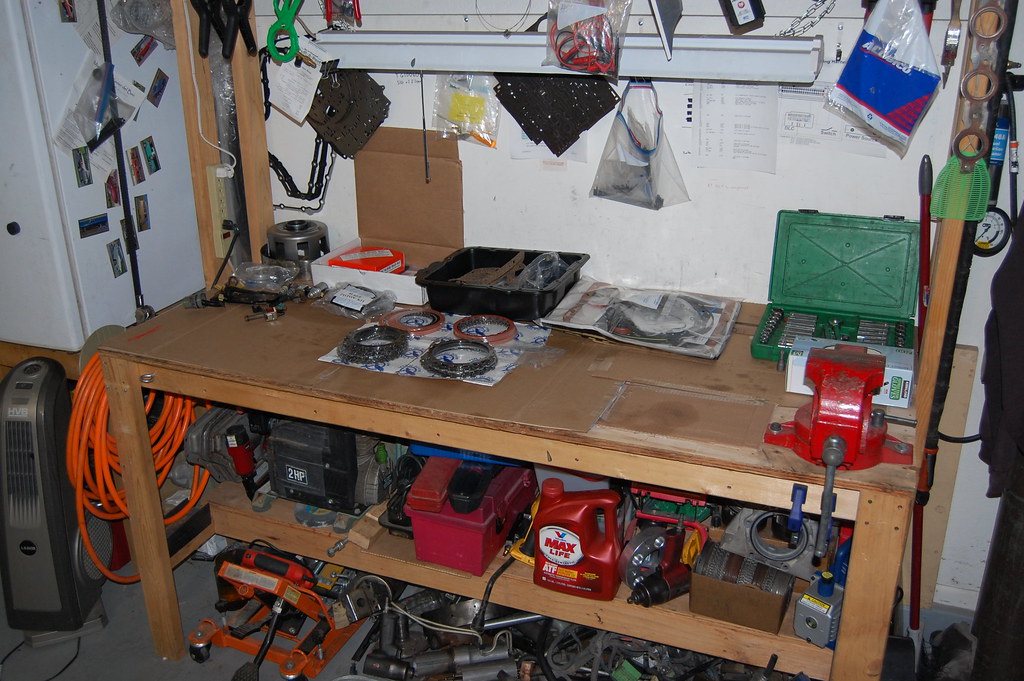
Did a little housekeeping. Getting ready for something...

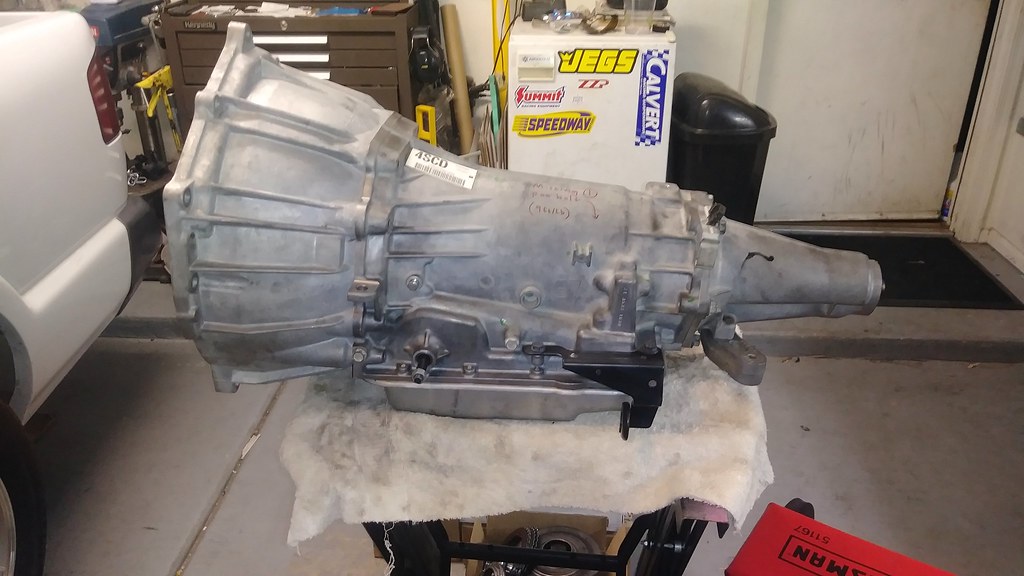
LM7 build is on pause for a week or two. Building a 4L60e for a buddy.
Got my fancy $7 fuel rail gauge fitting. Hydraulic fittings are great!
Just need my $20 Jegs gauge. I really like knowing the pressure at the rail.
Did a little housekeeping. Getting ready for something...
LM7 build is on pause for a week or two. Building a 4L60e for a buddy.
09-28-2018, 08:08 AM
#71

Is that -4AN female to 1/8" NPT female?
If so, where'd you find that?
EDIT: Looks like this will do the trick, with no need for the brass 90.
If so, where'd you find that?
EDIT: Looks like this will do the trick, with no need for the brass 90.
Last edited by TipsyMcStagger; 09-28-2018 at 10:06 AM.
09-28-2018, 02:03 PM
#72

Great start to a swap. I know you have said you are not doing ac at this point, but Im interested to hear where you think you will mount the compressor. I would like to keep it in the stock engine location on my 87 burb but im not sure that is going to work with the mounts and space between the frame rail.
09-29-2018, 12:52 AM
#73
On The Tree
Thread Starter
Is that -4AN female to 1/8" NPT female?
If so, where'd you find that?
EDIT: Looks like this will do the trick, with no need for the brass 90.
If so, where'd you find that?
EDIT: Looks like this will do the trick, with no need for the brass 90.
Great start to a swap. I know you have said you are not doing ac at this point, but Im interested to hear where you think you will mount the compressor. I would like to keep it in the stock engine location on my 87 burb but im not sure that is going to work with the mounts and space between the frame rail.
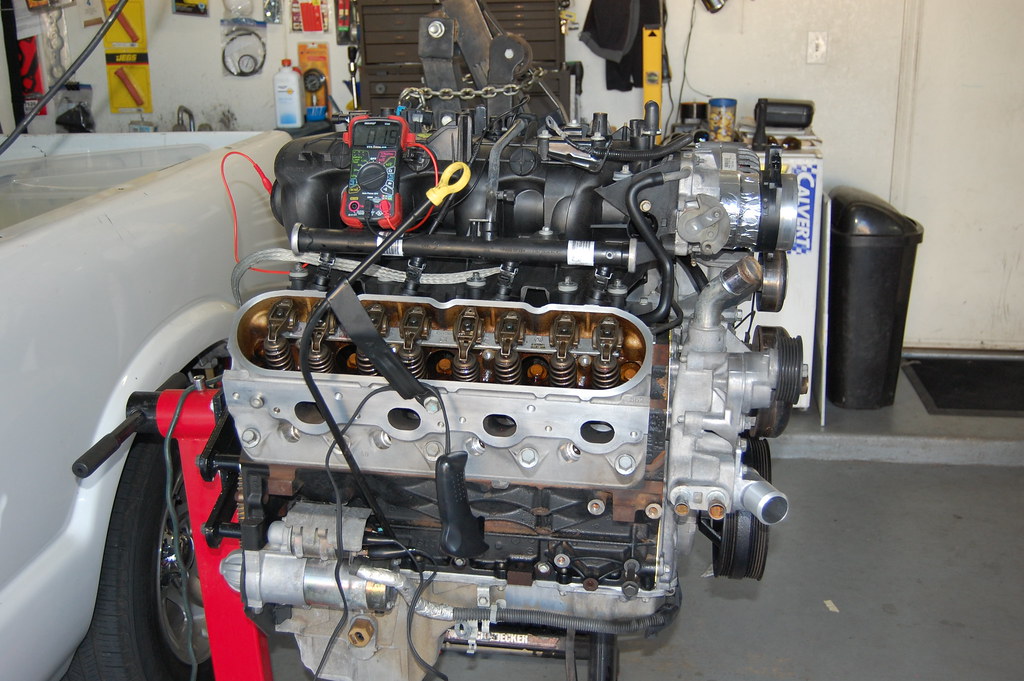
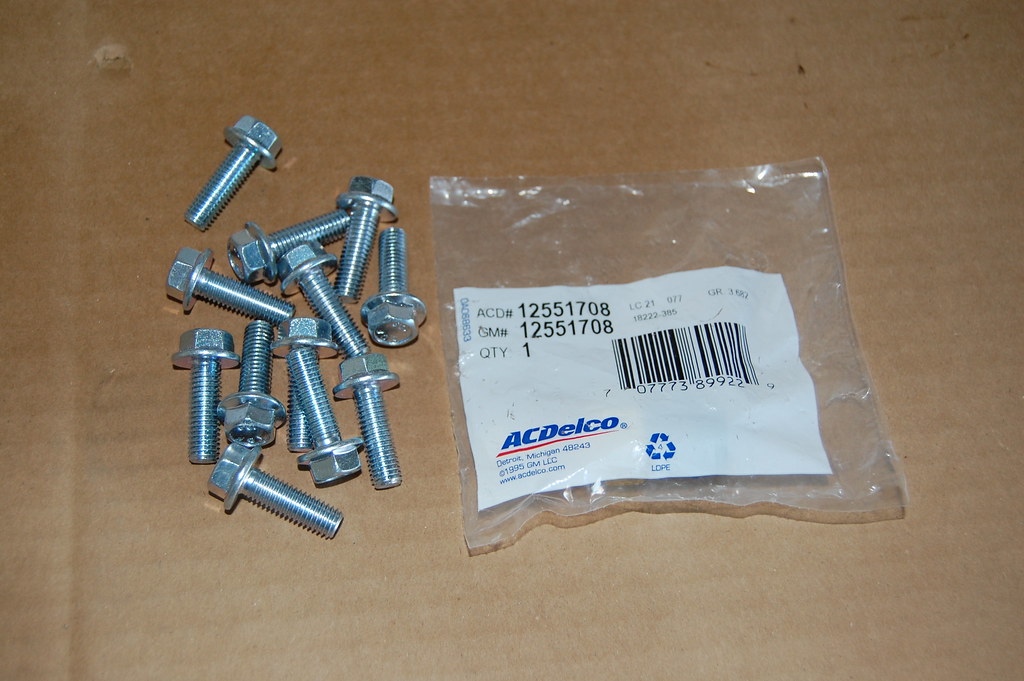
Got my header bolts and 3 wire coolant temp sensor today.
Promptly mounted the headers which, I'll admit, was a waste of time and space but I love that look!
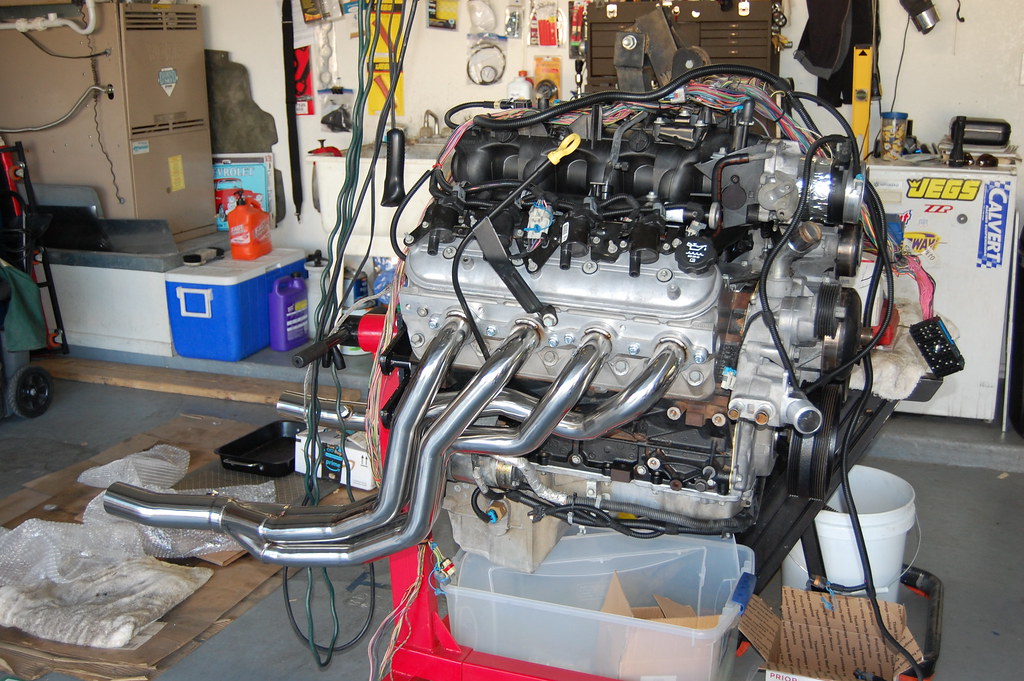
Okay. Everything I had on order has now arrived. NOW the build is on hold.
09-29-2018, 09:49 AM
#74
TECH Senior Member
iTrader: (7)
I had that FP sensor on the rail of my GTO. I accidentally discovered that it was about to fall off and hose down my engine compartment with fuel. It would have burned the car to the ground. That little nipple on the rail is not designed to be stressed on a continuous basis. The weight of a gauge hanging on it combined with engine vibration will eventually cause a stress failure.
Andrew
09-29-2018, 02:49 PM
#75

Fantastic build man! I am really excited to see this finished up!
One bit of criticism. You ***really*** should have spent some money for some stock replacement lifters with that new cam especially when you had the motor torn down that far.
Great job otherwise!
One bit of criticism. You ***really*** should have spent some money for some stock replacement lifters with that new cam especially when you had the motor torn down that far.
Great job otherwise!
09-29-2018, 09:34 PM
#76

Please do not hang a gauge on the rail as a permanent item. Check out this video:
https://www.youtube.com/watch?v=p3JschEiZEo
I had that FP sensor on the rail of my GTO. I accidentally discovered that it was about to fall off and hose down my engine compartment with fuel. It would have burned the car to the ground. That little nipple on the rail is not designed to be stressed on a continuous basis. The weight of a gauge hanging on it combined with engine vibration will eventually cause a stress failure.
Andrew
Jay
09-29-2018, 09:47 PM
#77
On The Tree
Thread Starter
Having said all that, I will keep a close on on my fuel rail test port. Thanks for looking out!
Thanks for following!
09-30-2018, 12:20 PM
#78
TECH Senior Member
iTrader: (7)
I see what you're saying. That fitting was definaley an issue. It looks like the rail in that video is constructed differently than the one I have. Probably a bit more weight on that setup than my little 1-1/2" gauge also. I've been running that same fitting and gauge setup on my S10 for almost 2 years now without issue.
Having said all that, I will keep a close on on my fuel rail test port. Thanks for looking out!
Having said all that, I will keep a close on on my fuel rail test port. Thanks for looking out!
Andrew
10-10-2018, 10:07 PM
#80
On The Tree
Thread Starter
Update:
The Yukon shell is tentatively sold for $500. Guy gave me $100 to hold it, balance to be paid on 10/20. I'm counting my chickens before they hatch here but...
Bought running Yukon for $1000, sold the t-case for $350, some other misc pieces and parts for $150 and the shell for $500. That's a payback of $1000! That makes the motor, transmission and all the other little trinkets I pulled FREE!! Only as far as dollars are concerned though. I worked my butt off to get them out. Still calling that a win.

The 4L60e I was building for a buddy is finally done and should be picked up tomorrow.
This clears my plate to focus on the K10 disassembly. Unfortunately, do to the way vehicles are situated I really can't decommission the K10 until the Yukon is gone. So I guess I spend the next few days planning and researching...
The Yukon shell is tentatively sold for $500. Guy gave me $100 to hold it, balance to be paid on 10/20. I'm counting my chickens before they hatch here but...
Bought running Yukon for $1000, sold the t-case for $350, some other misc pieces and parts for $150 and the shell for $500. That's a payback of $1000! That makes the motor, transmission and all the other little trinkets I pulled FREE!! Only as far as dollars are concerned though. I worked my butt off to get them out. Still calling that a win.
The 4L60e I was building for a buddy is finally done and should be picked up tomorrow.
This clears my plate to focus on the K10 disassembly. Unfortunately, do to the way vehicles are situated I really can't decommission the K10 until the Yukon is gone. So I guess I spend the next few days planning and researching...