When you click on links to various merchants on this site and make a purchase, this can result in this site earning a commission. Affiliate programs and affiliations include, but are not limited to, the eBay Partner Network.
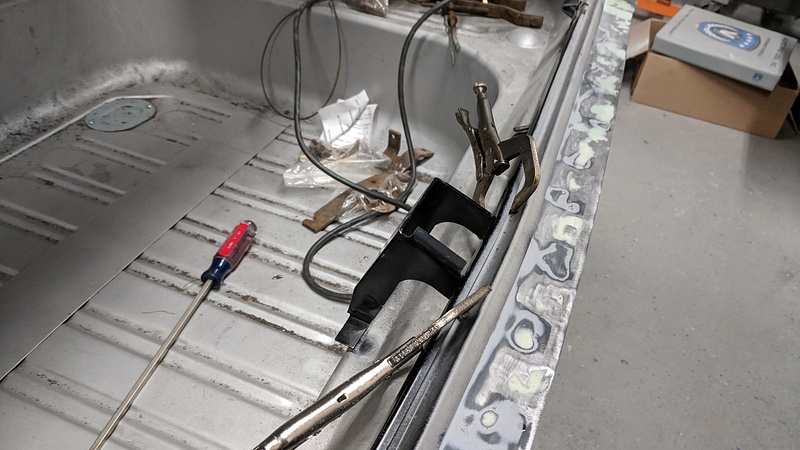
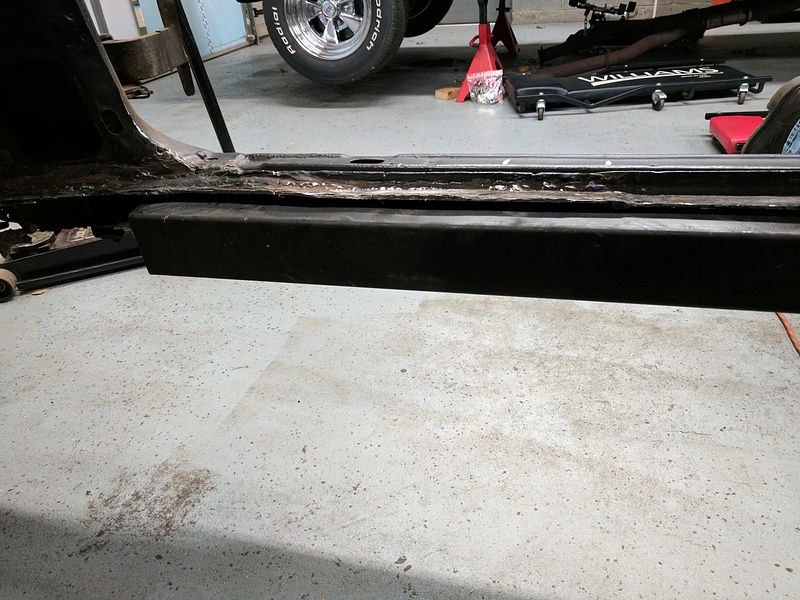
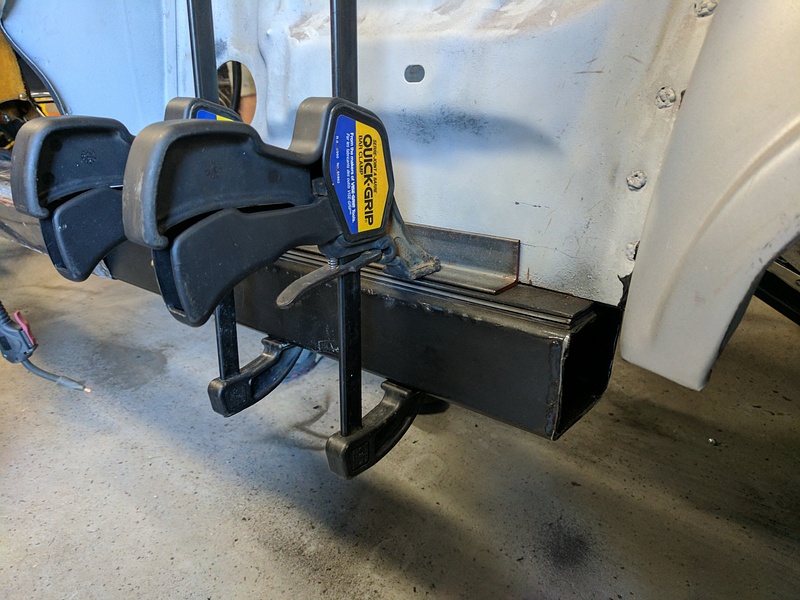
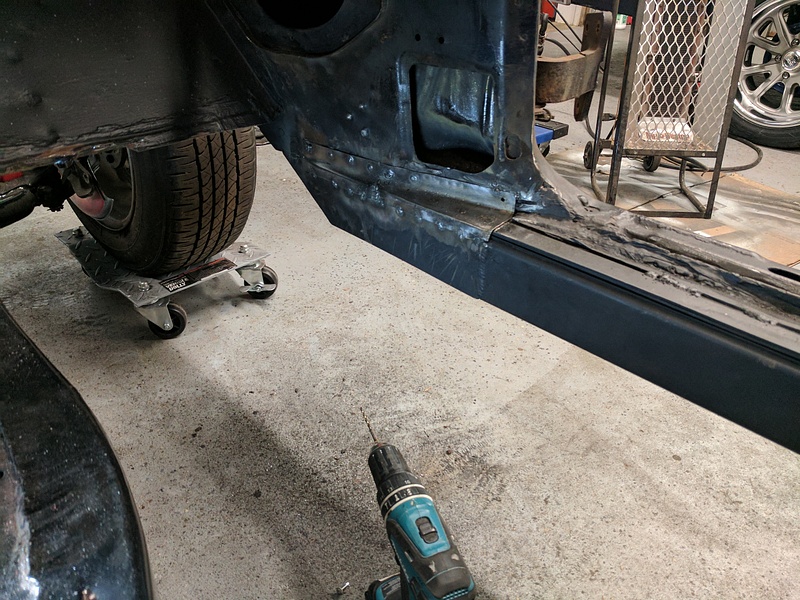
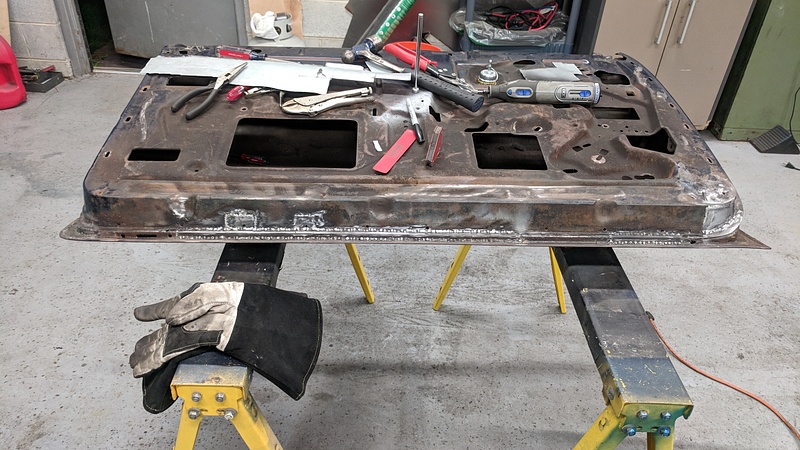
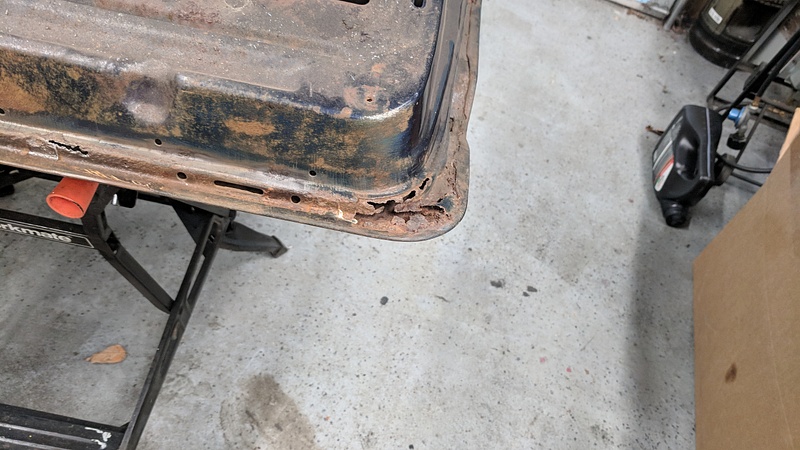
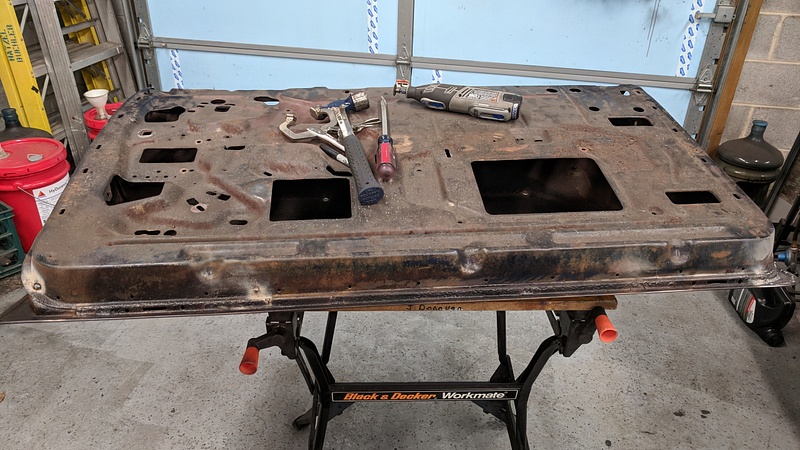
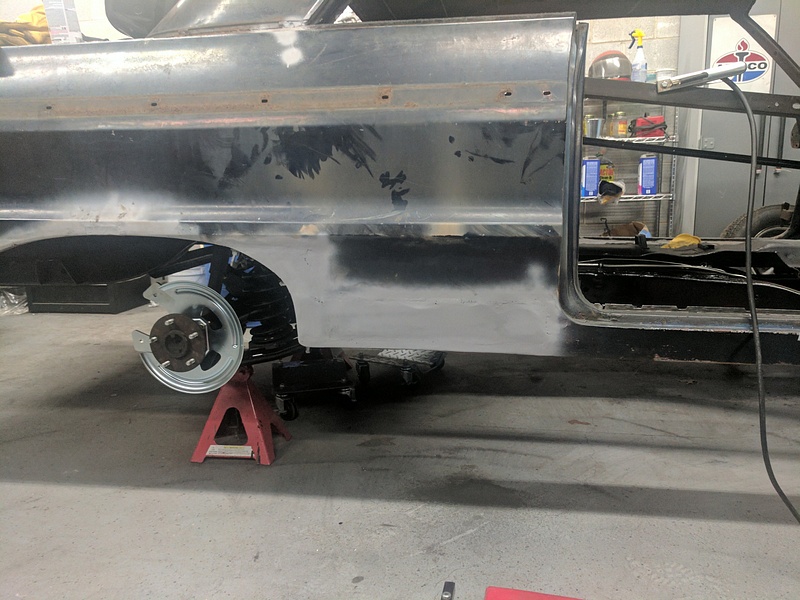
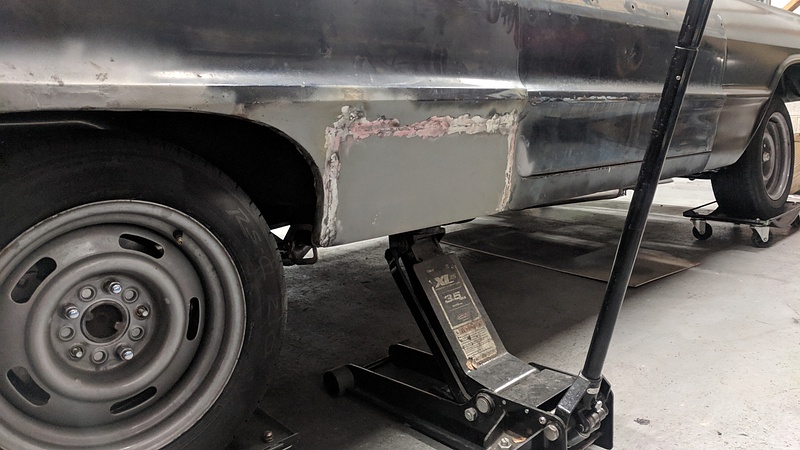
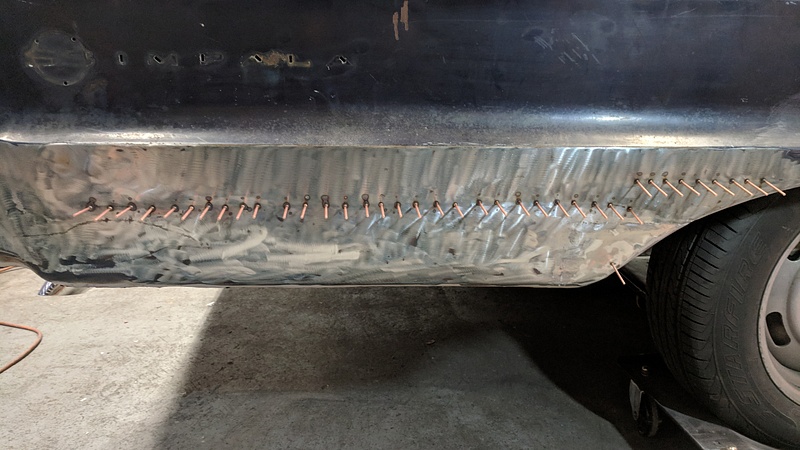
To go further into the inner rockers, we used 3" x 4" x 1/8" rectangular tube steel cut to around a 61" length, if my memory serves correctly. I got the idea after seeing the pricing of replacement inner rockers and after looking at this cutaway:
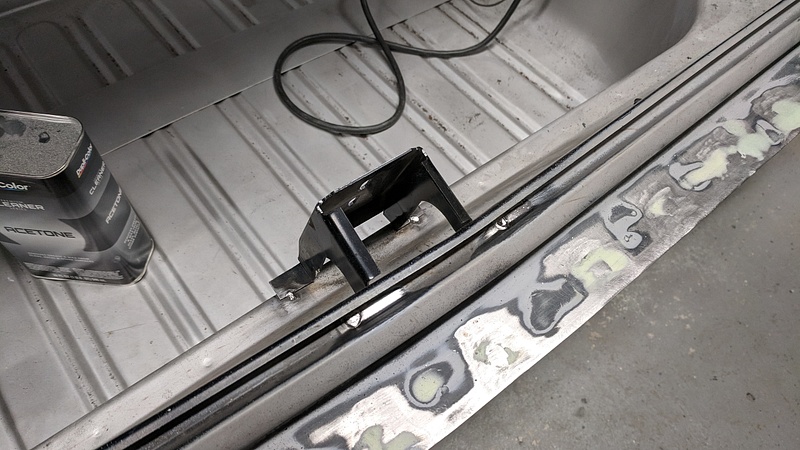
Essentially, the tube steel fits in as outlined below, with about 3/8" worth of shimming on top to bring the floor back up to its proper plane.
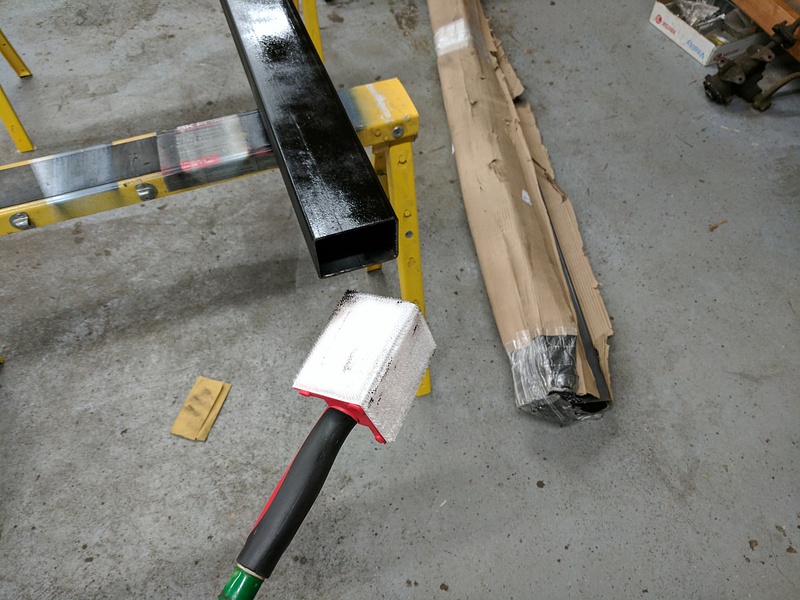
We used one of those corner cut-in tools to coat the inside of the tube with some Rustoleum.
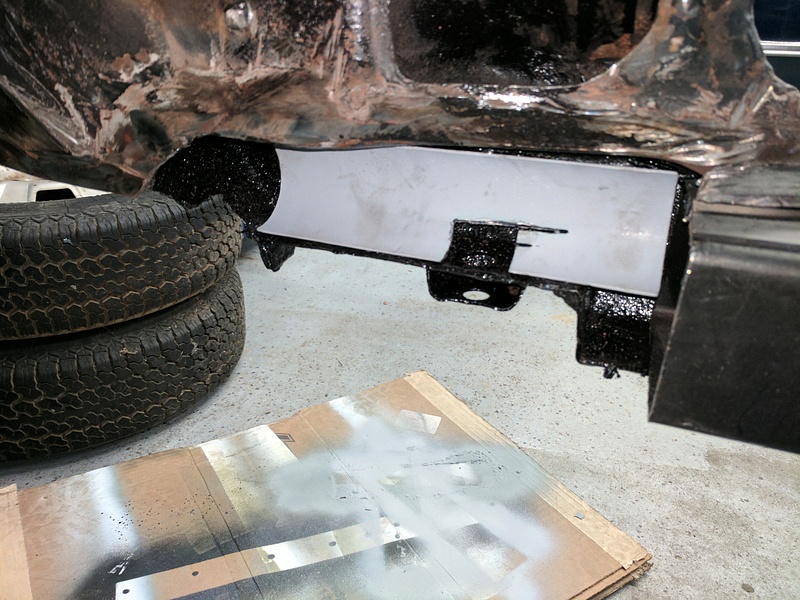
You can see here how the shimming is necessary.
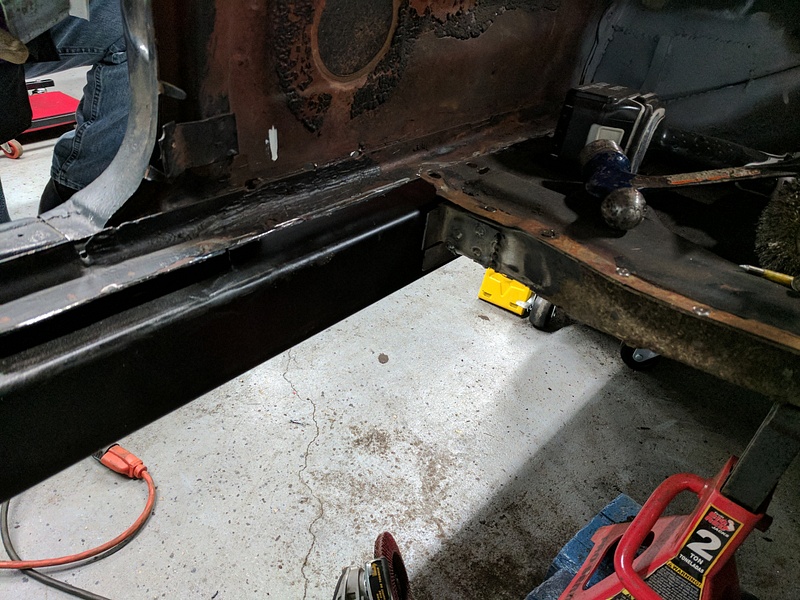
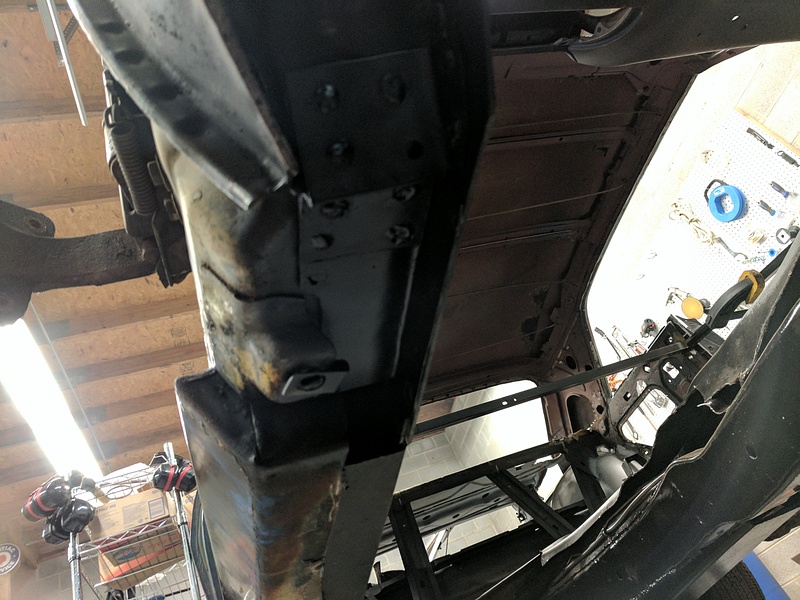
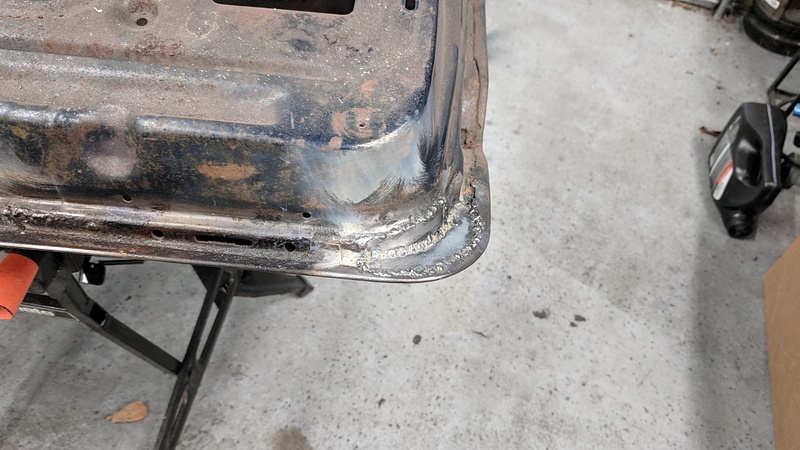
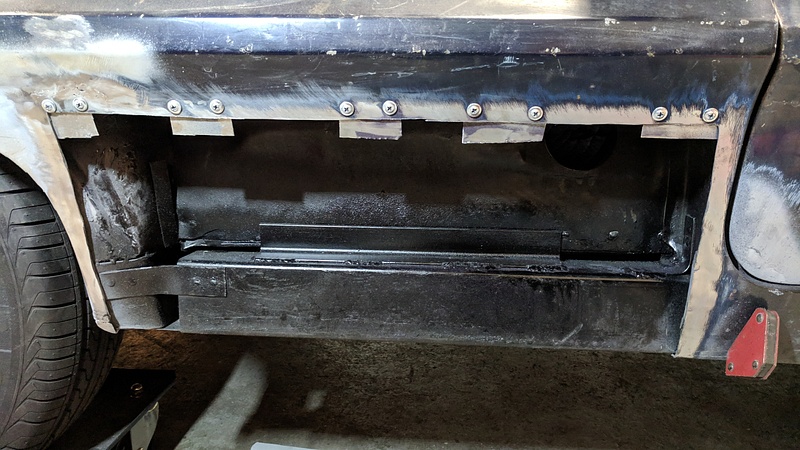
For the rear, we tied the tube steel in with the rocker cap.
This is on the other side, but it shows how we used a piece of angle iron to tie the tube steel in with the B pillar/quarter window.
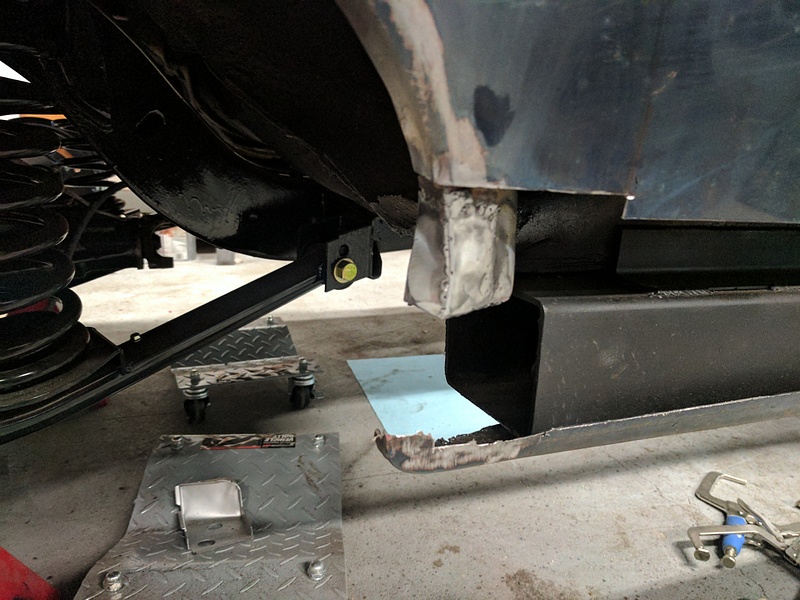
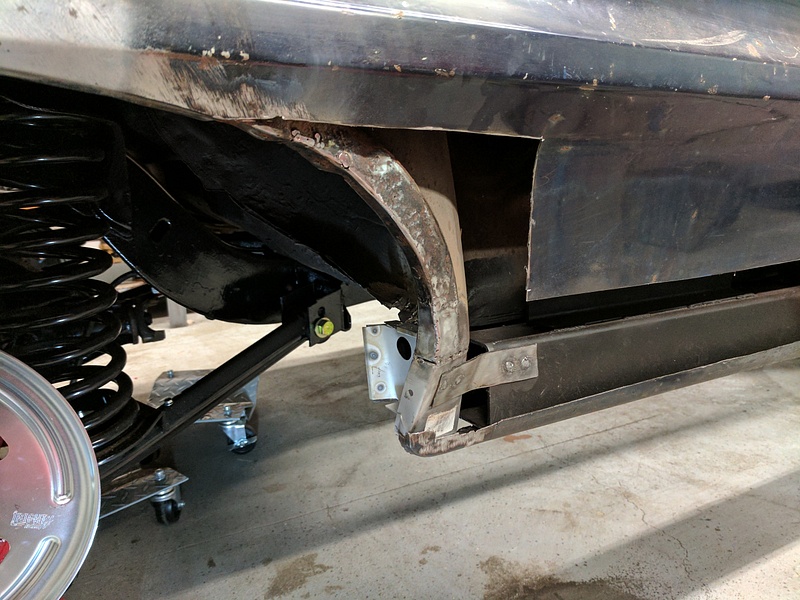
On the front side, we cut some tubing in half to make a new brace that was rotted out on the A pillar. We notched out a clearance for the fender bolt.
Then it was just a matter of building out the front floor area.
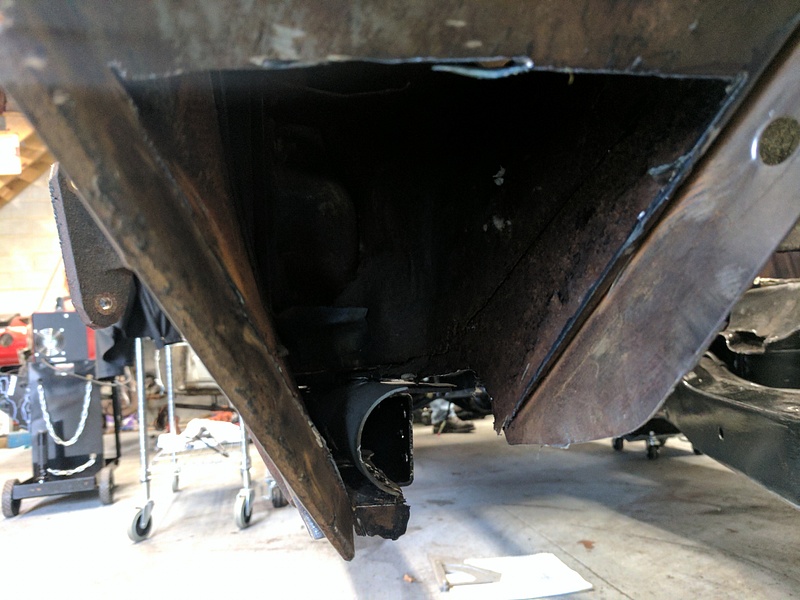
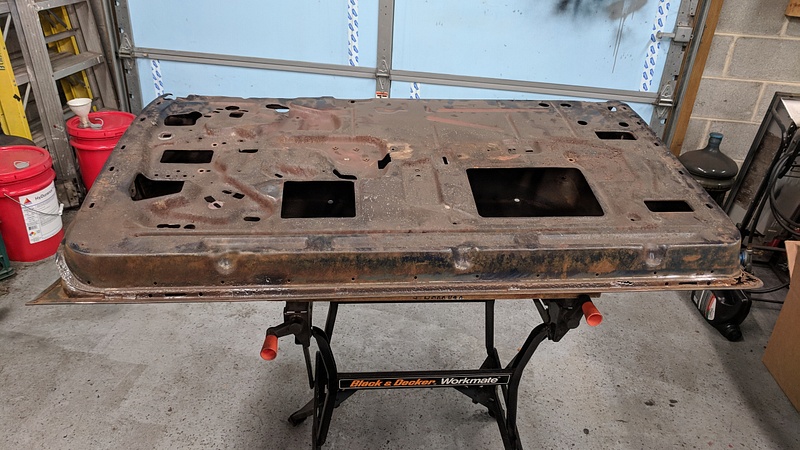
As well as the underside:
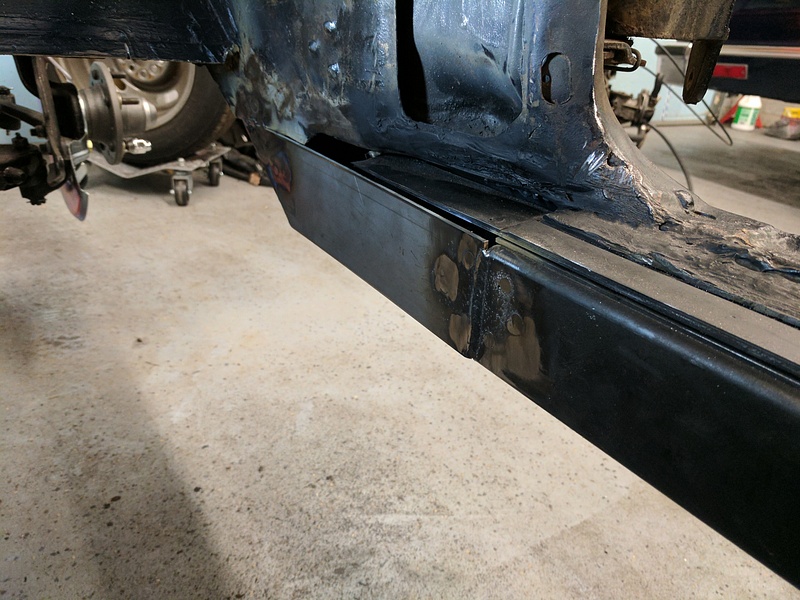
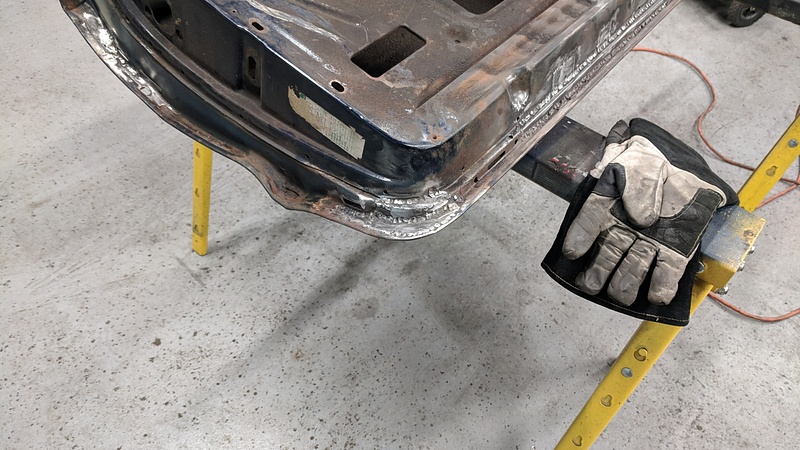
The result is a much, much stronger rocker area without spending the $160/side for the replacement pieces. Oh, and we can also jack the car up by the rockers now.
The posts I fired off were the culmination of four years of work. Now that this thread is caught up with where we are right now, things will be slowing down for the most part. I can go into more detail in other areas if so requested, since I pretty much gave a summary of what we have done. We currently only work on the car one day a week, so I try to gather enough pictures before making another post. Right now, we are waiting on the new driveshaft from Denny's Driveshaft to arrive. My dad also has to order new inner fenders so we can start putting the front end together. Once that is done, I plan on getting the wiring done, fluids in, and starting the car for the first time. My dad is currently saving up for the paint job, and hopefully we'll have this thing painted at the beginning of 2019 after we hate our lives with body work.
We got both doors patched. We briefly looked at getting new doors, but they would have been about $900 for the pair, which is $900 that can be applied towards paint. And since most of the rust was on the underside of the doors, we decided to just patch them. The driver side door was worse than the passenger side.
Driver side:
Passenger side:
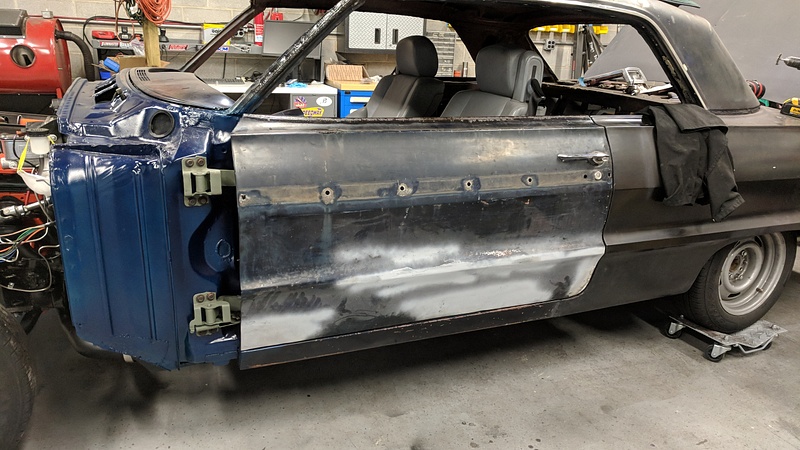
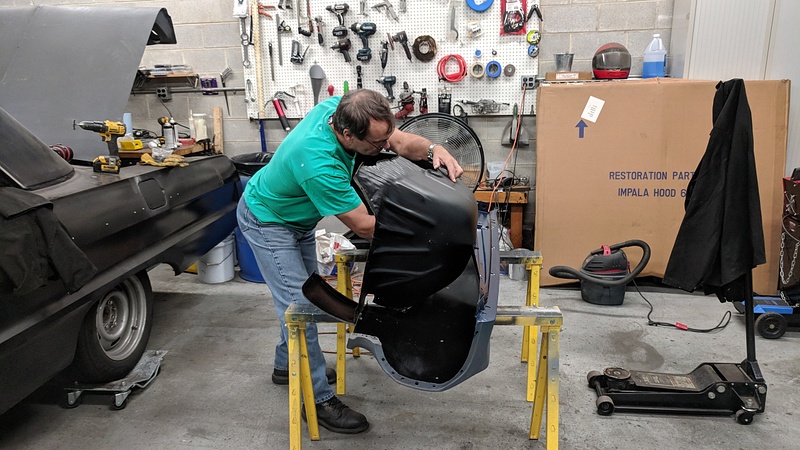
After dealing with the doors, we attached the driver side fender to the inner fender and set it onto the car.
Unfortunately, the fender isn't fitting as well as we were hoping, and it has taken quite a bit of shimming and bending to try and get it contoured correctly. The best we can assume is that it had warped in storage, but it is what it is.
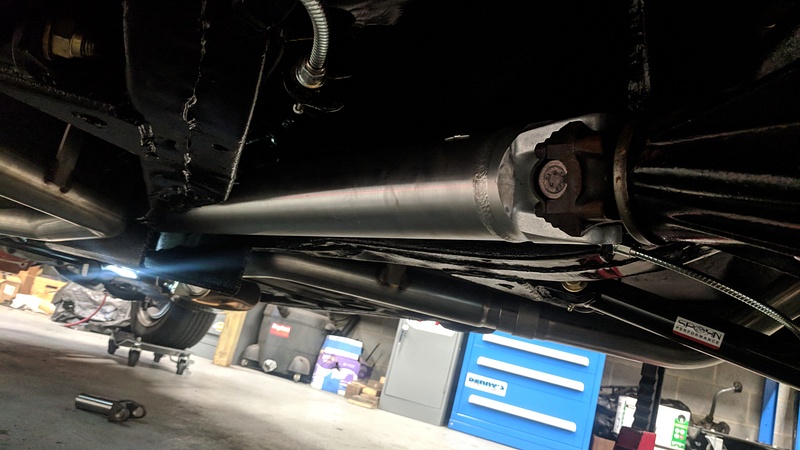
At the beginning of September, we had placed an order for a new driveshaft through Denny's Driveshaft. After looking over the options, my dad decided to save $100 and order a steel driveshaft. It finally came in last week. When I originally picked up the box, I thought to myself, "This isn't that heavy at all!" When I opened the box, I was a bit perplexed to find not a black tube, but rather this:
I guess Denny's decided to give us a free upgrade to an aluminum driveshaft. One more lucky score added to the roster.
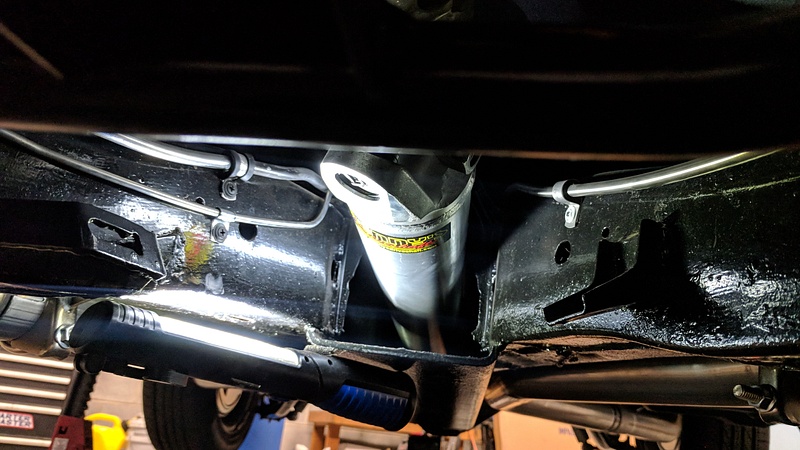
Since the frame tunnel had already been modified for a single piece driveshaft, the install went without a hitch.
Now, we just need to wait for the passenger inner fender to arrive and then we can get that side buttoned up.
The inner fender for the passenger side finally came in. My dad wound up cancelling his original order and ordering from a separate company since the first company said it was on "indefinite backorder." Once it arrived, we were able to get the passenger side bolted on. Due to the pieces being aftermarket, it didn't fit nearly as well as the driver side, and required just about all of the mounting holes on the inner fender to be re-drilled.
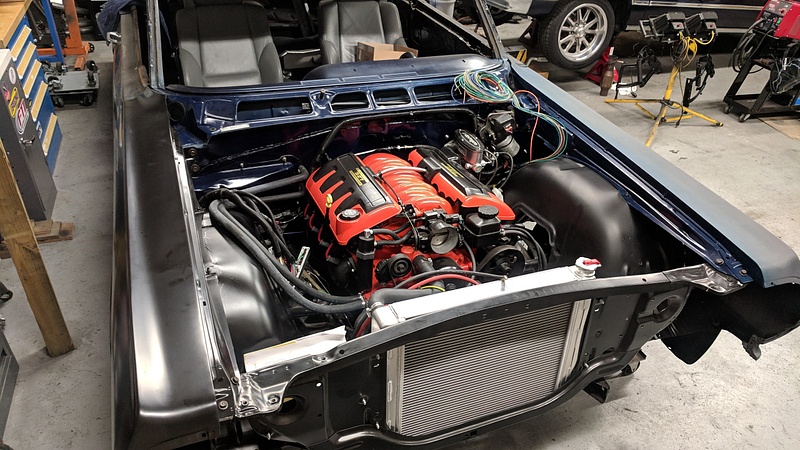
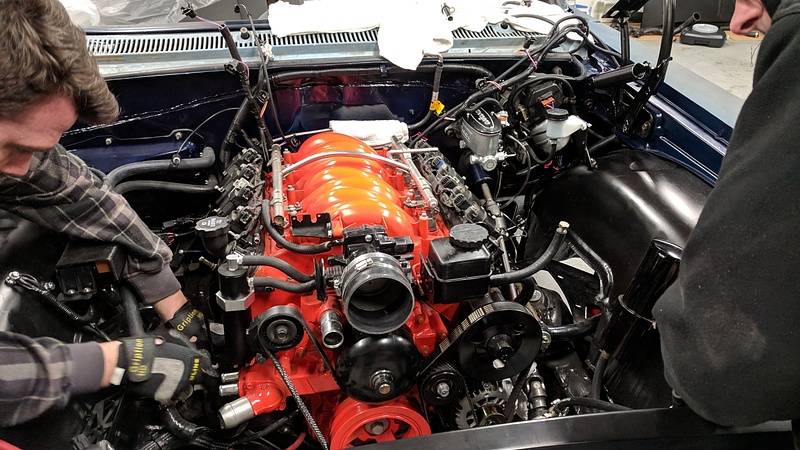
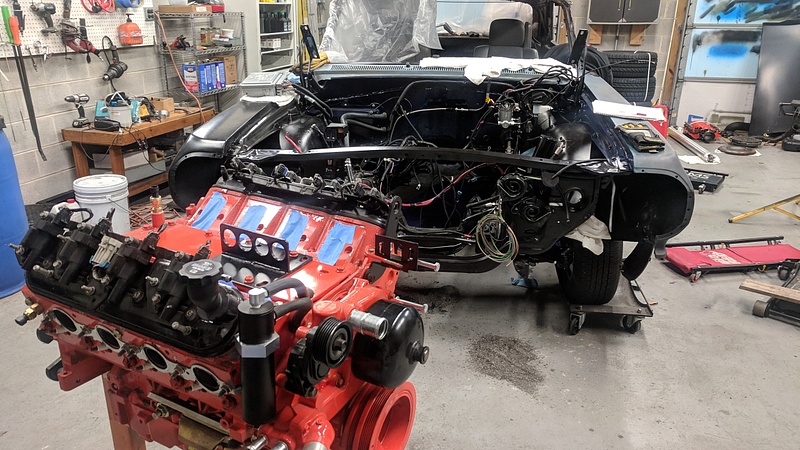
Now we can start making this look like an engine bay.
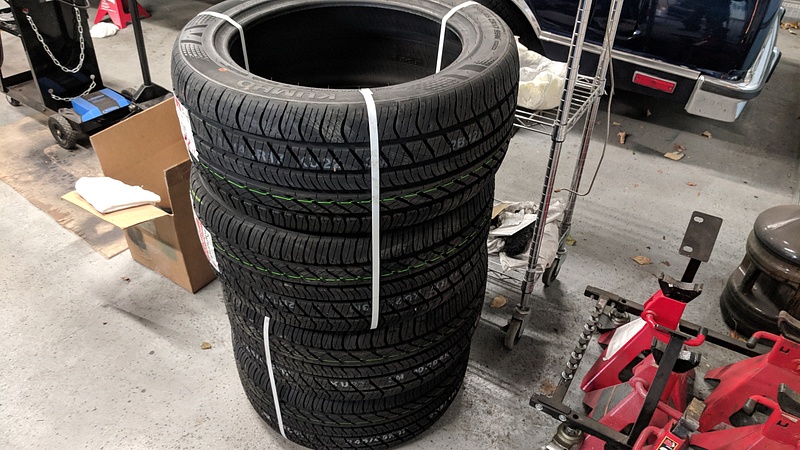
As an aside, eBay was running a deal with Discount Tire Direct for $100 off an order of $400 or more. So, my dad ordered four Kumho Ecsta 4XIIs for $342 shipped in 245/45/17. They'll get mounted on the new wheels shortly.
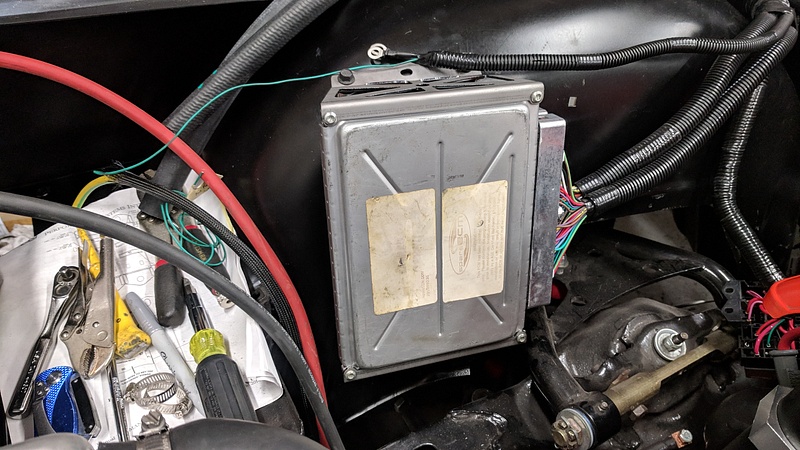
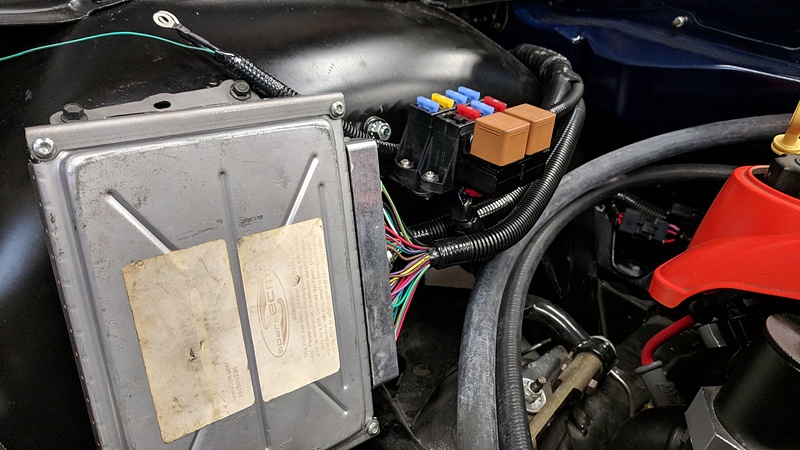
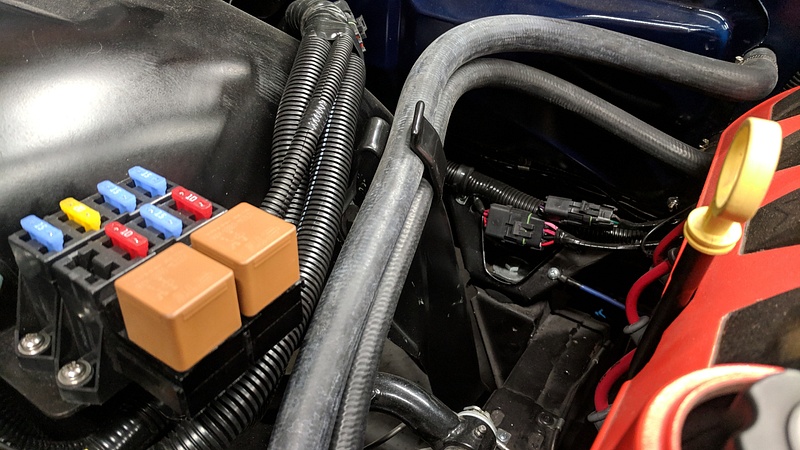
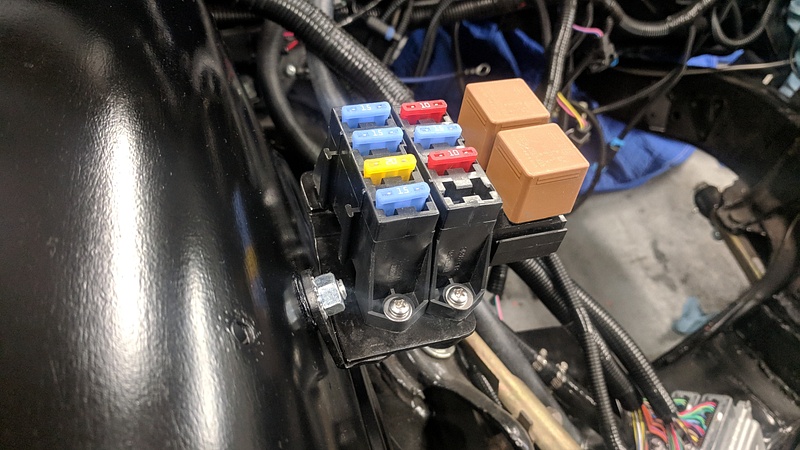
I mounted the relays for the fan, low beams, and high beams.
Then came the time to start mounting the PCM and fuse block for the engine. I found some steel brackets online that I was able to bend to fit the inner fender. As a bonus, the brackets weren't riddled with gaudy logos like all of Dirty Dingo's stuff.
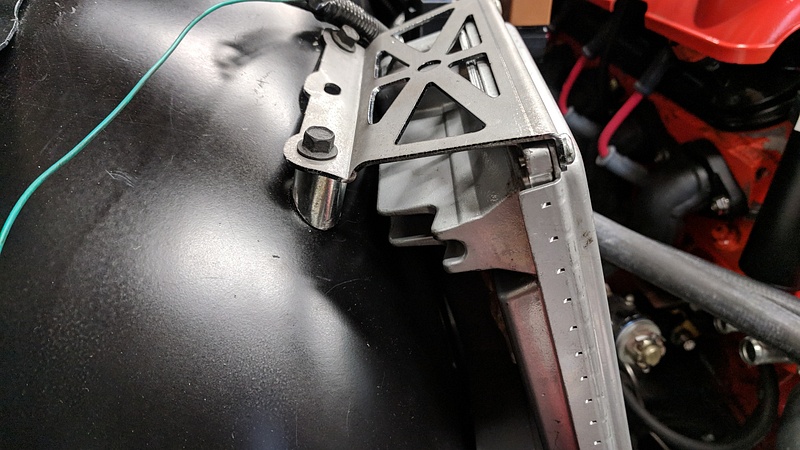
I made a spacer for the one bolt:
And then I used the existing bolt hole for the heater hose clip to fit a carriage bolt and mount the fuse block with a custom bracket I made.
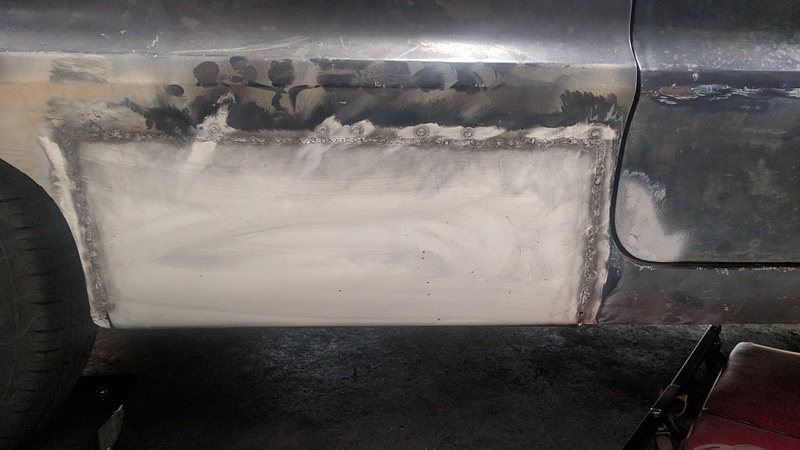
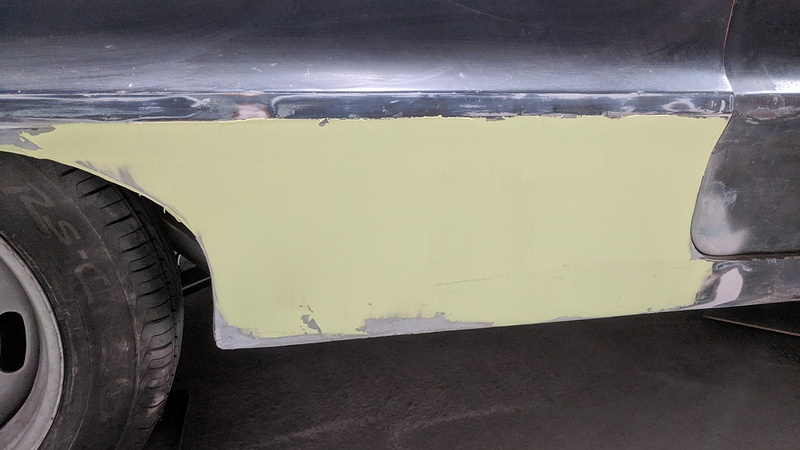
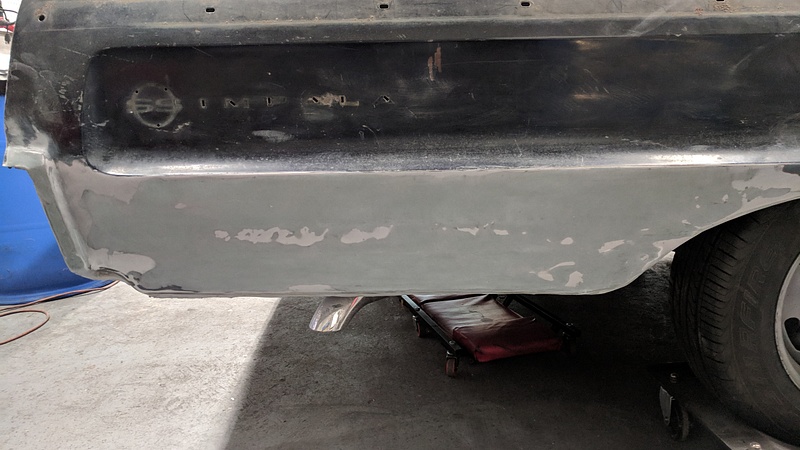
We then revisited this previous patch we had done because I absolutely hated it and knew we could do better:
So, we cut it out.
And welded in a new patch:
Oh, yeah, and thanks to the steel tube in the rockers, we can do this:
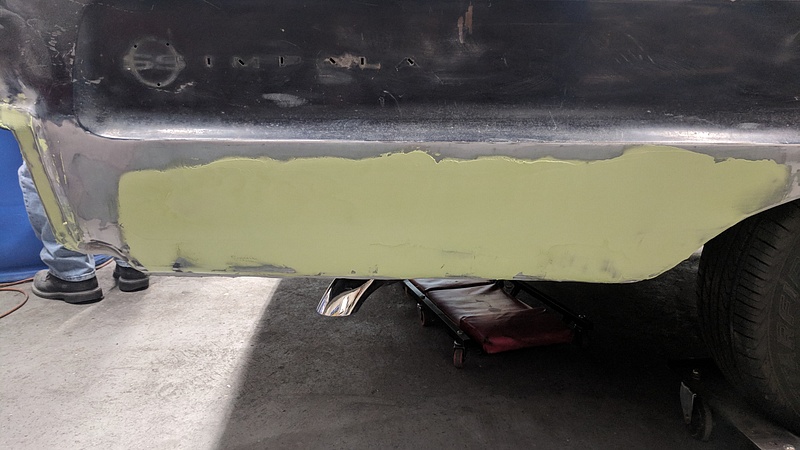
Eastwood Contour Aluminum-Filled Filler:
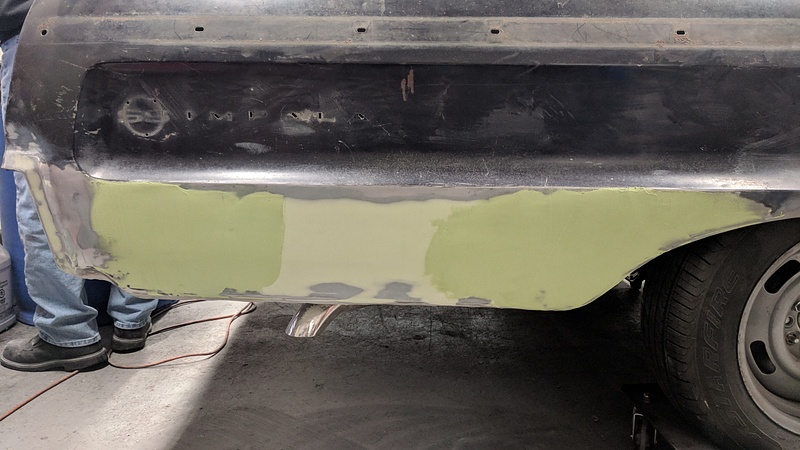
Eastwood Contour Premium Filler for a second coat after sanding:
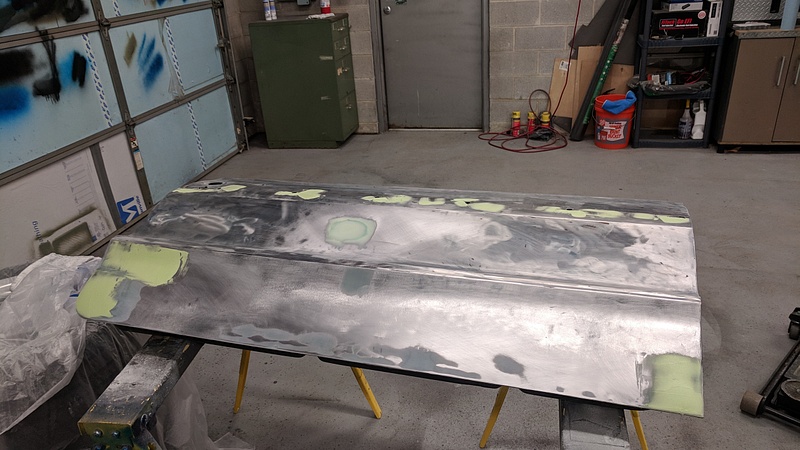
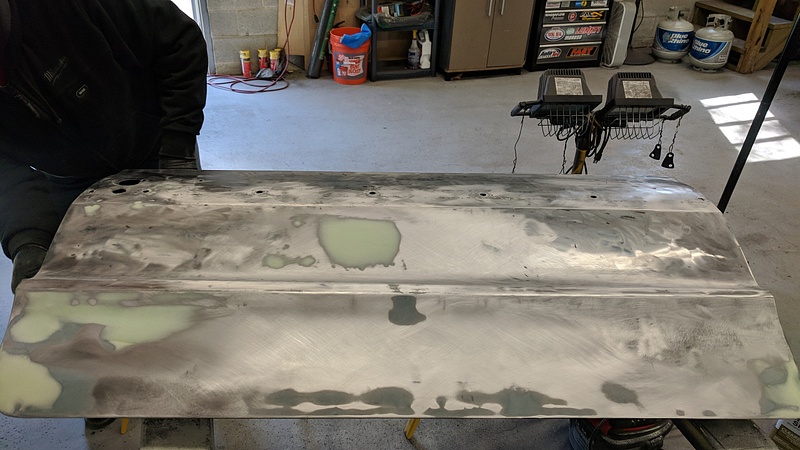
Sanded with 120 and then 220:
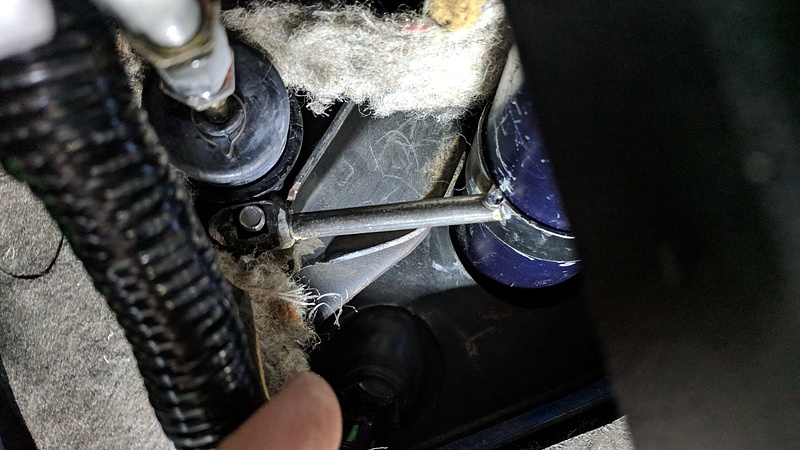
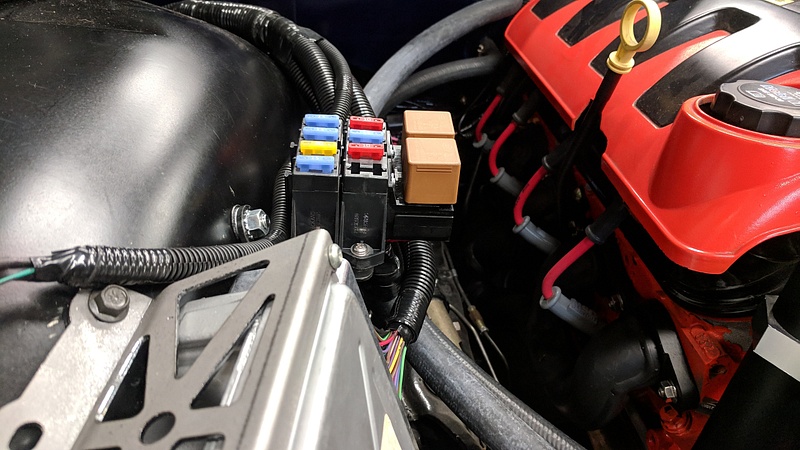
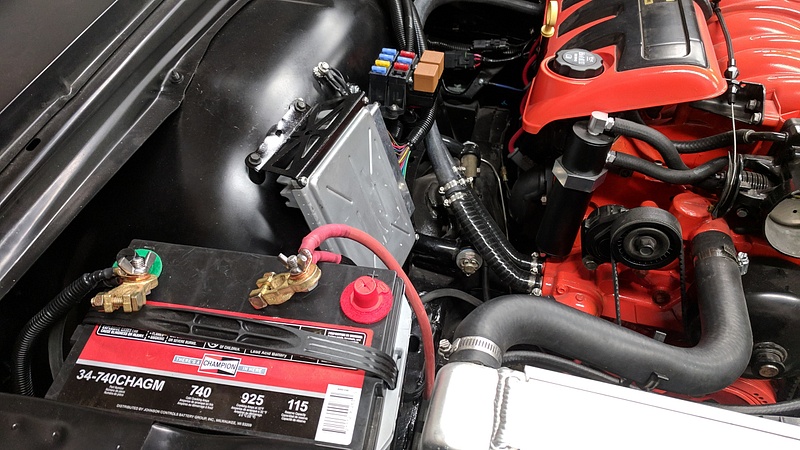
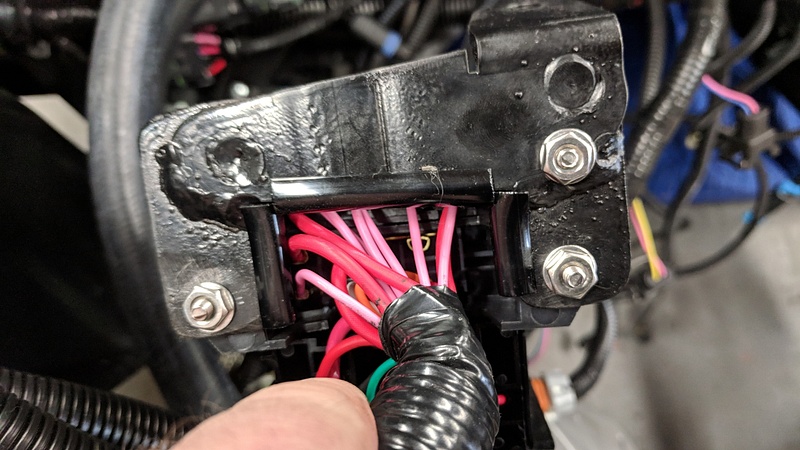
One thing that needed to be addressed was the fact that the heater hoses were rubbing on the control arm. I found some 45* silicone hoses with 6" and cut them as needed. We also picked up a battery and I terminated the ends of the battery cables. Between the PCM and fuseblock is a chassis ground I connected directly to the battery:
I also used a heater hose bracket from a Mopar Hemi for hold the hoses in place:
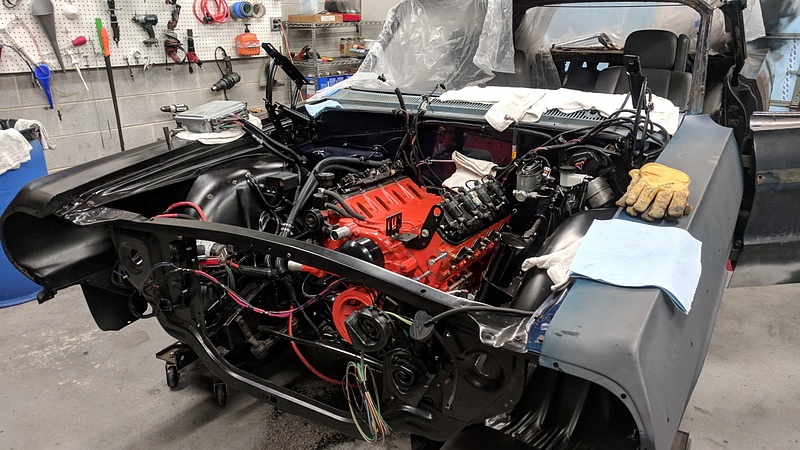
She's finally starting to look like an engine bay:
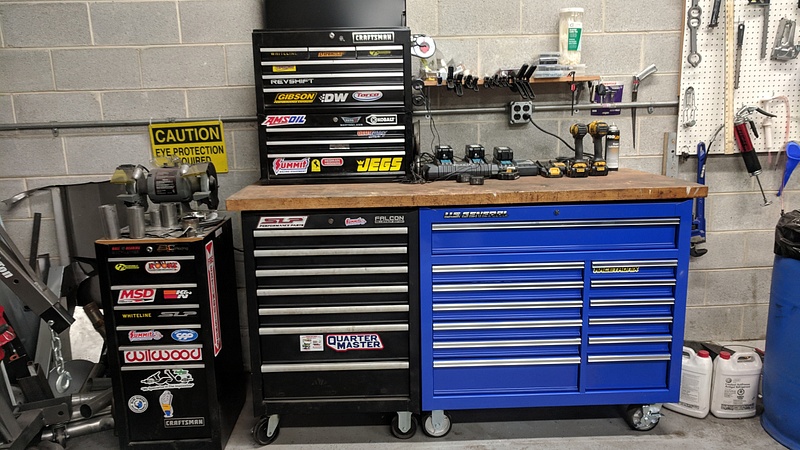
No update to the 64, but I did upgrade my tool storage. I took advantage of Black Friday and scooped up one of the Harbor Freight 44" boxes for $399. It had to be ordered and came in yesterday.
That's a lot of work , wish I had that kind of determination lol . It'll be a sweet ride once its done
That's the hope. It definitely can be a daunting task, especially in the beginning when you just keep uncovering more ****. I guess the trick was to simply take things one task at a time.
I got the front end wired up as much as I could without having the headlights in place. Once those get installed, I'll be able to terminate the ends for the H4 halogens.
This is a closeup of the bracket I made for mounting the clutch reservoir. Obviously, the car originally had a clutch with a mechanical linkage, so there was no factory provision for a hydraulic reservoir.
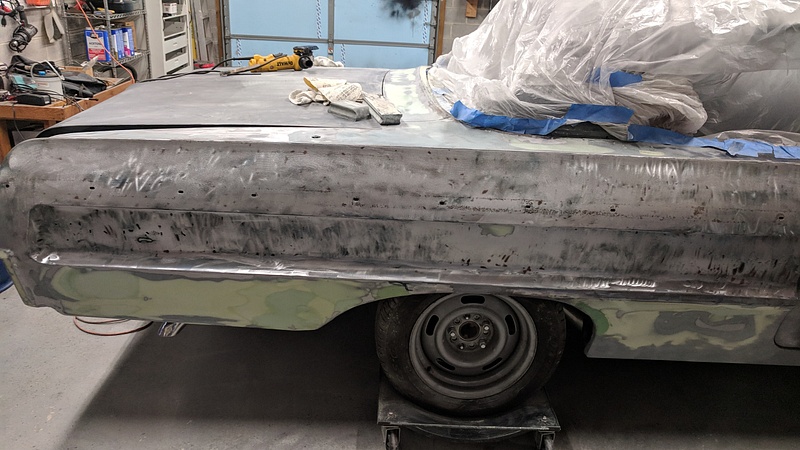
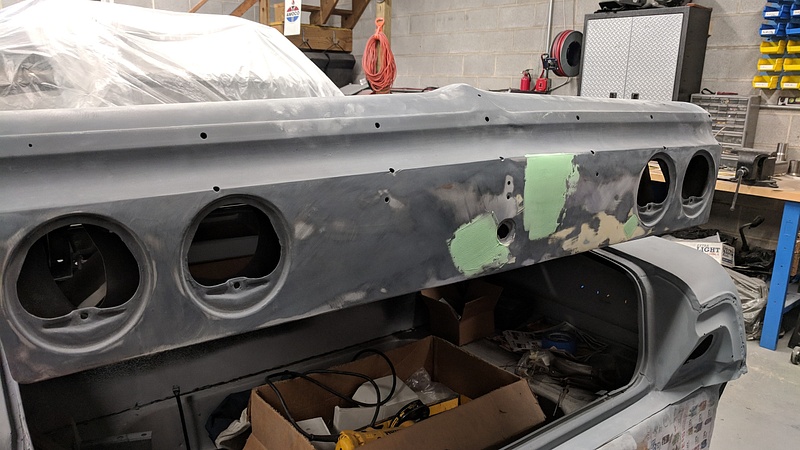
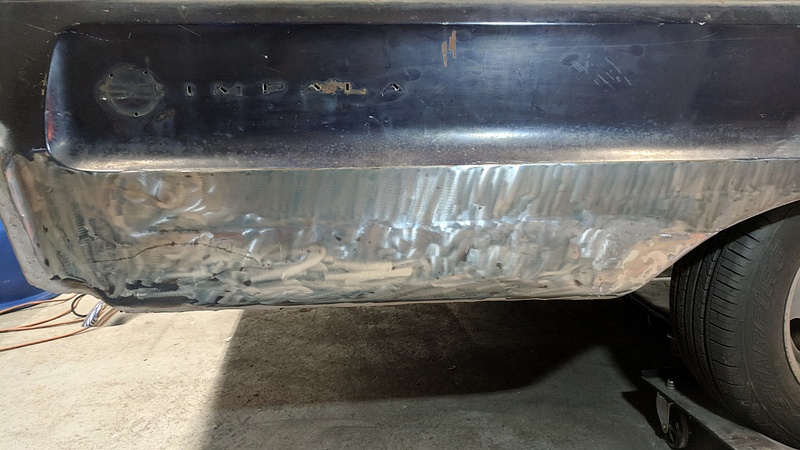
Then it was on to the passenger rear quarter and the nice crease it was sporting. We stripped it down to metal:
Then used a stud welder my dad picked up from Harbor Freight to pull it out as best we could:
While waiting for the filler to set, we tackled the exhaust tips and got them placed and welded where we wanted:
During that time, the filler had set, so we sanded it down with a DA and 120 grit sandpaper:
And applied a second coat, which is where we left off last night:
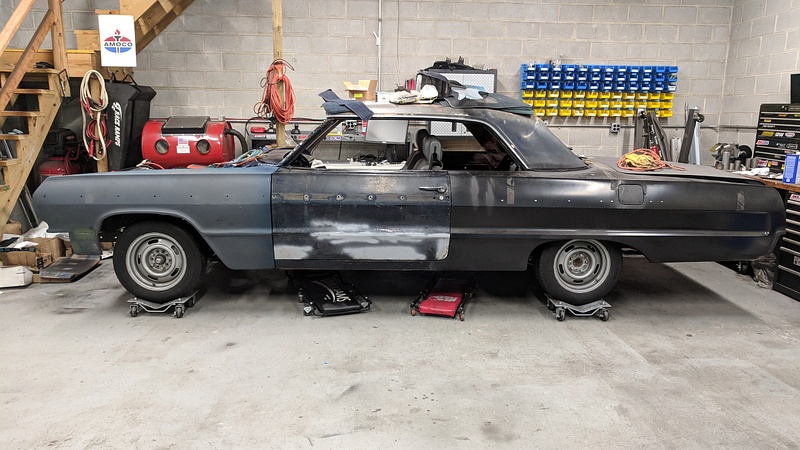
I haven't updated this in a while because it has been one tumultuous adventure. We had continued with the bodywork: sanding, applying coats, more sanding, and more applying.
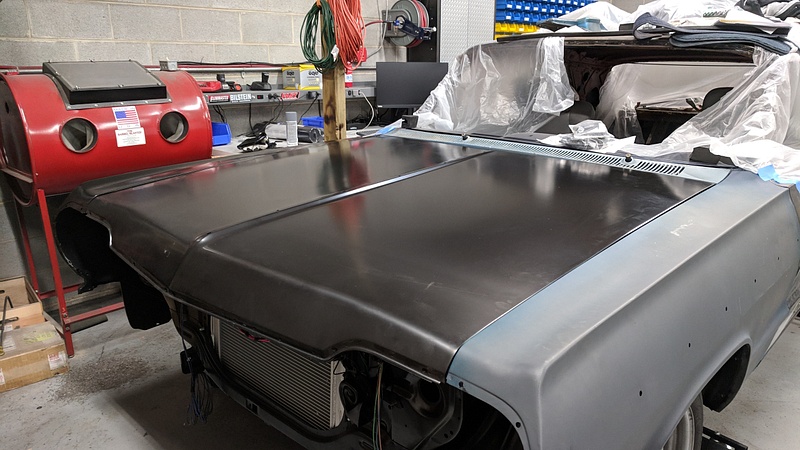
We even took the new reproduction hood and bolted it on. I know that people say the reproduction stuff is junk, but we haven't really had too many issues with the quarter, fender, floors, or hood. It all has seemed to line up really well.
But we really needed a break from the bodywork. So, we decided to concentrate on getting the engine ready to start. I picked up an Airaid U-Build-It intake kit, which comes with a long tube that has various bends in it and can be cut down to shape. The tubing is black plastic, so it gives a much better appearance than the aluminum stuff. We capped the end of the tube off with a dry element filter from AEM.
At that point, it was time to add fluids, double check the connections, and turn the key. So, we turned the key to ON to make sure everything came on.
And it didn't. My dad looked at me, and I looked at the car and remembered, "Right. Fuse blocks like fuses."
So, we installed the fuses. We turned the key back to ON. The gauge cluster lit up, which -I'll admit- brought about a similar joy I had as a kid when the Christmas tree first lit up for the year. I told my dad to turn the key to START to prime the engine. So, he pushed in the clutch and turned the key.
And nothing. God damn it. My dad looked at me, and I looked at the car and remembered, "Neutral safety switch. It is wired to work when the trans is in neutral." My dad took the trans out of gear and turned the key again. This time, the starter motor woke up and spun the engine. Oil pressure rose almost instantaneously. For anyone working on an LS engine, fill the oil pump with assembly lube on install. It makes a world of difference when trying to prime the engine.
At that point, I reinstalled the relays and spark plugs on the motor and told my dad to turn the key back to ON. He did and the fuel pump primed. I hopped under the car and checked every line connection for fuel leaks. When I verified that we had no leaks, I told my dad to start the car. So, he turned the key to START.
And it started.
And it died.
He turned the key again. And again it started, and then immediately died. Now, it was time to troubleshoot.
My friend came over with his Tech II software, and we attempted to start it a few more times to no avail. The computer threw the code P0336, which ties to the crankshaft position sensor, as well as a code for the security system. ******* VATS. So, I called my brother-in-law, who has HP Tuners, and he came over to turn off the VATS. Once it was disabled, along with some other emissions codes, we tried starting it again. It fired and died. P0336 returned. FACK.
I couldn't remember if the sensor on the engine had come with the engine or if it was new, so the first step was replacing the sensor. We picked up a new sensor from the parts store and installed it. We cleared the code and turned the key. The motor fired, died, and the code returned. For the next step, I pulled the sensor plug and tested the terminals. With the key ON, I verified 12V reference and ohmed the ground terminal to the harness ground and the battery ground. With the key OFF, I then ohmed the signal wire at the correct pin on the PCM. I do not have an oscilloscope to check the actual sensor's signal. Going through GM's published troubleshooting guide for this code, one of the steps said to verify the signal wire is isolated from any solenoid, relay, and secondary ignition wires. So, I ordered some EMI-shielded wire sleeving and installed it on the sensor lead. No change.
At this point, I tested every other electrical component with the car to verify that they all work. Gauge cluster? Check. Seats? Check. Radio? Check. Headlights? Check. Neutral safety? Check. Wipers? Check. Horn? Check. Everything is working as it should, including the engine harness until it needs to staying running. I never give 100% certainty on anything, but I was 99% certain this issue wasn't a result of my wiring. This left me with two options: the PCM or the reluctor wheel. Both are suspects since the PCM was bought used and the crank was changed from a 58x to a 24x reluctor by the machine shop back in 2014. I contacted the guy I got the engine from and asked him if he has ever had any issues with a reluctor being installed incorrectly. He told me that he never has. Not once. Ever. Never ever ever ever.
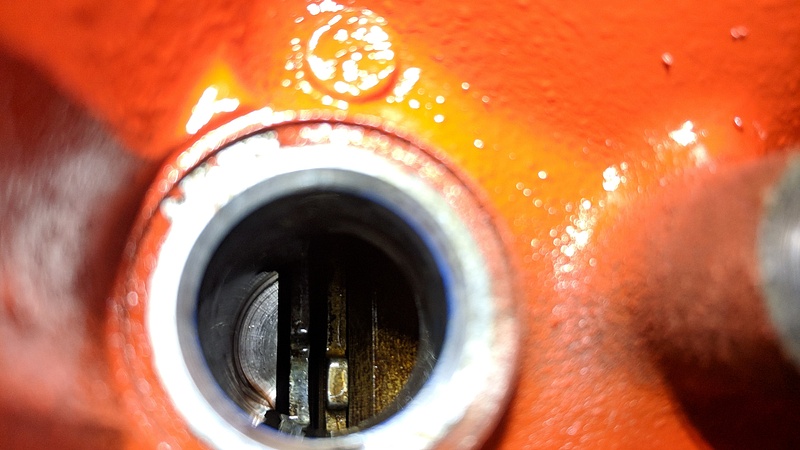
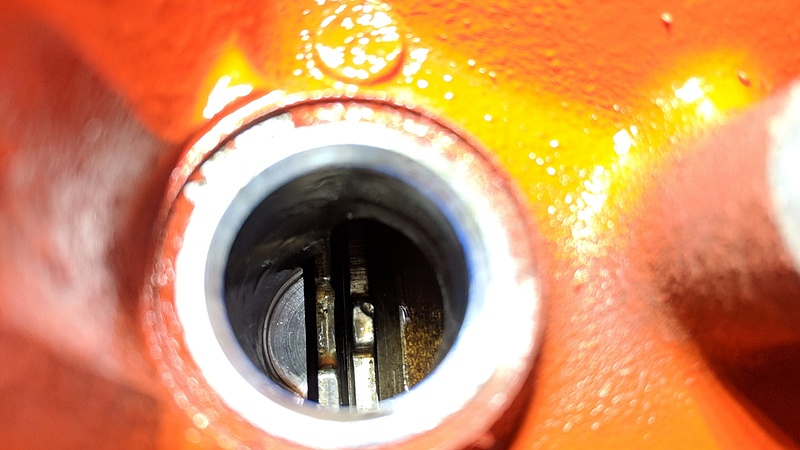
So, I took that information and started with the reluctor while my brother-in-law searched to see if he had another 411 PCM laying around. I pulled the crank sensor and was able to slide my phone up to the port and get a picture:
I rotated the engine and took a few more pictures after a few turns of the ratchet. Then, I saw this:
That's a pretty sweet ding on the reluctor's tooth. So, the worst case scenario was confirmed and the motor needed to be pulled and torn down. We decided to get started on Friday after work.
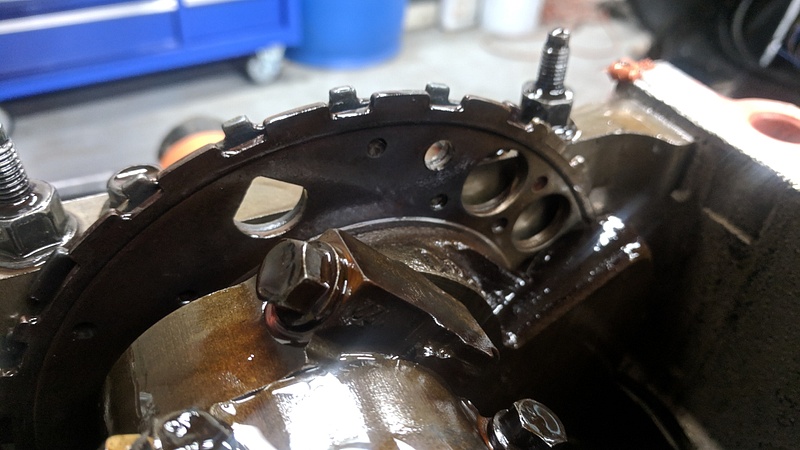
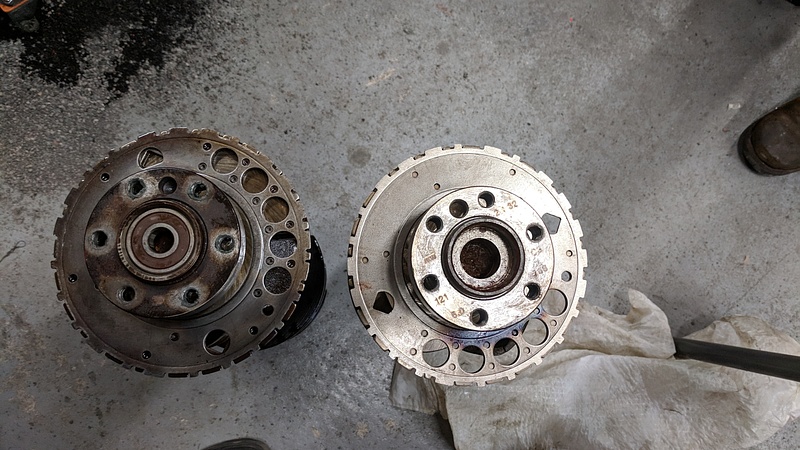
Once the motor was out, we called it a night. Saturday involved the teardown of the engine. When we got to the crank, we confirmed that the reluctor was, in fact, installed incorrectly. Not only was it installed backwards:
It was also indexed improperly. This is a shot of the Impala's crank on the left being compared to a factor crank on the right. ******* Stevie Wonder installed this reluctor.
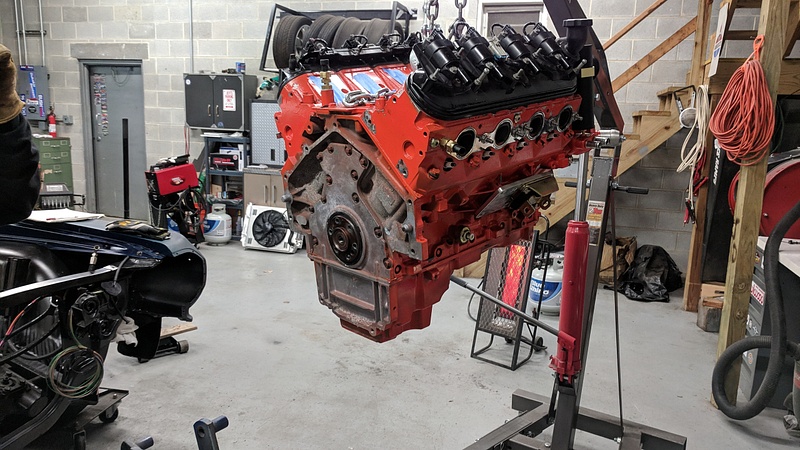
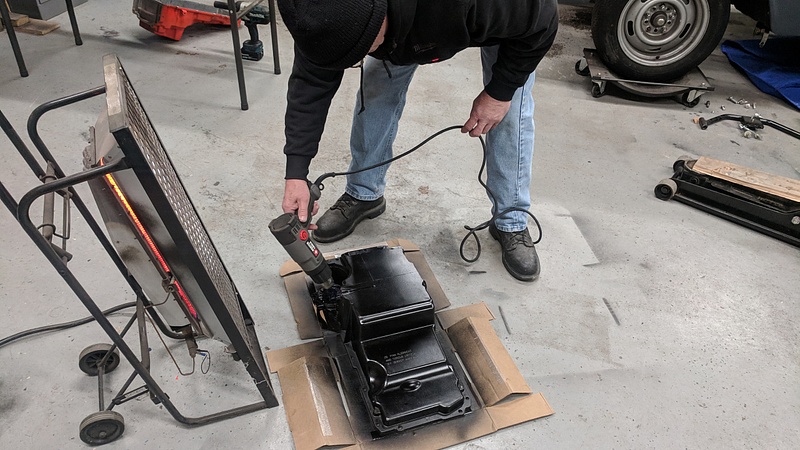
I don't have too many shots of the teardown and rebuild because we were busting our asses trying to get everything assembled. Luckily, we were able to source a brand new reluctor from my brother-in-law, as well as a homemade alignment tool for installation. We threw the new wheel in the oven at 425 for 30 minutes, set up the crank next to the oven, and slid the wheel right on. It is a very easy process with the alignment tool. As a bonus, we also decided to forego the H3 Hummer pan in favor of a 4th Gen F-Body pan. Painted, of course.
And here she is ready to go back in Saturday night:
And I hung up the old reluctor as a reminder:
I think I'm going to make a clock out of it and put "12" at the 4 o'clock position.
Before setting the motor back in on Sunday, I took the time to repaint the passenger side inner fender, and add some final touches to the attached accessories.
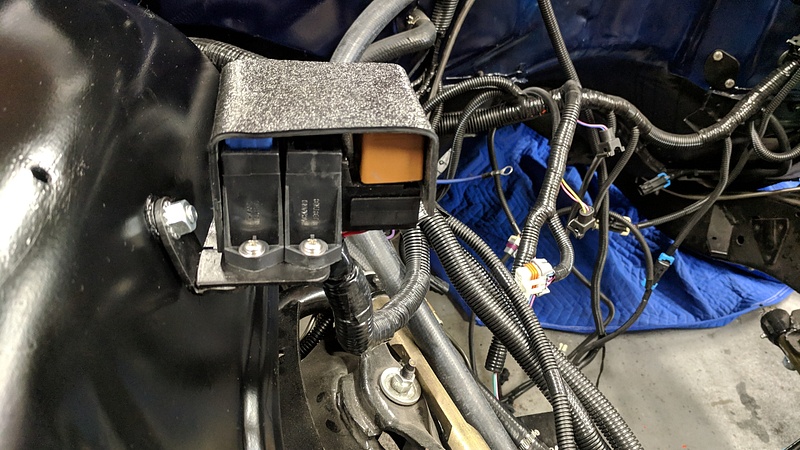
I added some door edge trim to the bracket I made for the engine fuse block to protect the wires:
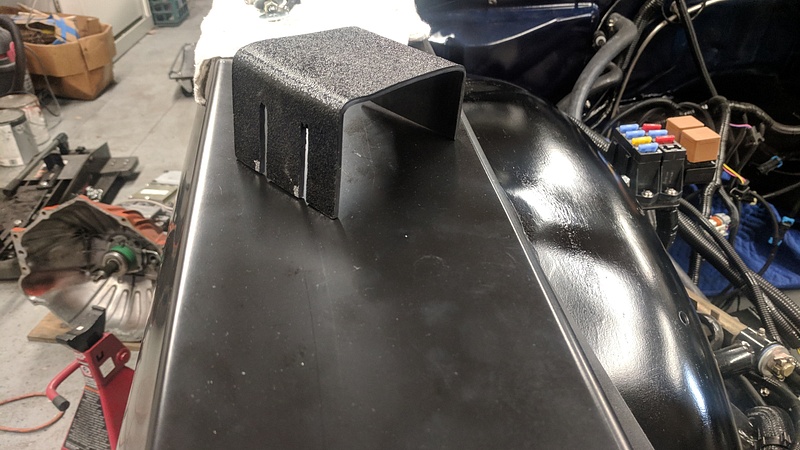
I also made a cover out of ABS plastic for the fuse block. If I have any complaints about the PSI harness, it is that the fuse block does not come with any sort of protective cover. While my cover isn't water proof, it will at least prevent stuff from falling directly onto it. I may plastic-weld some sides to it and add a gasket of some sort later on. I cut some slots in the cover to slide over the existing notches. It locks firmly into place.
I was pretty beat Sunday night, so I called it around 8pm. On Monday, we finished up reinstallation. I didn't start it because I wanted my dad to be there, and he was planning on coming over on Tuesday. So, the car was ready for him on Tuesday.
After work on Tuesday, my dad and friend arrived for the start-up. We went through the checklist again: check for leaks, verify fluid fills, and prime the engine. I pulled the relays. My dad turned the key. The starter spun. And then it stopped spinning. We heard a pop. And then we saw a large plume of smoke come from the starter area. Boy, did the ******** pucker. I got under the car to inspect. As it turned out, the EMI shielding I had left on the wiring wound up contacting one of the power leads on the starter. Since I had soldered a ground wire to the sleeving and grounded it to the engine block, it shorted the circuit and the 12 AWG wire fried. Nothing else appeared to be damaged. The wire fell on that grenade alone.
I removed the sleeving and reinstalled the wiring. With fingers crossed, my dad got back in and turned the key....
Infrequent updates does not mean infrequently working on the car. In fact, it is quite the opposite.
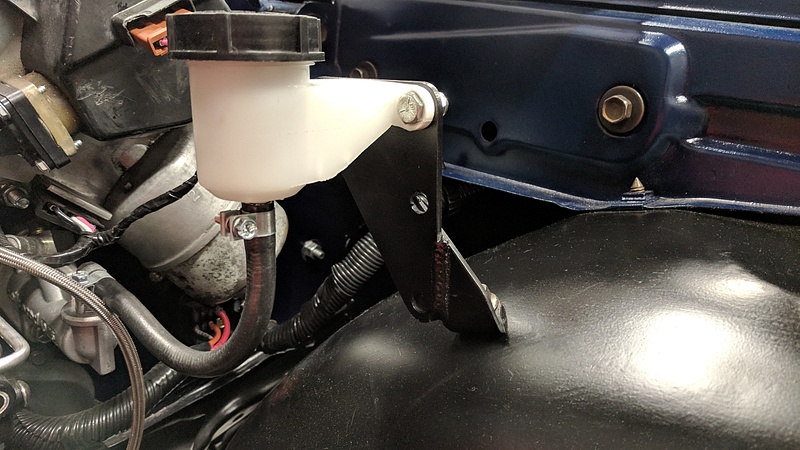
We addressed the issue with the firewall flexing every time the clutch pedal was pushed by making a bracket that tied one of the master's mounting bolts to the steering column. We may revisit and tie the upper bolt, as well, but the flex is basically gone at this point:
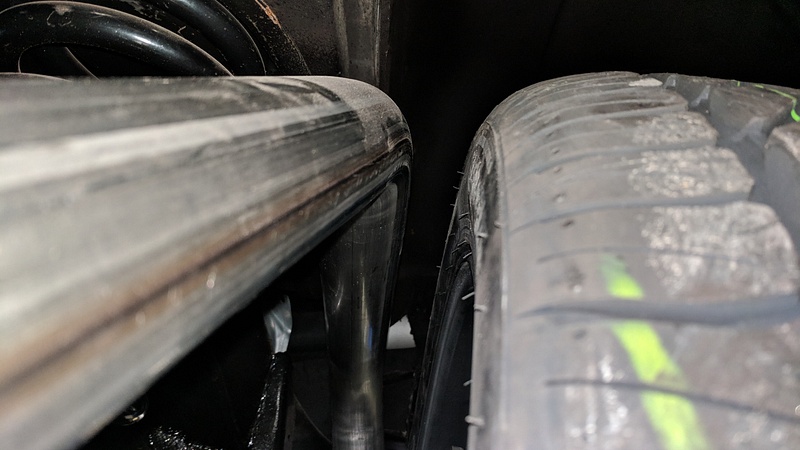
We also gave the new 17" Rally wheels a test to see how they fit:
The rear wheels are a little close to the exhaust. I may wrap that section of the exhaust instead of putting on a spacer.
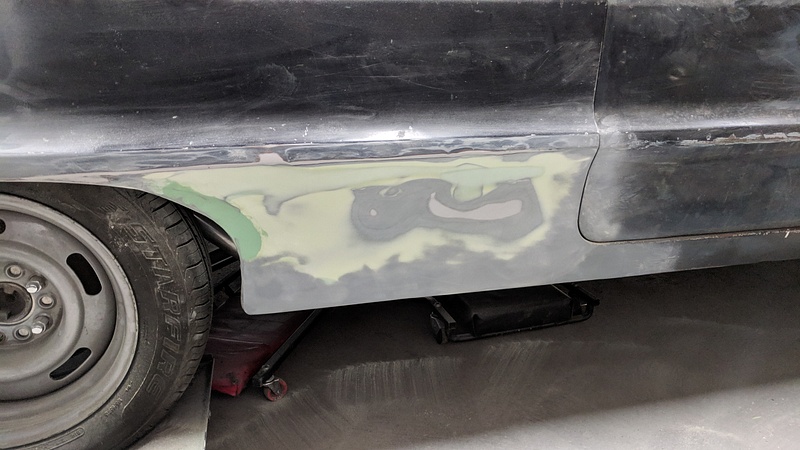
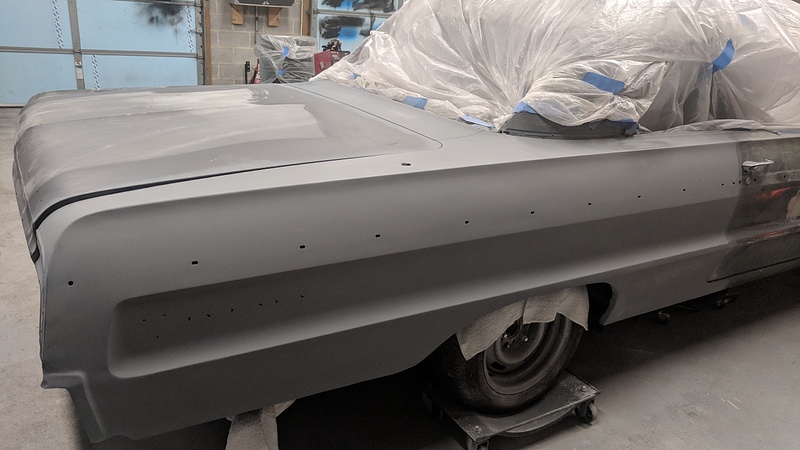
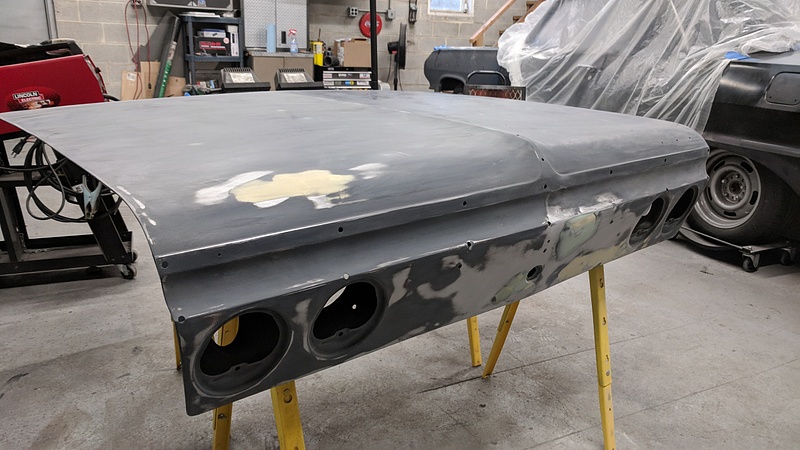
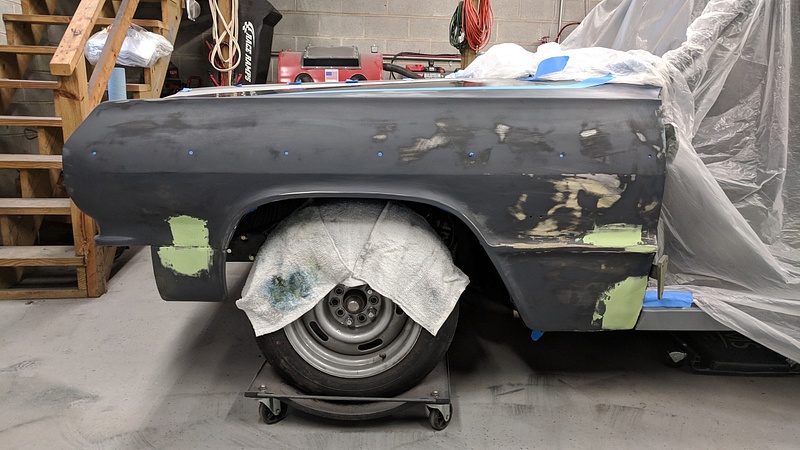
Then we proceeded with more sanding and body work. Despite going over the lower quarter multiple times, a magnet still sticks in the filler areas after sanding:
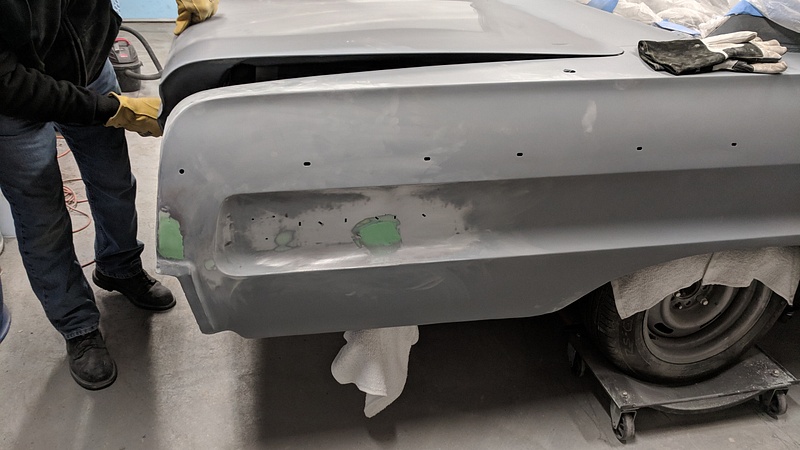
And then we stripped the rest of the quarter panel down and sanded that metal, touching up areas that needed to be addressed:
And then some more touching up when the primer makes other areas noticeable:
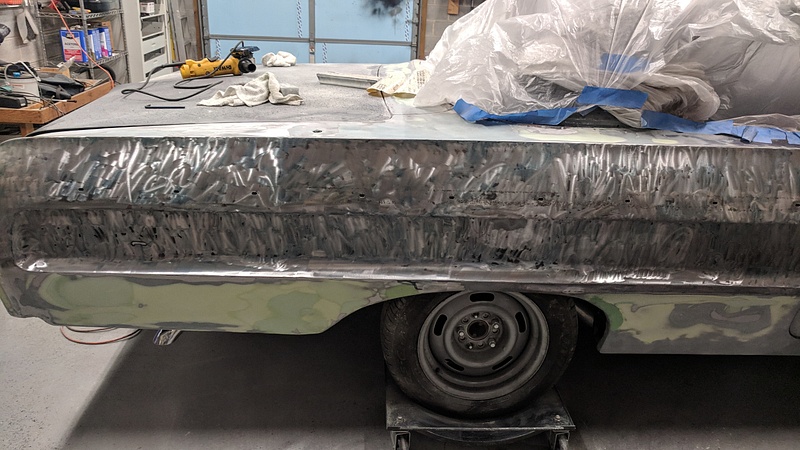
Sanding the rear was fun:
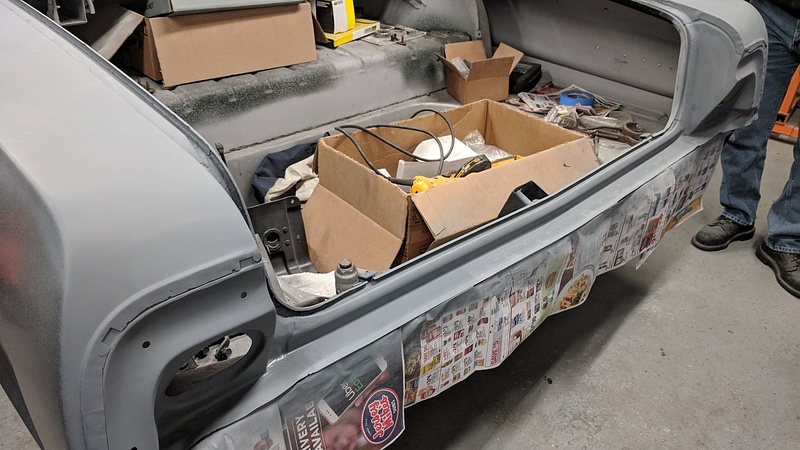
We tacked the rear latch in place, as well. One of the last few welding jobs on the car!
On to the trunk lid we picked up from Craigslist a while back. It's funny how much better things look at the time of purchase:
Body solder and a Dremel for redoing the factory leaded seam:
The trunk back on and latched:
Moving on to the passenger door:
On a side note, when you are a little tired and aggravated, these two cans look identical. It doesn't help that their contents are both gray, either. Guess which one was initially used as body filler and then caused endless frustration as to why it wasn't sanding properly:
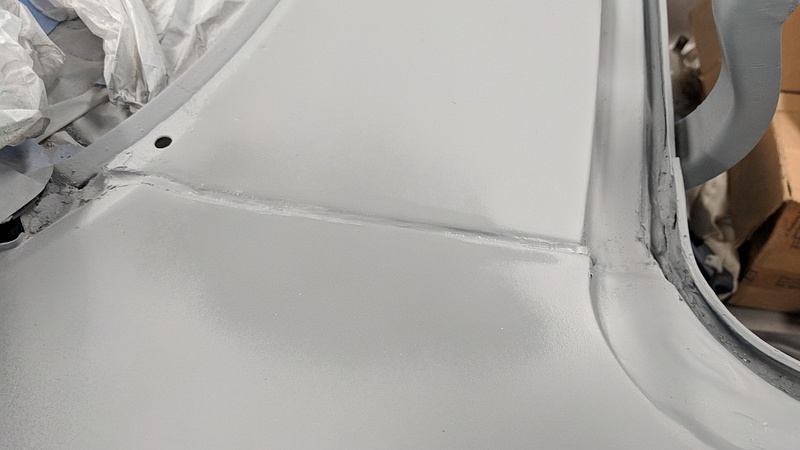
The door stripped down with repairs made:
Primed and then gone back over after the primer exposes more ****:
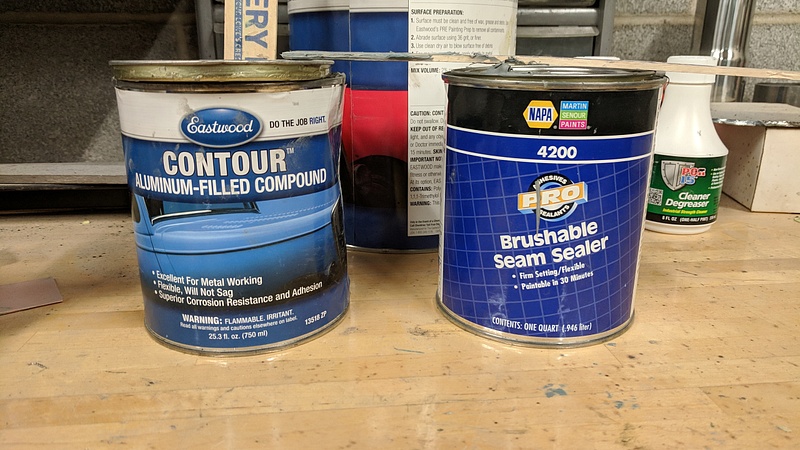
On to the driver's side rocker and factory leaded seam. For this seam, we used the filler with aluminum strands. It is supposed to be for these factory seams.
And this is where we left off:
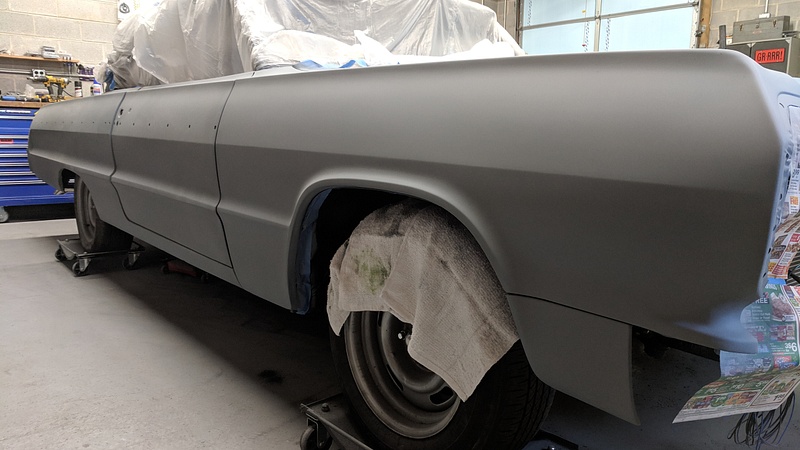
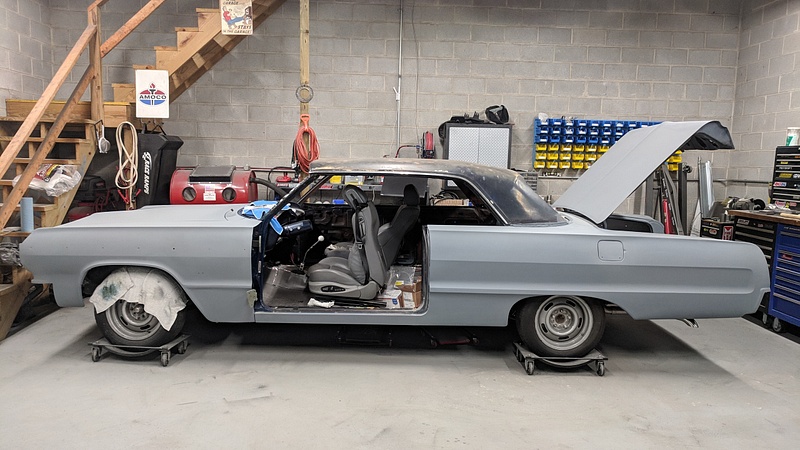
Up next on the docket is the driver door, hood, fenders, and roof. Then we will be ready to start priming with an epoxy primer, block sanding, and painting. I'd love to find a painter who was reliable enough to quote the job. So far, I've had one no-show, one guy refuse to give an actual quote, and a third guy bail because having the car done for my sister's wedding in October was too tight of a deadline. I'm probably going to just buy a turbine system and paint the thing myself.
Nice work, glad to see an update.
I think the only thing less reliable than a custom painter is a druggie. Since most custom painters I met through friends were current or former druggies it explains a lot.
I'm painting my car myself, I suggest you do the same. You are detail minded enough to do the job and know your deadlines. Hit some test panels, get your technique down and knock it out. If you take your time and hit some practice panels first it will come out better than you think.
I'm getting to that point. I have a spare decklid, hood, and fenders to practice on. Originally, I didn't want to paint because I didn't have a good setup with the compressor, but I started looking into the turbine paint systems. I'm starting to really lean towards that route.
When we last left our heroes, they were continuing with body work. Now, for this month's episode of "Hold the Effing Light."
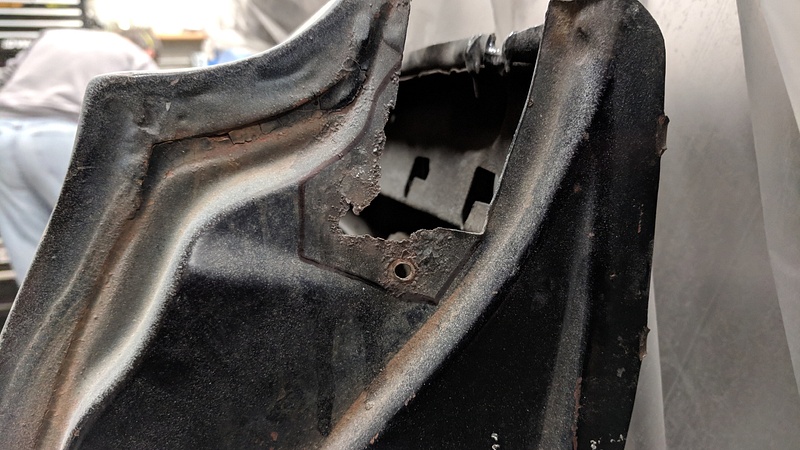
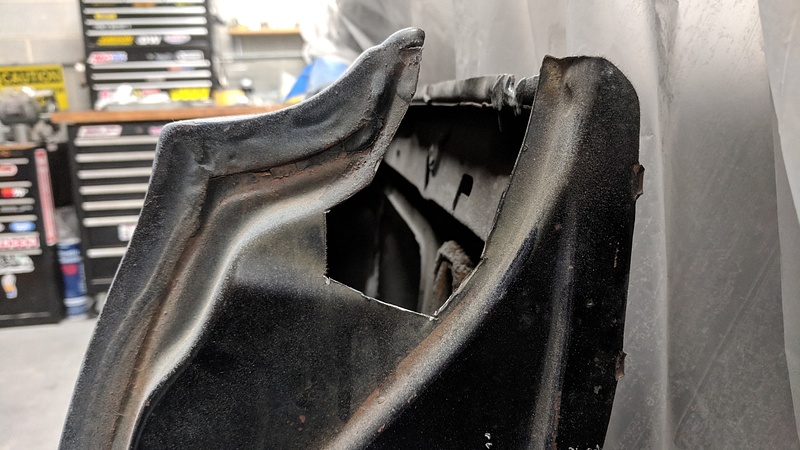
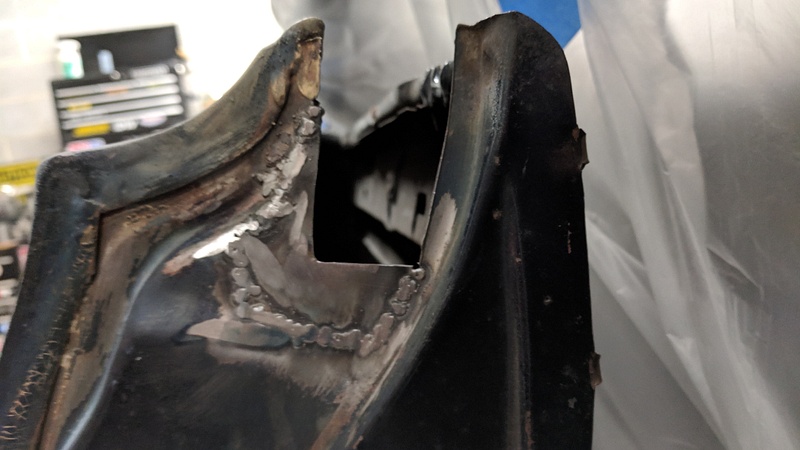
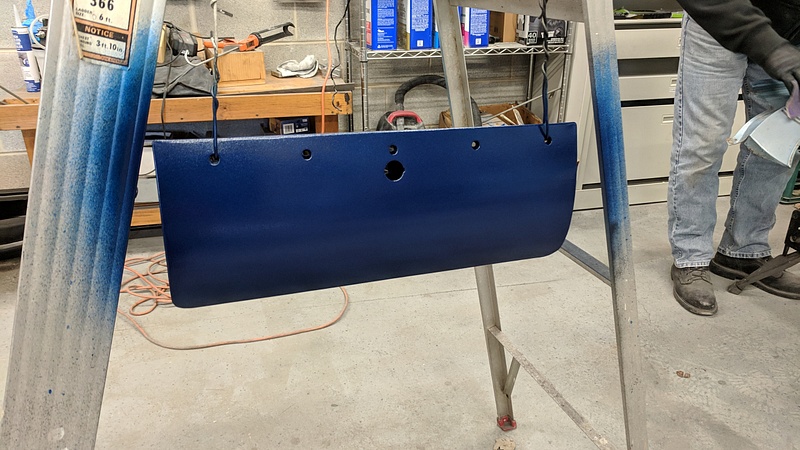
There was a spot on the passenger side B-pillar that needed to be repaired:
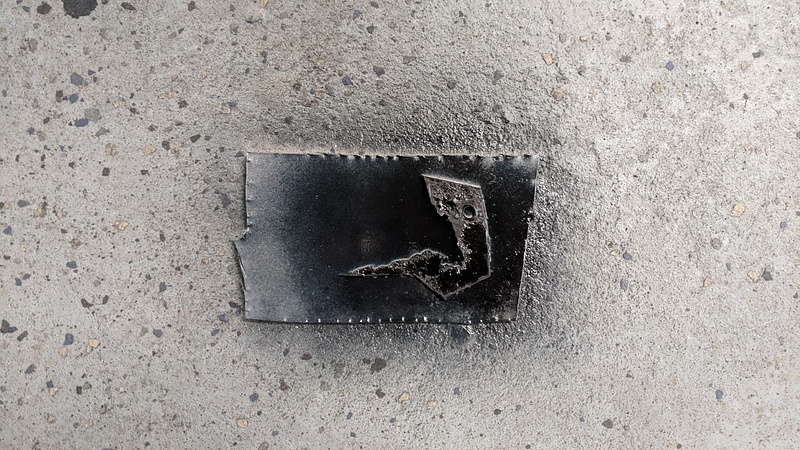
For weird pieces like this, the method that works for me is laying the cut piece down on a piece of sheet metal, and spraying it with a primer/paint.
This will allow you to trace out the missing parts of the piece that have long since rotted away:
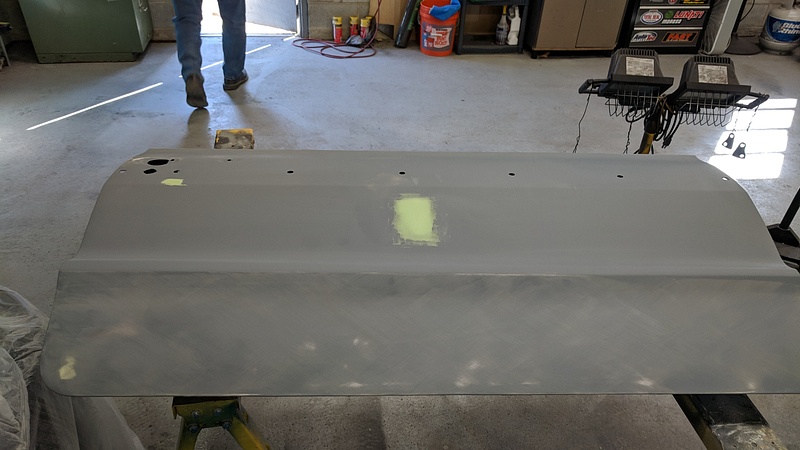
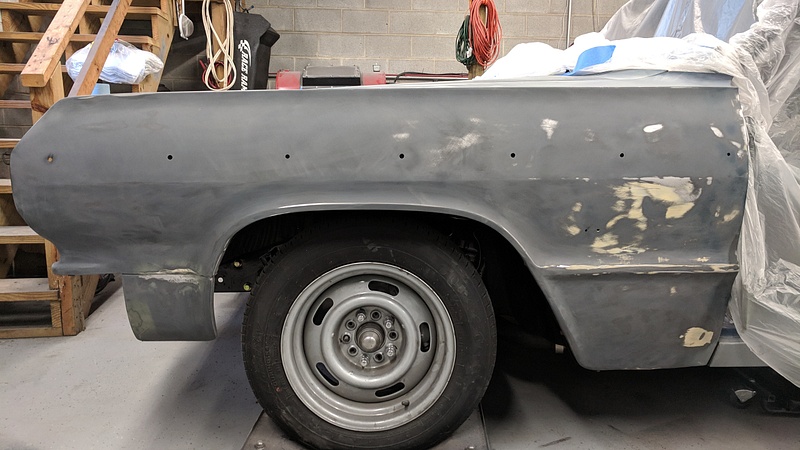
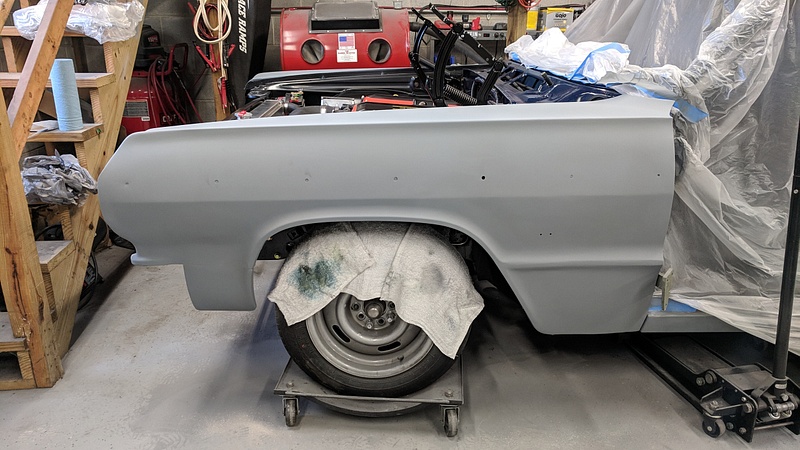
Passenger side fender primed:
And then it was time to start working on the driver side fender. This was a fender we found on Craigslist. Previous body work was done to it, but as well started looking at it more, was not done well. In retrospect, it would have been better to have just bought a reproduction panel. We've had great success with their fitments.
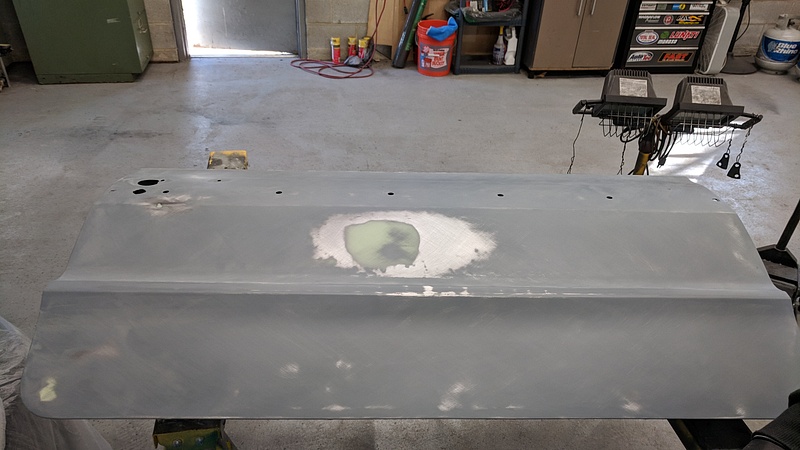
Then we needed to take care of the things we found after priming:
We repainted a used glove box door that we had found:
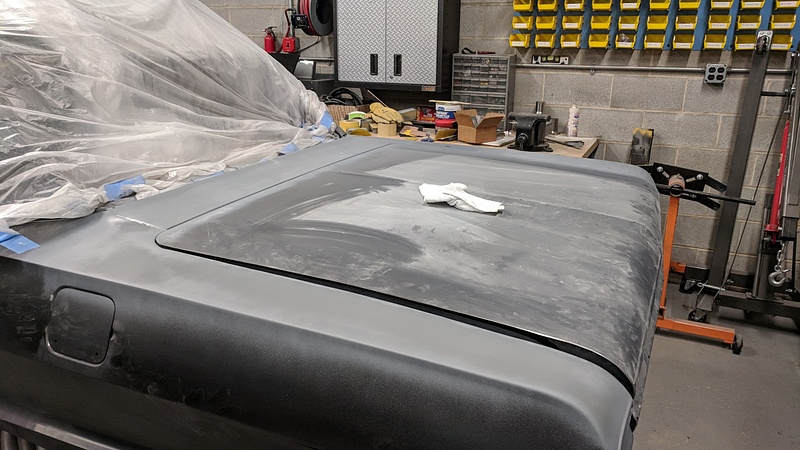
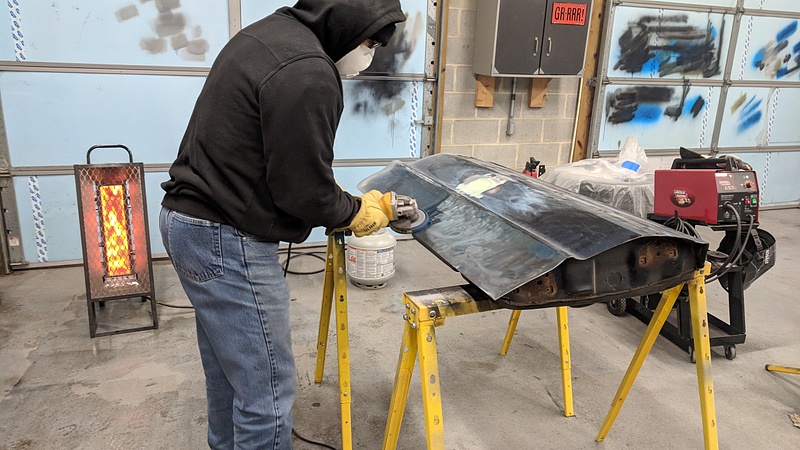
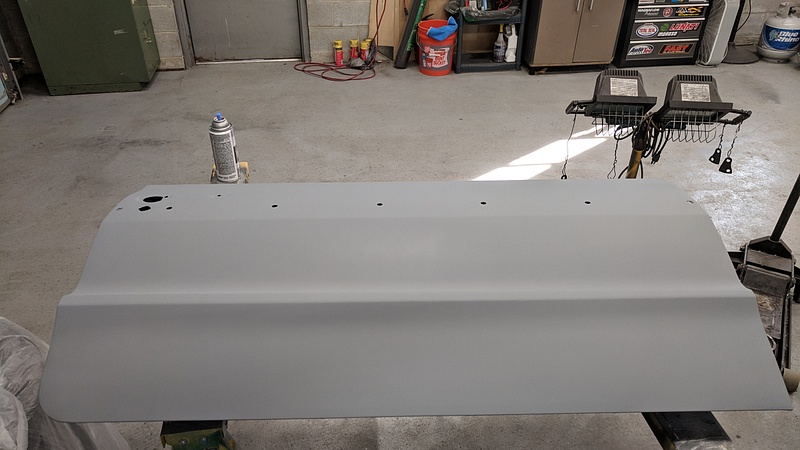
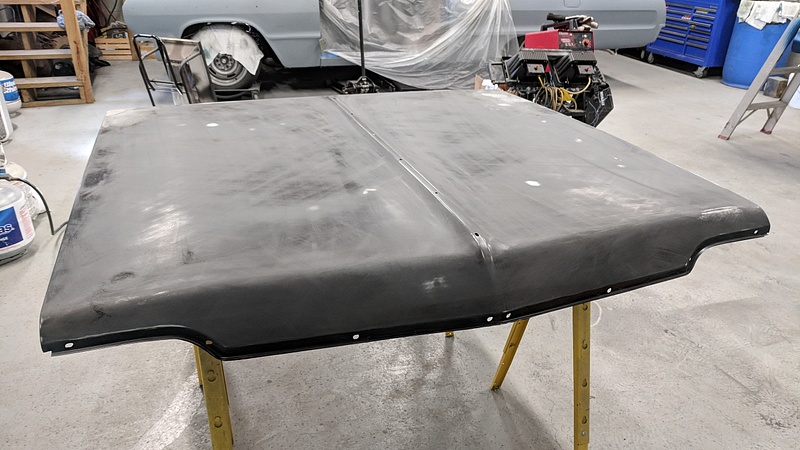
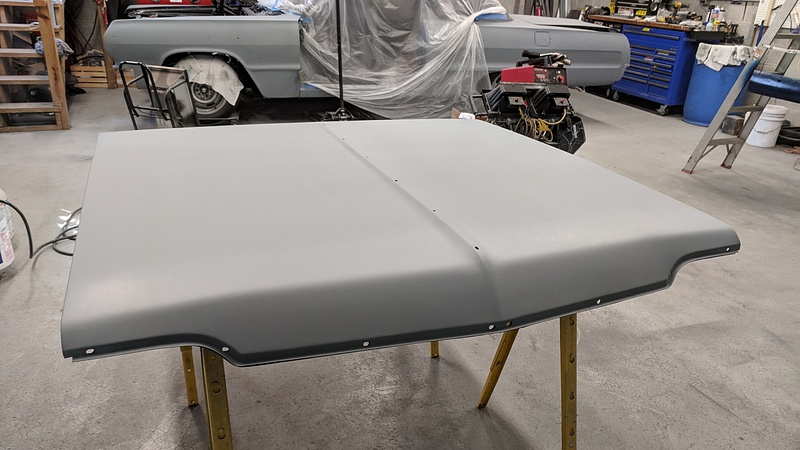
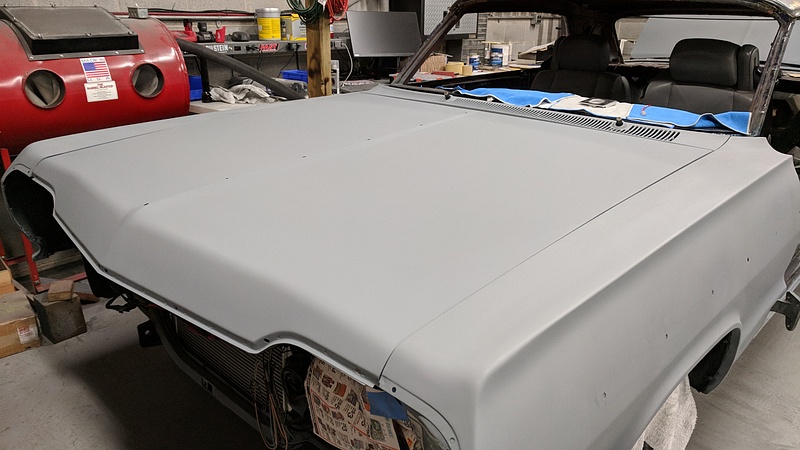
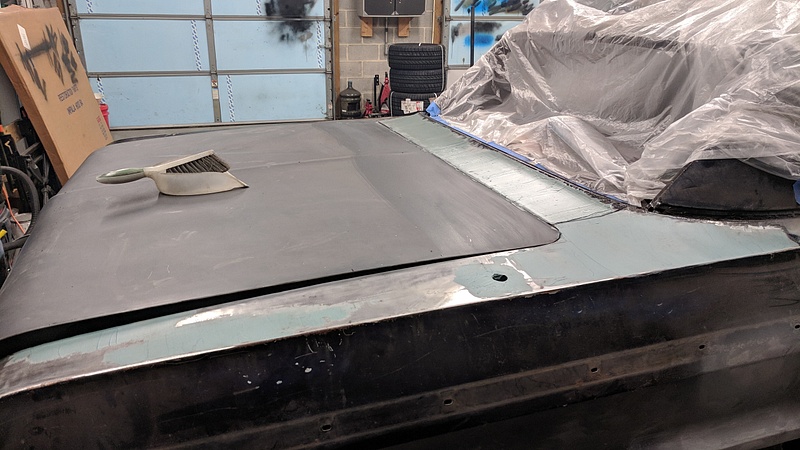
Then we removed the hood and blocked it with 220, and then primed it.
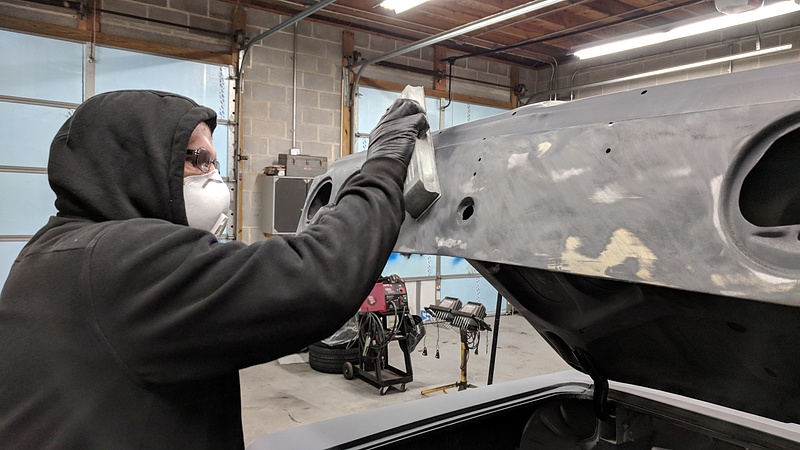
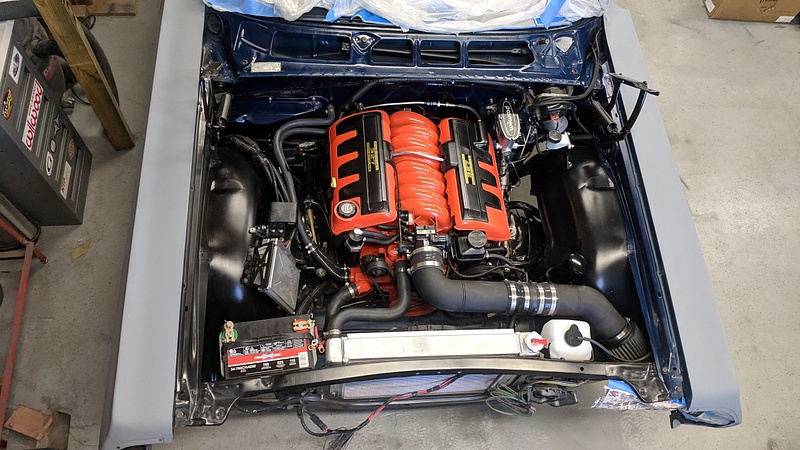
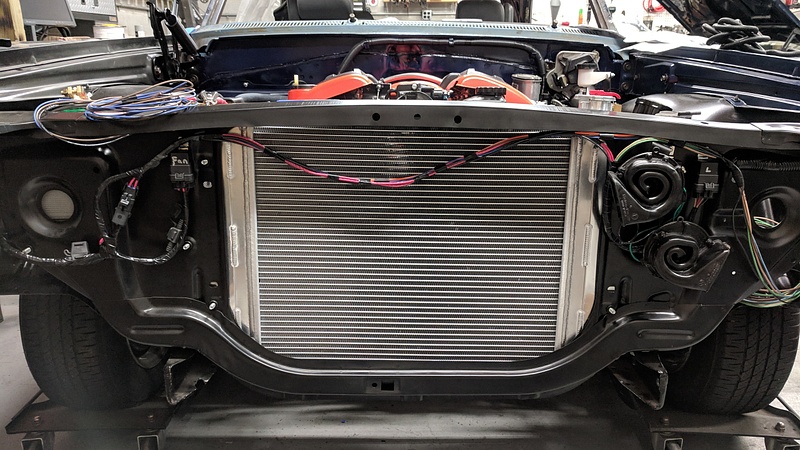
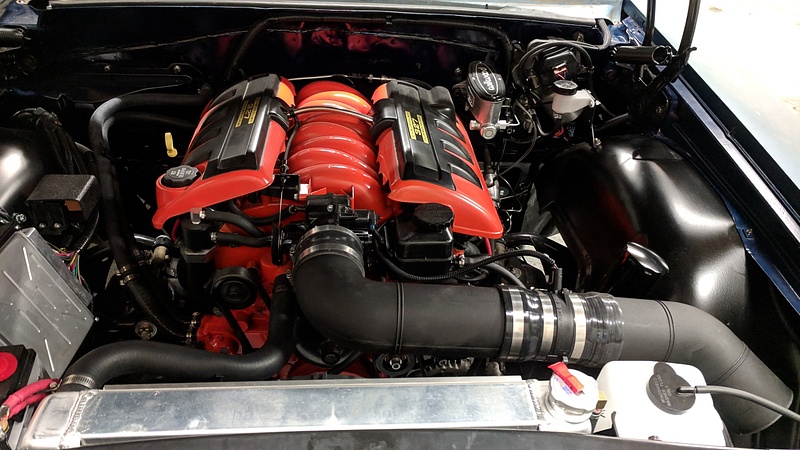
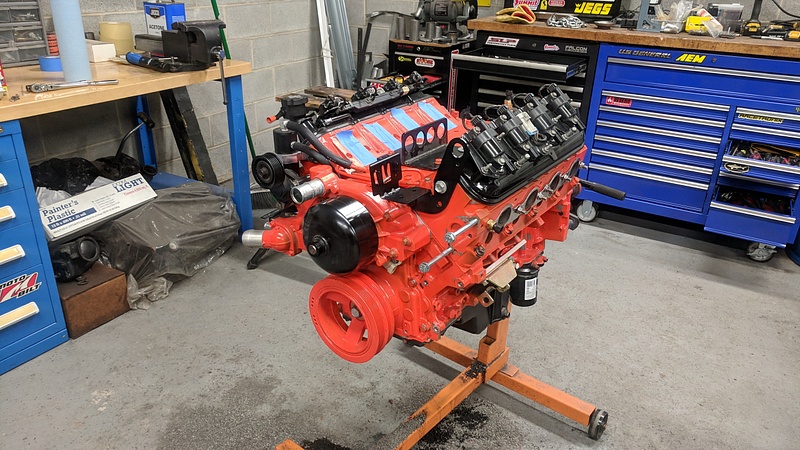
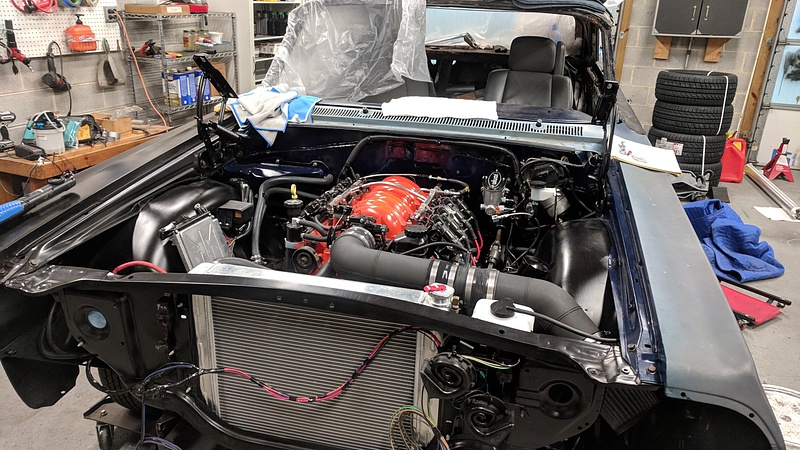
I decided to snag a nice overhead shot of the engine bay while the hood was off:
The cowl was cleaned, sanded, and primed. This was an eBay find since I don't think they make reproduction cowls for the 64, or at least, they didn't when we realized the original one was toast:


 09-25-2018, 08:24 AM


 Lucky guy!