
1964 Impala SS - 5.3, TKO 500 Swap/Restoration
 04-21-2019, 09:32 AM
#41
TECH Fanatic
Thread Starter

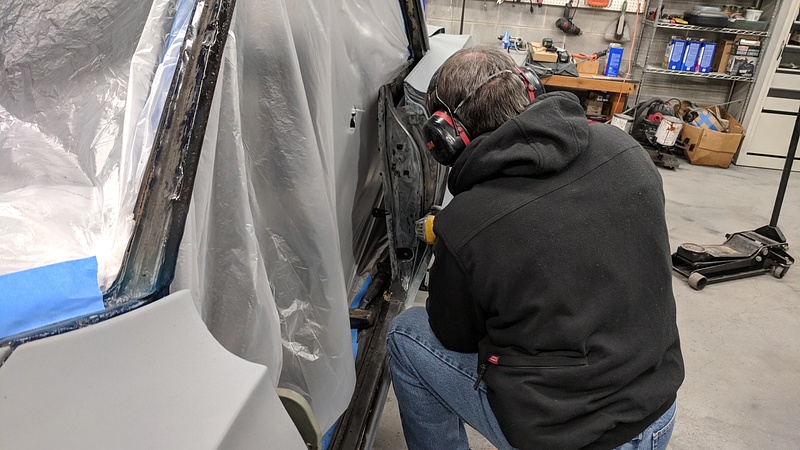
We masked off the driver side opening to take care of the door jamb:

I saw this tab completely bent over after priming and thought, "How did we do that?"
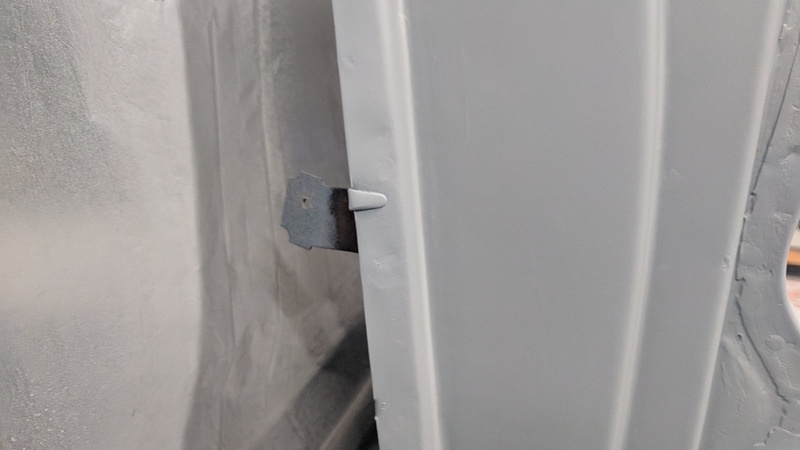
I was going to pry it back until I realized that it was pretty tight against the B-pillar. I then remembered seeing that tab before. I looked back at old pictures and found it:
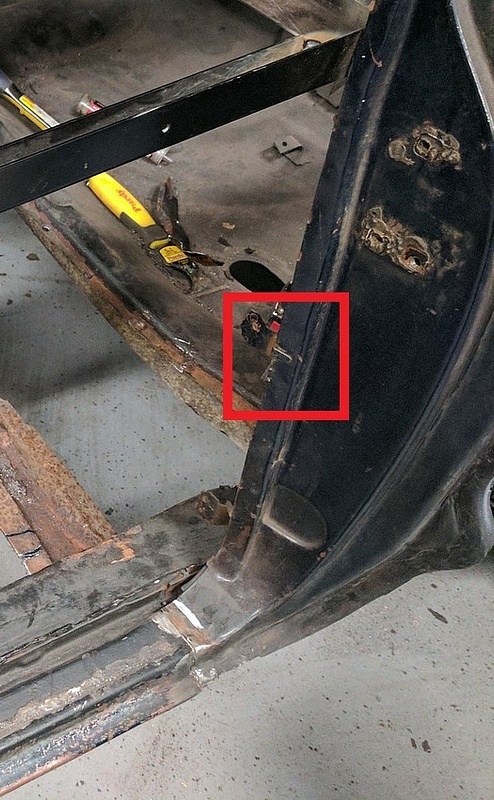
That is how the car rolled out from the factory.
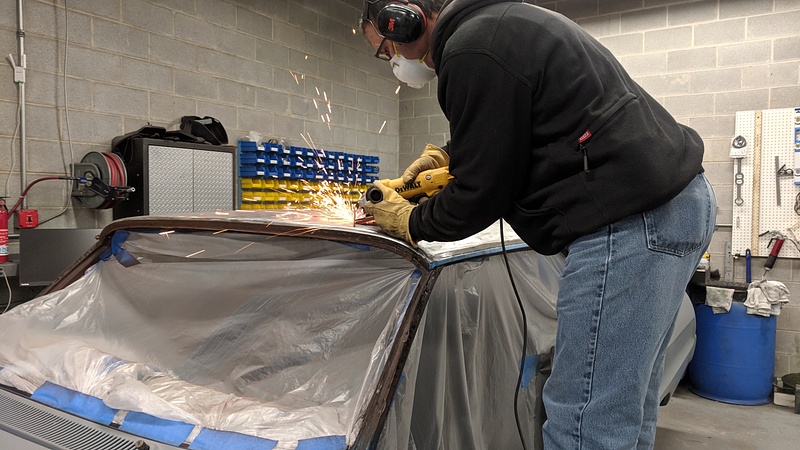
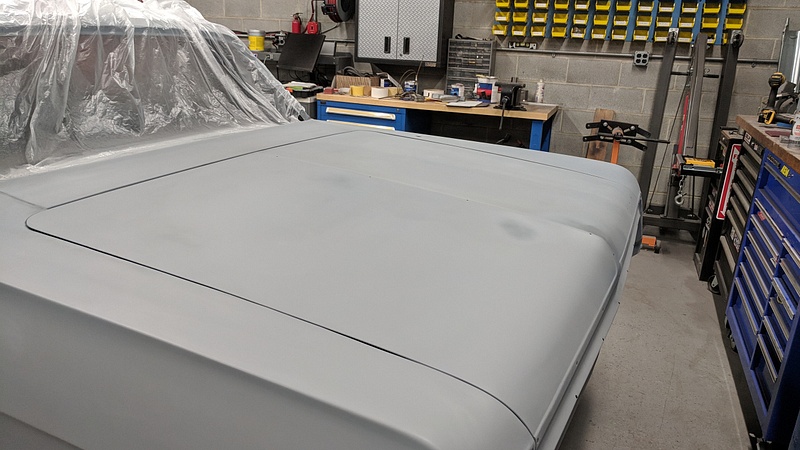
Then it was time to start on the roof.
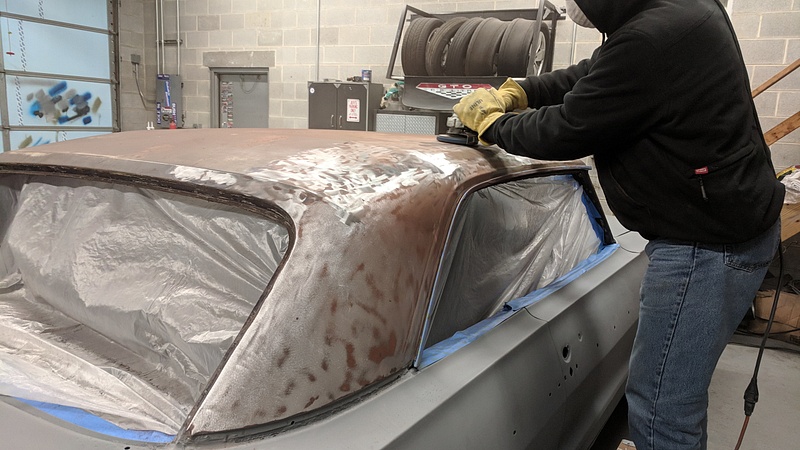
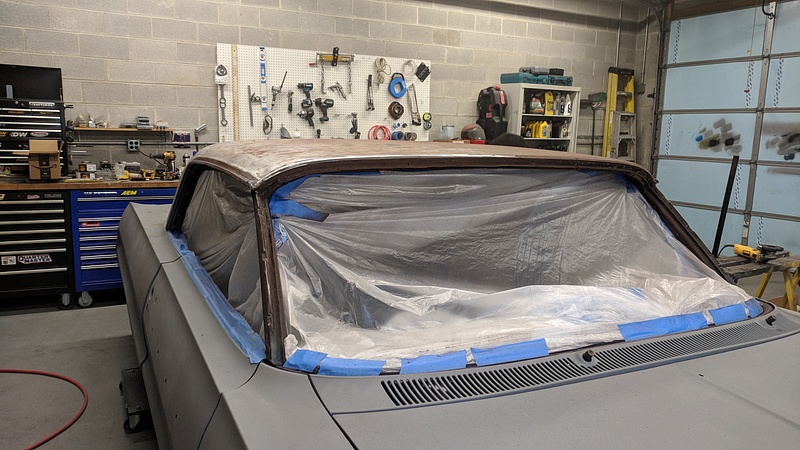
Those stripping discs really make quick work of taking everything down to metal. They also create one hell of a dusty mess.


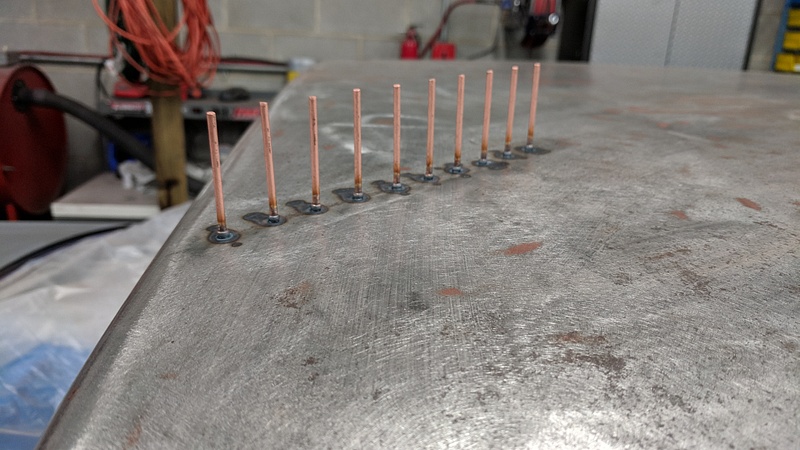
We found a nice dent after stripping everything down, so out came the stud welder.
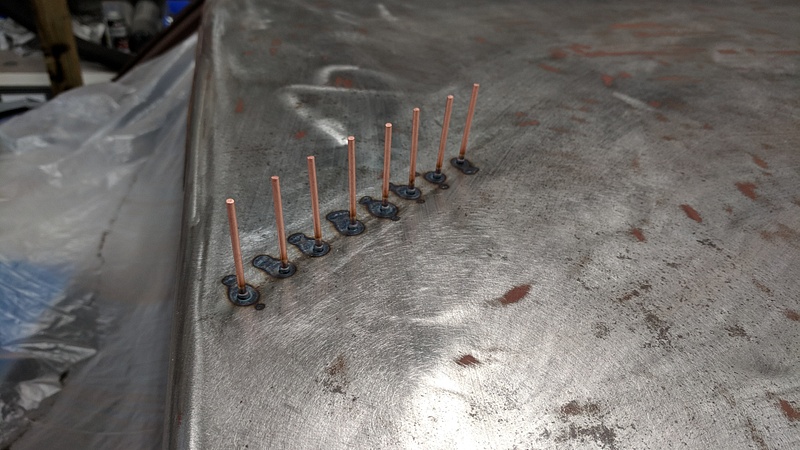
And after a little work with the slide hammer:
Knocking the studs off with a flap wheel:
Sanded with 180 and 220:
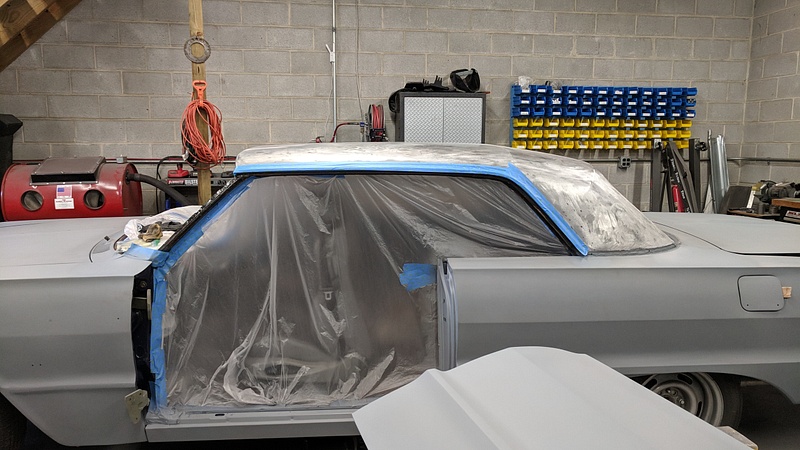
And primed:
I don't have any pictures of it, but we wound up scrapping the driver side door. After starting the strip the paint, we found that the door had been hit at some point. Instead of straightening the metal, they just put body filler overtop of the damage. This resulted in us finding a bunch of mangled metal underneath thick layers of filler. A new door was ordered and I had it delivered to my work since the vendor required a commercial address. My shipping guy was not happy.
However, even with it being a new door, the one corner did need a little work:
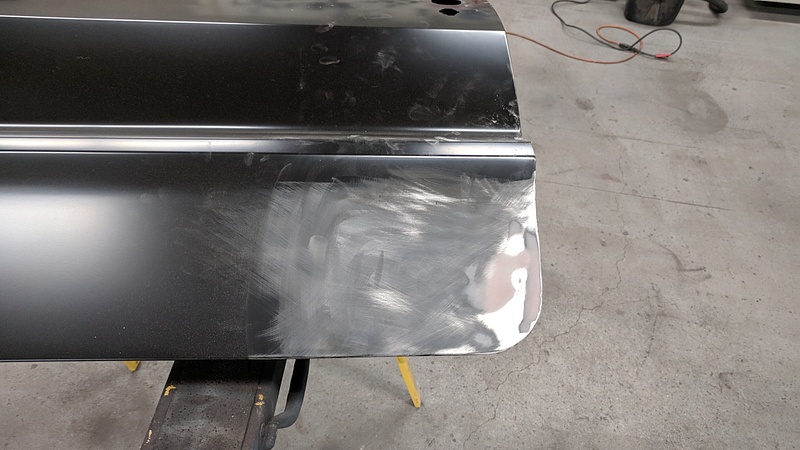
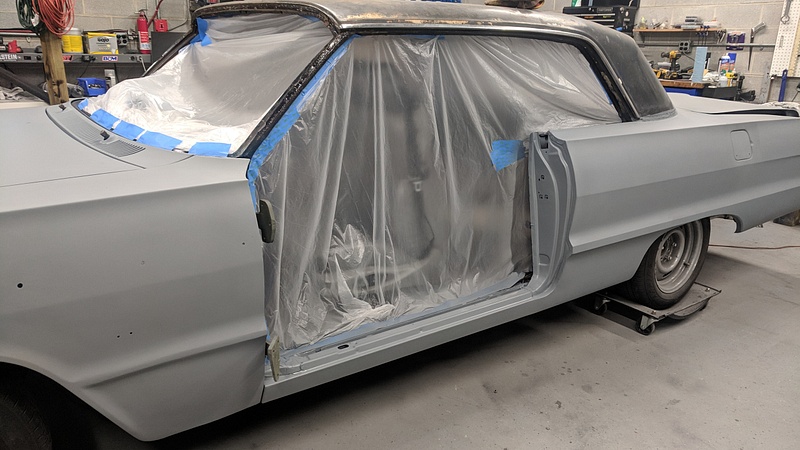
Blocked with 220 and primed:
I saw this tab completely bent over after priming and thought, "How did we do that?"
I was going to pry it back until I realized that it was pretty tight against the B-pillar. I then remembered seeing that tab before. I looked back at old pictures and found it:
That is how the car rolled out from the factory.
Then it was time to start on the roof.
Those stripping discs really make quick work of taking everything down to metal. They also create one hell of a dusty mess.
We found a nice dent after stripping everything down, so out came the stud welder.
And after a little work with the slide hammer:
Knocking the studs off with a flap wheel:
Sanded with 180 and 220:
And primed:
I don't have any pictures of it, but we wound up scrapping the driver side door. After starting the strip the paint, we found that the door had been hit at some point. Instead of straightening the metal, they just put body filler overtop of the damage. This resulted in us finding a bunch of mangled metal underneath thick layers of filler. A new door was ordered and I had it delivered to my work since the vendor required a commercial address. My shipping guy was not happy.
However, even with it being a new door, the one corner did need a little work:
Blocked with 220 and primed:
 04-21-2019, 09:33 AM
#42
TECH Fanatic
Thread Starter
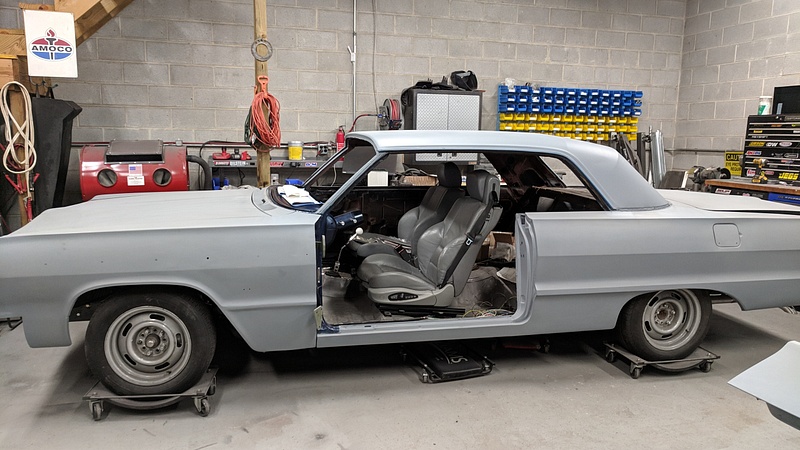
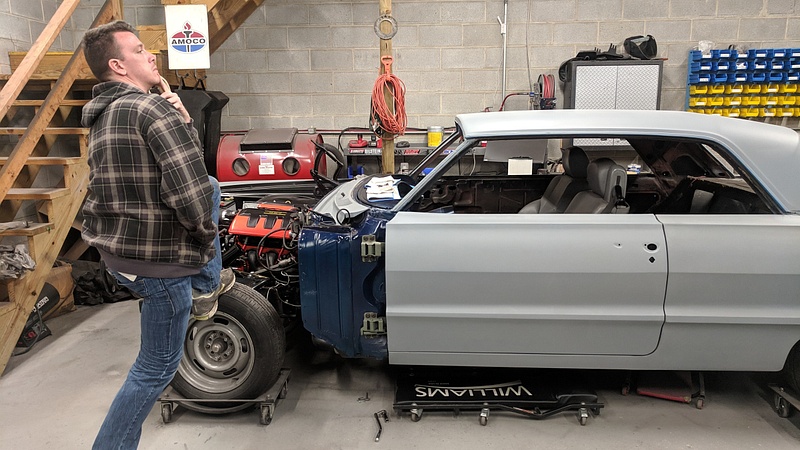
The new door wound up requiring the hinges be adjusted on the body in order for the gaps to be acceptable. Unfortunately, this required breaking down the front end to access the hinges. So, off came the hood and driver fender, with the aid of some guy:
And here's everything primed and back together for now:

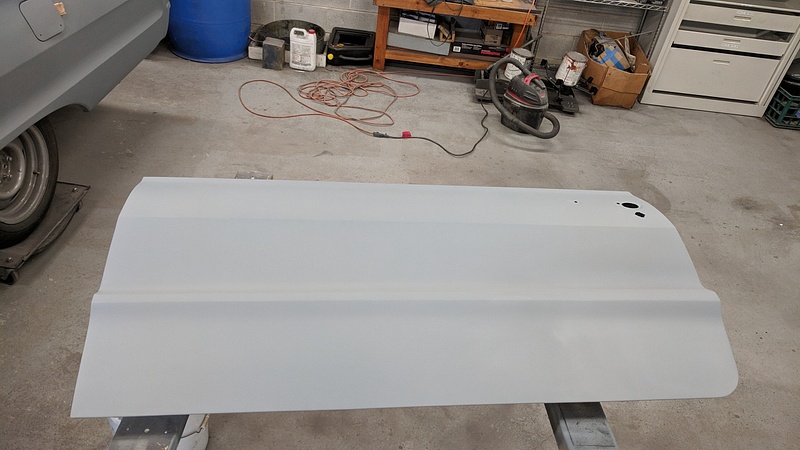
Of course, we found some low spots in the trunk, so we revisited that decklid, which was another Craigslist "treasure:"


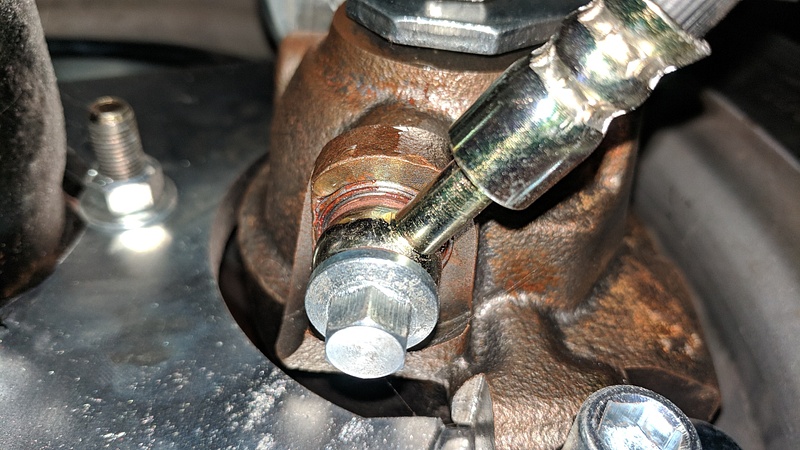
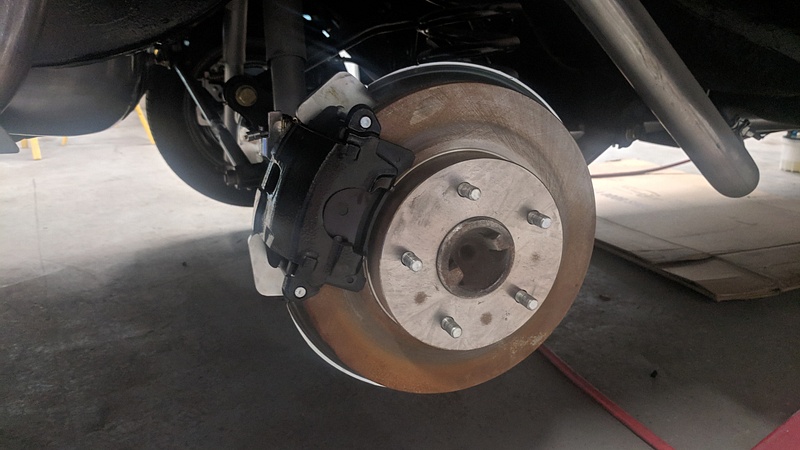
We decided to give the body work a break and jumped to the brakes. The original rear calipers we received were leaking out of the back of the calipers:
After talking with Right Stuff Detailing, we were able to swap them out and get some nifty black powdercoated calipers:
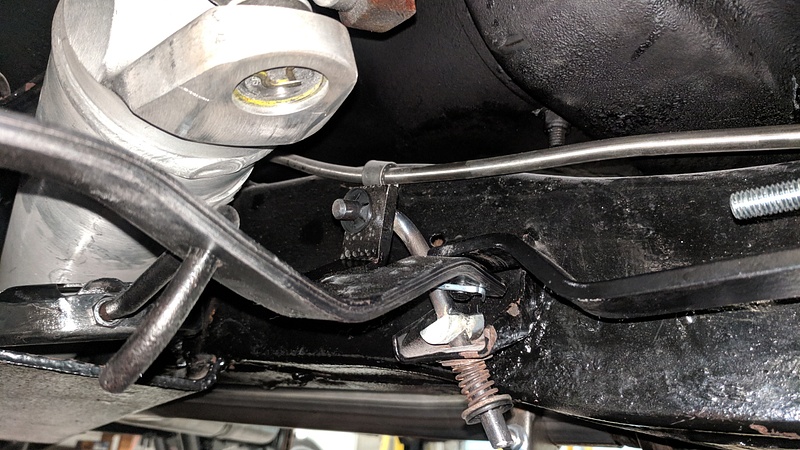
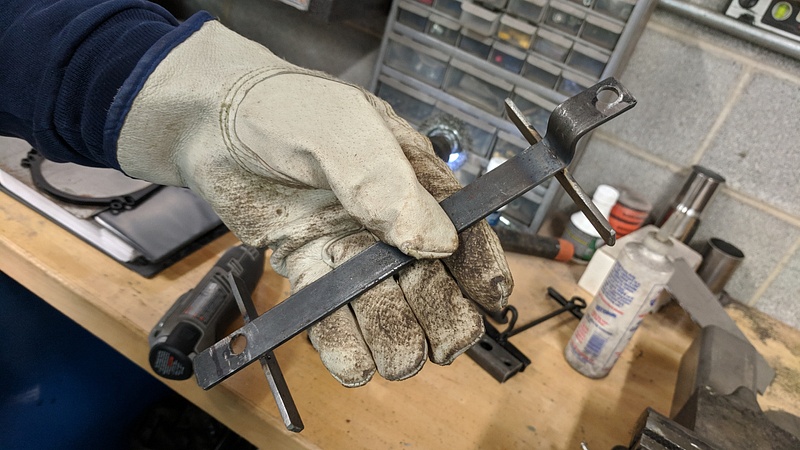
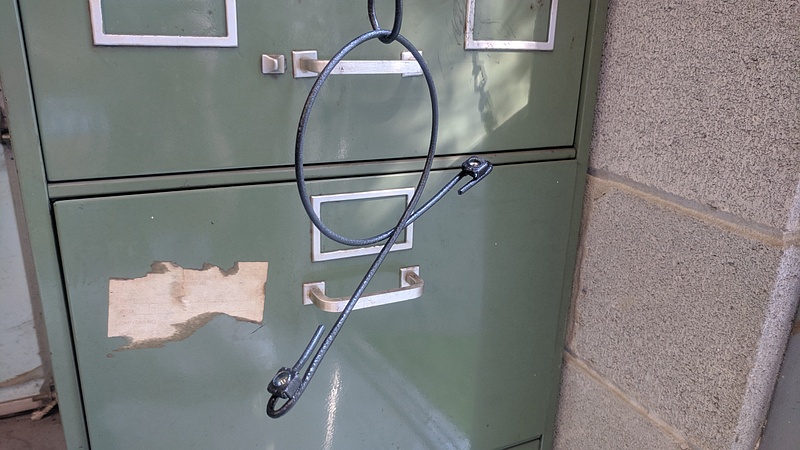
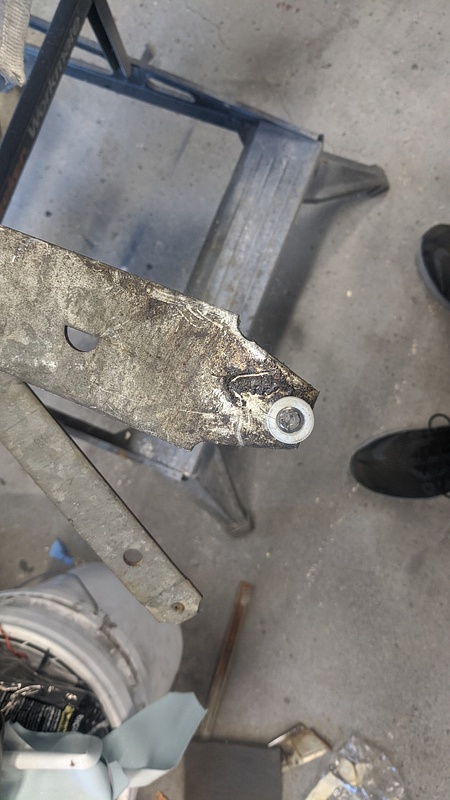
Adjusting the calipers takes some patience, since you need to properly adjust the parking brake in order to have some semblance of a pedal feel. Now, the parking set-up on the X-frame is a little bit of an oddball assortment of pivots and levers. Unfortunately, due to the TKO's tailshaft housing being longer and the driveshaft's diameter being larger, the factory set-up put everything far too close to the driveshaft. This isn't my picture, but it is one that someone else took with a 700R-4 conversion who experienced the same issue:

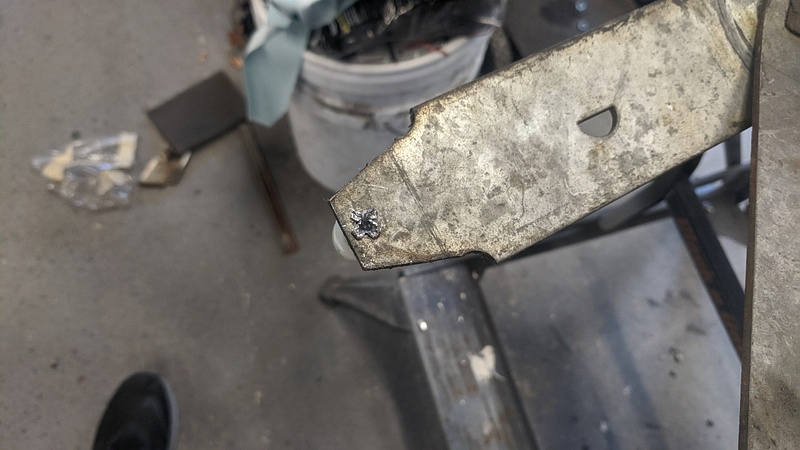
We resolved the problem by making a shorter lever out of bar stock I had laying around. It moved everything down and away from the driveshaft:
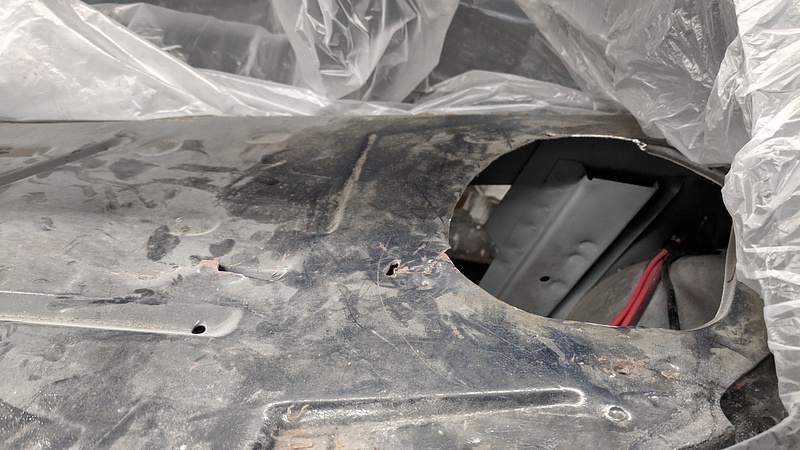
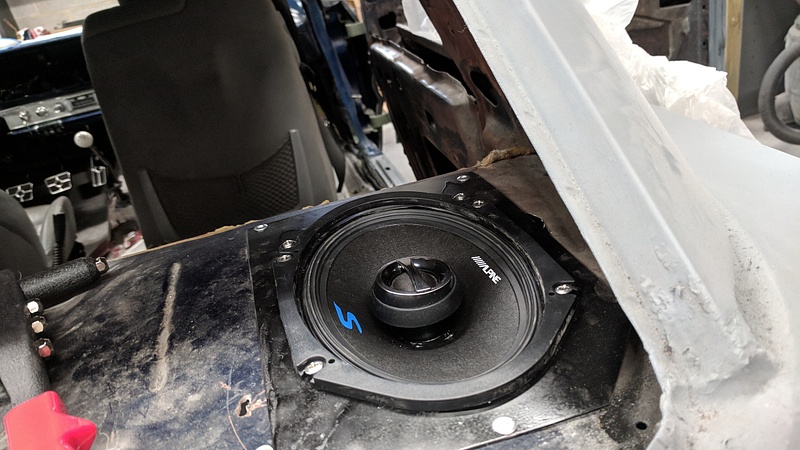
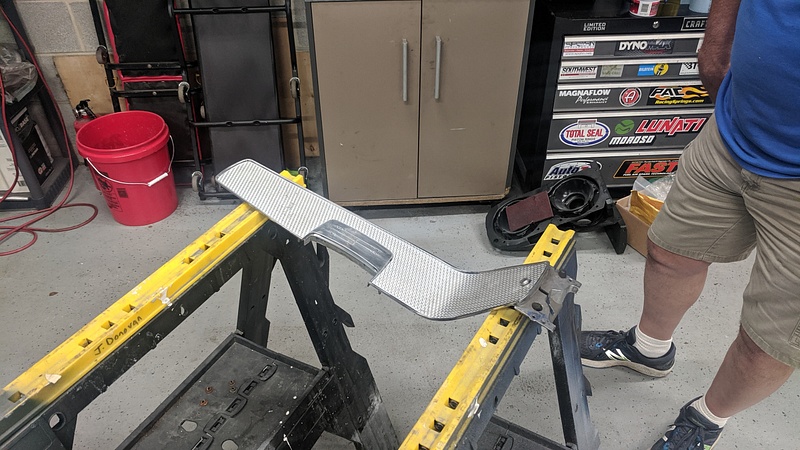
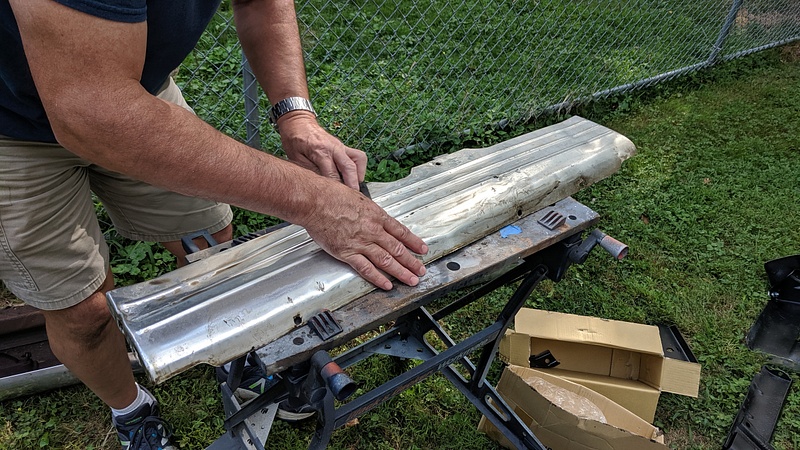
Next up was the rear deck and the butchered job that someone did for bigger speakers:

I started with a Dremel and cleaned up the edges:
Then I took some 18 gauge sheet metal and made a plate to hold a 5x7 speaker:
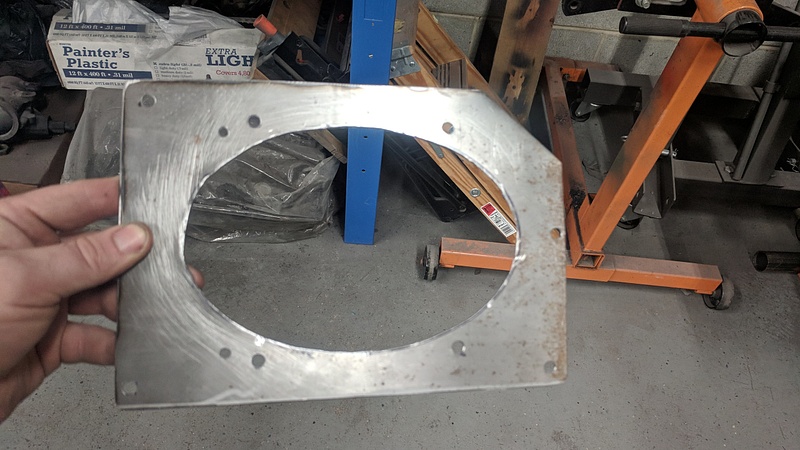
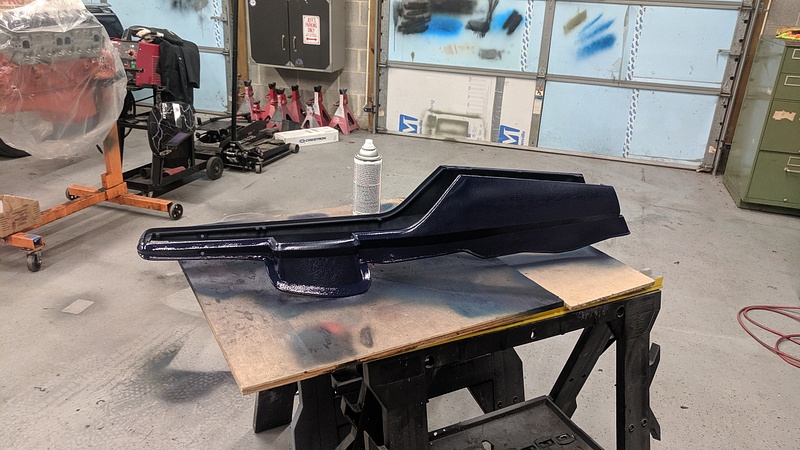
A little paint, a few rivets, and boom:
And here's everything primed and back together for now:
Of course, we found some low spots in the trunk, so we revisited that decklid, which was another Craigslist "treasure:"
We decided to give the body work a break and jumped to the brakes. The original rear calipers we received were leaking out of the back of the calipers:
After talking with Right Stuff Detailing, we were able to swap them out and get some nifty black powdercoated calipers:
Adjusting the calipers takes some patience, since you need to properly adjust the parking brake in order to have some semblance of a pedal feel. Now, the parking set-up on the X-frame is a little bit of an oddball assortment of pivots and levers. Unfortunately, due to the TKO's tailshaft housing being longer and the driveshaft's diameter being larger, the factory set-up put everything far too close to the driveshaft. This isn't my picture, but it is one that someone else took with a 700R-4 conversion who experienced the same issue:
We resolved the problem by making a shorter lever out of bar stock I had laying around. It moved everything down and away from the driveshaft:
Next up was the rear deck and the butchered job that someone did for bigger speakers:
I started with a Dremel and cleaned up the edges:
Then I took some 18 gauge sheet metal and made a plate to hold a 5x7 speaker:
A little paint, a few rivets, and boom:
The following users liked this post:
Project GatTagO (03-15-2024)
04-21-2019, 09:41 AM
#43
TECH Fanatic
Thread Starter
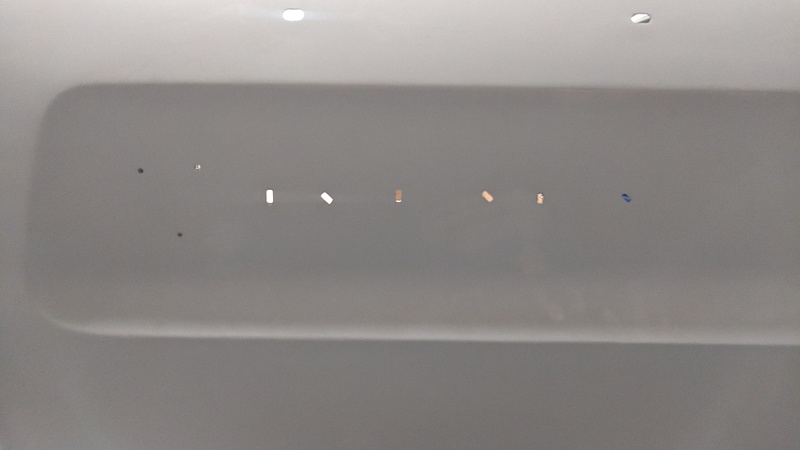
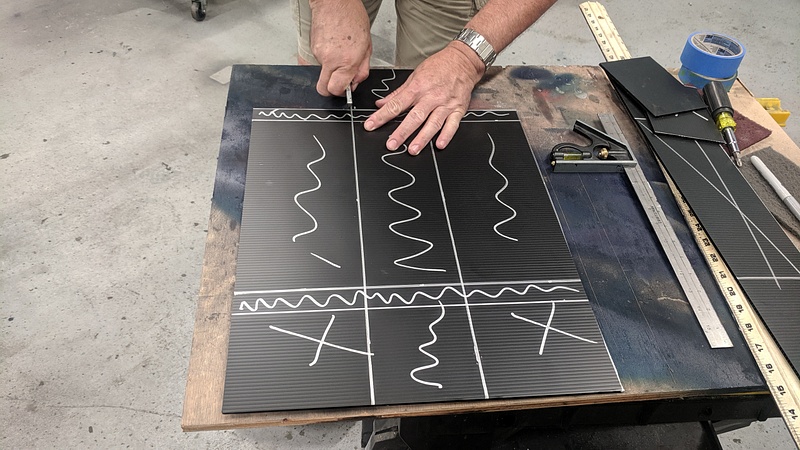
Now came time for the ******** to pucker: drilling for the trim holes. The reproduction panels didn't come with them, so we needed to measure, measure some more, measure a third time, draw some lines, and measure again.


The first oblong hole is a little funky. Luckily, it didn't affect anything:
As if the oblong holes weren't enough, we now had to figure out this nonsense:
So, we traced it out on cardboard:
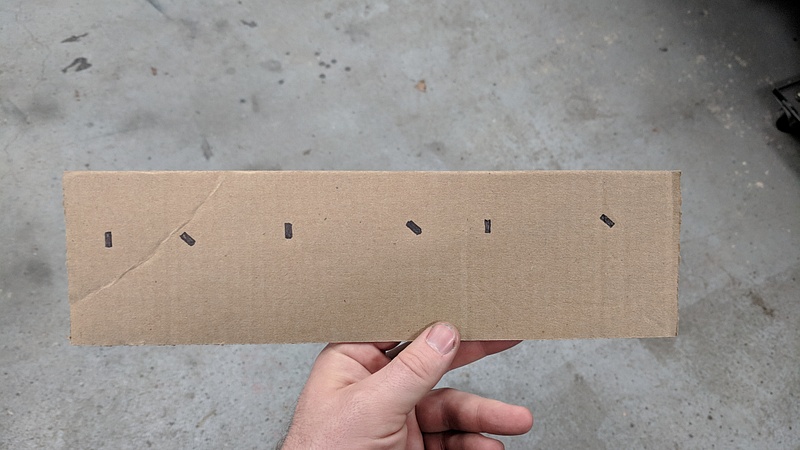
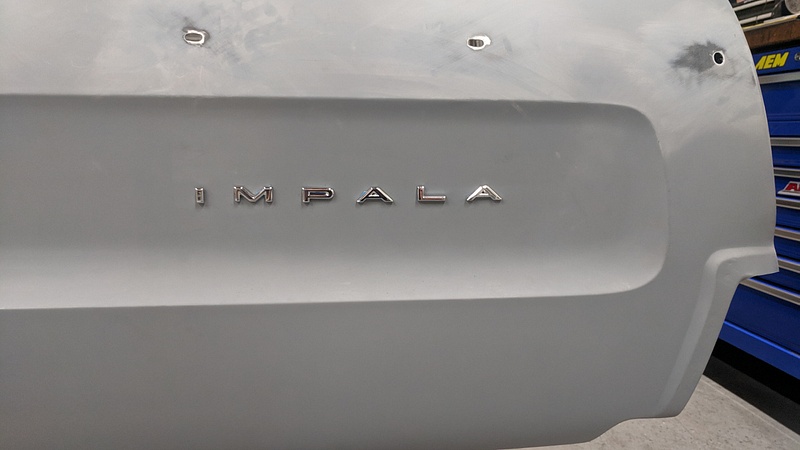
And fitted the new letters to make sure everything looked good:
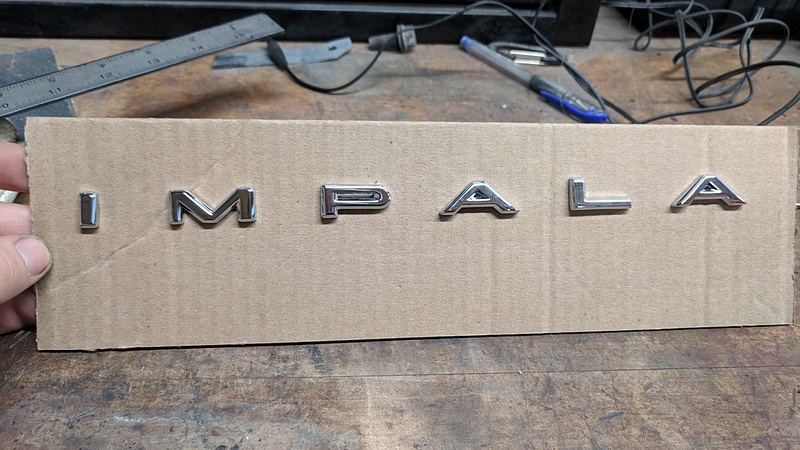
Luckily, the reproduction letters don't have the same pronounced rectangular protrusions that the original ones do. So, we were able to get away with 1/8th inch holes. The tough part was measuring and lining up the template before drilling:
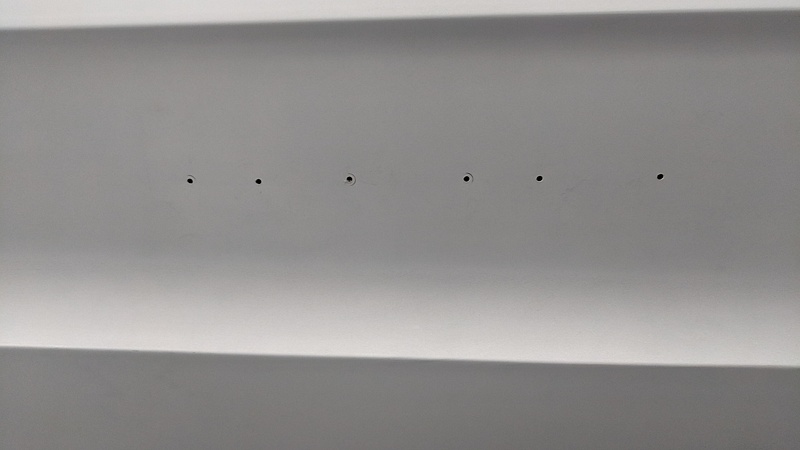
This past Wednesday, we were supposed to meet with a painter to have him quote the paint job. He no-showed. So, we decided that, since we have done everything else ourselves, why stop short of painting it ourselves? So, we ordered a Fuji Mini-Mite 4 HVLP spray system. I'm currently looking for a good source for the paint. Once that all comes in, we'll be turning the garage into a paint booth. The plan is to use a high-build polyester primer for blocking, base coat, and then clear coat. It should be a fun time.
The first oblong hole is a little funky. Luckily, it didn't affect anything:
As if the oblong holes weren't enough, we now had to figure out this nonsense:
So, we traced it out on cardboard:
And fitted the new letters to make sure everything looked good:
Luckily, the reproduction letters don't have the same pronounced rectangular protrusions that the original ones do. So, we were able to get away with 1/8th inch holes. The tough part was measuring and lining up the template before drilling:
This past Wednesday, we were supposed to meet with a painter to have him quote the paint job. He no-showed. So, we decided that, since we have done everything else ourselves, why stop short of painting it ourselves? So, we ordered a Fuji Mini-Mite 4 HVLP spray system. I'm currently looking for a good source for the paint. Once that all comes in, we'll be turning the garage into a paint booth. The plan is to use a high-build polyester primer for blocking, base coat, and then clear coat. It should be a fun time.
04-21-2019, 05:34 PM
#44
Registered User

Join Date: Apr 2019
Location: Chicago
Posts: 1
Likes: 0
Received 0 Likes
on
0 Posts
I have to say thank you.. I have been beating my self up on my project and was ready to just sell it, but after stumbling to your posts on you and your fathers project I don�t feel like I�m doing this alone. Kind of the same story just a lot longer time frame. My dad purchased a 1964 Impala in 1993 with no motor or trans and we worked on it for a while. Replacing the frame that was completely rotted and dropping in 350. Another engine later and fast forward to 2018 and the car has never been driven other than to my house from my dads place. The project was headed by my dad as I was busy with meeting my wife and having kids, buying a house.. the regular life events. My dad now in his early 70�s and disabled is now not able to work on the car. So I brought it to my house to work on it after selling my baby 2002 Camaro SS to have some cash to work on it. I planned to replace the floors and paint the car myself but after starting to remove the floors I came across the same thing you did. Rotted inner rocker panels that are dust hidden by previous half A$$ repairs. Long story short I basically have been laughed at by resto shops on my budget.. Discouraged that I can�t do the repairs on my own I was ready to sell until reading your awesome project yesterday. I have to take your perspective and just tackle the challenges as they go and not get over whelmed with how much the car needs. This morning I cut out the rest of the passenger floor and inner rocker panel and it feels great. I hope you don�t mind if I pick your brain and ask questions along the way. Thank you again for giving me a new perspective on my project! I would of regretted selling the 64!!
04-23-2019, 07:05 AM
#45
TECH Fanatic
Thread Starter
I have to say thank you.. I have been beating my self up on my project and was ready to just sell it, but after stumbling to your posts on you and your fathers project I don�t feel like I�m doing this alone. Kind of the same story just a lot longer time frame. My dad purchased a 1964 Impala in 1993 with no motor or trans and we worked on it for a while. Replacing the frame that was completely rotted and dropping in 350. Another engine later and fast forward to 2018 and the car has never been driven other than to my house from my dads place. The project was headed by my dad as I was busy with meeting my wife and having kids, buying a house.. the regular life events. My dad now in his early 70�s and disabled is now not able to work on the car. So I brought it to my house to work on it after selling my baby 2002 Camaro SS to have some cash to work on it. I planned to replace the floors and paint the car myself but after starting to remove the floors I came across the same thing you did. Rotted inner rocker panels that are dust hidden by previous half A$$ repairs. Long story short I basically have been laughed at by resto shops on my budget.. Discouraged that I can�t do the repairs on my own I was ready to sell until reading your awesome project yesterday. I have to take your perspective and just tackle the challenges as they go and not get over whelmed with how much the car needs. This morning I cut out the rest of the passenger floor and inner rocker panel and it feels great. I hope you don�t mind if I pick your brain and ask questions along the way. Thank you again for giving me a new perspective on my project! I would of regretted selling the 64!!
Yes, please feel free to pick my brain as you go along with your project. We've definitely learned things along the way and have revisited areas of the car after our skills progressed a bit further. I have no problem sharing that information so that you can hopefully be a few steps ahead of the game.
 04-23-2019, 01:14 PM
#47
TECH Fanatic
Thread Starter
I have an 81 El Camino with a 5.7 Vortec out of a '98 K1500, and I used the '98's AC compressor. I just had to make custom lines and I replaced the condenser, evaporator, drier, orifice tube, and seals so that the system could be ran on R-134a.
05-22-2019, 05:26 PM
#50
TECH Fanatic
Thread Starter
A few more updates:
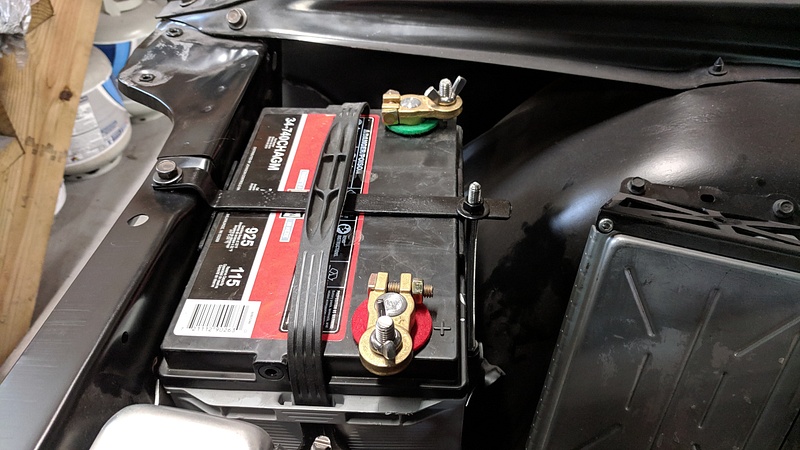
Since the battery we got isn't a factory battery size, none of the battery hold downs fit. Why didn't we get a factory battery size? Because the auto store didn't have one in stock when we wanted to start the car. So, fast-forward to now and we made our own:
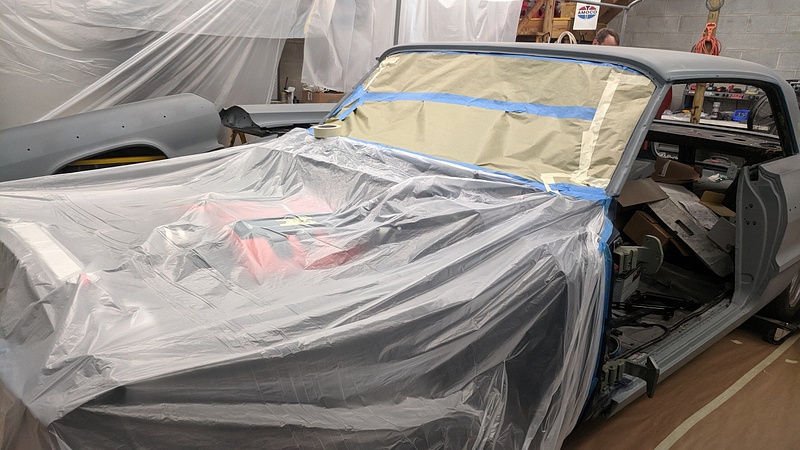
Then it came time to paint the inside of the trunk. This was a monumental occasion since, up to this point, it was used as storage space. So, we had to clean it out and wipe it down:
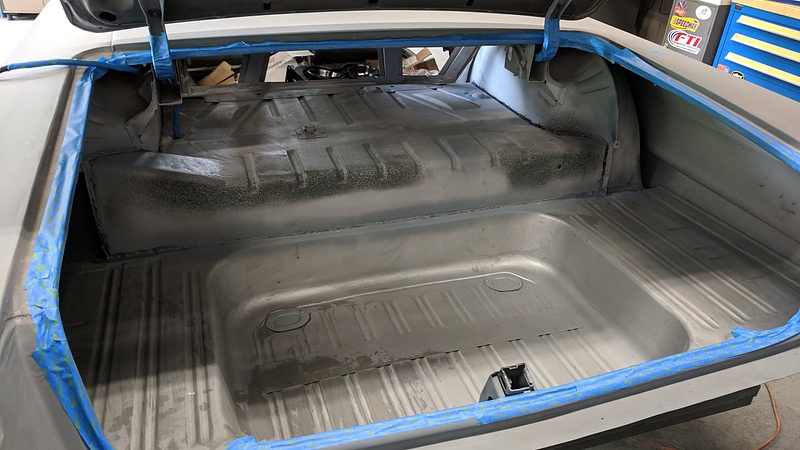
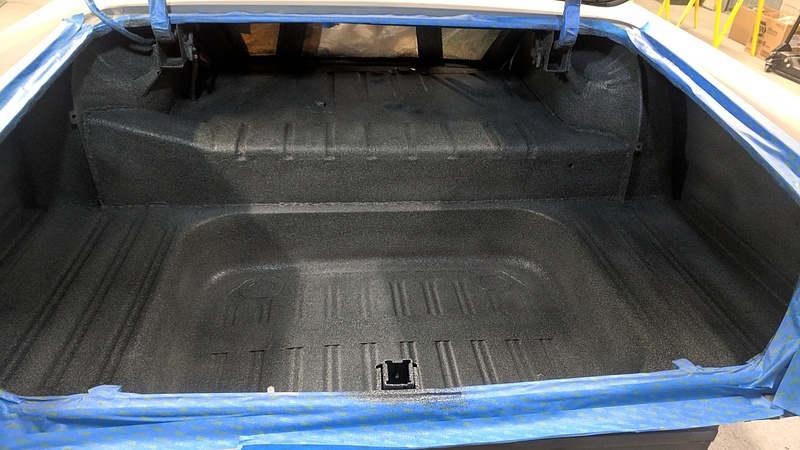
First coat:
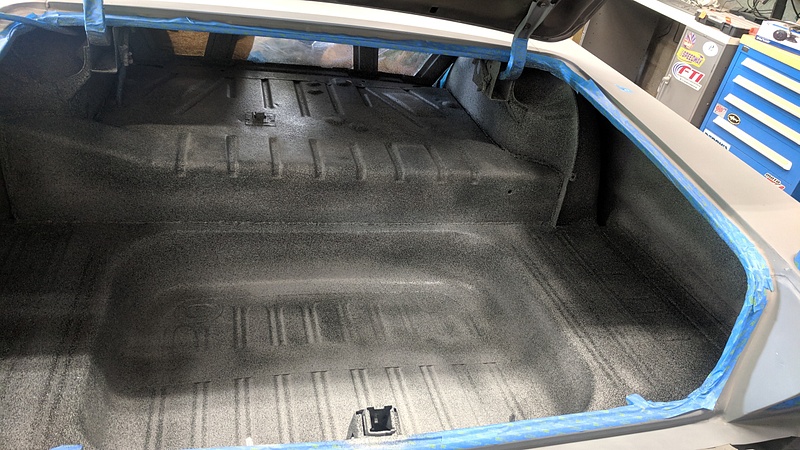
Second coat:
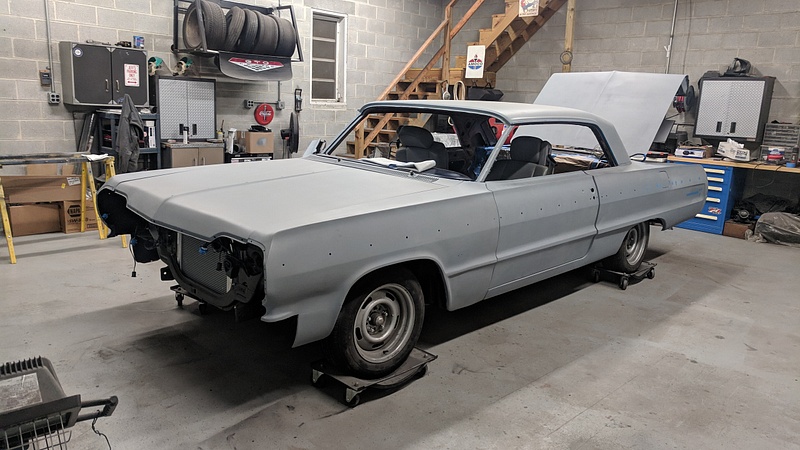
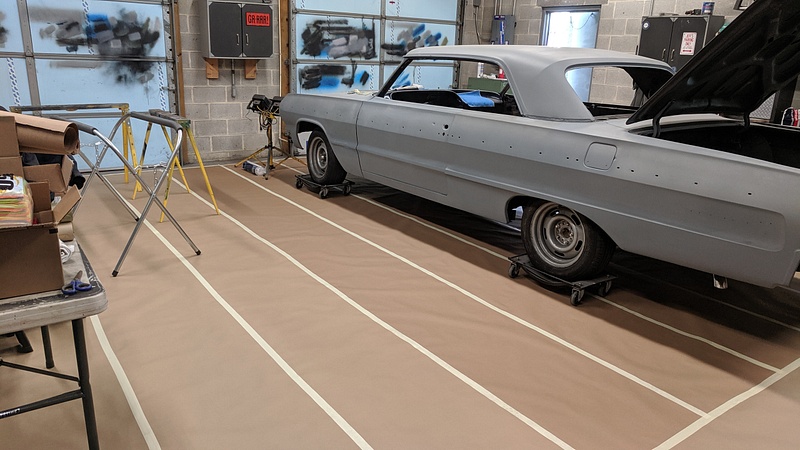
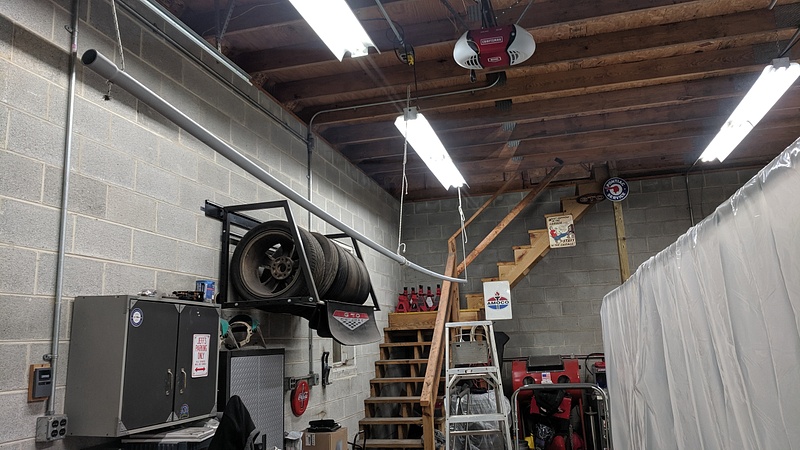
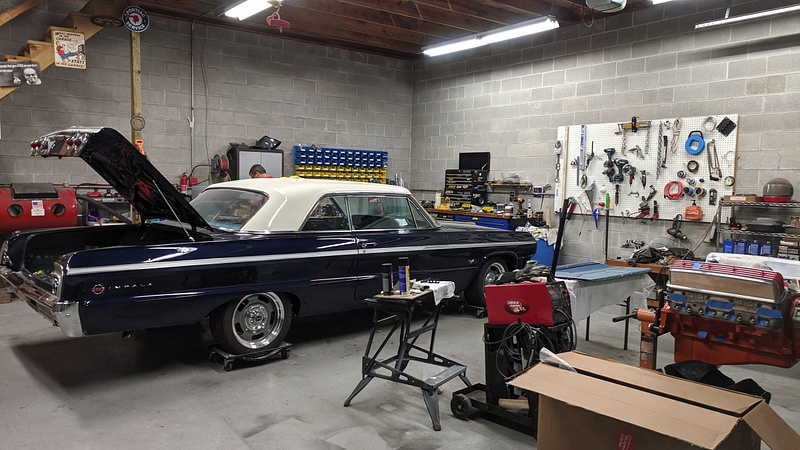
Then, it came time to move the GTO and Elco to a temporary spot so that we could move the Impala to the center of the garage and gear up for the last bit of body work and paint:
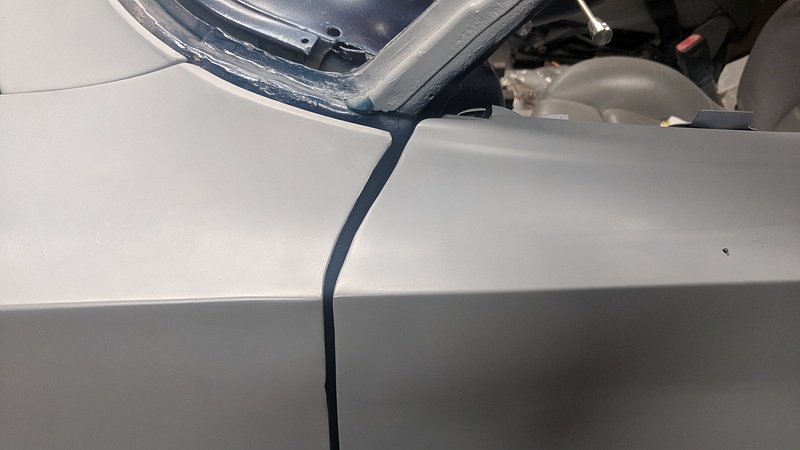
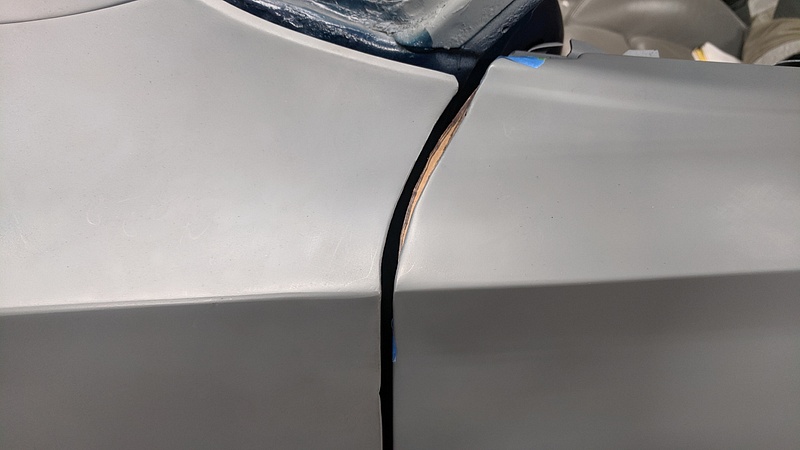
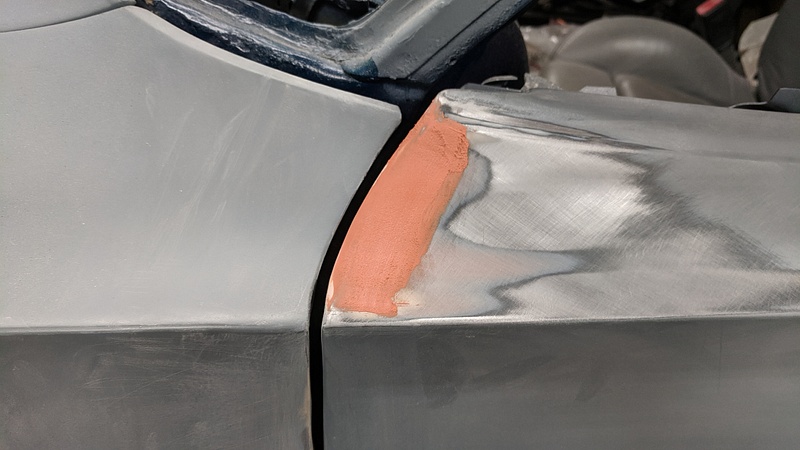
One thing that we needed to address was the horrible gap between the top of the driver fender and the replacement door. It was just atrocious:
After some brainstorming on how we were going to tackle this, we went to work. First, we made a cardboard template:
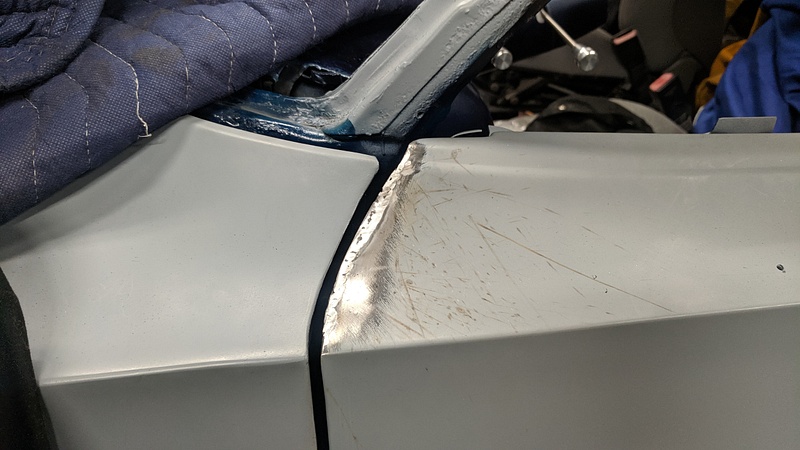
Then we cut the sheet metal and started welding:
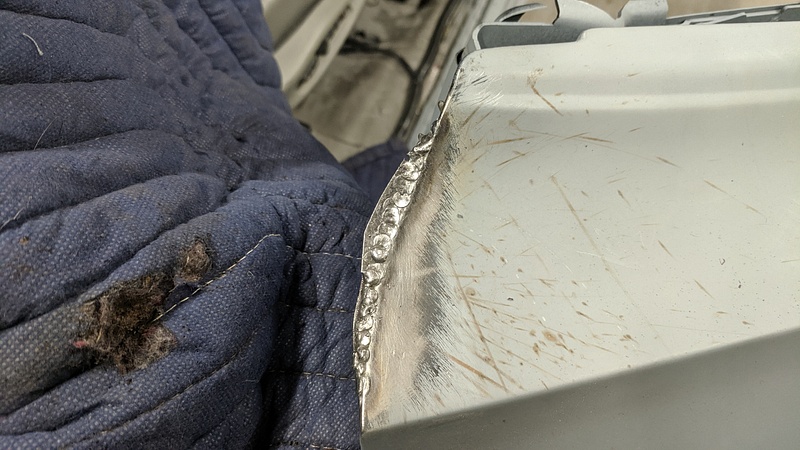
Some grinding action:
First coat of filler:
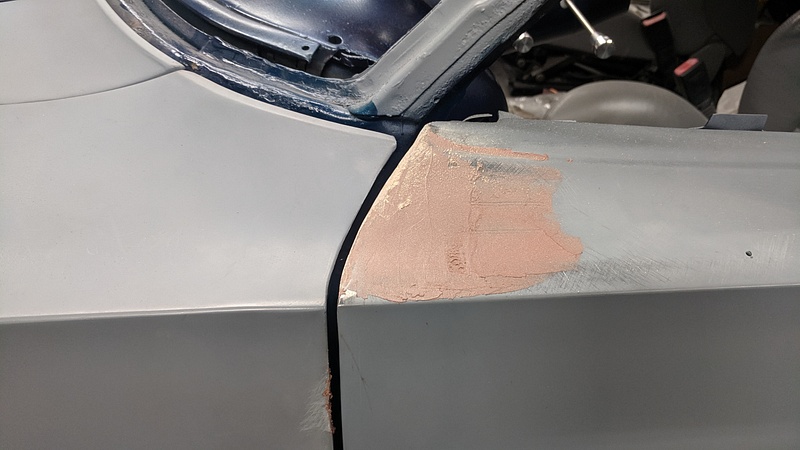
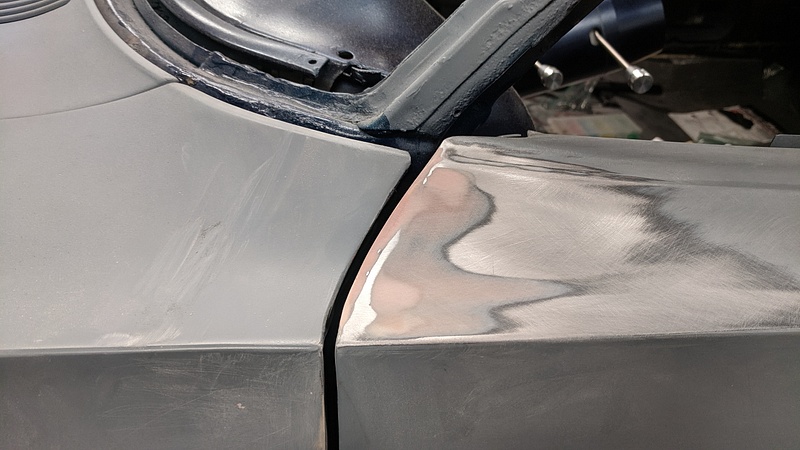
Second pass:
Sanded down:
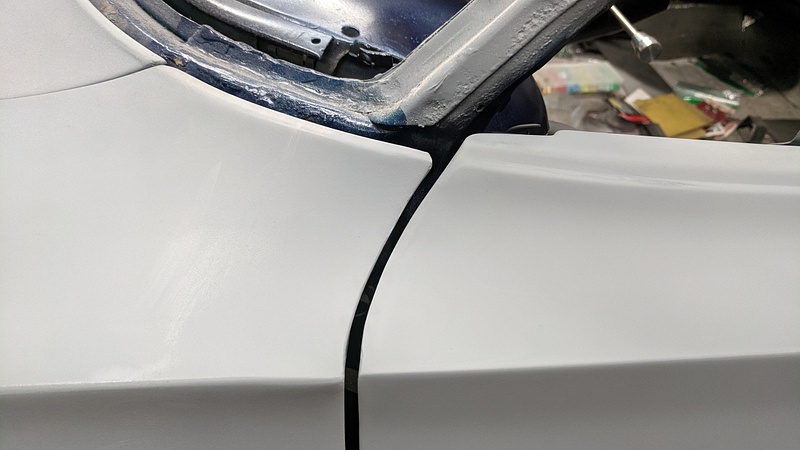
And boom goes the dynamite:
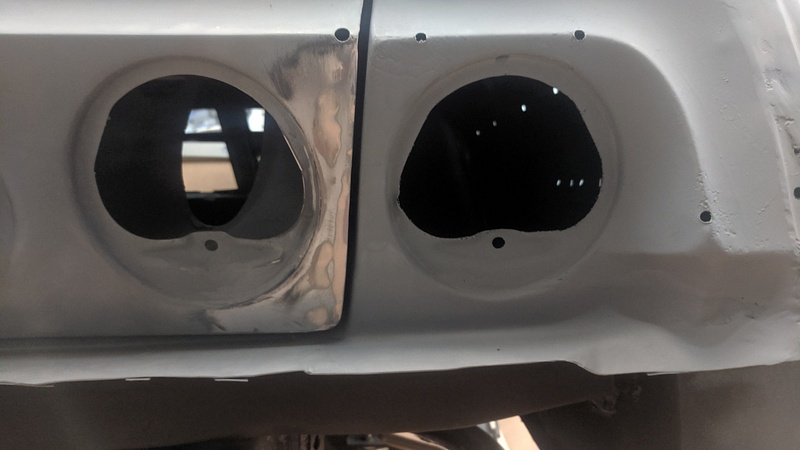
The same process was done on the passenger side trunk gap:
Since the battery we got isn't a factory battery size, none of the battery hold downs fit. Why didn't we get a factory battery size? Because the auto store didn't have one in stock when we wanted to start the car. So, fast-forward to now and we made our own:
Then it came time to paint the inside of the trunk. This was a monumental occasion since, up to this point, it was used as storage space. So, we had to clean it out and wipe it down:
First coat:
Second coat:
Then, it came time to move the GTO and Elco to a temporary spot so that we could move the Impala to the center of the garage and gear up for the last bit of body work and paint:
One thing that we needed to address was the horrible gap between the top of the driver fender and the replacement door. It was just atrocious:
After some brainstorming on how we were going to tackle this, we went to work. First, we made a cardboard template:
Then we cut the sheet metal and started welding:
Some grinding action:
First coat of filler:
Second pass:
Sanded down:
And boom goes the dynamite:
The same process was done on the passenger side trunk gap:
05-22-2019, 05:27 PM
#51
TECH Fanatic
Thread Starter
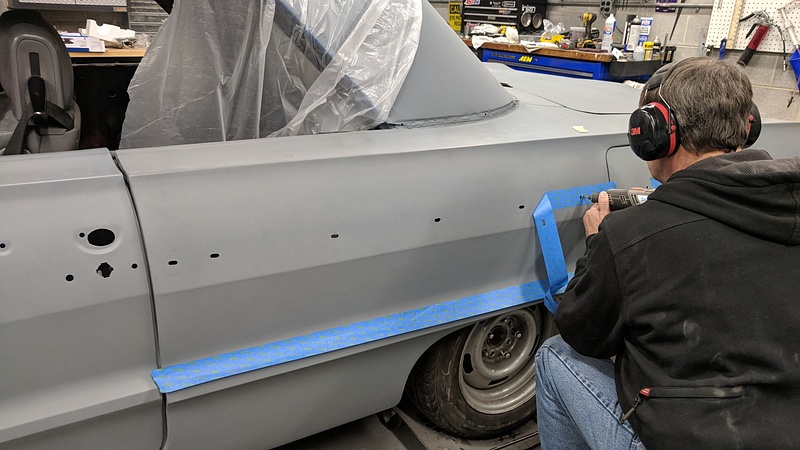
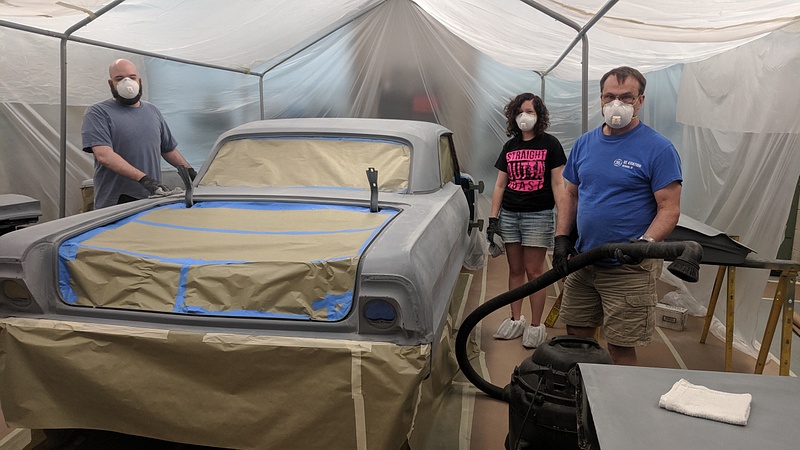
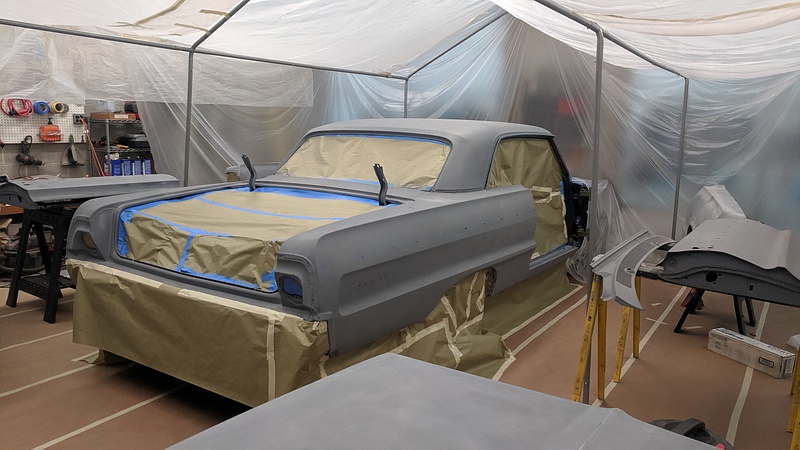
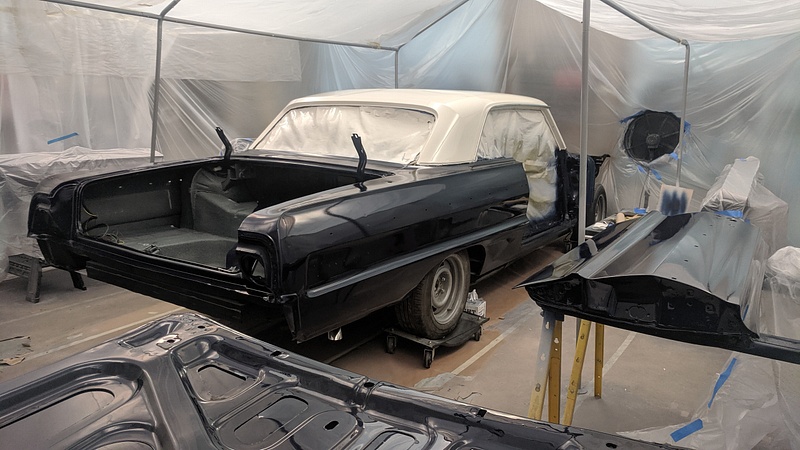
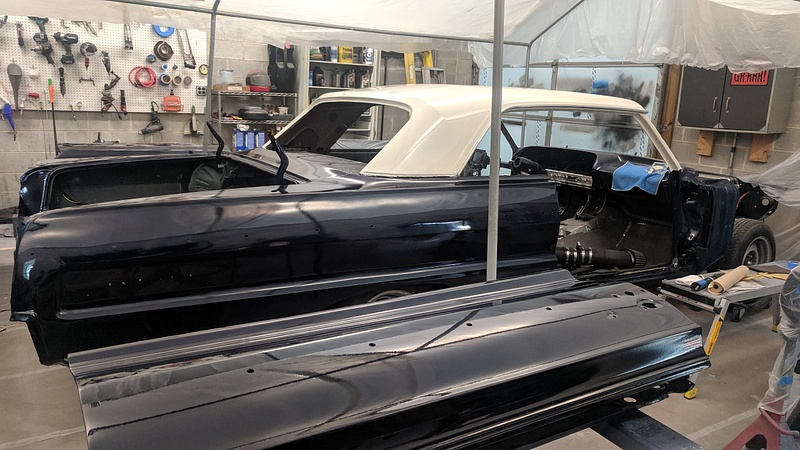
After that, we started gearing up for paint:
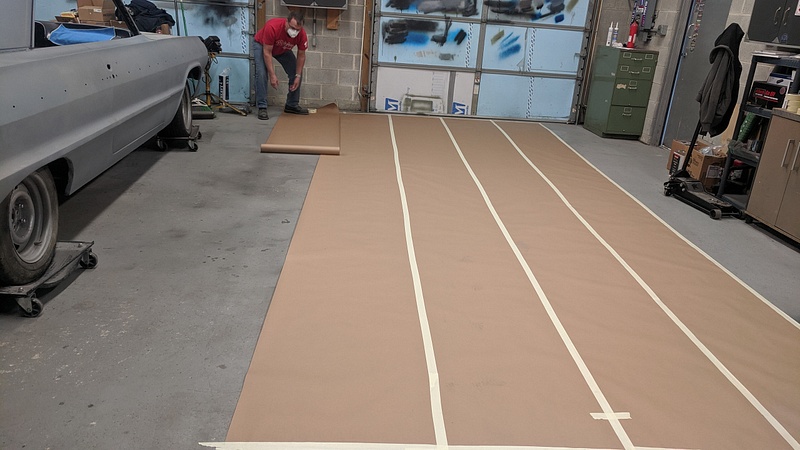
We bought a 12x20 tent to use as a main support structure:
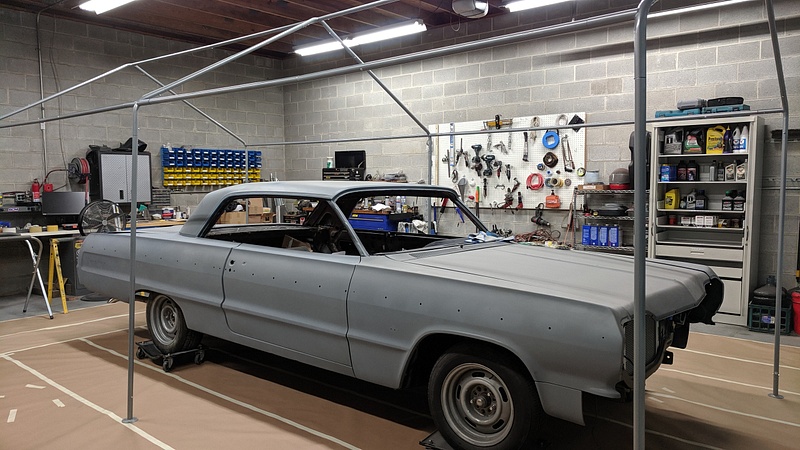
And then hung 20' worth of electrical conduit on both sides to create wider wings:
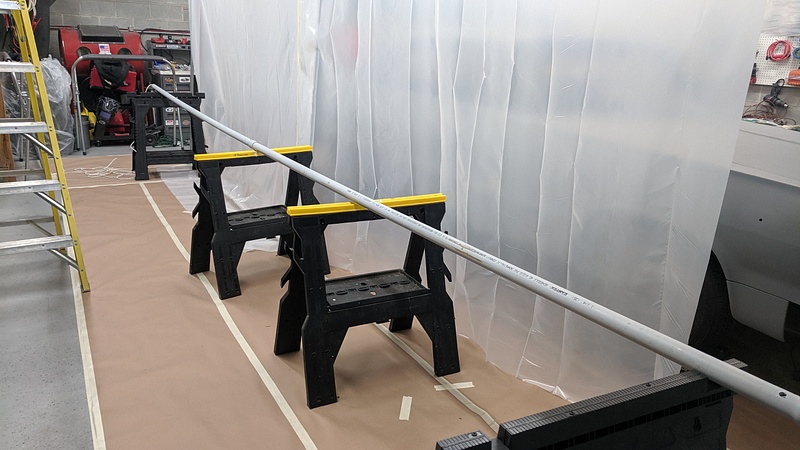
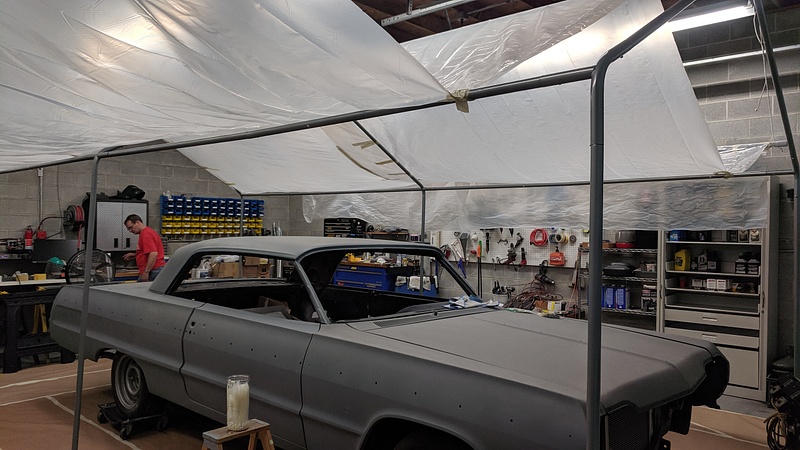
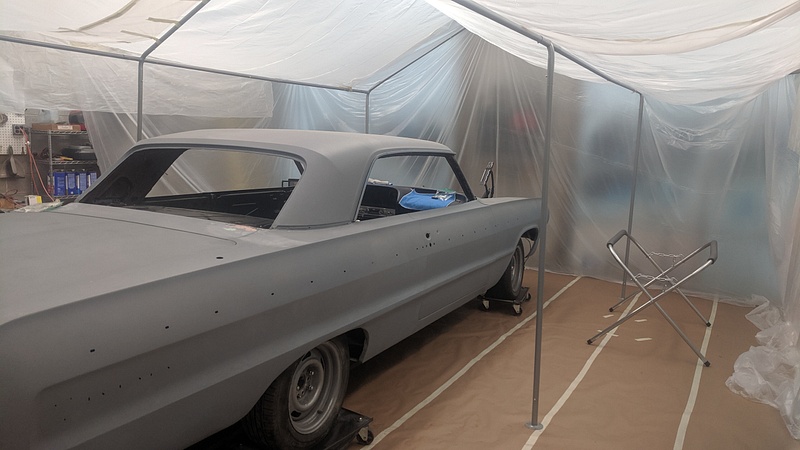
Taping everything up:
And this is where we left off last night:

We are going to be using a Fuji Mini Mite 4 turbine sprayer to spray the car. The paint has already been picked up from a local Napa paint store. We are going to begin blocking everything to 320 grit tomorrow in preparation for the coat of polyester high-build primer. That will get sanded to 400, and then we will apply the final coat of primer. That primer will get sanded to 600. Then it is the base color and the clear.
Hopefully, at the end of this, we'll have ourselves a fully painted car.
We bought a 12x20 tent to use as a main support structure:
And then hung 20' worth of electrical conduit on both sides to create wider wings:
Taping everything up:
And this is where we left off last night:
We are going to be using a Fuji Mini Mite 4 turbine sprayer to spray the car. The paint has already been picked up from a local Napa paint store. We are going to begin blocking everything to 320 grit tomorrow in preparation for the coat of polyester high-build primer. That will get sanded to 400, and then we will apply the final coat of primer. That primer will get sanded to 600. Then it is the base color and the clear.
Hopefully, at the end of this, we'll have ourselves a fully painted car.
07-27-2019, 07:41 AM
#52
TECH Fanatic
Thread Starter
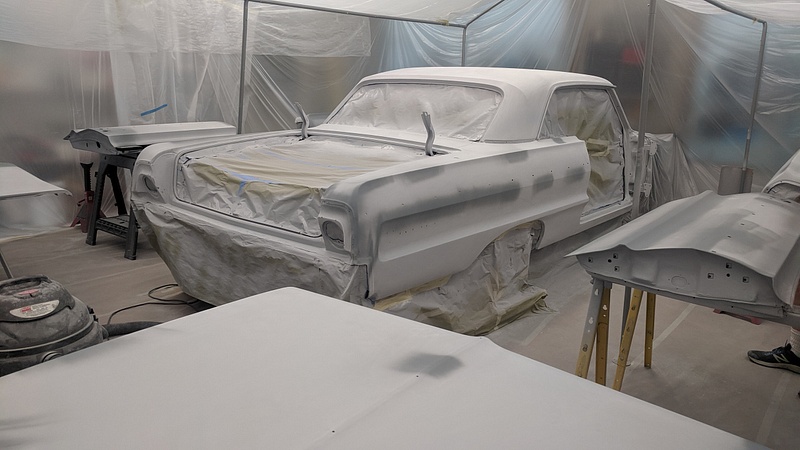
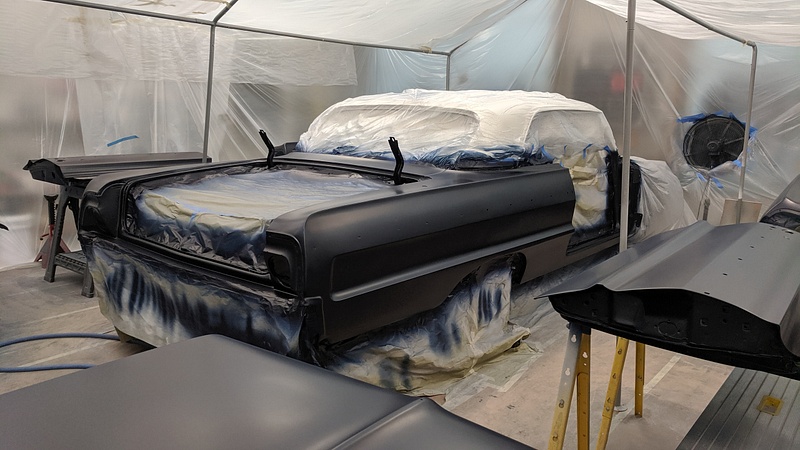
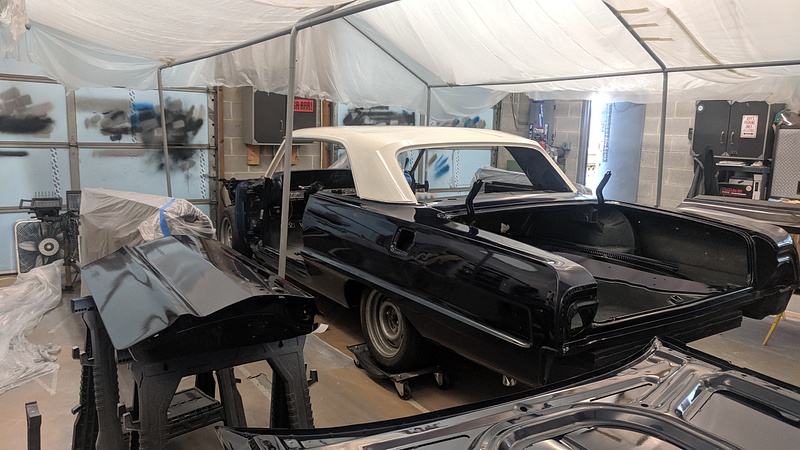
It's been a while, but that's because we've been rather busy. The booth was set up and there was some sanding.
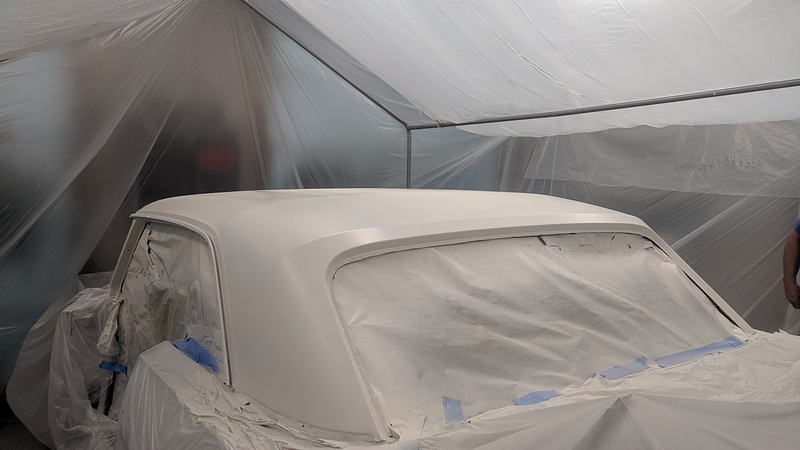
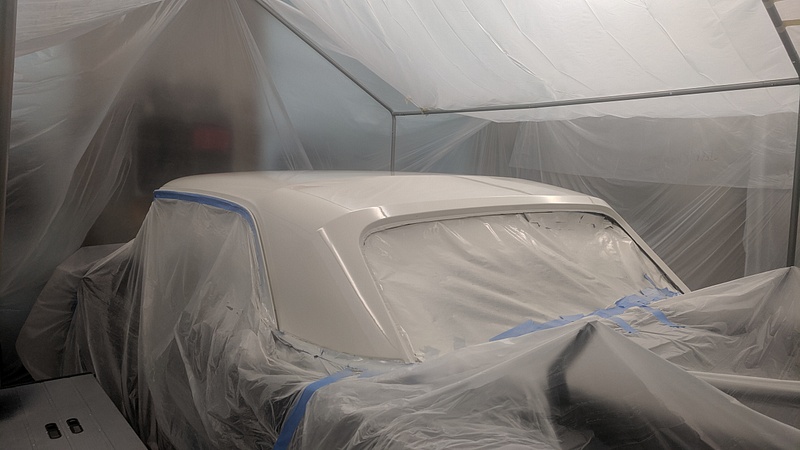
And then we laid down the primer.
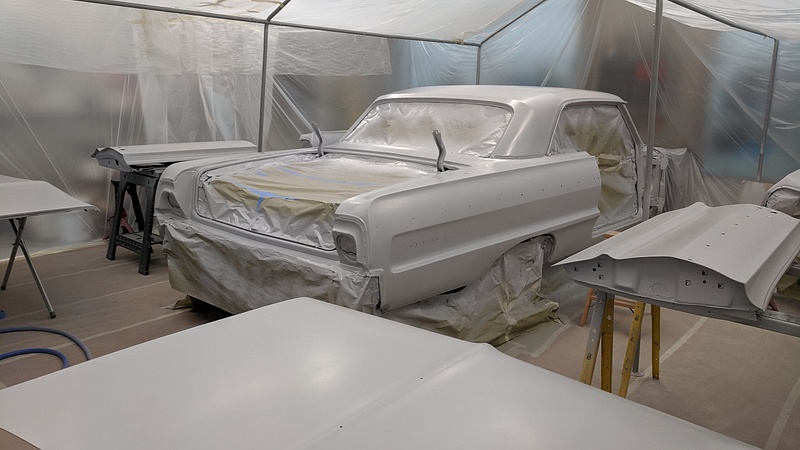
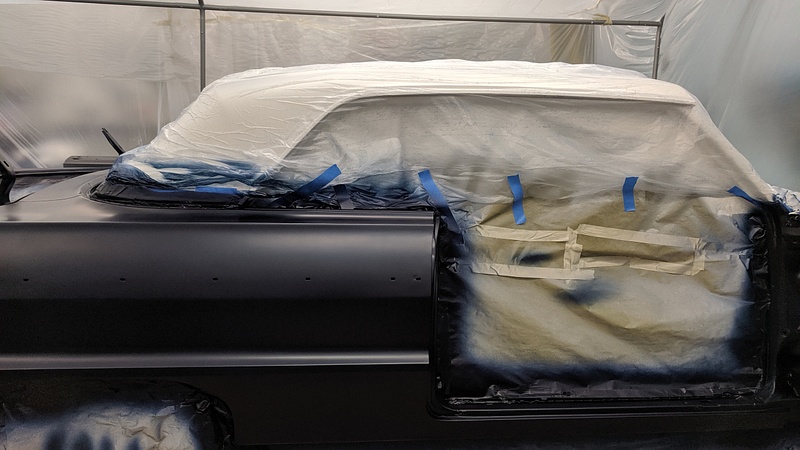
Annnd then we found some spots in the roof that needed more attention.
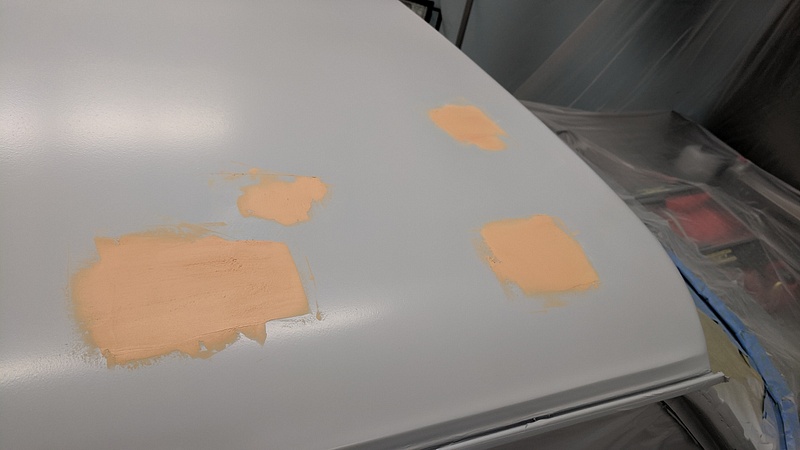
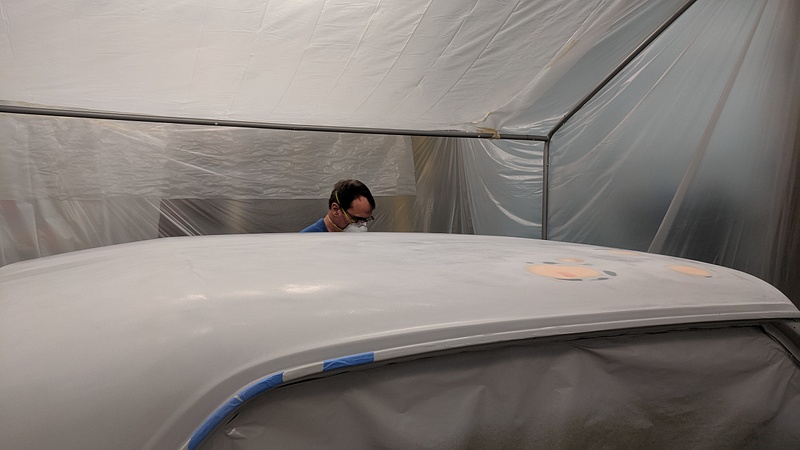
Some more areas needed to be touched up, as well.
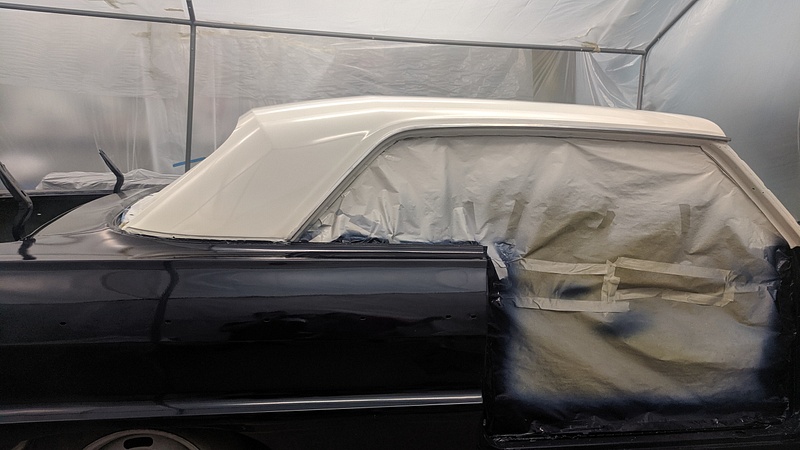
Base coat on the roof:

Base coat everywhere else:
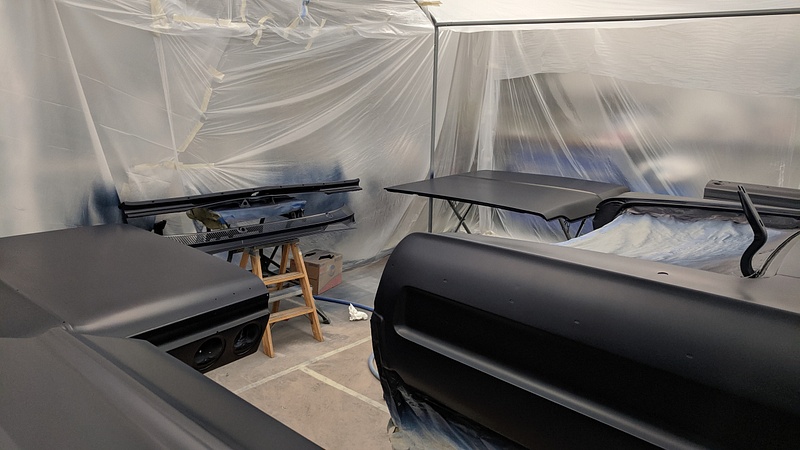
And then the clear:
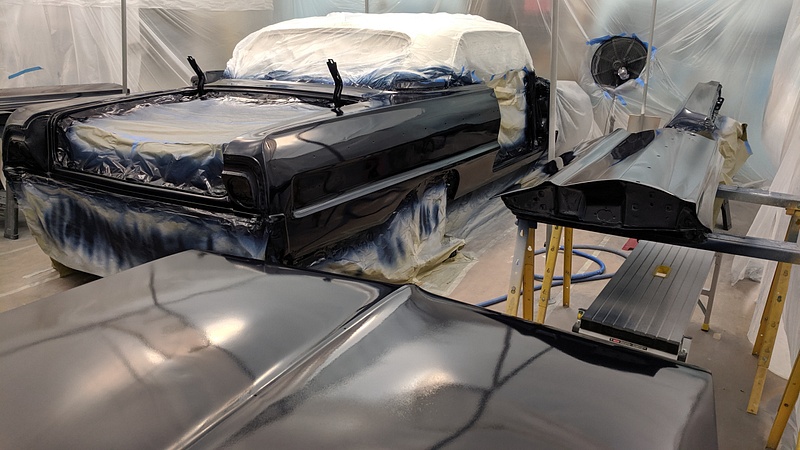
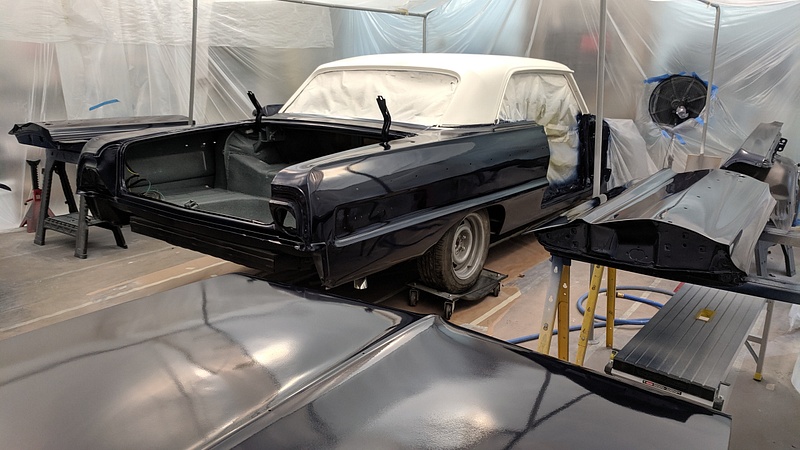
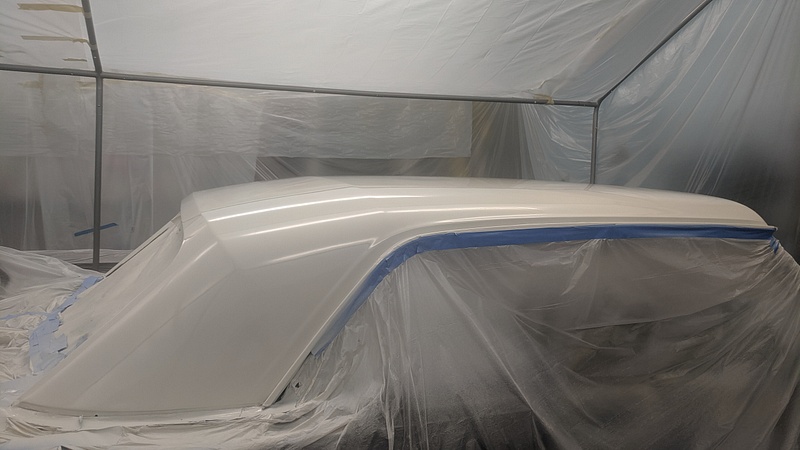
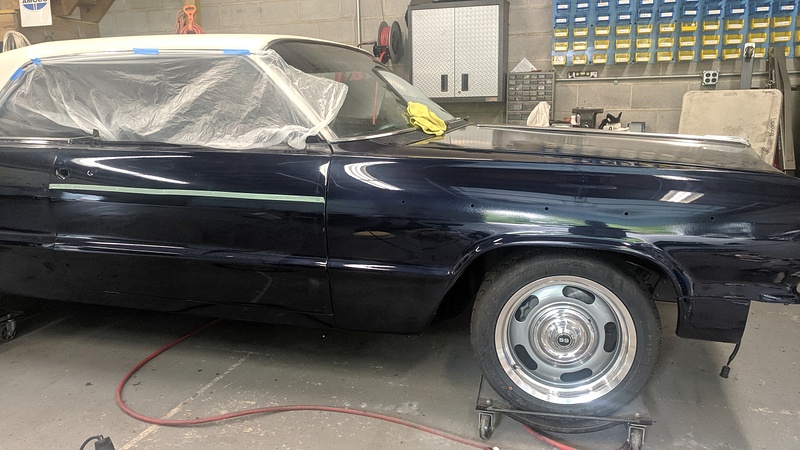
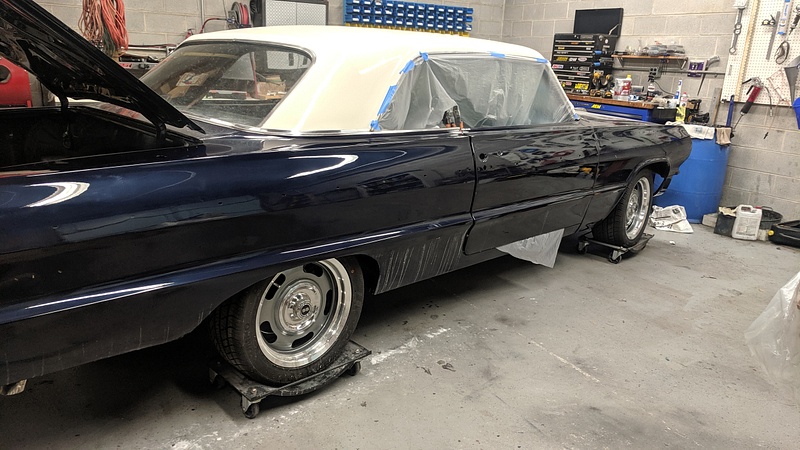
You may be wondering why the roof was cleared separately from the body. Well, we were having issues with the the way the base was laying. It looked funny in some light and I didn't want to clear over it with the way it looked. I eventually commissioned the help of a long-armed friend and had him lay the base. It turned out better, but it still had issues. As it turned out, it was much ado about nothing, because everything turned out fine once the clear was laid.
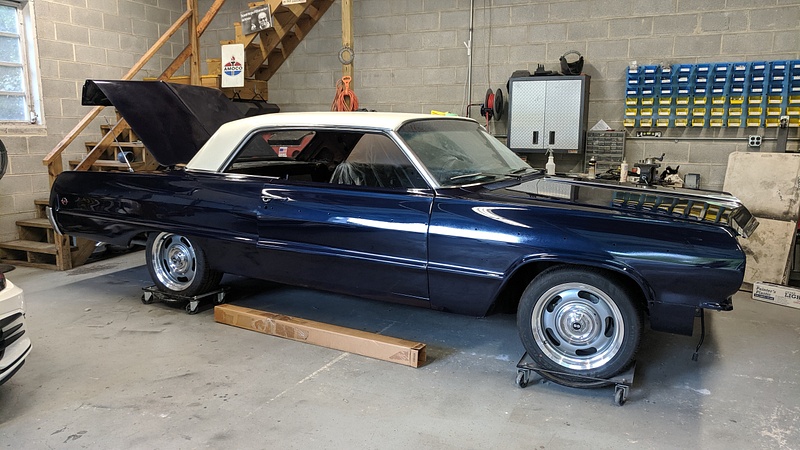
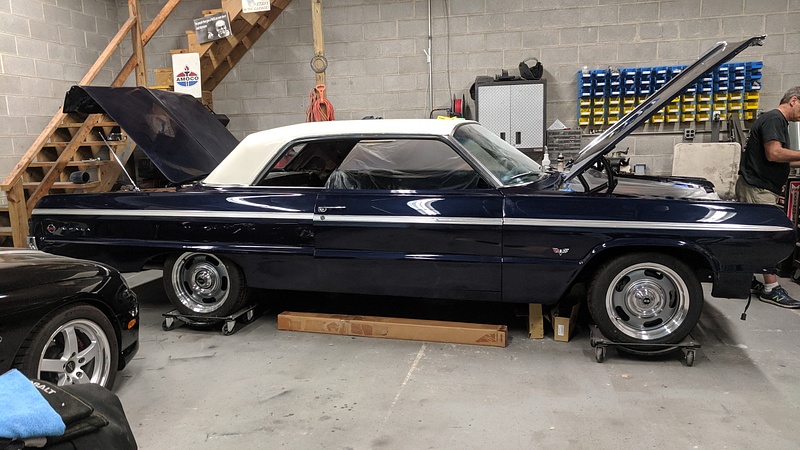
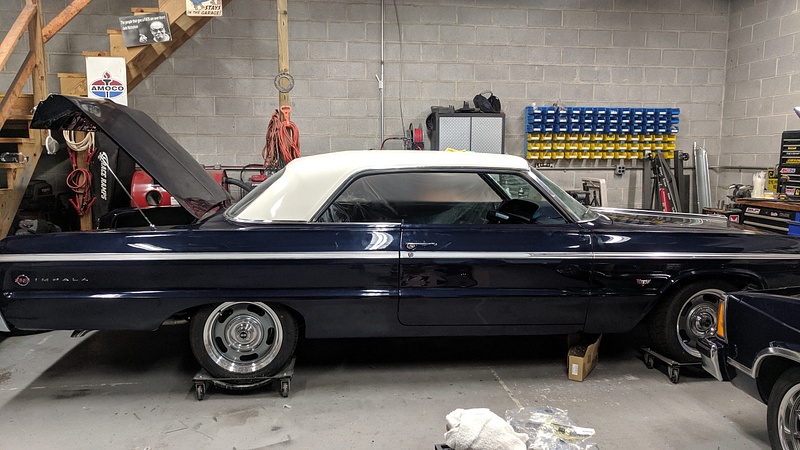
We then disassembled the booth to have a little more room for putting the car back together.
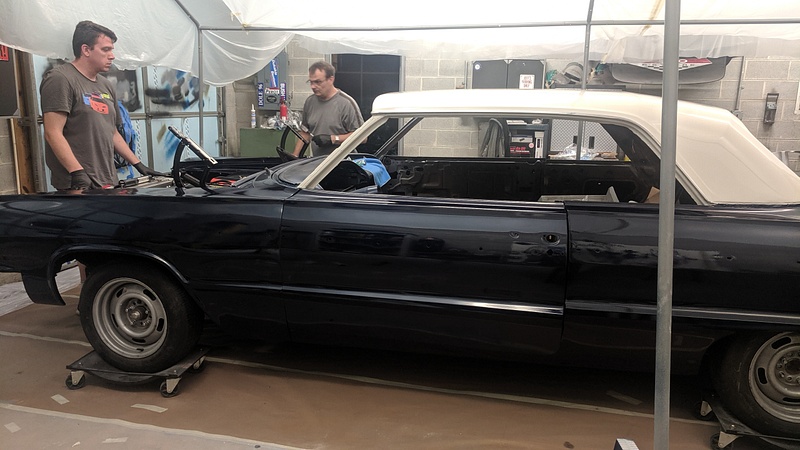
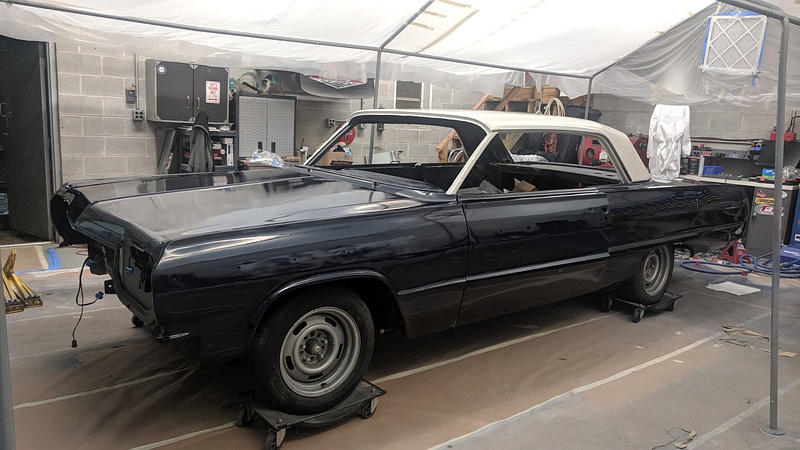
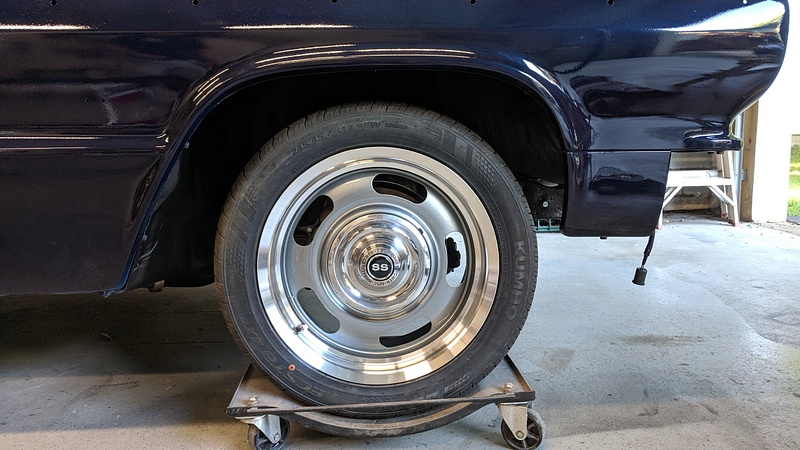
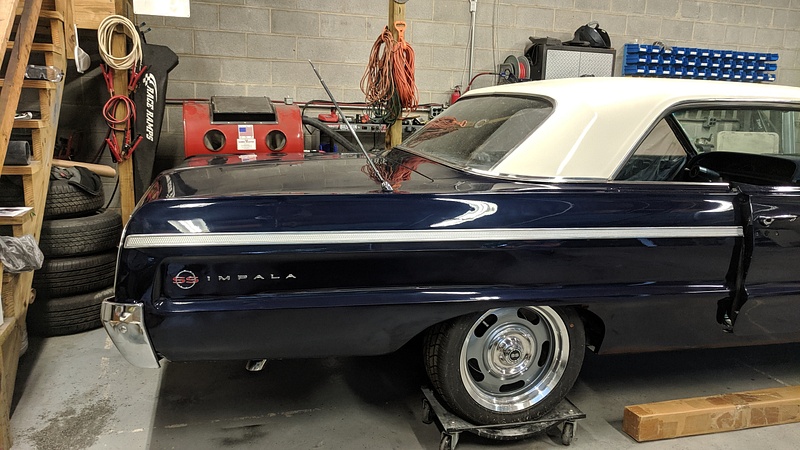
Obviously, it was time to put the 17" wheels on and see how they looked.
And while we were painting the car, we may have dropped the BMW seats off at a local upholstery shop....

The following 2 users liked this post by MuhThugga:
Imp709 (07-27-2019), Project GatTagO (07-27-2019)
09-20-2019, 11:53 AM
#54
TECH Fanatic
Thread Starter
It's been a little while, but we definitely haven't been sitting idle.
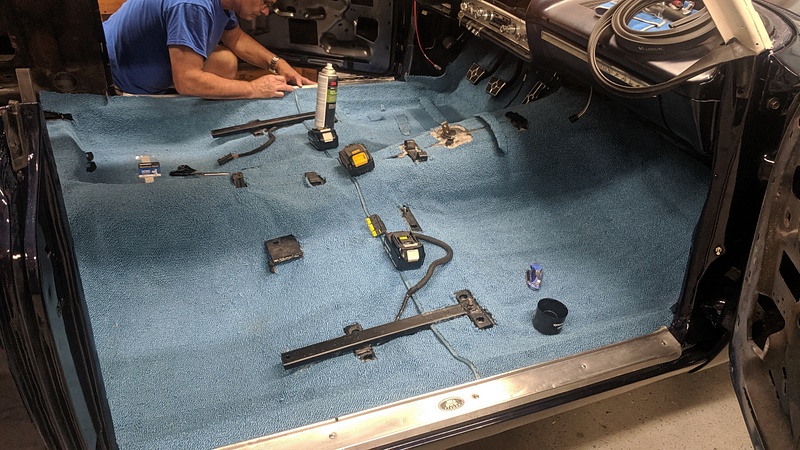
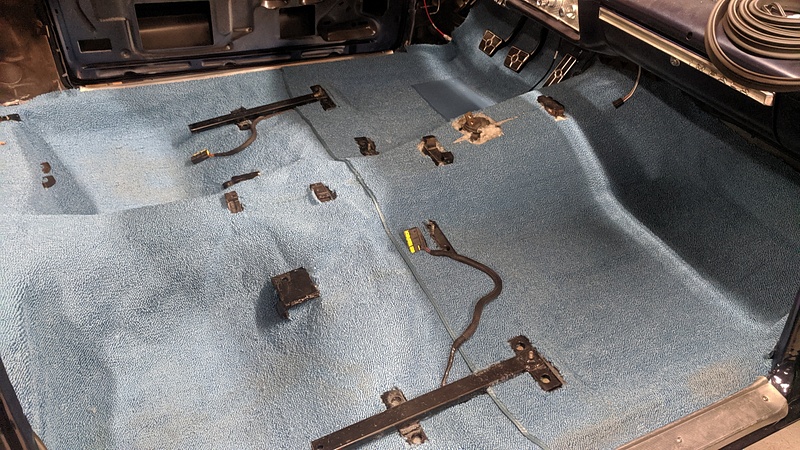
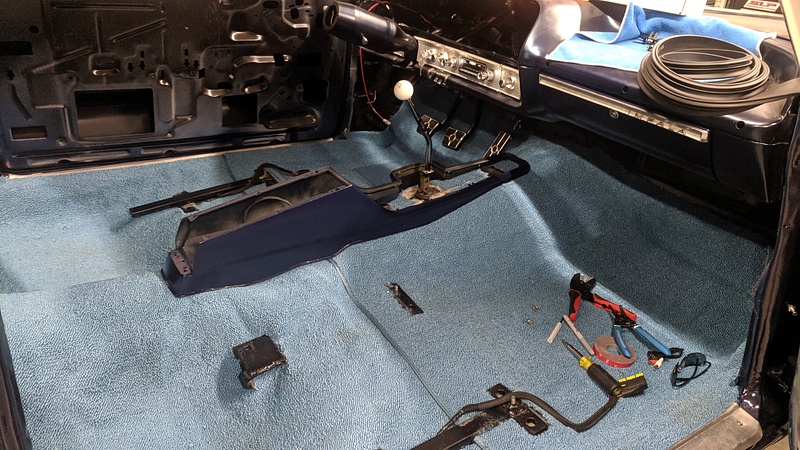
We fitted the new carpet, matching the original carpet color:
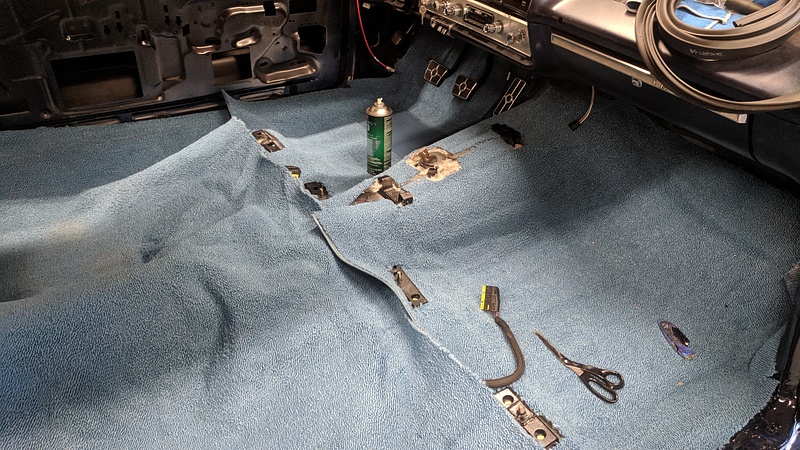
For the most part, it fit extremely well. It is nice knowing that this carpet is only glued in certain areas, unlike the original carpet that some yokel decided every square inch needed adhesive.
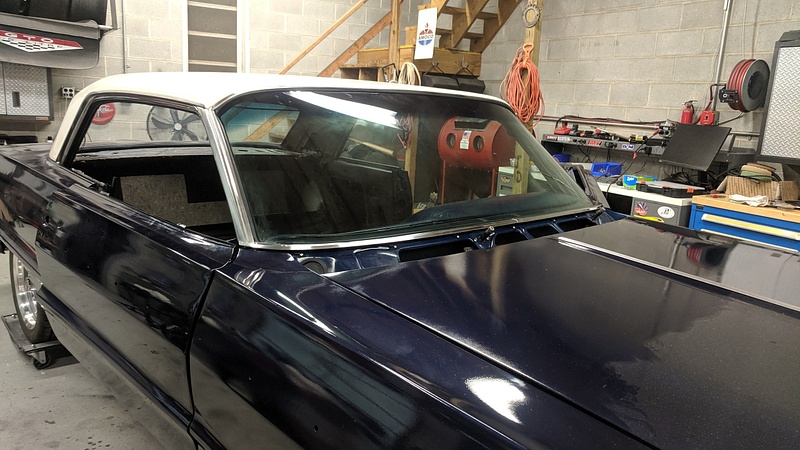
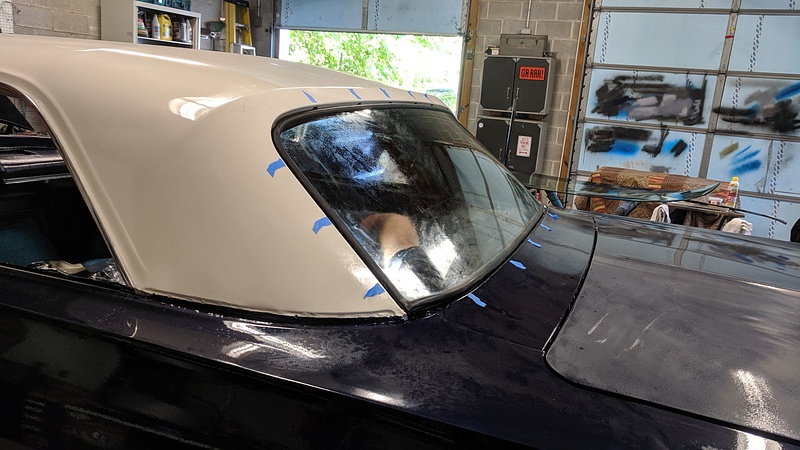
Then came time to install the front and rear windshield clips in preparation for the glass:

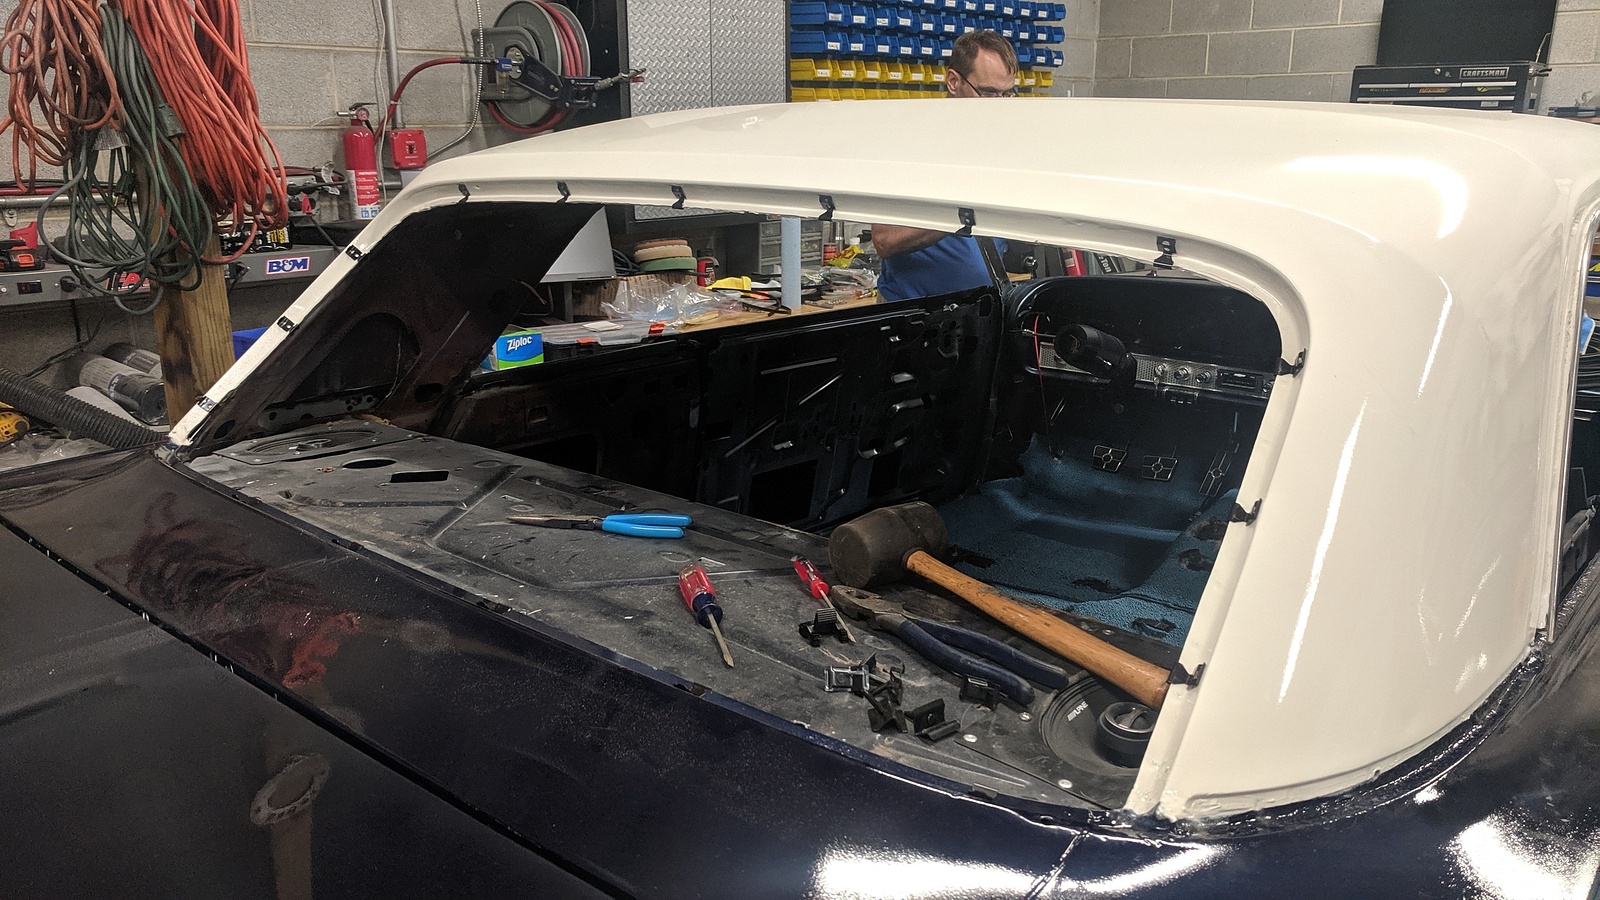
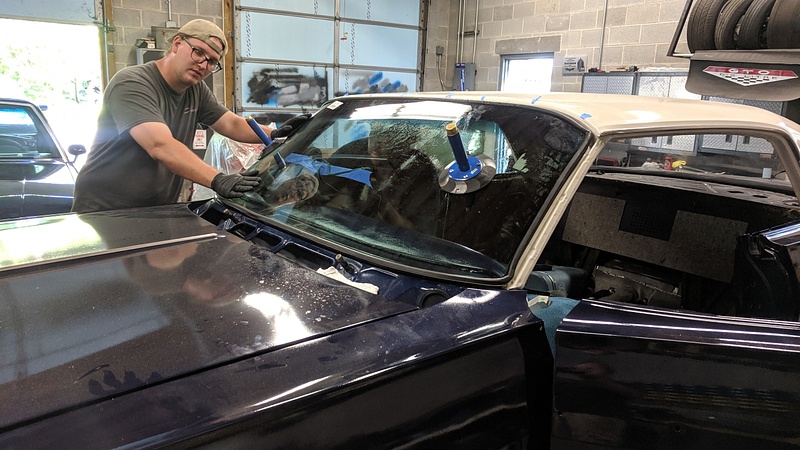
We had a company come in and install a new windshield and reinstall the original rear glass. They didn't charge extra for coming to the house. That was money well spent since they struggled with getting everything seated correctly, and even had to come back to reseat the rear gasket. Once the glass was in, the trim went on.
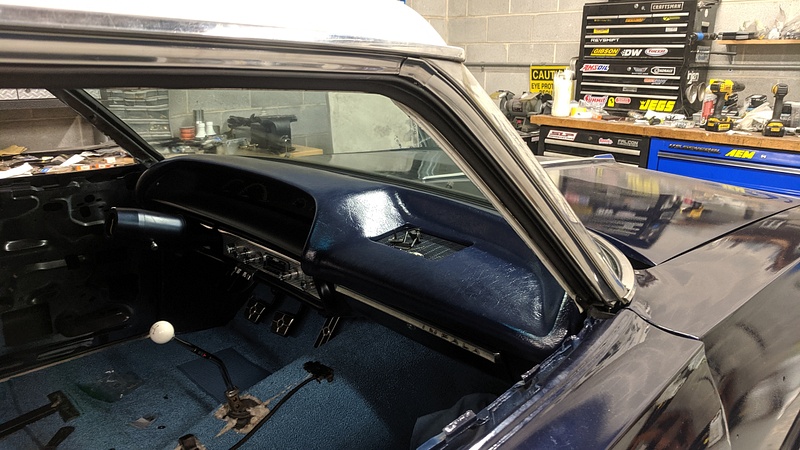
We also installed the dash pad, which is the original pad with a new cover glued over top and painted.
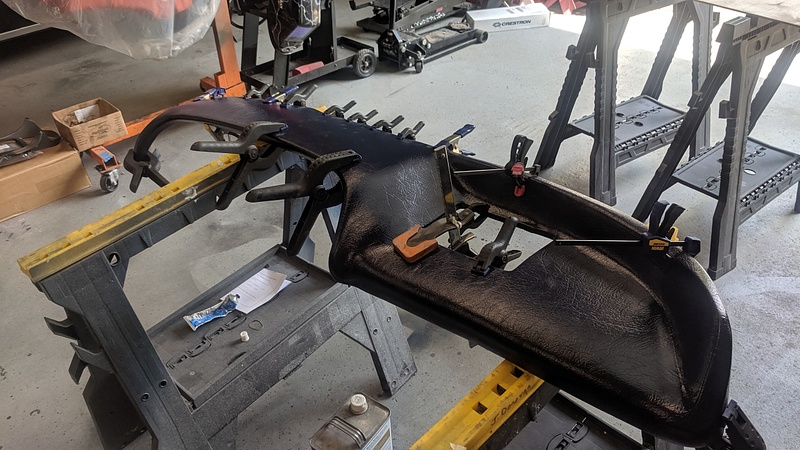
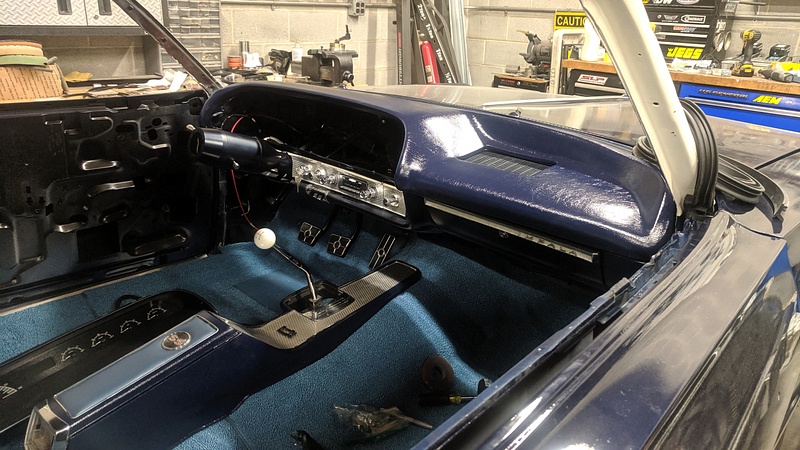
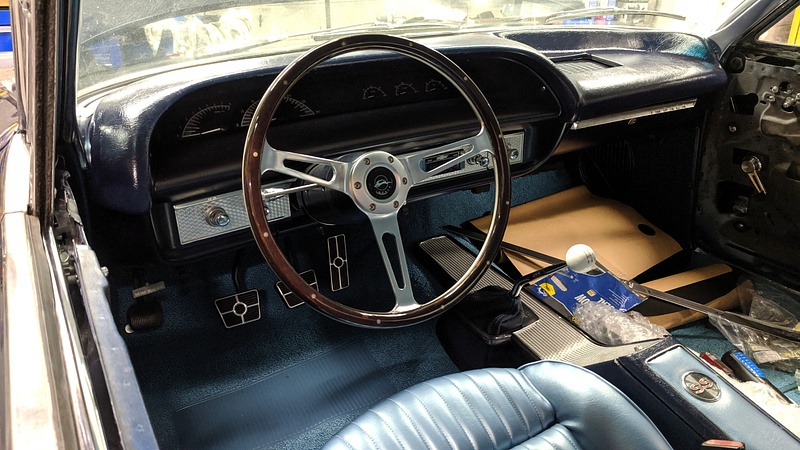
And the completed dash with the Dakota Digital cluster installed, as well as the outside trim:
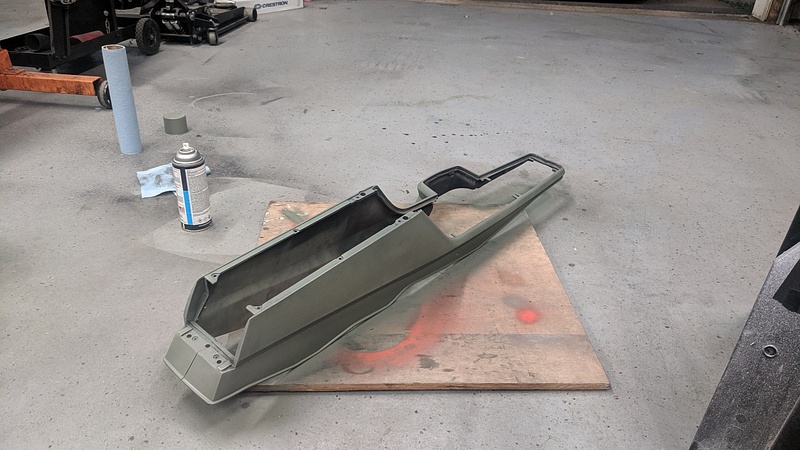
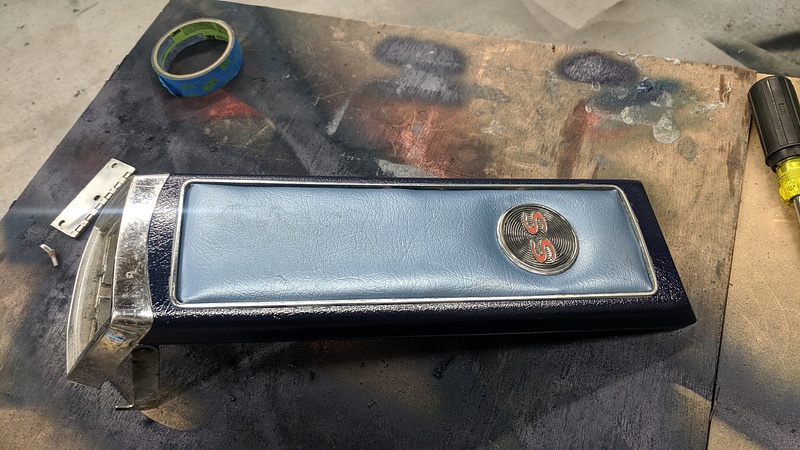
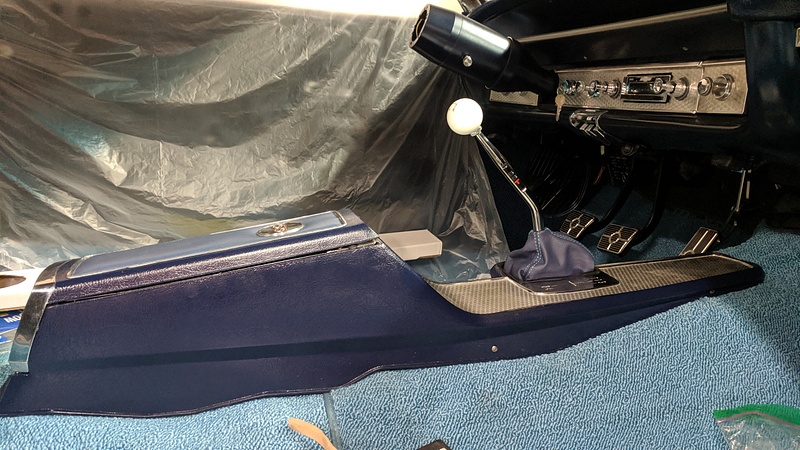
We refurbished the original console, as well:
We took leftover seat foam and material and refreshed the console lid:
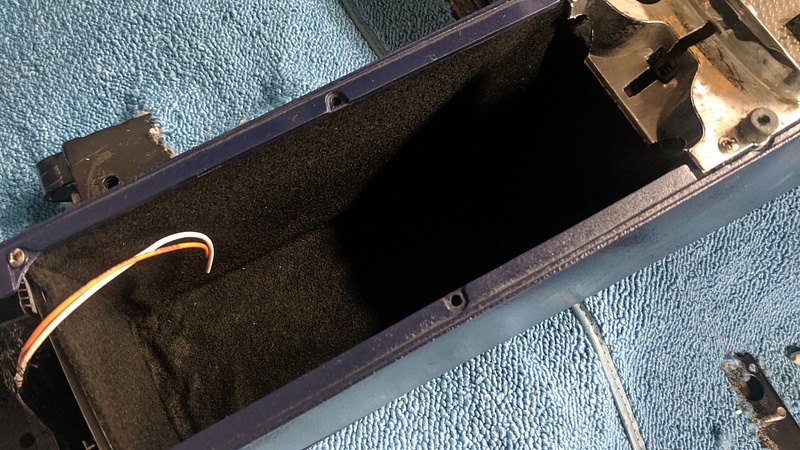
And then we bought some corrugated plastic and felt from Michael's for a total of $10 and made a new console compartment:
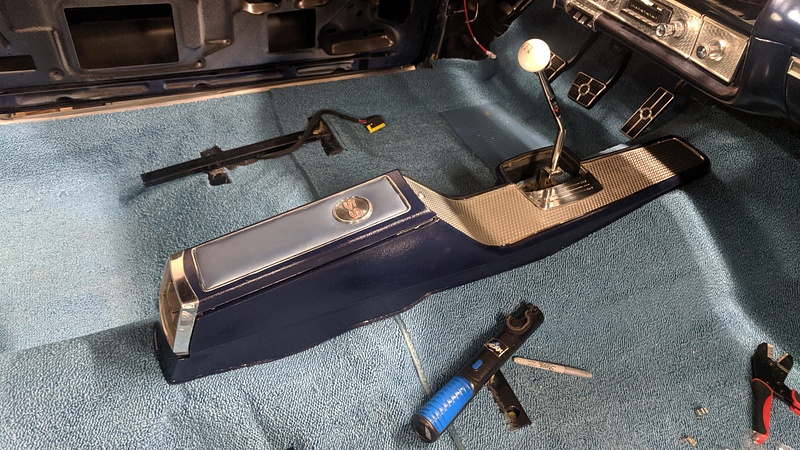
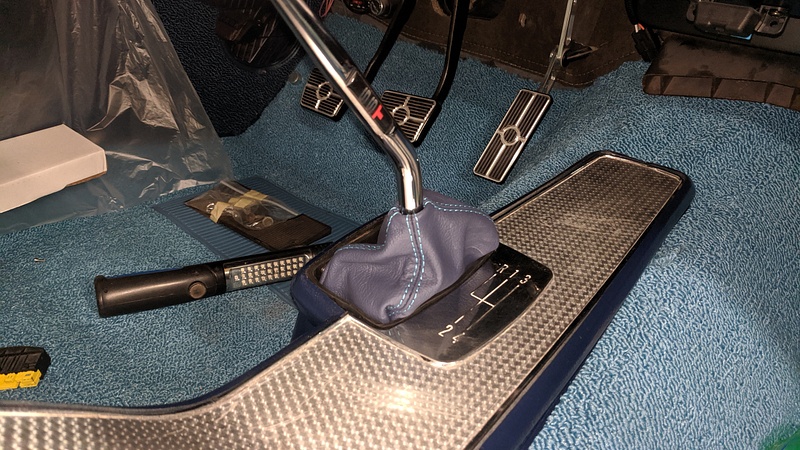
Now, one issue that we did come across is with the factory shift boot. It is just a square piece of rubber that sits recessed in the console. Unfortunately, because of this, it sat below the mounting points of the shifter handle:
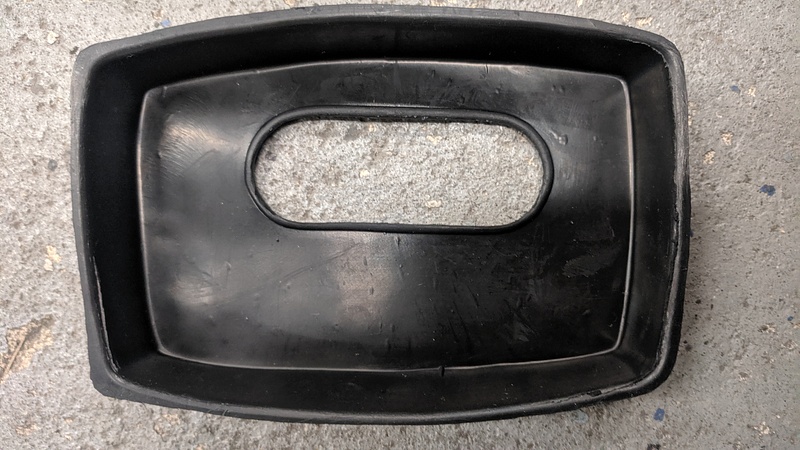
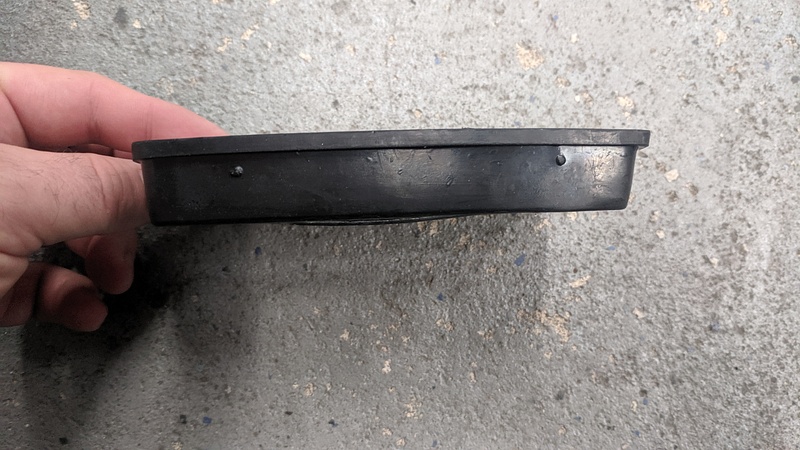
No bueno.
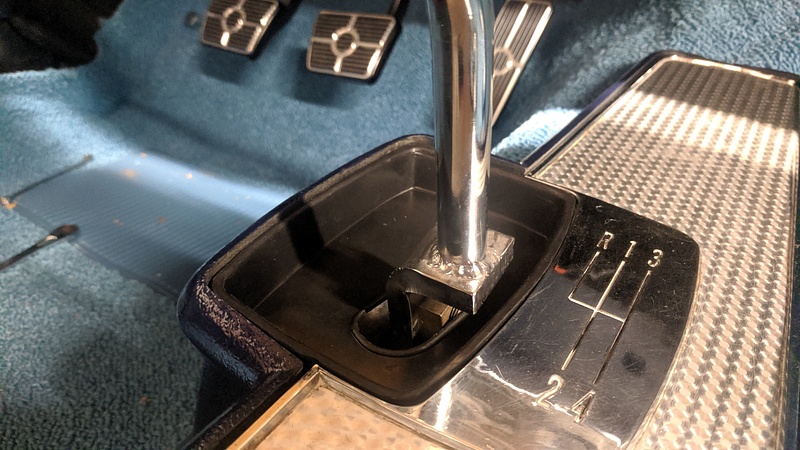
So, I placed a call to our Polish friends at Redline Goods with some measurements and had them make a custom shift boot. I had to fabricate a mounting bracket for the boot, but it came out great.
We fitted the new carpet, matching the original carpet color:
For the most part, it fit extremely well. It is nice knowing that this carpet is only glued in certain areas, unlike the original carpet that some yokel decided every square inch needed adhesive.
Then came time to install the front and rear windshield clips in preparation for the glass:
We had a company come in and install a new windshield and reinstall the original rear glass. They didn't charge extra for coming to the house. That was money well spent since they struggled with getting everything seated correctly, and even had to come back to reseat the rear gasket. Once the glass was in, the trim went on.
We also installed the dash pad, which is the original pad with a new cover glued over top and painted.
And the completed dash with the Dakota Digital cluster installed, as well as the outside trim:
We refurbished the original console, as well:
We took leftover seat foam and material and refreshed the console lid:
And then we bought some corrugated plastic and felt from Michael's for a total of $10 and made a new console compartment:
Now, one issue that we did come across is with the factory shift boot. It is just a square piece of rubber that sits recessed in the console. Unfortunately, because of this, it sat below the mounting points of the shifter handle:
No bueno.
So, I placed a call to our Polish friends at Redline Goods with some measurements and had them make a custom shift boot. I had to fabricate a mounting bracket for the boot, but it came out great.
09-20-2019, 11:53 AM
#55
TECH Fanatic
Thread Starter
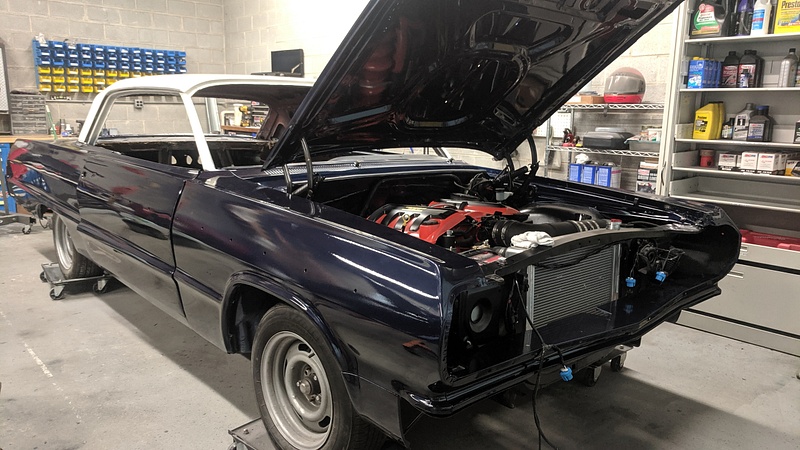
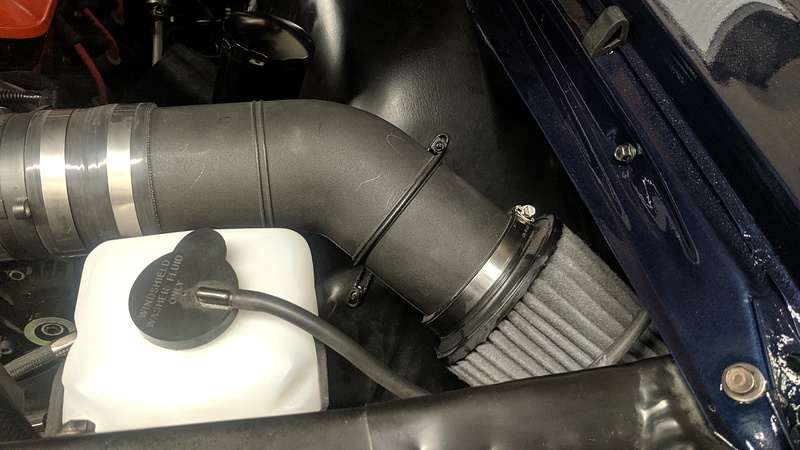
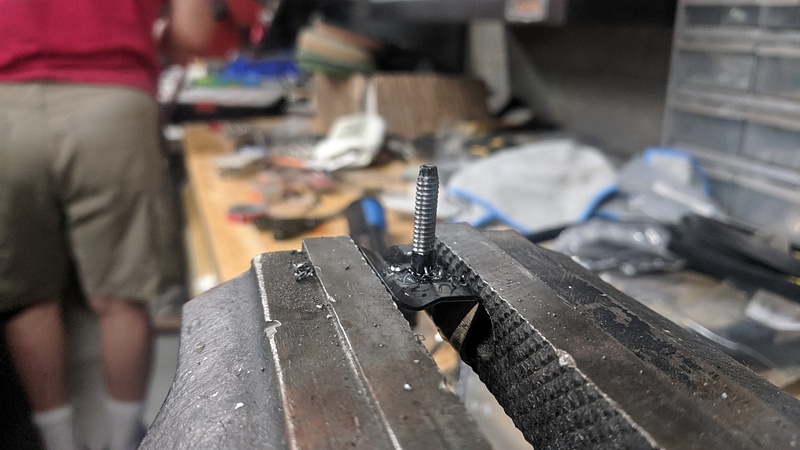
I fabricated a mounting bracket to hold the end of the air intake in place:
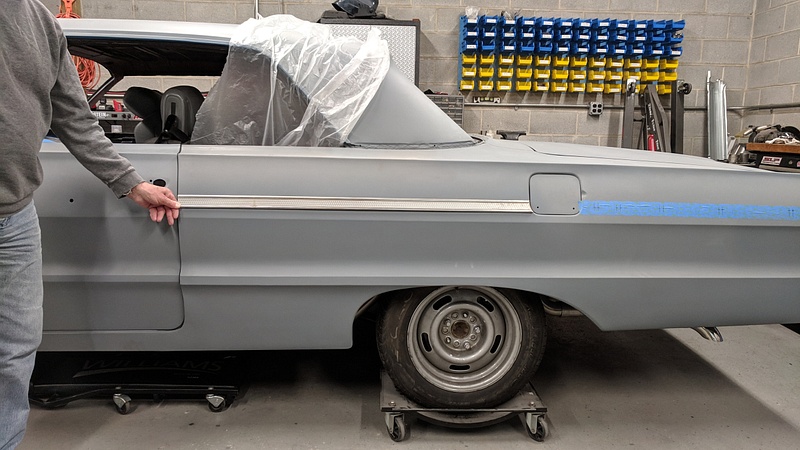
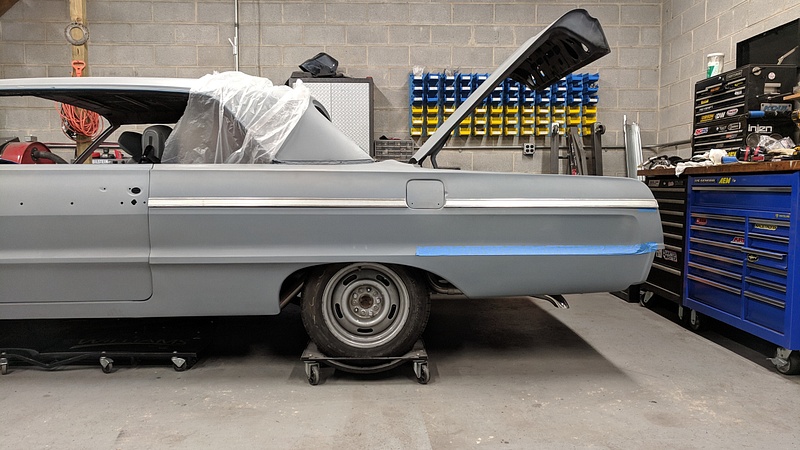
The replacement trim clips were being little ******. We had to tack each clip and then thread each stud. If we didn't, the stud would break loose and spin.
Before installing the trim, the wetsanding had to begin:
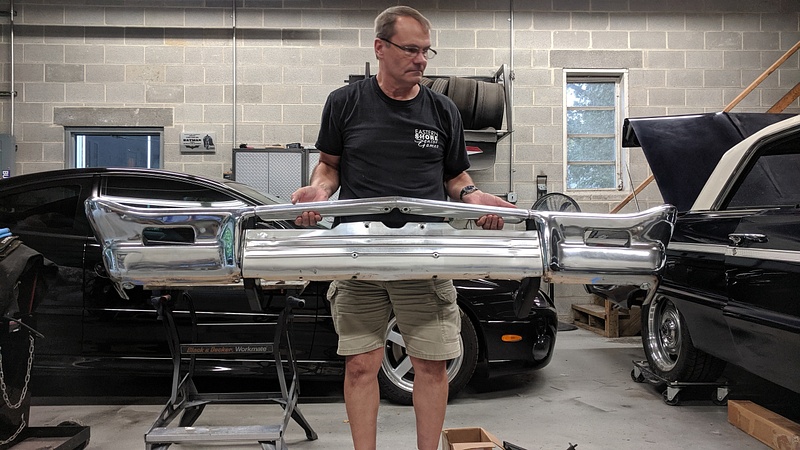
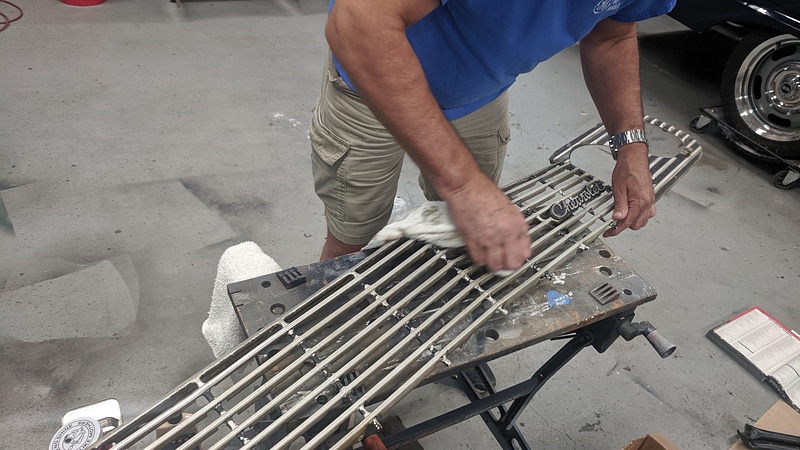
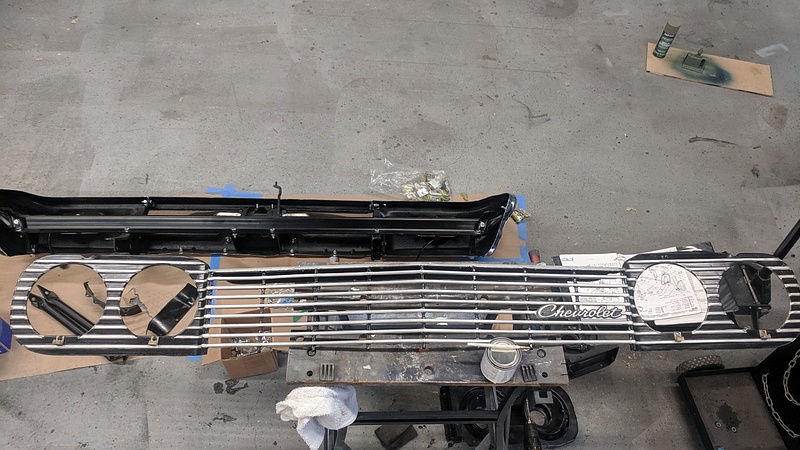
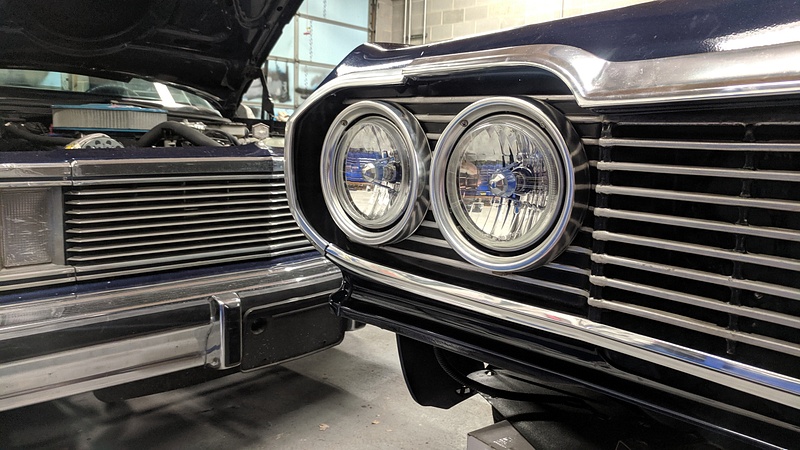
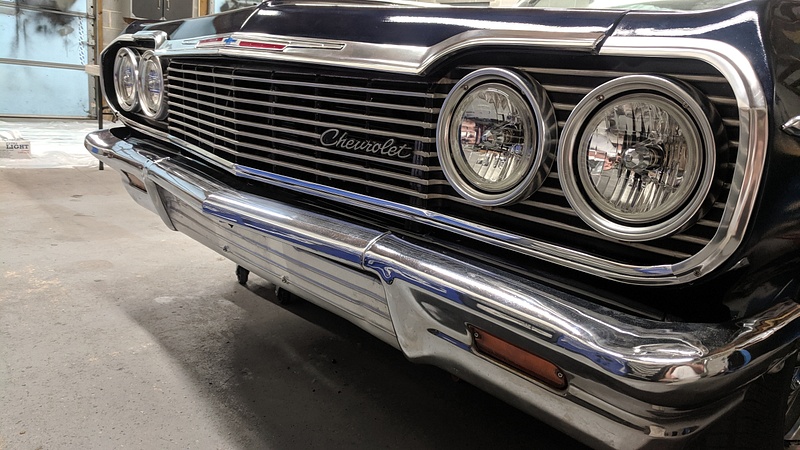
Then came time to clean up and reassemble the front bumper and grill:

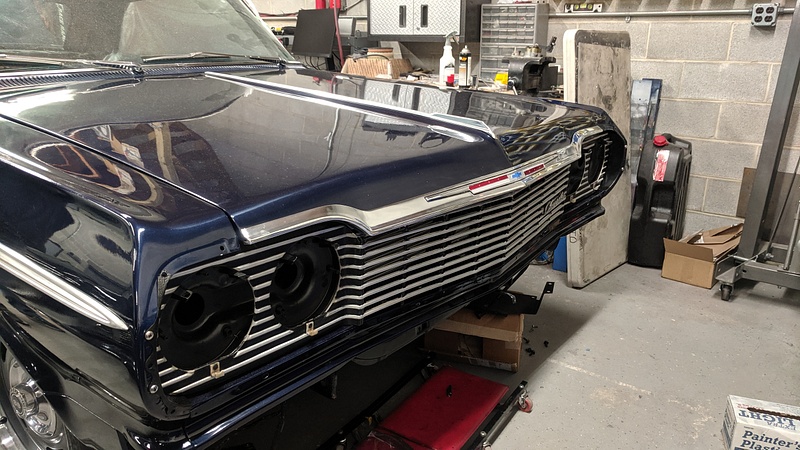
We picked up some halogen lenses from Vision X:
Next up is the side glass and the rest of the interior, starting with the headliner.
The replacement trim clips were being little ******. We had to tack each clip and then thread each stud. If we didn't, the stud would break loose and spin.
Before installing the trim, the wetsanding had to begin:
Then came time to clean up and reassemble the front bumper and grill:
We picked up some halogen lenses from Vision X:
Next up is the side glass and the rest of the interior, starting with the headliner.
09-20-2019, 04:05 PM
#56

Great job! It gives me hope that I should continue working on my basket case. I am sure your progress gives a lot of us in the same boat a lot of hope. So THANK YOU
09-26-2019, 09:57 PM
#57

Just saw this thread, great build, you guys did a huge amount of metalwork.
Gotta have more details on the C3 spindles, do you think these would swap onto stock A Arms, Or did the aftermarket arms have mods to make it work?
I have a 63 Impala, looking into better steering and suspension options, C3 spindles and brakes would be a great upgrade.
Gotta have more details on the C3 spindles, do you think these would swap onto stock A Arms, Or did the aftermarket arms have mods to make it work?
I have a 63 Impala, looking into better steering and suspension options, C3 spindles and brakes would be a great upgrade.
10-10-2019, 07:34 AM
#58
TECH Fanatic
Thread Starter
Just saw this thread, great build, you guys did a huge amount of metalwork.
Gotta have more details on the C3 spindles, do you think these would swap onto stock A Arms, Or did the aftermarket arms have mods to make it work?
I have a 63 Impala, looking into better steering and suspension options, C3 spindles and brakes would be a great upgrade.
Gotta have more details on the C3 spindles, do you think these would swap onto stock A Arms, Or did the aftermarket arms have mods to make it work?
I have a 63 Impala, looking into better steering and suspension options, C3 spindles and brakes would be a great upgrade.
However, if you are looking to upgrade steering and suspension, I would not keep the factory arms since they are rather flimsy. When it comes to the tubular stuff, though, you must go with CPP's upper A-arm. The cheaper arms are too shallow and cause too much negative camber, as we discovered.
 10-28-2019, 07:47 PM
#60
TECH Fanatic
Thread Starter
This past month has been a tumultuous roller coaster of emotion. With the deadline of my sister's wedding fast approaching, we had to kick it into gear. As Jerry Reed once put it, "We've got a long way to go and a short time to get there."
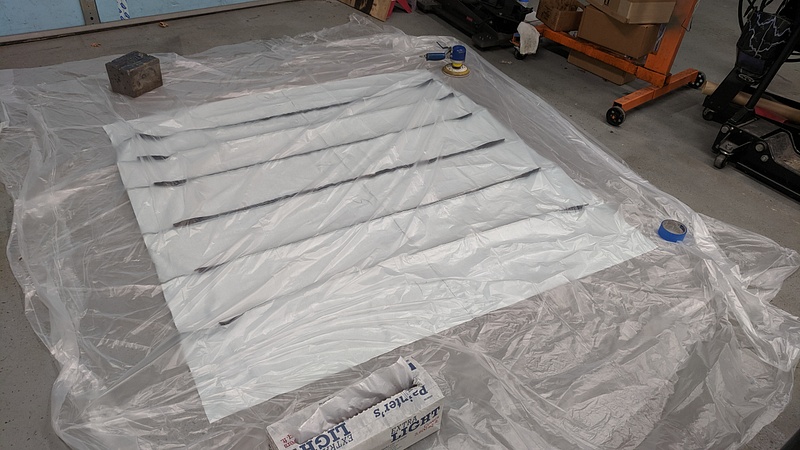
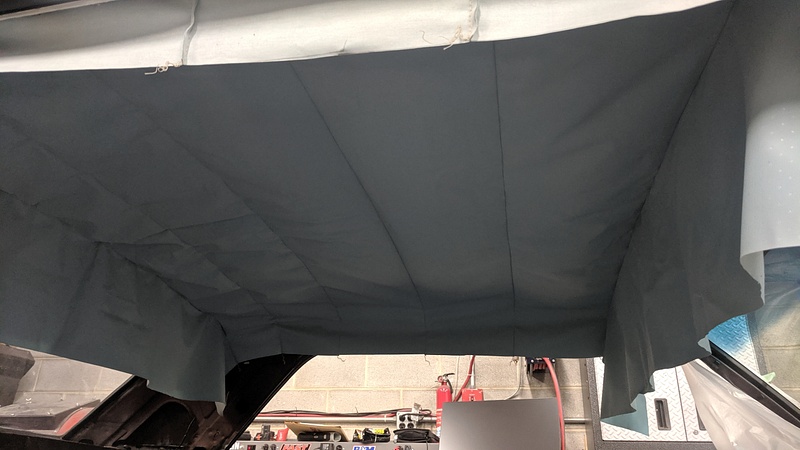
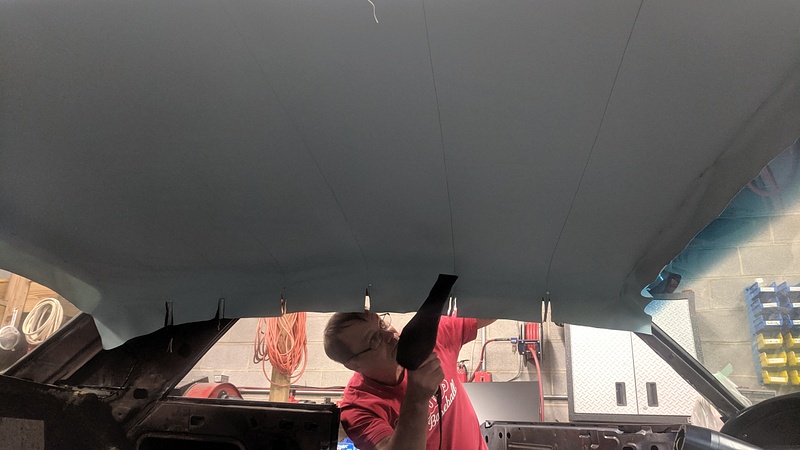
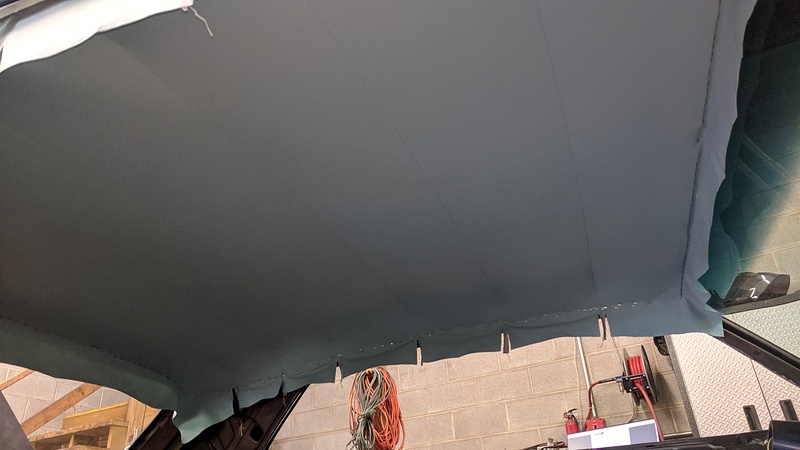
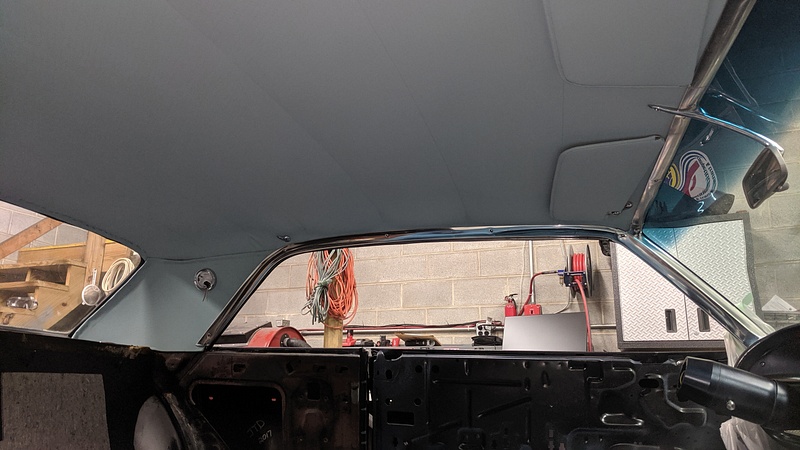
While we were assembling the front end of the grill, we had laid the headliner out so it had some time to unbox itself.
When it came time to concentrate on the interior, we glued some new matting to the ceiling:
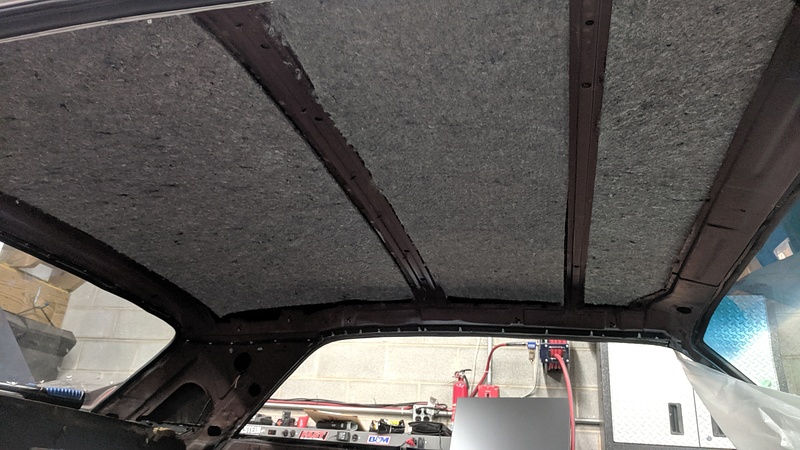
And then we followed these instructions for installing the new headliner: https://www.danchuk.com/images/Downl...-Headliner.pdf
If you ever need to install a bow-style headliner, follow those instructions and you will be fine. If us two knuckleheads can do it, you can, too.
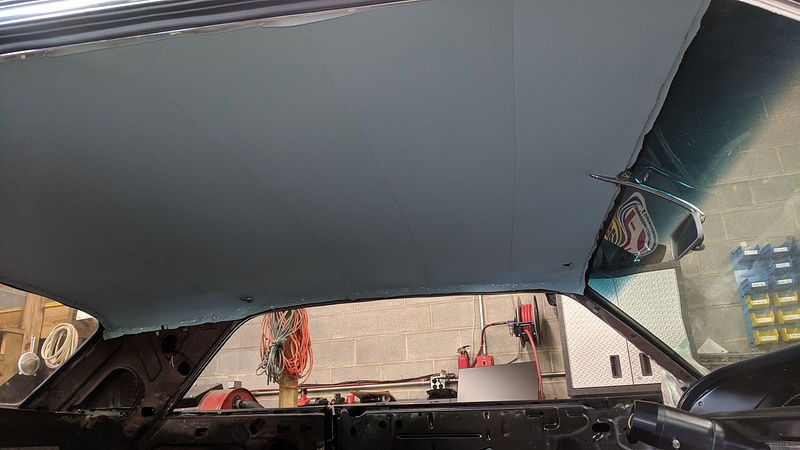
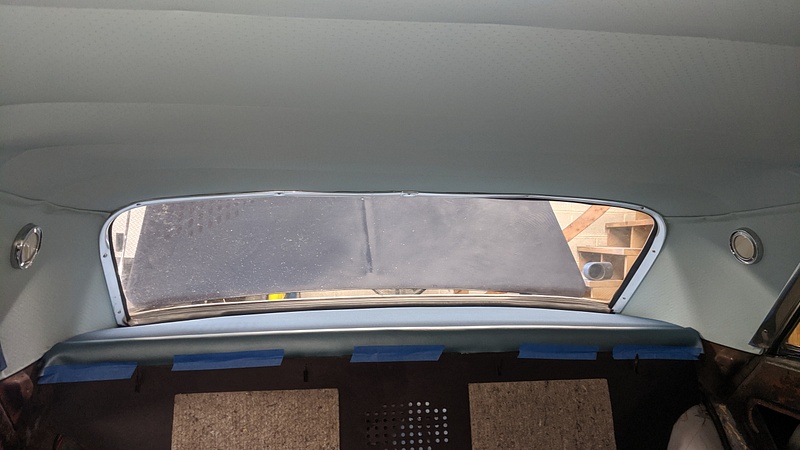
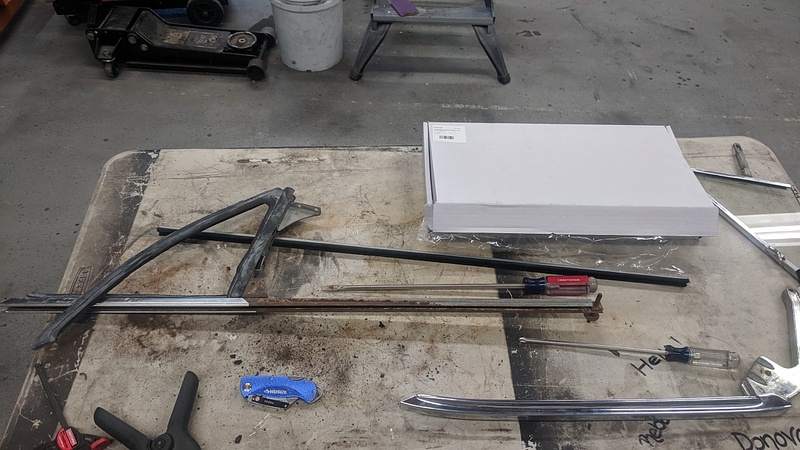
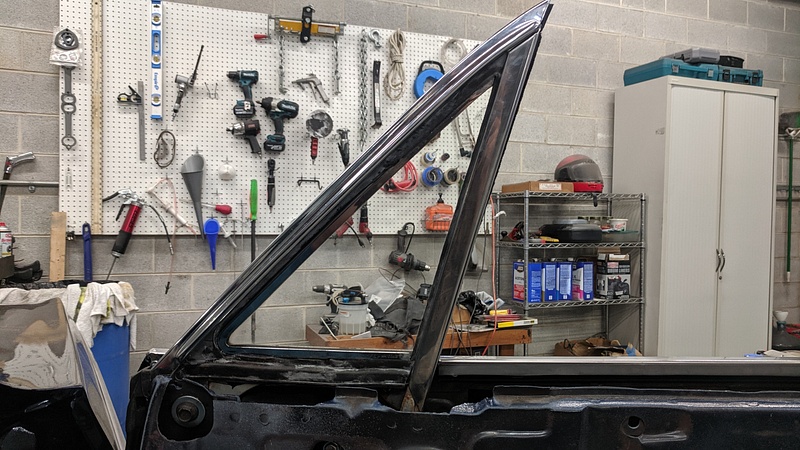
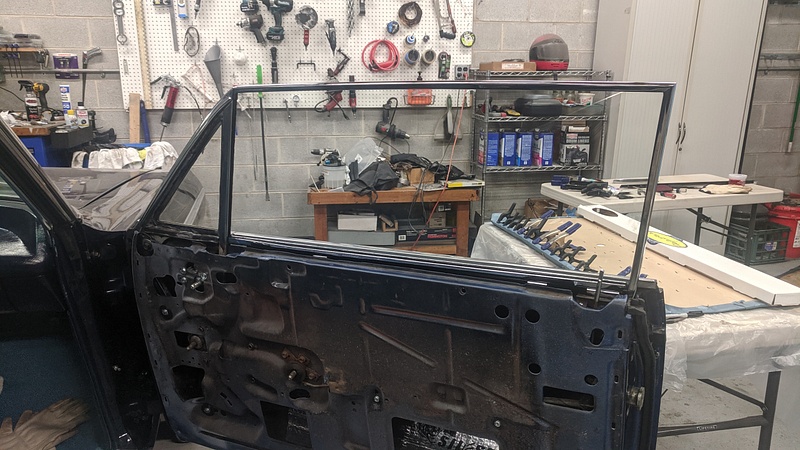
After the headliner was out of the way, it came time for the glass to get installed. Of course, this was when my dad realized the glass wasn't in as great of a shape as he remembered. So, we took to eBay to get some new/slightly used side glass. As a note of caution, the hardtop and the convertible are interchangeable with everything...EXCEPT THE DOOR GLASS. Guess how we learned that bit of trivia. With a deadline fast approaching, this isn't exactly news that you want to discover.
These pieces of glass are also a riot with their 400 different adjustments and each piece being integral to the other.
Replacing the seals in the vent windows is a real treat, too. GM took the concept of the windows all being integral to one another and applied it to the seals, too.
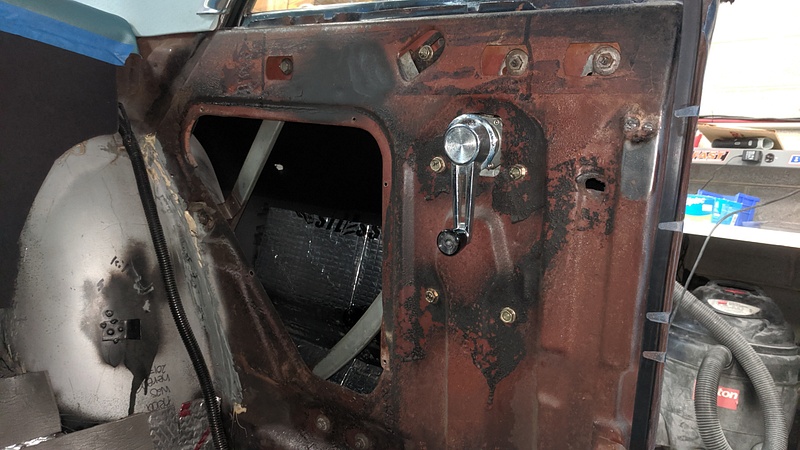
Before we could install the door glass, we had to install new rollers.
Why make an updated part that utilizes a bolt when you can reproduce it as a rivet?
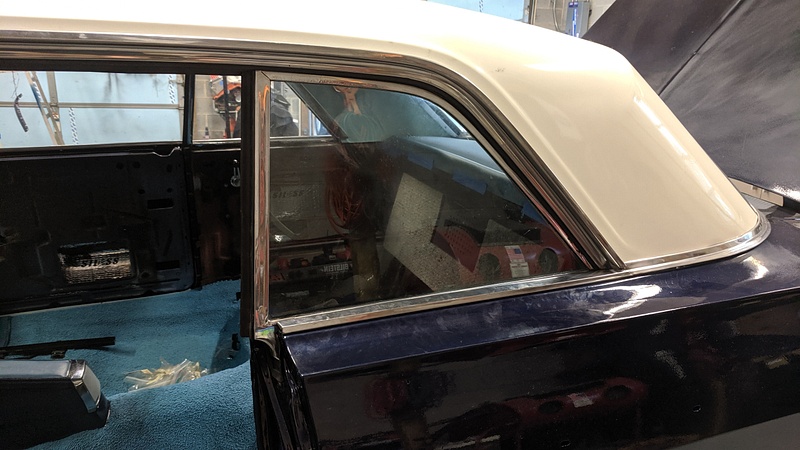
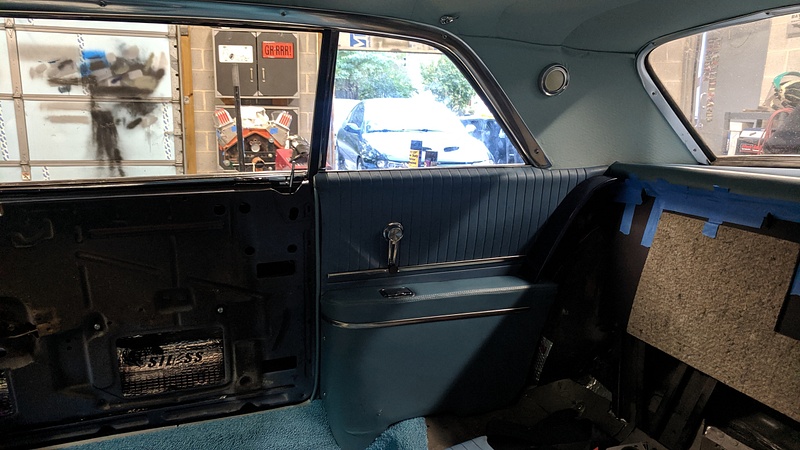
Once the glass was installed and adjusted, we were able to get the quarter interior panels in. These panels are original and cleaned up well.
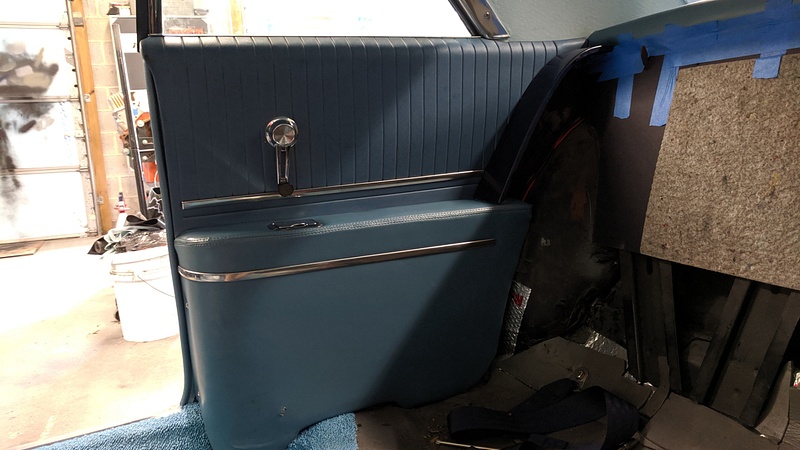
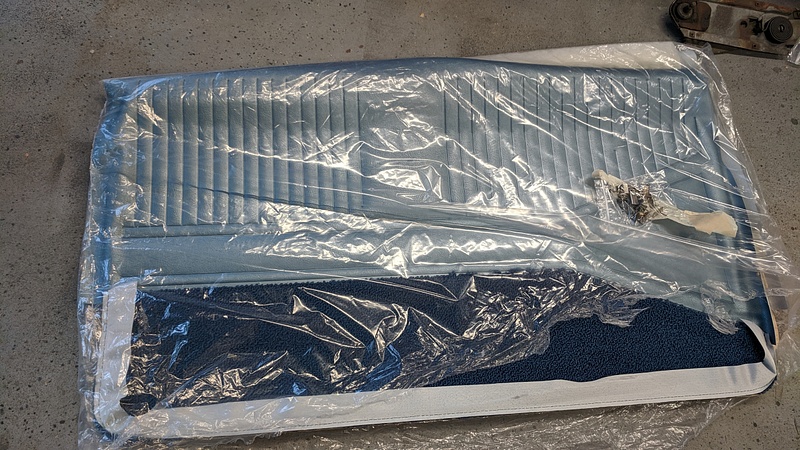
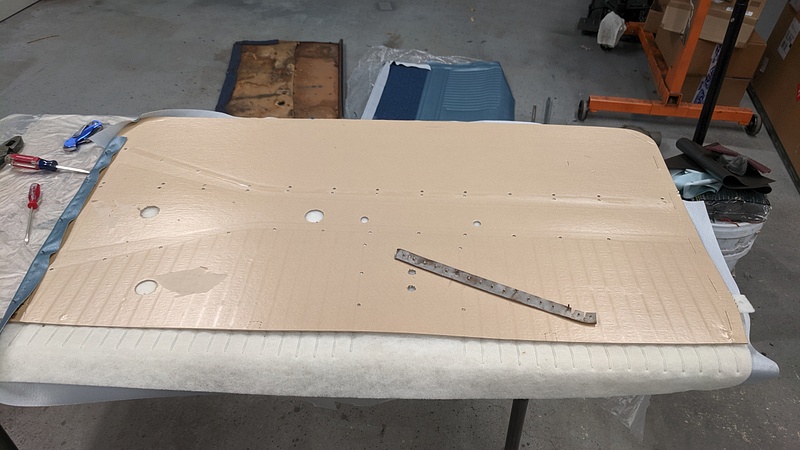
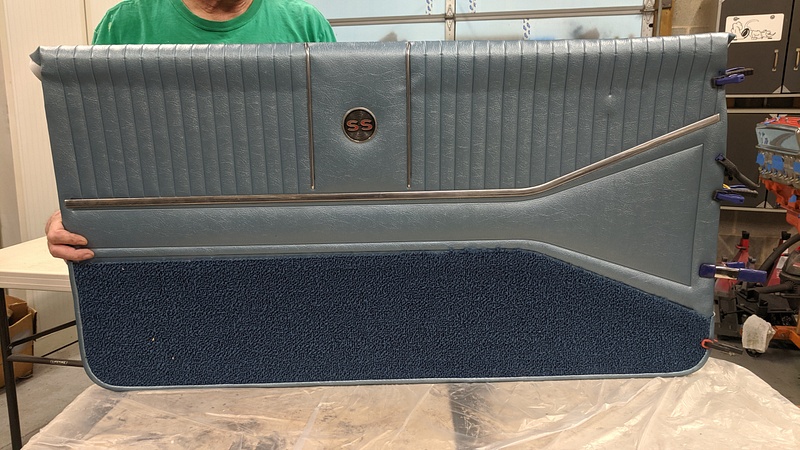
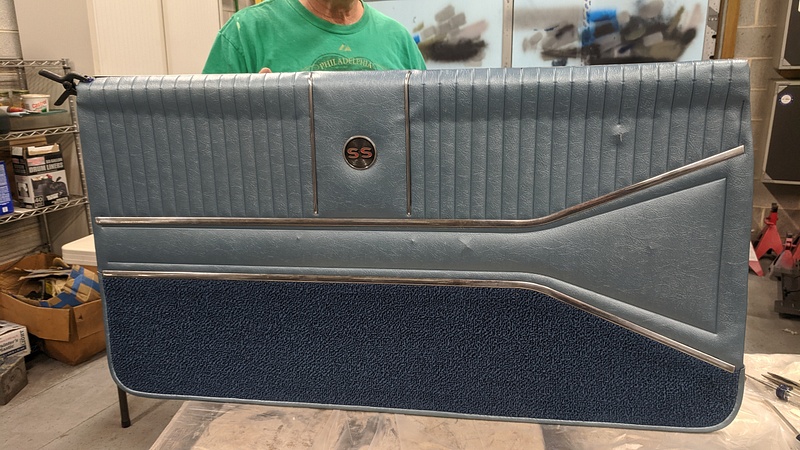
The door panels were not as lucky to be salvageable.
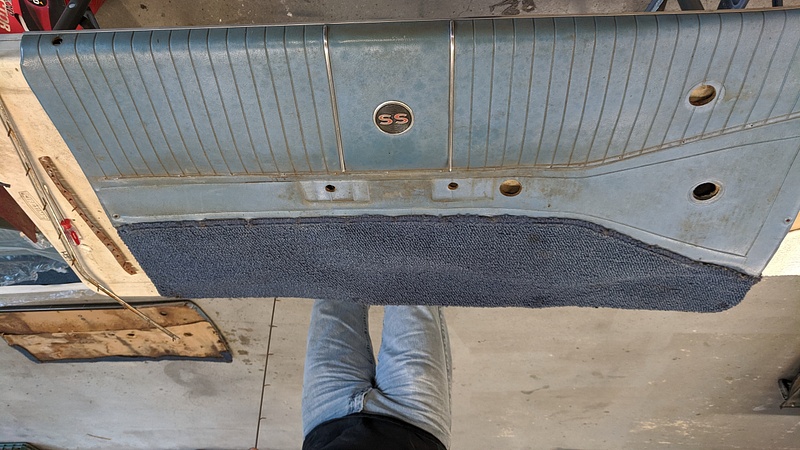
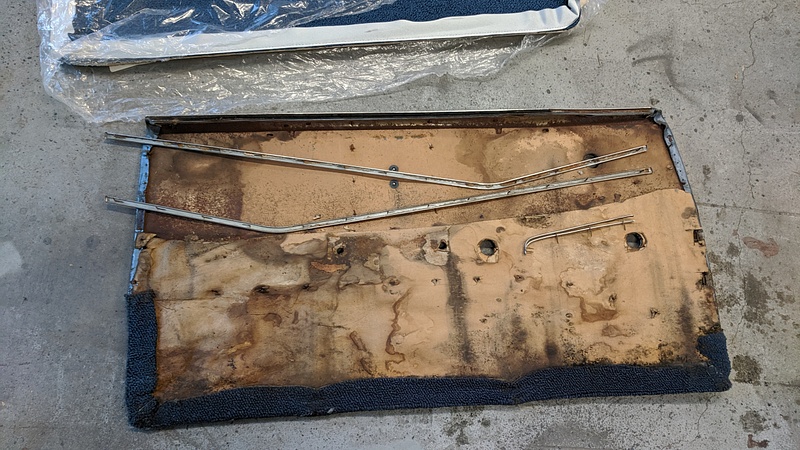
So, we removed all of the brightwork and spent time assembling the replacement door panels. Yes, I said "assembling," because that's how the factory sent them. The brightwork has teeth on the backside that puncture the panel to remain in place, so we had to make sure to get it right.
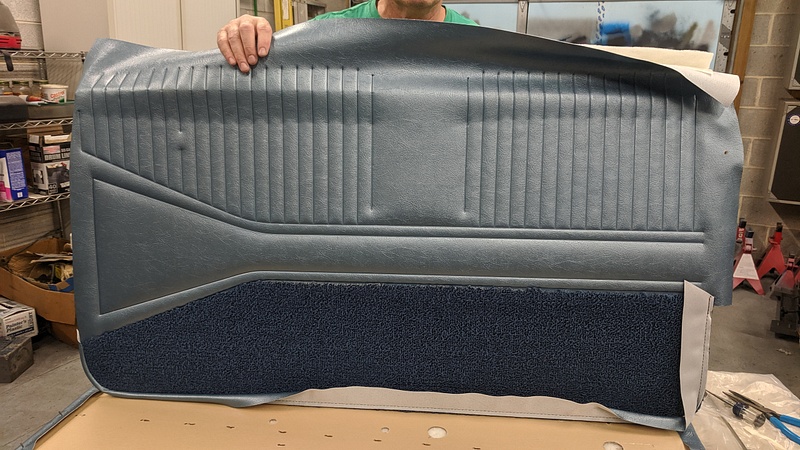
The driver side trim on the car, and holy ****, our holes lined up.
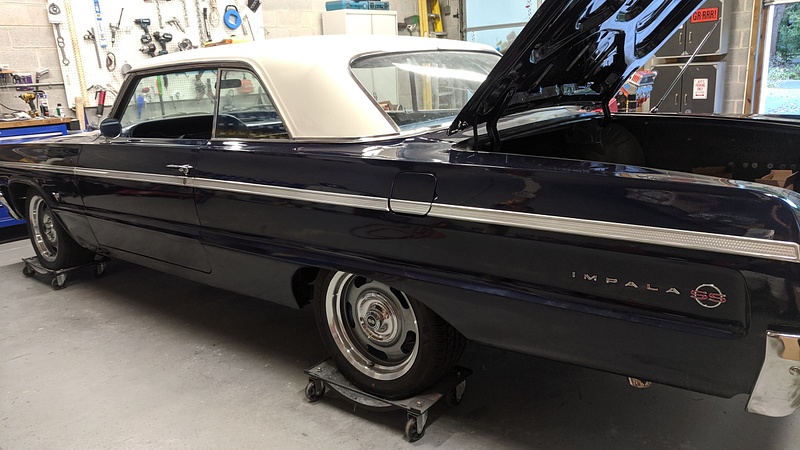
Basically, my GTO and El Camino lived outside for the duration of this crunch time. Once again, the huge garage somehow manages to not be big enough.
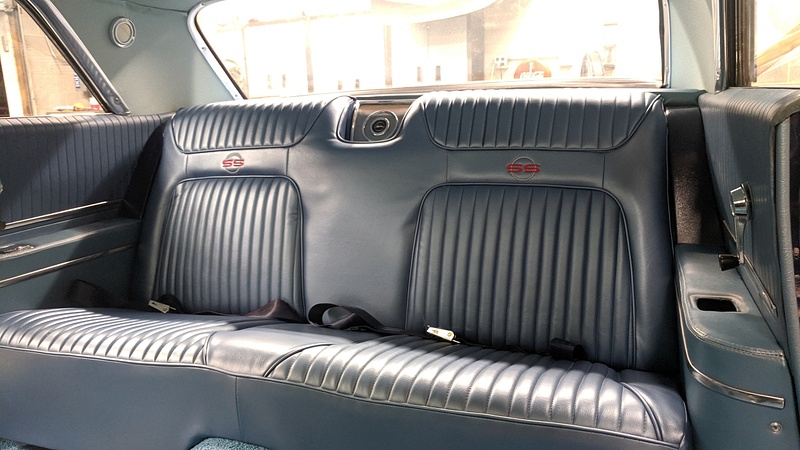
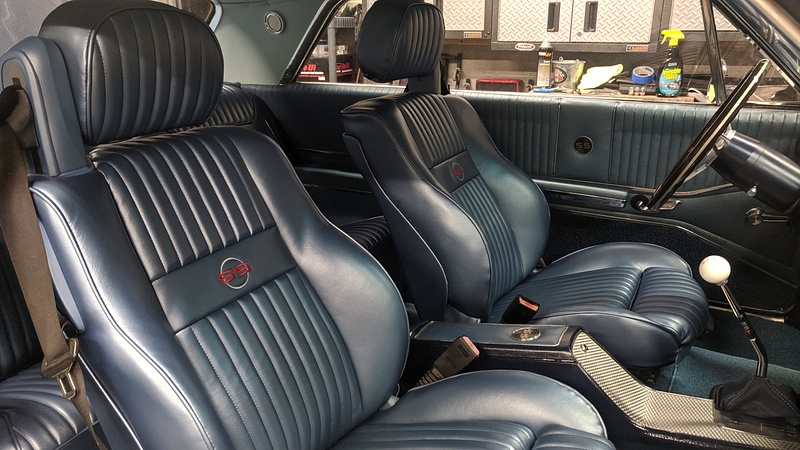
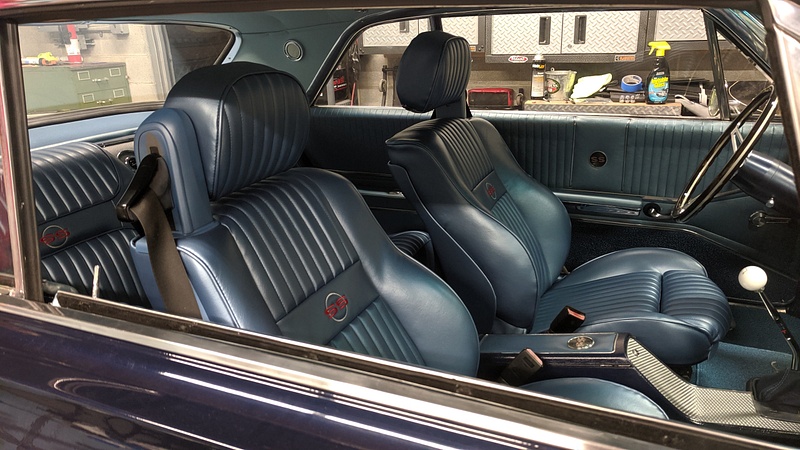
Once the rear interior panels were in, it was time to install the seats. And they turned out so nicely:
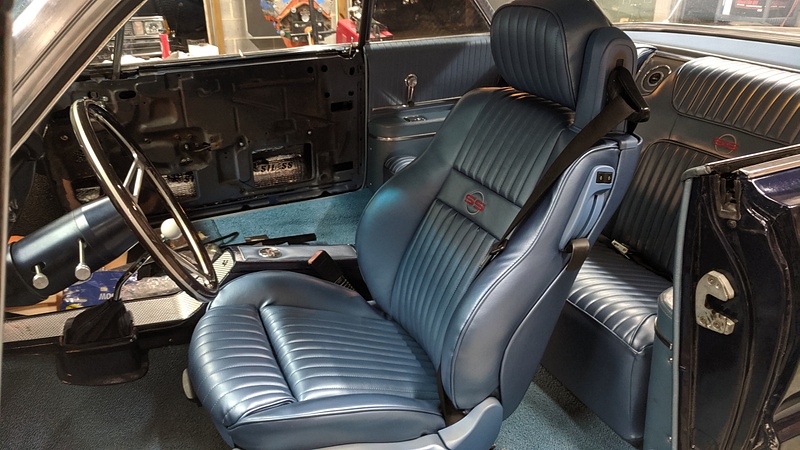
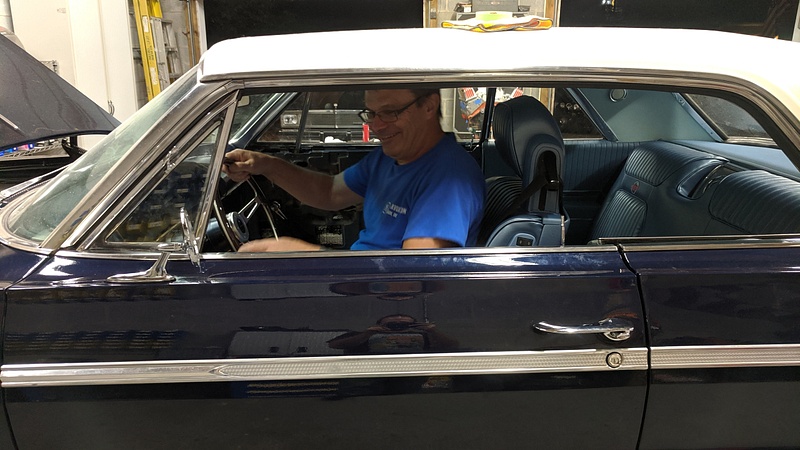
Once the rear seat was in, we put the driver seat in:
And, of course, my dad had to test out the seat...and the mirror....
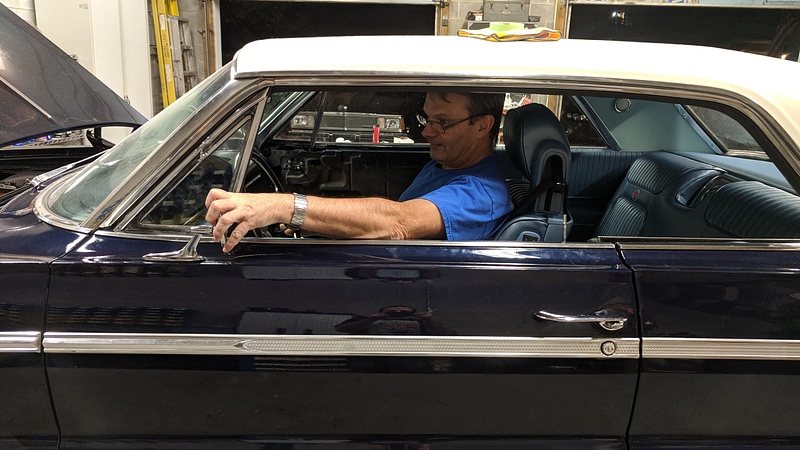
Giddy as a schoolboy:
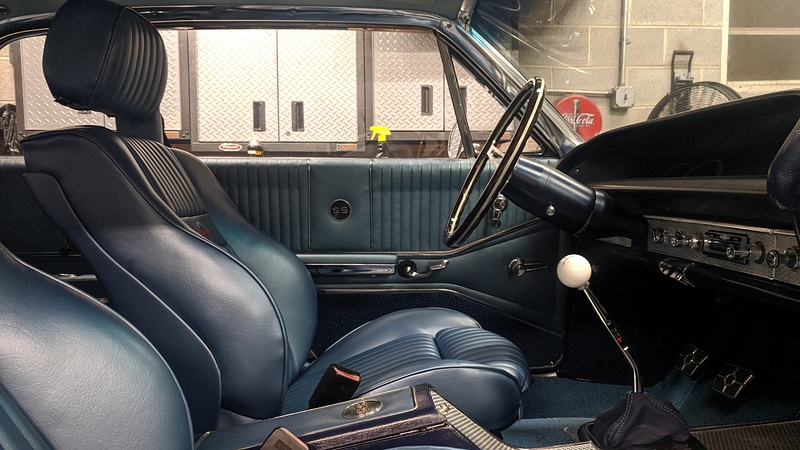
The completed interior:
While we were assembling the front end of the grill, we had laid the headliner out so it had some time to unbox itself.
When it came time to concentrate on the interior, we glued some new matting to the ceiling:
And then we followed these instructions for installing the new headliner: https://www.danchuk.com/images/Downl...-Headliner.pdf
If you ever need to install a bow-style headliner, follow those instructions and you will be fine. If us two knuckleheads can do it, you can, too.
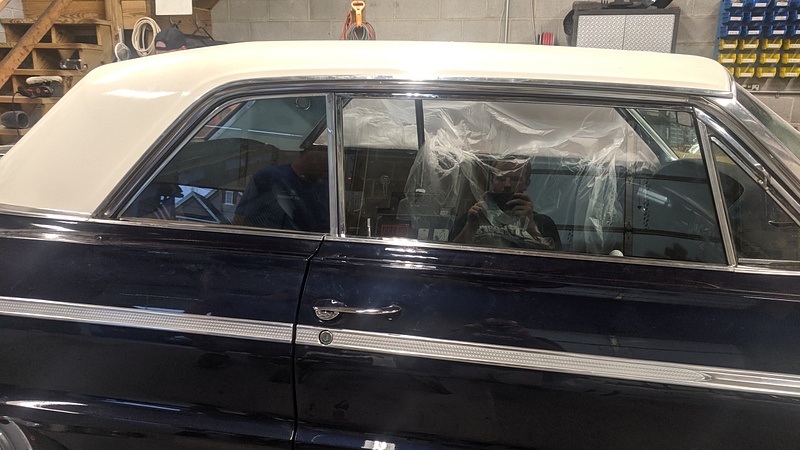
After the headliner was out of the way, it came time for the glass to get installed. Of course, this was when my dad realized the glass wasn't in as great of a shape as he remembered. So, we took to eBay to get some new/slightly used side glass. As a note of caution, the hardtop and the convertible are interchangeable with everything...EXCEPT THE DOOR GLASS. Guess how we learned that bit of trivia. With a deadline fast approaching, this isn't exactly news that you want to discover.
These pieces of glass are also a riot with their 400 different adjustments and each piece being integral to the other.
Replacing the seals in the vent windows is a real treat, too. GM took the concept of the windows all being integral to one another and applied it to the seals, too.
Before we could install the door glass, we had to install new rollers.
Why make an updated part that utilizes a bolt when you can reproduce it as a rivet?
Once the glass was installed and adjusted, we were able to get the quarter interior panels in. These panels are original and cleaned up well.
The door panels were not as lucky to be salvageable.
So, we removed all of the brightwork and spent time assembling the replacement door panels. Yes, I said "assembling," because that's how the factory sent them. The brightwork has teeth on the backside that puncture the panel to remain in place, so we had to make sure to get it right.
The driver side trim on the car, and holy ****, our holes lined up.
Basically, my GTO and El Camino lived outside for the duration of this crunch time. Once again, the huge garage somehow manages to not be big enough.
Once the rear interior panels were in, it was time to install the seats. And they turned out so nicely:
Once the rear seat was in, we put the driver seat in:
And, of course, my dad had to test out the seat...and the mirror....
Giddy as a schoolboy:
The completed interior:
The following users liked this post:
kpeters59 (10-29-2019)