
1964 Impala SS - 5.3, TKO 500 Swap/Restoration
 09-18-2018, 08:50 PM
#1
TECH Fanatic
Thread Starter

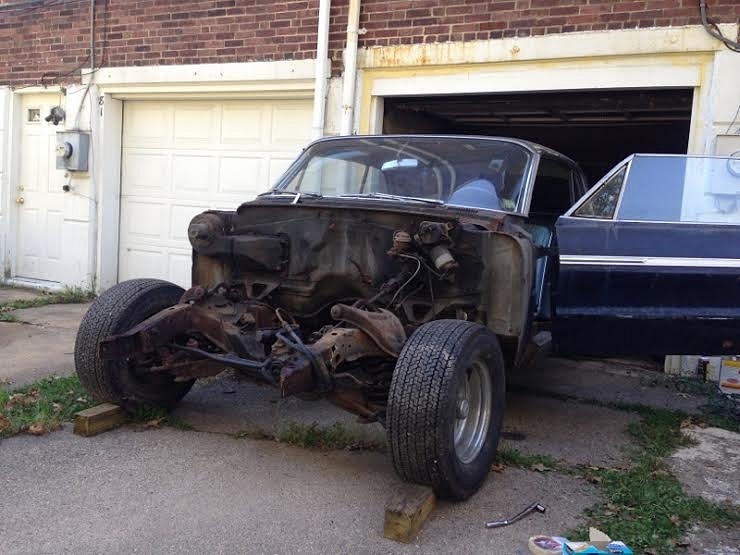
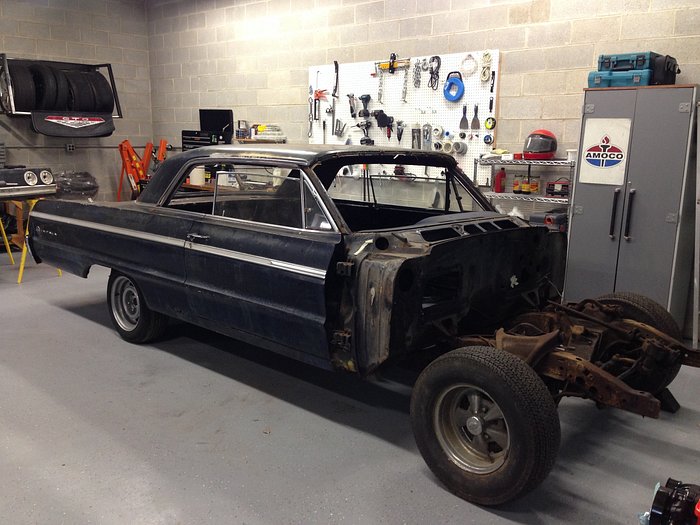
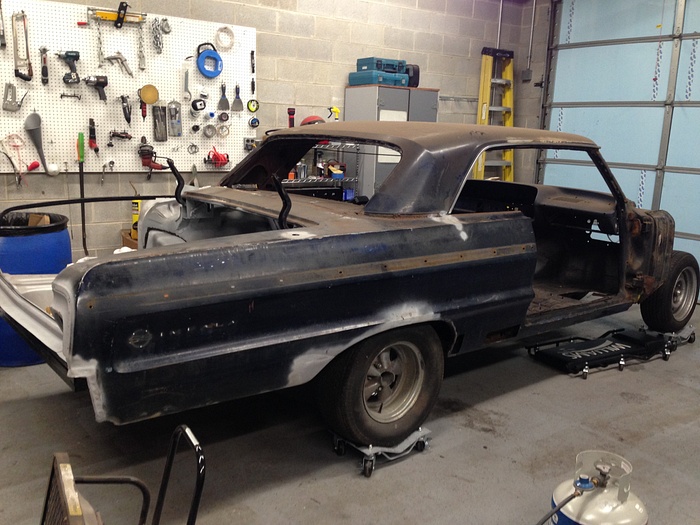
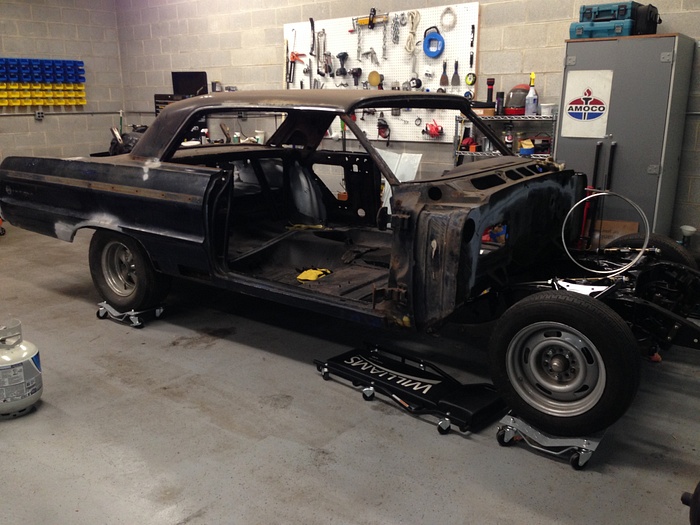
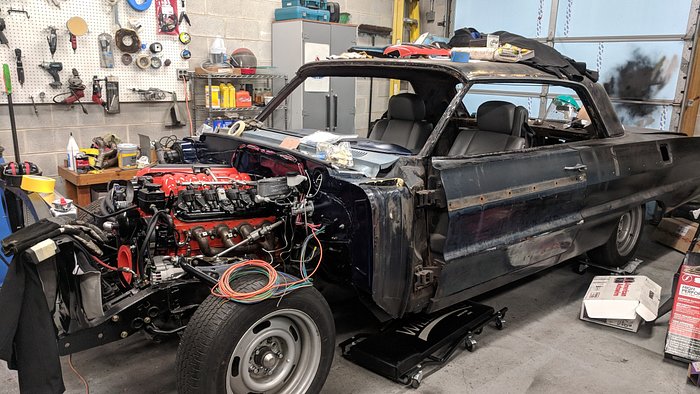
Back in 2014, my dad bought a 64 Impala SS two door hardtop. It is a true SS and was originally a 327/4 speed car. However, the original motor and trans were long gone. It made it the perfect candidate for the 5.3 swap that we wanted to do.

The nice thing about it is that it had almost all of the trim and interior pieces, which was a huge plus. After decoding the VIN, my dad realized that the car was assembled at the Boxwood plant in Wilmington, De, which is awesome since we are both Delaware natives and essentially have brought the old girl home. It hasn't been an easy or short process, but it has been rewarding. Our first indication that this was going to be arduous was the trailer having a blowout on the trip back home.

Nevertheless, much like that early challenge, we have overcome each obstacle that has crossed our paths. And since this thing turned out to be such a rusted pile, we have been presented with a ton of challenges.
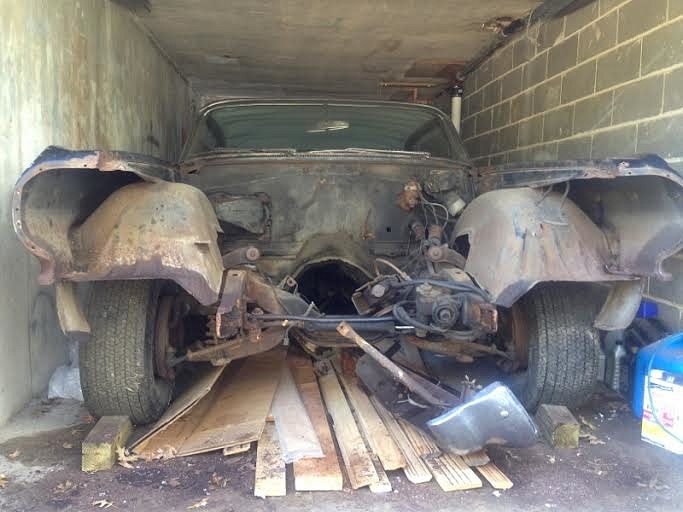
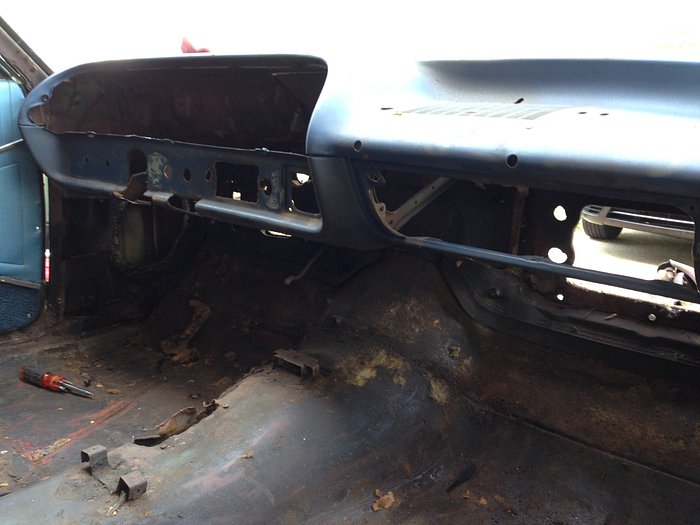
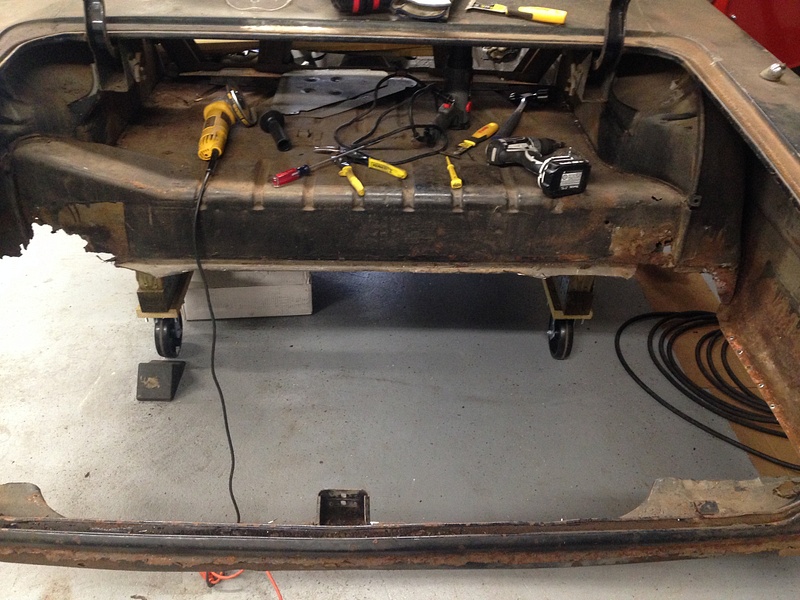
Initially, my dad wanted to keep the car at his house, which has a tiny one-car garage that required us to push the car onto the driveway to get any work done on it. The front end and the interior were disassembled there.
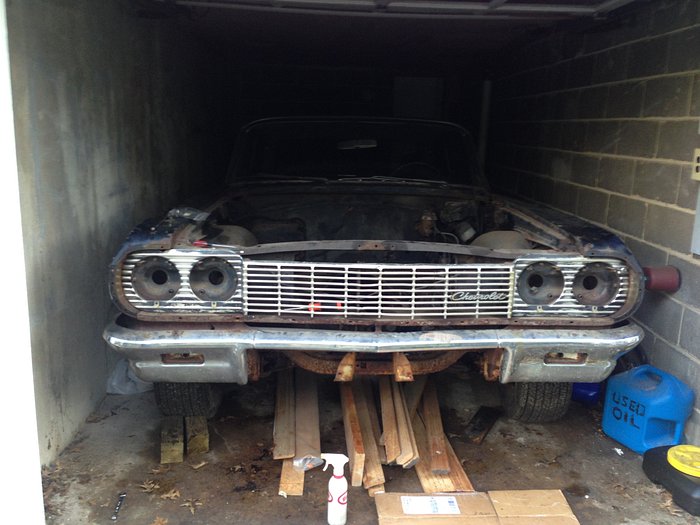
Notice the tight quarters.
The nice thing about it is that it had almost all of the trim and interior pieces, which was a huge plus. After decoding the VIN, my dad realized that the car was assembled at the Boxwood plant in Wilmington, De, which is awesome since we are both Delaware natives and essentially have brought the old girl home. It hasn't been an easy or short process, but it has been rewarding. Our first indication that this was going to be arduous was the trailer having a blowout on the trip back home.
Nevertheless, much like that early challenge, we have overcome each obstacle that has crossed our paths. And since this thing turned out to be such a rusted pile, we have been presented with a ton of challenges.
Initially, my dad wanted to keep the car at his house, which has a tiny one-car garage that required us to push the car onto the driveway to get any work done on it. The front end and the interior were disassembled there.
Notice the tight quarters.
Last edited by MuhThugga; 09-19-2018 at 01:48 PM.
 09-18-2018, 09:01 PM
#2
TECH Fanatic
Thread Starter
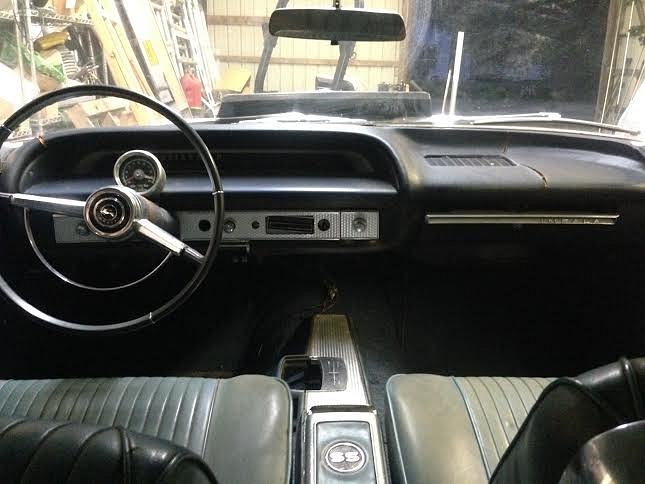
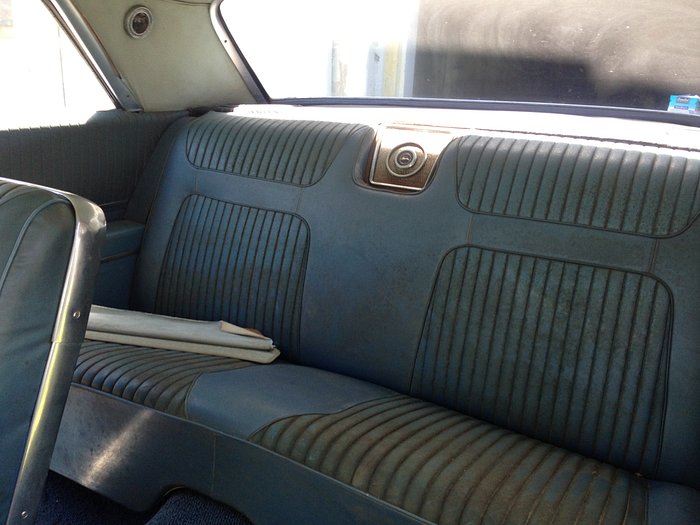
As I said, the interior was all mostly there, which is a good thing.
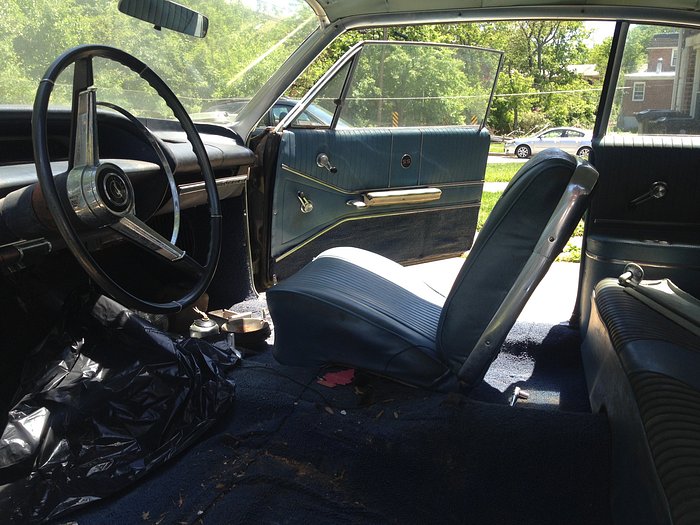
Of course, as it turned out, someone went completely insane with the carpet adhesive.
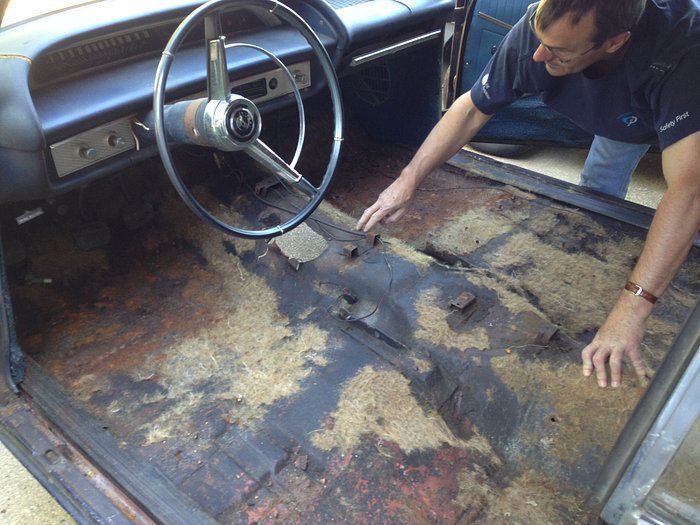
But the interior came apart without much issue.
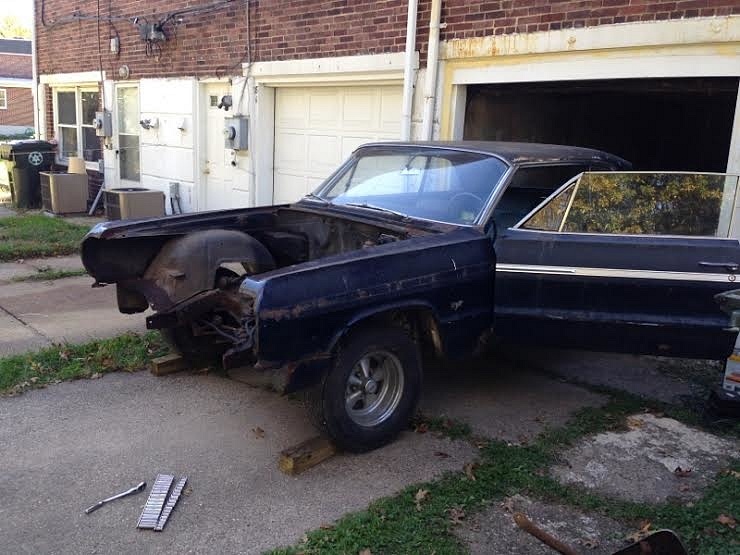
Since it was evident that the car was going to require more space than what was currently available, and since I was looking to buy a house anyways, I came across a garage that happened to come with a house.
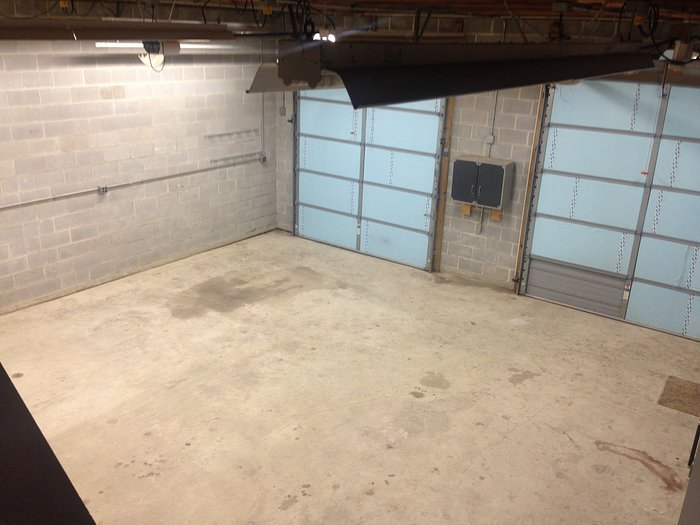
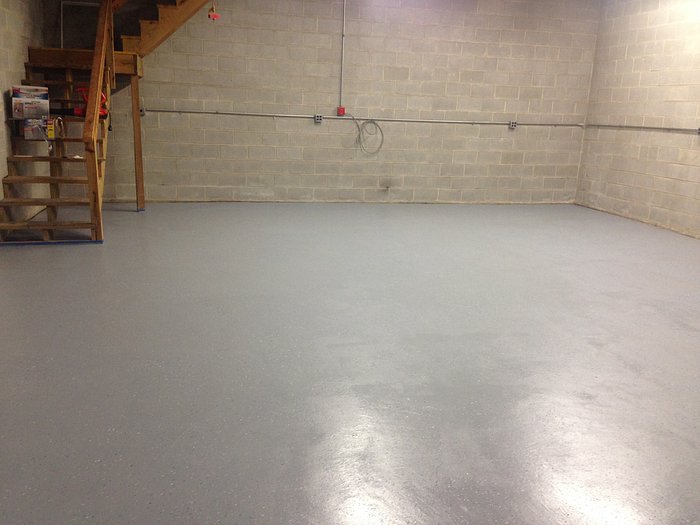
And in October of 2015, the Impala moved in.

And that's when the real fun began.
Of course, as it turned out, someone went completely insane with the carpet adhesive.
But the interior came apart without much issue.
Since it was evident that the car was going to require more space than what was currently available, and since I was looking to buy a house anyways, I came across a garage that happened to come with a house.
And in October of 2015, the Impala moved in.
And that's when the real fun began.
Last edited by MuhThugga; 09-19-2018 at 01:48 PM.
09-18-2018, 09:18 PM
#3
TECH Fanatic
Thread Starter
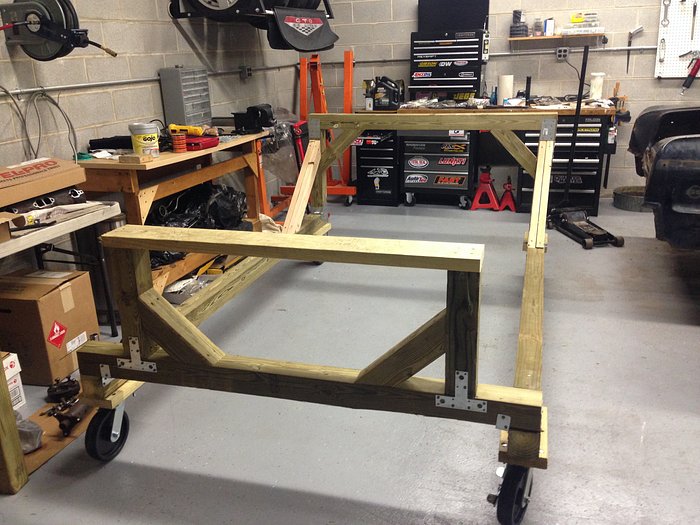
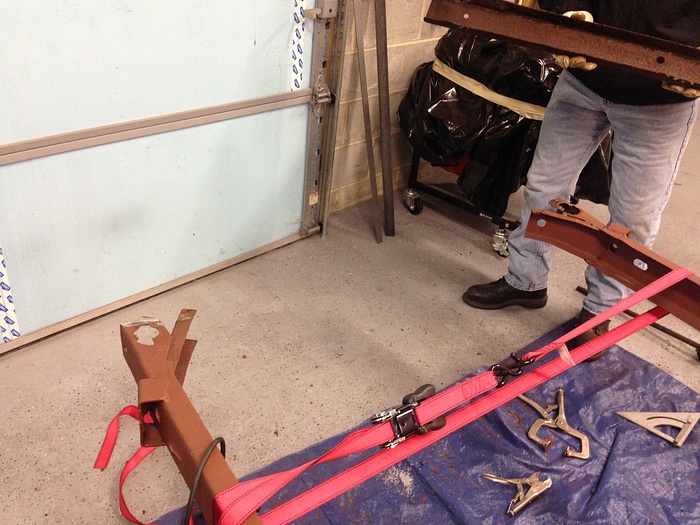
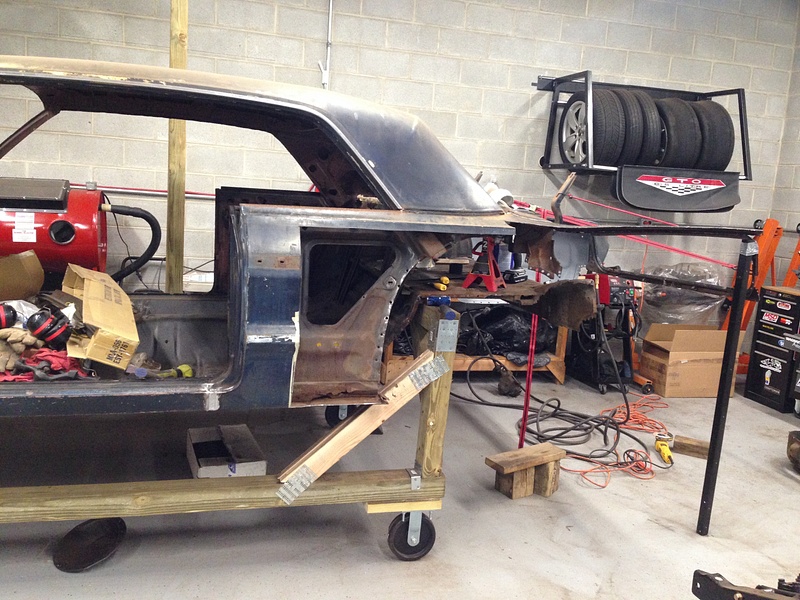
The first thing we did was get our asses to Lowe's and buy some lumber to make a body dolly.
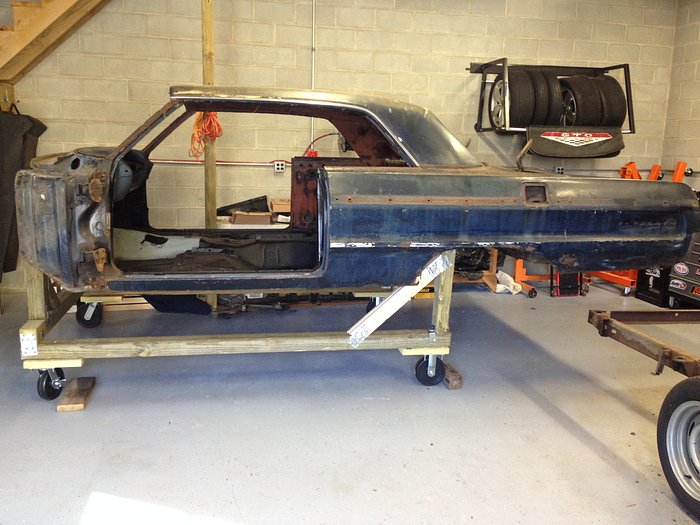
How did we get the body off? I gathered about 8 people and we gave it the ole heave-ho. One thing to note: it was at this point that we realized that the driveshaft was a one-piece unit. Even further, my uncle noticed that it was a factory driveshaft. Once removed, we saw the markings "68 Chevelle." What I failed to mention earlier in the thread is that the car came with a Muncie M21 and a 12 bolt. The guy had a 396 big block that he would have thrown in with the car for additional money, but we told him to keep it because we were going to do a 5.3 swap anyways. After checking the numbers on the 12 bolt and the Muncie, they were both from 1968. It looks like, at some point, someone had swapped in a complete 68 Chevelle big block drivetrain. The only thing missing were the Chevelle brackets on the 12 bolt, which were cut off to have the Impala brackets welded on. That effectively means that in our rejecting the 396, we rejected a numbers matching Chevelle drivetrain. God. Damn. It.
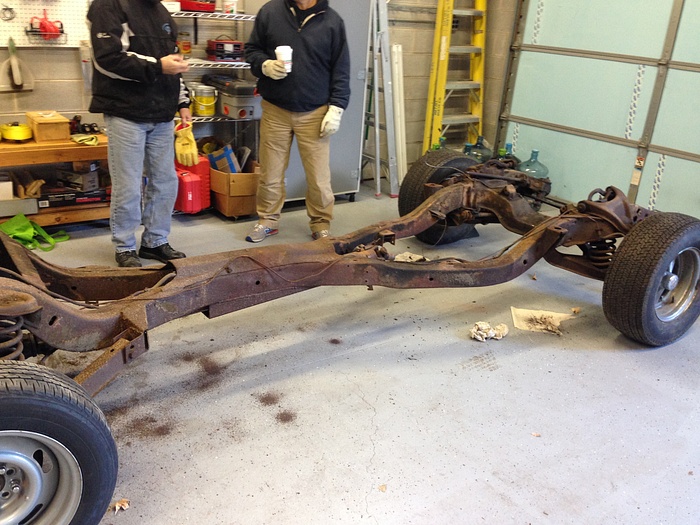
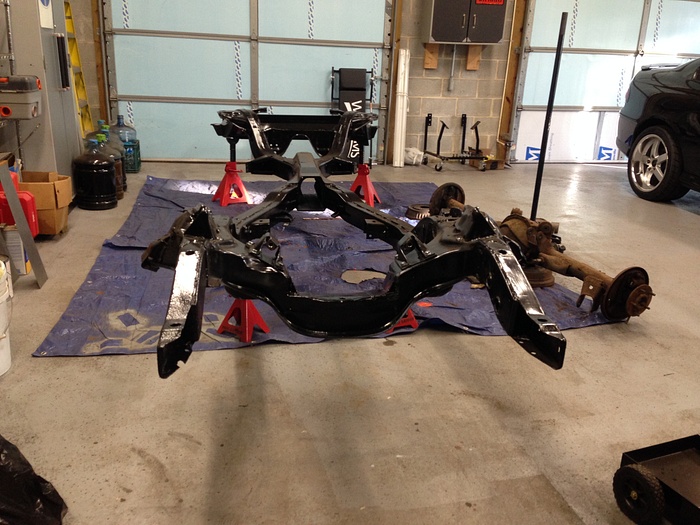
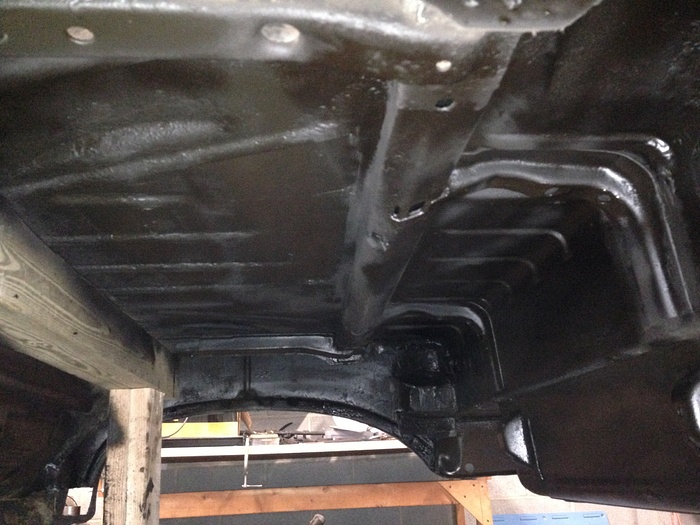
We stripped down the frame and wirebrushed the hell out of it.
Originally, we were going to have it blasted and coated, but after getting stupid pricing estimates along with the prerequisite that we need to remove the heavy dirt ourselves, we opted for good ol' Rustoleum and some brushes:
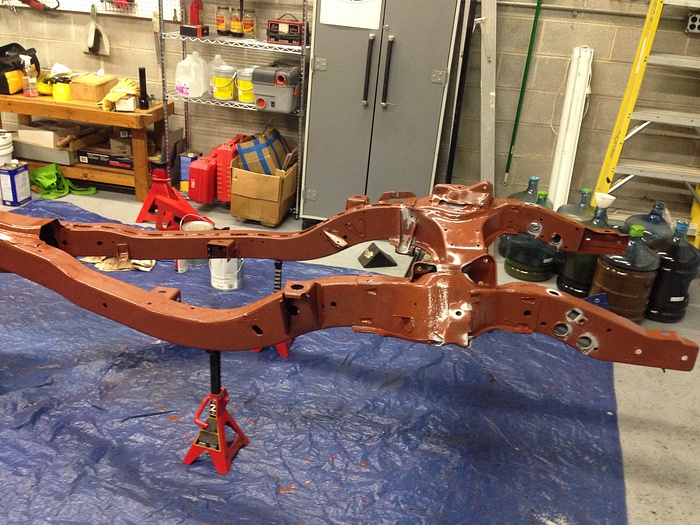
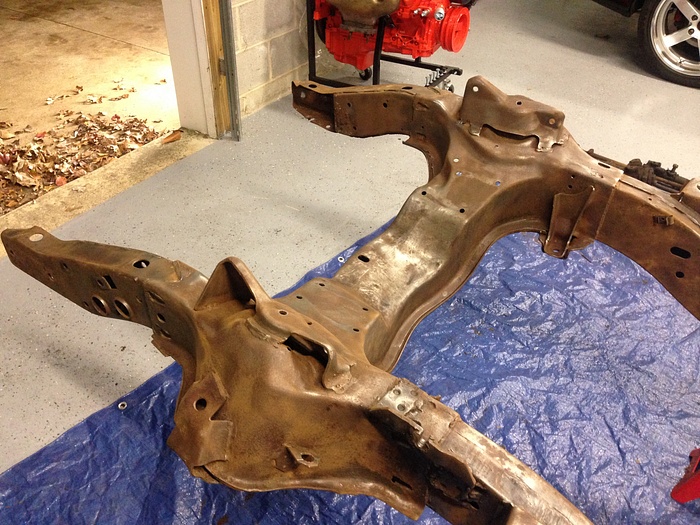
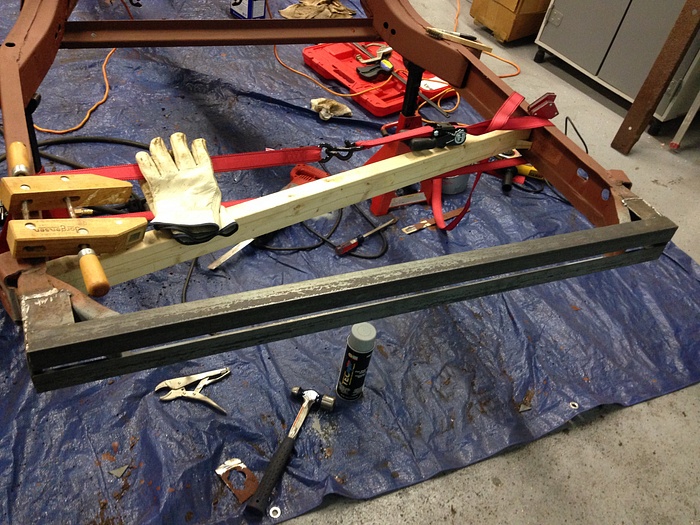
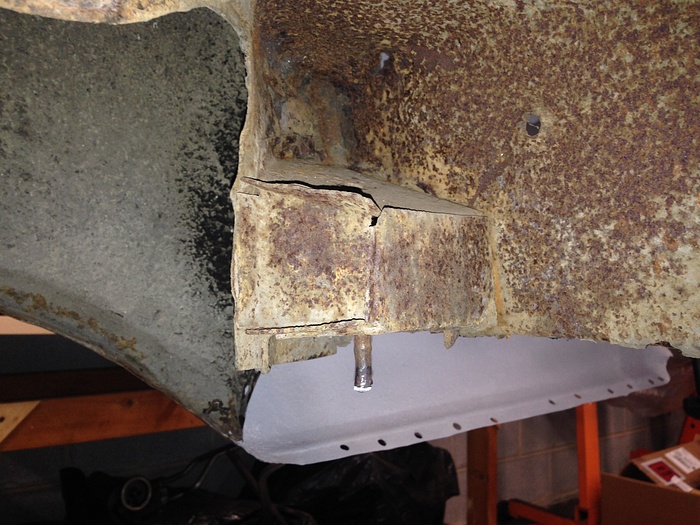
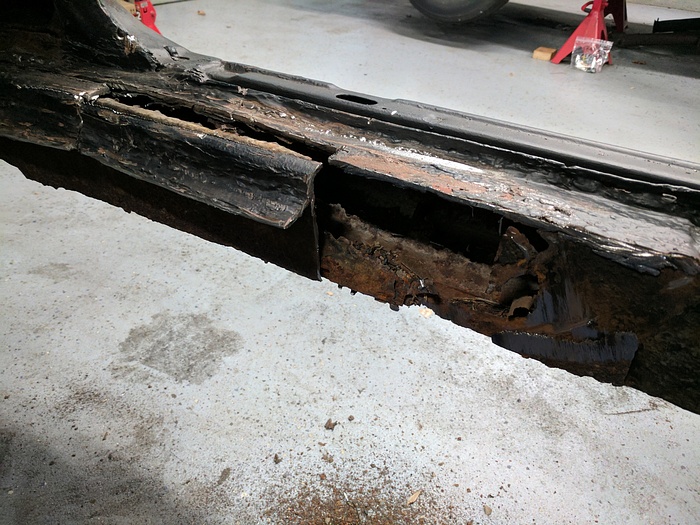
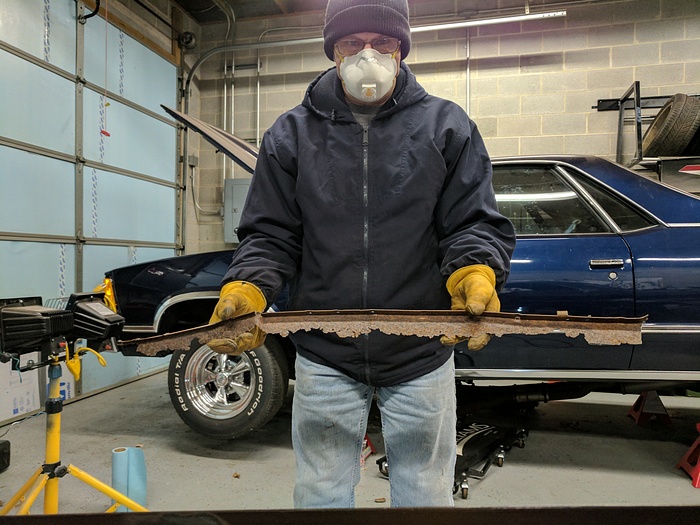
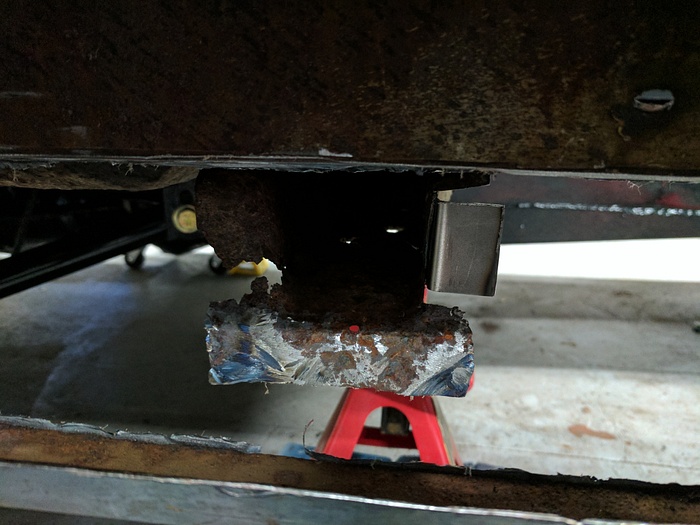
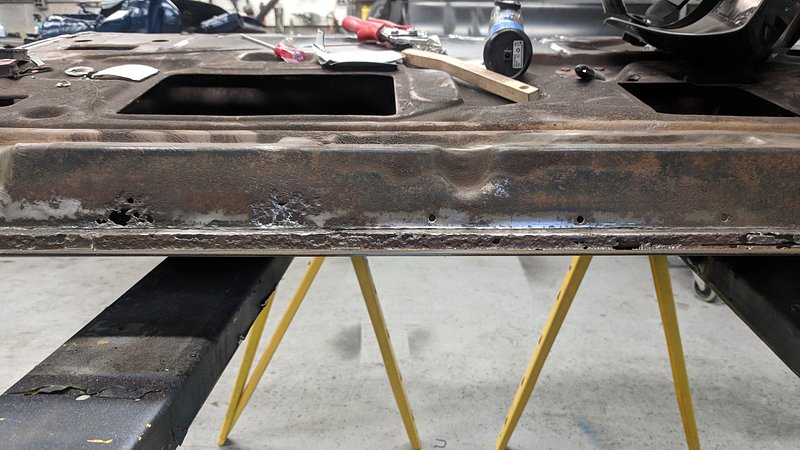
The frame itself wasn't without issues. The most glaring offense was the rear crossmember, which was rotted to ****.
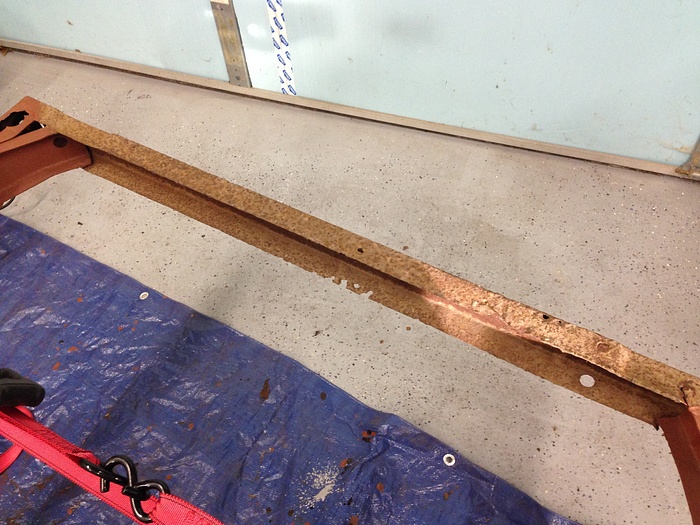
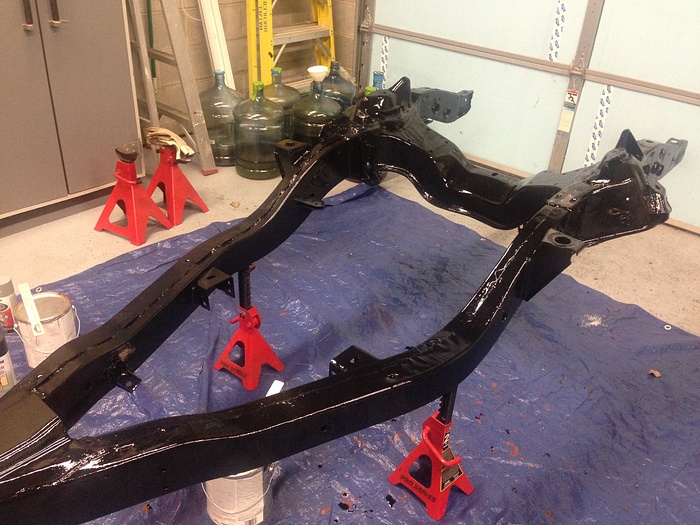
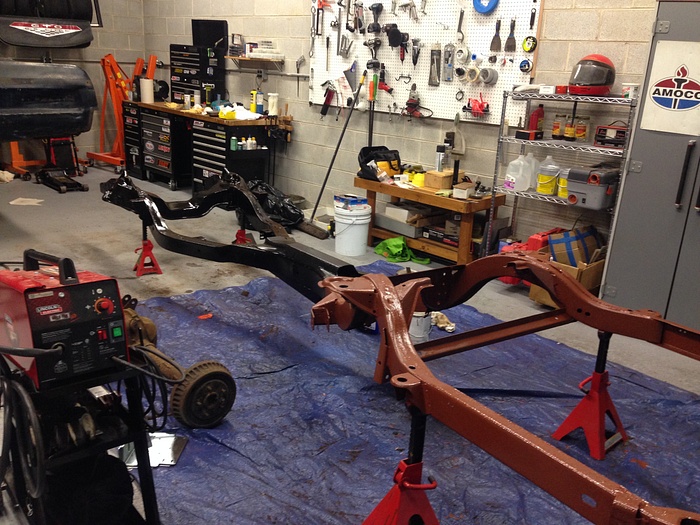
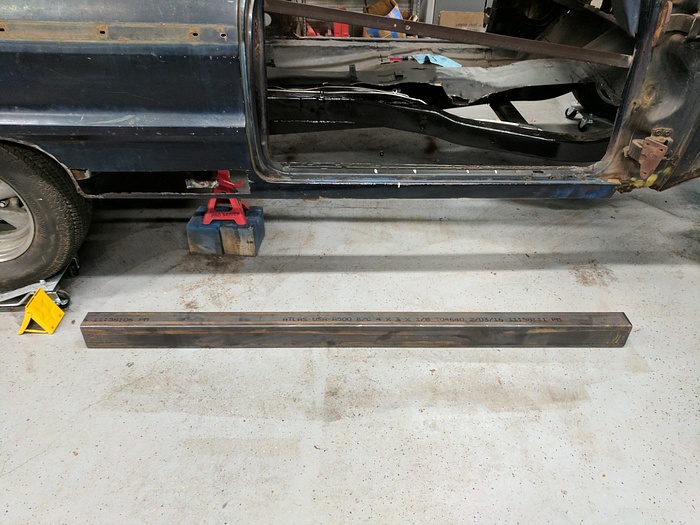
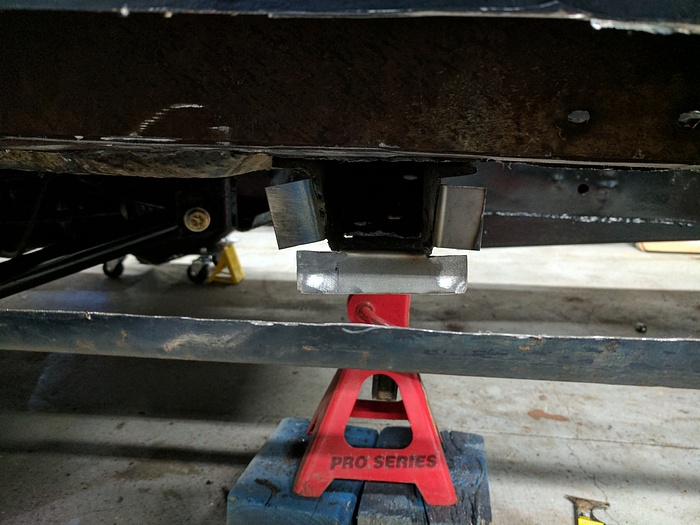
So, we cut it out and made a new one with some angle iron from Lowe's.
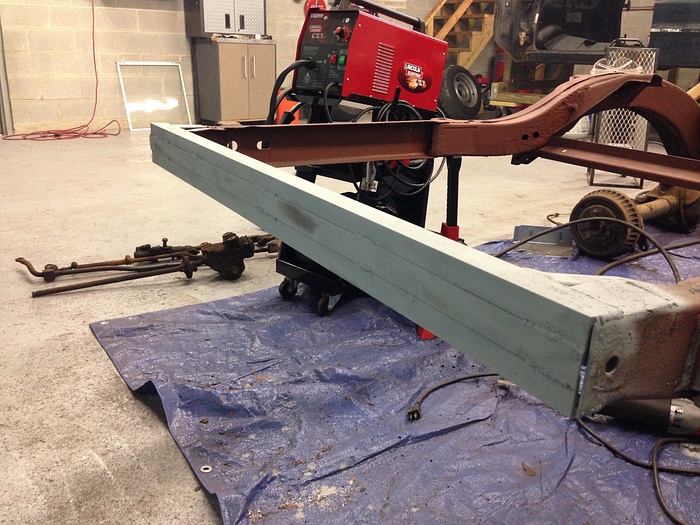
After that, we finished coating the frame.

How did we get the body off? I gathered about 8 people and we gave it the ole heave-ho. One thing to note: it was at this point that we realized that the driveshaft was a one-piece unit. Even further, my uncle noticed that it was a factory driveshaft. Once removed, we saw the markings "68 Chevelle." What I failed to mention earlier in the thread is that the car came with a Muncie M21 and a 12 bolt. The guy had a 396 big block that he would have thrown in with the car for additional money, but we told him to keep it because we were going to do a 5.3 swap anyways. After checking the numbers on the 12 bolt and the Muncie, they were both from 1968. It looks like, at some point, someone had swapped in a complete 68 Chevelle big block drivetrain. The only thing missing were the Chevelle brackets on the 12 bolt, which were cut off to have the Impala brackets welded on. That effectively means that in our rejecting the 396, we rejected a numbers matching Chevelle drivetrain. God. Damn. It.
We stripped down the frame and wirebrushed the hell out of it.
Originally, we were going to have it blasted and coated, but after getting stupid pricing estimates along with the prerequisite that we need to remove the heavy dirt ourselves, we opted for good ol' Rustoleum and some brushes:
The frame itself wasn't without issues. The most glaring offense was the rear crossmember, which was rotted to ****.
So, we cut it out and made a new one with some angle iron from Lowe's.
After that, we finished coating the frame.
Last edited by MuhThugga; 09-19-2018 at 01:50 PM.
09-18-2018, 09:31 PM
#4
TECH Fanatic
Thread Starter
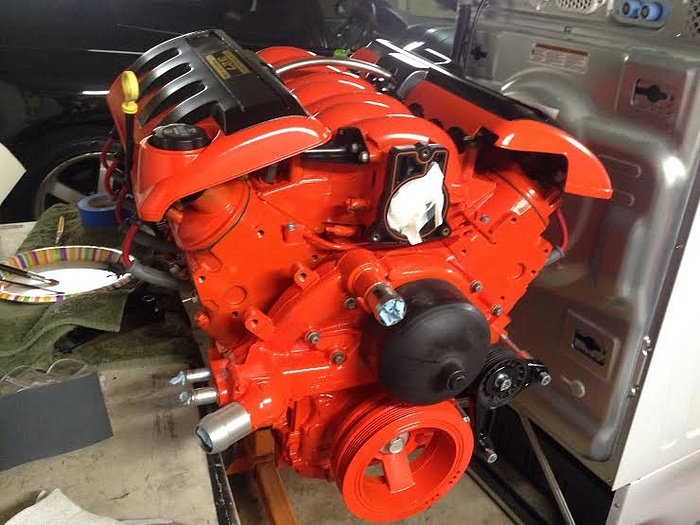
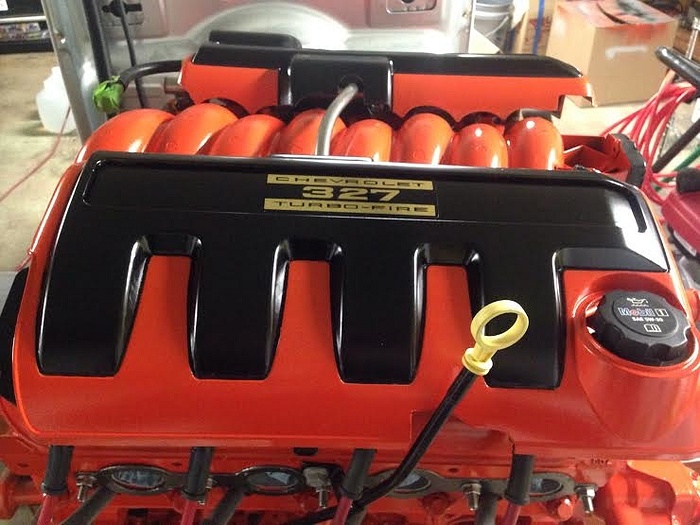
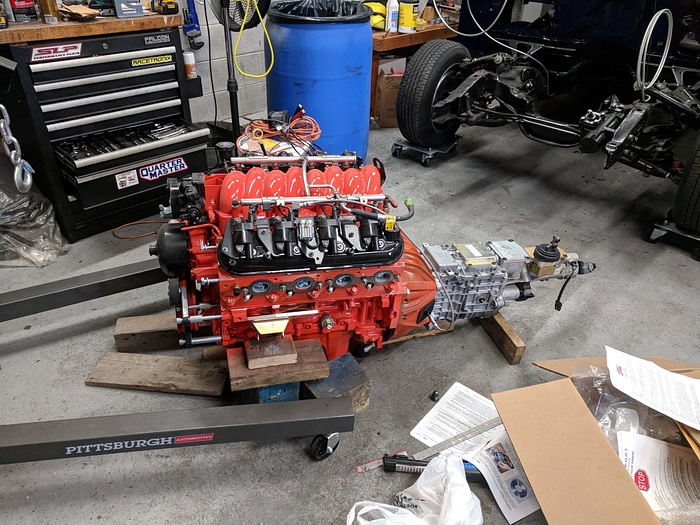
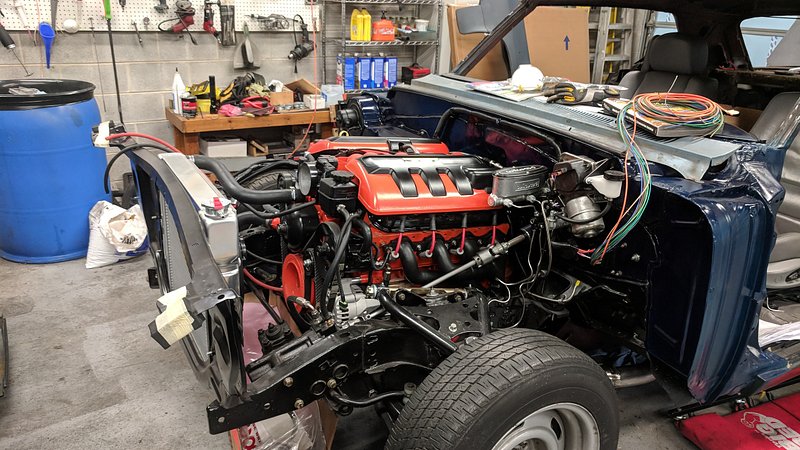
Now, a little bit about the 5.3. I sold my dad on the idea by telling him the 5.3 is a modern 327, which he has always had a soft spot for. The fact that this car was originally a 327 car sealed the deal for him. I didn't do anything wild since my dad wants a decent driver, so I made it a point to use factory components. The details:
- Aluminum Gen IV block, complete with flattop pistons.
- 862 heads
- Factory head gaskets for 10.5:1 compression
-LS2 camshaft and LS3 beehive springs
-LS6 intake manifold
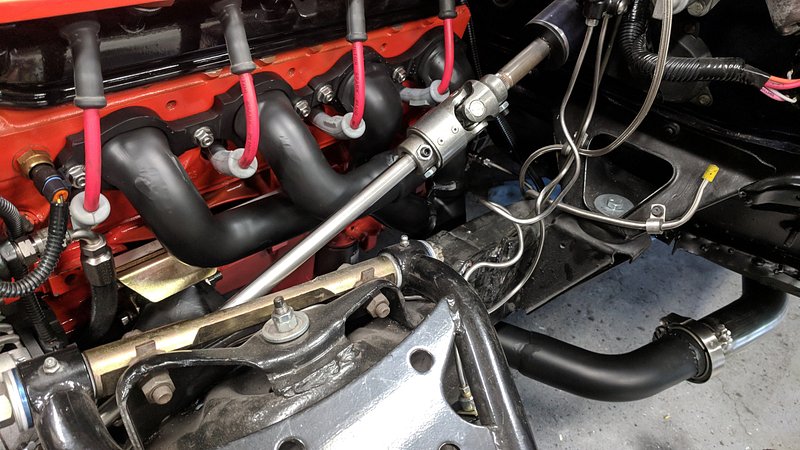
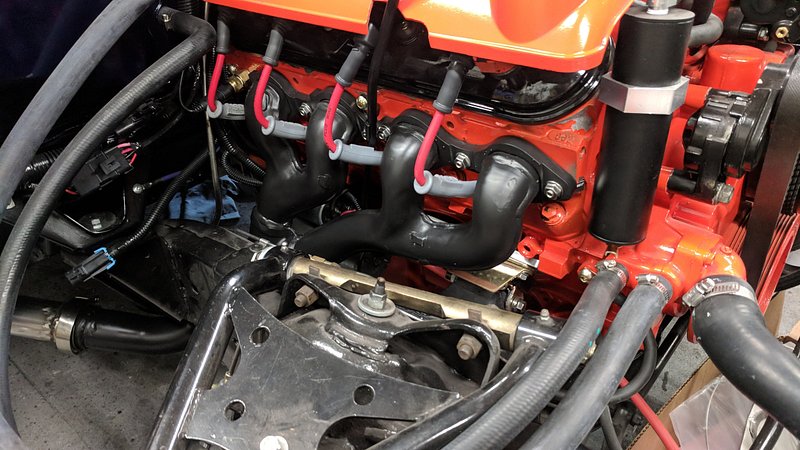
-Z/28 LS7 manifolds
I'm really interested to see how this engine performs.
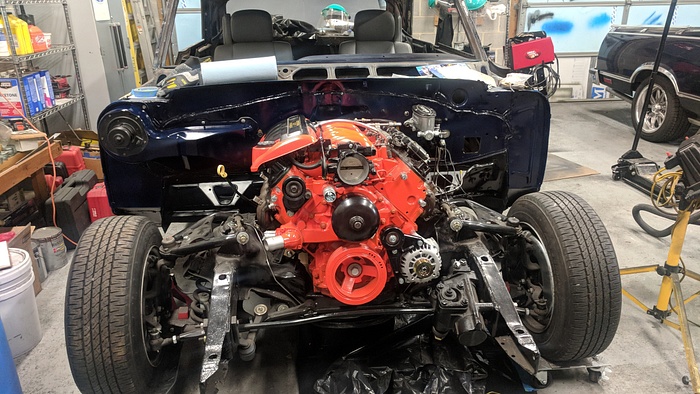
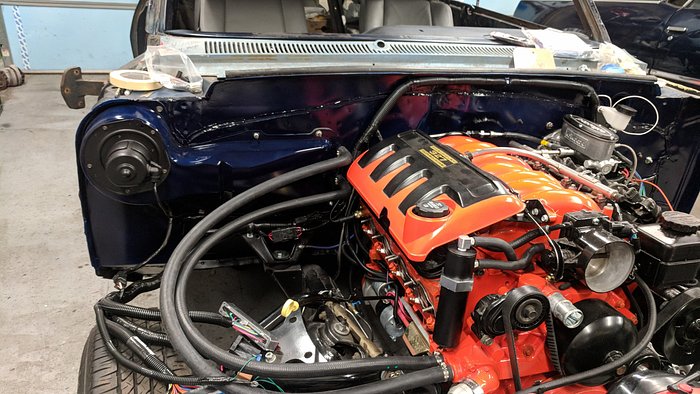
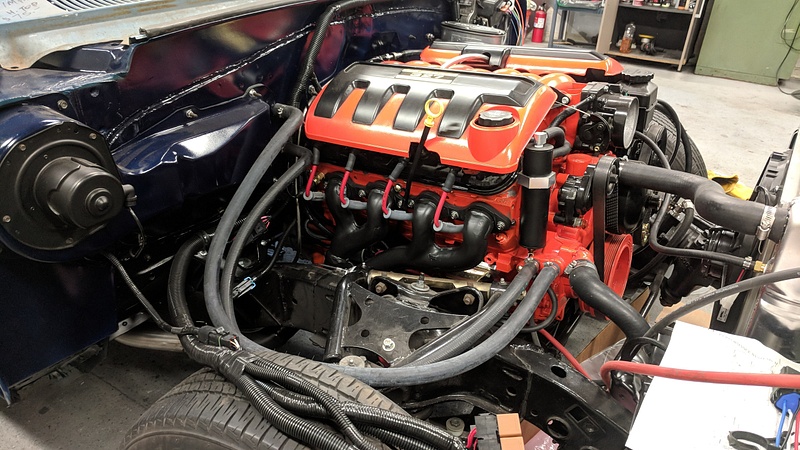
I painted the engine Chevy Orange, and modified some GTO fuel rail covers for the car.
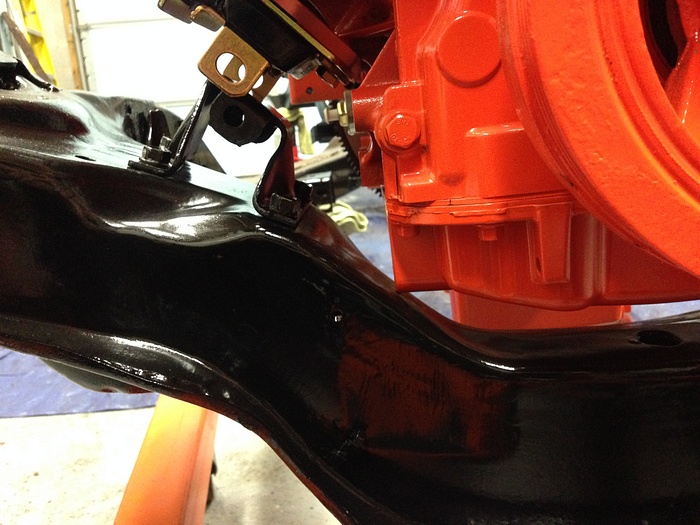
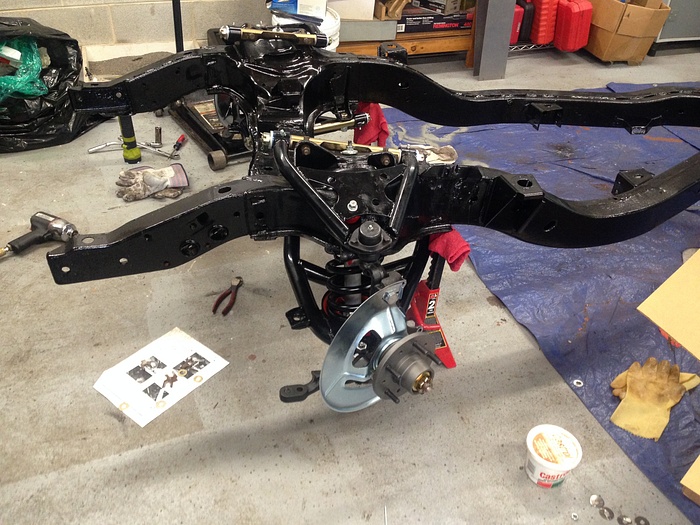
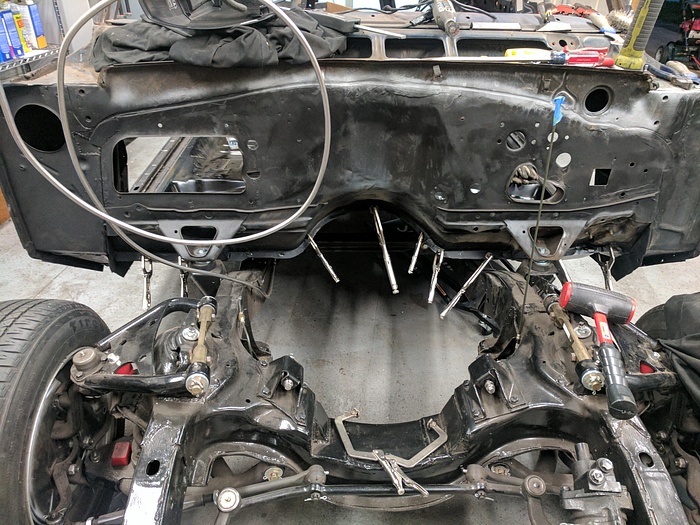
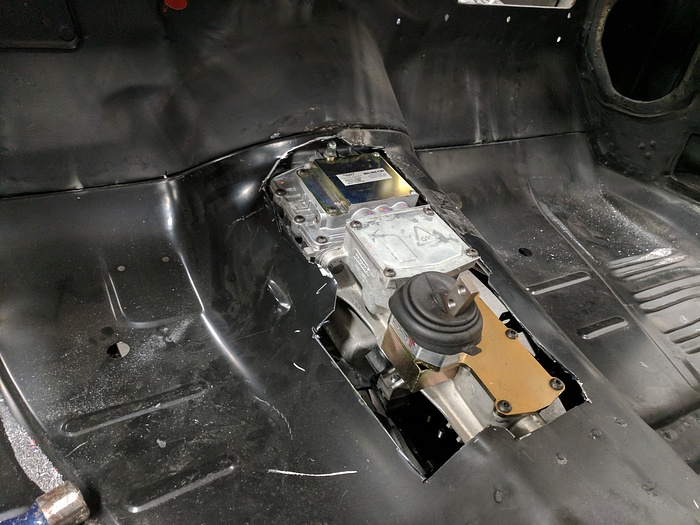
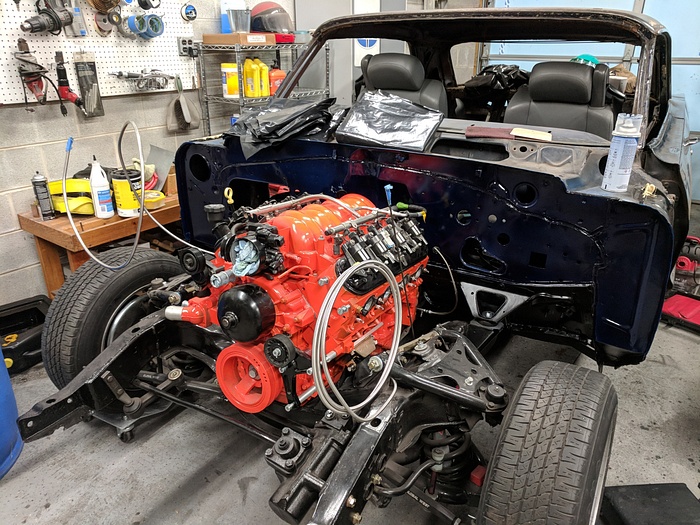
Once the frame was coated, we gave the engine a test fit to see what needed to be done.
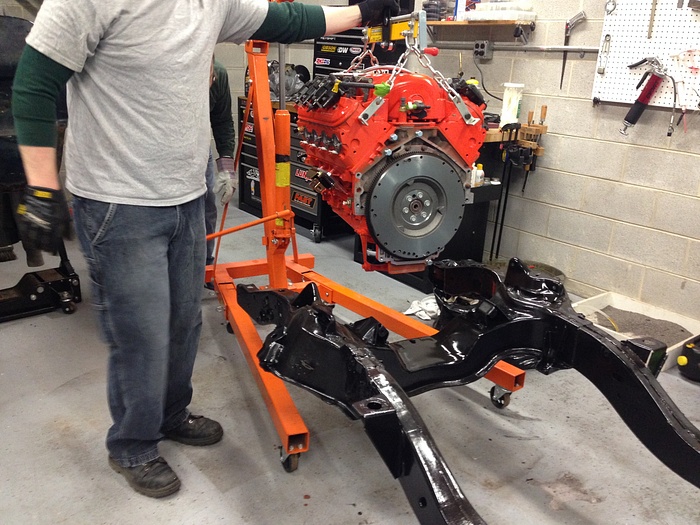
It turned out to be a lot with the LH6 pan.
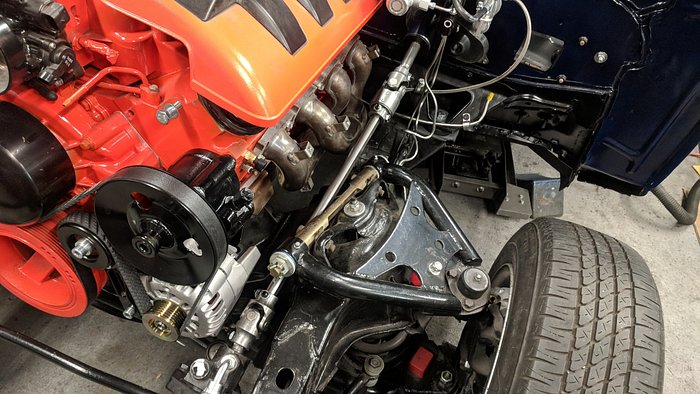
Once that was done, we assembled the front suspension using Global West lowering springs, Southwest Speed tubular control arms, and C3 spindles. As it turns out, on the B-Bodies, the C3 spindles are a direct bolt-on.
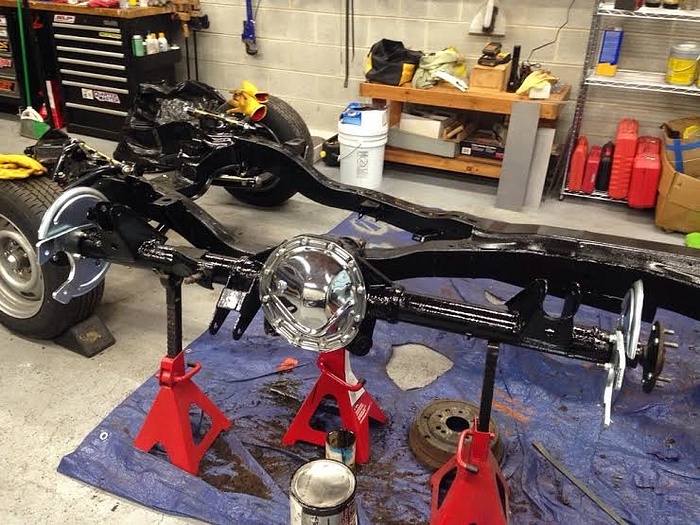
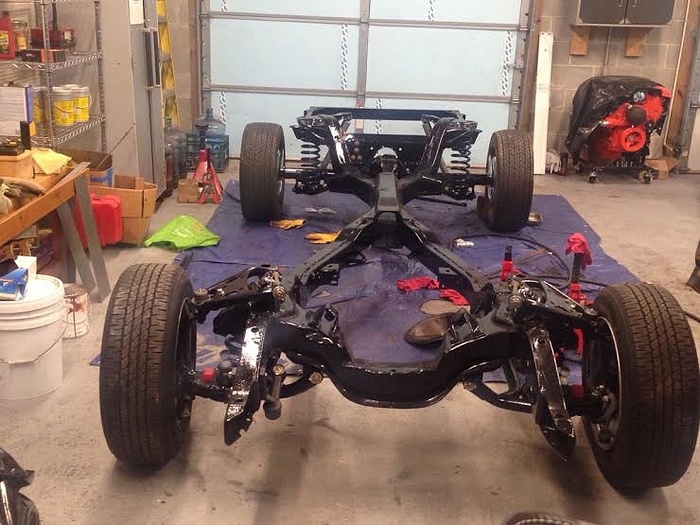
Then it was a matter of cleaning up the 12 bolt and getting the frame back on four wheels.
- Aluminum Gen IV block, complete with flattop pistons.
- 862 heads
- Factory head gaskets for 10.5:1 compression
-LS2 camshaft and LS3 beehive springs
-LS6 intake manifold
-Z/28 LS7 manifolds
I'm really interested to see how this engine performs.
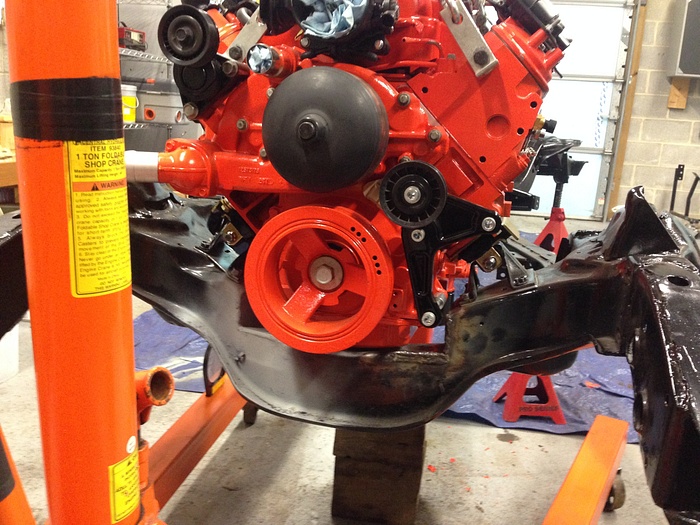
I painted the engine Chevy Orange, and modified some GTO fuel rail covers for the car.
Once the frame was coated, we gave the engine a test fit to see what needed to be done.
It turned out to be a lot with the LH6 pan.
Once that was done, we assembled the front suspension using Global West lowering springs, Southwest Speed tubular control arms, and C3 spindles. As it turns out, on the B-Bodies, the C3 spindles are a direct bolt-on.
Then it was a matter of cleaning up the 12 bolt and getting the frame back on four wheels.
Last edited by MuhThugga; 09-19-2018 at 01:51 PM.
09-18-2018, 09:37 PM
#5
TECH Fanatic
Thread Starter
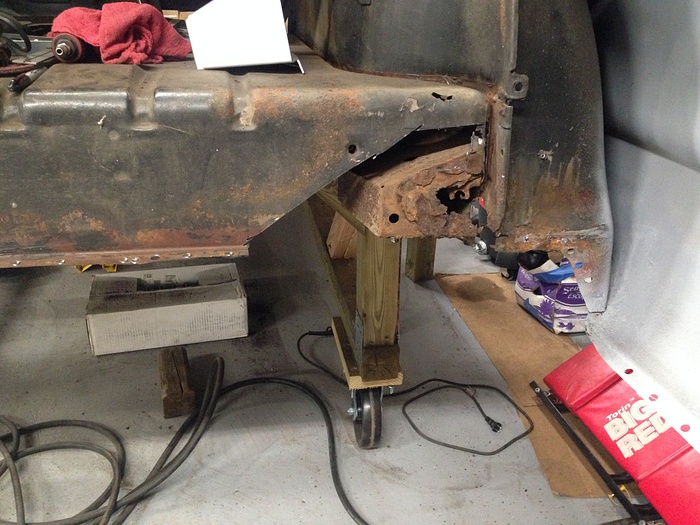
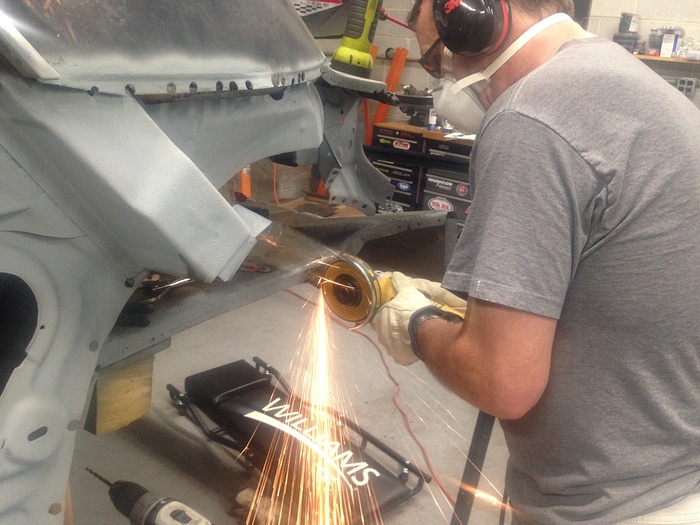
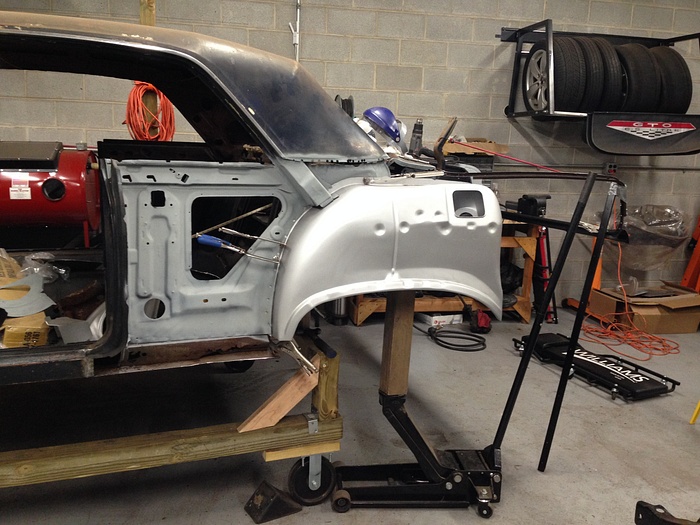
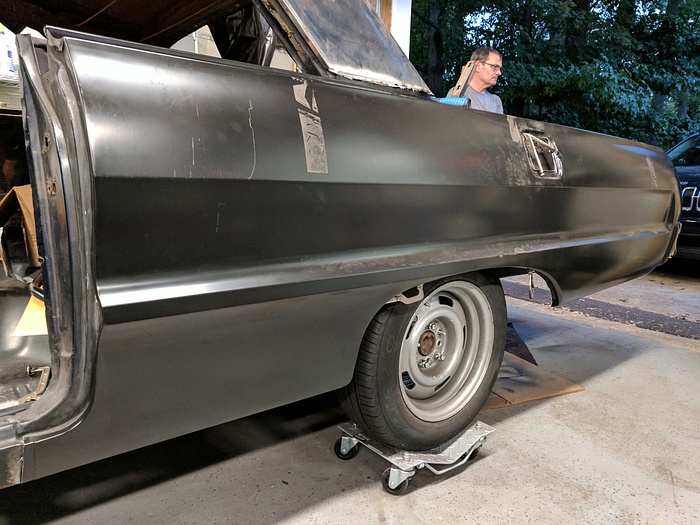
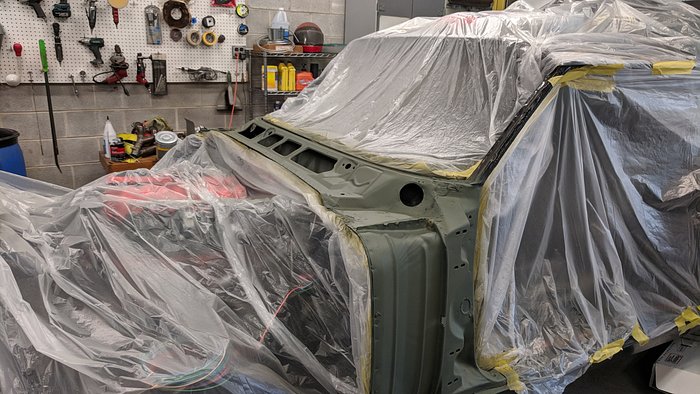
It was then time for the body.
Hole-Lee-****. I'm starting to get Vietnam flashbacks on this, so I'm going to let the pictures do the talking.
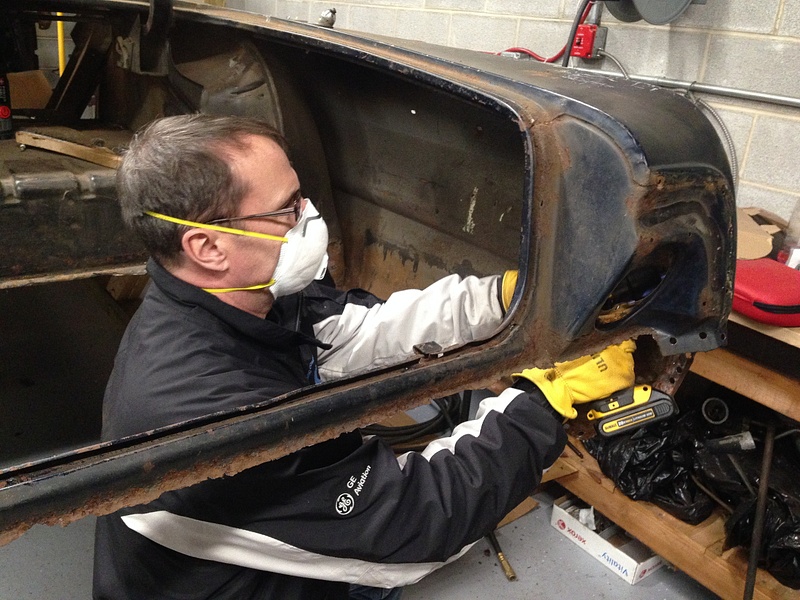
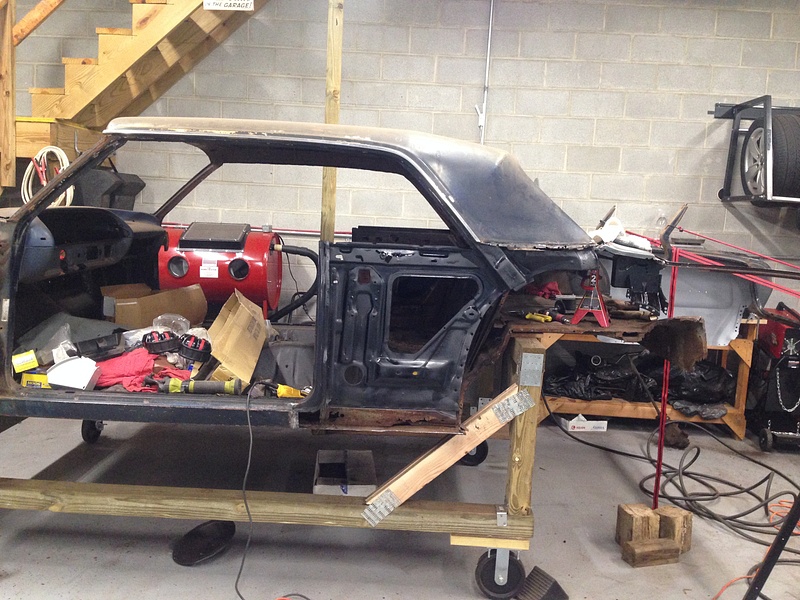
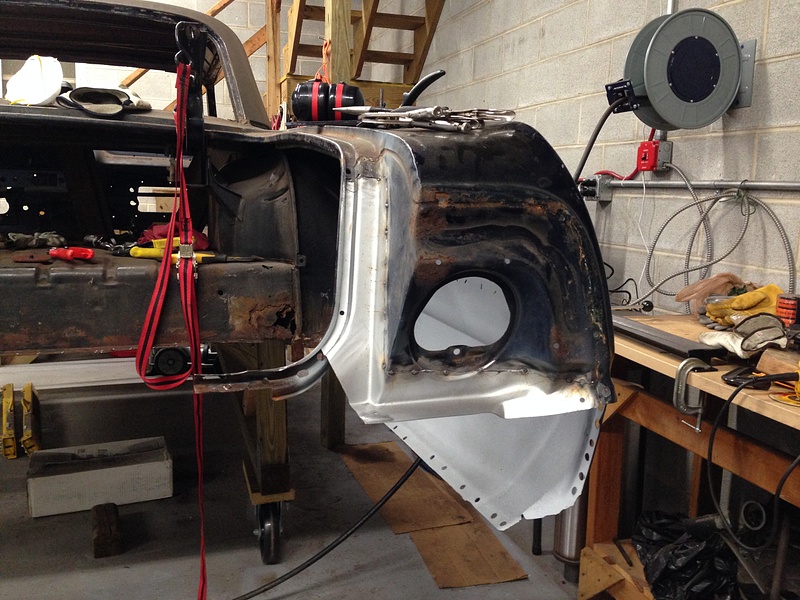
Hole-Lee-****. I'm starting to get Vietnam flashbacks on this, so I'm going to let the pictures do the talking.
Last edited by MuhThugga; 12-02-2018 at 05:11 PM.
 09-18-2018, 10:31 PM
#7
TECH Fanatic
Thread Starter
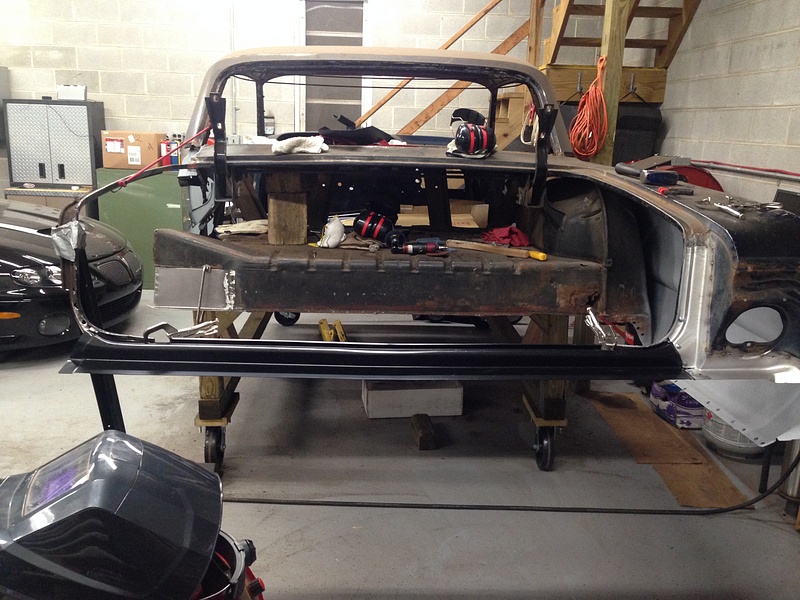
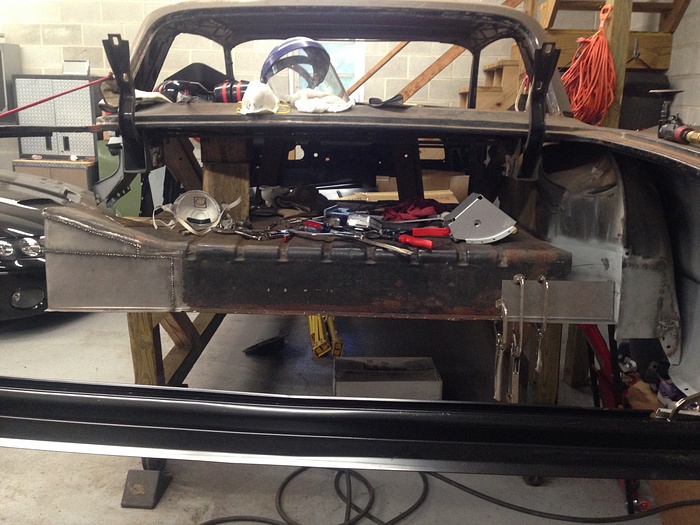
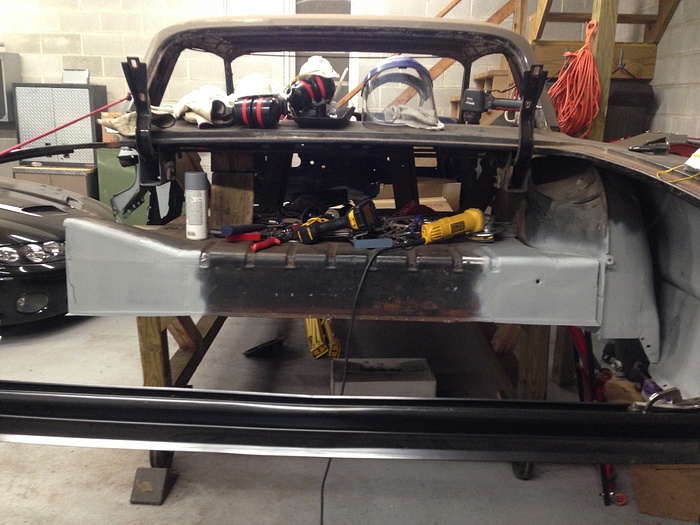
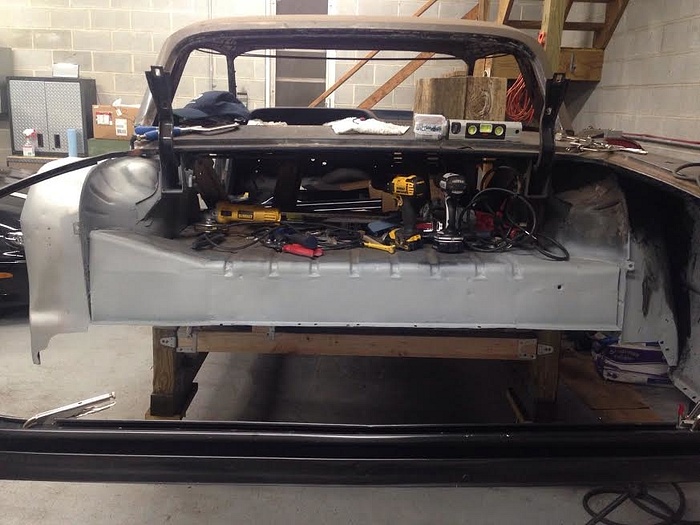
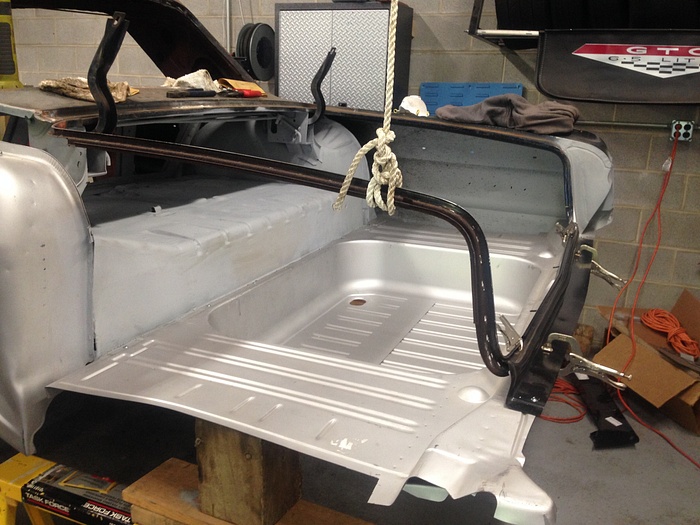
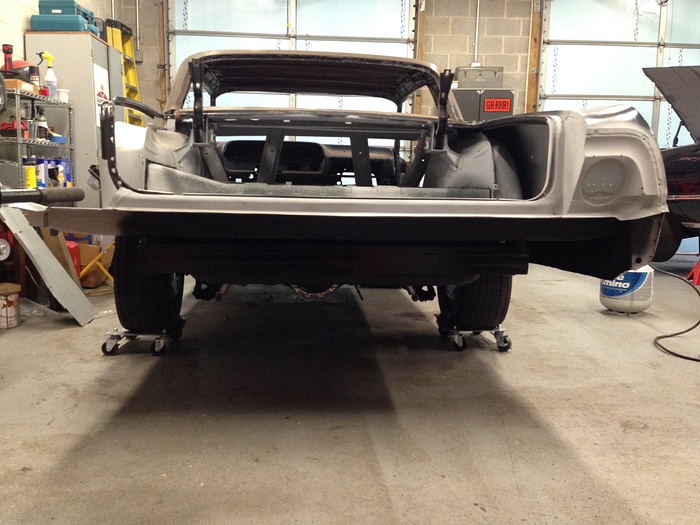
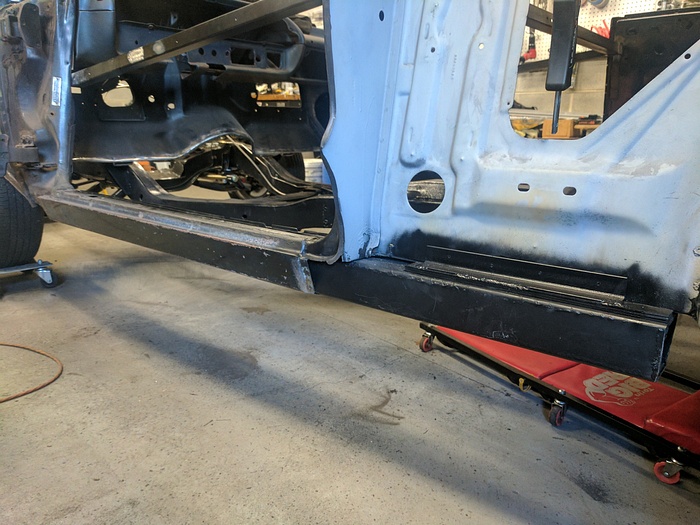
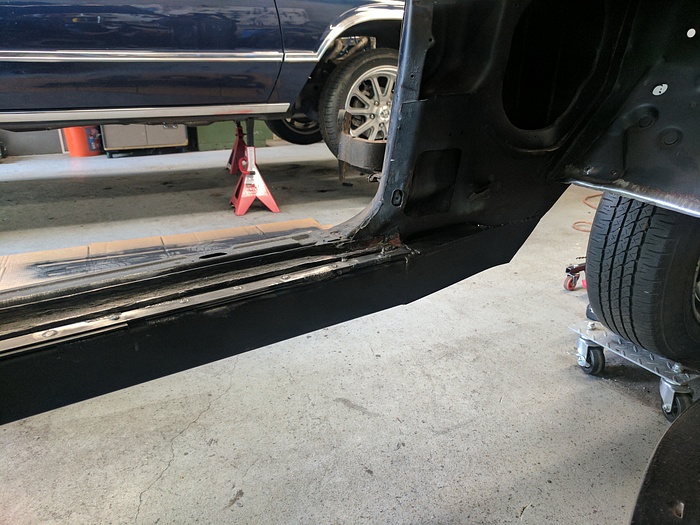
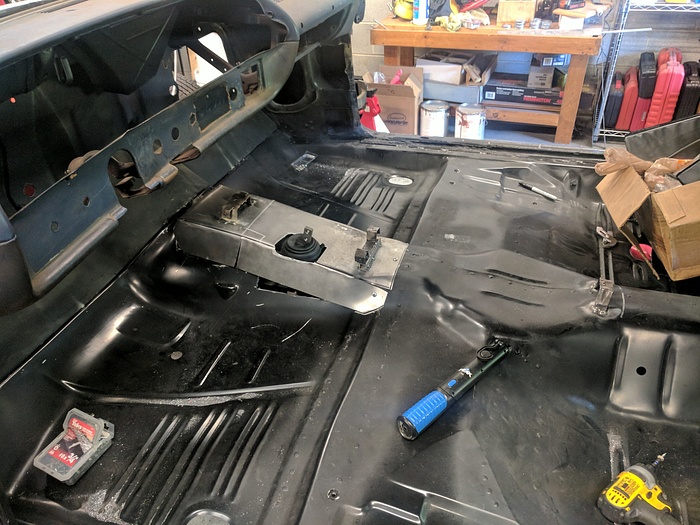
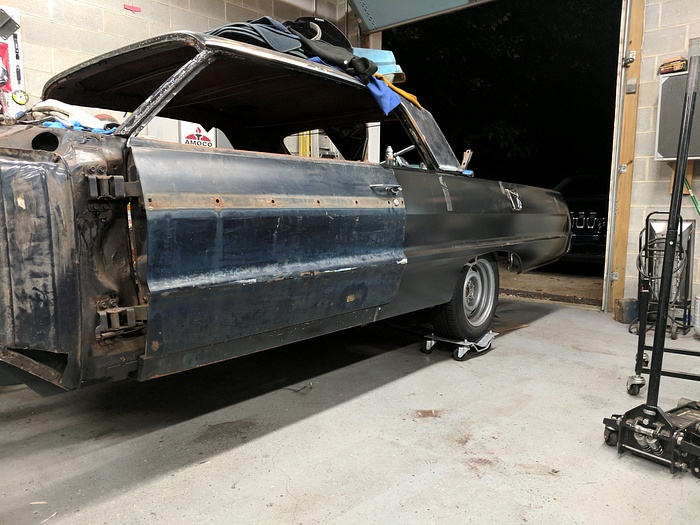
Then it was finally time to set the body back on the frame.
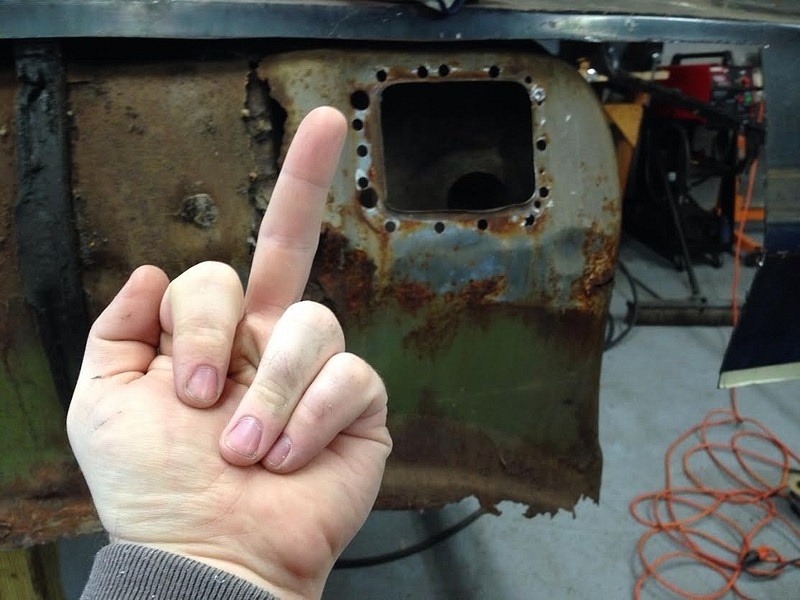
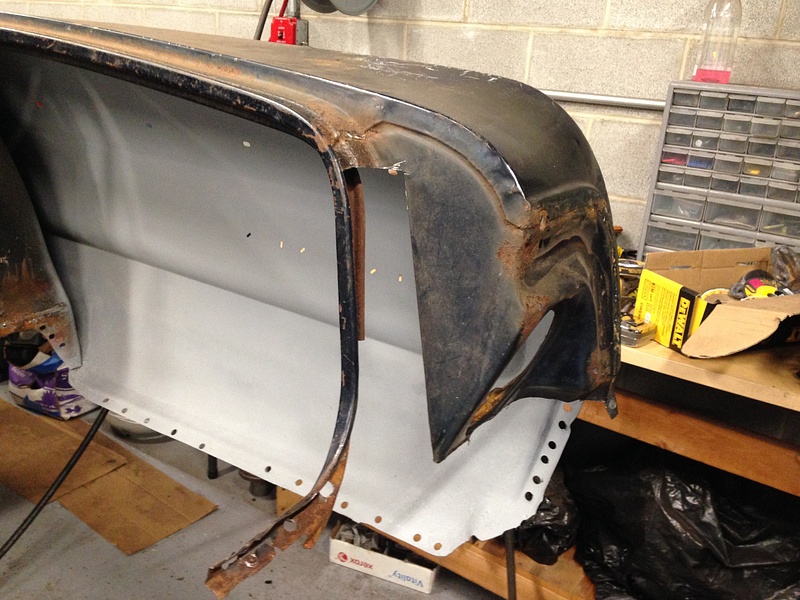
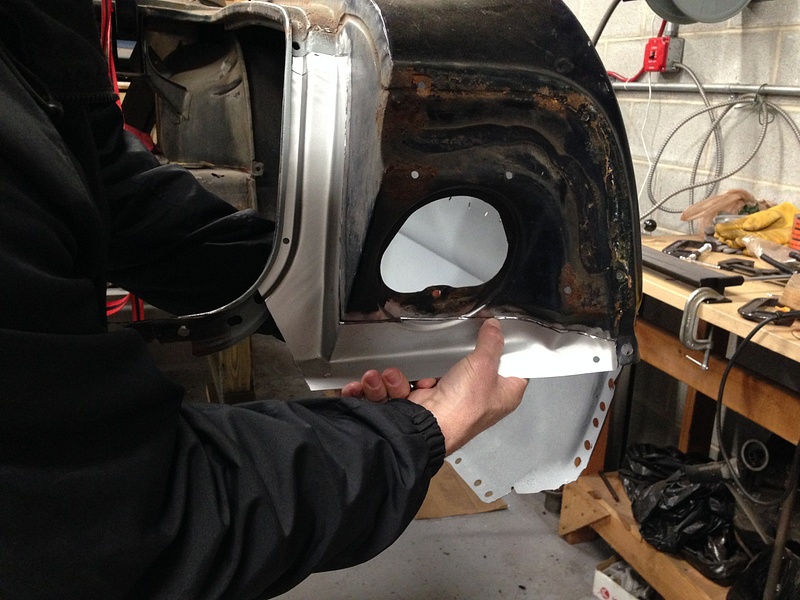
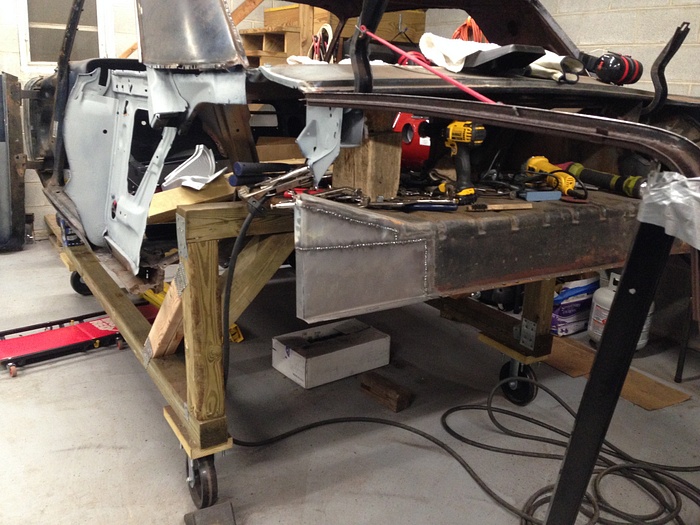
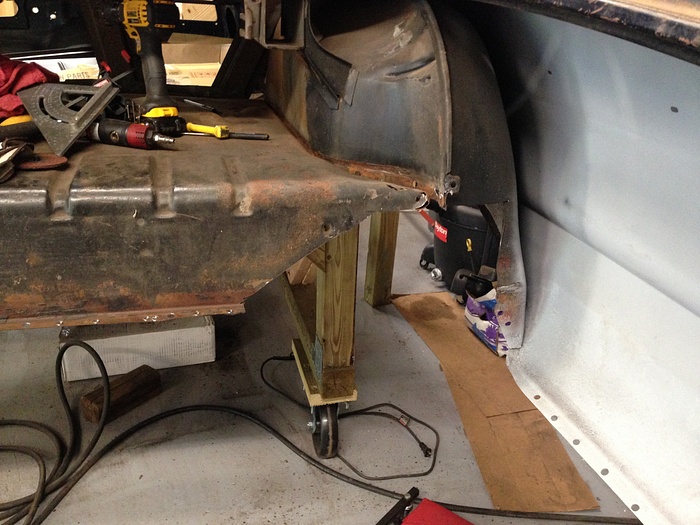
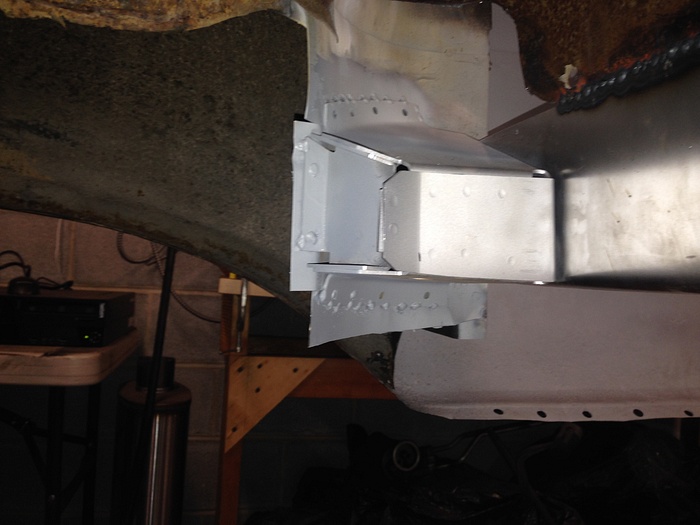
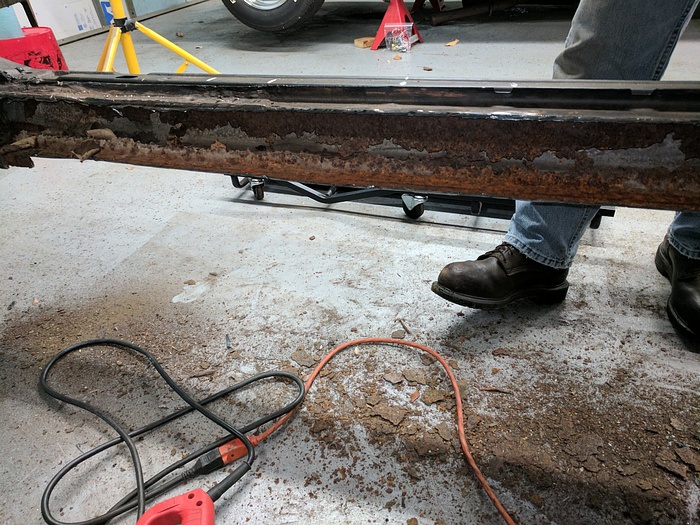
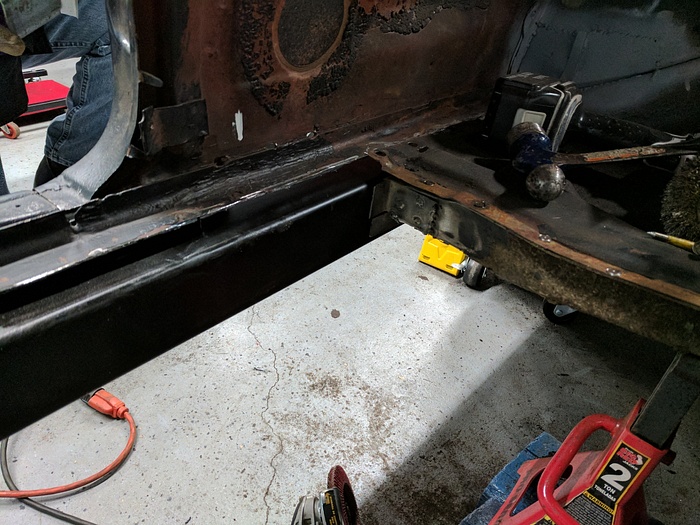
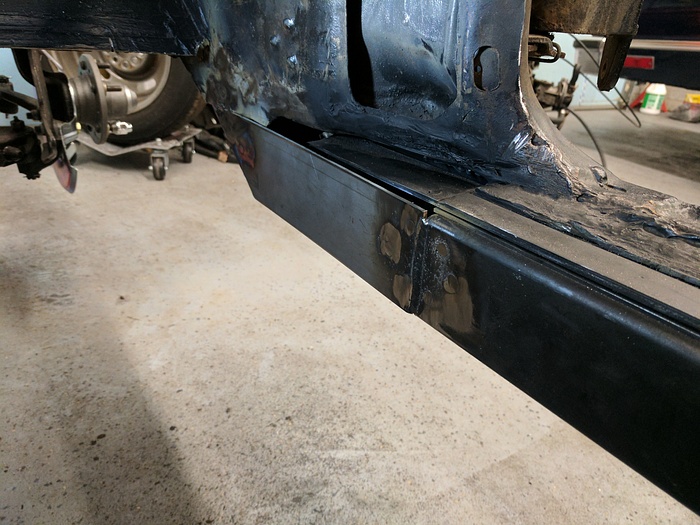
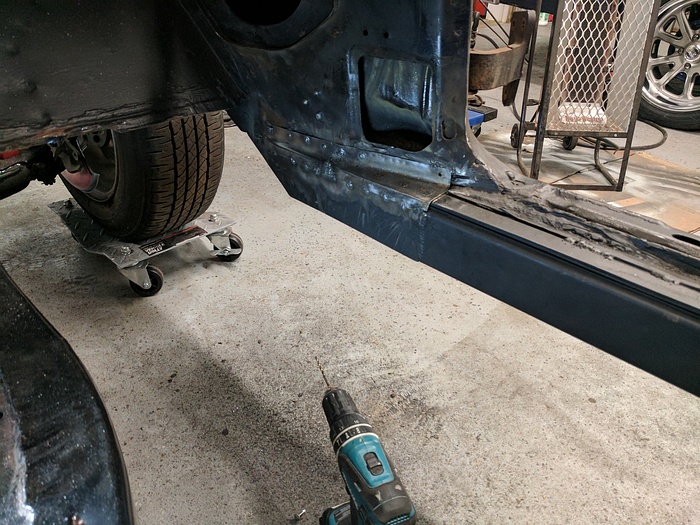
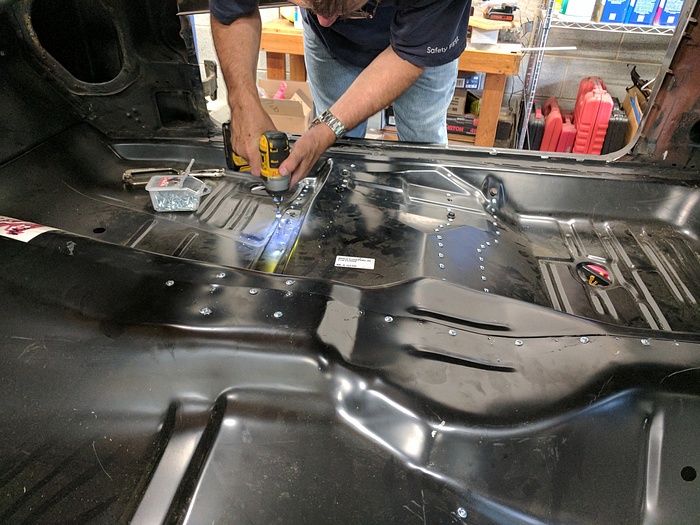
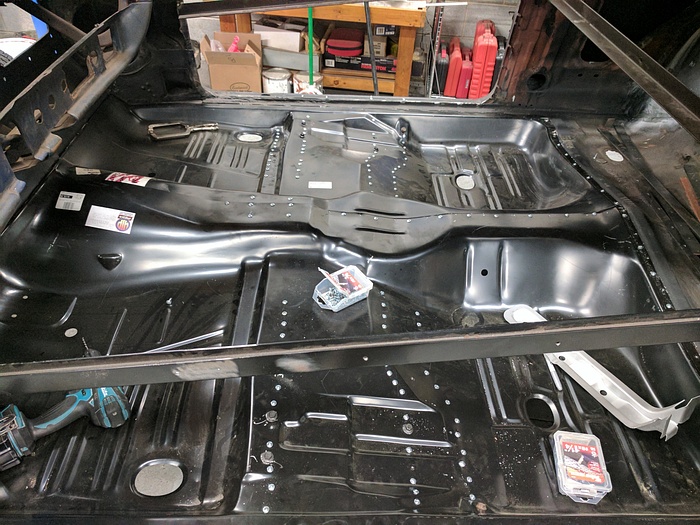
The inner rockers were a whole other animal. The previous owner had "patched" the floors by brazing steel overtop the bullshit. So, this is what we found when cutting out his "repairs."
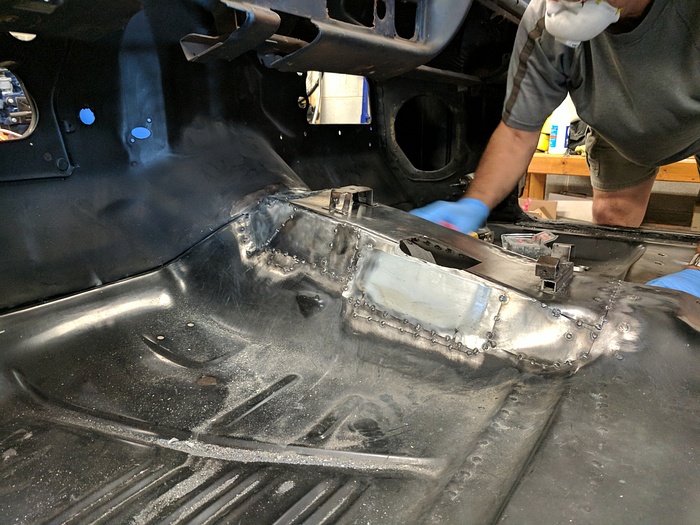
So, out came the floor and what was left of the inner rockers.
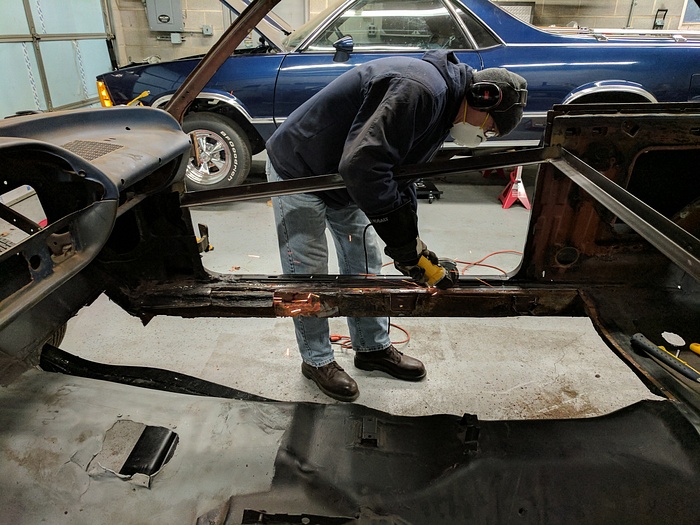
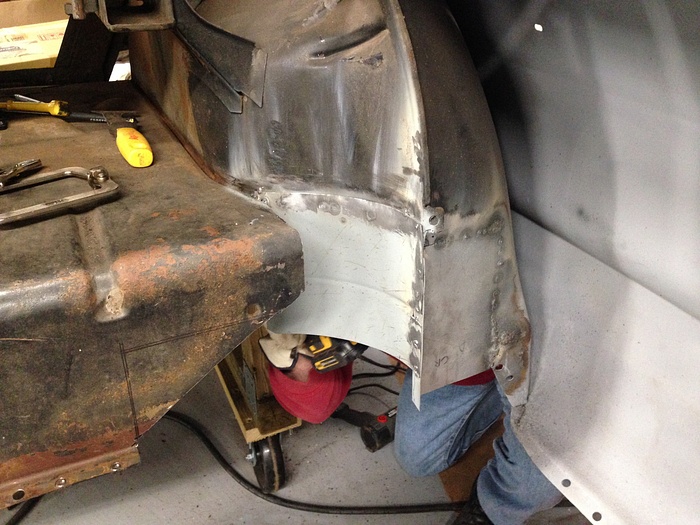
And this is the new inner rocker: 3x4 1/8" tube steel.

Last edited by MuhThugga; 09-19-2018 at 01:54 PM.
Trending Topics
09-18-2018, 10:43 PM
#8
TECH Fanatic
Thread Starter
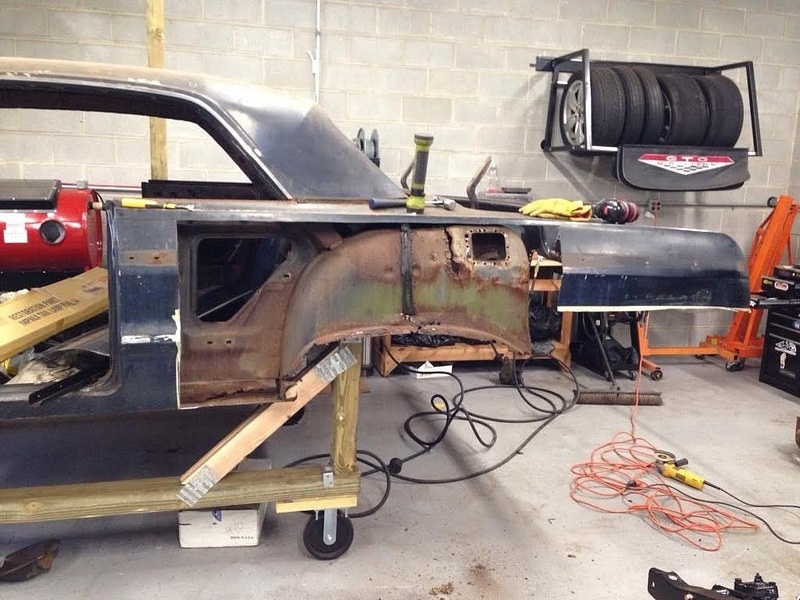
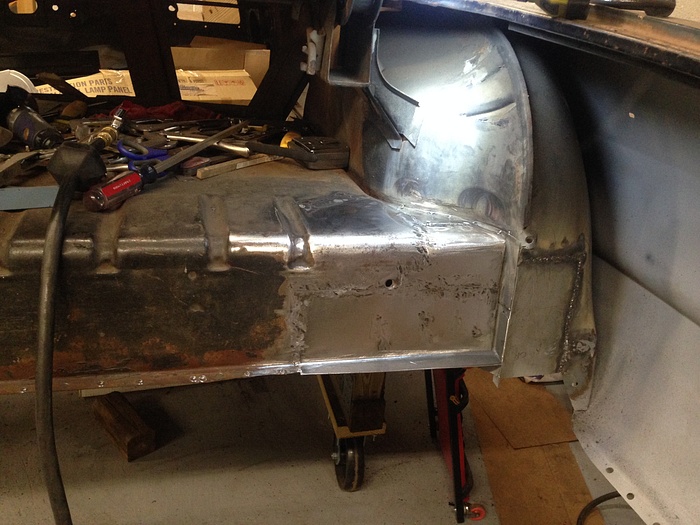
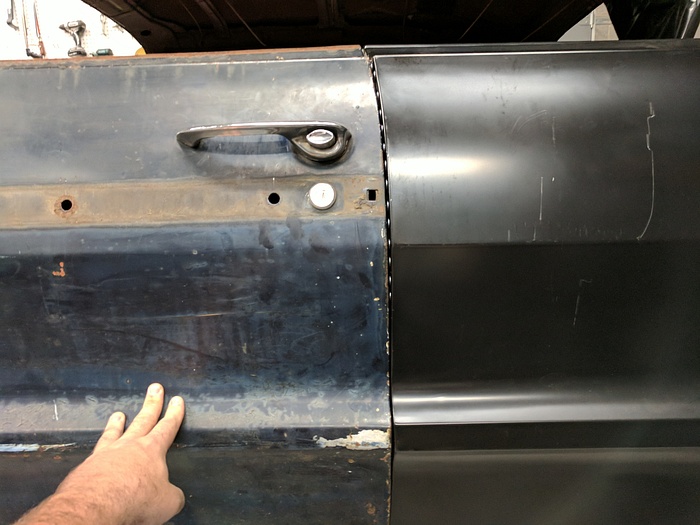
Annnnnd onto the other side....

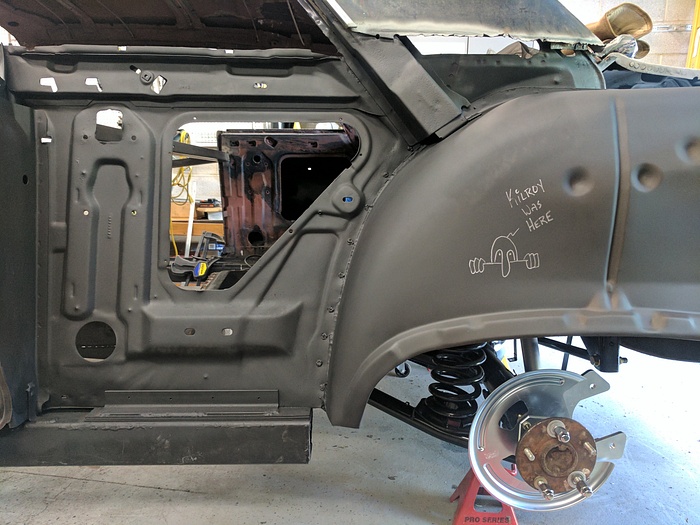
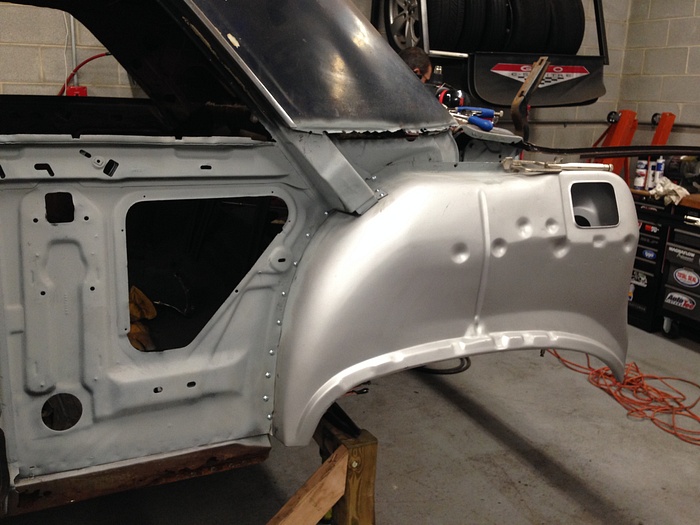
Then came time to fit the new quarter panel.
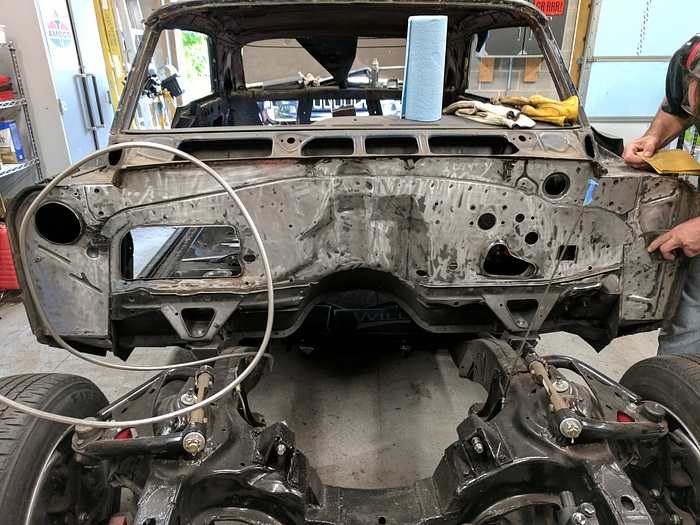
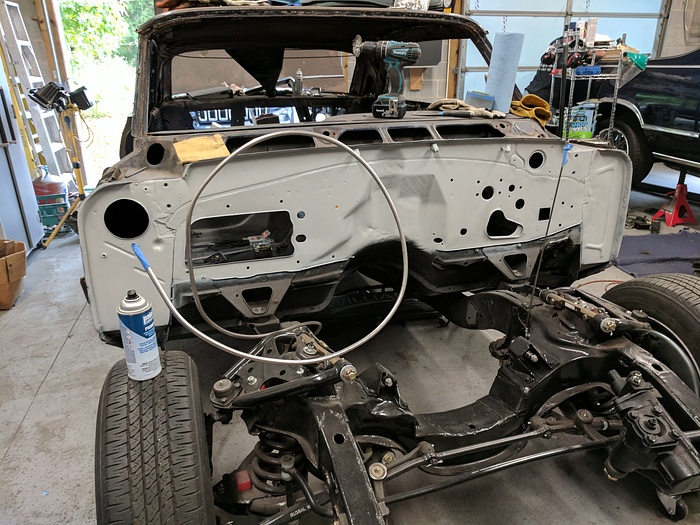
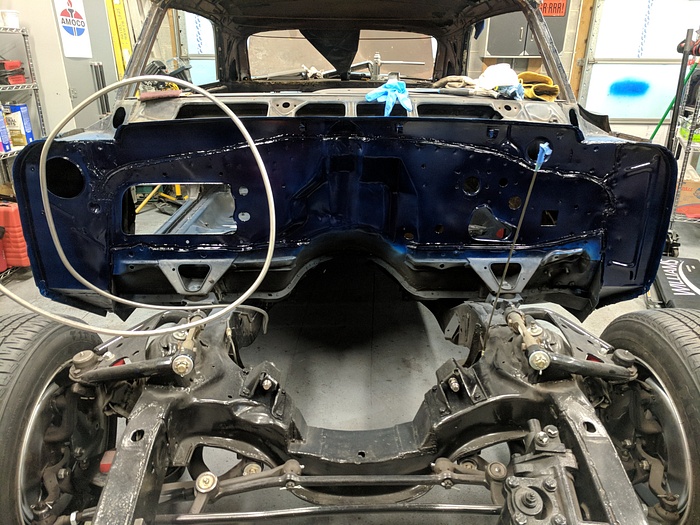
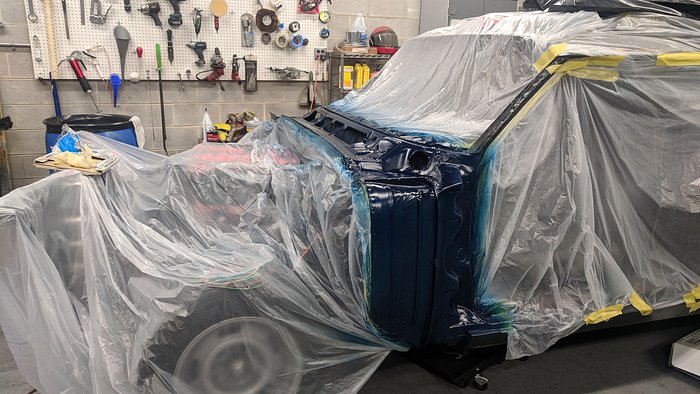
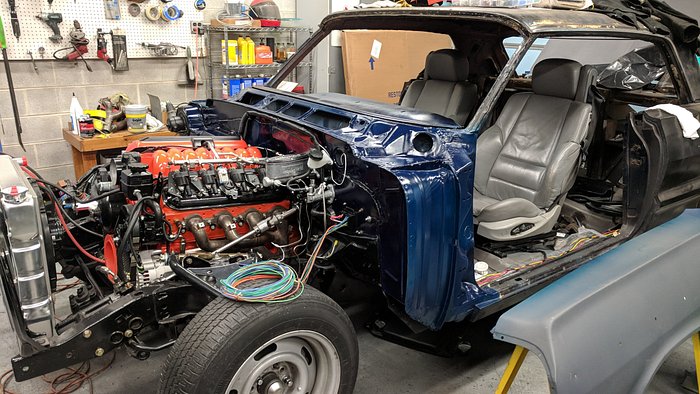
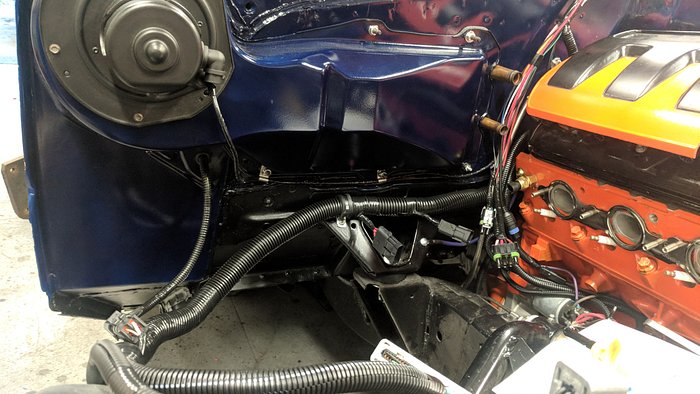
Then we stripped and painted the firewall. The color is Daytona Blue.
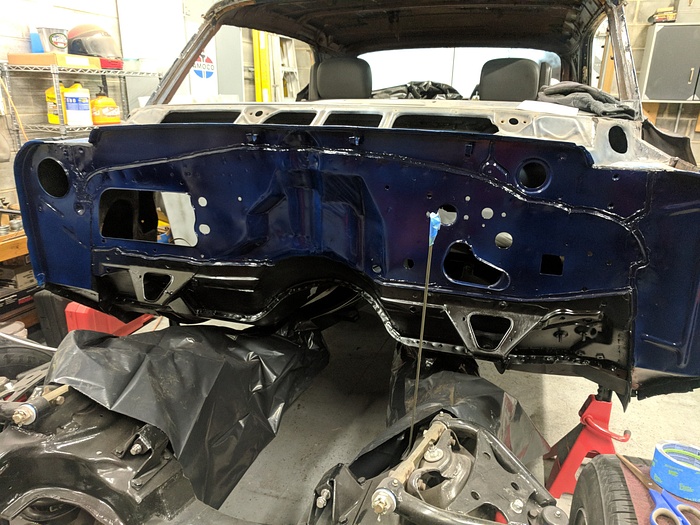
Then came time to fit the new quarter panel.
Then we stripped and painted the firewall. The color is Daytona Blue.
Last edited by MuhThugga; 09-19-2018 at 01:55 PM.
09-18-2018, 11:06 PM
#9
TECH Fanatic
Thread Starter
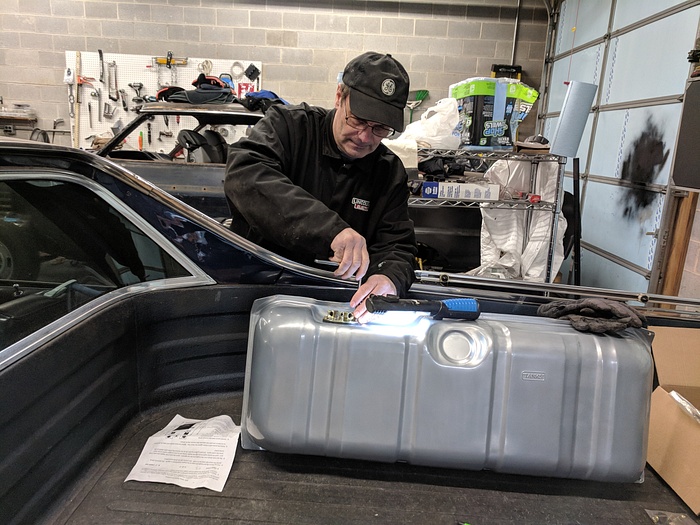
Now it is time for the fun stuff.
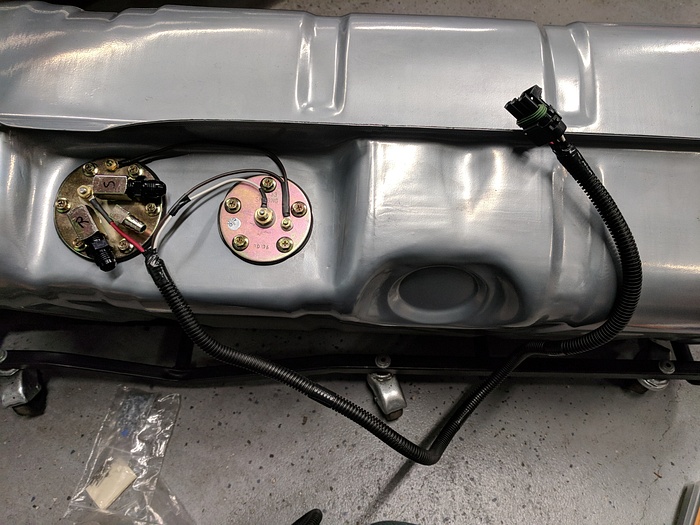
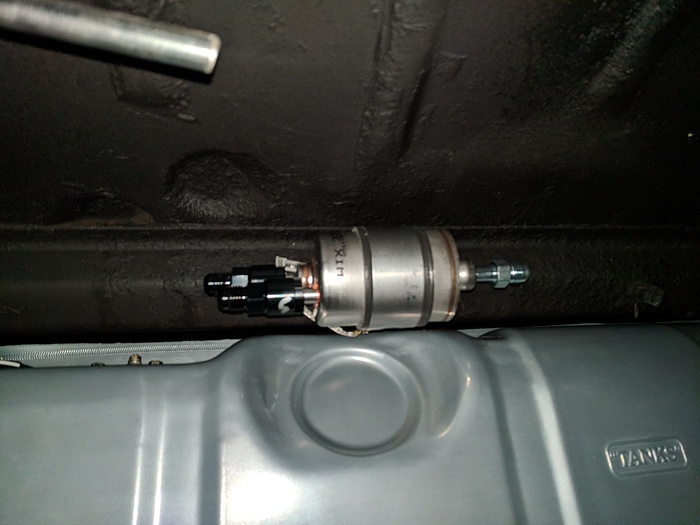
A Tanks, Inc tank that was purchased before Holley bought them.

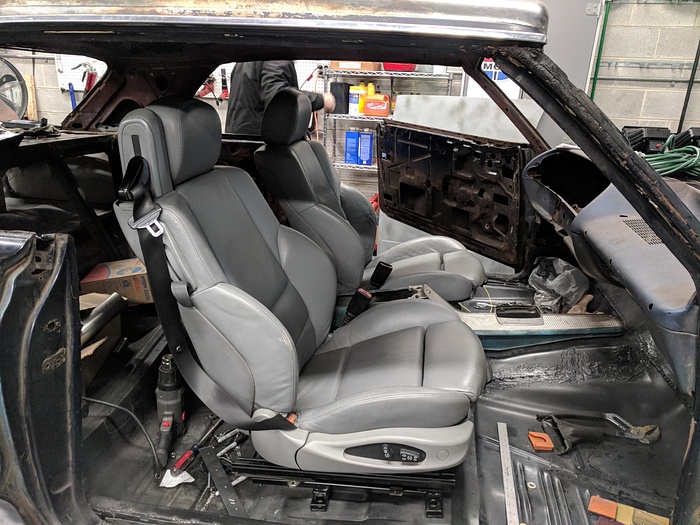
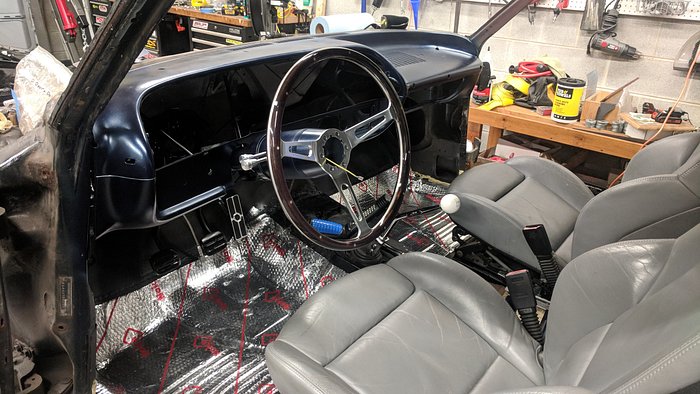
And since my dad wanted a standard 3-point seat belt, we picked up some E46 M3 convertible seats.

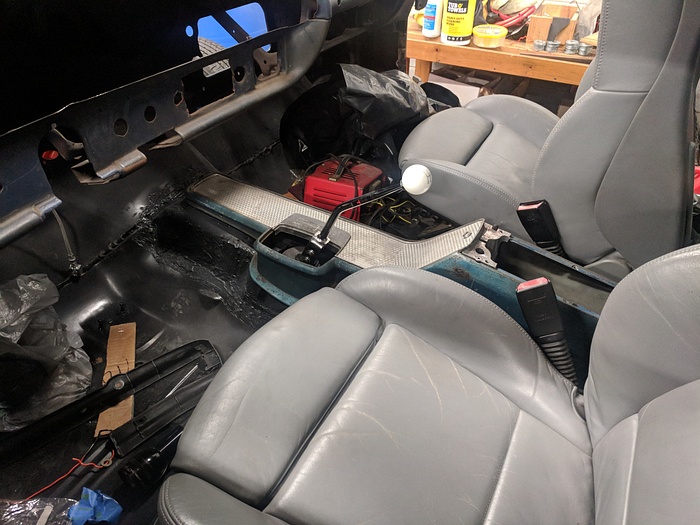
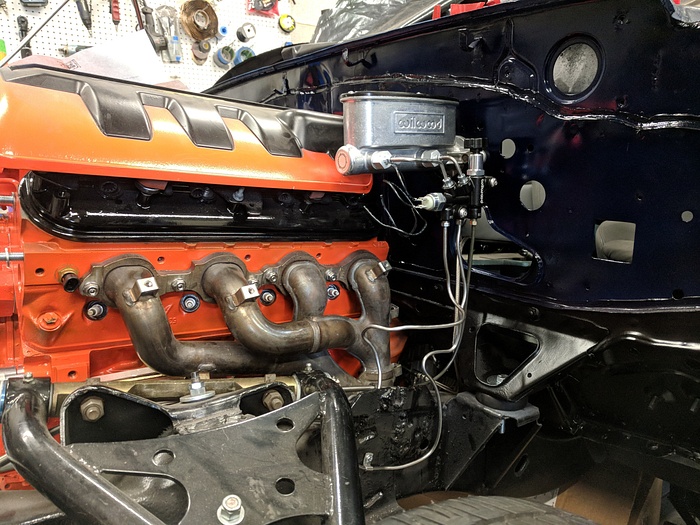
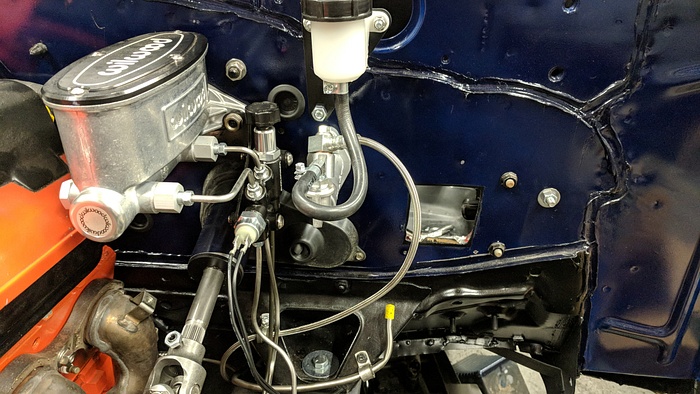
Wilwood master cylinder and adjustable proportioning valve.
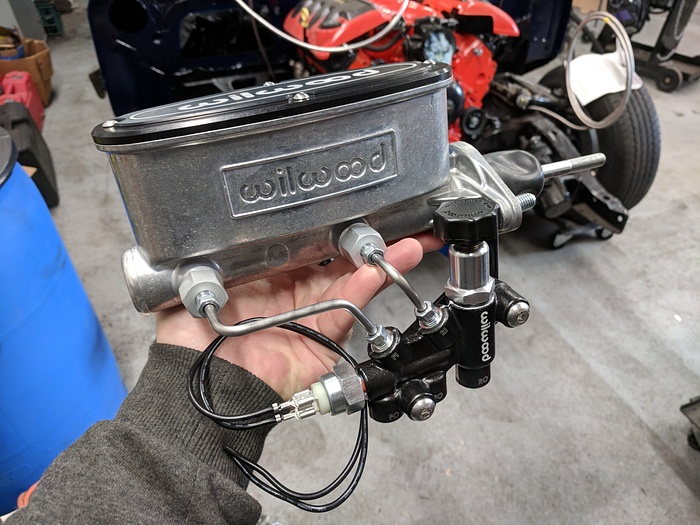
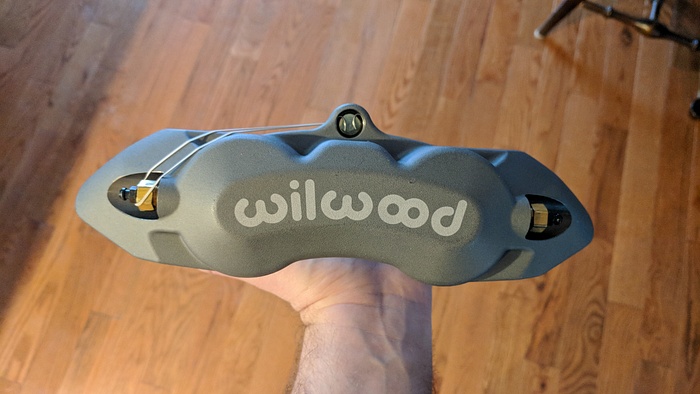
It will go great with the new front calipers.
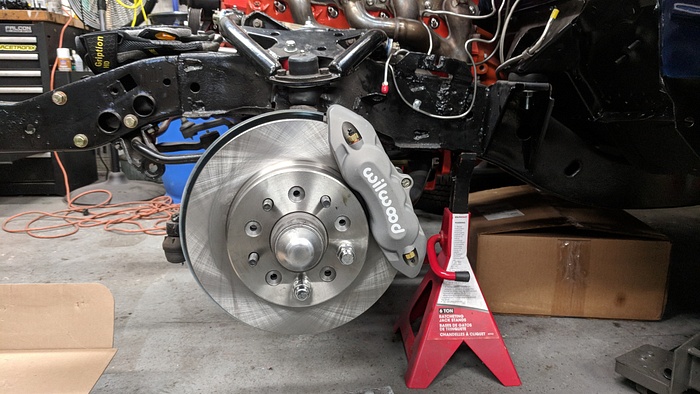
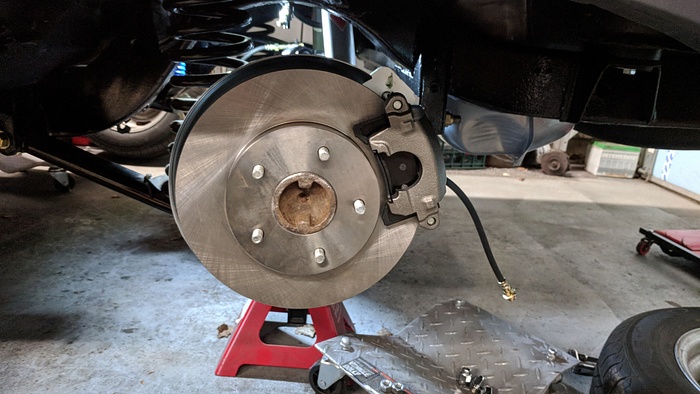
Rear brake set-up:
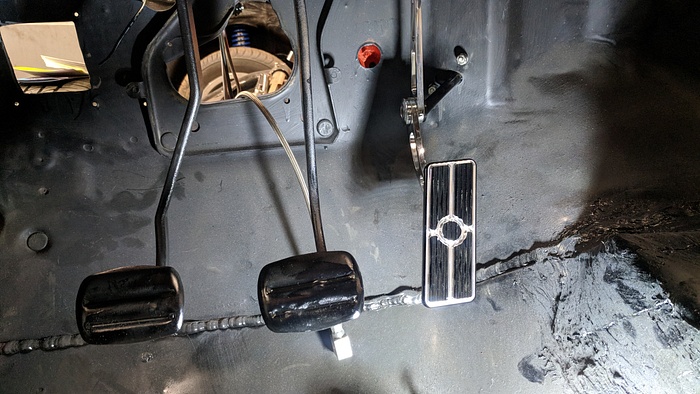
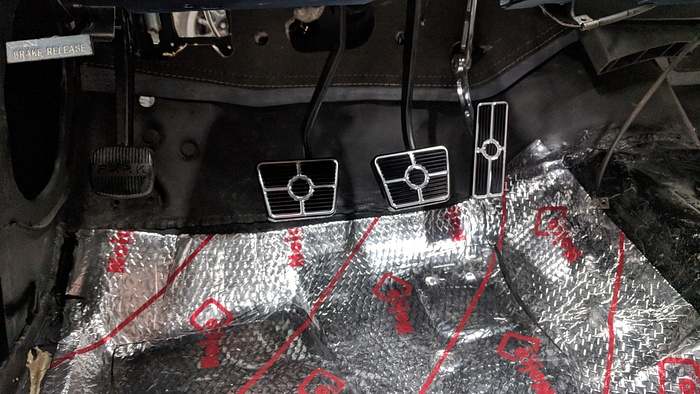
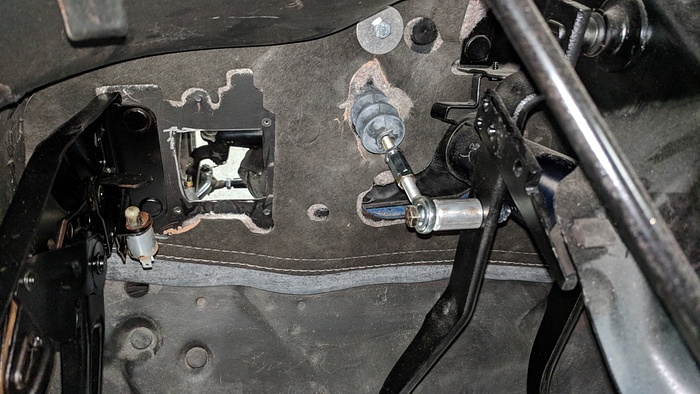
The clutch master took some figuring out. The original kit had a bracket for supposedly mounting the master on the steering column underneath the dash. Aside from no chance in hell of that working, the linkage also looked like it would bind just by looking at it. So, we mounted it to the firewall using the existing hole that was for the wiper motor wiring and drilling a hole in the clutch pedal.
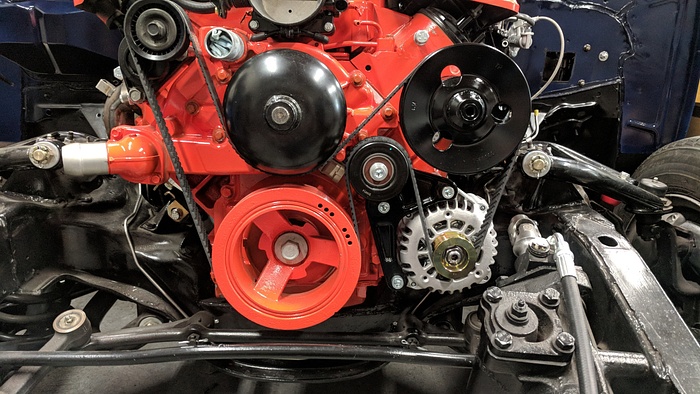
GTO accessories with a custom alternator from Tuff Stuff.
A Tanks, Inc tank that was purchased before Holley bought them.
And since my dad wanted a standard 3-point seat belt, we picked up some E46 M3 convertible seats.
Wilwood master cylinder and adjustable proportioning valve.
It will go great with the new front calipers.
Rear brake set-up:
The clutch master took some figuring out. The original kit had a bracket for supposedly mounting the master on the steering column underneath the dash. Aside from no chance in hell of that working, the linkage also looked like it would bind just by looking at it. So, we mounted it to the firewall using the existing hole that was for the wiper motor wiring and drilling a hole in the clutch pedal.
GTO accessories with a custom alternator from Tuff Stuff.
Last edited by MuhThugga; 09-19-2018 at 01:57 PM.
 09-19-2018, 01:30 PM
#12
TECH Fanatic
Thread Starter
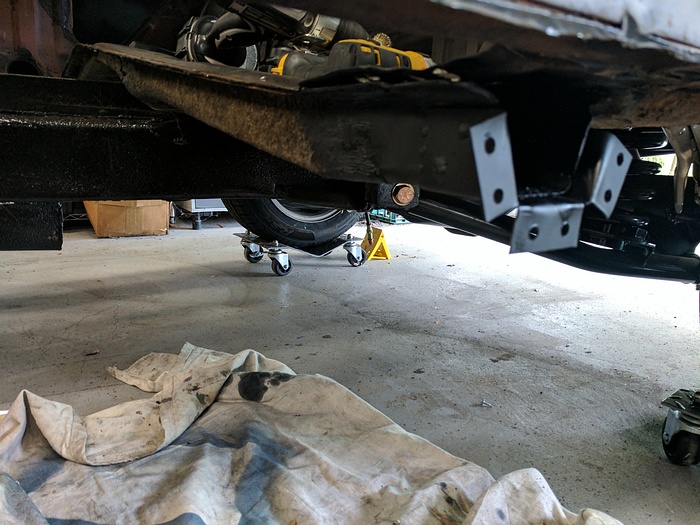
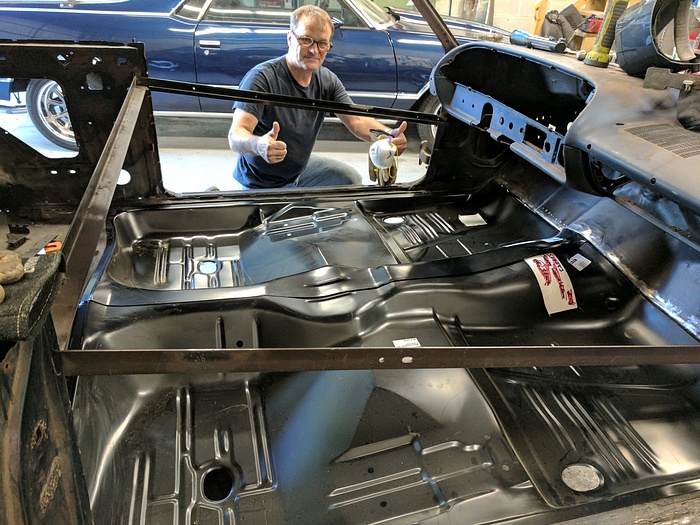
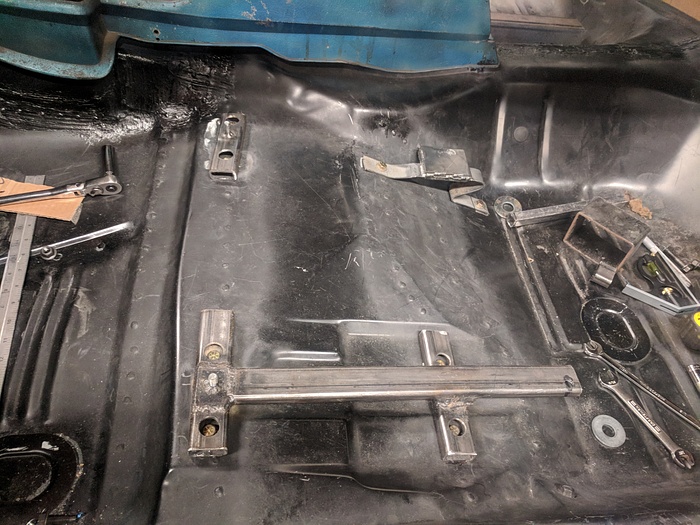
Thanks. I have more pictures of the tube steel if you want to see them. The steel wound up needing a 3/8" shim to keep level with the floor.
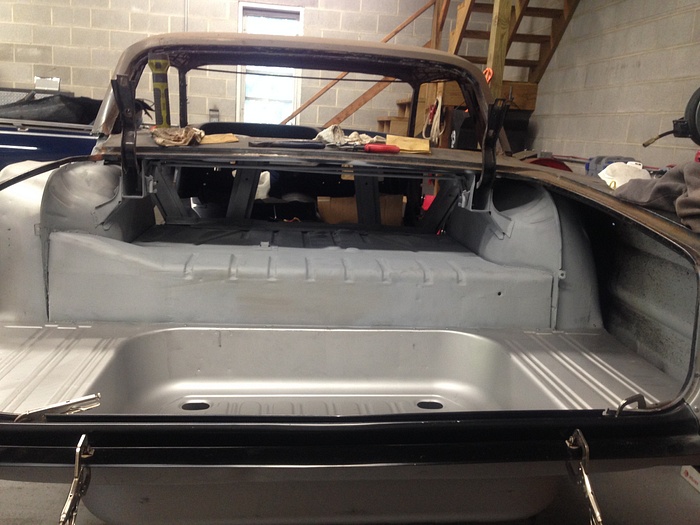
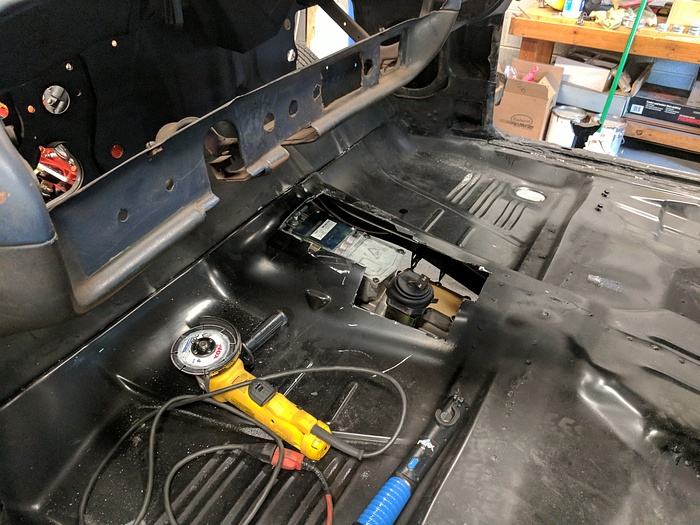
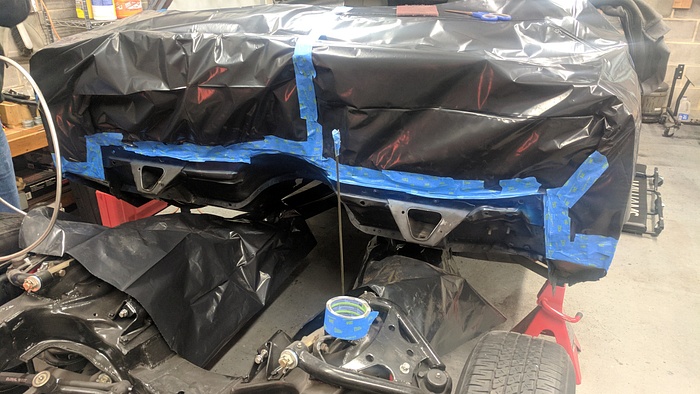
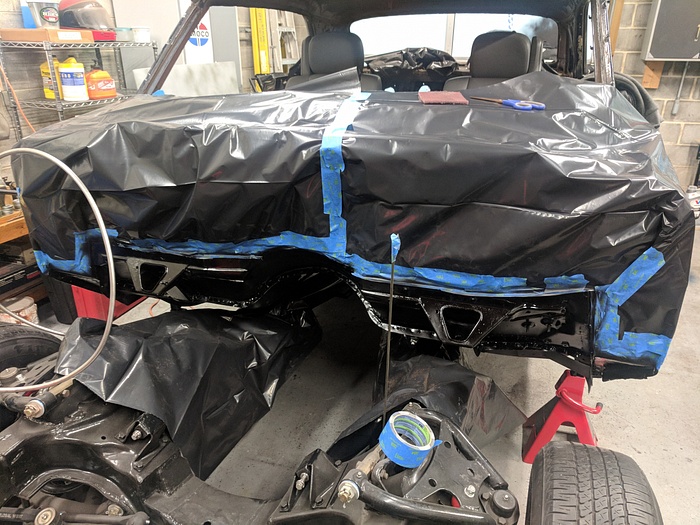
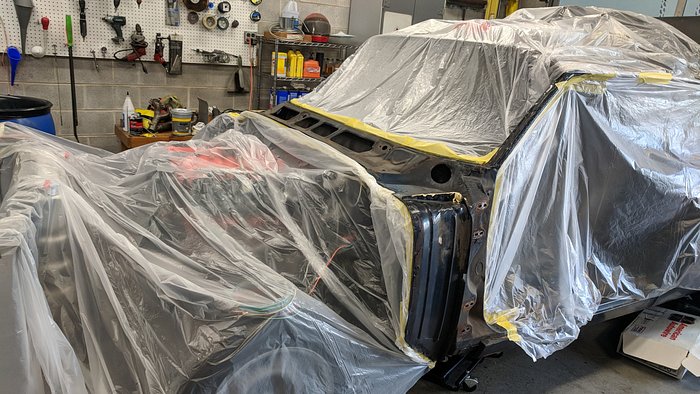
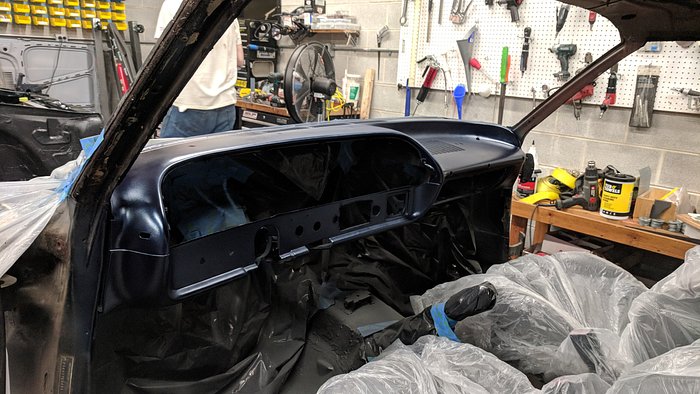
We masked everything off and painted the cowl. It came out a little lighter than we thought after removing the sheeting, but almost all of it is going to be covered.
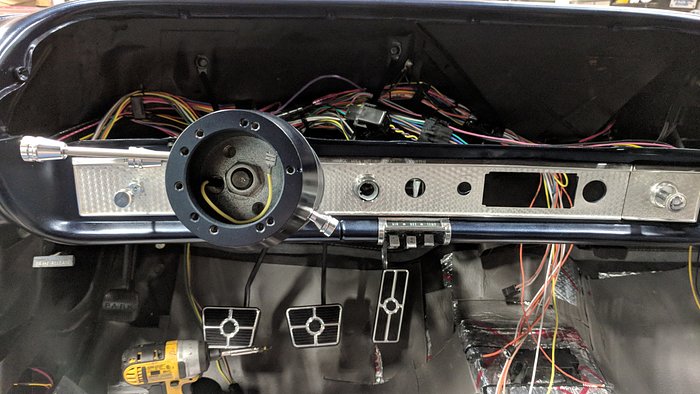
The dash was also painted and an Ididit steering column was installed.
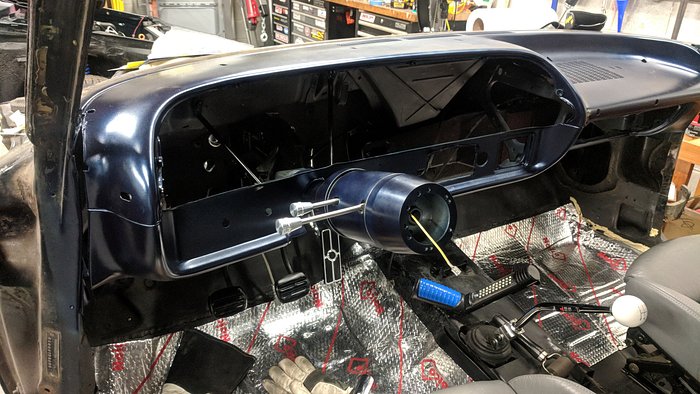
And my dad wanted a wooden steering wheel, so we found one that he liked.
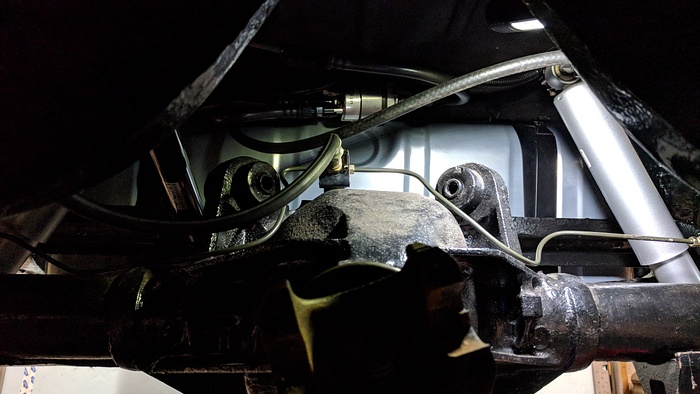
We then installed a CPP 500 steering box along with u-joints and 3/4 DD steering shaft cut to length.
We masked everything off and painted the cowl. It came out a little lighter than we thought after removing the sheeting, but almost all of it is going to be covered.
The dash was also painted and an Ididit steering column was installed.
And my dad wanted a wooden steering wheel, so we found one that he liked.
We then installed a CPP 500 steering box along with u-joints and 3/4 DD steering shaft cut to length.
Last edited by MuhThugga; 09-19-2018 at 02:09 PM.
09-19-2018, 01:40 PM
#13
TECH Fanatic
Thread Starter
Then it came time for the wiring. On the engine side, we are using a harness from PSI. On the chassis side, we are using a harness from American Autowire. Both harnesses are very well put together and I've had no issues marrying the two up.
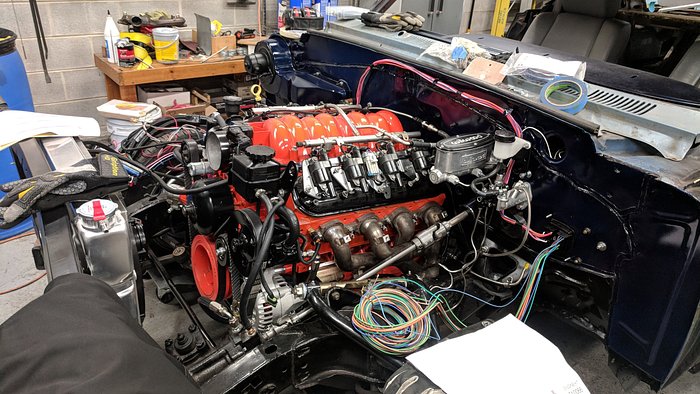
I used some weatherpack connectors to tie the body harness to the engine harness. Three plugs and it is disconnected.
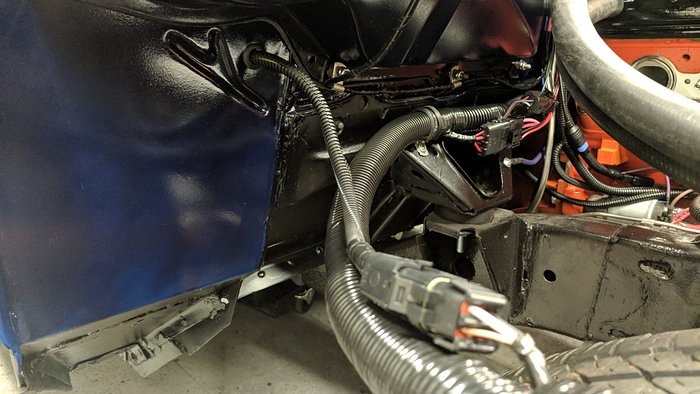
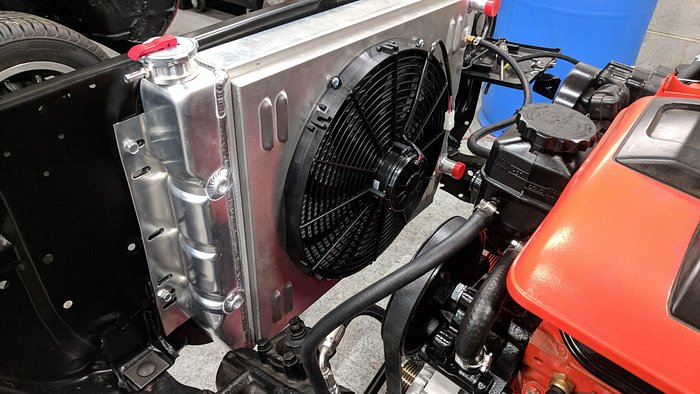
Picked up a radiator and 16" Spal cooling fan.
I used some weatherpack connectors to tie the body harness to the engine harness. Three plugs and it is disconnected.
Picked up a radiator and 16" Spal cooling fan.
Last edited by MuhThugga; 09-19-2018 at 01:59 PM.

The following users liked this post:
rkupon1 (04-01-2024)
09-20-2018, 08:11 AM
#15
TECH Fanatic
Thread Starter
Deal of the century here, and proof why you always, always make an offer on eBay when given the option.
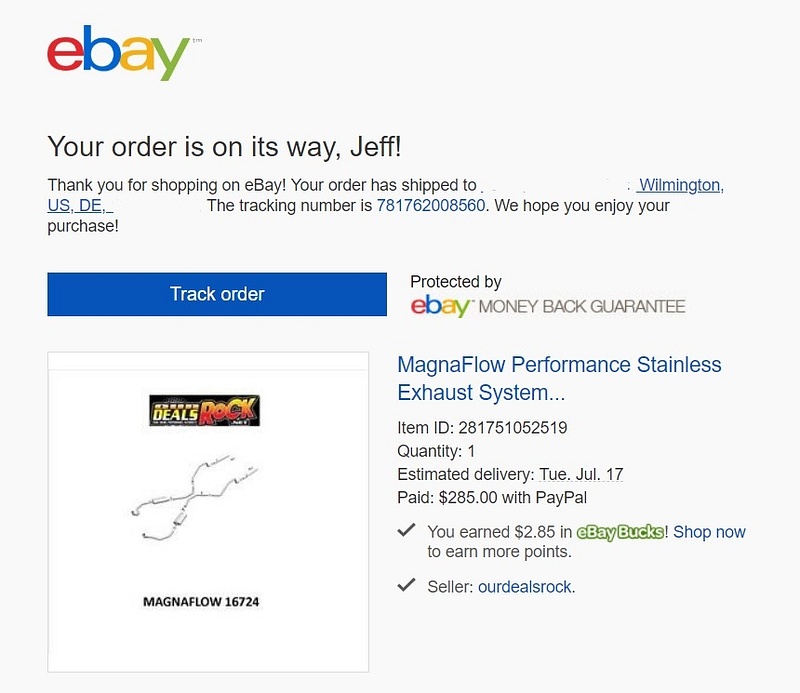
My dad and I were looking at exhaust kits, and he found that Magnaflow makes a complete kit from the manifolds back for a retail price of $700. I started browsing online for a deal and came across an eBay store selling them for $597 or to make an offer. So, I made an offer of $550.
The next morning, I received an email with their counter offer to my $550:


^^^Accurate to how I read that email.
I immediately accepted and paid, and then spent the rest of the day waiting to see what was going to happen. I fully expected to receive an email saying that the order was cancelled and they made a mistake. And I did receive an email:

I spent the last few days checking my tracking number while discussing with friends on what was going to actually show up in the box. I guess cardboard tubes. Someone else guessed a picture of the kit. Today, it arrived.
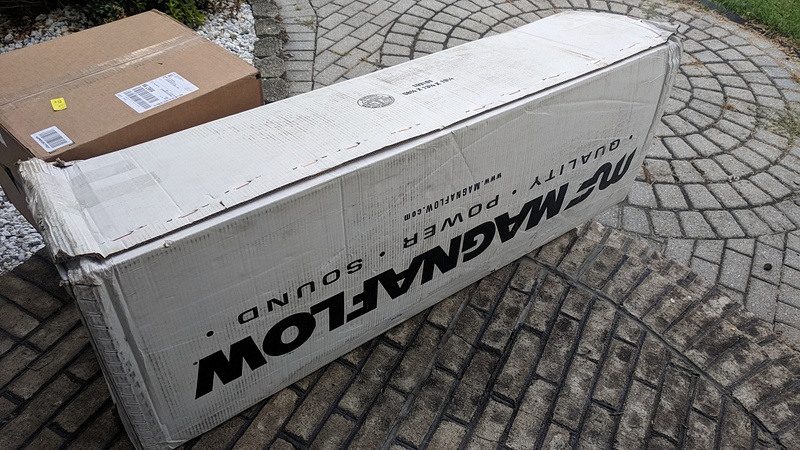

We managed to score a brand new, $700 Magnaflow exhaust system for $285 shipped to my door!
My dad and I were looking at exhaust kits, and he found that Magnaflow makes a complete kit from the manifolds back for a retail price of $700. I started browsing online for a deal and came across an eBay store selling them for $597 or to make an offer. So, I made an offer of $550.
The next morning, I received an email with their counter offer to my $550:
^^^Accurate to how I read that email.
I immediately accepted and paid, and then spent the rest of the day waiting to see what was going to happen. I fully expected to receive an email saying that the order was cancelled and they made a mistake. And I did receive an email:
I spent the last few days checking my tracking number while discussing with friends on what was going to actually show up in the box. I guess cardboard tubes. Someone else guessed a picture of the kit. Today, it arrived.
We managed to score a brand new, $700 Magnaflow exhaust system for $285 shipped to my door!
09-20-2018, 08:25 AM
#16
TECH Fanatic
Thread Starter
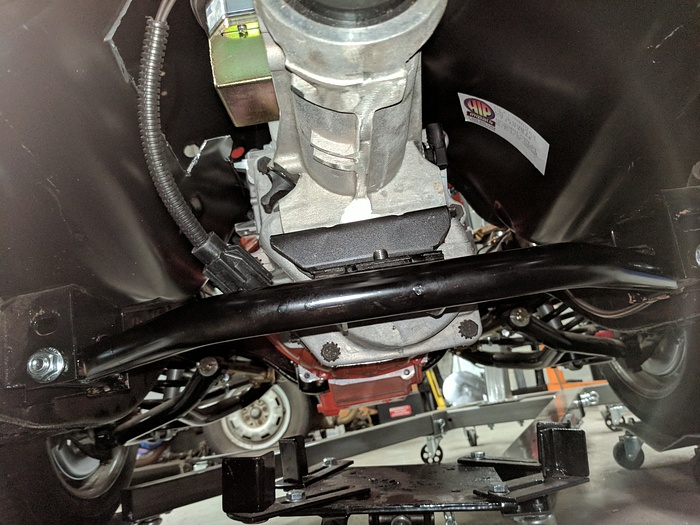
As I said earlier, the 5.3 is going to be utilizing the tri-y manifolds off the Z/28. Why? Because I wanted to see what could be done with factory parts.
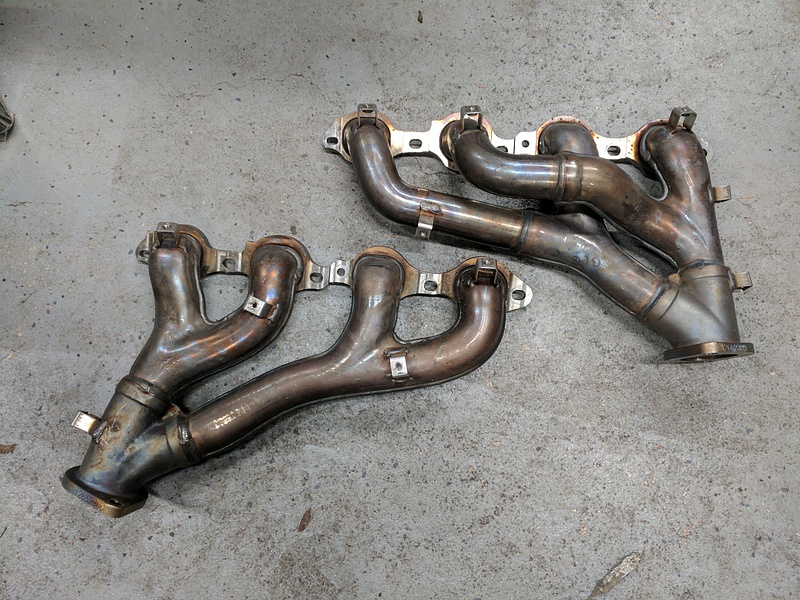
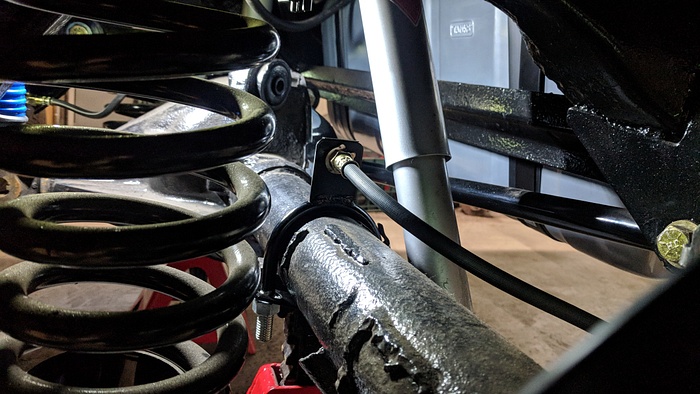
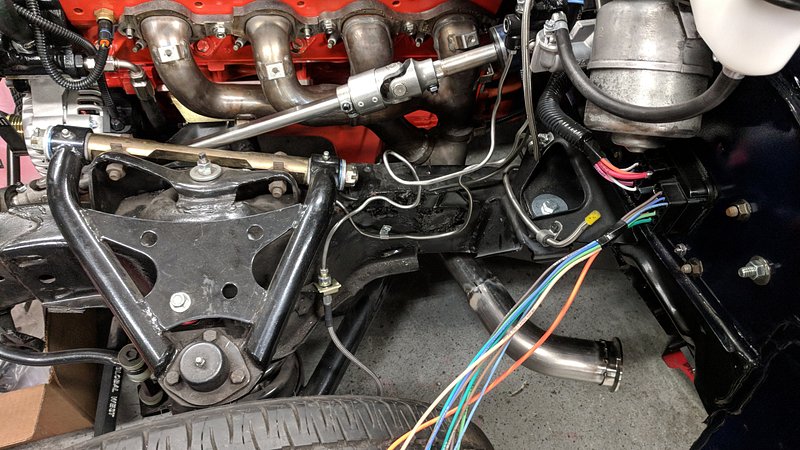
Now, when it comes to the X-frame, the exhaust actually runs along the outside of the frame rails. So, we grabbed some bent 2.25" and 2.5" tubing and got to fabricating.
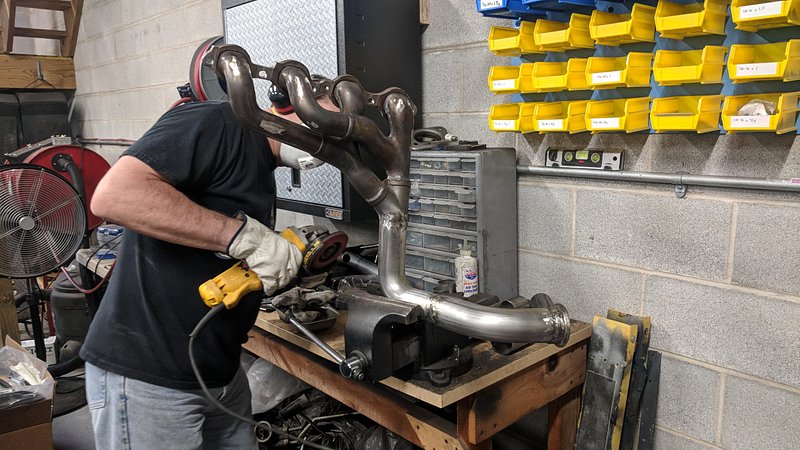
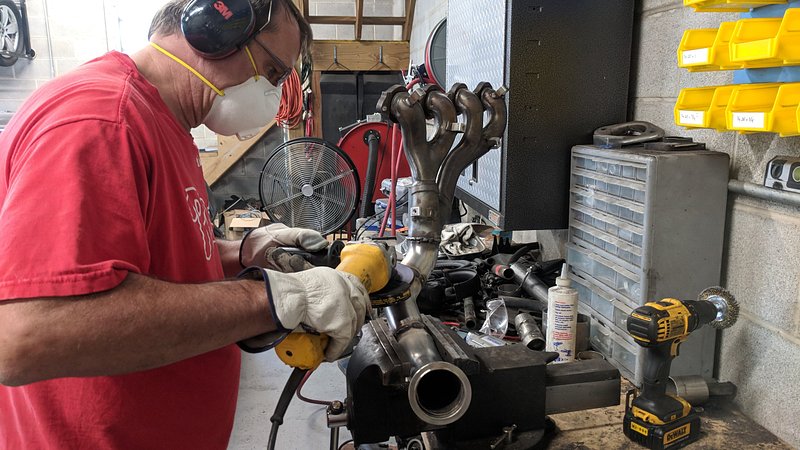
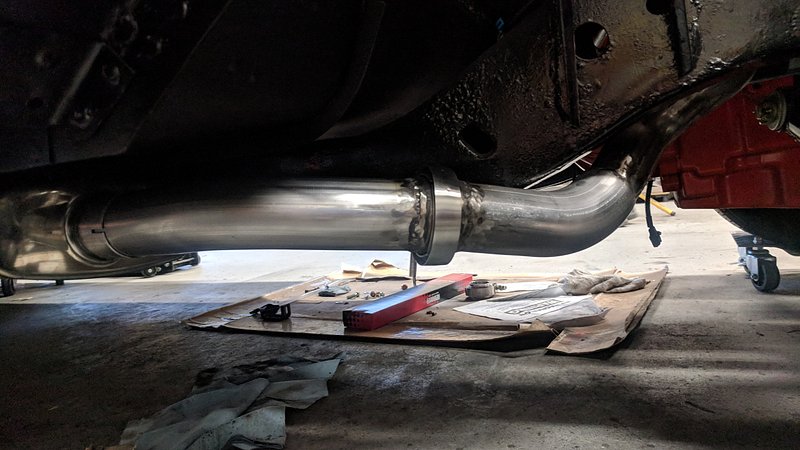
And then we sent them off for ceramic coating. I found a guy locally who uses a product called Cerakote.
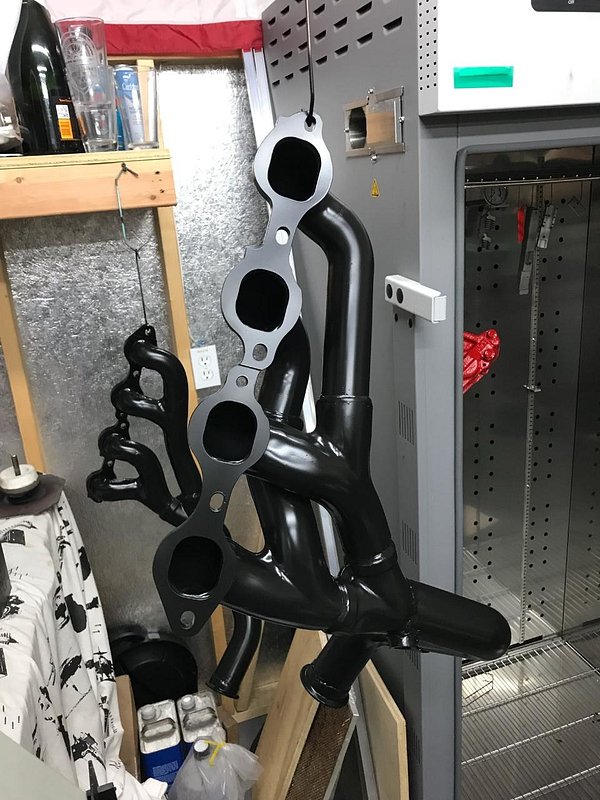
Now, when it comes to the X-frame, the exhaust actually runs along the outside of the frame rails. So, we grabbed some bent 2.25" and 2.5" tubing and got to fabricating.
And then we sent them off for ceramic coating. I found a guy locally who uses a product called Cerakote.
 09-20-2018, 12:22 PM
#18
TECH Fanatic
Thread Starter
Thanks. Some times I just look at the car and admire at how much has been accomplished. She's still a long ways away from being roadworthy, but we aren't that far off from being able to turn the key and fire her up.
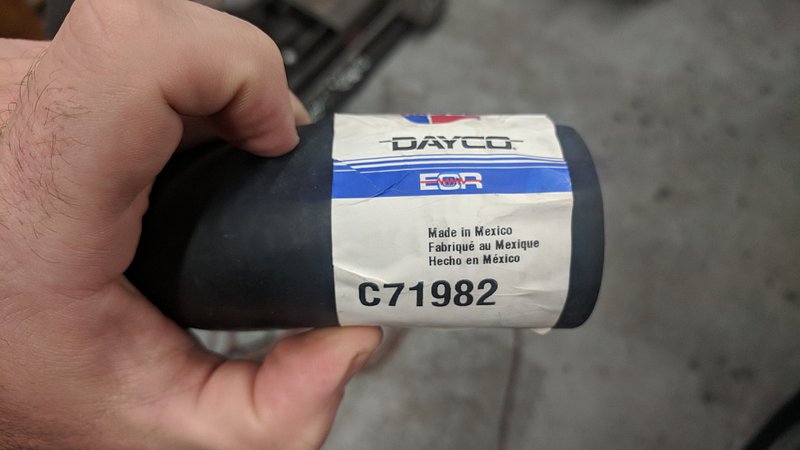
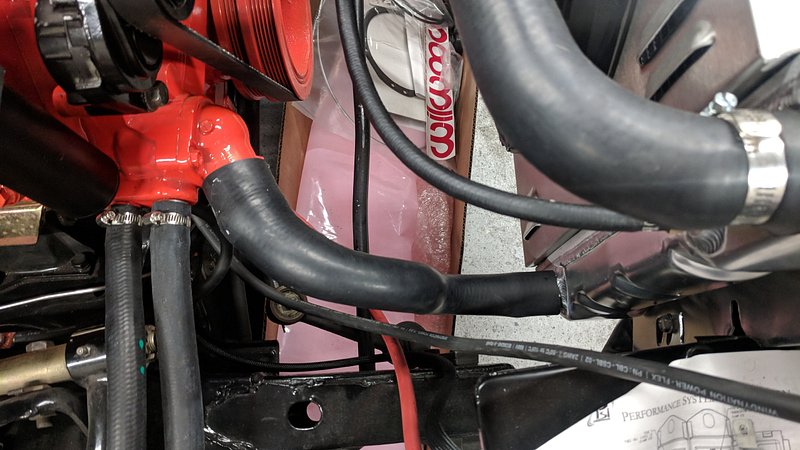
Since information on these specific 58-64 cars is rather sparse when it comes to LS swaps, for anyone looking for radiator hoses, here are the two I found to work:
Upper hose for an 01-07ish V6 Caravan. You just need to cut one end off.
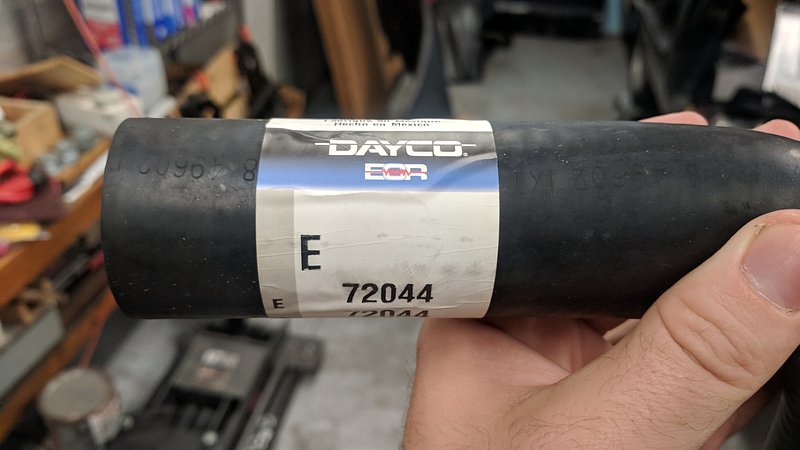
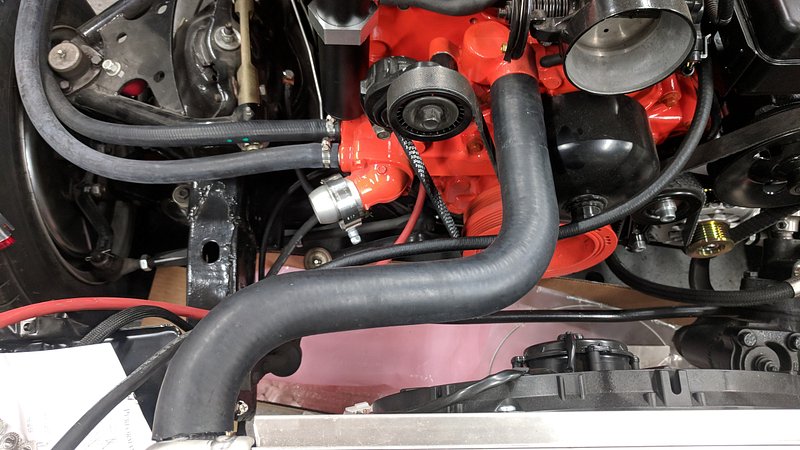
Lower hose for an LS1 4th Gen. Perfect fit.
Next on the list are the doors.
Since information on these specific 58-64 cars is rather sparse when it comes to LS swaps, for anyone looking for radiator hoses, here are the two I found to work:
Upper hose for an 01-07ish V6 Caravan. You just need to cut one end off.
Lower hose for an LS1 4th Gen. Perfect fit.
Next on the list are the doors.
 Hahaha!