
68 Camaro Build with a Gen V Swap
 10-30-2018, 09:43 AM
#21
TECH Senior Member
iTrader: (7)

It wouldn't surprise me if Holley released some Gen V swap products at SEMA (started today). Todd has posted some renderings of engine side brackets that would take into account the various dimensional differences between Gen 3/4 blocks and the Gen 5 blocks. They brackets would then mate with the cross member side engine mounts in existing Holley kits. Holley already has a Gen V pan in production.
Andrew
Andrew

 10-30-2018, 07:01 PM
#23
It wouldn't surprise me if Holley released some Gen V swap products at SEMA (started today). Todd has posted some renderings of engine side brackets that would take into account the various dimensional differences between Gen 3/4 blocks and the Gen 5 blocks. They brackets would then mate with the cross member side engine mounts in existing Holley kits. Holley already has a Gen V pan in production.
Andrew
Andrew
10-30-2018, 07:22 PM
#24
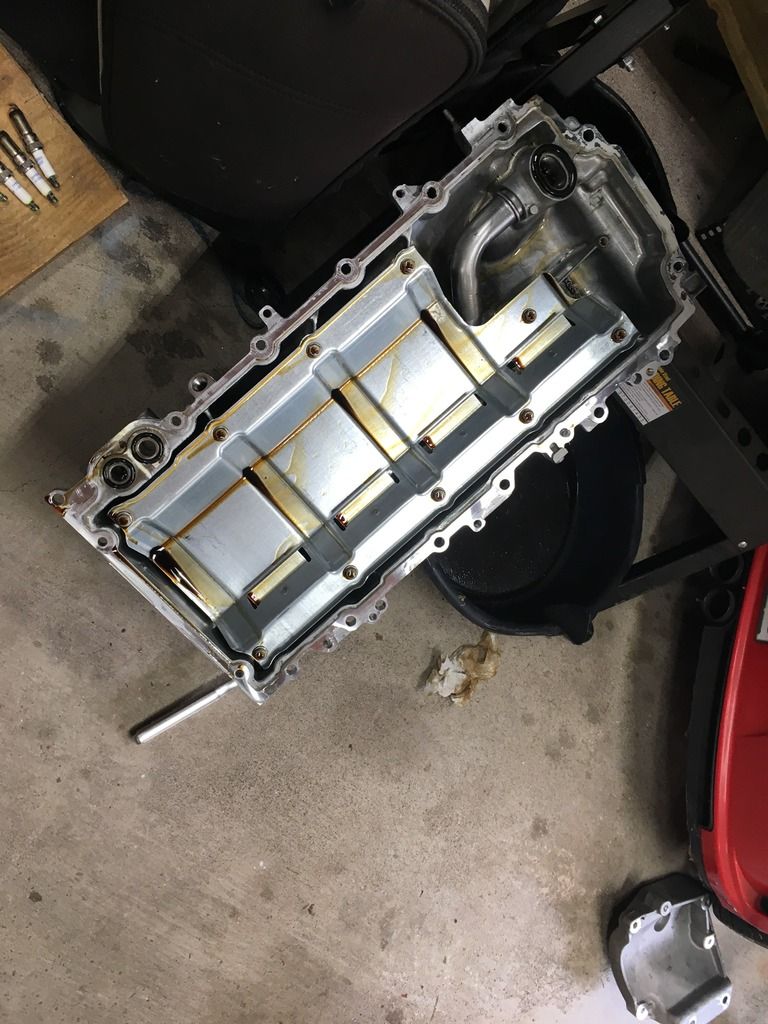
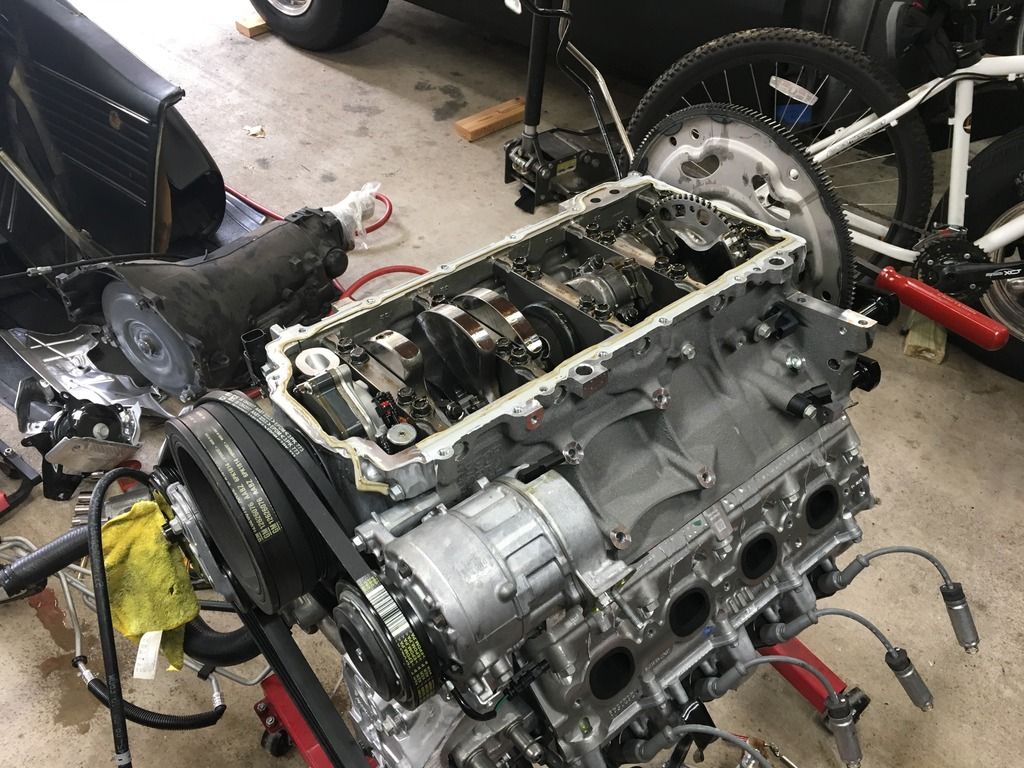
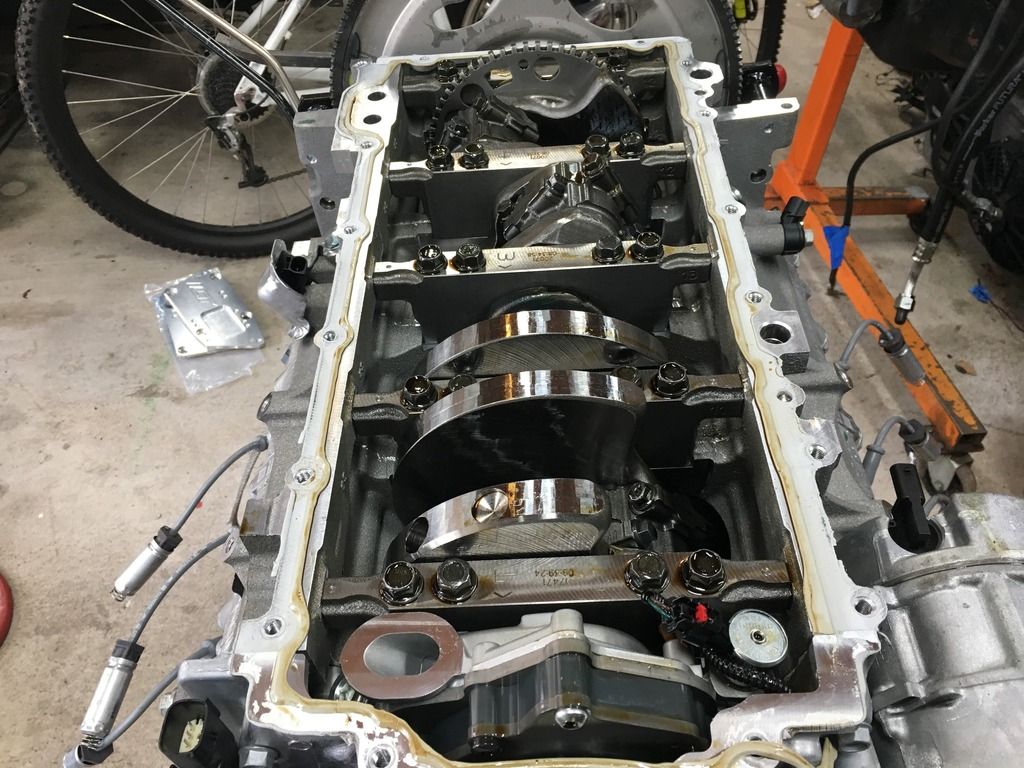
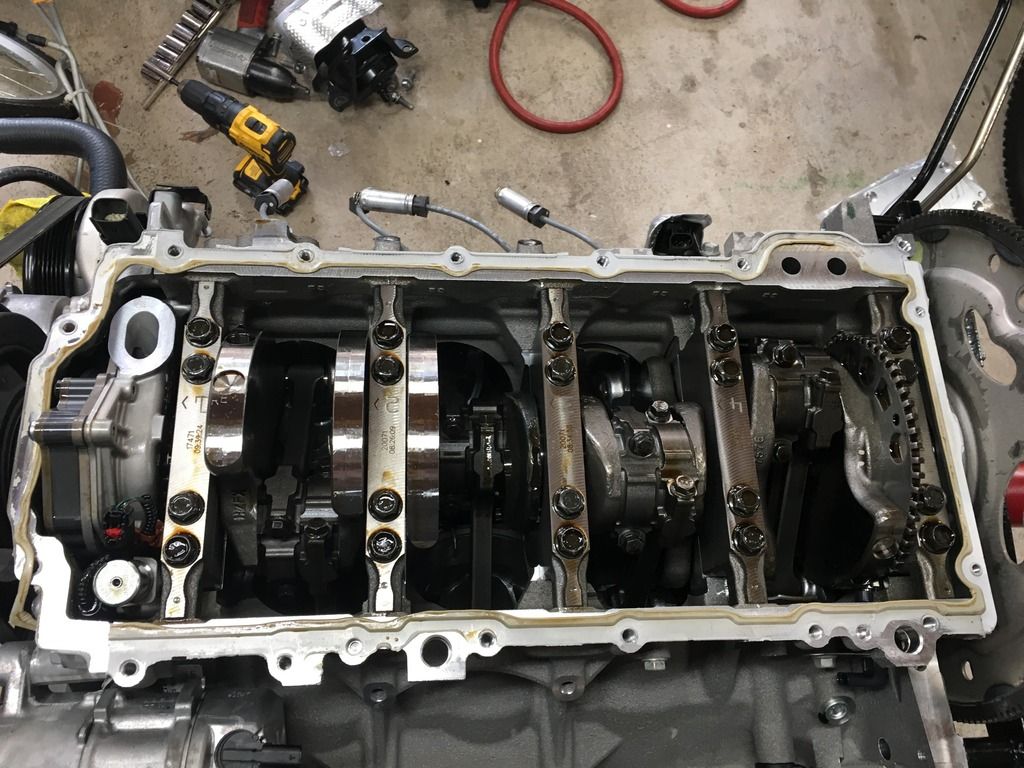
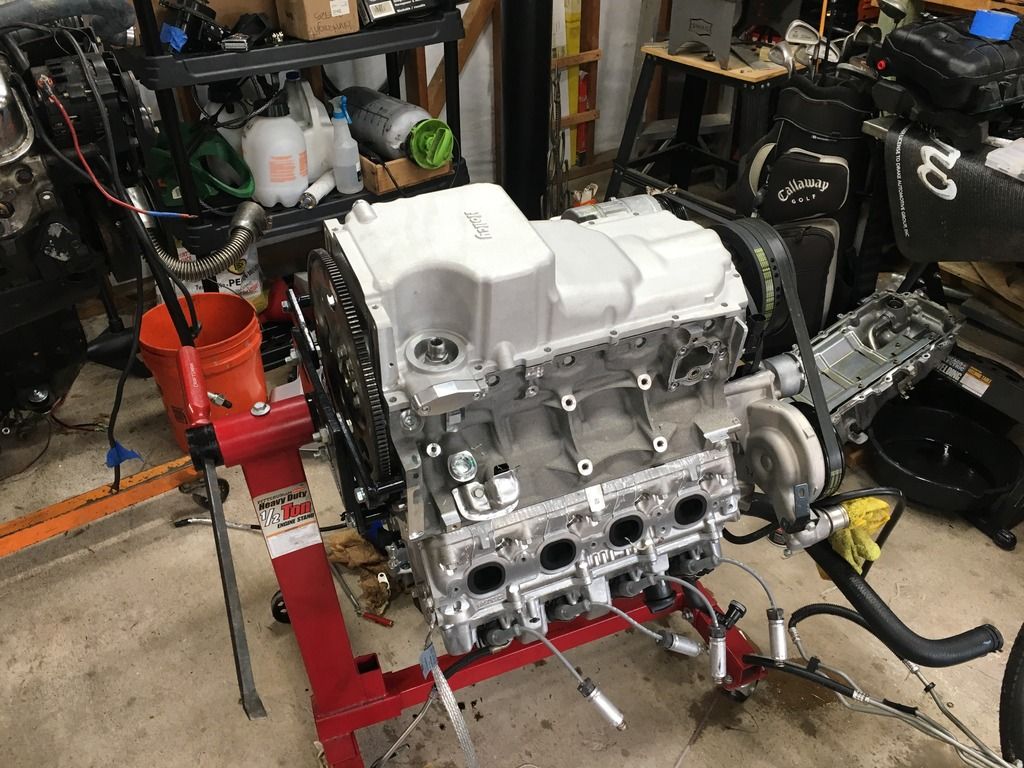
Here's the Holley oil pan install. I emptied all the oil out and let it drain overnight then removed the old pan prior to flipping the motor over. These new motors do not use an oil pan gasket if you don't know. GM uses a strong RTV silicone as the gasket so cleaning the surface really good is a must if you don't want oil leaks. I used the same sealant GM used, the PN is 12378521, it comes in a mini caulk gun tube. The pan requires a few items to be installed like the windage tray and pickup then slap it on following the torque instructions and that's it. The Pan is a lot smaller than stock and makes the motor look really small compared to how it was with the truck pan. I was also able to sell my truck pan for $80 so that's cool too. It felt good to take the pan off too with this being a used motor. With only 3K miles on this thing it checked out and passed my inspection.


 10-31-2018, 06:35 PM
#25
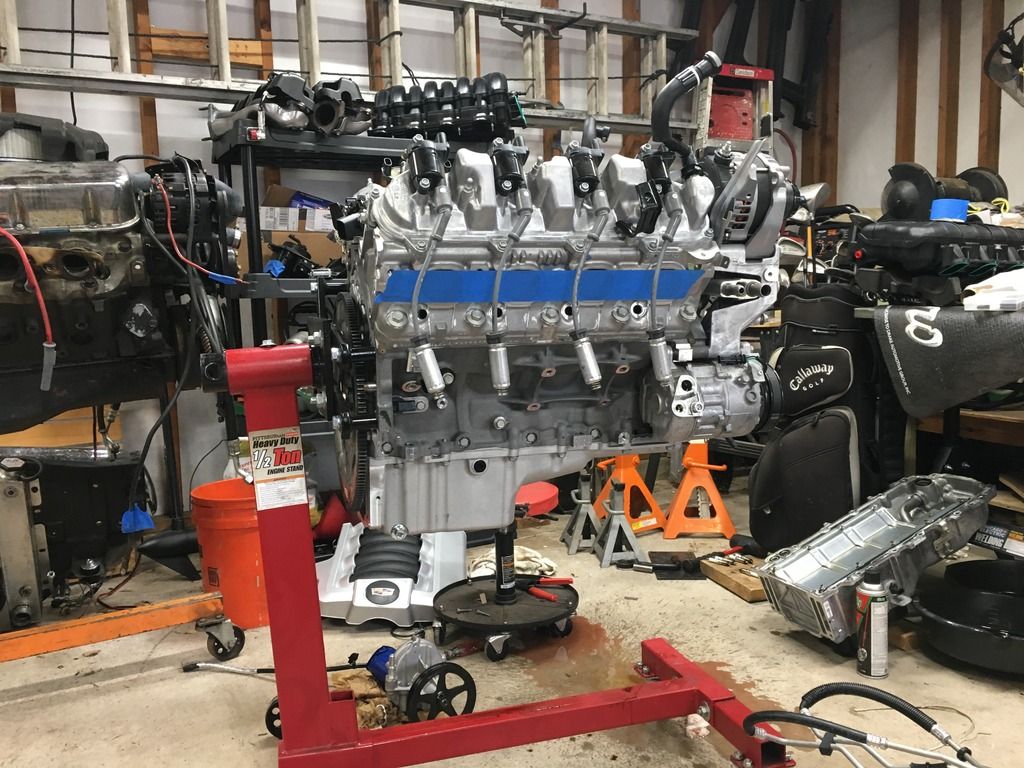
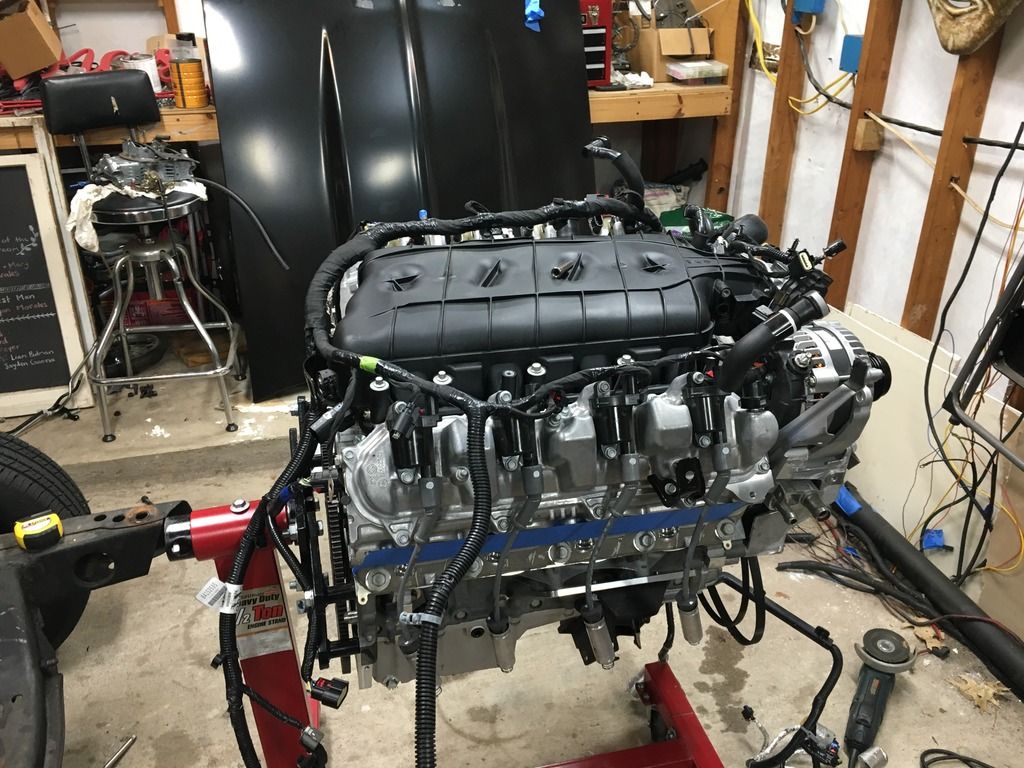
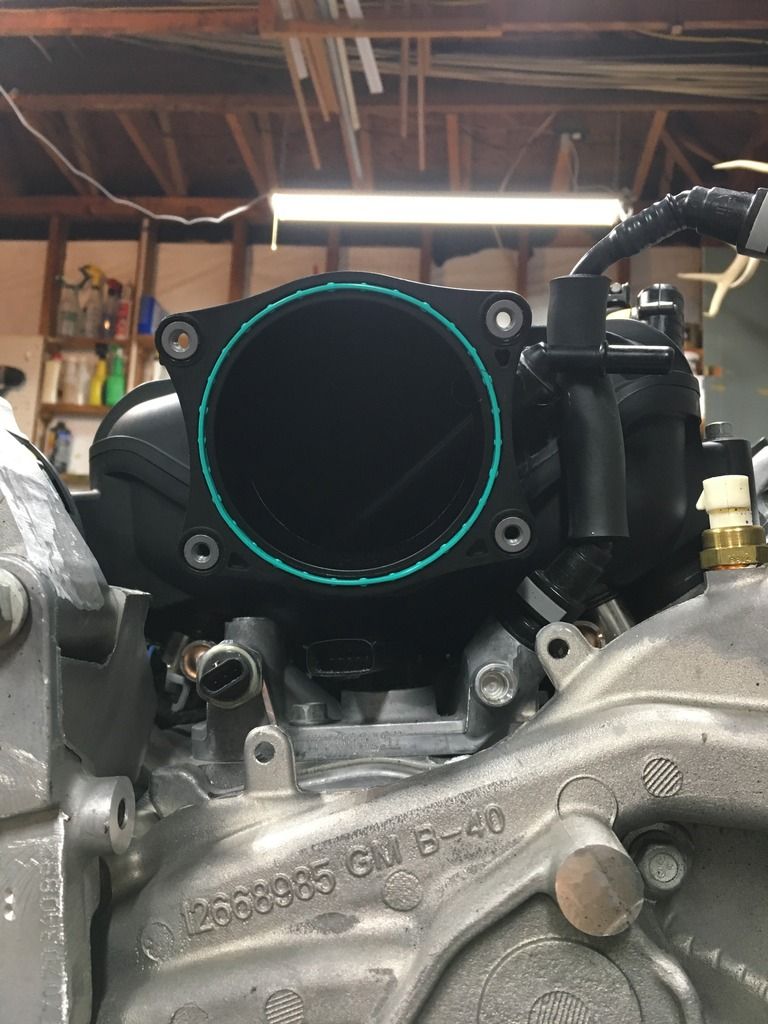
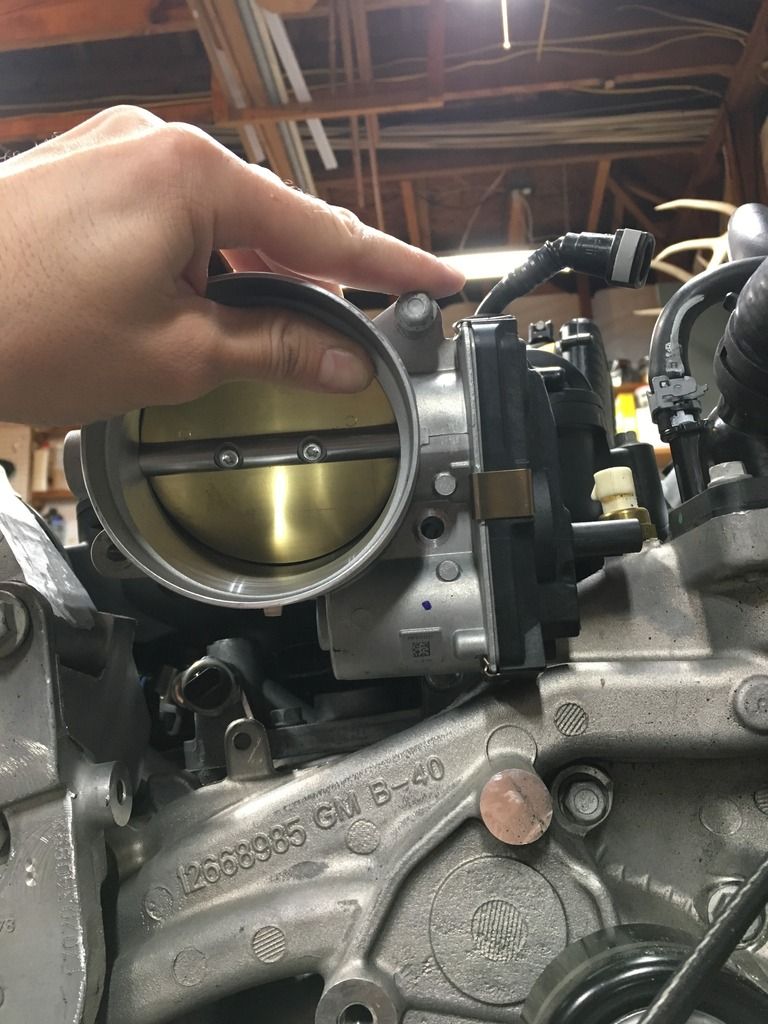
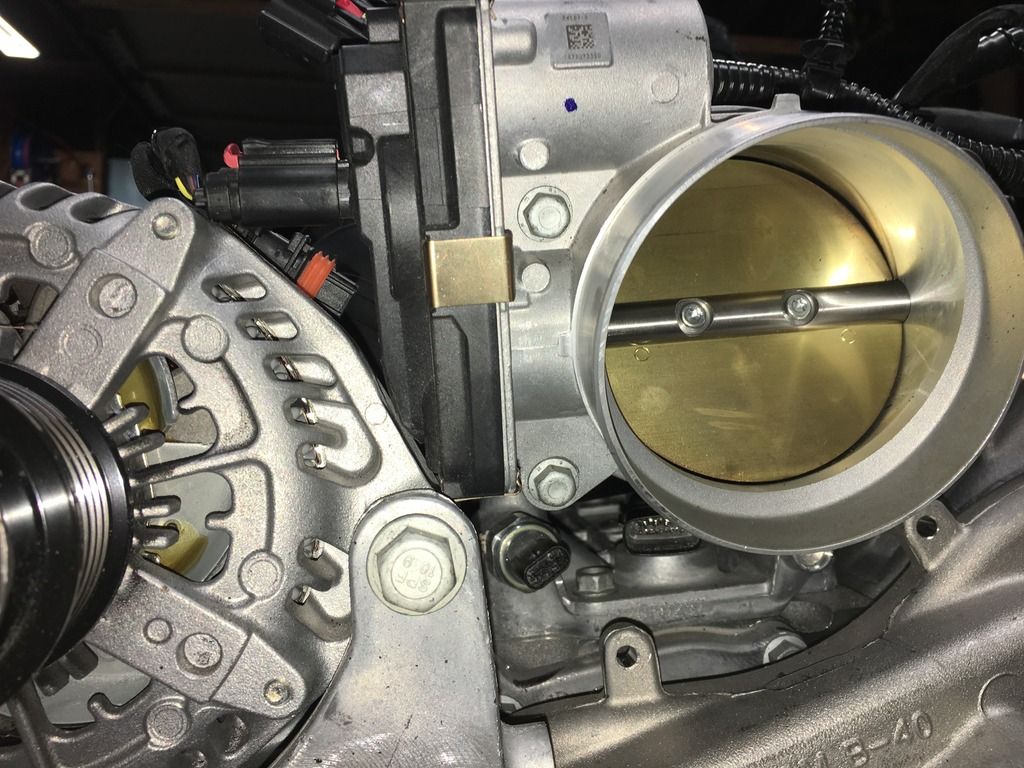
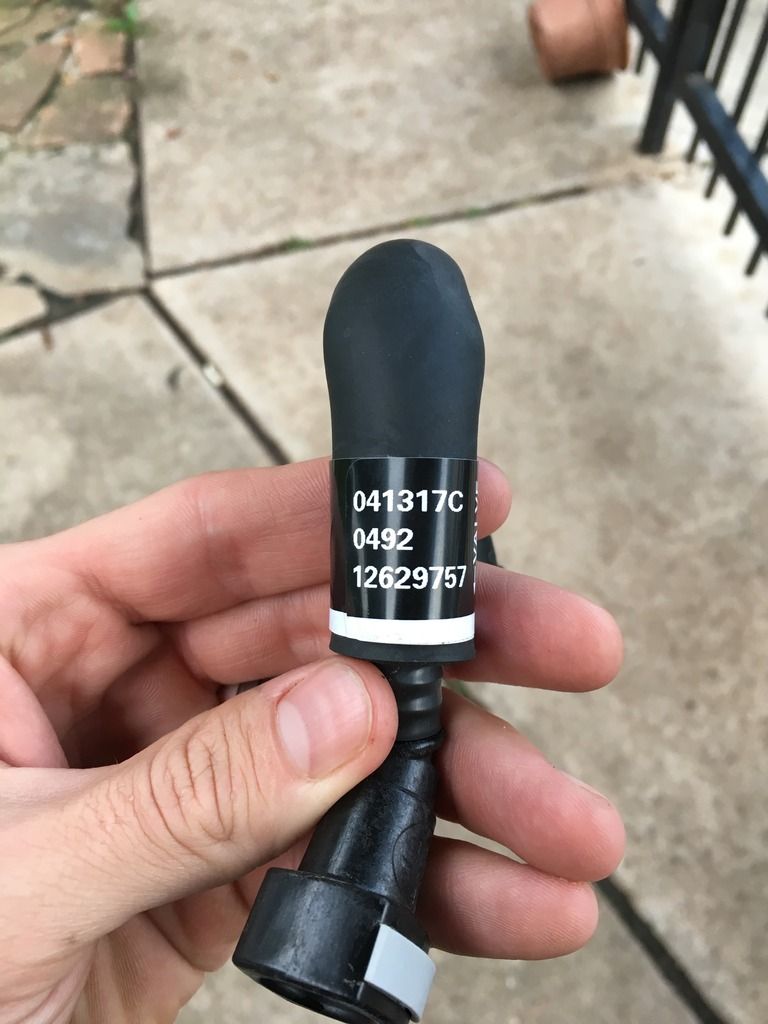
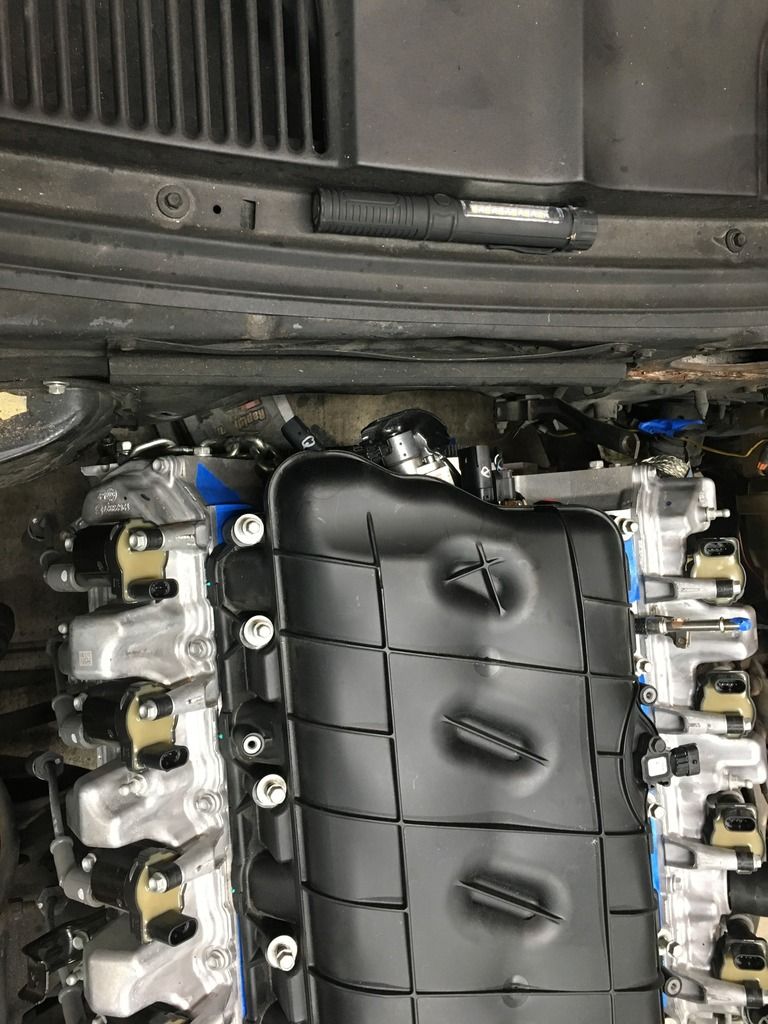
My next little project was to get an LT1 intake manifold and swap from my L86 intake. Some of the truck guys use this setup with their stock truck accessory drive and I got a few pointers from them that I'll share. First off the TB is upside down when compared to the LT1 position, they did this I'm assuming because the TB motor hits the water pump when you try to mimic the LT1 position. You must run it in the stock truck position and to accomplish this you need to clearance the TB motor and in my case, I also had to clearance the alternator slightly. I just used a Dremel and test fit it a few times until I got the results I was looking for. The TP harness plug is a tight fit but does not rub. Another issue you run into is the belt contacting the intake tube. To do this you must add an additional idler pulley to the alternator mounting bolt and wrap the belt below it thus pulling the belt below the intake tube. Requires a longer belt too. If you plan on doing the swap and want to use the factory style PCV tube from valley cover TB here is the correct PN in the photo below. If you try to use the L86 hose it will kink (very long in secont pic), the LT1 hose is shorter (last pic).
You can find these intakes on here or craigslist for around $100. I scored mine for $60 and sold the L86 for $80, made out like a bandit
I'm basing all this and other upcoming changes to me using the stock truck accessories (for the most part) and running the Kwik Performance L86 bracket to run PS and high mount AC on the PS side. This is the only accessory drive I know of that will allow me to run the factory vacuum pump (one goal I'd like to make) and not break the bank and spend $2K+ to get things going. The Kwik setup is around $500. See link below. Wayne at Kwik also said he can equip his setup with the additional idler pulley to run the LT1 intake and sent me a few pictures of another customers setup.
http://www.kwikperf.com/lt.html


Last edited by jasonz28camaro; 10-31-2018 at 06:40 PM.
11-01-2018, 06:50 PM
#26
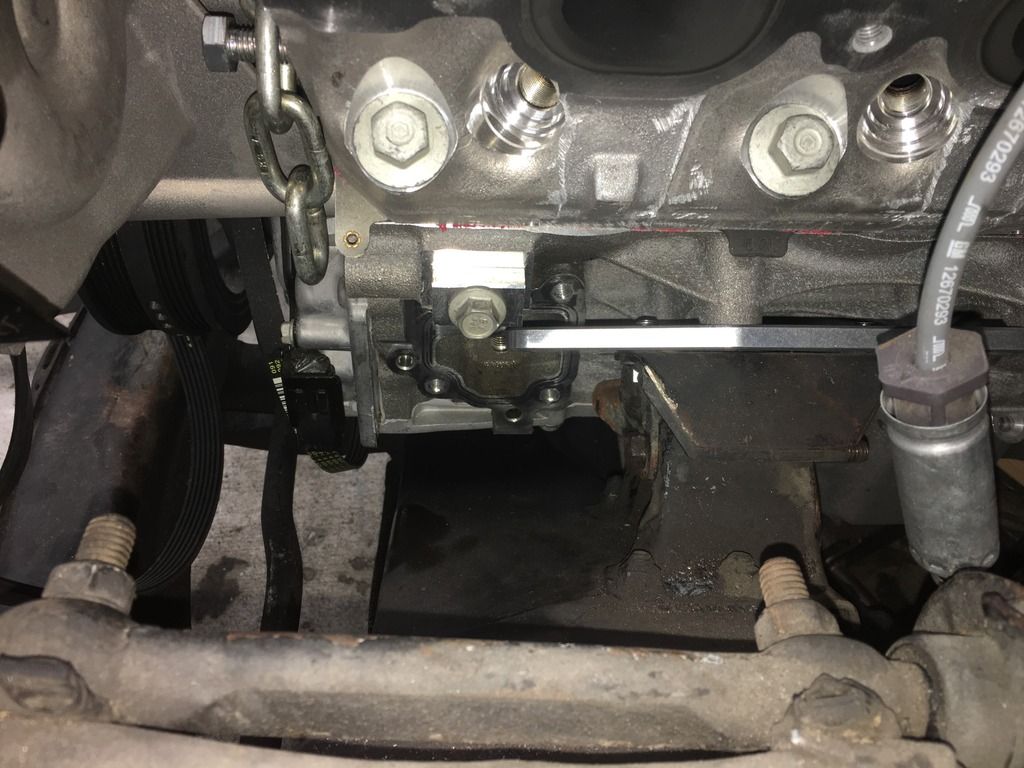
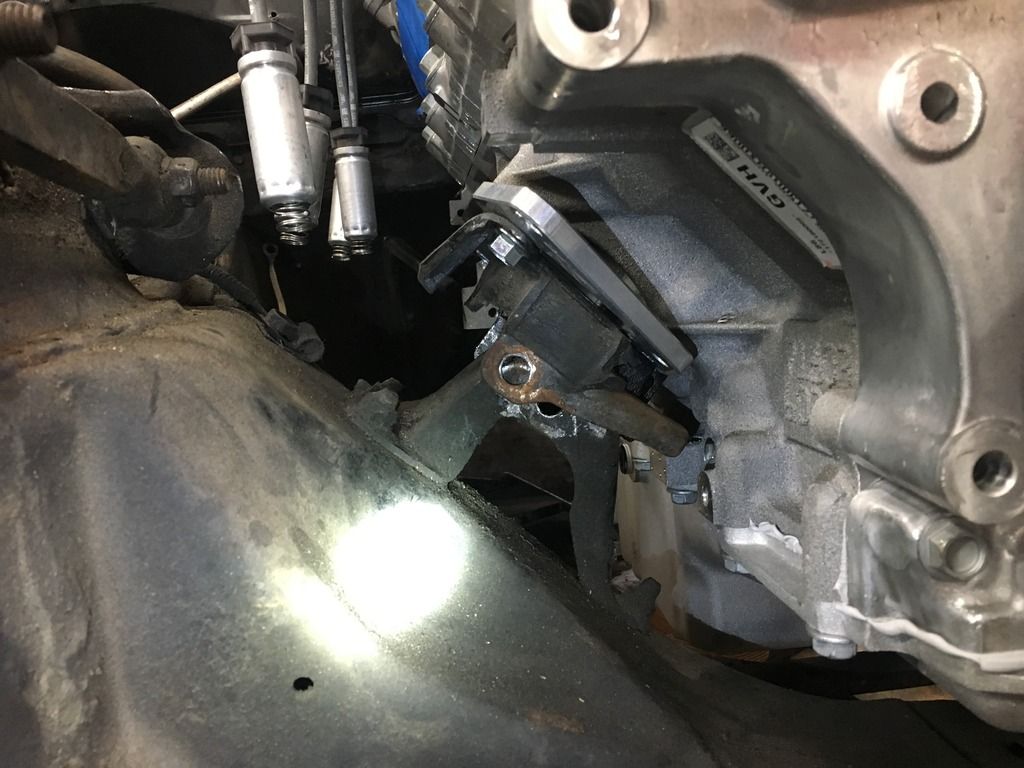
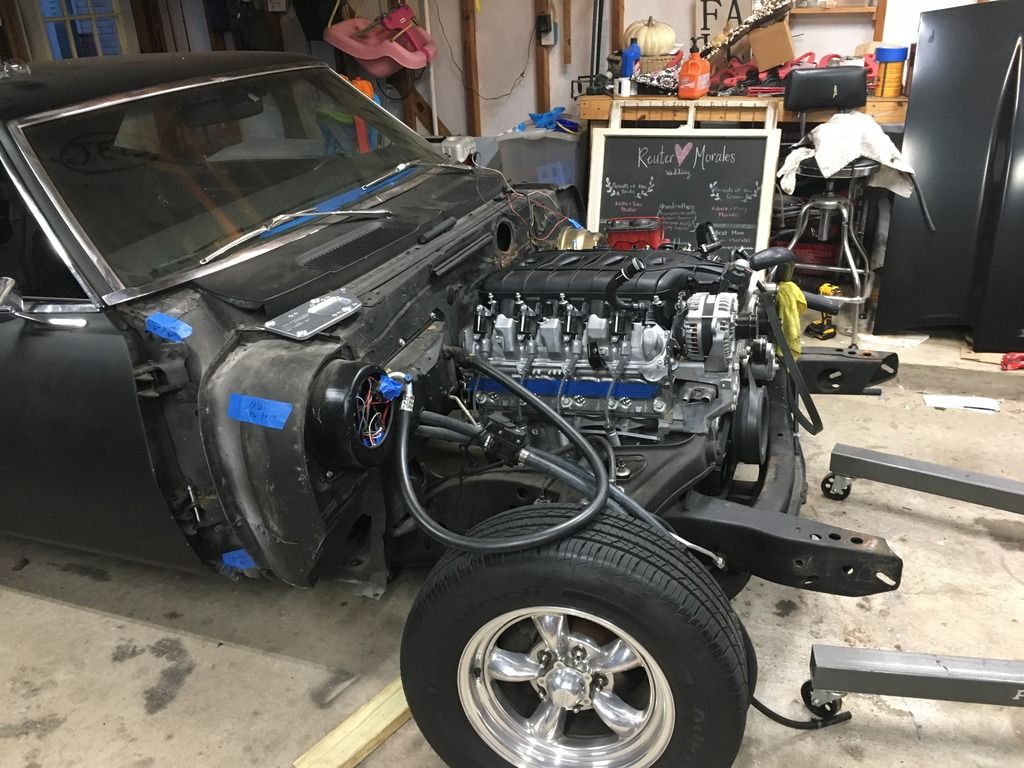
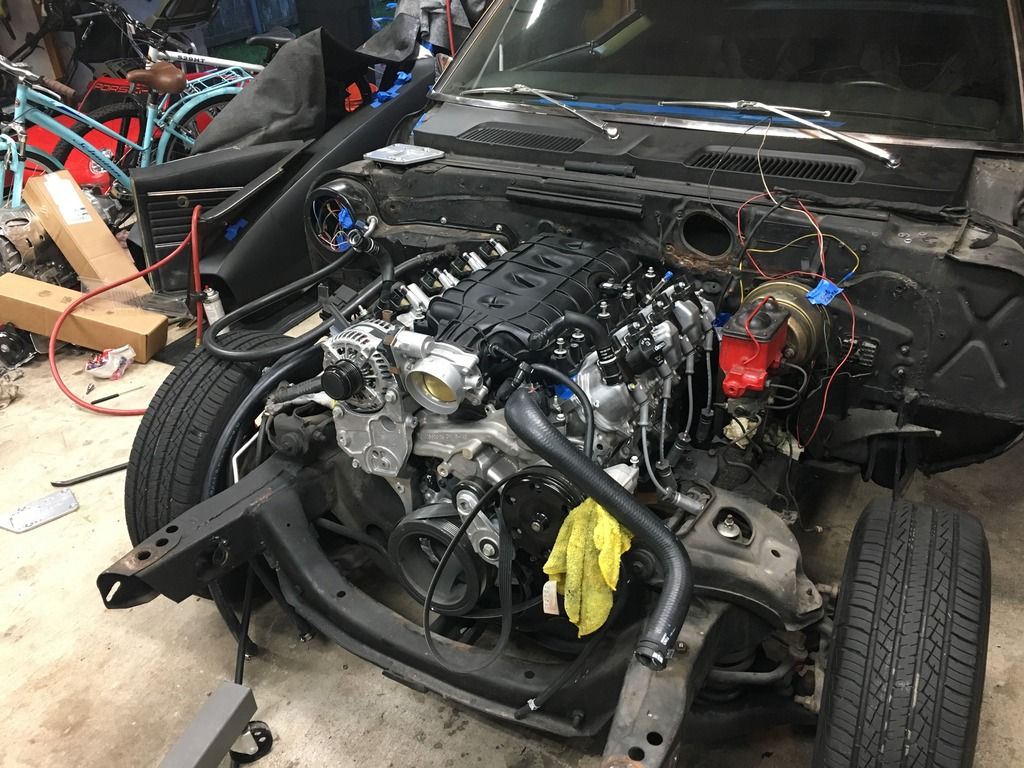
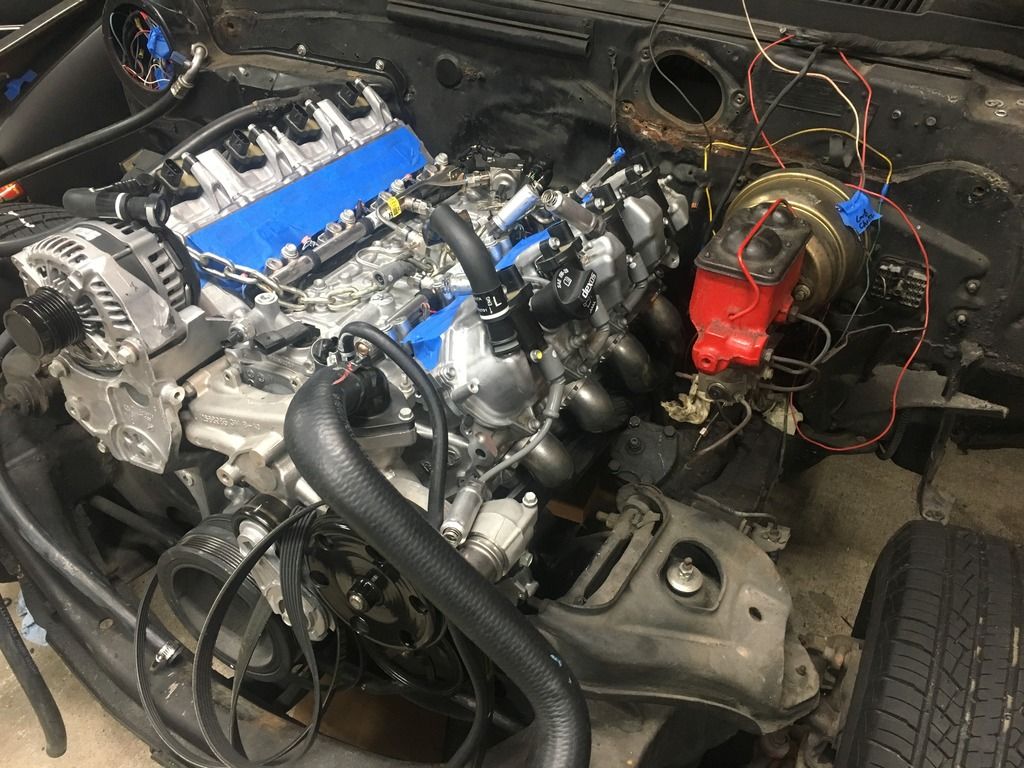
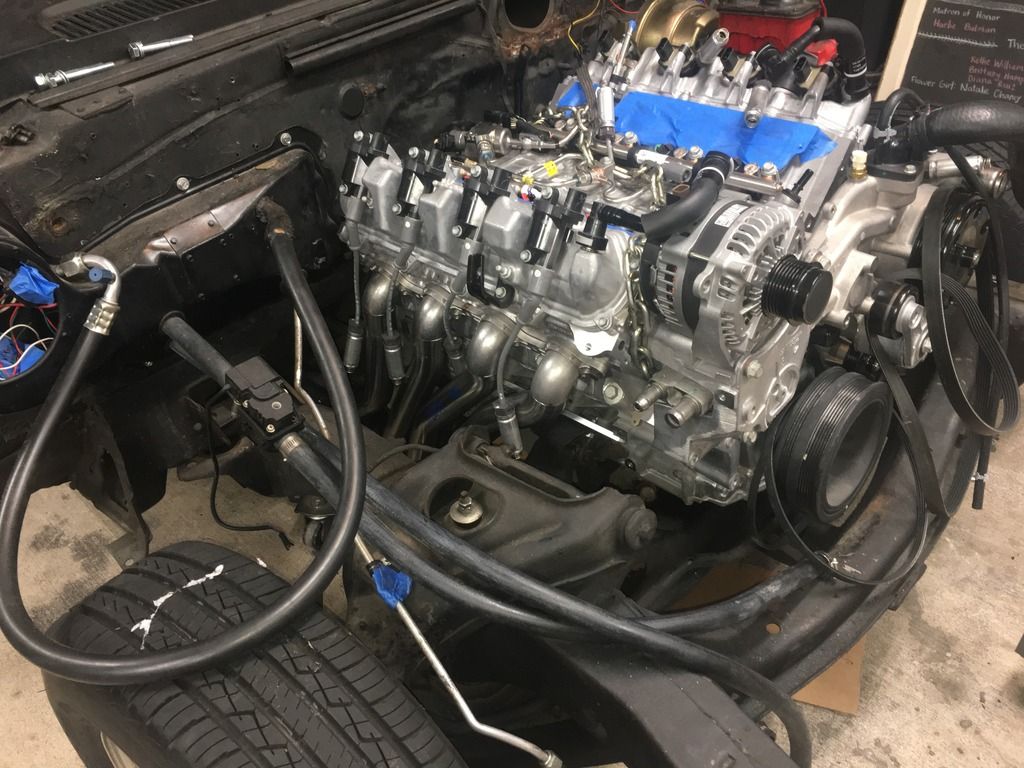
I chose to use the ITCBillet Gen V swap mounts they sell with short and wide engine mounts. One of the main reasons I went with these is because they advertise you can use these with the stock vacuum pump and thats something I wanted to achieve. I pulled the vacuum pump and went ahead and sat the motor down into the subframe to check fitment.
As you can see I'm a little ways off from getting them lined up so I reached out to ITCBillet for advice.
As you can see I'm a little ways off from getting them lined up so I reached out to ITCBillet for advice.


 11-01-2018, 07:06 PM
#27
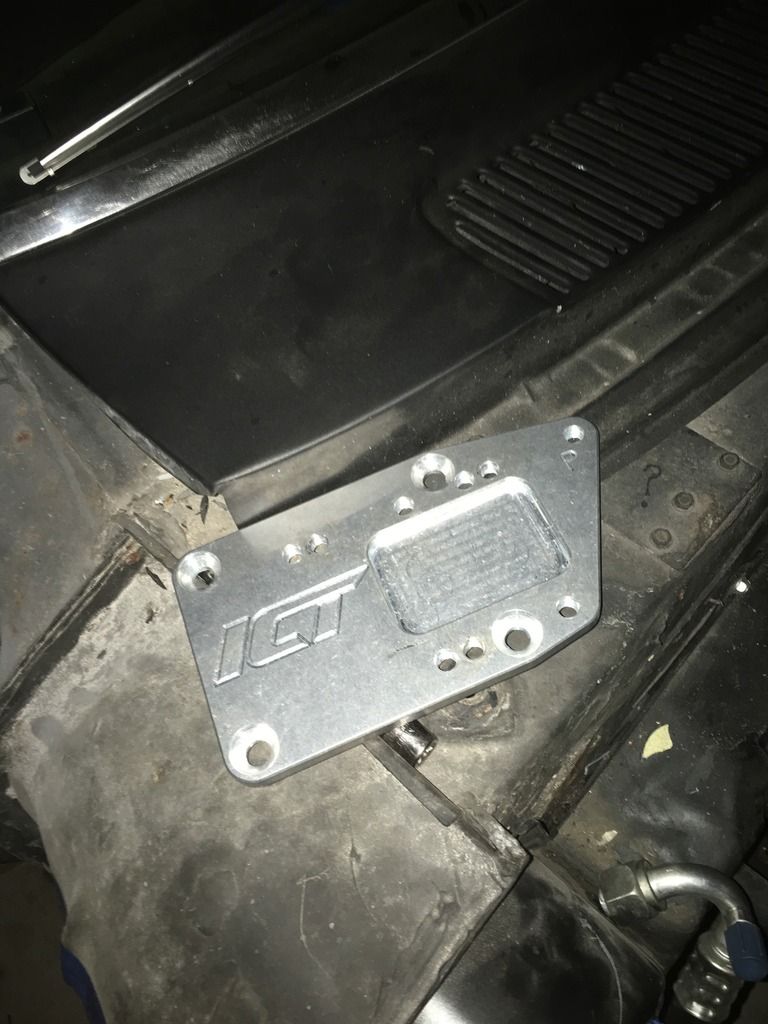
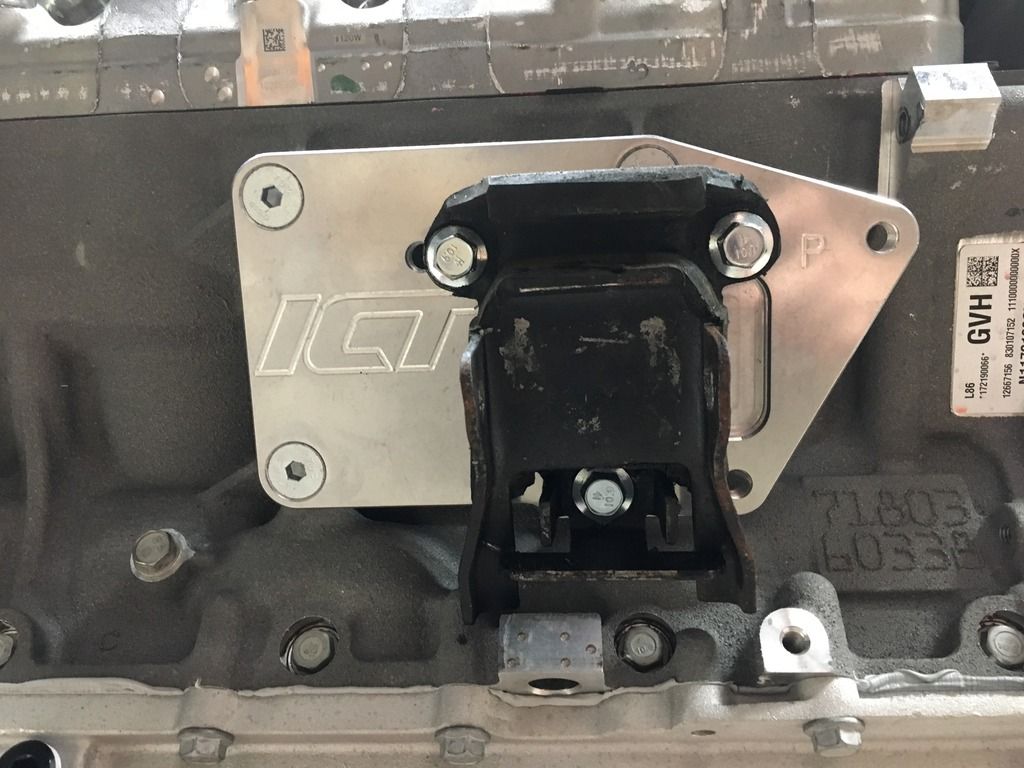
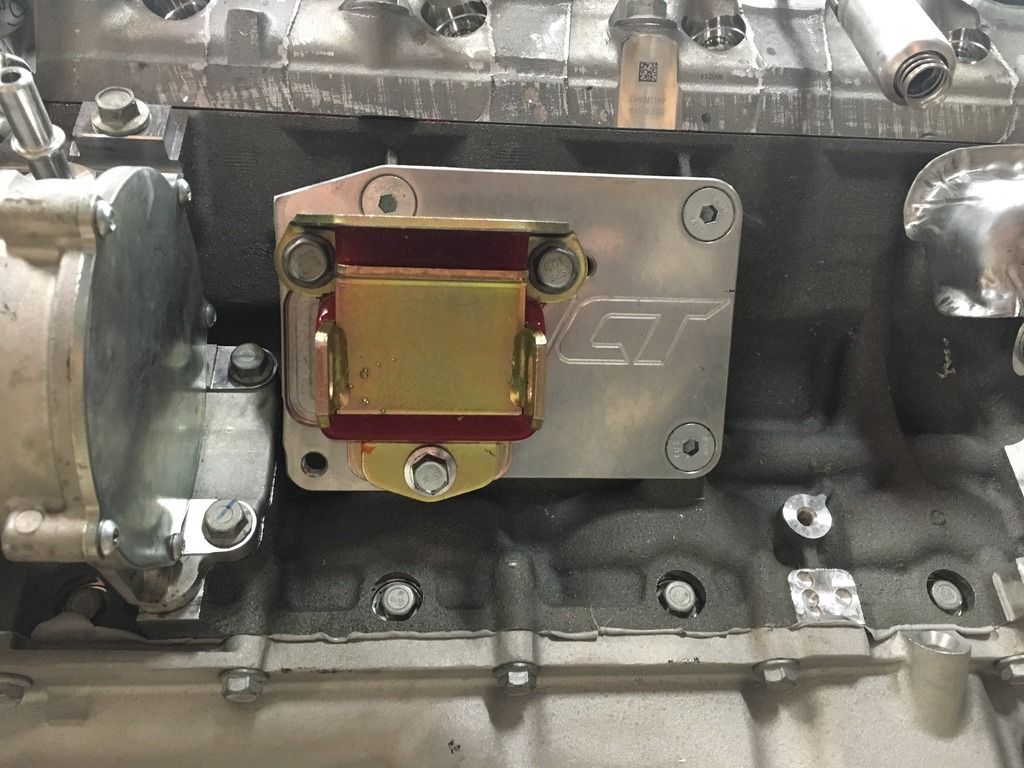
ICTBillet viewed my photos and advised me to purchase new SBC stands because the car had a BBC in it and they use different stands. I got the stands in the mail only to see that I already have these same stands in the car already. About an hour later I received an email from ICT with a tracking number for a package and a note that said there was a shipping error originally. Turns out they have revised their mounts at some point and I got the older style. Look at the first photo in my previous post and compare to what they have online and you can see the difference, they dropped the bolt holes down a bit on the newer style adapter plates. The motor fit easily with these new plates. I also have both energy suspension mounts installed unlike the photos show.
Here's a shot of the newer style plates, kind of hard to tell by the lower section of the plate has been extended to allow for the bolt holes for the rubber mounts to sit lower. Also here's what is required for the vacuum pump to be installed, see cut DS plate, you must also eliminate the most forward mounting hole and your dreams of using that position. There are three positions on these plates and from what I was told over the phone the most forward mounting holes are for the stock SBC position, middle is 1.625" forward and furthest is 2.25" forward from stock position. Not 100% sure on these measurements as I was writing them down while on the phone with them. I found that the middle position more closely resembled the position of my BBC. I really do not think the most forward position would work either, it would put the head either in the firewall or too close for my liking. I think something in the middle would work great. The motor is currently jacked up at the rear of the oil pan and the motor is sitting level. Whenever I lower the jack and the motor more closely resembles the actual operating angle it moves it really close to the firewall and rests on the AC box holted to my firewall. I guess another way to see where it sits is to compare the balancer to the subframe.
Here's a shot of the newer style plates, kind of hard to tell by the lower section of the plate has been extended to allow for the bolt holes for the rubber mounts to sit lower. Also here's what is required for the vacuum pump to be installed, see cut DS plate, you must also eliminate the most forward mounting hole and your dreams of using that position. There are three positions on these plates and from what I was told over the phone the most forward mounting holes are for the stock SBC position, middle is 1.625" forward and furthest is 2.25" forward from stock position. Not 100% sure on these measurements as I was writing them down while on the phone with them. I found that the middle position more closely resembled the position of my BBC. I really do not think the most forward position would work either, it would put the head either in the firewall or too close for my liking. I think something in the middle would work great. The motor is currently jacked up at the rear of the oil pan and the motor is sitting level. Whenever I lower the jack and the motor more closely resembles the actual operating angle it moves it really close to the firewall and rests on the AC box holted to my firewall. I guess another way to see where it sits is to compare the balancer to the subframe.


Last edited by jasonz28camaro; 11-01-2018 at 07:23 PM.
11-07-2018, 10:36 PM
#28
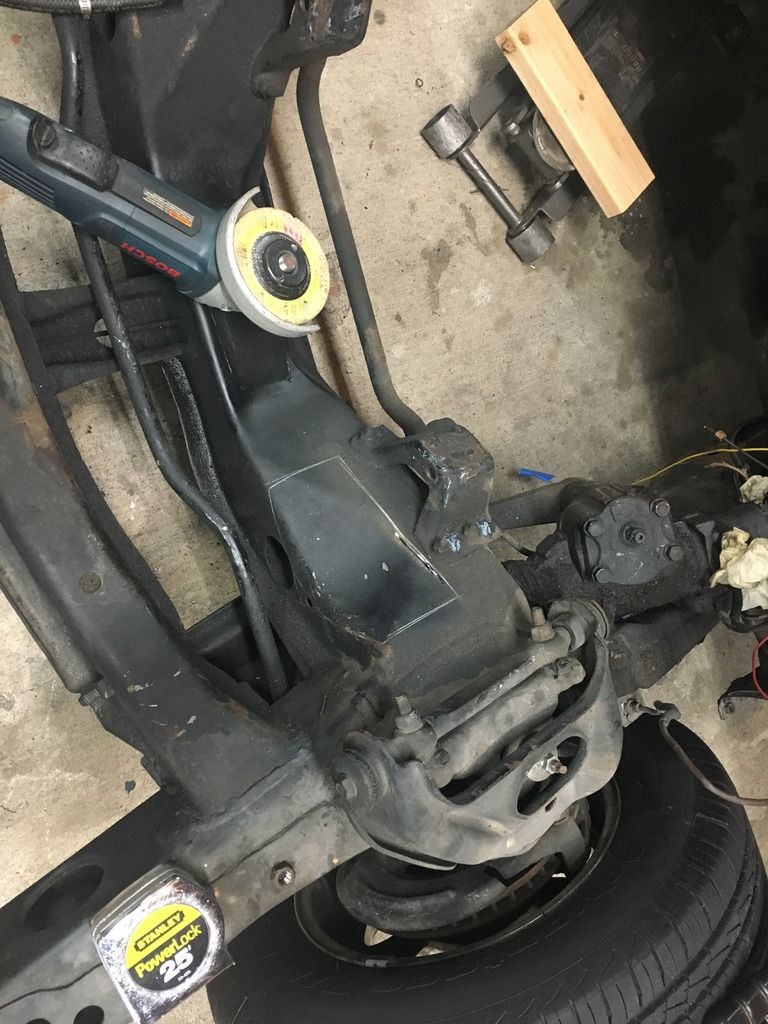
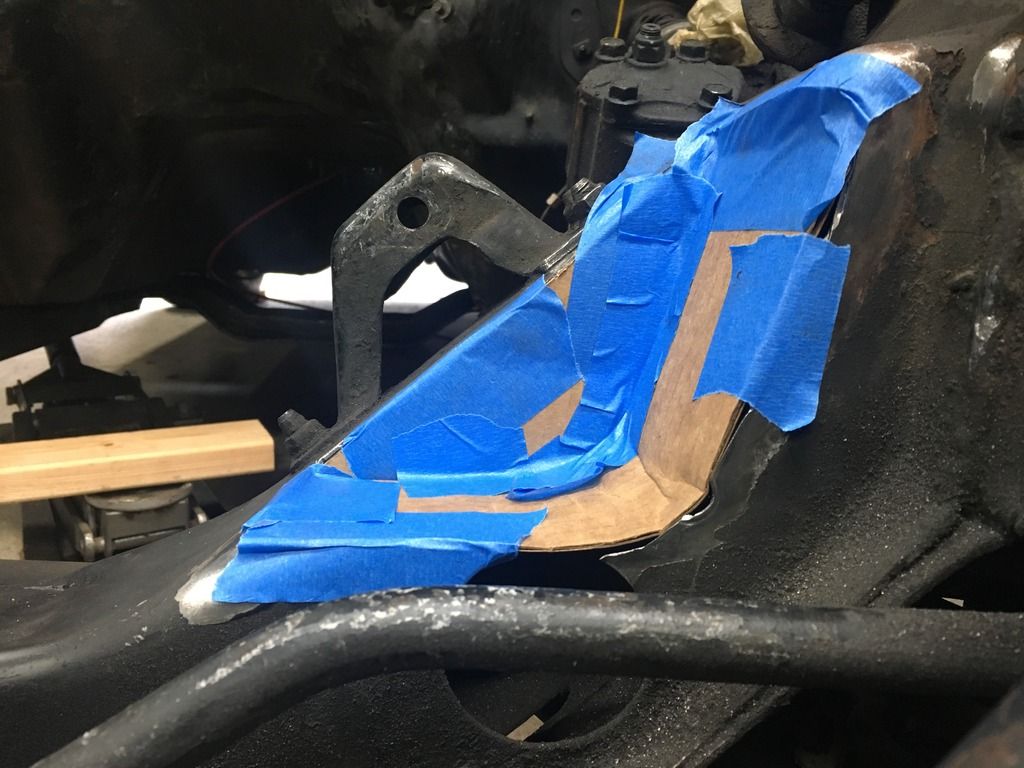
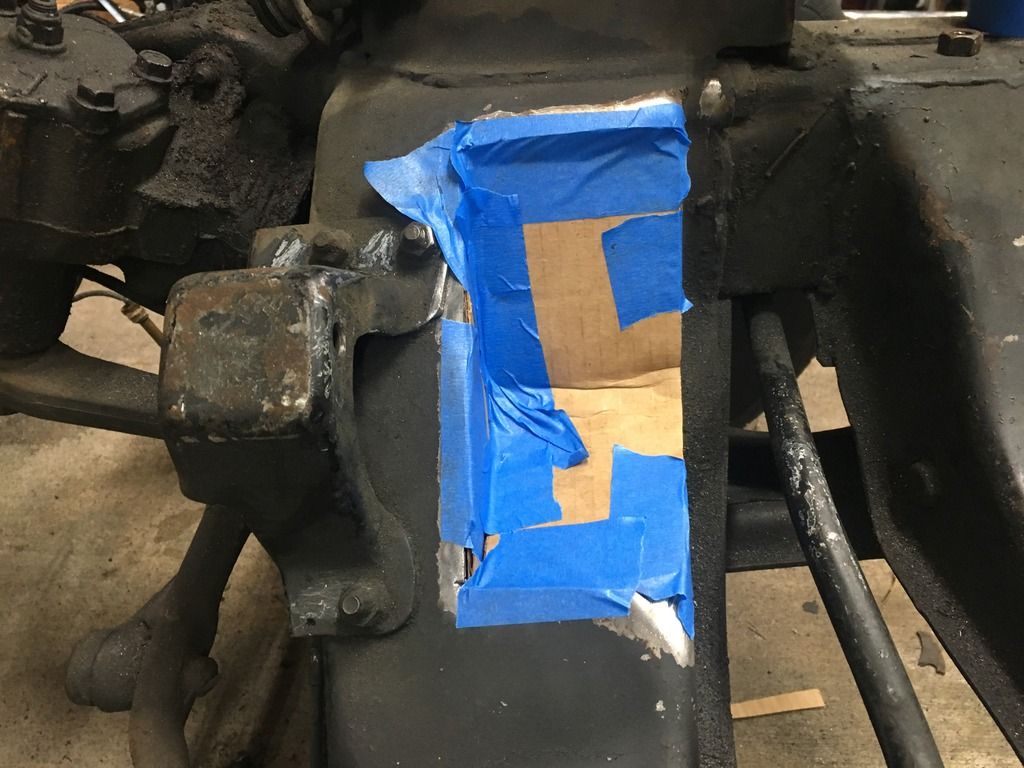
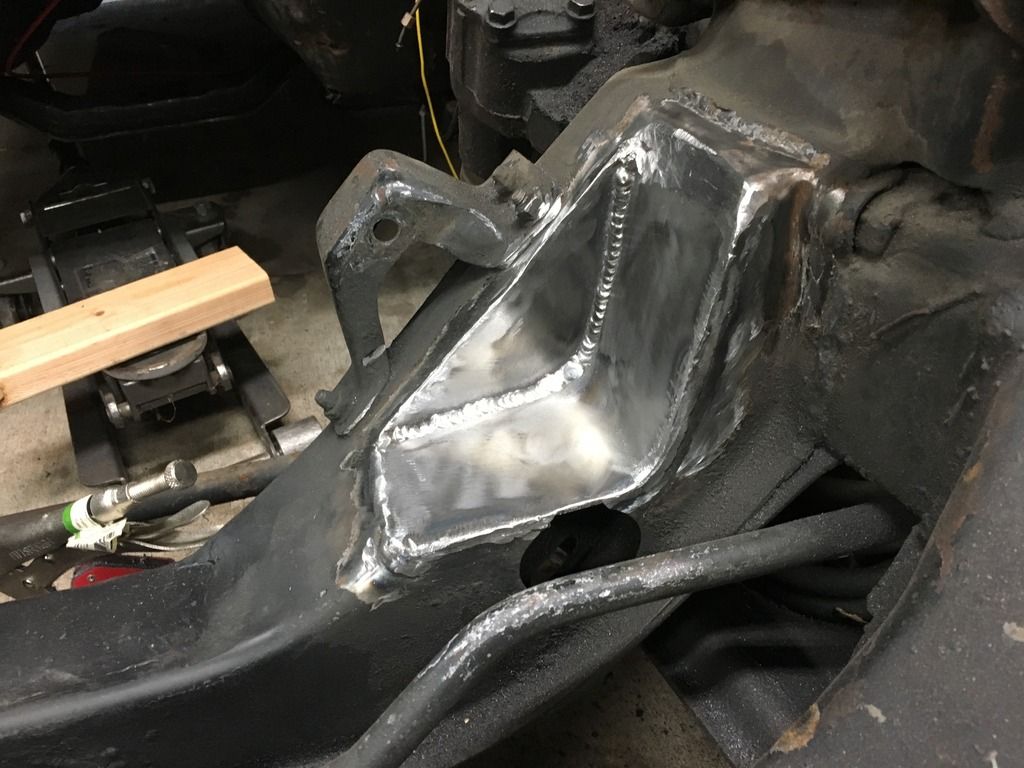
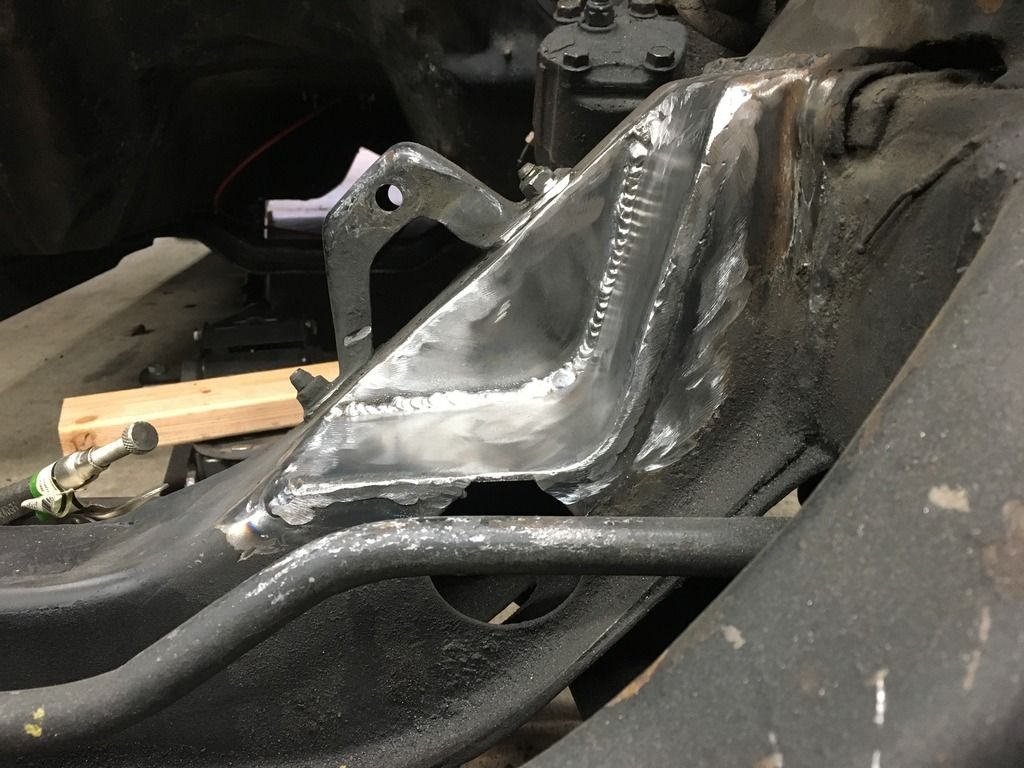
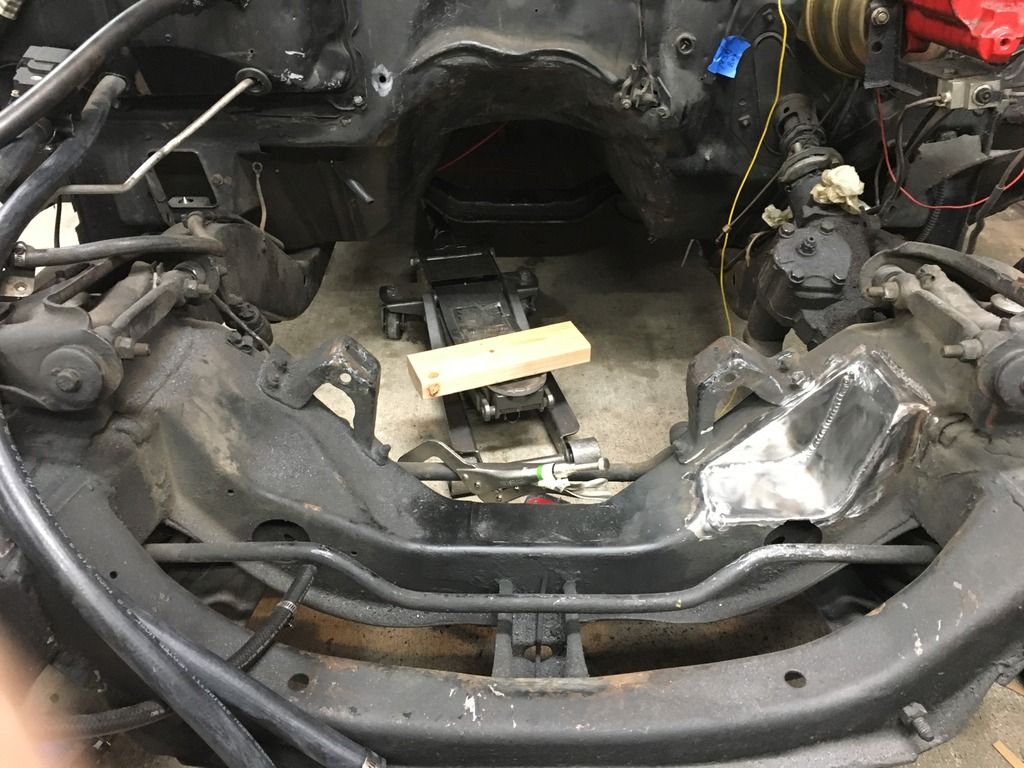
I mocked up the fitment of the vacuum pump and it requires the stock subframe to be notched. I cut out the area and stuck some cardboard in the cut section and test fit the motor and it cleared. I pulled the motor back out and welded it up with the cardboard as a template.


 11-07-2018, 10:55 PM
#30
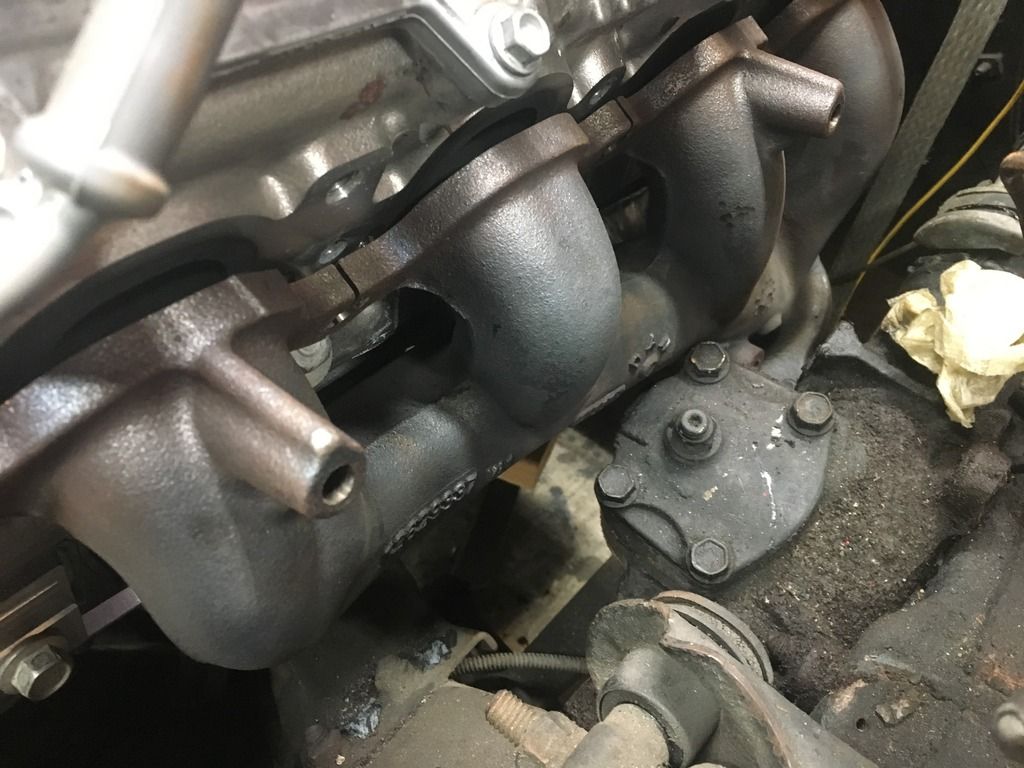
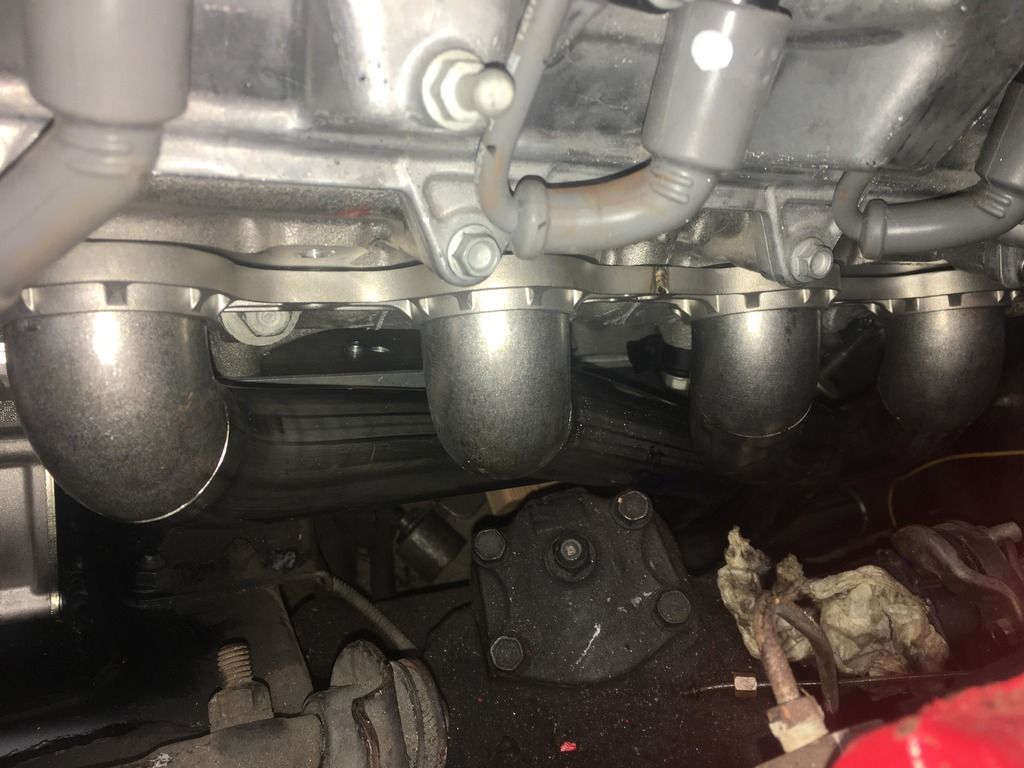
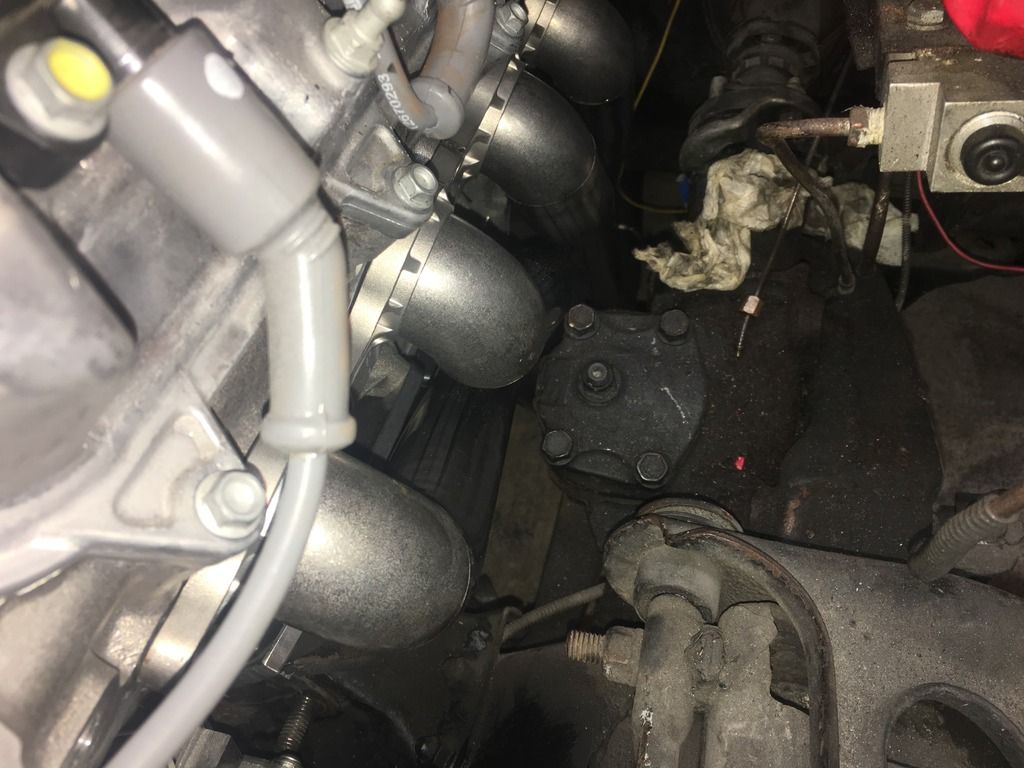
Now that I have the motor and vacuum pump settled I can focus on fitting the exhaust. I have always planned on using longtube headers but I mocked up the stock L86 manifolds to see if they would fit. The DS manifold hits the factory steering box, if you are not using the steering box you should have room to use these or grind them down a bit.
I spoke to Ultimate Headers as they seem to be the only vendor selling headers that will fit the 1st gen camaros with the factory subframe. They were really nice and sent me a set of headers tacked up for me to check clearances since I'm not in the factory location.
Also picked up a Ricks Tanks Restomod Tank with a 6th gen ZL1 pump. This thing will sit on the backburner for a bit until I get some of the body work sorted.
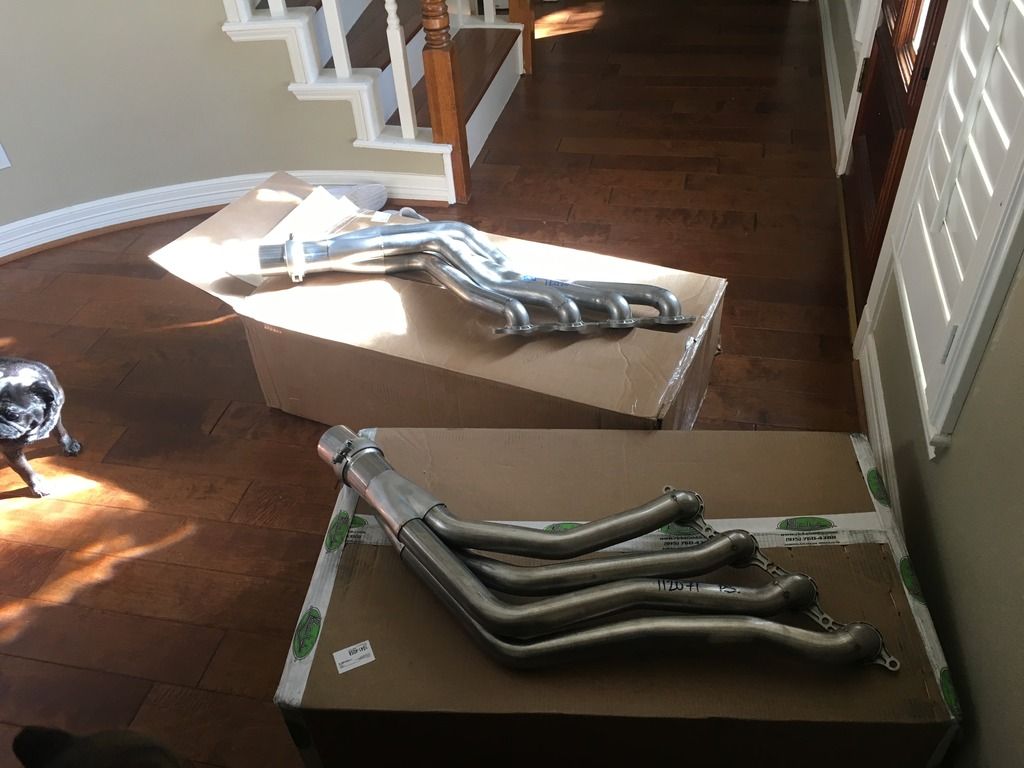

 11-07-2018, 11:07 PM
#31
I like power brakes. My big block had low vacuum and the brakes sucked. I'll be deleting the DOD/AFM in the ECM so this will not be an issue for me. I'll also be upgrading the cam at some point down the road so this will not create a vacuum problem for me either if I can use the pump. All and all I just thought it would be something different to use it. Another thing that encouraged me was when I hooked a gauge up to my brother's vacuum pump, it was consistently at around 30in.
11-28-2018, 05:37 PM
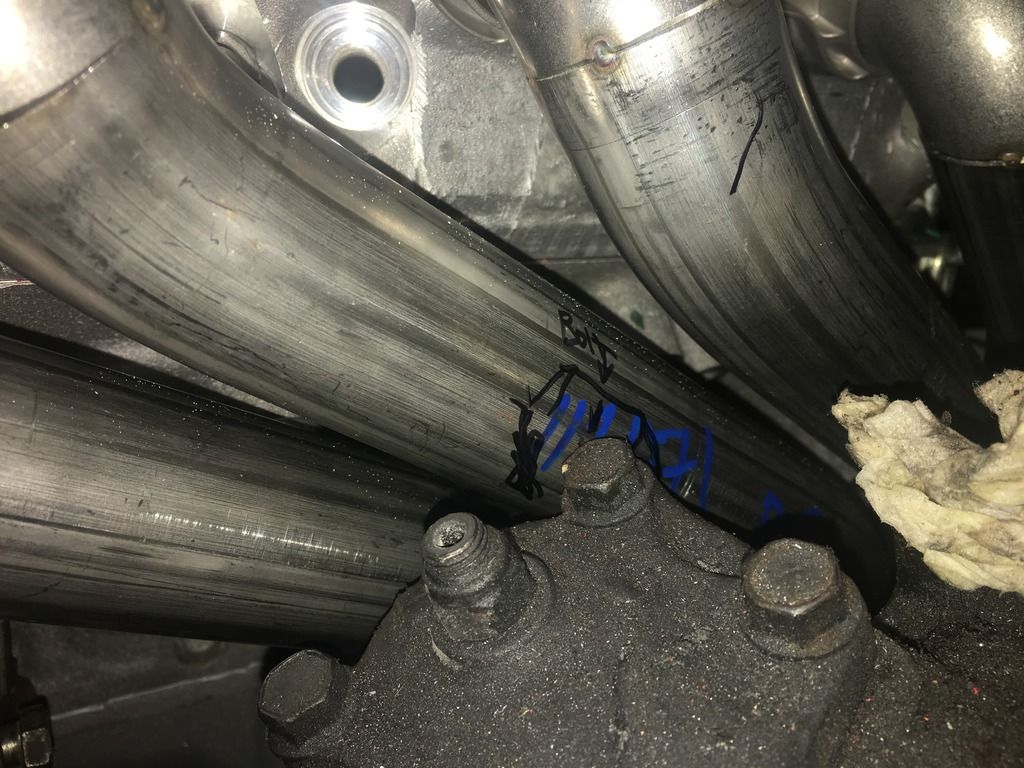
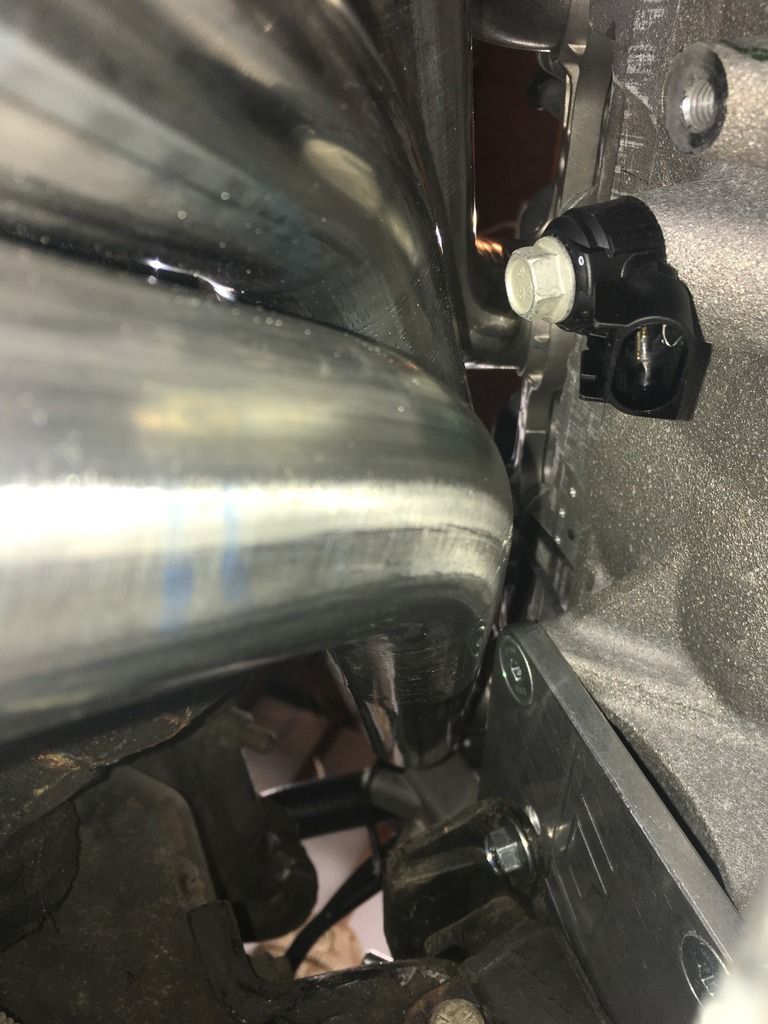
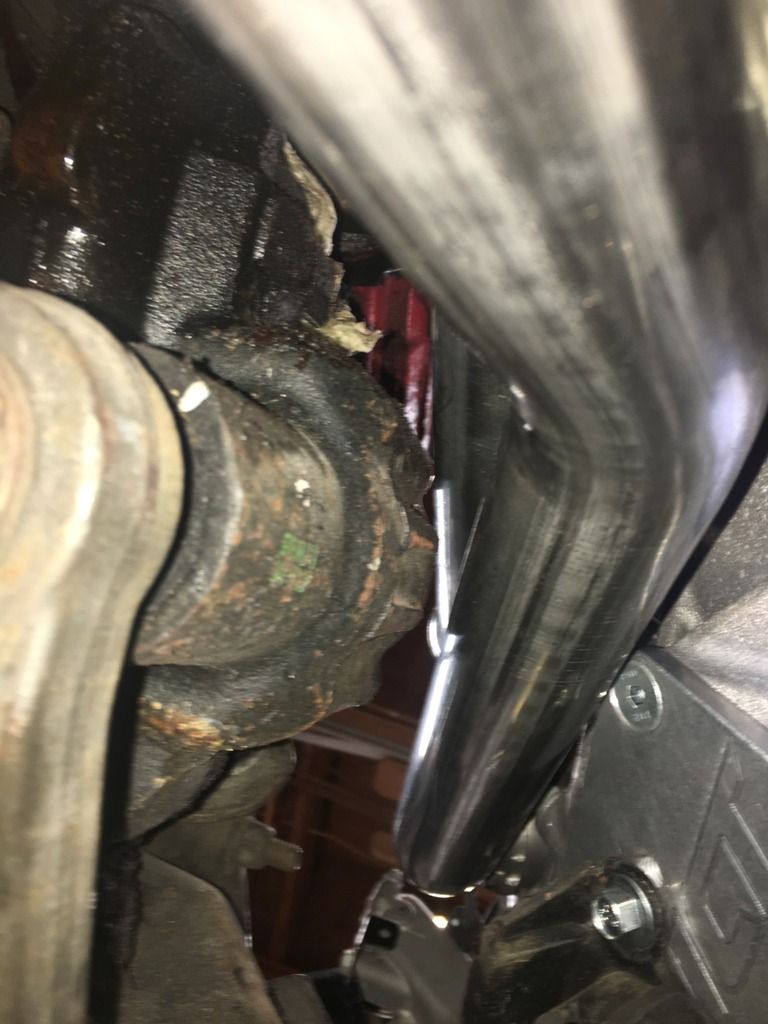
#32
I got the headers installed and they need a little adjustment to fit. They hit just about where the factory manifolds were hitting on the steering box. These could be resolved with a few blows from a hammer but the header guys are going to revise this tube to make it clear. Here's a few shots of it.


 12-29-2018, 03:05 AM
#35
TECH Resident

Awesome build! You are getting through some serious work there. Having done the A6 into a '68 Camaro 10+ years back, it's great to see the next generation going into conversions around Gen V LT1's, LT4's etc., plus A8's and A10's.
Happy New Year!
Happy New Year!
 12-29-2018, 12:42 PM
#37

I thought the vacuum pump was for PDB on trucks ? Is this NOT the case?
12-29-2018, 09:35 PM
#40
Pro-touring
but i have Been looking locally for some time and they range between 3500-4500. I got It shipped to me from California. Got it for 4500 with the motor, trans, harness and ECU with 3500 miles. Got the vin and car faxed it and looked up service records first. Motor checked out and looked good after inspection too.
but i have Been looking locally for some time and they range between 3500-4500. I got It shipped to me from California. Got it for 4500 with the motor, trans, harness and ECU with 3500 miles. Got the vin and car faxed it and looked up service records first. Motor checked out and looked good after inspection too.