

68 Camaro Build with a Gen V Swap
 08-07-2019, 12:09 AM
#121

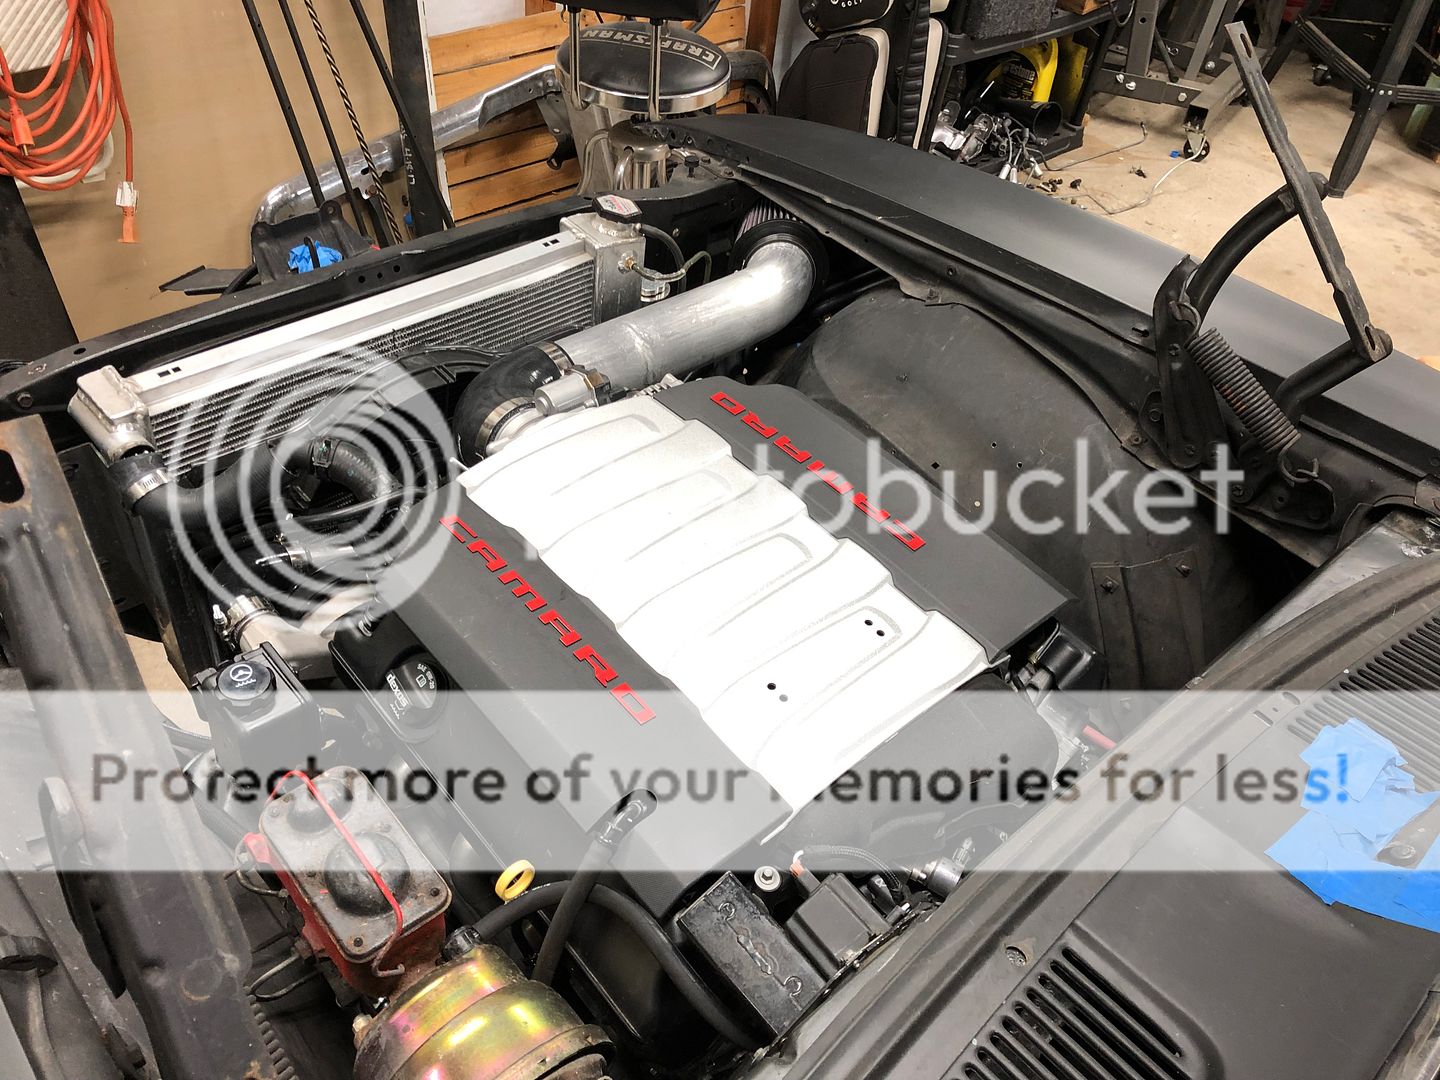
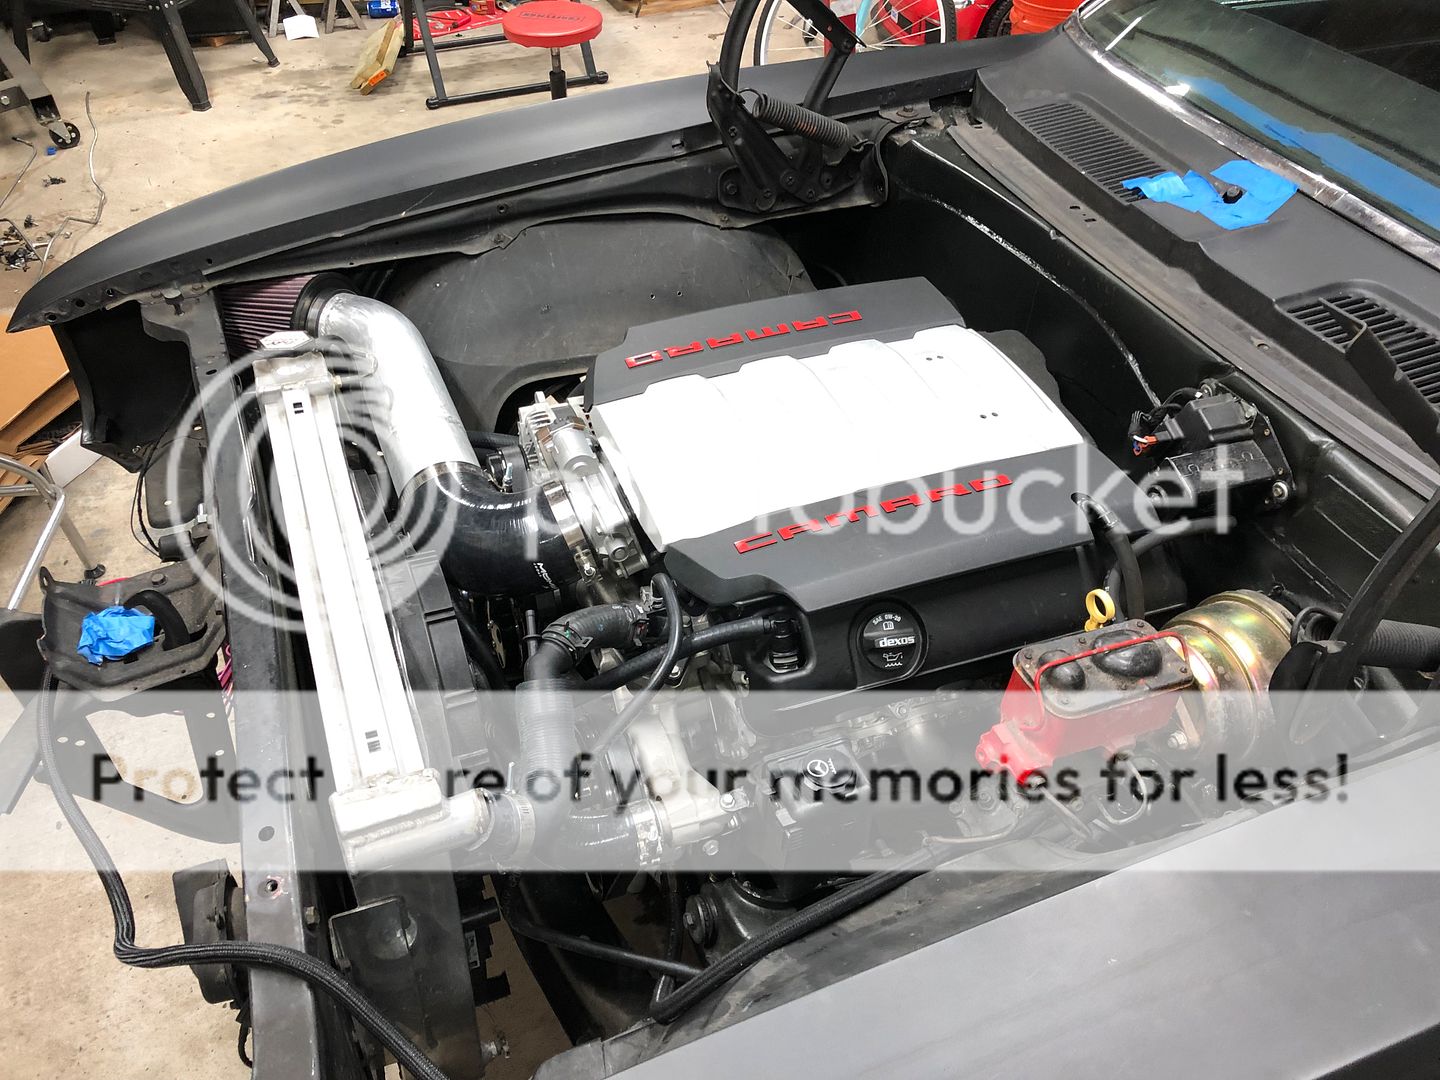
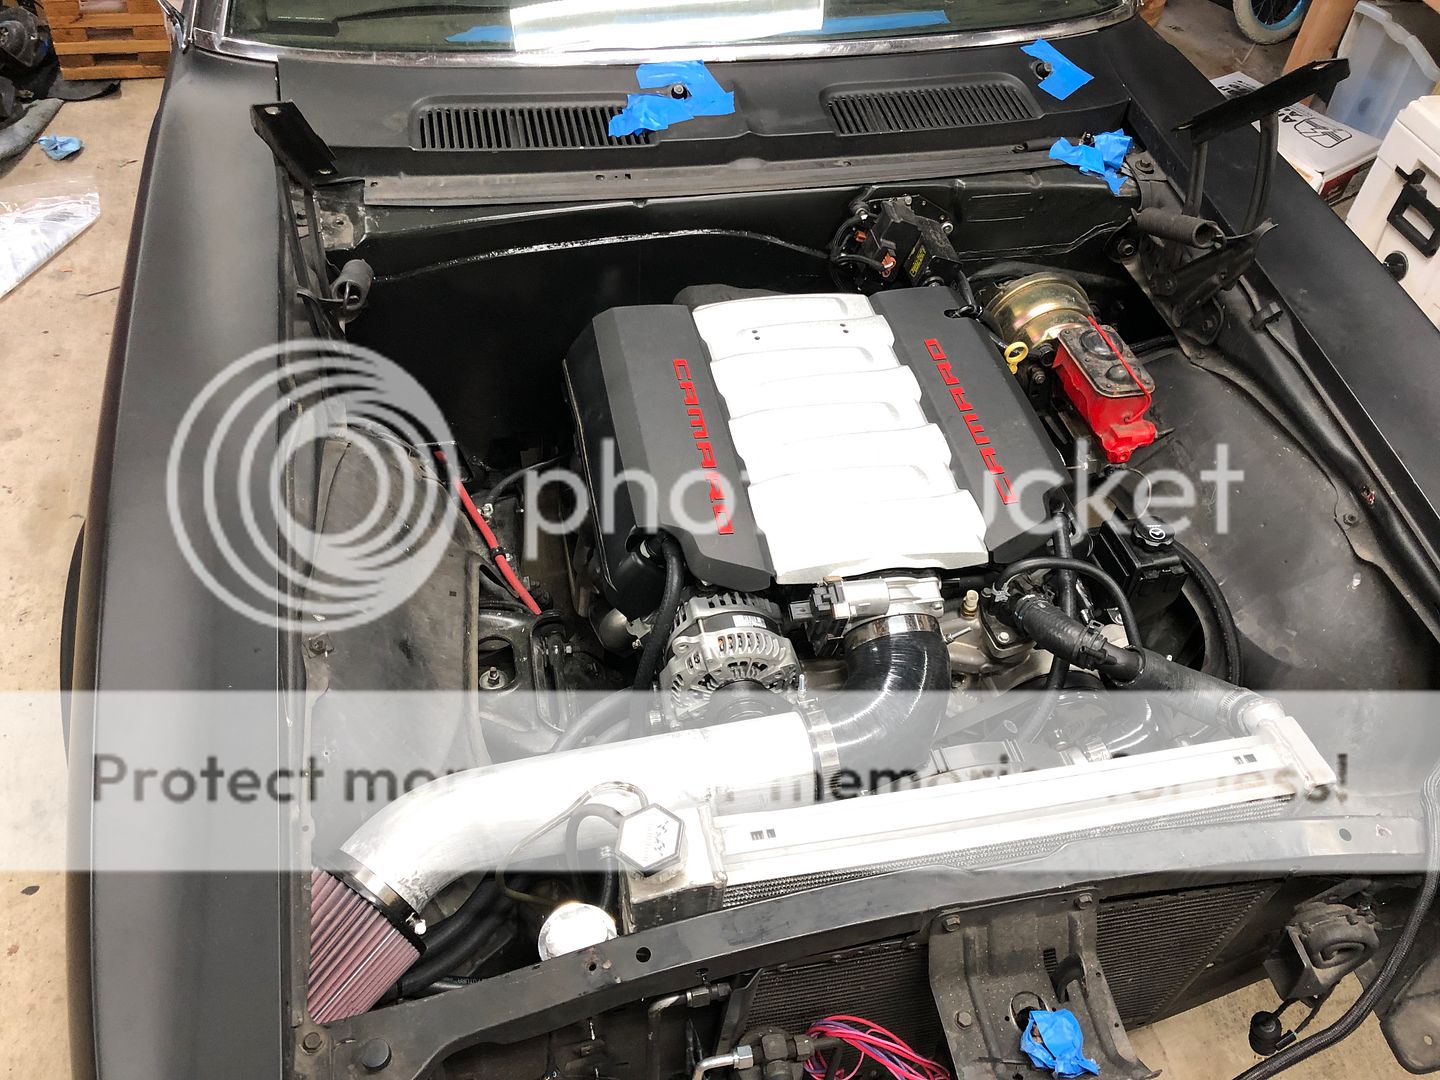
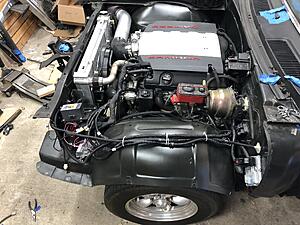
Here's a few pictures of the engine bay after I fixed the PS line and installed the air filter. I also ran the trans lines to the radiator but did not like how it turned out, I could not get a tight enough 90 degree bend to clear the intake. I ordered a tight radius 90 and I'm planning on changing this once I get the new part. Got the new rear brake line installed and hooked up the ebrakes, just need to bleed the brakes and adjust the ebrakes accordingly.
Just waiting on the engine harness and I'll be starting the exhaust in then next few weeks. Maybe a few other little things left and then I'll be able to start it.
Just waiting on the engine harness and I'll be starting the exhaust in then next few weeks. Maybe a few other little things left and then I'll be able to start it.


 08-22-2019, 10:21 PM
#123
Just been working out of town for the past few weeks so no updates.
I do not have a parts list, I don't want to leave any evidence of how much I've dumped into this thing! If you have any questions about any of the parts just give me a shout.
I do not have a parts list, I don't want to leave any evidence of how much I've dumped into this thing! If you have any questions about any of the parts just give me a shout.
08-23-2019, 04:53 AM
#124

LOL You must be married, LOL
 09-17-2019, 08:52 AM
#127
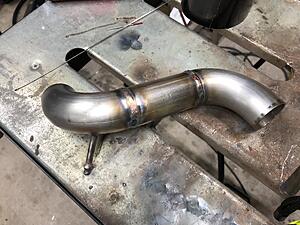
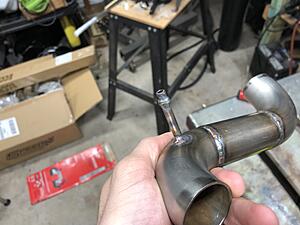
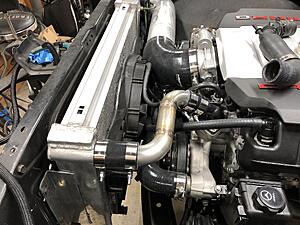
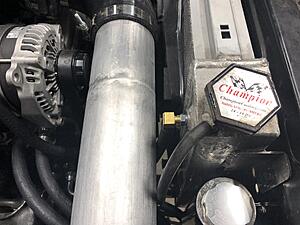
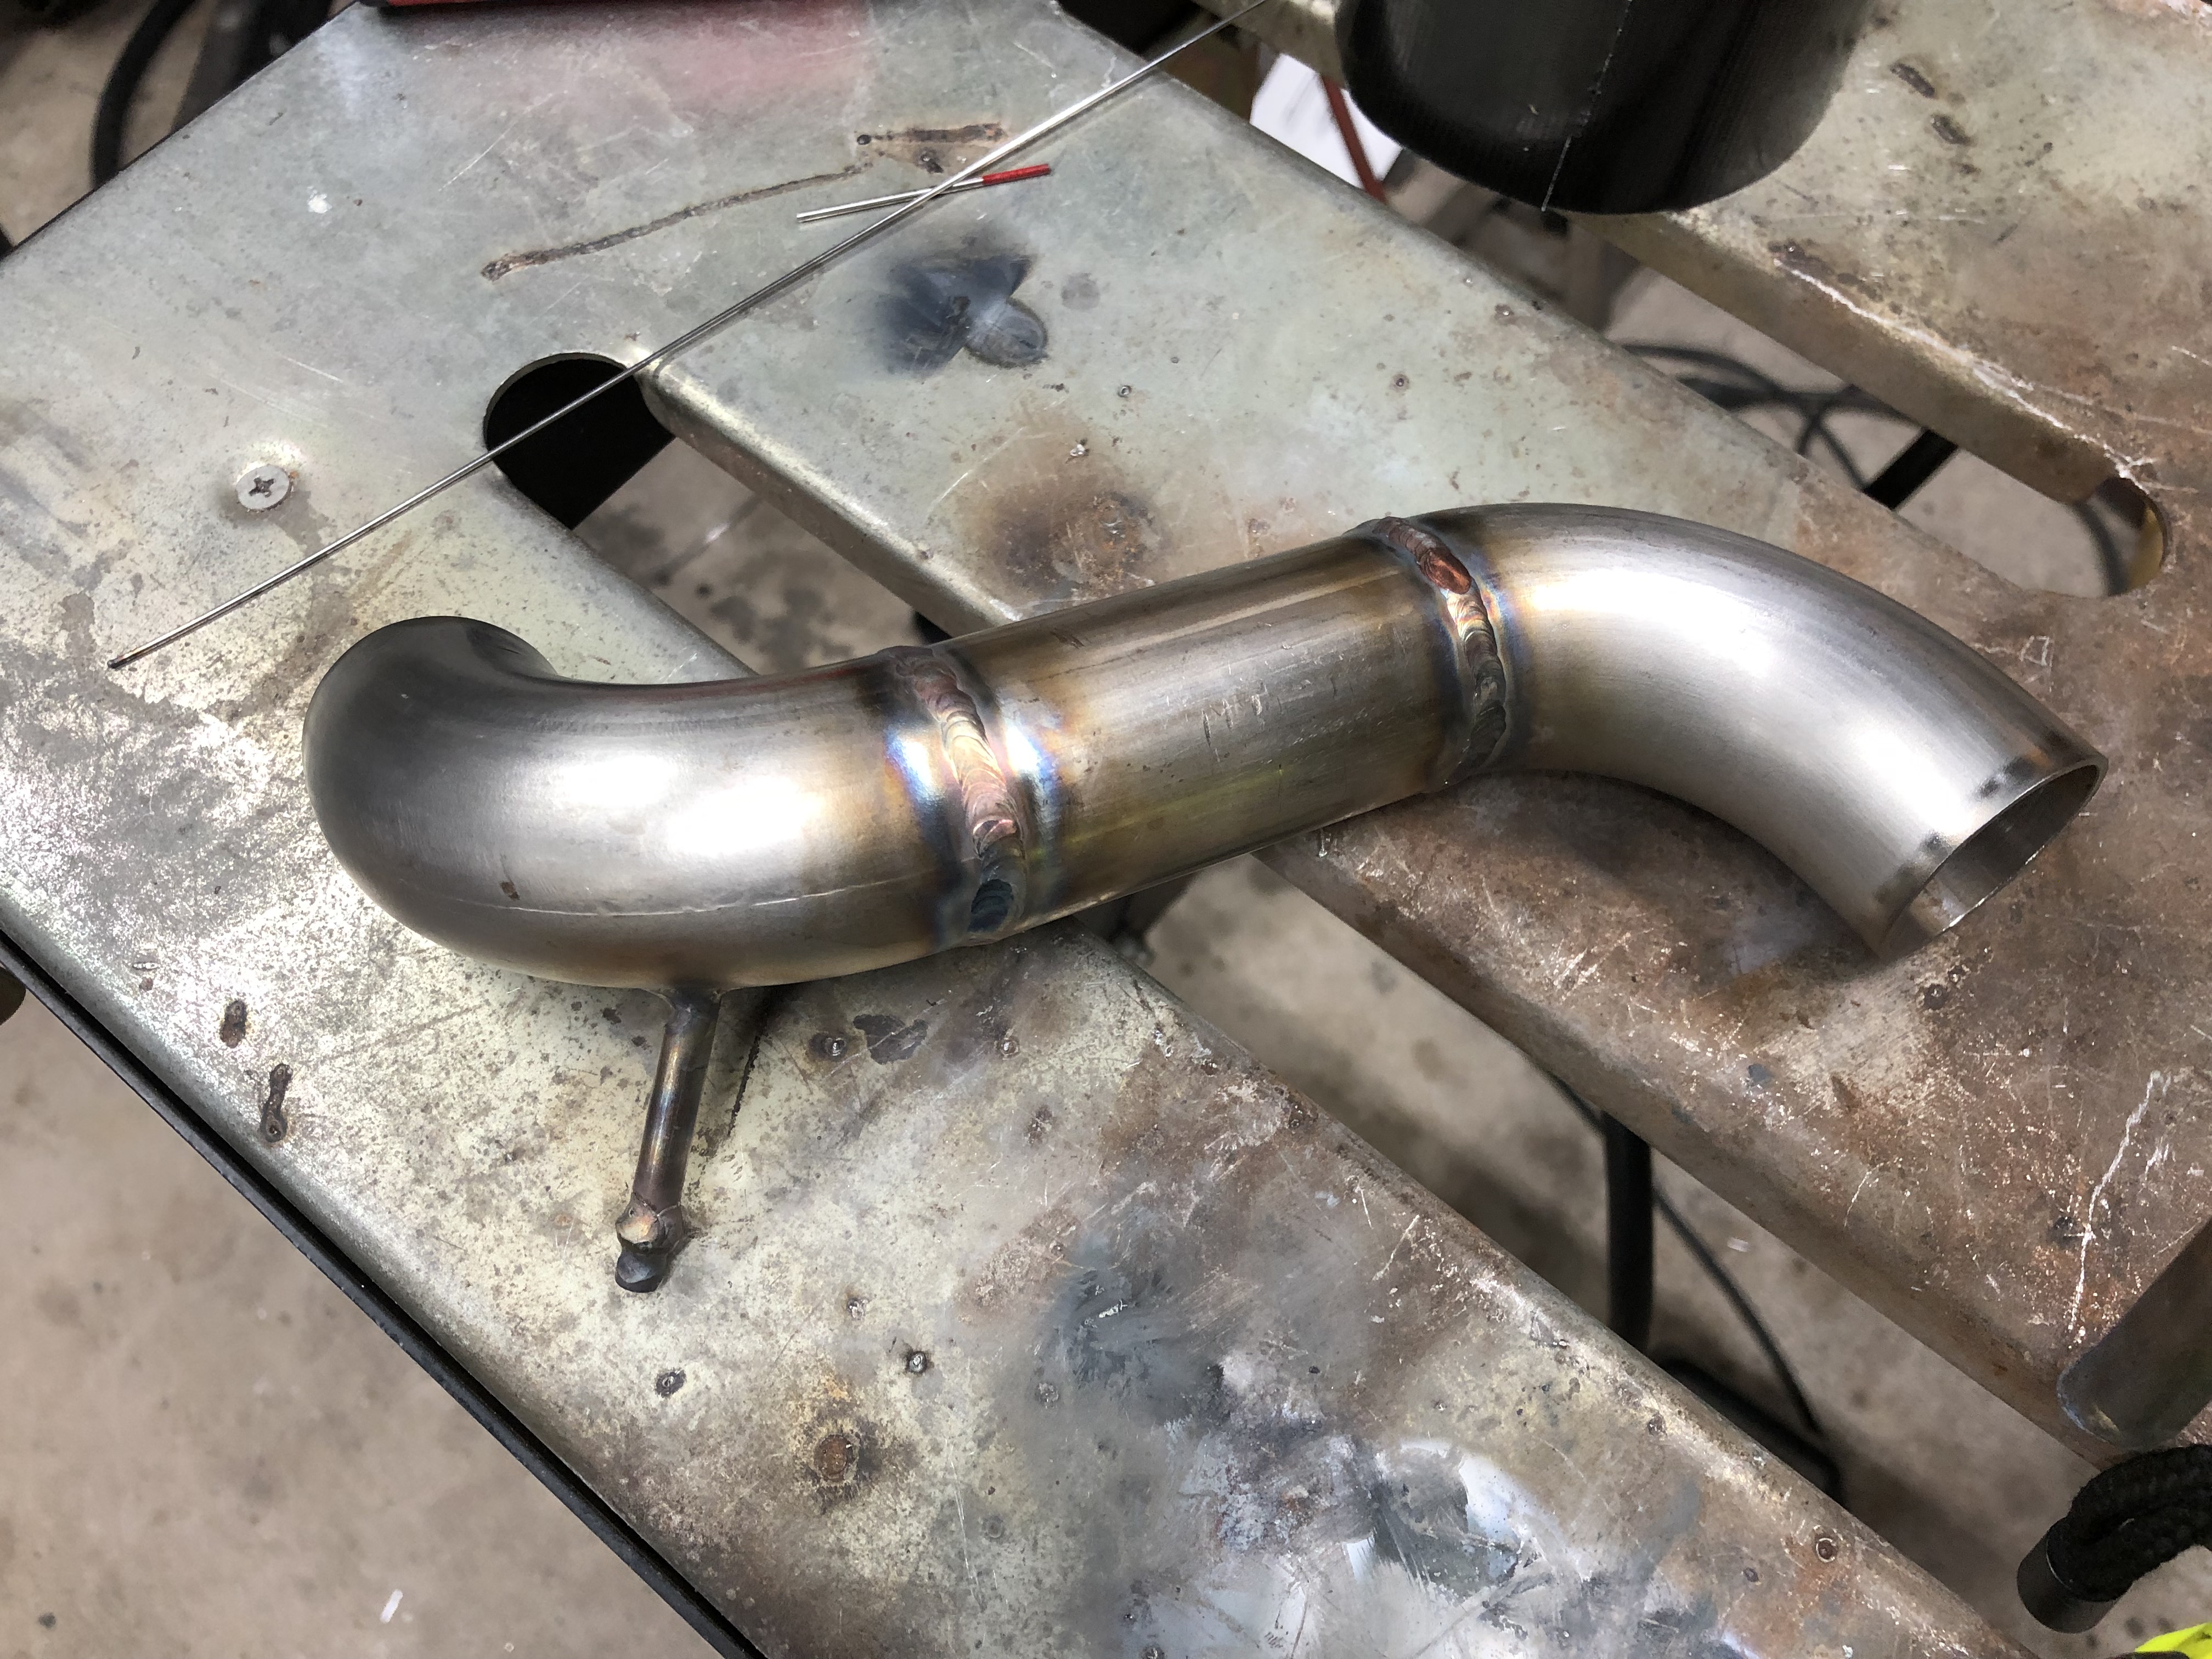
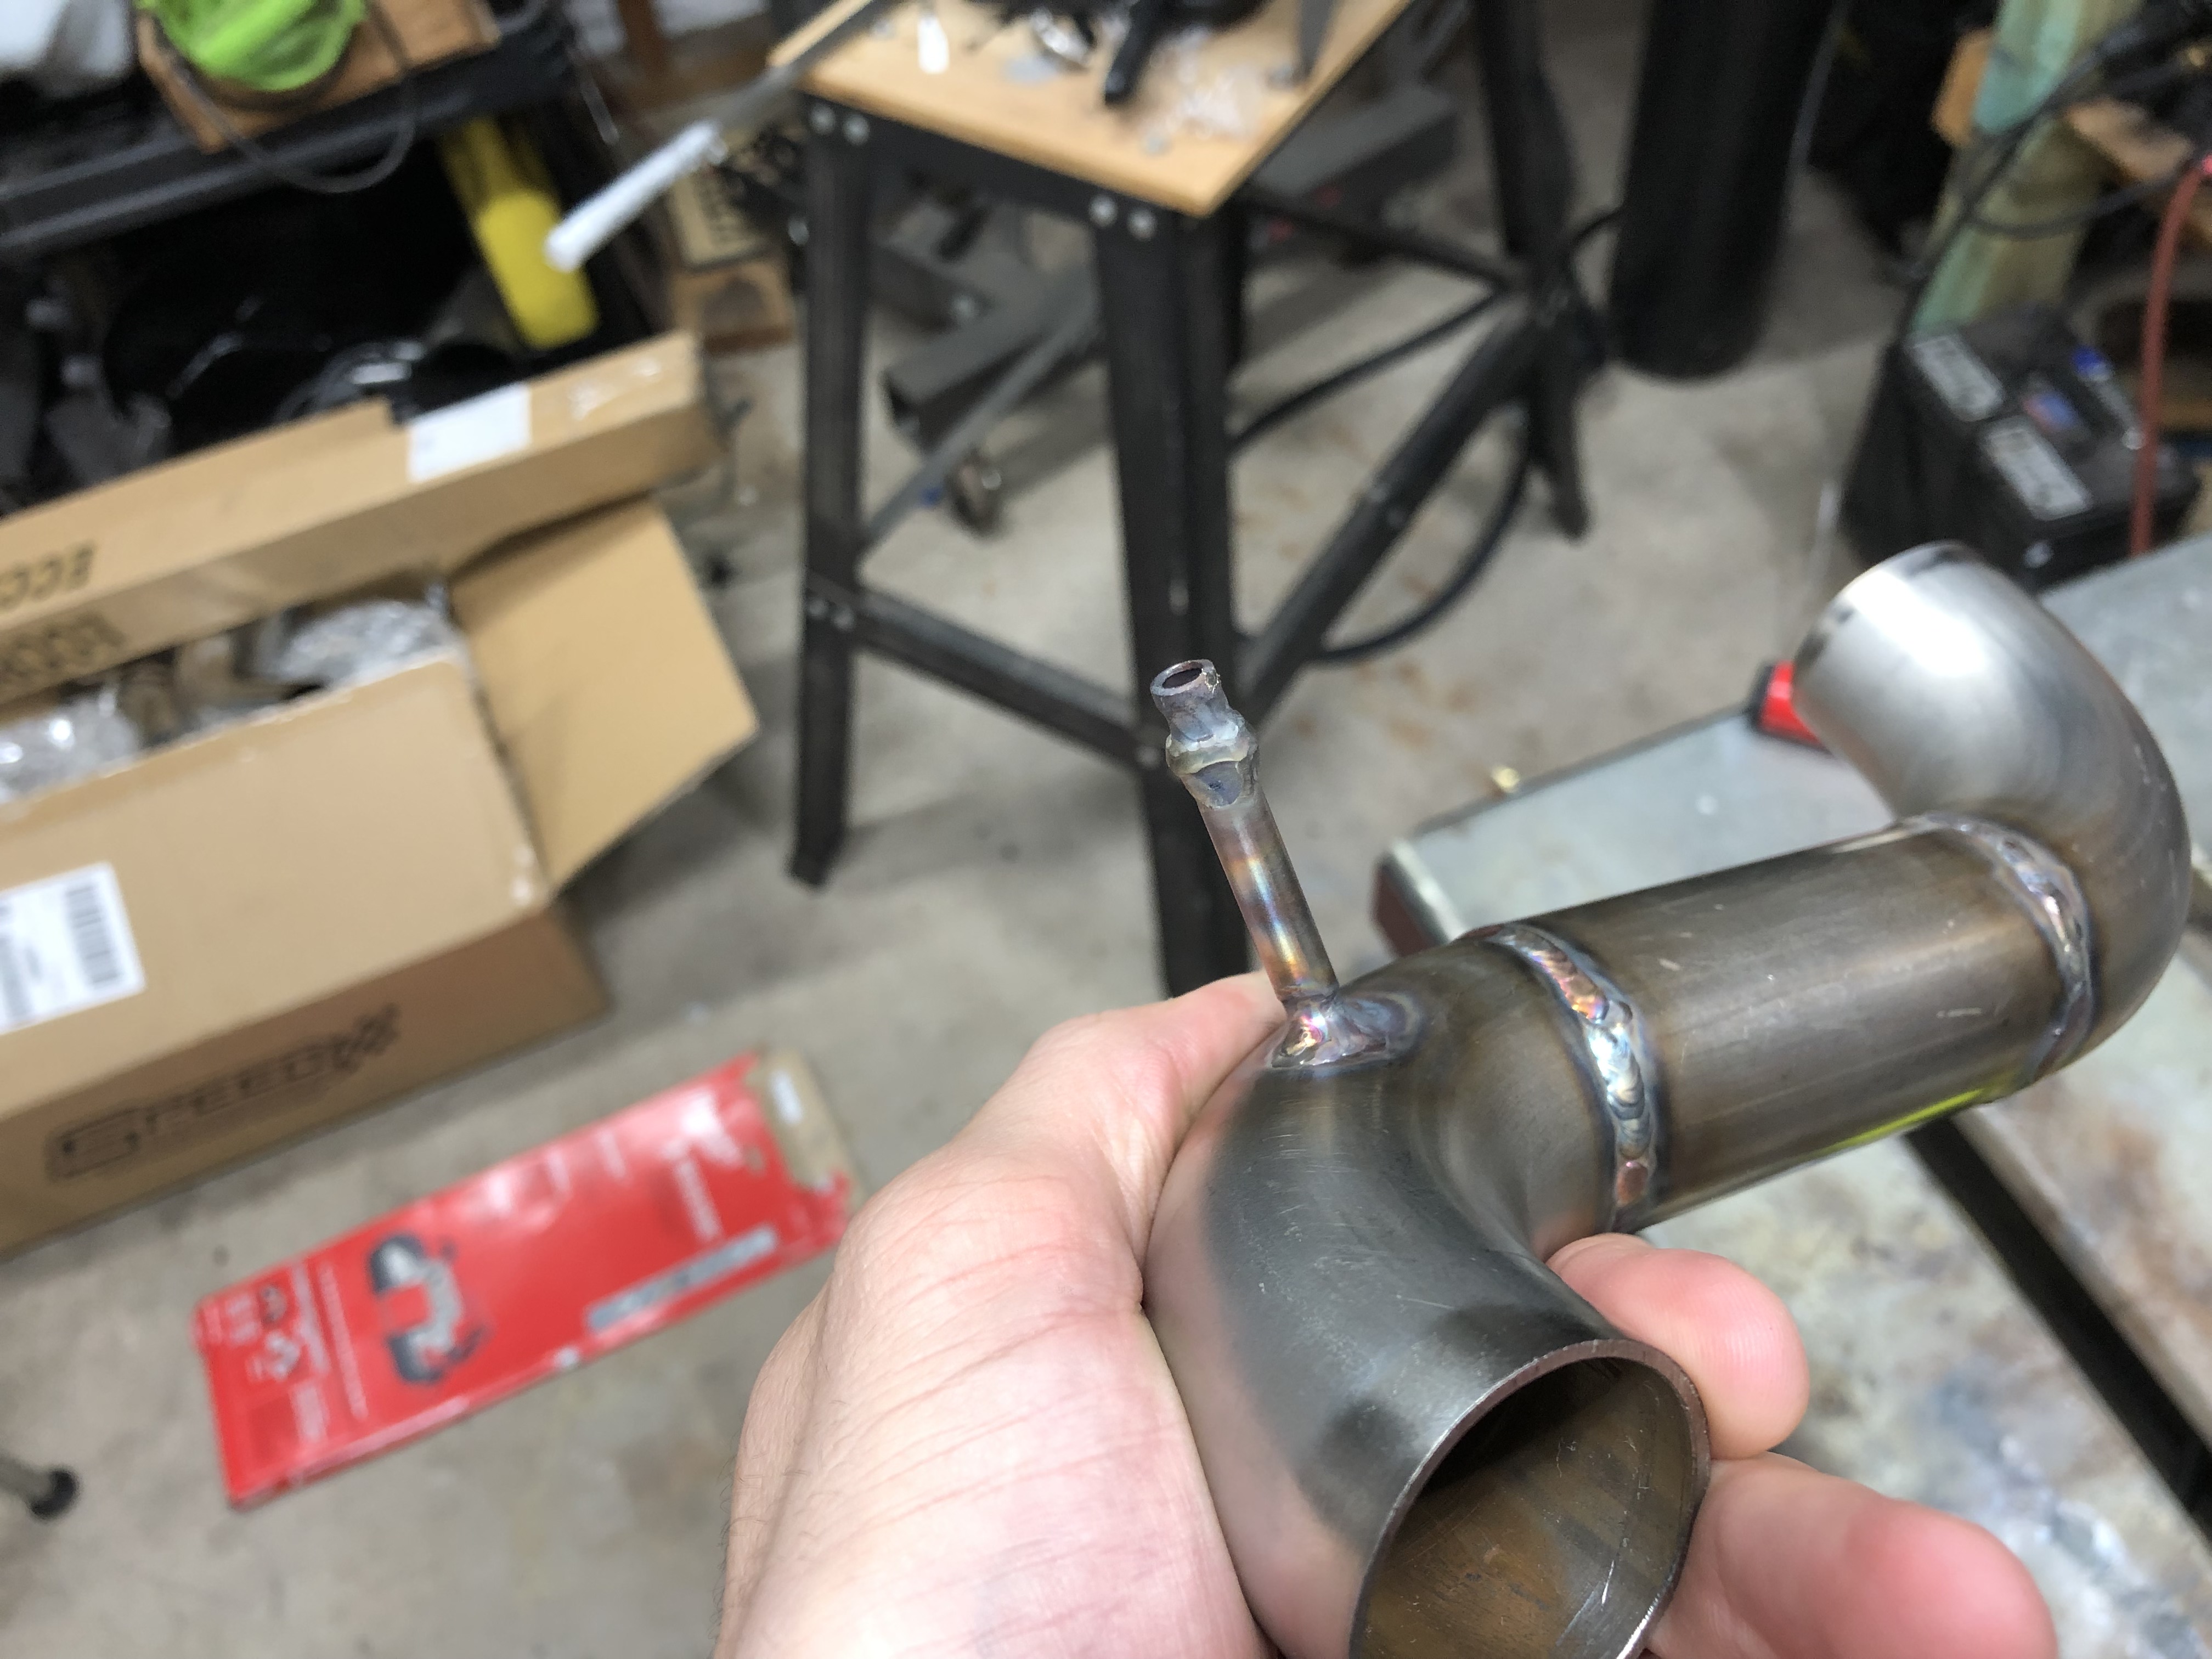
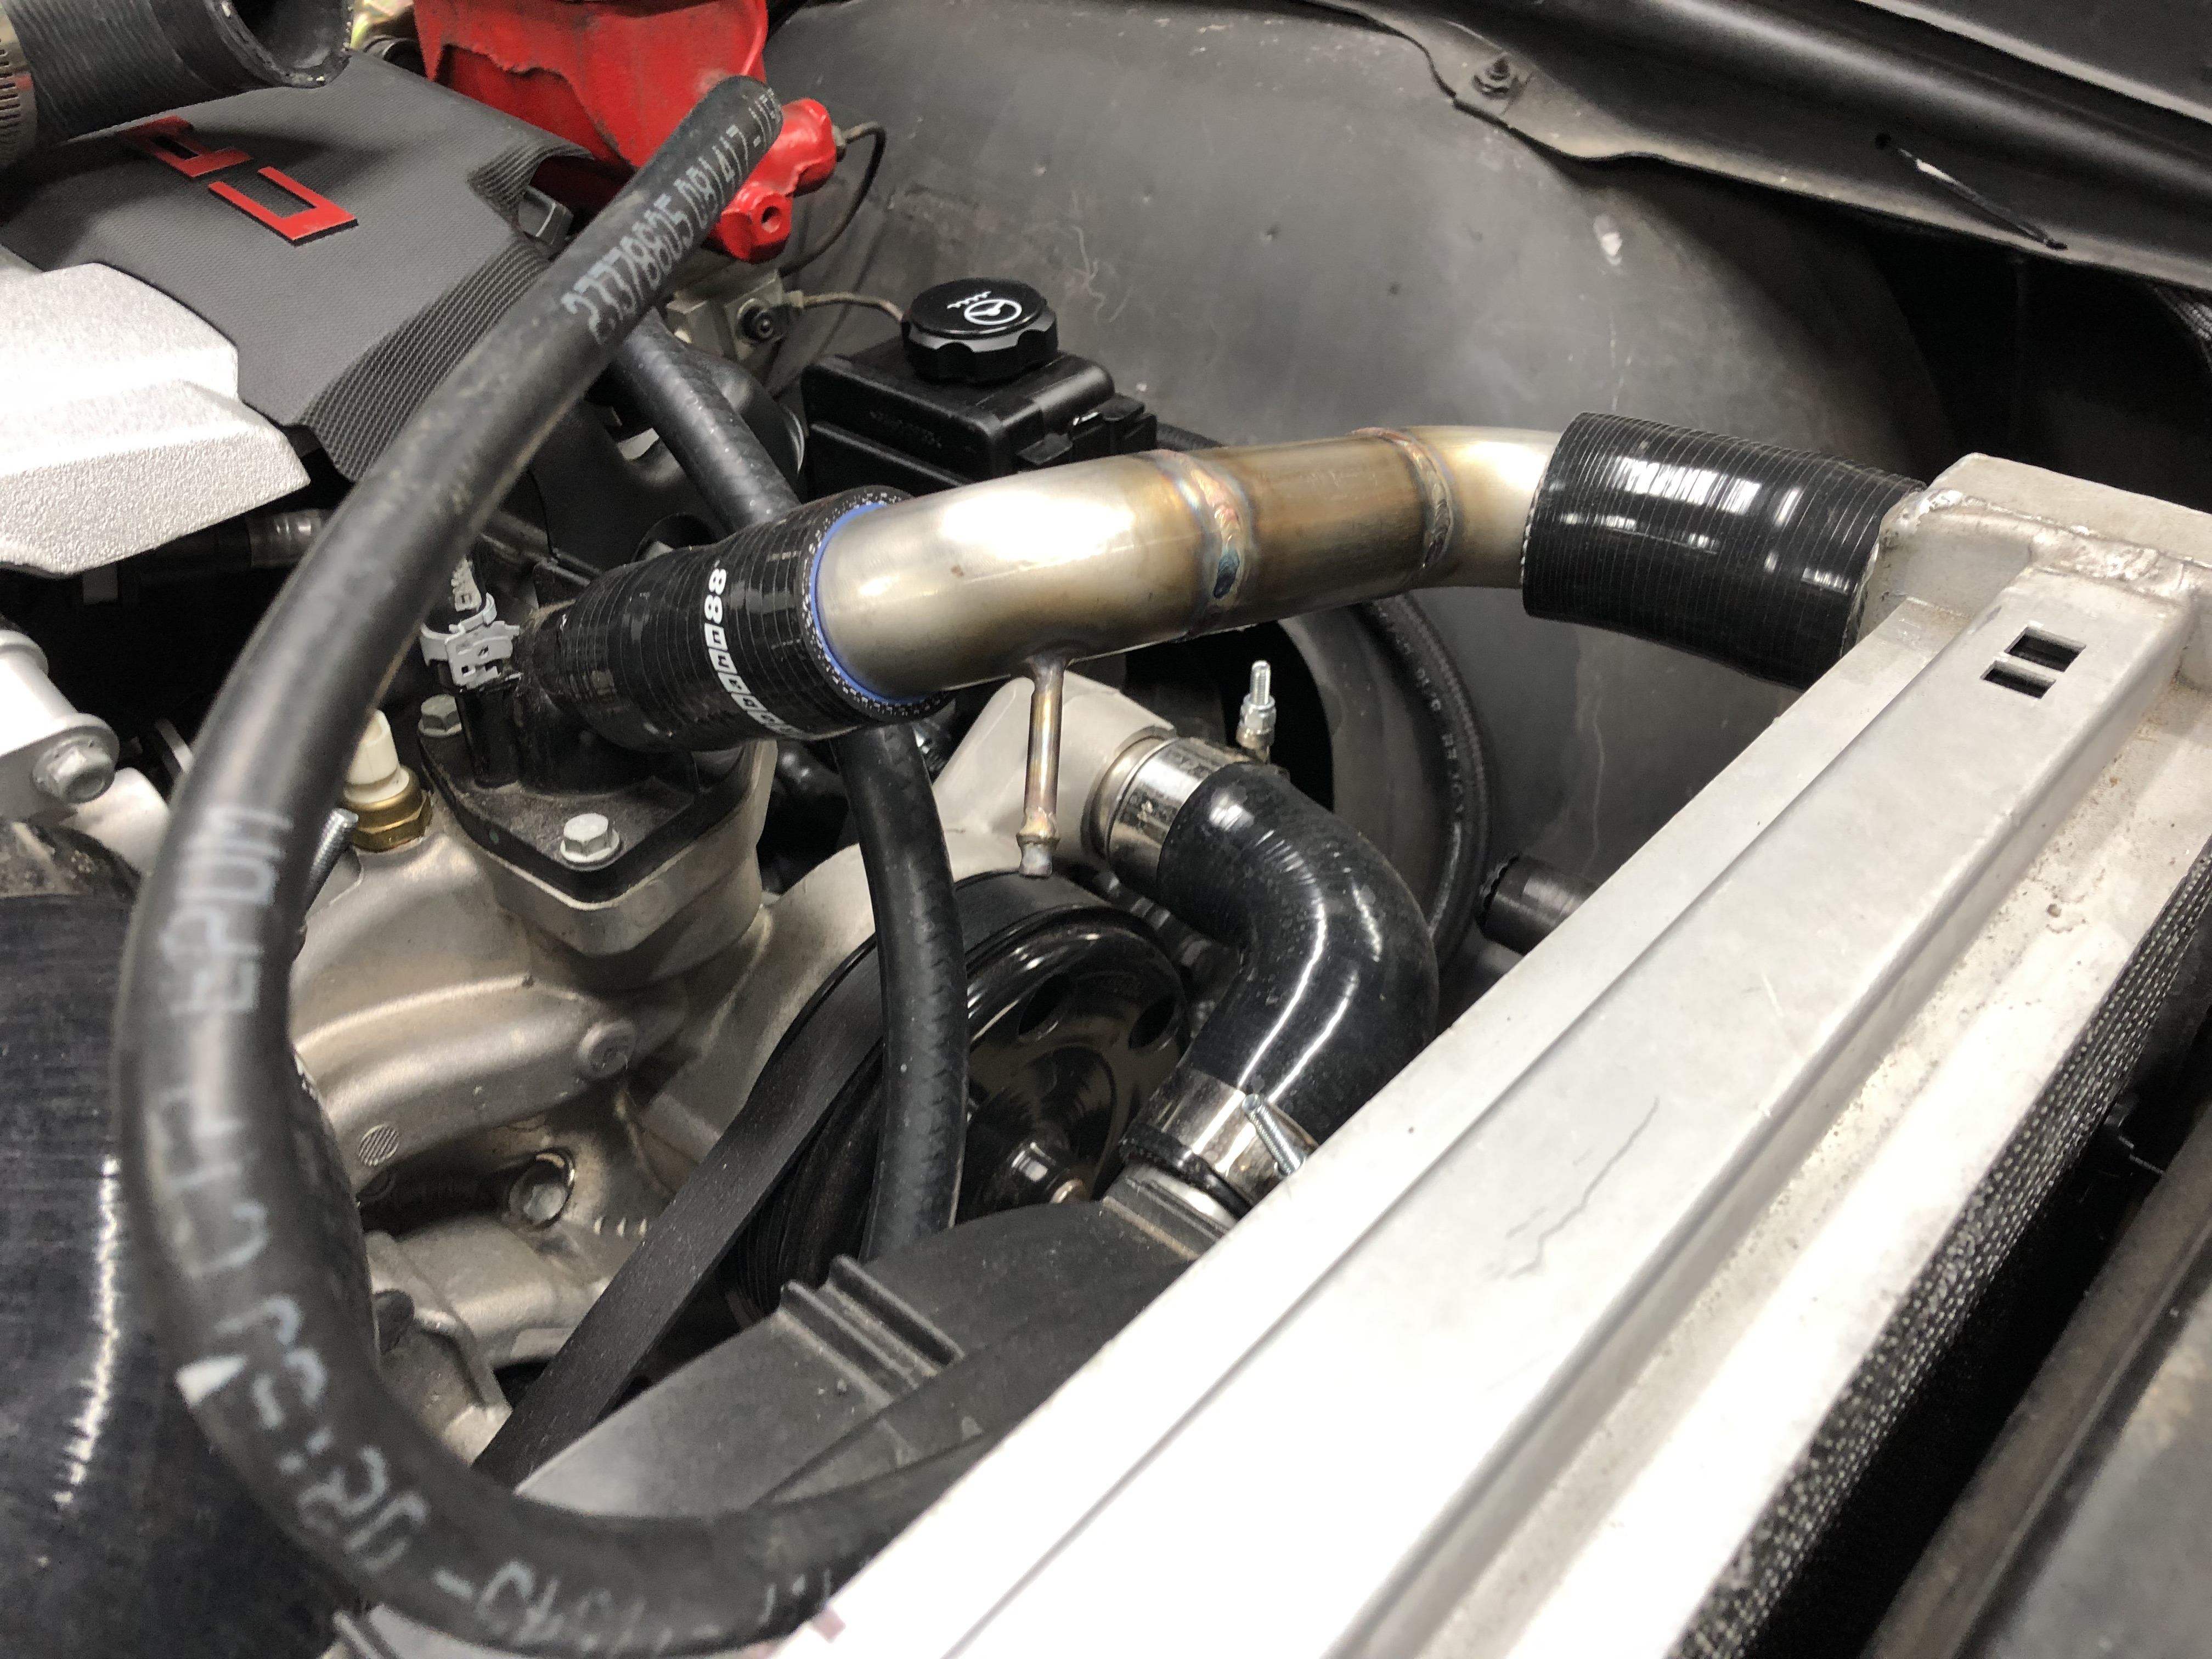
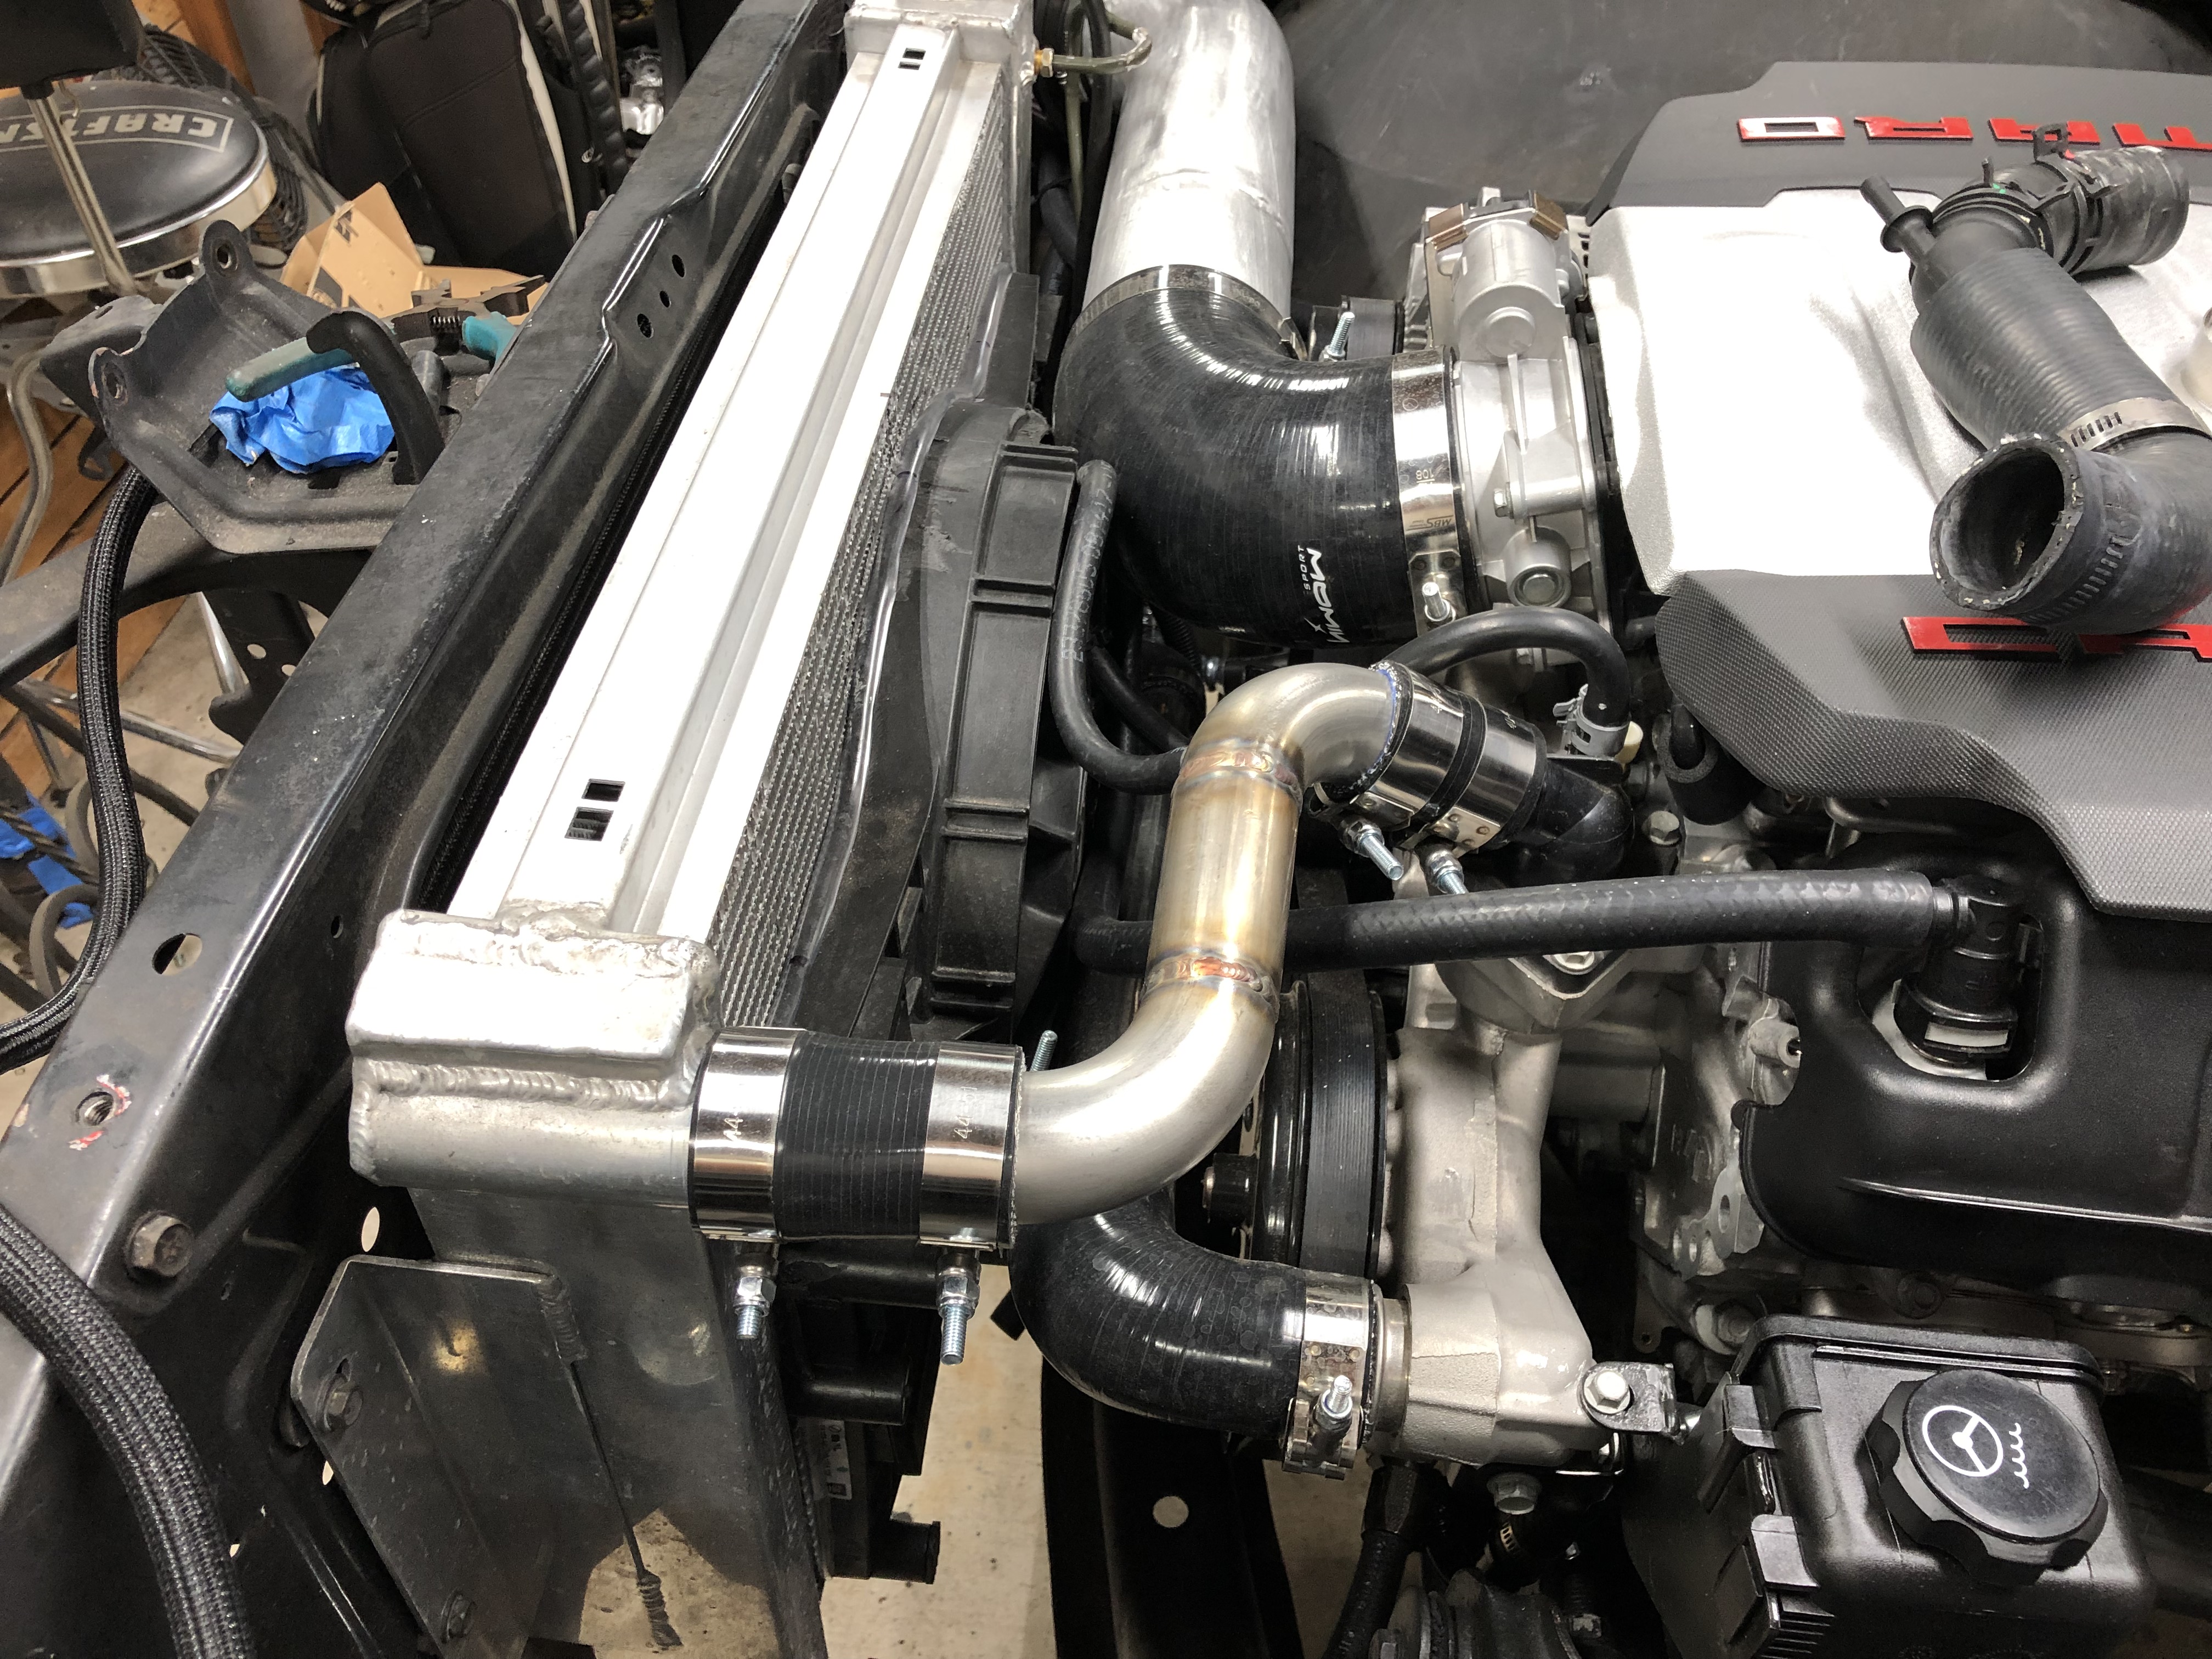
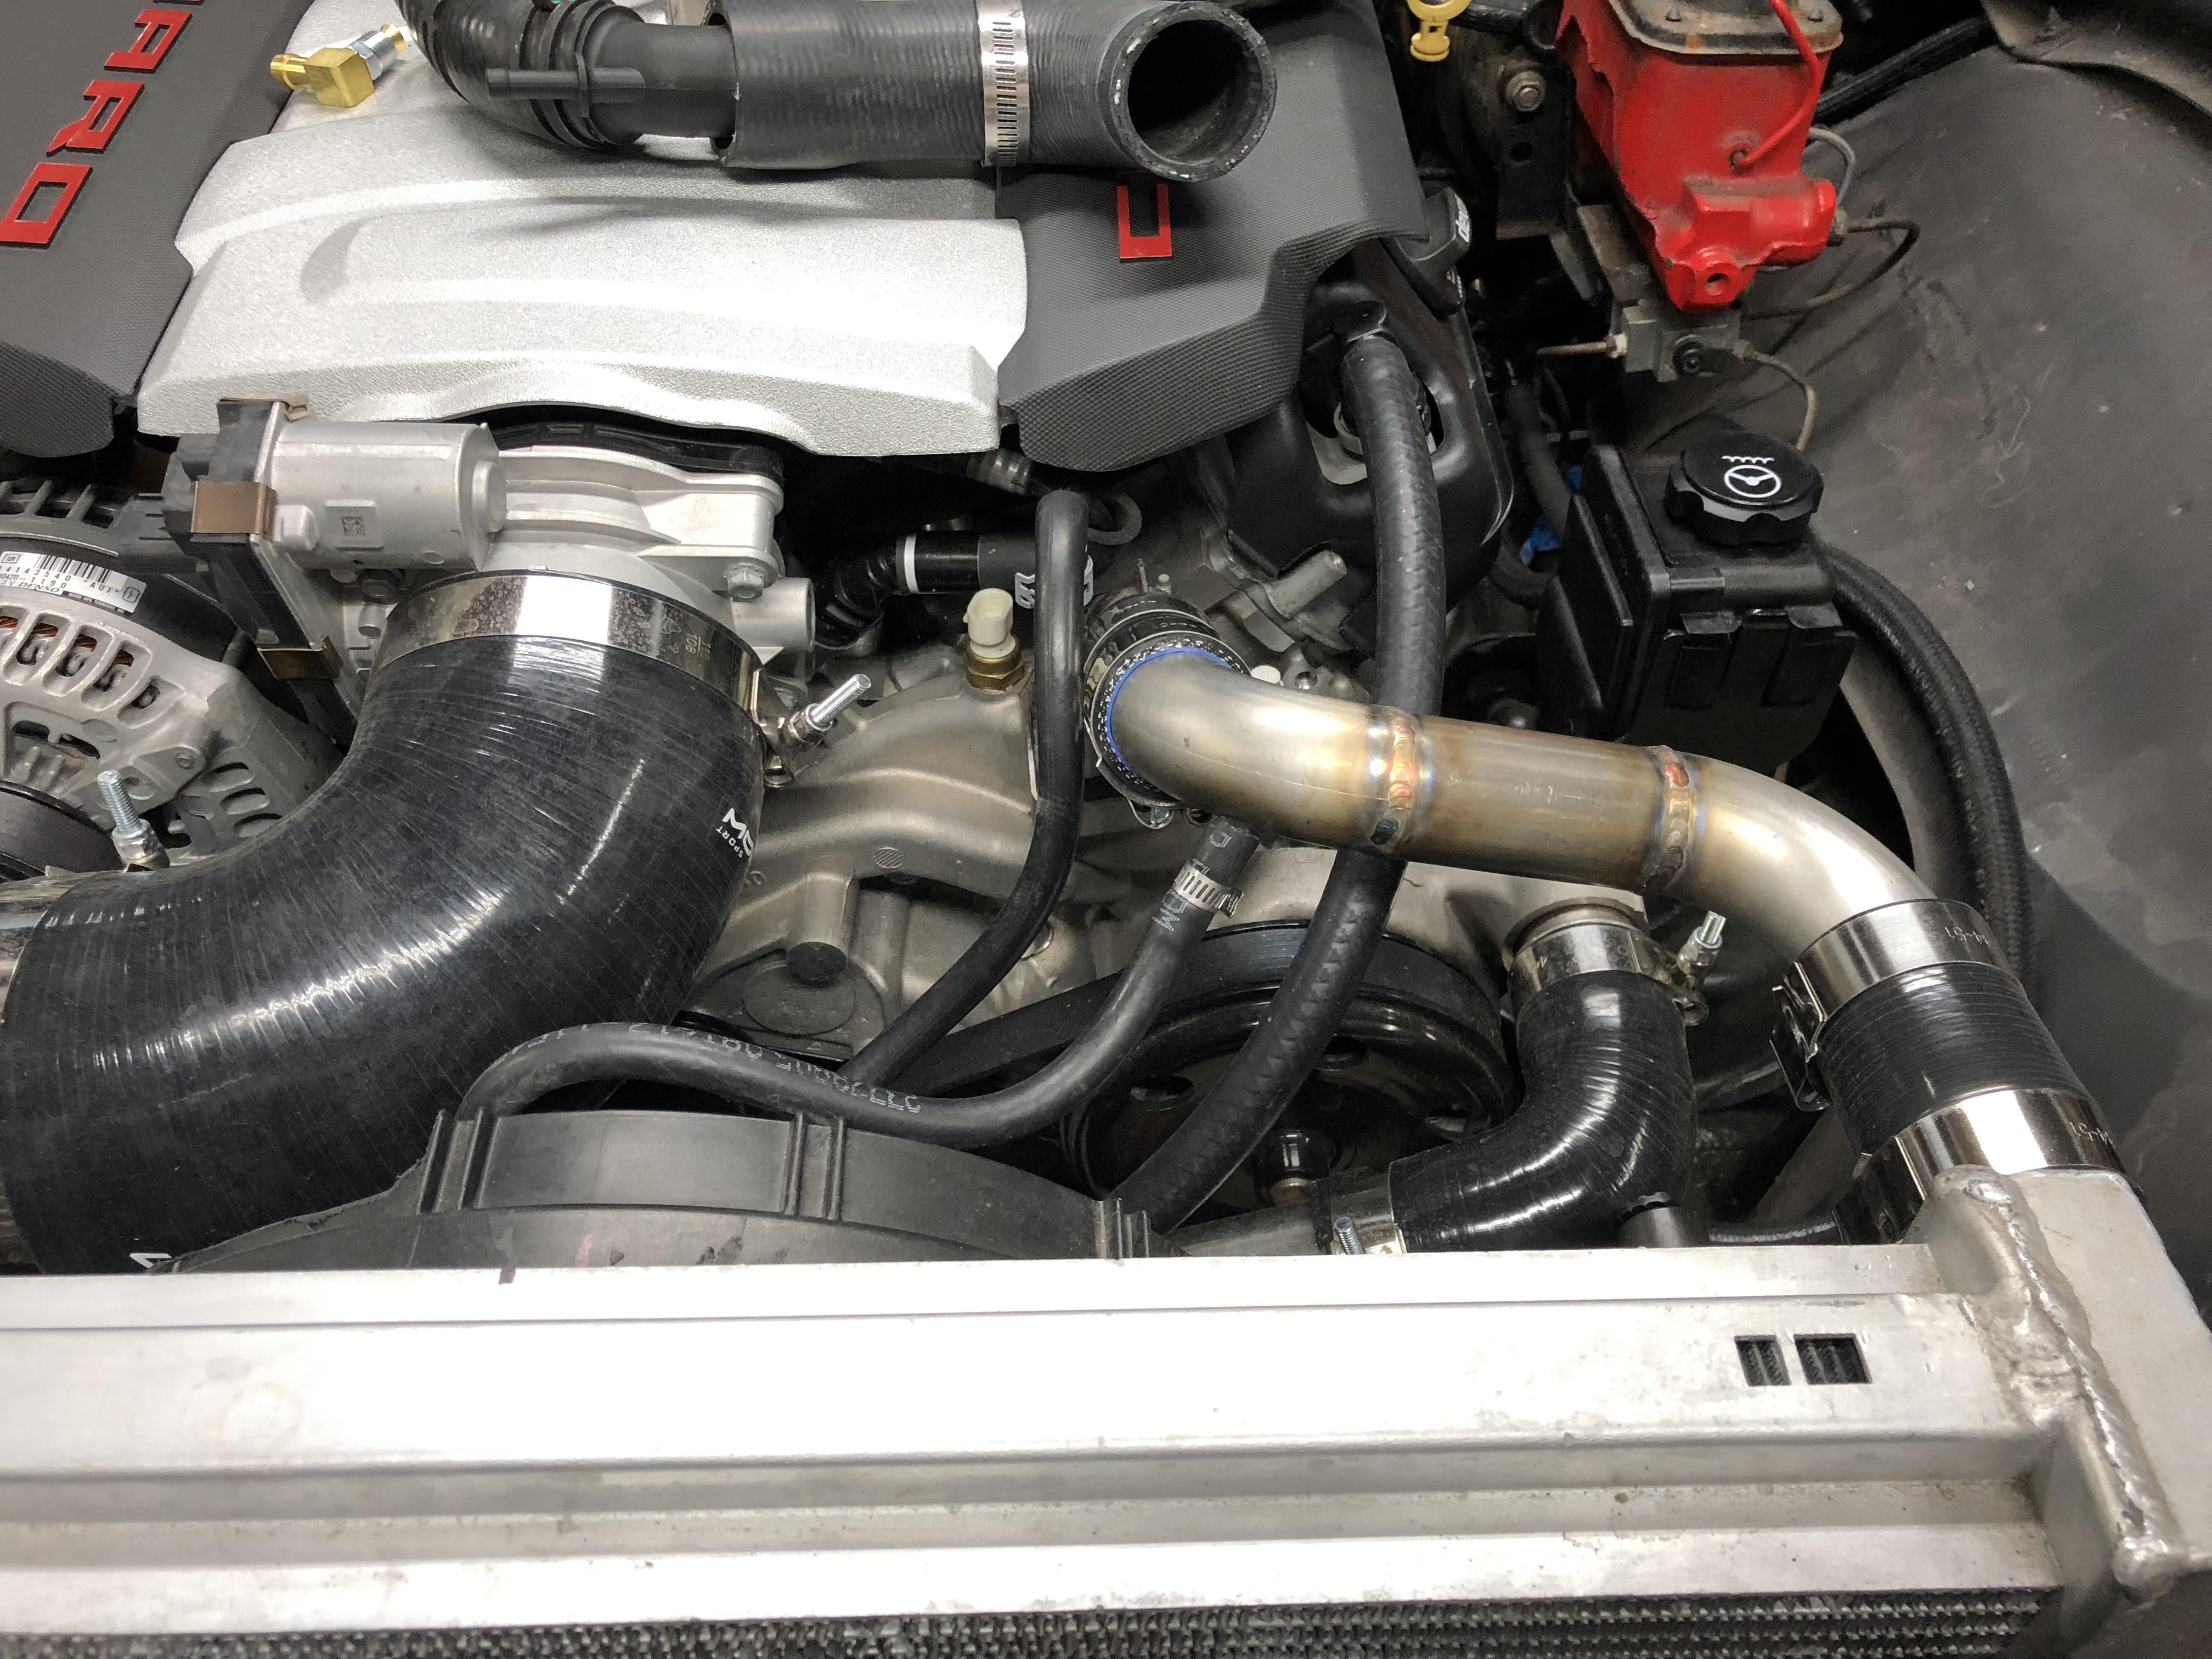
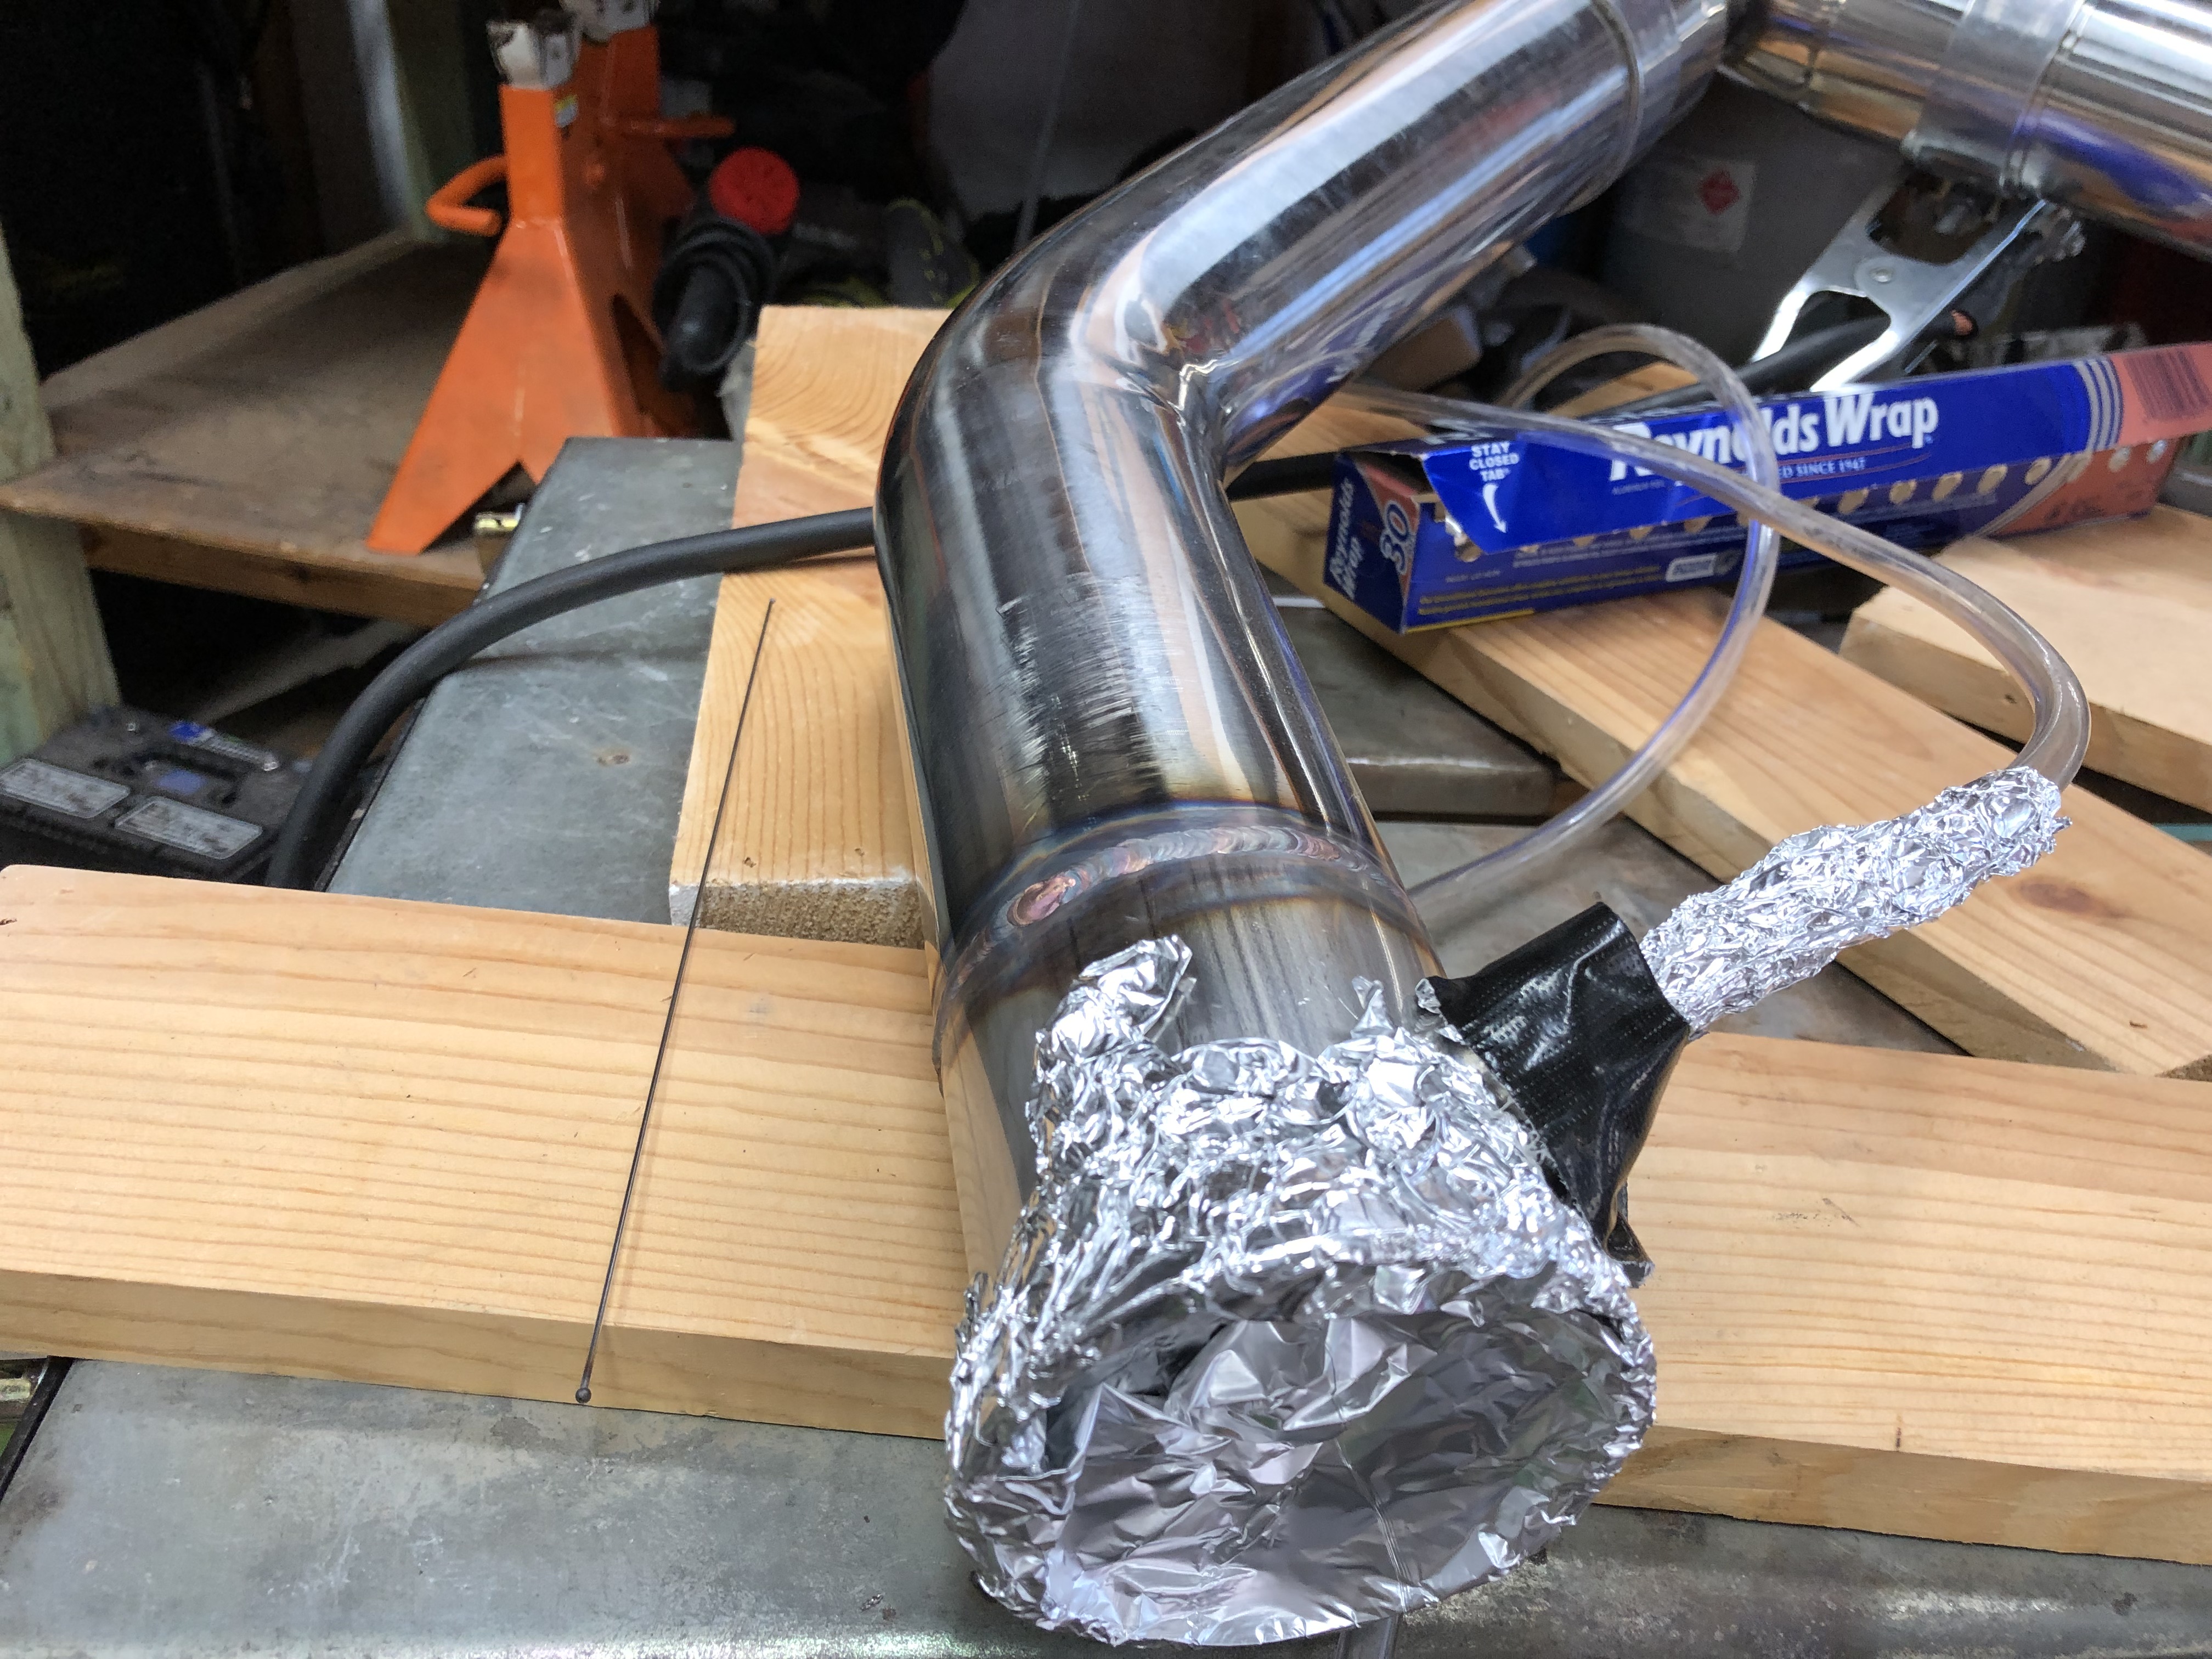
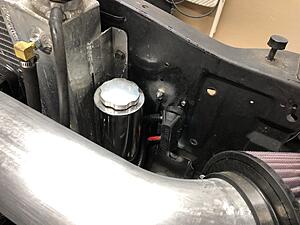
I got some 1.5" 304 tubing to build my upper radiator hose rather than use what you have seen in the previous photos. It only took about an hour or so and looks a lot better to cut up a U bend and make a few welds. I also incorporated a 1/4" tube to be used as the steam port. The 1/4" tube runs through the 1/5" tube and is extended in enough so it hits the high point of the system. These parts and a few couplers and t-bolt clams made it all fit nicely.
I have also changed the trans cooler line fitting at the radiator to make for a cleaner look.


I have also changed the trans cooler line fitting at the radiator to make for a cleaner look.

Last edited by jasonz28camaro; 09-17-2019 at 09:01 AM.
09-20-2019, 08:57 AM
#128
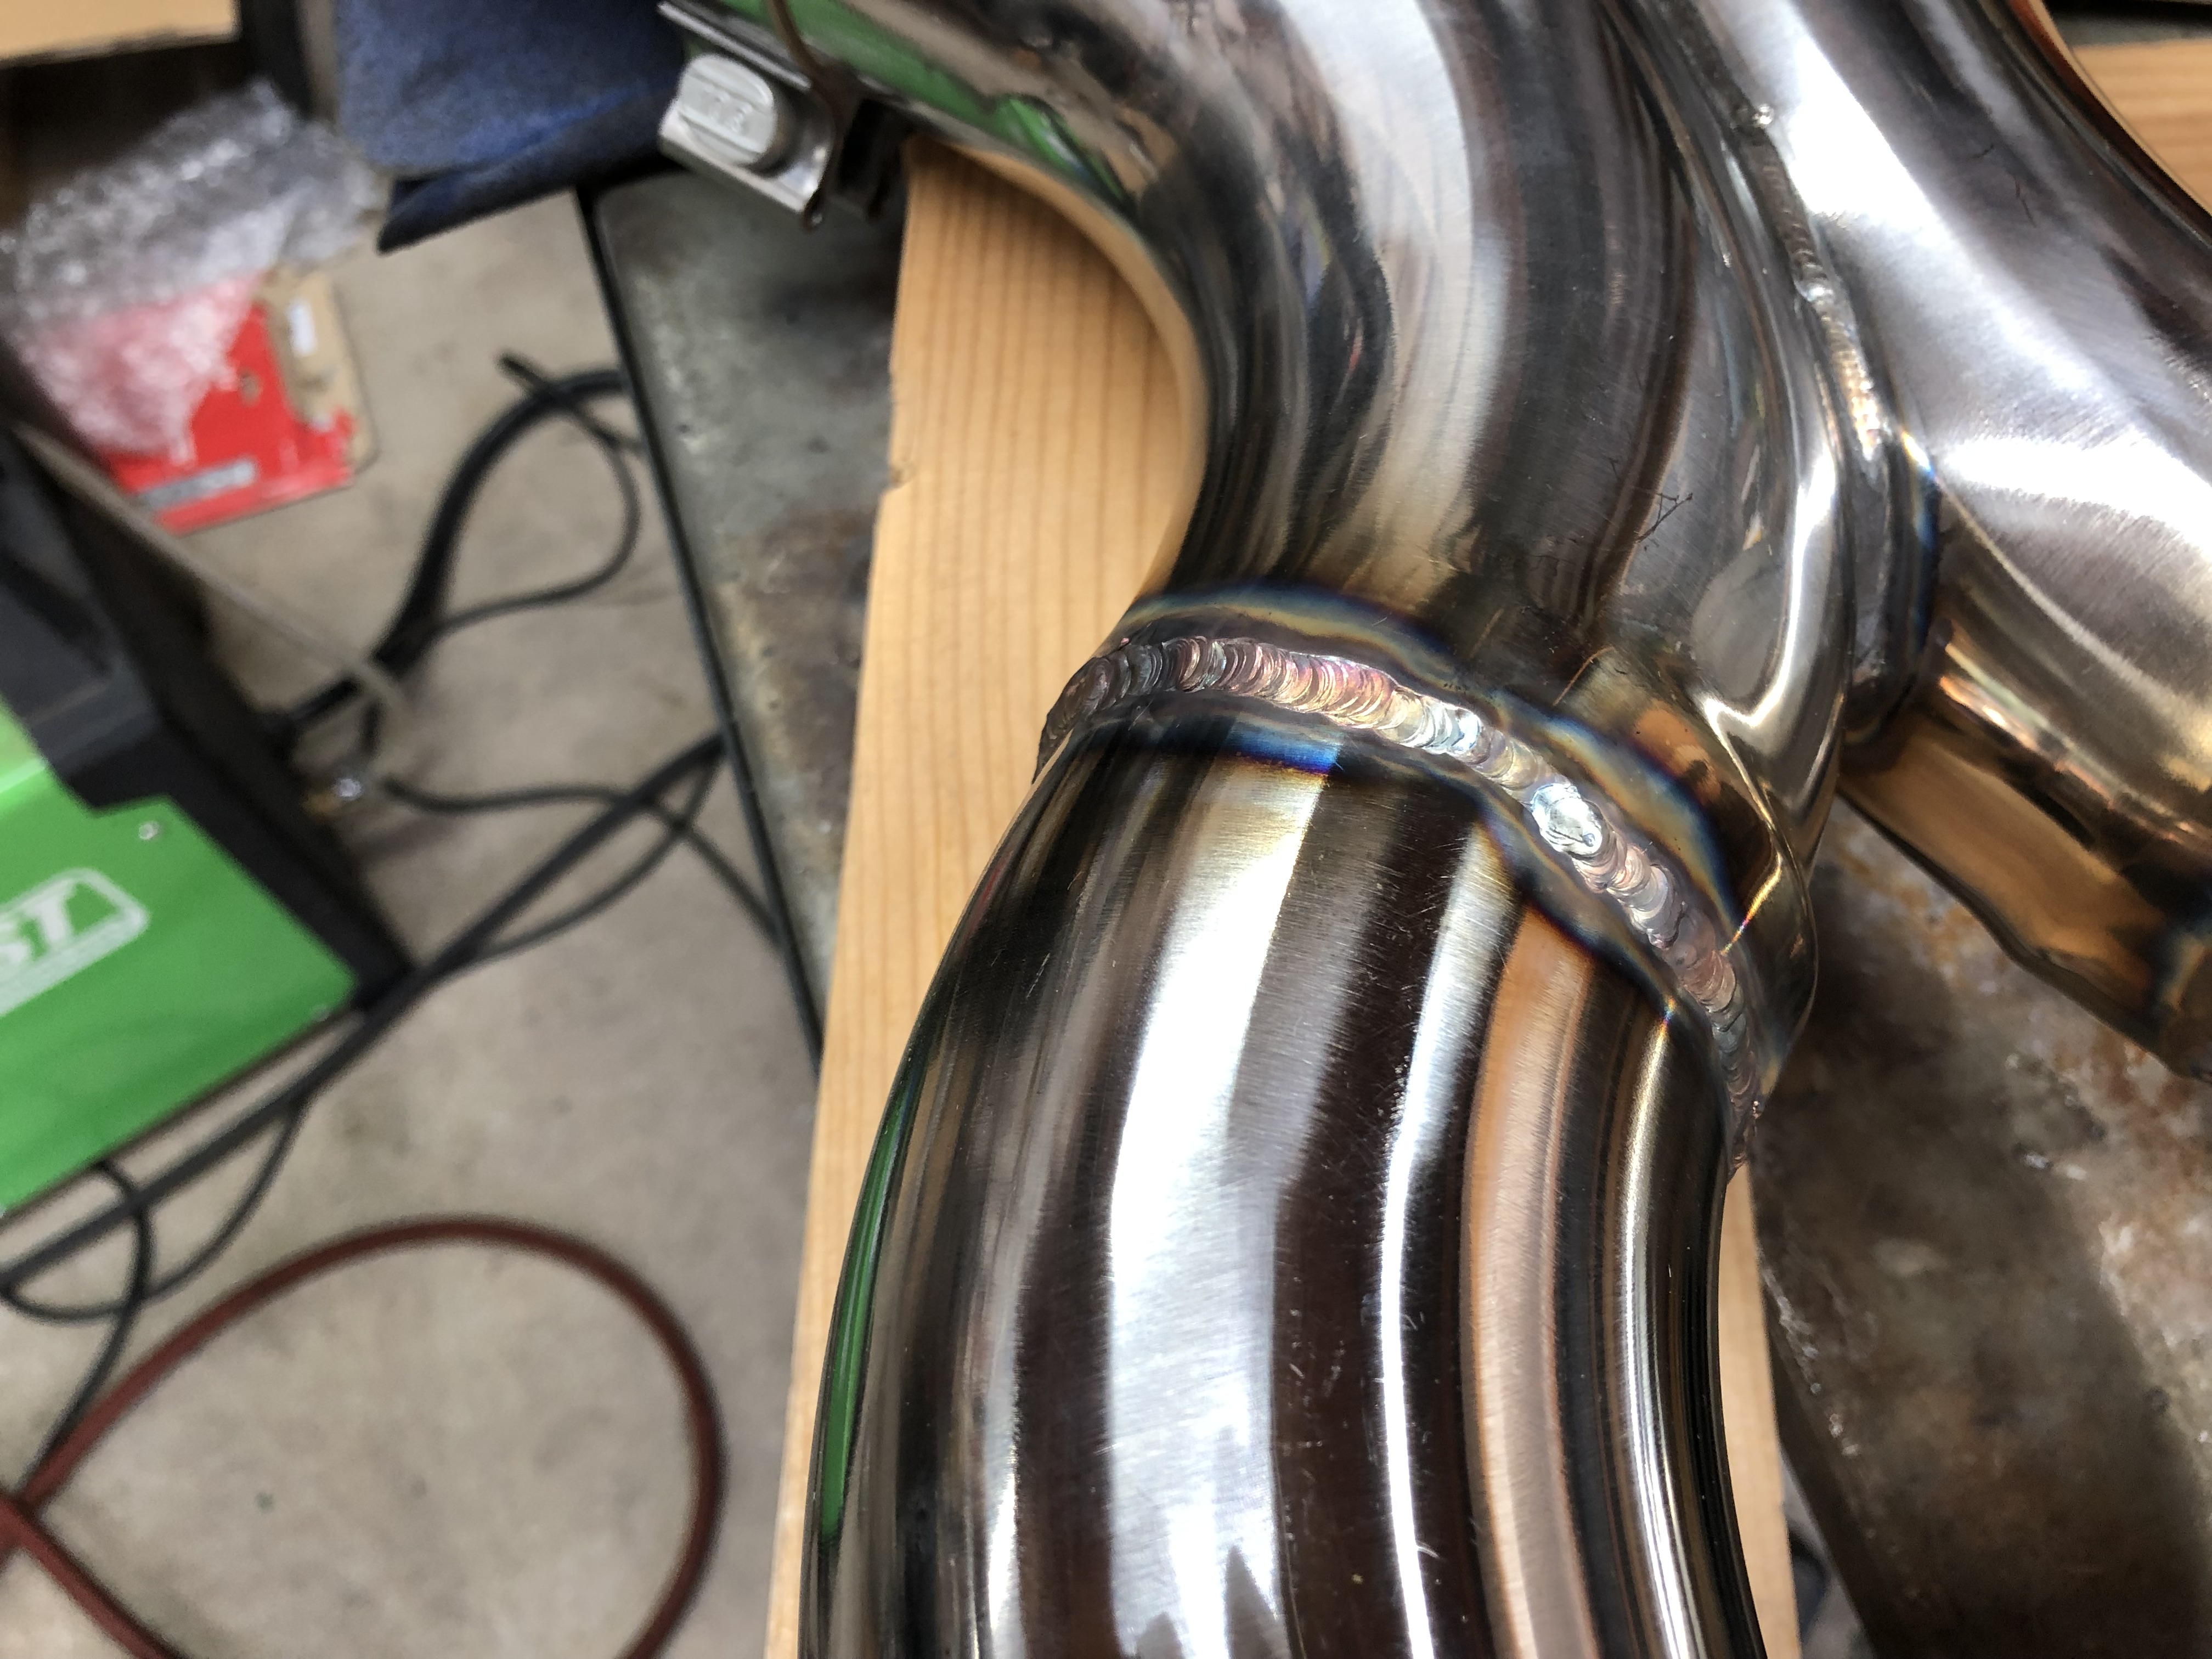
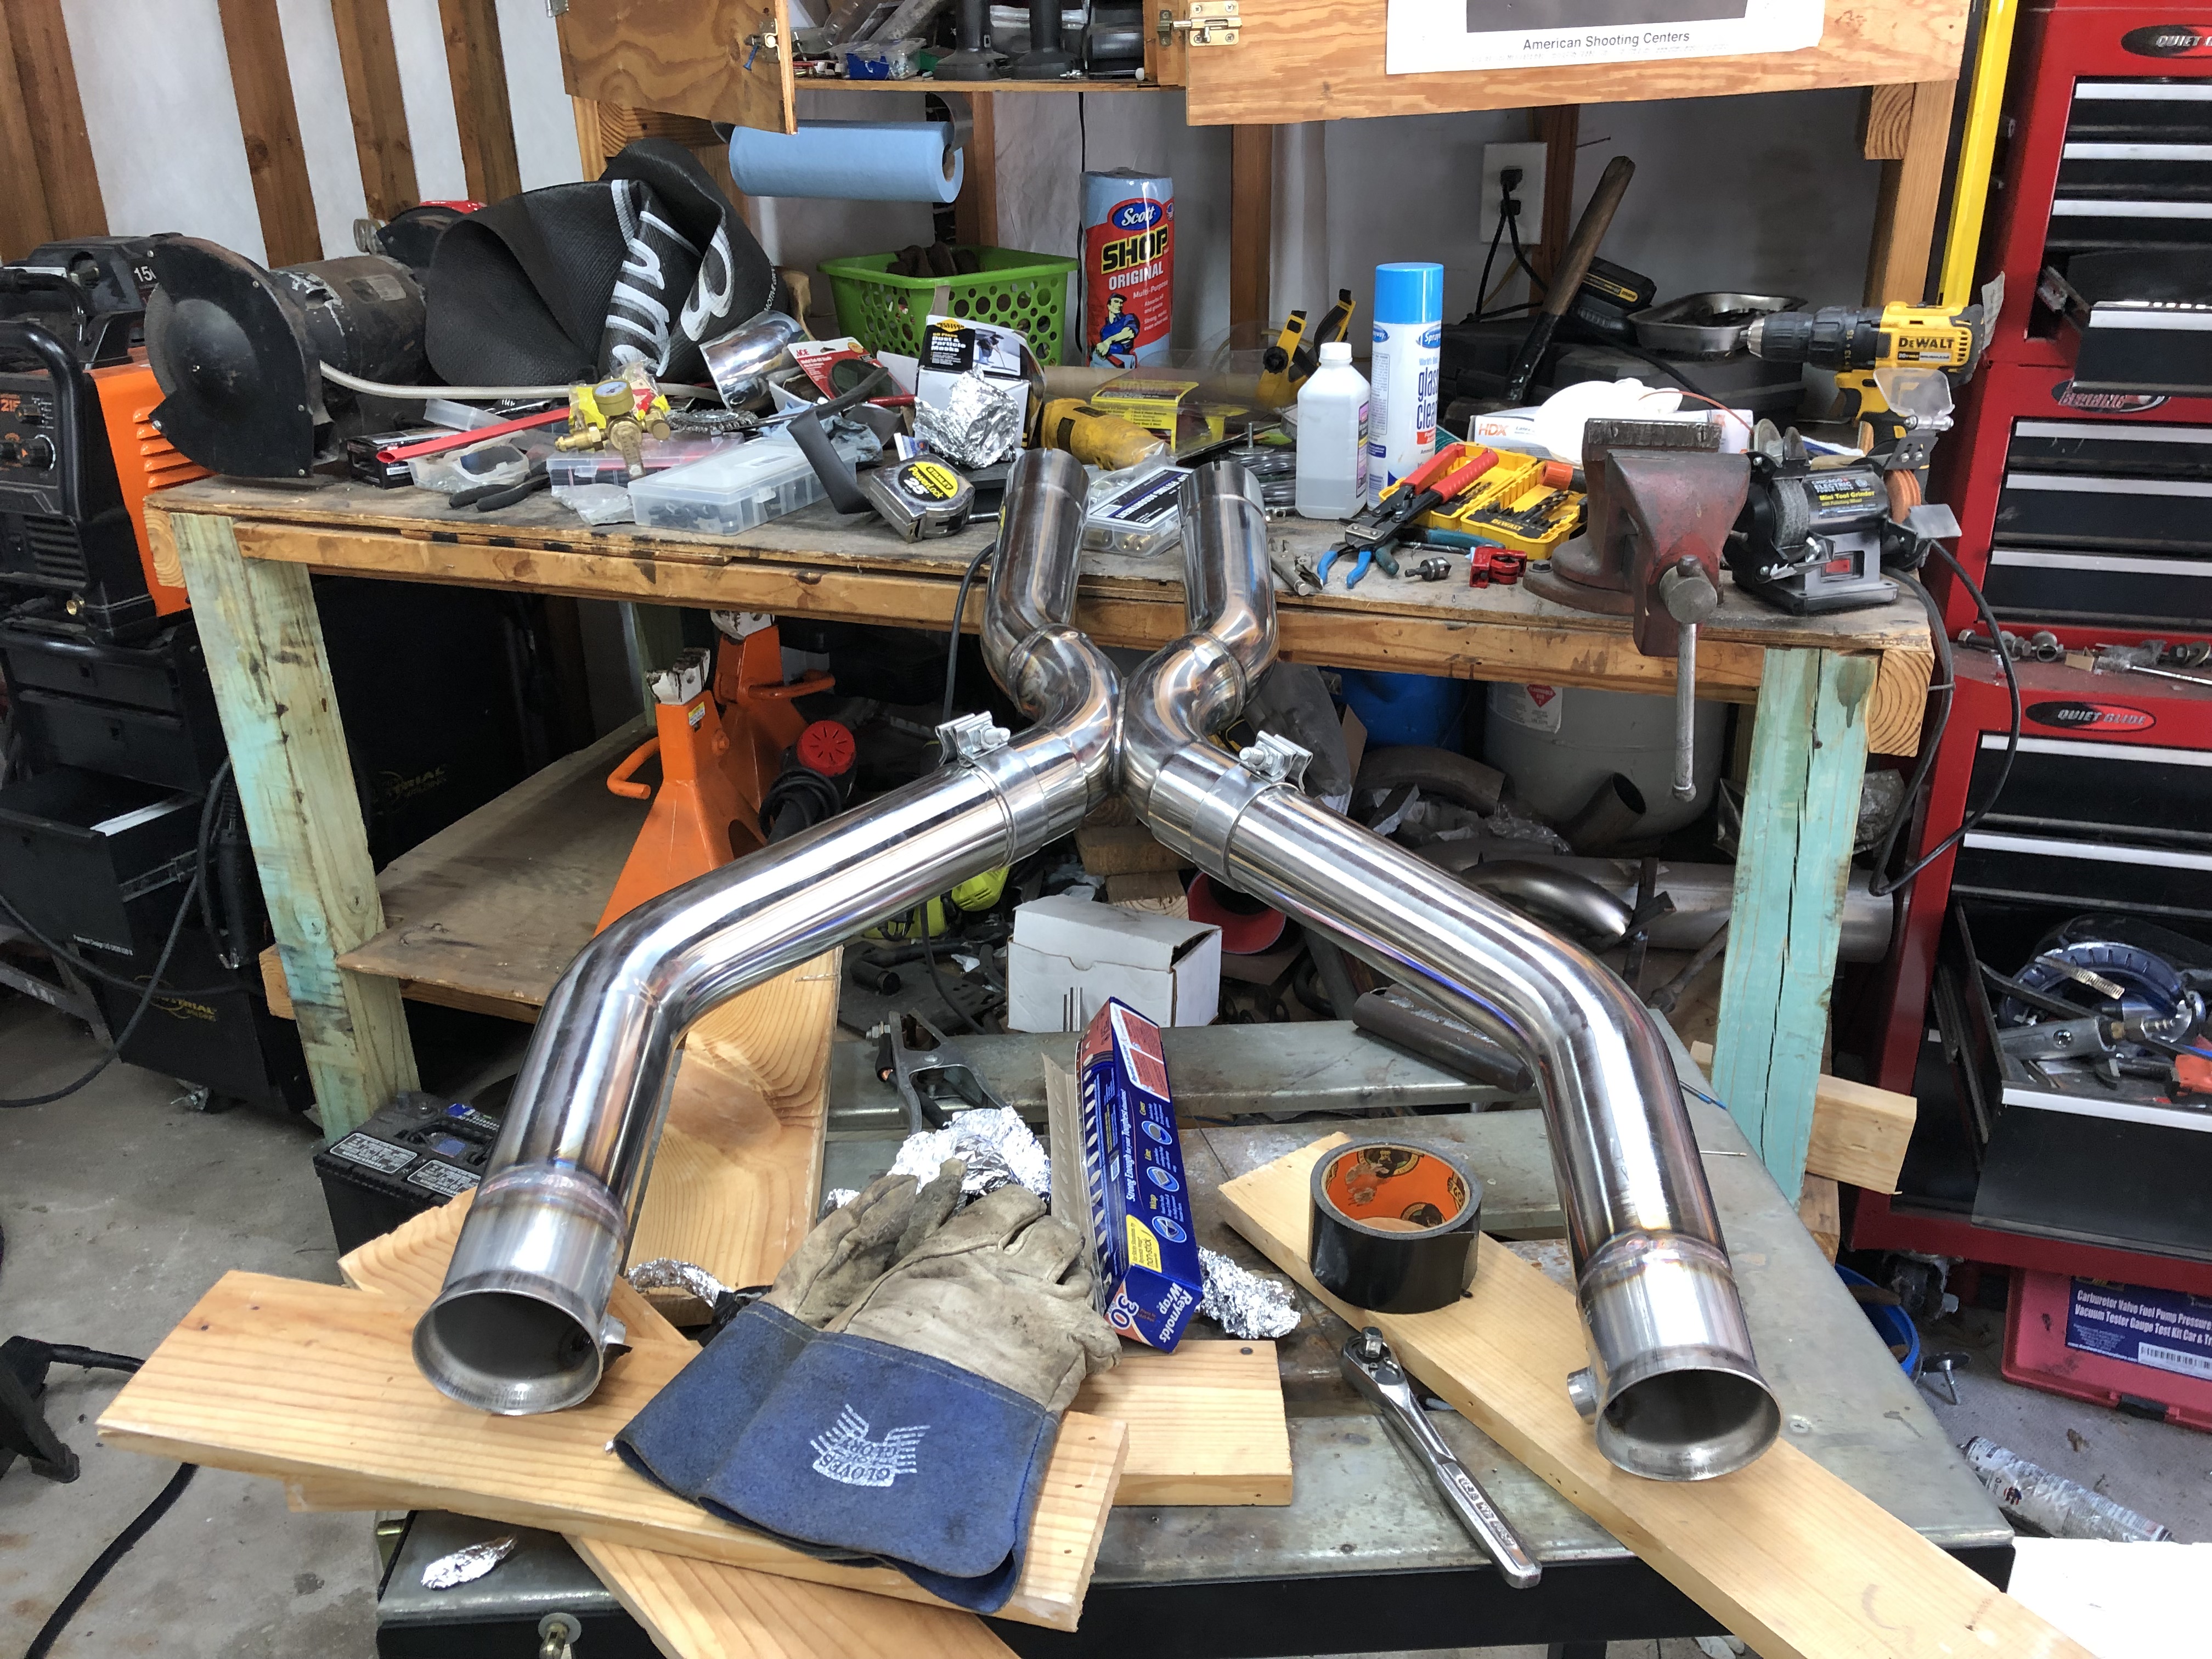
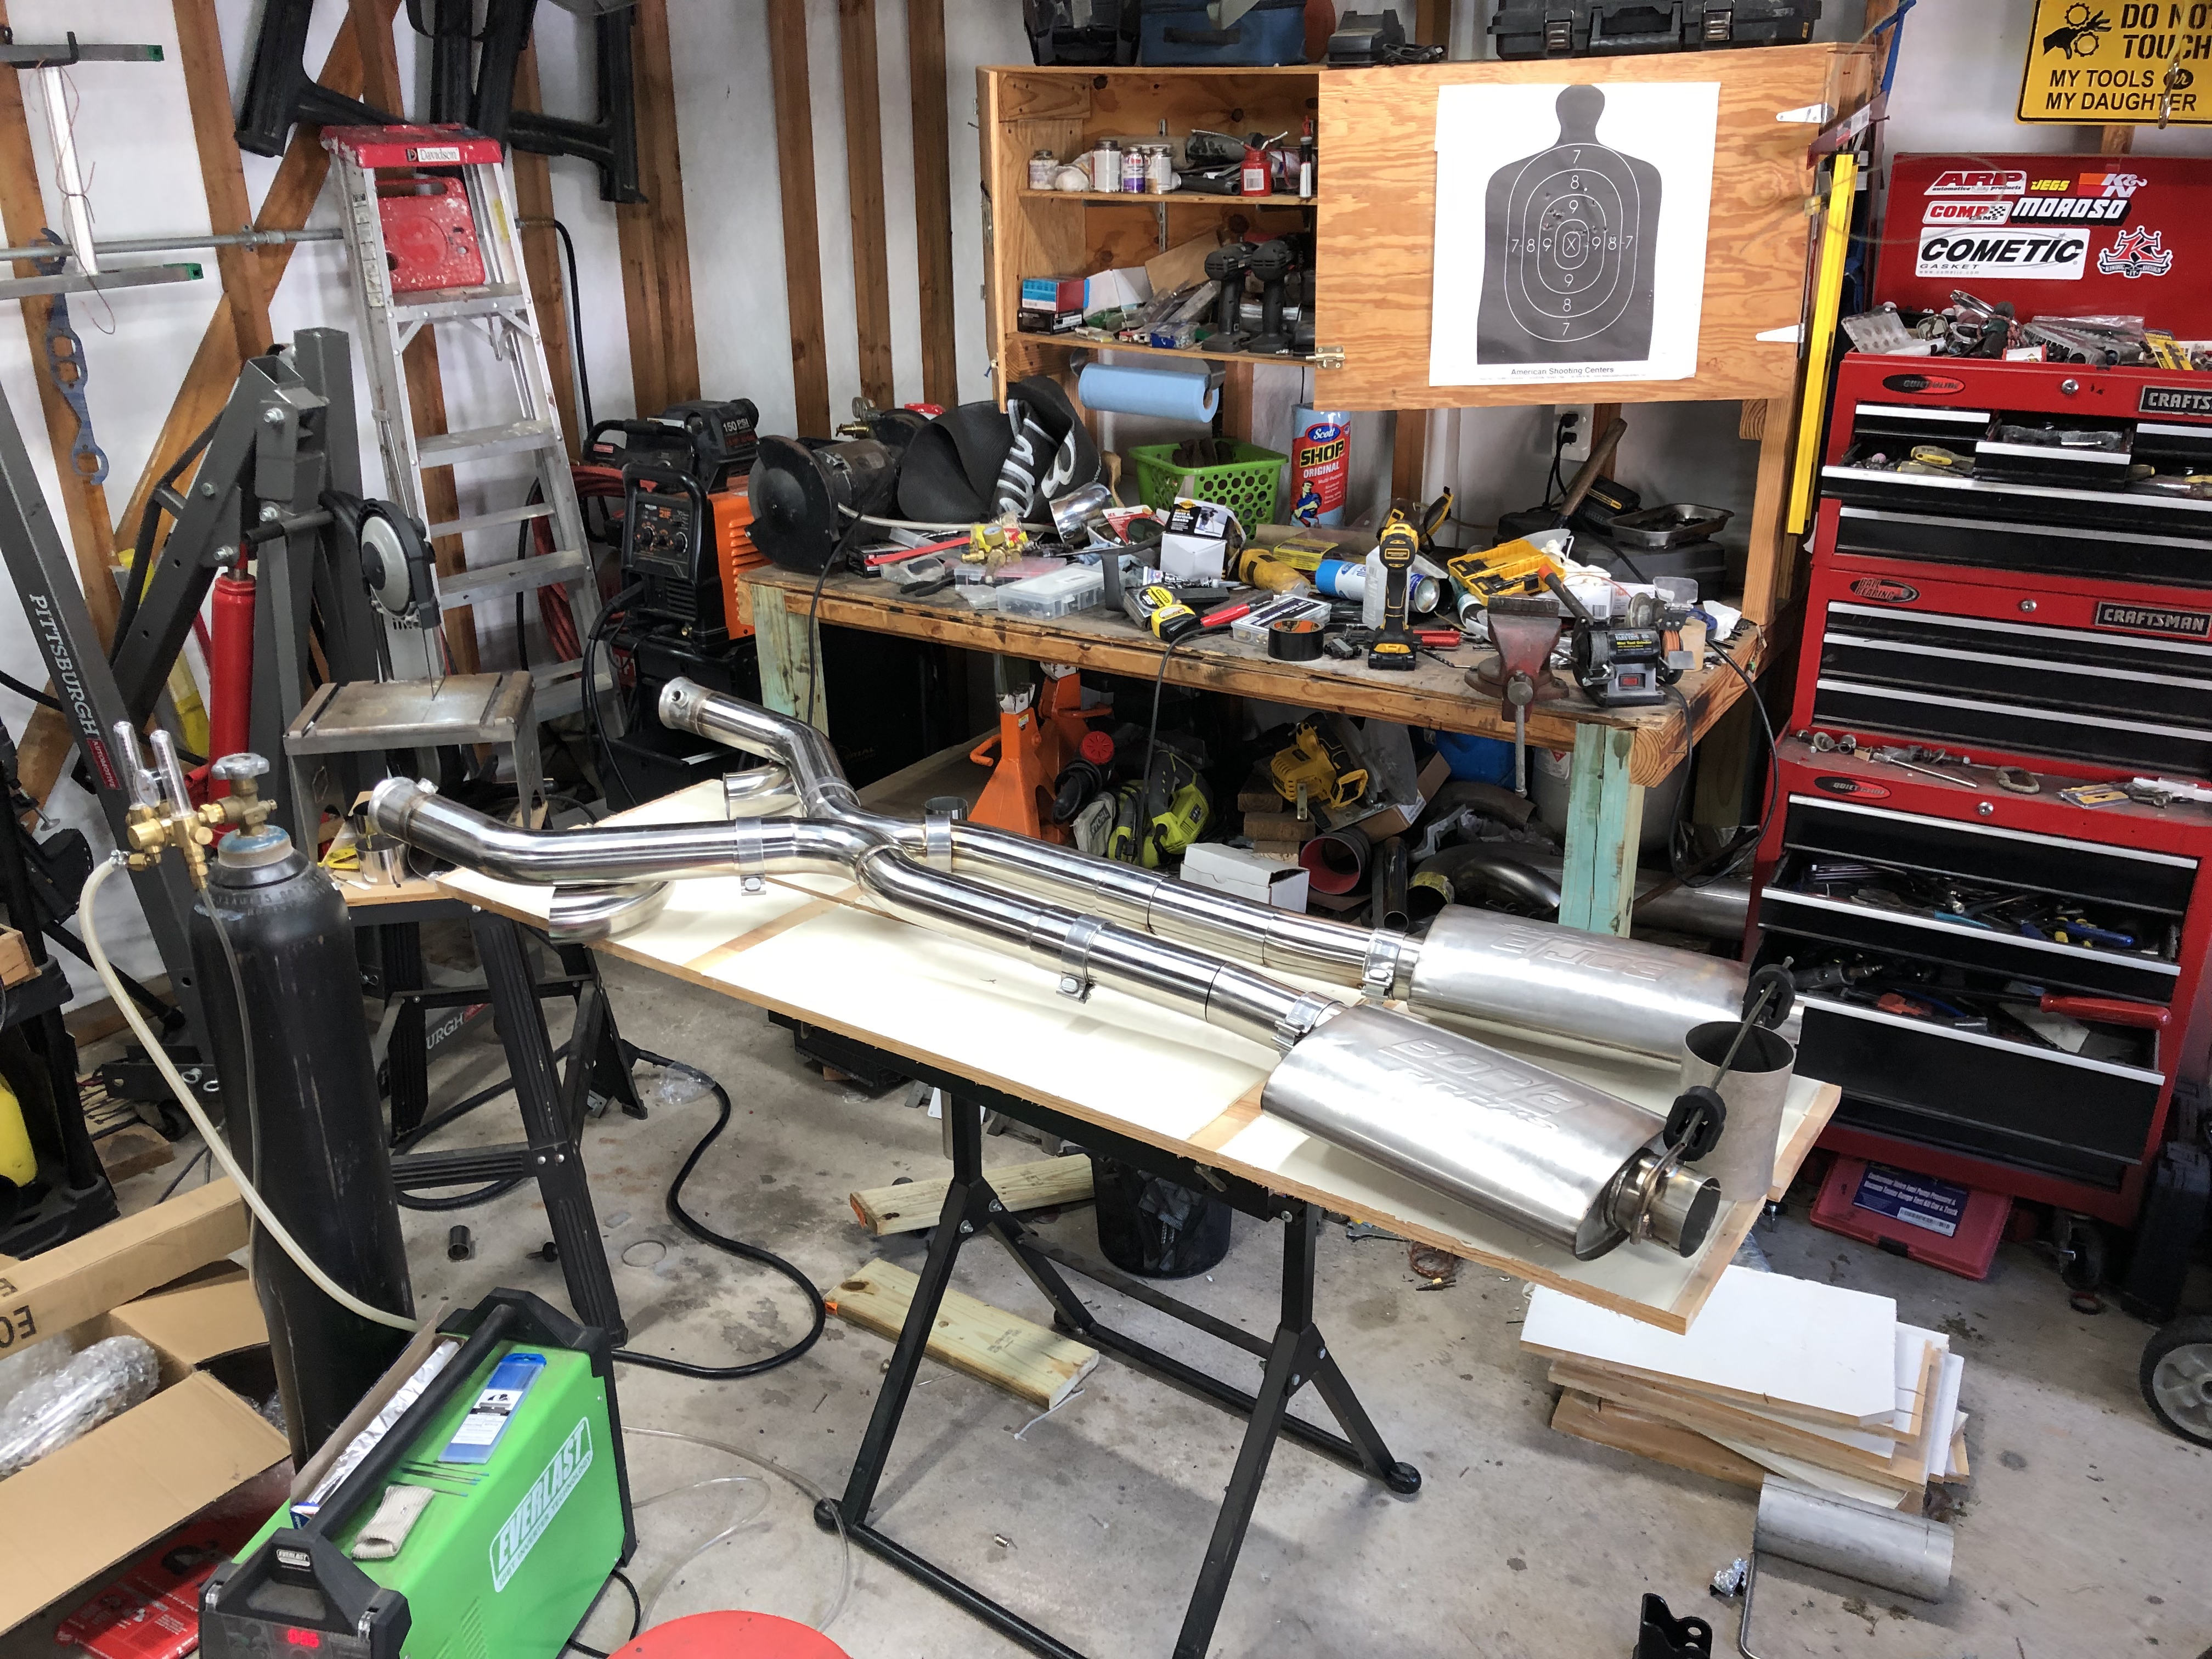
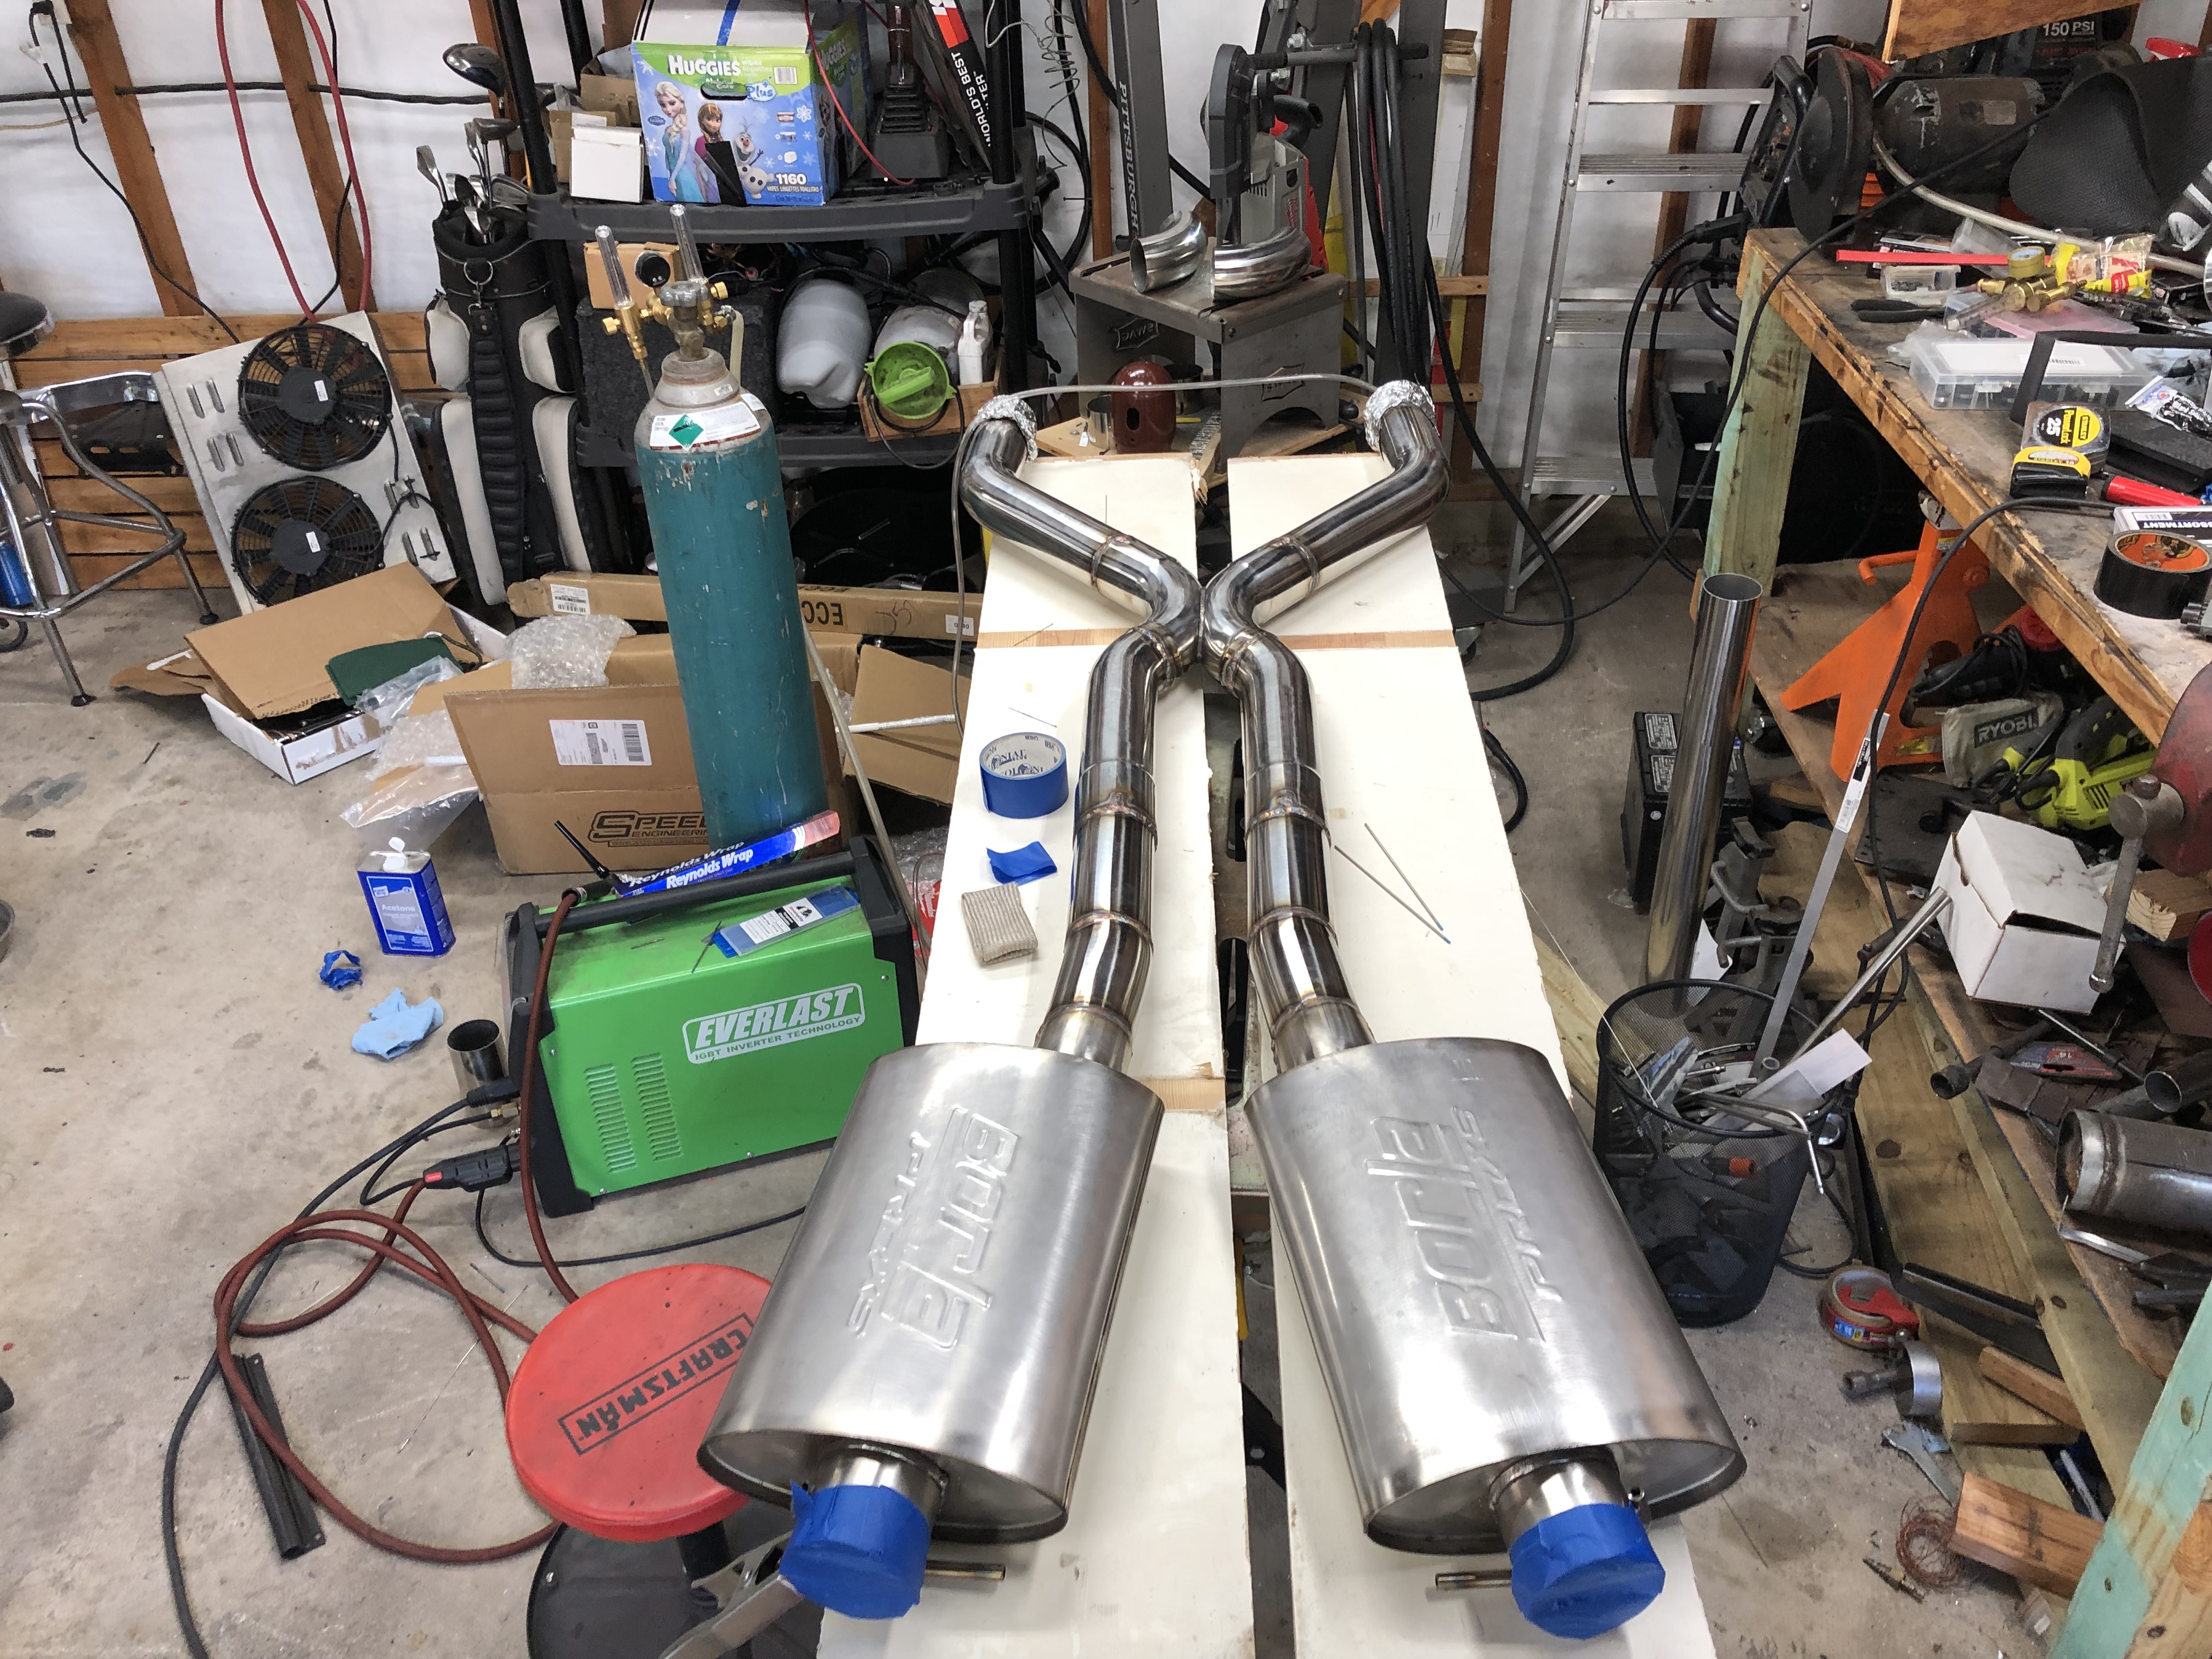
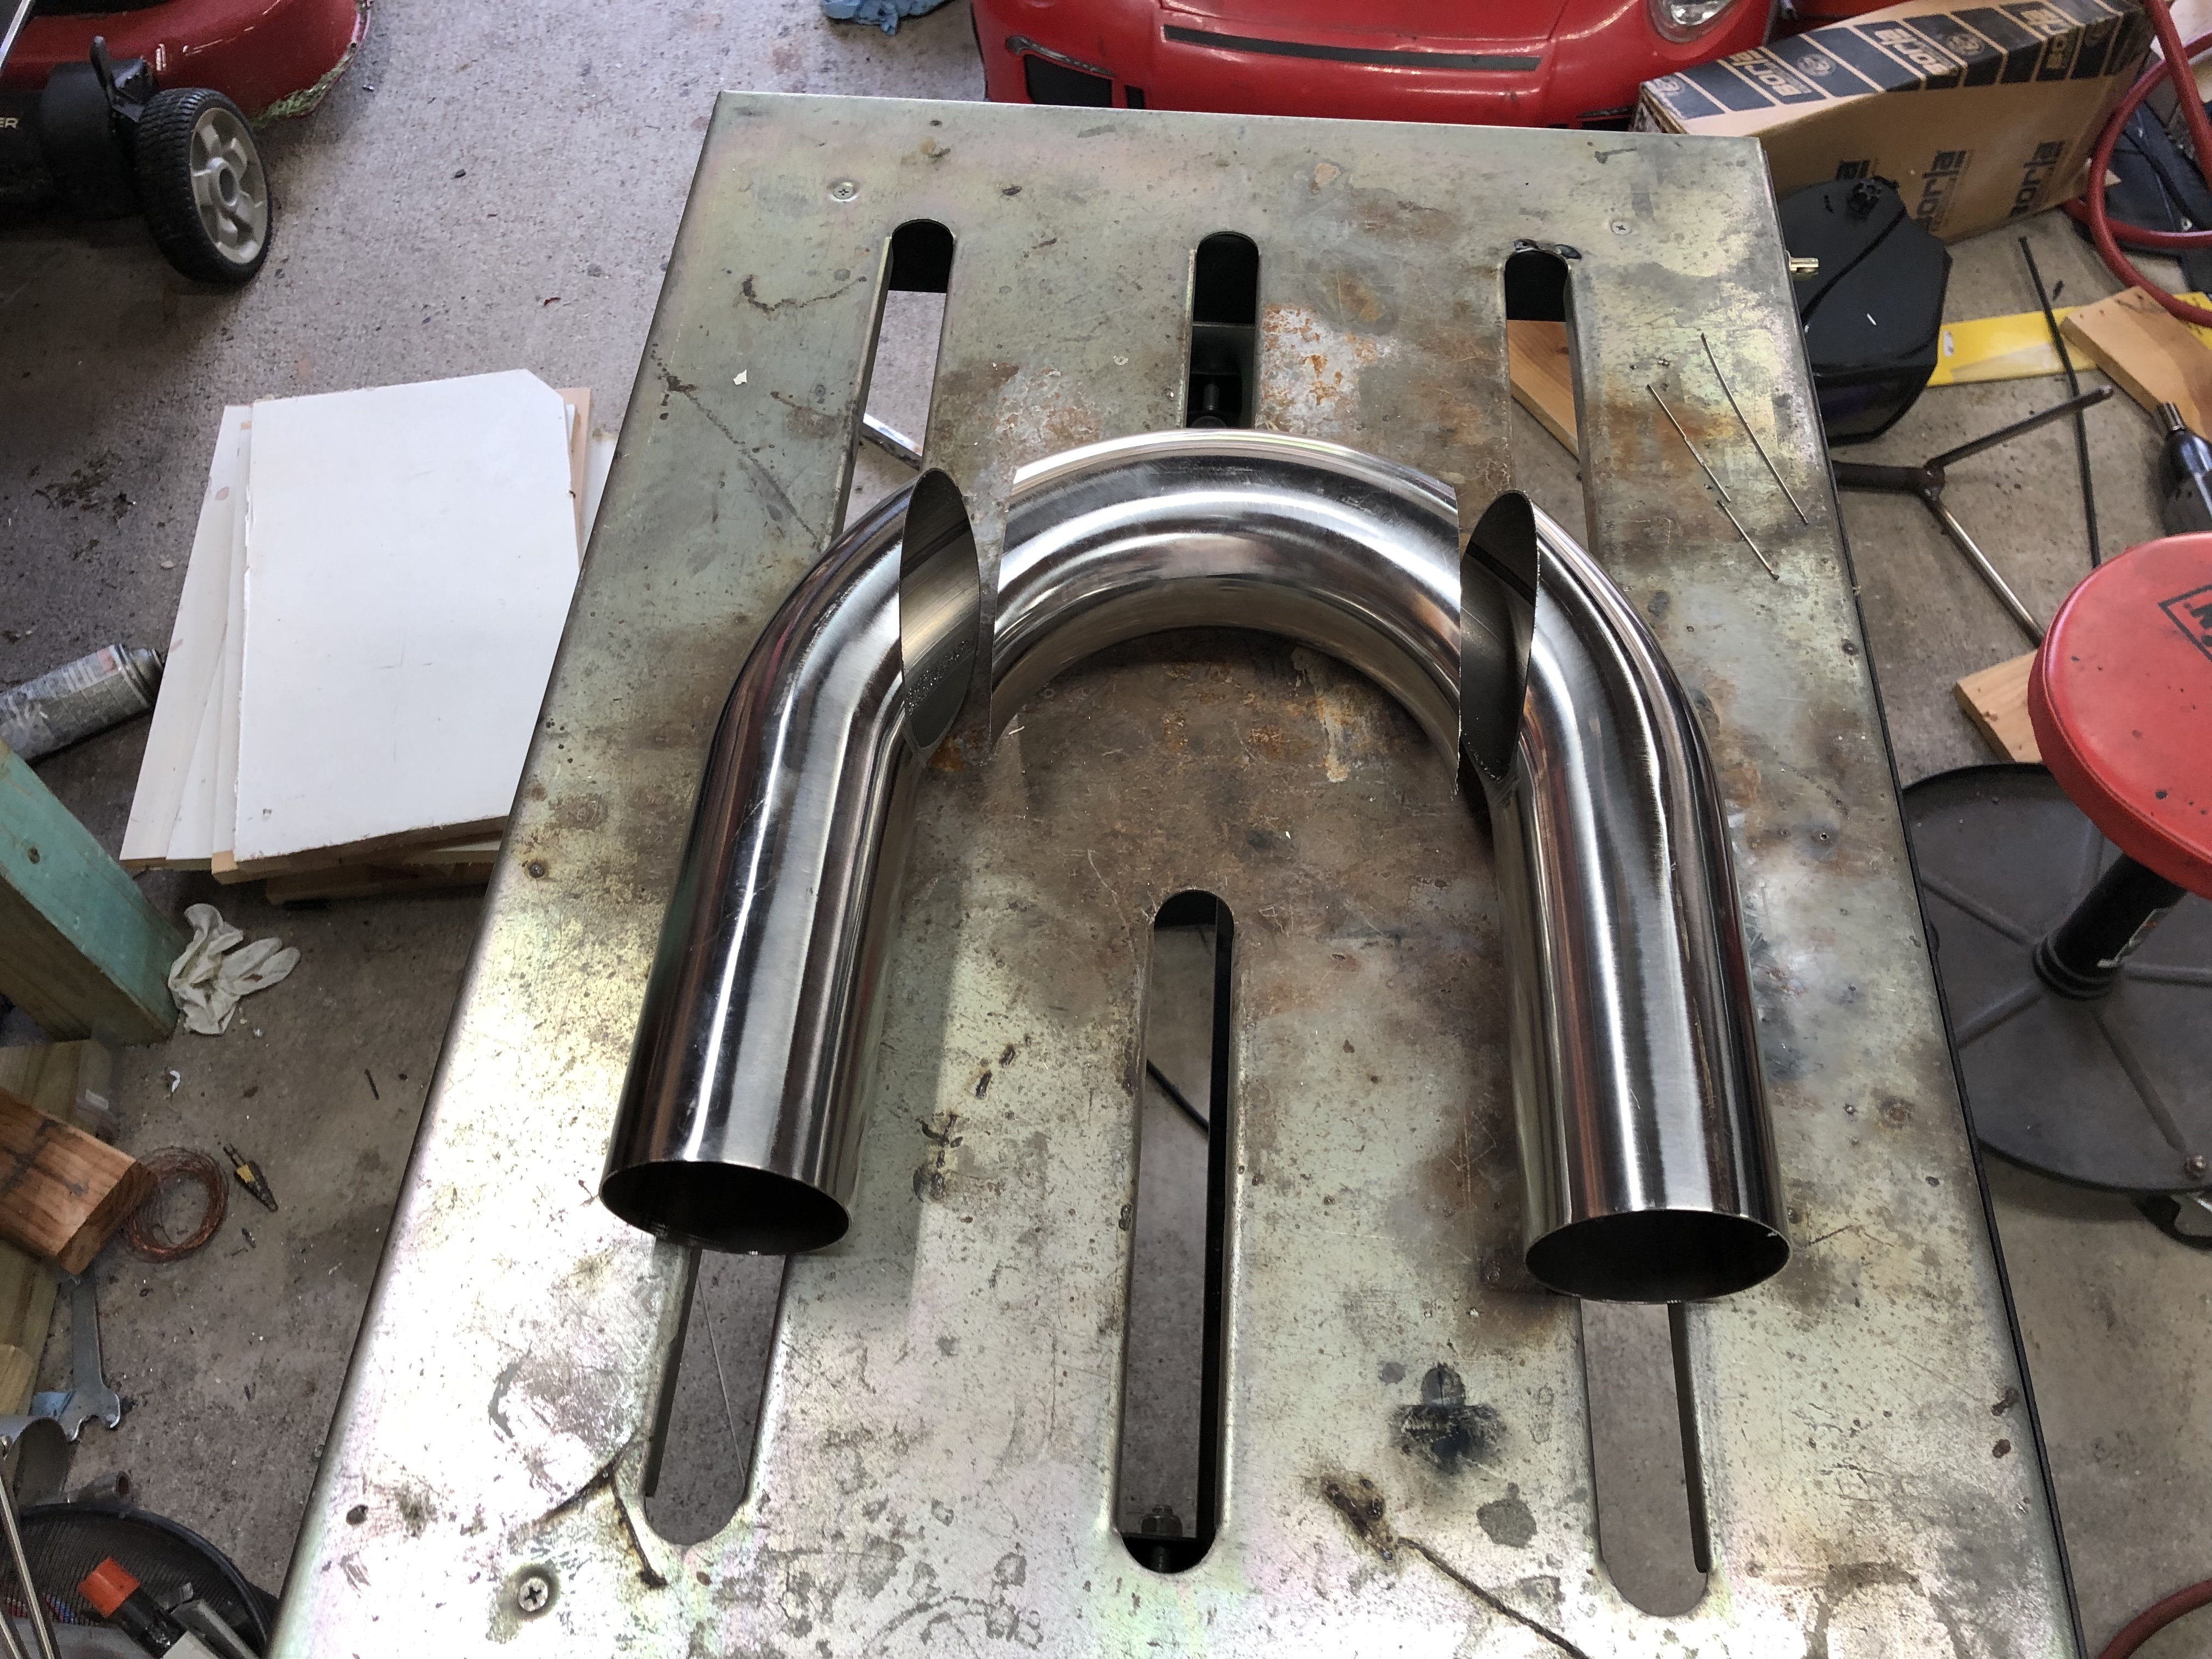
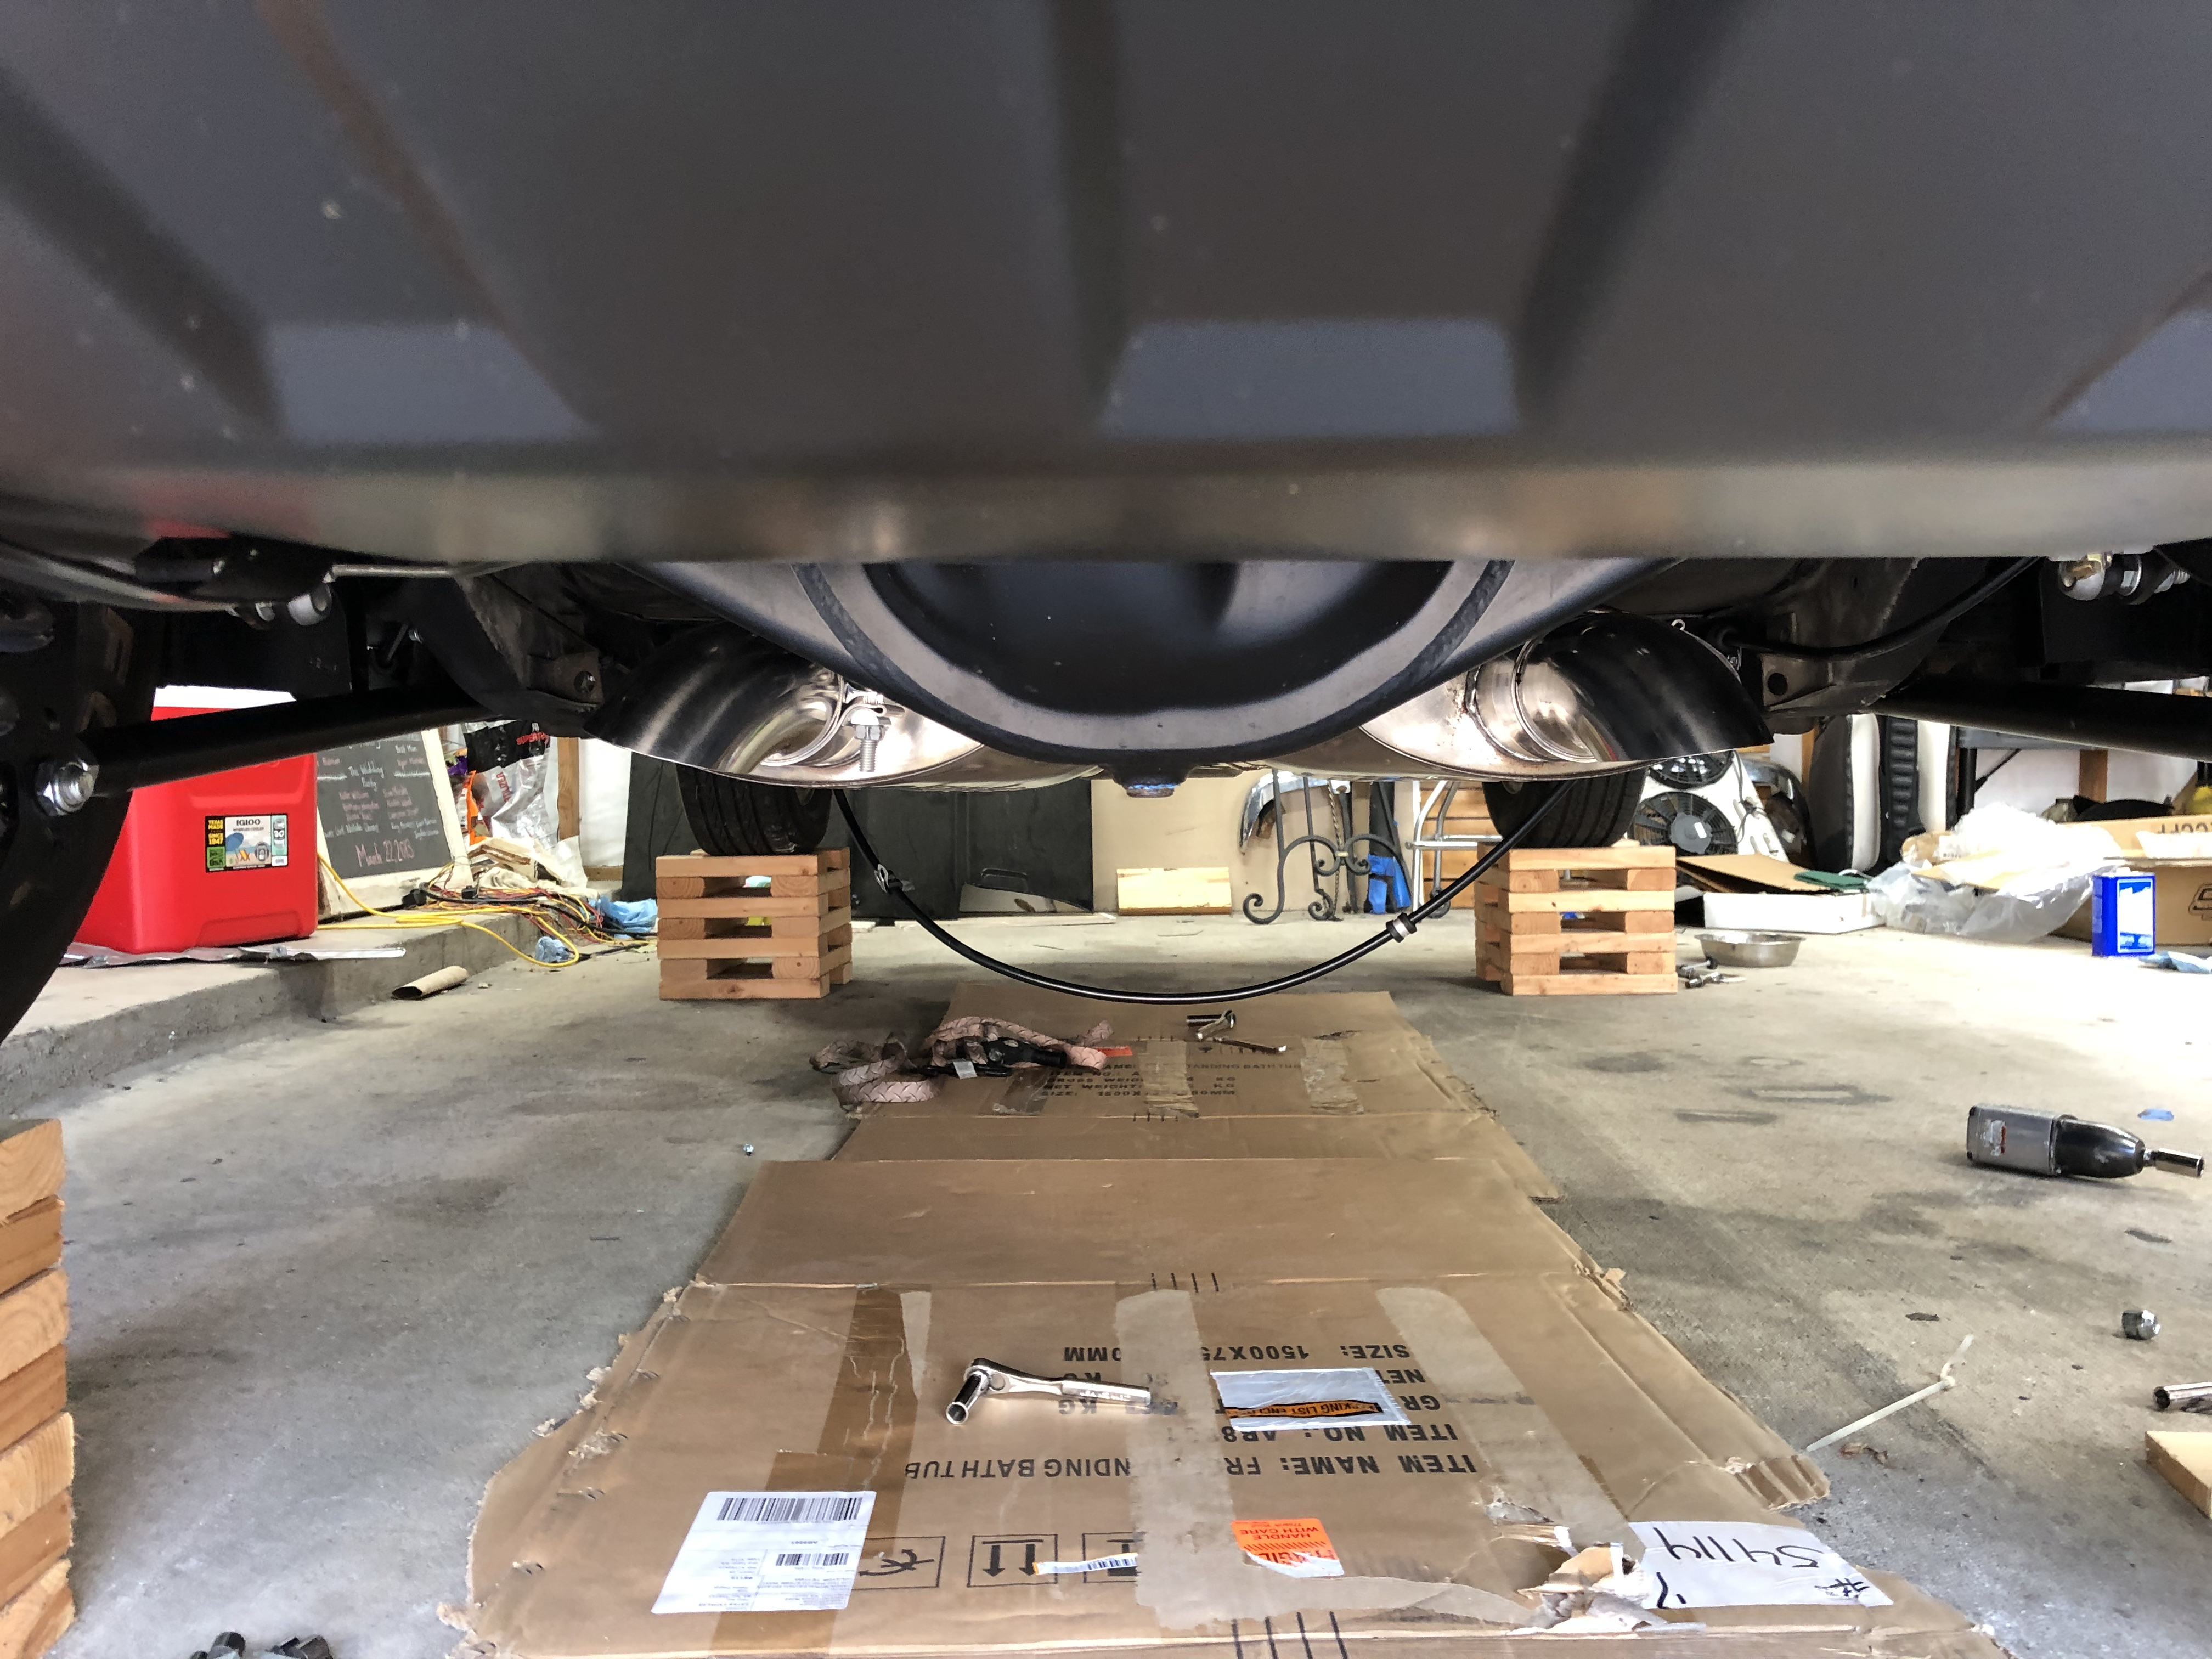
I shopped around for an exhaust system for a little while looking for a good system to fit the Ridtech rear and just couldnt find it. One way or another it would need to be adjusted to fit my needs with the rear and the headers. Price was another concern, the cheaper ones came in 409ss and I preferred getting a kit with 309ss if I was to spend over $600. I ended up buying a 3" 304ss builder kit from speed engineering and Borla PorXS mufflers, also 304ss. The total cost was $350 plus blood sweat and tears. It was a little time consuming TIG welding and back purging everything but it ended up turning out pretty nice, better than I thought actually. Nothing like building something yourself!
The builder kit came in slip fit and I opted for slip fit on the mufflers too, this made things a little easier for fitting. For the most part I had to stick it in place and clamp it, then weld it. I started bu hanging the mufflers and used some scrap .065" wall 3/8" ss tubing as the hangers, much cheaper and lighter if it matters than 3/8" solid $10 a piece ss bar hangers and they are surely capable of doing their job.
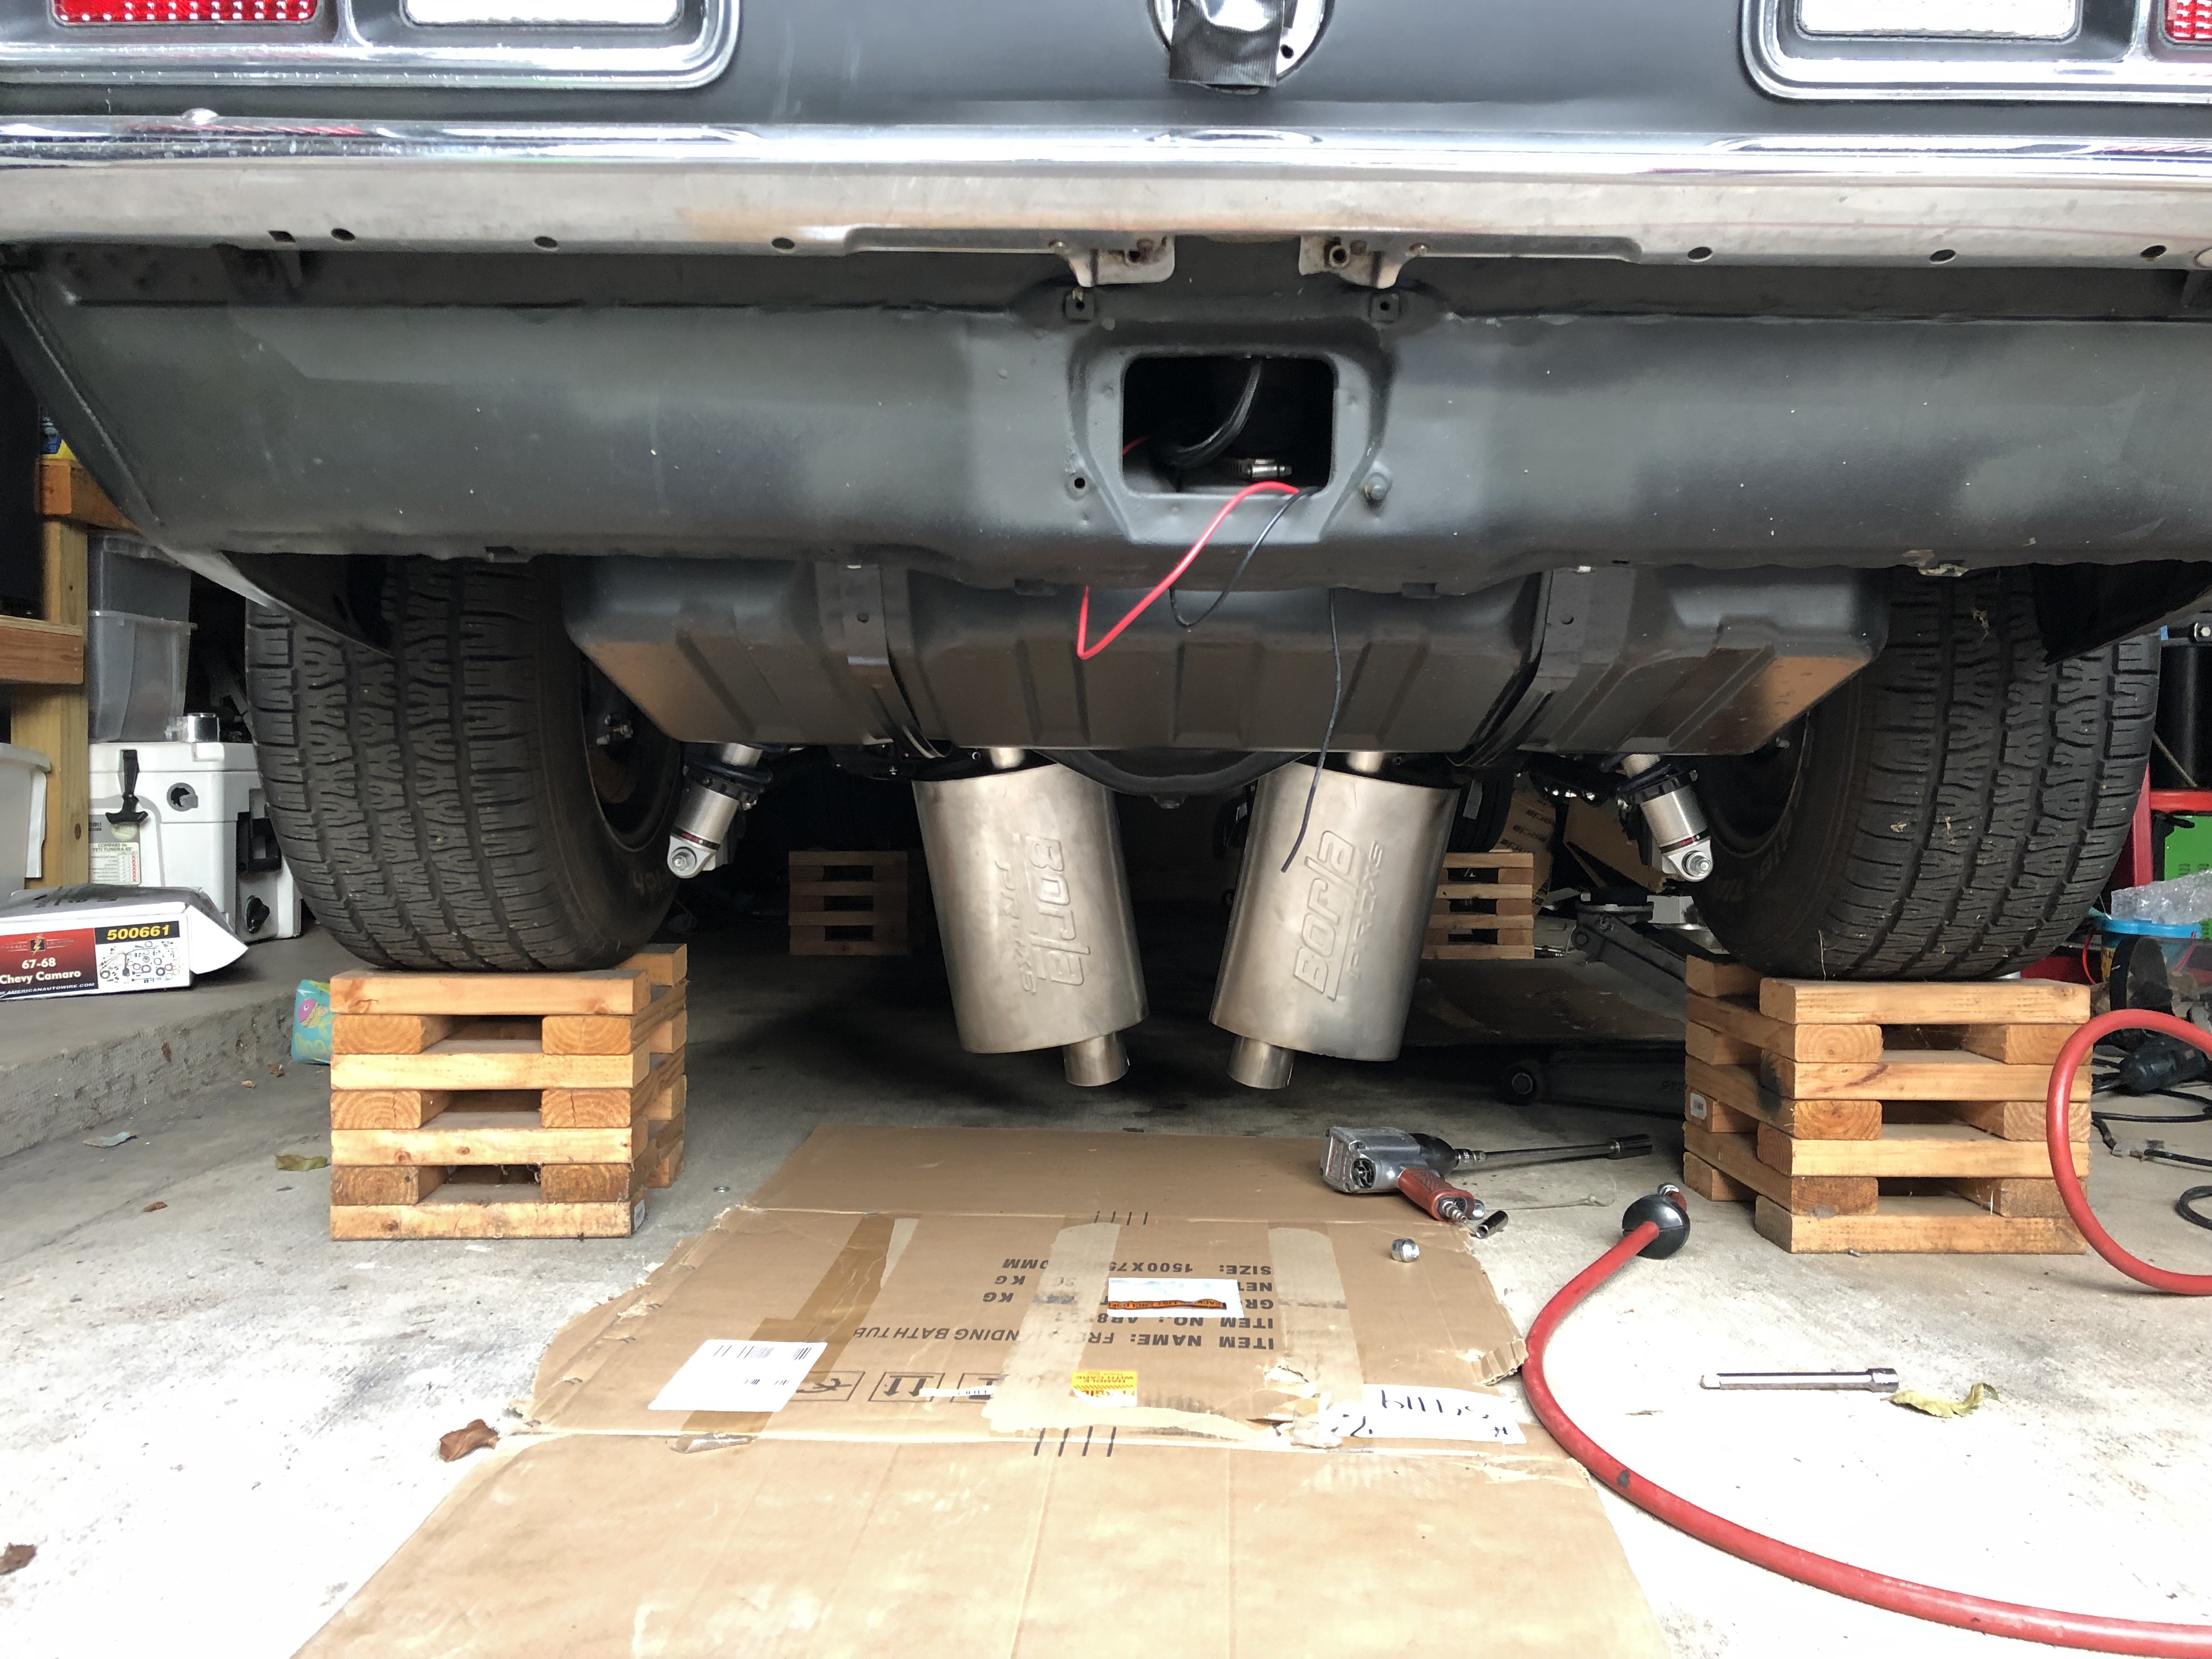
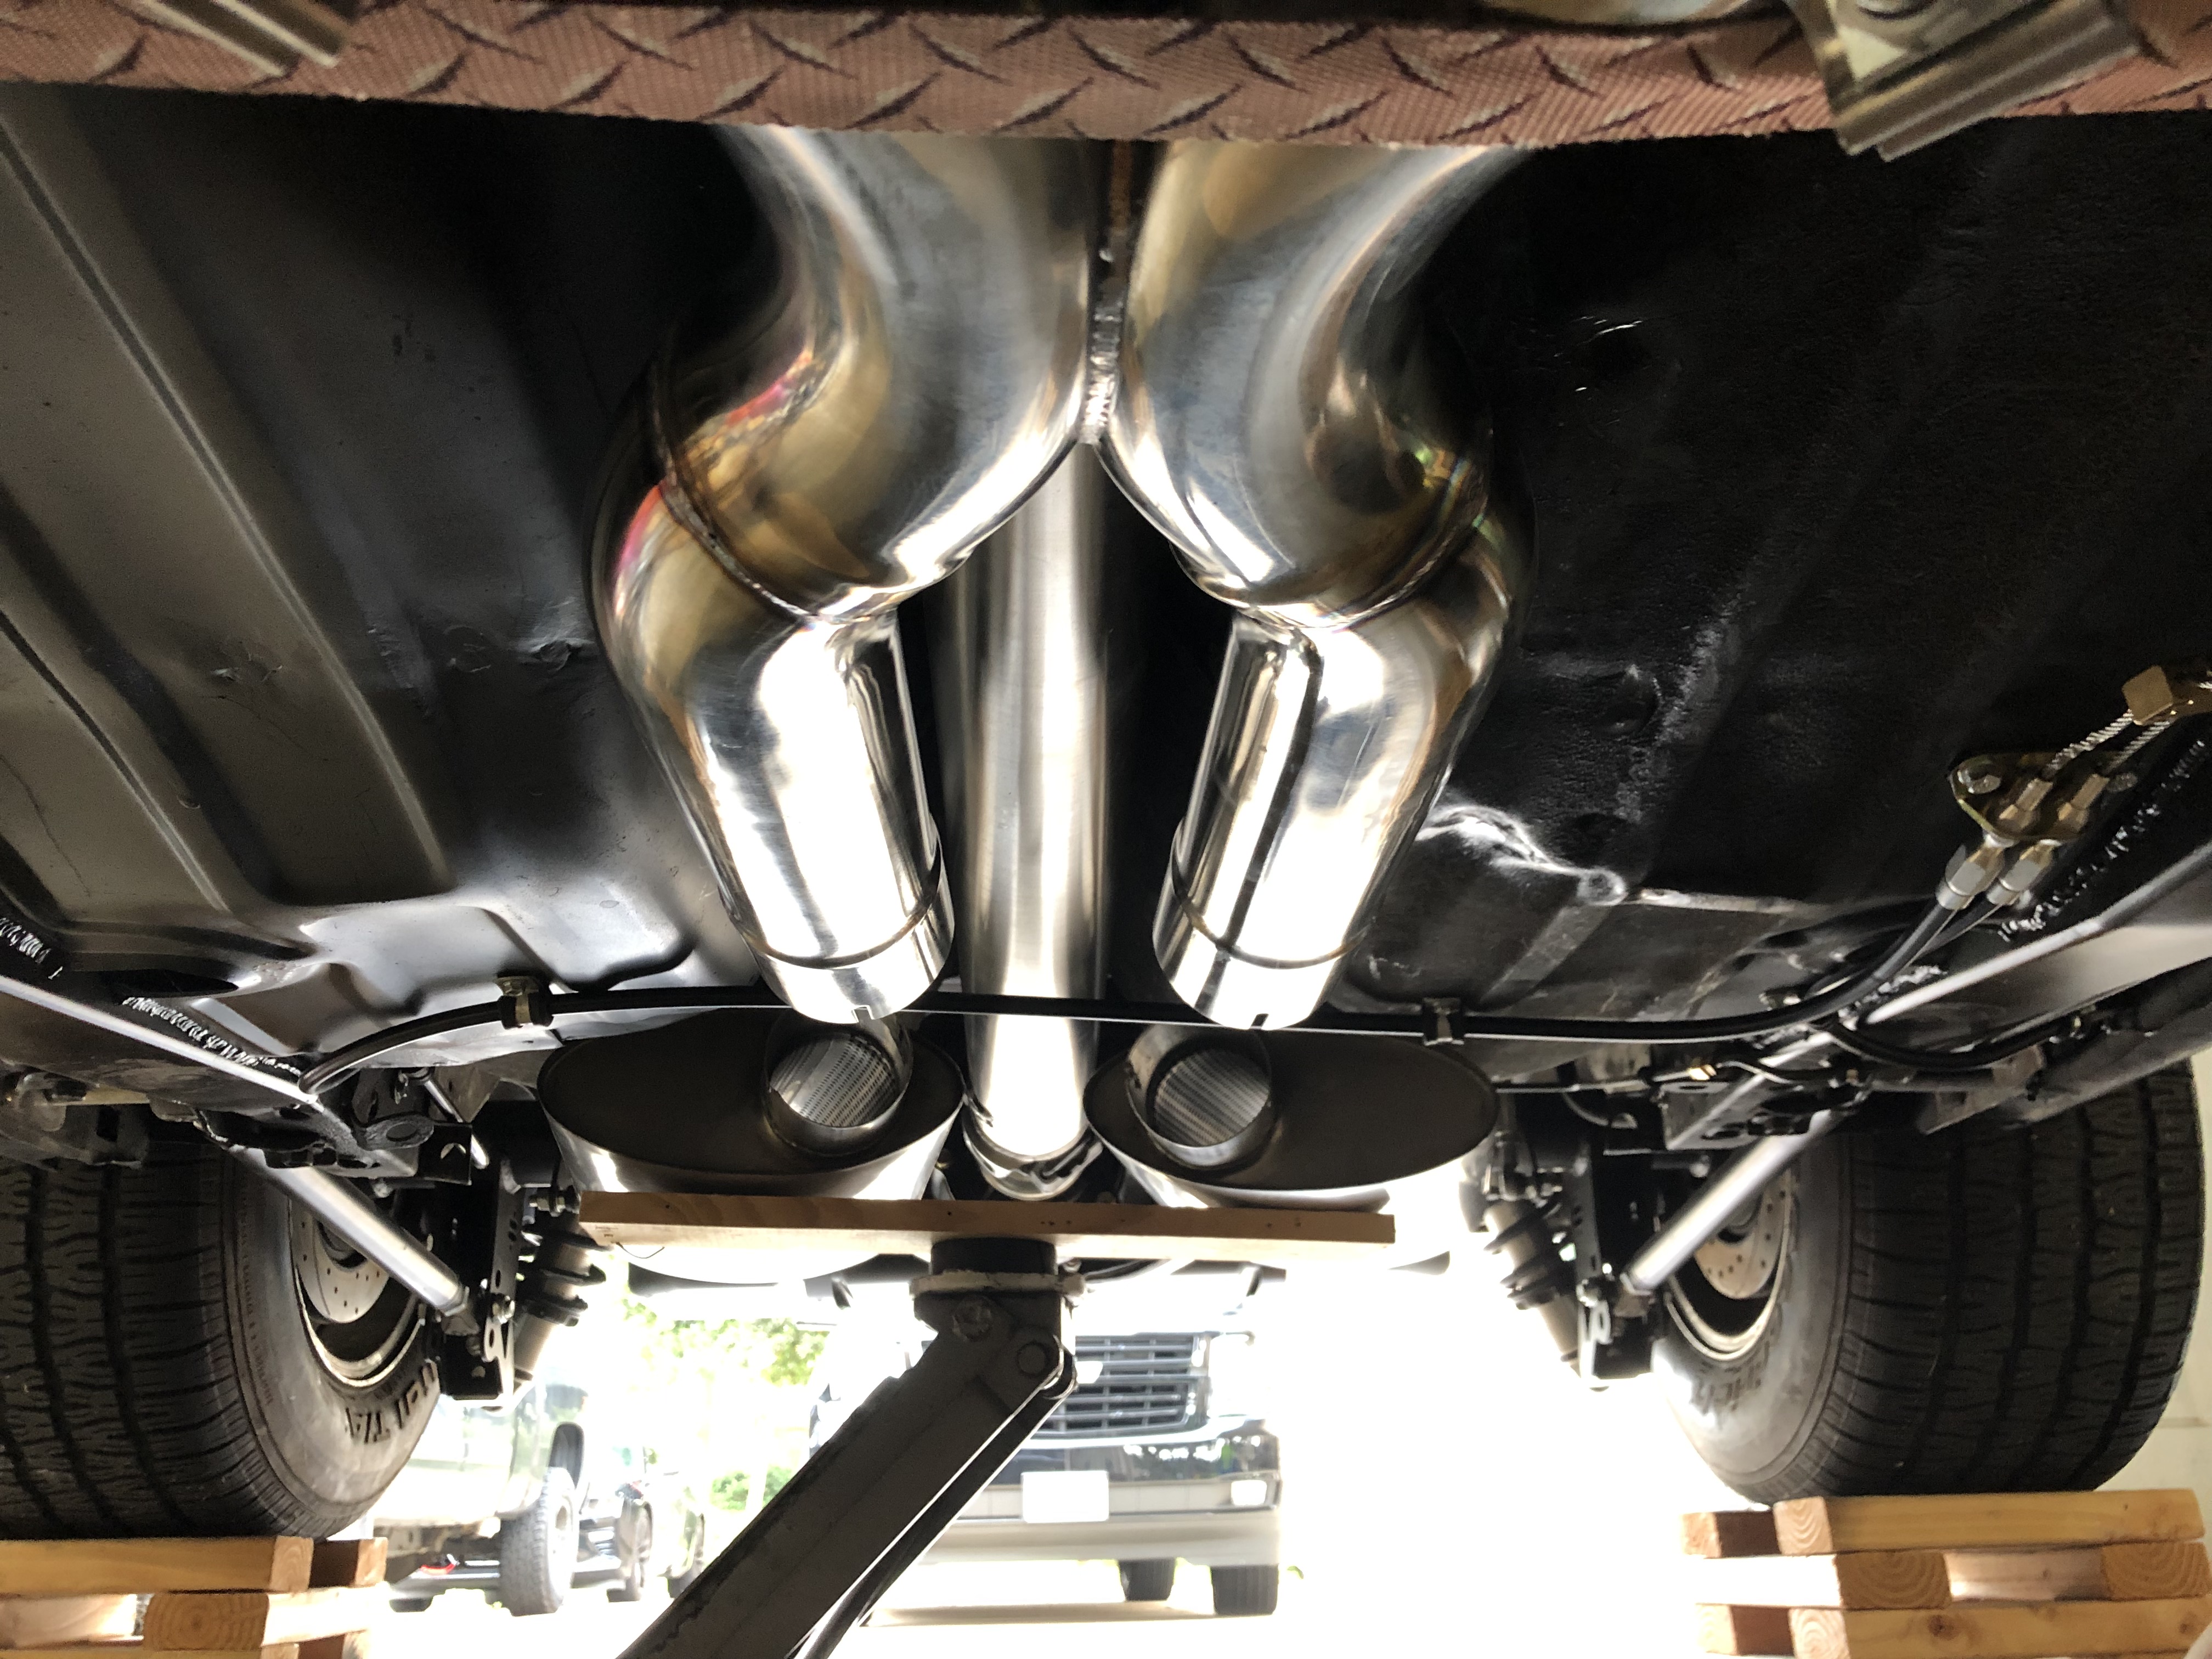
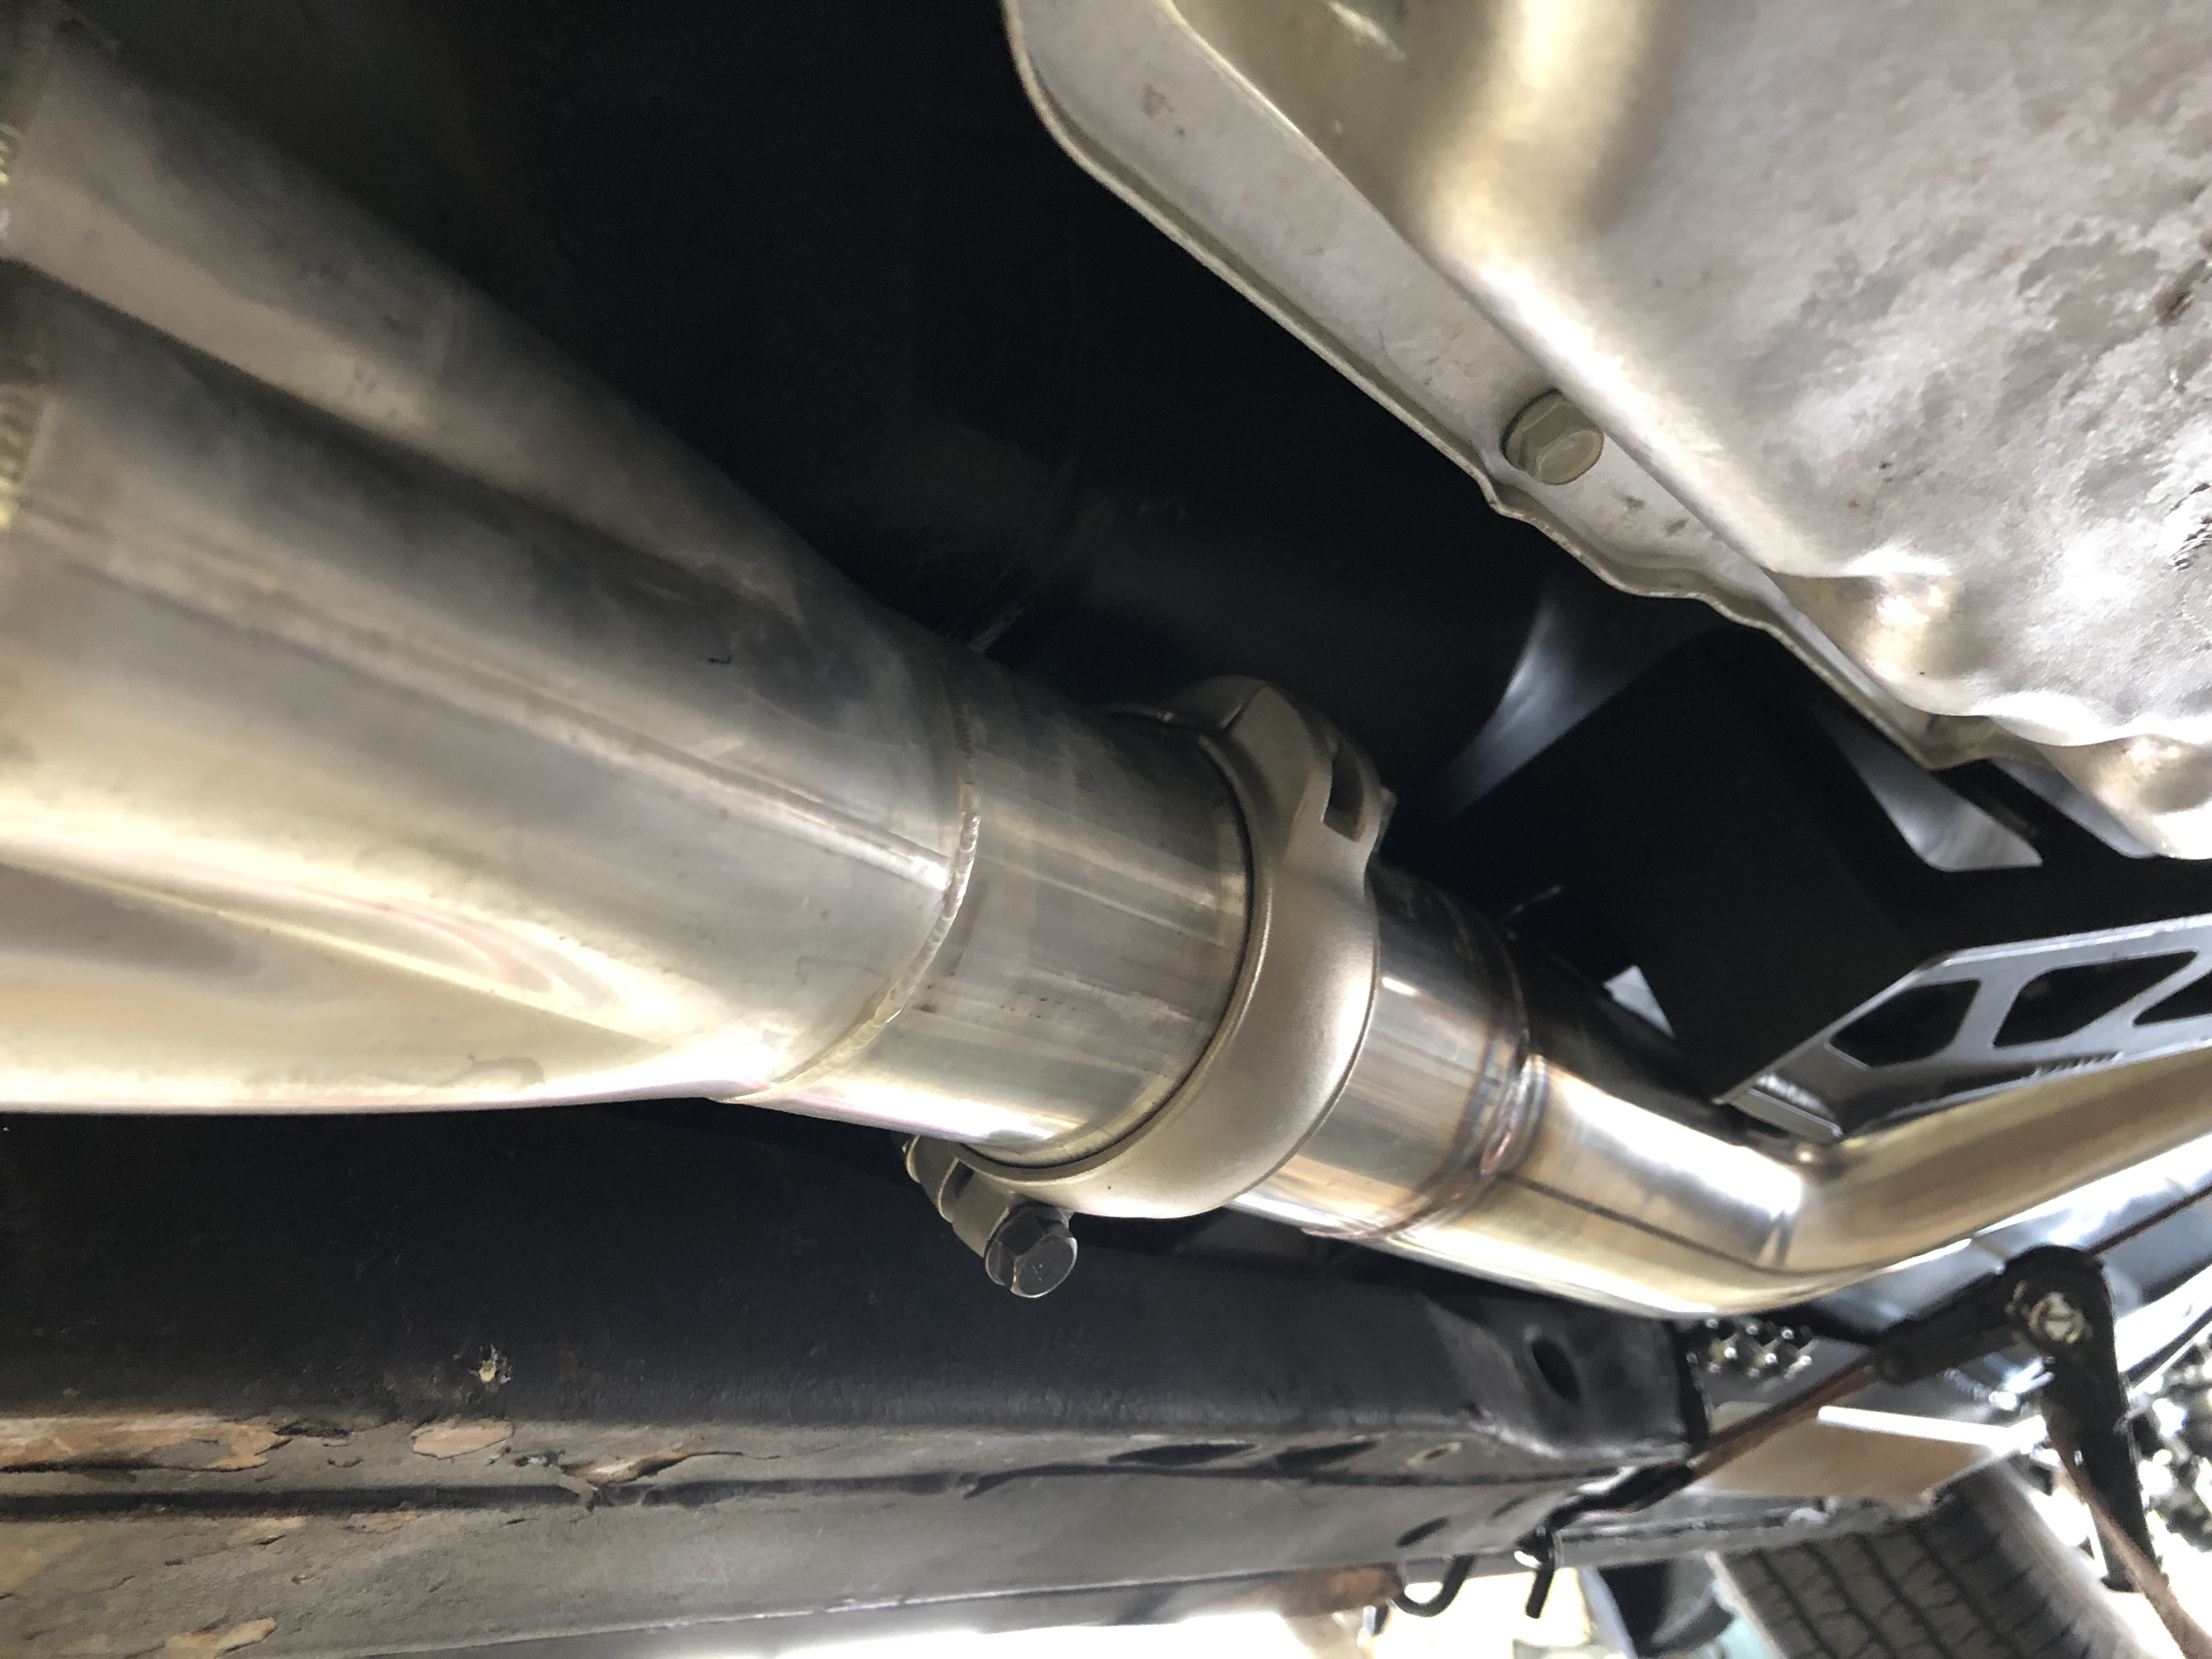
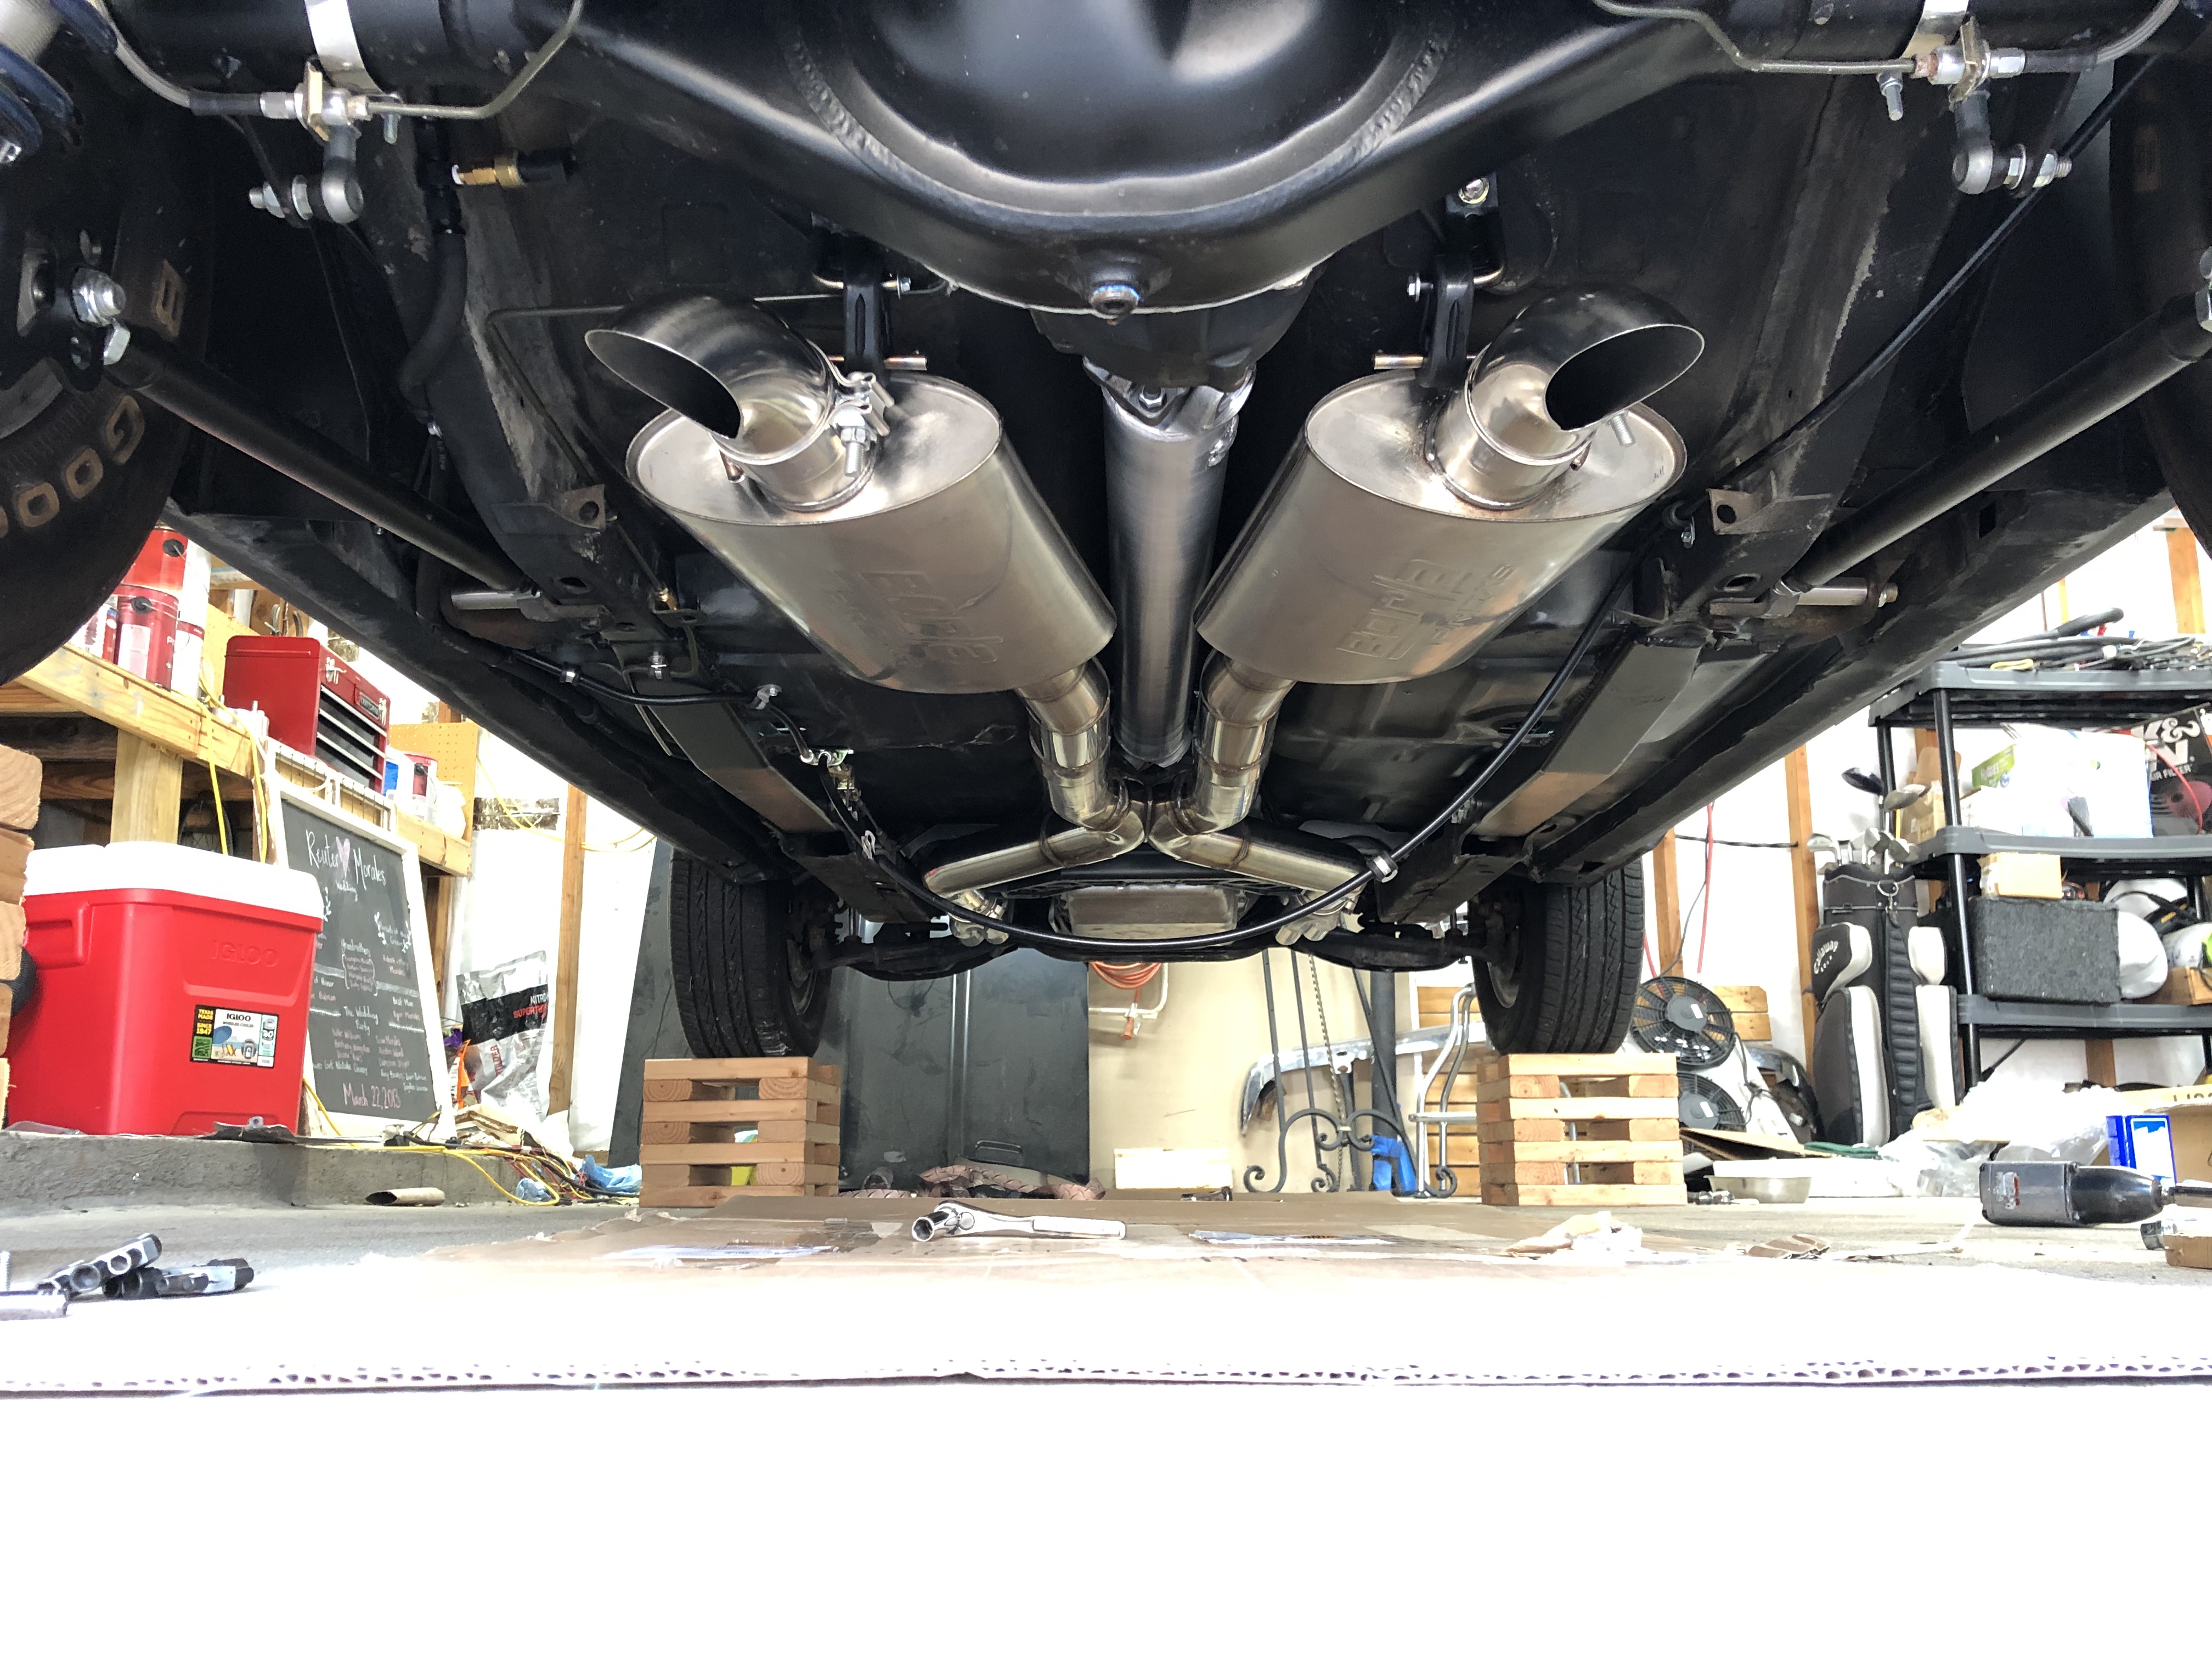
I first hung the header, got the angle right to ovoid hitting he rear center section. I then fitted the x-pipe front section to the headers and tacked my Ultimate Headers low profile flanges on. If any of you purchase these low profile flanges you need to get a good quality fastener. The one that came with it from Ultamate Headers is a nice ARP flanged SS bolt and a non-SS nut of lesser quality. The first attempt to tighten everything lead to the nut galling up on both clamps and I had to cut both of the nice ARP bolts to release the clamps. I ended up going to the hardware store and purchasing some matching Grade 8 fasteners and they worked out great taking them on and off a few times. Ultimate headers offered to send out replacements but I did not want to wait. After a lot of cutting and welding I was done, I added a little bit of tension to the to the rear hangers to keep the system nice and sturdy. Like I mentioned a while back, the PS header is tucked in real close and the crossmember did not line up good so I cut off about 1/8" of the crossmembers exhaust relief to make room rather than making more cuts and welds on the exhaust.
For now I dumped the exhaust before rear and it may stay like this forever or I might change it to go under the axle and exit out the rear if I don't like the sound.
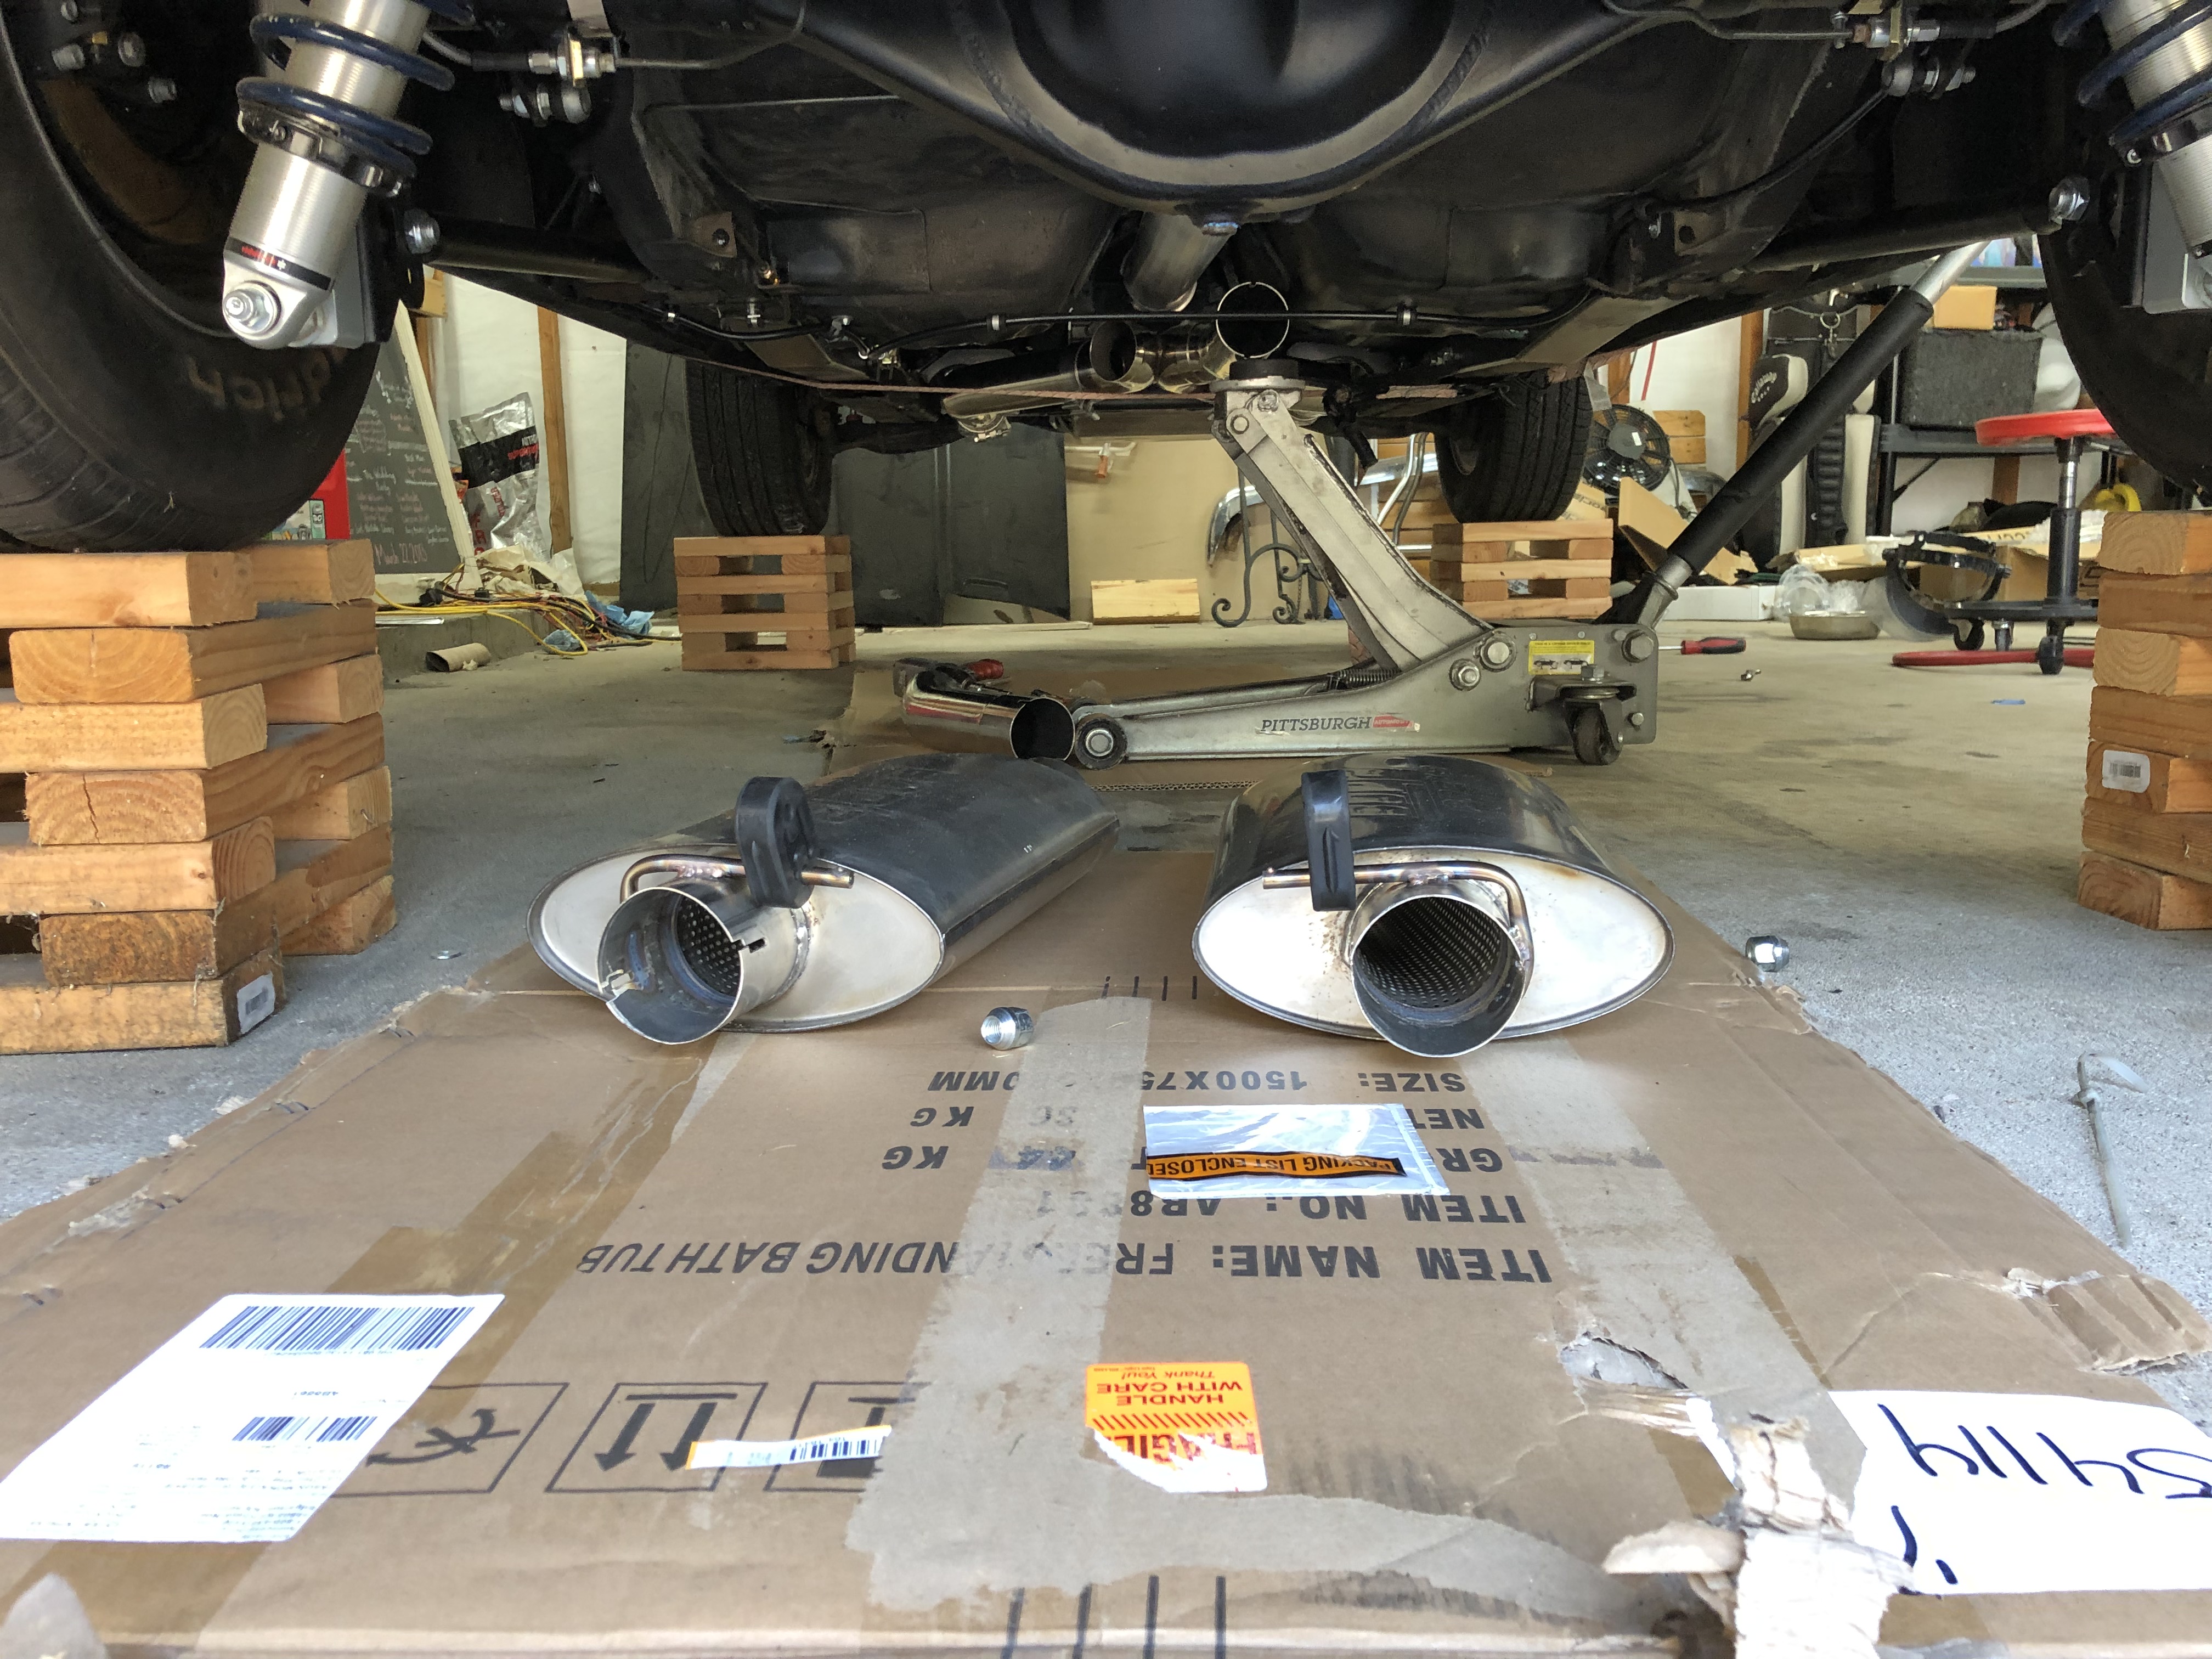

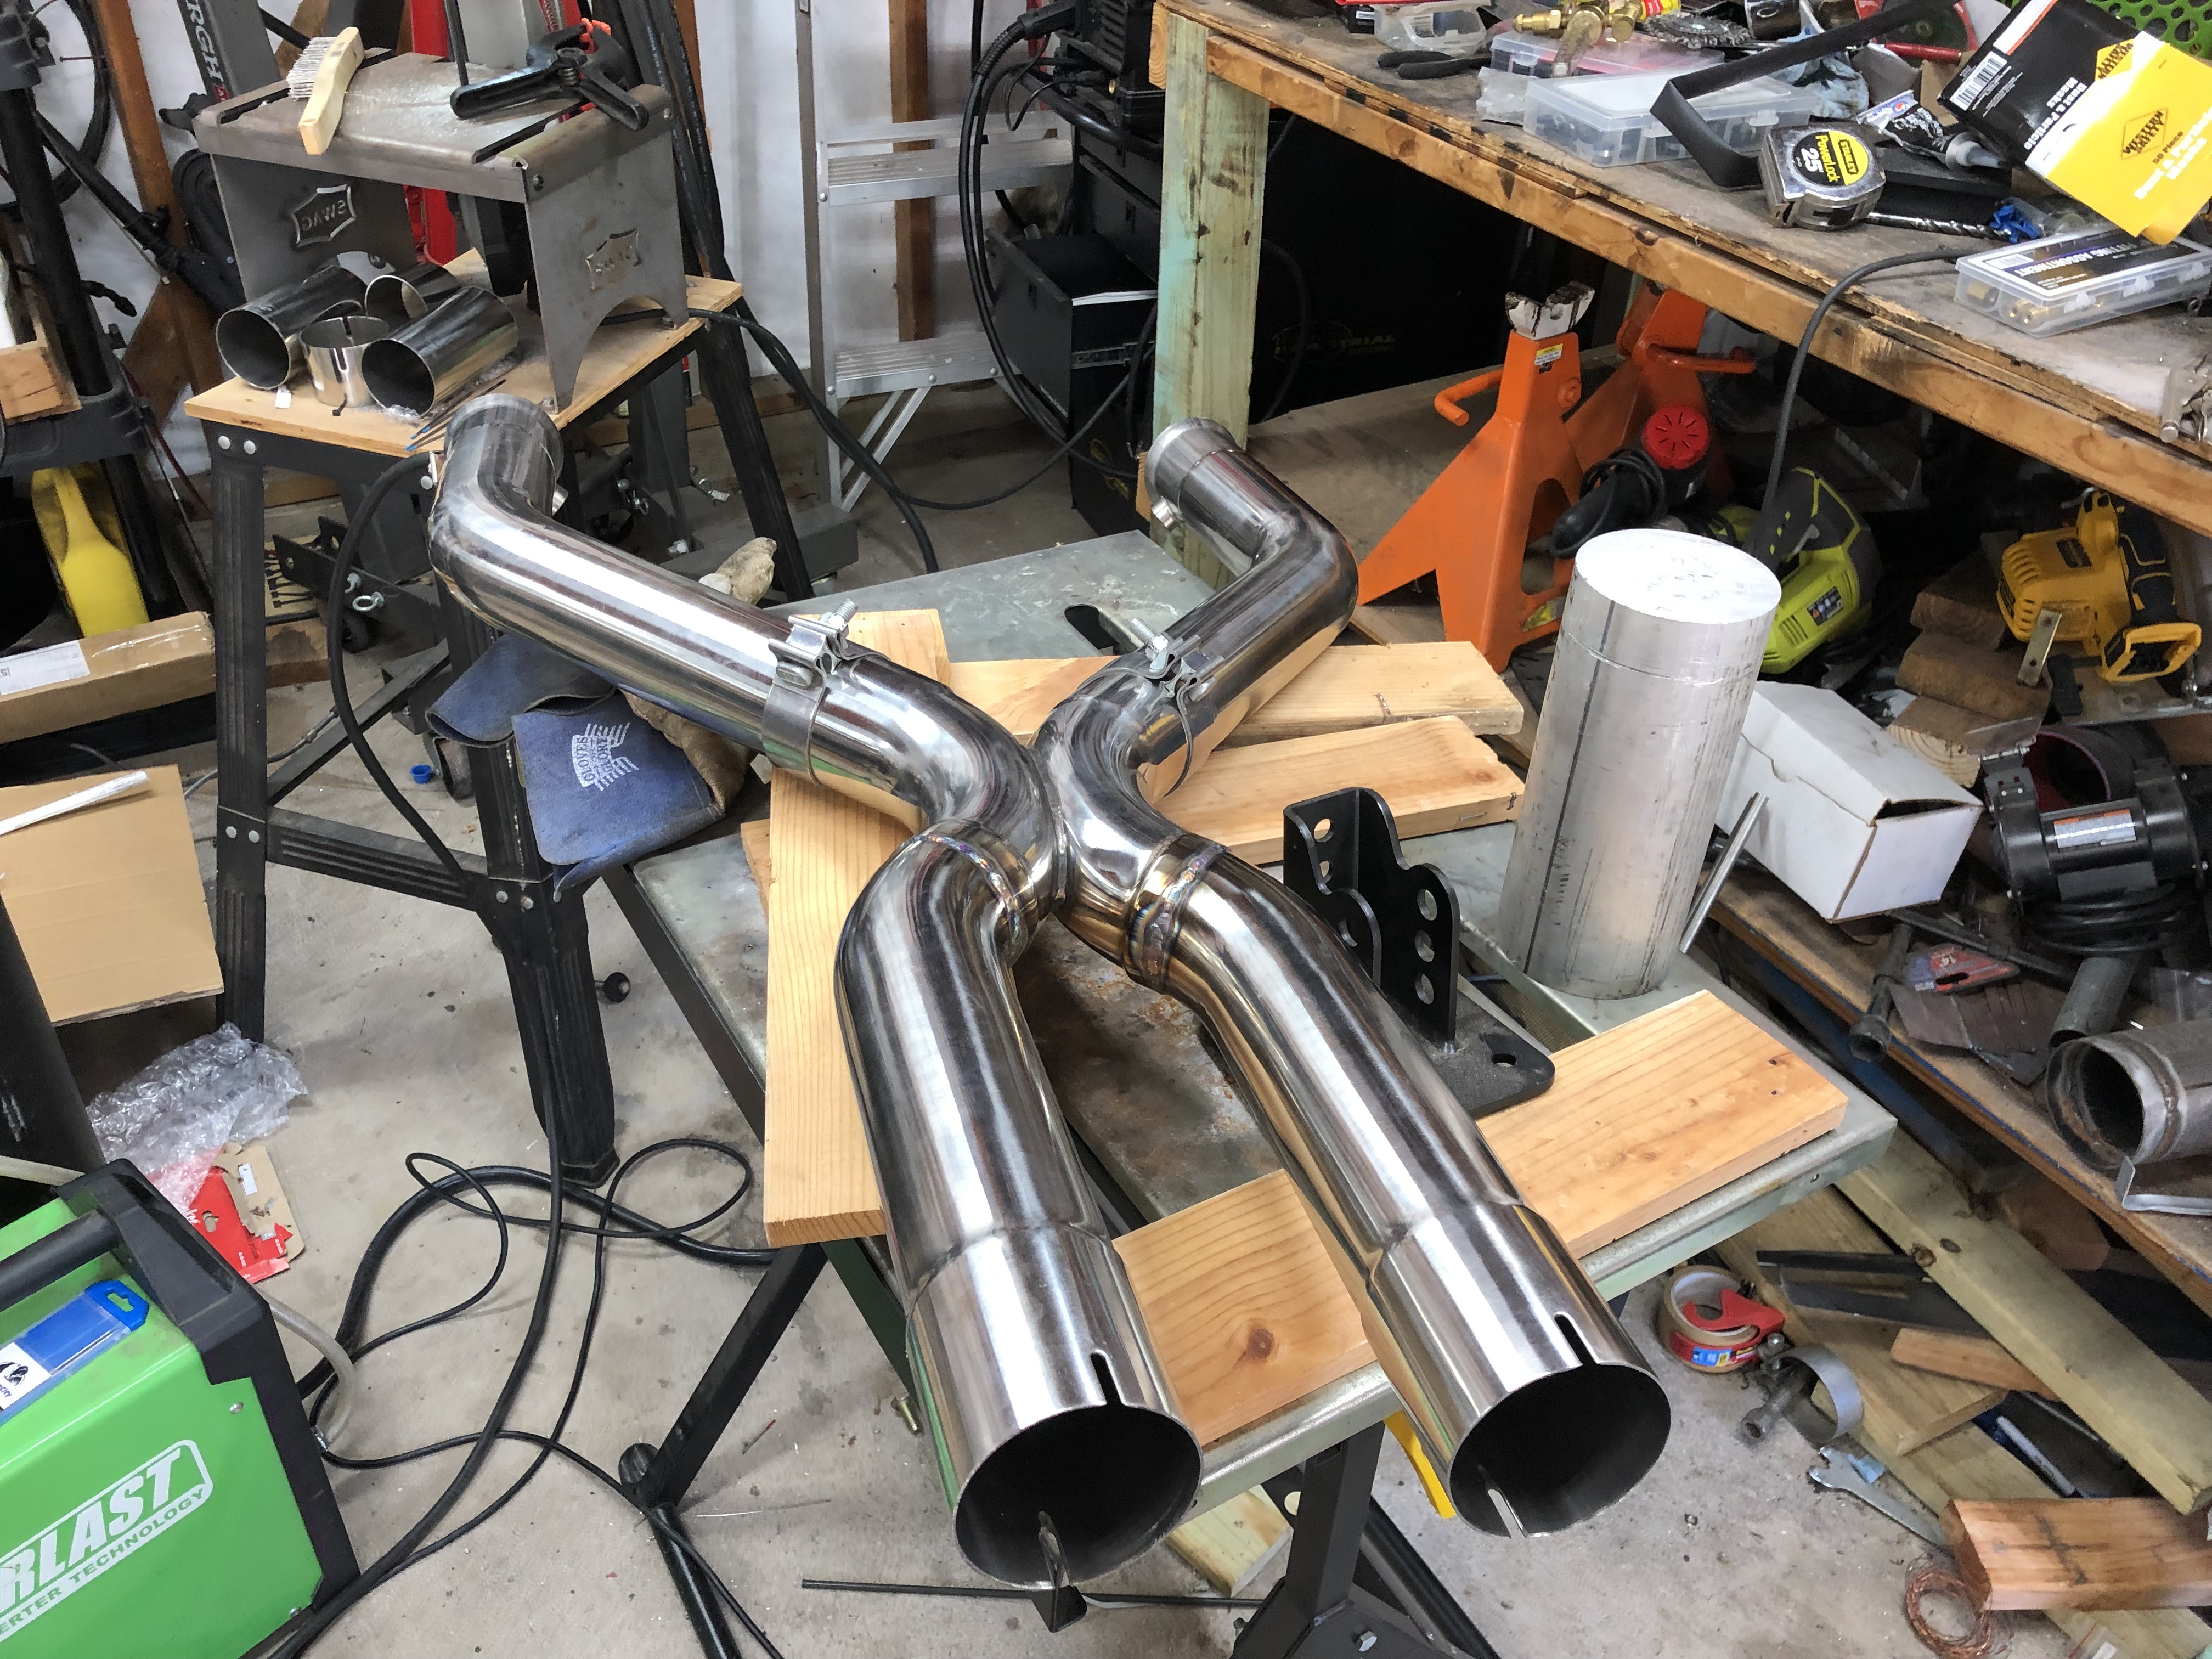

The builder kit came in slip fit and I opted for slip fit on the mufflers too, this made things a little easier for fitting. For the most part I had to stick it in place and clamp it, then weld it. I started bu hanging the mufflers and used some scrap .065" wall 3/8" ss tubing as the hangers, much cheaper and lighter if it matters than 3/8" solid $10 a piece ss bar hangers and they are surely capable of doing their job.
I first hung the header, got the angle right to ovoid hitting he rear center section. I then fitted the x-pipe front section to the headers and tacked my Ultimate Headers low profile flanges on. If any of you purchase these low profile flanges you need to get a good quality fastener. The one that came with it from Ultamate Headers is a nice ARP flanged SS bolt and a non-SS nut of lesser quality. The first attempt to tighten everything lead to the nut galling up on both clamps and I had to cut both of the nice ARP bolts to release the clamps. I ended up going to the hardware store and purchasing some matching Grade 8 fasteners and they worked out great taking them on and off a few times. Ultimate headers offered to send out replacements but I did not want to wait. After a lot of cutting and welding I was done, I added a little bit of tension to the to the rear hangers to keep the system nice and sturdy. Like I mentioned a while back, the PS header is tucked in real close and the crossmember did not line up good so I cut off about 1/8" of the crossmembers exhaust relief to make room rather than making more cuts and welds on the exhaust.
For now I dumped the exhaust before rear and it may stay like this forever or I might change it to go under the axle and exit out the rear if I don't like the sound.
Last edited by jasonz28camaro; 01-14-2020 at 02:41 AM.
The following users liked this post:
Motown 454 (04-24-2020)
09-21-2019, 06:48 PM
#133
How much were the mufflers? They weren�t purchased with the speedengineering purchase were they? It looks great. I�m curious to see how they sound
09-21-2019, 07:00 PM
#134
I�m curious too. I found a few clips on YouTube of ls motors with these mufflers and i liked The sound. I�m looking for more of a C6 corvette tone rather than an old muscle car sound. Might not get that sound until i change The dumps out.
The mufflers were $100 each. Exhaust kit was $150.
The mufflers were $100 each. Exhaust kit was $150.
09-25-2019, 05:26 PM
#135
Thanks
Without checking into pricing, it seams like a good deal.
Without checking into pricing, it seams like a good deal.
09-28-2019, 06:12 AM
#136

Wanted to say thanks for posting up such good pics, the engine mounting arrangements and frame notching are what ive had in my head the past month, but havent had a chance to mock up.
If you switch to a sanden compressors heres some info that may help.
SD5H 7.1" length 4.8" diam ports on head
SD7H 8.9" length 5" diam Ports on head
SD7B10 6.9" length 4.5 diam body, 6.6 diam bolt circle. Ports on Body of the compressor. This is smaller displacement than SD5 and SD 7 but works in tight locations.
01-07-2020, 09:05 PM
#137
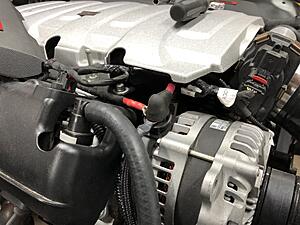
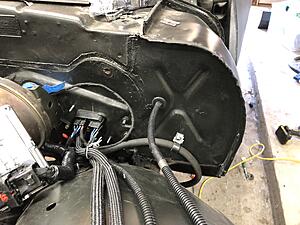
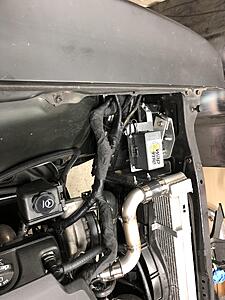
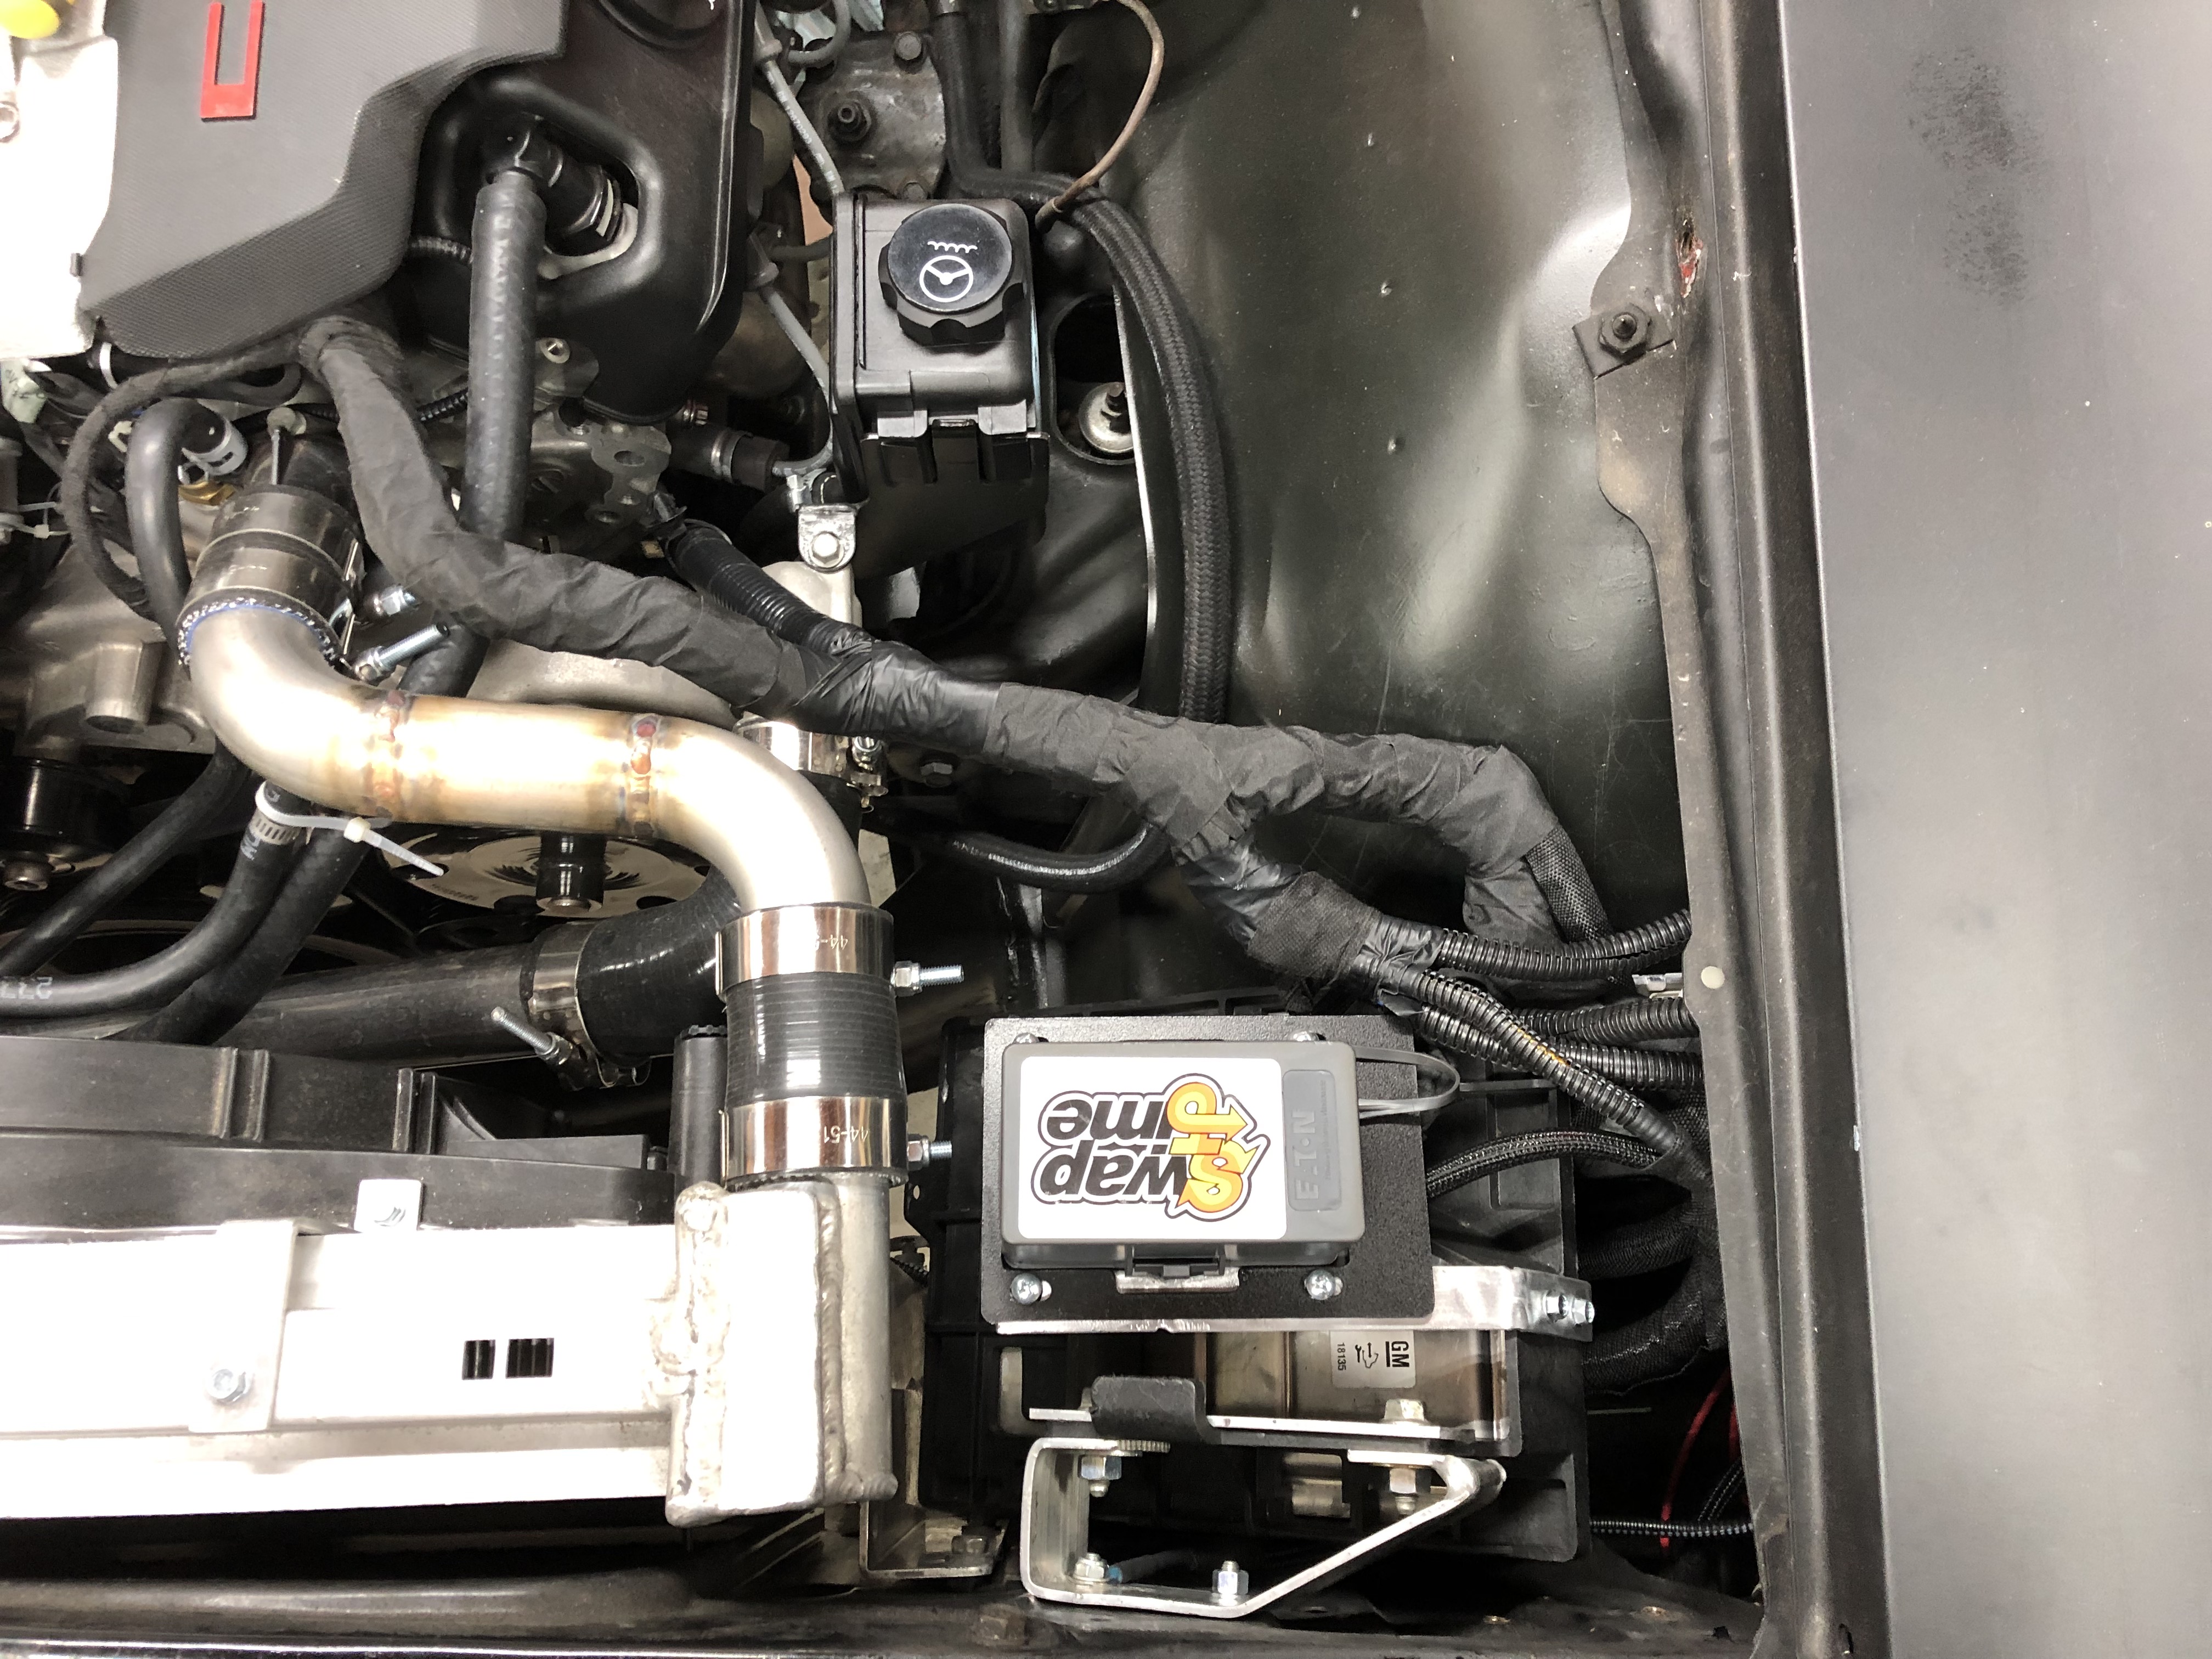
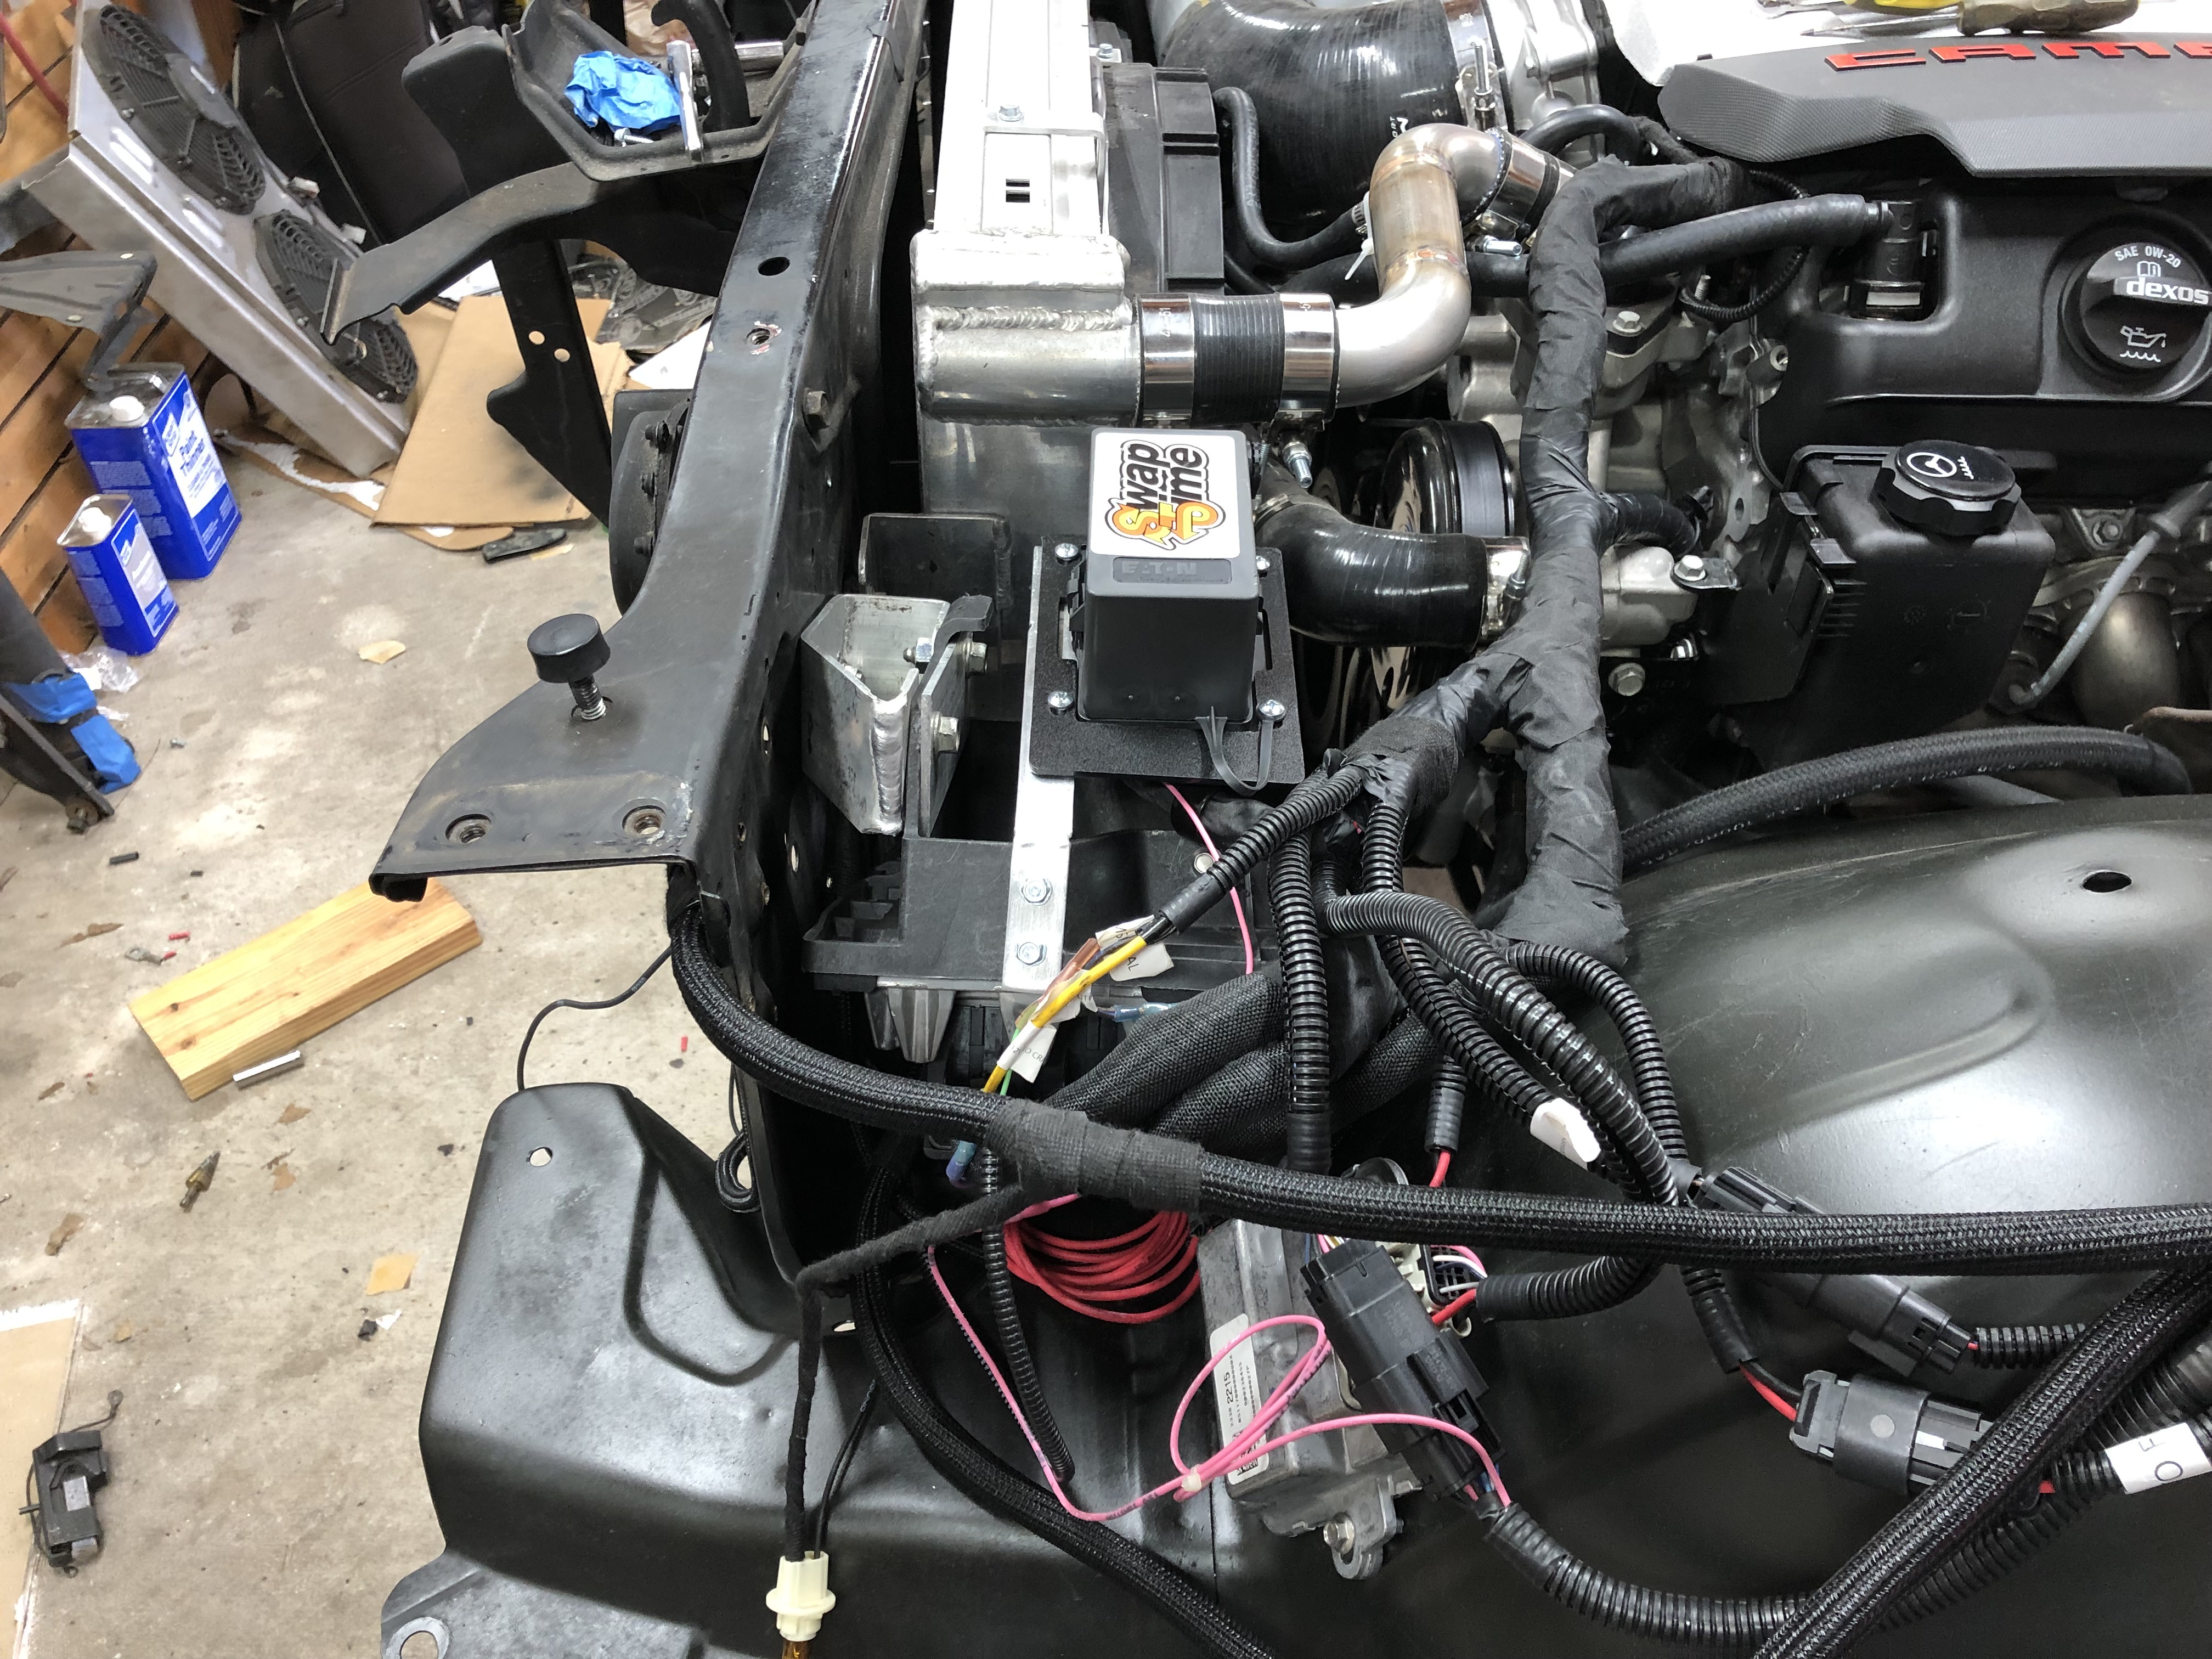
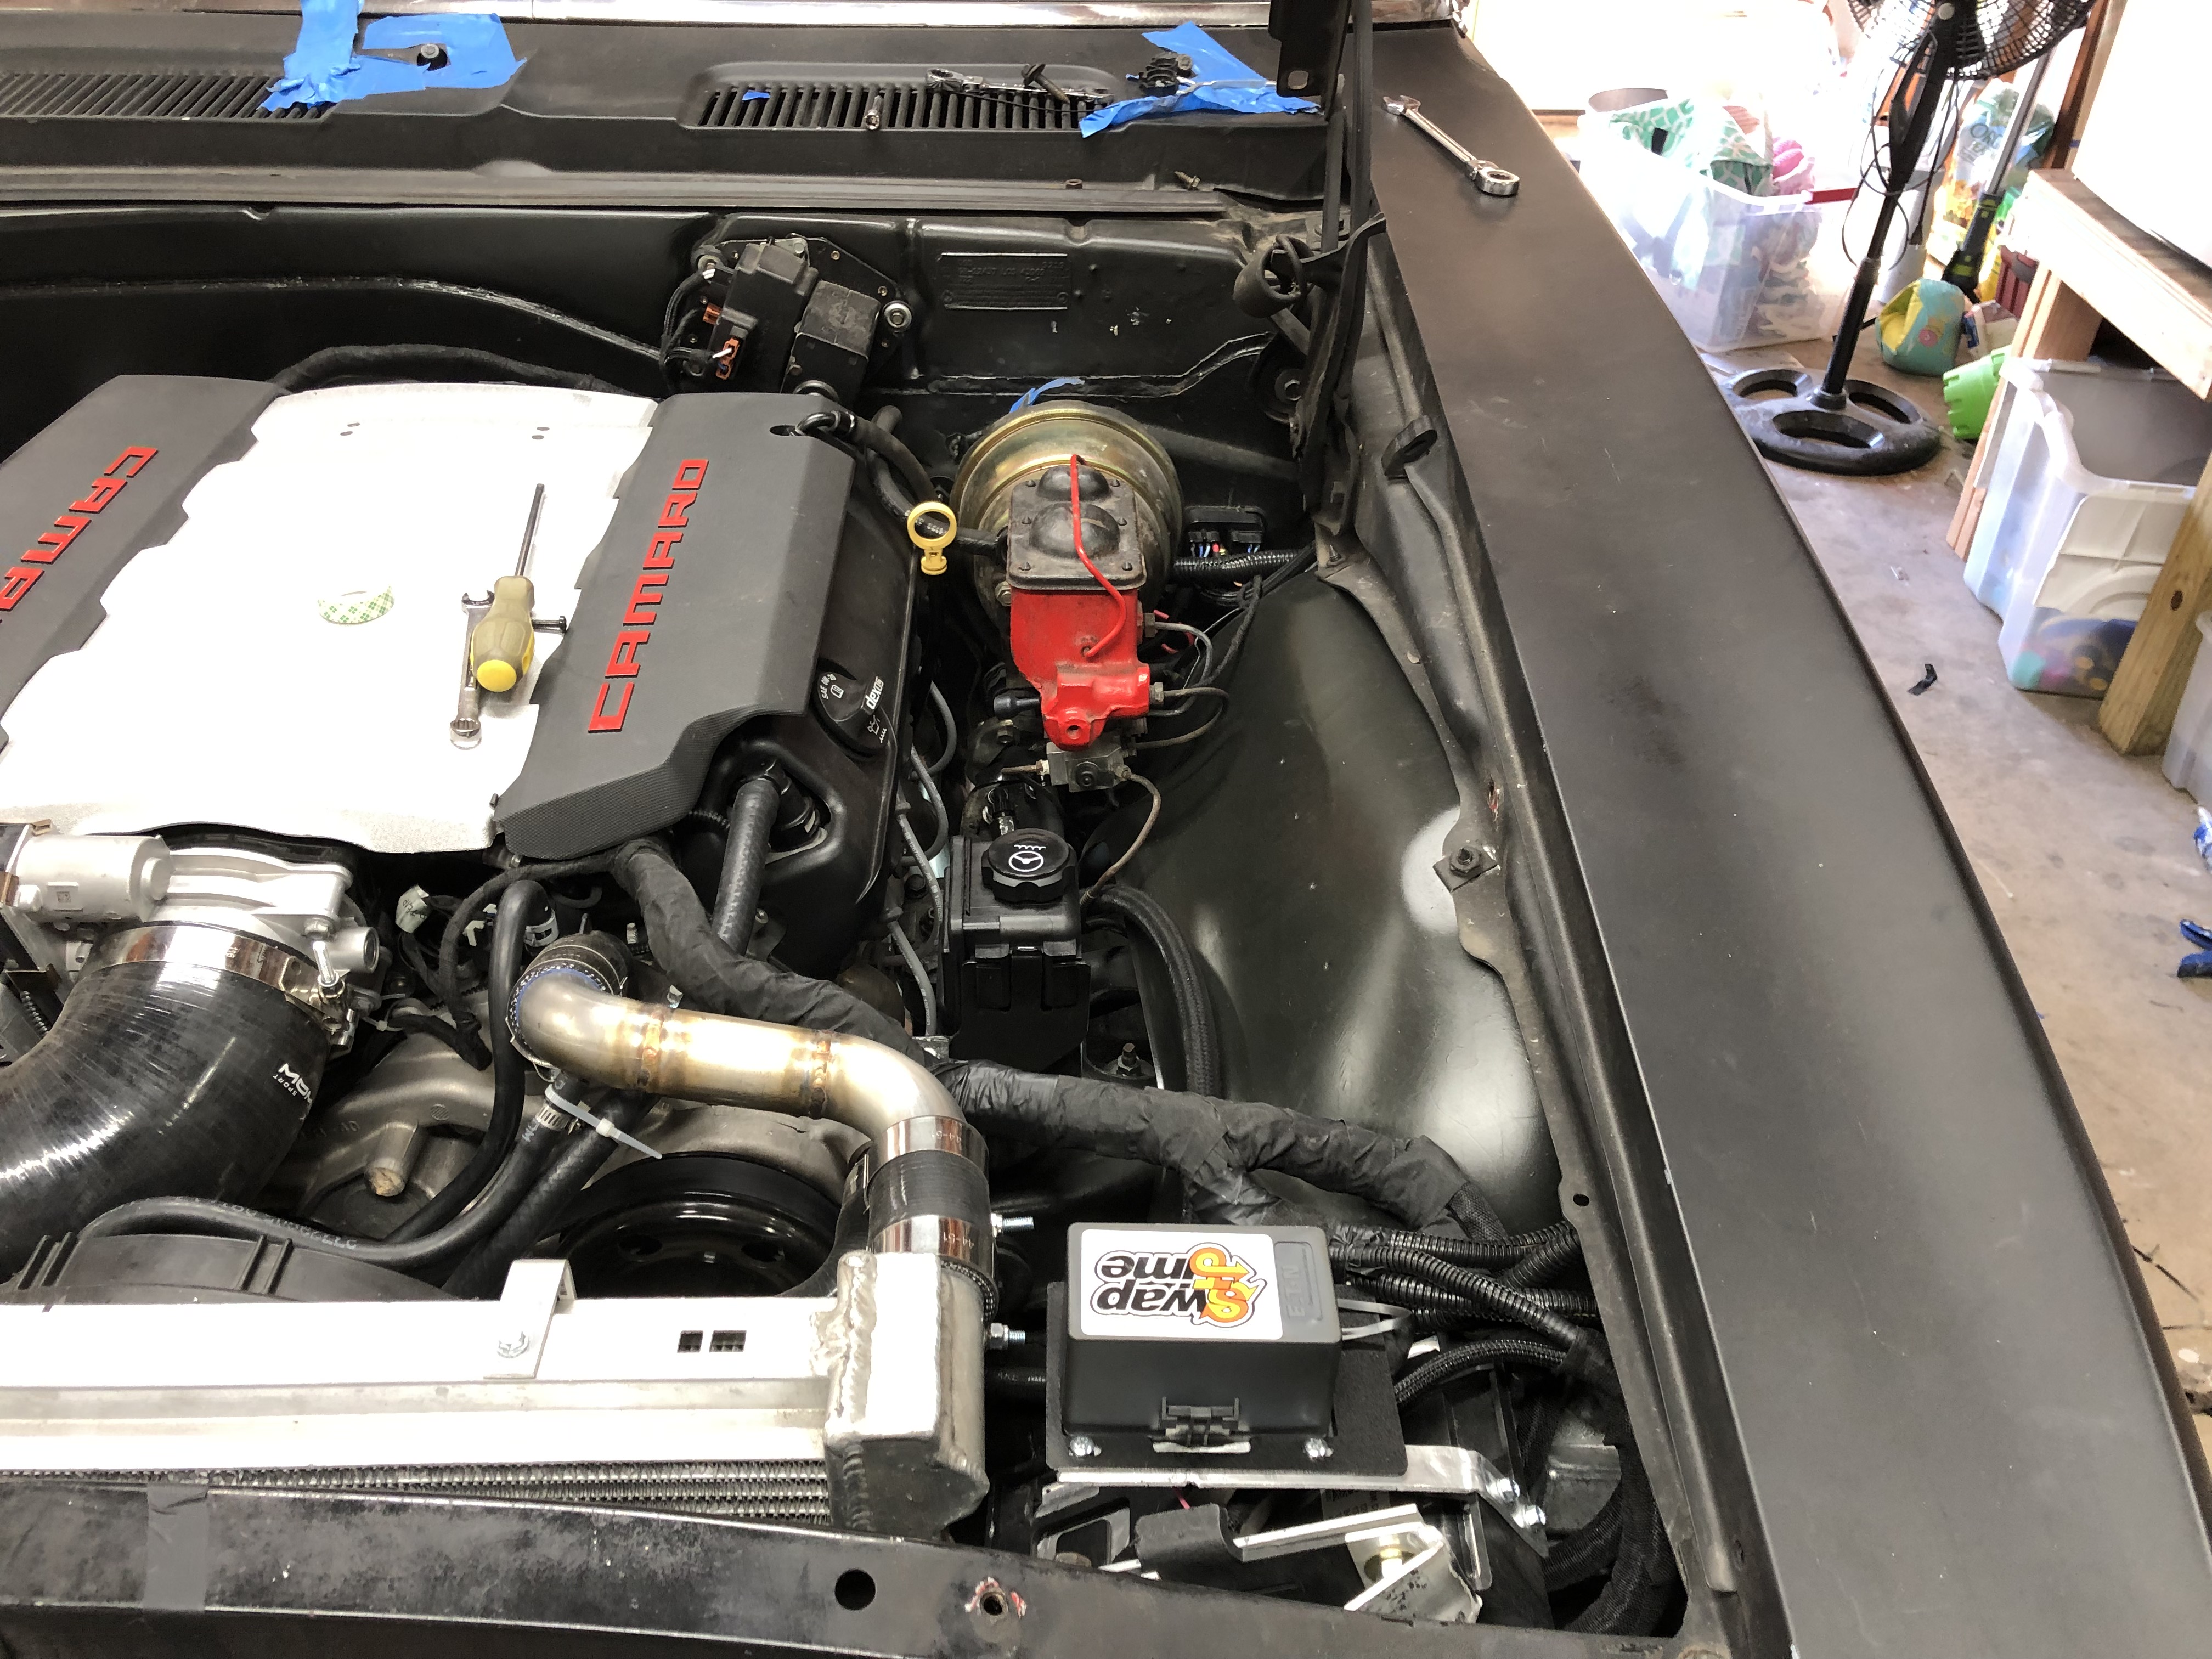
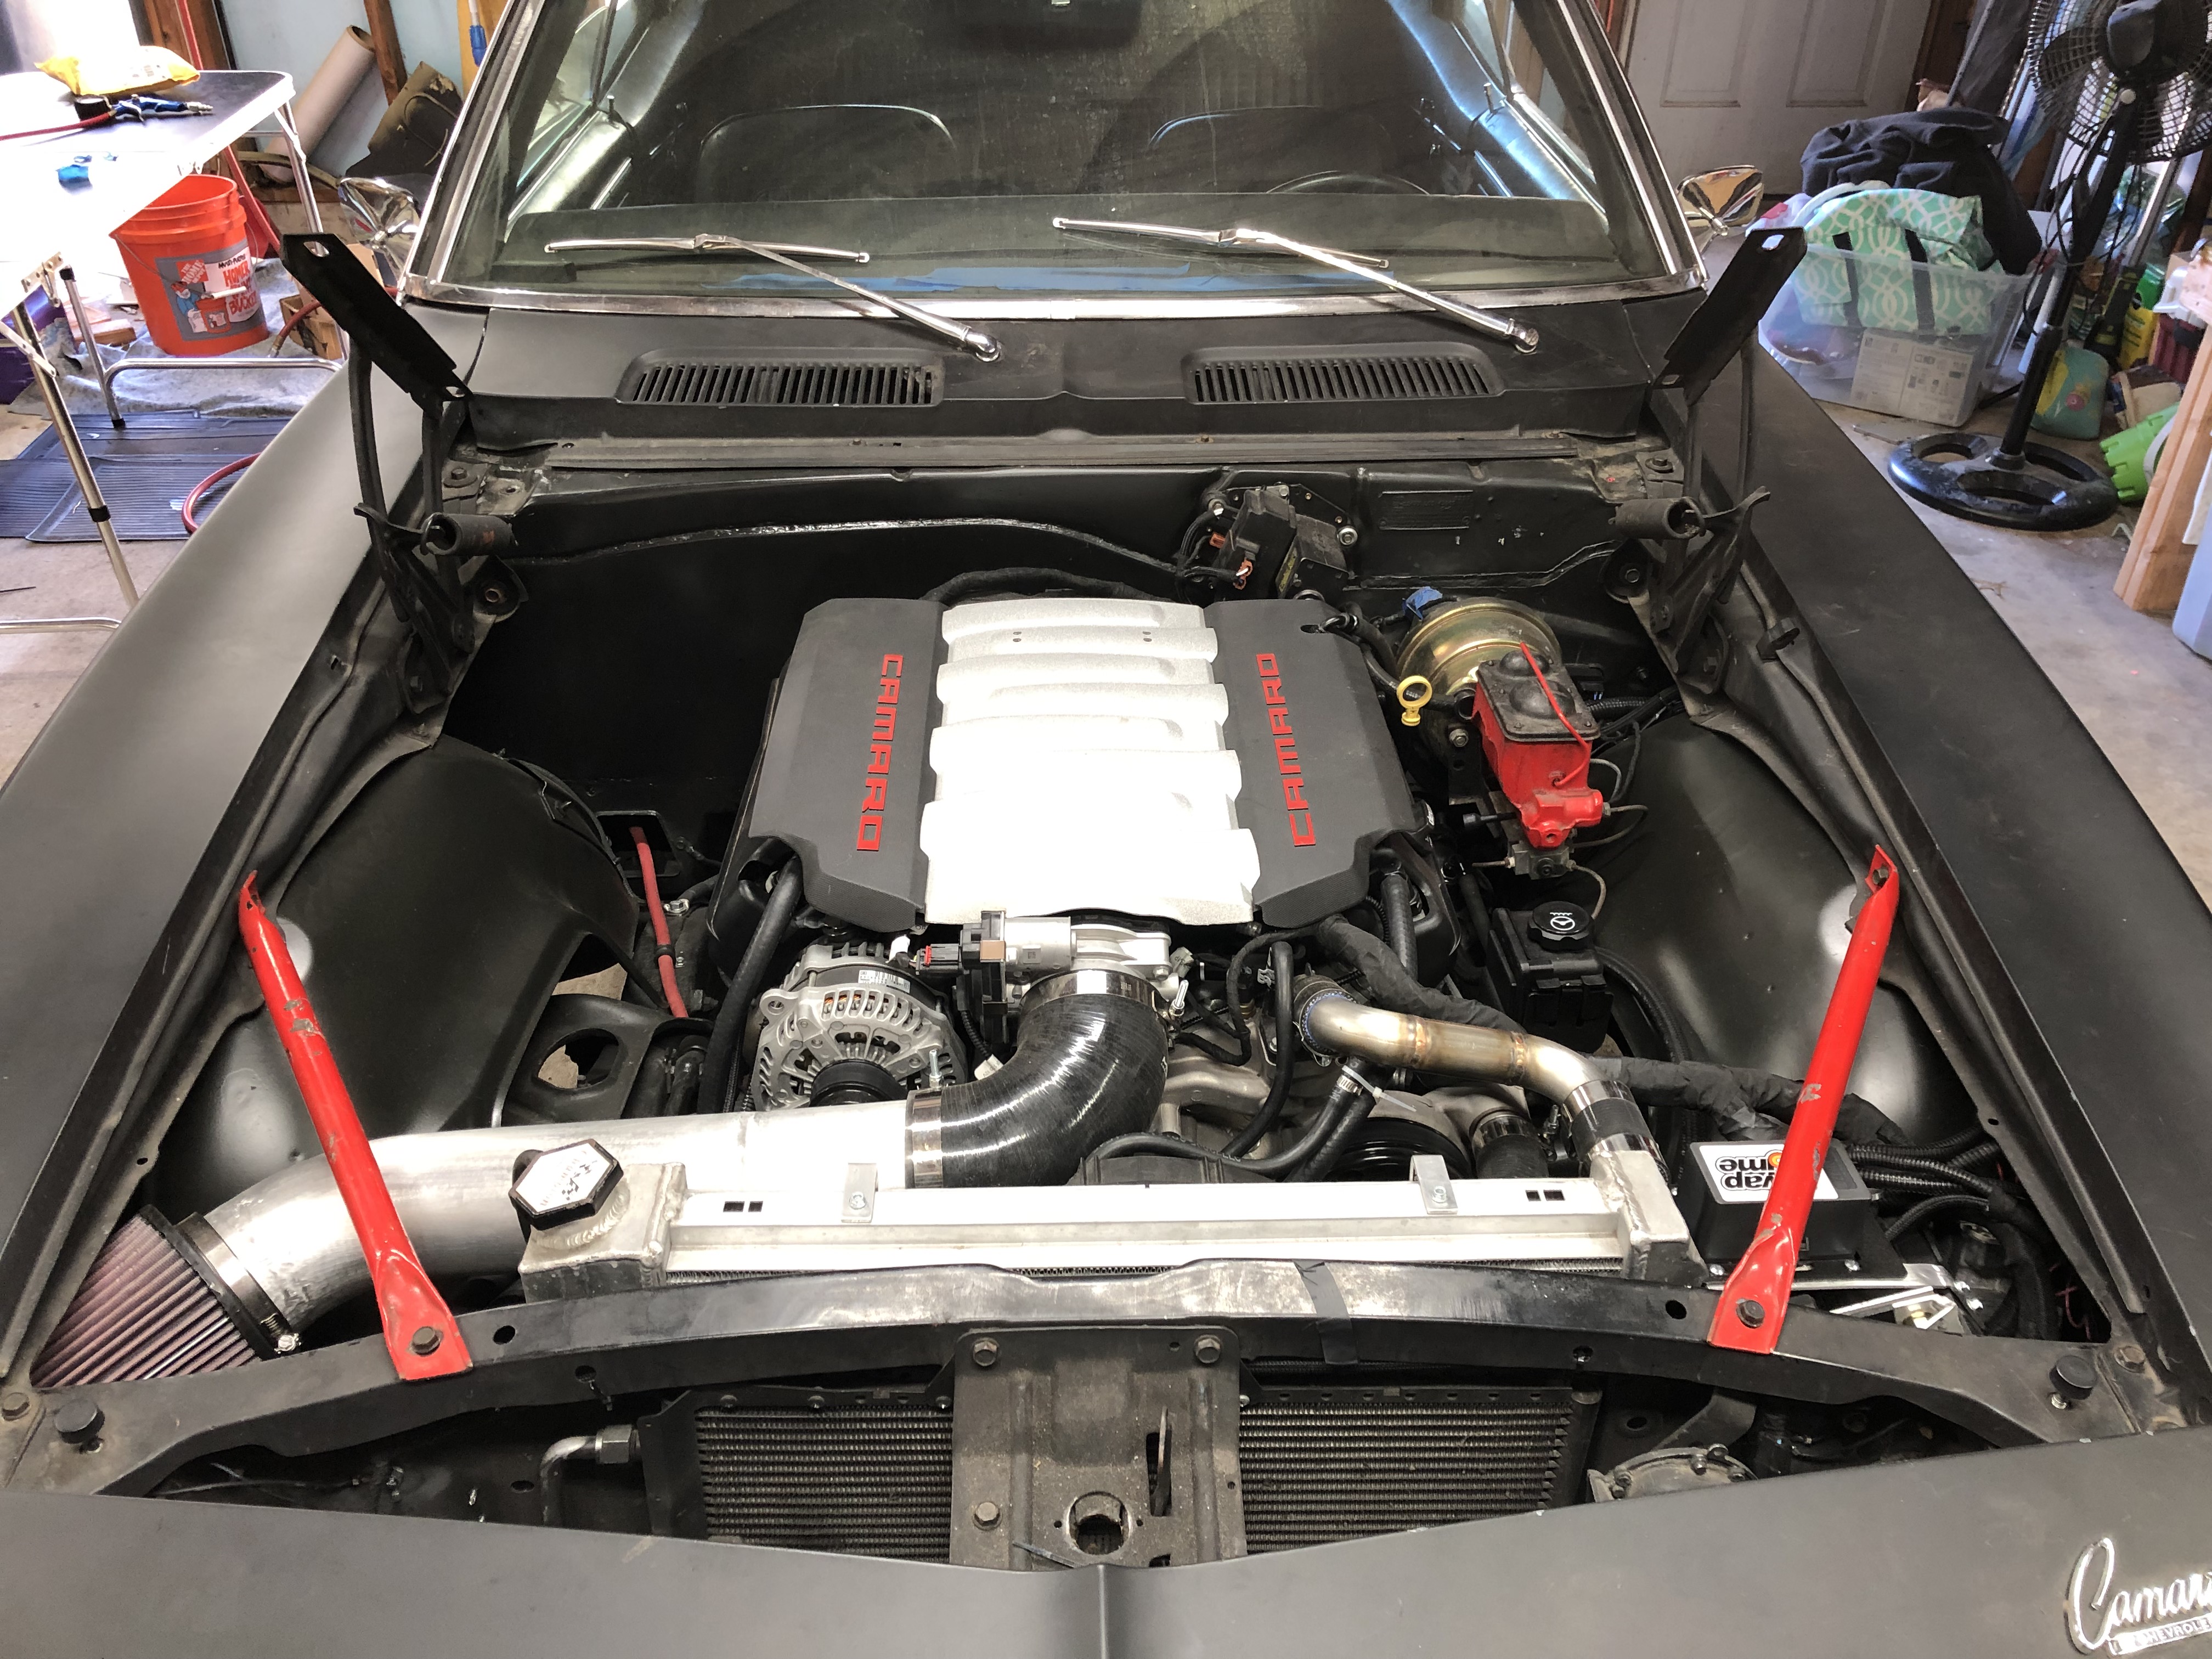
Its been a while but I got my engine harness and fan plug in so I started getting everything fitted. The harness looks good and functions as well. The harness is like others and just requires a battery power, ignition and crank wire to get going, all else is plug and play. It also has a brake signal it needs, not sure is others need this but its requred for me. For this I used my 3rd brake light wire for this as I do not have one and the AAW came with one. Here's some photos of the process.
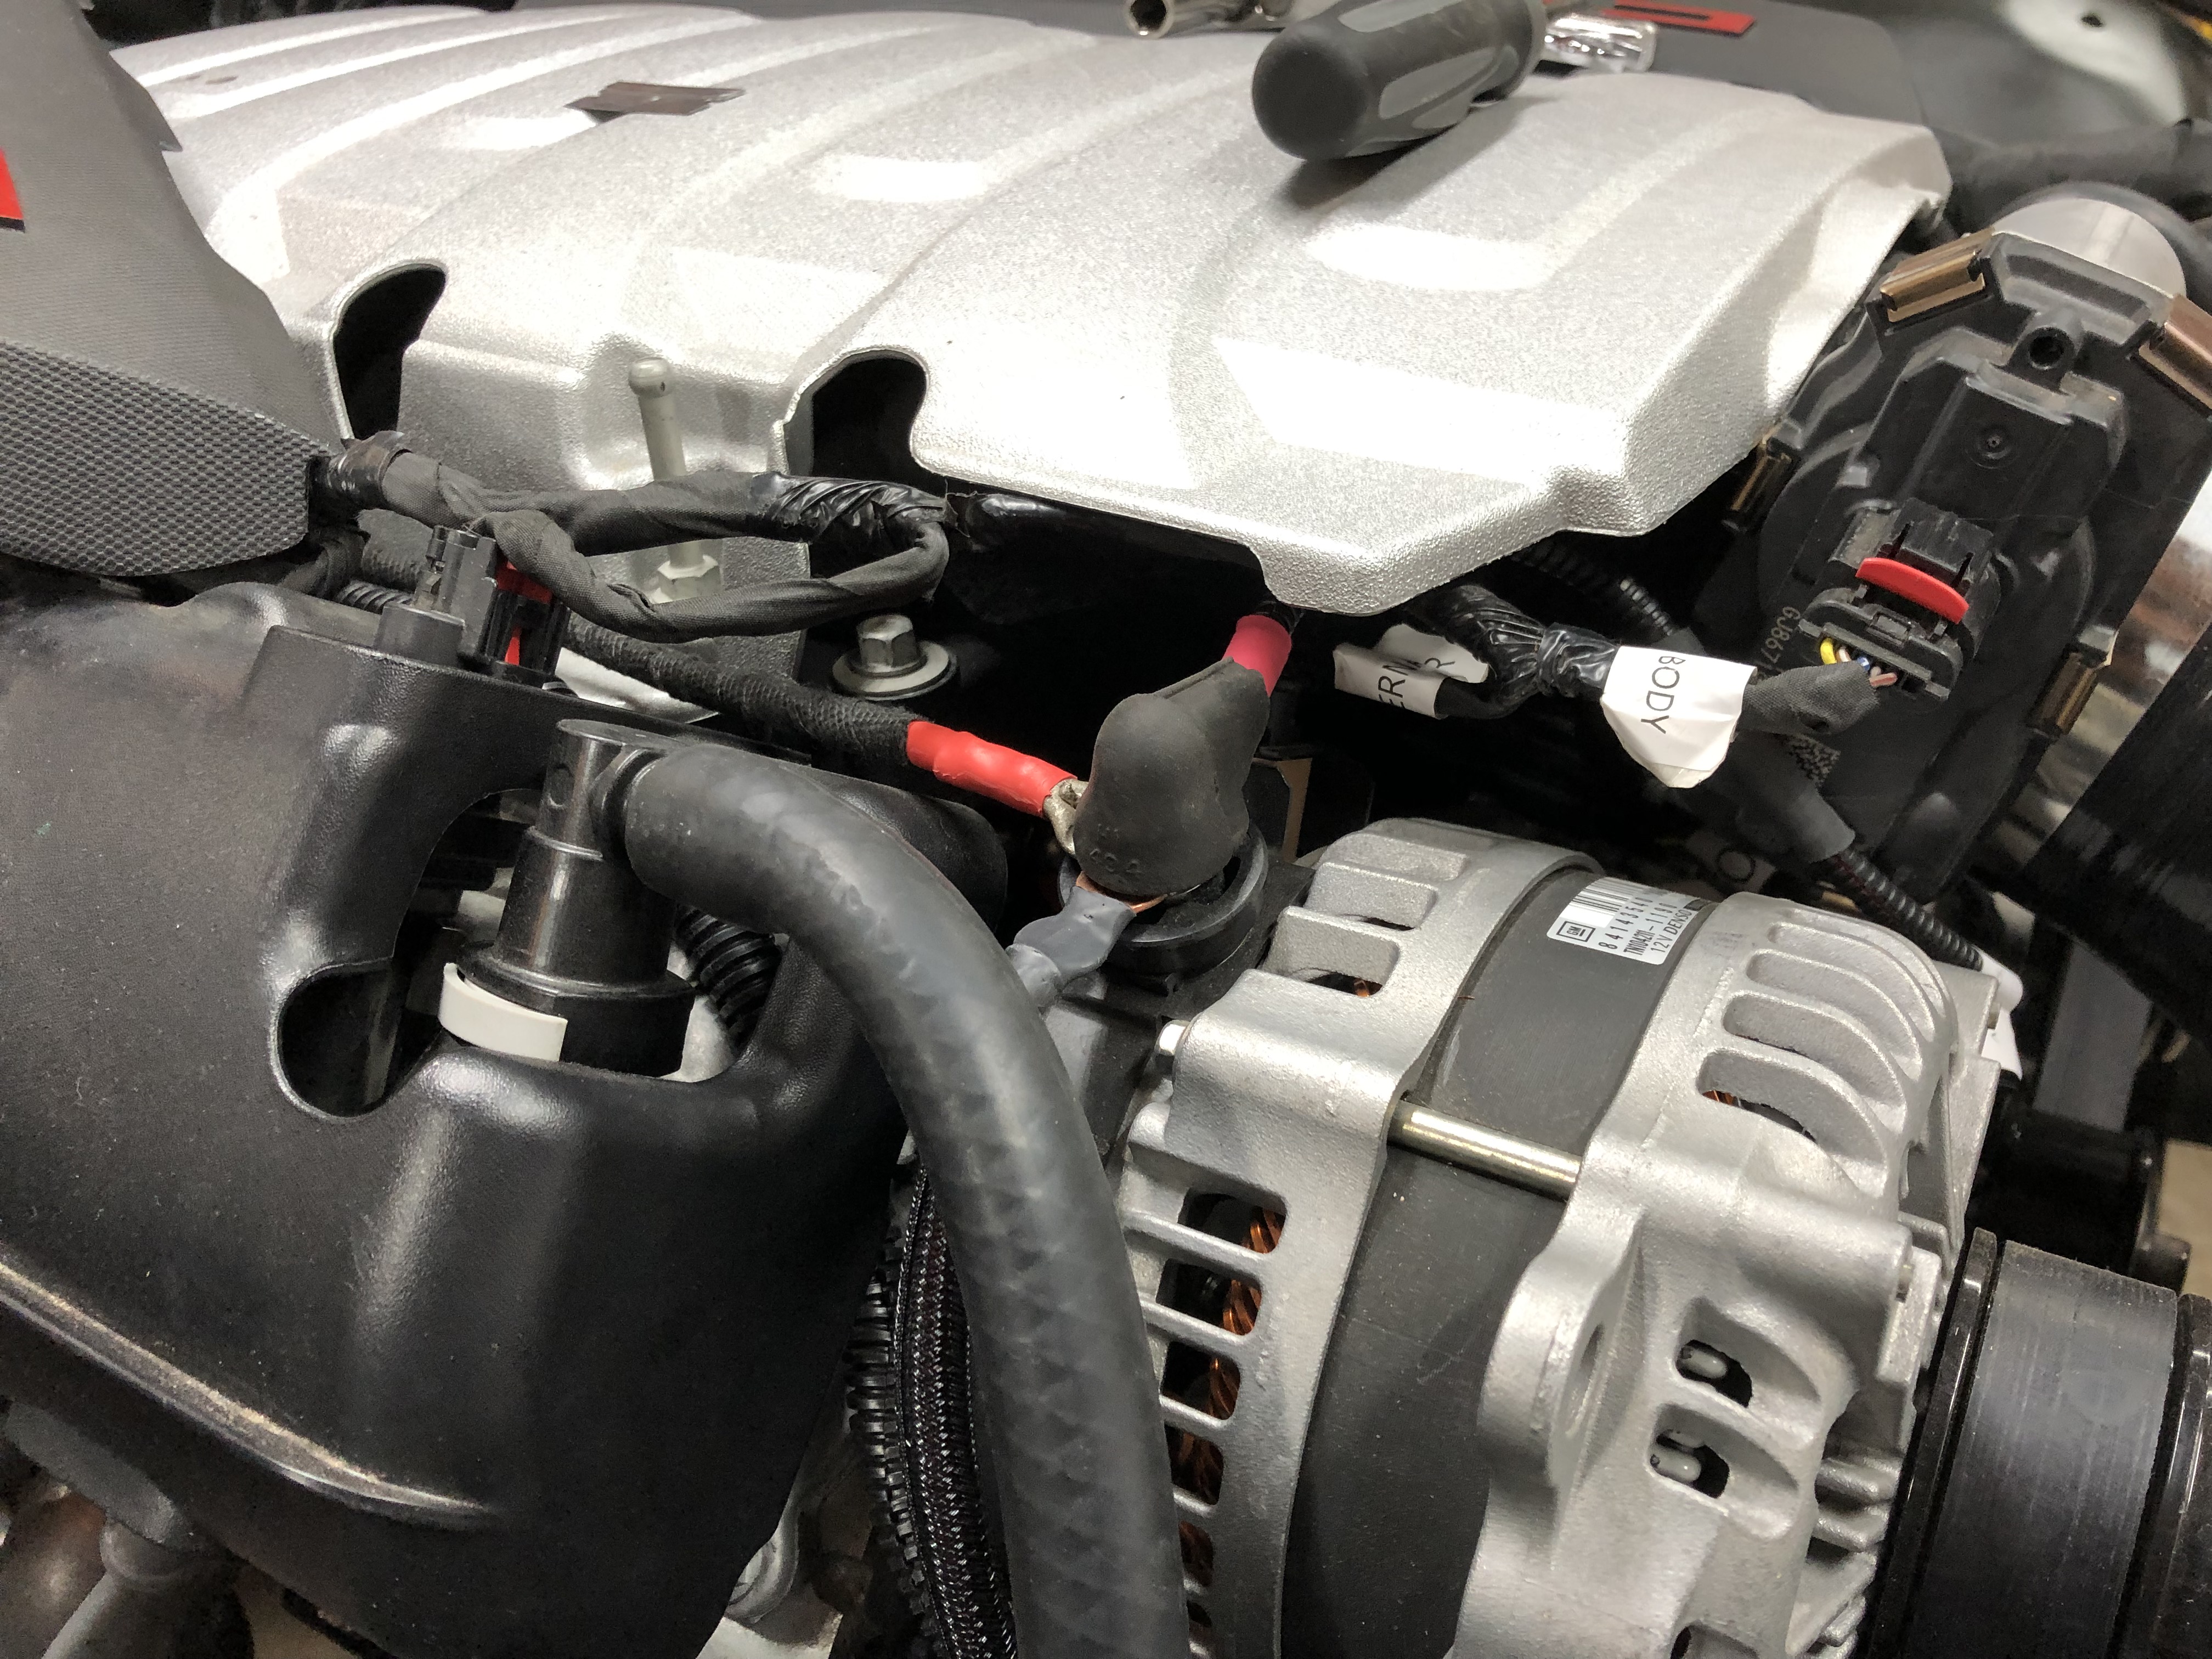
Wiring up the fan is easy, it has a PMW trigger wire, power and ground. The harness has the PWM wire labeled and you just have to crimp it and go. The harness builder recommended I add a fuse to protect the fan and I did so. The power is coming right off the alternator.
I removed the DS finder and ran all the wiring through there and hide them. The PWM fuel harness also traveled along the bottom of the car following the brake line to the low pressure sensor and fuel pump in the tank. The TCM is located on the DS side cowl and the ECM is mounted next to the radiator. The interior harness containing the OBDII port and pedal has been ran through the side cowl, the harness also includes a plug for the additional module for tapshift and what not but I do not have that yet.
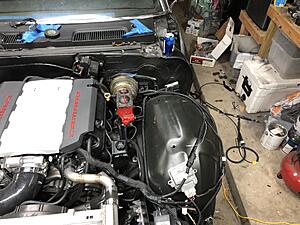

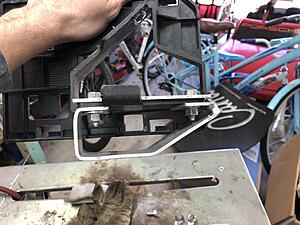
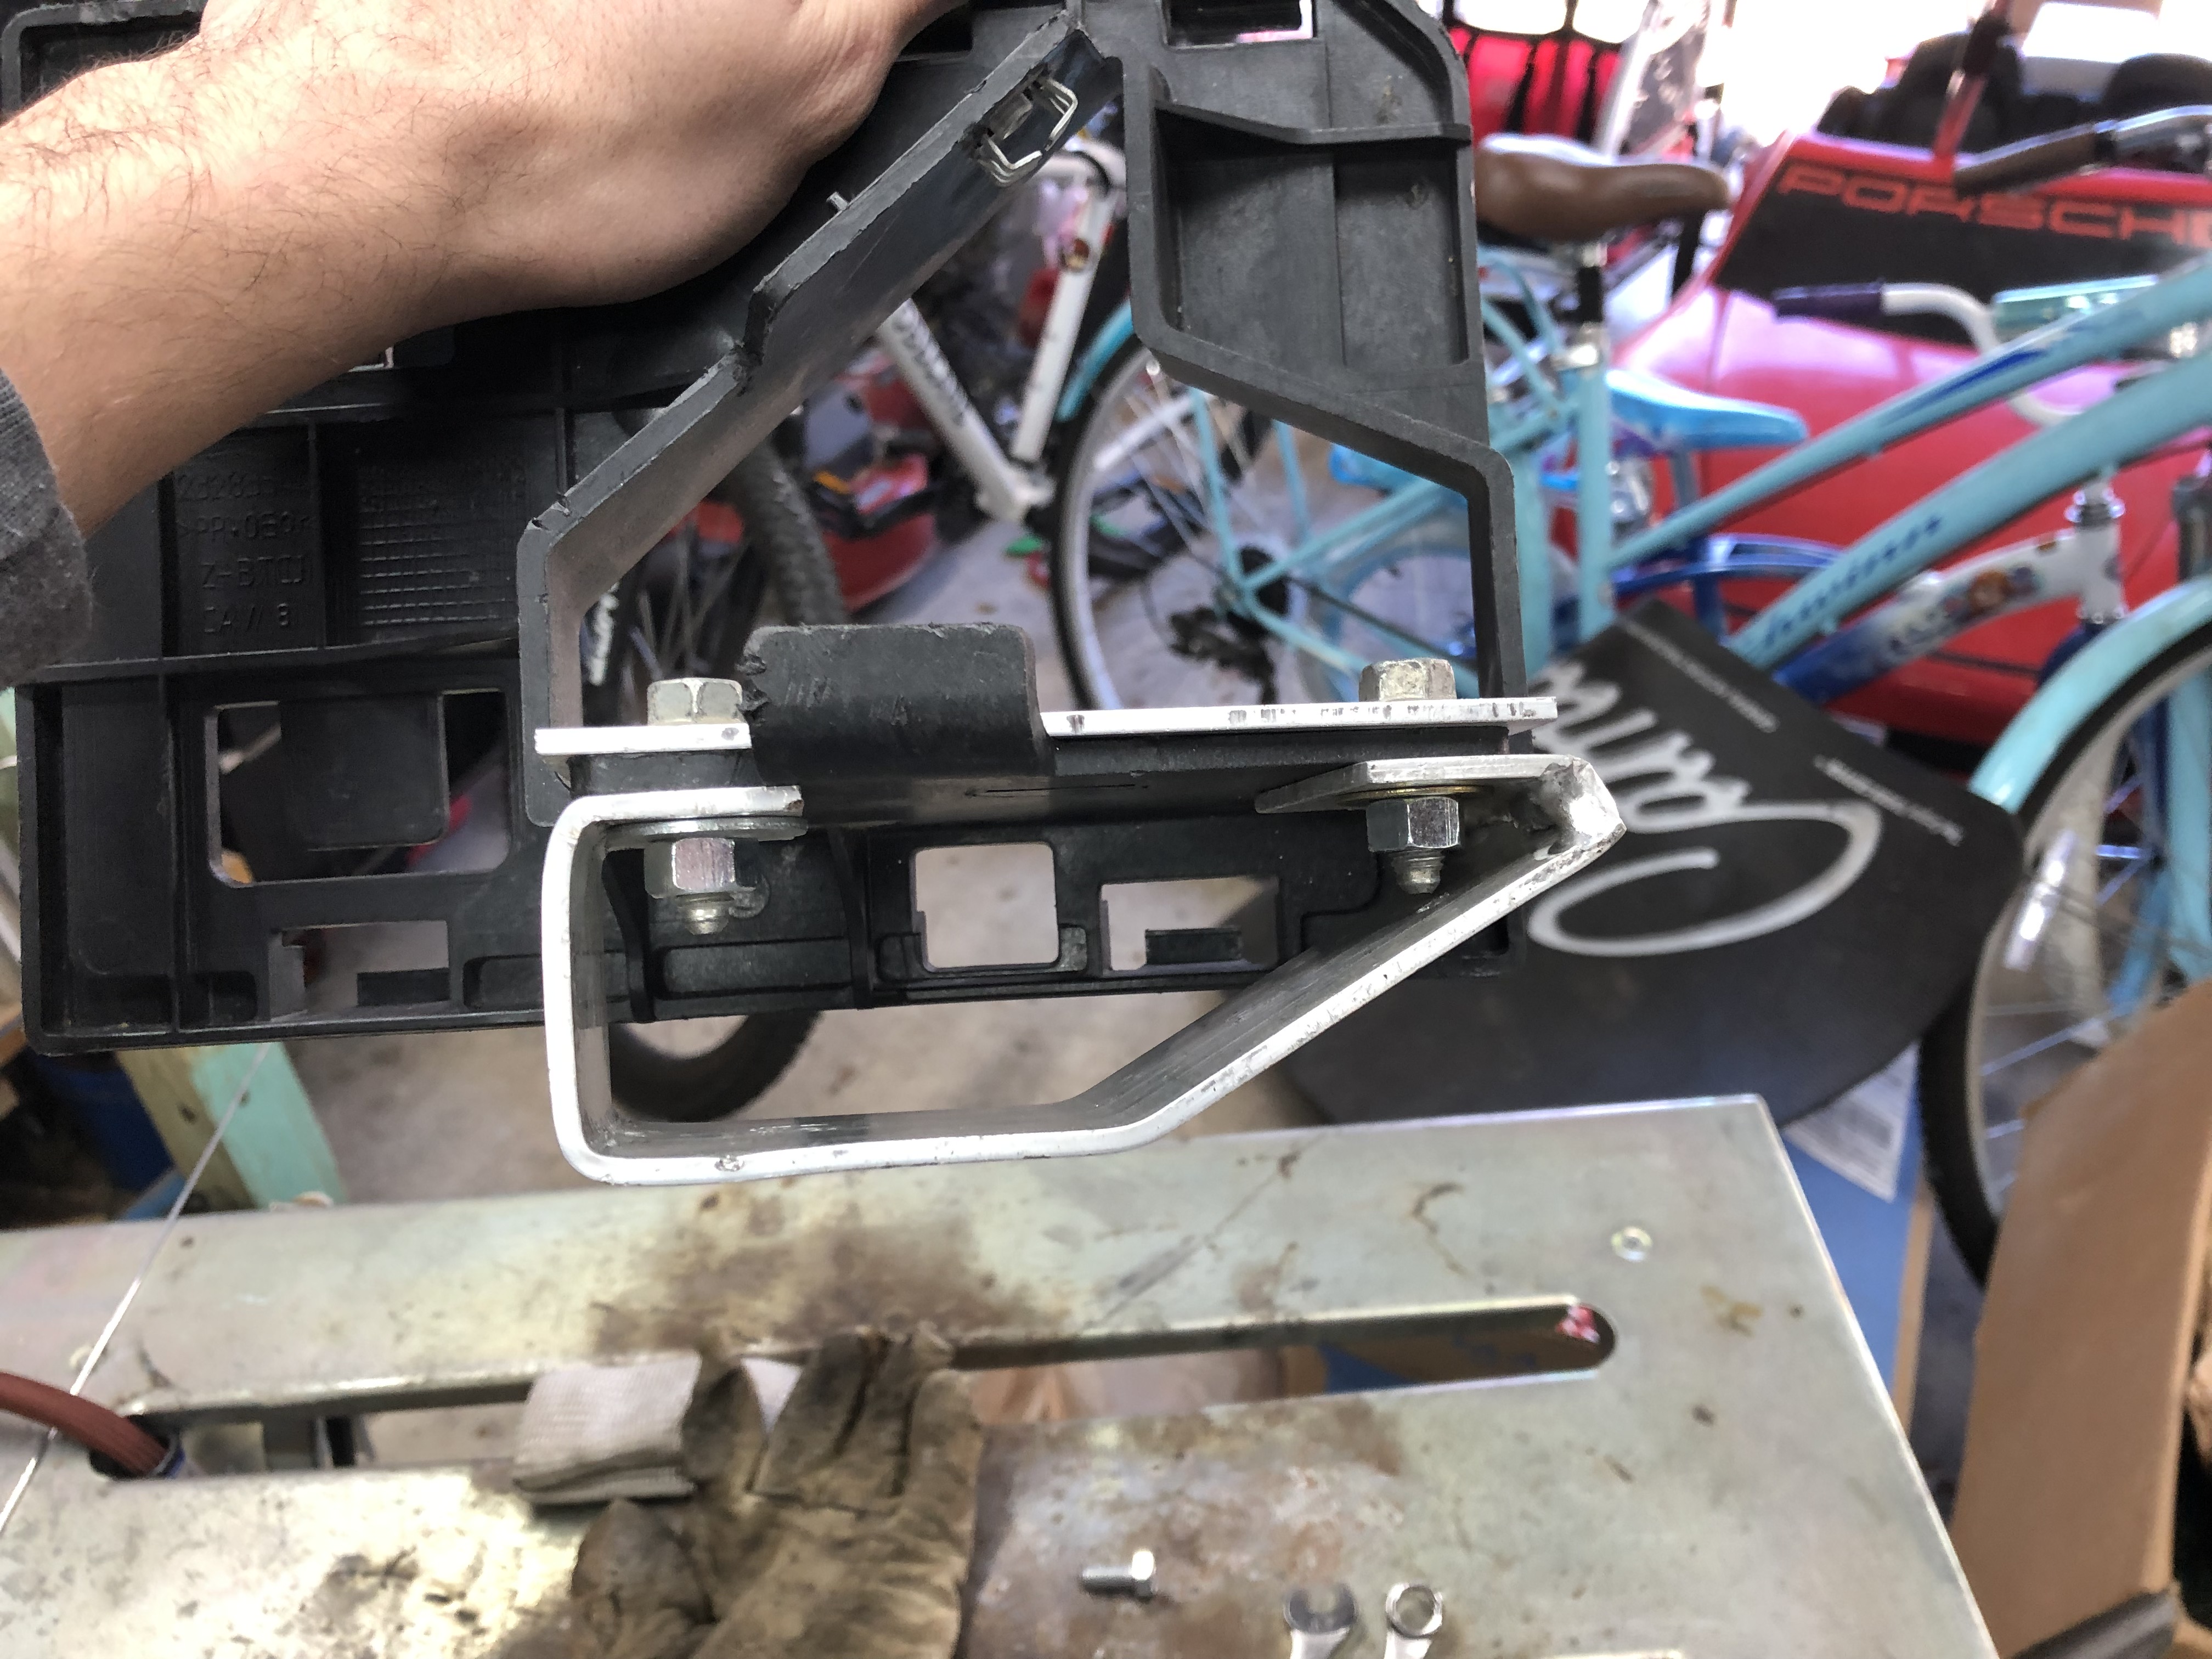
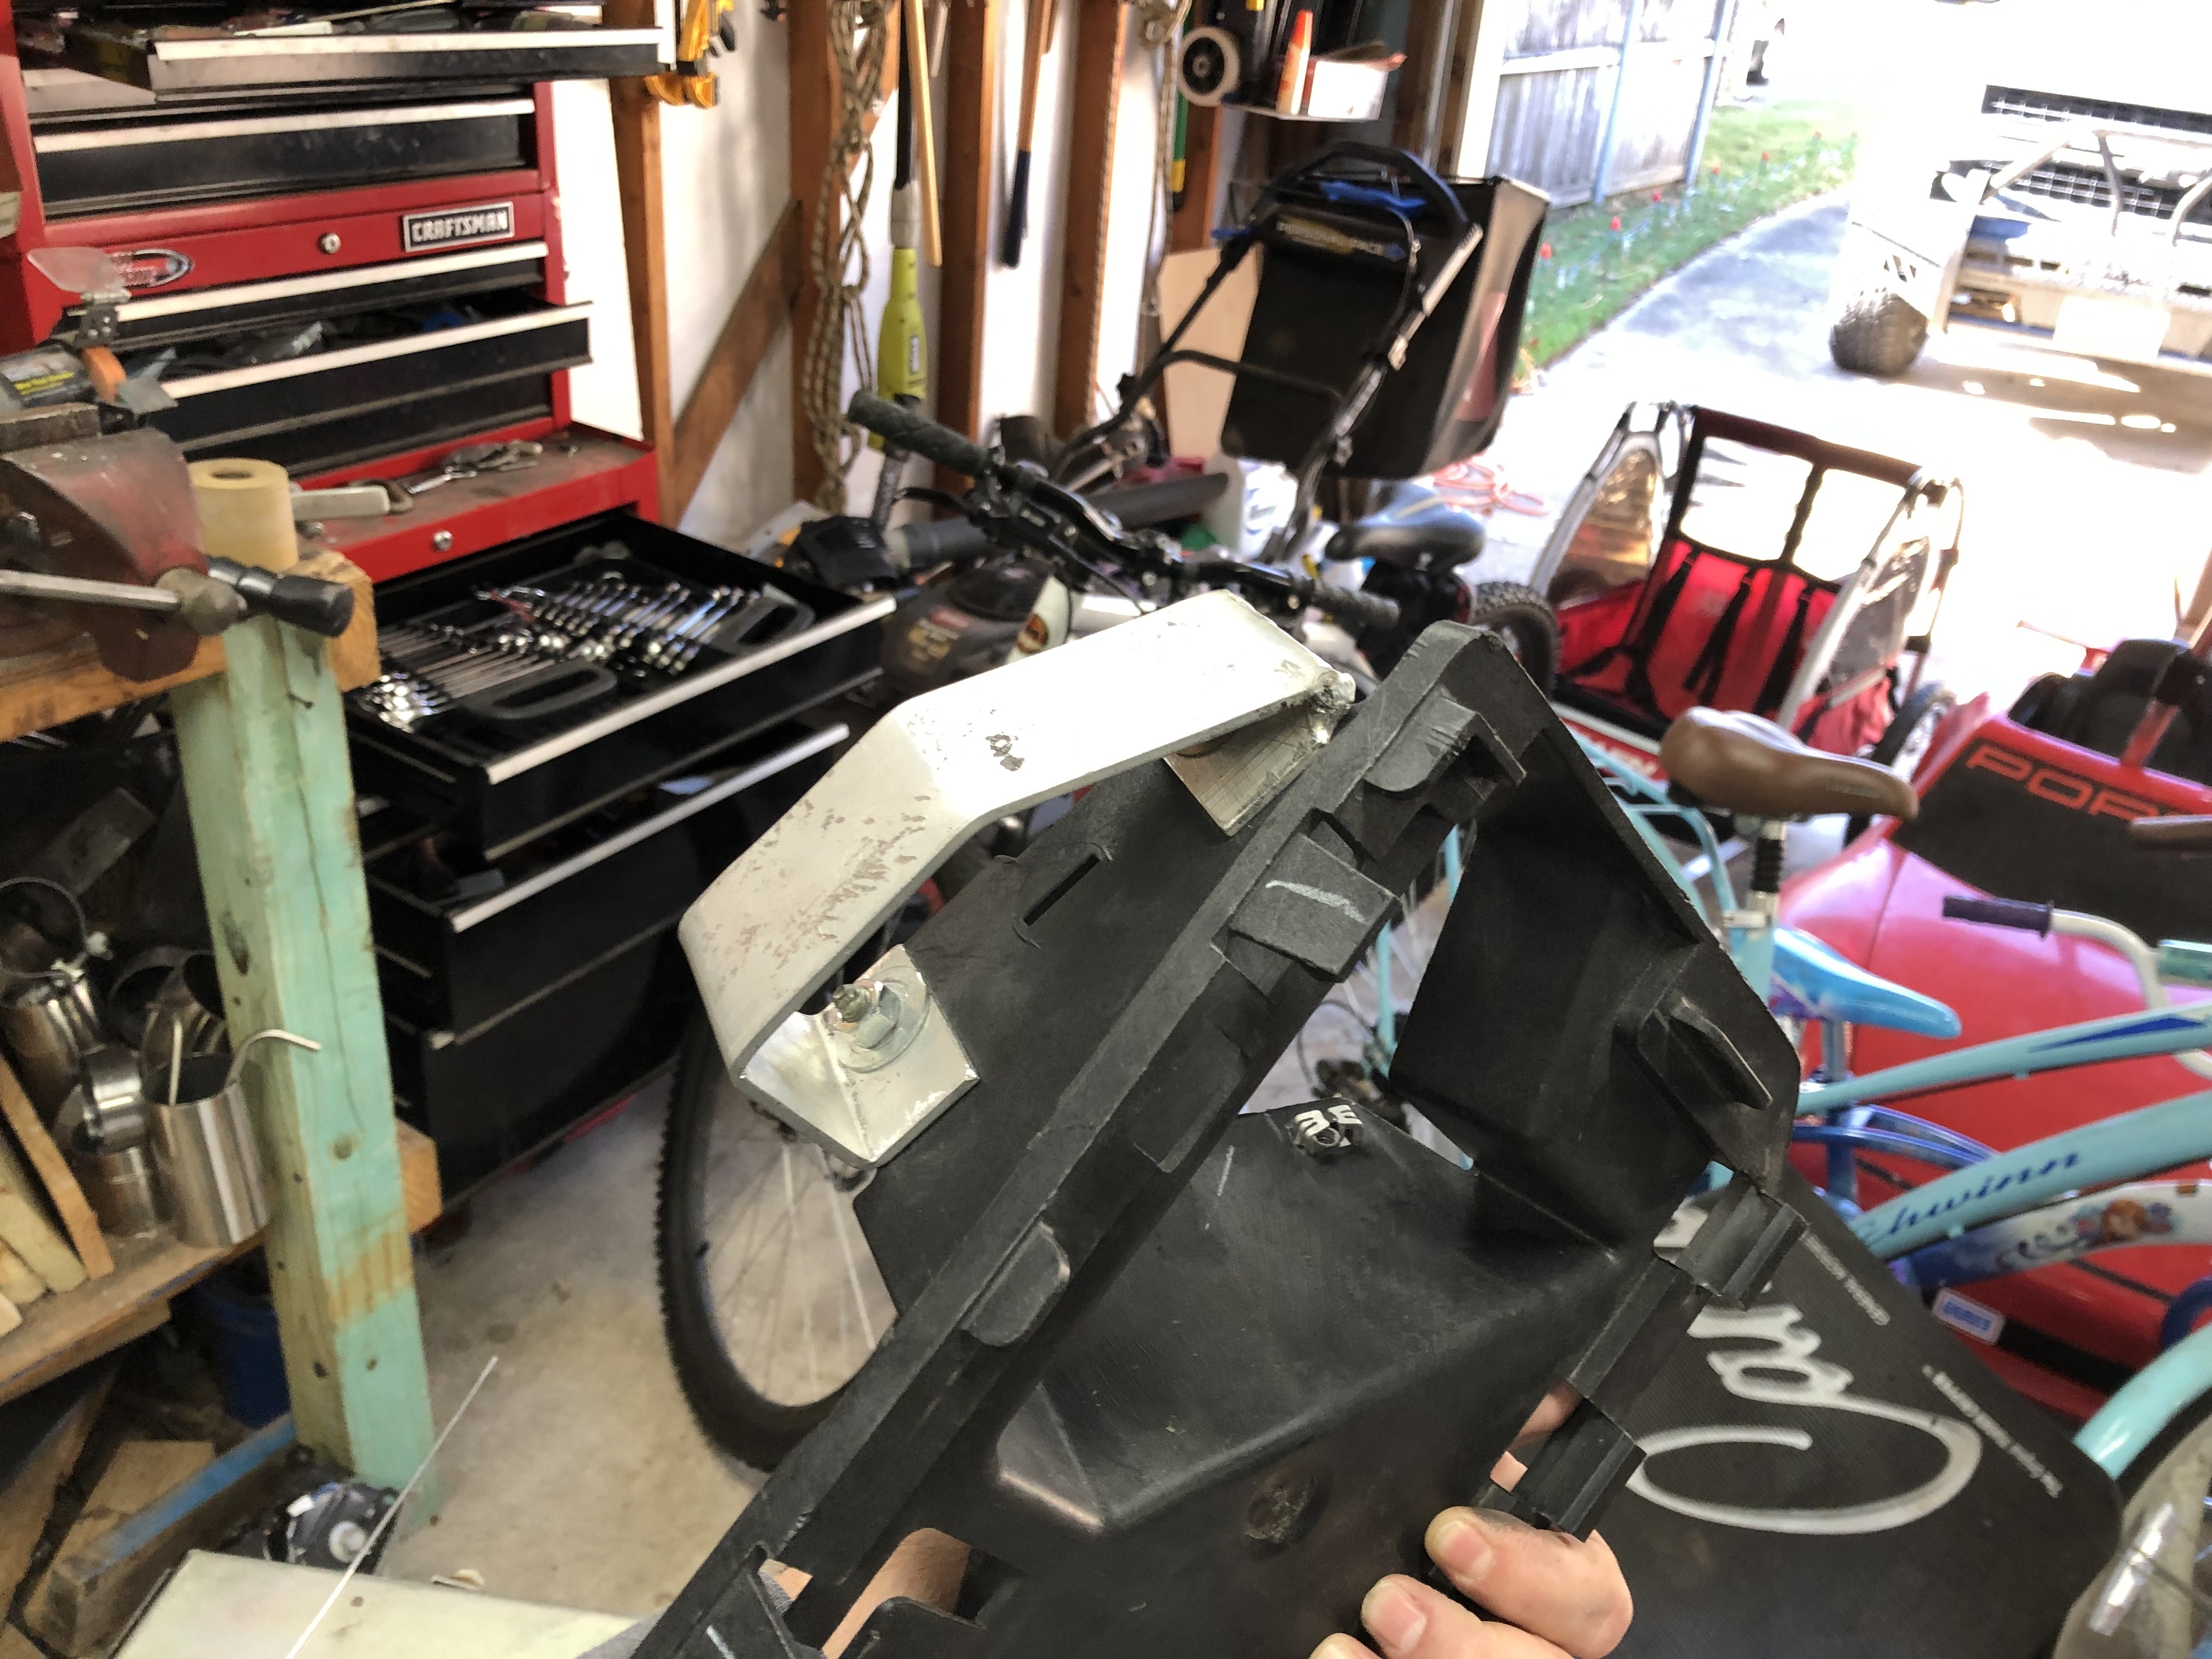
I created a couple of brackets to hold the ECM and fuse box using the factor ECM holder and some aluminum scrap I had laying around. Everything tucked in nicely in the corner of the engine bay and hidden behind the DS fender.

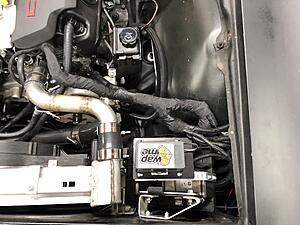


Wiring up the fan is easy, it has a PMW trigger wire, power and ground. The harness has the PWM wire labeled and you just have to crimp it and go. The harness builder recommended I add a fuse to protect the fan and I did so. The power is coming right off the alternator.

I removed the DS finder and ran all the wiring through there and hide them. The PWM fuel harness also traveled along the bottom of the car following the brake line to the low pressure sensor and fuel pump in the tank. The TCM is located on the DS side cowl and the ECM is mounted next to the radiator. The interior harness containing the OBDII port and pedal has been ran through the side cowl, the harness also includes a plug for the additional module for tapshift and what not but I do not have that yet.


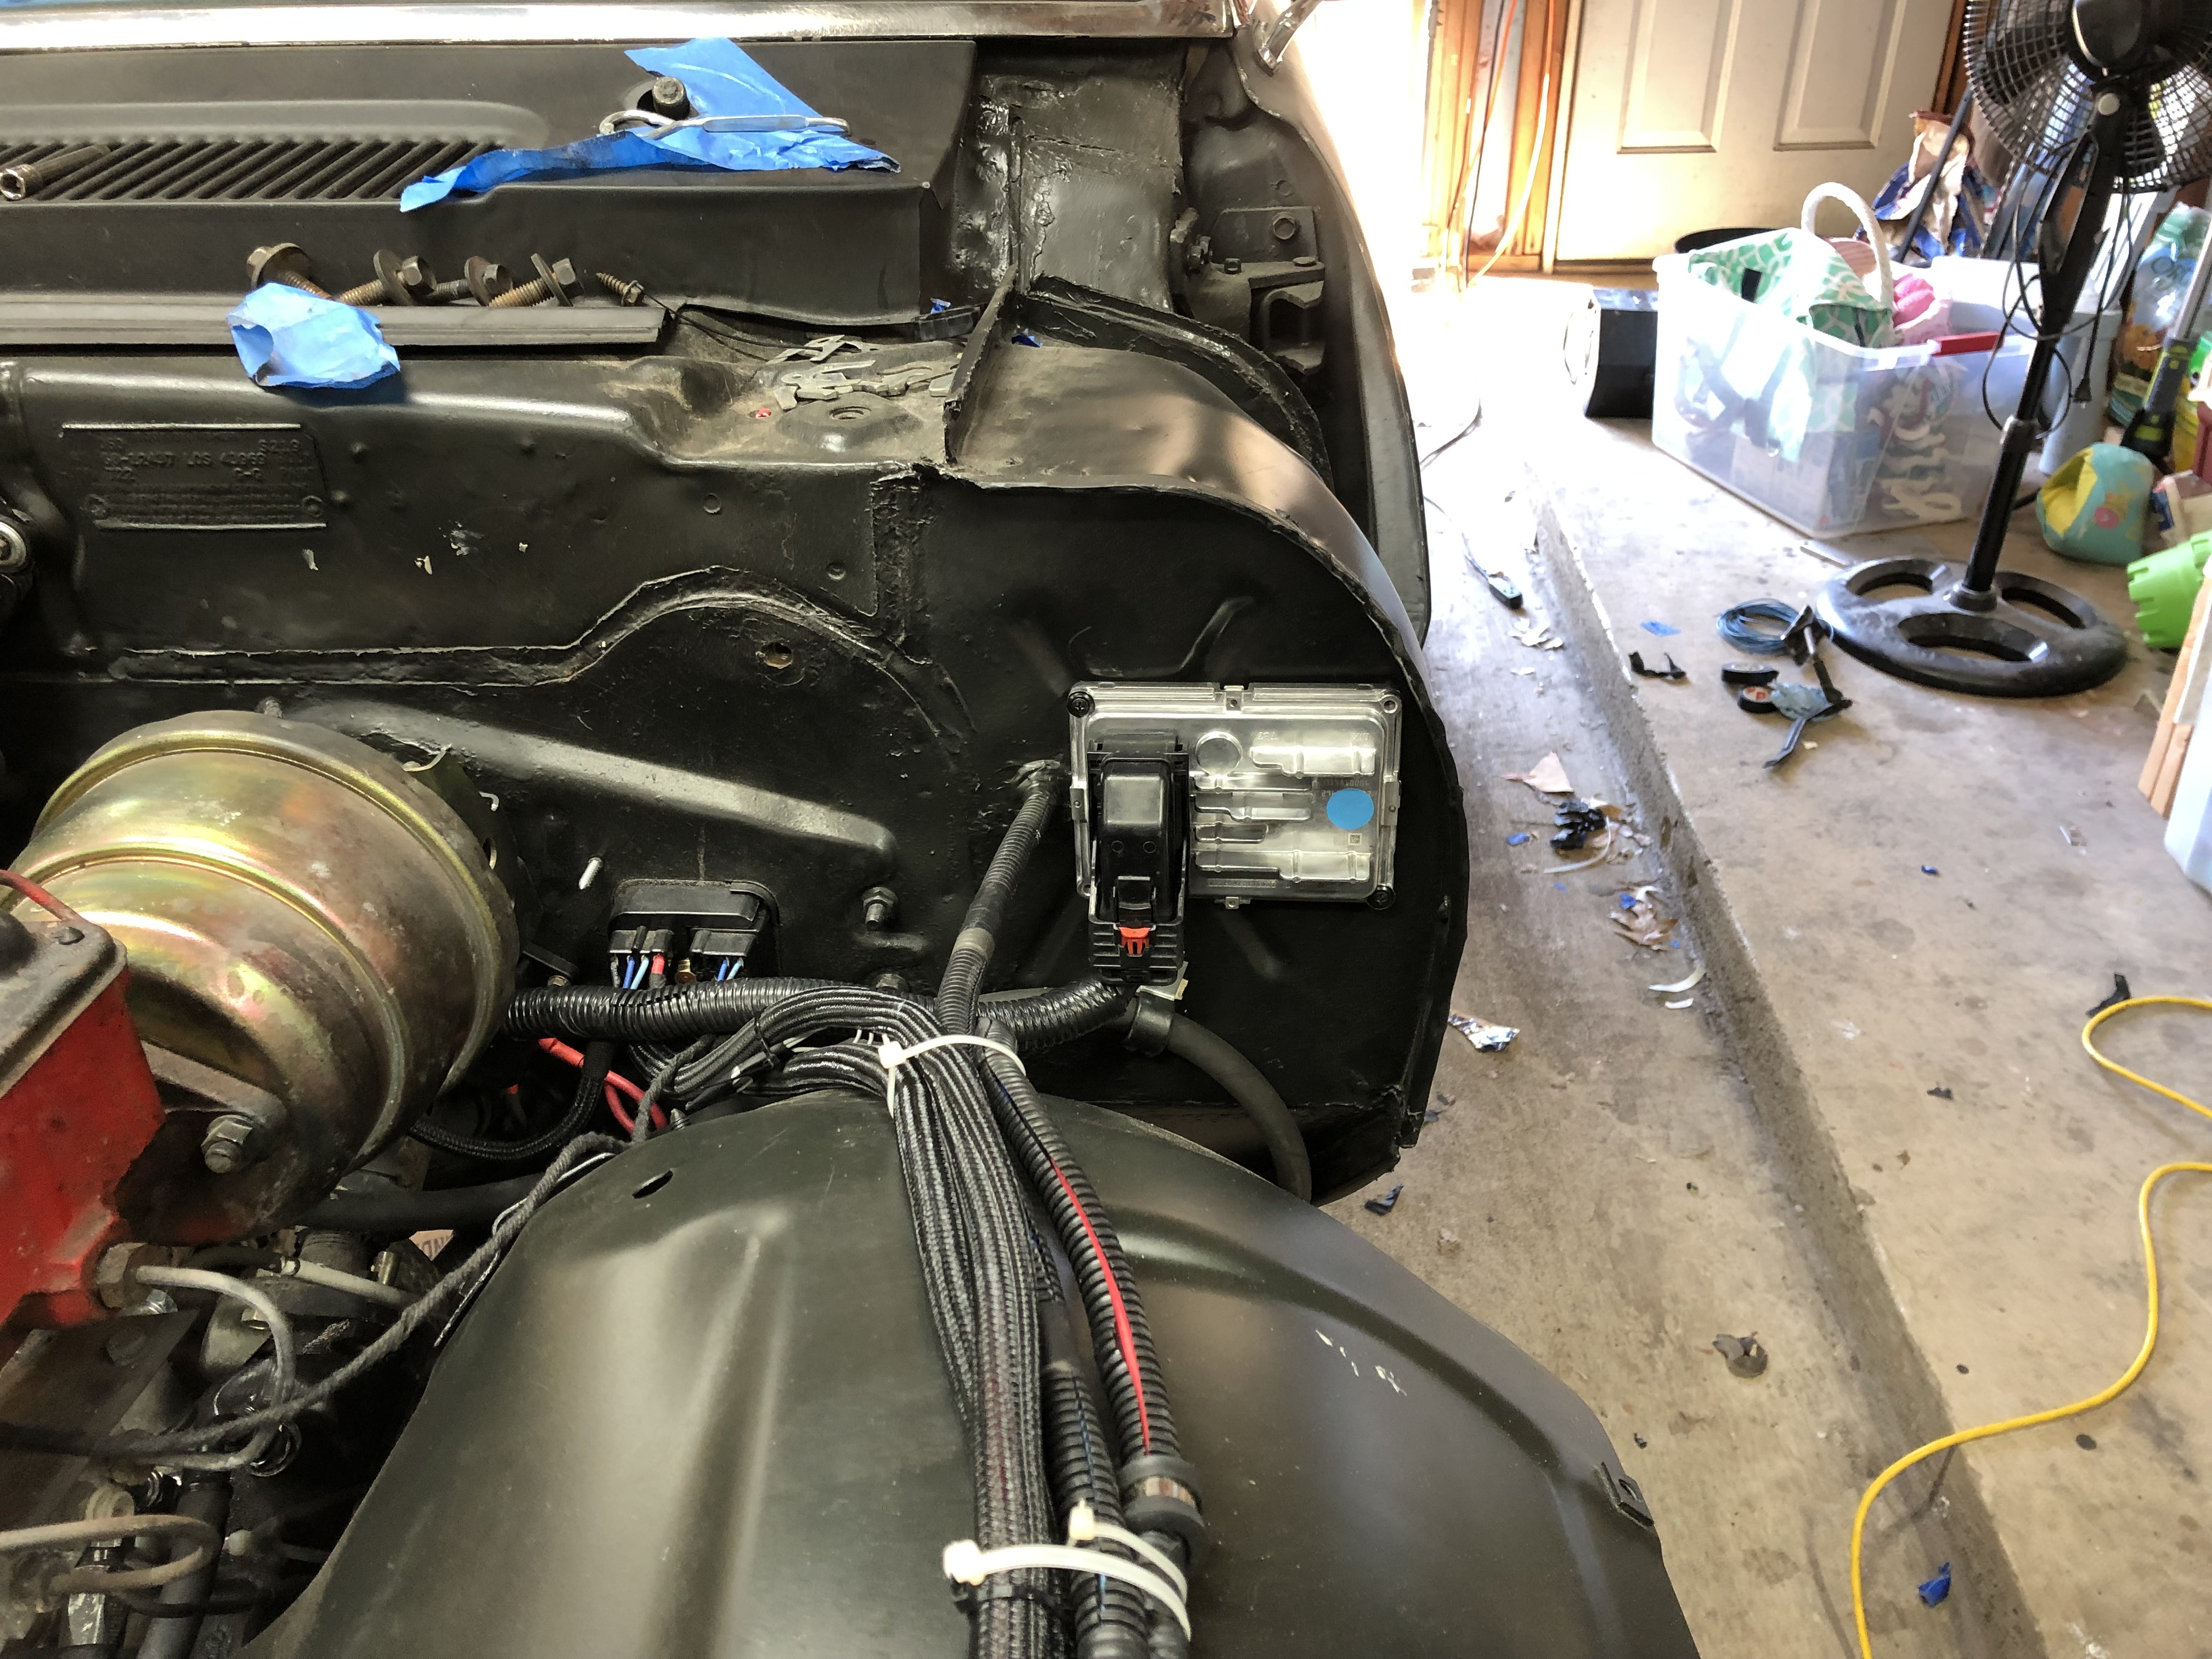
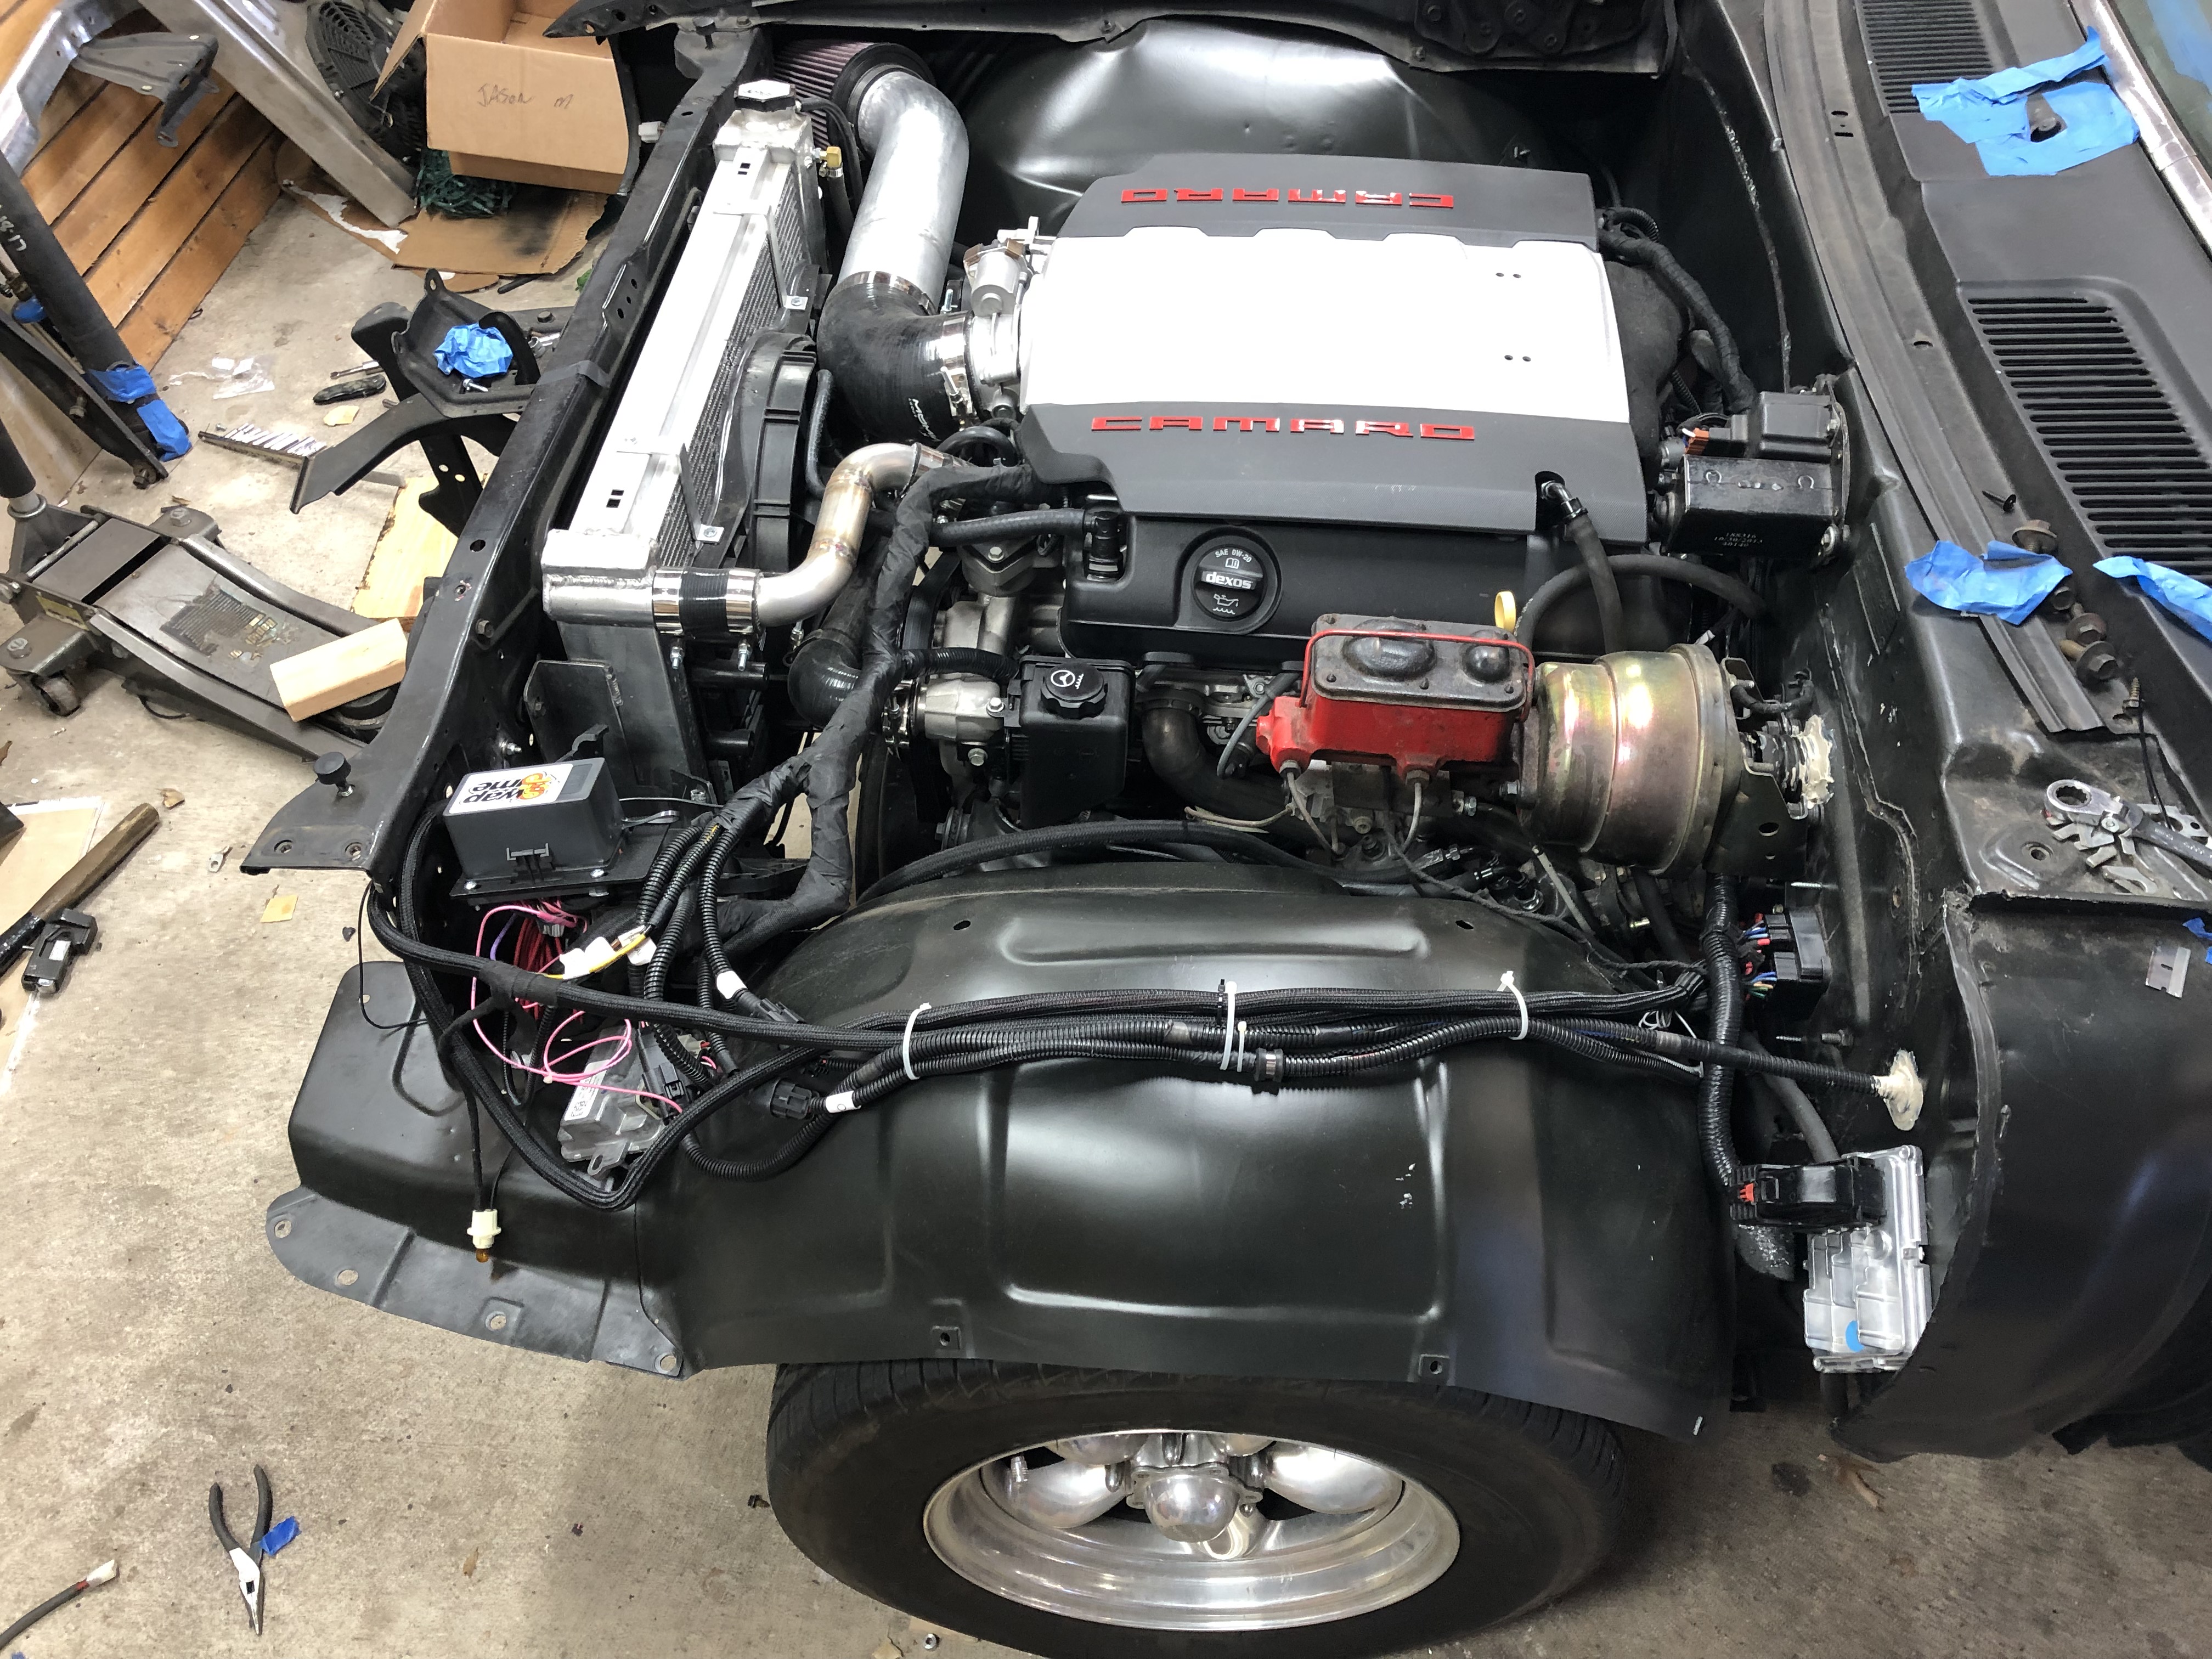
I created a couple of brackets to hold the ECM and fuse box using the factor ECM holder and some aluminum scrap I had laying around. Everything tucked in nicely in the corner of the engine bay and hidden behind the DS fender.


Last edited by jasonz28camaro; 01-07-2020 at 09:23 PM.
The following users liked this post:
Motown 454 (07-28-2022)
01-09-2020, 04:51 AM
#139
Congrats!!!!!!!!!
