
68 Camaro Build with a Gen V Swap
 10-27-2018, 06:22 PM
#1

I've always wanted to start a build/project thread but I normally do not take photos while I'm working on cars until now. This is a build/swap project and has a little of both.
I have a history with go fast parts with my later model Camaro and Corvette. I have for the most part always tried to do all modifications/repairs myself with an exception to tuning and some bodywork. I sold both my Camaro and Corvette when our little one was born, too little time for both at the time.
About a year ago my wife said I should get a hobby so I started shopping around for a cool car and saw lots of first gen pro-touring style cars with late model engines and it caught my attention. I built my previous 96 Camaro over a 10 year span then sold it so I could get a Corvette. The Corvette was already built so there was not much fun and satisfaction with it and I ended up selling it, plus you cannot fit 3 people in it. So about 6 months ago I purchased my 68 Camaro with a "rust free" body to start building what I like.
My goal is to make this car something fun to drive, dependable and just cool. Kind of hard to make it unique since its a first gen Camaro but I'll try with the drivetrain. The car will mostly just be for driving around and possibly autocross events if I work up the courage. I'll probably take it to the 1/4 track a few times as well.
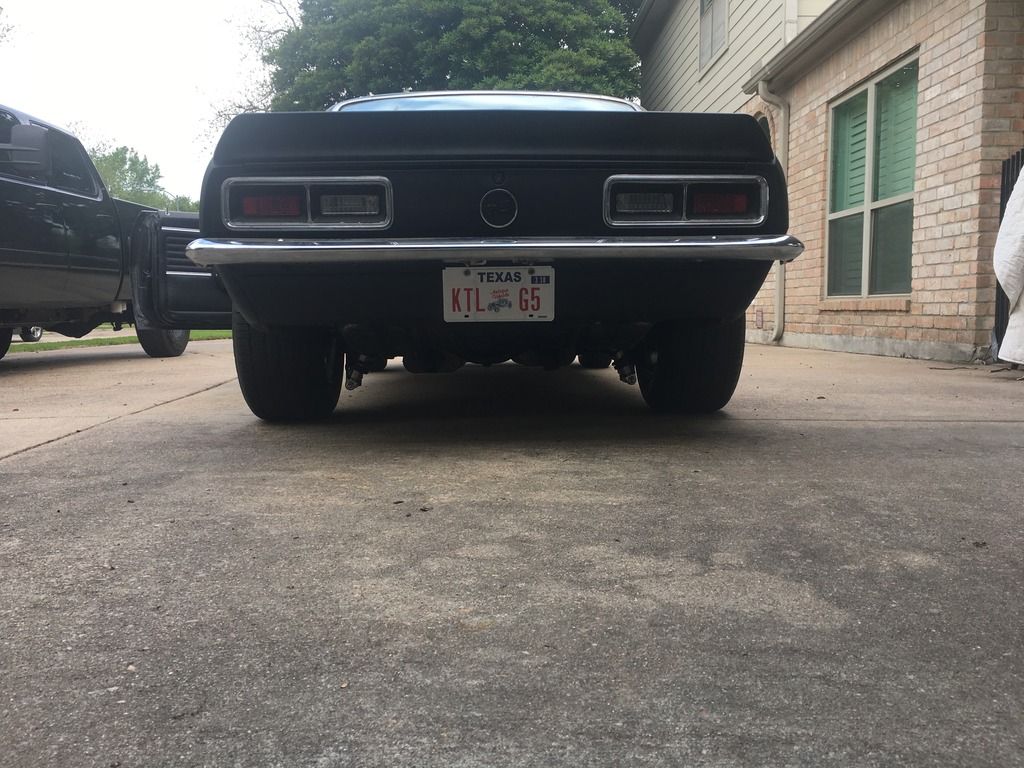
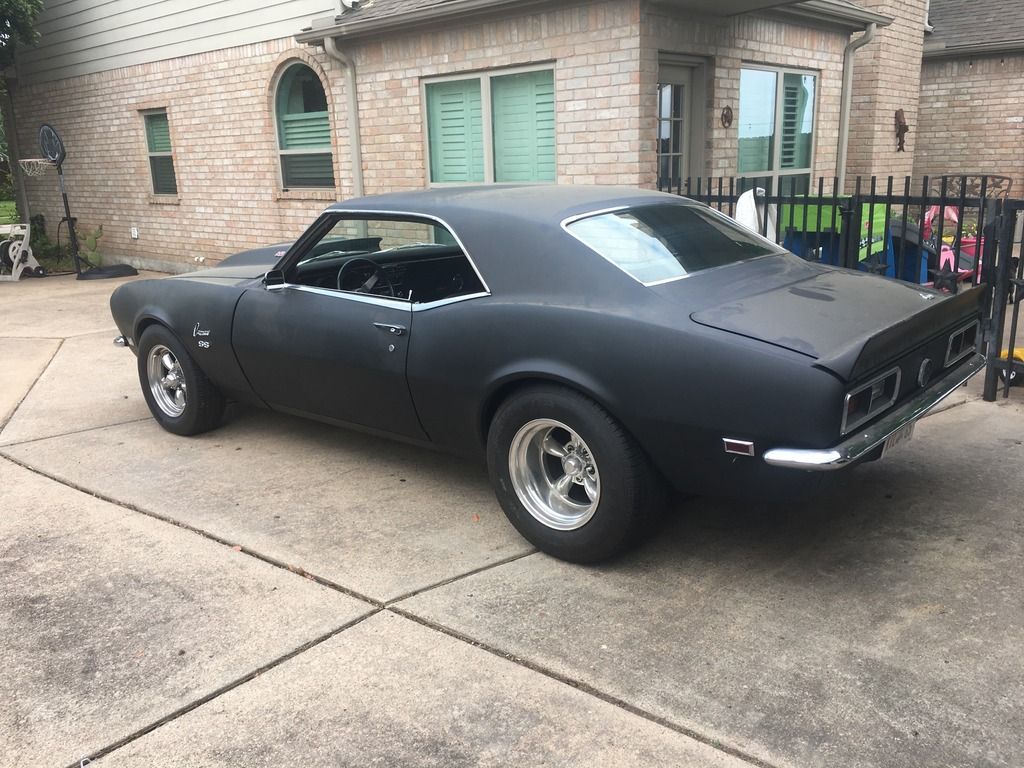
Below is a photo of the car when I got it. It's a BBC with a 700r4 and 9". The 9" is narrowed but the wheel backspacing is short so they stick out strange, I'll correct this soon. Mirrors are a little off too.
[IMG]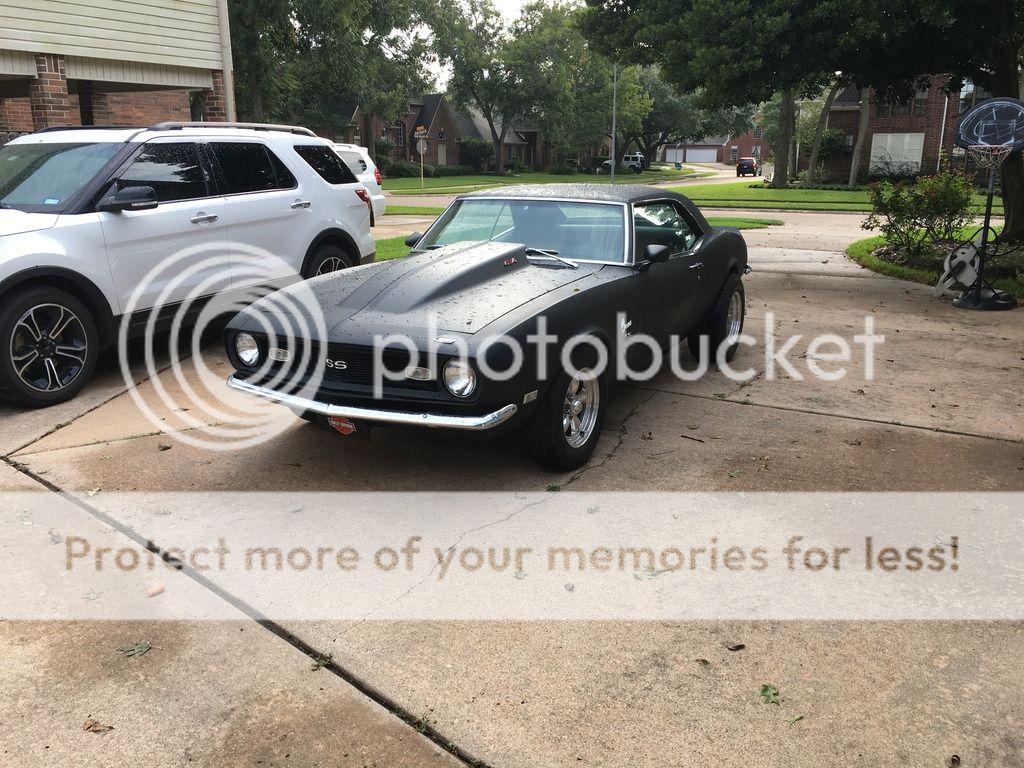
[IMG]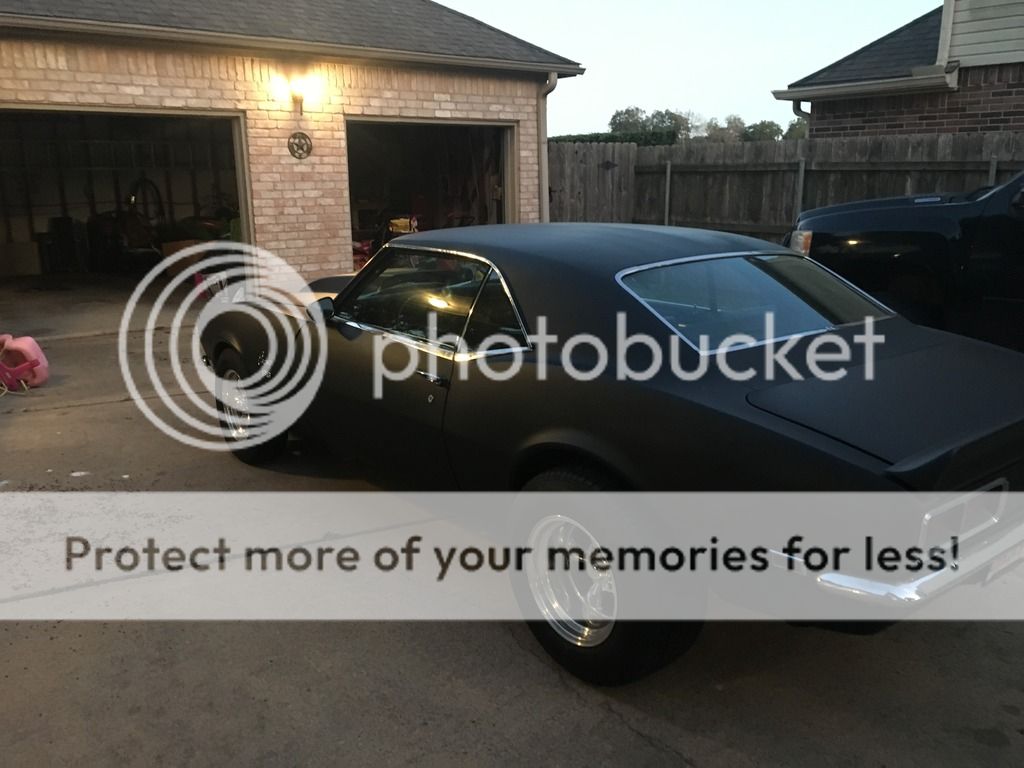
I have a history with go fast parts with my later model Camaro and Corvette. I have for the most part always tried to do all modifications/repairs myself with an exception to tuning and some bodywork. I sold both my Camaro and Corvette when our little one was born, too little time for both at the time.
About a year ago my wife said I should get a hobby so I started shopping around for a cool car and saw lots of first gen pro-touring style cars with late model engines and it caught my attention. I built my previous 96 Camaro over a 10 year span then sold it so I could get a Corvette. The Corvette was already built so there was not much fun and satisfaction with it and I ended up selling it, plus you cannot fit 3 people in it. So about 6 months ago I purchased my 68 Camaro with a "rust free" body to start building what I like.
My goal is to make this car something fun to drive, dependable and just cool. Kind of hard to make it unique since its a first gen Camaro but I'll try with the drivetrain. The car will mostly just be for driving around and possibly autocross events if I work up the courage. I'll probably take it to the 1/4 track a few times as well.
Below is a photo of the car when I got it. It's a BBC with a 700r4 and 9". The 9" is narrowed but the wheel backspacing is short so they stick out strange, I'll correct this soon. Mirrors are a little off too.
[IMG]

[IMG]


 10-27-2018, 06:23 PM
#2
I know this is not a how-to and its been done numerous times but I enjoy and learn off others builds so I'll include photos along with as much useful/useless info that I can provide and answer any questions along the way.
First on the chopping block were the mini tubs.
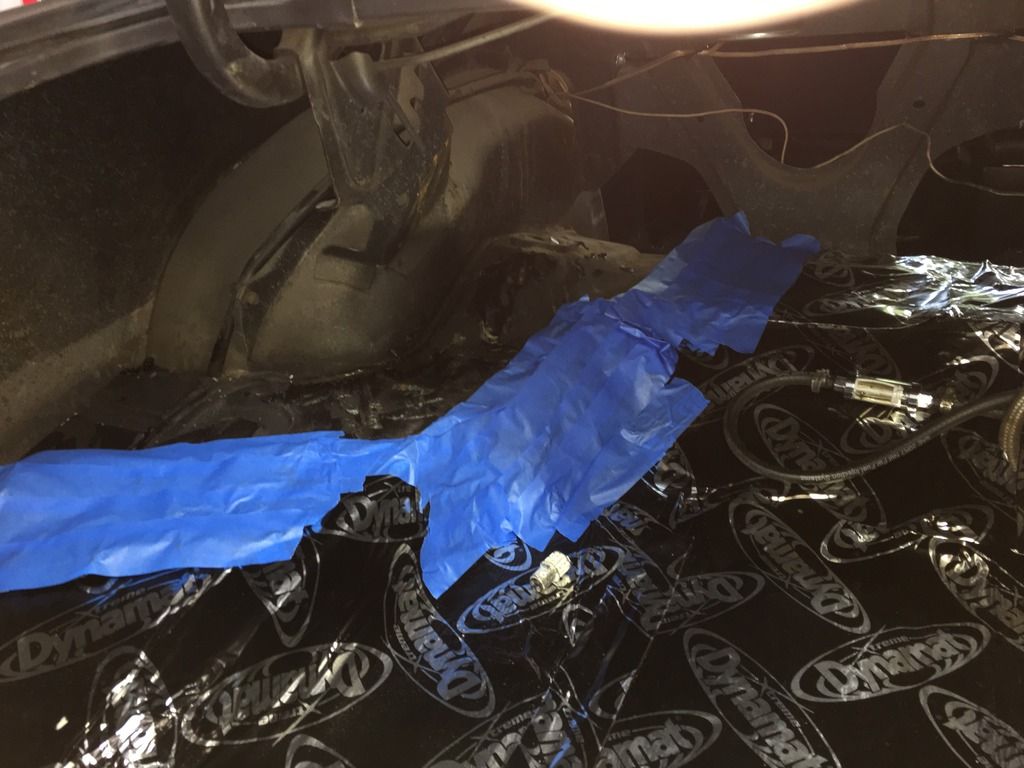
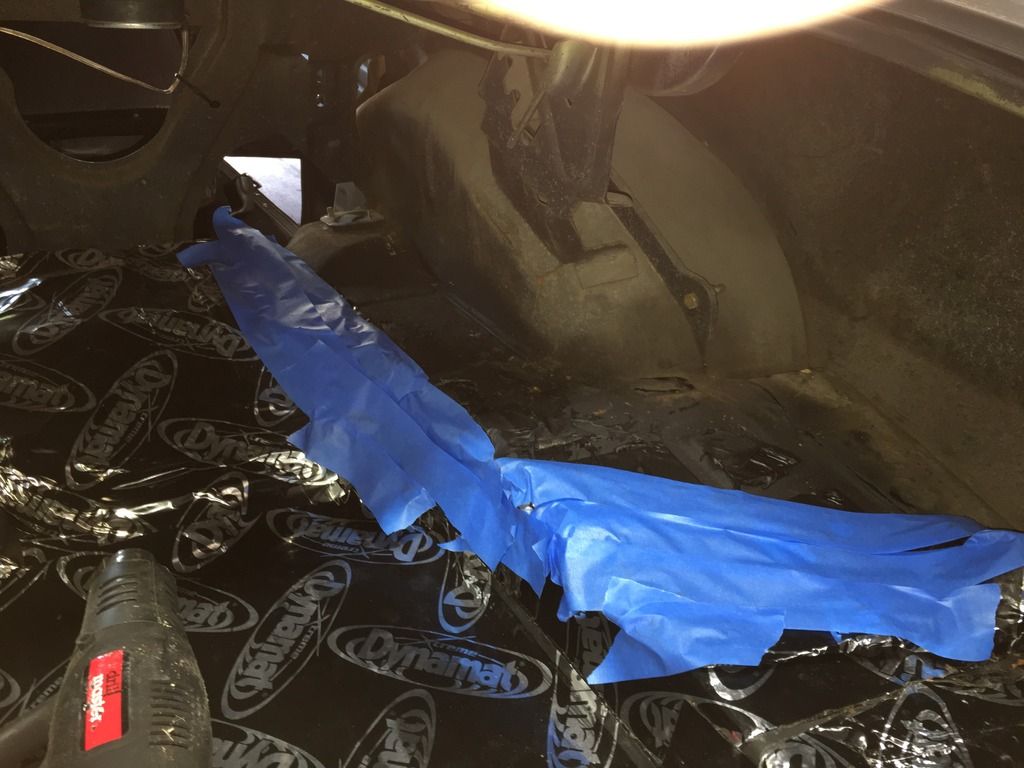
I started off by removing the rear seats and side trim. This is all relitivly simple to do and the only special tool I needed was the window crank remover but others can do it with a screwdriver.
Next was the trunk Dynamat. I wish I read into this a little more prior to starting this project. This stuff it tough to remove if you don’t know. I used a heat gun and came up easy with an exception to the tar left behind. I only removed what was needed at this time and covered the sticky side with masking tape. The tape came off pretty easy when it was done. People say dry ice is the way to go when removing this stuff. I may try this later when I remove the entire trunk Dynamat.
First on the chopping block were the mini tubs.
I started off by removing the rear seats and side trim. This is all relitivly simple to do and the only special tool I needed was the window crank remover but others can do it with a screwdriver.
Next was the trunk Dynamat. I wish I read into this a little more prior to starting this project. This stuff it tough to remove if you don’t know. I used a heat gun and came up easy with an exception to the tar left behind. I only removed what was needed at this time and covered the sticky side with masking tape. The tape came off pretty easy when it was done. People say dry ice is the way to go when removing this stuff. I may try this later when I remove the entire trunk Dynamat.


 10-27-2018, 06:24 PM
#3
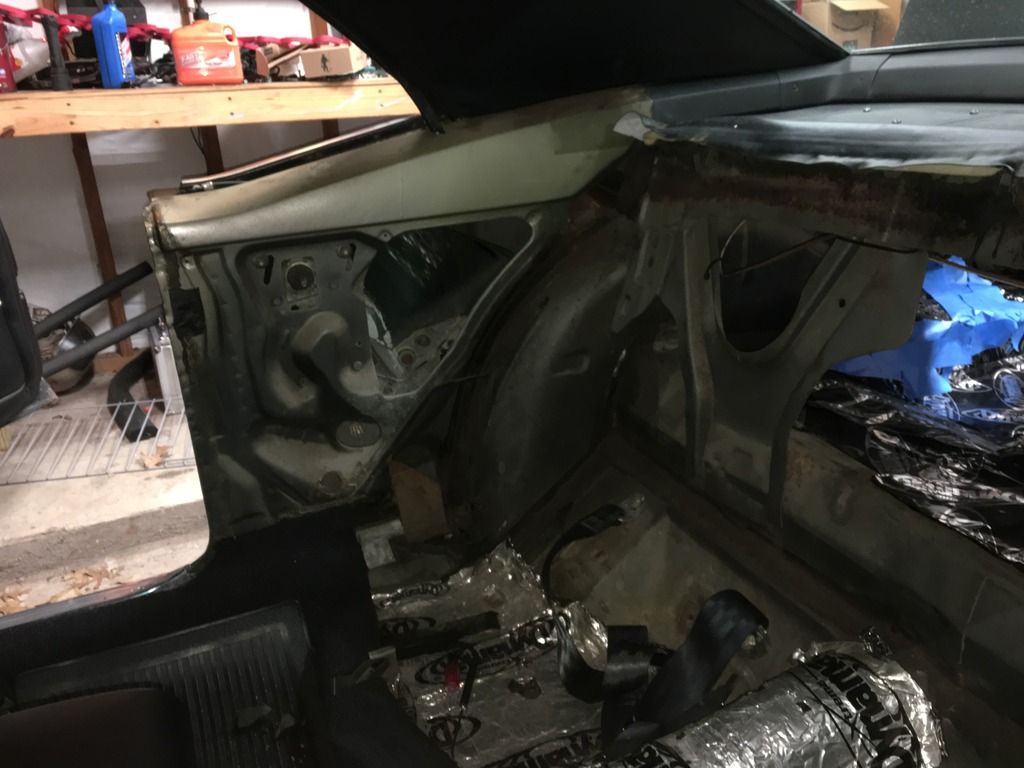
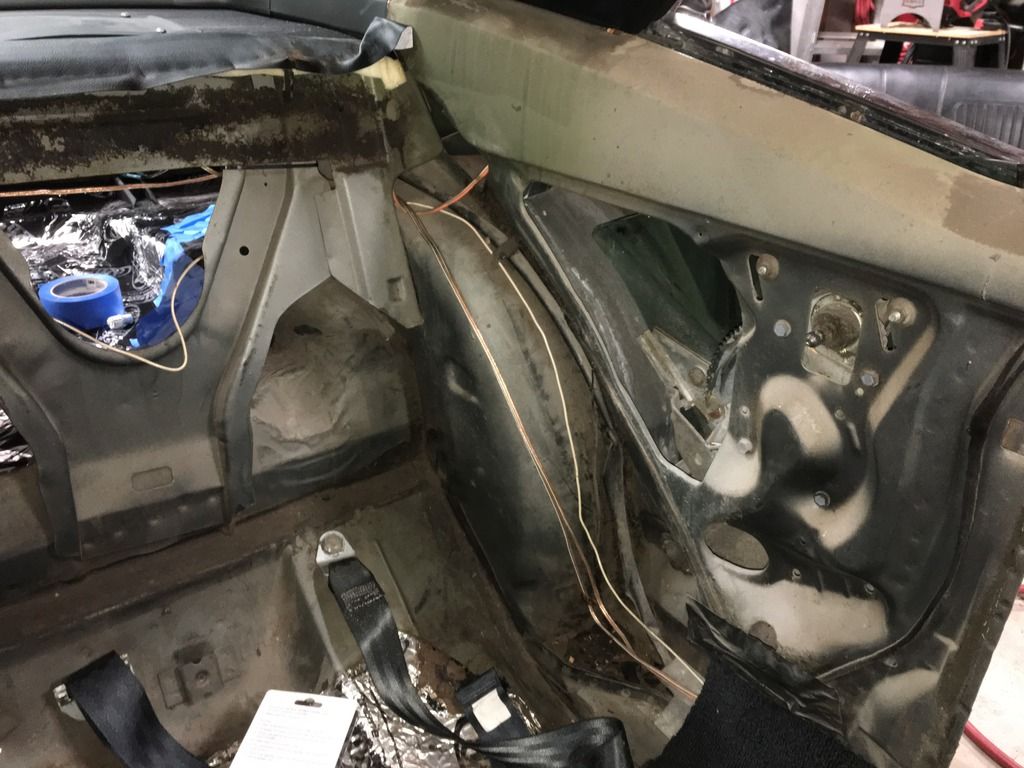
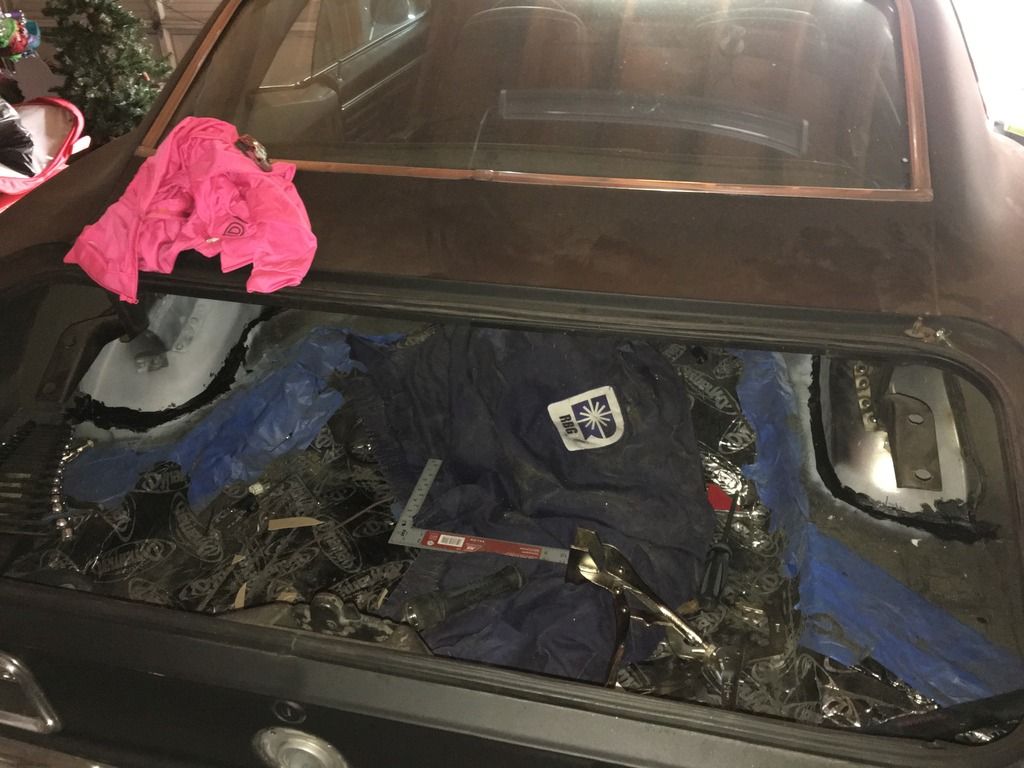
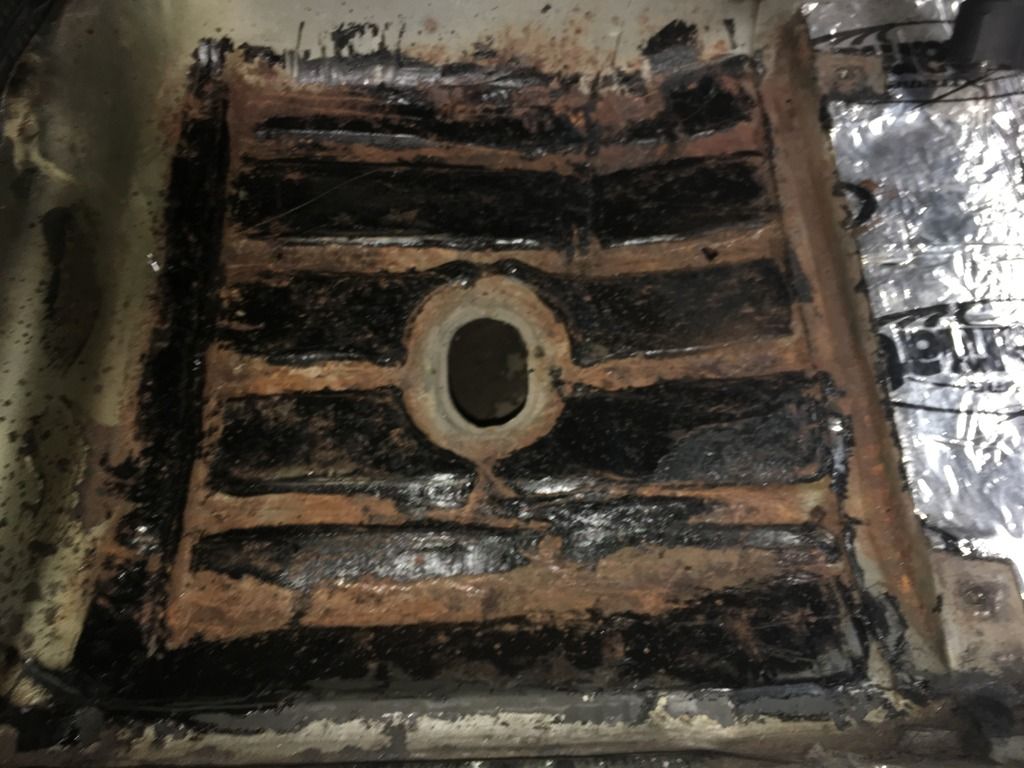
Next thing I did was remove the rear.

Empty now with plenty of room to work
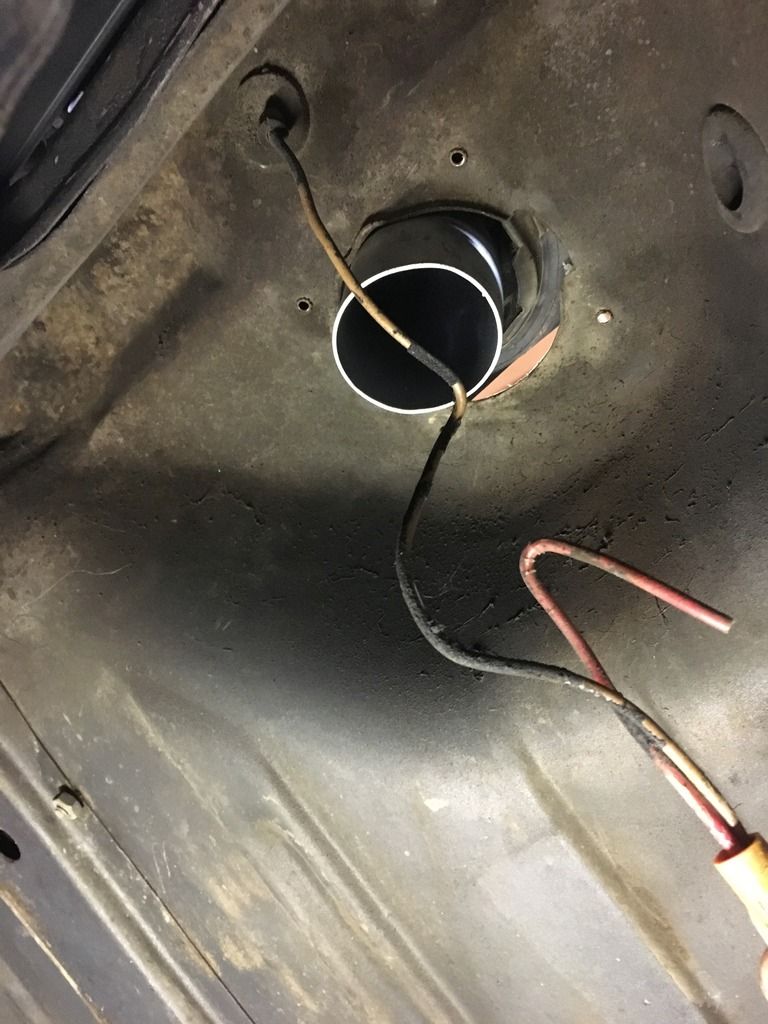
The fuel gauge did not work and I never checked the sending unit but this explains everything. I'll need to purchase a new sending unit harness to reconnect this wire with the screwcap.


Empty now with plenty of room to work

The fuel gauge did not work and I never checked the sending unit but this explains everything. I'll need to purchase a new sending unit harness to reconnect this wire with the screwcap.
10-27-2018, 06:25 PM
#4
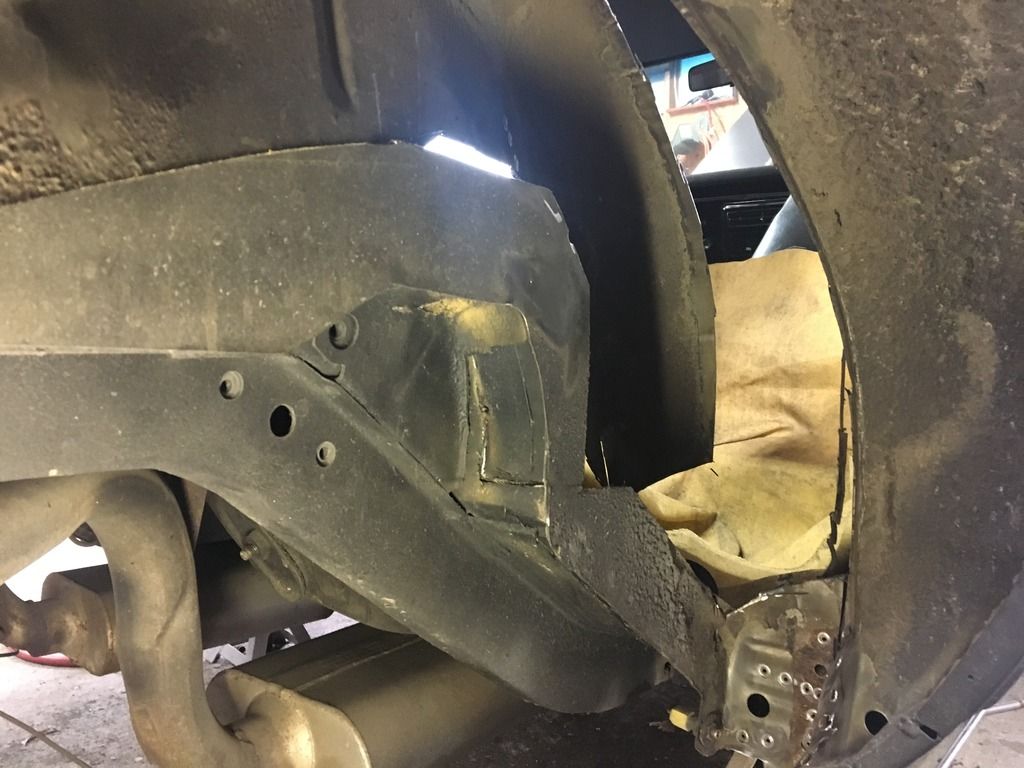
First thing I did was remove the DS package tray reinforcement per DSE instructions. This seemed to not be needed but did make it easier to do. I did not remove it on the PS. Then I went on removing the inner wheel well paint to expose the spot welds. Spot welds suck...
[IMG]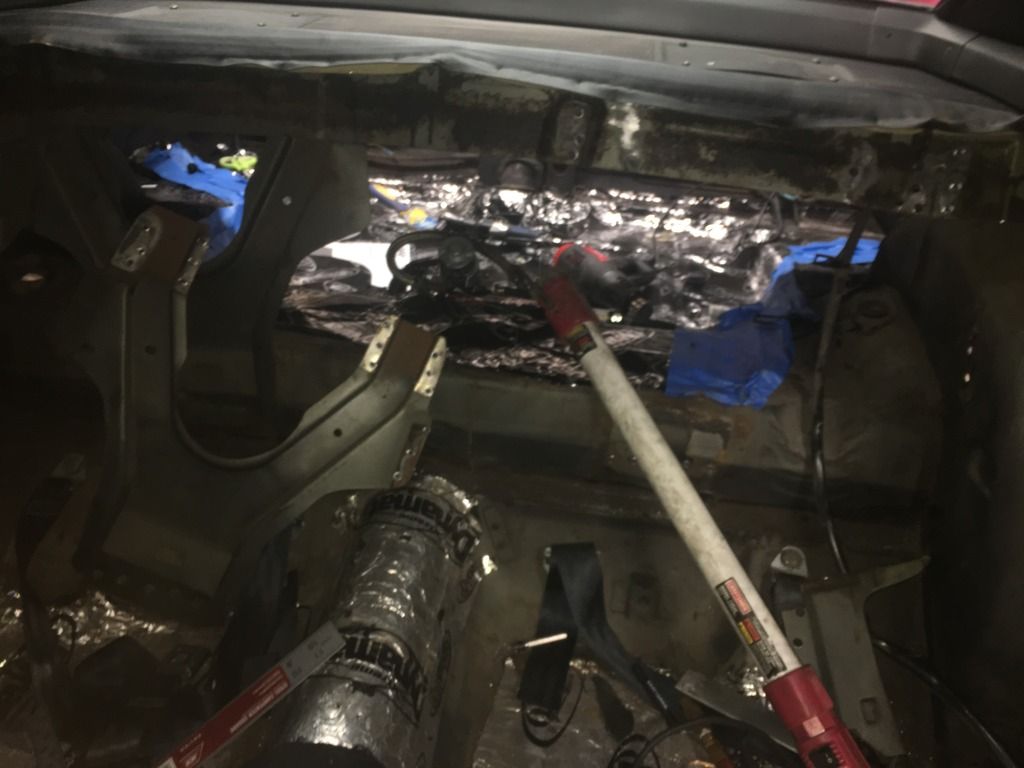

 [/IMG]
Next I cut out the inner wheel well and trunk floor/frame per the DSE instruction and use their template so I could mock up the new tubs

[IMG]


 [/IMG]
Next I cut out the inner wheel well and trunk floor/frame per the DSE instruction and use their template so I could mock up the new tubs


 10-27-2018, 06:25 PM
#5
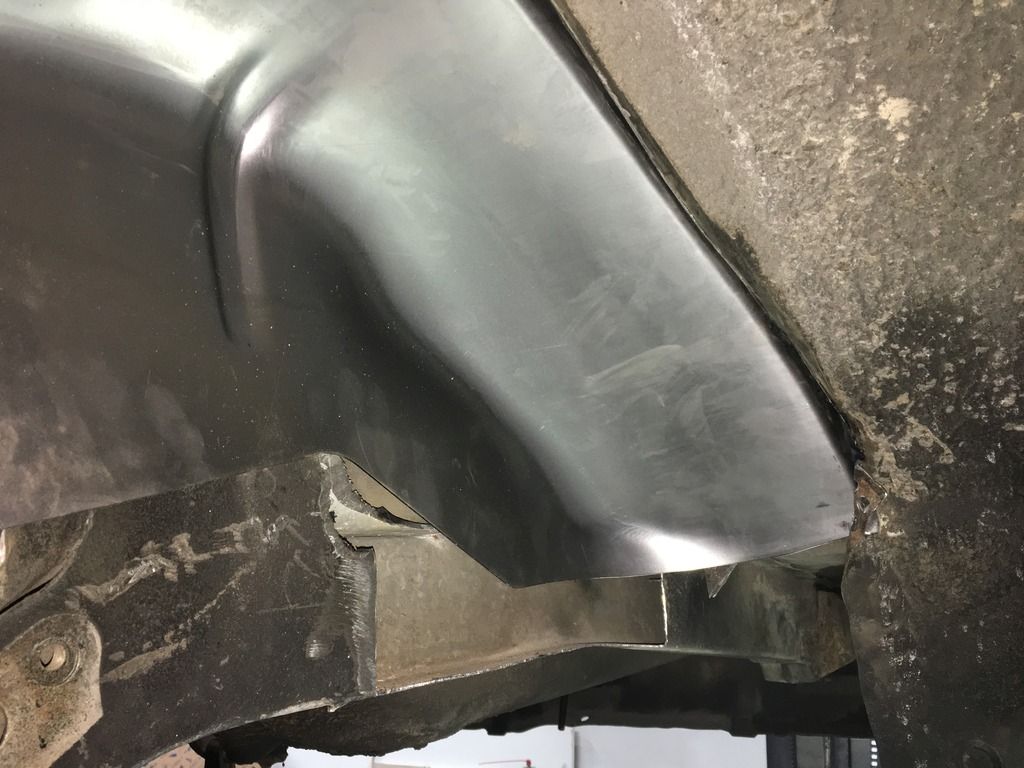
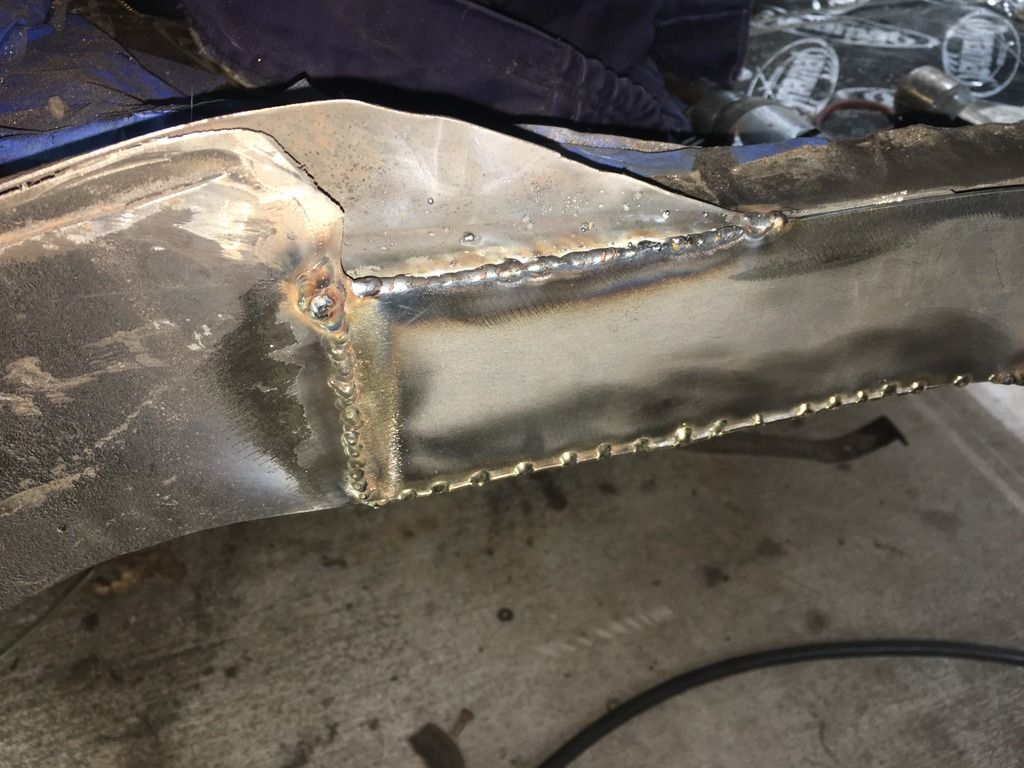
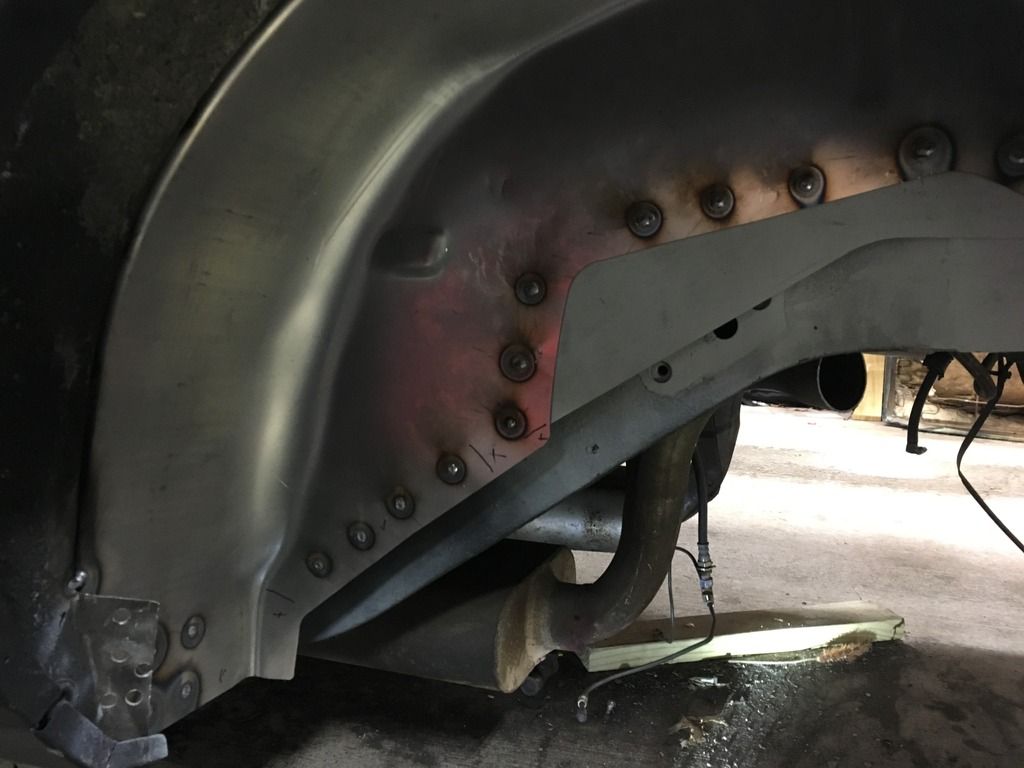
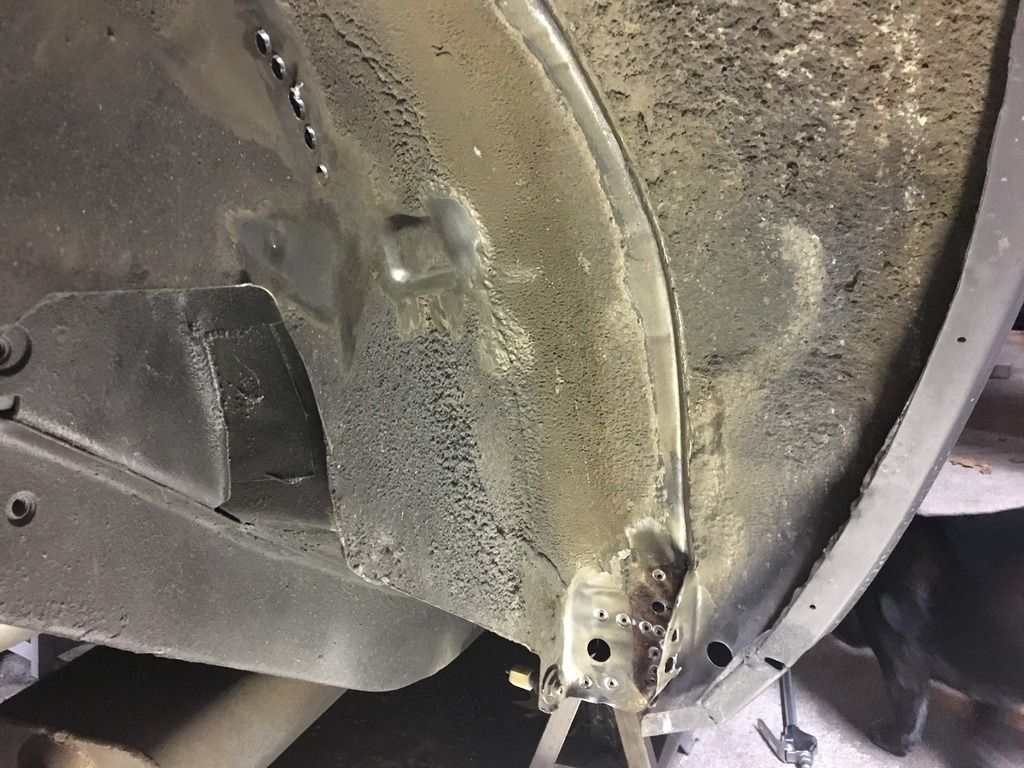
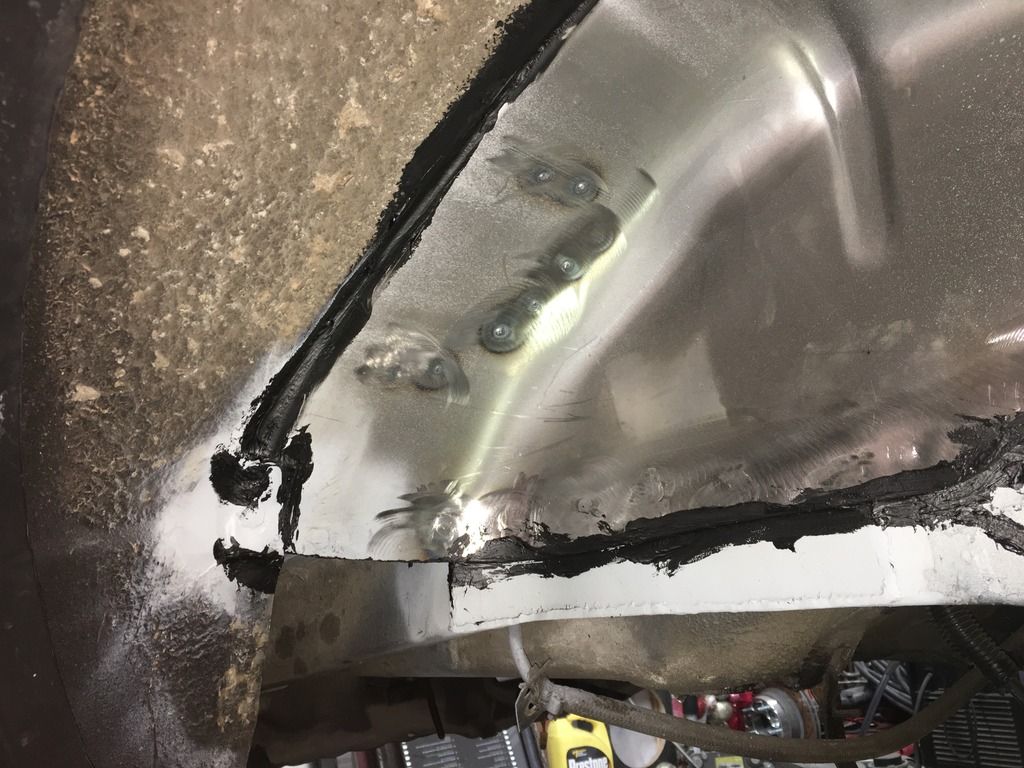
Now I had to close up the frame cuts and add the plate. This was somewhat of a paint getting decent penetration welding paper thin metal to 1/8" plate but I made it work slowly stitching away. I know a great deal about welding but I do not call myself a welder, I'm a hobby guy that likes to weld. I own a tig welder and I borrowed my buddies Miller 180 for this task, it works great.
After the plate, I drilled some holes for the plug welds and went at it. Grown down the welds and the DS was just about done. I then installed the package tray reinforcement and the trunk hinge I had removed.
After the plate, I drilled some holes for the plug welds and went at it. Grown down the welds and the DS was just about done. I then installed the package tray reinforcement and the trunk hinge I had removed.


 10-27-2018, 06:26 PM
#6
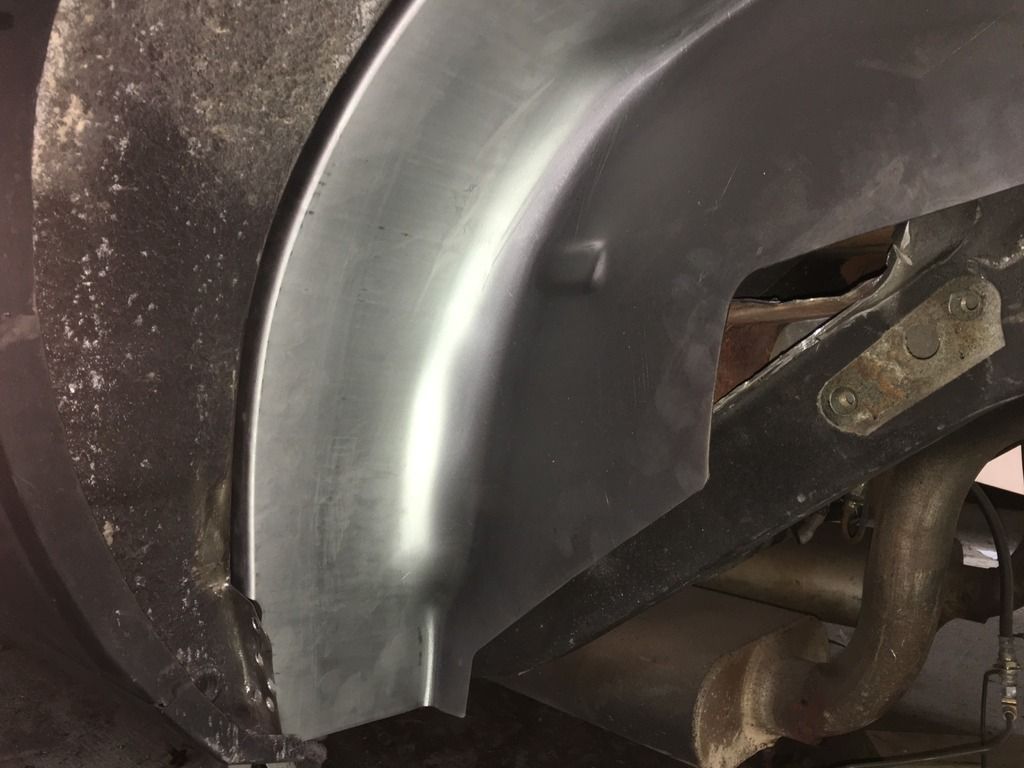
I jumped the gun a little with reinstalling the package tray reinforcement and new bracket prior to sticking my rear wiring harness behind it. No big deal though, it works and is hidden. I can always disconnect the wiring and move it around later.
After the DS tub I moved to the PS and it was a piece of cake, it was done in less than half the time.
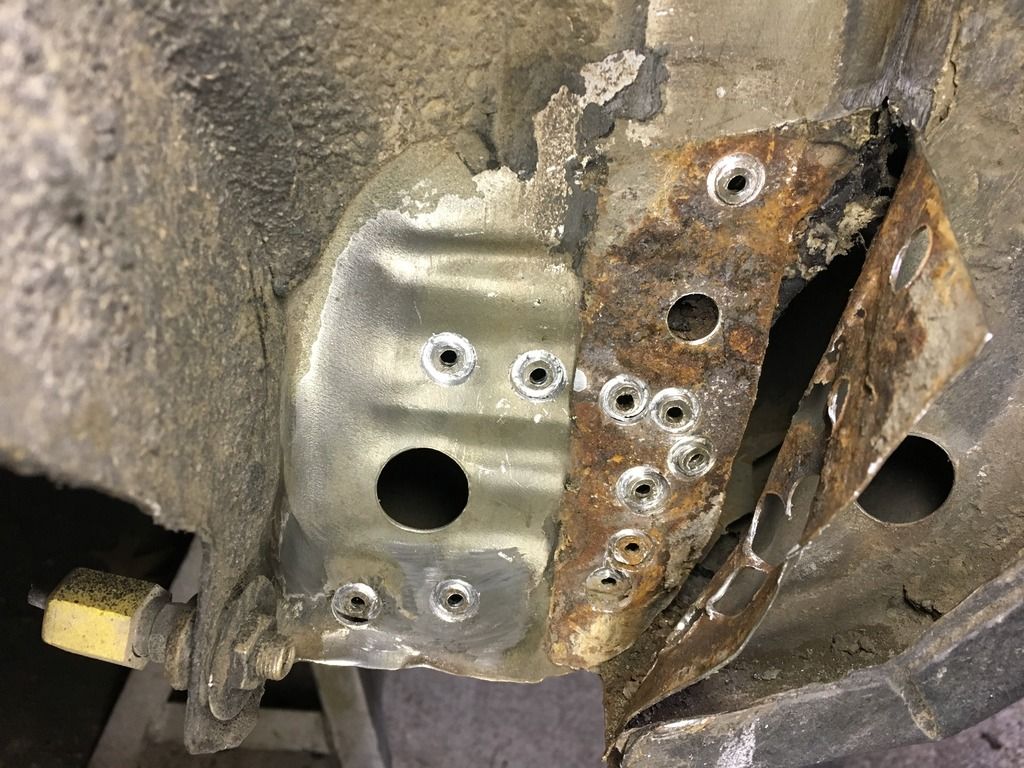
The only bit of rust I have discovered is where the outer wheel well was overlapping the inner at the rocker. this was just some light surface rust that cleaned up good.
Also like I mentioned before I kept the PS package tray reinforcement in place.
[IMG]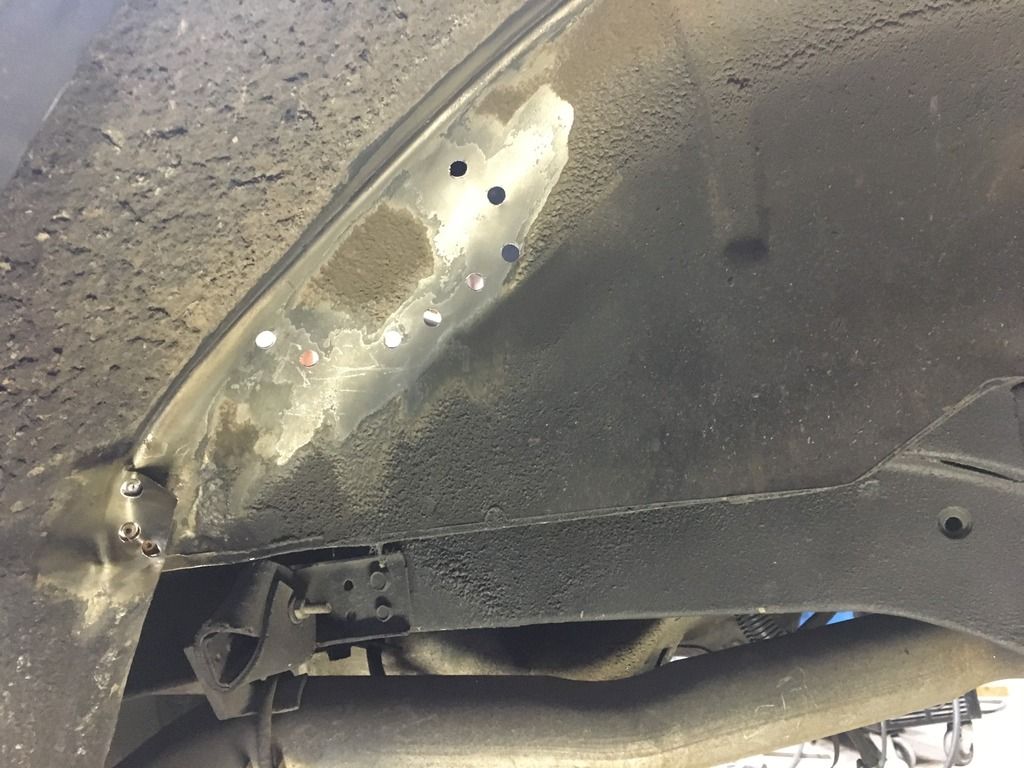
 [/IMG]
After the DS tub I moved to the PS and it was a piece of cake, it was done in less than half the time.
The only bit of rust I have discovered is where the outer wheel well was overlapping the inner at the rocker. this was just some light surface rust that cleaned up good.
Also like I mentioned before I kept the PS package tray reinforcement in place.
[IMG]


 [/IMG]


Trending Topics
10-27-2018, 06:27 PM
#8
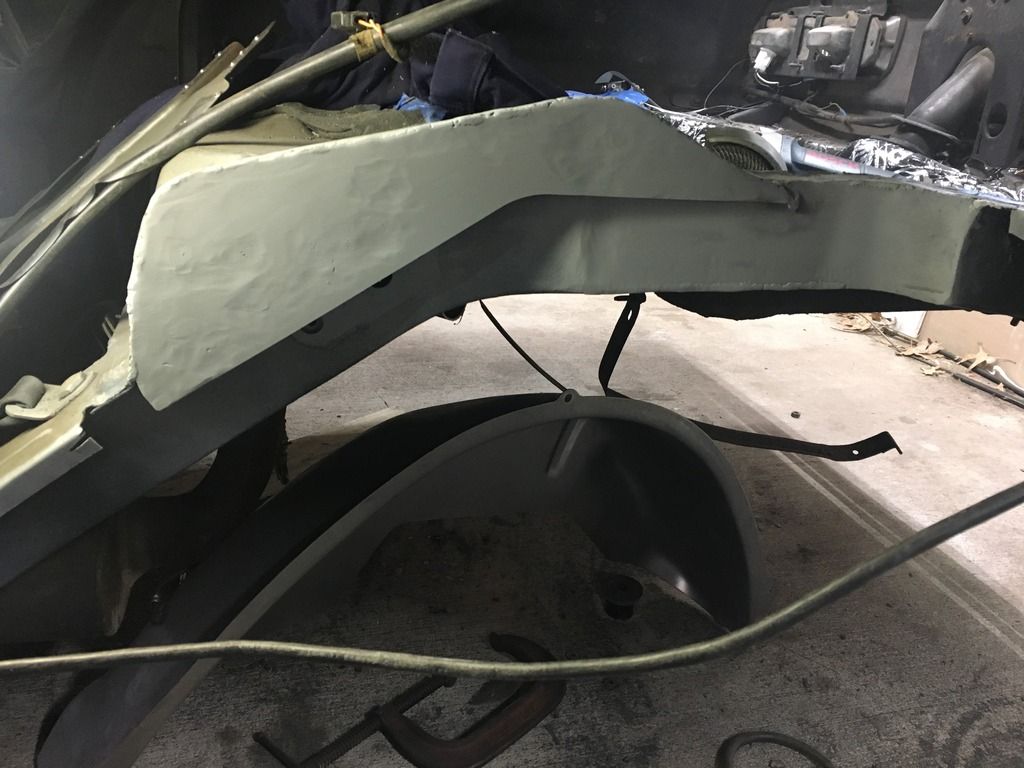
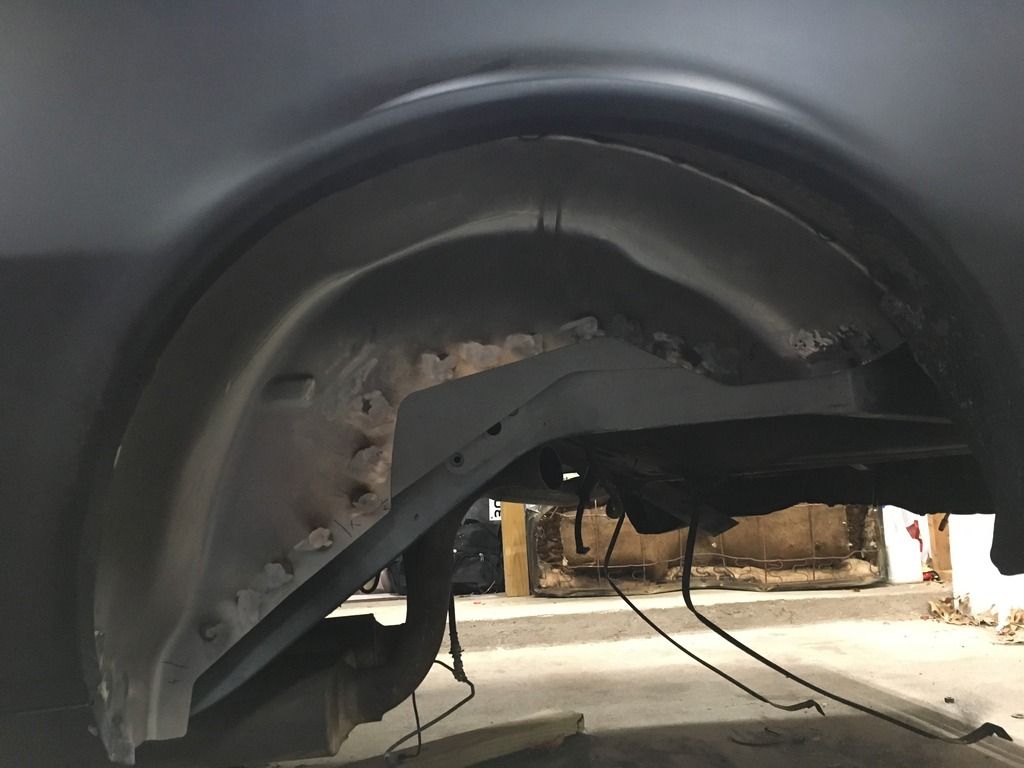
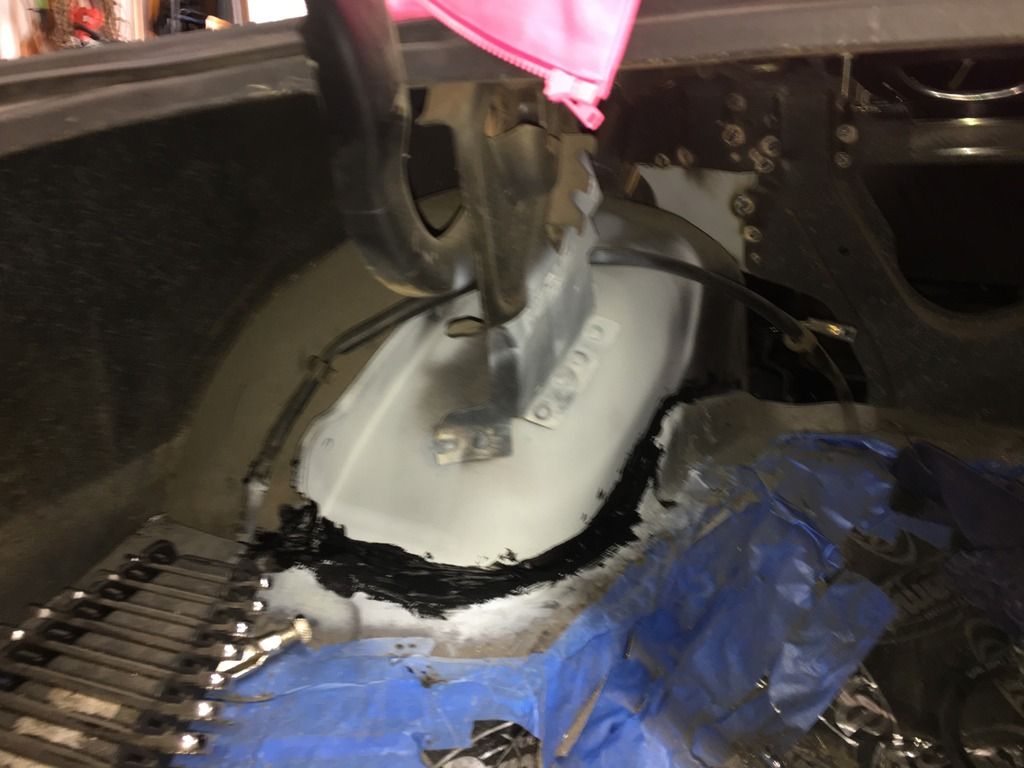
Now that everything is now welded in (missed two area on the DS side) I started to seal it all up. I used an Eastwood one part sealer. It works but took a long time to dry, a little longer than I wanted prior to me being able to paint. It says you can paint while it's curing but I waited. Next time I'll use a two part that cures a little quicker.
I dont have any photos but after this I ground down all the welds, primmed and painted flat black and used Rustoleum undercoating spray for the inner fenders.
[IMG]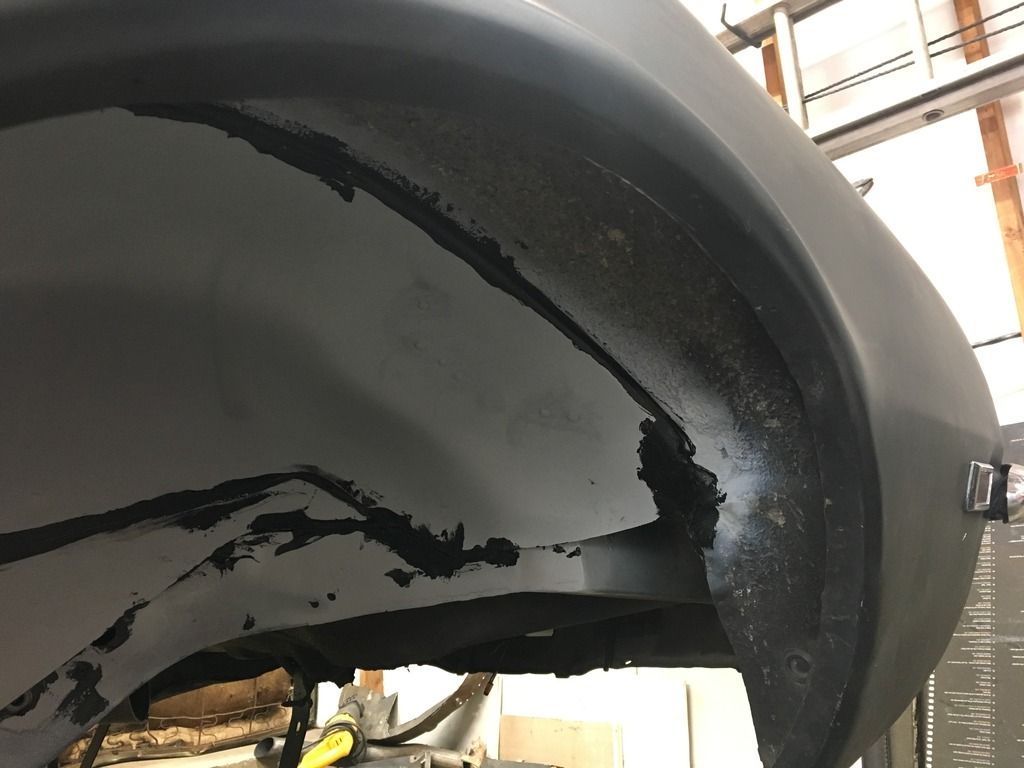

 [/IMG]
I dont have any photos but after this I ground down all the welds, primmed and painted flat black and used Rustoleum undercoating spray for the inner fenders.
[IMG]


 [/IMG]
10-27-2018, 06:27 PM
[/IMG]
10-27-2018, 06:27 PM
#9
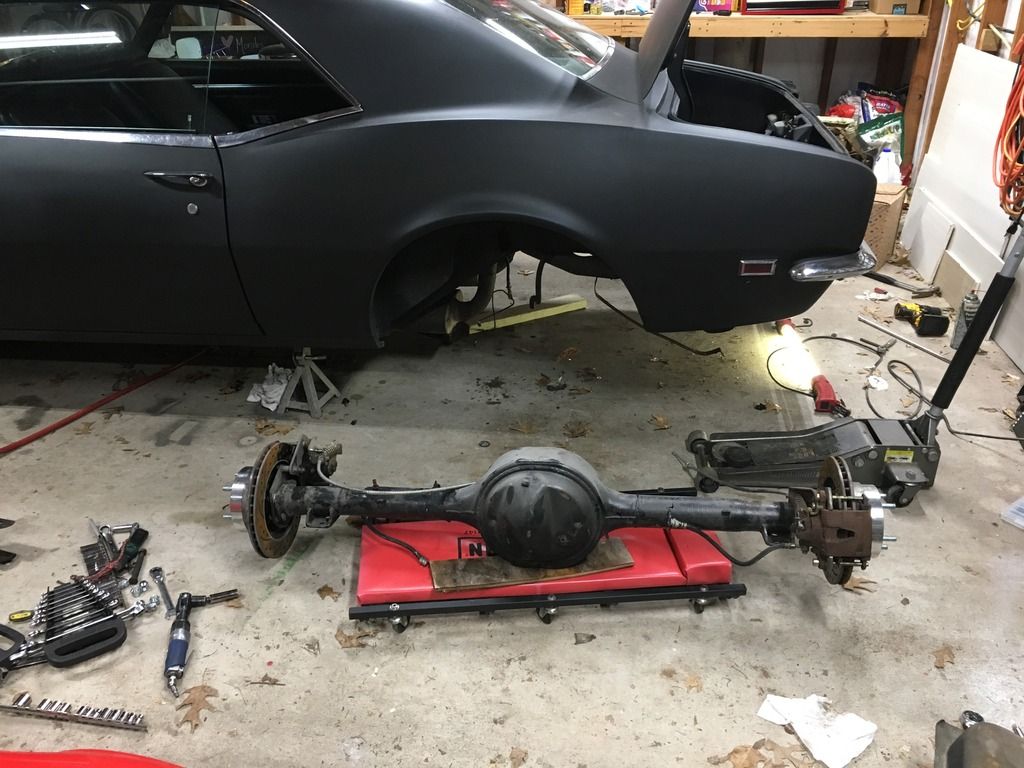
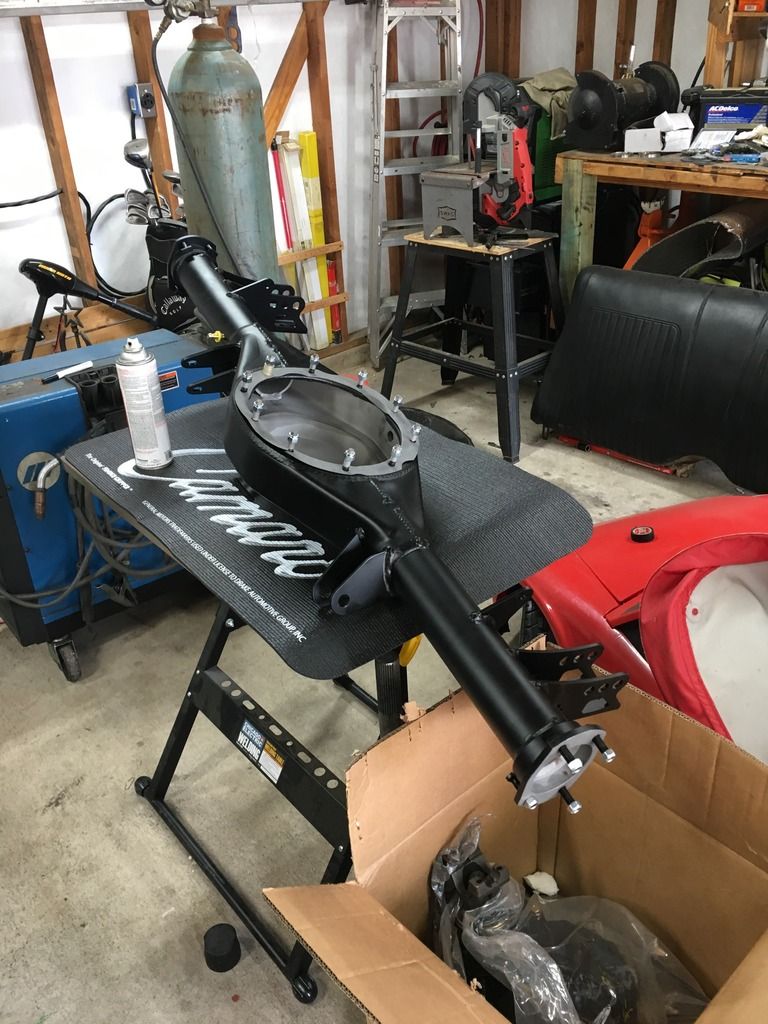
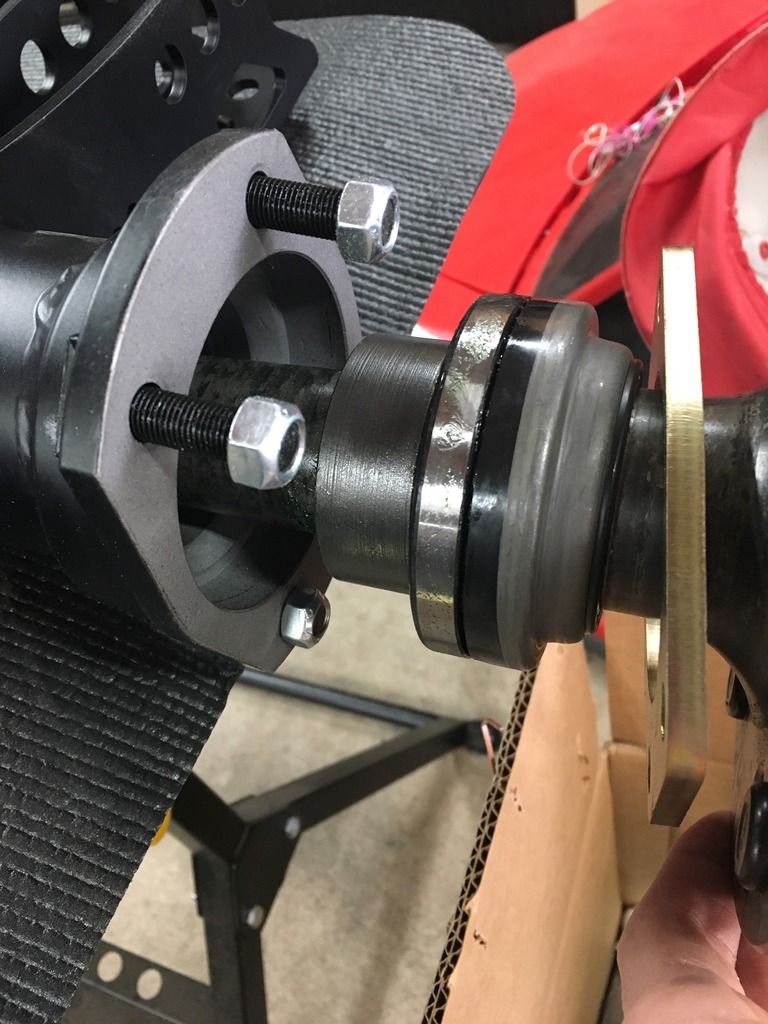
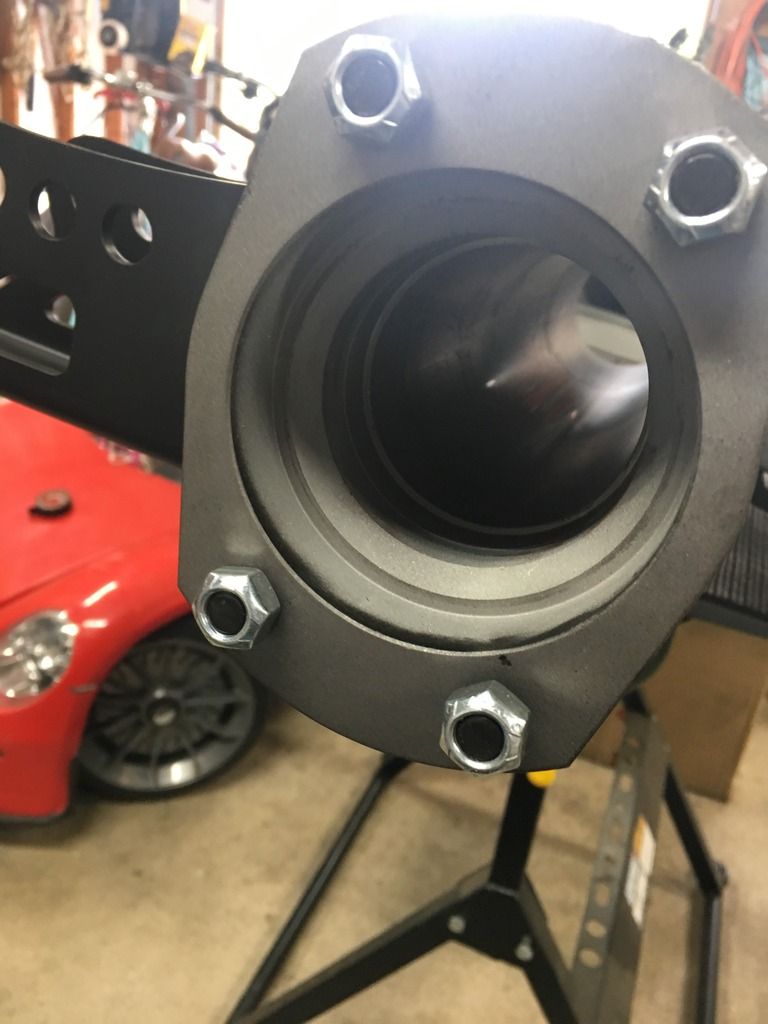
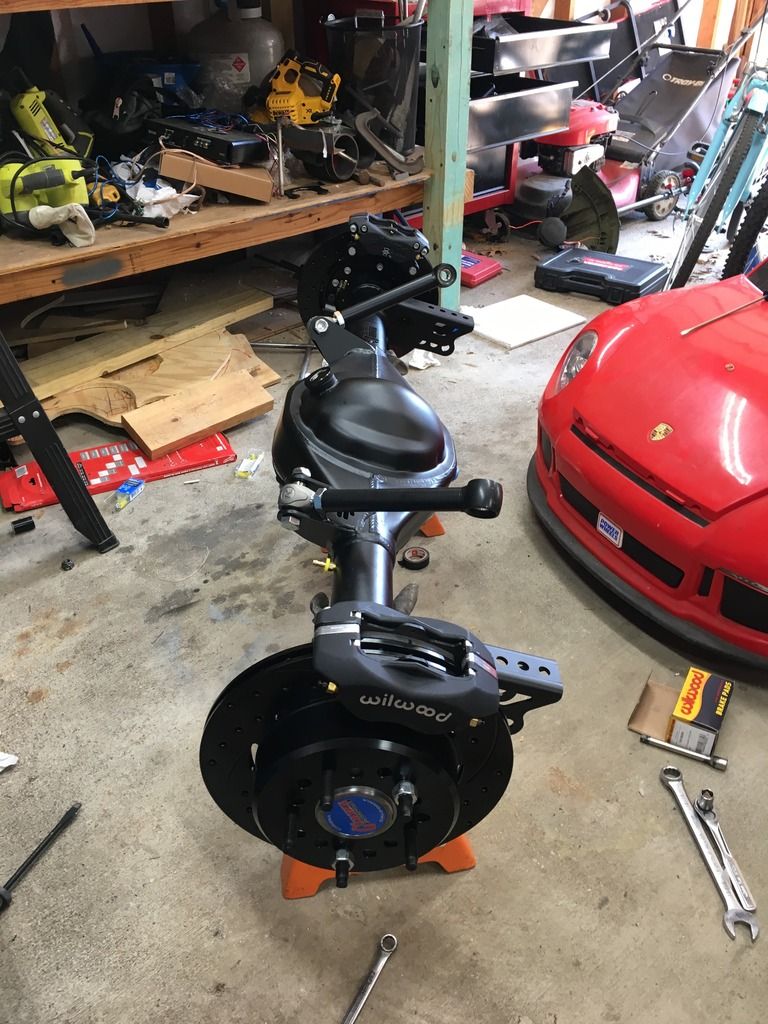
I ended up choosing to go with the Ridetech 4-link setup with the Curry rear they offer in the narrowed length. Chose the Wilwood 12" brakes to hopefully clear my 15" wheels so I didnt have to change them out right now, they do clear.
I started by assembling the rear.
[IMG]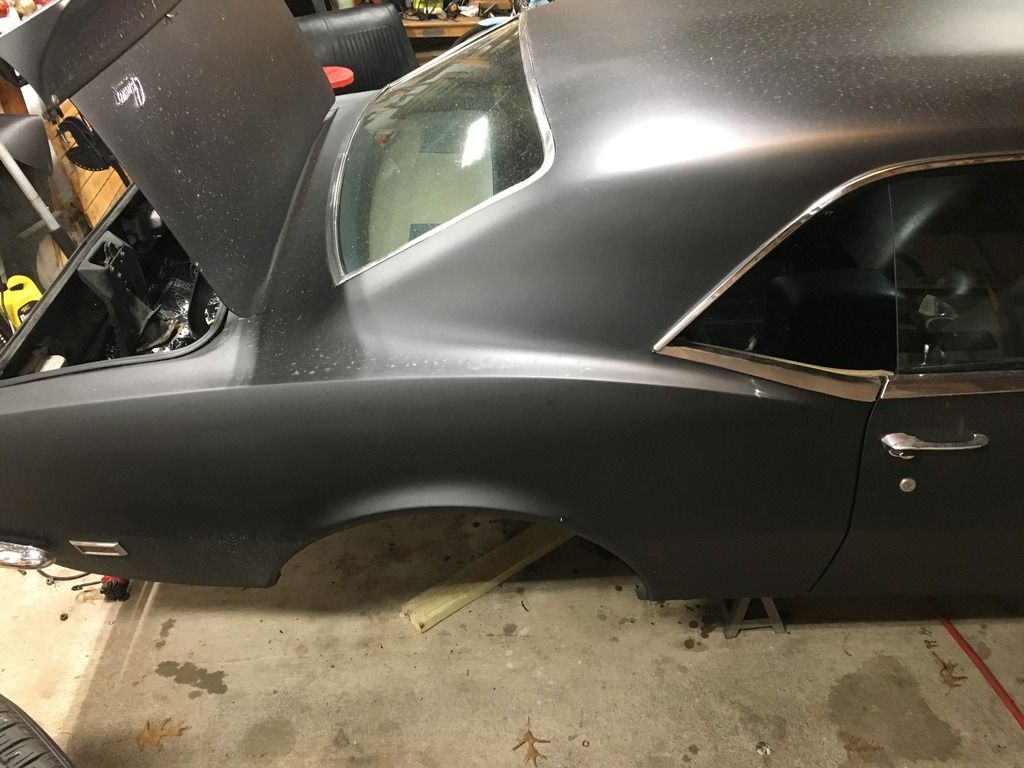

 [/IMG]
I started by assembling the rear.
[IMG]


 [/IMG]
10-27-2018, 06:28 PM
[/IMG]
10-27-2018, 06:28 PM
#10
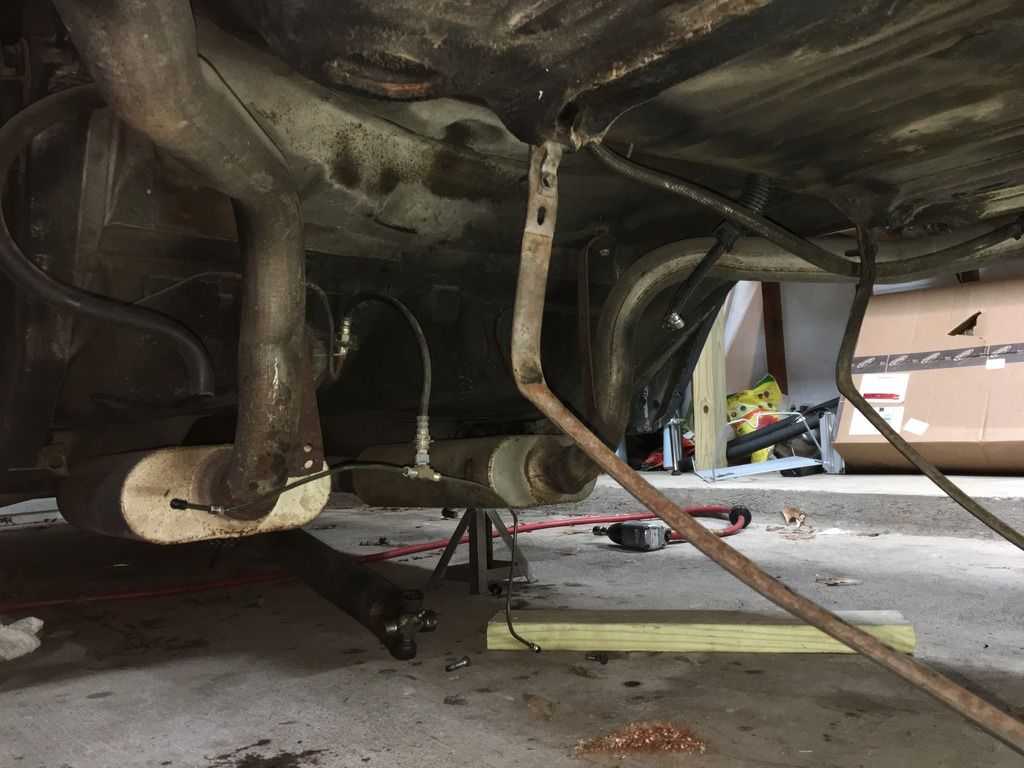
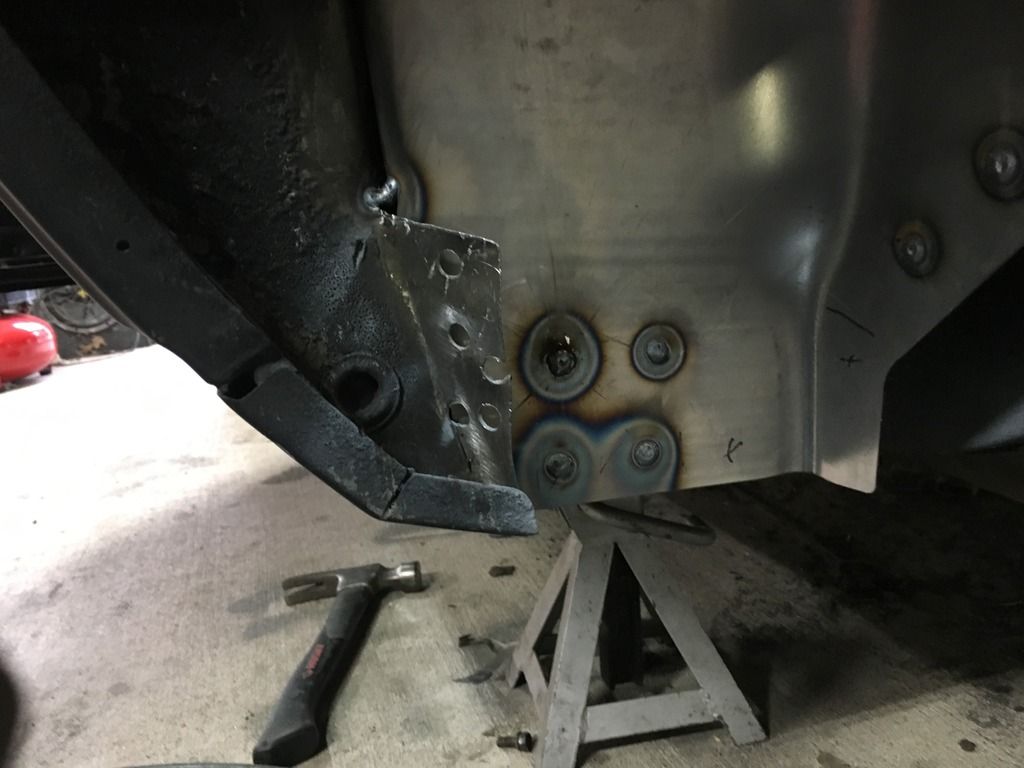
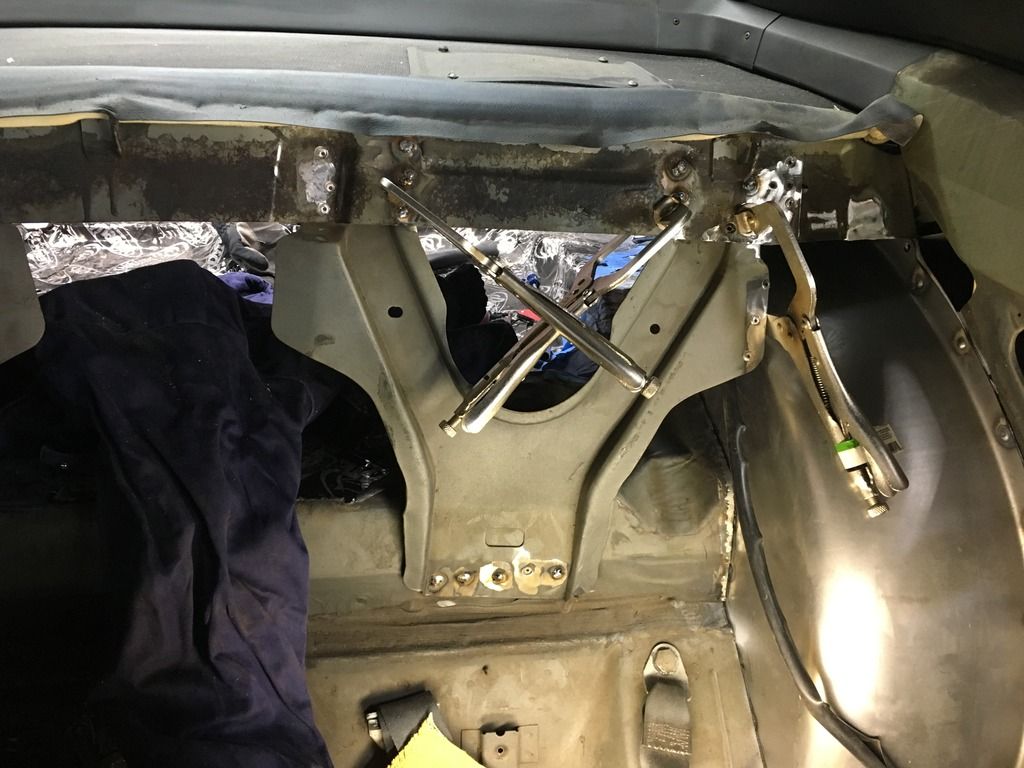
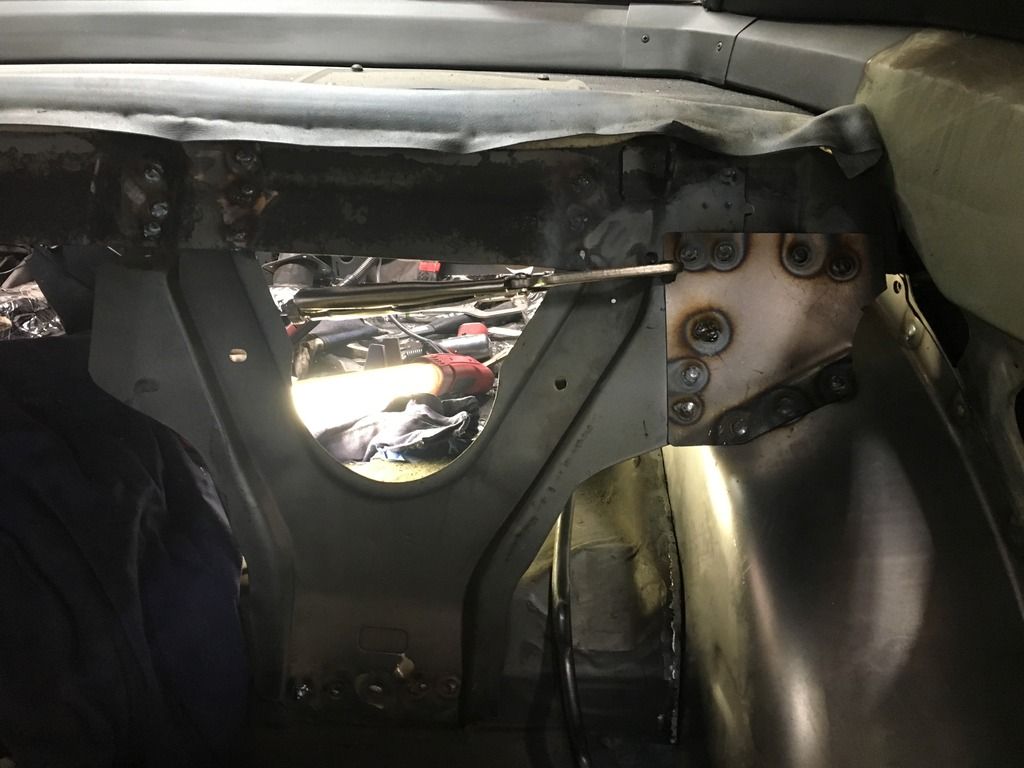
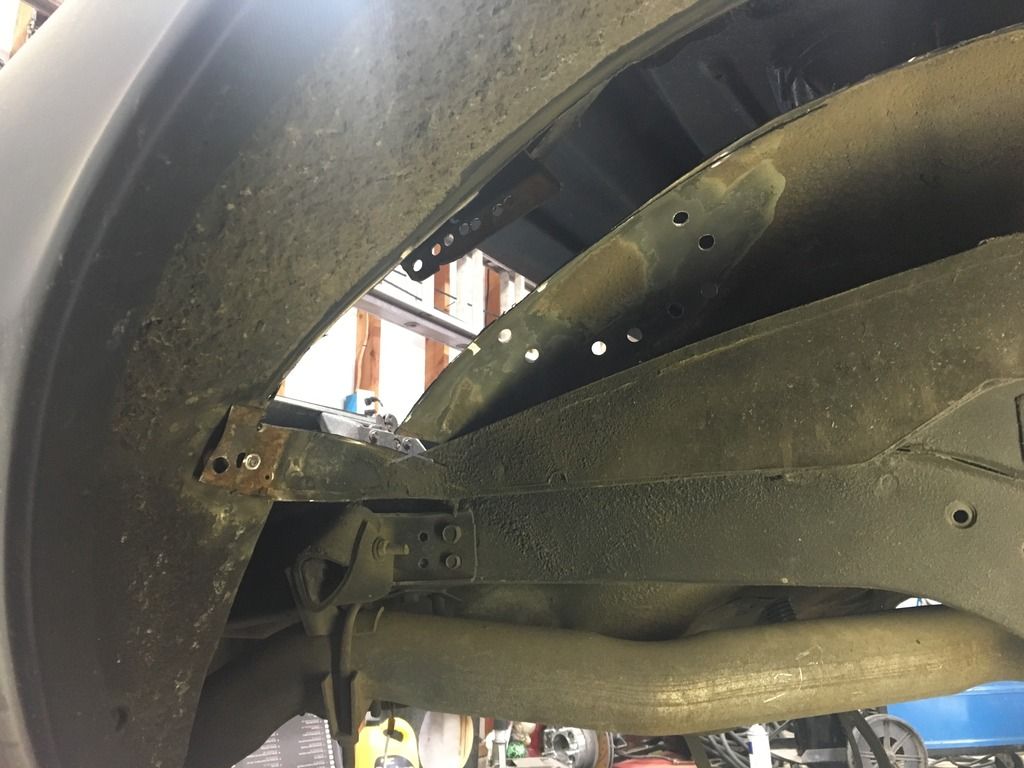
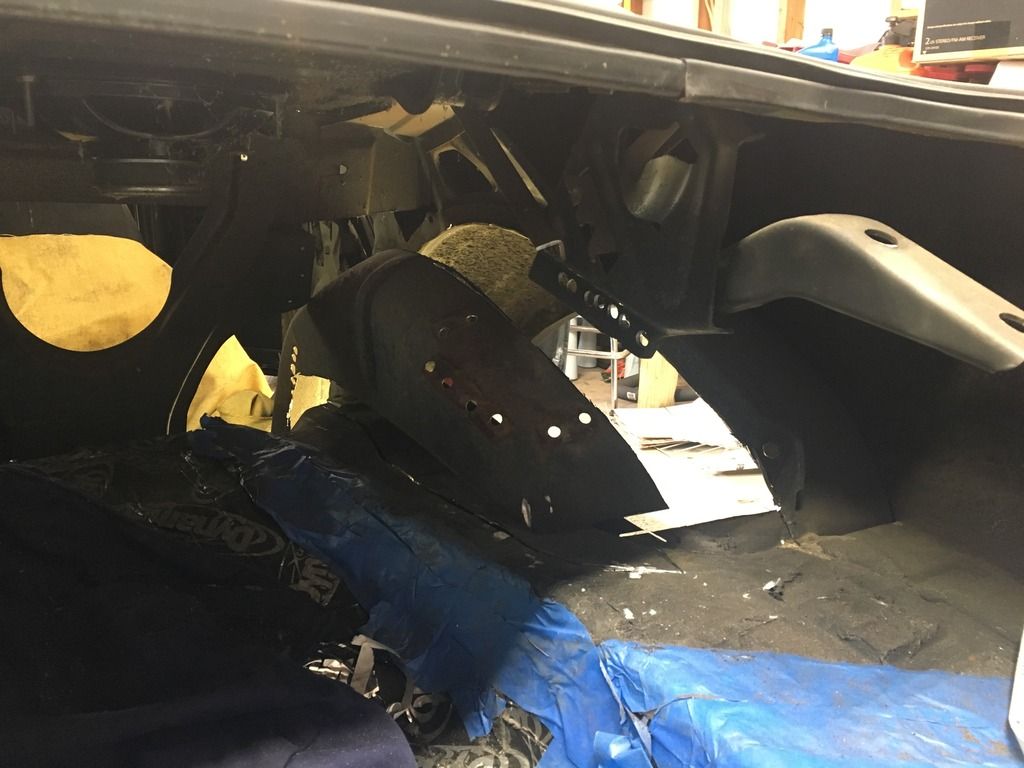
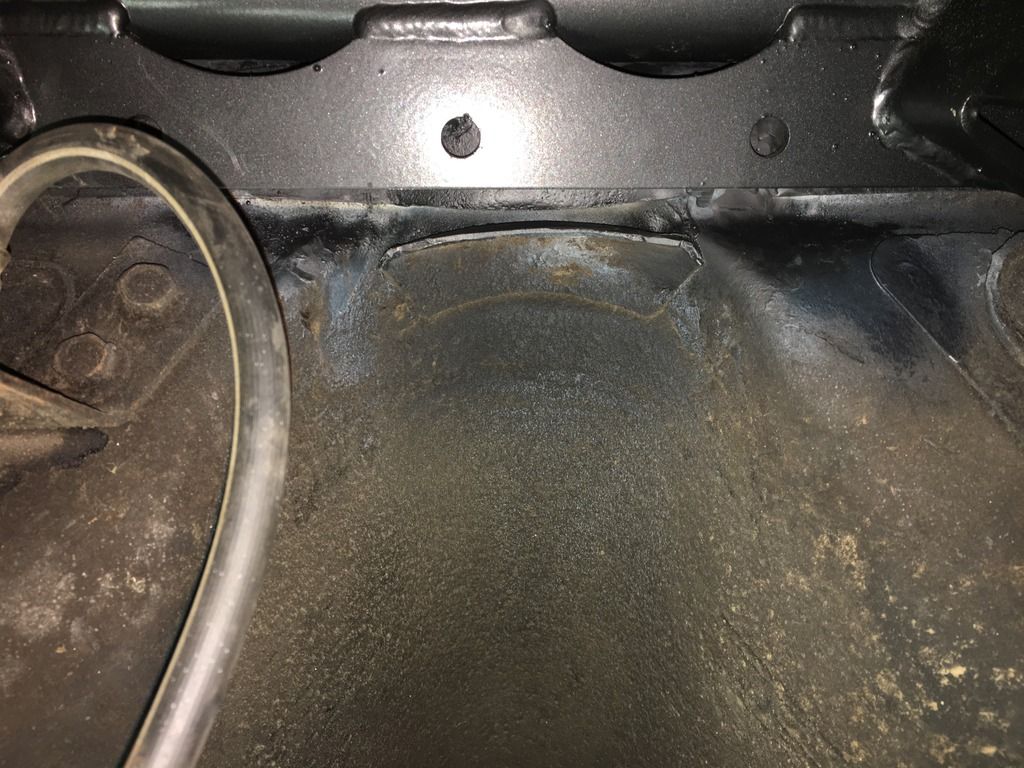
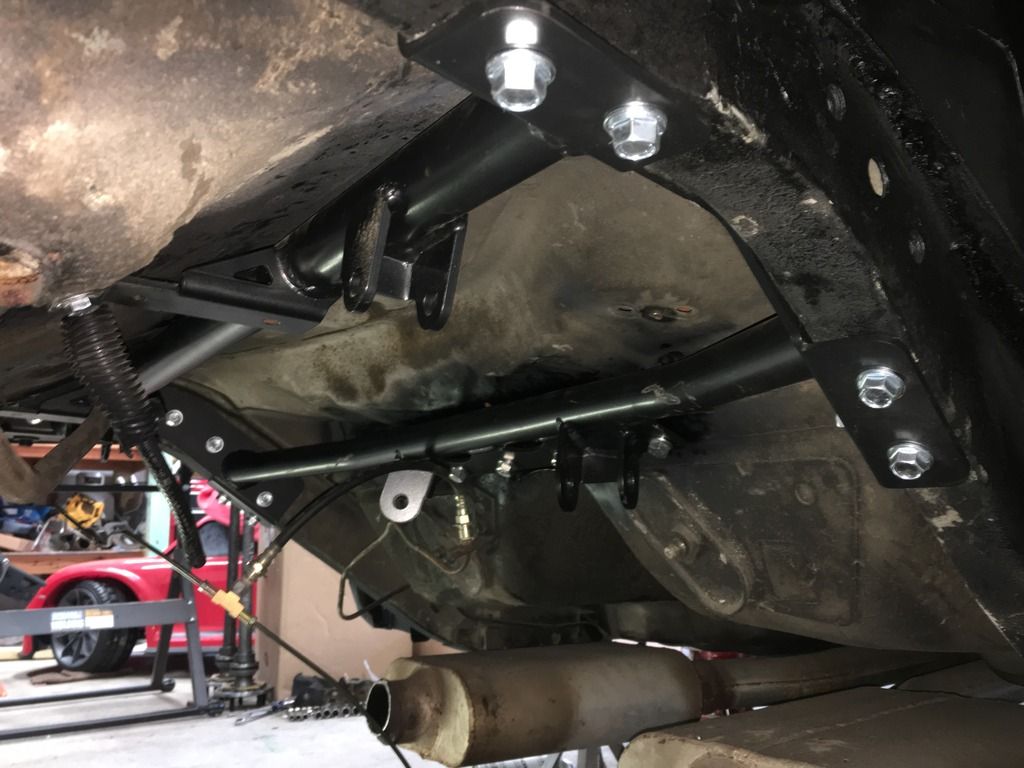
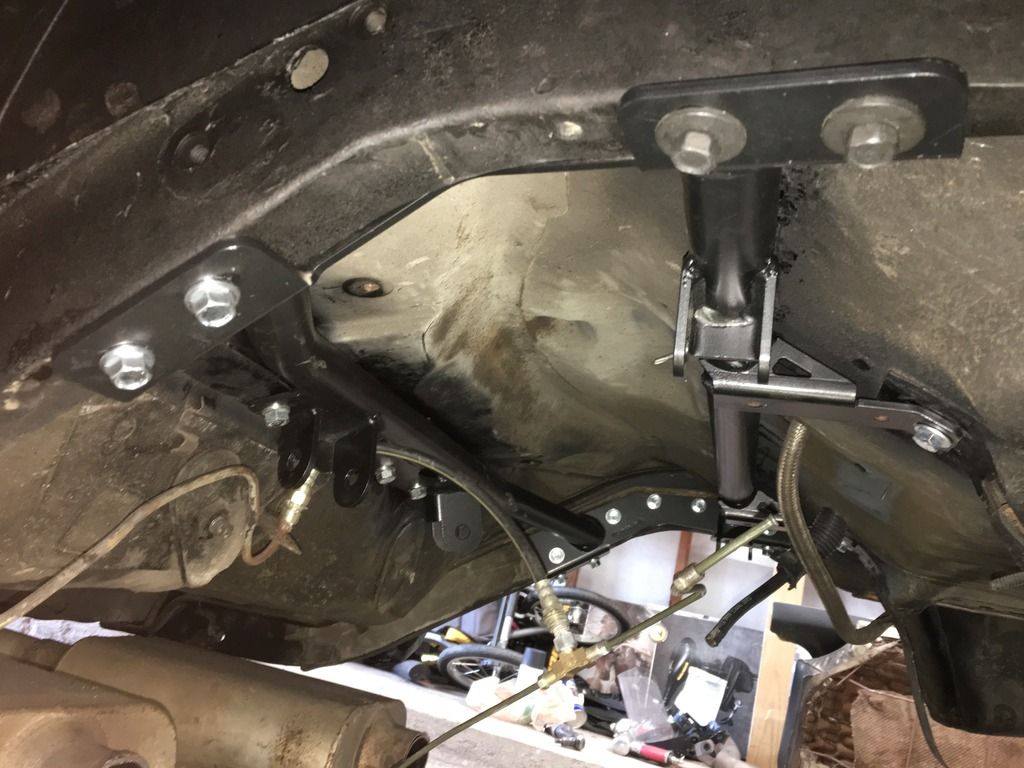
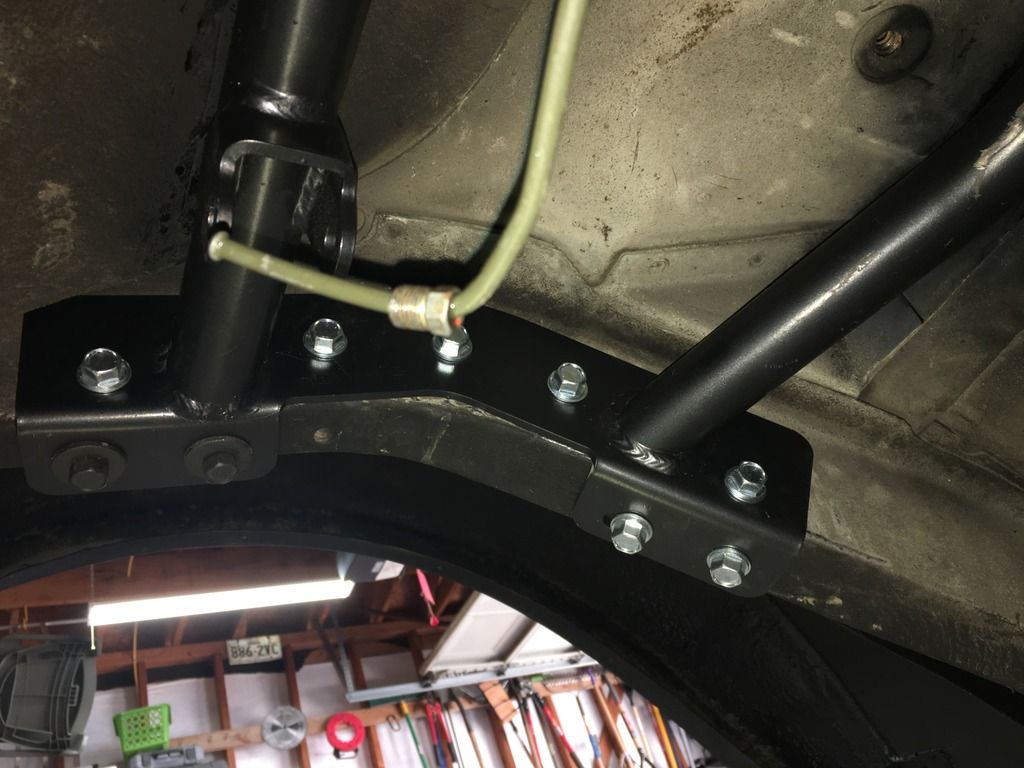
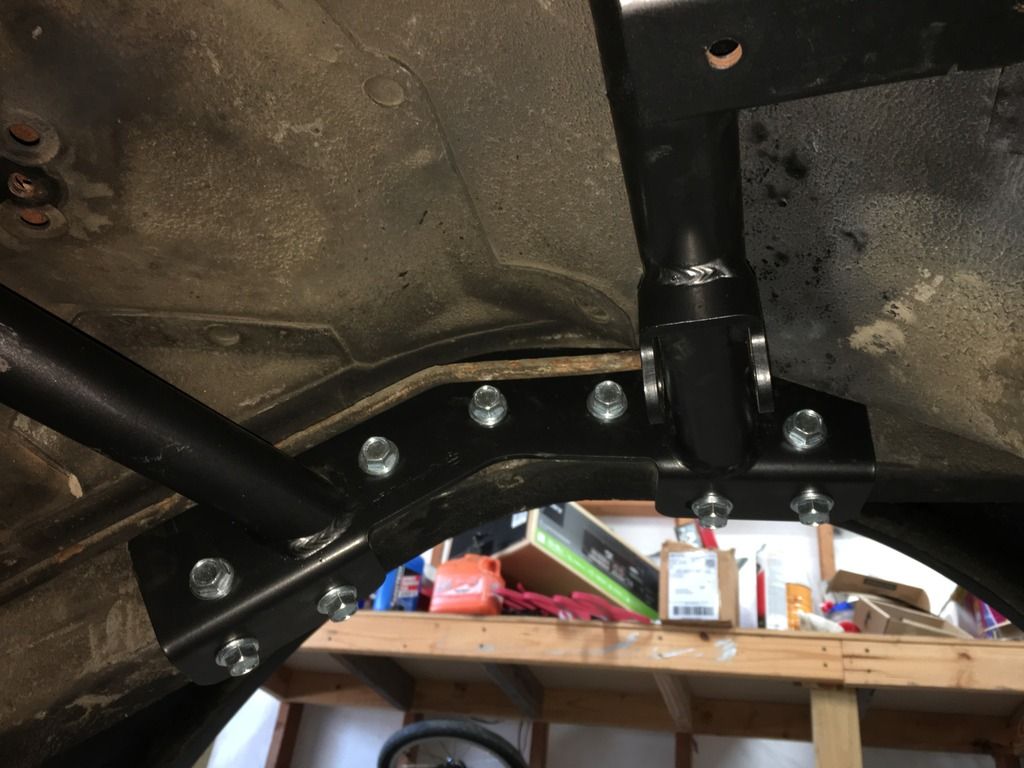
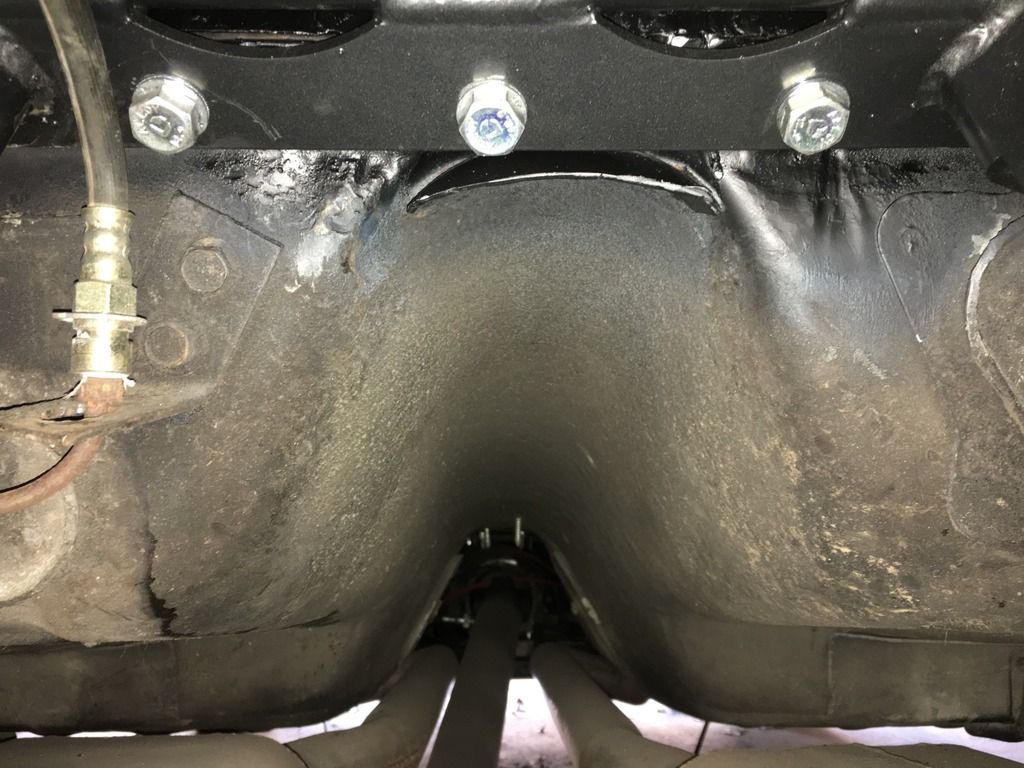
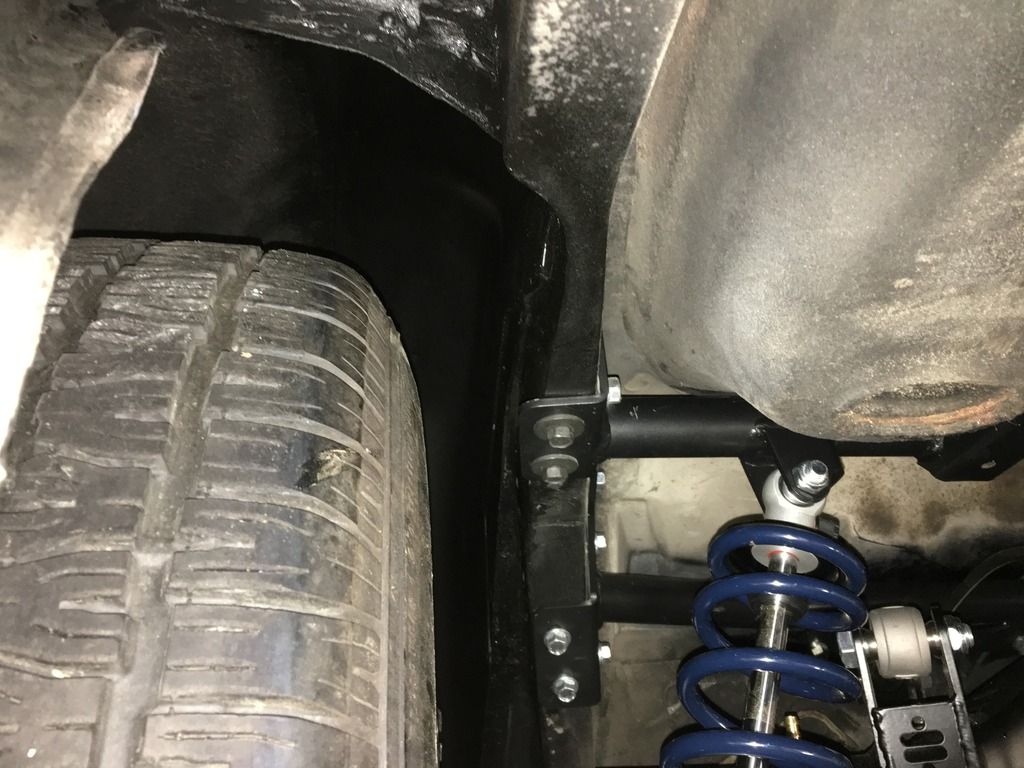
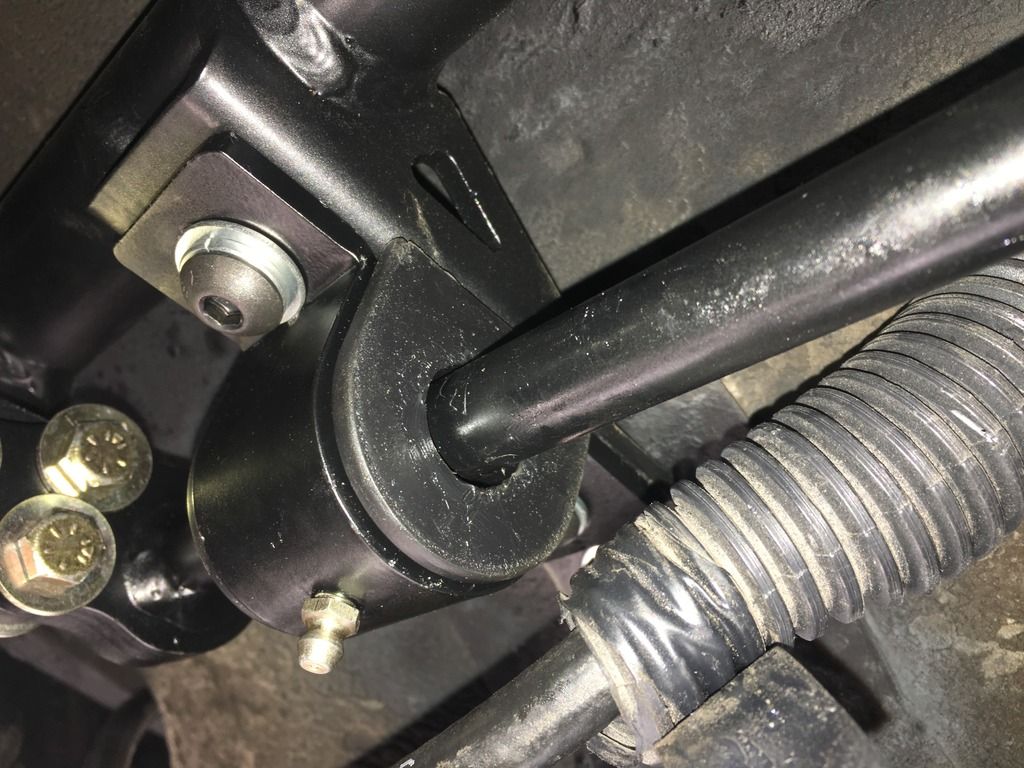
I installed the airbar and it was not too bad but had to do a good amount of hammering to get the bar in. The frame rails were spot on, only had to hammer in the front area of the trunk pan where it meets the floor pan and where the airbar bolts to the trunk floor.
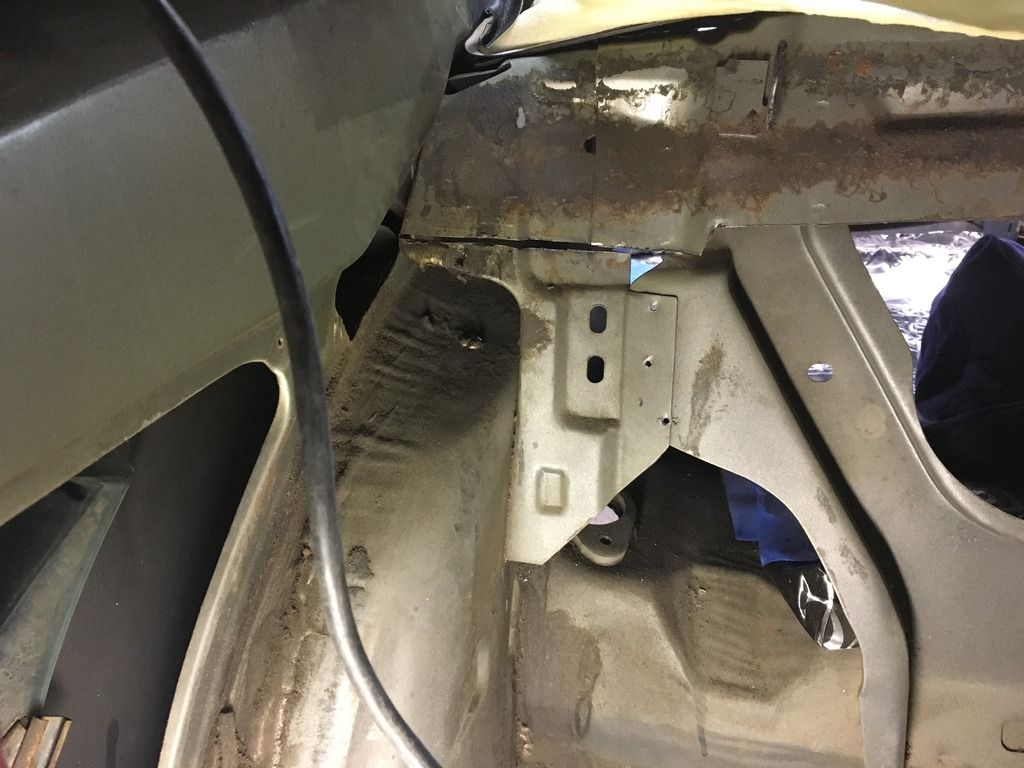
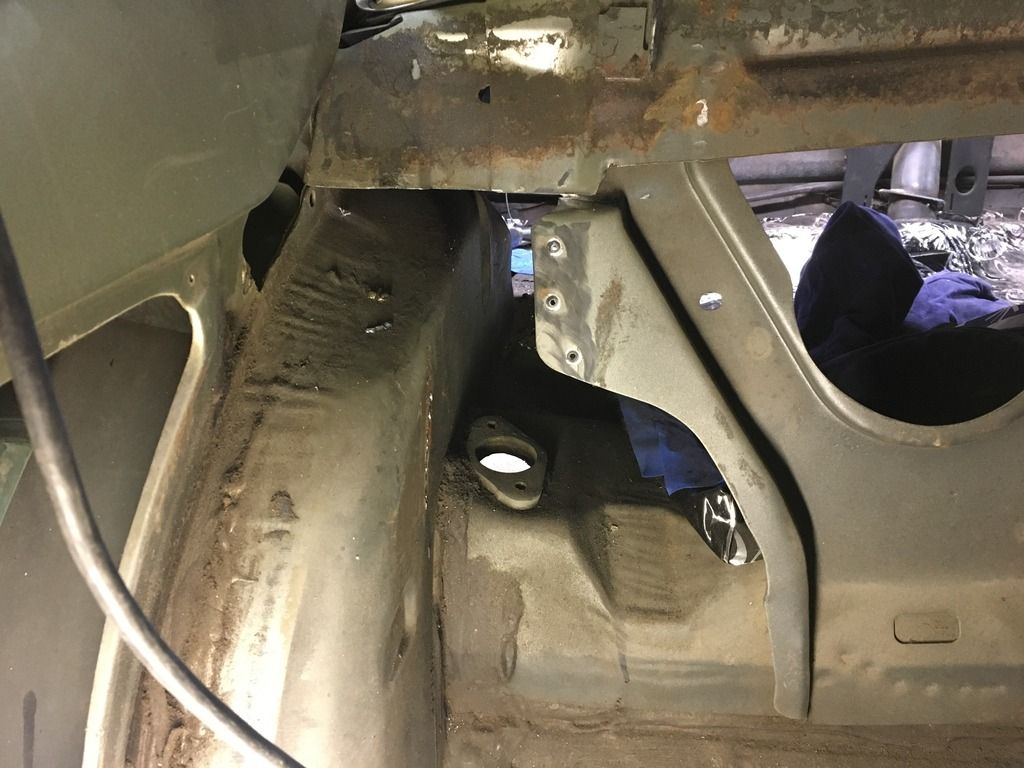
This airbar is the "newer style" where the upper arms point inwards rather than outwards. This newer style's mounting plate that bolts up near the tunnel is a little different from what I've seen on the older style airbars, there are 5 bolts and the middle bolt is the center of the airbar. As you can see in the photos the center bolt is off about an inch to the left. I called spoke to Ridetech and showed them the photos and it turns out the floor pan is a little crooked from factory tolerances or it was replaced at some point incorrectly.
[IMG]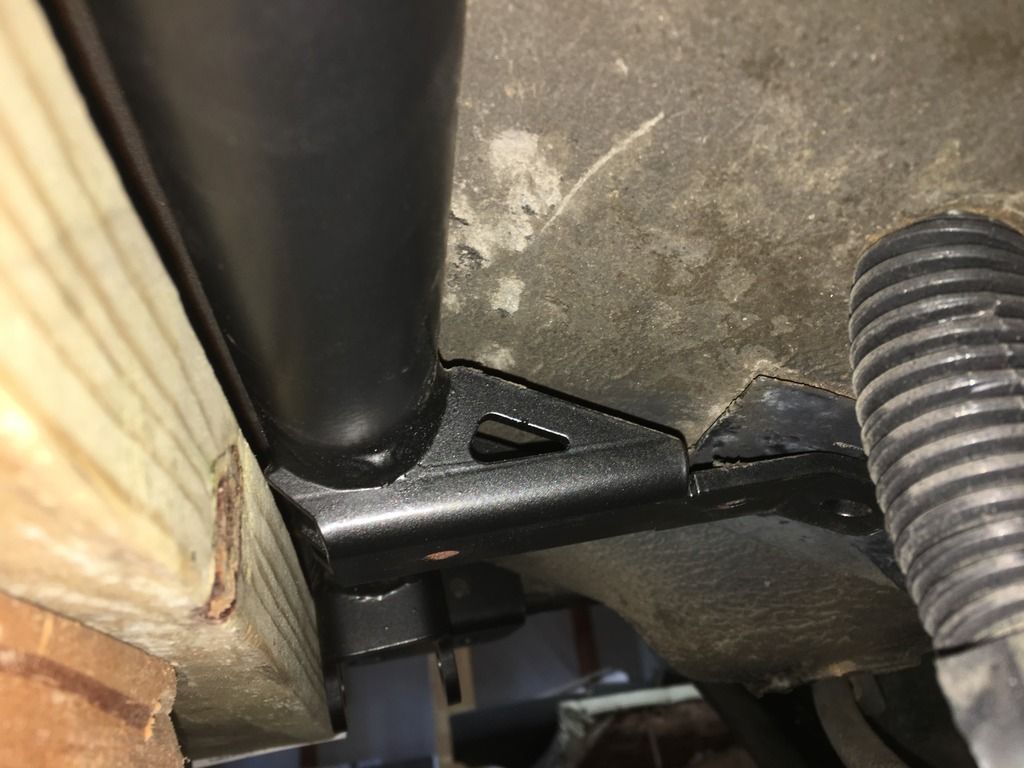
 [/IMG]
This airbar is the "newer style" where the upper arms point inwards rather than outwards. This newer style's mounting plate that bolts up near the tunnel is a little different from what I've seen on the older style airbars, there are 5 bolts and the middle bolt is the center of the airbar. As you can see in the photos the center bolt is off about an inch to the left. I called spoke to Ridetech and showed them the photos and it turns out the floor pan is a little crooked from factory tolerances or it was replaced at some point incorrectly.
[IMG]


 [/IMG]
10-27-2018, 06:28 PM
[/IMG]
10-27-2018, 06:28 PM
#11
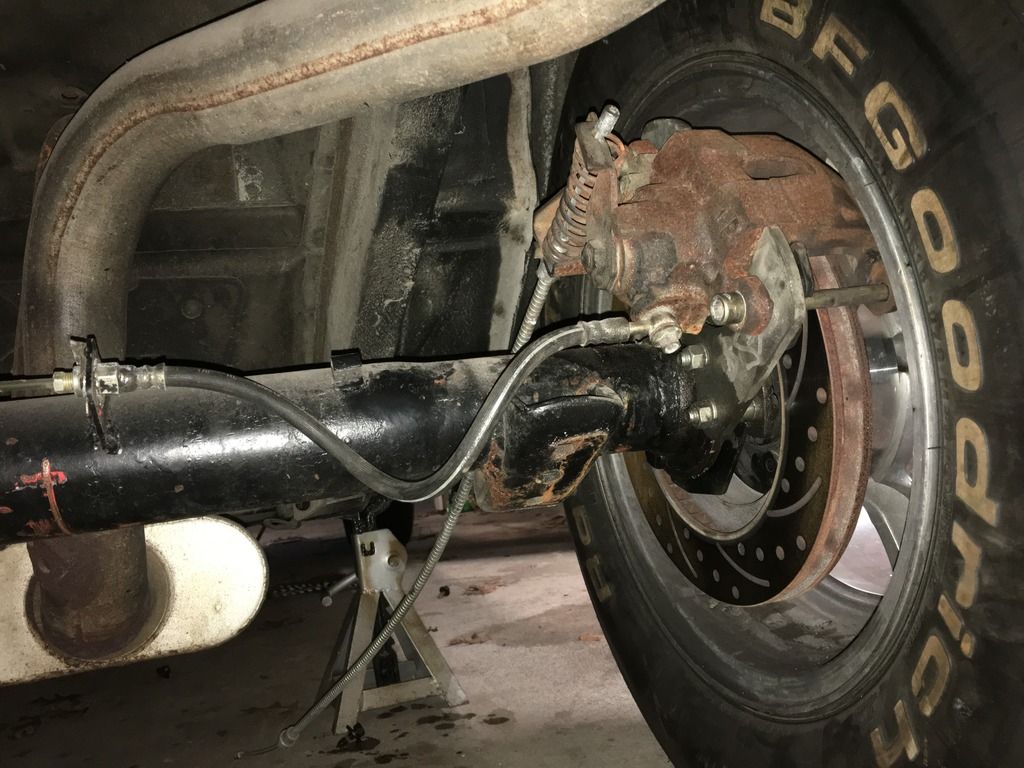
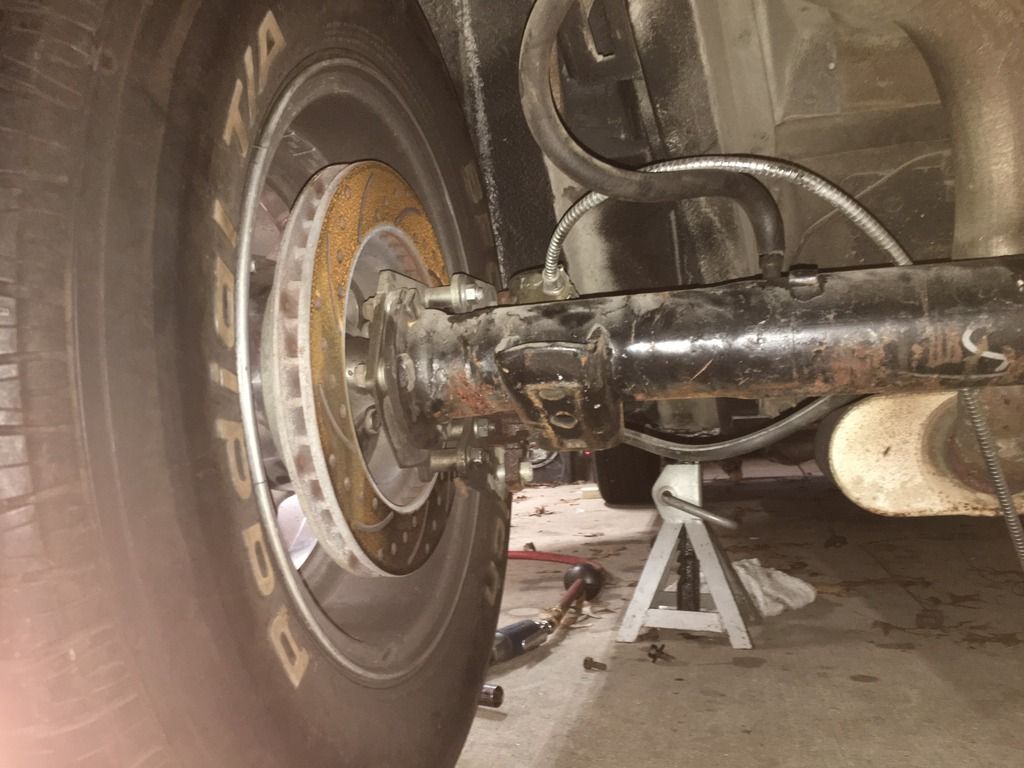
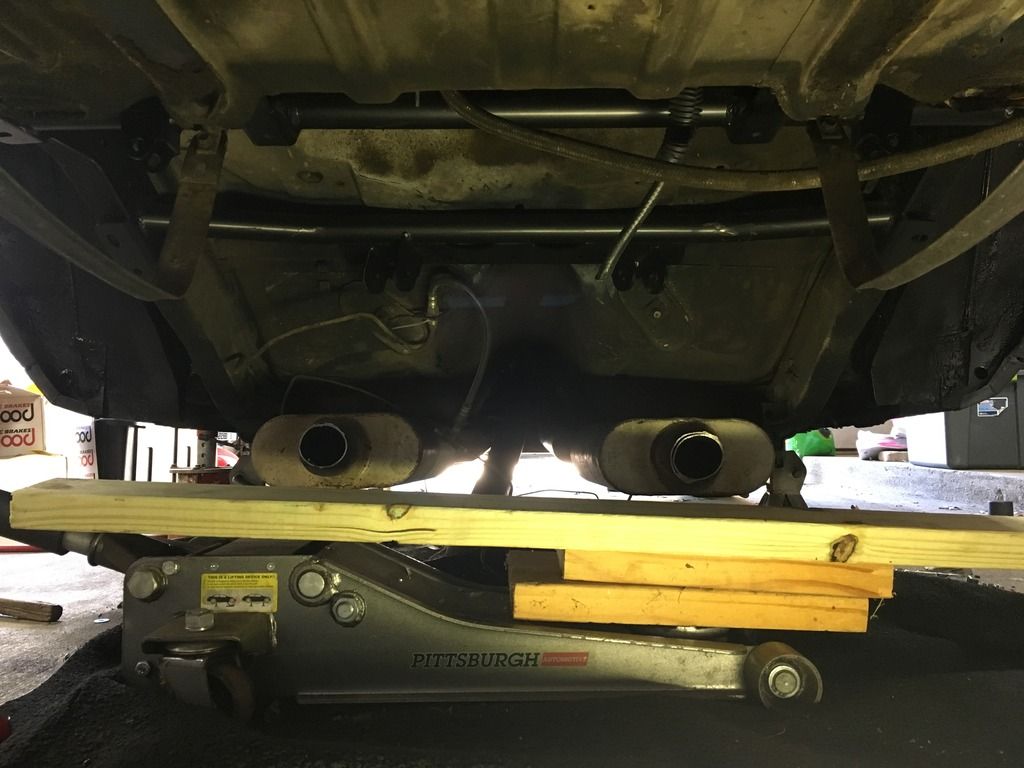
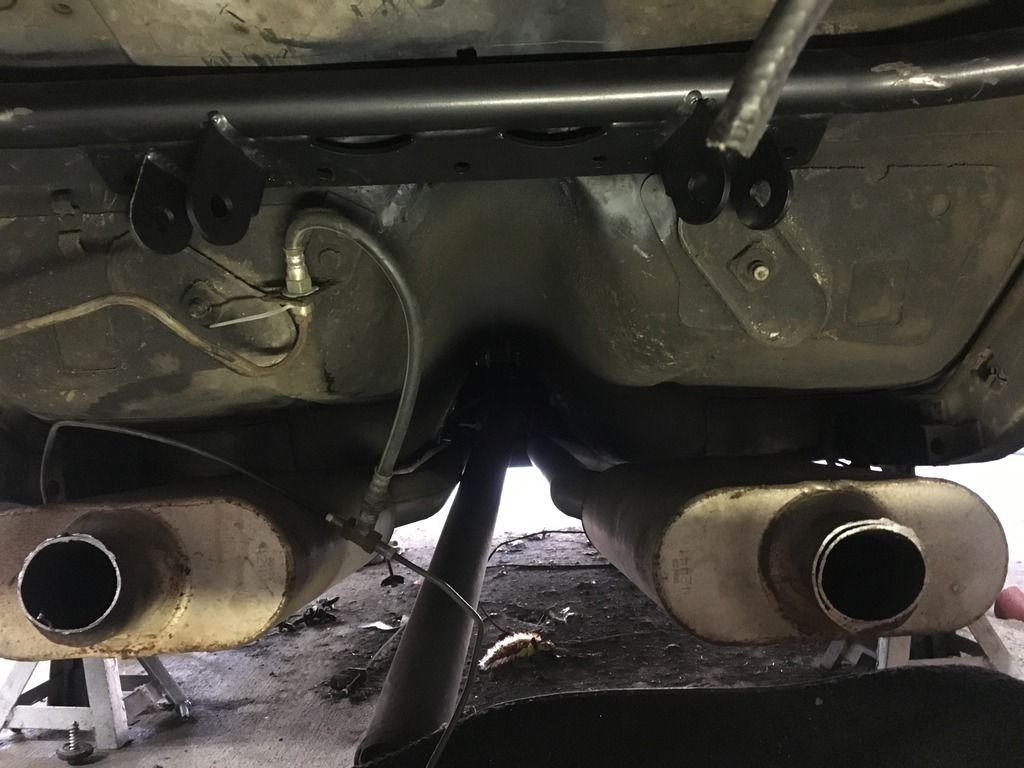
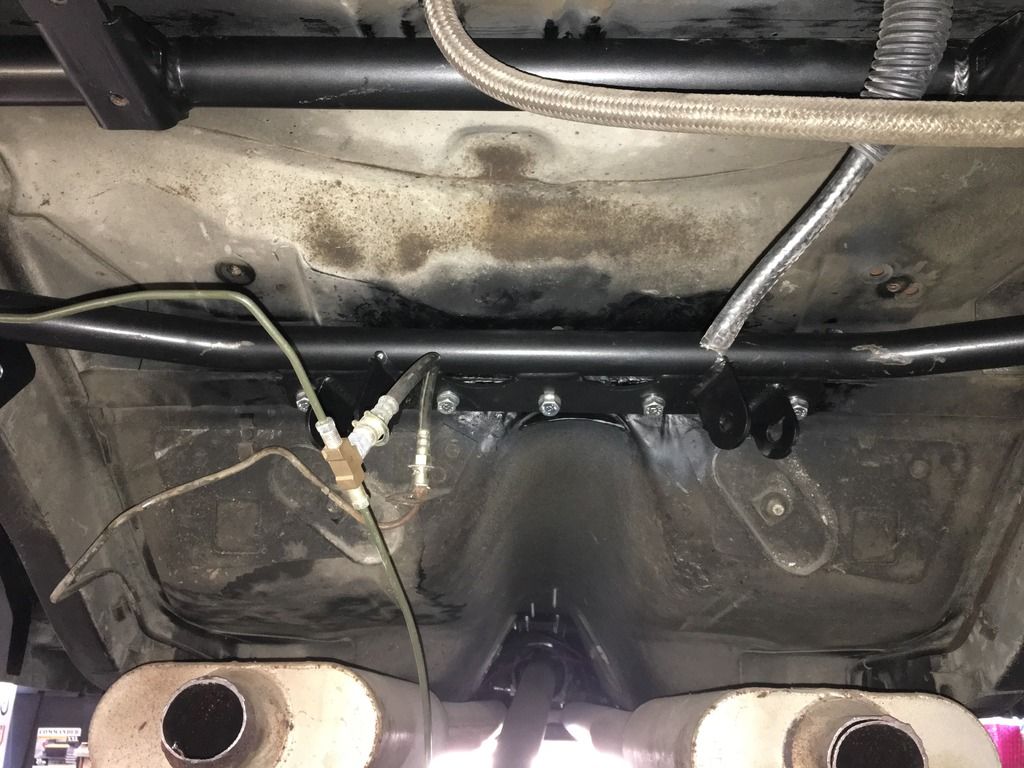
After the airbar was installed I put the rear in and ran some tubing for the brakes. You can also check out my badass exhaust turndowns I hacked up and installed for the time being. The funny looking wheels do not stick out anymore, they actually fit pretty damn good now. Not sure what size the wheels are exactly but they are a 15" torque thrust wheel with 3.75" backspacing and they are running a 275 tire.
My rear ended up being more towards the driverside and it needed to be shifted to the passenger side 1/4". When centering my rear side to side I found that the uppers moved it exactly 1/4" when lengthening and shortening the uppers simultaneously every 1.5 turns with the single adjustable uppers. I lengthened the DS upper and shortened the PS upper 1.5 turns and it shifted the rear 1/4" to the PS where it sits perfectly centered.
[IMG]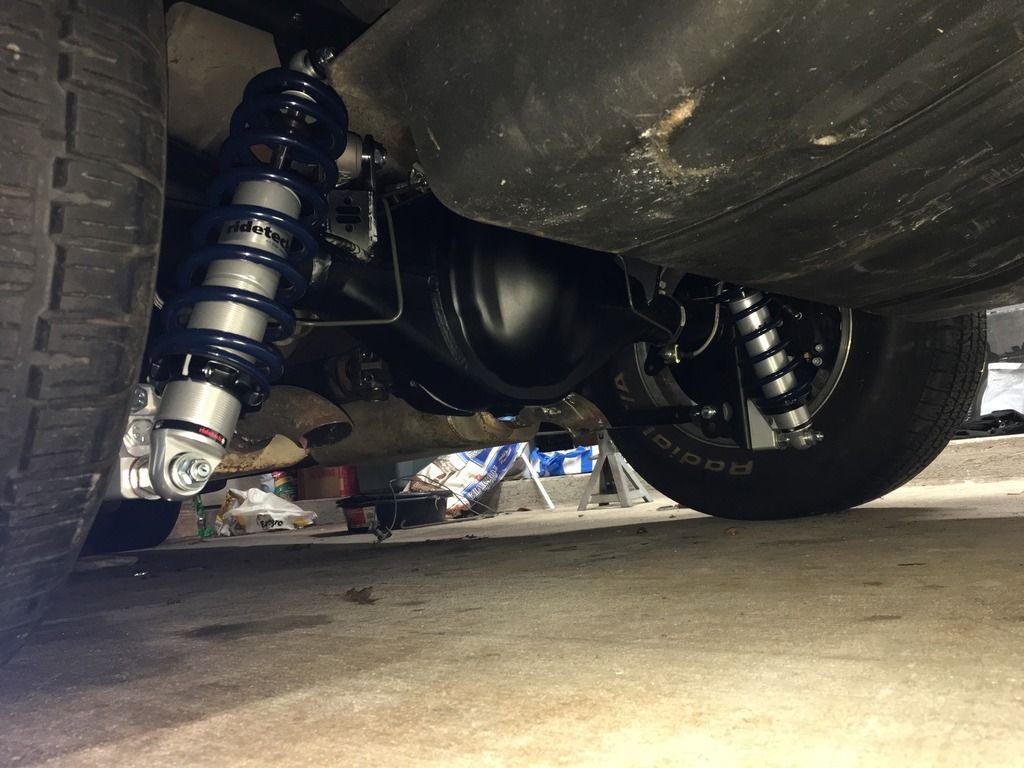

 [/IMG]
My rear ended up being more towards the driverside and it needed to be shifted to the passenger side 1/4". When centering my rear side to side I found that the uppers moved it exactly 1/4" when lengthening and shortening the uppers simultaneously every 1.5 turns with the single adjustable uppers. I lengthened the DS upper and shortened the PS upper 1.5 turns and it shifted the rear 1/4" to the PS where it sits perfectly centered.
[IMG]


 [/IMG]
10-27-2018, 06:29 PM
[/IMG]
10-27-2018, 06:29 PM
#12
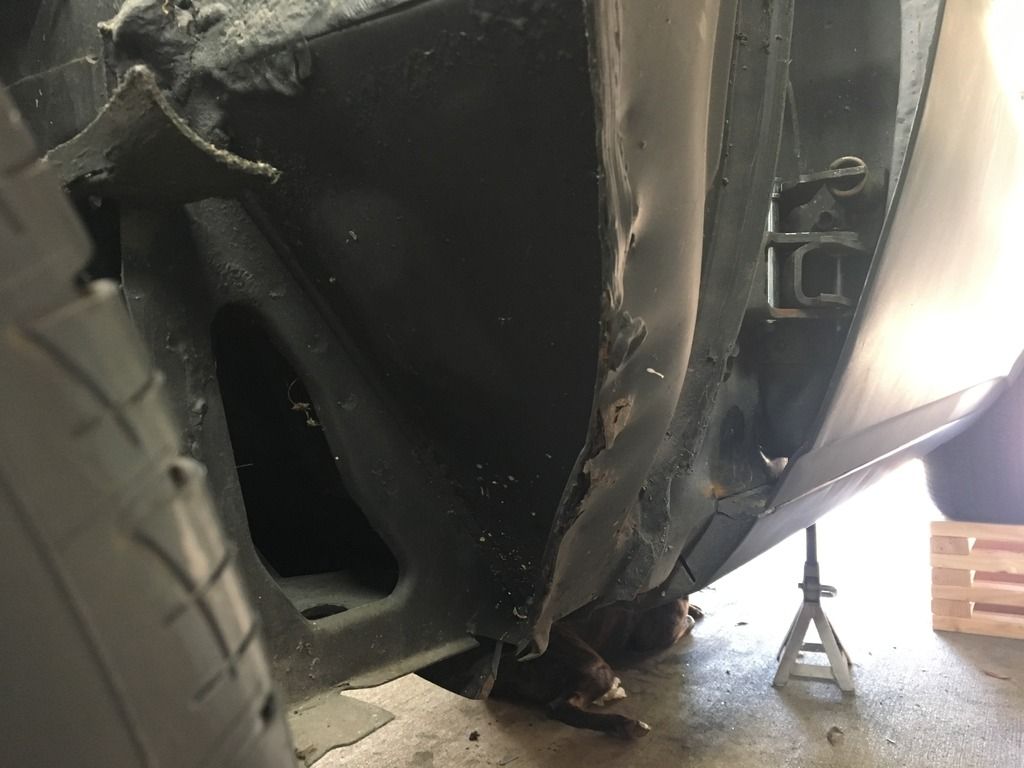
With all this extra articulation and my tall tires I hit the DS rear quarter and split the bondo lol. To not do this anymore I figured I would install the muscle bar but just my luck they sent me a 2nd gen muscle bar with 1st gen bushings. The 2nd gen bar is a little thinner in diameter. The quarter is shot and I'll replace it at some point. There is now a golfball sized hole where the bondo split.
[IMG]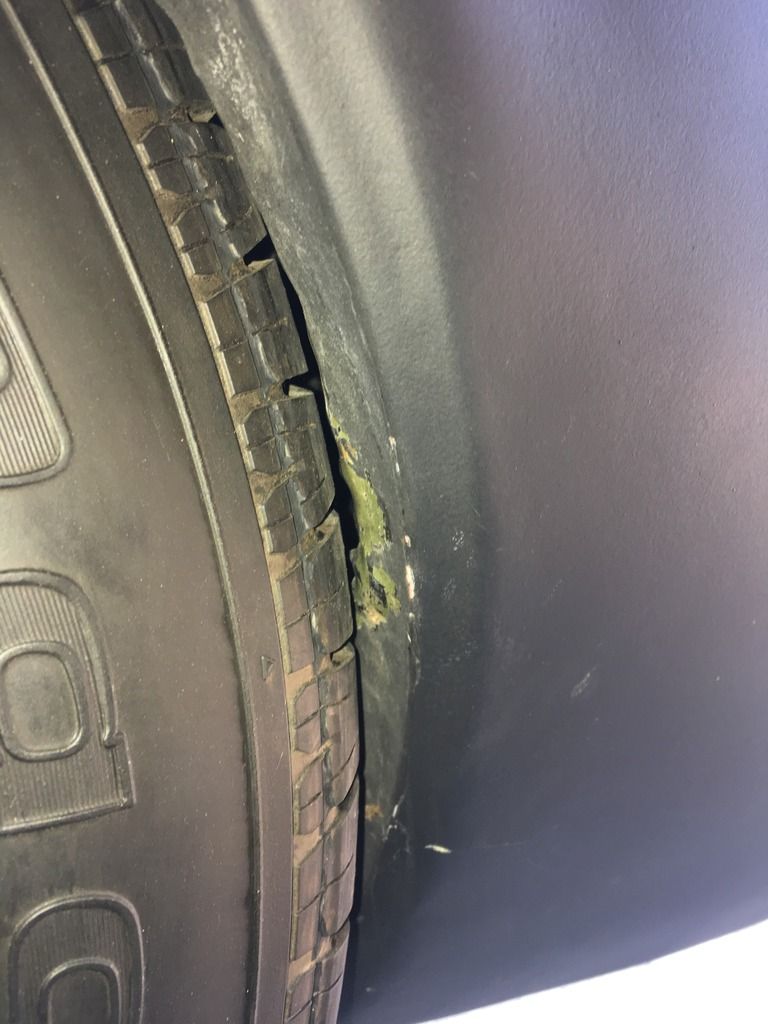
 [/IMG]
[IMG]

 [/IMG]
10-27-2018, 06:29 PM
[/IMG]
10-27-2018, 06:29 PM
#13
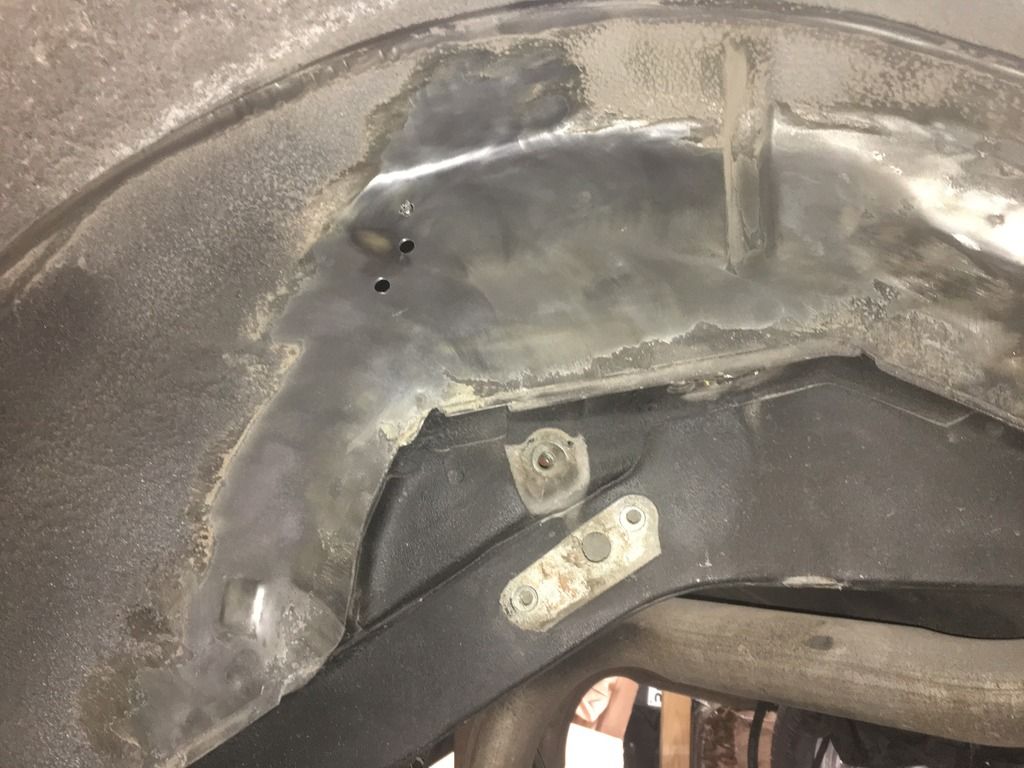
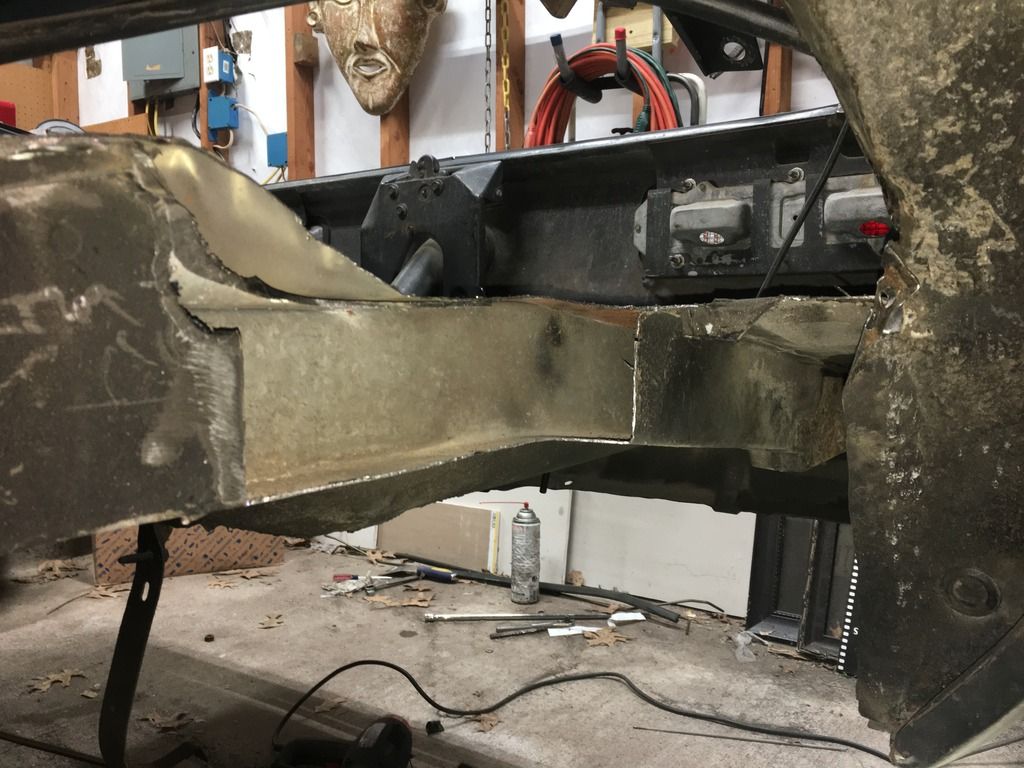
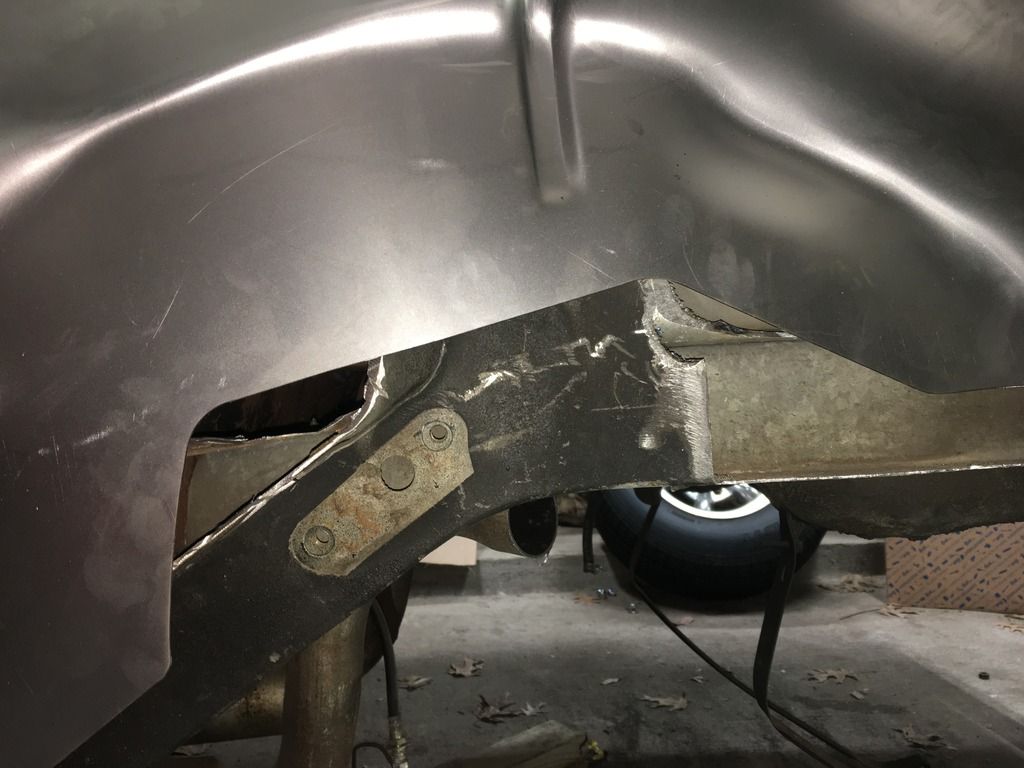
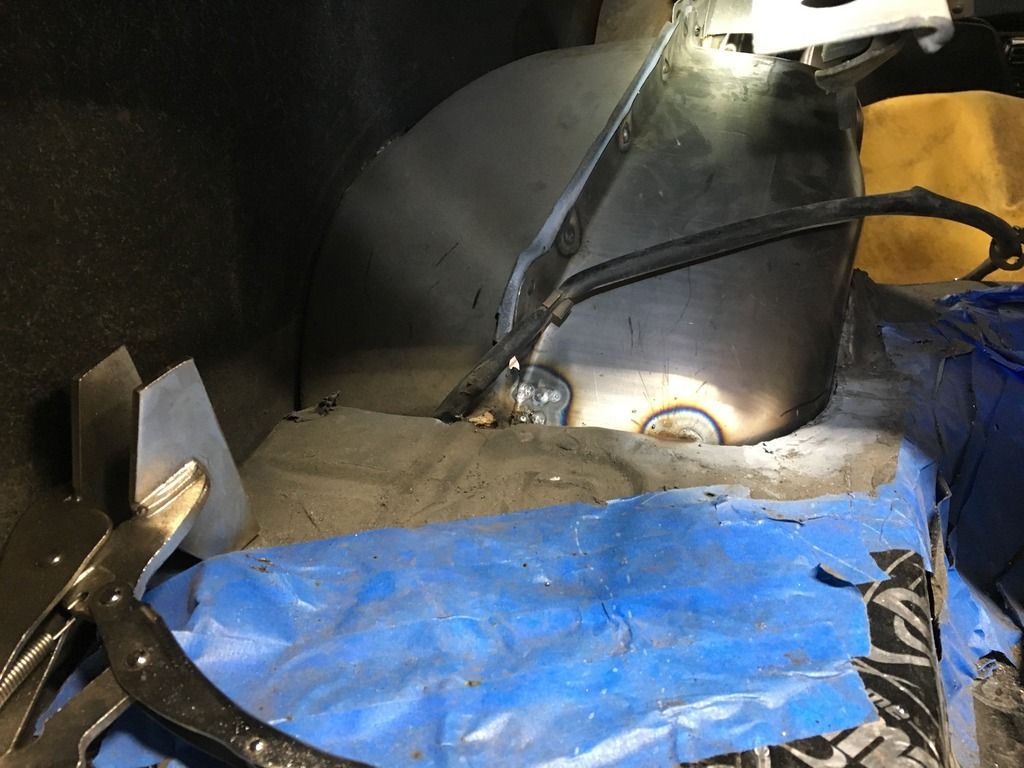
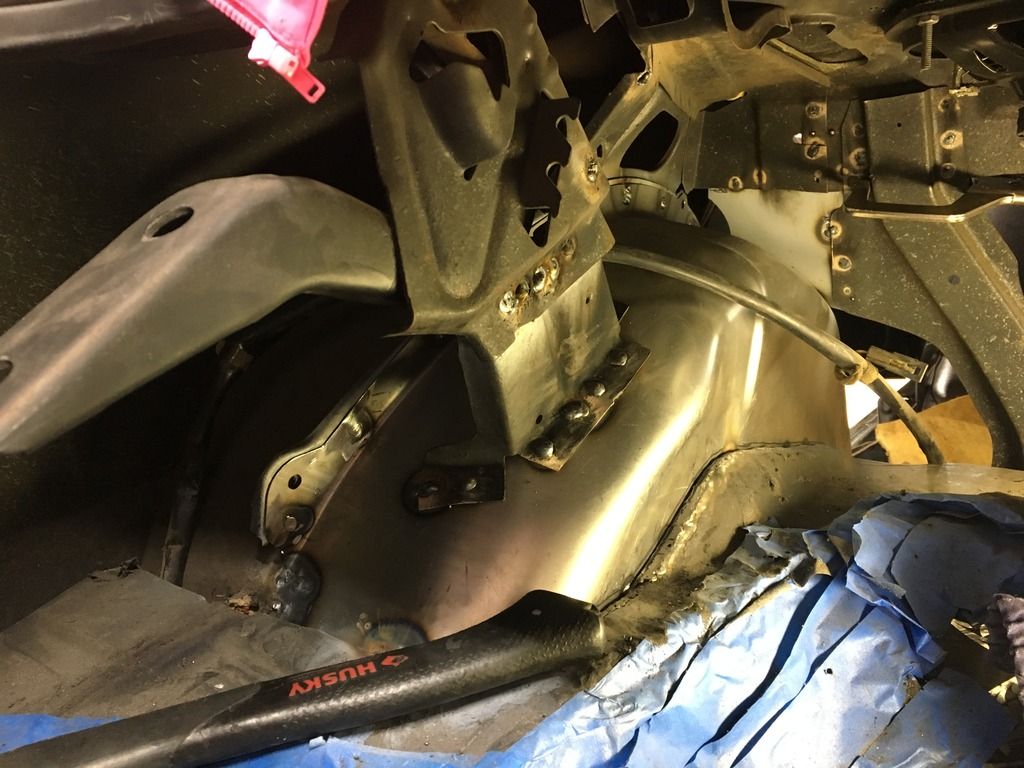
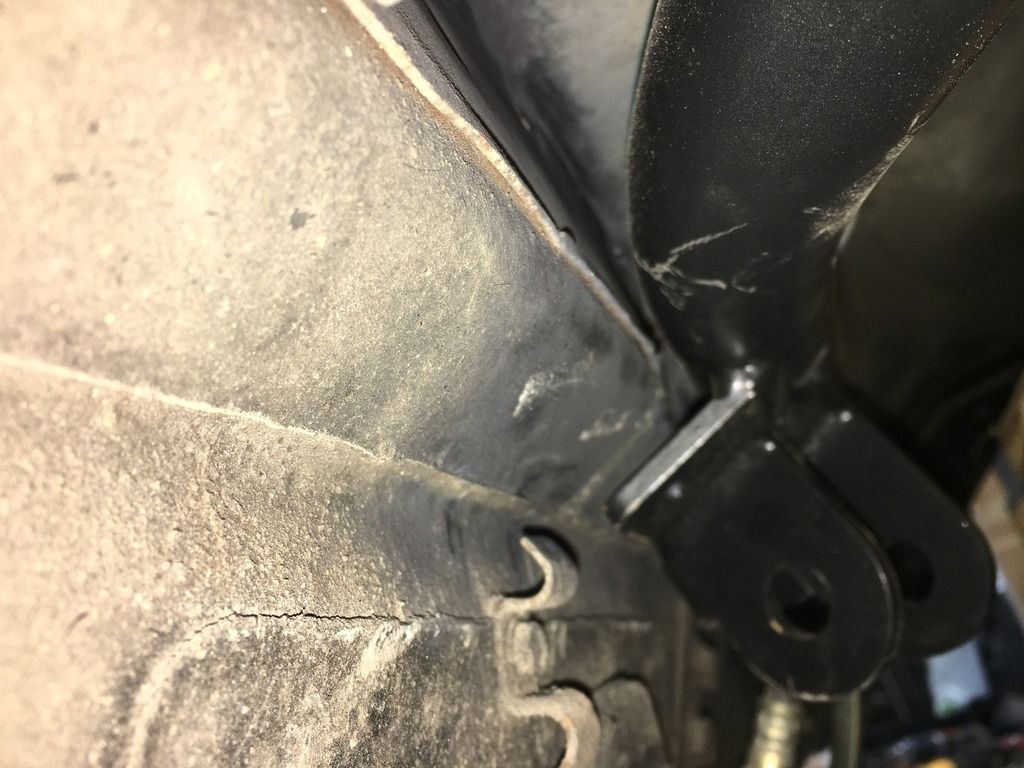
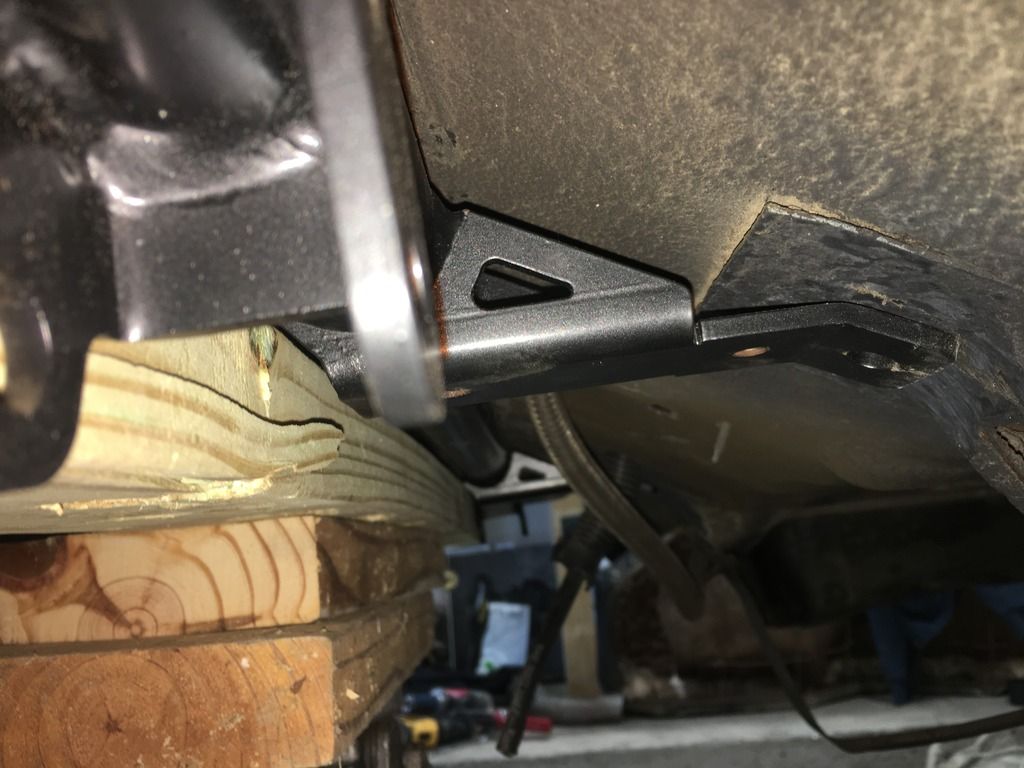
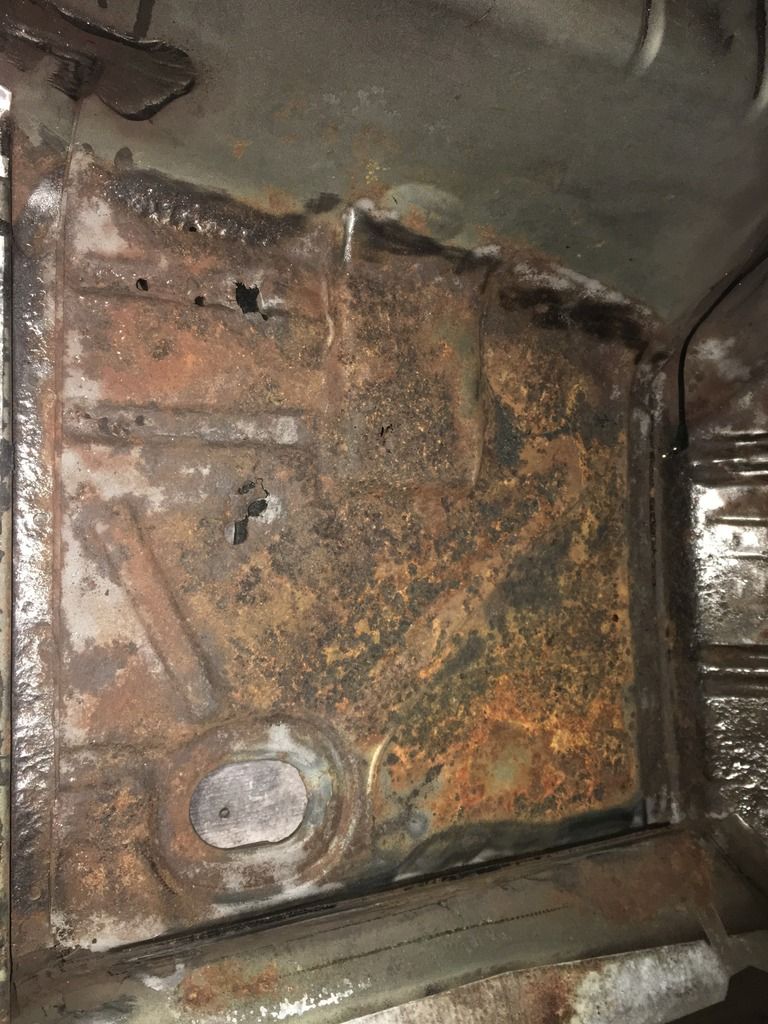
I was sent the correct muscle bar and installed it but it did not help with the body twisting and all and my tire woud still make contact with the quarter on both sides going up and down my driveway. I decided to purchase DSE subframe connectors. Also built some of those stands out of 2x4s to help with the install.
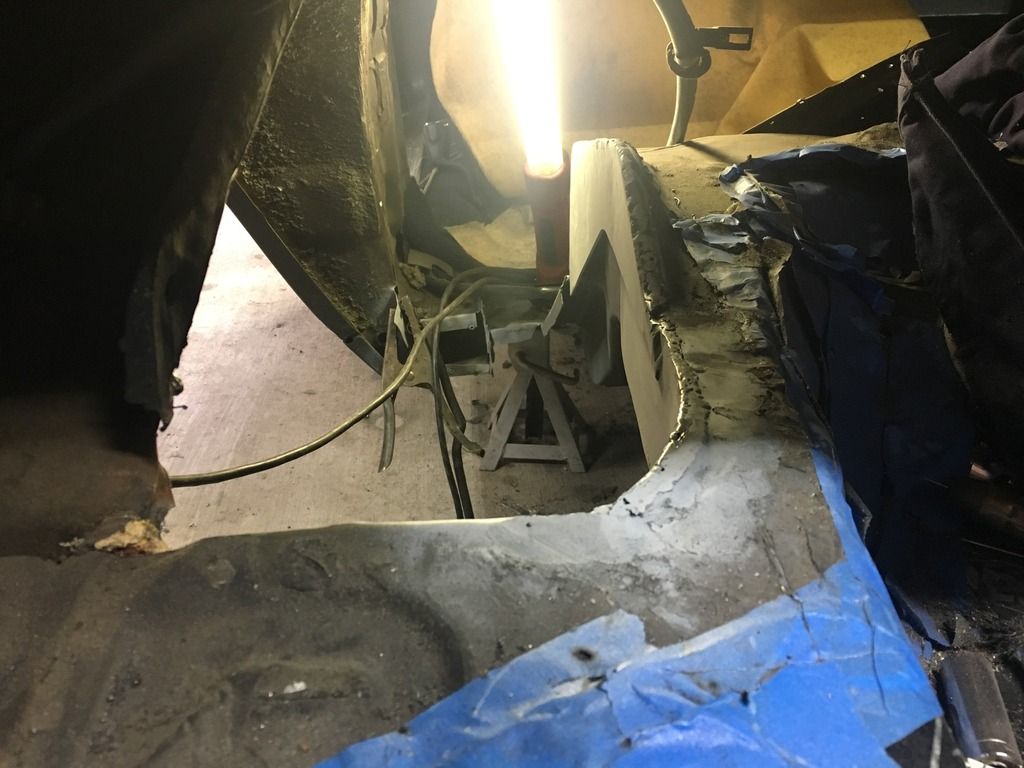
I started the install to find more rust as expected on the floor pan. I knew about this when I purchased the car but did not know it was quite as bad. All 4 low areas of the pan have rot and the firewall toeboards too. I'll hold off on the subframe connectors for the time being. I need to evaluate some things and see what I want to do with the floor and quarters.
[IMG]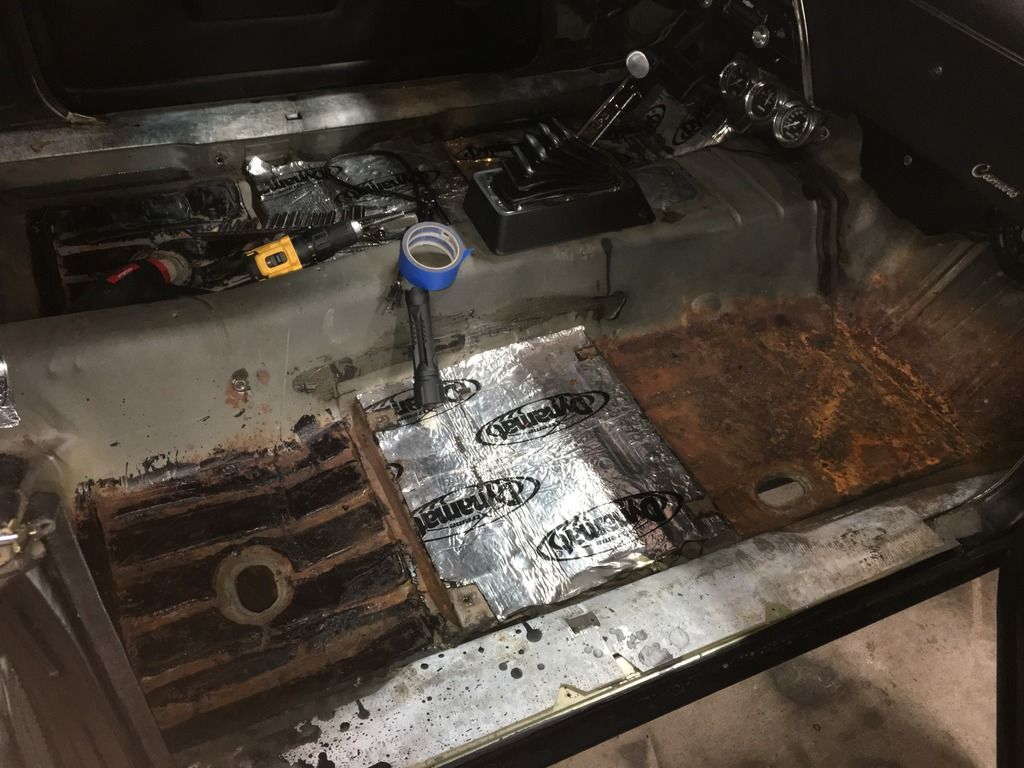
 [/IMG]
[IMG]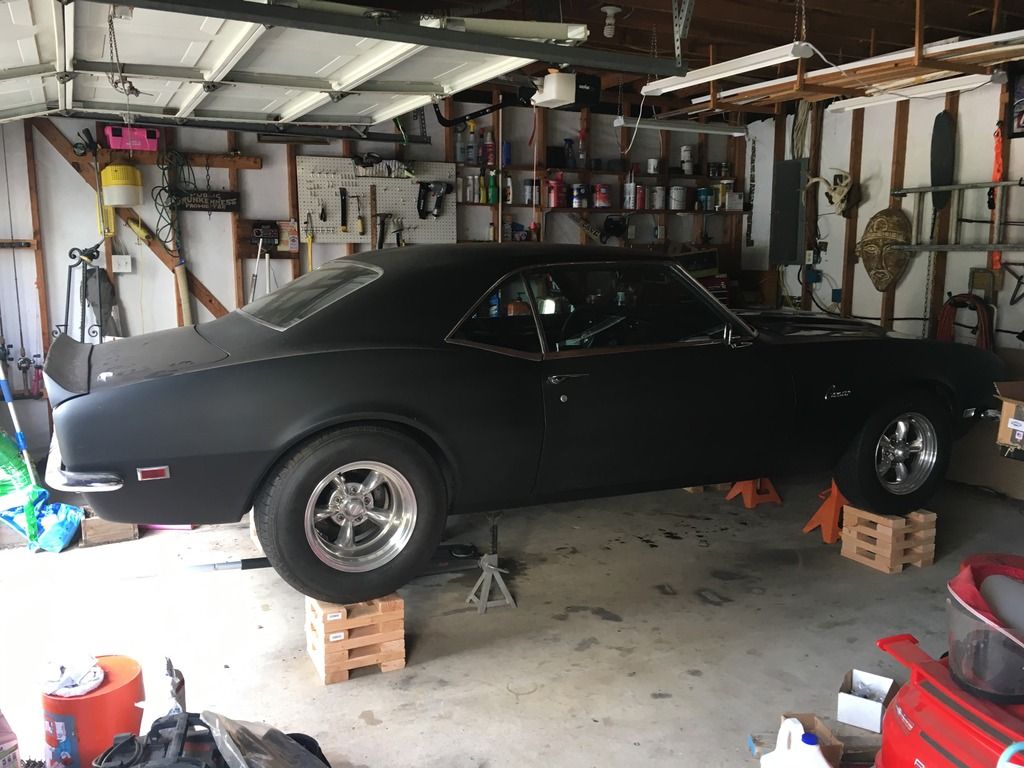 [/IMG]
I started the install to find more rust as expected on the floor pan. I knew about this when I purchased the car but did not know it was quite as bad. All 4 low areas of the pan have rot and the firewall toeboards too. I'll hold off on the subframe connectors for the time being. I need to evaluate some things and see what I want to do with the floor and quarters.
[IMG]


 [/IMG]
[IMG]
 [/IMG]
10-28-2018, 09:56 AM
[/IMG]
10-28-2018, 09:56 AM
#14

Looks like a nice start. I would think some epoxy paint (even rattle can) on bare metal would be the best thing for rust control, then whenever endercoating. Is there a specific reason why you didn't go with the DSE Quadralink rear suspension other than price? I'm glad to see you doing the DSE frame connectors. Just get some AMD floor pan or entire floor. Just remind the wife, this is her fault, she told you to get a hobby. LOL.
I'll be looking towards your next update. Great work !
I'll be looking towards your next update. Great work !
10-28-2018, 06:07 PM
#16
I kind of wimped our on fixing the quarters and floors due to my eagerness to get it back on the road. I work offshore and finding the time to do this work is difficult sometimes when I’m home so I just dropped it off at a local shop to get some of the metal work done. I will be handling some of the smaller metal work items still but I’d rather not mess up the quarters and have the car look funny. I plan on doing the subframe connectors still and some cowl related items once I get it back. I still have few weeks worth of photos to upload and a few more new goodies that I’ve picked up I’ll be sharing soon. The shop had an 8 week wait for my car so I tried not to waisted too much time. My goal is to get her back on the road this spring.
10-28-2018, 06:08 PM
#17
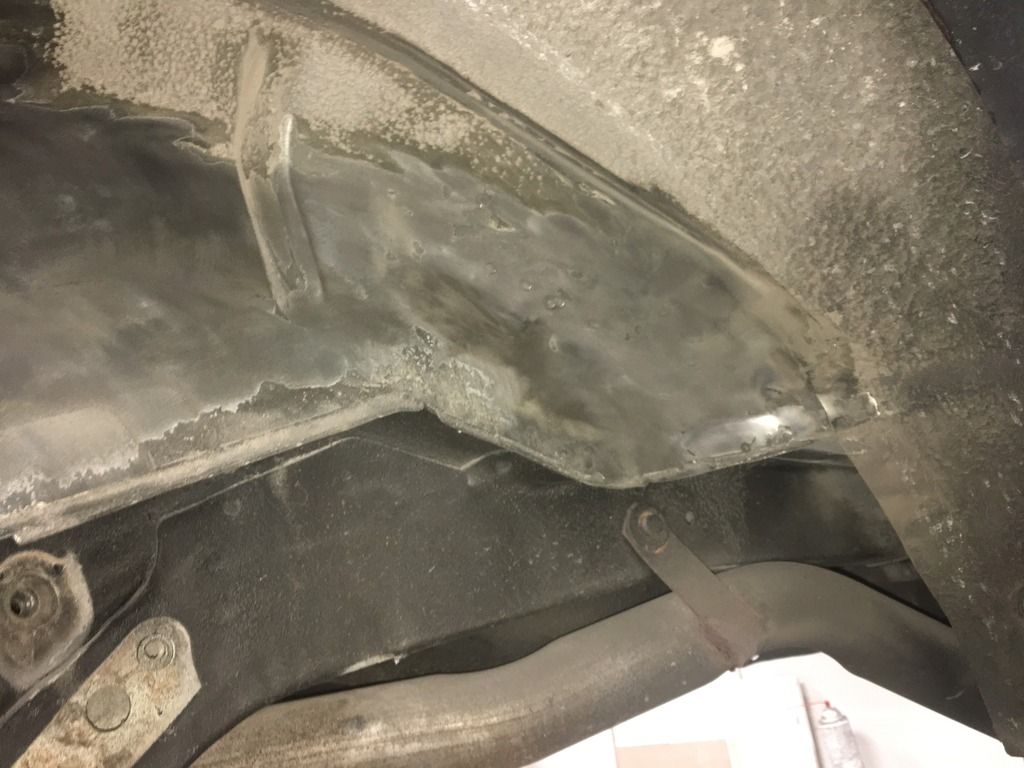
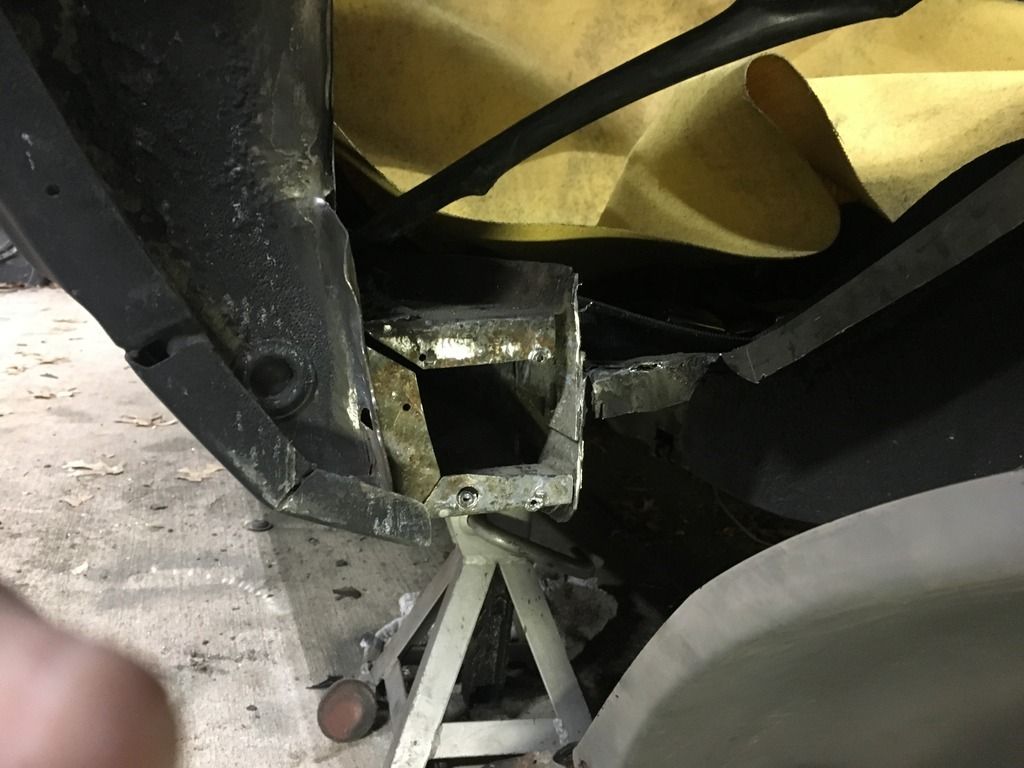
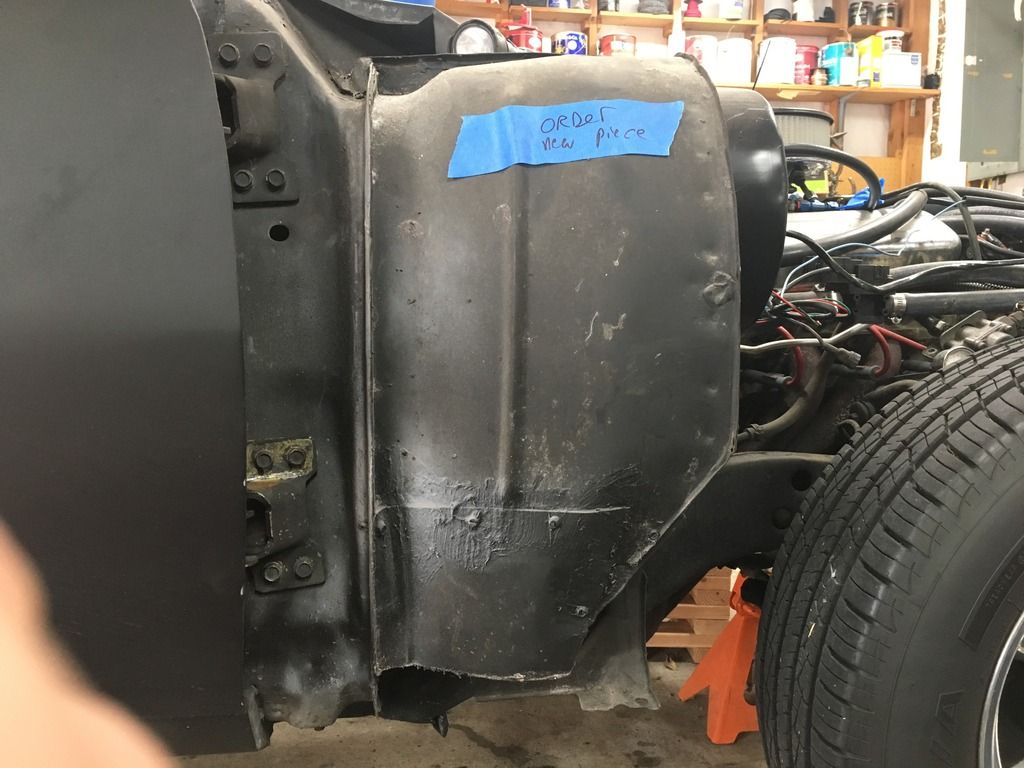
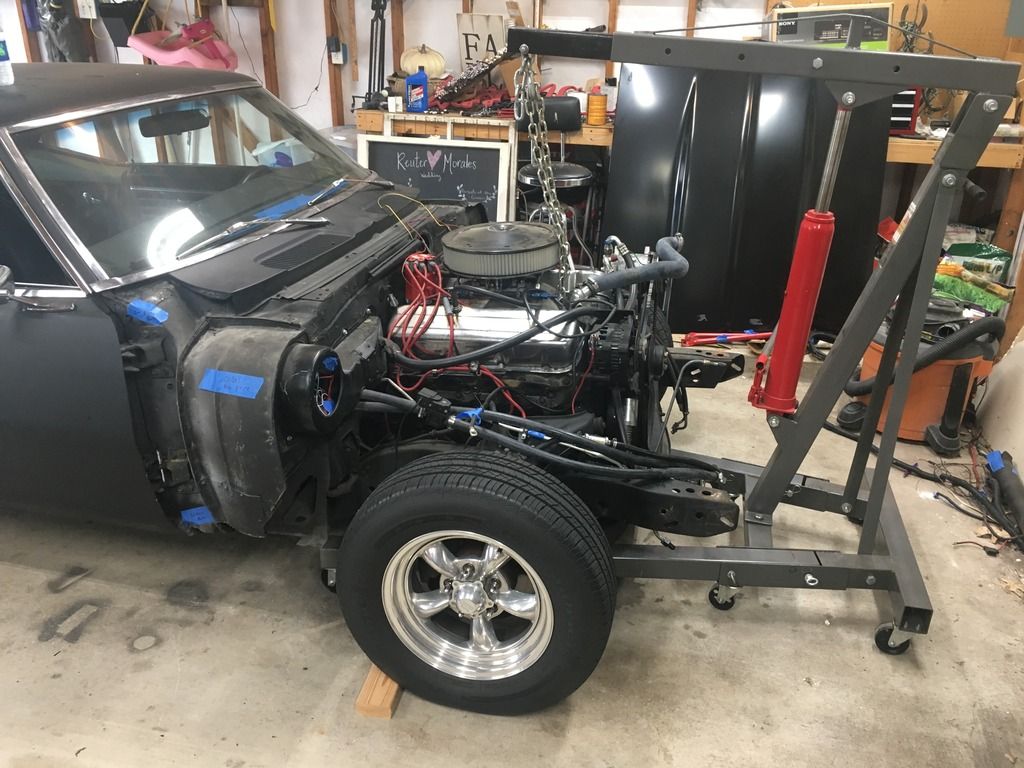
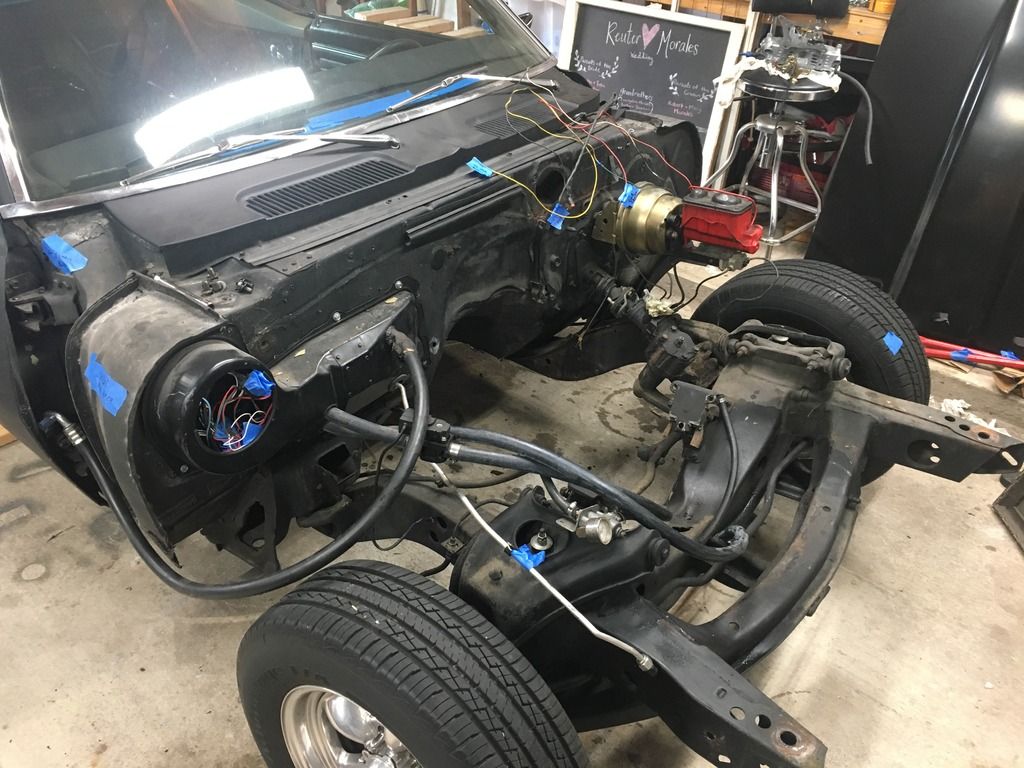
The shop said the cheapest way to get this stuff fixed was to send in as much of a shell as I could so I started by taking off the front sheet metal and the motor.
I found a creative patch on the PS side cowl piece that I'll be repairing when the car gets back and some rust on the driver side I'll be addressing.
FWI, I placed the motor mounts back on the stands after I removed it. Dont let the pictures fool you.
[IMG]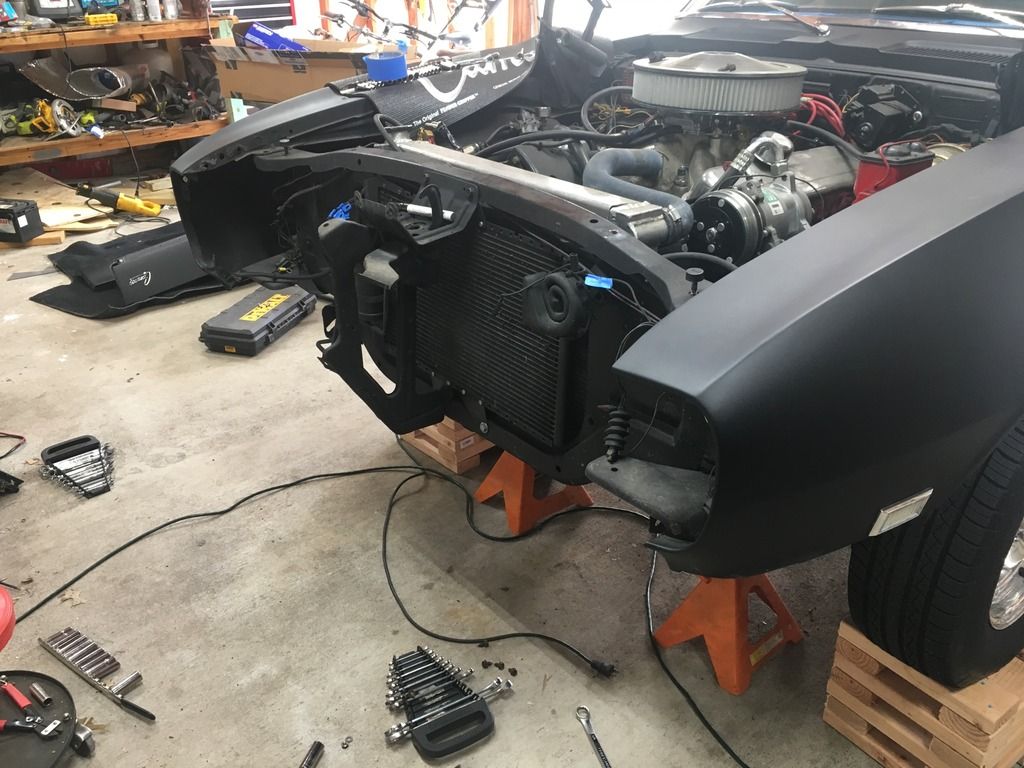


 [/IMG]
I found a creative patch on the PS side cowl piece that I'll be repairing when the car gets back and some rust on the driver side I'll be addressing.
FWI, I placed the motor mounts back on the stands after I removed it. Dont let the pictures fool you.
[IMG]


 [/IMG]


 10-28-2018, 06:09 PM
#19
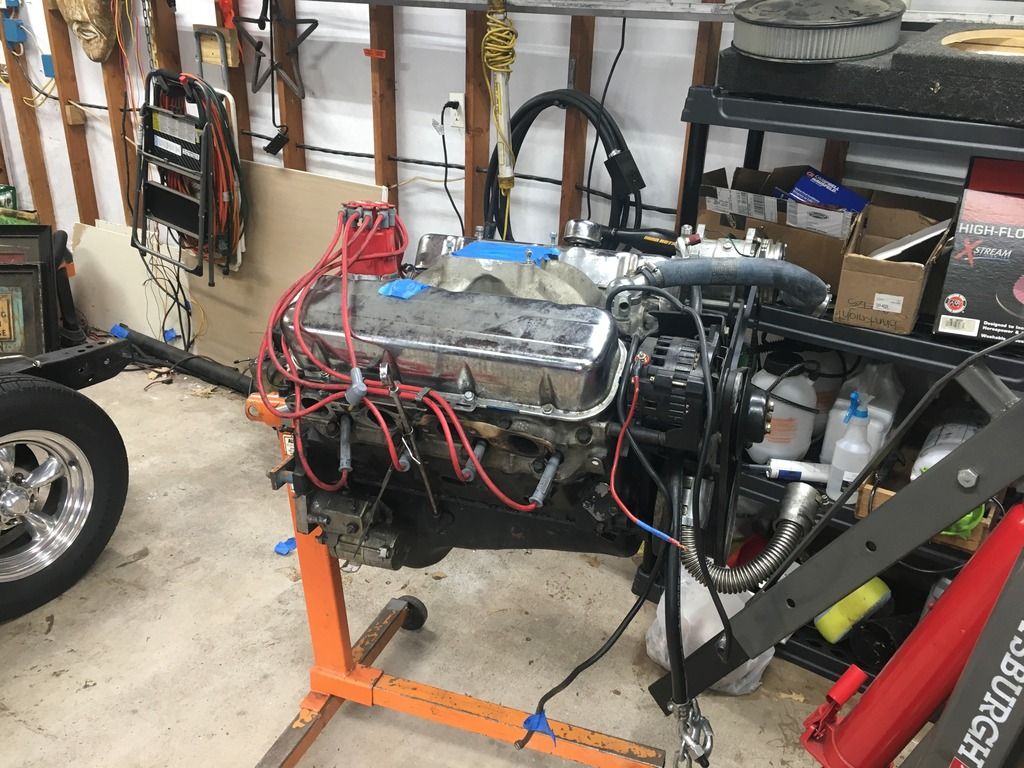
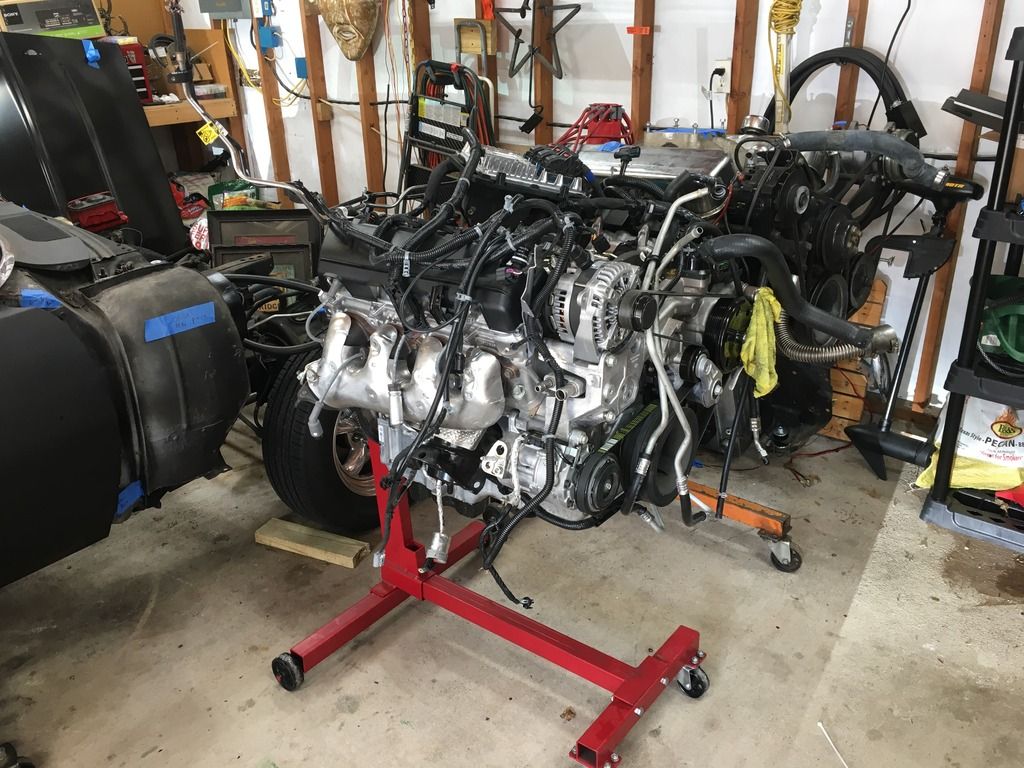
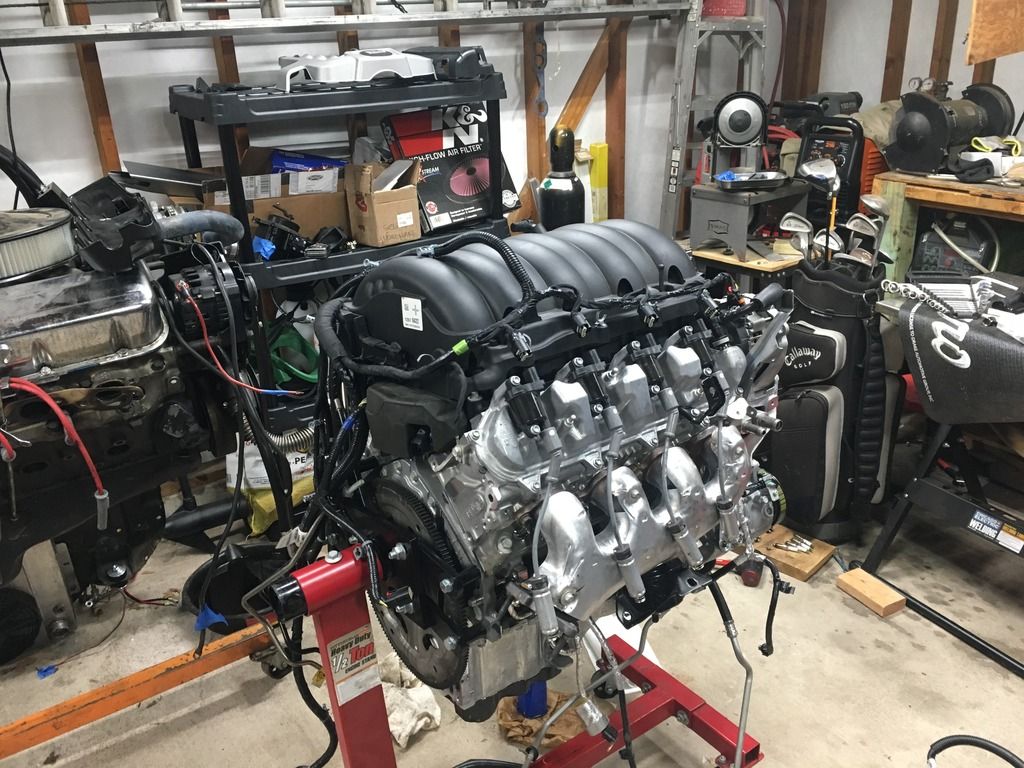
Got my new motor and trans. They came from a 2018 Escalade that was wrecked with 3K miles. Purchased it for $4500, not bad.
The motor is an L86 and the transmission is the new 10 speed 10l80. These Gen V motors are not like the Gen IV truck motors that were different from the LS2 and 3s. The longblock is the exact same GM PN, the only real difference between the L86 and LT1 is the accessory drive, oil pan and intake and I'll be addressing these soon.
The general consensus is that these are a more difficult swap than an LS motor but its really not. Perhaps a little more expensive but not by much.
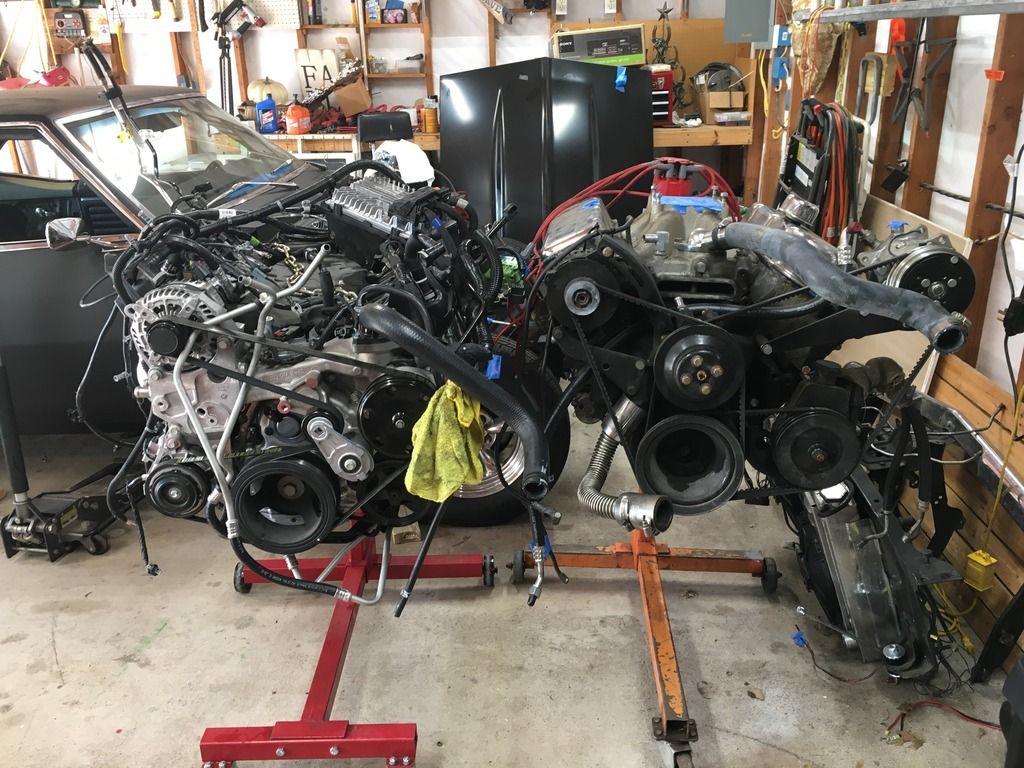
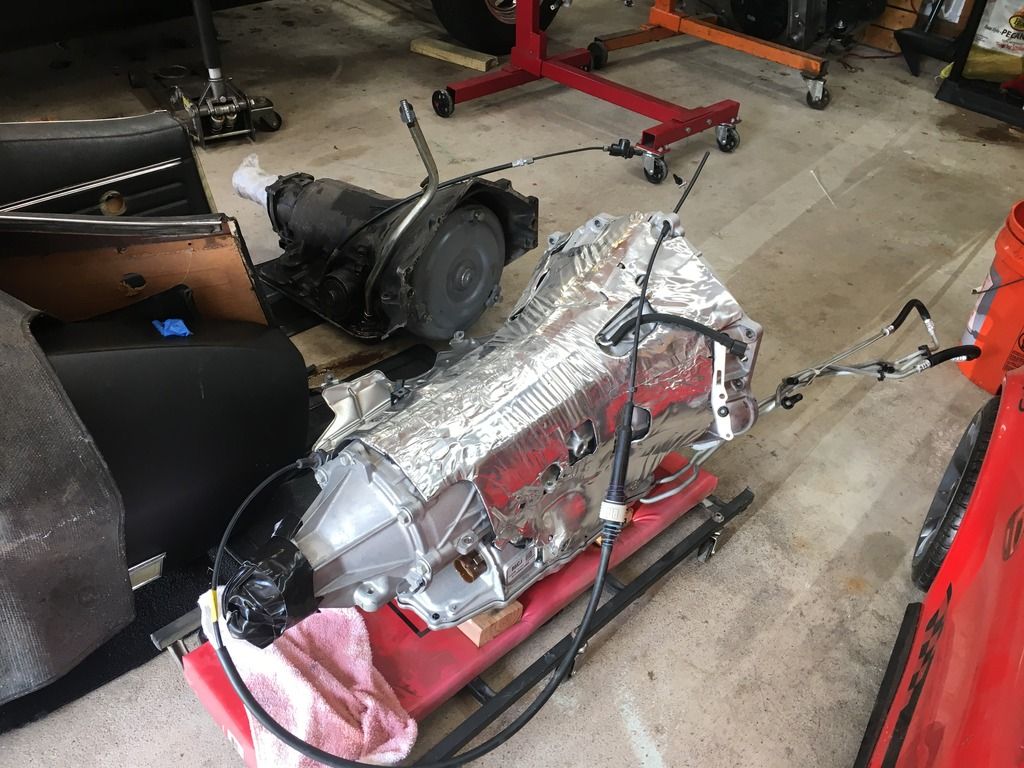
The motor looks pretty big fully dressed sitting next to the big block I pulled out. The trans is massive, my 700r4 is in the background and hard to tell but its a few inches longer, taller and wider.
[IMG]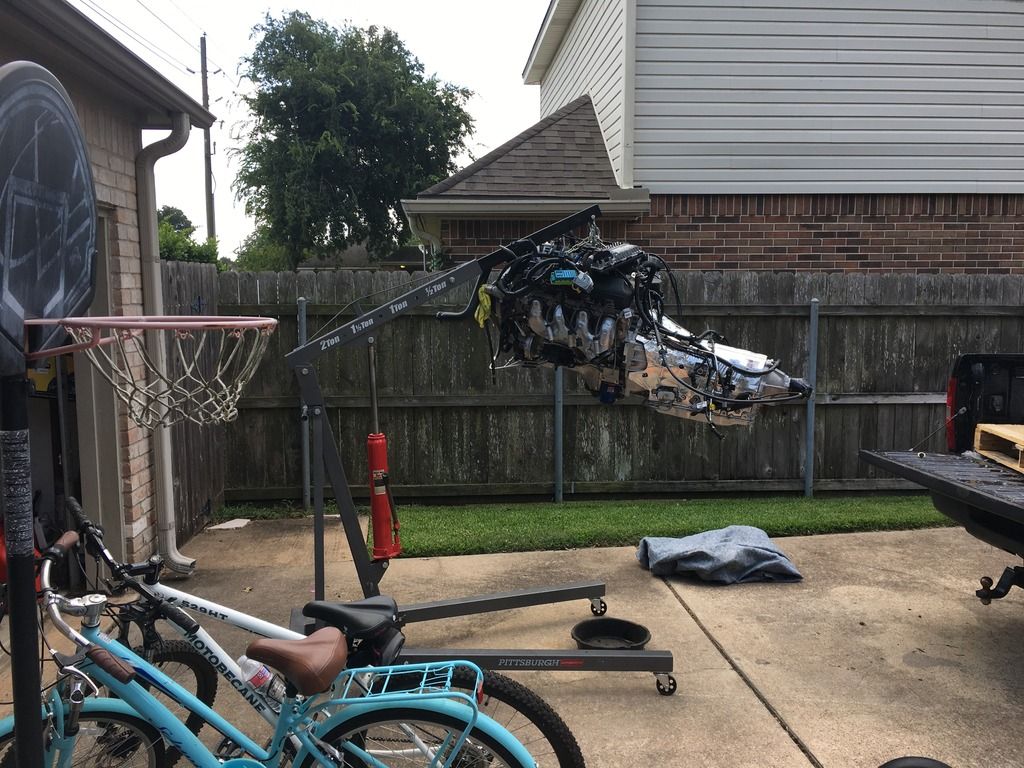
 [/IMG]
The motor is an L86 and the transmission is the new 10 speed 10l80. These Gen V motors are not like the Gen IV truck motors that were different from the LS2 and 3s. The longblock is the exact same GM PN, the only real difference between the L86 and LT1 is the accessory drive, oil pan and intake and I'll be addressing these soon.
The general consensus is that these are a more difficult swap than an LS motor but its really not. Perhaps a little more expensive but not by much.
The motor looks pretty big fully dressed sitting next to the big block I pulled out. The trans is massive, my 700r4 is in the background and hard to tell but its a few inches longer, taller and wider.
[IMG]


 [/IMG]
