
'71 Chevelle - LS1/T56 - In progress
 10-10-2006, 10:39 PM
#81

Originally Posted by stealth71
It is about 2-3*. I bought another angle finder to double check, but after the first drop it was less accurate than my old one. I wish I had a digital one.
With it where it is I have more room to shim it up and down if necessary, but i don't think it will be needed.
What type crossmember do you have? It looks like the rear of the trans is totally different as well. The mounting point on the T56 is much lower than your trans. I would say 2-3" lower than yours, thus the different placement of the tab.
Just add a spacer to yours to move it up some. Should be easy enough.
 10-10-2006, 10:47 PM
#82
TECH Enthusiast
iTrader: (6)
Join Date: Aug 2006
Location: Atlanta, GA
Posts: 572
Likes: 0
Received 0 Likes
on
0 Posts

I unbolted the body off my chevelle and I will lift the body to do the install. After the trans is in, I will drop the body back on and see where the tunnel needs room.
Where can I get a degree/angle finder and what am I shooting for ?
Where can I get a degree/angle finder and what am I shooting for ?
10-18-2006, 09:24 AM
#83
I got the trans tunnel mostly back in. I just need to build the section around the shifter after I put the trans back in.


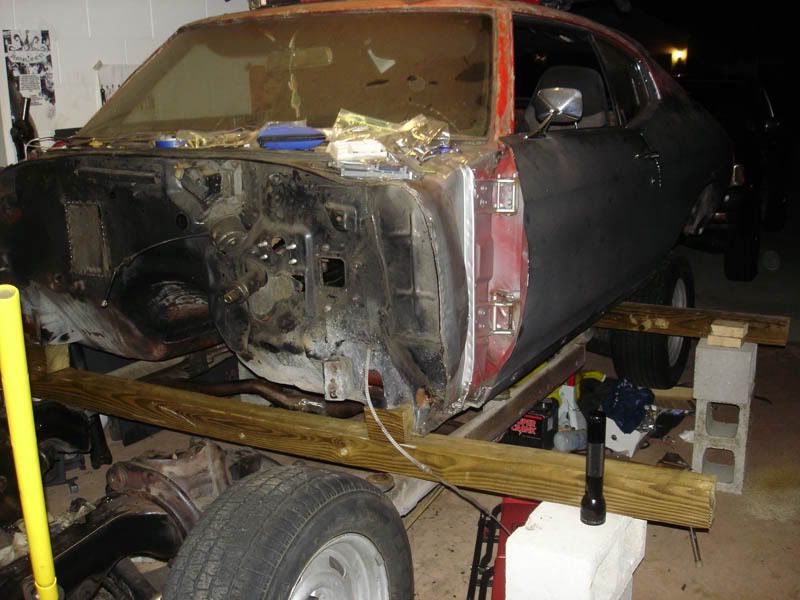
Last night I decided to pull the body off to remove the old brake/fuel lines and route the new ones. I also wanted to clean up the frame some and do some suspension work.
Last night I decided to pull the body off to remove the old brake/fuel lines and route the new ones. I also wanted to clean up the frame some and do some suspension work.
 10-18-2006, 12:42 PM
#86
I was thinking about rolling the chassis out and putting the motor in after I clean it up and run the lines. Only problem is getting the body high enough to fit the motor and chassis back under it. I guess I could roll it back under the body then drop it in. Maybe the new lower springs will help some.
A couple more cases of beer and it should be going back together sometime next week!!
A couple more cases of beer and it should be going back together sometime next week!!
10-18-2006, 01:34 PM
#87
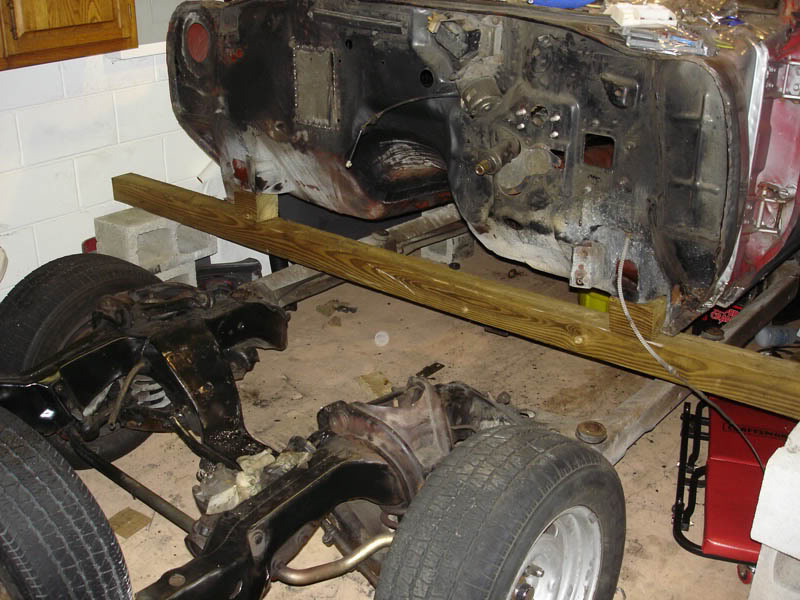
Shealth.. yeah.. I just keep jacking it up with jacks and block until the 4x4's holding the body was at the right height and then stuck construction block under the 4x4. then I justed wheeled the frame out.
You don't have to raise it that high if you take the wheels off and the use those dolly under the brakes or suspension. that should save you from rasing the body an extra 5 or 6 inches. By the time I though of that. I had gotten the body high enough already.. and it worked out ok..as it gave me more room to clean and prep the underside and then hit it with POR 15.
You can also use your engine host at the back of the car to raise it with some tow straps to the mounting bolt holes.
hope that give you some help..
Last edited by bczee; 10-18-2006 at 01:36 PM. Reason: update

 10-18-2006, 05:36 PM
#90
TECH Enthusiast
iTrader: (5)

Join Date: Dec 2005
Location: Strawberry Point, IA
Posts: 553
Likes: 0
Received 0 Likes
on
0 Posts
If you get more beer, Im sure you can find some guys to help you lift it off. (hint, hint)
Im back in town, if you need help, let me know. I would love to check it out!
Im back in town, if you need help, let me know. I would love to check it out!
10-18-2006, 08:05 PM
#92
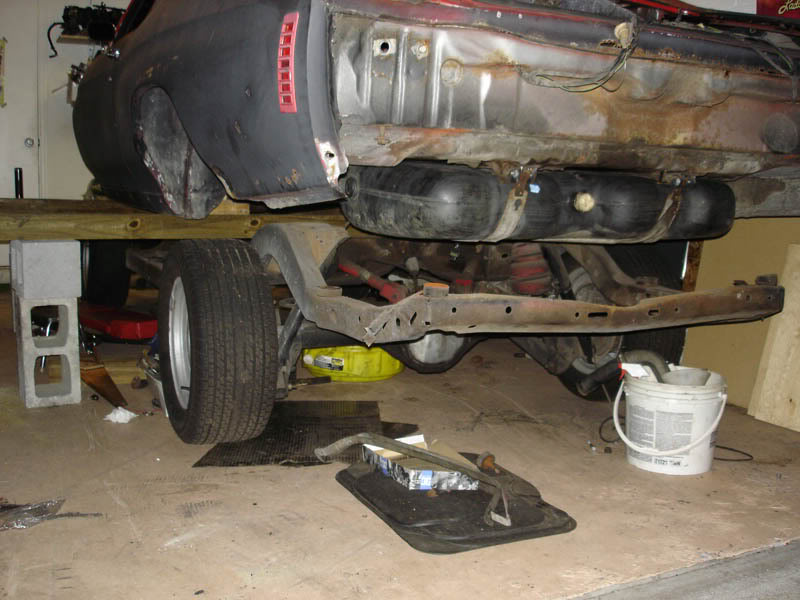
Did some more work tonight. Took of the old brake/fuel lines so I can start sanding the frame.

Did you look closely in the back left corner? If beer is all I need for labor I should have no problem.
BMR adjustable uppers. I will be putting Wolfe Race Craft spherical bushings in the pumpkin side of the upper control arms.

Got some dollies on sale at Tractor Supply to fit the chassis under the body. I don't have much room above the roof, because the garage door.

Before new springs.

My first atempt at polishing stainless. I need to sand it first.

Till tomorrow.
Did you look closely in the back left corner? If beer is all I need for labor I should have no problem.
BMR adjustable uppers. I will be putting Wolfe Race Craft spherical bushings in the pumpkin side of the upper control arms.
Got some dollies on sale at Tractor Supply to fit the chassis under the body. I don't have much room above the roof, because the garage door.
Before new springs.
My first atempt at polishing stainless. I need to sand it first.
Till tomorrow.
10-18-2006, 08:09 PM
#93
TECH Enthusiast
iTrader: (6)
Join Date: Aug 2006
Location: Atlanta, GA
Posts: 572
Likes: 0
Received 0 Likes
on
0 Posts
Nice ! getting a lot done 
I'm, not even done pulling tht emotor out of my donor..
Do you have a picture of the notch for the AC compressor? I'd like to do mine before I drop the motor in.
I'm, not even done pulling tht emotor out of my donor..
Do you have a picture of the notch for the AC compressor? I'd like to do mine before I drop the motor in.
10-18-2006, 08:20 PM
#95
TECH Enthusiast
iTrader: (6)
Join Date: Aug 2006
Location: Atlanta, GA
Posts: 572
Likes: 0
Received 0 Likes
on
0 Posts
Originally Posted by stealth71
I didn't notch. No A/C for now. I will get a under dash unit next spring and plan on relocating the compressor to the top passenger side.
10-18-2006, 10:04 PM
#97
Shealth.. I see ya got the body off ok.. makes life a lot easier doesn't it... I used all Stainless Steel brakes and 3/8" fuel lines. Wish I had finish my fab'in up before I did the body and paint. (i changed my mine to use a LS1 after I had the SBC ready and paint job done) and then just drop the body on with the engine and trans in place. You got it made.
Jfman.. I notched my frame.. you can see pictures on my project on Cardomain.com the link is some where in this thread.
Don't know about your area.. but I got my Frame and Radidator support Sand Blasted and Powder coated for $380.00... I didn't go to the normal automotive coating shops, they wanted $700 to $800 for the same job. I found a industrial Powder coater shop and it was 1/2 the Cost.. that blew me away.. cause the amount of time and stuff needed to refinish the frame .. well $380... is the way to go vs sand and grind, drink beer, prime, sand, drink more beer, paint, etc..
11-08-2006, 10:46 AM
#100
Well I am almost done w/ the frame. Been busy w/ work and my friend keeps invinting me hunting (which usually turns into working on his buggy for him) so I haven't had a bunch of time to work on her. I ordered new front suspension, stage II kit from SC&C, and I have to wait 2-3 weeks to get it in. I took apart all the front suspension and have been working on boxing my lower control arms. I need to finish up the frame, get the suspension done and then start reassembly.
I think I won't be finished by Thanksgiving now. I didn't originally plan on taking the body off or redoing the front suspension, but since it's all apart I figured I might as well do it now. The handling will be greatly improved so I will be able to top out my 160mph speedo. The weather has been on and off here and I can't work on the chassis if it is raining. I will try and get some more pics up this weekend. I have all weekend for car projects only, so I should be able to get some of this done.
I think I won't be finished by Thanksgiving now. I didn't originally plan on taking the body off or redoing the front suspension, but since it's all apart I figured I might as well do it now. The handling will be greatly improved so I will be able to top out my 160mph speedo. The weather has been on and off here and I can't work on the chassis if it is raining. I will try and get some more pics up this weekend. I have all weekend for car projects only, so I should be able to get some of this done.