
1970 GTO Version 2.0
 03-26-2008, 11:31 PM
#41
On The Tree
Join Date: Aug 2007
Location: So Cal
Posts: 110
Likes: 0
Received 0 Likes
on
0 Posts
Andrew,
I have been thinking about that also. I saw another picture posted by them on Team Chevelle thread several months back. It looks like they changed the fabbed piece just slightly. The price seemed high for the complete TKO kit but after looking at the cost of the bearing it's not really that bad. Let us know how it works as I may order one also. Keep the pictures coming.
Tom
 03-27-2008, 01:10 AM
#42
TECH Senior Member
Thread Starter
iTrader: (7)

Andrew,
I have been thinking about that also. I saw another picture posted by them on Team Chevelle thread several months back. It looks like they changed the fabbed piece just slightly. The price seemed high for the complete TKO kit but after looking at the cost of the bearing it's not really that bad. Let us know how it works as I may order one also. Keep the pictures coming.
Tom
I have been thinking about that also. I saw another picture posted by them on Team Chevelle thread several months back. It looks like they changed the fabbed piece just slightly. The price seemed high for the complete TKO kit but after looking at the cost of the bearing it's not really that bad. Let us know how it works as I may order one also. Keep the pictures coming.
Tom
I will keep you updated. The parts that I got today were under $300. It is a little on the pricey side, but everything looks to be well thought out and well made. The adapter is not billet, as the website says, but thats not an issue for me as long as it works as advertised. There are some lower cost hydraulic bearings that I found on eBay. My buddy John Parsons is using the Howe bearing with great success. I am hoping the Quarter Master bearing will work as well. The plan is to mock everything up and check bearing travel, before bolting it all together. I am pretty meticulous when it comes to certain driveline items. Most people underestimate their importance.
Andrew
03-27-2008, 01:25 AM
#43
On The Tree
Join Date: Aug 2007
Location: So Cal
Posts: 110
Likes: 0
Received 0 Likes
on
0 Posts
Tom,
I will keep you updated. The parts that I got today were under $300. It is a little on the pricey side, but everything looks to be well thought out and well made. The adapter is not billet, as the website says, but thats not an issue for me as long as it works as advertised. There are some lower cost hydraulic bearings that I found on eBay. My buddy John Parsons is using the Howe bearing with great success. I am hoping the Quarter Master bearing will work as well. The plan is to mock everything up and check bearing travel, before bolting it all together. I am pretty meticulous when it comes to certain driveline items. Most people underestimate their importance.
Andrew
I pretty sure I am going to use that also. I thought about going the Tilton pedal set up to take the factors of my limited knowledge out of the equation on the correct angle.
I think that is what II much is running on his or maybe Wilwood. I don't really want manual brakes though. In any case I am subscribed to your threads on this board and another and really look forward to your updates. Your details are very helpful and I suspect your future findings will help many of us before we cross these bridges.
Tom
03-28-2008, 07:38 PM
#44
TECH Senior Member
Thread Starter
iTrader: (7)
Today I got some more parts for the swap. I got a starter, power steering pump, and a bunch of little parts to complete my accessory drive system. What I have here is basically the C5/C6 layout.
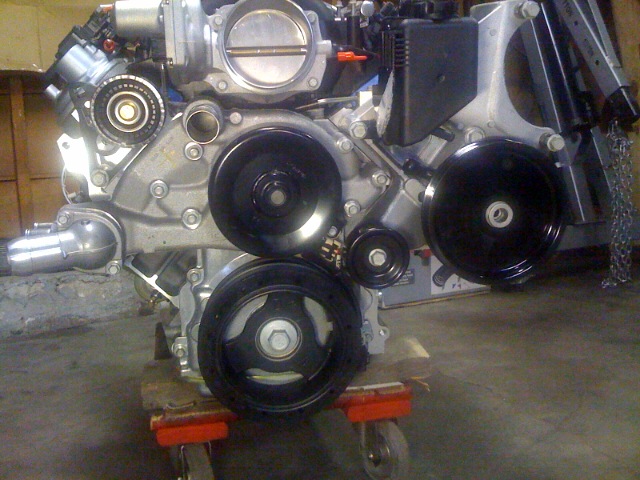
I also received the GM Performance Parts harness and ECU package. Pretty good value when you consider that it is very complete. It comes with a big relay center and an auxiliary fuse panel that needs to be mounted somewhere. Its fairly ugly so I don't really know where I am going to put it yet.
Andrew
03-29-2008, 09:46 AM
#45
TECH Senior Member
Thread Starter
iTrader: (7)
The benefits of being a bachelor and living alone include being able to have a bunch of car parts in the living room and not hearing "THE DISPOSAL IS CLOGGED!!!" LOL
Besides the engine swap I am doing some suspension mods. I already have some coilovers in the front. The springs in the front are 550 lb/inch. They were marginal with the big block. I think they will work very well with the L92, so for now I am not messing with them. In the rear I currently have some springs that I got way back in the day, from HO Racing.
Who remembers them? If you do, your old!!!
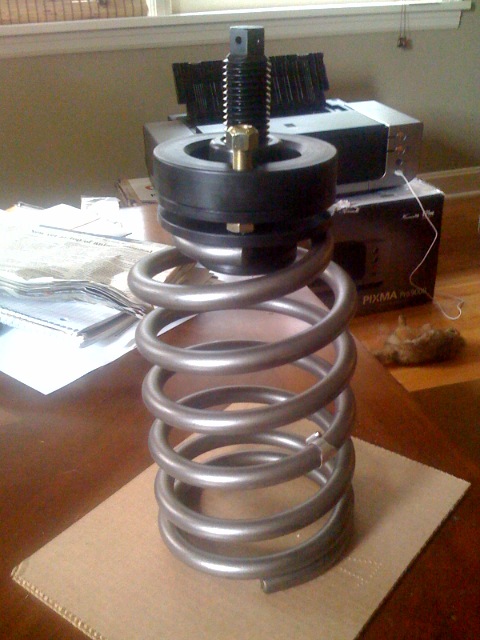
I wanted the ability to adjust the ride height in the rear and more importantly have the ability to properly set the corner weights once the car is done. There are all kinds of solutions to accomplish this, I chose a very nice product from Budzter:
https://www.budzter.com/index.html
Not cheap, but the quality is outstanding and it is a true bolt on. No hacking of the rear is required and its fully reversible. I like that. The spring is 9.5" tall, 175 lb/inch from the Coleman Racing catalog.
Andrew
Besides the engine swap I am doing some suspension mods. I already have some coilovers in the front. The springs in the front are 550 lb/inch. They were marginal with the big block. I think they will work very well with the L92, so for now I am not messing with them. In the rear I currently have some springs that I got way back in the day, from HO Racing.
Who remembers them? If you do, your old!!!
I wanted the ability to adjust the ride height in the rear and more importantly have the ability to properly set the corner weights once the car is done. There are all kinds of solutions to accomplish this, I chose a very nice product from Budzter:
https://www.budzter.com/index.html
Not cheap, but the quality is outstanding and it is a true bolt on. No hacking of the rear is required and its fully reversible. I like that. The spring is 9.5" tall, 175 lb/inch from the Coleman Racing catalog.
Andrew

 03-31-2008, 11:19 AM
#49
TECH Senior Member
Thread Starter
iTrader: (7)
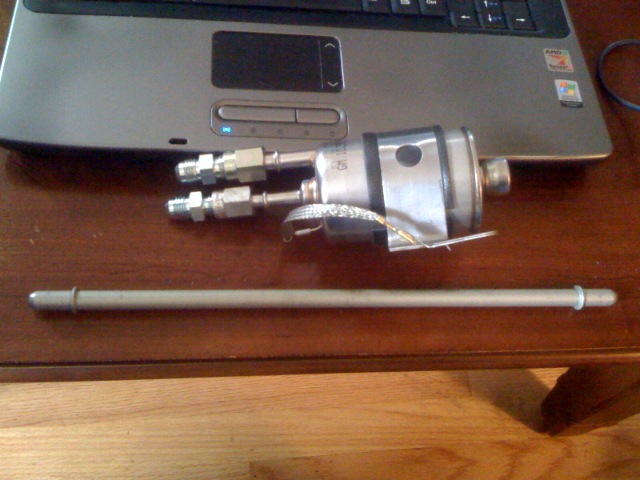
I got my Vette regulator/filter combo the other day. There are many ways to make it work in custom applications. I chose to go to the local hydraulic supply store and get some fittings. The compression fittings were about $12 bucks for the pair. Steel, made by Eaton. Dorman and autoparts stores can officially kiss my ***. The little tube in the picture was 16 bucks. Grrr....
Andrew
Andrew
03-31-2008, 06:45 PM
#50
TECH Senior Member
Thread Starter
iTrader: (7)
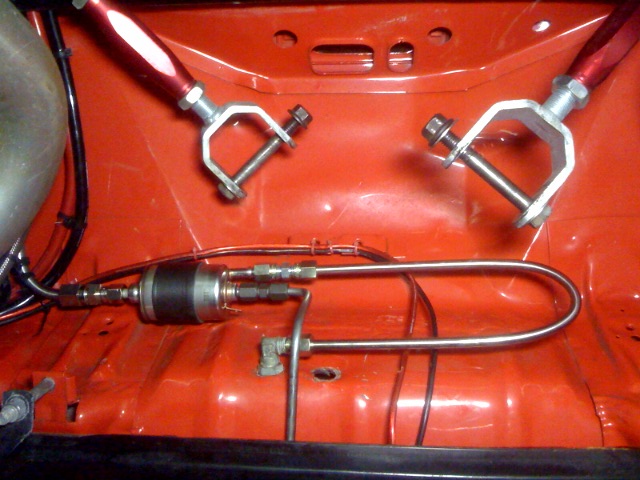
It seems that just when you think something will only take a short time, the bottom falls out. I got the fittings this morning and got under the car. It's a good thing the rear end was out, because I am not sure if I could have done this with the rear end installed. That also makes me worried that it might be hard to get to the filter for maintenance, but I will cross that bridge when the time comes.
So here is the final installation. It was a little challenging because I didn't have quite enough room. There were some existing lines that I wanted to reuse and this is the best layout that I could come up with.
Andrew
So here is the final installation. It was a little challenging because I didn't have quite enough room. There were some existing lines that I wanted to reuse and this is the best layout that I could come up with.
Andrew
03-31-2008, 10:32 PM
#52
TECH Senior Member
Thread Starter
iTrader: (7)
Thanks Matt!
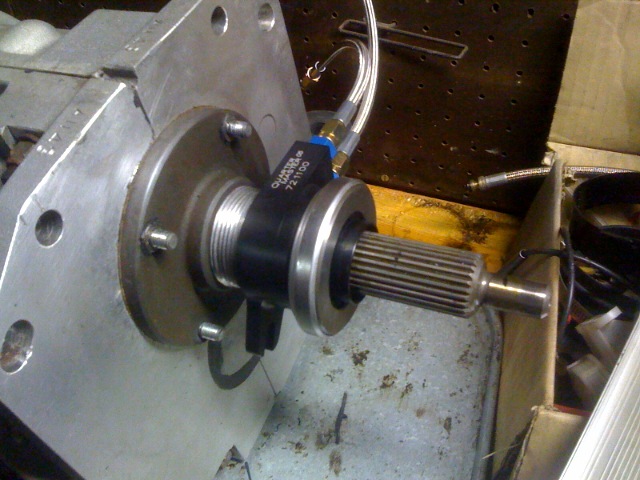
I also got the got the Quarter Master "street" hydraulic bearing today. Remember how I said in a previous post that the clutch fingers are 3.25" away from the face of the bellhousing? Well this is where that dimension is critical. The bearing has to be shimmed so that it is .100"-.150" from the clutch fingers. The shims go between the bearing retainer and the bearing and move it closer to the clutch fingers. I have mine set with a .090" gap. Tighter than what is recommended, but I am comfortable with it. The gap is needed because as the clutch wears, the spring fingers will move back towards the bearing. If there is no gap, the spring fingers will start to press against the bearing and there is the potential for clutch slippage due to decreased spring pressure.
Andrew
Last edited by Project GatTagO; 03-31-2008 at 11:30 PM.
04-01-2008, 10:24 PM
#54
TECH Senior Member
Thread Starter
iTrader: (7)
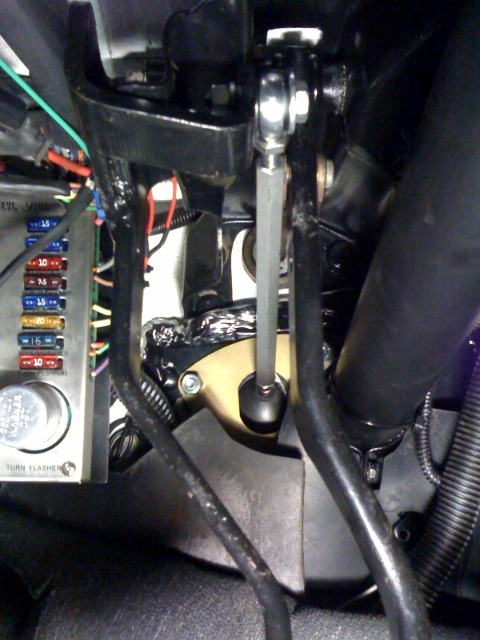
So tonight I tackled the installation of the Keisler clutch master kit. Overall I am pretty pleased with this setup. I had to clearance a small section of the mounting plate to clear the steering column, however that is no fault of the product. As I recall, my steering column is a hair over to the left. I did that so the steering shaft would clear the headers. The notch is minor as you can see in the picture:

The rod from the MC to the pedal makes a straight shot and fits well. I did have to remove the little bracket that held my backup light switch, so I will have to figure out something else for that.
Once everything was installed I wanted to test how far my throw out bearing would move with the full travel of the clutch pedal. This is important because moving the bearing past a certain point will cause it to leak and possibly get damaged. So I connected a long hard line to the MC and ran it to the outside of the car. Connected my Quarter Master release bearing, and bled the system.
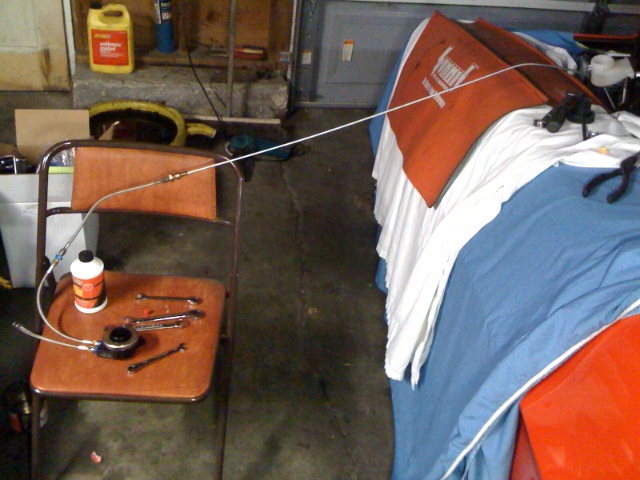
It turned out that the bearing moved about .610" with the full stroke of the clutch pedal. This is perfect considering that the max travel on this bearing is about .650". The net step will be to see how well the bearing releases the clutch. Tomorrow I will bolt everything together and mock it up outside the car. This seems like a lot of work, but it sure beats taking everything apart after the fact.
Andrew
The rod from the MC to the pedal makes a straight shot and fits well. I did have to remove the little bracket that held my backup light switch, so I will have to figure out something else for that.
Once everything was installed I wanted to test how far my throw out bearing would move with the full travel of the clutch pedal. This is important because moving the bearing past a certain point will cause it to leak and possibly get damaged. So I connected a long hard line to the MC and ran it to the outside of the car. Connected my Quarter Master release bearing, and bled the system.
It turned out that the bearing moved about .610" with the full stroke of the clutch pedal. This is perfect considering that the max travel on this bearing is about .650". The net step will be to see how well the bearing releases the clutch. Tomorrow I will bolt everything together and mock it up outside the car. This seems like a lot of work, but it sure beats taking everything apart after the fact.
Andrew
04-02-2008, 11:06 PM
#55
TECH Senior Member
Thread Starter
iTrader: (7)
Today I wanted to finalize the clutch hydraulics and confirm that everything will work. So I bled the clutch. I know that there are numerous methods out there, as well as all kinds of tools. My favorite solo bleeding method is still the "clear bottle with a tube" method.

Remember that bleeding hydraulics is not about pressure. There is no need to pump the pedal as hard and fast as you can. The goal is to displace air and replace it with fluid. Gently moving fluid through the system does just that, without aerating the fluid.
Once the hydraulics were free of air I was able to press on the clutch pedal to see what was happening at the bearing. The nice thing about doing this outside of the car is that I am able to look through the clutch fork hole and see exactly what is happening inside the bellhousing. I discovered that the fittings on the side of the throw out bearing were touching the clutch pressure plate. The LS7 clutch spring fingers sit a good ways down when the pressure place is bolted to the flywheel. So the solution was to press the bearing off the piston and put some shims behind it. This way there is more space between the body of the bearing and the face of the bearing. Hard to imagine what I am talking about.
Here is the bearing at rest, with the shims already installed.

Here is the bearing at full release.

The pedal is firmer than I expected, but the release is super smooth. So much better than the mechanical bearing with the z-bar. I would recommend this mod to anyone, regardless of engine choice.
Andrew
Remember that bleeding hydraulics is not about pressure. There is no need to pump the pedal as hard and fast as you can. The goal is to displace air and replace it with fluid. Gently moving fluid through the system does just that, without aerating the fluid.
Once the hydraulics were free of air I was able to press on the clutch pedal to see what was happening at the bearing. The nice thing about doing this outside of the car is that I am able to look through the clutch fork hole and see exactly what is happening inside the bellhousing. I discovered that the fittings on the side of the throw out bearing were touching the clutch pressure plate. The LS7 clutch spring fingers sit a good ways down when the pressure place is bolted to the flywheel. So the solution was to press the bearing off the piston and put some shims behind it. This way there is more space between the body of the bearing and the face of the bearing. Hard to imagine what I am talking about.
Here is the bearing at rest, with the shims already installed.
Here is the bearing at full release.
The pedal is firmer than I expected, but the release is super smooth. So much better than the mechanical bearing with the z-bar. I would recommend this mod to anyone, regardless of engine choice.
Andrew
 We all care, really
