
69 Chevelle with LS3


 04-10-2008, 07:35 AM
#62

They also sent me an unusable inspection cover and SAE bolts rather than the metric ones. Guess there shipping department got confused on the difference between LS blocks and first gen SBC blocks.
04-13-2008, 12:48 AM
#63
On The Tree
Thread Starter
Join Date: Aug 2007
Location: So Cal
Posts: 110
Likes: 0
Received 0 Likes
on
0 Posts
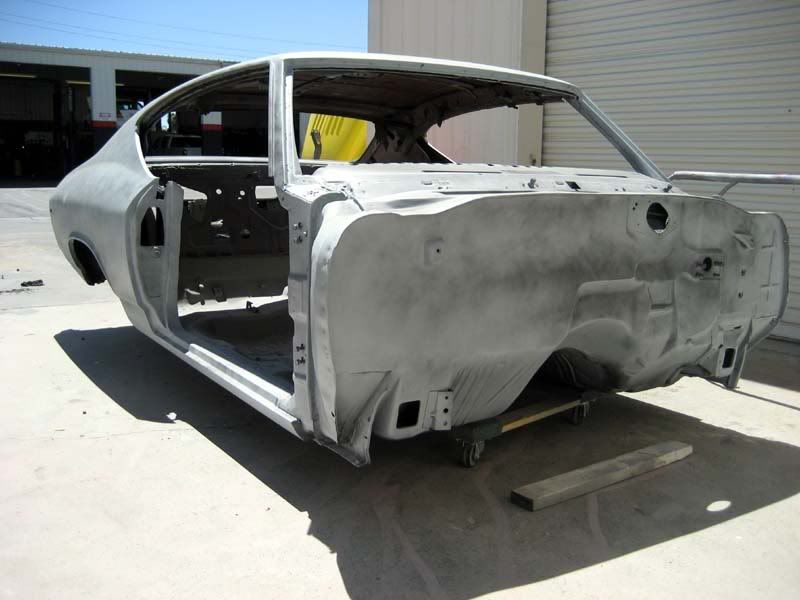
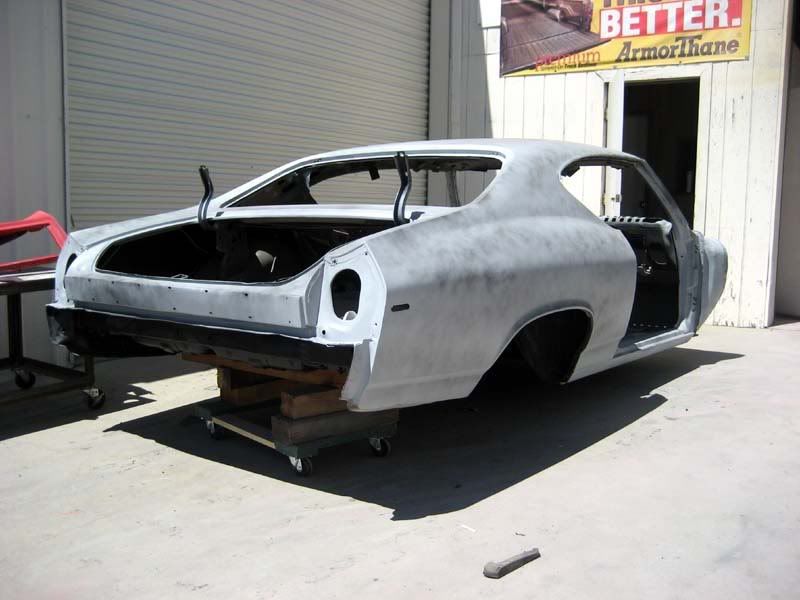
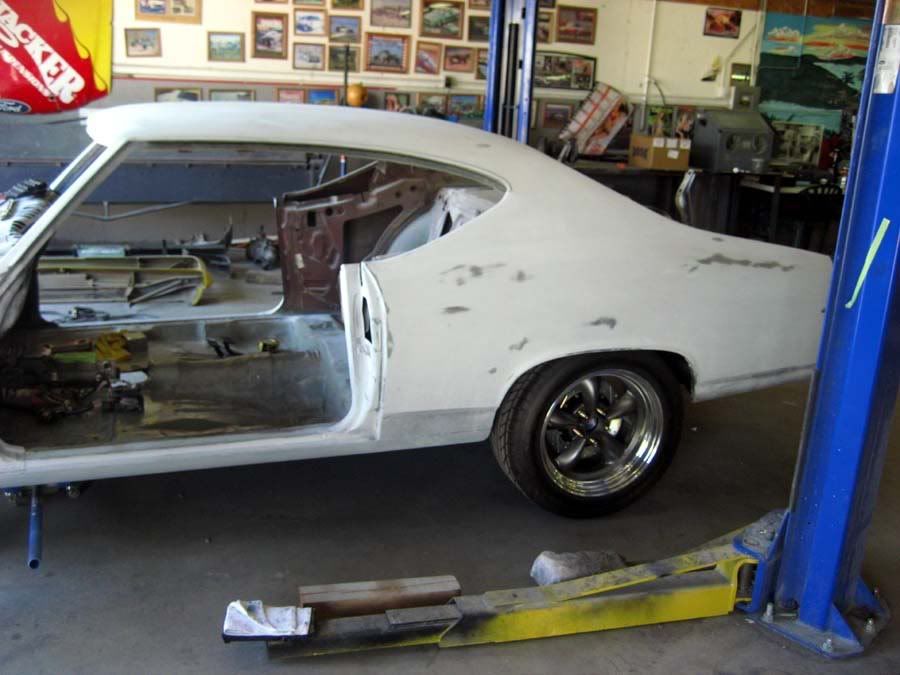
The body has got roughed in and coated with DP90 and then 5 coats of primer. My brother is actually the one doing the work on it as he has spare time. It's a good/news bad/news type of thing meaning the price is right but it just takes longer. When I have time I travel down and help (which means bascially a kick boy). With some material on it we can start blocking the car.
Here is a rendering I had done by Carter Hickman Designs. Still may change stripes and possibly color as I was thinking blue but I just have not made up my mind.

Here is a rendering I had done by Carter Hickman Designs. Still may change stripes and possibly color as I was thinking blue but I just have not made up my mind.
 04-21-2008, 11:10 PM
#65

The body has got roughed in and coated with DP90 and then 5 coats of primer. My brother is actually the one doing the work on it as he has spare time. It's a good/news bad/news type of thing meaning the price is right but it just takes longer. When I have time I travel down and help (which means bascially a kick boy). With some material on it we can start blocking the car.
Here is a rendering I had done by Carter Hickman Designs. Still may change stripes and possibly color as I was thinking blue but I just have not made up my mind.
Here is a rendering I had done by Carter Hickman Designs. Still may change stripes and possibly color as I was thinking blue but I just have not made up my mind.
Tom
I love your car and the progress, but please don't put stripes on your car. Solid color 68-69 cars are my favorite. I have even thought about not keeping the stripes on my 70.
Here is a picture of a 69 at Americruise Last year in Lincoln, NE.


Thanks
Ben
04-22-2008, 12:48 AM
#66
On The Tree
Thread Starter
Join Date: Aug 2007
Location: So Cal
Posts: 110
Likes: 0
Received 0 Likes
on
0 Posts
Thanks Ben,
Yah, the rendering was done a several months back and I would agree the stripes are questionable on the 69 models. I still waffle weekly on the color as well as the stripes. I have even been considering the SS Stripe along the side that came on the 69 year. That would be easy as it is just a decal. I may just jamb the car and put it in primer and shake it down (even doing that it will still take a long time). To some it may seem half *** but it's not show car level anyway rather just a driver. I have never gone this far with a car so the plan changes along the way. My Budget is mild compared to many, however it's still more than the car will be worth so I need to keep that in mind.
Thanks,
Tom
04-22-2008, 12:52 AM
#67
Thanks Ben,
Yah, the rendering was done a several months back and I would agree the stripes are questionable on the 69 models. I still waffle weekly on the color as well as the stripes. I have even been considering the SS Stripe along the side that came on the 69 year. That would be easy as it is just a decal. I may just jamb the car and put it in primer and shake it down (even doing that it will still take a long time). To some it may seem half *** but it's not show car level anyway rather just a driver. I have never gone this far with a car so the plan changes along the way. My Budget is mild compared to many, however it's still more than the car will be worth so I need to keep that in mind.
Thanks,
Tom
Yah, the rendering was done a several months back and I would agree the stripes are questionable on the 69 models. I still waffle weekly on the color as well as the stripes. I have even been considering the SS Stripe along the side that came on the 69 year. That would be easy as it is just a decal. I may just jamb the car and put it in primer and shake it down (even doing that it will still take a long time). To some it may seem half *** but it's not show car level anyway rather just a driver. I have never gone this far with a car so the plan changes along the way. My Budget is mild compared to many, however it's still more than the car will be worth so I need to keep that in mind.
Thanks,
Tom
Agreed, stripes down the side kick ***.
05-19-2008, 01:58 AM
#68
On The Tree
Thread Starter
Join Date: Aug 2007
Location: So Cal
Posts: 110
Likes: 0
Received 0 Likes
on
0 Posts
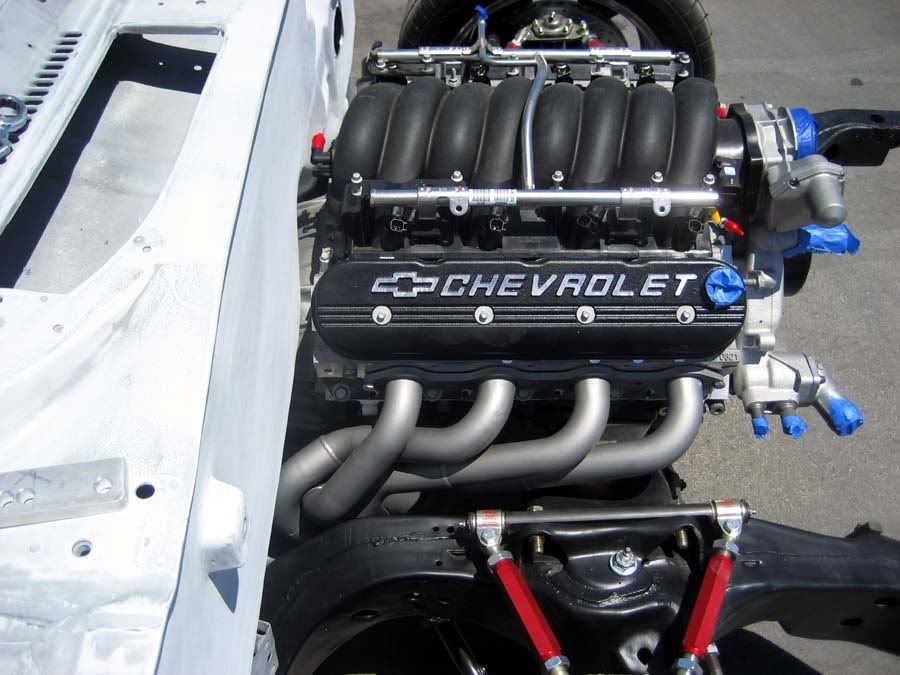
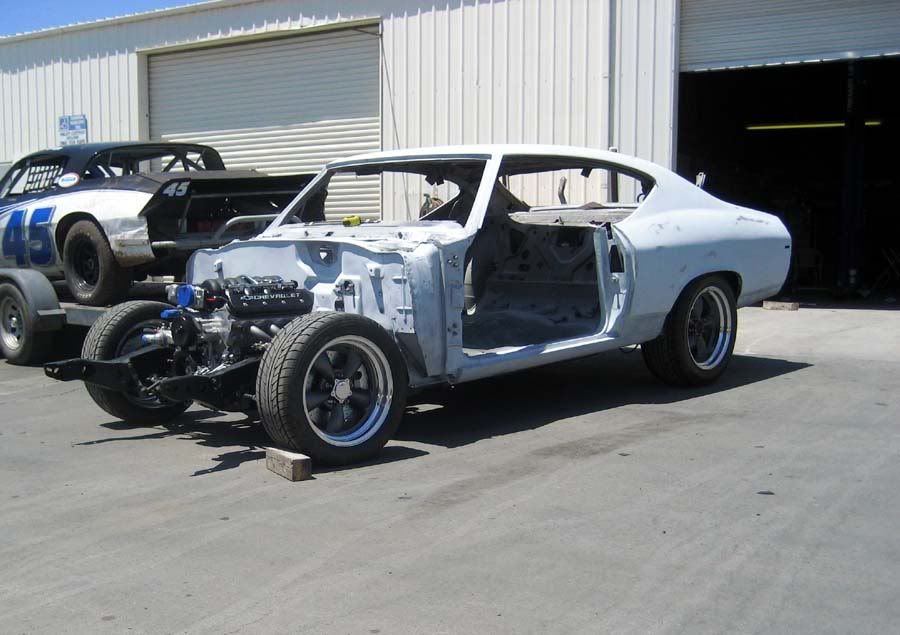
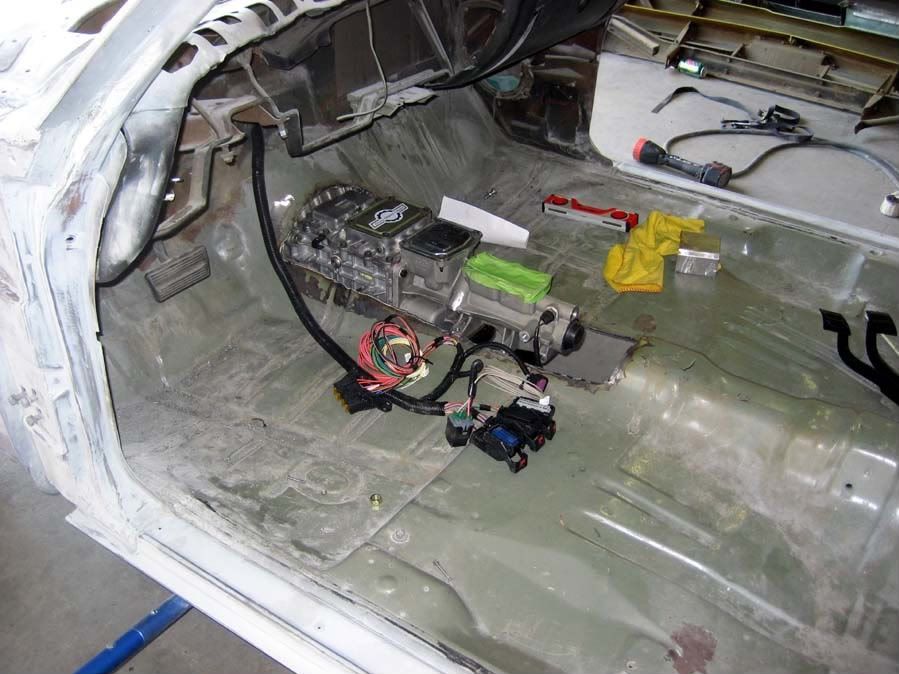
I have made a little progress this weekend. I towed the frame and engine to my brother's work. I needed to set the body on to see where things were at.
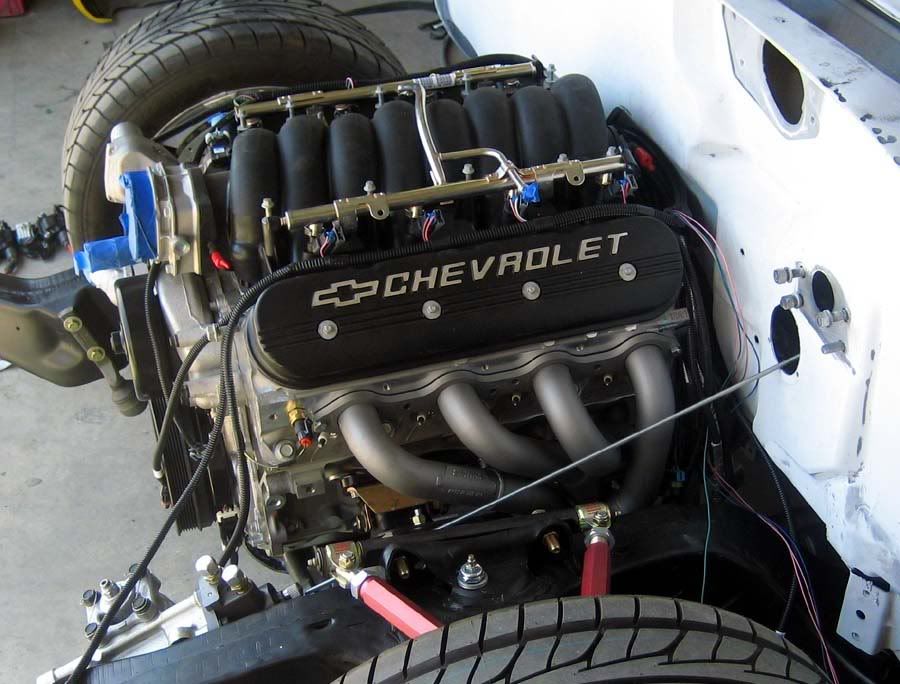
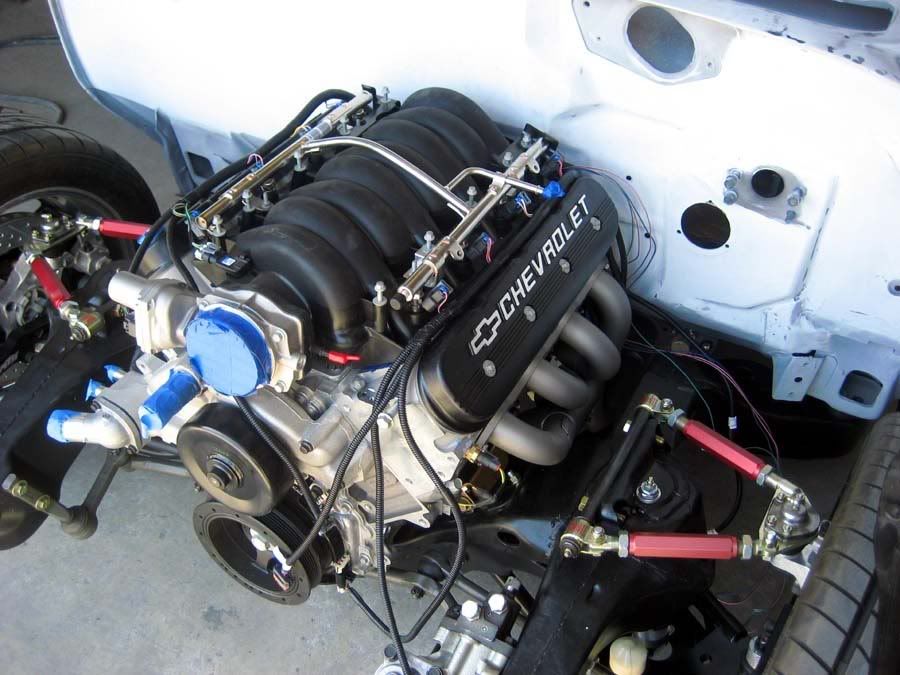
The placement of my engine would not work. So we moved the engine stands. I wanted to get as close as possible. I also wanted to hide the harness hole so I drilled a 2" hole low on the firewall. In doing this I had to leave a little room for the harness to come out behind the engine otherwise I could have snugged it up more.
The placement of my engine would not work. So we moved the engine stands. I wanted to get as close as possible. I also wanted to hide the harness hole so I drilled a 2" hole low on the firewall. In doing this I had to leave a little room for the harness to come out behind the engine otherwise I could have snugged it up more.
05-19-2008, 02:08 AM
#69
On The Tree
Thread Starter
Join Date: Aug 2007
Location: So Cal
Posts: 110
Likes: 0
Received 0 Likes
on
0 Posts
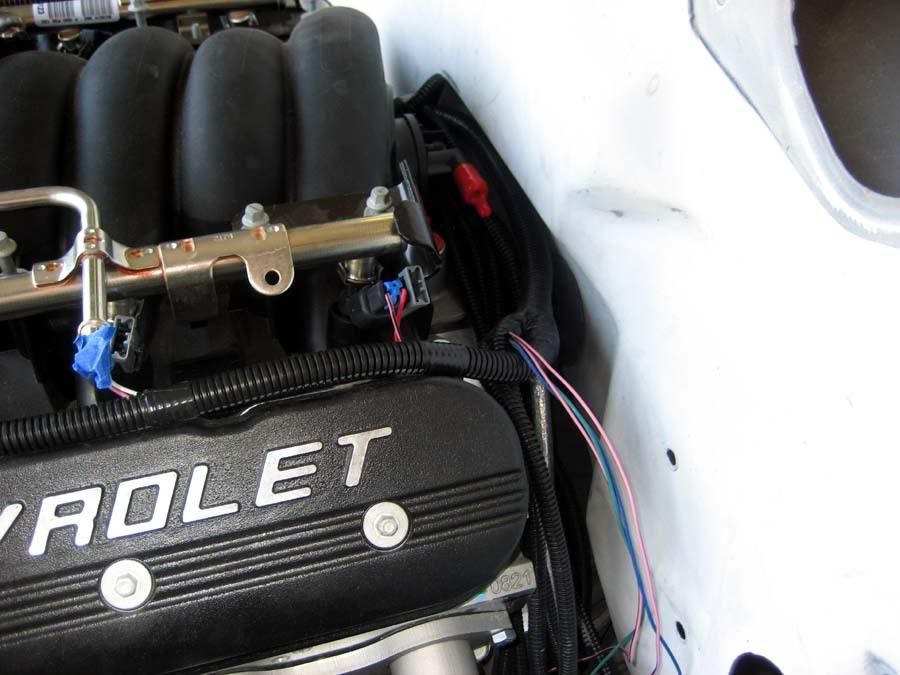
The Speartech harness is really nice. Everything lined up in the correct spot. This is all right out of the box. I still am trying to determine what I am going to do with coils. Other than that there should be very little wiring showing.
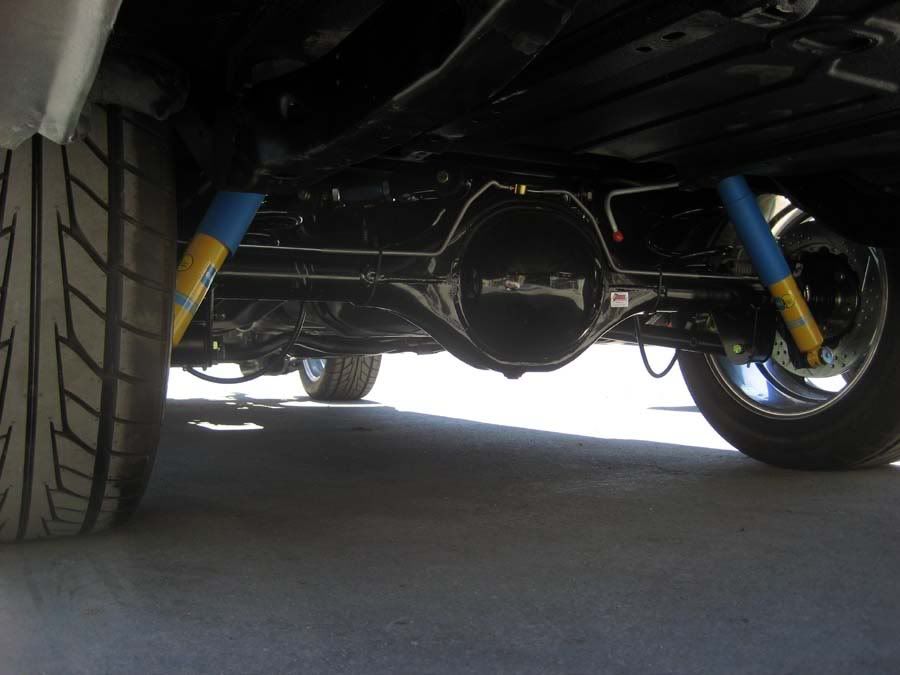
A few other things I found was that the rear needs to come way down. I already had planned on changing springs prior. The rear springs are just CPP
2" lowering springs with no published spring rate. I was surprised to see how high still was. This will be addressed later down the road. The rear tire is also a 295/45/18 which is rather tall. That may also change later down the road
05-19-2008, 02:34 AM
#70
On The Tree
Thread Starter
Join Date: Aug 2007
Location: So Cal
Posts: 110
Likes: 0
Received 0 Likes
on
0 Posts
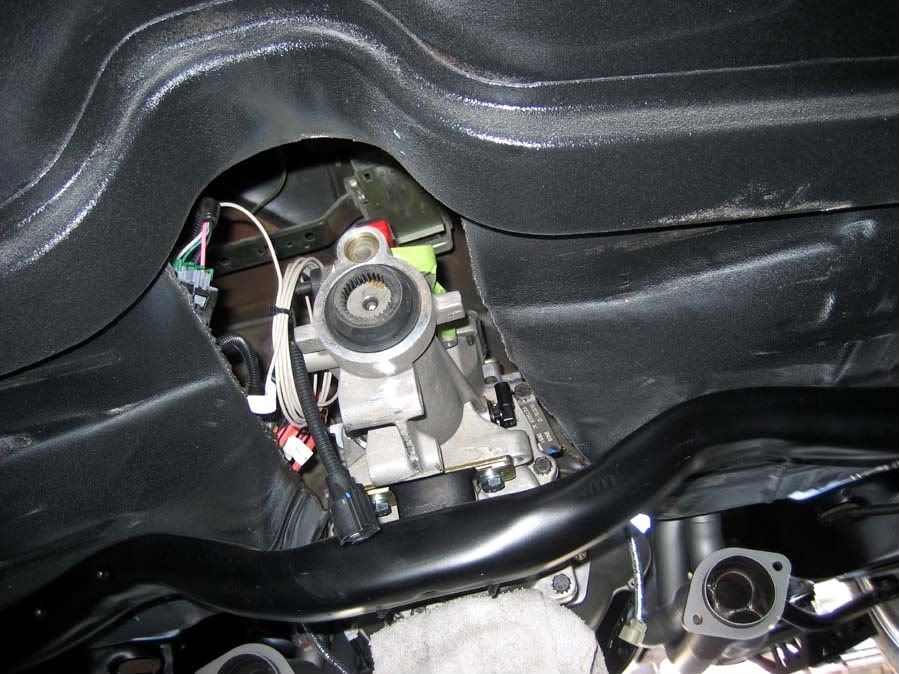
The other issue had been discussed on another board with regards to getting the TKO Tremec high enough into the tunnel for proper working angles of the rear pinion, driveline and transmission. The fix appears (A-Body cars) to be cutting and raising the hole trans and driveline tunnel which at first I thought was overkill. However my new friend/consultant Andrew (ProjectGatago on this board) encouraged me to do this while at my stage of the build. Well, Andrew thank you as I believe this would have been a bigger PITA down the road. In the pictures below it is hard to tell, but you can kinda see where I think the trans needs to be in relation to the driveline tunnel. Also in the first picture you don't see the floor brace right below where the cutting stops..it's even lower at that point. I had already modified my trans tunnel per the template in the 5 speed kit, however at that time it was guessing. As it turns out it would not have worked anyway. My brother has a plasma cutter and that thing kicks A$$. We just cut enough to allow the trans at this time. The rest of the tunnel mod should happen in the next couple of weeks. My brother could likely help me however he has projects coming out of his ears. As luck would have it we have a friend right next door to him who is a welder and fab guy. I feel it would be better to pay a pro on this as I want to feel at ease when I sit in my car. LOL!
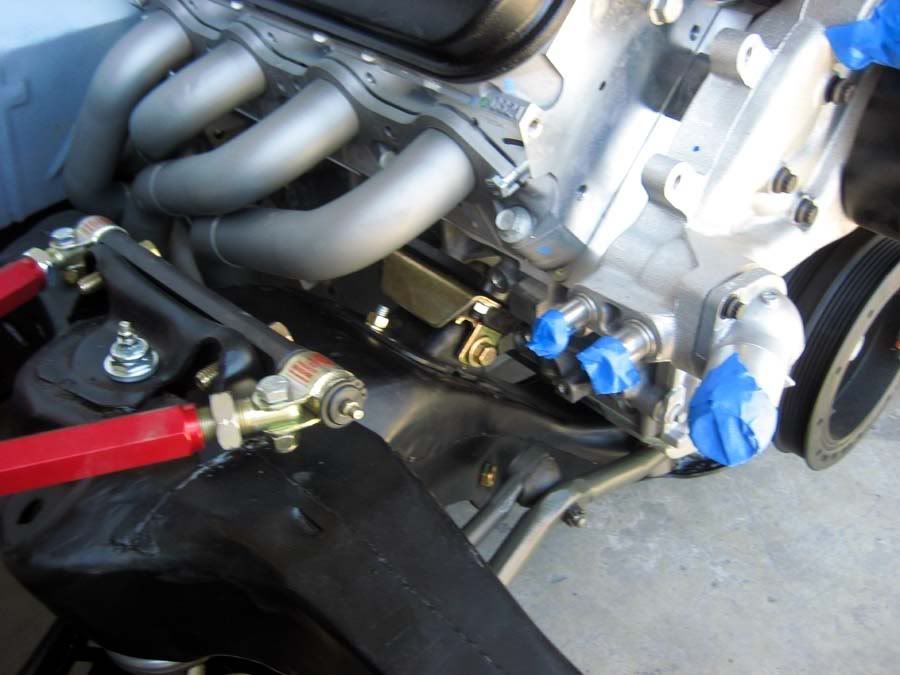
And since the spacers under the engine stands still would not correct the tie rod issue I elected to remove. Here is a picture of how they are now. Dropping the 1/2" spacers already helped decrease the transmission angle.
I will post pictures of tunnel mod when it is done. For those whom think cutting the whole area out is overkill...well it might. However it's your choice and opinion. I am glad Troy and Andrew shared this. I likely would have not even noticed till after I was vibrating down the road.
As for the body: it's getting closer and should have some updates in a month or so.
Thanks,
Tom
Last edited by tja42853; 05-19-2008 at 02:43 AM.
05-19-2008, 02:50 AM
#71
On The Tree
Thread Starter
Join Date: Aug 2007
Location: So Cal
Posts: 110
Likes: 0
Received 0 Likes
on
0 Posts
One more. If you look close you can see how short in height the tunnel is compared to trans. Just imagine a 3-1/2" diameter driveline trying to clear. Add my 225lb butt and it sits lower. Also problem will likely increase once I bring ride height down.
05-19-2008, 11:01 AM
#73
TECH Senior Member
iTrader: (7)

Tom,
Everything looks great. I have to give credit to Troy for all of this. I was simply following in his footsteps since we both seemed to share a common driveline vibration issue. His car and mine use almost identical suspension pieces in the rear.
I wouldn't worry about ride height or springs until the car is fully assembled.
Andrew
05-21-2008, 12:38 AM
#75
On The Tree
Thread Starter
Join Date: Aug 2007
Location: So Cal
Posts: 110
Likes: 0
Received 0 Likes
on
0 Posts
Thanks,
Tom
05-21-2008, 05:13 AM
#78
Staging Lane
Join Date: Jun 2006
Location: Hoschton, Ga. 1 mile from YearOne inc.
Posts: 66
Likes: 0
Received 0 Likes
on
0 Posts
How many positions do the ATS plates have? Did you use the standard SBC mounts along with the plates or are they specific to the conversion? Your build looks great, very clean! I'm lookin to start my frame off very soon...maybe next month!
 05-21-2008, 10:24 AM
#80
On The Tree
Thread Starter
Join Date: Aug 2007
Location: So Cal
Posts: 110
Likes: 0
Received 0 Likes
on
0 Posts
70-Chevelle: I will be using Vette accessories.
I do plan on running A/C at a later date. They are a few options for high mount that will let me retain the Vette acc.